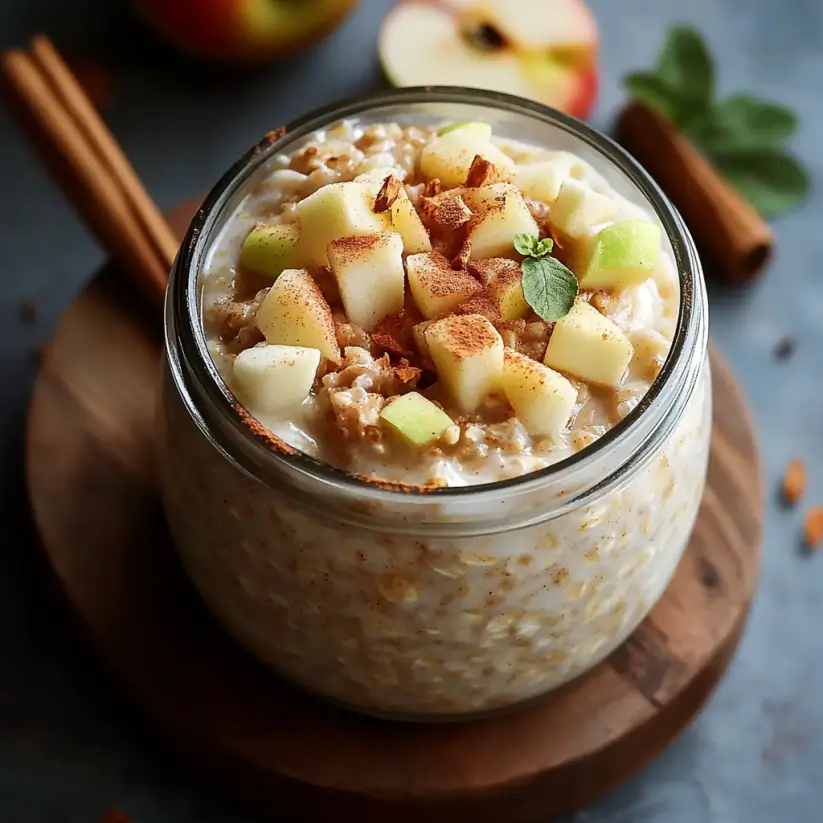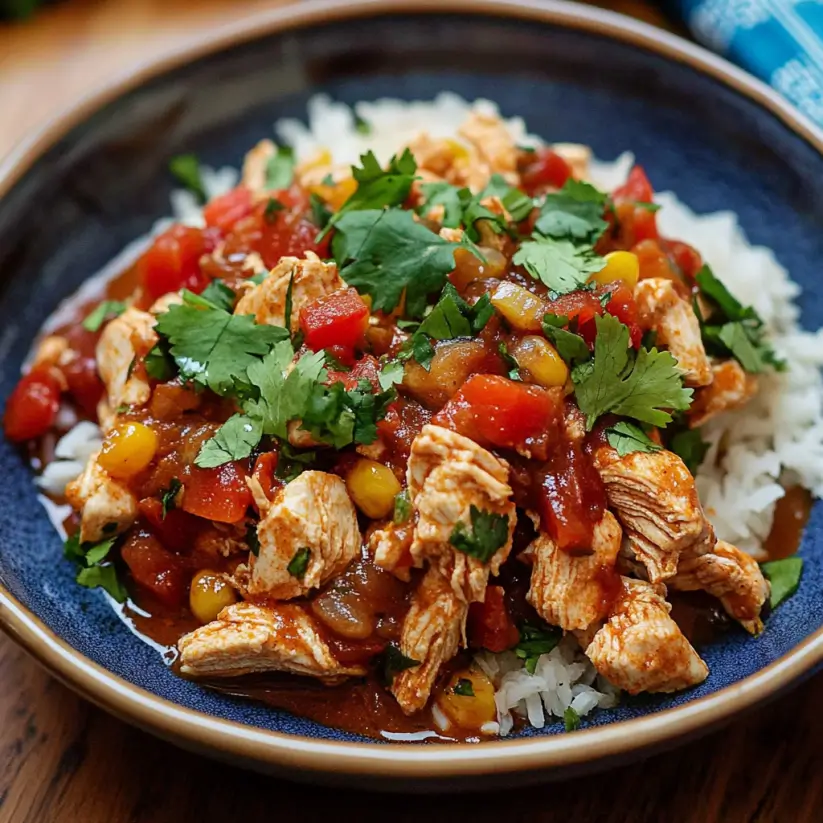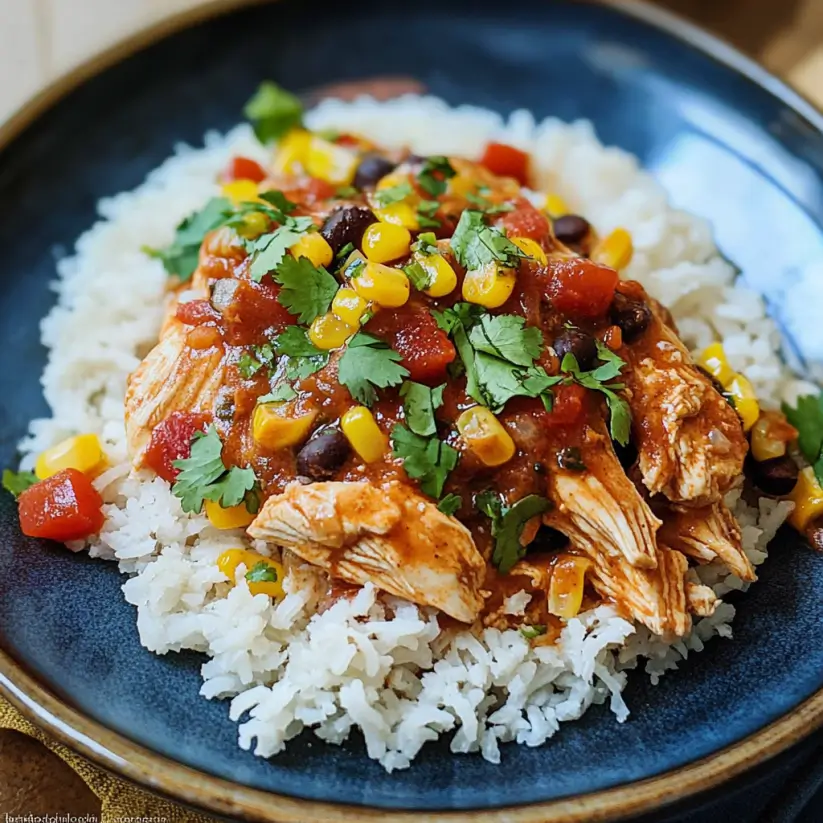
Chicken Piccata: Uncover the Secret to Perfection!

Introduction to Chicken Piccata

There’s something magical about the aroma of Chicken Piccata wafting through the kitchen. It takes me back to family dinners where laughter mingled with the sizzle of chicken in a hot skillet. This classic Italian dish is not just a meal; it’s a quick solution for those busy weeknights or a delightful way to impress your loved ones. With tender chicken cutlets bathed in a tangy lemon-caper sauce, it’s a dish that brings comfort and joy. Trust me, once you try this Chicken Piccata, it will become a staple in your culinary repertoire!

Why You’ll Love This Chicken Piccata

This Chicken Piccata is a game-changer for your dinner routine. It’s incredibly easy to whip up, taking just 30 minutes from start to finish. The bright, zesty flavors of lemon and capers dance on your palate, making each bite a delight. Plus, it’s versatile enough to impress guests or satisfy a hungry family. You’ll find yourself reaching for this recipe time and again, and your taste buds will thank you!

Ingredients for Chicken Piccata

Gathering the right ingredients is the first step to creating a delicious Chicken Piccata. Here’s what you’ll need:

  • Boneless, skinless chicken breasts: The star of the dish, these cutlets are tender and cook quickly.
  • All-purpose flour: This helps create a lovely golden crust on the chicken. For a gluten-free option, consider almond flour or a gluten-free blend.
  • Salt and black pepper: Essential for seasoning, enhancing the flavors of the chicken.
  • Olive oil: A staple in Italian cooking, it adds richness and helps in frying the chicken.
  • Unsalted butter: This adds a creamy texture to the sauce, balancing the acidity of the lemon.
  • Chicken broth: Provides depth of flavor to the sauce, making it savory and satisfying.
  • Fresh lemon juice: The zesty kick that defines Chicken Piccata, brightening up the dish.
  • Capers: These little bursts of briny flavor are what make this dish truly special.
  • Fresh parsley: A garnish that adds a pop of color and freshness to the final presentation.

For exact measurements, check the bottom of the article where you can find everything listed for easy printing. Feel free to get creative with your ingredients, adding sautéed mushrooms or spinach for extra flavor and nutrition!

How to Make Chicken Piccata

Now that you have your ingredients ready, let’s dive into the steps to create this delightful Chicken Piccata. Each step is straightforward, ensuring you can whip this up even on a busy weeknight. Let’s get cooking!

Step 1: Prepare the Chicken

Start by slicing each chicken breast in half horizontally. This creates thinner cutlets that cook evenly. Place the chicken between two sheets of plastic wrap. Grab a meat mallet and gently pound the chicken until it’s about 1/2 inch thick. This not only tenderizes the meat but also helps it absorb the flavors of the sauce later.

Step 2: Dredge the Chicken

In a shallow dish, mix together the flour, salt, and black pepper. This simple blend will give your chicken a delicious crust. Dredge each chicken cutlet in the flour mixture, making sure to shake off any excess. This step is crucial for that golden-brown finish that makes Chicken Piccata so appealing.

Step 3: Cook the Chicken

Heat the olive oil and 1 tablespoon of butter in a large skillet over medium-high heat. Once the oil is hot, add the chicken cutlets. Cook them for about 3-4 minutes on each side, or until they’re golden brown and cooked through. Don’t overcrowd the pan; you want each piece to get that perfect sear. Once done, remove the chicken from the skillet and set it aside.

Step 4: Make the Sauce

In the same skillet, add the chicken broth, fresh lemon juice, and capers. Bring this mixture to a simmer, scraping up any browned bits from the bottom of the pan. Those bits are packed with flavor! Let it simmer for a couple of minutes to meld the flavors together.

Step 5: Combine and Serve

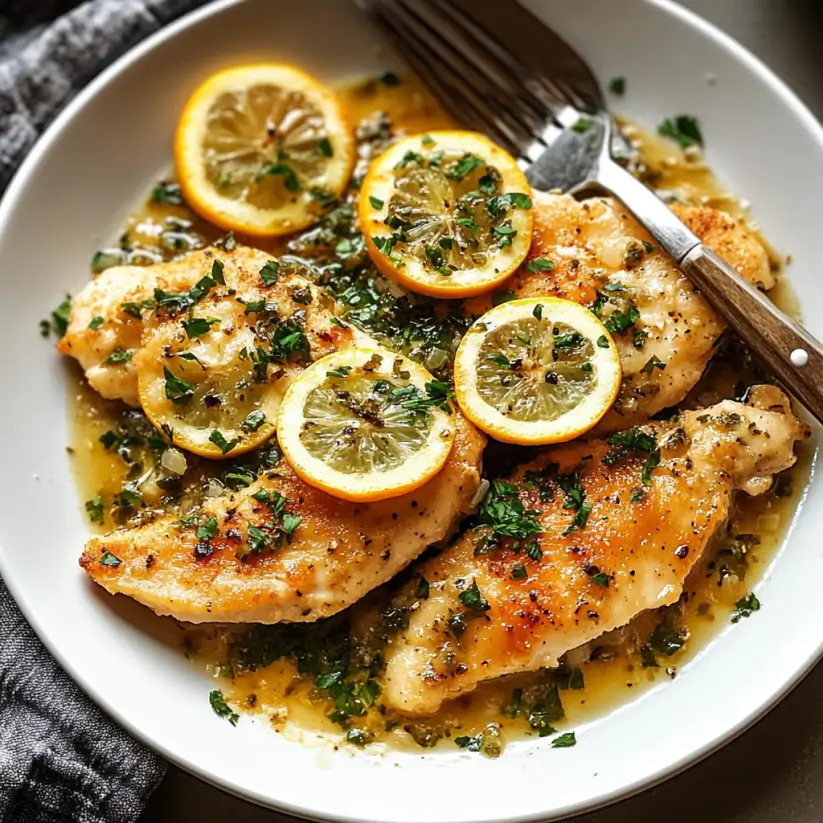
Return the chicken to the skillet and let it cook for an additional 2 minutes. This allows the chicken to soak up the tangy sauce. Once done, remove the chicken from the skillet again and place it on a serving platter. Stir in the remaining tablespoon of butter into the sauce until it’s melted and smooth. Pour this luscious sauce over the chicken and garnish with fresh parsley. Your Chicken Piccata is now ready to impress!
Tips for Success

  • Use a meat thermometer to ensure chicken reaches 165°F for perfect doneness.
  • Don’t skip the resting time after cooking; it helps the juices redistribute.
  • For extra flavor, marinate the chicken in lemon juice and garlic for 30 minutes before cooking.
  • Keep the sauce at a gentle simmer to avoid overcooking the chicken.
  • Serve immediately for the best taste and texture.

Equipment Needed

  • Skillet: A large non-stick skillet works best, but any heavy-bottomed pan will do.
  • Meat mallet: If you don’t have one, a rolling pin or the bottom of a heavy pot can substitute.
  • Shallow dish: For dredging, any plate or bowl will suffice.
  • Measuring cups: Essential for accuracy, but you can eyeball it if you’re confident!

Variations

  • Mushroom Chicken Piccata: Add sautéed mushrooms to the sauce for an earthy twist that complements the lemon and capers.
  • Spinach Chicken Piccata: Toss in fresh spinach during the last minute of cooking for a pop of color and added nutrition.
  • Gluten-Free Option: Substitute all-purpose flour with almond flour or a gluten-free flour blend for a delicious gluten-free Chicken Piccata.
  • Herb-Infused Piccata: Experiment with fresh herbs like thyme or basil in the sauce for a fragrant touch.
  • Spicy Chicken Piccata: Add a pinch of red pepper flakes to the sauce for a kick of heat that balances the tanginess.

Serving Suggestions

  • Pair with Pasta: Serve over a bed of angel hair or spaghetti to soak up the delicious sauce.
  • Fresh Salad: A crisp arugula or mixed greens salad adds a refreshing contrast.
  • Wine Selection: A chilled Pinot Grigio complements the lemony flavors beautifully.
  • Presentation: Garnish with lemon slices and extra parsley for a vibrant look.

FAQs about Chicken Piccata

As you embark on your Chicken Piccata journey, you might have a few questions. Here are some common queries that can help you navigate this delightful dish:

Can I use chicken thighs instead of breasts?

Absolutely! Chicken thighs will add a richer flavor and remain juicy. Just adjust the cooking time slightly, as they may take a bit longer to cook through.

What can I substitute for capers?

If you don’t have capers on hand, green olives can be a great alternative. They’ll provide a similar briny flavor that complements the dish.

Can I make Chicken Piccata ahead of time?

While it’s best enjoyed fresh, you can prepare the chicken and sauce separately in advance. Just reheat gently before serving to maintain the flavors.

Is Chicken Piccata gluten-free?

Yes, it can be! Simply swap out the all-purpose flour for almond flour or a gluten-free flour blend, and you’re good to go.

What sides pair well with Chicken Piccata?

Consider serving it with a light salad, roasted vegetables, or pasta. These sides will complement the tangy flavors of the Chicken Piccata beautifully.

Final Thoughts

Cooking Chicken Piccata is more than just preparing a meal; it’s about creating memories and sharing joy. The vibrant flavors of lemon and capers dance together, bringing a burst of brightness to your dinner table. Whether you’re impressing guests or enjoying a cozy night in, this dish never fails to deliver. Plus, it’s quick enough for those busy evenings when time is tight. I hope this Chicken Piccata becomes a cherished recipe in your kitchen, just as it has in mine. Here’s to delicious meals and the stories they create!

Ranis

Chicken Piccata: Uncover the Secret to Perfection!

Chicken Piccata is a classic Italian dish featuring tender chicken cutlets in a tangy lemon-caper sauce, perfect for a quick and delicious meal.
Prep Time 15 minutes
Cook Time 15 minutes
Total Time 30 minutes
Servings: 4 servings
Course: Main Course
Cuisine: Italian
Calories: 320

Ingredients
  

  • 2 boneless skinless chicken breasts (about 1 pound total)
  • 1/2 cup all-purpose flour
  • 1 teaspoon salt
  • 1/2 teaspoon black pepper
  • 2 tablespoons olive oil
  • 2 tablespoons unsalted butter
  • 1/2 cup chicken broth
  • 1/4 cup fresh lemon juice about 2 lemons
  • 1/4 cup capers rinsed and drained
  • 2 tablespoons fresh parsley chopped (for garnish)

Method
 

  1. Begin by slicing each chicken breast in half horizontally to create thinner cutlets. Place the chicken between two sheets of plastic wrap and gently pound with a meat mallet until about 1/2 inch thick.
  2. In a shallow dish, combine the flour, salt, and black pepper. Dredge each chicken cutlet in the flour mixture, shaking off any excess.
  3. In a large skillet, heat the olive oil and 1 tablespoon of butter over medium-high heat. Once hot, add the chicken cutlets and cook for about 3-4 minutes on each side, or until golden brown and cooked through. Remove the chicken from the skillet and set aside.
  4. In the same skillet, add the chicken broth, lemon juice, and capers. Bring to a simmer, scraping up any browned bits from the bottom of the pan.
  5. Return the chicken to the skillet and cook for an additional 2 minutes, allowing the flavors to meld. Remove the chicken from the skillet again and place on a serving platter.
  6. Stir in the remaining tablespoon of butter into the sauce until melted and smooth. Pour the sauce over the chicken and garnish with fresh parsley before serving.

Nutrition

Serving: 1servingCalories: 320kcalCarbohydrates: 6gProtein: 30gFat: 18gSaturated Fat: 6gPolyunsaturated Fat: 12gCholesterol: 90mgSodium: 600mgSugar: 1g

Notes

  • For a gluten-free option, substitute the all-purpose flour with almond flour or a gluten-free flour blend.
  • Add sautéed mushrooms or spinach to the sauce for extra flavor and nutrition.
Tried this recipe?

Let us know how it was!

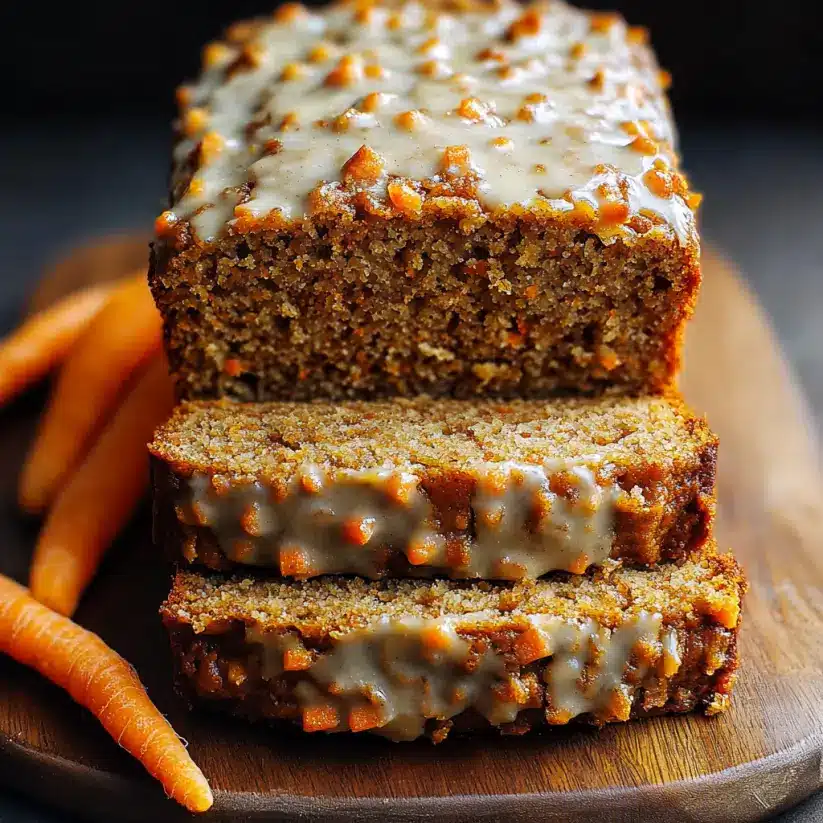
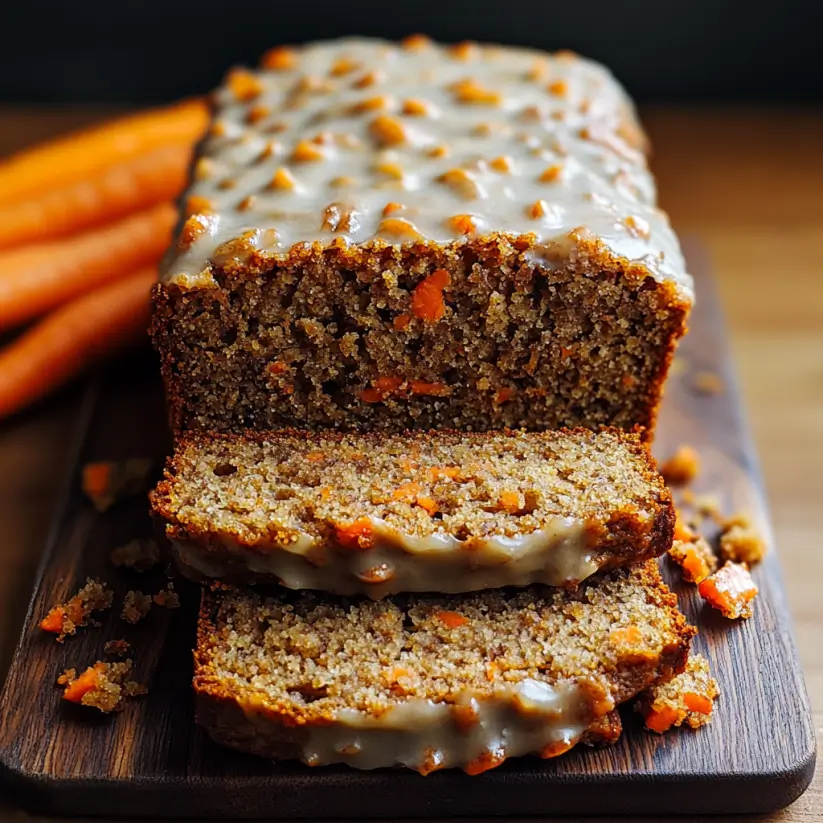
Carrot Banana Bread: A Healthy Twist on Tradition!

Introduction to Carrot Banana Bread

There’s something magical about the aroma of freshly baked bread wafting through the house. It takes me back to my childhood, where my mom would whip up delightful treats on lazy Sunday mornings. Today, I’m excited to share a recipe that combines two beloved ingredients: carrots and bananas. This Carrot Banana Bread is not just a delicious twist on tradition; it’s a quick solution for busy days or a delightful dish to impress your loved ones. With its moist texture and sweet, spiced flavor, it’s sure to become a favorite in your home, just like it is in mine.

Why You’ll Love This Carrot Banana Bread

This Carrot Banana Bread is a game-changer in the kitchen. It’s incredibly easy to whip up, making it perfect for those hectic mornings or lazy afternoons. The combination of sweet bananas and earthy carrots creates a flavor explosion that’s hard to resist. Plus, it’s a healthier alternative to traditional bread, packed with nutrients. You’ll love how it fills your home with warmth and invites everyone to gather around the table.

Ingredients for Carrot Banana Bread

Gathering the right ingredients is the first step to creating this delightful Carrot Banana Bread. Here’s what you’ll need:

  • Ripe Bananas: The star of the show! They add natural sweetness and moisture.
  • Finely Grated Carrots: These bring a subtle earthiness and vibrant color to the bread.
  • Granulated Sugar: For that classic sweetness that balances the flavors.
  • Brown Sugar: Adds depth and a hint of caramel flavor.
  • Vegetable Oil: Keeps the bread moist and tender; you can also use melted coconut oil for a twist.
  • Large Eggs: They help bind everything together and contribute to the bread’s structure.
  • Vanilla Extract: A splash of this elevates the flavor profile beautifully.
  • All-Purpose Flour: The base of the bread; it provides the necessary structure.
  • Baking Soda: This leavening agent helps the bread rise.
  • Baking Powder: Works alongside baking soda for a fluffy texture.
  • Salt: Enhances all the flavors and balances the sweetness.
  • Ground Cinnamon: Adds warmth and a comforting aroma.
  • Ground Nutmeg: A pinch of this spice brings a lovely depth to the flavor.
  • Chopped Walnuts or Pecans (optional): For a delightful crunch and nutty flavor.
  • Raisins or Dried Cranberries (optional): These add a chewy texture and extra sweetness.

For those looking to make this recipe gluten-free, simply swap the all-purpose flour with a 1:1 gluten-free flour blend. You can find all the exact measurements at the bottom of the article, ready for printing!

How to Make Carrot Banana Bread

Now that you have all your ingredients ready, let’s dive into the fun part: making this delicious Carrot Banana Bread! Follow these simple steps, and you’ll have a warm loaf ready to enjoy in no time.

Step 1: Preheat the Oven

First things first, preheat your oven to 350°F (175°C). This step is crucial because it ensures even baking. While the oven heats up, grease a 9×5-inch loaf pan or line it with parchment paper. This will help your bread slide out easily once it’s baked.

Step 2: Mix Wet Ingredients

In a large mixing bowl, combine the mashed bananas, finely grated carrots, granulated sugar, brown sugar, vegetable oil, eggs, and vanilla extract. Use a fork or whisk to mix everything together until it’s well combined. The bananas should be smooth, and the carrots should be evenly distributed. This mixture is where the magic begins!

Step 3: Combine Dry Ingredients

In a separate bowl, whisk together the all-purpose flour, baking soda, baking powder, salt, ground cinnamon, and ground nutmeg. This step is essential for evenly distributing the leavening agents and spices. The aroma of the spices will make your kitchen feel cozy and inviting!

Step 4: Combine Wet and Dry Mixtures

Now, it’s time to bring the two mixtures together. Gradually add the dry ingredients to the wet ingredients, stirring gently until just combined. Be careful not to overmix; a few lumps are perfectly fine. Overmixing can lead to a dense bread, and we want it light and fluffy!

Step 5: Add Optional Ingredients

If you’re feeling adventurous, fold in the chopped walnuts or pecans and the raisins or dried cranberries at this stage. These add a delightful crunch and a burst of sweetness. Just be gentle when folding them in to keep the batter airy.

Step 6: Bake the Bread

Pour the batter into your prepared loaf pan and smooth the top with a spatula. Bake in the preheated oven for 50-60 minutes. To check for doneness, insert a toothpick into the center of the bread. If it comes out clean or with a few moist crumbs, it’s ready!

Step 7: Cool and Serve

Once baked, allow the bread to cool in the pan for about 10 minutes. Then, transfer it to a wire rack to cool completely. This cooling step is important; it helps the flavors develop. When you’re ready to slice, use a serrated knife for clean cuts. Enjoy your homemade Carrot Banana Bread warm or at room temperature!

Tips for Success

  • Use overripe bananas for maximum sweetness and moisture.
  • Grate the carrots finely to ensure they blend well into the batter.
  • Don’t skip the spices; they elevate the flavor significantly.
  • Let the bread cool completely before slicing for the best texture.
  • Store leftovers in an airtight container to keep it fresh longer.

Equipment Needed

  • 9×5-inch Loaf Pan: Essential for baking; a round cake pan works in a pinch.
  • Mixing Bowls: Use any size; a large bowl is best for wet ingredients.
  • Whisk or Fork: For mixing; a hand mixer can speed things up.
  • Measuring Cups and Spoons: Accurate measurements are key; a kitchen scale is a great alternative.
  • Serrated Knife: Perfect for slicing; a regular knife will do if you’re careful.

Variations

  • Nut-Free: Omit the nuts for a kid-friendly version that’s safe for school lunches.
  • Vegan: Substitute eggs with flaxseed meal mixed with water or unsweetened applesauce for a plant-based option.
  • Spiced Up: Add a pinch of ginger or cloves for an extra layer of warmth and flavor.
  • Chocolate Chip: Fold in semi-sweet or dark chocolate chips for a decadent twist.
  • Fruit-Infused: Incorporate crushed pineapple or applesauce for added moisture and sweetness.

Serving Suggestions

  • Pair slices of Carrot Banana Bread with a dollop of cream cheese or butter for a rich treat.
  • Enjoy it alongside a steaming cup of coffee or tea for a cozy afternoon snack.
  • Top with fresh fruit or a sprinkle of powdered sugar for a beautiful presentation.
  • Serve warm for a comforting breakfast or brunch option.

FAQs about Carrot Banana Bread

As you embark on your baking adventure with Carrot Banana Bread, you might have a few questions. Here are some common queries that can help you along the way:

Can I use frozen bananas for this recipe?

Absolutely! Frozen bananas work wonderfully in Carrot Banana Bread. Just thaw them first and mash them well. They’ll add the same sweetness and moisture as fresh ones.

How do I store leftover Carrot Banana Bread?

To keep your bread fresh, store it in an airtight container at room temperature for up to three days. For longer storage, wrap it tightly in plastic wrap and freeze it for up to three months.

Can I make this recipe gluten-free?

Yes! Simply substitute the all-purpose flour with a 1:1 gluten-free flour blend. This way, everyone can enjoy this delicious treat without worry.

What can I substitute for eggs in this recipe?

If you’re looking for an egg substitute, try using 1/4 cup of unsweetened applesauce or a flaxseed meal mixed with water. Both options work well in keeping the bread moist.

How can I enhance the flavor of my Carrot Banana Bread?

For an extra flavor boost, consider adding spices like ginger or cloves. You can also fold in chocolate chips or dried fruits for a delightful twist!

Final Thoughts

Baking this Carrot Banana Bread is more than just a culinary task; it’s an experience that fills your home with warmth and joy. The delightful aroma wafting through the kitchen invites everyone to gather and share in the moment. Each slice is a perfect blend of sweetness and spice, making it a versatile treat for breakfast, snacks, or dessert. Whether you’re enjoying it solo with a cup of coffee or sharing it with loved ones, this recipe brings a sense of comfort and satisfaction. I hope it becomes a cherished part of your baking repertoire, just as it has in mine.

Ranis

Carrot Banana Bread: A Healthy Twist on Tradition!

Carrot Banana Bread: A Healthy Twist on Tradition!
Prep Time 15 minutes
Cook Time 1 hour
Total Time 1 hour 15 minutes
Servings: 8 servings
Course: Baking
Cuisine: American
Calories: 210

Ingredients
  

  • 2 ripe bananas mashed
  • 1 cup finely grated carrots about 2 medium carrots
  • 1/2 cup granulated sugar
  • 1/2 cup brown sugar packed
  • 1/2 cup vegetable oil
  • 2 large eggs
  • 1 teaspoon vanilla extract
  • 1 1/2 cups all-purpose flour
  • 1 teaspoon baking soda
  • 1/2 teaspoon baking powder
  • 1/2 teaspoon salt
  • 1 teaspoon ground cinnamon
  • 1/2 teaspoon ground nutmeg
  • 1/2 cup chopped walnuts or pecans optional
  • 1/2 cup raisins or dried cranberries optional

Method
 

  1. Preheat your oven to 350°F (175°C). Grease a 9x5-inch loaf pan or line it with parchment paper.
  2. In a large mixing bowl, combine the mashed bananas, grated carrots, granulated sugar, brown sugar, vegetable oil, eggs, and vanilla extract. Mix well until fully combined.
  3. In a separate bowl, whisk together the flour, baking soda, baking powder, salt, cinnamon, and nutmeg.
  4. Gradually add the dry ingredients to the wet ingredients, stirring until just combined. Be careful not to overmix.
  5. If using, fold in the chopped nuts and raisins or dried cranberries.
  6. Pour the batter into the prepared loaf pan and smooth the top with a spatula.
  7. Bake in the preheated oven for 50-60 minutes, or until a toothpick inserted into the center comes out clean.
  8. Allow the bread to cool in the pan for about 10 minutes before transferring it to a wire rack to cool completely.

Nutrition

Serving: 1sliceCalories: 210kcalCarbohydrates: 30gProtein: 3gFat: 9gSaturated Fat: 1gPolyunsaturated Fat: 8gCholesterol: 30mgSodium: 200mgFiber: 2gSugar: 15g

Notes

  • For added moisture and flavor, consider adding 1/2 cup of unsweetened applesauce to the batter.
  • To make this recipe gluten-free, substitute all-purpose flour with a 1:1 gluten-free flour blend.

Tried this recipe?

Let us know how it was!

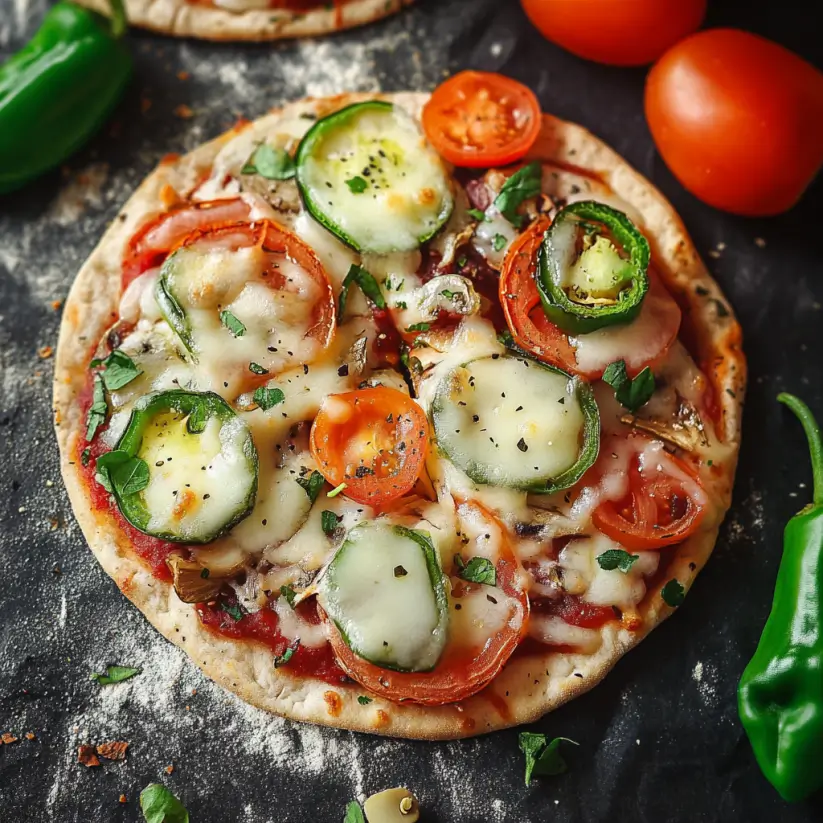
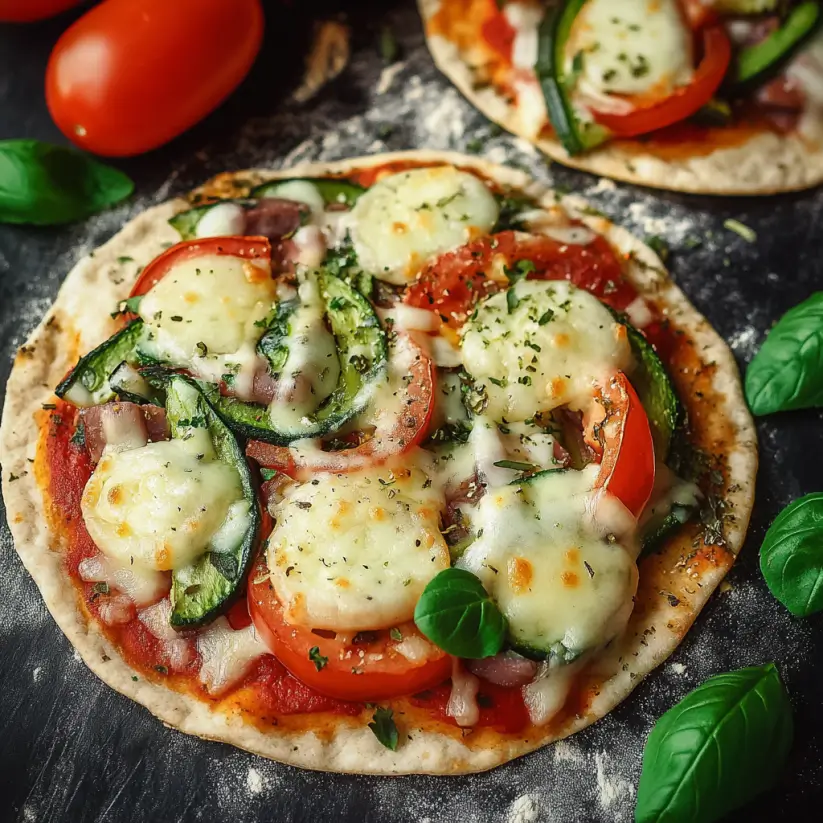
Pita Veggie Pizza: Discover a Healthy, Tasty Twist!

Introduction to Pita Veggie Pizza

There’s something magical about pizza, isn’t there? It’s the ultimate comfort food, and when I discovered the Pita Veggie Pizza, it felt like a lightbulb moment in my kitchen. This recipe is a game-changer, especially for those busy weeknights when you want something quick yet satisfying. With whole wheat pita as the base, you can whip up a delicious meal that’s not only healthy but also bursting with flavor. Whether you’re feeding a crowd or just treating yourself, this dish is sure to impress. Let’s dive into this tasty twist on a classic!

Why You’ll Love This Pita Veggie Pizza

This Pita Veggie Pizza is a lifesaver for anyone juggling a busy schedule. It’s quick to prepare, taking just 22 minutes from start to finish. The best part? You can customize it with your favorite veggies, making it a delightful treat for everyone. Plus, it’s a healthier alternative to traditional pizza, so you can indulge without the guilt. Trust me, once you try it, you’ll be hooked!

Ingredients for Pita Veggie Pizza

Gathering the right ingredients is key to making a fantastic Pita Veggie Pizza. Here’s what you’ll need:

  • Marinara Sauce: This classic tomato sauce adds a rich, tangy base. You can use store-bought or whip up a quick homemade version.
  • Whole Wheat Pita Breads: These serve as the perfect, healthy crust. They’re sturdy enough to hold all your toppings while adding a nutty flavor.
  • Shredded Mozzarella Cheese: A must for that gooey, melty goodness. Feel free to experiment with other cheeses like feta or goat cheese for a unique twist.
  • Assorted Veggies: Think bell peppers, onions, mushrooms, and spinach. The more colorful, the better! Fresh veggies not only enhance flavor but also pack in nutrients.
  • Dried Oregano: This herb brings a warm, earthy aroma that complements the pizza beautifully. It’s a staple in Mediterranean cooking.
  • Garlic Powder: A sprinkle of this adds depth and a savory kick. If you’re a garlic lover, fresh minced garlic works wonders too!
  • Salt and Pepper: Essential for seasoning. They elevate the flavors of your ingredients, making each bite more delicious.
  • Olive Oil: A drizzle before baking enhances flavor and helps achieve that golden, crispy finish.

For those who like a bit of heat, consider adding sliced jalapeños or crushed red pepper flakes. And if you’re feeling adventurous, swap out the veggies based on what’s in season or what you have on hand. The ingredient list with exact quantities is available at the bottom of the article for easy printing!

How to Make Pita Veggie Pizza

Creating your Pita Veggie Pizza is a breeze! Follow these simple steps, and you’ll have a delicious meal ready in no time. Let’s get cooking!

Step 1: Preheat the Oven

First things first, preheating your oven is crucial. Set it to 400°F. This ensures that your pizza cooks evenly and the cheese melts beautifully. A hot oven is your best friend for achieving that crispy crust!

Step 2: Prepare the Pita Base

Now, grab your whole wheat pita breads. Spread about ¼ cup of marinara sauce on each one. Use the back of a spoon for an even layer. This sauce is the heart of your pizza, giving it that classic flavor we all love.

Step 3: Add Cheese

Next up, sprinkle ¼ cup of shredded mozzarella cheese over the sauce. Make sure to cover the surface evenly. If you’re feeling adventurous, try mixing in some feta or goat cheese for a tangy twist. Cheese is what makes this Pita Veggie Pizza so irresistible!

Step 4: Load Up on Veggies

Time to get colorful! Top each pita with your choice of assorted veggies. Bell peppers, onions, mushrooms, and spinach work wonders. Distribute them evenly across the cheese. The more vibrant your toppings, the more appealing your pizza will look and taste!

Step 5: Seasoning

Don’t forget the seasoning! Sprinkle dried oregano, garlic powder, salt, and pepper over the veggies. These spices elevate the flavors, making each bite a delightful experience. A little seasoning goes a long way in enhancing your Pita Veggie Pizza!

Step 6: Drizzle with Olive Oil

For that extra flavor boost, drizzle a bit of olive oil over each pizza. This not only adds richness but also helps achieve that golden, crispy finish. Trust me, it’s worth it!

Step 7: Bake to Perfection

Finally, place your pitas on a baking sheet and pop them in the oven. Bake for 10-12 minutes, or until the cheese is melted and bubbly. Keep an eye on them! You want that perfect golden color. Once done, let them cool for a couple of minutes before slicing. Enjoy your homemade Pita Veggie Pizza!

Tips for Success

  • Use fresh veggies for the best flavor and texture.
  • Don’t overload the toppings; a balanced pizza cooks better.
  • Experiment with different cheeses to find your favorite combination.
  • Keep an eye on the baking time to avoid burning.
  • Let the pizzas cool slightly before slicing for easier handling.

Equipment Needed

  • Baking Sheet: A standard sheet works great, but a pizza stone can enhance crispiness.
  • Oven: Essential for baking; a toaster oven can also do the trick for smaller batches.
  • Spatula: Handy for transferring your pizzas in and out of the oven.
  • Measuring Cups: Useful for portioning sauce and cheese accurately.

Variations of Pita Veggie Pizza

  • Spicy Pita Veggie Pizza: Add sliced jalapeños or crushed red pepper flakes for a fiery kick that will wake up your taste buds.
  • Greek-Inspired: Top with feta cheese, Kalamata olives, and artichoke hearts for a Mediterranean twist that’s bursting with flavor.
  • Caprese Style: Use fresh mozzarella, sliced tomatoes, and basil leaves, drizzling with balsamic glaze after baking for a fresh, summery vibe.
  • Vegan Option: Swap out the cheese for a plant-based alternative and load up on your favorite veggies for a delicious vegan delight.
  • Breakfast Pita Pizza: Top with scrambled eggs, spinach, and a sprinkle of cheese for a hearty breakfast option that’s perfect any time of day.

Serving Suggestions for Pita Veggie Pizza

  • Side Salad: Pair your pizza with a fresh garden salad for a refreshing crunch.
  • Dipping Sauce: Serve with a side of ranch or garlic sauce for extra flavor.
  • Beverage Pairing: Enjoy with a cold craft beer or a sparkling water with lemon.
  • Presentation: Slice into wedges and serve on a wooden board for a rustic touch.

FAQs about Pita Veggie Pizza

Can I make Pita Veggie Pizza ahead of time?

Absolutely! You can prepare the pitas with sauce, cheese, and toppings, then store them in the fridge. Just bake them when you’re ready to enjoy a quick meal. This makes it a fantastic option for meal prep!

What are some good veggie combinations for this pizza?

The beauty of Pita Veggie Pizza lies in its versatility. You can mix and match veggies like zucchini, cherry tomatoes, or even roasted red peppers. Just remember to keep it colorful for a feast for the eyes!

Is Pita Veggie Pizza suitable for kids?

Definitely! Kids love pizza, and this healthier version is a great way to sneak in some veggies. Let them choose their toppings for a fun, interactive cooking experience!

Can I freeze Pita Veggie Pizza?

Yes, you can freeze the assembled pitas before baking. Just wrap them tightly in plastic wrap and foil. When you’re ready, bake them straight from the freezer, adding a few extra minutes to the cooking time.

What can I use instead of marinara sauce?

If you’re looking for alternatives, try pesto, hummus, or even a white sauce. Each option brings a unique flavor profile to your Pita Veggie Pizza, so feel free to get creative!

Final Thoughts

Making Pita Veggie Pizza is more than just cooking; it’s about creating a joyful experience in your kitchen. The aroma of fresh veggies mingling with melted cheese fills the air, inviting everyone to gather around the table. This recipe is a celebration of flavors, colors, and health, all wrapped up in a convenient pita. Whether you’re enjoying a quiet night in or hosting friends, this dish brings smiles and satisfaction. Plus, the best part? You can customize it to suit your taste. So roll up your sleeves and dive into this delightful twist on pizza!

Ranis

Pita Veggie Pizza: Discover a Healthy, Tasty Twist!

A healthy and tasty twist on traditional pizza using whole wheat pita bread and a variety of fresh veggies.
Prep Time 10 minutes
Cook Time 12 minutes
Total Time 22 minutes
Servings: 4 servings
Course: Main Dish
Cuisine: Mediterranean
Calories: 320

Ingredients
  

  • 1 cup marinara sauce
  • 4 whole wheat pita breads
  • 1 cup shredded mozzarella cheese
  • 1 cup assorted veggies bell peppers, onions, mushrooms, spinach
  • 1 teaspoon dried oregano
  • 1 teaspoon garlic powder
  • Salt and pepper to taste
  • Olive oil for drizzling

Method
 

  1. Preheat your oven to 400°F.
  2. Spread ¼ cup of marinara sauce on each pita bread.
  3. Sprinkle ¼ cup of shredded mozzarella cheese evenly over the sauce on each pita.
  4. Top each pita with a mix of your chosen veggies, distributing them evenly.
  5. Sprinkle oregano, garlic powder, salt, and pepper over the toppings.
  6. Drizzle a little olive oil over each pizza for added flavor.
  7. Place the pitas on a baking sheet and bake in the preheated oven for 10-12 minutes, or until the cheese is melted and bubbly.
  8. Remove from the oven and let cool for a couple of minutes before slicing.

Nutrition

Serving: 1pizzaCalories: 320kcalCarbohydrates: 30gProtein: 12gFat: 14gSaturated Fat: 7gPolyunsaturated Fat: 7gCholesterol: 30mgSodium: 600mgFiber: 4gSugar: 5g

Notes

  • For a spicier kick, add sliced jalapeños or crushed red pepper flakes on top before baking.
  • Try using different cheeses like feta or goat cheese for a unique flavor twist.

Tried this recipe?

Let us know how it was!

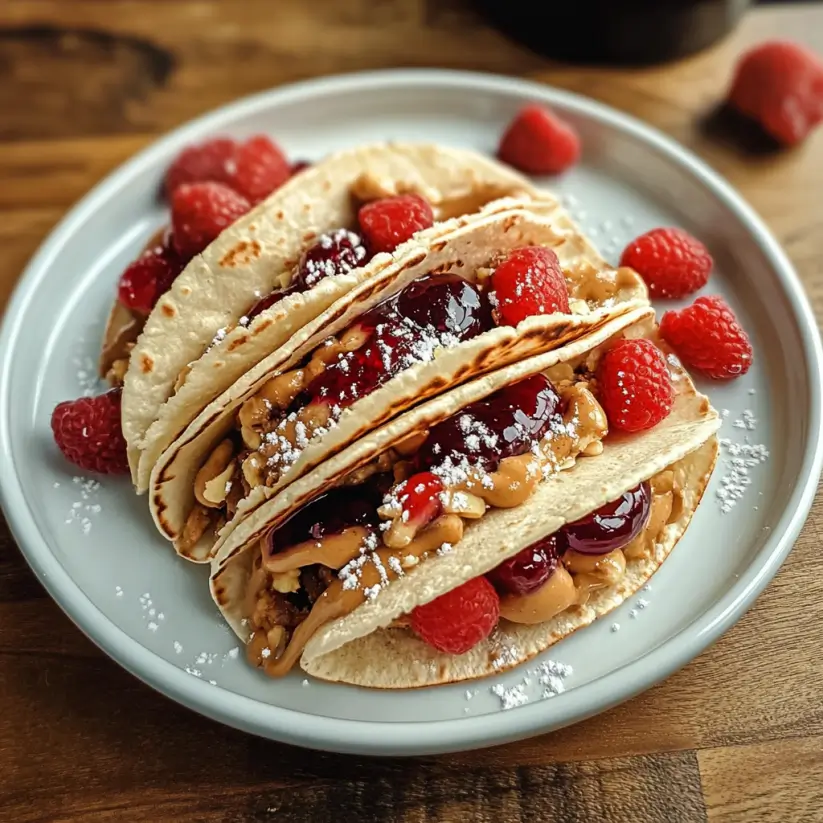
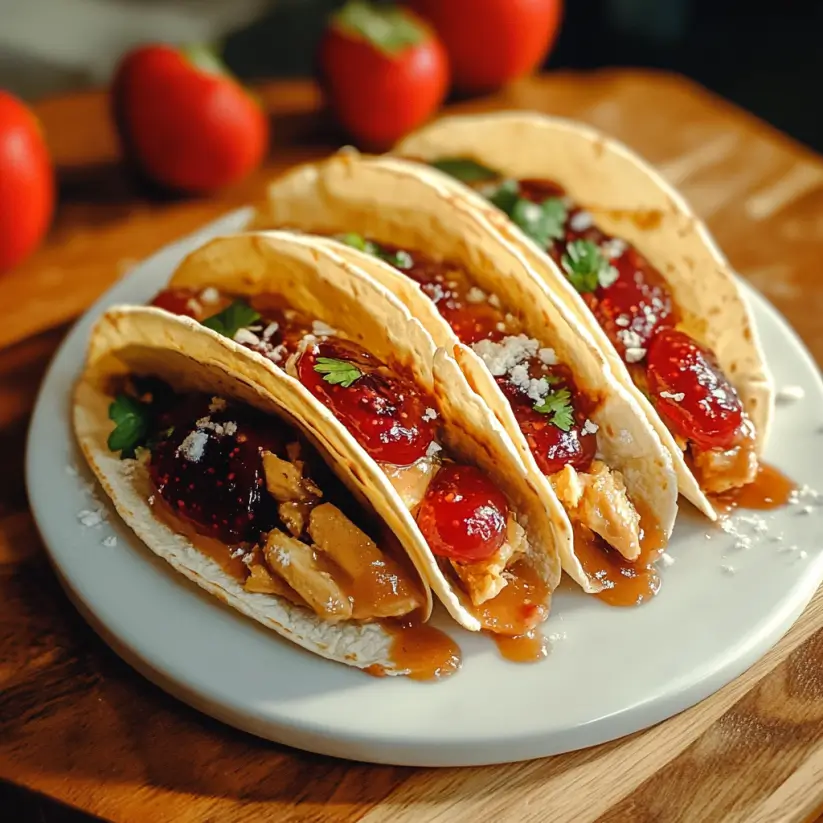
Peanut Butter and Jelly Tacos: A Creative Recipe Delight!

Introduction to Peanut Butter and Jelly Tacos

There’s something magical about combining childhood favorites into a fun, new dish. Peanut Butter and Jelly Tacos are just that—a delightful twist on a classic that brings back memories of carefree days. This recipe is perfect for those busy evenings when you want to whip up something quick yet impressive. With just a few ingredients, you can create a dish that not only satisfies your cravings but also sparks joy in your loved ones. Trust me, these tacos will have everyone smiling, making them a go-to for any occasion!

Why You’ll Love This Peanut Butter and Jelly Tacos

These Peanut Butter and Jelly Tacos are a game-changer in the kitchen. They’re incredibly easy to make, taking just 15 minutes from start to finish. The combination of creamy peanut butter and sweet jelly wrapped in a warm tortilla is pure bliss. Plus, they’re versatile! You can customize them with your favorite toppings, making them a hit for both kids and adults alike. Who wouldn’t love that?

Ingredients for Peanut Butter and Jelly Tacos

Gathering the right ingredients is the first step to creating these delightful Peanut Butter and Jelly Tacos. Here’s what you’ll need:

  • Creamy peanut butter: The star of the show! It adds richness and a satisfying texture.
  • Grape or strawberry jelly: Choose your favorite flavor for that sweet, fruity kick.
  • Large flour tortillas: These provide the perfect wrap for your taco creation, soft and pliable.
  • Banana: Sliced bananas add a fresh, fruity element that complements the peanut butter and jelly.
  • Granola: A crunchy topping that adds texture and a bit of wholesome goodness.
  • Honey (optional): A drizzle of honey can enhance sweetness if you’re feeling indulgent.
  • Mini chocolate chips (optional): For those who want to take it over the top with a touch of chocolate.

Feel free to experiment with different types of jelly or jam, like raspberry or apricot, for a unique flavor twist. If you’re looking for a healthier option, consider using whole wheat tortillas and natural peanut butter with no added sugar. For exact measurements, check the bottom of the article where you can find everything available for printing!

How to Make Peanut Butter and Jelly Tacos

Creating these Peanut Butter and Jelly Tacos is a breeze! Follow these simple steps, and you’ll have a delicious treat ready in no time. Let’s dive in!

Step 1: Mix the Peanut Butter and Jelly

Start by grabbing a small bowl. Add your creamy peanut butter and your choice of jelly. I like to use a 1:1 ratio, but feel free to adjust based on your taste. Mix them together until they’re well combined. This step is crucial; it ensures every bite is packed with flavor!

Step 2: Warm the Tortillas

Next, heat a skillet over medium heat. Place your large flour tortillas in the skillet for about 30 seconds on each side. You want them warm and pliable, not crispy. This makes folding them easier and enhances the overall experience. Trust me, a warm tortilla makes all the difference!

Step 3: Spread the Mixture

Now it’s time to spread that delicious peanut butter and jelly mixture onto each tortilla. Use a generous layer—don’t be shy! The goal is to create a satisfying base for your toppings. Make sure to leave a little space around the edges to avoid any messy spills when you fold them.

Step 4: Add Toppings

Here comes the fun part! Top your spread with sliced bananas and a sprinkle of granola. The bananas add a fresh, fruity crunch, while the granola gives it that delightful texture. If you’re feeling adventurous, drizzle some honey and toss on mini chocolate chips for an extra layer of sweetness. Go wild with your toppings!

Step 5: Fold and Serve

Finally, fold each tortilla in half to create your taco shape. Serve them immediately while they’re warm and inviting. These Peanut Butter and Jelly Tacos are best enjoyed fresh, so gather your friends or family and dig in. You’ll be amazed at how quickly they disappear!

Tips for Success

  • Use room temperature peanut butter for easier mixing.
  • Warm tortillas just enough to make them pliable, but not crispy.
  • Experiment with different jellies or jams for unique flavors.
  • For a crunchier texture, add nuts or seeds along with granola.
  • Don’t hesitate to customize toppings based on your preferences!

Equipment Needed

  • Skillet: A non-stick skillet works best, but any frying pan will do.
  • Mixing bowl: Use any bowl you have on hand for mixing the peanut butter and jelly.
  • Spatula: A spatula helps spread the mixture evenly.
  • Knife: For slicing bananas and any other toppings.

Variations

  • Nut Butter Swap: Try almond or cashew butter for a different nutty flavor.
  • Fruit Fiesta: Add other fruits like strawberries, blueberries, or even apples for a colorful twist.
  • Gluten-Free Option: Use gluten-free tortillas to make this recipe suitable for those with dietary restrictions.
  • Yogurt Drizzle: Instead of honey, drizzle some Greek yogurt for a tangy contrast.
  • Spicy Kick: Add a sprinkle of cinnamon or a dash of cayenne pepper for a surprising flavor boost.

Serving Suggestions

  • Fresh Fruit Salad: Pair your tacos with a refreshing fruit salad for a colorful side.
  • Milk or Almond Milk: A glass of cold milk complements the sweetness perfectly.
  • Presentation: Serve on a vibrant plate and garnish with mint leaves for a pop of color.
  • Ice Cream: For a dessert twist, serve with a scoop of vanilla ice cream on the side.

FAQs about Peanut Butter and Jelly Tacos

Can I make Peanut Butter and Jelly Tacos ahead of time?

While these tacos are best enjoyed fresh, you can prepare the peanut butter and jelly mixture in advance. Just store it in an airtight container in the fridge. When you’re ready to serve, warm the tortillas and assemble your tacos for a quick treat!

What can I substitute for flour tortillas?

If you’re looking for alternatives, corn tortillas work well for a gluten-free option. You can also use lettuce wraps for a low-carb version. The key is to find something that can hold all that delicious filling!

Are Peanut Butter and Jelly Tacos suitable for kids?

Absolutely! These tacos are a hit with kids. They’re fun to make and eat, plus you can customize the toppings to suit their tastes. Just watch out for any nut allergies!

Can I use different types of nut butter?

Definitely! Almond butter, cashew butter, or even sunflower seed butter can be great substitutes. Each will bring its own unique flavor to the tacos, so feel free to experiment!

How can I make these tacos healthier?

To make your Peanut Butter and Jelly Tacos healthier, opt for whole wheat tortillas and natural peanut butter without added sugars. You can also load up on fresh fruits and skip the chocolate chips for a lighter version!

Final Thoughts

Peanut Butter and Jelly Tacos are more than just a fun twist on a classic; they’re a celebration of creativity in the kitchen. Each bite is a delightful mix of flavors and textures that can transport you back to simpler times. Whether you’re making them for a quick snack or a special treat, these tacos bring smiles and satisfaction to the table. Plus, the joy of customizing them with your favorite toppings makes every experience unique. So gather your loved ones, whip up a batch, and enjoy the laughter and memories that come with this delicious creation!

Ranis

Peanut Butter and Jelly Tacos: A Creative Recipe Delight!

A creative and fun recipe for Peanut Butter and Jelly Tacos that combines classic flavors in a unique way.
Prep Time 10 minutes
Cook Time 5 minutes
Total Time 15 minutes
Course: Dessert
Cuisine: American
Calories: 350

Ingredients
  

  • 1 cup creamy peanut butter
  • 1 cup grape or strawberry jelly
  • 4 large flour tortillas
  • 1 medium banana sliced
  • 1/2 cup granola
  • 1 tablespoon honey optional
  • 1/4 cup mini chocolate chips optional

Method
 

  1. In a small bowl, mix the peanut butter and jelly together until well combined.
  2. Warm the flour tortillas in a skillet over medium heat for about 30 seconds on each side until soft and pliable.
  3. Spread a generous layer of the peanut butter and jelly mixture onto each tortilla.
  4. Top with sliced bananas and sprinkle granola evenly over the top.
  5. If desired, drizzle honey and sprinkle mini chocolate chips on top for added sweetness.
  6. Fold the tortillas in half to create a taco shape and serve immediately.

Nutrition

Serving: 1tacoCalories: 350kcalCarbohydrates: 45gProtein: 10gFat: 15gSaturated Fat: 3gPolyunsaturated Fat: 10gSodium: 200mgFiber: 3gSugar: 20g

Notes

  • For a healthier option, use whole wheat tortillas and natural peanut butter with no added sugar.
  • Experiment with different types of jelly or jam, such as raspberry or apricot, for a unique flavor twist.

Tried this recipe?

Let us know how it was!

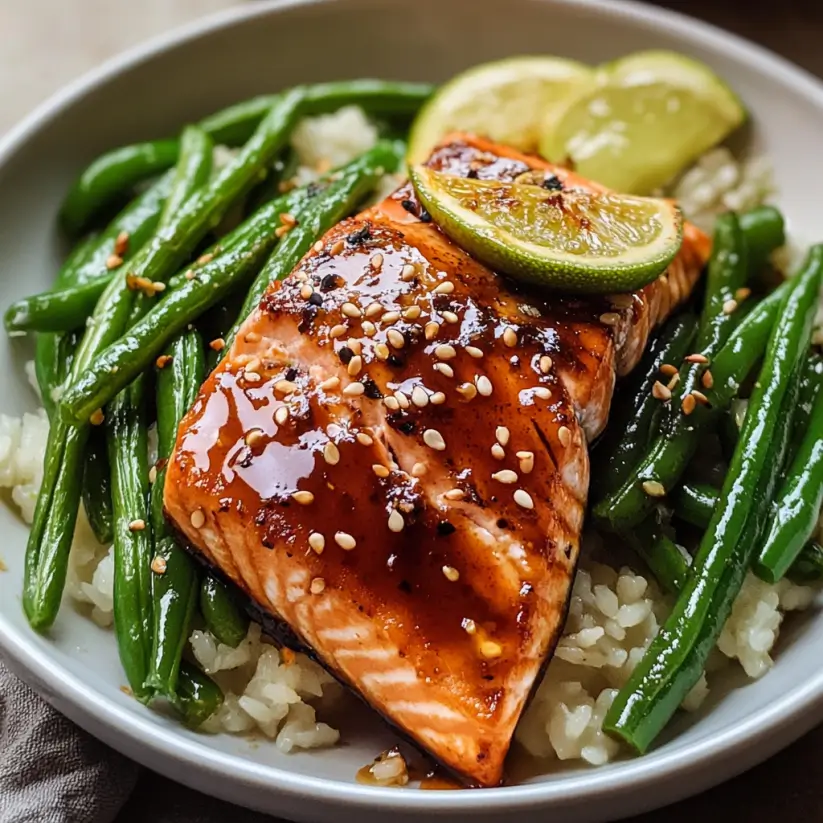
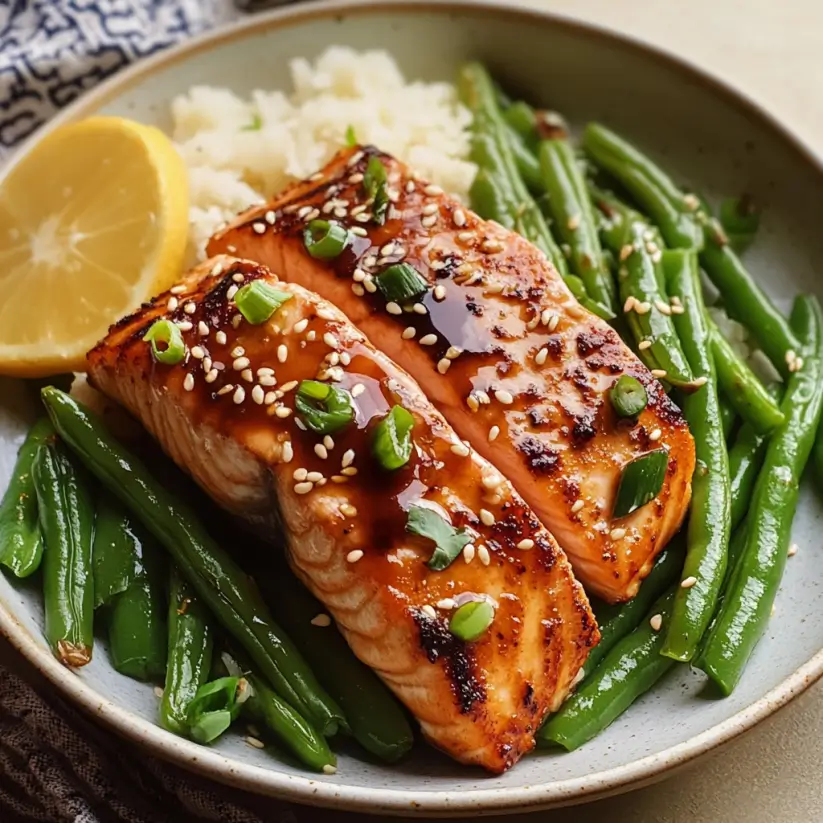
Miso Glazed Salmon with Garlic Green Beans Recipe Delights!

Introduction to Miso Glazed Salmon with Garlic Green Beans

Cooking has always been my way of unwinding after a long day. When I discovered the magic of Miso Glazed Salmon with Garlic Green Beans, it felt like I struck gold. This dish is not just a meal; it’s a quick solution for busy evenings or a delightful way to impress friends and family.

The rich umami flavor of the miso glaze pairs perfectly with tender salmon, while the garlic green beans add a fresh crunch. It’s healthy, satisfying, and comes together in just 25 minutes. Trust me, your taste buds will thank you!

Why You’ll Love This Miso Glazed Salmon with Garlic Green Beans

This Miso Glazed Salmon with Garlic Green Beans is a game-changer for anyone looking to whip up a delicious meal without spending hours in the kitchen.

It’s incredibly easy to prepare, making it perfect for weeknight dinners or last-minute gatherings. The combination of sweet and savory flavors will have your taste buds dancing, while the vibrant green beans add a nutritious crunch.

You’ll love how quickly it comes together!

Ingredients for Miso Glazed Salmon with Garlic Green Beans

Gathering the right ingredients is half the fun of cooking! For this Miso Glazed Salmon with Garlic Green Beans, you’ll need a mix of fresh and pantry staples that come together beautifully.

  • Salmon fillets: The star of the dish! Look for fresh, high-quality salmon for the best flavor.
  • White miso paste: This fermented soybean paste adds a rich umami flavor. It’s a must-have for that signature glaze.
  • Honey: A touch of sweetness balances the savory miso. You can also use maple syrup for a different twist.
  • Soy sauce: Adds depth and saltiness. Opt for low-sodium if you’re watching your salt intake.
  • Rice vinegar: This brings a subtle tanginess to the glaze. If you don’t have it, apple cider vinegar works too.
  • Sesame oil: A drizzle of this fragrant oil enhances the dish with a nutty aroma.
  • Fresh green beans: These add a crisp texture and vibrant color. Feel free to swap them for asparagus or broccoli if you prefer.
  • Olive oil: Used for sautéing the green beans, it adds healthy fats and flavor.
  • Garlic: Minced garlic infuses the green beans with a delicious aroma. Fresh is best, but jarred works in a pinch.
  • Salt and pepper: Essential for seasoning. Adjust to your taste!
  • Sesame seeds and chopped green onions: Optional garnishes that add a pop of color and extra flavor.

For exact measurements, check the bottom of the article where you can find everything listed for easy printing. Happy cooking!

How to Make Miso Glazed Salmon with Garlic Green Beans

Cooking this Miso Glazed Salmon with Garlic Green Beans is a breeze! Follow these simple steps, and you’ll have a delicious meal ready in no time. Let’s dive in!

Step 1: Preheat the Oven

Start by preheating your oven to 400°F (200°C). This step is crucial because it ensures even cooking. While the oven heats up, line a baking sheet with parchment paper. This makes cleanup a snap and prevents the salmon from sticking.

Step 2: Prepare the Miso Glaze

In a small bowl, whisk together the white miso paste, honey, soy sauce, rice vinegar, and sesame oil. Mix until smooth. The glaze should be thick but pourable. If it’s too thick, add a splash of water to reach the right consistency. This glaze is what makes the salmon shine!

Step 3: Glaze the Salmon

Place the salmon fillets on the prepared baking sheet. Using a brush or the back of a spoon, generously apply the miso glaze over the top of each fillet. Make sure to coat them well; this is where all the flavor comes from. Don’t be shy—get that glaze on there!

Step 4: Bake the Salmon

Slide the baking sheet into the preheated oven. Bake the salmon for 12-15 minutes. Keep an eye on it! You’ll know it’s done when it flakes easily with a fork. If you like a bit of a char, broil it for the last minute. Just don’t walk away—burnt salmon is a sad sight!

Step 5: Sauté the Garlic Green Beans

While the salmon bakes, heat olive oil in a large skillet over medium heat. Add the minced garlic and sauté for about a minute until fragrant. Then, toss in the fresh green beans. Season with salt and pepper, and sauté for 5-7 minutes until they’re tender-crisp. Timing is key here; you want them vibrant and crunchy!

Step 6: Serve and Garnish

Once the salmon is out of the oven, let it rest for a few minutes. This helps the juices redistribute. Plate the salmon alongside the garlic green beans. For a finishing touch, sprinkle sesame seeds and chopped green onions on top. This adds a pop of color and extra flavor. Enjoy your beautiful creation!

Tips for Success

  • Use a meat thermometer to check the salmon’s internal temperature; it should reach 145°F (63°C).
  • For extra flavor, marinate the salmon in the miso glaze for 30 minutes before baking.
  • Don’t overcrowd the skillet when sautéing green beans; this ensures they cook evenly.
  • Feel free to experiment with different vegetables like asparagus or bell peppers.
  • Always taste and adjust seasoning as you go for the best results!

Equipment Needed

  • Baking sheet: A standard sheet works, but a rimmed one prevents spills.
  • Parchment paper: Use aluminum foil if you don’t have it; it’s a great alternative.
  • Small bowl: For mixing the glaze; any mixing bowl will do.
  • Skillet: A non-stick skillet makes sautéing easy.
  • Brush or spoon: For glazing the salmon; a spoon works just fine!

Variations

  • Spicy Miso Glaze: Add a teaspoon of sriracha or chili paste to the miso glaze for a kick of heat.
  • Herb-Infused Salmon: Mix fresh herbs like dill or cilantro into the glaze for an aromatic twist.
  • Vegetable Swap: Substitute green beans with asparagus, broccoli, or snap peas for a different texture and flavor.
  • Gluten-Free Option: Ensure the soy sauce is gluten-free or use tamari for a similar taste.
  • Oven-Free Method: Grill the salmon instead of baking for a smoky flavor and charred finish.

Serving Suggestions

  • Rice: Serve with steamed jasmine or brown rice to soak up the delicious glaze.
  • Salad: A light cucumber salad pairs well for a refreshing contrast.
  • Wine: A chilled Sauvignon Blanc complements the flavors beautifully.
  • Presentation: Use a colorful plate and arrange the salmon and green beans artfully for a stunning look.

FAQs about Miso Glazed Salmon with Garlic Green Beans

Can I use frozen salmon for this recipe?

Absolutely! Just make sure to thaw it completely before applying the miso glaze. Frozen salmon can be just as delicious when cooked properly.

What can I substitute for white miso paste?

If you don’t have white miso, you can use yellow miso or even tahini in a pinch. The flavor will differ slightly, but it will still be tasty!

How do I store leftovers?

Store any leftovers in an airtight container in the fridge for up to 2 days. Reheat gently in the oven or microwave to avoid drying out the salmon.

Can I make this dish ahead of time?

Yes! You can prepare the miso glaze and trim the green beans in advance. Just bake the salmon and sauté the green beans right before serving for the best flavor and texture.

Is this recipe suitable for meal prep?

Definitely! Miso Glazed Salmon with Garlic Green Beans is perfect for meal prep. Just portion it out in containers for quick, healthy lunches or dinners throughout the week.

Final Thoughts

Cooking Miso Glazed Salmon with Garlic Green Beans is more than just preparing a meal; it’s about creating a moment of joy. The delightful aroma that fills your kitchen as the salmon bakes is simply irresistible.

Each bite offers a perfect balance of flavors, making it a dish that brings smiles to the table. Whether you’re enjoying it solo or sharing it with loved ones, this recipe is a reminder that healthy eating can be delicious and satisfying.

So, roll up your sleeves, embrace the process, and savor the happiness that comes from a home-cooked meal!

Ranis

Miso Glazed Salmon with Garlic Green Beans Recipe Delights!

A delicious recipe for Miso Glazed Salmon served with Garlic Green Beans, perfect for a healthy meal.
Prep Time 10 minutes
Cook Time 15 minutes
Total Time 25 minutes
Servings: 4 servings
Course: Main Course
Cuisine: Japanese
Calories: 350

Ingredients
  

  • 1 pound salmon fillets
  • 3 tablespoons white miso paste
  • 2 tablespoons honey
  • 1 tablespoon soy sauce
  • 1 tablespoon rice vinegar
  • 1 teaspoon sesame oil
  • 1 pound fresh green beans trimmed
  • 2 tablespoons olive oil
  • 3 cloves garlic minced
  • Salt and pepper to taste
  • Sesame seeds for garnish optional
  • Chopped green onions for garnish optional

Method
 

  1. Preheat the oven to 400°F (200°C). Line a baking sheet with parchment paper.
  2. In a small bowl, whisk together the miso paste, honey, soy sauce, rice vinegar, and sesame oil until smooth.
  3. Place the salmon fillets on the prepared baking sheet and brush the miso glaze generously over the top of each fillet.
  4. Bake the salmon in the preheated oven for 12-15 minutes, or until it flakes easily with a fork.
  5. While the salmon is baking, heat the olive oil in a large skillet over medium heat. Add the minced garlic and sauté for about 1 minute until fragrant.
  6. Add the green beans to the skillet, season with salt and pepper, and sauté for 5-7 minutes until tender-crisp.
  7. Once the salmon is done, remove it from the oven and let it rest for a few minutes. Serve the salmon with the garlic green beans on the side.
  8. Garnish with sesame seeds and chopped green onions if desired.

Nutrition

Serving: 1fillet with green beansCalories: 350kcalCarbohydrates: 8gProtein: 30gFat: 20gSaturated Fat: 3gPolyunsaturated Fat: 15gCholesterol: 70mgSodium: 600mgFiber: 3gSugar: 8g

Notes

  • For a spicier kick, add a teaspoon of sriracha to the miso glaze.
  • Substitute the green beans with asparagus or broccoli for a different vegetable option.

Tried this recipe?

Let us know how it was!

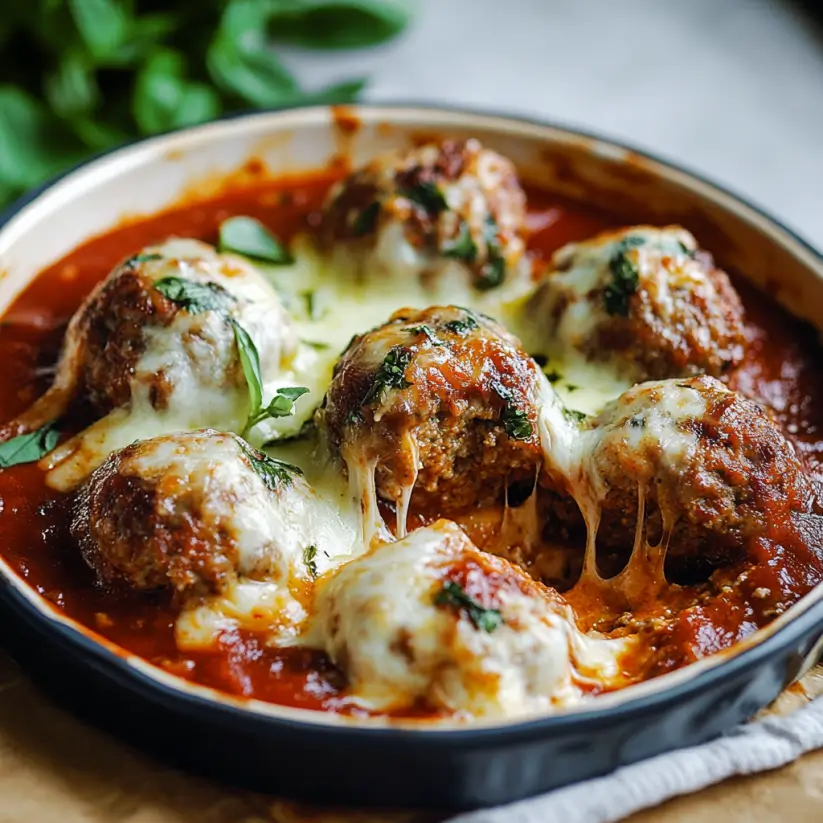
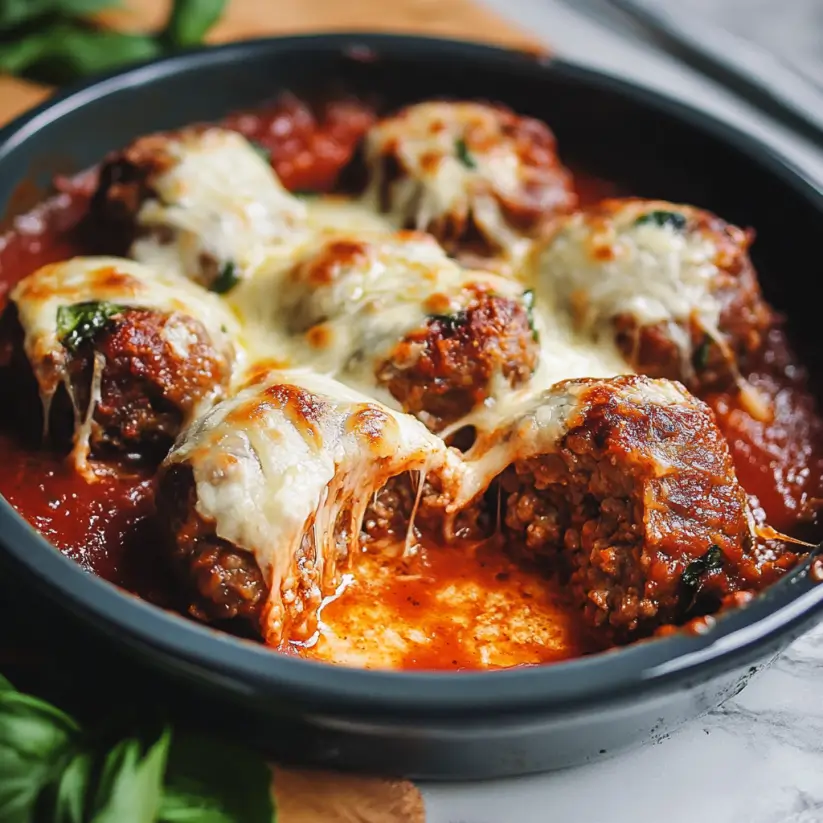
Cheesy Baked Meatballs: A Delightfully Easy Recipe!

Introduction to Cheesy Baked Meatballs

There’s something magical about the aroma of meatballs baking in the oven. It takes me back to family dinners where laughter filled the air, and the table was a canvas of deliciousness. Cheesy Baked Meatballs are not just a meal; they’re a warm hug on a plate. This recipe is perfect for those busy weeknights when you want to whip up something quick yet impressive. With gooey mozzarella hidden inside, these meatballs are sure to delight your loved ones. Trust me, once you try them, they’ll become a staple in your kitchen!

Why You’ll Love This Cheesy Baked Meatballs

These Cheesy Baked Meatballs are a game-changer for any home cook. They come together in just 40 minutes, making them perfect for busy evenings. The combination of savory beef and melty mozzarella creates a flavor explosion that’s hard to resist. Plus, they’re versatile enough to serve over pasta, in a sub, or on their own. You’ll love how easy they are to make and how quickly they disappear from the table!

Ingredients for Cheesy Baked Meatballs

Gathering the right ingredients is the first step to creating these delightful Cheesy Baked Meatballs. Here’s what you’ll need:

  • Ground beef: The star of the show! Choose a lean blend for a juicy texture.
  • Breadcrumbs: These add structure and help bind the meatballs together. You can use regular or gluten-free options.
  • Grated Parmesan cheese: A sprinkle of this adds a nutty flavor that complements the beef beautifully.
  • Chopped fresh parsley: This herb brings a pop of color and freshness to the mix.
  • Large egg: Acts as a binder, helping to hold everything together.
  • Minced garlic: For that aromatic kick that elevates the flavor profile.
  • Onion powder: A convenient way to add depth without the hassle of chopping onions.
  • Italian seasoning: A blend of herbs that captures the essence of Italian cuisine.
  • Salt and black pepper: Essential for seasoning and enhancing all the flavors.
  • Mozzarella cheese: The gooey surprise inside! Use fresh or block mozzarella cut into cubes.
  • Marinara sauce: A rich, tangy sauce to serve with the meatballs. You can use store-bought or homemade.
  • Olive oil: A drizzle before baking helps achieve that golden-brown crust.
  • Fresh basil leaves: Optional, but they make a lovely garnish that adds a burst of flavor.

For those looking to spice things up, consider adding red pepper flakes to the meat mixture. If you prefer a lighter option, ground turkey or chicken works beautifully as a substitute. Exact measurements for each ingredient can be found at the bottom of the article, ready for printing!

How to Make Cheesy Baked Meatballs

Creating these Cheesy Baked Meatballs is a straightforward process that anyone can master. Follow these simple steps, and you’ll have a delicious meal ready in no time!

Step 1: Preheat the Oven

First things first, preheat your oven to 400°F (200°C). This ensures that your meatballs will cook evenly and develop that lovely golden-brown crust. While the oven heats up, line a baking sheet with parchment paper. This makes cleanup a breeze and prevents sticking.

Step 2: Prepare the Meat Mixture

In a large bowl, combine the ground beef, breadcrumbs, grated Parmesan cheese, chopped parsley, egg, minced garlic, onion powder, Italian seasoning, salt, and black pepper. Mix everything together until well combined. Don’t be shy—get in there with your hands! This is where the magic begins, and the flavors meld beautifully.

Step 3: Form the Meatballs

Now comes the fun part! Take a small amount of the meat mixture, about 2 tablespoons, and flatten it in your hand. Place a cube of mozzarella cheese right in the center. Fold the meat around the cheese, forming a ball. Make sure the cheese is completely enclosed. Repeat this process with the remaining mixture. You’ll end up with a tray full of cheesy goodness!

Step 4: Bake the Meatballs

Place the formed meatballs on the prepared baking sheet. Drizzle them with a little olive oil to help them brown nicely. Bake in the preheated oven for 20-25 minutes. Keep an eye on them; you want them cooked through and beautifully browned. The aroma will be irresistible!

Step 5: Heat the Marinara Sauce

While the meatballs are baking, it’s time to heat the marinara sauce. Pour it into a saucepan and warm it over medium heat. Stir occasionally to prevent it from sticking. This step adds a rich, tangy flavor that pairs perfectly with the cheesy meatballs.

Step 6: Combine and Serve

Once the meatballs are done, carefully remove them from the oven. Transfer them to the saucepan with the marinara sauce. Let them simmer for about 5 minutes. This allows the flavors to meld together beautifully. Serve the meatballs hot, garnished with fresh basil if desired. Enjoy the cheesy, savory goodness!

Tips for Success

  • Use lean ground beef for a juicy texture without excess fat.
  • Don’t skip the resting time after baking; it helps the flavors develop.
  • Experiment with different cheeses for a unique twist—try cheddar or pepper jack!
  • Make a double batch and freeze half for a quick meal later.
  • Serve with crusty bread to soak up that delicious marinara sauce.

Equipment Needed

  • Baking sheet: A standard sheet works, but a cast-iron skillet adds a nice touch.
  • Parchment paper: Use aluminum foil if you’re out; it’ll still do the job.
  • Large mixing bowl: Any bowl will do, but a sturdy one makes mixing easier.
  • Measuring cups and spoons: Essential for accuracy; you can eyeball it if you’re feeling adventurous!
  • Wooden spoon or spatula: Great for mixing; your hands work too, just wash up afterward!

Variations

  • Spicy Meatballs: Add 1/4 teaspoon of red pepper flakes to the meat mixture for a kick of heat.
  • Cheese Lovers: Mix different cheeses like cheddar or pepper jack into the meat mixture for extra flavor.
  • Vegetarian Option: Substitute ground beef with lentils or chickpeas for a hearty, plant-based version.
  • Herb-Infused: Experiment with fresh herbs like thyme or oregano for a fragrant twist.
  • Gluten-Free: Use gluten-free breadcrumbs or crushed rice crackers to keep it celiac-friendly.

Serving Suggestions

  • Serve over a bed of spaghetti for a classic Italian meal.
  • Pair with garlic bread to soak up the marinara sauce.
  • Top with freshly grated Parmesan for an extra cheesy touch.
  • Enjoy with a side salad for a refreshing contrast.
  • Complement with a glass of red wine for a perfect dinner pairing.

FAQs about Cheesy Baked Meatballs

Can I make Cheesy Baked Meatballs ahead of time?

Absolutely! You can prepare the meatballs and refrigerate them for up to 24 hours before baking. Just remember to let them sit at room temperature for about 15 minutes before popping them in the oven.

What can I serve with Cheesy Baked Meatballs?

These meatballs are incredibly versatile! Serve them over pasta, in a sub sandwich, or alongside a fresh salad. They also pair wonderfully with garlic bread for a complete meal.

Can I freeze Cheesy Baked Meatballs?

Yes, you can freeze them! After baking, let the meatballs cool completely, then store them in an airtight container. They’ll last up to three months in the freezer. Just reheat in the oven or microwave when you’re ready to enjoy!

What type of ground meat can I use?

While ground beef is the classic choice, feel free to experiment! Ground turkey or chicken works well for a lighter option. You can even try a mix of meats for added flavor.

How do I know when the meatballs are done?

The best way to check is by using a meat thermometer. The internal temperature should reach 160°F (70°C). If you don’t have one, cut a meatball in half; it should be cooked through and no longer pink inside.

Final Thoughts

Cooking these Cheesy Baked Meatballs is more than just preparing a meal; it’s about creating memories. The joy of pulling them from the oven, golden and bubbling, fills the kitchen with warmth. Each bite is a delightful surprise, with gooey cheese melting in your mouth. Whether you’re sharing them with family or enjoying a quiet night in, these meatballs bring comfort and satisfaction. They’re a reminder that good food can turn an ordinary day into something special. So, roll up your sleeves, embrace the process, and let these cheesy wonders bring a smile to your face!

Ranis

Cheesy Baked Meatballs: A Delightfully Easy Recipe!

Cheesy Baked Meatballs are a delightful and easy recipe that combines ground beef with gooey mozzarella cheese, baked to perfection and served in marinara sauce.
Prep Time 15 minutes
Cook Time 25 minutes
Total Time 40 minutes
Servings: 4 servings
Course: Main Dish
Cuisine: Italian
Calories: 350

Ingredients
  

  • 1 pound ground beef
  • 1/2 cup breadcrumbs
  • 1/4 cup grated Parmesan cheese
  • 1/4 cup chopped fresh parsley
  • 1 large egg
  • 2 cloves garlic minced
  • 1 teaspoon onion powder
  • 1 teaspoon Italian seasoning
  • 1/2 teaspoon salt
  • 1/4 teaspoon black pepper
  • 4 ounces mozzarella cheese cut into small cubes
  • 1 jar 24 ounces marinara sauce
  • 1 tablespoon olive oil
  • Fresh basil leaves for garnish optional

Method
 

  1. Preheat your oven to 400°F (200°C) and line a baking sheet with parchment paper.
  2. In a large bowl, combine the ground beef, breadcrumbs, Parmesan cheese, parsley, egg, garlic, onion powder, Italian seasoning, salt, and black pepper. Mix until well combined.
  3. Take a small amount of the meat mixture (about 2 tablespoons) and flatten it in your hand. Place a cube of mozzarella cheese in the center and fold the meat around the cheese to form a ball. Repeat with the remaining mixture.
  4. Place the meatballs on the prepared baking sheet. Drizzle with olive oil.
  5. Bake in the preheated oven for 20-25 minutes, or until the meatballs are cooked through and browned.
  6. While the meatballs are baking, heat the marinara sauce in a saucepan over medium heat.
  7. Once the meatballs are done, remove them from the oven and transfer them to the saucepan with the marinara sauce. Simmer for 5 minutes to allow the flavors to meld.
  8. Serve the meatballs hot, garnished with fresh basil if desired.

Nutrition

Serving: 1meatballCalories: 350kcalCarbohydrates: 10gProtein: 28gFat: 22gSaturated Fat: 10gPolyunsaturated Fat: 8gCholesterol: 80mgSodium: 600mgFiber: 1gSugar: 3g

Notes

  • For a spicier kick, add 1/4 teaspoon of red pepper flakes to the meat mixture.
  • Substitute ground turkey or chicken for a lighter version of these meatballs.

Tried this recipe?

Let us know how it was!

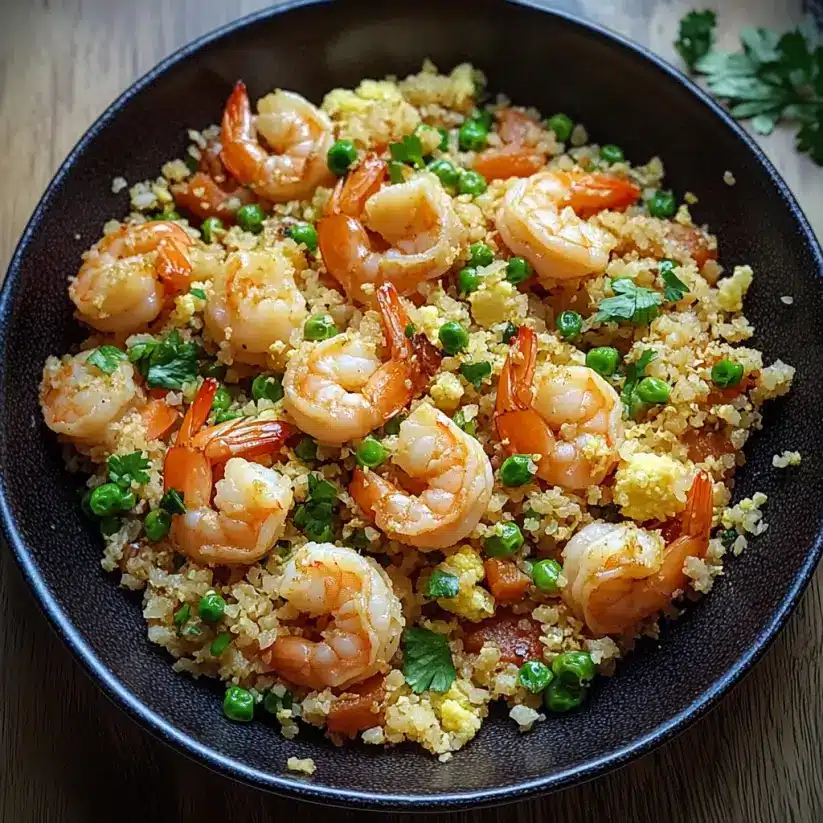
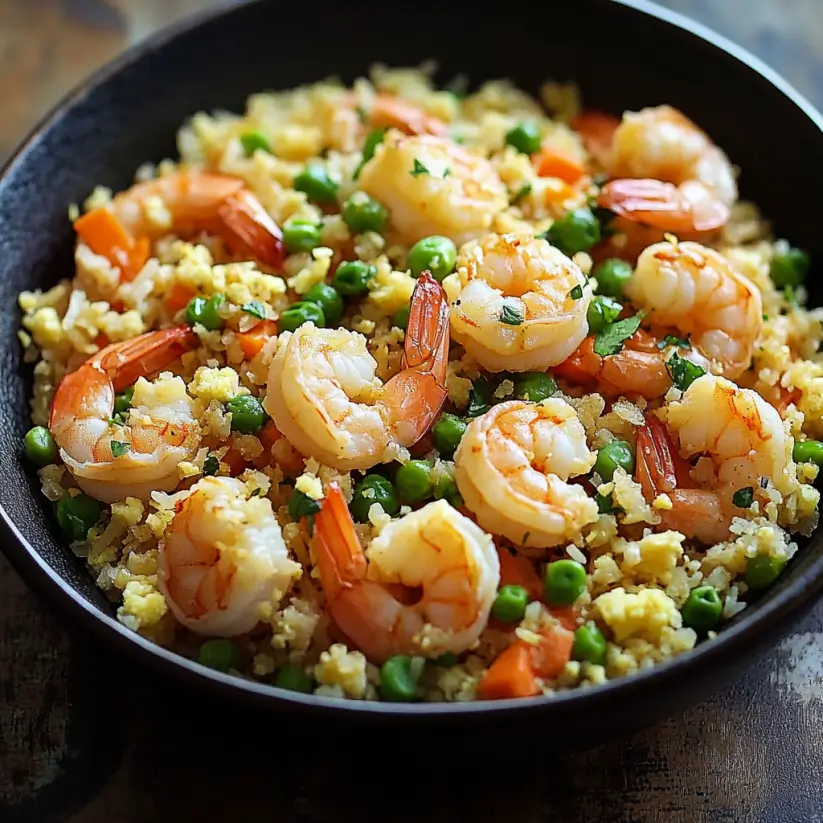
Cauliflower Fried Rice with Shrimp: A Quick Delight!

Introduction to Cauliflower Fried Rice with Shrimp

After a long day, the last thing I want is to spend hours in the kitchen. That’s where my go-to recipe for Cauliflower Fried Rice with Shrimp comes in. It’s quick, delicious, and packed with flavor, making it the perfect solution for busy evenings. Plus, it’s a fantastic way to sneak in some veggies without sacrificing taste. Whether you’re looking to impress your family or just want a satisfying meal for yourself, this dish hits the spot. Trust me, once you try it, you’ll be adding it to your regular rotation!

Why You’ll Love This Cauliflower Fried Rice with Shrimp

This Cauliflower Fried Rice with Shrimp is a game-changer for anyone who craves a quick, healthy meal. It comes together in just 25 minutes, making it perfect for those hectic weeknights. The combination of tender shrimp and vibrant veggies creates a delightful flavor explosion. Plus, it’s low in calories but high in satisfaction, so you can indulge without the guilt. What’s not to love?

Ingredients for Cauliflower Fried Rice with Shrimp

Gathering the right ingredients is key to making a delicious Cauliflower Fried Rice with Shrimp. Here’s what you’ll need:

  • Cauliflower rice: Fresh or frozen, this is the star of the dish. It’s low in carbs and adds a nice texture.
  • Shrimp: Peeled and deveined, shrimp cooks quickly and brings a lovely seafood flavor.
  • Vegetable oil: For sautéing, it helps to achieve that perfect stir-fry finish.
  • Onion: Diced, it adds sweetness and depth to the dish.
  • Garlic: Minced, it infuses the dish with a fragrant aroma that’s hard to resist.
  • Mixed vegetables: A colorful blend of peas, carrots, and corn adds nutrition and vibrancy.
  • Eggs: Beaten, they provide protein and a creamy texture when scrambled.
  • Soy sauce: This salty, umami-rich sauce ties all the flavors together.
  • Sesame oil: A drizzle adds a nutty flavor that elevates the dish.
  • Green onions: Sliced, they make for a fresh garnish that brightens the meal.
  • Salt and pepper: Essential for seasoning, adjust to your taste.

For those looking to mix things up, consider substituting shrimp with tofu for a vegetarian option. You can also add a splash of sriracha or chili sauce for a spicy kick. Exact measurements for each ingredient can be found at the bottom of the article, ready for printing!

How to Make Cauliflower Fried Rice with Shrimp

Now that you have all your ingredients ready, let’s dive into the fun part: making your Cauliflower Fried Rice with Shrimp. Follow these simple steps, and you’ll have a delicious meal in no time!

Step 1: Prepare the Cauliflower Rice

If you’re using fresh cauliflower, start by cutting it into florets. Then, pulse them in a food processor until they resemble rice. If you’re opting for frozen cauliflower rice, just thaw it and drain any excess moisture. This step is crucial for achieving that perfect texture!

Step 2: Sauté the Onions and Garlic

Heat a tablespoon of vegetable oil in a large skillet or wok over medium-high heat. Add the diced onion and sauté for about 2-3 minutes until it turns translucent. The aroma will be heavenly! Next, toss in the minced garlic and cook for an additional 30 seconds. You want it fragrant but not burnt.

Step 3: Cook the Shrimp

Now, it’s time for the shrimp! Add them to the skillet and cook until they turn pink, which should take about 3-4 minutes. Once they’re cooked, remove them from the skillet and set them aside. This keeps them juicy and prevents overcooking.

Step 4: Add Mixed Vegetables

In the same skillet, add your mixed vegetables. Cook them for 2-3 minutes until they’re tender. This colorful mix not only adds nutrition but also makes your dish visually appealing. Stir occasionally to ensure even cooking.

Step 5: Scramble the Eggs

Push the vegetables to one side of the skillet. Pour the beaten eggs into the other side and scramble them until fully cooked. Once they’re ready, mix them with the vegetables. This adds a creamy texture and extra protein to your Cauliflower Fried Rice with Shrimp.

Step 6: Combine Ingredients

Now, it’s time to bring everything together! Add the cauliflower rice to the skillet and stir to combine all the ingredients. Pour in the soy sauce and sesame oil, mixing well. Cook for another 3-4 minutes, stirring occasionally. This is where the magic happens!

Step 7: Final Touches

Finally, return the cooked shrimp to the skillet. Season with salt and pepper to taste, and stir everything together. Cook for an additional 1-2 minutes to heat through. Once done, remove from heat and garnish with sliced green onions. Your Cauliflower Fried Rice with Shrimp is ready to serve!

Tips for Success

  • Use fresh cauliflower for the best texture, but frozen works in a pinch.
  • Don’t overcrowd the skillet; cook in batches if necessary for even frying.
  • Adjust the soy sauce to your taste; you can always add more later.
  • For extra flavor, try adding ginger along with the garlic.
  • Serve immediately for the best taste and texture.

Equipment Needed

  • Large skillet or wok: Essential for stir-frying. A non-stick pan works too.
  • Food processor: Great for quickly ricing cauliflower. A box grater can work in a pinch.
  • Spatula: For stirring and flipping ingredients.
  • Measuring cups: Handy for portioning ingredients accurately.

Variations

  • Vegetarian Option: Swap shrimp for tofu or chickpeas for a protein-packed, meat-free meal.
  • Spicy Kick: Add a splash of sriracha or chili flakes for a fiery twist that’ll wake up your taste buds.
  • Different Veggies: Experiment with your favorite vegetables like bell peppers, broccoli, or snap peas for added crunch and flavor.
  • Herb Infusion: Toss in fresh herbs like cilantro or basil at the end for a burst of freshness.
  • Low-Sodium Version: Use low-sodium soy sauce to keep the dish heart-healthy without sacrificing flavor.

Serving Suggestions

  • Pair your Cauliflower Fried Rice with Shrimp with a light cucumber salad for a refreshing contrast.
  • A chilled glass of iced green tea complements the flavors beautifully.
  • For presentation, serve in a bowl topped with extra green onions and sesame seeds.
  • Consider adding a side of spring rolls for a complete Asian-inspired meal.

FAQs about Cauliflower Fried Rice with Shrimp

Can I use frozen cauliflower rice for this recipe?

Absolutely! Frozen cauliflower rice is a great time-saver. Just thaw it and drain any excess moisture before adding it to the skillet. It cooks up just as well as fresh!

How can I make this dish spicier?

If you’re looking for a kick, add a splash of sriracha or sprinkle some red pepper flakes while cooking. It’ll elevate the flavor and give your Cauliflower Fried Rice with Shrimp a nice heat!

Can I prepare this dish ahead of time?

Yes, you can! Prepare the ingredients and store them separately in the fridge. When you’re ready to eat, just follow the cooking steps. It’s a fantastic meal prep option!

What can I substitute for shrimp?

If shrimp isn’t your thing, try using tofu, chicken, or even chickpeas for a vegetarian twist. Each option brings its own unique flavor to the dish!

Is this recipe suitable for meal prep?

Definitely! This Cauliflower Fried Rice with Shrimp keeps well in the fridge for a few days. Just reheat it in a skillet or microwave when you’re ready to enjoy it again.

Final Thoughts

Cooking this Cauliflower Fried Rice with Shrimp is more than just preparing a meal; it’s about creating a moment of joy in your kitchen. The vibrant colors, enticing aromas, and satisfying crunch come together to make a dish that’s not only healthy but also incredibly delicious. Whether you’re whipping it up for a quick weeknight dinner or impressing friends at a gathering, this recipe delivers every time. Plus, it’s a fantastic way to enjoy a guilt-free indulgence. So grab your skillet, and let the cooking adventure begin—your taste buds will thank you!

Ranis

Cauliflower Fried Rice with Shrimp: A Quick Delight!

A quick and delicious recipe for Cauliflower Fried Rice with Shrimp, perfect for a healthy meal.
Prep Time 10 minutes
Cook Time 15 minutes
Total Time 25 minutes
Servings: 4 servings
Course: Main Dish
Cuisine: Asian
Calories: 220

Ingredients
  

  • 2 cups cauliflower rice fresh or frozen
  • 1 cup shrimp peeled and deveined
  • 1 tablespoon vegetable oil
  • 1 small onion diced
  • 2 cloves garlic minced
  • 1 cup mixed vegetables peas, carrots, corn
  • 2 large eggs beaten
  • 3 tablespoons soy sauce
  • 1 teaspoon sesame oil
  • 2 green onions sliced
  • Salt and pepper to taste

Method
 

  1. If using fresh cauliflower, pulse florets in a food processor until they resemble rice. If using frozen, thaw and drain excess moisture.
  2. Heat vegetable oil in a large skillet or wok over medium-high heat. Add the diced onion and sauté for 2-3 minutes until translucent.
  3. Add minced garlic and cook for an additional 30 seconds until fragrant.
  4. Stir in the shrimp and cook until they turn pink, about 3-4 minutes. Remove shrimp from the skillet and set aside.
  5. In the same skillet, add the mixed vegetables and cook for 2-3 minutes until tender.
  6. Push the vegetables to one side of the skillet and pour the beaten eggs into the other side. Scramble the eggs until fully cooked, then mix with the vegetables.
  7. Add the cauliflower rice to the skillet and stir to combine. Pour in the soy sauce and sesame oil, mixing well. Cook for another 3-4 minutes, stirring occasionally.
  8. Return the cooked shrimp to the skillet, season with salt and pepper, and stir to combine. Cook for an additional 1-2 minutes to heat through.
  9. Remove from heat and garnish with sliced green onions before serving.

Nutrition

Serving: 1servingCalories: 220kcalCarbohydrates: 12gProtein: 20gFat: 10gSaturated Fat: 1gPolyunsaturated Fat: 9gCholesterol: 200mgSodium: 800mgFiber: 4gSugar: 3g

Notes

  • For a vegetarian version, substitute shrimp with tofu or additional vegetables.
  • Add a splash of sriracha or chili sauce for a spicy kick.

Tried this recipe?

Let us know how it was!

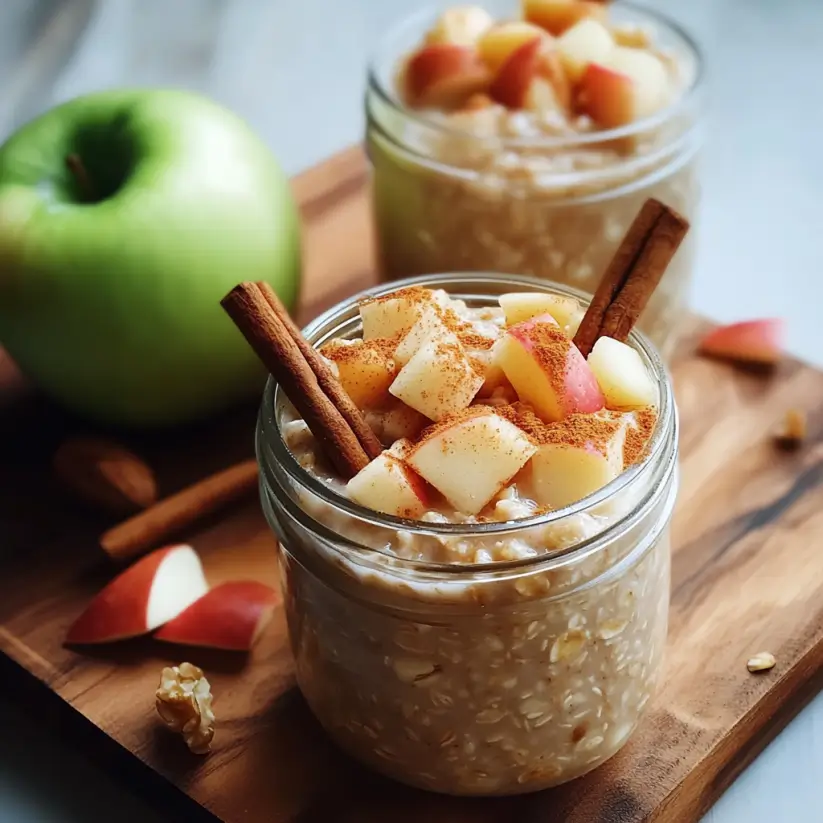
Apple Cinnamon Overnight Oats: Easy, Delicious Recipe!

Introduction to Apple Cinnamon Overnight Oats

There’s something magical about waking up to a breakfast that’s ready and waiting for you. Apple Cinnamon Overnight Oats are just that—a delightful, no-fuss solution for those busy mornings when time is tight. I remember my own mornings filled with chaos, rushing to get out the door. This recipe not only saves time but also fills your belly with wholesome goodness. With the sweet crunch of apples and the warm embrace of cinnamon, it’s a dish that can impress your loved ones or simply treat yourself. Let’s dive into this easy, delicious recipe!

Why You’ll Love This Apple Cinnamon Overnight Oats

Apple Cinnamon Overnight Oats are a game-changer for breakfast lovers. They’re incredibly easy to whip up, taking just 10 minutes of your time. Plus, they’re packed with flavor and nutrition, making them a guilt-free indulgence. The best part? You can customize them to suit your taste. Whether you’re rushing out the door or enjoying a leisurely morning, these oats are the perfect companion for any day.

Ingredients for Apple Cinnamon Overnight Oats

Gathering the right ingredients is the first step to creating your Apple Cinnamon Overnight Oats masterpiece. Here’s what you’ll need:

  • Rolled oats: The base of your dish, providing a hearty texture and a good source of fiber.
  • Unsweetened almond milk: A creamy alternative to dairy milk, but feel free to use any milk you prefer.
  • Medium apple: Diced for a sweet crunch; choose your favorite variety for the best flavor.
  • Ground cinnamon: This spice adds warmth and depth, making your oats feel cozy and inviting.
  • Maple syrup or honey: A touch of natural sweetness to balance the flavors; both work beautifully.
  • Vanilla extract: Just a splash enhances the overall taste, giving it a delightful aroma.
  • Salt: A pinch helps to elevate the flavors, making everything pop.
  • Chopped walnuts (optional): For added crunch and healthy fats; they also bring a nutty flavor.
  • Raisins (optional): These little gems add a chewy sweetness that complements the apples perfectly.

For exact measurements, check the bottom of the article where you can find everything listed for easy printing. Feel free to mix and match ingredients based on what you have on hand or your personal preferences!

How to Make Apple Cinnamon Overnight Oats

Making Apple Cinnamon Overnight Oats is as easy as pie—well, easier actually! Follow these simple steps, and you’ll have a delicious breakfast ready to go. Let’s get started!

Step 1: Combine Ingredients

In a large mixing bowl, toss together the rolled oats, almond milk, diced apple, ground cinnamon, maple syrup, vanilla extract, and salt. Stir well until everything is evenly mixed. This is where the magic begins! The oats will soak up the flavors, creating a delightful blend.

Step 2: Add Optional Ingredients

If you’re feeling adventurous, fold in the chopped walnuts and raisins. They add a wonderful texture and flavor. Walnuts bring a satisfying crunch, while raisins offer a sweet surprise in every bite. Feel free to skip them if you prefer a simpler version!

Step 3: Portion into Jars

Now, it’s time to divide the mixture into four jars or containers with lids. This makes for easy grab-and-go breakfasts. Plus, it’s a great way to keep your oats fresh and ready for the week ahead. Just make sure to leave a little space at the top for expansion.

Step 4: Refrigerate Overnight

Cover the jars and pop them in the fridge overnight. This is the key step! Letting the oats soak for at least four hours allows them to soften and absorb all those delicious flavors. You’ll wake up to a creamy, satisfying breakfast waiting for you.

Step 5: Serve and Enjoy

In the morning, give the oats a good stir. If you like them a bit thinner, add a splash of milk. You can enjoy them cold or warm them in the microwave for about 30 seconds. Either way, you’re in for a treat! Top with extra apple slices or a sprinkle of cinnamon for that finishing touch.

Tips for Success

  • Use old-fashioned rolled oats for the best texture; quick oats can get mushy.
  • For a creamier consistency, add a dollop of Greek yogurt before serving.
  • Experiment with different fruits like bananas or berries to keep things exciting.
  • Make a double batch to enjoy throughout the week—meal prep made easy!
  • Adjust the sweetness to your liking; taste before refrigerating!

Equipment Needed

  • Mixing bowl: A large bowl for combining ingredients; any size will do.
  • Measuring cups: Essential for accurate ingredient portions; use a kitchen scale if you prefer.
  • Jars or containers: For storing your overnight oats; mason jars work great!
  • Spoon: For stirring and serving; a simple kitchen spoon will suffice.

Variations

  • Nut Butter Delight: Stir in a tablespoon of almond or peanut butter for a protein boost and rich flavor.
  • Berry Blast: Swap out the apple for mixed berries like strawberries, blueberries, or raspberries for a refreshing twist.
  • Spiced Pumpkin: Replace the apple with pumpkin puree and add pumpkin spice for a fall-inspired treat.
  • Chia Seed Boost: Mix in a tablespoon of chia seeds for added fiber and omega-3 fatty acids.
  • Dairy-Free Option: Use coconut milk for a tropical flavor and creaminess that pairs well with the spices.

Serving Suggestions

  • Pair your Apple Cinnamon Overnight Oats with a side of Greek yogurt for extra creaminess and protein.
  • Enjoy with a hot cup of coffee or tea to kickstart your morning.
  • Top with fresh apple slices and a sprinkle of cinnamon for a beautiful presentation.
  • Drizzle a bit more maple syrup on top for added sweetness if desired.

FAQs about Apple Cinnamon Overnight Oats

Can I use quick oats instead of rolled oats?

While you can use quick oats, I recommend sticking with rolled oats for the best texture. Quick oats tend to get mushy, while rolled oats maintain a nice chewiness.

How long do Apple Cinnamon Overnight Oats last in the fridge?

These oats can last up to five days in the fridge. Just make sure to keep them in airtight containers to maintain freshness!

Can I make these oats vegan?

Absolutely! Just use almond milk or any plant-based milk of your choice, and opt for maple syrup instead of honey. You’ll have a delicious vegan breakfast!

What can I add for extra protein?

For a protein boost, consider stirring in some Greek yogurt or a scoop of protein powder. Nut butters are also a great option for adding both protein and flavor.

Can I heat up my overnight oats?

Yes! If you prefer your oats warm, simply pop them in the microwave for about 30 seconds. They’re delicious both cold and warm, so it’s all about your personal preference!

Final Thoughts

Apple Cinnamon Overnight Oats are more than just a breakfast; they’re a delightful way to start your day with ease and flavor. The combination of sweet apples and warm cinnamon creates a comforting embrace that makes mornings feel special. Plus, the convenience of prepping them the night before means you can savor a nutritious meal without the morning rush. Whether you’re enjoying them at home or on the go, these oats bring joy and satisfaction to your breakfast routine. So, grab your jars and get ready to indulge in a delicious, wholesome treat that’s sure to brighten your day!

Ranis

Apple Cinnamon Overnight Oats: Easy, Delicious Recipe!

A delicious and easy recipe for Apple Cinnamon Overnight Oats, perfect for a quick breakfast.
Prep Time 10 minutes
Total Time 4 hours 10 minutes
Servings: 4 servings
Course: Breakfast
Cuisine: American
Calories: 250

Ingredients
  

  • 2 cups rolled oats
  • 2 cups unsweetened almond milk or any milk of choice
  • 1 medium apple diced
  • 1 teaspoon ground cinnamon
  • 2 tablespoons maple syrup or honey
  • 1 teaspoon vanilla extract
  • 1/4 teaspoon salt
  • 1/4 cup chopped walnuts optional
  • 1/4 cup raisins optional

Method
 

  1. In a large mixing bowl, combine the rolled oats, almond milk, diced apple, ground cinnamon, maple syrup, vanilla extract, and salt. Stir well until all ingredients are evenly mixed.
  2. If using, fold in the chopped walnuts and raisins for added texture and flavor.
  3. Divide the mixture evenly into four jars or containers with lids.
  4. Cover the jars and refrigerate overnight, or for at least 4 hours, to allow the oats to soak and soften.
  5. In the morning, give the oats a good stir. You can add a splash of milk if you prefer a thinner consistency. Enjoy cold or warm them in the microwave for about 30 seconds if desired.

Nutrition

Serving: 1servingCalories: 250kcalCarbohydrates: 36gProtein: 6gFat: 8gSaturated Fat: 1gPolyunsaturated Fat: 7gSodium: 100mgFiber: 5gSugar: 10g

Notes

  • For a creamier texture, try adding a dollop of Greek yogurt on top before serving.
  • Experiment with different fruits such as bananas, berries, or peaches to customize the flavor profile to your liking.

Tried this recipe?

Let us know how it was!

Thai Chicken Lettuce Wraps that Everyone Will Love!

Introduction to Thai Chicken Lettuce Wraps

When I think of weeknight dinners, I often crave something quick yet satisfying. That’s where Thai Chicken Lettuce Wraps come into play. These wraps are not just a meal; they’re a delightful experience that brings a burst of flavor to your table.

Perfect for busy evenings or when you want to impress friends, they’re easy to whip up and even easier to enjoy. The crunch of fresh lettuce paired with savory chicken and vibrant veggies creates a dish that feels light yet fulfilling. Trust me, once you try these, they’ll become a staple in your kitchen!

Why You’ll Love This Thai Chicken Lettuce Wraps

These Thai Chicken Lettuce Wraps are a game-changer for anyone looking for a quick, healthy meal.

In just 30 minutes, you can serve up a dish that’s bursting with flavor and texture.

The combination of tender chicken, fresh veggies, and zesty sauce makes every bite a delight.

Plus, they’re customizable! You can easily adjust the ingredients to suit your taste or dietary needs.

What’s not to love?

Ingredients for Thai Chicken Lettuce Wraps

Creating these Thai Chicken Lettuce Wraps is a breeze, especially with the right ingredients. Here’s what you’ll need to bring this delicious dish to life:

  • Ground chicken: The star of the show! It’s lean, protein-packed, and cooks quickly.
  • Vegetable oil: A splash of this helps sauté the aromatics and chicken to perfection.
  • Onion: Finely chopped, it adds sweetness and depth to the flavor profile.
  • Garlic: Minced garlic brings a fragrant punch that elevates the dish.
  • Fresh ginger: A little goes a long way in adding warmth and zest.
  • Red bell pepper: Chopped for a pop of color and sweetness, it complements the savory elements.
  • Shredded carrots: These add crunch and a hint of natural sweetness.
  • Soy sauce: This salty, umami-rich sauce is essential for flavoring the chicken.
  • Fish sauce: A staple in Thai cuisine, it adds a unique depth and complexity.
  • Brown sugar: Just a touch balances the savory and tangy flavors beautifully.
  • Lime juice: Freshly squeezed, it brightens the dish and adds a refreshing zing.
  • Red pepper flakes (optional): For those who like a little heat, these can spice things up!
  • Lettuce leaves: Butter or romaine lettuce works best for wrapping. They provide a crisp, refreshing base.
  • Fresh cilantro: Chopped, it adds a burst of freshness and color as a garnish.
  • Chopped peanuts: These give a delightful crunch and nutty flavor to finish off the wraps.

For exact measurements, check the bottom of the article where you can find everything listed for easy printing. Enjoy the process of gathering these ingredients; each one plays a vital role in making your Thai Chicken Lettuce Wraps a hit!

How to Make Thai Chicken Lettuce Wraps

Making Thai Chicken Lettuce Wraps is a straightforward process that’s as enjoyable as it is delicious.

Let’s dive into the steps that will transform your kitchen into a Thai bistro!

Step 1: Sauté the Aromatics

Start by heating the vegetable oil in a large skillet over medium heat.

Once the oil is shimmering, toss in the finely chopped onion.

Sauté for about three minutes until it turns translucent.

Then, add the minced garlic and ginger.

Cook for another minute until your kitchen fills with that irresistible aroma.

Step 2: Cook the Chicken

Next, it’s time to add the ground chicken to the skillet.

Break it apart with a spatula, ensuring it cooks evenly.

You want it browned and cooked through, which should take about 5 to 7 minutes.

Keep stirring to avoid any sticking.

The chicken should be tender and juicy, ready to soak up all those flavors.

Step 3: Add Vegetables

Now, stir in the chopped red bell pepper and shredded carrots.

These vibrant veggies not only add color but also a delightful crunch.

Cook for another 2 to 3 minutes until they soften slightly.

You’ll want them tender but still crisp, adding texture to your wraps.

Step 4: Prepare the Sauce

In a small bowl, whisk together the soy sauce, fish sauce, brown sugar, lime juice, and red pepper flakes if you’re feeling adventurous.

This sauce is the magic that ties everything together.

Pour it over the chicken and vegetable mixture, stirring well to combine.

Let it cook for an additional 2 minutes to heat through and meld those flavors.

Step 5: Combine and Heat

Once everything is well mixed, remove the skillet from the heat.

Let it cool slightly; this will make it easier to handle when you’re ready to serve.

The mixture should be fragrant and colorful, a feast for the eyes as well as the palate.

Step 6: Serve in Lettuce Wraps

To serve, take a lettuce leaf and spoon in a generous amount of the chicken mixture.

Garnish with chopped cilantro and peanuts for that extra crunch and flavor.

These wraps are best enjoyed fresh, so gather your friends or family and dig in!

Each bite is a burst of flavor, making your meal a memorable one.

Tips for Success

  • Prep all your ingredients before starting to cook. It makes the process smoother.
  • Don’t overcook the chicken; it should be juicy and tender.
  • Feel free to customize the veggies based on what you have on hand.
  • For extra flavor, let the filling sit for a few minutes before serving.
  • Use fresh lettuce leaves for the best crunch and flavor.

Equipment Needed

  • Large skillet: A non-stick skillet works wonders for easy cooking and cleanup.
  • Spatula: Use a wooden or silicone spatula to break up the chicken and stir.
  • Cutting board: Essential for chopping veggies safely and efficiently.
  • Knife: A sharp chef’s knife makes quick work of your ingredients.
  • Mixing bowl: Handy for whisking together your sauce ingredients.

Variations

  • Vegetarian Option: Swap ground chicken for crumbled tofu or tempeh for a plant-based twist.
  • Spicy Kick: Add a splash of sriracha or your favorite hot sauce to the chicken mixture for extra heat.
  • Crunchy Additions: Toss in some water chestnuts or chopped bell peppers for added texture.
  • Herb Infusion: Experiment with fresh herbs like mint or basil for a unique flavor profile.
  • Low-Carb Version: Serve the filling in cucumber boats instead of lettuce for a refreshing alternative.

Serving Suggestions

  • Side Salad: Pair your wraps with a light cucumber and tomato salad for a refreshing contrast.
  • Rice: Serve with jasmine or brown rice to soak up any extra sauce.
  • Drink: A cold Thai iced tea or a crisp lager complements the flavors beautifully.
  • Presentation: Arrange the wraps on a platter with lime wedges for a vibrant touch.

FAQs about Thai Chicken Lettuce Wraps

Can I make Thai Chicken Lettuce Wraps ahead of time?

Absolutely! You can prepare the chicken filling in advance and store it in the fridge. Just reheat it when you’re ready to serve. The lettuce leaves should be kept fresh until serving to maintain their crunch.

What can I substitute for ground chicken?

If you’re looking for alternatives, ground turkey or crumbled tofu works great. For a heartier option, try using ground beef or pork. Each will bring its own unique flavor to the wraps.

Are Thai Chicken Lettuce Wraps gluten-free?

Yes, as long as you use gluten-free soy sauce, these wraps can easily fit into a gluten-free diet. Just check the labels to ensure all your ingredients are safe.

How can I make these wraps spicier?

For those who love heat, add more red pepper flakes or a dash of sriracha to the chicken mixture. You can also serve with sliced jalapeños on the side for an extra kick!

What are some good sides to serve with Thai Chicken Lettuce Wraps?

These wraps pair wonderfully with a light salad, steamed rice, or even a refreshing fruit platter. The goal is to keep it light and complement the flavors of the wraps.

Final Thoughts

Thai Chicken Lettuce Wraps are more than just a meal; they’re a celebration of flavors and textures that can brighten any day.

The joy of wrapping up that savory chicken and fresh veggies in crisp lettuce is an experience that brings smiles to the table.

Whether you’re cooking for family or hosting friends, these wraps are sure to impress.

They’re quick, healthy, and oh-so-delicious, making them a perfect choice for any occasion.

So, roll up your sleeves, gather your ingredients, and dive into this culinary adventure.

You won’t regret it!

Ranis

Thai Chicken Lettuce Wraps that Everyone Will Love!

Delicious Thai Chicken Lettuce Wraps that are easy to make and perfect for a healthy meal.
Prep Time 15 minutes
Cook Time 15 minutes
Total Time 30 minutes
Servings: 4 servings
Course: Main Dish
Cuisine: Thai
Calories: 290

Ingredients
  

  • 1 pound ground chicken
  • 1 tablespoon vegetable oil
  • 1 small onion finely chopped
  • 2 cloves garlic minced
  • 1 tablespoon fresh ginger minced
  • 1 red bell pepper finely chopped
  • 1 cup shredded carrots
  • 1/4 cup soy sauce
  • 2 tablespoons fish sauce
  • 1 tablespoon brown sugar
  • 1 tablespoon lime juice
  • 1/4 teaspoon red pepper flakes optional
  • 1 head of butter or romaine lettuce leaves separated
  • Chopped fresh cilantro for garnish
  • Chopped peanuts for garnish

Method
 

  1. In a large skillet, heat the vegetable oil over medium heat. Add the chopped onion and sauté for about 3 minutes until translucent.
  2. Stir in the minced garlic and ginger, cooking for an additional 1 minute until fragrant.
  3. Add the ground chicken to the skillet, breaking it apart with a spatula. Cook until browned and cooked through, about 5-7 minutes.
  4. Mix in the red bell pepper and shredded carrots, cooking for another 2-3 minutes until the vegetables are tender.
  5. In a small bowl, whisk together the soy sauce, fish sauce, brown sugar, lime juice, and red pepper flakes (if using). Pour this mixture over the chicken and vegetable mixture, stirring well to combine. Cook for an additional 2 minutes to heat through.
  6. Remove from heat and let cool slightly.
  7. To serve, spoon the chicken mixture into the lettuce leaves, garnish with chopped cilantro and peanuts, and enjoy!

Nutrition

Serving: 1wrapCalories: 290kcalCarbohydrates: 6gProtein: 30gFat: 15gSaturated Fat: 3gPolyunsaturated Fat: 12gCholesterol: 80mgSodium: 800mgFiber: 1gSugar: 5g

Notes

  • For a vegetarian option, substitute ground chicken with crumbled tofu or tempeh.
  • Add a splash of sriracha or your favorite hot sauce for an extra kick.

Tried this recipe?

Let us know how it was!

Santa Fe Chicken: Discover this Easy Slow Cooker Recipe!

Introduction to Santa Fe Chicken

There’s something magical about a dish that practically cooks itself while you go about your day. Santa Fe Chicken is just that—a delightful slow cooker recipe that combines tender chicken with vibrant black beans, sweet corn, and zesty tomatoes. It’s the perfect solution for busy evenings when you want to impress your loved ones without spending hours in the kitchen. With minimal prep and maximum flavor, this dish is sure to become a family favorite. Trust me, once you try it, you’ll wonder how you ever lived without this easy, satisfying meal in your rotation.

Why You’ll Love This Santa Fe Chicken

This Santa Fe Chicken recipe is a game-changer for anyone juggling a busy lifestyle. It’s incredibly easy to prepare, requiring just a few minutes of your time. The slow cooker does all the heavy lifting, transforming simple ingredients into a mouthwatering meal. Plus, the combination of flavors is nothing short of spectacular. You’ll savor every bite, and your family will be asking for seconds—what’s not to love?

Ingredients for Santa Fe Chicken

Gathering the right ingredients is the first step to creating your Santa Fe Chicken masterpiece. Here’s what you’ll need:

  • Boneless, skinless chicken breasts: The star of the show! They cook up tender and juicy, soaking in all the delicious flavors.
  • Black beans: These add a hearty texture and a boost of protein. Rinse them well to remove excess sodium.
  • Corn: Sweet and crunchy, corn brings a delightful contrast to the dish. You can use canned or frozen, depending on what you have on hand.
  • Diced tomatoes with green chilies: This adds a zesty kick and a splash of color. The juices help keep the chicken moist.
  • Taco seasoning: A blend of spices that infuses the dish with that classic Mexican flavor. Feel free to use homemade if you have a favorite mix!
  • Salsa: Adds depth and a bit of heat. Choose your favorite brand or make your own for a fresh twist.
  • Shredded cheddar cheese: The melty topping that brings everything together. You can swap it for Monterey Jack or pepper jack for a spicier kick.
  • Fresh cilantro (optional): A sprinkle of this herb adds a burst of freshness. If you’re not a fan, feel free to skip it.
  • Salt and pepper: Essential for seasoning. Adjust to your taste for the perfect balance.

For exact measurements, check the bottom of the article where you can find everything listed for easy printing. Now that you have your ingredients ready, let’s dive into the cooking process!

How to Make Santa Fe Chicken

Now that you have your ingredients ready, let’s get cooking! This Santa Fe Chicken recipe is straightforward and rewarding. Follow these simple steps, and you’ll have a delicious meal waiting for you at the end of the day.

Step 1: Prepare the Chicken

Start by placing the boneless, skinless chicken breasts at the bottom of your slow cooker. Season them generously with salt and pepper. This simple step ensures the chicken is flavorful right from the start. Trust me, it makes a difference!

Step 2: Mix the Ingredients

In a medium bowl, combine the black beans, corn, diced tomatoes (with their juices), taco seasoning, and salsa. Stir everything together until well mixed. This is where the magic begins! The colors and aromas will make your kitchen feel like a fiesta.

Step 3: Combine in Slow Cooker

Pour the bean and corn mixture over the seasoned chicken in the slow cooker. Spread it evenly to ensure every piece of chicken gets coated in those vibrant flavors. It’s like a warm hug for your chicken!

Step 4: Cook to Perfection

Cover the slow cooker and set it to cook on low for 6-7 hours or on high for 3-4 hours. The longer, the better! You want the chicken to be tender and easily shreddable. The slow cooking process allows all those flavors to meld beautifully.

Step 5: Shred the Chicken

Once the cooking time is up, it’s time for the fun part! Using two forks, shred the chicken right in the slow cooker. Mix it with the other ingredients to create a cohesive dish. The chicken should fall apart effortlessly, soaking up all that delicious sauce.

Step 6: Add Cheese and Serve

Sprinkle the shredded cheddar cheese on top of the chicken mixture. Cover the slow cooker again and let it sit for about 10 minutes. This allows the cheese to melt perfectly. When you’re ready to serve, dish it out warm, and don’t forget to garnish with fresh cilantro if you like!

Tips for Success

  • Don’t skip the seasoning! A little salt and pepper go a long way in enhancing flavor.
  • For extra flavor, sear the chicken in a skillet before adding it to the slow cooker.
  • Feel free to customize the spice level by adding jalapeños or hot sauce.
  • Leftovers make great burrito fillings or taco toppings—get creative!
  • Always check the chicken’s doneness; it should shred easily when cooked properly.

Equipment Needed

  • Slow Cooker: The star of the show! Any size will do, but a 6-quart is perfect for this recipe.
  • Medium Bowl: For mixing your ingredients. A large measuring cup works too!
  • Two Forks: Essential for shredding the chicken. You can also use tongs if you prefer.
  • Measuring Cups: Handy for precise ingredient portions, especially if you’re new to cooking.

Variations

  • Spicy Santa Fe Chicken: Add diced jalapeños or a splash of hot sauce to the bean mixture for an extra kick.
  • Vegetarian Option: Substitute the chicken with extra beans or lentils for a hearty, meat-free version.
  • Southwestern Twist: Incorporate diced bell peppers and onions for added flavor and texture.
  • Low-Carb Version: Serve over cauliflower rice instead of traditional rice for a healthier alternative.
  • Cheesy Delight: Mix in cream cheese before serving for a creamy, rich texture that everyone will love.

Serving Suggestions

  • Serve Santa Fe Chicken over a bed of fluffy rice or quinoa for a hearty meal.
  • Wrap it in warm tortillas for delicious burritos or tacos.
  • Pair with a fresh green salad to balance the flavors.
  • Enjoy with a cold beer or a refreshing margarita.
  • Garnish with extra cilantro and lime wedges for a vibrant presentation.

FAQs about Santa Fe Chicken

As you dive into the world of Santa Fe Chicken, you might have a few questions. Here are some common queries that can help you make the most of this delicious slow cooker recipe.

Can I use frozen chicken breasts for Santa Fe Chicken?

Absolutely! You can use frozen chicken breasts, but be sure to increase the cooking time. It’s best to cook on low for about 8 hours to ensure they’re fully cooked and tender.

What can I serve with Santa Fe Chicken?

This dish pairs wonderfully with rice, tortillas, or even a fresh salad. You can also serve it with chips and guacamole for a fun twist!

Can I make Santa Fe Chicken ahead of time?

Yes! You can prepare the ingredients the night before and store them in the fridge. Just pop everything in the slow cooker in the morning, and you’ll have a delicious meal waiting for you.

How do I store leftovers?

Leftovers can be stored in an airtight container in the fridge for up to 3 days. You can also freeze them for up to 3 months. Just reheat when you’re ready to enjoy!

Can I customize the spice level?

Definitely! If you like it spicy, add jalapeños or a dash of hot sauce to the bean mixture. Adjust the seasoning to suit your taste buds!

Final Thoughts

Cooking Santa Fe Chicken is more than just preparing a meal; it’s about creating a moment of joy and connection. The aroma wafting through your home as it simmers in the slow cooker is enough to make anyone’s mouth water. This dish brings together family and friends, inviting everyone to gather around the table. With its vibrant flavors and comforting textures, it’s a recipe that warms the heart. Whether you’re enjoying it on a busy weeknight or serving it at a gathering, Santa Fe Chicken is sure to become a cherished favorite in your culinary repertoire.

Ranis

Santa Fe Chicken: Discover this Easy Slow Cooker Recipe!

Santa Fe Chicken is a flavorful and easy slow cooker recipe featuring tender chicken breasts cooked with black beans, corn, and tomatoes, topped with melted cheddar cheese.
Prep Time 15 minutes
Servings: 6 servings
Course: Main Dish
Cuisine: Mexican
Calories: 320

Ingredients
  

  • 2 pounds boneless skinless chicken breasts
  • 1 can 15 ounces black beans, rinsed and drained
  • 1 can 15 ounces corn, drained
  • 1 can 14.5 ounces diced tomatoes with green chilies, undrained
  • 1 packet 1 ounce taco seasoning
  • 1 cup salsa
  • 1 cup shredded cheddar cheese
  • 1/4 cup chopped fresh cilantro optional
  • Salt and pepper to taste

Method
 

  1. Place the chicken breasts in the bottom of a slow cooker. Season with salt and pepper.
  2. In a medium bowl, combine the black beans, corn, diced tomatoes (with their juices), taco seasoning, and salsa. Mix well.
  3. Pour the bean and corn mixture over the chicken in the slow cooker.
  4. Cover and cook on low for 6-7 hours or on high for 3-4 hours, until the chicken is cooked through and easily shreds with a fork.
  5. Once cooked, shred the chicken in the slow cooker using two forks and mix it with the other ingredients.
  6. Sprinkle the shredded cheddar cheese on top, cover, and let it sit for an additional 10 minutes to melt the cheese.
  7. Serve warm, garnished with fresh cilantro if desired.

Nutrition

Serving: 1servingCalories: 320kcalCarbohydrates: 20gProtein: 30gFat: 10gSaturated Fat: 4gPolyunsaturated Fat: 6gCholesterol: 80mgSodium: 500mgFiber: 6gSugar: 2g

Notes

  • For a spicier dish, add diced jalapeños or a dash of hot sauce to the bean mixture.
  • Serve over rice or in tortillas for a delicious wrap or burrito option.

Tried this recipe?

Let us know how it was!