Mouthwatering Tahini Kofta: A Cozy Middle Eastern Delight

As I stood in my kitchen, the aroma of sizzling spices transported me to a bustling Middle Eastern market, where vibrant flavors beckon from every corner. That’s where my passion for crafting the Mouthwatering Tahini Kofta was born. This hearty one-pan dish combines juicy, herb-infused beef kofta with tender potatoes, all crowned with a luscious lemon-tahini sauce. Not only is this meal gluten-free, but it also embodies the perfect balance of comfort and nourishment. It’s an effortless way to bring warmth and joy to family dinners or gatherings with friends. Plus, with simple ingredient substitutions available, you can easily tailor it to fit your taste or dietary needs. Are you ready to dive into a dish that promises unforgettable flavors and heartwarming moments?

Why is Tahini Kofta a Must-Try?

Simplicity at Its Best: This recipe offers a straightforward cooking method that even beginner cooks will appreciate.

Flavor Explosion: Combining tender kofta with a rich lemon-tahini sauce creates an irresistible harmony that tantalizes the taste buds.

Versatile Serving Options: Enjoy it with warm pita or over a bed of fluffy couscous, catering to different tastes and preferences.

Crowd-Pleasing Delight: Perfect for cozy family dinners or gatherings, it’s a dish that everyone will love and talk about!

Time-Saving Meal: Bake everything in one pan, so cleanup is a breeze and dinner is ready in no time.

Adaptability Factor: With easy ingredient substitutions, you can customize your Mouthwatering Tahini Kofta to make it your own. For more flavors, check out my guidelines for ingredient swaps that cater to your pantry essentials!

Mouthwatering Tahini Kofta Ingredients

Here’s everything you need to create this delectable dish that will impress your family and friends!

For the Kofta

  • Ground Beef – the star of the dish, providing juiciness and heartiness; swap for ground turkey or chicken for a lighter option.
  • Fresh Herbs (parsley, mint, etc.) – adds a burst of flavor; if unavailable, use half the amount of dried herbs.
  • Onion (grated) – enhances moisture and adds depth; shallots can be a great substitute for a milder flavor.
  • Garlic – infuses the kofta with a robust aroma; garlic powder is a convenient alternative if fresh isn’t handy.
  • Breadcrumbs – essential for binding the mixture; opt for gluten-free breadcrumbs to keep this dish gluten-free.

For the Potatoes

  • Potatoes (golden) – a wonderful base that complements the kofta; sweet potatoes work beautifully for a twist in flavor.

For the Tahini Sauce

  • Tahini – gives a rich, nutty flavor to the sauce; Greek yogurt can lighten it up if preferred.
  • Lemon Juice – brightens and balances the dish; lime juice can serve as an excellent substitute.
  • Olive Oil – enhances moisture and flavor; any neutral oil will do if you’re out of olive oil.

With these ingredients in hand, you’re just moments away from creating your very own Mouthwatering Tahini Kofta! Enjoy the process and let the flavors guide you on this culinary adventure!

Step‑by‑Step Instructions for Mouthwatering Tahini Kofta

Step 1: Prepare Kofta Mix
In a large mixing bowl, combine the ground beef, grated onion, minced garlic, chopped fresh herbs, breadcrumbs, salt, and pepper. Use your hands or a wooden spoon to mix until fully combined. This mixture should feel moist yet hold together when shaped. Set aside for about 10 minutes to let the flavors meld while you prepare the potatoes.

Step 2: Form Koftas
Wet your hands slightly to prevent sticking and shape the beef mixture into elongated meatballs, about the size of your palm. Place the formed koftas on a large plate, ensuring they are evenly spaced. This will help them cook uniformly. Aim for around 12 koftas, giving you a generous serving for your family dinner.

Step 3: Prepare Potatoes
Preheat your oven to 350°F (175°C). While the oven heats up, wash and slice the golden potatoes into wedges or rounds, depending on your preference. In a mixing bowl, toss the potato slices with olive oil, salt, and pepper to coat evenly. Arrange the seasoned potatoes in a single layer in a large baking dish, which will provide a hearty base for your Mouthwatering Tahini Kofta.

Step 4: Bake Koftas and Potatoes
Once the oven is ready, place the meatballs directly on top of the seasoned potatoes in the baking dish. Bake in the preheated oven for 30 minutes, or until the koftas are browned and cooked through, and the potatoes are tender and slightly golden. Check the koftas for an internal temperature of 160°F (71°C) to ensure they’re done.

Step 5: Prepare Tahini Sauce
While the koftas and potatoes are baking, prepare the creamy tahini sauce. In a small bowl, whisk together the tahini, fresh lemon juice, minced garlic, and a few tablespoons of water until smooth and creamy. Adjust the consistency by adding more water or olive oil as necessary to achieve a pourable sauce. Set aside to allow the flavors to develop.

Step 6: Final Bake
After the initial baking time, drizzle the prepared tahini sauce generously over the koftas and potatoes in the baking dish. Return the dish to the oven for an additional 15-20 minutes. This will give everything a chance to meld together and create a beautiful golden finish. Check to ensure the tahini sauce remains creamy and doesn’t over-bake.

Step 7: Serve
Once baked to perfection, remove the dish from the oven and allow it to cool for a few minutes. Serve your delicious Mouthwatering Tahini Kofta warm, nestled among the tender potatoes. Pair with fluffy couscous or fresh tabbouleh for a delightful meal that brings a taste of the Middle East to your family table.

Storage Tips for Mouthwatering Tahini Kofta

  • Fridge: Store leftover kofta and potatoes in an airtight container in the refrigerator for up to 3 days. Reheat thoroughly before serving to maintain flavor and texture.
  • Freezer: You can freeze cooked kofta and potatoes for up to 3 months. It’s best to wrap them tightly in plastic wrap and foil before placing them in a freezer-safe container.
  • Uncooked Kofta: Prepare the kofta mixture and freeze it uncooked! Shape the koftas and arrange them on a baking sheet. Once frozen, transfer to a zip-top bag and store for up to 2 months.
  • Reheating: To reheat frozen uncooked kofta, simply bake directly from the freezer, adding a few extra minutes to the cooking time. Enjoy your Mouthwatering Tahini Kofta with freshly prepared tahini sauce!

Make Ahead Options

These Mouthwatering Tahini Kofta are a fantastic choice for busy home cooks looking to simplify meal planning! You can prepare the kofta mixture up to 24 hours in advance; simply combine the ground beef, grated onion, garlic, herbs, and breadcrumbs, then refrigerate in an airtight container. The seasoned potatoes can also be prepped ahead by slicing and tossing them with olive oil, salt, and pepper up to 3 days before baking. When you’re ready to enjoy your meal, just bake the koftas and potatoes together as directed. This way, you’ll have a wholesome dinner ready with less hassle, allowing the flavors to shine just as brightly!

What to Serve with Mouthwatering Tahini Kofta

There’s something incredibly inviting about crafting a full meal that warms the heart and tantalizes the taste buds.

  • Creamy Mashed Potatoes: The buttery richness of creamy mashed potatoes enhances the flavors of the kofta while providing a delightful contrast in texture.
  • Cucumber Yogurt Salad: Refreshing and cooling, this salad introduces a creamy texture and brightens the palate with its zingy flavors, perfectly balancing the savory kofta.
  • Tabbouleh: This vibrant salad, packed with parsley and tomatoes, adds a fresh and herby element that complements the dish beautifully, making every bite feel light and zesty.
  • Warm Pita Bread: Soft and pillowy, warm pita serves as a wonderful vessel for scooping up kofta and tahini sauce, making your meal interactive and fun.
  • Grilled Vegetables: Seasoned bell peppers, zucchini, and eggplant add a smoky sweetness that pairs harmoniously with the kofta’s spiced richness, infusing your meal with more depth.
  • Hummus: Silky and nutty, hummus not only adds a layer of creaminess to your plate but also serves as a perfect dip for kofta or fresh veggies.
  • Mint Tea: A fragrant cup of mint tea can elevate your dining experience, cleansing the palate and adding a delightful finish to your Middle Eastern meal.
  • Bulgur Wheat: This hearty grain brings a satisfying chew, absorbing the delicious flavors of tahini sauce while enhancing the overall texture of your dish.
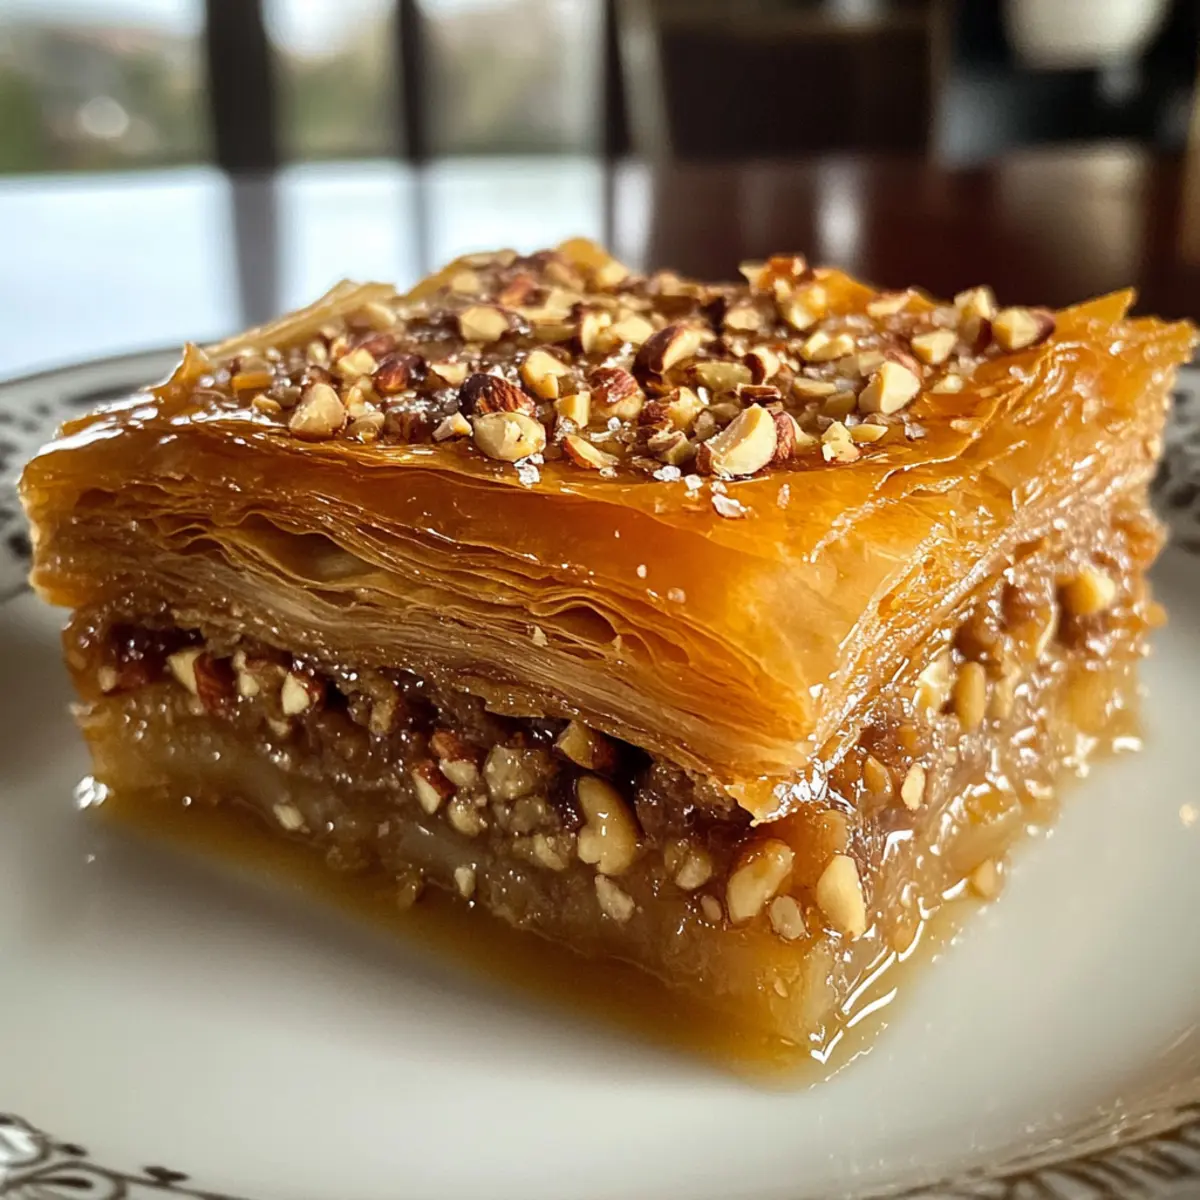
  • Baklava: End your meal on a sweet note with this flaky confection filled with nuts and honey, offering a perfect contrast to the savory kofta.
  • Sparkling Water: A bubbly option that refreshes your palate between bites while keeping the focus on the harmonizing flavors of your meal.

Expert Tips for Mouthwatering Tahini Kofta

Grate Onion Finely: Ensure the onion is finely grated to avoid a watery kofta mix, enhancing both flavor and texture.

Watch the Baking Time: Avoid overbaking after adding the tahini sauce to keep it creamy; a golden top is ideal!

Prep Ahead: Make the kofta mixture up to 24 hours in advance and refrigerate to save time on busy days.

Store Leftovers Properly: Store any leftover kofta and potatoes in an airtight container in the fridge for up to 3 days—reheat thoroughly before serving.

Experiment with Spices: Add different spices like cumin or coriander to your kofta mixture for an extra flavor boost that complements your Mouthwatering Tahini Kofta.

Mouthwatering Tahini Kofta Variations

Feel free to personalize your dish with these delightful variations and substitutions that will elevate your Mouthwatering Tahini Kofta experience!

  • Lamb Swap: Use ground lamb instead of beef for a richer, traditional flavor profile. The smoky notes of lamb beautifully enhance the spices.

  • Vegetable Boost: Toss in bell peppers or zucchini to the baking dish for added nutrition and color. It creates a vibrant dish that’s also visually appealing.

  • Spicy Twist: Add red pepper flakes or chili powder to the kofta mixture for a fiery kick. This spice boosts warmth and adds an exciting layer of flavor.

  • Dairy-Free Version: Replace tahini with coconut cream for a creamy, dairy-free sauce option. It adds a subtle sweetness and unique flavor, making it a fantastic alternative.

  • Herb Medley: Experiment with fresh herbs like dill or cilantro alongside or instead of parsley and mint. This adds complex flavors and delightful freshness to every bite.

  • Sweet Potato Swap: Try sweet potatoes in place of gold potatoes for a subtly sweet twist and lovely color contrast that pairs perfectly with the savory kofta.

  • Sauce Variation: Instead of tahini, use a yogurt-based sauce flavored with cucumber and dill for a lighter, refreshing topping. It complements the dish and keeps it exciting!

  • Quick Cooking: If short on time, form smaller koftas and reduce baking time. This ensures a quicker meal while still delivering on flavor and satisfaction.

By playing with these variations and substitutions, your Mouthwatering Tahini Kofta can be a different adventure each time! Don’t forget to explore my guidelines for ingredient swaps for even more customization options to fit your pantry needs!

Mouthwatering Tahini Kofta Recipe FAQs

Which ingredients should I choose to ensure ripeness and freshness?
Absolutely! When selecting your ingredients, aim for ground beef that is bright red with minimal fat; look for any dark spots, which could indicate spoilage. For herbs, fresh parsley and mint should be vibrant and firm, while potatoes should be smooth and free from any sprouting or dark spots. This will enhance the overall flavor of your Mouthwatering Tahini Kofta!

How should I store leftover kofta and potatoes?
After enjoying your meal, store any leftovers in an airtight container in the fridge for up to 3 days. This will help maintain both the taste and texture of the dish. Before serving the leftovers, reheat thoroughly on the stovetop or in the oven until piping hot to ensure food safety and quality.

**How can I freeze the **Mouthwatering Tahini Kofta?
You can freeze the kofta both before and after cooking! For uncooked kofta, shape the mixture into meatballs and place them on a baking sheet lined with parchment paper. Freeze until solid, then transfer to a zip-top bag for up to 2 months. When you’re ready to cook, simply bake them directly from the freezer, adding around 5 extra minutes to the cooking time. If you prefer to freeze cooked kofta, allow it to cool completely before wrapping tightly and placing in a freezer-safe container for up to 3 months.

What should I do if my kofta mixture is too wet?
If your kofta mixture feels too wet or loose, don’t worry! You can remedy this by adding extra breadcrumbs, a tablespoon at a time, until the mixture holds together better. Another option is to let it rest in the refrigerator for about 15 minutes; this will allow the breadcrumbs to absorb some moisture and firm it up before shaping.

**Are there any dietary considerations for the **Mouthwatering Tahini Kofta?
Definitely! This dish can easily cater to dietary needs. If you’re accommodating gluten-free diets, simply substitute regular breadcrumbs with gluten-free alternatives. For those with nut allergies, be cautious with tahini; you can replace it with Greek yogurt for a creamy texture without nuts. Always check ingredient labels to ensure they meet your dietary requirements.

Can I add vegetables to the baking dish with the kofta?
Very! Adding vegetables like bell peppers, zucchini, or even diced carrots is a fantastic way to boost nutrition and flavor. Just chop them into similar-sized pieces and layer them in the same baking dish as the potatoes. They will roast beautifully alongside the kofta, providing a deliciously colorful and healthy addition to your Mouthwatering Tahini Kofta dish.

Mouthwatering Tahini Kofta

Mouthwatering Tahini Kofta: A Cozy Middle Eastern Delight

This Mouthwatering Tahini Kofta combines juicy beef kofta with tender potatoes, topped with a creamy lemon-tahini sauce, creating a delightful gluten-free dish.
Prep Time 20 minutes
Cook Time 45 minutes
Total Time 1 hour 5 minutes
Servings: 4 people
Course: Dinner
Cuisine: Middle Eastern
Calories: 450

Ingredients
  

For the Kofta
  • 1 pound Ground Beef substitute with ground turkey or chicken for a lighter option
  • 1 cup Fresh Herbs (parsley, mint) use half the amount of dried herbs if unavailable
  • 1 medium Onion (grated) shallots can be a substitute for milder flavor
  • 2 cloves Garlic garlic powder can be used if fresh isn't handy
  • 1/2 cup Breadcrumbs opt for gluten-free breadcrumbs to keep gluten-free
For the Potatoes
  • 2 cups Potatoes (golden) sweet potatoes work well for a twist
For the Tahini Sauce
  • 1/2 cup Tahini Greek yogurt can lighten it up if preferred
  • 3 tablespoons Lemon Juice lime juice can be an excellent substitute
  • 2 tablespoons Olive Oil any neutral oil will do if you're out of olive oil

Equipment

  • large mixing bowl
  • Baking dish

Method
 

Step-by-Step Instructions
  1. In a large mixing bowl, combine the ground beef, grated onion, minced garlic, chopped fresh herbs, breadcrumbs, salt, and pepper.
  2. Wet your hands slightly and shape the beef mixture into elongated meatballs, placing them on a large plate.
  3. Preheat your oven to 350°F (175°C) and wash and slice the golden potatoes into wedges or rounds.
  4. Toss the potato slices with olive oil, salt, and pepper to coat evenly.
  5. Place the meatballs directly on top of the seasoned potatoes in the baking dish and bake for 30 minutes.
  6. Prepare the tahini sauce by whisking together tahini, fresh lemon juice, minced garlic, and water until smooth.
  7. After 30 minutes, drizzle the tahini sauce over the koftas and potatoes and return to the oven for an additional 15-20 minutes.
  8. Remove the dish from the oven and serve warm.

Nutrition

Serving: 1plateCalories: 450kcalCarbohydrates: 40gProtein: 30gFat: 20gSaturated Fat: 5gMonounsaturated Fat: 15gCholesterol: 80mgSodium: 600mgPotassium: 800mgFiber: 5gSugar: 3gVitamin A: 200IUVitamin C: 20mgCalcium: 50mgIron: 3mg

Notes

Ensure the onion is finely grated to avoid a watery kofta mix, and avoid overbaking the tahini sauce to keep it creamy.

Tried this recipe?

Let us know how it was!

Creamed Chicken Over Biscuits: Your Cozy Comfort Food Fix

As I flipped through my recipe box, a familiar scent of savory nostalgia wafted through the air—Creamed Chicken Over Biscuits, my ultimate comfort food! This delightful dish brings together tender chicken, rich homemade gravy, and fluffy biscuits in a way that instantly warms the soul. With just 20 minutes of prep, it’s a game-changer for busy weeknights. Not only does it bring family together around the table, but it’s also a fantastic way to use up leftovers, especially during the holidays! Whether you’re serving it for dinner on a chilly evening or whipping it up for a cozy gathering, this recipe promises satisfaction with every bite. Are you ready to transform your kitchen into a haven of deliciousness?

Why is Creamed Chicken Over Biscuits a Must-Try?

Comforting flavors of this heartwarming dish offer a nostalgic experience, reminiscent of grandma’s cooking. Quick and easy, it takes just 20 minutes to prepare, making it perfect for busy weeknights. Versatile enough to adapt with turkey leftovers or your choice of veggies, it caters to your kitchen creativity. Homemade gravy without any canned soup means pure, wholesome ingredients. Finally, family-friendly appeal guarantees smiles around the dinner table—and don’t forget, it pairs beautifully with a side of steamed vegetables or a simple salad!

Creamed Chicken Over Biscuits Ingredients

For the Gravy

  • Unsalted Butter – Provides richness and flavor; substitute with oil for a dairy-free version.
  • Onion – Adds depth and sweetness to the dish; can use shallots as a milder alternative.
  • All-Purpose Flour – Thickens the gravy; gluten-free all-purpose flour can be used as a substitute.
  • Salt and Pepper – Enhances flavor; adjust to personal taste.
  • Chicken Stock – Forms the base of the gravy; vegetable broth can be used for a vegetarian version.
  • Half-and-Half – Adds creaminess and richness; whole milk or heavy cream can be substituted.
  • Dried Tarragon – Provides a unique flavor that complements chicken; replace with dried dill or oregano if needed.
  • Peas – Adds color and texture; fresh or frozen peas work well; you can also use corn for variation.

For the Dish

  • Cooked Chicken – Main protein source; leftover rotisserie chicken can save prep time.
  • Country Biscuits – Serves as the base; store-bought biscuits can make this even easier.

Whether you’re enjoying Creamed Chicken Over Biscuits for a cozy weeknight dinner or a family gathering, these ingredients come together to create a deliciously comforting dish!

Step‑by‑Step Instructions for Creamed Chicken Over Biscuits

Step 1: Sauté Onions
In a deep skillet, melt 3 tablespoons of unsalted butter over medium heat. Add one diced onion and sauté until it becomes translucent and slightly caramelized, about 3–5 minutes. The aroma will fill your kitchen, inviting you to continue with this comforting dish.

Step 2: Make Roux
Sprinkle 1/4 cup of all-purpose flour into the skillet, stirring continuously to create a smooth roux. Add salt and pepper to taste, mixing well for about 1–2 minutes. You’ll notice the mixture thickening, forming a luscious base for your homemade gravy.

Step 3: Add Stock and Cream
Pour in 2 cups of chicken stock while whisking vigorously to combine. Gradually add 1 cup of half-and-half, stirring frequently as the heat increases. Keep cooking for 1–2 minutes until the gravy thickens and bubbles gently, ensuring a creamy consistency for your Creamed Chicken Over Biscuits.

Step 4: Combine Ingredients
Stir in 1 teaspoon of dried tarragon, 1 cup of frozen peas, and 2 cups of diced cooked chicken, mixing well to combine. Allow the mixture to simmer for an additional 3–5 minutes on low heat until the chicken is heated through and the peas are tender but vibrant.

Step 5: Serve
Remove the skillet from heat and prepare your fluffy country biscuits. Ladle the rich creamed chicken over the warm biscuits, letting the gravy seep into the fluffy layers. Serve immediately for a heartwarming meal that will satisfy the whole family.

What to Serve with Creamed Chicken Over Biscuits

Nourishing sides will elevate your cozy meal, turning comfort into a delightful feast that all will love.

  • Steamed Green Beans: Fresh, tender green beans add a crisp contrast that brightens the plate and balances the creamy texture.

  • Garlic Mashed Potatoes: The smooth, buttery potatoes soak up the rich gravy, creating a delicious harmony that feels indulgent yet comforting.

  • Simple Garden Salad: Crisp greens tossed with a light vinaigrette provides a refreshing crunch, cutting through the richness of the dish.

  • Roasted Brussels Sprouts: Their slight bitterness enhances the savory notes of the meal while adding a delightful caramelized depth when roasted perfectly.

  • Buttered Corn on the Cob: Sweet, juicy corn offers a pop of sweetness that complements the savory flavors, making for a deliciously comforting combination.

  • Homemade Biscuit Gravy: For those who can’t resist, serve an extra side of rich gravy for those who want to take their biscuit experience to the next level.

  • Apple Crisp: A warm, slightly tart dessert can be the perfect finish, adding a touch of sweetness to round out the meal.

  • Chardonnay: A crisp, chilled glass of Chardonnay ties this all together beautifully, enhancing the dish’s flavors while keeping the experience light and refreshing.

  • Fruit-Infused Water: A refreshing drink, like cucumber or citrus-infused water, cleanses the palate and keeps the meal feeling fresh and light.

With these delightful pairings, your Creamed Chicken Over Biscuits will shine even brighter at your dinner table!

Make Ahead Options

Creamed Chicken Over Biscuits is a fantastic choice for meal prep, saving you precious time during busy weeknights! You can prepare the creamy chicken mixture (minus the biscuits) up to 3 days in advance, storing it in an airtight container in the refrigerator. To keep the flavors fresh, make sure to reheat it gently on the stove, stirring occasionally until heated through. The biscuits can be made ahead as well, baked and stored in an airtight container for up to 24 hours. Simply reheat them in the oven for a few minutes before serving. This way, you’ll enjoy a quick, comforting meal with just a little finishing touch when hunger strikes!

How to Store and Freeze Creamed Chicken Over Biscuits

Fridge: Store leftovers in an airtight container for up to 3-4 days. Reheat in the microwave or on the stovetop until steaming hot at 165°F.

Freezer: While it’s not recommended to freeze this dish due to the creamy texture possible graininess, if you must, use vacuum-sealed bags to minimize freezer burn for up to 2 months.

Reheating: When reheating, add a splash of chicken stock or half-and-half to retain creaminess, stirring gently on low heat until warmed through.

Leftovers: Elevate your next meal by using leftover creamed chicken as a filling for savory pot pies or transformed into a hearty soup.

Creamed Chicken Over Biscuits Variations

Ready to put your own spin on this comforting classic? Let your creativity shine in the kitchen!

  • Turkey Twist: Substitute cooked chicken with leftover turkey for a delightful post-holiday dish. This option makes use of those cherished Thanksgiving leftovers, transforming them into something delightful.

  • Vegetable Medley: Incorporate diced carrots, sliced mushrooms, or celery into the gravy for a nutritious boost. Each vegetable adds its own flavor, creating a colorful, savory experience.

  • Cheesy Bliss: Stir in shredded cheddar or mozzarella cheese just before serving. The melty goodness will elevate your dish, giving a rich, creamy texture that family will rave about.

  • Spicy Kick: Add a pinch of cayenne pepper or a splash of hot sauce for some heat. This tweak introduces a delightful zing that transforms your comforting meal into a flavor-packed adventure.

  • Biscuits Upgrade: Instead of traditional biscuits, try serving over cornbread or even warm, crusty bread. Each bite delivers a unique touch that’ll have everyone asking for seconds!

  • Coconut Cream: Substitute half-and-half with coconut cream for a dairy-free alternative. This variation introduces a subtle sweetness and creaminess, making it perfect for those avoiding dairy.

  • Asian Infusion: Swap out tarragon for ginger or sesame oil, and include green peas and diced bell peppers. An innovative twist that leans toward Asian flavors, this version freshens up the classic recipe beautifully.

Looking for more inspiration? Try using leftover chicken in these scrumptious recipes: Air Fryer Chicken or whip up a flavorful Thai Chicken Meatball. Your taste buds will thank you!

Expert Tips for Creamed Chicken Over Biscuits

  • Use Leftovers Wisely: Save time by using leftover rotisserie chicken; it adds convenience and depth to your Creamed Chicken Over Biscuits.

  • Season Thoughtfully: Taste your gravy at each step, especially after adding salt and pepper, to ensure robust flavor without being overly salty.

  • Avoid Freezing: Don’t freeze this dish, as the cream may separate upon thawing, resulting in a less pleasant texture when reheated.

  • Use Fresh Ingredients: Opt for fresh or frozen peas over canned for better texture and natural sweetness in your comforting dish.

  • Adjust Consistency: If your gravy becomes too thick, simply whisk in a bit more chicken stock or half-and-half to reach your desired creaminess.

  • Experiment with Herbs: If you don’t have tarragon on hand, switch it up with dried dill or oregano for a new twist on this classic recipe.

Creamed Chicken Over Biscuits Recipe FAQs

How do I select the best chicken for my recipe?
Absolutely! When choosing chicken for Creamed Chicken Over Biscuits, look for cooked chicken that’s tender and juicy. I often recommend using leftover rotisserie chicken—it saves prep time and adds excellent flavor. If you’re cooking from scratch, ensure it’s well-seasoned and properly cooked to keep the dish flavorful.

What’s the best way to store leftovers?
You can store your Creamed Chicken Over Biscuits leftovers in an airtight container in the refrigerator for up to 3-4 days. Just make sure it’s cooled down before sealing it tight. When reheating, bring it to an internal temperature of 165°F either in the microwave or stovetop for a delicious meal all over again!

Can I freeze Creamed Chicken Over Biscuits?
Generally, I don’t recommend freezing this dish as the creamy texture may become grainy upon thawing. However, if you decide to freeze it, place it in vacuum-sealed bags to minimize freezer burn. It should keep well for up to 2 months, but do be prepared for a different texture when reheating.

What should I do if my gravy is too thick?
If you find your gravy has thickened more than you’d like, don’t worry! Simply whisk in a little more chicken stock or half-and-half gradually until you reach your desired consistency. Heat it gently to warm it back up. This way, you maintain that luscious creaminess we all love.

Are there any dietary considerations with this recipe?
Yes, if you’re cooking for someone with dietary restrictions, you can make several adjustments! You can use gluten-free all-purpose flour for a gluten-free option and substitute half-and-half with a non-dairy cream for a dairy-free version. Be sure to check any pre-cooked chicken for hidden allergens and tailor the recipe further by swapping in veggies your guests prefer.

Creamed Chicken Over Biscuits

Creamed Chicken Over Biscuits: Your Cozy Comfort Food Fix

Creamed Chicken Over Biscuits is a comforting dish that combines tender chicken and rich gravy served over fluffy biscuits.
Prep Time 20 minutes
Cook Time 15 minutes
Total Time 35 minutes
Servings: 4 servings
Course: Dinner
Cuisine: American
Calories: 450

Ingredients
  

For the Gravy
  • 3 tablespoons unsalted butter Provides richness and flavor; substitute with oil for a dairy-free version.
  • 1 medium onion Adds depth and sweetness; can use shallots as a milder alternative.
  • 1/4 cup all-purpose flour Thickens the gravy; gluten-free all-purpose flour can be used as a substitute.
  • salt and pepper Enhances flavor; adjust to personal taste.
  • 2 cups chicken stock Forms the base of the gravy; vegetable broth can be used for a vegetarian version.
  • 1 cup half-and-half Adds creaminess and richness; whole milk or heavy cream can be substituted.
  • 1 teaspoon dried tarragon Provides a unique flavor that complements chicken; replace with dried dill or oregano if needed.
  • 1 cup peas Adds color and texture; fresh or frozen peas work well.
For the Dish
  • 2 cups cooked chicken Main protein source; leftover rotisserie chicken can save prep time.
  • 1 batch country biscuits Serves as the base; store-bought biscuits can make this even easier.

Equipment

  • Deep skillet

Method
 

Directions
  1. In a deep skillet, melt 3 tablespoons of unsalted butter over medium heat. Add one diced onion and sauté until it becomes translucent and slightly caramelized, about 3–5 minutes.
  2. Sprinkle 1/4 cup of all-purpose flour into the skillet, stirring continuously to create a smooth roux. Add salt and pepper to taste, mixing well for about 1–2 minutes.
  3. Pour in 2 cups of chicken stock while whisking vigorously to combine. Gradually add 1 cup of half-and-half, stirring frequently as the heat increases.
  4. Stir in 1 teaspoon of dried tarragon, 1 cup of frozen peas, and 2 cups of diced cooked chicken, mixing well to combine.
  5. Remove the skillet from heat and prepare your fluffy country biscuits. Ladle the rich creamed chicken over the warm biscuits.

Nutrition

Serving: 1servingCalories: 450kcalCarbohydrates: 30gProtein: 25gFat: 25gSaturated Fat: 15gPolyunsaturated Fat: 1gMonounsaturated Fat: 8gCholesterol: 80mgSodium: 700mgPotassium: 500mgFiber: 2gSugar: 1gVitamin A: 500IUVitamin C: 10mgCalcium: 150mgIron: 2mg

Notes

Use leftover rotisserie chicken for convenience. Taste your gravy at each step to avoid excess salt. Avoid freezing due to potential cream separation.

Tried this recipe?

Let us know how it was!

Comforting Kitchari: Your Go-To Ayurvedic Comfort Bowl

On a chilly afternoon, when the world feels a little heavier, there’s nothing more soothing than a warm bowl of Kitchari. This delightful Ayurvedic dish is a cozy blend of yellow split mung beans and fragrant Basmati rice, simmered gently with a medley of spices that awaken the senses. What I love most about Kitchari is its versatility—this nutritious one-pot meal not only caters to gluten-free and vegetarian diets, but it can be tailored to suit any palate with added veggies or spices. Whether you’re looking for quick comfort after a long day or a healthy upgrade to your lunch routine, Kitchari makes for a wholesome choice that doesn’t skimp on flavor. So, are you ready to dive into the creamy goodness and discover the heart of this traditional dish?

Why is Kitchari a Must-Try?

Comforting and Warm: Kitchari is perfect for those chilly evenings when you crave something soothing. Its hearty, porridge-like texture wraps you in warmth.

Nutrient-Dense Goodness: Packed with protein and fiber, this dish provides balanced nutrition in every bite, making it a fantastic choice for health-conscious food lovers.

Versatile Variations: Customize your Kitchari by adding your favorite veggies or experimenting with spices, ensuring that it appeals to every palate.

Quick and Easy: With minimal prep and cooking time, Kitchari is ideal for busy individuals looking to whip up a nourishing meal without hassle.

Gluten-Free & Vegan-Friendly: This dish fits perfectly into gluten-free and vegan diets, allowing everyone to enjoy its delicious flavors. Discover more about its health benefits and ingredients in our guide!

Kitchari Ingredients

For the Base

  • Yellow Split Mung Beans (Moong Dal) – Provides protein and fiber; substitute with other lentils for different textures.
  • Basmati Rice – Main starch component; use jasmine rice, brown rice, or quinoa if preferred.
  • Water – Acts as the cooking liquid; vegetable broth can enhance flavor.

For the Flavor

  • Ghee or Oil – Adds richness; for a vegan option, switch to coconut oil or avocado oil.
  • Cumin Seeds – Enhance flavor and aid digestion; ground cumin works as a substitute if needed.
  • Fresh or Ground Ginger – Provides warmth and spice; fresh ginger offers better flavor, but ground ginger is convenient.
  • Turmeric – Adds a vibrant color and anti-inflammatory properties.
  • Sea Salt and Black Pepper – Seasoning agents; adjust to taste before serving.

For the Finish

  • Cilantro (for garnish) – Adds freshness and color; optional but highly recommended for presentation.
  • Lime or Lemon Slices (for garnish) – Introduces acidity to balance the flavors beautifully.

Step‑by‑Step Instructions for Kitchari

Step 1: Soak the Beans and Rice
Begin by combining the yellow split mung beans and Basmati rice in a large bowl. Cover them with water and let them soak for about 15 to 20 minutes. This not only improves digestibility but also ensures a creamy texture in your Kitchari. After soaking, rinse the mixture under cold water until the water runs clear.

Step 2: Prepare the Spices
In a medium pot, heat 2 tablespoons of ghee or your preferred oil over medium-low heat. Once hot, add 1 teaspoon of cumin seeds and sauté for about 1 minute until fragrant and slightly darkened. Next, stir in 1 tablespoon of fresh grated ginger and ½ teaspoon of turmeric, allowing them to cook for another minute, letting the spices release their rich aroma.

Step 3: Combine the Ingredients
With the spices aromatic and vibrant, gently add the drained moong dal and Basmati rice mixture into the pot. Pour in 4 cups of water, followed by 1 teaspoon of sea salt and a dash of black pepper. Stir everything together and bring the mixture to a gentle boil while keeping the heat on medium-high.

Step 4: Cook the Kitchari
Once boiling, reduce the heat to medium-low and allow your Kitchari to simmer uncovered for about 30 minutes. Stir occasionally to prevent sticking and to promote even cooking. You’ll know it’s done when the mixture reaches a creamy, porridge-like consistency, with the beans and rice tender and well-combined.

Step 5: Taste and Adjust
After the Kitchari has simmered, check for softness and adjust the consistency if necessary. If it seems too thick, add a little more water gradually while stirring. Taste the dish and adjust the seasoning with more salt and pepper as desired, ensuring a balanced flavor profile.

Step 6: Serve and Garnish
Once ready, ladle the Kitchari into warm bowls and finish with a sprinkle of fresh cilantro and a few lime or lemon slices for a zesty kick. This comforting Kitchari serves beautifully on its own or alongside a simple salad, making it a perfect nourishing meal to enjoy.

What to Serve with Comforting Kitchari?

On chilly evenings, nothing complements a warm bowl of Comforting Kitchari quite like these delightful pairings that enhance the meal’s nourishing qualities.

  • Crispy Papadums: These crunchy lentil chips provide a satisfying contrast in texture, adding a delightful crunch to each spoonful of Kitchari. They soak up flavors beautifully and bring an extra layer of enjoyment.

  • Simple Cucumber Salad: A refreshing salad of diced cucumbers, tomatoes, and lemon juice brightens the plate, offering a crisp and zesty accompaniment. This light dish balances the hearty Kitchari, creating a perfect harmony of flavors.

  • Creamy Cucumber Raita: Yogurt mixed with finely diced cucumbers and spices acts as a cooling contrast to the spiced dish. The richness of raita offers a brilliant flavor combination while adding a creaminess to each delicious bite.

  • Spicy Pickles: The tangy, spicy kick of Indian pickles adds layers of flavor and excitement to the meal. This bold addition is perfect for those craving a little heat and zest alongside the soothing Kitchari.

  • Steamed Green Vegetables: Brightly colored steamed veggies, like broccoli or green beans, infuse your meal with freshness and color. They enhance the nutritional value, making the meal even more wholesome.

  • Warm Naan or Roti: Bread makes for a delightful side that you can use to scoop up the Kitchari, adding heartiness and fulfilling the dining experience. Warm naan or roti completes the meal with comforting, soft textures.

  • Herbal Tea: Enjoy a soothing cup of herbal tea, like ginger or chamomile, to sip alongside Kitchari. This adds warmth and can aid digestion, making it a lovely, calming beverage choice.

  • Mango Chutney: A spoonful of sweet mango chutney introduces a delightful sweetness that perfectly contrasts the savory spices of the Kitchari. This sweet side brings an unexpected burst of flavor to your plate.

Expert Tips for Kitchari

  • Use Fresh Spices: Fresh herbs and spices enhance flavor significantly. Opt for whole spices whenever possible for a more aromatic experience in your Kitchari.

  • Soak for Digestibility: Generously soak the yellow split mung beans and rice for 15-20 minutes. This not only improves texture but also makes the dish easier to digest.

  • Watch the Cooking Time: Avoid covering the pot while simmering to maintain the desired porridge consistency. Keep stirring occasionally to prevent sticking and ensure even cooking.

  • Customize with Vegetables: If adding veggies, include them towards the end of cooking to preserve their texture. Consider spinach or peas for added color and nutrients.

  • Adjust Consistency Smartly: If your Kitchari turns out too thick, gradually add water while stirring until it reaches your preferred creamy texture. Adjust seasoning to taste.

  • Experiment with Variations: Don’t hesitate to play with spices or add lentils for different flavors. Each variation can give your Kitchari a delightful twist!

Storage Tips for Kitchari

Room Temperature: Kitchari is best enjoyed fresh. If needed, it can sit out at room temperature for up to 2 hours before storing.

Fridge: Allow your Kitchari to cool completely before transferring it to an airtight container. It can be stored in the refrigerator for 2-3 days, keeping its comforting flavors intact.

Freezer: For longer storage, Kitchari can be frozen in a safe container for up to 2 months. Be sure to label it with the date for easy reference.

Reheating: Thaw frozen Kitchari in the fridge overnight before reheating. Warm it on the stove or microwave, adding a splash of water to maintain moisture and achieve that creamy texture.

Make Ahead Options

These comforting Kitchari bowls are perfect for busy home cooks looking to save time! You can soak the yellow split mung beans and Basmati rice up to 24 hours in advance; simply cover them with water and refrigerate. The spice mixture can also be prepared in advance—sauté the cumin seeds, ginger, and turmeric, then store them in an airtight container in the fridge for up to 3 days. When you’re ready to enjoy your Kitchari, just combine the prepped ingredients, add the water, and simmer as directed, ensuring your dish is just as delicious and nourishing as if made fresh. Enjoy the convenience without sacrificing flavor!

Kitchari Variations & Substitutions

Feel free to get creative and make this Kitchari your own with these delightful twists and swaps!

  • Vegetable Boost: Add diced spinach, carrots, or peas during the last 10 minutes of cooking for vibrant color and nutrition. The addition of greens brings a fresh, lively taste to each spoonful.

  • Lentil Twist: Substitute yellow split mung beans with red lentils or chickpeas for a different flavor profile and texture. Each option adds its unique flair while maintaining the nourishing essence of Kitchari.

  • Herb-Infused: Incorporate fresh herbs like cilantro or curry leaves to elevate the flavor. A sprinkle of fresh herb goodness can transport your Kitchari to a whole new level of deliciousness.

  • Spicy Kick: Amp up the heat by adding chopped green chilies or a pinch of red pepper flakes. This spicy addition will wake up your senses, perfect for those who crave a little warmth in their dish.

  • Nutty Flavor: Toss in toasted cashews or almonds for added crunch and richness. The nutty surprise adds texture and a delightful contrast to the creamy base of the Kitchari.

  • Quinoa Swap: Replace Basmati rice with quinoa for a protein-packed alternative. This gluten-free grain provides a nutritious twist without sacrificing flavor or comfort.

  • Broth Base: Use vegetable or bone broth in place of water for extra flavor and depth. This small change transforms your Kitchari into a savory sensation, making it even cozier.

  • Coconut Cream: Stir in a dollop of coconut cream at the end for a rich, creamy finish. This indulgent touch brings a tropical sweetness to your comforting bowl.

Experimenting with these variations can help you discover a version of Kitchari that’s perfectly tailored to your taste buds. Don’t hesitate to explore and make it your own! For more ideas about serving this dish or adding side items, check out our serving suggestions. And if you’re curious about the benefits of each ingredient, our detailed ingredient guide is just a click away!

Kitchari Recipe FAQs

How do I choose the right mung beans for Kitchari?
Absolutely! For the best texture and flavor, look for yellow split mung beans that are whole and dry. Avoid beans with dark spots or signs of moisture, as these may affect your Kitchari’s outcome. If you can only find whole mung beans, you can still use them, but you’ll need to adjust the cooking time since they take longer to soften.

What is the best way to store leftover Kitchari?
Very good question! To keep your Kitchari fresh, allow it to cool completely before transferring it to an airtight container. Store it in the fridge where it will last for 2-3 days. If you’re looking to keep it longer, freeze it in suitable containers for up to 2 months—just remember to label them with the date!

Can I freeze Kitchari? If so, how?
Absolutely! Freezing Kitchari is a great way to preserve it. After it has cooled completely, spoon the Kitchari into freezer-safe containers, leaving a little space at the top since it will expand as it freezes. Seal and label them, then place in the freezer. To reheat, simply thaw overnight in the fridge and reheat on the stove over low heat, adding a splash of water to restore its creamy consistency.

What if my Kitchari turns out too thick?
No worries! If your Kitchari ends up thicker than you’d like, just stir in a little more water gradually while reheating until it reaches your desired creamy texture. Remember, it’s better to add water little by little, as you can always add more, but you can’t take it out once it’s mixed!

Is Kitchari safe for pets or people with allergies?
It’s important to check! While Kitchari is made from wholesome ingredients like mung beans and rice that are generally pet-safe, keep in mind that certain spices, such as salt and garlic, can be harmful to pets. For those with gluten or other food allergies, ensure all your ingredients, particularly broth or oils, are labeled gluten-free. Always speak to a healthcare provider if you have specific dietary concerns.

Can I add vegetables to my Kitchari?
The more, the merrier! You can absolutely enhance your Kitchari by adding vegetables. Just chop your choice of veggies, such as carrots, spinach, or peas, and add them in the last 10-15 minutes of cooking. This way, they’ll retain their flavor and texture while enriching the dish with even more nutrients. Enjoy experimenting!

Kitchari

Comforting Kitchari: Your Go-To Ayurvedic Comfort Bowl

Kitchari is a soothing, nutritious dish made with yellow split mung beans and Basmati rice, offering comfort on chilly afternoons.
Prep Time 20 minutes
Cook Time 30 minutes
Total Time 50 minutes
Servings: 4 bowls
Course: Dinner
Cuisine: Indian
Calories: 260

Ingredients
  

For the Base
  • 1 cup Yellow Split Mung Beans (Moong Dal) Provides protein and fiber; substitute with other lentils for different textures.
  • 1 cup Basmati Rice Main starch component; use jasmine rice, brown rice, or quinoa if preferred.
  • 4 cups Water Acts as the cooking liquid; vegetable broth can enhance flavor.
For the Flavor
  • 2 tablespoons Ghee or Oil Adds richness; for a vegan option, switch to coconut oil or avocado oil.
  • 1 teaspoon Cumin Seeds Enhance flavor and aid digestion; ground cumin works as a substitute if needed.
  • 1 tablespoon Fresh or Ground Ginger Provides warmth and spice; fresh ginger offers better flavor, but ground ginger is convenient.
  • ½ teaspoon Turmeric Adds a vibrant color and anti-inflammatory properties.
  • to taste Sea Salt and Black Pepper Adjust to taste before serving.
For the Finish
  • ¼ cup Cilantro (for garnish) Adds freshness and color; optional but highly recommended for presentation.
  • 2 slices Lime or Lemon Introduces acidity to balance the flavors beautifully.

Equipment

  • large bowl
  • Medium pot

Method
 

Step-by-Step Instructions for Kitchari
  1. Soak the yellow split mung beans and Basmati rice in a large bowl with water for about 15 to 20 minutes and then rinse until the water runs clear.
  2. In a medium pot, heat ghee or preferred oil over medium-low heat and add cumin seeds, sautéing until fragrant. Stir in fresh grated ginger and turmeric.
  3. Add the drained moong dal and rice mixture, pour in water, and season with sea salt and black pepper. Bring to a gentle boil.
  4. Reduce heat to medium-low and simmer uncovered for about 30 minutes, stirring occasionally, until a creamy consistency is reached.
  5. Check for softness and adjust the consistency with water if necessary, seasoning to taste.
  6. Ladle into warm bowls, garnishing with cilantro and lime or lemon slices.

Nutrition

Serving: 1bowlCalories: 260kcalCarbohydrates: 45gProtein: 10gFat: 7gSaturated Fat: 3gPolyunsaturated Fat: 1gMonounsaturated Fat: 3gSodium: 400mgPotassium: 550mgFiber: 8gSugar: 1gVitamin A: 10IUVitamin C: 15mgCalcium: 4mgIron: 20mg

Notes

Use fresh spices for enhanced flavor and consider adding vegetables towards the end of cooking for added nutrients.

Tried this recipe?

Let us know how it was!

Banana Chamomile Tea Smoothie for a Soothing Sip

Sipping on a Banana Chamomile Smoothie immediately transports me to a soothing moment of calm, even on the busiest days. This delightful concoction blends the gentle, floral essence of chamomile tea with the creamy sweetness of ripe bananas, creating a refreshing drink that feels like a warm hug. Not only is this smoothie a quick and healthy option, but it also delivers a tranquil vibe that’s perfect for winding down or starting your day on a peaceful note. With just a few ingredients and minimal prep time, you’ll be enjoying a homemade delight that satisfies both your taste buds and your desire for comfort. Curiosity piqued? Let’s dive into this simple yet indulgent recipe!

Why Are You Going to Love This?

Simplicity at Its Core: With just a handful of ingredients, this Banana Chamomile Smoothie is incredibly easy to whip up, making it ideal for busy mornings or a quick afternoon refreshment.

Soothing Flavor: The unique blend of chamomile tea and bananas creates a gentle, calming experience that delights the senses.

Healthy Indulgence: Packed with nutrients, you can enjoy a creamy treat that won’t derail your healthy lifestyle—perfect alongside a wholesome breakfast or as a mid-afternoon snack.

Versatile Base: Easily customize the milk or sweetness level to your preference—whether it’s a splash of almond milk or a drizzle of maple syrup, you’re in control!

Quick Prep: A mere five minutes is all you need from the kitchen to sipping bliss, letting you embrace relaxation without delay.

If you’re in the mood for more delightful options, this Banana Chamomile Smoothie pairs wonderfully with a refreshing Avocado Smoothie Healthy or a savory Korean Steak Sandwich for a satisfying meal combo!

Banana Chamomile Tea Smoothie Ingredients

  • For the Smoothie Base
    Brewed Chamomile Tea – Provides a calming, floral flavor; use high-quality chamomile for depth.
    Large Ripe Banana – Offers natural sweetness and a creamy texture; pick bananas with brown spots for maximum flavor.
    Honey – This sweetener enhances the floral notes; opt for raw or organic for the best taste.
    Milk (or Milk Alternative) – Creates a creamy base; almond or oat milk adds nuttiness, while dairy provides a neutral option.
    Ice Cubes (optional) – Chill your smoothie for a refreshing twist; add more for a frostier treat.

  • For Garnish
    Dried Chamomile Leaves (optional) – Adds visual charm and aromatic hints; beautiful as a finishing touch to your smoothie.

Enjoy crafting this refreshing Banana Chamomile Tea Smoothie and let the flavors soothe your spirit!

Step‑by‑Step Instructions for Banana Chamomile Tea Smoothie

Step 1: Brew the Tea
Begin by brewing 1/2 cup of chamomile tea using high-quality loose flowers or a tea bag. Heat water to a gentle boil, then steep the tea for about 5 minutes. Remove the tea bag or strain the loose flowers and allow the chamomile tea to cool to room temperature while releasing its soothing floral aroma.

Step 2: Prepare Ingredients
While the tea is cooling, prepare your smoothie ingredients. Peel and slice the large ripe banana into chunks. Look for bananas with brown spots, as they are sweeter and creamier, adding richness to your Banana Chamomile Tea Smoothie. Set aside the banana chunks while ensuring your workspace is organized.

Step 3: Blend Smoothie
In a blender, combine the cooled chamomile tea, banana chunks, a drizzle of honey, and your choice of milk or milk alternative. If you enjoy a frosty texture, add a handful of ice cubes. Blend everything on high for about 30–45 seconds or until the mixture becomes velvety smooth and creamy, ensuring all ingredients are well incorporated.

Step 4: Serve and Garnish
Once blended to perfection, pour the smoothie into a tall glass, visually admiring the creamy consistency. For a touch of elegance, consider garnishing with a sprinkle of dried chamomile leaves or a slice of banana on the rim. Enjoy your Banana Chamomile Tea Smoothie immediately to savor its refreshing taste and soothing qualities!

Helpful Tricks for Banana Chamomile Tea Smoothie

  • Choose Quality Tea: Opt for high-quality chamomile tea for the best flavor. Cheap tea bags may sacrifice taste and aroma, impacting your smoothie experience.

  • Sweetness Balance: Use ripe bananas for natural sweetness. If you find it too sweet, reduce honey or switch to agave syrup for a milder flavor.

  • Creaminess Control: For a thicker Banana Chamomile Tea Smoothie, add less milk or more ice cubes. Adjust according to your texture preference!

  • Chill Factors: If you like a cold smoothie, chill your chamomile tea beforehand in the fridge. It saves ice and keeps the drink refreshing.

  • Cinnamon Enhancer: Enhance the soothing qualities by adding a pinch of cinnamon. It complements the chamomile beautifully and adds warmth to every sip.

Variations & Substitutions for Banana Chamomile Tea Smoothie

Feel free to mix things up and create your own version of this delightful Banana Chamomile Tea Smoothie!

  • Dairy-Free: Swap out dairy milk for almond or oat milk to create a creamy, nutty base that’s also plant-based.
    Plant-based alternatives add a lovely flavor while keeping it light and refreshing.

  • Add a Spice Twist: Stir in a pinch of ground cinnamon or nutmeg for a warm spice that beautifully complements the chamomile.
    A dash of spice can elevate the calmness of your smoothie into a delightful experience for the senses.

  • Vegan Sweetener: If you’re avoiding honey, agave syrup or maple syrup make great substitutes for a vegan-friendly option.
    These sweeteners will still provide that luscious sweetness while adhering to plant-based choices.

  • Berry Burst: Toss in a handful of fresh or frozen berries for a fruity flavor boost that’ll complement the banana beautifully.
    Think strawberries or blueberries; their vibrant colors and fresh taste will give your smoothie an appealing twist!

  • Choco-Chamomile: Add a tablespoon of cocoa powder for a chocolatey flavor that indulges the palate while keeping soothing benefits intact.
    Who wouldn’t love a warm hug of flavors wrapped in a comforting cocoa embrace?

  • Protein Packed: Include a scoop of protein powder or Greek yogurt for added protein to keep you feeling fuller longer.
    This ensures your smoothie doubles as a satisfying snack or post-workout treat.

  • Citrus Zing: Add a splash of orange juice for a zesty twist that brightens the flavors and enhances hydration.
    This addition gives your smoothie a refreshing lift, making it perfect for a sunny afternoon.

Don’t forget that serving this Banana Chamomile Tea Smoothie alongside a refreshing Avocado Smoothie Healthy or a savory Steak Fajita Salad creates a wonderfully versatile meal experience!

How to Store and Freeze Banana Chamomile Tea Smoothie

Room Temperature: Best enjoyed fresh, but if you must, leave the smoothie out for no longer than 2 hours to avoid spoilage.

Fridge: Store in an airtight container for up to 24 hours. Stir well before enjoying, as the ingredients may separate over time.

Freezer: If you want to prepare in advance, freeze the smoothie in portioned containers for up to 1 month. Thaw overnight in the fridge before blending again for a refreshing sip.

Reheating: While smoothies are best cold, you can gently blend the thawed smoothie with a bit more milk to revive the creamy texture if desired.

Make Ahead Options

These Banana Chamomile Smoothies are perfect for busy weeknights or meal prep enthusiasts! You can brew the chamomile tea and mash the banana up to 24 hours in advance to save precious time. Simply refrigerate the brewed tea and banana separately in airtight containers to maintain their flavor and freshness. When it’s time to enjoy, combine the cooled tea, mashed banana, honey, and milk (or milk alternative) in a blender, add ice if desired, and blend until smooth. This way, your Banana Chamomile Smoothie will be just as delicious and soothing, giving you a comforting sip in minutes!

What to Serve with Banana Chamomile Tea Smoothie

Sipping on a Banana Chamomile Smoothie is just the beginning of your comforting culinary experience, inviting delightful pairings to enhance your relaxation moment.

  • Warm Cinnamon Buns: Their gooey sweetness with a hint of spice complements the floral notes of the smoothie beautifully, creating a cozy brunch treat.
  • Berry Chia Pudding: This light, fruity contrast adds a wholesome crunch, perfect for balancing the creamy, soothing texture of the smoothie.
  • Granola with Yogurt: The nutty crunch of granola paired with creamy yogurt provides a delightful texture contrast, enhancing the smoothie’s soothing vibe remarkably.
  • Oatmeal with Honey: Creamy oatmeal brings heartiness to your meal, while honey echoes the sweetness in your smoothie, making every bite feel indulgent.
  • Fresh Fruit Salad: A medley of vibrant seasonal fruits refreshes the palate, their natural sweetness enhancing the mellow flavors of your drink.
  • Herbal Tea Selection: Pairing with another herbal tea, like mint or lavender, deepens the calming experience and offers additional layers of flavor to explore.
  • Almond Biscotti: This crunchy treat adds a pleasant contrast, offering a satisfying crunch alongside the velvety smoothness of your Banana Chamomile Tea Smoothie.
  • Dark Chocolate: A few pieces of rich dark chocolate provide a luxurious finish, their boldness harmonizing with the subtleties of your soothing drink.

Banana Chamomile Tea Smoothie Recipe FAQs

What type of banana should I use for the smoothie?
Absolutely! For the best flavor and texture, choose large, ripe bananas that have brown spots on their skin. These bananas are not only sweeter but also creamier, making them perfect for your Banana Chamomile Tea Smoothie. The ripe fruit will blend beautifully and bring a rich, inviting sweetness to your drink.

How long can I store the smoothie in the fridge?
You can store the Banana Chamomile Tea Smoothie in an airtight container in the fridge for up to 24 hours. Keep in mind that the ingredients may separate over time, so be sure to give it a good stir before enjoying it again. I recommend consuming it fresh for the best taste and texture!

Can I freeze the Banana Chamomile Tea Smoothie? How?
Very! If you want to prepare ahead, you can freeze your smoothie in portioned containers for up to 1 month. To do so, pour the blended smoothie into ice cube trays or small containers. Once frozen, transfer the smoothie cubes to a zip-top bag for better storage. Thaw them overnight in the fridge whenever you’re ready for a refreshing sip!

What if my smoothie turns out too thin or too thick?
No worries if you encounter texture issues! If your Banana Chamomile Tea Smoothie is too thin, simply blend in a few more ice cubes to thicken it up. Conversely, if it’s too thick, adding a splash more milk or chamomile tea will bring it back to your desired consistency. Taste and adjust as you go—happy blending!

Is this smoothie safe for pets or people with allergies?
It’s always good to be cautious! The Banana Chamomile Tea Smoothie is generally safe for most people, but be mindful of potential allergies. Honey should be avoided for infants due to the risk of botulism, and some individuals may be allergic to chamomile or bananas. For pets, especially dogs, small amounts of banana are safe but monitor them closely for any adverse reactions.

Banana Chamomile Tea Smoothie

Banana Chamomile Tea Smoothie for a Soothing Sip

Savor the soothing Banana Chamomile Tea Smoothie, blending chamomile tea and bananas for a calming sip.
Prep Time 5 minutes
Cooling Time 5 minutes
Total Time 10 minutes
Servings: 1 smoothie
Course: Drinks
Calories: 200

Ingredients
  

For the Smoothie Base
  • 1/2 cup Brewed Chamomile Tea Use high-quality chamomile for depth.
  • 1 large Ripe Banana Pick bananas with brown spots for maximum flavor.
  • 1 tablespoon Honey Opt for raw or organic for the best taste.
  • 1 cup Milk (or Milk Alternative) Almond or oat milk adds nuttiness.
  • 1 cup Ice Cubes Optional, for a refreshing twist.
For Garnish
  • 1 tablespoon Dried Chamomile Leaves Optional, adds visual charm.

Equipment

  • blender

Method
 

Step‑by‑Step Instructions
  1. Brew 1/2 cup of chamomile tea using high-quality loose flowers or a tea bag. Heat water to a gentle boil, then steep for about 5 minutes. Allow to cool.
  2. Peel and slice the large ripe banana into chunks.
  3. In a blender, combine the cooled chamomile tea, banana chunks, honey, and your choice of milk. Add ice cubes if desired. Blend on high for 30–45 seconds, until smooth.
  4. Pour the smoothie into a glass and garnish with dried chamomile leaves or banana slice. Enjoy immediately.

Nutrition

Serving: 1smoothieCalories: 200kcalCarbohydrates: 37gProtein: 3gFat: 4gSaturated Fat: 1gPolyunsaturated Fat: 1gMonounsaturated Fat: 2gSodium: 60mgPotassium: 400mgFiber: 3gSugar: 15gVitamin A: 2IUVitamin C: 15mgCalcium: 10mgIron: 3mg

Notes

Use ripe bananas for natural sweetness. Chill the chamomile tea beforehand for a colder smoothie.

Tried this recipe?

Let us know how it was!

Creamy Pistachio Overnight Oats for a Wholesome Start

The morning sun poured through my kitchen window, illuminating a jar of creamy Pistachio Overnight Oats that practically radiated cheerfulness. These oats are not just a breakfast; they’re a delightful way to kickstart your day with nutty goodness and a satisfying texture. This vegan, gluten-free recipe is a perfect solution for busy mornings, needing only five minutes of prep the night before. Not only do these oats provide a wholesome boost of fiber and healthy fats, but they also offer endless customization possibilities to suit your taste. Whether you’re adding a dollop of non-dairy yogurt or a handful of fresh berries, you’ll find that these vibrant oats never get old. Curiosity piqued? Let’s dive into how to make this wonderful breakfast, shall we?

Why are Pistachio Overnight Oats amazing?

Simplicity in preparation means you can whip up a nutritious breakfast in just five minutes! Nutty flavor combines perfectly with creamy textures, making every bite an indulgent treat. Customizable to your heart’s content, add your favorite fruits or nut butters. Meal prep-friendly, these oats stay fresh in your fridge for days! Healthy balance of fiber and fats fuels your morning, leaving you satisfied and energized. If you love variety, check out the Overnight Croissant Breakfast for another delicious twist!

Pistachio Overnight Oats Ingredients

For the Base
Non-dairy milk – A creamy liquid base; almond or soy milk are great substitutes.
Pistachio butter – Adds a rich, nutty flavor; you can use almond or peanut butter if preferred.
Maple syrup – This natural sweetener makes your oats delicious; agave nectar can work too.
Vanilla extract – Enhances the flavor profile; an optional but delightful addition.
Quick oats – The star ingredient that gives structure; ensure they are gluten-free if needed.

For the Texture
Chia seeds – These add thickness and nutrition; feel free to skip if desired.

For Toppings
Non-dairy yogurt – Optional for creaminess; regular yogurt is a great substitute if not dairy-free.
Raspberries – Adds freshness and color to your dish; swap with bananas or blueberries for variety.
Chopped pistachios – Crunchy goodness that enhances flavor; choose any nuts or seeds you fancy.

These Pistachio Overnight Oats are a simple yet delightful way to enjoy breakfast, packed with flavor and nutrients to kick off your day right!

Step‑by‑Step Instructions for Pistachio Overnight Oats

Step 1: Combine Wet Ingredients
In a medium jar or bowl, whisk together 1 cup of non-dairy milk, 2 tablespoons of pistachio butter, 1 tablespoon of maple syrup, and 1 teaspoon of vanilla extract until fully blended. This creamy mixture will serve as the delicious base for your Pistachio Overnight Oats. Ensure there are no lumps in the pistachio butter, creating a smooth consistency that’s inviting and rich.

Step 2: Mix in Dry Ingredients
Next, add in 1 cup of quick oats and 2 tablespoons of chia seeds to the mixture. Stir thoroughly until everything is well combined and the oats are evenly coated with the liquid. The chia seeds will help thicken the oats and add a lovely texture. If you want a pop of color, you can also mix in 1/4 teaspoon of matcha powder at this stage for an extra boost of nutrients.

Step 3: Refrigerate Overnight
Cover the jar or bowl tightly with a lid or plastic wrap and place it in the refrigerator. Allow the mixture to soak overnight for at least 4 hours, but preferably 8 hours, to achieve optimal creaminess. As the oats absorb the liquid, they will swell and soften, creating that delightful pudding-like texture that makes Pistachio Overnight Oats so enjoyable.

Step 4: Prepare for Serving
The next morning, remove the jar from the refrigerator and give the oats a gentle stir. If the mixture seems too thick, feel free to add a splash of non-dairy milk to reach your desired consistency. This is the perfect time to adjust the sweetness by adding more maple syrup if you prefer a sweeter breakfast.

Step 5: Add Toppings
To serve, top your creamy Pistachio Overnight Oats with a generous dollop of non-dairy yogurt for added richness. Then, sprinkle fresh raspberries on top for a burst of color and freshness. Finally, finish with a handful of chopped pistachios, giving each bite a satisfying crunch that contrasts beautifully with the creamy base.

Step 6: Enjoy Your Meal
Savor your delightful creation right from the jar or transfer it to a bowl for a more leisurely breakfast experience. These Pistachio Overnight Oats can be enjoyed chilled or at room temperature, making them a versatile and nourishing option to kickstart your day. You can also store any leftovers in the fridge for up to 3-5 days, ensuring healthy breakfasts are always at hand!

Expert Tips for Pistachio Overnight Oats

  • Soak Time Matters: Allow the oats to soak overnight for the best flavor and texture; this makes them creamier and more delightful.
  • Glass Jars Are Best: Use glass jars for easy meal prep and storage. They’re also perfect for on-the-go breakfasts!
  • Consistency Check: If the mixture is too thick in the morning, simply stir in a bit more non-dairy milk to reach your desired creaminess.
  • Avoid Steel Cut Oats: Quick oats work best for this recipe; steel cut oats require cooking and won’t absorb liquid in the same way.
  • Layer Toppings Creatively: Get creative with your toppings! Layer your non-dairy yogurt and fresh fruits to make your Pistachio Overnight Oats visually appealing and even more delicious.
  • Swap Ingredients Freely: Don’t hesitate to substitute ingredients based on what you have on hand; a different nut butter can change the game!

Make Ahead Options

These Pistachio Overnight Oats are a fantastic choice for meal prep, saving you precious time on busy mornings! You can prepare the oat mixture, consisting of non-dairy milk, pistachio butter, maple syrup, vanilla extract, quick oats, and chia seeds, up to 24 hours in advance. To maintain quality, store the mixture in an airtight container in the refrigerator to prevent drying out. When you’re ready to enjoy, simply stir the oats and add a splash of non-dairy milk if needed for creaminess. Top with non-dairy yogurt, fresh raspberries, and chopped pistachios just before serving to keep flavors fresh and vibrant. With this make ahead approach, you’ll have a delicious, nourishing breakfast waiting for you every busy day!

How to Store and Freeze Pistachio Overnight Oats

  • Fridge: Store your Pistachio Overnight Oats in an airtight container in the fridge for up to 3-5 days. This allows for a convenient and nutritious breakfast throughout the week.
  • Freezer: If you want to prepare them further in advance, these oats can be frozen for up to 2 months. Ensure they’re in a freezer-safe container, and let them thaw in the fridge overnight before enjoying.
  • Reheating: For a cozy breakfast, you can warm the oats gently in the microwave. Add a splash of non-dairy milk to help restore creaminess if needed.
  • Serving: Enjoy your oats chilled or at room temperature. Adding fresh toppings after reheating is a great way to keep flavors vibrant and enjoyable!

What to Serve with Creamy Pistachio Overnight Oats

Imagine adding delightful sides that will elevate your creamy breakfast experience to new heights!

  • Fresh Fruit Salad: A vibrant mix of seasonal fruits adds brightness and natural sweetness, balancing the nutty flavors beautifully. The refreshing and juicy elements create a wonderful contrast with the smooth oats.
  • Toasted Sourdough Bread: The crunchy crust and soft interior provide a satisfying texture that pairs perfectly with the creamy oats. Spread a bit of avocado or almond butter on top for an extra layer of flavor and nutrition!
  • Nut Butter Energy Balls: These bite-sized snacks complement the oats and keep you energized throughout your morning. Packed with protein and healthy fats, they offer a delightful crunch that enhances your breakfast routine.
  • Herbal Tea or Smoothie: A fragrant herbal tea awakens the senses while a smoothie can brighten your meal with varied flavors. Consider a berry smoothie for a fruity twist that aligns with the nutty notes of the oats.
  • Coconut Yogurt Parfait: Layering dairy-free coconut yogurt with granola and berries creates a creamy texture and satisfying crunch, perfect alongside your overnight oats. Mix in some seeds for added nutrition and flavor!
  • Homemade Granola: A sprinkle of homemade granola serves as a crunchy topping, amplifying the oat experience. Choose a mix with nuts and dried fruit to fully enhance the breakfast celebration!
  • Chia Pudding: This light and healthy treat offers a delightful alternative that can be made with a variety of flavors. Pairing well with the Pistachio Overnight Oats, a scoop enhances the overall experience and texture!

Pistachio Overnight Oats Variations

Feel free to unleash your creativity with this delightful recipe and customize it to fit your taste and dietary preferences!

  • Dairy-Free: Use almond milk or coconut yogurt to keep it vegan and creamy without dairy.
  • Sweet Switch: Swap maple syrup for a splash of honey or agave nectar for a different sweetness.
  • Fruity Twist: Mix in fresh or dried fruit like bananas, mangoes, or apples to enhance the natural sweetness.
  • Nutty Variety: Replace pistachio butter with almond or cashew butter for a new flavor experience.
  • Crunchy Top: Add a sprinkle of granola or sunflower seeds on top for an enticing crunch.
  • Superfood Boost: Stir in a spoonful of protein powder or matcha for an extra health kick.
  • Spice it Up: Incorporate a pinch of cinnamon or nutmeg to warm up the flavor profile.
  • Choco Bliss: Add cocoa powder or dark chocolate chips for a delightful chocolatey treat.

If you love those delightful layers, you might also appreciate this Pistachio Carrot Cake for an exciting dessert twist!

Pistachio Overnight Oats Recipe FAQs

How do I choose the right non-dairy milk for my Pistachio Overnight Oats?
Absolutely! The type of non-dairy milk you choose can impact the flavor and creaminess of your oats. Almond milk offers a light and slightly sweet flavor, while coconut milk brings a rich creaminess. Soy milk is a good protein-packed option. Always go for unsweetened varieties if you want to control the sweetness, especially if you’re already adding maple syrup.

How long can I store my Pistachio Overnight Oats in the fridge?
You can keep your Pistachio Overnight Oats in an airtight container in the refrigerator for up to 3-5 days. This makes it a fantastic option for meal prep! Just give them a good stir before serving, and feel free to add a splash of non-dairy milk if they seem thick.

Can I freeze Pistachio Overnight Oats for later use?
Certainly! To freeze your Pistachio Overnight Oats, first ensure they’re in a freezer-safe container. They can last up to 2 months in the freezer. When you’re ready to enjoy them, thaw them overnight in the fridge. If they appear a bit dry after thawing, add a splash of non-dairy milk and stir well before serving.

What can I do if my oats seem too thick after soaking?
Very! If your overnight oats are thicker than you’d like in the morning, have no worries. Just stir in a little more non-dairy milk until you reach your desired creaminess. You can adjust sweetness by adding more maple syrup if you prefer a sweeter taste.

Can I modify the ingredients for allergies or dietary preferences?
Absolutely! This recipe is quite flexible. If you’re allergic to nuts, you can use sunflower butter instead of pistachio butter. For gluten-free versions, ensure you use certified gluten-free oats. If you have dietary preferences, feel free to substitute maple syrup with agave nectar or honey, depending on dietary restrictions. Enjoy experimenting!

Pistachio Overnight Oats

Creamy Pistachio Overnight Oats for a Wholesome Start

Enjoy a delicious start to your day with these Pistachio Overnight Oats, a vegan and gluten-free breakfast packed with flavor and nutrients.
Prep Time 5 minutes
Refrigeration Time 8 hours
Total Time 8 hours 5 minutes
Servings: 2 jars
Course: Breakfast
Cuisine: Vegan
Calories: 400

Ingredients
  

For the Base
  • 1 cup non-dairy milk almond or soy milk are great substitutes
  • 2 tablespoons pistachio butter can substitute with almond or peanut butter
  • 1 tablespoon maple syrup agave nectar can work too
  • 1 teaspoon vanilla extract optional but delightful
  • 1 cup quick oats ensure they are gluten-free if needed
For the Texture
  • 2 tablespoons chia seeds feel free to skip if desired
For Toppings
  • 1 cup non-dairy yogurt regular yogurt is a substitute if not dairy-free
  • 1 cup raspberries can swap with bananas or blueberries
  • 1/4 cup chopped pistachios or any nuts or seeds you fancy

Equipment

  • Jar or Bowl

Method
 

Step-by-Step Instructions
  1. In a medium jar or bowl, whisk together 1 cup of non-dairy milk, 2 tablespoons of pistachio butter, 1 tablespoon of maple syrup, and 1 teaspoon of vanilla extract until fully blended.
  2. Next, add in 1 cup of quick oats and 2 tablespoons of chia seeds to the mixture. Stir thoroughly until everything is well combined.
  3. Cover the jar or bowl tightly and place it in the refrigerator. Allow the mixture to soak overnight for at least 4 hours.
  4. The next morning, remove the jar from the refrigerator and give the oats a gentle stir. Adjust the consistency with a splash of non-dairy milk if needed.
  5. Top with a dollop of non-dairy yogurt, fresh raspberries, and chopped pistachios before serving.
  6. Savor your Pistachio Overnight Oats either right from the jar or in a bowl. Enjoy them cold or at room temperature.

Nutrition

Serving: 1jarCalories: 400kcalCarbohydrates: 50gProtein: 10gFat: 18gSaturated Fat: 2gPolyunsaturated Fat: 3gMonounsaturated Fat: 8gSodium: 150mgPotassium: 350mgFiber: 10gSugar: 8gVitamin C: 10mgCalcium: 15mgIron: 15mg

Notes

These oats can be stored in the fridge for up to 3-5 days, making breakfast prep easy and healthy.

Tried this recipe?

Let us know how it was!

Sponge Cake Baklava: Your New Favorite Festive Dessert

As I sifted through my collection of beloved dessert recipes, a lightbulb moment struck me: what if I could merge the rich tradition of Baklava with a softer, airier sponge cake? Enter the Sponge Cake Baklava, a delightful Greek dessert that tantalizes your taste buds while offering a lighter texture perfect for those special occasions. This innovative twist not only simplifies the baking process by using fewer phyllo layers, but it also delivers all the classic flavors of honey, nuts, and warm spices. Whether you’re treating your family or impressing guests at a festive gathering, this recipe is a true showstopper. Curious how to blend these two worlds into one delicious bite? Let’s dive in!

Why Is Sponge Cake Baklava So Great?

Delicious Fusion: This recipe beautifully combines the classic elements of Baklava with an airy sponge cake, making it a unique delight that everyone will love at the dinner table.
Easier Baking: With fewer phyllo layers required, this method simplifies the process while still ensuring that rich honey and nut flavors shine through.
Textural Contrast: Enjoy the spongy cake paired with crisp phyllo and a sweet syrup soak, creating a dish that intrigues both the palate and the plate.
Perfect for Celebrations: Whether it’s a holiday feast or a casual gathering, this Sponge Cake Baklava is sure to wow your guests and spark conversations.
Versatile Options: Feel free to personalize your dessert! Add a hint of citrus zest or serve alongside whipped cream or chocolate sauce for a modern twist. If you’re in the mood for more delightful desserts, check out our Patriotic Poke Cake or Strawberry Cheesecake Bars for additional crowd-pleasers!

Sponge Cake Baklava Ingredients

For the Cake
Eggs – Fresh, large eggs are essential for a perfect rise and moist texture.
Sugar – Use granulated sugar for sweetness; coconut sugar can be a lower glycemic alternative.
Flour – A blend of all-purpose and fine semolina flour gives this cake a unique structure.
Baking Powder – Ensure your baking powder is fresh for the best leavening results.
Water – Used to make the syrup that soaks into the cake.

For the Nut Mixture
Walnuts – These give a rich, nutty flavor; feel free to substitute with pecans or hazelnuts if you prefer.
Pistachios – Adds crunch and enhances flavor; slivered almonds can be a nice alternative.
Ground Cinnamon – Provides warmth; adjust to taste or swap with nutmeg to mix it up.
Ground Clove – Adds aromatic depth; you can omit this if it’s unavailable or use allspice instead.

For the Assembly
Greek Phyllo Sheets – Essential for that classic Baklava texture; opt for high-quality sheets for best results.
Butter – Adds richness and helps achieve flaky layers; melted coconut oil can work for a dairy-free option.

For the Syrup
Honey – Sweetens the syrup and gives that unmistakable taste of traditional Baklava; maple syrup can provide a different flavor note.
Water – Combined with sugar and spices, it’s crucial for the syrup that soaks into the cake.

This delightful Sponge Cake Baklava perfectly melds tradition and innovation, creating a festive dessert that’s both easy to make and visually stunning!

Step‑by‑Step Instructions for Sponge Cake Baklava

Step 1: Prepare Egg Mixtures
Begin by separating the egg yolks from the whites into two large bowls. Use an electric mixer to beat the egg whites until they form firm peaks, gradually adding half of the sugar for sweetness. In the second bowl, beat the yolks with the remaining sugar until the mixture is thick and pale, achieving a creamy texture.

Step 2: Mix Dry Ingredients
While the egg mixtures are coming together, blend the walnuts, pistachios, ground cinnamon, and ground clove in a separate bowl. In another bowl, whisk together the flour, semolina, and baking powder to ensure even distribution. This balance of dry ingredients will contribute to the light texture of your Sponge Cake Baklava.

Step 3: Combine Mixtures
Gently fold the meringue into the yolk mixture using a spatula—take care not to deflate the whites. Once incorporated, gradually add the sifted dry ingredients along with the nut mixture. Mix until just combined, ensuring you achieve a uniform batter without over-mixing, which keeps the sponge light and airy.

Step 4: Prepare Phyllo Layers
Preheat your oven to 180°C (356°F). While it heats, melt the butter in a small saucepan and generously grease a round cake pan to prevent sticking. Lay the sheets of phyllo dough in the pan, brushing a thin layer of melted butter between each sheet to create those classic Baklava layers and ensure they fully cover the base and sides of the pan.

Step 5: Layer the Cake
Pour the prepared cake mixture over the stacked phyllo layers, spreading it evenly with a spatula. Carefully fold the edges of the phyllo over the cake batter, creating a lovely encasement. Use a sharp knife to prick the surface gently, allowing steam to escape during baking and helping the sponge to bake evenly.

Step 6: Bake
Place the cake in the preheated oven and bake for approximately 20 minutes—or until the top turns a beautiful golden brown. Keep an eye on it, as you want it to spring back slightly when pressed to ensure a fluffy texture. Once baked, remove it from the oven and let it cool for a moment while you prepare the syrup.

Step 7: Make Syrup
In a saucepan, combine water, sugar, honey, and a cinnamon stick to create the syrup. Bring the mixture to a boil over medium heat, then reduce to a simmer for about 5 minutes until slightly thickened. Remove from heat and allow to cool slightly, as this warm syrup will soak into your cake beautifully.

Step 8: Soak the Cake
As soon as the Sponge Cake Baklava comes out of the oven, pour the warm syrup evenly over the hot cake. Ensure every inch is covered, allowing it to soak in and create that signature moist texture. Let it cool completely at room temperature, which helps set the cake before slicing and serving.

What to Serve with Sponge Cake Baklava

Elevate your dessert experience by pairing delightful accompaniments with this innovative treat that embodies rich flavors and textures.

  • Whipped Cream: A dollop of fluffy whipped cream balances the sweetness, adding a light, airy counterpart to the rich layers.
  • Citrus Sorbet: The refreshing zing of citrus sorbet brings a cool contrast, enhancing flavors with a delightful acidity that livens up each bite.
  • Turkish Coffee: Bold and rich, this traditional beverage complements the sweet, nutty notes perfectly, providing a warm finish to your meal.
  • Mint Tea: A calming cup of mint tea adds aroma and a refreshing herbal note, making it a serene pairing for this indulgent dessert.
  • Chocolate Sauce: Drizzling luscious chocolate sauce on top adds a modern twist and a hint of decadence that transforms each piece into a luxurious bite.
  • Fresh Berries: Sweet and slightly tart berries introduce a vibrant pop of color and a fresh flavor that perfectly offsets the richness of the baklava.

Serve Sponge Cake Baklava alongside these delightful options for a truly memorable dessert experience.

Make Ahead Options

These Sponge Cake Baklava are perfect for busy home cooks looking to streamline their meal prep! You can prepare the cake mixture and layer it in the phyllo up to 24 hours in advance; simply cover it with plastic wrap and refrigerate to keep it fresh. When you’re ready to bake, allow it to come to room temperature for about 30 minutes before placing it in the preheated oven. Additionally, you can make the syrup and store it in an airtight container for up to 3 days—just reheat slightly before soaking your baked cake. With these tips, you’ll enjoy a deliciously convenient dessert that tastes just as delightful!

Expert Tips for Sponge Cake Baklava

  • Grease Well: Ensure to grease the cake pan thoroughly to prevent sticking and facilitate easy removal, making your sponge cake baklava presentation perfect.
  • Don’t Overmix: After folding the meringue into the yolk mixture, mix gently. Overmixing can deflate the batter and lead to a denser texture instead of the airy sponge you want.
  • Rest for Best Texture: Allow the cake to rest at room temperature after soaking it in syrup. This enhances the flavor and achieves the best texture before slicing.
  • Use Fresh Phyllo: For optimal crispness, use fresh phyllo dough; if opting for frozen, ensure it is completely thawed and covered to prevent drying out.
  • Syrup Soaking Timing: Pour the warm syrup over the baked cake immediately after it comes out of the oven to ensure the sponge fully absorbs the delicious flavors.

How to Store and Freeze Sponge Cake Baklava

Fridge: Store your Sponge Cake Baklava in an airtight container in the refrigerator for up to 3 days to maintain freshness and flavor.

Freezer: For longer storage, wrap slices tightly in plastic wrap and then in aluminum foil, keeping them in the freezer for up to 2 months.

Reheating: Thaw in the fridge overnight before reheating. Warm in the microwave for about 10-15 seconds to enjoy that comforting, moist texture again.

Serving: For the best experience, serve it at room temperature after soaking in syrup, as this enhances the delightful flavors of your dessert.

Sponge Cake Baklava Variations & Substitutions

Feel free to personalize your Sponge Cake Baklava with these exciting twists and alternatives that will surely elevate your dessert experience!

  • Nut Alternatives: Substitute walnuts with pecans or hazelnuts for a completely different nutty flavor that will add a unique spin to the dessert.

  • Citrus Zest: Add lemon or orange zest to the batter for a refreshing brightness that complements the nutty flavors beautifully.

  • Dairy-Free Option: Swap butter with melted coconut oil to craft a dairy-free version while still keeping the delicious flakiness of phyllo.

  • Sweetener Switch: Replace honey with maple syrup in the syrup mixture for a different sweet note that subtly alters the overall flavor profile.

  • Whipped Cream Topping: Top your Sponge Cake Baklava with freshly whipped cream for an indulgent touch; it adds an additional layer of creaminess that complements the flavors.

  • Chocolate Drizzle: Elevate the dessert further by drizzling melted chocolate on top before serving, adding richness and a delightful contrast to the sweetness.

  • Texture Twist: Incorporate chia seeds or flaxseeds into the batter for an added crunch. They not only offer unique texture but also boost the nutritional profile.

  • Heat Level: For those who love a little spice, add a pinch of cayenne or a few drops of chili oil to the syrup to create a surprising kick that balances the sweetness.

If you’re in the mood for more delightful variations, don’t miss out on our delicious Pistachio Carrot Cake that also gives a refreshing twist to classic flavors or check out our airy Buttermilk Pancakes Discover for breakfast inspiration!

Sponge Cake Baklava Recipe FAQs

What kind of eggs should I use for the Sponge Cake Baklava?
Absolutely! For the best results, I recommend using fresh, large eggs. They provide the ideal moisture and structure that your cake needs to rise beautifully and achieve that lovely airy texture.

How should I store Sponge Cake Baklava?
You can keep your Sponge Cake Baklava in an airtight container in the refrigerator for up to 3 days. To maintain its delightful flavor and texture, it’s best served fresh but can be enjoyed cold or at room temperature.

Can I freeze Sponge Cake Baklava?
Yes, you can certainly freeze it! Wrap individual slices tightly in plastic wrap, then in aluminum foil to protect against freezer burn. This delicious dessert can be stored in the freezer for up to 2 months. When ready to enjoy, simply thaw in the refrigerator overnight and reheat in the microwave for a delightful warm treat!

What should I do if my phyllo dough tears while assembling?
Very! If your phyllo dough tears, don’t stress! Simply layer an extra torn piece over the tear—this actually adds more texture to your dessert. Just remember to brush melted butter between the layers to keep them flakey and delicious!

Is there a way to adjust the sweetness of my Sponge Cake Baklava?
Absolutely! If you prefer a less sweet dessert, you can reduce the amount of sugar in the syrup. Try tasting the syrup before pouring it over the cake; feel free to adjust it to your liking. Remember, you can always serve it with a light dusting of powdered sugar to add just the right touch when serving.

Are there any ingredient substitutions I can make for allergies?
Certainly! If you’re working with allergies, you can substitute the walnuts with sunflower seeds or pepitas to maintain that nutty flavor without triggering nut allergies. Additionally, using coconut oil instead of butter makes the recipe dairy-free. Enjoy customizing it to fit your needs while still capturing the essence of this beautiful Sponge Cake Baklava!

Sponge Cake Baklava

Sponge Cake Baklava: Your New Favorite Festive Dessert

Sponge Cake Baklava combines the richness of baklava with a lighter sponge cake, creating a delightful dessert perfect for celebrations.
Prep Time 30 minutes
Cook Time 20 minutes
Cooling Time 1 hour
Total Time 1 hour 50 minutes
Servings: 12 slices
Course: Dessert
Cuisine: Greek
Calories: 250

Ingredients
  

For the Cake
  • 4 large Eggs Fresh for perfect rise
  • 1 cup Granulated Sugar Can substitute with coconut sugar
  • 1 cup All-purpose Flour
  • ½ cup Fine Semolina Flour
  • 1 tbsp Baking Powder Ensure it's fresh
  • ½ cup Water For syrup
For the Nut Mixture
  • 1 cup Walnuts Can substitute with pecans or hazelnuts
  • 1 cup Pistachios Can use slivered almonds
  • 1 tsp Ground Cinnamon Adjust to taste
  • ½ tsp Ground Clove Omit if unavailable
For the Assembly
  • 1 pkg Greek Phyllo Sheets Use high-quality
  • ½ cup Butter Melted; can use coconut oil for dairy-free
For the Syrup
  • 1 cup Honey Can use maple syrup
  • 1 cup Water

Equipment

  • Electric Mixer
  • Oven
  • Saucepan
  • cake pan
  • Spatula

Method
 

Step-by-Step Instructions
  1. Separate egg yolks and whites, beat egg whites with sugar, beat yolks separately.
  2. Mix nuts and dry ingredients in separate bowls.
  3. Fold meringue into yolks, gradually add dry and nut mixtures.
  4. Preheat oven to 180°C (356°F), grease cake pan, and layer phyllo sheets.
  5. Spread cake mixture over phyllo, fold edges over, prick surface.
  6. Bake for about 20 minutes or until golden brown.
  7. Prepare syrup, combining water, sugar, honey, and cinnamon. Boil and cool.
  8. Pour warm syrup over the baked cake immediately after taking it out of the oven.

Nutrition

Serving: 1sliceCalories: 250kcalCarbohydrates: 36gProtein: 4gFat: 10gSaturated Fat: 5gPolyunsaturated Fat: 1gMonounsaturated Fat: 4gCholesterol: 70mgSodium: 200mgPotassium: 150mgFiber: 2gSugar: 18gVitamin A: 300IUCalcium: 20mgIron: 2mg

Notes

Rest and cool the cake completely before serving to enhance flavors.

Tried this recipe?

Let us know how it was!

Irresistible Red Velvet Molten Lava Cake with Gooey Surprise

As a wave of anticipation washes over me, I pull my Red Velvet Molten Lava Cake from the oven, the aroma wrapping around my kitchen like the warmest hug. This dessert isn’t just a feast for the eyes with its striking crimson hue; it boasts a heart of gooey chocolate that promises to impress at any gathering. What I love most about my Red Velvet Molten Lava Cake is how simple it is to whip up, making it perfect for a cozy night in or a special celebration. Its velvety texture is not only irresistible but also a delightful way to treat yourself or make someone feel special. Curious about how this stunning treat comes together? Let’s dive into the recipe!

Why is Red Velvet Molten Lava Cake special?

Irresistible, the luxurious blend of red velvet and molten chocolate creates a unique dessert experience. Effortlessly Elegant, you can impress guests with minimal effort—perfect for any occasion. Gooey Surprise, that molten center awaits to wow anyone who takes a bite. Versatile Treat, dress it up with ice cream or fresh berries for added flair. Whether it’s a cozy night in or a festive gathering, this cake is the ultimate crowd-pleaser that everyone will love! Don’t miss trying it alongside other delightful desserts like my Patriotic Poke Cake or Buttermilk Pancakes for a complete treat experience!

Red Velvet Molten Lava Cake Ingredients

For the Batter

  • Butter – Adds richness and moisture; you can use dairy-free butter for a vegan option.
  • Bittersweet Chocolate – Creates the molten center, providing essential flavor; opt for dairy-free chocolate for a vegan twist.
  • Granulated Sugar – Sweetens the batter; while no direct substitutions exist, coconut sugar can be a healthier alternative.
  • Eggs & Egg Yolks – Provide structure and richness for a tender, fudgy texture; no substitutes are recommended for the best results.
  • Vanilla Extract – Enhances the flavor profile; almond extract can be substituted for a different taste.
  • Red Food Coloring or Beet Juice – Imparts that signature red color; beet juice is a natural way to avoid artificial dyes.
  • All-Purpose Flour – Forms the cake structure; gluten-free flour can be used for a gluten-free option.
  • Cocoa Powder – Adds depth of flavor; regular unsweetened cocoa powder works best, as Dutch-processed can alter taste slightly.
  • Salt – Balances sweetness and enhances flavor.

Optional Additions

  • Cream Cheese – Adds a tangy contrast; feel free to dot some in the centers for an extra layer of flavor.
  • Powdered Sugar – For dusting before serving, adding a sweet touch to the presentation.

Now that you have the ingredients, let’s get ready to create this beautiful and decadent Red Velvet Molten Lava Cake that will surely steal the show!

Step‑by‑Step Instructions for Red Velvet Molten Lava Cake

Step 1: Prepare Ramekins
Begin by greasing four 6-ounce ramekins with butter, ensuring every surface is covered to prevent sticking. Then, dust each ramekin with cocoa powder, shaking out the excess. This step is crucial for your Red Velvet Molten Lava Cake to slide out beautifully after baking.

Step 2: Melt Ingredients
In a microwave-safe bowl, combine butter and chopped bittersweet chocolate. Heat in 30-second increments, stirring thoroughly in between, until the mixture is completely smooth and glossy. This melting process should take about 1-2 minutes total, creating a rich base for your cake batter.

Step 3: Whisk Eggs
In a medium bowl, add the eggs, egg yolks, and granulated sugar. Using a whisk, beat the mixture until it becomes thick, pale, and fluffy, usually around 2-3 minutes of vigorous mixing. This aeration will help achieve that tender texture in the Red Velvet Molten Lava Cake.

Step 4: Incorporate Colors
Once your egg mixture is ready, add in the vanilla extract and red food coloring (or beet juice if you prefer). Gently whisk again until the color is evenly distributed, making sure to create that signature vibrant red hue. This step is vital for both appearance and flavor enhancement.

Step 5: Combine Mixtures
Take the melted chocolate mixture and gradually whisk it into the egg mixture. Stir until the batter is smooth and well-blended, ensuring no lumps remain. This unification will ensure that your Red Velvet Molten Lava Cake has a rich, creamy consistency that bakes evenly.

Step 6: Fold in Dry Ingredients
Sift together the flour, cocoa powder, and salt in a separate bowl to remove any lumps. Gently fold this dry mixture into the wet ingredients using a spatula until just combined. Be careful not to overmix, as this could affect the cake’s texture and lead to a less than perfect lava consistency.

Step 7: Fill Ramekins
Spoon half of the red velvet batter into each prepared ramekin, filling them about halfway. If desired, add a small dot of cream cheese in the center of each, then cover with the remaining batter until almost full. This layering is essential to achieve that delightful molten center.

Step 8: Bake
Preheat your oven to 425°F (220°C) and carefully place the filled ramekins on a baking sheet. Bake them for 12-13 minutes, keeping a close eye on them. The edges should appear set while the centers remain jiggly—this is your cue that the Red Velvet Molten Lava Cake is ready to come out.

Step 9: Cool & Serve
Once baked, let the ramekins cool for just 1 minute to allow the cakes to set slightly. Then, gently run a thin knife around the edges before inverting each ramekin onto a plate. Serve immediately to experience the glorious molten chocolate surprise that lies within.

What to Serve with Red Velvet Molten Lava Cake

Elevate your dessert experience by pairing this warm, gooey delight with scrumptious sides and drinks that accentuate its richness.

  • Vanilla Bean Ice Cream: The creamy, cold ice cream contrasts beautifully with the warm lava cake, creating a heavenly bite. A scoop of rich ice cream melting over the warm cake elevates each spoonful to a new level of indulgence.

  • Fresh Berries: Mixed berries, like raspberries or strawberries, add a pop of freshness that cuts through the richness. Their natural tartness balances the sweet, decadent flavors perfectly.

  • Chocolate Sauce: A drizzle of chocolate sauce enhances the molten center and adds a touch of luxe. This extra layer of chocolate is a delight for true chocolate lovers.

  • Whipped Cream: Light and airy whipped cream complements the cake’s richness, allowing the bold flavors to shine through. It adds a festive flair, making your dessert presentation even more appealing.

  • Mint Leaves: A few fresh mint leaves sprinkled on top can add a refreshing element, elevating the visual appeal and enhancing the flavors. Their vibrant green contrasts wonderfully with the deep red of the cake.

  • Coffee: A strong cup of coffee pairs beautifully, enhancing the dessert’s chocolate notes while providing a delightful contrast. The bitterness of coffee complements the sweetness, making it a truly balanced experience.

  • Wine Pairing: Consider a dessert wine, like a sweet red or sparkling wine, which can nicely accompany the cake’s rich flavors. Sipping wine with each bite adds sophistication to your dessert experience.

Serving your Red Velvet Molten Lava Cake with these delicious sides will transform an already extraordinary dessert into a memorable culinary indulgence!

Expert Tips for Red Velvet Molten Lava Cake

  • Perfect Baking Time: Aim for 12-13 minutes in the oven. Watch closely; overbaking is the enemy that turns gooey centers into cake!
  • Chill Before Baking: If prepping in advance, chill the filled ramekins before baking. This helps maintain that luscious molten center when baked.
  • Use Quality Chocolate: Choose a good quality bittersweet chocolate for the best flavor. It crucially affects the richness of your Red Velvet Molten Lava Cake.
  • Don’t Skip the Butter: Proper greasing of ramekins with butter is key to ensuring the cakes release easily. Dusting with cocoa powder will help too!
  • Slice with Care: When serving, use a sharp knife to gently cut through the cake. This preserves the gooey center that everyone adores.

Make Ahead Options

Preparing your Red Velvet Molten Lava Cake in advance is a fantastic way to save time for busy weeknights or special occasions. You can prepare the batter up to 24 hours ahead of time; simply fill your greased ramekins and cover them tightly with plastic wrap to prevent drying out. For an even longer option, freeze the unbaked cakes for up to 3 months—just thaw in the refrigerator overnight before baking. When you’re ready to serve, remove the ramekins from the fridge or freezer, let them sit at room temperature for about 15 minutes, then bake as directed. This method ensures your cakes will be just as delicious and gooey when served!

Storage Tips for Red Velvet Molten Lava Cake

Fridge: Store leftover Red Velvet Molten Lava Cake in an airtight container for up to 2 days. Best enjoyed warm, so consider reheating before serving.

Freezer: If you want to keep it longer, unbaked batter can be frozen in ramekins for up to 3 months. Simply thaw in the refrigerator before baking, adding a few extra minutes to the cook time.

Reheating: Reheat individual servings in the microwave for about 10-15 seconds or until warmed through to revive that gooey center.

Room Temperature: Avoid leaving the cake at room temperature for more than 2 hours to ensure safety and maintain freshness.

Red Velvet Molten Lava Cake Variations

Feel free to get creative with your Red Velvet Molten Lava Cake, making each bite even more delightful!

  • Dairy-Free: Use dairy-free butter and chocolate to make this dessert suitable for vegan diets without sacrificing flavor. The gooey center remains just as luscious and delectable.

  • Cream Cheese Swirl: Dot a few spoonfuls of cream cheese in the center before topping with batter for a delightful tangy surprise. The contrast pairs beautifully with the rich chocolate!

  • Espresso Infusion: Add a teaspoon of instant espresso powder to the batter to elevate the chocolate flavor. It’s a simple twist that adds depth and sophistication to your lava cake.

  • Gluten-Free Option: Swap out all-purpose flour for a gluten-free blend. This ensures everyone can enjoy the deliciousness without worrying about gluten.

  • Mini Skillets: Bake the batter in individual cast iron skillets for a rustic, charming presentation. It also allows for easy serving and keeps warm longer at the table.

  • Raspberry Surprise: Add a few fresh or frozen raspberries into the center for a tart contrast to the sweet chocolate. The burst of fruitiness is simply irresistible!

  • Peanut Butter Center: For a nutty twist, spoon a little creamy peanut butter right into the middle before adding the rest of the batter. The combination of flavors is a match made in dessert heaven!

  • Spicy Heat: Sprinkle a pinch of cayenne pepper or your favorite chili powder in the batter for a surprising warmth that beautifully complements the sweetness.

These playful variations can change the way you and your loved ones experience this classic dessert! Pair it with a scoop of vanilla bean ice cream or fresh berries for a delightful contrast, and don’t forget to check out my Red White Blue Fruit Kabobs for another fun treat!

Red Velvet Molten Lava Cake Recipe FAQs

How do I choose ripe or high-quality ingredients for the cake?
Absolutely! For the butter, look for the freshest piece with a slight creaminess and no off-smells. The bittersweet chocolate should have a rich aroma and a smooth texture, free from bloom (white spots). When using eggs, choose large, fresh eggs with uncracked shells. For red food coloring, you can opt for high-quality gel for more vibrant color, or organic beet juice for a natural alternative without any artificial dyes.

What are the best storage methods for leftovers?
Very good question! Store any leftover Red Velvet Molten Lava Cake in an airtight container in the refrigerator. This keeps it fresh for up to 2 days. However, they are best when enjoyed warm, so I recommend reheating them slightly in the microwave for 10–15 seconds before serving to revive that luscious molten center.

Can I freeze the batter or baked cakes?
Yes! If you’d like to prep ahead, unbaked batter can be frozen in the ramekins for up to 3 months. Just wrap each ramekin tightly in plastic wrap and aluminum foil to prevent freezer burn. When you’re ready to bake, thaw them in the refrigerator for a few hours or overnight, then add an extra couple of minutes to the cook time for best results. Baked cakes can also be frozen, but for the best gooey texture, I recommend freezing the batter instead.

What can I do if my cakes don’t have a molten center?
A common hiccup with the Red Velvet Molten Lava Cake! Ensure you’re baking them for exactly 12-13 minutes. The cake should still jiggle in the center when you take them out of the oven. If they are overbaked, they can lose that gooey consistency. Another tip is to let them sit no longer than 1 minute before inverting—this allows them to remain soft inside.

Are there any dietary considerations I should keep in mind for this recipe?
Indeed! For those with egg allergies, unfortunately, traditional eggs provide necessary structure and texture, so substitutes like flax eggs may not yield the same results. However, for a vegan option, you can use dairy-free butter and chocolate! If you’re serving guests with gluten intolerance, using a quality gluten-free all-purpose flour works wonderfully. Always check labels for potential allergens like soy or nuts, especially in chocolate brands.

Red Velvet Molten Lava Cake

Irresistible Red Velvet Molten Lava Cake with Gooey Surprise

This Red Velvet Molten Lava Cake features a gooey chocolate center, making it an irresistible dessert for any occasion.
Prep Time 15 minutes
Cook Time 13 minutes
Cooling Time 1 minute
Total Time 29 minutes
Servings: 4 cakes
Course: Dessert
Cuisine: American
Calories: 350

Ingredients
  

For the Batter
  • 1/2 cup Butter Use dairy-free for a vegan option
  • 4 oz Bittersweet Chocolate Opt for dairy-free chocolate for a vegan twist
  • 1 cup Granulated Sugar Coconut sugar can be a healthier alternative
  • 2 large Eggs No substitutes recommended for best results
  • 2 large Egg Yolks
  • 1 tsp Vanilla Extract Almond extract can be substituted
  • 1 tbsp Red Food Coloring or Beet Juice Beet juice is a natural alternative
  • 1/2 cup All-Purpose Flour Use gluten-free flour for a gluten-free option
  • 1/4 cup Cocoa Powder Regular unsweetened works best
  • 1/4 tsp Salt
Optional Additions
  • 1/4 cup Cream Cheese Dot some in the centers for extra flavor
  • Powdered Sugar For dusting Adds a sweet touch to presentation

Equipment

  • Microwave-safe bowl
  • Ramekins (6-ounce)
  • Whisk
  • Spatula
  • Baking Sheet

Method
 

Step-by-Step Instructions
  1. Prepare Ramekins: Grease four 6-ounce ramekins with butter and dust with cocoa powder.
  2. Melt Ingredients: Combine butter and chopped bittersweet chocolate in a bowl and heat in increments until smooth.
  3. Whisk Eggs: Beat the eggs, egg yolks, and sugar until thick and fluffy, about 2-3 minutes.
  4. Incorporate Colors: Add vanilla extract and red food coloring, whisk gently.
  5. Combine Mixtures: Gradually whisk melted chocolate into the egg mixture until smooth.
  6. Fold in Dry Ingredients: Sift flour, cocoa powder, and salt together and fold into the wet mixture carefully.
  7. Fill Ramekins: Spoon half the batter into each ramekin, add cream cheese if desired, and cover with remaining batter.
  8. Bake: Preheat oven to 425°F (220°C) and bake for 12-13 minutes until edges are set.
  9. Cool & Serve: Let cool for 1 minute, run a knife around edges, invert onto plates, and serve immediately.

Nutrition

Serving: 1cakeCalories: 350kcalCarbohydrates: 40gProtein: 4gFat: 20gSaturated Fat: 12gPolyunsaturated Fat: 1gMonounsaturated Fat: 8gCholesterol: 100mgSodium: 300mgPotassium: 200mgFiber: 1gSugar: 25gVitamin A: 500IUCalcium: 50mgIron: 2mg

Notes

Chill filled ramekins before baking for best results. Serve warm for gooey centers.

Tried this recipe?

Let us know how it was!

Delicious Mango Truffles – No-Bake Treats in 20 Minutes

The kitchen buzzes with excitement as I pull out those golden, ripe mangoes, their fragrant sweetness filling the air. Today, I’m whipping up a batch of No-Bake Mango Truffles that are sure to impress anyone who takes a bite. With just three simple ingredients, these delightful treats are not only quick to make—ready in just 20 minutes—but also a gluten-free and vegetarian delight that transforms ordinary moments into something special. Imagine indulging in soft, chewy bites that melt in your mouth, all while enjoying the tropical essence of mango and coconut. Whether you’re entertaining friends or simply treating yourself, these truffles are the perfect stress-free dessert to brighten your day. Ready to elevate your dessert game with these scrumptious Mango Truffles? Let’s dive in!

Why Are These Mango Truffles Irresistible?

Simplicity: With only three ingredients, these truffles offer an effortless way to indulge without a lengthy prep time.

Tropical Bliss: The combination of ripe mangoes and coconut creates a heavenly flavor that transports you to a sunny paradise.

Quick Treat: Ready in just 20 minutes, they’re perfect for a last-minute dessert or a sweet snack anytime.

Versatile Options: Whether you want to stick to the classic recipe or try variations like adding nuts or different fruits, the possibilities are endless!

Crowd-Pleasing: These Mango Truffles are sure to impress your guests, making them a fantastic addition to any gathering or picnic. Dive into the deliciousness and explore other delightful recipes like Mango Coconut Pudding or Chicken Burritos Mango.

Mango Truffles Ingredients

• Whip up these delightful truffles effortlessly with just three core ingredients!

For the Truffles

  • Mango Purée – Provides sweetness and flavor; use very ripe mangoes for the best tasting results.
  • Desiccated Coconut – Adds excellent texture and visual appeal; toasting enhances its flavor, making each bite irresistible.
  • Sweetened Condensed Milk – Binds the mixture into a rich, fudgy consistency; consider substituting with unsweetened coconut cream for a twist.

For Coating

  • Extra Desiccated Coconut – Used for rolling the truffles for that crunchy texture; keeps the truffles from sticking and adds visual appeal!

Step‑by‑Step Instructions for Mango Truffles

Step 1: Prepare Mango Purée
Start by taking 2 ripe mangoes and scoop out their juicy pulp. Place the mango pulp in a blender and blend until smooth, aiming for about 1 cup of purée. The vibrant orange color should be visually enticing. This luscious mango purée will be the star ingredient of your Mango Truffles, providing a sweet tropical flavor.

Step 2: Toast Coconut
In a nonstick pan, add 1 cup of desiccated coconut over low heat. Toast the coconut for about 1 minute while stirring continuously until it turns a light golden brown and emits a fragrant aroma. This step enhances the coconut flavor and texture of the Mango Truffles, adding a delightful crunch to each bite.

Step 3: Cook Mixture
Combine the mango purée with the toasted coconut and 1 can of sweetened condensed milk in the same pan. Stir the mixture over medium heat for 5-7 minutes. Continue until it thickens to a dough-like consistency that easily pulls away from the sides of the pan. You’ll know it’s ready when it forms a soft mass, perfect for shaping your Mango Truffles.

Step 4: Shape Truffles
Once the mixture has cooled slightly for about 5 minutes, start scooping out approximately 1 tablespoon of the mixture. Roll it between your hands to form smooth balls. If the mixture is too sticky, lightly grease your hands with a bit of oil or coconut, making the shaping process easier. These truffles will transform into bite-sized delights in no time!

Step 5: Coat & Store
To finish your Mango Truffles, roll each ball in extra desiccated coconut to coat them evenly. This not only adds wonderful texture but also a beautiful presentation. Store your coated truffles in an airtight container in the fridge, where they will keep for up to 1 week. Enjoy them chilled as a refreshing and indulgent treat!

Make Ahead Options

These No-Bake Mango Truffles are perfect for meal prep, saving you valuable time on busy days! You can make the mango mixture and shape the truffles up to 24 hours in advance—just store them in an airtight container in the fridge. To maintain their delightful texture and flavor, coat the truffles in desiccated coconut only when you’re ready to serve. When it’s time to indulge, simply roll them in coconut, and they’ll be just as delicious as if you made them fresh! This way, you’ll have a refreshing dessert ready to enjoy whenever cravings strike, ensuring stress-free entertaining or snacking.

How to Store and Freeze Mango Truffles

Fridge: Store your Mango Truffles in an airtight container in the refrigerator for up to 1 week. This keeps them fresh and chewy for a delightful treat anytime.

Freezer: For longer storage, place the truffles in a freezer-safe container or bag, separating layers with parchment paper. They can be frozen for up to 3 months.

Thawing: When ready to enjoy, thaw the truffles in the fridge overnight. This retains their soft texture and tropical flavor.

Reheating: These truffles are best enjoyed chilled. However, if you prefer them slightly softer, leave them at room temperature for about 10 minutes before serving.

Expert Tips for Mango Truffles

Riper Mangoes: Ensure your mangoes are extremely ripe for the sweetest purée and best flavor in your Mango Truffles.

Toasting Coconut: Don’t skip toasting the desiccated coconut; it elevates the taste and texture of the truffles, making them even more delightful.

Adjusting Stickiness: If the mixture is too sticky to handle, chill it in the fridge for a bit before shaping, which makes forming the truffles easier.

Flavor Boosters: Consider adding a pinch of cardamom or a splash of vanilla extract to enhance the flavor profile of your Mango Truffles.

Coating Essentials: For a prettier finish, roll your truffles in extra desiccated coconut immediately after shaping; it helps them look as good as they taste!

Mango Truffles Variations & Substitutions

Feel free to let your creativity shine with these delicious Mango Truffles by exploring these enticing variations!

  • Fruit Swap: Replace mango with banana or avocado for a creamy alternative that’s equally delightful.
    Both options offer a different taste while maintaining the creamy consistency that makes these truffles so special.

  • Nuts Galore: Add crushed almonds, pistachios, or walnuts for a delightful crunch that enhances texture.
    The nutty flavor pairs beautifully with mango, creating a lovely balance of sweetness and heartiness in every bite.

  • Chocolate Twist: Mix in mini chocolate chips or drizzle melted chocolate over the top for an indulgent touch.
    The fusion of tropical fruit and rich chocolate is simply irresistible, making each truffle a decadent treat!

  • Spiced Up: Infuse a hint of cardamom or cinnamon for a warm, aromatic flavor enhancement.
    These spices add a cozy twist to your truffles, perfect for those chilly evenings when you crave something sweet.

  • Vegan Delight: Substitute sweetened condensed milk with unsweetened coconut cream for a vegan-friendly version.
    This swap keeps the truffles creamy while ensuring they cater to different dietary needs without sacrificing flavor.

  • Coconut Variants: Experiment with different types of coconut, such as coconut flakes or toasted coconut chips for rolling.
    Each offers a unique texture and presentation, enhancing the overall experience of your Mango Truffles.

  • Shape Change: Instead of traditional balls, press the mixture into a lined baking dish to create truffle bars.
    Cut them into squares for a fun and shareable twist that’s great for gatherings or parties.

For more fruity inspirations, why not try some Mango Coconut Pudding next, or whip up these Chicken Burritos Mango for a savory delight? Enjoy customizing your Mango Truffles!

What to Serve with Easy No-Bake Mango Truffles

The perfect addition to your tropical dessert spread, these truffles deserve delightful companions to make your meal truly memorable.

  • Creamy Coconut Rice: A velvety side that whispers of the tropics, its subtle sweetness balances the bright mango flavors perfectly.

  • Fresh Fruit Salad: A medley of seasonal fruits adds vibrant color and refreshing palate-cleansing bites to complement the rich truffles.

  • Chilled Chai Tea: The spiced warmth of chai creates a beautiful contrast, elevating the mango’s tropical notes with every sip.

  • Vanilla Ice Cream: Creamy ice cream melts beautifully against the chewy truffles, blending textures while enhancing the overall sweetness.

  • Lemon Sorbet: The tartness of lemon sorbet cuts through the sweetness, providing a rejuvenating and zesty experience alongside the truffles.

  • Mini Cheesecakes: These indulgent bites offer a creamy tanginess that balances the sweetness of the mango truffles perfectly, making for a luxurious dessert platter.

Mango Truffles Recipe FAQs

What kind of mangoes should I use for the best Mango Truffles?
Absolutely! For the sweetest and most flavorful Mango Truffles, use very ripe mangoes, such as Alphonso or Ataulfo. These varieties have the best taste and yield a smooth purée, which is essential for achieving that luscious, tropical flavor in your truffles.

How should I store my Mango Truffles and for how long?
To keep your Mango Truffles fresh and delightful, store them in an airtight container in the fridge for up to 1 week. This ensures they maintain their chewy consistency and vibrant flavor, making them an irresistible snack anytime!

Can I freeze Mango Truffles? How?
Very! You can freeze your Mango Truffles for up to 3 months. To do this, place them in a freezer-safe container or bag, separating each layer with parchment paper to prevent sticking. Just make sure they’re fully cooled before freezing to preserve their texture. When you’re ready to enjoy them, simply thaw the truffles in the fridge overnight.

What if my Mango Truffle mixture is too sticky to handle?
If you find the mixture too sticky, don’t worry! Chill it in the refrigerator for about 15-20 minutes. This will make it easier to scoop and shape into truffles. If it still sticks, you can lightly grease your hands with a bit of coconut oil to help form those perfect bite-sized balls.

Are there any dietary considerations I should be aware of?
Absolutely! These Mango Truffles are a vegetarian and gluten-free treat, perfect for a variety of diets. However, if you’re serving them to guests with allergies, make sure to check that the coconut and condensed milk are allergen-free, as some brands may contain additives.

Mango Truffles

Delicious Mango Truffles – No-Bake Treats in 20 Minutes

Enjoy these quick and delightful Mango Truffles, a gluten-free treat made with ripe mangoes and coconut, perfect for any occasion.
Prep Time 20 minutes
Cooling Time 5 minutes
Total Time 25 minutes
Servings: 12 truffles
Course: Dessert
Cuisine: Tropical
Calories: 90

Ingredients
  

For the Truffles
  • 2 mangoes ripe mangoes for mango purée
  • 1 cup desiccated coconut toasting enhances flavor
  • 1 can sweetened condensed milk binds mixture
For Coating
  • 1 cup extra desiccated coconut for rolling truffles

Equipment

  • blender
  • Nonstick pan
  • airtight container

Method
 

Step-by-Step Instructions for Mango Truffles
  1. Prepare Mango Purée by scooping out pulp from 2 ripe mangoes, blend until smooth to get about 1 cup of purée.
  2. Toast coconut in a nonstick pan over low heat for about 1 minute, stirring constantly until light golden brown.
  3. Combine mango purée, toasted coconut, and sweetened condensed milk in the pan, stirring over medium heat for 5-7 minutes until thickened.
  4. Let the mixture cool for about 5 minutes, then scoop out 1 tablespoon to roll into truffles.
  5. Roll each truffle in extra desiccated coconut and store in an airtight container in the fridge.

Nutrition

Serving: 1truffleCalories: 90kcalCarbohydrates: 15gProtein: 1gFat: 4gSaturated Fat: 3gMonounsaturated Fat: 1gSodium: 10mgPotassium: 50mgFiber: 1gSugar: 8gVitamin A: 100IUVitamin C: 10mgCalcium: 10mgIron: 0.2mg

Notes

For best flavor, use very ripe mangoes. Toasting coconut enhances taste and texture. Chill the mixture if too sticky before shaping truffles.

Tried this recipe?

Let us know how it was!

Delicious Key Lime Quick Bread for a Zesty Snack!

As I stood in my kitchen, the intoxicating aroma of fresh limes filled the air, instantly transporting me to a sun-soaked beach. This is the magic of making Key Lime Quick Bread, where every slice bursts with a refreshing tang and a hint of sweetness. Not only is this recipe a breeze to whip up, making it perfect for busy mornings or unexpected guests, but it also offers the comforting essence of homemade goodness that fast food can never replicate. You’ll love how the bright flavors perfectly complement a cup of coffee or a cozy afternoon tea. So, are you ready to embrace the zesty delight of this cheerful quick bread? Let’s get baking!

Why is Key Lime Quick Bread a Must-Try?

Tangy and Sweet: This Key Lime Quick Bread perfectly balances the zingy tartness of key limes with just the right amount of sweetness.

Quick and Easy: With a straightforward prep process, you’ll spend less time cooking and more time enjoying, making it ideal for busy families or impromptu gatherings.

Endless Variations: Feel free to experiment! Add blueberries for a fruity twist or turn it into muffins for a fun bite-sized option—there’s something for everyone.

Perfect Pairing: Every slice pairs beautifully with coffee or tea, elevating your snack game and delighting guests at your next brunch.

Make Ahead: This bread stores well, allowing you to whip up a batch and enjoy it all week, just like the beloved flavors in a refreshing Tuna Salad Sandwich.

Nostalgic Comfort: Enjoy the homemade goodness that takes you away to sun-soaked beaches, a delight that no fast food can replicate!

Key Lime Quick Bread Ingredients

Here’s everything you need to whip up this delightful Key Lime Quick Bread!

For the Bread

  • Unsalted Butter (⅓ cup) – Adds richness and moisture; substitute margarine or coconut oil for a dairy-free option.
  • Sugar (¾ cup) – Provides sweetness and aids in browning; can be reduced for a less sweet bread.
  • Eggs (2) – Binds ingredients and adds structure; use flax eggs for a vegan alternative.
  • Key Lime Zest (1 tablespoon) – Enhances the flavor profile with an intense aroma; regular lime zest can be used as a substitute.
  • Key Lime Juice (1 tablespoon) – Imparts tartness and moisture; regular lime juice works if needed.
  • Vanilla Extract (1 teaspoon) – Adds depth to the flavor; feel free to omit for a purer lime taste.
  • All-Purpose Flour (1 ½ cups) – Provides structure; you can use gluten-free flour blends as a substitute, though it may alter the texture.
  • Salt (½ teaspoon) – Balances flavors; essential for enhancing the overall taste of the bread.
  • Baking Powder (1 ½ teaspoons) – Acts as a leavening agent for rise; always check for freshness for optimal results.
  • Buttermilk (½ cup) – Contributes moisture and tenderness; mix ½ tablespoon of vinegar with milk and let sit for a quick substitute.

For the Glaze

  • Powdered Sugar (¾ cup) – Adds sweetness to the glaze; can be swapped with coconut sugar for a healthier option.
  • Key Lime Juice (2 tablespoons) – Gives tangy flavor to the glaze; substitute with regular lime juice if necessary.

Step‑by‑Step Instructions for Key Lime Quick Bread

Step 1: Preheat the Oven
Begin by preheating your oven to 350°F (175°C). While the oven heats up, grease a 9×5 loaf pan with butter or cooking spray to ensure easy removal of your delightful Key Lime Quick Bread once it’s baked.

Step 2: Cream Butter and Sugar
In a medium mixing bowl, cream together ⅓ cup of unsalted butter and ¾ cup of sugar using an electric mixer on medium speed. Mix until the mixture turns light and fluffy, about 2–3 minutes. This step is crucial for creating a tender crumb in your bread.

Step 3: Mix in Wet Ingredients
Add 2 eggs to the creamed mixture followed by 1 tablespoon of key lime zest, 1 tablespoon of key lime juice, and 1 teaspoon of vanilla extract. Beat until all ingredients are fully incorporated and the mixture appears smooth and creamy, enhancing the key lime flavor in your quick bread.

Step 4: Combine Dry Ingredients
In another bowl, whisk together 1½ cups of all-purpose flour, ½ teaspoon of salt, and 1½ teaspoons of baking powder. Gradually add this dry mixture to the wet ingredients, alternating with ½ cup of buttermilk. Stir gently until just combined; be careful not to overmix, as this will affect the texture of your Key Lime Quick Bread.

Step 5: Pour and Bake
Carefully pour the batter into the prepared loaf pan, smoothing the top with a spatula. Place the pan in the preheated oven and bake for about 45 minutes. The bread is ready when it turns a golden brown on the edges and a toothpick inserted into the center comes out clean.

Step 6: Prepare the Glaze
While your Key Lime Quick Bread is baking, whisk together ¾ cup of powdered sugar and 2 tablespoons of key lime juice in a small bowl. Mix until smooth and well-combined, creating a delightful tangy glaze that will elevate the flavor of your bread once it cools.

Step 7: Cool and Glaze
After baking, allow the bread to cool in the pan for about 10 minutes. Then, gently transfer it to a wire rack to cool completely. Once cooled, drizzle the prepared glaze over the warm bread, letting it soak into the top and adding an extra layer of zesty flavor.

Step 8: Slice and Serve
Finally, slice your Key Lime Quick Bread into generous pieces. Serve it warm or at room temperature, enjoying the delicious balance of tangy lime and sweetness. This quick bread is perfect for breakfast or as a delightful snack any time of the day!

Make Ahead Options

These Key Lime Quick Bread preparations are perfect for meal prep enthusiasts eager to save time on busy mornings! You can mix the dry ingredients (1 ½ cups flour, ½ teaspoon salt, and 1 ½ teaspoons baking powder) and store them in an airtight container up to 3 days in advance. Additionally, zesting the key limes and cutting the butter into small cubes can be done up to 24 hours ahead—just remember to refrigerate the butter to keep it fresh. When you’re ready to bake, simply combine the wet ingredients with your prepped dry mixture and follow the original baking instructions for a treat that’s just as delicious as if you made it fresh!

Expert Tips for Key Lime Quick Bread

  • Room Temperature Ingredients: Ensure your buttermilk and eggs are at room temperature for better mixing and a more even texture in your Key Lime Quick Bread.

  • Avoid Overmixing: When combining wet and dry ingredients, stir just until incorporated. Overmixing can lead to a dense bread rather than the fluffy texture we all love.

  • Fresh Baking Powder: Always check the freshness of your baking powder before use. Expired baking powder can prevent your bread from rising properly.

  • Adjusting Lime Tartness: If substituting regular limes for key limes, start with a little less juice and zest since regular limes are typically more acidic.

  • Minimize Crust Hardness: If you prefer a softer crust, cover the top of the loaf with aluminum foil halfway through baking to prevent over-browning.

  • Storage Tips: To maintain freshness, store your Key Lime Quick Bread in an airtight container at room temperature, or freeze it for longer storage.

What to Serve with Zesty Key Lime Quick Bread

The tangy sweetness of this delightful bread calls for perfect companions that enhance its tropical charm.

  • Creamy Greek Yogurt: A dollop of Greek yogurt adds creaminess, balancing the tangy flavors while providing a refreshing touch. Enjoy it as a light breakfast or with a slice for dessert!

  • Coconut Chia Pudding: The subtle sweetness and creaminess of coconut chia pudding create a tropical vibe that elevates your Key Lime experience, making it feel like a vacation in every bite.

  • Fresh Berry Medley: A colorful assortment of strawberries, blueberries, and raspberries introduces a burst of freshness and color, complementing the bright lime flavors and adding a contrast in texture.

  • Honey Butter: Whipped honey butter brings a rich sweetness that beautifully contrasts the tang of the Key Lime Quick Bread; it’s perfect for an afternoon treat or a luxurious brunch spread.

  • Iced Tea or Lemonade: Refreshing homemade iced tea or lemonade offers a perfect balance of sweet and tart, making them delightful beverages to pair with your zesty quick bread.

  • Dark Chocolate Drizzle: A simple drizzle of melted dark chocolate can elevate each slice to a decadent dessert experience, mingling the tangy and sweet notes beautifully.

  • Coconut Macaroon Cookies: These chewy, sweet treats harmonize perfectly with the zesty bread, making them a delightful duo for dessert or tea time. Enjoy the tropical flavors together for a delightful snack!

How to Store and Freeze Key Lime Quick Bread

Room Temperature: Store your Key Lime Quick Bread in an airtight container at room temperature for up to 4 days to keep it moist and flavorful.

Fridge: If you’d like to keep it longer, place the bread in the fridge where it will stay fresh for up to a week. Ensure it’s well-wrapped to avoid drying out.

Freezer: For maximum freshness, freeze slices of the Key Lime Quick Bread for up to 3 months. Wrap them tightly in plastic wrap and then aluminum foil to prevent freezer burn.

Reheating: When ready to enjoy, thaw overnight in the fridge or on the counter. Reheat individual slices in the microwave for about 15-20 seconds or in a toaster oven for a warm, delightful treat!

Key Lime Quick Bread Variations

Feel free to get creative and customize your Key Lime Quick Bread with these delightful twists that will enhance both flavor and texture!

  • Fruit Twist: Substitute blueberries for a juicy burst of flavor that beautifully complements the tangy lime. The juicy berries add a lovely sweetness and a pop of color!

  • Muffin Transformation: Make muffins instead of bread by pouring the batter into a muffin tin and adjusting the baking time to about 25 minutes. Perfect for grab-and-go breakfasts or snacks!

  • Nutty Addition: Incorporate walnuts or pecans for a crunchy texture and an earthy flavor. Toasting the nuts beforehand will intensify their flavor, making every bite extra special!

  • Zesty Spice: Add a pinch of cinnamon or nutmeg to the batter for a warm, spicy twist. These spices create a cozy aroma that pairs wonderfully with the bright lime essence.

  • Coconut Delight: Mix in shredded coconut for a tropically inspired flavor that brings a delightful chewiness and richness. It’ll feel like a slice of paradise in every bite!

  • Heat It Up: For those who love a little heat, incorporate jalapeño or red pepper flakes to the batter. A spicy kick can create a surprising yet delicious contrast to the sweet and tangy flavors.

  • Gluten-Free Option: Use a gluten-free flour blend instead of all-purpose flour to cater to dietary needs. Just be mindful that the texture might differ slightly, so adjust hydration if necessary.

  • Alternate Citrus: Swap key limes for lemons to create a refreshing variation that’s just as delightful. Lemons offer their own zesty brightness, making this bread universally appealing!

Each variation opens up a world of flavors, making your Key Lime Quick Bread a versatile treat. Whether you’re inspired to make a sweet batch for the family or an adventurous spiced version for friends, this recipe is a canvas for your culinary creativity. And if you’re looking for more fresh ideas, why not check out a refreshing Italian Chopped Salad next? Or consider pairing a slice with some tangy Garlic Shrimp Broccoli for a delicious meal!

Key Lime Quick Bread Recipe FAQs

How do I choose the best key limes for this recipe?
Absolutely! When selecting key limes, look for small, bright green limes that feel firm to the touch. Avoid any with dark spots or wrinkles. The best key limes will have a glossy skin and yield slightly when pressed, indicating juicy flesh inside.

How should I store my Key Lime Quick Bread?
For optimal freshness, store your Key Lime Quick Bread in an airtight container at room temperature for up to 4 days. If you want it to last longer, you can refrigerate it for up to a week, but be sure to wrap it well to prevent it from drying out.

Can I freeze Key Lime Quick Bread and how?
Absolutely! To freeze your Key Lime Quick Bread, wrap individual slices tightly in plastic wrap and then in aluminum foil to prevent freezer burn. You can freeze it for up to 3 months. When you’re ready to enjoy a slice, simply thaw it in the fridge overnight or at room temperature, and reheat in the microwave for about 15-20 seconds!

What tips do you have for troubleshooting if my bread doesn’t rise properly?
Very! If your Key Lime Quick Bread doesn’t rise as expected, the culprit could be old baking powder. Always check that your baking powder is fresh and active before baking. To test, mix a teaspoon with hot water; if it bubbles vigorously, it’s good to go. If not, it’s time to replace it!

Is there a dairy-free option for this recipe?
Yes! You can easily make this Key Lime Quick Bread dairy-free by substituting the buttermilk with a mixture of ½ tablespoon of vinegar and enough milk (or a plant-based alternative like almond or oat milk) to make ½ cup total liquid. Additionally, swapping unsalted butter for coconut oil or margarine keeps it dairy-free while maintaining that moisture.

Are there any allergies I should be aware of with the ingredients?
Yes! This recipe contains common allergens like eggs and gluten (from the all-purpose flour). If you’re preparing this for someone with allergies, consider using flax eggs for a vegan alternative and a gluten-free flour blend for a gluten-free version. Always check that any substitutions also align with individual dietary restrictions.

Key Lime Quick Bread

Delicious Key Lime Quick Bread for a Zesty Snack!

This Key Lime Quick Bread is a refreshing and easy-to-make treat packed with tangy flavor, perfect for any occasion.
Prep Time 15 minutes
Cook Time 45 minutes
Cooling Time 10 minutes
Total Time 1 hour 10 minutes
Servings: 8 slices
Course: Dessert
Cuisine: American
Calories: 200

Ingredients
  

For the Bread
  • cup Unsalted Butter Adds richness and moisture; substitute margarine or coconut oil for a dairy-free option.
  • ¾ cup Sugar Provides sweetness and aids in browning; can be reduced for a less sweet bread.
  • 2 pieces Eggs Binds ingredients and adds structure; use flax eggs for a vegan alternative.
  • 1 tablespoon Key Lime Zest Enhances the flavor profile with an intense aroma; regular lime zest can be used as a substitute.
  • 1 tablespoon Key Lime Juice Imparts tartness and moisture; regular lime juice works if needed.
  • 1 teaspoon Vanilla Extract Adds depth to the flavor; feel free to omit for a purer lime taste.
  • 1 ½ cups All-Purpose Flour Provides structure; you can use gluten-free flour blends as a substitute, though it may alter the texture.
  • ½ teaspoon Salt Balances flavors; essential for enhancing the overall taste of the bread.
  • 1 ½ teaspoons Baking Powder Acts as a leavening agent for rise; always check for freshness for optimal results.
  • ½ cup Buttermilk Contributes moisture and tenderness; mix ½ tablespoon of vinegar with milk and let sit for a quick substitute.
For the Glaze
  • ¾ cup Powdered Sugar Adds sweetness to the glaze; can be swapped with coconut sugar for a healthier option.
  • 2 tablespoons Key Lime Juice Gives tangy flavor to the glaze; substitute with regular lime juice if necessary.

Equipment

  • Loaf Pan
  • Mixing bowls
  • Electric Mixer
  • Whisk

Method
 

Step-by-Step Instructions for Key Lime Quick Bread
  1. Preheat your oven to 350°F (175°C). Grease a 9x5 loaf pan with butter or cooking spray.
  2. In a medium mixing bowl, cream together the unsalted butter and sugar using an electric mixer on medium speed until light and fluffy, about 2–3 minutes.
  3. Add eggs, key lime zest, key lime juice, and vanilla extract to the creamed mixture. Beat until smooth and creamy.
  4. In another bowl, whisk together flour, salt, and baking powder. Gradually add this dry mixture to the wet ingredients, alternating with buttermilk, stirring gently until just combined.
  5. Pour the batter into the prepared loaf pan and smooth the top. Bake for about 45 minutes or until golden brown and a toothpick comes out clean.
  6. While baking, whisk together powdered sugar and key lime juice in a small bowl until smooth.
  7. After baking, let the bread cool in the pan for about 10 minutes. Transfer to a wire rack to cool completely.
  8. Once cooled, drizzle over the prepared glaze and enjoy your Key Lime Quick Bread!

Nutrition

Serving: 1sliceCalories: 200kcalCarbohydrates: 30gProtein: 3gFat: 8gSaturated Fat: 5gPolyunsaturated Fat: 1gMonounsaturated Fat: 2gCholesterol: 40mgSodium: 150mgPotassium: 120mgFiber: 1gSugar: 15gVitamin A: 250IUVitamin C: 5mgCalcium: 20mgIron: 1mg

Notes

Ensure room temperature ingredients for best results. Avoid overmixing for a fluffy texture.

Tried this recipe?

Let us know how it was!

Crispy Grated Potato Pie with Savory Spinach and Mushrooms

I can still hear the sizzle as I tossed a handful of mushrooms into the hot skillet, the aroma weaving its way through my kitchen. That moment sparked the creation of my Crispy Grated Potato Pie, a delightful dish that transforms simple ingredients into a comforting culinary masterpiece. With a golden, crunchy potato crust enveloping tender spinach and savory mushrooms, this gluten-free gem is wonderfully flexible—you can easily swap in your favorite cheese or add extra veggies. Not only is this pie a feast for the senses, but it also comes together quickly, making it perfect for both busy weeknights and festive gatherings. Imagine serving it as a main course or a delightful side, where every bite invites smiles and satisfaction. Are you ready to bring a touch of homemade comfort to your table? Let’s dive into the recipe!

Why You’ll Crave This Potato Pie

Simplicity Meets Flavor: The process is incredibly easy, perfect for both seasoned chefs and home cooks alike.

Golden Crispiness: The potato crust achieves a delightful crunch, encasing the tender spinach and savory mushrooms for a satisfying bite.

Versatile Ingredients: Feel free to mix and match your favorite cheeses and veggies, allowing for endless customization. Have you tried adding zucchini or bell peppers?

Healthy Indulgence: Packed with vitamins from spinach and nutrients from mushrooms, this gluten-free delight is a guilt-free pleasure.

Quick Prep Time: With just a few straightforward steps, you can whip up a dish that impresses friends and family alike, making it a go-to for any occasion.

Whether you’re looking for a standout main dish or a tasty side, this Crispy Grated Potato Pie will surely become a household favorite! If you’re interested in more comforting meals, don’t miss our Ground Beef Potato Taco Bowl or our Hearty Potato Kielbasa Soup.

Crispy Grated Potato Pie Ingredients

For the Potato Crust

  • Potatoes – Use starchy potatoes for better crispiness in the crust.
  • Mozzarella Cheese – Provides creaminess and stretch; feel free to substitute with other semi-soft cheeses.
  • Eggs – Binds the potato mixture; for a vegan option, use flax eggs.
  • Fresh Parsley – Adds a burst of flavor; can be substituted with basil or dill.
  • Olive Oil – Helps crisp the crust and sauté vegetables; can switch to canola oil or melted butter.

For the Filling

  • Baby Spinach – Brings nutrition and color; kale can be a great substitute if you desire.
  • Champignon Mushrooms – Offers umami flavor, but feel free to swap with shiitake or portobello mushrooms.
  • Green Onion – Adds a mild onion flavor; yellow onions or shallots can also work.
  • Garlic – Enhances the overall flavor; both fresh and powdered garlic are perfect here.
  • Dried Oregano – A fragrant seasoning to elevate both the crust and filling; consider Italian seasoning as an alternative.

For Topping

  • Parmesan Cheese – Gives a delicious salty kick; for a vegan variant, nutritional yeast is a fantastic option.
  • Fresh Parsley (for garnish) – Enhances the dish’s presentation and adds a hint of freshness.

This Crispy Grated Potato Pie with Spinach and Mushrooms is not only a treat for your taste buds but a celebration of wholesome ingredients that come together in divine harmony! Enjoy creating this comforting dish, and feel free to experiment with your favorite components.

Step‑by‑Step Instructions for Crispy Grated Potato Pie

Step 1: Prepare Potatoes
Begin by grating your starchy potatoes using a box grater or food processor for fine shreds. Soak the grated potatoes in a bowl of cold salted water for 15 minutes; this helps to remove excess starch. After soaking, drain well and pat them dry with a clean kitchen towel to ensure a crispy potato crust in your Crispy Grated Potato Pie.

Step 2: Sauté Vegetables
In a skillet, heat a tablespoon of olive oil over medium heat. Add chopped green onion and sauté for about 2 minutes until softened. Next, stir in the baby spinach, dried oregano, and a pinch of salt, cooking until the spinach wilts. Finally, add sliced champignon mushrooms and minced garlic, cooking until golden and the liquid has evaporated, approximately 5 minutes.

Step 3: Combine Mixtures
Drain the soaked potatoes and squeeze out any excess moisture. In a large mixing bowl, combine the potatoes with shredded mozzarella cheese, beaten eggs, chopped parsley, and additional seasoning. Mix thoroughly until everything is well incorporated, creating a cohesive mixture for your Crispy Grated Potato Pie crust.

Step 4: Form Crust
Preheat your oven to 200°C (390°F). Grease a 9-inch round baking dish with olive oil. Press the potato mixture evenly into the bottom and up the sides of the dish to form a sturdy crust. Bake in the preheated oven for 35-40 minutes or until the crust turns golden brown and crispy, becoming the perfect base for the filling.

Step 5: Add Filling
Once the crust is golden, remove it from the oven and let it cool slightly. Spoon the sautéed spinach and mushroom mixture evenly into the cooked potato crust. Sprinkle additional mozzarella and Parmesan cheese on top for a deliciously cheesy finish.

Step 6: Bake Again
Return the assembled Crispy Grated Potato Pie to the oven and bake for an additional 10-15 minutes. Keep an eye on it; you are looking for the cheese to melt and bubble, creating a beautiful, creamy topping that enhances the pie’s flavor.

Step 7: Serve
After baking, allow the pie to cool for about 5 minutes. This makes slicing easier. Garnish with freshly chopped parsley and a sprinkle of Parmesan before serving. This delightful crispy potato pie is now ready to be enjoyed, bringing warmth and comfort to your table!

Expert Tips for Crispy Grated Potato Pie

Crispy Crust: Make sure to thoroughly drain and dry the grated potatoes before forming the crust—excess moisture will lead to a soggy bottom.

Cheese Choices: Experiment with different cheese types for your desired flavor. A blend of mozzarella and cheddar can give a delightful twist to the dish.

Flavor Boost: Don’t skip the garlic and oregano! These ingredients elevate the filling’s taste, ensuring a savory experience in every bite of your Crispy Grated Potato Pie.

Watch the Bake: Keep an eye on the pie during the second bake—if the cheese is browning too quickly, cover it lightly with foil to prevent burning.

Rest Before Serving: Allow the pie to rest for a few minutes after baking. This will not only help it set but will also make for easier slicing and serving!

Make Ahead Options

These Crispy Grated Potato Pies are perfect for meal prep, allowing you to enjoy homemade goodness without the last-minute rush! You can prepare the potato crust up to 24 hours in advance; simply follow the initial steps, then cool it completely before covering it tightly with plastic wrap and refrigerating. The sautéed spinach and mushroom filling can also be made ahead and stored in the fridge for up to 3 days. When you’re ready to serve, just fill the pre-baked crust with the filling, top with cheese, and bake until bubbly—this way, every bite is just as delicious and fresh! Enjoy the time-saving benefits of prepping ahead with this comforting dish!

How to Store and Freeze Crispy Grated Potato Pie

Fridge: Store leftover crispy potato pie in an airtight container in the fridge for up to 3 days. Be sure to let it cool to room temperature before sealing to avoid condensation.

Freezer: Wrap individual slices tightly in plastic wrap, then place in a freezer-safe bag or container. It can be frozen for up to 2 months without losing its delicious taste and texture.

Reheating: For best results, reheat slices in the oven at 180°C (350°F) for about 15-20 minutes, keeping the crust crispy. You can also microwave, but the crust may not retain its crunch.

Thawing: When ready to enjoy your crispy grated potato pie, thaw overnight in the fridge before reheating. This gentle process helps maintain the flavors and texture beautifully.

What to Serve with Crispy Grated Potato Pie

Elevate your meal experience with delightful accompaniments that enhance the flavors of your potato pie.

  • Fresh Green Salad: A crisp, mixed greens salad drizzled with a light vinaigrette balances the richness of the pie, adding freshness to each bite.

  • Garlic Breadsticks: These warm, buttery sticks are perfect for dipping; their crunch pairs beautifully with the tender filling of the pie.

  • Steamed Asparagus: The bright, slightly earthy flavor of asparagus complements the creamy cheese and mushrooms, bringing a touch of elegance to the table.

  • Creamy Coleslaw: A tangy coleslaw adds a refreshing crunch and slight acidity, which perfectly contrasts the savory elements of your crispy grated potato pie.

  • Roasted Vegetables: Toss seasonal veggies with olive oil, salt, and herbs. Their caramelized sweetness enhances the umami flavors of the filling.

  • Sparkling Lemonade: A bright, citrusy beverage brings a bubbly freshness that contrasts nicely with the hearty pie, making for a delightful sip between bites.

  • Chocolate Mousse: Cap off your meal with a light yet indulgent dessert. The rich and smooth mousse offers a sweet ending to a savory dinner.

Each of these pairings will create a harmonious dining experience, making your crispy grated potato pie shine even more!

Variations & Substitutions

Customize your Crispy Grated Potato Pie to create a unique and delicious experience for your taste buds!

  • Dairy-Free: Use vegan cheese blends or nutritional yeast instead of mozzarella and Parmesan for a melty, dairy-free delight.

  • Spinach Alternatives: Swap baby spinach with kale, Swiss chard, or even arugula for a fresh spin on flavor and nutrition. Each leafy green offers a distinct taste profile.

  • Mushroom Mix: Try different mushrooms like shiitake or portobello for a hearty umami boost. The variety of textures will truly elevate the pie.

  • Herb Variations: Experiment with fresh herbs like basil or thyme in place of parsley for another layer of aromatic flavor that complements the dish beautifully.

  • Vegetable Medley: Add bell peppers, zucchini, or even shredded carrots to the filling for extra color and nutrition. You can also include leftover veggies from your fridge to reduce waste!

  • Heat Factor: Spice it up by adding diced jalapeños or red pepper flakes for those who enjoy a little kick in their savory dishes.

  • Crust Innovations: For a unique twist, consider mixing in some grated carrots or sweet potatoes into the crust for a hint of sweetness that contrasts beautifully with the savory filling.

  • Cheesy Layers: Layer different cheese varieties such as cheddar for a tangy edge or feta for a salty punch, creating a new flavor experience with each slice.

Feel free to discover your favorite combinations and transform your pie into a family favorite! If you’re seeking more comforting recipes, don’t forget to check out our Zucchini Sweet Potato or the delightful Smoked Salmon Potato.

Crispy Grated Potato Pie with Spinach and Mushrooms Recipe FAQs

How do I choose the best potatoes for my pie?
Absolutely! For the Crispy Grated Potato Pie, use starchy potatoes like Russets or Yukon Golds. These types yield a crispier texture in the crust. Avoid waxy potatoes, as they may not hold up as well.

What’s the best way to store leftovers?
You can store your leftover crispy potato pie in an airtight container in the fridge for up to 3 days. Make sure to let it cool at room temperature before sealing, which helps prevent condensation and sogginess.

Can I freeze my crispy potato pie?
Very! To freeze, wrap individual slices tightly in plastic wrap, then place them into a freezer-safe bag or container. It can be frozen for up to 2 months. Just be sure to let it cool completely before wrapping to keep it fresh!

How should I reheat the pie?
For the best results, reheat slices in the oven at 180°C (350°F) for about 15-20 minutes to keep the crust crispy. If you’re in a pinch, you can use a microwave, but the pie won’t be as crunchy.

Are there any dietary considerations to keep in mind?
Definitely! This crispy grated potato pie is vegetarian and gluten-free. If you’re concerned about dairy, consider using plant-based cheese or nutritional yeast as a substitute for both mozzarella and Parmesan. Always check labels if your guests have allergies.

What if my potato crust doesn’t turn out crispy?
If the crust is soggy, it’s often due to excess moisture in the grated potatoes. Make sure you thoroughly soak, drain, and dry the potatoes before mixing. Also, ensure your oven is at the correct temperature when baking for that perfect golden texture!

Crispy Grated Potato Pie

Crispy Grated Potato Pie with Savory Spinach and Mushrooms

Crispy Grated Potato Pie is a delightful dish with a crunchy potato crust, tender spinach, and savory mushrooms, perfect for cozy meals.
Prep Time 15 minutes
Cook Time 50 minutes
Cooling Time 5 minutes
Total Time 1 hour 10 minutes
Servings: 8 slices
Course: Dinner
Cuisine: Gluten-Free
Calories: 220

Ingredients
  

For the Potato Crust
  • 4 medium Potatoes Use starchy potatoes for better crispiness.
  • 1 cup Mozzarella Cheese Provides creaminess and stretch; feel free to substitute with semi-soft cheeses.
  • 2 large Eggs Binds the potato mixture; for vegan option, use flax eggs.
  • 1/4 cup Fresh Parsley Can be substituted with basil or dill.
  • 2 tablespoons Olive Oil Helps crisp the crust; can switch to canola oil or melted butter.
For the Filling
  • 5 ounces Baby Spinach Brings nutrition and color; can substitute with kale.
  • 8 ounces Champignon Mushrooms Offers umami flavor; feel free to swap with shiitake or portobello.
  • 2 large Green Onion Adds a mild onion flavor; yellow onions or shallots can also work.
  • 2 cloves Garlic Enhances overall flavor; both fresh and powdered garlic are perfect here.
  • 1 teaspoon Dried Oregano A fragrant seasoning to elevate crust and filling; consider Italian seasoning as alternative.
For Topping
  • 1/4 cup Parmesan Cheese Gives a delicious salty kick; for vegan variant, nutritional yeast is a great option.
  • 1/4 cup Fresh Parsley For garnish, enhances presentation.

Equipment

  • Grater
  • Skillet
  • Mixing Bowl
  • Baking dish

Method
 

Step-by-Step Instructions for Crispy Grated Potato Pie
  1. Begin by grating your starchy potatoes using a box grater or food processor for fine shreds. Soak the grated potatoes in a bowl of cold salted water for 15 minutes; this helps to remove excess starch. After soaking, drain well and pat them dry with a clean kitchen towel to ensure a crispy potato crust.
  2. In a skillet, heat a tablespoon of olive oil over medium heat. Add chopped green onion and sauté for about 2 minutes until softened. Next, stir in the baby spinach, dried oregano, and a pinch of salt, cooking until the spinach wilts. Finally, add sliced champignon mushrooms and minced garlic, cooking until golden and the liquid has evaporated, approximately 5 minutes.
  3. Drain the soaked potatoes and squeeze out any excess moisture. In a large mixing bowl, combine the potatoes with shredded mozzarella cheese, beaten eggs, chopped parsley, and additional seasoning. Mix thoroughly until everything is well incorporated.
  4. Preheat your oven to 200°C (390°F). Grease a 9-inch round baking dish with olive oil. Press the potato mixture evenly into the bottom and up the sides of the dish to form a sturdy crust. Bake in the preheated oven for 35-40 minutes or until the crust turns golden brown and crispy.
  5. Once the crust is golden, remove it from the oven and let it cool slightly. Spoon the sautéed spinach and mushroom mixture evenly into the cooked potato crust. Sprinkle additional mozzarella and Parmesan cheese on top.
  6. Return the assembled Crispy Grated Potato Pie to the oven and bake for an additional 10-15 minutes until the cheese melts and bubbles.
  7. After baking, allow the pie to cool for about 5 minutes. Garnish with freshly chopped parsley and a sprinkle of Parmesan before serving.

Nutrition

Serving: 1sliceCalories: 220kcalCarbohydrates: 25gProtein: 8gFat: 10gSaturated Fat: 4gPolyunsaturated Fat: 1gMonounsaturated Fat: 4gCholesterol: 60mgSodium: 300mgPotassium: 400mgFiber: 3gSugar: 2gVitamin A: 800IUVitamin C: 15mgCalcium: 180mgIron: 2mg

Notes

Make sure to thoroughly drain and dry the grated potatoes before forming the crust to avoid sogginess. Experiment with different cheeses for added flavor.

Tried this recipe?

Let us know how it was!