Kimchi Grilled Cheese: A Flavorful Comfort Food Reimagined

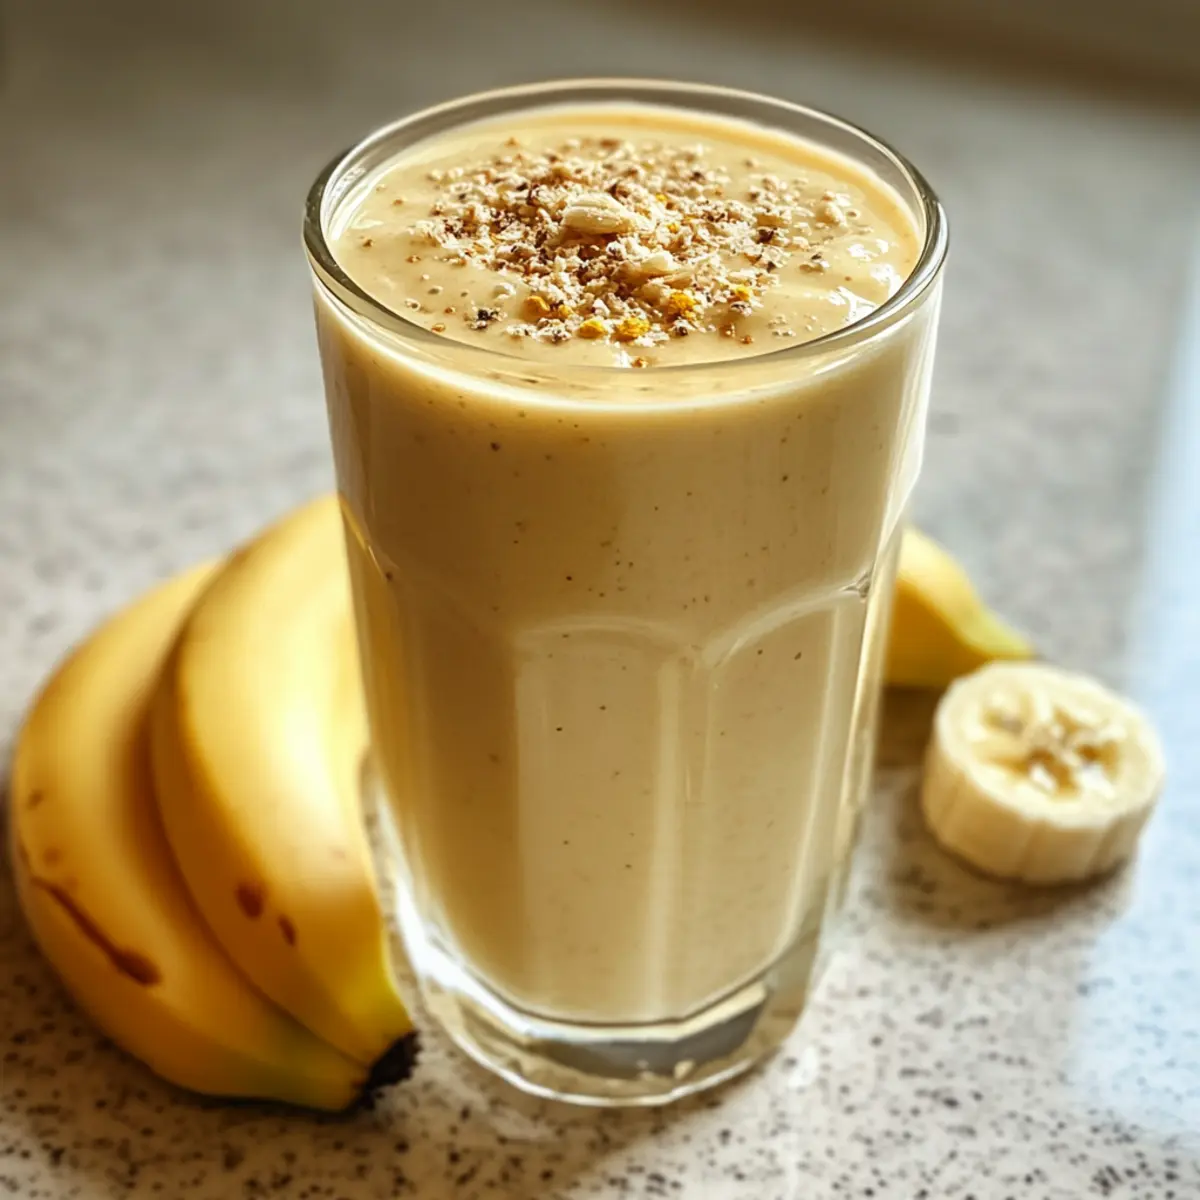
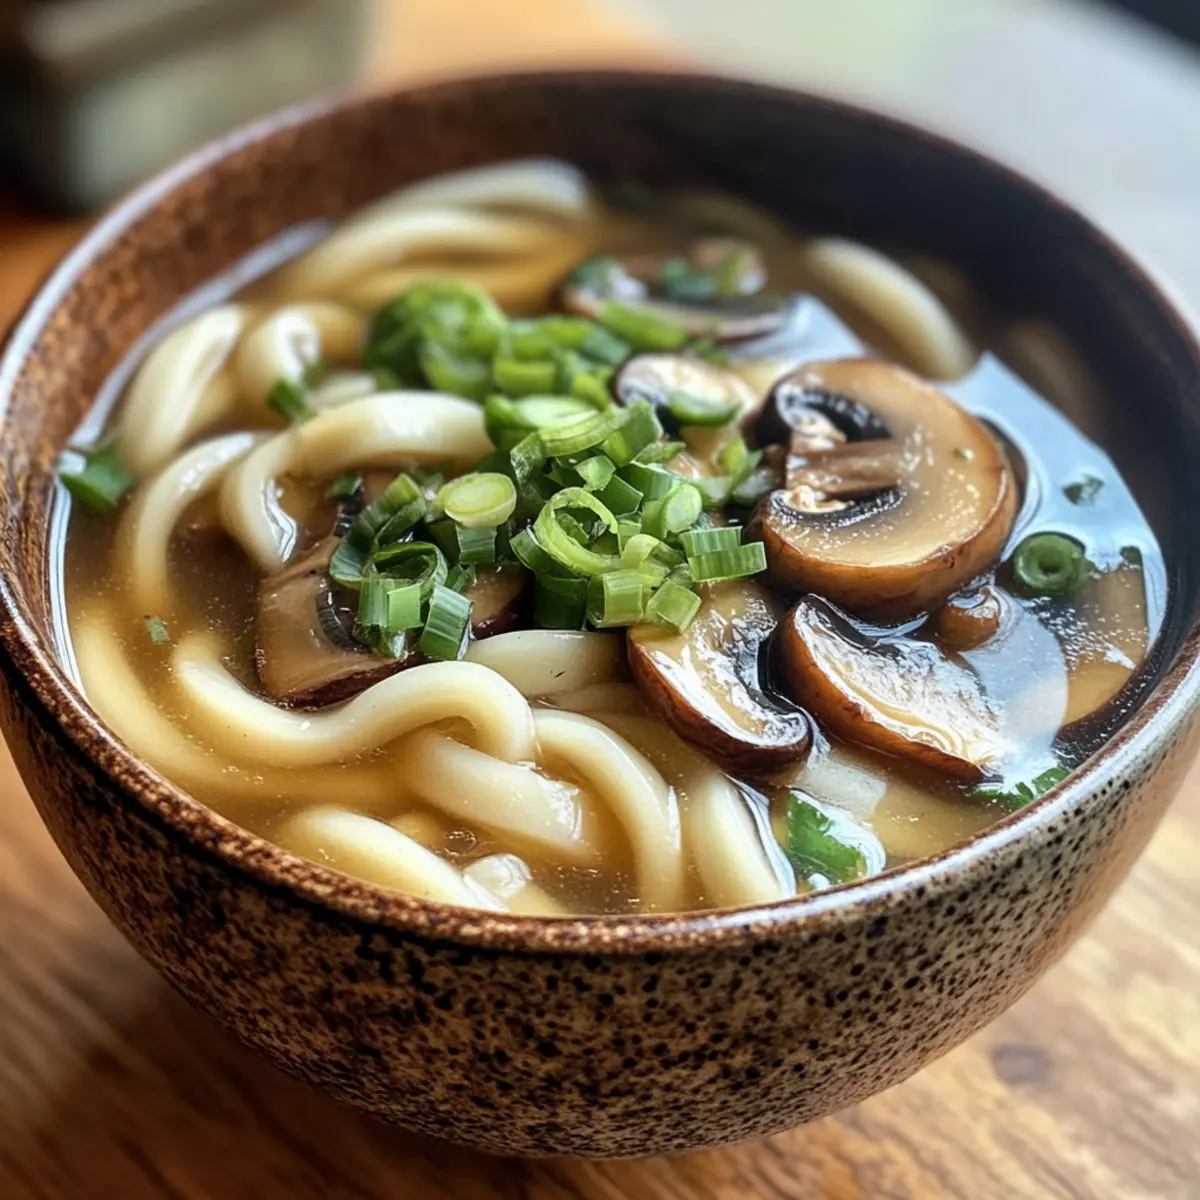
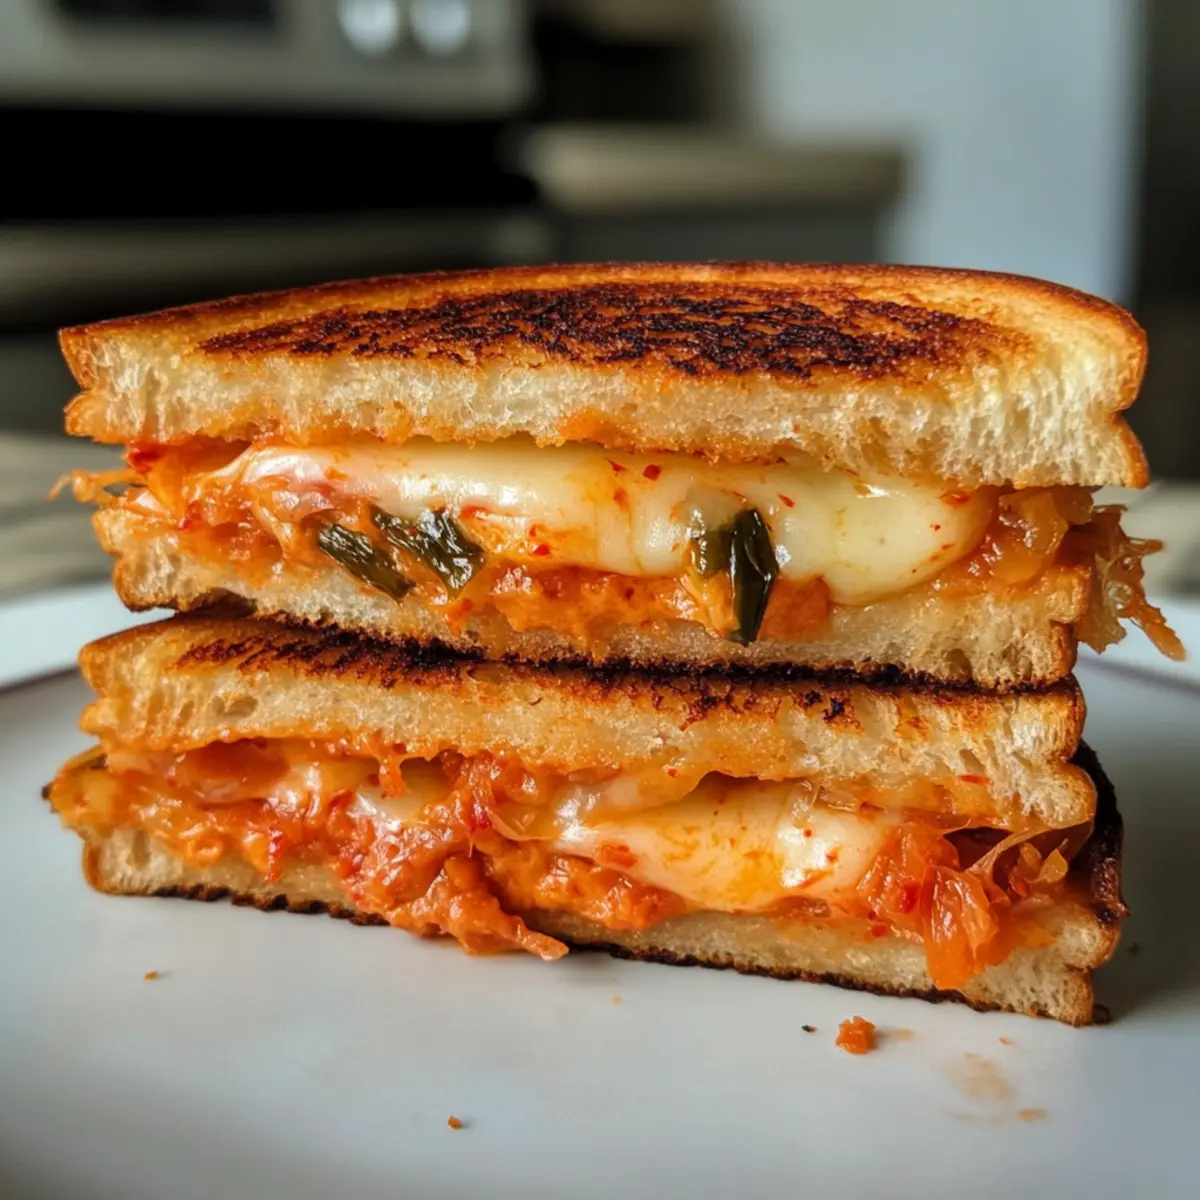
You won’t believe how incredible a humble grilled cheese can be when it meets the bold flavors of Korean kimchi! This Kimchi Grilled Cheese is my go-to recipe for those days when I want something comforting yet exciting—and it comes together in under 15 minutes! The crispy, golden-brown sourdough cradles melty cheeses paired with the tangy, spicy punch of kimchi, creating an irresistible combination that’s both vegetarian-friendly and packed with flavor. Whether you’re looking for a quick lunch or a tasty snack to impress friends, this Asian-inspired twist on a classic comfort food will surely become a favorite in your home. Are you ready to elevate your grilled cheese game? Let’s dive in!

Why Try This Unique Grilled Cheese?

Bold, Flavorful: This Kimchi Grilled Cheese redefines comfort food by infusing it with rich, tangy, and spicy flavors that make your taste buds dance. Quick & Easy: Perfect for busy weekdays, this delightful creation comes together in less than 15 minutes! Versatile: Tailor it to your liking by adding extra toppings or even experimenting with different cheeses from your favorites. Satisfying Crunch: The crispy sourdough bread perfectly contrasts the gooey, melted cheese inside, ensuring each bite is a delightful experience. Pair it with a side of chips or Asian slaw for a complete meal that will impress family and friends alike!

Kimchi Grilled Cheese Ingredients

For the Sandwich

  • Sourdough Bread – Provides structure and a crispy exterior; feel free to use any hearty bread as a substitute.
  • Salted Butter – Adds flavor while achieving a golden, crispy crust; unsalted butter can be used if you prefer, just adjust the salt accordingly.
  • Sharp Cheddar Cheese – Offers a rich, tangy flavor that beautifully balances the spice of kimchi; any excellent melty cheese can take its place if needed.
  • Kimchi – Delivers a spicy, tangy punch; opt for store-bought or homemade, ensuring it’s fresh for the best flavor.
  • Gouda Cheese – Adds creaminess and depth to the sandwich; mozzarella or fontina can work well as substitutes for a different flair.

Optional Add-Ons

  • Avocado – Brings creaminess and a fresh touch; perfect for enhancing your Kimchi Grilled Cheese.
  • Gochujang – Adds a kick; swirl it in with the kimchi for an extra layer of spiciness.
  • Crispy Bacon – For those who appreciate a savory crunch, adding bacon elevates the flavor profile.

Step‑by‑Step Instructions for Kimchi Grilled Cheese

Step 1: Prepare the Bread
Start by buttering the outside of four slices of sourdough bread using room temperature salted butter. Ensure a generous layer so that each slice is well-coated for that perfect crispy exterior. This step is vital for achieving a golden-brown finish as you cook your Kimchi Grilled Cheese.

Step 2: Assemble the Sandwich
On the inside surfaces of two slices of the bread, layer sharp cheddar cheese followed by gouda cheese, and finish with a generous portion of kimchi. Distribute the ingredients evenly, allowing the spicy kimchi to spread its flavor throughout the melted cheeses. Once filled, place the remaining slices of bread on top, buttered sides facing out.

Step 3: Heat the Pan
Get your cast-iron pan ready by placing it over medium-high heat. Allow it to warm for about 2-3 minutes, ensuring the surface is hot enough to sizzle when you make contact with the sandwich. This temperature is crucial to achieving that satisfying crispiness while still allowing the cheese to melt thoroughly.

Step 4: Cook the Sandwich
Carefully place the assembled sandwiches in the preheated pan. Cook for approximately 5 minutes, or until the bottom is golden-brown and crispy. Peek underneath for that beautiful color, then flip to the other side, cooking for another 5 minutes. This ensures the cheeses melt completely and the bread develops a delightful crunch.

Step 5: Serve and Enjoy
Once both sides of your Kimchi Grilled Cheese are golden and the cheese is irresistibly gooey, remove them from the pan. Slice each sandwich in half to reveal the melty interior filled with kimchi goodness. Serve warm with a side of chips or Asian slaw for an extra tasty meal experience.

Variations & Substitutions for Kimchi Grilled Cheese

Feel free to make this delicious Kimchi Grilled Cheese your own with these tasty twists and substitutions!

  • Cheese Swap: Try mixing different cheeses like gouda or mozzarella rather than cheddar for a unique flavor profile. Each option brings its creamy touch to the melty goodness.

  • Gluten-Free: Substitute sourdough with your favorite gluten-free bread, ensuring everyone can enjoy this delightful meal without compromise. A perfect way to cater to those with dietary restrictions!

  • Add Fruits: Incorporate sweet elements like sliced apples or pear for a contrast to the spicy kimchi. The fruity sweetness complements the tangy kick beautifully.

  • Extra Spicy: Mix in gochujang or sriracha with the kimchi for an additional kick. If you’re a fan of spice, this variation will elevate your grilled cheese experience to a new level.

  • Crunchy Add-Ons: Add crispy bacon or fried shallots for a savory crunch. These toppings not only enhance the texture but also add another layer of flavor you won’t forget.

  • Creamy Avocado: Layer fresh avocado slices in the sandwich for a creamy addition that creates a delightful contrast to the spicy and tangy notes of kimchi.

  • Whole Grain: Experiment with whole grain bread for added fiber and a nuttier flavor. This alternative can make the sandwich even more fulfilling and nutritious.

  • Herb Infusion: Add fresh herbs like cilantro or green onions for a burst of fresh flavor. These herbs will brighten the overall dish, making each bite refreshing.

Remember, your kitchen is the canvas, and creating delicious variations is all part of the fun! For more creative meals, check out my recipes for Grilled Honey BBQ Bacon Chicken Kabobs or Grilled Garlic Rosemary Smashed Potatoes. Enjoy your flavorful journey!

Make Ahead Options

These Kimchi Grilled Cheese sandwiches are perfect for meal prep enthusiasts! You can assemble the entire sandwich (but not cook it) up to 24 hours in advance by buttering the outside of the bread and layering sharp cheddar cheese, gouda cheese, and kimchi on the inside. Wrap them tightly in plastic wrap or use an airtight container to prevent the bread from drying out. When you’re ready to enjoy them, simply heat a cast-iron pan over medium-high heat and cook for about 5 minutes on each side until they’re golden brown and the cheese is gooey. This way, you’ll have a delicious, spicy grilled cheese with minimal effort during busy weeknights!

Expert Tips for Kimchi Grilled Cheese

  • Perfect Pan Heat: Avoid overheating the pan; medium-high heat allows for even browning while ensuring the cheese melts beautifully.
  • Room Temperature Butter: Ensure the butter is at room temperature for easy spreading, which helps achieve a perfectly crispy Kimchi Grilled Cheese.
  • Layer Wisely: Distribute cheese and kimchi evenly within the sandwich to prevent overflow and ensure every bite is flavorful.
  • Cheese Choices: Feel free to mix and match cheeses; blending sharp cheddar with creamier options like gouda enhances the taste profile wonderfully.
  • Customize It: Don’t hesitate to add personal touches like avocado or gochujang for a spicy kick!

What to Serve with Kimchi Grilled Cheese?

Elevate your meal experience with delightful sides and refreshing drinks that complement the spicy excitement of this unique grilled cheese.

  • Crispy Potato Chips: The crunch of crispy chips adds a satisfying texture that perfectly contrasts the gooey cheese and kimchi.
  • Asian Slaw: A refreshing, tangy slaw brings a burst of color and a crispness that balances the richness of the sandwich. The vegetables’ crunch enhances the entire experience!
  • Pickled Vegetables: Bring a tangy kick to your meal! A small side of pickled veggies offers a zesty contrast to the rich flavors of the grilled cheese.
  • Tomato Soup: This classic pairing brings a creamy, comforting warmth that soothes and enhances the kimchi’s spice, creating a comforting balance.
  • Sweet Potato Fries: The sweet and savory blend of fries provides a lovely contrast to the spicy sandwich, making each bite an adventure!
  • Coconut Iced Tea: Refreshing and subtly sweet, this drink perfectly complements the bold flavors of the Kimchi Grilled Cheese while offering a cool contrast.
  • Beer: A light, hoppy lager cuts through the cheesiness, enriching your Grilled Cheese experience with its refreshing character.
  • Mint Chocolate Ice Cream: For dessert, this refreshing treat offers a cool, sweet finish, balancing out the kick from the sandwich in a delightful way!

Storage Tips for Kimchi Grilled Cheese

Fridge: Store your Kimchi Grilled Cheese in an airtight container for up to 1 day to keep it fresh.

Freezer: If you want to save them longer, wrap each sandwich tightly in foil and store in the freezer for up to 1 month.

Reheating: To regain the crispy texture, reheat in a skillet over medium heat for about 3-4 minutes per side. Avoid the microwave to prevent sogginess.

Enjoy Fresh: This sandwich is best enjoyed fresh, so savor every bite shortly after making it!

Kimchi Grilled Cheese Recipe FAQs

How do I choose the best kimchi for this recipe?
Absolutely! For the best flavor, opt for kimchi that is fresh and vibrant. Look for a bright, lively color without any dark spots all over the cabbage. If you’re using store-bought, check the expiration date; homemade kimchi can be fantastic if it’s fermented properly and still has its crunch!

What is the best way to store leftover Kimchi Grilled Cheese?
Very good question! To keep your sandwich fresh, store it in an airtight container in the refrigerator for up to 1 day. If you have more than one, another option is to wrap each sandwich tightly in foil before placing them in the fridge. This will help maintain freshness and prevent them from drying out.

Can I freeze Kimchi Grilled Cheese sandwiches?
Absolutely! To freeze your sandwiches, wrap each one tightly in foil and place them in a freezer bag. They can be stored in the freezer for up to 1 month. When you’re ready to enjoy them again, let the sandwich thaw in the refrigerator overnight, then reheat in a skillet for the best crispy texture.

What if my grilled cheese isn’t browning properly?
If your Kimchi Grilled Cheese isn’t browning as it should, make sure your pan is at the right temperature—medium-high works best. If it’s too hot, the bread may burn before the cheese has the chance to melt. If your cheese is melting too slow, consider lowering the heat slightly, allowing more time for the cheese to get gooey while still achieving that golden crust.

Is this recipe suitable for vegetarians?
Yes, it is! The Kimchi Grilled Cheese is perfect for vegetarians as it includes no meat, using delicious cheese and kimchi for flavor. However, if you have a dairy allergy, consider substituting the cheeses with vegan alternatives that melt well to enjoy a similar experience.

Kimchi Grilled Cheese

Kimchi Grilled Cheese: A Flavorful Comfort Food Reimagined

Experience the bold flavors of Korean kimchi in a comforting grilled cheese—perfect for a quick lunch or snack.
Prep Time 5 minutes
Cook Time 10 minutes
Total Time 15 minutes
Servings: 2 sandwiches
Course: Lunch
Cuisine: American, Korean
Calories: 450

Ingredients
  

For the Sandwich
  • 4 slices Sourdough Bread or any hearty bread
  • 2 tablespoons Salted Butter room temperature
  • 1 cup Sharp Cheddar Cheese shredded
  • 1 cup Gouda Cheese shredded
  • 1/2 cup Kimchi fresh or store-bought
Optional Add-Ons
  • 1/2 fruit Avocado sliced
  • 1 tablespoon Gochujang optional
  • 2 slices Crispy Bacon optional

Equipment

  • Cast-iron pan

Method
 

Step-by-Step Instructions
  1. Butter the outside of four slices of sourdough bread with room temperature salted butter.
  2. On the inside of two slices, layer sharp cheddar cheese, gouda cheese, and kimchi.
  3. Heat a cast-iron pan over medium-high heat for 2-3 minutes.
  4. Cook the sandwiches for about 5 minutes until golden-brown, then flip and cook for another 5 minutes.
  5. Remove from the pan, slice in half and serve warm.

Nutrition

Serving: 1sandwichCalories: 450kcalCarbohydrates: 40gProtein: 20gFat: 25gSaturated Fat: 15gPolyunsaturated Fat: 1gMonounsaturated Fat: 10gCholesterol: 70mgSodium: 850mgPotassium: 300mgFiber: 3gSugar: 2gVitamin A: 15IUVitamin C: 5mgCalcium: 25mgIron: 10mg

Notes

Serve with chips or Asian slaw for a complete meal. Best enjoyed fresh!

Tried this recipe?

Let us know how it was!

Lemon Sugar Baked Donuts for a Bright Start to Your Day

“Have you ever bitten into a donut that made you feel like you were dancing in the sunshine? These Lemon Sugar Baked Donuts do just that! Bursting with a bright, zesty flavor, they offer a delightful combination of sweetness and tang that revives your taste buds. What’s even better? They are quick to prepare and yet feel like a special treat, perfect for breakfast, brunch, or even a cozy afternoon snack. Plus, if you’re looking for a lighter option, the baked version (as opposed to fried) ensures you can indulge without the guilt. Curious how to whip up these fluffy delights? Let’s dive in!”

Why Are These Donuts So Irresistible?

Light and Fluffy: Each bite of these Lemon Sugar Baked Donuts gives you the perfect combination of softness and airiness, making them a joy to eat.
Zesty Flavor: The vibrant lemon zest and juice create a refreshing, tangy kick that brightens your day.
Quick to Prepare: With minimal prep time, you can have these delightful treats ready to enjoy in under 30 minutes!
Versatile Enjoyment: Perfect for breakfast, brunch, or even an afternoon pick-me-up, these donuts cater to every occasion.
Guilt-Free Indulgence: Baked instead of fried, these lemony treats offer a lighter alternative without sacrificing flavor. Pair them with a steaming cup of coffee or enjoy them alongside a slice of Baked Vegetable Egg casserole for a complete meal!

Lemon Sugar Baked Donuts Ingredients

  • For the Donuts

  • All-Purpose Flour – Provides structure and fluffiness; can use gluten-free flour blend as a gluten-free option.

  • Baking Powder – Ensures the donuts rise properly for a delightful lightness; check expiration date for effectiveness.

  • Granulated Sugar – Adds sweetness and forms a crisp exterior for that perfect finish.

  • Salt – A pinch enhances the overall flavor balance of the donuts.

  • Large Eggs – Contributes moisture and acts as a binder; room temperature eggs work best for mixing.

  • Whole Milk – Adds richness and keeps the donuts moist; you can use any non-dairy milk for a dairy-free version.

  • Lemon Zest – Freshly grated zest brightens the flavor; do not skip for the best results.

  • Fresh Lemon Juice – Provides tanginess that beautifully balances the sweetness of the donuts.

  • Unsalted Butter – Adds richness and should be melted for easy integration into the batter.

  • For the Sugar Coating

  • Sugar Coating Mix – Granulated sugar mixed with lemon zest creates an aromatic glaze that enhances the flavor of your Lemon Sugar Baked Donuts.

Step‑by‑Step Instructions for Lemon Sugar Baked Donuts

Step 1: Preheat and Prepare
Begin by preheating your oven to 350°F (175°C). While it’s heating, grab a donut pan and lightly grease each cavity with non-stick spray or butter to ensure your Lemon Sugar Baked Donuts release easily after baking. This preparation step is crucial for achieving those perfectly shaped donuts.

Step 2: Mix Dry Ingredients
In a large mixing bowl, whisk together 1 and 1/2 cups of all-purpose flour, 2 teaspoons of baking powder, 1/2 cup of granulated sugar, and a pinch of salt. Make sure there are no clumps, as this ensures a smooth batter. The combination of these dry ingredients will provide the structure and lightness that your baked donuts need.

Step 3: Combine Wet Ingredients
In another bowl, crack 2 large eggs and whisk them lightly. Add in 3/4 cup of whole milk, 1/4 cup of melted unsalted butter, 1/4 cup of fresh lemon juice, and the zest from 1 lemon. Mix until the wet ingredients are smooth and well combined. This blend will infuse your Lemon Sugar Baked Donuts with that delightful zesty flavor.

Step 4: Combine Both Mixtures
Gently fold the wet ingredients into the dry mixture using a spatula. Stir until just combined; be careful not to overmix, as this will keep your donuts light and fluffy. The batter should be somewhat thick but free of dry pockets, ensuring a delightful texture in every bite of your Lemon Sugar Baked Donuts.

Step 5: Fill the Pan and Bake
Using a spoon or a piping bag, fill each cavity of your prepared donut pan about two-thirds full with the batter. Place the pan in the preheated oven and bake for 10-12 minutes, or until the donuts turn golden brown and spring back lightly when touched. The warm aroma of lemon will fill your kitchen as they bake!

Step 6: Cool and Coat
Once baked, remove the donut pan from the oven and let it cool for about 5 minutes. Gently remove the donuts from the pan and let them sit on a wire rack. While they are still warm, roll each donut in a sugar coating mix made of granulated sugar and additional lemon zest. This step adds a delightful sweet and tangy finish to your Lemon Sugar Baked Donuts.

Lemon Sugar Baked Donuts Variations

Feel free to let your creativity shine and tailor these donuts to your taste buds!

  • Gluten-Free: Swap all-purpose flour with a gluten-free flour blend for a deliciously fluffy donut.
  • Dairy-Free: Use almond or oat milk instead of whole milk, ensuring each bite remains rich and moist.
  • Citrus Variations: Substitute the lemon with orange or lime for an exciting twist that will awaken your senses! Imagine the vibrant flavors dancing on your palate.
  • Textured Add-ins: Incorporate poppy seeds directly into the batter for an intriguing crunch that enhances the overall experience.
  • Decadent Drizzle: Top with a simple glaze made from powdered sugar and lemon juice for extra sweetness and a glossy finish. This adds a delightful flair to your presentation.
  • Fruit Infusion: Consider folding in blueberries or raspberries for a fruity burst with every bite—adding a whole new level of flavor.
  • Spice It Up: Add a pinch of cinnamon or nutmeg to the batter for a warming spice note that pairs beautifully with the lemon zest.
  • Chocolate Lovers: Throw in some mini chocolate chips for a sweet surprise that contrasts delightfully with the tanginess of the lemons.

These variations can take your Lemon Sugar Baked Donuts to new heights. For more inspiration, check out our delicious Lemon Garlic Shrimp for a fresh meal to pair with these sweet treats!

What to Serve with Lemon Sugar Baked Donuts

Every delightful bite of these golden treats invites you to create a complete dining experience that tantalizes the senses.

  • Fresh Fruit Salad: A colorful mix of seasonal fruits adds a refreshing contrast and balances the sweetness of the donuts perfectly. The vibrant colors and varied textures will brighten up your plate!

  • Creamy Yogurt Parfait: Layered with yogurt and fresh berries, this combination contrasts beautifully with the fluffy donuts while providing a satisfying feel. It’s a match made in brunch heaven!

  • Coffee or Tea: A warm cup of coffee or fragrant tea enhances the delightful lemony flavor and creates a cozy pairing, perfect for those quiet mornings with a good book.

  • Lemonade or Iced Tea: For a refreshing twist, serve your donuts with a glass of homemade lemonade or chilled iced tea. The tangy drink complements the lemon flavor and adds a refreshing zing to your snack time.

  • Poppy Seed Muffins: Pairing your lemon donuts with light poppy seed muffins offers delightful textures. Both share a sweet, citrusy note that works harmoniously together.

  • Almond Croissants: Flaky, buttery almond croissants bring richness and depth to your breakfast plate, creating a variety of textures that make each bite exciting.

  • Vanilla Ice Cream: For a touch of indulgence, serve your donuts warm with a scoop of vanilla ice cream. The creamy contrast with the warm, zesty donuts is simply heavenly.

  • Nutella or Chocolate Spread: Offering a side of Nutella or a rich chocolate spread invites a delicious dipping experience, making your treats even more enjoyable. This creates a fun, interactive twist to your meal!

  • Chai-Spiced Hot Chocolate: Cozy up with a luxurious cup of chai-spiced hot chocolate. The exotic spices enhance the overall flavor profile of the donuts, making every bite feel special.

  • Lemon Curd: For the true lemon lovers, a side of tangy lemon curd to dip your donuts creates an explosion of citrus flavor, making it an unforgettable experience.

How to Store and Freeze Lemon Sugar Baked Donuts

  • Room Temperature: Store leftover Lemon Sugar Baked Donuts in an airtight container at room temperature for up to 3 days to maintain their delightful softness.
  • Fridge: If you prefer, you can refrigerate them for up to 5 days; just be aware that they may lose some of their fluffiness.
  • Freezer: For longer storage, freeze the donuts in a single layer, then transfer to an airtight bag for up to 2 months. Thaw overnight in the fridge before enjoying.
  • Reheating: To enjoy them warm, reheat in the microwave for about 10 seconds. This will bring back their freshly baked texture!

Make Ahead Options

These Lemon Sugar Baked Donuts are perfect for meal prep enthusiasts looking to save time! You can mix the dry ingredients (flour, baking powder, sugar, and salt) up to 24 hours ahead; simply store them in an airtight container at room temperature. For optimal flavor, prepare the wet ingredients by whisking together the eggs, milk, melted butter, lemon juice, and zest, but keep them refrigerated for up to 3 days. On the day you plan to enjoy them, combine both mixtures and bake as directed. Just remember, to ensure the donuts maintain their fluffy texture, avoid overmixing and coat them in sugar while they are still warm for that delightful finish!

Expert Tips for Lemon Sugar Baked Donuts

  • Fresh Ingredients: Always use fresh lemon juice and zest; this ensures a bright, zesty flavor that elevates your Lemon Sugar Baked Donuts.

  • Avoid Overmixing: Gently fold the wet and dry ingredients together to prevent dense donuts. Overmixing can lead to a tough texture.

  • Bake to Perfection: Keep an eye on the baking time and test with a toothpick. Donuts should be golden brown and spring back when lightly touched.

  • Cooling Technique: Allow the donuts to cool slightly before coating them in sugar. This helps the coating stick better and enhances flavor.

  • Mix-In Fun: Don’t hesitate to experiment! Adding poppy seeds or chocolate chips can give your Lemon Sugar Baked Donuts a delightful twist.

Lemon Sugar Baked Donuts Recipe FAQs

What type of flour should I use for the Lemon Sugar Baked Donuts?
To make delicious Lemon Sugar Baked Donuts, all-purpose flour is recommended for that perfect fluffiness and structure. If you’re looking for a gluten-free option, you can easily substitute it with a gluten-free flour blend. Just ensure that the blend contains xanthan gum or a similar binder to maintain the desired texture.

How should I store my leftover baked donuts?
To keep your Lemon Sugar Baked Donuts fresh, store them in an airtight container at room temperature for up to 3 days. If you want to extend their shelf life, refrigerate them for up to 5 days, but note that refrigeration may cause them to lose some fluffiness.

Can I freeze the Lemon Sugar Baked Donuts?
Absolutely! To freeze your Lemon Sugar Baked Donuts, first, let them cool completely. Then, place them in a single layer on a baking sheet and freeze until solid. After that, transfer them to an airtight freezer bag, where they can be stored for up to 2 months. When you’re ready to indulge, simply thaw them overnight in the fridge and enjoy!

What should I do if my donuts turn out dense or heavy?
If your Lemon Sugar Baked Donuts are coming out dense, it may be due to overmixing the batter. When combining the wet and dry ingredients, be gentle and stop mixing as soon as no dry flour remains. Also, ensure your baking powder is fresh, as expired baking powder can prevent proper rising. For airy donuts, it’s crucial not to rush; take your time during mixing.

Are there any dietary considerations for allergies?
For those concerned about allergies, it’s important to note that this recipe contains eggs and dairy due to the use of milk and butter. For a dairy-free alternative, you can substitute whole milk with almond milk or any other non-dairy milk. Just be sure to choose a gluten-free flour if you are avoiding gluten, and check ingredients for any other sensitivities like nuts or soy.

Can I add other flavors or ingredients to the donuts?
The answer is very! While the recipe is perfect as is, you can experiment by adding poppy seeds for a delightful crunch or substituting lemon with orange or lime zest for a different citrus flavor. You can also mix in chocolate chips or nuts to customize your Lemon Sugar Baked Donuts to your preference!

Lemon Sugar Baked Donuts

Lemon Sugar Baked Donuts for a Bright Start to Your Day

Lemon Sugar Baked Donuts are quick to prepare and offer a delightful combination of sweetness and tang for a perfect breakfast treat.
Prep Time 10 minutes
Cook Time 12 minutes
Cooling Time 5 minutes
Total Time 27 minutes
Servings: 12 donuts
Course: Dessert
Cuisine: American
Calories: 150

Ingredients
  

For the Donuts
  • 1.5 cups all-purpose flour can use gluten-free flour blend as a gluten-free option
  • 2 teaspoons baking powder check expiration date for effectiveness
  • 0.5 cups granulated sugar adds sweetness and forms a crisp exterior
  • 1 pinch salt enhances overall flavor balance
  • 2 large eggs room temperature eggs work best
  • 0.75 cups whole milk you can use any non-dairy milk for a dairy-free version
  • 1 tablespoon lemon zest freshly grated
  • 0.25 cups fresh lemon juice provides tanginess that balances sweetness
  • 0.25 cups unsalted butter melted for easy integration
For the Sugar Coating
  • 1 cup sugar coating mix granulated sugar mixed with lemon zest

Equipment

  • donut pan
  • Mixing bowls
  • Whisk
  • Spatula

Method
 

Step-by-Step Instructions
  1. Preheat your oven to 350°F (175°C) and grease a donut pan.
  2. In a large mixing bowl, whisk together the dry ingredients: flour, baking powder, sugar, and salt.
  3. In another bowl, whisk the eggs and add milk, melted butter, lemon juice, and zest. Mix until smooth.
  4. Fold the wet ingredients into the dry ingredients until just combined, taking care not to overmix.
  5. Fill each donut pan cavity about two-thirds full and bake for 10-12 minutes until golden brown.
  6. Cool the donuts for 5 minutes, then roll in the sugar coating while warm.

Nutrition

Serving: 1donutCalories: 150kcalCarbohydrates: 20gProtein: 2gFat: 7gSaturated Fat: 4gPolyunsaturated Fat: 1gMonounsaturated Fat: 2gCholesterol: 40mgSodium: 180mgPotassium: 50mgSugar: 9gVitamin A: 200IUVitamin C: 3mgCalcium: 50mgIron: 0.5mg

Notes

These donuts are quick to prepare, light, and perfect for any occasion, either enjoyed alone or with coffee.

Tried this recipe?

Let us know how it was!

Banana Chamomile Tea Smoothie for a Soothing Boost

As the sun rises, there’s nothing quite like that first sip of a refreshing drink to set the tone for your day. Enter the delightful Banana Chamomile Smoothie, a creamy concoction that combines the calming essence of chamomile tea with the natural sweetness of ripe bananas. This soothing drink not only serves as a quick breakfast option but also works wonders as a revitalizing afternoon pick-me-up. Within just 15 minutes, you can enjoy a delicious smoothie that marries wellness with irresistible taste. Think of the nourishing benefits: it’s healthy and so easy to whip up! Ready to elevate your smoothie game and indulge in a moment of zen? Let’s dive in!

Why is this smoothie so soothing?

Wellness Boost: This Banana Chamomile Smoothie is a delightful blend of calming chamomile and sweet banana, perfect for starting your day on a peaceful note.
Easy to Make: With just four main ingredients, you can whip this up in under 15 minutes—ideal for busy mornings or a refreshing snack!
Health Benefits: Packed with vitamins and natural sugars, it’s not just delicious but nourishing too, giving your day a boost without the guilt.
Versatile Flavor: Feel free to swap in different milk alternatives or sweeteners like maple syrup for a personal touch, catering to your taste preferences!
Crowd-Pleasing: Great for all ages, this smoothie is a hit with family and friends, whether it’s for breakfast or a mid-afternoon treat. Looking for more smoothie ideas? Check out our Creamy Avocado Smoothie Healthy for another refreshing option!

Banana Chamomile Smoothie Ingredients

For the Smoothie Base

  • Brewed Chamomile Tea – This is the soothing foundation of the smoothie and should be made using high-quality tea for the best flavor.
  • Large Ripe Banana – Provides natural sweetness and gives the smoothie its creamy texture; look for bananas with brown spots for maximum flavor.
  • Honey – Adds a touch of sweetness and enhances chamomile’s floral notes; raw or organic options elevate the taste.
  • Milk (or Milk Alternative) – Creates a rich and creamy base; using almond or oat milk adds a delicious nutty flavor while regular milk keeps it neutral.
  • Ice Cubes (optional) – For those who prefer a chilled smoothie, adding ice enhances the texture and refreshing qualities.

For Garnish

  • Dried Chamomile Leaves (optional) – These make a lovely garnish, offering visual appeal and a hint of chamomile aroma that ties beautifully with the smoothie theme.

With these simple ingredients, you can create a luscious Banana Chamomile Tea Smoothie that promises both wellness and delightful taste in every sip!

Step‑by‑Step Instructions for Banana Chamomile Tea Smoothie

Step 1: Brew the Tea
Start by boiling water in a small pot or kettle and then steep 1/2 cup of high-quality chamomile tea for about 5 minutes. Once brewed, remove the tea bag or strain the leaves, and allow the tea to cool to room temperature. This step is essential as it enhances the soothing qualities of the Banana Chamomile Tea Smoothie.

Step 2: Prepare the Ingredients
While the tea is cooling, peel and slice your large ripe banana into chunks, ensuring it has brown spots for optimal sweetness. Measure out your honey and your choice of milk—or milk alternative. If you prefer a chilled smoothie, gather some ice cubes as well. Having everything ready will make blending easier and more enjoyable.

Step 3: Blend the Smoothie
In a blender, combine the cooled chamomile tea, banana, honey, and milk. If you’re using ice cubes, add them in now. Blend on high for about 30-60 seconds, or until you achieve a smooth, creamy consistency. You’ll know it’s ready when the mixture is well-blended and has a luscious texture, perfect for your soothing Banana Chamomile Tea Smoothie.

Step 4: Serve and Garnish
Pour the smoothie into a glass for a refreshing treat. To elevate its presentation, consider garnishing with a sprinkle of dried chamomile leaves or a slice of banana on the rim. This touch enhances the visual appeal and invites you to savor the calming flavors of the Banana Chamomile Tea Smoothie.

Expert Tips for Banana Chamomile Tea Smoothie

  • Fresh Tea Is Key: Use freshly brewed chamomile tea for a better flavor. Let it cool before blending to maintain that soothing essence.
  • Ripeness Matters: Choose bananas with brown spots for optimal sweetness in your smoothie, avoiding the need for added sugars.
  • Texture Control: If you like a creamier smoothie, adjust the milk quantity. Adding too much ice can dilute flavor, so find your perfect balance!
  • Sweetener Swap: If you prefer a different sweetener, maple syrup is a great vegan alternative that pairs beautifully with chamomile.
  • Garnish Wisely: Use dried chamomile leaves for garnish not only to enhance visuals but to also subtly boost the chamomile aroma in your drink.

Make Ahead Options

These Banana Chamomile Smoothies are perfect for meal prep enthusiasts looking to save time! You can brew and cool the chamomile tea, then store it in the refrigerator for up to 3 days. Additionally, peel and slice your ripe banana; store it in an airtight container to prevent browning and maintain freshness for 24 hours. When you’re ready to enjoy this soothing beverage, simply blend the cooled tea, banana, honey, and milk together. If you prefer a chilled smoothie, add ice just before blending to ensure that it stays deliciously creamy and fresh. By prepping the components ahead, you’ll streamline your mornings and still enjoy a nourishing, flavorful Banana Chamomile Smoothie!

Storage Tips for Banana Chamomile Tea Smoothie

Fridge: Store any leftover Banana Chamomile Tea Smoothie in an airtight container for up to 24 hours. Stir well before enjoying, as separation may occur.

Freezer: Freeze the smoothie in portion-sized containers for up to 1 month. Thaw overnight in the fridge before consuming, and blend again for optimal creaminess.

Reheating: Avoid reheating; it’s best served cold. If you prefer a warmer option, gently warm the milk before blending for a cozy twist.

Freshness Reminder: For the best flavor and texture, enjoy your smoothie fresh. However, knowing how to store it properly ensures you can relish its soothing benefits even later!

What to Serve with Banana Chamomile Tea Smoothie

Looking to create a harmonious meal that pairs beautifully with this delightful smoothie?

  • Avocado Toast: A creamy layer of ripe avocado on whole grain bread adds healthy fats and complements the smoothie’s soothing sweetness.
  • Greek Yogurt Parfait: Tart yogurt layered with fresh fruits and granola provides a refreshing contrast, enhancing your breakfast experience.
  • Light Salad: A simple spinach salad with nuts and light vinaigrette brings crunch and freshness, elevating this smoothie to a nourishing meal.
  • Nut Butter Toast: Spreading almond or peanut butter on whole-wheat toast introduces a savory richness, making the meal both hearty and satisfying.
  • Fruit Salad: A mix of seasonal fruits brightens the palate and adds a refreshing note; think juicy berries and tangy citrus to awaken your senses.
  • Herbal Tea: Complement the soothing vibes of your smoothie with a cup of herbal tea, sharing the calming essence of chamomile while enhancing relaxation.

Each suggestion not only adds variety to your meal but also balances the flavors and textures perfectly with your Banana Chamomile Tea Smoothie!

Banana Chamomile Smoothie Variations

Feel free to get creative with your Banana Chamomile Smoothie and customize it to your heart’s desire!

  • Vegan Delight: Replace honey with maple syrup for a completely vegan option that still carries that sweet charm.

  • Coconut Creamy: Swap regular milk for coconut milk to give your smoothie a tropical twist and a delightful creaminess.

  • Spiced Up: Adding a sprinkle of cinnamon or nutmeg can transform your smoothie into a warm, cozy experience that delights the senses.

  • Berry Boost: Toss in a handful of fresh or frozen berries for an added burst of flavor, antioxidants, and vibrant color to your drink.

  • Nutty Texture: Blend in a tablespoon of almond or peanut butter for a rich, nutty flavor and a protein boost—the perfect way to start your day!

  • Herbal Fusion: Incorporate a few fresh mint leaves into the blend for a refreshing twist that’s both soothing and invigorating, enhancing that tranquil vibe.

  • Chilled Vibrance: Experiment with adding spinach or kale for a green smoothie that boosts both nutrients and aesthetics without overshadowing the banana’s sweetness.

And if you’re looking for more delightful smoothie ideas, check out our Creamy Avocado Smoothie Healthy and elevate your blending adventures!

Banana Chamomile Tea Smoothie Recipe FAQs

What type of bananas should I use for this smoothie?
Absolutely! Use large ripe bananas with plenty of brown spots. These bananas are sweeter and creamier, providing the smoothie with that perfect texture and natural sweetness without the need for added sugars.

How long can I store the Banana Chamomile Tea Smoothie in the fridge?
You can keep any leftover Banana Chamomile Tea Smoothie in an airtight container in the fridge for up to 24 hours. Stir well before enjoying, as some separation may occur—it’s perfectly normal and easily fixable!

Can I freeze the Banana Chamomile Tea Smoothie? How?
Yes, you can freeze this smoothie! Pour it into portion-sized containers and freeze for up to 1 month. To thaw, simply transfer it to the fridge overnight. Once thawed, blend again for that creamy texture—just like fresh!

What if the smoothie is too thin for my liking?
No worries! If you find your smoothie is too thin, you can add a little more banana, reduce the amount of milk, or add more ice during blending. This will help achieve a thicker and creamier consistency that’s just right for you.

Is this smoothie safe for people with allergies?
Very! The Banana Chamomile Tea Smoothie is quite friendly for most dietary needs. However, if you have allergies to honey or milk, simply substitute with agave syrup or maple syrup for sweetness and a dairy-free milk alternative to keep it safe and enjoyable for everyone.

Can I serve the smoothie warm?
You can! Though it’s traditionally served cold, if you’d like a cozy version, you can gently heat the milk before blending. Just be careful not to overheat it; you want a pleasantly warm smoothie, not a hot one!

Banana Chamomile Tea Smoothie

Banana Chamomile Tea Smoothie for a Soothing Boost

Enjoy the refreshing Banana Chamomile Tea Smoothie, a creamy blend that combines chamomile tea and ripe bananas for a soothing boost.
Prep Time 15 minutes
Total Time 15 minutes
Servings: 2 cups
Course: Drinks
Calories: 150

Ingredients
  

For the Smoothie Base
  • 1/2 cup Brewed Chamomile Tea Cool to room temperature before blending.
  • 1 large Ripe Banana Choose one with brown spots for sweetness.
  • 1 tablespoon Honey Raw or organic recommended for best flavor.
  • 1 cup Milk (or Milk Alternative) Almond or oat milk adds flavor.
  • 1 cup Ice Cubes Optional for a chilled smoothie.
For Garnish
  • 1 tablespoon Dried Chamomile Leaves Optional for visual appeal and aroma.

Equipment

  • blender
  • kettle

Method
 

Step-by-Step Instructions
  1. Brew the chamomile tea by steeping it in boiling water for about 5 minutes. Allow it to cool.
  2. Prepare the ingredients: slice the banana, measure honey and milk, and gather ice if desired.
  3. In a blender, combine the cooled chamomile tea, banana, honey, and milk along with ice if using. Blend until smooth.
  4. Pour into a glass and garnish with dried chamomile leaves or a slice of banana for added appeal.

Nutrition

Serving: 1cupCalories: 150kcalCarbohydrates: 35gProtein: 3gFat: 2gSaturated Fat: 0.5gSodium: 50mgPotassium: 400mgFiber: 3gSugar: 25gVitamin A: 2IUVitamin C: 10mgCalcium: 10mgIron: 2mg

Notes

Store leftovers in an airtight container for up to 24 hours. Enjoy fresh for the best flavor.

Tried this recipe?

Let us know how it was!

Crack Chicken Deviled Eggs: A Flavorful Twist on Tradition

At our last family gathering, I overheard someone exclaim, “These deviled eggs taste like a party in my mouth!” That moment was the spark for my latest obsession, Crack Chicken Deviled Eggs. Picture a delightful fusion of savory chicken, crispy bacon, and zesty ranch dressing, all nestled in creamy yolk-filled egg whites. What makes this recipe even better is its simplicity—it requires just four ingredients and minimal prep time! Perfect for busy weekdays or when you’re craving a crowd-pleasing appetizer that feels indulgent yet effortless. Whether it’s a festive holiday meal or a game day delight, these eggs promise to elevate any gathering. Are you ready to whip up something unforgettable?

Why are Crack Chicken Deviled Eggs a must-try?

Flavor Explosion: Each bite delivers a savory blend of chicken, bacon, and ranch that will have everyone coming back for more.
Simplicity: With only four simple ingredients, these deviled eggs are a breeze to prepare, making them perfect for any occasion.
Crowd-Pleaser: Serve them at parties or family gatherings, and watch them disappear faster than you can say “deviled eggs!”
Versatile Options: Want to mix it up? Substitute mayo with Greek yogurt for a lighter twist or try different cheeses to suit your taste.
Quick Prep: Ready in no time, especially if you use an Instant Pot for hard-boiling eggs, giving you more time to enjoy with loved ones.
Perfect Addition: Pair them with other favorites like Jerk Chicken Burritos or Air Fryer Chicken to create an unforgettable spread!

Crack Chicken Deviled Eggs Ingredients

For the Filling
Eggs – Use 6 hard-boiled eggs for a solid base that compliments the flavors.
Cheddar Cheese – ½ cup shredded cheddar adds richness; you can substitute with mozzarella or pepper jack for a different flavor twist.
Chicken – ½ cup of precooked or canned chicken is perfect; leftover rotisserie chicken works wonderfully!
Bacon Bits – 3 tablespoons of real cooked bacon bits enhance texture; omit for a vegetarian version.
Ranch Dressing Mix – 1 tablespoon of dry mix brings a bold, savory kick to the filling.
Mayonnaise – ⅓ cup creates a creamy base; swap with Greek yogurt for a lighter taste or cream cheese for extra richness.
Salt and Pepper – A pinch is essential for seasoning; adjust to taste for the best flavor.

For Garnish
Paprika – A sprinkle of paprika adds a pop of color and flavor before serving these delightful Crack Chicken Deviled Eggs.

Step‑by‑Step Instructions for Crack Chicken Deviled Eggs

Step 1: Hard-Boil the Eggs
Begin by boiling a pot of water over medium-high heat. Once boiling, gently add 6 large eggs, and let them cook for about 10-12 minutes. When cooked, transfer the eggs to an ice bath for 5 minutes to cool. This method not only makes the eggs easier to peel but also stops the cooking process, ensuring a tender yolk for your Crack Chicken Deviled Eggs.

Step 2: Prepare the Egg Yolks
Once the eggs are completely cool, carefully peel them and slice them in half lengthwise. Place the yolks in a mixing bowl, setting the egg whites aside on a serving plate. Using a fork, mash the yolks until they are grainy and smooth, creating a perfect base for your filling. This texture will help the filling blend seamlessly into the whites of your Crack Chicken Deviled Eggs.

Step 3: Mix the Filling
To the bowl with the yolks, add ½ cup shredded cheddar cheese, ½ cup diced precooked chicken, and 3 tablespoons of bacon bits. Then, sprinkle in 1 tablespoon of ranch dressing mix and pour in ⅓ cup of mayonnaise. Mix everything together until fully combined, ensuring that the flavors meld together beautifully for those delicious Crack Chicken Deviled Eggs you’re about to make!

Step 4: Fill the Egg Whites
Take the egg white halves and place them cut-side up on a clean plate. Use a spoon or a piping bag fitted with a large tip to fill each egg white with the creamy chicken mixture you prepared. Fill them generously until the mixture slightly mounds over the top, making your Crack Chicken Deviled Eggs as inviting as they are delicious.

Step 5: Garnish and Serve
Once all the egg white halves are filled, dust the tops of the Crack Chicken Deviled Eggs with a sprinkle of paprika for color and an added flavor boost. Serve these delightful appetizers fresh for the best experience, and watch as they disappear at your next gathering.

Make Ahead Options

These Crack Chicken Deviled Eggs are a fantastic appetizer that can save you time on busy days! You can prepare the filling up to 24 hours in advance by mixing the mashed yolks, cheddar cheese, diced chicken, bacon bits, ranch dressing mix, and mayonnaise in a sealed container, helping to blend the flavors beautifully. However, avoid filling the egg whites until just before serving to keep them fresh and maintain their texture. When you’re ready to present, simply fill each white half with the prepared mixture and garnish with paprika. This way, you’ll ensure your deviled eggs remain just as delectable and irresistible!

How to Store and Freeze Crack Chicken Deviled Eggs

Fridge: Store your Crack Chicken Deviled Eggs in an airtight container for best results; they can stay fresh for up to 1 day.

Room Temperature: Keep filled deviled eggs at room temperature for no more than 2 hours to prevent spoilage.

Freezing: It’s best not to freeze Crack Chicken Deviled Eggs as the textures may change. Freezing can cause the egg whites to become rubbery.

Reheating: If you have leftovers that have been stored, enjoy them cold; avoid reheating to maintain the creamy consistency of the filling.

Crack Chicken Deviled Eggs Variations

Feel free to get creative with these tasty ideas to personalize your Crack Chicken Deviled Eggs even further!

  • Greek Yogurt: Replace mayonnaise with Greek yogurt for a lighter, tangy twist.
  • Cheese Swaps: Try feta for a salty punch or pepper jack for an exciting kick!
  • Seafood Delight: Add crab meat instead of chicken for a luxurious seafood edition.
  • Spicy Kick: Mix in diced jalapeños for a delightful heat that elevates the flavor.
  • Vegetarian Version: Omit bacon and use sun-dried tomatoes to still pack a flavor punch.
  • Herb Infusion: Fresh chives or parsley can lend a lovely, fresh taste to the filling.
  • Cream Cheese: For an even richer option, substitute Greek yogurt with cream cheese.
  • Smoked Chicken: Use shredded smoked chicken for a deep, smoky flavor profile.

These variations can turn your deviled eggs into a delicious lineup that impresses guests at your next gathering! Treat your guests to these alongside flavorful dishes like Grilled Chicken Sandwich or Mexican Barbecue Chicken. Enjoy the culinary adventure!

Expert Tips for Crack Chicken Deviled Eggs

Quick Cooking: Use an Instant Pot to hard-boil eggs in just a few minutes; this saves time and ensures perfectly cooked yolks.

Texture Check: Ensure bacon bits are tender; overly crispy bits can break the creamy consistency of the filling.

Taste Before Filling: Always sample your filling before stuffing the egg whites. Adjust the seasonings if needed for the best Crack Chicken Deviled Eggs experience.

Keep Chilled: To maintain freshness, store filled eggs in the refrigerator until it’s time to serve. This helps preserve flavor and texture.

Variety of Cheeses: Don’t hesitate to experiment with cheeses! Feta or pepper jack can add a delightful twist to your Crack Chicken Deviled Eggs.

What to Serve with Crack Chicken Deviled Eggs

Looking to create a fabulous spread that complements each flavorful bite of creamy goodness?

  • Crispy Potato Chips: The salty crunch pairs beautifully, balancing the richness of the deviled eggs while adding a satisfying texture.
  • Fresh Veggie Platter: A colorful assortment of crunchy carrots, celery, and bell peppers adds a refreshing crispness that brightens each bite.
  • Classic Caesar Salad: The creamy dressing and crispy romaine enrich the meal, making each deviled egg feel even more indulgent.
  • Fruit Salad: Juicy, sweet fruits cut through the savoriness, offering a light, refreshing contrast that’s perfect for gatherings.
  • Sparkling Lemonade: This refreshing drink enhances the party vibe with its bright, citrusy flavor, complementing the rich egg filling delightfully.
  • Chocolate Chip Cookies: End your meal with a sweet touch; the warm, gooey cookies contrast perfectly against the savory deviled eggs.
  • Garlic Breadsticks: Soft and buttery, these breadsticks create a comforting vibe that pairs nicely with the bold flavors of the Crack Chicken Deviled Eggs.
  • Pasta Salad: A vibrant mix of pasta with fresh herbs and veggies adds heartiness and a burst of color to the table, perfect for any occasion.
  • Red Wine Spritzer: The bubbly texture and fruity essence make a refreshing pairing that enhances the flavors of the meal without overwhelming them.

Crack Chicken Deviled Eggs Recipe FAQs

What type of eggs should I use for Crack Chicken Deviled Eggs?
Absolutely! Use fresh, large eggs for the best results. Look for eggs without any cracks in the shell, and ideally, choose those that are at room temperature to ensure even cooking.

How should I store leftover Crack Chicken Deviled Eggs?
To preserve freshness, store your Crack Chicken Deviled Eggs in an airtight container in the refrigerator for up to one day. If they start to develop a dull appearance or if the egg whites feel unusually dry, it’s best to discard them.

Can I freeze Crack Chicken Deviled Eggs?
It’s not recommended to freeze Crack Chicken Deviled Eggs. Freezing may alter the texture of both the egg whites and the filling, leading to a rubbery consistency when thawed. Instead, enjoy them fresh and within a day for the best experience.

What are some common issues I might encounter when making Crack Chicken Deviled Eggs?
A common issue can be overcooked eggs, which results in a rubbery yolk. To avoid this, ensure you time your boiling carefully—10-12 minutes is perfect, and transferring them to an ice bath helps cool them rapidly. Additionally, if your filling seems too dry, a splash more mayonnaise can bring it back to that creamy consistency you want!

Are there any dietary considerations for Crack Chicken Deviled Eggs?
Yes, if you’re making Crack Chicken Deviled Eggs for guests with dietary restrictions, consider omitting bacon and using Greek yogurt in place of mayonnaise for a lighter option. Always check for allergies to chicken or dairy, particularly if you’re serving these at gatherings.

How can I modify the flavors in Crack Chicken Deviled Eggs?
The more the merrier when it comes to flavor! You can experiment with different cheeses like pepper jack for a spicy kick or add diced jalapeños to elevate the heat. Alternatively, consider using fresh herbs like dill or chives for a burst of freshness in the creamy filling.

Crack Chicken Deviled Eggs

Crack Chicken Deviled Eggs: A Flavorful Twist on Tradition

Crack Chicken Deviled Eggs offer a savory blend of chicken, bacon, and ranch, making them a must-try appetizer.
Prep Time 15 minutes
Cook Time 12 minutes
Cooling Time 5 minutes
Total Time 32 minutes
Servings: 6 egg halves
Course: Appetizer
Cuisine: American
Calories: 150

Ingredients
  

Filling Ingredients
  • 6 large hard-boiled eggs
  • 0.5 cups shredded cheddar cheese can substitute with mozzarella or pepper jack
  • 0.5 cups precooked or canned chicken leftover rotisserie chicken works wonderfully
  • 3 tablespoons bacon bits omit for vegetarian version
  • 1 tablespoon ranch dressing mix dry mix
  • 0.33 cups mayonnaise can substitute with Greek yogurt or cream cheese
  • 1 pinch salt for seasoning
  • 1 pinch pepper for seasoning
Garnish
  • 1 pinch paprika for sprinkling on top

Equipment

  • Instant Pot

Method
 

Cooking Instructions
  1. Begin by boiling a pot of water over medium-high heat. Once boiling, gently add 6 large eggs and cook for about 10-12 minutes.
  2. Transfer the eggs to an ice bath for 5 minutes to cool and stop the cooking process.
  3. Once cool, peel the eggs and slice them in half lengthwise. Place the yolks in a mixing bowl and set the egg whites aside.
  4. Mash the yolks until smooth and grainy to create a base for the filling.
  5. Add shredded cheddar cheese, diced precooked chicken, bacon bits, ranch dressing mix, and mayonnaise to the yolks. Mix until fully combined.
  6. Fill the egg white halves with the creamy chicken mixture until mounded on top.
  7. Dust filled eggs with paprika for color and flavor before serving.

Nutrition

Serving: 2egg halvesCalories: 150kcalCarbohydrates: 2gProtein: 9gFat: 12gSaturated Fat: 3gPolyunsaturated Fat: 1gMonounsaturated Fat: 7gCholesterol: 190mgSodium: 250mgPotassium: 130mgSugar: 1gVitamin A: 300IUCalcium: 150mgIron: 1mg

Notes

For best results, store filled eggs in the refrigerator until serving and avoid freezing to maintain texture.

Tried this recipe?

Let us know how it was!

Zesty Lemon Capellini Salad for a Refreshing Summer Bite

As I tossed together the vibrant ingredients for my Lemon Capellini Salad, the refreshing aroma of citrus filled my kitchen, instantly transporting me to a sun-drenched Italian terrace. This easy-to-make dish features delicate capellini pasta, ripe tomatoes, and briny capers, all harmonizing under a simple lemon dressing that brings a burst of brightness. Not only is this salad a crowd-pleaser perfect for warm evenings, but its quick prep time makes it an accessible option for any home chef looking to escape the monotony of fast food. With each bite, you’ll enjoy a delightful blend of flavors that feels like a mini vacation on your plate. Curious about how to bring a taste of summer to your dining table? Let’s dive into this vibrant recipe!

Why is Lemon Capellini Salad a must-try?

Freshness at its finest: Each bite of this salad bursts with the vibrant flavors of ripe tomatoes and fresh lemon, making it ideal for a hot summer day.
Easy to Make: With just a few simple ingredients, you can whip this up in no time, allowing you to enjoy a home-cooked meal without the fuss.
Light and Zesty: The delicate capellini pasta harmonizes with the tangy dressing, creating a refreshing dish that’s perfect as a side or light main course.
Versatile Options: Feel free to add grilled chicken or arugula for an extra boost or swap capers for olives, making it your own. Pair it with Grilled Lemon Herb Salmon or serve alongside the classic Italian Chopped Salad for an impressive meal.
Crowd-Pleaser: This salad not only impresses guests, but it’s also a guaranteed hit at gatherings, making it your go-to recipe for entertaining!

Lemon Capellini Salad Ingredients

For the Salad

  • Capellini Pasta – This delicate pasta provides a light base; substitute with angel hair if needed.
  • Lemons – Juice of 2 lemons and 1 tsp zest adds brightness and acidity to the dish.
  • Extra Virgin Olive Oil – Balances the tanginess of the lemons, providing richness to the dressing.
  • Garlic Salt – Seasoning that offers a hint of garlic flavor without overpowering the freshness.
  • Black Pepper – Just a touch adds mild spice and flavor depth to the salad.
  • Tomatoes – Seedless, diced tomatoes introduce natural sweetness and freshness.
  • Capers – These little gems bring a salty punch and unique tang that complements the other ingredients.
  • Curly Leaf Parsley – Adds freshness and a pop of green color; optional but highly recommended.

For Serving

  • Chilled Serving Option – Letting the salad chill enhances its refreshing qualities; perfect for hot days.
  • Grilled Lemon Herb Chicken – A delightful pairing to elevate your meal experience.

Embrace the freshness of this Lemon Capellini Salad and make it a staple in your summer menu!

Step‑by‑Step Instructions for Lemon Capellini Salad

Step 1: Cook Pasta
Bring a large pot of salted water to a rolling boil over high heat. Add the capellini pasta and cook for about 4 to 5 minutes until al dente, stirring occasionally to prevent sticking. Once done, drain the pasta and immediately rinse it under cool running water to stop the cooking process, leaving you with perfectly tender strands for your Lemon Capellini Salad.

Step 2: Make Dressing
In a spacious mixing bowl, combine the juice of two freshly squeezed lemons, 1/4 cup of extra virgin olive oil, 1 teaspoon of garlic salt, and a pinch of black pepper. Whisk these ingredients together until they are well blended, and the dressing appears emulsified. The bright, citrusy aroma will fill your kitchen, setting the stage for a refreshing Lemon Capellini Salad.

Step 3: Combine Ingredients
Once the capellini has cooled, gently add it to the bowl with the lemon dressing. Next, stir in 1 to 2 cups of diced, seedless tomatoes and 2 tablespoons of capers. Using a spatula, toss everything together until the pasta and vegetables are evenly coated in the zesty dressing, ensuring each bite will be a delightful explosion of flavors.

Step 4: Finish Salad
Chop a handful of curly leaf parsley and stir it into the salad along with the zest of one lemon. This addition not only enhances the flavor but also adds a lovely pop of color to your Lemon Capellini Salad. Give everything one final toss to ensure the ingredients are well mixed and the salad is beautifully presented.

Step 5: Serve or Chill
You have the option to serve the Lemon Capellini Salad immediately for a fresh bite or cover it and store it in the refrigerator for a few hours to chill. Chilling allows the flavors to meld together, making it even more refreshing. If chilling, just remember to give it a gentle toss before serving to redistribute the dressing.

Expert Tips for Lemon Capellini Salad

  • Pasta Perfection: Ensure your capellini pasta cooks just until al dente; overcooking can make it mushy and bland in your Lemon Capellini Salad.
  • Flavor Boost: Allow the salad to chill for at least 30 minutes before serving. This helps the flavors meld beautifully and enhances the overall taste.
  • Chop Wisely: Use a sharp knife for chopping your tomatoes and parsley; this keeps the ingredients fresh and visually appealing in your salad.
  • Adjust Acidity: If you prefer a less tangy flavor, start with the juice of one lemon and gradually add more to your dressing—personalize the zing in your Lemon Capellini Salad!
  • Storage Savvy: Store leftovers in an airtight container in the fridge for up to 5 days. Remember to toss before serving to refresh the flavors.

Lemon Capellini Salad Variations Made Easy

Feel free to get creative and customize your Lemon Capellini Salad—a dish that’s as versatile as it is delightful!

  • Olive Twist: Swap capers for olives for a hearty briny flavor. The salty goodness of olives adds a new depth, making it a unique variation that’s equally delicious.

  • Extra Greens: Add a handful of arugula or baby spinach to amp up the nutrition. These greens not only enhance the salad’s color but also provide a peppery kick that brightens each bite.

  • Protein Punch: Incorporate grilled chicken or shrimp for a satisfying meal. Tossing in these proteins transforms your salad into a fulfilling dish that’s perfect for lunch or dinner.

  • Nutty Crunch: Sprinkle some toasted pine nuts or sliced almonds for added texture. The crunch will beautifully contrast the tenderness of the pasta, making each mouthful exciting.

  • Herb Infusion: Experiment with fresh basil or mint alongside parsley for an aromatic twist. Each herb adds a distinct flavor profile, elevating your salad with vibrant freshness.

  • Spicy Kick: Add a pinch of red pepper flakes to the dressing for a bit of heat. This subtle spice complements the zesty lemon while giving the dish an exhilarating edge.

  • Veggie Boost: Toss in diced cucumbers or bell peppers for added crunch and color. These veggies introduce a refreshing element that enhances the salad’s overall appeal.

  • Fruit Fusion: Consider throwing in some diced avocados or ripe peaches for a touch of sweetness. The creaminess from avocados balances the acidity of the dressing, creating a heavenly combination.

Pair your Lemon Capellini Salad with a refreshing Strawberry Spinach Salad with Poppy Seed Dressing or serve it as a delightful side with Tuna Salad Sandwiches. The possibilities are endless!

How to Store and Freeze Lemon Capellini Salad

Fridge: Store the Lemon Capellini Salad in an airtight container in the fridge for up to 5 days to maintain freshness and flavor.

Toss Before Serving: When ready to enjoy leftovers, give the salad a good toss to recoat the pasta and veggies with the dressing that may have settled.

Avoid Room Temperature: To keep your salad safe and tasty, avoid leaving it at room temperature for more than 2 hours.

Chill for Flavor: For an extra refreshing salad experience, let the Lemon Capellini Salad chill in the fridge for at least 30 minutes before serving!

What to Serve with Lemon Capellini Salad?

This vibrant dish shines even brighter when paired with complementary sides and drinks that enhance the meal’s refreshing, zesty essence.

  • Grilled Lemon Herb Chicken: Juicy chicken marinated in lemon and herbs perfectly matches the salad’s bright flavors for a harmonious meal.
  • Roasted Asparagus: Tender asparagus with a hint of garlic provides a lovely crunch and earthy depth that beautifully contrasts the salad’s lightness.
  • Mediterranean Lentil Soup: The hearty and savory soup adds comforting warmth, making it an ideal accompaniment for a complete dining experience.
  • Garlic Bread: Crisp, buttery bread is a fabulous way to savor the leftovers; perfect for mopping up any leftover dressing.
  • Tomato Bruschetta: Light and refreshing bruschetta offers a complementary topping that echoes the salad’s vibrant tomato flavors.
  • Crisp White Wine: A chilled Pinot Grigio or Sauvignon Blanc can elevate the meal, enhancing the citrus notes and balancing the dish’s saltiness.
  • Lemon Sorbet: This tangy dessert is a delightful and refreshing way to round off your meal, leaving your palate feeling bright and satisfied.
  • Cucumber Feta Salad: This light and tangy side provides an additional layer of freshness, making your meal feel extra special.
  • Zucchini Fritters: Crispy fritters add a satisfying texture and flavor contrast to the dish, enhancing the overall dining experience.
  • Cold Iced Tea: A refreshing glass of iced tea with a hint of lemon can balance the meal while keeping things light and casual.

Make Ahead Options

These Lemon Capellini Salad preparations are perfect for busy cooks looking to save time! You can make the dressing (lemon juice, olive oil, garlic salt, and black pepper) up to 24 hours in advance and refrigerate it in an airtight container. Additionally, you can cook the capellini pasta up to 3 days before serving, rinse it under cold water to halt cooking, and store it separately in the fridge. When you’re ready to enjoy your Lemon Capellini Salad, simply combine the prepped ingredients with diced tomatoes, capers, fresh parsley, and lemon zest, giving it a good toss to ensure a refreshing dish that’s just as delicious as when freshly made!

Lemon Capellini Salad Recipe FAQs

How do I know when my capellini pasta is perfectly cooked?
Absolutely! To achieve the ideal texture, cook the capellini pasta for about 4 to 5 minutes, checking for al dente doneness. It should be firm yet tender. Remember to taste a strand before draining to ensure it’s just right!

What’s the best way to store leftover Lemon Capellini Salad?
Very! Store any leftovers in an airtight container in the refrigerator for up to 5 days. This keeps the salad fresh and flavorful. Just be sure to give it a good toss before serving again, as the dressing may settle.

Can I freeze Lemon Capellini Salad for later use?
While I recommend enjoying this salad fresh, you can freeze the components separately for about 1 to 2 months. To do this, prepare the pasta and dressing but store them in separate airtight containers. When you’re ready to enjoy, thaw in the fridge overnight and combine!

What are some common troubleshooting tips for my Lemon Capellini Salad?
If your salad tastes too tangy, start with half the lemon juice and gradually add more to suit your taste. If it’s missing flavor, a sprinkle of salt or an extra pinch of black pepper can elevate the dish. Additionally, ensure that your pasta is cooled completely before mixing, so it doesn’t absorb too much of the dressing.

Can pets eat any ingredients from the Lemon Capellini Salad?
Generally, it’s best to avoid sharing this salad with pets. While plain pasta is usually safe in small amounts, the garlic salt and capers can be harmful to dogs and cats. Always consult your veterinarian before introducing new human foods to your furry friends!

Are there any dietary considerations for those with allergies?
Yes, definitely! This salad contains gluten from the capellini pasta and should be avoided by those with gluten allergies or sensitivities. However, you can use gluten-free pasta alternatives. Always check that your olive oil and other ingredients are free from allergens for a safe, enjoyable meal!

Lemon Capellini Salad

Zesty Lemon Capellini Salad for a Refreshing Summer Bite

Enjoy a refreshing Lemon Capellini Salad, bursting with vibrant flavors, perfect for summer meals.
Prep Time 10 minutes
Cook Time 5 minutes
Chilling Time 30 minutes
Total Time 45 minutes
Servings: 4 servings
Course: Salad
Cuisine: Italian
Calories: 250

Ingredients
  

For the Salad
  • 8 oz Capellini Pasta substitute with angel hair if needed
  • 2 each Lemons juice of 2 lemons and zest of 1
  • 1/4 cup Extra Virgin Olive Oil
  • 1 tsp Garlic Salt
  • 1 pinch Black Pepper
  • 2 cups Tomatoes seedless, diced
  • 2 tbsp Capers
  • 1 handful Curly Leaf Parsley optional but recommended
For Serving
  • 1 each Chilled Serving Option letting the salad chill enhances its refreshing qualities
  • 4 oz Grilled Lemon Herb Chicken optional pairing

Equipment

  • large pot
  • Mixing Bowl
  • Spatula
  • Whisk

Method
 

Step‑by‑Step Instructions for Lemon Capellini Salad
  1. Cook pasta in a large pot of salted boiling water for 4-5 minutes until al dente, drain, and rinse with cool water.
  2. Combine lemon juice, olive oil, garlic salt, and black pepper in a mixing bowl and whisk until emulsified.
  3. Add cooled capellini to the dressing, then stir in tomatoes and capers, tossing to coat.
  4. Add chopped parsley and lemon zest, tossing everything together until well mixed.
  5. Serve immediately or chill for at least 30 minutes before serving to enhance flavors.

Nutrition

Serving: 1servingCalories: 250kcalCarbohydrates: 34gProtein: 5gFat: 12gSaturated Fat: 2gMonounsaturated Fat: 9gSodium: 300mgPotassium: 400mgFiber: 2gSugar: 3gVitamin A: 500IUVitamin C: 20mgCalcium: 30mgIron: 1mg

Notes

Allow the salad to chill for at least 30 minutes before serving for better flavor melding. Store leftovers in an airtight container in the fridge for up to 5 days.

Tried this recipe?

Let us know how it was!

Decadent Vanilla Slice with Flaky Puff Pastry Bliss

As I stood in my kitchen, the sweet aroma of vanilla began to fill the air, a gentle reminder of my childhood afternoons spent baking with my grandmother. Today, I’m thrilled to share my treasured recipe for the Irresistible Homemade Vanilla Slice with Flaky Puff Pastry. This dessert brings together the delicate crunch of puff pastry and the luxurious embrace of creamy custard—perfect for impressing guests or simply satisfying a sweet tooth. It’s remarkably easy to whip up, making it an ideal choice for any occasion, whether you’re throwing a casual get-together or celebrating a special milestone. Plus, it’s great for make-ahead planning! Ready to indulge in this delightful treat? Let’s dive into the recipe that will surely become a favorite in your home.

Why is this vanilla slice irresistible?

Homemade Delight: Turn simple ingredients into a showstopper that impresses with elegance! This vanilla slice offers the perfect weekend project for bakers of any skill level.

Crisp, Flaky Layers: The puff pastry forms a crunchy outer shell, creating a perfect contrast to the soft, creamy custard inside.

Customization Options: Feel free to modify by adding fresh berries for an elevated finishing touch, or swap half of the milk for cream to make it indulgently rich.

Make-Ahead Friendly: Plan ahead! This dessert can be prepared up to 24 hours in advance, freeing your time for other treats like Savory Turkey Patties or Coconut Curry Soup.

Perfect for Any Occasion: Whether you’re hosting a tea party or celebrating a birthday, this dessert is guaranteed to win over your guests. Get ready to enjoy a slice of happiness!

Vanilla Slice Ingredients

• Preparation is key for this vanilla slice. Gather everything before you start!

For the Puff Pastry

  • Puff Pastry – Use thawed puff pastry for easy layering while ensuring that it remains crisp.

For the Creamy Custard

  • Granulated Sugar – Adds sweetness; coconut sugar can enhance this with a unique flavor.
  • Cornstarch – A must for thickening the custard for a luxurious texture.
  • Kosher Salt – Enhances the flavors; swap for regular salt if necessary.
  • Whole Milk – Brings creaminess; almond or oat milk can be a dairy-free alternative, though it might alter the richness.
  • Large Egg Yolks – Provides richness; aquafaba can serve as a vegan substitute if needed.
  • Vanilla Bean or Vanilla Bean Paste – Infuses layers of aromatic vanilla flavor; extract can substitute, but may lack some depth.
  • Unsalted Butter – Adds to the creaminess of the custard; vegan butter can replace it for a dairy-free version.

For the Finishing Touch

  • Powdered Sugar – Perfect for dusting the final layer, offering a delightful sweetness at first sight!

Step‑by‑Step Instructions for Irresistible Homemade Vanilla Slice with Flaky Puff Pastry

Step 1: Prepare Puff Pastry
Preheat your oven to 400°F (200°C) and line two baking trays with parchment paper. Roll out the thawed puff pastry sheets on a floured surface until they are about 1/8 inch thick. Prick the pastry all over with a fork to prevent bubbling. This step is crucial to ensuring even baking for your vanilla slice.

Step 2: Bake Puff Pastry
Place the pricked puff pastry on the prepared trays and bake in the preheated oven for 35-45 minutes. The pastry should puff up and turn a beautiful golden brown. Once baked, remove from the oven and let it cool completely on a wire rack. This cooling phase is essential for achieving the perfect flaky layer for your vanilla slice.

Step 3: Trim Edges
Once cooled, carefully trim the baked pastry edges to fit an 8×8 inch pan. Use a sharp knife to create clean lines for a professional look. This step ensures that your layers will fit neatly, giving your vanilla slice an appealing presentation when assembled.

Step 4: Mix Dry Ingredients
In a medium saucepan, whisk together granulated sugar, cornstarch, and a pinch of kosher salt. Stir to combine thoroughly, ensuring there are no lumps. This mixture will form the base of your custard, allowing it to thicken beautifully when combined with the liquids.

Step 5: Warm Milk
In a separate saucepan, heat whole milk over medium heat until it’s steaming but not boiling. Keep an eye on it, as you don’t want it to scorch. This step is important to ensure the milk blends smoothly into the custard mix without clumping, giving your vanilla slice a silky texture.

Step 6: Temper Eggs
In a bowl, whisk egg yolks until smooth. Gradually pour in the warmed milk while continuously whisking, creating a tempered mixture. This process helps prevent the yolks from cooking too quickly, ensuring a velvety custard for your vanilla slice without any scrambled bits.

Step 7: Cook Custard
Return the tempered mixture to the saucepan and cook over medium heat. Stir constantly until the custard thickens and begins to bubble, about 5-7 minutes. When it’s thick enough to coat the back of a spoon, removed from heat and stir in the vanilla seeds and butter until blended.

Step 8: Assemble Dessert
In your trimmed pan, layer one sheet of puff pastry at the bottom. Pour half of the creamy custard over the pastry, spreading it evenly. Place a second layer of puff pastry on top and pour the remaining custard evenly over it, smoothing it out. Chill in the refrigerator for at least 4 hours to set.

Step 9: Slice and Serve
Once set, remove the vanilla slice from the refrigerator. Use a sharp serrated knife to carefully cut it into squares or rectangles for serving. Dust the top with powdered sugar for an elegant finish. Each slice reveals the delightful layers of creamy custard and flaky pastry, ready to be enjoyed!

How to Store and Freeze Vanilla Slice

Fridge: Store your homemade vanilla slice in an airtight container for up to 3 days. This helps maintain its creamy custard and flaky texture.

Freezer: You can freeze individual slices wrapped tightly in plastic wrap and then aluminum foil for up to 2 months. Thaw in the fridge before enjoying for the best experience.

Reheating: If you’d like to warm the dessert slightly, microwave for about 10-15 seconds. This will soften the custard without compromising its quality.

Make-Ahead: Prepare the vanilla slice a day in advance for ease, and store it in the fridge until ready to serve.

Vanilla Slice Variations & Substitutions

Customizing this delightful vanilla slice allows you to create a unique dessert that suits your taste buds perfectly!

  • Milk Swap:
    Use half cream and half milk for an ultra-rich custard that adds a decadent touch.

  • Dairy-Free Delight:
    Substitute whole milk with almond or oat milk for a creamy dairy-free version, though it may slightly alter the texture.

  • Sweetness Twist:
    Swap granulated sugar for coconut sugar to bring a hint of caramel flavor to your custard.

  • Fruit Layer:
    Add a layer of fresh berries or poached fruit between the custard layers for a fruity surprise and color explosion.

  • Flavor Boost:
    Infuse the milk with citrus zest like lemon or orange before mixing into the custard for a refreshing brightness.

  • Nutty Add-In:
    Stir in finely chopped nuts like almonds or hazelnuts into the custard for delightful crunch and added flavor.

  • Chocolate Drizzle:
    Melt some chocolate and drizzle it over the sliced portions for a luxurious finish that chocolate lovers will adore.

  • Spices and Zests:
    Mix in a pinch of cinnamon or nutmeg in the custard for an extra layer of warmth and spice.

Feel free to explore these variations and pair your vanilla slice with a cup of tea or coffee for an afternoon treat. And if you’re in the mood for more indulgent desserts, don’t forget to check out my recipes for Coconut Curry Soup or Savory Turkey Patties!

What to Serve with Irresistible Homemade Vanilla Slice

Creating a charming dessert experience is easy when you consider delightful pairings that elevate your homemade vanilla slice.

  • Fresh Berries: A burst of juicy flavor complements the creamy custard and adds a refreshing touch.

  • Espresso or Coffee: The rich and bold notes of coffee create a perfect contrast to the sweet vanilla, enhancing your indulgence.

  • Whipped Cream: Light and airy, whipped cream adds a luxurious layer of creaminess that enhances the dessert’s texture.

  • Chocolate Sauce: Drizzling warm chocolate over your vanilla slice adds a decadent twist that appeals to chocolate lovers.

  • Caramel Drizzle: The rich sweetness of caramel elevates the custard’s flavor profile, making each bite utterly irresistible.

  • Chai Tea: The warm spices in chai tea create a delightful pairing, balancing the sweetness and bringing comfort in every sip.

  • Almond Biscotti: Dunking this crunchy treat into your coffee or tea while enjoying the vanilla slice makes for a cozy treat experience.

  • Ice Cream: A scoop of vanilla or caramel ice cream creates a delightful contrast in temperatures and textures, perfect for a summer treat.

Make Ahead Options

These vanilla slice delights are perfect for meal prep, allowing you to impress guests without the last-minute rush! You can prepare the custard and puff pastry up to 24 hours in advance. To do so, complete the baking of the pastry and cool it completely. Store the pastry in an airtight container at room temperature to maintain its crispness. Meanwhile, refrigerate the cooled custard in a tightly covered container. When you’re ready to assemble, simply layer the pastry and custard, chill for at least 4 hours, and dust with powdered sugar before serving. This way, you’ll enjoy the same decadent flavors and textures, all while saving precious time for your busy week!

Expert Tips for Vanilla Slice

  • Preheat Properly: Ensure your oven is fully preheated to 400°F (200°C) before baking the puff pastry. This helps achieve a perfect golden brown color and flakiness in your vanilla slice.

  • Prick Evenly: Don’t skip the step of pricking the puff pastry with a fork! This prevents uneven puffing and allows for a crisp texture.

  • Cool Completely: Let the baked pastry cool on a wire rack before trimming. This ensures the layers maintain their crunch and don’t become soggy.

  • Slicing Technique: Use a serrated knife to slice the finished dessert, cleaning the blade between cuts for clean, tidy edges that showcase your beautiful layers.

  • Chill Thoroughly: Make sure to refrigerate the assembled dessert for at least 4 hours. This helps the custard set properly, making for easy, neat slices.

  • Storage Tips: If you have leftovers, cover tightly with plastic wrap to avoid drying out. The vanilla slice is best enjoyed within 3 days to retain its delightful texture.

Homemade Vanilla Slice Recipe FAQs

What type of puff pastry should I use for the vanilla slice?
Absolutely! For the best results, I recommend using high-quality, store-bought puff pastry that has been fully thawed. This ensures crispiness and convenience, allowing the flaky layers to shine. If you’re feeling adventurous and have the time, homemade puff pastry can also be used, but it does require more effort.

How long does homemade vanilla slice last in the fridge?
The vanilla slice can be stored in an airtight container in the refrigerator for up to 3 days. I recommend enjoying it within this timeframe to relish the delightful contrast between the creamy custard and crisp pastry.

Can I freeze the vanilla slice?
Very! You can absolutely freeze the vanilla slice. Just wrap individual slices tightly in plastic wrap, then in aluminum foil, and freeze for up to 2 months. When you’re ready to enjoy a slice, thaw it in the fridge overnight for the best texture. If you prefer it slightly warmed, a quick zap in the microwave for about 10-15 seconds will do the trick!

What should I do if my custard doesn’t thicken properly?
If your custard isn’t thickening, no need to worry! It may help to increase the heat slightly and continue stirring constantly for a few more minutes. If it’s still too thin after cooking, you can whisk in a slurry made of 1 tablespoon of cornstarch with 1 tablespoon of cold milk. Return it to the heat and cook until bubbling and thickened.

Are there any ingredient substitutions I should consider for dietary restrictions?
Definitely! If you’re looking for a dairy-free option, you can substitute whole milk with almond milk or oat milk, understanding that it may affect the richness. For a vegan option, replace the large egg yolks with aquafaba (the liquid from canned chickpeas) in a 3:1 ratio (3 tablespoons aquafaba for each yolk). Keep in mind, the texture may differ slightly from the original recipe.

Vanilla Slice with Flaky Puff Pastry

Decadent Vanilla Slice with Flaky Puff Pastry Bliss

This easy-to-make vanilla slice features flaky puff pastry and a creamy custard, perfect for any occasion.
Prep Time 1 hour
Cook Time 45 minutes
Chill Time 4 hours
Total Time 5 hours 45 minutes
Servings: 12 slices
Course: Dessert
Cuisine: American
Calories: 250

Ingredients
  

For the Puff Pastry
  • 2 sheets Puff Pastry thawed
For the Creamy Custard
  • 100 grams Granulated Sugar coconut sugar can enhance flavor
  • 40 grams Cornstarch
  • 1 pinch Kosher Salt or regular salt
  • 500 ml Whole Milk or almond/oat milk as alternative
  • 6 large Large Egg Yolks or aquafaba as vegan substitute
  • 1 bean Vanilla Bean or Vanilla Bean Paste or extract as substitute
  • 100 grams Unsalted Butter or vegan butter as dairy-free option
For the Finishing Touch
  • 50 grams Powdered Sugar for dusting

Equipment

  • Oven
  • Mixing bowls
  • Saucepan
  • Whisk
  • Baking trays
  • Parchment paper
  • Wire Rack
  • sharp knife

Method
 

Step-by-Step Instructions
  1. Preheat your oven to 400°F (200°C) and line two baking trays with parchment paper. Roll out the thawed puff pastry sheets on a floured surface until they are about 1/8 inch thick. Prick the pastry all over with a fork to prevent bubbling.
  2. Place the pricked puff pastry on the prepared trays and bake in the preheated oven for 35-45 minutes until golden brown. Let it cool completely on a wire rack.
  3. Once cooled, carefully trim the baked pastry edges to fit an 8x8 inch pan using a sharp knife.
  4. In a medium saucepan, whisk together granulated sugar, cornstarch, and a pinch of kosher salt to combine thoroughly.
  5. In a separate saucepan, heat whole milk over medium heat until steaming but not boiling.
  6. In a bowl, whisk egg yolks until smooth. Gradually pour in the warmed milk while continuously whisking to temper the yolks.
  7. Return the tempered mixture to the saucepan and cook over medium heat, stirring constantly, until the custard thickens and begins to bubble, about 5-7 minutes.
  8. In your trimmed pan, layer one sheet of puff pastry at the bottom. Pour half of the creamy custard over it, followed by a second layer of pastry and the remaining custard. Chill in the refrigerator for at least 4 hours.
  9. Once set, remove the vanilla slice from the refrigerator and slice using a sharp serrated knife. Dust with powdered sugar before serving.

Nutrition

Serving: 1sliceCalories: 250kcalCarbohydrates: 35gProtein: 3gFat: 12gSaturated Fat: 7gPolyunsaturated Fat: 1gMonounsaturated Fat: 3gCholesterol: 100mgSodium: 100mgPotassium: 150mgSugar: 15gVitamin A: 500IUCalcium: 100mgIron: 1mg

Notes

This dessert can be prepared up to 24 hours in advance and is perfect for impressing guests or satisfying a sweet tooth.

Tried this recipe?

Let us know how it was!

Comforting Miso Udon Noodle Soup in Just 30 Minutes

The aroma of savory broth wafted through my kitchen, transporting me straight to the heart of Japan with each bubble. I was on a mission to create the ultimate comfort dish: Vegan Miso Udon Noodle Soup with Teriyaki Mushrooms. This soul-soothing bowl is not only a treat for the senses but also a miracle of efficiency—you can whip it up in just 30 minutes! Its creamy miso base, tender udon noodles, and glazed teriyaki mushrooms make it a satisfying meal that warms the spirit on chilly nights or busy weekdays. Better yet, it’s completely plant-based, making it a delightful choice for everyone. Are you ready to dive into this umami-packed experience that’s just waiting for your personal touch?

Why is this Miso Udon Noodle Soup a must-try?

Quick and Easy: This comforting soup comes together in just 30 minutes, perfect for busy weeknights.

Umami Explosion: The combination of miso, teriyaki mushrooms, and soy sauce creates a delightful depth of flavor that will keep you coming back for more.

Customization Galore: Easily swap out ingredients based on what you have—substitute udon with soba or even add greens like bok choy for an extra nutrient boost.

Plant-Based Goodness: This vegan recipe is a delicious way to enjoy comfort food without compromising on flavor.

Crowd-Pleaser: Serve this dish to friends and family, and watch as they rave about the rich broth and chewy noodles—there will be no leftovers!

Pair this favorite with a warm comforting side, like Coconut Curry Soup or explore other flavors with my Chicken Mushroom Soup for a heartwarming meal experience.

Miso Udon Noodle Soup Ingredients

For the Broth

  • Neutral Oil or Vegan Butter – Adds richness to the dish and helps in sautéing; any cooking oil will do if you’re out of vegan options.
  • Rehydrated Shiitake Mushrooms – Provides deep umami flavor for the broth; can substitute with other mushrooms or extra firm tofu for a non-mushroom option.
  • Mirin – A sweet rice wine that enhances the broth’s depth; can be replaced with additional sugar in a pinch.
  • Sake – Adds complexity; optional but recommended for a richer taste; can be omitted if unavailable.
  • Soy Sauce – Essential for seasoning and an umami flavor boost.
  • Dark Soy Sauce – Optional for adding color and richness to the dish.
  • Sugar – Balances the saltiness of the soy sauce; feel free to adjust for taste.
  • Vegan Butter or Sesame Oil – Forms the base for the broth, adding depth and flavor.
  • Garlic – Provides aromatic qualities that enhance the overall flavor profile.
  • Plain Nut Butter or Sesame Paste – Adds creaminess to the broth; almond or peanut butter work wonders here.
  • Mushroom or Vegetable Broth – Forms the soup base; can be made from soaking mushrooms to enhance flavor.
  • Soy Milk or Oat Milk – Contributes creaminess without dairy, perfect for a vegan dish.
  • Miso Paste – Adds a complex flavor profile; white miso is typically lighter and works beautifully in this recipe.

For the Noodles and Toppings

  • Udon Noodles – The primary carbohydrate; fresh, frozen, or dried varieties can be used based on availability.
  • Teriyaki Mushrooms – For that luscious, savory topping that elevates the dish; can use any mushrooms you have on hand.
  • Layu (Japanese chili oil) – Optional for an extra kick of heat, adjusting to your spice preferences.
  • Spring Onions or Green Onions – Fresh, crunchy garnish that adds a burst of color and flavor to your soup.

This Miso Udon Noodle Soup is a delightful masterpiece waiting to be created in your kitchen!

Step‑by‑Step Instructions for Miso Udon Noodle Soup

Step 1: Prepare the Mushrooms
If you’re using dried shiitake mushrooms, start by soaking them in warm water for about 20 minutes or until rehydrated. Once softened, drain the mushrooms and slice them thinly. This step enhances the deep umami flavor of the soup. Fresh mushrooms can also be used; just clean and slice them before proceeding.

Step 2: Cook Udon Noodles
Bring a pot of water to a rolling boil and add the udon noodles according to the package instructions. Typically, this takes about 5–7 minutes. Once cooked, drain the noodles and rinse them under cold water to halt the cooking process. This will prevent them from becoming overly soft in your Miso Udon Noodle Soup.

Step 3: Sauté Teriyaki Mushrooms
In a skillet over medium heat, add 1-2 tablespoons of neutral oil or vegan butter. Once hot, add the sliced shiitake and king oyster mushrooms. Sauté for about 5–7 minutes until they’re browned and glossy. Pour in mirin, soy sauce, and a sprinkle of sugar, stirring until the mushrooms are well-coated and the glaze thickens slightly; set aside.

Step 4: Make the Broth
In a medium pot, heat 1 tablespoon of vegan butter or sesame oil over medium heat, adding minced garlic as it starts to melt. Sauté for about 1–2 minutes until fragrant, ensuring it doesn’t brown. Then, stir in your plain nut butter or sesame paste, vegetable broth, and soy/oat milk. Mix until blended, then add miso paste and soy sauce, simmering for about 10-12 minutes on low heat.

Step 5: Combine and Serve
In serving bowls, add a portion of the udon noodles. Carefully ladle the hot miso broth over the noodles, ensuring they’re fully submerged. Top with the sautéed teriyaki mushrooms and garnish with chopped spring onions or green onions for freshness. Serve your comforting Miso Udon Noodle Soup hot, inviting everyone to enjoy this delicious meal!

Expert Tips for Miso Udon Noodle Soup

  • Noodle Cooking: Avoid overcooking udon noodles; they should be tender but chewy. Drain and rinse them to stop further cooking before adding to the broth.

  • Broth Clarity: For a clear broth, cook udon separately rather than in the soup. This prevents cloudiness and maintains the broth’s beautiful appearance.

  • Flavor Enhancement: Don’t skip the mirin and sake; they elevate the flavor depth in your Miso Udon Noodle Soup. Adjust quantities for personal taste as needed.

  • Mushroom Options: Feel free to mix and match mushrooms—shiitake and king oyster provide a rich umami taste, but any mushrooms you love will work!

  • Nutty Creaminess: Incorporate different nut butters or sesame paste for varied flavors in the broth, adding creaminess that transcends ordinary soups.

  • Fresh Garnishes: Top your soup with spring onions and a drizzle of chili oil for added freshness and a touch of heat, enhancing the overall dining experience.

Miso Udon Noodle Soup Variations

Customize your Vegan Miso Udon Noodle Soup with these delightful twists and substitutions that will add your personal flair to this comforting dish!

  • Noodle Swap: Change udon for soba or ramen noodles for a different texture and flavor experience. Each noodle brings its unique chew that’s worth exploring.

  • Tofu Addition: Instead of teriyaki mushrooms, add cubes of extra firm tofu for a hearty plant-based protein option that soaks up flavor beautifully.

  • Greens Galore: Toss in some chopped bok choy, spinach, or kale towards the end of cooking for a nutritious boost while adding a vibrant splash of color.

  • Heat Level: Dial up the spice by incorporating sriracha or another hot sauce to give your soup an exciting kick. Experiment until you find your perfect level of heat!

  • Nutty Variations: Swap out the plain nut butter for tahini or sunbutter, imparting new depth and richness to the creamy broth. Each nut adds its signature flavor!

  • Herb Infusion: Try adding a handful of fresh cilantro or basil at the end to brighten the soup with fresh herbal notes, enriching every spoonful.

  • Umami Twist: If seeking an extra umami punch, incorporate a splash of liquid smoke or a teaspoon of miso seasoning for a delightful depth of flavor.

  • Garnish Upgrade: Replace simple green onions with a sprinkle of toasted sesame seeds or seaweed flakes for added texture and visual appeal to your finished soup.

Now, bring these tasty ideas into your kitchen and let your creativity shine! You might also enjoy pairing your soup with a warm and hearty Old Fashioned Vegetable Beef Soup or a robust Seafood Bisque Soup for a complete meal experience, perfect for sharing with loved ones!

What to Serve with Vegan Miso Udon Noodle Soup

Dive into a warm, satisfying meal experience, perfect for cozy evenings or whenever you need a touch of comfort.

  • Crispy Vegetable Tempura: Lightly battered and fried vegetables add a delightful crunch, bringing texture to your comforting bowl. Perfect to dip in a soy sauce-based dressing!

  • Steamed Bok Choy: Simple, fresh, and lightly seasoned with soy sauce, bok choy complements the rich broth and adds a vibrant element to your meal.

  • Spicy Edamame: A pop of heat from chili flakes elevates these protein-packed pods, making for an addictive side that pairs beautifully with the umami flavors of the soup.

  • Brown Rice: Nutty and wholesome, brown rice provides a lovely base to soak up the savory broth. It’s a filling and healthy option that works well alongside the udon.

  • Pickled Vegetables: The tangy, crisp contrast of pickled cucumbers or radishes enhances the richness of the soup, offering a refreshing palate cleanse with each bite.

  • Mango Coconut Chia Pudding: End your meal on a sweet note with this creamy, tropical dessert that provides a light and refreshing finish after your hearty soup.

Make Ahead Options

These Miso Udon Noodle Soup meals are perfect for busy home cooks looking to save time! You can prepare the broth up to 3 days in advance and refrigerate it in an airtight container, which helps maintain its rich flavor. Additionally, the teriyaki mushrooms can be sautéed and stored in a separate container for up to 48 hours. When you’re ready to serve, simply reheat the broth while cooking the udon noodles according to package instructions. Combine everything in serving bowls, adding the mushrooms and any desired toppings just before serving to ensure every bite is deliciously fresh. This meal prep strategy guarantees you’ll enjoy all the comforting flavors without the fuss!

How to Store and Freeze Miso Udon Noodle Soup

Fridge: Store the broth in an airtight container for up to 5 days; keep udon noodles and toppings separate to maintain texture and flavor.

Freezer: You can freeze the soup broth for up to 2 months. Thaw in the fridge overnight, reheat, and return to a simmer before adding freshly cooked udon and toppings.

Reheating: Reheat the broth on the stove until hot; avoid boiling to maintain clarity. Add cooked noodles and any desired toppings just before serving for an enjoyable meal.

Leftovers: If you have leftover Miso Udon Noodle Soup, it’s best to store components separately to keep your meal fresh and delicious!

Miso Udon Noodle Soup Recipe FAQs

What type of mushrooms should I use for Miso Udon Noodle Soup?
Absolutely! Rehydrated shiitake mushrooms are fantastic for their deep umami flavor, but you can substitute with other varieties such as king oyster, cremini, or even extra firm tofu if mushrooms aren’t your thing. Just ensure they are fresh or properly rehydrated for the best flavor!

How do I store leftovers of Miso Udon Noodle Soup?
To keep your Miso Udon Noodle Soup fresh, store the broth in an airtight container in the fridge for up to 5 days. Make sure to keep the udon noodles and toppings separate. This prevents the noodles from becoming mushy and allows you to enjoy the best texture possible!

Can I freeze Miso Udon Noodle Soup?
Yes! You can freeze the soup broth for up to 2 months. To freeze, pour the cooled broth into an airtight container or freezer bag, ensuring you leave some space for expansion. When you’re ready to enjoy it, thaw the broth in the fridge overnight, then reheat on the stove until hot and add freshly cooked udon noodles and your toppings.

How do I prevent my broth from becoming cloudy?
To maintain a clear and beautiful broth, cook the udon noodles separately rather than directly in the broth. After boiling the noodles, rinse them under cold water to halt the cooking process and prevent them from thickening the soup. This little tip goes a long way in keeping your soup looking as wonderful as it tastes!

Is this Miso Udon Noodle Soup suitable for allergies?
You bet! This recipe is vegan-friendly, making it a great choice for those avoiding dairy. For nut allergies, you can skip the nut butter and opt for tahini or just expand the flavor with more miso. Always check labels on other ingredients like soy sauce to ensure it’s allergen-friendly, especially for gluten sensitivities.

Can I add more vegetables to my Miso Udon Noodle Soup?
Very much so! Feel free to throw in some leafy greens like bok choy or spinach, or even carrots and bell peppers for an extra splash of nutrition and flavor. Just remember to add them close to the end of cooking to keep them vibrant and just slightly tender. Enjoy your customized creation!

Miso Udon Noodle Soup

Comforting Miso Udon Noodle Soup in Just 30 Minutes

Enjoy a comforting bowl of Vegan Miso Udon Noodle Soup packed with umami flavor and ready in just 30 minutes.
Prep Time 10 minutes
Cook Time 20 minutes
Total Time 30 minutes
Servings: 4 bowls
Course: Dinner
Cuisine: Japanese
Calories: 300

Ingredients
  

For the Broth
  • 2 tablespoons Neutral Oil or Vegan Butter Adds richness to the dish and helps in sautéing.
  • 1 cup Rehydrated Shiitake Mushrooms Provides deep umami flavor for the broth.
  • 2 tablespoons Mirin Enhances the broth's depth.
  • 2 tablespoons Sake Adds complexity to the broth.
  • 3 tablespoons Soy Sauce Essential for seasoning.
  • 1 tablespoon Dark Soy Sauce Optional for adding color.
  • 1 tablespoon Sugar Balances the saltiness.
  • 1 tablespoon Vegan Butter or Sesame Oil Forms the base for the broth.
  • 2 cloves Garlic Provides aromatic qualities.
  • 2 tablespoons Plain Nut Butter or Sesame Paste Adds creaminess to the broth.
  • 4 cups Mushroom or Vegetable Broth Forms the soup base.
  • 1 cup Soy Milk or Oat Milk Contributes creaminess without dairy.
  • 3 tablespoons Miso Paste Adds a complex flavor profile.
For the Noodles and Toppings
  • 400 grams Udon Noodles The primary carbohydrate.
  • 2 cups Teriyaki Mushrooms Savory topping for the dish.
  • 1 tablespoon Layu (Japanese chili oil) Optional for added heat.
  • 2 stalks Spring Onions or Green Onions Fresh garnish for the soup.

Equipment

  • pot
  • Skillet
  • Spatula
  • colander
  • knife
  • cutting board

Method
 

Preparation Steps
  1. Soak dried shiitake mushrooms in warm water for about 20 minutes or until rehydrated. Drain and slice them thinly.
  2. Bring a pot of water to a rolling boil and add the udon noodles, cooking according to package instructions (typically 5–7 minutes). Drain and rinse under cold water.
  3. In a skillet, heat 1-2 tablespoons of neutral oil or vegan butter over medium heat. Sauté sliced shiitake and king oyster mushrooms for about 5–7 minutes until browned. Add mirin, soy sauce, and sugar, stirring until well-coated.
  4. In a medium pot, heat 1 tablespoon of vegan butter or sesame oil, adding minced garlic until fragrant (1–2 minutes). Stir in nut butter, vegetable broth, and soy/oat milk. Mix, then add miso paste and soy sauce, simmering for 10-12 minutes.
  5. In serving bowls, add udon noodles, ladle hot miso broth over them, top with sautéed teriyaki mushrooms, and garnish with chopped spring onions.

Nutrition

Serving: 1bowlCalories: 300kcalCarbohydrates: 45gProtein: 10gFat: 10gSaturated Fat: 2gPolyunsaturated Fat: 5gMonounsaturated Fat: 3gSodium: 800mgPotassium: 500mgFiber: 3gSugar: 5gVitamin A: 50IUVitamin C: 2mgCalcium: 100mgIron: 2mg

Notes

Store leftover broth in an airtight container for up to 5 days. Freeze for up to 2 months. Adjust recipe based on personal tastes and available ingredients.

Tried this recipe?

Let us know how it was!

Irresistible Lavender Buttercream Frosting for Whimsical Treats

As I whisk the butter into a creamy blend, the delicate scent of lavender begins to envelop my kitchen, transporting me to a sunlit field in spring. This irresistible lavender buttercream frosting takes your usual baking adventures to enchanting new heights, transforming simple cakes and cookies into stunning masterpieces bursting with whimsy. Not only is it a delightfully quick way to elevate your desserts, but it’s also perfect for any occasion that calls for a touch of floral elegance, from tea parties to Mother’s Day celebrations. Plus, with tips to create a vegan version, everyone can indulge in this dreamy frosting! What dessert will you sprinkle with this floral charm?

Why Choose Lavender Buttercream Frosting?

Whimsical and enchanting, this frosting transforms ordinary desserts into delightful creations. Quick to prepare, you can whip up this dreamy buttercream in under 15 minutes! Customizable for all diets, with vegan adaptations possible, everyone can enjoy its floral charm. Stunning aesthetics make it the perfect finishing touch for any special occasion. From layering cakes to frosting cupcakes, this versatile recipe is sure to impress your guests and elevate your baking game, much like my Honey Butter Brioche that adds a delightful sweetness to your table!

Irresistible Lavender Buttercream Frosting Ingredients

• To create this delightful frosting, you’ll need a few key ingredients to ensure a perfectly fluffy and floral result.

For the Frosting Base

  • Butter – This rich, creamy base brings a luxurious mouthfeel; for a vegan adaptation, simply substitute with vegan butter.
  • Powdered Sugar – Adds sweetness and structure for a light, airy texture; no direct substitutes recommended unless using a sugar alternative.
  • Heavy Cream (or milk) – Enhances the creaminess and helps achieve that delightful fluffy consistency; use dairy-free milk for vegan versions.

For the Floral Infusion

  • Culinary-Grade Lavender Buds – Infuses the frosting with gentle floral notes; ensure you use culinary-grade to avoid any soapy flavors.

For Appearance

  • Food Coloring (optional) – Enhances visual appeal; omit if you prefer a natural, delicate lavender hue.

Let’s get baking and indulge in this irresistible lavender buttercream frosting! With each swirl, you’ll infuse your treats with that charming floral flavor everyone will adore.

Step‑by‑Step Instructions for Irresistible Lavender Buttercream Frosting

Step 1: Prepare Lavender Infusion
Begin by heating 1/4 cup of heavy cream in a small saucepan over low heat, just until warm—avoid boiling. Add 1 tablespoon of culinary-grade lavender buds to the cream and let the mixture steep for about 10-15 minutes. This process will infuse the cream with delicate floral notes, enhancing your irresistible lavender buttercream frosting.

Step 2: Mix Ingredients
In a large mixing bowl, beat 1 cup of softened butter using an electric mixer on medium speed until creamy, about 2-3 minutes. Gradually add 4 cups of powdered sugar, mixing on low initially to prevent a sugar cloud. Increase the speed to medium and blend until fully incorporated, ensuring your base is soft and fluffy for the frosting.

Step 3: Add Cream and Lavender
Strain the lavender-infused cream to remove the buds, then slowly drizzle it into the butter-sugar mixture. Mix gently on low speed until it’s well blended, about 1-2 minutes. You’ll want the icing to reach a light, airy texture, showcasing the enchanting lavender flavor that makes this buttercream irresistible.

Step 4: Adjust Consistency
Check the frosting consistency; it should be fluffy but spreadable. If it’s too thick, add a teaspoon of the remaining infused cream to loosen it up. On the other hand, if it’s too thin, gradually add more powdered sugar, mixing well until you achieve the perfect consistency for your irresistible lavender buttercream frosting.

Step 5: Whip Well
Increase the speed of your mixer to high and whip the frosting for an additional 3-5 minutes. This crucial step will incorporate air, giving your buttercream a light and fluffy texture that holds its shape beautifully. It should look creamy and luscious, perfect for decorating your cakes and cupcakes with whimsical flair.

Make Ahead Options

These Irresistible Lavender Buttercream Frosting options are perfect for busy home cooks looking to save time without sacrificing flavor! You can prepare the lavender-infused cream up to 3 days in advance by following the infusion steps and storing it in an airtight container in the refrigerator. Additionally, the frosted buttercream itself can be made up to 24 hours ahead of time. Simply mix the ingredients as instructed, then refrigerate the finished frosting in a tightly sealed container. When you’re ready to serve, just re-whip the frosting for about 1-2 minutes to restore that fluffy texture, ensuring it’s as delightful as the day you made it! By prepping ahead, you’ll enjoy the convenience of having this enchanting frosting ready to elevate your desserts whenever you need.

Irresistible Lavender Buttercream Frosting Variations

Unleash your creativity and make this frosting uniquely yours with delightful twists and swaps that will tantalize your taste buds!

  • Vegan Twist: Substitute regular butter with vegan butter and use non-dairy milk for a creamy, plant-based option. Everyone can indulge, from the vegan to the non-vegan crowd.

  • Lemon Zest: Add a teaspoon of fresh lemon zest to the frosting for a zippy citrus twist, perfectly balancing the floral notes. The combination should brighten up your treats beautifully.

  • Almond Essence: Swap lavender for a splash of almond extract to create a beautifully nutty flavor. This twist offers a comforting warmth that feels like home!

  • Coconut Cream: Utilize coconut cream in place of heavy cream, adding a rich, tropical flair that pairs deliciously with the floral notes. Imagine a delightful summer party with this luscious taste!

  • Honey Drizzle: Incorporate a tablespoon of honey for added sweetness and a floral essence that complements the lavender. This slightly sticky option brings a lovely depth to your frosting.

  • Chocolate Infusion: Fold in cocoa powder for a delightful chocolate-lavender mix that surprises and delights—think of a dreamy floral chocolate cake as the perfect twist!

  • Chili Infusion: Give it a kick by adding a hint of cayenne pepper or chili powder—just a pinch will do! This unique twist will surprise everyone and add a zesty flair to your treats.

As you explore these variations, think about serving your irresistible lavender buttercream frosting on Honey Butter Brioche or layering it between cake tiers for those special occasions. The possibilities are endless!

Expert Tips for Irresistible Lavender Buttercream Frosting

  • Culinary-Grade Lavender: Use only culinary-grade lavender buds to avoid an unpleasant soapy flavor in your frosting. It’s crucial for safety and taste!

  • Adjust Flavor Gradually: Start with a small amount of lavender during infusion and adjust based on your taste preference; too much can easily overpower the frosting.

  • Perfect Whip: Whip the frosting until it’s fluffy and holds its shape. This ensures your irresistible lavender buttercream frosting looks gorgeous on your desserts!

  • Consistency Matters: If the frosting is too thick, add more cream; if it’s too thin, incorporate more powdered sugar until you reach the ideal spreadable texture.

  • Storage Tips: Store any leftover frosting in an airtight container in the fridge for up to a week. Remember to re-whip it before use to restore its fluffy consistency!

What to Serve with Irresistible Lavender Buttercream Frosting

Delight your senses with beautifully paired treats that elevate your baking experience to floral heights of deliciousness.

  • Lemon Cake: The citrusy brightness of lemon cake cuts through the sweetness of lavender, creating a harmonious balance of flavors. It’s a refreshing change that sings of spring, perfect for those sunny afternoon gatherings.

  • Vanilla Cupcakes: A classic combination, the rich vanilla base of cupcakes enhances the floral notes beautifully. Top with lavender frosting for a dreamy dessert that’s sure to impress at any celebration.

  • Shortbread Cookies: Buttery and crumbly, shortbread cookies provide a delightful contrast to the smooth frosting. The simplicity of these cookies allows the lavender flavor to shine and offers a delightful crunch to every bite.

  • Earl Grey Tea: This sophisticated tea brings its own floral notes while enhancing the aroma of the lavender. Pairing them offers a serene afternoon treat reminiscent of a quiet tea party.

  • Fresh Berries: Strawberries or raspberries scattered atop cupcakes add a pop of color and juicy freshness that complements the floral richness of the frosting. They bring a refreshing tartness that pairs beautifully with the sweet creaminess.

  • Almond Cookies: Nutty and subtly sweet, almond cookies offer a rich base that works seamlessly with lavender buttercream. Their crunchy texture provides a delightful contrast to the frosting’s smoothness.

Mix and match these delectable treats to create a beautiful dessert table that reflects the enchanting qualities of your irresistible lavender buttercream frosting!

Storage Tips for Irresistible Lavender Buttercream Frosting

Fridge: Store in an airtight container for up to one week, ensuring it retains its delightful texture and floral flavor.

Freezer: Freeze for up to three months in a tightly sealed container or freezer bag. When ready to use, thaw in the fridge overnight before re-whipping to restore its airy consistency.

Reheating: When you take frosting out of the fridge, allow it to come to room temperature before re-whipping to revive its fluffy texture for your cakes and treats.

Irresistible Lavender Buttercream Frosting Recipe FAQs

What is the best way to select culinary-grade lavender buds?
Absolutely! When selecting lavender buds, ensure they are labeled as culinary-grade to guarantee they are safe for consumption. Look for dried lavender in specialty grocery stores or online, commercial brands known for quality herbs. Fresh lavender is delicious but can also bring herbal notes that might not suit the frosting.

How should I store lavender buttercream frosting?
You can store your irresistible lavender buttercream frosting in an airtight container in the fridge for up to one week. For long-term storage, place it in a sealed container or freezer bag and freeze for up to three months. When you’re ready to use it, simply thaw it in the fridge overnight, and re-whip it to restore its delightful fluffy texture.

Can I freeze lavender buttercream frosting? How should I do it?
Yes! To freeze your lavender buttercream frosting, follow these steps:

  1. Transfer the frosting into an airtight container or a freezer bag, pressing out as much air as possible.
  2. Label the container with the date and type of frosting for easy identification later.
  3. Freeze for up to three months.
    When you’re ready to use it, take the frozen frosting out and let it thaw in the fridge overnight. Before using, whip it up again to achieve that light, fluffy consistency you love!

What should I do if my frosting is too thick or too thin?
If you find your frosting is too thick, no worries! Simply add a teaspoon of your remaining lavender-infused cream and blend until you reach the desired consistency. Conversely, if it’s too thin, gradually add more powdered sugar be mixing well until you hit that perfect fluffy texture. It’s all about personal preference, so adjust to suit your style!

Is this buttercream suitable for those with dietary restrictions?
Very! You can easily adapt this irresistible lavender buttercream frosting to be vegan by substituting the regular butter with vegan butter and using non-dairy milk instead of heavy cream. This way, everyone can indulge in its floral charm without missing out on deliciousness! Just make sure to always check for any nut allergies or sensitivities with the ingredients you’re using.

What desserts work best with lavender buttercream frosting?
This delightful frosting is versatile and perfect for enhancing a variety of desserts! It’s ideal for decorating cupcakes, layering between cake tiers, or even as a filling for cookies. Its delicate floral notes beautifully complement vanilla, lemon, or almond-flavored treats, adding that enchanting touch to your baked creations!

Irresistible Lavender Buttercream Frosting

Irresistible Lavender Buttercream Frosting for Whimsical Treats

Create an enchanting buttercream frosting infused with lavender, perfect for cakes and cupcakes. Delightfully quick and customizable for vegan diets.
Prep Time 15 minutes
Total Time 15 minutes
Servings: 12 servings
Course: Dessert
Cuisine: American
Calories: 150

Ingredients
  

Frosting Base
  • 1 cup Butter Softened (use vegan butter for vegan version)
  • 4 cups Powdered Sugar No substitutes recommended
  • 1/4 cup Heavy Cream Use dairy-free milk for vegan version
Floral Infusion
  • 1 tablespoon Culinary-Grade Lavender Buds Ensure using culinary-grade
Appearance
  • Food Coloring Optional; omit for natural hue

Equipment

  • Mixing Bowl
  • Electric Mixer
  • Saucepan
  • Fine mesh strainer

Method
 

Preparation
  1. Heat 1/4 cup of heavy cream in a saucepan over low heat until warm. Add 1 tablespoon of culinary-grade lavender buds and steep for about 10-15 minutes.
  2. In a mixing bowl, beat 1 cup of softened butter with an electric mixer on medium speed until creamy, about 2-3 minutes.
  3. Gradually add 4 cups of powdered sugar, mixing on low to prevent a sugar cloud, then increase to medium until fluffy.
  4. Strain the lavender-infused cream to remove the buds, then slowly drizzle it into the butter-sugar mixture. Mix on low speed for 1-2 minutes.
  5. Adjust the consistency of the frosting by adding a teaspoon of the infused cream if too thick or more powdered sugar if too thin.
  6. Whip the frosting on high speed for an additional 3-5 minutes until light and fluffy.

Nutrition

Serving: 1servingCalories: 150kcalCarbohydrates: 22gFat: 7gSaturated Fat: 4gPolyunsaturated Fat: 0.5gMonounsaturated Fat: 2.5gCholesterol: 30mgSodium: 15mgPotassium: 10mgSugar: 15gVitamin A: 300IUCalcium: 5mg

Notes

Store any leftover frosting in an airtight container in the fridge for up to a week and re-whip before use. Adjust flavors gradually to taste preference.

Tried this recipe?

Let us know how it was!

Raspberry Angel Food Cake That’s Light and Irresistibly Fruity

As I watched the vibrant red raspberries tumble into my mixing bowl, it hit me—making my very own Raspberry Angel Food Cake was the perfect way to celebrate the season’s fruit. This delightful recipe offers a light, airy texture that melts in your mouth, all while being a health-conscious choice that won’t weigh you down. With minimal ingredients and a simple technique, this cake is a fantastic way to impress guests at any gathering, or simply to indulge yourself on a lazy afternoon. Plus, with its low-calorie profile, you can savor each luscious slice without guilt. Are you ready to transform your kitchen into a berry-filled haven? Let’s dive into the world of Raspberry Angel Food Cake!

Why is Raspberry Angel Food Cake a Must-Try?

Lightness: This cake is the ultimate guilt-free treat, boasting a low-calorie profile without sacrificing sweetness.

Aromatic Burst: Fresh raspberries deliver a delightful tang that perfectly complements the cake’s airy texture.

Versatile Options: From drizzling with berry coulis to serving alongside chilled strawberry cheesecake bars, the possibilities are endless!

Simple to Make: Even beginner bakers can create this masterpiece with minimal ingredients and straightforward techniques.

Perfect for Any Occasion: Whether it’s a summer barbecue or a classy dinner party, this cake is bound to impress your guests while keeping things light.

Crowd-Pleaser: With its stunning presentation and irresistible flavors, it’s sure to become a favorite among family and friends!

Raspberry Angel Food Cake Ingredients

For the Cake

  • Egg Whites – Essential for achieving the cake’s signature lightness and airy texture.
  • Granulated Sugar – Sweetens the cake and helps stabilize the whipped egg whites for that fluffy goodness.
  • Cake Flour – Provides a delicate crumb; substitute with all-purpose flour if needed, but the texture may not be as fine.
  • Raspberries – Gives a burst of fruity flavor and vibrant color; fresh or frozen can be used, just ensure frozen raspberries are well-drained.

For Dusting and Topping

  • Powdered Sugar – Adds a touch of sweetness and visual appeal when dusted on top before serving.
  • Whipped Cream – Enhances the cake’s lightness and creaminess; Greek yogurt can be a healthier substitute for a delightful twist.

Step‑by‑Step Instructions for Raspberry Angel Food Cake

Step 1: Preheat the Oven
Begin your culinary journey by preheating your oven to 350°F (175°C). While the oven heats up, select a 10-inch tube pan, ensuring not to grease it. This will allow the cake to cling to the sides while baking, helping it rise beautifully and maintain its airy texture.

Step 2: Whip the Egg Whites
In a large, grease-free mixing bowl, combine your egg whites. Using an electric mixer, whip the whites on medium speed until they become foamy, which should take about 1-2 minutes. Then, gradually sprinkle in granulated sugar while increasing the speed to high. Continue whipping until stiff peaks form, resembling the consistency of fluffy clouds, typically around 5-7 minutes.

Step 3: Incorporate the Cake Flour
Next, sift the cake flour gently over your whipped egg whites. This is a crucial step for your Raspberry Angel Food Cake’s light texture. Using a spatula, carefully fold the flour into the egg whites, taking care not to deflate the mixture. This should be done slowly and gently until fully combined; your batter will be silky and airy.

Step 4: Add the Raspberries
Gently fold in the fresh or well-drained thawed raspberries into your batter, ensuring they are evenly distributed but not crushed. This will create delightful pockets of fruity flavor throughout your cake. Take care to maintain the lightness of the batter as you mix, allowing the vibrant color to swirl delicately within.

Step 5: Transfer to the Pan
Pour the raspberry batter into your prepared tube pan, smoothing the top with a spatula. Be sure to tap the pan lightly on the counter to release any air bubbles trapped in the batter. This step is vital for achieving a smooth and lovely surface on your Raspberry Angel Food Cake.

Step 6: Bake the Cake
Place the pan in the preheated oven and bake for 30-35 minutes. You know the cake is done when it springs back lightly when touched and a toothpick inserted into the center comes out clean. Keep an eye on it as it bakes, enjoying the delightful aroma filling your kitchen!

Step 7: Cool the Cake
Once baked, immediately invert the tube pan, placing it upside down on a cooling rack. This technique prevents the cake from collapsing as it cools. Allow the cake to cool completely in this position for at least an hour, ensuring it retains its airy structure.

Step 8: Dust and Serve
Once completely cool, gently run a knife around the edges and center of the cake to release it from the pan. Turn it out onto a serving platter and dust with powdered sugar for that touch of sweetness. Serve slices with a dollop of whipped cream and extra raspberries for a delightful contrast to the cake’s lightness.

Make Ahead Options

These Raspberry Angel Food Cakes are perfect for meal prep enthusiasts! You can whip the egg whites and prepare the batter up to 24 hours in advance, allowing you to save precious time on busy days. Simply store the batter in an airtight container in the refrigerator to keep it fresh. When you’re ready to bake, gently fold in the raspberries, and pour it into your tube pan. Bake as directed and for best quality, cool the cake upside down to maintain its fluffy structure. By prepping ahead, you’ll have a delectable, light dessert ready to impress guests with minimal last-minute effort!

Storage Tips for Raspberry Angel Food Cake

Room Temperature: Store the cake in an airtight container at room temperature for up to 3 days. Keep it covered to maintain its light texture and prevent drying out.

Fridge: If you top your Raspberry Angel Food Cake with whipped cream, refrigerate it for up to 2 days to keep it fresh. Always cover it lightly to prevent odors from the fridge.

Freezer: Freeze unadorned cake slices in an airtight container for up to 2 months. Wrap slices separately in plastic wrap for easy individual servings later.

Reheating: To enjoy leftover cake, let it come to room temperature or gently warm it in the microwave for about 10-15 seconds if desired; this helps revive its original fluffiness.

Raspberry Angel Food Cake Variations

Feel free to explore different flavors and textures to make this delightful cake your own!

  • Berry Swap: Substitute raspberries with blueberries or strawberries for a different berry flavor. Each fruit brings its unique sweetness, creating variations that keep things exciting!

  • Coulis Drizzle: Drizzle with a homemade berry coulis instead of whipped cream for a tangy, lighter option. Just blend fresh berries with a touch of sweetener, and pour it over slices right before serving.

  • Citrus Infusion: Add a hint of lemon or orange zest to the batter for an extra layer of brightness. The citrus complements the berries beautifully, elevating the entire flavor profile.

  • Nutty Crunch: Fold in finely chopped nuts, like almonds or walnuts, for added texture. This not only enhances the crunch factor but also introduces a satisfying contrast to the cake’s softness.

  • Sweetened Yogurt: Swap the whipped cream for sweetened Greek yogurt to keep things creamy while adding a protein boost. Top with extra berries for a delightful garnish!

  • Chocolate Twist: For a decadent variation, sprinkle some cocoa powder into the flour mixture, giving the cake a rich, chocolaty flavor. Top with chocolate shavings for an irresistible finish!

  • Spiced Delight: Incorporate a pinch of cinnamon or nutmeg into the dry ingredients for a warm, spiced aroma. It adds a cozy feeling to every bite, perfect for a chilly evening.

Looking for more deliciousness? Consider serving this cake alongside a scoop of light vanilla ice cream or with a side of Strawberry Cheesecake Bars for a well-rounded dessert experience!

What to Serve with Raspberry Angel Food Cake?

Indulging in a slice of this fluffy delight opens the door to endless possibilities for a delightful meal experience.

  • Fresh Berry Compote: A vibrant sauce of mixed berries adds a tangy, fruity layer that perfectly complements the lightness of the cake. Drizzle over each slice for a colorful twist.

  • Vanilla Ice Cream: The creamy richness of light vanilla ice cream creates a beautiful contrast to the cake’s airy texture while adding a touch of indulgence.

  • Citrus Salad: A refreshing mix of oranges and grapefruits brings a zesty brightness that complements the sweetness of the raspberries, enhancing the overall flavor profile.

  • Herbal Iced Tea: A chilled herbal tea, perhaps mint or chamomile, can cleanse the palate and provide a light, soothing drink alongside the dessert.

  • Chocolate-Dipped Strawberries: The rich flavor of berries dipped in chocolate offers a delightful indulgence that pairs beautifully with the airy sweetness of the angel food cake.

  • Lemon Cream: A dollop of tangy lemon cream introduces a citrusy zing that lifts the dessert’s flavors, giving an unexpected, refreshing contrast.

Imagine serving this delightful cake with your chosen pairings, transforming a simple dessert into a memorable experience for family and friends!

Expert Tips for Raspberry Angel Food Cake

  • Clean Equipment: Ensure all bowls and utensils are completely grease-free for optimal egg white whipping; any residue can hinder achieving those stiff peaks.

  • Gentle Folding: When incorporating the cake flour and raspberries, fold gently to maintain the lightness of the batter; overmixing can deflate it and affect the texture of your Raspberry Angel Food Cake.

  • Proper Inversion: Remember to cool the cake upside down in the pan on a cooling rack: this prevents collapsing and keeps your cake fluffy and airy.

  • Fresh Ingredients: Use fresh and ripe raspberries for the best flavor and color; if using frozen, make sure they are well-thawed and fully drained to prevent excess moisture.

  • Testing for Doneness: Keep an eye on the cake while baking; it’s done when it springs back lightly to touch, ensuring you catch that perfect moment for the best result!

Raspberry Angel Food Cake Recipe FAQs

How do I choose the best raspberries for my cake?
Absolutely! Opt for fresh, plump raspberries that are bright in color and free from dark spots or mold. If you’re using frozen raspberries, ensure they’re well-drained to avoid excess moisture, which can affect the cake’s texture. I often look for berries with a slight give, indicating ripeness, and usually avoid any that look too soft or mushy.

What’s the best way to store Raspberry Angel Food Cake?
Store your Raspberry Angel Food Cake in an airtight container at room temperature for up to 3 days. This helps retain its light texture. If you’ve topped the cake with whipped cream, it’s best to refrigerate it, where it will stay fresh for up to 2 days. Make sure to cover it lightly, so it doesn’t absorb any odors from the fridge!

Can I freeze Raspberry Angel Food Cake?
Yes, you can absolutely freeze your cake! To do so, slice the unadorned cake and wrap each slice tightly in plastic wrap, then place them in an airtight container. The cake can be frozen for up to 2 months. To enjoy, let each slice thaw at room temperature or warm it in the microwave for about 10-15 seconds—you’ll love the restored fluffiness!

What should I do if my cake collapses after baking?
Very! A collapsed cake can be disheartening, but it can happen if the cake isn’t cooled properly. Always remember to invert the cake pan immediately after baking; this allows it to cool without losing its airy structure. Additionally, be cautious with the folding technique; overmixing can deflate the batter before it sets.

Are there any dietary considerations I should know about?
This Raspberry Angel Food Cake is generally lower in calories and does not contain butter, making it a healthier dessert option! However, if you’re serving it to guests with dietary restrictions, it’s good to highlight it contains egg whites, which may concern those with egg allergies. For alternative toppings, consider using Greek yogurt instead of whipped cream for a different flavor profile that’s still light.

How can I enhance the flavor of my Raspberry Angel Food Cake?
Adding a hint of lemon zest to the batter can definitely elevate the flavor! Start with about a teaspoon of finely grated lemon zest mixed into the egg whites before incorporating the flour. This little addition will create a refreshing citrus undertone that pairs beautifully with the raspberries and keeps your cake vibrant and exciting!

Raspberry Angel Food Cake

Raspberry Angel Food Cake That's Light and Irresistibly Fruity

This Raspberry Angel Food Cake is a light, airy, and guilt-free dessert that showcases vibrant raspberries.
Prep Time 15 minutes
Cook Time 35 minutes
Cooling Time 1 hour
Total Time 1 hour 50 minutes
Servings: 8 slices
Course: Dessert
Cuisine: American
Calories: 120

Ingredients
  

For the Cake
  • 12 large Egg Whites Essential for achieving the cake's signature lightness and airy texture.
  • 1 cup Granulated Sugar Sweetens the cake and helps stabilize the whipped egg whites for that fluffy goodness.
  • 1 cup Cake Flour Provides a delicate crumb; substitute with all-purpose flour if needed, but the texture may not be as fine.
  • 2 cups Raspberries Gives a burst of fruity flavor and vibrant color; fresh or frozen can be used, just ensure frozen raspberries are well-drained.
For Dusting and Topping
  • 1 cup Powdered Sugar Adds a touch of sweetness and visual appeal when dusted on top before serving.
  • 1 cup Whipped Cream Enhances the cake's lightness and creaminess; Greek yogurt can be a healthier substitute for a delightful twist.

Equipment

  • 10-inch tube pan
  • Electric Mixer
  • Spatula
  • sifting tool

Method
 

Step‑by‑Step Instructions
  1. Preheat your oven to 350°F (175°C) and select a 10-inch tube pan, without greasing it.
  2. In a large, grease-free mixing bowl, whip the egg whites on medium speed until foamy, about 1-2 minutes.
  3. Gradually sprinkle in sugar while increasing the speed to high, continuing to whip until stiff peaks form, about 5-7 minutes.
  4. Sift the cake flour over the whipped egg whites and gently fold in.
  5. Gently fold in the raspberries into your batter, ensuring they are evenly distributed.
  6. Pour the batter into the prepared tube pan, smoothing the top with a spatula and tapping to release air bubbles.
  7. Bake for 30-35 minutes until it springs back lightly and a toothpick comes out clean.
  8. Invert the pan on a cooling rack immediately to cool completely for at least an hour.
  9. Run a knife around the cake to release it from the pan, then dust with powdered sugar and serve with whipped cream and raspberries.

Nutrition

Serving: 1sliceCalories: 120kcalCarbohydrates: 30gProtein: 3gSodium: 50mgPotassium: 150mgFiber: 1gSugar: 20gVitamin C: 10mgCalcium: 1mgIron: 2mg

Notes

Ensure all equipment is clean and grease-free to whip the egg whites effectively. Use fresh raspberries for the best flavor.

Tried this recipe?

Let us know how it was!

Garlic Parmesan Roasted Nuts for the Ultimate Snack Attack

As I prepared for a cozy weekend gathering, the scent of roasted garlic filled the air, instantly transporting me to my childhood kitchen. I can hardly resist the allure of Garlic Parmesan Roasted Nuts, a snack that turns ordinary evenings into something special. This easy, homemade recipe is the perfect blend of crunchy almonds and cashews, bringing not only a delightful taste but also a healthier alternative to those store-bought snacks that often fall flat. Imagine serving these delicious morsels at your next game night or as a surprise addition to a charcuterie board—it’s sure to impress! Ready to elevate your snacking game? Let’s dive into making these irresistible nibbles that everyone will love.

Why Are Garlic Parmesan Roasted Nuts Irresistible?

Flavor Explosion: The combination of roasted garlic and Parmesan creates a snack that is both savory and satisfying, elevating your taste buds to new heights.

Quick & Easy: With only a handful of ingredients, this recipe is perfect for busy evenings or last-minute gatherings. Just toss, roast, and serve!

Customizable Goodness: Feel free to substitute nuts or spice it up with cayenne pepper for an added kick. Add your twist to make it uniquely yours!

Perfect for Sharing: These Garlic Parmesan Roasted Nuts are an excellent choice for game days or movie nights, ensuring everyone keeps coming back for more.

Healthier Snack Option: Packed with protein and healthy fats, you’ll feel great about serving this homemade treat over those boring, store-bought options.

Don’t forget to check out this delightful Roasted Strawberry Whipped ricotta toast for a perfect pairing!

Garlic Parmesan Roasted Nuts Ingredients

• Here’s what you’ll need to create this mouthwatering snack!

For the Nuts

  • Almonds – A crunchy, nutritious base that adds delightful texture.
  • Cashews – Their creamy flavor complements the almonds beautifully.

For the Flavoring

  • Olive Oil – Helps bind the flavors and enhances the nuttiness.
  • Garlic Powder – Provides that essential garlicky punch; adjust to your taste preference.
  • Salt – Brings out the deep flavors; feel free to reduce for a lighter saltiness.

For the Garnish

  • Parmesan Cheese – Adds a rich, savory finish when roasted; be sure to use freshly grated for the best results.

With these ingredients, you’ll be all set to whip up a batch of irresistible Garlic Parmesan Roasted Nuts that outshine any fast-food alternative. Enjoy the crunch and flavor in every bite!

Step‑by‑Step Instructions for Garlic Parmesan Roasted Nuts

Step 1: Preheat Your Oven
Begin by preheating your oven to 350°F (175°C). This step is crucial for achieving those perfectly roasted Garlic Parmesan Roasted Nuts that are crunchy on the outside and warm on the inside. As the oven warms, you can prepare your nut mixture and gather the necessary equipment, including a large mixing bowl and a baking sheet.

Step 2: Combine Ingredients
In a large mixing bowl, combine your selection of almonds and cashews with a drizzle of olive oil. Sprinkle in garlic powder and salt based on your taste preferences. Stir the mixture well with a spatula or your hands, ensuring that all the nuts are evenly coated. A great mix will give you the delicious flavors of Garlic Parmesan Roasted Nuts that everyone will love.

Step 3: Spread on Baking Sheet
Once the nuts are well coated, spread the mixture evenly onto a baking sheet lined with parchment paper. Make sure to arrange them in a single layer to promote even roasting. This will help the Garlic Parmesan Roasted Nuts achieve that delectable golden color and crispy texture, giving you a perfect snack or appetizer.

Step 4: Roast the Nuts
Place the baking sheet in the preheated oven and roast the nuts for about 10 to 15 minutes. Stir the nuts halfway through to ensure they brown evenly. Keep a close eye on them, as you want them to become golden and aromatic but not burnt. The kitchen will soon fill with an irresistible aroma that hints at the tasty Garlic Parmesan Roasted Nuts to come.

Step 5: Add Parmesan and Cool
After roasting, remove the baking sheet from the oven and immediately sprinkle freshly grated Parmesan cheese over the hot nuts. The heat will help the cheese melt slightly and adhere to the nuts. Allow the Garlic Parmesan Roasted Nuts to cool on the baking sheet for a few minutes before transferring them to a serving bowl. This will ensure they reach that perfect crunch while still retaining their flavors.

Garlic Parmesan Roasted Nuts Variations

Feel free to mix things up and make this recipe your own with these creative suggestions!

  • Nutty Swap: Substitute cashews with pecans or walnuts for a different flavor profile. Each nut brings its own delightful crunch and taste, making every batch unique.

  • Herb Infusion: Add dried herbs like rosemary or thyme for an aromatic twist. Just a sprinkle will elevate the flavor, making your Garlic Parmesan Roasted Nuts even more irresistible.

  • Spicy Kick: Incorporate cayenne pepper or chili flakes for a zesty heat. The warmth balances beautifully with the Parmesan, turning this snack into a fiery delight.

  • Sweet Touch: Drizzle with a bit of maple syrup before roasting for a sweet-savory combination that will surprise your taste buds. It’s a lovely contrast to the saltiness of the Parmesan!

  • Nut Blend: Experiment with your favorite nuts to create a custom blend. From pistachios to hazelnuts, there are countless combinations for your snacking pleasure!

While you whip up these delectable treats, don’t forget to try pairing them with a refreshing salad, such as a Roasted Carrot Lentil salad for a wholesome meal. You can also serve them alongside a delectable charcuterie board that features your favorite cheeses!

  • Textural Contrast: For added crunch, toss in some crispy bacon bits or roasted chickpeas. This variation introduces a hearty texture and flavor that’s simply irresistible.

  • Cheesy Goodness: Swap out Parmesan for aged cheddar or pecorino for a cheese twist that brings its own unique flavor profile. Each cheese offers a delightful variation that will leave your guests wanting more!

Expert Tips for Garlic Parmesan Roasted Nuts

  • Watch Closely: Keep an eye on the roasting nuts to prevent burning; they can turn from golden to charred very quickly.

  • Freshly Grated Cheese: Use freshly grated Parmesan for a better melt and flavor compared to pre-grated options, ensuring the Garlic Parmesan Roasted Nuts are irresistibly delicious.

  • Spice It Up: Add a pinch of cayenne pepper or smoked paprika for a delightful kick that transforms your snack experience.

  • Perfect Storage: Store leftover nuts in an airtight container at room temperature to maintain their crunch and flavor for up to two weeks.

  • Mix and Match: Feel free to experiment with different nut combinations for unique flavors, or try adding herbs like rosemary to enhance the herbaceous notes!

Make Ahead Options

These Garlic Parmesan Roasted Nuts are perfect for busy weeknights or when hosting gatherings! You can prepare the nut mixture (excluding the Parmesan) up to 24 hours in advance and store it in an airtight container in the refrigerator. This method keeps the nuts flavorful and fresh, avoiding any moisture that could dampen their crunch. When you’re ready to serve, simply spread the mixture onto a baking sheet and roast at 350°F (175°C) for 10 to 15 minutes, adding the Parmesan during the last moments of roasting. This way, you’ll have delicious, homemade snacks with minimal effort that everyone will love!

How to Store and Freeze Garlic Parmesan Roasted Nuts

Room Temperature: Store Garlic Parmesan Roasted Nuts in an airtight container at room temperature for up to 2 weeks for optimal freshness and crunch.

Fridge: If you prefer longer storage, keep the nuts in the fridge for up to a month. This can help maintain their flavor but might slightly affect crunchiness.

Freezer: Freeze Garlic Parmesan Roasted Nuts in a freezer-safe bag or container for up to 3 months. When ready to enjoy, let them thaw at room temperature.

Reheating: For a quick refresh, reheat in the oven at 350°F (175°C) for about 5 minutes. This restores their delightful crunch before serving!

What to Serve with Garlic Parmesan Roasted Nuts

Elevate your snack game with these delightful pairings that complement every crunchy bite.

  • Fresh Veggies & Hummus: Crunchy veggies like carrots and cucumbers dipped in creamy hummus offer vibrant freshness alongside your nuts.
  • Fruit Platter: A mix of juicy strawberries and crisp apples adds a refreshing sweetness that balances the savory flavors beautifully.
  • Cheese Board Delights: Pair with creamy brie and sharp cheddar on a cheese board for a perfect contrast of taste and texture, sure to impress your guests.
  • Herbed Flatbread: Serve with warm, herbed flatbread for a savory bite that complements the nuts’ rich flavor while adding a delightful diffrent texture.
  • Savory Tapenade: A spread of olive or sun-dried tomato tapenade introduces a briny element that harmonizes with the roasted garlic and Parmesan.
  • Craft Beer: Enjoy with a refreshing craft beer. Its carbonation cuts through the richness, cooling the palate and enhancing the overall experience.
  • Mixed Green Salad: Toss with a light vinaigrette dressing for a salad that adds brightness to your plate and pairs well with the nutty flavors.

With these thoughtful additions, your Garlic Parmesan Roasted Nuts will be the star of the gathering, creating a truly memorable and delicious spread!

Garlic Parmesan Roasted Nuts Recipe FAQs

How do I choose the right nuts for roasting?
Absolutely! For this Garlic Parmesan Roasted Nuts recipe, I suggest using a mix of almonds and cashews. Both nuts provide an enjoyable crunch, while cashews add a smoothness that beautifully complements the almond flavor. You can also experiment with variations—pecans or walnuts work wonderfully if you’re looking for something a tad different.

What is the best way to store Garlic Parmesan Roasted Nuts?
Very good question! Store your Garlic Parmesan Roasted Nuts in an airtight container at room temperature for up to 2 weeks. This will help maintain their freshness and crunchiness. I often recommend keeping them in a cool, dry place away from direct sunlight. If you notice any dark spots on the nuts, it’s best to discard them to ensure you’re enjoying the freshest batch!

Can I freeze Garlic Parmesan Roasted Nuts?
Absolutely! To freeze Garlic Parmesan Roasted Nuts, simply place them in a freezer-safe bag or airtight container. They can last for up to 3 months in the freezer. When you’re ready to enjoy, just let them thaw at room temperature. For a quick refresh, pop them back in a preheated oven at 350°F (175°C) for about 5 minutes for that delightful crunch!

What if my nuts burn during roasting?
Oh no, that can happen! Nuts can easily go from perfect to burnt if they’re left unattended. I recommend setting a timer and checking on them halfway through the roasting time—around the 5 to 7 minute mark. If you notice they are browning too quickly, you may want to reduce the oven temperature to 325°F (163°C) and keep an eye on them for a few more minutes.

Are these Garlic Parmesan Roasted Nuts suitable for pets?
While these nuts are delicious for us, it’s best to keep them away from pets. Garlic is toxic to dogs and cats in significant amounts, and the added salt could be harmful as well. If you’re snacking with pets around, it’s a good idea to have a pet-friendly alternative on hand to keep everyone happy!

Can I adjust the seasoning or add different flavors?
The more the merrier! Feel free to adjust the garlic powder and salt according to your preference. If you enjoy a bit of heat, adding cayenne pepper would give these Garlic Parmesan Roasted Nuts a delightful kick. Additionally, herbs like rosemary or thyme can infuse wonderful flavors; just mix them in during the initial combining of the nuts!

Garlic Parmesan Roasted Nuts

Garlic Parmesan Roasted Nuts for the Ultimate Snack Attack

Enjoy a delightful blend of crunchy almonds and cashews with Garlic Parmesan Roasted Nuts, a healthier snack option perfect for gatherings.
Prep Time 10 minutes
Cook Time 15 minutes
Cooling Time 5 minutes
Total Time 30 minutes
Servings: 4 cups
Course: Appetizer
Cuisine: American
Calories: 250

Ingredients
  

Nuts
  • 1 cup Almonds A crunchy, nutritious base that adds delightful texture.
  • 1 cup Cashews Their creamy flavor complements the almonds beautifully.
Flavoring
  • 2 tablespoons Olive Oil Helps bind the flavors and enhances the nuttiness.
  • 1 teaspoon Garlic Powder Provides that essential garlicky punch; adjust to your taste preference.
  • 1 teaspoon Salt Brings out the deep flavors; feel free to reduce for a lighter saltiness.
Garnish
  • 1/2 cup Parmesan Cheese Adds a rich, savory finish when roasted; use freshly grated for the best results.

Equipment

  • large mixing bowl
  • Baking Sheet
  • Spatula

Method
 

Preparation
  1. Preheat your oven to 350°F (175°C).
  2. In a large mixing bowl, combine almonds and cashews with olive oil, garlic powder, and salt. Stir well to coat.
  3. Spread the mixture evenly onto a baking sheet lined with parchment paper.
  4. Roast in the preheated oven for about 10 to 15 minutes, stirring halfway through.
  5. Sprinkle freshly grated Parmesan cheese over the hot nuts and let cool for a few minutes.

Nutrition

Serving: 1cupCalories: 250kcalCarbohydrates: 10gProtein: 8gFat: 21gSaturated Fat: 3gPolyunsaturated Fat: 2gMonounsaturated Fat: 15gCholesterol: 5mgSodium: 200mgPotassium: 250mgFiber: 3gSugar: 1gCalcium: 150mgIron: 1mg

Notes

Keep a close watch on the nuts while roasting to prevent burning. Store leftovers in an airtight container for freshness.

Tried this recipe?

Let us know how it was!