Irresistible Brownie Waffle Dreams for Your Sweet Tooth

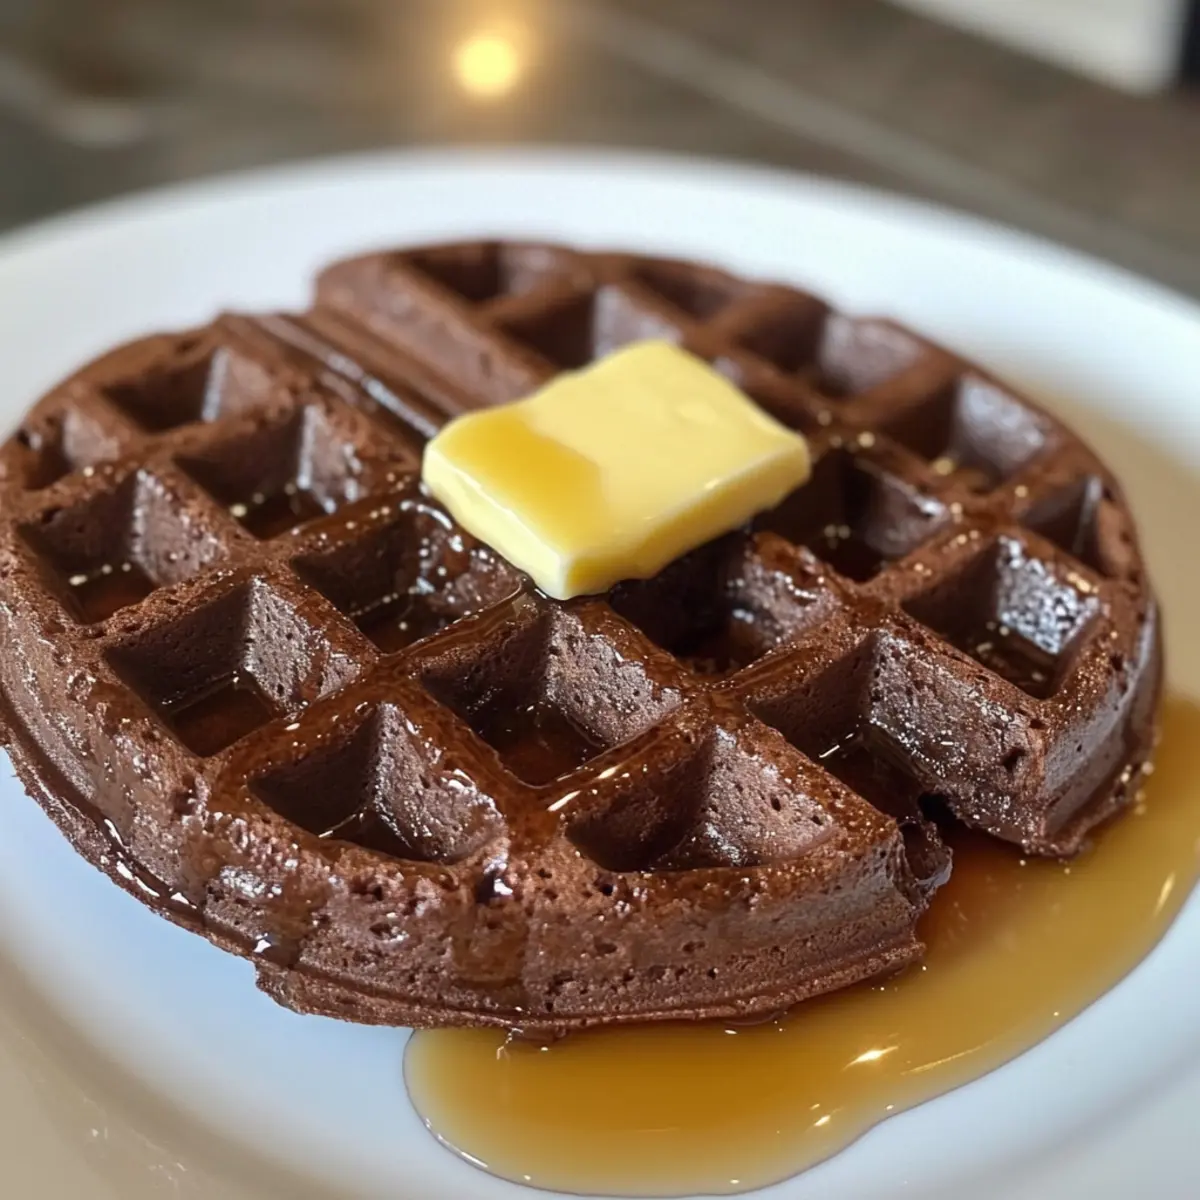
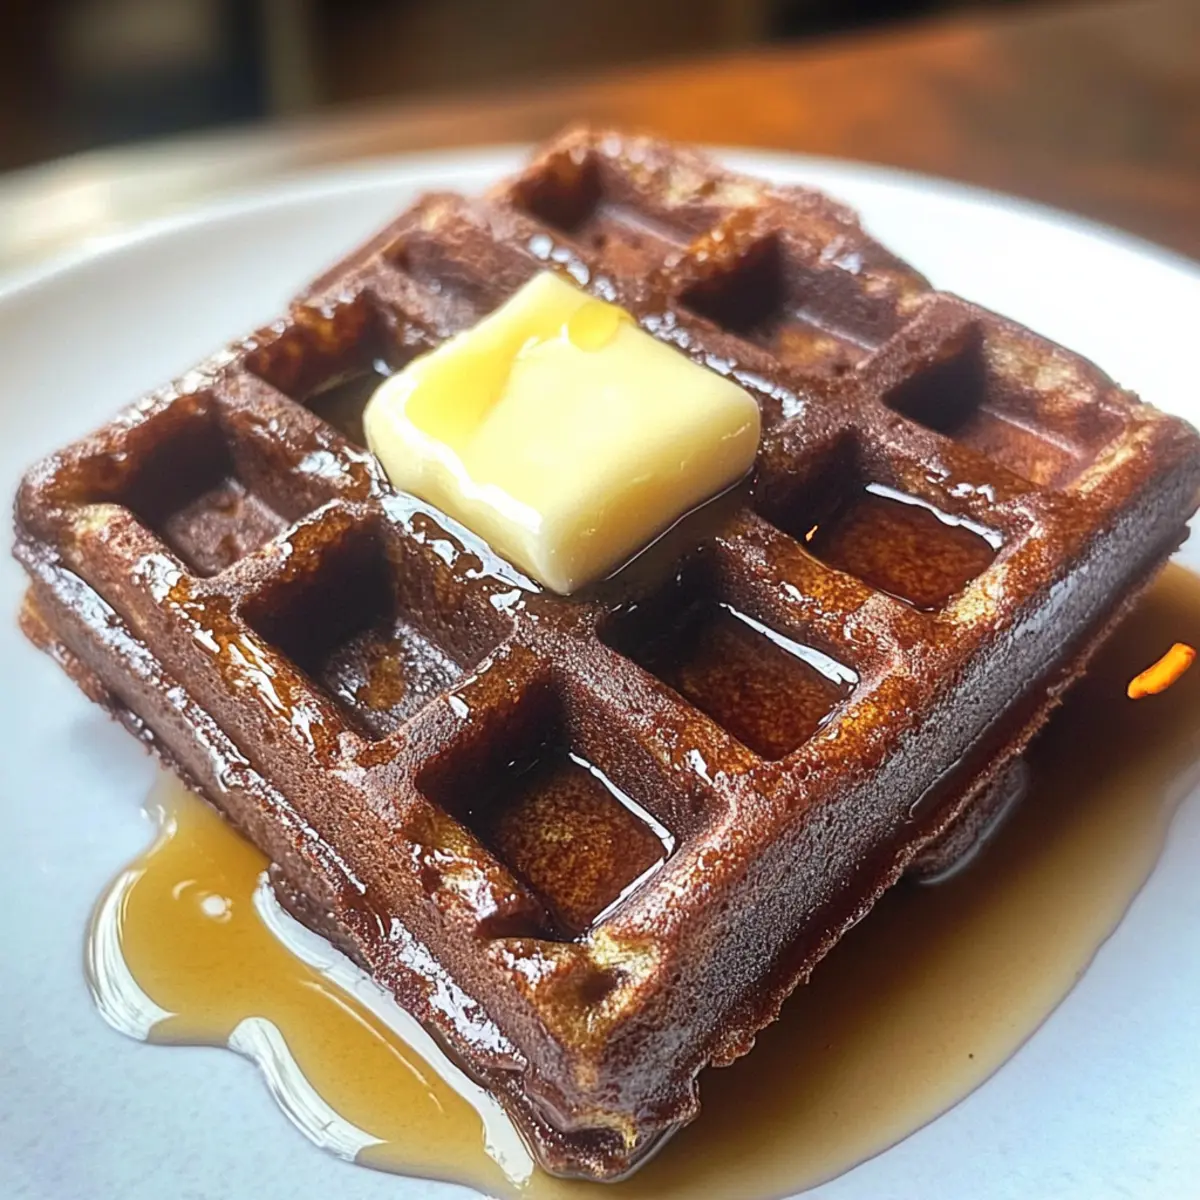
The aroma of chocolate wafting through the kitchen is enough to draw anyone in, and today, I’m thrilled to share my recipe for Keto Brownie Waffles. Striking the perfect balance between indulgence and health, these delightful treats are just as easy to whip up as they are delicious. With only about 100 calories and 3 net carbs per waffle, they’re a fabulous low-carb option for breakfast or a satisfying dessert. Plus, they cook up in a mere 10 minutes, making them a busy home chef’s best friend. Just imagine your mornings transformed, with a breakfast that’s both sweet and guilt-free—who could resist? Ready to dive into this chocolaty goodness and conquer your cravings? Let’s get started!

Why Are Brownie Waffles So Irresistible?

Decadent Flavor: Each bite is a chocolate lover’s dream, blending rich cocoa and creamy peanut butter for an unforgettable taste.

Quick & Easy: Whip up this easy recipe in just 10 minutes, perfect for those hectic mornings or a spontaneous dessert.

Low-Carb Delight: At around 100 calories and 3 net carbs, indulge without the guilt!

Versatile Toppings: Dress up your waffles with sugar-free syrup, fresh berries, or even make a delightful brownie waffle sundae with keto ice cream for a fun treat.

Feel-Good Ingredients: With simple, wholesome components, you can feel good about what you’re serving. If you’re on a keto journey, these are a must-try! For more tempting variations, check out my Fudgy Brownies Indulge or explore festive options like Patriotic Star Brownies.

Brownie Waffle Ingredients

For the Batter

  • Peanut Butter – Adds creaminess and rich flavor; choose a sugar-free version for keto compliance.
  • Egg – Acts as a binder, contributing to a delightful texture and structure.
  • Cocoa Powder – A crucial player for that rich chocolate flavor; stick to unsweetened for low-carb benefits.
  • Monkfruit Sweetener – Sweetens without the carbs; include it if you crave that extra sweetness in your brownie waffle.
  • Salt – A pinch enhances the overall chocolate experience.
  • Sugar-Free Semi-Sweet Chocolate Chips – Introduces delightful melted pockets of chocolate; pick dairy-free if you want a vegan option.
  • Water – Necessary for adjusting batter consistency; add as needed if it becomes too thick.

Each ingredient is a crucial puzzle piece in creating the perfect brownie waffle that your sweet tooth dreams about!

Step‑by‑Step Instructions for Brownie Waffles

Step 1: Combine Ingredients
In a mixing bowl, blend together 1/2 cup of creamy peanut butter, 1 large egg, 1/4 cup of unsweetened cocoa powder, a pinch of salt, and monkfruit sweetener (if desired). Stir until creamy and well-mixed. You’ll know it’s ready when there are no clumps and the mixture is thick yet smooth, resembling a rich brownie batter.

Step 2: Adjust Consistency
If your batter is too thick, add 1-2 teaspoons of water gradually to achieve a stirrable consistency. Mix until fully incorporated and smooth. The ideal brownie waffle batter should be thick but pourable; it shouldn’t feel runny or overly viscous, ensuring a delightful texture when cooked.

Step 3: Preheat the Waffle Maker
While you mix the batter, preheat your mini waffle maker according to the manufacturer’s instructions, ensuring it heats up properly for even cooking. This step usually takes about 5 minutes. A hot waffle maker will ensure that the outside gets crispy while keeping the inside soft and chocolatey.

Step 4: Prepare the Waffle Maker
If necessary, lightly spray the preheated waffle maker with cooking oil to prevent sticking. This step is essential for easy removal of your brownie waffles. Watch for steam or a ready light on the waffle maker; when it’s ready, you’ll hear a slight sizzle as you pour in the batter.

Step 5: Cook the First Waffle
Pour half of the brownie waffle batter into the center of the waffle maker and sprinkle with half of the sugar-free chocolate chips for added indulgence. Close the lid and cook for 2-3 minutes, until steam subsides and the indicator shows it’s done. You’ll know it’s ready once the exterior is slightly crispy, releasing a sweet chocolate aroma.

Step 6: Remove and Serve the First Waffle
Carefully remove the first brownie waffle using a fork or silicone spatula. It should come out easily if the waffle maker was well-prepared. Place the waffle on a plate and keep warm while you repeat the cooking process with the remaining batter and chocolate chips for the second waffle.

Step 7: Complete Your Batch
Pour the remaining batter into the preheated waffle maker, sprinkle the last of the chocolate chips, and close the lid again. Cook for an additional 2-3 minutes, checking for steam reduction before lifting the lid. When both brownie waffles are ready, they’ll have a delectable sheen and an inviting chocolate aroma.

Brownie Waffle Variations & Substitutions

Feel free to sprinkle your creativity and personalize these brownie waffles to ignite your taste buds!

  • Nut Butter Swap: Replace peanut butter with almond or cashew butter for a unique flavor twist. Each nut butter brings its own creamy texture and richness.

  • Dairy-Free Delight: Use dairy-free chocolate chips instead of semi-sweet ones for a completely vegan option that’s equally delicious. Enjoy the same sweet indulgence without the dairy!

  • Spice It Up: Add a teaspoon of cinnamon or a splash of vanilla extract for an enticing flavor boost that elevates the chocolate. These spices pair beautifully, creating warm, comforting notes.

  • Coconut Flour Twist: For an exotic touch, replace a tablespoon of cocoa powder with coconut flour. This adds a delightful coconut hint while ensuring low-carb goodness.

  • Berry Burst: Fold in some fresh or freeze-dried berries into the batter for a fruity zing. This twist offers a lovely contrast to the rich chocolate, making every bite adventurous!

  • Syrup & Toppings: Top with a drizzle of sugar-free caramel or a dollop of homemade whipped cream for an indulgent treat. The creamy textures enhance the overall experience beautifully.

  • Crunch Factor: Add chopped nuts or seeds to the batter for a satisfying crunch and added nutrition. Pecans or walnuts work wonderfully, giving an extra dimension to each bite.

If you’re looking for more ways to satisfy your sweet cravings, don’t miss out on my delectable Fudgy Brownies Indulge recipe or check out my festive Patriotic Star Brownies for a fun twist!

Make Ahead Options

These Keto Brownie Waffles are perfect for busy home cooks looking to save precious time! You can prepare the batter up to 24 hours in advance and refrigerate it in an airtight container to maintain freshness. Simply combine all the ingredients, adjusting the consistency with water as needed, and store it until you’re ready to use. Additionally, you can cook the waffles ahead of time and keep them in the fridge for up to 3 days. To reheat, place them in a toaster or a preheated waffle maker for a couple of minutes, ensuring they come out just as delicious and crispy as when freshly made. This way, you can enjoy a warm, chocolatey breakfast with zero hassle!

Expert Tips for Brownie Waffles

Perfect Batter: Make sure to adjust the batter consistency carefully; it should be thick but pourable for the best brownie waffle texture.

Preheated Waffle Maker: Always preheat your waffle maker before adding the batter. A hot surface ensures a crispy exterior and soft interior.

Avoiding Sogginess: Steer clear of the microwave when reheating; this can make your brownie waffles soggy. Instead, use a toaster oven for a better texture.

Storage Solution: Keep leftover brownie waffles in an airtight container for 4-5 days or freeze them for up to three months, ensuring a quick treat anytime!

Experiment with Flavors: Don’t hesitate to tweak the recipe! Incorporate spices like cinnamon or vanilla extract to elevate the flavor of your brownie waffles.

Storage Tips for Brownie Waffles

Fridge: Keep your brownie waffles in an airtight container for up to 4-5 days. This helps maintain their soft texture and chocolatey flavor.

Freezer: For longer storage, freeze your brownie waffles after laying them flat on a baking sheet to avoid sticking. Transfer them to a freezer bag for up to three months.

Reheating: When you’re ready to enjoy, reheat your brownie waffles in a toaster oven to restore their crispiness. Avoid the microwave, as it can make them soggy.

Thawing: If frozen, thaw your brownie waffles overnight in the fridge before reheating. They will taste just as delicious as the day you made them!

What to Serve with Keto Brownie Waffles?

Transform your breakfast or dessert spread with delicious additions that will tantalize your taste buds!

  • Creamy Whipped Cream:
    A dollop of homemade whipped cream provides a light, airy balance to the rich chocolate flavor, adding a delightful texture.

  • Fresh Berries:
    Strawberries, blueberries, or raspberries introduce a burst of freshness and natural sweetness, making every bite more vibrant.

  • Sugar-Free Syrup:
    Drizzle with sugar-free syrup to enhance the sweetness without the carbs, accentuating the brownie waffle’s decadent taste.

  • Chopped Nuts:
    Crunchy walnuts or pecans add a satisfying texture and nutty flavor that complements the soft, chocolatey waffle wonderfully.

  • Keto Ice Cream:
    For an indulgent treat, top your brownie waffles with a scoop of keto ice cream, turning them into a delightful sundae!

  • Peanut Butter Drizzle:
    A drizzle of melted peanut butter intensifies the flavor, marrying perfectly with the brownie base for a rich experience.

  • Coconut Flakes:
    Toasted coconut flakes bring a tropical flair and crunchy boost, providing a sweet contrast to the deep cocoa.

  • Hot Chocolate Sauce:
    Pour over a warm, sugar-free chocolate sauce to amplify the chocolatey goodness, creating an irresistible dessert experience.

  • Bulletproof Coffee:
    Pair your waffles with a cup of Bulletproof coffee for a satisfying, creamy beverage that complements the chocolate delight perfectly.

Keto Brownie Waffles Recipe FAQs

What is the best way to select ripened ingredients for my Brownie Waffles?
Absolutely! When selecting peanut butter, choose a variety that’s creamy and sugar-free for the best keto-friendly option. For eggs, look for freshly laid ones (check the expiration date); they should feel heavy and have a smooth, clean shell. Unsweetened cocoa powder should be rich in color without any clumps for optimal chocolate flavor.

How should I store leftover Brownie Waffles?
You can keep your brownie waffles in an airtight container in the refrigerator for up to 4-5 days. Make sure they are completely cool before sealing to avoid moisture. If you want to store them for longer, you can freeze them. Place the waffles flat on a baking sheet, freeze until solid, and then transfer them to a freezer-safe bag for up to three months. This way, you can enjoy them anytime!

Can I freeze my Brownie Waffles and how should I do it?
Yes, you can absolutely freeze your brownie waffles! After they have cooled completely, lay them flat on a baking sheet without overlapping and freeze until solid. Once frozen, transfer them to a freezer bag, removing as much air as possible to prevent freezer burn. They can be stored for up to three months and will taste just as delightful when reheated!

What should I do if my brownie waffle batter seems too thick?
If you find your batter is too thick, don’t worry! Simply add 1-2 teaspoons of water gradually while stirring until it reaches a smooth, pourable consistency. It’s important that you keep mixing until there are no clumps, ideally resembling a slightly thick brownie batter, ensuring your waffles come out fluffy with a wonderful chew.

Are there any dietary considerations I should be aware of for the Brownie Waffles?
Very! If you’re catering to dietary restrictions, ensure you choose sugar-free ingredients to keep this recipe keto-friendly. Also, if anyone has nut allergies, you can substitute peanut butter with sunflower seed butter. For a dairy-free option, switch to dairy-free chocolate chips. Always check labels, especially for allergens, to keep everyone safe while enjoying this delicious treat!

Can I make substitutions in the recipe to fit my taste?
The more the merrier! Absolutely feel free to experiment! Swap creamy peanut butter for almond butter or cashew butter for variety. You can also include spices like cinnamon, nutmeg, or a splash of vanilla extract to enhance the flavor. Just be mindful of the macros if you’re sticking to a keto diet!

Brownie Waffle

Irresistible Brownie Waffle Dreams for Your Sweet Tooth

Delicious Brownie Waffles are a low-carb treat with rich chocolate flavor, perfect for breakfast or dessert.
Prep Time 5 minutes
Cook Time 10 minutes
Total Time 15 minutes
Servings: 2 waffles
Course: Dessert
Cuisine: American
Calories: 100

Ingredients
  

Batter Ingredients
  • 1/2 cup peanut butter choose a sugar-free version for keto compliance
  • 1 large egg acts as a binder
  • 1/4 cup unsweetened cocoa powder for rich chocolate flavor
  • 1 tbsp monkfruit sweetener optional for extra sweetness
  • a pinch salt enhances chocolate flavor
  • 1/2 cup sugar-free semi-sweet chocolate chips dairy-free for vegan option
  • 1-2 tsp water adjusts batter consistency

Equipment

  • waffle maker

Method
 

Preparation Steps
  1. Combine peanut butter, egg, cocoa powder, salt, and monkfruit sweetener in a mixing bowl until smooth.
  2. Add water gradually if the batter is too thick, mixing until smooth.
  3. Preheat waffle maker according to manufacturer's instructions.
  4. Lightly spray the preheated waffle maker with cooking oil to prevent sticking.
  5. Pour half of the batter into the center of the waffle maker and sprinkle with half of the chocolate chips. Cook for 2-3 minutes until done.
  6. Carefully remove the waffle and keep warm while cooking the second one with the remaining batter and chips.
  7. Pour the remaining batter into the waffle maker, add remaining chocolate chips, and cook for 2-3 minutes.

Nutrition

Serving: 1waffleCalories: 100kcalCarbohydrates: 3gProtein: 3gFat: 6gSaturated Fat: 1gPolyunsaturated Fat: 1gMonounsaturated Fat: 4gCholesterol: 70mgSodium: 110mgPotassium: 120mgFiber: 2gSugar: 1gVitamin A: 200IUCalcium: 30mgIron: 1mg

Notes

Store leftovers in an airtight container for 4-5 days or freeze for up to three months.

Tried this recipe?

Let us know how it was!

Cozy Red Bean & Black Sesame Milk Tea for Refreshing Sips

As I sipped my latest concoction, a delightful surprise filled my senses—this Creamy Red Bean & Black Sesame Milk Tea was unlike anything I’ve ever indulged in! The smooth, earthy flavor and the creamy texture, punctuated by chewy red beans, transport me from my kitchen to a cozy café on a bustling street market. This unique beverage is not only a refreshing twist on traditional boba drinks, but it also packs a satisfying punch that’ll leave you feeling cozy and fulfilled. Best of all, it comes together quickly, making it perfect for any moment you crave something comforting yet innovative. Ready to explore the deliciously rich world of flavors in this drink? Let’s dive into the recipe!

Why is this tea so irresistible?

Unique Flavor Experience: The combination of roasted black sesame seeds and sweet red beans creates a rich, soothing flavor that’s both comforting and refreshing.

Simplicity Made Delicious: With just a few ingredients and minimal prep time, this recipe lets you whip up a gourmet treat without any hassle.

Creamy, Cozy Texture: Enjoy the heartwarming blend of smooth milk with chewy red beans that gives each sip a delightful twist.

Versatile Enjoyment: Whether served over ice or warm, this milk tea is adaptable to any season, offering a cozy experience year-round.

Pair it with a light snack like mochi or indulge after a meal with some pastries for a delightful treat! If you’re keen on unique flavors, be sure to check out our Buttermilk Pancakes Discover for a deliciously cozy pairing.

Red Bean & Black Sesame Milk Tea Ingredients

For the Nutty Base

  • Toasted Black Sesame Seeds – Toasting intensifies their nutty flavor, making them the star of your milk tea.
  • Milk (or plant-based alternative) – Acts as the creamy liquid base; you can try almond milk or oat milk for a delightful vegan twist.

For the Sweet Elements

  • Sweetened Red Beans – These beans add a deliciously chewy texture and sweetness; using canned red beans saves time—just rinse and drain!
  • Sweetener (optional) – Customize the sweetness to your taste with honey, agave, or any sugar alternative; this helps balance the flavors in your Red Bean & Black Sesame Milk Tea.

Feel free to adjust any ingredients to create your dream milk tea experience. Dive into the cozy world of flavors!

Step‑by‑Step Instructions for Red Bean & Black Sesame Milk Tea

Step 1: Toast the Black Sesame Seeds
Begin by preheating a skillet over medium heat. Add the black sesame seeds, stirring frequently for about 3–5 minutes until they release a rich, nutty aroma and begin to turn golden brown. This toasting process enhances the flavor profile of your Red Bean & Black Sesame Milk Tea, so keep a close eye to prevent burning.

Step 2: Blend the Nutty Base
Once toasted, add the sesame seeds to a blender along with your choice of milk. Blend on high speed for about 1–2 minutes until the mixture is completely smooth and creamy. The goal is to create a luscious nutty milk base, which will provide the foundation for your delightful tea.

Step 3: Sweeten the Milk Base (Optional)
Taste your blended sesame milk and, if desired, add your preferred sweetener. Blend again for 10-15 seconds to incorporate, achieving the right balance of sweetness for your Red Bean & Black Sesame Milk Tea. You may choose to adjust the sweetness depending on your personal preference or the natural sweetness of the red beans.

Step 4: Prepare the Glasses
In a clear glass or bowl, scoop in a generous portion of the sweetened red beans. The bright color and texture of the red beans will add visual appeal to your drink. Ensure that the red beans are well-drained if using canned beans, as this will prevent excess liquid from diluting the flavors.

Step 5: Combine and Serve
Pour the creamy black sesame milk carefully over the red beans, allowing the rich mixture to embrace them. The milk should be at room temperature if not chilled, creating a beautifully layered appearance. Enjoy your Red Bean & Black Sesame Milk Tea right away for the best flavor experience or proceed to chill it for a refreshing alternative.

Step 6: Chill or Serve Over Ice
For an extra refreshing twist, let your prepared drink chill in the refrigerator for about 15-30 minutes or serve it over ice immediately. The chilled version enhances the nutty, smooth flavors and chewy texture, making this beverage perfect for warm days or as a cozy treat all year round.

Expert Tips for Red Bean & Black Sesame Milk Tea

  • Toasting Matters: Ensure you toast the black sesame seeds just right; over toasting can lead to a bitter flavor in your Red Bean & Black Sesame Milk Tea.
  • Bean Prep: Rinse canned red beans thoroughly before adding them; this helps to remove excess sugar syrup and enhance the overall taste of your drink.
  • Sweetness Balance: Taste before adding sweetener; the natural sweetness of red beans may mean you need less sugar than expected.
  • Chill Time: For the best refreshing experience, chill your tea for at least 15 minutes before serving—this allows the flavors to meld beautifully.
  • Vegan Alternatives: If you’re looking for a plant-based option, substitute cow’s milk with almond or oat milk for a deliciously creamy vegan adaptation.

Red Bean & Black Sesame Milk Tea Variations

Customize your cozy drink experience with these delightful options that will elevate your Red Bean & Black Sesame Milk Tea!

  • Milder Flavor: Substitute black sesame seeds with white sesame seeds for a creamier and gentler taste.
  • Chewy Delight: Add tapioca pearls for that beloved boba texture. Just cook and mix them in for a fun chew!
  • Flavor Twist: Experiment with different sweeteners, such as maple syrup or coconut sugar, to create a unique flavor profile that surprises your palate.
  • Extra Creamy: Enhance richness by adding a splash of heavy cream or coconut cream for an indulgent treat that feels like dessert.
  • Choco-Lover’s Add-In: Stir in a teaspoon of cocoa powder for a chocolatey twist—it’s a delightful surprise that pairs beautifully with the nuttiness.
  • Nutty Combo: Try mixing in toasted almond slices or crushed walnuts for added flavor and crunch.
  • Fruit Infusion: Add a layer of flavors by tossing in some fresh mango or bananas for a fruity twist that brightens the drink.
  • Spicy Kick: For a hint of warmth, sprinkle a dash of cinnamon or ginger powder into the mix, creating a cozy flavor explosion.

Ready to delve deeper into delightful dessert-like beverages? You might want to explore our scrumptious Red White Blue Rice Krispie Treats Discover for even more fun kitchen experiments!

What to Serve with Creamy Red Bean & Black Sesame Milk Tea

Indulging in this delightful milk tea opens the door to numerous tasty pairings that enhance the experience.

  • Sweet Mochi: Soft and chewy, these rice cakes beautifully complement the creamy texture of the tea, adding a delightful contrast.

  • Crispy Spring Rolls: The crunchy exterior and savory filling of spring rolls create a harmonious balance with the smoothness of the milk tea.

  • Flaky Pastries: Light and buttery pastries provide a contrast to the earthy flavors; try serving with almond croissants for a savory twist!

  • Fresh Fruit Salad: Bright, juicy fruits add a refreshing element while highlighting the natural sweetness of the red beans.

  • Coconut Rice Pudding: The creamy, coconut-infused dish echoes the smoothness of the milk tea and offers a mild sweetness that marries beautifully with the flavors.

  • Chilled Green Tea: Served alongside, this refreshing beverage complements the nuttiness of the sesame while balancing out the sweetness.

Elevate your experience by exploring these delightful pairings the next time you savor a glass of creamy red bean & black sesame milk tea!

Make Ahead Options

These Creamy Red Bean & Black Sesame Milk Tea drinks are ideal for busy home cooks who want to save time without sacrificing flavor! You can prepare the nutty black sesame milk base up to 24 hours in advance; simply blend the toasted black sesame seeds with your choice of milk, and store it in the refrigerator. The sweetened red beans can also be prepared ahead of time—just keep them in a sealed container for up to 3 days. When you’re ready to enjoy your Red Bean & Black Sesame Milk Tea, combine the chilled milk with the red beans in a glass, and serve it over ice or at room temperature. By prepping ahead, you ensure a delicious, satisfying drink is just moments away, making your busy days a little more delightful!

Storage Tips for Red Bean & Black Sesame Milk Tea

Fridge: Store any leftover Red Bean & Black Sesame Milk Tea in an airtight container in the refrigerator for up to 2 days. Make sure to stir well before serving as separation may occur.

Freezer: You can freeze the milk tea for up to 1 month. Pour it into an airtight freezer-safe container, leaving space for expansion; thaw in the fridge overnight before enjoying.

Reheating: If you prefer your drink warm, gently reheat in a saucepan over low heat, stirring continuously to maintain a smooth texture. Avoid boiling, as it may affect the creamy quality.

Serving Suggestion: For the best experience, enjoy your Red Bean & Black Sesame Milk Tea fresh, as the texture and flavors are at their peak!

Red Bean & Black Sesame Milk Tea Recipe FAQs

What is the best way to choose ripe red beans?
Absolutely! When selecting red beans for your milk tea, look for beans that are smooth, shiny, and free from any dark spots or blemishes. If you’re using dried beans, ensure they have a uniform color and no signs of moisture. For canned red beans, choose a brand that uses minimal additives for the best flavor and texture.

How should I store leftover Red Bean & Black Sesame Milk Tea?
To keep your drink fresh, store any leftover Red Bean & Black Sesame Milk Tea in an airtight container in the refrigerator for up to 2 days. Make sure to stir it well before serving, as the ingredients might separate during storage. If the flavor seems a bit muted, a quick stir can help revitalize the taste!

Can I freeze Red Bean & Black Sesame Milk Tea?
Very! You can freeze your milk tea for up to 1 month. Pour it into an airtight freezer-safe container, leaving about an inch of space at the top to allow for expansion. When you’re ready to enjoy it again, simply thaw it in the refrigerator overnight. For best results, stir well before serving to restore the creamy texture.

What should I do if my black sesame milk is too grainy?
If you find your milk tea is grainy, it’s likely due to not blending the toasted black sesame seeds long enough. To remedy this, return the mixture to your blender and blend for an additional 30 seconds to 1 minute until smooth. If desired, you can also strain the mixture through a fine mesh sieve to remove any remaining graininess and achieve a creamy finish.

Are there any dietary considerations regarding red beans?
Yes! Red beans are a great source of fiber and can be a fantastic addition to a balanced diet. However, they do contain lectins and should be cooked thoroughly to ensure they are safe to eat. If you’re cooking from dried beans, soaking them overnight before cooking can help reduce these compounds. As for allergies, red beans are generally safe for most, but be cautious if you have a specific legume allergy.

What type of milk alternative is best for this recipe?
You can use any milk alternative you love! Almond milk and oat milk provide a creamy consistency that pairs beautifully with the nutty flavors of the black sesame. If you prefer a richer taste, consider coconut milk for a tropical twist. Whatever your choice, just ensure it’s unsweetened to maintain the balance of flavors in your Red Bean & Black Sesame Milk Tea.

Red Bean & Black Sesame Milk Tea

Cozy Red Bean & Black Sesame Milk Tea for Refreshing Sips

Discover the unique flavors of Red Bean & Black Sesame Milk Tea, a soothing and creamy drink perfect for any occasion.
Prep Time 10 minutes
Cook Time 5 minutes
Chill Time 30 minutes
Total Time 45 minutes
Servings: 2 cups
Course: Drinks
Cuisine: Asian
Calories: 230

Ingredients
  

For the Nutty Base
  • 2 tablespoons Toasted Black Sesame Seeds Toast until golden brown
  • 2 cups Milk or plant-based alternative Almond or oat milk recommended
For the Sweet Elements
  • 1 cup Sweetened Red Beans Canned, rinsed, and drained
  • to taste Sweetener Honey, agave, or sugar alternative (optional)

Equipment

  • Skillet
  • blender
  • clear glass

Method
 

Step-by-Step Instructions
  1. Preheat a skillet over medium heat and toast the black sesame seeds for 3–5 minutes.
  2. Add toasted sesame seeds and milk to a blender; blend on high for 1–2 minutes until smooth.
  3. Taste the blended mixture and add sweetener if desired, blending again for 10-15 seconds.
  4. In a glass, scoop in the sweetened red beans and ensure they are well-drained.
  5. Pour the sesame milk over the red beans, serving immediately or chilling them for a refreshing drink.
  6. For a chilled version, let the drink sit in the refrigerator for 15-30 minutes or serve over ice.

Nutrition

Serving: 1cupCalories: 230kcalCarbohydrates: 35gProtein: 6gFat: 10gSaturated Fat: 2gPolyunsaturated Fat: 4gMonounsaturated Fat: 4gSodium: 120mgPotassium: 250mgFiber: 5gSugar: 10gCalcium: 15mgIron: 10mg

Notes

Ideal to enjoy fresh or chilled. Adjust sweetness according to preference. Serve with light snacks or pastries for extra delight.

Tried this recipe?

Let us know how it was!

NYT Gochujang Caramel Cookies That Will Ignite Your Tastebuds

“Do you crave cookies that surprise your taste buds?” I once stumbled upon a recipe that brilliantly merged sweet and spicy, transforming my usual baking routine into an adventure. Enter the NYT Gochujang Caramel Cookies, a delightful blend of classic sugar cookie goodness and the unique kick of gochujang, Korea’s beloved chili paste. Not only are these cookies irresistible with their crispy edges and chewy centers, but they also bring a warm complexity to your dessert table that’s bound to impress friends and family. They’re a breeze to whip up, making them perfect for unexpected guests or cozy nights in, and the intriguing twist of flavors ensures they stand out at any gathering. Ready to elevate your cookie game with this creative fusion? Let’s dive into baking these tantalizing treats!

Why Are Gochujang Caramel Cookies Special?

Unique Fusion of Flavors: Delight in the incredible balance of sweet caramel and spicy gochujang, offering a cookie experience unlike any other.

Quick and Easy: Whipping these up is a breeze! They come together swiftly, making them an ideal choice for last-minute baking.

Crowd-Pleasing Treat: Impress your friends and family with these conversation starters; they’re sure to spark interest at any gathering!

Versatile Options: Explore creative variations by swapping out gochujang or adding chocolate chips for that extra flavor boost.

Perfectly Textured: Enjoy a satisfying contrast with crispy edges and a chewy center, making every bite a delightful experience.

Elevate your dessert game and try other unique recipes like Spicy Korean Gochujang Noodles for a full-flavored meal!

NYT Gochujang Caramel Cookie Ingredients

For the Cookie Dough
Unsalted Butter – Adds richness and creates a tender crumb; ensure it’s softened for easy mixing.
Light Brown Sugar – Provides moisture and a slight molasses flavor; crucial for the chewy texture.
Granulated Sugar – Contributes sweetness and helps achieve a crispy texture, balancing out the spicy notes.
Large Egg – Binds the ingredients together and adds to the cookie’s structure.
Vanilla Extract – Enhances flavor with a delightful sweet aroma, brightening the overall taste.
All-Purpose Flour – The main structural component, ensuring the cookies hold their shape beautifully.
Baking Soda – Acts as a leavening agent, helping the cookies rise to perfection.
Kosher Salt – Balances sweetness and enhances all flavors, making each bite more enjoyable.
Ground Cinnamon – Adds warmth that pairs exceptionally with the gochujang’s spice.

For the Gochujang Caramel
Gochujang (Korean Chili Paste) – The star of this recipe; provides that signature sweet and spicy flavor. Make sure to use a plain version without added garlic for the best results.
Additional Butter – Used to create a smooth caramel paste, enriching the overall cookie experience.

This unique combination of ingredients will elevate your baking and bring the delightful NYT Gochujang Caramel Cookies to life!

Step‑by‑Step Instructions for NYT Gochujang Caramel Cookies

Step 1: Prepare the Gochujang Caramel Paste
In a medium mixing bowl, combine 1 tablespoon of softened butter with light brown sugar and gochujang. Mix until fully integrated and smooth, creating a thick caramel paste with a vibrant color. Set aside to allow the flavors to meld while you prepare the cookie dough.

Step 2: Make the Cookie Dough
In a large mixing bowl, beat the remaining softened butter with granulated sugar and light brown sugar using a hand mixer until the mixture is creamy and fluffy, about 2-3 minutes. Add the large egg and vanilla extract, mixing until well combined. In another bowl, whisk together the all-purpose flour, baking soda, kosher salt, and ground cinnamon before gradually adding the dry ingredients to the wet mixture, stirring just until combined.

Step 3: Chill the Dough
Cover the cookie dough with plastic wrap and refrigerate for 10-15 minutes. This chilling step is essential for the NYT Gochujang Caramel Cookies, as it helps the dough firm up and reduces spreading during baking. While the dough chills, preheat your oven to 350°F (175°C) and prepare your baking sheets with parchment paper.

Step 4: Add Gochujang Caramel
Once the dough has chilled, remove it from the refrigerator and gently fold in dollops of the prepared gochujang caramel paste. Use a spatula to swirl the caramel into the dough, creating a marbled effect that will result in visually appealing cookies with delightful pockets of flavor.

Step 5: Baking
Using a large cookie scoop (about 3 tablespoons), portion out the cookie dough onto the prepared baking sheets, leaving enough space between each cookie for spreading. Bake in the preheated oven for 11-13 minutes, or until the tops crack slightly and the edges turn a lovely golden brown. Remember to rotate the baking sheets halfway through cooking for even baking.

Step 6: Cool and Store
After baking, let the cookies cool on the sheets for about 3 minutes before transferring them to a wire rack to cool completely. This helps them maintain their shape and texture. Store your delicious NYT Gochujang Caramel Cookies in an airtight container at room temperature, where they will stay fresh for up to three days.

Expert Tips for NYT Gochujang Caramel Cookies

Dough Chilling Time: Ensure to chill the dough for at least 15 minutes. This helps reduce spreading and yields perfectly structured cookies.

Use Room Temperature Butter: Softened unsalted butter mixes more easily, ensuring your dough comes together smoothly and combines well with all ingredients.

Gochujang Selection: Opt for plain gochujang without garlic or additional seasonings. This guarantees the right balance of sweet and spicy notes.

Avoid Overmixing: When combining dry and wet ingredients, stir until just incorporated. Overmixing can lead to tough cookies instead of the desired tender texture.

Baking Sheet Rotation: Always rotate your baking sheets halfway through baking for even heat distribution. This prevents one side from browning faster than the other, ensuring perfect NYT Gochujang Caramel Cookies every time.

Make Ahead Options

These NYT Gochujang Caramel Cookies are perfect for meal prep enthusiasts! You can make the cookie dough up to 24 hours in advance; simply mix the ingredients, then cover and refrigerate it until you’re ready to bake. Additionally, the gochujang caramel paste can be prepared ahead of time and stored in an airtight container in the refrigerator for up to 3 days. To maintain their delicious quality, be sure to chill the dough before baking, as this helps keep them chewy and reduces spreading. When ready to serve, scoop out the chilled dough, swirl in the caramel, and bake to perfection—your homemade cookies will be just as delightful!

How to Store and Freeze NYT Gochujang Caramel Cookies

Room Temperature: Store cookies in an airtight container at room temperature for up to 3 days. This keeps them soft and chewy, ready to delight your taste buds.

Fridge: If you want to extend their freshness, you can refrigerate the cookies for up to a week. Ensure they’re in an airtight container to prevent them from drying out.

Freezer: To freeze, place the cooled cookies in a freezer-safe bag or container, separating layers with parchment paper. They can be frozen for up to 3 months.

Reheating: To enjoy the cookies warm, reheat in the oven at 300°F (150°C) for about 5-7 minutes, or until heated through. This gives back their original gooey charm, making each bite as delightful as fresh-baked!

Variations & Substitutions for Gochujang Caramel Cookies

Feel free to explore these creative twists on your Gochujang Caramel Cookies that will brighten your baking adventures!

  • Spicy Twist: Swap gochujang for Sriracha for a different heat profile. The tangy flavor will add an exciting dimension to the cookies.

  • Nutty Boost: Add chopped pecans or walnuts for a delightful crunch. Nuts provide a hearty texture that complements the soft chewiness of the cookie.

  • Chocolate Lovers: Mix in dark chocolate chips for a rich, decadent treat. The bittersweet chocolate beautifully balances out the spice from the gochujang.

  • Milder Flavor: For a gentler kick, reduce gochujang by half or replace it with mild chili paste. This way, everyone at the table can enjoy these cookies!

  • Cinnamon Infusion: Kick up the warmth by increasing the ground cinnamon. This will enhance the cookie’s cozy flavors and pair excellently with the gochujang.

  • Sweet and Spicy Variation: Incorporate chili flakes into the cookie dough for added heat. This variation will give a delightful surprise in every bite!

  • Maple Sweetness: Swap out half of the granulated sugar for maple syrup. This will add a unique flavor while keeping the cookies fluffy and inviting.

  • Fun Shapes: Use cookie cutters to create fun shapes instead of dropping cookies. Decorate with a drizzle of caramel or melted chocolate for an eye-catching finish.

Now you’re well-equipped to make these cookies your own! For a delightful outing in the kitchen, you may also enjoy making Chocolate Cranberry Cookies or indulge in a batch of No-Bake Cookies and Cream Cheesecake Cups. Happy baking!

What to Serve with Gochujang Caramel Cookies

Indulging in these unique cookies opens the door to a world of delightful pairings that complement their sweet and spicy flavor profile.

  • Creamy Ice Cream: The coolness of vanilla or coconut ice cream contrasts beautifully with the warmth of the cookies, creating a luscious treat.

  • Fresh Fruit Salad: Bright and juicy fruits provide a refreshing balance, enhancing the complex flavors of the cookies while adding a vibrant touch to your plate.

  • Spiced Chai Tea: Enjoying these cookies with a cup of warm spiced chai brings together the cozy sweetness of the cookies with the comforting spices of the tea.

  • Mango Lassi: This creamy yogurt-based drink offers a sweet, tangy counterpart that plays nicely against the spicy gochujang notes, making each bite even more satisfying.

  • Dark Chocolate Drizzle: Drizzling some melted dark chocolate on top can turn your cookies into an elevated dessert, adding a rich flavor layer to the sweetness of the caramel.

  • Nutty Granola Parfait: Layering these cookies with yogurt and granola creates a crunchy, creamy dessert that’s perfect for brunch or a light snack.

Elevate your dessert game even further by serving these cookies alongside other flavorful inspirations, like a vibrant spicy chocolate cake, to keep those taste buds dancing!

NYT Gochujang Caramel Cookies Recipe FAQs

What type of gochujang should I use?
Absolutely, you want to choose a plain gochujang without added garlic or seasonings. This ensures you get that perfect balance of sweet and spicy flavors, enhancing the overall taste of your NYT Gochujang Caramel Cookies.

How should I store my cookies to keep them fresh?
To keep your cookies deliciously soft and chewy, store them in an airtight container at room temperature for up to 3 days. If you need them to last longer, refrigerate them for up to a week. Just make sure they’re sealed tightly to prevent drying out.

Can I freeze the cookie dough for later use?
Certainly! To freeze your cookie dough, scoop out the portions onto a baking sheet and place them in the freezer until solid. After about 1-2 hours, transfer the frozen dough balls to a freezer-safe bag or container. They can be kept frozen for up to 3 months. When you’re ready to bake, no need to thaw; just add a couple of extra minutes to the baking time!

My cookies spread too much during baking. What can I do?
Very common! If your cookies spread too much, you can try chilling the dough for a longer time—up to 30 minutes can work wonders. You might also consider slightly increasing the flour or reducing the butter while keeping their ratio balanced. This will help maintain that chewy texture.

Are Gochujang Caramel Cookies safe for kids and pets?
While the cookies are safe for kids (just be mindful of their spice tolerance!), it’s important to note that chocolate and some spices can be harmful to pets, particularly dogs. Always keep sweets like these out of reach from your furry friends!

How long can I store the baked cookies in the freezer?
Great question! Baked NYT Gochujang Caramel Cookies can be stored in the freezer for up to 3 months. Ensure they’re in a proper freezer-safe container separated by parchment paper to prevent sticking, so you can enjoy them anytime fresh out of the freezer!

NYT Gochujang Caramel Cookies

NYT Gochujang Caramel Cookies That Will Ignite Your Tastebuds

NYT Gochujang Caramel Cookies blend sweet and spicy for a unique dessert experience.
Prep Time 30 minutes
Cook Time 13 minutes
Chilling Time 15 minutes
Total Time 58 minutes
Servings: 24 cookies
Course: Dessert
Cuisine: Korean
Calories: 150

Ingredients
  

For the Cookie Dough
  • 1 cup Unsalted Butter softened
  • 1 cup Light Brown Sugar
  • 1/2 cup Granulated Sugar
  • 1 large Egg
  • 1 teaspoon Vanilla Extract
  • 2 cups All-Purpose Flour
  • 1 teaspoon Baking Soda
  • 1/2 teaspoon Kosher Salt
  • 1 teaspoon Ground Cinnamon
For the Gochujang Caramel
  • 3 tablespoons Gochujang (Korean Chili Paste) use plain version
  • 1 tablespoon Additional Butter softened

Equipment

  • Mixing bowls
  • Hand mixer
  • Baking Sheets
  • Parchment paper
  • Spatula
  • Cookie Scoop

Method
 

Step-by-Step Instructions
  1. In a medium mixing bowl, combine 1 tablespoon of softened butter with light brown sugar and gochujang. Mix until fully integrated and smooth, creating a thick caramel paste.
  2. In a large mixing bowl, beat the remaining softened butter with granulated sugar and light brown sugar until creamy and fluffy, about 2-3 minutes. Add the large egg and vanilla extract, mixing until well combined.
  3. Whisk together all-purpose flour, baking soda, kosher salt, and ground cinnamon before gradually adding the dry ingredients to the wet mixture, stirring just until combined.
  4. Cover the cookie dough with plastic wrap and refrigerate for 10-15 minutes. Preheat your oven to 350°F (175°C) and prepare your baking sheets with parchment paper.
  5. Remove the dough from the refrigerator and gently fold in dollops of the prepared gochujang caramel paste, creating a marbled effect.
  6. Using a large cookie scoop, portion out the cookie dough onto the prepared baking sheets, leaving enough space between each cookie for spreading. Bake for 11-13 minutes.
  7. Let the cookies cool on the sheets for about 3 minutes before transferring them to a wire rack to cool completely.

Nutrition

Serving: 1cookieCalories: 150kcalCarbohydrates: 20gProtein: 2gFat: 6gSaturated Fat: 4gPolyunsaturated Fat: 1gMonounsaturated Fat: 1gCholesterol: 20mgSodium: 100mgPotassium: 50mgFiber: 1gSugar: 10gVitamin A: 150IUCalcium: 10mgIron: 0.5mg

Notes

Ensure to chill the dough for at least 15 minutes to produce perfectly structured cookies.

Tried this recipe?

Let us know how it was!

Delicious Honey Dijon Chicken Sandwiches for Busy Nights

“What’s for dinner?” I overheard my friend exclaim in frustration, which reminded me of those chaotic weeknights filled with takeout menus and indecision. Well, I have the perfect antidote: Honey Dijon Chicken Sandwiches that will rescue your evenings! Imagine succulent chicken cutlets kissed with a sweet and tangy honey Dijon marinade, layered with crispy bacon and melty Swiss cheese, all cradled in a warm pretzel bun. Not only is this sandwich a fabulous way to bring gourmet flavors to your table, but it’s a breeze to throw together, making it ideal for busy families. Plus, this recipe accommodates dietary preferences, offering gluten-free and dairy-free options to keep everyone satisfied. Why settle for fast food when you can whip up this delicious delight in no time? Ready to transform your dinner routine? Let’s dive into this mouthwatering recipe!

Why Choose Honey Dijon Chicken Sandwiches?

Quick Preparation: These sandwiches can be whipped up in just 30 minutes, perfect for busy weeknights.

Flavor Explosion: The combination of sweet honey and tangy Dijon creates a mouthwatering taste that will satisfy your cravings.

Versatile Variations: Need gluten-free or dairy-free options? This recipe easily accommodates those preferences without sacrificing taste.

Crowd-Pleaser: Your family will love this gourmet-style sandwich, making it a hit at the dinner table. Serve it with a side of sweet potato fries or a fresh salad for a well-rounded meal! Don’t forget to check out our Thai Chicken Meatballs for another quick and flavorful dinner idea!

Make Ahead: Prepare and marinate the chicken in advance for an effortless meal when time is short.

Honey Dijon Chicken Sandwiches Ingredients

For the Chicken Cutlet
Boneless Skinless Chicken Breasts – Provides lean protein; cuts easily into cutlets for even cooking.
Honey Dijon Chicken Marinade – Adds flavor and moisture; can reduce salt to 1/2 teaspoon for sauce preparation.

For the Sandwich Assembly
Pretzel Buns – Offers a unique flavor and soft texture; whole grain hamburger buns can be used as a substitute.
Swiss Cheese – Adds creaminess; dairy-free cheese can be used for lactose-intolerant options.
Cooked Bacon – Contributes smokiness and richness.
Optional Lettuce and Tomato Slices – Adds freshness and additional texture.

For Cooking
Olive Oil – Helps prevent sticking while grilling; can substitute with vegetable oil if needed.

These ingredients are key to crafting those delightful Honey Dijon Chicken Sandwiches that your family will fall in love with!

Step‑by‑Step Instructions for Honey Dijon Chicken Sandwiches

Step 1: Prepare Chicken
Begin by cutting the boneless skinless chicken breasts in half lengthwise to create thin cutlets. This ensures even cooking and helps the chicken soak up all the flavors from the Honey Dijon marinade. Once cut, set them aside and grab a gallon-sized freezer bag for marination.

Step 2: Marinate
In the gallon-sized freezer bag, combine the chicken cutlets with the Honey Dijon marinade you prepared. Seal the bag tightly and massage the chicken gently to coat each piece evenly. Refrigerate for 1 hour to allow the flavors to meld, or freeze the bag directly if you’re prepping for a future meal.

Step 3: Cook Marinade
While the chicken is marinating, pour the remaining Honey Dijon marinade into a small saucepan. Bring it to a boil over medium heat, then reduce to a simmer. Let it cook for about 5 minutes until slightly thickened, stirring occasionally to prevent burning. This will create a delicious sauce to drizzle over your sandwiches.

Step 4: Grill Chicken
Preheat your grill to medium heat, aiming for about 350°F. Once hot, place the marinated chicken cutlets on the grill. Grill each side for approximately 4 minutes, or until the chicken reaches a juicy internal temperature of 165°F. Look for a nice char and golden color to indicate they are perfectly cooked.

Step 5: Assemble Sandwiches
Once the chicken cutlets are done, take your soft pretzel buns and place them cut-side up on a clean surface. Layer a chicken cutlet on the bottom half of each bun, followed by a slice of Swiss cheese and three crispy bacon pieces. Drizzle your thickened Honey Dijon sauce generously over the top, then add fresh lettuce and tomato slices if desired.

Step 6: Serve and Enjoy
Finally, place the top halves of the pretzel buns on the assembled sandwiches. Serve immediately while everything is warm and melty. Cut the sandwiches in half for easy handling and enjoy the explosive flavors of the Honey Dijon Chicken Sandwiches, perfect for busy weeknights!

Make Ahead Options

These Honey Dijon Chicken Sandwiches are perfect for meal prep, allowing busy cooks to save time during the week! You can marinate the chicken cutlets in the Honey Dijon marinade up to 24 hours in advance, sealing them in a gallon-sized freezer bag for maximum flavor. Additionally, you can grill the chicken and assemble the sandwiches in advance, storing the assembled sandwiches in the refrigerator for up to 3 days. To maintain freshness, wrap them tightly to prevent drying out. When ready to enjoy, simply reheat the grilled chicken in the microwave or on the stove, assemble the sandwiches, and drizzle with the warmed Honey Dijon sauce for that just-made deliciousness!

Expert Tips for Honey Dijon Chicken Sandwiches

Marination Time Matters: Allow the chicken to marinate for at least 1 hour for maximum flavor absorption. For best results, consider marinating overnight.

Don’t Rush the Grill: Ensure your grill is preheated to medium heat to achieve that perfect char and juicy chicken cutlet without drying it out.

Healthier Cooking Options: Try oven baking for a lighter version—bake at 400°F for about 20 minutes for a healthier alternative.

Sauce Consistency Check: When thickening the marinade, keep an eye on salt levels to avoid an overly salty Honey Dijon sauce.

Adapt to Dietary Needs: Swap pretzel buns for gluten-free options or use dairy-free cheese to make these Honey Dijon Chicken Sandwiches suitable for everyone at the table.

How to Store and Freeze Honey Dijon Chicken Sandwiches

Fridge: Store any leftover sandwiches in an airtight container for up to 3 days. Layer parchment paper between sandwiches to prevent them from sticking together.

Freezer: Freeze assembled sandwiches for up to 2 months. Wrap each sandwich tightly in plastic wrap, then place them in a freezer-safe bag. Thaw in the fridge overnight before reheating.

Reheating: To reheat, place the thawed sandwiches in an oven at 350°F for 10-15 minutes, or until warmed through. This helps restore the pretzel bun’s soft texture.

Make-Ahead: Marinate the chicken in the freezer before cooking. Just remove the bag a few hours before your meal to thaw and prepare delicious Honey Dijon Chicken Sandwiches!

What to Serve with Honey Dijon Chicken Sandwiches?

These mouthwatering sandwiches call for the perfect companions to create a well-rounded meal that delights the senses.

  • Sweet Potato Fries: The subtle sweetness and crispy texture pair beautifully with the savory chicken, adding a fun crunch to each bite.

  • Fresh Garden Salad: A light and refreshing salad topped with vinaigrette complements the richness of the sandwich while adding a vibrant crunch from fresh veggies.

  • Creamy Coleslaw: This tangy and creamy side brings a delightful contrast to the honey mustard flavors, making each mouthful even more enjoyable.

  • Garlic Parmesan Roasted Vegetables: Tender veggies infused with garlic and parmesan add a savory depth, balancing the sweet and tangy elements of the sandwiches beautifully.

  • Pickle Chips: The zesty crunch of pickles cuts through the richness and enhances the flavor profile, making every bite of the sandwich more exciting.

  • Iced Tea: A refreshing glass of sweetened iced tea or lemon-infused tea perfectly offsets the savory elements, offering a refreshing balance with every sip.

  • Chocolate Brownies: For a delightful dessert, serve fudgy chocolate brownies to satisfy the sweet tooth while contrasting with the savory main course.

Honey Dijon Chicken Sandwiches Variations

Feel free to explore these fun twists and substitutions to make your Honey Dijon Chicken Sandwiches truly your own!

  • Gluten-Free Buns: Swap out regular pretzel buns for gluten-free buns or rolls for a delicious, celiac-friendly option. You’ll still enjoy that satisfying texture!

  • Dairy-Free Delight: Omit the Swiss cheese entirely or use a dairy-free cheese alternative. You’ll still enjoy a creamy texture without the lactose!

  • Baked Version: How about a healthier take? Bake the marinated chicken at 400°F for about 20 minutes instead of grilling. This ensures a flavorful, lighter sandwich that everyone will adore.

  • Crispy Chicken: For an extra crunch, bread your chicken cutlets before grilling. Coat with seasoned breadcrumbs for that delightful crispy texture that elevates every bite!

  • Spicy Kick: Add some heat by including sliced jalapeños or a dash of sriracha in your Honey Dijon sauce. It’ll give your sandwiches a zesty boost!

  • Savory Add-Ins: Consider adding sautéed mushrooms or caramelized onions as an extra layer of flavor. These additions will create a gourmet touch that will impress every guest.

  • Savory Slaw: Top your sandwiches with a tangy slaw made from shredded cabbage and a splash of vinegar. It adds freshness and a nice crunch!

Try pairing these sandwiches with a side of sweet potato fries, a fresh salad, or even check out our Grilled Honey BBQ for another delightful meal idea! Adapt these ideas to suit your family’s taste and dietary needs, and watch them disappear at the dinner table.

Honey Dijon Chicken Cutlet Sandwich Recipe FAQs

How do I choose the right chicken for my sandwiches?
Absolutely! When selecting chicken breasts, look for ones that are pale pink with no dark spots or heavy bruising. Fresh chicken should feel firm to the touch and have a faint smell—avoid any that has a strong or off odor.

What’s the best way to store leftover sandwiches?
Very! Store any leftover sandwiches in an airtight container in the fridge for up to 3 days. I recommend placing parchment paper between sandwiches before sealing them. This prevents them from sticking together and maintains their deliciousness.

Can I freeze the Honey Dijon Chicken Sandwiches?
Of course! You can freeze assembled sandwiches for up to 2 months. Wrap each sandwich tightly in plastic wrap, then place them in a freezer-safe bag. Thaw them in the fridge overnight before reheating. This ensures they stay as moist and tasty as when freshly made!

What if my chicken cutlets turn out dry?
If your chicken cutlets are dry, a little marinating can help! Make sure you’re cooking the chicken to an internal temperature of 165°F but avoid overcooking. Try using a meat thermometer and remove the chicken from heat immediately once it reaches that temp. Another tip is to let the chicken rest for a few minutes before slicing to retain moisture.

Are there any allergy considerations I should keep in mind?
Absolutely! For gluten-free options, opt for gluten-free buns instead of pretzel buns. For those avoiding dairy, you can replace Swiss cheese with dairy-free cheese alternatives. Always check labels for hidden allergens when using store-bought ingredients.

Honey Dijon Chicken Sandwiches

Delicious Honey Dijon Chicken Sandwiches for Busy Nights

Try these Honey Dijon Chicken Sandwiches, perfect for quick dinners that satisfy your taste buds.
Prep Time 30 minutes
Cook Time 10 minutes
Marination Time 1 hour
Total Time 1 hour 40 minutes
Servings: 4 sandwiches
Course: Lunch
Cuisine: American
Calories: 450

Ingredients
  

For the Chicken Cutlet
  • 2 pieces Boneless Skinless Chicken Breasts
  • 1/2 cup Honey Dijon Chicken Marinade Reduce salt to 1/2 teaspoon for sauce preparation.
For the Sandwich Assembly
  • 4 pieces Pretzel Buns Whole grain hamburger buns can be used as a substitute.
  • 4 slices Swiss Cheese Dairy-free cheese for lactose-intolerant options.
  • 12 slices Cooked Bacon Contributes smokiness and richness.
  • 1 cup Optional Lettuce and Tomato Slices Adds freshness and additional texture.
For Cooking
  • 2 tablespoons Olive Oil Can substitute with vegetable oil if needed.

Equipment

  • Grill
  • gallon-sized freezer bag
  • Small saucepan

Method
 

Step-by-Step Instructions for Honey Dijon Chicken Sandwiches
  1. Begin by cutting the boneless skinless chicken breasts in half lengthwise to create thin cutlets.
  2. In a gallon-sized freezer bag, combine the chicken cutlets with the Honey Dijon marinade. Seal the bag tightly and massage the chicken gently to coat each piece evenly. Refrigerate for 1 hour or freeze for future use.
  3. Pour the remaining Honey Dijon marinade into a small saucepan. Bring it to a boil over medium heat, then reduce to a simmer. Cook for about 5 minutes until slightly thickened, stirring occasionally.
  4. Preheat your grill to medium heat. Grill the marinated chicken cutlets on each side for approximately 4 minutes, or until the chicken reaches an internal temperature of 165°F.
  5. Once cooked, place the soft pretzel buns cut-side up. Layer a chicken cutlet on the bottom half, followed by a slice of Swiss cheese and three crispy bacon pieces. Drizzle the thickened sauce over the top and add lettuce and tomato slices if desired.
  6. Top the sandwiches with the pretzel bun halves and serve immediately while warm. Cut in half for easy handling.

Nutrition

Serving: 1sandwichCalories: 450kcalCarbohydrates: 30gProtein: 28gFat: 20gSaturated Fat: 8gPolyunsaturated Fat: 2gMonounsaturated Fat: 9gCholesterol: 70mgSodium: 800mgPotassium: 600mgFiber: 2gSugar: 5gVitamin A: 500IUVitamin C: 5mgCalcium: 300mgIron: 2mg

Notes

Allow the chicken to marinate for at least 1 hour for maximum flavor absorption. For best results, consider marinating overnight. Swap pretzel buns for gluten-free options or use dairy-free cheese to accommodate dietary needs.

Tried this recipe?

Let us know how it was!

Crispy Halloumi Fries in Just 15 Minutes of Pure Bliss

Just the other day, I was chatting with a friend who mentioned how often we settle for boring snacks while watching our favorite shows. That got me thinking about how a little culinary creativity could elevate our snack game! Enter Crispy Halloumi Fries—the quick and easy appetizer that transforms ordinary moments into something special. In just 15 minutes and with only five ingredients, these halloumi fries are not only a vegetarian delight but also a unique alternative to traditional fries. They’re shallow-fried to golden perfection, offering a satisfying crunch with every bite—perfect for gatherings or a cozy night in. Plus, they’re incredibly fun to customize with your favorite dips! Ready to upgrade your snack time? Let’s dive into this delightful recipe!

Why You’ll Crave Halloumi Fries?

Irresistible Crunch: These Crispy Halloumi Fries provide a delightful crunch that beats any ordinary potato fry.

Easy as 1-2-3: With only five simple ingredients and a quick 15-minute prep time, making these fries is a breeze, perfect for busy weeknights.

Versatile Flavors: You can spice them up with different seasonings or pair them with delightful dips like sweet chili or spicy aioli for a personal touch.

Crowd-Pleasing Snack: Whether you’re hosting friends or enjoying a quiet night in, these halloumi fries are guaranteed to impress and disappear quickly.

No Fryer Needed: Skip the deep-frying hassle and enjoy a healthier take on fries that still gives you that satisfying golden crisp!

Get ready to indulge in this Mediterranean treat that’s a game changer for snack lovers everywhere!

Halloumi Fries Ingredients

• Get ready for a crunchy delight!

For the Halloumi Fries

  • Halloumi Cheese (250g / 8.8oz) – Provides a rich, salty flavor and creamy texture while retaining its shape when cooked; look for halloumi in the cheese section or Mediterranean delis if needed.
  • Plain / All-Purpose Flour (3 tbsp) – Helps create a crispy coating on the fries; can be substituted with gluten-free flour for a gluten-free version.
  • Paprika (1 tsp) – Adds flavor and a subtle smokiness; optional spices like oregano or mint can be used for variation.
  • Cumin (1/2 tsp) – Enhances the savory depth of flavor; a must for that Mediterranean flair in your Halloumi Fries.
  • Olive Oil (for frying) – Necessary for shallow frying the halloumi; ensure the oil is hot for optimal crispiness.

Step‑by‑Step Instructions for Halloumi Fries

Step 1: Cut Halloumi
Start by slicing your halloumi cheese into even-sized fries, aiming for pieces about 1.5cm (½ inch) thick. You should have approximately 10 fries. This thickness ensures that the halloumi fries will cook evenly, creating a delightful crunchy exterior while maintaining a soft and chewy inside. Once cut, set them aside on a plate.

Step 2: Coat in Flour Mixture
On a large plate, combine the plain flour, paprika, and cumin, mixing them well to distribute the spices evenly. Take each halloumi fry and roll it in the flour mixture, ensuring they are fully coated. Shake off any excess flour gently to prevent clumping. This step will help achieve that crispy texture in your halloumi fries once they’re fried.

Step 3: Heat Oil & Fry
In a frying pan, pour enough olive oil to cover the bottom and heat it over medium heat until shimmering. Carefully add half of the coated halloumi fries to the pan, making sure not to overcrowd them. Fry for about 2-3 minutes on each side or until they turn a beautiful golden brown. Use tongs to flip them gently, ensuring each side crisps up nicely.

Step 4: Drain & Repeat
Once the first batch of halloumi fries is golden and crispy, transfer them to a plate lined with paper towels to absorb excess oil. Repeat the frying process with the remaining fries, adding more oil if necessary to maintain a proper frying depth. Remember, this batch should also take about 2-3 minutes on each side to achieve that perfect crispy exterior.

Step 5: Serve Immediately
Once all the halloumi fries are cooked and drained, serve them hot for the best taste and texture. You can enjoy these crispy halloumi fries on their own or with your choice of delicious dips, like sweet chili sauce or spicy aioli. The aim is to indulge immediately in the warm, crunchy goodness that this delightful snack offers!

Expert Tips for Halloumi Fries

  • Oil Temperature Matters: Ensure the olive oil is hot enough before adding the fries; if it’s not, they may become greasy instead of crispy.

  • Coating Technique: Shake off excess flour after coating the halloumi fries—this prevents clumping and ensures a light, crunchy texture.

  • Batch Frying: Fry in small batches to avoid overcrowding, which can lower the oil temperature and affect crispiness.

  • Enjoy Fresh: Halloumi fries are best enjoyed immediately after frying; they lose their delightful texture when reheated.

  • Spice it Up: Experiment with different spices beyond paprika and cumin for your halloumi fries to cater to various flavor preferences and create exciting variations.

How to Store and Freeze Halloumi Fries

Fridge: Store any leftover halloumi fries in an airtight container for up to 3 days. Keep them in the fridge to maintain a fresh taste; however, they may lose their crispiness.

Freezer: For longer storage, you can freeze uncooked coated halloumi fries on a baking sheet until firm, then transfer them to a freezer bag. They will keep for up to 1 month.

Reheating: To reheat leftover fries, preheat your oven to 200°C (400°F) and bake for about 10 minutes until heated through and crispy again. While reheated halloumi fries are tasty, they’re best enjoyed fresh for that perfect crunch.

Make-Ahead Tip: If planning for a gathering, coat the halloumi fries ahead of time and store them in the fridge for easy frying right before serving.

Make Ahead Options

These Crispy Halloumi Fries are an excellent choice for busy home cooks looking to save time without compromising on flavor! You can cut the halloumi and coat it in the flour mixture up to 24 hours in advance; simply store the coated fries in the refrigerator to keep them fresh. To maintain their quality, use an airtight container to prevent moisture that can affect the crispiness. When you’re ready to enjoy, just heat olive oil and fry the halloumi fries in batches until golden brown, about 2-3 minutes per side. This prep-ahead strategy ensures you have a delicious, hassle-free snack ready to serve while freeing up your time for other meal prep activities!

What to Serve with Crispy Halloumi Fries?

Elevate your snacking experience with delicious sides that complement the warm, salty crunch of halloumi fries.

  • Garlic Butter Asparagus: Tender asparagus drizzled with garlic butter perfectly balances the fries’ richness, creating a delightful texture contrast.
    Pairing these veggies adds a fresh element that lightens up your plate and enhances the overall meal.

  • Mediterranean Salad: A fresh salad with tomatoes, cucumbers, and feta brings bright flavors to the table, balancing the savory halloumi.
    The refreshing crunch of the salad cuts through the richness, making each bite of halloumi even more satisfying.

  • Pita Bread with Hummus: Soft pita bread paired with creamy hummus not only complements the salty halloumi but also adds a fun, interactive element to your meal.
    Enjoy dipping your crispy fries into the smooth hummus for a delightful fusion of flavors that feels indulgent yet healthy.

  • Sweet Chilli Dipping Sauce: This tangy-sweet sauce enhances the natural saltiness of the halloumi, creating a perfectly balanced bite.
    The vibrant flavor adds a kick that transforms the fries into a flavorful appetizer everyone will love.

  • Crispy Potato Wedges: Add another layer to your snack spread with golden-brown potato wedges that offer a classic crunch alongside halloumi.
    Their heartiness makes them a perfect accompaniment, ensuring every need for comfort food is satisfied.

  • Sparkling Lemonade: Refreshing and effervescent, this drink provides a zesty palate cleanser between bites of rich halloumi fries.
    The bright citrus notes revive your taste buds, making it a cheerful partner to your delicious snack.

Halloumi Fries Variations & Substitutions

Feel free to explore these delightful variations and customize your Halloumi Fries to suit your taste buds perfectly!

  • Gluten-Free: Substitute all-purpose flour with your favorite gluten-free blend to ensure everyone can enjoy this crispy snack.
  • Spice it Up: Add a pinch of cayenne or chili powder to the flour mixture for a spicy kick that’ll set your taste buds dancing!
  • Herb-Infused: Mix in dried herbs like oregano or thyme to the flour coating for an aromatic twist that elevates the flavor profile.
  • Crispy Panko: Use panko breadcrumbs instead of flour for an extra crunchy texture; perfect for those who love that satisfying crunch.
  • Zesty Lemon: Serve with a squeeze of fresh lemon juice on top or a lemon-herb dip on the side for a refreshing burst of flavor.
  • Sweet & Savory: Pair these fries with a honey-yogurt dipping sauce for a luscious sweet-savory combination that’s hard to resist.
  • Mediterranean Medley: Serve with a side of tzatziki for a delightful Mediterranean touch that complements the salty halloumi beautifully.
  • Cheesy Goodness: Add grated Parmesan or feta cheese over the hot fries right after frying for an indulgent cheesy twist.

These tweaks can transform your halloumi fries into a variety of exciting dishes! If you’re interested in other snack concepts, check out my Homemade Sweet Potato Fries or explore a unique flavor with my Mediterranean Chickpea Salad for a refreshing lunch option! Enjoy your culinary adventure!

Halloumi Fries Recipe FAQs

How do I choose the best halloumi cheese?
Absolutely! When selecting halloumi cheese, look for a firm texture without any dark spots; it should feel slightly springy to the touch. Fresh halloumi will have a mild, salty aroma, while older cheese can be drier and have a stronger scent. Mediterranean delis often stock higher-quality halloumi, which can enhance your dish’s flavor.

How should I store leftover halloumi fries?
Very! If you have any leftover halloumi fries, store them in an airtight container in the refrigerator for up to 3 days. They tend to lose their crunch, but you can still enjoy them when reheated. Just remember to place a paper towel in the container to absorb excess moisture which helps keep them fresher longer.

Can I freeze halloumi fries for future use?
Absolutely! To freeze your uncooked coated halloumi fries, arrange them in a single layer on a baking sheet and freeze until firm, typically about 2 hours. Once frozen, transfer them to a resealable freezer bag, and they will keep well for up to 1 month. When you’re ready to enjoy them, there’s no need to thaw—simply fry them straight from the freezer, and they will be just as delightful!

What can I do if my halloumi fries are too greasy?
Oh no, that can happen sometimes! If your halloumi fries turn out greasier than desired, it might be due to the oil being not hot enough before frying. To remedy this, try to ensure your oil reaches a shimmering state before adding the fries. You can also place the cooked fries on paper towels immediately after frying to absorb some excess oil.

Are halloumi fries suitable for a gluten-free diet?
Very! You can easily make halloumi fries gluten-free by substituting the all-purpose flour with a gluten-free alternative, such as almond flour or a gluten-free all-purpose mix. Just ensure any additional seasonings you use are also gluten-free. This makes them a delightful snack option for everyone!

Can I share these halloumi fries with my pets?
It’s lovely to share, but be cautious! While portions of plain halloumi are generally safe for dogs, it’s best to avoid giving them the fried version due to the added oil and spices. Always consult with your veterinarian before introducing new foods to your pet’s diet, to ensure it aligns with their health needs.

Halloumi Fries

Crispy Halloumi Fries in Just 15 Minutes of Pure Bliss

Discover the delight of Halloumi Fries, a quick and creative vegetarian snack that transforms ordinary moments into something special.
Prep Time 15 minutes
Cook Time 6 minutes
Total Time 21 minutes
Servings: 2 servings
Course: Appetizer
Cuisine: Mediterranean
Calories: 350

Ingredients
  

Halloumi Fries Ingredients
  • 250 g Halloumi Cheese Look for halloumi in the cheese section or Mediterranean delis if needed.
  • 3 tbsp Plain / All-Purpose Flour Can be substituted with gluten-free flour for a gluten-free version.
  • 1 tsp Paprika Optional spices like oregano or mint can be used for variation.
  • 0.5 tsp Cumin A must for that Mediterranean flair in your Halloumi Fries.
  • Olive Oil Necessary for shallow frying the halloumi.

Equipment

  • Frying pan
  • Plate
  • Tongs

Method
 

Step‑by‑Step Instructions for Halloumi Fries
  1. Start by slicing your halloumi cheese into even-sized fries, aiming for pieces about 1.5cm (½ inch) thick. You should have approximately 10 fries.
  2. On a large plate, combine the plain flour, paprika, and cumin, mixing them well. Roll each halloumi fry in the flour mixture to coat.
  3. In a frying pan, pour enough olive oil to cover the bottom and heat it over medium heat until shimmering. Fry half of the coated halloumi fries for about 2-3 minutes on each side or until golden brown.
  4. Transfer the first batch to a plate lined with paper towels to absorb excess oil. Repeat with the remaining fries, adding more oil if necessary.
  5. Serve the halloumi fries hot, enjoying with your choice of dips like sweet chili sauce or spicy aioli.

Nutrition

Serving: 150gCalories: 350kcalCarbohydrates: 20gProtein: 22gFat: 24gSaturated Fat: 10gPolyunsaturated Fat: 1gMonounsaturated Fat: 7gCholesterol: 40mgSodium: 800mgPotassium: 220mgFiber: 1gSugar: 1gVitamin A: 500IUVitamin C: 1mgCalcium: 600mgIron: 1mg

Notes

Ensure the olive oil is hot enough before adding the fries to prevent greasiness. Halloumi fries are best enjoyed immediately after frying.

Tried this recipe?

Let us know how it was!

Blueberry Muffin Dirty Soda: Your New Favorite Refreshing Treat

As I stirred the vibrant layers of my Blueberry Muffin Dirty Soda, I couldn’t help but smile at the unexpected joy of turning classic flavors into something refreshingly fizzy. This creative concoction captures the essence of a blueberry muffin in a delightful drink, transforming your ordinary snack time into an extraordinary experience. Ready in just five minutes, this crowd-pleaser is not only visually stunning but also offers a creamy texture and a dairy-free option for those with dietary preferences. Whether you’re looking to impress friends at a gathering or simply treating yourself to a unique afternoon delight, this fizzy drink is sure to become a new favorite. Curious about how to whip up this blend of bubbly goodness? Let’s dive into the delicious details together!

Why is Blueberry Muffin Dirty Soda a must-try?

Uniquely refreshing: This drink combines the comforting flavors of blueberry muffins with a fizzy twist, making it a delightful choice for any occasion.
Easy to prepare: Whip up this vibrant beverage in just five minutes, perfect for when you crave something special without the hassle.
Crowd-pleaser: Serve it at your next gathering or brunch, and watch your guests be amazed by this fun twist on a classic favorite.
Dairy-free option: With simple substitutions, you can craft a creamy and delicious version suitable for anyone, ensuring everyone can enjoy this treat!
Versatile flavor: Swap out almond extract for vanilla or try different syrups like raspberry for a personalized experience. For more delicious ideas, you can also check out our Style Blueberry Muffins or mix up a refreshing Blueberry Thyme Gin to elevate your culinary adventures!

Blueberry Muffin Dirty Soda Ingredients

For the Soda Base

  • Cream Soda – Provides a sweet and slightly buttery base, mimicking muffin flavors. Vanilla soda can be a substitute.
  • Blueberry Syrup – Adds fruity sweetness and tang. Store-bought is fine; homemade can be made with blueberries, sugar, and water.

For the Creamy Mix

  • Heavy Cream – Contributes to the creamy texture. Can be substituted with coconut cream or oat milk creamer for a dairy-free option.
  • Sweetened Condensed Milk – Adds sweetness and creamy richness. No direct substitute suggested.
  • Almond Extract – Brings nutty, baked flavor essential to replicate that muffin taste. Do not skip for authentic flavor.

Step‑by‑Step Instructions for Blueberry Muffin Dirty Soda

Step 1: Prepare the Sweet Cream Mixture
In a small bowl, combine heavy cream and sweetened condensed milk. Whisk them together smoothly for about 1-2 minutes until the mixture is rich and creamy. This sweet cream will beautifully mimic the rich texture of a blueberry muffin, making it an essential component of your Blueberry Muffin Dirty Soda.

Step 2: Add Ice to Glasses
Grab two tall glasses and fill them generously with clear ice cubes, about three-quarters full. The ice will keep your drink refreshingly cold, ensuring that each sip of the Blueberry Muffin Dirty Soda is crisp and invigorating. Set the glasses aside while you prepare the soda base.

Step 3: Pour in the Cream Soda
Carefully pour 1 cup of cold cream soda into each glass over the ice, watching as the fizz fills the glass. The cream soda’s sweet and buttery flavor is the foundation of your drink, so ensure the soda is well-chilled to enhance your experience. Allow it to sit briefly until the bubbles settle down a bit.

Step 4: Incorporate the Blueberry Syrup
Using a spoon, gently pour 2 tablespoons of blueberry syrup into each glass, letting it swirl naturally into the cream soda. This step adds a vibrant, fruity depth to the drink, creating a stunning visual effect. Watch as the deep blue of the syrup contrasts with the cream soda, making the Blueberry Muffin Dirty Soda even more inviting.

Step 5: Add Almond Extract
Sprinkle in ¼ teaspoon of almond extract to each glass. This unique touch is vital for emulating that classic muffin flavor found in your delicious drink. Stir the ingredients gently if desired, or leave them layered for an exciting presentation that showcases the beautiful colors.

Step 6: Pour Sweet Cream Mixture
Gently pour the sweet cream mixture into each glass, allowing it to sink and swirl without stirring it. The cream will float on top, adding a luscious layer that enhances both the look and taste of your Blueberry Muffin Dirty Soda, creating a delightful gradient effect just before serving.

Step 7: Serve and Enjoy
Serve your Blueberry Muffin Dirty Soda immediately, equipped with a straw or spoon in each glass for stirring. The combination of creamy, fizzy, and fruity flavors awaits your taste buds, so relish in the refreshment right away while the layers remain distinct and visually appealing.

Blueberry Muffin Dirty Soda Variations

Feel free to enhance this drink with fun twists that tantalize your taste buds and match your unique cravings!

  • Vanilla Extract: Swap almond extract for vanilla extract for a classic and comforting flavor switch.

    If you’re looking for a sweeter twist, vanilla adds a rich note that complements the cream soda perfectly. It’s a delightful alternative that brings a familiar warmth to your drink!

  • Fruit Syrups: Try using different fruit syrups like raspberry or strawberry for a vibrant flavor exploration.

    These syrups can brighten up the drink and give it a fresh take, keeping the blueberry theme, but creating something new and exciting at the same time.

  • Oat Milk Creamer: For a creamy dairy-free alternative, replace heavy cream with oat milk creamer.

    This option keeps the drink rich and smooth while letting everyone enjoy the fizzy delight without the dairy. You won’t miss the creaminess!

  • Coconut Cream: Use coconut cream instead of heavy cream for a tropical twist.

    With its natural sweetness and exotic flair, this swap infuses the drink with a delightful coconut hint, taking your taste buds on a mini-vacation.

  • Spicy Kick: Add a pinch of cinnamon or nutmeg for an aromatic spice that elevates the flavors.

    This unexpected twist adds warmth and depth, making your Blueberry Muffin Dirty Soda feel like a cozy hug in a glass.

  • Honey or Maple Syrup: Substitute sweetened condensed milk with honey or maple syrup, adjusting the sweetness to your liking.

    This not only sweetens your drink but can also lend a unique flavor profile that is both decadent and natural.

  • Bubbly Enhancements: Use sparkling water instead of cream soda for a lighter and less sweet version.

    You’ll still have that fizzy magic, but with a refreshing twist that makes it perfect for a hot day or a breakfast delight!

These variations allow you to explore new flavors while keeping the essence of the Blueberry Muffin Dirty Soda. Enjoy experimenting, and don’t forget to serve this delightful drink alongside light snacks or even your favorite dessert! For a fun culinary adventure, consider trying our Style Blueberry Muffins for a perfect pairing, or mix up a refreshing Blueberry Thyme Gin to complement your drink creation!

Make Ahead Options

These Blueberry Muffin Dirty Soda ingredients are perfect for busy home cooks, allowing for quick and easy assembly when you need a refreshing treat! You can prepare the sweet cream mixture and blueberry syrup up to 3 days in advance, storing them separately in the refrigerator. To maintain optimal quality and freshness, ensure the mixtures are in airtight containers; this will prevent any absorption of odors from the fridge. When you’re ready to serve, fill glasses with ice, pour in the chilled cream soda, add the syrup and almond extract, and finally, top with the sweet cream mixture. This way, you’ll enjoy a delightful drink with minimal effort, perfectly capturing the essence of blueberry muffins!

Expert Tips for Blueberry Muffin Dirty Soda

  • Essential Almond Extract: Don’t skip this key ingredient. Almond extract creates that distinctive muffin flavor essential for authentic Blueberry Muffin Dirty Soda.

  • Serve Immediately: For the best visual impact, serve the drink right after preparation. The stunning layers are part of the magic!

  • Chill Your Ingredients: Ensure your cream soda and glasses are chilled beforehand. This keeps your drink refreshingly cold and enhances the overall experience.

  • Store Separately: If you have leftover sweet cream mix or blueberry syrup, store them in the refrigerator. Combine with cream soda just before serving to preserve fizz.

  • Experiment with Syrups: Feel free to swap blueberry syrup with other fruity flavors like raspberry or strawberry for a fun twist on the classic recipe.

What to Serve with Blueberry Muffin Dirty Soda

Elevate your refreshment experience by pairing this delightful fizzy drink with delicious bites and treats that enhance its flavors.

  • Fluffy Pancakes: Light and fluffy pancakes drizzled with maple syrup create a comforting breakfast vibe that beautifully complements the drink’s sweetness.

  • Fruit Salad: A vibrant mix of fresh berries and melons adds a refreshing contrast that brightens each sip of the creamy soda.

  • Savory Scones: Savory cheese or herb scones bring a delightful contrast, balancing the drink’s sweetness while echoing its muffin-like essence.

  • Cheese Platter: A selection of creamy cheeses enhances the creamy texture and can be paired with crisp crackers, providing a delightful contrast to the fizzy drink.

  • Vanilla Ice Cream: For a decadent twist, serve a scoop of vanilla ice cream on the side. The creaminess pairs harmoniously with the Blueberry Muffin Dirty Soda.

Indulge in these pairings to create a memorable snacking experience that will not only satisfy your taste buds but also make your gatherings even more enjoyable!

Storage Tips for Blueberry Muffin Dirty Soda

Fridge: Store leftover sweet cream mixture and blueberry syrup in airtight containers in the refrigerator for up to 3 days. This keeps them fresh and ready for your next drink.

Freezer: It’s not recommended to freeze the complete Blueberry Muffin Dirty Soda since carbonation won’t hold up; however, you can freeze leftover blueberry syrup into ice cubes for a fruity burst in future drinks.

Preparation: To enjoy the beverage, mix the chilled sweet cream and blueberry syrup with freshly opened cream soda right before serving. This maintains the drink’s delightful fizz and flavor.

Blueberry Muffin Dirty Soda Recipe FAQs

What type of cream soda should I use?
Absolutely! The best choice is a classic cream soda, which provides that sweet and slightly buttery flavor mimicking blueberry muffins. If you’re looking for alternatives, a good-quality vanilla soda can offer a nice twist as well.

How do I store leftover sweet cream mixture and blueberry syrup?
Very simple! Store any leftover sweet cream mixture and blueberry syrup in airtight containers in the refrigerator. They will stay fresh for up to 3 days. Just remember to keep them separate and only mix them with freshly opened cream soda when you’re ready to enjoy your Blueberry Muffin Dirty Soda again.

Can I freeze blueberry syrup?
Yes, you can! While it’s not recommended to freeze the entire drink, you can freeze any leftover blueberry syrup into ice cubes. These fruity ice cubes can be added to future drinks for a burst of blueberry flavor—just pop them in your soda and enjoy!

Is there a dairy-free alternative for the heavy cream?
Absolutely! If you’re aiming for a dairy-free option, you can substitute heavy cream with either coconut cream or oat milk creamer. Both will maintain a creamy texture while keeping the drink deliciously smooth and enjoyable for everyone!

How can I troubleshoot if the layers don’t form properly in the drink?
If your layers aren’t forming beautifully, it might be due to pouring too quickly or stirring too much after adding ingredients. To achieve that stunning visual effect, pour slowly while letting each component settle. For best results, don’t stir after you’ve layered the sweet cream; let it swirl naturally.

Can I make this ahead of time?
Yes, you can prep the sweet cream mixture and blueberry syrup ahead of time! I suggest preparing them in advance and storing them in the fridge. However, mix them with the cream soda right before serving to ensure that the drink retains its fizzy charm and stunning layered look.

Blueberry Muffin Dirty Soda

Blueberry Muffin Dirty Soda: Your New Favorite Refreshing Treat

Discover the refreshing Blueberry Muffin Dirty Soda, a delightful drink combining classic flavors into a fizzy treat.
Prep Time 5 minutes
Total Time 5 minutes
Servings: 2 glasses
Course: Drinks
Cuisine: American
Calories: 250

Ingredients
  

Soda Base
  • 1 cup Cream Soda Vanilla soda can be a substitute.
  • 2 tablespoons Blueberry Syrup Store-bought is fine; homemade can be made with blueberries, sugar, and water.
Creamy Mix
  • ½ cup Heavy Cream Can be substituted with coconut cream or oat milk creamer for a dairy-free option.
  • 2 tablespoons Sweetened Condensed Milk No direct substitute suggested.
  • ¼ teaspoon Almond Extract Do not skip for authentic flavor.

Equipment

  • Mixing Bowl
  • Whisk
  • Measuring cups
  • Measuring spoons
  • Spoon
  • Tall glasses

Method
 

Preparation Steps
  1. In a small bowl, combine heavy cream and sweetened condensed milk. Whisk them together smoothly for about 1-2 minutes until the mixture is rich and creamy.
  2. Grab two tall glasses and fill them generously with clear ice cubes, about three-quarters full.
  3. Carefully pour 1 cup of cold cream soda into each glass over the ice.
  4. Using a spoon, gently pour 2 tablespoons of blueberry syrup into each glass, letting it swirl naturally into the cream soda.
  5. Sprinkle in ¼ teaspoon of almond extract to each glass. Stir the ingredients gently if desired.
  6. Gently pour the sweet cream mixture into each glass, allowing it to sink and swirl without stirring.
  7. Serve your Blueberry Muffin Dirty Soda immediately, equipped with a straw or spoon in each glass for stirring.

Nutrition

Serving: 1glassCalories: 250kcalCarbohydrates: 34gProtein: 2gFat: 12gSaturated Fat: 7gCholesterol: 30mgSodium: 50mgPotassium: 100mgSugar: 30gVitamin A: 200IUVitamin C: 1mgCalcium: 100mg

Notes

Serve the drink right after preparation for the best visual impact. Chill your ingredients beforehand for a refreshing experience.

Tried this recipe?

Let us know how it was!

Creamy Pesto Lentil Quinoa Bowl That Everyone Will Love

Caught in a whirlwind of busy days, we often forget the simple joys of cooking—like the fresh aroma of a homemade pesto wafting through your kitchen. Today, I’m thrilled to share my recipe for Spinach Pesto Butter Bean Lentil Quinoa Bowls with Sun-Dried Tomatoes, a delightful dish that will not only satisfy your taste buds but also nourish your body. This Pesto Lentil Quinoa Bowl is packed with vibrant flavors and heart-healthy ingredients, making it a perfect choice for anyone seeking quick prep without sacrificing nutrition. With just a half-hour needed to whip up this colorful meal, you’ll find it’s a wonderful solution for hectic weeknights or even as a showstopper at your next gathering. So, are you ready to bring a little sunshine to your dinner table?

Why Choose a Pesto Lentil Quinoa Bowl?

Quick and Easy: In just 30 minutes, you’ll have a wholesome meal that’s ready to impress.

Vibrant Flavors: The homemade spinach pesto packs a punch of freshness, transforming simple ingredients into something truly memorable.

Nutrient-Rich: With butter beans and lentils, it’s a protein powerhouse, perfect for anyone wanting a plant-based meal.

Family-Friendly: Kids love the creamy texture, making it an easy way to introduce them to healthier choices.

Flexible Recipe: Easily adapt with your favorite greens, grains, or legumes! If you’re craving something different, check out my Roasted Carrot Lentil or Ground Beef Bowl for more exciting options.

Pesto Lentil Quinoa Bowl Ingredients

• A delicious way to embrace plant-based nutrition!

For the Base

  • Quinoa – Offers a gluten-free base; rinse before cooking for a fluffier texture.
  • Butter Beans – Adds creamy texture; opt for canned for convenience or use dried if pre-cooked.
  • Lentils – Packed with protein; canned lentils are a quick choice, but dried varieties can be cooked in advance.

For the Pesto

  • Olive Oil (EVOO) – Creates a smooth pesto texture; choose high-quality oil for optimal flavor.
  • Fresh Spinach – The star of the pesto; fresh is best, but frozen can work if thawed well.
  • Fresh Basil – Essential for that classic pesto taste; consider substituting with Italian parsley if you run out.
  • Fresh Parsley – Balances the flavors; both curly and flat-leaf varieties work well.
  • Raw Sunflower Seeds – A nut-free option that gives a nice crunch; can be swapped with cashews if nuts are not an issue.
  • Nutritional Yeast – Provides a cheesy flavor without dairy, a must-have for this vegan pesto.
  • Garlic – Adds depth and a punchy flavor; use fresh or jarred minced garlic based on your preference.
  • Lemon Juice – Brightens the pesto; fresh lemon juice is ideal, but bottled works in a pinch.
  • Salt & Pepper – Essential for enhancing flavor; adjust to your taste.

For the Finishing Touch

  • Sun-Dried Tomatoes – Infuses a tangy flavor into the dish; the julienne cut mixes in easily and aesthetically.

This Pesto Lentil Quinoa Bowl is not just a meal; it’s a chance to explore flavors, nourish your body, and delight your loved ones with a delicious yet healthy dish!

Step‑by‑Step Instructions for Spinach Pesto Butter Bean Lentil Quinoa Bowls with Sun-Dried Tomatoes

Step 1: Cook Quinoa
Begin by rinsing 1/2 cup of quinoa under cold water in a fine mesh sieve to remove any bitterness. In a medium saucepan, bring 1 cup of water to a boil, then add the rinsed quinoa. Reduce heat to low, cover, and let it simmer for about 15 minutes or until all the water is absorbed. Fluff with a fork and set aside as you prepare the remaining ingredients.

Step 2: Rinse Legumes
While your quinoa is cooking, drain and rinse 1 can of butter beans and 1 can of lentils in a colander under cold water. This step helps remove excess sodium and ensures your legumes are fresh-tasting. Once rinsed, allow them to sit in the colander for a few moments to drain completely, then place them aside for the next step.

Step 3: Prepare Pesto
For the delicious homemade pesto, gather your food processor. Add 1/4 cup of olive oil, 2 cups of fresh spinach, 1 cup of basil leaves, 1/4 cup of parsley, 1/4 cup of raw sunflower seeds, 1/4 cup of nutritional yeast, 2 cloves of garlic, the juice of 1 lemon, and a pinch of salt and pepper. Blend on high until smooth and creamy, ensuring no large chunks remain, then set aside.

Step 4: Combine Ingredients
In a large mixing bowl, combine the cooked quinoa, rinsed butter beans, lentils, and 1/3 cup of the freshly prepared pesto. Add roughly chopped sun-dried tomatoes, mixing gently with a spatula to incorporate everything evenly. The Pesto Lentil Quinoa Bowl should look vibrant and colorful, signaling deliciousness.

Step 5: Serve
Divide the mixture into serving bowls, drizzling any remaining pesto over the top for extra flavor. For a delightful complement to your Pesto Lentil Quinoa Bowl, consider serving it alongside grilled gluten-free bread, toasted naan, or even as a dip with your favorite crackers. Enjoy the delicious burst of flavors!

What to Serve with Spinach Pesto Butter Bean Lentil Quinoa Bowls?

Elevate your meal experience by exploring delightful companions that enhance the vibrant flavors of your dish.

  • Grilled Gluten-Free Bread: Crispy and warm, it’s perfect for scooping up the creamy goodness and adds a satisfying crunch.

  • Toasted Naan: Soft and chewy, naan makes a fantastic vessel for your quinoa bowls, mingling flavors beautifully.

  • Fresh Vegetable Sticks: Crisp cucumber, bell peppers, or carrots offer a refreshing contrast while adding a nutritious crunch.

  • Mixed Green Salad: A simple salad with light dressing brings in freshness, enhancing the hearty bowl with vibrant greens.

  • Roasted Vegetables: Carrots, bell peppers, or zucchini complement the meal’s earthiness while adding caramelized sweetness.

  • Chickpea Hummus: Creamy and flavorful, it’s perfect for dipping those veggie sticks or spreading over your warm bread.

  • Sparkling Water with Lemon: A light, bubbly drink refreshes the palate, balancing the dish’s richness without overwhelming it.

  • Coconut Chia Pudding: For dessert, this light and creamy treat provides a sweet yet healthy ending to your meal.

  • Dark Chocolate Squares: A small piece can satisfy your sweet tooth while adding a hint of rich flavor to conclude your dining experience.

Pesto Lentil Quinoa Bowl Variations

Feel free to unleash your creativity and make this recipe your own with these delightful twists!

  • Chickpea Swap: Replace butter beans with chickpeas for a firmer texture and added protein.

  • Whole Grain Base: Use whole grain noodles or brown rice instead of quinoa for a hearty alternative.

  • Roasted Veggies Add-in: Toss in some roasted bell peppers or zucchini for extra flavor and nutrients. These veggies caramelize beautifully and add depth.

  • Creamy Avocado: Top your bowls with sliced avocado for a buttery finish that enhances creaminess and healthy fats.

  • Spicy Kick: Stir in red pepper flakes or a dash of hot sauce into the pesto for a delightful spiciness that will excite your taste buds.

  • Flavorful Herbs: Mix in or substitute the fresh herbs with cilantro or dill for an earthy twist that brightens the dish.

  • Smoky Flavor: Add a pinch of smoked paprika or some charred corn to introduce a smoky flavor profile, perfect for BBQ lovers.

  • Zesty Citrus Twist: Substitute lemon juice with lime juice for a tangy twist that elevates the freshness of the pesto.

Whichever variation you choose, you’ll find that this dish resonates with your family’s taste. For more inspiration, consider pairing your bowls with a refreshing Street Corn Bowl or adding a scoop of hearty Roasted Carrot Lentil for an exciting flavor adventure!

Expert Tips for Pesto Lentil Quinoa Bowl

  • Taste Testing: Always taste your pesto before mixing it into the bowl. Adjust the seasoning with more salt, lemon juice, or nutritional yeast if needed for extra flavor.

  • Perfect Texture: For the creamiest pesto, start by adding the olive oil to the food processor before other ingredients, allowing for better blending and a smoother finish.

  • Prep Ahead: If short on time, prepare the quinoa, rinse the beans, and make the pesto in advance. This allows for a quick 10-minute assembly during busy weeknights.

  • Smart Mixing: Gently fold the sun-dried tomatoes into the quinoa mix rather than stirring vigorously; this helps keep the integrity of your soft beans and maintains the bowl’s lovely textures.

  • Storage Solutions: If you have leftovers, store the quinoa and pesto separately. This helps keep the dish fresh and prevents the quinoa from absorbing all the moisture overnight.

  • Experiment with Greens: Feel free to mix in different greens like kale or arugula. They can add additional nutrients and flavor variations to your Pesto Lentil Quinoa Bowl!

How to Store and Freeze Pesto Lentil Quinoa Bowl

Fridge: Store leftover Pesto Lentil Quinoa Bowls in an airtight container for up to 3 days to maintain freshness.

Freezer: For longer storage, freeze the quinoa bowl without the pesto for up to 3 months. Thaw overnight in the fridge before reheating.

Pesto Storage: If you have extra pesto, freeze it in ice cube trays for easy access. Once frozen, transfer the cubes to a zip-top bag and store for up to 6 months.

Reheating: Reheat the bowls gently in a microwave or stovetop over low heat, adding a splash of water or olive oil if needed to keep everything moist.

Make Ahead Options

These Spinach Pesto Butter Bean Lentil Quinoa Bowls are perfect for meal prep enthusiasts! You can prepare the quinoa and rinse the butter beans and lentils up to 3 days in advance; just store them in airtight containers in the refrigerator to keep them fresh. Additionally, the pesto can be made ahead and refrigerated for up to 24 hours. To maintain the pesto’s vibrant color and prevent browning, cover it tightly with plastic wrap pressed directly against the surface. When you’re ready to serve, simply combine all prepped components – quinoa, legumes, and sun-dried tomatoes – with the pesto, mix well, and enjoy a delightful meal effortlessly!

Spinach Pesto Butter Bean Lentil Quinoa Bowls with Sun-Dried Tomatoes Recipe FAQs

How do I select the right quinoa for my Pesto Lentil Quinoa Bowl?
Absolutely! When selecting quinoa, look for whole grains that are free from any dark spots or cracks. Choose a brand that offers a clear label stating it’s gluten-free if needed. I always recommend rinsing quinoa thoroughly under cool water in a fine mesh sieve to remove any bitter saponins before cooking. This ensures a fluffy, flavorful base for your dish.

What is the best way to store leftover Pesto Lentil Quinoa Bowls?
Very! To maintain freshness, store any leftovers in an airtight container in the fridge for up to 3 days. If you find you’re not going to finish them in that time, I suggest separating the quinoa base from the pesto to prolong shelf life. This will prevent the quinoa from becoming soggy while still allowing you to enjoy the vibrant flavors later!

Can I freeze the Pesto Lentil Quinoa Bowl?
Absolutely! For optimal results, freeze the quinoa bowl without the pesto for up to 3 months. To do this, simply let the bowl cool completely, then transfer it to a freezer-safe container or zip-top bag, removing as much air as possible. When you’re ready to enjoy it, thaw overnight in the fridge and reheat gently on the stovetop, adding a splash of vegetable broth or water to keep it moist.

What if my pesto turns out too thick?
Not to worry! If your pesto is on the thicker side, you can easily adjust the consistency. Start by adding a tablespoon of olive oil or a little water and blend again until you reach your desired smoothness. If you’re still not satisfied, another helpful tip is to gradually add more spinach or basil while blending, allowing for a fresher flavor and creamy texture.

Are there any dietary considerations for the Pesto Lentil Quinoa Bowl?
For sure! This dish is both vegan and nut-free, making it suitable for a variety of dietary needs. However, if you’re preparing it for someone with allergies, double-check that all ingredients, particularly the sunflower seeds and nutritional yeast, are safe for everyone. Additionally, for those with gluten sensitivities, always choose gluten-free quinoa and ensure all other included products are certified gluten-free.

How long can I keep pesto in the freezer?
Great question! If you have extra pesto, it freezes wonderfully. I recommend freezing it in ice cube trays to easily portion out for future use. Once solid, transfer the cubes into a zip-top bag and store them for up to 6 months. This way, you can simply pop out a cube whenever you need that vibrant pesto flavor for pasta, salads, or dips!

Pesto Lentil Quinoa Bowl

Creamy Pesto Lentil Quinoa Bowl That Everyone Will Love

This Pesto Lentil Quinoa Bowl combines vibrant flavors and heart-healthy ingredients for a quick and nutritious meal.
Prep Time 15 minutes
Cook Time 15 minutes
Total Time 30 minutes
Servings: 4 bowls
Course: Salad
Cuisine: Healthy, Vegan
Calories: 420

Ingredients
  

For the Base
  • 1/2 cup Quinoa Rinse before cooking for fluffier texture.
  • 1 can Butter Beans Opt for canned for convenience.
  • 1 can Lentils Canned lentils are a quick choice.
For the Pesto
  • 1/4 cup Olive Oil (EVOO) Choose high-quality oil for optimal flavor.
  • 2 cups Fresh Spinach Fresh is best, but frozen can work.
  • 1 cup Fresh Basil Essential for classic pesto taste.
  • 1/4 cup Fresh Parsley Both curly and flat-leaf work well.
  • 1/4 cup Raw Sunflower Seeds A nut-free option.
  • 1/4 cup Nutritional Yeast Provides a cheesy flavor without dairy.
  • 2 cloves Garlic Use fresh or jarred minced garlic.
  • 1 tablespoon Lemon Juice Fresh lemon juice is ideal.
  • To taste Salt & Pepper Adjust to your taste.
For the Finishing Touch
  • 1/3 cup Sun-Dried Tomatoes Julienne cut for easy mixing.

Equipment

  • Medium saucepan
  • colander
  • Food processor
  • large mixing bowl

Method
 

Step-by-Step Instructions
  1. Rinse quinoa under cold water in a fine mesh sieve. In a medium saucepan, bring 1 cup of water to a boil, then add the rinsed quinoa. Reduce heat to low, cover, and let it simmer for about 15 minutes or until all the water is absorbed.
  2. Drain and rinse butter beans and lentils in a colander under cold water, then place aside.
  3. In a food processor, blend olive oil, spinach, basil, parsley, sunflower seeds, nutritional yeast, garlic, lemon juice, and salt & pepper until smooth and creamy.
  4. In a large mixing bowl, combine cooked quinoa, rinsed butter beans, lentils, and 1/3 cup of the pesto. Add chopped sun-dried tomatoes and mix gently.
  5. Divide the mixture into serving bowls, drizzling remaining pesto over the top. Serve with grilled gluten-free bread or crackers.

Nutrition

Serving: 1bowlCalories: 420kcalCarbohydrates: 60gProtein: 15gFat: 18gSaturated Fat: 2gPolyunsaturated Fat: 6gMonounsaturated Fat: 8gSodium: 300mgPotassium: 600mgFiber: 12gSugar: 4gVitamin A: 1800IUVitamin C: 25mgCalcium: 80mgIron: 4mg

Notes

Store leftovers in an airtight container for up to 3 days. For longer storage, freeze without pesto for up to 3 months.

Tried this recipe?

Let us know how it was!

Ultimate Watermelon Smoothie Recipe for a Fresh Summer Boost

As I stood in my kitchen, the scent of summer hung in the air, and I craved something refreshing. That’s when I remembered my go-to Watermelon Smoothie Recipe, which never fails to bring joy on hot days. This creamy vegan delight—blending luscious watermelon, frozen strawberries, and a hint of lime—comes together in under five minutes. It’s not just quick to whip up; it’s also a wonderfully hydrating treat that makes for a perfect breakfast or a midday pick-me-up. With its vibrant pink hue, your taste buds will be transported to a sunny afternoon at your favorite beachside café. Ready to dive into a glass of pure summer bliss?

Why Choose This Watermelon Smoothie Recipe?

Refreshing flavors to lift your spirits: The sweetness of ripe watermelon combines flawlessly with tangy lime, creating a blissful taste reminiscent of summer.

Smooth and creamy texture: Say goodbye to boring drinks! This smoothie’s velvety consistency, thanks to frozen strawberries and banana, makes it feel indulgent while remaining healthy.

Quick and simple preparation: Ready in just under five minutes, it’s perfect for busy mornings or a last-minute snack!

Health-conscious choice: Packed with hydration, vitamins, and antioxidants from wholesome fruits, it’s not only delicious but great for your body too.

Versatile ingredient options: Feel free to customize with spinach or matcha for an extra nutrient boost, or go for a banana swap with frozen zucchini for lower sugar. This Watermelon Smoothie is your canvas for creativity! Enjoy as a refreshing breakfast or an afternoon appeal like the Avocado Smoothie Healthy alternative.

Watermelon Smoothie Ingredients

For the Smoothie

  • Watermelon – Use ripe watermelon for the best sweetness and hydration.
  • Frozen Strawberries – These add a delightful berry flavor and make your smoothie extra refreshing.
  • Banana – Contributes creaminess; freezing it makes the texture even smoother.
  • Vegan Yogurt – Opt for unsweetened varieties for a creamy base; it also adds probiotics.
  • Lime – Fresh juice and zest will enhance the smoothie’s flavor balance with a zesty kick.
  • Maple Syrup – This is optional for added sweetness; feel free to adjust based on your taste.

Note: This Watermelon Smoothie Recipe is not just hydrating; it’s loaded with nutritious goodness that is sure to brighten your day!

Step‑by‑Step Instructions for Watermelon Smoothie Recipe

Step 1: Prepare Your Blender
Start by gathering your high-speed blender and tamper. Ensure the blender is securely plugged in and ready for action. This Watermelon Smoothie Recipe comes together effortlessly, so setting up your workspace will help you maintain a smooth workflow.

Step 2: Add the Ingredients
In the blender, add the ripe watermelon chunks, frozen strawberries, and the frozen banana. Follow this with a generous scoop of vegan yogurt, freshly squeezed lime juice, and a sprinkle of lime zest for that zesty kick. If you’d like your smoothie a bit sweeter, this is the time to drizzle in some maple syrup.

Step 3: Blend to Perfection
Secure the lid tightly on your blender and start blending on high speed. Blend until the mixture is silky smooth, which should take about 30–45 seconds. If needed, use your tamper to press down any frozen strawberries or watermelon to ensure everything is blended evenly and thoroughly for that creamy texture.

Step 4: Check Consistency
After blending, take a moment to assess the consistency of your smoothie. If you prefer a thinner texture, gradually add a splash of water—about 1/4 cup to start—and blend again for an additional 10–15 seconds. Continue adjusting until you achieve your desired thickness for this refreshing Watermelon Smoothie.

Step 5: Prepare for Serving
Once blended to your liking, it’s time to pour the smoothie. For a fun presentation, consider using a hollowed mini watermelon as a bowl. Carefully remove the top and scoop out the flesh, leaving just enough rind for a sturdy vessel. Pour your vibrant watermelon smoothie into this creative serving dish.

Step 6: Serve and Enjoy Immediately
Serve your Watermelon Smoothie right away for the freshest taste and the best texture. Garnish with a slice of lime or a few fresh berries on top if you wish. The bright pink hue and creamy consistency will not only look appetizing but also provide a cooling and hydrating experience, perfect for any hot day!

What to Serve with Creamy Vegan Watermelon Smoothie

Looking to enhance your summer experience? Pair this refreshing drink with delightful options that complement its sweet, hydrating flavors.

  • Crunchy Granola Bars: The perfect balance of crunch and sweetness, these bars add texture and energy for your day.
  • Fresh Fruit Salad: A vibrant medley of seasonal fruits brightens up your meal, enhancing the healthy vibe with each fresh bite.
  • Almond Butter Toast: Nutty and satisfying, this toast offers protein to round out your smoothie, making it a fully nourishing treat.
  • Chilled Cucumber Slices: Refreshing and hydrating, these cool slices add a crisp contrast to the smoothness of your Watermelon Smoothie.
  • Minty Lemonade: The bright flavors and refreshing zest from mint lemonade can elevate your warm summer day, harmonizing beautifully with the smoothie.
  • Coconut Chia Pudding: This creamy, slightly sweet pudding provides healthy fats and a filling texture, complementing the fruity drink perfectly.
  • Veggie Sticks with Hummus: Crunchy vegetables paired with creamy hummus create a delightful contrast to your smoothie while keeping it light.
  • Berry Sorbet: For a dessert option, this refreshing sorbet made from mixed berries is both cooling and indulgent, making it a sweet ending to your meal.
  • Herbal Iced Tea: A cooling beverage option, iced tea can be infused with mint or citrus for an added refreshing kick alongside your smoothie.

Expert Tips for the Best Watermelon Smoothie

  • Perfect Watermelon Selection: Choose a ripe watermelon that’s heavy for its size and has a uniform shape for the sweetest flavor.

  • Frozen Ingredients: Using frozen strawberries and bananas not only cools the drink but also enhances the creamy texture. Avoid fresh bananas as they won’t yield the same consistency.

  • Adjust to Taste: Start with a small amount of maple syrup and add more as needed; you want the natural sweetness of the fruit to shine in your Watermelon Smoothie Recipe.

  • Consistent Blending: If your blender struggles, pause and stir the ingredients with a tamper before continuing. This ensures a smooth blending process without any chunks.

  • Serving Style: Don’t forget to serve in a fun way! Hollowing out a mini watermelon makes for a stunning presentation and adds an extra touch of summer charm.

Make Ahead Options

These Watermelon Smoothie Recipe preparations are perfect for busy home cooks looking to save time! You can cube the watermelon and freeze it up to 24 hours in advance, which not only helps with the smoothie’s consistency but also keeps everything refreshingly cold. Additionally, pre-freeze the banana and strawberries the night before to ensure easy blending. When you’re ready to enjoy your smoothie, simply add all the prepped ingredients (watermelon, frozen fruits, vegan yogurt, lime juice, and zest) into the blender, blend until creamy, and enjoy the same delicious flavors as if you made it fresh. This way, you can savor a delightful, hydrating treat on even the busiest of mornings!

Watermelon Smoothie Recipe Variations & Substitutions

Feel free to put your unique twist on this watermelon smoothie to suit your tastes and dietary needs!

  • Dairy-Free: Use almond or coconut yogurt instead of vegan yogurt for a different flavor profile.
    Enjoy the creamy texture of the smoothie while adding a nutty or tropical twist!

  • Berry Boost: Mix in some fresh blueberries or raspberries for a delightful berry blend.
    This adds an extra layer of flavor and antioxidants, making your smoothie even more nutritious!

  • Greens Power: Add a handful of spinach or kale for additional nutrients without changing the taste.
    This could be a sneaky way to make your smoothie even healthier while keeping its refreshing essence.

  • Sweetness Adjustments: Swap maple syrup for agave nectar or honey (if not vegan) for a different sweetener option.
    Both alternatives blend well, allowing you to customize the sweetness to your liking!

  • Protein Punch: Boost your smoothie with a scoop of your favorite protein powder.
    This makes a great post-workout snack, adding sustenance without compromising the taste.

  • Frozen Zucchini: Replace the banana with frozen zucchini to lower the sugar while maintaining creaminess.
    This twist opens up your flavor profile while still yielding that velvety texture you’ll love!

  • Spicy Kick: Add a pinch of cayenne or ginger for a spiced-up version of your smoothie.
    This unexpected twist can heighten the flavor, giving your refreshing drink a delightful kick!

  • Coconut Cream Add-in: Mix in a tablespoon of coconut cream for a tropical flavor boost and extra richness.
    It’s perfect for those days when you want to bring a taste of the tropics right to your kitchen!

For even more creative ideas, pair this refreshing drink with a bowl of savory Hobo Casserole or indulge in a vibrant Zucchini Sweet Skillet. The versatility of smoothies is endless, and you can always find fresh inspirations to keep things exciting!

Storage Tips for Watermelon Smoothie Recipe

  • Fridge: Store leftovers in an airtight container for up to 1 day. Give it a good shake or stir before enjoying, as separation may occur.

  • Freezer: For longer storage, pour the smoothie into ice cube trays or freezer-safe bags, and freeze for up to 3 months. Blend frozen cubes with a splash of water for a quick re-creation.

  • Reheating: This smoothie is best consumed cold, so instead of reheating, consider blending it again with a bit of fresh fruit or liquid to refresh its creamy texture.

  • Freshness Tip: While the Watermelon Smoothie Recipe is refreshing when made fresh, keeping it stored in the fridge is convenient for a quick grab-and-go snack!

Watermelon Smoothie Recipe FAQs

How do I choose a ripe watermelon for my smoothie?
Absolutely! Look for a watermelon that is heavy for its size, which usually indicates high water content. The skin should be symmetrically shaped with a uniform color and a creamy yellow spot where it sat on the ground. If you tap it lightly and hear a deep sound, it’s a sign that it’s ripe and sweet!

How should I store leftover watermelon smoothie?
You can store any leftover watermelon smoothie in an airtight container in the fridge for up to 1 day. Just give it a good shake or stir before enjoying it again, as separation may occur. This ensures that you still get that delightful taste and texture even the next day.

Can I freeze the smoothie for later use?
Yes, certainly! To freeze your Watermelon Smoothie, pour it into ice cube trays or freezer-safe bags and store for up to 3 months. When you’re ready to enjoy it, simply blend the frozen cubes with a splash of water or any additional fresh fruit to recreate that creamy texture.

What if my smoothie is too thick?
If your smoothie turns out too thick for your liking, don’t worry! Just add a bit of water (around 1/4 cup) to the blender and blend again until you reach your preferred consistency. You can fine-tune it until it’s just right, ensuring you enjoy a smooth and refreshing drink.

Are there any dietary considerations for this watermelon smoothie?
Very! This Watermelon Smoothie Recipe is vegan, making it suitable for those following a plant-based diet. Additionally, if you or anyone in your household has allergies, be sure to check the specific brands of vegan yogurt and maple syrup for any allergens. It’s important to personalize this refreshing drink to fit your family’s dietary needs.

Watermelon Smoothie Recipe

Ultimate Watermelon Smoothie Recipe for a Fresh Summer Boost

Enjoy a refreshing Watermelon Smoothie that's quick to make, hydrating, and packed with flavor for summer.
Prep Time 5 minutes
Total Time 5 minutes
Servings: 2 cups
Course: Drinks
Cuisine: Vegan
Calories: 150

Ingredients
  

  • 2 cups Watermelon Use ripe watermelon for the best sweetness.
  • 1 cup Frozen Strawberries These add a delightful berry flavor.
  • 1 medium Banana Freezing enhances creaminess.
  • 1/2 cup Vegan Yogurt Opt for unsweetened varieties.
  • 1 tablespoon Lime Juice Fresh juice enhances the flavor.
  • 1 tablespoon Maple Syrup Optional, adjust based on taste.

Equipment

  • High-Speed Blender

Method
 

  1. Prepare your high-speed blender and ensure it's plugged in.
  2. Add watermelon chunks, frozen strawberries, and frozen banana to the blender.
  3. Add vegan yogurt, lime juice, and lime zest, plus maple syrup if desired.
  4. Blend on high speed until smooth, about 30–45 seconds.
  5. Check consistency; add water if a thinner texture is preferred.
  6. Pour into a fun serving dish, like a hollowed mini watermelon.
  7. Serve immediately, garnished with lime or berries.

Nutrition

Serving: 1cupCalories: 150kcalCarbohydrates: 36gProtein: 2gFat: 1gSodium: 10mgPotassium: 300mgFiber: 3gSugar: 28gVitamin A: 500IUVitamin C: 25mgCalcium: 50mgIron: 0.5mg

Notes

This smoothie is hydrating and nutritious, perfect for hot days and as a quick snack.

Tried this recipe?

Let us know how it was!

Vibrant Potsticker Salad Recipe for a Fresh Flavor Boost

While rummaging through my fridge one warm afternoon, I stumbled upon a hidden treasure: a bag of frozen gyoza dumplings. As I pondered how to elevate this quick fix, inspiration struck! That’s when I created my Umami-Packed Potsticker Salad Recipe, a delightful fusion of savory potstickers and crisp, colorful vegetables like juicy heirloom tomatoes and refreshing cucumbers. This dish is not only quick to prepare but also vegan and gluten-free, making it a perfect choice for anyone seeking a light yet satisfying meal. Whether you’re looking for a breezy lunch or a dazzling side dish for summer gatherings, this salad delights the senses and keeps your kitchen cool during hot days. Ready to take your dumplings beyond the usual? Let’s dive into this vibrant and versatile salad together!

Why Make Potsticker Salad Today?

Quick and Easy: The preparation takes minimal time, perfect for busy days when you crave something special without the hassle.
Fresh and Vibrant: Combining fresh veggies with gyoza dumplings creates an eye-catching dish that bursts with color and flavor.
Customizable: Add your favorite vegetables or switch up the dressing for a unique twist. Think sliced carrots or even avocados for creaminess!
Crowd-Pleasing: Ideal for sharing at BBQs or potlucks, this salad is bound to impress guests. Pair it with a refreshing drink or serve it alongside a classic American Potato Salad for an uplifting meal.
Healthy and Nourishing: Enjoy a guilt-free dish that’s vegan and gluten-free, making it a fantastic option for everyone. This Potsticker Salad is not just a meal; it’s a culinary adventure waiting to happen!

Potsticker Salad Ingredients

For the Dumplings
Frozen Gyoza Dumplings – This main component provides a protein boost; opt for vegan dumplings for a plant-based version.

For the Salad
Heirloom Tomatoes – Adds a burst of freshness and sweetness; substitute with regular tomatoes if needed.
English Cucumber – Provides a satisfying crunch; Persian cucumbers can be used as an alternative.
Scallions – These enhance flavor with a mild onion taste; feel free to swap with chives if desired.
Red Chili Pepper – Adds a touch of heat; adjust the quantity based on your spice tolerance.
Basil Leaves – Infuses the salad with fragrant herb notes; mint is a lovely substitute for a different twist.

For the Dressing
Tamari – Acts as a savory base for the dressing; for a non-gluten-free option, use soy sauce.
Balsamic Vinegar – Provides both acidity and sweetness to the dish; apple cider vinegar works as an alternative.
Maple Syrup – Balances the flavors with sweetness; honey is a good substitute if preferred.

For Garnishing
Toasted Sesame Seeds – Adds a nutty flavor and nice crunch; crushed peanuts can also be used.
Garlic Chili Sauce – This extra condiment provides a kick of heat and depth to the salad.

Feel free to experiment and enjoy creating your very own Potsticker Salad Recipe!

Step‑by‑Step Instructions for Potsticker Salad Recipe

Step 1: Cook Dumplings
Begin by steaming the frozen gyoza dumplings according to the package instructions, usually 6-8 minutes until they are piping hot and tender. Once cooked, transfer them to a large mixing bowl and drizzle with a teaspoon of sesame oil, tossing gently to coat and prevent sticking.

Step 2: Prepare Dressing
In a separate bowl, whisk together ¼ cup of tamari, 2 tablespoons of balsamic vinegar, and 1 tablespoon of maple syrup until well combined. This dressing should have a perfect balance of savory and sweet. Pour it over the warm dumplings in the bowl and gently toss to evenly coat each dumpling, allowing the flavors to meld.

Step 3: Add Vegetables
Next, slice the heirloom tomatoes, English cucumber, and scallions into bite-sized pieces. Add these vibrant vegetables to the bowl with the dumplings, mixing everything together carefully to ensure that every ingredient is evenly distributed. Look for a colorful mix as it comes together!

Step 4: Garnish
Tear fresh basil leaves into smaller pieces and sprinkle them over the salad for a fragrant touch. To add texture, sprinkle toasted sesame seeds over the top. This will not only enhance the flavor but also provide a nutty crunch that complements the Potsticker Salad beautifully.

Step 5: Serve
For the best experience, serve your Potsticker Salad at room temperature. This allows the flavors to shine without being masked by extreme temperatures. If desired, offer garlic chili sauce on the side for those who enjoy an extra kick, enabling everyone to customize their serving.

Expert Tips for Potsticker Salad Recipe

  • Prep Ahead: Steam dumplings in advance and store them in the fridge. This saves time on busy days when you crave comfort food without the hassle.

  • Keep Veggies Crisp: Add fresh vegetables just before serving to maintain their crunch and vibrant colors, preventing them from wilting in the dressing.

  • Adjust Spice Level: If you’re sensitive to heat, start with half the red chili pepper and gradually add more to your Potsticker Salad, tasting as you go.

  • Experiment with Flavors: Don’t hesitate to swap out ingredients! Try different herbs, vinegars, or add-ins like shredded carrots to match your taste preferences.

  • Serve Chilled: While it can be served at room temperature, chilling the salad for about 30 minutes enhances the flavors and makes it even more refreshing on hot days.

Storage Tips for Potsticker Salad

Fridge: Store the Potsticker Salad in an airtight container in the refrigerator for up to 2 days. This keeps the veggies crisp and the flavors fresh.

Room Temperature: If serving at a gathering, try to keep the salad at room temperature for no more than 2 hours to maintain quality and safety.

Reheating: If you have leftover dumplings, you can reheat them in a steam basket or in a skillet over medium heat. Just be sure to separate them from the salad ingredients to avoid wilting!

Customizing: Feel free to add or remove ingredients when storing to keep your Potsticker Salad fresh and enjoyable for each meal.

Potsticker Salad Recipe: Variations & Substitutions

Feel free to get creative with this Potsticker Salad Recipe and make it your own; a little twist can go a long way in flavor and enjoyment!

  • Dumpling Swap: Use homemade dumplings or try different filled dumplings for a personalized touch. The kind of dumplings you choose can give the dish a whole new vibe.
  • Veggie Boost: Add shredded cabbage or diced bell peppers for extra crunch—this will enhance that fresh texture while adding a splash of color!
  • Creamy Addition: Top with sliced avocado for a luscious, creamy experience. It pairs beautifully with the potstickers and enhances the dish’s overall richness.
  • Herb Variations: Swap basil for fresh mint or cilantro to bring a different herby flavor profile into play. Each herb offers its unique zing, inviting adventurous taste buds!
  • Chili Levels: Adjust the amount of red chili pepper based on your heat preference, or substitute with sriracha for a different kick. Spice it up or mellow it down—your choice!
  • Dressing Options: Experiment with a sprinkle of lime juice or a splash of soy sauce in the dressing for a zesty twist. A hint of citrus can brighten the whole salad!
  • Crunchy Toppings: Crushed peanuts work well as an alternative to sesame seeds if you want extra crunch and nuttiness without missing a beat. They add a delightful texture boost!
  • Vegan Dressing: For a completely plant-based dressing, use agave syrup instead of maple syrup for that touch of sweetness. Easy swaps can elevate your dish even further!

For inspiration on delicious salads, check out my refreshing Strawberry Spinach Salad or a classic Tuna Salad Sandwich for your next gathering!

What to Serve with Potsticker Salad?

Elevate your meal with these delicious pairings that perfectly complement the vibrant flavors of your salad.

  • Creamy Avocado Toast: Slathered with ripe avocado, it offers a rich creaminess that pairs beautifully with the crisp textures of the salad.

  • Thai Coconut Rice: This subtly sweet and fragrant rice dish enhances the umami notes of the salad, bringing a tropical twist to your table.

  • Crispy Spring Rolls: Perfectly crunchy on the outside and packed with fresh veggies on the inside, they add a delightful texture contrast to the salad.

  • Grilled Tofu Skewers: Marinated and char-grilled, these provide a savory protein element that complements the potsticker flavors while adding a satisfying chew.

  • Fresh Watermelon Salad: Drizzled with lime juice and sprinkled with mint, this refreshing side balances the savory flavors of the salad with its light, sweet notes.

  • Chilled White Wine: A glass of crisp Sauvignon Blanc or a light Pinot Grigio will enhance the salad’s freshness and elevate the overall dining experience.

These pairings promise to create a vibrant and exciting meal, turning your potsticker salad into a culinary celebration!

Make Ahead Options

These Umami-Packed Potsticker Salad bowls are perfect for busy weeknights and can be prepped in advance for convenience! You can cook the frozen gyoza dumplings and toss them with the dressing up to 24 hours ahead (refrigerate them to maintain freshness). Additionally, chop the vegetables (tomatoes, cucumbers, and scallions) up to 3 days in advance, storing them in airtight containers to keep them crisp and vibrant. When you’re ready to serve, simply mix the prepped vegetables into the dumplings and garnish with fresh basil and sesame seeds for a delightful, restaurant-quality dish with minimal effort. Enjoy an effortless, flavorful meal without compromising on quality!

Potsticker Salad Recipe FAQs

How do I select the best heirloom tomatoes for my salad?
Absolutely! Look for heirloom tomatoes that are firm yet slightly tender to the touch, with vibrant colors and no dark spots. A ripe tomato will have a rich aroma and give slightly when gently pressed—these indicators mean they’re bursting with flavor!

What’s the best way to store leftover Potsticker Salad?
Very! Transfer any leftovers into an airtight container and place it in the refrigerator. It’s best to enjoy the salad within 2 days for optimal freshness. Keep in mind that the longer it sits, the more the vegetables may wilt, affecting the texture.

Can I freeze the Potsticker Salad?
Great question! While the dumplings can be frozen (before cooking), freezing the entire salad isn’t recommended, as the fresh vegetables will lose their crispness and texture. However, you can freeze leftover dumplings separately for up to 3 months. Just steam them again when you’re ready to use, and toss them with fresh veggies for a quick meal!

What if my dumplings stick together after cooking?
No worries! If your dumplings do stick, simply steam them according to the package instructions and once they’re cooked, drizzle them with a bit more sesame oil while gently tossing them in the bowl. This not only helps separate the dumplings but also adds extra flavor!

Are there any dietary considerations for this Potsticker Salad?
Absolutely! This recipe is naturally vegan and gluten-free, especially if you use gluten-free dumplings and tamari. If you have allergies, be cautious with the ingredients, particularly when it comes to soy-based products. Always double-check labels to ensure they meet your dietary needs.

Can I customize the flavors in this recipe?
Very much so! Feel free to add your favorite vegetables or herbs according to your taste. You can even switch the dressing for a different flavor profile, like using a citrus-based dressing with lime or orange juice for a zesty twist. The more, the merrier in flavor explorations!

Potsticker Salad Recipe

Vibrant Potsticker Salad Recipe for a Fresh Flavor Boost

Experience a delightful fusion with this Potsticker Salad, featuring savory gyoza dumplings and fresh vegetables.
Prep Time 15 minutes
Cook Time 8 minutes
Total Time 23 minutes
Servings: 4 servings
Course: Salad
Cuisine: Asian
Calories: 220

Ingredients
  

For the Dumplings
  • 1 bag Frozen Gyoza Dumplings Opt for vegan dumplings for a plant-based version.
For the Salad
  • 2 cups Heirloom Tomatoes Substitute with regular tomatoes if needed.
  • 1 cup English Cucumber Persian cucumbers can be used as an alternative.
  • 3 stalks Scallions Feel free to swap with chives if desired.
  • 1 unit Red Chili Pepper Adjust the quantity based on your spice tolerance.
  • 1 cup Basil Leaves Mint is a lovely substitute for a different twist.
For the Dressing
  • 1/4 cup Tamari For a non-gluten-free option, use soy sauce.
  • 2 tablespoons Balsamic Vinegar Apple cider vinegar works as an alternative.
  • 1 tablespoon Maple Syrup Honey is a good substitute if preferred.
For Garnishing
  • 2 tablespoons Toasted Sesame Seeds Crushed peanuts can also be used.
  • 2 tablespoons Garlic Chili Sauce Provides a kick of heat and depth to the salad.

Equipment

  • steamer
  • Mixing Bowl
  • Whisk
  • knife
  • cutting board

Method
 

Step-by-Step Instructions
  1. Begin by steaming the frozen gyoza dumplings according to the package instructions, usually 6-8 minutes until they are piping hot and tender. Once cooked, transfer them to a large mixing bowl and drizzle with a teaspoon of sesame oil, tossing gently to coat and prevent sticking.
  2. In a separate bowl, whisk together ¼ cup of tamari, 2 tablespoons of balsamic vinegar, and 1 tablespoon of maple syrup until well combined. Pour it over the warm dumplings in the bowl and gently toss to evenly coat each dumpling.
  3. Slice the heirloom tomatoes, English cucumber, and scallions into bite-sized pieces. Add these vibrant vegetables to the bowl with the dumplings, mixing everything together carefully.
  4. Tear fresh basil leaves into smaller pieces and sprinkle them over the salad for a fragrant touch. Sprinkle toasted sesame seeds over the top for added texture.
  5. Serve your Potsticker Salad at room temperature. If desired, offer garlic chili sauce on the side for an extra kick.

Nutrition

Serving: 1servingCalories: 220kcalCarbohydrates: 30gProtein: 8gFat: 10gSaturated Fat: 1gPolyunsaturated Fat: 5gMonounsaturated Fat: 3gSodium: 500mgPotassium: 400mgFiber: 4gSugar: 5gVitamin A: 20IUVitamin C: 25mgCalcium: 5mgIron: 10mg

Notes

Feel free to experiment and enjoy creating your very own Potsticker Salad Recipe! Prep ahead by steaming dumplings in advance, and keep veggies crisp by adding them just before serving.

Tried this recipe?

Let us know how it was!

Hearty Colombian Mondongo: Comfort in Every Spoonful

The aroma of simmering spices wafted through my kitchen, instantly transporting me to the heart of Colombia, where family gatherings are warmed by bowls of hearty Colombian Mondongo. This beloved tripe soup, infused with vibrant vegetables and aromatic herbs, epitomizes comfort food in every spoonful. Not only is it a fulfilling meal that’s perfect for sharing, but it’s also surprisingly quick to prepare, making it an ideal option for busy weeknights or special occasions alike. Whether you’re new to tripe or a seasoned pro, this recipe invites everyone to explore an authentic taste of Colombian culture. Curious how to transform simple ingredients into a dish that resonates with tradition? Let’s get cooking!

Why Is Colombian Mondongo So Special?

Heartwarming Tradition: Colombian Mondongo isn’t just a meal—it’s a celebration of culture and togetherness, often served during family gatherings.
Hearty and Flavorful: Each spoonful is packed with robust flavors, thanks to the unique blend of spices and ingredients like beef tripe, chorizo, and vibrant vegetables.
Budget-Friendly: Utilizing affordable ingredients like tripe, potatoes, and cassava, this dish proves that comfort food doesn’t have to break the bank.
Versatile Dish: Feel free to make it your own! Try different proteins or toss in extra veggies based on your family’s preferences.
Quick Preparation: With a straightforward cooking process, you can whip up this heartfelt soup in under two hours, perfect for busy weeknights or special occasions. Whether you’re new to cooking tripe or looking to impress, this recipe makes it achievable and delicious—just like a warm hug in a bowl! For an authentic experience, serve your Mondongo with a side of white rice and avocado slices.

Colombian Mondongo Ingredients

For the Soup Base
Beef Tripe – This main ingredient gives Mondongo its signature texture and flavor; make sure to clean it thoroughly!
Pork Belly or Ham Hock – Adds rich depth to the broth; you can substitute with extra tripe if preferred.
Chorizo – Infuses a spicy kick into the dish; use pre-cooked chorizo to save time.
Beef or Chicken Stock – Provides a flavorful base for the soup; homemade stock works best.

For the Vegetables
Potato – Contributes starchiness; feel free to swap it with sweet potatoes for added sweetness.
Carrot – Brings natural sweetness and vibrant color; substitute with parsnips for a slight twist.
Corn – Adds a delightful crunch; fresh corn is ideal, but frozen will work too.
Cassava (Yuca) – Offers a starchy texture; be sure to peel and cube it before cooking.
Tomatoes – Adds acidity and freshness to the dish; you can use fresh or canned based on what’s available.
Onion, Garlic, Bell Peppers – These aromatics build a robust flavor; any color bell pepper works perfectly.

Spices and Seasonings
Ground Cumin and Paprika – Essential spices that flavor the broth; adjust to your liking.
Salt and Black Pepper – For seasoning; remember to taste as you go!
Fresh Cilantro – Adds a burst of freshness; feel free to omit if it’s not your favorite herb.
Lime – Brightens the soup when served; lemon can be an alternative if needed.

For Serving
White Rice – Complements the soup; it’s a traditional pairing you won’t want to skip!
Avocado Slices – Adds a creamy touch and balances the dish; optional but highly recommended.

Now that you have your ingredients ready, let’s embark on this delicious journey of making Colombian Mondongo, a hearty tripe soup that resonates with family warmth and culture!

Step‑by‑Step Instructions for Colombian Mondongo

Step 1: Prepare the Tripe
Thoroughly rinse the beef tripe under cold water to remove any impurities. Once cleaned, cut the tripe into bite-sized pieces and set aside. This step is crucial for ensuring that your Colombian Mondongo has the right texture and taste without any off-putting flavors.

Step 2: Cook the Base
In a large pot, combine the cleaned tripe, pork belly or ham hock, beef or chicken stock, and halved limes. Bring the mixture to a boil over medium heat, then reduce to a gentle simmer. Allow it to cook for about 1 hour, stirring occasionally, until the tripe becomes tender.

Step 3: Sauté the Aromatics
Meanwhile, heat a splash of oil in a separate pan over medium heat. Add chopped onions, minced garlic, diced bell peppers, and tomatoes. Sauté for about 5–7 minutes, or until the vegetables are softened and fragrant. Stir in ground cumin and paprika, cooking for an additional 2 minutes to enhance their flavors, then set aside.

Step 4: Combine and Simmer
Add the sautéed vegetable mixture to the pot with the tripe. Next, incorporate diced potatoes, carrots, corn, cassava, and sliced chorizo. Stir everything together, making sure the vegetables are evenly distributed. Cover the pot and simmer for an additional 30-40 minutes, or until all ingredients are tender.

Step 5: Final Seasoning and Serve
Taste the Colombian Mondongo and season it with salt, black pepper, and freshly chopped cilantro to elevate the flavor. Serve the soup hot, alongside white rice and avocado slices for a delightful contrast and a traditional touch. Enjoy this comforting dish that embodies the spirit of Colombian cooking!

Colombian Mondongo: Endless Possibilities

Get ready to make this recipe your own with delightful twists and customizable ingredients that will tantalize your taste buds!

  • Lamb Tripe: Swap out beef tripe for lamb tripe to introduce a unique flavor that elevates the soup’s richness.

  • Vegetarian Delight: Replace tripe with meaty mushrooms and load up on additional veggies for a heartwarming plant-based version that everyone will love.

  • Extra Spice: For those who crave heat, try incorporating your favorite hot sauce or diced jalapeños to bring a fiery kick to each bowl.

  • Sweet Potatoes: Substitute regular potatoes with sweet potatoes to add a delightful sweetness and a pop of color to your Mondongo.

  • Mixed Beans: For added protein, throw in some cooked beans of your choice—black beans or kidney beans work well for a hearty boost.

  • Smoky Paprika: Elevate the taste by using smoked paprika instead of regular; it will give the broth a fantastic depth of flavor that complements the other ingredients beautifully.

  • Coconut Milk: Consider adding coconut milk for a creamy, tropical twist that melds wonderfully with the spices and makes for a rich comforting soup.

Feel free to experiment and mix in your loved flavors, and don’t forget to serve your Colombian Mondongo with a side of white rice and fresh avocado for the ultimate comfort experience!

What to Serve with Colombian Mondongo

The heartiness of this flavorful tripe soup deserves the perfect complements to create a memorable meal experience.

  • White Rice: Acts as a staple side, balancing the rich flavors of the soup, allowing you to savor every bite of Mondongo.
  • Avocado Slices: Their creamy texture adds a delightful contrast to the soup’s robust elements, enhancing each mouthful with a touch of freshness.
  • Fried Plantains: Sweetness from the plantains creates a lovely contrast to the savory soup, making each bite truly comforting. Pair the warmth of the soup with crispy fried plantains for an unforgettable combination.
  • Colombian arepas: These cornmeal cakes are a traditional accompaniment, and their slightly crispy exterior pairs beautifully with the soup’s tenderness. Best enjoyed warm and stuffed or topped with cheese!
  • Cilantro-Lime Corn Salad: This fresh, zesty salad adds a burst of flavor, brightening up your meal and complementing the vibrant spices in the Mondongo.
  • A bottle of Aguardiente: A popular Colombian anise-flavored liqueur, served chilled, can enhance the experience of enjoying your hearty dish!
  • Tropical Fruit Salad: End your meal with a refreshing fruit salad that captures the essence of Colombia, providing a sweet and light finish.
  • Chicharrón: Crispy pork cracklings provide an irresistible crunch that contrasts beautifully with the creamy and tender aspects of the soup.
  • Hot Sauce: For those who enjoy a little heat, a drizzle of spicy sauce can elevate the flavors in each comforting spoonful of Colombian Mondongo.

Make Ahead Options

Preparing Colombian Mondongo ahead of time can save you precious moments on busy weeknights! You can clean and cut the tripe and store it in an airtight container, refrigerated for up to 24 hours before cooking. Furthermore, the sautéed aromatics like onions, garlic, and peppers can be prep actions completed up to 3 days in advance; simply refrigerate them in a separate container to maintain their flavor and freshness. When you’re ready to serve, simply simmer the prepped ingredients together with the remaining vegetables and broth, adding in the fresh herbs before serving. Your Colombian Mondongo will be just as delicious, ready to warm the hearts of your family with minimal effort!

Storage Tips for Colombian Mondongo

Fridge: Store leftovers in an airtight container for up to 3 days to maintain freshness and flavor.

Freezer: If you want to keep Colombian Mondongo longer, freeze it for up to 2 months. Ensure you use freezer-safe containers to prevent freezer burn.

Reheating: When ready to enjoy, thaw frozen Mondongo in the fridge overnight. Reheat gently on the stove, adding a splash of broth to loosen the soup and bring back its amazing texture before serving.

Room Temperature: Avoid keeping the soup out for more than 2 hours to ensure food safety. Enjoy the comforting warmth right away!

Expert Tips for Colombian Mondongo

Clean the Tripe Well: Ensure tripe is thoroughly cleaned to prevent any unpleasant odors in the soup, which can ruin the dish’s flavor.

Cook Time is Key: Simmer the tripe for at least 1 hour for tender results. Undercooking might leave it chewy, affecting the overall texture of the Colombian Mondongo.

Adjust Spice Level: Everyone has different heat preferences! Start with the recommended spices and gradually add more to customize the flavor to your liking.

Veggie Variations: Don’t hesitate to incorporate your family’s favorite vegetables into the soup. Zucchini or green beans can be tasty additions to enhance the dish.

Storage Savvy: Refrigerate leftovers in an airtight container for up to 3 days. Reheat gently on the stove and add a splash of broth to loosen the soup before serving.

Make It Your Way: Remember, Colombian Mondongo is versatile; try different proteins or even a vegetarian version with mushrooms for a unique twist!

Colombian Mondongo Recipe FAQs

What should I look for when selecting beef tripe?
Absolutely! When selecting beef tripe, ensure it is pale white to yellow in color, with a firm texture. Avoid any pieces that are discolored or have a strong odor, as these can indicate spoilage. Fresh tripe should have minimal blood and should be clean and free of dark spots; always ask your butcher to help you choose the best option.

How long can I store leftovers of Colombian Mondongo?
You can refrigerate leftover Colombian Mondongo for up to 3 days. Make sure to store it in an airtight container to keep it fresh. When reheating, I recommend adding a splash of broth or water to loosen the soup before warming it on the stove for an even texture.

Can I freeze Colombian Mondongo, and if so, how?
Definitely! To freeze Colombian Mondongo, allow it to cool completely after cooking. Then, transfer it to freezer-safe containers, leaving some space at the top for expansion. It can be frozen for up to 2 months. When you’re ready to enjoy it, thaw overnight in the refrigerator and reheat gently on the stove, adding a splash of broth to restore its delicious consistency.

What if my tripe doesn’t become tender after simmering?
Very importantly, if your tripe isn’t tender after the recommended 1 hour of cooking, continue to simmer it gently, checking every 10 minutes. Tripe can sometimes require a bit longer depending on the thickness. If it remains tough, consider adding a bit more broth to help keep it moist as it cooks.

Is Colombian Mondongo suitable for those with food allergies?
It’s crucial to check for any allergies before enjoying Colombian Mondongo. The soup contains beef, pork, and spices, which could be an issue for some. If you’re cooking for someone with dietary restrictions, you can easily customize the recipe by omitting the pork and adding more vegetables or using chicken stock instead. Always ensure to read labels if you’re using pre-packaged ingredients like chorizo or stock.

What’s the best way to serve Colombian Mondongo?
Serve Colombian Mondongo hot, alongside a side of white rice, which balances the hearty soup, and enhance the dish with creamy avocado slices for an added texture. This traditional pairing is loved, and it creates a warm, inviting meal perfect for gatherings with family and friends!

Colombian Mondongo

Hearty Colombian Mondongo: Comfort in Every Spoonful

Colombian Mondongo is a hearty tripe soup infused with vibrant vegetables and spices, perfect for family gatherings.
Prep Time 30 minutes
Cook Time 1 hour 30 minutes
Total Time 2 hours
Servings: 6 bowls
Course: Dinner
Cuisine: Colombian
Calories: 350

Ingredients
  

For the Soup Base
  • 2 pounds beef tripe Make sure to clean it thoroughly.
  • 1 pound pork belly or ham hock Can substitute with extra tripe.
  • 1 link chorizo Use pre-cooked to save time.
  • 8 cups beef or chicken stock Homemade stock works best.
For the Vegetables
  • 2 medium potatoes Starchy; can swap with sweet potatoes.
  • 2 medium carrots Natural sweetness.
  • 1 cup corn Fresh corn is ideal.
  • 1 pound cassava (yuca) Peel and cube before cooking.
  • 2 medium tomatoes Fresh or canned.
  • 1 medium onion Aromatics contribute to flavor.
  • 4 cloves garlic Minced.
  • 2 medium bell peppers Any color works.
Spices and Seasonings
  • 1 teaspoon ground cumin Adjust to liking.
  • 1 teaspoon paprika Adjust to liking.
  • to taste salt
  • to taste black pepper
  • 1/2 cup fresh cilantro Feel free to omit.
For Serving
  • 4 cups white rice Traditional pairing.
  • 1 cup avocado slices Optional but highly recommended.

Equipment

  • large pot
  • Pan

Method
 

Step-by-Step Instructions
  1. Thoroughly rinse the beef tripe under cold water to remove impurities, then cut into bite-sized pieces.
  2. In a large pot, combine the cleaned tripe, pork belly or ham hock, stock, and halved limes. Bring to a boil, then simmer for about 1 hour.
  3. Heat oil in a pan, add chopped onions, minced garlic, diced bell peppers, and tomatoes. Sauté for 5–7 minutes, add spices, and set aside.
  4. Add the sautéed vegetables to the pot, incorporate potatoes, carrots, corn, cassava, and sliced chorizo. Cover and simmer for 30-40 minutes.
  5. Season with salt, black pepper, and cilantro, then serve hot with rice and avocado slices.

Nutrition

Serving: 1bowlCalories: 350kcalCarbohydrates: 40gProtein: 25gFat: 10gSaturated Fat: 3gPolyunsaturated Fat: 1gMonounsaturated Fat: 5gCholesterol: 50mgSodium: 800mgPotassium: 800mgFiber: 5gSugar: 4gVitamin A: 500IUVitamin C: 15mgCalcium: 30mgIron: 3mg

Notes

Ensure tripe is thoroughly cleaned. Simmer for at least 1 hour for tenderness. Customize spices to taste. Store leftovers in an airtight container for up to 3 days.

Tried this recipe?

Let us know how it was!