Creamy White Queso Dip That Will Elevate Your Game Day

Every gathering can use a bit of pizazz, and nothing elevates a snack table quite like a warm bowl of Creamy Tex-Mex White Queso Dip. As the enticing aroma of melted cheese mingles with a hint of spice fills the air, your friends will flock to the kitchen, curious about the magic happening. This homemade queso dip is not only quick to whip up—ready in just 25 minutes—but it also brings a depth of flavor that store-bought versions can only dream of. Whether you’re watching the big game, hosting a cozy night in, or simply craving a tasty treat, this rich, creamy dip is a sure crowd-pleaser! So, are you ready to dip into this deliciousness and take your snack game to the next level?
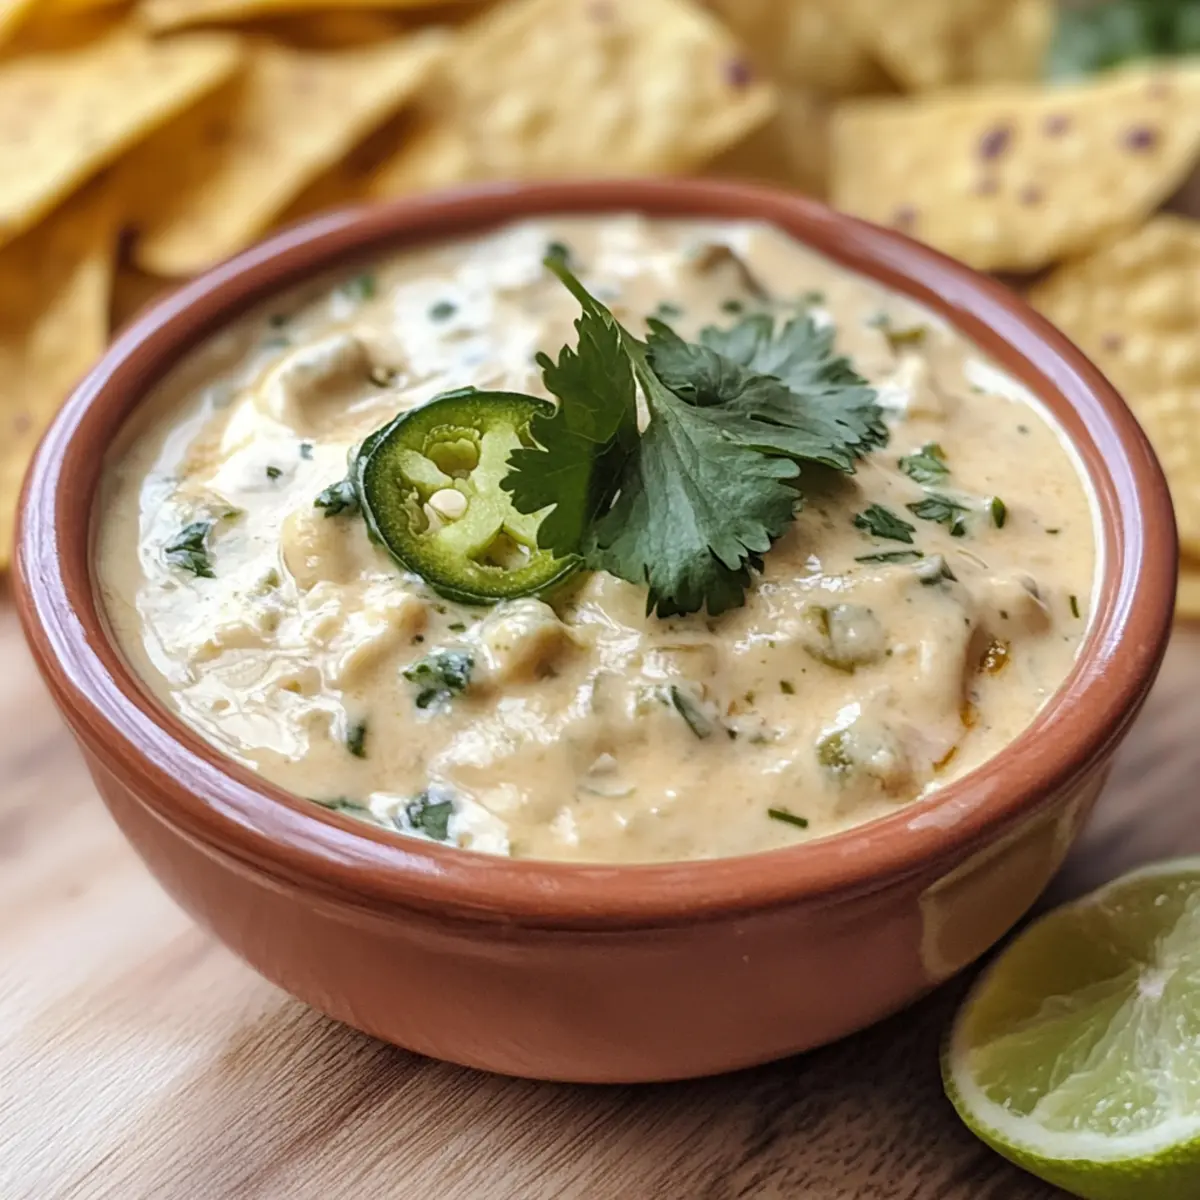
Why Is White Queso Dip a Must-Try?

Creamy, dreamy goodness: This white queso dip is everything you crave in a snack—rich, smooth, and perfectly cheesy. Flavor-packed: Each bite bursts with flavors from a delightful blend of spices and fresh ingredients. Versatile pairing: It’s great with tortilla chips, veggies, or drizzled over tacos.Try it with tacos for a fun twist! Quick to prepare: In just 25 minutes, you’ll have a warm bowl of deliciousness ready to impress your guests. Crowd favorite: The perfect appetizer for game days or gatherings, it’s sure to steal the show and keep everyone coming back for more.

White Queso Dip Ingredients

• Get ready for cheesy goodness!

For the Base
Neutral Oil – Provides a cooking medium for sautéing; olive oil is a great flavor twist!
Yellow Onion – Adds sweetness and depth; substitute with white onions if desired.
Jalapeños – For that perfect heat; reduce or omit for a milder option.
Cream Cheese – Creates a creamy base; Neufchâtel can lighten it up.
Evaporated Milk – Ensures a silky texture; heavy cream works too.

For Flavoring
Ground Cumin – Adds warm, earthy tones; feel free to skip it if you prefer something different.
Chili Powder – Imparts complexity; adjust for your desired heat level.
Rotel Tomatoes & Chilies – Brings acidity and flavor; diced canned tomatoes can substitute.

For the Creaminess
Monterey Jack Cheese – Provides meltiness and flavor; use cheddar for a sharper taste.
Cilantro – Adds freshness; parsley is a suitable swap for cilantro fans.
Lime Juice – Enhances brightness; lemon juice can be swapped in as well.
Salt & Pepper – Season to taste for a deliciously balanced dip.

Now, let’s gather these ingredients and bring that delightful white queso dip to life!

Step‑by‑Step Instructions for Creamy Tex-Mex White Queso Dip

Step 1: Sauté Vegetables
Heat 1 tablespoon of neutral oil in a nonstick skillet over medium heat, swirling it around to coat the bottom evenly. Add 1 finely diced yellow onion and 1 minced jalapeño, cooking for 2-3 minutes until the onion is translucent and soft. Season lightly with salt and pepper, allowing the aromas to mingle as they sauté.

Step 2: Melt Cream Cheese
Next, introduce 8 ounces of diced cream cheese into the skillet. Stir continuously using a wooden spoon until the cream cheese fully melts and becomes creamy, incorporating it with the onion and jalapeño mixture. This usually takes about 2 minutes, resulting in a luscious base for your white queso dip.

Step 3: Add Rotel and Spices
Once the cream cheese is melted, add in one can of Rotel tomatoes and chilies along with ½ teaspoon of ground cumin and ½ teaspoon of chili powder. Mix thoroughly, ensuring the spices and tomatoes blend uniformly into the creamy mixture. Cook for another minute, allowing the flavors to deepen and harmonize.

Step 4: Simmer Sauce
Gradually pour in 1 cup of evaporated milk while stirring the mixture often. Increase the heat slightly to bring the queso dip to a gentle simmer, cooking for about 3-5 minutes until it thickens just enough to coat the back of your spoon. This step ensures your creamy dip achieves the perfect consistency.

Step 5: Incorporate Cheese
Lower the heat to medium-low, then add 2 cups of grated Monterey Jack cheese gradually, stirring continuously until fully melted. This will take around 2-3 minutes. As the cheese blends in, it will create a velvety texture for your creamy white queso dip, making it thoroughly irresistible.

Step 6: Finish and Season
Lastly, fold in ¼ cup of freshly chopped cilantro and 1 tablespoon of lime juice for a burst of freshness. Taste your dip, adjusting the seasoning with additional salt and pepper as needed. Serve it warm immediately with tortilla chips, reveling in the rich and creamy flavors of your homemade white queso dip!
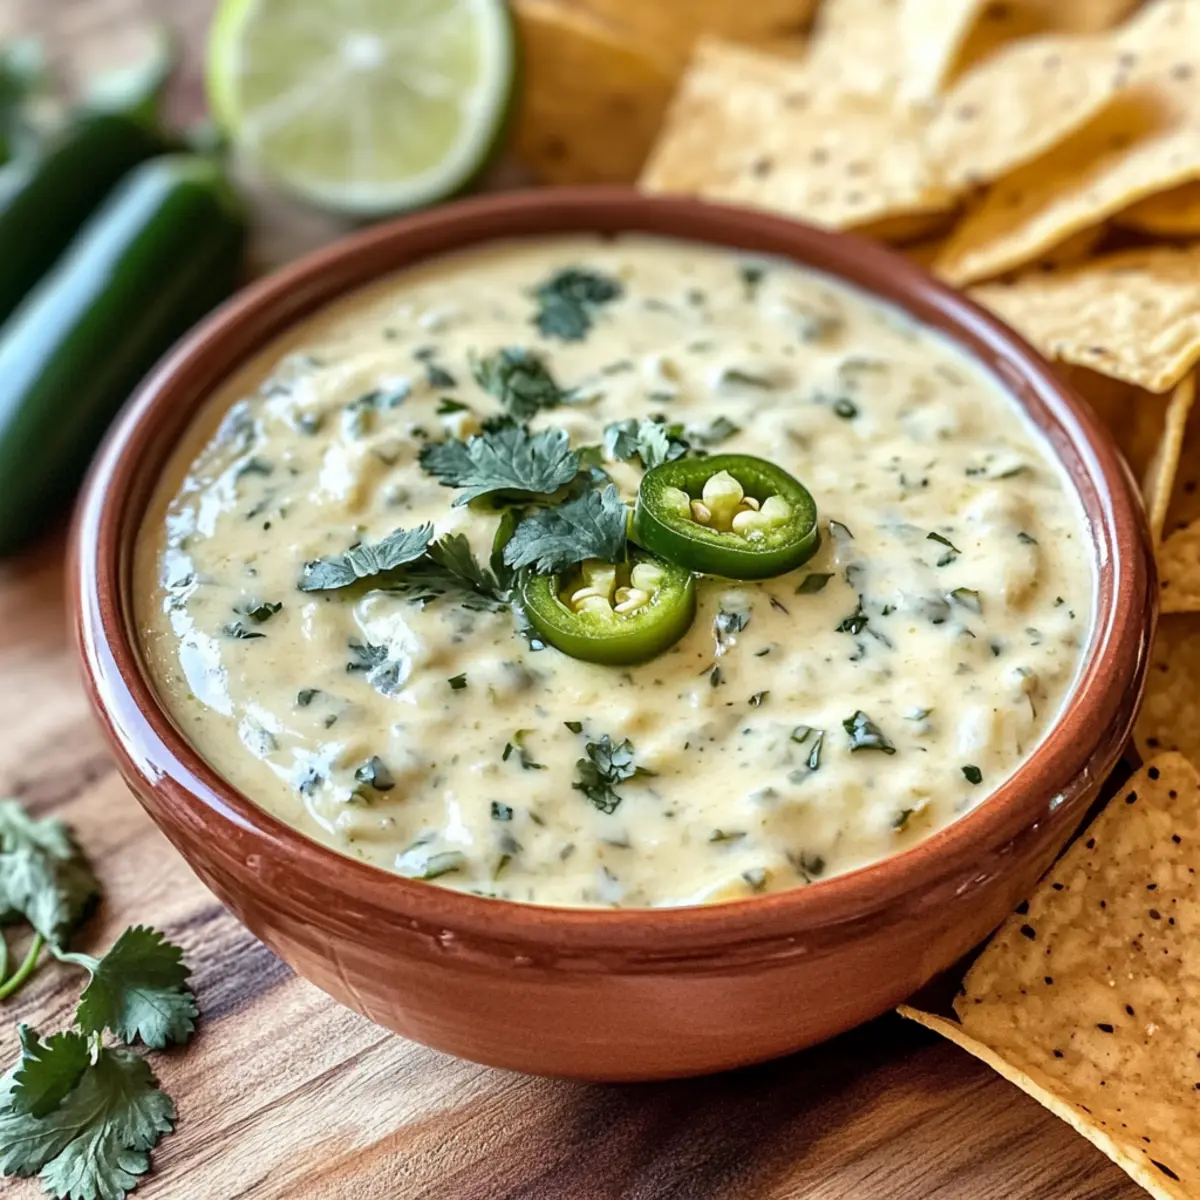
Storage Tips for White Queso Dip

  • Fridge: Store leftovers in an airtight container for up to 3 days. This keeps the dip fresh and ready for a quick snack or warm-up.
  • Freezer: For longer storage, freeze the dip in a freezer-safe container for up to 2 months. Thaw in the refrigerator before reheating.
  • Reheating: When ready to enjoy, gently reheat on the stove over low heat, stirring frequently to maintain a creamy consistency. Add a splash of evaporated milk if needed.
  • Serving Freshness: For the best flavor, consume within a day or two after preparation. The longer it sits, the more the flavors meld, but texture may slightly change.

Expert Tips for White Queso Dip

  • Control Thickness: Add evaporated milk slowly to reach your desired consistency; it’s easier to adjust than to fix a dip that’s too thin.
  • Gentle Reheating: When reheating leftovers, warm only what you’ll use and do it gently over low heat to avoid grainy cheese.
  • Customize Spice Levels: Adjust jalapeño amounts or add chipotle for a smoky kick, catering to different heat preferences in your crowd.
  • Separate Storage: Store leftovers in an airtight container; leaving the dip in the original pot can lead to drying out and losing that creamy texture.
  • Use Fresh Ingredients: Fresh cilantro and lime juice enhance the dish’s brightness, making your white queso dip even more flavorful.

White Queso Dip Variations

Feel free to put your own spin on this creamy delight—there are so many delicious ways to enjoy it!

  • Meaty Addition: Add cooked ground beef or chorizo for a hearty twist. Combine the meat during the melting process for extra flavor.
  • Smoky Chipotle: Toss in some chipotle peppers for a smoky depth. The heat combined with creaminess is truly mouthwatering.
  • Creamy Vegan: Substitute cream cheese with cashew cream blended with nutritional yeast. A creamy plant-based option that doesn’t skimp on flavor!
  • Spice Level: Adjust the amount of jalapeños for extra or reduced heat. Alternatively, use serrano peppers for a fiery kick!
  • Cheese Lovers: Combine Monterey Jack with Pepper Jack cheese for a spicy twist. The extra flavor makes every bite even more addictive.
  • Citrus Zing: Swap lime juice for fresh lemon juice. This fresh option gives your dip a lively, zesty kick that pairs well with cool chips.
  • Herbaceous Touch: Replace cilantro with fresh parsley or chives for a different herbaceous note. This slight shift in flavor can refresh your favorite dip.
  • Veggie Boost: Add diced bell peppers or spinach into the mix for a nutritious twist. The veggies add texture and a pop of freshness.

Looking to serve your white queso dip with something special? Try it with tacos or as a topping for nachos! You’ll elevate your game day experience to a whole new level.

What to Serve with Creamy Tex-Mex White Queso Dip

There’s nothing quite like pairing delicious bites with your warm white queso dip to create an unforgettable meal experience.

  • Crunchy Tortilla Chips: The perfect vessel for your dip, adding a satisfying crunch that contrasts beautifully with the creamy dip.

  • Fresh Veggie Platter: Crisp bell peppers, celery sticks, and carrots add a fresh crunch that balances the richness of the queso, providing a delightful contrast.

  • Spicy Guacamole: This classic dip complements the creamy texture with its smoothness and a zesty avocado flavor, bringing a punch of freshness.

  • Savory Nachos: Layered tortilla chips topped with melted cheese, jalapeños, and your white queso dip for a satisfying snack that promises to be a crowd favorite.

  • Mexican Street Corn (Elote): Grilled corn on the cob slathered with cotija cheese, lime, and spices pairs perfectly, bringing in a delightful sweetness to your flavor profile.

  • Crispy Chicken Wings: Offer up your favorite spicy or tangy wings alongside the dip to create a feast that’s perfect for game day or gatherings.

  • Light Beer or Margaritas: Refreshing drinks that enhance the flavors in the dip, a cold beer or refreshing margaritas will elevate the eating experience.

  • Churros for Dessert: End the night on a sweet note. Light, crispy churros dusted with cinnamon and sugar make for a delightful treat after your savory fare.

Make Ahead Options

These Creamy Tex-Mex White Queso Dip preparations are perfect for busy weeknights! You can sauté the vegetables and melt the cream cheese up to 24 hours in advance, allowing the flavors to meld overnight. Simply refrigerate the mixture in an airtight container. When you’re ready to serve, combine the remaining ingredients (like evaporated milk and Monterey Jack cheese) and gently reheat the dip on low heat until it’s smooth and creamy again. This method ensures your queso dip is just as delicious while saving you precious time when gatherings come around! Enjoy the ease of meal prep without sacrificing flavor!
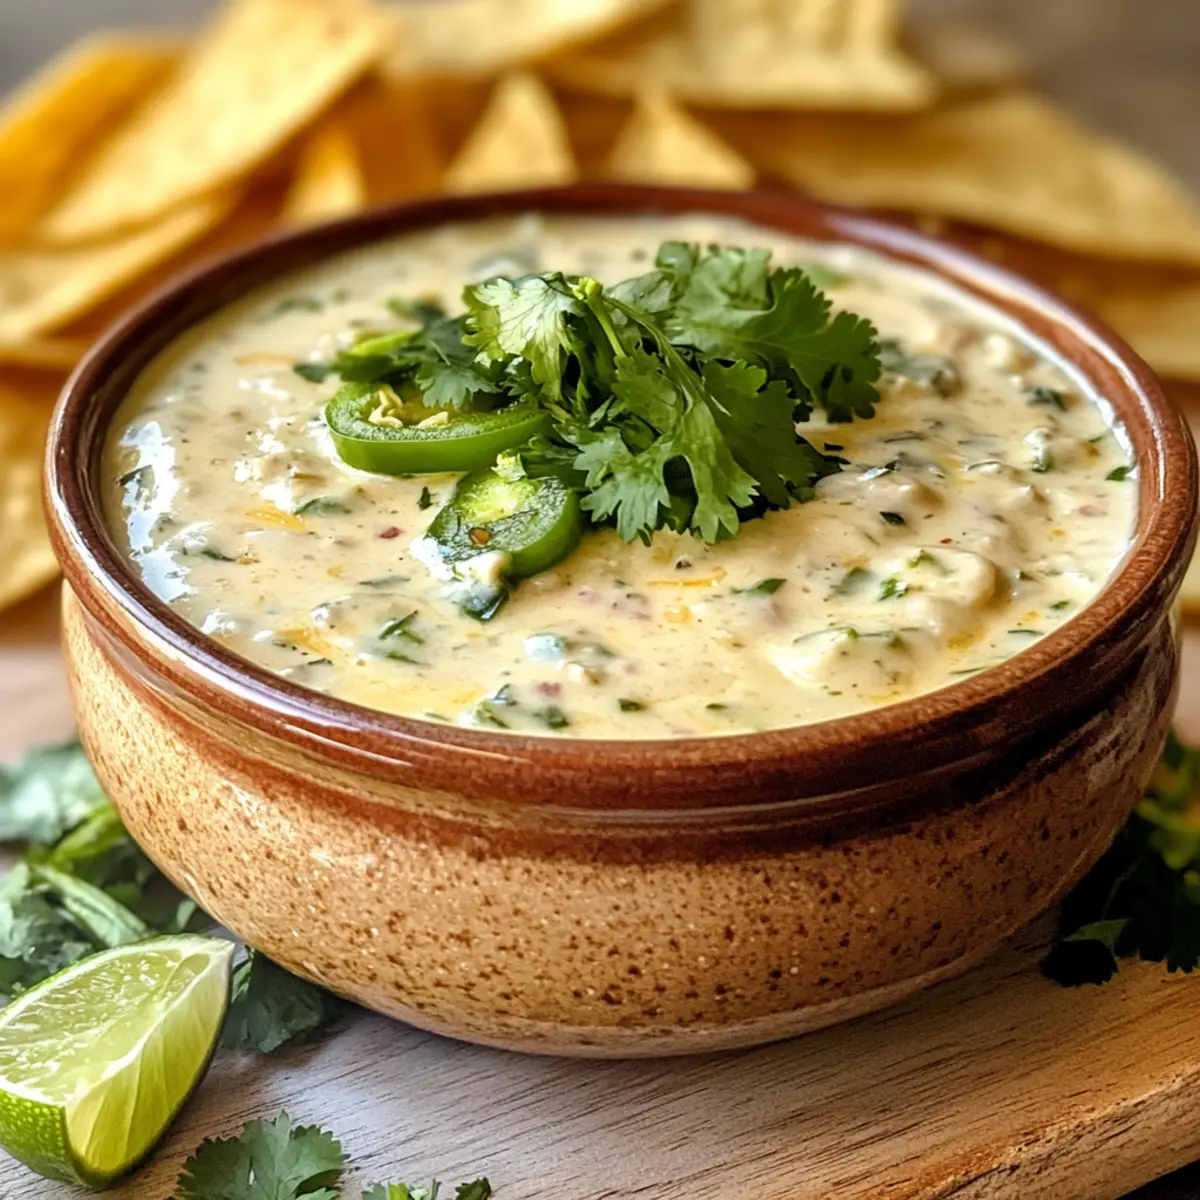
White Queso Dip Recipe FAQs

How do I choose the right jalapeños for my dip?
Absolutely! When selecting jalapeños, look for firm peppers that are bright green and shiny. Avoid any that feel soft or have dark spots, as this indicates they may be overripe. For a milder flavor, choose smaller peppers, as they tend to be less spicy.

How should I store leftover white queso dip?
To keep your dip fresh, store it in an airtight container in the fridge for up to 3 days. Make sure it cools down to room temperature before sealing. If reheating, do so gently over low heat to maintain its creamy texture, adding a splash of evaporated milk as needed.

Can I freeze white queso dip?
Yes! For freezing, transfer your cooled dip into a freezer-safe container and store it for up to 2 months. To thaw, simply place it in the refrigerator overnight. When you’re ready to enjoy, reheat on the stove over low heat, stirring frequently to restore its original creaminess.

What if my queso dip is too thick?
No worries! If your dip turns out too thick, gradually add small amounts of evaporated milk while stirring until you reach your desired consistency. It’s best to add a little at a time, allowing the dip to blend, rather than adding too much at once, which can make it too runny.

Can my pets eat white queso dip?
While it might be tempting to share your white queso dip with furry friends, it’s not advisable. The cream, cheese, and spices could upset their digestive systems. It’s best to keep this delicious treat just for you and your guests. Always consult your veterinarian for pet-safe food options.

Are there any allergy considerations for this recipe?
Very! If you’re serving guests with allergies, ensure to check for common allergens like dairy in the cream cheese and cheese, and adjust accordingly. For a dairy-free version, consider using plant-based cream cheese and nutritional yeast for added flavor.
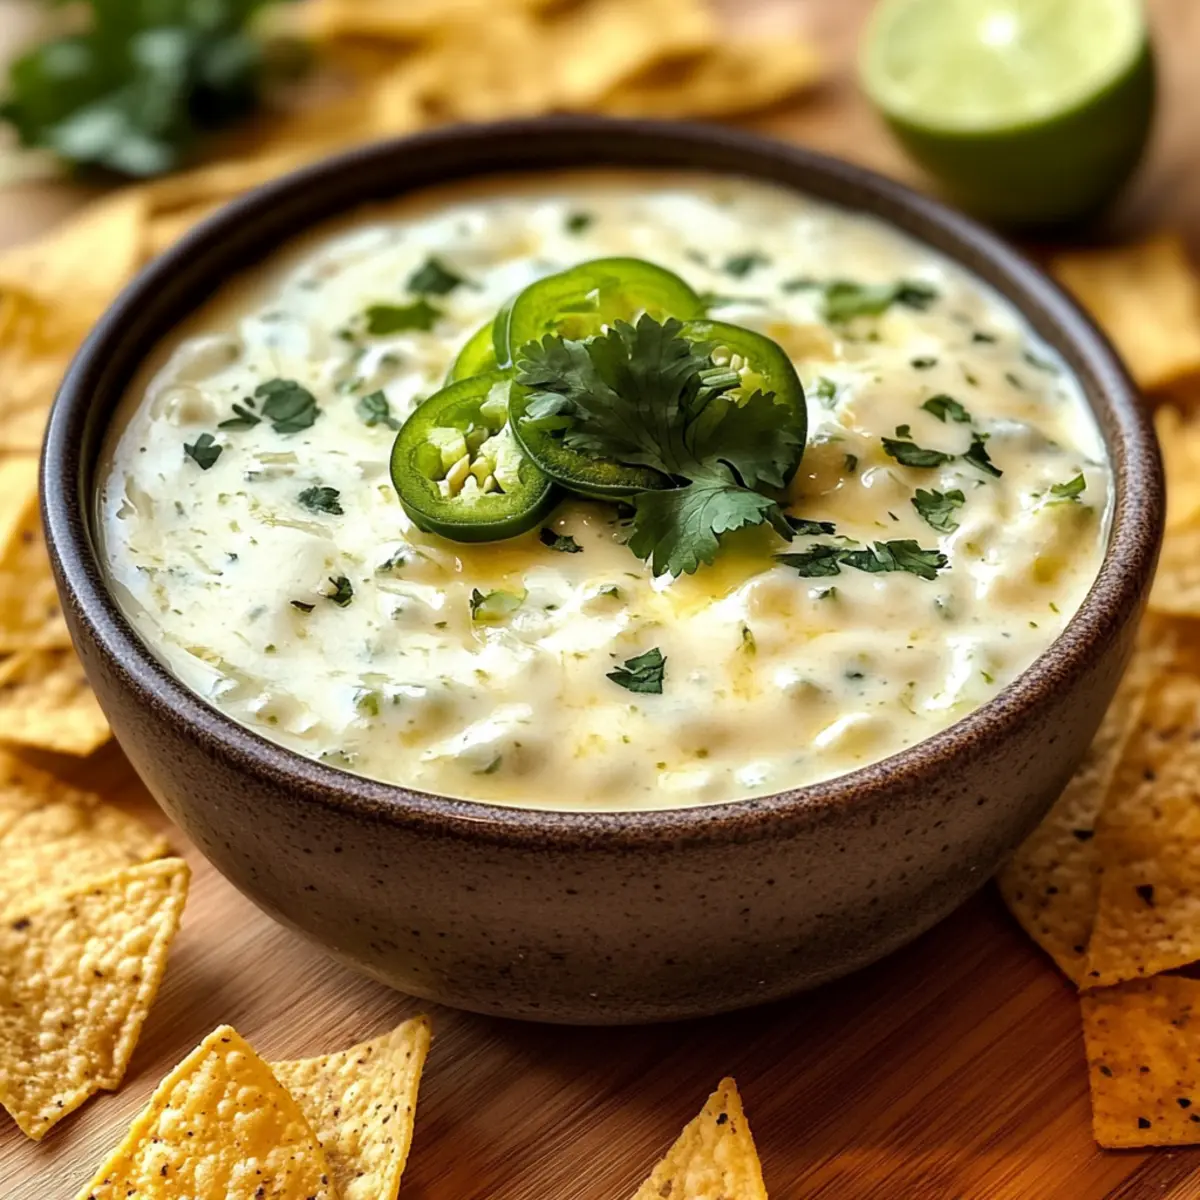
White Queso Dip

Creamy White Queso Dip That Will Elevate Your Game Day

This Creamy White Queso Dip is a must-try snack, perfect for game day or gatherings, delivering rich flavors and creamy goodness.
Prep Time 10 minutes
Cook Time 15 minutes
Total Time 25 minutes
Servings: 6 servings
Course: Appetizer
Cuisine: Tex-Mex
Calories: 250

Ingredients
  

For the Base
  • 1 tablespoon Neutral Oil Olive oil is a great flavor twist!
  • 1 medium Yellow Onion Substitute with white onions if desired.
  • 1 medium Jalapeño Reduce or omit for a milder option.
  • 8 ounces Cream Cheese Neufchâtel can lighten it up.
  • 1 cup Evaporated Milk Heavy cream works too.
For Flavoring
  • 0.5 teaspoon Ground Cumin Feel free to skip it if you prefer.
  • 0.5 teaspoon Chili Powder Adjust for desired heat level.
  • 1 can Rotel Tomatoes & Chilies Diced canned tomatoes can substitute.
For the Creaminess
  • 2 cups Monterey Jack Cheese Use cheddar for a sharper taste.
  • 0.25 cup Cilantro Parsley is a suitable swap.
  • 1 tablespoon Lime Juice Lemon juice can be swapped.
  • Salt & Pepper Season to taste.

Equipment

  • nonstick skillet

Method
 

Cooking Instructions
  1. Heat 1 tablespoon of neutral oil in a nonstick skillet over medium heat. Add 1 finely diced yellow onion and 1 minced jalapeño, cooking for 2-3 minutes until the onion is translucent and soft. Season with salt and pepper.
  2. Introduce 8 ounces of diced cream cheese into the skillet. Stir continuously until the cream cheese fully melts and becomes creamy.
  3. Add in one can of Rotel tomatoes and chilies along with ½ teaspoon of ground cumin and ½ teaspoon of chili powder. Mix thoroughly and cook for another minute.
  4. Gradually pour in 1 cup of evaporated milk while stirring. Increase heat to bring the dip to a gentle simmer, cooking for 3-5 minutes until it thickens.
  5. Lower heat and add in 2 cups of grated Monterey Jack cheese, stirring continuously until fully melted.
  6. Fold in ¼ cup of freshly chopped cilantro and 1 tablespoon of lime juice. Adjust seasoning with additional salt and pepper if needed.


Nutrition

Serving: 1cupCalories: 250kcalCarbohydrates: 10gProtein: 8gFat: 20gSaturated Fat: 10gPolyunsaturated Fat: 1gMonounsaturated Fat: 2gCholesterol: 50mgSodium: 600mgPotassium: 200mgFiber: 1gSugar: 2gVitamin A: 500IUVitamin C: 10mgCalcium: 300mgIron: 1mg

Notes

Store leftovers in an airtight container for up to 3 days. For longer storage, freeze in a freezer-safe container for up to 2 months.

Tried this recipe?

Let us know how it was!

Melty Raclette Dinner: Easy Comfort for Cozy Gatherings

As I gathered with friends around the table, the enticing aroma of melted cheese filled the air, instantly transporting us to the cozy Swiss Alps. A Raclette Dinner isn’t just a meal; it’s a delightful experience, perfect for entertaining and connecting with loved ones. This classic dish invites everyone to indulge in gooey raclette cheese, gracefully draped over tender boiled potatoes and a variety of savory meats. The beauty lies in its simplicity—preparing this hearty feast takes under 30 minutes, allowing you to focus on what truly matters: laughter and great company. Whether you’re a meat lover or seeking vegetarian options, this adaptable recipe invites creativity. So, what exciting twist will you add to your raclette experience?

Why is Raclette Dinner so special?

Experience the joy of interactive dining with this delightful meal that invites everyone to craft their own perfect bite. Quick and Easy preparation means you can have a gourmet dinner on the table in just 30 minutes! Versatile Options cater to all tastes—switch up the cheese or add more veggies for a vegetarian twist. Crowd-Pleasing Flavor combines gooey raclette with hearty potatoes and savory meats, offering a taste sensation that’ll have everyone coming back for seconds. Don’t miss out on pairing it with a refreshing salad or crusty bread; it’s the perfect way to elevate your gathering, just like with our Butter Shrimp Dinner or Hawaiian Crockpot Chicken. Get ready to create cherished memories around the table!

Raclette Dinner Ingredients

For the Cheese

  • Raclette cheese – The star of the dish, melty and gooey; if unavailable, Emmental or Gruyere are excellent substitutes.
  • Fresh thyme – Adds a delightful aroma and freshness; swap it out for rosemary or oregano if desired.
  • Dry white wine – Enhances the cheese’s flavor during melting; optional for a non-alcoholic version.

For the Accompaniments

  • Sausages (kielbasa or bratwurst) – Provides heartiness to the meal; you can substitute with grilled chicken or omit for a vegetarian option.
  • Assorted salami or cured meats – Brings variety and richness; feel free to use any of your favorite cured meats.
  • Baby potatoes – Acts as a fulfilling base for the cheese; feel free to experiment with any small potato varieties.
  • Cornichons – Offers a tangy contrast to the richness of the cheese; try pickled onions or other pickled veggies if preferred.
  • Dijon or whole grain mustard – A flavorful condiment that perfectly complements the meal.

Get ready for a Raclette Dinner that’s bound to create warm, joyful moments!

Step‑by‑Step Instructions for Raclette Dinner

Step 1: Prepare the Cheese
Begin by carefully removing the rind from the raclette cheese and slicing it into 1/2-inch thick pieces. This step ensures a wonderful melting experience during your Raclette Dinner. Keep the cheese in the fridge to maintain its firmness until you’re ready to melt it over the potatoes.

Step 2: Boil the Potatoes
In a large pot, bring salted water to a rolling boil. Add the baby potatoes and cook them for about 15–20 minutes, or until they are fork-tender but not mushy. Once cooked, drain the water and set the potatoes aside to remain warm, as they’ll serve as a hearty base for the gooey cheese.

Step 3: Prepare the Meats
Arrange a beautiful platter with assorted salami and cured meats for your Raclette Dinner. Simultaneously, grill the sausages over medium heat for approximately 10–12 minutes until they reach an internal temperature of 160°F (70°C) and have a golden color. This step adds heartiness and variety to your meal.

Step 4: Melt the Raclette
Preheat your broiler to high, and in a cast iron skillet, place your slices of raclette cheese. Sprinkle fresh thyme over the cheese and drizzle with a touch of dry white wine to enhance the flavors. Broil the cheese for about 5 minutes, until it becomes bubbly and slightly golden. This melting cheese will be the star of your Raclette Dinner!

Step 5: Serve the Dish
Now it’s time to beautifully arrange your Raclette Dinner! On each plate, add the warm boiled potatoes, grilled sausages, and assorted cured meats. Generously top everything with the luscious melted cheese. Don’t forget to add a side of cornichons and a dollop of Dijon mustard to elevate the flavors and invite everyone to indulge in this comforting meal.

Expert Tips for the Best Raclette Dinner

Cheese Choice: Use high-quality raclette cheese for the best flavor, but if necessary, Emmental or Gruyere can also work beautifully.

Perfect Potatoes: Cook the baby potatoes until just tender and not mushy to support the richness of the melted cheese without falling apart.

Broiler Method: For perfect melting, ensure your broiler is preheated and that you use a cast iron skillet to achieve that bubbling, golden top on your raclette.

Serving Style: Arrange your ingredients beautifully to entice guests; providing a variety of meats and veggies makes the Raclette Dinner interactive and fun!

Portion Planning: Aim for about 4 ounces of cheese per person to satisfy hearty appetites, and don’t forget the delightful contrast of pickles to cut through the richness.

Variations & Substitutions for Raclette Dinner

Feel free to explore delightful twists on this classic dish to make it even more personal and flavorful!

  • Dairy-Free: Substitute raclette cheese with a dairy-free melting cheese to accommodate vegan guests while still achieving that creamy texture.
  • Vegetarian Delight: Skip the meats and add roasted veggies like zucchini, bell peppers, and mushrooms for a hearty vegetarian feast.
  • Seafood Twist: Swap sausages for grilled shrimp for a coastal approach that will impress seafood lovers. The light, savory flavors are a wonderful addition!
  • Herb Variation: Try different herbs such as sage or dill in place of thyme for a unique aromatic touch that will elevate your raclette experience.
  • Spicy Kick: Add jalapeños or red pepper flakes to the melted cheese for a delightful heat that’ll surprise your palate. This twist can stimulate exciting conversations as everyone enjoys the flavor adventure!
  • Chunky Potatoes: Instead of baby potatoes, use chunky root vegetables like sweet potatoes or even parsnips for a sweeter, more complex flavor.
  • Contrast of Flavors: Incorporate fruit spreads like fig jam or apple chutney alongside your pickles to provide a sweet contrast to the savory richness of the cheese. Pairing these unique flavors can make your table more inviting!
  • Mustard Mash-Up: Experiment with flavored mustards like honey or whole grain mustard to add an extra zing to your raclette experience.

Let your creativity shine with this Raclette Dinner and discover variations fit for every gathering! If you’re looking for more simple yet satisfying recipes, don’t miss out on our delightful Shrimp Sausage Dinner that brings heartiness to your table.

How to Store and Freeze Raclette Dinner

Fridge: Store any leftover cooked ingredients in an airtight container for up to 3 days. Keep the melted cheese separate to maintain texture and flavor.

Freezer: Freeze leftover raclette cheese slices for up to 2 months, wrapped tightly in plastic wrap and then in foil. Avoid freezing the cooked potatoes or meats, as they may become mushy.

Reheating: To reheat leftover raclette dinner, gently warm potatoes and meats in the oven, and re-melt cheese under the broiler for maximum gooeyness.

Prep Ahead: You can slice the cheese and prepare the meats and potatoes a few hours in advance, storing them separately in the fridge until you’re ready to enjoy your Raclette Dinner.

Make Ahead Options

A Raclette Dinner is an excellent choice for meal prep, saving you time on busy weeknights! You can slice the raclette cheese and store it in the fridge up to 24 hours in advance, ensuring it’s ready to melt. Additionally, you can boil the baby potatoes 3 days ahead; just refrigerate them after cooking. For the meats, arrange the assorted salami and cured meats on a platter up to 4 hours before serving, covering them to maintain freshness. When it’s time to eat, simply reheat the potatoes if needed, grill the sausages, melt the cheese as directed, and serve for a delightful and stress-free dinner experience!

What to Serve with Raclette Dinner

As you gather your loved ones for this comforting meal, complement it with delightful sides that enhance the experience.

  • Crusty Sourdough Bread: Perfect for dipping into the gooey cheese, this bread adds a rustic texture that pairs beautifully with the rich flavors.

  • Simple Mixed Green Salad: A refreshing blend of greens, lightly dressed, balances the meal’s heaviness and adds a vibrant burst of color to the table.

  • Honey-Glazed Roasted Carrots: Their natural sweetness and tender texture contrast harmoniously with the savory raclette, creating a perfectly balanced bite.

  • Herb-Infused Olive Oil: Drizzle over your potatoes or bread for an aromatic touch; it enriches the meal’s flavor profile with earthy notes.

  • Sparkling White Wine: The effervescence refreshes the palate, making it a delightful companion to the rich and creamy raclette cheese.

  • Tart Pickled Vegetables: Cornichons or pickled onions amplify the flavor experience; their acidity cuts through the richness, creating a fun contrast.

  • Dark Chocolate for Dessert: A small piece can round off the meal nicely, providing a rich, sweet end to the savory feast, perfect for ending on a high note.

Raclette Dinner Recipe FAQs

What type of raclette cheese should I choose?
Absolutely! Look for high-quality raclette cheese to ensure that creamy, gooey texture. If it’s unavailable, you can substitute with Emmental or Gruyere, which also melt beautifully and offer a slightly different flavor profile.

How do I store leftovers after my Raclette Dinner?
After your meal, store any leftover cooked ingredients in an airtight container in the fridge for up to 3 days. It’s best to keep the melted cheese separate to maintain its texture and flavor, so enjoy it fresh!

Can I freeze raclette cheese?
Yes, you can freeze leftover raclette cheese slices! To do so, wrap them tightly in plastic wrap, then in foil to prevent freezer burn. It can be kept in the freezer for up to 2 months. However, I recommend not freezing cooked potatoes or meats, as they can turn mushy upon thawing.

What if I don’t have fresh thyme?
No worries! If you don’t have fresh thyme on hand, you can substitute it with dried thyme or even use rosemary or oregano for a different aromatic flavor. The key is to incorporate herbs that resonate with your taste preferences.

How do I reheat my Raclette Dinner leftovers?
To reheat your leftovers, start by gently warming the boiled potatoes and meats in the oven at a low temperature. For maximum gooeyness, re-melt the raclette cheese under the broiler for about 2 to 3 minutes. This gives it the delicious, stretchy quality we love!

Is Raclette Dinner suitable for vegetarians?
Very! You can easily adapt the Raclette Dinner for vegetarians by skipping the meats and adding in more delicious roasted vegetables like asparagus, bell peppers, or mushrooms instead. The melted cheese and veggies create a wonderful, hearty alternative that even meat lovers will enjoy!

Raclette Dinner

Melty Raclette Dinner: Easy Comfort for Cozy Gatherings

Experience a delightful Raclette Dinner full of melted cheese and hearty sides for a cozy gathering.
Prep Time 10 minutes
Cook Time 20 minutes
Total Time 30 minutes
Servings: 4 people
Course: Dinner
Cuisine: Swiss
Calories: 600

Ingredients
  

For the Cheese
  • 8 ounces Raclette cheese Emmental or Gruyere can be used as substitutes
  • 1 tablespoon fresh thyme Or substitute with rosemary or oregano
  • 1/4 cup dry white wine Optional for a non-alcoholic version
For the Accompaniments
  • 1 pound sausages (kielbasa or bratwurst) Substitute with grilled chicken or omit for vegetarian
  • 4 ounces assorted salami or cured meats Choose your favorite cured meats
  • 1 pound baby potatoes Any small potato varieties can be used
  • 1 cup cornichons Or pickled onions or other veggies
  • 1 tablespoon Dijon or whole grain mustard

Equipment

  • large pot
  • cast-iron skillet
  • Serving Platter

Method
 

Preparation Steps
  1. Begin by carefully removing the rind from the raclette cheese and slicing it into 1/2-inch thick pieces.
  2. In a large pot, bring salted water to a rolling boil. Add the baby potatoes and cook them for about 15–20 minutes, then drain.
  3. Arrange a platter with assorted salami and cured meats. Grill the sausages over medium heat for approximately 10–12 minutes.
  4. Preheat your broiler to high. In a cast iron skillet, place the raclette cheese slices, sprinkle thyme, and drizzle wine. Broil until bubbly and golden.
  5. On each plate, add boiled potatoes, grilled sausages, and cured meats, then top generously with melted cheese. Serve with cornichons and mustard.

Nutrition

Serving: 1plateCalories: 600kcalCarbohydrates: 40gProtein: 25gFat: 35gSaturated Fat: 20gPolyunsaturated Fat: 2gMonounsaturated Fat: 5gCholesterol: 80mgSodium: 900mgPotassium: 800mgFiber: 5gSugar: 3gVitamin A: 10IUVitamin C: 15mgCalcium: 300mgIron: 2mg

Notes

Aim for about 4 ounces of cheese per person to satisfy hearty appetites. Store leftovers in an airtight container for up to 3 days.

Tried this recipe?

Let us know how it was!

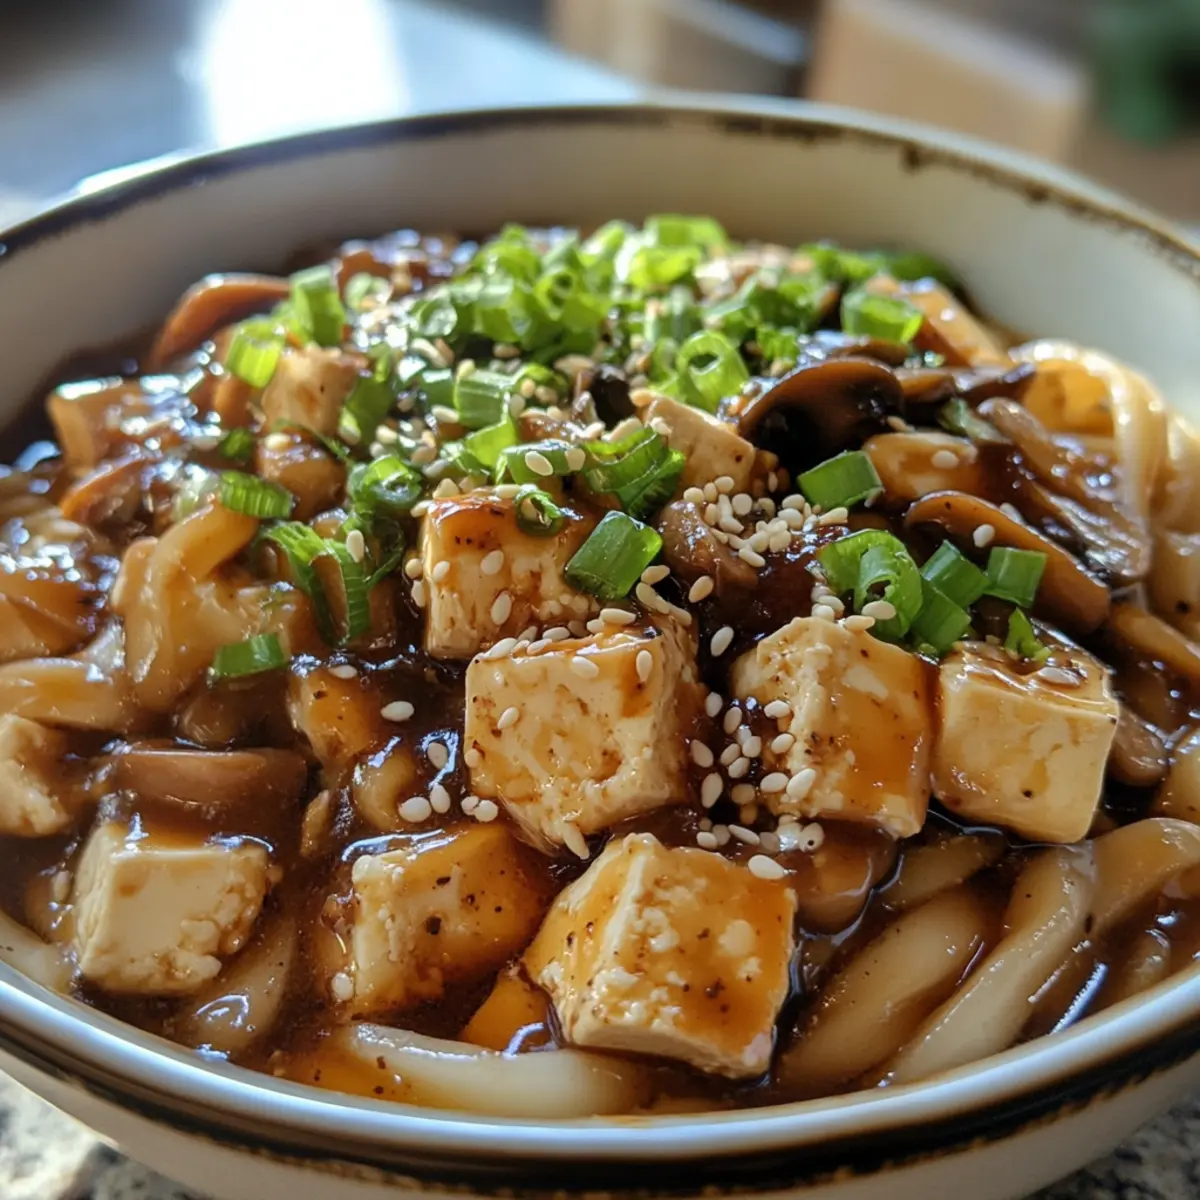
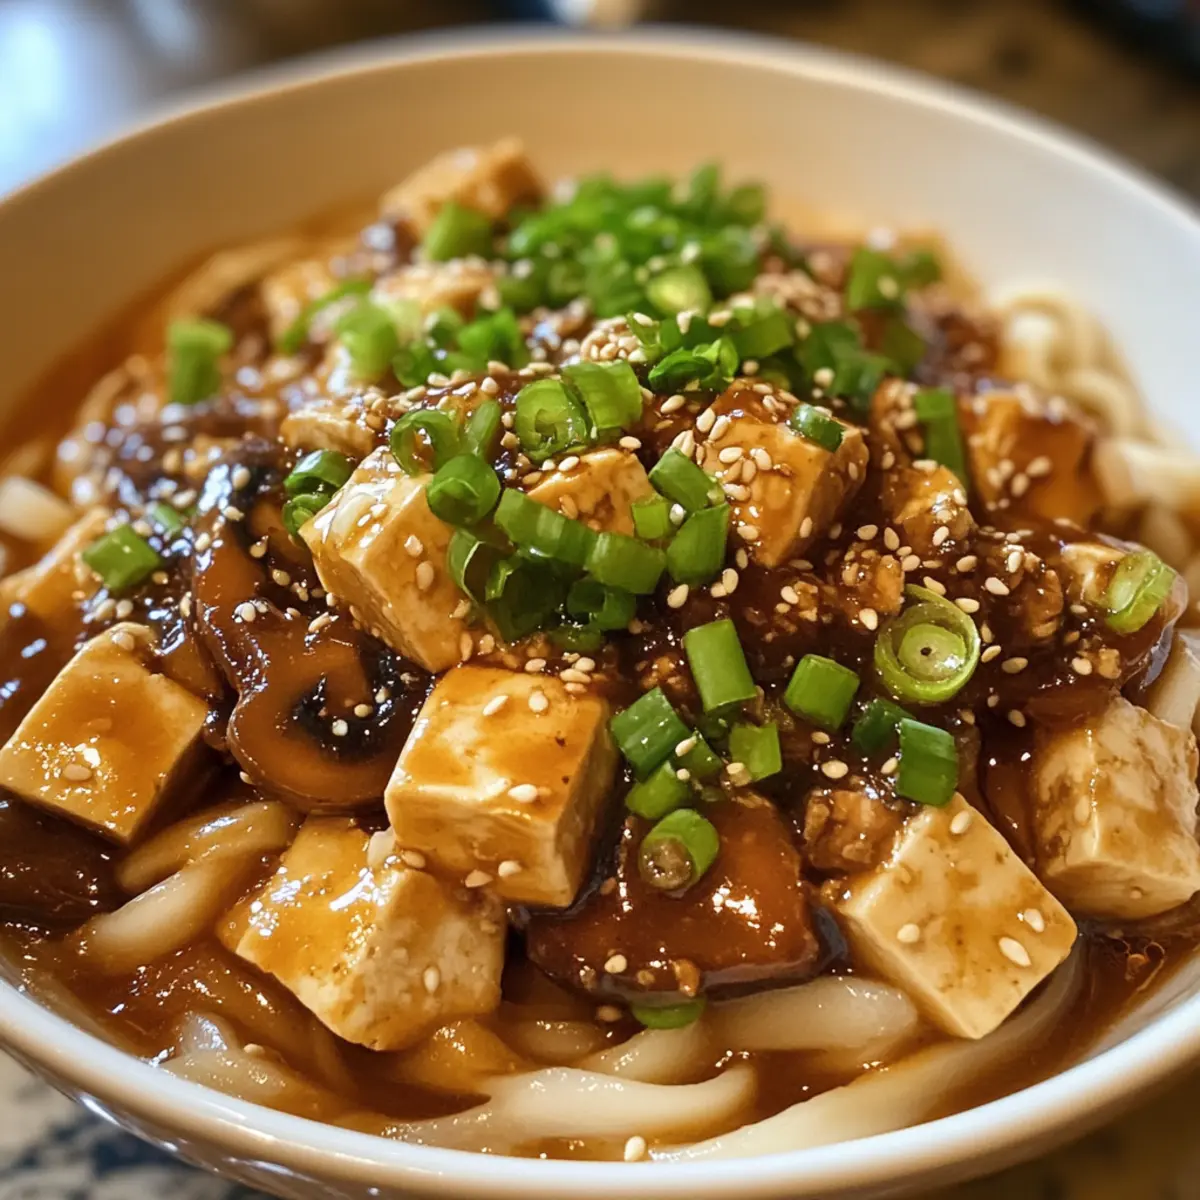
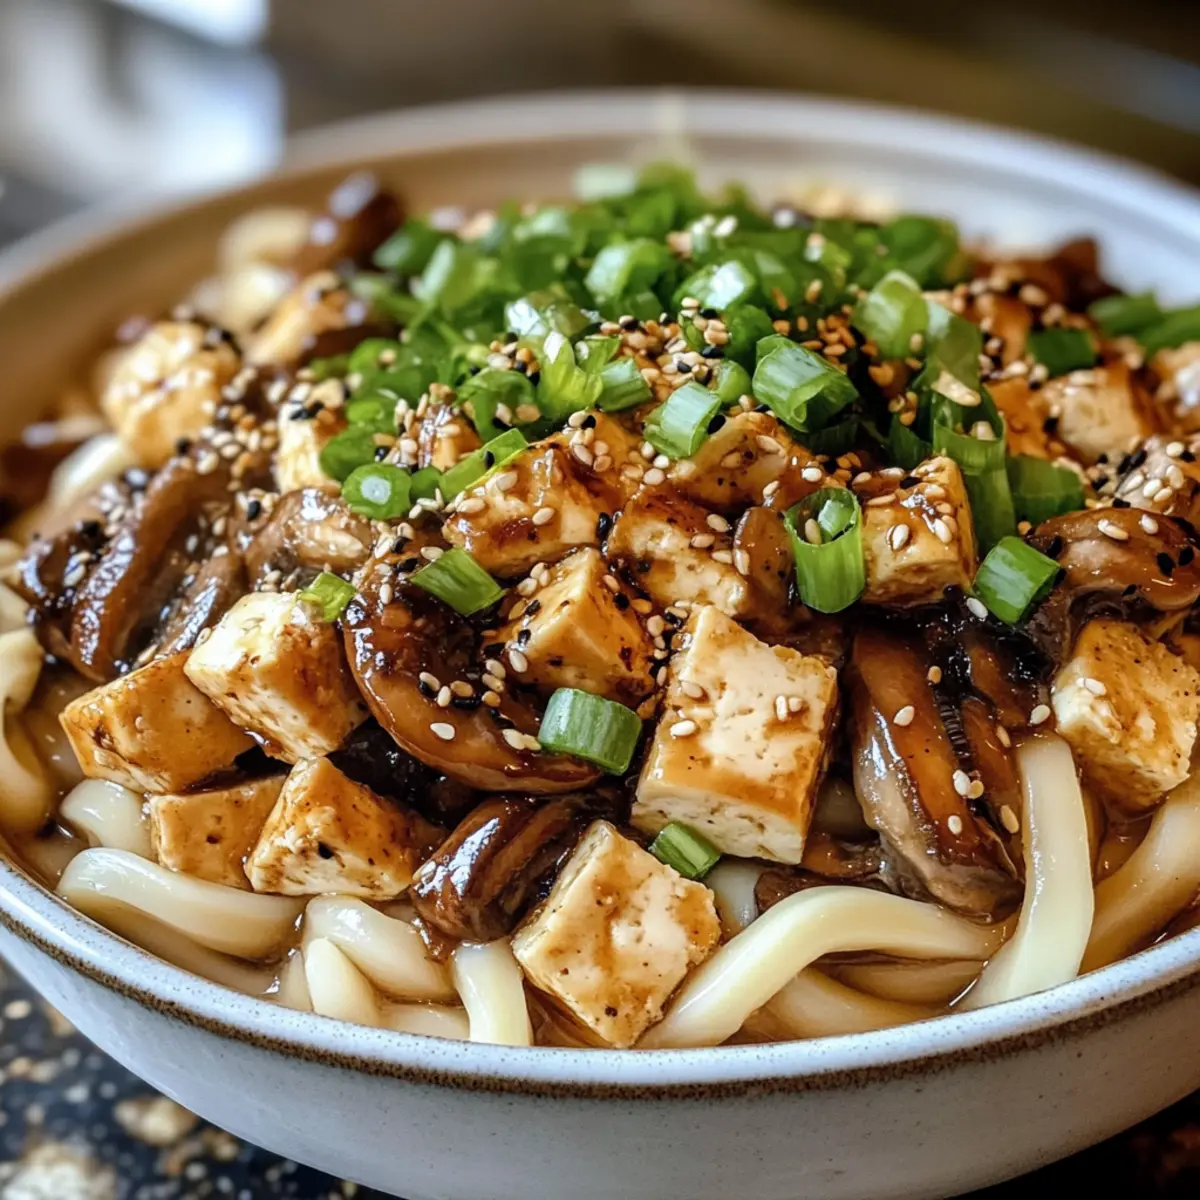
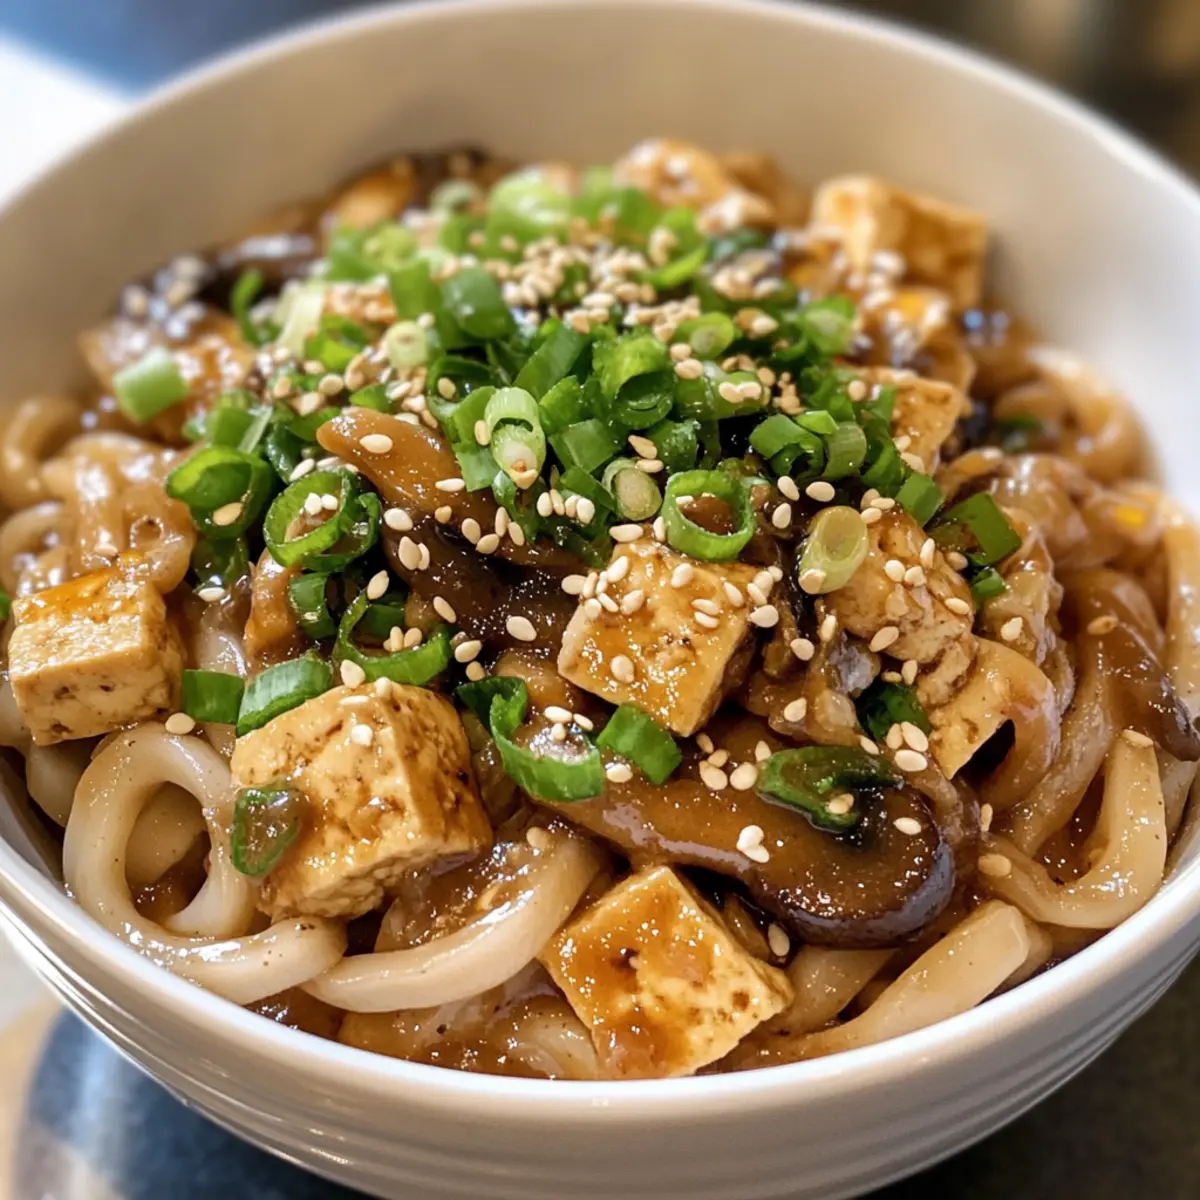
Mapo Tofu Udon: Irresistibly Spicy, Creamy Comfort Dish

As I stirred the pot of simmering ingredients, the tantalizing aroma of spices filled my kitchen, instantly transporting me to a bustling street market in Chengdu. This Viral Mapo Tofu Udon captures that vibrant essence and brings it straight to your home. With its creamy tofu sauce enveloping thick, chewy udon noodles and topped with a zesty mix of mushrooms, this vegetarian twist on a classic dish is not just for herbivores—it’s a hearty delight for anyone on the hunt for comfort food. The best part? It boasts a high protein content, keeping you satisfied while also showing that plant-based meals can be incredibly fulfilling. Don’t you just love finding new favorite recipes that make you rethink your weeknight dinner options?

Why is this dish a must-try?

Bold Flavors: Every bite of Mapo Tofu Udon bursts with spicy, rich goodness that keeps your taste buds dancing.

High Protein: Packed with 32g of protein, this hearty meal will fuel your day while fulfilling your vegetarian cravings.

Texture Contrast: Enjoy the delightful combination of chewy udon noodles and creamy tofu that create an irresistible mouthfeel.

Quick & Easy: With a simple set of steps and only 30 minutes of prep time, you can whip up this delightful dish any night of the week.

Versatile Preparations: Perfect for customizing with various veggies or protein swaps, you’ll never get bored. Check out our great vegetable substitutes for more inspiration!

Crowd-Pleasing Appeal: Whether serving for family or impressing guests, this recipe is bound to win hearts—and stomachs!

Mapo Tofu Udon Ingredients

For the Noodles
Udon Noodles – Use thick udon for better sauce adherence and satisfying chewiness.

For the Tofu Sauce
Silken Tofu – Provides a creamy consistency; blanch firm tofu before blending for optimal smoothness.
White Miso – Adds umami flavor; peanut butter or sesame paste can be used as a flavorful substitute.
Soy Milk – Blends with tofu for a smooth texture; any non-dairy milk works if desired.

For the Mushroom Topping
Chili Bean Paste (Toban Djan) – Essential for adding heat; any chili paste can be a suitable alternative.
Button Mushrooms – Acts as the main protein source; feel free to substitute with other mushrooms or minced chicken.
Garlic – Enhances the overall aroma and flavor of the dish.
Spring Onions – Adds freshness and spice; no substitutions recommended here.

For the Seasoning
Sichuan Pepper Powder – Provides a unique warmth; adjust to your spice tolerance.
Red Chili Powder – Adds an extra kick of heat.
Chinese 5 Spice Powder – Elevates the flavor with a complex profile.
Soy Sauce – Brings depth of flavor to the dish.
Shaoxing Wine – Adds a hint of sweetness; optional but recommended.
Salt & Sugar – Balances the flavors perfectly.

This Mapo Tofu Udon is not only a generous portion of comfort food but also a delightful way to embrace vegetarian cooking!

Step‑by‑Step Instructions for Mapo Tofu Udon

Step 1: Prepare the Mushroom Topping
Heat a wok over medium-high heat and add 1 tablespoon of toasted sesame oil. Once shimmering, toss in 3 minced garlic cloves and 2 chopped spring onions, sautéing for about 1 minute until fragrant. Stir in 2 tablespoons of chili bean paste, then add 8 ounces of finely chopped button mushrooms. Cook for 8-10 minutes until mushrooms are tender, then sprinkle with salt, sugar, Sichuan pepper powder, and red chili powder. Pour in 1 tablespoon of soy sauce and 1 tablespoon of Shaoxing wine, tossing in the spring onion greens at the end.

Step 2: Make the Tofu Sauce
In a blender, combine 1 block of silken tofu, 2 tablespoons of white miso paste, 1 cup of soy milk, and a pinch of salt. Blend on high until smooth and creamy, about 1-2 minutes. Check the consistency and taste, adjusting seasoning if necessary. This rich and velvety tofu sauce will beautifully complement the udon noodles.

Step 3: Cook Udon Noodles
Bring a large pot of water to a rolling boil, adding a generous pinch of salt. Cook 12-15 ounces of udon noodles according to package instructions, usually about 3-5 minutes. Once they are tender yet chewy, drain and rinse them under cold water to stop the cooking process. This way, they will maintain their perfect texture and be ready to absorb the flavors of the sauce.

Step 4: Assemble the Bowls
Divide the cooked udon noodles between serving bowls, creating a lovely nest for your toppings. Spoon the sautéed mushroom mixture onto one side of the noodles, and generously pour the creamy tofu sauce on the other side. For an extra touch of flavor and visual appeal, drizzle with chili oil, sprinkle sesame seeds, and garnish with additional chopped spring onions.

Step 5: Serve
Before digging in, mix the savory mushroom topping and the rich tofu sauce with the udon noodles. This allows all the bold flavors of your Mapo Tofu Udon to meld together, creating a comforting bowl that’s as delicious as it is satisfying. Savor each bite and enjoy this warm, hearty dish!

What to Serve with Viral Mapo Tofu Udon?

Transform your meal into a feast with these delightful pairings that will elevate your dining experience!

  • Creamy Mashed Potatoes: Their rich and buttery flavor provides a comforting contrast, making each bite of udon even more satisfying.

  • Crispy Green Salad: Fresh greens with a zesty vinaigrette add a refreshing crunch, balancing the savory and creamy notes of the udon.

  • Grilled Asparagus: Tender stalks lightly charred bring a touch of earthiness that complements the umami-packed sauce beautifully.

  • Sesame Spinach Salad: Packed with nutrients, the nutty sesame flavor enhances the overall profile while adding vibrant color to your plate.

  • Steamed Bok Choy: This light and delicate vegetable offers a clean, slightly sweet flavor that pairs well with the spicy udon.

  • Szechuan Corn Soup: Its subtle heat harmonizes with the Mapo Tofu Udon’s spice, creating a balance that warms the soul.

  • Spring Rolls: These delightful bundles filled with fresh vegetables provide a fun munchable side that adds texture and flavor contrast.

  • Chilled Green Tea: This refreshing drink cleanses the palate, soothing the heat while enhancing the overall dining experience.

  • Mango Sticky Rice: For dessert, the sweet and sticky rice allows you to indulge your sweet tooth, completing your Asian-inspired meal perfectly.

Storage Tips for Mapo Tofu Udon

Fridge: Keep leftover Mapo Tofu Udon in an airtight container in the fridge for up to 2 days. The flavors will continue to meld, but the noodles may soften slightly.

Freezer: If you need to store it longer, freeze your Mapo Tofu Udon in individual portions for up to 1 month. Make sure to use freezer-safe containers. For the best texture, consider freezing just the sauce and mushrooms separately from the noodles.

Reheating: When ready to enjoy, thaw in the refrigerator overnight and reheat gently in a pan over low heat, adding a splash of water or vegetable broth to loosen the sauce. Stir frequently to avoid sticking.

Room Temperature: It’s best not to leave Mapo Tofu Udon at room temperature for more than 2 hours to maintain freshness and safety.

Expert Tips for Mapo Tofu Udon

  • Blend Smoothly: Ensure that the silken tofu is blended until completely creamy; this will provide an unforgettable texture in your dish.
  • Taste as You Go: Always taste the tofu sauce before serving; adjusting the seasoning helps to create a balanced flavor that shines through.
  • Finishing Touches: Drizzle a little extra chili oil on top right before serving for a burst of flavor and a gorgeous presentation.
  • Perfect Noodles: Be careful not to overcook your udon noodles; they should be chewy and hold their shape when combined with the sauce.
  • Flavor Adjustments: Don’t hesitate to tweak the spiciness according to your preferences; everyone’s taste for heat is different!
  • Storage Tips: Enjoy your leftovers within 1-2 days, but note that the noodles may soften in storage, so fresh preparation is best for the best Mapo Tofu Udon experience.

Make Ahead Options

These Mapo Tofu Udon bowls are perfect for meal prep, allowing you to enjoy a delicious homemade dinner with minimal effort on busy weeknights! You can prepare the mushroom topping and tofu sauce up to 24 hours in advance; simply store them separately in airtight containers in the refrigerator to maintain their fresh flavors. When you’re ready to serve, heat the mushroom topping in a pan and rewarm the tofu sauce in the microwave or over low heat. Cook the udon noodles fresh just before serving for that perfect chewy texture. With these simple make-ahead steps, you can relish comforting, restaurant-quality Mapo Tofu Udon any night of the week!

Mapo Tofu Udon Variations

Feel free to get creative and personalize your Mapo Tofu Udon to suit your taste and dietary needs!

  • Mushroom Medley:
    Swap button mushrooms for shiitake, oyster, or portobello to enhance the umami flavor. A mix of different mushrooms can create a rich, layered taste.

  • Spicy Kick:
    For an extra heat boost, include diced fresh chili peppers or a dash of cayenne pepper into the mushroom topping. Spice lovers will appreciate this fiery twist!

  • Crunchy Toppings:
    Add toasted almonds or sesame seeds on top for a satisfying crunch and added nutritional benefit. They will elevate the dish with delightful texture.

  • Gluten-Free Option:
    Substitute udon with gluten-free noodles or zucchini noodles for a lighter, gluten-free meal. Embrace the versatility of vegetables while still enjoying comfort food.

  • Flavor Boost:
    Incorporate a splash of coconut aminos or tamari instead of soy sauce for a deeper flavor profile, perfect for those seeking gluten-free alternatives.

  • Protein Power:
    Add some edamame or chickpeas to the mushroom topping for an extra protein punch. This makes your meal even heartier and more satisfying.

  • Creamy Twist:
    Stir in a tablespoon of peanut or almond butter into the tofu sauce for a delightful nutty finish. This addition adds richness and depth, blending beautifully with the spices.

  • Vegetable Delight:
    Mix in a variety of vegetables like bell peppers, bok choy, or spinach with the mushroom topping for added color and nutrition. Each veggie brings its own unique flavor and texture.

Explore these exciting variations to make the Mapo Tofu Udon your own masterpiece and enjoy the rich flavors of this comforting dish that guarantees satisfaction! Interested in more substitutions? Check our handy guide on great vegetable substitutes to ignite your culinary creativity!

Mapo Tofu Udon Recipe FAQs

How do I choose the right tofu for Mapo Tofu Udon?
Absolutely! For the creamiest sauce in your Mapo Tofu Udon, I recommend using silken tofu as it blends smoothly and provides that luscious texture. If you only have firm tofu on hand, simply blanch it in boiling water for 2-3 minutes to soften it before blending. This will help mimic the creamy consistency of silken tofu, ensuring every bite is delicious!

How should I store leftovers of Mapo Tofu Udon?
Store your leftover Mapo Tofu Udon in an airtight container in the fridge for up to 1-2 days. While the flavors will meld beautifully over time, keep in mind the noodles may soften. For the best experience, I often recommend enjoying it freshly made, but if you’re short on time, reheating is perfectly fine!

Can I freeze Mapo Tofu Udon?
Absolutely! You can freeze your Mapo Tofu Udon for up to 1 month. For optimal texture, I recommend freezing just the sauce and mushroom topping separately from the noodles. Use freezer-safe containers, and when you’re ready to enjoy, allow it to thaw overnight in the refrigerator. Reheat gently in a pan, adding a splash of water or vegetable broth to loosen the sauce.

What can I substitute for the chili bean paste in the mushroom topping?
If you don’t have chili bean paste on hand, you can swap it out with any type of chili paste you prefer. Just remember, different chili pastes may vary in heat and flavor, so adjust the quantity according to your personal spice tolerance. The more the merrier—you might discover a new favorite!

Are there any dietary considerations for Mapo Tofu Udon?
Certainly! This recipe is vegetarian and can easily be made vegan by ensuring all your ingredients, such as the soy sauce and miso, are plant-based. Additionally, if you have allergies, double-check for any gluten in the soy sauce, and feel free to substitute with a gluten-free soy sauce if needed. It’s always great to make a delicious meal that everyone can enjoy!
What should I do if the sauce is too thick or too spicy?
If you find your tofu sauce to be too thick, simply add a little more soy milk or non-dairy milk until you reach your desired consistency. For spice adjustments, counterbalance the heat by adding a splash of soy milk into the mixture, which can help mellow out the fieriness. Remember, it’s all about customizing to your taste so it becomes that perfect comfort dish!

Mapo Tofu Udon

Mapo Tofu Udon: Irresistibly Spicy, Creamy Comfort Dish

This Mapo Tofu Udon is a high-protein, vegetarian twist on a classic dish, blending spicy and creamy flavors for a hearty comfort meal.
Prep Time 30 minutes
Cook Time 30 minutes
Total Time 1 hour
Servings: 4 bowls
Course: Dinner
Cuisine: Chinese
Calories: 550

Ingredients
  

For the Noodles
  • 12-15 ounces Udon Noodles Use thick udon for better sauce adherence and satisfying chewiness.
For the Tofu Sauce
  • 1 block Silken Tofu Provides a creamy consistency; blanch firm tofu before blending for optimal smoothness.
  • 2 tablespoons White Miso Adds umami flavor; peanut butter or sesame paste can be used as a substitute.
  • 1 cup Soy Milk Any non-dairy milk works if desired.
For the Mushroom Topping
  • 2 tablespoons Chili Bean Paste (Toban Djan) Essential for adding heat; any chili paste can be a suitable alternative.
  • 8 ounces Button Mushrooms Acts as the main protein source; feel free to substitute with other mushrooms or minced chicken.
  • 3 cloves Garlic Enhances the overall aroma and flavor of the dish.
  • 2 chopped Spring Onions Adds freshness and spice; no substitutions recommended.
For the Seasoning
  • 1 teaspoon Sichuan Pepper Powder Provides a unique warmth; adjust to your spice tolerance.
  • 1 teaspoon Red Chili Powder Adds an extra kick of heat.
  • 1 teaspoon Chinese 5 Spice Powder Elevates the flavor with a complex profile.
  • 1 tablespoon Soy Sauce Brings depth of flavor to the dish.
  • 1 tablespoon Shaoxing Wine Adds a hint of sweetness; optional but recommended.
  • to taste Salt Balances the flavors perfectly.
  • to taste Sugar Balances the flavors perfectly.

Equipment

  • wok
  • blender
  • large pot

Method
 

Step 1: Prepare the Mushroom Topping
  1. Heat a wok over medium-high heat and add 1 tablespoon of toasted sesame oil. Once shimmering, toss in 3 minced garlic cloves and 2 chopped spring onions, sautéing for about 1 minute until fragrant. Stir in 2 tablespoons of chili bean paste, then add 8 ounces of finely chopped button mushrooms. Cook for 8-10 minutes until mushrooms are tender, then sprinkle with salt, sugar, Sichuan pepper powder, and red chili powder. Pour in 1 tablespoon of soy sauce and 1 tablespoon of Shaoxing wine, tossing in the spring onion greens at the end.
Step 2: Make the Tofu Sauce
  1. In a blender, combine 1 block of silken tofu, 2 tablespoons of white miso paste, 1 cup of soy milk, and a pinch of salt. Blend on high until smooth and creamy, about 1-2 minutes. Check the consistency and taste, adjusting seasoning if necessary.
Step 3: Cook Udon Noodles
  1. Bring a large pot of water to a rolling boil, adding a generous pinch of salt. Cook 12-15 ounces of udon noodles according to package instructions, usually about 3-5 minutes. Once they are tender yet chewy, drain and rinse them under cold water to stop the cooking process.
Step 4: Assemble the Bowls
  1. Divide the cooked udon noodles between serving bowls. Spoon the sautéed mushroom mixture onto one side of the noodles, and generously pour the creamy tofu sauce on the other side. Drizzle with chili oil, sprinkle sesame seeds, and garnish with additional chopped spring onions.
Step 5: Serve
  1. Before digging in, mix the mushroom topping and the tofu sauce with the udon noodles. Savor each bite and enjoy this warm, hearty dish!

Nutrition

Serving: 1bowlCalories: 550kcalCarbohydrates: 60gProtein: 32gFat: 20gSaturated Fat: 4gPolyunsaturated Fat: 2gMonounsaturated Fat: 5gSodium: 800mgPotassium: 600mgFiber: 6gSugar: 4gVitamin A: 10IUVitamin C: 15mgCalcium: 200mgIron: 3mg

Notes

Enjoy leftovers within 1-2 days, but note that the noodles may soften in storage; fresh preparation is best for optimal experience.

Tried this recipe?

Let us know how it was!

Texas Nachos: Ultimate Cheesy Delight for Your Next Party

A wave of excitement washes over me every time I pull a tray of Loaded Texas Nachos out of the oven. These opulent bites, inspired by the vibrant flavors of the Lone Star State, create the perfect backdrop for any gathering. Each chip is an inviting canvas, topped with creamy refried beans and a gooey blend of cheeses that melt together beautifully, making them a favorite for both game days and cozy movie nights. What’s more, this recipe is quick to whip up, ensuring you can spend less time in the kitchen and more time enjoying the company of friends and family. With a little spice from zesty jalapeños and a sprinkle of fresh cilantro, they’ll be a delightful crowd-pleaser. Ready to learn how to create this deliciousness at home? Let’s dive into the recipe!

Why Are Texas Nachos So Irresistible?

Loaded with Flavor: Each bite is a delightful mix of gooey cheese and creamy refried beans, ensuring everyone keeps coming back for more.
Quick and Easy: This recipe mixes up in no time, making it perfect for impromptu gatherings or last-minute game day snacks.
Customizable: Feel free to switch up the toppings, whether you prefer spicy pepper jack cheese or milder black beans.
Perfect for Sharing: The large platter of nachos invites everyone to dig in, creating a communal and festive atmosphere.
A Crowd Favorite: With flavors inspired by Texas cuisine, you’re sure to please friends and family alike. For more Texas-inspired dishes, don’t miss out on our Texas Roadhouse Style or explore other fun appetizers!

Texas Nachos Ingredients

For the Nachos
Corn Tortilla Chips – Use sturdy, thick chips to support all the toppings without getting soggy.
Refried Beans – Choose creamy refried beans to add substance and moisture to each bite.
Shredded Mild Cheddar Cheese – This provides a creamy layer; sharp cheddar can be used for bolder flavor.
Shredded Monterey Jack Cheese – Its melty quality is perfect for a gooey, cheesy experience.
Pickled Jalapeños – Add as much as you like for that zesty kick; adjust to your heat preference.

For the Toppings
Red or Pickled Onions – Offers a crunchy texture and a slightly tangy bite; green onions work as a milder option.
Chopped Cilantro – A fresh garnish that enhances both appearance and flavor; can be omitted for simpler tastes.
Mexican Crema or Sour Cream – Adds a rich, creamy finish to the nachos; Greek yogurt is a great healthier substitute.

Step‑by‑Step Instructions for Texas Nachos

Step 1: Preheat the Oven
Start by preheating your oven to 400ºF (200ºC). This step is crucial for achieving perfectly melted cheese and crispy chips. Make sure to allow the oven to fully reach the desired temperature before placing your nachos inside for an even cook.

Step 2: Arrange the Tortilla Chips
On a large rimmed baking sheet, arrange the corn tortilla chips in a single, even layer. Ensure that the chips are not overlapping; this allows each one to crisp up beautifully and hold the toppings without becoming soggy.

Step 3: Add the Refried Beans
Using a spoon, take dollops of refried beans and spread them generously on top of each chip. Be sure to cover the surface but not overload; the beans add creaminess and flavor to your Texas Nachos while allowing the chips to maintain their crispiness.

Step 4: Sprinkle the Cheese
Now it’s time to generously sprinkle a mix of shredded mild cheddar and Monterey Jack cheese over the chips. Aim for an even distribution so every chip gets its fair share of gooey goodness. The cheese will melt beautifully, holding everything together.

Step 5: Top with Jalapeños
Add a slice of pickled jalapeño to each chip, adjusting the quantity based on your spice preference. This step adds a delightful kick that complements the cheesy layers perfectly. Visually, they create a vibrant, tantalizing look that is sure to impress.

Step 6: Bake the Nachos
Carefully transfer the baking sheet to the preheated oven. Bake for 10-12 minutes, or until the cheese is completely melted and bubbly, creating an irresistible golden layer. Keep an eye on them to avoid burning; you want that perfect, melty texture.

Step 7: Garnish and Serve
Once out of the oven, let the nachos cool for a minute. Then, top them with crunchy red or pickled onions, a sprinkle of fresh cilantro, and a drizzle of Mexican crema or sour cream. These finishing touches enhance the flavor profile and make your Texas Nachos beautiful and inviting!

How to Store and Freeze Texas Nachos

Room Temperature: Enjoy Texas Nachos fresh for the best flavor; they can sit out for about 2 hours during gatherings.

Fridge: If you have leftovers, store them in an airtight container for up to 2 days. Keep in mind that they may lose some crispiness, so reheating is recommended.

Freezer: It’s best to avoid freezing nachos as the texture can suffer. However, if necessary, wrap them tightly in foil or plastic wrap and freeze for up to one month.

Reheating: For the best results, reheat nachos in a preheated oven at 350ºF (175ºC) for about 10 minutes, until the cheese is bubbly and the chips are crispy again.

Make Ahead Options

These Texas Nachos are perfect for meal prep, allowing you to enjoy delicious flavors with less last-minute fuss! You can prepare the refried beans and shred the cheese up to 3 days in advance; simply store them in airtight containers in the refrigerator to preserve their quality. Additionally, you can chop your red or pickled onions and cilantro and keep them in the fridge as well. When you’re ready to serve, layer the chips on a baking sheet, add the prepared ingredients, and bake as directed for 10-12 minutes until bubbly. This way, you’ll enjoy restaurant-quality nachos without all the stress!

What to Serve with Loaded Texas Nachos

There’s nothing quite like the joy of creating a full meal around these indulgent, flavor-packed nachos.

  • Refreshing Guacamole: Creamy avocados mixed with lime, onion, and cilantro add a cool contrast to the spicy nachos, elevating the experience.
  • Zesty Pico de Gallo: This fresh salsa, bursting with vibrant tomatoes and onions, complements the richness of the nachos while offering a juicy crunch.
  • Mexican Street Corn Salad: With its sweet corn, creamy dressing, and spicy seasonings, this salad plays off the nachos’ savory flavors to create delightful harmony on your plate.
  • Crisp Lettuce Wraps: These provide a refreshing bite and unique texture; perfect for a lighter side option that balances the richness of the nachos.
  • Chilled Margaritas: The citrusy tang and ice-cold nature of a margarita pair beautifully with hot, cheesy nachos—ideal for a fun evening.
  • Chocolate Flan: To end the meal on a sweet note, this creamy dessert contrasts nicely with the savory flavors of the nachos.
  • Spicy Cilantro Lime Rice: Fluffy rice with hints of lime zest and fresh cilantro brings a beautiful aromatic balance to the heavier nacho flavors.
  • Beer: A cold, crisp beer enhances the nacho experience, helping to wash down those cheesy and spicy bites with ease.

Tips for the Best Texas Nachos

Choose Quality Chips: Use thick, sturdy corn tortilla chips to prevent sogginess. Cheap, thin chips may crumble under the weight of toppings.

Layer Wisely: Avoid overloading each chip; less is more! Ensure toppings are evenly distributed to provide a balanced flavor experience in every bite.

Customize for Heat: Adjust the amount of pickled jalapeños to suit your spice tolerance. More heat means more flavor, but don’t overwhelm the other ingredients.

Keep It Fresh: Don’t skip the garnish! Fresh cilantro and a drizzle of crema elevate the nachos’ flavor, making your Texas Nachos visually and tastily appealing.

Serve Immediately: Nachos are best enjoyed hot from the oven. If you have leftovers, store them in an airtight container and reheat in the oven for best texture.

Texas Nachos Variations & Substitutions

Explore the delightful possibilities to elevate your Texas Nachos with these tempting twists and substitutions!

  • Bean Substitutes: Swap refried beans for black or pinto beans to give a unique flair and different flavors.
  • Cheese Variety: Experiment with provolone or pepper jack cheese for an extra kick; the options are endless!
  • Adding Meats: Top with cooked ground beef or shredded chicken for a heartier dish that’s sure to please any crowd.
  • Spicy Kick: If you’re craving more heat, consider adding fresh diced jalapeños or a drizzle of hot sauce for a fiery punch.
  • Veggie Delight: Incorporate grilled veggies like bell peppers and zucchini for a deliciously colorful and nutritious twist.
  • Savory Seasoning: Sprinkle some taco seasoning over the chips before baking for an added depth of flavor; it’s a simple twist that can brighten things up!
  • Creamy Alternatives: For a lighter option, swap out sour cream with Greek yogurt; it still gives that creamy finish while being a bit healthier.
  • Herb Boost: Try using fresh chives or dill instead of cilantro for a different herbaceous touch that complements the nachos beautifully.

Feel free to get creative with your Texas Nachos! Looking for a more complete Texas-inspired meal? Check out our delicious Texas Roadhouse Style for another fantastic dish that will enchant your taste buds!

Texas Nachos Recipe FAQs

How do I select the best tortilla chips for Texas Nachos?
Absolutely! Look for high-quality corn tortilla chips that are thick and sturdy. This will ensure they can support the toppings without becoming soggy. I recommend avoiding inexpensive, thin chips, as they tend to crumble under the weight of the toppings.

How should I store leftover Texas Nachos?
You can store any leftover Texas Nachos in an airtight container in the refrigerator for up to 2 days. Keep in mind that the chips may lose their crunch, so it’s best to reheat them in the oven for that crispy texture. Just pop them in a preheated oven at 350ºF (175ºC) for about 10 minutes.

Can I freeze Texas Nachos?
While it’s not ideal to freeze nachos due to potential texture changes, if needed, tightly wrap them in foil or plastic wrap and freeze for up to one month. When you’re ready to eat, reheat in the oven instead of the microwave for the best results.

What can I do if my nachos turn out soggy?
Very! If your nachos ended up soggy, it often comes down to overloaded toppings or thin chips. To prevent this, make sure each chip has just the right amount of toppings without being piled too high. If they are already soggy, you can crisp them up again by placing them on a baking sheet and reheating them in the oven.

Are there any dietary considerations for Texas Nachos?
Yes! If you’re catering to guests with dietary restrictions, consider using gluten-free tortilla chips and ensure that the beans and toppings are made with no gluten-containing ingredients. For allergy concerns, be mindful of dairy in the cheeses and crema; you can always substitute with dairy-free alternatives.

How spicy are pickled jalapeños, and can I adjust them?
Pickled jalapeños can provide a nice kick, but their heat level varies by brand. If you’re worried about spice levels, start with a small amount; you can always add more to taste. Alternatively, you can replace them with milder toppings like banana peppers for a delicious flavor without the heat!

Texas Nachos

Texas Nachos: Ultimate Cheesy Delight for Your Next Party

Enjoy these flavorful Texas Nachos, perfect for gatherings as a savory, cheesy appetizer.
Prep Time 15 minutes
Cook Time 12 minutes
Total Time 27 minutes
Servings: 6 servings
Course: Appetizer
Cuisine: Tex-Mex
Calories: 450

Ingredients
  

For the Nachos
  • 1 bag Corn Tortilla Chips Use sturdy, thick chips to support all the toppings without getting soggy.
  • 1 can Refried Beans Choose creamy refried beans for moisture.
  • 2 cups Shredded Mild Cheddar Cheese Sharp cheddar can be used for bolder flavor.
  • 2 cups Shredded Monterey Jack Cheese Perfect for a gooey, cheesy experience.
  • 1/2 cup Pickled Jalapeños Adjust for heat preference.
For the Toppings
  • 1/2 cup Red or Pickled Onions Offers a crunchy texture.
  • 1/4 cup Chopped Cilantro Can be omitted for simpler tastes.
  • 1/2 cup Mexican Crema or Sour Cream Greek yogurt is a great healthier substitute.

Equipment

  • Baking Sheet

Method
 

Step‑by‑Step Instructions for Texas Nachos
  1. Preheat your oven to 400ºF (200ºC).
  2. Arrange the corn tortilla chips in a single, even layer on a large rimmed baking sheet.
  3. Spread dollops of refried beans generously on top of each chip.
  4. Generously sprinkle a mix of shredded mild cheddar and Monterey Jack cheese over the chips.
  5. Add a slice of pickled jalapeño to each chip.
  6. Bake for 10-12 minutes, until the cheese is melted and bubbly.
  7. Let the nachos cool slightly, then top with onions, cilantro, and a drizzle of crema or sour cream.

Nutrition

Serving: 1servingCalories: 450kcalCarbohydrates: 45gProtein: 15gFat: 25gSaturated Fat: 15gPolyunsaturated Fat: 2gMonounsaturated Fat: 8gCholesterol: 60mgSodium: 800mgPotassium: 250mgFiber: 5gSugar: 2gVitamin A: 15IUVitamin C: 10mgCalcium: 30mgIron: 10mg

Notes

For the best flavor, enjoy immediately after cooking. Adapt the spice level with jalapeños per taste preference.

Tried this recipe?

Let us know how it was!

Decadent No Bake Brownie Bites That You Can Make Today

As I rummaged through my pantry, I stumbled upon the simplest yet most satisfying idea: Easy No Bake Brownie Bites. With just three easy ingredients, you can whip up these indulgent treats without ever turning on the oven. Not only are these brownie bites deliciously vegan and gluten-free, but they also tick the box for those looking for a low-carb snack. Perfect for a quick dessert or a late-night treat, they provide the comforting taste of brownies without the fuss. Plus, they come together in minutes—ideal for busy days or unexpected guests. Curious how to create these chewy morsels that will make your taste buds dance? Let’s dive in!

Why You’ll Adore No Bake Brownie Bites

Simplicity: These No Bake Brownie Bites are crafted with only three ingredients, making them a breeze to whip up.

Guilt-Free Indulgence: Each bite offers a rich, fudgy flavor while being gluten-free, vegan, and low in carbs—perfect for treating yourself without the guilt.

Texture Perfection: Enjoy a delightful chew that resembles traditional brownie batter, satisfying your cravings while keeping things healthy.

Versatility: Feel free to customize these bites by adding mix-ins like nuts or chocolate chips, or use different nut butters to suit your taste.

Time-Saving: No baking required! You can prepare these scrumptious treats in just minutes, making them perfect for quick desserts or last-minute cravings.

These brownie bites are such a hit that you might find yourself reaching for them again and again. Looking for more quick and tasty options? Check out these Fudgy Brownies Indulge and Baked Vegetable Egg dishes for even more delicious ideas!

No Bake Brownie Bites Ingredients

• Prepare to delight in these easy No Bake Brownie Bites!

For the Bites

  • Cocoa Powder – Provides the rich chocolate flavor; opt for unsweetened cocoa for the best taste.
  • Almond Butter – Acts as the glue and adds healthy fats; substitute with peanut butter if you prefer a different nutty flavor.
  • Maple Syrup – A natural sweetener that enhances the lusciousness while keeping it refined sugar-free; agave syrup can be a good alternative if desired.

Step‑by‑Step Instructions for Easy No Bake Brownie Bites

Step 1: Combine Ingredients
In a large mixing bowl, add the cocoa powder, almond butter, and maple syrup. Using a spatula or wooden spoon, mix the ingredients together until you achieve a smooth and well-combined mixture, which should take about 2-3 minutes. The dough will be thick and slightly sticky, indicating it’s ready for the next step.

Step 2: Adjust Consistency
If the brownie mixture feels too thick and hard to mix, slowly add a tablespoon of almond milk or water to it. Stir well to incorporate the liquid until the mixture reaches a pliable, dough-like consistency, which should take about another minute. You want it sticky but workable for rolling into bites.

Step 3: Shape the Bites
To avoid sticky hands, wet them slightly with water or a little oil before rolling. Take small portions of the mixture—about a tablespoon each—and roll them into bite-sized balls, ensuring they are compact and smooth. This process should only take about 5-10 minutes, depending on how many brownie bites you’re making.

Step 4: Line the Tray
Prepare a tray by lining it with parchment paper to prevent sticking. Gently place the rolled brownie bites onto the parchment-lined tray, spacing them about an inch apart to allow for easy removal later. Make sure they’re evenly distributed for a neat presentation, which will help them set properly.

Step 5: Refrigerate or Freeze
Once all the brownie bites are shaped and on the tray, transfer them to the refrigerator or freezer. Allow them to chill for about 30-60 minutes in the fridge or about 15-20 minutes in the freezer until they firm up. You’ll know they’re ready when they feel solid and hold their shape well, ensuring the ultimate texture for your No Bake Brownie Bites.

Step 6: Serve and Enjoy
After chilling, remove the bites from the refrigerator or freezer. Serve them as a delicious snack or dessert. Enjoy them plain or pair them with fresh fruit for a balanced treat. If you have leftovers, store them in an airtight container in the fridge for up to a month, or freeze them for up to six months for future enjoyment!

How to Store and Freeze No Bake Brownie Bites

Fridge: Store your No Bake Brownie Bites in an airtight container for up to 1 month. This keeps them fresh and ready for quick snacking.

Freezer: For longer storage, freeze the brownie bites in a single layer on a parchment-lined tray. Once firm, transfer them to a freezer-safe bag or container for up to 6 months.

Reheating: Enjoy the brownie bites straight from the fridge or freezer. If desired, let them sit at room temperature for a few minutes before munching.

Make-Ahead: These bites are perfect for meal prep! Prepare them ahead of time and store in the fridge or freezer for easy access to a delicious treat.

Make Ahead Options

These Easy No Bake Brownie Bites are perfect for meal prep enthusiasts! You can roll the brownie mixture into bite-sized balls and refrigerate them up to 24 hours in advance to enhance their flavors. Simply shape the mixture into balls, place them on a parchment-lined tray, and refrigerate until they firm up. For longer storage, freeze them for up to six months; just make sure to store them in an airtight container! When you’re ready to enjoy, take them out of the fridge or freezer and let them sit at room temperature for a few minutes, or enjoy them chilled. This prep-ahead strategy means you’ll have delicious, guilt-free treats on hand for busy weeknights or unexpected cravings!

What to Serve with Easy No Bake Brownie Bites

Satisfy your sweet cravings and elevate your dessert game by pairing these delightful no-bake bites with complementary flavors and textures.

  • Fresh Berries: Juicy strawberries or raspberries add a refreshing contrast, enhancing the rich chocolate flavor while providing a burst of freshness.

  • Coconut Whipped Cream: This light and airy topping adds a delightful creaminess that balances the fudgy bites perfectly, creating a luxurious dessert experience.

  • Nut Butter Drizzle: A drizzle of almond or peanut butter provides an extra layer of nutty flavor, making each bite even more indulgent and satisfying—perfect for nut lovers!

  • Chocolate Dipping Sauce: Dip your brownie bites in a warm chocolate sauce for an extra dose of chocolatey goodness that will thrill any sweet tooth.

  • Ice Cream Scoop: Top with a scoop of your favorite dairy-free ice cream for a luscious sundae experience, bringing an element of creaminess that pairs heavenly with the brownie texture.

  • Coffee or Tea: Enjoy these brownie bites with a warm cup of coffee or herbal tea, creating a delightful afternoon snack that warms the heart and satisfies the soul.

  • Chopped Nuts Topping: Sprinkle chopped walnuts or pecans on top for added crunch. This contrasts beautifully with the soft brownie texture, offering a fun textural play that makes each bite more exciting!

Expert Tips for No Bake Brownie Bites

  • Choose Quality Cocoa: Use high-quality unsweetened cocoa powder for rich chocolate flavor. Avoid sweetened varieties to keep your brownie bites healthy.

  • Binding Consistency: If your mixture seems too dry, don’t hesitate to add a splash of almond milk. This adjustment ensures a perfect dough-like texture for rolling.

  • Sticky Hands No More: Wet your hands slightly before rolling the mixture into bites. This simple trick keeps the chocolatey dough from sticking to your skin.

  • Variations Galore: Experiment with different nut butters or add-ins like nuts or chocolate chips. This allows you to create your own signature No Bake Brownie Bites that cater to your taste.

  • Store for Future Treats: Keep leftover bites in an airtight container in the fridge for up to a month, or freeze them for quick, guilt-free snacking down the road.

No Bake Brownie Bites Variations

Feel free to unleash your creativity with these delicious No Bake Brownie Bites by exploring the following variations.

  • Nut Butter Swap: Substitute almond butter for cashew or sunflower seed butter to make these bites allergy-friendly. Each nut butter brings a unique flavor profile that can surprise your taste buds.

  • Sweetener Twist: Use honey or agave syrup instead of maple syrup for a different sweetness. This change will alter the flavor slightly but create a delightful alternative for your snacks.

  • Chocolate Boost: Add mini chocolate chips or cocoa nibs for an extra chocolatey experience. Just a handful can elevate your treats to an indulgent dessert worthy of any celebration.

  • Fruity Addition: Incorporate some finely chopped dried fruits like cherries or cranberries for a fruity flavor burst. This not only amps up the taste but also adds a chewy texture that pairs nicely with the brownie bites.

  • Spice it Up: Sprinkle in a dash of cinnamon or a pinch of sea salt for enhanced flavor depth. The warmth from spices or the crunch from salt can take your bites to a whole new level.

  • Crunch Factor: Add finely chopped nuts, like walnuts or pecans, to the mixture for added crunch and a satisfying bite. This will make each mouthful an exciting experience with various textures.

  • Low-Carb Option: For an even lower carb version, try using sugar-free sweeteners like erythritol. This allows enjoyment without the sugar-induced energy crash.

  • Double Chocolate Twist: Replace a portion of almond flour with additional cocoa powder for rich, double chocolate bites. Your chocolate cravings will be delighted with this intense choco goodness.

These variations not only provide endless possibilities but also inspire you to create your perfect No Bake Brownie Bites. Don’t forget to check out these Fudgy Brownies Indulge for another scrumptious option and consider pairing your bites with a slice of Baked Vegetable Egg for a balanced treat!

Easy 3-Ingredient No Bake Brownie Bites Recipe FAQs

What cocoa powder should I use for the No Bake Brownie Bites?
Absolutely, I recommend using high-quality unsweetened cocoa powder for the richest chocolate flavor. Sweetened cocoa can alter the overall sweetness of your brownies, so stick with unsweetened for an indulgent yet guilt-free treat!

How should I store my No Bake Brownie Bites?
Store your brownie bites in an airtight container in the fridge for up to 1 month. This keeps them fresh and ready to satisfy those cravings. If you’re like me and want to prepare ahead, transfer them to the freezer for longer storage, where they can last for up to 6 months!

Can I freeze No Bake Brownie Bites, and how?
Yes, you can! To freeze your brownie bites, first place them in a single layer on a parchment-lined tray and freeze until firm, about 30 minutes. Once they’ve set, transfer them to a freezer-safe bag or container, labeling it with the date. This way, you can enjoy a delicious snack any time for the next 3 to 6 months!

What if my brownie mixture is too sticky or too dry?
No worries! If your mixture is too sticky, simply add a little extra cocoa powder to help absorb some moisture. Conversely, if it feels too dry, add a splash of almond milk (about a tablespoon at a time) until you achieve a workable dough-perfect for rolling into bite-sized balls!

Are these No Bake Brownie Bites safe for those with nut allergies?
Certainly! You can substitute almond butter with sunflower seed butter or another allergy-friendly nut butter, like tahini, to cater to various dietary needs. Just make sure to check the specific butter’s consistency and taste for the best results!

Can I add anything to my brownie bites?
Very! You can customize your brownie bites by adding chocolate chips, chopped nuts, or even a sprinkle of sea salt on top for a flavor boost. Get creative and make them your own!

No Bake Brownie Bites

Decadent No Bake Brownie Bites That You Can Make Today

Indulge in delicious No Bake Brownie Bites that are vegan, gluten-free, and low-carb—perfect for a quick dessert!
Prep Time 10 minutes
Chilling Time 45 minutes
Total Time 55 minutes
Servings: 12 bites
Course: Dessert
Cuisine: Vegan
Calories: 80

Ingredients
  

For the Bites
  • 1 cup Cocoa Powder Opt for unsweetened
  • 1 cup Almond Butter Can substitute with peanut butter
  • 1/2 cup Maple Syrup Agave syrup can be used as an alternative

Equipment

  • Mixing Bowl
  • Spatula
  • Parchment paper
  • tray

Method
 

Step‑by‑Step Instructions
  1. In a large mixing bowl, add the cocoa powder, almond butter, and maple syrup. Mix until smooth and well-combined.
  2. If the mixture feels too thick, add a tablespoon of almond milk or water to reach a pliable consistency.
  3. Wet your hands and roll the mixture into bite-sized balls, making them compact and smooth.
  4. Line a tray with parchment paper and place the rolled bites on it, spaced apart.
  5. Transfer to the refrigerator or freezer to chill until firm.
  6. Serve chilled as a delicious snack or dessert.

Nutrition

Serving: 1biteCalories: 80kcalCarbohydrates: 10gProtein: 3gFat: 4gSaturated Fat: 1gMonounsaturated Fat: 3gSodium: 5mgPotassium: 100mgFiber: 2gSugar: 5gCalcium: 5mgIron: 5mg

Notes

Store leftovers in an airtight container in the fridge for up to a month, or freeze for up to six months.

Tried this recipe?

Let us know how it was!

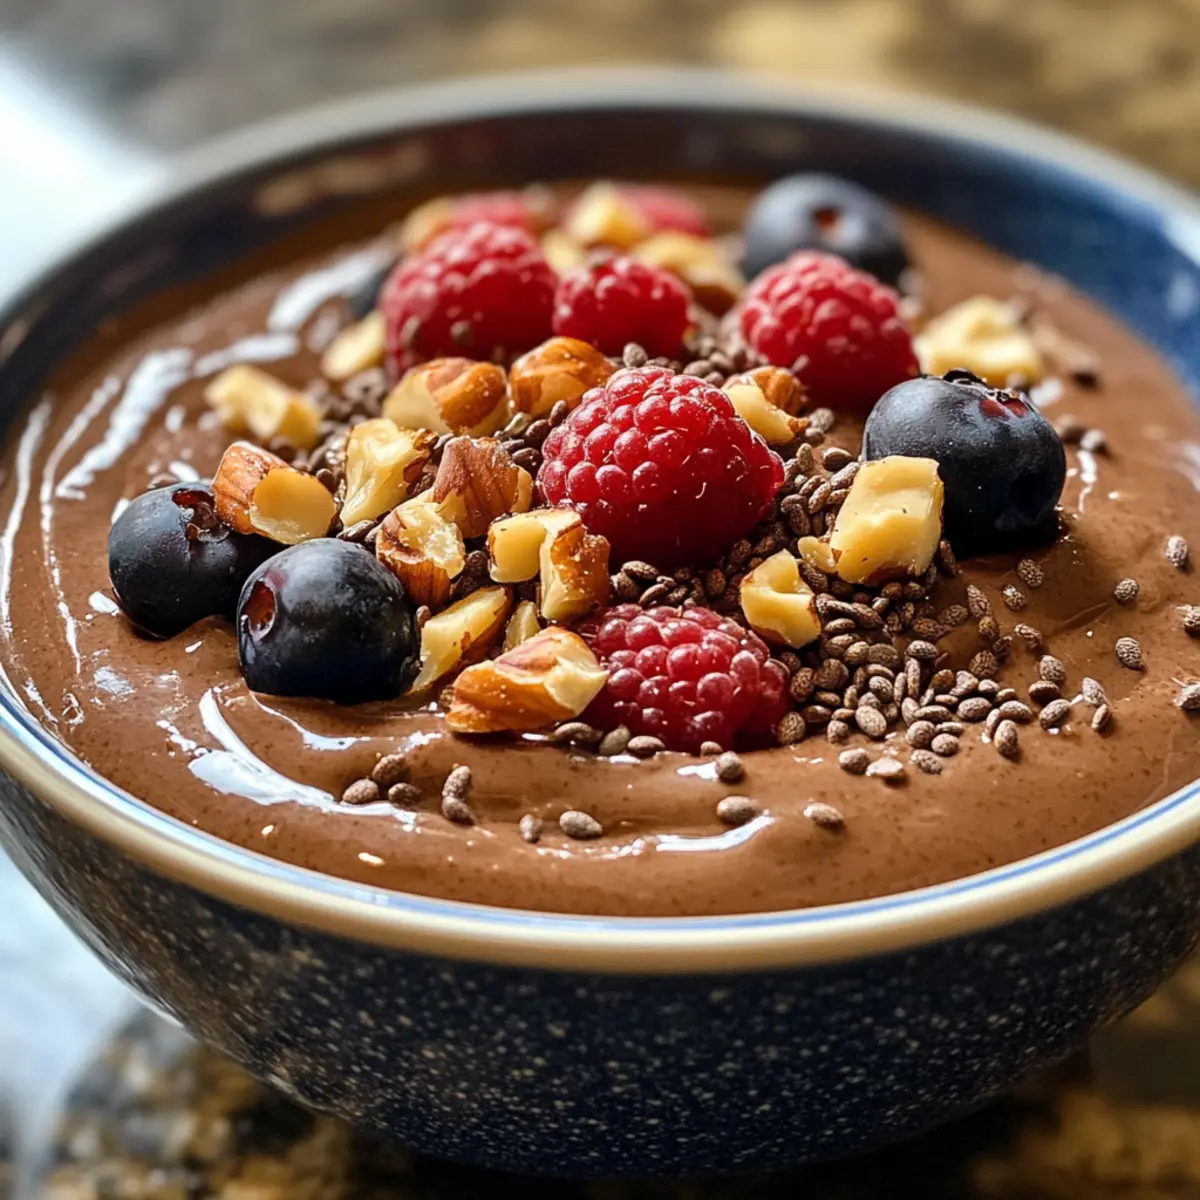
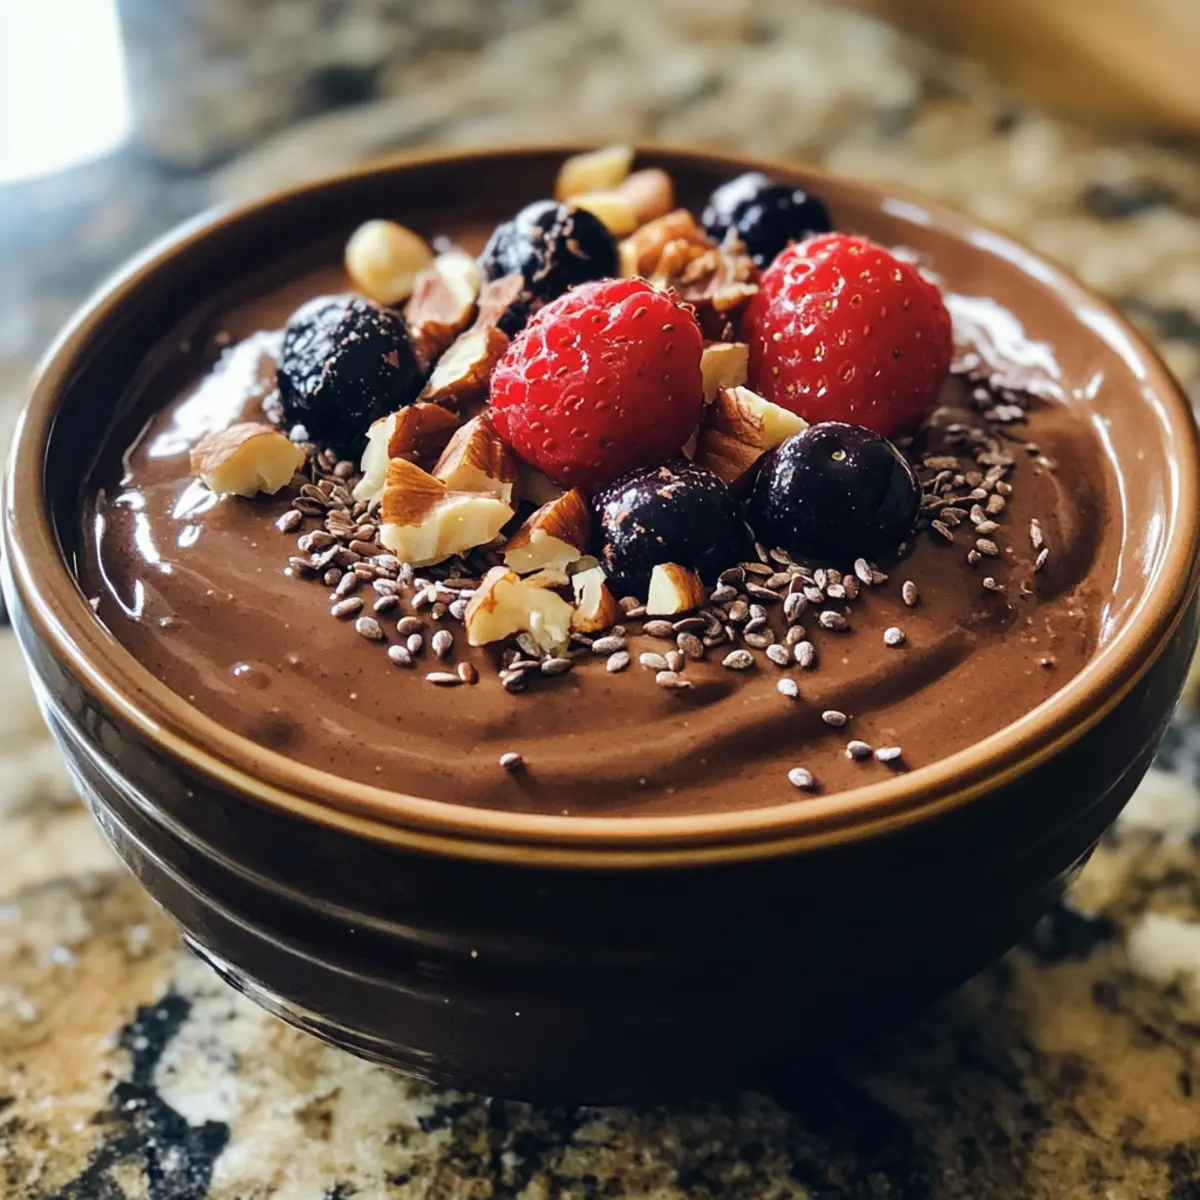
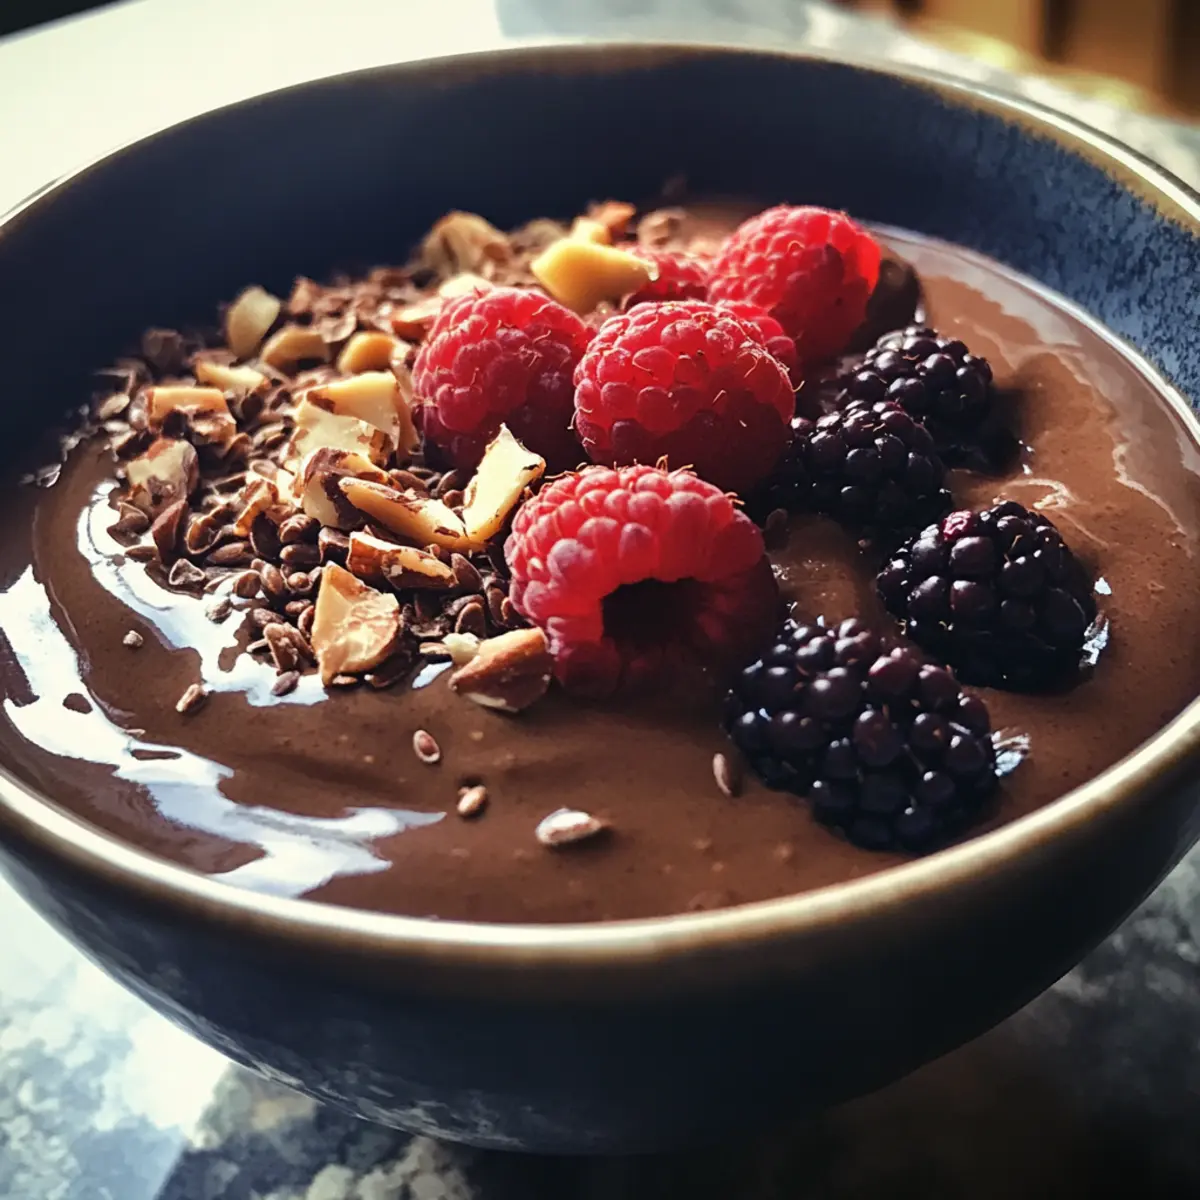
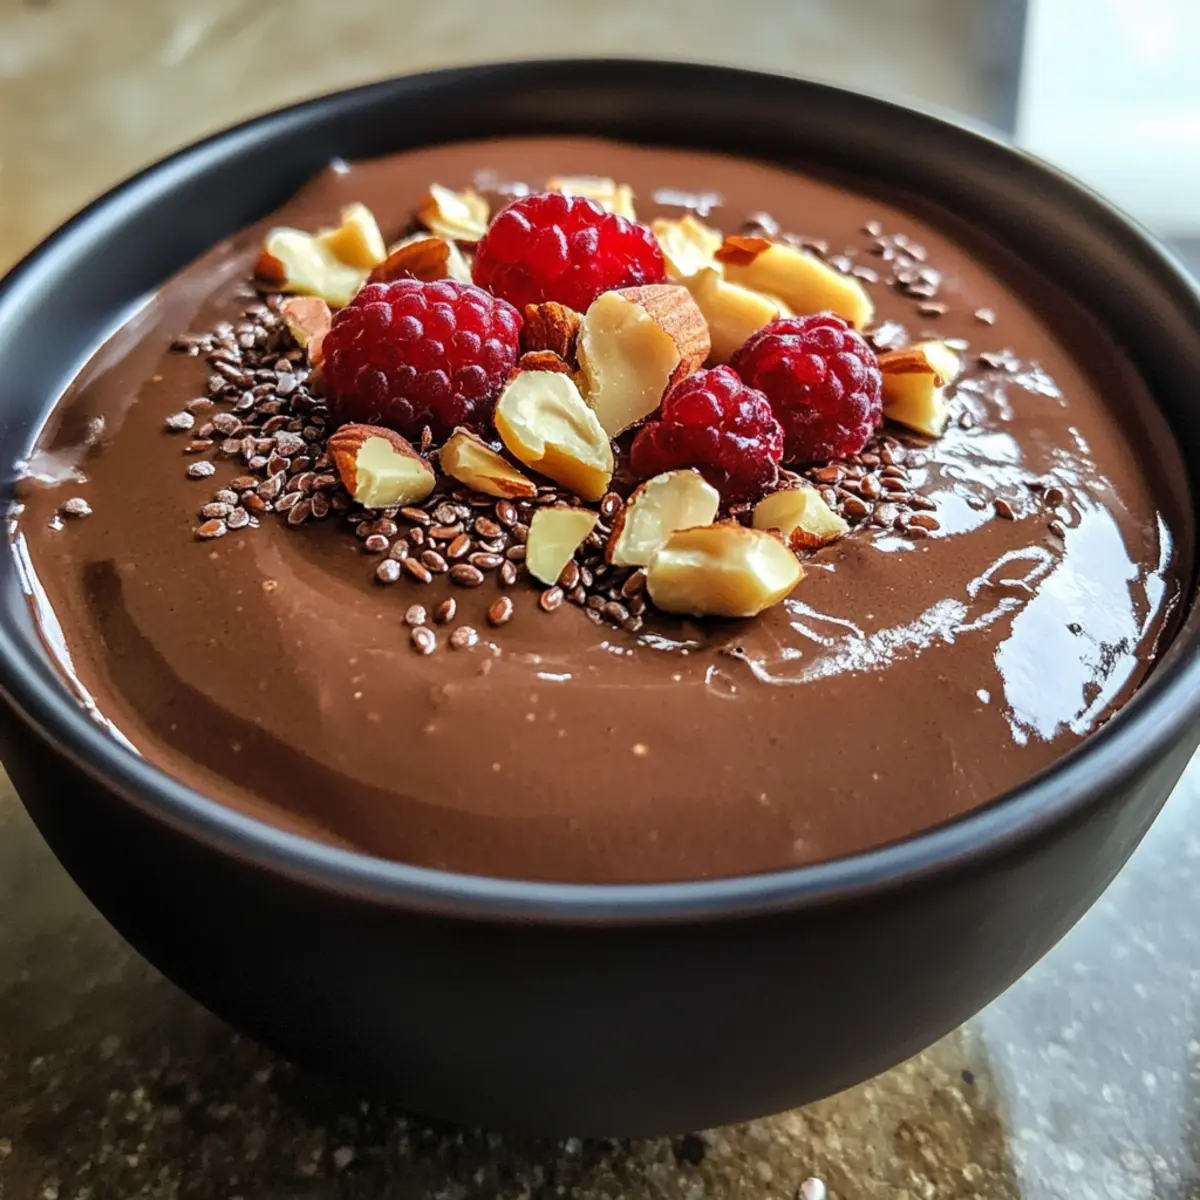
Irresistibly Creamy Chocolate Flaxseed Pudding You’ll Love

As the steam rises from my kitchen, I often find myself in a happy dilemma: what healthy treat can satisfy my chocolate cravings? That’s when I stumbled upon the creamy wonder of Chocolate Flaxseed Pudding. This nutrient-packed delight is not just a delicious dessert but also a powerhouse of fiber and omega-3 fatty acids, making it a guilt-free indulgence. Perfect for breakfast, a mid-afternoon snack, or a satisfying dessert, it’s quick to prepare and easily customizable with your favorite flavors and toppings. Whether you dress it up with fresh fruit or enjoy it by the spoonful straight from the fridge, this pudding will elevate your healthy snacking game. Curious how such a simple recipe can transform your day? Let’s dive into this delicious journey together!

Why is Chocolate Flaxseed Pudding a Must-Try?

Decadent yet Healthy: This dessert gives you the rich chocolate satisfaction without the guilt, balancing health and indulgence perfectly.
Quick & Easy: Whipping up this pudding takes less than 10 minutes, allowing you to enjoy a nutritious snack without the fuss.
Customizable Delight: Whether you want to add spices, sweeteners, or toppings, this recipe allows you to tailor each serving to your taste. Think of it as a blank canvas for your culinary creativity!
Family-Friendly: Kids and adults alike will love the smooth, creamy texture – it’s an excellent way to sneak in some healthy omega-3s.
Make-Ahead Joy: This pudding stores well in the fridge for up to 4 days, making it perfect for meal prep and accommodating your busy lifestyle. If you enjoy delightful, health-focused treats, you may also want to explore options like Mango Coconut Pudding or indulge in the festive flavors of our Patriotic Chocolate Chip recipes!

Chocolate Flaxseed Pudding Ingredients

• Create your own creamy delight with these ingredients!

For the Pudding Base

  • Ground Flaxseed – A nutritious base rich in fiber and omega-3s; ensure to grind if using whole seeds for optimal texture.
  • Cocoa Powder – Provides the deep chocolate flavor; for a caffeine-free variation, consider carob powder.
  • Milk of Choice – Adds creaminess and can be any preferred milk such as almond, oat, or dairy milk to suit your taste.
  • Sweetener – Balances the rich chocolate; use honey, maple syrup, or stevia, and adjust to your desired sweetness.
  • Vanilla Extract – Elevates the flavor; while optional, a splash can make a delightful difference.
  • Salt – A pinch enhances all the flavors; use regular or sea salt for the best results.

This Chocolate Flaxseed Pudding is not just a treat; it’s a wonderful way to nourish your body while indulging your sweet tooth. Enjoy crafting this versatile dessert!

Step‑by‑Step Instructions for Chocolate Flaxseed Pudding

Step 1: Mix the Dry Ingredients
In a medium mixing bowl, whisk together 1 cup of ground flaxseed, ⅓ cup of cocoa powder, and a pinch of salt until well combined. This step creates a fine, dry mixture that ensures an even distribution of flavors in your Chocolate Flaxseed Pudding. Take a moment to appreciate the rich chocolate aroma before moving on.

Step 2: Create a Smooth Base
Gradually add ½ cup of your chosen milk to the dry mixture while whisking vigorously. Incorporate 2-4 tablespoons of sweetener, depending on your taste preference. Continue mixing for about 2-3 minutes until the batter is smooth and the cocoa powder is fully dissolved, removing any lumps that may form.

Step 3: Add the Remaining Milk
Pour in the remaining 1 cup of milk and add 1 teaspoon of vanilla extract for an enhanced flavor. Whisk the mixture again for about 2-3 minutes until it achieves a thick and creamy consistency, similar to a pancake batter. Make sure to check for any remaining lumps; a smooth texture is key to the perfect Chocolate Flaxseed Pudding.

Step 4: Transfer to Containers
Carefully spoon the mixture into a large jar, individual ramekins, or small bowls, ensuring even portions. Leave a little space at the top of each container to allow for some expansion as the mixture thickens. The more visually appealing your vessels, the more delightful your Chocolate Flaxseed Pudding will look!

Step 5: Chill for the Best Results
Cover your containers with plastic wrap or lids and place them in the refrigerator. Allow the pudding to chill for at least 1 hour, but preferably 2 hours or overnight. The chilling process helps the flavors meld beautifully and thickens the pudding to a luscious, creamy texture.

Step 6: Serve with Your Favorite Toppings
Once chilled, take out your Chocolate Flaxseed Pudding and give it a gentle stir to restore its creamy texture. Serve it cold, adding your choice of toppings like fresh fruit, a dollop of yogurt, or chopped nuts for a delightful crunch. Enjoy this nutrient-packed treat at breakfast, as a snack, or indulge after dinner!

How to Store and Freeze Chocolate Flaxseed Pudding

  • Fridge: Store your Chocolate Flaxseed Pudding in an airtight container for up to 4 days. This keeps it fresh and creamy for quick snacking or dessert.
  • Freezer: If you want to keep it longer, you can freeze the pudding for up to 2 months. Scoop into freezer-safe containers, leaving space for expansion to maintain texture.
  • Thawing: To enjoy frozen pudding, transfer it to the fridge and let it thaw overnight. Give it a gentle stir before serving to restore creaminess.
  • Reheating: This pudding is best enjoyed cold, but if you prefer it warm, microwave it in 15-second intervals, stirring in between until just warmed through.

What to Serve with Creamy Chocolate Flaxseed Pudding?

As you savor the smooth indulgence of this creamy delight, let’s build a complete meal that dances on your palate.

  • Fresh Berries: Juicy strawberries, blueberries, or raspberries add a burst of sweetness and a lovely tartness that pairs beautifully with chocolate.

  • Crispy Granola: Layering your pudding with crunchy granola introduces a delightful texture contrast, making each spoonful an exciting experience.

  • Chopped Nuts: Sprinkle on almonds or walnuts for a satisfying crunch and healthy fats that enhance the flavor profile of the pudding.

  • Coconut Whipped Cream: A dollop of coconut cream brings an airy lightness and a subtle sweetness that elevates the rich chocolate notes.

  • Banana Slices: Fresh banana slices add natural sweetness and a creamy texture that complements the pudding, creating a blissful combination.

  • Herbal Tea: A warm cup of chamomile or peppermint tea can cleanse your palate and provide a soothing finish to this sweet treat.

  • Dark Chocolate Shavings: For the true chocolate lovers, a sprinkle of finely grated dark chocolate adds depth and richness that will heighten the indulgence.

  • Cinnamon Dust: A sprinkle of ground cinnamon introduces a warm spice that enhances the chocolate flavor, giving it an extra layer of comfort.

  • Dairy-Free Milkshake: Serve alongside a chilled, creamy almond or coconut milkshake for a delightful pairing that can double as a dessert.

  • Fragrant Fruit Salad: A refreshing fruit salad will cut through the richness of the pudding, providing a light and zesty balance to your meal.

Tips for the Best Chocolate Flaxseed Pudding

  • Chill Time Matters: Allow your pudding to chill overnight for the best flavor. The extra time helps the chocolate and flaxseed flavors meld beautifully.
  • Add Sweetener Gradually: Start with less sweetener and adjust to your taste. This helps avoid overly sweet pudding, ensuring the chocolate flavor shines through.
  • Check Consistency: If your pudding is runny, whisk in a bit more ground flaxseed and let it thicken in the fridge. This is a common oversight that can easily be fixed!
  • Flavor Variations: Don’t hesitate to experiment with spices like cinnamon or add nut butters to enhance the flavor profile of your Chocolate Flaxseed Pudding.
  • Stir Before Serving: Give your pudding a gentle stir before serving, as it may separate slightly during refrigeration. This keeps the texture creamy and inviting.

Chocolate Flaxseed Pudding Variations

Feel free to unleash your creativity with these fabulous spins on the classic recipe that will make your taste buds dance!

  • Dairy-Free: Swap regular milk for almond or coconut milk for a completely dairy-free treat, adding a nutty flavor.
  • Sweetener Swap: Use mashed bananas instead of sweeteners for a naturally sweet taste while enriching the pudding with potassium.
  • Chocolate Espresso: Add 1 tablespoon of instant espresso or coffee powder for a mocha twist that fuels your energy with a chocolate buzz.
  • Coconut Cream Topping: Top with a dollop of whipped coconut cream for an indulgent, tropical flair and enrich the creamy texture.
  • Fruit Infusion: Stir in a few tablespoons of your favorite fruit puree, like raspberry or strawberry, to add a fruity zing that contrasts beautifully with the chocolate.
  • Chia Seed Boost: Mix in a tablespoon of chia seeds for added texture and nutritional benefits, enhancing the fiber content even further.
  • Heat It Up: Sprinkle in a pinch of cayenne or chili powder for a surprising kick that brings out the depth of chocolate flavor.
  • Nutty Crunch: Garnish with chopped hazelnuts or almonds for a satisfying crunch and a delightful contrast to the creamy pudding.

For further delightful dessert ideas, check out our White Chocolate Cranberry recipe or consider a fruity Mango Coconut Pudding. Happy cooking!

Make Ahead Options

These Chocolate Flaxseed Pudding cups are perfect for busy home cooks looking to save time without sacrificing taste! You can whisk together the dry ingredients (1 cup of ground flaxseed and ⅓ cup of cocoa powder) up to 24 hours in advance and store them in an airtight container to keep them fresh. Prepare the pudding mixture and chill it in the refrigerator for at least 1 hour, or ideally overnight for the best flavor and texture. When you’re ready to enjoy, simply stir the pudding to restore its creamy consistency and serve with your favorite toppings. This approach allows you to savor a delicious, healthful dessert anytime with minimal effort!

Chocolate Flaxseed Pudding Recipe FAQs

What type of flaxseed should I use for the pudding?
Absolutely! For the best texture and flavor, I recommend using ground flaxseed rather than whole flaxseeds, as grinding helps release omega-3 fatty acids. If you only have whole flaxseeds, simply grind them in a food processor or blender until they reach a fine powder consistency.

How should I store the chocolate flaxseed pudding?
You can store your Chocolate Flaxseed Pudding in an airtight container in the refrigerator for up to 4 days. Just make sure to keep it covered to maintain its freshness and creaminess for those late-night cravings or quick breakfast options!

Can I freeze the chocolate flaxseed pudding?
Very! To freeze your pudding, ladle it into freezer-safe containers or ice cube trays, leaving about an inch of space at the top for expansion. It can be frozen for up to 2 months. When you’re ready to enjoy, simply move it to the fridge to thaw overnight and stir well before serving.

What should I do if my pudding is too runny?
If you find that your Chocolate Flaxseed Pudding is runny, no worries! Just whisk in an additional tablespoon of ground flaxseed and allow it to sit in the refrigerator for another 20-30 minutes. This will help thicken the pudding to a luscious consistency.

Is this pudding safe for people with allergies?
It’s essential to consider dietary needs when preparing dishes. The Chocolate Flaxseed Pudding is naturally gluten-free and dairy-free, making it suitable for many diet restrictions. However, if you’re concerned about allergies, ensure the sweetener and milk alternatives you use are safe for your specific diet. Always double-check ingredient labels for potential allergens.

Can I customize this pudding with different toppings?
The more the merrier! You can enhance the flavor of your Chocolate Flaxseed Pudding with various toppings such as fresh berries, bananas, nuts, or a dollop of dairy-free yogurt. Not only do they add a delightful crunch and freshness, but they also contribute additional nutrients to your indulgent treat!

Chocolate Flaxseed Pudding

Irresistibly Creamy Chocolate Flaxseed Pudding You’ll Love

Chocolate Flaxseed Pudding is a nutritious dessert packed with fiber and omega-3 fatty acids, offering a guilt-free indulgence.
Prep Time 10 minutes
Chill Time 2 hours
Total Time 2 hours 10 minutes
Servings: 4 servings
Course: Dessert
Calories: 200

Ingredients
  

For the Pudding Base
  • 1 cup Ground Flaxseed Ensure to grind if using whole seeds for optimal texture.
  • cup Cocoa Powder For a caffeine-free variation, consider carob powder.
  • 1 cup Milk of Choice May use almond, oat, or dairy milk.
  • 2-4 tablespoons Sweetener Adjust to desired sweetness.
  • 1 teaspoon Vanilla Extract Optional, but enhances flavor.
  • 1 pinch Salt Enhances all the flavors.

Equipment

  • medium mixing bowl
  • Whisk
  • Containers for serving

Method
 

Step-by-Step Instructions
  1. In a medium mixing bowl, whisk together the ground flaxseed, cocoa powder, and salt until well combined.
  2. Gradually add the milk to the dry mixture while whisking vigorously. Incorporate sweetener and continue mixing until smooth.
  3. Pour in the remaining milk and add vanilla extract. Whisk until the mixture is thick and creamy.
  4. Carefully spoon the mixture into containers, leaving a little space for expansion.
  5. Cover containers and place in the refrigerator. Chill for at least 1 hour, preferably 2 hours or overnight.
  6. Once chilled, gently stir the pudding and serve with your choice of toppings.

Nutrition

Serving: 1servingCalories: 200kcalCarbohydrates: 25gProtein: 5gFat: 10gSaturated Fat: 1gPolyunsaturated Fat: 5gMonounsaturated Fat: 3gSodium: 50mgPotassium: 120mgFiber: 8gSugar: 5gCalcium: 4mgIron: 10mg

Notes

Chill overnight for best flavor. Add sweetener gradually to avoid overly sweet pudding. Adjust consistency with more flaxseed if needed.
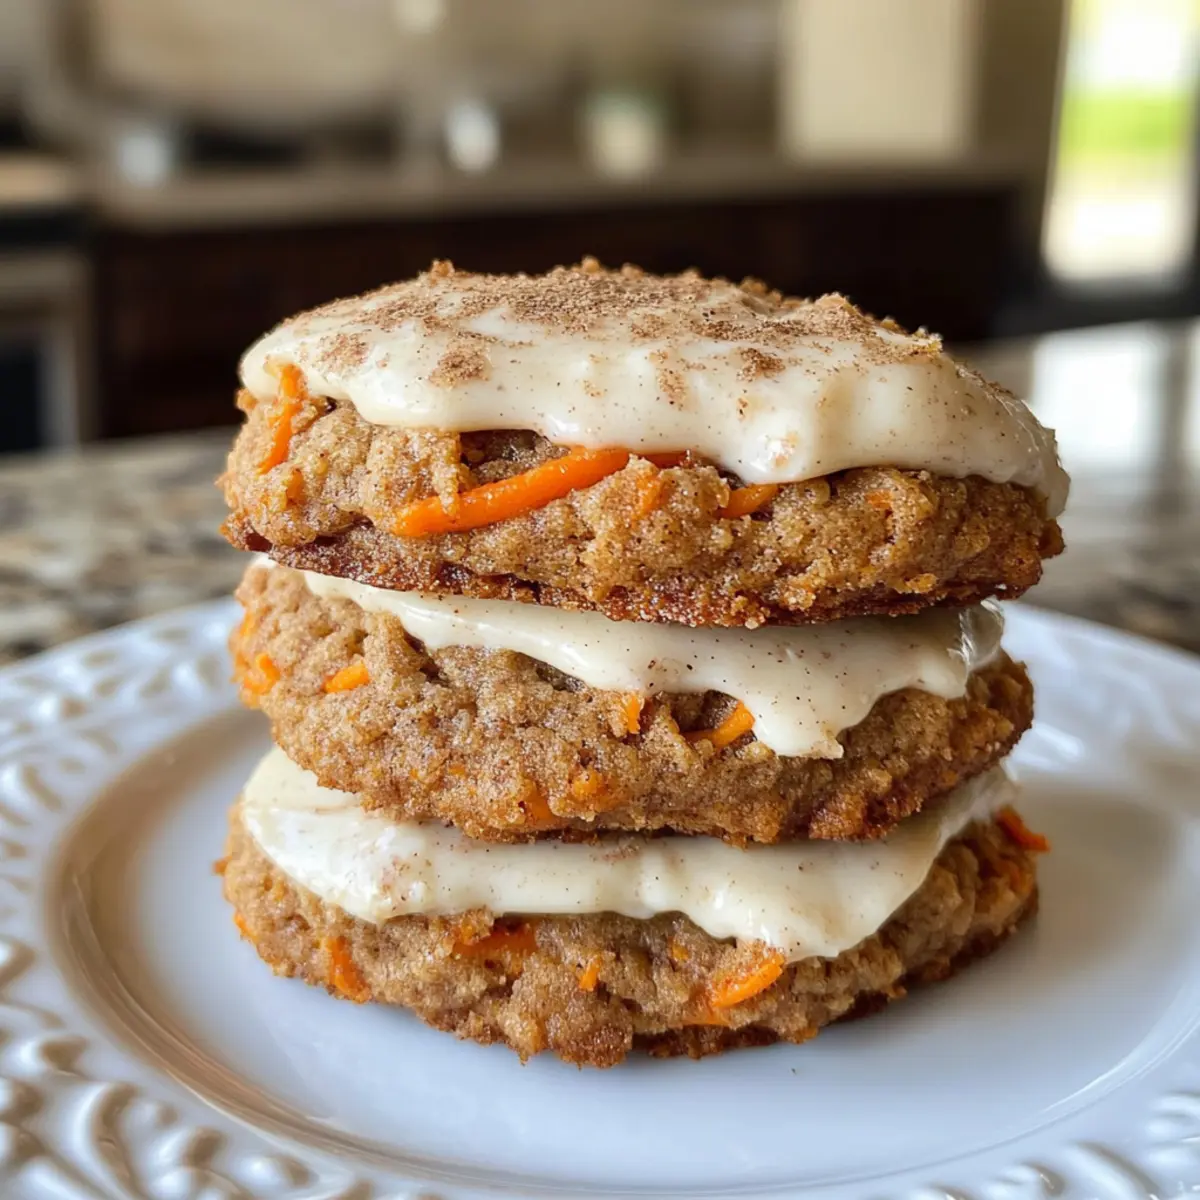
Tried this recipe?

Let us know how it was!

Carrot Cake Yogurt Bowl: Your Healthy Breakfast Upgrade

The warm, sweet aroma of freshly baked carrot cake always fills me with nostalgia, transforming mundane mornings into cozy moments. With my Carrot Cake Yogurt Bowl, I’ve captured those beloved flavors and made them accessible for busy days—no baking required! This delightful dish combines protein-rich Greek yogurt, vibrant grated carrots, and the subtle sweetness of pineapple, making it a nutritious and customizable breakfast option. In just a few minutes, you can whip up a satisfying meal that not only fuels your body but also brings a burst of joy to your morning routine. Plus, it’s easy to modify based on your dietary preferences, whether you’re going vegan or simply looking to shake things up. Ready to dive into a deliciously quick breakfast revolution? Let’s get started!

Why is this Carrot Cake Yogurt Bowl a game changer?

Uplifting Nostalgia: This dish transforms beloved carrot cake flavors into a healthy breakfast that you can savor daily.

Quick & Effortless: With minimal prep, you can whip together a nutritious meal in just minutes—perfect for busy mornings.

High-Protein Goodness: Made with protein-rich Greek yogurt, it fuels your day and keeps you feeling full.

Customizable Delight: Add your favorite nuts, seeds, or even a scoop of protein powder to match your dietary needs.

A Visual Treat: Layered with vibrant colors and textures, it’s not just delicious but also a feast for the eyes—ideal for impressing guests or family!

Meal Prep Friendly: Create your yogurt base ahead of time and add toppings fresh each day for an effortless, quick breakfast option!

Carrot Cake Yogurt Bowl Ingredients

For the Yogurt Base
Greek Yogurt – Provides creaminess and a high-protein boost; can be substituted with thick plant-based yogurt for a vegan-friendly option.
Maple Syrup or Honey – Natural sweetener to adjust to your taste preferences.

For the Carrot Mixture
Finely Grated Carrot – Offers natural sweetness and a nutrient boost; use the smallest holes on a box grater for the best texture.
Crushed Pineapple – Adds moisture and sweetness; be sure it is well-drained to prevent excess water in the yogurt bowl.
Cinnamon, Nutmeg, and Ginger – These warm spices bring that classic carrot cake flavor to life; feel free to adjust amounts based on your personal taste.

For the Toppings
Chopped Walnuts or Pecans – Adds crunch and healthy fats; swap these with any preferred nuts or seeds for customization.
Granola – Introduces fun texture and extra crunch; ensure it’s nut-free or gluten-free if necessary.
Optional Add-Ons – Consider raisins, shredded coconut, or almond butter for an extra layer of flavor and texture in your Carrot Cake Yogurt Bowl.

Step‑by‑Step Instructions for Carrot Cake Yogurt Bowl

Step 1: Prepare the Creamy Base
In a mixing bowl, combine 2 cups of Greek yogurt with 2-3 tablespoons of maple syrup or honey, 1 teaspoon of cinnamon, 1/2 teaspoon of nutmeg, and 1/4 teaspoon of ginger. Use a whisk or spatula to blend until smooth and creamy, ensuring that the spices are evenly incorporated. This creates the rich yogurt base for your Carrot Cake Yogurt Bowl.

Step 2: Mix in the Vegetables
Next, finely grate 1 medium carrot using the smallest holes on a box grater, then squeeze it gently to remove excess moisture. Fold the grated carrot and 1/2 cup of well-drained crushed pineapple into the yogurt mixture using a spatula. Be gentle to maintain the creamy texture of the yogurt, allowing the flavors to meld beautifully in your bowl.

Step 3: Top the Bowl
Spoon the creamy carrot yogurt mixture into bowls, dividing it equally. Now it’s time to add those delightful toppings! Artfully arrange 1/4 cup of chopped walnuts or pecans and a sprinkle of granola over the top. This adds not only texture and crunch but also visual appeal, making your Carrot Cake Yogurt Bowl a feast for the eyes.

Step 4: Finish and Serve
For that extra touch, drizzle a bit more maple syrup or a swirl of almond butter on top of each bowl. This enhances the sweetness and richness of the Carrot Cake Yogurt Bowl. Serve it chilled, and enjoy this deliciously nutritious breakfast that captures the essence of carrot cake in every bite!

Make Ahead Options

These Carrot Cake Yogurt Bowls are a fantastic choice for meal prep enthusiasts! You can prepare the yogurt base (mixing Greek yogurt, maple syrup, and spices) up to 3 days in advance and store it in an airtight container in the refrigerator. Additionally, you can grate the carrots and drain the pineapple the night before and keep them in separate containers to maintain freshness. Just be sure to squeeze out excess moisture from the carrots to prevent the yogurt from becoming watery. When you’re ready to enjoy your quick breakfast, simply combine the yogurt mixture with the carrot and pineapple, top with nuts and granola, and savor your delicious creation—effortlessly enjoyed on busy mornings!

Expert Tips for Carrot Cake Yogurt Bowl

  • Drain the Pineapple: Ensure your crushed pineapple is well-drained to prevent the yogurt from becoming watery and losing that creamy texture.

  • Squeeze Carrots: Gently squeeze the grated carrots to remove excess moisture before mixing them in. This keeps your Carrot Cake Yogurt Bowl perfectly thick and luscious.

  • Experiment with Spices: Feel free to adjust the spices! Carrot cake usually contains distinct flavors, so play with cinnamon, nutmeg, and ginger according to your taste preferences.

  • Customize Toppings: Try different toppings such as seeds, or a scoop of protein powder to create a version that suits your dietary needs. Get creative with your Carrot Cake Yogurt Bowl!

  • Meal Prep Savvy: For easy breakfast during busy mornings, prepare the yogurt base ahead of time. Store it separately from the toppings to maintain freshness and texture.

What to Serve with Carrot Cake Yogurt Bowl

A nourishing breakfast can be a vibrant feast for the senses, bursting with delightful flavors and textures.

  • Fresh Berries: Their natural sweetness and acidity brilliantly contrast the creamy yogurt, adding color and freshness to your bowl.

  • Honey Almond Granola: The crunchiness complements the smooth yogurt while enhancing the flavor profile with a nutty sweetness.

  • Toasted Coconut Flakes: Adding a tropical flair, toasted coconut provides a delightful crunch and enhances the overall sweetness.

  • Cinnamon Swirl Oatmeal: A warm bowl of cinnamon oatmeal pairs beautifully, offering a comforting, hearty option alongside your yogurt bowl.

  • Chia Seed Pudding: Light and refreshing, this creamy addition brings a lovely contrast in texture while packing in extra nutrients.

  • Herbal Tea: A cup of chamomile or ginger tea can complement your breakfast, adding soothing warmth to your nourishing morning routine.

  • Mixed Fruit Salad: A combination of fruits brings brightness and freshness, balancing the richness of the yogurt bowl beautifully.

  • Dark Chocolate Chips: A sprinkle of dark chocolate adds indulgent moments, creating a sweet and vibrant contrast that’s hard to resist!

Carrot Cake Yogurt Bowl: Variations & Substitutions

Get ready to make this delightful dish your own with these imaginative tweaks that cater to your taste buds and dietary preferences!

  • Vegan Swap: Replace Greek yogurt with thick coconut or almond yogurt for a deliciously creamy vegan option.
    Embrace a rich, dairy-free twist that still honors those classic carrot cake flavors.

  • Nut-Free Option: Swap walnuts or pecans with sunflower seeds or pumpkin seeds for a nut-free alternative.
    This way, you can still enjoy that delightful crunch while accommodating allergies!

  • Add Protein: Mix in a scoop of your favorite protein powder for a more filling breakfast.
    Boost your bowl with protein, making it perfect for post-workout recovery or a busy day ahead.

  • Spice it Up: Try adding a pinch of cardamom or an extra dash of ginger for a unique flavor profile.
    Delight in how these spices can elevate the warm, comforting taste of your yogurt bowl.

  • Crunchy Granola: Explore various granola types, from coconut to chocolate-infused, depending on your cravings.
    The right granola can create a completely new texture and flavor experience—go wild!

  • Tropical Twist: Incorporate sliced bananas or diced mango for a tropical flavor upgrade.
    The added sweetness and freshness will transport you to a sunny paradise every morning.

  • Creamy Coconut: Replace syrup sweetness with coconut cream for a gentler, rich flavor.
    This creates a luxurious feel while maintaining that signature carrot cake taste; it’s like a mini vacation in a bowl!

For other creative breakfast ideas, check out my Patriotic Poke Cake or the filling Roasted Carrot Lentil for more nutritious and delicious options! Enjoy the adventure of customization as you explore all the delicious ways to make your Carrot Cake Yogurt Bowl shine!

How to Store and Freeze Carrot Cake Yogurt Bowl

  • Fridge: The spiced yogurt mixture can be stored in an airtight container for up to 2-3 days. Keep toppings separate to maintain their crunch and freshness.
  • Freezer: For longer storage, freeze the yogurt base for up to 1 month. Thaw overnight in the fridge before serving. Add toppings fresh upon serving.
  • Reheating: This Carrot Cake Yogurt Bowl is best enjoyed chilled. If you feel it needs a little warmth, gently microwave for 10-15 seconds without toppings.
  • Texture Preservation: To keep the creamy consistency, avoid freezing the toppings; they are best added right before serving!

Carrot Cake Yogurt Bowl Recipe FAQs

How should I select my carrots for this recipe?
Absolutely! When choosing carrots, look for firm, vibrant-colored ones without any dark spots or blemishes. The brighter the color, the sweeter the flavor! Freshly grated carrots work best, providing natural sweetness and essential nutrients.

How can I store my Carrot Cake Yogurt Bowl?
Very! You can store the spiced yogurt mixture in an airtight container in the fridge for up to 2-3 days. To preserve the toppings’ texture and crunch, be sure to keep them separate until you’re ready to enjoy your healthy breakfast.

Can I freeze the yogurt base for my Carrot Cake Yogurt Bowl?
Absolutely! You can freeze the yogurt base for up to 1 month. To freeze, place it in an airtight container and ensure it’s sealed tightly. When you’re ready to enjoy it, just thaw it in the fridge overnight. Remember to add your toppings fresh upon serving for the best texture!

What if my yogurt mixture is too watery?
If your mixture turns out watery, start by ensuring your crushed pineapple was well-drained and your grated carrots were squeezed to remove excess moisture. If you’ve added these properly and it’s still too thin, consider incorporating a bit more Greek yogurt to restore thickness, adjusting the sweetness if needed.
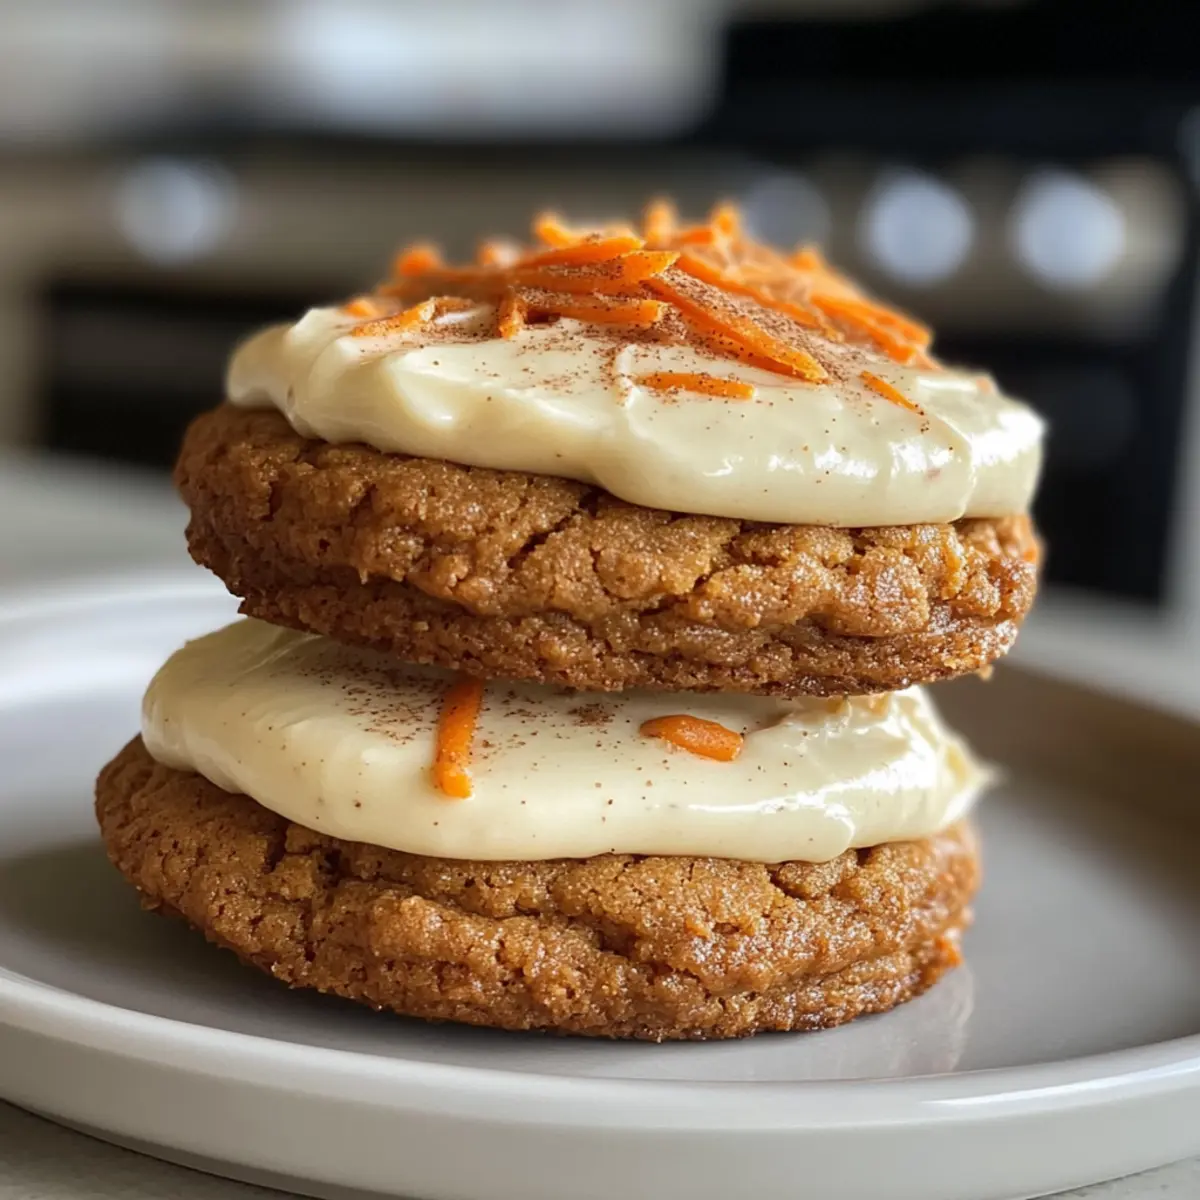
Are there any dietary considerations for my Carrot Cake Yogurt Bowl?
Yes, indeed! If you’re preparing this for someone with allergies, ensure that the granola is nut-free or gluten-free, depending on dietary restrictions. Additionally, swapping Greek yogurt for a thick plant-based yogurt makes this recipe suitable for vegans. Always customize based on individual needs!

Carrot Cake Yogurt Bowl

Carrot Cake Yogurt Bowl: Your Healthy Breakfast Upgrade

A delicious and nutritious Carrot Cake Yogurt Bowl to elevate your breakfast with beloved flavors, promoting healthy eating and satisfaction.
Prep Time 10 minutes
Total Time 10 minutes
Servings: 2 bowls
Course: Breakfast
Cuisine: American
Calories: 350

Ingredients
  

For the Yogurt Base
  • 2 cups Greek Yogurt Can be substituted with thick plant-based yogurt for a vegan option.
  • 2-3 tablespoons Maple Syrup or Honey Adjust to taste.
For the Carrot Mixture
  • 1 medium Finely Grated Carrot Use smallest holes on a box grater for best texture.
  • 1/2 cup Crushed Pineapple Well-drained to prevent excess water.
  • 1 teaspoon Cinnamon Adjust according to taste.
  • 1/2 teaspoon Nutmeg Adjust according to taste.
  • 1/4 teaspoon Ginger Adjust according to taste.
For the Toppings
  • 1/4 cup Chopped Walnuts or Pecans Can swap with any preferred nuts or seeds.
  • to taste Granola Ensure it’s nut-free or gluten-free if necessary.
  • Optional Add-Ons Consider raisins, shredded coconut, or almond butter.

Equipment

  • Mixing Bowl
  • Whisk or spatula
  • Box Grater

Method
 

Step-by-Step Instructions
  1. In a mixing bowl, combine 2 cups of Greek yogurt with 2-3 tablespoons of maple syrup or honey, 1 teaspoon of cinnamon, 1/2 teaspoon of nutmeg, and 1/4 teaspoon of ginger. Blend until smooth and creamy to create the yogurt base.
  2. Finely grate 1 medium carrot and squeeze gently to remove excess moisture. Fold the grated carrot and 1/2 cup of well-drained crushed pineapple into the yogurt mixture.
  3. Spoon the creamy carrot yogurt mixture into bowls. Add 1/4 cup of chopped walnuts or pecans and a sprinkle of granola on top.
  4. Drizzle more maple syrup or a swirl of almond butter on top of each bowl before serving.

Nutrition

Serving: 1bowlCalories: 350kcalCarbohydrates: 45gProtein: 20gFat: 10gSaturated Fat: 1gPolyunsaturated Fat: 3gMonounsaturated Fat: 5gCholesterol: 10mgSodium: 100mgPotassium: 450mgFiber: 5gSugar: 20gVitamin A: 5000IUVitamin C: 15mgCalcium: 250mgIron: 1.5mg

Notes

Ensure pineapple is well-drained to maintain yogurt texture. Customize your toppings to suit dietary needs and preferences. For meal prep, create yogurt base ahead of time, storing toppings separately.

Tried this recipe?

Let us know how it was!

Creamy Mexican White Sauce That’s Easy and Irresistible

Who knew a simple blend of everyday ingredients could transform your cooking game? This Creamy Mexican White Sauce is the perfect embodiment of that magic, adding an irresistible tang to your tacos, nachos, and grilled meats. With just a few pantry staples and minimal prep time, you’ll create a versatile condiment that elevates any meal. Not only does it boast a creamy texture that pairs beautifully with various dishes, but it also offers customization potential—perfect for those following a vegan diet. Imagine drizzling this sauce on fresh salads or using it as a dip for your next gathering! Are you ready to elevate your culinary creations with this vibrant sauce?

Why is Mexican White Sauce a Must-Try?

Simplicity at its Core: This Creamy Mexican White Sauce comes together in just minutes, making it a go-to for busy weeknights or spontaneous gatherings.

Versatility in Every Bite: Perfect for tacos, nachos, or even grilled chicken, this sauce transforms any dish into a flavor fiesta.

Customizable Flavors: Want a kick? Add jalapeños! Prefer a lighter version? Switch to Greek yogurt. This sauce adapts beautifully to your taste.

Perfect for Sharing: Serve it chilled as a dip at parties or as a zesty dressing for salads, making it a crowd-pleaser for all occasions.

Elevate your meals with this delightful sauce and make sure to check out Mexican Barbecue Chicken for a delicious pairing!

Mexican White Sauce Ingredients

For the Sauce

  • Creamy Salad Dressing (e.g., Miracle Whip™) – Provides a creamy base for the sauce; a vegan salad dressing can be a great alternative for dairy-free options.
  • Milk – Adjusts the sauce’s consistency to make it lighter and pourable; any plant-based milk works perfectly for a vegan version.
  • Crushed Red Pepper Flakes – Adds heat and spice to the sauce, so feel free to adjust according to your taste preference.
  • Ground Cumin – Enhances the flavor with warm, earthy notes; while there’s no direct substitute, chili powder offers a different flavor profile if desired.
  • Garlic Powder – Delivers savory depth; fresh minced garlic can be used for an even more robust flavor.
  • Dried Oregano – Contributes herbal undertones; opt for fresh oregano if available, remembering to use slightly more.
  • Salt – Balances all flavors; adjust to your liking.

Let this creamy Mexican white sauce take your meals to a new delicious level!

Step‑by‑Step Instructions for Creamy Mexican White Sauce

Step 1: Combine Ingredients
In a mixing bowl, whisk together 1 cup of creamy salad dressing, ¼ cup of milk, and the spices: 1 teaspoon of crushed red pepper flakes, 1 teaspoon of ground cumin, ½ teaspoon of garlic powder, 1 teaspoon of dried oregano, and salt to taste. Continue mixing until the mixture is smooth and well-integrated, with no visible lumps.

Step 2: Adjust Consistency
After combining the ingredients, check the consistency of your Mexican White Sauce. If it feels too thick for your liking, gradually add more milk, one tablespoon at a time. Stir continuously while doing this until you achieve a pourable and creamy texture that flows beautifully.

Step 3: Chill
Once your sauce reaches the desired consistency, transfer it to an airtight container. Refrigerate the Creamy Mexican White Sauce for at least 2 hours; this chilling period allows the flavors to meld and develop richness. You’ll know it’s ready when it thickens slightly and the aroma becomes more intense.

Step 4: Serve
Before serving, give the sauce a good stir to mix any settled ingredients. Use this delicious Mexican White Sauce generously on tacos, nachos, or as a dipping sauce. It should be creamy and zesty, elevating the flavors of your dishes effortlessly.

How to Store and Freeze Mexican White Sauce

Fridge: Store your Creamy Mexican White Sauce in an airtight container for up to 5-7 days. Always give it a stir before using to refresh the flavors.

Freezer: Avoid freezing the sauce, as the texture will change upon thawing, resulting in a grainy consistency.

Reheating: If serving after refrigeration, let the sauce sit at room temperature for a few minutes before stirring, or gently warm it on low heat for a few seconds, ensuring it doesn’t get too hot.

Consistency Check: If the sauce appears too thick after chilling, add a splash of milk to restore its creamy texture before serving.

What to Serve with Creamy Mexican White Sauce?

Imagine a vibrant feast where each bite dances with flavor, complementing the creamy tang of your Mexican White Sauce.

  • Crunchy Tacos: The crispy shell and seasoned fillings create a delightful contrast with the smooth sauce, making each bite a celebration.
  • Savory Nachos: Golden, crispy tortilla chips piled high with cheese and toppings harmonize beautifully with the zesty sauce for a perfect game-day snack.
  • Grilled Chicken: Juicy, smoky chicken drizzled with creamy sauce brings a delicious creaminess that brightens grilled flavors, ideal for summer cookouts.
  • Fresh Garden Salad: Crisp greens and vibrant veggies tossed in a light vinaigrette paired with the sauce elevate your salad from ordinary to extraordinary, adding a creamy twist.
  • Spicy Quesadillas: Melty cheese and spicy fillings paired with this sauce create an irresistible fusion of flavors; it’s great as a dip!
  • Creamy Cilantro Rice: The herby notes in cilantro rice complement the tanginess of the sauce, making for a delightful and refreshing side dish.

Create your culinary masterpiece by combining these tasty options alongside your Mexican White Sauce, turning every meal into a fiesta!

Mexican White Sauce Variations You’ll Love

Get ready to unleash your creativity in the kitchen—this creamy sauce welcomes delicious twists and substitutions to make it truly your own!

  • Vegan Substitute: Swap creamy salad dressing for a plant-based alternative like cashew cream to keep it dairy-free.
  • Zesty Lime: Add 1-2 teaspoons of fresh lime juice or lime zest for a burst of citrusy brightness that heightens the flavor.
  • Spicy Kick: Toss in finely chopped jalapeños or a dash of hot sauce to give your sauce a fiery boost perfect for spice lovers.
  • Greek Yogurt: Replace the creamy salad dressing with Greek yogurt for a protein-packed, tangy version without sacrificing creaminess.
  • Fresh Herbs: Toss in freshly chopped cilantro or parsley for a vibrant herbal touch that complements your Mexican dishes beautifully.
  • Creamy Avocado: Blend in mashed avocado to create an even creamier sauce with a unique flavor twist, perfect for dipping and drizzling!
  • Smoky Flavor: Add a pinch of smoked paprika or chipotle powder for a smoky essence to take your sauce to the next level.
  • Herb Infusion: Infuse your sauce with fresh herbs like basil or dill for a refreshing take—imagine how delightful that would taste on salads or grilled chicken!

The possibilities are endless, and don’t forget to elevate your meals with this sauce by pairing it with favorites like Mexican Lasagna or your own soup and salad creations. Dive in and enjoy crafting your unique flavor bomb!

Make Ahead Options

These Creamy Mexican White Sauce is perfect for meal prep enthusiasts! You can easily mix all the ingredients (1 cup of creamy salad dressing, ¼ cup of milk, and spices) up to 24 hours in advance, storing it in an airtight container in the refrigerator. This chilling period not only saves you time on busy weekdays but also allows the flavors to meld beautifully together. When you’re ready to serve, just give it a good stir to re-combine any settled ingredients, and it’s ready to elevate your tacos and nachos. To maintain its creamy texture, make sure to stir well before serving, ensuring you keep that delightful consistency just as delicious!

Expert Tips for Mexican White Sauce

Smooth Blend: Ensure all ingredients are thoroughly mixed to avoid clumps. A smooth texture makes your Mexican White Sauce irresistible.

Chill Before Serving: Refrigerate the sauce for at least 2 hours. This step enhances the flavors and ensures the sauce thickens properly. Avoid serving it warm, as it can become runny.

Taste as You Go: Adjust seasoning gradually. Start with less salt and crushed red pepper flakes, then incrementally add more to suit your personal taste.

Explore Variations: Don’t hesitate to customize your sauce! Adding fresh lime juice or zest can brighten the flavor, while diced jalapeños can kick up the heat for spice lovers.

Storage Tips: Store your Mexican White Sauce in an airtight container in the fridge for up to 5-7 days. It won’t freeze well due to texture changes, so enjoy it fresh!

Creamy Mexican White Sauce Recipe FAQs

What’s the best way to select ingredients for this Mexican White Sauce?
Absolutely! Start with a creamy salad dressing that has good texture, like Miracle Whip™, or try a vegan alternative for a dairy-free option. When choosing milk, any plant-based variety works well to keep the sauce vegan-friendly. Look for spicy red pepper flakes that are bright in color and free of clumps for the best flavor.

How should I store leftover Mexican White Sauce, and how long does it last?
Store your Creamy Mexican White Sauce in an airtight container in the refrigerator for up to 5-7 days. Remember to give it a good stir before using, as some ingredients may settle. This sauce is great for quick snacks or top-offs of your favorite meals!

Can I freeze Mexican White Sauce for later use?
I recommend against freezing the sauce, as it can lose its creamy texture and become grainy once thawed. Instead, enjoy it fresh! If you have leftovers, make sure to store them properly in the fridge and use within a week to savor its deliciousness.

What if my sauce is too thick after refrigeration?
Very! If your Mexican White Sauce becomes thick after being stored, simply add a splash of milk and stir until you achieve your desired consistency. I often suggest taking it out of the fridge a few minutes before serving to allow it to soften slightly.

Are there any dietary considerations I should keep in mind for this recipe?
Absolutely! This sauce can easily be made vegan by choosing a dairy-free salad dressing and substituting milk with almond, soy, or oat milk. If anyone has allergies, ensure to verify that all your ingredients are allergen-free, especially the salad dressing, as it can contain various additives.

What are some common issues when making this sauce, and how can I fix them?
Don’t worry if things don’t go perfectly! A common issue is clumping, which can happen if the dressing and seasonings are not well mixed. To solve this, make sure to whisk vigorously when combining your ingredients. If you find the sauce too salty, try balancing it with a bit more milk or dressing to tone down the flavor. Tasting as you go is key to ensuring your sauce is delicious!

Mexican White Sauce

Creamy Mexican White Sauce That's Easy and Irresistible

Discover the magic of this Creamy Mexican White Sauce, elevating your dishes with a tangy twist that's easy to make.
Prep Time 10 minutes
Chilling Time 2 hours
Total Time 2 hours 10 minutes
Servings: 8 servings
Course: Appetizer
Cuisine: Mexican
Calories: 100

Ingredients
  

For the Sauce
  • 1 cup Creamy Salad Dressing (e.g., Miracle Whip™) a vegan salad dressing can replace for a dairy-free option
  • 0.25 cup Milk any plant-based milk works for vegan version
  • 1 teaspoon Crushed Red Pepper Flakes adjust according to taste preference
  • 1 teaspoon Ground Cumin chili powder can be a substitute
  • 0.5 teaspoon Garlic Powder fresh minced garlic can be used for a stronger flavor
  • 1 teaspoon Dried Oregano use fresh oregano if available, slightly more
  • to taste Salt adjust to your liking

Equipment

  • Mixing Bowl
  • Whisk
  • airtight container

Method
 

Step-by-Step Instructions
  1. In a mixing bowl, whisk together 1 cup of creamy salad dressing, ¼ cup of milk, and the spices: 1 teaspoon of crushed red pepper flakes, 1 teaspoon of ground cumin, ½ teaspoon of garlic powder, 1 teaspoon of dried oregano, and salt to taste. Continue mixing until smooth and well-integrated.
  2. Check the consistency of your Mexican White Sauce. If too thick, gradually add more milk, one tablespoon at a time, stirring continuously until pourable.
  3. Transfer the sauce to an airtight container and refrigerate for at least 2 hours to enhance the flavors and thickening.
  4. Before serving, stir to mix any settled ingredients and use generously on tacos, nachos, or as a dipping sauce.

Nutrition

Serving: 2tablespoonsCalories: 100kcalCarbohydrates: 5gProtein: 1gFat: 8gSaturated Fat: 1gPolyunsaturated Fat: 1gMonounsaturated Fat: 5gSodium: 150mgPotassium: 30mgSugar: 1gCalcium: 10mg

Notes

Store in an airtight container in the fridge for up to 5-7 days. It won’t freeze well due to texture changes.

Tried this recipe?

Let us know how it was!

Delicious Carrot Cake Cookies with Cream Cheese Bliss

As the sweet scent of cinnamon and freshly grated carrots fills the kitchen, I find myself transported back to family gatherings where carrot cake was the star of the dessert table. Now, imagine that beloved flavor transformed into Soft & Tender Carrot Cake Cookies with Cream Cheese Frosting—an easy dessert that’s perfect for Easter celebrations or any spring occasion. These delightful cookies are not only a breeze to whip up, but they also offer a unique twist on a classic favorite, making them an instant crowd-pleaser. Whether you’re baking for a tea party or simply treating yourself, these soft cookies are sure to bring a little sunshine to your day. Are you ready to bring joy to your kitchen with these delicious bites? Let’s get started!

Why are Carrot Cake Cookies a must-try?

Unforgettable Flavor: Each bite bursts with the warm spices of cinnamon and the natural sweetness of carrots, making these cookies an instant classic.

Easy to Make: With straightforward steps, even novice bakers can whip up these treats without stress.

Perfect for Any Occasion: Whether it’s a spring tea party or an Easter gathering, these cookies are versatile and loved by all.

Cream Cheese Frosting Delight: The creamy, tangy frosting elevates the flavor profile, creating a delightful contrast to the spiced cookie.

Grab-and-Go Treat: Soft and tender, they are ideal for snacks on the go, effortlessly fitting into lunchboxes or picnics.

Adaptable Recipe: Feel free to customize by adding nuts or even a splash of orange zest for a refreshing twist! Looking for more delicious cookie ideas? You might also enjoy these Chocolate Cranberry Cookies.

Carrot Cake Cookies Ingredients

For the Cookies

  • Unsalted Butter – Provides richness and moisture; melt and cool to room temperature for better texture.
  • Granulated Sugar – Sweetens the cookies and helps retain moisture.
  • Eggs – Essential for structure and contributes to a tender crumb.
  • Carrot Purée – Adds moisture and sweetness; use baby food for convenience or homemade purée if preferred.
  • Neutral Oil (Canola or Coconut) – Enhances tenderness; coconut oil adds a delightful flavor twist.
  • Finely Grated Carrots – Contributes flavor and texture; make sure to press out excess moisture.
  • Vanilla Extract – Enhances the overall flavor; opt for pure vanilla for a richer taste.
  • Flour – Provides necessary structure to keep cookies from spreading too much.
  • Baking Soda – A leavening agent that helps the cookies rise properly.
  • Baking Powder – Ensures a light, tender texture; remember to replace if older than 6 months.
  • Cinnamon – Key for that signature carrot cake flavor; regular grocery brands work just fine.
  • Salt – Enhances and balances all the flavors.

For the Cream Cheese Frosting

  • Cream Cheese – Use full-fat for a creamy, rich frosting.
  • Powdered Sugar – Sweetens the frosting while ensuring a smooth, velvety texture.

Feel free to experiment with this recipe, because these Carrot Cake Cookies will quickly become a family favorite!

Step‑by‑Step Instructions for Carrot Cake Cookies

Step 1: Preparation
Preheat your oven to 350°F (175°C) and line a half-sheet pan with parchment paper to prevent the cookies from sticking. This easy step ensures the perfect baking surface for your delicious Carrot Cake Cookies, allowing them to spread just right while maintaining that soft, tender texture.

Step 2: Melt Butter
In a saucepan over medium heat, melt the unsalted butter until it becomes liquid. Once melted, remove it from the heat and let it cool for about 15 minutes. Cooling the butter is essential to avoid altering the cookie texture, ensuring your Carrot Cake Cookies are rich and chewy.

Step 3: Prepare Carrots
Grate fresh carrots until you have the desired amount, then place them on paper towels to press out any excess moisture. This step is crucial; aim for 40 grams of finely grated carrots to deepen the flavor and maintain the cookies’ tenderness without making them dense.

Step 4: Mix Wet Ingredients
In a large mixing bowl, combine the cooled melted butter, granulated sugar, eggs, neutral oil, carrot purée, grated carrots, and vanilla extract. Whisk these wet ingredients together until thoroughly blended. This mixture not only enriches the Carrot Cake Cookies but also binds all the fantastic flavors together beautifully.
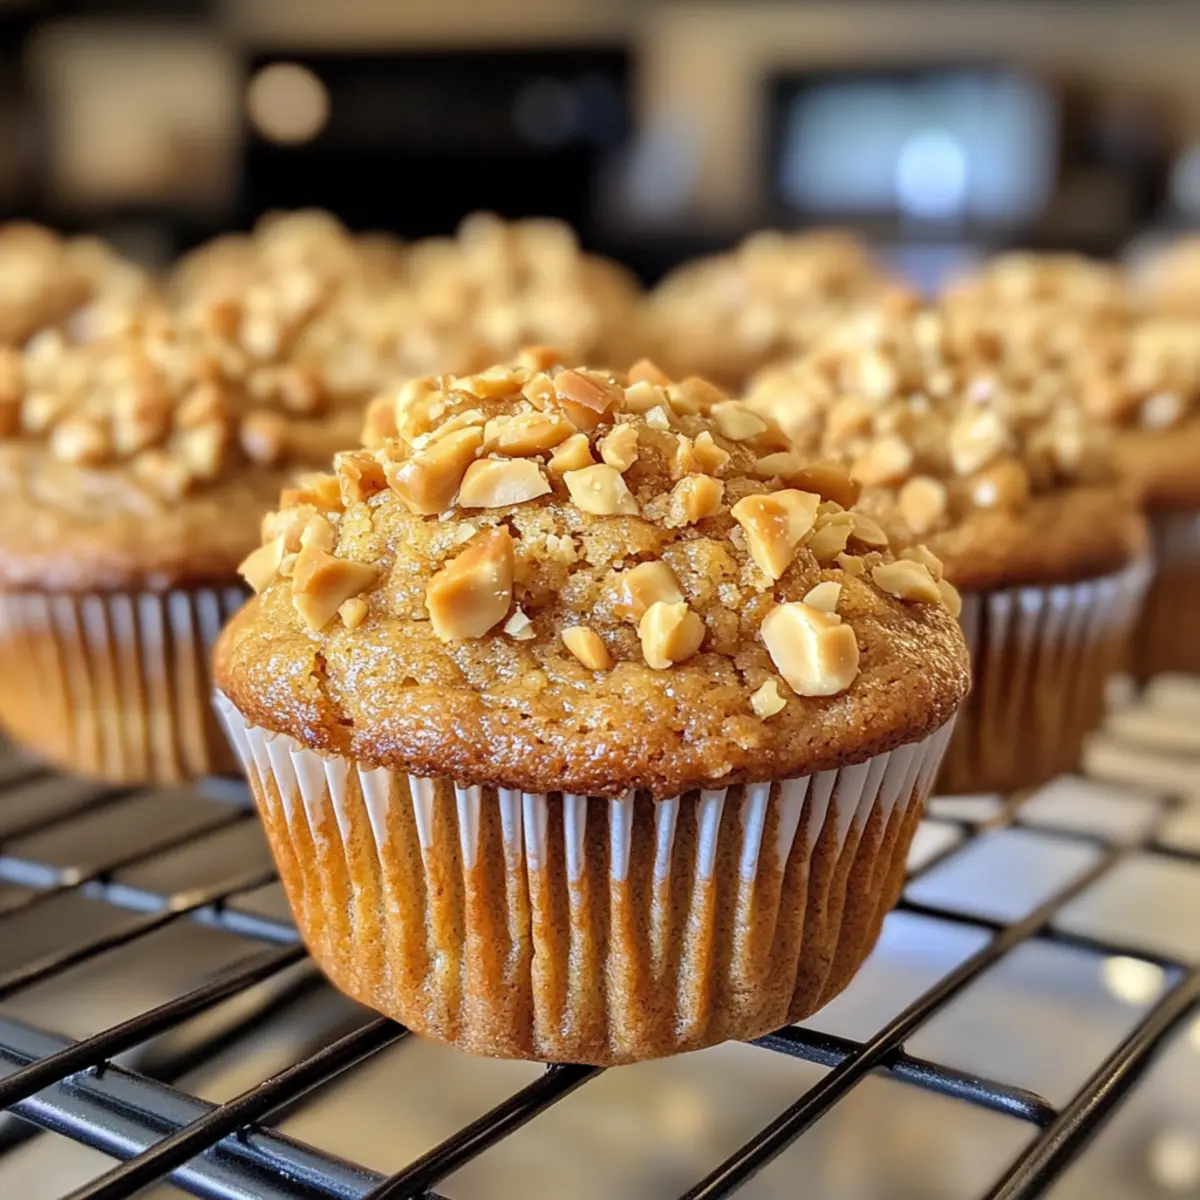
Step 5: Combine Dry Ingredients
In a separate bowl, whisk together the flour, baking soda, baking powder, cinnamon, and salt. Gradually incorporate this dry mixture into the wet ingredients, stirring just until combined. Overmixing can lead to tougher cookies, so take care not to stir too vigorously to keep your Carrot Cake Cookies soft and tender.

Step 6: Portion Cookies
Using a 2-tablespoon cookie scoop or spoon, drop the cookie dough onto the prepared baking pan, spacing each mound about 2 inches apart. This spacing allows the Carrot Cake Cookies to expand while baking, ensuring they get that delightful, soft texture without merging into each other.

Step 7: Bake
Place the pan in the preheated oven and bake the cookies for about 8-10 minutes. They should bounce back lightly when touched, indicating they are done. Let the cookies cool on the baking sheet for 5 minutes before gently transferring them to a wire cooling rack to finish cooling completely.

Step 8: Prepare Frosting
In a medium mixing bowl, beat the cream cheese and softened butter until the mixture is smooth and creamy. Gradually add in the vanilla extract and powdered sugar, mixing until you attain a thick frosting consistency. This creamy frosting will take your Carrot Cake Cookies to the next level of indulgence!

Step 9: Frost Cookies
Once the cookies are completely cooled, spread a generous layer of frosting on top of each cookie using a spatula or a piping bag for decorative designs. The distinct creaminess of the frosting complements the flavors of your Carrot Cake Cookies, making them an irresistible treat for any occasion.

What to Serve with Carrot Cake Cookies

As you savor the delightful sweetness of these carrot cake cookies, consider pairing them with complementary flavors and textures for a fully satisfying treat.

  • Creamy Mashed Potatoes: The richness of buttery mashed potatoes provides a savory contrast to the cookies’ sweetness, creating a delightful balance.

  • Refreshing Fruit Salad: A light and colorful fruit salad adds freshness and a hint of acidity, beautifully offsetting the dense flavors of the cookies.

  • Traditional Tea: A warm cup of chai or Earl Grey tea enhances the spices in the cookies, making your snack feel extra special.

  • Coconut Macaroons: For a tropical twist, these chewy coconut delights share a similar sweetness, wrapping every bite in luscious flavor.

  • Lemonade Spritzer: A bubbly lemonade spritzer gives a refreshing zing, cutting through the richness of the cookies and awakening your taste buds.

  • Chocolate Dipped Strawberries: Juicy strawberries dipped in rich chocolate provide a lush indulgence that pairs wonderfully with the soft, creamy texture of the cookies.

  • Vanilla Ice Cream: A scoop of creamy vanilla ice cream adds a chill complement, allowing the flavors of the cookies and frosting to shine even brighter.

These pairings will transform your carrot cake cookies from a delightful snack to a well-rounded, indulgent experience worth celebrating with family and friends!

How to Store and Freeze Carrot Cake Cookies

Fridge: Store the frosted cookies in an airtight container for up to 4 days to maintain their freshness and creamy texture.

Freezer: For long-term storage, freeze the Carrot Cake Cookies by chilling them until the frosting is set, then place them in a single layer in an airtight container. They will keep well for up to 3 months.

Thawing: When you’re ready to enjoy, thaw the cookies at room temperature for the best texture. Allow about 30 minutes to ensure each bite remains soft and tender.

Reheating: If you prefer a warm treat, pop the cookies in a microwave for 10-15 seconds to revive their delightful softness without compromising the frosting.

Make Ahead Options

These Carrot Cake Cookies are fantastic for meal prep enthusiasts! You can prepare the dough up to 24 hours in advance by mixing the wet and dry ingredients, then refrigerate it in an airtight container. The grated carrots can also be prepped ahead; ensure they are stored in the refrigerator with a paper towel to absorb moisture, which helps maintain their freshness. When you’re ready to bake, simply scoop the chilled dough onto a lined baking sheet and bake as directed. For a delightful finish, whip up the cream cheese frosting a day ahead and store it in the refrigerator. Just bring the frosting to room temperature before spreading it on the cookies to enjoy every bite fresh and delicious!

Expert Tips for Carrot Cake Cookies

  • Butter Temperature Matters: Make sure the butter is cooled before adding it to the mixture. This prevents the sugar from melting too much, which can alter the cookie’s texture.

  • Moisture Control: Squeeze out excess moisture from the grated carrots to avoid denser Carrot Cake Cookies. This simple step ensures they remain soft and tender.

  • Don’t Overmix: When combining the dry and wet ingredients, mix just until combined. Overmixing can lead to tough cookies; the goal is softness!

  • Timing is Key: Bake the cookies until they lightly bounce back when touched. Overbaking might result in hard cookies instead of the desired tender texture.

  • Freshness of Ingredients: Ensure your baking powder is fresh (less than 6 months old) for optimal rise and lightness in your cookies.

  • Frosting Freshness: For the best flavor, frost the cookies on the same day you bake them. Store in an airtight container to keep them fresh longer.

Carrot Cake Cookies Variations & Substitutions

Customize your Carrot Cake Cookies to suit your taste buds with these delightful and simple swaps!

  • Nutty Delight: Add chopped walnuts or pecans to the dough for a crunchy texture and nutty flavor that pairs perfectly with the soft cookies.
  • Gluten-Free Option: Use almond flour instead of all-purpose flour for a gluten-free treat. Just be sure to adjust other ingredients slightly for the best results.
  • Spicy Twist: Throw in an extra pinch of nutmeg along with the cinnamon for a delightful, warm spice that elevates the cookie’s flavor profile.
  • Zesty Frosting: Stir in orange zest to the cream cheese frosting for a refreshing citrus twist that brightens every bite.
  • Carrot & Pineapple Fusion: Incorporate drained crushed pineapple for extra moisture and a tropical flare; it makes for an excellent flavor combination!
  • Sweet Add-In: Mix in chocolate chips to the cookie dough for a decadent take on carrot cake. Chocolate and carrots work surprisingly well together!
  • Vegan Version: Substitute the eggs with flaxseed meal mixed with water and use a dairy-free cream cheese for the frosting, making these cookies suitable for vegan diets.
  • Fun Sprinkles: Top the frosted cookies with colored sprinkles for a fun, festive look, especially if you’re baking for a celebration like Easter.

Remember, there are endless possibilities to make these Carrot Cake Cookies your own. And if you’re looking for more delicious treats, you might also enjoy these delightful Honey Glazed Carrots or classic Pistachio Carrot Cake!

Carrot Cake Cookies Recipe FAQs

How do I select the best carrots for my cookies?
Absolutely! When choosing carrots, look for firm, crisp ones that are vibrant in color and free from dark spots or blemishes. Larger carrots may be tough, while smaller, baby carrots often have a sweeter flavor. For this recipe, finely grating and pressing out excess moisture will intensify their natural sweetness in your cookies.

How should I store my Carrot Cake Cookies?
For the best freshness, store frosted Carrot Cake Cookies in an airtight container in the fridge for up to 4 days. This ensures they stay soft and delicious. If you want to enjoy these cookies longer, consider freezing them!

Can I freeze Carrot Cake Cookies, and if so, how?
Very! To freeze your cookies, first chill them in the refrigerator until the frosting is set. Then layer them in an airtight container or freezer bag, ensuring they don’t stick together. They can be frozen for up to 3 months. Just remember to thaw them at room temperature—this usually takes about 30 minutes for those delightful soft bites.

What should I do if my cookies come out too dense?
No worries! If your cookies are denser than expected, it might be due to not pressing out enough moisture from the grated carrots or overmixing the dough. Ensure you squeeze out the carrots well next time, and mix just until combined to keep them tender and soft. A gentle touch is key!

Are there any allergies I should be aware of?
Certainly! These Carrot Cake Cookies contain common allergens like eggs and dairy (from the butter and cream cheese). If preparing for someone with allergies, feel free to substitute with egg replacers and dairy-free cream cheese. Always check ingredient labels if you’re cooking for someone with specific dietary needs.

Can I add variations to my Carrot Cake Cookies?
The more the merrier! Feel free to customize these cookies by adding nuts like walnuts or pecans for crunch, or a splash of orange zest for a refreshing twist. Each variation adds a unique touch while keeping that beloved carrot cake flavor front and center!

Carrot Cake Cookies

Delicious Carrot Cake Cookies with Cream Cheese Bliss

Discover the joy of Carrot Cake Cookies, a delightful dessert perfect for any occasion.
Prep Time 20 minutes
Cook Time 10 minutes
Cooling Time 5 minutes
Total Time 35 minutes
Servings: 24 cookies
Course: Dessert
Cuisine: American
Calories: 150

Ingredients
  

Cookies Ingredients
  • 1 cup Unsalted Butter Melted and cooled
  • 1 cup Granulated Sugar
  • 2 large Eggs
  • 1 cup Carrot Purée Use baby food or homemade
  • 1/2 cup Neutral Oil Canola or Coconut
  • 40 grams Finely Grated Carrots Press out excess moisture
  • 1 teaspoon Vanilla Extract Opt for pure vanilla
  • 2 cups Flour
  • 1 teaspoon Baking Soda
  • 1 teaspoon Baking Powder Check freshness
  • 2 teaspoons Cinnamon
  • 1/4 teaspoon Salt
Cream Cheese Frosting
  • 8 oz Cream Cheese Full-fat
  • 2 cups Powdered Sugar

Equipment

  • Mixing Bowl
  • Baking pan
  • Saucepan
  • Whisk
  • Cookie Scoop
  • Spatula

Method
 

Cookie Preparation
  1. Preheat your oven to 350°F (175°C) and line a half-sheet pan with parchment paper.
  2. In a saucepan over medium heat, melt the unsalted butter until liquid. Let cool for about 15 minutes.
  3. Grate fresh carrots, then press out any excess moisture using paper towels.
  4. In a large mixing bowl, combine cooled melted butter, granulated sugar, eggs, neutral oil, carrot purée, grated carrots, and vanilla extract. Whisk until thoroughly blended.
  5. In a separate bowl, whisk together flour, baking soda, baking powder, cinnamon, and salt. Gradually incorporate into the wet ingredients.
  6. Using a 2-tablespoon cookie scoop, drop cookie dough onto the prepared baking pan, spacing about 2 inches apart.
  7. Bake for about 8-10 minutes or until they bounce back lightly when touched.
  8. Let cookies cool on the baking sheet for 5 minutes before transferring to a cooling rack.
Frosting Preparation
  1. In a medium mixing bowl, beat the cream cheese and softened butter until smooth and creamy.
  2. Gradually add vanilla extract and powdered sugar, mixing until thick and creamy.
  3. Once cookies are cooled, spread frosting on top using a spatula or piping bag.

Nutrition

Serving: 1cookieCalories: 150kcalCarbohydrates: 20gProtein: 2gFat: 7gSaturated Fat: 4gPolyunsaturated Fat: 0.5gMonounsaturated Fat: 2.5gCholesterol: 30mgSodium: 90mgPotassium: 50mgFiber: 0.5gSugar: 10gVitamin A: 500IUVitamin C: 1mgCalcium: 20mgIron: 0.5mg

Notes

Store frosted cookies in an airtight container for up to 4 days or freeze for up to 3 months.

Tried this recipe?

Let us know how it was!

Fluffy Peanut Butter Muffins for a Healthy, Tasty Treat

As I stand by the kitchen counter, the fragrant scent of creamy peanut butter fills the air, gently urging me to whip up a batch of Fluffy Peanut Butter Muffins. These delightful treats are not only quick and easy to prepare, but they also blend perfectly into your busy mornings or serve as a wholesome snack any time of day. Rich in flavor yet health-conscious, they boast a soft and moist texture that makes every bite feel indulgent, while still being a smart choice for breakfast or dessert. Trust me; your loved ones will be begging for seconds! Curious about how to make these irresistible muffins? Let’s dive in!

Why are Peanut Butter Muffins a Must-Try?

Irresistible Taste: The combination of creamy peanut butter and real maple syrup creates a flavor explosion that feels like a warm hug in every bite.

Quick & Easy: With just a handful of pantry staples, you can whip up these muffins in no time, making them perfect for busy mornings or unexpected snack attacks.

Healthy Indulgence: Made with white whole wheat flour and natural sweeteners, these muffins are a guilt-free treat that doesn’t sacrifice flavor.

Versatile Delight: Add in dark chocolate chips or swap applesauce for mashed bananas to customize your creation; the options are endless! For more delightful breakfast ideas, check out these Buttermilk Pancakes or Honey Butter Brioche.

Crowd-Pleaser: These muffins are perfect for sharing at brunches or family gatherings, ensuring you’ll be the star of the kitchen with minimal effort!

Peanut Butter Muffin Ingredients

For the Batter

  • White Whole Wheat Flour – Gives structure and a nutritious base; you can substitute half with all-purpose flour for a lighter texture.
  • Baking Soda – Essential for creating that fluffy lift in your peanut butter muffins.
  • Baking Powder – Works alongside baking soda to enhance the rise for a lighter muffin.
  • Fine Sea Salt – Brings out the flavor, balancing the sweetness perfectly.
  • Ground Cinnamon – Adds warmth and spice, elevating the overall taste.
  • Creamy Peanut Butter – This is the star ingredient, so opt for natural unsalted for the best flavor.
  • Pure Maple Syrup – A natural sweetener that also lends moisture; honey can be a delightful alternative.
  • Unsweetened Applesauce – Contributes moisture without added fat; yogurt can be used as an equal substitute.
  • Large Egg – Acts as a binder for all the ingredients; for a vegan option, replace with a flaxseed egg.
  • Vanilla Extract – Enhances the overall flavor subtly, blending perfectly with the peanut butter.
  • Unsweetened Non-Dairy Milk – Offers moisture and can be adjusted for your desired consistency.

Step‑by‑Step Instructions for Peanut Butter Muffins

Step 1: Preheat and Prepare
Start by preheating your oven to 375ºF (190ºC). While the oven warms, grab a muffin pan and either grease it well or line it with silicone muffin liners. This will ensure your fluffy Peanut Butter Muffins release easily after baking, preventing any sticky situations.

Step 2: Combine Dry Ingredients
In a medium mixing bowl, whisk together the white whole wheat flour, baking soda, baking powder, fine sea salt, and ground cinnamon. This step is crucial for evenly distributing the leavening agents. As you combine, take note of the dusty texture and aroma of the spices—you want to create a well-mixed foundation for your muffins.

Step 3: Mix Wet Ingredients
In a larger bowl, whisk together the creamy peanut butter and pure maple syrup until they form a smooth, cohesive mixture. Next, add the unsweetened applesauce, large egg, and vanilla extract, continuing to whisk until everything is fully blended and invitingly creamy. This vibrant mixture embodies the delicious essence of your Peanut Butter Muffins.

Step 4: Combine Mixtures
Gently add the dry mixture to your wet ingredients, stirring with a spatula until just combined. Be careful not to overmix—the goal is a lumpy batter that will create tender muffins. Slowly pour in the unsweetened non-dairy milk, folding it in until the batter is just mixed, but still a bit rustic in appearance.

Step 5: Fill and Bake
Spoon the batter evenly into your prepared muffin cups, filling each about two-thirds full. If desired, sprinkle some crushed peanuts on top for texture. Place the muffin pan in the preheated oven and bake for 15-20 minutes. The muffins are ready when they turn lightly golden brown on the tops and a toothpick inserted comes out clean.

Step 6: Cool and Serve
Once baked, remove the Peanut Butter Muffins from the oven and allow them to cool in the pan for about 5 minutes. Then, transfer them to a wire rack to cool completely. The delightful aroma will fill your kitchen, making them hard to resist! Serve at room temperature or slightly warm for an extra comforting treat.

Peanut Butter Muffins Customizations

Feel free to make these delightful Peanut Butter Muffins your own with these tasty twists and substitutions!

  • Dairy-Free: Use a plant-based milk, such as almond or oat milk, for a completely dairy-free treat.
  • Gluten-Free: Substitute white whole wheat flour with gluten-free all-purpose flour to cater to gluten-sensitive friends. Ensure that your baking powder is also gluten-free.
  • Lower Sugar: Replace maple syrup with a sugar-free sweetener like monk fruit for a reduced-sugar version that maintains sweetness.
  • Nutty Variety: Try almond or sunflower butter instead of peanut butter for a unique flavor profile. These swaps will add richness and flair to your muffins.
  • Fruit-Infused: Incorporate fresh or frozen blueberries or raspberries into the batter for a fruity surprise in every bite; they pair wonderfully with peanut butter!
  • Chocolate Delight: Add dark chocolate chips to the batter for a sweet, indulgent twist. The richness of chocolate complements the nutty flavor beautifully.
  • Spice it Up: Elevate the flavor with a pinch of nutmeg or a dash of pumpkin spice for a warm and cozy aromatic experience.
  • Add Crunch: Top your muffins with chopped nuts or granola before baking for a delightful crunchy texture on top. Children and adults alike will appreciate this fun twist!

Don’t forget to explore more delightful treats, such as these Honey Butter Brioche or our tasty Bakery-Style Blueberry Muffins for even more kitchen excitement!

What to Serve with Fluffy Peanut Butter Muffins?

The perfect accompaniments can elevate your muffins into a delightful meal or snack experience.

  • Fresh Berries: Their tartness balances the sweet richness of the muffins, adding a burst of flavor and freshness. Serve alongside a handful of strawberries or blueberries for a colorful plate.

  • Greek Yogurt: A dollop of creamy Greek yogurt pairs beautifully, bringing tanginess and added protein. Top it with a sprinkle of granola for a satisfying crunch and complete breakfast.

  • Nutty Granola: Crunchy, nutty granola can add texture and a caffeine kick when served with your muffins. It complements the flavors while providing a wholesome crunch that everyone will love.

  • Smoothie Bowl: Whipping up a refreshing smoothie bowl can create a delightful contrast. Blend spinach, banana, and almond milk for a nourishing drink that rounds out your meal beautifully.

  • Honey Drizzle: A light drizzle of honey over your muffins enhances the sweetness and adds a touch of floral flavor. It’s a simple yet effective way to make your muffins feel extra special.

  • Herbal Tea: Pairing your muffins with a soothing cup of herbal tea offers a serene moment. The warm, fragrant notes of chamomile or mint bring a calmness to your snack time.

  • Chocolate Milk: For a nostalgic twist, serve a glass of chocolate milk alongside. The creamy chocolate undertones will create an irresistibly indulgent experience with your muffins.

Make Ahead Options

These Fluffy Peanut Butter Muffins are a dream for meal prep enthusiasts! You can prepare the batter and store it in the refrigerator up to 24 hours in advance, which allows the flavors to meld beautifully. To maintain their quality, cover the bowl tightly with plastic wrap. When you’re ready to bake, simply preheat the oven and spoon the batter into muffin cups. If you prefer, you can also bake a batch ahead of time and freeze the muffins individually for up to 3 months. Just thaw them in the refrigerator overnight or warm them briefly in the microwave before serving for the same delightful aroma and taste.

Expert Tips for Peanut Butter Muffins

Choose Natural Peanut Butter: Opt for natural peanut butter without additives for a smoother texture and authentic flavor in your muffins.

Avoid Overmixing: Mixing the batter too much can result in tough muffins. Stir gently until just combined for light and fluffy treats.

Temperature Adjustment: For an extra fluffy muffin, start baking at 425°F for the first 5 minutes, then lower to 350°F for the remainder of the time.

Taste Test Variations: Experiment with crunchy peanut butter or chocolate chips to find your favorite flavor combination—there’re no wrong choices!

Proper Storage: Keep your muffins in an airtight container at room temperature for up to 5 days to maintain their freshness and moisture.

How to Store and Freeze Peanut Butter Muffins

Room Temperature: Keep your muffins in an airtight container for up to 5 days to maintain their soft and moist texture while avoiding any staleness.

Fridge: If you want them to last a bit longer, store them in the refrigerator where they can be kept for up to 1 week without losing flavor.

Freezer: For extended storage, wrap the cooled muffins individually in plastic wrap and place them in a freezer bag; they can stay fresh for up to 3 months. Thaw in the fridge or at room temperature before enjoying.

Reheating: To enjoy warm muffins, pop them in the microwave for 10-15 seconds or toast them lightly for a delightful treat that tastes fresh!

Peanut Butter Muffins Recipe FAQs

What type of peanut butter should I use for these muffins?
Absolutely! For the best texture and flavor, I recommend using natural creamy peanut butter without added ingredients. This will ensure a smooth batter and that rich peanut butter taste that makes these muffins so irresistible.

How do I tell when my muffins are baked properly?
Very good question! To check for doneness, insert a toothpick into the center of a muffin; if it comes out clean or with just a few crumbs attached, they’re ready. You’ll also want to look for a lightly golden brown top, which is a great visual cue that they are perfectly baked.

How should I store leftover muffins?
Keep your muffins in an airtight container at room temperature for up to 5 days. If you need them to last longer, refrigerating them can extend their freshness for up to 1 week. Just make sure they are wrapped tightly or placed in a container to maintain moisture.

Can I freeze the muffins for later?
Absolutely! To freeze your Peanut Butter Muffins, first allow them to cool completely. Then, wrap each muffin individually in plastic wrap and place them in a freezer-safe bag. They can last up to 3 months in the freezer. When you’re ready to enjoy them, simply thaw in the fridge overnight or at room temperature for a few hours.

Are there any allergenic ingredients I should be aware of?
Yes, these muffins contain peanuts and eggs, which are common allergens. If you’re making them for someone with allergies, consider using a flaxseed egg as a substitute and ensure the peanut butter used is free from cross-contamination with other nuts. Additionally, check to see if the baking powder used is gluten-free if that’s a concern.

What if my muffins didn’t rise?
If your muffins didn’t rise as expected, it might be due to overmixing the batter or using old leavening agents. I recommend gently folding the ingredients together only until just combined and checking the expiration dates on your baking soda and baking powder. This will help you achieve those fluffy muffins that everyone loves!

Peanut Butter Muffins

Fluffy Peanut Butter Muffins for a Healthy, Tasty Treat

Indulge in Fluffy Peanut Butter Muffins, a healthy and delightful treat perfect for breakfast or snacks.
Prep Time 10 minutes
Cook Time 20 minutes
Total Time 30 minutes
Servings: 12 muffins
Course: Breakfast
Cuisine: American
Calories: 180

Ingredients
  

For the Batter
  • 1.5 cups white whole wheat flour Can substitute half with all-purpose flour.
  • 1 teaspoon baking soda
  • 1 teaspoon baking powder
  • 0.5 teaspoon fine sea salt
  • 1 teaspoon ground cinnamon
  • 1 cup creamy peanut butter Opt for natural unsalted.
  • 0.5 cup pure maple syrup Honey can be a substitute.
  • 0.5 cup unsweetened applesauce Can use yogurt as a substitute.
  • 1 large egg Flaxseed egg can be a vegan substitute.
  • 1 teaspoon vanilla extract
  • 0.5 cup unsweetened non-dairy milk

Equipment

  • muffin pan
  • Mixing bowls
  • Whisk
  • Spatula

Method
 

Step‑by‑Step Instructions for Peanut Butter Muffins
  1. Preheat your oven to 375ºF (190ºC). Grease a muffin pan or line it with silicone muffin liners.
  2. In a medium mixing bowl, whisk together the white whole wheat flour, baking soda, baking powder, fine sea salt, and ground cinnamon.
  3. In a larger bowl, whisk together the creamy peanut butter and pure maple syrup until smooth. Add the unsweetened applesauce, large egg, and vanilla extract, whisking until fully blended.
  4. Gently add the dry mixture to your wet ingredients, stirring with a spatula until just combined. Pour in the unsweetened non-dairy milk, folding it in until mixed but still lumpy.
  5. Spoon the batter into prepared muffin cups, filling each about two-thirds full. Bake for 15-20 minutes until lightly golden and a toothpick comes out clean.
  6. Allow muffins to cool in the pan for 5 minutes before transferring to a wire rack. Serve warm or at room temperature.

Nutrition

Serving: 1muffinCalories: 180kcalCarbohydrates: 22gProtein: 5gFat: 8gSaturated Fat: 1.5gPolyunsaturated Fat: 3gMonounsaturated Fat: 4gCholesterol: 30mgSodium: 200mgPotassium: 180mgFiber: 2gSugar: 5gVitamin A: 200IUCalcium: 30mgIron: 1mg

Notes

For optimal results, avoid overmixing and consider using natural peanut butter without additives for the best flavor.

Tried this recipe?

Let us know how it was!