Thanksgiving Turkey Recipe for Juicy, Flavorful Perfection

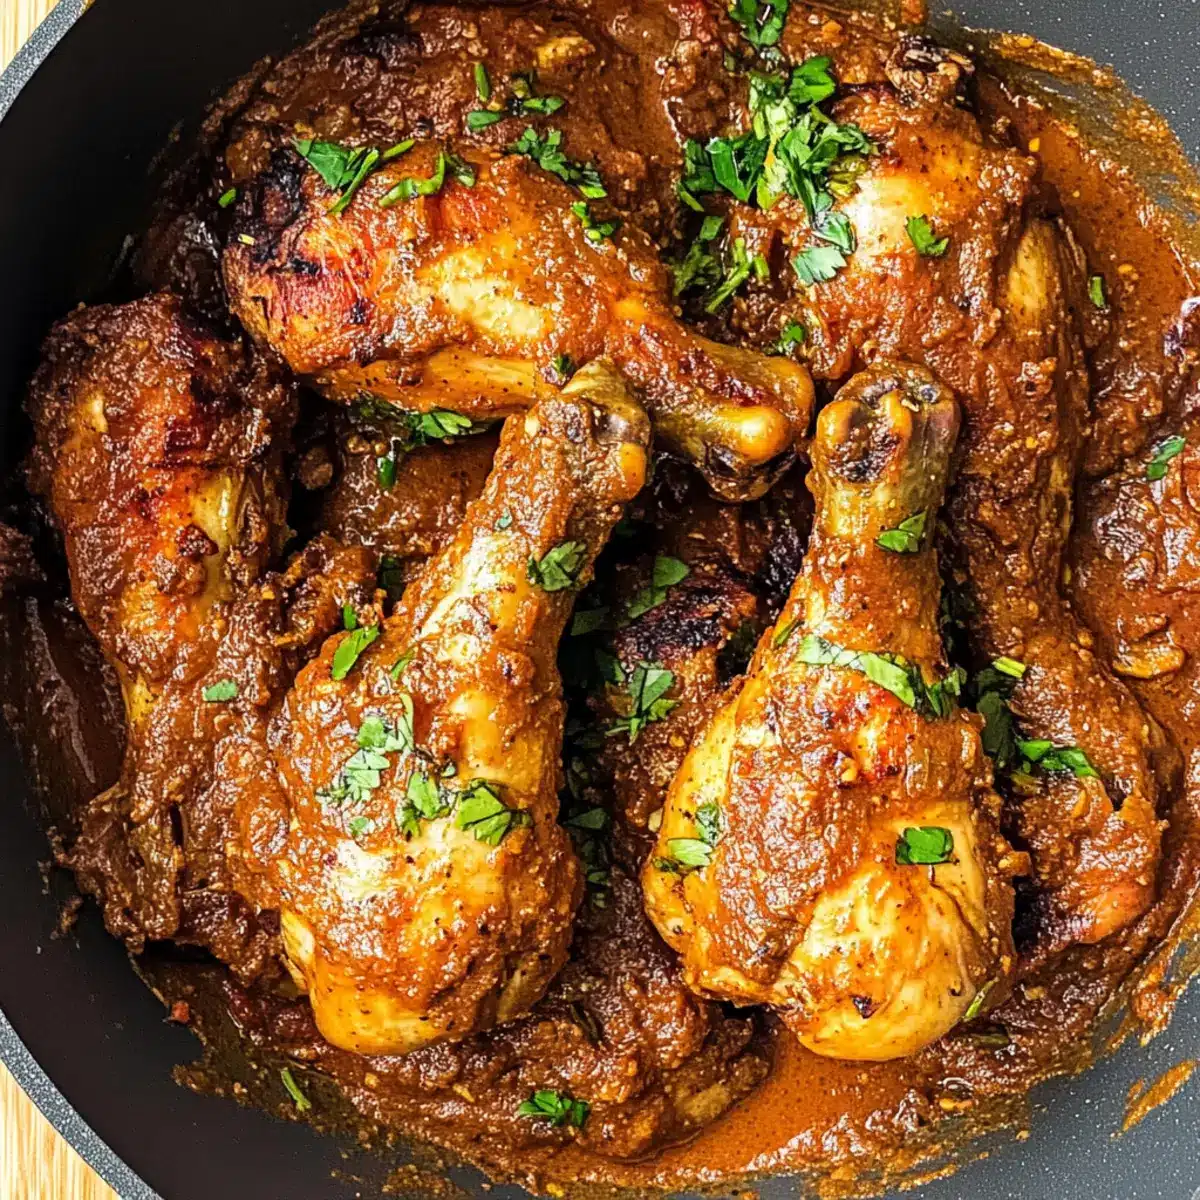
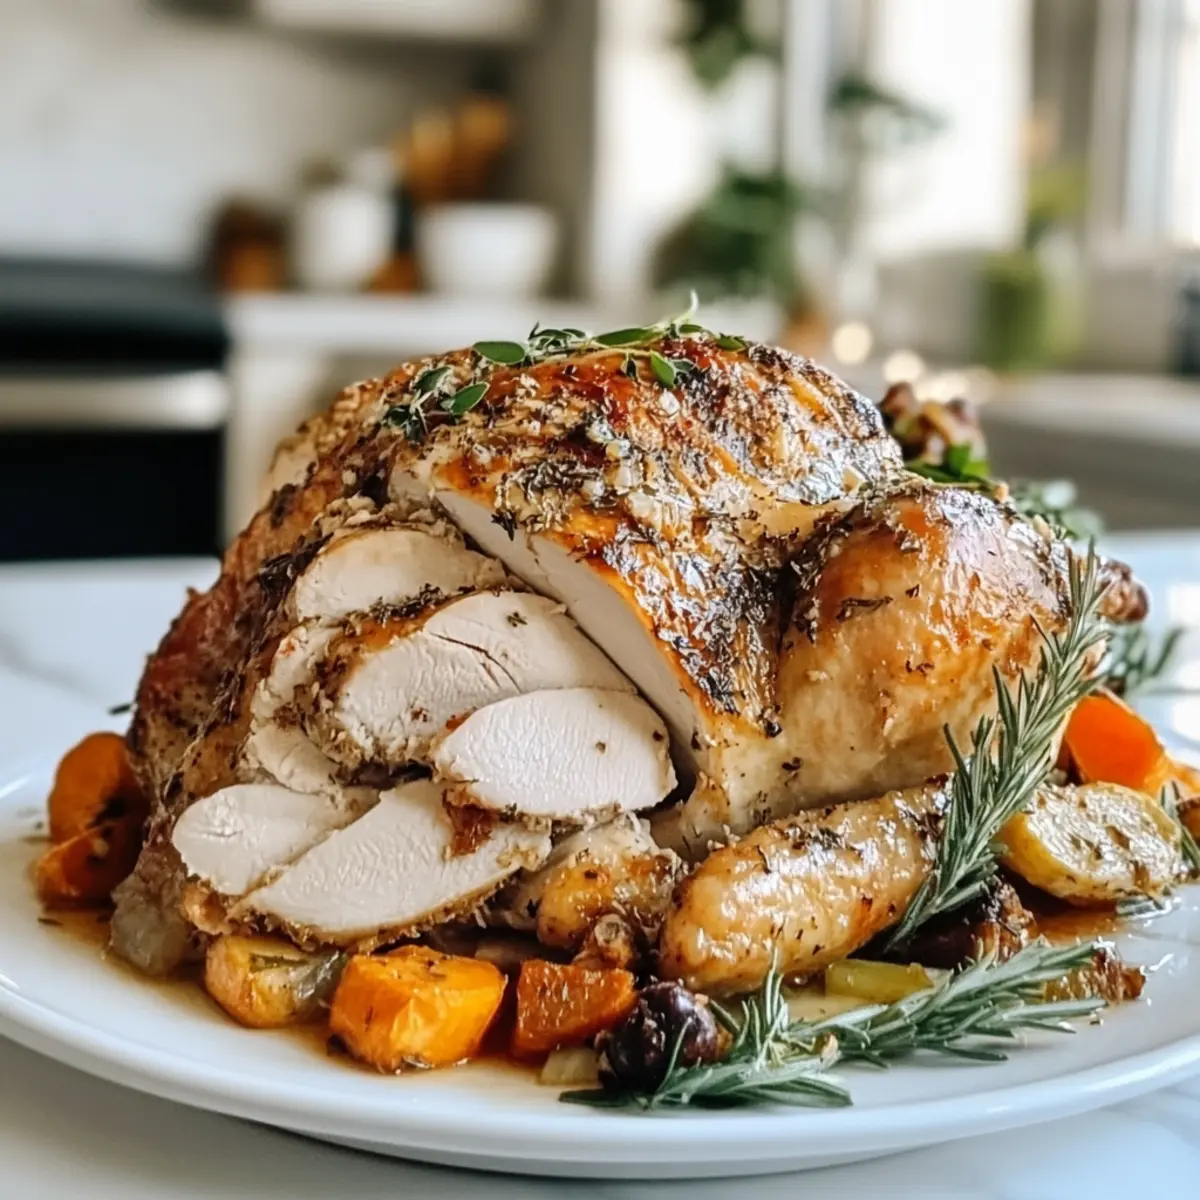
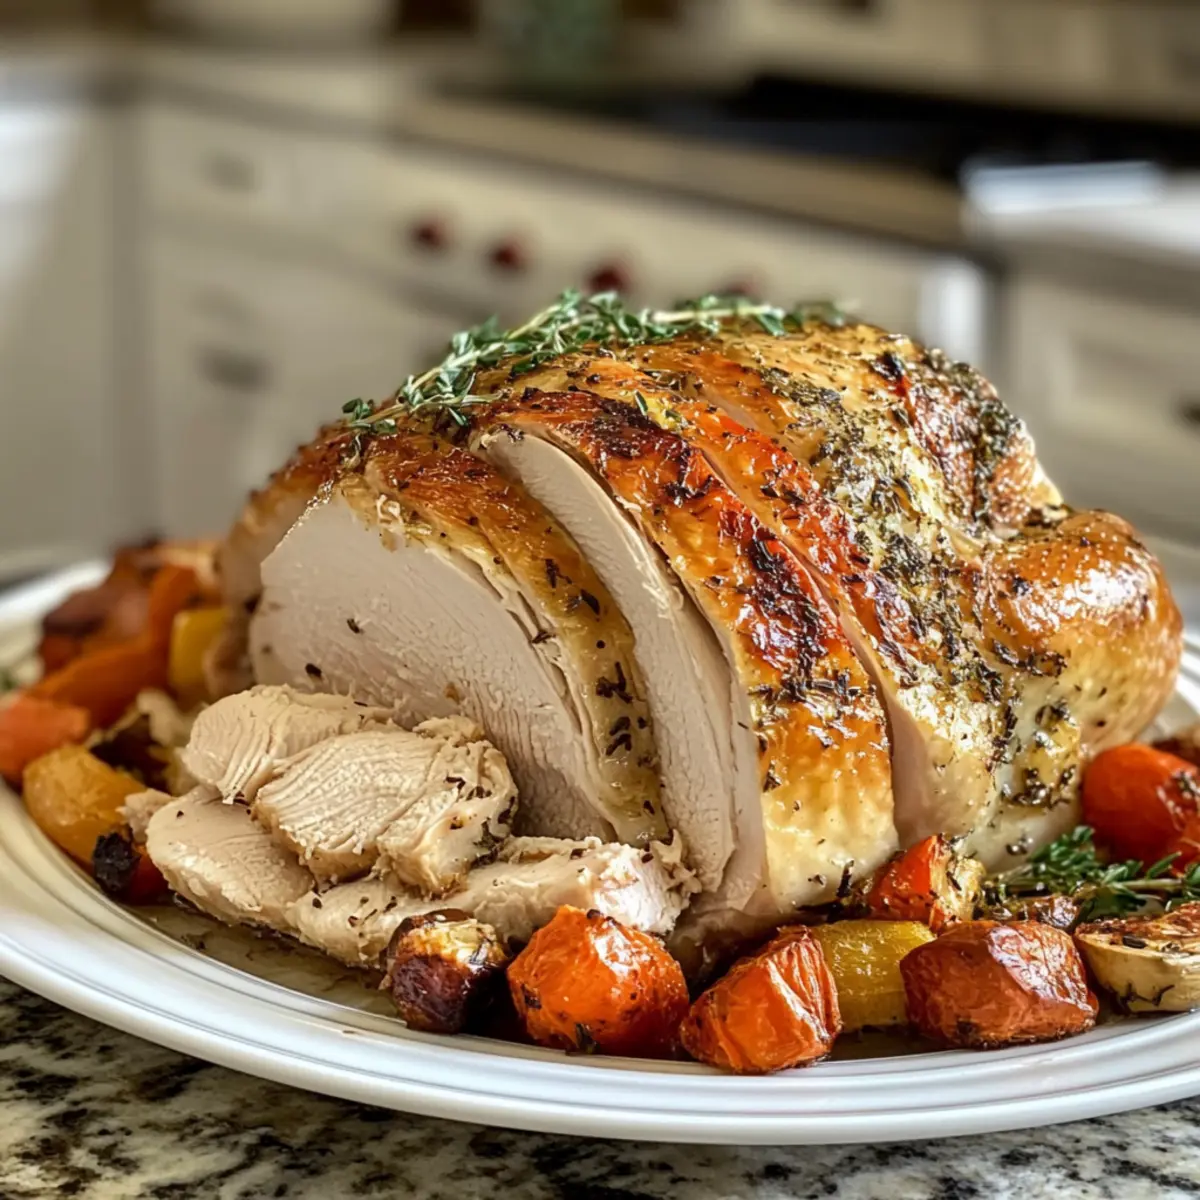
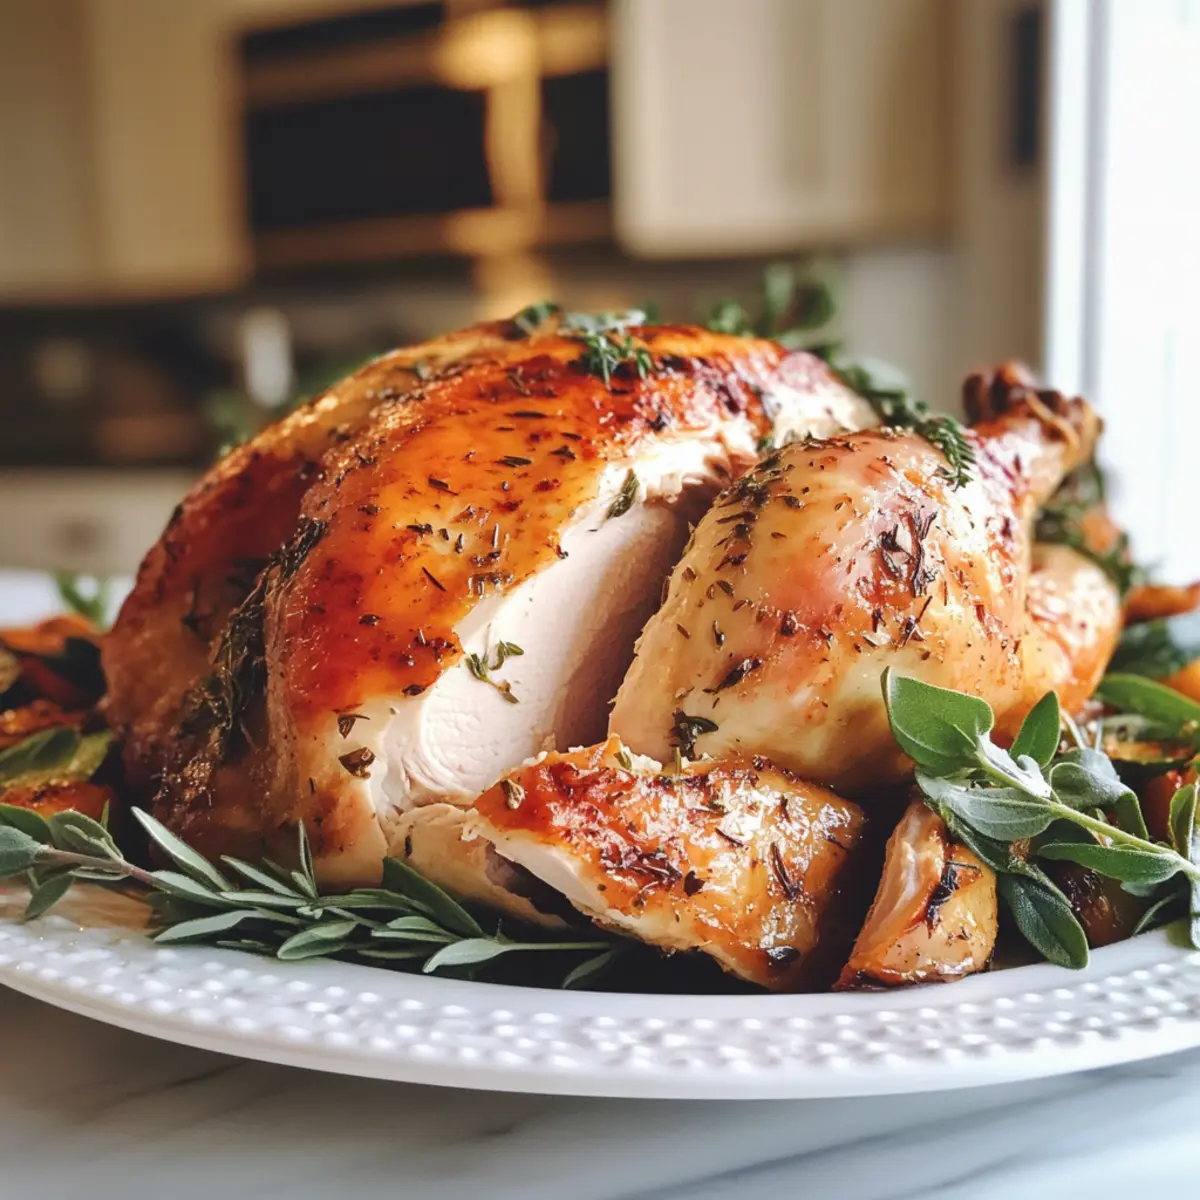
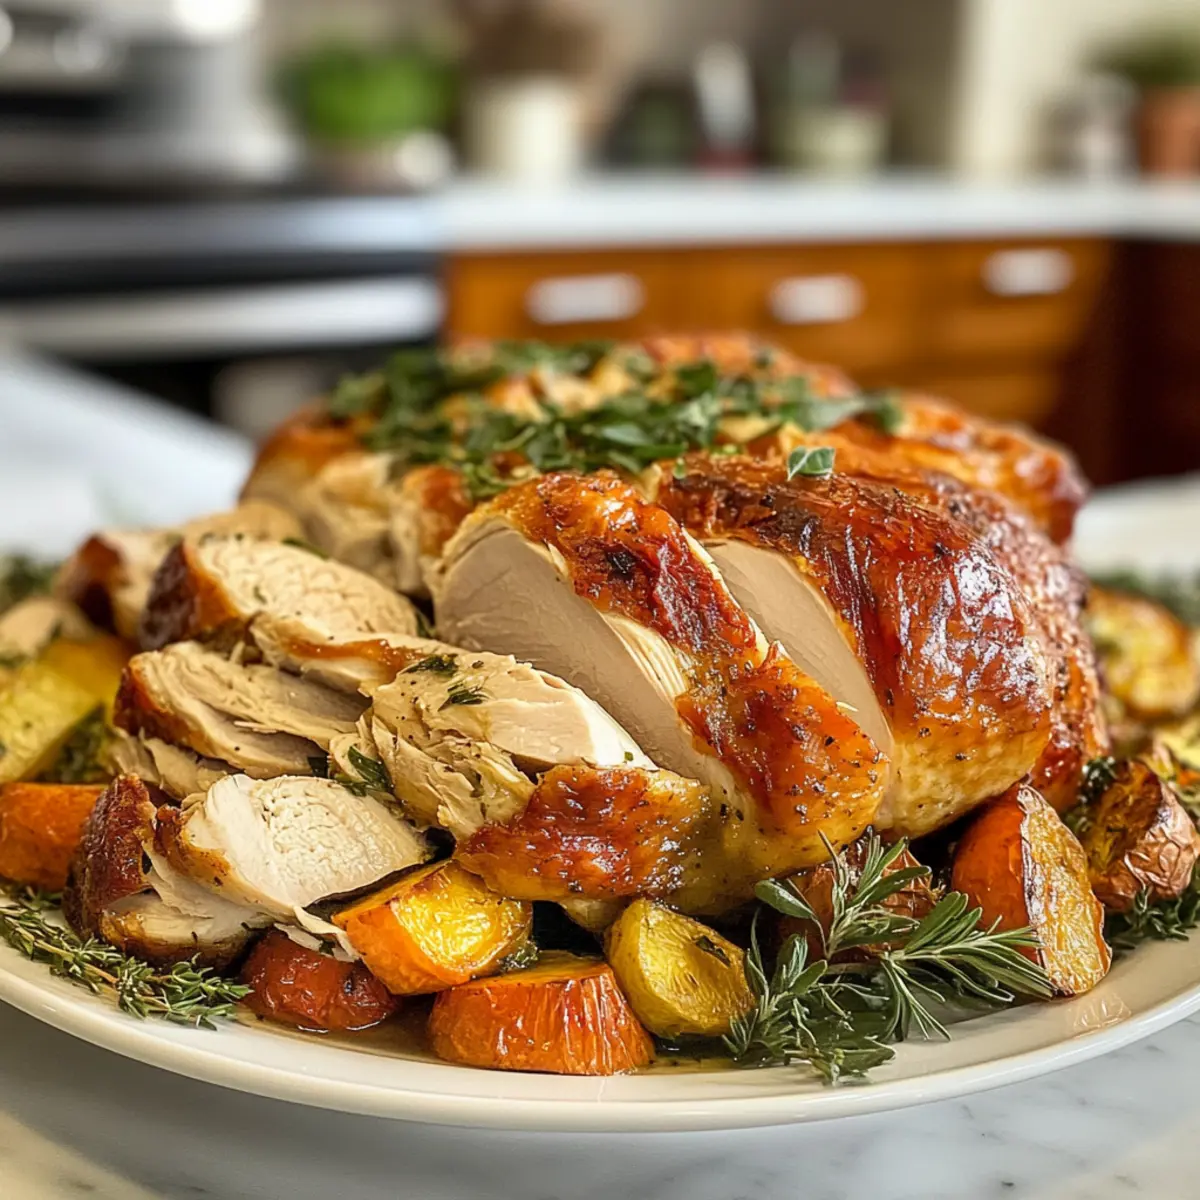
The aroma of a turkey roasting in the oven is an instant holiday spirit lifter, and this Juicy Thanksgiving Turkey Recipe is the ultimate showstopper for any festive gathering. Forget the fuss of brining or complicated steps—this foolproof method guarantees a golden, succulent turkey that will impress your guests. What’s even better? Not only will you savor every juicy bite, but you’ll also find that it’s perfect for any celebratory meal, from Thanksgiving to Christmas dinner. The combination of simple, readily available ingredients and easy instructions makes this a delightful option for both seasoned chefs and beginners alike. Are you ready to elevate your holiday feast with a turkey that will have everyone coming back for seconds?

Why is this turkey recipe a must-try?

Simplicity: This recipe eliminates the stress of intricate techniques—it’s straightforward and requires no brining, making it ideal for busy cooks.

Flavor Explosion: Juicy turkey meets aromatic herbs like rosemary, thyme, and garlic. Every bite is infused with rich and zesty flavors that will tantalize your taste buds.

Perfectly Crispy Skin: Achieve that golden-brown, crispy exterior without hassle, thanks to the herb-infused compound butter. Your turkey will be the star of the table!

Crowd-Pleaser: Whether it’s Thanksgiving or a festive gathering, this turkey will impress your guests and leave them asking for your secret.

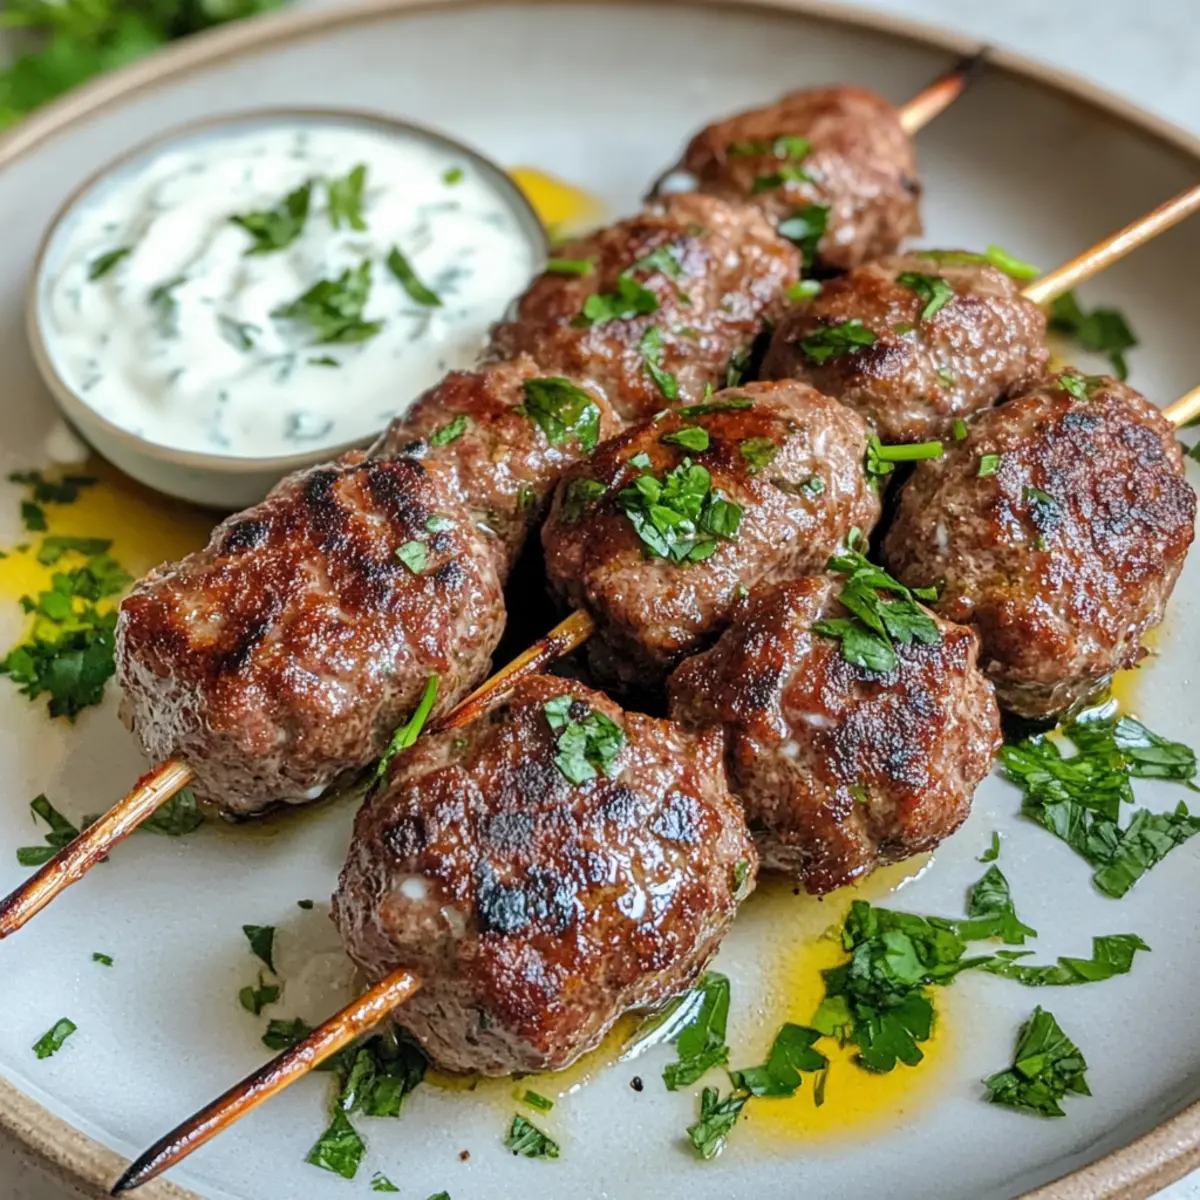
Versatile: Enjoy this turkey not just for holidays but as a fantastic meal option for any celebration or cozy family dinner! Pair it effortlessly with favorites like Savory Turkey Patties or Hobo Casserole for a varied feast.

Thanksgiving Turkey Recipe Ingredients

• Discover the essential components for a juicy Thanksgiving turkey!

For the Turkey

  • Turkey (12-18 pounds) – Make sure it’s fully thawed for even cooking.
  • Kosher Salt – Essential for seasoning and enhancing flavor; sea salt can also work.

For the Aromatics

  • Onion – Imparts a lovely aroma; swap with garlic for a stronger flavor.
  • Lemon – Brightens the overall taste; orange can be used for a sweeter twist.

For the Herb Butter

  • Unsalted Butter (¾ cup, room temperature) – This adds richness and moisture to your turkey; clarified butter can enhance flavor.
  • Garlic (6 cloves, minced) – Infuses the butter with robust flavor; adjust to your taste for a milder effect.
  • Fresh Rosemary – Imparts classic holiday flavor; dried can be used but cut the amount in half.
  • Fresh Thyme – Adds depth to the flavor; dried can also be substituted with a reduction.
  • Sage – A key herb for holiday cooking that enhances the turkey’s taste profile.

Optional Vegetables

  • Onion, Celery, Carrots – Elevate flavor and moisture during roasting; feel free to swap based on availability.

With these ingredients in hand, you’re set to create a Thanksgiving turkey that will be the highlight of your holiday feast. Enjoy the process and the delicious results that are sure to impress!

Step‑by‑Step Instructions for Juicy Thanksgiving Turkey Recipe

Step 1: Bring Turkey to Room Temperature
Remove the fully thawed turkey from the refrigerator and let it sit at room temperature for about 1 hour. This ensures even cooking throughout the turkey. Remember to remove any giblets from the cavity during this time. A properly rested turkey will help achieve the juicy finish you desire.

Step 2: Prepare the Oven and Stuff the Cavity
Preheat your oven to 325°F (160°C). While the oven heats, season the inside of the turkey with kosher salt and freshly cracked black pepper. Stuff the cavity with quartered onion, lemon, and a handful of fresh herbs like rosemary and thyme, creating layers of flavor that will permeate the turkey as it roasts.

Step 3: Make the Herb Butter
In a mixing bowl, combine softened unsalted butter, minced garlic, kosher salt, black pepper, and finely chopped fresh rosemary and thyme. Mix until well blended into a paste. This herb butter will not only enhance the flavor of your Juicy Thanksgiving Turkey but also keep it moist throughout the roasting process.

Step 4: Apply the Herb Butter
Gently loosen the skin of the turkey by sliding your fingers underneath it. Take about one-third of the herb butter and spread it evenly underneath the skin over the breast meat. Rub the remaining butter all over the outside of the turkey, ensuring it’s well coated for an irresistible golden-brown color and crispy texture.

Step 5: Roast the Turkey
Place the turkey breast side up on a rack in a large roasting pan. If using, surround it with chopped onions, celery, and carrots. Roast in the preheated oven, allowing approximately 15 minutes per pound for cooking time. Use a meat thermometer to check for doneness; the internal temperature should read between 158°F to 160°F. Cover with foil if it begins to brown too quickly.

Step 6: Let It Rest
Once the internal temperature is reached, carefully remove the turkey from the oven and transfer it to a cutting board. Loosely cover it with aluminum foil and allow it to rest for 30 minutes. This resting period allows juices to redistribute, ensuring each slice of your Thanksgiving turkey is tender and juicy.

Step 7: Carve and Serve
After resting, begin carving the turkey, starting with the legs and then slicing the breast meat. Serve the slices on a platter, making sure to reserve the flavorful drippings at the bottom of the roasting pan for a delicious gravy. A well-carved Juicy Thanksgiving Turkey will surely be the highlight of your holiday meal.

How to Store and Freeze Thanksgiving Turkey

Fridge: Store leftover turkey in an airtight container or wrap it tightly in aluminum foil; it will keep fresh for up to 4 days.

Freezer: For longer storage, wrap turkey portions in plastic wrap and place in a freezer bag; it can be frozen for up to 4 months without losing flavor.

Reheating: To reheat, thaw turkey overnight in the fridge, then warm in the oven at 325°F (160°C) until heated through, ensuring it remains juicy and delicious.

Leftover Dishes: Incorporate leftover turkey into soups, sandwiches, or casseroles for delightful meals that’ll keep the festive spirit alive!

Thanksgiving Turkey Recipe Variations

Feel free to get creative with your Thanksgiving turkey, exploring diverse flavors to make it uniquely yours!

  • Citrus Twist: Replace lemon with orange for a sweeter, bright flavor that enhances the turkey’s profile. It’s a subtle swap yet impactful.

  • Garlic Boost: Add roasted garlic to the herb butter to elevate its flavor. Roasting mellows its pungency, giving a sweet, creamy taste.

  • Heat it Up: Incorporate red pepper flakes or a dash of cayenne in your herb butter for a delightful kick. It’s a fantastic way to introduce a bit of warmth and depth.

  • Herb Medley: Swap out the rosemary and thyme for fresh basil and parsley for a fresh, summery herb twist. This brightens the dish and makes for a delicious variation.

  • Savory Stuffing: Instead of using vegetables under the turkey, consider placing a savory stuffing mix that complements your turkey. It absorbs juicy goodness while adding texture and flavor.

  • Apple Cider Glaze: Drizzle apple cider vinegar over the turkey during the last 30 minutes of cooking for a sweet-tart glaze. Consistency adds an exciting twist on classic flavors.

  • Pineapple Infusion: For a tropical take, stuff your turkey with pineapple chunks alongside the onion and herbs. This will add a hint of sweetness and juiciness.

  • Smoky Flavor: For a barbecue-style turkey, mix in a tablespoon of smoked paprika into your herb butter. It adds an irresistible smoky note that sets your turkey apart, reminiscent of summer barbecues.

Enhancing your turkey with these twists not only adds flavor but also keeps the holiday meal exciting! Consider serving it alongside Savory Ground Turkey dishes for a full feast your guests will love.

Expert Tips for Juicy Thanksgiving Turkey

  • Thaw Properly: Make sure your turkey is fully thawed before cooking to avoid areas that remain undercooked. A good rule of thumb is that it takes about 24 hours for every 5 pounds in the fridge.

  • Minimal Washing Needed: Avoid rinsing the turkey; it’s not necessary and can spread bacteria. Cooking at the right temperature will ensure it’s safely cooked through.

  • Rest for Juiciness: Allow your turkey to rest for at least 30 minutes after roasting. This step is crucial for redistributing the juices, leading to a more succulent turkey.

  • Use a Thermometer: For a perfectly cooked turkey, use a meat thermometer. When it reads between 158°F and 160°F in the thickest part of the breast, your Thanksgiving turkey is ready!

  • Avoid Stuffing Inside: For even cooking, cook stuffing separately rather than inside the turkey. This ensures your turkey cooks through completely and helps maintain its juiciness.

  • Customize Flavor: Feel free to experiment with different herb blends in your compound butter to personalize your juicy Thanksgiving turkey. A mix of sage and thyme can add a delightful twist!

What to Serve with Juicy Thanksgiving Turkey?

The aroma of your golden-brown turkey invites the senses, and the perfect sides can elevate your holiday table to unforgettable heights.

  • Creamy Mashed Potatoes: The velvety texture and buttery flavor of mashed potatoes balance the turkey’s savory richness, making them a classic pairing.
  • Garlic Roasted Brussels Sprouts: These crispy sprouts add a delightful crunch and earthy flavor, enhancing your meal’s overall taste and presentation.
  • Sweet Potato Casserole: Topped with a crunchy pecan streusel, this dish brings a sweet contrast to the savory turkey while adding a festive touch.
  • Homemade Cranberry Sauce: The bright acidity of fresh cranberry sauce cuts through the richness of the turkey, providing a refreshing burst of flavor with each bite.
  • Stuffing with Sage and Sausage: This traditional side complements the turkey perfectly by soaking up juices and adding its own savory depth to the feast.
  • Green Bean Almondine: The crisp green beans, enhanced by toasty almonds and a hint of lemon, add a vibrant pop that lightens your holiday spread.
  • Mulled Apple Cider: A warm and spiced drink rounds out the meal beautifully, offering comforting notes that harmonize with the festive flavors of your turkey.
  • Pumpkin Pie: To finish the meal on a sweet note, this iconic dessert delivers holiday flavors in every slice, making it the perfect ending.

With these delightful pairings, your Thanksgiving dinner not only centers around the turkey but becomes a feast for the senses that your loved ones will cherish.

Make Ahead Options

These Juicy Thanksgiving Turkey preparations are perfect for busy cooks looking to save time during the holiday hustle! You can prepare the herb butter and stuff the turkey cavity up to 24 hours in advance. Simply mix the softened butter with the garlic and herbs, then refrigerate it until you’re ready to cook. For maintaining quality, store the turkey covered in the fridge, ensuring it’s well-seasoned to enhance flavors. On the day you plan to serve, bring the turkey to room temperature for about an hour before roasting. Then, just apply the herb butter and roast according to the instructions for a juicy Thanksgiving Turkey that tastes fresh out of the oven!

Thanksgiving Turkey Recipe FAQs

What should I look for when selecting a turkey?
Absolutely! When selecting a turkey, look for a fresh, blemish-free bird with a pleasant smell. If buying frozen, ensure it’s solid without any ice crystals, indicating that it hasn’t been thawed and refrozen. Choose a size based on your guest list—about 1 to 1.5 pounds per person is a good rule.

How should I store leftover turkey?
Leftover turkey can be stored in the refrigerator for up to 4 days. Place it in an airtight container or wrap it tightly in aluminum foil to keep moisture locked in and prevent it from drying out. For longer storage, wrap the turkey in plastic wrap and place it in a freezer bag, where it can be kept for up to 4 months.

Can I freeze leftover turkey, and how should I do it?
Yes! To freeze leftover turkey, start by allowing it to cool completely. Then, slice the turkey into portions and wrap each piece tightly in plastic wrap. Place the wrapped portions into a freezer bag, squeezing out as much air as possible. Label the bag with the date for easy reference, and enjoy your turkey within 4 months for the best flavor.

How do I prevent the turkey from overcooking?
To prevent your turkey from overcooking, use a meat thermometer to check the internal temperature. Insert it into the thickest part of the breast—when it reads between 158°F and 160°F, it’s done! Remember to remove the turkey from the oven about 5 degrees earlier, as it will continue to cook while resting.

Is this turkey recipe suitable for people with allergies?
Yes, this Thanksgiving turkey recipe can be adapted for various dietary considerations. If you’re concerned about allergens, be mindful of substituting ingredients like butter with a dairy-free option, and ensure your herbs and spices are free from any cross-contamination. Always check the labels to ensure they meet your dietary needs!

Thanksgiving Turkey Recipe

Thanksgiving Turkey Recipe for Juicy, Flavorful Perfection

This Thanksgiving Turkey Recipe guarantees juicy, flavorful perfection for your holiday feast.
Prep Time 1 hour
Cook Time 3 hours
Resting Time 30 minutes
Total Time 4 hours 30 minutes
Servings: 12 slices
Course: Dinner
Cuisine: American
Calories: 400

Ingredients
  

For the Turkey
  • 12-18 pounds Turkey Make sure it’s fully thawed for even cooking.
  • to taste Kosher Salt Essential for seasoning and enhancing flavor.
For the Aromatics
  • 1 Onion Imparts a lovely aroma.
  • 1 Lemon Brightens the overall taste.
For the Herb Butter
  • ¾ cup Unsalted Butter Adds richness and moisture.
  • 6 cloves Garlic Minced.
  • to taste Fresh Rosemary Imparts classic holiday flavor.
  • to taste Fresh Thyme Adds depth to the flavor.
  • to taste Sage A key herb for holiday cooking.
Optional Vegetables
  • 1 Onion Elevates flavor and moisture during roasting.
  • 2 Celery Stalks Elevates flavor and moisture during roasting.
  • 3 Carrots Elevates flavor and moisture during roasting.

Equipment

  • Roasting Pan
  • Meat Thermometer
  • Mixing Bowl

Method
 

Step‑by‑Step Instructions
  1. Remove the fully thawed turkey from the refrigerator and let it sit at room temperature for about 1 hour.
  2. Preheat your oven to 325°F (160°C). Season the inside of the turkey with kosher salt and pepper. Stuff the cavity with onion, lemon, and herbs.
  3. In a mixing bowl, combine softened unsalted butter, minced garlic, kosher salt, black pepper, and chopped herbs.
  4. Gently loosen the skin of the turkey and spread one-third of the herb butter underneath it. Rub the remaining butter all over the turkey.
  5. Place the turkey breast side up on a rack in a roasting pan and roast in the oven, allowing 15 minutes per pound for cooking time.
  6. Once the internal temperature is reached, carefully remove the turkey from the oven and let it rest for 30 minutes.
  7. Begin carving the turkey and serve on a platter, reserving the drippings for gravy.

Nutrition

Serving: 1sliceCalories: 400kcalProtein: 30gFat: 28gSaturated Fat: 10gPolyunsaturated Fat: 2gMonounsaturated Fat: 12gCholesterol: 100mgSodium: 700mgPotassium: 500mgVitamin A: 2IUVitamin C: 4mgCalcium: 1mgIron: 5mg

Notes

Feel free to experiment with different herb blends in your compound butter to personalize the flavor of your Thanksgiving turkey.

Tried this recipe?

Let us know how it was!

Refreshing Coconut Orange Glow: A Creamy Tropical Delight

As I whisked together the chilled coconut cream and zesty orange juice, a rush of tropical sunshine filled my kitchen. This Refreshing Coconut Orange Glow is not just a dessert; it’s a sunshine-infused escape from the ordinary, perfect for elevating any moment. Whether you’re hosting family for dinner or treating yourself after a long day, this creamy and easy dessert will not weigh you down but rather enchant your taste buds. You’ll love how this gluten-free and dairy-free delight comes together quickly, all while leaving room for a bit of customization to fit your palate. Curious about how to whip up this luscious treat that feels like a vacation on a plate? Let’s dive in!

Why Is This Dessert a Must-Try?

Simplicity at Its Best: Whip it up in just 5 minutes with minimal ingredients for a hassle-free treat.

Creamy Tropical Bliss: The smooth coconut cream blends beautifully with vibrant orange juice, creating an irresistible flavor combination.

Versatile Customization: Feel free to experiment with different sweeteners or citrus like lime to suit your taste.

Perfect for Any Occasion: Whether it’s a family gathering or a self-care night, this dessert is sure to impress.

Dairy-Free and Gluten-Free: Enjoy it guilt-free, knowing it meets various dietary needs without sacrificing taste!

This Refreshing Coconut Orange Glow pairs wonderfully with a refreshing drink like Coconut Mojito Refreshing or cozy herbal tea for an uplifting experience.

Refreshing Coconut Orange Glow Ingredients

For the Creamy Base
Chilled Coconut Cream – Provides a silky, creamy texture; for a lighter option, coconut milk can be used, but expect a less rich consistency.
Freshly Squeezed Orange Juice – Offers bright, zesty flavor and natural sweetness; if fresh is unavailable, store-bought juice is an alternative.
Honey or Maple Syrup – Acts as a sweetener to enhance the flavor; adjust the quantity based on the natural sweetness of the oranges, and use maple syrup for a vegan option.

For the Flavor Boost
Orange Zest – Enhances the citrus flavor of the Refreshing Coconut Orange Glow, contributing to aroma and freshness; it’s best to avoid substitutions to maintain the vibrant taste.

Step‑by‑Step Instructions for Refreshing Coconut Orange Glow

Step 1: Combine Ingredients
In a blender, add the chilled coconut cream, freshly squeezed orange juice, honey or maple syrup, and orange zest. Ensure the coconut cream is well-chilled to achieve a silky, creamy consistency. Blend on medium speed for about 30 seconds, checking that all ingredients are incorporated and the mixture has achieved a smooth texture.

Step 2: Blend Smooth
Continue blending the mixture on high speed for another 30-60 seconds until it is light and creamy. The Refreshing Coconut Orange Glow should look silky and have a uniform consistency without any lumps. If necessary, use a spatula to scrape down the sides to ensure everything is well combined before blending again.

Step 3: Taste and Adjust
Once blended, pause to taste the mixture, allowing the zesty flavors to shine through. If you desire a sweeter profile, gradually add more honey or maple syrup, blending for an additional 10 seconds after each addition. Your dessert should balance between the rich coconut and tangy orange elements for the perfect result.

Step 4: Chill for Flavor
Transfer the blended mixture into a bowl or airtight container, covering it tightly. Refrigerate the Refreshing Coconut Orange Glow for at least one hour. Chilling allows the flavors to meld together and enhances the creamy texture, resulting in a delightful treat that’s cool and refreshing.

Step 5: Serve and Enjoy
Scoop the chilled dessert into clear glasses or bowls to display its vibrant color and creamy consistency. This dessert is best served chilled, paired with a refreshing beverage like herbal tea or sparkling water. Enjoy your tropical escape with each delicious spoonful!

What to Serve with Refreshing Coconut Orange Glow

Indulge in a tropical meal experience that perfectly complements the creamy delight of this citrus dessert.

  • Coconut Rice: The subtle sweetness and creaminess of coconut rice enhance the tropical vibes of the dessert, creating a cohesive theme for your meal.

  • Grilled Pineapple Skewers: The caramelized sweetness of grilled pineapple adds a delightful contrast to the zesty orange flavors, providing a refreshing burst of flavor.

  • Herbal Iced Tea: A chilled mint or lemongrass herbal tea offers a refreshing palate cleanser that pairs beautifully with the creamy texture of the dessert.

  • Mixed Green Salad: Tossed with a light citrus vinaigrette, a fresh salad adds a crunchy texture and bright flavors that enhance the dessert’s tropical essence.

  • Crusty Baguette: Serve thin slices of crusty baguette alongside the dessert to give a pleasant texture contrast, perfect for savoring the creamy coconut orange mix.

  • Mango Smoothie: A chilled mango smoothie brings out the tropical notes, making the entire experience feel like a sunny getaway with each sip and spoonful.

Bringing these delightful pairings to your table will surely elevate any occasion, making each bite of the Refreshing Coconut Orange Glow feel like a vacation on your plate!

Expert Tips for Refreshing Coconut Orange Glow

  • Chill Ingredients: Always use chilled coconut cream for the best creamy consistency; warm ingredients won’t yield the same texture.

  • Don’t Skip Zest: Orange zest is crucial; it enhances flavors and adds aromatic depth that transforms the dessert.

  • Blend Thoroughly: Blend until completely smooth for a melt-in-your-mouth experience; hand mixing is possible but will take longer to achieve desired creaminess.

  • Taste Testing: Adjust sweetness after blending. The natural sweetness of oranges varies, so tasting allows for perfect personalization.

  • Serve Chilled: Remember to chill the dessert prior to serving; this enhances the refreshing qualities of the Refreshing Coconut Orange Glow, making it an irresistible treat.

Refreshing Coconut Orange Glow: Variations & Substitutions

Feel free to elevate your dessert experience by customizing the Refreshing Coconut Orange Glow to fit your taste buds and preferences.

  • Tangy Twist: Substitute lemon or lime juice for a more tart flavor profile that adds a delightful zing.
  • Vegan Sweetener: Use maple syrup in place of honey to make this dessert fully vegan while keeping it deliciously sweet.
  • Sweetness Adjustments: Experiment with different sweeteners like agave or monk fruit to find your preferred level of sweetness.
  • Citrus Explosion: Add zest from other citrus fruits like grapefruit or tangerine alongside orange zest for a vibrant flavor medley.
  • Creamy Coconut Milk: If you want a lighter dessert, swap chilled coconut cream for coconut milk, understanding it may alter the texture slightly.
  • Fruity Additions: Fold in diced mango or pineapple for a fruity surprise amidst the creamy textures—perfect for a tropical vibe!
  • Nutty Texture: Sprinkle some toasted coconut flakes or crushed nuts on top before serving for added crunch and flavor contrast.

Pairing your Refreshing Coconut Orange Glow with a delightful drink like Maui Mule Refreshing or enjoy it with a creamy Mango Coconut Pudding for an inspiring dessert spread! You can also warm up your evening with a comforting Coconut Curry Soup to round off a perfect meal.

Make Ahead Options

These Refreshing Coconut Orange Glow desserts are perfect for busy home cooks looking to save time! You can prepare the creamy mixture up to 24 hours in advance; simply blend all your ingredients and refrigerate them in an airtight container. This not only allows the flavors to meld beautifully but also keeps the dessert delightfully creamy. If you need to keep it fresh longer, it can be stored in the fridge for up to 3 days. When you’re ready to serve, just stir the mixture gently to maintain its silky texture and serve in clear glasses to highlight that vibrant color. Your guests will be wowed, and you’ll enjoy a hassle-free dessert that tastes just as fresh!

How to Store and Freeze Refreshing Coconut Orange Glow

Fridge: Keep the dessert covered tightly with plastic wrap in the refrigerator for up to 3 days to maintain its creamy texture and freshness.

Freezer: For longer storage, freeze the Refreshing Coconut Orange Glow in an airtight container for up to one month. Be prepared for a creamy sorbet-like texture once thawed.

Reheating: This dessert is best enjoyed chilled. Simply take it out of the fridge or freezer and allow it to rest at room temperature for a few minutes before serving.

Serving Tip: Always give it a good stir after thawing to restore its smooth consistency and brighten up the flavors before enjoying!

Refreshing Coconut Orange Glow Recipe FAQs

What type of coconut cream should I use?
Absolutely! For the best creamy texture, I recommend using canned chilled coconut cream. Make sure to select a full-fat version for that luxurious mouthfeel. If you can’t find coconut cream, coconut milk is a suitable substitute, but keep in mind it will result in a lighter, less creamy consistency.

How long can I store the Refreshing Coconut Orange Glow in the fridge?
You can keep this luscious dessert covered tightly with plastic wrap in the refrigerator for up to 3 days. It’s best to consume it within this timeframe to enjoy its optimal creamy texture and freshness. If you notice any dark spots appearing, it’s a sign to wrap it up and enjoy it before it loses its charm.

Can I freeze the Refreshing Coconut Orange Glow?
Very much! To freeze, simply transfer the dessert into an airtight container and store it for up to a month. When you’re ready to enjoy, let it thaw in the refrigerator overnight or at room temperature for a few minutes. This will give it a creamy sorbet-like texture, which is still delicious!

What should I do if my mixture isn’t blending smoothly?
Don’t worry, this happens sometimes! If your mixture is not blending smoothly, pause to scrape down the sides of the blender with a spatula to ensure all ingredients are well combined. You can add a splash of orange juice to help it along—this will loosen the mixture and help it blend more easily.

Is this dessert safe for my pet?
While the Refreshing Coconut Orange Glow is a delightful dessert for humans, it’s important to keep it away from pets. Ingredients like honey can pose health risks to certain animals. Always consult your veterinarian before sharing human food with your furry friends.

Can I adjust the sweetness of the dessert?
Absolutely! The natural sweetness of oranges can vary. After blending, taste your mixture and adjust the sweetness to your liking by gradually adding honey or maple syrup, blending a bit more each time. This lets you customize the dessert perfectly to suit your taste!

Refreshing Coconut Orange Glow

Refreshing Coconut Orange Glow: A Creamy Tropical Delight

Enjoy a creamy, gluten-free, and dairy-free Refreshing Coconut Orange Glow, a delightful dessert that feels like a tropical escape.
Prep Time 5 minutes
Chilling Time 1 hour
Total Time 1 hour 5 minutes
Servings: 4 servings
Course: Dessert
Cuisine: Tropical
Calories: 180

Ingredients
  

For the Creamy Base
  • 1 cup Chilled Coconut Cream For a lighter option, substitute with coconut milk.
  • 1/2 cup Freshly Squeezed Orange Juice Store-bought juice is an alternative if fresh is unavailable.
  • 2 tablespoons Honey or Maple Syrup Adjust quantity based on the sweetness of the oranges.
For the Flavor Boost
  • 1 tablespoon Orange Zest Avoid substitutions for the best flavor.

Equipment

  • blender
  • airtight container

Method
 

Step-by-Step Instructions
  1. In a blender, add the chilled coconut cream, freshly squeezed orange juice, honey or maple syrup, and orange zest. Blend on medium speed for about 30 seconds until smooth.
  2. Continue blending on high speed for another 30-60 seconds until the mixture is light and creamy. Use a spatula to scrape down the sides if necessary.
  3. Taste the mixture and adjust sweetness by adding more honey or maple syrup if desired. Blend again for 10 seconds after each addition.
  4. Transfer the mixture into a bowl or airtight container and refrigerate for at least one hour to allow the flavors to meld.
  5. Scoop the chilled dessert into glasses or bowls and serve chilled, pairing with a refreshing drink.

Nutrition

Serving: 1servingCalories: 180kcalCarbohydrates: 22gProtein: 1gFat: 8gSaturated Fat: 7gSodium: 5mgPotassium: 150mgFiber: 1gSugar: 15gVitamin A: 5IUVitamin C: 40mgCalcium: 2mgIron: 2mg

Notes

Chill ingredients before use for the best consistency. Do not skip the zest, as it enhances the flavors significantly.

Tried this recipe?

Let us know how it was!

Korean Ground Beef Lettuce Wraps: A Healthy Flavor Explosion

As the sun sets and the aroma of sizzling beef fills the air, the promise of a quick and delightful meal beckons. Let me introduce you to Korean Ground Beef Lettuce Wraps—a dish that marries convenience with vibrant flavor. In just 20 minutes, you can create a healthy, low-carb dinner that’s not only high in protein but also bursting with cultural flair. These wraps feature savory ground beef infused with the spicy-sweet notes of gochujang, all wrapped in crisp, fresh lettuce leaves. Whether you’re a busy parent or a culinary adventurer, this recipe will surely satisfy your hunger without the fuss. Are you ready to elevate your dinner routine and impress your taste buds? Let’s wrap things up!

Why are Korean Ground Beef Lettuce Wraps special?

Deliciously Unique: These wraps are not just any dinner; the bold blend of gochujang brings an authentic Korean twist to your table.
Quick and Easy: Ready in just 20 minutes, perfect for busy evenings when you crave a healthy meal without spending hours in the kitchen.
Flavorful Crunch: The crisp lettuce combined with juicy, spicy beef creates a perfect harmony of textures that’s simply irresistible.
Versatile Options: Enjoy them as is or customize with toppings like chopped peanuts or fried onions to suit your taste—try adding vegetables for extra color and nutrition.
Crowd-Pleasing: Whether it’s a family dinner or a casual get-together, these wraps are sure to impress everyone around the table, making them a guaranteed hit!

Korean Ground Beef Lettuce Wraps Ingredients

For the Beef Marinade

  • Ground Beef – A lean protein source providing the main flavor; substitute with ground turkey or chicken for a lighter option.
  • Gochujang – This Korean chili paste adds spice and umami; make sure to use it for the authentic taste profile.
  • Soy Sauce – Enhances saltiness and depth; opt for low-sodium soy sauce for a healthier alternative.
  • Sesame Oil – Delivers a nutty aroma and richness; you can use olive oil, but it will alter the traditional flavor.
  • Garlic – Fresh minced garlic adds aromatic flavor; using fresh is key for the best taste.
  • Honey/Sugar – Balances the heat of gochujang with sweetness; maple syrup is a great substitute if desired.
  • Green Onions – Adds freshness and color; use both the white and green parts for a burst of flavor.

For the Wraps

  • Lettuce (Butter or Romaine) – Serves as the crunchy wrap; ensure it is fresh to avoid tearing.
  • Toasted Sesame Seeds – Adds crunch and garnishing flair; optional, but highly recommended for extra texture.
  • Chopped Peanuts/Fried Onions – These optional toppings give added crunch and flavor; feel free to experiment with your favorites.

These Korean Ground Beef Lettuce Wraps are not only easy to make but also delightful in every bite!

Step‑by‑Step Instructions for Korean Ground Beef Lettuce Wraps

Step 1: Prepare the Marinade
In a mixing bowl, combine gochujang, soy sauce, sesame oil, minced garlic, honey, and the white parts of green onions. Stir well until fully mixed and glossy, ensuring no lumps remain. This marinade will infuse the ground beef with a rich, spicy-sweet flavor. Set it aside for a moment, letting the ingredients meld together.

Step 2: Cook the Ground Beef
Heat a non-stick skillet over medium heat, allowing it to warm for about 2 minutes. Add the ground beef, breaking it apart with a spatula, and cook until it is browned and no longer pink, approximately 6-8 minutes. As the beef cooks, it should sizzle and turn a rich brown; drain excess fat if necessary for a healthier touch in your Korean Ground Beef Lettuce Wraps.

Step 3: Add Marinade
Once the beef is fully cooked, reduce the heat slightly and pour the reserved marinade over the meat. Stir to thoroughly coat the beef and allow the flavors to combine. Continue to cook for an additional 2-3 minutes, watching for the mixture to bubble gently. This step enhances the savory profile of the beef, making it perfectly delicious for your wraps.

Step 4: Finish with Green Onions
After the beef has absorbed the marinade flavor, stir in the green parts of the sliced green onions. Let it cook for another minute, giving it a quick toss to combine. The vibrant green onions will add freshness and a pop of color, and you can taste the mixture to adjust seasoning if necessary, ensuring each bite is packed with flavor.

Step 5: Assemble Wraps
While the beef mixture cools slightly, gently separate the lettuce leaves from the head and wash them under cold water. Pat the leaves dry with a clean kitchen towel. Each leaf will be your wrap, so make sure they are crisp and whole, ready to cradle the savory beef filling inside your delightful Korean Ground Beef Lettuce Wraps.

Step 6: Garnish and Serve
Spoon a generous amount of the beef mixture into the center of each lettuce leaf, folding it like a taco. For added flair, sprinkle with toasted sesame seeds and any optional toppings like chopped peanuts or fried onions. Serve your wraps immediately, showcasing the vibrant colors and inviting fragrance that promises an unforgettable meal!

Korean Ground Beef Lettuce Wraps Adaptations

Feel free to get creative and make this dish your own with these delightful twists and substitutions!

  • Turkey Option: Substitute ground beef with ground turkey for a leaner protein choice that still packs flavor. It’s a great way to enjoy a lighter version of this dish.

  • Veggie Boost: Add shredded carrots, diced bell peppers, or water chestnuts to the beef mixture for extra crunch and color. These vibrant veggies not only enhance the taste but also increase the nutritional value.

  • Spice it Up: For those who love heat, add sliced fresh jalapeños or a sprinkle of red pepper flakes into the marinade. This will bring an exhilarating kick to your wraps and tantalize your taste buds.

  • Flavor Fusion: Mix in some hoisin sauce for a sweet, sticky addition that complements the gochujang beautifully. The combination will elevate the dish with a unique flavor profile that’s simply irresistible.

  • Alternative Greens: Switch up the lettuce with green leaf or butter lettuce if you prefer a different texture. Each type of lettuce will offer a fresh take on the classic wrap experience.

  • Crunchy Toppings: Top your wraps with crunchy fried onions or roasted peanuts for an extra layer of flavor and satisfying crunch. It’s these small details that can transform the entire dish!

  • Plant-Based Twist: For a vegetarian version, swap out the beef for crumbled tempeh or lentils. Season them with the same marinade for a satisfying, nutritious wrap that everyone can enjoy.

  • Herbed Variants: Fresh herbs like cilantro or mint added to the beef mixture can enhance the freshness of the wraps. It’s a wonderful way to incorporate vibrant flavors synonymous with Asian cuisine.

Let your taste buds guide you on this culinary adventure! You might also enjoy trying these variations with my Savory Ground Turkey or embracing the flavors of Honey Sriracha Ground Chicken for a delightful experience. Happy cooking!

How to Store and Freeze Korean Ground Beef Lettuce Wraps

Fridge: Keep cooked Korean Ground Beef in an airtight container for up to 4 days. This will help retain its flavor and prevent spoilage.

Freezer: Freeze the beef filling in a sealed container for up to 3 months. When ready to enjoy, thaw it in the refrigerator before reheating.

Lettuce: Store washed lettuce leaves wrapped in a slightly damp paper towel in a plastic bag. This keeps them crisp for up to 3 days.

Reheating: Reheat the beef mixture in a skillet over medium heat until warmed through. Avoid reheating the lettuce to keep it fresh and crunchy.

Make Ahead Options

These Korean Ground Beef Lettuce Wraps are fantastic for busy weeknights! You can prepare the beef filling up to 3 days in advance—simply cook it, cool it, and store in an airtight container in the refrigerator. To maintain quality and flavor, wait to mix in the green onions until you’re ready to serve. The lettuce leaves can be rinsed and dried a day before and kept wrapped in a damp paper towel inside a plastic bag to stay crisp. When it’s time to enjoy your meal, just reheat the beef mixture in a skillet and assemble the wraps with fresh lettuce for a delicious, quick dinner!

Expert Tips for Korean Ground Beef Lettuce Wraps

  • Perfect Beef Cooking: Avoid overcooking the ground beef to keep it tender; aim for just browned and fully cooked to enhance the flavor of your Korean Ground Beef Lettuce Wraps.
  • Crispy Lettuce Leaves: Always use cold, crisp lettuce to ensure your wraps hold their shape and have that satisfying crunch when bit into.
  • Batch Preparation: Cook the beef filling ahead of time for convenience, but assemble the wraps just before serving to maintain the best texture and freshness.
  • Marinade Magic: Let the marinade coat the beef thoroughly to ensure rich flavor; it’s essential for achieving that authentic Korean taste in your wraps.
  • Storage Smarts: If you have leftovers, store cooked beef and unwrapped lettuce in separate airtight containers to keep everything fresh and ready for a quick meal!

What to Serve with Korean Ground Beef Lettuce Wraps

Elevate your dining experience with delightful sides that perfectly complement the vibrant flavors of your wraps.

  • Steamed Jasmine Rice: This fluffy rice provides a calming contrast to the spice of the wraps, absorbing delicious gochujang drips for a satisfying bite.

  • Asian-style Slaw: A refreshing mix of cabbage, carrots, and a tangy sesame dressing adds crunch and brightness, balancing the richness of the beef.

  • Miso Soup: Light yet comforting, this classic Japanese soup brings warmth and umami notes to your meal, soothing the palate between bites.

  • Cucumber Salad: This cool and crunchy salad, dressed in vinegar and sesame oil, adds a crisp freshness that elevates the entire experience of the wraps.

  • Grilled Corn on the Cob: Sweet and smoky grilled corn adds a fun, summery vibe to your table, providing an extra layer of flavor and texture.

  • Chilled Soju or Green Tea: A light, crisp drink like soju or fresh green tea cleanses the palate and enhances the food’s flavors, making for a refreshing pairing.

  • Fruit Sorbet: For dessert, a light fruit sorbet offers a sweet and refreshing finish that is easy on the stomach after a savory meal, keeping your dining experience balanced.

Korean Ground Beef Lettuce Wraps Recipe FAQs

What type of lettuce is best for wraps?
I recommend using Butter or Romaine lettuce, as they provide a crisp texture and sturdy wrap. Make sure the leaves are fresh and undamaged to avoid tearing when filled with the savory ground beef mixture.

How should I store leftover Korean Ground Beef?
Store your cooked Korean Ground Beef in an airtight container in the refrigerator for up to 3-4 days. This will preserve its flavor and ensure it’s safe to eat later.

Can I freeze the beef filling?
Absolutely! To freeze your Korean Ground Beef, place it in a sealed container and store it in the freezer for up to 3 months. When you’re ready to enjoy, just thaw it in the fridge overnight and reheat in a skillet over medium heat until warmed through.

What if the beef is too spicy?
If you accidentally overdo it with the gochujang, don’t fret! You can balance the spice by adding a bit of honey or sugar to the cooked beef. Alternatively, stir in additional cooked ground meat to dilute the heat and make it milder.

Are there any dietary considerations I should be aware of?
For those with gluten sensitivities, opt for a gluten-free soy sauce. If you’re concerned about allergies, check ingredient labels for possible allergens, especially when choosing the gochujang.

How long does the lettuce stay fresh?
To keep your lettuce crisp, store it wrapped in a damp paper towel inside a plastic bag in the fridge. This method can help keep it fresh for up to 3 days, ensuring your wraps maintain that delightful crunch!

Korean Ground Beef Lettuce Wraps

Korean Ground Beef Lettuce Wraps: A Healthy Flavor Explosion

Korean Ground Beef Lettuce Wraps are a quick, flavorful, low-carb dinner option, high in protein and cultural flair.
Prep Time 10 minutes
Cook Time 10 minutes
Total Time 20 minutes
Servings: 4 wraps
Course: Beef
Cuisine: Korean
Calories: 300

Ingredients
  

For the Beef Marinade
  • 1 pound Ground Beef Can substitute with ground turkey or chicken
  • 3 tablespoons Gochujang Korean chili paste for spice
  • 2 tablespoons Soy Sauce Use low-sodium for a healthier option
  • 1 tablespoon Sesame Oil Can substitute with olive oil
  • 3 cloves Garlic Fresh minced for best flavor
  • 1 tablespoon Honey/Sugar Maple syrup can be used as a substitute
  • 2 stalks Green Onions Use both white and green parts
For the Wraps
  • 1 head Lettuce (Butter or Romaine) Ensure freshness to avoid tearing
  • 2 tablespoons Toasted Sesame Seeds Optional, for extra crunch
  • Chopped Peanuts/Fried Onions Optional toppings for added flavor

Equipment

  • Non-stick skillet
  • Mixing Bowl

Method
 

Preparation Steps
  1. In a mixing bowl, combine gochujang, soy sauce, sesame oil, minced garlic, honey, and the white parts of green onions. Stir well until fully mixed and glossy.
  2. Heat a non-stick skillet over medium heat for about 2 minutes. Add the ground beef and cook until browned, about 6-8 minutes. Drain excess fat if necessary.
  3. Pour the reserved marinade over the cooked beef and stir to coat thoroughly. Cook for an additional 2-3 minutes.
  4. Stir in the green parts of the sliced green onions and cook for another minute.
  5. Gently separate lettuce leaves, wash, and dry them. These will be your wraps.
  6. Spoon the beef mixture into the center of each lettuce leaf and garnish with sesame seeds and optional toppings before serving.

Nutrition

Serving: 2wrapsCalories: 300kcalCarbohydrates: 20gProtein: 25gFat: 15gSaturated Fat: 5gPolyunsaturated Fat: 2gMonounsaturated Fat: 8gCholesterol: 70mgSodium: 600mgPotassium: 500mgFiber: 3gSugar: 5gVitamin A: 20IUVitamin C: 30mgCalcium: 50mgIron: 3mg

Notes

Perfect for busy evenings and can be customized with various toppings.

Tried this recipe?

Let us know how it was!

Savory Ethiopian Beef Tibs Recipe: Quick & Flavorful Delight

As I stood in my kitchen smelling the intoxicating aroma of spices swirling in the air, I felt transported to a vibrant Ethiopian marketplace bustling with flavors. This Spicy Awaze Tibs recipe brings that same electric energy to your dinner table, combining tender beef with a bold and fiery awaze sauce that celebrates authentic Ethiopian cuisine. In just 25 minutes, you can whip up a dish that’s not only quick but also gluten-free and low-carb, making it an absolute lifesaver for modern home chefs. Whether you’re looking to impress guests or treat yourself to a mouthwatering meal, this Ethiopian Beef Tibs recipe is bound to be a showstopper. Ready to spice up your weeknight routine? Let’s delve into this flavorful journey together!

Why Is Ethiopian Beef Tibs So Special?

Bold flavors: The zesty awaze sauce delivers a punch of spice and deep, aromatic richness that brings excitement to any meal.
Quick and easy: In just 25 minutes, you can prepare a delicious dish, perfect for busy weeknights or last-minute dinner guests.
Versatile options: Feel free to customize by swapping beef with lamb or venison—and serve it over injera or cauliflower rice for flexible dining.
Low-carb delight: With only 3g of carbs per serving, this recipe is ideal for those on a keto diet looking for flavorful meals.
Crowd-pleaser: With its vibrant presentation and tantalizing aroma, this dish is sure to impress anyone at your table, making it a go-to for gatherings.
Cultural experience: Bring the essence of Ethiopian cuisine to your kitchen and enjoy the communal spirit that comes with sharing food. Explore more with Ground Beef Potato or Sweet Potato Beef for varied culinary delights.

Ethiopian Beef Tibs Recipe Ingredients

For the Beef
Beef (1.5 lbs) – Use bite-sized pieces for quick cooking; alternative options include lamb or venison for variation.

For the Sauce
Niter Kibbeh (⅓ cup) – This Ethiopian clarified butter adds depth and flavor; unsalted butter works as a substitute if needed.
Berbere Spice (3 tbsp + 1 tsp) – This key spice blend delivers the distinctive kick in the Ethiopian Beef Tibs recipe; use homemade or store-bought.
Black Pepper (1.5 tsp) – Enhances overall flavor; feel free to adjust according to taste.
Cumin (½ tsp) – Adds a touch of warmth to the spice mixture.
Ground Ginger (½ tsp) – Provides a lovely aromatic spice note.
Salt (1 tsp) – Essential for seasoning; adjust to personal preference.
Olive Oil (4 tbsp) – Used for cooking the beef and combining the sauce.
Lemon Juice (1 tbsp) – Balances the flavors and adds a refreshing acidity.
Water (¼ cup) – Used for mixing the awaze sauce.

For the Vegetables
Onion (½ medium) – This aromatic base is crucial for building flavor.
Garlic (2 cloves) – Adds a fragrant and flavorful touch to the dish.
Jalapeno Pepper (1, sliced) – Infuses spiciness and freshness; adjust based on your desired heat level.

With this carefully curated ingredients list, you’re just a step away from crafting your own Ethiopian Beef Tibs masterpiece! Enjoy the journey of flavors!

Step‑by‑Step Instructions for Ethiopian Beef Tibs Recipe

Step 1: Prepare Awaze Sauce
In a medium bowl, combine 3 tablespoons of berbere spice, 1.5 teaspoons of black pepper, ½ teaspoon of cumin, ½ teaspoon of ground ginger, and 1 teaspoon of salt with ¼ cup of water and 4 tablespoons of olive oil. Mix well until it forms a smooth paste. This spicy awaze sauce will elevate your Ethiopian Beef Tibs recipe, adding rich flavors.

Step 2: Cook Beef
Start by draining and rinsing 1.5 lbs of beef pieces under cold water. In a large skillet, heat 2 tablespoons of olive oil over medium-high heat. Once hot, add the beef in a single layer, cooking for about 5-7 minutes until browned on all sides. Avoid overcrowding the pan to achieve that perfect sear. Remove the beef and set aside.

Step 3: Sauté Vegetables
In the same skillet, reduce the heat to medium and add ⅓ cup of niter kibbeh. Once melted, add half a chopped medium onion and 2 minced garlic cloves. Sauté for 3-4 minutes until the onion is translucent. Stir in a sliced jalapeno pepper and cook for an additional minute, allowing the flavors to meld beautifully with the Ethiopian Beef Tibs.

Step 4: Combine Ingredients
With the sautéed vegetables ready, pour in the prepared awaze sauce and bring to a gentle simmer. Let it cook for about 5 minutes, allowing the spices to infuse. Next, return the cooked beef to the skillet, stirring well to coat with the sauce. This step ensures that each piece of beef is enveloped in rich, aromatic flavors.

Step 5: Final Adjustments
Add 1 tablespoon of lemon juice to the skillet, stirring to combine and balance the flavors. Adjust the seasoning as needed, tasting for salt and spice levels. Continue simmering for an additional 2-3 minutes, ensuring the beef is heated through and the sauce thickens slightly, resulting in a robust Ethiopian Beef Tibs dish.

Step 6: Serve
Remove your skillet from heat and garnish the Ethiopian Beef Tibs with fresh cilantro if desired. Serve hot over a bed of injera, basmati rice, or cauliflower rice for a low-carb option. Enjoy this flavorful delight with family and friends, making mealtime a memorable experience!

What to Serve with Spicy Awaze Tibs?

Imagine a vibrant feast where bold flavors collide with soothing textures, turning any meal into an unforgettable experience.

  • Injera: This traditional Ethiopian flatbread is perfect for scooping up the spicy awaze tibs, enhancing the authentic experience.
  • Basmati Rice: Fluffy, aromatic rice serves as a wonderful canvas, soaking up the rich awaze sauce and balancing the dish’s spices.
  • Cauliflower Rice: For a low-carb option, this tender alternative offers a light and healthy base that complements the beef beautifully.
  • Roasted Vegetables: Colorful, caramelized veggies bring freshness and crunch, creating a delightful contrast to the rich flavors of the tibs.
  • Crispy Fried Plantains: Sweetness from plantains adds a deliciously contrasting flavor that enhances the overall dining experience. Their crispiness will delight your taste buds!
  • Ethiopian Spiced Lentils: Nutty lentils steeped in warm spices bring additional protein and a wholesome element to your meal.
  • Yogurt Sauce: A cool, creamy yogurt sauce provides a refreshing dip, tempering the heat and adding a rich layer of flavor.
  • Ethiopian Honey Wine: This sweet, aromatic wine pairs splendidly with the spices, creating a memorable finish to your meal.
  • Baklava: Complete your dining experience with this sweet, nutty dessert, offering layers of textures that contrast the main dish beautifully.

How to Store and Freeze Ethiopian Beef Tibs

Fridge: Store leftover Ethiopian Beef Tibs in an airtight container for up to 3 days. Be sure to let it cool completely before sealing to maintain texture.

Freezer: For longer storage, freeze the dish in a freezer-safe container for up to 2 months. Make sure to label the container with the date for easy reference.

Reheating: Thaw in the refrigerator overnight before reheating. To warm up, use a skillet on medium heat until heated through, or microwave in short intervals, stirring occasionally for even heating.

Serving Suggestions: Revive the flavors by garnishing with fresh cilantro before serving again, enhancing the meal’s appeal.

Helpful Tricks for Ethiopian Beef Tibs

  • Batch Cooking: Cook beef in single layers in batches to get a perfect sear instead of steaming it. This ensures maximum flavor and texture.

  • Adjust the Heat: If you’re sensitive to spices, start with less berbere spice in your Ethiopian beef tibs recipe, and gradually add more to find your perfect heat level.

  • Fresh Ingredients: Use fresh onions and garlic for the best flavor in your awaze sauce. They add an aromatic base that’s vital for depth.

  • Consistent Sauce: If your awaze sauce is too thin, add a touch more berbere to thicken it up and boost the spice profile.

  • Garnishing Well: Fresh cilantro or parsley not only enhances the dish’s appeal but also adds a hint of freshness that elevates the overall flavor.

Make Ahead Options

These Ethiopian Beef Tibs are perfect for meal prep enthusiasts looking to save time during busy weeknights! You can prepare the awaze sauce up to 24 hours in advance; simply refrigerate it in an airtight container to preserve its bold flavors. Additionally, you can chop the vegetables and store them separately for up to 3 days. When you’re ready to serve, sauté the veggies and beef as directed, then add the pre-made sauce and simmer until heated through—this way, your dish will taste just as delicious as if you made it fresh that day! Enjoy the convenience without compromising on flavor!

Ethiopian Beef Tibs Recipe Variations

Feel free to put your personal twist on this delicious dish and explore new flavors!

  • Lamb Alternative: Swap beef for lamb to enjoy a different texture and flavor profile. Lamb pairs beautifully with the spicy awaze sauce.

  • Venison Option: For game meat lovers, use venison instead of beef. Its rich taste beautifully complements the spicy awaze sauce.

  • Vegetable Boost: Add bell peppers or zucchini for extra nutrition and color in your dish. They not only brighten up the plate but also add a satisfying crunch.

  • Gluten-Free Serving: Serve over injera made from teff flour for an authentic Ethiopian experience. It’s naturally gluten-free and enhances the dish with its unique flavor.

  • Low-Carb Twist: Use cauliflower rice as a low-carb alternative to traditional rice. It absorbs the flavors of the awaze sauce beautifully without the extra carbs.

  • Sweet Heat: Add a touch of honey or brown sugar to the awaze sauce to balance the spices with a hint of sweetness. This creates an intriguing flavor contrast that many will love.

  • Extra Spicy: For those who enjoy a serious kick, incorporate more jalapeño or even a dash of cayenne pepper into the mix. Adjust to meet the heat level you love!

  • Hearty Addition: Toss in cooked chickpeas or lentils to make the dish more filling. It enhances the protein content while providing a lovely texture.

This Ethiopian Beef Tibs recipe is a canvas for your culinary creativity! If you’re curious about more delightful variations, explore my Chili Beef Flavor or try a comforting Pie Ground Beef for a family-favorite spin!

Ethiopian Beef Tibs Recipe FAQs

What kind of beef is best for Ethiopian Beef Tibs?
I recommend using tender cuts of beef like sirloin or flank steak, cut into bite-sized pieces. These cuts are quick to cook and absorb the spices beautifully. If you prefer, you can also opt for lamb or venison for a different flavor profile.

How long can I store leftover Ethiopian Beef Tibs?
Leftover Awaze Tibs can be stored in an airtight container in the refrigerator for up to 3 days. Make sure to let the dish cool completely before sealing the container to maintain its texture and flavor.

Can I freeze Ethiopian Beef Tibs?
Absolutely! To freeze, place the cooled Awaze Tibs in a freezer-safe container, making sure to label it with the date. They will last up to 2 months in the freezer. When you’re ready to enjoy it again, simply thaw in the refrigerator overnight and reheat in a skillet or microwave.

How can I adjust the spice level of my Ethiopian Beef Tibs?
Very! If you’re concerned about the heat, start with a lower amount of berbere spice—perhaps just 2 tablespoons—and taste as you go. You can always add more if you desire a stronger flavor. Also, consider removing the seeds from the jalapeño to further reduce spiciness.

Is there a way to make this recipe suitable for my gluten-free diet?
Yes! This Ethiopian Beef Tibs recipe is already gluten-free since it doesn’t include any wheat products. Be sure to use gluten-free niter kibbeh or substitute with regular unsalted butter, and your meal is good to go!

Can I add vegetables to Ethiopian Beef Tibs?
Of course! Feel free to include bell peppers, zucchini, or your favorite vegetables. Simply chop them and sauté along with the onions and garlic in step 3 of the instructions. This adds great color and additional nutrients, making your dish even more appealing!

Ethiopian Beef Tibs Recipe

Savory Ethiopian Beef Tibs Recipe: Quick & Flavorful Delight

This Ethiopian Beef Tibs recipe is a quick, gluten-free dish that packs bold flavors and can be made in just 25 minutes.
Prep Time 10 minutes
Cook Time 15 minutes
Total Time 25 minutes
Servings: 4 servings
Course: Beef
Cuisine: Ethiopian
Calories: 300

Ingredients
  

For the Beef
  • 1.5 lbs Beef Use bite-sized pieces for quick cooking
For the Sauce
  • cup Niter Kibbeh Ethiopian clarified butter; unsalted butter works as a substitute
  • 3 tbsp Berbere Spice Key spice blend; use homemade or store-bought
  • 1.5 tsp Black Pepper Enhances overall flavor
  • ½ tsp Cumin Adds warmth
  • ½ tsp Ground Ginger Provides aromatic spice note
  • 1 tsp Salt Essential for seasoning
  • 4 tbsp Olive Oil Used for cooking the beef and combining the sauce
  • 1 tbsp Lemon Juice Balances flavors
  • ¼ cup Water Used for mixing the awaze sauce
For the Vegetables
  • ½ medium Onion Aromatic base for flavor
  • 2 cloves Garlic Adds fragrance
  • 1 Jalapeno Pepper Sliced, adjust for desired heat level

Equipment

  • Skillet
  • Medium Bowl

Method
 

Preparation
  1. In a medium bowl, combine 3 tablespoons of berbere spice, 1.5 teaspoons of black pepper, ½ teaspoon of cumin, ½ teaspoon of ground ginger, and 1 teaspoon of salt with ¼ cup of water and 4 tablespoons of olive oil. Mix well until smooth.
  2. Start by draining and rinsing 1.5 lbs of beef pieces under cold water. In a large skillet, heat 2 tablespoons of olive oil over medium-high heat. Cook the beef for 5-7 minutes until browned, then set aside.
  3. In the same skillet, reduce the heat to medium and add ⅓ cup of niter kibbeh. Once melted, add half a chopped medium onion and 2 minced garlic cloves. Sauté for 3-4 minutes until the onion is translucent. Stir in a sliced jalapeno pepper and cook for an additional minute.
  4. Pour in the prepared awaze sauce and bring to a gentle simmer. Cook for about 5 minutes, then return the cooked beef to the skillet, stirring well to coat with the sauce.
  5. Add 1 tablespoon of lemon juice, adjust seasoning for salt and spice levels, and simmer for an additional 2-3 minutes to heat through and thicken the sauce.
  6. Remove from heat and garnish with fresh cilantro if desired. Serve hot over injera, basmati rice, or cauliflower rice.

Nutrition

Serving: 1servingCalories: 300kcalCarbohydrates: 3gProtein: 28gFat: 20gSaturated Fat: 8gPolyunsaturated Fat: 2gMonounsaturated Fat: 10gCholesterol: 70mgSodium: 500mgPotassium: 600mgFiber: 1gVitamin A: 100IUVitamin C: 5mgCalcium: 20mgIron: 3mg

Notes

For best results, cook beef in single layers in batches for perfect sear. Use fresh ingredients for optimal flavor.

Tried this recipe?

Let us know how it was!

Savory Chinese Stuffed Peppers with Garlicky Pork Filling

As I stood in my kitchen the other day, the aroma of sizzling garlic pulled me back to my travels through Northern China, where street vendors served up the most comforting Chinese stuffed peppers, filled to perfection. This recipe for Northern Chinese Pork-Stuffed Peppers with Garlicky Brown Sauce brings that delightful memory to life, featuring tender ground pork wrapped in the sweet embrace of Cubanelle peppers. It’s the ultimate easy weekday meal that not only warms the soul but also makes for a fantastic make-ahead dish for busy weeknights. Each bite is a reassuring hug from home, perfect for sharing with loved ones or enjoying alone after a long day. Have you ever experienced the joy of transforming simple ingredients into something extraordinary? Let’s dive into this culinary adventure!

Why make Chinese Stuffed Peppers?

Simplicity at its core: This dish is straightforward, incorporating basic cooking skills that anyone can master.

Rich, robust flavors: The combination of ground pork and garlicky brown sauce creates a savory explosion that never disappoints.

Versatility reigns: Feel free to swap in different proteins or peppers to suit your taste or dietary needs.

Make-ahead magic: Prepare these stuffed peppers in advance, saving you valuable time on hectic weeknights.

Crowd-pleasing appeal: These beauties are sure to impress at any family meal or gathering, making them a beloved centerpiece.

Serve with a side of steamed rice, or try pairing with other favorites like Chicken Stuffed Peppers. Happy cooking!

Chinese Stuffed Peppers Ingredients

For the Peppers
Cubanelle Peppers – Sweet with mild heat; these are perfect for stuffing and can be swapped with Anaheim peppers if needed.
Vegetable Oil – Essential for frying; feel free to use any neutral oil to avoid overpowering flavors.

For the Filling
Ground Pork – The main protein; it brings richness, but you can substitute with ground chicken or turkey for a lighter option.
Water Chestnuts – These add a delightful crunch; finely chopped celery works as a great substitute if unavailable.
Ginger – Fresh and fragrant; ensure it’s minced for even flavor distribution.
Scallion – Adds a fresh, onion-like taste, crucial for the filling’s aromatic profile.
Egg – Binds the filling together; a flax egg can be used for a vegan-friendly version.
Cornstarch – Useful for thickening the filling and the brown sauce; arrowroot powder can be used instead.
White Pepper – Adds a gentle heat; black pepper is a suitable substitute if needed.

For the Sauce
Shaoxing Wine – Adds depth and umami; feel free to replace it with dry sherry or omit if you prefer.
Soy Sauce – A seasoning staple; opt for low-sodium if you’re watching your salt intake.
Chicken Stock – Enhances the sauce’s flavor; vegetable stock can be used for a vegetarian option.
Oyster Sauce – Offers umami richness; mushroom sauce serves as a suitable vegetarian substitute.
Garlic – A key player for flavor; always use fresh for the best results.
Sugar – Balances the sauce; consider coconut sugar for a unique twist.
Dark Soy Sauce – Adds color and sweetness; don’t worry if you don’t have it—just skip it.
Cornstarch Slurry – A necessary thickener for the sauce; make sure to mix well before adding to the pan.

This delightful combination creates the ultimate Chinese stuffed peppers you’ll love to share around the dinner table!

Step‑by‑Step Instructions for Northern Chinese Pork-Stuffed Peppers with Garlicky Brown Sauce

Step 1: Prepare the Peppers
Begin by preheating your oven to 375°F (190°C). Carefully cut the tops off of each Cubanelle pepper, removing the seeds inside. Use a paper towel to thoroughly dry the peppers to ensure they blister nicely during cooking. Set the prepared peppers aside as you mix the filling, creating an inviting vessel for your flavorful stuffing.

Step 2: Make the Stuffing
In a mixing bowl, combine the ground pork, Shaoxing wine, soy sauce, minced water chestnuts, ginger, scallion, egg, cornstarch, sugar, and white pepper. Using your hands, mix the ingredients until the mixture becomes sticky and well-blended, which should take about 2-3 minutes. This filling will create a deliciously rich core for your Chinese stuffed peppers.

Step 3: Stuff the Peppers
Carefully fill each prepared Cubanelle pepper with the pork mixture, pressing it in tightly to avoid air pockets. Trim any excess pepper from the tops if necessary to ensure the stuffing is fully contained. As you stuff each pepper, line them up on a plate or baking dish, ready for their sizzling transformation in step four.

Step 4: Blister the Peppers
Heat a generous amount of vegetable oil in a large skillet over medium-high heat. Once hot, add the stuffed peppers, cooking them for about 3 minutes on each side until they are blistered and golden brown all over. Allow the skin to develop a beautiful char, which enhances both the flavor and presentation of your Northern Chinese pork-stuffed peppers.

Step 5: Braise the Peppers
After the peppers are blistered, pour in the braising sauce made from chicken stock, oyster sauce, minced garlic, sugar, dark soy sauce, and a pinch of cornstarch slurry. Cover the skillet and reduce the heat to medium-low, allowing the peppers to simmer for about 5 minutes. This step will ensure that the pork filling cooks through and absorbs the rich flavors of the sauce.

Step 6: Thicken the Sauce
Remove the lid and stir the sauce gently. For a thicker consistency, mix a bit of cornstarch with water to create a slurry, then add it to the pan. Continue stirring for another 2-3 minutes until the sauce has thickened and clings beautifully to the peppers. Your Northern Chinese stuffed peppers will now be radiant and ready to serve.

Step 7: Serve the Peppers
Once the sauce has thickened to your liking, plate the Chinese stuffed peppers elegantly. Drizzle the thickened sauce over the top for an extra layer of flavor. For a final touch, splash each pepper with a hint of rice vinegar, adding a bright contrast to the rich, savory dish. Enjoy the beauty you’ve created that’s perfect for sharing or indulging!

How to Store and Freeze Chinese Stuffed Peppers

  • Fridge: Store leftover Chinese stuffed peppers in an airtight container for up to 3 days. Be sure to let them cool completely before sealing to maintain freshness.
  • Freezer: For longer storage, freeze stuffed peppers in a single layer on a baking sheet until solid, then transfer to a freezer-safe container for up to 3 months.
  • Reheating: Thaw frozen peppers in the refrigerator overnight, then reheat in the oven at 350°F (175°C) until warmed through, about 20-25 minutes.
  • Meal Prep: Feel free to prepare these stuffed peppers in advance and freeze them uncooked. When you’re ready to enjoy, simply braise from frozen, adding a few extra minutes to the cooking time.

Tips for the Best Chinese Stuffed Peppers

  • Prep Peppers Properly: Ensure the Cubanelle peppers are completely dry before frying to avoid unwanted splatter and achieve a perfect blistered exterior.

  • Rest the Mixture: Let the stuffing mixture sit for at least 15 minutes before using. This resting time allows the flavors to meld for an even tastier filling.

  • Braising Time Matters: Adjust cooking time based on the size of your peppers. Smaller peppers will cook faster, so keep an eye on them to prevent overcooking the filling.

  • Use Tongs: When frying, use tongs to hold the peppers upright to ensure even cooking and blistering on all sides.

  • Adjust Seasonings: Taste and adjust the soy sauce or sugar levels according to your preference. This keeps your Chinese stuffed peppers balanced in flavors!

What to Serve with Northern Chinese Pork-Stuffed Peppers?

Elevate your meal with these delightful accompaniments that balance flavors and textures beautifully.

  • Steamed Jasmine Rice: A fragrant base that soaks up the rich garlicky sauce, making each bite a pleasure. Steamed rice is versatile and comforting, providing a perfect backdrop for these flavorful stuffed peppers.

  • Sautéed Broccoli: This green addition brings a fresh crunch and vibrant color to your plate, complementing the softness of the peppers. The slight bitterness of broccoli contrasts nicely with the sweetness of the Cubanelle peppers and the savory filling.

  • Cucumber Salad: A light, refreshing side that cuts through the richness of the stuffed peppers. Toss thinly sliced cucumbers with rice vinegar, sesame oil, and a pinch of sugar for a zesty crunch.

  • Sesame Noodles: These flavorful noodles are a fantastic companion, offering a nutty flavor and silky texture that contrasts with the stuffed peppers. Toss them with sesame oil, soy sauce, and scallions for a quick and delicious side.

  • Sweet and Sour Pineapple Chunks: This unique pairing introduces a burst of sweetness that enhances the savory profile of the stuffed peppers. The juicy pineapple complements the dish beautifully, providing a tropical twist to your meal.

  • Chilled Green Tea: A soothing drink that refreshes the palate and helps to balance the bold flavors of your meal. It’s a perfect non-alcoholic option to complement these Northern Chinese stuffed peppers.

Each of these side dishes adds a distinct layer of flavor to your dinner, creating a well-rounded, satisfying meal experience.

Chinese Stuffed Peppers Variations

Feel free to have fun and make these stuffed peppers your own!

  • Protein Swap: Substitute ground pork with ground beef or even firm tofu for a vegan delight. Blend flavors and textures for a unique dish.

  • Pepper Variety: Use different peppers, like bell peppers or poblano, depending on your preferences and what’s in season. Each will bring its own lovely sweetness.

  • Added Crunch: Mix in finely chopped mushrooms or water chestnuts to the filling for an extra crunch that elevates each bite to a delightful textural experience.

  • Spicy Kick: For heat, fold in some diced fresh chili peppers or a dash of chili oil into the mixture. Your taste buds will thank you for the adventure!

  • Herb Infusion: Substituting in fresh herbs like basil or cilantro can add a fragrant twist to the flavor profile. Imagine the fresh aroma wafting through your kitchen!

  • Sauce Variations: Swap out the oyster sauce for hoisin or teriyaki sauce to offer a different taste sensation to the beloved garlicky brown sauce.

Don’t forget, these flavorful stuffed peppers pair wonderfully with dishes like Blackened Salmon Stuffed or Chicken Stuffed Peppers. Happy experimenting!

Make Ahead Options

These Northern Chinese Stuffed Peppers with Pork are ideal for meal prep aficionados! You can prepare the stuffing (mixture of ground pork, ginger, scallion, and other ingredients) up to 24 hours in advance; simply cover it and refrigerate to maintain freshness. The stuffed peppers can be assembled and kept in the fridge for up to 3 days before cooking. Just remember to dry the peppers well to prevent sogginess. When ready to serve, blister the peppers and braise them as instructed; this will ensure they maintain that delicious flavor and texture that makes them a family favorite. Enjoy the convenience of a homemade meal that saves you time without sacrificing quality!

Chinese Stuffed Peppers Recipe FAQs

How do I choose the right peppers for stuffing?
Absolutely! When selecting Cubanelle peppers, look for ones that are firm and free from blemishes. Ideally, choose peppers that have a smooth skin and vibrant color. If you see dark spots all over, they might be past their prime. You can also substitute them with Anaheim or bell peppers if you prefer a different flavor or just can’t find Cubanelle.

What’s the best way to store leftover Chinese stuffed peppers?
Very good question! You should store leftover stuffed peppers in an airtight container in the refrigerator for up to 3 days. Make sure they have cooled completely before sealing, as this will help maintain their freshness. If you want to enjoy them later, consider freezing them for longer storage!

Can I freeze Chinese stuffed peppers?
Certainly! To freeze your Chinese stuffed peppers, place them in a single layer on a baking sheet. Freeze them until solid, which usually takes about 1-2 hours, then transfer them to a freezer-safe container or a zip-top bag. This method ensures they won’t stick together, allowing you to grab just what you need later. They’ll keep for up to 3 months in the freezer.

What if my stuffed peppers are too watery after cooking?
No worries! If you find your stuffed peppers are watery, it could be due to excess moisture in the cooking process. To troubleshoot, ensure that the peppers are well-dried before frying, and consider adjusting your cornstarch slurry by adding a bit more cornstarch mixed with water to help thicken the sauce. Cook it a little longer if needed until the sauce clings better to the peppers!

Are these stuffed peppers suitable for people with allergies?
Very much so, but be cautious! The recipe contains ingredients like soy sauce, which has gluten, and oyster sauce, which may not be suitable for vegans. For allergies, you can easily swap traditional soy sauce for a gluten-free alternative and use a plant-based oyster sauce or simply leave it out. Always check for specific allergens like eggs or sesame in ingredients.

How long can I prep these stuffed peppers in advance?
Great question! You can definitely make your Chinese stuffed peppers ahead of time. If you’re preparing them uncooked, freeze them for up to 3 months. If they’re cooked, keep them in the fridge for up to 3 days. The flavors tend to improve when they rest, making them a more delectable option for busy weeknights. Enjoy the ease of meal prep!

Chinese Stuffed Peppers

Savory Chinese Stuffed Peppers with Garlicky Pork Filling

Discover the joy of Chinese Stuffed Peppers with this savory recipe that fills Cubanelle peppers with a delicious pork mixture.
Prep Time 15 minutes
Cook Time 30 minutes
Resting Time 15 minutes
Total Time 1 hour
Servings: 4 peppers
Course: Dinner
Cuisine: Chinese
Calories: 320

Ingredients
  

For the Peppers
  • 4 pieces Cubanelle Peppers Can be swapped with Anaheim peppers if needed.
  • 2 tablespoons Vegetable Oil Any neutral oil is fine.
For the Filling
  • 1 pound Ground Pork Can substitute with ground chicken or turkey.
  • 1/2 cup Water Chestnuts Finely chopped.
  • 1 tablespoon Ginger Minced.
  • 2 tablespoons Scallion Chopped.
  • 1 large Egg Flax egg can be used for a vegan version.
  • 2 tablespoons Cornstarch
  • 1/2 teaspoon White Pepper Black pepper is a suitable substitute.
For the Sauce
  • 1/4 cup Shaoxing Wine Can be replaced with dry sherry.
  • 3 tablespoons Soy Sauce Low-sodium recommended.
  • 1/2 cup Chicken Stock Vegetable stock can be used.
  • 2 tablespoons Oyster Sauce Mushroom sauce can be used.
  • 4 cloves Garlic Minced.
  • 1 teaspoon Sugar Coconut sugar can be used for a twist.
  • 1 tablespoon Dark Soy Sauce Omit if unavailable.
  • 1 tablespoon Cornstarch Slurry Mix cornstarch with water before adding.

Equipment

  • Oven
  • large skillet
  • Mixing Bowl

Method
 

Preparation and Cooking
  1. Preheat your oven to 375°F (190°C) and prepare the Cubanelle peppers by cutting off the tops and removing seeds.
  2. In a mixing bowl, combine ground pork, Shaoxing wine, soy sauce, chopped water chestnuts, minced ginger, scallion, egg, cornstarch, sugar, and white pepper; mix until sticky.
  3. Stuff each pepper with the pork mixture tightly and place them in a baking dish.
  4. Heat vegetable oil in a skillet over medium-high heat, then add the stuffed peppers and cook for about 3 minutes on each side until blistered.
  5. Pour chicken stock, oyster sauce, garlic, sugar, dark soy sauce, and cornstarch slurry over peppers; cover and simmer for 5 minutes.
  6. Stir sauce gently and thicken it if desired by adding cornstarch slurry; cook until sauce clings to peppers.
  7. Plate the peppers, drizzle with thickened sauce, and finish with a splash of rice vinegar.

Nutrition

Serving: 1pepperCalories: 320kcalCarbohydrates: 15gProtein: 24gFat: 18gSaturated Fat: 6gPolyunsaturated Fat: 2gMonounsaturated Fat: 8gCholesterol: 100mgSodium: 800mgPotassium: 600mgFiber: 3gSugar: 3gVitamin A: 900IUVitamin C: 30mgCalcium: 30mgIron: 2mg

Notes

Ensure peppers are completely dry before frying for best results. Let filling rest for better flavor.

Tried this recipe?

Let us know how it was!

Brown Stew Salmon: A Flavor-Packed 30-Minute Delight

As the sun dips below the horizon, the tantalizing aroma of sizzling salmon fills my kitchen, transporting me straight to the vibrant shores of the Caribbean. This Brown Stew Salmon recipe is my go-to for those busy weeknights when I crave something quick yet brimming with flavor. In just 30 minutes, you’ll transform tender salmon fillets into a culinary masterpiece, simmered in a rich, aromatic sauce accented by colorful vegetables and spices. Not only is this delightful dish a total crowd-pleaser, but it also offers a nutritious and satisfying alternative to fast food. Are you ready to embrace the essence of Caribbean cooking in your home? Let’s dive into this delicious journey together!

Why is Brown Stew Salmon a Must-Try?

Flavorful Adventure: Embark on a culinary journey with this Caribbean-inspired dish that bursts with rich, savory flavors!
Speedy Preparation: Who said gourmet meals take hours? This recipe is ready in just 30 minutes, perfect for your busy weeknights.
Nutrient-Packed: Not only is the salmon tender and delicious, but it’s also a healthy alternative packed with proteins and vitamins.
Versatile Serving Options: Pair it with rice, quinoa, or even fried plantains to suit your palate.
Feeling adventurous? Try swapping salmon for tofu or snapper in new variations! Enjoy deliciousness that rivals any takeout without the long wait.

Brown Stew Salmon Ingredients

Here’s everything you need to create your delicious Brown Stew Salmon!

For the Salmon
Salmon Fillets – This is your primary protein; other firm fish like snapper can work well as a substitute.
Salt – Essential for enhancing flavor; adjust to taste based on preference.
Black Pepper – Adds depth and a hint of heat; freshly ground offers the best flavor.

For the Sauce
Garlic Powder – Provides aromatic warmth; feel free to use fresh garlic if you prefer.
Seasoning Salt – An overall flavor enhancer; all-purpose seasoning is a great alternative.
Bell Peppers (Red & Green) – Brings sweetness and vibrant color; any color pepper works if red or green is unavailable.
Onion – Adds sweetness and depth; a sweeter onion can offer a milder taste.
Garlic – Fresh aromatic component; adjust based on your garlic preference.
Fresh Thyme – Adds herby notes; dried thyme can also be used but in smaller quantities.
Scotch Bonnet Pepper – Authentic Caribbean flavor with a spicy kick; use whole for milder heat or sliced for more spice.
Tomato – Balances sweetness while adding moisture; you can substitute with tomato paste if needed.

For the Liquid Base
Chicken Broth (or Vegetable Broth/Water) – Forms the base of the sauce; use vegetable broth for a vegetarian option.
Hoisin Sauce – Provides a sweet, complex flavor; if you don’t have it, mix 1 tsp brown sugar with 1 tsp browning sauce instead.
Soy Sauce – Enhances umami; tamari is a great gluten-free alternative.
Brown Sugar – Offers a sweet touch to the sauce; adjust according to your sweetness preference.
Neutral Cooking Oil – Ideal for frying salmon; options like canola or grapeseed oil work best.

Each ingredient plays a crucial role in creating the vibrant flavors of this Brown Stew Salmon that you’ll surely crave!

Step‑by‑Step Instructions for Brown Stew Salmon

Step 1: Prep the Salmon
Begin by rinsing the salmon fillets under cold water and soaking them in lime or lemon juice for a few minutes to remove any fishy scent. Pat them dry with paper towels, then season both sides evenly with salt, black pepper, and seasoning salt, ensuring every bite of this Brown Stew Salmon is full of flavor.

Step 2: Brown the Salmon
Heat about 2 tablespoons of neutral cooking oil in a large non-stick skillet over medium-high heat until shimmering. Carefully place the seasoned salmon fillets in the skillet and fry for 5-7 minutes on each side, allowing them to become golden and crisp. Once cooked, remove the fillets and set them on a rack to drain any excess oil.

Step 3: Sauté the Vegetables
In the same skillet, add more oil if needed and lower the heat to medium. Begin by sautéing the chopped onion and minced garlic for about 2 minutes until they become fragrant. Next, add the diced bell peppers, tomatoes, fresh thyme, and the whole or sliced scotch bonnet pepper. Cook for another 3-4 minutes, stirring frequently, until the vegetables soften and blend together.

Step 4: Create the Sauce
Pour in the hoisin sauce, soy sauce, and chicken broth to the skillet with the sautéed vegetables, stirring well to combine the flavors. Allow the mixture to come to a gentle simmer, letting it bubble for about 2-3 minutes. The sauce should begin thickening slightly, creating a rich base for your Brown Stew Salmon.

Step 5: Combine and Steam
Return the browned salmon fillets to the skillet, nestling them gently into the sauce. Use a spoon to drizzle some of the bubbling sauce over the top of the fish. Cover the skillet partially with a lid, steaming the salmon for another 2-3 minutes, which helps infuse it with the aromatic flavors of the sauce.

Step 6: Serve and Enjoy
Once the salmon is flaky and heated through, remove the skillet from heat. Serve the Brown Stew Salmon hot, spooning the flavorful sauce and chunky vegetables over the fillets. This dish pairs beautifully with rice, quinoa, or any of your favorite sides, making a delightful meal bursting with Caribbean flavors.

Storage Tips for Brown Stew Salmon

Fridge: Store leftover Brown Stew Salmon in an airtight container in the refrigerator for up to 3-4 days. This keeps it fresh and ready to reheat!

Freezer: For longer storage, freeze portions of the Brown Stew Salmon in freezer-safe bags or containers for up to 2 months. Make sure to remove as much air as possible to prevent freezer burn.

Reheating: When ready to enjoy, gently reheat refrigerated salmon in the microwave or on the stovetop over medium-low heat until warmed through. Avoid high heat to retain moisture.

Storage Tips: If you want to maintain the salmon’s delicious texture, store the sauce separately and combine just before serving!

Expert Tips for Brown Stew Salmon

Fish Freshness: Always choose fresh salmon fillets for the best flavor and texture. Look for vibrant, moist flesh without a strong fishy odor.

Don’t Overcrowd: Avoid placing too many fillets in the skillet at once. This prevents proper browning and helps maintain the salmon’s integrity while cooking.

Control the Heat: If you find the scotch bonnet pepper too spicy, consider using a smaller piece or removing the seeds for a milder flavor, so everyone can enjoy the Brown Stew Salmon.

Perfectly Cooked Salmon: Keep an eye on the frying time; salmon should reach an internal temperature of 145°F for it to be fully cooked.

Adjusting Sauce Consistency: If the sauce is too thick, add a splash of water or broth to achieve your desired consistency, enhancing the overall enjoyment of your Brown Stew Salmon.

Brown Stew Salmon Variations & Substitutions

Feel free to get creative with this Brown Stew Salmon recipe and make it your own!

  • Firm Fish: Swap salmon with other firm fish like snapper or mackerel for a delightful twist. Each fish brings its own unique character to the dish!
  • Vegetarian Delight: Replace salmon with tofu or sautéed hearty vegetables for a vegetarian version that still packs a punch in flavor. It’s a fantastic way to enjoy rich Caribbean-inspired taste with plant-based goodness.
  • Heat Up: Adjust the scotch bonnet pepper by using fewer slices or adding more, depending on how much heat you can handle. Feeling brave? Go for that spicy kick!
  • More Veggies: Toss in extra vegetables like zucchini, broccoli, or carrots to add nutrition and variation in texture. Not only will it make the dish more colorful, but it also elevates the overall flavor.
  • Herbs Galore: Experiment with fresh herbs such as basil or cilantro instead of thyme for a fresh twist. Each herb adds its own aromatic layer, enhancing your culinary experience.
  • Sweet & Savory: For a sweeter finish, increase the amount of brown sugar or incorporate pineapple chunks into the stew. The sweetness beautifully balances the savory elements of the dish.
  • Broth Choices: Use vegetable broth instead of chicken broth for a lighter base, keeping it deliciously nutritious while catering to dietary preferences.
  • Sauce Swaps: If hoisin sauce is hard to find, use a mix of soy sauce with a little extra brown sugar for that sweet, umami depth. It’s a great way to keep that flavor profile intact.

As you explore these ideas, consider pairing your Brown Stew Salmon with sides like Fudgy Brownies Indulge for dessert or a fresh salad to complement the meal beautifully!

What to Serve with Brown Stew Salmon

Elevate your dining experience with delightful sides that perfectly complement the vibrant flavors of this Caribbean classic.

  • Steamed Jasmine Rice: The fluffy texture of jasmine rice soaks up the rich sauce, enhancing each bite of the salmon.

  • Quinoa Salad: A refreshing mix of quinoa with diced cucumbers and cherry tomatoes adds a nutty flavor and crunch, balancing the dish beautifully.

  • Fried Plantains: Delicately sweet, fried plantains add a delightful contrast to the savory salmon, making for a satisfying and traditional Caribbean pairing.

  • Garlic Green Beans: Crisp-tender green beans sautéed in garlic butter bring fresh brightness and a dash of elegance to your plate.

  • Coconut Rice: Creamy coconut rice, infused with coconut milk, offers a luscious mouthfeel that harmonizes wonderfully with the salmon’s bold flavors.

  • Mango Salsa: A tropical mango salsa sprinkled with lime juice introduces a fresh, fruity element that lightens the overall dish beautifully.

  • Coleslaw: A crunchy coleslaw brings a textural contrast to the soft salmon, while the tangy dressing brightens the flavors of the meal.

  • Pineapple Ginger Juice: To drink, a tall glass of sweet and tangy pineapple ginger juice provides refreshing relief from the dish’s spices, tying everything together.

  • Chocolate Rum Cake: For dessert, indulge in a rich chocolate rum cake that echoes the Caribbean theme, leaving everyone satisfied.

Make Ahead Options

These Brown Stew Salmon delights are perfect for meal prep! You can season the salmon fillets and refrigerate them for up to 24 hours in advance, ensuring they remain flavorful and fresh. Additionally, you can chop the vegetables (bell peppers, onion, and tomatoes) and store them in an airtight container in the refrigerator for up to 3 days. When you’re ready to serve, simply follow the cooking steps starting from browning the salmon and sautéing the vegetables. By prepping these components ahead of time, you will save precious minutes during busy weeknights, bringing the taste of the Caribbean to your dinner table with minimal fuss!

Brown Stew Salmon Recipe FAQs

What type of salmon is best for Brown Stew Salmon?
I recommend using fresh, skinless salmon fillets for the best flavor. Look for salmon that is bright and moist, avoiding any strong fishy odors. If salmon isn’t available, firm white fish like snapper or parrotfish makes a wonderful substitute!

How long can I store leftover Brown Stew Salmon?
Store leftover Brown Stew Salmon in an airtight container in the refrigerator for 3-4 days. Ensure that it’s cooled to room temperature before sealing it up. This will keep your delicious meal ready to enjoy again, while still tasting fantastic!

Can I freeze Brown Stew Salmon?
Absolutely! To freeze it, place portions of the Brown Stew Salmon in freezer-safe bags or containers, removing as much air as possible to prevent freezer burn. This dish can be stored for up to 2 months. When you’re ready, just thaw it in the fridge overnight and reheat gently.

What should I do if my sauce is too thick?
If your sauce turns out too thick, don’t worry! Simply add a splash of broth or warm water to the skillet while gently stirring. This will help loosen the sauce consistency. Remember, you can always adjust it gradually until you achieve your desired texture!

Are there any dietary considerations I should be aware of?
Yes! If you’re making this dish for someone with allergies or dietary restrictions, be mindful of the soy sauce as it contains gluten. You could use tamari as a gluten-free alternative. Additionally, consider reducing the amount of scotch bonnet pepper if you prefer a milder flavor, making it accessible for everyone to enjoy your delicious Brown Stew Salmon!

Brown Stew Salmon

Brown Stew Salmon: A Flavor-Packed 30-Minute Delight

Discover the stunning flavors of Brown Stew Salmon, a quick and nutritious Caribbean-inspired dish, perfect for busy weeknights.
Prep Time 10 minutes
Cook Time 20 minutes
Total Time 30 minutes
Servings: 4 servings
Course: Dinner
Cuisine: Caribbean
Calories: 350

Ingredients
  

For the Salmon
  • 4 fillets Salmon Can substitute with snapper
  • to taste Salt Adjust according to preference
  • to taste Black Pepper Freshly ground offers best flavor
For the Sauce
  • 1 teaspoon Garlic Powder Use fresh garlic if preferred
  • 1 teaspoon Seasoning Salt All-purpose seasoning is alternative
  • 1 each Bell Peppers (Red & Green) Any color works if unavailable
  • 1 medium Onion Sweeter onion for milder taste
  • 2 cloves Garlic Adjust based on preference
  • 1 tablespoon Fresh Thyme Dried thyme can also be used
  • 1 whole Scotch Bonnet Pepper Use whole for milder heat
  • 1 medium Tomato Substitutable with tomato paste
For the Liquid Base
  • 1 cup Chicken Broth Or vegetable broth/water
  • 2 tablespoons Hoisin Sauce Mix 1 tsp brown sugar with 1 tsp browning sauce if unavailable
  • 2 tablespoons Soy Sauce Tamari is gluten-free alternative
  • 1 tablespoon Brown Sugar Adjust to taste
  • 2 tablespoons Neutral Cooking Oil Canola or grapeseed oil recommended

Equipment

  • large non-stick skillet

Method
 

Step-by-Step Instructions for Brown Stew Salmon
  1. Prep the salmon by rinsing the fillets under cold water and soaking them in lime or lemon juice for few minutes. Pat dry and season both sides with salt, black pepper, and seasoning salt.
  2. Heat oil in a large skillet and brown the salmon fillets, frying for 5-7 minutes on each side until golden.
  3. Sauté onion and garlic for 2 minutes in the skillet, then add bell peppers, tomatoes, thyme, and scotch bonnet pepper, cooking for 3-4 minutes.
  4. Pour in hoisin sauce, soy sauce, and chicken broth, stirring well. Allow to simmer for 2-3 minutes until the sauce thickens.
  5. Return salmon to the skillet, cover partially, and steam for 2-3 minutes.
  6. Serve hot, spooning sauce and vegetables over fillets. Enjoy with rice or quinoa.

Nutrition

Serving: 1filletCalories: 350kcalCarbohydrates: 15gProtein: 30gFat: 20gSaturated Fat: 3gPolyunsaturated Fat: 2gMonounsaturated Fat: 10gCholesterol: 70mgSodium: 700mgPotassium: 500mgFiber: 2gSugar: 3gVitamin A: 500IUVitamin C: 30mgCalcium: 50mgIron: 1.5mg

Notes

Store leftovers in an airtight container in the fridge for up to 3-4 days. For longer storage, freeze in freezer-safe bags for up to 2 months. Reheat gently to maintain texture.

Tried this recipe?

Let us know how it was!

Savory Moambe Chicken: A Taste of Africa at Home

As the savory aroma wafted through the kitchen, it felt like a warm embrace from another world. Moambe Chicken, a celebrated Congolese delight, has the remarkable ability to turn any meal into a festive occasion. This rich dish combines tender chicken with a luscious sauce of peanut butter and palm oil, creating a unique and hearty experience that keeps your taste buds dancing. Not only is this Moambe Chicken gluten-free, accommodating various dietary needs, but it also keeps prep time manageable, making it perfect for busy weeknights. With its delightful mix of flavors, this traditional recipe promises to become a favorite in your home. What aromas will you be exploring in your kitchen today?

What makes Moambe Chicken irresistible?

Bold flavors: The combination of peanut butter and palm oil creates a sauce that’s creamy and rich, making every bite a delight. Quick to prepare: In just a few simple steps, you can have this savory dish ready to impress friends and family. Versatile serving options: Pair it with steamed rice, boiled yams, or sautéed greens for a complete meal that suits any palate. Cultural connection: Bringing a taste of Congolese tradition to your table, this dish invites conversation and exploration about diverse cuisines. Don’t miss out on trying it with dishes like our Jerk Chicken Burritos or Grilled Chicken Sandwich for a fun culinary journey!

Moambe Chicken Ingredients

• The key to a tasty Moambe Chicken lies in a few essential ingredients, crafted to perfection!

For the Chicken

  • Chicken Drumsticks – The star of the dish, lending a juicy and tender quality.
  • Salt – Essential for seasoning; adjust to your taste preference.

For the Sauce

  • Onion – Adds sweetness and depth; shallots work as a great substitute.
  • Garlic – Provides aromatic flavor; opt for fresh garlic for the best taste.
  • Tomato Sauce – Forms the sauce base, introducing acidity; crushed tomatoes can give a chunkier texture.
  • Peanut Butter – Brings creaminess and richness; palm nut concentrate can be used for a traditional touch.
  • Palm Oil – The main cooking fat, known for its unique flavor; you can substitute with olive oil if needed.
  • Cayenne Pepper – Introduces heat; adjust according to your preference or omit for a milder sauce.
  • Bouillon Powder – Boosts savory flavors; use vegetable or chicken bouillon as options.
  • Smoked Paprika – Delivers a smoky depth; regular paprika is a good alternative if necessary.

Let this Moambe Chicken be the centerpiece of your dinner table, inviting friends and family to share in a deliciously memorable meal!

Step‑by‑Step Instructions for Moambe Chicken

Step 1: Prepare the Chicken
Start by washing the chicken drumsticks thoroughly under cold running water, then pat them dry with paper towels. This step is crucial for achieving a good sear later on. Set the chicken aside while you gather your other ingredients, ensuring they’re prepped and within reach for a smooth cooking process.

Step 2: Brown the Chicken
In a large skillet or Dutch oven, heat about 2 tablespoons of palm oil (or olive oil) over medium-high heat. Once the oil is shimmering, add the chicken drumsticks, cooking them for about 5-7 minutes on each side until they are golden brown. This will give your Moambe chicken a beautiful color and rich flavor base.

Step 3: Sauté Aromatics
After browning the chicken, remove it from the pan and place it on a plate. In the same skillet, add chopped onions and minced garlic, sautéing them for 2-3 minutes until fragrant and translucent. Stir occasionally to prevent burning, allowing the savory aromas to fill your kitchen and enhance the flavor of the forthcoming sauce.

Step 4: Create the Sauce
Pour in the tomato sauce along with cayenne pepper, bouillon powder, smoked paprika, and salt, stirring the mixture to combine all the ingredients well. Allow the sauce to simmer for about 5 minutes, thickening slightly as it heats up; this will create the robust foundation for your Moambe chicken.

Step 5: Simmer with Chicken
Return the browned chicken drumsticks to the pan, nestling them into the sauce. Increase the heat to bring it all to a gentle boil, then lower the heat and cover the pan, letting it simmer for 15 minutes. Keep an eye on the mixture, adding a splash of water if it gets too dry, ensuring the chicken stays tender.

Step 6: Incorporate Peanut Butter
Once the chicken has simmered and absorbed those lovely flavors, carefully remove the pieces from the pan. Stir in the peanut butter, mixing it well into the sauce until it’s completely blended. This creamy addition brings the signature richness to the Moambe chicken, transforming the sauce into a luscious coating.

Step 7: Final Cooking
Return the chicken to the skillet, coating it with the velvety sauce. Cover and let it simmer on low heat for an additional 5-10 minutes. This final cooking step ensures the chicken is fully cooked through, reaching an internal temperature of 165°F, resulting in tender, flavorful Moambe chicken ready to serve.

What to Serve with Moambe Chicken

As you enjoy the rich and savory notes of this Congolese delight, consider rounding out your meal with complementary sides that bring balance to the table.

  • Steamed Rice: The fluffy grains absorb the creamy sauce beautifully, making every bite a warm hug. It’s a classic pairing that enriches the dining experience.

  • Sautéed Greens: Lightly sautéed spinach or kale adds a nutritious crunch, cutting through the richness of the chicken and offering a refreshing contrast.

  • Boiled Yams: Their natural sweetness provides a delightful counterpoint to the savory sauce, creating a comforting and filling plate. Serve them sliced for easy sharing!

  • Plantains: Sweet or green plantains can be fried or boiled for a delightful texture that complements the bold flavors, enhancing the overall enjoyment of the dish.

  • Fried Cassava: Crispy on the outside and fluffy inside, cassava chips add a unique crunch that pairs nicely with the moist and creamy chicken.

  • Chilled Mango Salsa: The sweetness of fresh mangoes with lime and cilantro gives a refreshing bite, brightening up the entire meal while enhancing the flavor of the chicken.

  • Sparkling Water with Lime: A light, fizzy drink cleanses the palate between bites, making every taste of the Moambe Chicken more vibrant and memorable.

  • Chocolate Mousse: For dessert, indulge in a silky chocolate mousse, creating the perfect sweet finish after the savory richness of the meal. It’s your decadent reward!

Moambe Chicken Variations & Substitutions

Feel free to unleash your creativity in the kitchen by customizing this delightful dish to suit your taste!

  • Tender Thighs: Swap chicken drumsticks for skinless chicken thighs for an even juicier texture and quicker cooking time. They absorb the sauce beautifully!

  • Traditional Twist: Replace peanut butter with palm nut concentrate to honor traditional flavors. This will elevate the authenticity of your Moambe chicken, giving it a true Congolese essence.

  • Low-Carb Delight: Serve your Moambe chicken over cauliflower rice or shirataki noodles for a low-carb option that doesn’t compromise on flavor. Both alternatives provide a light base perfect for soaking up the rich sauce.

  • Vegan Version: Substitute chicken with chickpeas or tofu to create a plant-based version of Moambe Chicken. The creamy sauce will enhance these protein-packed options while keeping the essence of the dish intact.

  • Flavor Boost: Add a splash of coconut milk alongside the peanut butter for an extra layer of creaminess and subtle sweetness. This twist balances well with the savory components.

  • Smoky Spice: If you love a kick, add a dash of smoked chipotle powder instead of cayenne pepper. The sweet smokiness adds depth and a unique flavor profile.

  • Fresh Herbs: Incorporate fresh herbs like cilantro or parsley as a garnish to add a pop of freshness and color right before serving. It uplifts the dish with delightful aromas!

  • Side Suggestions: Consider pairing your Moambe chicken with sides like plantains or boiled yams. Each option complements the dish, contributing to a well-rounded meal with varied textures!

Embrace the spirit of exploration with these variations and make this dish your own—who knows, you might discover a new family favorite!

Make Ahead Options

Moambe Chicken is a fantastic dish for busy weeknights! You can prep the chicken and sauce separately up to 24 hours in advance, keeping everything fresh in the refrigerator. To do this, brown the chicken and prepare the sauce (steps 1-4), then cool and store them in airtight containers. This helps maintain the tender quality of the chicken and the flavorful depth of the sauce. When you’re ready to enjoy your meal, simply reheat the sauce in a skillet, return the chicken to the pan, and simmer for about 10-15 minutes until heated through. You’ll savor the same delicious experience with minimal effort!

Helpful Tricks for Moambe Chicken

  • Use Fresh Ingredients: Fresh garlic and onions enhance the flavor significantly; opt for fresh produce for the best results.
  • Don’t Rush Browning: Take your time to brown the chicken properly. This step adds depth to the Moambe Chicken, enhancing its overall flavor.
  • Check Sauce Thickness: If the sauce gets too thick while simmering, add a little water to keep it creamy and prevent burning.
  • Adjust Spice Levels: Taste as you go! Feel free to tweak the cayenne pepper according to your spice preference, ensuring it suits your family’s taste.
  • Serve Warm: Moambe Chicken is best enjoyed hot, as the flavors marry beautifully when served right away. Pair it with your favorite sides for a memorable meal!

Storage Tips for Moambe Chicken

Fridge: Store Moambe chicken in an airtight container for up to 3-5 days. This helps retain its rich flavors and creamy texture.

Freezer: You can freeze Moambe chicken for up to 2 months. Just place it in a freezer-safe container, ensuring it’s tightly sealed to prevent freezer burn.

Reheating: When ready to enjoy, thaw in the fridge overnight and reheat in a saucepan over low heat until heated through. Add a splash of water if the sauce thickens.

Leftovers: If you have extra sauce, it can be used as a dipping sauce or drizzled over other dishes, bringing the delightful taste of Moambe chicken back to your table!

Moambe Chicken Recipe FAQs

What should I look for when selecting chicken for Moambe Chicken?
Absolutely! When selecting chicken drumsticks, look for ones that are plump and have a nice pink hue without any dark spots. Freshness is key, so check the sell-by date and avoid any packages that appear leaky or have an off smell!

How should I store leftovers of Moambe Chicken?
Moambe chicken can be stored in an airtight container in the refrigerator for about 3-5 days. Be sure to let it cool completely before sealing. To maintain its rich flavors, reheat gently on the stovetop, adding a splash of water if the sauce has thickened.

Can I freeze Moambe Chicken?
Yes! You can freeze Moambe chicken for up to 2 months. To do this, place the cooled chicken and sauce in a freezer-safe container, ensuring it’s tightly sealed. When ready to enjoy, thaw overnight in the fridge and reheat in a saucepan until heated through.

What if I need to adjust the spice level in the recipe?
No problem! If you prefer a milder flavor, simply adjust the cayenne pepper or omit it altogether. You can also add a small amount of sugar or honey to balance the heat. Taste as you go to find that perfect flavor profile for your family!

Are there any dietary considerations for Moambe Chicken?
Very! This recipe is gluten-free, making it a friendly option for those with gluten sensitivities. However, if you have nut allergies, you may want to replace the peanut butter with sunflower seed butter or omit it entirely. Always double-check ingredient labels to be safe.

How can I tell when the chicken is cooked properly?
To ensure your Moambe chicken is fully cooked, use a meat thermometer to check that it has reached an internal temperature of 165°F (75°C). The juices should run clear when the meat is pierced at the thickest part, and the chicken should be tender and easy to pull apart.

Moambe Chicken

Savory Moambe Chicken: A Taste of Africa at Home

Moambe Chicken is a celebrated Congolese delight that combines tender chicken with a luscious sauce of peanut butter and palm oil, perfect for any festive occasion.
Prep Time 15 minutes
Cook Time 40 minutes
Total Time 55 minutes
Servings: 4 servings
Course: Chicken
Cuisine: Congolese
Calories: 450

Ingredients
  

For the Chicken
  • 8 pieces Chicken Drumsticks The star of the dish, lending a juicy and tender quality.
  • 1 teaspoon Salt Essential for seasoning; adjust to taste.
For the Sauce
  • 1 medium Onion Adds sweetness and depth; shallots work as a substitute.
  • 3 cloves Garlic Opt for fresh garlic for the best taste.
  • 1 cup Tomato Sauce Forms the sauce base, introducing acidity.
  • 1/2 cup Peanut Butter Brings creaminess and richness.
  • 1/4 cup Palm Oil Known for its unique flavor; can substitute with olive oil.
  • 1/2 teaspoon Cayenne Pepper Adjust for heat preference.
  • 1 teaspoon Bouillon Powder Boosts savory flavors; use vegetable or chicken.
  • 1 teaspoon Smoked Paprika Delivers a smoky depth.

Equipment

  • Large skillet or Dutch oven

Method
 

Step-by-Step Instructions for Moambe Chicken
  1. Prepare the Chicken: Wash the chicken drumsticks thoroughly under cold running water, then pat them dry with paper towels.
  2. Brown the Chicken: Heat about 2 tablespoons of palm oil over medium-high heat, add chicken drumsticks, cooking for 5-7 minutes on each side until golden brown.
  3. Sauté Aromatics: Remove chicken and sauté chopped onions and minced garlic until fragrant and translucent.
  4. Create the Sauce: Pour in tomato sauce, cayenne pepper, bouillon powder, smoked paprika, and salt, stirring to combine. Simmer for about 5 minutes.
  5. Simmer with Chicken: Return chicken to the pan, increase heat to a gentle boil, then lower heat and cover to simmer for 15 minutes.
  6. Incorporate Peanut Butter: Remove chicken and stir in peanut butter until well blended.
  7. Final Cooking: Return chicken to skillet, coating with sauce, cover, and simmer on low heat for an additional 5-10 minutes.

Nutrition

Serving: 1servingCalories: 450kcalCarbohydrates: 30gProtein: 28gFat: 25gSaturated Fat: 6gPolyunsaturated Fat: 4gMonounsaturated Fat: 14gCholesterol: 110mgSodium: 800mgPotassium: 600mgFiber: 3gSugar: 5gVitamin A: 500IUVitamin C: 5mgCalcium: 40mgIron: 2mg

Notes

For best results, use fresh ingredients, and adjust flavors according to your taste preference. Moambe Chicken is best served warm and can be paired with sides like steamed rice or boiled yams.

Tried this recipe?

Let us know how it was!

Savor Beef Kofta Yogurt with a Delightful Twist

As I lifted a warm, fragrant kofta from the grill, I could almost taste the Mediterranean sun shining down, infusing joy into my kitchen. This Juicy Beef Kofta with Refreshing Yogurt Sauce is more than just a dish; it’s a one-way ticket to a weeknight feast that is quick to prepare and utterly satisfying. With lean ground beef packed with high protein and a creamy yogurt sauce that you can whip up in minutes, this recipe is a delightful escape that caters to both your taste buds and your busy lifestyle. Plus, with the flexibility to make it gluten-free or dairy-free, it’s a crowd-pleaser for everyone around the table. So, are you ready to savor each bite and elevate your dinner game?

Why Savor Beef Kofta Yogurt?

Juicy Koftas: These koftas are incredibly moist and flavorful, with spices that transport your taste buds straight to the Mediterranean.

Quick & Easy: With a simple prep and cook time, you’ll have dinner on the table in no time, perfect for busy weeknights!

High-Protein Delight: Each serving boasts a whopping 28g of protein, making it a filling meal that won’t let you down.

Versatile Ingredients: Swap in ground turkey for a lighter option or replace the yogurt with labneh for a unique twist.

Family-Friendly: Kids love the tender koftas and refreshing sauce, ensuring happy faces around the dinner table!

Meal Prep Friendly: Prepare the koftas ahead of time and keep left overs for quick meals throughout the week or freeze for later. For more delicious beef dish ideas, check out my Slow Cooked Summer Beef Casserole or Chili Beef Flavor.

Savor Beef Kofta Yogurt Ingredients

For the Kofta
Lean Ground Beef – Provides essential protein for a hearty dish; can substitute with ground turkey for a lighter alternative.
Medium Onion – Adds moisture and flavor; finely chop to ensure even distribution and cooking.
Garlic Cloves – Enhances the overall flavor profile; fresh garlic delivers the best taste.
Fresh Cilantro – Adds a burst of freshness; can substitute with parsley if desired.
Ground Cumin – Key spice for authentic Middle Eastern flavor; can substitute with garam masala for a different taste.
Ground Coriander – Complements cumin and adds depth; a small amount of curry powder can be used if unavailable.
Paprika – Offers mild sweetness and vibrant color; smoked paprika can provide richer flavor.

For the Yogurt Sauce
Greek Yogurt – Serves as the base for the sauce, offering creaminess and tang; regular yogurt can be strained for a thicker consistency.
Fresh Lemon Juice – Brightens the yogurt sauce and balances flavors; vinegar can substitute for acidity if necessary.
Fresh Dill or Mint – Adds aromatic freshness; feel free to select based on taste preference.

These ingredients will help you savor every bite of your delicious beef kofta yogurt dish!

Step‑by‑Step Instructions for Savor Beef Kofta Yogurt

Step 1: Prepare Kofta Mixture
In a large mixing bowl, combine 1 pound of lean ground beef with a finely chopped medium onion, minced garlic cloves, and freshly chopped cilantro. Add ground cumin, ground coriander, paprika, salt, and pepper. Mix well until the mixture is slightly sticky and all ingredients are evenly distributed, taking about 3-4 minutes.

Step 2: Shape Koftas
With wet hands to prevent sticking, form the beef mixture into oval-shaped patties or skewers, about 1 inch thick. Aim for uniformity to ensure even cooking. Place formed koftas on a clean plate, allowing them to rest while you preheat your grill.

Step 3: Preheat Grill
Preheat your grill to medium-high heat, approximately 400°F. Once hot, lightly grease the grates with cooking oil to prevent the koftas from sticking. Keep a close watch on the temperature to achieve a beautifully seared exterior while not overcooking the beef.

Step 4: Cook Koftas
Carefully place the koftas on the preheated grill, ensuring they have enough space to cook evenly. Grill each side for about 5 minutes, checking for a golden-brown crust. Use a meat thermometer to ensure the internal temperature reaches 160°F for safe consumption.

Step 5: Prepare Yogurt Sauce
While the koftas are grilling, mix together 1 cup of Greek yogurt with fresh lemon juice and your choice of chopped dill or mint in a separate bowl. Season with salt and pepper to taste, and let the sauce rest for 10 minutes. This allows the flavors to meld beautifully, pairing perfectly with the koftas.

Step 6: Serve
After grilling, let the beef koftas rest for a couple of minutes off the heat to retain their juiciness. Serve them alongside the refreshing yogurt sauce and optional sides like warm pita, cucumber salad, or rice pilaf for a delightful and satisfying meal with each bite of your Savor Beef Kofta Yogurt.

What to Serve with Juicy Beef Kofta with Refreshing Yogurt Sauce

What complements the hearty flavors of beef kofta?

Pairing your delicious kofta dish with thoughtful sides can elevate it into an unforgettable meal experience. Here are some delightful options that will make your dining table shine.

  • Warm Pita Bread: Ideal for scooping up koftas and sauce, it adds a delightful chewy texture that enhances each bite. The soft bread invites a comforting embrace of flavors.

  • Cucumber Salad: Crisp and refreshing, this salad brightens your plate with juicy cucumbers, tangy lemon, and a hint of dill for a cool contrast to the warm koftas.

  • Herbed Rice Pilaf: A fragrant side that brings together aromatic spices and tender grains, making it a perfect foundation for your kofta.

  • Roasted Vegetables: Colorful and caramelized, seasonal veggies such as zucchini, bell peppers, and carrots complement the rich meatiness while bringing sweetness and crunch.

  • Tzatziki Sauce: For a flavor echo, serve this cool, garlicky yogurt sauce alongside to enhance the cooling effect enjoyed with the kofta. It’s a match made in culinary heaven!

  • Chickpea Salad: A protein-packed side that offers a nutty taste with fresh greens, tomatoes, and a zesty dressing, creating a filling meal with different textures.

  • Mint Tea: This refreshing drink with its soothing herbal notes perfectly complements the aromatic spices of your beef kofta for a complete Mediterranean experience.

  • Baklava: As a sweet finish, this rich pastry delivers a decadent contrast to your savory meal, tying everything together in a delightful way. It’s a true indulgence for the senses!

Make Ahead Options

These Juicy Beef Kofta with Refreshing Yogurt Sauce are perfect for busy home cooks looking to save time! You can prepare the kofta mixture up to 24 hours in advance by combining the lean ground beef, chopped onion, garlic, cilantro, and spices, then storing it in an airtight container in the refrigerator. Additionally, the yogurt sauce can be mixed and refrigerated for up to 3 days, allowing flavors to develop beautifully. Just make sure to stir it well before serving to maintain its creamy texture. When you’re ready to cook, simply shape the mixture into patties and grill as instructed, delivering restaurant-quality results with minimal effort!

Savor Beef Kofta Yogurt Variations

Feel free to unleash your creativity and customize this dish to suit your taste and dietary needs!

  • Zucchini Boost: Mix in grated zucchini to the kofta mixture for added moisture and nutrition. It’s an excellent way to sneak in more veggies while maintaining that juicy texture!

  • Spicy Kick: For those who enjoy heat, add cayenne pepper or chopped jalapeños. Just imagine the satisfying warmth as it melds with the savory flavors of the koftas!

  • Mediterranean Flavor: Incorporate sun-dried tomatoes and dried oregano into the meat mixture for a unique twist. This combination adds a lovely depth that transports you straight to a sun-soaked terrace.

  • Yogurt Alternatives: If you’re avoiding dairy, substitute Greek yogurt with labneh or a creamy dairy-free option like coconut yogurt. The richness remains while accommodating various dietary preferences.

  • Herb Swap: Experiment with different herbs by replacing cilantro with fresh parsley or oregano for a different aromatic experience. Each herb brings its charm to the plate!

  • Add Nuts: Mix in crushed pine nuts or walnuts for an added crunch and nuttiness in your koftas. It creates a delightful contrast with the tender meat.

  • Citrus Zest: Brighten up the yogurt sauce with a splash of orange or lime zest. This will elevate the freshness and marry wonderfully with the spices in the koftas.

  • Sweet Twist: Add a hint of sweetness by incorporating finely chopped apricots or raisins into the kofta mixture. It surprises the palate and perfectly balances the savory flavors of the dish.

Whether sticking to the classic approach or trying out one of these delicious twists, there’s endless potential to savor your beef kofta yogurt dish with joy. For even more exciting beef recipes, don’t miss my Sweet Potato Beef Skillet or dive into a comforting serving of Shepherd’s Pie with Ground Beef!

Storage Tips for Savor Beef Kofta Yogurt

  • Fridge: Leftover koftas can be stored in an airtight container in the refrigerator for up to 3 days to maintain their juicy texture.
  • Freezer: For longer storage, shape the koftas and freeze them on a baking sheet. Once frozen, transfer to a freezer bag; they’ll last up to 3 months, ready for your next craving.
  • Reheating: When ready to enjoy, cook directly from frozen by adding a few extra minutes to your grilling time, ensuring they reach an internal temperature of 160°F.
  • Yogurt Sauce Storage: The yogurt sauce can be kept in the fridge for about 2 days; store it in an airtight container for the best flavor in your Savor Beef Kofta Yogurt dish.

Expert Tips for Savor Beef Kofta Yogurt

Finely Chop Onions: This ensures even cooking and prevents any textural issues in your koftas—nobody wants a crunchy bite!

Use a Meat Thermometer: To guarantee juiciness, check that your koftas reach an internal temperature of 160°F without overcooking them.

Rest the Yogurt Sauce: Allowing the sauce to rest for at least 10 minutes enhances its flavor, making it the perfect complement to your koftas.

Shape Uniformly: Ensure all koftas are of similar size for even grilling; larger pieces may take longer to cook fully.

Prep Ahead: You can prepare the kofta mixture and store it in the fridge for up to 24 hours, making mealtime a breeze with this Savor Beef Kofta Yogurt recipe.

Savor Beef Kofta Yogurt Recipe FAQs

How can I ensure my ground beef is the right texture for koftas?
Absolutely! Use lean ground beef that feels slightly sticky after mixing in your ingredients. Finely chop your onions to prevent crunchy bits and allow for even cooking. The mixture should hold together but not be too dry; adding a bit more chopped cilantro can help with moisture if needed!

What is the best way to store leftovers?
Very simple! Leftover koftas can be stored in an airtight container in the fridge for up to 3 days. To maintain their juicy texture, ensure they are completely cooled before sealing. If you’re storing the yogurt sauce separately, it keeps well in the fridge for about 2 days in an airtight container.

Can I freeze the koftas and how do I do that?
Absolutely! Shape the koftas and place them on a baking sheet lined with parchment paper. Freeze until solid, then transfer them to a freezer bag. They’ll last for up to 3 months. When ready to cook, simply grill them right from frozen, adding a couple of extra minutes to the cooking time, ensuring they reach an internal temperature of 160°F.

What should I do if my koftas fall apart while grilling?
Very common! If your koftas are not holding together, you might need a little more binding. Try adding an egg to the mixture or breadcrumbs to help hold everything together. It’s also vital to ensure your grill is hot enough to sear the outside quickly, locking in those flavorful juices.

Are there any substitutions for making this dish gluten-free or dairy-free?
Of course! To make the koftas gluten-free, ensure you’re using certified gluten-free breadcrumbs if adding any. For a dairy-free option, substitute Greek yogurt with coconut yogurt or a dairy-free yogurt alternative without compromising on tang and creaminess! Both options will work beautifully in your Savor Beef Kofta Yogurt dish.

Can I use different herbs in the yogurt sauce?
Absolutely! If you’re not a fan of dill or mint, feel free to experiment with other fresh herbs such as parsley or even basil for a different flavor profile. Each herb brings its own unique taste, adding a delightful twist to your Savor Beef Kofta Yogurt experience!

Savor Beef Kofta Yogurt

Savor Beef Kofta Yogurt with a Delightful Twist

Enjoy this Savor Beef Kofta Yogurt recipe, a delightful meal with high protein and refreshing yogurt sauce.
Prep Time 15 minutes
Cook Time 10 minutes
Resting Time 10 minutes
Total Time 35 minutes
Servings: 4 koftas
Course: Beef
Cuisine: Mediterranean
Calories: 350

Ingredients
  

For the Kofta
  • 1 pound Lean Ground Beef Can substitute with ground turkey for a lighter alternative.
  • 1 Medium Onion Finely chopped for even distribution.
  • 2 cloves Garlic Cloves Minced for best flavor.
  • 1/4 cup Fresh Cilantro Can substitute with parsley.
  • 1 teaspoon Ground Cumin Key spice for flavor.
  • 1 teaspoon Ground Coriander Adds depth; substitute with curry powder if needed.
  • 1 teaspoon Paprika Smoked paprika can add richer flavor.
For the Yogurt Sauce
  • 1 cup Greek Yogurt Strain regular yogurt for thicker sauce.
  • 2 tablespoons Fresh Lemon Juice Can substitute vinegar for acidity.
  • 2 tablespoons Fresh Dill or Mint Select based on taste preference.

Equipment

  • Grill
  • Mixing Bowl
  • Meat Thermometer

Method
 

Step-by-Step Instructions
  1. In a large mixing bowl, combine the lean ground beef, chopped onion, minced garlic, and chopped cilantro. Add ground cumin, ground coriander, paprika, salt, and pepper. Mix well until the mixture is sticky and evenly distributed, about 3-4 minutes.
  2. With wet hands, form the beef mixture into oval-shaped patties or skewers, about 1 inch thick. Place the koftas on a clean plate and rest them while preheating the grill.
  3. Preheat the grill to medium-high heat, about 400°F, and lightly grease the grates to prevent sticking.
  4. Grill each side of the koftas for about 5 minutes until a golden-brown crust forms and the internal temperature reaches 160°F.
  5. In a separate bowl, mix the Greek yogurt with fresh lemon juice and chopped dill or mint. Season with salt and pepper to taste, then let the sauce rest for 10 minutes.
  6. Let the beef koftas rest for a couple of minutes off the heat, then serve with the yogurt sauce and optional sides.

Nutrition

Serving: 1koftaCalories: 350kcalCarbohydrates: 10gProtein: 28gFat: 20gSaturated Fat: 8gPolyunsaturated Fat: 2gMonounsaturated Fat: 10gCholesterol: 85mgSodium: 500mgPotassium: 450mgFiber: 1gSugar: 2gVitamin A: 500IUVitamin C: 2mgCalcium: 80mgIron: 3mg

Notes

For best results, finely chop onions and shape koftas uniformly. Prepare the kofta mixture ahead for convenience.

Tried this recipe?

Let us know how it was!

Gluten-Free Focaccia: Irresistibly Fluffy and Flavorful

As I stood in my kitchen, the seductive aroma of warm rosemary wafting through the air transported me to a quaint Italian café. That’s the magic of making gluten-free focaccia! This recipe for Easy Gluten-Free Rosemary Focaccia with Crispy Crust not only captures the heartwarming essence of traditional Italian bread but offers a delightful escape for all of us who seek comfort in wholesome, homemade food. With its perfectly crispy crust and a tender, fluffy interior, this focaccia is incredibly simple to whip up, making it perfect for both seasoned chefs and curious newbies alike. Plus, it’s vegan-friendly, so you can share this culinary triumph with everyone at the table. Are you ready to elevate your bread game and impress your loved ones? Let’s dive into the delicious world of focaccia!

Why is this focaccia so irresistible?

Fluffy Texture: This gluten-free focaccia boasts a light and airy interior that mimics traditional bread, making it comfortable for everyone at the table.

Herb-Infused Flavor: With the fragrant rosemary and rich olive oil, every slice bursts with irresistible flavor that elevates your meals.

Easy for Everyone: Perfect for both novice and experienced bakers, you can whip this up quickly—great for a weeknight side or a fancy dinner!

Versatile Toppings: Experiment with various toppings like sun-dried tomatoes or vegan parmesan to make each loaf uniquely yours.

Crowd-Pleasing Delight: It’s not just gluten-free; it’s a hit among all guests, ensuring everyone can join in on the delicious experience.

You might also enjoy pairing it with homemade soup or using it for your favorite bruschetta toppings—what a way to impress!

Gluten-Free Focaccia Ingredients

For the Dough

  • Gluten-Free 1:1 Flour – This flour is essential for structure; King Arthur Measure-for-Measures is preferred, but Bob’s Red Mill can work too for a heavier texture.
  • Baking Powder – Crucial for achieving that light and fluffy texture in your gluten-free focaccia.
  • Warm Water – Activates the yeast; aim for 120-130°F for the best results.
  • Instant or Rapid Rise Yeast – The backbone of leavening; freshness is key for a good rise.
  • Sugar/Honey/Agave – Provides nourishment for the yeast; agave is a low-glycemic alternative.
  • Kosher Salt – Enhances the flavor; remember to use it judiciously to maintain balance.
  • Olive Oil – Vital for a crispy crust and rich flavor; opt for extra virgin olive oil for the best taste.

For Toppings

  • Fresh Rosemary – This aromatic herb adds a lovely flavor; feel free to swap in thyme or oregano for a twist.
  • Vegan Parmesan or Regular Parmesan – An optional touch for an extra layer of savory flavor on top.
  • Flaky Sea Salt – Gives your focaccia a delightful crunch and enhances the top flavor.
  • Black Pepper – Adds depth and a subtle kick to every bite.

With these ingredients, you’re well on your way to crafting a delicious gluten-free focaccia that will have everyone asking for more!

Step‑by‑Step Instructions for Gluten-Free Focaccia

Step 1: Combine Dry Ingredients
In a large mixing bowl, whisk together 2 cups of gluten-free 1:1 flour, 1 tablespoon of baking powder, and 1 teaspoon of kosher salt until well blended. This mixture sets the foundation for your gluten-free focaccia, so make sure there are no lumps and everything is evenly distributed.

Step 2: Prepare Wet Ingredients
In a separate bowl, combine 1 cup of warm water (120-130°F), 2 teaspoons of instant yeast, and 1 tablespoon of sugar or agave. Stir to dissolve and let it bloom for about 3-5 minutes until the mixture is foamy. This step activates the yeast and ensures your focaccia will rise beautifully.

Step 3: Mix Batter
Once the yeast is bubbly, pour the mixture into the bowl of dry ingredients along with 2 tablespoons of olive oil. Stir vigorously until fully combined; the batter will be sticky and wet. Allow the gluten-free focaccia batter to sit for a few minutes, giving it time to absorb the moisture properly.

Step 4: Transfer Batter
Lightly grease an 8×8 or 9×9 baking pan and line it with parchment paper for easy removal. Pour the focaccia batter into the pan, using a spatula to spread it evenly. Gently pat down the batter with your fingers, smoothing the surface, ensuring you reach the corners of the pan.

Step 5: Second Rise
Cover the pan with a clean kitchen towel and let it rise in a warm area for about 30 minutes to 1 hour. You’ll know it’s ready when the batter has doubled in size, showcasing beautiful air bubbles. This step is crucial for achieving a light and fluffy texture in your gluten-free focaccia.

Step 6: Prepare for Baking
Preheat your oven to 400°F (200°C). Once the focaccia has risen, use your oiled fingers to gently dimple the surface of the batter, creating small indentations. This helps hold the toppings and gives the focaccia its classic look.

Step 7: Add Toppings
Sprinkle a generous amount of fresh rosemary, optional vegan parmesan, flaky sea salt, and a dash of black pepper over the dimpled batter. Feel free to customize it with any other toppings you love—this is where your creativity can shine before baking the gluten-free focaccia.

Step 8: Bake
Slide your pan into the preheated oven and bake for 25-30 minutes. Keep an eye on it; you want the focaccia to turn a lovely golden brown. Once it’s crisp and has a nice color, remove it from the oven and let it cool in the pan for 10-12 minutes before slicing into pieces.

What to Serve with Easy Gluten-Free Rosemary Focaccia

Nothing pairs better with this warm, herby bread than delicious side dishes and thoughtful toppings that enhance its delightful flavor!

  • Creamy Tomato Soup: A classic pairing that balances the focaccia’s crispness with rich, velvety textures, creating a comforting experience.

  • Arugula Salad: The peppery bite of arugula, tossed with a light lemon vinaigrette, complements the focaccia perfectly, adding freshness to each bite.

  • Savory Oil Dipping Sauce: A mixture of olive oil, balsamic vinegar, and Italian herbs makes for a simple yet elegant dip that elevates the focaccia’s taste. Go ahead—dunk away!

  • Garlic Roasted Vegetables: Roasted seasonal veggies, seasoned with garlic and herbs, provide a colorful side filled with flavor and nutrition next to your focaccia.

  • Bruschetta Topping: Top slices of focaccia with diced tomatoes, basil, and a drizzle of balsamic glaze for an inspiring appetizer that dances with vibrant Italian flavors.

  • Chianti Wine: A glass of this Italian red wine perfectly complements the focaccia’s flavors while enhancing the entire meal with its rich, fruity notes.

By incorporating these pairings, you’ll create a beautiful dining experience that showcases your delicious focaccia while pleasing every palate at the table!

Make Ahead Options

These gluten-free focaccia delights are perfect for meal prep enthusiasts! You can prepare the focaccia dough and let it rise up to 24 hours in advance to save time on busy weeknights. Simply follow the steps up to the second rise, then cover the pan tightly with plastic wrap and refrigerate. When you’re ready to bake, allow the dough to come to room temperature (about 30 minutes) and reshape it if needed. Dimple the surface, add your toppings, and pop it in the oven. This way, you’ll enjoy the same crispy, fluffy texture that’s just as delicious, making your homemade meal a breeze!

How to Store and Freeze Gluten-Free Focaccia

Fridge: Store leftover gluten-free focaccia in an airtight container or wrapped in plastic wrap for up to 3 days to maintain freshness and flavor.

Freezer: For longer storage, slice the focaccia and wrap each piece tightly in plastic wrap and foil. Freeze for up to 3 months, ensuring it retains its delicious texture.

Reheating: To enjoy, simply thaw in the fridge overnight, then reheat in a 350°F oven for about 10-15 minutes until warmed through. This will revive the crispy crust and fluffy interior.

Make-Ahead Tips: If you’re planning to serve focaccia at a later date, consider making it a day in advance. Freshly baked focaccia can be stored and tastes delightful when reheated, perfect for impressing your guests!

Gluten-Free Focaccia: Customization Ideas

Why not explore some exciting twists and substitutions to make this focaccia truly your own? With options that offer delightful flavors and textures, your creativity can shine through in every bite!

  • Dairy-Free: Swap the cheese for nut-based vegan parmesan alternatives or nutritional yeast for a cheesy flavor without the dairy.
  • Herb-Infused: Add garlic powder, herbs de Provence, or Italian seasoning to the dough for an aromatic experience in every slice.
  • Veggie Boost: Fold in diced sun-dried tomatoes or sliced olives into the batter for an unexpected flavor burst that adds Mediterranean flair.
  • Sweet Twist: Drizzle the top with a mixture of honey and balsamic reduction before baking for a sweet contrast to the savory herbs.
  • Flaxseed Meal: Substitute part of the flour with ground flaxseed for added nutrition and a nutty flavor that complements the focaccia nicely.
  • Heat Lover’s Special: Sprinkle crushed red pepper flakes into the batter or on top before baking for a spicy kick that’ll awaken your palate.
  • Grainy Texture: Incorporate a tablespoon of chia seeds or sesame seeds into the dough for a delightful crunch and extra nutrition.
  • Thinner Loaf: For a crispier version, spread the batter onto a larger baking sheet to create a thinner focaccia that bakes up beautifully.

Remember, you can easily adapt this recipe to fit your taste preferences or dietary needs while still keeping that delightful gluten-free essence. For more inspiration, you might also enjoy checking out ideas for homemade bruschetta or pairing it with a warming soup. Happy baking!

Helpful Tricks for Gluten-Free Focaccia

Fresh Ingredients: Always check that your yeast is fresh. Expired yeast may prevent your gluten-free focaccia from rising properly, resulting in a dense texture.

Parchment Paper: Line your baking pan with parchment paper for simple removal after baking. This can save you from the frustration of sticking dough!

Correct Flour Measurement: Use a scale for the gluten-free flour, if possible; this ensures precision in your ratios, leading to a consistent outcome every time.

Hot Water Temp: Ensure the warm water is between 120-130°F. Too hot can kill the yeast, while too cool won’t activate it properly.

Bare Hands for Dimples: When dimpling the batter before baking, use oiled fingers. This helps create perfect indentations while preventing sticking.

Double Rise: Allowing the dough to rise twice enhances the fluffiness of your gluten-free focaccia. Don’t skip this step for the best texture!

Gluten-Free Focaccia with Rosemary Recipe FAQs

How do I choose the best gluten-free flour for this focaccia?
Absolutely! For the best results, I recommend using King Arthur Measure-for-Measures gluten-free flour, as it provides optimal texture and structure. If you can’t find that, Bob’s Red Mill 1:1 gluten-free flour is a good alternative, though it may yield a slightly denser focaccia. Make sure your flour is fresh and hasn’t been sitting on the shelf too long for the best rise.

How should I store leftover gluten-free focaccia?
Certainly! Store any leftover focaccia in an airtight container at room temperature for up to 3 days. If you want to keep it fresh a little longer, wrapping it tightly in plastic wrap and aluminum foil before refrigerating can also work wonders, but enjoying it fresh is always the best!

Can I freeze gluten-free focaccia? If so, how?
Yes, indeed! To freeze your gluten-free focaccia, first cool it completely after baking. Then slice it into individual pieces. Wrap each slice tightly in plastic wrap, followed by aluminum foil or place them in a freezer-safe bag. These can be frozen for up to 3 months. When you’re ready to enjoy, simply thaw overnight in the refrigerator and reheat in a 350°F oven for about 10-15 minutes for that freshly baked texture.

What can I do if my focaccia doesn’t rise properly?
If your focaccia isn’t rising, don’t worry; it’s a common hiccup! First, check that your yeast is fresh; expired yeast will lead to a disappointing rise. Also, ensure that your warm water was at the right temperature (120-130°F) for activating the yeast. If these steps check out, consider letting the dough rise a little longer in a warm space—sometimes it just needs a bit more time to work its magic!

Is this gluten-free focaccia safe for people with nut allergies?
Yes, this focaccia recipe is nut-free, making it a safe and tasty option for those with nut allergies! Just be cautious with any toppings you might choose to add, such as certain vegan cheeses, and always check the labels to confirm they are nut-free. Enjoy baking without worry!

Can I make variations of this focaccia, or should I stick to the recipe?
The more the merrier! Feel free to experiment with this focaccia! You can add garlic powder to the dough, throw in black olives, or even experiment with toppings like sun-dried tomatoes and caramelized onions. This recipe is versatile, so let your culinary creativity shine through while baking!

Gluten-Free Focaccia

Gluten-Free Focaccia: Irresistibly Fluffy and Flavorful

This gluten-free focaccia is light, fluffy, and full of flavor, perfect for any meal.
Prep Time 15 minutes
Cook Time 30 minutes
Rising Time 1 hour
Total Time 1 hour 45 minutes
Servings: 8 slices
Course: Dinner
Cuisine: Italian
Calories: 150

Ingredients
  

For the Dough
  • 2 cups gluten-free 1:1 flour King Arthur Measure-for-Measures preferred
  • 1 tablespoon baking powder for light texture
  • 1 teaspoon kosher salt
  • 1 cup warm water 120-130°F
  • 2 teaspoons instant or rapid rise yeast freshness is key
  • 1 tablespoon sugar or agave nourishment for yeast
  • 2 tablespoons olive oil extra virgin preferred
For Toppings
  • 1 tablespoon fresh rosemary or thyme/oregano
  • to taste vegan parmesan or regular parmesan (optional)
  • to taste flaky sea salt
  • to taste black pepper

Equipment

  • Mixing Bowl
  • Baking pan
  • Whisk
  • Spatula

Method
 

Step-by-Step Instructions
  1. In a large mixing bowl, whisk together 2 cups of gluten-free 1:1 flour, 1 tablespoon of baking powder, and 1 teaspoon of kosher salt until well blended.
  2. In a separate bowl, combine 1 cup of warm water, 2 teaspoons of instant yeast, and 1 tablespoon of sugar or agave. Stir to dissolve and let it bloom for about 3-5 minutes.
  3. Once the yeast is bubbly, pour the mixture into the bowl of dry ingredients along with 2 tablespoons of olive oil. Stir vigorously until fully combined.
  4. Lightly grease an 8x8 or 9x9 baking pan and line it with parchment paper. Pour the focaccia batter into the pan.
  5. Cover the pan with a clean kitchen towel and let it rise in a warm area for about 30 minutes to 1 hour.
  6. Preheat your oven to 400°F (200°C). Use your oiled fingers to gently dimple the surface of the batter.
  7. Sprinkle fresh rosemary, vegan parmesan, flaky sea salt, and black pepper over the dimpled batter.
  8. Slide your pan into the preheated oven and bake for 25-30 minutes. Let it cool in the pan for 10-12 minutes before slicing.

Nutrition

Serving: 1sliceCalories: 150kcalCarbohydrates: 25gProtein: 3gFat: 5gMonounsaturated Fat: 4gSodium: 200mgPotassium: 120mgFiber: 1gSugar: 1gCalcium: 2mgIron: 4mg

Notes

For best results, check the freshness of your yeast and follow correct measurements especially for the gluten-free flour.

Tried this recipe?

Let us know how it was!

Creamy Espresso Cheesecake Recipe That Steals the Show

As I stirred the silky cheesecake filling for my latest creation, I caught a whiff of robust espresso mingling with sweet chocolate. This Decadent No-Bake Espresso Cheesecake is the perfect solution when you’re craving something indulgent yet effortless. With a buttery Oreo crust that’s gluten-free-friendly and a rich ganache topping, this recipe is easy to whip together, making it an ideal choice for both casual family dinners and elegant gatherings. Plus, it requires no baking—who could resist such a tempting treat on a warm day? Let’s dive into this delightful dessert that promises to wow your friends and family; I bet they won’t even believe you made it at home! What’s your favorite way to enjoy coffee-flavored treats?

Why is This Espresso Cheesecake Irresistible?

Decadent Creaminess: The rich, silky texture of this cheesecake will have you swooning with every bite. It’s a luxurious dessert that tastes as good as it looks!

No-Bake Convenience: Perfect for those hot days when turning on the oven seems daunting, this no-bake recipe saves time without sacrificing flavor.

Crowd-Pleasing Treat: Impress your guests at any gathering, from casual family dinners to sophisticated get-togethers. Pair it with a side of fresh whipped cream like in my popular Cookies Cream Cheesecake for an extra special touch!

Versatile Variations: Want to mix things up? Try adding a layer of chocolate syrup or experimenting with flavored whipped creams—imaginative toppings that take this dessert to the next level.

Guilt-Free Indulgence: With an Oreo crust that can be made gluten-free, this dessert is a delicious solution that caters to different dietary needs. Savor every luxurious bite!

Espresso Cheesecake Ingredients

For the Crust
Oreo Cookies – This forms the perfect crust base, but you can substitute with gluten-free chocolate cookies for a delicious alternative.
Unsalted Butter – Binds the crust together, and margarine can be used as a dairy-free option.

For the Cheesecake Filling
Cream Cheese – Provides that essential creamy texture; using softened cream cheese is key for smooth mixing.
Confectioners’ Sugar – Adds sweetness and smoothness; granulated sugar can work in a pinch but may alter the texture.
Espresso Powder – Infuses the cheesecake with that delightful coffee flavor, or use instant coffee granules if you’re in a hurry.
Heavy Cream – This adds richness and aids in achieving the perfect whipped texture; half-and-half is a lighter alternative but will affect creaminess.

For the Ganache Topping
Dark Chocolate – The star of the ganache, lending that deep chocolate flavor; feel free to use milk chocolate for a sweeter finish.

Enjoy crafting your Espresso Cheesecake Recipe, a treat that balances bold flavors with a creamy texture!

Step‑by‑Step Instructions for Espresso Cheesecake Recipe

Step 1: Prepare the Crust
Start by crushing Oreo cookies into fine crumbs using a food processor or a resealable bag and a rolling pin. Melt 5 tablespoons of unsalted butter and mix it with the crushed cookies until well combined. Press this mixture evenly into the bottom of a springform pan to create a firm base, using the back of a measuring cup for an even layer. Chill in the refrigerator for 10 minutes while you prepare the filling.

Step 2: Make the Cheesecake Filling
In a mixing bowl, beat 16 ounces of softened cream cheese with 1 cup of confectioners’ sugar and 2 tablespoons of espresso powder until smooth and creamy, usually about 2-3 minutes. In a separate bowl, whip 1 cup of heavy cream on high speed until stiff peaks form, then gently fold it into the cream cheese mixture. Be careful not to overmix, as the cheesecake filling for your Espresso Cheesecake should remain light and airy.

Step 3: Assemble Cheesecake
Once your cheesecake filling is ready, pour it over the chilled Oreo crust, smoothing the top with a spatula to create an even surface. Cover the springform pan tightly with plastic wrap and place it in the refrigerator to set for at least 4 hours, or overnight if you can wait! This allows the flavors to meld beautifully while achieving the perfect texture.

Step 4: Prepare Ganache
When the cheesecake is almost set, heat 6 ounces of dark chocolate and 1/2 cup of heavy cream in a small saucepan over low heat. Stir continuously until the chocolate melts and the mixture becomes smooth and glossy, which should take about 2-3 minutes. Remove from heat and let it cool slightly, ensuring it’s still pourable but not hot.

Step 5: Chill
Once the ganache is ready, pour it over the set cheesecake layer, spreading it gently to cover the entire surface. Return the cheesecake to the refrigerator for an additional hour so the ganache solidifies. After this time, your decadent Espresso Cheesecake will be ready to slice and serve, featuring a luscious chocolate topping that complements the rich coffee flavor perfectly.

Espresso Cheesecake Recipe Variations

Feel free to explore your creativity with this delightful recipe and tailor it to your taste buds!

  • Dairy-Free: Swap cream cheese and heavy cream for coconut cream and a dairy-free cream cheese alternative for a luscious, vegan-friendly version.

  • Flavor Boost: Add 1 teaspoon of vanilla extract to the cheesecake filling for a hint of warmth that harmonizes beautifully with the espresso.

  • Textural Twist: Experiment with a crust made from crushed almonds or hazelnuts instead of Oreos for a nutty flavor and delightful crunch.

  • Decadent Layer: Drizzle a layer of caramel sauce between the cheesecake and ganache for an extra indulgent touch.

  • Chocolate Lovers: Incorporate chocolate chips into the cheesecake filling for delightful pockets of chocolate in every bite.

  • Spicy Kick: Add a dash of cinnamon or a pinch of cayenne pepper into the filling for a surprising and tasty warmth that complements the espresso.

  • Cold Brew Variation: Use cold brew coffee instead of espresso powder to create a smoother coffee flavor that works especially well for warm days.

  • Fancy Topping: Top your cheesecake with caramelized nuts or fresh berries, which add a pop of color and freshness alongside the rich ganache.

These variations are just suggestions, but feel free to customize them even further. If you’re in the mood for a no-bake chocolate delight, consider trying my Strawberry Cheesecake Bars next! Or, for a different kind of rich dessert, you might love the Cookies Cream Cheesecake. Enjoy making this recipe uniquely yours!

Make Ahead Options

These Espresso Cheesecake Recipe preparations are perfect for home cooks looking to save time on busy days! You can prepare the Oreo crust and fill it with the cheesecake mixture up to 24 hours in advance, then refrigerate it. Just cover the springform pan tightly with plastic wrap to ensure it remains fresh and creamy. If you’re in a pinch, you can also make the chocolate ganache up to 3 days prior; simply store it in an airtight container in the refrigerator. When it’s time to serve, pour the ganache over the cheesecake, and allow it to chill for an hour to ensure the ganache sets beautifully. This make-ahead approach offers the same decadent taste without the last-minute rush, making your dessert experience as enjoyable as possible!

Expert Tips for Espresso Cheesecake

Crust Perfection: Press the cookie crust firmly using the back of a measuring cup. This prevents crumbling and ensures a stable base for your Espresso Cheesecake.

Avoid Air Bubbles: Be gentle when mixing the cheesecake filling; overbeating can introduce air bubbles, leading to cracks during setting.

Cool Your Ganache: Allow the ganache to cool slightly before pouring it over the cheesecake. This tip ensures a smooth, glossy finish without melting the filling.

Chill Longer: For the best flavor and texture, refrigerate the cheesecake overnight if possible. This allows the flavors to meld beautifully and gives it a perfect set.

Presentation Tip: For an elegant touch, garnish your cheesecake with chocolate shavings or cocoa powder right before serving, enhancing both flavor and appearance.

What to Serve with Decadent No-Bake Espresso Cheesecake?

Delightful pairings elevate this creamy dessert, creating a harmonious meal that your loved ones will cherish.

  • Fresh Whipped Cream: Light and airy, it adds a sweet touch that perfectly enhances the rich flavor of the cheesecake. A dollop on each slice transforms every bite into a cloud of sweetness.

  • Espresso or Coffee: Brew a cup of your favorite espresso or rich coffee for a perfect contrast to the cheesecake’s sweetness. The bitterness cuts through the creaminess, making each mouthful balanced and delightful.

  • Chocolate-Covered Espresso Beans: For an added crunch and an extra jolt of coffee flavor, sprinkle a few on top or serve on the side. Their boldness beautifully complements the cheesecake’s indulgence.

  • Fruit Compote: A fresh berry or cherry compote provides a tart contrast, elevating the rich cheesecake flavors. The acidity from the fruit adds a refreshing note that brightens each bite.

  • Cocoa Powder Dusting: Sprinkle unsweetened cocoa powder atop the cheesecake for an understated garnish that enhances both visual appeal and deepens the chocolate flavor.

  • Vanilla Ice Cream: A scoop of vanilla ice cream brings in a creamy coldness that mellows the espresso kick. Plus, its sweetness balances out the rich layers for a complete dessert experience.

  • Nutty Biscotti: Serve these crunchy delights alongside the cheesecake. Dipping them into your espresso or coffee adds a delightful textural contrast, perfect for snackers.

  • Chocolate Mint Tea or Mojito: A refreshing mint-infused drink can cleanse the palate and invigorate your senses, making it an ideal companion for this decadent dessert.

Indulge in these harmonious pairings as you celebrate the delightful flavors of this Espresso Cheesecake Recipe!

How to Store and Freeze Espresso Cheesecake

Fridge: Store your leftover espresso cheesecake in an airtight container for up to 3 days. This will keep the flavors fresh and the texture creamy.

Freezer: You can freeze the cheesecake for up to 1 month. Wrap it tightly with plastic wrap and then aluminum foil to prevent freezer burn. Thaw in the refrigerator before serving.

Serving After Storing: After refrigerating, allow the cheesecake to sit at room temperature for about 15-20 minutes for the best texture. This helps in maintaining that luscious creamy feeling when served.

Preventing Moisture: To avoid moisture buildup, consider placing a paper towel at the top of the storage container. This will help absorb excess moisture while the cheesecake is stored in the refrigerator.

Espresso Cheesecake Recipe FAQs

How do I choose the right espresso powder?
Absolutely! For the best flavor, look for high-quality espresso powder specifically labeled for baking, as it will provide a richer coffee taste. If you can’t find espresso powder, instant coffee granules can be a good substitute. Just make sure to use a strong brew to ensure your cheesecake is packed with that delightful coffee flavor.

How should I store leftovers?
You can store any leftover espresso cheesecake in an airtight container in the refrigerator for up to 3 days. This keeps it fresh and creamy! If you’re worried about moisture, placing a paper towel at the top of the container can help absorb excess moisture during storage.

Can I freeze the espresso cheesecake?
Yes! You can absolutely freeze your espresso cheesecake for up to 1 month. Wrap it tightly in plastic wrap followed by aluminum foil to prevent freezer burn. To serve, simply thaw it in the refrigerator overnight, helping to retain its creamy texture for the ultimate indulgence.

What can I do if my cheesecake cracks during the setting process?
Very! If your cheesecake develops cracks, don’t worry! This can often happen if the filling is overbeats, introducing air bubbles. To prevent this, mix gently and ensure you don’t overwhip the cream. If it already has cracks, consider adding chocolate shavings on top or serving it with a delicious sauce to disguise any imperfections.

Are there any dietary considerations I should keep in mind?
Absolutely! For gluten-sensitive individuals, simply swap the regular Oreo cookies for gluten-free chocolate cookies to maintain that delicious crust. Also, if you need a dairy-free option, margarine can replace the butter, and there are dairy-free cream cheeses available. Just be sure to read labels to avoid any unwanted allergens!

How long does it take for the cheesecake to set properly?
For optimal results, I recommend refrigerating your cheesecake for at least 4 hours to allow it to set. However, letting it chill overnight not only enhances the flavors but also ensures a perfect texture. Just imagine it—you take it out, slice it, and every bite is both creamy and dreamy!

Espresso Cheesecake Recipe

Creamy Espresso Cheesecake Recipe That Steals the Show

This Espresso Cheesecake Recipe is a no-bake dessert that combines rich coffee flavors with a creamy texture, perfect for any occasion.
Prep Time 10 minutes
Chilling Time 4 hours
Total Time 4 hours 10 minutes
Servings: 8 slices
Course: Dessert
Cuisine: American
Calories: 450

Ingredients
  

For the Crust
  • 24 cookies Oreo Cookies Can substitute with gluten-free chocolate cookies
  • 5 tablespoons Unsalted Butter Margarine can be used as a dairy-free option
For the Cheesecake Filling
  • 16 ounces Cream Cheese Must be softened for smooth mixing
  • 1 cup Confectioners' Sugar Granulated sugar can work in a pinch
  • 2 tablespoons Espresso Powder Or use instant coffee granules
  • 1 cup Heavy Cream Half-and-half is a lighter alternative
For the Ganache Topping
  • 6 ounces Dark Chocolate Feel free to use milk chocolate for a sweeter finish
  • 1/2 cup Heavy Cream

Equipment

  • springform pan
  • Mixing bowls
  • Food processor
  • Whisk
  • Spatula
  • Measuring cups
  • Saucepan

Method
 

Prepare the Crust
  1. Crush Oreo cookies into fine crumbs and mix with melted butter. Press into the bottom of a springform pan and chill for 10 minutes.
Make the Cheesecake Filling
  1. Beat cream cheese with confectioners' sugar and espresso powder until smooth. Whip heavy cream and fold gently into the mixture.
Assemble Cheesecake
  1. Pour cheesecake filling over the crust, smooth the top, and refrigerate for at least 4 hours.
Prepare Ganache
  1. Heat dark chocolate and heavy cream in a saucepan, stirring until melted. Let cool slightly before pouring over the cheesecake.
Chill
  1. Refrigerate the cheesecake for an additional hour after adding ganache to allow it to set.

Nutrition

Serving: 1sliceCalories: 450kcalCarbohydrates: 35gProtein: 6gFat: 34gSaturated Fat: 20gPolyunsaturated Fat: 1gMonounsaturated Fat: 11gCholesterol: 90mgSodium: 250mgPotassium: 200mgFiber: 1gSugar: 25gVitamin A: 800IUCalcium: 100mgIron: 2mg

Notes

For optimal texture and flavor, refrigerate overnight if possible. Garnish with chocolate shavings or cocoa powder before serving.

Tried this recipe?

Let us know how it was!