Savory Chinese Ginger Scallion Chicken in Minutes

As I pulled a fresh batch of ginger from my pantry, the aroma flooded my kitchen, transforming my cozy space into a vibrant Asian marketplace. This is how Chinese Ginger Scallion Poached Chicken makes its entrance on my dinner table—a dish that is not only healthful but also a breeze to whip up. With its juicy, tender chicken and a punch of fresh ginger and scallions, this recipe offers a delightful twist on the typical weeknight dinner. It’s perfect for those evenings when time is short but you still crave something satisfying. Plus, it’s a wonderful way to add a nutritious option to your repertoire without the fuss of complicated cooking. Are you ready to experience the magic of this dish? Let’s dive into the recipe!

Why is this recipe a must-try?

Simplicity at Its Best: This recipe requires minimal ingredients and effort, making it perfect for busy evenings. Nutritious and Light: Packed with protein and low in calories, it’s a guilt-free dish the whole family will enjoy. Flavor Explosion: Fresh ginger and scallions create a vibrant taste that brightens any meal. Think of pairing it with options like Grilled Chicken Sandwich for variety! Versatile Alternatives: Feel free to experiment with tofu for a vegetarian twist or add veggies to the poaching liquid for extra nutrition. Meal Prep Hero: The flavors deepen over time, making leftovers even more delightful—a win for your weekly meal prep!

Chinese Ginger Scallion Chicken Ingredients

For the Chicken
Chicken Drumsticks – Main protein source; substitute with thighs or breasts for a different flavor and texture.
Reserved Water – Used to create the sauce, enriched with flavors from cooking the chicken; essential for authentic taste.

For the Sauce
Ginger – Adds warmth and aromatic flavor; always use fresh for the best results.
Scallions – Provides freshness and crunch; remember to use only the white parts during poaching.
Olive/Sesame Oil – Adds richness to the sauce; sesame oil lends a more authentic Asian flavor.
Low Sodium Soy Sauce – For seasoning and umami depth; opt for regular soy sauce if low sodium isn’t available.
Coconut Sugar/Regular Sugar – Balances savory flavors with sweetness; brown sugar is a suitable alternative.

Using these ingredients, you’ll create a delicious and healthful Chinese Ginger Scallion Chicken that everyone at the table will love!

Step‑by‑Step Instructions for Chinese Ginger Scallion Chicken

Step 1: Prepare the Poaching Liquid
Begin by filling a large pot with 6 cups of water and place it over high heat. Bring the water to a rolling boil, which should take about 5 minutes. This will be the base for your flavorful Chinese Ginger Scallion Chicken. Once boiling, ensure that you have all your ingredients ready for the next step.

Step 2: Add Chicken and Aromatics
Once your water is boiling, carefully add the chicken drumsticks, sliced ginger, and the white parts of the scallions to the pot. Watch as the water returns to a boil, which should only take a minute or two. Once boiling again, reduce the heat to medium-low, allowing everything to simmer gently for about 10 minutes. This will infuse the chicken with delicious flavors.

Step 3: Allow Chicken to Steep
After the 10 minutes of simmering, turn off the heat and cover the pot tightly with a lid. Let the chicken sit in the hot water for an additional 5 minutes. This gentle steeping process ensures the chicken remains tender and juicy for your Chinese Ginger Scallion Chicken dish.

Step 4: Cool Down the Chicken
Prepare an ice water bath in a large bowl while the chicken is resting. Using tongs, carefully transfer the chicken drumsticks into the ice water to cool completely for about 20 minutes. This technique stops the cooking process and helps maintain the chicken’s tender texture while intensifying its flavor.

Step 5: Mix the Sauce Ingredients
While the chicken is cooling, grab a bowl and prepare the sauce for your Chinese Ginger Scallion Chicken. Combine olive oil, low sodium soy sauce, coconut sugar, and approximately 1/2 cup of the reserved chicken cooking water. Whisk in more sliced ginger and finely chopped scallions to create a vibrant and flavorful sauce.

Step 6: Serve the Dish
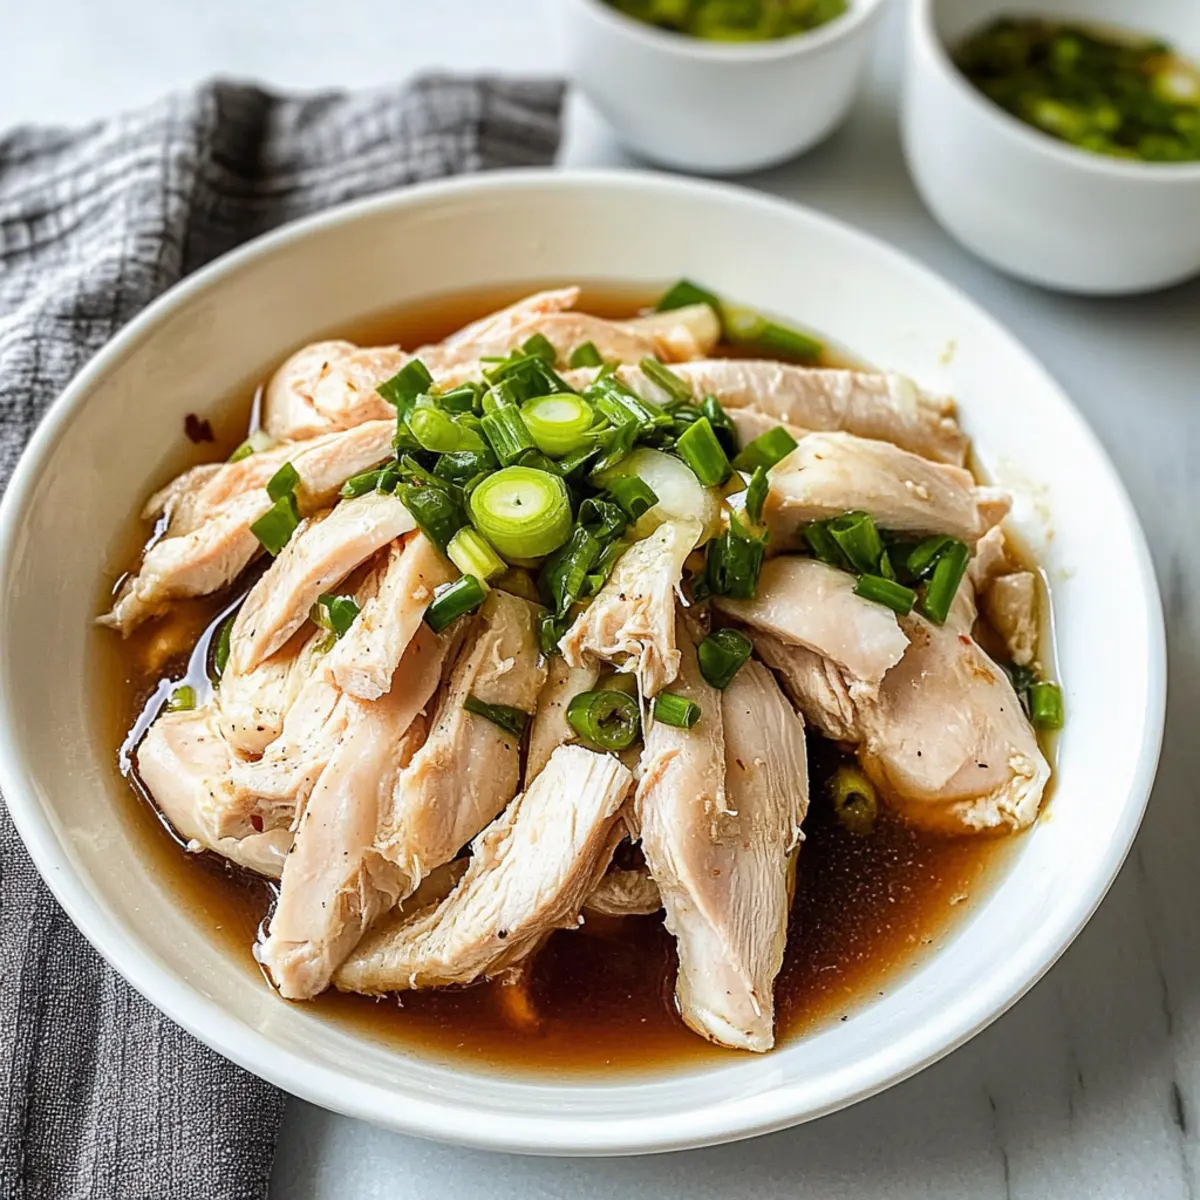
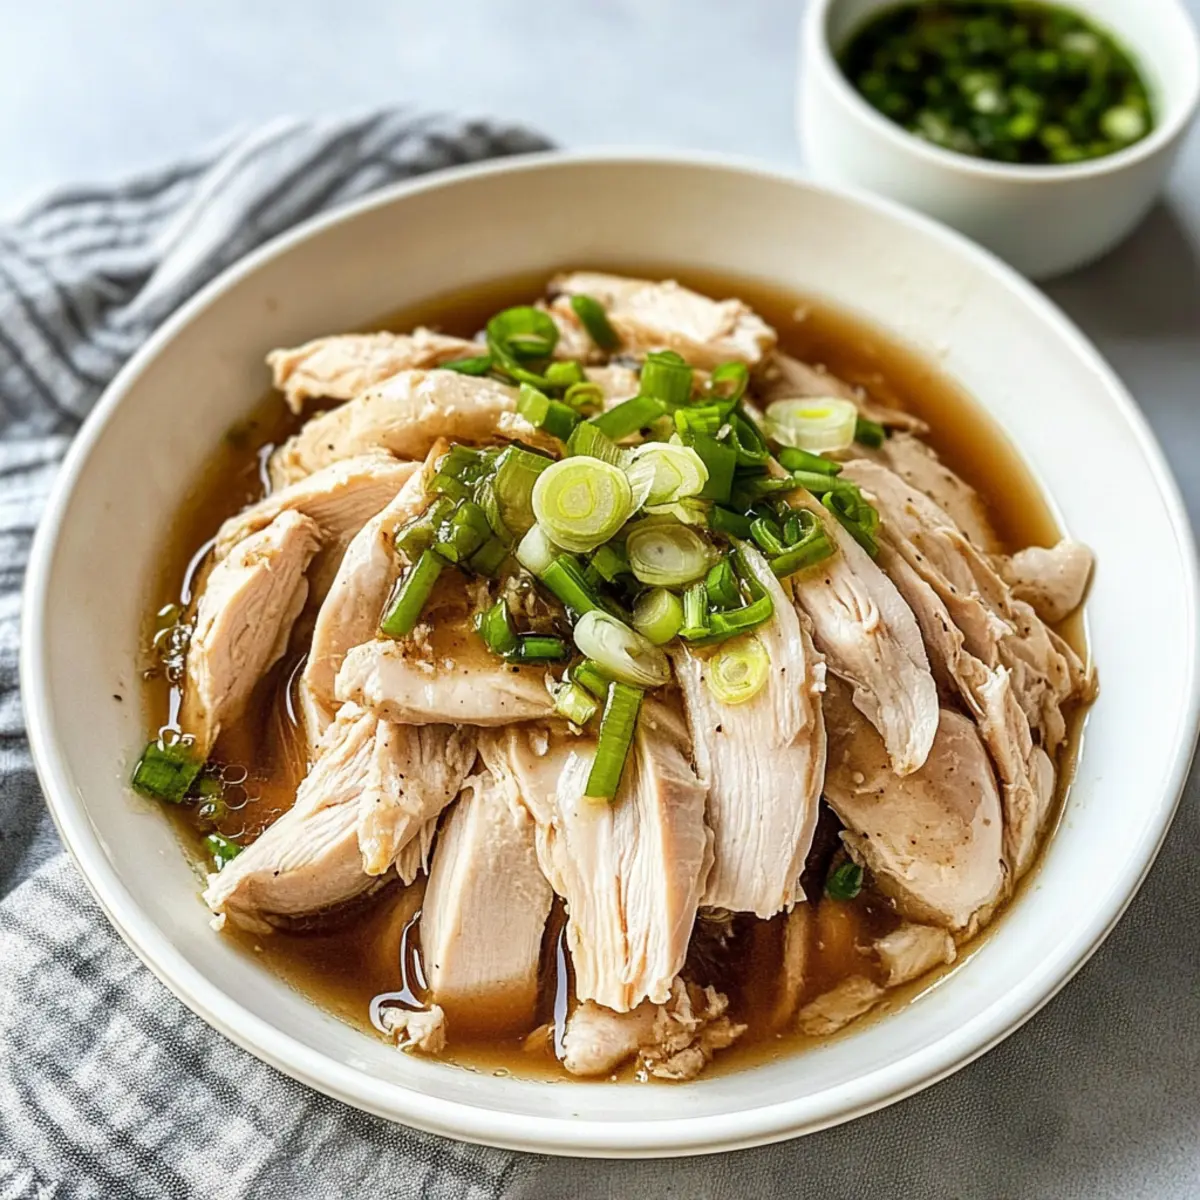
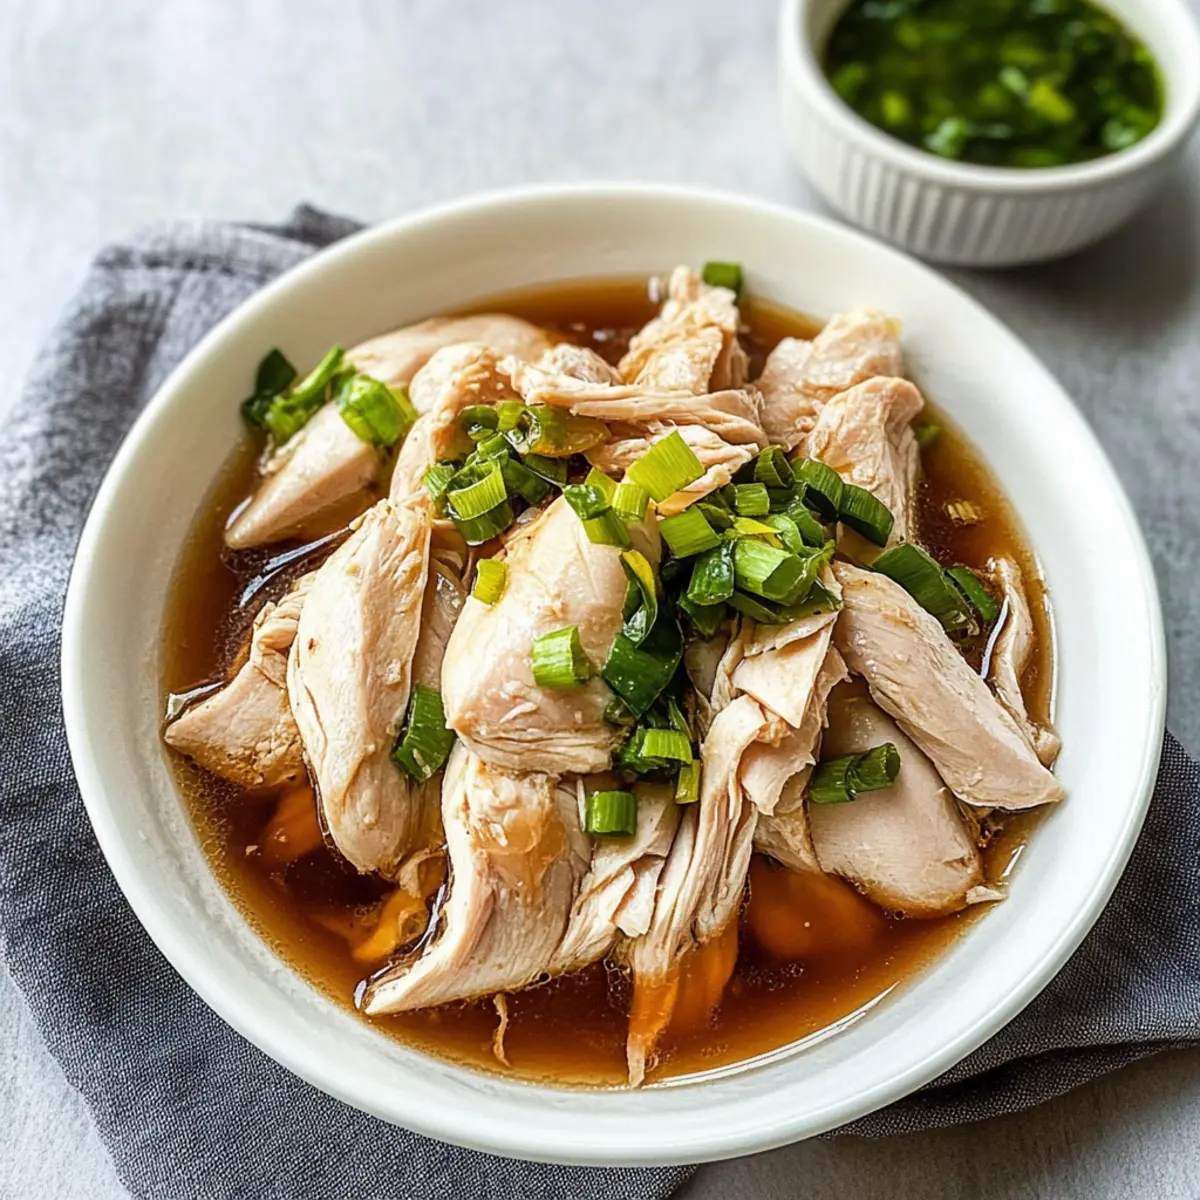
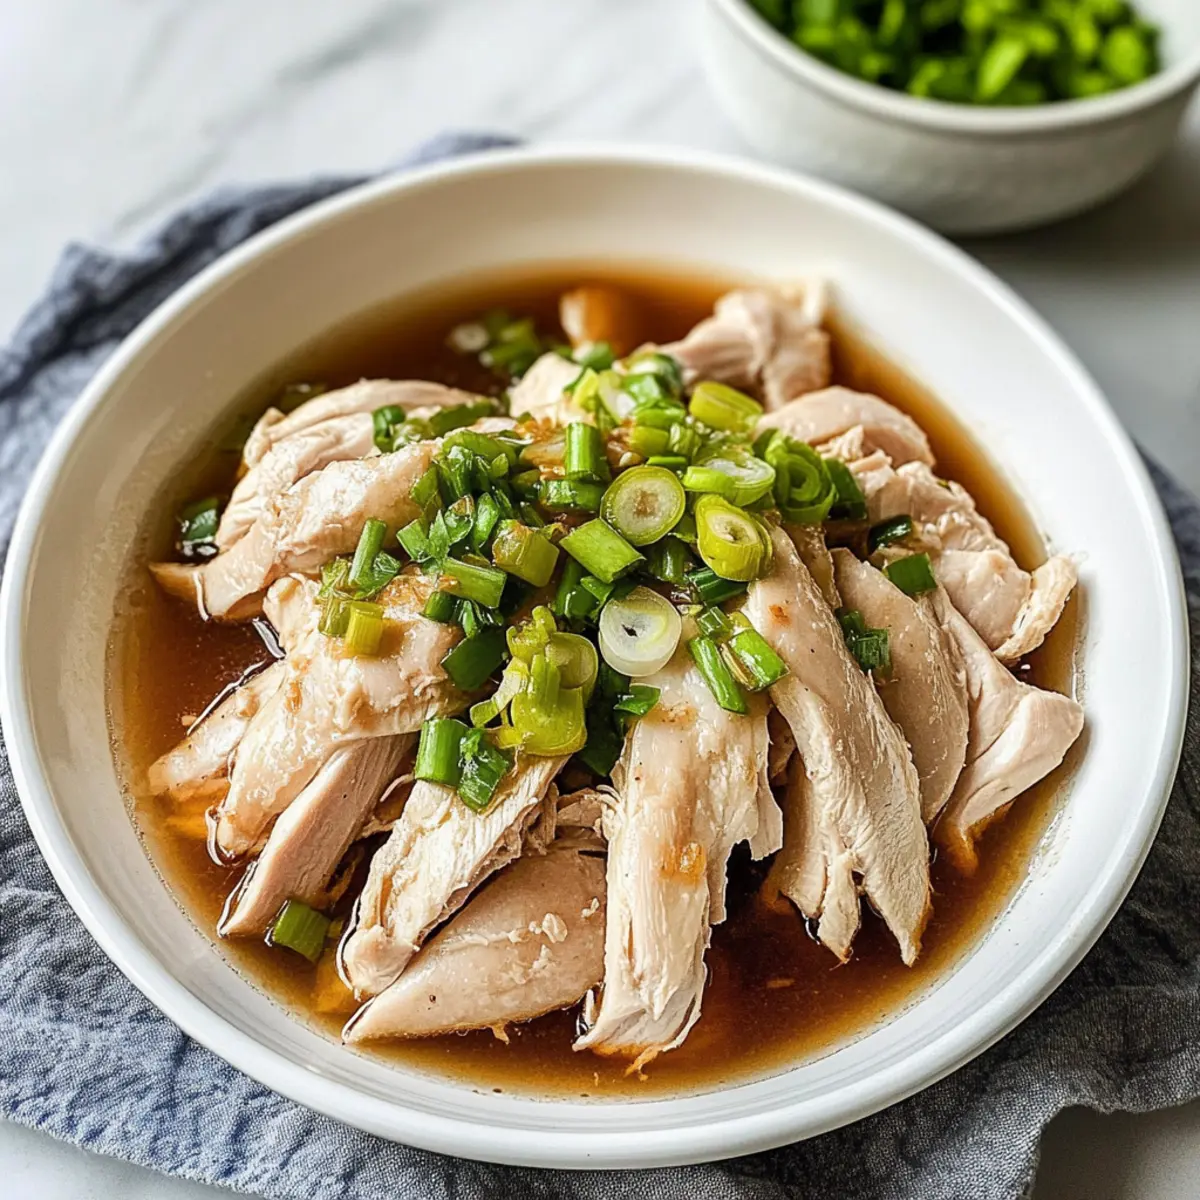
Once the chicken has cooled, remove it from the ice bath and gently shred it onto a serving plate. Drizzle the flavorful sauce you prepared in the previous step all over the shredded chicken. This finishing touch highlights the aromatic ginger and scallion flavors, making your Chinese Ginger Scallion Chicken irresistibly inviting.

How to Store and Freeze Chinese Ginger Scallion Chicken

Fridge: Store leftovers in an airtight container for up to 3 days. The flavors will deepen over time, enhancing your next meal.

Freezer: For longer storage, freeze the shredded chicken and sauce in a freezer-safe container for up to 3 months. Thaw in the fridge before reheating.

Reheating: Gently reheat the chicken in a pan over low heat, adding a splash of water or broth to maintain moisture and prevent drying out. Enjoy the delicious flavors!

Meal Prep: This dish is perfect for meal prep! Cook a batch ahead of time and enjoy a nutritious, flavorful meal throughout the week.

Expert Tips for Chinese Ginger Scallion Chicken

Marinate for More Flavor: Consider marinating the chicken in the sauce for 30 minutes before cooking. This enhances the savory taste, making every bite delicious.

Perfect Cooking Temp: Avoid overcooking the chicken by using a meat thermometer; it should reach an internal temperature of 165°F (74°C) for juicy, tender results.

Chill to Retain Tenderness: Don’t skip the ice water bath after cooking; it helps keep the chicken moist and firm while enhancing the flavors of the dish.

Watch the Sodium: Be mindful of sodium levels in soy sauce; opt for low sodium versions to keep the dish healthier without sacrificing flavor.

Customize Your Veggies: Experiment by adding sliced bell peppers or carrots in the poaching liquid for extra nutrition and vibrant color to your Chinese Ginger Scallion Chicken.

Variations & Substitutions for Chinese Ginger Scallion Chicken

Feel free to put your own spin on this dish—you’ll find plenty of delicious ways to customize it!

  • Vegetarian Option: Swap chicken for tofu or tempeh, marinating it in the sauce before poaching for a tasty twist.
  • Crispy Add-In: Toss in sliced bell peppers or carrots to the poaching liquid, enhancing both flavor and nutrition in every bite.
  • Spicy Kick: Add red pepper flakes or Sriracha to the sauce for a spicy variation that brings heat to your meal!
  • Herb Infusion: Mix in fresh cilantro or basil to the sauce before serving, adding an aromatic depth that pairs beautifully with the ginger.
  • Nutty Flavor: Replace olive oil with toasted sesame oil for richer, more complex flavor, truly evoking that authentic Asian essence.
  • Sweet Alternative: Use honey instead of coconut sugar for a natural sweetness that complements the savory notes beautifully.
  • Rice Twist: Serve alongside coconut rice or jasmine rice for an aromatic side dish that complements the ginger and scallions.
  • Hearty Option: Add quinoa or farro as a bed for the chicken, making your meal even heartier while keeping it nutritious and delicious.

With these variations, your Chinese Ginger Scallion Chicken can become a versatile meal that’s worth making time and again. Enjoy experimenting and find your favorite combinations!

Make Ahead Options

These Chinese Ginger Scallion Poached Chicken are perfect for meal prep enthusiasts! You can prepare the poached chicken up to 24 hours in advance; simply follow the cooking instructions and let the chicken cool completely before refrigerating. To enhance the flavor, mix the sauce ingredients and store them separately in the fridge for up to 3 days. This separation helps maintain the quality of the chicken and sauce until you’re ready to serve. When it’s time to enjoy your dish, simply reheat the chicken gently and drizzle the chilled sauce on top for a delicious meal that tastes just as great as when freshly made. This way, you can enjoy a wholesome dinner on busy weeknights with minimal effort!

What to Serve with Chinese Ginger Scallion Poached Chicken

As you savor the vibrant flavors of poached chicken, let’s create a delightful dining experience with complementary dishes that will elevate your meal.

  • Steamed Jasmine Rice: The perfect bed for the juicy chicken, allowing its savory sauce to soak in, creating a mouthwatering combination.

  • Sautéed Green Vegetables: Think tender bok choy or bright snap peas, bringing a fresh crunch that perfectly balances the chicken’s tender texture.

  • Cucumber Salad: A refreshing side with crisp cucumber and a tangy dressing, adding a light and zesty contrast to the warm chicken. This dish can awaken your taste buds in every bite!

  • Miso Soup: A warm and comforting accompaniment with earthy flavors, perfect for deepening the Asian experience on your table.

  • Chili Garlic Edamame: For those who enjoy a spicy kick, these tender soybeans provide a satisfying bite and a wonderful textural contrast to the smooth chicken.

  • Sesame Noodles: These flavorful noodles dressed in sesame oil and soy sauce make for a delightful side that harmonizes with the poached chicken’s subtle flavors. Their chewiness complements the dish beautifully.

  • Green Tea: A soothing drink choice following the meal. Green tea’s earthy notes cleanse the palate and enhance the lightness of the dish.

  • Mango Sticky Rice: For dessert, this sweet treat brings tropical vibes, making a delightful conclusion to your ginger-infused dinner experience.

Chinese Ginger Scallion Poached Chicken Recipe FAQs

How do I choose the right ingredients for this recipe?
Absolutely! When selecting chicken drumsticks, look for ones that are plump and free of dark spots. For the ginger, fresh is always best; it should be firm with smooth skin. Scallions should be bright green and crisp, with no wilting or yellowing.

How should I store leftovers of the poached chicken?
You can store leftovers in an airtight container in the refrigerator for up to 3 days. The sauce’s flavors will deepen over this time, making the dish even more delightful when you reheat it. I often enjoy it as a quick lunch by pairing it with fresh steamed rice!

Can I freeze Chinese Ginger Scallion Chicken?
Certainly! To freeze, place the shredded chicken and sauce in a freezer-safe container, ensuring to expel as much air as possible. This can be stored for up to 3 months. When you’re ready to enjoy it, let it thaw in the fridge overnight, and then reheat gently in a pan with a splash of water to keep it moist.

What should I do if the chicken is overcooked?
If you find your chicken has gone a bit dry, no worries! You can shred it and let it marinate in the sauce for a bit longer. The sauce adds moisture and flavor back into the chicken. It’s a great way to salvage your dish, and trust me, it will still taste amazing!

Is this recipe suitable for various dietary preferences?
Yes! This recipe can be made vegetarian by swapping the chicken with firm tofu or tempeh. You can also add more veggies like bell peppers or carrots to the poaching liquid for added nutrition and variety. Always check for any allergies related to soy sauce or sesame oil, though!

How can I enhance the flavors of the dish?
For a more robust flavor profile, consider marinating the chicken in the sauce for about 30 minutes before cooking. You can also add additional spices or herbs during the cooking process to customize it to your liking. The more, the merrier!

Chinese Ginger Scallion Chicken

Savory Chinese Ginger Scallion Chicken in Minutes

A quick and delicious recipe for Chinese Ginger Scallion Chicken that's both healthful and easy to prepare.
Prep Time 15 minutes
Cook Time 15 minutes
Cooling Time 20 minutes
Total Time 50 minutes
Servings: 4 pieces
Course: Chicken
Cuisine: Chinese
Calories: 320

Ingredients
  

For the Chicken
  • 6 cups water for poaching
  • 4 pieces chicken drumsticks substitute with thighs or breasts if desired
For the Sauce
  • 3 tablespoons fresh ginger sliced
  • 4 pieces scallions white parts only
  • 2 tablespoons olive oil or sesame oil for an authentic taste
  • 1/4 cup low sodium soy sauce or regular soy sauce
  • 2 tablespoons coconut sugar or regular sugar

Equipment

  • large pot
  • Whisk
  • bowl
  • Tongs

Method
 

Step-by-Step Instructions
  1. Fill a large pot with 6 cups of water and bring it to a rolling boil, which takes about 5 minutes.
  2. Once boiling, add the chicken drumsticks, sliced ginger, and white parts of the scallions to the pot. Allow the water to return to a boil, then reduce heat to medium-low and simmer for about 10 minutes.
  3. Turn off the heat and cover the pot tightly. Let chicken steep in the hot water for an additional 5 minutes.
  4. Prepare an ice water bath in a large bowl. Transfer the chicken drumsticks to the ice water to cool completely for about 20 minutes.
  5. While cooling, combine olive oil, low sodium soy sauce, coconut sugar, and about 1/2 cup of reserved cooking water in a bowl. Whisk in more sliced ginger and chopped scallions.
  6. Remove the chicken from the ice bath, shred it onto a serving plate, and drizzle the sauce over the top.

Nutrition

Serving: 1pieceCalories: 320kcalCarbohydrates: 10gProtein: 28gFat: 18gSaturated Fat: 3gPolyunsaturated Fat: 5gMonounsaturated Fat: 9gCholesterol: 80mgSodium: 600mgPotassium: 350mgFiber: 1gSugar: 2gVitamin A: 500IUVitamin C: 5mgCalcium: 30mgIron: 1mg

Notes

Consider marinating the chicken in the sauce for 30 minutes before cooking for added flavor. Use a meat thermometer to ensure the chicken reaches 165°F (74°C) for perfect results. Store leftovers in an airtight container for up to 3 days.

Tried this recipe?

Let us know how it was!

Wisconsin Apple Kringle: Your New Favorite Cozy Dessert

As the warm aroma of spiced apples wafted through my kitchen, I couldn’t help but reminisce about the special gatherings where homemade treats took center stage. Today, I’m excited to share my take on a Wisconsin Apple Kringle—a flaky, Danish-inspired pastry that elegantly cradles a luscious apple pie filling. This delightful dessert is not only a feast for the senses but also a fantastic crowd-pleaser, perfect for both festive celebrations and cozy breakfasts. With its beautiful presentation and straightforward preparation, this recipe eliminates the fast food fatigue and adds a touch of homemade charm to your table. So, are you ready to embrace the delightful world of baked goods and impress everyone with this stunning kringle?

Have You Tried Wisconsin Apple Kringle?

Irresistible Flavor: The combination of spiced apples and buttery pastry creates a mouthwatering experience that embodies cozy comfort.
Unique Presentation: Its elegant oval shape not only looks beautiful but also makes it perfect for serving at gatherings.
Quick to Make: Despite its stunning appearance, this recipe is easy to follow, saving you time without sacrificing quality.
Versatile Delight: Enjoy it warm for breakfast or as a delightful dessert alongside a scoop of ice cream—like a delicious twist on the classic apple pie!
Crowd-Pleaser: Whether shared at a festive gathering or enjoyed at home, this Wisconsin Apple Kringle is bound to impress family and friends alike. Give it a try after whipping up some Grilled Cinnamon Apples as a perfect side!

Wisconsin Apple Kringle Ingredients

For the Dough

  • All-Purpose Flour – Provides the essential structure and texture for that flaky pastry; try substituting with whole wheat flour for a heartier bite.
  • Sugar – Adds a hint of sweetness; brown sugar can deepen the flavor profile beautifully.
  • Salt – Enhances all flavors in the pastry; consider using sea salt for a gourmet touch.
  • Cold Butter – Creates those desirable flaky layers; it must be cold to achieve the best texture—avoid margarine for optimal results.
  • Active Dry Yeast – Acts as the leavening agent to give the dough lift; ensure it’s fresh for the best rise.
  • Milk – Infuses moisture and richness into the dough; whole milk is preferable, or opt for nut milk for a dairy-free alternative.
  • Egg – Binds the ingredients together while adding richness; substitute with flaxseed meal for a vegan version, if desired.

For the Filling

  • Spiced Apple Filling – Offers a delicious sweet and tart flavor; store-bought filling works just as well for convenience.

For the Glaze

  • Vanilla Extract – Provides an aromatic and flavorful touch to the glaze; almond extract can be a lovely alternative to try.
  • Powdered Sugar – Sweetens the glaze for that perfect finishing touch; granulated sugar, blended into a powder, can work in a pinch.

Step‑by‑Step Instructions for Wisconsin Apple Kringle

Step 1: Prepare the Dough
In a large mixing bowl, combine the all-purpose flour, sugar, salt, and active dry yeast. Cut in the cold butter until the mixture resembles coarse crumbs. Gradually add in the milk and egg, mixing until a soft dough forms. This process should take about 5 minutes, and your dough will be slightly sticky yet manageable.

Step 2: Chill
Cover the dough with plastic wrap and refrigerate for at least 30 minutes. Chilling allows the butter to firm up, ensuring that the Wisconsin Apple Kringle has a flaky texture once baked. You can chill it longer if desired, enhancing the flavors and making it easier to shape later.

Step 3: Shape the Kringle
Preheat your oven to 375°F (190°C). On a lightly floured surface, roll out the chilled dough into a large oval shape, about 1/4 inch thick. Spread the spiced apple filling generously down the center of the dough, leaving edges to fold over. Carefully fold the dough over the filling, pinching the edges to seal, and form into an oval or horseshoe shape on a lined baking sheet.

Step 4: Bake
Place the shaped kringle in the preheated oven and bake for 25–30 minutes, or until it’s golden brown and the filling is bubbling slightly. Keep an eye on the kringle in the last few minutes for that perfect golden hue which indicates that it’s ready to come out.

Step 5: Add Glaze
Once baked, allow the Wisconsin Apple Kringle to cool for about 10 minutes on a wire rack. In a small bowl, whisk together the powdered sugar and vanilla extract until smooth. Drizzle this sweet glaze over the warm kringle to finish off this delightful pastry, allowing it to seep into the cracks for extra sweetness.

What to Serve with Wisconsin Apple Kringle

Enjoy this delightful pastry alongside dishes that bring out its spiced apple goodness and buttery richness, creating a cozy meal experience.

  • Whipped Cream: A dollop of whipped cream adds a light, airy counterpoint to the rich flavors, enhancing each slice’s indulgence.
  • Vanilla Ice Cream: The creamy texture melts deliciously into the warm kringle, making for a tempting contrast that guests will adore.
  • Hot Tea: A soothing cup of herbal or spiced tea pairs perfectly, complementing the comforting warmth of the baked pastry.
  • Caramel Sauce: Drizzling a bit of caramel on top creates a luxurious finish, elevating the dessert to a whole new level of sweetness.
  • Fresh Fruit Salad: Bright, juicy fruits like berries and citrus provide a refreshing, tangy side that balances the sweetness of the kringle.
  • Cinnamon Sugar Donuts: These little bites of heaven bring a delightful twist and crunchy texture that harmonizes beautifully with the soft pastry.
  • Chai Latte: The warm spices in a chai latte echo the flavors of the kringle, making for a comforting beverage that’s perfect for cool evenings.
  • Red Wine: A glass of sweet red wine complements the apple filling with notes of rich fruit, making it an excellent pairing for adult gatherings.

Make Ahead Options

Preparing Wisconsin Apple Kringle ahead of time is a smart way to save precious minutes during busy mornings or festive gatherings! You can make the dough and refrigerate it for up to 24 hours, which helps develop flavor and makes shaping easier. Simply wrap the dough tightly in plastic wrap to prevent drying out. Additionally, the spiced apple filling can be prepared and stored in the fridge for up to 3 days. When you’re ready to serve, just roll out the chilled dough, fill it with the prepped apples, and bake as directed. With these make-ahead strategies, your Wisconsin Apple Kringle will be just as delicious but with a lot less last-minute fuss!

Expert Tips for Wisconsin Apple Kringle

  • Chill Dough Well: Refrigerating your dough for at least 30 minutes makes it easier to handle and promotes flakiness; don’t skip this step!
  • Use Fresh Yeast: Ensure your active dry yeast is fresh for a perfectly risen dough. Expired yeast can lead to disappointing results.
  • Seal Edges Firmly: To prevent filling from leaking during baking, pinch the dough edges tightly. Take your time for a clean presentation!
  • Brush with Egg Wash: For an extra shiny, golden crust, brush the kringle with an egg wash before baking. This little step makes a huge difference!
  • Experiment with Fillings: While spiced apple is traditional, don’t hesitate to try different fruit fillings to customize your Wisconsin Apple Kringle to your taste.

Wisconsin Apple Kringle Variations & Substitutions

Get ready to make this delightful pastry your own with these fun twists and substitutions that will satisfy your cravings!

  • Whole Wheat Flour: Swap all-purpose flour for whole wheat flour to add a nutty flavor and denser texture.
  • Vegan Delight: Substitute the egg with flaxseed meal mixed with water for a plant-based version that doesn’t sacrifice taste.
  • Brown Sugar: Use brown sugar in place of regular sugar for a rich, caramel-like depth in sweetness.
  • Fruit Filling: Try filling with cherry or peach instead of apple for a deliciously unique flavor twist.
  • Cinnamon Infusion: A pinch of cinnamon or nutmeg in the dough adds warmth and elevates the overall flavor profile.
  • Almond Extract Glaze: Replace vanilla extract with almond extract in the glaze for a nutty twist that beautifully complements the apple filling.
  • Nut Topping: Sprinkle chopped walnuts or pecans on top of the kringle before baking for an added crunch.
  • Spicy Kick: Add a dash of cayenne or black pepper to the apple filling for a surprising heat that contrasts with the sweetness.

Feel free to mix and match these variations! Whether you’re looking to try something new or accommodate dietary restrictions, these simple swaps can transform your Wisconsin Apple Kringle into a new family favorite. And for a delightful finish, why not serve it alongside some Grilled Cinnamon Apples for that extra touch of fall flavor?

How to Store and Freeze Wisconsin Apple Kringle

Room Temperature: Store the kringle in an airtight container for up to 2 days to maintain freshness and prevent drying out.

Fridge: If you wish to keep it longer, refrigerate the Wisconsin Apple Kringle for up to 5 days in an airtight container to preserve its delicious flavor.

Freezer: Wrap the cooled kringle tightly in plastic wrap and then in aluminum foil. It can be frozen for up to 3 months for a delightful treat later on.

Reheating: To enjoy your kringle warm, reheat in the oven at 350°F (175°C) for about 10 minutes. This will restore its flaky texture beautifully!

Wisconsin Apple Kringle Recipe FAQs

How do I select ripe apples for the spiced apple filling?
Absolutely! Look for firm apples without dark spots or bruises. Varieties like Granny Smith provide a nice tartness, while Honeycrisp brings sweetness. Aim for medium to large apples for the best filling.

How should I store leftover Wisconsin Apple Kringle?
To maintain its delightful flavor, keep the kringle in an airtight container at room temperature for up to 2 days. If you’d like it to last longer, refrigerate it for up to 5 days. Just be sure to let it cool completely before storing!

Can I freeze Wisconsin Apple Kringle?
Yes, you can! Once cooled, wrap the kringle tightly in plastic wrap and then in aluminum foil. It will stay fresh in the freezer for up to 3 months. When you’re ready to enjoy, simply reheat it in the oven at 350°F (175°C) for about 10 minutes or until warmed through.

What should I do if my dough doesn’t rise?
Very! If your dough doesn’t rise, first check the freshness of your active dry yeast—it should bubble when mixed with warm water. Ensure your ingredients are at the correct temperature and create a warm, draft-free environment for the dough to rise. A warm oven or a cozy spot on the countertop works well.

Are there any allergy considerations for this Wisconsin Apple Kringle?
Of course! This recipe contains wheat, dairy, and eggs, which are common allergens. For a gluten-free version, you can use a gluten-free flour blend. Substitute the milk with almond or soy milk for a dairy-free option, and flaxseed meal can replace the egg for a vegan version as well.

Can I use a different filling besides spiced apples?
Absolutely! You can mix it up by using other fruit fillings like cherry, peach, or even cream cheese. Just ensure that the filling is not too liquidy to avoid sogginess. Experimenting with flavors makes baking even more fun!

Wisconsin Apple Kringle

Wisconsin Apple Kringle: Your New Favorite Cozy Dessert

Wisconsin Apple Kringle is a deliciously flaky pastry filled with spiced apples, perfect for cozy breakfasts and festive gatherings.
Prep Time 35 minutes
Cook Time 30 minutes
Chilling Time 30 minutes
Total Time 1 hour 35 minutes
Servings: 8 slices
Course: Dessert
Cuisine: American
Calories: 320

Ingredients
  

For the Dough
  • 2 cups All-Purpose Flour Whole wheat flour can be substituted for a heartier bite.
  • 2 tablespoons Sugar Brown sugar can deepen the flavor.
  • 1 teaspoon Salt Sea salt can be used for a gourmet touch.
  • 1 cup Cold Butter Cold butter is essential for a flaky texture.
  • 1 packet Active Dry Yeast Ensure it's fresh for best results.
  • 1 cup Milk Whole milk is preferable for richness.
  • 1 large Egg Can be substituted with flaxseed meal for vegan version.
For the Filling
  • 2 cups Spiced Apple Filling Store-bought filling works for convenience.
For the Glaze
  • 1 teaspoon Vanilla Extract Almond extract can be used as an alternative.
  • 1 cup Powdered Sugar Can substitute with granulated sugar blended into powder.

Equipment

  • Mixing Bowl
  • Baking Sheet
  • Wire Rack
  • small bowl

Method
 

Step‑by‑Step Instructions
  1. In a large mixing bowl, combine the all-purpose flour, sugar, salt, and active dry yeast. Cut in the cold butter until the mixture resembles coarse crumbs. Gradually add in the milk and egg, mixing until a soft dough forms. This process should take about 5 minutes.
  2. Cover the dough with plastic wrap and refrigerate for at least 30 minutes. Chilling allows the butter to firm up, ensuring that the Wisconsin Apple Kringle has a flaky texture once baked.
  3. Preheat your oven to 375°F (190°C). On a lightly floured surface, roll out the chilled dough into a large oval shape, about 1/4 inch thick. Spread the spiced apple filling generously down the center of the dough, leaving edges to fold over. Carefully fold the dough over the filling, pinching the edges to seal, and form into an oval or horseshoe shape on a lined baking sheet.
  4. Place the shaped kringle in the preheated oven and bake for 25–30 minutes, or until it is golden brown and the filling is bubbling slightly. Keep an eye on the kringle in the last few minutes for a perfect golden hue.
  5. Once baked, allow the Wisconsin Apple Kringle to cool for about 10 minutes on a wire rack. In a small bowl, whisk together the powdered sugar and vanilla extract until smooth. Drizzle this sweet glaze over the warm kringle.

Nutrition

Serving: 1sliceCalories: 320kcalCarbohydrates: 42gProtein: 4gFat: 15gSaturated Fat: 9gPolyunsaturated Fat: 1gMonounsaturated Fat: 5gCholesterol: 40mgSodium: 180mgPotassium: 150mgFiber: 1gSugar: 10gVitamin A: 400IUVitamin C: 2mgCalcium: 25mgIron: 1mg

Notes

Store in an airtight container at room temperature for up to 2 days; refrigerate for up to 5 days, or freeze for up to 3 months.

Tried this recipe?

Let us know how it was!

Delightful Pistachio Wedding Cookies for Every Sweet Occasion

There’s something magical about the soft crunch of pistachios enveloped in a delicate, buttery cookie dough. These Irresistible Pistachio Wedding Cookies are not just treats; they’re little bites of celebration, perfect for your next gathering or elegant occasion. Imagine watching loved ones’ faces light up as they take that first blissful bite, only to discover a melt-in-your-mouth texture that’s surprisingly easy to achieve. What makes these cookies truly special is their versatility—they can be a delightful addition to any dessert table while effortlessly complementing tea, coffee, or even a sparkling toast. Curious about how to create this elegant indulgence and maybe even add your own twist? Let’s dive into this delightful recipe!

Why Are Pistachio Wedding Cookies Irresistible?

Delicate crunch: The soft crunch of pistachios paired with buttery cookie dough creates a uniquely satisfying texture that truly elevates your dessert experience.

Elegant presentation: Dusting these cookies with powdered sugar gives them a refined look, making them a perfect fit for any celebration.

Versatile treats: These cookies aren’t just for weddings; they make delightful snacks for tea parties, brunches, or simply a sweet treat at home.

Easy to customize: With simple substitutions like swapping in pecans or adding chocolate chips, you can tailor these cookies to fit different tastes while maintaining their delicious charm.

Crowd-pleasers: Their melt-in-your-mouth quality will have everyone coming back for more, making them a hit at any gathering! You might also enjoy these lovely Cookies and Cream Cheesecake Cups or the delightful Pistachio Carrot Cake for even more indulgence!

Pistachio Wedding Cookies Ingredients

Get ready to create your own batch of delightful Pistachio Wedding Cookies with these essential ingredients.

For the Cookies

  • Pistachios – Adds crunch and earthy flavor; you can substitute with pecans or walnuts for different taste profiles.
  • Butter – Provides richness and moisture; it’s best to stick with unsalted for a classic flavor.
  • Sugar – Sweetens the cookies and adds structure; consider reducing if using salted pistachios to balance sweetness.
  • Almond Extract – Enhances the flavor profile; it’s optional but highly recommended for a nuanced taste.

For the Topping

  • Powdered Sugar – Used for dusting; essential for that elegant presentation, so don’t skip this step!

Step‑by‑Step Instructions for Irresistible Pistachio Wedding Cookies

Step 1: Preheat the Oven
Begin by preheating your oven to 350°F (175°C). This initial step is crucial as it ensures your cookies bake evenly and become perfectly golden. While waiting for the oven to heat, line a baking sheet with parchment paper to prevent sticking and make cleanup a breeze.

Step 2: Cream Butter and Sugar
In a mixing bowl, add softened unsalted butter and granulated sugar. Using a hand mixer or stand mixer, beat them together on medium speed until the mixture turns fluffy and light in color, approximately 2-3 minutes. This process incorporates air, giving your Pistachio Wedding Cookies their delightful texture.

Step 3: Incorporate Pistachios and Extract
Once the butter and sugar are well-creamed, gently fold in the finely chopped pistachios and almond extract if using. Mix until everything is evenly combined—a rich green speckle should be visible throughout the dough. This step enhances the cookies’ nutty flavor and adds a lovely aroma, making the anticipation even sweeter.

Step 4: Shape the Dough
Scoop small amounts of dough (about a tablespoon each) and roll them into balls with your hands. Place the shaped dough balls onto the prepared baking sheet, spacing them about 2 inches apart. This spacing allows the cookies to spread without merging while baking, ensuring each one retains its distinct shape.

Step 5: Bake the Cookies
Carefully transfer the baking sheet to the preheated oven and bake for 10-12 minutes. Keep an eye on them, looking for a light golden hue around the edges. The centers should remain slightly soft; they will firm up as they cool. The delightful aroma will fill your kitchen, signaling that lovely Pistachio Wedding Cookies are on their way!

Step 6: Cool the Cookies
Once baked, remove the cookies from the oven and let them cool on the baking sheet for 5-10 minutes. This crucial resting period allows them to set properly. When they’re firm enough to handle, gently transfer each cookie to a wire rack to cool completely, ensuring they develop that signature melt-in-your-mouth texture.

Step 7: Dust with Powdered Sugar
Once your Pistachio Wedding Cookies have completely cooled, take your powdered sugar and lightly dust it over the top using a fine sieve. This finishing touch not only adds a sweet contrast but also creates an elegant presentation that’s perfect for any occasion. The result is stunning cookies ready to be savored!

Make Ahead Options

These Irresistible Pistachio Wedding Cookies are perfect for busy home cooks looking to save time! You can prepare the cookie dough up to 24 hours in advance; simply shape the dough into balls and refrigerate them in an airtight container. This not only enhances the flavor but also makes it easier to bake when you’re ready. If you want to prep even further ahead, you can freeze the dough balls for up to 3 months—just place them on a baking sheet to freeze individually before transferring to a freezer-safe bag. When it’s time to bake, there’s no need to thaw; just add a couple of extra minutes to your baking time. Your Pistachio Wedding Cookies will be just as delicious, maintaining that delightful texture and flavor for your special occasion!

Pistachio Wedding Cookies Variations

Feel free to explore these playful twists to make your Pistachio Wedding Cookies even more delightful and tailored to your taste!

  • Nut Swap: Replace pistachios with pecans or walnuts for a different nutty flavor. Each variety brings its own charm, enhancing the cookies in unexpected ways.

  • Chocolate Chunk: Add a handful of chocolate chips for an indulgent twist. The rich chocolate melds beautifully with the nutty flavors, creating a luscious combination that chocolate lovers will adore.

  • Citrus Zest: For a refreshing lift, incorporate some lemon or orange zest into the dough. This brightens the flavor while adding a fragrant note, making each bite feel just a little more special.

  • Gluten-Free: Substitute all-purpose flour with almond flour for a gluten-free option. This adds a lovely texture and intensifies the nuttiness, making for an elegant alternative without compromising on flavor.

  • Spiced Variation: Add a pinch of cinnamon or cardamom to the dough for a warm, aromatic flavor. This delightful hint of spice can transform your cookies into a cozy treat perfect for any gathering.

  • Fancy Glaze: Drizzle a simple icing made of powdered sugar and milk over the cooled cookies for a sweet finishing touch. This not only enhances the visual appeal but adds an extra layer of sweetness that pairs beautifully with the nutty base.

  • Savory Twist: Consider integrating a touch of sea salt or using a lightly salted butter. This creates a lovely contrast with the sweetness, enhancing the overall flavor profile and turning the cookies into a delightful sweet-savory experience.

  • Layered Treat: Sandwich two cookies together with a dollop of cream cheese frosting or nut butter for a more indulgent dessert. This creates a satisfying bite that’s as visually appealing as it is delicious.

If you’re seeking more sweet ideas to delight your family and friends, you might enjoy these fantastic Cookies and Cream Cheesecake Cups or the scrumptious Pistachio Carrot Cake. Happy baking!

What to Serve with Irresistible Pistachio Wedding Cookies

Delight your senses and elevate your gathering by pairing these elegant treats with flavors and textures that will leave a lasting impression.

  • Creamy Hot Chocolate: Rich and velvety, this drink provides a warm balance to the delicate sweetness of the cookies, creating a comforting experience.

  • Earl Grey Tea: The light floral notes from the bergamot in Earl Grey tea beautifully complement the nutty flavors of the cookies, enhancing the overall taste.

  • Fresh Berries: A medley of juicy raspberries or strawberries adds a refreshing acidity, offsetting the cookie’s sweetness while presenting a vibrant splash of color.

  • Lemon Sorbet: The bright citrus notes of lemon sorbet cleanse the palate, making each bite of the pistachio cookies feel renewed and invigorating.

  • Fizzy Prosecco: The effervescence of Prosecco enhances the celebration vibes, making it a perfect companion for wedding cookies and festive gatherings alike.

  • Chocolate Dipped Dates: These sweet and chewy treats provide an exquisite contrast to the crumbliness of the cookies, giving a taste of indulgence with every bite.

  • Coconut Macarons: Light and chewy, these airy cookies mirror the elegance of the pistachio cookies while introducing a delightful coconut flavor that harmonizes beautifully.

  • Almond Biscotti: The crunch and slight sweetness of almond biscotti create a lovely textural contrast, perfect for dipping alongside the pistachio cookies.

  • Espresso: A shot of rich, dark espresso enhances the nutty flavors in the cookies and adds an invigorating kick—a delightful way to end a sweet treat.

Expert Tips for Pistachio Wedding Cookies

  • Chop with Care: Use a food processor for finely chopping pistachios. This ensures they’re evenly distributed in the dough, avoiding clumps.

  • Butter Temperature: Make sure your butter is softened, not melted. This is key for proper creaming, leading to fluffier cookies.

  • Keep an Eye on Baking: Thinner cookies might require less baking time. Always check for a light golden edge—overbaking can lead to dry cookies.

  • Cool Before Serving: Allow cookies to cool completely on the baking sheet for better texture and flavor. This helps them set and enhances the melt-in-your-mouth quality.

  • Dough Flexibility: If your kitchen is warm, consider chilling the dough for easier shaping. It’ll make rolling into balls a breeze!

How to Store and Freeze Pistachio Wedding Cookies

Room Temperature: Store these delicious Pistachio Wedding Cookies in an airtight container at room temperature for up to 3 days to maintain their freshness.

Fridge: If you want the cookies to last longer, keep them in the refrigerator for up to a week. Just remember to bring them back to room temperature before serving for the best texture!

Freezer: For longer storage, freeze the unbaked dough balls. They can be kept in the freezer for up to 3 months. Bake directly from frozen, adding a couple of minutes to the baking time.

Reheating: To enjoy cookies that taste freshly baked, briefly reheat in the oven at 300°F (150°C) for about 5 minutes, allowing the butter to soften and restore their delicate texture.

Pistachio Wedding Cookies Recipe FAQs

What kind of pistachios should I use for these cookies?
I recommend using unsalted, shelled pistachios for the best flavor. Look for fresh, vibrant green nuts without dark spots. If you prefer, you can substitute them with pecans or walnuts for a different but equally delightful taste!

How should I store my Pistachio Wedding Cookies?
Store your cookies in an airtight container at room temperature for up to 3 days. If you want them to last longer, move them to the fridge, where they’ll keep for about a week. Just be sure to let them come back to room temperature before serving for that perfect melt-in-your-mouth texture.

Can I freeze the cookie dough, and if so, how?
Absolutely! To freeze the dough, shape it into balls and place them on a baking sheet lined with parchment paper. Freeze until solid, then transfer to a freezer-safe bag or container. They can be stored for up to 3 months. When ready to bake, simply add a couple of extra minutes to the baking time if baking straight from frozen!

Why are my cookies turning out flat or dry?
Flat cookies could result from using melted butter instead of softened butter or overmixing the dough. Ensure your butter is at room temperature, and mix just until combined. For dryness, check that you aren’t overbaking! Aim for a light golden edge and keep the centers slightly soft as they will firm up while cooling.

Are these cookies suitable for people with allergies?
These Pistachio Wedding Cookies do contain allergens, specifically nuts and dairy from the butter. Always check with guests concerning their allergies before serving. If you need a nut-free alternative, consider using sunflower seeds in place of pistachios, but the flavor will vary from the original recipe.

Can I add other flavors to my Pistachio Wedding Cookies?
Very! Feel free to mix in chocolate chips or dried fruits like cranberries or cherries for a delightful twist. Just keep in mind that these additions might change the classic flavor profile a bit, but they’ll still be wonderfully unique and enjoyable!

Pistachio Wedding Cookies

Delightful Pistachio Wedding Cookies for Every Sweet Occasion

These Pistachio Wedding Cookies offer a magical soft crunch and buttery flavor, perfect for any celebration and gathering.
Prep Time 30 minutes
Cook Time 12 minutes
Cooling Time 10 minutes
Total Time 52 minutes
Servings: 24 cookies
Course: Dessert
Cuisine: American
Calories: 85

Ingredients
  

For the Cookies
  • 1 cup Pistachios Finely chopped; can substitute with pecans or walnuts.
  • 1/2 cup Butter Unsalted, softened.
  • 1/2 cup Sugar Granulated; reduce if using salted pistachios.
  • 1 teaspoon Almond Extract Optional but recommended.
For the Topping
  • 1 cup Powdered Sugar For dusting.

Equipment

  • Oven
  • Mixing Bowl
  • Hand mixer or stand mixer
  • Baking Sheet
  • Parchment paper
  • Wire Rack
  • Fine sieve

Method
 

Step-by-Step Instructions
  1. Preheat your oven to 350°F (175°C) and line a baking sheet with parchment paper.
  2. Beat softened unsalted butter and granulated sugar together until fluffy, about 2-3 minutes.
  3. Gently fold in finely chopped pistachios and almond extract until evenly combined.
  4. Scoop tablespoon-sized amounts of dough and roll into balls, placing them on the baking sheet 2 inches apart.
  5. Bake for 10-12 minutes until edges are light golden and centers remain slightly soft.
  6. Cool cookies on the baking sheet for 5-10 minutes before transferring to a wire rack to cool completely.
  7. Dust cooled cookies with powdered sugar using a fine sieve for an elegant presentation.

Nutrition

Serving: 1cookieCalories: 85kcalCarbohydrates: 10gProtein: 1gFat: 5gSaturated Fat: 2gPolyunsaturated Fat: 1gMonounsaturated Fat: 2gCholesterol: 10mgSodium: 30mgPotassium: 30mgFiber: 1gSugar: 3gVitamin A: 5IUCalcium: 10mgIron: 1mg

Notes

Chop pistachios carefully for even distribution, ensure butter is softened at room temperature, and check cookies regularly while baking to avoid overbaking.

Tried this recipe?

Let us know how it was!

Irresistible Chocolate Eclairs to Delight Your Senses

There’s nothing quite like the sight of light, puffed eclairs glistening on a holiday dessert table. As you take your first bite of these irresistible peppermint chocolate eclairs, the airy pastry filled with luscious, creamy peppermint whipped cream melts away, leaving a tickle of holiday joy on your palate. This marvelous treat is not only a showstopper for any gathering, but it’s also a breeze to whip up, making it perfect for both novice bakers and seasoned pros. With gluten-free and dairy-free options at your fingertips, everyone gets to join in the festive fun! So, are you ready to bring a little magic to your kitchen? Let’s dive into this delicious adventure!

Why Are These Eclairs Irresistible?

Festive Vibe: Enjoy the holiday spirit with each delectable bite, perfect for festive gatherings.
Easy to Make: Even novice bakers can master this recipe with ease, ensuring a delightful experience for all skill levels.
Customizable Flavors: With variations like vanilla or mocha, you can delight a range of palates.
Diet-Friendly Options: Gluten-free and dairy-free options mean everyone can indulge without worry.
Showstopper Appeal: These eclairs are sure to impress your guests, making your dessert table unforgettable. Consider pairing them with a warm cup of cocoa or a scoop of ice cream for an even sweeter experience!

Irresistible Chocolate Eclair Ingredients

Here’s what you’ll need to whip up these delectable treats:

For the Choux Pastry

  • Butter – Adds richness and moisture; substitute with margarine for a dairy-free option.
  • Water – Provides steam for the pastry; no substitutes recommended.
  • All-purpose Flour – Gives structure to the pastry; for gluten-free, a suitable blend is recommended.
  • Large Eggs – Adds moisture and helps leaven the pastry; no direct substitutes recommended.

For the Peppermint Whipped Cream

  • Heavy Cream – Contributes to the rich flavor of the filling; use coconut cream for a dairy-free version.
  • Peppermint Extract – Provides the iconic peppermint flavor; vanilla extract can be used for a classic alternative.
  • Confectioners’ Sugar – Sweetens the whipped cream; optional for reduced sweetness.

For the Chocolate Frosting

  • Butter – Adds smoothness; margarine can be used for a dairy-free alternative.
  • Milk – Helps achieve the right consistency; a non-dairy alternative can be used.
  • Unsweetened Cocoa – Adds chocolaty flavor; no substitutes recommended.
  • Confectioners’ Sugar – Sweetens the frosting; can be reduced for less sweetness.

For the Garnish

  • Crushed Peppermints or Candy Canes – Adds a festive touch; chocolate shavings can be an alternative garnish.

With these ingredients ready, you’ll be well on your way to creating irresistible chocolate eclairs that everyone will adore!

Step‑by‑Step Instructions for Irresistible Chocolate Eclairs

Step 1: Prepare Choux Pastry
Preheat your oven to 400°F (200°C) to ensure a perfect bake. In a saucepan, melt the butter in the water over medium heat until it reaches a rolling boil. Quickly add the sifted all-purpose flour, stirring vigorously until a dough ball forms. Let it cool slightly before mixing in the eggs, one at a time, until you achieve a smooth and glossy batter.

Step 2: Bake Eclairs
Line a baking sheet with parchment paper and transfer your choux pastry into a piping bag fitted with a large round nozzle. Pipe 3-inch long strips on the parchment, leaving space between them for expansion. Bake the eclairs for 25–30 minutes, or until they are puffy and golden brown. Once baked, allow them to cool and pierce the sides of each eclair to release any steam.

Step 3: Make Whipped Cream
In a chilled mixing bowl, pour in the heavy cream and use a handheld mixer to whip it on medium speed until it starts to thicken. Gradually add confectioners’ sugar and peppermint extract. Continue whipping until you reach stiff peaks; this should take about 4–5 minutes. Once ready, use a piping bag to fill each cooled eclair with the peppermint whipped cream.

Step 4: Prepare Frosting
To create the rich chocolate frosting, melt the butter in a small saucepan over low heat. Stir in the milk until well combined, then whisk in unsweetened cocoa powder and confectioners’ sugar until you achieve a smooth, glossy consistency. This decadent frosting will add a beautiful finish to your irresistible chocolate eclairs.

Step 5: Assemble Eclairs
Now, it’s time to assemble your eclairs! Carefully slice each eclair down the middle, taking care not to cut all the way through. Generously pipe the peppermint whipped cream into each one. Once filled, dip the tops into the warm chocolate frosting, allowing any excess to drip off. Finally, garnish with crushed peppermint or candy canes for that festive touch right before serving.

How to Store and Freeze Irresistible Chocolate Eclairs

Room Temperature: Eclairs are best enjoyed fresh, but if you need to store them, keep unfilled choux pastry in an airtight container at room temperature for up to 1 day.

Fridge: Filled eclairs with peppermint whipped cream can be stored in the refrigerator for up to 2 days. Ensure they’re in a tightly sealed container to maintain freshness and prevent sogginess.

Freezer: You can freeze unfilled eclairs for up to 2 months. Wrap them individually in plastic wrap and store them in a freezer-safe bag. Defrost in the fridge before filling and frosting.

Reheating: If you would like to enjoy the eclairs warm, reheat unfilled eclairs in a preheated oven at 350°F for about 5–7 minutes, just until warmed through. Fill and frost after reheating for the best texture!

Expert Tips for Irresistible Chocolate Eclairs

  • Temperature Matters: Make sure your water and butter mixture is at a rolling boil before adding flour. This ensures the choux pastry puffs perfectly and creates that light texture.

  • Don’t Open the Oven: Resist the urge to peek during baking! Opening the oven can cause the temperature to drop, preventing the eclairs from rising properly.

  • Pipe with Precision: Use a large round nozzle and pipe with even pressure for uniform eclairs. This helps achieve consistent size and a lovely presentation for your irresistible chocolate eclairs.

  • Whip It Right: Ensure your heavy cream is chilled before whipping. This guarantees it reaches the right texture for the peppermint whipped cream filling, making it light and fluffy.

  • Fill Last Minute: To avoid soggy eclairs, fill them with whipped cream just before serving. This keeps the pastry nice and crisp, ensuring a delightful crunch with every bite!

Irresistible Chocolate Eclair Variations

Feel free to get creative with these delightful eclair variations that will tickle your taste buds and suit everyone’s preferences!

  • Citrus Twist: Substitute peppermint with orange extract for a lively, zesty alternative that brightens your dessert table.

  • Classic Vanilla: Swap the peppermint whipped cream filling for a creamy vanilla version, giving a nostalgic nod to traditional flavors.

  • Mocha Magic: Replace peppermint with coffee and chocolate flavors for a mocha delight, making these eclairs a perfect pick-me-up treat.

  • Nutty Crunch: Add finely ground nuts to the filling for that extra layer of texture. Chopped hazelnuts or almonds complement the chocolate beautifully.

  • Tropical Escape: Infuse the whipped cream with coconut extract or add shredded coconut for a fun, tropical flair that brings sunshine to your winter celebrations.

  • Vegan Delight: To make these eclairs vegan, use aquafaba instead of eggs for the choux pastry, and coconut cream in place of heavy cream for the filling.

  • Chocolate Lovers: Boost the chocolate factor by drizzling melted chocolate over the assembled eclairs or using a chocolate ganache as the frosting.

  • Mint Chocolate Chip: Stir mini chocolate chips into the peppermint whipped cream before filling, giving these eclairs an extra chocolate surprise.

Feel inspired? Pair these variations with a lovely cup of cocoa or enjoy with a side of fresh berries, echoing flavors from our Honey Butter Brioche rolls or treat your guests to a little something special just like our White Chocolate Cranberry cookies for a delightful dessert experience!

Make Ahead Options

These Irresistible Peppermint Chocolate Eclairs are perfect for meal prep enthusiasts! You can prepare the choux pastry up to 24 hours in advance. Simply bake the eclairs, let them cool completely, and store them in an airtight container at room temperature. The peppermint whipped cream filling can be made up to 3 days ahead; keep it in the refrigerator in a sealed container to stay fluffy and fresh. When you’re ready to serve, fill the eclairs with whipped cream and top them with chocolate frosting. This way, you can enjoy stunning desserts with minimal last-minute effort, ensuring they’re just as delicious as if made fresh!

What to Serve with Irresistible Peppermint Chocolate Eclairs?

Experience a delightful holiday feast by pairing these eclairs with complementary flavors and textures to enhance every bite.

  • Rich Hot Cocoa: This creamy beverage adds a comforting warmth, making every bite of eclairs an experience of cozy indulgence.

  • Fresh Berries: A burst of juicy raspberries or strawberries offers a refreshing contrast, balancing the sweet richness of the eclairs.

  • Vanilla Ice Cream: A scoop of smooth vanilla ice cream enhances the chocolate, creating a luxurious creaminess that visitors will crave.

  • Strong Coffee: A rich espresso provides just the right bitterness to cut through the sweetness, making for a balanced dessert experience.

  • Whipped Cream Topping: Extra freshly whipped cream can add a light and airy touch, allowing guests to indulge even more in the festive spirit.

  • Chocolate Fondue: A small pot of warm chocolate allows guests to dip pieces of eclair, adding a fun and interactive element to your holiday gathering.

  • Pineapple Sorbet: This fruity sorbet refreshes the palate and adds a tropical twist, perfectly complementing the minty peppermint flavor.

These pairings not only elevate the dessert but create a stunning presentation that captures the essence of holiday celebrations.

Irresistible Peppermint Chocolate Eclairs Recipe FAQs

How do I select ripe ingredients for my eclairs?
Absolutely! Using the right ingredients is crucial. For the best flavor in your peppermint whipped cream, choose heavy cream with a fat content of at least 36%. If opting for coconut cream, ensure it’s well-chilled and thick. When picking butter, go for high-quality unsalted varieties for that rich taste. Fresh large eggs should have smooth, uncracked shells; this ensures freshness and better rise in your choux pastry.

What is the best way to store filled chocolate eclairs?
Very! To maintain the goodness of your filled eclairs, store them in the refrigerator, where they will stay fresh for up to 2 days. Use a tightly sealed container to minimize air exposure, which can cause them to become soggy. When serving, bring them to room temperature for the best flavor experience; you can also enjoy them chilled if you prefer!

Can I freeze my peppermint chocolate eclairs?
Absolutely! You can freeze unfilled eclairs for up to 2 months. Wrap each eclair tightly in plastic wrap, then place them in a freezer-safe bag to prevent freezer burn. When you’re ready to indulge, let them defrost in the refrigerator overnight. Once thawed, fill and frost them just before serving to preserve that delightful texture.

What should I do if my eclairs didn’t puff up properly?
It can be disappointing, but don’t fret! If your eclairs didn’t puff, there may be a few reasons. Ensure that your water and butter mixture is at a rolling boil before adding flour, as this is vital for creating steam. Avoid opening the oven door during baking, as this can cause temperature fluctuations that inhibit proper rising. Also, check that your eggs were incorporated one at a time until completely smooth, contributing to adequate leavening in the pastry.

Are there dietary considerations for my dessert?
Certainly! For those with dietary restrictions, you can easily modify this recipe. When making the choux pastry, substitute butter with margarine or oil for a dairy-free option. For gluten-free friends, a suitable gluten-free flour blend can work just as well. The peppermint whipped cream can be made with coconut cream instead of heavy cream. Always check ingredient labels for allergens and modify as necessary to suit your guests’ needs.

How long in advance can I make the eclairs?
I often make them a day ahead! You can prepare the choux pastry and bake it one day in advance, storing the unfilled shells in an airtight container at room temperature. The peppermint whipped cream can be made up to 3 days ahead; just keep it in a sealed container in the fridge. Fill the eclairs just before serving to keep the pastry crispy and ensure that every bite is delightful!

Irresistible Chocolate Eclairs

Irresistible Chocolate Eclairs to Delight Your Senses

Experience the joy of Irresistible Chocolate Eclairs, a perfect festive treat that combines airy pastry and creamy peppermint filling.
Prep Time 30 minutes
Cook Time 30 minutes
Cooling Time 15 minutes
Total Time 1 hour 15 minutes
Servings: 12 eclairs
Course: Dessert
Cuisine: French
Calories: 230

Ingredients
  

For the Choux Pastry
  • 0.5 cup Butter Substitute with margarine for a dairy-free option.
  • 1 cup Water No substitutes recommended.
  • 1 cup All-purpose Flour Use a suitable blend for gluten-free.
  • 4 Large Eggs No direct substitutes recommended.
For the Peppermint Whipped Cream
  • 1 cup Heavy Cream Use coconut cream for a dairy-free version.
  • 1 teaspoon Peppermint Extract Vanilla extract can be used for a classic alternative.
  • 0.5 cup Confectioners’ Sugar Optional for reduced sweetness.
For the Chocolate Frosting
  • 0.5 cup Butter Margarine can be used for a dairy-free alternative.
  • 2 tablespoons Milk A non-dairy alternative can be used.
  • 0.5 cup Unsweetened Cocoa No substitutes recommended.
  • 2 cups Confectioners’ Sugar Can be reduced for less sweetness.
For the Garnish
  • 0.5 cup Crushed Peppermints or Candy Canes Chocolate shavings can be an alternative garnish.

Equipment

  • piping bag
  • Handheld mixer
  • Saucepan
  • Baking Sheet
  • Parchment paper

Method
 

Step-by-Step Instructions for Irresistible Chocolate Eclairs
  1. Preheat your oven to 400°F (200°C) and melt the butter in the water over medium heat until boiling. Add the sifted flour, stir into a dough ball, cool, then mix in the eggs until smooth.
  2. Line a baking sheet with parchment, pipe 3-inch strips of pastry, and bake for 25–30 minutes until golden brown. Cool and pierce to release steam.
  3. In a chilled bowl, whip the heavy cream, gradually adding sugar and peppermint extract until stiff peaks form. Fill each eclair with whipped cream.
  4. Melt the butter for frosting, mix in the milk, cocoa powder, and sugar until smooth. Dip eclair tops into frosting and allow excess to drip.
  5. Slice eclairs, pipe in the whipped cream, dip topped eclairs in frosting, and garnish with crushed peppermint right before serving.

Nutrition

Serving: 1eclairCalories: 230kcalCarbohydrates: 30gProtein: 3gFat: 12gSaturated Fat: 7gPolyunsaturated Fat: 1gMonounsaturated Fat: 4gCholesterol: 80mgSodium: 100mgPotassium: 150mgFiber: 1gSugar: 10gVitamin A: 400IUCalcium: 30mgIron: 1mg

Notes

Serve immediately for best texture. For storage, keep unfilled eclairs at room temperature for a day or fill and refrigerate for up to 2 days.

Tried this recipe?

Let us know how it was!

Red Velvet Snowball Cookies: Your New Holiday Obsession

As I stood in my kitchen, the tantalizing aroma of baking cookies filled the air, instantly transporting me to cherished memories of festive gatherings. This season, I’m excited to share my favorite recipe for Red Velvet Snowball Cookies – a dazzling addition to any holiday cookie platter. Their rich cocoa flavor combined with a creamy center makes these treats not only scrumptious but also visually captivating. With their bright crimson hue and a generous dusting of powdered sugar, these cookies are not just a delight to eat but also make for delightful gifts or the perfect centerpiece for holiday gatherings. Plus, they’re incredibly easy to whip up, requiring simple ingredients and minimal fuss. Curious to see how these festive cream-filled delights come together? Let’s dive in!

Why Are Red Velvet Snowball Cookies So Loved?

Colors That Captivate: Their striking red hue makes them a showstopper on any dessert table during the holiday season.

Delectable Taste: With a rich cocoa flavor and creamy filling, each bite offers a harmonious blend of sweetness and tang.

User-Friendly: Easy to prepare with common ingredients, these cookies are perfect for both novice and seasoned bakers.

Perfect for Gifting: Pack them in festive tins or on cookie trays for that thoughtful homemade touch—better than any store-bought treats!

Versatile Options: Want to switch it up? Try adding nuts or roll them in coconut for an exciting twist.

These Red Velvet Snowball Cookies are more than a treat; they bring a festive spirit that you and your loved ones will adore! If you love cookies, consider also trying some delightful Chocolate Cranberry Cookies or our festive Red White Blue Fruit Kabobs for your holiday gatherings!

Red Velvet Snowball Cookies Ingredients

• Here’s everything you need to create these festive treats that embody holiday cheer!

For the Cookie Dough

  • Unsalted Butter – The base of buttery softness; use softened butter for a rich texture.
  • Powdered Sugar – Provides subtle sweetness; reserve some for dusting after baking.
  • Vanilla Extract – Adds depth; opt for pure vanilla for the best flavor.
  • Red Food Gel Coloring – Gives the cookies their vibrant hue; gel helps maintain the dough’s moisture.
  • All-Purpose Flour – Forms the structure; avoid adding too much to keep cookies light.
  • Unsweetened Cocoa Powder – Imparts a mild chocolate flavor; essential for that classic red velvet profile.
  • Salt – Enhances flavor balance; vital even in sweet treats.
  • Finely Chopped Pecans (Optional) – Offers a nutty crunch; a traditional compliment in snowball cookies.

For the Cream Cheese Filling

  • Cream Cheese – Creates the rich, tangy center; ensure it’s softened for easy mixing.
  • Additional Powdered Sugar (for Filling) – Sweetens the cream cheese without running; key for the cookie’s shape.

With these ingredients at hand, you’re ready to craft your own batch of delightful Red Velvet Snowball Cookies that will surely wow your family and friends this holiday season!

Step‑by‑Step Instructions for Red Velvet Snowball Cookies

Step 1: Prepare the Cream Cheese Filling
In a small bowl, combine softened cream cheese, powdered sugar, and vanilla extract until smooth. Use a hand mixer for effortless blending, ensuring there are no lumps. Once mixed, scoop the filling into small balls, about one tablespoon each, and place on a parchment-lined tray. Freeze for 30 minutes to firm them up—this will make filling the cookies easier later on.

Step 2: Make the Cookie Dough
In a large mixing bowl, cream together softened unsalted butter and powdered sugar using an electric mixer until the mixture is light and fluffy—about 3-4 minutes. Then, add in vanilla extract and a few drops of red food gel coloring, mixing until you achieve a vibrant hue. The dough should be smooth and creamy, setting the stage for your delicious Red Velvet Snowball Cookies.

Step 3: Combine Dry Ingredients
In a separate bowl, whisk together all-purpose flour, unsweetened cocoa powder, and a pinch of salt until well combined. Gradually add this dry mixture to the creamed butter mixture, blending on low speed until just combined. Your dough should be soft yet slightly sticky. If desired, fold in finely chopped pecans for added texture and flavor that perfectly complements the red velvet profile.

Step 4: Chill the Dough
If your dough appears too soft to handle, wrap it in plastic wrap and refrigerate for 15-30 minutes until it firms up. This step is key for maintaining the shape of your cookies while baking. After chilling, it should be manageable to scoop and shape without losing form, setting you up for a successful baking experience.

Step 5: Shape the Cookies
Preheat your oven to 350°F (175°C) and line a baking sheet with parchment paper. Take about one tablespoon of dough and flatten it in your palm. Place a frozen cream cheese ball in the center, then fold the dough around it, sealing completely. Roll it into a smooth ball and place it on the baking sheet, ensuring there’s about an inch of space between each dough ball for even baking.

Step 6: Bake the Cookies
Bake the cookies in the preheated oven for 12-14 minutes, or until the tops are dry to the touch. Keep an eye on them; they should not spread much. Once baked, remove them from the oven and let them cool on the baking sheet for a few minutes before transferring them to a cooling rack. This lets them set beautifully while retaining their soft, fluffy interior.

Step 7: Cool and Dust
Once the cookies have cooled completely, it’s time to roll them in powdered sugar. Place powdered sugar in a shallow dish, then gently roll each cookie until they’re fully coated. This dusting not only adds sweetness but also enhances the snowy appearance of your Red Velvet Snowball Cookies, making them a festive treat for your holiday gatherings.

Red Velvet Snowball Cookies Variations

Get ready to unleash your creativity and elevate your Red Velvet Snowball Cookies with these fun twists!

  • Nutty Delight: Swap pecans for walnuts or almonds for a delightful crunch and a richer flavor profile. Nuts enhance the cookies’ texture and add a unique taste.

  • Coconut Bliss: Roll the cookies in shredded coconut after their initial bake for a tropical flair that pairs beautifully with the creaminess. Imagine each bite delivering a sweet, chewy surprise.

  • Spicy Kick: Add a pinch of cinnamon or cayenne pepper to your dough for an unexpected but delightful warm spice that adds depth. The warmth complements the chocolate nicely and will have your guests guessing.

  • Dairy-Free Option: Substitute cream cheese with a dairy-free cream cheese alternative. This makes the cookies accessible for friends with dietary restrictions without sacrificing flavor!

  • Chocolatey Indulgence: Mix in chocolate chips or chunks into the dough for those who crave extra chocolate goodness. It’s gooey, luscious, and elevates the cookies to another level of indulgence.

  • Fruity Filling: Replace traditional cream cheese filling with a fruit-flavored frosting, like strawberry or raspberry, for a sweet, tangy twist that brightens every bite. It adds a pop of color and flavor that’s perfect for summer gatherings.

  • Vegan Twist: Use vegan butter and an alternative egg substitute like flaxseed meal combined with water for a plant-based version that everyone can enjoy. They will still turn out soft and delicious!

These variations can easily be mixed and matched, giving you endless possibilities to explore while baking. And if you’re looking for more festive ideas, don’t miss our cozy Red White Blue Dirt Cups or our easy-to-make No Bake Cookies and Cream Cheesecake Cups this season!

What to Serve with Red Velvet Snowball Cookies

There’s nothing quite like the joy of serving a festive plate filled with treats, making holiday celebrations even more delightful.

  • Creamy Hot Chocolate: A warm cup of rich hot chocolate complements the cookies’ flavors and adds to the cozy atmosphere of the season.
  • Peppermint Bark: The festive combination of chocolate and mint offers a refreshing contrast, enhancing the overall dessert table appeal.
  • Mini Cheesecakes: These indulgent bites add a different texture while the vanilla and cream flavors elevate the experience alongside the cookies.
  • Spiced Nuts: The crunch and warmth from spiced nuts balance the soft, sweet cookies and provide a delightful textural variation.
  • Gingerbread Cookies: Nothing says holiday cheer quite like a classic! The spicy flavor of gingerbread pairs wonderfully with the rich red velvet.
  • Festive Fruit Punch: A light, fruity drink can cleanse the palate and refresh guests, complementing the sweet treat experience perfectly.
  • Coconut Macaroons: Their chewy texture and coconut flavor provide a different bite, contrasting beautifully with the creamy-filled snowball cookies.
  • Mulled Wine: For adults, this warm, spiced wine offers a comforting addition, wrapping up the festive atmosphere and perfectly pairing with sweet flavors.

Surprise your friends and family by offering these delightful treats alongside your enchanting Red Velvet Snowball Cookies!

Expert Tips for Red Velvet Snowball Cookies

  • Room Temperature Butter: Ensure your unsalted butter is softened to room temperature for smooth mixing and a rich texture in your dough.

  • Chill for Perfect Shape: If your dough is too soft, don’t skip chilling it! Refrigerate for at least 15-30 minutes to maintain the cookie shape during baking.

  • Use Gel Coloring: Opt for gel food coloring instead of liquid to keep the dough’s consistency intact; it won’t alter the moisture levels.

  • Warm Sugar Coating: Roll your cookies in powdered sugar while they are still warm from the oven for a better coating and sweetness retention.

  • Avoid Overmixing: When combining the dry ingredients with the butter mixture, mix just until combined to prevent the cookies from becoming dense.

  • Taste as You Go: Sample the cream cheese filling before sealing; it should be sweet and creamy, setting the perfect base for your Red Velvet Snowball Cookies!

Make Ahead Options

These Red Velvet Snowball Cookies are a fantastic option for busy home cooks looking to simplify holiday baking! You can prepare the cream cheese filling up to 3 days in advance; simply mix the softened cream cheese, powdered sugar, and vanilla, scoop it into balls, and store them in an airtight container in the refrigerator. Additionally, you can make the dough and refrigerate it for up to 24 hours before baking. Just remember to chill it again if it becomes too soft. When ready to bake, shape the cookies around the frozen filling and follow the usual baking instructions for delightful results. This way, you’ll have these festive treats ready in no time, making your holiday season a little less hectic!

Storage Tips for Red Velvet Snowball Cookies

Room Temperature: Keep cookies in an airtight container at room temperature for up to 2 days to maintain their softness and flavor.

Fridge: For a longer shelf life, refrigerate your cookies for up to 5-6 days due to the cream cheese filling. Layer them with parchment paper to prevent sticking.

Freezer: These Red Velvet Snowball Cookies can be frozen for up to 2 months. Place them in a single layer in an airtight container or freezer bag to preserve their texture.

Reheating: If you prefer warm cookies, reheat them in the oven at 300°F (150°C) for about 5-10 minutes to restore their softness!

Red Velvet Snowball Cookies Recipe FAQs

How do I choose the right cocoa powder for my cookies?
Absolutely! When selecting cocoa powder for your Red Velvet Snowball Cookies, opt for unsweetened cocoa to impart a mild chocolate flavor without overwhelming the sweetness. Look for a brand that is Dutch-processed if you prefer a rich, deep flavor, but regular unsweetened cocoa works beautifully as well.

How should I store leftover cookies?
Very! To keep your Red Velvet Snowball Cookies fresh, store them in an airtight container at room temperature for up to 2 days. If you need them to last longer, refrigerate them for 5-6 days, layering them with parchment paper to avoid sticking. Always ensure they are fully cooled before storing to maintain texture.

Can I freeze Red Velvet Snowball Cookies?
Absolutely! To freeze these delightful cookies, first let them cool completely. Then, arrange them in a single layer in an airtight container or freezer bag, ensuring they’re sealed tightly. They can be frozen for up to 2 months. For best results, thaw them overnight in the refrigerator before enjoying!

What should I do if my cookie dough is too sticky?
No problem! If your dough seems too sticky to handle, simply wrap it in plastic wrap and chill it in the refrigerator for 15-30 minutes. This will make it much easier to scoop and shape. Alternatively, you can lightly dust your hands and work surface with flour to help with handling without altering the dough too much.

Are these cookies suitable for people with allergies?
Very! If you or someone you’re baking for has allergies, be sure to check the ingredient labels carefully. The dough contains common allergens such as dairy and gluten. To make these cookies gluten-free, substitute the all-purpose flour with a gluten-free flour blend. For dairy allergies, you could explore using dairy-free cream cheese as a substitute!

Can I make these cookies ahead of time?
Absolutely! You can prepare the cream cheese filling a day before and keep it in the refrigerator. The cookie dough can also be made ahead; just refrigerate it overnight. When you’re ready, you can shape, bake, and enjoy your Red Velvet Snowball Cookies fresh for your holiday gatherings!

Red Velvet Snowball Cookies

Red Velvet Snowball Cookies: Your New Holiday Obsession

These Red Velvet Snowball Cookies offer a rich cocoa flavor with a creamy center, perfect for holiday gatherings.
Prep Time 30 minutes
Cook Time 14 minutes
Chilling Time 30 minutes
Total Time 1 hour 14 minutes
Servings: 24 cookies
Course: Dessert
Cuisine: American
Calories: 120

Ingredients
  

For the Cookie Dough
  • 1 cup Unsalted Butter Softened
  • 1 cup Powdered Sugar Reserve some for dusting
  • 1 teaspoon Vanilla Extract Pure for best flavor
  • 1 tablespoon Red Food Gel Coloring For vibrant hue
  • 2 cups All-Purpose Flour Avoid adding too much
  • 2 tablespoons Unsweetened Cocoa Powder Essential for red velvet profile
  • 1/4 teaspoon Salt Enhances flavor balance
  • 1/2 cup Finely Chopped Pecans Optional
For the Cream Cheese Filling
  • 8 ounces Cream Cheese Softened
  • 1/2 cup Additional Powdered Sugar For filling

Equipment

  • Mixing bowls
  • Electric Mixer
  • Parchment paper
  • Baking Sheet
  • Freezer

Method
 

Preparation
  1. In a small bowl, combine softened cream cheese, powdered sugar, and vanilla extract until smooth. Scoop the filling into small balls and freeze for 30 minutes.
  2. In a large bowl, cream together softened butter and powdered sugar until light and fluffy. Add vanilla extract and red food gel coloring, mixing until smooth.
  3. In a separate bowl, whisk together flour, cocoa powder, and salt. Gradually add to the butter mixture until just combined. Fold in pecans if desired.
  4. Chill dough in plastic wrap for 15-30 minutes if too soft.
  5. Preheat oven to 350°F (175°C). Shape tablespoons of dough around frozen cream cheese balls and roll into balls.
  6. Bake for 12-14 minutes, until tops are dry. Cool on the baking sheet.
  7. Once cooled, roll cookies in powdered sugar until fully coated.

Nutrition

Serving: 1cookieCalories: 120kcalCarbohydrates: 15gProtein: 1gFat: 7gSaturated Fat: 4gPolyunsaturated Fat: 0.5gMonounsaturated Fat: 2.5gCholesterol: 30mgSodium: 100mgPotassium: 50mgFiber: 0.5gSugar: 6gVitamin A: 2IUCalcium: 1mgIron: 2mg

Notes

For optimal results, use room temperature ingredients and roll in powdered sugar while still warm for better coating.

Tried this recipe?

Let us know how it was!

The Ultimate Chicken Wild Rice Casserole for Cozy Nights

The aroma of a warm, bubbling casserole wafting through the kitchen is a memory that embraces you like a favorite blanket. The Ultimate Chicken Wild Rice Casserole is here to transform your weeknight dinners into comforting culinary experiences. Bursting with tender chicken, hearty wild rice, and a medley of sautéed vegetables wrapped in a creamy sauce, this dish is an ideal choice for family gatherings or potluck parties. It’s meal prep-friendly, letting you whip it up ahead of time, and fully customizable! You can swap in your favorite cheeses or even opt for different rice varieties to keep things interesting. Ready to dive into a dish that’s both cozy and adaptable? Let’s explore how to make this exquisite casserole that will surely become a staple on your dinner table!

Why is this casserole a must-try?

Comfort, the Ultimate Chicken Wild Rice Casserole captures the essence of home-cooked meals, wrapping you in warmth with every bite. Versatile, it easily adapts to different cheese or rice preferences, making it a hit among family members and guests alike! Easy to prepare, it streamlines meal prep, giving you a delicious dish ready for any occasion. Flavorful, the rich, creamy sauce combined with sautéed veggies offers a delightful taste that will keep everyone coming back for seconds. Serve it alongside a refreshing side salad or alongside roasted vegetables for a complete meal. If you’re looking for more inspiration, check out my Corn Chicken Rice or Air Fryer Chicken for delightful variations!

The Ultimate Chicken Wild Rice Ingredients

For the Casserole

  • Chicken – Use boneless, skinless chicken breast or thighs for tender bites.
  • Wild Rice – This is the base ingredient that adds nuttiness; you can substitute with white or brown rice, adjusting the cooking times accordingly.
  • Butter – Adds richness to the sauce; substitute with olive oil for a dairy-free option.
  • Onion – Gives a savory flavor; feel free to replace with shallots for a milder taste.
  • Garlic – Enhances the depth of flavor; fresh garlic is best but garlic powder can work in a pinch.
  • Carrots – Offers sweetness and color; easily swap for peas for a different texture.
  • Celery – Adds crunch; other crunchy veggies like bell peppers can work as well.
  • Mushrooms – Brings an earthy flavor; you can replace them with zucchini or spinach for variety.
  • Panko Breadcrumbs – Provides a crunchy topping; regular breadcrumbs can be used if panko is not available.
  • Parmesan Cheese – A flavor enhancer for the topping; feel free to swap in cheddar or smoked Gouda for a twist.
  • Thyme – A fragrant herb that adds depth; use Italian seasoning if thyme is unavailable.
  • Salt & Pepper – Essential seasonings; adjust to taste to enhance the overall flavor of the dish.

For the Topping

  • Panko Breadcrumbs – Use for crunch; mix with cheese for extra flavor.
  • Parmesan Cheese – Choose this for a savory kick; mix in some cheddar for added richness.

Step‑by‑Step Instructions for The Ultimate Chicken Wild Rice Casserole

Step 1: Preheat the Oven
Start by preheating your oven to 350°F (175°C). This ensures that the Ultimate Chicken Wild Rice Casserole cooks evenly and gets that golden, bubbly finish. While the oven heats up, you can prep your ingredients, which will make the cooking process feel smooth and quick.

Step 2: Prepare the Wild Rice
If you haven’t done so already, cook the wild rice according to the package instructions, typically about 45 minutes. Ensure it achieves a chewy texture, as this is crucial for the casserole’s overall flavor and consistency. Once cooked, set it aside to cool slightly while you continue with the preparation.

Step 3: Sauté the Vegetables
In a large skillet over medium heat, melt some butter, allowing it to coat the bottom of the pan. Add diced onion, minced garlic, sliced carrots, chopped celery, and mushrooms. Sauté for about 5-7 minutes until the vegetables are softened and fragrant. Season this mixture with thyme, salt, and pepper, enhancing the flavor profile of your casserole.

Step 4: Combine Ingredients
In a large mixing bowl, combine the diced cooked chicken, the wild rice, and the sautéed vegetables. Then, add your creamy sauce of choice—this could be a mix of cream of chicken soup with a splash of milk or homemade sauce. Stir everything together until well mixed, ensuring each ingredient is evenly distributed.

Step 5: Prepare the Baking Dish
Grease a 9×13 inch baking dish with a bit of butter or cooking spray to prevent sticking. Then, pour the combined mixture of chicken, wild rice, and vegetables into the dish, spreading it out evenly. This will form the hearty base of your Ultimate Chicken Wild Rice Casserole.

Step 6: Create the Topping
In a separate bowl, combine panko breadcrumbs, melted butter, and grated Parmesan cheese. This mixture adds a delightful crunch to the casserole. Stir until the breadcrumbs are well-coated, then sprinkle it generously over the casserole mixture, creating an even layer.

Step 7: Bake the Casserole
Place the casserole in the preheated oven and bake uncovered for about 30-35 minutes. You’ll know it’s ready when the topping is golden brown and the edges are bubbly. The aroma of the Ultimate Chicken Wild Rice Casserole will fill your kitchen, making patience the hardest part.

Step 8: Let It Rest
Once the casserole is out of the oven, let it rest for about 5 minutes. This resting period allows the flavors to meld further and makes serving easier. You’ll achieve a beautiful slice full of texture and taste when you’re ready to dish it up.

Make Ahead Options

This Ultimate Chicken Wild Rice Casserole is perfect for busy cooks looking to save time during the week! You can prepare the entire casserole up to 24 hours in advance; simply assemble it in the baking dish, cover tightly with foil, and refrigerate. This way, the flavors meld beautifully overnight, ensuring a delicious meal when you’re ready to bake. If you’re preparing it even further ahead, you can freeze it for up to 3 months. Just remember to thaw it in the refrigerator overnight before baking. When you’re ready to serve, preheat your oven and bake it directly from the fridge for 35-40 minutes, or until heated through and golden on top. With these make-ahead options, you’ll enjoy a comforting homemade dish with minimal effort!

What to Serve with the Ultimate Chicken Wild Rice Casserole

Elevate your dining experience by pairing this comforting casserole with delightful sides and sips that complement its rich flavors.

  • Crispy Green Salad: The freshness of mixed greens tossed in a light vinaigrette balances the creamy casserole, adding a crunchy contrast that brightens each bite.

  • Garlic Breadsticks: Soft and buttery herb-infused breadsticks are perfect for mopping up any creamy sauce left behind, making your meal feel extra indulgent.

  • Steamed Broccoli: Tender stalks of broccoli provide a nutrient-packed side that adds vibrant color and a satisfying crunch to your plate.

  • Roasted Brussels Sprouts: Their earthy flavor and crispy edges bring a delightful texture and depth that pairs beautifully with the richness of the casserole.

  • Mashed Potatoes: Creamy mashed potatoes with a hint of garlic offer a fluffy base that enhances the comforting nature of the dish, making every bite absolutely dreamy.

  • Sparkling Apple Cider: This refreshing drink’s sweet-tart notes perfectly contrast the creamy casserole, balancing the richness with each sip to elevate your meal.

  • Cheesecake Bites: End your meal on a sweet note with these creamy treats, serving as a delightful follow-up to the savory flavors of the Ultimate Chicken Wild Rice Casserole.

  • Herbed Quinoa: Light and fluffy quinoa sprinkled with fresh herbs can serve as a healthy alternative, providing a nice texture that rounds out the meal.

How to Store and Freeze Ultimate Chicken Wild Rice Casserole

Fridge: Store leftovers in an airtight container for up to 4 days. This allows you to enjoy the comforting flavors of the Ultimate Chicken Wild Rice Casserole throughout the week.

Freezer: Freeze the casserole before baking for up to 3 months. Just cover it tightly with foil or plastic wrap to prevent freezer burn.

Reheating: Thaw overnight in the fridge when ready to enjoy, then reheat in the oven at 350°F (175°C) for 20-25 minutes, or until warmed through.

Make-Ahead Tip: Assemble the casserole in advance and keep it in the fridge overnight before baking, making it perfect for busy weeknights or gatherings.

Expert Tips for the Ultimate Chicken Wild Rice Casserole

  • Perfectly Cooked Rice: Ensure your wild rice is fully cooked and has a chewy texture before combining; this is key for a delicious casserole.
  • Make Ahead: You can prepare the casserole a day in advance. Just store it covered in the refrigerator before baking, making dinner a breeze!
  • Slow Cooker Option: For an easy setup, combine your ingredients in a slow cooker on low for 4-6 hours. Just add the topping right before serving.
  • Customizable Creaminess: Adjust the creamy sauce’s richness by using different cheese varieties like cheddar or smoked Gouda to enhance flavor profiles.
  • Mix and Match Veggies: Explore with various vegetables! Spinach or bell peppers can add color and nutrients, keeping the casserole exciting every time.

The Ultimate Chicken Wild Rice Variations

Feel free to get creative and customize this casserole to suit your tastes and dietary needs!

  • Rice Alternative: Swap wild rice for brown or white rice; adjust cooking times for a perfect texture.

  • Dairy-Free Swap: Use olive oil instead of butter and a non-dairy cream substitute for a rich, creamy base that everyone will enjoy.

  • Veggie Boost: Toss in some spinach or bell peppers for an extra layer of flavor and a pop of color that makes every serving special.

  • Cheese Medley: Experiment with a mix of cheeses like cheddar, Monterey Jack, or even smoked Gouda for a unique flavor twist that caters to everyone’s tastes.

  • Spicy Kick: Add a pinch of red pepper flakes or some diced jalapeños if you like a bit of heat to elevate the flavor profile.

  • Protein Options: Substitute the chicken with turkey or even chickpeas for a satisfying vegetarian option that doesn’t skimp on flavor.

  • Herb Variations: Try out fresh herbs like rosemary or fresh basil instead of thyme to give the dish a fragrant, garden-fresh aroma.

  • Crunchy Topping: For an extra crunch, mix some crushed nuts or seeds with your panko breadcrumbs, elevating the texture in every bite!

Looking for more inspiration? Check out my delicious Jerk Chicken Burritos for another tasty twist, or enjoy a quick and delightful Chicken Cashew Broccoli stir-fry!

Ultimate Chicken Wild Rice Casserole Recipe FAQs

How do I choose the best wild rice?
Absolutely! When selecting wild rice, look for a package labeled “whole grain” and check the grains for a dark color with a robust, nutty aroma. Avoid any that have dark spots all over, which can indicate spoilage. The grains should be firm and not broken. If you want a quicker option, consider using a pre-packaged blend that includes wild rice.

What’s the best way to store leftovers?
Very! Store any leftover Ultimate Chicken Wild Rice Casserole in an airtight container in the refrigerator for up to 4 days. Make sure it’s cool before sealing the container to avoid condensation, which could make the casserole soggy. When reheating, pop it in the oven at 350°F (175°C) for about 20 minutes, or microwave individual portions if you’re in a hurry.

Can I freeze the casserole?
Absolutely! You can freeze the casserole before baking for up to 3 months. Cover it tightly with foil or plastic wrap to prevent freezer burn. When you’re ready to enjoy, thaw it overnight in the refrigerator. To bake, preheat your oven to 350°F (175°C) and pop it in for 30-35 minutes, or until bubbly and golden brown on top.

How can I make the casserole dairy-free?
Very! You can easily adapt the Ultimate Chicken Wild Rice Casserole for a dairy-free diet. Substitute the butter with olive oil or a dairy-free butter alternative. For the creamy sauce, use a non-dairy milk like almond or coconut milk mixed with a dairy-free cream of chicken soup. Nutritional yeast is a great addition for that cheesy flavor without the dairy.

What if my rice isn’t fully cooked when I combine it?
Oh no! If that happens, don’t panic. If your wild rice isn’t fully cooked, it may not absorb the sauce properly. To remedy this, you can pre-cook the rice longer before adding it to the casserole mix. Alternatively, add a little extra broth or water to the casserole; cover and bake for an extra 10-15 minutes at the same temperature. Just check occasionally to make sure it’s cooking through.

Can I use leftover chicken in the casserole?
Absolutely! Using leftover chicken is a fantastic way to save time and reduce waste. Simply shred or dice the cooked chicken, then mix it into the casserole ingredients during assembly. It makes for a quick and delicious way to transform your leftovers into a comforting meal!

The Ultimate Chicken Wild Rice

The Ultimate Chicken Wild Rice Casserole for Cozy Nights

The Ultimate Chicken Wild Rice delivers a comforting casserole experience with tender chicken, hearty wild rice, and creamy sauce.
Prep Time 15 minutes
Cook Time 35 minutes
Resting Time 5 minutes
Total Time 55 minutes
Servings: 6 servings
Course: Chicken
Cuisine: American
Calories: 350

Ingredients
  

For the Casserole
  • 1 lb Boneless Skinless Chicken Breast or Thighs Use for tender bites
  • 1 cup Wild Rice Base ingredient, can substitute with white or brown rice
  • 2 Tbsp Butter Richness to the sauce, can substitute with olive oil
  • 1 cup Onion Savory flavor, can replace with shallots
  • 3 cloves Garlic Fresh is best; garlic powder can work
  • 2 medium Carrots Sweetness and color, can swap for peas
  • 2 stalks Celery Adds crunch, can use bell peppers
  • 1 cup Mushrooms Earthy flavor, can replace with zucchini or spinach
  • 1 cup Panko Breadcrumbs Crunchy topping, regular breadcrumbs can be used
  • 1 cup Parmesan Cheese Flavor enhancer, can swap in cheddar
  • 1 tsp Thyme Fragrant herb, Italian seasoning can be used
  • to taste Salt Essential seasoning
  • to taste Pepper Essential seasoning
For the Topping
  • 1 cup Panko Breadcrumbs Use for crunch, can mix with cheese
  • 1/2 cup Parmesan Cheese Savory kick, can mix with cheddar

Equipment

  • Skillet
  • Baking dish
  • Mixing Bowl

Method
 

Step-by-Step Instructions
  1. Preheat your oven to 350°F (175°C).
  2. Cook the wild rice according to package instructions, about 45 minutes, until chewy.
  3. In a large skillet, melt butter over medium heat. Add onion, garlic, carrots, celery, and mushrooms. Sauté for 5-7 minutes.
  4. In a large bowl, combine cooked chicken, wild rice, sautéed veggies, and creamy sauce. Mix well.
  5. Grease a 9×13 inch baking dish. Pour in the mixture and spread evenly.
  6. In a separate bowl, mix panko, melted butter, and Parmesan. Sprinkle over the casserole.
  7. Bake uncovered for 30-35 minutes until golden brown and bubbly.
  8. Let the casserole rest for about 5 minutes before serving.

Nutrition

Serving: 1servingCalories: 350kcalCarbohydrates: 40gProtein: 30gFat: 10gSaturated Fat: 5gPolyunsaturated Fat: 1gMonounsaturated Fat: 3gCholesterol: 100mgSodium: 800mgPotassium: 600mgFiber: 3gSugar: 2gVitamin A: 900IUVitamin C: 6mgCalcium: 200mgIron: 2mg

Notes

Customize with different cheese and vegetables for varied flavors. Perfect for make-ahead meals.

Tried this recipe?

Let us know how it was!

Delicious Christmas Cakesicles: 3 Easy Ways to Festively Celebrate

As the holiday season approaches, the kitchen becomes a symphony of scents and delights, and nothing captures that festive spirit quite like 3-Ingredient Christmas Cakesicles. These chocolate-covered treats are more than just a pop of color on your dessert table; they’re a delightful mashup of moist cake and sweet candy coating that is simply irresistible. With just three easy-to-find ingredients, this recipe opens the door to creativity, offering gluten-free and vegan adaptations that everyone can enjoy. The best part? They come together in minutes and are perfect for sharing—making them a wonderful alternative to store-bought sweets. Imagine gifting these to friends or serving them at holiday gatherings, sparking joy and sweet conversations. Are you ready to make your holidays a little sweeter with these festive treats?

Why are Christmas Cakesicles a must-try?

Rapid Preparation: With only three ingredients, you can whip up a delightful treat in no time. This is perfect for busy chefs looking to bring festive cheer without the stress!

Crowd Pleaser: Their charming appearance and sweet flavor make them an instant hit at any gathering. Picture a table filled with smiles as guests savor these delicious cakesicles!

Customizable Options: Whether you prefer gluten-free or vegan, this recipe has you covered. You can even experiment with various flavors and decorations, making each batch uniquely yours.

Fun for All Ages: Get the family involved in decorating these treats! It’s a wonderful way to bond and create festive memories together.

Perfect for Gifting: Wrap up these festive delights and share them with friends, spreading joy and sweetness this season. For more delightful holiday treats, check out our delicious cookie recipes!

Christmas Cakesicles Ingredients

For the Cakes:

  • Crumpled Cake – Gives the cakesicles moisture and structure; leftover cake works perfectly for this.
  • Frosting – Acts as the binding agent to hold the cake together; consider flavored frosting to enhance the overall taste.

For the Coating:

  • Colored Candy Melts – Adds a festive flair and flavor; for a different twist, use dark or white chocolate instead.
  • Vegetable Oil or Coconut Oil – Used to smooth out the candy melts for easy coating; coconut oil provides a subtle flavor enhancement.

For Assembly:

  • Popsicle Sticks – Essential for handling the cakesicles; ensure they’re securely placed for easy dipping and munching.
  • Ice Cream Silicone Molds – Key for shaping cakesicles and making them easy to remove; choose festive shapes to boost visual appeal.

Decoration (Optional):

  • Sprinkles or Crushed Candy Canes – Perfect for adding color and crunch; customize according to your holiday theme.
  • Piping Bags – Great for drizzling extra chocolate for a professional touch in your cakesicle designs.

Now you’re all set to create your Christmas Cakesicles and spread delicious cheer this holiday season!

Step‑by‑Step Instructions for Christmas Cakesicles

Step 1: Prepare the Dough
Begin by crumbling your leftover cake into a large mixing bowl until you achieve a fine texture. Add flavored frosting to the crumbled cake, mixing thoroughly until a moist dough forms that can be easily molded. This step ensures the cake remains deliciously soft—a perfect base for your Christmas Cakesicles!

Step 2: Melt the Candy Coating
In a microwave-safe bowl, combine your colored candy melts with a splash of vegetable or coconut oil. Heat the mixture in 30-second intervals, stirring between each until smooth and glossy, about 1-2 minutes in total. This melted candy coating will provide a delightful and festive look for your cakesicles.

Step 3: Coat Molds
Pour a thin layer of the melted candy mixture into the ice cream silicone molds, tilting them to ensure the candy coats the sides evenly. Use a spatula if needed to spread the coating. Place the molds in the freezer for 5-10 minutes until the coating is slightly firm to the touch, making way for the next step.

Step 4: Insert Sticks
Once the initial candy layer is set but not frozen solid, carefully press popsicle sticks into the centers of each mold. Ensure they’re positioned securely to support the cakesicles once filled. Return the molds to the freezer for another 10-15 minutes to fully set the coating before adding the cake dough.

Step 5: Add Dough
Take the molds out of the freezer and fill each one with the prepared cake dough. Gently press the dough down into the molds to avoid air pockets and ensure even shapes, but be careful not to overfill, as this will make sealing difficult later.

Step 6: Seal and Freeze
Pour the remaining melted candy coating over each filled mold, ensuring the dough is completely covered. This step locks in the flavors of your Christmas Cakesicles. Return the molds to the freezer, allowing them to set fully for 25-30 minutes until the candy coating is hard and secure.

Step 7: Unmold
Once the cakesicles have set, gently flex the silicone molds to release each cakesicle. The flexibility of the molds makes this process easier, and you’ll be left with beautifully shaped treats ready for decoration.

Step 8: Decorate
For the finishing touch, melt any leftover candy coating and drizzle it over the cakesicles using a piping bag for precision. Sprinkle with festive decorations like crushed candy canes or colorful sprinkles, adding a personal flair to each Christmas Cakesicle. Enjoy your festive creations!

Expert Tips for Christmas Cakesicles

  • Moisture Matters: Use leftover cake that’s moist to prevent crumbling. Dry cake won’t hold together, ruining those festive vibes!

  • Silicone Molds: Opt for flexible silicone molds for easier unmolding. They help retain the shape of your Christmas Cakesicles perfectly.

  • Melt Method: Melt candy melts in 30-second intervals to avoid burning. If they become too thick, add a teaspoon of oil to restore smoothness.

  • Mind the Fill: Avoid overfilling molds with cake dough. Too much can lead to messy cakesicles and trouble sealing them with the candy coating.

  • Freeze Time: Stick to the recommended freeze times. Proper chilling is crucial for the candy coating to harden well and maintain the treats’ integrity.

Storage Tips for Christmas Cakesicles

  • Room Temperature: Keep Christmas Cakesicles at room temperature for up to 3 days. Ensure they are placed in an airtight container to maintain freshness and prevent drying out.

  • Fridge: If stored in the refrigerator, these treats can last for up to 2 weeks. Use a covered container to protect them from absorbing any fridge odors.

  • Freezer: For longer storage, freeze the cakesicles for up to 3 months. Place them in an airtight freezer bag or container. Allow them to thaw at room temperature for a few minutes before serving.

  • Reheating: There’s no need to reheat these delicate desserts; simply enjoy them cold!

Make Ahead Options

These Christmas Cakesicles are a fantastic choice for meal prep, allowing you to enjoy the festive flavors without the last-minute rush. You can prepare the cake dough and mold them into shapes up to 24 hours in advance—simply store them tightly wrapped in the refrigerator to maintain their moisture and flavor. Additionally, you can melt the candy coating ahead of time; just refrigerate it until you’re ready to use, gently reheating it if needed. When you’re ready to serve, simply dip the cakesicles in the coating and decorate them with your favorite sprinkles. This way, you ensure delightful treats that are just as delicious, perfect for saving time during the busy holiday season!

Christmas Cakesicles Variations & Substitutions

Feel free to get creative and make these delightful treats uniquely yours with a few easy swaps!

  • Gluten-Free: Use a gluten-free cake mix or flour blend to accommodate dietary needs. This way, everyone can indulge in the festive fun!

  • Vegan Delight: Substitute the frosting and candy melts with vegan options for a plant-based treat. This ensures everyone can enjoy the sweetness of the season.

  • Flavor Boost: Add flavor extracts like almond or vanilla to your dough for a delightful twist. The extra aroma will elevate the cakesicles to a whole new level!

  • Nutty Crunch: Incorporate crushed nuts or cookies into the dough for added texture. Imagine the satisfying crunch amidst the soft cake!

  • Spiced Seasonal Touch: Use spiced cake mixes or add cinnamon and nutmeg to the dough for a cozy, holiday flavor. The warm spices will wrap you in a comforting embrace.

  • Festive Mold Shapes: Experiment with different festive mold shapes such as stars or trees to match your holiday decorations. Your presentation will wow your guests!

  • Creative Coatings: Swap colored candy melts for dark or white chocolate depending on your preference. Each variety brings a different flavor and visual appeal to your cakesicles.

  • Decorative Toppings: Use crushed candy canes, dried fruits, or even edible glitter for a dazzling finish. Add these personal touches to wow your family and friends!

These variations not only accommodate different tastes but also open up a world of exciting flavor combinations. For more inspiration on dessert ideas, check out our delightful cookie recipes!

What to Serve with Christmas Cakesicles?

Get ready to delight your holiday guests with a complete dessert spread that pairs perfectly with your festive treats.

  • Creamy Hot Chocolate: Rich and velvety, hot chocolate adds warmth and complements the sweet chocolate coating of the cakesicles.
  • Spiced Sugar Cookies: These soft, spiced treats bring a classic holiday flavor that balances the sweet cake pops beautifully.
  • Fruit Platter: A colorful assortment of fresh fruits offers a refreshing contrast to the indulgence of cakesicles. Think tart berries and creamy bananas!
  • Eggnog: This classic holiday drink, creamy and spiced, brings festive cheer and pairs perfectly with the sweet cakesicles. It’s a delightful twist to your dessert experience!
  • Gingerbread Men: With their warm spices, these cookies create a nostalgic pairing that echoes holiday traditions, perfect for decorating the table.
  • Peppermint Bark: This crunchy, chocolatey treat adds seasonal flair and a refreshing minty taste that harmonizes with the cakesicles’ flavors.
  • Vanilla Ice Cream: A scoop of creamy vanilla ice cream serves as a luscious base, allowing cakesicles to shine with their vibrant textures.
  • Chai Tea: The warmth and spices in chai tea create a comforting aura, enhancing the savory-sweet experience of the cakesicles.
  • Cranberry Sauce: This tangy sauce offers a surprising twist; its tartness complements the sweetness of the cakesicles wonderfully!
  • Pecan Pie: A slice of classic pecan pie introduces nutty richness and provides a delightful contrast to the lightness of cakesicles.

Christmas Cakesicles Recipe FAQs

What type of cake should I use for Christmas Cakesicles?
Absolutely! It’s best to use moist cake for a delightful texture. You can opt for any leftover cake you have on hand—chocolate, vanilla, or even spiced. Just make sure it’s not too dry, as that can lead to crumbly cakesicles that don’t hold their shape.

How should I store my Christmas Cakesicles?
Very! You can store them at room temperature in an airtight container for up to 3 days. If you want to keep them fresh for longer, refrigerate them, where they’ll last up to 2 weeks. For the best long-term storage, freeze the cakesicles in an airtight container or bag for up to 3 months. Let them thaw at room temperature before serving!

Can I freeze Christmas Cakesicles?
Absolutely! After tightly wrapping or placing them in an airtight container, your Christmas Cakesicles can be frozen for up to 3 months. It’s best to let them thaw for a few minutes at room temperature before digging in, as this ensures the perfect texture and flavor.

What if my candy melts are too thick?
No worries! If you find your melted candy coating is too thick to work with, just add a teaspoon of vegetable or coconut oil to the mixture. Reheat it in 30-second intervals until smooth. This will bring back the desired consistency and make coating your cakesicles a breeze!

Are Christmas Cakesicles safe for my pet?
It’s always better to be safe! Christmas Cakesicles contain ingredients like chocolate and sugar, which can be harmful to pets. Keep these delightful treats out of reach of your furry friends to ensure their safety and well-being.

How can I adapt this recipe for dietary needs?
Very! To make gluten-free cakesicles, simply use a gluten-free cake mix for the base. For a vegan alternative, select a vegan frosting and candy melts to maintain that festive spirit while accommodating dietary preferences. You can also enhance the flavor with extracts like vanilla or almond for a unique touch!

Christmas Cakesicles

Delicious Christmas Cakesicles: 3 Easy Ways to Festively Celebrate

Christmas Cakesicles are a delightful mashup of moist cake and sweet candy coating perfect for the holiday season.
Prep Time 30 minutes
Freezing Time 40 minutes
Total Time 1 hour 10 minutes
Servings: 12 cakesicles
Course: Dessert
Cuisine: American
Calories: 250

Ingredients
  

For the Cakes
  • 2 cups Crumpled Cake leftover cake works perfectly
  • 1 cup Frosting flavored frosting recommended
For the Coating
  • 1 cup Colored Candy Melts or dark/white chocolate
  • 2 tablespoons Vegetable Oil or Coconut Oil
For Assembly
  • 12 pieces Popsicle Sticks ensure they're securely placed
  • 1 set Ice Cream Silicone Molds choose festive shapes
Decoration (Optional)
  • 1 cup Sprinkles or Crushed Candy Canes customize according to your holiday theme
  • 1 piece Piping Bags for drizzling chocolate

Equipment

  • Mixing Bowl
  • Microwave-safe bowl
  • Ice Cream Silicone Molds
  • Popsicle Sticks
  • Spatula
  • Piping Bags

Method
 

Step-by-Step Instructions
  1. Prepare the Dough: Crumble leftover cake into a large bowl and mix with flavored frosting until a moist dough forms.
  2. Melt the Candy Coating: Combine candy melts with oil and microwave in 30-second intervals until smooth.
  3. Coat Molds: Pour melted candy into molds and freeze for 5-10 minutes until slightly firm.
  4. Insert Sticks: Press popsicle sticks into the centers of each mold and freeze for another 10-15 minutes.
  5. Add Dough: Fill molds with cake dough, pressing down gently to avoid air pockets.
  6. Seal and Freeze: Pour remaining candy coating over the dough and freeze for 25-30 minutes until hard.
  7. Unmold: Flex the silicone molds to release the cakesicles.
  8. Decorate: Drizzle leftover candy coating and add sprinkles or crushed candy canes for decoration.

Nutrition

Serving: 1cakesicleCalories: 250kcalCarbohydrates: 35gProtein: 2gFat: 12gSaturated Fat: 7gCholesterol: 10mgSodium: 50mgPotassium: 100mgFiber: 1gSugar: 20gVitamin A: 200IUCalcium: 20mgIron: 1mg

Notes

Use leftover moist cake for the best results and opt for flexible silicone molds for easier unmolding.

Tried this recipe?

Let us know how it was!

Delightful Strawberry Christmas Macarons for Festive Joy

With the holiday season in full swing, there’s something truly magical about transforming your kitchen into a festive haven of treats. My Strawberry Christmas Macarons are the perfect way to add a whimsical touch to your celebrations, crafted with love and bursting with the vibrant flavor of strawberries. These delightful French desserts not only make your holiday table dazzle but are also a cinch to prepare, perfect for both seasoned bakers and those just starting their culinary journey. Imagine the joy on your friends’ faces as they savor these light, crisp shells filled with a luscious strawberry buttercream. Whether you’re gifting them or showcasing them at a festive gathering, they’ll quickly become a staple in your holiday dessert repertoire. Curious about how to whip up these elegant little bites? Let’s dive in and make this Christmas extra sweet!

Why are Strawberry Christmas Macarons a must-try?

Festive Delight: These Strawberry Christmas Macarons add a charming touch to your holiday festivities, making them a delightful centerpiece.

Simple Steps: Even beginners can impress with this straightforward recipe that demystifies the macaron-making process.

Unique Flavor: The combination of sweet strawberry filling and a hint of almond creates a taste sensation that’s sure to please everyone.

Versatile Options: Feel free to switch things up by experimenting with different jam flavors to match your palate or mood, or try out variations like Strawberry Icebox Pie for an exciting twist.

Perfect for Gifting: Their elegant appearance makes them a thoughtful and delightful gift during the holidays, leaving your friends and family craving more.

Strawberry Christmas Macaron Ingredients

• A delightful blend of flavors awaits you with these Strawberry Christmas Macarons.

For the Batter

  • Almond Flour – Provides structure and a nutty flavor; can substitute with sunflower seed flour for a nut-free option.
  • Powdered Sugar – Adds sweetness and smooth texture to the shells, ensuring a delectable bite.
  • Egg Whites – Essential for creating the airy meringue texture; whip until glossy for best results.
  • Granulated Sugar – Helps stabilize the meringue and adds sweetness; use fine sugar for optimal incorporation.

For the Filling

  • Strawberry Jam – Brings a bright, sweet taste to the filling; raspberry or cherry preserves can serve as delightful alternatives.
  • Unsalted Butter – Contributes creaminess to the buttercream; swap with dairy-free margarine for a vegan-friendly treat.
  • Red Gel Food Coloring – Enhances the festive visual appeal; beetroot powder can be used for a natural coloring option.

Indulge in the joy of festive baking with these Strawberry Christmas Macarons that will surely impress family and friends!

Step‑by‑Step Instructions for Strawberry Christmas Macaron

Step 1: Prepare the Meringue
Begin by preheating your oven to 300°F (150°C) and preparing two baking sheets lined with parchment paper. In a clean, dry mixing bowl, whip 3 egg whites until they become foamy. Gradually add 1/4 cup of granulated sugar, continuing to beat until stiff, glossy peaks form. This meringue is the backbone of your Strawberry Christmas Macaron, providing that characteristic lightness.

Step 2: Mix Dry Ingredients
In a separate bowl, sift together 1 cup of almond flour and 1 3/4 cups of powdered sugar. This step ensures that your macaron shells will be smooth and free from lumps. Sifting is essential for a delicate texture, so don’t skip this! Once combined, use a spatula to stir these dry ingredients gently, preparing them for incorporation into the meringue.

Step 3: Combine Mixtures
Carefully fold the sifted almond flour and powdered sugar mixture into the whipped meringue using a rubber spatula. Aim to incorporate the dry ingredients without deflating the meringue—this step is crucial for achieving the right consistency. The batter should flow smoothly and form a thick ribbon when lifted, which is key for your Strawberry Christmas Macaron to develop that perfect foot.

Step 4: Pipe Macarons
Transfer the macaron batter into a piping bag fitted with a round tip. On the parchment-lined baking sheets, pipe small circles, about 1.5 inches in diameter, leaving space between each to allow for spreading. Be steady and consistent, ensuring each shell is of uniform size for even baking. Visualize your charming Strawberry Christmas Macaron assembly as you create these delightful circles!

Step 5: Rest
Let the piped macarons rest at room temperature for 30 to 60 minutes. During this time, they will form a film on the surface that is not sticky to the touch. This resting period is vital; it helps the macarons develop that much-coveted shiny top and allows their feet to rise beautifully while baking.

Step 6: Bake
Once the macarons have rested, bake them in your preheated oven for about 15 minutes. Keep an eye on them, and look for smooth tops and slight feet developing at the base. The macarons should not be browned; they should retain a lovely pale color. If you have an oven thermometer, use it to ensure the temperature is precise for the best results.

Step 7: Cool and Fill
After baking, remove the trays from the oven and allow the Strawberry Christmas Macarons to cool completely before attempting to lift them off the parchment paper. Fill each macaron with a dollop of strawberry buttercream or jam, matching pairs of shells by size. Finally, sandwich them together gently, creating delightful little bites of holiday joy that everyone will love!

How to Store and Freeze Strawberry Christmas Macarons

Fridge: Store your Strawberry Christmas Macarons in an airtight container in the fridge for up to 5 days. This will keep them fresh and maintain their delightful texture.

Freezer: For longer storage, freeze the macarons in an airtight container for up to 1 month. Ensure they are well-wrapped to prevent freezer burn.

Thawing: When ready to enjoy your frozen Strawberry Christmas Macarons, thaw them overnight in the refrigerator. This gradual warming helps retain their lovely flavors and texture.

Reheating: If you prefer a slightly warm macaron, gently warm them in the oven at a low temperature for a few minutes, but be careful not to bake them again!

Variations & Substitutions for Strawberry Christmas Macaron

Feel free to get creative with your Strawberry Christmas Macarons—let’s explore delightful ways to customize these festive treats!

  • Nut-Free: Use sunflower seed flour instead of almond flour for a delicious nut-free macaron base. The flavor remains delightful, giving everyone a chance to enjoy them!

  • Vegan Option: Substitute unsalted butter with dairy-free margarine and ensure your strawberry jam is vegan to create a tasty treat for everyone at the table.

  • Fruit Swaps: Try raspberry or cherry preserves instead of strawberry jam for a twist on the classic flavor. Each fruit brings its own unique sweetness, making your macarons a fun surprise!

  • Color Variations: Experiment with natural coloring, like beetroot powder, instead of red gel food coloring. This adds a charming hue while keeping things wholesome and beautiful.

  • Chocolate Lovers: Fill your macarons with white chocolate ganache for a rich and decadent take on your festive treat. The creaminess of the chocolate enhances the festive elegance of these small bites.

  • Minty Freshness: For a refreshing twist, consider peppermint cream as a filling. This seasonal flavor adds a lovely holiday spirit to your macarons, perfect for those who appreciate a minty surprise!

  • Texture Boost: Consider folding in finely chopped nuts like pistachios or hazelnuts into your batter for an extra crunch. This delightful texture variation adds a nutty taste that complements the sweetness beautifully.

  • Spicy Kick: Add a pinch of ground cinnamon or nutmeg to the meringue batter for a warming hint of spice. This seasonal flavor can elevate the holiday essence in every bite, resonating with the cozy mood of the festivities.

These variations not only make your Strawberry Christmas Macarons unique but also invite everyone to find a flavor combination they’ll fall in love with. Serve them alongside options like Strawberry Cheesecake Bars or a refreshing Strawberry Spinach Salad to brighten up your festive gatherings! Enjoy the process and happy baking!

Make Ahead Options

These Strawberry Christmas Macarons are perfect for meal prepping, allowing you to enjoy your holiday baking without the last-minute rush. You can prepare the macaron shells (up to 24 hours in advance) by piping them onto baking sheets, then covering them with plastic wrap and refrigerating until you’re ready to bake. The filling, made with strawberry buttercream, can be made up to 3 days prior and stored in the refrigerator in an airtight container for optimal freshness. When it’s time to complete your macarons, simply bake your prepped shells directly from the fridge and allow them to cool completely before filling. This way, you’ll have delicious, festive treats ready to impress your guests with minimal effort!

Expert Tips for Strawberry Christmas Macarons

Use a Scale: For consistent success with your Strawberry Christmas Macaron, using a digital scale ensures precise measurements, especially critical with meringue.

Check Oven Temperature: An oven thermometer helps avoid overbaking—the key to preventing cracked macarons is maintaining the right temperature throughout the baking process.

Don’t Rush the Resting: Allowing the piped macarons to rest is essential for forming the skin; skipping this step can lead to misshaped or collapsed cookies.

Fold Gently: When combining the dry ingredients with the meringue, fold gently to preserve the airiness; deflating the meringue will affect the macarons’ texture.

Store Properly: To keep your Strawberry Christmas Macarons fresh, store them in an airtight container in the fridge or freeze them for later enjoyment—just don’t forget to thaw them overnight!

What to Serve with Strawberry Christmas Macarons?

Indulging in delicate, flavorful macarons is a wonder on its own, but pairing them with the right accompaniments can elevate your festive experience.

  • Rich Hot Chocolate: The creamy chocolate richness pairs beautifully, complementing the strawberry filling with warmth and comfort.

  • Vanilla Ice Cream: A scoop of vanilla ice cream creates a delightful contrast, balancing the macaron’s sweetness while adding a creamy texture.

  • Fresh Berries: A medley of fresh strawberries or raspberries adds a burst of freshness, enhancing the fruitiness of the filling and making each bite even more delightful.

  • Sparkling Wine: A glass of bubbly not only adds elegance to your dessert spread but its effervescence cuts through the sweetness of the macarons wonderfully.

  • Mint Tea: This refreshing, herbal tea offers a gentle palate cleanser that highlights the strawberry flavor while soothing the senses after a sweet indulgence.

  • Chocolate Ganache Dip: Drizzling or dipping in smooth chocolate ganache creates an exquisite flavor pairing, making the experience even more indulgent.

  • Buttercream Frosting: Serve extra strawberry or vanilla buttercream for those who want a little extra sweetness to spread on their macarons, taking them to another level of decadence.

Strawberry Christmas Macaron Recipe FAQs

How do I select ripe strawberries for the filling?
Absolutely! Look for strawberries that are bright red, firm, and fragrant. Avoid berries with dark spots all over, as they may be overripe or moldy. Fresh, ripe strawberries will provide the sweetest and most vibrant flavor for your filling.

What’s the best way to store leftover macarons?
To keep your Strawberry Christmas Macarons fresh, simply place them in an airtight container and store them in the fridge for up to 5 days. This method preserves their delightful texture and prevents them from drying out, so you can enjoy each bite to the fullest!

Can I freeze Strawberry Christmas Macarons?
Very! Freezing is a great option if you want to make your macarons ahead of time. Place them in an airtight container, ensuring they’re not touching each other, and freeze for up to 1 month. For the best experience, thaw them overnight in the refrigerator before serving.

What should I do if my macarons crack while baking?
No worries! Cracked macarons are often a sign of either overmixing the batter or baking at too high of a temperature. Make sure your meringue is whipped to stiff peaks and that you’re gently folding in the dry ingredients without deflating the mixture. Also, using an oven thermometer can help ensure perfect baking conditions at the right temperature.

Are these macarons suitable for people with nut allergies?
Great question! Unfortunately, traditional macarons use almond flour which is not suitable for nut allergies. However, you can substitute almond flour with sunflower seed flour for a nut-free version. Just note the flavor and texture might differ slightly, but still delicious!

How can I achieve smooth and glossy macarons?
To get that beautiful, glossy finish, make sure to whip your egg whites until they reach stiff peaks—the mixture should look shiny! Also, don’t skip the resting step after piping; this allows the top to dry out a bit, which is essential for forming that smooth shell when baked. Patience is key to achieving those perfect Strawberry Christmas Macarons!

Strawberry Christmas Macaron

Delightful Strawberry Christmas Macarons for Festive Joy

These Strawberry Christmas Macarons are a must-try festive treat that will bring joy to your holiday celebrations.
Prep Time 30 minutes
Cook Time 15 minutes
Resting Time 1 hour
Total Time 1 hour 45 minutes
Servings: 24 macarons
Course: Dessert
Cuisine: French
Calories: 80

Ingredients
  

For the Batter
  • 1 cup Almond Flour Can substitute with sunflower seed flour for a nut-free option.
  • 1.75 cups Powdered Sugar Adds sweetness and smooth texture.
  • 3 large Egg Whites Essential for airy meringue texture.
  • 0.25 cup Granulated Sugar Helps stabilize meringue.
For the Filling
  • 0.5 cup Strawberry Jam Brings a bright, sweet taste.
  • 0.5 cup Unsalted Butter Contributes creaminess to buttercream.
  • 1 drop Red Gel Food Coloring Enhances festive visual appeal.

Equipment

  • Mixing Bowl
  • piping bag
  • Baking Sheets
  • Parchment paper
  • Rubber Spatula

Method
 

Step-by-Step Instructions
  1. Preheat your oven to 300°F (150°C) and prepare two baking sheets lined with parchment paper. Whip 3 egg whites until foamy, gradually adding 1/4 cup of granulated sugar until stiff peaks form.
  2. Sift together 1 cup of almond flour and 1 3/4 cups of powdered sugar in a separate bowl. Gently stir to combine.
  3. Carefully fold the sifted almond flour and powdered sugar mixture into the whipped meringue without deflating it.
  4. Transfer the batter into a piping bag fitted with a round tip and pipe small circles on the baking sheets, leaving space for spreading.
  5. Let the piped macarons rest at room temperature for 30 to 60 minutes to form a film on the surface.
  6. Bake the macarons in the preheated oven for about 15 minutes until they have smooth tops and slight feet.
  7. Allow the macarons to cool completely before filling them with strawberry buttercream or jam. Sandwich pairs of shells together.

Nutrition

Serving: 1macaronCalories: 80kcalCarbohydrates: 9gProtein: 1gFat: 4gSaturated Fat: 2gCholesterol: 10mgSodium: 30mgPotassium: 30mgSugar: 6gVitamin A: 100IUVitamin C: 1mgCalcium: 10mgIron: 0.5mg

Notes

Store in an airtight container for up to 5 days or freeze for up to 1 month. Ensure proper thawing for best taste.

Tried this recipe?

Let us know how it was!

Delicious Mini Croque Monsieur for Effortless Entertaining

As I stood in my kitchen the other day, the aroma of warming béchamel whipped me back to a cozy bistro in Paris, where Mini Croque Monsieur is served as the ultimate treat. These little bites of heaven combine crispy puff pastry with a creamy, tangy sauce, savory ham, and gooey Gruyère cheese, delivering a taste that’s sure to impress. And the best part? They come together in just over 30 minutes, making them an effortless choice for your next gathering. With their elegant appearance and crowd-pleasing flavor, these mini masterpieces are destined for your recipe collection, especially with a gluten-free option available for those who need it. Are you ready to elevate your appetizer game? Let’s dive into how to make these delightful Mini Croque Monsieur!

Why Choose Mini Croque Monsieur?

Quick and Easy: You’ll whip these up in just over 30 minutes, making them perfect for last-minute entertaining.

Impressive Presentation: Their golden-brown, flaky layers will wow your guests before they even take a bite.

Crowd-Pleasing Flavor: The combination of creamy béchamel, savory ham, and gooey cheese creates a taste explosion that everyone adores.

Versatile Substitutions: Adapt the filling to meet dietary needs—try gluten-free puff pastry or a vegetarian option with sautéed mushrooms!

Effortless Entertaining: Serve with a refreshing salad or comforting tomato soup for a complete meal, allowing you to relax and enjoy the party.

With all these factors combined, you’ll find these Mini Croque Monsieur are not only delightful but essential to your culinary repertoire!

Mini Croque Monsieur Ingredients

For the Béchamel Sauce

  • Unsalted Butter – Adds richness and flavor to the béchamel sauce. Substitution: Can use salted butter but adjust salt in the sauce.
  • All-Purpose Flour – Forms the base for creating a creamy béchamel sauce. No substitutions required.
  • Whole Milk – Provides a rich and creamy consistency for the sauce. Substitution: Non-dairy alternatives can be used.
  • Whole Grain Dijon Mustard – Adds a tangy flavor to the béchamel. Substitution: Regular mustard can be used for a milder taste.
  • Salt and Pepper – Essential for seasoning the béchamel. Adjust to taste.

For the Pastry Bites

  • Puff Pastry (14 oz sheet) – Creates flaky layers that enclose the filling. Substitution: Gluten-free puff pastry available.
  • Diced Ham (1 cup) – Adds savory flavor to the bites. Substitution: Turkey or sautéed mushrooms for a vegetarian option.
  • Gruyère Cheese (1 cup) – Provides a melty and rich taste. Substitution: Cheddar or Swiss cheese can be used.
  • Egg (1 large) – For glazing and achieving a golden color on the pastry.

Embrace the comfort of your kitchen as you prepare these delightful Mini Croque Monsieur, where every bite brings the warmth of home and the allure of gourmet dining!

Step‑by‑Step Instructions for Mini Croque Monsieur

Step 1: Preheat Your Oven
Begin by preheating your oven to 425ºF (220ºC). Line a baking sheet with parchment paper to ensure the Mini Croque Monsieur cook evenly without sticking. Preparing your baking surface now will help streamline the process later and save you time when assembling these delightful appetizers.

Step 2: Make the Béchamel Sauce
In a medium saucepan, melt 4 tablespoons of unsalted butter over medium heat. Once melted, whisk in 4 tablespoons of all-purpose flour, stirring continuously for about 3 minutes until it turns a light golden hue, forming a roux. Gradually add 2 cups of whole milk, whisking until the mixture thickens, roughly 5 minutes. Stir in 1 tablespoon of Dijon mustard, along with salt and pepper to taste, and set aside.

Step 3: Prep the Puff Pastry
Roll out a sheet of chilled puff pastry onto a floured surface until it measures approximately 13 x 15 inches. Use a 2-inch round cutter to cut out circles from the rolled pastry, poking holes in the center of each circle to allow for steam escape during baking. Ensure you have enough rounds to assemble your Mini Croque Monsieur and maintain the flaky texture.

Step 4: Assemble the Mini Croque Monsieur
Take the puff pastry rounds and brush the edges with a beaten egg for a golden finish. Place about a tablespoon of the béchamel sauce in the center of each circle, followed by a generous spoonful of diced ham and a sprinkle of Gruyère cheese. Fold the pastry over neatly and seal the edges to encase the delicious filling, ensuring they’re ready for baking.

Step 5: Bake to Perfection
Carefully transfer the assembled Mini Croque Monsieur to the prepared baking sheet. Bake in the preheated oven for 15 minutes or until the pastries puff up and turn a beautifully golden brown. Keep an eye on them towards the end to achieve that perfect crunchy exterior, as they will be irresistibly tempting when done.

Step 6: Serve and Enjoy
Once baked, remove the Mini Croque Monsieur from the oven and let them cool slightly before serving. Their enticing aroma will draw everyone in! Arrange them on a platter for your guests to admire, and prepare for compliments as they indulge in this sophisticated yet simple appetizer that embodies the essence of French cuisine.

How to Store and Freeze Mini Croque Monsieur

  • Fridge: Store leftovers in an airtight container for up to 3 days. Ensure they have cooled completely to maintain their flaky texture.

  • Freezer: Freeze unbaked Mini Croque Monsieur for up to 2 months. Simply arrange them on a baking sheet, freeze until solid, then transfer to a ziplock bag. Bake directly from frozen, adding about 5-10 minutes to the cooking time.

  • Reheating: For best results, reheat in the oven at 350ºF until warmed through and crispy again, rather than using a microwave, which can make them soggy.

  • Avoid Moisture: Make sure to wrap any leftover cooked pastries well if refrigerating to prevent them from becoming soggy.

Make Ahead Options

These Mini Croque Monsieur are perfect for busy home cooks looking to save time! You can prepare the puff pastry rounds and béchamel sauce up to 24 hours in advance. Simply assemble the pastry circles and refrigerate them without the filling; this helps maintain their flaky texture. When you’re ready to serve, spoon in the béchamel, diced ham, and Gruyère cheese, then bake as directed. For those with tight schedules, feel free to assemble completely and refrigerate for up to 3 days—just keep them covered to prevent drying out. Your Mini Croque Monsieur will be just as delicious, allowing you more time to enjoy the company of your guests!

What to Serve with Mini Croque Monsieur?

Transform your appetizer into a delightful meal with the right pairings that enhance every bite of this French classic.

  • Mixed Green Salad: A fresh salad adds a crisp contrast to the rich flavors of the Croque Monsieur, making for a light balance. Toss with a tangy vinaigrette for a pop of brightness.

  • Tomato Soup: The comforting warmth of tomato soup beautifully complements the flaky pastry and creamy béchamel, creating a cozy dinner experience. Dip each bite for an indulgent combination.

  • Sparkling Lemonade: This refreshing drink pairs perfectly, cutting through the richness of the savory bites and providing a touch of sweetness with its effervescence.

  • Cheese Platter: Elevate your gathering with an assortment of cheeses. Offer mild varieties like brie alongside sharper cheeses, allowing guests to explore complementary flavors.

  • Roasted Vegetables: Roasted seasonal veggies add earthy notes and vibrant colors, enhancing both the taste and visual appeal of your meal. Drizzle with olive oil and herbs for a roasted delight.

  • Chardonnay or Sauvignon Blanc: These wines are delightful companions, their crisp acidity enhancing the buttery notes of the pastry while complementing the savory filling within.

With these pairings, your Mini Croque Monsieur will inspire not just good food, but wonderful memories at your table!

Expert Tips for Mini Croque Monsieur

  • Chilling is Key: Use chilled puff pastry to ensure the layers bake up flaky and light. Room temperature pastry can lead to dense results.

  • Watch the Baking Time: Keep a close eye on them as they bake; remove when golden brown to avoid overcooking and losing that perfect crispy exterior.

  • Make-Ahead Option: Assemble your Mini Croque Monsieur without the béchamel and refrigerate them. Just add the filling and bake when ready, ensuring fresh, warm appetizers.

  • Perfect Filling Balance: Don’t overfill; a tablespoon of béchamel per pastry is just right. Too much filling can cause them to burst open while baking.

  • Create a Delicious Glaze: Brush the tops with egg wash before baking for a beautiful golden finish, enhancing their appetizing appearance.

Embrace these tips to ensure your Mini Croque Monsieur shine at your next gathering!

Mini Croque Monsieur Variations

Feel free to get creative with these Mini Croque Monsieur variations, turning this delightful recipe into your own masterpiece!

  • GLUTEN-FREE: Opt for gluten-free puff pastry options available in stores for a worry-free treat.

  • VEGETARIAN: Swap the ham for sautéed mushrooms or spinach, bringing in a burst of earthy flavors.

  • SPICY: Add crushed red pepper flakes or a dash of hot sauce to the béchamel for a pleasant kick.

  • HERBAL: Incorporate fresh herbs like thyme or parsley into the béchamel sauce for added aroma and freshness.

  • CHEESE SWAP: Experiment with different cheeses like cheddar or Swiss for a unique twist on flavor.

  • Fruity Note: Include finely chopped apples or pears with the ham for a sweet and savory combination that’s surprisingly delicious.

  • Creamy Texture: Add a dollop of cream cheese into the béchamel for extra creaminess that elevates the dish.

  • Snack Size: Make mini versions using smaller puff pastry squares, perfect for delightful finger food at your next gathering.

As you can see, the Mini Croque Monsieur is a canvas for your culinary creativity! For more tempting ideas, check out my guide on quick and easy appetizers or explore tasty vegetarian alternatives. Enjoy customizing these bites to fit your taste or dietary needs—your friends and family will love them!

Mini Croque Monsieur Recipe FAQs

How do I know if my ingredients are ripe or good for use?
Absolutely! When selecting ingredients, look for puff pastry that is well within its expiration date—opt for fresh, flaky sheets with no visible tears. For the béchamel, ensure your milk is fresh and has no sour smell. Diced ham should be firm and have a pleasant color, while Gruyère cheese should be smooth and creamy with a rich aroma.

What is the best way to store leftovers?
Very! To store leftovers, place them in an airtight container after they’ve cooled completely, and keep them in the fridge for up to 3 days. Make sure not to stack them too tightly to preserve their texture, and always reheat in the oven to retain their crispness.

Can I freeze Mini Croque Monsieur?
Absolutely! You can freeze unbaked Mini Croque Monsieur for up to 2 months. Arrange the pastries on a baking sheet and freeze until solid, then transfer them to a ziplock bag. When you’re ready to enjoy, bake them directly from frozen, adding an extra 5-10 minutes to the cooking time for perfectly puffed treats.

What common troubleshooting tips do you have?
If your pastries don’t puff up as expected, it might be due to the puff pastry being too warm before baking—chill it properly! If they burst open, ensure you’re not overfilling them. A tablespoon of béchamel is usually the sweet spot.

Are there any dietary considerations I should keep in mind?
Of course! For a gluten-free option, simply use a gluten-free puff pastry. If you’re catering to vegetarians, sautéed mushrooms can replace the diced ham without losing flavor. Always double-check all ingredient labels for potential allergens, particularly with cheese and pre-packaged puff pastry.

How can I keep these appetizers fresh when serving?
Great question! To maintain their texture during serving, present the Mini Croque Monsieur on a platter lined with paper towels to absorb any moisture. They’ll stay crisp and delicious while your guests indulge in this elegant appetizer.

Mini Croque Monsieur

Delicious Mini Croque Monsieur for Effortless Entertaining

Mini Croque Monsieur combines crispy puff pastry with béchamel, ham, and cheese for a delightful appetizer.
Prep Time 15 minutes
Cook Time 15 minutes
Total Time 30 minutes
Servings: 12 bites
Course: Appetizer
Cuisine: French
Calories: 200

Ingredients
  

For the Béchamel Sauce
  • 4 tablespoons unsalted butter Can use salted butter but adjust salt in the sauce.
  • 4 tablespoons all-purpose flour No substitutions required.
  • 2 cups whole milk Non-dairy alternatives can be used.
  • 1 tablespoon whole grain Dijon mustard Regular mustard can be used for a milder taste.
  • salt Adjust to taste.
  • pepper Adjust to taste.
For the Pastry Bites
  • 14 oz puff pastry Gluten-free puff pastry available.
  • 1 cup diced ham Turkey or sautéed mushrooms for a vegetarian option.
  • 1 cup Gruyère cheese Cheddar or Swiss cheese can be used.
  • 1 large egg For glazing.

Equipment

  • Oven
  • Medium saucepan
  • Baking Sheet
  • Parchment paper
  • floured surface
  • 2-inch round cutter

Method
 

Step-by-Step Instructions for Mini Croque Monsieur
  1. Preheat your oven to 425ºF (220ºC). Line a baking sheet with parchment paper.
  2. In a medium saucepan, melt butter over medium heat. Whisk in flour, stirring for about 3 minutes.
  3. Gradually add milk, whisking until thickened (roughly 5 minutes). Stir in mustard, salt, and pepper. Set aside.
  4. Roll out puff pastry until it measures approximately 13 x 15 inches and cut out 2-inch circles.
  5. Brush edges with beaten egg, place béchamel, ham, and cheese in the center, fold and seal.
  6. Bake for 15 minutes or until golden brown. Let cool slightly before serving.

Nutrition

Serving: 1biteCalories: 200kcalCarbohydrates: 15gProtein: 6gFat: 14gSaturated Fat: 8gPolyunsaturated Fat: 1gMonounsaturated Fat: 5gCholesterol: 45mgSodium: 400mgPotassium: 100mgFiber: 1gSugar: 1gVitamin A: 500IUCalcium: 150mgIron: 1mg

Notes

Store leftovers in airtight container for up to 3 days. Freeze unbaked for up to 2 months. Reheat in oven, not microwave, for best results.

Tried this recipe?

Let us know how it was!

Decadent Christmas Red Velvet Cheesecake for Festive Cheer

The moment I pulled my Christmas Red Velvet Cheesecake from the oven, the festive spirit enveloped my kitchen like a warm hug. Each layer of velvety, rich red cake intertwined with luscious cheesecake promises to sweep your loved ones off their feet. This luxurious dessert isn’t just a treat for the taste buds—its stunning visual appeal makes it a show-stopping centerpiece for your holiday gatherings. Not to mention, it’s surprisingly simple to make, ensuring you can spend less time stressing and more time yule-tiding with your family. With its delightful blend of sweet and tangy flavors, I guarantee this cheesecake will become a cherished holiday tradition in your home. What unique touch will you add to make this festive delight your own?

Why is this cheesecake a holiday must?

Indulgent Layers: This Christmas Red Velvet Cheesecake features stunning layers that combine rich red velvet cake with a creamy cheesecake center, making it not only delicious but also visually captivating.
Festive Flavor Profile: The blend of sweet and tangy flavors will remind your guests of beloved holiday treats, ensuring it becomes a cherished favorite.
Simple Preparation: Despite its luxurious appearance, this recipe is easy to follow, allowing you to whip up a show-stopper without the stress—perfect alongside my Strawberry Cheesecake Bars!
Versatile Options: Feel free to customize this cheesecake with chocolate chips or a touch of peppermint for an extra festive twist.
Make-Ahead Convenience: Prepare a day in advance to save time on the big day—so you can focus on celebrating with loved ones instead of last-minute baking!
Centerpiece Appeal: Its vibrant red and white contrast makes it the perfect centerpiece for your holiday table, ready to be admired and savored.

Christmas Red Velvet Cheesecake Ingredients

For the Cake Layers

  • All-Purpose Flour – Provides structure to the cake layers; try using gluten-free flour if needed.
  • Unsweetened Cocoa Powder – Adds a subtle chocolate flavor; ensure it’s high-quality for best results.
  • Baking Powder – Acts as a leavening agent; make sure it’s fresh for optimal rise.
  • Baking Soda – Helps neutralize acidity from cocoa and buttermilk.
  • Salt – Enhances all flavors.
  • Granulated Sugar – Sweetens the batter and contributes to moisture.
  • Vegetable Oil – Provides moisture; substitute with melted coconut oil for a richer taste.
  • Buttermilk – Adds tanginess and keeps the cake moist; milk mixed with vinegar works as a substitute.
  • Eggs – Binds the ingredients and provides structure; use eggs at room temperature for best results.
  • Red Food Coloring – Gives the cake its iconic hue; gel food coloring offers better intensity.
  • Vanilla Extract – Enhances the flavor profile.
  • White Vinegar – Activates the baking soda and adds a touch of tanginess.

For the Cheesecake Layer

  • Cream Cheese – The main ingredient for the cheesecake layer; use full-fat for the creamiest texture.
  • Granulated Sugar (for cheesecake) – Sweetens the cheesecake layer effectively.
  • Sour Cream – Adds creaminess with a slight tang to balance flavors.

For the Frosting

  • Unsalted Butter – Used in the frosting, contributing to its creaminess and flavor; ensure it’s softened.
  • Powdered Sugar – Sweetens and thickens the frosting for a perfect finish.

This festive creation, the Christmas Red Velvet Cheesecake, will leave your guests enchanted!

Step‑by‑Step Instructions for Christmas Red Velvet Cheesecake

Step 1: Preheat and Prep
Begin by preheating your oven to 350°F (175°C). Grease and flour two 9-inch round cake pans, ensuring they are well-prepared to release the cake layers effortlessly. Place parchment paper at the bottoms for added security. This step ensures that your beautiful Christmas Red Velvet Cheesecake layers come out perfectly shaped and ready for indulgence.

Step 2: Sift the Dry Ingredients
In a large bowl, sift together 2 cups of all-purpose flour, ¼ cup of unsweetened cocoa powder, 2 teaspoons of baking powder, 1 teaspoon of baking soda, and ½ teaspoon of salt. Sifting helps to aerate the mixture and avoid lumps, resulting in a light and fluffy cake. Set this bowl aside, allowing the dry ingredients to blend while you prepare the wet mix.

Step 3: Whisk the Wet Ingredients
In a separate large mixing bowl, whisk together 1 ½ cups of granulated sugar and 1 cup of vegetable oil until well combined. Next, incorporate 1 cup of buttermilk, 2 large eggs (ensure they are at room temperature), 1 tablespoon of red food coloring, 1 teaspoon of vanilla extract, and 1 teaspoon of white vinegar. Mix until the mixture is smooth and vibrant—it should have a lovely, rich red hue!

Step 4: Combine Wet and Dry Mixtures
Gently fold the dry ingredients into the wet ingredients using a spatula. Mix until just combined—don’t overmix, as this can lead to a dense cake. The batter for your Christmas Red Velvet Cheesecake should be thick and luscious, with no visible dry spots remaining. This careful blending is crucial for achieving the perfect cake texture.

Step 5: Bake the Cake Layers
Divide the red velvet batter evenly between the prepared cake pans. Bake in your preheated oven for 25-30 minutes or until a toothpick inserted in the center comes out clean. As they bake, your kitchen will fill with a delightful aroma that signifies the holiday spirit. Once done, remove the pans and let them cool on a wire rack.

Step 6: Cool and Prepare the Cheesecake Layer
After allowing the cake layers to cool in the pans for about 10 minutes, gently turn them out onto the wire racks to cool completely. Meanwhile, prepare your cheesecake layer by preheating the oven to 325°F (160°C). Using a mixer, beat 16 oz of cream cheese until smooth, then add 1 cup of granulated sugar, 1 cup of sour cream, and 2 large eggs, mixing until silky and lump-free.

Step 7: Bake the Cheesecake
Pour the creamy cheesecake mixture into a greased 9-inch springform pan. Bake in the preheated oven for 50-60 minutes, until the edges are set but the center is slightly jiggly. This gentle baking helps create a smooth, velvety texture for your Christmas Red Velvet Cheesecake. Once done, turn off the oven and crack the door open for an hour to cool gradually.

Step 8: Frost the Cake Layers
Once the red velvet cake layers and cheesecake have cooled completely, it’s time to assemble. Use a serrated knife to level the tops of the cakes if necessary. Spread a layer of cream cheese frosting on top of the first red velvet layer, followed by the cheesecake layer. Place the second red velvet layer on top, securing the layers in place with creamy frosting.

Step 9: Decorate and Chill
Frost the entire cake with cream cheese frosting, decorating as desired with festive touches like crushed candy canes or seasonal sprinkles. Once frosted, chill the entire Christmas Red Velvet Cheesecake in the refrigerator for at least 4 hours, or overnight if possible, to allow the layers to meld beautifully.

Step 10: Serve and Enjoy
Before serving, slice into your stunning Christmas Red Velvet Cheesecake, revealing its festive layers. This beautiful dessert is sure to be the highlight of your holiday gatherings. Pair each slice with a coffee or dessert wine for a delightful experience. Share the love of homemade flavors and create sweet memories with your friends and family!

Expert Tips for Christmas Red Velvet Cheesecake

  • Cool Completely: Make sure the cake layers are completely cool before frosting to avoid melting your cream cheese frosting and ruining its beautiful presentation.

  • Level Layers: Use a serrated knife to level the tops of the cake layers if they’re domed. This ensures a more stable and easier-to-cut Christmas Red Velvet Cheesecake.

  • Room Temperature Ingredients: Allow your cream cheese and eggs to reach room temperature. This helps create a smoother cheesecake layer, eliminating lumps for a perfect texture.

  • Gel Food Coloring: Opt for gel food coloring instead of liquid for a more vibrant red color that holds better in the cake. Adjust the amount depending on the desired intensity.

  • Crease Prevention: To prevent the cheesecake from cracking, follow the baking time closely and allow it to cool gradually in the oven with the door slightly ajar.

  • Make-Ahead Delight: Prepare your cheesecake a day in advance to improve the flavors and save time on the day of your celebration, allowing you to enjoy the festivities!

What to Serve with Christmas Red Velvet Cheesecake

The perfect holiday feast deserves equally delightful companions to elevate your festive experience.

  • Creamy Mashed Potatoes: Their buttery richness contrasts beautifully with the cheesecake’s sweet tang, rounding out your holiday meal.

  • Roasted Brussels Sprouts: Crispy on the outside and tender inside, these add a satisfying crunch that refreshes the palate between bites of cheesecake.

  • Spiced Apple Cider: Warm and fragrant, this seasonal drink brings out the flavors of your red velvet dessert while wrapping you in cozy comfort.

  • Homemade Hot Chocolate: Topped with whipped cream, this sweet treat echoes the dessert’s richness, making every sip a delightful continuation of indulgence.

  • Chocolate-Dipped Fruit: Fresh strawberries or bananas dipped in chocolate provide a fresh, contrasting touch to the rich cheesecake, perfect for a light touch.

  • Gingerbread Cookies: With their spiced flavor, these holiday favorites add a classic touch to your celebration, complementing the festive essence of your cheesecake.

  • Pecan Pie: Its gooey sweetness combines beautifully with the cheesecake’s cheesiness, creating a heavenly and comforting dessert experience.

  • Nutty Cheese Platter: A selection of nuts and creamy cheeses creates a sophisticated appetizer that balances well with the dessert’s sweet notes.

  • Caramel Sauce: Drizzling this over each slice adds an extra layer of decadence, enhancing the joy of every bite of your Christmas Red Velvet Cheesecake.

How to Store and Freeze Christmas Red Velvet Cheesecake

Fridge: Store your cheesecake in the refrigerator, wrapped tightly in plastic wrap or placed in an airtight container. It will stay fresh for up to 3-4 days.

Freezer: If you want to keep the Christmas Red Velvet Cheesecake for a longer period, freeze it. Wrap slices in plastic wrap and aluminum foil, or place the whole cake in an airtight container for up to 1 month.

Reheating: To enjoy frozen slices, simply transfer to the fridge to thaw overnight before serving. Avoid reheating in the microwave, as it may alter the texture.

Make Ahead Options

These Christmas Red Velvet Cheesecake layers make for an incredible make-ahead dessert that saves you time on busy holiday days! You can prepare the red velvet cake layers up to 24 hours in advance; just cool them completely, wrap them tightly in plastic wrap, and refrigerate to maintain their moisture and prevent drying out. Additionally, the cheesecake layer can be made up to 3 days ahead—simply bake it, let it cool, and store it in an airtight container in the fridge. When it’s time to serve, assemble the cake by frosting and chilling it for at least 4 hours (or overnight if you can wait). This ensures all flavors meld perfectly, delivering a stunning dessert that’s just as delicious as if made fresh that day!

Christmas Red Velvet Cheesecake Variations

Feel free to add your personal touch to this decadent dessert masterpiece! Each variation offers a delightful twist that will please your senses and creativity.

  • Gluten-Free: Substitute all-purpose flour with a gluten-free blend for a safe and equally delicious option for gluten-sensitive friends and family.

  • Classic Vanilla Layers: Swap the red velvet layers for a classic vanilla cake to create a more neutral base that lets the cheesecake shine.

  • Minty Freshness: Mix in crushed peppermint candies into the cheesecake layer for a refreshing holiday flavor. The candy adds a delightful crunch and festive flair!

  • Chocolate Chip Surprise: Fold in chocolate chips into the red velvet batter to create pockets of melty chocolate in every slice. It’s a sweet surprise that chocolate lovers will adore!

  • Festive Toppings: Top the cheesecake with festive decorations like crushed candy canes, seasonal sprinkles, or even a drizzle of white chocolate for added sweetness and visual appeal.

  • Cream Cheese Swirl: Before baking, dollop cheesecake batter over the red velvet batter in the cake pans and use a knife to create beautiful swirls. This results in a stunning marbled effect for your holiday dessert!

  • Spice Up the Flavor: Add a pinch of cinnamon or nutmeg to both the cake and cheesecake batter for a warm hint of spice that evokes cozy holiday memories.

  • Mini Cheesecakes: For a fun twist, turn the cheesecake into mini versions by using a muffin tin. Just adjust the baking time, and you’ll have bite-sized delights perfect for sharing.

If you enjoy this indulgent recipe, you might also find joy in making my festive Red White Blue Rice Krispie Treats or celebrating with my luxurious Cookies Cream Cheesecake. Let your imagination run wild!

Christmas Red Velvet Cheesecake Recipe FAQs

Which ingredients should I pay attention to for ripeness and quality?
Absolutely! For the best flavor and texture in your Christmas Red Velvet Cheesecake, ensure you use high-quality ingredients. Fresh eggs are vital as they bind the mixture effectively, so check the sell-by date. Use full-fat cream cheese for a rich flavor in the cheesecake layer, and opt for fresh buttermilk or homemade alternatives (milk mixed with vinegar) for that perfect tanginess. When it comes to cocoa powder, a good, unsweetened variety will elevate the chocolate notes beautifully!

How should I store the cheesecake, and how long will it last?
Very! Store your Christmas Red Velvet Cheesecake by wrapping it tightly in plastic wrap or placing it in an airtight container. It will stay fresh in the refrigerator for about 3 to 4 days. If you plan to keep it longer, the freezer is a great option—just make sure to wrap it properly to prevent freezer burn!

Can I freeze my Christmas Red Velvet Cheesecake? If so, how?
Certainly! Freezing your cheesecake is simple! After it has completely cooled, wrap each slice tightly in plastic wrap, followed by a layer of aluminum foil for added protection. Alternatively, you can place the whole cake in an airtight container. It can be frozen for up to 1 month. When you’re ready to enjoy it, transfer the slices to the refrigerator to thaw overnight.

What if my cheesecake layer cracks during baking?
Don’t worry; it happens to the best of us! To avoid cracks in your cheesecake layer, make sure you don’t overbake it—look for the edges to be set, while the center remains slightly jiggly. Gradually cooling it in the oven with the door slightly ajar for about an hour after baking can also help. If cracks do occur, you can cover them with frosting or festive decorations like crushed candy canes!

Do any dietary considerations need to be kept in mind?
Definitely! If you’re serving guests with dietary restrictions, it’s good to know that this cheesecake contains gluten (from all-purpose flour) and dairy (from cream cheese and butter). You could use gluten-free flour to make it gluten-free and plant-based cream cheese or coconut cream for a dairy-free version. Always check ingredient labels for potential allergens like soy or nut oils if you’re uncertain about specific allergies.

How can I make this cheesecake more festive or personalized?
The more the merrier! Feel free to add a personal touch—incorporating chocolate chips, crushed peppermint candies, or even a hint of espresso powder can elevate the festive appeal. You might also try different food coloring for seasonal themes—pastel colors for spring or rich greens for St. Patrick’s Day! Don’t be shy to experiment; customization is part of the fun!

Christmas Red Velvet Cheesecake

Decadent Christmas Red Velvet Cheesecake for Festive Cheer

This Christmas Red Velvet Cheesecake features rich layers and festive flavors, making it a must-have dessert for holiday cheer.
Prep Time 30 minutes
Cook Time 1 hour
Cooling Time 4 hours
Total Time 5 hours 30 minutes
Servings: 12 slices
Course: Dessert
Cuisine: American
Calories: 450

Ingredients
  

For the Cake Layers
  • 2 cups all-purpose flour try using gluten-free flour if needed.
  • 0.25 cups unsweetened cocoa powder ensure it's high-quality for best results.
  • 2 teaspoons baking powder make sure it’s fresh for optimal rise.
  • 1 teaspoon baking soda
  • 0.5 teaspoon salt enhances all flavors.
  • 1.5 cups granulated sugar sweetens the batter and contributes to moisture.
  • 1 cup vegetable oil substitute with melted coconut oil for a richer taste.
  • 1 cup buttermilk milk mixed with vinegar works as a substitute.
  • 2 large eggs use eggs at room temperature for best results.
  • 1 tablespoon red food coloring gel food coloring offers better intensity.
  • 1 teaspoon vanilla extract enhances the flavor profile.
  • 1 teaspoon white vinegar activates the baking soda and adds a touch of tanginess.
For the Cheesecake Layer
  • 16 oz cream cheese use full-fat for the creamiest texture.
  • 1 cup granulated sugar sweetens the cheesecake layer effectively.
  • 1 cup sour cream adds creaminess with a slight tang to balance flavors.
For the Frosting
  • 0.5 cups unsalted butter ensure it's softened for the frosting.
  • 2 cups powdered sugar sweetens and thickens the frosting for a perfect finish.

Equipment

  • 9-inch round cake pans
  • 9-inch springform pan
  • Mixer
  • Spatula
  • Serrated Knife
  • Wire Rack

Method
 

Step-by-Step Instructions
  1. Preheat your oven to 350°F (175°C). Grease and flour two 9-inch round cake pans.
  2. In a large bowl, sift together 2 cups of all-purpose flour, ¼ cup of unsweetened cocoa powder, 2 teaspoons of baking powder, 1 teaspoon of baking soda, and ½ teaspoon of salt.
  3. In a separate large mixing bowl, whisk together 1 ½ cups of granulated sugar and 1 cup of vegetable oil until well combined. Incorporate 1 cup of buttermilk, 2 large eggs, 1 tablespoon of red food coloring, 1 teaspoon of vanilla extract, and 1 teaspoon of white vinegar. Mix until smooth.
  4. Gently fold the dry ingredients into the wet ingredients using a spatula until just combined.
  5. Divide the batter evenly between the prepared cake pans and bake for 25-30 minutes or until a toothpick comes out clean.
  6. Cool the cake layers for 10 minutes in the pans, then turn them onto wire racks to cool completely.
  7. Preheat the oven to 325°F (160°C) and prepare the cheesecake layer by beating 16 oz of cream cheese until smooth. Add 1 cup of granulated sugar, 1 cup of sour cream, and 2 large eggs, mixing until silky and lump-free.
  8. Pour the cheesecake mixture into a greased 9-inch springform pan and bake for 50-60 minutes, until the edges are set but the center is slightly jiggly.
  9. Cool the cheesecake gradually by cracking the oven door open after baking for an hour.
  10. Level the tops of the cooled cake layers with a serrated knife if necessary. Assemble by frosting the top of the first layer with cream cheese frosting, adding the cheesecake layer, then the second cake layer.
  11. Frost the entire cake and chill in the refrigerator for at least 4 hours, or overnight if possible.
  12. Slice and serve your stunning Christmas Red Velvet Cheesecake paired with coffee or dessert wine.

Nutrition

Serving: 1sliceCalories: 450kcalCarbohydrates: 50gProtein: 6gFat: 25gSaturated Fat: 15gCholesterol: 100mgSodium: 300mgPotassium: 200mgFiber: 2gSugar: 35gVitamin A: 500IUCalcium: 50mgIron: 1mg

Notes

This cheesecake can be made a day in advance to enhance flavors and save time on the big day.

Tried this recipe?

Let us know how it was!