Mango Truffles Recipe: No Bake Treats for Sweet Moments

As I stood in the kitchen, the scent of ripe mangoes filled the air, transporting me back to sun-soaked beaches and tropical getaways. It’s funny how a simple ingredient can spark such vivid memories, isn’t it? Today, I’m thrilled to share my No Bake Mango Truffles recipe, a delightful twist that brings the sunshine directly to your dessert table. These truffles are not only an easy and quick treat to whip up, but they also offer a luscious, creamy texture, perfectly suited for warm weather gatherings. With no oven required, you can spend less time baking and more time enjoying. Curious about how to recreate this tropical paradise in your own kitchen? Let’s dive into the delightful world of mango truffles!
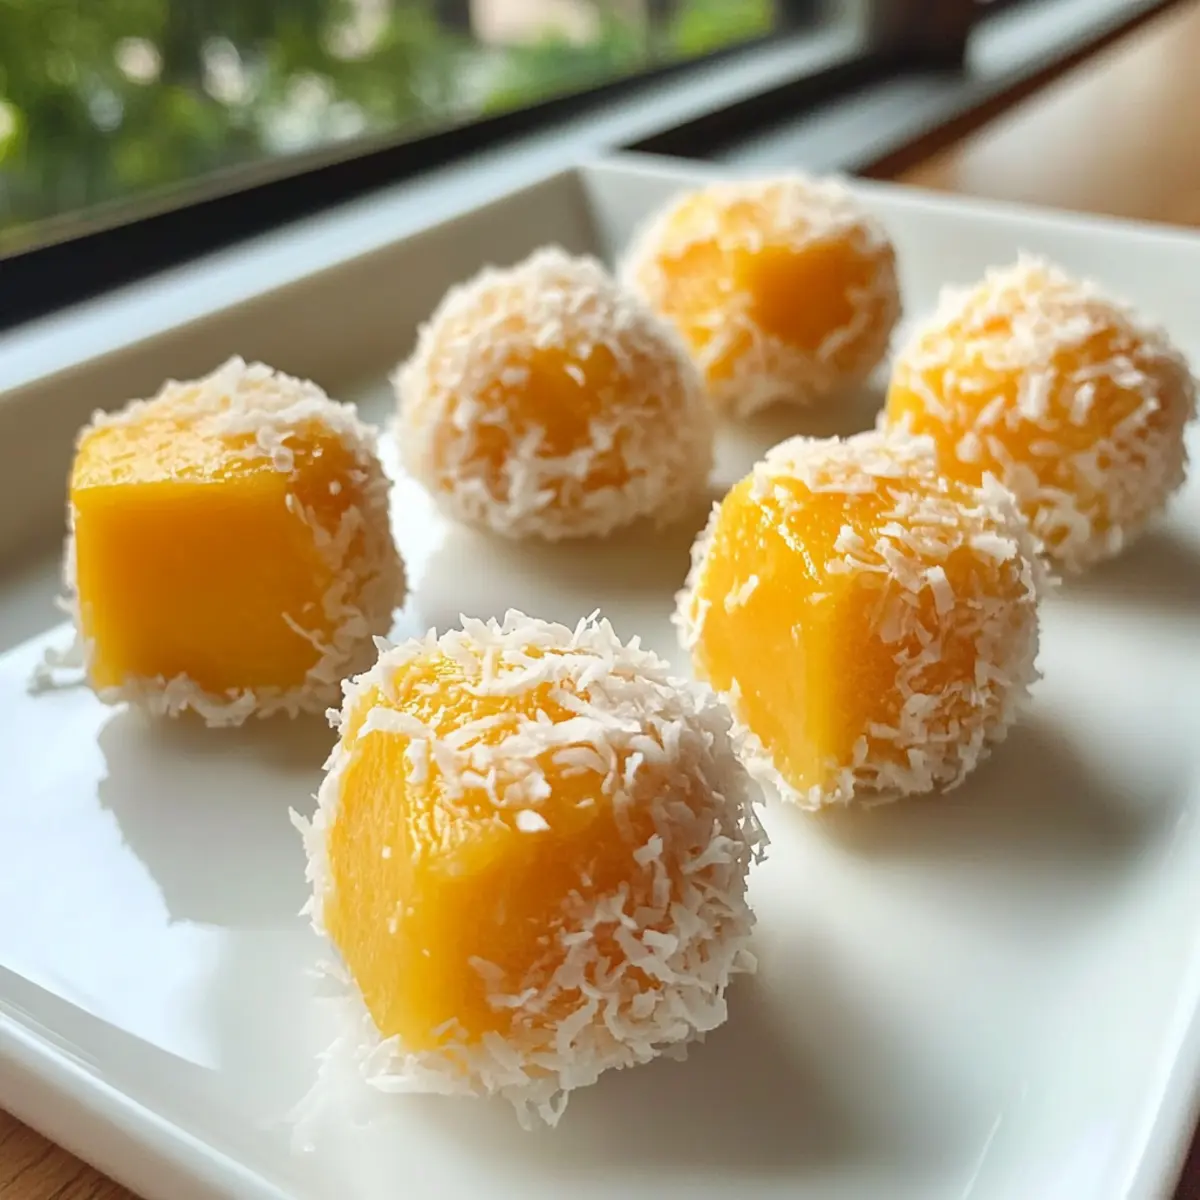
Why Are These Mango Truffles Irresistible?

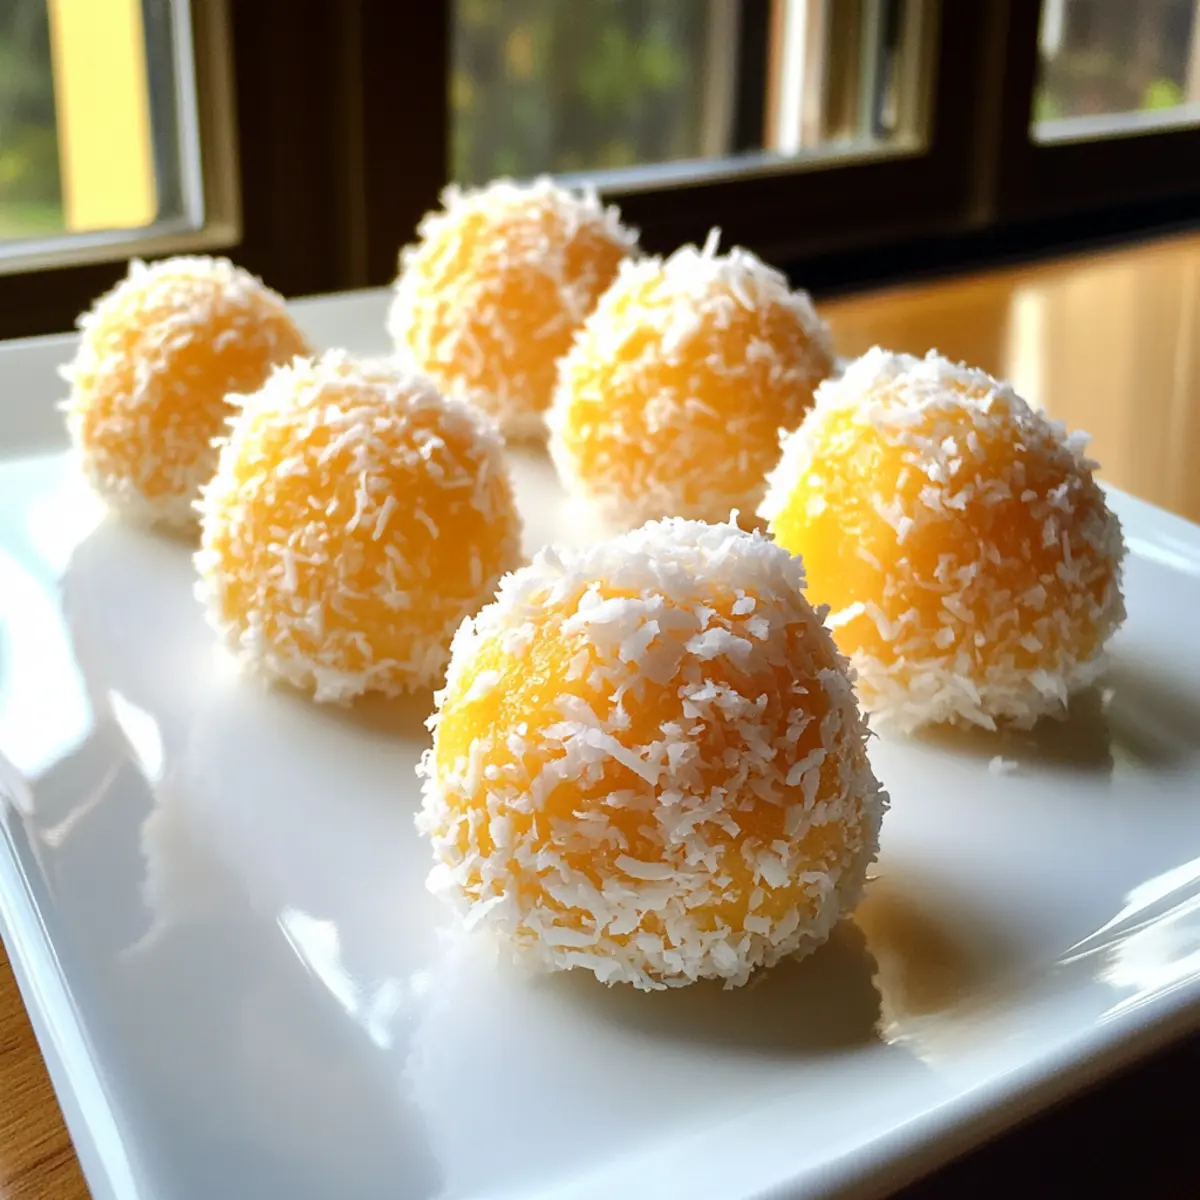
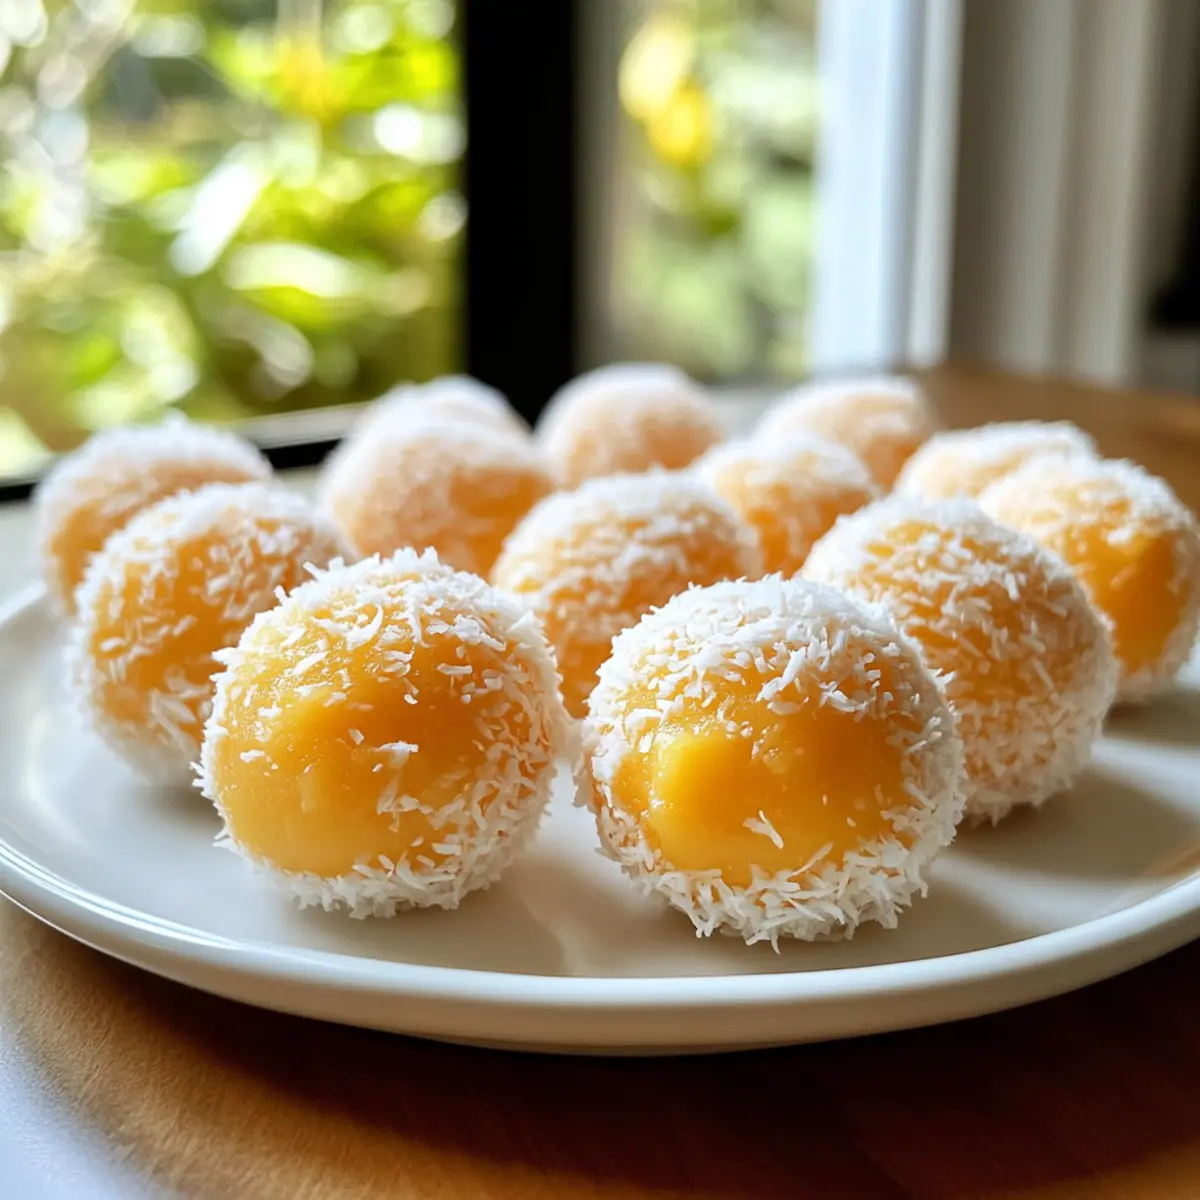
Tropical Delight: Each bite transports you to a sun-drenched beach, bursting with fresh mango flavor.
No Oven Needed: Whipping up these treats is a breeze, perfect for those hot days when you want to skip baking.
Melt-in-Your-Mouth Texture: Creamy centers and smooth chocolate coating create the ultimate indulgence, guaranteed to impress.
Customizable Fun: Swap in Greek yogurt or dark chocolate for a playful twist that suits everyone’s taste.
Crowd-Pleaser: Whether at parties or intimate dinners, these truffles are sure to leave your guests wanting more! For more tropical flair, try serving them alongside a refreshing Mango Dragonfruit Refresher.

Mango Truffles Recipe Ingredients

For the Truffles
Ripe Mango – 1 cup (pureed) – Provides the fresh, tropical flavor that makes these mango truffles irresistible.
Cream Cheese – 8 oz (softened) – Adds a rich creaminess that binds everything together beautifully; Greek yogurt can be a lighter substitute.
Powdered Sugar – 1 cup – Sweetens the truffles and helps achieve the desired thick consistency.
Vanilla Extract – 1 teaspoon – Enhances the overall flavor profile, making each truffle a delight.
Lemon Juice – 1 teaspoon – Balances the sweetness, adding a subtle zing to the truffles.

For the Coating
White Chocolate – 1 cup (for coating) – Creates a sweet and creamy outer layer, perfecting the mango truffles. Dark chocolate can be used for a richer flavor.
Desiccated Coconut – 1 cup – Coats the truffles for added texture and visual appeal; press gently into the chocolate to ensure it sticks.

Step‑by‑Step Instructions for Mango Truffles Recipe

Step 1: Puree Mango
Begin by peeling and chopping the ripe mango into small pieces. Place the mango chunks in a blender and blend until the mixture is smooth and creamy, which should take about 1-2 minutes. The vibrant orange pulp should have no lumps, ensuring a luscious base for your mango truffles.

Step 2: Mix Ingredients
In a mixing bowl, combine the fresh mango puree with the softened cream cheese. Use a hand mixer or spatula to blend them until you achieve a creamy consistency, typically around 2-3 minutes. Gradually add in the powdered sugar and vanilla extract, mixing until well combined and thickened. To brighten the flavors, stir in the lemon juice for a zesty finish.

Step 3: Shape Truffles
With the mango mixture ready, take a small portion and roll it into a ball using your hands. Aim for about 1 inch in diameter for each truffle. Place the formed balls on a baking tray lined with parchment paper, ensuring they are evenly spaced. This step should take around 10 minutes, and the truffles should have a smooth appearance.

Step 4: Chill Mixture
Pop the tray of mango truffles into the refrigerator for at least 30 minutes. This chilling time allows the truffles to firm up, making them easier to coat in chocolate later. After 30 minutes, check that they are solid but still slightly soft to the touch, ready for the next stage.

Step 5: Melt White Chocolate
While the truffles chill, prepare the white chocolate coating. In a microwave-safe bowl, heat the white chocolate in 20-30 second intervals until fully melted and smooth. Stir between each interval to prevent overheating. Alternatively, use a double boiler for melting; just ensure the bowl doesn’t touch the boiling water.

Step 6: Coat Truffles
Once the truffles are firm and your white chocolate is melted, carefully dip each chilled truffle into the chocolate using a fork. Let the excess chocolate drip off before returning the coated truffles to the parchment paper. This process should be quick to maintain the firmness of the truffles, taking about 10 minutes in total.

Step 7: Add Coconut Coating
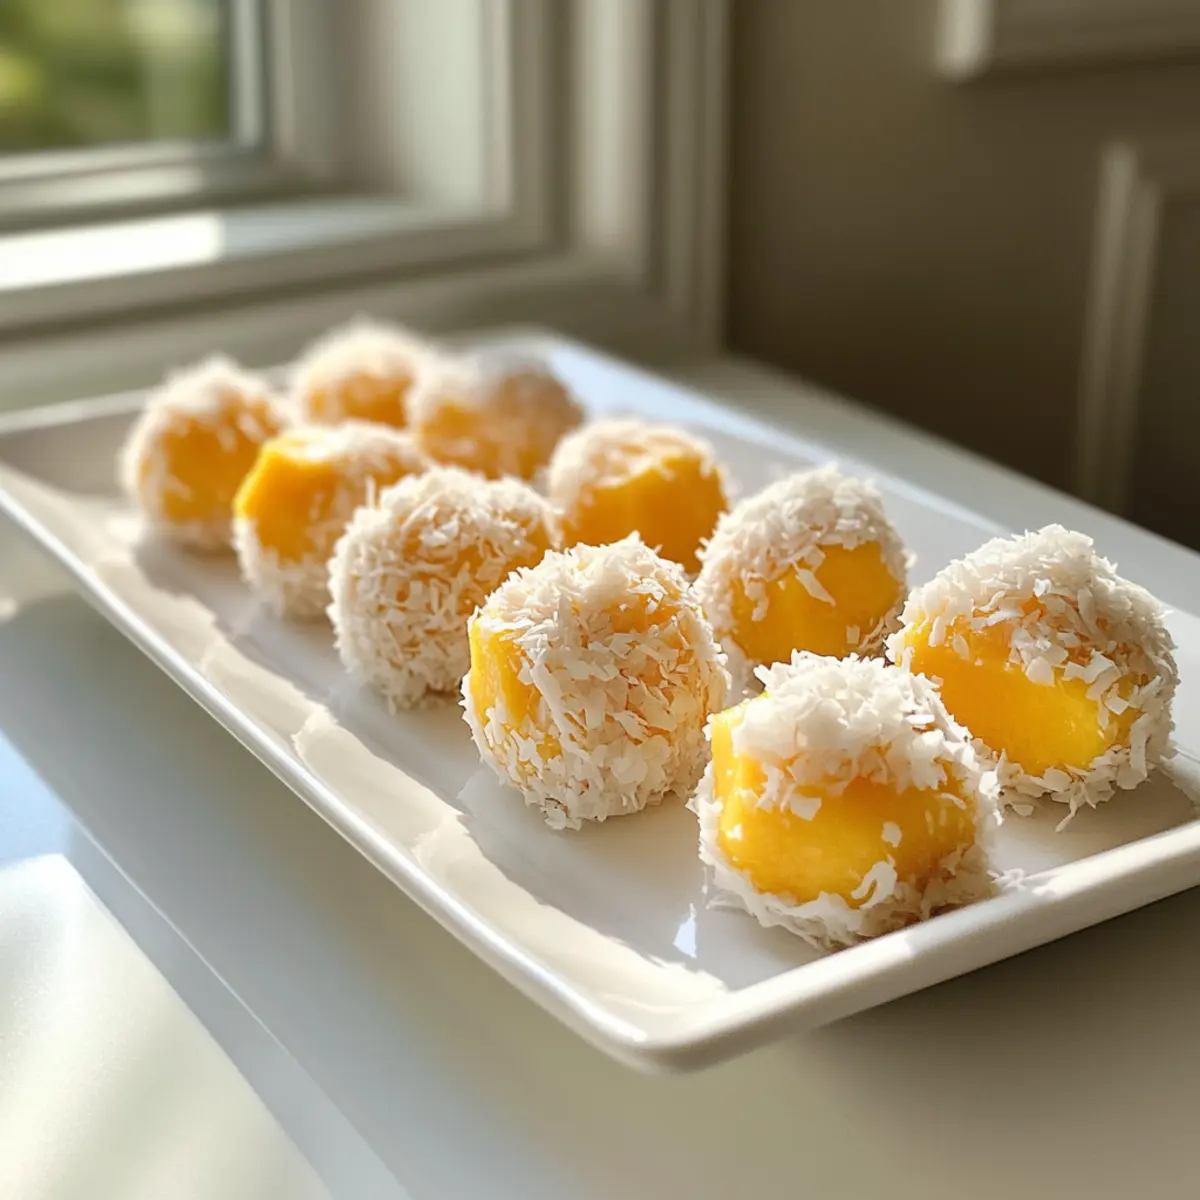
While the chocolate is still wet, generously sprinkle desiccated coconut over the truffles. Gently press the coconut onto the surface to ensure it adheres well. This step adds both texture and visual appeal, making your mango truffles look irresistible. Repeat until all truffles are coated.

Step 8: Final Chill
Return the coated mango truffles to the refrigerator for an additional 15 minutes. This final chilling stage allows the chocolate to set properly, ensuring a glorious crunch when you take a bite. Once chilled, your No Bake Mango Truffles are ready to be served and enjoyed!
Expert Tips for Mango Truffles Recipe

  • Choose Ripe Mango: Selecting a perfectly ripe mango is crucial. It enhances the sweetness and tropical flavor of your mango truffles.
  • Work Quickly: When shaping the truffles, keep the mixture cool to prevent it from melting. Quick hands mean better shapes!
  • Even Coating: Use a fork or dipping tool to ensure your truffles are evenly coated in white chocolate, preventing clumps and ensuring a smooth finish.
  • Coconut Adherence: Press the desiccated coconut firmly onto the truffles while the chocolate is still wet to maximize adherence and achieve a beautiful look.
  • Storage Secrets: Store your mango truffles in an airtight container in the fridge for up to five days. Avoid freezing to prevent a watery texture.

Mango Truffles Recipe Variations

Feel free to get creative with this recipe, exploring flavors and textures that delight your taste buds!

  • Greek Yogurt: Swap cream cheese for Greek yogurt for a lighter touch. It brings a tangy creaminess that’s just as delicious!

  • Dark Chocolate: Use dark chocolate instead of white chocolate for coating. The rich flavor will elevate your truffles to a whole new level of indulgence.

  • Lime Zest: Add a hint of lime zest to the mango puree for a bright, citrus kick that beautifully complements the sweetness.

  • Nut Butter: Incorporate almond or cashew butter into the mixture for a nutty depth of flavor. It adds a creamy texture that’s simply irresistible.

  • Coconut Flakes: Replace desiccated coconut with toasted coconut flakes for a warm, nutty crunch that adds another layer of flavor and texture.

  • Spiced Option: Sprinkle some cinnamon or nutmeg into the mixture for a warm, aromatic twist. This adds a cozy touch, perfect for rainy days.

  • Fruit Medley: Blend in other fruit purees, like passionfruit or pineapple, for a tropical fusion that brightens the flavor and adds complexity.

  • Chili Kick: For the adventurous, add a pinch of chili powder or cayenne pepper to the chocolate coating for a sweet and spicy contrast.

These mango truffles are incredibly versatile! For an even sweeter experience, pair them with a refreshing Mango Coconut Pudding or enjoy alongside flavorful Fish Tacos Mango for a delightful meal.

Make Ahead Options

These No Bake Mango Truffles are a fantastic option for meal prep enthusiasts looking to save time! You can prepare the mango mixture up to 24 hours in advance by following the first three steps, then cover and refrigerate it. Additionally, the rolled truffles can be frozen for up to 3 months; just ensure they are tightly wrapped to maintain their freshness. When you’re ready to enjoy, coat the chilled truffles in melted white chocolate and add the coconut topping. Simply return them to the fridge for about 15 minutes to set, and you’ll have delightful mango truffles that taste just as fresh as if you made them that day!

How to Store and Freeze Mango Truffles

Fridge: Store truffles in an airtight container and keep them in the fridge for up to 5 days. This ensures they stay fresh and maintain their creamy texture.

Freezer: While not recommended, you can freeze these truffles for up to 1 month. However, be aware that the texture may become watery once thawed, impacting the enjoyment of the mango truffles.

Reheating: Enjoy the truffles chilled for the best taste. There’s no need to reheat, as they are meant to be a refreshing treat straight from the fridge!

What to Serve with No Bake Mango Truffles

Looking to create a memorable meal alongside your tropical mango truffles? Let’s explore some delightful pairings that will elevate your dessert experience.

  • Coconut Rice Pudding: This creamy and subtly sweet pudding complements the mango flavor, offering a comforting texture. Consider serving it warm for a homely touch.

  • Tropical Fruit Salad: A vibrant mix of fresh fruits like pineapple, kiwi, and banana adds a refreshing zing, enhancing the overall tropical experience. It invites bright flavors to dance on your palate.

  • Mint-Infused Iced Tea: Crisp and invigorating, this beverage can balance the sweetness of the truffles. Add fresh mint leaves for that extra aromatic touch!

  • Chocolate Dipped Strawberries: The slight bitterness of dark chocolate contrasts beautifully with the sweet mango, creating a pleasing harmony of flavors and textures.

  • Lime Sorbet: This zesty and chilled dessert will cleanse your palate, perfectly complementing the rich mango truffles. Each spoonful can feel like a refreshing tropical escape.

  • Pineapple Coconut Smoothie: Blend these two delightful flavors for a cool, creamy drink that echoes the tropical vibes of your mango truffles. It’s an indulgent treat that’s still refreshing and light!

  • Cheesecake Bites: These mini desserts provide a rich contrast to the light mango truffles. The creaminess marries well with the fruity notes, creating a beautiful dessert experience for your guests.

  • Sparkling Water with Lime: Pure and simple, this effervescent drink can enhance the flavors of your meal without overpowering it, adding a touch of elegance to the table.
Mango Truffles Recipe FAQs

What type of mango should I use for the truffles?
Absolutely! For the best flavor, choose a ripe mango that feels slightly soft when gently squeezed. The mango’s skin should be a vibrant yellow or orange. You can also use frozen mango, but ensure it is fully thawed and drained to avoid excess moisture.

How long can I store the mango truffles in the fridge?
Very! You can store the mango truffles in an airtight container in the refrigerator for up to 5 days. This keeps them fresh and preserves that creamy texture. Always check for any visual signs like dark spots before consuming them again.

Can I freeze mango truffles for later?
While technically you can, it’s not recommended as the texture may become watery once thawed. If you choose to freeze them, place them in a single layer in a freezer-safe container for up to 1 month. When ready to enjoy, let them thaw in the fridge overnight for the best results.

What can I do if my truffles are too soft to shape?
No worries! If you find that your mango mixture is too soft, try chilling it in the refrigerator for about 15-20 minutes to firm it up before shaping. If they’re still too soft, adding a little more powdered sugar can help thicken the mixture, making it easier to roll into truffles.

Are these mango truffles suitable for people with allergies?
That depends! These truffles contain cream cheese and may not be suitable for those with dairy allergies. As an alternative, you could substitute the cream cheese with a dairy-free cream cheese or Greek yogurt, but note that this may alter the flavor slightly. Always check ingredient labels for potential allergens.

How can I make my mango truffles a bit more exciting?
Oh, the more the merrier! You could add a teaspoon of lime zest to the mixture for a zesty twist or even experiment with different coatings like crushed nuts or sprinkles. Each variation can bring a delightful surprise to this mango truffles recipe!
Mango Truffles Recipe

Mango Truffles Recipe: No Bake Treats for Sweet Moments

A delightful No Bake Mango Truffles recipe, bursting with fresh mango flavor and creamy texture, perfect for warm weather gatherings.
Prep Time 15 minutes
Chilling Time 45 minutes
Total Time 1 hour
Servings: 12 truffles
Course: Dessert
Cuisine: Tropical
Calories: 120

Ingredients
  

For the Truffles
  • 1 cup Ripe Mango pureed
  • 8 oz Cream Cheese softened
  • 1 cup Powdered Sugar
  • 1 teaspoon Vanilla Extract
  • 1 teaspoon Lemon Juice
For the Coating
  • 1 cup White Chocolate for coating
  • 1 cup Desiccated Coconut

Equipment

  • blender
  • Mixing Bowl
  • Hand mixer
  • Baking tray
  • Parchment paper
  • Microwave-safe bowl
  • Fork

Method
 

Step-by-Step Instructions
  1. Begin by peeling and chopping the ripe mango into small pieces. Place the mango chunks in a blender and blend until smooth and creamy.
  2. In a mixing bowl, combine the mango puree with softened cream cheese. Blend until creamy, then add powdered sugar and vanilla extract, mixing to combine. Stir in lemon juice.
  3. Roll a small portion of the mango mixture into a ball about 1 inch in diameter and place on a baking tray lined with parchment paper.
  4. Refrigerate the tray of truffles for at least 30 minutes to firm them up.
  5. Melt white chocolate in a microwave-safe bowl, heating in 20-30 second intervals until fully melted and smooth.
  6. Dip each chilled truffle into the melted chocolate, letting the excess drip off before returning them to parchment paper.
  7. While the chocolate is still wet, sprinkle desiccated coconut over the truffles, pressing gently to adhere.
  8. Return the coated truffles to the refrigerator for an additional 15 minutes to let the chocolate set properly.
Nutrition

Serving: 1truffleCalories: 120kcalCarbohydrates: 15gProtein: 2gFat: 6gSaturated Fat: 4gCholesterol: 15mgSodium: 30mgPotassium: 50mgSugar: 12gVitamin A: 500IUVitamin C: 5mgCalcium: 20mgIron: 0.5mg

Notes

Store truffles in an airtight container in the fridge for up to 5 days. Not recommended to freeze.

Tried this recipe?

Let us know how it was!

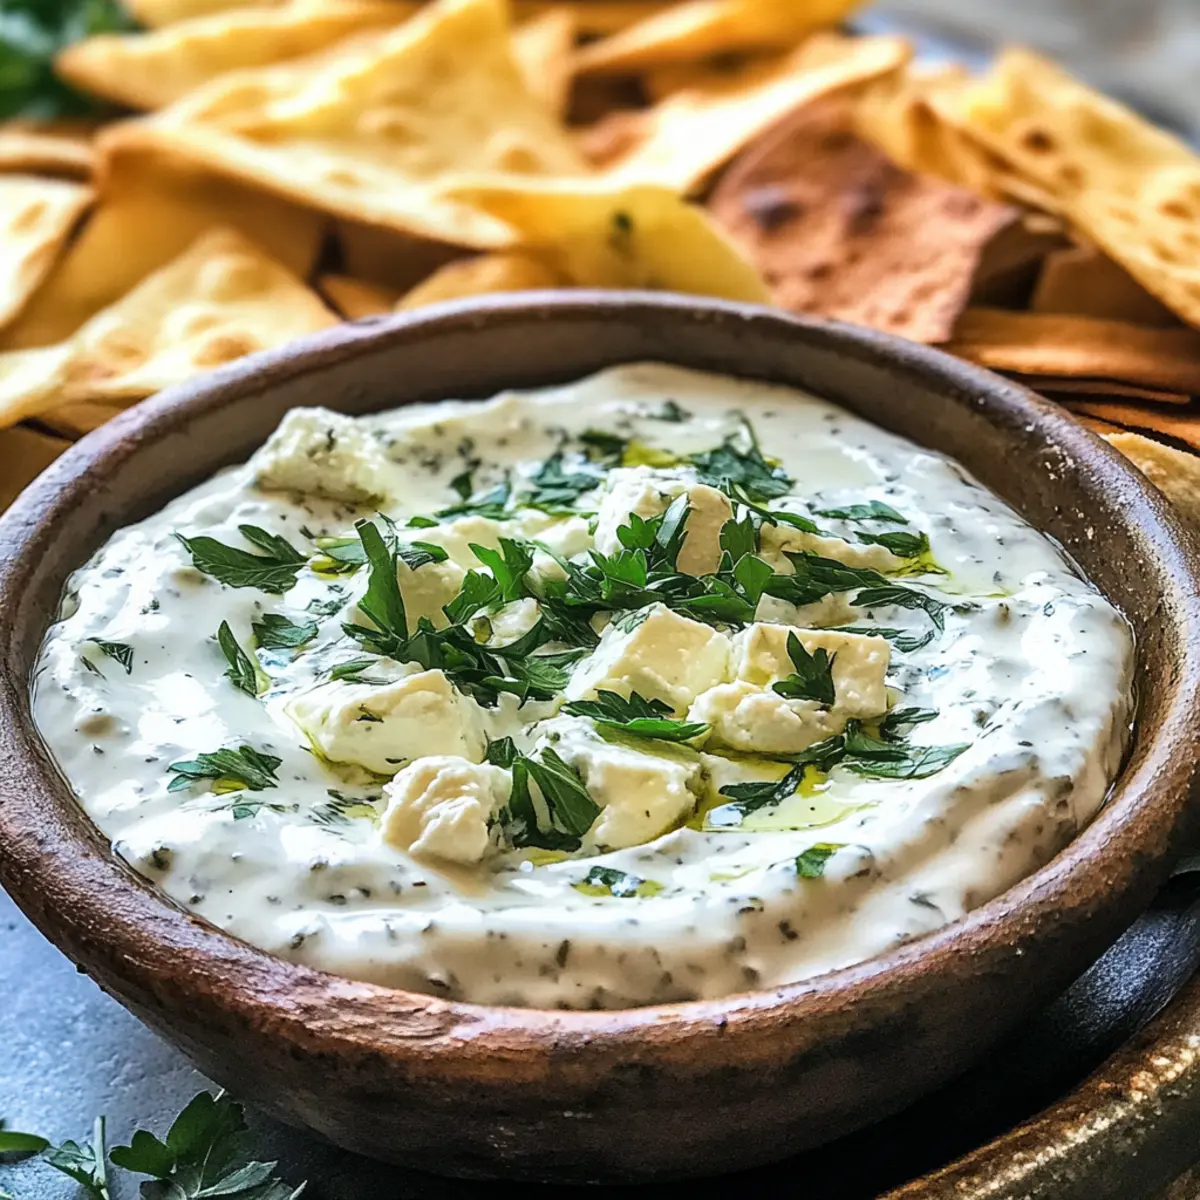
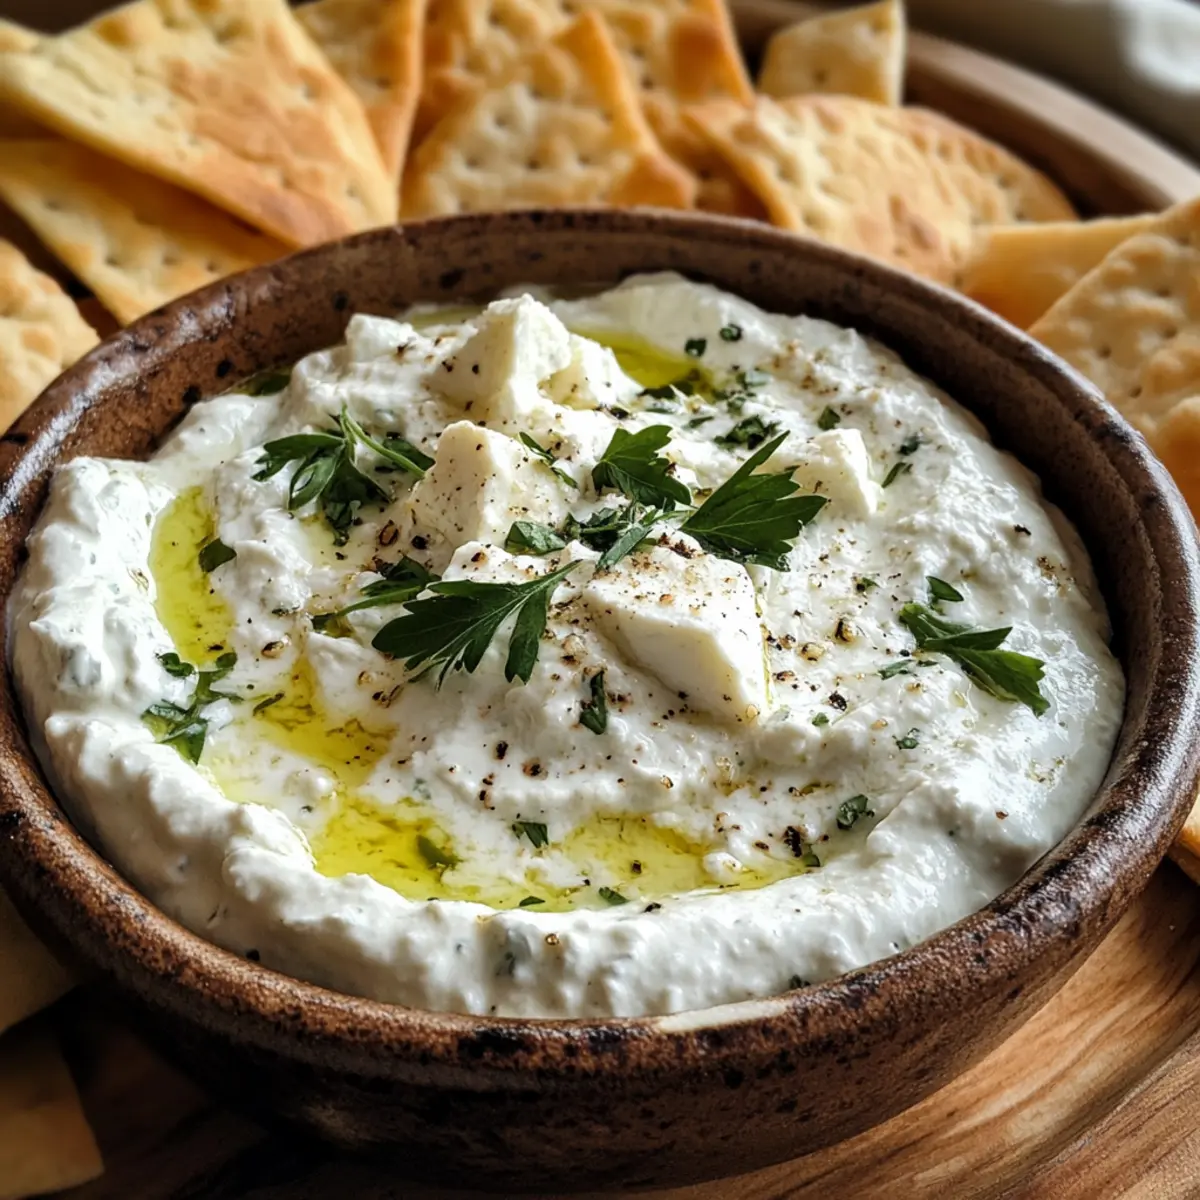
Classic Cava Feta Dip: Creamy Goodness for Every Party

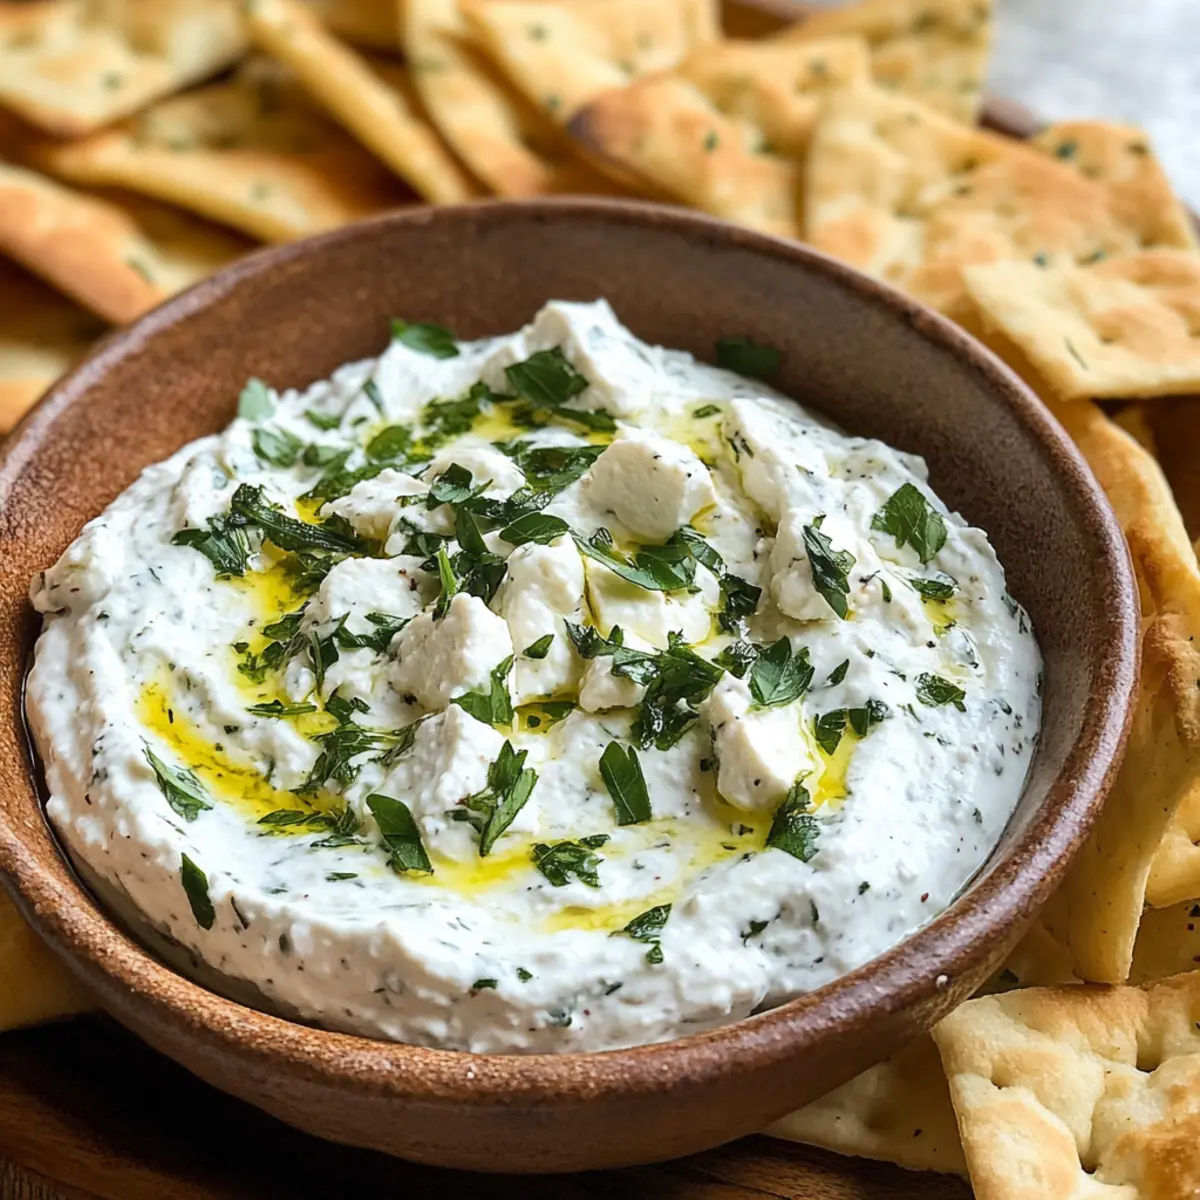
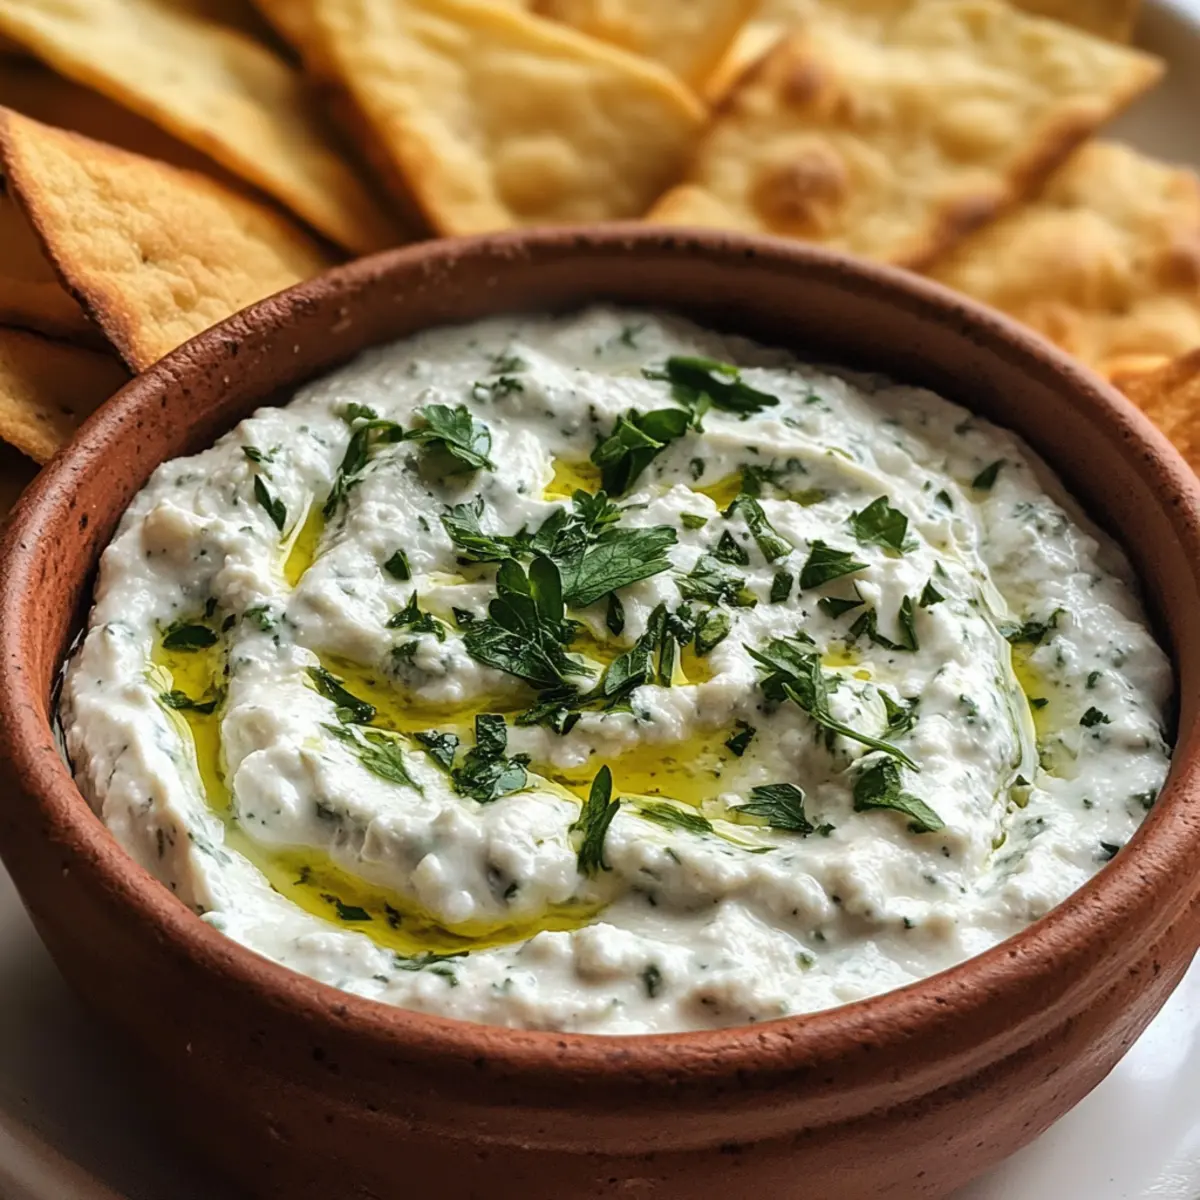
As I stood beside the counter, the aroma of caramelized onion mingled with the tangy notes of rich, creamy feta cheese, I felt a wave of excitement wash over me—this was the magic of my Classic Cava Feta Dip in the making. Perfect for potlucks or simply a cozy night in, this dish delights with its effortless blend of fresh herbs and zesty lemon, making it a standout party appetizer. Not only is it unbelievably simple to whip up, but it also becomes an instant favorite, vanishing quickly amidst laughter and chatter. Whether you serve it with crispy pita chips or vibrant veggie sticks, this dip promises to elevate any gathering. Are you ready to discover how this creamy treat can transform your entertaining game?

Why is Cava Feta Dip a Must-Try?

Crowd-Pleasing Delight: This creamy dip is not just a recipe; it’s a guaranteed hit at any gathering. Effortlessly Simple: Whip it up with minimal effort and enjoy maximum flavor, perfect for beginner cooks. Flavor Explosion: The mix of feta, fresh herbs, and jalapeños gives this dip an unforgettable taste. Versatile Serving Options: Pair it with warm pita chips, crunchy veggies, or even baguette slices for a beautiful spread. Make-Ahead Friendly: Prepare it in advance and let the flavors mingle for a tasty appetizer ready when you are. If you’re looking for more delicious recipes for gatherings, check out my American Flag Party and Greek Style Loaded Hummus for more crowd-pleasing ideas!

Classic Cava Feta Dip Ingredients

• Discover what makes this dip so creamy!

For the Base

  • Block Feta Cheese – Provides a rich, creamy base; opt for Greek feta for the best flavor and texture.
  • Olive Oil – Enhances creaminess and mouthfeel; substituting with avocado oil offers a unique twist.

For the Flavor

  • Fresh Herbs (e.g., parsley, dill) – Adds freshness and depth; feel free to mix in any preferred fresh herbs.
  • Sweet Onion – Contributes natural sweetness; caramelizing it will bring out the best flavors.
  • Jalapeños – Infuses a delightful kick; remove seeds for a milder version or swap with another mild pepper.

For Serving

  • Pita Chips or Baguette Slices – Perfect for scooping and complement the creamy texture of the dip.
  • Fresh Veggies (like cucumber and bell peppers) – Offers a colorful and crunchy alternative for dipping.

Step‑by‑Step Instructions for Classic Cava Feta Dip

Step 1: Heat Oil
In a medium frying pan, heat 2 tablespoons of olive oil over medium heat. As the oil shimmers, it’s ready for the next step. This initial heating builds a foundation for the creamy classic Cava feta dip, giving the onions the perfect environment to caramelize beautifully.

Step 2: Sauté Onions and Jalapeños
Add finely diced sweet onion and chopped jalapeños to the hot oil. Cook this mixture for 5-7 minutes, stirring occasionally until the onion is golden and fragrant. This caramelization adds depth to your dip, blending beautifully with the feta and creating a rich flavor profile.

Step 3: Prepare Feta Mixture
While the onion-jalapeño mixture cooks, take a food processor and crumble the block feta cheese into it. Blend the feta cheese with 1/4 cup of olive oil until the mixture is creamy and smooth. This step creates the base of your classic Cava feta dip, ensuring a delightful creaminess.

Step 4: Combine Ingredients
Once the onion-jalapeño mixture is ready, remove it from the heat and let it cool slightly. Then, fold this mixture into the whipped feta, stirring until everything is well integrated. The warmth of the sautéed ingredients will meld beautifully with the creamy feta, enhancing the flavors of your dip.

Step 5: Allow Flavors to Meld
Let the Classic Cava feta dip rest for a few minutes at room temperature. This short waiting period allows the flavors to mingle and deepen, giving your dip an irresistible taste that’s perfect for serving. If the dip feels too thick, drizzle in more olive oil to achieve your desired consistency.

Step 6: Serve and Enjoy
Transfer the creamy classic Cava feta dip to a serving bowl and prepare to delight your guests. It pairs wonderfully with warm pita chips, fresh veggies, or toasted baguette slices. Ready to savor a crowd-pleasing appetizer, this dip will surely disappear from the table in no time!

Expert Tips for Classic Cava Feta Dip

  • Quality Matters: Use high-quality block feta cheese to avoid a grainy texture; cheap pre-crumbled varieties can ruin your creamy classic Cava feta dip.
  • Slow Caramelization: Allow the sweet onions to caramelize slowly over medium heat; hurrying this step may lead to bitter flavors instead of sweetness.
  • Rest for Flavor: Let the dip sit at room temperature for a few minutes after mixing; this helps meld the flavors, enhancing your dip’s overall taste.
  • Consistency Check: Adjust the dip’s thickness with olive oil as needed; starting with a creamier base ensures a perfect scoop on pita chips.
  • Customize Your Heat: If you prefer a milder dip, ensure you remove all the jalapeño seeds; for added spice, feel free to include the seeds or explore other pepper options.

Classic Cava Feta Dip Variations

Customize your Classic Cava Feta Dip to fit any mood or occasion, and delight in the sensory experience of experimenting with flavors!

  • Spicy Kick: Add extra chopped jalapeños or keep some seeds to ramp up the heat!

  • Roasted Red Peppers: Swap jalapeños for roasted red peppers, which lend a sweet, smoky flavor that brightens each bite.

  • Creamy Alternative: Make a dairy-free version with cashew cream; it’s just as dreamy and rich without lactose.

  • Herbal Infusion: Experiment with different fresh herbs like basil or cilantro for a unique twist; each herb brings its own vibrant character.

  • Nutty Crunch: Incorporate finely chopped walnuts or pine nuts for added texture and a delicious nutty flavor.

  • Zesty Citrus: Elevate the dip with a squeeze of fresh lime juice or the zest of a lemon to give it a refreshing burst.

  • Mediterranean Touch: Blend in some sun-dried tomatoes or olives for an authentic Mediterranean flavor explosion.

  • For a Sweet Touch: Mix in a little honey or agave syrup for a touch of sweetness that pairs heavenly with the salty feta.

If you’re eager to blend more flavors, check out my American Flag Party for more delicious ideas or dive into my Greek Style Loaded Hummus for a delightful variation on Mediterranean dips!

How to Store and Freeze Classic Cava Feta Dip

Fridge: Store the dip in an airtight container for up to 5 days. The flavors actually improve as it sits, making it even more delicious for your next snack.

Freezer: You can freeze the classic Cava feta dip for up to 2 months. Be sure to transfer it to a freezer-safe container before freezing.

Thawing: When ready to enjoy, thaw the dip in the fridge overnight. Stir well before serving to regain its creamy texture.

Reheating: If you prefer it warm, gently reheat in a microwave-safe bowl, stirring every 30 seconds until heated through. Enjoy the creamy goodness!

Make Ahead Options

These Classic Cava Feta Dip preparations are fantastic for busy home cooks looking to save time without sacrificing flavor! You can prepare the onion and jalapeño mixture up to 3 days in advance; simply sauté, cool, and store it in an airtight container in the refrigerator. The whipped feta can also be made ahead of time and stored for up to 5 days; just keep it in a separate container. When you’re ready to serve, combine the chilled ingredients and let them warm to room temperature, allowing the flavors to meld beautifully. This way, you’ll have a delicious party appetizer ready to impress at a moment’s notice!

What to Serve with Classic Cava Feta Dip

Craving a memorable spread to accompany this creamy delight? Let’s create a feast that whets the appetite and pleases the palate!

  • Warm Pita Chips: Perfectly crispy yet soft, they provide an excellent base to scoop up the rich dip and enhance every creamy bite.

  • Crunchy Veggie Platter: Fresh celery sticks, cucumber slices, and vibrant bell pepper strips add a refreshing crunch that complements the dip’s smoothness beautifully.

  • Toasted Baguette Slices: These crispy, buttery bites are ideal for serving alongside the dip, introducing a satisfying crunch and a touch of gourmet charm.

  • Stuffed Grape Leaves: Packed with herby rice and spices, they offer a wonderful Mediterranean flavor that pairs exceptionally well with the feta’s creaminess.

  • Marinated Olives: Their briny richness balances the dip’s tang, adding a burst of flavor that elevates your appetizer spread.

  • Chilled White Wine: A glass of crisp Sauvignon Blanc or a refreshing Pinot Grigio harmonizes with the dip’s flavors, making every gathering feel special.

  • Homemade Hummus: Creamy and earthy, hummus offers another delicious dip option that pairs wonderfully with pita chips and veggies for a fulfilling spread.

  • Crispy Flatbreads: Their light texture and subtle nuttiness provide a delightful contrast to the luscious dip, making your guests beg for more.

Prepare to wow your friends and family with this inviting combination!

Classic Cava Feta Dip Recipe FAQs

What type of feta cheese should I use for the best flavor?
Absolutely! For the best flavor and creamy texture in your Classic Cava Feta Dip, opt for high-quality block Greek feta cheese. This type blends beautifully into the dip, providing that luscious mouthfeel. If you can only find crumbled feta, rinsing it under cold water can help reduce its saltiness, making it a suitable alternative.

How long can I store the Classic Cava Feta Dip in the refrigerator?
You can refrigerate the dip in an airtight container for up to 5 days. In fact, I often find that the flavors deepen and improve the longer it sits, making it an ideal make-ahead appetizer for gatherings!

Can I freeze Classic Cava Feta Dip?
Yes, you can freeze this dip for up to 2 months. To do so, transfer it into a freezer-safe container, making sure to leave some room at the top for expansion. When you’re ready to enjoy, thaw it in the fridge overnight and stir well before serving. If you’d like it warm, you can gently reheat it in a microwave-safe bowl, stirring every 30 seconds until heated through.

What if my Classic Cava Feta Dip is too thick?
Very! If you find that your dip is too thick, simply drizzle in a little more olive oil and mix until you reach your desired consistency. This not only adjusts the thickness but also enhances the flavor. Remember, the dip’s creamy texture is part of its charm!

Are there any dietary considerations I should keep in mind?
Certainly! If you or your guests have allergies or dietary restrictions, be cautious of the jalapeños if you’re serving individuals sensitive to spicy foods. Additionally, this dip is gluten-free, making it a great choice for those with gluten sensitivities. Always check the ingredient labels, especially for feta cheese, as some brands may contain additives that some may wish to avoid.

How can I tell if my feta cheese has gone bad?
To ensure your feta is still fresh, look out for visual cues. If you spot any dark spots all over, or if the cheese has an excessive sour smell, it’s best to err on the side of caution and discard it. Fresh feta should have a pleasant briny smell and a creamy texture. Always check the expiration date as well!

Classic Cava Feta Dip

Classic Cava Feta Dip: Creamy Goodness for Every Party

This Classic Cava Feta Dip is a creamy and delicious appetizer perfect for any gathering, featuring feta cheese, fresh herbs, and jalapeños.
Prep Time 15 minutes
Cook Time 10 minutes
Cooling Time 5 minutes
Total Time 30 minutes
Servings: 8 servings
Course: Appetizer
Cuisine: Mediterranean
Calories: 150

Ingredients
  

For the Base
  • 1 block Feta Cheese Opt for Greek feta for the best flavor and texture.
  • 2 tablespoons Olive Oil Substituting with avocado oil offers a unique twist.
For the Flavor
  • 1 cup Fresh Herbs (e.g., parsley, dill) Feel free to mix in any preferred fresh herbs.
  • 1 large Sweet Onion Caramelizing it will bring out the best flavors.
  • 2 tablespoons Jalapeños Remove seeds for a milder version.
For Serving
  • 1 bag Pita Chips Perfect for scooping the dip.
  • 1 cup Fresh Veggies (like cucumber and bell peppers) Offers a colorful and crunchy alternative for dipping.

Equipment

  • Frying pan
  • Food processor
  • Serving Bowl

Method
 

Step‑by‑Step Instructions for Classic Cava Feta Dip
  1. In a medium frying pan, heat 2 tablespoons of olive oil over medium heat.
  2. Add finely diced sweet onion and chopped jalapeños to the hot oil. Cook for 5-7 minutes until the onion is golden.
  3. Crumble the block feta cheese into a food processor and blend with 1/4 cup of olive oil until creamy.
  4. Fold the onion-jalapeño mixture into the whipped feta, stirring until well integrated.
  5. Let the dip rest for a few minutes at room temperature to allow flavors to meld.
  6. Transfer the creamy dip to a serving bowl and enjoy with pita chips or veggies.

Nutrition

Serving: 1cupCalories: 150kcalCarbohydrates: 8gProtein: 6gFat: 12gSaturated Fat: 5gPolyunsaturated Fat: 1gMonounsaturated Fat: 5gCholesterol: 30mgSodium: 400mgPotassium: 160mgFiber: 1gSugar: 1gVitamin A: 500IUVitamin C: 5mgCalcium: 200mgIron: 1mg

Notes

This dip can be made ahead of time for convenient serving. For thicker consistency, adjust with olive oil as needed.

Tried this recipe?

Let us know how it was!

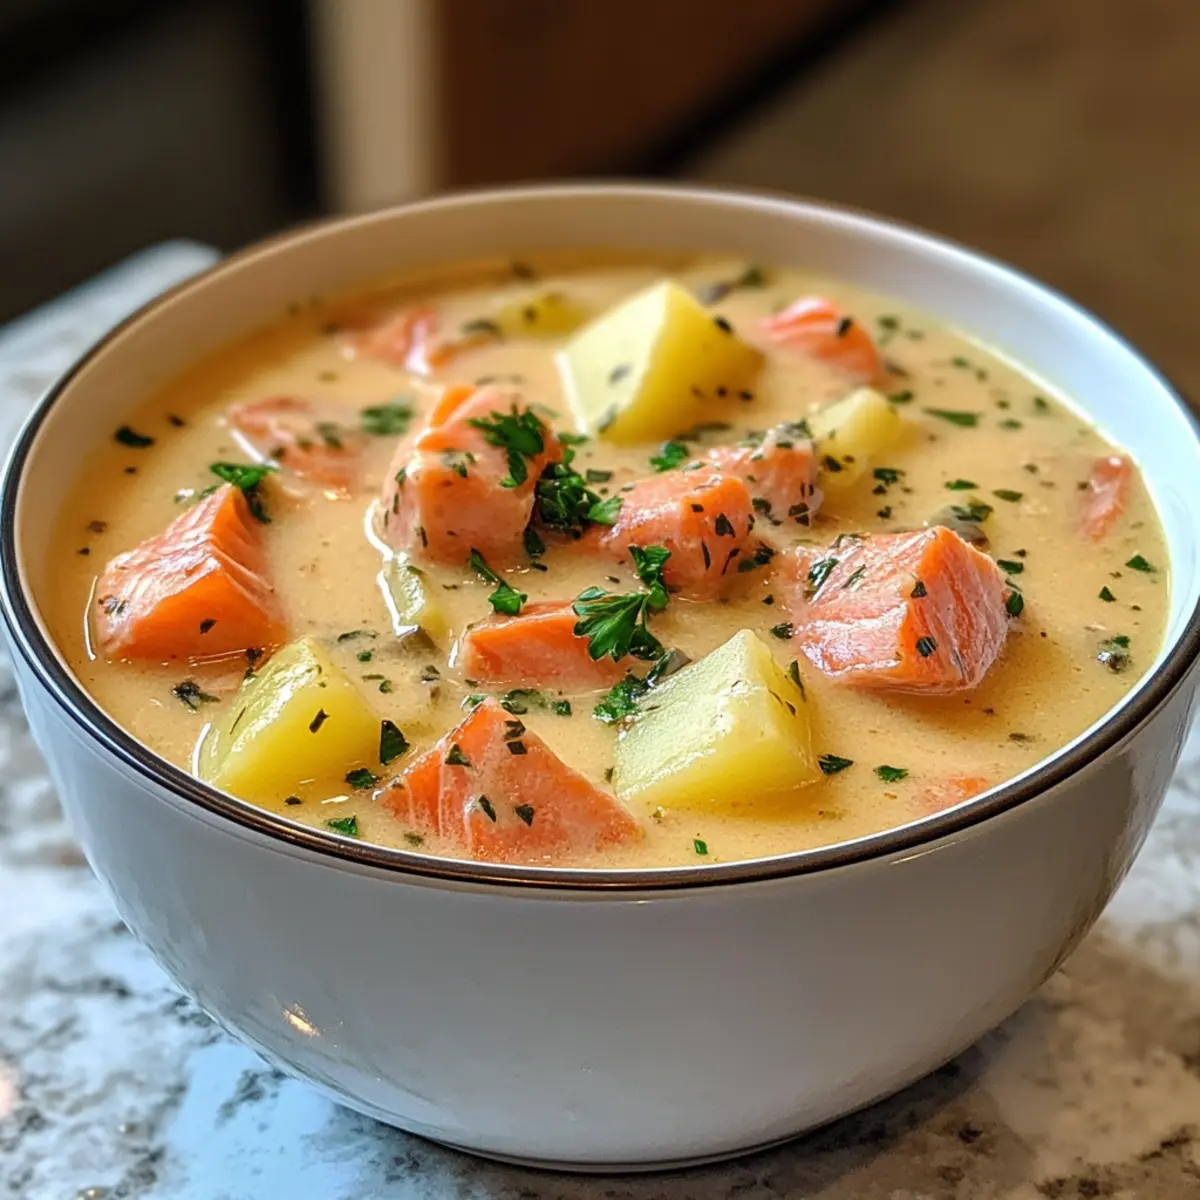
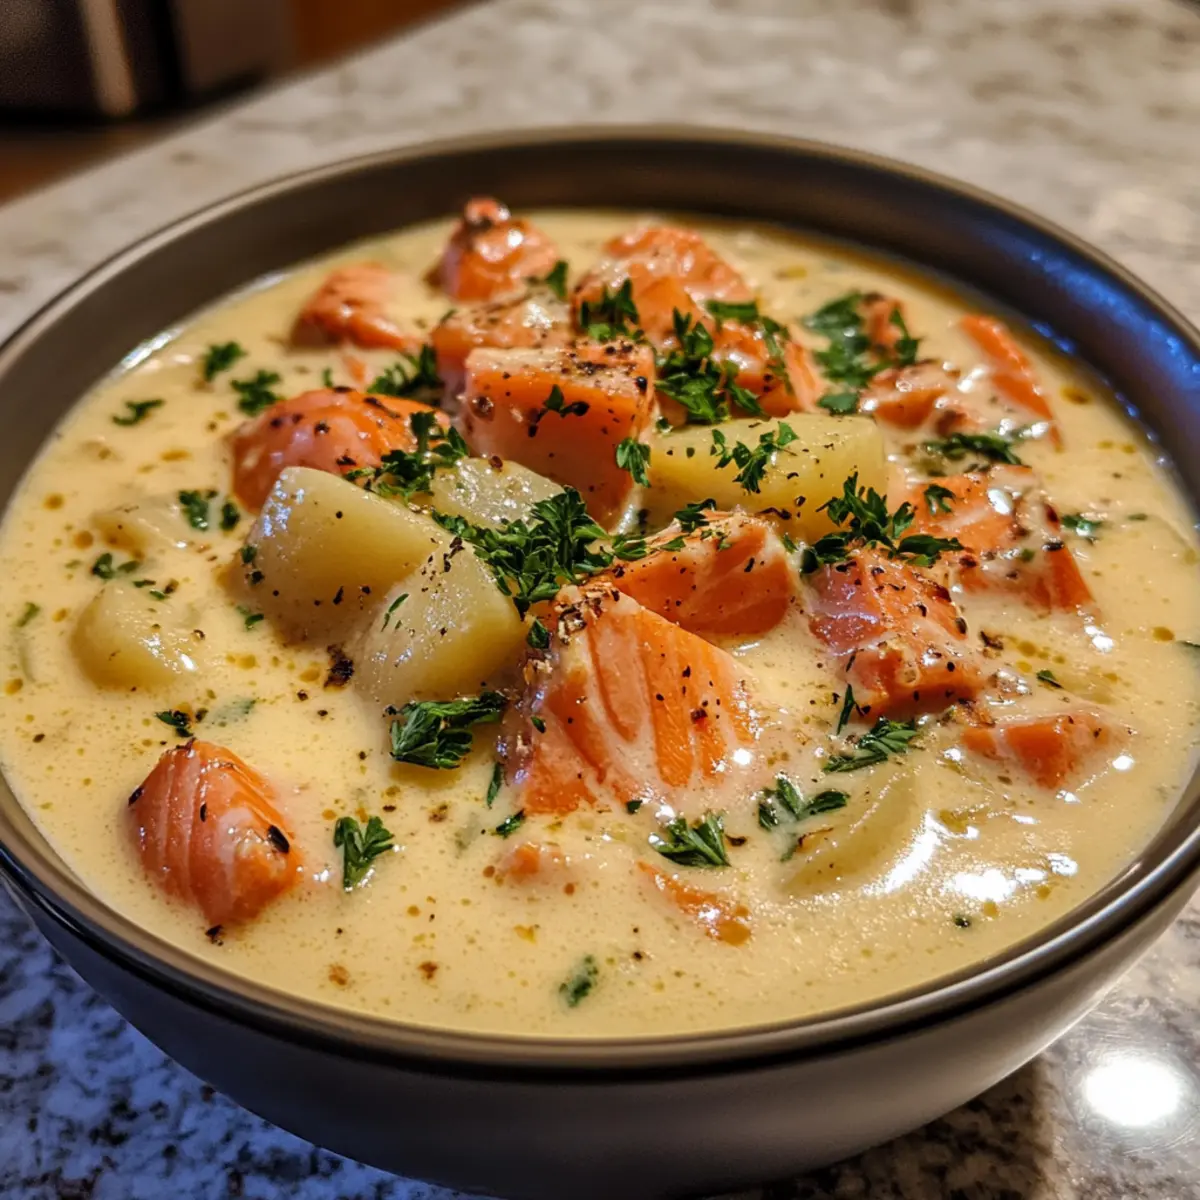
Creamy Smoked Salmon Chowder for Cozy Nights

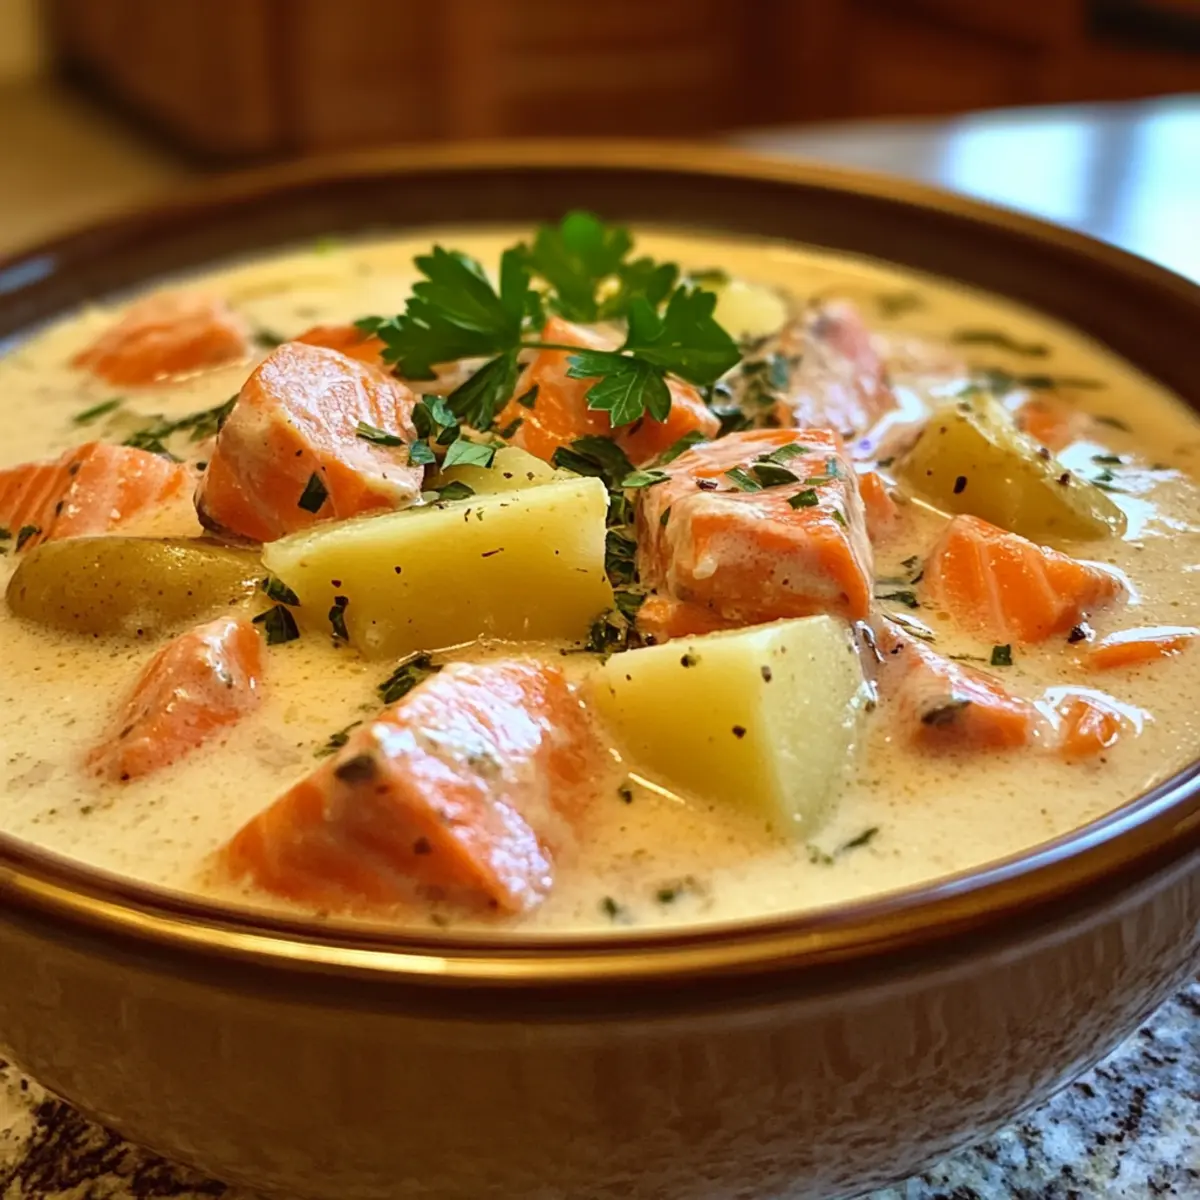
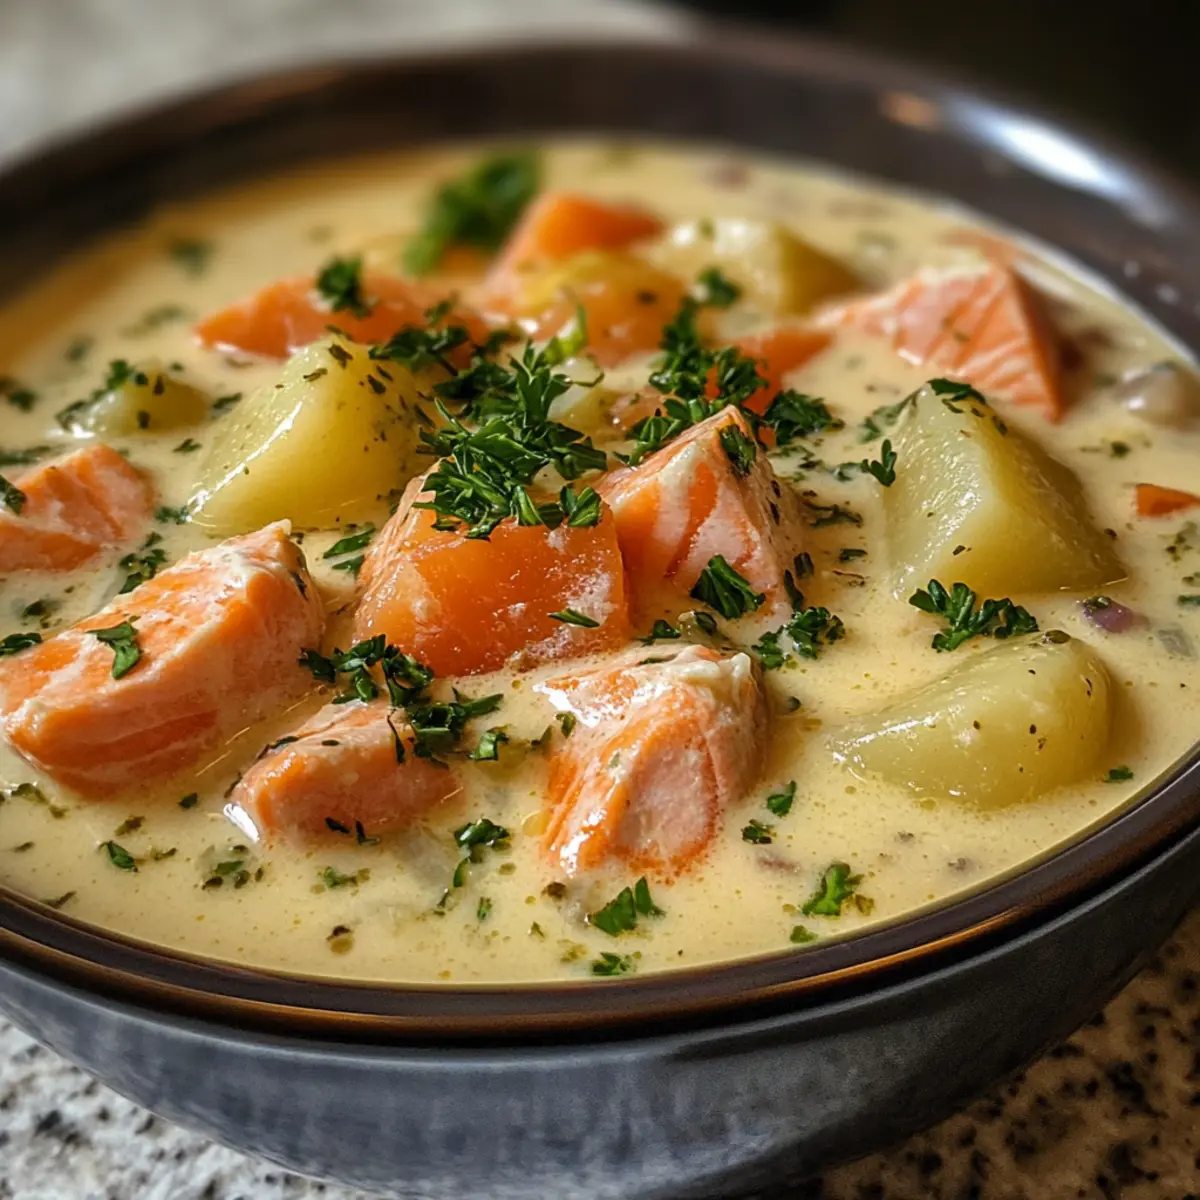
As I was stirring a pot of soup on a particularly chilly evening, the aroma of hot-smoked salmon wafted through my kitchen, instantly transporting me to cozy nights by the seaside. This Creamy Smoked Salmon Chowder is more than just a comforting treat; it captures that magic in a bowl. With tender potatoes and a rich, creamy base, it’s the perfect antidote to a hectic day, inviting everyone to gather around the table. You won’t believe how easily this gourmet delight can be made at home, allowing you to impress guests without breaking a sweat. As comfort food goes, this chowder stands out for its heartiness and the delightful seafood twist it brings to your menu. So, are you ready to warm up your kitchen and your soul with a bowl of this irresistible chowder?

What Makes This Chowder a Must-Try?

Irresistible Comfort: This chowder is the epitome of comfort food, with creamy textures that hug your senses.
Flavor Explosion: The hot-smoked salmon adds an exceptional depth of flavor, making each spoonful a gourmet experience.
Quick and Easy: With simple ingredients and easy steps, anyone can whip up this delightful dish at home.
Crowd-Pleaser: Perfect for family dinners or gatherings, it’s sure to wow guests and spark conversations.
Versatile Options: With ideas to customize, such as using smoked trout or swapping in veggies, this chowder caters to every palate. Dive into a bowl and enjoy the cozy warmth it brings!

Smoked Salmon Chowder Ingredients

For the Chowder Base
Hot-Smoked Salmon – Provides a rich, smoky flavor; avoid cold-smoked varieties for the best texture.
Butter – Adds richness and depth to the chowder.
Onions – Creates a flavorful foundation; cook until translucent for a touch of sweetness.
Celery – Offers crunch and aromatic flair to the mix.
Garlic – Enhances overall flavor; sauté until fragrant.
Diced Potatoes – Contributes heartiness; dice into uniform ½ inch cubes for even cooking.

For Flavor & Seasoning
Fennel Seeds – Introduces a gentle anise flavor; crush before adding for better release.
Bay Leaves & Dried Basil – Add aromatic depth; be sure to remove bay leaves before serving.
Diced Tomatoes – Brightens the chowder with acidity; canned versions save time.
Stock (vegetable or chicken) – Forms the chowder’s liquid base; opt for low-sodium to control saltiness.
Capers – Adds a briny kick to complement the salmon; include the brine for extra seasoning.
Tomato Paste – Thickens the chowder while intensifying tomato flavor.

For Creaminess & Garnish
Cream Cheese – Essential for achieving that dreamy, creamy texture; ensure it melts smoothly.
Heavy Cream – Delivers a luxurious mouthfeel; stir in at low heat to prevent curdling.
Shrimp – A delightful seafood addition for protein; add just before serving to prevent overcooking.
Old Bay Seasoning (optional) – Enhances the ocean flavors, perfect for a signature touch.

Embrace the warmth and flavor of this Smoked Salmon Chowder, and get ready for comfort in every bite!

Step‑by‑Step Instructions for Creamy Smoked Salmon Chowder

Step 1: Melt Butter
In a large pot or Dutch oven, melt 2 tablespoons of butter over medium-high heat. As the butter sizzles and bubbles gently, get ready to create a flavorful base for your chowder. This step should take about 1-2 minutes, allowing the butter to become fragrant without browning.

Step 2: Sauté Vegetables
Add 1 diced onion and 1 chopped celery stalk to the pot. Sauté these aromatic vegetables for 6-8 minutes until they become translucent and begin to soften. Stir occasionally to ensure even cooking, and enjoy the enticing aroma filling your kitchen as the onion and celery blend together beautifully.

Step 3: Add Garlic and Potatoes
Next, mix in 3 minced garlic cloves and 2 cups of diced potatoes cut into uniform ½ inch cubes. Cook these for about 3-4 minutes, stirring frequently until the garlic is fragrant and the potatoes start to soften slightly. This adds depth to your creamy smoked salmon chowder.

Step 4: Incorporate Spices and Stock
Crush 1 teaspoon of fennel seeds and add them along with 2 bay leaves, 1 teaspoon of dried basil, one 14-ounce can of diced tomatoes, and 2 ½ cups of stock (vegetable or chicken). Bring the mixture to a gentle rolling boil, letting the flavors meld for about 2-3 minutes.

Step 5: Simmer Until Tender
Reduce the heat and let the chowder simmer uncovered for 8-15 minutes, or until the potatoes are fork-tender. Cover the pot to help retain heat and speed up cooking, ensuring a nice, thick consistency for your creamy smoked salmon chowder.

Step 6: Mix in Tomato Paste and Cream Cheese
Stir in 2 tablespoons of tomato paste and 4 ounces of cream cheese, mixing thoroughly until smooth. This will thicken your chowder and enhance the richness. Allow it to simmer on low heat for about 3-5 minutes, avoiding any boiling to keep the cream from curdling.

Step 7: Add Heavy Cream
Slowly pour in 1 cup of heavy cream while gently stirring the chowder. Reduce the heat to low and let it warm through for another 5 minutes. The cream infuses a luxurious texture, transforming your soup into a velvety creamy smoked salmon chowder that everyone will love.

Step 8: Finish with Seafood
Finally, add 8 ounces of shrimp and 6 ounces of hot-smoked salmon, stirring just until heated through, which should take about 3-4 minutes. Be careful not to overcook the seafood; it should remain tender and flaky, enhancing the delightful seafood essence of your chowder.

Step 9: Serve and Enjoy
Serve the chowder immediately in warm bowls, garnished with fresh herbs or a sprinkle of Old Bay seasoning if desired. This creamy smoked salmon chowder is rich and inviting, perfect for cozy nights in that will surely make you feel at home!

What to Serve with Creamy Smoked Salmon Chowder

Cozying up with a bowl of this chowder is only part of the charm; let’s create a full meal that warms the heart even more.

  • Crusty Sourdough Bread: Perfect for dipping, this bread’s chewy crust pairs beautifully with the chowder’s creamy texture.

  • Oyster Crackers: These light, crispy bites add a delightful crunch and are a classic accompaniment to any soup.

  • Mixed Green Salad with Lemon Vinaigrette: The freshness of greens and zesty dressing cuts through richness, complementing the chowder brilliantly.

  • Roasted Asparagus: Slightly charred and tender spears bring a lovely balance; they add a touch of earthiness to your meal.

  • Herbed Garlic Butter Shrimp: Elevate the seafood experience by pairing this chowder with succulent shrimp drizzled in fragrant garlic butter.

  • Chardonnay or Rosé: A light wine will harmonize beautifully, enhancing the smoky notes of the salmon while uplifting the overall dining experience.

These pairings not only elevate your chowder but also remind us of the joy of sharing a heartwarming meal with loved ones. Grab your loved ones, gather around, and enjoy the comforting flavors!

How to Store and Freeze Smoked Salmon Chowder

Fridge: Store in an airtight container for up to 3 days; flavors deepen as it sits, making it even more delectable when reheated.

Freezer: If you want to save leftovers, use freezer-safe containers and freeze for up to 2 months—remember to leave space for expansion.

Reheating: When ready to enjoy, reheat on medium-low heat to preserve creaminess; if it’s too thick, stir in a splash of broth or cream to achieve your desired consistency.

Make Ahead Options

These Creamy Smoked Salmon Chowder preparations are perfect for busy weeknights! You can chop the vegetables (onions, celery, and potatoes) and store them in an airtight container in the refrigerator for up to 3 days to save valuable time. Additionally, you can prepare the chowder base (without the seafood and cream) and refrigerate it for up to 24 hours; this helps to intensify the flavors. When you’re ready to enjoy your chowder, simply heat the base, then stir in the heavy cream, shrimp, and hot-smoked salmon, cooking until heated through. This way, you’ll have a comforting, restaurant-quality dish on the table in no time!

Expert Tips for Smoked Salmon Chowder

  • Quality Ingredients: Use high-quality hot-smoked salmon; avoid cold-smoked varieties as they yield different textures that may not work in this chowder.
  • Seasoning Balance: Taste as you go! Keep an eye on salt levels, especially with stock and capers; you want the flavors to shine without overwhelming.
  • Gentle Simmer: After adding heavy cream, avoid boiling to prevent curdling. A low, gentle simmer allows flavors to meld beautifully while keeping the chowder silky.
  • Uniform Chop: Cut potatoes into uniform ½ inch cubes. This ensures even cooking and prevents some pieces from turning mushy while others stay hard.
  • Add Seafood Last: To keep shrimp and salmon tender, add them at the end of cooking; heat gently to maintain their delightful texture.

Smoked Salmon Chowder Variations

Feel free to get creative with your chowder and tailor it to your taste or dietary preferences!

  • Smoky Swap: Use smoked trout instead of hot-smoked salmon for a delightful flavor change. This will provide a similar richness while offering a unique twist to your chowder.

  • Vegetarian Delight: Omit the seafood and add mushrooms for a meaty texture. Sauté the mushrooms until golden before adding them to the chowder, enriching the overall flavor experience.

  • Creamy Vegan Option: Replace butter with coconut oil and use plant-based cream cheese along with coconut milk for a creamy, vegan-friendly chowder that still satisfies.

  • Spicy Kick: For a flavorful heat boost, add diced jalapeños or a dash of your favorite hot sauce. It’ll bring an exciting warmth that pairs nicely with the smoky flavors.

  • Herb-Infused: Elevate flavors with fresh herbs such as dill or parsley. Stir them in just before serving for a burst of freshness that brightens each spoonful!

  • Extra Protein: If you’re craving more seafood, toss in some cooked crab or scallops towards the end of cooking, giving your chowder that deluxe touch reminiscent of a seaside feast.

  • Cheesy Goodness: Mix in some shredded cheese like cheddar or Gruyere while stirring to create an extra creamy and cheesy chowder. This delightful addition works like a charm on chilly evenings.

  • Tomato Boost: For those who love a touch of acidity, consider adding an extra can of diced tomatoes or a splash of white wine to deepen the flavor profile, giving it a tangy twist.

Whether you’re opting for a seafood medley with my Smoked Salmon Potato recipe or wanting a classic comfort like Summer Corn Chowder, the possibilities with chowder are limitless! Enjoy experimenting and making it your own!

Creamy Hot-Smoked Salmon Chowder Recipe FAQs

What type of smoked salmon should I use for this chowder?
Absolutely, use hot-smoked salmon as it provides the rich, smoky flavor essential for the chowder. Cold-smoked salmon (lox) tends to be too delicate and won’t hold its texture well in hot preparations. If hot-smoked salmon isn’t available, smoked trout is a fantastic alternative that maintains a similar flavor profile.

How long can I store leftover chowder in the fridge?
You can store your creamy smoked salmon chowder in an airtight container in the fridge for up to 3 days. Interestingly, the flavors can deepen as it sits, making the soup even more delicious when reheated. Just be sure to check for any visual changes before consuming, like dark spots or separation.

Can I freeze smoked salmon chowder?
Yes, you can freeze leftovers! Transfer the chowder to freezer-safe containers, leaving some space for expansion, and it can last for up to 2 months. To reheat, thaw overnight in the fridge and gently warm on the stove over medium-low heat, adding a splash of broth or cream to restore creaminess.

What should I do if my chowder is too thick after reheating?
If your chowder has thickened too much, no worries! Just add a bit of broth or heavy cream while gently stirring over low heat until you reach your desired consistency. Remember to stir often to ensure an even blend and to prevent sticking to the bottom of the pot.

Are there any dietary considerations I should be aware of?
Great question! This chowder contains seafood and dairy, so if anyone at your table has allergies, be sure to make adjustments. For a dairy-free or lactose-free version, you can substitute the heavy cream with coconut milk or a plant-based cream. Additionally, you can omit the shrimp or replace it with mushrooms for a vegetarian option.

What should I do if my seafood overcooked?
If your shrimp or salmon has become tough from cooking too long, try to salvage the chowder by adding more liquid and gently warming it on low heat. Try incorporating fresh herbs or a squeeze of lemon juice to revitalize flavors and make the dish feel bright. Remember, seafood should be tender and flaky, and adding some fresh ingredients can help reinvigorate the chowder!

Smoked Salmon Chowder

Creamy Smoked Salmon Chowder for Cozy Nights

This Creamy Smoked Salmon Chowder is a comforting delight, perfect for cozy nights.
Prep Time 15 minutes
Cook Time 40 minutes
Total Time 55 minutes
Servings: 4 bowls
Course: Dinner
Cuisine: Seafood
Calories: 450

Ingredients
  

For the Chowder Base
  • 6 ounces Hot-Smoked Salmon Avoid cold-smoked varieties for best texture.
  • 2 tablespoons Butter
  • 1 medium Onion Diced.
  • 1 stalk Celery Chopped.
  • 3 cloves Garlic Minced.
  • 2 cups Diced Potatoes Cut into uniform ½ inch cubes.
For Flavor & Seasoning
  • 1 teaspoon Fennel Seeds Crushed.
  • 2 leaves Bay Leaves Remove before serving.
  • 1 teaspoon Dried Basil
  • 14 ounces Diced Tomatoes Canned.
  • 2.5 cups Stock Vegetable or chicken, low-sodium recommended.
  • 2 tablespoons Capers Include the brine.
  • 2 tablespoons Tomato Paste
For Creaminess & Garnish
  • 4 ounces Cream Cheese Ensure it melts smoothly.
  • 1 cup Heavy Cream Stir in at low heat.
  • 8 ounces Shrimp Add just before serving.
  • to taste Old Bay Seasoning Optional.

Equipment

  • large pot or Dutch oven

Method
 

Step-by-Step Instructions
  1. Melt 2 tablespoons of butter in a large pot over medium-high heat for 1-2 minutes.
  2. Add 1 diced onion and 1 chopped celery stalk and sauté for 6-8 minutes until translucent.
  3. Mix in 3 minced garlic cloves and 2 cups of diced potatoes, cooking for 3-4 minutes.
  4. Add 1 teaspoon of crushed fennel seeds, 2 bay leaves, 1 teaspoon of dried basil, 14 ounces canned diced tomatoes, and 2 ½ cups of stock; bring to a rolling boil for 2-3 minutes.
  5. Reduce heat and simmer uncovered for 8-15 minutes until potatoes are fork-tender.
  6. Stir in 2 tablespoons of tomato paste and 4 ounces of cream cheese until smooth; simmer on low for 3-5 minutes.
  7. Slowly pour in 1 cup of heavy cream, stirring gently; warm through for another 5 minutes.
  8. Finally, add 8 ounces of shrimp and 6 ounces of hot-smoked salmon, stirring just until heated through for 3-4 minutes.
  9. Serve immediately in warm bowls, garnished with fresh herbs or Old Bay seasoning.

Nutrition

Serving: 1bowlCalories: 450kcalCarbohydrates: 30gProtein: 25gFat: 25gSaturated Fat: 12gPolyunsaturated Fat: 5gMonounsaturated Fat: 6gCholesterol: 100mgSodium: 800mgPotassium: 700mgFiber: 3gSugar: 5gVitamin A: 800IUVitamin C: 12mgCalcium: 150mgIron: 2mg

Notes

Use high-quality hot-smoked salmon; ensure even cooking by chopping potatoes uniformly; add seafood at the end for tenderness.

Tried this recipe?

Let us know how it was!

Savor the Flavor: Delicious Green Olive Soup You’ll Love

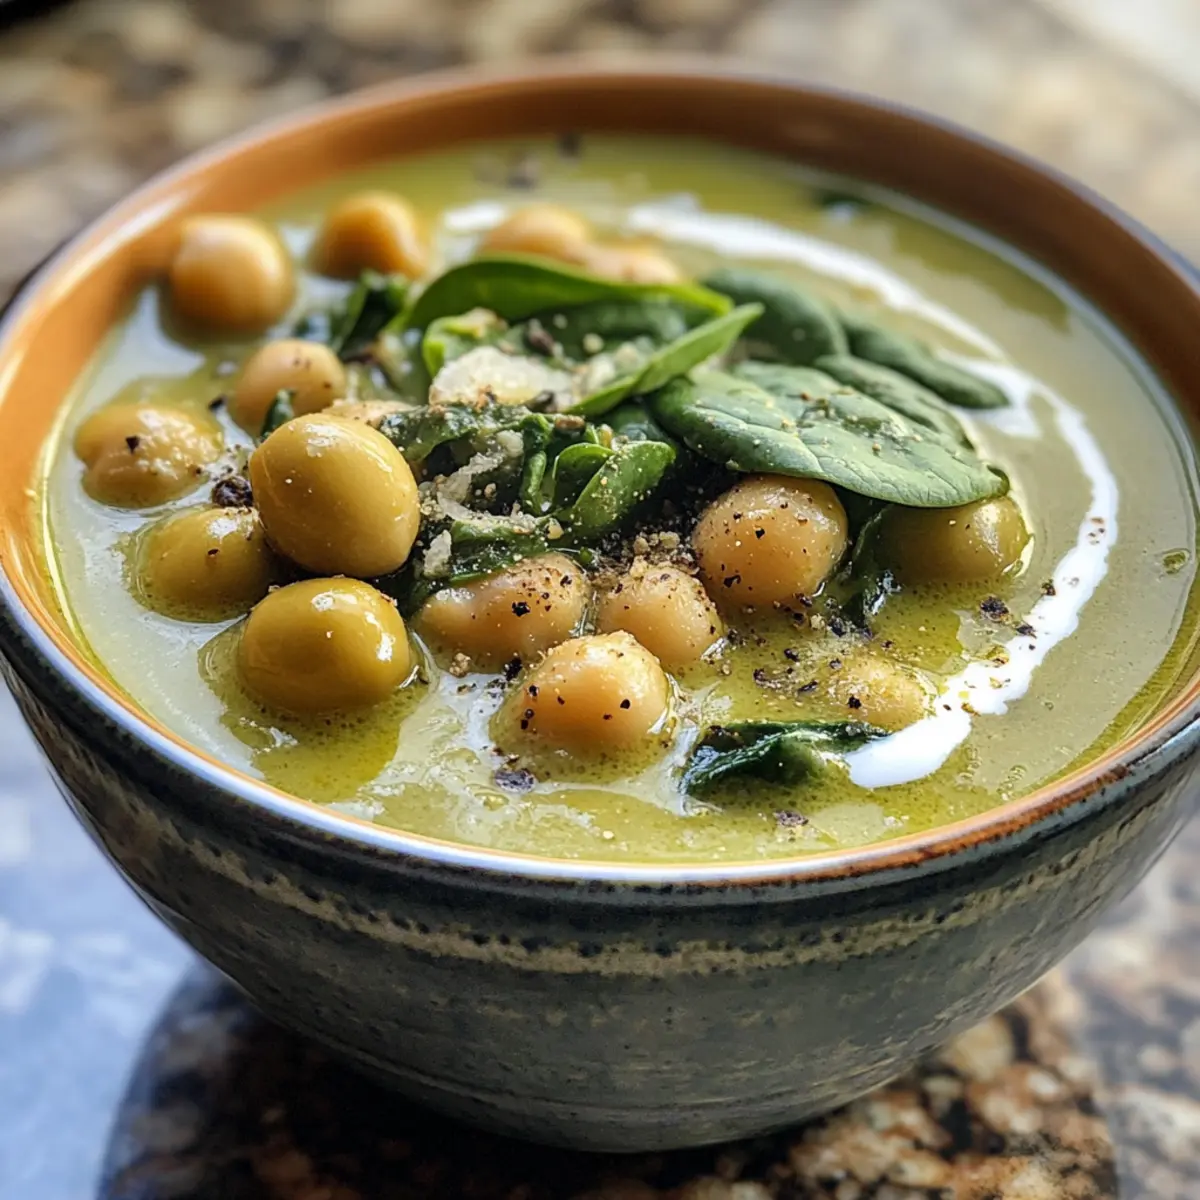
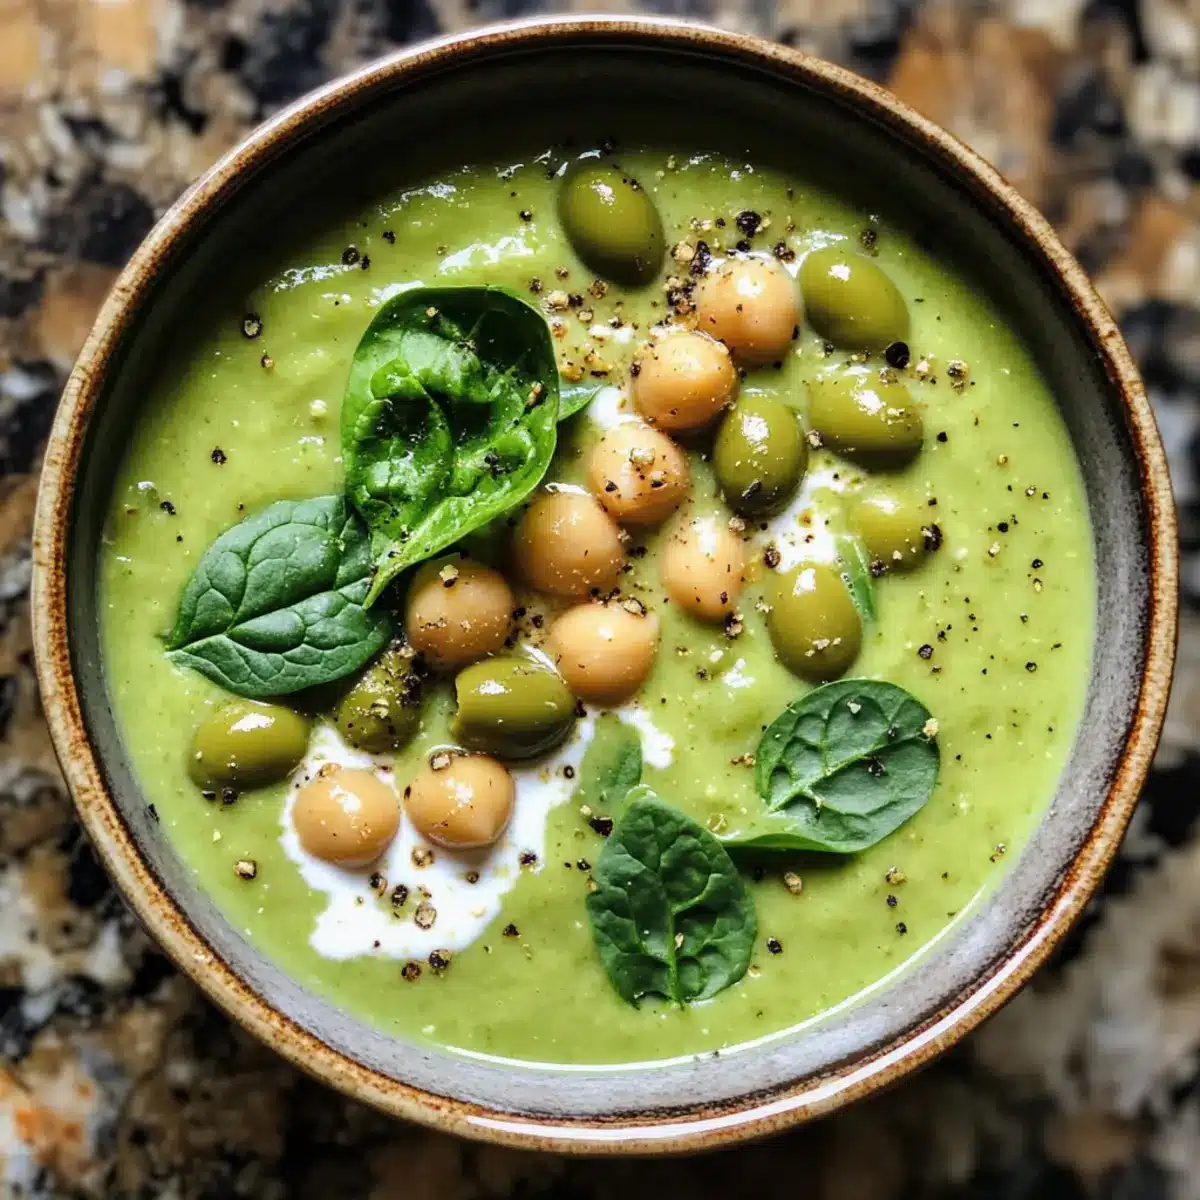
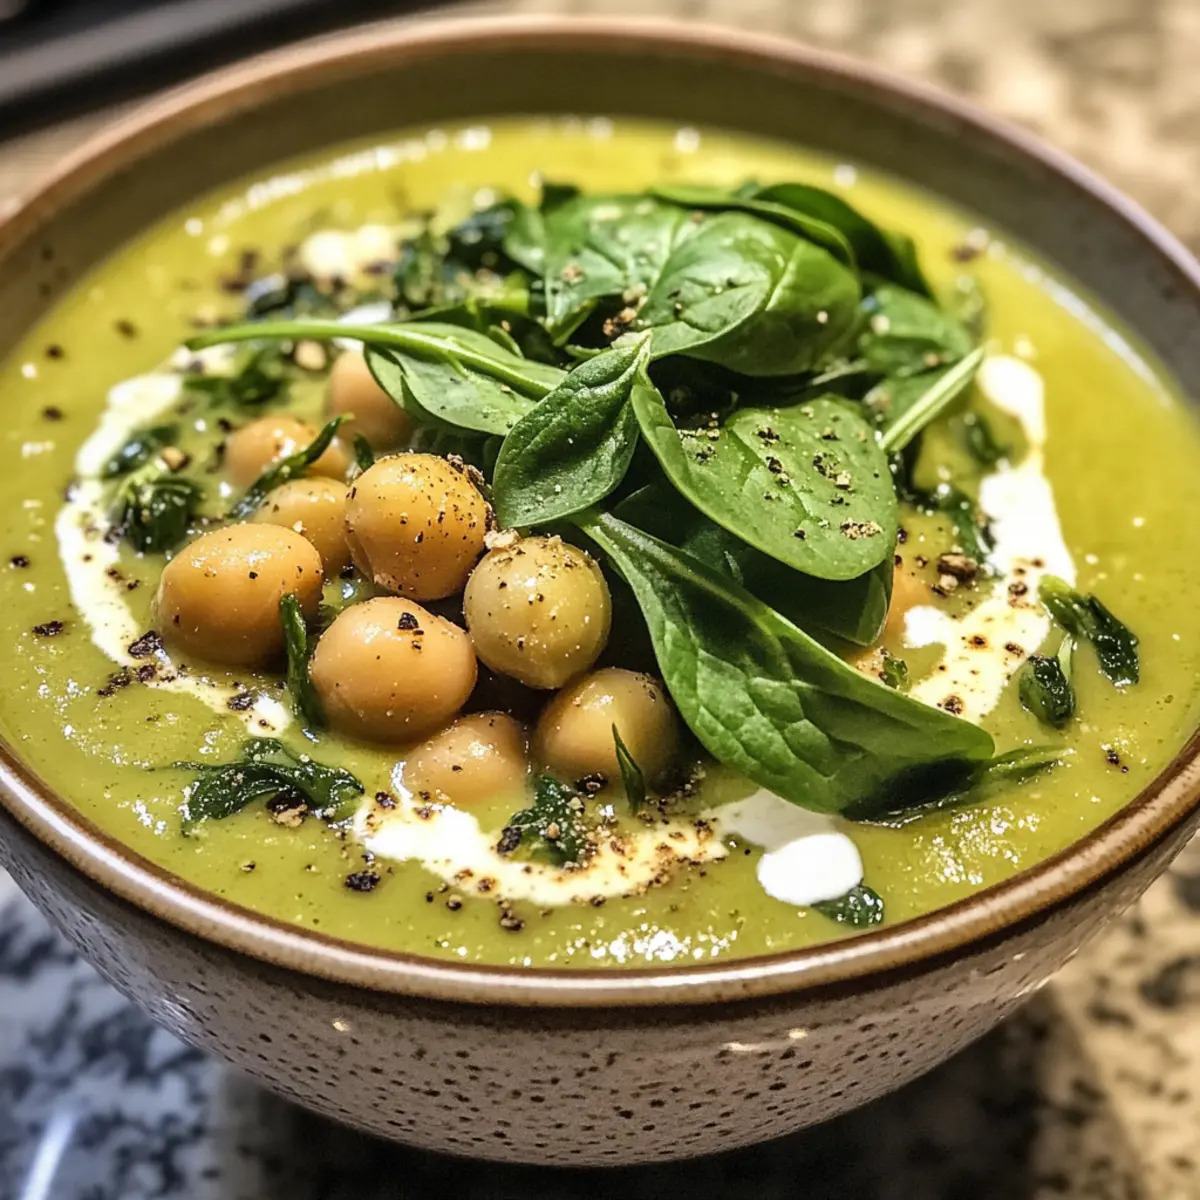
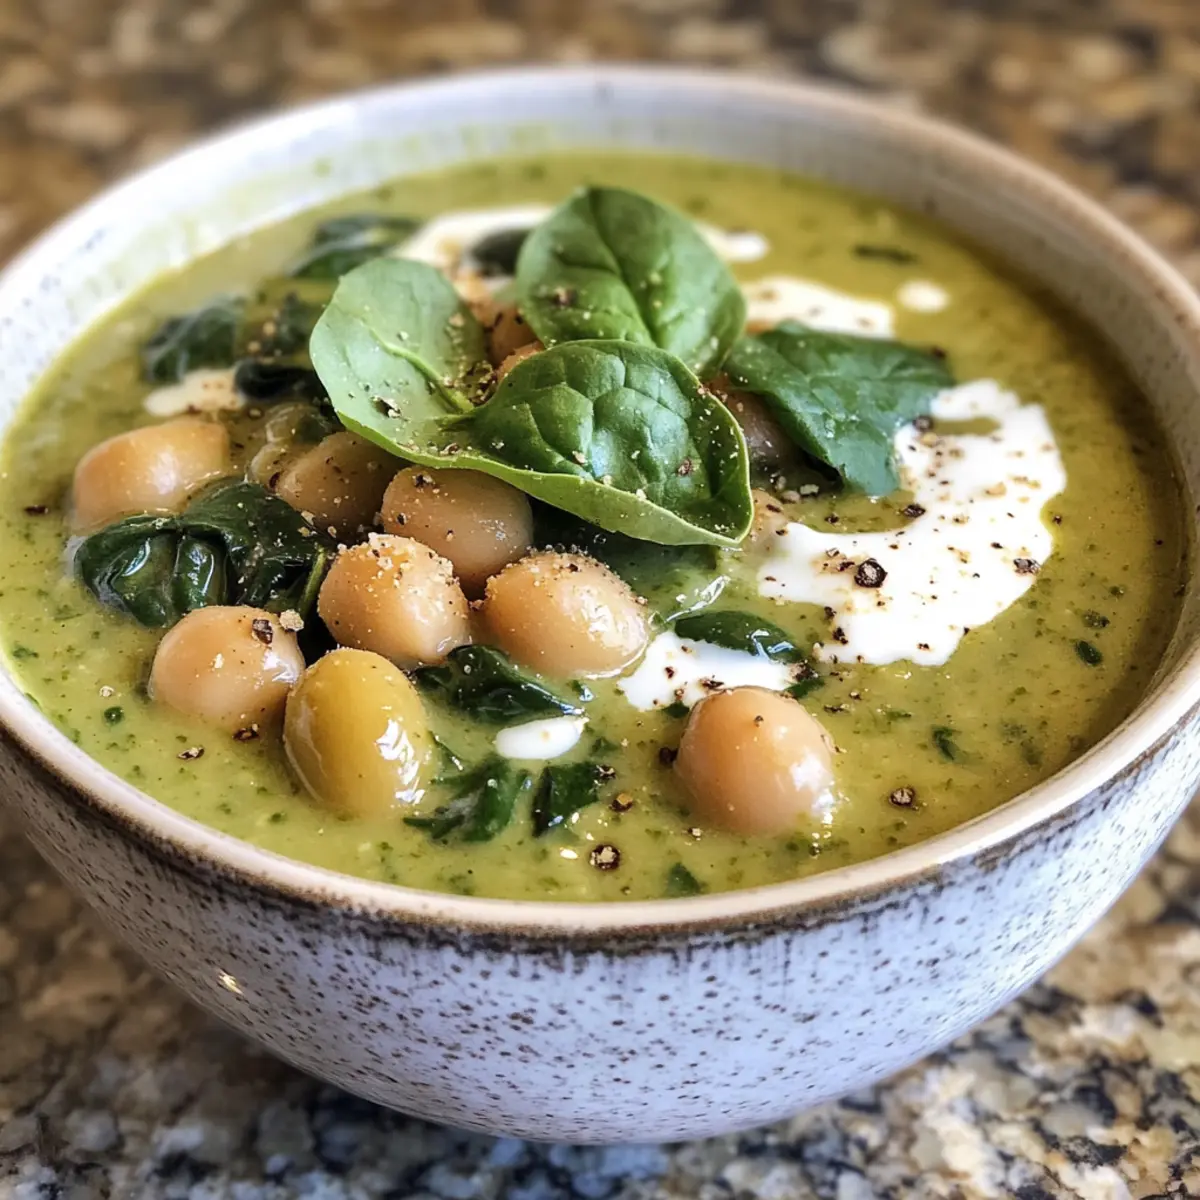
The aroma of sizzling garlic and warm olive oil fills the air, instantly transporting me to a cozy Mediterranean kitchen. Today, I’m excited to share my cherished recipe for Delicious Green Olive Soup—a comforting bowl of warmth perfect for weeknights when you crave something homemade yet quick to prepare. In just 35 minutes, this creamy soup combines briny green olives, luscious coconut, and hearty chickpeas, making it a true delight for your taste buds. Whether you’re embracing a healthier lifestyle or simply tired of fast food, this dish offers an irresistible solution with its gluten-free and vegan options. Each spoonful is designed to wrap you in a warm hug, transporting you to sunlit shores. Curious about how to customize your bowl for maximum enjoyment? Let’s dive into the details!

Why is Green Olive Soup so popular?

Ultimate Comfort Food: This Delicious Green Olive Soup wraps you in warmth, making it a go-to dish on chilly evenings.

Quick Prep Time: Ready in just 35 minutes, it’s a lifesaver for busy weeknights when homemade meals are a must.

Versatile Variations: Whether you’re craving a spicy kick or a creamy vegan delight, this soup can be tailored to suit any palate.

Packed with Nutrients: With ingredients like chickpeas and spinach, it’s not just delicious; it’s nourishing too.

Mediterranean Magic: The robust flavors of olives and herbs will transport you to a sun-kissed Mediterranean kitchen, elevating your mealtime experience.

Pair it with a crunchy garlic bread or a light salad for the perfect meal!

Delicious Green Olive Soup Ingredients

For the Soup Base

  • Olive oil – Adds richness and is essential for sautéing; use any neutral oil if preferred.
  • Onion – Provides aromatic base flavor; substitute with shallots for a milder taste.
  • Garlic – Enhances overall flavor; fresh is best, but garlic powder can be used in a pinch.
  • Tomato paste – Adds depth and sweetness; can be replaced with pureed tomatoes if unavailable.
  • Fresh oregano – Brings Mediterranean flavor; dried oregano can be used at a 1:3 ratio.
  • Fresh thyme – Complements the soup’s herbal notes; substitute with Italian seasoning if necessary.
  • Sundried tomatoes – Offers tangy sweetness; fresh tomatoes can also be used, but adjust for moisture.
  • Chickpeas – Provide protein and texture; canned chickpeas are convenient, but dried need soaking.
  • Orzo – Contributes heartiness; substitute with gluten-free pasta or quinoa for gluten-free options.
  • Vegetable stock – Forms the broth base and adds flavor; chicken stock can be used for non-vegetarian options.

For the Flavor Finish

  • Green olives – Impart a briny kick for depth; Castelvetrano or kalamata are ideal—make sure they are pitted.
  • Coconut cream – Provides creaminess without dairy; cashew cream can substitute for a nutty flavor.
  • Baby spinach – Adds nutrients and vibrant color; kale or Swiss chard can be substituted for variety.
  • Salt & black pepper – Essential for seasoning; adjust according to personal taste preferences.

Enjoy this Delicious Green Olive Soup as a comforting weeknight meal, and feel free to experiment with the variations to make it your own!

Step‑by‑Step Instructions for Delicious Green Olive Soup

Step 1: Sauté Aromatics
In a large pot, heat 2 tablespoons of olive oil over medium heat. Once shimmering, add 1 diced onion and sauté until softened and translucent, about 5 minutes. The aroma will begin to fill your kitchen, making it hard to resist! Just before the onion begins to brown, proceed to the next step.

Step 2: Add Garlic and Seasoning
To the sautéed onion, add 3 cloves of chopped garlic and cook for 1 minute until fragrant. Stir in 2 tablespoons of tomato paste, 1 teaspoon of fresh oregano, and 1 teaspoon of fresh thyme, cooking for another 2 minutes. This will create a wonderfully aromatic base for your Delicious Green Olive Soup.

Step 3: Incorporate Ingredients
Add ½ cup of sundried tomatoes, 1 can of drained chickpeas, and ½ cup of orzo to the pot. Pour in 4 cups of vegetable stock, stirring well to combine. Increase the heat slightly to bring the mixture to a gentle boil while keeping an eye on it to prevent sticking or burning.

Step 4: Simmer the Soup
Once boiling, reduce the heat to low and let the soup simmer uncovered for about 10 minutes. Stir occasionally to ensure the orzo cooks evenly and becomes tender. By now, the flavors will meld beautifully, and you’ll notice the comforting aroma of Delicious Green Olive Soup wafting through your home.

Step 5: Finish with Green Olives and Spinach
After 10 minutes, stir in 1 cup of pitted green olives, ½ cup of coconut cream, and 2 cups of baby spinach. Cook until the spinach has wilted, about 2–3 minutes. The soup should begin to look creamy and enticing, inviting you to grab your bowl!

Step 6: Adjust Seasoning
Finally, taste your Delicious Green Olive Soup and season with salt and black pepper to your liking. This is the moment to elevate the flavor profile, making it perfectly personal. Let it simmer for an additional minute before serving, ensuring all ingredients are warmed through and ready to enjoy.

Delicious Green Olive Soup Variations

Embark on a flavor adventure by customizing this soup to your heart’s content—there’s no limit to the delicious possibilities!

  • Spicy Kick: Add red pepper flakes or diced jalapeños to heat things up. For a unique twist, consider incorporating chipotle peppers for a smoky flair.

  • Protein Boost: Stir in cooked chicken or turkey for a hearty addition. This will turn your soup into a wholesome meal that puts a wonderful spin on leftovers.

  • Gluten-Free: Use gluten-free pasta or quinoa in place of orzo. This option maintains the satisfying texture, making it suitable for everyone at the table.

  • Creamy Vegan: Swap coconut cream with cashew cream to create an ultra-rich, nutty goodness. Just remember to blend the cashews first for an even creaminess.

  • Citrus Zing: A splash of lemon or lime juice adds a refreshing brightness. It complements the briny olives beautifully, balancing the flavors in a delightful way.

  • Herb Explosion: Experiment with fresh herbs like basil or cilantro for an aromatic twist. Mixing in dill can also create a lovely Mediterranean vibe.

  • Root Veggies: Incorporate diced carrots, sweet potatoes, or even parsnips for a touch of sweetness and added nutrients. You’ll love the extra texture they bring to your bowl!

  • Cheesy Finish: Top your soup with grated parmesan or a sprinkle of nutritional yeast for a delightful umami kick. This melty finish completes the soup with comforting richness.

Make each bowl uniquely yours, and if you’re looking for more Mediterranean-inspired dishes, why not try this Seafood Bisque Soup or Potato Kielbasa Soup to expand your culinary repertoire?

Expert Tips for Delicious Green Olive Soup

Sauté Carefully: Make sure to sauté the onions until just softened to bring out their sweetness without browning them, which can create bitterness.

Cook Orzo Al Dente: Keep an eye on the orzo; cook it until just tender to prevent it from becoming mushy in your Delicious Green Olive Soup.

Adjust Olive Brininess: Taste as you go; adjust the amount of green olives based on your preference for how salty or briny you want the soup.

Cool Before Storing: Let the soup cool completely before storing it in the fridge to maintain its freshness and avoid condensation.

Use Fresh Herbs: Fresh oregano and thyme will significantly elevate the soup’s flavor. If using dried, remember to adjust the ratio accordingly.

How to Store and Freeze Delicious Green Olive Soup

Fridge: Store the soup in an airtight container for up to 3 days. Make sure to cool it completely before refrigerating to preserve its flavors.

Freezer: Freeze the Delicious Green Olive Soup in freezer-safe bags or containers for up to 3 months. Leave some space for expansion, as liquids can expand when frozen.

Reheating: To reheat, thaw overnight in the fridge. Gently warm in a pot over low heat, adding vegetable stock for desired consistency and ensuring a delightful serving every time.

Make Ahead Options

Making your Delicious Green Olive Soup ahead of time is an excellent way to streamline meal prep for busy evenings! You can chop the onions, garlic, sundried tomatoes, and herbs up to 24 hours in advance, storing them in the refrigerator to maintain freshness. The chickpeas can also be rinsed and drained (if using canned) a day ahead. Additionally, consider cooking the orzo slightly underdone before refrigerating; it will continue to cook when reheated. When you’re ready to serve, simply combine the prepped ingredients in a pot, add the vegetable stock, and simmer until heated through, ensuring that each bowl is just as delicious as if it were freshly made!

What to Serve with Delicious Green Olive Soup

Pairing a delicious meal elevates your dining experience and creates memorable moments around the table.

  • Crunchy Garlic Bread: A perfect side for dipping, this toasted delight offers a crunchy contrast to the creamy soup. Its aromatic allure will enhance every spoonful of flavor.

  • Simple Green Salad: A refreshing bed of mixed greens, cherry tomatoes, and a lemon vinaigrette lightens the meal and complements the savory flavors of the soup. The freshness balances the richness beautifully.

  • Savory Cheese Platter: A selection of tangy cheeses like feta or goat cheese adds a delightful creamy edge when enjoyed alongside your soup. Add some crackers or olives for a gourmet touch!

  • Herbed Quinoa: This nutty grain is a great gluten-free option that pairs deliciously with the Mediterranean theme of the soup. Toss in some herbs for an aromatic addition to your meal.

  • Roasted Vegetables: Seasonal veggies drizzled with olive oil and herbs provide a sweet, caramelized counterpart to the soup’s flavors. Their textures create a satisfying balance on your plate.

  • Zesty Lemonade or Iced Tea: A refreshing beverage with a hint of citrus will cleanse your palate between bites. You could even infuse your lemonade with mint for an added burst of freshness!

Each of these pairings helps to create a wholesome, delightful meal showcasing the comforting qualities of your Delicious Green Olive Soup. Enjoy!

Delicious Green Olive Soup Recipe FAQs

What type of green olives should I use?
For the best flavor, I recommend using Castelvetrano or Kalamata olives. These varieties are typically pitted, juicy, and provide a wonderful briny kick that enhances your Delicious Green Olive Soup. Always ensure they are pitted to save yourself the hassle during cooking!

How should I store the Delicious Green Olive Soup?
Cool the soup completely and then transfer it to an airtight container. It can be stored in the fridge for up to 3 days. Be sure to label it with the date so you can enjoy it fresh.

Can I freeze Delicious Green Olive Soup?
Absolutely! You can freeze it in freezer-safe bags or containers for up to 3 months. Just be sure to leave some space in the container for the soup to expand as it freezes. When you’re ready to enjoy it, thaw it overnight in the fridge and reheat gently with a splash of vegetable stock to restore its creamy texture.

What if the soup is too salty?
If you find your Delicious Green Olive Soup is too salty, try adding a little more coconut cream or a diced potato during reheating. The potato will absorb some of the saltiness, balancing the flavors.

Can I make this soup in advance?
Yes, this soup is great for meal prep! Just store it in the fridge for up to 3 days or freeze it for longer storage. Reheat gently before serving, and it will taste just as delightful.

Is this recipe suitable for vegetarians and vegans?
Absolutely! This Delicious Green Olive Soup is naturally vegan and vegetarian, as it uses vegetable stock and no animal products. It’s a great option for anyone looking to enjoy a comforting meal without animal ingredients.

Delicious Green Olive Soup

Savor the Flavor: Delicious Green Olive Soup You’ll Love

Delicious Green Olive Soup is a comforting and quick recipe featuring briny olives, creamy coconut, and hearty chickpeas, perfect for weeknights.
Prep Time 15 minutes
Cook Time 20 minutes
Total Time 35 minutes
Servings: 4 bowls
Course: Dinner
Cuisine: Mediterranean
Calories: 250

Ingredients
  

For the Soup Base
  • 2 tablespoons olive oil or any neutral oil
  • 1 medium onion diced
  • 3 cloves garlic chopped
  • 2 tablespoons tomato paste or pureed tomatoes
  • 1 teaspoon fresh oregano or dried at 1:3 ratio
  • 1 teaspoon fresh thyme or Italian seasoning
  • ½ cup sundried tomatoes or fresh tomatoes
  • 1 can chickpeas drained
  • ½ cup orzo or gluten-free pasta/quinoa
  • 4 cups vegetable stock or chicken stock
For the Flavor Finish
  • 1 cup green olives pitted, Castelvetrano or kalamata
  • ½ cup coconut cream or cashew cream
  • 2 cups baby spinach or kale/Swiss chard
  • Salt & black pepper to taste

Equipment

  • large pot

Method
 

Step-by-Step Instructions
  1. In a large pot, heat 2 tablespoons of olive oil over medium heat. Once shimmering, add 1 diced onion and sauté until softened and translucent, about 5 minutes.
  2. To the sautéed onion, add 3 cloves of chopped garlic and cook for 1 minute until fragrant. Stir in 2 tablespoons of tomato paste, 1 teaspoon of fresh oregano, and 1 teaspoon of fresh thyme, cooking for another 2 minutes.
  3. Add ½ cup of sundried tomatoes, 1 can of drained chickpeas, and ½ cup of orzo to the pot. Pour in 4 cups of vegetable stock, stirring well to combine.
  4. Once boiling, reduce the heat to low and let the soup simmer uncovered for about 10 minutes.
  5. After 10 minutes, stir in 1 cup of pitted green olives, ½ cup of coconut cream, and 2 cups of baby spinach. Cook until the spinach has wilted, about 2–3 minutes.
  6. Finally, taste your soup and season with salt and black pepper. Let it simmer for an additional minute before serving.

Nutrition

Serving: 1bowlCalories: 250kcalCarbohydrates: 30gProtein: 8gFat: 12gSaturated Fat: 8gPolyunsaturated Fat: 1gMonounsaturated Fat: 3gSodium: 600mgPotassium: 750mgFiber: 6gSugar: 4gVitamin A: 2000IUVitamin C: 15mgCalcium: 50mgIron: 3mg

Notes

Feel free to experiment with the variations to make it your own.

Tried this recipe?

Let us know how it was!

Sweet and Salty Caramel Crunch Oyster Crackers You’ll Love

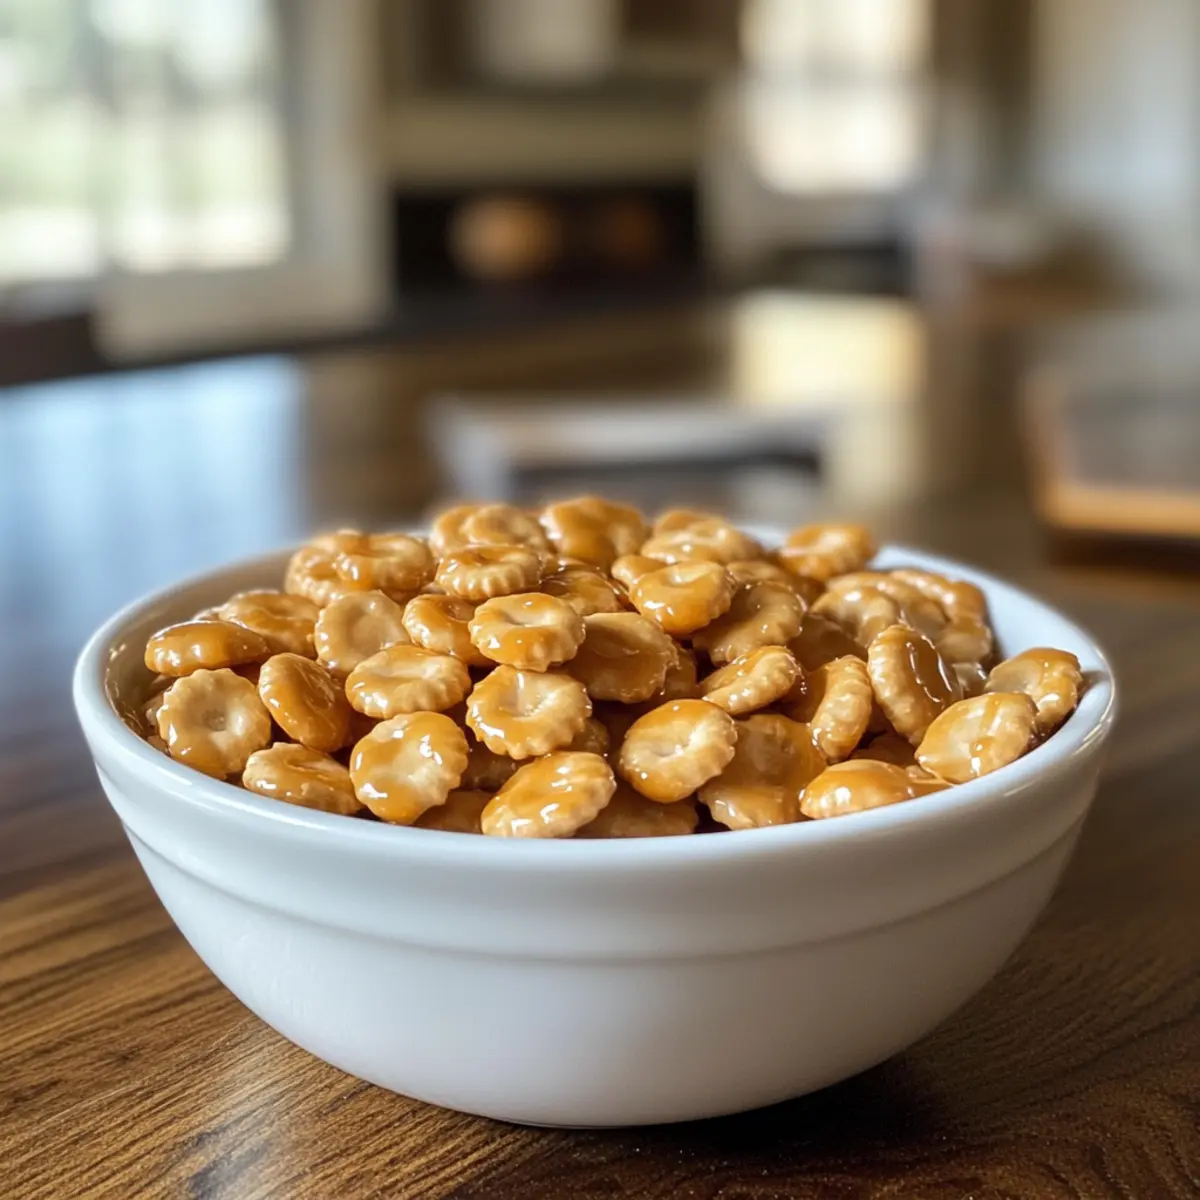
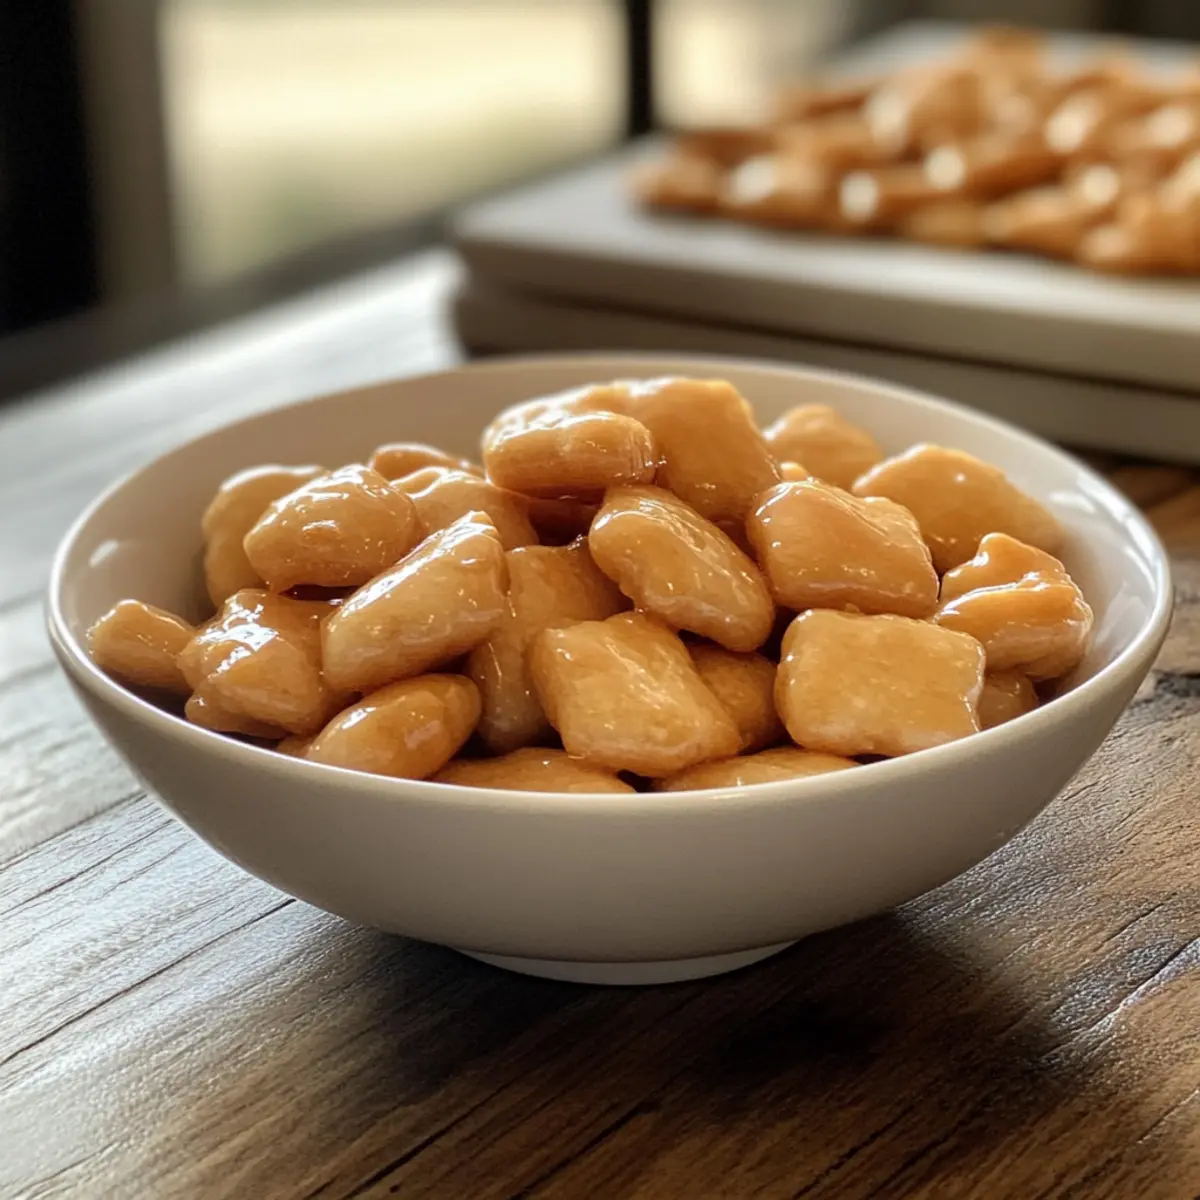
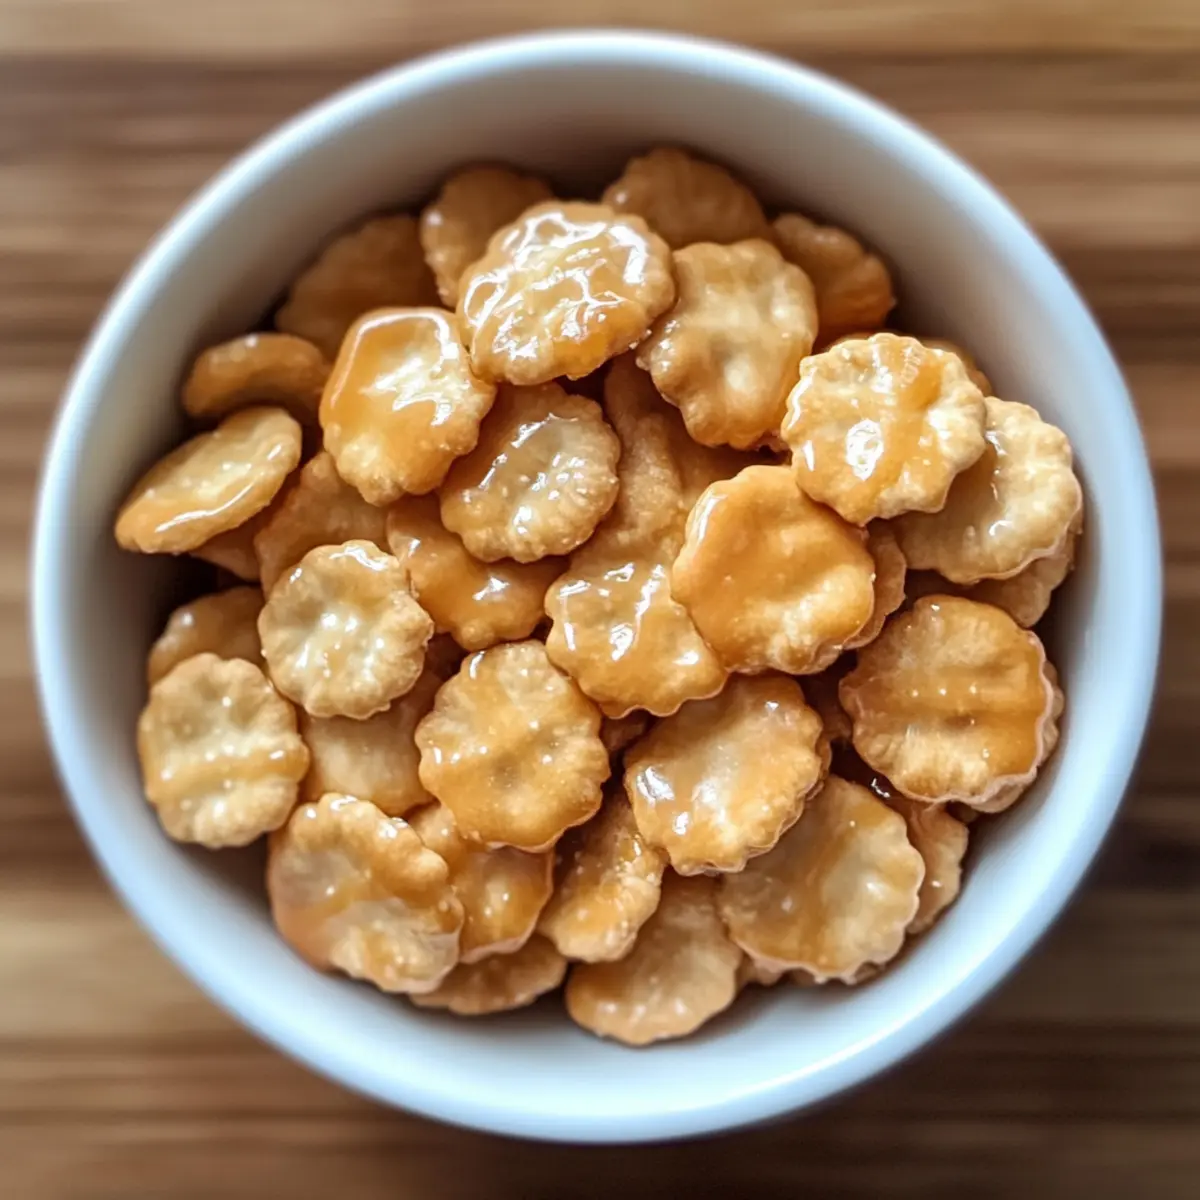
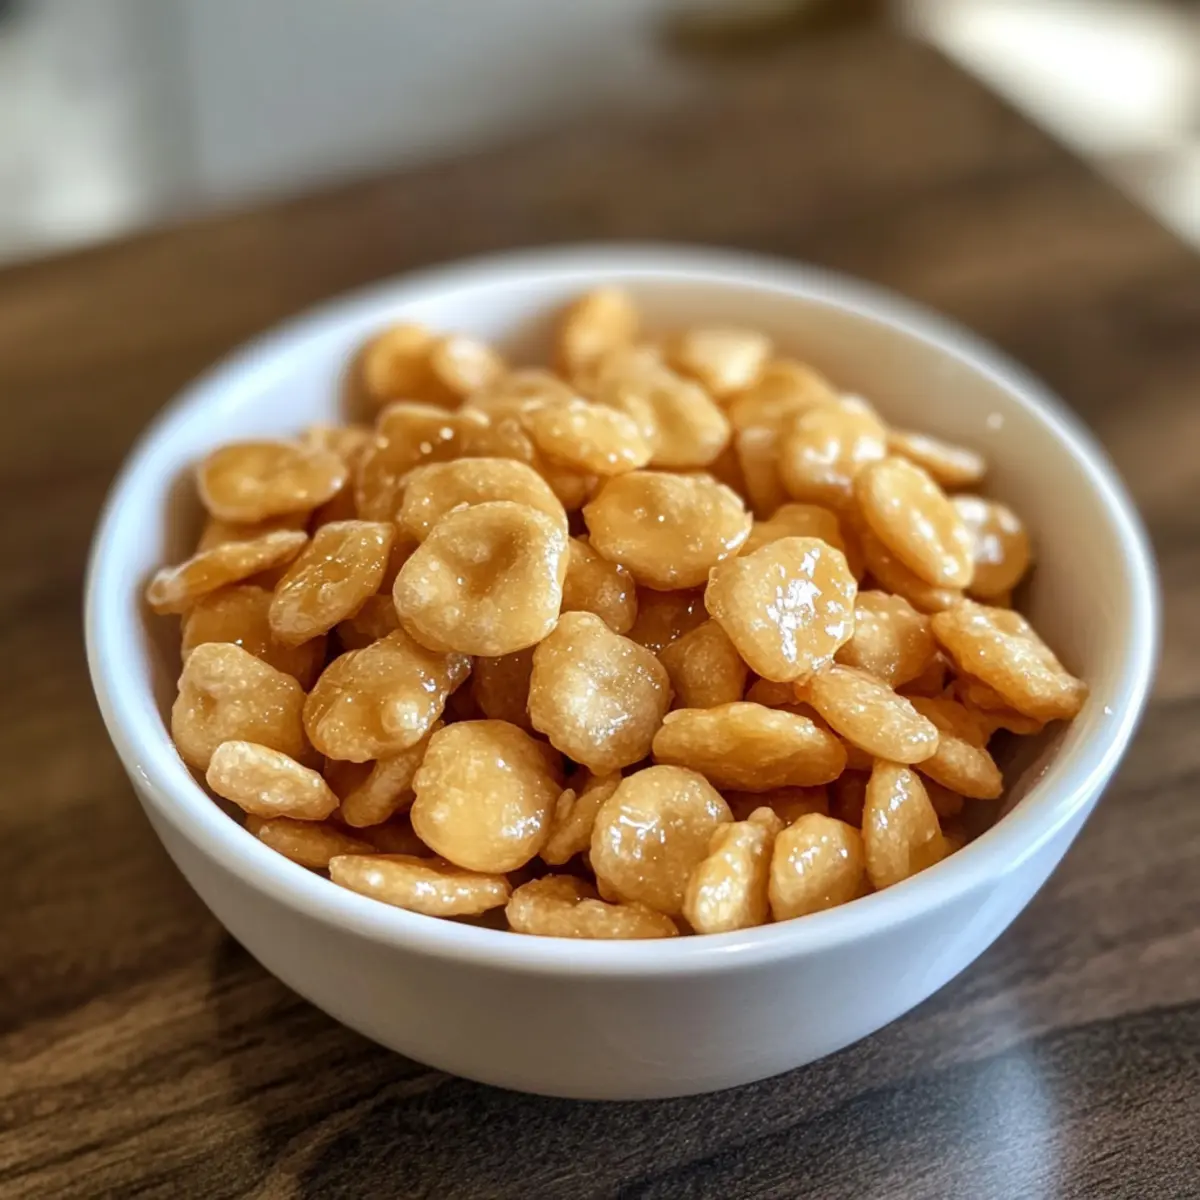
As I rushed through the kitchen, the sweet aroma of melting butter and brown sugar enveloped me like a warm hug. That’s when I decided to whip up a batch of Caramel Crunch Oyster Crackers—a recipe that transforms simple pantry staples into a divine sweet snack! The magic lies in the addictive combination of crispy oyster crackers coated with buttery caramel, creating a treat that’s equal parts sweet and salty. I love how quick and easy this recipe is; it’s perfect for festive gatherings or cozy movie nights when you crave something comforting and indulgent. Plus, it makes an excellent gift when packaged in a charming jar, spreading joy to friends and family alike. Are you ready to crunch into this delightful creation?

Why Are These Crackers Addictive?

Unique Flavor Fusion: The caramel coating perfectly balances buttery sweetness and salty crunch, creating a snack that will make you yearn for more.

Quick Preparation: With just a few steps, you can whip up a batch that will impress your guests or satisfy your sweet tooth!

Versatile Treat: These Caramel Crunch Oyster Crackers are perfect for sharing during holiday gatherings, as a sweet movie snack, or even as thoughtful gifts.

Simple Ingredients: Made with easily accessible pantry staples, this recipe is approachable for cooks of all skill levels.

Crowd-Pleasing Delight: This irresistible mix offers a crunchy twist that’s sure to steal the spotlight, alongside other snacks like Crab Crunchies Snack. Enjoy a delightful experience with every bite!

Caramel Crunch Oyster Cracker Ingredients

For the Caramel Coating
Butter – rich and creamy, it’s the base that brings everything together in this delicious caramel.
Brown Sugar – provides a deep sweetness that beautifully complements the buttery flavor.
Vanilla Extract – enhances the caramel’s warm notes; while optional, it’s highly recommended!
Baking Soda – this ingredient is critical for creating a light and crunchy texture in the caramel coating.
Salt – just a pinch balances the sweetness, enhancing the overall flavor profile of the Caramel Crunch Oyster Crackers.

For the Crackers
Oyster Crackers – the perfect crunchy base that holds the caramel coating beautifully; their size is ideal for snacking.

With these simple ingredients, you’ll be on your way to enjoying delightful Caramel Crunch Oyster Crackers in no time!

Step‑by‑Step Instructions for Caramel Crunch Oyster Crackers

Step 1: Preheat the Oven
Begin by preheating your oven to 250°F (120°C). Line a large baking sheet with parchment paper or foil, ensuring it’s ready to hold the delightful Caramel Crunch Oyster Crackers. This step is crucial as it sets the stage for an even baking process, allowing the caramel to coat the crackers perfectly.

Step 2: Create the Caramel
In a medium saucepan, combine butter and brown sugar over medium heat. Stir the mixture continuously to ensure the butter melts evenly and prevents scorching, allowing it to bubble for about 2-3 minutes. Keep an eye on the caramel, and watch for its golden hue as it thickens, transforming into a rich, glossy consistency that will envelop the oyster crackers.

Step 3: Enhance the Flavor
Once the caramel has bubbled and thickened, carefully remove the saucepan from the heat. Stir in the vanilla extract and sprinkle the baking soda into the mixture. Be prepared for a little foaming action as the baking soda reacts, creating a lighter texture for the caramel coating. This magical moment elevates the flavor, making your Caramel Crunch Oyster Crackers irresistible!

Step 4: Coat the Crackers
In a large mixing bowl, pour the warm caramel over the oyster crackers. Using a spatula, gently mix the crackers and caramel together until each cracker is evenly coated. Take your time with this step, ensuring the buttery caramel envelops every piece, so you get that delicious sweet crunch in every bite of your Caramel Crunch Oyster Crackers.

Step 5: Bake for Crunchiness
Carefully spread the coated oyster crackers onto the prepared baking sheet in an even layer. Bake them in your preheated oven for approximately 45 minutes, stirring every 15 minutes. This ensures that each cracker remains separated and evenly crisp, transforming into the delectable Caramel Crunch Oyster Crackers you’ve been dreaming of.

Step 6: Cool and Serve
Once baking is complete, remove the tray from the oven and let the crackers cool completely on the baking sheet. As they cool, the caramel will harden into a delightful crunch. After cooling, break apart any clumps, and get ready to savor your homemade Caramel Crunch Oyster Crackers. Enjoy them with family or package them as gifts to spread the joy!

Expert Tips for Caramel Crunch Oyster Crackers

  • Storage Secrets: Ensure crackers cool completely before storing in an airtight container. This keeps your Caramel Crunch Oyster Crackers perfectly crunchy!

  • Flavor Variations: Don’t hesitate to add a teaspoon of cinnamon or a handful of chopped nuts to enhance flavor and crunch; it personalizes your delightful creation.

  • Gentle Reheating: If the caramel hardens too quickly, reheat it gently over low heat to make coating the crackers easier and prevent clumping.

  • Gluten-Free Options: If you need to cater to dietary restrictions, opt for certified gluten-free oyster crackers to let everyone enjoy this sweet snack!

  • Avoid Overheating: Watch the caramel carefully while it bubbles; it can easily burn if left unattended. A perfect caramel gives a deep, inviting color without bitterness.

Make Ahead Options

These Caramel Crunch Oyster Crackers are perfect for busy home cooks looking to save time! You can prepare the caramel coating up to 24 hours in advance—simply melt the butter and brown sugar, then store the mixture in an airtight container in the refrigerator. To maintain quality, allow the caramel to come to room temperature before using it to coat the oyster crackers. Additionally, you can measure out and store the oyster crackers separately for up to 3 days. When you’re ready to enjoy your Caramel Crunch Oyster Crackers, just follow the final steps: quickly reheat the caramel if needed, coat the crackers, bake, and they’ll be just as delicious as if made fresh. Enjoy the convenience without compromising on taste!

Caramel Crunch Oyster Crackers Variations

Feel free to let your creativity shine by customizing your Caramel Crunch Oyster Crackers with these delicious variations!

  • Nutty Crunch: Add in chopped pecans or almonds for an extra layer of crunch and flavor. They’ll toast beautifully as the crackers bake!

  • Cocoa Delight: Mix in cocoa powder with the caramel for a chocolatey twist that elevates the sweetness. What a decadent treat that any chocolate lover will adore!

  • Cinnamon Sugar: Sprinkle some cinnamon into the caramel mixture for a warm, comforting flavor. This helps evoke feelings of cozy holidays with every bite.

  • Spicy Kick: Add a pinch of cayenne pepper to the caramel to introduce a delightful heat that complements the sweetness. It’s a fun surprise for daring snackers!

  • Pretzel Swap: Try using mini pretzels instead of oyster crackers for a unique twist on texture. The combination of salty pretzel and sweet caramel is simply irresistible!

  • Almond Extract Boost: Swap vanilla extract for almond extract to give your caramel a new depth of flavor. It’s an unexpected yet delightful change that will impress your taste buds!

  • Seasonal Spice: During the fall, incorporate pumpkin spice into your caramel for a seasonal treat that evokes all the cozy vibes. It’s like autumn in a bite!

  • Mix it Up: Combine different snacks like Cheerios or Rice Chex with the oyster crackers for a crunchy medley! This fun mix will make for an adventurous snack experience.

With all these delightful options, there’s no shortage of ways to tailor your Caramel Crunch Oyster Crackers. Speaking of perfect pairings, how about serving them alongside some delightful Crab Crunchies Snack? The combination will surely be a hit with friends and family!

Storage Tips for Caramel Crunch Oyster Crackers

Airtight Container: Store your Caramel Crunch Oyster Crackers in an airtight container to maintain their crispy texture for up to 1 week.

Room Temperature: Keep the container in a cool, dry place to prevent the caramel from becoming sticky. Avoid areas with high humidity.

Freezing: Freezing is not recommended, as it may cause the caramel to lose its crunch when thawed. Enjoy fresh for the best experience.

Reheating: If the crackers clump together, gently reheat in the oven at a low temperature (around 200°F or 93°C) for a few minutes to restore their crunchiness.

What to Serve with Caramel Crunch Oyster Crackers

Dive into a delightful array of accompaniments that enrich the sweet and salty experience of these irresistible treats.

  • Hot Cocoa: Perfectly paired with the sweet caramel, a warm cup of cocoa will create a cozy, comforting atmosphere.

  • Creamy Vanilla Ice Cream: The luscious ice cream contrasts beautifully with the crunch, elevating your snack into a delectable dessert experience.

  • Nutty Trail Mix: A handful of nutty trail mix adds extra texture and a healthy twist, complementing the cracker’s sweetness with savory elements.

  • Charcuterie Board: Include these crackers on a charcuterie board for a sweet surprise alongside meats and cheeses, charming guests with a variety of flavors.

  • Fresh Fruit Salad: Bright and refreshing, a medley of fruits like strawberries or grapes provides a delightful freshness that balances the sweetness of the crackers.

  • Sparkling Water: A fizzy drink is perfect for cleansing the palate, enhancing the experience with a light and refreshing touch.

Each pairing amplifies the joy of the Caramel Crunch Oyster Crackers, inviting you to explore delicious combinations and create unforgettable moments.

Caramel Crunch Oyster Crackers Recipe FAQs

What type of oyster crackers should I use?
I recommend using plain oyster crackers as they provide the best texture to hold the caramel coating. For those with dietary restrictions, make sure to choose certified gluten-free oyster crackers if needed!

How should I store my Caramel Crunch Oyster Crackers?
Store your Caramel Crunch Oyster Crackers in an airtight container to keep them crisp for up to 1 week. It’s important to keep the container in a cool, dry place, away from humidity, which can make them sticky and lose their delightful crunch.

Can I freeze Caramel Crunch Oyster Crackers?
Freezing is not recommended as it can affect the texture of the caramel, causing it to lose its crunch. It’s best to enjoy them fresh. However, if they do clump together after storage, you can gently reheat them in the oven at approximately 200°F (93°C) for a few minutes to restore their delicious crunchiness.

What can I do if my caramel hardens too quickly?
If your caramel hardens and makes it difficult to coat the crackers, you can gently reheat it over low heat to loosen it up. Stir in a little water or additional butter if necessary to restore a pourable consistency, then coat your crackers as before.

Are there any allergenic ingredients I should consider?
Yes! This recipe contains butter, which is a dairy product. For those with dairy allergies, you could substitute with a nondairy margarine. Also, if you’re adding nuts or using flavored extracts, be sure to consider any allergies associated with those as well.

Caramel Crunch Oyster Crackers

Sweet and Salty Caramel Crunch Oyster Crackers You’ll Love

Delight in the addictive combination of sweet and salty Caramel Crunch Oyster Crackers, perfect for gatherings or cozy nights.
Prep Time 15 minutes
Cook Time 45 minutes
Cooling Time 10 minutes
Total Time 1 hour 10 minutes
Servings: 8 servings
Course: Appetizer
Cuisine: American
Calories: 200

Ingredients
  

For the Caramel Coating
  • 1 cup Butter rich and creamy
  • 1 cup Brown Sugar provides deep sweetness
  • 1 teaspoon Vanilla Extract optional but recommended
  • 1 teaspoon Baking Soda for light texture
  • 1/4 teaspoon Salt balances sweetness
For the Crackers
  • 4 cups Oyster Crackers perfect crunchy base

Equipment

  • Medium saucepan
  • Baking Sheet
  • Spatula
  • Measuring cups
  • Measuring spoons

Method
 

Preparation Steps
  1. Preheat your oven to 250°F (120°C). Line a large baking sheet with parchment paper or foil.
  2. In a medium saucepan, combine butter and brown sugar over medium heat. Stir continuously for about 2-3 minutes until it bubbles and thickens.
  3. Remove from heat, stir in vanilla extract and sprinkle baking soda, watch for foaming action.
  4. Pour the warm caramel over the oyster crackers in a large bowl; mix gently until evenly coated.
  5. Spread coated crackers onto the prepared baking sheet in an even layer and bake for about 45 minutes, stirring every 15 minutes.
  6. Let cool completely on the baking sheet, then break apart any clumps and enjoy!

Nutrition

Serving: 1cupCalories: 200kcalCarbohydrates: 25gProtein: 2gFat: 10gSaturated Fat: 6gPolyunsaturated Fat: 1gMonounsaturated Fat: 3gCholesterol: 30mgSodium: 300mgPotassium: 100mgFiber: 1gSugar: 10gVitamin A: 500IUCalcium: 20mgIron: 1mg

Notes

Store in an airtight container to maintain crunch; can add cinnamon or nuts for variations!

Tried this recipe?

Let us know how it was!

Miso Butter Roasted Cabbage Wedges for a Flavorful Twist

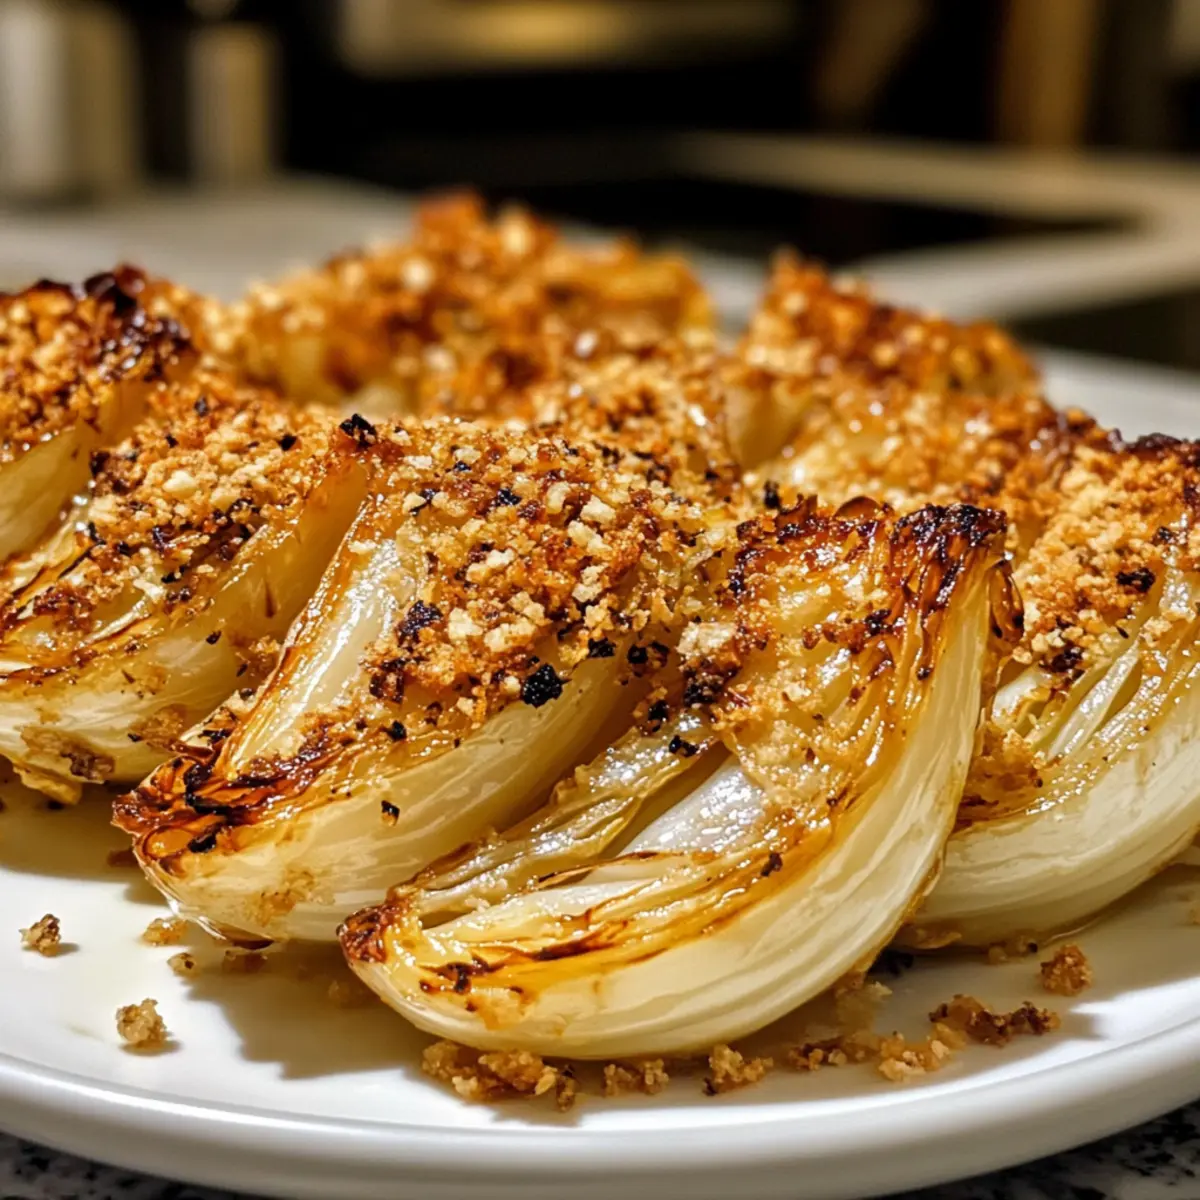
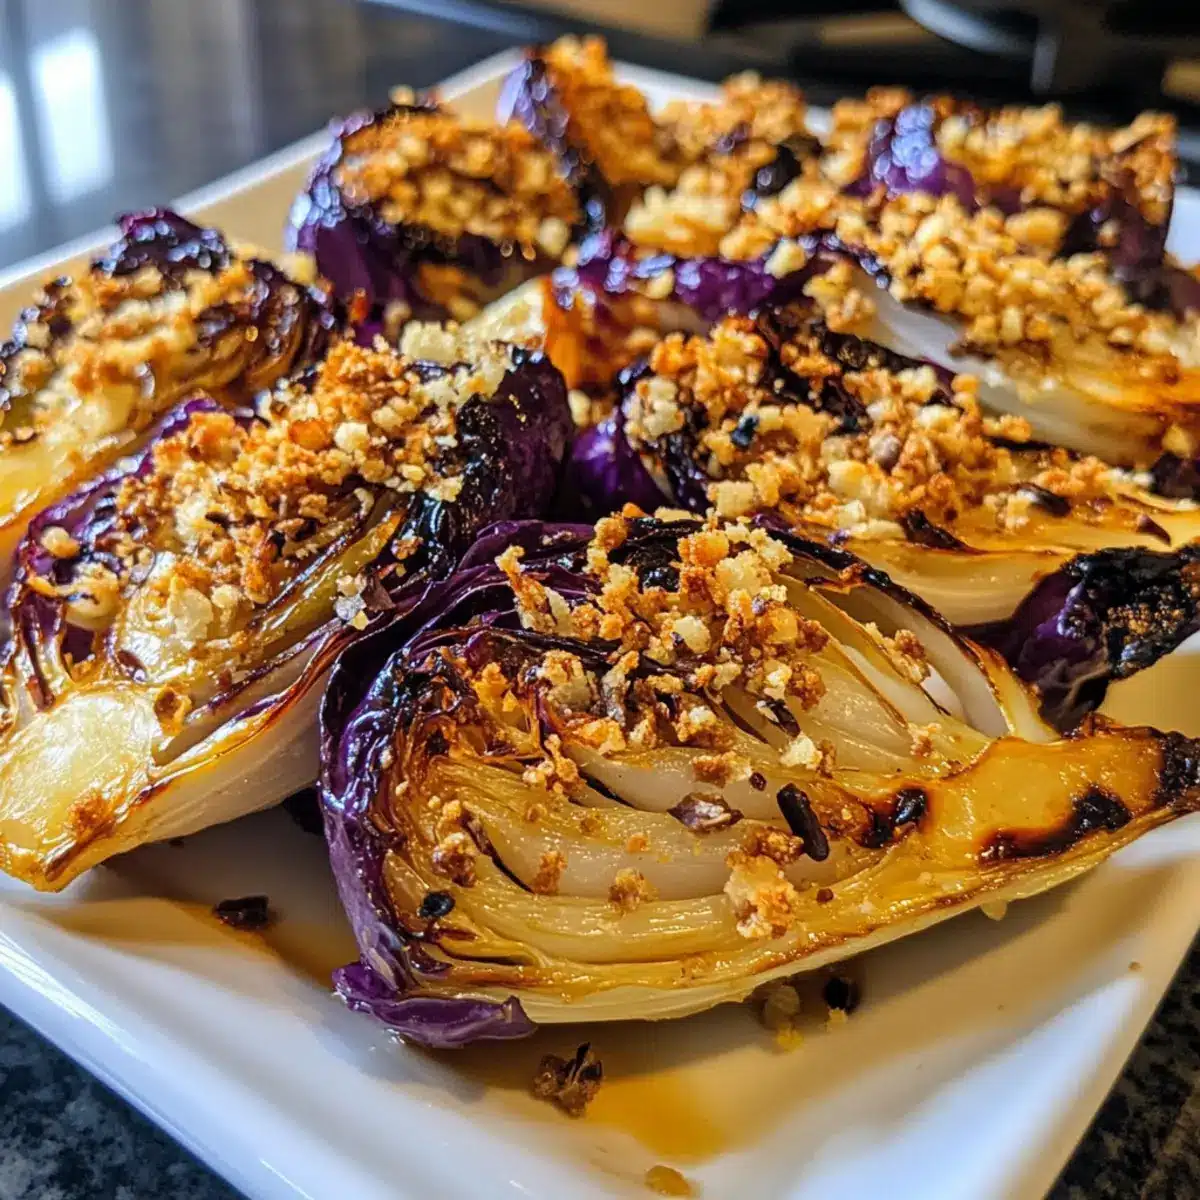
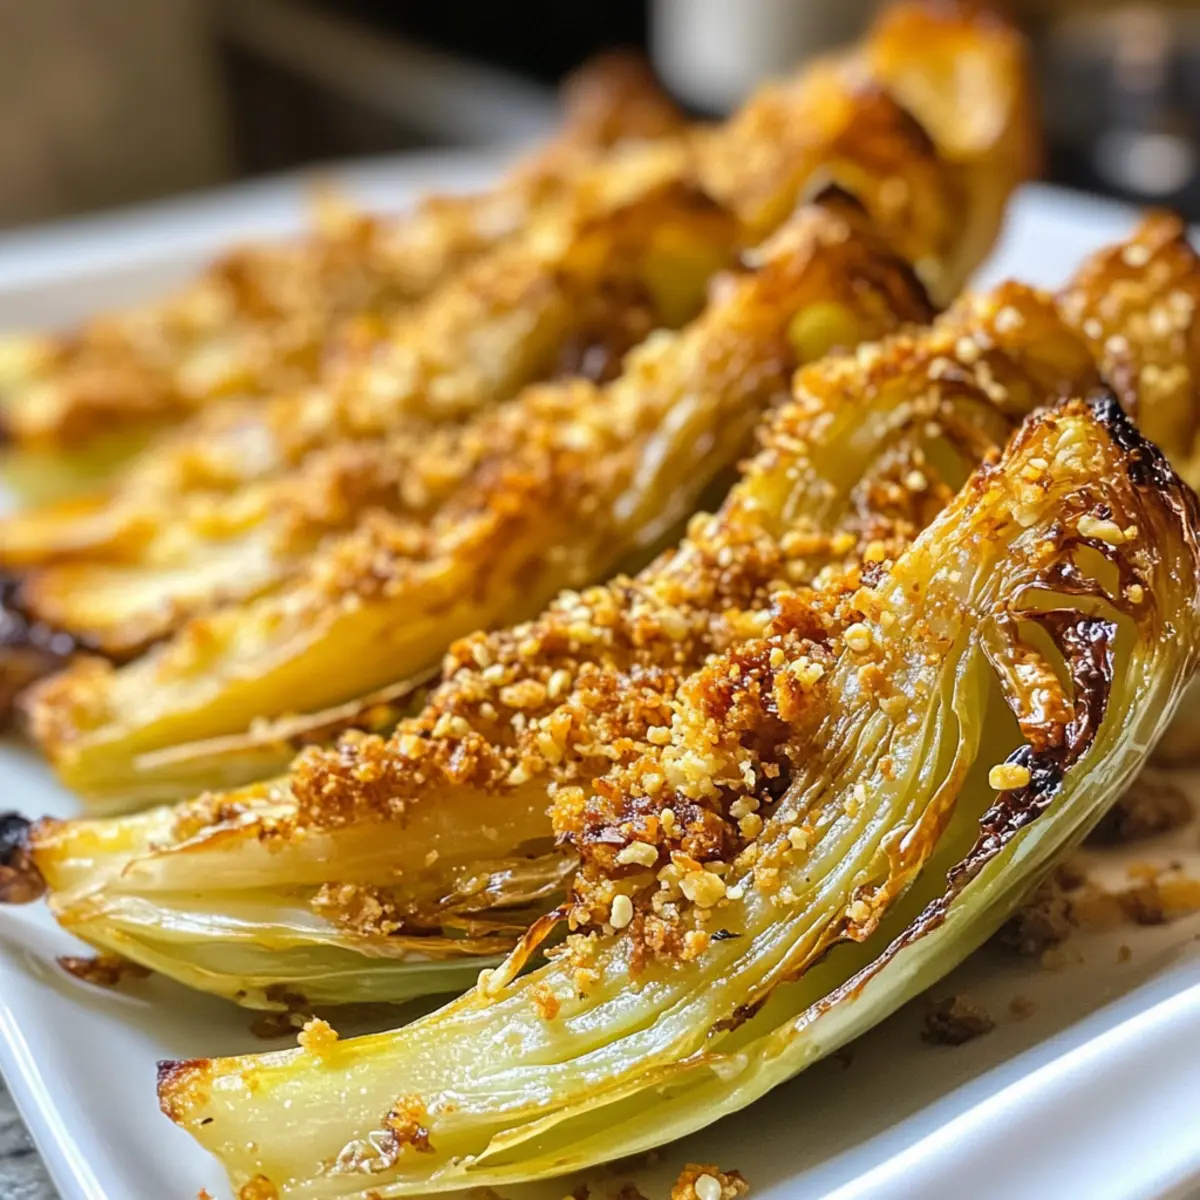
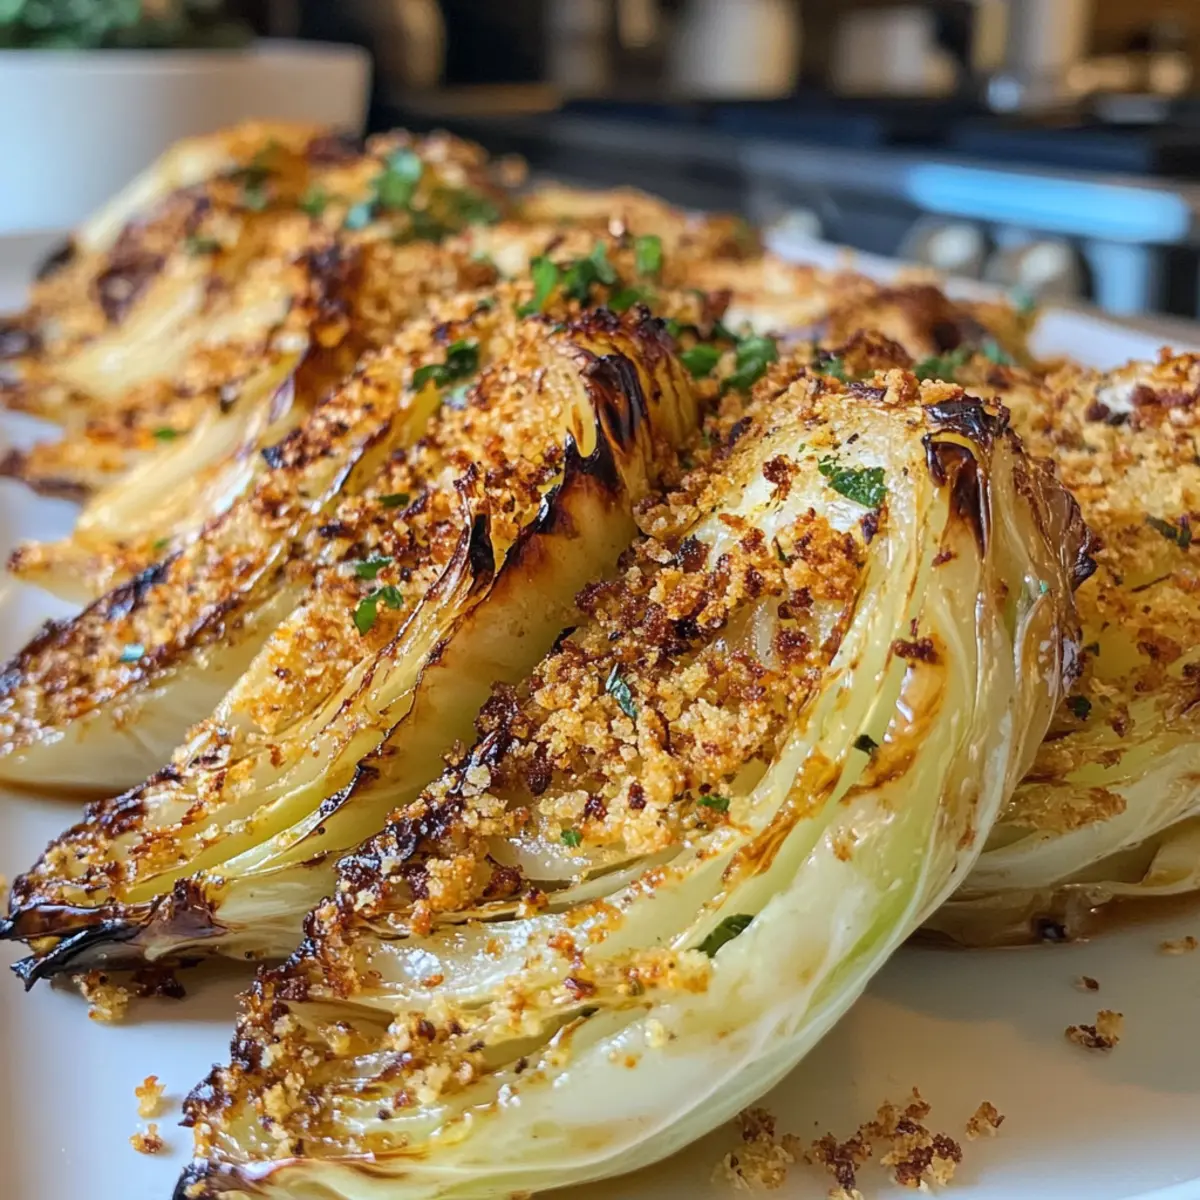
As the oven hums to life, the promise of something delightful fills the air. Today, I’m excited to share my recipe for Miso Butter Roasted Cabbage Wedges, a unique take that breathes new life into this humble vegetable. These cabbage wedges transform into golden, buttery bites coated with a savory miso glaze and topped with crunchy panko crumbs. Perfect for those quick weeknight dinners or as a standout side for your next gathering, this dish is not only simple to prepare but also low-carb and vegetarian-friendly. It’s a wonderful way to delight your palate and impress family and friends alike. Curious to see how the magic happens? Let’s dive into this delicious adventure!

Why Try Miso Butter Roasted Cabbage Wedges?

Elevate your table with this easy yet sophisticated side dish! Each bite delivers savory miso goodness paired with the crunchy texture of panko crumbs, making these cabbage wedges irresistibly delicious. Quick and simple, they fit well into busy weeknight meals or festive gatherings. Plus, they cater to both vegetarian and low-carb diets, ensuring everyone can enjoy a delightful dish. Looking for another quick recipe? Try Garlic Butter Shrimp for a flavorful main course!

Miso Butter Roasted Cabbage Wedges Ingredients

• Here’s what you need to create these delicious Miso Butter Roasted Cabbage Wedges!

For the Cabbage

  • Cabbage (1 sweetheart/hispi cabbage) – The main ingredient that provides texture and volume; a pointed cabbage can also work as a substitute.

For the Miso Glaze

  • Butter (3 tbsp, divided) – Adds richness and assists in roasting; you can use vegan butter for a dairy-free option.
  • Miso paste (1 tbsp) – This is the key seasoning that imparts umami flavor; red or brown miso is recommended for its robust taste, but white or yellow can be used if needed.

For the Topping

  • Panko breadcrumbs (¼ cup) – Provides a delightful crispy topping after toasting; use regular breadcrumbs if panko is unavailable.
  • Garlic powder (¼ tsp) – Enhances the flavor profile; can be omitted for a more subtle taste.
  • Chopped parsley (1 tbsp, optional) – Adds a touch of freshness and color when serving.

Step‑by‑Step Instructions for Miso Butter Roasted Cabbage Wedges

Step 1: Preheat the Oven
Begin by preheating your oven to 200°C (400°F). This temperature is essential for achieving the perfect golden-brown caramelization on your cabbage wedges. While the oven warms up, gather all your ingredients and equipment, ensuring you have a baking sheet ready for the upcoming steps.

Step 2: Prepare the Cabbage
Carefully cut the sweetheart cabbage into four wedges, keeping the core intact for stability. This will help the wedges maintain their shape during roasting. Place the cabbage on a cutting board, and use a sharp knife to slice through in a straight motion, ensuring even wedges to cook uniformly.

Step 3: Mix the Miso Butter Glaze
In a small bowl, combine 2 tablespoons of softened butter with 1 tablespoon of miso paste. Use a whisk or fork to thoroughly mix until smooth and well-blended. This savory miso butter glaze is what will coat your cabbage wedges, enhancing their flavor profile and helping them achieve that desired buttery goodness.

Step 4: Brush the Cabbage Wedges
Take your glaze and gently brush it all over the cabbage wedges, making sure to cover both the sides and the base. The miso butter should create a lovely sheen on the cabbage, signaling that it will roast beautifully. Place the glazed wedges on a baking sheet lined with parchment paper for easy cleanup.

Step 5: Roast the Cabbage
Carefully transfer the baking sheet with the cabbage wedges into your preheated oven. Roast them for about 30 to 35 minutes, keeping an eye on their progress. Look for the wedges to turn golden brown and develop a slightly crispy exterior, a sign that the miso butter has worked its magic.

Step 6: Toast the Panko Breadcrumbs
While the cabbage is roasting, melt the remaining tablespoon of butter in a pan over medium heat. Add the panko breadcrumbs along with ¼ teaspoon of garlic powder. Stir continuously as the breadcrumbs toast until golden brown and fragrant, about 3–5 minutes. This crunchy topping will add delightful texture to your Miso Butter Roasted Cabbage Wedges.

Step 7: Add the Crunchy Topping
Once the cabbage wedges are beautifully roasted, remove them from the oven. Generously sprinkle the toasted panko mixture over the top of the cabbage. This will create a deliciously crispy layer that perfectly complements the buttery, miso-glazed vegetable.

Step 8: Serve and Garnish
For a touch of freshness, consider sprinkling chopped parsley over the cabbage wedges just before serving. This optional garnish adds a pop of color and enhances the overall presentation. Your Miso Butter Roasted Cabbage Wedges are now ready to impress as a savory side at any meal!

How to Store and Freeze Miso Butter Roasted Cabbage Wedges

Fridge: Store leftover Miso Butter Roasted Cabbage Wedges in an airtight container for up to 3–5 days, ensuring they maintain their flavor and texture.

Freezer: For longer storage, freeze the roasted wedges in a single layer before transferring them to a freezer-safe bag. They can last for up to 2 months.

Reheating: Reheat the cabbage wedges in the oven at 180°C (350°F) for about 10–15 minutes, or until heated through. This will help restore their desired crispness.

Wrap: If storing in the fridge, make sure to cover the container tightly to prevent moisture loss and maintain the quality of the roasted cabbage.

What to Serve with Miso Butter Roasted Cabbage Wedges

As the fragrant aroma of roasted cabbage fills your kitchen, it’s time to think about what will beautifully accompany this dish!

  • Creamy Mashed Potatoes: These buttery, velvety potatoes provide a rich contrast to the crispy cabbage, making every bite divine.

  • Savory Mushroom Wellington: The earthiness of mushrooms wrapped in flaky pastry pairs splendidly, offering a hearty vegetarian option alongside your dish.

  • Roasted Chickpeas: These crunchy bites bring a delightful burst of flavor and protein, balancing the softness of the cabbage nicely.

  • Herbed Quinoa Salad: With its light and fresh profile, this salad adds a refreshing touch that complements the savory miso flavors.

  • Honey-Glazed Carrots: Their natural sweetness combined with a hint of honey enhances the savory richness of the cabbage, creating a harmonious flavor duo.

  • Sparkling Water with Lime: This refreshing drink cleanses the palate, keeping the dining experience vibrant and lively.

Elevate your meal with these perfect pairings that make your Miso Butter Roasted Cabbage Wedges shine even brighter at the table!

Expert Tips for Miso Butter Roasted Cabbage Wedges

  • Brush Well: Ensure that each wedge is fully coated with the miso butter glaze to amplify the flavor and achieve that golden finish.

  • Watch the Time: Keep a close eye on the cabbage during roasting. If it’s browning too quickly, reduce the oven temperature to prevent burning.

  • Toast Carefully: Stir the panko breadcrumbs frequently while toasting to avoid burning. Golden brown is the goal for that delightful crunch on your Miso Butter Roasted Cabbage Wedges.

  • Variations: Feel free to mix in or substitute other vegetables like Brussels sprouts for an exciting twist. Just adjust cooking time based on the vegetable size.

  • Serve Fresh: For the best experience, serve the wedges right after they come out of the oven; they will lose their crispiness if left to sit too long.

Make Ahead Options

These Miso Butter Roasted Cabbage Wedges are perfect for meal prep enthusiasts! You can slice the cabbage into wedges and brush them with the miso butter glaze up to 24 hours in advance, simply refrigerate them in an airtight container to prevent browning. The toasted panko topping can also be prepared ahead of time—just store the toasted breadcrumbs in an airtight container and keep them at room temperature. When you’re ready to serve, pop the prepped cabbage in the oven and roast for 30-35 minutes, then sprinkle with the stored breadcrumbs for that delightful crunch. You’ll enjoy the same deliciously rich flavors with minimal effort during busy weeknights!

Miso Butter Roasted Cabbage Wedges Variations

Customize these Miso Butter Roasted Cabbage Wedges for a flavor adventure that suits your taste buds!

  • Dairy-Free: Substitute regular butter with vegan butter for a deliciously creamy miso glaze that everyone can enjoy.

  • Spicy Kick: Add a teaspoon of gochujang to the miso butter glaze for a fiery twist that will awaken your palate.

  • Nutty Addition: Incorporate a tablespoon of sesame oil in the glaze for an extra layer of nutty flavor that beautifully complements the miso.

  • Herbed Delight: Mix in fresh herbs like thyme or rosemary directly into the miso glaze for a fragrant infusion that elevates the dish.

  • Texture Twist: Try adding roasted nuts, like almonds or cashews, on top of the panko for an unexpected crunch and richness.

  • Alternative Veggies: Explore with kale or cauliflower instead of cabbage for a delightful change—just adjust the roasting time until tender.

  • Citrus Zest: A splash of lemon or lime juice in the miso glaze adds a bright note that balances the richness beautifully.

  • Sweetness Boost: Drizzle a little honey or maple syrup over the cabbage wedges before roasting for a sweet and savory flavor combo that’s truly irresistible.

Looking for more delicious ideas? Try adding these roasted cabbage wedges next to a hearty Roasted Carrot Lentil Salad for a vibrant meal!

Miso Butter Roasted Cabbage Wedges Recipe FAQs

What type of cabbage should I use for Miso Butter Roasted Cabbage Wedges?
Absolutely! A sweetheart or hispi cabbage is perfect for this recipe due to its sweetness and tenderness. If you can’t find those, a pointed cabbage works beautifully as a substitute. Look for heads that are firm and heavy for their size, with no dark spots or blemishes for the best flavor.

How should I store leftover Miso Butter Roasted Cabbage Wedges?
You can store your leftover cabbage wedges in an airtight container in the fridge for about 3 to 5 days. Ensure they are fully cooled before sealing to maintain their texture. When you’re ready to enjoy them again, a quick microwave won’t do them justice; instead, reheat them gently in the oven to bring back that delightful crispiness!

Can I freeze Miso Butter Roasted Cabbage Wedges?
Yes, you can freeze them! First, allow your wedges to cool completely, then lay them out in a single layer on a baking sheet and place them in the freezer for about 1 hour. Once they’re solid, transfer the wedges to a freezer-safe bag or container, and they can last for up to 2 months. When ready to eat, reheat them from frozen in the oven at 180°C (350°F) for about 15 to 20 minutes to maintain that satisfying crunch.

What should I do if my panko breadcrumbs burn while toasting?
Very! If your panko breadcrumbs are browning too quickly, it’s essential to remove them from the heat immediately. Next time, lower the heat slightly and stir continuously, watching closely for that perfect golden color. Mix a little bit of garlic powder into the panko beforehand to give it extra flavor, but using lower heat helps control how fast it cooks.

Are Miso Butter Roasted Cabbage Wedges suitable for people with dietary restrictions?
Absolutely! This recipe is vegetarian-friendly, and you can easily make it gluten-free by substituting panko with gluten-free breadcrumbs. If you’re following a vegan diet, simply swap out the butter for a high-quality vegan alternative, and you’ve got a delicious, inclusive dish that everyone can enjoy!

How can I add more flavor to Miso Butter Roasted Cabbage Wedges?
If you’re eager to enhance the flavor, consider mixing a bit of gochujang or sriracha into your miso glaze for a delightful kick! Also, adding spices like smoked paprika or a sprinkle of sesame seeds can elevate the taste profile. The more the merrier, so feel free to get creative with what you have on hand!

Miso Butter Roasted Cabbage Wedges

Miso Butter Roasted Cabbage Wedges for a Flavorful Twist

Miso Butter Roasted Cabbage Wedges bring a unique flavor twist to a humble vegetable, making them a delightful and easy dish to enjoy.
Prep Time 15 minutes
Cook Time 35 minutes
Total Time 50 minutes
Servings: 4 wedges
Course: Dinner
Cuisine: Vegetarian
Calories: 150

Ingredients
  

For the Cabbage
  • 1 head sweetheart/hispi cabbage A pointed cabbage can also work as a substitute.
For the Miso Glaze
  • 3 tbsp butter, divided Vegan butter can be used for a dairy-free option.
  • 1 tbsp miso paste Red or brown miso is recommended.
For the Topping
  • ¼ cup panko breadcrumbs Regular breadcrumbs can be used if panko is unavailable.
  • ¼ tsp garlic powder Can be omitted for a more subtle taste.
  • 1 tbsp chopped parsley Optional for garnish.

Equipment

  • Oven
  • Baking Sheet
  • Parchment paper
  • small bowl
  • knife
  • Whisk or fork
  • Pan

Method
 

Step-by-Step Instructions
  1. Preheat your oven to 200°C (400°F).
  2. Cut the sweetheart cabbage into four wedges, keeping the core intact for stability.
  3. In a small bowl, combine 2 tablespoons of softened butter with 1 tablespoon of miso paste, mixing until smooth.
  4. Brush the miso butter glaze all over the cabbage wedges and place them on a baking sheet lined with parchment paper.
  5. Roast the cabbage wedges in the oven for about 30 to 35 minutes, until golden brown.
  6. In a pan, melt the remaining tablespoon of butter over medium heat, add panko breadcrumbs and garlic powder, stirring until golden brown.
  7. Sprinkle the toasted panko mixture over the roasted cabbage wedges.
  8. Garnish with chopped parsley before serving.

Nutrition

Serving: 1wedgeCalories: 150kcalCarbohydrates: 10gProtein: 3gFat: 12gSaturated Fat: 7gPolyunsaturated Fat: 1gMonounsaturated Fat: 4gCholesterol: 30mgSodium: 300mgPotassium: 200mgFiber: 2gSugar: 3gVitamin A: 500IUVitamin C: 15mgCalcium: 50mgIron: 1mg

Notes

Serve the wedges immediately after roasting for the best texture and flavor. Make sure to coat them well for maximum taste.

Tried this recipe?

Let us know how it was!

Irresistible Smoked Salmon Roll Ups for a Quick, Healthy Snack

As I took a bite of the vibrant Smoked Salmon Roll Ups, the tangy hint of lemon intertwined with creamy avocado and fresh cucumber whisked me away to the coast. These delightful little bites are not just a feast for the senses; they offer a quick lunch option that remains exceptionally healthy. Perfectly suited for anyone dreading the mundane routine of fast food, this recipe is a low-carb snack that boasts rich flavors and a satisfying crunch. Whether you’re hosting a gathering or simply need a light meal during a busy day, these roll ups will surely impress. Curious about how to put this deliciousness together? Let’s dive into the recipe!

Why are Smoked Salmon Roll Ups a Must-Try?

Irresistible Flavors: Each bite bursts with savory smoked salmon complemented by a zesty lemon & cream cheese filling, making these roll ups utterly delicious.
Quick & Easy: Perfect for busy days, this recipe comes together in just minutes, allowing you to enjoy a gourmet snack without the fuss.
Low-Carb Delight: Ideal for those on a low-carb or keto diet, these roll ups are packed with healthy fats from avocado while keeping carbs at bay.
Versatile Options: Feel free to experiment by adding capers or substituting smoked trout for a new spin on the classic flavor profile.
Crowd-Pleasing Appetizer: Great for gatherings, serve them alongside crackers or as part of a vibrant platter to wow your guests. For more fresh ideas, check out my Cheese Roll Ups or Texas Roadhouse Salmon!

Smoked Salmon Roll Ups Ingredients

For the Filling
Whipped Cream Cheese – Provides a creamy and tangy base for the filling.
Green Onion – Adds a fresh, sharp flavor; slice thinly for the best taste.
Lemon Zest – Infuses brightness; use freshly grated for maximum impact.

For the Rolls
Smoked Salmon – The star of the show, offering rich, savory flavor; opt for high-quality salmon.
Persian Cucumber – Delivers a satisfying crunch and freshness; you can substitute with English cucumber if needed.
Avocado – Adds a creamy texture that perfectly balances the flavors; make sure it’s ripe.
Everything But The Bagel Seasoning (EBTB) – Provides a savory finishing touch; sesame seeds can be used as an alternative.

For Dipping Sauce
Soy Sauce – Adds a touch of saltiness; tamari is a great gluten-free substitution.
Lemon Juice – Offers acidity to enhance flavors; fresh juice is always best.
Water – Used to dilute the soy sauce for a lighter consistency.
Mirin – Contributes a gentle sweetness; can substitute with rice vinegar mixed with a bit of sugar.

These Smoked Salmon Roll Ups are not only a delight to eat but also incredibly simple to prepare, making them a perfect addition to your quick lunch or snack rotation!

Step‑by‑Step Instructions for Smoked Salmon Roll Ups

Step 1: Prepare the Dipping Sauce
In a small bowl, combine 1 tablespoon of soy sauce, 1 tablespoon of fresh lemon juice, 1 tablespoon of water, and 1 teaspoon of mirin. Whisk together until well blended and chill in the refrigerator while you prepare the rest of your ingredients. This refreshing dipping sauce enhances the flavors of the Smoked Salmon Roll Ups, providing a light tangy contrast.

Step 2: Make the Cream Cheese Filling
In a medium bowl, mix 4 ounces of whipped cream cheese, 2 finely sliced green onions, and the zest of half a lemon until smooth and creamy. Use a hand mixer or spatula for the best texture. Set the filling aside to allow the flavors to meld, making the perfect creamy base for your Smoked Salmon Roll Ups.

Step 3: Prepare the Salmon Base
On a sheet of plastic wrap, evenly sprinkle about 1 tablespoon of Everything But The Bagel seasoning. Carefully arrange 4 ounces of smoked salmon in a rectangle, slightly overlapping each piece to create a solid base. Ensure that the salmon is laid flat and covers most of the plastic wrap for easy rolling later.

Step 4: Assemble the Roll Ups
Spread the cream cheese filling evenly over the smoked salmon layer, leaving a small border around the edges. Next, place thin strips of 1 Persian cucumber and half of a ripe avocado in the center. Gently lift the plastic wrap to begin rolling the salmon tightly around the filling, using the wrap to guide you without squeezing too tightly.

Step 5: Firm Up the Roll
Wrap the rolled salmon tightly in the plastic wrap, twisting the ends to secure. Place the roll in the freezer for about 5-10 minutes. This chilling step helps firm up the Smoked Salmon Roll Ups, making it easier for you to slice them neatly into pieces without losing any filling.

Step 6: Slice and Serve
Once firm, carefully remove the roll from the freezer and unwrap. Using a sharp knife, slice the roll into bite-sized pieces, approximately 1-inch thick. Serve the Smoked Salmon Roll Ups on a platter with the chilled dipping sauce by the side, or pair them with crispy crackers for an added crunch.

Make Ahead Options

These Smoked Salmon Roll Ups are perfect for busy cooks looking to save time during hectic weekdays! You can make the cream cheese filling and slice your vegetables—green onions, cucumber, and avocado—up to 24 hours in advance. Just store them in airtight containers in the refrigerator to keep them fresh. Additionally, you can assemble the roll ups entirely and refrigerate them, but it’s best to slice them just before serving to maintain their texture. For optimal freshness, enjoy the roll ups within up to 3 days. Simply pull them out of the fridge, slice, and pair with the dipping sauce for a delicious, ready-made snack that’s just as delightful!

Helpful Tricks for Smoked Salmon Roll Ups

Tight Rolling: Ensure you roll the salmon tightly but gently to keep the filling intact and prevent spills during slicing.

Chill Before Slicing: Freeze the rolled salmon for 5-10 minutes to firm it up, making slicing much easier and cleaner.

Quality Ingredients: Opt for high-quality smoked salmon for the best flavor; it truly elevates your smoked salmon roll ups.

Flavor Adjustments: Feel free to start with less soy sauce when making the dipping sauce; you can always add more to suit your taste preferences.

Experiment with Fillings: Don’t hesitate to adjust ingredients; adding capers or herbs can give your smoked salmon roll ups a delightful twist.

Serve Fresh: Slice the roll ups just before serving to maintain freshness and texture; they taste best when enjoyed right away.

How to Store and Freeze Smoked Salmon Roll Ups

Fridge: Keep leftovers wrapped tightly in plastic wrap in the refrigerator for up to 2 days. Slicing them just before serving helps maintain their freshness and texture.

Freezer: For longer storage, wrap the assembled roll tightly in plastic wrap and then in aluminum foil, freezing for up to 1 month. Thaw in the fridge overnight before serving.

Reheating: These smoked salmon roll ups are best served cold. Simply slice and enjoy straight from the fridge or after thawing. Avoid reheating to maintain texture.

Airtight Storage: To prevent drying out, ensure the roll ups are well-wrapped or placed in an airtight container when storing in the fridge or freezer.

Smoked Salmon Roll Ups Variations

Feel free to get creative with these smoked salmon roll ups; your taste buds deserve to be delighted!

  • Dairy-Free: Substitute whipped cream cheese with a creamy dairy-free option made from cashews or almonds for a vegan-friendly treat.
    A nut-based cream adds a smooth texture while keeping it plant-based and delicious.

  • Herbed Twist: Add fresh dill or chives to the cream cheese mixture for an aromatic flavor boost.
    This herbed variation transports you to a garden party with each refreshing bite.

  • Spicy Kick: Mix a dash of sriracha or wasabi into the cream cheese for a zesty, fiery kick.
    Spice lovers will enjoy the contrast of heat against the rich smoked salmon!

  • Crunchy Add-in: Toss in some finely diced bell peppers or radishes for an extra crunch.
    These vibrant additions enhance both the texture and aesthetic of your roll ups.

  • Citrusy Variation: Incorporate orange zest along with lemon for a unique citrusy flavor profile.
    This delightful change increases the freshness and brightness of your rolls, making every bite pop!

  • Different Protein: Swap out smoked salmon for smoked chicken or tuna for an exciting twist.
    Each protein offers its own delicious flavor, allowing you to personalize your roll ups while maintaining that wonderful creaminess.

  • Fusion Flavors: Try using a Thai peanut sauce dip instead of soy sauce for a sweet, savory change.
    The nutty flavor offers a fantastic fusion that pairs exceptionally with the salmon.

For additional flavors, consider serving these roll ups alongside my delicious Honey Butter Brioche Rolls for a sweet contrast or some zesty Blackened Salmon Stuffed bites to complement your meal.

What to Serve with Easy Smoked Salmon Roll Ups

Elevate your dining experience by exploring delightful pairings that complement the rich flavors and textures of these luscious rolls.

  • Crispy Salad: A light, mixed greens salad brightened with lemon vinaigrette offers a refreshing contrast to the creamy roll ups.
  • Savory Crackers: Serve with whole grain or seed crackers for crunch; they enhance the flavors and make each bite satisfying.
  • Chilled White Wine: A glass of crisp Sauvignon Blanc highlights the smoky notes of salmon while balancing the meal’s richness.
  • Creamy Avocado Soup: An elegant chilled avocado soup brings a smooth, velvety element that pairs beautifully with the rolls.
  • Roasted Vegetables: Colorful roasted asparagus or bell peppers provide vibrant flavors and textures, making your plate visually appealing and hearty.
  • Fruit Platter: A selection of fresh melons, berries, and citrus fruits adds a sweet touch, cleansing the palate between bites.
  • Hummus Dip: A light, lemon-infused hummus served on the side offers a creamy complement that pairs perfectly with the roll ups.
  • Pickled Vegetables: Tangy quick pickles introduce an exciting crunch and acidity that contrast well with the richness of the creamy filling.
  • Sparkling Water: A refreshing glass of sparkling water or infused water keeps the meal light while providing a delightful fizz that’s refreshing.

Smoked Salmon Roll Ups Recipe FAQs

What type of smoked salmon should I use?
Absolutely! For the best flavor, choose high-quality smoked salmon from a reputable source. Look for salmon that’s moist and has a rich, savory aroma. Avoid any that has dark spots or appears dry — those indicators suggest it’s past its prime.

How should I store leftovers?
Very simple! Keep any leftover smoked salmon roll ups tightly wrapped in plastic wrap or placed in an airtight container in the refrigerator for up to 2 days. This ensures they maintain their freshness. I recommend slicing them just before serving to keep the creaminess intact.

Can I freeze the smoked salmon roll ups?
Absolutely! To freeze, wrap the assembled roll tightly in plastic wrap followed by aluminum foil to prevent freezer burn. They can last in the freezer for up to 1 month. When you’re ready to enjoy, thaw them overnight in the refrigerator for the best texture.

What can I do if my filling is too runny?
If you find your cream cheese filling has become too soft or runny, I suggest adding a bit more whipped cream cheese to thicken it up. Another great method is to chill the mixture in the fridge for about 30 minutes before spreading it on the salmon, which can help it firm up.

Are smoked salmon roll ups safe for people with dietary restrictions?
Very! However, if you or your guests have specific dietary restrictions, such as lactose intolerance or a gluten allergy, consider using dairy-free cream cheese and tamari instead of soy sauce to make these roll ups fully accommodating. Just double-check ingredient labels to ensure compatibility.

How long can I keep these roll ups in the refrigerator?
The smoked salmon roll ups can be stored in the fridge for up to 2 days. For the best taste and texture, enjoy them fresh. If possible, slice them right before serving to maintain their vibrancy and crunch.

Smoked Salmon Roll Ups

Irresistible Smoked Salmon Roll Ups for a Quick, Healthy Snack

Enjoy these Smoked Salmon Roll Ups, a quick, healthy snack bursting with flavor.
Prep Time 15 minutes
Chilling Time 10 minutes
Total Time 25 minutes
Servings: 2 rolls
Course: Appetizer
Cuisine: American
Calories: 250

Ingredients
  

For the Filling
  • 4 ounces whipped cream cheese Provides a creamy and tangy base for the filling.
  • 2 pieces green onion Adds a fresh, sharp flavor; slice thinly for the best taste.
  • 0.5 pieces lemon zest Infuses brightness; use freshly grated for maximum impact.
For the Rolls
  • 4 ounces smoked salmon The star of the show, offering rich, savory flavor; opt for high-quality salmon.
  • 1 piece Persian cucumber Delivers a satisfying crunch and freshness; substitute with English cucumber if needed.
  • 1 pieces avocado Adds a creamy texture that perfectly balances the flavors; ensure it's ripe.
  • 1 tablespoon Everything But The Bagel Seasoning (EBTB) Provides a savory finishing touch; sesame seeds can be used as an alternative.
For Dipping Sauce
  • 1 tablespoon soy sauce Adds a touch of saltiness; tamari is a great gluten-free substitution.
  • 1 tablespoon lemon juice Offers acidity to enhance flavors; fresh juice is always best.
  • 1 tablespoon water Used to dilute the soy sauce for a lighter consistency.
  • 1 teaspoon mirin Contributes a gentle sweetness; can substitute with rice vinegar mixed with a bit of sugar.

Equipment

  • Mixing Bowl
  • Whisk
  • sharp knife
  • Plastic Wrap

Method
 

Step-by-Step Instructions
  1. In a small bowl, combine soy sauce, fresh lemon juice, water, and mirin. Whisk until well blended and chill in the refrigerator.
  2. In a medium bowl, mix cream cheese, finely sliced green onions, and lemon zest until smooth and creamy.
  3. On a sheet of plastic wrap, sprinkle Everything But The Bagel seasoning. Arrange smoked salmon in a rectangle, slightly overlapping each piece.
  4. Spread cream cheese filling evenly over salmon layer, leaving a small border. Place strips of cucumber and avocado in the center.
  5. Gently lift plastic wrap to roll salmon tightly around filling. Wrap and refrigerate for about 5-10 minutes.
  6. Carefully unwrap roll and slice into bite-sized pieces. Serve on a platter with the chilling dipping sauce.

Nutrition

Serving: 1rollCalories: 250kcalCarbohydrates: 8gProtein: 15gFat: 20gSaturated Fat: 4gPolyunsaturated Fat: 2gMonounsaturated Fat: 14gCholesterol: 30mgSodium: 600mgPotassium: 300mgFiber: 2gSugar: 1gVitamin A: 10IUVitamin C: 15mgCalcium: 4mgIron: 6mg

Notes

Ensure you roll tightly but gently to keep filling intact. Slice just before serving for freshness.

Tried this recipe?

Let us know how it was!

Filipino Mango Float: Your Indulgent No-Bake Tropical Treat

As the warm breeze mingles with the sweet scent of ripe mangoes, I’m reminded of sunny afternoons spent with family, where every bite tells a story. Today, I’m excited to share my beloved take on the Filipino Mango Float, a no-bake tropical delight that brings joy to any gathering. Not only is this dessert a breeze to prepare, but it’s also endlessly customizable, allowing you to create layers of luscious whipped cream, fresh mango slices, and graham crackers to your heart’s delight. The airy texture offers just the right amount of indulgence without weighing you down, making it a perfect treat for hot summer days or festive family events. Ready to dive into the creamy goodness? Let’s create some delicious memories together!

Why is Filipino Mango Float a Must-Try?

Indulgent, this no-bake dessert is a true tropical treat that combines juicy mangoes with rich whipped cream. Customizable, you can easily switch up ingredients or toppings, making it your own. No-Fuss Preparation means you can whip it together in minutes, allowing you more time to enjoy with loved ones. Crowd-Pleasing, it’s a hit at both summer gatherings and festive occasions like Noche Buena. Check out how this deliciousness compares with my Mango Coconut Pudding or refreshingly pair it with juicy Fish Tacos Mango! You’ll understand why it’s beloved!

Filipino Mango Float Ingredients

For the Creamy Base
Heavy Cream – Provides the rich and creamy base; chill overnight for the best results.
Sweetened Condensed Milk – Adds sweetness and enhances creaminess; can substitute with sweetened almond milk for a lighter version.
Salt – Balances sweetness and enhances flavor in the Filipino Mango Float.

For the Layers
Ripe Mangoes – The star of the dish, offering a floral and honeyed taste; use Carabao mangoes if available for the best flavor.
Graham Crackers – Forms the structure of the dessert; alternatives like ladyfingers or chocolate graham crackers can add different flavors.

Step‑by‑Step Instructions for Filipino Mango Float

Step 1: Prepare Mangoes
Start by washing and peeling the ripe mangoes. Once peeled, slice them into thin pieces or cubes, ensuring they are uniform for even layering. Set the mangoes aside on a clean cutting board; they will become the luscious, tropical layers in your Filipino Mango Float.

Step 2: Whip the Cream
In a chilled mixing bowl, begin whipping the heavy cream using an electric mixer on medium speed. Whip until soft peaks form, which will take about 3-5 minutes. Gradually add the salt and sweetened condensed milk while continuing to whip until you achieve stiff peaks, about 2-3 more minutes. The cream should be thick and fluffy, creating a delightful base for your dessert.

Step 3: Crush Crackers
Take your graham crackers and place them inside a zip-lock bag. Use a rolling pin or your hands to crush the crackers until you reach your desired texture—chunky or fine. This will create layers in the Filipino Mango Float, and it will also soak up the cream beautifully, so they completely soften and blend with the other ingredients.

Step 4: Layer the Dessert
Select an 8×8 inch glass dish for assembling the Filipino Mango Float. Start by placing a layer of crushed graham crackers at the bottom of the dish. Next, pour in a layer of the whipped cream mixture, spreading it evenly. Follow this with a layer of sliced mangoes. Repeat the layering process until you run out of ingredients, finishing with whipped cream and garnishing on top with extra mango slices and cracker crumbs for added flair.

Step 5: Chill or Freeze
Cover the assembled Filipino Mango Float with plastic wrap and place it in the refrigerator. For a soft texture, chill it overnight. Alternatively, for a firmer texture akin to an ice cream cake, freeze it for about 4-6 hours. If frozen, allow the dessert to sit at room temperature for around 30 minutes before serving to make slicing easier and to enhance its creamy texture.

Expert Tips for Filipino Mango Float

Preparation Timing: Assemble the Filipino Mango Float the night before for the best flavor meld. This will maximize the creaminess and freshness.

Chill Your Tools: For a fluffier whipped cream, chill your mixing bowl and beaters before whipping. Cold tools help achieve perfect peaks more easily.

Mango Selection: Choose ripe, sweet Carabao mangoes for that authentic flavor. Overripe or under ripe mangoes can compromise the overall taste.

Layering Technique: Alternate between layers of cream, mango, and graham crackers to ensure a balanced mix of flavors in each bite.

Texture Preference: Opt for freezing if you prefer a firmer dessert akin to ice cream, but don’t forget to let it thaw for 30 minutes before serving.

Customization Options: Feel free to add vanilla or a splash of coconut milk to the cream for an extra layer of tropical flavor in your Filipino Mango Float.

Filipino Mango Float Variations

Feel free to get creative with your Filipino Mango Float—your taste buds will thank you!

  • Dairy-Free: Substitute heavy cream with coconut cream and use sweetened almond milk for a delicious, plant-based version. The tropical flavors will shine through beautifully!

  • Flavorful Twist: Add a splash of vanilla extract or a hint of rum to the whipped cream for an extra depth of flavor. It adds a delightful warmth that complements the mango perfectly.

  • Chunky Texture: Incorporate diced fruits like bananas or lychees between the layers for added texture and freshness. The mixed fruits create a beautiful surprise with each spoonful!

  • Nutty Crunch: Top your float with crushed cashews or toasted coconuts for an added crunch. It contrasts perfectly with the creamy layers and will impress your guests!

  • Chocolate Lover’s Version: Use chocolate graham crackers instead of regular ones for a decadent chocolatey base. You won’t believe how wonderful it tastes with mango!

  • Lower-Calorie Option: Lighten the dessert by using reduced-fat cream and sugar-free sweetened condensed milk. You’ll still enjoy the amazing flavors without the guilt!

  • Fruity Layers: Try layering with other fruits like strawberries or peaches along with mango for a colorful and flavorful twist. Each bite becomes a new fruity adventure!

  • Frozen Delight: Transform it into a frozen treat by blending the layers into a smoothie-like consistency before freezing. A fun take on a refreshing summer dessert that’s sure to be a hit!

Pair your Filipino Mango Float with my delightful Mango Coconut Pudding or serve alongside my tempting Chicken Burritos Mango for a sweet and savory spread that will dazzle your family and friends!

What to Serve with Filipino Mango Float

As summer approaches, imagining the ultimate tropical feast becomes a delightful adventure for the palate, and we all know that great desserts deserve fantastic companions.

  • Fresh Fruit Salad: A vibrant mix of seasonal fruits adds a refreshing zing that complements the rich creaminess of the mango float. The juicy bites elevate every mouthful, making it a colorful, healthful addition to your meal.

  • Toasted Coconut Flakes: Adding a sprinkle of toasted coconut on top or alongside the mango float creates delightful textures and a subtle nutty flavor. This tropical touch enhances the overall experience and introduces a delightful crunch.

  • Crispy Spring Rolls: Light, crunchy spring rolls filled with fresh vegetables or shrimp are a savory counterpart to the sweet mango float. Their crispy texture offers a satisfying contrast, ensuring a delightful balance of indulgence and lightness.

  • Mango Lassi: Sip on a creamy mango lassi—a yogurt-based drink that pairs perfectly with the rich flavors of the dessert. The cooling effect and tangy notes make it an ideal refreshment to cleanse your palate.

  • Dark Chocolate Shavings: Consider adding rich dark chocolate shavings to the top of your mango float for an indulgent twist. The bitterness of the chocolate perfectly balances the sweetness, creating a decadent finish that’s hard to resist.

  • Lemon Sorbet: Serve alongside a scoop of zesty lemon sorbet to cut through the creaminess of the dessert. This refreshing addition imparts a bright flavor explosion, making your tropical feast even more unforgettable.

  • Mint Iced Tea: A glass of mint iced tea is not only soothing but also refreshing, enhancing your mango float experience. The herbal notes in the drink will complement the dessert’s fruity flavor seamlessly.

Indulge in a delightful symphony of flavors and textures that will surely make this tropical celebration a memorable one!

Make Ahead Options

Preparing Filipino Mango Float ahead of time is a delightful way to ensure you have a creamy treat ready to impress your guests! You can slice the ripe mangoes and whip the heavy cream (including the sweetened condensed milk) up to 24 hours in advance. Simply store the mango slices in an airtight container in the refrigerator to prevent browning and maintain vibrancy. Assemble the layers in your dish the night before serving, allowing the flavors to meld beautifully. If you prefer, you can chill the dessert overnight for a soft texture or freeze it for a firmer consistency. Just remember to let it sit for about 30 minutes at room temperature before slicing when ready to serve, so it’s just as delicious as when freshly made!

How to Store and Freeze Filipino Mango Float

  • Room Temperature: This dessert is best stored in the fridge or freezer. Avoid leaving it out for more than 2 hours, especially in warm weather.

  • Fridge: Store the Filipino Mango Float in an airtight container for up to 3 days. This helps maintain its creamy texture and flavorful layers.

  • Freezer: If freezing, wrap the dessert tightly in plastic wrap and aluminum foil. It can stay frozen for up to 2 months. Allow it to thaw in the refrigerator for about 4-5 hours or at room temperature for 30 minutes before serving.

  • Reheating: No reheating is needed for this chilled dessert, but if it was frozen, ensure it softens slightly before slicing for a perfect presentation.

Filipino Mango Float Recipe FAQs

What should I look for when selecting mangoes?
For the best flavor, opt for ripe Carabao mangoes, which have a sweet and fragrant aroma. Look for mangoes with a slight give when gently squeezed, indicating ripeness. Avoid those with dark spots all over or overly firm flesh, as these might not taste as sweet.

How should I store leftover Filipino Mango Float?
Store your Filipino Mango Float in an airtight container in the refrigerator for up to 3 days. This will help maintain its creamy texture and delicious layers. If you notice any separation or water around the layers due to condensation, simply stir it gently before serving.

Can I freeze Filipino Mango Float, and how do I do it?
Absolutely! To freeze your Filipino Mango Float, wrap it tightly in plastic wrap, followed by aluminum foil, to prevent freezer burn. It can be stored in the freezer for up to 2 months. When you’re ready to enjoy it again, thaw in the refrigerator for about 4-5 hours or leave it at room temperature for 30 minutes before serving to achieve the perfect texture.

What if my whipped cream doesn’t thicken properly?
If you find your whipped cream hasn’t thickened, it may be due to the cream being too warm or not having enough fat content. Make sure your heavy cream is well-chilled and that your mixing bowl and beaters are cold too. If it’s still not thickening, you can try adding a tablespoon of powdered sugar, which might help stabilize it further.

Are there any dietary considerations for Filipino Mango Float?
Yes! This dessert is typically gluten-free when made with gluten-free graham crackers. However, check the labels to ensure they don’t contain any cross-contaminants. For dairy-free options, substitute heavy cream with coconut cream or a suitable dairy-free whipped topping. Always ensure the sweetened condensed milk is suitable for your dietary needs—look for alternatives if lactose is a concern.

How can I customize my Filipino Mango Float?
The more the merrier when it comes to customization! You can swap out graham crackers for chocolate graham crackers or ladyfingers for a different flavor profile. For added textures, consider topping with crushed nuts, toasted coconut, or even layers of other seasonal fruits like strawberries or bananas. Don’t hesitate to let your creativity shine!

Filipino Mango Float

Filipino Mango Float: Your Indulgent No-Bake Tropical Treat

Experience the delightful Filipino Mango Float, a no-bake tropical treat perfect for gatherings.
Prep Time 20 minutes
Chilling Time 8 hours
Total Time 8 hours 20 minutes
Servings: 8 slices
Course: Dessert
Cuisine: Filipino
Calories: 320

Ingredients
  

For the Creamy Base
  • 2 cups Heavy Cream Chill overnight for best results.
  • 1 can Sweetened Condensed Milk Can substitute with sweetened almond milk for a lighter version.
  • 1/4 teaspoon Salt Balances sweetness and enhances flavor.
For the Layers
  • 3 pieces Ripe Mangoes Use Carabao mangoes for the best flavor.
  • 1 package Graham Crackers Alternatives like ladyfingers add different flavors.

Equipment

  • Mixing Bowl
  • Electric Mixer
  • zip-lock bag
  • Rolling Pin
  • 8x8 inch glass dish

Method
 

Step-by-Step Instructions for Filipino Mango Float
  1. Start by washing and peeling the ripe mangoes. Once peeled, slice them into thin pieces or cubes, ensuring they are uniform for even layering.
  2. In a chilled mixing bowl, begin whipping the heavy cream using an electric mixer on medium speed until soft peaks form, about 3-5 minutes.
  3. Gradually add the salt and sweetened condensed milk while continuing to whip until stiff peaks form, about 2-3 more minutes.
  4. Take your graham crackers and place them inside a zip-lock bag. Crush with a rolling pin or hands until desired texture.
  5. Select an 8x8 inch glass dish. Start with a layer of crushed graham crackers at the bottom, followed by whipped cream, then sliced mangoes. Repeat layers until ingredients are used up.
  6. Cover with plastic wrap and chill in the refrigerator overnight, or freeze for 4-6 hours for a firmer texture.

Nutrition

Serving: 1sliceCalories: 320kcalCarbohydrates: 45gProtein: 4gFat: 15gSaturated Fat: 10gCholesterol: 50mgSodium: 130mgPotassium: 200mgFiber: 2gSugar: 30gVitamin A: 500IUVitamin C: 50mgCalcium: 100mgIron: 1mg

Notes

Assemble the Filipino Mango Float the night before for better flavor blending. Use chilled tools for fluffier whipped cream and select ripe Carabao mangoes for best results.

Tried this recipe?

Let us know how it was!

Sweet and Crunchy Honey Sesame Cashews You’ll Love

The aroma wafting through the kitchen was a delightful tease, hinting at the magic soon to unfold—crunchy honey sesame cashews were about to make their debut! This 4-ingredient snack is my go-to when I’m craving something sweet and salty, and it’s ready in under an hour. Not only are these cashews gluten-free, but they also elevate any occasion, whether as a quick snack or a sophisticated touch to a salad or charcuterie board. The sticky sweetness of honey harmonizes beautifully with toasted sesame seeds while a splash of cayenne gives it an unexpected kick. Curious about how to whip up this irresistible combination? Let’s dive into this simple recipe that’s sure to impress your taste buds!

Why Are Honey Sesame Cashews Irresistible?

Simplicity: With just four ingredients, this recipe is a breeze to whip up—perfect for home cooks of any skill level.

Quick to Prepare: Ready in under an hour, these honey sesame cashews are perfect for when cravings strike, saving you from reaching for unhealthy snacks.

Sweet and Savory Bliss: The balance of honey’s sweetness and cayenne’s subtle heat creates a flavor explosion that’s hard to resist!

Versatile Addition: Whether you’re snacking, dressing up a salad, or adding to a charcuterie board, these cashews elevate any dish—similar to my Honey Garlic Shrimp.

Crowd-Pleaser: Serve them at gatherings, and watch them disappear—they’re sure to be a hit at your next party!

Honey Sesame Cashew Ingredients

• A simple list of key ingredients to bring this sweet and salty snack to life!

For the Cashews

  • Honey – Provides natural sweetness and acts as the adhesive for the ingredients; substitute with maple syrup for a vegan version.
  • Roasted Cashews – The base ingredient that adds creaminess and crunch; can also use peanuts, almonds, walnuts, or pecans.

For Flavoring

  • Toasted Sesame Seeds – Contributes nuttiness and crunch; ensure they’re toasted to bring out their flavor.
  • Cayenne Pepper – Adds a hint of heat without overwhelming the sweetness; can be omitted for a milder flavor.
  • Salt – Enhances flavor and balances the sweetness; opt for sea salt or kosher salt, or leave out for a sodium-reduced snack.

Note: This ingredient list is simple and just perfect for whipping up those delightful Honey Sesame Cashews!

Step‑by‑Step Instructions for Honey Sesame Cashews

Step 1: Prepare Baking Sheet
Preheat your oven to 325°F (163°C) and line a baking sheet with parchment paper. This helps prevent the honey sesame cashews from sticking and ensures easy cleanup. As the oven heats up, gather your ingredients and get ready for the delicious mix that will create your crunchy snack.

Step 2: Mix Ingredients
In a large mixing bowl, combine the honey, salt, and cayenne pepper to create a flavorful glaze. Stir well until the mixture is smooth and cohesive. Next, add the toasted sesame seeds and roasted cashews, tossing everything together until each cashew is evenly coated in the sticky, sweet glaze.

Step 3: Bake
Spread the coated cashew mixture in a single layer on the prepared baking sheet. Place the sheet in the preheated oven and bake for 15-18 minutes, stirring halfway through. Keep an eye on your honey sesame cashews; they should become golden and fragrant, but be careful not to let them burn!

Step 4: Cool
Once the cashews are baked to perfection, remove the baking sheet from the oven and let them cool for about 10 minutes. This cooling period allows the honey glaze to harden, transforming the sticky cashews into a deliciously crunchy snack.

Step 5: Break Clusters
After the honey sesame cashews have cooled completely, gently break them into smaller clusters. This makes them easier to snack on and perfect for storage. Place your beautifully baked cashews in an airtight container for a delightful treat any time you need a sweet and savory pick-me-up!

Honey Sesame Cashews Variations & Substitutions

Invite your creativity into the kitchen! These delightful honey sesame cashews can be easily customized to suit your taste preferences and dietary needs.

  • Nut-Free: Use sunflower seeds or pumpkin seeds instead of cashews for a completely nut-free snack.
  • Vegan: Swap honey for maple syrup or agave nectar to make this treat plant-based and just as delicious!
  • Sweet & Spicy: Add a sprinkle of chili powder or smoked paprika alongside cayenne for an extra kick that dances on your taste buds.
  • Roasted Sweet Potatoes: Toss in some oven-roasted sweet potato cubes for added sweetness and a nice chewy texture that contrasts with the crunchy cashews.
  • Coconut Twist: Mix in unsweetened shredded coconut for a tropical flair that pairs beautifully with the sweet and salty coating.

Let your imagination run wild! Experiment with these variations, and perhaps even try a special combination that aligns with your culinary desires. For more naturally sweet and savory ideas, you might also enjoy my Honey Sriracha Ground Chicken or even Honey Sriracha Glazed Meatballs that can make your meals pop!

Expert Tips for Honey Sesame Cashews

  • Parchment Paper: Always line your baking sheet to prevent the cashews from sticking, ensuring a hassle-free clean-up.

  • Toasting Sesame Seeds: Toast your sesame seeds just right for maximum flavor. Keep an eye on them to prevent burning.

  • Cooling Time: Allow cashews to cool completely on the baking sheet before storage; this helps the honey glaze harden properly for the best crunch.

  • Customizing Heat: Adjust cayenne pepper to suit your taste. Omit it entirely for a purely sweet treat if preferred.

  • Using Whole Cashews: Don’t feel compelled to halve the cashews; whole nuts retain their creaminess and crunch beautifully in your honey sesame cashews!

Make Ahead Options

These honey sesame cashews are a fantastic choice for meal prep, allowing you to enjoy a delightful snack anytime! You can mix the honey glaze and coat your cashews up to 24 hours in advance. Simply combine the honey, salt, and cayenne pepper, adding the roasted cashews and toasted sesame seeds. Store this mixture in an airtight container in the refrigerator until you’re ready to bake. When you’re set to serve, spread the mixture on a lined baking sheet and bake at 325°F (163°C) for 15-18 minutes. This ensures your honey sesame cashews remain just as delicious, providing the sweet, salty crunch you crave, all without the weekday rush!

What to Serve with Honey Sesame Cashews

The sweet, crunchy allure of honey sesame cashews is only the beginning of the culinary journey; enhance your snacking experience with these delightful pairings.

  • Fresh Fruit Salad: A burst of juicy fruits complements the nutty cashews and adds a refreshing contrast to their sweetness.

  • Creamy Yogurt Dip: Pair with a yogurt dip for a smooth, tangy contrast that balances the honey’s sweetness beautifully.

  • Cheese Platter: The rich creaminess of Brie or goat cheese pairs wonderfully with the sweet and salty flavor profile of the cashews, creating an indulgent bite.

  • Crunchy Vegetable Sticks: Serve with carrot and cucumber sticks for a satisfying crunch that adds a fresh, crisp element.

  • Mixed Green Salad: Toss these cashews into a bed of greens for a nourishing salad with intriguing textures and flavors, making every bite a celebration.

  • Spicy Popcorn: For a twist, pair with spicy popcorn for a thrilling snack mix that plays off the sweet and savory notes of the cashews.

  • Chilled White Wine: A glass of chilled Sauvignon Blanc or a dry Riesling is the perfect drink to elevate this delightful treat.

  • Dark Chocolate Squares: For a sweet finish, serve with dark chocolate to create a heavenly combination of flavors that tantalize the taste buds.

How to Store and Freeze Honey Sesame Cashews

Room Temperature: Store cooled honey sesame cashews in an airtight container at room temperature for up to 1 week to maintain their crispiness and flavor.

Fridge: If you prefer, you can keep them in the fridge where they can last for up to 2 weeks. Ensure they are sealed tightly to prevent moisture.

Freezer: For longer storage, freeze the cashews in a carefully sealed freezer bag for up to 3 months. Thaw at room temperature before enjoying.

Reheating: If the cashews become soft, re-bake at 300°F (150°C) for about 5-10 minutes to restore their crunchy texture.

Honey Sesame Cashews Recipe FAQs

How do I select the best honey for this recipe?
Absolutely, choose a honey that you love! Look for pure, raw honey to get the best flavor—avoid blends or those with added sugars. Local honey can also add a unique touch, often featuring flavors that reflect the local flora.

How do I store honey sesame cashews?
To keep your honey sesame cashews fresh, store them in an airtight container at room temperature for up to one week. Make sure they are completely cooled before sealing, so they maintain their delightful crunch!

Can I freeze honey sesame cashews?
Yes, you can! To freeze, place the cooled cashews in a well-sealed freezer bag or airtight container. They’ll stay good for up to 3 months. When you’re ready to enjoy them, thaw them at room temperature. If they’ve lost some crunch, you can gently re-bake them at 300°F (150°C) for about 5-10 minutes.

What should I do if my cashews are sticking together after baking?
If your cashews are sticking together, it could be due to not cooling them completely before storage. To remedy this, break them apart gently using your hands or a spatula. If they remain too sticky after cooling, you might need to bake them a bit longer next time. Make sure to stir them halfway through to prevent clumping.

Are honey sesame cashews safe for those with nut allergies?
Unfortunately, this recipe isn’t suitable for those with nut allergies, but you can try substituting seeds like sunflower seeds for a similar crunch! Always check for cross-contamination if you’re using shared equipment, and adjust the recipe as needed for your dietary needs.

Honey Sesame Cashews

Sweet and Crunchy Honey Sesame Cashews You’ll Love

Delight in these Honey Sesame Cashews, a sweet and salty snack perfect for any occasion.
Prep Time 10 minutes
Cook Time 15 minutes
Cooling Time 10 minutes
Total Time 35 minutes
Servings: 4 servings
Course: Appetizer
Cuisine: American
Calories: 200

Ingredients
  

For the Cashews
  • 1 cup Honey Substitute with maple syrup for vegan version
  • 2 cups Roasted Cashews Can substitute with peanuts, almonds, walnuts, or pecans
For Flavoring
  • 1 tablespoon Toasted Sesame Seeds Ensure they’re toasted for maximum flavor
  • 1/4 teaspoon Cayenne Pepper Can be omitted for a milder flavor
  • 1/2 teaspoon Salt Opt for sea salt or kosher salt

Equipment

  • Oven
  • Mixing Bowl
  • Baking Sheet
  • Parchment paper

Method
 

Step-by-Step Instructions
  1. Preheat your oven to 325°F (163°C) and line a baking sheet with parchment paper.
  2. In a large mixing bowl, combine the honey, salt, and cayenne pepper.
  3. Add the toasted sesame seeds and roasted cashews, tossing until evenly coated.
  4. Spread the mixture in a single layer on the prepared baking sheet and bake for 15-18 minutes.
  5. Remove from the oven and let them cool for about 10 minutes.
  6. Break into smaller clusters for easy snacking and store in an airtight container.

Nutrition

Serving: 1ozCalories: 200kcalCarbohydrates: 16gProtein: 5gFat: 14gSaturated Fat: 1.5gPolyunsaturated Fat: 3gMonounsaturated Fat: 8gSodium: 150mgPotassium: 200mgFiber: 2gSugar: 8gCalcium: 30mgIron: 1mg

Notes

These honey sesame cashews are perfect for snacking, salads, or charcuterie boards. Store in a cool, dry place for maximum crispiness.

Tried this recipe?

Let us know how it was!

Greek Style Loaded Hummus: A Fresh Twist for Fast Flavor

As summer beckons with its vibrant colors and fresh produce, I found myself in a mini crisis—how to create something quick yet bursting with flavor that could elevate our usual snack game. Enter this Quick and Easy Loaded Greek Hummus, where creamy goodness meets a delightful Greek-style horiatiki salad atop a smooth hummus base. This recipe is not only a no-bake sensation, but it’s also a healthy appetizer that’s perfect for warm evenings or gatherings. Picture a colorful platter filled with juicy cherry tomatoes, crunchy cucumbers, and briny olives, all harmoniously mingling together. You’ll love how it effortlessly combines convenience with a Mediterranean flair, making it an enticing option for meal prep or entertaining. Could there be a better way to savor summer’s best offerings? Let’s dive into this delicious creation together!

Why is this Greek Style Loaded Hummus special?

Simplicity: With just a handful of fresh ingredients, this recipe is a breeze to prepare, making it perfect for those busy summer days.

Vibrant Flavors: The combination of crunchy cucumbers, juicy tomatoes, and tangy olives brings a refreshing taste that will delight your palate.

Healthy Option: Packed with plant-based protein and fiber, this appetizer not only satisfies your cravings but also supports your wellness goals.

Versatility: It’s a fantastic addition to any party platter or a quick lunch, and you can easily swap veggies or spices to cater to your taste.

Make Ahead: Meal prep has never been easier! Prepare this dish in advance for quick snacks or light dinners, ensuring you’ll always have a delicious, healthy option on hand.

For more refreshing ideas, check out my Roasted Carrot Hummus or these Greek Style Loaded variations to mix things up!

Greek Style Loaded Hummus Ingredients

For the Hummus

  • Hummus – The creamy base; you can use store-bought or a homemade version for ease. Substitute with any flavored hummus for a twist!
  • Garlic – Minced for maximum flavor enhancement; don’t skip this for that delicious depth!

For the Greek Salad Topping

  • Kalamata Olives – Adds a briny richness; feel free to omit for a milder taste or substitute with black olives.
  • Cherry Tomatoes – Provide sweetness and juiciness; halve or quarter based on size for better presentation.
  • Cucumbers – Adds crunch; mini cucumbers work best here, but bell peppers can be a delightful alternative!
  • Red Onion/Shallots – Offers a sharper flavor; thinly slice to keep it balanced or switch to shallots for a gentler taste.
  • Pepperoncini Peppers – For a mild kick and tang; if you crave more heat, opt for jalapeños instead.

Herbs and Seasonings

  • Oregano – Brings earthiness to the dish; dried can be used, but fresh is the way to go for an aromatic touch!
  • Olive Oil – Adds richness; drizzle over the top to enhance flavors and texture.
  • Herbs (parsley, mint, chives) – Fresh herbs elevate the dish; use a mix of your favorites to brighten the flavor profile.

For the Garnish

  • Sumac/Paprika – A sprinkle adds an extra layer of flavor; choose either for a beautiful finish.
  • Toasted Pine Nuts – Optional for added crunch; these give a delicious nuttiness to your Greek Style Loaded Hummus.

This blend of fresh ingredients creates a vibrant and delectable dish that not only pleases the eye but also tantalizes the taste buds. Enjoy the flavors of summer with this healthy appetizer!

Step‑by‑Step Instructions for Greek Style Loaded Hummus

Step 1: Prepare the Hummus Base
Begin by spreading your chosen hummus in a large serving bowl, creating an even layer that covers the base. Use a spatula to smooth it out to the edges, making a lovely canvas for your toppings. Aim for a thickness of about half an inch, ensuring it looks creamy and inviting.

Step 2: Add the Fresh Veggies
Next, layer the colorful cherry tomatoes, crunchy cucumbers, sliced red onions, and pepperoncini peppers over the hummus base. Arrange the ingredients in a visually appealing pattern, grouping similar colors and textures together. This not only adds vibrancy but also ensures each bite is packed with flavor.

Step 3: Drizzle with Olive Oil
Drizzle a generous amount of olive oil over the fresh vegetable layer, using a spoon or a small dish for control. The oil will add richness and help the flavors mingle beautifully. Aim for a glossy finish, making the vibrant veggies glisten, enticing everyone to dive in.

Step 4: Season the Dish
Sprinkle dried oregano, salt, and freshly cracked black pepper over the veggie layer to enhance the taste. Be liberal, but adjust according to the saltiness of your hummus and olives, as you want the seasoning to complement and not overpower. Watch for an aromatic lift as the herbs meld into the dish.

Step 5: Garnish with Fresh Herbs
Finely chop a mix of fresh herbs like parsley, mint, or chives, and sprinkle them generously over the top of your Greek Style Loaded Hummus. These herbs will not only elevate the visual appeal but also add freshness and a burst of flavor. Each herb will contribute its unique aroma, inviting everyone closer.

Step 6: Add Finishing Touches
For the final flourish, sprinkle either sumac or paprika over the completed dish for an extra layer of flavor and color. If desired, top with toasted pine nuts to add crunch and nutty depth. Visualize a delightful contrast of colors that beckons guests to scoop in and enjoy.

Step 7: Serve with Accompaniments
Serve your Greek Style Loaded Hummus immediately alongside an assortment of dippers such as pita chips, sliced sweet peppers, or fresh veggies. Add lemon wedges for a zesty squeeze right before you dig in; this will enhance the flavors and freshness of the dish, making it a true delight at any gathering.

Expert Tips for Greek Style Loaded Hummus

  • Ingredient Quality: Use the freshest veggies you can find; they make a significant difference in flavor and texture for your Greek Style Loaded Hummus.

  • Chopping Technique: Cut your veggies uniformly to not only enhance appearance but also ensure a balanced bite every time.

  • Flavor Balance: Taste before serving! Adjust seasoning according to the saltiness of your hummus and the brininess of olives to avoid overpowering flavors.

  • Storage Solution: If making in advance, layer the hummus and toppings separately until serving to maintain freshness and prevent sogginess.

  • Customization Freedom: Don’t hesitate to experiment with different topping options; adding feta, or roasted veggies can create a whole new flavor experience!

Storage Tips for Greek Style Loaded Hummus

Fridge: Store any leftovers in an airtight container in the fridge for up to 3 days. This helps maintain freshness while allowing the flavors to meld nicely.

Freezer: While freezing is not recommended for the topped hummus, you can freeze leftover hummus without toppings for up to 3 months. Thaw in the fridge before using.

Reheating: If your hummus has been frozen, make sure to stir it well after thawing. For serving, consider adding a drizzle of olive oil and fresh herbs on top for a burst of flavor.

Serving Freshness: This Greek Style Loaded Hummus is best enjoyed fresh, so aim to prepare only what you’ll enjoy within a few days.

Greek Style Loaded Hummus Variations

Feel free to play around with these delectable twists to make your Greek Style Loaded Hummus uniquely yours!

  • Roasted Veggies: Substitute fresh veggies for roasted bell peppers and zucchini for a deeper, caramelized flavor. Roasting enhances sweetness and adds a warm touch that complements the creamy hummus beautifully.

  • Spicy Kick: Add diced jalapeños instead of pepperoncini for a fiery punch. If you love heat, this twist will transform your dish into a spicy sensation that’s sure to impress.

  • Herb Infusion: Experiment with fresh herbs like dill or basil instead of oregano. Each herb can introduce a new layer of aroma and taste, giving your dish a fresh update that feels both familiar and exciting.

  • Cheesy Bliss: Crumble feta cheese over the top for a rich and creamy addition. This salty element pairs perfectly with the other ingredients, taking your flavor game to new heights.

  • Nutritional Boost: For a vegan option, ensure your hummus is dairy-free and sprinkle with nutritional yeast for a cheesy flavor without the dairy. Your hummus will have a delightful umami kick without compromising your dietary choices.

  • Crunchy Seeds: Add sunflower or pumpkin seeds on top for an extra crunch and nutty flavor. This not only enhances texture but also makes for a satisfying bite that kids and adults will love.

  • Citrus Zing: Squeeze fresh lemon juice over the top for a zesty kick that brightens up every mouthful. The acidity complements the hummus’ richness and lifts the overall flavor profile.

  • Sweet Twist: Incorporate diced fresh fruits like strawberries or pomegranate seeds for a surprising sweet and savory contrast. This creative touch not only adds color but also a refreshing burst of sweetness to counterbalance the dish’s savory elements.

Feel free to explore these variations and create your very own masterpiece! You might also enjoy using the same creative spirit with my delicious Bakery Style Blueberry muffins or try layering your hummus with elements from my Greek Style Loaded ideas. The world is your culinary playground!

What to Serve with Loaded Greek Hummus

Looking to create a delightful, well-rounded meal around your vibrant Loaded Greek Hummus?

  • Pita Chips: Their crunchy texture complements the creamy hummus, providing an irresistible dipper that enhances the overall experience. Perfectly seasoned and warm, pita chips add a fresh twist.
  • Greek Salad: A classic pairing that mirrors the flavors in the hummus, offering a light and refreshing contrast, packed with fresh cucumbers, juicy tomatoes, and tangy feta. It’s a vibrant addition to your spread!
  • Stuffed Grape Leaves: These flavorful morsels bring a delightful Mediterranean twist that harmonizes well with your hummus, enhancing the theme and providing a chewy texture.
  • Grilled Vegetable Skewers: Sweet bell peppers, zucchini, and eggplant provide a smoky element that beautifully balances the creamy hummus while adding a lovely charred flavor.
  • Lemon Wedges: Adding a zesty squeeze of lemon not only brightens the flavors of the hummus but also refreshes the palate between bites, enhancing the overall taste experience.
  • Mint Yogurt Sauce: A creamy and cooling counterpart, this yogurt-based sauce brings a hint of tanginess and a burst of freshness that makes each bite even more delightful. It’s a perfect complement to the Mediterranean theme!
  • Chickpea Salad: A hearty side that’s protein-rich and full of texture, the chickpeas work beautifully with the hummus, offering an additional layer of flavors that will keep guests coming back for more!

Enjoy these delicious accompaniments as they elevate your Loaded Greek Hummus into a memorable feast!

Make Ahead Options

These Loaded Greek Hummus bowls are a fantastic meal prep option for busy home cooks! You can prepare the hummus base and layer the chopped veggies up to 24 hours in advance for optimal convenience. Simply spread the hummus in a serving bowl and arrange your cherry tomatoes, cucumbers, and red onions on top; cover tightly with plastic wrap to keep the ingredients fresh. When you’re ready to serve, drizzle with olive oil, sprinkle with oregano, and garnish with the herbs and toasted pine nuts just before enjoying. This ensures every bite is as fresh and vibrant as if you made it right before serving, saving you precious time in your busy schedule!

Greek Style Loaded Hummus Recipe FAQs

How do I select ripe cherry tomatoes and cucumbers?
Absolutely! Look for cherry tomatoes that are vibrant in color and firm to the touch, without any dark spots. For cucumbers, choose ones that are firm and crisp, preferably with smooth skin. If they have any wrinkles, they might be overripe. Trust your senses; fresh produce is the heart of this dish!

What is the best way to store leftovers?
Very! To keep your Greek Style Loaded Hummus fresh, place any leftovers in an airtight container and store it in the fridge. It should stay good for up to 3 days. Just remember, the longer it sits, the more the veggies can lose their crunch, so try to enjoy it as soon as possible!

Can I freeze Greek hummus?
You can! If you have leftover hummus without the toppings, you can freeze it for up to 3 months. Simply transfer the hummus into a freezer-safe container, leaving some room at the top for expansion. When you’re ready to enjoy, thaw it in the fridge overnight and stir well before serving. Adding a drizzle of olive oil can bring back a lovely creaminess!

What if my hummus is too thick after thawing?
No problem! If your hummus seems a bit thick after thawing, just add a tablespoon or two of olive oil or warm water and blend until smooth. This will help restore its creamy consistency. A quick pulse in the food processor, and it’s good to go!

Are there any dietary considerations I should be aware of?
Definitely! While this recipe is naturally vegetarian and can be made vegan, if you have allergies, make sure to check the ingredients used in the hummus. If you’re serving it to pets, keep in mind that garlic and onion can be harmful to dogs and cats, so it’s best to keep those ingredients away from them.

Can I customize the toppings for different flavor profiles?
The more the merrier! Feel free to swap out ingredients according to your taste. You can add roasted red peppers for sweetness or crumbled feta cheese for a salty kick. Just keep the balance of flavors in mind, and you’ll create your very own twist on the Greek Style Loaded Hummus!

Greek Style Loaded Hummus

Greek Style Loaded Hummus: A Fresh Twist for Fast Flavor

This Greek Style Loaded Hummus combines creamy hummus with a vibrant Greek salad for a quick and healthy appetizer.
Prep Time 15 minutes
Total Time 15 minutes
Servings: 4 servings
Course: Appetizer
Cuisine: Mediterranean
Calories: 250

Ingredients
  

For the Hummus
  • 1 cup hummus store-bought or homemade
  • 1 clove garlic minced
For the Greek Salad Topping
  • 1/2 cup kalamata olives pitted and sliced
  • 1 cup cherry tomatoes halved or quartered
  • 1 cup cucumbers sliced
  • 1/4 cup red onion thinly sliced
  • 1/4 cup pepperoncini peppers sliced
Herbs and Seasonings
  • 1 teaspoon oregano dried or fresh
  • 2 tablespoons olive oil for drizzling
  • 1/4 cup herbs (parsley, mint, chives) finely chopped
For the Garnish
  • 1 teaspoon sumac or paprika for sprinkling
  • 1/4 cup toasted pine nuts optional

Equipment

  • large serving bowl
  • Spatula
  • Spoon

Method
 

Step‑by‑Step Instructions
  1. Spread your chosen hummus in a large serving bowl, covering the base evenly.
  2. Layer cherry tomatoes, cucumbers, red onions, and pepperoncini peppers over the hummus.
  3. Drizzle olive oil over the fresh vegetable layer.
  4. Sprinkle oregano, salt, and pepper over the veggie layer.
  5. Finely chop fresh herbs and sprinkle over the top.
  6. Sprinkle either sumac or paprika on top and add toasted pine nuts.
  7. Serve with assorted dippers like pita chips and fresh veggies.

Nutrition

Serving: 1cupCalories: 250kcalCarbohydrates: 20gProtein: 6gFat: 15gSaturated Fat: 2gPolyunsaturated Fat: 1gMonounsaturated Fat: 12gSodium: 300mgPotassium: 500mgFiber: 5gSugar: 3gVitamin A: 10IUVitamin C: 15mgCalcium: 60mgIron: 2mg

Notes

Use the freshest veggies available for the best flavor. Customize toppings to your liking.

Tried this recipe?

Let us know how it was!