As the sun blazes down, nothing beats the satisfaction of a refreshing bite that cools you to your core. Enter my Frozen Tajin Grapes—a vibrant, four-ingredient delight that blends sweetness and spice into one juicy treat. This simple recipe is not just easy to whip up; it makes a perfect healthy snack to have on hand for those long summer days. Just gather some fresh grapes, a splash of lemon, monk fruit sweetener, and the zesty kick of Tajin, and you’re ready to go. The best part? You can prepare these tasty morsels days in advance, simplifying your snacking while delighting your taste buds with a unique flavor twist. Ready to give your snack game a refreshing upgrade? Let’s dive in!
Why are Frozen Tajin Grapes so irresistible?
Simplicity: Just four ingredients come together swiftly, making this recipe a breeze for anyone, from busy parents to culinary enthusiasts.
Unique Flavor: The sweet juiciness of grapes perfectly harmonizes with the zesty Tajin, creating an extraordinary flavor profile.
Healthy Snack: With around 44 calories per serving, these treats are a guilt-free way to satisfy your cravings!
Make-Ahead Magic: Prep them in advance and pull them from the freezer whenever hunger strikes—no thawing necessary!
Crowd-Pleasing Delight: Serve these at summer gatherings, and watch as friends and family rave about this vibrant and tasty snack. Check out other exciting, healthy snacks that will wow your guests!
Frozen Tajin Grapes Ingredients
For the Grapes
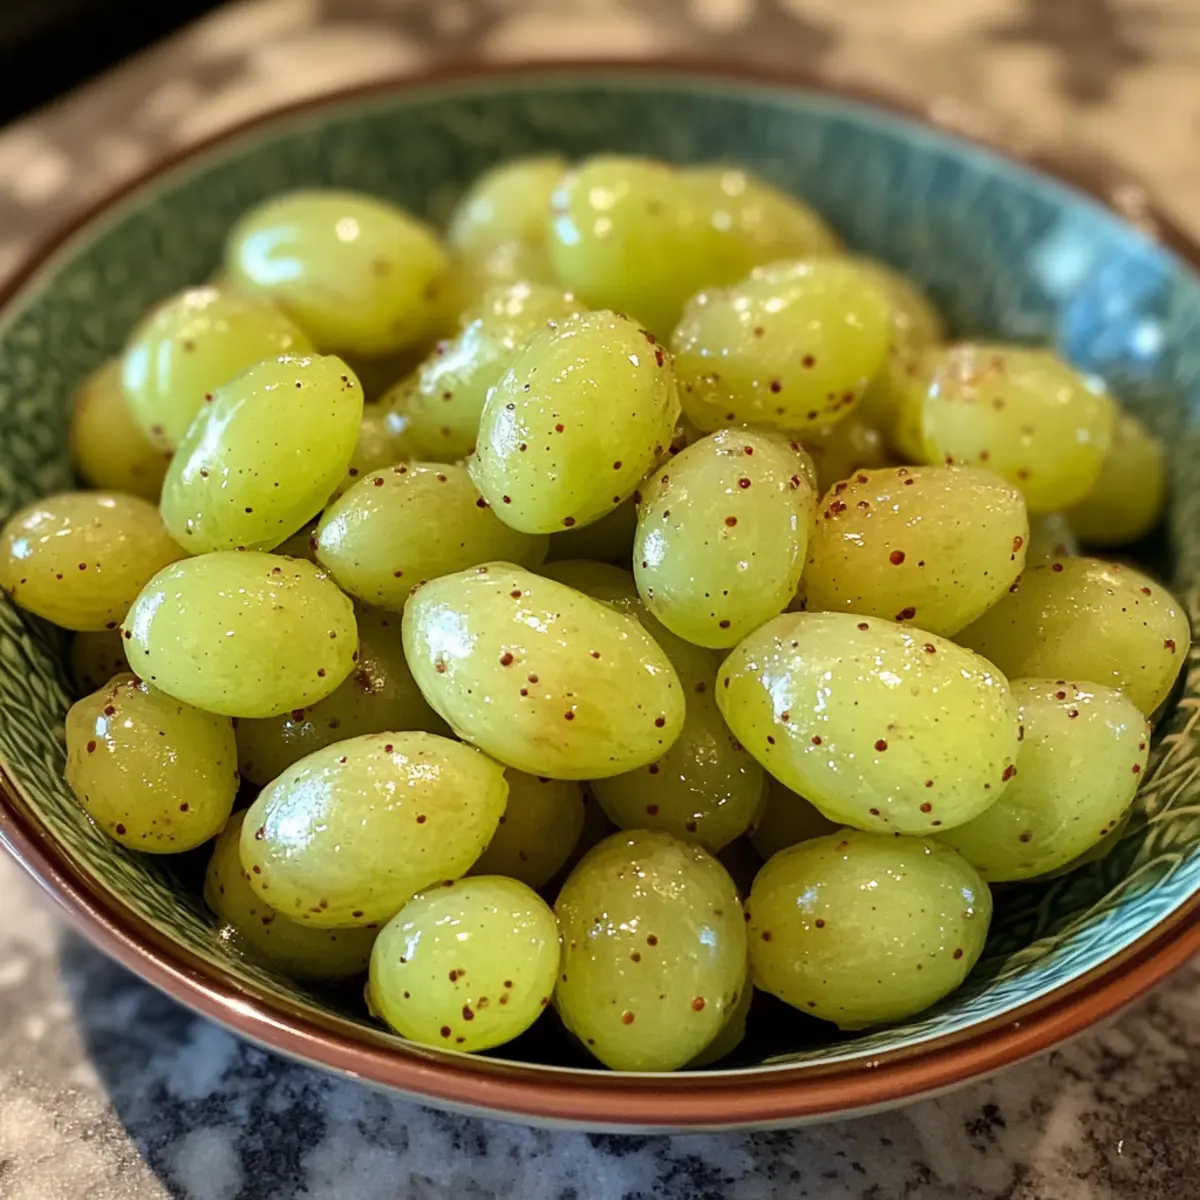
- Grapes – Fresh fruit providing natural sweetness and juiciness; green grapes offer a crisper flavor.
- Lemon – Adds acidity for balance; fresh lemon juice elevates the flavor profile.
For Sweetening and Spice
- Monk Fruit Sweetener – A low-calorie sweetener alternative; can be replaced with equal parts sugar if desired.
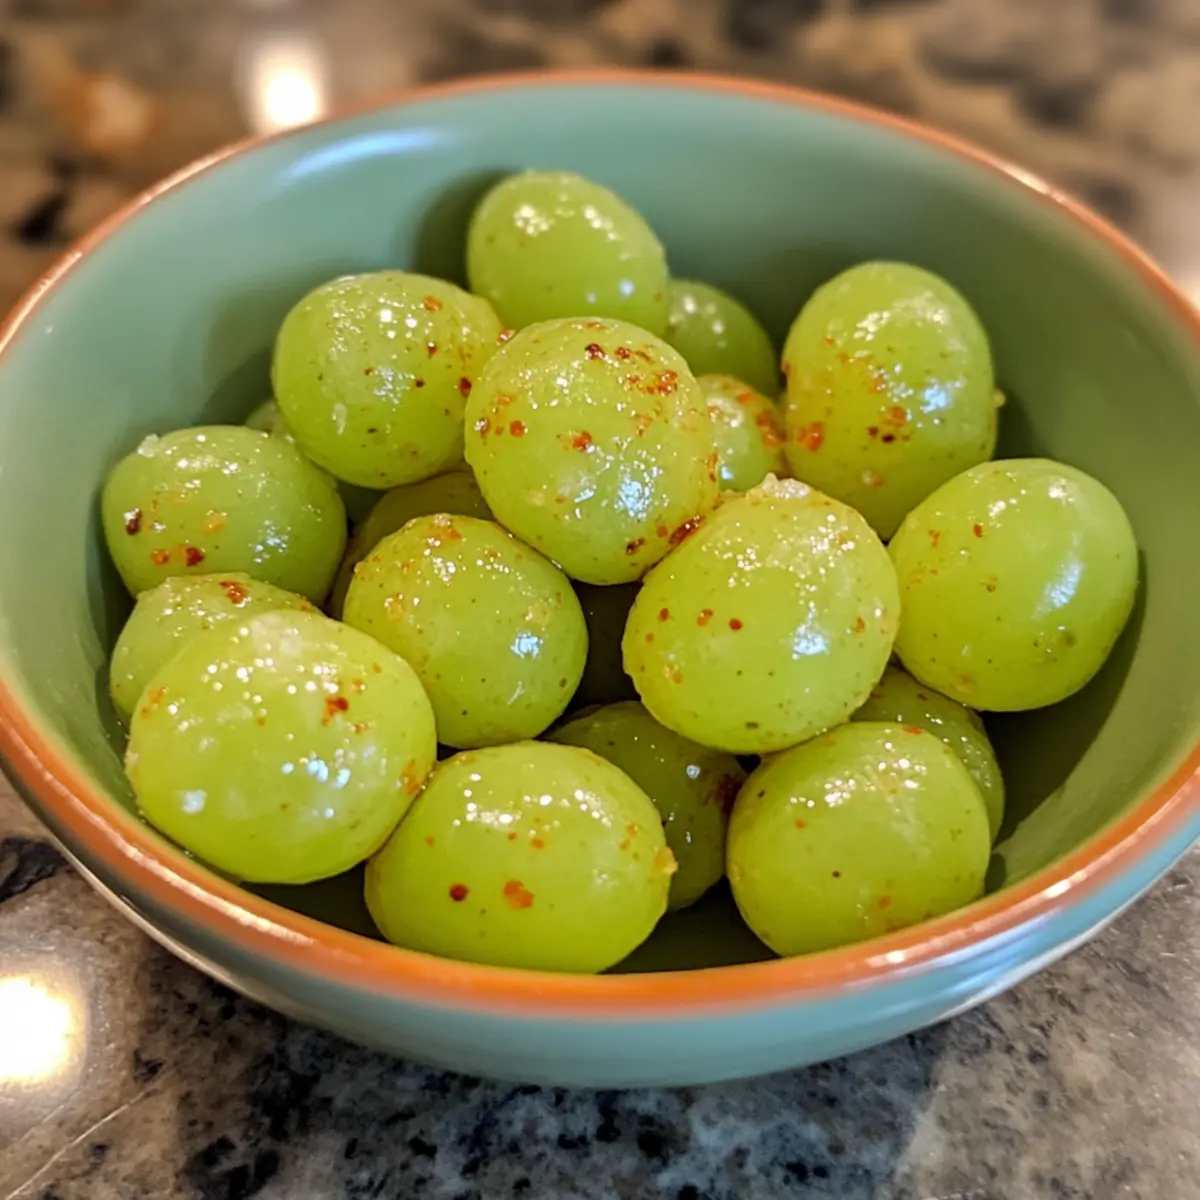
- Tajin – A chili-lime seasoning that delivers a zesty kick; it’s the secret to making your Frozen Tajin Grapes irresistibly refreshing!
Step‑by‑Step Instructions for Frozen Tajin Grapes
Step 1: Wash the Grapes
Begin by washing a large bunch of fresh green grapes under cool running water. Gently rub them to remove any dirt or residue, then place them on a clean kitchen towel to dry completely. It’s essential to soak up all moisture, as thoroughly dried grapes will maintain their texture when frozen.
Step 2: Prepare the Lemon Juice
Once your grapes are dry, take one fresh lemon and cut it in half. Using a citrus juicer or your hand, squeeze the juice of both halves directly over the grapes in a large bowl. Make sure to catch any seeds that may escape, allowing the citrusy goodness to coat the grapes evenly, infusing them with a bright flavor.
Step 3: Add Sweetener and Tajin
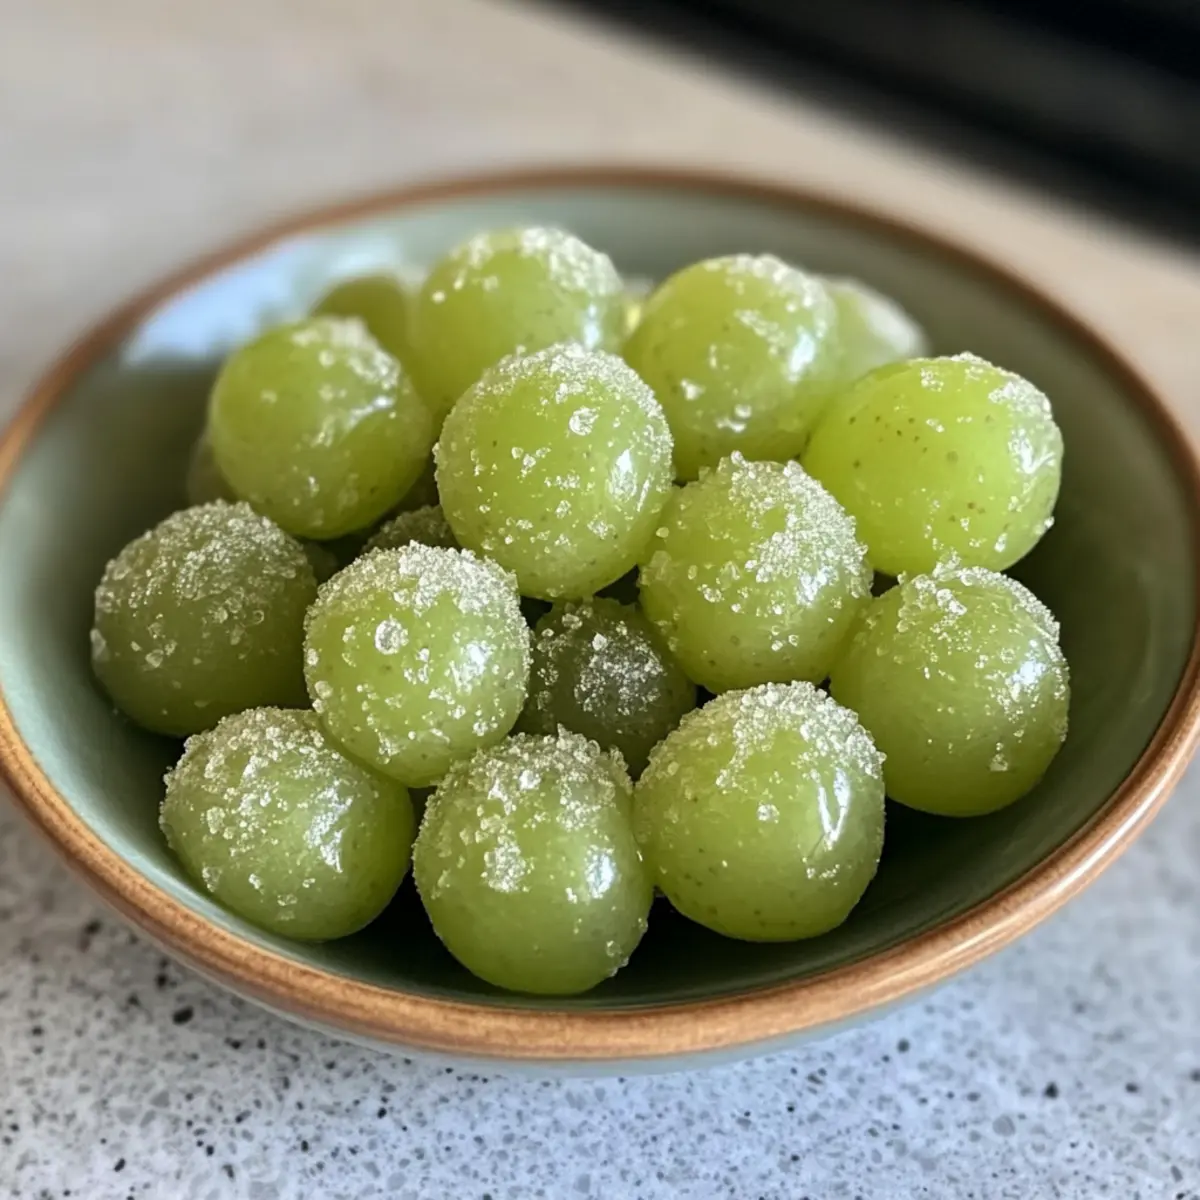
Next, measure out 2 tablespoons of monk fruit sweetener and 2 tablespoons of Tajin seasoning. Sprinkle them into the bowl over the lemon-coated grapes. The combination of sweetness and tangy spice will create a tantalizing flavor profile for your Frozen Tajin Grapes, ensuring each bite is both refreshing and exciting.
Step 4: Toss the Ingredients
With clean hands or a spatula, gently toss the grapes with the lemon juice, sweetener, and Tajin. Ensure all grapes are thoroughly coated; they should appear glistening and vibrant. Adjust the amounts of sweetener and Tajin to fit your personal taste if needed, making sure every grape is a burst of flavor.
Step 5: Freeze the Grapes
Cover the bowl with plastic wrap or a lid, and place it in the freezer. Allow the Grapes to freeze for a minimum of 2 hours, or overnight for best results. This freezing step ensures that your Frozen Tajin Grapes achieve the perfect icy texture, becoming a delightful treat on a hot day.
Step 6: Serve and Enjoy!
Once frozen, take the bowl out of the freezer and serve the grapes directly. They should be firm and refreshing, bursting with sweet and zesty flavors. If there are any leftovers, simply return them to the freezer; they can last up to one month, offering you an ongoing supply of this delicious snack.
How to Store and Freeze Frozen Tajin Grapes
Fridge: Keep Frozen Tajin Grapes in the freezer for optimal freshness. If you prefer a slightly softer texture, you can allow them to thaw in the fridge for up to 30 minutes before serving.
Freezer: Store them in an airtight container or a freezer-safe bag to prevent freezer burn. They can stay fresh in the freezer for up to one month.
Reheating: There’s no need to reheat these treats; simply serve them straight from the freezer for the ultimate refreshing snack experience!
Leftovers: If you have any leftover grapes, return them to the airtight container and pop them back into the freezer immediately for later enjoyment.
Expert Tips for Frozen Tajin Grapes
Dry Thoroughly: Ensure grapes are completely dry before freezing; excess moisture can lead to ice crystals and a mushy texture.
Taste Adjustments: Feel free to taste before freezing; adjust the sweetness or Tajin levels according to your preference for the most delicious Frozen Tajin Grapes.
Experiment with Varieties: Try using different grape varieties—red or black grapes can bring a unique sweetness and flavor profile to your snack.
Flavor Boost: For added zest, consider a touch of chamoy sauce before tossing the grapes for an extra layer of spice and sweetness.
Serving Size: Remember to serve the grapes straight from the freezer—it keeps them refreshing and prevents melting before enjoyment!
Frozen Tajin Grapes Variations & Substitutions
Feel free to get creative and personalize your Frozen Tajin Grapes with these delightful twists!
- Spicy Kick: Add a sprinkle of cayenne pepper for an extra heat level that warms up the flavor perfectly.
- Different Sweeteners: Swap monk fruit sweetener for honey or agave syrup for a richer sweetness; keep it natural and delicious!
- Mixed Fruit Medley: Incorporate other fruits like strawberries or ripe mango slices to create a colorful frozen fruit salad.
- Fresh Herbs: A hint of fresh mint can enhance the refreshing taste; simply chop finely and mix in for a burst of flavor.
- Tajin Alternatives: If you can’t find Tajin, chili powder or a mix of lime zest and salt works wonders, bringing zestiness without compromising on taste.
- Citrus Variety: Mix it up with lime or orange juice instead of lemon for a unique flavor profile that still keeps things bright and zesty.
- Creamy Texture: For a creamier treat, pulse the frozen grapes in a food processor briefly to make them smoother before serving.
- Tropical Twist: Add a hint of coconut flakes to the mix before freezing; it offers a tropical flavor that pairs beautifully with the other ingredients.
Explore these variations to make your Frozen Tajin Grapes uniquely yours and share them at your next summer gathering! See how adding a splash of creativity can take healthy snacks to the next level with more delicious ideas from our Healthy Snack Recipes.
Make Ahead Options
These Frozen Tajin Grapes are perfect for busy home cooks looking to streamline their snack preparation! You can wash, dry, and toss the grapes with lemon juice, monk fruit sweetener, and Tajin up to 24 hours in advance. After combining the ingredients, simply cover the bowl and store it in the refrigerator. For the best texture, freeze the coated grapes for a minimum of 2 hours or overnight. When you’re ready to serve, take them directly from the freezer—no thawing necessary! This way, you’ll always have a refreshing, guilt-free snack on hand to satisfy your cravings throughout the week.
What to Serve with Frozen Tajin Grapes
To elevate your snacking experience, consider these delightful pairings that complement the sweet and spicy nature of your frozen treat.
-
Creamy Yogurt Dip:
A dollop of creamy Greek yogurt drizzled with honey creates a balanced contrast to the tartness of the grapes. The richness of the yogurt enhances each bite, making it a satisfying snack. -
Savory Cheese Platter:
A selection of soft cheeses, like goat or brie, pairs beautifully, offering a creamy counterpart that blends flavors seamlessly. The mildness of the cheese offsets the spice, creating a well-rounded flavor profile. -
Spicy Roasted Nuts:
Crunchy, spicy roasted nuts echo the Tajin’s kick while adding a satisfying crunch. The nuttiness complements the sweet grapes perfectly, creating a delightful texture contrast. -
Fresh Mint Salad:
A refreshing salad with mint, cucumber, and lime boosts the flavors while adding a crisp freshness. The coolness of the mint and crunch from the cucumbers harmonize with the spicy sweetness of your grapes. -
Coconut Water:
This naturally sweet beverage provides hydration and a tropical essence that pairs delightfully with the frozen grapes. It’s a thirst-quenching drink perfect for hot summer days. -
Dark Chocolate Squares:
Rich dark chocolate offers a luxurious treat that plays against the sweet and spicy notes. Each bite infuses a decadent richness, elevating your snacking experience. -
Berry Medley:
An assortment of fresh berries, such as strawberries and blueberries, adds a burst of juiciness that complements the flavors of the grapes. Their sweetness balances the tangy spices perfectly. -
Lemonade Spritzer:
A refreshing lemonade spritzer with a hint of mint invigorates your palate and pairs beautifully with the bold flavors of the grapes, keeping your snacking light and refreshing.
Frozen Tajin Grapes Recipe FAQs
What type of grapes should I use for Frozen Tajin Grapes?
Absolutely opt for fresh green grapes, as they offer a perfectly crisp and juicy flavor that pairs wonderfully with Tajin. While green grapes are recommended for their sweetness, you can also experiment with black or red grapes for a unique twist.
How should I store Frozen Tajin Grapes?
Storage is simple! Keep your Frozen Tajin Grapes in an airtight container or a resealable freezer-safe bag. They can stay fresh for up to one month in the freezer. If you prefer a slightly softer texture, allow them to thaw for about 30 minutes in the fridge before serving.
Can I freeze Frozen Tajin Grapes?
Yes! In fact, freezing is what makes this snack so irresistible. After preparing your grapes, cover the bowl and freeze them for at least 2 hours or overnight for best results. They stay perfectly refreshing when served straight from the freezer.
How do I avoid ice crystals when freezing?
To prevent ice crystals and maintain a delightful texture, ensure your grapes are thoroughly dried after washing. Also, avoid leaving them in the freezer for too long without consuming them. A good rule is to use them within a month for the best experience.
Are there any dietary restrictions I should be aware of?
Frozen Tajin Grapes are gluten-free and low in calories, making them an excellent healthy snack option. However, if you’re not using monk fruit sweetener, choose a sweetener that fits your dietary needs. Always check for any specific allergies regarding the spices used, like Tajin, which may contain chili and lime ingredients.

Frozen Tajin Grapes: Your Refreshing 4-Ingredient Snack
Ingredients
Equipment
Method
- Wash a large bunch of fresh green grapes under cool running water and dry them completely.
- Squeeze the juice of one fresh lemon over the grapes in a large bowl, removing seeds.
- Add 2 tablespoons of monk fruit sweetener and 2 tablespoons of Tajin to the bowl with the grapes.
- Gently toss the grapes to ensure they are coated with the lemon juice, sweetener, and Tajin.
- Cover the bowl with plastic wrap and freeze for at least 2 hours or overnight.
- Serve the frozen grapes directly from the freezer for a refreshing snack, returning leftovers to the freezer.