Creamy Parmesan Cloud Chicken Bombs for Quick Comfort

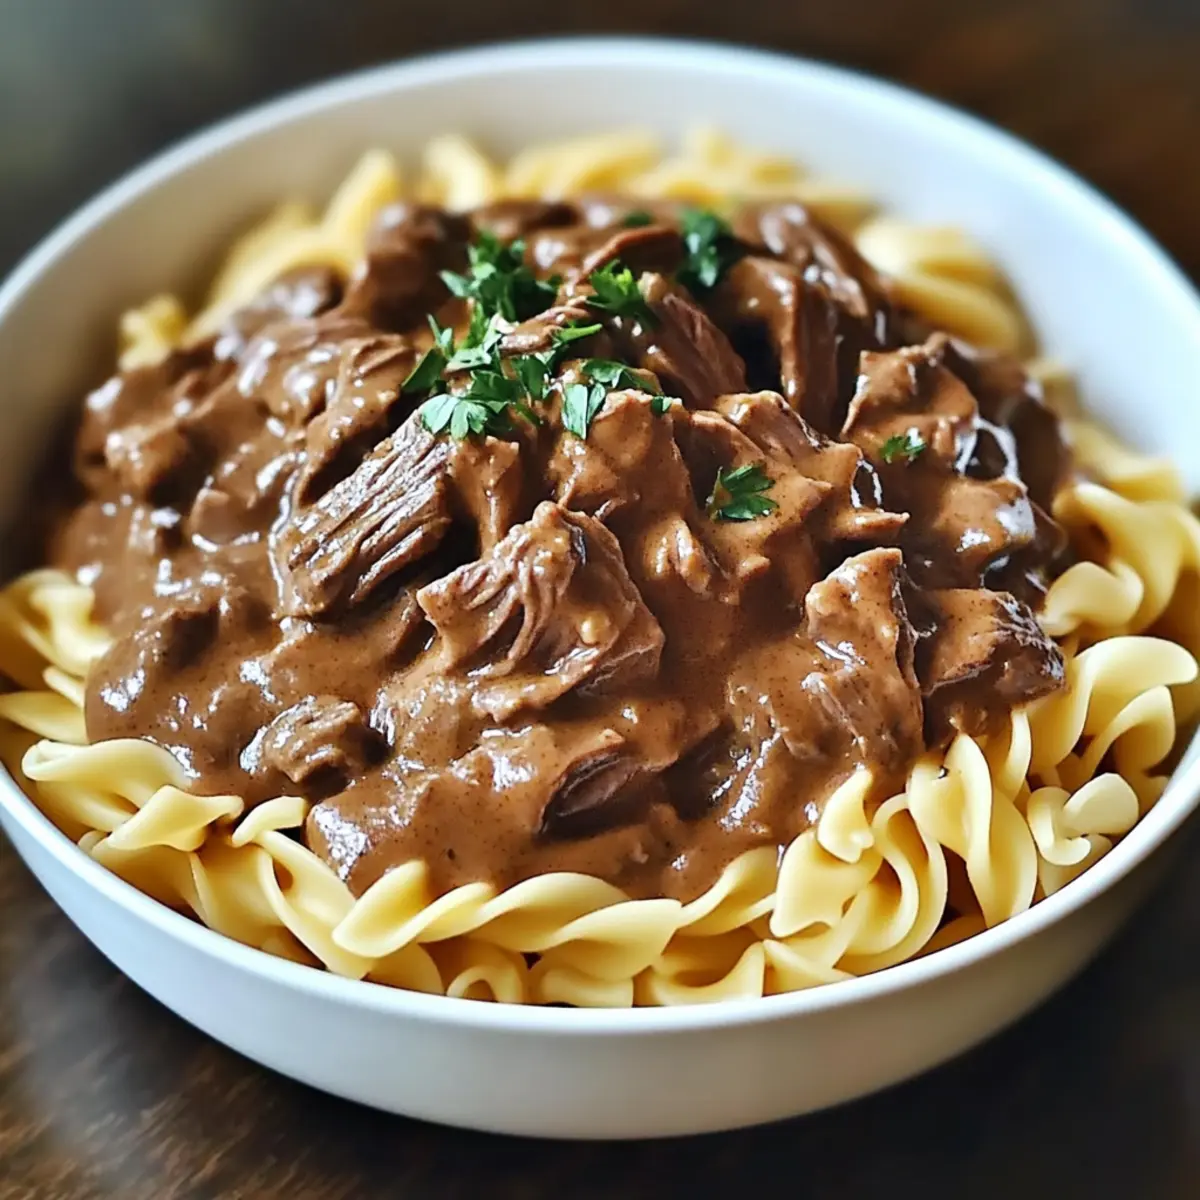
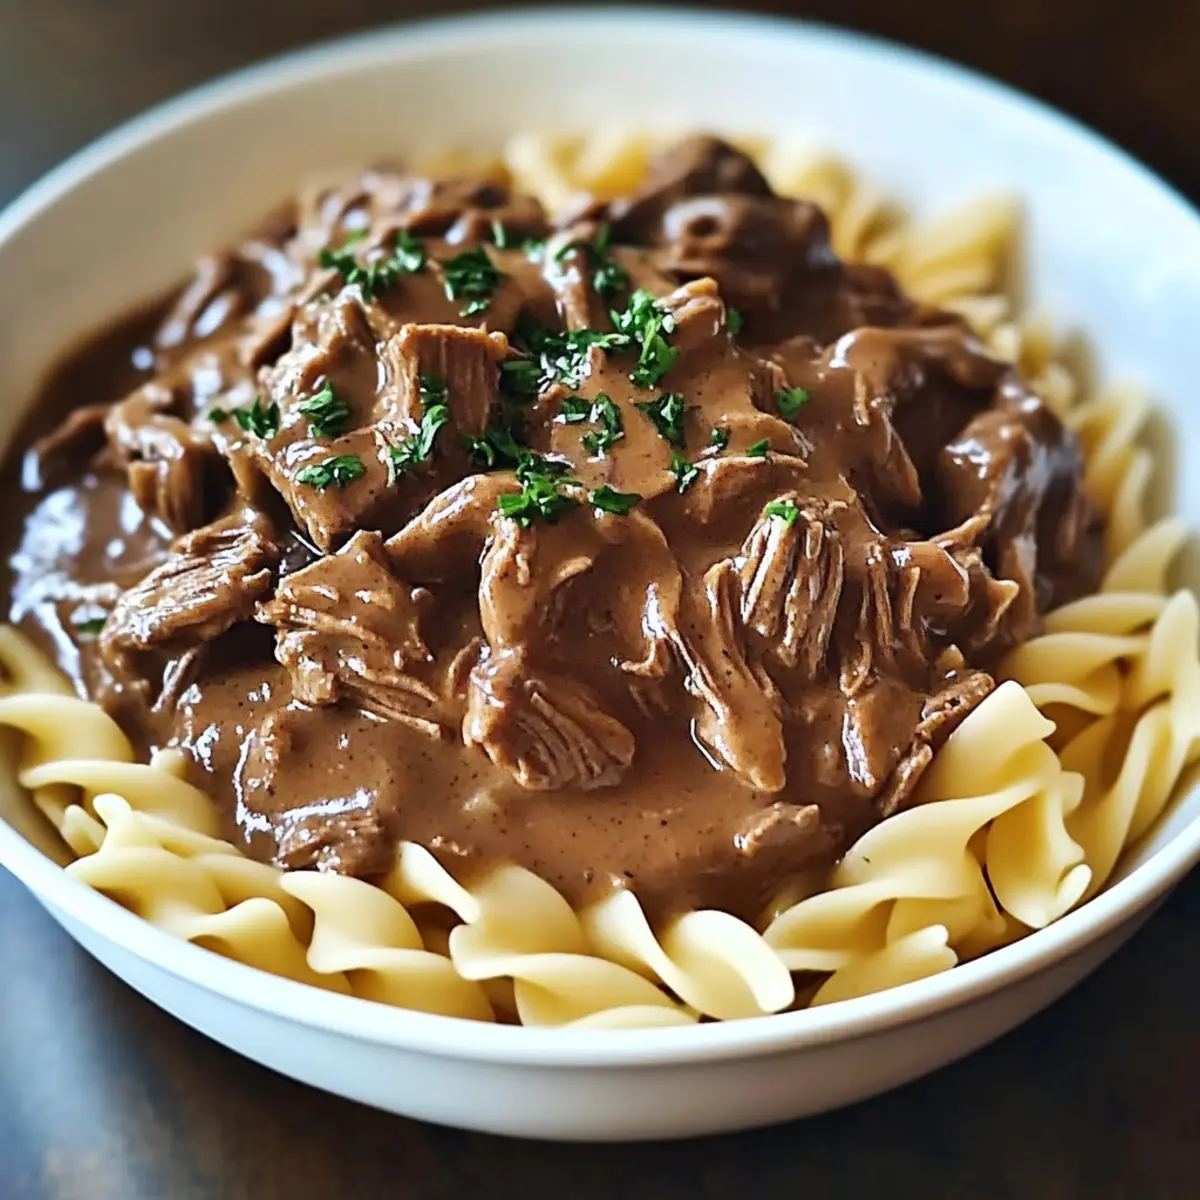
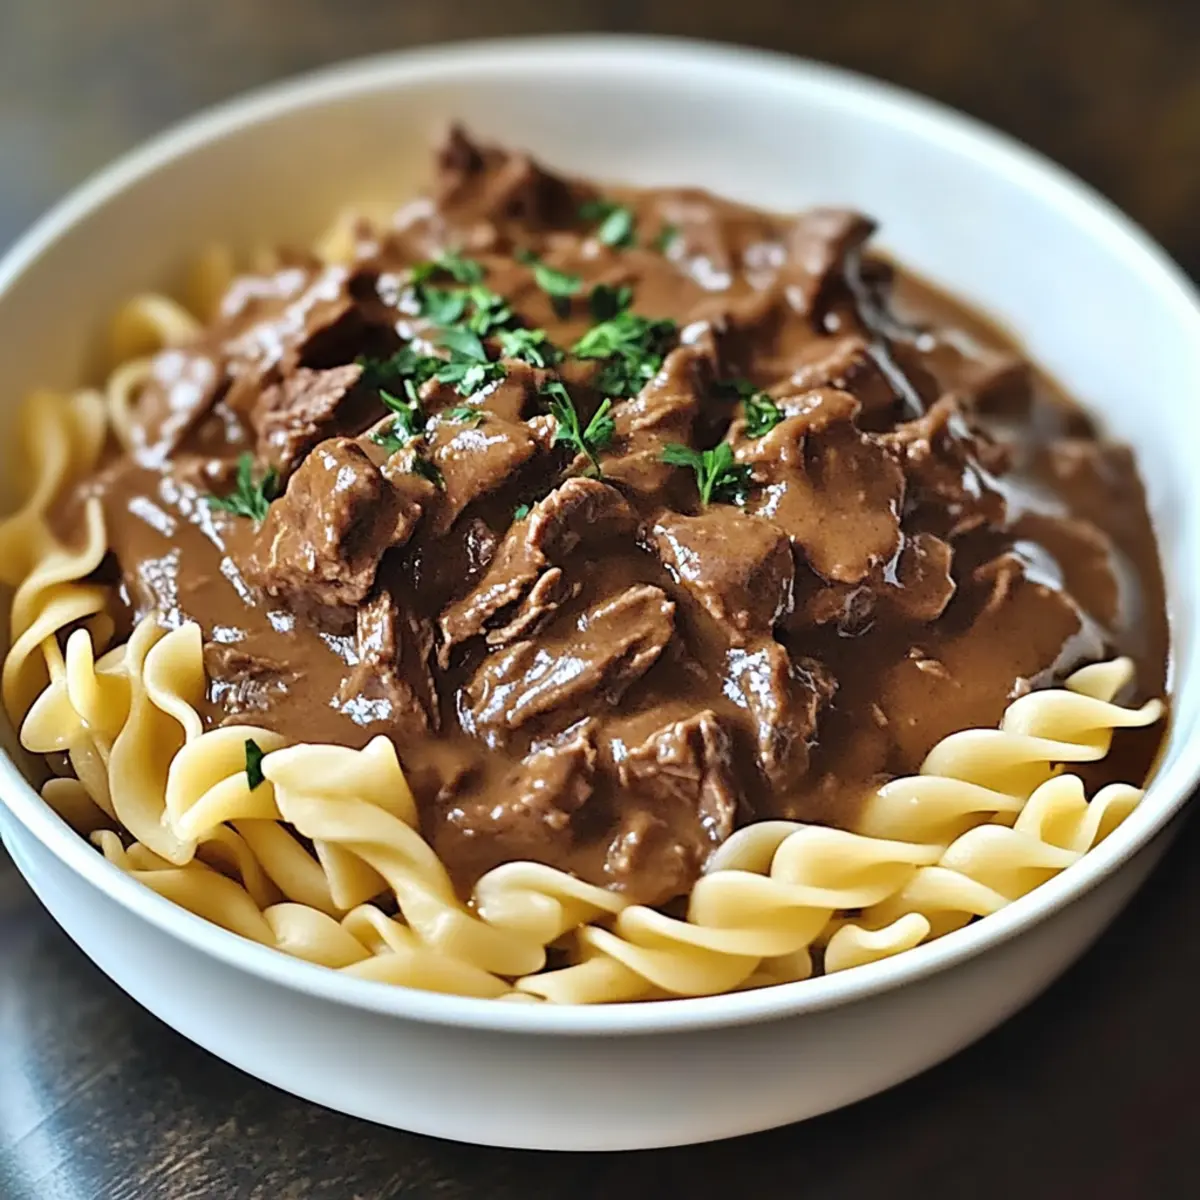
With the oven preheating, a sense of excitement stirs as I prepare to whip up these Parmesan Cloud Chicken Bombs. The aroma of garlic, parsley, and creamy Parmesan fills the kitchen, promising a comforting meal that’s both indulgent and easy to make. Perfectly suited for those bustling weeknights, this recipe offers a quick escape from the mundane fast-food routine without sacrificing flavor or satisfaction. You’ll love how effortlessly these glorious bites come together while still being gluten-free-friendly. Fancy a culinary adventure that leaves your guests wanting seconds? Let’s dive into the simple steps that will turn ordinary chicken into an unforgettable dish!

Why Are Parmesan Cloud Chicken Bombs Irresistible?

Quick, Easy Meal: They come together in just 30 minutes, making them perfect for those hectic weeknights.
Comforting Flavor: The rich, creamy sauce pairs beautifully with tender chicken, creating an irresistible combination.
Crowd-Pleasing Bite: Whether for family dinners or entertaining guests, they always leave a lasting impression.
Versatile Ingredient Swaps: You can easily customize them with different proteins or gluten-free breadcrumbs for your dietary needs.
Perfect Pair: Serve these with a side of Grilled Chicken Sandwich or a fresh green salad for a complete meal!

Parmesan Cloud Chicken Bombs Ingredients

For the Chicken Mixture

  • Ground Chicken – Main protein source that provides structure and heartiness; feel free to swap with ground turkey for a similar flavor profile.
  • Egg – Acts as a binder to hold the mixture together; no substitute recommended for this crucial role.
  • Breadcrumbs – Adds texture and helps form the chicken bombs; use gluten-free breadcrumbs to keep your Parmesan Cloud Chicken Bombs suitable for gluten-sensitive diets.
  • Parmesan Cheese – Contributes creaminess and savory depth; swap with Pecorino Romano for a tangier flavor if desired.
  • Minced Garlic – Adds aromatic depth to the filling; garlic powder can be used as a substitute if fresh isn’t available.
  • Chopped Parsley – Introduces freshness and bright flavor; basil can be swapped in for a different herb profile.
  • Onion Powder – Provides savory flavor to enhance the mixture; use fresh onion sautéed for a similar taste but adjust the quantity accordingly.
  • Paprika – Offers a subtle smokiness; opt for smoked paprika if you want to elevate the depth of flavor.
  • Salt and Pepper – Essential seasonings that amplify the overall taste; don’t skimp on these!

For the Creamy Sauce

  • Butter – Creates a base for the sauce; olive oil can be used for a lighter alternative.
  • Flour – Helps thicken the sauce; gluten-free flour can be used if following a gluten-free diet.
  • Milk – Adds creaminess; any plant-based milk works as a dairy substitute if desired.
  • Mozzarella Cheese – Melts beautifully into the sauce; can be replaced with a dairy-free cheese alternative if needed.
  • Nutmeg – Just a pinch enhances the creamy flavor; omit if you’re not a fan but it’s worth a try!

Now you have the perfect blend of ingredients to create these satisfying Parmesan Cloud Chicken Bombs. Excited to dive into the recipe? Let’s keep the culinary adventure rolling!

Step‑by‑Step Instructions for Parmesan Cloud Chicken Bombs

Step 1: Preheat the Oven
Begin by preheating your oven to 200°C (400°F). This ensures a perfectly crisp exterior on your Parmesan Cloud Chicken Bombs. While the oven heats up, gather your equipment, including a large mixing bowl, a parchment-lined baking tray, and your measuring cups and spoons for an organized cooking process.

Step 2: Mix Ingredients
In a large bowl, combine the ground chicken, egg, gluten-free breadcrumbs, Parmesan cheese, minced garlic, chopped parsley, onion powder, paprika, salt, and pepper. Use your hands or a spatula to blend these ingredients gently until just combined, being careful not to overmix. This will keep your chicken bombs tender and flavorful.

Step 3: Shape Mixture
Scoop out portions of the chicken mixture and form them into medium-sized balls, roughly the size of a golf ball. Place the shaped Parmesan Cloud Chicken Bombs evenly on your parchment-lined baking tray, ensuring they are spaced apart to allow for even cooking. Enjoy the aroma of the mixture as you prepare them for baking!

Step 4: Bake
Now, place the baking tray in your preheated oven and bake for 20–25 minutes. Keep an eye on them as they cook; you’re looking for a delightful golden brown color and a mouthwatering aroma. This will signal that your Parmesan Cloud Chicken Bombs are cooked through and ready to be enjoyed.

Step 5: Prepare Sauce
While the chicken bombs are baking, melt some butter in a saucepan over medium heat. Whisk in flour for about 1 minute, then gradually add milk while continuously whisking until the mixture thickens. Stir in mozzarella cheese, remaining Parmesan, salt, pepper, and a pinch of nutmeg to create a creamy sauce, setting aside when smooth.

Step 6: Combine
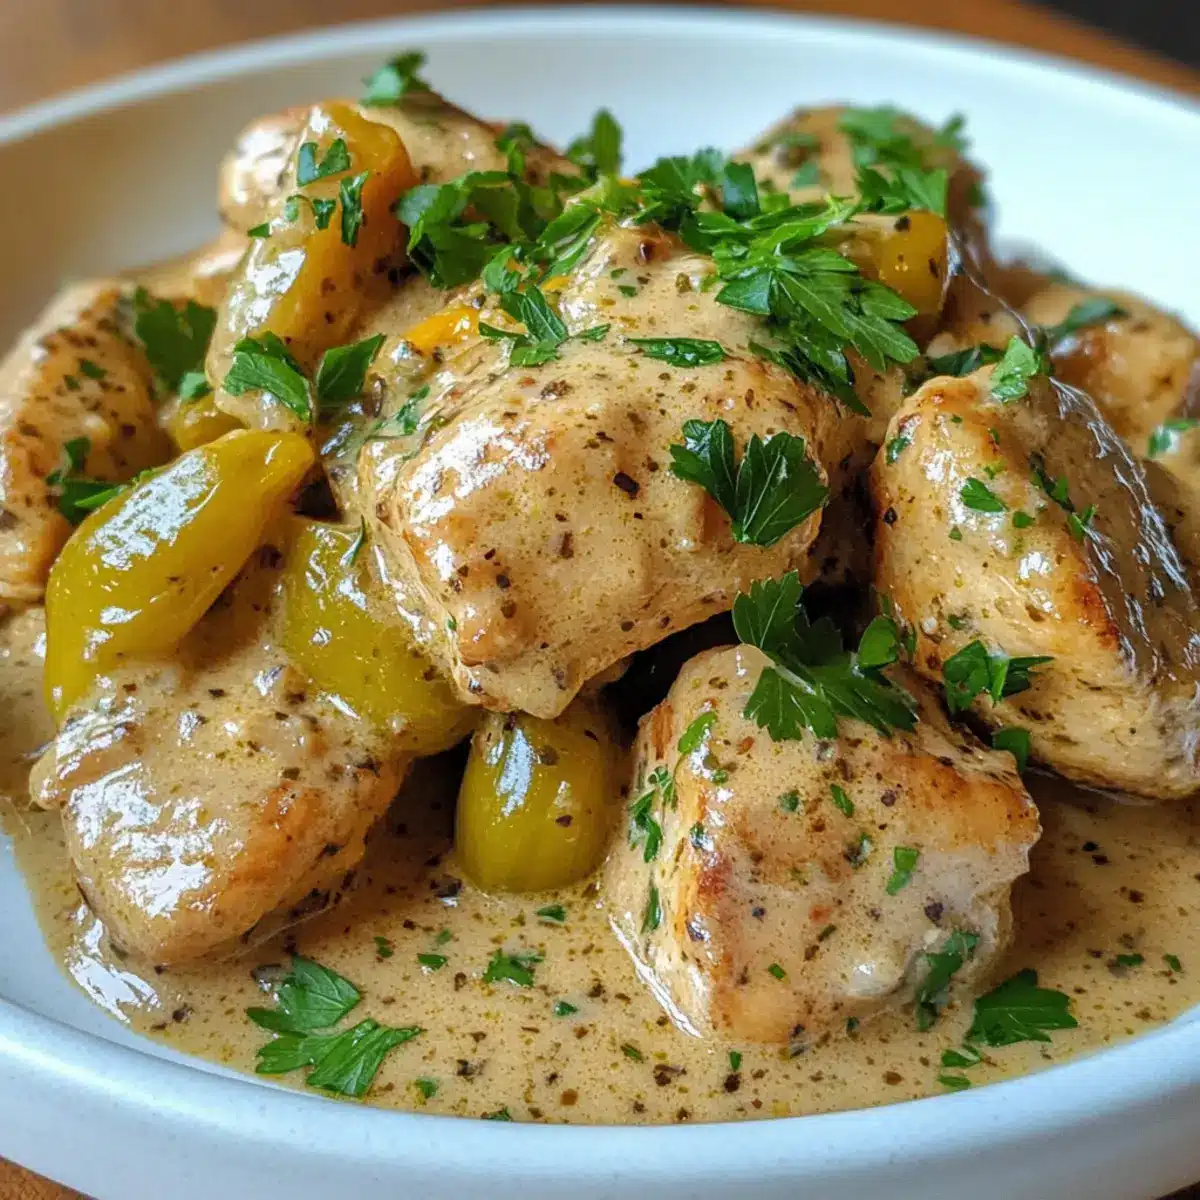
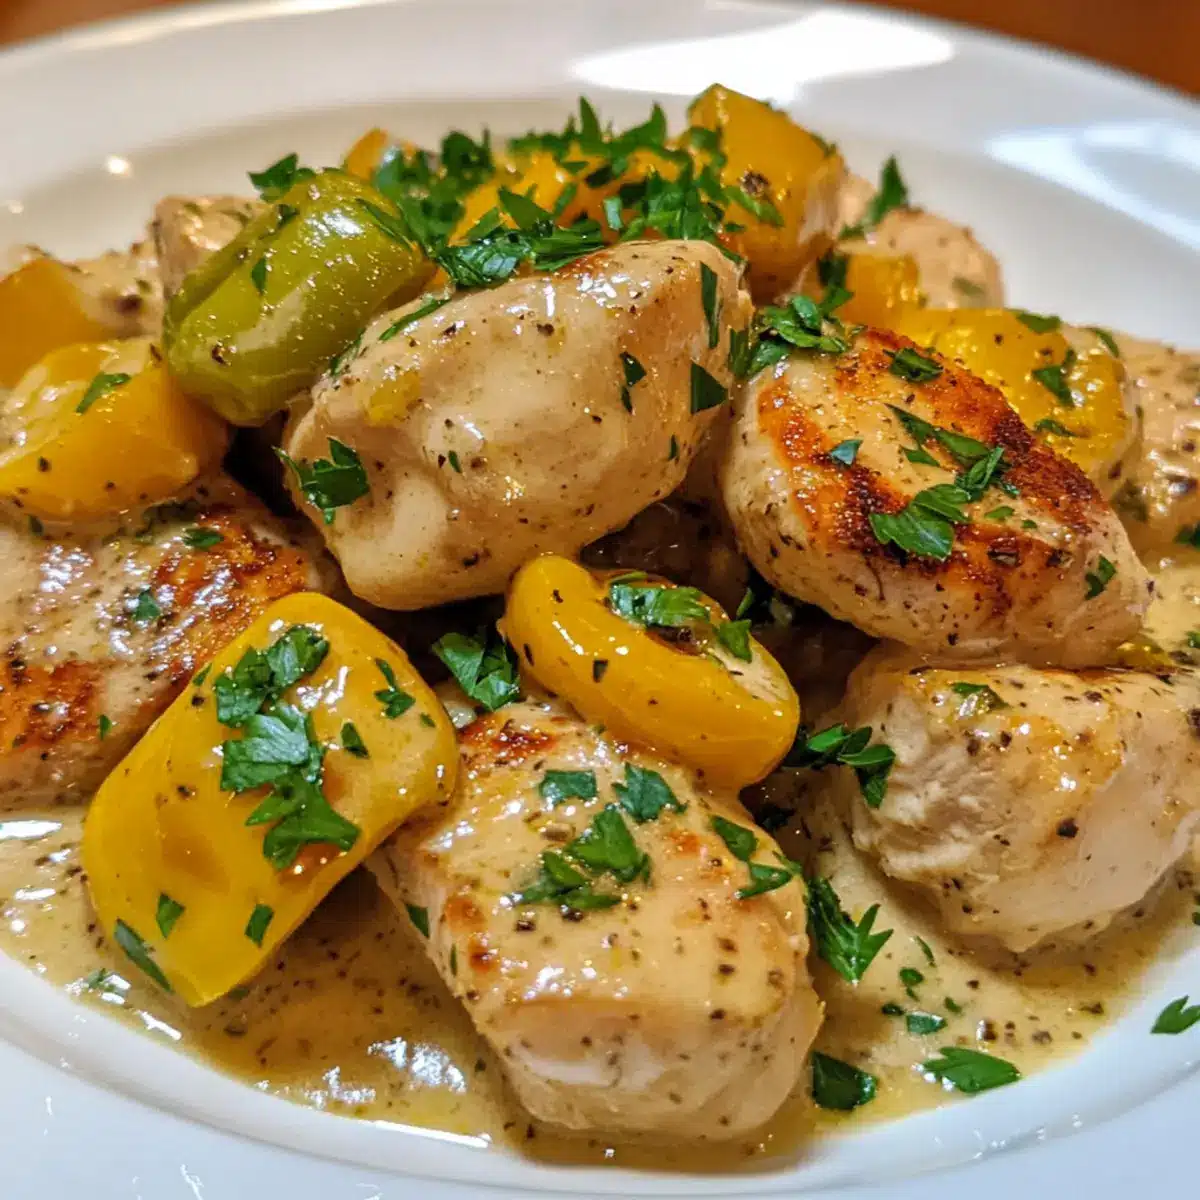
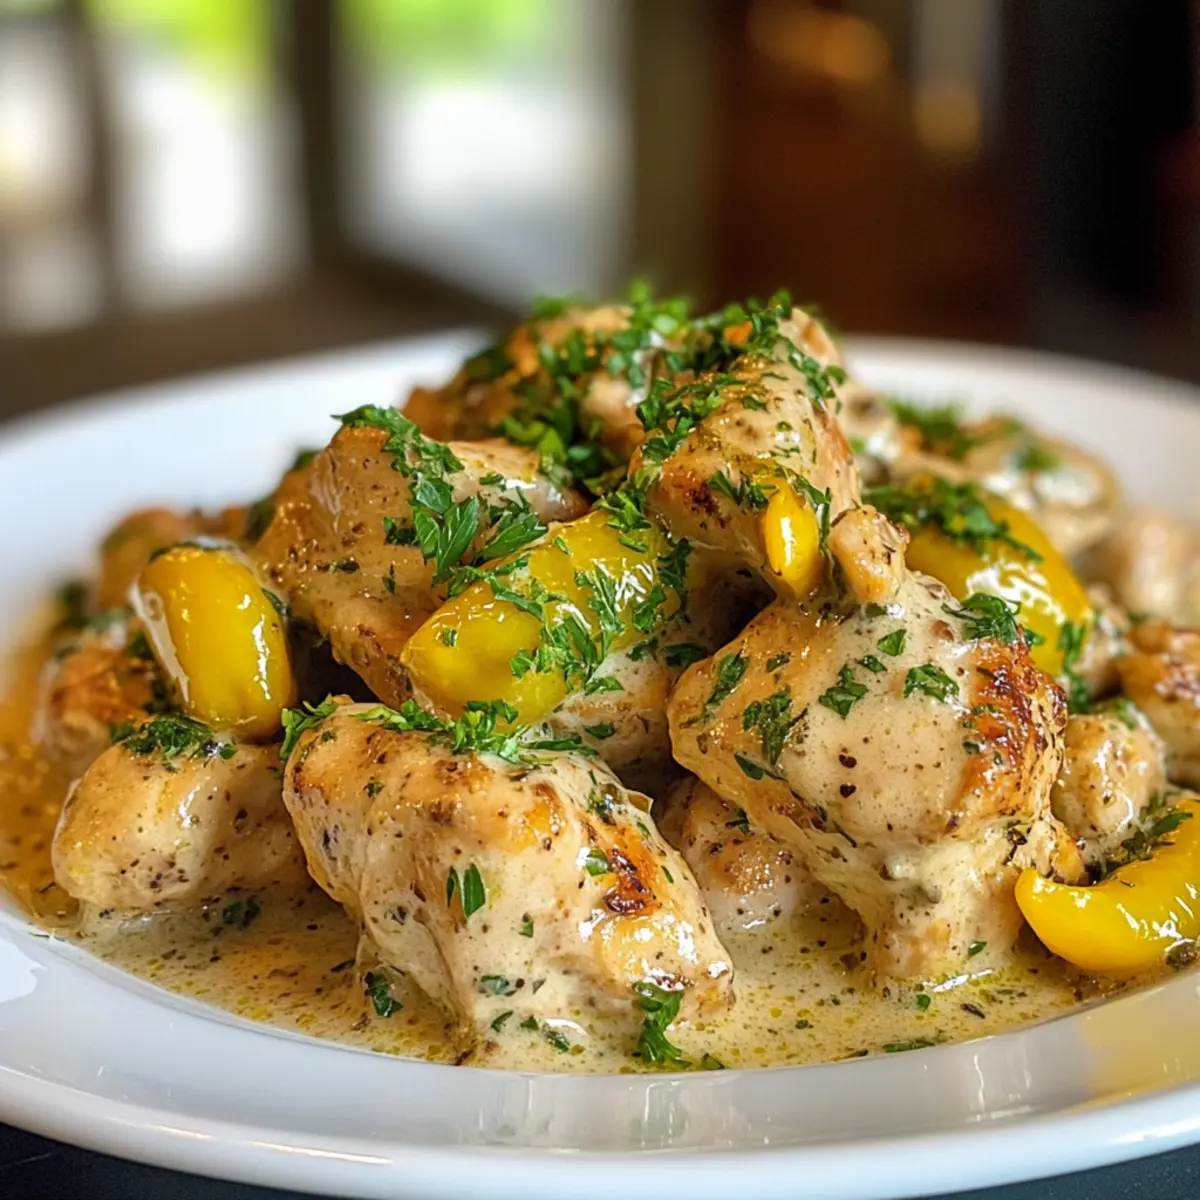
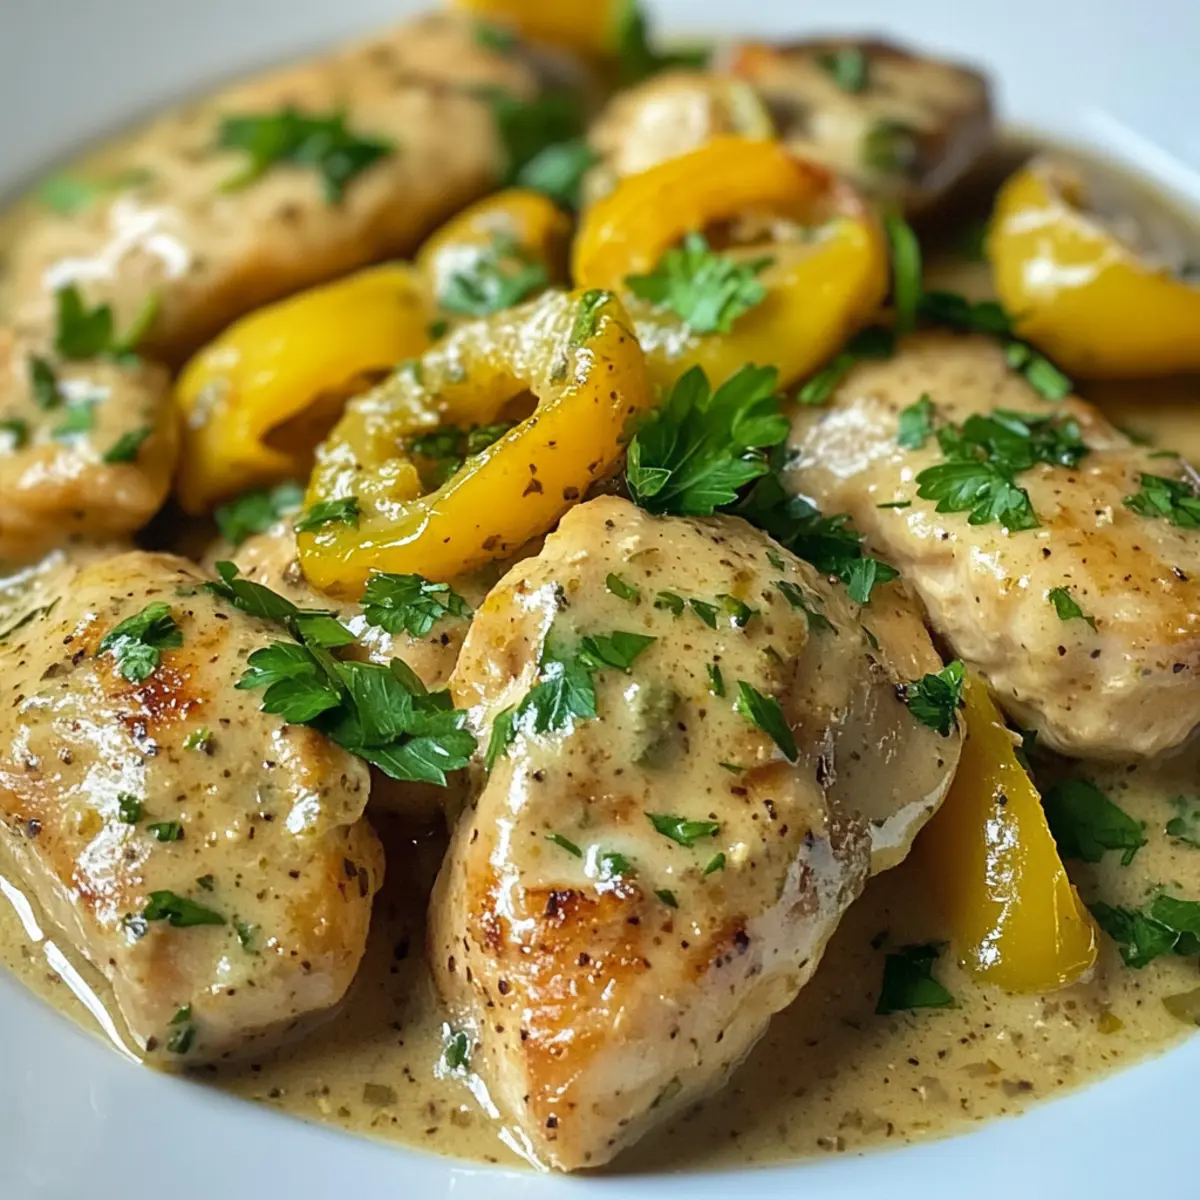
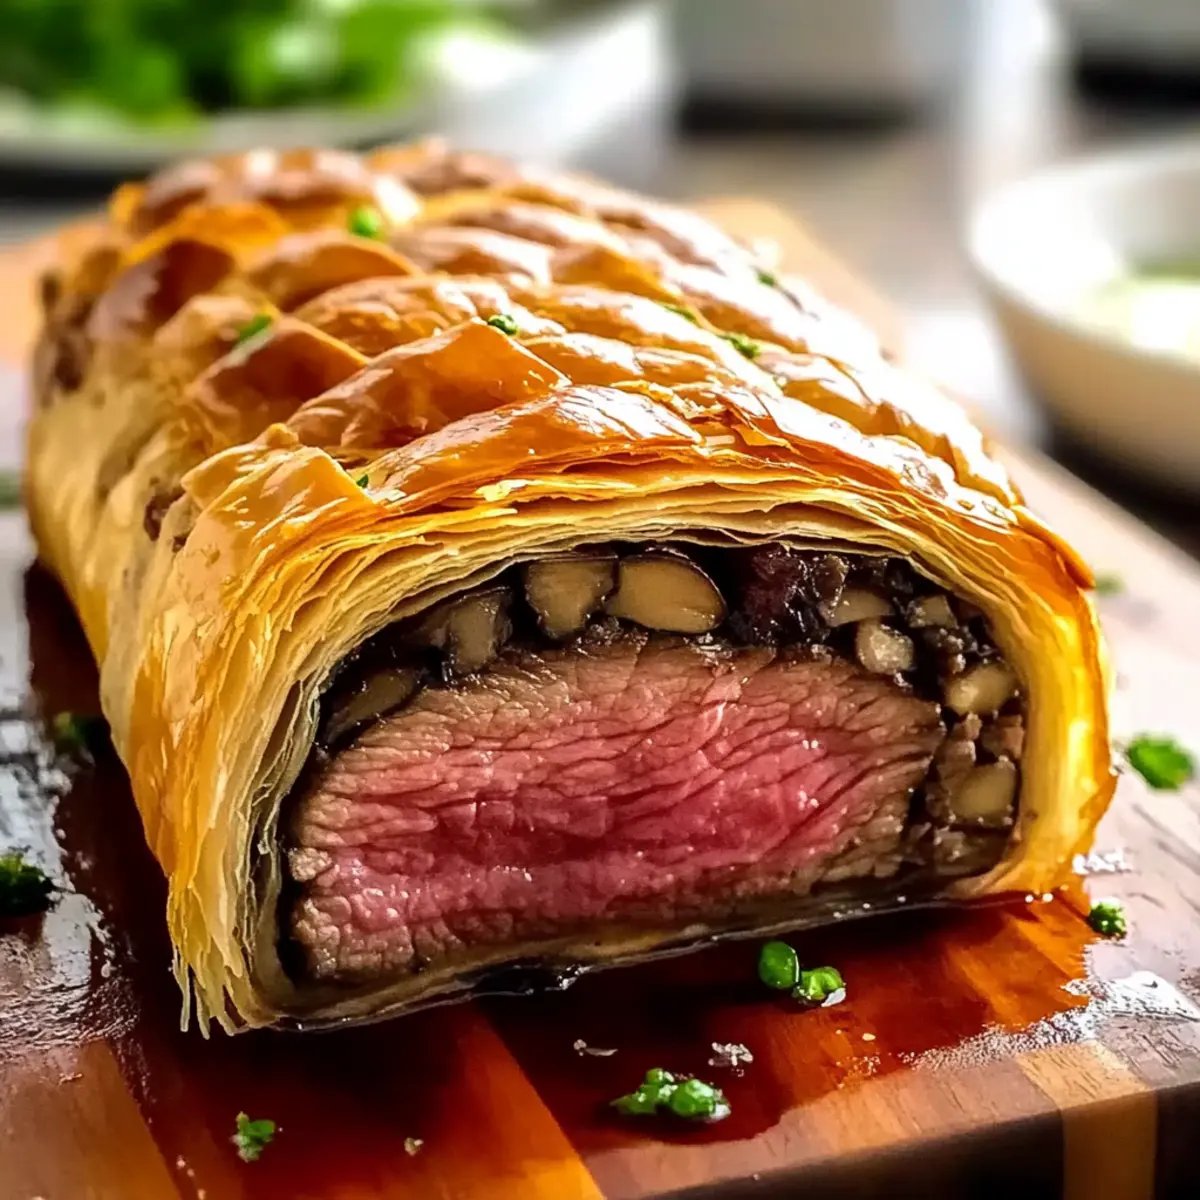
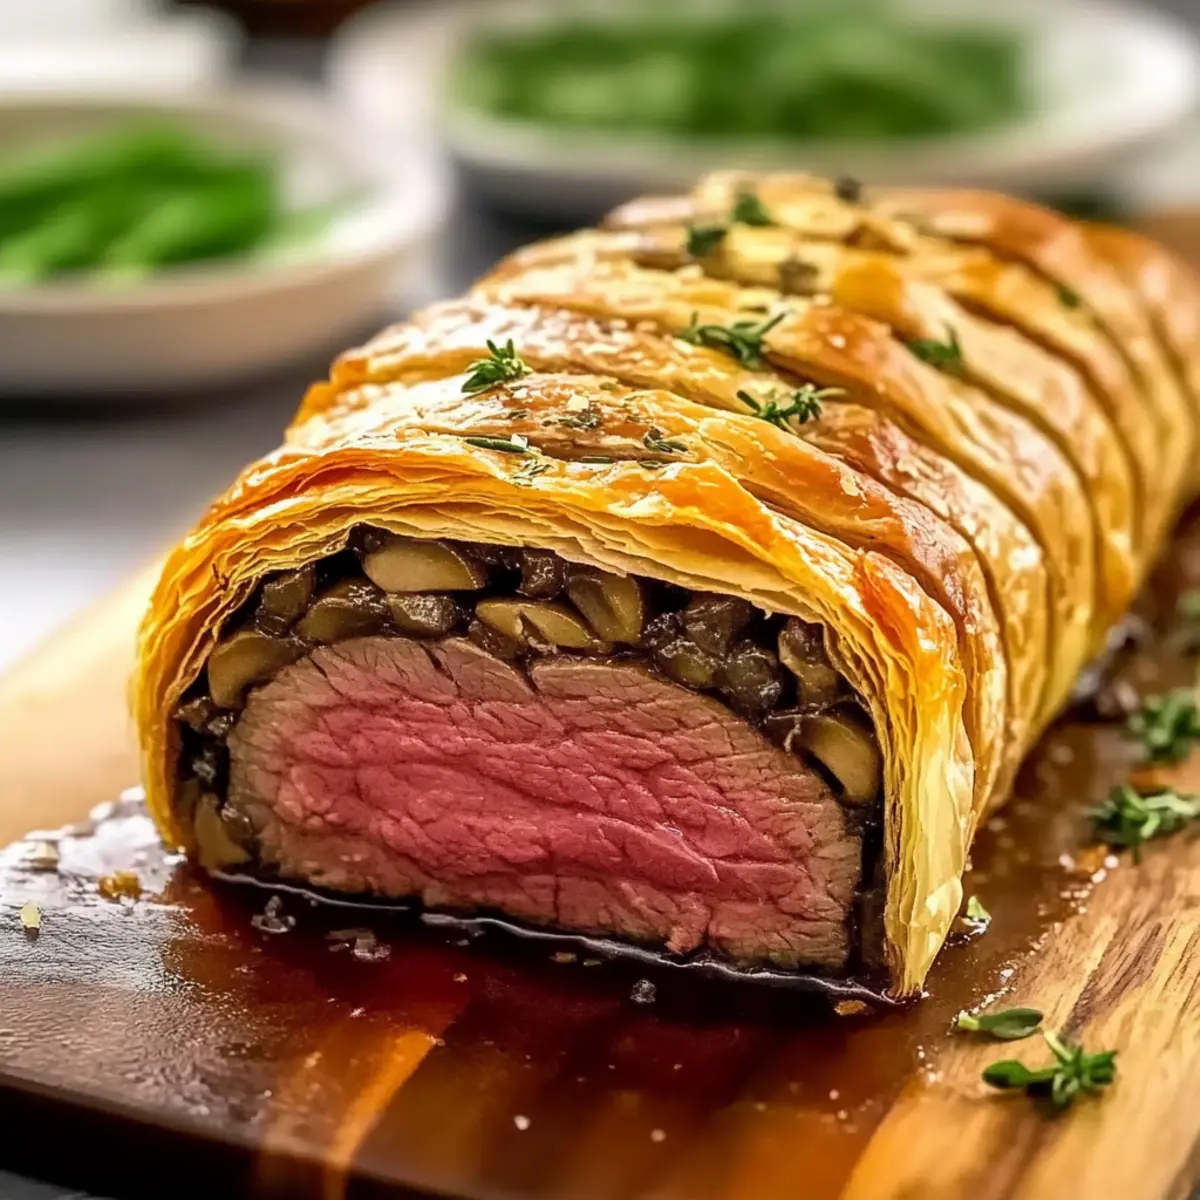
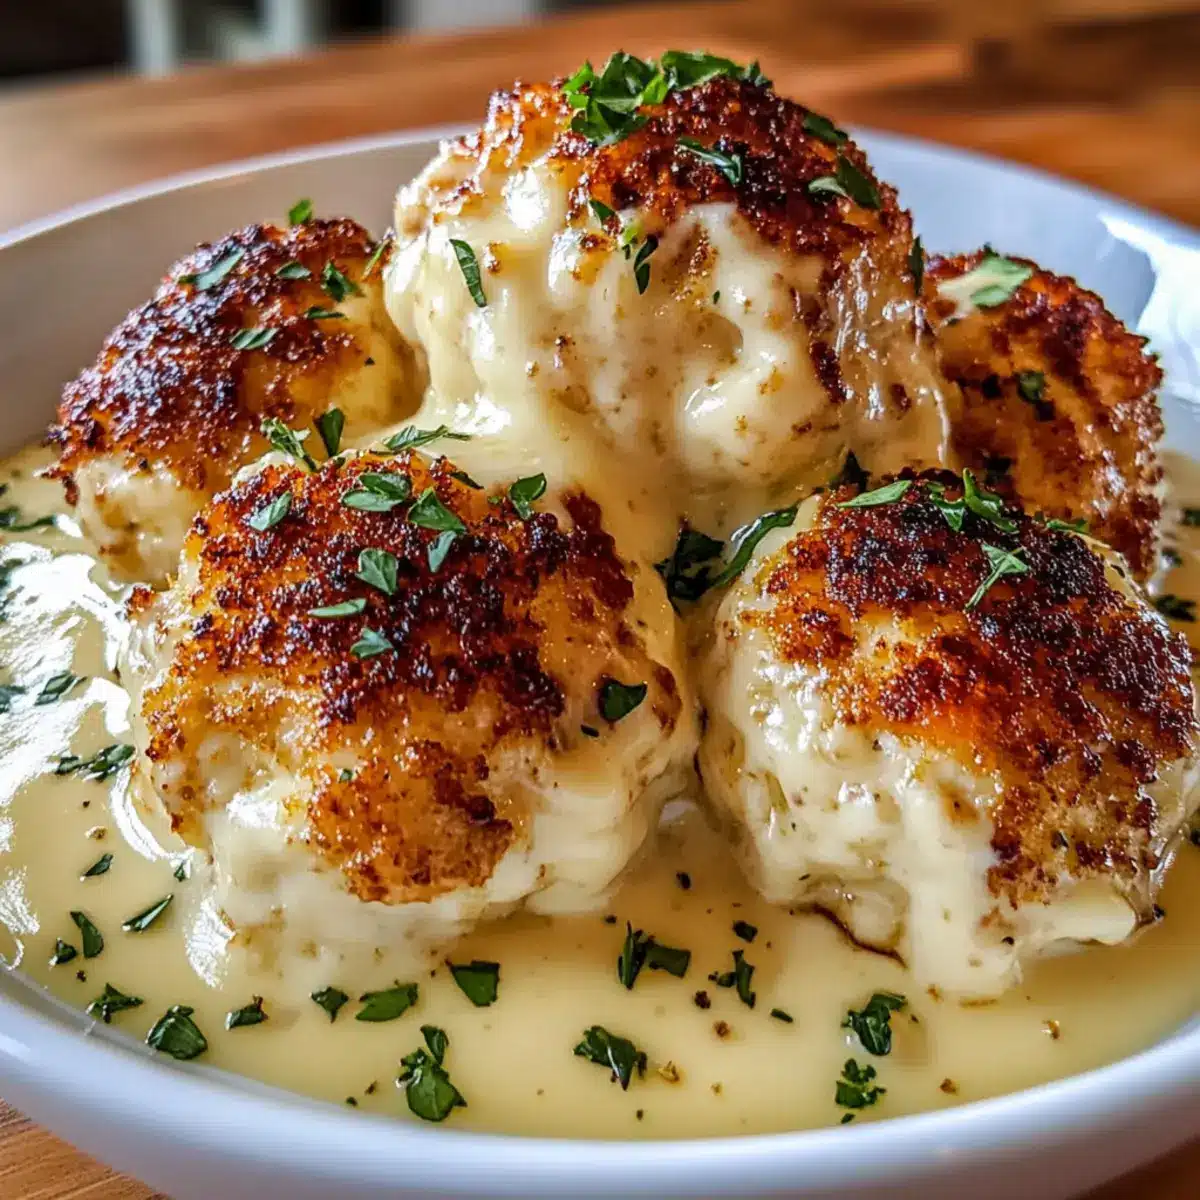
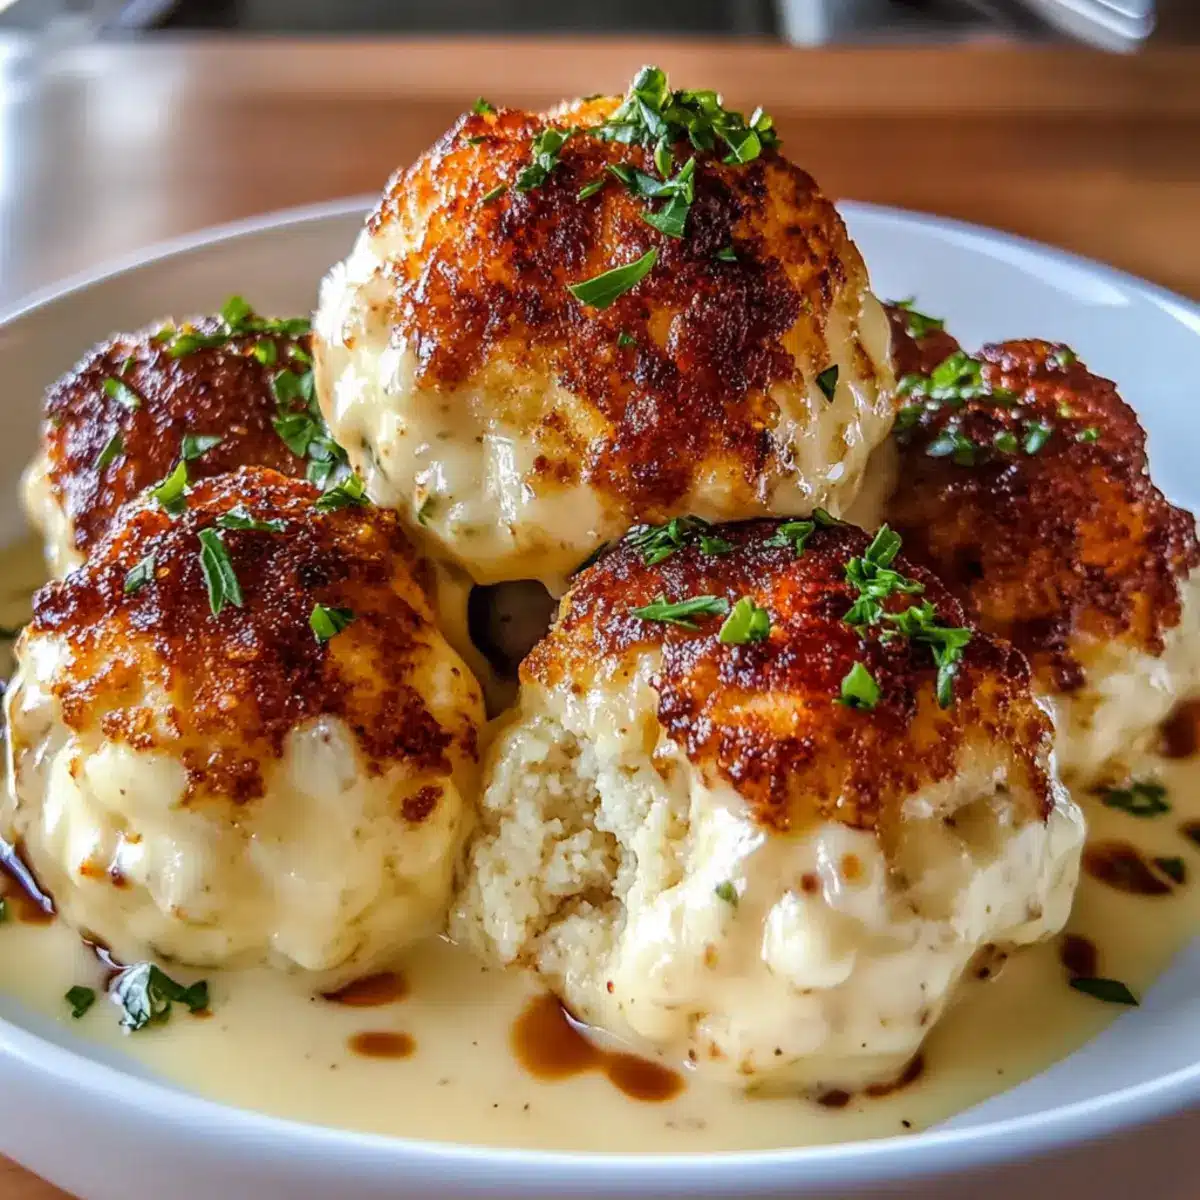
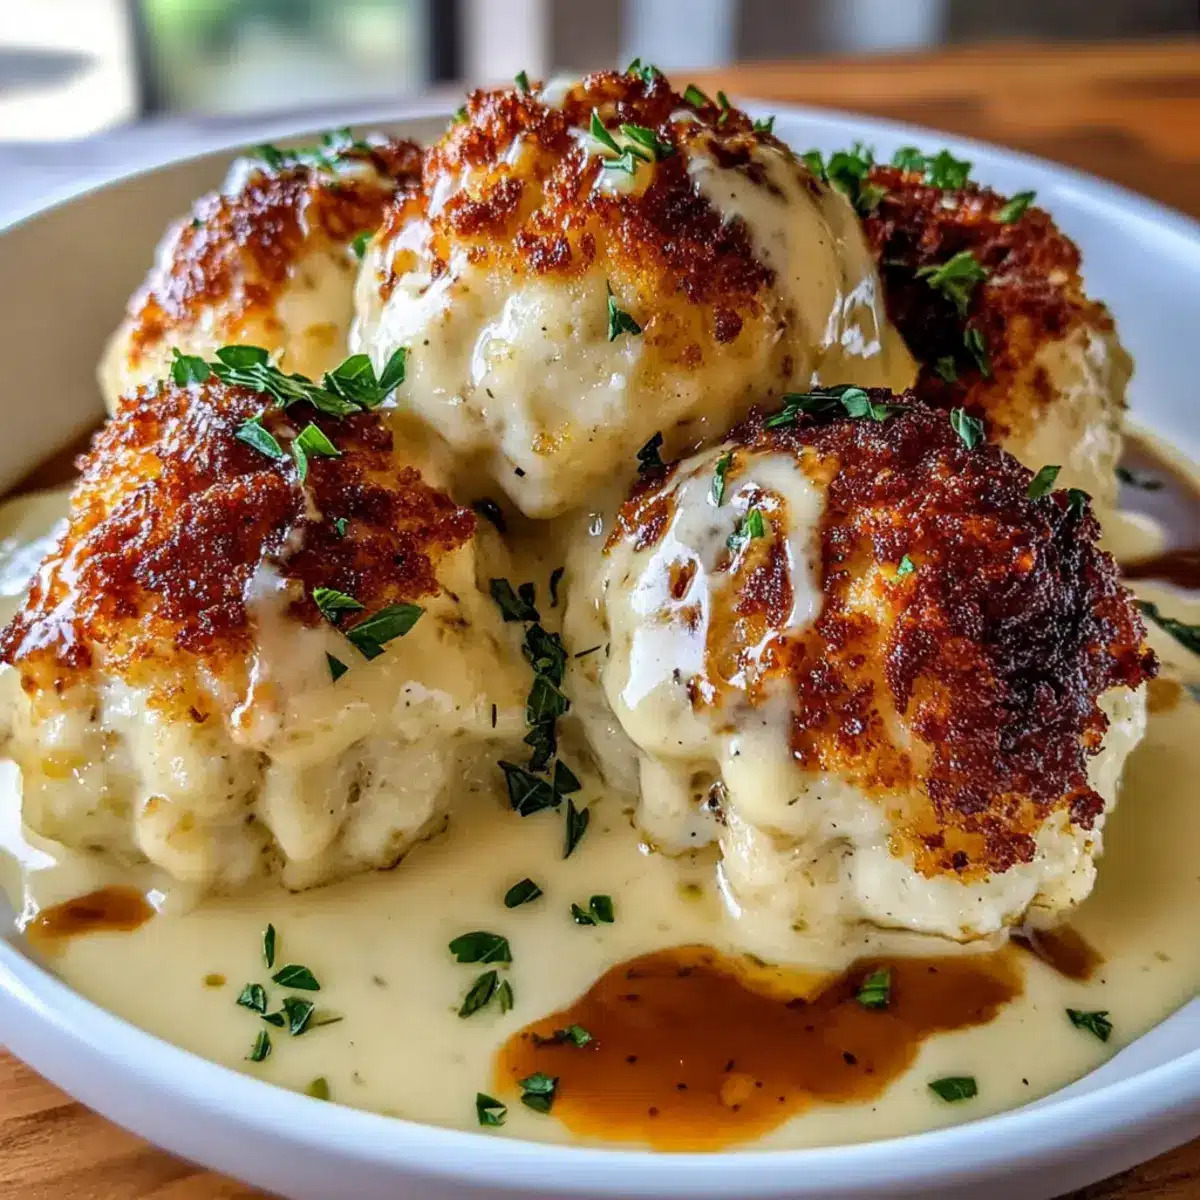
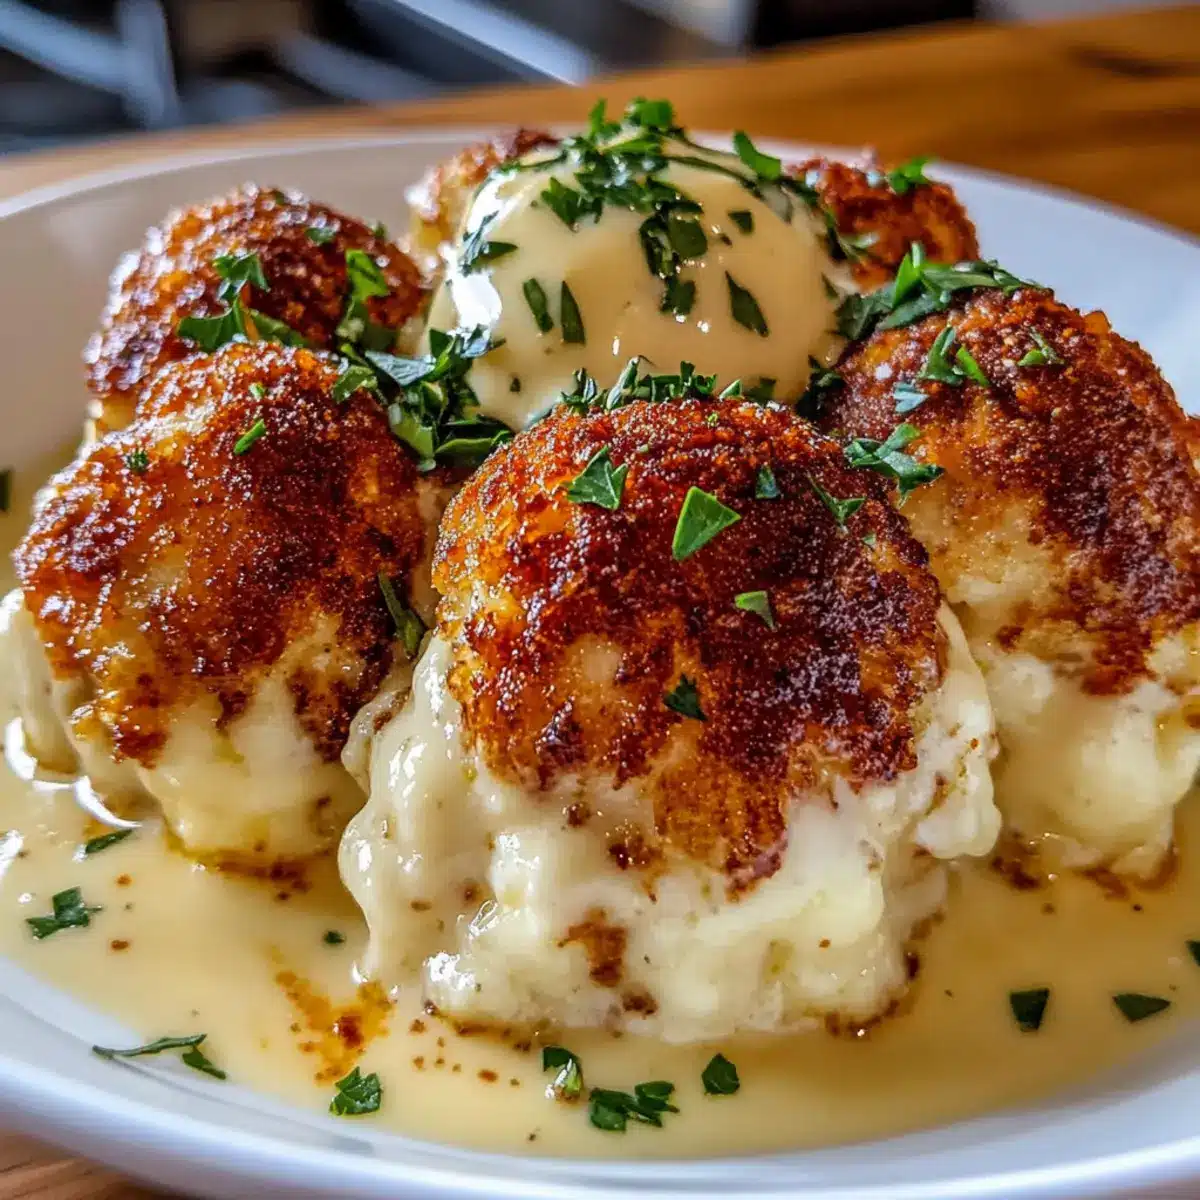
Once the chicken bombs are golden and cooked through, carefully transfer them to a casserole dish. Pour the creamy sauce over the top, ensuring each bomb is well coated. This adds an irresistible creamy layer to your Parmesan Cloud Chicken Bombs, enhancing their flavor and texture.

Step 7: Broil
Finally, set your oven to broil and place the casserole under the broiler for 3–5 minutes. Watch closely as the sauce bubbles and turns a lovely golden hue. This step will give your Parmesan Cloud Chicken Bombs a restaurant-worthy finish, making them even more tempting and delicious.

Step 8: Serve
Once broiled, remove the casserole from the oven and let it cool slightly. Serve the Parmesan Cloud Chicken Bombs with a drizzle of extra sauce, pairing them with mashed potatoes or cauliflower purée for a comforting meal. Garnish with fresh herbs for a delightful touch!

Expert Tips for Parmesan Cloud Chicken Bombs

  • Avoid Overmixing: Keeping the chicken mixture tender is essential. Mix just until combined to prevent toughness in your Parmesan Cloud Chicken Bombs.

  • Chill for Convenience: Refrigerate shaped chicken bombs for up to a day before baking. This helps flavors meld and makes meal prep easier.

  • Watch the Broil: Broiling adds a beautiful finish but requires close attention. Don’t walk away; they can go from golden to burnt quickly!

  • Customize Ingredients: Feel free to swap ground chicken with turkey and use gluten-free breadcrumbs. Explore various proteins for a personal touch.

  • Taste Before Baking: A little taste-test of the mixture can go a long way. Adjust seasonings accordingly to ensure savory perfection in your bombs!

How to Store and Freeze Parmesan Cloud Chicken Bombs

Fridge: Store leftover Parmesan Cloud Chicken Bombs in an airtight container for up to 3 days. Reheat in the oven at 180°C (350°F) to retain crispiness.

Freezer: For long-term storage, freeze shaped but unbaked chicken bombs, individually wrapped in plastic wrap, for up to 3 months. Bake directly from frozen, adding a few extra minutes to the cooking time.

Reheating: To enjoy leftovers, warm the baked chicken bombs in the oven at 180°C (350°F) for about 15 minutes, or until heated through. This maintains the delicious texture and flavor.

Wrap Carefully: If you plan to freeze the creamy sauce, store it separately to prevent sogginess. Combine before serving for the best results!

Parmesan Cloud Chicken Bombs Variations

Feel free to personalize your Parmesan Cloud Chicken Bombs to suit your taste and dietary needs!

  • Dairy-Free: Use a dairy-free cheese alternative in the creamy sauce for a lactose-free option without sacrificing flavor.
  • Veggie-Loaded: Incorporate finely chopped spinach or bell peppers into the chicken mixture for added nutrients and vibrant color. It’s a great way to sneak in some veggies for the kids!
  • Spicy Kick: Mix in some crushed red pepper flakes or diced jalapeños to give your chicken bombs a delightful heat that will tantalize your taste buds.
  • Herbed Twist: Experiment with different herbs like thyme or oregano instead of parsley for a unique flavor twist that elevates the dish.
  • Gluten-Free Friendly: Swap breadcrumbs with ground oats or crushed gluten-free crackers to make this recipe suitable for gluten-sensitive diets without compromising texture.
  • Flavorful Filling: Try stuffing the chicken bombs with mozzarella or feta cheese for a melty surprise inside. It’s a cheesy treat that’ll have everyone coming back for more!
  • Asian-Inspired: Add ginger, soy sauce, and sesame oil to your chicken mixture for a unique flavor profile that’s reminiscent of a savory dumpling.
  • Savory Sauces: Experiment with different sauces to drizzle on top—like a sweet and sour sauce or a tangy BBQ sauce for a delightful and different twist!

For more amazing meal ideas, pair these with Chicken Cashew Broccoli or try the delightful Thai Chicken Meatball. Enjoy exploring these fun variations!

Make Ahead Options

These Parmesan Cloud Chicken Bombs are perfect for busy home cooks looking to save time during the week! You can prepare the chicken mixture and shape the bombs up to 24 hours in advance. Simply refrigerate them on a parchment-lined tray, which helps maintain their texture. If short on time, consider baking them ahead and storing leftovers in the fridge for up to 3 days—just reheat in the oven to restore that crispy exterior. When you’re ready to serve, cover with sauce and broil for 3–5 minutes until bubbly. This way, you’ll enjoy restaurant-quality results with minimal effort, making weeknight dinners a breeze!

What to Serve with Parmesan Cloud Chicken Bombs?

With the aroma of these creamy bites wafting through your kitchen, it’s time to think about delightful sides that will elevate your meal to the next level.

  • Creamy Mashed Potatoes: Their velvety texture complements the crispy chicken bombs beautifully, soaking up the rich sauce effortlessly.

  • Cauliflower Purée: A lighter alternative that adds a subtle sweetness, making each bite feel indulgent without the extra carbs.

  • Fresh Garden Salad: Crisp greens and vibrant vegetables add a refreshing crunch, perfectly balancing the creamy richness of the chicken bombs.

  • Steamed Asparagus: The bright flavors and tender-crisp texture of asparagus provide a lovely contrast to the savory chicken bombs, enhancing every mouthful.

  • Roasted Brussels Sprouts: Caramelized yet slightly bitter, these bites bring a delightful flavor profile that complements the dish’s creamy component seamlessly.

  • Garlic Bread: Slice into warm, crusty bread to soak up every drop of creamy sauce left on your plate, delivering a comforting experience with each bite.

  • Chardonnay or Sauvignon Blanc: A chilled glass of white wine brings a refreshing acidity to cut through the richness of the meal, making it a delightful pairing.

  • Chocolate Mousse: End your meal on a sweet note with a light and airy dessert that contrasts beautifully with the savory flavors of the main course.

With these complementary dishes, your Parmesan Cloud Chicken Bombs will shine even brighter on the dining table!

Parmesan Cloud Chicken Bombs Recipe FAQs

How do I choose ripe ingredients for Parmesan Cloud Chicken Bombs?
Absolutely! For the freshest flavor, use ground chicken with a pink hue and no graying or discoloration. Look for Parmesan cheese that is aged and crumbly, as fresher versions tend to be softer. When selecting garlic, choose bulbs that are firm with no dark spots or sprouting.

How should I store leftover Parmesan Cloud Chicken Bombs?
You can store leftover Parmesan Cloud Chicken Bombs in an airtight container in the fridge for up to 3 days. Make sure they’re completely cooled before sealing to maintain texture. When you’re ready to enjoy them again, just reheat in the oven at 180°C (350°F) for best results!

Can I freeze Parmesan Cloud Chicken Bombs?
Yes! For long-term storage, freeze shaped but unbaked chicken bombs, wrapping each one in plastic wrap individually. Place them in a freezer-safe bag, and they’ll be good for up to 3 months. When you’re ready to bake, you can cook them directly from frozen, simply adding a few extra minutes to the cooking time.

What if my chicken bombs are too dry?
Very! If you find your Parmesan Cloud Chicken Bombs are too dry, it might be due to overmixing or baking them for too long. Make sure to mix just until combined and keep an eye on the oven during baking. If they’re already cooked, you can add a drizzle of the creamy sauce before serving; it will help add moisture!

Are Parmesan Cloud Chicken Bombs suitable for gluten-free diets?
Absolutely! You can easily make Parmesan Cloud Chicken Bombs gluten-free by using gluten-free breadcrumbs. Most of the other ingredients are naturally gluten-free, making this dish a perfect option for those with gluten sensitivities. Just double-check your cheese and any other added ingredients too!

Can my pets have Parmesan Cloud Chicken Bombs?
While it might be tempting, it’s best to avoid feeding your pets these chicken bombs. Ingredients like garlic and onion, which are common in the recipe, can be harmful to dogs and cats. However, you can always set aside plain cooked chicken for your furry friends as a treat!

Parmesan Cloud Chicken Bombs

Creamy Parmesan Cloud Chicken Bombs for Quick Comfort

These Parmesan Cloud Chicken Bombs are a quick and comforting appetizer that combines tender chicken with a creamy Parmesan sauce.
Prep Time 10 minutes
Cook Time 25 minutes
Total Time 35 minutes
Servings: 4 bombs
Course: Appetizer
Cuisine: American
Calories: 320

Ingredients
  

For the Chicken Mixture
  • 1 lb Ground Chicken or ground turkey
  • 1 large Egg acts as a binder
  • 1 cup Gluten-Free Breadcrumbs
  • 1 cup Parmesan Cheese or Pecorino Romano
  • 2 cloves Minced Garlic or garlic powder
  • 1/4 cup Chopped Parsley or basil
  • 1 tsp Onion Powder or fresh onion sautéed
  • 1 tsp Paprika or smoked paprika
  • 1 tsp Salt
  • 1/2 tsp Pepper
For the Creamy Sauce
  • 2 Tbsp Butter or olive oil
  • 2 Tbsp Flour or gluten-free flour
  • 1 cup Milk or plant-based milk
  • 1 cup Mozzarella Cheese or dairy-free cheese
  • 1 pinch Nutmeg omit if desired

Equipment

  • Mixing Bowl
  • Baking tray
  • Saucepan

Method
 

Step-by-Step Instructions
  1. Preheat your oven to 200°C (400°F).
  2. In a large bowl, combine ground chicken, egg, gluten-free breadcrumbs, Parmesan cheese, minced garlic, chopped parsley, onion powder, paprika, salt, and pepper.
  3. Scoop out the mixture to form medium-sized balls and place them on a parchment-lined baking tray.
  4. Bake for 20–25 minutes until golden brown.
  5. For the sauce, melt butter in a saucepan over medium heat, whisk in flour, then gradually add milk until thickened.
  6. Stir in mozzarella, remaining Parmesan, salt, pepper, and nutmeg to create the creamy sauce.
  7. Transfer cooked chicken bombs to a casserole dish and pour the creamy sauce over the top.
  8. Broil for 3–5 minutes, watching closely until bubbling and golden.
  9. Serve warm with extra sauce and garnish with fresh herbs.

Nutrition

Serving: 1bombCalories: 320kcalCarbohydrates: 15gProtein: 25gFat: 18gSaturated Fat: 10gPolyunsaturated Fat: 2gMonounsaturated Fat: 6gCholesterol: 130mgSodium: 560mgPotassium: 300mgFiber: 1gSugar: 2gVitamin A: 500IUVitamin C: 2mgCalcium: 200mgIron: 2mg

Notes

Chill shaped chicken bombs for up to a day before baking for enhanced flavor. Taste the mixture before baking to adjust seasonings if necessary.

Tried this recipe?

Let us know how it was!

Savor Mary Berry Toad Feast: A Cozy Family Comfort Dish

As the aroma of sausages sizzling in hot oil fills my kitchen, I can’t help but feel a surge of warmth and nostalgia. There’s something undeniably charming about traditional British comfort food, and Mary Berry’s Toad in the Hole holds a special place in my heart. This delightful dish combines juicy pork sausages with a fluffy Yorkshire pudding batter, creating the perfect dinner option for those cozy family evenings. Not only is it a straightforward recipe that can be prepared in under an hour, but it also packs a satisfying punch, making it a sure hit with every member of the family. With its crispy top and soft, savory underside, this meal is like a warm hug on a plate. Are you ready to discover how to bring this classic to your dinner table?

Why Is Toad in the Hole So Loved?

Comforting simplicity: This hearty dish comes together with just a handful of ingredients, making it an easy choice for busy weeknights.

Rich, savory flavor: The combination of juicy sausages enveloped in a light, fluffy Yorkshire pudding delivers an unforgettable taste that appeals to all palates.

Crowd pleaser: Perfect for feeding the entire family, it’s a recipe that guarantees smiles around the dinner table.

Endless versatility: Feel free to swap out the sausages, try different herbs, or even serve it with a rich onion gravy or your favorite mashed potatoes for added comfort.

Tradition at its finest: Channel the warmth of British home cooking with a dish that invokes nostalgia and love in every bite.

Whether you’re seeking a delightful family dinner or just want to bring a touch of British culture into your kitchen, this Toad in the Hole will surely impress! For more comforting recipes, check out my Bakery Style Blueberry Muffins or enjoy a refreshing Blueberry Thyme Gin Fizz alongside your meal.

Mary Berry Toad Feast Ingredients

Discover the essential ingredients for creating this delightful British comfort food classic.

For the Batter

  • Plain (all-purpose) flour – Provides structure to the pudding; consider whole wheat flour for a denser texture.
  • Salt – Enhances flavor; use sea salt for a subtler, finer taste.
  • Large eggs – Binds the batter and gives lift; room temperature eggs work best for smooth emulsification.
  • Whole milk – Adds moisture and richness; feel free to substitute with non-dairy milk like almond or soy.

For the Sausages

  • Pork sausages – The flavorful protein that takes center stage; any favorite sausage will do, whether spicy or herbed varieties.

For the Cooking Base

  • Sunflower oil or beef drippings – Used to create a crispy base; olive oil or bacon grease can be great alternatives for added flavor.

Optional Garnish

  • Fresh parsley – Adds a touch of herbal brightness; feel free to omit if it’s not your preference.

With these simple ingredients, you’ll be well on your way to whipping up a satisfying Mary Berry Toad Feast that will warm your family’s hearts!

Step‑by‑Step Instructions for Mary Berry Toad Feast

Step 1: Preheat the Oven
Begin by preheating your oven to 400°F (200°C). This ensures that when you place your dish inside, it reaches the ideal temperature for creating a crispy Yorkshire pudding. While the oven heats, prepare your ingredients to make the most of your time.

Step 2: Prepare the Batter
In a large mixing bowl, combine the plain flour and salt, whisking them together until evenly mixed. Add the large eggs and gradually whisk in the whole milk to create a smooth batter. This mixture should have a silky consistency, which is essential for the delightful rise of your Mary Berry Toad Feast later on.

Step 3: Rest the Batter
Allow your batter to rest for at least 30 minutes. This step is crucial as it lets the flour hydrate properly, resulting in a tender and airy Yorkshire pudding. Meanwhile, you can prepare the sausages, ensuring they are ready for the next step while the batter is resting.

Step 4: Heat the Oil
While the batter is resting, take a roasting pan and pour in your sunflower oil or beef drippings. Place it in the preheated oven for about 10 minutes or until the oil is shimmering and smoking hot. This high heat is key to achieving that lovely crunch on the Yorkshire pudding when you pour in the batter.

Step 5: Brown the Sausages
Once the oil is hot, carefully add your pork sausages to the pan. Make sure to space them out, allowing them to crisp up evenly. Return the pan to the oven for about 10 minutes until the sausages are beautifully browned, filling your kitchen with a mouthwatering aroma.

Step 6: Pour in the Batter
After the sausages are nicely browned, take the pan out of the oven with caution. Carefully pour the rested batter over the sausages, ensuring they are fully submerged. The sound of the batter hitting the hot oil is a promising sign of the fluffy Yorkshire pudding you’ll soon enjoy.

Step 7: Bake to Perfection
Return the pan to the oven and bake for 25-30 minutes. You’ll know it’s done when the Yorkshire pudding has puffed up dramatically and turned a golden brown. Avoid opening the oven door during this time, as it could cause the pudding to deflate.

Step 8: Serve Immediately
Now that your Mary Berry Toad Feast is ready, take it out of the oven and let it rest for a few minutes. This dish is best enjoyed fresh, so serve it right away with rich onion gravy, creamy mashed potatoes, and your choice of vegetables for a complete and heartwarming meal.

What to Serve with Mary Berry’s Toad in the Hole

There’s something special about crafting a full meal around this comforting British classic that brings warmth to the table.

  • Rich Onion Gravy: A traditional accompaniment that adds depth and moisture, enhancing the savory flavors of the sausages. Drizzle it generously over your Toad in the Hole for the ultimate comfort.

  • Creamy Mashed Potatoes: These silky potatoes balance perfectly with the crispy pudding, offering a velvety texture that’s hard to resist. It’s a match made in comfort food heaven.

  • Garlicky Green Beans: Fresh green beans sautéed with garlic provide a delightful crunch and bright color, making them an excellent contrast to the rich pudding.

  • Steamed Carrots: Their natural sweetness pairs beautifully with the savory elements of the dish, adding a pop of color and nutrition to your plate.

  • Roasted Brussels Sprouts: These little veggies bring a nutty taste and crispy texture, perfectly juxtaposing the fluffy Yorkshire pudding. Roasting caramelizes their edges, enhancing their flavor.

  • Crisp Apple Salad: A refreshing salad with sliced apples, mixed greens, and a tangy vinaigrette offers a crisp contrast, cutting through the richness of the dish.

  • Chilled Cider or Ale: Pair with a classic English cider or a malty ale to elevate your meal. The effervescence cleanses the palate beautifully between bites.

  • Sticky Toffee Pudding: For dessert, indulge in this classic British sweet treat. Its rich toffee sauce and soft texture make it a delightful finish after a hearty meal.

Craft your meal around these delightful sides and drinks to transform your Toad in the Hole into an unforgettable dining experience.

Variations & Substitutions for Mary Berry Toad Feast

Feel free to switch things up and make this dish your own with these fun and easy variations!

  • Dairy-Free: Substitute whole milk with almond or soy milk for a delightful non-dairy version that doesn’t compromise on flavor.

  • Gluten-Free: Use a gluten-free all-purpose flour blend for those with dietary restrictions. Just ensure your sausages are also gluten-free!

  • Herbed Sausages: Swap in spicy Italian or herbed sausages for a zestier flavor that adds a little something extra to the classic recipe.

  • Vegetarian Option: Choose plant-based sausages for a vegetarian twist that keeps the heartiness without the meat, making it suitable for all diners.

  • Sweet Touch: Try adding a sprinkle of nutmeg or cinnamon to the batter for a hint of warmth and sweetness, which contrasts nicely with the savory sausages.

  • Savory Batter Additions: Incorporate finely chopped onions or garlic into the batter for an aromatic lift that enhances the overall taste of your Toad in the Hole.

  • Cheesy Delight: Mix in grated cheese like cheddar into the batter for a rich and gooey texture that pairs wonderfully with the juicy sausages.

  • Tomato Variation: Serve with a spoonful of roasted tomatoes atop the pudding for a bright and tangy flavor boost that complements the rich elements of this dish.

Don’t hesitate to let your creativity shine! Whether you’re pairing it with a side of Strawberry Spinach Salad or indulging in White Chocolate Cranberry Cookies for dessert, you can transform your Mary Berry Toad Feast into a memorable family meal.

Expert Tips for Mary Berry Toad Feast

  • Hot Oil Essential: Ensure your oil or drippings are smoking hot before adding the batter; this step is crucial for creating that perfect puff in the Yorkshire pudding.

  • No Peeking: Resist the urge to open the oven door while it’s baking, as this can cause your beautiful pudding to deflate.

  • Rest Time Matters: Allowing the batter to rest for at least 30 minutes hydrates the flour, resulting in a lighter, fluffier Mary Berry Toad Feast.

  • Flavor Variations: Feel free to experiment with different sausages or herbs to customize your dish; this can elevate the comfort food experience for the whole family.

  • Serve Fresh: Enjoy the dish immediately after baking for the best texture; leftovers can lose that delightful fluffiness if left standing too long.

Make Ahead Options

Preparing Mary Berry’s Toad in the Hole in advance is a fantastic way to save time on busy weeknights! You can mix the batter and refrigerate it for up to 24 hours, allowing the flavors to meld beautifully while maintaining the batter’s texture. Additionally, you can brown the sausages and store them in the fridge for up to 3 days. When you’re ready to serve, simply heat the oil until smoking in your roasting pan, add the pre-cooked sausages, pour in the chilled batter, and bake as directed. This method ensures that your family enjoys restaurant-quality results with minimal effort, making mealtime stress-free and delicious!

Storage Tips for Mary Berry Toad Feast

Fridge: Store leftovers in an airtight container for up to 2 days. This helps retain the flavors and prevents the pudding from drying out.

Freezer: If you need to keep it longer, freeze portions for up to 1 month. Wrap tightly in plastic wrap and then in foil to prevent freezer burn.

Reheating: For the best results, reheat in a preheated oven at 375°F (190°C) for 10-15 minutes. This restores crispiness to the Yorkshire pudding, making your Mary Berry Toad Feast feel fresh and delicious.

Mary Berry’s Classic Toad in the Hole Recipe FAQs

What type of sausages should I use for Toad in the Hole?
Absolutely! You can use any type of pork sausages you love, whether they’re herbed, spicy, or even chicken or vegetarian options. Just ensure they are of good quality for the best flavor. My family favorites are a mix of spicy and herbed sausages for an extra kick!

How can I ensure my Yorkshire pudding puffs perfectly?
The secret to achieving that glorious puff is to use smoking hot oil when pouring in the batter. Preheat your oven to 400°F (200°C) and heat your oil in the roasting pan for about 10 minutes until it shimmers. Pour the batter in quickly and resist the urge to open the door while it bakes—this will help keep that wonderful rise!

How should I store leftovers from my Toad in the Hole?
You can refrigerate your leftovers in an airtight container for up to 2 days. To maintain flavor and moisture, be sure to allow any excess steam to escape before sealing. For longer storage, wrap individual portions tightly and freeze for up to 1 month.

Can I freeze Toad in the Hole?
Yes! To freeze, allow the dish to cool completely. Wrap portions in plastic wrap and then in aluminum foil to prevent freezer burn. When you’re ready to enjoy, simply reheat in a preheated oven at 375°F (190°C) for 10-15 minutes until heated through and crispy again.

Are there any dietary considerations I should keep in mind?
Certainly! While this recipe doesn’t cater to specific dietary restrictions, you can easily tailor it. For example, use gluten-free flour for a gluten-friendly version, or swap in plant-based sausages for a vegan option. Always double-check any allergen information for the ingredients you choose.

What can I do if my Yorkshire pudding doesn’t rise?
If your pudding doesn’t rise as expected, it could be due to several factors: the batter may not have rested long enough, the oil may not have been hot enough, or opening the oven door could have caused it to deflate. To ensure success next time, let your batter rest for at least 30 minutes and keep that oven door closed until baking is complete.

Mary Berry Toad Feast

Savor Mary Berry Toad Feast: A Cozy Family Comfort Dish

Experience the nostalgic charm of Mary Berry Toad Feast, a delightful British dish that combines sausages and Yorkshire pudding.
Prep Time 30 minutes
Cook Time 30 minutes
Resting Time 30 minutes
Total Time 1 hour 30 minutes
Servings: 4 servings
Course: Dinner
Cuisine: British
Calories: 400

Ingredients
  

For the Batter
  • 1 cup plain flour Consider whole wheat flour for a denser texture.
  • 1 teaspoon salt Use sea salt for a finer taste.
  • 3 large eggs Room temperature for best results.
  • 1 cup whole milk Can be substituted with non-dairy milk.
For the Sausages
  • 4 links pork sausages Any favorite sausage will do.
For the Cooking Base
  • 2 tablespoons sunflower oil Or beef drippings for a crispy base.
Optional Garnish
  • 1 tablespoon fresh parsley Optional for garnish.

Equipment

  • Roasting Pan
  • Mixing Bowl
  • Whisk

Method
 

Step-by-Step Instructions
  1. Preheat your oven to 400°F (200°C).
  2. In a large mixing bowl, combine plain flour and salt.
  3. Add the large eggs and gradually whisk in the whole milk to create a smooth batter.
  4. Allow batter to rest for at least 30 minutes.
  5. Pour sunflower oil or beef drippings into a roasting pan and place in the preheated oven.
  6. After 10 minutes, add pork sausages to the hot oil.
  7. Bake sausages for about 10 minutes until browned.
  8. Pour rested batter over the browned sausages.
  9. Return pan to the oven and bake for 25-30 minutes until puffed and golden.
  10. Serve immediately with onion gravy and vegetables.

Nutrition

Serving: 1servingCalories: 400kcalCarbohydrates: 50gProtein: 20gFat: 15gSaturated Fat: 5gPolyunsaturated Fat: 1gMonounsaturated Fat: 9gCholesterol: 180mgSodium: 800mgPotassium: 600mgFiber: 2gSugar: 1gVitamin A: 500IUVitamin C: 1mgCalcium: 200mgIron: 2mg

Notes

Enjoy the dish fresh for the best texture. Leftovers can be stored in an airtight container for up to 2 days.

Tried this recipe?

Let us know how it was!

Peppermint Bark Cinnamon Rolls You’ll Crave Every Morning

As I stood in my cozy kitchen, the intoxicating aroma of warm cinnamon swirled around me like a fuzzy blanket on a chilly day. These Festive Peppermint Bark Cinnamon Rolls are not just another holiday treat; they’re a delightful twist on a classic favorite, combining rich chocolate and refreshing mint. Perfect for a quick, festive breakfast or a sweet centerpiece for your holiday brunch spread, they come together with ease and promise to impress both family and friends. The fluffy, gooey layers, generously drizzled with cream cheese glaze and topped with a crunch of peppermint, are simply irresistible. Are you ready to elevate your holiday baking game with a recipe that will fill your home with warmth and joy? Let’s dive in!

Why You’ll Adore These Cinnamon Rolls

Irresistible Flavor: The sweet marriage of peppermint and rich chocolate makes every bite a festive delight that’s perfect for the holidays.

Easy to Make: With simple ingredients and straightforward steps, even beginner bakers can master these rolls effortlessly.

Gooey Goodness: Each roll emerges fluffy and gooey, enhanced by a creamy glaze that adds a velvety touch.

Perfect for Sharing: These rolls are not just a treat for you—serve them warm to family and friends during holiday gatherings for some serious crowd-pleasing.

Versatile Treat: Switch up flavors easily! Try incorporating different extracts or fillings like mini chocolate chunks for a unique twist.

If you’re looking for more festive ideas, check out my recipe for Grilled Cinnamon Apples or pair these rolls with Butter Brioche Rolls for an impressive brunch spread!

Peppermint Bark Cinnamon Rolls Ingredients

Whether you’re baking for yourself or a festive gathering, the delightful combination of flavors in these rolls will surely brighten your holiday season.

For the Dough

  • All-Purpose Flour – Provides the necessary structure for your rolls; opt for gluten-free flour for a gluten-free version.
  • Instant Yeast – Ensures a quick rise of the dough; you can also use active dry yeast but remember to activate it before mixing in.
  • Granulated Sugar – Adds sweetness and helps achieve that golden-brown crust; for a deeper flavor, mix in some brown sugar.
  • Salt – A crucial ingredient that enhances the flavor; don’t skip this essential component.
  • Warm Milk – Activates the yeast and hydrates the dough; feel free to use dairy-free milk for a vegan alternative.
  • Melted Butter – Contributes richness and moisture to the rolls; vegetable oil can be used as a substitute if necessary.
  • Large Egg – Binds all ingredients and adds structure; omit for a vegan version, but note it may affect texture.

For the Filling

  • Brown Sugar – Provides a sweet depth of flavor that pairs perfectly with the chocolate.
  • Unsweetened Cocoa Powder – Infuses the filling with rich chocolate flavor.
  • Ground Cinnamon – Adds warmth; no substitutes are needed unless you want to create unique spice blends.
  • Mini Chocolate Chips – Offers delightful bursts of chocolate within the rolls; consider dark chocolate chips for a more intense flavor.
  • Crushed Peppermint Candies – Perfect for that festive crunch and refreshing touch; can be swapped with crushed Oreos for a fun variation.

For the Glaze

  • Cream Cheese – Acts as the creamy base for the glaze; vegan cream cheese works wonderfully if you’re looking for a dairy-free option.
  • Powdered Sugar – Sweetens the glaze perfectly; raw cane sugar blended into a powder is an acceptable substitute.
  • Peppermint Extract – Intensifies the minty flavor; you can replace it with vanilla extract if you’re in the mood for a different profile.
  • Milk (for glaze) – Adjusts the glaze’s consistency; use as needed for your desired texture.

Embrace this festive delight, and let the gentle aroma of your Peppermint Bark Cinnamon Rolls fill your kitchen with warmth and joy, heralding the holidays!

Step‑by‑Step Instructions for Peppermint Bark Cinnamon Rolls

Step 1: Mix Dry Ingredients
In a large mixing bowl, combine 4 cups of all-purpose flour, 2 ¼ teaspoons of instant yeast, ½ cup of granulated sugar, and 1 teaspoon of salt. Whisk together until well-blended, creating a fluffy base for your Peppermint Bark Cinnamon Rolls. This step sets the foundation for your rolls’ texture, so ensure there are no lumps.

Step 2: Add Wet Ingredients
Gently warm 1 cup of milk until it’s slightly warm to the touch (about 110°F or 43°C) and mix it with ⅓ cup of melted butter and 1 large egg in a separate bowl. Pour this mixture into the dry ingredients and stir with a spatula until a sticky dough forms. The warmth will activate the yeast, making your rolls soft and fluffy.

Step 3: Knead the Dough
Dust a clean surface lightly with flour and transfer the dough onto it. Knead the dough for 6-8 minutes until it becomes smooth and elastic. When done, the dough should spring back when lightly pressed. Form it into a ball and place it in a greased bowl, covering it with a clean towel to rise.

Step 4: Let the Dough Rise
Place the covered bowl in a warm, draft-free spot, allowing the dough to rise for about 1 hour. You’ll know it’s ready when it has doubled in size. This rising process is crucial for achieving those fluffy Peppermint Bark Cinnamon Rolls everyone loves, so be patient!

Step 5: Prepare the Filling
While the dough is rising, prepare the filling. In a medium bowl, combine ¾ cup of brown sugar, ¼ cup of unsweetened cocoa powder, and 1 tablespoon of ground cinnamon. Stir until evenly blended, bringing out the rich chocolatey warmth that makes these rolls so irresistible.

Step 6: Roll the Dough
After the dough has risen, punch it down gently to release air, then turn it out onto a floured surface. Roll the dough into a 16×10-inch rectangle, ensuring even thickness. Spread ¼ cup of softened butter generously over the entire surface, creating a rich layer for your filling to adhere to.

Step 7: Add the Filling
Sprinkle the prepared filling mixture evenly over the buttered dough. Next, add ½ cup of mini chocolate chips and ½ cup of crushed peppermint candies, ensuring you have a festive blend of flavors throughout the dough. This step is what transforms regular cinnamon rolls into delightful Peppermint Bark Cinnamon Rolls.

Step 8: Form the Rolls
Starting from one long side, carefully roll the dough tightly into a log. Slice the log into 12 equal pieces. Arrange the rolls in a greased 9×13-inch baking dish, allowing for some space between them. Each piece should be looking beautifully swirled, full of chocolate and peppermint goodness!

Step 9: Second Rise
Cover the baking dish with a clean towel and let the rolls rise for an additional 30-40 minutes, or until they are puffy. This second rising phase is essential to achieving that lovely light texture in your Peppermint Bark Cinnamon Rolls, so give them time to rise again.

Step 10: Preheat the Oven
While the rolls are rising, preheat your oven to 350°F (175°C). The warmth of the oven is perfect for baking these delicious treats! As it heats, prepare to fill your kitchen with the tantalizing aroma of cinnamon and peppermint.

Step 11: Bake the Rolls
Once preheated, bake the rolls in the oven for 22-25 minutes. They should turn golden brown on top and smell heavenly. Keep an eye on them as they bake, and you’ll know they’re ready when they’re puffed and lightly golden around the edges.

Step 12: Make the Glaze
As the rolls cool slightly, prepare the glaze by beating together 4 ounces of cream cheese and ⅓ cup of softened butter until smooth. Gradually incorporate 2 cups of powdered sugar and 1 teaspoon of peppermint extract, adjusting with milk as needed to reach your desired creamy consistency.

Step 13: Glaze the Rolls
Once the rolls are slightly cooled, generously spread the creamy glaze over the warm surface. To finish, sprinkle additional crushed peppermint candies on top for that festive flair. Your Peppermint Bark Cinnamon Rolls are now ready to serve and enjoy!

Peppermint Bark Cinnamon Rolls Variations

Get creative and make these Peppermint Bark Cinnamon Rolls your own with these fun variations!

  • Gluten-Free: Use a 1:1 gluten-free flour blend to enjoy a fluffy version that everyone can savor. The taste and texture remain delightful!

  • Vegan: Replace the milk with almond or oat milk, omit the egg, and use vegan butter for a plant-based treat that’s just as scrumptious. You won’t miss the dairy!

  • Dark Chocolate Delight: Swap mini chocolate chips for dark chocolate chunks to intensify the cocoa experience. Each bite will be rich and deeply satisfying.

  • Mint Chocolate Swirls: Add a few drops of peppermint extract directly into the dough for an extra minty kick! It truly elevates the peppermint profile.

  • Cookie Butter Infusion: Spread a layer of cookie butter before adding the filling for a sweet, unexpected twist. The flavors will create a warm spice that tastes of cozy holidays.

  • Pecan Crunch: Sprinkle chopped pecans or walnuts in the filling along with the chocolate and peppermint. The added texture brings a delightful crunch in every bite.

  • Spiced Apples: Layer in thinly sliced apples for a fruity surprise. Their juiciness complements the rich chocolate, creating a comforting contrast that tastes like festive magic!

While you embark on these changes, consider pairing your rolls with my Grilled Cinnamon Apples for a warm, aromatic breakfast spread or serve alongside my delightful Butter Brioche Rolls to make a true brunch masterpiece. Enjoy baking!

Make Ahead Options

These Peppermint Bark Cinnamon Rolls are perfect for busy mornings and holiday gatherings! You can prepare the rolls up to the second rise, covering them tightly with plastic wrap and refrigerating for up to 24 hours. This method locks in freshness and flavor while allowing the dough to slowly rise in the fridge, just as delicious the next day! When you’re ready to bake, simply let the rolls sit at room temperature for about 30 minutes before popping them in the oven. This way, you’ll have warm, gooey treats ready to impress your family and friends with minimal effort!

How to Store and Freeze Peppermint Bark Cinnamon Rolls

Room Temperature: Store cooled cinnamon rolls in an airtight container for up to 2 days for the best freshness. Consider reheating in the microwave for a few seconds before serving.

Fridge: If you need a longer storage option, keep the rolls in the refrigerator for up to 5 days. Be sure to wrap them tightly to maintain their moisture and prevent drying out.

Freezer: For future holiday enjoyment, freeze baked rolls in a single layer on a baking sheet for 1-2 hours, then transfer to an airtight container or freezer bag. They can be frozen for up to 2 months.

Reheating: To reheat frozen Peppermint Bark Cinnamon Rolls, thaw overnight in the fridge. Warm in the oven at 350°F (175°C) for about 10-15 minutes until heated through, or microwave for a quick option!

Expert Tips for Peppermint Bark Cinnamon Rolls

  • Warm Environment: Allow dough to rise in a warm area, like an oven with the light on, to ensure optimal fluffiness in your Peppermint Bark Cinnamon Rolls.

  • Temperature Check: Make sure the milk is just warm, around 110°F, to activate the yeast without killing it. Use a thermometer for best results.

  • Kneading Caution: Avoid adding too much extra flour while kneading; this could lead to dense rolls instead of the light, fluffy texture you desire.

  • Glaze Consistency: If the glaze is too thick, gradually add milk, one tablespoon at a time, until it reaches the smooth, drizzle-able consistency you prefer.

  • Rest After Baking: Allow the rolls to cool slightly before glazing; this helps the glaze to set beautifully on the warm rolls without melting away.

What to Serve with Peppermint Bark Cinnamon Rolls

The perfect pairing can elevate these festive rolls into a spectacular meal that celebrates warmth and cheer.

  • Rich Hot Cocoa: The creamy, chocolatey goodness complements the minty flavors, making each sip a delightful experience alongside your cinnamon rolls.

  • Fresh Fruit Salad: A burst of citrus and berries provides a refreshing contrast to the sweet rolls, adding a healthful touch to your holiday brunch.

  • Savory Breakfast Sausages: The savory flavor of sausages balances the sweetness, creating a satisfying mix of tastes on your brunch table.

  • Fluffy Scrambled Eggs: Light and airy, scrambled eggs add protein and a savory element, making this pairing nourishing and delicious for brunch.

  • Nutty Granola: A sprinkle of homemade granola adds a satisfying crunch and complements the soft, gooey rolls, enhancing both texture and flavor.

  • Festive Fruit Juice: A glass of freshly squeezed orange or cranberry juice enhances the holiday vibe while providing a refreshing balance to your sweet treat.

These suggestions promise to transform your Peppermint Bark Cinnamon Rolls into the centerpiece of a joyful, memorable holiday meal.

Peppermint Bark Cinnamon Rolls Recipe FAQs

What type of flour is best for these rolls?
All-purpose flour provides the best structure for your Peppermint Bark Cinnamon Rolls, ensuring a fluffy and tender texture. However, if you’re looking for a gluten-free option, feel free to substitute with a gluten-free all-purpose flour blend.

How should I store the cinnamon rolls?
For optimal freshness, store cooled cinnamon rolls in an airtight container at room temperature for up to 2 days. If you need to keep them longer, wrap them tightly and refrigerate for up to 5 days. Before serving, you can gently reheat them in the microwave for a few seconds to warm them up.

Can I freeze Peppermint Bark Cinnamon Rolls?
Absolutely! To freeze, first arrange baked rolls in a single layer on a baking sheet and place them in the freezer for 1-2 hours. Once frozen, transfer to an airtight container or freezer bag and store for up to 2 months. To reheat, thaw overnight in the fridge, then warm in a 350°F (175°C) oven for about 10-15 minutes or microwave for convenience.

What are some common mistakes to avoid when making these rolls?
One common mistake is using milk that is too hot, which can kill the yeast. Make sure it’s warm but not hot, around 110°F (43°C). Another pitfall is adding too much flour while kneading; keep it minimal to maintain the light and fluffy texture of the rolls. Lastly, allow enough rising time to achieve that wonderful puffiness—don’t rush this crucial step!

Are these rolls suitable for vegan diets?
Yes, they can be made vegan! Simply use dairy-free alternatives for milk and cream cheese, and omit the egg or substitute with a flaxseed egg (1 tablespoon ground flaxseed mixed with 2.5 tablespoons water, let sit for 5 minutes), as it provides binder properties similar to an egg.

Peppermint Bark Cinnamon Rolls

Peppermint Bark Cinnamon Rolls You'll Crave Every Morning

Festive Peppermint Bark Cinnamon Rolls, combining rich chocolate and refreshing mint, are perfect for your holiday breakfast.
Prep Time 40 minutes
Cook Time 25 minutes
Rise Time 1 hour
Total Time 2 hours 5 minutes
Servings: 12 rolls
Course: Breakfast
Cuisine: American
Calories: 350

Ingredients
  

For the Dough
  • 4 cups all-purpose flour or gluten-free flour
  • 2.25 teaspoons instant yeast or active dry yeast
  • 0.5 cup granulated sugar or mix in brown sugar
  • 1 teaspoon salt
  • 1 cup warm milk about 110°F
  • 0.33 cup melted butter or vegetable oil
  • 1 large egg omit for vegan
For the Filling
  • 0.75 cup brown sugar
  • 0.25 cup unsweetened cocoa powder
  • 1 tablespoon ground cinnamon
  • 0.5 cup mini chocolate chips or dark chocolate chips
  • 0.5 cup crushed peppermint candies or crushed Oreos
For the Glaze
  • 4 ounces cream cheese or vegan cream cheese
  • 0.33 cup softened butter
  • 2 cups powdered sugar or raw cane sugar
  • 1 teaspoon peppermint extract or vanilla extract
  • milk for glaze use as needed

Equipment

  • Mixing Bowl
  • Rolling Pin
  • Baking dish
  • Spatula
  • Whisk
  • Measuring cups
  • Measuring spoons

Method
 

Step‑by‑Step Instructions
  1. In a large mixing bowl, combine 4 cups of all-purpose flour, 2 ¼ teaspoons of instant yeast, ½ cup of granulated sugar, and 1 teaspoon of salt. Whisk together until well-blended.
  2. Gently warm 1 cup of milk and mix it with ⅓ cup of melted butter and 1 large egg in a separate bowl. Pour this mixture into the dry ingredients and stir until a sticky dough forms.
  3. Dust a clean surface lightly with flour and knead the dough for 6-8 minutes until it becomes smooth and elastic. Place it in a greased bowl, covering it with a clean towel to rise.
  4. Allow the dough to rise for about 1 hour until it doubles in size.
  5. In a medium bowl, combine ¾ cup of brown sugar, ¼ cup of unsweetened cocoa powder, and 1 tablespoon of ground cinnamon. Stir until evenly blended.
  6. After the dough has risen, punch it down gently, turn it out onto a floured surface, and roll into a 16x10-inch rectangle. Spread ¼ cup of softened butter over the entire surface.
  7. Sprinkle the filling mixture evenly over the buttered dough, then add ½ cup of mini chocolate chips and ½ cup of crushed peppermint candies.
  8. Starting from one long side, roll the dough tightly into a log and slice into 12 equal pieces. Arrange in a greased 9x13-inch baking dish.
  9. Cover with a towel and let rise for an additional 30-40 minutes, or until puffy.
  10. Preheat your oven to 350°F (175°C).
  11. Bake the rolls for 22-25 minutes until golden brown on top.
  12. Prepare the glaze by beating together 4 ounces of cream cheese and ⅓ cup of softened butter until smooth. Gradually mix in 2 cups of powdered sugar and 1 teaspoon of peppermint extract, adjusting with milk as needed.
  13. Spread the glaze over the warm rolls, and sprinkle additional crushed peppermint candies on top.

Nutrition

Serving: 1rollCalories: 350kcalCarbohydrates: 50gProtein: 4gFat: 15gSaturated Fat: 9gMonounsaturated Fat: 4gCholesterol: 35mgSodium: 250mgPotassium: 150mgFiber: 2gSugar: 20gVitamin A: 500IUCalcium: 30mgIron: 1.5mg

Notes

Allow dough to rise in a warm area for optimal fluffiness. If the glaze is too thick, gradually add milk until smooth. Store cooled rolls in an airtight container.

Tried this recipe?

Let us know how it was!

Creamy Pepperoncini Chicken Skillet That Will Wow Your Taste Buds

As I stood in my kitchen, the vibrant scent of sautéed garlic and onions filled the air, instantly lifting my mood after a hectic day. Enter the Creamy Pepperoncini Chicken Skillet—a recipe that has become my go-to solution for busy weeknights when the last thing I want is to compromise on flavor. This dish features tender chicken simmered in a creamy, tangy sauce that beautifully balances the mild heat of pepperoncini peppers. Not only is it a quick meal that can be prepared in just one pan, but it also promises a wholesome, comforting experience that leaves my family wanting more. The best part? You can easily pair it with your favorite sides for a satisfying dinner. Are you ready to bring this tasty dish to your table? Let’s dive into the recipe!

Why Is This Skillet Recipe a Must-Try?

Quick Preparation: This creamy pepperoncini chicken skillet is perfect for busy weeknights, allowing you to whip up a delicious meal in no time.

Bold Flavors: The tangy pepperoncini peppers bring a delightful kick that elevates the dish to a whole new level.

Versatile Choices: Pair it with steamed rice, mashed potatoes, or even a crisp salad—whatever suits your cravings!

Single-Pan Convenience: Say goodbye to tedious clean-ups; this one-pan wonder makes cooking a breeze.

Healthy Ingredients: Packed with nutritious elements, this recipe is a wholesome option that doesn’t skimp on flavor. You might also enjoy Chicken Fettuccine Alfredo for another creamy delight!

Creamy Pepperoncini Chicken Skillet Ingredients

For the Chicken
Chicken Breasts – Use boneless, skinless to ensure quick cooking and tender bites.

For the Sauce
Pepperoncini Peppers – These add the essential tanginess; banana peppers can substitute for a milder flavor.
Garlic – Freshly minced garlic works best, enhancing the aroma and flavor profile beautifully.
Onions – Chopped onions provide sweetness; shallots are a good alternative for a softer taste.
Cream – A splash of cream creates a lush, creamy sauce; half-and-half can lighten it up if desired.
Chicken Broth – Choosing low-sodium broth is healthier and elevates the dish with rich flavor.

Now that you have your ingredients assembled, let’s get cooking the Creamy Pepperoncini Chicken Skillet!

Step‑by‑Step Instructions for Creamy Pepperoncini Chicken Skillet

Step 1: Prepare Ingredients
Start by gathering all your ingredients for the Creamy Pepperoncini Chicken Skillet. Slice the garlic and onions thinly, and cut the pepperoncini peppers into rings. Next, cut the chicken breasts into bite-sized pieces. This prep work will make cooking smoother and quicker, ensuring everything is ready to go when you start sautéing.

Step 2: Sauté Aromatics
In a large skillet, heat a drizzle of olive oil over medium heat. Once the oil shimmers, add the sliced onions and minced garlic. Sauté them for about 3-4 minutes, stirring frequently until the onions are translucent and fragrant. This step builds a delicious flavor base for your creamy sauce, enhancing the overall taste of the dish.

Step 3: Cook Chicken
Add the bite-sized chicken pieces into the skillet with the sautéed onions and garlic. Cook them for about 5-7 minutes, turning occasionally, until each piece is golden brown on the outside and cooked through. This browning adds depth to your Creamy Pepperoncini Chicken Skillet, so ensure you achieve a nice golden color before proceeding.

Step 4: Combine with Peppers
Stir in the sliced pepperoncini peppers, mixing them well with the chicken. Then, pour in the cream and chicken broth, allowing everything to come together in the skillet. Give it a gentle stir to combine and let the mixture start to bubble, which typically takes about 1-2 minutes, creating the luscious sauce you desire.

Step 5: Simmer to Thicken
Reduce the heat to low, letting the creamy mixture simmer for about 8-10 minutes. This gentle heat will thicken the sauce and ensure the chicken is fully cooked, reaching an internal temperature of 165°F. Stir occasionally to prevent sticking and to ensure an even cooking process while the flavors meld beautifully.

Step 6: Serve Up
Once the sauce has thickened and the chicken is fully cooked, remove the skillet from heat. Spoon the creamy pepperoncini chicken onto plates or into bowls. Pair it with your choice of sides like steamed rice or mashed potatoes for a comforting meal. Enjoy the rich flavors and creamy texture that make this dish truly special!

What to Serve with Creamy Pepperoncini Chicken Skillet

Imagine savoring a warm, comforting meal that tantalizes your taste buds while perfectly complementing your creamy chicken dish.

  • Steamed Rice: A fluffy bed of rice soaks up the luscious creamy sauce, creating a harmonious bite with each forkful.

  • Creamy Mashed Potatoes: Rich and buttery mashed potatoes provide a delightful contrast to the tangy chicken, enhancing the overall comfort of the meal.

  • Roasted Vegetables: Roasted seasonal veggies add a caramelized depth, balancing the creaminess of the skillet with their natural sweetness.

  • Crisp Green Salad: A refreshing salad of mixed greens and a zesty vinaigrette introduces a bright note that cuts through the richness beautifully.

  • Garlic Bread: Warm, toasty garlic bread serves as the perfect tool for soaking up the remaining sauce, ensuring every last bit is enjoyed.

  • Chilled White Wine: A light, chilled white wine like Sauvignon Blanc complements the tangy pepperoncini, making for an elegant dining experience.

  • Molten Chocolate Cake: For dessert, a luscious molten chocolate cake provides a decadent contrast, wrapping up the meal on a sweet note that satisfies.

Each pairing shines, creating a delightful tapestry of flavors and textures that will turn your dinner into a memorable event!

How to Store and Freeze Creamy Pepperoncini Chicken Skillet

Fridge: Store leftovers in an airtight container for up to 3 days. This helps maintain the creaminess of your creamy pepperoncini chicken skillet while preventing it from drying out.

Freezer: For long-term storage, freeze portions in airtight containers for up to 3 months. Make sure to leave space for expansion, as liquids may expand when frozen.

Reheating: Thaw in the fridge overnight, then reheat gently on the stovetop over low heat. Add a splash of chicken broth or cream to restore the sauce’s consistency.

Make-Ahead Tip: Prepare the creamy pepperoncini chicken skillet in advance and store it in the fridge for quick weeknight dinners—just reheat and enjoy!

Make Ahead Options

These Creamy Pepperoncini Chicken Skillet is a lifesaver for busy weeknights! You can chop the garlic, onions, and pepperoncini up to 24 hours in advance and store them in an airtight container in the refrigerator. The chicken can also be cut into bite-sized pieces ahead of time, making it easy to toss everything into the skillet when you’re ready to cook. Additionally, you can prepare the creamy sauce (cream and broth combined) and refrigerate it for up to 3 days. When it’s time to enjoy your meal, simply sauté the aromatics, add the chicken and any prepped ingredients to the skillet, and follow through with the quick cooking steps. You’ll have a delicious homemade dinner with minimal effort!

Creamy Pepperoncini Chicken Skillet Variations

Feel free to personalize your creamy pepperoncini chicken skillet to delight your taste buds even further!

  • Turkey Swap: Use ground turkey or turkey cutlets instead of chicken for a leaner protein option.
  • Tofu Twist: Swap chicken for firm tofu, making it a delightful vegetarian dish with the same lovely flavors.
  • Veggie Boost: Add colorful bell peppers or fresh spinach to increase the nutritional value and brighten the dish.
  • Spicy Kick: Toss in some crushed red pepper flakes or diced jalapeños to heighten the heat level and awaken your palate.
  • Creamy Alternatives: Use coconut milk or cashew cream for a dairy-free version that doesn’t skimp on creaminess.
  • Cheesy Finish: Stir in some grated Parmesan or mozzarella cheese for an extra layer of flavor and richness that complements the tang of the pepperoncini.
  • Zesty Citrus: Squeeze fresh lemon juice over the dish before serving to add a refreshing zing that cuts through the richness.
  • Herb Infusion: Incorporate fresh herbs like basil or parsley for a burst of flavor and a beautiful finishing touch.

Each variation offers a unique twist to the classic recipe. Whether you’re craving something light like a Thai Chicken Meatball or a rich comforting dish like Chicken Fettuccine Alfredo, the possibilities are as endless as your imagination!

Expert Tips for Creamy Pepperoncini Chicken Skillet

  • Temperature Check: Always ensure the chicken reaches an internal temperature of 165°F for safety and optimal texture.

  • Fresh Ingredients: Use fresh garlic and onions for a more aromatic and flavorful sauce that elevates your creamy pepperoncini chicken skillet.

  • Avoid Overcooking: Keep an eye on the pepperoncini; overcooking can lead to mushiness. Add them towards the end for a delightful crunch.

  • Let It Rest: For the best flavor meld, allow your dish to sit for a few minutes before serving—this enhances the taste experience.

  • Customize to Taste: Experiment with additional spices or herbs based on your family’s preferences, making each creamy pepperoncini chicken skillet your own!

Creamy Pepperoncini Chicken Skillet Recipe FAQs

How do I choose the right pepperoncini peppers?
Absolutely! Look for firm, bright green or yellow peppers without any dark spots or blemishes. Those with a shiny skin indicate freshness. If you prefer a milder taste, you can substitute them with banana peppers, which will still give you that delicious tang without the heat.

How should I store leftovers?
Very! Store your creamy pepperoncini chicken skillet in an airtight container in the refrigerator for up to 3 days. It’s best to let it cool down before sealing it up to maintain its creamy texture and flavor. When you’re ready to reheat, a gentle warming on the stove with a splash of broth or cream helps revitalize the sauce.

Can I freeze the creamy pepperoncini chicken skillet?
Absolutely! For freezing, divide the dish into portions and store in airtight containers for up to 3 months. It’s essential to leave a little space at the top of the container because liquids expand when frozen. When you’re ready to enjoy it again, thaw overnight in the fridge, then gently reheat on the stovetop, adding a touch of cream if needed to bring back the luscious consistency.

What should I do if the sauce is too thick?
No worries! If your sauce becomes thicker than you’d like, simply stir in a little chicken broth or cream while reheating. Start with a tablespoon at a time, stirring until you reach your desired consistency. This method keeps your creamy pepperoncini chicken skillet delightful and smooth without compromising flavor.

Are there any dietary considerations for this recipe?
Absolutely! If you’re cooking for someone with specific dietary needs, this recipe can be easily modified. For a gluten-free option, ensure your chicken broth is certified gluten-free, and feel free to swap the chicken with turkey or a plant-based protein like tofu for a vegetarian twist. Always check ingredient labels to ensure they meet your specific dietary guidelines.

Can I make this dish ahead of time?
Very! You can prepare the entire creamy pepperoncini chicken skillet up to a day in advance. Just make sure to cool it completely before storing it in the fridge. When it’s time to serve, reheat it gently on the stovetop over low heat, stirring occasionally to ensure even warming. A splash of chicken broth or cream can help restore that beautiful creamy texture!

Creamy Pepperoncini Chicken Skillet

Creamy Pepperoncini Chicken Skillet That Will Wow Your Taste Buds

A quick, one-pan meal featuring tender chicken simmered in a creamy, tangy sauce with pepperoncini peppers.
Prep Time 10 minutes
Cook Time 30 minutes
Total Time 40 minutes
Servings: 4 servings
Course: Chicken
Cuisine: American
Calories: 350

Ingredients
  

For the Chicken
  • 1 pound boneless, skinless chicken breasts cut into bite-sized pieces
For the Sauce
  • 1 cup pepperoncini peppers sliced
  • 3 cloves garlic freshly minced
  • 1 medium onion chopped
  • 1 cup cream or half-and-half for a lighter option
  • 1 cup chicken broth low-sodium preferred

Equipment

  • large skillet

Method
 

Step-by-Step Instructions
  1. Gather all your ingredients for the Creamy Pepperoncini Chicken Skillet. Slice the garlic and onions thinly, and cut the pepperoncini peppers into rings. Cut the chicken breasts into bite-sized pieces.
  2. In a large skillet, heat a drizzle of olive oil over medium heat. Add the sliced onions and minced garlic. Sauté for about 3-4 minutes until onions are translucent and fragrant.
  3. Add the chicken pieces into the skillet. Cook for about 5-7 minutes, turning occasionally, until golden brown and cooked through.
  4. Stir in the sliced pepperoncini peppers, then pour in the cream and chicken broth. Stir gently and let the mixture start to bubble for about 1-2 minutes.
  5. Reduce heat to low and let the mixture simmer for about 8-10 minutes to thicken. Stir occasionally.
  6. Remove the skillet from heat. Serve the creamy pepperoncini chicken with your choice of sides like steamed rice or mashed potatoes.

Nutrition

Serving: 1servingCalories: 350kcalCarbohydrates: 12gProtein: 29gFat: 20gSaturated Fat: 10gPolyunsaturated Fat: 1gMonounsaturated Fat: 5gCholesterol: 100mgSodium: 600mgPotassium: 500mgFiber: 2gSugar: 3gVitamin A: 500IUVitamin C: 10mgCalcium: 80mgIron: 2mg

Notes

Always ensure chicken reaches an internal temperature of 165°F. Use fresh ingredients for better flavor and avoid overcooking the pepperoncini.

Tried this recipe?

Let us know how it was!

Melt-in-Your-Mouth Slow Cooker Beef & Noodles Delight

There’s something magical about the aroma of a hearty stew simmering away in the kitchen, isn’t there? When I first made Slow Cooker Beef & Noodles, that tantalizing scent wrapped around me like a warm hug, instantly transporting me to simpler, cozier times. This comforting classic features tender chunks of beef chuck roast, nestled in rich beef broth, sweet onions, and a dash of Worcestershire sauce, all served over silky egg noodles. Not only is this dish a delightful crowd-pleaser, but it’s also a lifesaver when you don’t have hours to spend in the kitchen. With minimal prep and the slow cooker doing the heavy lifting, you’ll have a satisfying meal ready when you are. Curious to learn how to bring this cozy dish to your own table? Let’s dive into the recipe!

Why is Slow Cooker Beef & Noodles a Must-Try?

Effortless Preparation: This recipe requires minimal hands-on time, making it perfect for even the busiest schedules.

Heavenly Aromas: As it cooks, your kitchen will be filled with an irresistible scent that draws everyone in.

Comforting Twist: Enjoy the classic beef stroganoff flavors while simplifying your cooking process, making it a go-to for any night.

Crowd-Pleaser: Share this dish at family gatherings or dinner parties—everyone will love the rich, hearty taste.

Customizable: Feel free to add veggies or swap meats, turning this into your favorite meal. Pair it with a fresh side salad to complete your dining experience! You’ll love how easy it is to create a delicious yet comforting dish that feels like a warm embrace.

Slow Cooker Beef & Noodles Ingredients

Get ready to savor the heartwarming flavors of this classic dish!

For the Beef and Broth
Beef Chuck Roast – A tender cut that breaks down beautifully in the slow cooker for melt-in-your-mouth texture.
Beef Broth – The flavorful base that infuses the dish; using low-sodium broth helps control salt levels.
Onion Soup Mix – Adds richness and deep flavor; substitute with fresh caramelized onions for a personal touch.
Worcestershire Sauce – Brings a delightful umami kick; soy sauce makes for a viable alternative.
Salt, Pepper, and Garlic Powder – Essential seasonings for enhancing the dish; fresh garlic can amplify the flavor profile.

For the Noodles
Egg Noodles – The classic pairing that captures the sauce; consider gluten-free options like rice noodles if needed.

Optional Toppings
Fresh Parsley – Adds a burst of color and freshness to the finished dish.
Grated Parmesan Cheese – A delicious sprinkle that enriches the creamy sauce.

Embrace this Slow Cooker Beef & Noodles recipe, and let your kitchen fill with the rich aromas of comfort food!

Step‑by‑Step Instructions for Melt-in-Your-Mouth Slow Cooker Beef & Noodles Delight

Step 1: Brown the Beef
Begin by heating a large skillet over medium-high heat. Pat the beef chuck roast dry and sear it in the skillet for about 4-5 minutes on each side until golden brown. This step not only enhances the flavor but also locks in the juices. Once browned, transfer the beef to the slow cooker and set it aside.

Step 2: Sauté the Onion Soup Mix
In the same skillet, add the onion soup mix and sauté in the remaining drippings for 2-3 minutes. Stir continuously to ensure the mix absorbs all those flavorful bits stuck to the pan. This will create a deeper flavor profile for your Slow Cooker Beef & Noodles. Once aromatic, pour the mixture over the beef in the slow cooker.

Step 3: Add Broth and Seasonings
Pour in the beef broth until it covers the roast and add the Worcestershire sauce, salt, pepper, and garlic powder. Stir gently to combine. Set the slow cooker to low and cover it, allowing the beef to simmer for about 6-8 hours, or until it’s fork-tender. The rich aroma will fill your kitchen, promising a sumptuous dinner ahead.

Step 4: Cook the Egg Noodles
About 30 minutes before serving, cook the egg noodles according to package instructions in a separate pot. Boil them in salted water until they are al dente, typically around 6-8 minutes. This ensures they maintain their texture when combined with the beef and sauce. Drain and set aside.

Step 5: Combine Noodles and Beef
Once the beef is tender, carefully remove it from the slow cooker and shred it using two forks. Return the shredded beef to the slow cooker, along with the cooked egg noodles. Gently stir to coat the noodles in that luscious sauce, letting all the flavors meld for another 5 minutes on warm.

Step 6: Serve and Garnish
Ladle the delicious Slow Cooker Beef & Noodles onto plates or into bowls. Garnish with fresh parsley and a sprinkle of grated Parmesan cheese for a touch of brightness and richness. Serve hot and watch as friends and family gather around, eager to enjoy this comforting dish!

Make Ahead Options

Preparing your Slow Cooker Beef & Noodles ahead of time means more time to relax when dinnertime rolls around! You can brown the beef and sauté the onion soup mix up to 24 hours in advance; simply refrigerate these components in an airtight container. Additionally, you can cook the egg noodles ahead of time, storing them in the fridge as well for up to 3 days. When you’re ready to serve, all you need to do is combine the refrigerated beef, onion mixture, and noodles in the slow cooker with the broth and seasonings, allowing them to warm together and meld flavors. This strategy will not only save you precious minutes but also keep your meal just as delicious and heartwarming!

Slow Cooker Beef & Noodles Variations

Feel free to personalize your slow cooker creation with these exciting twists that will take your dish to the next level!

  • Chicken Alternative: Swap beef with boneless chicken thighs for a lighter flavor profile. Cooking times may vary, so check for tenderness.

  • Vegetarian Delight: Use hearty mushrooms or a mix of your favorite veggies as a satisfying meat replacement. This adds wonderful texture and earthiness.

  • Spicy Kick: Add a pinch of red pepper flakes or a splash of hot sauce to your broth for a gentle heat that warms the soul.

  • Creamy Addition: Stir in a dollop of sour cream or cream cheese right before serving for an extra creamy, velvety sauce that’s simply irresistible.

  • Extra Veggies: Toss in carrots, celery, or green beans about 2-3 hours into the cooking process for added flavor, nutrition, and crunch.

  • Herb Infusion: Experiment with fresh herbs like thyme or rosemary to add fragrant layers of flavor that elevate your beef noodles.

  • Savory Gravy Base: Consider using cream of mushroom soup along with your beef broth for a richer, heartier gravy that clings beautifully to the noodles.

  • Zoodles Twist: Swap out egg noodles for spiralized zucchini (zoodles) for a low-carb option that still absorbs the delicious sauce well!

If you’re looking for more comforting recipes, don’t miss out on my Slow Cooked Summer Beef Casserole or try the delightful Ground Beef Potato Taco Bowl for another take on hearty home cooking!

How to Store and Freeze Slow Cooker Beef & Noodles

Fridge: Store any leftovers in an airtight container for up to 3 days. Reheat on the stovetop for best results to maintain that creamy sauce.

Freezer: Freeze portions in airtight freezer bags or containers for up to 3 months. Consider adding a splash more broth before freezing to keep it moist.

Thawing: To enjoy your Slow Cooker Beef & Noodles, thaw overnight in the fridge and reheat gently on the stovetop or in the microwave, adding a bit of water if needed.

Reheating: When reheating, do so slowly over low heat to retain the dish’s texture and flavor. Stir occasionally, ensuring it’s heated through without burning.

What to Serve with Classic Beef Stroganoff?

There’s nothing quite like a comforting dinner that wraps you in warmth and nostalgia, making every bite feel like home.

  • Steamed Broccoli: Adds a vibrant green color and a fresh crunch, perfectly balancing the richness of the stroganoff. Plus, it’s packed with nutrients!

  • Crisp Green Salad: A light and refreshing salad with mixed greens and a tangy vinaigrette helps to cleanse the palate after each delightful mouthful.

  • Garlic Bread: The buttery, toasted slices with a hint of garlic make for an irresistible side that’s perfect for soaking up every drop of savory sauce.

  • Roasted Carrots: Their natural sweetness and caramelized edges provide a lovely contrast to the creamy beef dish, offering both flavor and texture diversity.

  • Mashed Potatoes: Creamy mashed potatoes enhance the comfort level, creating an inviting plate while soaking up every bit of the flavorful sauce.

  • Sautéed Green Beans: Tender-crisp green beans add a satisfying snap and a touch of freshness that beautifully complements the hearty stroganoff.

  • Chardonnay: A crisp white wine like Chardonnay pairs excellently, as its acidity balances the creamy elements of the dish, enhancing the overall flavor profile.

Indulging in these pairings will elevate your meal from fabulous to truly unforgettable, creating a heartwarming dining experience for you and your loved ones!

Expert Tips for Slow Cooker Beef & Noodles

  • Perfect Texture: Shred the beef once it’s fork-tender to maintain a beautiful, melt-in-your-mouth texture for the Slow Cooker Beef & Noodles.

  • Seasoning Balance: Taste the broth before serving; adjust salt and pepper if needed. Remember, the noodles will absorb some flavors!

  • Prevent Overcooking: Set a timer for the last 30 minutes of cooking to add the egg noodles. They should be firm yet tender—too long, and they may become mushy.

  • Customize Wisely: Feel free to add your favorite veggies, but add them halfway through cooking to avoid overcooking.

  • Use Fresh Ingredients: Fresh garlic and herbs can elevate the flavors, making your dish even more delicious while sticking to the classic recipe’s essence.

Slow Cooker Beef & Noodles Recipe FAQs

What type of meat should I use for Slow Cooker Beef & Noodles?
For the best flavor and texture, use beef chuck roast. This cut is perfect for slow cooking as it tenderizes beautifully while simmering, yielding melt-in-your-mouth bites. Look for a roast with nice marbling to ensure it stays juicy!

How long can I store Slow Cooker Beef & Noodles in the fridge?
Leftovers can be stored in an airtight container in the refrigerator for up to 3 days. When you’re ready to enjoy them again, simply reheat on the stovetop over low heat for optimal flavor and texture retention. Stir occasionally to avoid sticking.

Can I freeze Slow Cooker Beef & Noodles?
Absolutely! Freeze portions in airtight freezer bags or containers for up to 3 months. I recommend adding a splash of broth before freezing to keep everything moist. When you’re ready to enjoy, thaw overnight in the fridge and reheat carefully on the stovetop or microwave.

What should I do if my beef becomes tough after cooking?
If your beef turns out tough, it may not have cooked long enough. For the next attempt, ensure you cook it for the full recommended time—6-8 hours on low. The cooking time can vary based on your slow cooker, so don’t hesitate to check the tenderness with a fork; it should shred easily when done!

What can I substitute for egg noodles?
If you’re looking for alternatives, gluten-free noodles like rice noodles work beautifully and hold the sauce well. Consider using zucchini noodles for a low-carb option; just add them during the last 10 minutes of cooking so they soften without losing their structure.

Are there any dietary considerations for this recipe?
Certainly! If you’re cooking for anyone with food allergies, be aware that Worcestershire sauce often contains anchovies. For a vegetarian version, try substituting meat with mushrooms or chickpeas, and use a rich vegetable broth instead. Always check labels for allergens, especially if cooking for pets!

Slow Cooker Beef & Noodles

Melt-in-Your-Mouth Slow Cooker Beef & Noodles Delight

Enjoy the comforting and flavorful Slow Cooker Beef & Noodles, perfect for busy days and family gatherings.
Prep Time 15 minutes
Cook Time 8 hours
Total Time 8 hours 15 minutes
Servings: 6 servings
Course: Beef
Cuisine: American
Calories: 350

Ingredients
  

For the Beef and Broth
  • 3 pounds Beef Chuck Roast
  • 4 cups Beef Broth Use low-sodium broth
  • 1 packet Onion Soup Mix Or substitute with fresh caramelized onions
  • 2 tablespoons Worcestershire Sauce Soy sauce can be a substitute
  • 1 teaspoon Salt
  • 1 teaspoon Pepper
  • 1 teaspoon Garlic Powder Consider fresh garlic for better flavor
For the Noodles
  • 12 ounces Egg Noodles Gluten-free options like rice noodles can be used
Optional Toppings
  • 1/4 cup Fresh Parsley Chopped, for garnish
  • 1/4 cup Grated Parmesan Cheese For garnish

Equipment

  • Slow Cooker
  • large skillet
  • pot

Method
 

Step-by-Step Instructions
  1. Begin by heating a large skillet over medium-high heat. Pat the beef chuck roast dry and sear it in the skillet for about 4-5 minutes on each side until golden brown. Once browned, transfer the beef to the slow cooker and set it aside.
  2. In the same skillet, add the onion soup mix and sauté in the remaining drippings for 2-3 minutes, stirring continuously. Pour the mixture over the beef in the slow cooker.
  3. Pour in the beef broth until it covers the roast and add Worcestershire sauce, salt, pepper, and garlic powder. Stir gently to combine. Set the slow cooker to low and cover it, simmering for 6-8 hours, or until fork-tender.
  4. About 30 minutes before serving, cook the egg noodles according to package instructions in a separate pot. Drain and set aside.
  5. Once the beef is tender, carefully remove it from the slow cooker and shred it using two forks. Return the shredded beef to the slow cooker along with cooked egg noodles. Gently stir to coat the noodles in the sauce.
  6. Ladle the Slow Cooker Beef & Noodles onto plates. Garnish with fresh parsley and a sprinkle of grated Parmesan cheese. Serve hot.

Nutrition

Serving: 1servingCalories: 350kcalCarbohydrates: 35gProtein: 25gFat: 10gSaturated Fat: 4gPolyunsaturated Fat: 1gMonounsaturated Fat: 3gCholesterol: 80mgSodium: 800mgPotassium: 700mgFiber: 2gSugar: 1gVitamin A: 300IUVitamin C: 4mgCalcium: 50mgIron: 3mg

Notes

Store any leftovers in an airtight container for up to 3 days. Reheat gently on the stovetop.

Tried this recipe?

Let us know how it was!

Crispy Onion Ring Chips: Irresistibly Crunchy Snack Delight

The moment those crispy, golden onion ring chips touch your tongue, it feels like a mini celebration. You won’t believe how a few simple ingredients can transform into these irresistible delights! My homemade onion ring chips are not only quick to prepare but also offer a fun twist on traditional snacks—perfect for game nights or casual gatherings. With their satisfying crunch and the option to add your favorite spices, these chips are truly versatile and sure to impress anyone you share them with. Curious about how to make these crunchy bites at home? Let’s dive into the recipe!

Why Are Onion Ring Chips So Addictive?

Irresistible Crunch: The delightful crispiness of these onion ring chips will keep you coming back for more.

Simple Ingredients: With just a handful of pantry staples, whipping up these chips is a breeze—perfect for anyone craving a homemade snack.

Versatile Flavor: Customize with your favorite spices or herbs to create a unique twist every time! Want a hint of heat? Try adding cayenne or paprika.

Crowd-Pleaser: Ideal for game nights or casual gatherings, everyone will rave about these crunchy bites. Serve them alongside Cheesy French Onion dip for the ultimate pairing!

Quick & Easy: Ready in no time, these chips are a fantastic solution for when hunger strikes. You won’t have to settle for fast food again!

Onion Ring Chips Ingredients

• Discover the joy of homemade chips!

For the Coating

  • All-Purpose Flour – Forms the base for that crispy coating; make sure to season it for extra flavor!
  • Cornstarch – Helps achieve a light and airy crunch; don’t skip this for the best texture!
  • Salt – Enhances the flavor of the chips; adjust to your liking based on dietary needs.
  • Smoked Paprika – Adds a smoky tang; feel free to swap for regular paprika for a milder taste.
  • Garlic Powder – Infuses a savory kick; a great way to elevate your onion ring chips!

For the Onion Rings

  • Large Onions – Sweet or yellow onions are ideal; cut them into even rings for uniform baking.
  • Eggs – Acts as a binder for the coating; a vegan alternative can be flax eggs for a plant-based option.
  • Buttermilk – Helps tenderize and adds flavor; easily make your own by mixing milk with vinegar!

For Baking or Frying

  • Oil – Use vegetable or canola oil for frying; if baking, opt for a light brushing of olive oil instead.

Now, you’re set to create the most delicious onion ring chips that will elevate your snack game!

Step‑by‑Step Instructions for Crispy Onion Ring Chips

Step 1: Preheat the Oven or Heat Oil
Begin by preheating your oven to 425°F (220°C) if you’re baking the onion ring chips. If frying instead, heat vegetable or canola oil in a deep pan or fryer until it reaches 350°F (175°C). This initial step sets the stage for achieving that perfect, crispy texture that makes these onion ring chips so irresistible.

Step 2: Prepare the Onion Rings
While the oven or oil heats up, slice your large onions into even rings about half an inch thick. Separate the rings carefully to ensure each chip retains its shape. For an added kick, you can soak the onion rings in buttermilk for about 15 minutes to imbue them with flavor and tenderness, making your crispy onion ring chips even more delightful when baked or fried.

Step 3: Mix the Coating
In a large bowl, combine all-purpose flour, cornstarch, salt, smoked paprika, and garlic powder to create the crispy coating mixture. Stir well to ensure an even distribution of flavors. This seasoned mixture is what gives your onion ring chips their remarkable crunch and savory flavor, so don’t rush this step—make sure it’s well combined!

Step 4: Prepare the Breading Station
Set up your breading station by laying out three bowls: one with the egg (or flax egg) for binding, the second for the flour mixture, and a third to hold the finished onion ring chips. This will streamline the process of coating each onion ring. Quick transitions between bowls will help ensure an even crust on each chip, leading to perfectly crispy onion ring chips.

Step 5: Coat the Onion Rings
Dip each onion ring into the egg mixture, allowing any excess to drip off before transferring it to the flour mixture. Coat each ring thoroughly, pressing gently to ensure the coating sticks well. Repeat this process until all onion rings are coated. You’re well on your way to mouthwatering crispy onion ring chips!

Step 6: Bake or Fry the Chips
If baking, place the coated onion ring chips on a parchment-lined baking sheet, ensuring they are spaced out for even cooking. Bake for 20-25 minutes, or until golden brown, flipping halfway through. For frying, carefully immerse the coated rings in the hot oil and fry for 2-3 minutes per side, or until they’re beautifully golden and crispy.

Step 7: Drain and Cool
Once your crispy onion ring chips are baked or fried, transfer them to a wire rack or paper towels to drain excess oil. This cooling step is essential to maintain that delightful crunch while keeping the chips light. Be patient as they cool, letting the magic of flavor settle in!

Step 8: Serve and Enjoy
Gather your crispy onion ring chips on a serving platter and pair them with delicious dips like ranch or spicy mayo. These flavorful chips are sure to be a hit at any game night or casual gathering. Take a moment to appreciate the irresistible golden-brown perfection before sharing—everyone won’t be able to resist these homemade delights!

How to Store and Freeze Onion Ring Chips

Room Temperature: Store leftover onion ring chips in an airtight container at room temperature for up to 2 days to maintain their crunchiness.

Fridge: You can refrigerate them to extend freshness for up to 4 days, but note they may lose some crispiness. Reheat in the oven or air fryer for optimal texture.

Freezer: To freeze, place cooled onion ring chips in a single layer on a baking sheet, freeze until solid, then transfer to an airtight container or freezer bag for up to 3 months.

Reheating: When ready to enjoy, reheat frozen onion ring chips in the oven at 400°F (200°C) for about 10-15 minutes until crispy.

Variations & Substitutions for Onion Ring Chips

Feel free to get creative with these onion ring chips; your taste buds will thank you for the adventure!

  • Gluten-Free: Substitute all-purpose flour with a gluten-free flour blend to make these chips suitable for those with gluten sensitivities. The texture will remain delightful!

  • Spicy Kick: Add cayenne pepper or crushed red pepper flakes to the coating mixture for an exciting heat that elevates each chip. It’s a fantastic way to bring the flavor to life!

  • Herb-Infused: Incorporate dried herbs, such as oregano or thyme, into the coating for a fragrant twist. These herb-infused chips pair beautifully with a creamy dip like Cheesy French Onion!

  • Cheesy Flavor: Mix finely grated Parmesan cheese into the flour coating for a delicious cheesy crust that takes everything to a whole new level of scrumptiousness.

  • Baked Variation: For a lighter version, skip the frying altogether and bake them until crispy. Lightly spraying the coated chips with olive oil before baking enhances the crunchy texture.

  • Sweet & Savory: Try dipping your onion rings in a honey or maple syrup glaze after they’re cooked for a unique sweet twist that contrasts perfectly with the savory flavor.

  • Veggie Delight: Swap out half of the onions for zucchini or eggplant slices to add a veggie twist that keeps the crunch factor in play. An exciting mix is always a hit at gatherings!

  • Seasoning Swap: Experiment with different seasoning blends such as taco seasoning or buffalo spice for a completely different take. Get ready for flavor explosions that will delight your guests!

What to Serve with Classic Chocolate Chip Cookies

There’s nothing quite like the enchantment of freshly baked cookies, perfectly paired with delightful treats to create a memorable dessert spread.

  • Ice Cream: The creamy, cold texture of vanilla ice cream complements warm chocolate chip cookies beautifully, creating a classic cookie sandwich that’s simply irresistible.

  • Fresh Berries: Juicy strawberries or raspberries add a refreshing burst of flavor and a pop of color on your dessert plate, balancing the sweetness of the cookies.

  • Cold Milk: A classic pairing! The chill of cold milk enhances the chocolate richness while softening the cookies, making every bite a delightful experience.

  • Coffee: The rich, aromatic notes of brewed coffee contrast perfectly with the sweet, buttery flavors of the cookies, adding a cozy touch for adult palates.

  • Nut Butter: Spread creamy almond or peanut butter on a warm cookie for a wholesome upgrade. The nutty flavor adds depth and a satisfying texture.

  • Chocolate Sauce: Drizzle warm chocolate sauce over cookies for an extra indulgent treat. The gooey topping enhances every bite, making it even more decadent.

  • Caramel Sauce: Sweet, sticky caramel pairs beautifully with chocolate, adding a luxurious flair to your cookie experience.

  • Whipped Cream: Light and airy, a dollop of whipped cream on the side brings an elegant touch to the plate, perfect for a dessert with flair.

  • Cheesecake Dip: Dip your cookies into a light cheesecake-flavored dip for a fun and unique twist. This creamy complement will delight every guest!

  • Chocolate Milkshake: Indulge in a classic, frosty chocolate milkshake that pairs wonderfully with cookies, creating a nostalgic dessert reminiscent of diner treats.

Expert Tips for Onion Ring Chips

  • Use Fresh Onions: Always opt for fresh, firm onions for the best flavor and texture. Avoid soft onions, as they won’t provide that delightful crunch.

  • Don’t Skip Soaking: Soaking the onion rings in buttermilk not only enhances flavor but also helps the coating stick better, ensuring your onion ring chips remain crispy.

  • Coating Consistency: Ensure your coating has an even texture; lumps in your mixture can lead to unevenly coated chips. Take your time when preparing the breading station!

  • Monitor Cooking Time: Keep a close eye while baking or frying; overcooking can result in burnt edges. Perfectly timed chips will be golden brown and irresistibly crunchy.

  • Cooling Matters: Allow the chips to drain and cool properly to maintain their crunch. Avoid stacking them while cooling, as trapped steam can make them soggy.

  • Flavor with Ease: Experiment with various spices or herbs in the coating to create unique onion ring chips. Adding a pinch of chili powder can elevate the flavor profile wonderfully!

Make Ahead Options

These crispy onion ring chips are perfect for meal prep enthusiasts! You can prepare the onion rings and coat them in advance, up to 3 days ahead. Simply slice the onions, soak them in buttermilk for added flavor, and coat them with the flour mixture. Store the coated rings in an airtight container in the refrigerator to maintain their crunch. When it’s time to serve, just bake or fry them straight from the fridge, adding an extra minute or two to the cooking time for the best results. This approach allows you to enjoy delicious homemade onion ring chips with minimal effort on busy days!

Crispy Onion Ring Chips Recipe FAQs

How do I choose the best onions for my onion ring chips?
Absolutely! For the best onion ring chips, opt for large sweet or yellow onions. They provide a balanced taste and hold up wonderfully during baking or frying. Look for firm onions without any soft spots, as these will deliver that irresistible crunch you are after.

How should I store leftover onion ring chips?
Very! To keep your leftover onion ring chips crispy, store them in an airtight container at room temperature for up to 2 days. If you want to extend their freshness, you can refrigerate them for up to 4 days, but they may lose some crispiness. Just pop them back in the oven or air fryer to re-crisp before serving!

Can I freeze onion ring chips?
Absolutely! To freeze, first ensure your onion ring chips have cooled completely. Arrange them in a single layer on a baking sheet and freeze until solid. Once frozen, you can transfer them to an airtight container or freezer bag for up to 3 months. This way, you can always have crispy onion ring chips on hand!

What can I do if my onion ring chips are soggy?
The more the merrier! If you find that your onion ring chips are turning out soggy, it’s usually due to trapped moisture during cooling. To prevent this, make sure to cool them on a wire rack rather than stacking them. If they are soggy after storage, try reheating them in the oven at 400°F (200°C) for about 10-15 minutes, and they should regain their crispiness!

Are onion ring chips suitable for those with dietary restrictions?
Absolutely! If you have dietary needs, onion ring chips can be easily adapted. For a vegan version, substitute the egg with a flax egg (mix 1 tablespoon ground flaxseed with 2.5 tablespoons of water and let it sit until it thickens). Additionally, you can customize the spices to accommodate allergies—just be mindful of the ingredients in your coating mix.

Onion Ring Chips

Crispy Onion Ring Chips: Irresistibly Crunchy Snack Delight

Delight in crispy onion ring chips that are a perfect blend of crunch and flavor, transforming simple ingredients into an irresistible snack.
Prep Time 15 minutes
Cook Time 25 minutes
Total Time 40 minutes
Servings: 4 servings
Course: Appetizer
Cuisine: American
Calories: 150

Ingredients
  

For the Coating
  • 1 cup All-Purpose Flour Make sure to season for flavor!
  • 1/2 cup Cornstarch Essential for a light crunch!
  • 1 teaspoon Salt Adjust based on your dietary needs.
  • 1 teaspoon Smoked Paprika Substitute with regular paprika if desired.
  • 1 teaspoon Garlic Powder Adds a savory kick!
For the Onion Rings
  • 2 large Large Onions Sweet or yellow, cut into rings.
  • 2 large Eggs Substitute with flax eggs for a vegan option.
  • 1 cup Buttermilk Can be made with milk and vinegar.
For Baking or Frying
  • 2 cups Oil Vegetable or canola for frying.

Equipment

  • Baking Sheet
  • Deep pan or fryer
  • Mixing bowls
  • Wire Rack

Method
 

Step-by-Step Instructions for Crispy Onion Ring Chips
  1. Preheat the oven to 425°F (220°C) if baking, or heat oil in a pan to 350°F (175°C) if frying.
  2. Slice large onions into even rings about half an inch thick, soaking them in buttermilk if desired.
  3. In a large bowl, mix flour, cornstarch, salt, smoked paprika, and garlic powder.
  4. Set up a breading station with bowls for egg, flour mixture, and finished chips.
  5. Coat onion rings, first dipping in egg and then in the flour mixture evenly.
  6. If baking, place on a parchment-lined baking sheet and bake for 20-25 minutes until golden.
  7. If frying, immerse in hot oil and fry for 2-3 minutes per side until golden.
  8. Drain on wire racks or paper towels to remove excess oil and cool.
  9. Serve with dips and enjoy the crunchy goodness!

Nutrition

Serving: 1servingCalories: 150kcalCarbohydrates: 20gProtein: 2gFat: 7gSaturated Fat: 1gPolyunsaturated Fat: 2gMonounsaturated Fat: 3gCholesterol: 50mgSodium: 350mgPotassium: 200mgFiber: 1gVitamin A: 100IUVitamin C: 2mgCalcium: 10mgIron: 0.5mg

Notes

Use fresh onions for the best flavor. Experiment with spices to customize your chips.

Tried this recipe?

Let us know how it was!

Cajun Seafood Mac Delight: Creamy Comfort for Any Occasion

The aroma of Cajun spices wafts through my kitchen, instantly transporting me to a lively Southern gathering. That’s the magic of this Cajun Shrimp and Crab Mac and Cheese—a creamy seafood delight that elevates the classic comfort food we all know and love. With every generous bite, you’ll savor the rich combination of succulent shrimp and tender crab, perfectly enveloped in velvety cheese goodness. Not only is this dish a show-stopping centerpiece for family feasts, but it’s also surprisingly quick to whip up on busy weeknights. Plus, you can customize it by using fresh or imitation crab, depending on what’s on hand. Are you ready to dive into this creamy seafood adventure?

Why is Cajun Seafood Mac Delight a Must-Try?

Culinary Adventure: Each bite promises a rich blend of flavors that dance on your palate, thanks to the zesty Cajun seasoning and fresh seafood.
Quick and Easy: Pulling this dish together takes minimal time, making it perfect for busy weeknights or last-minute gatherings.
Versatile Ingredients: Whether you opt for fresh crab legs or budget-friendly imitation crab, this recipe is adaptable to your pantry.
Impressive Presentation: The golden, bubbling top entices everyone, transforming your dinner table into a gourmet experience.
Ultimate Comfort Food: It’s not just a meal—it’s the cozy feeling of home, combining all the best elements of comfort food with a seafood twist, like you’d find in a classic Seafood Bisque Soup.

Cajun Seafood Mac Delight Ingredients

• Get ready for a creamy and indulgent experience!

For the Pasta

  • Elbow Macaroni – The traditional base for this dish; feel free to substitute with any favorite pasta shape.

For the Seafood

  • Fresh Crab Legs or Imitation Crab Meat – Choose fresh for a luxurious touch or imitation for a budget-friendly option.
  • 2 lbs Shrimp – Deveined and peeled; you can mix sizes for varying textures in every bite.

For the Creamy Mixture

  • Whole Milk – Essential for achieving that dreamy creaminess; stick with whole for the best results.
  • Evaporated Milk – Adds richness; adjust the amount based on your creaminess preference.
  • Large Eggs – Helps bind everything together for a luscious consistency.

For the Seasoning

  • Cajun Seasoning – Elevates the dish with bold flavors, adjust to suit your spice tolerance.
  • Paprika – Provides a beautiful color and enhances flavor; adjust the amount to your liking.
  • Cayenne Pepper – For a kick of heat; use sparingly based on your preference.
  • Salt & Pepper – Key in bringing all the flavors together; go easy and taste as you go.

For the Cheese

  • Cheeses (Sharp Cheddar, Mild Cheddar, Colby & Monterey Jack, Parmesan) – A blend of cheeses ensures a rich, velvety texture; hold back some for the perfect topping.

For Cooking

  • Olive Oil – Perfect for sautéing shrimp; any cooking oil will work if you prefer.
  • Basil (Fresh/Dried) – Adds a hint of herbaceous flavor; fresh is ideal, but dried can be used in smaller quantities (2-3 tbsp).

This Cajun Seafood Mac Delight is sure to impress, whether for a casual dinner or a special occasion!

Step‑by‑Step Instructions for Cajun Seafood Mac Delight

Step 1: Prep Ingredients
Start by gathering all your ingredients for the Cajun Seafood Mac Delight. This includes shrimp, crab (either fresh or imitation), elbow macaroni, milk, evaporated milk, eggs, and various cheeses. Make sure to have your spices ready, including Cajun seasoning, paprika, and cayenne pepper. Prepping everything will make the cooking process seamless and enjoyable.

Step 2: Sauté Shrimp
In a large skillet, heat a tablespoon of olive oil over medium heat. Add your deveined and peeled shrimp, seasoning them generously with Cajun spices. Sauté for about 4-6 minutes or until the shrimp are bright pink and opaque. Once cooked, remove them from heat and set aside, allowing the flavors to settle as you prepare the next steps.

Step 3: Preheat Oven
While the shrimp is cooling, preheat your oven to 350°F (177°C). Also, prepare a 9×13-inch baking dish by lightly greasing it to prevent sticking. This will ensure that when your Cajun Seafood Mac Delight is ready, it will bake evenly without any fuss.

Step 4: Cook Pasta
In a large pot, bring salted water to a boil and cook your elbow macaroni according to package instructions until al dente. This usually takes about 8-10 minutes. Once done, drain the pasta and set it aside. It will soon come together with the shrimp, crab, and aromatic basil for that mouthwatering combination.

Step 5: Prepare Milk Mixture
In a large bowl, whisk together whole milk, evaporated milk, and beaten eggs until smooth. Add in your paprika, salt, pepper, and cayenne, adjusting the spices to your liking. This rich liquid base will envelop your pasta, shrimp, and crab, creating that creamy texture for your Cajun Seafood Mac Delight.

Step 6: Combine Mixtures
Stir in your blend of cheeses (saving some for topping) into the milk mixture until thoroughly combined. Next, gently fold the cooked macaroni, sautéed shrimp, crab pieces, and basil into this creamy concoction. Mix everything until evenly coated; the cheese should melt beautifully into the mix, creating a luscious texture.

Step 7: Transfer to Baking Dish
Pour the prepared mixture into your greased 9×13-inch baking dish, spreading it evenly with a spatula. Top generously with the reserved cheeses and a sprinkle of additional Cajun seasoning if desired. This will help create a gorgeous, golden crust on your Cajun Seafood Mac Delight as it bakes.

Step 8: Bake
Cover your baking dish with foil and place it in the preheated oven. Bake for 45-55 minutes, removing the foil after 35-40 minutes to let the top crisp up. You’ll know it’s done when the top is beautifully golden and bubbly, and your kitchen is filled with irresistible aromas.

Step 9: Rest
Once out of the oven, let your Cajun Seafood Mac Delight rest for 20-30 minutes before serving. This resting period helps the dish set, preventing it from being too soupy. As it cools, you can look forward to diving into that creamy, cheesy goodness with the delightful tastes of seafood and spices.

Make Ahead Options

These Cajun Shrimp and Crab Mac and Cheese are perfect for the busy home cook looking to save time without sacrificing flavor! You can prepare the entire casserole up to 24 hours in advance; simply assemble all components—cooked pasta, sautéed shrimp, crab, and creamy milk mixture—then cover and refrigerate. To maintain the best quality, ensure the dish is tightly wrapped to prevent drying out. When you’re ready to enjoy this creamy seafood delight, simply pop it in the preheated oven and bake without thawing, adding a few extra minutes to the cooking time if needed. This way, you can have a comforting meal ready to serve with minimal effort, making weeknight dinners a breeze!

Expert Tips for Cajun Seafood Mac Delight

  • Ingredient Quality: Use fresh seafood for the best flavor, but imitation crab is a great alternative for budget-friendly meals.

  • Mix Carefully: When blending the milk and eggs, whisk gently to prevent scrambling. A smooth mixture is crucial for this creamy seafood mac delight.

  • Seasoning Adjustment: Always taste the milk mixture before adding eggs. This ensures the flavors are balanced and to your liking.

  • Consistent Texture: To avoid a soupy result, let the dish rest after baking. This step allows the macaroni to absorb excess moisture.

  • Golden Top: Cover the baking dish loosely with foil to prevent over-browning, then remove it during the last minutes of baking for a perfect golden crust.

How to Store and Freeze Cajun Seafood Mac Delight

Fridge: Store leftovers in an airtight container for up to 3 days. Make sure to allow it to cool before sealing to prevent condensation.

Freezer: For longer storage, freeze in airtight containers or heavy-duty freezer bags for up to 3 months. Label with the date for easy reference.

Reheating: To reheat, thaw overnight in the fridge, then bake in a preheated oven at 350°F (177°C) until heated through, about 25-30 minutes. Add a splash of milk to restore creaminess if needed.

Make-Ahead Tip: You can assemble the Cajun Seafood Mac Delight a day in advance; simply store it in the fridge without baking. When ready, bake directly from the fridge, extending the baking time as needed.

What to Serve with Cajun Shrimp and Crab Mac and Cheese?

A dinner table filled with flavor and warmth awaits you when you serve this creamy seafood delight alongside these perfect pairings.

  • Garlic Bread: The warm, buttery goodness of garlic bread complements the rich flavors beautifully, providing that perfect crunchy contrast.
  • Caesar Salad: Crisp romaine, creamy dressing, and Parmesan cheese add brightness and balance to your meal, enhancing the seafood experience.
  • Steamed Asparagus: Tender asparagus with a sprinkle of lemon helps to cut through the richness, adding a fresh element that brightens your plate.
  • Coleslaw: The creamy, tangy crunch of coleslaw offers a delightful textural play against the creamy mac and cheese.
  • Corn on the Cob: Sweet, juicy corn with a touch of butter brings a comforting, homey element to the table that everyone will adore.
  • Crispy Fried Green Tomatoes: Their tartness and crunchy texture add a Southern flair, mirroring the Cajun spirit of your dish.
  • White Wine: A chilled glass of Sauvignon Blanc or a crisp Chardonnay elevates the meal, enhancing the flavors of the seafood with every sip.
  • Peach Cobbler: End your meal on a sweet note with warm peach cobbler; the fruitiness and warmth create a delicious contrast to your savory mac and cheese.
  • Fresh Fruit Salad: A medley of fresh fruits adds a refreshing finish, cutting through the richness of the main dish and cleansing the palate.
  • Lemonade: A cool, sweet lemonade will enhance the rich, spicy flavors of the mac and cheese, creating an inviting atmosphere for everyone.

Cajun Seafood Mac Delight Variations

Feel free to unleash your creativity and tailor this dish to your liking with these delightful variations!

  • Seafood Mix: Try adding lobster or scallops alongside shrimp for an extravagant twist. The more the merrier when it comes to seafood!

  • Pasta Options: Swap elbow macaroni for rigatoni or penne for a unique texture and shape. Each pasta adds its own charm, making every bite a new experience.

  • Cheese Lovers: Boost the cheesiness by incorporating cream cheese or gouda into the sauce. You’ll achieve a melt-in-your-mouth finish that’s hard to resist.

  • Spicy Kick: Elevate the heat by adding diced jalapeños or some hot sauce to the mix. A little heat can bring a whole new level to your dish!

  • Vegetable Power: Mix in sautéed bell peppers, onions, or spinach for added nutrition and color. This not only enhances the flavor but also brings vibrant freshness to the table.

  • Dairy-Free Adaptation: Use almond milk and dairy-free cheeses to create a lighter version without sacrificing creaminess. Everyone deserves a delicious bite, no matter their dietary needs!

  • Breadcrumb Topping: For a crunchy finish, top with a mixture of breadcrumbs and melted butter before baking. It provides a lovely contrast to the creamy filling.

  • Flavor Infusion: Try different herbs like thyme or dill instead of basil to change the flavor profile completely. Each herb brings its own personality, taking your dish on a different journey.

Explore these delightful options and make this Cajun Seafood Mac Delight your own! And if you’re looking for other comforting dishes, don’t miss out on Summer Corn Chowder or our cozy, hearty Shepherds Pie Ground. Happy cooking!

Cajun Shrimp and Crab Mac and Cheese Recipe FAQs

What type of pasta can I use in this recipe?
You can absolutely use any pasta shape you prefer! While elbow macaroni is traditional for mac and cheese, feel free to try shell pasta, cavatappi, or even penne. Just make sure to cook it al dente as it will continue to cook in the oven.

How should I store leftover Cajun Seafood Mac Delight?
For best results, store leftovers in an airtight container in the fridge for up to 3 days. Make sure to let it cool completely before sealing to avoid condensation, which can affect its texture.

Can I freeze Cajun Seafood Mac Delight?
Yes, you can freeze it! Transfer the mac and cheese to airtight containers or freezer bags, ensuring to remove as much air as possible. It will keep well for up to 3 months. When you’re ready to enjoy it again, simply thaw overnight in the refrigerator before reheating.

What if my mac and cheese turns out soupy?
If you find your Cajun Seafood Mac Delight is too soupy, it might be due to not letting it rest after baking. After removing it from the oven, let the dish sit for 20-30 minutes to firm up before serving. This resting period allows the pasta to absorb excess moisture for a creamier texture.

Is this recipe suitable for people with seafood allergies?
If you or your guests have seafood allergies, you can customize this recipe by replacing the shrimp and crab with cooked chicken or a variety of vegetables like spinach, mushrooms, or bell peppers, allowing everyone to enjoy a delicious mac and cheese without worry.

What are some variations I can try with this dish?
You can mix up the seafood by using a combination of shrimp, scallops, or even a bit of lobster for a touch of luxury. If you’re not a fan of spicy food, reduce the amount of Cajun seasoning and cayenne pepper to suit your taste. Additionally, consider topping it with breadcrumbs for added crunch!

Cajun Seafood Mac Delight

Cajun Seafood Mac Delight: Creamy Comfort for Any Occasion

Experience the rich flavors of Cajun Seafood Mac Delight, a creamy blend of shrimp, crab, and cheese that brings comfort to any meal.
Prep Time 20 minutes
Cook Time 55 minutes
Resting Time 30 minutes
Total Time 1 hour 45 minutes
Servings: 6 servings
Course: Dinner
Cuisine: American, Southern
Calories: 650

Ingredients
  

For the Pasta
  • 1 lbs Elbow Macaroni Feel free to substitute with any favorite pasta shape.
For the Seafood
  • 2 lbs Shrimp Deveined and peeled.
  • Fresh Crab Legs or Imitation Crab Meat Choose fresh for a luxurious touch or imitation for a budget-friendly option.
For the Creamy Mixture
  • 2 cups Whole Milk Essential for achieving creaminess.
  • 1 cup Evaporated Milk Adjust based on creaminess preference.
  • 2 Large Eggs Helps bind everything together.
For the Seasoning
  • 2 tbsp Cajun Seasoning Elevates the dish with bold flavors.
  • 1 tbsp Paprika Provides color and enhances flavor.
  • 1/4 tsp Cayenne Pepper Use sparingly for a kick of heat.
  • Salt & Pepper Adjust to taste.
For the Cheese
  • 2 cups Cheeses (Sharp Cheddar, Mild Cheddar, Colby & Monterey Jack, Parmesan) Blend for richness; hold back some for topping.
For Cooking
  • 1 tbsp Olive Oil Perfect for sautéing shrimp.
  • 2-3 tbsp Basil (Fresh/Dried) Fresh is ideal, dried can be used in smaller quantities.

Equipment

  • large skillet
  • 9x13-inch baking dish
  • large pot
  • large bowl

Method
 

Step-by-Step Instructions for Cajun Seafood Mac Delight
  1. Start by gathering all your ingredients for the Cajun Seafood Mac Delight. Prepping everything will make the cooking process seamless.
  2. In a large skillet, heat a tablespoon of olive oil over medium heat. Add shrimp and sauté for 4-6 minutes until bright pink and opaque.
  3. Preheat your oven to 350°F (177°C) and lightly grease a 9x13-inch baking dish.
  4. In a large pot, bring salted water to a boil and cook the elbow macaroni until al dente, about 8-10 minutes. Drain and set aside.
  5. In a large bowl, whisk together whole milk, evaporated milk, and beaten eggs until smooth. Add spices and mix well.
  6. Stir in the blend of cheeses into the milk mixture until combined. Fold in the cooked macaroni, shrimp, crab, and basil.
  7. Pour the mixture into the greased baking dish and top with reserved cheeses and additional seasoning if desired.
  8. Cover with foil and bake for 45-55 minutes. Remove foil after 35-40 minutes for a crispy top.
  9. Let the dish rest for 20-30 minutes before serving to allow it to set.

Nutrition

Serving: 1servingCalories: 650kcalCarbohydrates: 50gProtein: 35gFat: 30gSaturated Fat: 15gPolyunsaturated Fat: 5gMonounsaturated Fat: 5gCholesterol: 150mgSodium: 800mgPotassium: 600mgFiber: 3gSugar: 5gVitamin A: 500IUVitamin C: 2mgCalcium: 400mgIron: 3mg

Notes

Use fresh seafood for the best flavor. Allow resting after baking to avoid a soupy result.

Tried this recipe?

Let us know how it was!

Gingerbread Cheesecake Cookies: Your New Holiday Favorite

As I unwrapped the spice jar and inhaled the heady aroma of ground ginger and cinnamon, memories of cozy holiday gatherings washed over me. That’s the magic of these Festive Gingerbread Cheesecake Cookies—they effortlessly blend the beloved flavors of gingerbread with a luscious cheesecake filling. Perfectly soft, buttery, and chewy, they’re not just cookies; they are delightful little parcels of joy that elevate any holiday celebration. Whether you’re hosting a cookie exchange or just want a sweet treat to enjoy by the fire, these cookies have you covered. Plus, they’re incredibly versatile, offering variations for gluten-free options and an array of delicious toppings. So, are you ready to fill your kitchen with the heartwarming scent of the season and indulge in these festive treats? Let’s dive into the recipe!

Why are these cookies a must-try?

Flavorful Fusion: These Gingerbread Cheesecake Cookies blend spicy ginger and creamy cheesecake into a delightful bite.
Versatile Options: Easily customize them with different toppings, whether it’s festive sprinkles or crushed gingerbread.
Gluten-Free Friendly: Perfect for everyone, simply swap in gluten-free flour for a delicious alternative.
Bake Ahead: Store them in an airtight container for up to a week or freeze the dough for future enjoyment.
Festive Appeal: Ideal for holiday gatherings, these cookies will charm your guests and become a new tradition.
Heartwarming Memories: They evoke cozy gatherings, making the baking experience nostalgic and joyful.

Gingerbread Cheesecake Cookies Ingredients

Here’s everything you need to make these delightful cookies!

For the Cookie Dough

  • Salted Butter – Provides richness and flavor; you can substitute with unsalted butter and add 1/4 teaspoon of salt.
  • Brown Sugar – Adds sweetness and a chewy texture; use either light or dark brown sugar.
  • Egg – Binds ingredients together, adding moisture; ensure it’s at room temperature for better mixing.
  • Molasses – Contributes moisture and gives that classic gingerbread flavor.
  • All-Purpose Flour – Provides structure to the cookie cups; remember to spoon and level it for accuracy.
  • Ground Ginger – Essential for the gingerbread taste; adds that signature spice.
  • Ground Cinnamon – Enhances warmth and pairs beautifully with ginger.
  • Ground Nutmeg – Adds a lovely complexity to the spice mix.
  • Ground Cloves – Complements the other spices, further enriching the gingerbread flavor.
  • Baking Soda – Helps the cookie rise, giving it a lovely texture.
  • Cornstarch – Improves the cookie’s tenderness for that soft bite.

For the Cheesecake Filling

  • Cream Cheese – Forms the base of the cheesecake frosting; ensure it’s softened for easy mixing.
  • Powdered Sugar – Sweetens the frosting while creating a smooth texture; essential for that perfect cheesecake filling.
  • Vanilla Extract – Adds depth of flavor and richness to the frosting.

Optional Toppings

  • Christmas Sprinkles – Perfect for festive decoration; add a pop of color and holiday cheer!
  • Alternative Toppings – Consider chopped nuts or chocolate chips for added texture and flavor!

Let’s make these Gingerbread Cheesecake Cookies sing with flavor!

Step‑by‑Step Instructions for Gingerbread Cheesecake Cookies

Step 1: Prepare Dough
Begin by creaming together 1 cup of softened salted butter and 1 cup of brown sugar in a large mixing bowl using an electric mixer. Beat them together on medium speed until the mixture is fluffy and light, about 2 to 3 minutes. Next, add in 1 egg and 1/4 cup of molasses, mixing until fully combined and smooth.

Step 2: Combine Dry Ingredients
In a separate bowl, whisk together 2 1/2 cups of all-purpose flour, 2 teaspoons of ground ginger, 1 teaspoon each of ground cinnamon, ground nutmeg, and ground cloves, along with 1 teaspoon of baking soda and 1 tablespoon of cornstarch. This dry mix creates the spiced backbone of your Gingerbread Cheesecake Cookies, so ensure all ingredients are well incorporated before proceeding.

Step 3: Form the Dough
Gradually add the dry mixture to the creamed butter and sugar, mixing on low speed until just combined. Avoid overmixing, as this can make the cookies tough. Once incorporated, form the dough into a ball, wrap it in plastic wrap, and chill in the refrigerator for at least 30 minutes. Chilling helps to enhance the flavors and prevents the cookies from spreading too much while baking.

Step 4: Preheat and Prepare Pans
While the dough chills, preheat your oven to 350°F (175°C). Grease your muffin pans with non-stick spray to ensure the cookie cups release easily after baking. This is a crucial step for achieving the perfect shape for your Gingerbread Cheesecake Cookies.

Step 5: Form Cookie Cups
Once the dough is chilled, remove it from the refrigerator and scoop about 2 tablespoons of dough for each cookie cup. Press the dough firmly into the bottom and halfway up the sides of each muffin cup, ensuring an even thickness for a cozy filling space.

Step 6: Bake
Place the muffin pans in the preheated oven and bake for 12 minutes or until the cookie cups are lightly golden around the edges. Keep an eye on them, as you want them cooked through but still soft. Remove the pans from the oven and let the cookie cups cool for about 5 minutes, then gently press a tablespoon into the center of each cookie cup to create a well.

Step 7: Make Frosting
In a mixing bowl, beat together 8 ounces of softened cream cheese, 1 cup of powdered sugar, 1/4 cup of brown sugar, and 1 teaspoon of vanilla extract. Mix until smooth and creamy, about 2 minutes, ensuring there are no lumps for a delightful cheesecake filling. Add a pinch of ground cinnamon for an added layer of flavor if you wish.

Step 8: Fill Cookie Cups
Once the cookie cups are completely cool, pipe or spoon the luscious cheesecake frosting into each cup, filling it generously. For a festive touch, top your Gingerbread Cheesecake Cookies with colorful Christmas sprinkles or your choice of toppings, adding a cheerful presentation perfect for holiday sharing.

How to Store and Freeze Gingerbread Cheesecake Cookies

  • Room Temperature: Store leftover cookies in an airtight container at room temperature for up to 7 days. This keeps them soft and chewy, ready for festive snacking.
  • Fridge: For longer freshness, you can refrigerate the cookies for up to 2 weeks in an airtight container, but enjoy them at room temperature for the best texture.
  • Freezer: Freeze undecorated cookie cups for up to 3 months. Wrap tightly in plastic wrap and place them in a freezer-safe bag to maintain quality.
  • Reheating: To enjoy cookies warm, simply pop them in the microwave for about 10-15 seconds. This will revive their chewy texture, perfect before adding the cheesecake filling.

Gingerbread Cheesake Cookies Variations

Feel free to explore these delightful twists to make your Gingerbread Cheesecake Cookies truly your own!

  • Toppings: Instead of traditional sprinkles, sprinkle on chopped pecans, caramel drizzle, or crushed gingerbread cookies for a delicious crunch. Imagine each bite filled with extra textures that elevate your festive treat!

  • Frosting Alternatives: Swap out the cheesecake frosting for rich buttercream or a warm chocolate ganache. The smooth chocolate will bring a luxurious twist to every bite—perfectly festive for chocolate lovers!

  • Different Shapes: To create bars, press the dough into a 13″x9″ baking dish and bake for 30-35 minutes instead of using muffin pans. Cut them into squares for a different presentation!

  • Gluten-Free Option: Use a 1:1 gluten-free flour blend to whip up a batch that everyone can enjoy. Your gluten-sensitive guests will appreciate the effort, and they won’t even miss the gluten!

  • Flavor Boost: Add a tablespoon of orange zest to your cheesecake filling for a citrusy brightness that complements the spices wonderfully. This zesty note will surprise and delight!

  • Nutty Twist: Fold in some almond or pecan flour into your cookie dough for a nutty texture and flavor that pairs wonderfully with the gingerbread spices. It’s an extra layer of delightful warmth!

  • Spicy Kick: For an extra kick, toss in a pinch of cayenne or chili powder to the dough. This subtle heat will surprise your taste buds in the best way—perfect for those who love a bit of spice!

  • Fruity Variation: Top your cookies with a dollop of cranberry sauce instead of frosting. The tartness of the cranberries adds a refreshing contrast to the sweet cookie and creamy center.

Explore these variations, and let your creativity shine! If you love trying out different flavors, you might also enjoy these festive treats: Cookies Cream Cheesecake, Strawberry Cheesecake Bars, and Chocolate Cranberry Cookies. Happy baking!

What to Serve with Festive Gingerbread Cheesecake Cookies

These delightful treats elevate any holiday gathering, inviting a warm, cozy atmosphere filled with laughter and joy.

  • Creamy Mashed Potatoes: A comforting side that adds a creamy texture to balance the rich flavors of gingerbread.
  • Winter Salad: Fresh greens topped with cranberries, nuts, and a citrus dressing offer a refreshing contrast to the sweet cookies.
  • Spiced Apple Cider: The warm, spiced notes of this drink complement the gingerbread flavors perfectly, creating a festive pairing.
  • Dark Chocolate Truffles: Rich, bittersweet chocolate echoes the sweetness of the cookies while adding a touch of indulgence.
  • Pumpkin Pie: A holiday classic that brings in seasonal flavors, harmonizing beautifully with the spiced cookies.
  • Vanilla Ice Cream: A scoop of creamy ice cream serves as a cool, refreshing counterpart to the warm, spiced cookies.

Consider serving these together for a delightful holiday spread that warms the heart and delights the palate!

Make Ahead Options

These Gingerbread Cheesecake Cookies are perfect for busy home cooks looking to save time during the holidays! You can prepare the cookie dough up to 24 hours in advance; simply wrap it tightly in plastic wrap and refrigerate. The cheesecake filling can also be made ahead and stored in an airtight container for up to 3 days in the fridge—just be sure to give it a gentle stir before using to maintain that smooth texture. When ready to bake, simply shape and bake the cookie cups, then fill them with the chilled frosting before serving. This way, you’ll enjoy delicious, freshly baked cookies with minimal effort—just the festive treat you need!

Expert Tips for Gingerbread Cheesecake Cookies

  • Room Temperature Ingredients: Ensure that the butter and cream cheese are at room temperature. This helps them mix smoothly, creating a creamy cheesecake filling that’s rich and delightful.

  • Chill the Dough: Don’t skip chilling the dough for at least 30 minutes. This crucial step prevents the cookie cups from spreading too much, ensuring a perfect structure for your Gingerbread Cheesecake Cookies.

  • Avoid Overmixing: Mix the dough just until combined. Overmixing can lead to tougher cookies; you want them soft and chewy.

  • Press Gently: When forming the cookie cups, be gentle yet firm when pressing the dough into the muffin pan. This ensures even thickness for the perfect filling space.

  • Let Them Cool: Allow the cookie cups to cool completely before filling with frosting. This prevents the cheesecake filling from melting and maintains their delicious texture.

  • Try Variations: Feel free to mix up the toppings on your Gingerbread Cheesecake Cookies! Consider using crushed gingerbread cookies or a drizzle of chocolate for added flavor and flair.

Gingerbread Cheesecake Cookies Recipe FAQs

How do I select the best ingredients for my cookies?
Absolutely! For the best flavor, use fresh spices, especially ground ginger, cinnamon, and cloves. When selecting butter, ensure it’s fresh and at room temperature for easy creaming. For the molasses, a dark variety adds richer flavor, while the egg should also be at room temperature for optimal mixing.

What’s the best way to store leftover Gingerbread Cheesecake Cookies?
You can store leftover cookies in an airtight container at room temperature for up to 7 days. This keeps them soft and chewy, making them perfect for snacking. If you want to preserve their texture, refrigerate them for up to 2 weeks. Just remember to let them come to room temperature before enjoying!

Can I freeze the dough for future baking?
Absolutely! To freeze the dough, wrap it tightly in plastic wrap and place it in a freezer-safe bag. This method keeps the dough fresh for up to 6 months. When you’re ready to bake, thaw it overnight in the fridge, then continue with the recipe as usual. This allows you to enjoy freshly baked cookies any time you wish!

What if my cookies spread too much during baking?
Don’t worry! If you find that your cookies spread too much, it might be due to the dough being too warm or not chilled enough before baking. Make sure to chill the dough for at least 30 minutes. If the cookies are already baked and spread, try pressing the centers gently after removing them from the oven to create a well for the filling.

Are these cookies safe for people with allergies?
Very! However, please take caution. These Gingerbread Cheesecake Cookies contain common allergens like eggs, gluten (in regular flour), and dairy (in cream cheese). For gluten-free options, you can substitute all-purpose flour with a 1:1 gluten-free baking mix, ensuring that all ingredients used are certified gluten-free. Always check labels for any specific allergen warnings.

Can I customize the toppings or frosting?
The more the merrier! You can absolutely customize the toppings. Swap the cheesecake frosting for chocolate buttercream or try a simple glaze for a lighter option. For toppings, consider using nuts, crushed gingerbread, or even a drizzle of caramel for a festive touch. Make them your own!

Gingerbread Cheesecake Cookies

Gingerbread Cheesecake Cookies: Your New Holiday Favorite

Delight in these Gingerbread Cheesecake Cookies that combine spicy gingerbread flavors with a creamy cheesecake filling, perfect for the festive season.
Prep Time 30 minutes
Cook Time 12 minutes
Chill Time 30 minutes
Total Time 1 hour 12 minutes
Servings: 24 cookies
Course: Dessert
Cuisine: American
Calories: 150

Ingredients
  

For the Cookie Dough
  • 1 cup Salted Butter Can substitute with unsalted butter and add 1/4 teaspoon of salt.
  • 1 cup Brown Sugar Use light or dark brown sugar.
  • 1 large Egg Room temperature for better mixing.
  • 1/4 cup Molasses Provides classic gingerbread flavor.
  • 2 1/2 cups All-Purpose Flour Spoon and level for accuracy.
  • 2 teaspoons Ground Ginger
  • 1 teaspoon Ground Cinnamon
  • 1 teaspoon Ground Nutmeg
  • 1 teaspoon Ground Cloves
  • 1 teaspoon Baking Soda
  • 1 tablespoon Cornstarch
For the Cheesecake Filling
  • 8 ounces Cream Cheese Softened for easy mixing.
  • 1 cup Powdered Sugar Essential for smooth texture.
  • 1 teaspoon Vanilla Extract
Optional Toppings
  • Christmas Sprinkles For festive decoration.
  • Alternative Toppings Consider chopped nuts or chocolate chips.

Equipment

  • Mixing Bowl
  • Electric Mixer
  • Muffin Pans
  • Whisk
  • Plastic Wrap

Method
 

Step-by-Step Instructions
  1. Cream together salted butter and brown sugar until fluffy, then mix in egg and molasses.
  2. Whisk together flour, ginger, cinnamon, nutmeg, cloves, baking soda, and cornstarch.
  3. Gradually add dry ingredients to creamed mixture, mix until combined, form dough into a ball and chill.
  4. Preheat oven to 350°F (175°C) and grease muffin pans.
  5. Scoop dough into muffin cups, pressing firmly to form cookie cups.
  6. Bake for 12 minutes or until lightly golden; allow to cool and create wells.
  7. Beat together cream cheese, powdered sugar, brown sugar, and vanilla until smooth; add cinnamon if desired.
  8. Fill cooled cookie cups with cheesecake frosting and top with sprinkles or your choice of toppings.

Nutrition

Serving: 1cookieCalories: 150kcalCarbohydrates: 18gProtein: 1gFat: 8gSaturated Fat: 5gMonounsaturated Fat: 3gCholesterol: 20mgSodium: 100mgPotassium: 30mgSugar: 10gVitamin A: 250IUCalcium: 15mg

Notes

Ensure ingredients are at room temperature for best results and chill the dough to prevent spreading during baking.

Tried this recipe?

Let us know how it was!

Tender Lemon Blueberry Rolls with Creamy Frosting Delight

The warm scent of freshly baked goods is like a hug for the senses, twisting and curling through the air until you can’t help but follow it to the kitchen. Today, I’m thrilled to share my recipe for Lemon Blueberry Rolls, a delightful twist on a classic treat that’s sure to brighten your mornings or sweeten your brunches. With an irresistibly soft and fluffy dough filled with gooey lemon sugar and sweet blueberry jam, these rolls are topped off with a luscious cream cheese frosting that adds a perfect creamy finish. Not only do they serve as a show-stopping centerpiece for special occasions, but they also come together with surprising ease—making them a must-try for both novice bakers and seasoned pros. Curious about how to create this bakery-worthy delight in your own home? Let’s dive into the recipe!

Why are Lemon Blueberry Rolls a must-try?

Irresistible Flavor: The vibrant combination of lemon and blueberry creates a fresh, zesty flavor that’s absolutely delightful.

Easy to Make: Even if you’re new to baking, the simple steps in this recipe will guide you for success, making it a great choice for beginners.

Perfect for Any Occasion: Whether it’s an Easter brunch or a weekend breakfast, these rolls are a show-stopping treat every time.

Gooey Goodness: With a sweet blueberry jam and creamy frosting, each bite is filled with a heavenly combination of textures that will make your taste buds dance.

Make-Ahead Option: Prep the dough the night before for a convenient morning treat—just let them rise before baking! If you love elevating your brunch spread, check out my Bakery Style Blueberry muffins for another treat!

Lemon Blueberry Rolls Ingredients

• These delightful rolls come together with a simple list of ingredients that pack a flavorful punch!

For the Dough

  • Active Dry Yeast – A key ingredient that helps your dough rise; ensure it’s fresh for the best results.
  • Whole Milk – Provides moisture; warm it to 110°F to activate the yeast properly.
  • Granulated White Sugar – Sweetens both the dough and blueberry jam; feel free to adjust according to your taste.
  • All-Purpose Flour – Forms the backbone of your rolls; spoon and level for an accurate measure.
  • Salt – Enhances flavor; it’s essential for proper dough development.
  • Unsalted Butter – Adds richness; make sure it’s very soft for easy incorporation.
  • Eggs – Provides structure and richness; use large eggs, whisked beforehand.
  • Lemon Zest & Lemon Juice – Key ingredients for that refreshing flavor; fresh lemons are best!

For the Blueberry Jam

  • Frozen Blueberries – Main flavor component for the filling; fresh blueberries are a tasty substitute if available.
  • Brown Sugar – Adds depth of flavor to the jam; can adjust based on sweetness preference.
  • Corn Starch – Thickens the jam; you can omit it for a looser texture, if desired.

For the Cream Cheese Frosting

  • Cream Cheese – Provides a smooth and creamy base for your frosting; make sure it’s softened.
  • Powdered Sugar – Sweetens and thickens your frosting; add gradually for desired consistency.
  • Reserved Blueberry Jam – Adds extra flavor and a lovely purple hue; use the leftover jam from your filling.

With this blend of ingredients, your Lemon Blueberry Rolls will offer a delightful journey of flavor that’s hard to resist!

Step‑by‑Step Instructions for Lemon Blueberry Rolls

Step 1: Make Blueberry Jam
In a medium saucepan, combine frozen blueberries, granulated sugar, and corn starch. Cook over medium heat for 20-25 minutes, stirring occasionally, until the mixture thickens and bubbles. Once done, remove from heat and let it cool completely, reserving some jam to use for the frosting later.

Step 2: Prepare Dough
Warm the whole milk to about 110°F, then sprinkle the active dry yeast and a pinch of sugar on top. Let it bloom for 10 minutes until frothy. In a large mixing bowl, blend all-purpose flour, salt, and remaining sugar. Stir in the eggs, lemon zest, softened butter, and the yeast mixture until combined.

Step 3: Knead Dough
Transfer the mixture to a floured work surface and knead with your hands or use a stand mixer fitted with a dough hook. Knead for 7-10 minutes until the dough is smooth and elastic, bouncing back when pressed gently. If the dough feels too sticky, add a tablespoon of flour gradually until manageable.

Step 4: First Rise
Shape the kneaded dough into a ball and place it in a greased bowl, turning it once to coat. Cover the bowl with a clean kitchen towel and allow it to rise in a warm area until doubled in size, about 1 to 1.5 hours. You’ll know it’s ready when the dough has puffed up significantly.

Step 5: Prepare Filling
In a small bowl, mix softened butter, brown sugar, lemon zest, lemon juice, and a pinch of salt until smooth. This will create a lovely creamy filling for your Lemon Blueberry Rolls. Set aside while the dough is rising to allow the flavors to meld together.

Step 6: Roll Out Dough
Once the dough has risen, punch it down gently and transfer it to a floured surface. Roll it out into an 18×12-inch rectangle, ensuring an even thickness. Spread the lemon filling mixture across the dough, leaving a small border around the edges. Then, dollop the blueberry jam evenly over the lemon filling.

Step 7: Form Rolls
Starting from one long edge, tightly roll the dough into a log. Slice the log into 12 equal pieces using unflavored dental floss for a clean cut. Place the rolls cut-side up in a greased baking dish, ensuring they are snug but not overcrowded.

Step 8: Proof Rolls
Pour room temperature heavy cream carefully in between the rolls. Cover the dish with plastic wrap or a damp towel, allowing the rolls to rise until doubled in size, approximately 1 hour. They should look puffy and almost touching when ready for baking.

Step 9: Bake
Preheat your oven to 350°F (175°C). Once preheated, place the rolls in the oven and bake for 22-25 minutes until they are lightly golden on top and the filling is bubbling. Keep an eye on them to avoid overbaking, as you want that soft texture to shine.

Step 10: Make Icing
While the rolls are baking, prepare the cream cheese frosting. In a mixing bowl, beat together softened cream cheese and butter until creamy. Gradually mix in powdered sugar, lemon zest, and the reserved blueberry jam until the frosting is fluffy and smooth.

Step 11: Frost
Once the Lemon Blueberry Rolls have cooled for about 10 minutes, spread the luscious cream cheese frosting generously over the top. Serve warm for a delightful treat that pairs perfectly with coffee or tea, and enjoy the burst of flavors in every heavenly bite!

Expert Tips for Lemon Blueberry Rolls

  • Fresh Yeast: Ensure your active dry yeast is fresh; expired yeast won’t activate and can lead to dense rolls.

  • Even Filling: Use an offset spatula to spread the lemon filling evenly, preventing uneven flavors in your Lemon Blueberry Rolls.

  • Room Temperature Cream: Always use room temperature heavy cream for soaking; this ensures a moist, fluffy rise between your rolls.

  • Floss Cutting: Cut the dough with unflavored dental floss for neat slices, avoiding squished edges that could affect baking.

  • Sticky Dough Solutions: If the dough is sticky during kneading, gradually add flour—1 tablespoon at a time—until it’s manageable and smooth.

How to Store and Freeze Lemon Blueberry Rolls

Room Temperature: Store leftover rolls in an airtight container at room temperature for up to 3 days. This keeps them soft and flavorful.

Fridge: If you need to extend their life, you can refrigerate the rolls for up to a week. Just allow them to come to room temperature before serving.

Freezer: To freeze, wrap each roll tightly in plastic wrap and then in foil. They can be frozen for up to 2 months. Thaw in the fridge overnight before reheating.

Reheating: To enjoy warm Lemon Blueberry Rolls, reheat in the microwave for about 15-20 seconds or in the oven at 350°F (175°C) for 10 minutes.

What to Serve with Lemon Blueberry Rolls

The warm scent of lemon and blueberry fills the air, inviting you to create a complete feast that perfectly enhances these fluffy treats.

  • Fresh Fruit Salad: A medley of seasonal fruits adds brightness and a refreshing contrast to the sweet rolls, creating a vibrant breakfast spread.
  • Crispy Bacon: The salty crunch of bacon complements the sweetness of the rolls, balancing flavors and textures beautifully for a satisfying meal.
  • Greek Yogurt Parfaits: Layer rich Greek yogurt with berries and granola for a creamy, crunchy side that adds a nutritious touch to your brunch.
  • Iced Coffee: A chilled cup of coffee pairs well with the sweetness of the rolls, providing a delightful wake-up call with each bite.
  • Herbal Tea: The light flavors of chamomile or mint tea can enhance the citrus notes in the rolls, creating a soothing breakfast experience.
  • Creamy Scrambled Eggs: Fluffy eggs, rich in flavor, bring a savory balance to the meal, making it hearty and delightful.
  • Lemonade or Citrus Mocktail: A refreshing citrus drink can elevate the brunch experience, echoing the flavors in the rolls while quenching your thirst.
  • Cinnamon Sugar Donuts: For a sweet sidekick, these treats provide a different texture and flavor while keeping your pastry theme alive.
  • Chocolate Drizzle: Drizzling a bit of chocolate syrup over the rolls adds a decadent touch, transforming them into an indulgent dessert suitable for any occasion.

Lemon Blueberry Rolls Variations & Substitutions

Feel free to get creative with these Lemon Blueberry Rolls and customize them to your taste buds!

  • Berry Twist: Substitute blueberries with blackberries for a slightly tart flavor that still marries beautifully with lemon.

  • Fruit Medley: Try adding raspberries or strawberries alongside blueberries for a colorful, fruity swirl that brightens up each bite. The mix of flavors will surprise and delight!

  • Almond Extract: Add a splash of almond extract to the dough for a warm, nutty flavor that complements the lemon zest. This subtle twist will make your rolls resonate with extra depth.

  • Gluten-Free: Use a gluten-free flour blend to accommodate dietary preferences while maintaining that soft, fluffy texture. Just ensure the blend contains xanthan gum or similar to mimic the elasticity of regular flour!

  • Vegan Option: Replace eggs with flaxseed meal (1 tablespoon ground flaxseed mixed with 2.5 tablespoons water per egg) and use almond or coconut milk in place of whole milk, producing a delicious vegan treat.

  • Cinnamon Roll Style: Swirl in some cinnamon with the lemon filling for an extra layer of warmth and spiciness. This twist creates a delightful contrast to the freshness of lemon and blueberry.

  • Savory Spin: Experiment with adding herbs like fresh thyme to the dough or filling for a surprising savory version. It creates a unique flavor profile fit for an adventurous palate.

  • Lemon Cream Cheese Pairing: Drizzle melted white chocolate over the cream cheese frosting for an added layer of indulgence. It’ll turn your rolls into a dessert experience reminiscent of a gourmet coffeehouse!

Whether you’re serving them for breakfast, brunch, or dessert, these variations will keep your Lemon Blueberry Rolls exciting! For an excellent companion recipe, consider pairing them with my delightful Grilled Lemon Herb salmon to complete your dining experience perfectly.

Make Ahead Options

These Lemon Blueberry Rolls are perfect for meal prep enthusiasts! You can prepare the dough up to the second rise and refrigerate it for up to 24 hours. To do this, simply follow the recipe through the first rise, then shape the rolls and place them in a greased dish. Cover tightly with plastic wrap and refrigerate. On baking day, allow the rolls to come to room temperature and proof again for about 30-60 minutes before baking. This method ensures that the rolls maintain their fluffy texture and delightful flavors, making them just as delicious when you’re ready to serve. Enjoy soft and fluffy Lemon Blueberry Rolls with minimal morning fuss!

Lemon Blueberry Rolls Recipe FAQs

How do I choose ripe blueberries for my Lemon Blueberry Rolls?
Absolutely! When selecting blueberries, look for ones that are plump, firm, and have a rich blue color. Avoid any with green or red hues and those that show dark spots or wrinkling. Fresh blueberries are ideal for flavor, but if you can only find frozen ones, they work wonderfully as well!

How should I store leftover Lemon Blueberry Rolls?
For storing, place your leftover rolls in an airtight container at room temperature for up to 3 days. They’ll stay soft and delicious! If you want to keep them longer, refrigerate them, but remember to let them come back to room temperature before serving for the best texture.

Can I freeze Lemon Blueberry Rolls?
Very! To freeze your rolls, first let them cool completely. Then, wrap each roll tightly in plastic wrap, followed by aluminum foil to prevent freezer burn. This way, they’ll stay fresh for up to 2 months. When you’re ready to enjoy one, simply thaw it in the fridge overnight and reheat in the microwave for 15-20 seconds or in a preheated oven at 350°F for about 10 minutes.

What if my dough isn’t rising properly?
If your dough isn’t rising, it could be due to inactive yeast. Always check that your yeast is fresh by blooming it in warm milk with a pinch of sugar. Make sure the milk is around 110°F; too hot or too cold can hinder yeast activation. If your dough doesn’t rise, try placing it in a warmer environment, like an oven preheated for just a minute and turned off.

Are Lemon Blueberry Rolls safe for pets or do they contain common allergens?
Great question! These rolls contain ingredients like wheat (all-purpose flour), dairy (milk, butter, cream cheese), and eggs, which can be allergens for some. Always double-check with your guests about allergies. As for pets, it’s best to keep them away from these treats since ingredients like sugar and dairy can upset their stomachs.

Can I make these Lemon Blueberry Rolls vegan?
Absolutely, you can substitute regular ingredients for vegan options! Use plant-based milk, coconut oil instead of butter, flax eggs (1 tbsp ground flaxseed + 2.5 tbsp water per egg), and a vegan cream cheese alternative for the frosting. The flavor won’t disappoint, and they’ll still be a delightful treat!

Lemon Blueberry Rolls

Tender Lemon Blueberry Rolls with Creamy Frosting Delight

These Lemon Blueberry Rolls are a delightful twist on a classic treat, featuring soft dough, lemon sugar, and blueberry jam.
Prep Time 1 hour
Cook Time 25 minutes
Rising Time 1 hour 30 minutes
Total Time 2 hours 55 minutes
Servings: 12 rolls
Course: Breakfast
Cuisine: American
Calories: 250

Ingredients
  

For the Dough
  • 1 packet Active Dry Yeast Ensure it's fresh for best results.
  • 1 cup Whole Milk Warm it to 110°F to activate the yeast.
  • ¼ cup Granulated White Sugar Adjust according to taste.
  • 4 cups All-Purpose Flour Spoon and level for accuracy.
  • 1 teaspoon Salt Essential for dough development.
  • ½ cup Unsalted Butter Make sure it's very soft.
  • 2 large Eggs Whisked beforehand.
  • 2 tablespoons Lemon Zest Fresh lemons are best.
  • 2 tablespoons Lemon Juice Fresh lemons are best.
For the Blueberry Jam
  • 2 cups Frozen Blueberries Fresh blueberries are a tasty substitute.
  • ¼ cup Brown Sugar Can adjust based on sweetness preference.
  • 1 tablespoon Corn Starch Can omit for a looser texture.
For the Cream Cheese Frosting
  • 8 ounces Cream Cheese Make sure it's softened.
  • 2 cups Powdered Sugar Add gradually for desired consistency.
  • ½ cup Reserved Blueberry Jam Use the leftover jam from filling.

Equipment

  • Medium saucepan
  • large mixing bowl
  • Stand Mixer
  • Floured work surface
  • Baking dish
  • Plastic Wrap
  • Oven

Method
 

Step-by-Step Instructions
  1. In a medium saucepan, combine frozen blueberries, granulated sugar, and corn starch. Cook over medium heat for 20-25 minutes, stirring occasionally, until thickened. Let it cool completely, reserving some for frosting.
  2. Warm whole milk to about 110°F, then sprinkle active dry yeast and a pinch of sugar. Let it bloom for 10 minutes.
  3. In a large mixing bowl, blend all-purpose flour, salt, and remaining sugar. Stir in eggs, lemon zest, softened butter, and yeast mixture until combined.
  4. Transfer to a floured surface and knead by hand or with a stand mixer for 7-10 minutes until smooth and elastic.
  5. Shape dough into a ball, place in a greased bowl, cover, and let rise until doubled, about 1 to 1.5 hours.
  6. Mix softened butter, brown sugar, lemon zest, lemon juice, and salt in a small bowl to create the filling.
  7. After rising, punch down the dough and roll it to an 18x12-inch rectangle. Spread lemon filling, leaving a border, dollop blueberry jam on top.
  8. Starting from one edge, tightly roll into a log and slice into 12 equal pieces. Place in a greased baking dish.
  9. Pour room temperature heavy cream between rolls. Cover and let rise until doubled, about 1 hour.
  10. Preheat oven to 350°F (175°C). Bake for 22-25 minutes until lightly golden and filling is bubbling.
  11. Prepare frosting by beating cream cheese and butter until creamy, then mix in powdered sugar, lemon zest, and reserved blueberry jam.
  12. Once rolls cool for about 10 minutes, spread cream cheese frosting on top.

Nutrition

Serving: 1rollCalories: 250kcalCarbohydrates: 35gProtein: 3gFat: 12gSaturated Fat: 7gPolyunsaturated Fat: 1gMonounsaturated Fat: 3gCholesterol: 30mgSodium: 200mgPotassium: 150mgFiber: 1gSugar: 10gVitamin A: 500IUVitamin C: 2mgCalcium: 50mgIron: 1mg

Notes

Store leftover rolls in an airtight container for up to 3 days. They can also be refrigerated for a week or frozen for 2 months.

Tried this recipe?

Let us know how it was!

Master the Perfect Beef Wellington for Unforgettable Occasions

As I stood in the kitchen, the aroma of sizzling beef and earthy mushrooms filled the air, whisking me away to my favorite culinary moments. I couldn’t help but smile knowing I was about to create the Perfect Beef Wellington, a classic dish that never fails to impress. This masterpiece effortlessly marries tender beef tenderloin with a savory mushroom duxelles, all encased in a golden, flaky puff pastry. It’s more than just a meal; it’s a delightful centerpiece for any special occasion. Not only does this recipe elevate your home cooking game, but it’s also surprisingly easy to master, making it a crowd-pleaser even for novice chefs. Are you ready to embark on this delicious adventure and elevate your dinner table? Let’s get started!

Why is Beef Wellington so special?

Exquisite Flavors: The combination of tender beef and rich mushroom duxelles creates a symphony of taste that’s hard to resist.

Impressive Presentation: With its golden pastry crust, this dish is a showstopper that will delight your guests at any gathering.

Surprisingly Easy: Although it sounds fancy, making the Perfect Beef Wellington is achievable, even for home cooks.

Versatile Options: Feel free to swap in different mushrooms or use bacon instead of prosciutto for a fun twist—perfect for your taste!

Crowd-Pleasing Appeal: Whether for a special occasion or a weeknight treat, this classic dish never fails to impress. For more mealtime inspiration, check out my recipes for Ground Beef Potato Taco Bowl or Chili Beef Flavor Explosion.

Perfect Beef Wellington Ingredients

For the Beef
Beef Tenderloin (2 to 3 lb) – The star of the dish, offering tenderness and a rich flavor. Substitution: Filet mignon can be used if preferred.
Kosher Salt & Freshly Ground Black Pepper – Enhances the beef’s natural flavors. Note: Use generous amounts for seasoning.
Olive Oil (4 tbsp total) – For searing the beef and cooking the mushroom mixture. Substitution: Avocado oil can be used.
Dijon Mustard (2 tbsp) – Adds a zesty kick to the beef before wrapping. Substitution: Whole grain mustard for a different texture.

For the Duxelles
Assorted Mushrooms (1.5 lb) – Creates the flavorful duxelles filling. Variation: Use a single type like shiitake for a more intense flavor.
Shallots (2 medium) – Adds sweetness and depth to the mushroom mixture.
Fresh Thyme (2 tsp) – Infuses the duxelles with a subtle herbal note.
Garlic Cloves (4) – Provides aromatic richness.
Salted Butter (2 tbsp) – Enhances the flavor of the mushroom mixture.

For Assembly
Prosciutto (12 slices) – Acts as a barrier to keep the beef moist while adding savory taste.
Flour (for dusting) – Prevents sticking when rolling out pastry.
Puff Pastry (14 oz) – The flaky exterior that wraps the beef. Note: Ensure it’s thawed prior to use.
Beaten Egg (1 large) – For egg wash to give the pastry a golden finish.
Flaky Sea Salt (1/2 tsp) – Sprinkled on top for enhanced flavor and presentation.
Chives (1 bunch) – For garnish, adding color and mild onion flavor.

Step‑by‑Step Instructions for Perfect Beef Wellington

Step 1: Prepare the Beef
Trim any excess fat from the beef tenderloin and tie it with kitchen twine to maintain its shape. Generously season the beef with kosher salt and freshly ground black pepper. Allow it to sit at room temperature for 30 minutes to help enhance the flavors before you sear it.

Step 2: Sear the Beef
In a large skillet, heat 2 tablespoons of olive oil over medium-high heat until shimmering. Sear the beef tenderloin on all sides for about 8 minutes, until nicely browned and caramelized. This step locks in the juices and flavors, so give it the attention it deserves before removing it from the heat.

Step 3: Make the Duxelles
Using a food processor, finely chop half of the assorted mushrooms along with shallots, garlic, and fresh thyme until they resemble a coarse paste. Melt 2 tablespoons of salted butter in the same skillet, then add the mushroom mixture. Cook it over medium heat for about 15 minutes until most of the moisture has evaporated, leaving a rich, flavorful duxelles.

Step 4: Wrap the Beef
Lay out the prosciutto slices on a piece of plastic wrap, slightly overlapping them. Spread the cooled duxelles evenly over the prosciutto, then place the seared beef on top. Using the plastic wrap, roll the prosciutto tightly around the beef, ensuring it’s completely encased. Chill the wrapped beef in the refrigerator for about 15 minutes to set the shape.

Step 5: Assemble the Wellington
Lightly flour your work surface and roll out the puff pastry into a rectangle large enough to completely envelope the beef roll. Remove the beef from the plastic wrap and place it in the center of the pastry. Fold the pastry over the beef, sealing the edges firmly and trimming any excess. Brush the entire pastry with a beaten egg for a shiny finish.

Step 6: Bake the Wellington
Preheat your oven to 425°F (218°C). Carefully transfer the wrapped beef onto a baking sheet lined with parchment paper. Bake for 40-45 minutes, or until the pastry turns golden brown and the internal temperature of the beef reads 120-125°F for medium-rare. Keep an eye on the pastry to avoid over-browning.

Step 7: Rest and Serve
Once baked, remove the Perfect Beef Wellington from the oven and allow it to rest for 10 minutes. This will let the juices redistribute. Slice it carefully with a sharp knife and garnish with freshly chopped chives for a touch of color before presenting it at the table.

Perfect Beef Wellington Variations

Feel free to get creative and tailor the Perfect Beef Wellington to your own tastes—each twist enhances this classic dish!

  • Mushroom Medley: Use a mix of shiitake, cremini, and oyster mushrooms for a depth of flavor. This blend adds an earthy richness that’s truly tempting.

  • Smoky Bacon: Swap prosciutto for smoked bacon to impart a delightful crunch and savory punch. The crispy texture pairs beautifully with the tender beef.

  • Gluten-Free: Replace puff pastry with a gluten-free alternative or a homemade almond flour crust for those with dietary restrictions. Your guests will appreciate this thoughtful option!

  • Herbed Twist: Add fresh herbs like rosemary or parsley to the mushroom duxelles for a fragrant lift. This adds brightness and complements the earthy flavors wonderfully.

  • Vegetarian Delight: For a meat-free version, use a thick, hearty mushroom steak marinated in balsamic vinegar, wrapped in roasted zucchini slices instead of pastry. It’s a great option that doesn’t compromise on taste!

  • Savory Crust: Brush the pastry with garlic-infused oil before the egg wash for an extra layer of flavor. This subtle addition makes the crust irresistible.

  • Heat It Up: Sprinkle red pepper flakes into the mushroom mixture for a kick of spice. This adjustment adds an exciting heat that elevates the dish, pleasing the adventurous eaters in your crowd.

  • Savory Cheese Filling: Incorporate a blend of cream cheese and goat cheese into the mushroom duxelles for extra creaminess. This indulgent touch will warm your heart and make your taste buds dance!

For more mealtime inspiration and variations, don’t miss my recipes for Sweet Potato Beef Skillet and Old-Fashioned Vegetable Beef Soup. Embrace your creativity—there’s no wrong way to enjoy your Perfect Beef Wellington!

Make Ahead Options

Preparing the Perfect Beef Wellington in advance is a fantastic way to save time during busy weeknights or special occasions! You can wrap the beef and duxelles up to 24 hours ahead; just chill it tightly in plastic wrap in the refrigerator to maintain its shape and freshness. For added convenience, you can also prepare the mushroom duxelles and prosciutto layer one day in advance, storing them separately in airtight containers. Assemble the Wellington just before baking for the best results. When you’re ready to serve, simply do the final assembly, brush with egg wash, and bake. This method ensures you’ll enjoy a deliciously impressive dish with minimal effort at mealtime!

What to Serve with Perfect Beef Wellington

Elevate your dining experience with complementary dishes that enhance the exquisite flavors of the Perfect Beef Wellington.

  • Creamy Mashed Potatoes: These buttery, smooth potatoes soak up all the delicious juices, making each bite delightful.

  • Garlic Roasted Asparagus: The crisp-tender texture and earthy flavor of asparagus beautifully balance the richness of the Wellington.

  • Arugula Salad: A simple salad with a zesty vinaigrette adds a refreshing contrast, complimenting the savory depth of the dish.

  • Red Wine Reduction Sauce: Drizzling this flavorful sauce over each slice elevates the dish and enhances the overall experience with complex flavors.

  • Truffle Fries: Crispy on the outside and fluffy on the inside, these indulgent fries bring a touch of luxury to your table.

  • Herb-Infused Rice Pilaf: Lightly seasoned rice with herbs complements the beef and mushrooms while adding a lovely texture to the plate.

  • Chocolate Lava Cake: Finish your meal with this rich, gooey dessert that indulges your sweet tooth and rounds out the dining experience beautifully.

  • Sparkling Water with Lime: A refreshing drink that cleanses the palate and echoes the elegant feel of your gourmet dining experience.

Expert Tips for Perfect Beef Wellington

Sear for Flavor: Ensure you sear the beef until it’s beautifully browned on all sides. This crucial step locks in juices and enhances the flavor of your Perfect Beef Wellington.

Dry Your Mushrooms: Thoroughly dry the mushrooms after cooking to prevent a soggy pastry. Excess moisture can ruin the flaky texture you desire.

Use a Meat Thermometer: To achieve the perfect doneness, invest in a meat thermometer. It ensures your beef reaches the ideal internal temperature of 120-125°F for medium-rare.

Cool Before Wrapping: Allow the seared beef to cool completely before wrapping it in pastry to maintain the structure and prevent sogginess.

Chill Before Baking: After wrapping, chill the Wellington for at least 15 minutes. This helps the pastry maintain its shape during baking and enhances its flakiness.

Egg Wash for Gloss: Don’t skip the egg wash! It gives your puff pastry that beautiful golden color and enticing shine, making for an impressive presentation.

How to Store and Freeze Perfect Beef Wellington

Fridge: Store any leftovers in an airtight container for up to 3 days. Reheat in the oven at 350°F (175°C) until warmed through for the best texture.

Freezer: Wrap the assembled, uncooked Beef Wellington tightly in plastic wrap, then in foil for added protection. It can be frozen for up to 2 months. When ready to cook, thaw overnight in the fridge before baking.

Make-Ahead: You can prepare the Beef Wellington up to 24 hours in advance. Keep it wrapped in plastic in the fridge until you’re ready to bake.

Reheating: If you have reheated portions, place slices on a baking sheet, cover with foil, and warm in the oven at 350°F (175°C) until heated through to retain the pastry’s flakiness.

Perfect Beef Wellington Recipe FAQs

What type of beef is best for Beef Wellington?
Absolutely! For the Perfect Beef Wellington, beef tenderloin is your best choice due to its tenderness and rich flavor. If tenderloin is unavailable, filet mignon is a suitable substitute. When selecting your beef, look for a cut that is bright red, well-marbled, and firm to the touch.

How should I store leftovers?
Leftovers can be stored in an airtight container in the fridge for up to 3 days. For the best texture, reheat in the oven at 350°F (175°C) until warmed through. I often find that reheating in the oven preserves the pastry’s flaky quality better than using a microwave.

Can I freeze the Beef Wellington?
Yes! To freeze, wrap the assembled but uncooked Beef Wellington tightly in plastic wrap, followed by a layer of foil for added protection. It can be kept in the freezer for up to 2 months. When you’re ready to cook, thaw it overnight in the fridge before baking to ensure even cooking.

What can I do if the pastry gets soggy?
To prevent a soggy pastry, make sure your mushrooms are thoroughly cooked and dried before spreading them on the beef. If your pastry does happen to get soggy, you can bake it for a bit longer to crisp it up, but be cautious not to overcook the beef.

Is this recipe suitable for people with food allergies?
This recipe contains beef, mushrooms, and gluten from the puff pastry, which could be problematic for those with specific allergies. If you’re hosting someone with dietary restrictions, consider using a gluten-free puff pastry alternative or swapping the mushrooms with a safe vegetable.

Can I make Beef Wellington ahead of time?
Very! You can prepare the Perfect Beef Wellington up to 24 hours in advance. Assemble it, wrap it tightly in plastic wrap, and store it in the fridge until you’re ready to bake. This is a fantastic way to save time on a special occasion!

Perfect Beef Wellington

Master the Perfect Beef Wellington for Unforgettable Occasions

Discover how to create the Perfect Beef Wellington, a classic dish that impresses for any occasion.
Prep Time 30 minutes
Cook Time 45 minutes
Chilling Time 15 minutes
Total Time 1 hour 30 minutes
Servings: 4 slices
Course: Beef
Cuisine: British
Calories: 550

Ingredients
  

For the Beef
  • 2 to 3 lb Beef Tenderloin Substitution: Filet mignon can be used if preferred.
  • to taste Kosher Salt Use generous amounts for seasoning.
  • to taste Freshly Ground Black Pepper
  • 4 tbsp Olive Oil Substitution: Avocado oil can be used.
  • 2 tbsp Dijon Mustard Substitution: Whole grain mustard for a different texture.
For the Duxelles
  • 1.5 lb Assorted Mushrooms Use a single type like shiitake for a more intense flavor.
  • 2 medium Shallots
  • 2 tsp Fresh Thyme
  • 4 Garlic Cloves
  • 2 tbsp Salted Butter
For Assembly
  • 12 slices Prosciutto
  • Flour for dusting
  • 14 oz Puff Pastry Ensure it's thawed prior to use.
  • 1 large Beaten Egg For egg wash to give the pastry a golden finish.
  • 1/2 tsp Flaky Sea Salt Sprinkled on top for enhanced flavor and presentation.
  • 1 bunch Chives For garnish, adding color and mild onion flavor.

Equipment

  • large skillet
  • Food processor
  • kitchen twine
  • Parchment paper
  • Baking Sheet

Method
 

Step-by-Step Instructions
  1. Trim any excess fat from the beef tenderloin and tie it with kitchen twine to maintain its shape. Generously season the beef with kosher salt and freshly ground black pepper. Allow it to sit at room temperature for 30 minutes to help enhance the flavors before you sear it.
  2. In a large skillet, heat 2 tablespoons of olive oil over medium-high heat until shimmering. Sear the beef tenderloin on all sides for about 8 minutes, until nicely browned and caramelized. This step locks in the juices and flavors, so give it the attention it deserves before removing it from the heat.
  3. Using a food processor, finely chop half of the assorted mushrooms along with shallots, garlic, and fresh thyme until they resemble a coarse paste. Melt 2 tablespoons of salted butter in the same skillet, then add the mushroom mixture. Cook it over medium heat for about 15 minutes until most of the moisture has evaporated, leaving a rich, flavorful duxelles.
  4. Lay out the prosciutto slices on a piece of plastic wrap, slightly overlapping them. Spread the cooled duxelles evenly over the prosciutto, then place the seared beef on top. Using the plastic wrap, roll the prosciutto tightly around the beef, ensuring it's completely encased. Chill the wrapped beef in the refrigerator for about 15 minutes to set the shape.
  5. Lightly flour your work surface and roll out the puff pastry into a rectangle large enough to completely envelope the beef roll. Remove the beef from the plastic wrap and place it in the center of the pastry. Fold the pastry over the beef, sealing the edges firmly and trimming any excess. Brush the entire pastry with a beaten egg for a shiny finish.
  6. Preheat your oven to 425°F (218°C). Carefully transfer the wrapped beef onto a baking sheet lined with parchment paper. Bake for 40-45 minutes, or until the pastry turns golden brown and the internal temperature of the beef reads 120-125°F for medium-rare. Keep an eye on the pastry to avoid over-browning.
  7. Once baked, remove the Perfect Beef Wellington from the oven and allow it to rest for 10 minutes. This will let the juices redistribute. Slice it carefully with a sharp knife and garnish with freshly chopped chives for a touch of color before presenting it at the table.

Nutrition

Serving: 1sliceCalories: 550kcalCarbohydrates: 35gProtein: 40gFat: 30gSaturated Fat: 12gPolyunsaturated Fat: 5gMonounsaturated Fat: 10gCholesterol: 95mgSodium: 840mgPotassium: 800mgFiber: 3gSugar: 2gVitamin A: 400IUVitamin C: 2mgCalcium: 40mgIron: 3mg

Notes

Expert tips include ensuring you sear the beef until it's beautifully browned, drying mushrooms after cooking, using a meat thermometer, and allowing the beef to cool before wrapping in pastry.

Tried this recipe?

Let us know how it was!