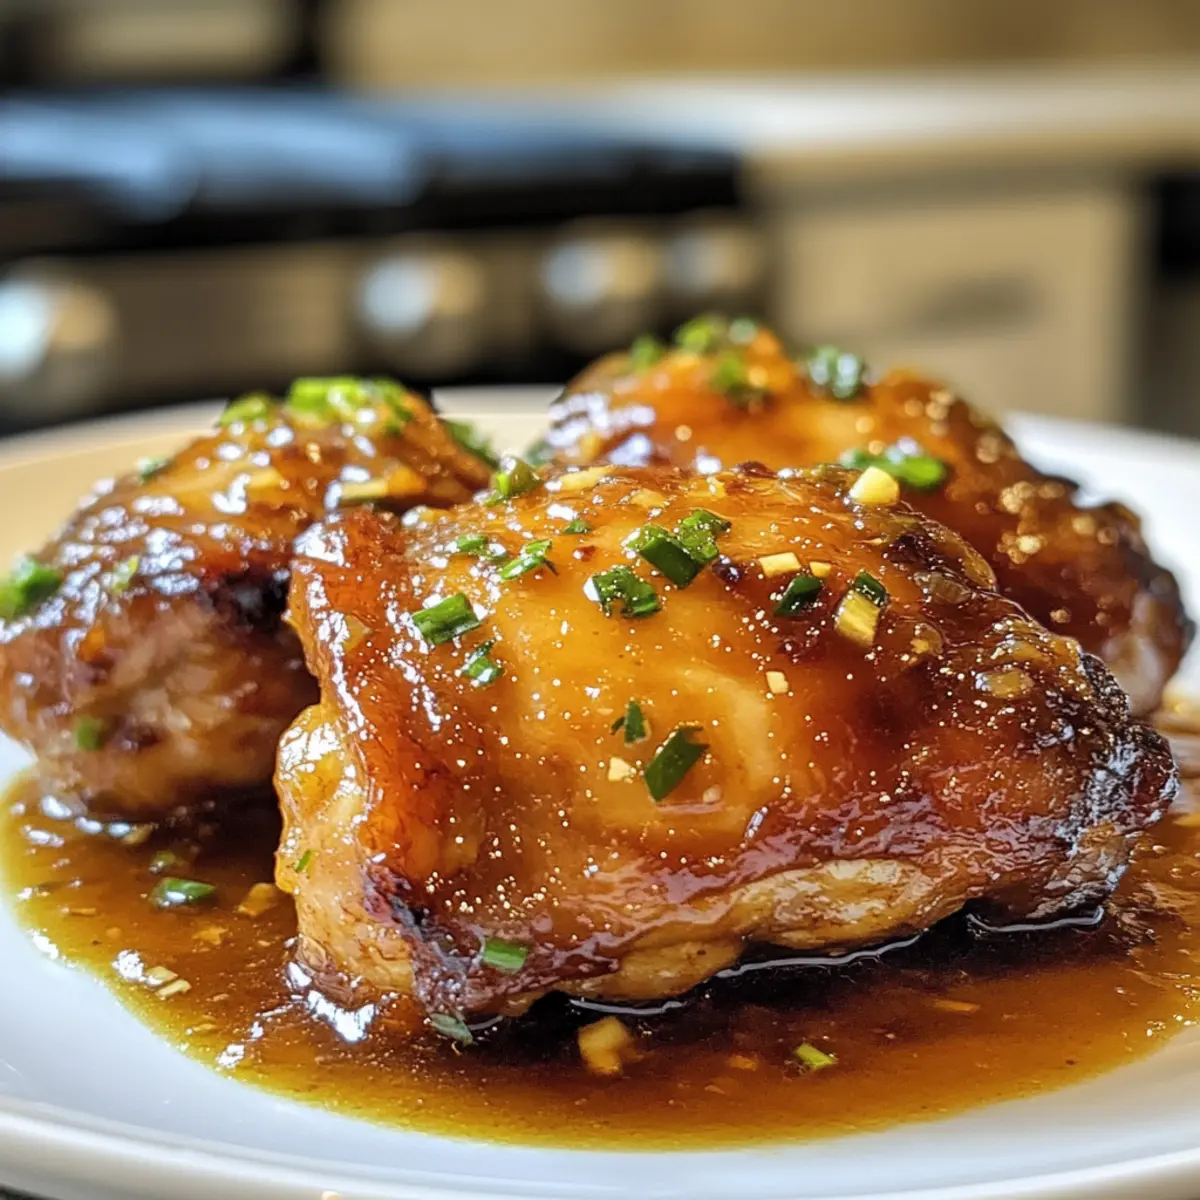
As the aroma of sizzling chicken fills the kitchen, a wave of nostalgia washes over me, transporting me back to cherished family dinners. Our main star today is Braised Catalina Chicken, and it’s not just any recipe—it’s a delightful blend of tender chicken thighs and a homemade Catalina sauce that evokes that comforting warmth we all crave. This dish is a dream whether you’re aiming for a quick weeknight dinner or impressing guests at a casual gathering—a true crowd-pleaser that packs rich, satisfying flavors. Plus, making your own sauce elevates the dish beyond store-bought shortcuts, ensuring every bite is a delightful reminder of home. Ready to bring some joy to your table? Let’s dive into creating this comforting meal together!
What makes this chicken recipe irresistible?
Comforting, Nostalgic Taste: This Braised Catalina Chicken transports you back to cozy family dinners, with its rich, homemade sauce that’s hard to resist.
Effortless Cooking: The simple step-by-step process means you can have delicious comfort food on your table without a fuss.
Versatile Pairings: Serve it alongside fluffy rice, mashed potatoes, or a refreshing salad for a delightful balance of flavors.
Crowd-Pleasing Appeal: Whether it’s a weeknight meal or a laid-back get-together, this dish is sure to impress everyone!
Easy Storage: Leftovers save beautifully, allowing you to enjoy delicious meals throughout the week. For more tasty chicken inspirations, check out the Air Fryer Chicken or Jerk Chicken Burritos for some variety!
Braised Catalina Chicken Ingredients
For the Chicken
• Chicken Thighs – Tender and juicy, they provide the perfect base for this flavorful dish; boneless options can reduce cooking time by 15-20 minutes.
• Olive Oil – Necessary for searing, it adds richness to the chicken; you can use vegetable oil as an alternative if desired.
• Salt & Pepper – These essential seasonings enhance the overall flavor; adjust to suit your taste preferences.
For the Catalina Sauce
• Catalina Sauce Ingredients – A blend of ingredients that lends beautiful tanginess and sweetness; making it homemade ensures superior taste compared to store-bought.
• Fresh Parsley – Optional for garnish, adding a fresh and colorful touch; can be skipped if you prefer.
Now that you have the ingredients ready, it’s time to whip up that nostalgic Braised Catalina Chicken!
Step‑by‑Step Instructions for Braised Catalina Chicken
Step 1: Preheat the Oven
Begin by preheating your oven to 350°F (175°C). This temperature will allow the Braised Catalina Chicken to cook evenly and develop that mouthwatering, tender texture we all love. As the oven warms, it’s a great time to prepare your chicken and get your ingredients ready for the next steps.
Step 2: Prepare the Chicken
Pat your chicken thighs dry with paper towels and season them generously with salt and pepper on both sides. This not only enhances the flavor of the skin but also helps to achieve a lovely golden-brown crust. Set the seasoned chicken aside as you prepare to sear them, ensuring they are ready for a hot skillet.
Step 3: Sear the Chicken
In a Dutch oven, heat a couple of tablespoons of olive oil over medium heat. Once the oil is shimmering, carefully place the chicken thighs in the pan, skin-side down. Sear for 4-5 minutes until the skin is crispy and golden brown. Then, flip the chicken and let it cook for another 2 minutes. Remove the chicken and place it on a plate.
Step 4: Whisk the Sauce Together
In a mixing bowl, whisk together all the ingredients for the homemade Catalina sauce. Taste as you go, adjusting the sweetness and tanginess to your preference. This flavorful sauce is what makes the Braised Catalina Chicken so special, so take your time to get it just right before moving on to the next step.
Step 5: Assemble the Dish
Pour half of the Catalina sauce into the same Dutch oven you used for searing, making sure to scrape any brown bits from the bottom for added flavor. Place the seared chicken thighs back into the pot, skin-side up, and pour the remaining sauce over them. This is where the magic begins, as the sauce infuses deep flavors into the chicken.
Step 6: Bake the Chicken
Cover the Dutch oven with a lid or tightly seal it with foil, then place it in the preheated oven. Bake for 45 minutes, allowing the chicken to braise and soak up all that delicious sauce. The aroma that fills your kitchen will be irresistible, hinting at the comforting meal about to come.
Step 7: Finish Uncovered
After the initial baking time, carefully remove the lid or foil from the Dutch oven. Continue to bake uncovered for an additional 20-25 minutes, letting the sauce thicken and caramelize around the chicken. You’ll know it’s ready when the sauce becomes rich and glossy, and the chicken is tender and fully cooked.
Step 8: Serve and Garnish
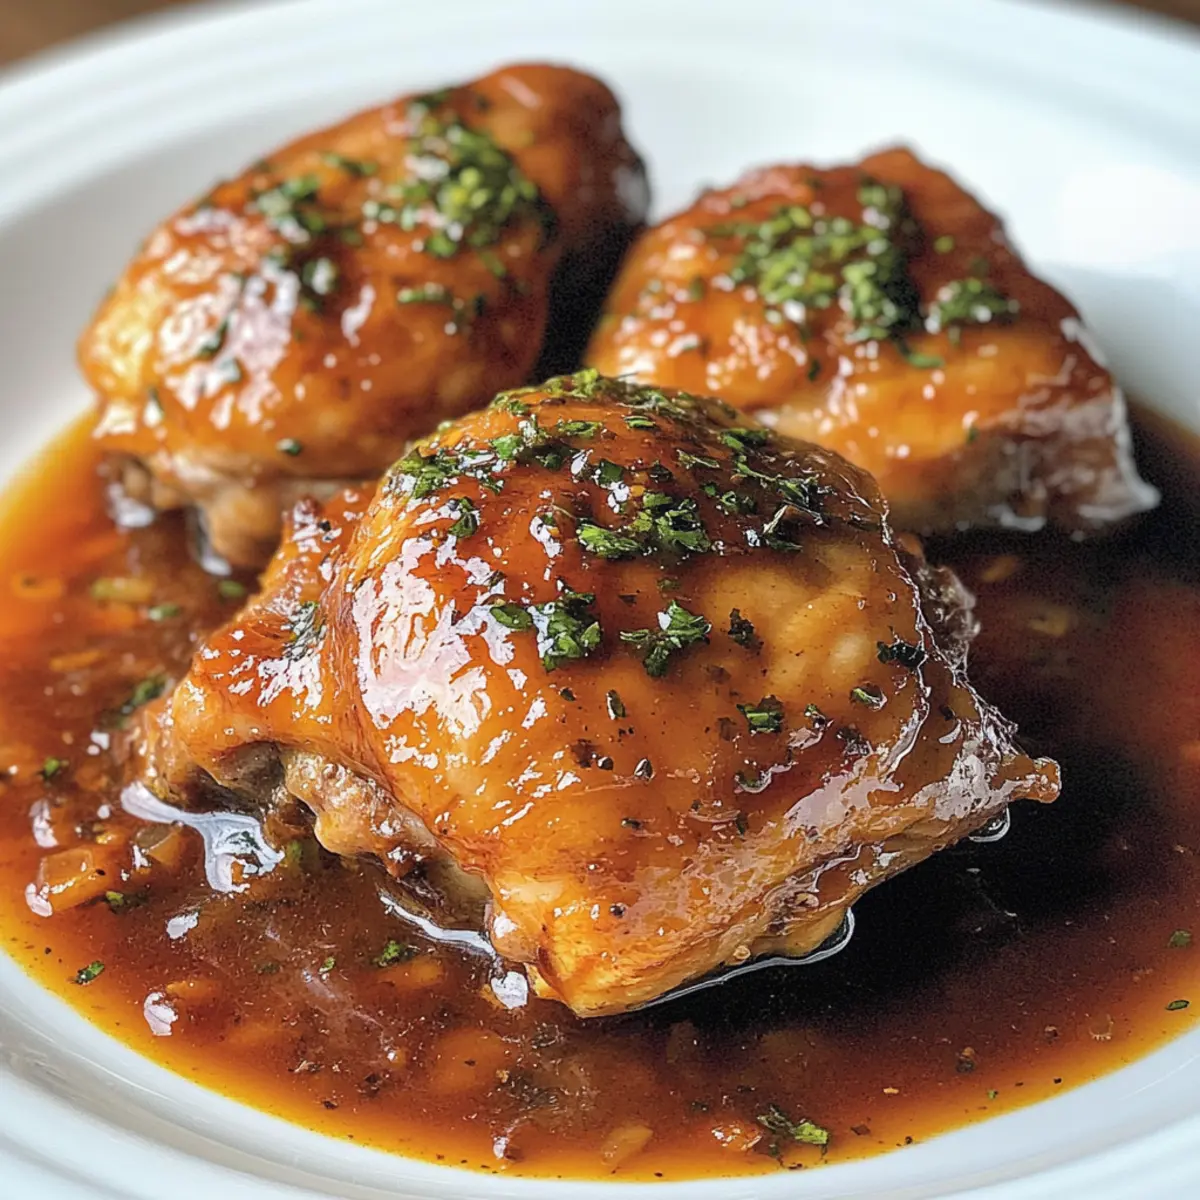
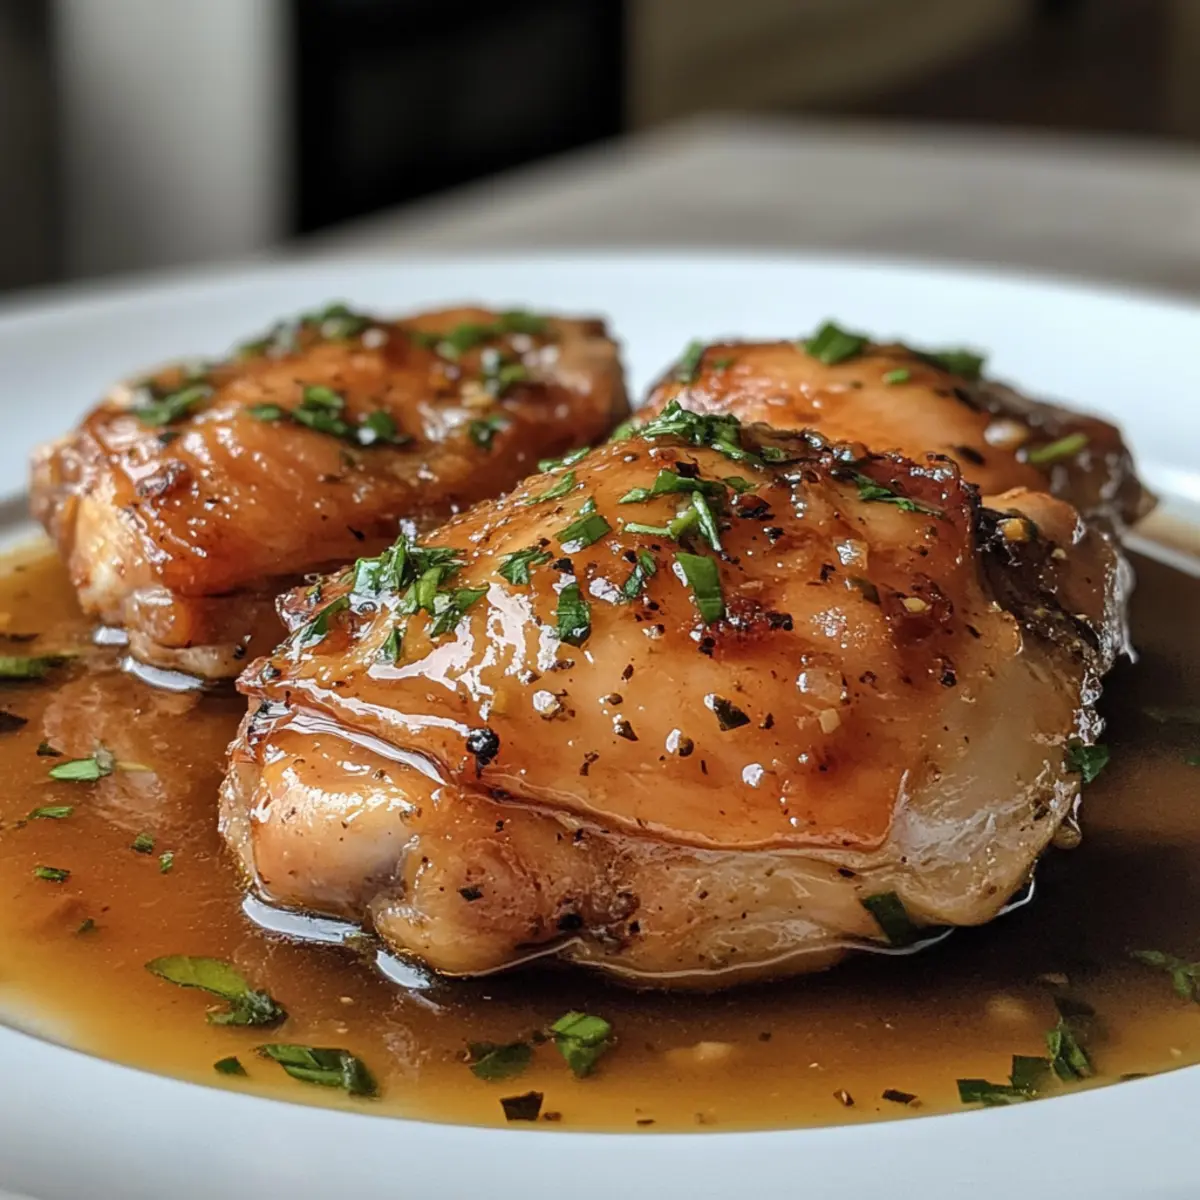
Once out of the oven, dish up the Braised Catalina Chicken while it’s hot. Spoon some of the delicious sauce over each piece, allowing the flavors to meld beautifully. If desired, sprinkle with fresh parsley for a bright, herbaceous touch. This dish pairs wonderfully with rice or mashed potatoes, making for a delightful family feast.
Braised Catalina Chicken Variations
Feeling adventurous? Let’s explore exciting ways to customize your Braised Catalina Chicken and elevate the dish to your liking!
-
Boneless Options: Use boneless chicken breasts or thighs for quicker cooking; adjust the bake time by reducing it by 15-20 minutes for a tender result.
-
Herb Infusion: Add fresh herbs like thyme or rosemary to the sauce for an aromatic twist that compliments the chicken beautifully.
-
Spicy Kick: For a fiery flavor profile, add a dash of cayenne pepper or a spoonful of your favorite hot sauce to the Catalina sauce.
-
Sweet & Savory: Incorporate diced pineapples or raisins into the sauce for a burst of sweetness that contrasts wonderfully with the tangy flavor.
-
Nutty Crunch: Top the finished dish with toasted almonds or walnuts for a delightful crunch that adds texture to every bite.
-
Smoky Flavor: Incorporate smoked paprika into the sauce for a rich, smoky flavor, perfect for enhancing the overall depth of this dish.
-
Vegetable Boost: Add hearty vegetables like bell peppers or carrots to the braising pot for added nutrition and color, making the dish even more vibrant.
-
Asian Twist: Swap the sauce ingredients for a soy sauce-based glaze and serve it with steamed rice and sautéed bok choy for a quick fusion dish.
If you’re looking for more chicken inspiration, be sure to check out the Grilled Chicken Sandwich or try making some delicious Chicken Cashew Broccoli that brings spice and crunch to your table!
Make Ahead Options
These Braised Catalina Chicken dishes are perfect for busy home cooks looking to save time! You can prepare the homemade Catalina sauce up to 3 days in advance, storing it in an airtight container in the refrigerator to lock in its vibrant flavors. The chicken thighs can also be seasoned and seared ahead of time, then stored in the fridge for up to 24 hours before baking—just be sure to cover them well to maintain their quality. When you’re ready to serve, simply place the seared chicken in the Dutch oven, add the sauce, and follow the initial baking instructions. This way, you’ll enjoy a comforting, homemade meal with minimal effort on busy weeknights!
How to Store and Freeze Braised Catalina Chicken
Fridge: Store any leftover Braised Catalina Chicken in an airtight container in the refrigerator for up to 4 days to maintain its delicious flavor and texture.
Freezer: For longer storage, freeze the chicken in sauce in a suitable airtight container for up to 2 months. This preserves its rich taste and makes meal prep easy!
Thawing: When ready to enjoy, thaw the chicken overnight in the fridge and reheat gently in the oven at 325°F until warmed through for the best results.
Reheating: If reheating from frozen, allow extra time and ensure it reaches an internal temperature of 165°F for safe consumption.
Expert Tips for Braised Catalina Chicken
-
Quality Ingredients: Use fresh chicken thighs and high-quality olive oil for the best flavor. The fresher the ingredients, the richer your Braised Catalina Chicken will taste.
-
Sauce Balance: Taste your Catalina sauce before adding it to the chicken. Adjust sweetness and acidity for a flavor profile that best suits your family’s tastes.
-
Don’t Rush Searing: Ensure the oil is hot before adding the chicken. Skipping this step can result in steamed instead of seared chicken, affecting texture and flavor.
-
Monitor Cooking Time: If using boneless chicken, check for doneness earlier to prevent drying out. Adjust baking time for the juiciest results.
-
Garnish Thoughtfully: Fresh parsley adds a beautiful pop of color and brightness. Don’t skip it; it elevates the overall presentation and flavor of your dish.
What to Serve with Braised Catalina Chicken
As this comforting dish fills your home with its delightful aroma, think of the perfect accompaniments to create a wholesome meal.
-
Creamy Mashed Potatoes: The velvety texture complements the tender chicken, soaking up the flavorful sauce beautifully.
-
Fluffy Rice: A neutral base that balances the rich, tangy sauce, perfect for making each bite memorable.
-
Fresh Garden Salad: Crisp greens and a light vinaigrette provide a refreshing contrast to the warmth of the chicken.
-
Roasted Seasonal Vegetables: Sweet, caramelized veggies add a depth of flavor and color to your plate, enhancing the overall experience.
-
Garlic Bread: A warm, crispy side that’s perfect for mopping up the delicious sauce, making dinner feel indulgent.
-
Sweet Cornbread: The slightly sweet flavor and crumbly texture makes a delightful contrast to the savory chicken dish, creating a Southern-inspired feast.
-
Chilled White Wine: A glass of chilled Sauvignon Blanc or Chardonnay pairs beautifully, cutting through the sauce’s richness for a refreshing sip.
-
Lemon Sorbet: For dessert, this light and zesty treat cleanses the palate after a savory meal, ending on a bright and cheerful note.

Braised Catalina Chicken Recipe FAQs
What kind of chicken is best for this recipe?
I recommend using chicken thighs for their tenderness and flavor, but you can also substitute boneless thighs or breasts. Just keep in mind that if you opt for boneless cuts, reduce the cooking time by about 15-20 minutes for the juiciest results.
How should I store leftover Braised Catalina Chicken?
Store any leftovers in an airtight container in the refrigerator for up to 4 days. This keeps the chicken flavorful and safe to eat. Make sure to let it cool down before sealing to prevent condensation.
Can I freeze Braised Catalina Chicken?
Absolutely! You can freeze the chicken with sauce in a suitable airtight container for up to 2 months. When you’re ready to enjoy it, thaw it overnight in the fridge and reheat gently in the oven at 325°F until warmed through. This helps retain the rich flavors.
What if my sauce is too runny?
If your sauce turns out too runny, don’t worry! After cooking, you can return it to the stovetop and simmer it on medium heat for a few minutes to thicken it up. Stir occasionally until it reaches your desired consistency.
Is there a way to make this recipe allergy-friendly?
Definitely! You can swap out the olive oil for another cooking oil like avocado oil if you have sensitivities. Also, check the ingredients of your homemade Catalina sauce to ensure they fit your dietary requirements. Easily modify spices and sweeteners to suit different allergies.
Can I make the Catalina sauce ahead of time?
Yes! You can make the homemade Catalina sauce a day in advance. Simply store it in an airtight container in the fridge. The flavors will deepen overnight, making your Braised Catalina Chicken even more delicious when you’re ready to cook!
Tender Braised Catalina Chicken with Homemade Flavor Galore
Ingredients
Equipment
Method
- Preheat your oven to 350°F (175°C).
- Pat the chicken thighs dry with paper towels and season generously with salt and pepper.
- In a Dutch oven, heat olive oil over medium heat and sear the chicken thighs skin-side down for 4-5 minutes until crispy and golden brown.
- Flip the chicken and cook for an additional 2 minutes, then remove and set aside.
- Whisk together all ingredients for the homemade Catalina sauce.
- Pour half of the Catalina sauce into the Dutch oven, add the seared chicken thighs skin-side up, and pour the remaining sauce over them.
- Cover the Dutch oven and bake for 45 minutes.
- Remove the cover and continue baking for an additional 20-25 minutes until sauce thickens and chicken is tender.
- Serve hot, spooning some sauce over the chicken and garnishing with fresh parsley if desired.