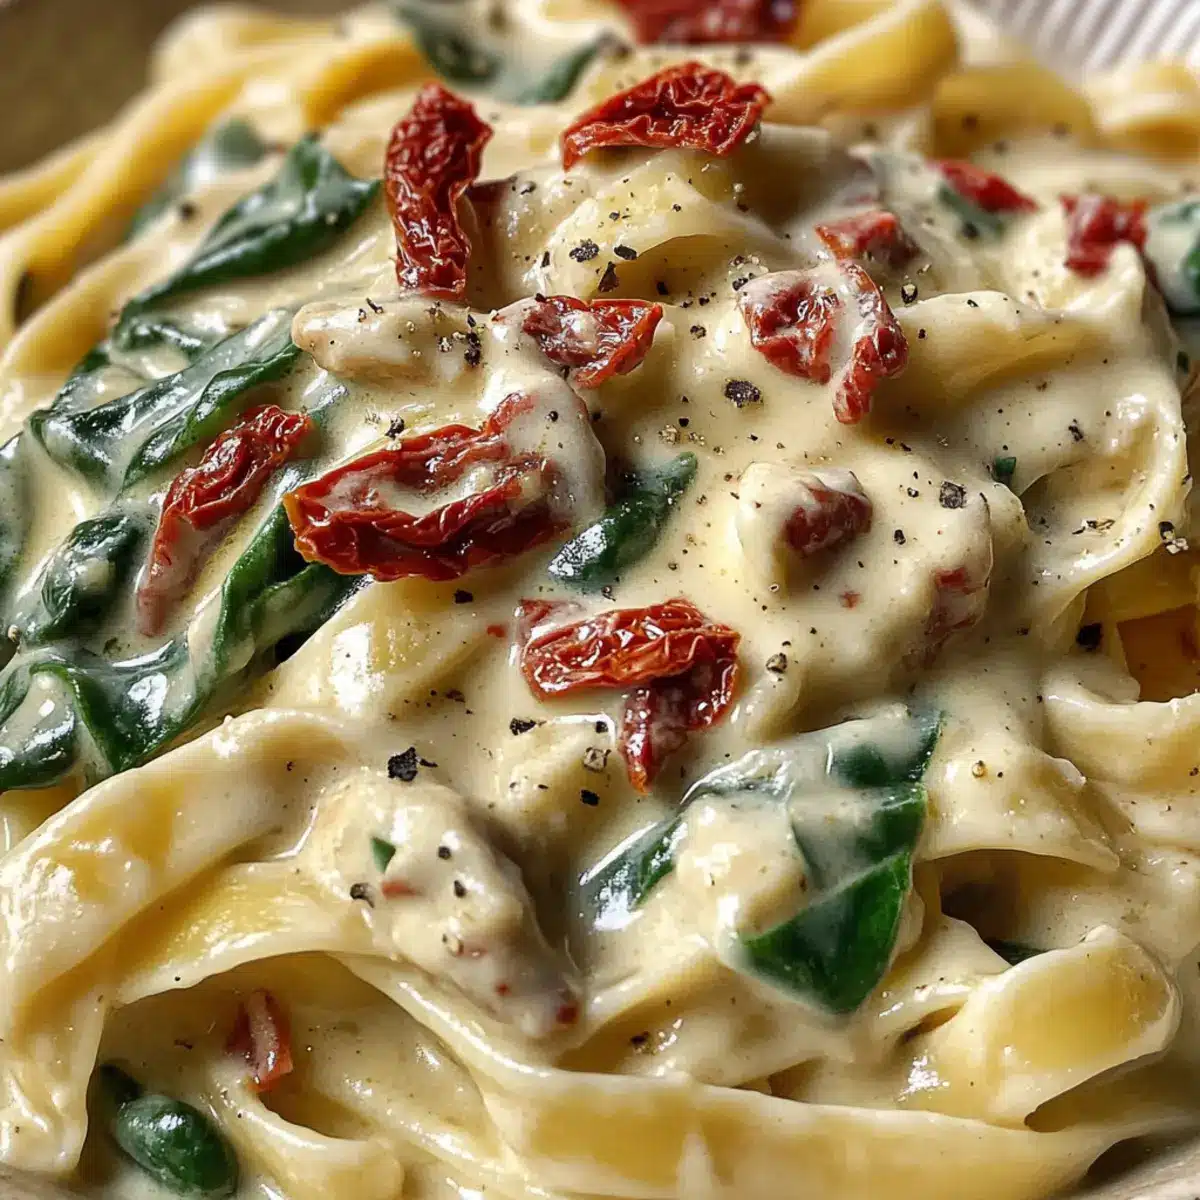
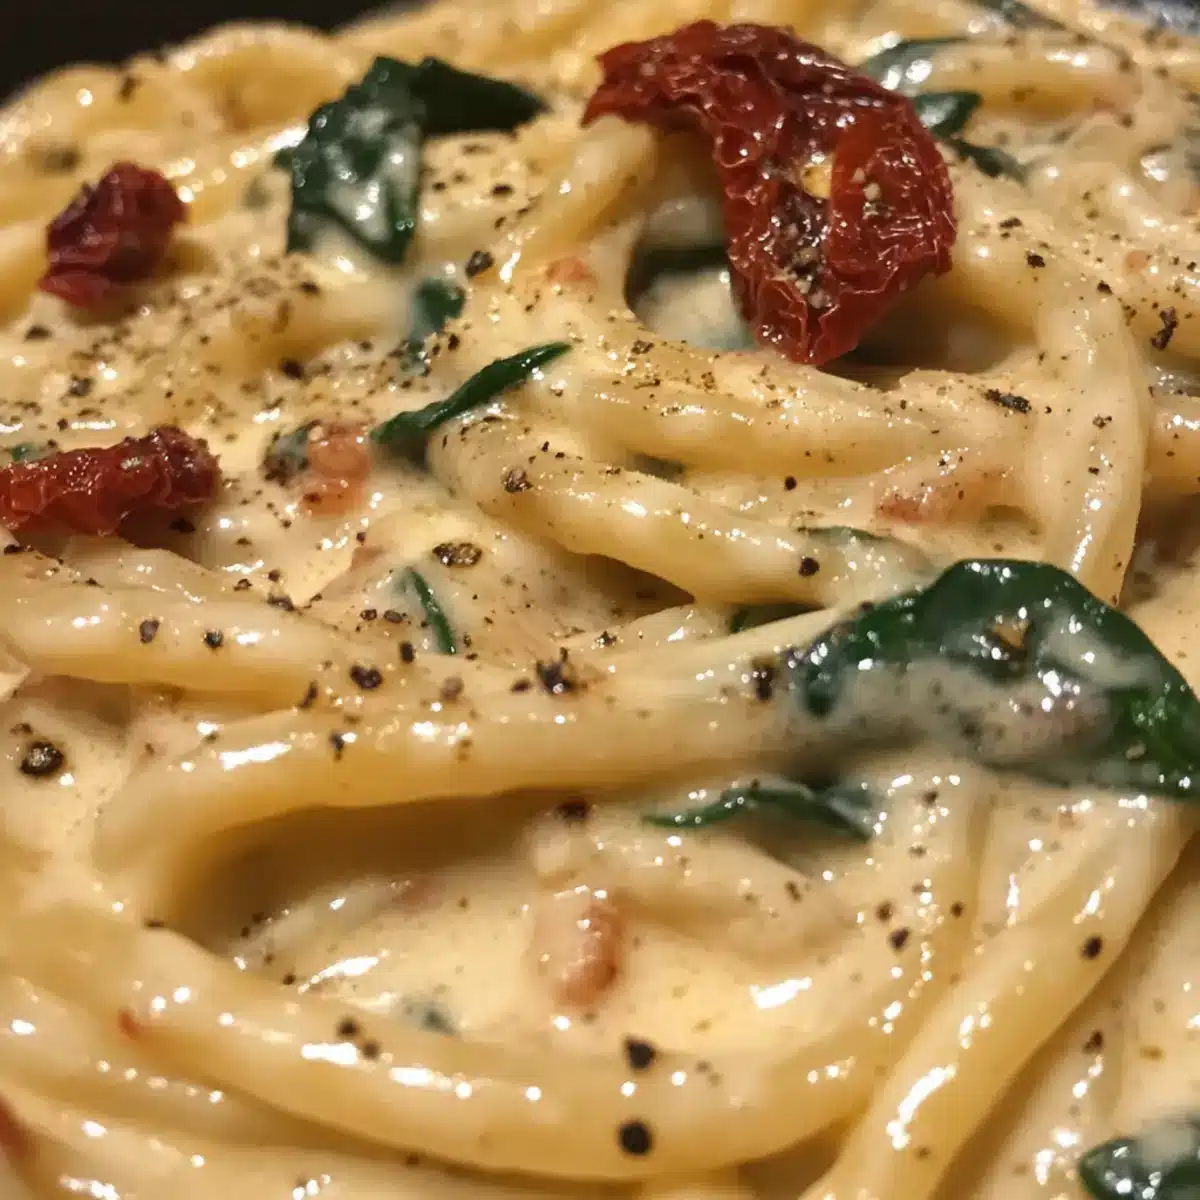
As I sautéed fragrant garlic in a pan, my senses were instantly transported to a cozy trattoria nestled in the heart of Tuscany. The magic of Creamy Tuscan Garlic Sauce beckons, and you, too, can whip up this culinary delight at home. Not only does this sauce elevate any simple dish into a lavish experience, but it also comes together in a flash, making it perfect for both hectic weeknights and special gatherings. Plus, with adaptable ingredients, it’s easy to accommodate various dietary needs—whether you’re seeking gluten-free options or delicious vegetarian variations. Ready to tantalize your taste buds? Let’s dive into this creamy world where comfort meets versatility!
Why is Creamy Tuscan Garlic Sauce a Must-Try?
Irresistible Flavor: This sauce not only enhances your dishes but is infused with aromatic garlic and rich sun-dried tomatoes, bringing a taste of Italy to your table.
Convenience: Quick to prepare, it’s a lifesaver for busy weeknights or last-minute gatherings.
Versatile Options: Easily adaptable for various diets, whether you need gluten-free pasta or a dairy-free alternative with coconut milk.
Crowd-Pleaser: Perfect for family dinners or impressing guests with minimal effort—everyone will be asking for seconds!
Elevate Any Meal: Pair it with grilled chicken, toss it with pasta, or drizzle over roasted vegetables for a creamy indulgence that works for any occasion.
Creamy Tuscan Garlic Sauce Ingredients
• Get ready to make your taste buds dance with this delectable sauce!
For the Base
- Heavy Cream – Provides the necessary richness and creaminess; substitute with half-and-half or coconut milk for a lighter or dairy-free option.
- Parmesan Cheese – Adds a delightful cheesiness; nutritional yeast works well as a dairy-free alternative if needed.
For the Vegetables
- Spinach – Packed with vitamins and fibers; kale serves as a great alternative if you’re feeling adventurous.
- Sun-Dried Tomatoes – Intensifies the flavor and adds a splash of color; fresh tomatoes can be used for a lighter touch.
For the Flavoring
- Garlic Powder – Infuses the sauce with that necessary garlicky punch; fresh garlic makes for an even bolder taste.
- Italian Seasoning – A wonderful blend of herbs; individual herbs like basil or oregano can be substituted if this isn’t on hand.
For the Liquid
- Chicken or Vegetable Broth – Provides the base and depth of flavor; use vegetable broth for a vegetarian or vegan variation.
Step‑by‑Step Instructions for Creamy Tuscan Garlic Sauce
Step 1: Prepare Your Ingredients
Start by gathering and preparing all your ingredients for the Creamy Tuscan Garlic Sauce. Chop the fresh spinach into bite-sized pieces, measure out the sun-dried tomatoes, and grate a generous portion of Parmesan cheese. Having everything handy will streamline your cooking process, making it easy to create this delightful sauce.
Step 2: Heat the Broth
In a large skillet, pour in about 1 cup of chicken or vegetable broth and heat it over medium heat. Allow the broth to come to a gentle simmer, which should take about 3-5 minutes. This step will create the flavorful base for your creamy sauce, providing depth to the overall taste.
Step 3: Mix in the Cream and Spices
Once the broth is simmering, stir in approximately 1 cup of heavy cream along with 1 teaspoon of garlic powder and 1 tablespoon of Italian seasoning. Whisk the mixture together until it’s well combined and smooth, about 2 minutes. You’ll notice the sauce starting to thicken, creating a luxurious base for your Creamy Tuscan Garlic Sauce.
Step 4: Add Spinach and Tomatoes
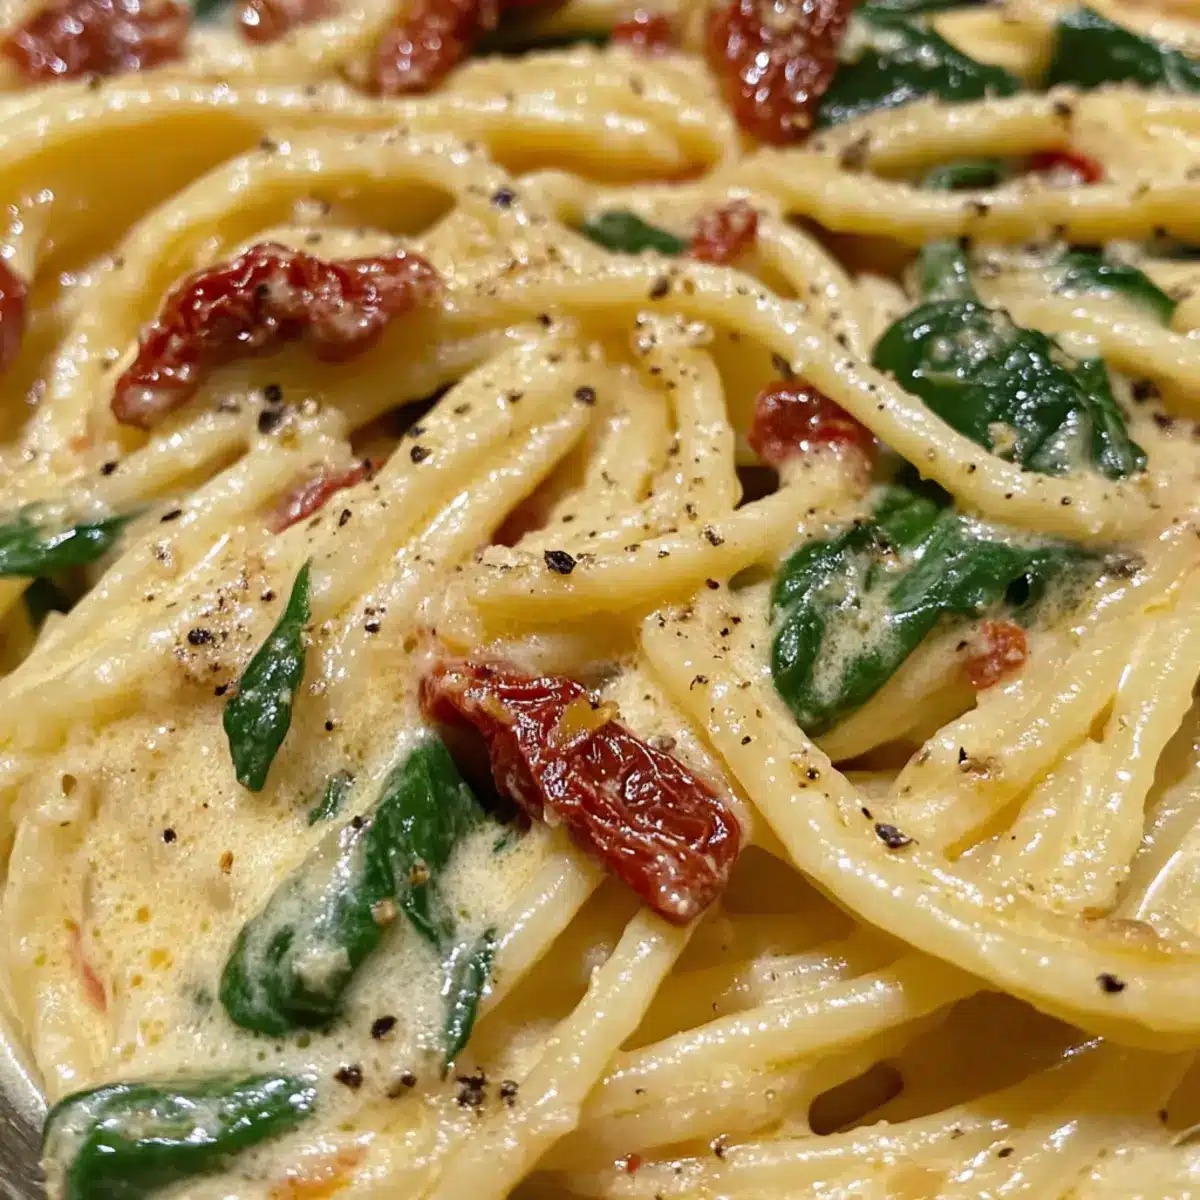
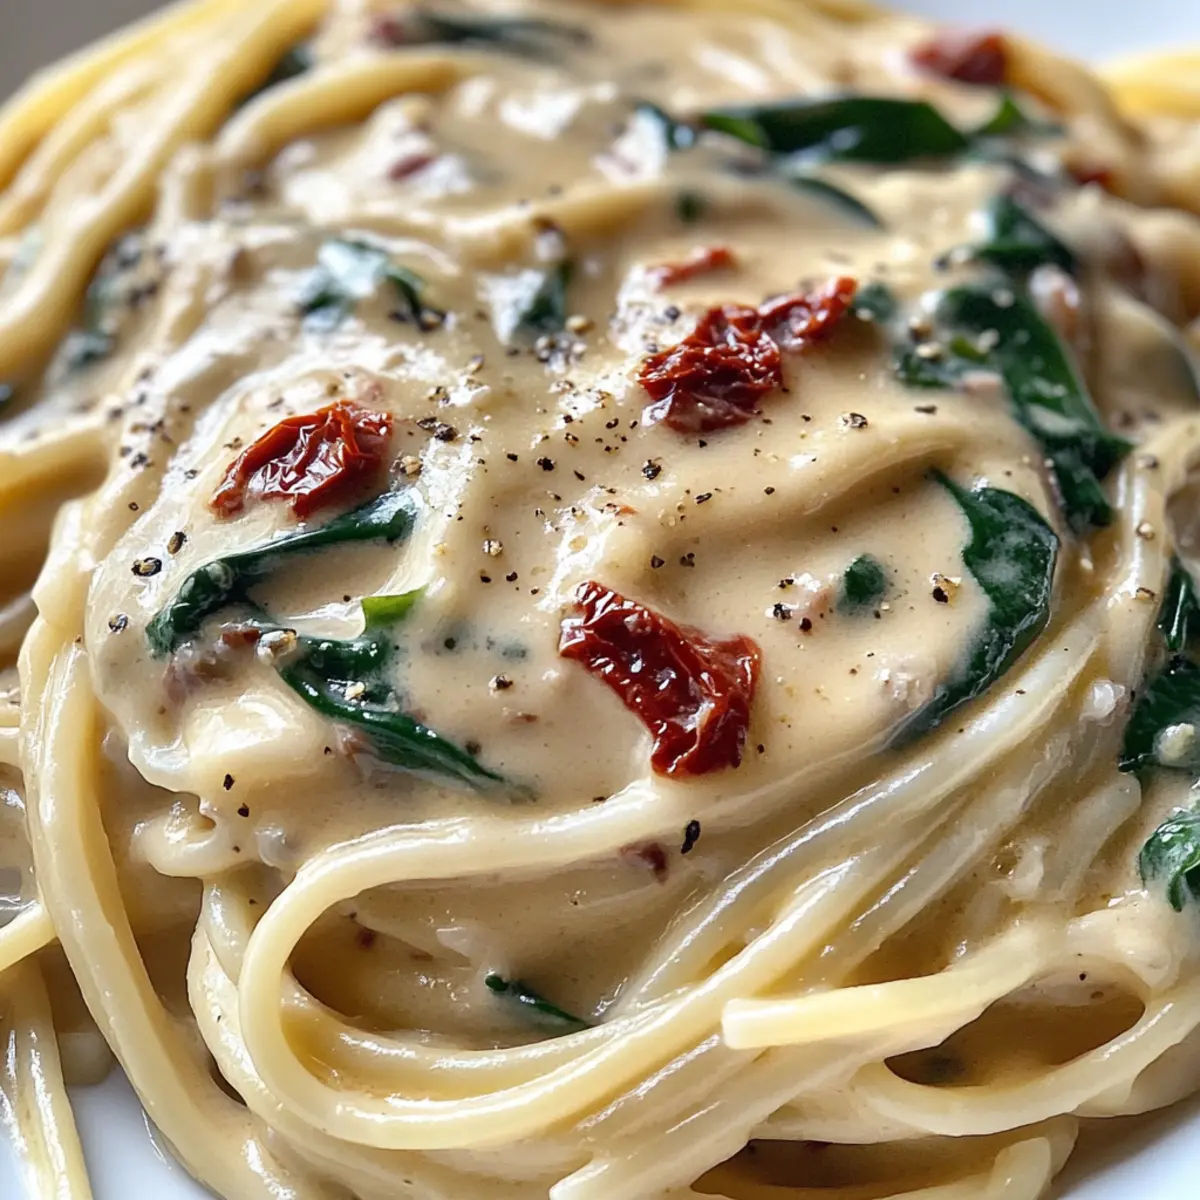
Next, bring in your chopped spinach and sun-dried tomatoes, stirring them into the sauce mixture. Let it simmer for about 5-7 minutes, allowing the flavors to meld and the spinach to wilt. You’ll see the sauce become a luscious, thickened consistency with vibrant green flecks from the spinach, indicating it’s almost ready.
Step 5: Check for Consistency
After simmering, assess the sauce’s consistency—it should be creamy and glossy with a luxurious coating. If it appears too thick, you can add a splash more broth or cream to reach your desired texture. This creamy Tuscan garlic sauce is now ready to elevate any dish you choose to pair it with, so taste and adjust seasonings as necessary.
Step 6: Optional Add-Ins
For a heartier variation, consider adding roasted vegetables or protein such as grilled chicken or shrimp into the pan right before serving. You may also like to sprinkle in some red pepper flakes for a spicy kick. This step allows you to personalize the Creamy Tuscan Garlic Sauce to fit your meal perfectly.
Creamy Tuscan Garlic Sauce Variations
Feel free to let your culinary creativity shine with these delightful twists on the classic sauce!
-
Dairy-Free: Use coconut milk instead of heavy cream for a creamy vegan version that doesn’t skimp on flavor. You might be amazed by how luscious and satisfying it feels!
-
Gluten-Free: Swap regular pasta for zucchini noodles or gluten-free pasta to keep the meal hearty yet safe for gluten-sensitive eaters. Imagine twirling those noodles around your fork, soaking up the flavor!
-
Vegetarian Boost: Add roasted vegetables or chickpeas for a satisfying vegetarian main that’s packed with nutrients. Roasting enhances their natural sweetness, turning every bite into a flavor explosion!
-
Spicy Kick: Sprinkle in red pepper flakes or a dash of hot sauce for a little heat. This option adds depth and character, making each taste a dance of flavors on your palate.
-
Seasonal Twist: Incorporate seasonal veggies like fresh asparagus in spring or butternut squash in autumn. With each seasonal change, you can enjoy a new culinary adventure, full of fresh and vibrant tastes.
-
Nutty Flavor: Stir in a tablespoon of tahini for a unique, nutty taste without the dairy. This creamy addition will surprise and delight your taste buds!
-
Herb Variations: Swap out Italian seasoning for a burst of fresh herbs, like basil or parsley, for a garden-fresh touch. These vibrant flavors can awaken your dish and provide a beautiful aroma.
-
Creamy Garlic Alternatives: For an even richer sauce, consider blending in a dollop of cream cheese or mascarpone—perfect for those who seek indulgence. Just imagine the creaminess enveloping your favorite pasta!
In the mood for more flavorful inspirations? Try pairing this sauce with Grilled Garlic Rosemary potatoes or drizzling it over Honey Garlic Shrimp for a delightful twist!
Expert Tips for Creamy Tuscan Garlic Sauce
• Prep Ahead: Gather and chop all your ingredients beforehand to streamline cooking and avoid last-minute stress.
• Watch the Heat: Cook on medium heat to prevent the cream from curdling; a gentle simmer ensures a smooth sauce.
• Fresh vs. Powdered Garlic: Opt for fresh garlic for a bolder flavor, but if using garlic powder, add it after mixing in the cream to avoid burning.
• Adjust Consistency: If the sauce is too thick, simply add more broth or cream, stirring until you reach your preferred texture.
• Storage Smartly: Refrigerate any leftovers in an airtight container for up to 3 days or freeze for up to 3 months; enjoy your Creamy Tuscan Garlic Sauce later!
What to Serve with Creamy Tuscan Garlic Sauce
Transform your dinner table into a gourmet experience that delights the senses and warms the heart.
- Pasta Primavera: Pair this sauce with al dente pasta and an assortment of vibrant vegetables for a colorful, flavorful dish that sings with freshness. It’s a match made in culinary heaven!
- Garlic Bread: The buttery, toasted goodness of garlic bread is perfect for soaking up every drop of creamy sauce, making every bite incredibly satisfying.
- Grilled Chicken: Juicy, tender grilled chicken drizzled with the sauce adds protein and richness, elevating your meal without overwhelming the palate.
- Quinoa Salad: A light quinoa salad with fresh herbs and lemon complements the richness of the sauce, providing a wonderful contrast in texture and flavor.
- Roasted Asparagus: Crisp-tender asparagus enhances the dish with its earthy notes while balancing the luscious creaminess of the sauce. An elegant touch to your plate!
- White Wine: A chilled glass of Pinot Grigio or Sauvignon Blanc pairs beautifully, brightening the flavors and enhancing the overall dining experience.
- Cauliflower Rice: For a low-carb option, serve the sauced dish over cauliflower rice; its mild flavor and fluffy texture make a fantastic base without a heavy feel.
- Chocolate Mousse: Finish your meal with a rich chocolate mousse for dessert. The sweetness and decadence perfectly contrast the savory richness of the Creamy Tuscan Garlic Sauce.
Make Ahead Options
Preparing Creamy Tuscan Garlic Sauce in advance is a fantastic way to save time on busy weeknights! You can chop your spinach and sun-dried tomatoes up to 24 hours ahead and store them in airtight containers in the refrigerator to maintain freshness. Additionally, you can combine the heavy cream, garlic powder, and Italian seasoning as a base in the skillet, ready to go. When you’re ready to enjoy this creamy delight, simply heat your broth, stir in the prepped mixture, and add your veggies, letting it simmer for about 5-7 minutes until heated through. This ensures your sauce remains just as delicious and flavorful, effortlessly elevating any meal!
How to Store and Freeze Creamy Tuscan Garlic Sauce
Fridge: Store leftover Creamy Tuscan Garlic Sauce in an airtight container for up to 3 days. Ensure it’s cooled before sealing to maintain freshness.
Freezer: For longer storage, freeze the sauce in a freezer-safe container for up to 3 months. Leave some space for expansion as it freezes.
Reheating: When ready to enjoy, thaw in the fridge overnight. Reheat gently on the stovetop over low heat, stirring often to restore its creamy texture.
Consistency Tips: If the sauce thickens after freezing, whisk in a bit of broth or cream as you reheat to bring it back to its velvety form.
Creamy Tuscan Garlic Sauce Recipe FAQs
What is the best way to select ripe ingredients for my Creamy Tuscan Garlic Sauce?
Absolutely! For the best flavor, choose heavy cream that is fresh and has no expiration date approaching. Look for sun-dried tomatoes that are plump and vibrant in color, which indicates they are high-quality. Spinach should be crisp and brightly colored, avoiding any yellowed or wilted leaves. If you’re opting for fresh garlic, select bulbs that are firm with no soft spots or signs of sprouting.
How should I store leftover Creamy Tuscan Garlic Sauce?
Very well! To store your leftover sauce, allow it to cool completely before transferring it to an airtight container. This way, it can be kept in the refrigerator for up to 3 days. It’s important to seal it properly to maintain its creamy texture and prevent any refrigeration odors from seeping in.
Can I freeze Creamy Tuscan Garlic Sauce, and if so, how?
Absolutely! To freeze this sauce, pour it into a freezer-safe container, leaving some space at the top to allow for expansion as it freezes. Your Creamy Tuscan Garlic Sauce will last in the freezer for up to 3 months. When you’re ready to enjoy it again, thaw it in the fridge overnight and gently reheat it on the stovetop, stirring well to restore its silky consistency.
What can I do if my sauce ends up too thick after cooking?
Not a problem! If your sauce is too thick, simply whisk in a little chicken or vegetable broth or extra cream, a tablespoon at a time, until you reach your desired consistency. It’s always best to add in small amounts, as you can always thicken it more, but it’s tricky to start over. Just maintain a gentle heat and keep stirring for a smooth finish.
Is this recipe suitable for those with dietary restrictions?
Very much so! The Creamy Tuscan Garlic Sauce can be easily adapted for various dietary needs. If you’re looking for a gluten-free option, pair it with gluten-free pasta. For a dairy-free version, just swap the heavy cream and Parmesan with coconut milk and nutritional yeast, respectively. If you’re concerned about allergies, check that your broth and any pre-packaged ingredients are allergy-friendly.
Can I use frozen spinach or sun-dried tomatoes for this recipe?
Absolutely! Frozen spinach works great in this recipe—just make sure to thaw it and squeeze out any excess moisture before adding it to the sauce. Similarly, if you have frozen sun-dried tomatoes, simply chop them and incorporate them into your creamy mixture. While fresh ingredients provide the best flavor, these substitutes will still yield a delicious creamy sauce.
Creamy Tuscan Garlic Sauce: A Velvety Family Favorite
Ingredients
Equipment
Method
- Gather and prepare all your ingredients for the Creamy Tuscan Garlic Sauce. Chop the fresh spinach, measure the sun-dried tomatoes, and grate Parmesan cheese.
- In a large skillet, pour in about 1 cup of chicken or vegetable broth and heat it over medium heat for about 3-5 minutes until it simmers.
- Stir in 1 cup of heavy cream, 1 teaspoon of garlic powder, and 1 tablespoon of Italian seasoning, whisking until smooth for about 2 minutes.
- Add chopped spinach and sun-dried tomatoes, stirring them into the sauce mixture and simm er for 5-7 minutes.
- Check the consistency; it should be creamy and glossy. Adjust thickness by adding splash broth or cream.
- For optional add-ins, consider roasted vegetables or protein such as grilled chicken or shrimp.