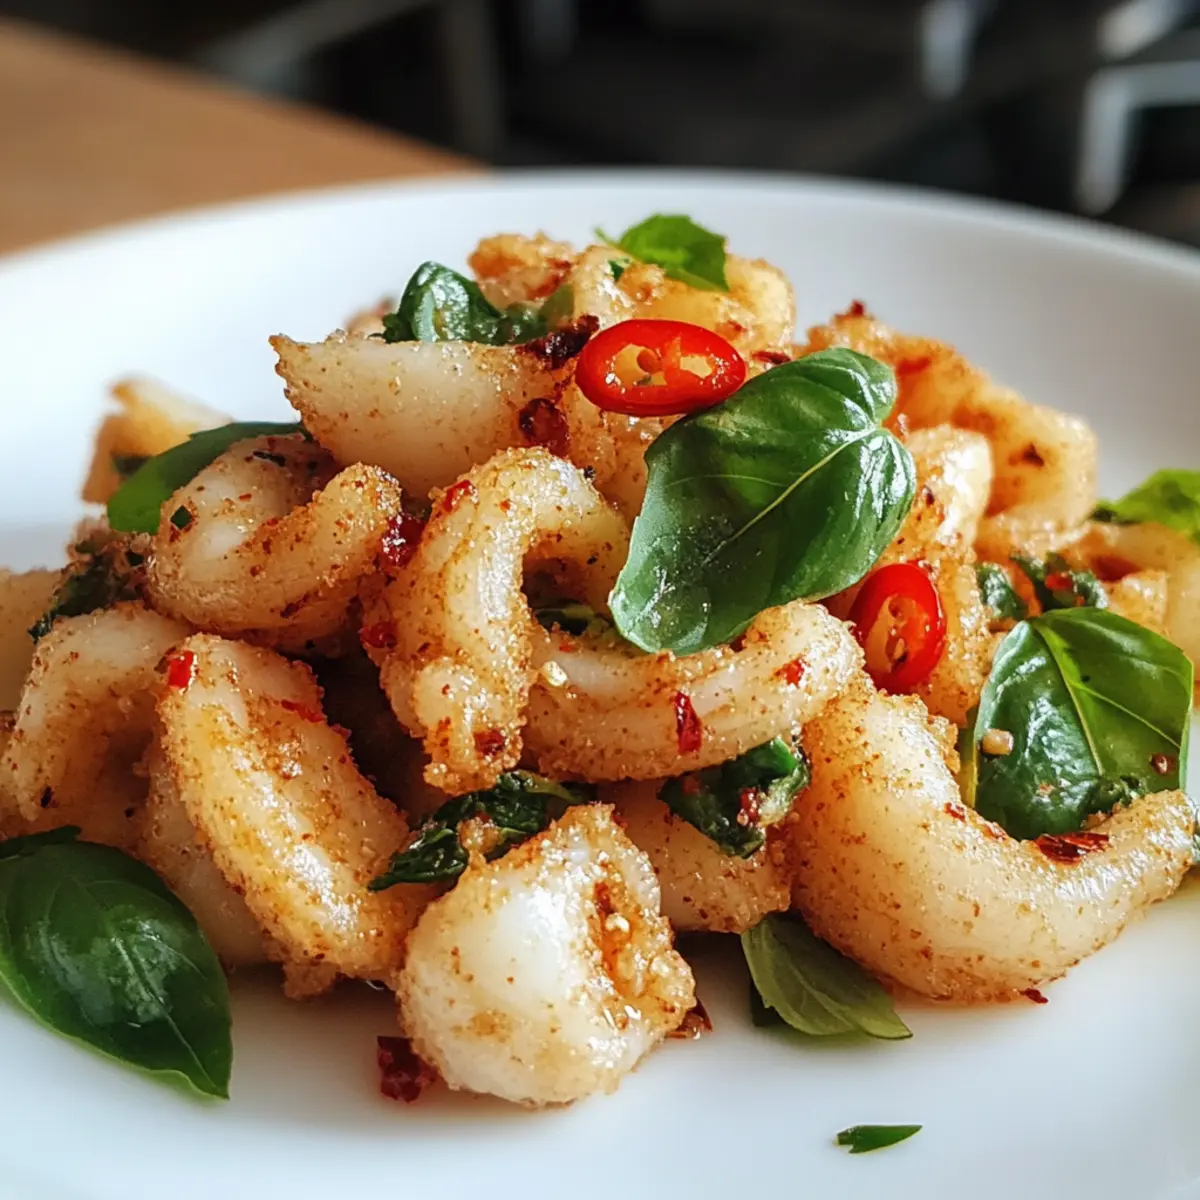
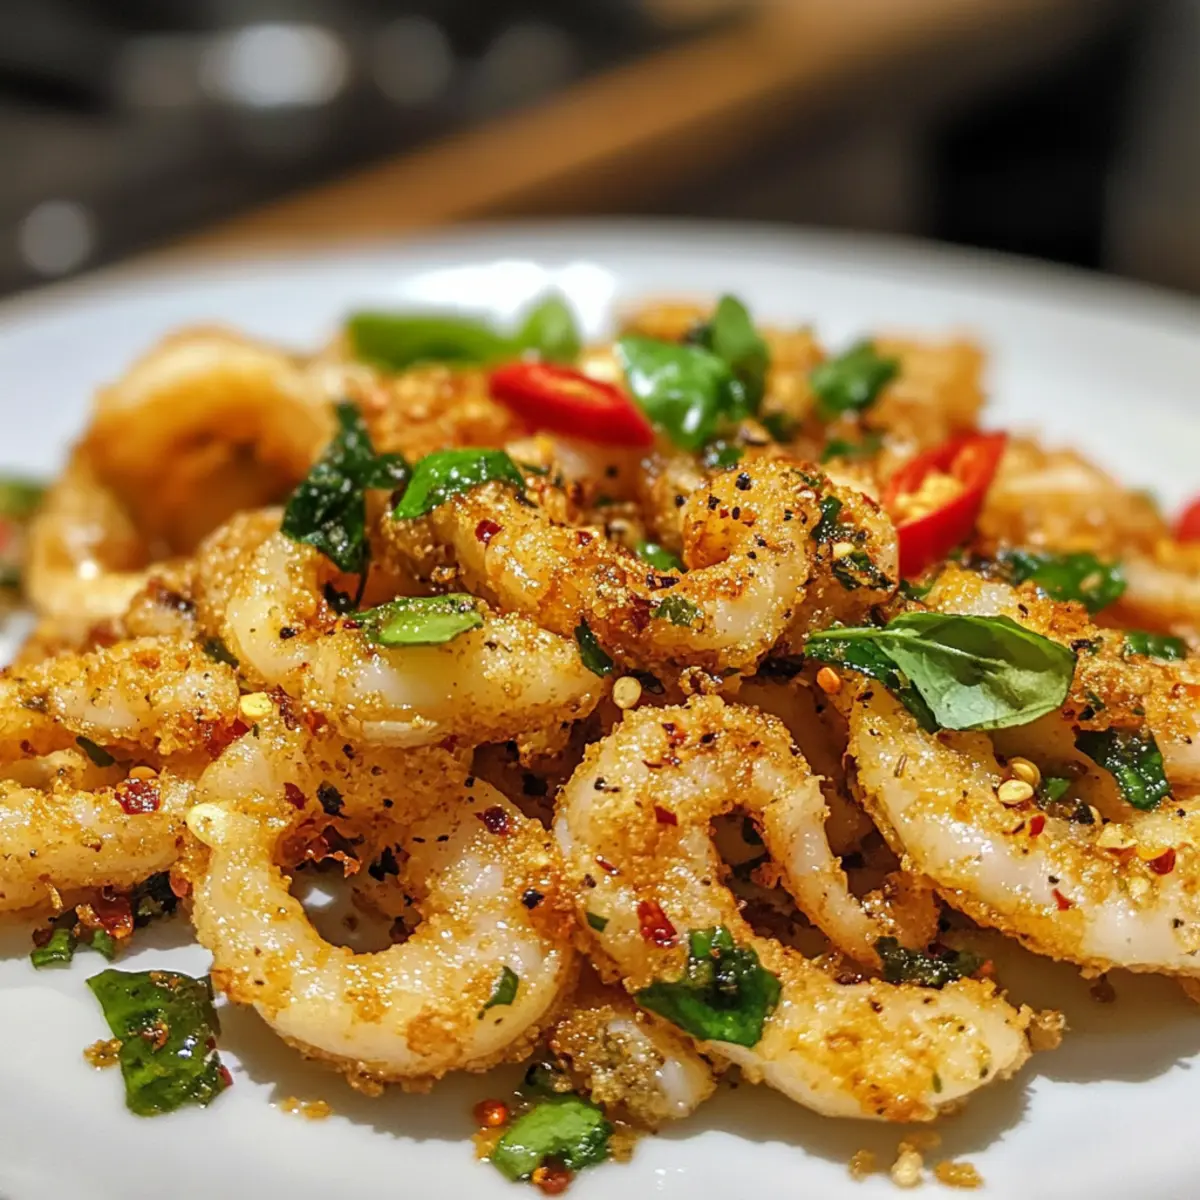
The Ultimate Chicken Wild Rice Casserole for Cozy Nights

The aroma of a warm, bubbling casserole wafting through the kitchen is a memory that embraces you like a favorite blanket. The Ultimate Chicken Wild Rice Casserole is here to transform your weeknight dinners into comforting culinary experiences. Bursting with tender chicken, hearty wild rice, and a medley of sautéed vegetables wrapped in a creamy sauce, this dish is an ideal choice for family gatherings or potluck parties. It’s meal prep-friendly, letting you whip it up ahead of time, and fully customizable! You can swap in your favorite cheeses or even opt for different rice varieties to keep things interesting. Ready to dive into a dish that’s both cozy and adaptable? Let’s explore how to make this exquisite casserole that will surely become a staple on your dinner table!

Why is this casserole a must-try?

Comfort, the Ultimate Chicken Wild Rice Casserole captures the essence of home-cooked meals, wrapping you in warmth with every bite. Versatile, it easily adapts to different cheese or rice preferences, making it a hit among family members and guests alike! Easy to prepare, it streamlines meal prep, giving you a delicious dish ready for any occasion. Flavorful, the rich, creamy sauce combined with sautéed veggies offers a delightful taste that will keep everyone coming back for seconds. Serve it alongside a refreshing side salad or alongside roasted vegetables for a complete meal. If you’re looking for more inspiration, check out my Corn Chicken Rice or Air Fryer Chicken for delightful variations!

The Ultimate Chicken Wild Rice Ingredients

For the Casserole

  • Chicken – Use boneless, skinless chicken breast or thighs for tender bites.
  • Wild Rice – This is the base ingredient that adds nuttiness; you can substitute with white or brown rice, adjusting the cooking times accordingly.
  • Butter – Adds richness to the sauce; substitute with olive oil for a dairy-free option.
  • Onion – Gives a savory flavor; feel free to replace with shallots for a milder taste.
  • Garlic – Enhances the depth of flavor; fresh garlic is best but garlic powder can work in a pinch.
  • Carrots – Offers sweetness and color; easily swap for peas for a different texture.
  • Celery – Adds crunch; other crunchy veggies like bell peppers can work as well.
  • Mushrooms – Brings an earthy flavor; you can replace them with zucchini or spinach for variety.
  • Panko Breadcrumbs – Provides a crunchy topping; regular breadcrumbs can be used if panko is not available.
  • Parmesan Cheese – A flavor enhancer for the topping; feel free to swap in cheddar or smoked Gouda for a twist.
  • Thyme – A fragrant herb that adds depth; use Italian seasoning if thyme is unavailable.
  • Salt & Pepper – Essential seasonings; adjust to taste to enhance the overall flavor of the dish.

For the Topping

  • Panko Breadcrumbs – Use for crunch; mix with cheese for extra flavor.
  • Parmesan Cheese – Choose this for a savory kick; mix in some cheddar for added richness.

Step‑by‑Step Instructions for The Ultimate Chicken Wild Rice Casserole

Step 1: Preheat the Oven
Start by preheating your oven to 350°F (175°C). This ensures that the Ultimate Chicken Wild Rice Casserole cooks evenly and gets that golden, bubbly finish. While the oven heats up, you can prep your ingredients, which will make the cooking process feel smooth and quick.

Step 2: Prepare the Wild Rice
If you haven’t done so already, cook the wild rice according to the package instructions, typically about 45 minutes. Ensure it achieves a chewy texture, as this is crucial for the casserole’s overall flavor and consistency. Once cooked, set it aside to cool slightly while you continue with the preparation.

Step 3: Sauté the Vegetables
In a large skillet over medium heat, melt some butter, allowing it to coat the bottom of the pan. Add diced onion, minced garlic, sliced carrots, chopped celery, and mushrooms. Sauté for about 5-7 minutes until the vegetables are softened and fragrant. Season this mixture with thyme, salt, and pepper, enhancing the flavor profile of your casserole.

Step 4: Combine Ingredients
In a large mixing bowl, combine the diced cooked chicken, the wild rice, and the sautéed vegetables. Then, add your creamy sauce of choice—this could be a mix of cream of chicken soup with a splash of milk or homemade sauce. Stir everything together until well mixed, ensuring each ingredient is evenly distributed.

Step 5: Prepare the Baking Dish
Grease a 9×13 inch baking dish with a bit of butter or cooking spray to prevent sticking. Then, pour the combined mixture of chicken, wild rice, and vegetables into the dish, spreading it out evenly. This will form the hearty base of your Ultimate Chicken Wild Rice Casserole.

Step 6: Create the Topping
In a separate bowl, combine panko breadcrumbs, melted butter, and grated Parmesan cheese. This mixture adds a delightful crunch to the casserole. Stir until the breadcrumbs are well-coated, then sprinkle it generously over the casserole mixture, creating an even layer.

Step 7: Bake the Casserole
Place the casserole in the preheated oven and bake uncovered for about 30-35 minutes. You’ll know it’s ready when the topping is golden brown and the edges are bubbly. The aroma of the Ultimate Chicken Wild Rice Casserole will fill your kitchen, making patience the hardest part.

Step 8: Let It Rest
Once the casserole is out of the oven, let it rest for about 5 minutes. This resting period allows the flavors to meld further and makes serving easier. You’ll achieve a beautiful slice full of texture and taste when you’re ready to dish it up.

Make Ahead Options

This Ultimate Chicken Wild Rice Casserole is perfect for busy cooks looking to save time during the week! You can prepare the entire casserole up to 24 hours in advance; simply assemble it in the baking dish, cover tightly with foil, and refrigerate. This way, the flavors meld beautifully overnight, ensuring a delicious meal when you’re ready to bake. If you’re preparing it even further ahead, you can freeze it for up to 3 months. Just remember to thaw it in the refrigerator overnight before baking. When you’re ready to serve, preheat your oven and bake it directly from the fridge for 35-40 minutes, or until heated through and golden on top. With these make-ahead options, you’ll enjoy a comforting homemade dish with minimal effort!

What to Serve with the Ultimate Chicken Wild Rice Casserole

Elevate your dining experience by pairing this comforting casserole with delightful sides and sips that complement its rich flavors.

  • Crispy Green Salad: The freshness of mixed greens tossed in a light vinaigrette balances the creamy casserole, adding a crunchy contrast that brightens each bite.

  • Garlic Breadsticks: Soft and buttery herb-infused breadsticks are perfect for mopping up any creamy sauce left behind, making your meal feel extra indulgent.

  • Steamed Broccoli: Tender stalks of broccoli provide a nutrient-packed side that adds vibrant color and a satisfying crunch to your plate.

  • Roasted Brussels Sprouts: Their earthy flavor and crispy edges bring a delightful texture and depth that pairs beautifully with the richness of the casserole.

  • Mashed Potatoes: Creamy mashed potatoes with a hint of garlic offer a fluffy base that enhances the comforting nature of the dish, making every bite absolutely dreamy.

  • Sparkling Apple Cider: This refreshing drink’s sweet-tart notes perfectly contrast the creamy casserole, balancing the richness with each sip to elevate your meal.

  • Cheesecake Bites: End your meal on a sweet note with these creamy treats, serving as a delightful follow-up to the savory flavors of the Ultimate Chicken Wild Rice Casserole.

  • Herbed Quinoa: Light and fluffy quinoa sprinkled with fresh herbs can serve as a healthy alternative, providing a nice texture that rounds out the meal.

How to Store and Freeze Ultimate Chicken Wild Rice Casserole

Fridge: Store leftovers in an airtight container for up to 4 days. This allows you to enjoy the comforting flavors of the Ultimate Chicken Wild Rice Casserole throughout the week.

Freezer: Freeze the casserole before baking for up to 3 months. Just cover it tightly with foil or plastic wrap to prevent freezer burn.

Reheating: Thaw overnight in the fridge when ready to enjoy, then reheat in the oven at 350°F (175°C) for 20-25 minutes, or until warmed through.

Make-Ahead Tip: Assemble the casserole in advance and keep it in the fridge overnight before baking, making it perfect for busy weeknights or gatherings.

Expert Tips for the Ultimate Chicken Wild Rice Casserole

  • Perfectly Cooked Rice: Ensure your wild rice is fully cooked and has a chewy texture before combining; this is key for a delicious casserole.
  • Make Ahead: You can prepare the casserole a day in advance. Just store it covered in the refrigerator before baking, making dinner a breeze!
  • Slow Cooker Option: For an easy setup, combine your ingredients in a slow cooker on low for 4-6 hours. Just add the topping right before serving.
  • Customizable Creaminess: Adjust the creamy sauce’s richness by using different cheese varieties like cheddar or smoked Gouda to enhance flavor profiles.
  • Mix and Match Veggies: Explore with various vegetables! Spinach or bell peppers can add color and nutrients, keeping the casserole exciting every time.

The Ultimate Chicken Wild Rice Variations

Feel free to get creative and customize this casserole to suit your tastes and dietary needs!

  • Rice Alternative: Swap wild rice for brown or white rice; adjust cooking times for a perfect texture.

  • Dairy-Free Swap: Use olive oil instead of butter and a non-dairy cream substitute for a rich, creamy base that everyone will enjoy.

  • Veggie Boost: Toss in some spinach or bell peppers for an extra layer of flavor and a pop of color that makes every serving special.

  • Cheese Medley: Experiment with a mix of cheeses like cheddar, Monterey Jack, or even smoked Gouda for a unique flavor twist that caters to everyone’s tastes.

  • Spicy Kick: Add a pinch of red pepper flakes or some diced jalapeños if you like a bit of heat to elevate the flavor profile.

  • Protein Options: Substitute the chicken with turkey or even chickpeas for a satisfying vegetarian option that doesn’t skimp on flavor.

  • Herb Variations: Try out fresh herbs like rosemary or fresh basil instead of thyme to give the dish a fragrant, garden-fresh aroma.

  • Crunchy Topping: For an extra crunch, mix some crushed nuts or seeds with your panko breadcrumbs, elevating the texture in every bite!

Looking for more inspiration? Check out my delicious Jerk Chicken Burritos for another tasty twist, or enjoy a quick and delightful Chicken Cashew Broccoli stir-fry!

Ultimate Chicken Wild Rice Casserole Recipe FAQs

How do I choose the best wild rice?
Absolutely! When selecting wild rice, look for a package labeled “whole grain” and check the grains for a dark color with a robust, nutty aroma. Avoid any that have dark spots all over, which can indicate spoilage. The grains should be firm and not broken. If you want a quicker option, consider using a pre-packaged blend that includes wild rice.

What’s the best way to store leftovers?
Very! Store any leftover Ultimate Chicken Wild Rice Casserole in an airtight container in the refrigerator for up to 4 days. Make sure it’s cool before sealing the container to avoid condensation, which could make the casserole soggy. When reheating, pop it in the oven at 350°F (175°C) for about 20 minutes, or microwave individual portions if you’re in a hurry.

Can I freeze the casserole?
Absolutely! You can freeze the casserole before baking for up to 3 months. Cover it tightly with foil or plastic wrap to prevent freezer burn. When you’re ready to enjoy, thaw it overnight in the refrigerator. To bake, preheat your oven to 350°F (175°C) and pop it in for 30-35 minutes, or until bubbly and golden brown on top.

How can I make the casserole dairy-free?
Very! You can easily adapt the Ultimate Chicken Wild Rice Casserole for a dairy-free diet. Substitute the butter with olive oil or a dairy-free butter alternative. For the creamy sauce, use a non-dairy milk like almond or coconut milk mixed with a dairy-free cream of chicken soup. Nutritional yeast is a great addition for that cheesy flavor without the dairy.

What if my rice isn’t fully cooked when I combine it?
Oh no! If that happens, don’t panic. If your wild rice isn’t fully cooked, it may not absorb the sauce properly. To remedy this, you can pre-cook the rice longer before adding it to the casserole mix. Alternatively, add a little extra broth or water to the casserole; cover and bake for an extra 10-15 minutes at the same temperature. Just check occasionally to make sure it’s cooking through.

Can I use leftover chicken in the casserole?
Absolutely! Using leftover chicken is a fantastic way to save time and reduce waste. Simply shred or dice the cooked chicken, then mix it into the casserole ingredients during assembly. It makes for a quick and delicious way to transform your leftovers into a comforting meal!

The Ultimate Chicken Wild Rice

The Ultimate Chicken Wild Rice Casserole for Cozy Nights

The Ultimate Chicken Wild Rice delivers a comforting casserole experience with tender chicken, hearty wild rice, and creamy sauce.
Prep Time 15 minutes
Cook Time 35 minutes
Resting Time 5 minutes
Total Time 55 minutes
Servings: 6 servings
Course: Chicken
Cuisine: American
Calories: 350

Ingredients
  

For the Casserole
  • 1 lb Boneless Skinless Chicken Breast or Thighs Use for tender bites
  • 1 cup Wild Rice Base ingredient, can substitute with white or brown rice
  • 2 Tbsp Butter Richness to the sauce, can substitute with olive oil
  • 1 cup Onion Savory flavor, can replace with shallots
  • 3 cloves Garlic Fresh is best; garlic powder can work
  • 2 medium Carrots Sweetness and color, can swap for peas
  • 2 stalks Celery Adds crunch, can use bell peppers
  • 1 cup Mushrooms Earthy flavor, can replace with zucchini or spinach
  • 1 cup Panko Breadcrumbs Crunchy topping, regular breadcrumbs can be used
  • 1 cup Parmesan Cheese Flavor enhancer, can swap in cheddar
  • 1 tsp Thyme Fragrant herb, Italian seasoning can be used
  • to taste Salt Essential seasoning
  • to taste Pepper Essential seasoning
For the Topping
  • 1 cup Panko Breadcrumbs Use for crunch, can mix with cheese
  • 1/2 cup Parmesan Cheese Savory kick, can mix with cheddar

Equipment

  • Skillet
  • Baking dish
  • Mixing Bowl

Method
 

Step-by-Step Instructions
  1. Preheat your oven to 350°F (175°C).
  2. Cook the wild rice according to package instructions, about 45 minutes, until chewy.
  3. In a large skillet, melt butter over medium heat. Add onion, garlic, carrots, celery, and mushrooms. Sauté for 5-7 minutes.
  4. In a large bowl, combine cooked chicken, wild rice, sautéed veggies, and creamy sauce. Mix well.
  5. Grease a 9×13 inch baking dish. Pour in the mixture and spread evenly.
  6. In a separate bowl, mix panko, melted butter, and Parmesan. Sprinkle over the casserole.
  7. Bake uncovered for 30-35 minutes until golden brown and bubbly.
  8. Let the casserole rest for about 5 minutes before serving.

Nutrition

Serving: 1servingCalories: 350kcalCarbohydrates: 40gProtein: 30gFat: 10gSaturated Fat: 5gPolyunsaturated Fat: 1gMonounsaturated Fat: 3gCholesterol: 100mgSodium: 800mgPotassium: 600mgFiber: 3gSugar: 2gVitamin A: 900IUVitamin C: 6mgCalcium: 200mgIron: 2mg

Notes

Customize with different cheese and vegetables for varied flavors. Perfect for make-ahead meals.

Tried this recipe?

Let us know how it was!

Delicious Christmas Cakesicles: 3 Easy Ways to Festively Celebrate

As the holiday season approaches, the kitchen becomes a symphony of scents and delights, and nothing captures that festive spirit quite like 3-Ingredient Christmas Cakesicles. These chocolate-covered treats are more than just a pop of color on your dessert table; they’re a delightful mashup of moist cake and sweet candy coating that is simply irresistible. With just three easy-to-find ingredients, this recipe opens the door to creativity, offering gluten-free and vegan adaptations that everyone can enjoy. The best part? They come together in minutes and are perfect for sharing—making them a wonderful alternative to store-bought sweets. Imagine gifting these to friends or serving them at holiday gatherings, sparking joy and sweet conversations. Are you ready to make your holidays a little sweeter with these festive treats?

Why are Christmas Cakesicles a must-try?

Rapid Preparation: With only three ingredients, you can whip up a delightful treat in no time. This is perfect for busy chefs looking to bring festive cheer without the stress!

Crowd Pleaser: Their charming appearance and sweet flavor make them an instant hit at any gathering. Picture a table filled with smiles as guests savor these delicious cakesicles!

Customizable Options: Whether you prefer gluten-free or vegan, this recipe has you covered. You can even experiment with various flavors and decorations, making each batch uniquely yours.

Fun for All Ages: Get the family involved in decorating these treats! It’s a wonderful way to bond and create festive memories together.

Perfect for Gifting: Wrap up these festive delights and share them with friends, spreading joy and sweetness this season. For more delightful holiday treats, check out our delicious cookie recipes!

Christmas Cakesicles Ingredients

For the Cakes:

  • Crumpled Cake – Gives the cakesicles moisture and structure; leftover cake works perfectly for this.
  • Frosting – Acts as the binding agent to hold the cake together; consider flavored frosting to enhance the overall taste.

For the Coating:

  • Colored Candy Melts – Adds a festive flair and flavor; for a different twist, use dark or white chocolate instead.
  • Vegetable Oil or Coconut Oil – Used to smooth out the candy melts for easy coating; coconut oil provides a subtle flavor enhancement.

For Assembly:

  • Popsicle Sticks – Essential for handling the cakesicles; ensure they’re securely placed for easy dipping and munching.
  • Ice Cream Silicone Molds – Key for shaping cakesicles and making them easy to remove; choose festive shapes to boost visual appeal.

Decoration (Optional):

  • Sprinkles or Crushed Candy Canes – Perfect for adding color and crunch; customize according to your holiday theme.
  • Piping Bags – Great for drizzling extra chocolate for a professional touch in your cakesicle designs.

Now you’re all set to create your Christmas Cakesicles and spread delicious cheer this holiday season!

Step‑by‑Step Instructions for Christmas Cakesicles

Step 1: Prepare the Dough
Begin by crumbling your leftover cake into a large mixing bowl until you achieve a fine texture. Add flavored frosting to the crumbled cake, mixing thoroughly until a moist dough forms that can be easily molded. This step ensures the cake remains deliciously soft—a perfect base for your Christmas Cakesicles!

Step 2: Melt the Candy Coating
In a microwave-safe bowl, combine your colored candy melts with a splash of vegetable or coconut oil. Heat the mixture in 30-second intervals, stirring between each until smooth and glossy, about 1-2 minutes in total. This melted candy coating will provide a delightful and festive look for your cakesicles.

Step 3: Coat Molds
Pour a thin layer of the melted candy mixture into the ice cream silicone molds, tilting them to ensure the candy coats the sides evenly. Use a spatula if needed to spread the coating. Place the molds in the freezer for 5-10 minutes until the coating is slightly firm to the touch, making way for the next step.

Step 4: Insert Sticks
Once the initial candy layer is set but not frozen solid, carefully press popsicle sticks into the centers of each mold. Ensure they’re positioned securely to support the cakesicles once filled. Return the molds to the freezer for another 10-15 minutes to fully set the coating before adding the cake dough.

Step 5: Add Dough
Take the molds out of the freezer and fill each one with the prepared cake dough. Gently press the dough down into the molds to avoid air pockets and ensure even shapes, but be careful not to overfill, as this will make sealing difficult later.

Step 6: Seal and Freeze
Pour the remaining melted candy coating over each filled mold, ensuring the dough is completely covered. This step locks in the flavors of your Christmas Cakesicles. Return the molds to the freezer, allowing them to set fully for 25-30 minutes until the candy coating is hard and secure.

Step 7: Unmold
Once the cakesicles have set, gently flex the silicone molds to release each cakesicle. The flexibility of the molds makes this process easier, and you’ll be left with beautifully shaped treats ready for decoration.

Step 8: Decorate
For the finishing touch, melt any leftover candy coating and drizzle it over the cakesicles using a piping bag for precision. Sprinkle with festive decorations like crushed candy canes or colorful sprinkles, adding a personal flair to each Christmas Cakesicle. Enjoy your festive creations!

Expert Tips for Christmas Cakesicles

  • Moisture Matters: Use leftover cake that’s moist to prevent crumbling. Dry cake won’t hold together, ruining those festive vibes!

  • Silicone Molds: Opt for flexible silicone molds for easier unmolding. They help retain the shape of your Christmas Cakesicles perfectly.

  • Melt Method: Melt candy melts in 30-second intervals to avoid burning. If they become too thick, add a teaspoon of oil to restore smoothness.

  • Mind the Fill: Avoid overfilling molds with cake dough. Too much can lead to messy cakesicles and trouble sealing them with the candy coating.

  • Freeze Time: Stick to the recommended freeze times. Proper chilling is crucial for the candy coating to harden well and maintain the treats’ integrity.

Storage Tips for Christmas Cakesicles

  • Room Temperature: Keep Christmas Cakesicles at room temperature for up to 3 days. Ensure they are placed in an airtight container to maintain freshness and prevent drying out.

  • Fridge: If stored in the refrigerator, these treats can last for up to 2 weeks. Use a covered container to protect them from absorbing any fridge odors.

  • Freezer: For longer storage, freeze the cakesicles for up to 3 months. Place them in an airtight freezer bag or container. Allow them to thaw at room temperature for a few minutes before serving.

  • Reheating: There’s no need to reheat these delicate desserts; simply enjoy them cold!

Make Ahead Options

These Christmas Cakesicles are a fantastic choice for meal prep, allowing you to enjoy the festive flavors without the last-minute rush. You can prepare the cake dough and mold them into shapes up to 24 hours in advance—simply store them tightly wrapped in the refrigerator to maintain their moisture and flavor. Additionally, you can melt the candy coating ahead of time; just refrigerate it until you’re ready to use, gently reheating it if needed. When you’re ready to serve, simply dip the cakesicles in the coating and decorate them with your favorite sprinkles. This way, you ensure delightful treats that are just as delicious, perfect for saving time during the busy holiday season!

Christmas Cakesicles Variations & Substitutions

Feel free to get creative and make these delightful treats uniquely yours with a few easy swaps!

  • Gluten-Free: Use a gluten-free cake mix or flour blend to accommodate dietary needs. This way, everyone can indulge in the festive fun!

  • Vegan Delight: Substitute the frosting and candy melts with vegan options for a plant-based treat. This ensures everyone can enjoy the sweetness of the season.

  • Flavor Boost: Add flavor extracts like almond or vanilla to your dough for a delightful twist. The extra aroma will elevate the cakesicles to a whole new level!

  • Nutty Crunch: Incorporate crushed nuts or cookies into the dough for added texture. Imagine the satisfying crunch amidst the soft cake!

  • Spiced Seasonal Touch: Use spiced cake mixes or add cinnamon and nutmeg to the dough for a cozy, holiday flavor. The warm spices will wrap you in a comforting embrace.

  • Festive Mold Shapes: Experiment with different festive mold shapes such as stars or trees to match your holiday decorations. Your presentation will wow your guests!

  • Creative Coatings: Swap colored candy melts for dark or white chocolate depending on your preference. Each variety brings a different flavor and visual appeal to your cakesicles.

  • Decorative Toppings: Use crushed candy canes, dried fruits, or even edible glitter for a dazzling finish. Add these personal touches to wow your family and friends!

These variations not only accommodate different tastes but also open up a world of exciting flavor combinations. For more inspiration on dessert ideas, check out our delightful cookie recipes!

What to Serve with Christmas Cakesicles?

Get ready to delight your holiday guests with a complete dessert spread that pairs perfectly with your festive treats.

  • Creamy Hot Chocolate: Rich and velvety, hot chocolate adds warmth and complements the sweet chocolate coating of the cakesicles.
  • Spiced Sugar Cookies: These soft, spiced treats bring a classic holiday flavor that balances the sweet cake pops beautifully.
  • Fruit Platter: A colorful assortment of fresh fruits offers a refreshing contrast to the indulgence of cakesicles. Think tart berries and creamy bananas!
  • Eggnog: This classic holiday drink, creamy and spiced, brings festive cheer and pairs perfectly with the sweet cakesicles. It’s a delightful twist to your dessert experience!
  • Gingerbread Men: With their warm spices, these cookies create a nostalgic pairing that echoes holiday traditions, perfect for decorating the table.
  • Peppermint Bark: This crunchy, chocolatey treat adds seasonal flair and a refreshing minty taste that harmonizes with the cakesicles’ flavors.
  • Vanilla Ice Cream: A scoop of creamy vanilla ice cream serves as a luscious base, allowing cakesicles to shine with their vibrant textures.
  • Chai Tea: The warmth and spices in chai tea create a comforting aura, enhancing the savory-sweet experience of the cakesicles.
  • Cranberry Sauce: This tangy sauce offers a surprising twist; its tartness complements the sweetness of the cakesicles wonderfully!
  • Pecan Pie: A slice of classic pecan pie introduces nutty richness and provides a delightful contrast to the lightness of cakesicles.

Christmas Cakesicles Recipe FAQs

What type of cake should I use for Christmas Cakesicles?
Absolutely! It’s best to use moist cake for a delightful texture. You can opt for any leftover cake you have on hand—chocolate, vanilla, or even spiced. Just make sure it’s not too dry, as that can lead to crumbly cakesicles that don’t hold their shape.

How should I store my Christmas Cakesicles?
Very! You can store them at room temperature in an airtight container for up to 3 days. If you want to keep them fresh for longer, refrigerate them, where they’ll last up to 2 weeks. For the best long-term storage, freeze the cakesicles in an airtight container or bag for up to 3 months. Let them thaw at room temperature before serving!

Can I freeze Christmas Cakesicles?
Absolutely! After tightly wrapping or placing them in an airtight container, your Christmas Cakesicles can be frozen for up to 3 months. It’s best to let them thaw for a few minutes at room temperature before digging in, as this ensures the perfect texture and flavor.

What if my candy melts are too thick?
No worries! If you find your melted candy coating is too thick to work with, just add a teaspoon of vegetable or coconut oil to the mixture. Reheat it in 30-second intervals until smooth. This will bring back the desired consistency and make coating your cakesicles a breeze!

Are Christmas Cakesicles safe for my pet?
It’s always better to be safe! Christmas Cakesicles contain ingredients like chocolate and sugar, which can be harmful to pets. Keep these delightful treats out of reach of your furry friends to ensure their safety and well-being.

How can I adapt this recipe for dietary needs?
Very! To make gluten-free cakesicles, simply use a gluten-free cake mix for the base. For a vegan alternative, select a vegan frosting and candy melts to maintain that festive spirit while accommodating dietary preferences. You can also enhance the flavor with extracts like vanilla or almond for a unique touch!

Christmas Cakesicles

Delicious Christmas Cakesicles: 3 Easy Ways to Festively Celebrate

Christmas Cakesicles are a delightful mashup of moist cake and sweet candy coating perfect for the holiday season.
Prep Time 30 minutes
Freezing Time 40 minutes
Total Time 1 hour 10 minutes
Servings: 12 cakesicles
Course: Dessert
Cuisine: American
Calories: 250

Ingredients
  

For the Cakes
  • 2 cups Crumpled Cake leftover cake works perfectly
  • 1 cup Frosting flavored frosting recommended
For the Coating
  • 1 cup Colored Candy Melts or dark/white chocolate
  • 2 tablespoons Vegetable Oil or Coconut Oil
For Assembly
  • 12 pieces Popsicle Sticks ensure they're securely placed
  • 1 set Ice Cream Silicone Molds choose festive shapes
Decoration (Optional)
  • 1 cup Sprinkles or Crushed Candy Canes customize according to your holiday theme
  • 1 piece Piping Bags for drizzling chocolate

Equipment

  • Mixing Bowl
  • Microwave-safe bowl
  • Ice Cream Silicone Molds
  • Popsicle Sticks
  • Spatula
  • Piping Bags

Method
 

Step-by-Step Instructions
  1. Prepare the Dough: Crumble leftover cake into a large bowl and mix with flavored frosting until a moist dough forms.
  2. Melt the Candy Coating: Combine candy melts with oil and microwave in 30-second intervals until smooth.
  3. Coat Molds: Pour melted candy into molds and freeze for 5-10 minutes until slightly firm.
  4. Insert Sticks: Press popsicle sticks into the centers of each mold and freeze for another 10-15 minutes.
  5. Add Dough: Fill molds with cake dough, pressing down gently to avoid air pockets.
  6. Seal and Freeze: Pour remaining candy coating over the dough and freeze for 25-30 minutes until hard.
  7. Unmold: Flex the silicone molds to release the cakesicles.
  8. Decorate: Drizzle leftover candy coating and add sprinkles or crushed candy canes for decoration.

Nutrition

Serving: 1cakesicleCalories: 250kcalCarbohydrates: 35gProtein: 2gFat: 12gSaturated Fat: 7gCholesterol: 10mgSodium: 50mgPotassium: 100mgFiber: 1gSugar: 20gVitamin A: 200IUCalcium: 20mgIron: 1mg

Notes

Use leftover moist cake for the best results and opt for flexible silicone molds for easier unmolding.

Tried this recipe?

Let us know how it was!

Delightful Strawberry Christmas Macarons for Festive Joy

With the holiday season in full swing, there’s something truly magical about transforming your kitchen into a festive haven of treats. My Strawberry Christmas Macarons are the perfect way to add a whimsical touch to your celebrations, crafted with love and bursting with the vibrant flavor of strawberries. These delightful French desserts not only make your holiday table dazzle but are also a cinch to prepare, perfect for both seasoned bakers and those just starting their culinary journey. Imagine the joy on your friends’ faces as they savor these light, crisp shells filled with a luscious strawberry buttercream. Whether you’re gifting them or showcasing them at a festive gathering, they’ll quickly become a staple in your holiday dessert repertoire. Curious about how to whip up these elegant little bites? Let’s dive in and make this Christmas extra sweet!

Why are Strawberry Christmas Macarons a must-try?

Festive Delight: These Strawberry Christmas Macarons add a charming touch to your holiday festivities, making them a delightful centerpiece.

Simple Steps: Even beginners can impress with this straightforward recipe that demystifies the macaron-making process.

Unique Flavor: The combination of sweet strawberry filling and a hint of almond creates a taste sensation that’s sure to please everyone.

Versatile Options: Feel free to switch things up by experimenting with different jam flavors to match your palate or mood, or try out variations like Strawberry Icebox Pie for an exciting twist.

Perfect for Gifting: Their elegant appearance makes them a thoughtful and delightful gift during the holidays, leaving your friends and family craving more.

Strawberry Christmas Macaron Ingredients

• A delightful blend of flavors awaits you with these Strawberry Christmas Macarons.

For the Batter

  • Almond Flour – Provides structure and a nutty flavor; can substitute with sunflower seed flour for a nut-free option.
  • Powdered Sugar – Adds sweetness and smooth texture to the shells, ensuring a delectable bite.
  • Egg Whites – Essential for creating the airy meringue texture; whip until glossy for best results.
  • Granulated Sugar – Helps stabilize the meringue and adds sweetness; use fine sugar for optimal incorporation.

For the Filling

  • Strawberry Jam – Brings a bright, sweet taste to the filling; raspberry or cherry preserves can serve as delightful alternatives.
  • Unsalted Butter – Contributes creaminess to the buttercream; swap with dairy-free margarine for a vegan-friendly treat.
  • Red Gel Food Coloring – Enhances the festive visual appeal; beetroot powder can be used for a natural coloring option.

Indulge in the joy of festive baking with these Strawberry Christmas Macarons that will surely impress family and friends!

Step‑by‑Step Instructions for Strawberry Christmas Macaron

Step 1: Prepare the Meringue
Begin by preheating your oven to 300°F (150°C) and preparing two baking sheets lined with parchment paper. In a clean, dry mixing bowl, whip 3 egg whites until they become foamy. Gradually add 1/4 cup of granulated sugar, continuing to beat until stiff, glossy peaks form. This meringue is the backbone of your Strawberry Christmas Macaron, providing that characteristic lightness.

Step 2: Mix Dry Ingredients
In a separate bowl, sift together 1 cup of almond flour and 1 3/4 cups of powdered sugar. This step ensures that your macaron shells will be smooth and free from lumps. Sifting is essential for a delicate texture, so don’t skip this! Once combined, use a spatula to stir these dry ingredients gently, preparing them for incorporation into the meringue.

Step 3: Combine Mixtures
Carefully fold the sifted almond flour and powdered sugar mixture into the whipped meringue using a rubber spatula. Aim to incorporate the dry ingredients without deflating the meringue—this step is crucial for achieving the right consistency. The batter should flow smoothly and form a thick ribbon when lifted, which is key for your Strawberry Christmas Macaron to develop that perfect foot.

Step 4: Pipe Macarons
Transfer the macaron batter into a piping bag fitted with a round tip. On the parchment-lined baking sheets, pipe small circles, about 1.5 inches in diameter, leaving space between each to allow for spreading. Be steady and consistent, ensuring each shell is of uniform size for even baking. Visualize your charming Strawberry Christmas Macaron assembly as you create these delightful circles!

Step 5: Rest
Let the piped macarons rest at room temperature for 30 to 60 minutes. During this time, they will form a film on the surface that is not sticky to the touch. This resting period is vital; it helps the macarons develop that much-coveted shiny top and allows their feet to rise beautifully while baking.

Step 6: Bake
Once the macarons have rested, bake them in your preheated oven for about 15 minutes. Keep an eye on them, and look for smooth tops and slight feet developing at the base. The macarons should not be browned; they should retain a lovely pale color. If you have an oven thermometer, use it to ensure the temperature is precise for the best results.

Step 7: Cool and Fill
After baking, remove the trays from the oven and allow the Strawberry Christmas Macarons to cool completely before attempting to lift them off the parchment paper. Fill each macaron with a dollop of strawberry buttercream or jam, matching pairs of shells by size. Finally, sandwich them together gently, creating delightful little bites of holiday joy that everyone will love!

How to Store and Freeze Strawberry Christmas Macarons

Fridge: Store your Strawberry Christmas Macarons in an airtight container in the fridge for up to 5 days. This will keep them fresh and maintain their delightful texture.

Freezer: For longer storage, freeze the macarons in an airtight container for up to 1 month. Ensure they are well-wrapped to prevent freezer burn.

Thawing: When ready to enjoy your frozen Strawberry Christmas Macarons, thaw them overnight in the refrigerator. This gradual warming helps retain their lovely flavors and texture.

Reheating: If you prefer a slightly warm macaron, gently warm them in the oven at a low temperature for a few minutes, but be careful not to bake them again!

Variations & Substitutions for Strawberry Christmas Macaron

Feel free to get creative with your Strawberry Christmas Macarons—let’s explore delightful ways to customize these festive treats!

  • Nut-Free: Use sunflower seed flour instead of almond flour for a delicious nut-free macaron base. The flavor remains delightful, giving everyone a chance to enjoy them!

  • Vegan Option: Substitute unsalted butter with dairy-free margarine and ensure your strawberry jam is vegan to create a tasty treat for everyone at the table.

  • Fruit Swaps: Try raspberry or cherry preserves instead of strawberry jam for a twist on the classic flavor. Each fruit brings its own unique sweetness, making your macarons a fun surprise!

  • Color Variations: Experiment with natural coloring, like beetroot powder, instead of red gel food coloring. This adds a charming hue while keeping things wholesome and beautiful.

  • Chocolate Lovers: Fill your macarons with white chocolate ganache for a rich and decadent take on your festive treat. The creaminess of the chocolate enhances the festive elegance of these small bites.

  • Minty Freshness: For a refreshing twist, consider peppermint cream as a filling. This seasonal flavor adds a lovely holiday spirit to your macarons, perfect for those who appreciate a minty surprise!

  • Texture Boost: Consider folding in finely chopped nuts like pistachios or hazelnuts into your batter for an extra crunch. This delightful texture variation adds a nutty taste that complements the sweetness beautifully.

  • Spicy Kick: Add a pinch of ground cinnamon or nutmeg to the meringue batter for a warming hint of spice. This seasonal flavor can elevate the holiday essence in every bite, resonating with the cozy mood of the festivities.

These variations not only make your Strawberry Christmas Macarons unique but also invite everyone to find a flavor combination they’ll fall in love with. Serve them alongside options like Strawberry Cheesecake Bars or a refreshing Strawberry Spinach Salad to brighten up your festive gatherings! Enjoy the process and happy baking!

Make Ahead Options

These Strawberry Christmas Macarons are perfect for meal prepping, allowing you to enjoy your holiday baking without the last-minute rush. You can prepare the macaron shells (up to 24 hours in advance) by piping them onto baking sheets, then covering them with plastic wrap and refrigerating until you’re ready to bake. The filling, made with strawberry buttercream, can be made up to 3 days prior and stored in the refrigerator in an airtight container for optimal freshness. When it’s time to complete your macarons, simply bake your prepped shells directly from the fridge and allow them to cool completely before filling. This way, you’ll have delicious, festive treats ready to impress your guests with minimal effort!

Expert Tips for Strawberry Christmas Macarons

Use a Scale: For consistent success with your Strawberry Christmas Macaron, using a digital scale ensures precise measurements, especially critical with meringue.

Check Oven Temperature: An oven thermometer helps avoid overbaking—the key to preventing cracked macarons is maintaining the right temperature throughout the baking process.

Don’t Rush the Resting: Allowing the piped macarons to rest is essential for forming the skin; skipping this step can lead to misshaped or collapsed cookies.

Fold Gently: When combining the dry ingredients with the meringue, fold gently to preserve the airiness; deflating the meringue will affect the macarons’ texture.

Store Properly: To keep your Strawberry Christmas Macarons fresh, store them in an airtight container in the fridge or freeze them for later enjoyment—just don’t forget to thaw them overnight!

What to Serve with Strawberry Christmas Macarons?

Indulging in delicate, flavorful macarons is a wonder on its own, but pairing them with the right accompaniments can elevate your festive experience.

  • Rich Hot Chocolate: The creamy chocolate richness pairs beautifully, complementing the strawberry filling with warmth and comfort.

  • Vanilla Ice Cream: A scoop of vanilla ice cream creates a delightful contrast, balancing the macaron’s sweetness while adding a creamy texture.

  • Fresh Berries: A medley of fresh strawberries or raspberries adds a burst of freshness, enhancing the fruitiness of the filling and making each bite even more delightful.

  • Sparkling Wine: A glass of bubbly not only adds elegance to your dessert spread but its effervescence cuts through the sweetness of the macarons wonderfully.

  • Mint Tea: This refreshing, herbal tea offers a gentle palate cleanser that highlights the strawberry flavor while soothing the senses after a sweet indulgence.

  • Chocolate Ganache Dip: Drizzling or dipping in smooth chocolate ganache creates an exquisite flavor pairing, making the experience even more indulgent.

  • Buttercream Frosting: Serve extra strawberry or vanilla buttercream for those who want a little extra sweetness to spread on their macarons, taking them to another level of decadence.

Strawberry Christmas Macaron Recipe FAQs

How do I select ripe strawberries for the filling?
Absolutely! Look for strawberries that are bright red, firm, and fragrant. Avoid berries with dark spots all over, as they may be overripe or moldy. Fresh, ripe strawberries will provide the sweetest and most vibrant flavor for your filling.

What’s the best way to store leftover macarons?
To keep your Strawberry Christmas Macarons fresh, simply place them in an airtight container and store them in the fridge for up to 5 days. This method preserves their delightful texture and prevents them from drying out, so you can enjoy each bite to the fullest!

Can I freeze Strawberry Christmas Macarons?
Very! Freezing is a great option if you want to make your macarons ahead of time. Place them in an airtight container, ensuring they’re not touching each other, and freeze for up to 1 month. For the best experience, thaw them overnight in the refrigerator before serving.

What should I do if my macarons crack while baking?
No worries! Cracked macarons are often a sign of either overmixing the batter or baking at too high of a temperature. Make sure your meringue is whipped to stiff peaks and that you’re gently folding in the dry ingredients without deflating the mixture. Also, using an oven thermometer can help ensure perfect baking conditions at the right temperature.

Are these macarons suitable for people with nut allergies?
Great question! Unfortunately, traditional macarons use almond flour which is not suitable for nut allergies. However, you can substitute almond flour with sunflower seed flour for a nut-free version. Just note the flavor and texture might differ slightly, but still delicious!

How can I achieve smooth and glossy macarons?
To get that beautiful, glossy finish, make sure to whip your egg whites until they reach stiff peaks—the mixture should look shiny! Also, don’t skip the resting step after piping; this allows the top to dry out a bit, which is essential for forming that smooth shell when baked. Patience is key to achieving those perfect Strawberry Christmas Macarons!

Strawberry Christmas Macaron

Delightful Strawberry Christmas Macarons for Festive Joy

These Strawberry Christmas Macarons are a must-try festive treat that will bring joy to your holiday celebrations.
Prep Time 30 minutes
Cook Time 15 minutes
Resting Time 1 hour
Total Time 1 hour 45 minutes
Servings: 24 macarons
Course: Dessert
Cuisine: French
Calories: 80

Ingredients
  

For the Batter
  • 1 cup Almond Flour Can substitute with sunflower seed flour for a nut-free option.
  • 1.75 cups Powdered Sugar Adds sweetness and smooth texture.
  • 3 large Egg Whites Essential for airy meringue texture.
  • 0.25 cup Granulated Sugar Helps stabilize meringue.
For the Filling
  • 0.5 cup Strawberry Jam Brings a bright, sweet taste.
  • 0.5 cup Unsalted Butter Contributes creaminess to buttercream.
  • 1 drop Red Gel Food Coloring Enhances festive visual appeal.

Equipment

  • Mixing Bowl
  • piping bag
  • Baking Sheets
  • Parchment paper
  • Rubber Spatula

Method
 

Step-by-Step Instructions
  1. Preheat your oven to 300°F (150°C) and prepare two baking sheets lined with parchment paper. Whip 3 egg whites until foamy, gradually adding 1/4 cup of granulated sugar until stiff peaks form.
  2. Sift together 1 cup of almond flour and 1 3/4 cups of powdered sugar in a separate bowl. Gently stir to combine.
  3. Carefully fold the sifted almond flour and powdered sugar mixture into the whipped meringue without deflating it.
  4. Transfer the batter into a piping bag fitted with a round tip and pipe small circles on the baking sheets, leaving space for spreading.
  5. Let the piped macarons rest at room temperature for 30 to 60 minutes to form a film on the surface.
  6. Bake the macarons in the preheated oven for about 15 minutes until they have smooth tops and slight feet.
  7. Allow the macarons to cool completely before filling them with strawberry buttercream or jam. Sandwich pairs of shells together.

Nutrition

Serving: 1macaronCalories: 80kcalCarbohydrates: 9gProtein: 1gFat: 4gSaturated Fat: 2gCholesterol: 10mgSodium: 30mgPotassium: 30mgSugar: 6gVitamin A: 100IUVitamin C: 1mgCalcium: 10mgIron: 0.5mg

Notes

Store in an airtight container for up to 5 days or freeze for up to 1 month. Ensure proper thawing for best taste.

Tried this recipe?

Let us know how it was!

Delicious Mini Croque Monsieur for Effortless Entertaining

As I stood in my kitchen the other day, the aroma of warming béchamel whipped me back to a cozy bistro in Paris, where Mini Croque Monsieur is served as the ultimate treat. These little bites of heaven combine crispy puff pastry with a creamy, tangy sauce, savory ham, and gooey Gruyère cheese, delivering a taste that’s sure to impress. And the best part? They come together in just over 30 minutes, making them an effortless choice for your next gathering. With their elegant appearance and crowd-pleasing flavor, these mini masterpieces are destined for your recipe collection, especially with a gluten-free option available for those who need it. Are you ready to elevate your appetizer game? Let’s dive into how to make these delightful Mini Croque Monsieur!

Why Choose Mini Croque Monsieur?

Quick and Easy: You’ll whip these up in just over 30 minutes, making them perfect for last-minute entertaining.

Impressive Presentation: Their golden-brown, flaky layers will wow your guests before they even take a bite.

Crowd-Pleasing Flavor: The combination of creamy béchamel, savory ham, and gooey cheese creates a taste explosion that everyone adores.

Versatile Substitutions: Adapt the filling to meet dietary needs—try gluten-free puff pastry or a vegetarian option with sautéed mushrooms!

Effortless Entertaining: Serve with a refreshing salad or comforting tomato soup for a complete meal, allowing you to relax and enjoy the party.

With all these factors combined, you’ll find these Mini Croque Monsieur are not only delightful but essential to your culinary repertoire!

Mini Croque Monsieur Ingredients

For the Béchamel Sauce

  • Unsalted Butter – Adds richness and flavor to the béchamel sauce. Substitution: Can use salted butter but adjust salt in the sauce.
  • All-Purpose Flour – Forms the base for creating a creamy béchamel sauce. No substitutions required.
  • Whole Milk – Provides a rich and creamy consistency for the sauce. Substitution: Non-dairy alternatives can be used.
  • Whole Grain Dijon Mustard – Adds a tangy flavor to the béchamel. Substitution: Regular mustard can be used for a milder taste.
  • Salt and Pepper – Essential for seasoning the béchamel. Adjust to taste.

For the Pastry Bites

  • Puff Pastry (14 oz sheet) – Creates flaky layers that enclose the filling. Substitution: Gluten-free puff pastry available.
  • Diced Ham (1 cup) – Adds savory flavor to the bites. Substitution: Turkey or sautéed mushrooms for a vegetarian option.
  • Gruyère Cheese (1 cup) – Provides a melty and rich taste. Substitution: Cheddar or Swiss cheese can be used.
  • Egg (1 large) – For glazing and achieving a golden color on the pastry.

Embrace the comfort of your kitchen as you prepare these delightful Mini Croque Monsieur, where every bite brings the warmth of home and the allure of gourmet dining!

Step‑by‑Step Instructions for Mini Croque Monsieur

Step 1: Preheat Your Oven
Begin by preheating your oven to 425ºF (220ºC). Line a baking sheet with parchment paper to ensure the Mini Croque Monsieur cook evenly without sticking. Preparing your baking surface now will help streamline the process later and save you time when assembling these delightful appetizers.

Step 2: Make the Béchamel Sauce
In a medium saucepan, melt 4 tablespoons of unsalted butter over medium heat. Once melted, whisk in 4 tablespoons of all-purpose flour, stirring continuously for about 3 minutes until it turns a light golden hue, forming a roux. Gradually add 2 cups of whole milk, whisking until the mixture thickens, roughly 5 minutes. Stir in 1 tablespoon of Dijon mustard, along with salt and pepper to taste, and set aside.

Step 3: Prep the Puff Pastry
Roll out a sheet of chilled puff pastry onto a floured surface until it measures approximately 13 x 15 inches. Use a 2-inch round cutter to cut out circles from the rolled pastry, poking holes in the center of each circle to allow for steam escape during baking. Ensure you have enough rounds to assemble your Mini Croque Monsieur and maintain the flaky texture.

Step 4: Assemble the Mini Croque Monsieur
Take the puff pastry rounds and brush the edges with a beaten egg for a golden finish. Place about a tablespoon of the béchamel sauce in the center of each circle, followed by a generous spoonful of diced ham and a sprinkle of Gruyère cheese. Fold the pastry over neatly and seal the edges to encase the delicious filling, ensuring they’re ready for baking.

Step 5: Bake to Perfection
Carefully transfer the assembled Mini Croque Monsieur to the prepared baking sheet. Bake in the preheated oven for 15 minutes or until the pastries puff up and turn a beautifully golden brown. Keep an eye on them towards the end to achieve that perfect crunchy exterior, as they will be irresistibly tempting when done.

Step 6: Serve and Enjoy
Once baked, remove the Mini Croque Monsieur from the oven and let them cool slightly before serving. Their enticing aroma will draw everyone in! Arrange them on a platter for your guests to admire, and prepare for compliments as they indulge in this sophisticated yet simple appetizer that embodies the essence of French cuisine.

How to Store and Freeze Mini Croque Monsieur

  • Fridge: Store leftovers in an airtight container for up to 3 days. Ensure they have cooled completely to maintain their flaky texture.

  • Freezer: Freeze unbaked Mini Croque Monsieur for up to 2 months. Simply arrange them on a baking sheet, freeze until solid, then transfer to a ziplock bag. Bake directly from frozen, adding about 5-10 minutes to the cooking time.

  • Reheating: For best results, reheat in the oven at 350ºF until warmed through and crispy again, rather than using a microwave, which can make them soggy.

  • Avoid Moisture: Make sure to wrap any leftover cooked pastries well if refrigerating to prevent them from becoming soggy.

Make Ahead Options

These Mini Croque Monsieur are perfect for busy home cooks looking to save time! You can prepare the puff pastry rounds and béchamel sauce up to 24 hours in advance. Simply assemble the pastry circles and refrigerate them without the filling; this helps maintain their flaky texture. When you’re ready to serve, spoon in the béchamel, diced ham, and Gruyère cheese, then bake as directed. For those with tight schedules, feel free to assemble completely and refrigerate for up to 3 days—just keep them covered to prevent drying out. Your Mini Croque Monsieur will be just as delicious, allowing you more time to enjoy the company of your guests!

What to Serve with Mini Croque Monsieur?

Transform your appetizer into a delightful meal with the right pairings that enhance every bite of this French classic.

  • Mixed Green Salad: A fresh salad adds a crisp contrast to the rich flavors of the Croque Monsieur, making for a light balance. Toss with a tangy vinaigrette for a pop of brightness.

  • Tomato Soup: The comforting warmth of tomato soup beautifully complements the flaky pastry and creamy béchamel, creating a cozy dinner experience. Dip each bite for an indulgent combination.

  • Sparkling Lemonade: This refreshing drink pairs perfectly, cutting through the richness of the savory bites and providing a touch of sweetness with its effervescence.

  • Cheese Platter: Elevate your gathering with an assortment of cheeses. Offer mild varieties like brie alongside sharper cheeses, allowing guests to explore complementary flavors.

  • Roasted Vegetables: Roasted seasonal veggies add earthy notes and vibrant colors, enhancing both the taste and visual appeal of your meal. Drizzle with olive oil and herbs for a roasted delight.

  • Chardonnay or Sauvignon Blanc: These wines are delightful companions, their crisp acidity enhancing the buttery notes of the pastry while complementing the savory filling within.

With these pairings, your Mini Croque Monsieur will inspire not just good food, but wonderful memories at your table!

Expert Tips for Mini Croque Monsieur

  • Chilling is Key: Use chilled puff pastry to ensure the layers bake up flaky and light. Room temperature pastry can lead to dense results.

  • Watch the Baking Time: Keep a close eye on them as they bake; remove when golden brown to avoid overcooking and losing that perfect crispy exterior.

  • Make-Ahead Option: Assemble your Mini Croque Monsieur without the béchamel and refrigerate them. Just add the filling and bake when ready, ensuring fresh, warm appetizers.

  • Perfect Filling Balance: Don’t overfill; a tablespoon of béchamel per pastry is just right. Too much filling can cause them to burst open while baking.

  • Create a Delicious Glaze: Brush the tops with egg wash before baking for a beautiful golden finish, enhancing their appetizing appearance.

Embrace these tips to ensure your Mini Croque Monsieur shine at your next gathering!

Mini Croque Monsieur Variations

Feel free to get creative with these Mini Croque Monsieur variations, turning this delightful recipe into your own masterpiece!

  • GLUTEN-FREE: Opt for gluten-free puff pastry options available in stores for a worry-free treat.

  • VEGETARIAN: Swap the ham for sautéed mushrooms or spinach, bringing in a burst of earthy flavors.

  • SPICY: Add crushed red pepper flakes or a dash of hot sauce to the béchamel for a pleasant kick.

  • HERBAL: Incorporate fresh herbs like thyme or parsley into the béchamel sauce for added aroma and freshness.

  • CHEESE SWAP: Experiment with different cheeses like cheddar or Swiss for a unique twist on flavor.

  • Fruity Note: Include finely chopped apples or pears with the ham for a sweet and savory combination that’s surprisingly delicious.

  • Creamy Texture: Add a dollop of cream cheese into the béchamel for extra creaminess that elevates the dish.

  • Snack Size: Make mini versions using smaller puff pastry squares, perfect for delightful finger food at your next gathering.

As you can see, the Mini Croque Monsieur is a canvas for your culinary creativity! For more tempting ideas, check out my guide on quick and easy appetizers or explore tasty vegetarian alternatives. Enjoy customizing these bites to fit your taste or dietary needs—your friends and family will love them!

Mini Croque Monsieur Recipe FAQs

How do I know if my ingredients are ripe or good for use?
Absolutely! When selecting ingredients, look for puff pastry that is well within its expiration date—opt for fresh, flaky sheets with no visible tears. For the béchamel, ensure your milk is fresh and has no sour smell. Diced ham should be firm and have a pleasant color, while Gruyère cheese should be smooth and creamy with a rich aroma.

What is the best way to store leftovers?
Very! To store leftovers, place them in an airtight container after they’ve cooled completely, and keep them in the fridge for up to 3 days. Make sure not to stack them too tightly to preserve their texture, and always reheat in the oven to retain their crispness.

Can I freeze Mini Croque Monsieur?
Absolutely! You can freeze unbaked Mini Croque Monsieur for up to 2 months. Arrange the pastries on a baking sheet and freeze until solid, then transfer them to a ziplock bag. When you’re ready to enjoy, bake them directly from frozen, adding an extra 5-10 minutes to the cooking time for perfectly puffed treats.

What common troubleshooting tips do you have?
If your pastries don’t puff up as expected, it might be due to the puff pastry being too warm before baking—chill it properly! If they burst open, ensure you’re not overfilling them. A tablespoon of béchamel is usually the sweet spot.

Are there any dietary considerations I should keep in mind?
Of course! For a gluten-free option, simply use a gluten-free puff pastry. If you’re catering to vegetarians, sautéed mushrooms can replace the diced ham without losing flavor. Always double-check all ingredient labels for potential allergens, particularly with cheese and pre-packaged puff pastry.

How can I keep these appetizers fresh when serving?
Great question! To maintain their texture during serving, present the Mini Croque Monsieur on a platter lined with paper towels to absorb any moisture. They’ll stay crisp and delicious while your guests indulge in this elegant appetizer.

Mini Croque Monsieur

Delicious Mini Croque Monsieur for Effortless Entertaining

Mini Croque Monsieur combines crispy puff pastry with béchamel, ham, and cheese for a delightful appetizer.
Prep Time 15 minutes
Cook Time 15 minutes
Total Time 30 minutes
Servings: 12 bites
Course: Appetizer
Cuisine: French
Calories: 200

Ingredients
  

For the Béchamel Sauce
  • 4 tablespoons unsalted butter Can use salted butter but adjust salt in the sauce.
  • 4 tablespoons all-purpose flour No substitutions required.
  • 2 cups whole milk Non-dairy alternatives can be used.
  • 1 tablespoon whole grain Dijon mustard Regular mustard can be used for a milder taste.
  • salt Adjust to taste.
  • pepper Adjust to taste.
For the Pastry Bites
  • 14 oz puff pastry Gluten-free puff pastry available.
  • 1 cup diced ham Turkey or sautéed mushrooms for a vegetarian option.
  • 1 cup Gruyère cheese Cheddar or Swiss cheese can be used.
  • 1 large egg For glazing.

Equipment

  • Oven
  • Medium saucepan
  • Baking Sheet
  • Parchment paper
  • floured surface
  • 2-inch round cutter

Method
 

Step-by-Step Instructions for Mini Croque Monsieur
  1. Preheat your oven to 425ºF (220ºC). Line a baking sheet with parchment paper.
  2. In a medium saucepan, melt butter over medium heat. Whisk in flour, stirring for about 3 minutes.
  3. Gradually add milk, whisking until thickened (roughly 5 minutes). Stir in mustard, salt, and pepper. Set aside.
  4. Roll out puff pastry until it measures approximately 13 x 15 inches and cut out 2-inch circles.
  5. Brush edges with beaten egg, place béchamel, ham, and cheese in the center, fold and seal.
  6. Bake for 15 minutes or until golden brown. Let cool slightly before serving.

Nutrition

Serving: 1biteCalories: 200kcalCarbohydrates: 15gProtein: 6gFat: 14gSaturated Fat: 8gPolyunsaturated Fat: 1gMonounsaturated Fat: 5gCholesterol: 45mgSodium: 400mgPotassium: 100mgFiber: 1gSugar: 1gVitamin A: 500IUCalcium: 150mgIron: 1mg

Notes

Store leftovers in airtight container for up to 3 days. Freeze unbaked for up to 2 months. Reheat in oven, not microwave, for best results.

Tried this recipe?

Let us know how it was!

Decadent Christmas Red Velvet Cheesecake for Festive Cheer

The moment I pulled my Christmas Red Velvet Cheesecake from the oven, the festive spirit enveloped my kitchen like a warm hug. Each layer of velvety, rich red cake intertwined with luscious cheesecake promises to sweep your loved ones off their feet. This luxurious dessert isn’t just a treat for the taste buds—its stunning visual appeal makes it a show-stopping centerpiece for your holiday gatherings. Not to mention, it’s surprisingly simple to make, ensuring you can spend less time stressing and more time yule-tiding with your family. With its delightful blend of sweet and tangy flavors, I guarantee this cheesecake will become a cherished holiday tradition in your home. What unique touch will you add to make this festive delight your own?

Why is this cheesecake a holiday must?

Indulgent Layers: This Christmas Red Velvet Cheesecake features stunning layers that combine rich red velvet cake with a creamy cheesecake center, making it not only delicious but also visually captivating.
Festive Flavor Profile: The blend of sweet and tangy flavors will remind your guests of beloved holiday treats, ensuring it becomes a cherished favorite.
Simple Preparation: Despite its luxurious appearance, this recipe is easy to follow, allowing you to whip up a show-stopper without the stress—perfect alongside my Strawberry Cheesecake Bars!
Versatile Options: Feel free to customize this cheesecake with chocolate chips or a touch of peppermint for an extra festive twist.
Make-Ahead Convenience: Prepare a day in advance to save time on the big day—so you can focus on celebrating with loved ones instead of last-minute baking!
Centerpiece Appeal: Its vibrant red and white contrast makes it the perfect centerpiece for your holiday table, ready to be admired and savored.

Christmas Red Velvet Cheesecake Ingredients

For the Cake Layers

  • All-Purpose Flour – Provides structure to the cake layers; try using gluten-free flour if needed.
  • Unsweetened Cocoa Powder – Adds a subtle chocolate flavor; ensure it’s high-quality for best results.
  • Baking Powder – Acts as a leavening agent; make sure it’s fresh for optimal rise.
  • Baking Soda – Helps neutralize acidity from cocoa and buttermilk.
  • Salt – Enhances all flavors.
  • Granulated Sugar – Sweetens the batter and contributes to moisture.
  • Vegetable Oil – Provides moisture; substitute with melted coconut oil for a richer taste.
  • Buttermilk – Adds tanginess and keeps the cake moist; milk mixed with vinegar works as a substitute.
  • Eggs – Binds the ingredients and provides structure; use eggs at room temperature for best results.
  • Red Food Coloring – Gives the cake its iconic hue; gel food coloring offers better intensity.
  • Vanilla Extract – Enhances the flavor profile.
  • White Vinegar – Activates the baking soda and adds a touch of tanginess.

For the Cheesecake Layer

  • Cream Cheese – The main ingredient for the cheesecake layer; use full-fat for the creamiest texture.
  • Granulated Sugar (for cheesecake) – Sweetens the cheesecake layer effectively.
  • Sour Cream – Adds creaminess with a slight tang to balance flavors.

For the Frosting

  • Unsalted Butter – Used in the frosting, contributing to its creaminess and flavor; ensure it’s softened.
  • Powdered Sugar – Sweetens and thickens the frosting for a perfect finish.

This festive creation, the Christmas Red Velvet Cheesecake, will leave your guests enchanted!

Step‑by‑Step Instructions for Christmas Red Velvet Cheesecake

Step 1: Preheat and Prep
Begin by preheating your oven to 350°F (175°C). Grease and flour two 9-inch round cake pans, ensuring they are well-prepared to release the cake layers effortlessly. Place parchment paper at the bottoms for added security. This step ensures that your beautiful Christmas Red Velvet Cheesecake layers come out perfectly shaped and ready for indulgence.

Step 2: Sift the Dry Ingredients
In a large bowl, sift together 2 cups of all-purpose flour, ¼ cup of unsweetened cocoa powder, 2 teaspoons of baking powder, 1 teaspoon of baking soda, and ½ teaspoon of salt. Sifting helps to aerate the mixture and avoid lumps, resulting in a light and fluffy cake. Set this bowl aside, allowing the dry ingredients to blend while you prepare the wet mix.

Step 3: Whisk the Wet Ingredients
In a separate large mixing bowl, whisk together 1 ½ cups of granulated sugar and 1 cup of vegetable oil until well combined. Next, incorporate 1 cup of buttermilk, 2 large eggs (ensure they are at room temperature), 1 tablespoon of red food coloring, 1 teaspoon of vanilla extract, and 1 teaspoon of white vinegar. Mix until the mixture is smooth and vibrant—it should have a lovely, rich red hue!

Step 4: Combine Wet and Dry Mixtures
Gently fold the dry ingredients into the wet ingredients using a spatula. Mix until just combined—don’t overmix, as this can lead to a dense cake. The batter for your Christmas Red Velvet Cheesecake should be thick and luscious, with no visible dry spots remaining. This careful blending is crucial for achieving the perfect cake texture.

Step 5: Bake the Cake Layers
Divide the red velvet batter evenly between the prepared cake pans. Bake in your preheated oven for 25-30 minutes or until a toothpick inserted in the center comes out clean. As they bake, your kitchen will fill with a delightful aroma that signifies the holiday spirit. Once done, remove the pans and let them cool on a wire rack.

Step 6: Cool and Prepare the Cheesecake Layer
After allowing the cake layers to cool in the pans for about 10 minutes, gently turn them out onto the wire racks to cool completely. Meanwhile, prepare your cheesecake layer by preheating the oven to 325°F (160°C). Using a mixer, beat 16 oz of cream cheese until smooth, then add 1 cup of granulated sugar, 1 cup of sour cream, and 2 large eggs, mixing until silky and lump-free.

Step 7: Bake the Cheesecake
Pour the creamy cheesecake mixture into a greased 9-inch springform pan. Bake in the preheated oven for 50-60 minutes, until the edges are set but the center is slightly jiggly. This gentle baking helps create a smooth, velvety texture for your Christmas Red Velvet Cheesecake. Once done, turn off the oven and crack the door open for an hour to cool gradually.

Step 8: Frost the Cake Layers
Once the red velvet cake layers and cheesecake have cooled completely, it’s time to assemble. Use a serrated knife to level the tops of the cakes if necessary. Spread a layer of cream cheese frosting on top of the first red velvet layer, followed by the cheesecake layer. Place the second red velvet layer on top, securing the layers in place with creamy frosting.

Step 9: Decorate and Chill
Frost the entire cake with cream cheese frosting, decorating as desired with festive touches like crushed candy canes or seasonal sprinkles. Once frosted, chill the entire Christmas Red Velvet Cheesecake in the refrigerator for at least 4 hours, or overnight if possible, to allow the layers to meld beautifully.

Step 10: Serve and Enjoy
Before serving, slice into your stunning Christmas Red Velvet Cheesecake, revealing its festive layers. This beautiful dessert is sure to be the highlight of your holiday gatherings. Pair each slice with a coffee or dessert wine for a delightful experience. Share the love of homemade flavors and create sweet memories with your friends and family!

Expert Tips for Christmas Red Velvet Cheesecake

  • Cool Completely: Make sure the cake layers are completely cool before frosting to avoid melting your cream cheese frosting and ruining its beautiful presentation.

  • Level Layers: Use a serrated knife to level the tops of the cake layers if they’re domed. This ensures a more stable and easier-to-cut Christmas Red Velvet Cheesecake.

  • Room Temperature Ingredients: Allow your cream cheese and eggs to reach room temperature. This helps create a smoother cheesecake layer, eliminating lumps for a perfect texture.

  • Gel Food Coloring: Opt for gel food coloring instead of liquid for a more vibrant red color that holds better in the cake. Adjust the amount depending on the desired intensity.

  • Crease Prevention: To prevent the cheesecake from cracking, follow the baking time closely and allow it to cool gradually in the oven with the door slightly ajar.

  • Make-Ahead Delight: Prepare your cheesecake a day in advance to improve the flavors and save time on the day of your celebration, allowing you to enjoy the festivities!

What to Serve with Christmas Red Velvet Cheesecake

The perfect holiday feast deserves equally delightful companions to elevate your festive experience.

  • Creamy Mashed Potatoes: Their buttery richness contrasts beautifully with the cheesecake’s sweet tang, rounding out your holiday meal.

  • Roasted Brussels Sprouts: Crispy on the outside and tender inside, these add a satisfying crunch that refreshes the palate between bites of cheesecake.

  • Spiced Apple Cider: Warm and fragrant, this seasonal drink brings out the flavors of your red velvet dessert while wrapping you in cozy comfort.

  • Homemade Hot Chocolate: Topped with whipped cream, this sweet treat echoes the dessert’s richness, making every sip a delightful continuation of indulgence.

  • Chocolate-Dipped Fruit: Fresh strawberries or bananas dipped in chocolate provide a fresh, contrasting touch to the rich cheesecake, perfect for a light touch.

  • Gingerbread Cookies: With their spiced flavor, these holiday favorites add a classic touch to your celebration, complementing the festive essence of your cheesecake.

  • Pecan Pie: Its gooey sweetness combines beautifully with the cheesecake’s cheesiness, creating a heavenly and comforting dessert experience.

  • Nutty Cheese Platter: A selection of nuts and creamy cheeses creates a sophisticated appetizer that balances well with the dessert’s sweet notes.

  • Caramel Sauce: Drizzling this over each slice adds an extra layer of decadence, enhancing the joy of every bite of your Christmas Red Velvet Cheesecake.

How to Store and Freeze Christmas Red Velvet Cheesecake

Fridge: Store your cheesecake in the refrigerator, wrapped tightly in plastic wrap or placed in an airtight container. It will stay fresh for up to 3-4 days.

Freezer: If you want to keep the Christmas Red Velvet Cheesecake for a longer period, freeze it. Wrap slices in plastic wrap and aluminum foil, or place the whole cake in an airtight container for up to 1 month.

Reheating: To enjoy frozen slices, simply transfer to the fridge to thaw overnight before serving. Avoid reheating in the microwave, as it may alter the texture.

Make Ahead Options

These Christmas Red Velvet Cheesecake layers make for an incredible make-ahead dessert that saves you time on busy holiday days! You can prepare the red velvet cake layers up to 24 hours in advance; just cool them completely, wrap them tightly in plastic wrap, and refrigerate to maintain their moisture and prevent drying out. Additionally, the cheesecake layer can be made up to 3 days ahead—simply bake it, let it cool, and store it in an airtight container in the fridge. When it’s time to serve, assemble the cake by frosting and chilling it for at least 4 hours (or overnight if you can wait). This ensures all flavors meld perfectly, delivering a stunning dessert that’s just as delicious as if made fresh that day!

Christmas Red Velvet Cheesecake Variations

Feel free to add your personal touch to this decadent dessert masterpiece! Each variation offers a delightful twist that will please your senses and creativity.

  • Gluten-Free: Substitute all-purpose flour with a gluten-free blend for a safe and equally delicious option for gluten-sensitive friends and family.

  • Classic Vanilla Layers: Swap the red velvet layers for a classic vanilla cake to create a more neutral base that lets the cheesecake shine.

  • Minty Freshness: Mix in crushed peppermint candies into the cheesecake layer for a refreshing holiday flavor. The candy adds a delightful crunch and festive flair!

  • Chocolate Chip Surprise: Fold in chocolate chips into the red velvet batter to create pockets of melty chocolate in every slice. It’s a sweet surprise that chocolate lovers will adore!

  • Festive Toppings: Top the cheesecake with festive decorations like crushed candy canes, seasonal sprinkles, or even a drizzle of white chocolate for added sweetness and visual appeal.

  • Cream Cheese Swirl: Before baking, dollop cheesecake batter over the red velvet batter in the cake pans and use a knife to create beautiful swirls. This results in a stunning marbled effect for your holiday dessert!

  • Spice Up the Flavor: Add a pinch of cinnamon or nutmeg to both the cake and cheesecake batter for a warm hint of spice that evokes cozy holiday memories.

  • Mini Cheesecakes: For a fun twist, turn the cheesecake into mini versions by using a muffin tin. Just adjust the baking time, and you’ll have bite-sized delights perfect for sharing.

If you enjoy this indulgent recipe, you might also find joy in making my festive Red White Blue Rice Krispie Treats or celebrating with my luxurious Cookies Cream Cheesecake. Let your imagination run wild!

Christmas Red Velvet Cheesecake Recipe FAQs

Which ingredients should I pay attention to for ripeness and quality?
Absolutely! For the best flavor and texture in your Christmas Red Velvet Cheesecake, ensure you use high-quality ingredients. Fresh eggs are vital as they bind the mixture effectively, so check the sell-by date. Use full-fat cream cheese for a rich flavor in the cheesecake layer, and opt for fresh buttermilk or homemade alternatives (milk mixed with vinegar) for that perfect tanginess. When it comes to cocoa powder, a good, unsweetened variety will elevate the chocolate notes beautifully!

How should I store the cheesecake, and how long will it last?
Very! Store your Christmas Red Velvet Cheesecake by wrapping it tightly in plastic wrap or placing it in an airtight container. It will stay fresh in the refrigerator for about 3 to 4 days. If you plan to keep it longer, the freezer is a great option—just make sure to wrap it properly to prevent freezer burn!

Can I freeze my Christmas Red Velvet Cheesecake? If so, how?
Certainly! Freezing your cheesecake is simple! After it has completely cooled, wrap each slice tightly in plastic wrap, followed by a layer of aluminum foil for added protection. Alternatively, you can place the whole cake in an airtight container. It can be frozen for up to 1 month. When you’re ready to enjoy it, transfer the slices to the refrigerator to thaw overnight.

What if my cheesecake layer cracks during baking?
Don’t worry; it happens to the best of us! To avoid cracks in your cheesecake layer, make sure you don’t overbake it—look for the edges to be set, while the center remains slightly jiggly. Gradually cooling it in the oven with the door slightly ajar for about an hour after baking can also help. If cracks do occur, you can cover them with frosting or festive decorations like crushed candy canes!

Do any dietary considerations need to be kept in mind?
Definitely! If you’re serving guests with dietary restrictions, it’s good to know that this cheesecake contains gluten (from all-purpose flour) and dairy (from cream cheese and butter). You could use gluten-free flour to make it gluten-free and plant-based cream cheese or coconut cream for a dairy-free version. Always check ingredient labels for potential allergens like soy or nut oils if you’re uncertain about specific allergies.

How can I make this cheesecake more festive or personalized?
The more the merrier! Feel free to add a personal touch—incorporating chocolate chips, crushed peppermint candies, or even a hint of espresso powder can elevate the festive appeal. You might also try different food coloring for seasonal themes—pastel colors for spring or rich greens for St. Patrick’s Day! Don’t be shy to experiment; customization is part of the fun!

Christmas Red Velvet Cheesecake

Decadent Christmas Red Velvet Cheesecake for Festive Cheer

This Christmas Red Velvet Cheesecake features rich layers and festive flavors, making it a must-have dessert for holiday cheer.
Prep Time 30 minutes
Cook Time 1 hour
Cooling Time 4 hours
Total Time 5 hours 30 minutes
Servings: 12 slices
Course: Dessert
Cuisine: American
Calories: 450

Ingredients
  

For the Cake Layers
  • 2 cups all-purpose flour try using gluten-free flour if needed.
  • 0.25 cups unsweetened cocoa powder ensure it's high-quality for best results.
  • 2 teaspoons baking powder make sure it’s fresh for optimal rise.
  • 1 teaspoon baking soda
  • 0.5 teaspoon salt enhances all flavors.
  • 1.5 cups granulated sugar sweetens the batter and contributes to moisture.
  • 1 cup vegetable oil substitute with melted coconut oil for a richer taste.
  • 1 cup buttermilk milk mixed with vinegar works as a substitute.
  • 2 large eggs use eggs at room temperature for best results.
  • 1 tablespoon red food coloring gel food coloring offers better intensity.
  • 1 teaspoon vanilla extract enhances the flavor profile.
  • 1 teaspoon white vinegar activates the baking soda and adds a touch of tanginess.
For the Cheesecake Layer
  • 16 oz cream cheese use full-fat for the creamiest texture.
  • 1 cup granulated sugar sweetens the cheesecake layer effectively.
  • 1 cup sour cream adds creaminess with a slight tang to balance flavors.
For the Frosting
  • 0.5 cups unsalted butter ensure it's softened for the frosting.
  • 2 cups powdered sugar sweetens and thickens the frosting for a perfect finish.

Equipment

  • 9-inch round cake pans
  • 9-inch springform pan
  • Mixer
  • Spatula
  • Serrated Knife
  • Wire Rack

Method
 

Step-by-Step Instructions
  1. Preheat your oven to 350°F (175°C). Grease and flour two 9-inch round cake pans.
  2. In a large bowl, sift together 2 cups of all-purpose flour, ¼ cup of unsweetened cocoa powder, 2 teaspoons of baking powder, 1 teaspoon of baking soda, and ½ teaspoon of salt.
  3. In a separate large mixing bowl, whisk together 1 ½ cups of granulated sugar and 1 cup of vegetable oil until well combined. Incorporate 1 cup of buttermilk, 2 large eggs, 1 tablespoon of red food coloring, 1 teaspoon of vanilla extract, and 1 teaspoon of white vinegar. Mix until smooth.
  4. Gently fold the dry ingredients into the wet ingredients using a spatula until just combined.
  5. Divide the batter evenly between the prepared cake pans and bake for 25-30 minutes or until a toothpick comes out clean.
  6. Cool the cake layers for 10 minutes in the pans, then turn them onto wire racks to cool completely.
  7. Preheat the oven to 325°F (160°C) and prepare the cheesecake layer by beating 16 oz of cream cheese until smooth. Add 1 cup of granulated sugar, 1 cup of sour cream, and 2 large eggs, mixing until silky and lump-free.
  8. Pour the cheesecake mixture into a greased 9-inch springform pan and bake for 50-60 minutes, until the edges are set but the center is slightly jiggly.
  9. Cool the cheesecake gradually by cracking the oven door open after baking for an hour.
  10. Level the tops of the cooled cake layers with a serrated knife if necessary. Assemble by frosting the top of the first layer with cream cheese frosting, adding the cheesecake layer, then the second cake layer.
  11. Frost the entire cake and chill in the refrigerator for at least 4 hours, or overnight if possible.
  12. Slice and serve your stunning Christmas Red Velvet Cheesecake paired with coffee or dessert wine.

Nutrition

Serving: 1sliceCalories: 450kcalCarbohydrates: 50gProtein: 6gFat: 25gSaturated Fat: 15gCholesterol: 100mgSodium: 300mgPotassium: 200mgFiber: 2gSugar: 35gVitamin A: 500IUCalcium: 50mgIron: 1mg

Notes

This cheesecake can be made a day in advance to enhance flavors and save time on the big day.

Tried this recipe?

Let us know how it was!

Soft Stovetop Custard Cream Buns for a Cozy Treat

The kitchen was filled with a warm, inviting scent that whisked me back to my childhood—a comforting aroma I can hardly resist. Today, I am thrilled to share my recipe for Soft Stovetop Custard Cream Buns, a delightful treat that brings together fluffy milk buns and creamy custard filling, perfect for breakfast or an afternoon snack. The best part? These buns are easy to whip up on the stovetop, no oven required, making them a speedy solution for your homemade cravings. Not only are they a great way to satisfy your sweet tooth, but they can also be tailored to meet dietary preferences with egg-free and gluten-free options. Curious about how simple ingredients can transform into such a cozy indulgence? Let’s dive into the magic of stovetop baking!

Why Try Stovetop Custard Cream Buns?

Simplicity at Its Best: These buns require minimal ingredients and no baking fuss, making them perfect for both seasoned chefs and kitchen novices.

Versatile Fillings: Customize your stuffing with delightful options like egg-based, homemade, or even store-bought custard. Have fun exploring flavors!

Diet-Friendly: Egg-free variations allow everyone to enjoy this treat, and with the right custard powder, it can even be gluten-free.

Quick Cooking Method: No lengthy wait for the oven! Our stovetop method gets you fluffy buns in just over a half-hour, perfect for busy days.

Warm Comfort: Each bite reveals a soft, pillowy bun with a creamy filling, satisfying both your cravings and your nostalgia for homemade goodness. Enjoy these with a cup of coffee or as a shareable snack with friends!

Stovetop Custard Cream Buns Ingredients

For the Dough
All-Purpose / Cake Flour – Provides structure and lightness to the buns; you can substitute with whole wheat flour for a denser texture, though it may affect the final result.
Instant Dry Yeast – Leavens the dough for fluffy buns; make sure it’s fresh for optimal rising.
Granulated Sugar – Adds sweetness to the dough; consider replacing it with caster sugar for a finer texture.
Salt – Enhances flavor and strengthens gluten structure; don’t skip it, as it’s essential for taste.
Warm Water – Activates the yeast and helps form the dough; ensure it’s warm (not hot) for the best results.
Milk – Adds moisture and richness; you can use any non-dairy milk for a lactose-free version.
Oil (Canola or Sunflower) – Keeps the buns soft and moist; other neutral oils can be used as substitutes.

For the Custard Filling
Custard Powder – Creates a creamy custard filling; opt for homemade egg-free custard powder, store-bought (check for egg content), or your favorite egg-based custard recipe.

Enjoy making these delicious stovetop custard cream buns, a perfect treat for anyone craving cozy, homemade goodness!

Step‑by‑Step Instructions for Stovetop Custard Cream Buns

Step 1: Prepare the Dough
In a large mixing bowl, combine the all-purpose flour, instant dry yeast, granulated sugar, and salt. In a separate jug, mix warm water, milk, and oil until combined. Pour the wet ingredients into the dry mixture, stirring until a dough begins to form. This should take about 2-3 minutes, and you’ll see the dough starting to come together nicely.

Step 2: Knead the Dough
Transfer the dough to a lightly floured surface and knead for about 5 minutes. Aim for a smooth, elastic texture; it should feel soft but not sticky, which indicates the dough is ready. If it feels too tacky, sprinkle a bit more flour as needed to help achieve that smooth finish.

Step 3: First Rise
Place the kneaded dough into a lightly greased bowl and cover it with a clean kitchen towel or plastic wrap. Allow it to rise in a warm spot for about 1 hour or until it doubles in size. You’ll know it’s ready when the dough springs back gently after pressing it with your finger.

Step 4: Make the Custard Filling
While the dough rises, prepare your custard filling according to the custard powder instructions, or make your preferred recipe. It should have a creamy consistency that’s thick enough to hold its shape without being too runny. Set it aside to cool slightly while you handle the dough.

Step 5: Shape the Buns
Once the dough has risen, punch it down to release the gas. Knead it briefly for about 3 minutes to even out the texture, then divide the dough into 12 equal pieces. Roll each piece into a circle, about 4-5 inches in diameter, ensuring they remain uniform for even cooking.

Step 6: Fill the Dough Circles
Spoon a generous amount of custard filling onto one half of each circle. Fold the dough over to create a half-moon shape and pinch the edges tightly to seal, ensuring no custard leaks during cooking. Allow the buns to rest for 15 minutes to puff up slightly before cooking.

Step 7: Cook the Buns
Heat a non-stick pan over low heat and carefully place the filled buns inside, leaving space between them. Cover the pan with a lid, cooking for about 10 minutes until the bottoms are lightly golden. Flip the buns gently, cooking for an additional 5 minutes with the lid on until they are evenly cooked.

Step 8: Cool and Serve
Remove the buns from the pan and let them cool slightly on a wire rack. If desired, dust with powdered sugar for an extra touch of sweetness. These Soft Stovetop Custard Cream Buns are best enjoyed warm, offering a delightful balance of soft bun and creamy filling in each bite.

Variations & Substitutions for Stovetop Custard Cream Buns

Feel free to play with the ingredients and personalize these delightful buns; your kitchen adventure awaits!

  • Chocolate Custard: Swap the vanilla custard for a rich chocolate pastry cream for a sweet twist that chocolate lovers will adore.
    Indulging in a chocolatey filling adds deep flavor and decadence, making these buns extra special.

  • Spiced Dough: Add a teaspoon of cinnamon or nutmeg to the dough for an inviting, warm flavor.
    This aromatic twist will make your kitchen smell heavenly while enhancing the overall taste of the buns.

  • Egg-Free Option: Use custard powder to create an egg-free filling, perfect for those avoiding eggs without sacrificing taste.
    This way, everyone can enjoy the creamy goodness of these buns without dietary concerns!

  • Fruit-Filled Surprise: Incorporate dried fruits like raisins or cranberries into the dough for a delightful burst of sweetness and texture.
    These little additions elevate the flavor while providing a pleasant chewy contrast to the soft buns.

  • Nutty Delight: Add finely chopped nuts like walnuts or hazelnuts into the custard for a crunchy finish that contrasts beautifully with the soft bun.
    This unexpected texture enhances each bite and adds a lovely depth to your treat!

  • Gluten-Free: Use a gluten-free flour blend for those with gluten sensitivities; ensure your custard powder is gluten-free too.
    Everyone deserves a taste, and this swap allows for a delicious indulgence without gluten!

  • Coconut Flair: Incorporate coconut milk instead of regular milk for a tropical twist that adds creaminess and flavor.
    The coconut will transport you to an island getaway with every fluffy bite!

For fellow cooking enthusiasts, why not pair these buns with a delightful beverage? A cup of Pumpkin Cream Cold or a slice of Mushroom Pasta can elevate your experience in the kitchen. Enjoy the adventure of making your perfect Stovetop Custard Cream Buns!

Expert Tips for Stovetop Custard Cream Buns

  • Fresh Yeast Check: Always check the expiration date of your instant dry yeast. Using fresh yeast ensures your dough rises properly, resulting in fluffy buns.

  • Temperature Matters: Maintaining a warm environment while the dough rises is crucial. Avoid drafts and ensure the warmth is consistent for optimal fermentation.

  • Avoid Overfilling: When adding custard, resist the urge to overfill the buns. A generous spoonful is perfect—too much custard can cause leaks during cooking.

  • Heat Control: Cook the buns on low heat to achieve that beautiful golden color without burning. If they’re browning too quickly, lower the heat further.

  • Customize Wisely: Make sure to choose custard powder suitable for your dietary needs. Egg-free options are available, but be mindful of gluten content if necessary.

  • Serving Fresh: These buns are best enjoyed warm. If storing, reheat briefly in the microwave to revive their soft, fluffy texture.

What to Serve with Soft Stovetop Custard Cream Buns?

These fluffy delights can be easily transformed into a full meal, delighting your senses and warming your heart.

  • Fresh Fruit Salad: A vibrant mix of seasonal fruits adds a refreshing contrast to the rich custard filling and fluffy buns.

  • Coffee or Tea: The warmth of a cup of freshly brewed coffee or tea complements the sweet custard, making for a cozy pairing.

  • Homemade Whipped Cream: A dollop of light, fluffy whipped cream can elevate the dessert experience, adding a creamy texture on top.

  • Chocolate Sauce: Drizzling warm chocolate sauce over the buns brings an indulgent sweetness that pairs beautifully with the custard.

  • Nutty Granola: The crunch of toasted nuts and oats offers a delightful texture contrast, adding a wholesome touch to your treat.

  • Vanilla Ice Cream: Serve warm buns alongside a scoop of vanilla ice cream for an irresistible, warm-and-cold dessert experience.

  • Spiced Chai: The aromatic spices in chai tea harmonize perfectly with these buns, enhancing their comforting feel on a chilly day.

  • Coconut Macaroons: These chewy delights add a different flavor dimension, creating a tropical feel to your afternoon snack spread.

Make Ahead Options

These Soft Stovetop Custard Cream Buns are perfect for busy home cooks looking to save time during the week! You can prepare the dough up to 24 hours in advance by making it and allowing it to rise, then refrigerating it until you’re ready to shape and fill the buns. Alternatively, the custard filling can be made ahead and stored in an airtight container in the refrigerator for up to 3 days—just remember to cover it to keep it fresh and creamy. When you’re ready to enjoy, simply shape the buns, fill them with custard, and cook as instructed. With these make ahead options, you can have delicious homemade treats ready at a moment’s notice!

Storage Tips for Stovetop Custard Cream Buns

Room Temperature: Store any leftover buns in an airtight container at room temperature for up to 1 day. This keeps them soft, but they are best fresh.

Fridge: If you need to store for longer, refrigerate the buns in an airtight container for up to 2 days. Remember to reheat them in the microwave briefly before enjoying again.

Freezer: For longer storage, freeze the cooled buns by placing them in a freezer-safe bag or container for up to 1 month. Thaw overnight in the fridge, then reheat for a warm treat.

Reheating: When ready to serve, reheat the buns in the microwave for 15-30 seconds for a soft finish, or in a pan for a few minutes to regain that fluffy texture. Enjoy your stovetop custard cream buns even after storage!

Stovetop Custard Cream Buns Recipe FAQs

What type of flour should I use for the buns?
You can use all-purpose or cake flour for a light, fluffy texture. If you’d prefer a denser bun, feel free to substitute with whole wheat flour. Just keep in mind that it may alter the overall texture and rise slightly.

How long can I store the custard cream buns?
For the best taste, enjoy your stovetop custard cream buns fresh! If you have leftover buns, store them in an airtight container at room temperature for up to 1 day. To keep them longer, you can refrigerate them for up to 2 days, but they do taste best when freshly made.

Can I freeze the custard cream buns?
Absolutely! To freeze, place cooled buns in a freezer-safe bag or container and store them for up to 1 month. When you’re ready to enjoy, simply thaw them in the fridge overnight and reheat in the microwave for 15-30 seconds to bring back their softness.

What if my dough doesn’t rise properly?
If your dough isn’t rising, check the freshness of your instant dry yeast first. Ensure that you activated it correctly with warm water (not hot) so that it can do its job. Sometimes, it also helps to create a warm environment; try placing the dough in a turned-off oven with just the light on or a warm corner of your kitchen.

Can I make these buns egg-free?
Yes! These stovetop custard cream buns can easily be made egg-free. You can use homemade egg-free custard powder or opt for store-bought custard powder that doesn’t contain eggs. This way, everyone can enjoy a delicious, creamy filling without worry.

What is the best way to reheat the buns?
To reheat, I suggest microwaving them for about 15-30 seconds to regain their softness. Alternatively, you can place the buns in a non-stick pan over low heat for a few minutes to warm them while restoring some of that lovely fluffy texture. Enjoy your delicious treat!

Stovetop Custard Cream Buns

Soft Stovetop Custard Cream Buns for a Cozy Treat

These Soft Stovetop Custard Cream Buns feature fluffy dough and a creamy custard filling, perfect for a cozy treat.
Prep Time 15 minutes
Cook Time 15 minutes
Rising Time 1 hour
Total Time 1 hour 30 minutes
Servings: 12 buns
Course: Dessert
Cuisine: Global
Calories: 150

Ingredients
  

For the Dough
  • 3 cups all-purpose flour can substitute with whole wheat flour
  • 2 teaspoons instant dry yeast ensure it's fresh
  • 1 tablespoon granulated sugar can substitute with caster sugar
  • 1 teaspoon salt essential for taste
  • 1 cup warm water warm, not hot
  • 1 cup milk can use non-dairy milk
  • 2 tablespoons oil (canola or sunflower) keeps buns soft
For the Custard Filling
  • 1 cup custard powder homemade or store-bought, check for eggs

Equipment

  • Mixing Bowl
  • non-stick pan
  • Measuring cups
  • Measuring spoons
  • Kitchen towel
  • Whisk

Method
 

Prepare the Dough
  1. Combine flour, yeast, sugar, and salt in a bowl. In a jug, mix warm water, milk, and oil. Pour wet into dry, stirring until a dough begins to form.
Knead the Dough
  1. Transfer dough to a floured surface; knead for about 5 minutes until smooth and elastic.
First Rise
  1. Place dough in a greased bowl, cover, and let rise for about 1 hour until doubled in size.
Make the Custard Filling
  1. Prepare the custard filling according to instructions, let cool slightly.
Shape the Buns
  1. Punch down the risen dough, knead briefly, then divide into 12 pieces and roll into circles.
Fill the Dough Circles
  1. Place custard on one half of each circle, fold over and seal the edges. Let rest for 15 minutes.
Cook the Buns
  1. Heat a non-stick pan over low heat, place buns leaving space, cover and cook for 10 minutes. Flip and cook for another 5 minutes.
Cool and Serve
  1. Remove from pan, cool on a wire rack, dust with powdered sugar if desired, and enjoy warm.

Nutrition

Serving: 1bunCalories: 150kcalCarbohydrates: 22gProtein: 3gFat: 5gSaturated Fat: 1gPolyunsaturated Fat: 0.5gMonounsaturated Fat: 3gSodium: 120mgPotassium: 120mgFiber: 1gSugar: 5gCalcium: 2mgIron: 4mg

Notes

These buns are best enjoyed fresh and warm. Store leftovers in an airtight container. Reheat for a soft finish.

Tried this recipe?

Let us know how it was!

Tasty Baked Breakfast Tacos You’ll Crave Every Morning

The aroma of breakfast sizzling in the pan always takes me back to carefree mornings filled with laughter. What if I told you that you can recreate those moments with these Tasty Baked Breakfast Tacos? Featuring crispy potatoes, fluffy scrambled eggs, and savory bacon, all nestled in warm corn tortillas, this dish is a delightful way to kick-start your day. Perfect for busy mornings, these tacos are not just quick and easy to prepare; they also allow for endless customization, so you can whip them up with whatever ingredients you have on hand. Plus, they can be made ahead of time for those hectic weekday breakfasts! Curious about how to make this morning masterpiece? Let’s dive in!

Why are Breakfast Tacos a Game Changer?

Versatile Fillings: Your kitchen is your playground! Customize these tacos with your favorite ingredients, whether it’s sausage, veggies, or different cheeses.

Quick Preparation: Speedy mornings don’t have to mean skipping breakfast. This recipe is designed for simplicity, perfect for busy families seeking healthy meals.

Make-Ahead Magic: Prep the fillings a day before, making breakfast a breeze when time is tight.

Crowd-Pleasing Flavor: Everyone loves tacos! These breakfast wonders are sure to please even the pickiest eaters, making them perfect for family brunches.

Wholesome Goodness: Packed with protein and nutrients, these Tacos not only taste delicious but also leave you feeling satisfied and energized. Pair them with fresh fruit or even an easy Overnight Croissant Breakfast for a delightful spread!

Tasty Baked Breakfast Tacos Ingredients

Kickstart your cooking adventure with these festive tacos!

For the Filling

  • Bacon – Adds savory flavor; consider turkey bacon for a healthier twist.
  • Potatoes (Yukon Gold or Russet) – Provides a buttery taste and crispy texture; red potatoes work if you need quicker cooking.
  • Canola Oil – Essential for crisping the potatoes; substitute with vegetable or olive oil if needed.
  • Taco Seasoning – Infuses flavor into the potatoes; opt for a homemade blend for a lower sodium option.
  • Eggs – Create that fluffy filling we crave; remove from heat just before fully set for a creamier texture.
  • Monterey Jack Cheese – Delivers a melty finish; try cheddar or dairy-free cheese if preferred.

For the Tacos

  • Corn Tortillas – Act as the taco shell; swap for flour tortillas for a different mouthfeel.

Step‑by‑Step Instructions for Tasty Baked Breakfast Tacos

Step 1: Preheat the Oven
Begin by preheating your oven to 375°F (190°C). This is an essential step, as a properly heated oven will ensure that your Tasty Baked Breakfast Tacos cook evenly and achieve a delightful crispiness.

Step 2: Bake the Bacon
Spread the bacon strips evenly on an ungreased cookie sheet and pop them into the preheated oven. Allow the bacon to bake for about 10 minutes or until it becomes crispy and golden brown. Once done, remove it from the oven, let it cool slightly, and chop it into small pieces for easy filling.

Step 3: Prepare the Potatoes
While the bacon bakes, heat about 2 tablespoons of canola oil in a skillet over medium heat. Once hot, add the cubed Yukon Gold or Russet potatoes and sprinkle them generously with taco seasoning. Cook them for 15–20 minutes, stirring occasionally, until they become fork-tender and crispy on the outside, creating a flavorful base for your tacos.

Step 4: Arrange the Tortillas
Next, take your warm corn tortillas and arrange them in a greased baking dish, forming them into open taco shapes. Ensure they maintain their shape as this will hold all your delicious fillings perfectly. This step sets the stage for your delectable Tasty Baked Breakfast Tacos.

Step 5: Scramble the Eggs
In a clean skillet, add the beaten eggs and cook them over medium heat. Stir gently and continuously until the eggs are just set but still slightly creamy. This will ensure they stay fluffy and delicious when baked. Remove them from heat, as they will continue to cook slightly in the next steps.

Step 6: Assemble the Tacos
It’s time for assembly! Start by spooning a generous portion of the seasoned potatoes into each tortilla, followed by a layer of the fluffy scrambled eggs and crispy bacon pieces. Finish off by sprinkling a good amount of Monterey Jack cheese on top, waiting for that melt-in-your-mouth moment that makes these breakfast tacos so irresistible.

Step 7: Bake the Tacos
Carefully place your assembled tacos back in the oven and bake for an additional 10 minutes. This will allow the cheese to melt beautifully, creating a deliciously gooey topping over your Tasty Baked Breakfast Tacos. Keep an eye on them to ensure they don’t over-bake!

Step 8: Serve Hot
Once baked, remove the tacos from the oven and serve them hot. These Tasty Baked Breakfast Tacos are best enjoyed immediately. Pair with fresh fruit, salsa, or your favorite toppings for a complete and satisfying breakfast experience.

What to Serve with Tasty Baked Breakfast Tacos

Imagine brightening your breakfast table with vibrant side dishes that complement these delightful tacos perfectly!

  • Fresh Fruit Salad: A medley of seasonal berries and citrus adds a refreshing zing, balancing the savory goodness of the tacos.

  • Pico de Gallo: This zesty salsa adds a burst of flavor and freshness that cuts through the richness of the melted cheese and eggs.

  • Creamy Avocado Toast: Spread smooth avocado on crunchy bread for a satisfying crunch that pairs beautifully with the soft textures of your tacos.

  • Refried Beans: Rich, hearty, and protein-packed, these beans make a classic Mexican side that rounds out the meal perfectly!

  • Spicy Salsa Verde: A drizzle of this vibrant green salsa brings an exciting kick that amplifies the flavor profiles of the breakfast tacos.

  • Crispy Hash Browns: The added crunch of golden brown hashbrowns provides a lovely textural contrast with each bite of your tacos, making breakfast even more satisfying.

  • Hot Coffee: Start your day right with a warm cup of coffee that enhances the flavors of breakfast, offering the perfect cozy beverage to sip alongside.

  • Chocolate Chip Pancakes: For a sweet twist, fluffy pancakes filled with delicious chocolate chips can create a wonderfully indulgent breakfast experience, pleasing both kids and adults alike!

How to Store and Freeze Tasty Baked Breakfast Tacos

Fridge: Store your Tasty Baked Breakfast Tacos in an airtight container for up to 3 days. Separate layers with parchment paper to prevent sticking and keep them fresh.

Freezer: Wrap individual tacos tightly in foil or freezer-safe bags. They can be frozen for up to 3 months. Thaw in the fridge overnight before reheating.

Reheating: For the best results, reheat in a preheated oven at 350°F until warmed through and crispy, about 15-20 minutes. Alternatively, use a microwave for 1-2 minutes for a quicker option.

Tips for the Best Tasty Baked Breakfast Tacos

  • Warm Tortillas: Pre-warm the corn tortillas in a skillet to keep them pliable and avoid cracking during assembly.

  • Perfectly Cooked Eggs: Stop cooking the scrambled eggs just before fully set for a creamy texture in your Tasty Baked Breakfast Tacos.

  • Uniform Potatoes: Cut potatoes into even cubes for consistent cooking; this ensures they crisp up beautifully and don’t end up undercooked.

  • Crispy Bacon Trick: Start baking bacon in a cold oven to render the fat slowly, resulting in perfectly crispy pieces without burning.

  • Seasoning Balance: Adjust taco seasoning based on your taste; remember that homemade blends let you control sodium and flavors.

Make Ahead Options

These Tasty Baked Breakfast Tacos are perfect for busy home cooks looking to save time during hectic mornings! You can prepare the potato and bacon filling up to 24 hours in advance by cooking the potatoes and baking the bacon, then simply store them in airtight containers in the fridge. When you’re ready to enjoy your breakfast tacos, scramble the eggs fresh right before assembly to ensure they remain fluffy and delicious. Assemble the tacos with the prepped fillings, sprinkle with cheese, and bake for about 10 minutes until the cheese is melted and bubbly. This way, you’ll have a warm, satisfying breakfast ready to serve with minimal effort!

Tasty Baked Breakfast Tacos Variations

Feel free to explore these delightful variations to make these tacos truly your own!

  • Protein Swap: Substitute bacon with sausage or smoked salmon for a tasty twist that adds richness to your tacos. Go bold with flavors and see what brings you joy!

  • Veggie Boost: Add colorful vegetables like bell peppers, onions, or spinach for extra nutrition and flavor. Not only will they enhance the presentation, but they’ll also create a heartier taco experience.

  • Cheese Choices: Experiment with different types of cheese such as pepper jack for a kick or feta for a Mediterranean flair. Mixing and matching creates a fun cheese adventure!

  • Spicy Kick: For those who crave heat, add jalapeños or a splash of hot sauce to the filling. A little spice is all you need for a warm morning surprise!

  • Dairy-Free Delight: Use a dairy-free cheese alternative for a lactose-free option, making these tacos suitable for everyone in the family. With flavors locked in, you won’t even miss the dairy!

  • Sweet Touch: Try drizzling a little honey or maple syrup on top for a sweet and savory contrast. This unexpected twist might just become your new favorite!

  • Wrap It Up: Instead of corn tortillas, use whole wheat tortillas or lettuce wraps for a lighter option. This swap is perfect for keeping it fresh and fun!

  • Make-ahead Freedom: Prepare your filling in advance and store it in the fridge. On busy mornings, just assemble and bake—effortless enjoyment for you!

Remember, these tasty variations can turn your breakfast experience into a groundbreaking morning ritual. For a complete meal, serve with fresh fruit or a side of refried beans alongside these delicious tacos!

Tasty Baked Breakfast Tacos Recipe FAQs

What kinds of potatoes work best for this recipe?
Yukon Gold or Russet potatoes offer a buttery flavor and ideal texture, crispy on the outside and tender on the inside. For quicker cooking, red potatoes can be substituted. Make sure to cut them into even cubes for consistent cooking!

How should I store leftovers?
Store your Tasty Baked Breakfast Tacos in an airtight container in the fridge for up to 3 days. To keep them fresh and prevent sticking, separate layers with parchment paper. You can reheat them in a preheated oven at 350°F for about 15-20 minutes for that scrumptious crispness!

Can I freeze these breakfast tacos?
Absolutely! Wrap each taco tightly in foil or place them in freezer-safe bags to keep them fresh. They can be stored in the freezer for up to 3 months. When you’re ready to enjoy them, thaw in the fridge overnight, then reheat in the oven for optimal results.

What can I do if the potatoes are undercooked?
If you find your potatoes are undercooked after assembling the tacos, simply return them to the oven and bake for an additional 5-10 minutes, allowing them to crisp and soften further. Keeping the potato cubes uniform in size will help avoid this issue!

Are these breakfast tacos suitable for dietary restrictions?
Definitely! You can easily adapt this recipe to accommodate various dietary needs. For a leaner protein, substitute bacon with turkey bacon or sausage. To make this dish gluten-free, opt for corn tortillas, and if you’re looking for dairy-free options, use dairy-free cheese. Always check ingredient labels to manage allergies.

Can I make these tacos ahead of time?
Yes! You can prep the potato and bacon filling a day before. Just store them in the fridge, and scramble the eggs fresh right before assembly. This make-ahead approach allows you to whip up your Tasty Baked Breakfast Tacos in hardly any time during those hectic mornings.

Tasty Baked Breakfast Tacos

Tasty Baked Breakfast Tacos You’ll Crave Every Morning

Delicious Tasty Baked Breakfast Tacos featuring crispy potatoes, fluffy scrambled eggs, and savory bacon.
Prep Time 15 minutes
Cook Time 30 minutes
Total Time 45 minutes
Servings: 4 tacos
Course: Breakfast
Cuisine: Mexican
Calories: 300

Ingredients
  

For the Filling
  • 6 slices Bacon Consider turkey bacon for a healthier twist.
  • 2 cups Potatoes (Yukon Gold or Russet) Red potatoes work if you need quicker cooking.
  • 2 tablespoons Canola Oil Substitute with vegetable or olive oil if needed.
  • 1 tablespoon Taco Seasoning Opt for a homemade blend for a lower sodium option.
  • 4 large Eggs Remove from heat just before fully set for a creamier texture.
  • 1 cup Monterey Jack Cheese Try cheddar or dairy-free cheese if preferred.
For the Tacos
  • 8 pieces Corn Tortillas Swap for flour tortillas for a different mouthfeel.

Equipment

  • Oven
  • Skillet
  • Baking dish
  • cookie sheet
  • knife
  • cutting board

Method
 

Step-by-Step Instructions
  1. Preheat your oven to 375°F (190°C).
  2. Spread the bacon strips evenly on an ungreased cookie sheet and bake for about 10 minutes.
  3. Heat about 2 tablespoons of canola oil in a skillet and add the cubed potatoes with taco seasoning. Cook for 15–20 minutes until fork-tender and crispy.
  4. Arrange warm corn tortillas in a greased baking dish, forming open taco shapes.
  5. In a clean skillet, scramble the eggs over medium heat until just set but still slightly creamy.
  6. Assemble the tacos with seasoned potatoes, scrambled eggs, and crispy bacon. Top with Monterey Jack cheese.
  7. Bake the assembled tacos in the oven for an additional 10 minutes to melt the cheese.
  8. Serve hot, pairing with fresh fruit or salsa.

Nutrition

Serving: 1tacoCalories: 300kcalCarbohydrates: 35gProtein: 15gFat: 12gSaturated Fat: 4gPolyunsaturated Fat: 2gMonounsaturated Fat: 5gCholesterol: 200mgSodium: 450mgPotassium: 600mgFiber: 3gSugar: 2gVitamin A: 800IUVitamin C: 15mgCalcium: 150mgIron: 2mg

Notes

Warm tortillas before assembly to avoid cracking. Adjust taco seasoning to taste.

Tried this recipe?

Let us know how it was!

Delightful Christmas Ice Cream Snowmen for Your Holiday Fun

Amid the hustle and bustle of the holiday season, nothing brings a smile quite like a charming dessert. The No-Bake Christmas Ice Cream Snowmen are a delightful solution, offering a whimsical twist to your festive gatherings. These easy holiday treats require no baking, making them a perfect choice for busy schedules while doubling as a fun family activity. As we craft these frosty figures, you’ll quickly discover how this customizable dessert can delight both kids and adults alike. Let’s dive into creating a sweet centerpiece that promises to be the highlight of your holiday table—who wouldn’t want to decorate their very own snowman?

Why Make Christmas Ice Cream Snowmen?

Easy to Assemble: With no baking required, these snowmen are a breeze to create. Family Fun: Gather the kids for an interactive and enjoyable dessert-making experience. Customizable Delight: Choose your favorite ice cream flavors and decorations, adapting them to suit all preferences. Festive Presentation: Their whimsical design makes them a stunning centerpiece. Quick Freezing: Ready in under an hour; perfect for busy holiday schedules. Create these delightful No-Bake Christmas Ice Cream Snowmen and watch both kids and adults smile with joy!

Christmas Ice Cream Snowmen Ingredients

For the Snowmen

  • Vanilla Ice Cream – A creamy base for the snowmen; ensure it’s easy to scoop. Opt for ice cream with fewer stabilizers for the best texture.
  • Mini Sugar Cones – Serves as the snowmen’s hats; can be swapped with waffle cones for variety.
  • Mini Chocolate Chips – Used for eyes and mouths; their small size helps them stay put during decoration.
  • Mini Orange Candies/Tic Tacs – Perfect for creating carrot noses; select candies that adhere well.
  • White Icing – Acts as glue for attaching decorations; a piping bag is recommended for neat application.

Step‑by‑Step Instructions for Christmas Ice Cream Snowmen

Step 1: Prep Ice Cream
Start by scooping your vanilla ice cream into a bowl and allowing it to soften slightly at room temperature for about 5 minutes. You’ll want it to be creamy enough to scoop but not too melted. This will make it easier to work with as you create your delightful Christmas Ice Cream Snowmen.

Step 2: Scoop Ice Cream
Using an ice cream scoop, create one large scoop for the snowman’s body and one smaller scoop for the head. Carefully stack the smaller scoop on top of the larger one, ensuring the snowman stands well. This layering is key to forming the perfect whimsical shape of your snowman.

Step 3: Freeze Snowmen
Once your snowmen are stacked, place them on a parchment-lined tray to keep them from sticking. Transfer the tray to the freezer and allow your creations to firm up for at least 20 minutes. This step is essential to ensure that your snowmen hold their shape while decorating.

Step 4: Add Decorations
Retrieve the frozen snowmen from the freezer, and quickly use white icing to attach mini chocolate chips for eyes and mouths, and mini orange candies for the noses. Working swiftly ensures that the ice cream remains firm and the decorations adhere properly. Let your creativity shine as you make each snowman unique!

Step 5: Final Freeze
After decorating, return your Christmas Ice Cream Snowmen to the freezer for an additional 10 minutes. This final chilling time will help set the icing and keep your cheerful creations intact. Once done, your festive treats will be ready to impress family and friends at your holiday gathering!

Christmas Ice Cream Snowmen Variations

Feel free to get creative with your Christmas Ice Cream Snowmen and make them uniquely yours by trying these fun twists!

  • Flavor Change: Swap vanilla ice cream for chocolate or strawberry for a fun twist on flavor!
    Experimenting with different ice cream options can lead to delightful surprises. Imagine a chocolate snowman decorated with colorful candies!

  • Dairy-Free Delight: Use coconut or almond milk-based ice cream for a dairy-free version.
    This variation allows lactose-intolerant guests to join in on the festive fun without compromising on taste!

  • Sugar-Free Swap: Opt for sugar-free ice cream and low-calorie candies to cater to health-conscious friends.
    Everyone should get to enjoy the sweetness of the holidays; these alternatives are just as festive and delicious!

  • Add Sprinkles: Top your snowmen with seasonal sprinkles for extra flair and color.
    These little decorations add a pop of personality and joy to each snowman, making them even more delightful for kids.

  • Elevated Toppings: Incorporate crushed peppermint or holiday spices for an aromatic touch.
    The refreshing kick of mint or warm cinnamon perfectly complements the sweetness of the ice cream.

  • Make-Your-Own Station: Set up a decorating station with various candies and toppings.
    Let guests create their unique snowmen! This interactive element engages everyone, making it a lovely family activity.

  • Spice it Up: Add a hint of cinnamon or nutmeg into your vanilla ice cream for a cozy flavor addition.
    This warm twist captures the essence of festive baking, ensuring they taste as good as they look!

  • Chocolate Dipped Hats: Dip the tops of your mini sugar cones in melted chocolate before decorating.
    This simple twist adds an extra level of deliciousness and brings a rich flavor contrast to your snowy treats.

For more inspiration, consider pairing your snowmen with some warm gingerbread cookies or a cozy hot chocolate bar. You can also check out our delightful No-Bake Cookies and Cream Cheesecake Cups for another festive treat!

Expert Tips for Christmas Ice Cream Snowmen

  • Work Quickly: Ice cream can melt fast! Have all your decorations ready before you start to ensure a smooth decorating process.

  • Soften the Right Amount: Let your vanilla ice cream soften just enough to scoop easily; too soft will make assembly tricky.

  • Stable Base: Always place your snowmen on a parchment-lined tray while freezing. This prevents sticking and ensures easy movement to the freezer.

  • Fun Alternatives: Feel free to swap out the vanilla ice cream for chocolate or strawberry for a twist on your Christmas Ice Cream Snowmen.

  • Decorate with Care: Use a piping bag to apply white icing neatly, helping to create a clean and polished look for your snowmen.

  • Keep Frozen: Store any leftover snowmen in an airtight container, separated by parchment. They will stay fresh for up to two weeks!

Storage Tips for Christmas Ice Cream Snowmen

  • Fridge: These snowmen do best in the freezer, but if you must store them in the fridge temporarily, limit the time to no more than 10 minutes before serving to prevent melting.

  • Freezer: Keep your assembled Christmas Ice Cream Snowmen in an airtight container, separated by parchment paper, to retain their shape and freshness for up to 2 weeks.

  • Serving: Before serving, remove the snowmen from the freezer and let them sit at room temperature for about 5 minutes to soften slightly. This makes them easier to enjoy!

  • Reheating: There’s no need to reheat these festive treats; simply thaw them for a few minutes at room temperature when you’re ready to serve.

What to Serve with No-Bake Christmas Ice Cream Snowmen

Elevate your holiday gathering with delightful accompaniments that perfectly complement these charming treats.

  • Warm Gingerbread Cookies: Their spiced warmth contrasts beautifully with the icy sweetness of the snowmen, creating a delightful taste experience.
  • Hot Chocolate Bar: A rich and creamy hot chocolate pairs wonderfully, with marshmallows and whipped cream adding a festive touch to your dessert spread.
  • Peppermint Bark: This sweet and crunchy treat enhances the holiday spirit, adding a minty freshness that balances the creaminess of the snowmen.
  • Fruit Salad: A vibrant mix of seasonal fruits adds a refreshing element, brightening up your dessert table and offering a healthier option alongside the sweet snowmen.
  • Spiced Apple Cider: This cozy beverage warms hearts and homes, making it the perfect drink to sip on while enjoying your festive desserts.
  • Brownie Bites: Rich, fudgy brownie bites provide a decadent chocolate contrast to the vanilla ice cream, appealing to all chocolate lovers.
  • Pecan Pie Bars: These sweet, nutty bars offer a chewy texture that contrasts nicely with the soft ice cream, making for an indulgent pairing.
  • Mini Cheesecakes: Light and creamy, these mini delights can be flavored with holiday spices or fruits, providing a smooth, refreshing counterpoint to your snowmen.

Make Ahead Options

These No-Bake Christmas Ice Cream Snowmen are perfect for meal prep enthusiasts who want to save time during the festive season! You can assemble the snowmen up to 24 hours in advance without losing quality. Simply prepare the ice cream sculptures and then place them in an airtight container lined with parchment paper; this helps prevent sticking. When ready to decorate, just retrieve them from the freezer and apply the icing and decorations quickly—this ensures they maintain their delightful shape. After decoration, return them to the freezer for an additional 10 minutes to set. With this prep, you’ll have delightful holiday treats ready to impress your guests with minimal last-minute effort!

Christmas Ice Cream Snowmen Recipe FAQs

What kind of ice cream is best for making snowmen?
Absolutely! I recommend using high-quality vanilla ice cream. Opt for varieties with fewer stabilizers, as they tend to scoop better and create a creamier texture for your snowmen. If you’re feeling adventurous, try chocolate or strawberry ice cream for a fun twist!

How should I store the ice cream snowmen?
To keep your Christmas Ice Cream Snowmen fresh, store them in an airtight container, separated by parchment paper. This will prevent them from sticking together and help maintain their shape. They’ll stay delightful in the freezer for up to 2 weeks—perfect for holiday parties!

Can I freeze the snowmen once decorated?
Very much so! After decorating, return your snowmen to the freezer for an additional 10 minutes. This final freeze helps set the icing and keeps your charming creations intact. Make sure to place them on a parchment-lined tray to avoid any sticking!

What if my ice cream is too soft to scoop?
No worries at all! If you find that your ice cream is too soft, simply let it freeze for a little longer until it firms up. Alternatively, you can put it back in the freezer for 10-15 minutes before attempting to scoop again. It’s all about getting that perfect consistency for easy assembly!

Are there any allergen concerns with the decorations?
Yes! It’s important to check for allergies, especially with the mini chocolate chips and orange candies. Some brands may contain common allergens like dairy or nuts. I recommend reading labels closely to ensure all ingredients are safe for everyone enjoying your festive treats!

How can I customize the decorations for dietary restrictions?
You can easily adapt the decorations to cater to dietary needs! Use dairy-free chocolate chips and alternative candies such as gummies or fruit chews that are free from common allergens. For icing, consider making your own using powdered sugar and almond milk to ensure it meets everyone’s dietary preferences. The more the merrier when it comes to decorating your snowmen!

Christmas Ice Cream Snowmen

Delightful Christmas Ice Cream Snowmen for Your Holiday Fun

Create charming Christmas Ice Cream Snowmen that will bring joy to your holiday gatherings with this no-bake recipe.
Prep Time 5 minutes
Freezing Time 30 minutes
Total Time 35 minutes
Servings: 8 snowmen
Course: Dessert
Cuisine: American
Calories: 200

Ingredients
  

For the Snowmen
  • 1 quart Vanilla Ice Cream Opt for ice cream with fewer stabilizers for the best texture.
  • 8 pieces Mini Sugar Cones Can be swapped with waffle cones for variety.
  • 16 pieces Mini Chocolate Chips Used for eyes and mouths.
  • 8 pieces Mini Orange Candies/Tic Tacs Perfect for creating carrot noses.
  • 1 cup White Icing Acts as glue for attaching decorations.

Equipment

  • Ice cream scoop
  • piping bag
  • Parchment paper
  • tray

Method
 

Step-by-Step Instructions for Christmas Ice Cream Snowmen
  1. Start by scooping your vanilla ice cream into a bowl and allowing it to soften slightly at room temperature for about 5 minutes.
  2. Using an ice cream scoop, create one large scoop for the snowman’s body and one smaller scoop for the head. Stack the smaller scoop on top of the larger one.
  3. Place the snowmen on a parchment-lined tray and transfer to the freezer for at least 20 minutes.
  4. Use white icing to attach mini chocolate chips for eyes and mouths, and mini orange candies for the noses.
  5. Return your snowmen to the freezer for an additional 10 minutes to set the icing.

Nutrition

Serving: 1snowmanCalories: 200kcalCarbohydrates: 30gProtein: 2gFat: 8gSaturated Fat: 5gCholesterol: 30mgSodium: 70mgPotassium: 100mgSugar: 18gVitamin A: 200IUCalcium: 60mg

Notes

Store any leftover snowmen in an airtight container, separated by parchment. They will stay fresh for up to two weeks.

Tried this recipe?

Let us know how it was!

Irresistibly Smooth Classic Orange Tart for Every Occasion

As the fragrance of fresh orange zest wafts through my kitchen, memories of sunny afternoons come rushing back, reminding me why I adore making a Classic Orange Tart. This elegant dessert is a luscious blend of sweet and tangy flavors, and it’s so approachable that even novice bakers can impress their guests without feeling overwhelmed. The buttery, flaky crust cradles a creamy orange curd filling that practically melts in your mouth, making it a delightful centerpiece for any occasion. Plus, it’s a make-ahead marvel, giving you more time to revel in the company of your loved ones. Are you ready to elevate your dessert game and bring a touch of sunshine to your table? Let’s dive into this delightful recipe together!

Why Is This Classic Orange Tart Special?

Elegance Reimagined: This classic orange tart brings a touch of sophistication to any gathering without the fuss.

Flavor Harmony: The bright, zesty orange curd combines sweetness and a hint of tang, creating a taste that dances on your palate.

Make-Ahead Convenience: Perfect for busy hosts, this dessert can be prepared a day in advance, allowing flavors to deepen and ensuring you’re stress-free when serving.

Flexible Ingredients: Substitute ingredients easily—opt for gluten-free flour or try lemon for a citrus twist.

Visually Stunning: Its charming presentation, adorned with whipped cream and fresh fruit, makes it the ideal centerpiece for your dessert table, sure to wow your guests just like a homemade American Potato Salad would at a picnic.

Enjoy this delightful tart that promises both flavor and ease, making your dessert experience truly memorable!

Classic Orange Tart Ingredients

  • For the Crust
    Flour – Structure is key; substitute with gluten-free flour for a gluten-free option.
    Powdered Sugar – Provides sweetness and a smooth texture; regular sugar can alter the crust’s feel.
    Almond Flour – Adds nuttiness and moisture; can be replaced with all-purpose flour or coconut flour.
    Salt – Essential for flavor balance; don’t skip it!
    Orange Zest – Infuses vibrant flavor; use zest from Navel or Valencia oranges for the best results.
    Chilled Butter – Creates that flaky texture we love; margarine may be used, although results can vary.
    Egg Yolk – Contributes richness and structure; don’t replace with whole eggs for the crust.
    Cold Water – Binds the dough; ice water is preferred.

  • For the Orange Curd
    Fresh Orange Juice – The main flavor component; other citrus juices can be used but will alter the profile.
    Superfine Sugar – Sweetens and produces a silky texture; can substitute regular granulated sugar—just blend or sift for smoothness.
    Cornstarch – Acts as a thickening agent; arrowroot or egg yolks can be alternatives.
    Gelatin – Helps set the curd; agar-agar is a great vegetarian substitute.
    Unsalted Butter – Adds richness and creaminess; switch to clarified butter, but be prepared for a flavor change.

  • For the Topping
    Heavy Cream – Whipped for a luscious topping; can replace with coconut cream for a dairy-free option.
    Powdered Sugar – Sweetens whipped cream; adjust to taste.

Step‑by‑Step Instructions for Classic Orange Tart

Step 1: Prepare the Crust
In a food processor, combine flour, powdered sugar, almond flour, salt, and orange zest. Pulse in chilled butter until the mixture resembles coarse crumbs. Next, add the egg yolk and cold water, and mix until a dough forms. Wrap the dough in plastic wrap and chill in the refrigerator for at least 15 minutes, ensuring it remains firm and easy to handle.

Step 2: Blind Bake the Crust
On a lightly floured countertop, roll out the chilled dough into a 12-inch circle and transfer it to a greased tart pan, pressing it into the edges. Place the lined pan in the refrigerator for another 15 minutes to firm up. Preheat the oven to 375°F (190°C), then bake the crust with pie weights for 12-15 minutes. Remove the weights and bake for an additional 10-12 minutes until the crust is golden brown. Allow it to cool completely.

Step 3: Make the Orange Curd
In a medium saucepan, gently heat the fresh orange juice over low heat. Meanwhile, whisk together egg yolks, superfine sugar, and cornstarch in a bowl. Gradually temper the eggs by slowly adding the warm orange juice, then pour the mixture back into the saucepan. Cook on low heat for about 5-7 minutes, stirring constantly until thickened, taking care not to scramble the eggs.

Step 4: Incorporate Gelatin and Butter
Once the orange curd has thickened, remove it from the heat. Stir in the gelatin and unsalted butter until fully melted and combined, creating a smooth texture. Allow the curd to cool slightly before pouring it into the prepared crust. Smooth out the top with a spatula and refrigerate for at least 3 hours, or overnight, to let the flavors meld and the filling set perfectly.

Step 5: Prepare the Whipped Topping
Using an electric mixer, whip the heavy cream with powdered sugar in a chilled bowl until stiff peaks form. Be careful not to over-whip, as you want a light and airy texture. Once your Classic Orange Tart has set, carefully garnish it with this luscious whipped cream, adding fresh orange segments, crushed pistachios, and a sprig of mint for that extra pop of color and flavor.

How to Store and Freeze Classic Orange Tart

Fridge: Store your Classic Orange Tart in the refrigerator, covered with plastic wrap, for up to 3 days. This keeps it fresh while safeguarding the delicate flavors.

Make-Ahead: You can prepare the tart shell and orange curd filling up to 2 days in advance. Store them separately in the fridge, then assemble just before serving for optimal freshness.

Freezer: To freeze, wrap the fully cooled tart tightly in plastic wrap and aluminum foil. It can be frozen for up to 1 month. Thaw it in the fridge overnight before serving.

Reheating: If serving cold, just bring it out of the fridge shortly before enjoying. For a warm twist, you can briefly bake it at 350°F (175°C) for about 10 minutes, but be cautious not to overheat.

Expert Tips for Classic Orange Tart

  • Avoid Overworking Dough: Gently mix the dough to maintain flakiness; overworking can lead to a tough crust instead of a tender one.

  • Proper Blind Baking: Ensure the crust is pre-baked with weights, preventing it from puffing. This step is essential for a crisp, even base.

  • Low Heat for Curd: Cook the orange curd on low heat; avoid boiling to prevent scrambled eggs in your smooth filling.

  • Chill Time Matters: Allow the tart to chill for a minimum of 3 hours to let the flavors meld and ensure the curd sets properly before serving.

  • Natural Sweetness: Use fresh, high-quality oranges for the juiciest flavor in the filling, keeping the essence of the Classic Orange Tart bright and delicious.

What to Serve with Perfectly Elegant Orange Tart

Transform your dessert experience by pairing this lovely tart with delightful accompaniments that will elevate its flavors.

  • Fresh Berries: The natural sweetness and acidity of strawberries or blueberries create a delightful counterbalance to the tangy orange curd, enhancing each bite.
  • Chocolate Drizzle: A rich, dark chocolate sauce drizzled atop the tart adds a luxurious depth, creating a beautiful contrast of flavors that guests will adore.
  • Mint Sprig: A fresh mint garnish not only brightens the presentation but also adds a refreshing note that perfectly complements the citrus, inviting every palate to savor the moment.
  • Pistachios: Crushed pistachios sprinkled on top provide a lovely crunch and nutty flavor that harmonizes beautifully with the creamy filling, adding texture to each slice.
  • Ice Cream: A scoop of vanilla or coconut ice cream pairs beautifully, offering a creamy contrast to the tart’s silky filling while cooling off the palate.
  • Herbal Tea: A warm, soothing cup of chamomile or lemon thyme tea will beautifully complement the tart, enhancing the citrus flavor while adding a comforting touch to your meal ending.
  • Prosecco: A glass of bubbly Prosecco or sparkling wine adds a festive flair, perfectly balancing the dessert’s sweetness with its effervescence and brightness.
  • Fruit Salad: A refreshing fruit salad with citrus and melons adds vibrant colors and varied textures, serving as a light contrast to the dense richness of the tart.
  • Lemon Curd: A side of lemon curd as a dip offers an unexpected and delightful tartness, echoing the flavors while providing a new twist alongside your orange tart.

Make Ahead Options

These Classic Orange Tarts are perfect for meal prep enthusiasts looking to save time! You can prepare the tart crust and the orange curd up to 48 hours in advance. To start, make the crust, blind bake it, and allow it to cool completely before storing it in an airtight container at room temperature. For the curd, follow the instructions and pour it into the cooled crust, then refrigerate for up to three days. This way, the flavors meld beautifully and it stays just as delicious! When you’re ready to serve, simply whip the cream and garnish with fresh toppings, ensuring your tart remains fresh and visually stunning for your guests.

Classic Orange Tart Variations & Substitutions

Feel free to get creative and tailor this classic orange tart to match your tastes—it’s all about making it your own!

  • Gluten-Free: Use gluten-free flour to make the crust, keeping the texture light and enjoyable for everyone.
  • Citrus Swap: Experiment with lemons or limes instead of oranges for a tangy twist that adds brightness and zest.
  • Dairy-Free Whipped Topping: Substitute heavy cream with coconut cream for a luscious, dairy-free topping that will still impress.
  • Flavored Liqueurs: Add a splash of Grand Marnier or Cointreau to the curd for an adult twist that deepens the flavor complexity.
  • Different Nuts: Use finely chopped walnuts or pecans instead of almond flour for a unique nutty flavor in the crust.
  • Chocolate Drizzle: For an elegant touch, drizzle melted dark chocolate over the tart before serving to complement the citrus flavors beautifully.
  • Fruit Accents: Top with fresh berries or kiwi slices for a vibrant garnish that enhances both the color and taste of your tart.
  • Jam Glaze: Brush a thin layer of orange marmalade or apricot jam over the cooled tart for a shiny, sweet finish that adds another dimension to the dessert.

Creating your own version of this beautiful tart can make serving it even more special, much like how you can personalize a dish of American Potato Salad for family gatherings or picnics! Let your culinary creativity shine!

Classic Orange Tart Recipe FAQs

How do I select the best oranges for my tart?
Absolutely! For the best flavor, choose Navel or Valencia oranges, which are not only juicy but also have a vibrant zest. Look for oranges that are firm, heavy for their size, and free from dark spots. If you can smell their fragrance when you hold them, that’s a good sign of ripeness!

How can I store my Classic Orange Tart once it’s made?
Very simply! Store your Classic Orange Tart in the refrigerator, tightly wrapped in plastic wrap, for up to 3 days. Make sure it’s covered to keep it fresh and to protect those delightful flavors from any odors in your fridge.

Can I freeze my Classic Orange Tart?
Yes! To freeze, allow your tart to cool completely, then wrap it tightly in plastic wrap, followed by aluminum foil. It can be stored in the freezer for up to 1 month. When you’re ready to enjoy, simply thaw it in the refrigerator overnight to preserve its texture!

What should I do if my crust turns out too tough?
Don’t worry! If your crust is tough, it’s usually because the dough was overworked or too much flour was added. For next time, gently mix and avoid adding extra flour when rolling out. If the crust has already been baked, consider topping it with a generous layer of whipped cream to add moisture and richness!

Is this Classic Orange Tart suitable for vegetarians?
Yes, indeed! To make this tart vegetarian-friendly, simply substitute gelatin with agar-agar in the orange curd. Follow the package instructions for the proper ratio, typically about 1 tablespoon of agar-agar for every cup of liquid, which will help set your curd beautifully!

Can I make substitutions for any of the ingredients?
Absolutely! You can easily adjust the ingredients based on dietary preferences. For a gluten-free version, use gluten-free flour instead of all-purpose flour. Also, replace almond flour with coconut flour for a different flavor, or swap heavy cream for coconut cream in the topping for a dairy-free alternative!

Classic Orange Tart

Irresistibly Smooth Classic Orange Tart for Every Occasion

Make a delightful Classic Orange Tart with a rich orange curd filling and flaky crust, perfect for any occasion.
Prep Time 15 minutes
Cook Time 30 minutes
Chilling Time 3 hours
Total Time 3 hours 45 minutes
Servings: 8 slices
Course: Dessert
Cuisine: French
Calories: 350

Ingredients
  

For the Crust
  • 1 cup Flour Can substitute with gluten-free flour.
  • 1/4 cup Powdered Sugar Regular sugar can alter the crust's feel.
  • 1/4 cup Almond Flour Can be replaced with all-purpose flour or coconut flour.
  • 1/4 teaspoon Salt Essential for flavor balance.
  • 2 tablespoons Orange Zest Use zest from Navel or Valencia oranges.
  • 1/2 cup Chilled Butter Margarine may alter results.
  • 1 large Egg Yolk Avoid using whole eggs in the crust.
  • 3-4 tablespoons Cold Water Ice water is preferred.
For the Orange Curd
  • 1 cup Fresh Orange Juice Can use other citrus juices, but flavor will change.
  • 3/4 cup Superfine Sugar Substitute with regular granulated sugar if blended.
  • 2 tablespoons Cornstarch Arrowroot or egg yolks can be alternatives.
  • 1 teaspoon Gelatin Agar-agar is a vegetarian substitute.
  • 4 tablespoons Unsalted Butter Switch to clarified butter if necessary.
For the Topping
  • 1 cup Heavy Cream Can substitute with coconut cream for dairy-free.
  • 2 tablespoons Powdered Sugar Adjust to taste.

Equipment

  • Food processor
  • Tart Pan
  • Electric Mixer
  • Saucepan

Method
 

Preparing the Tart
  1. In a food processor, combine flour, powdered sugar, almond flour, salt, and orange zest. Pulse in chilled butter until the mixture resembles coarse crumbs. Add the egg yolk and cold water, and mix until a dough forms. Wrap in plastic and chill for at least 15 minutes.
  2. On a lightly floured surface, roll out the dough into a 12-inch circle. Transfer it to a greased tart pan and press into the edges. Chill in the refrigerator for 15 minutes. Preheat the oven to 375°F (190°C) and bake with pie weights for 12-15 minutes. Remove weights and bake for an additional 10-12 minutes until golden. Let cool completely.
  3. In a medium saucepan, gently heat the orange juice over low heat. Whisk together egg yolks, superfine sugar, and cornstarch in a bowl. Gradually add the warm juice to temper the eggs, then pour back into the saucepan. Cook on low for 5-7 minutes, stirring until thickened.
  4. Remove from heat and stir in the gelatin and unsalted butter until melted. Pour the curd into the prepared crust. Smooth the top and refrigerate for at least 3 hours.
  5. Whip the heavy cream with powdered sugar in a chilled bowl until stiff peaks form. Garnish the tart with whipped cream, fresh orange segments, crushed pistachios, and mint.

Nutrition

Serving: 1sliceCalories: 350kcalCarbohydrates: 30gProtein: 3gFat: 25gSaturated Fat: 15gPolyunsaturated Fat: 0.5gMonounsaturated Fat: 5gCholesterol: 80mgSodium: 150mgPotassium: 150mgFiber: 1gSugar: 18gVitamin A: 200IUVitamin C: 40mgCalcium: 30mgIron: 1mg

Notes

Use fresh, high-quality oranges for the best flavor. Avoid overworking the dough and ensure proper blind baking for a crisp crust.

Tried this recipe?

Let us know how it was!

Creamy Coconut Rice Pudding with Mango Bliss and Honey

The gentle aroma of warm coconut rice pudding wafts through the kitchen, momentarily whisking me away to sun-kissed shores and tropical breezes. This delightful bowl of comfort—infused with rich coconut milk and sweetened with Silvestre honey—makes the perfect treat to cozy up with during the chillier months. With vibrant mango slices adorning the top, it’s not just a feast for the stomach but also a satisfying feast for the eyes. What I love most about this Coconut Rice Pudding is how effortlessly it comes together, making it a fabulous option for both impromptu gatherings and quiet evenings at home. Plus, it’s gluten-free and dairy-free, inviting everyone to indulge in its creamy embrace without worry. Ready to experience this tropical twist on a classic? Let’s dive into the recipe!

Why is Coconut Rice Pudding a Must-Try?

Comforting and creamy, this Coconut Rice Pudding will instantly make you feel at home. Versatile toppings, like fresh mango or freeze-dried raspberries, allow you to customize each bowl. Time-saving and easy to prepare, it’s perfect for busy evenings or unexpected guests. Healthy yet indulgent, it’s gluten-free and dairy-free, catering to diverse diets. Discover why this delightful dessert has become a beloved classic—you might even find it pairs beautifully with a refreshing drink like our Pineapple Coconut Mojito for a complete treat!

Coconut Rice Pudding Ingredients

For the Pudding
Medium Grain Rice – This gives the pudding its desirable chewiness; short grain rice can also be used for a creamier texture.
Coconut Milk – Provides that rich, tropical flavor; almond milk is a good dairy-free alternative but won’t be as creamy.
Water – Use warm water as needed to adjust the pudding’s consistency during cooking.
Brazilian Iguaçu River Wildflower Honey (Silvestre) – Naturally sweetens the pudding; you can swap it with any quality honey or maple syrup for a vegan option.
Vanilla Extract – Enhances the overall aroma; always opt for pure extract for the best flavor.
Cinnamon – Adds a warm note; you can substitute with nutmeg for a different spice profile.
Salt – Balances the sweetness; don’t skip this essential ingredient.

For the Toppings
Fresh Mango – Offers vibrant sweetness and freshness; feel free to use other seasonal fruits like bananas or berries.
Mandarin Slices – Brightens the dish with zesty notes; they can be swapped out based on seasonality.
Freeze-Dried Raspberries – Provides a delightful crunch and color contrast; optional but highly recommended for an added touch.

Each ingredient in this Coconut Rice Pudding works synergistically to create a luscious dessert that’s sure to warm your heart and satisfy your cravings!

Step‑by‑Step Instructions for Coconut Rice Pudding

Step 1: Combine Ingredients
In a heavy-bottomed saucepan, mix 1 cup of medium grain rice, 2 cups of coconut milk, and 1 cup of warm water. Add ¼ cup of Brazilian Iguaçu River Wildflower Honey, 1 teaspoon of vanilla extract, ½ teaspoon of cinnamon, and a pinch of salt. Stir the ingredients together until well combined and the honey is fully dissolved, ensuring an inviting aroma fills your kitchen.

Step 2: Bring to a Boil
Set the saucepan over medium heat and bring the mixture to a gentle boil, stirring occasionally to prevent the rice from sticking to the bottom. Keep an eye on it, as the liquid will bubble and turn frothy; this should take around 5–7 minutes. The sweet scent of coconut will begin to fill the air, signaling that it’s time for the next step.

Step 3: Simmer and Cook
Once boiling, reduce the heat to low and cover the saucepan with a lid. Allow the coconut rice pudding to simmer for 40-50 minutes, stirring frequently to maintain creaminess and prevent it from clumping. As it cooks, the rice should become tender and the mixture thickens into a beautiful, rich pudding consistency—just perfect for your cozy dessert.

Step 4: Adjust Consistency
Throughout the cooking process, keep a watchful eye on your coconut rice pudding. If it becomes too thick, gradually stir in additional warm water, about ¼ cup at a time, until you reach your desired creamy texture. This will ensure your pudding remains luxurious without losing its delightful viscosity.

Step 5: Serve with Toppings
Once the pudding has reached that perfect creamy texture, remove it from the heat and let it cool slightly. Serve it warm in bowls topped with fresh diced mango, mandarin slices, and a sprinkle of freeze-dried raspberries for added crunch and color. Drizzle with a bit more honey for an extra touch of sweetness if desired, transforming your Coconut Rice Pudding into a tropical bliss!

Make Ahead Options

These Coconut Rice Pudding delights are perfect for busy home cooks looking to save time! You can prepare the pudding base up to 24 hours in advance; simply follow all cooking instructions, let it cool completely, and refrigerate it in an airtight container. To maintain the pudding’s luxurious creamy texture, gently stir in a little warm water before serving if it thickens overnight. When you’re ready to enjoy it, just reheat the pudding on low heat, and top with fresh mango slices and a drizzle of Silvestre honey. This way, you can savor a comforting dessert without the last-minute fuss!

How to Store and Freeze Coconut Rice Pudding

Fridge: Store your Coconut Rice Pudding in an airtight container for up to 3 days. Reheat gently on the stovetop or in the microwave with a splash of coconut milk to restore the creamy texture.

Freezer: If you’d like to freeze the pudding, portion it into freezer-safe containers—ideal for quick treats later. It can be kept for up to 3 months; thaw overnight in the fridge before reheating.

Reheating: When reheating, add a little water or coconut milk to help regain creaminess. Stir well while heating to ensure even warmth throughout.

Serving Tip: The pudding is best enjoyed warm with fresh toppings, but can be chilled for a delightful twist on a hot summer day!

What to Serve with Coconut Rice Pudding

The sweetness of coconut rice pudding pairs beautifully with a variety of flavorful companions, creating an unforgettable dining experience.

  • Fresh Fruit Salad: A mix of tropical fruits like pineapple and papaya brings out the coconut’s rich flavor while adding a refreshing crunch.
  • Crispy Coconut Cookies: These add a delightful textural contrast, with a sweet treat that complements the pudding’s creaminess perfectly.
  • Spicy Pineapple Salsa: The heat from the jalapeños in this salsa enhances the sweetness of the pudding, giving a vibrant twist to each bite.
  • Toasted Coconut Flakes: Sprinkle these over the top for an elegant touch; their nuttiness elevates the pudding to a new level of indulgence.
  • Chai Tea: The warm spices in chai tea create a cozy ambiance that complements the comforting flavors of the pudding beautifully.
  • Minted Iced Green Tea: A refreshing drink that contrasts well with the richness; the mint can awaken your palate after indulging.
  • Dark Chocolate Shavings: Adding these gives a lovely depth of flavor; the slight bitterness pairs beautifully with the sweet coconut and honey.
  • Cinnamon Sugar Dusting: A sprinkle of this on top before serving adds an aromatic and slightly crunchy finish to each warm bowl.
  • Vanilla Bean Ice Cream: The creaminess of the ice cream harmonizes with the pudding and solidifies a decadent dessert experience.
  • Honey Almond Biscotti: Perfect for dipping, it brings a lovely nutty flavor that resonates well with the honey used in the pudding.

Expert Tips for Coconut Rice Pudding

  • Choose the Right Rice: Opt for medium or short grain rice for the best texture; long grain can lead to a less creamy pudding.
  • Monitor the Heat: Cooking on low prevents sticking and ensures even cooking, so don’t rush the simmering process.
  • Adjust Liquid Gradually: If the pudding thickens too much, add warm water slowly, about ¼ cup at a time, to maintain that desired creamy consistency.
  • Taste for Sweetness: Keep in mind that different honeys vary in sweetness. Always adjust the amount of Silvestre honey to suit your palate.
  • Mix It Up: Explore various toppings—bananas, blueberries, or even a sprinkle of toasted coconut flakes can elevate your Coconut Rice Pudding experience!

Coconut Rice Pudding Variations & Substitutions

Feel free to let your creativity shine with these unique twists on this cozy dessert!

  • Fruit Swaps: Replace mango with bananas, berries, or peaches to suit your taste and what’s in season.

  • Sweetener Choices: For a healthier option, use agave syrup or stevia instead of honey to lower sugar content.

  • Add Nuts: Toss in some toasted almonds or cashews for a delightful crunch that adds both texture and nutrition.

  • Spice It Up: Amp up the flavor with ginger or cardamom in place of cinnamon for an exotic twist that surprises the palate.

  • Creamy Alternatives: Try using cashew or oat milk instead of coconut milk for a different flavor and texture profile.

  • Boozy Bliss: Add a splash of rum or coconut rum for an adults-only version that elevates this dessert to a tropical vacation experience.

  • Chill for a Treat: Serve this pudding chilled as a refreshing dessert during warmer months, garnished with fresh mint leaves.

  • Texture Enhancements: Fold in some chia seeds or a drizzle of coconut cream just before serving for an extra layer of flavor and creaminess.

Remember, whatever variation you choose, each bowl of Coconut Rice Pudding can become a unique masterpiece! For a delightful pairing, serve it alongside our irresistible Mango Coconut Pudding or a flavorful Coconut Curry Soup for a full tropical experience. Enjoy!

Coconut Rice Pudding with Mango and Honey Recipe FAQs

How do I choose ripe mangoes for the toppings?
Absolutely! Look for mangoes that are slightly soft to the touch and have a sweet aroma. The skin color can vary, so inspect for that subtle give when gently pressing. Ideal ripeness indicates they’ll be sweet, juicy, and perfect for topping your Coconut Rice Pudding.

What’s the best way to store leftover Coconut Rice Pudding?
Very! Store your Coconut Rice Pudding in an airtight container in the refrigerator for up to 3 days. Make sure to keep it sealed tightly to prevent it from absorbing odors. When you’re ready to enjoy it again, reheat gently on the stove or in the microwave, adding a splash of coconut milk for that creamy consistency.

Can I freeze Coconut Rice Pudding? If so, how?
Absolutely! To freeze, ladle your Coconut Rice Pudding into freezer-safe containers, leaving some space for expansion. It can be frozen for up to 3 months. When you’re ready to enjoy it, transfer it to the refrigerator to thaw overnight, then reheat gently on the stove, adding a little warm water or coconut milk to restore its creamy texture.

What should I do if my pudding turns out too thick?
If your Coconut Rice Pudding thickens more than you’d like, no worries! Gradually stir in additional warm water, about ¼ cup at a time. Return it to low heat while stirring until it reaches your desired consistency. This simple adjustment keeps it rich and delightful.

Is this recipe gluten-free and safe for those with dairy allergies?
Yes, indeed! The Coconut Rice Pudding is naturally gluten-free and dairy-free, making it a wonderful option for anyone with those dietary considerations. Just be mindful of the honey if you have specific allergies. You can easily substitute it with maple syrup for a vegan-friendly twist.

Can I use different fruits as toppings?
The more the merrier! Feel free to switch up the fruit toppings based on your preferences and what’s in season. Bananas, berries, or even peaches work wonderfully alongside or instead of mangoes, allowing you to customize this comforting dessert with your favorites!

Coconut Rice Pudding

Creamy Coconut Rice Pudding with Mango Bliss and Honey

Indulge in this delightful Coconut Rice Pudding, a creamy, gluten-free dessert topped with fresh mango and honey.
Prep Time 15 minutes
Cook Time 50 minutes
Cooling Time 5 minutes
Total Time 1 hour 10 minutes
Servings: 4 bowls
Course: Dessert
Cuisine: Tropical
Calories: 250

Ingredients
  

For the Pudding
  • 1 cup Medium Grain Rice Short grain can also be used.
  • 2 cups Coconut Milk Almond milk is a good substitute.
  • 1 cup Warm Water Use as needed for consistency.
  • 1/4 cup Brazilian Iguaçu River Wildflower Honey Can substitute with quality honey or maple syrup.
  • 1 teaspoon Vanilla Extract Use pure extract for best flavor.
  • 1/2 teaspoon Cinnamon Nutmeg can be used as a substitute.
  • 1 pinch Salt Essential for balancing sweetness.
For the Toppings
  • 1 cup Fresh Mango Diced for topping.
  • 1 cup Mandarin Slices Can be swapped based on season.
  • 1/4 cup Freeze-Dried Raspberries Optional but recommended.

Equipment

  • Heavy-Bottomed Saucepan

Method
 

Step-by-Step Instructions
  1. In a heavy-bottomed saucepan, mix 1 cup of medium grain rice, 2 cups of coconut milk, and 1 cup of warm water. Add ¼ cup of Brazilian Iguaçu River Wildflower Honey, 1 teaspoon of vanilla extract, ½ teaspoon of cinnamon, and a pinch of salt. Stir together until well combined.
  2. Set the saucepan over medium heat and bring the mixture to a gentle boil, stirring occasionally to prevent sticking. This should take around 5-7 minutes.
  3. Once boiling, reduce the heat to low and cover the saucepan. Allow the pudding to simmer for 40-50 minutes, stirring frequently.
  4. If it becomes too thick, gradually stir in additional warm water, about ¼ cup at a time, to maintain creamy texture.
  5. Serve warm in bowls topped with fresh mango, mandarin slices, and freeze-dried raspberries. Drizzle with more honey if desired.

Nutrition

Serving: 1bowlCalories: 250kcalCarbohydrates: 40gProtein: 3gFat: 10gSaturated Fat: 8gPolyunsaturated Fat: 0.5gMonounsaturated Fat: 1.5gSodium: 50mgPotassium: 200mgFiber: 1gSugar: 14gVitamin C: 10mgCalcium: 2mgIron: 4mg

Notes

Best enjoyed warm, but can be chilled for a summer treat.

Tried this recipe?

Let us know how it was!