Irresistible Southern Maple Sweet Potatoes for Holiday Joy

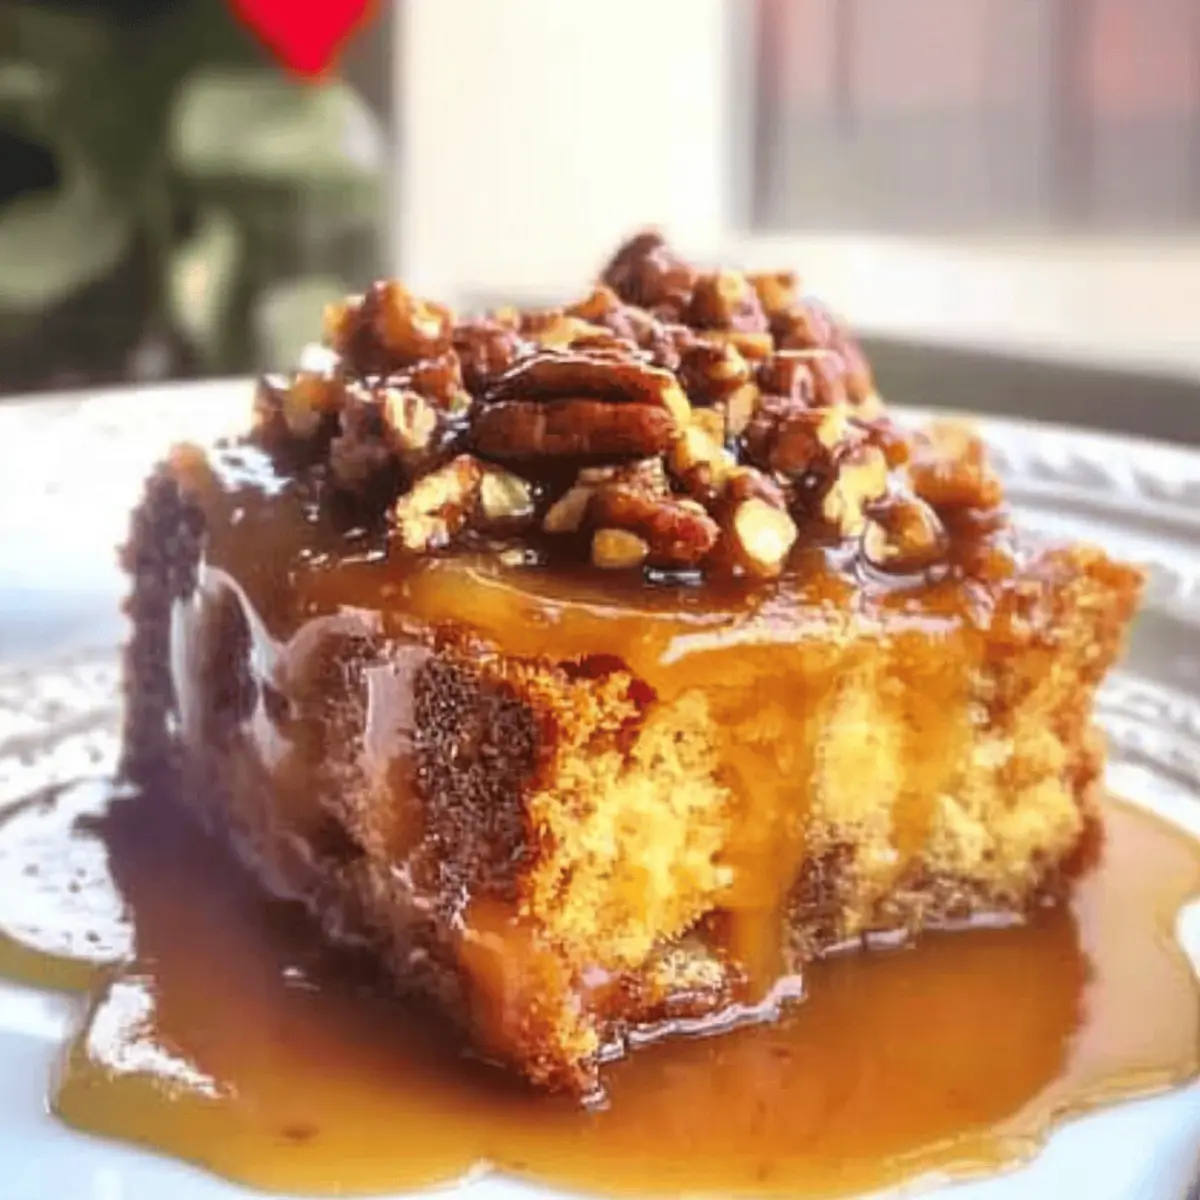
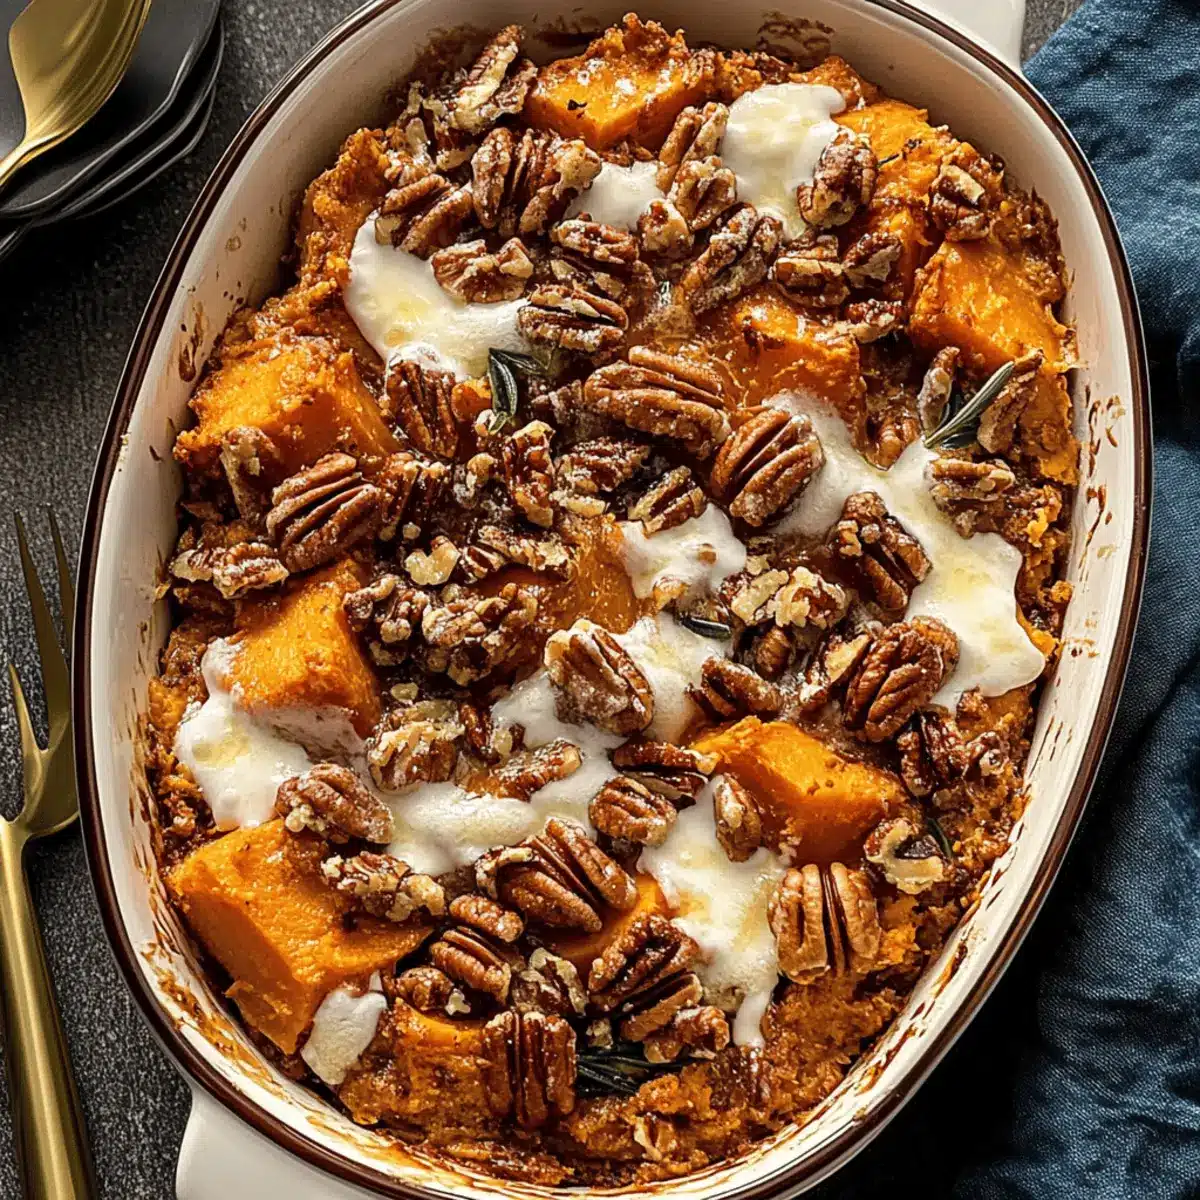
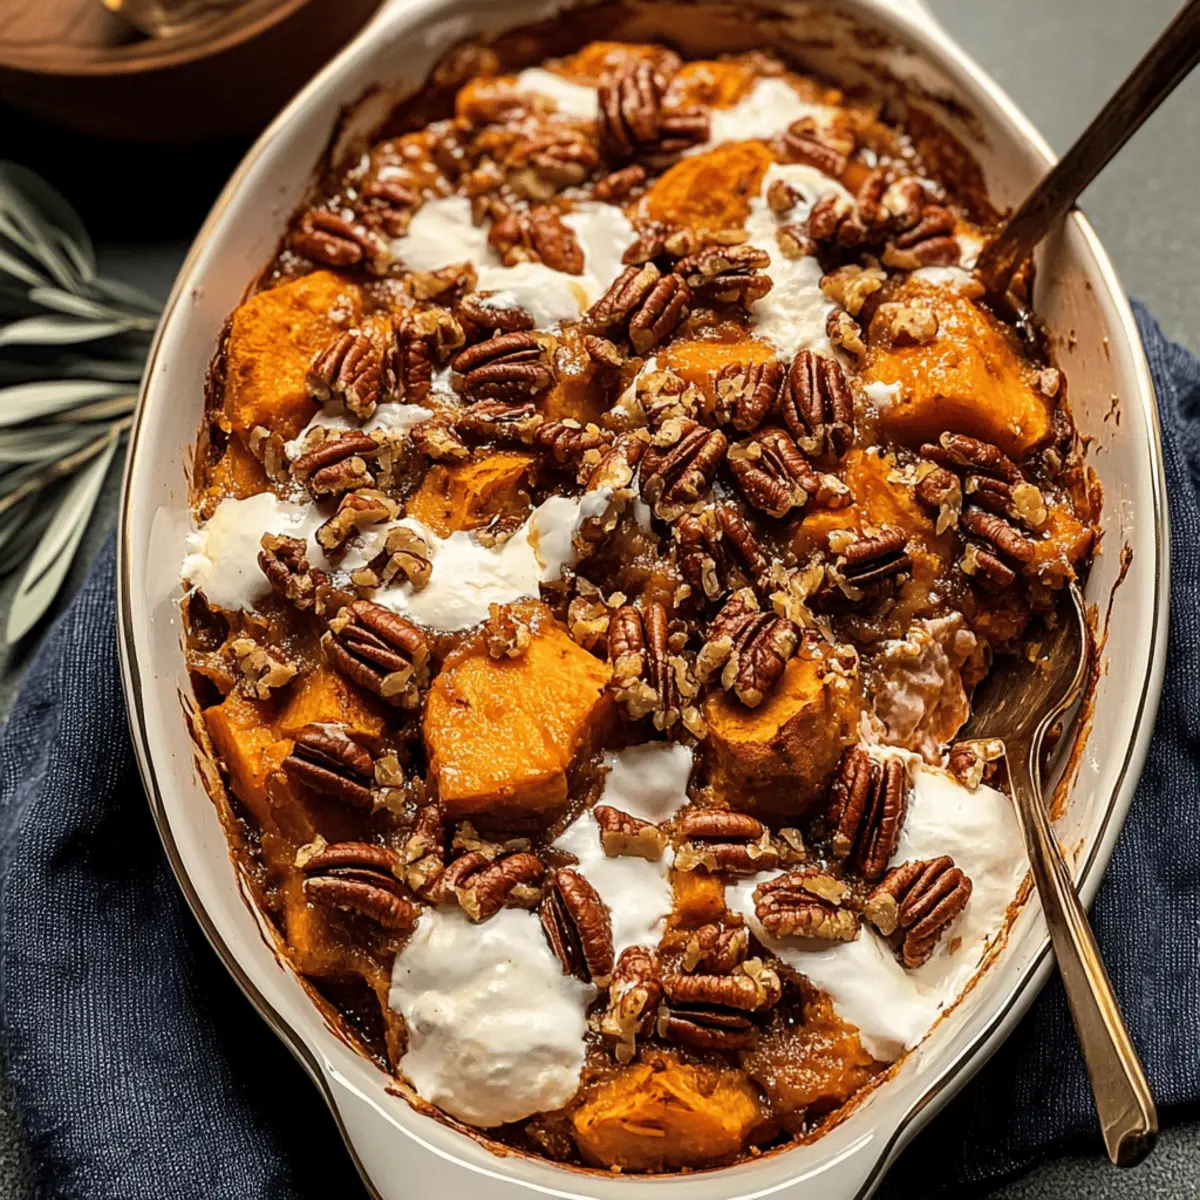
As I lifted the lid of the casserole dish, the warm aroma of baked sweet potatoes and maple syrup enveloped me like a cozy hug. This is not just any dish; it’s my Southern Maple Sweet Potato Casserole, the perfect companion for holiday gatherings. With its velvety filling and crunchy maple-pecan topping, it’s a crowd-pleaser that offers not only delightful textures but also a surprisingly delicious vegan option. Best of all, you can make it ahead of time, allowing you to focus on basking in the company of loved ones instead of being tethered to the stove. Are you curious to know how to whip up this Southern comfort food staple that’s sure to impress? Let’s dive in!

Why Is This Casserole So Special?

Unforgettable Flavor: The harmony of roasted sweet potatoes combined with rich maple syrup creates a mouthwatering taste that’s hard to forget.

Versatile Options: Whether you enjoy traditional flavors or prefer a vegan twist, this casserole adapts to everyone’s preferences!

Effortless Prep: Prepare it a day in advance and simply pop it in the oven before serving, giving you more time with guests.

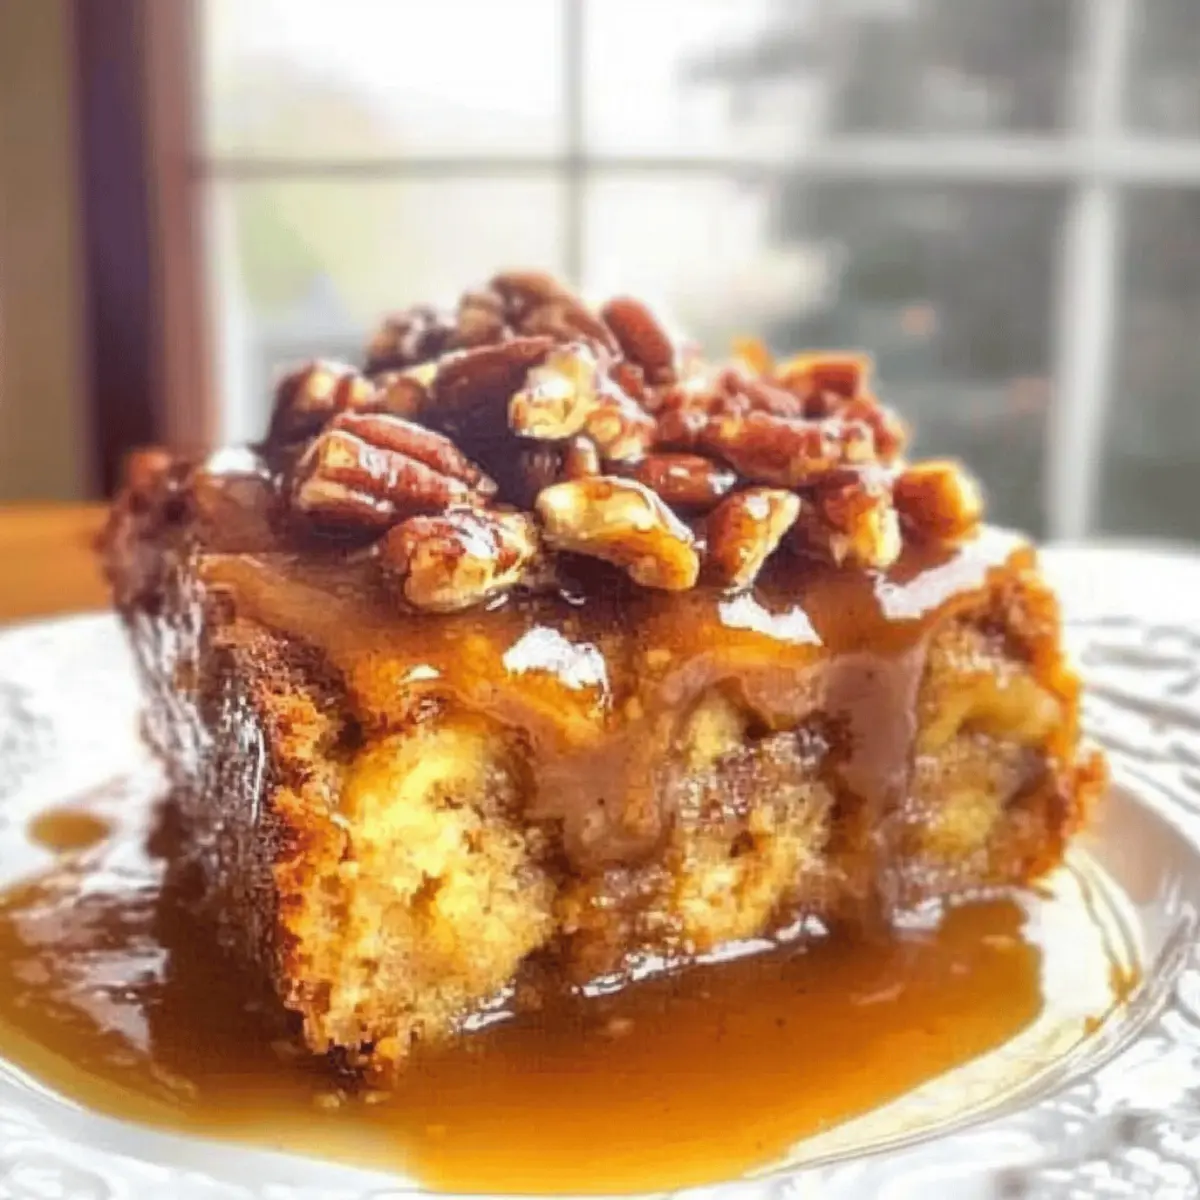
Crowd-Pleasing Texture: The creamy filling paired with a crunchy maple-pecan topping offers a delightful contrast that keeps every bite exciting.

Perfect for Any Occasion: Whether it’s Thanksgiving or a cozy family dinner, Zucchini Sweet Potato and this Southern Maple Sweet Potato Casserole will steal the spotlight on your table!

Southern Maple Sweet Potato Ingredients

• Discover the magic behind this Southern Maple Sweet Potato Casserole with these essential ingredients!

For the Base

  • Roasted Sweet Potatoes – Essential for base flavor; try using organic, peeled, and cubed sweet potatoes for an extra wholesome dish.
  • Olive Oil – For roasting and enhancing flavor; coconut oil makes a great substitute if you’re looking for something different.
  • Ground Cinnamon – Adds warmth to the flavor profile, no substitutions recommended to keep that comforting taste.
  • Ground Nutmeg – Complements sweetness beautifully, not mandatory but enhances the aroma significantly.

For the Creamy Mixture

  • Almond Milk – Acts as a creamy base; any plant-based or whole milk will work perfectly here.
  • Vanilla Extract – For depth of flavor; using a high-quality vanilla makes a noticeable difference.
  • Unsalted Butter – Provides richness to the filling; consider vegan butter or coconut oil for a vegan version.
  • Brown Sugar – Sweetens the mixture; coconut sugar can be a healthier alternative if desired.
  • Maple Syrup – Adds natural sweetness and is key for authentic flavor in your Southern Maple Sweet Potatoes.
  • Ground Allspice – For aromatic notes; mixed spices can substitute if you’re in a pinch.

For the Sweet Add-ins

  • Raisins – Sweet chewy contrasts; soaking them in boiling water for 5-10 minutes will plump them up nicely.
  • Marshmallows – Offer sweetness and gooey texture; vegan marshmallows are an option for plant-based diets.

For the Topping

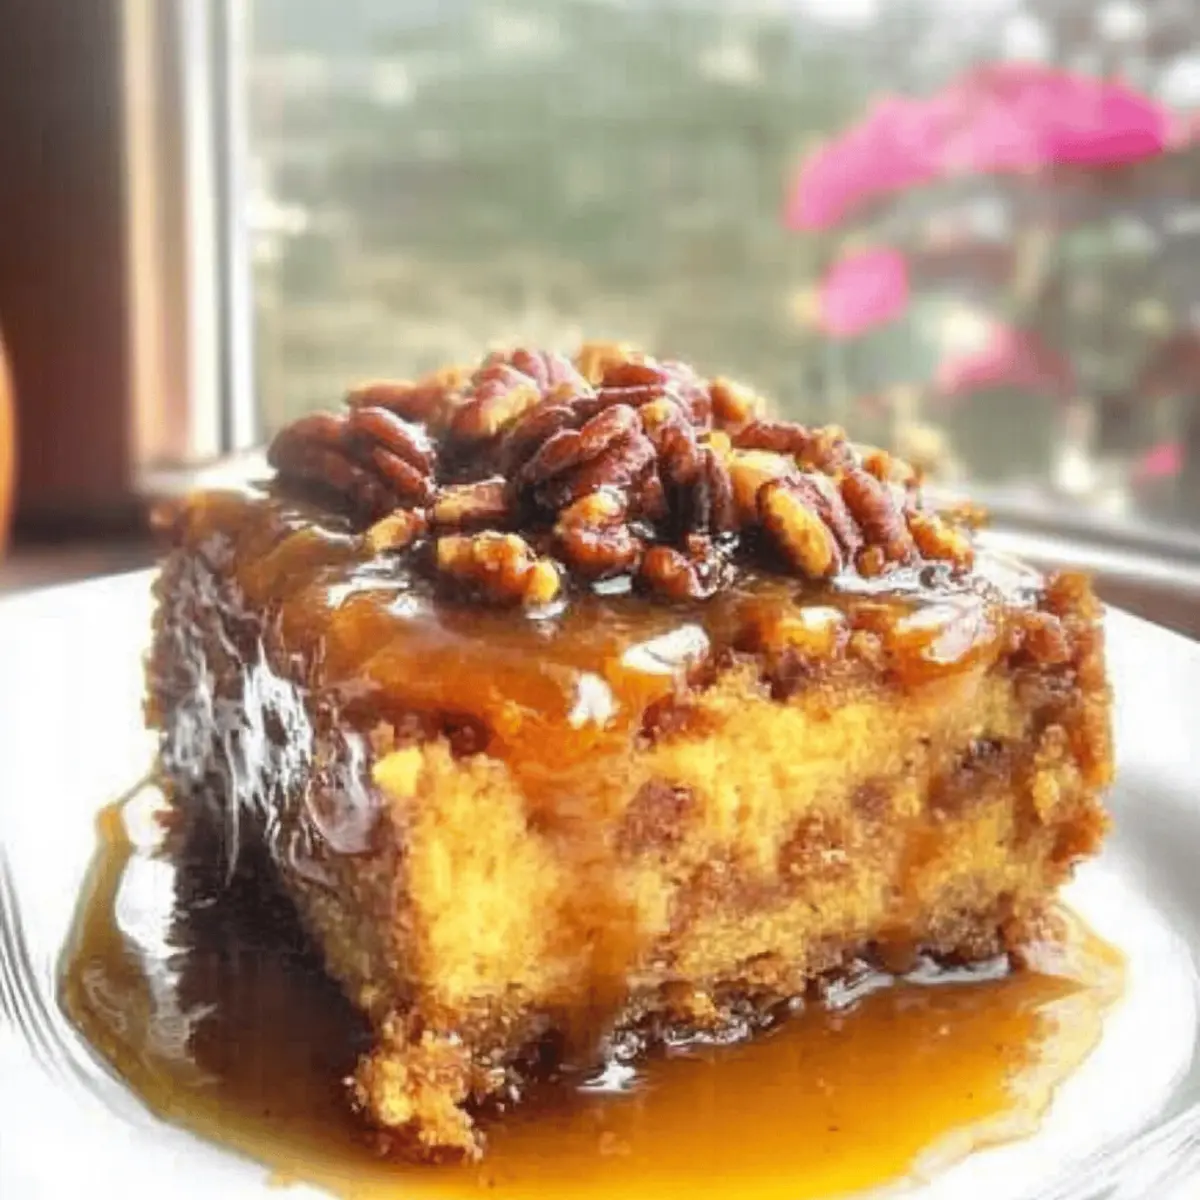
  • Raw Pecans – Crunchy topping; feel free to swap with walnuts or almonds if you prefer.

Step‑by‑Step Instructions for Southern Maple Sweet Potato Casserole

Step 1: Roast Potatoes
Preheat your oven to 400°F (200°C). In a large mixing bowl, toss the peeled and cubed sweet potatoes with olive oil, ground cinnamon, and nutmeg until well coated. Spread the sweet potatoes evenly on a baking sheet and roast for 50-60 minutes, or until they are fork-tender and slightly charred on the edges, stirring halfway through for even cooking.

Step 2: Prepare Filling
Once the sweet potatoes are done roasting, reduce the oven temperature to 375°F (190°C). In a mixing bowl, combine the roasted sweet potatoes with almond milk, vanilla extract, brown sugar, maple syrup, ground allspice, soaked raisins, and marshmallows. Blend everything together until smooth and creamy, ensuring that all ingredients are well-incorporated and the texture is velvety, indicative of your Southern Maple Sweet Potatoes.

Step 3: Transfer to Dish
Grease a 9×13-inch baking dish with some unsalted butter or vegan butter for easy removal. Scoop the sweet potato mixture into the prepared dish, spreading it out evenly. Dot small pieces of butter over the top to enrich the flavors as it bakes. This preparation really helps create that delightful contrast in texture for your casserole.

Step 4: Make Topping
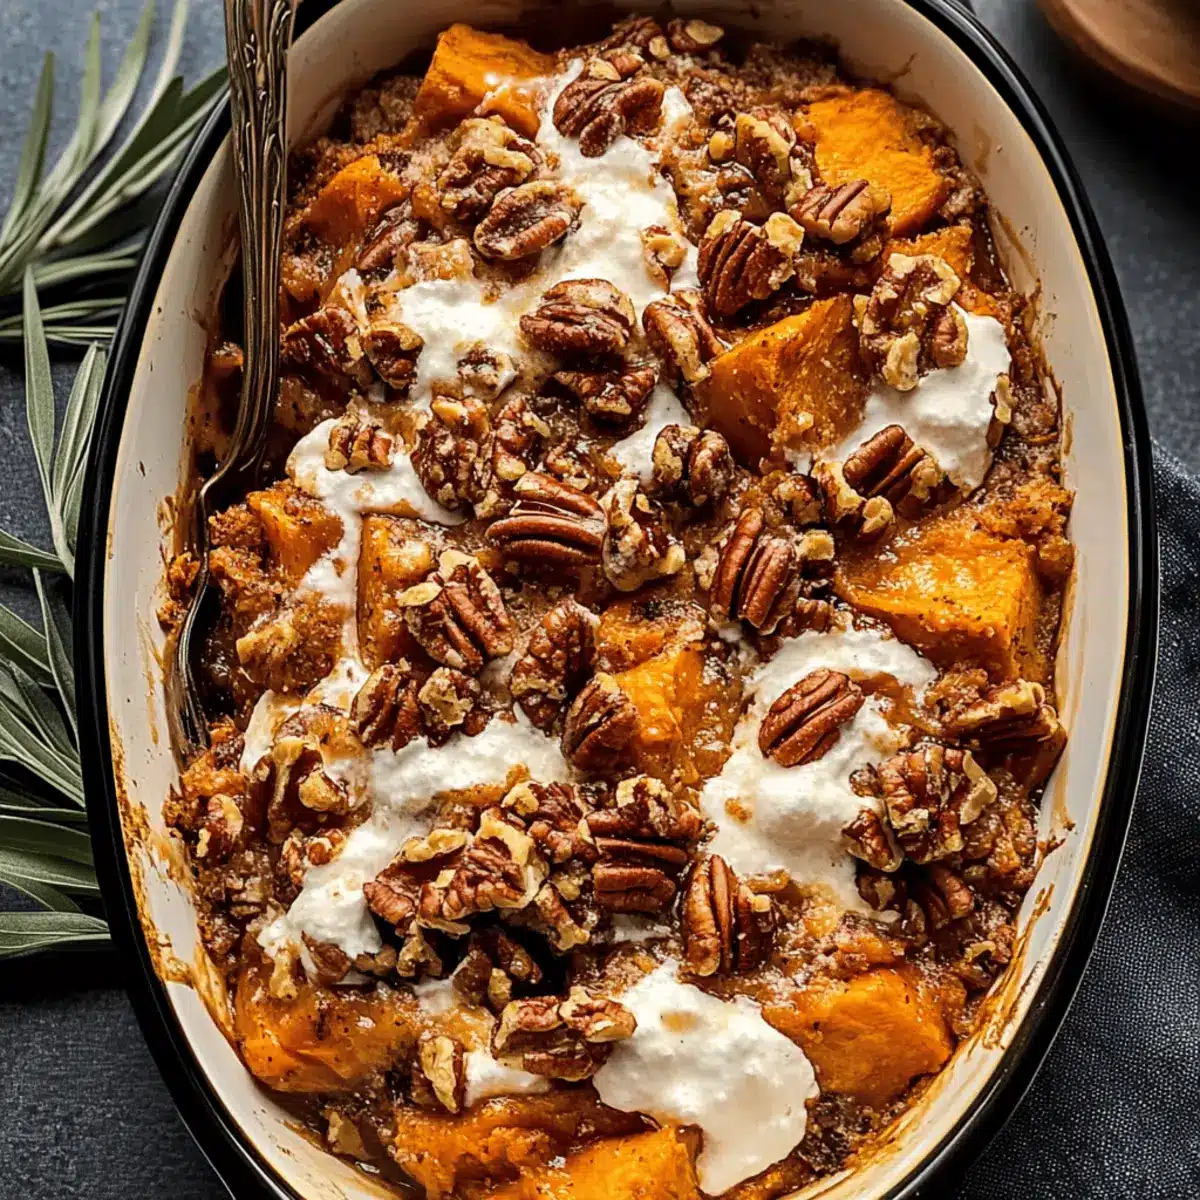
In a small bowl, mix raw pecans with maple syrup until they are evenly coated. Sprinkle this mixture generously over the sweet potato filling, making sure to distribute the pecans evenly across the surface. This topping will provide a wonderfully crunchy texture to complement the creamy Southern Maple Sweet Potatoes underneath.

Step 5: Bake
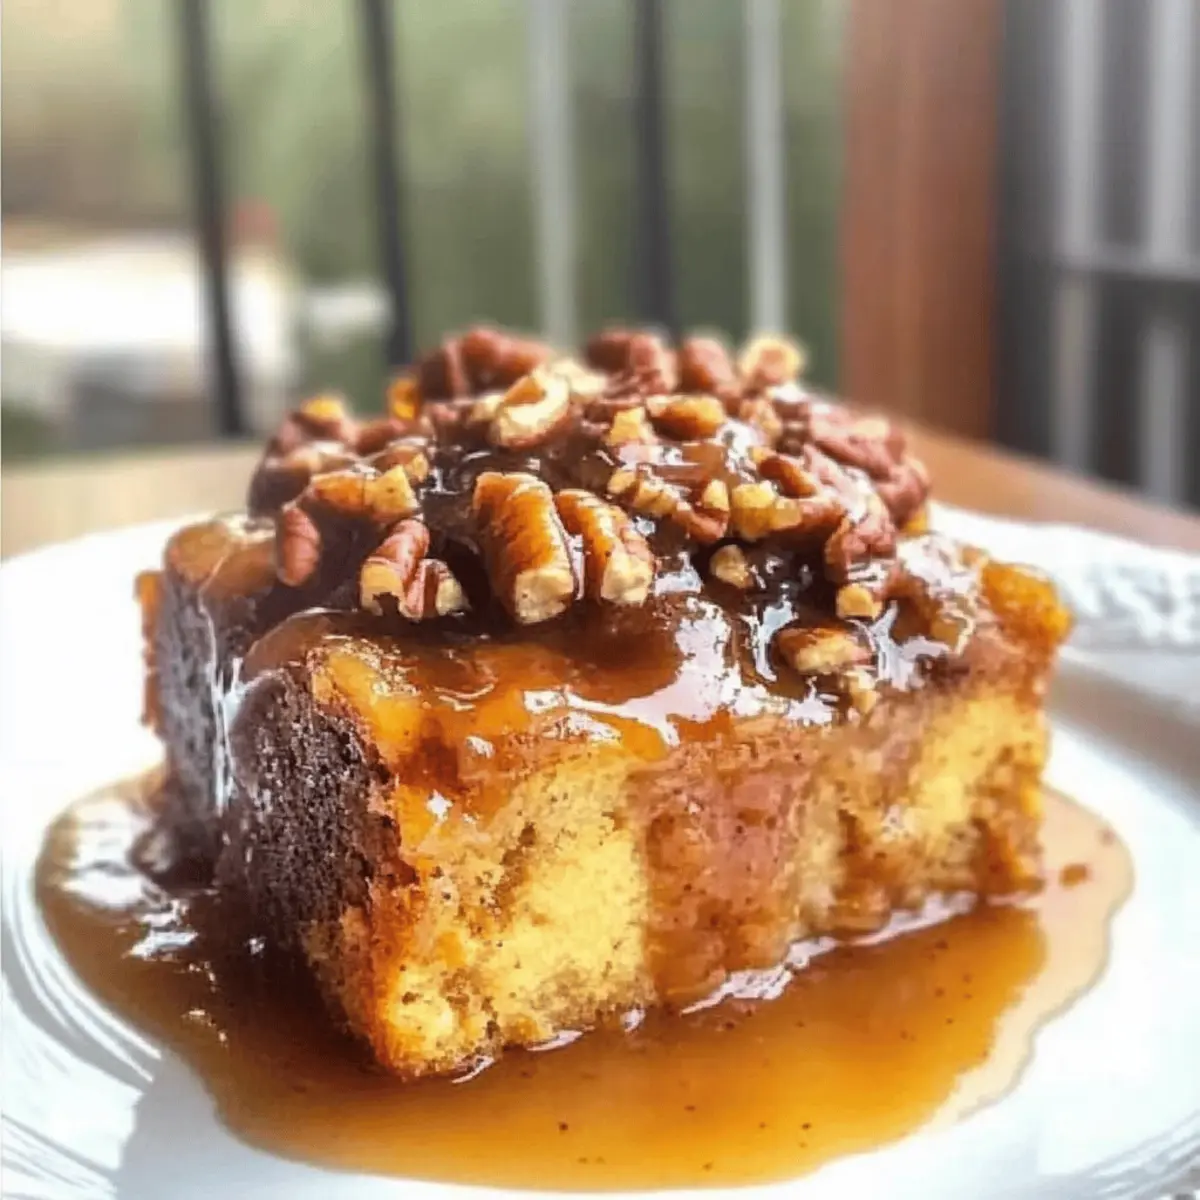
Cover the baking dish with aluminum foil to trap moisture and prevent the topping from burning. Bake in your preheated oven for 15 minutes. After this, carefully remove the foil and continue to bake for an additional 15 minutes or until the topping is golden brown and the marshmallows are beautifully melted and slightly toasted.

Step 6: Cool and Serve
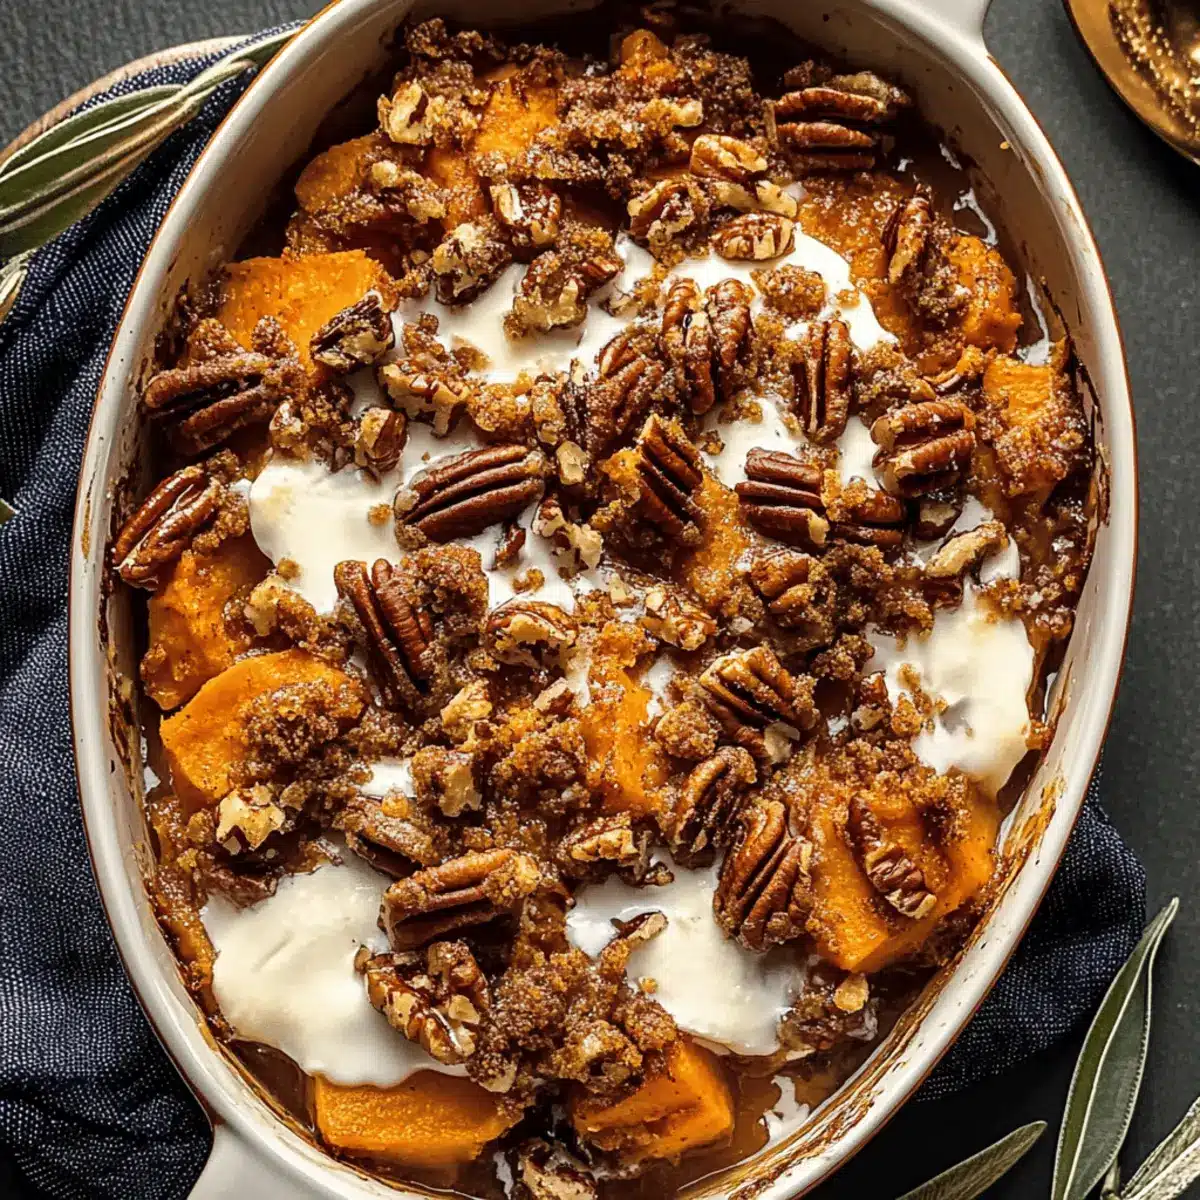
Once out of the oven, allow the casserole to cool for a few minutes to set slightly before serving. This cooling time helps develop the flavors and makes it easier to scoop. Serve warm to enjoy the delightful blend of textures in your Southern Maple Sweet Potato Casserole, perfect for family gatherings or holiday feasts!

How to Store and Freeze Southern Maple Sweet Potatoes

Fridge: Store leftover casserole in an airtight container in the refrigerator for up to 4 days. This way, you can enjoy the warm, comforting flavors throughout the week.

Freezer: To freeze, let the casserole cool completely, then wrap it well in plastic wrap followed by aluminum foil. It can be stored in the freezer for up to 3 months; just remember to label it with the date!

Reheating: To reheat, place the frozen casserole in the refrigerator overnight to thaw. Then, bake at 350°F (175°C) for about 25-30 minutes or until heated through, covering with foil to prevent over-browning.

Make-Ahead Tip: You can assemble your Southern Maple Sweet Potatoes a day in advance and refrigerate them before baking. This clever trick allows you to save time on the day of your gathering!

Expert Tips for Southern Maple Sweet Potatoes

  • Watch the Timing: Make sure to roast the sweet potatoes until they’re tender and charred but not burned; this caramelization enhances their natural sweetness.

  • Avoid Dense Filling: Blend the filling until smooth to ensure a velvety texture in your Southern Maple Sweet Potatoes; lumpy, uneven mixtures can lead to an unappealing bite.

  • Topping Technique: Distributing the maple-pecan topping evenly prevents some parts from being too crunchy or too soggy; this balance is essential for a delightful contrast in texture.

  • Raisin Soaking: Don’t skip the soaking step; plumping the raisins beforehand prevents them from absorbing moisture from the filling, keeping everything pleasantly sweet and juicy.

  • Cool Before Serving: Allow the casserole to cool for a few minutes before serving; this rest period helps the mixture set, making it easier to serve and enhancing the flavors.

Southern Maple Sweet Potatoes Variations

Feel free to put your unique spin on this delightful casserole and make it your own!

  • Vegan Option: Use vegan butter and marshmallows for a delicious plant-based version that doesn’t compromise on flavor.
    With the right substitutes, you’ll get all that rich, sweet goodness without any animal products.

  • Fruit Swap: Replace raisins with dried cranberries or apricots for a tart twist in each bite.
    The added zing from cranberries can brighten up the casserole’s overall flavor profile, making it even more festive!

  • Crispy Crumble: Top with a mix of oats and brown sugar instead of pecans for an extra crunchy texture.
    This variance creates a delightful contrast and adds wholesomeness, perfect for those who enjoy a heartier bite.

  • Spicy Kick: Add a pinch of ground ginger or cloves to the filling for a hint of warmth that balances the sweetness.
    The subtle heat elevates this classic dish, making it a delightful surprise for any palate.

  • Nutty Goodness: Experiment with different nuts like walnuts or almonds instead of pecans for a unique flavor twist.
    Each nut brings its own character, and you can tailor it to your family’s favorites.

  • Sweet Potato Blend: Mix in other root vegetables like butternut squash for a deeper flavor profile.
    This blend provides rich, earthy notes that complement the sweet aspect splendidly.

  • Maple Syrup Variation: Try a touch of flavored maple syrups, like pumpkin spice or vanilla, for an extra hint of creativity.
    A flavored syrup can make it feel like a brand-new dish and provide new flavor notes to explore!

  • Adding Texture: Consider folding in some finely chopped apple or pear for a fruity surprise and additional moisture.
    These fruits bring a layer of sweetness and a juicy texture that beautifully harmonizes with the casserole.

For more delightful ideas and recipes to enhance your holiday table, check out my Cheesy French Potatoes or Sweet Hawaiian Crockpot dishes to round out your festive menu!

What to Serve with Southern Maple Sweet Potato Casserole

The perfect accompaniment to create a truly delightful holiday meal awaits you!

  • Juicy Roast Turkey: The savory notes of turkey will harmonize beautifully with the sweet and creamy flavors of the casserole.

  • Honey-Glazed Ham: A touch of sweetness from the ham enhances the maple undertones, creating a perfectly balanced plate.

  • Green Bean Almondine: This vibrant dish adds a fresh, crunchy contrast to the dish’s rich textures while bringing color to your table.

  • Crispy Brussels Sprouts: The slight bitterness of roasted Brussels sprouts provides a welcome balance to the sweetness of the casserole, making each bite exciting.

  • Herbed Dinner Rolls: Soft, warm rolls are perfect for soaking up any creamy sauce left on your plate, rounding out the meal beautifully.

  • Apple Cider Sangria: This refreshing drink, loaded with fruity flavors, pairs perfectly with the warmth of the Southern Maple Sweet Potato Casserole, enhancing the festive mood.

  • Pumpkin Pie: A classic holiday dessert that resonates with the same cozy spices, ensuring your meal feels like a warm embrace!

  • Pineapple Upside-Down Cake: The tropical sweetness of this dessert contrasts nicely with the casserole, leaving your guests craving another bite!

Make Ahead Options

These Southern Maple Sweet Potato Casseroles are perfect for meal prep, saving you time during those busy holiday gatherings. You can assemble the casserole up to 24 hours in advance; simply cover it tightly with foil and refrigerate to maintain freshness. For best results, prepare the filling (after roasting the sweet potatoes) and keep it in the fridge, while the pecan topping can be stored separately to preserve its crunch. When you’re ready to serve, just preheat your oven and bake directly from the fridge, adding an extra five minutes to the baking time if it’s still cold. This ensures you’ll still have that velvety, warm casserole to delight your guests, making your holiday cooking just a little easier!

Southern Maple Sweet Potato Casserole Recipe FAQs

How do I select ripe sweet potatoes for this casserole?
Absolutely! Look for sweet potatoes that are firm and have smooth, unblemished skin. Avoid any with dark spots or blemishes, as these may indicate spoilage. Ideally, select medium to large sweet potatoes for the best texture and flavor.

What is the best way to store leftovers from the casserole?
Very! Wrap any leftover casserole tightly in plastic wrap or transfer it to an airtight container and store it in the refrigerator for up to 4 days. This keeps the flavors intact and maintains the creamy texture for your next meal.

Can I freeze Southern Maple Sweet Potato Casserole?
Definitely! To freeze, first let the casserole cool completely. Then, wrap it tightly in plastic wrap, followed by aluminum foil, and store it in the freezer for up to 3 months. When you’re ready to enjoy it, thaw it overnight in the refrigerator, and reheat at 350°F (175°C) for 25-30 minutes, covering it with foil to prevent over-browning.

What should I do if the filling turns out lumpy?
No worries at all! If your mixture is lumpy, blend it again until smooth; use an immersion blender if you have one handy. This will ensure a velvety texture for your Southern Maple Sweet Potatoes. Take care to thoroughly blend the ingredients after roasting to avoid any unwanted clumps in your casserole.

Are there any dietary considerations for this recipe?
Absolutely! For those with allergies or dietary preferences, you can easily substitute unsalted butter with vegan butter or coconut oil to make this dish completely plant-based. Additionally, swap regular marshmallows with vegan marshmallows to keep it suited for vegan diets. Always check packaging to ensure products align with any specific dietary restrictions.

Can I prepare the casserole in advance?
Very! You can assemble the Southern Maple Sweet Potato Casserole up to a day in advance. Just cover it with foil or plastic wrap and refrigerate. When you’re ready to serve, simply pop it in the oven before your guests arrive to bask in the wonderful aromas!

Southern Maple Sweet Potatoes

Irresistible Southern Maple Sweet Potatoes for Holiday Joy

Delicious Southern Maple Sweet Potatoes featuring rich flavors and textures, perfect for holiday celebrations.
Prep Time 30 minutes
Cook Time 1 hour 15 minutes
Cooling Time 10 minutes
Total Time 1 hour 55 minutes
Servings: 8 servings
Course: Dinner
Cuisine: Southern
Calories: 250

Ingredients
  

For the Base
  • 4 cups Peeled and cubed sweet potatoes Organic preferred
  • 2 tablespoons Olive oil Coconut oil can be substituted
  • 1 teaspoon Ground cinnamon
  • 1/4 teaspoon Ground nutmeg Optional but enhances flavor
For the Creamy Mixture
  • 1 cup Almond milk Any plant-based or whole milk will work
  • 1 teaspoon Vanilla extract Use high-quality for best flavor
  • 1/4 cup Unsalted butter Use vegan butter for a vegan version
  • 1/2 cup Brown sugar Coconut sugar can be an alternative
  • 1/4 cup Maple syrup Key ingredient for flavor
  • 1/2 teaspoon Ground allspice Mixed spices can substitute
For the Sweet Add-ins
  • 1/2 cup Raisins Soak in boiling water for 5-10 mins
  • 1 cup Marshmallows Vegan marshmallows are an option
For the Topping
  • 1 cup Raw pecans Can substitute with walnuts or almonds

Equipment

  • Baking dish
  • Mixing bowls
  • Baking Sheet

Method
 

Preparation
  1. Preheat your oven to 400°F (200°C). Toss sweet potatoes with olive oil, cinnamon, and nutmeg in a large bowl. Spread on a baking sheet and roast for 50-60 minutes until tender and slightly charred, stirring halfway through.
  2. Reduce the oven temperature to 375°F (190°C). Combine roasted sweet potatoes with almond milk, vanilla extract, brown sugar, maple syrup, allspice, soaked raisins, and marshmallows. Blend until smooth and creamy.
  3. Grease a 9x13-inch baking dish with butter. Scoop the sweet potato mixture into the dish, spreading evenly, and dot with small pieces of butter.
  4. Mix pecans with maple syrup in a bowl and sprinkle over the sweet potato filling.
  5. Cover with aluminum foil and bake for 15 minutes. Remove the foil and bake for an additional 15 minutes until the topping is golden brown.
  6. Allow to cool for a few minutes before serving to set slightly.

Nutrition

Serving: 1servingCalories: 250kcalCarbohydrates: 42gProtein: 4gFat: 10gSaturated Fat: 3gPolyunsaturated Fat: 1gMonounsaturated Fat: 6gCholesterol: 15mgSodium: 150mgPotassium: 460mgFiber: 5gSugar: 12gVitamin A: 12000IUVitamin C: 25mgCalcium: 80mgIron: 1.5mg

Notes

This casserole can be prepared a day in advance, stored in the fridge, and baked before serving. Perfect for holiday gatherings!

Tried this recipe?

Let us know how it was!

Decadent Pumpkin Praline Bread Pudding for Your Thanksgiving Table

As I sifted through my spice cabinet, a delightful aroma of autumn spices wafted through the air, igniting memories of cozy gatherings. This is the moment I knew I had to share my beloved Pumpkin Praline Bread Pudding, an indulgent dessert that shines as an alternative to traditional pumpkin pie. Effortlessly blending creamy pumpkin with a crunchy pecan praline topping, it’s not only a crowd-pleaser but also a quick-prep option that’s bound to impress your guests this Thanksgiving. Best of all, it can be made ahead, allowing you to savor every moment with family and friends. Are you ready to elevate your dessert game this holiday season?

Why is Pumpkin Praline Bread Pudding a Must-Try?

Comforting and Cozy: This Pumpkin Praline Bread Pudding perfectly captures the essence of fall with its warm, inviting flavors and textures, making it a go-to dessert for Thanksgiving.

Effortless Preparation: Unlike a traditional pie, this recipe is incredibly easy to make. Just mix, bake, and serve—no special skills required!

Crowd Favorite: Bring smiles to your gatherings as this dessert appeals to children and adults alike, making it a fantastic centerpiece on your Thanksgiving table.

Make-Ahead Marvel: You can prepare this delightful dish in advance, freeing you up to enjoy quality time with loved ones while still delivering an indulgent treat.

Deliciously Versatile: Feel free to personalize the praline sauce with a splash of bourbon or even switch out the pecans for walnuts—the options are as endless as your creativity!

Don’t forget to try this with a dash of spice, just like in my Mango Coconut Pudding for a delightful twist!

Pumpkin Praline Bread Pudding Ingredients

• Here’s what you need to create this delightful Thanksgiving dessert!

For the Bread Pudding

  • Day-Old Bread – 1-pound loaf (French, Italian, or Challah); use day-old bread for optimal absorption.
  • Heavy Cream – 1 cup; adds richness and creaminess, but you can substitute with whipping cream if needed.
  • Half and Half – 1 cup; enhances creaminess without being too heavy—whole milk works as a lighter option.
  • Pumpkin Puree – 1 (15-ounce) can; it provides flavor and moisture, and pureed butternut squash is a nice alternative.
  • Granulated Sugar – 1-1/2 cups; sweetens the dish, or swap for brown sugar for a deeper flavor.
  • Melted Butter – 3 tablespoons; adds richness and helps bind the mixture together.
  • Eggs – 4 large; helps provide structure and sets the pudding.
  • Vanilla Extract – 2 teaspoons; adds depth of flavor.
  • Pumpkin Pie Spice – 1 tablespoon; infuses it with holiday flavors; you can blend your own mix from common spices.

For the Praline Sauce

  • Unsalted Butter – 1 cup; for richness in the sauce.
  • Heavy Cream – 1 cup; for a creamy texture.
  • Brown Sugar – 1 cup; adds sweetness and a delightful caramel flavor.
  • Chopped Toasted Pecans – 1/2 cup; provides crunch and complements the sauce beautifully.
  • Spices (for sauce) – Cinnamon, nutmeg, ground ginger, ground cloves, and ground allspice; enhance the overall flavor profile.

Ready to make your rich Pumpkin Praline Bread Pudding? Grab these ingredients, and let’s bake something incredible together!

Step‑by‑Step Instructions for Pumpkin Praline Bread Pudding

Step 1: Preheat the Oven
Start by preheating your oven to 350°F (175°C). While the oven warms up, grab a 9×13 baking dish and lightly grease it with butter or cooking spray. This ensures that the Pumpkin Praline Bread Pudding will easily release from the dish once baked, making it easier to serve.

Step 2: Tear the Bread
Take your day-old bread and tear it into small bite-sized pieces, approximately 1-inch in size. Spread the torn bread evenly across the greased baking dish. Make sure the pieces are scattered well to achieve a uniform texture in your bread pudding, allowing for optimal absorption of the custard mixture.

Step 3: Mix the Custard
In a large mixing bowl, combine the heavy cream, half and half, pumpkin puree, granulated sugar, melted butter, eggs, vanilla extract, and pumpkin pie spice. Use a whisk to blend everything together until the mixture is smooth and creamy, with no lumps remaining. This rich custard will infuse your bread with delightful flavors.

Step 4: Combine Bread and Custard
Pour the creamy pumpkin custard evenly over the torn bread pieces in the baking dish. Gently press the bread down with your hands or a spatula to ensure that every piece becomes saturated with the custard. Let it sit for 10 minutes, allowing the bread to soak up the liquid for a rich, moist texture.

Step 5: Bake the Pudding
Place the baking dish in the preheated oven and bake the Pumpkin Praline Bread Pudding for about 60 minutes. You’ll know it’s ready when the top is golden brown and the pudding feels set but slightly wobbly in the center. This gives that perfect creamy texture, just like old-fashioned bread pudding.

Step 6: Prepare the Praline Sauce
While the pudding is baking, it’s time to make your praline sauce. In a saucepan, combine the unsalted butter, heavy cream, and brown sugar. Bring this mixture to a gentle boil over medium heat, stirring frequently to dissolve the sugar. Once it starts boiling, lower the heat and let it simmer for about 5 minutes until it thickens slightly.

Step 7: Add Pecans and Spices
After the praline sauce has thickened, stir in the chopped toasted pecans along with the spices of cinnamon, nutmeg, ginger, cloves, and allspice. Allow it to simmer on low for an additional minute, infusing the sauce with rich flavors that will beautifully complement the Pumpkin Praline Bread Pudding.

Step 8: Serve Optimally
Once the pudding has cooled slightly, scoop it into bowls while still warm and drizzle generously with the warm praline sauce. For an extra festive touch, consider adding a dollop of whipped cream or a scoop of vanilla ice cream alongside. Dive into this warm slice of comfort!

Pumpkin Praline Bread Pudding Variations

Feel free to unleash your inner chef by customizing this delicious treat with these fun ideas!

  • Nut-Free: Omit pecans and replace with sunflower seeds for a crunchy alternative that still adds texture.

  • Gluten-Free: Use gluten-free bread options to make this dessert safe for everyone at your table. Just ensure the bread is stale for the best absorption!

  • Bourbon-Infused: Add 2 tablespoons of bourbon in the praline sauce for a delightful twist that enhances the warm flavors beautifully.

  • Maple Sweetened: Swap granulated sugar for pure maple syrup in both the pudding and the sauce for a subtly sweet variation that brings rustic charm to every bite.

  • Spiced Up: Enhance the flavor profile by adding a teaspoon of ginger or cardamom to the pumpkin mixture for an exciting kick of spiciness.

  • Butternut Squash: Substitute pumpkin puree with pureed butternut squash for a sweeter, lighter taste while maintaining that creamy texture.

  • Creamy Coconut: Replace heavy cream with coconut milk for a tropical flavor that complements the fall spices perfectly. Pair this with my Mango Coconut Pudding for a delightful dessert table!

Explore these variations to put your unique spin on the rich Pumpkin Praline Bread Pudding, making each celebration unforgettable!

Make Ahead Options

These rich Pumpkin Praline Bread Pudding are perfect for meal prep, making your Thanksgiving stress-free! You can prepare the entire bread pudding mixture up to 24 hours in advance, covering it tightly and refrigerating it to maintain its freshness. To do this, simply tear the bread, mix in the custard, and let it soak overnight. When you’re ready to serve, bake it directly from the refrigerator; just add an extra 10 minutes to the baking time. For the praline sauce, it’s best to make this shortly before serving to keep the sauce creamy and fresh. Follow these steps and enjoy a warm, crowd-pleasing dessert with minimal effort!

What to Serve with Pumpkin Praline Bread Pudding

Creating a memorable Thanksgiving feast goes beyond the main course—it’s about crafting a complete dining experience.

  • Whipped Cream: A generous dollop on top adds airy sweetness, balancing the richness of the bread pudding.
  • Vanilla Ice Cream: This silky treat melts into the warm pudding, elevating the flavors with its creamy texture.
  • Cranberry Sauce: The tartness of cranberries cuts through the sweetness, providing a refreshing contrast that brightens every bite.
  • Hot Apple Cider: Serve this warm, spiced beverage alongside for a cozy, fall-inspired pairing that enhances your gathering’s atmosphere.
  • Maple Pecans: Sprinkle these on top for an added crunch, complementing the pudding while echoing the luscious pecan flavors in the praline sauce.
  • Coffee or Tea: A cup of freshly brewed coffee or spiced chai will round out your meal, cleaning the palate between bites of this decadent dessert.

Embrace the autumn vibes with these delightful pairings, making your Thanksgiving not just a meal, but a heartwarming celebration!

Expert Tips for Pumpkin Praline Bread Pudding

  • Use Day-Old Bread: Ensure you use day-old bread for maximum absorption; fresh bread won’t soak up the custard as well, leading to a soggier texture.
  • Mix Carefully: Avoid over-mixing the bread and custard; gentle folding helps maintain a light texture in your Pumpkin Praline Bread Pudding.
  • Soak Time Matters: Allow the mixture to sit for about 10 minutes before baking, so every piece of bread is fully saturated for a moist outcome.
  • Watch the Bake: Keep an eye on the baking time. Ovens vary, so check for a golden top and slightly wobbly center to avoid drying it out.
  • Make-Ahead Tips: Prepare the pudding the day before; just make the praline sauce closer to serving time to retain its texture and freshness.

Storage Tips for Pumpkin Praline Bread Pudding

Fridge: Store any leftover Pumpkin Praline Bread Pudding in an airtight container for up to 3 days. This preserves its creamy texture and distinctive flavors.

Freezer: If you want to make it ahead, you can freeze the bread pudding for up to 2 months. Wrap it tightly in plastic wrap and foil to prevent freezer burn.

Reheating: To enjoy, thaw overnight in the fridge and reheat in the oven at 350°F (175°C) for about 20 minutes, or until warmed through. Drizzle with the praline sauce for that fresh-baked taste!

Pumpkin Praline Bread Pudding Recipe FAQs

What type of bread is best for this recipe?
Absolutely! I recommend using day-old bread like French, Italian, or Challah, as it absorbs the custard mixture beautifully. If you don’t have those, brioche or sourdough can also work well.

How long can you store Pumpkin Praline Bread Pudding in the fridge?
You can store your leftover Pumpkin Praline Bread Pudding in an airtight container in the fridge for up to 3 days. This will keep its creamy texture and luxurious flavors intact.

Can you freeze Pumpkin Praline Bread Pudding?
Yes, indeed! For longer storage, freeze the bread pudding for up to 2 months. Wrap it tightly in plastic wrap and then aluminum foil to prevent freezer burn. When you’re ready to enjoy it, thaw it overnight in the fridge before reheating.

What should I do if my bread pudding is too soggy?
If you find your bread pudding is too soggy, try reducing the amount of liquid next time, or ensure you’re using day-old bread that has dried out a bit. Additionally, letting the mixture sit for 10 minutes before baking allows for better absorption, which can help prevent sogginess.

Is Pumpkin Praline Bread Pudding suitable for gluten-free diets?
Absolutely! You can easily make this pumpkin bread pudding gluten-free by using gluten-free bread options available in stores. Just make sure to check the ingredients, especially in the other components like the spices and sauces.

Can pets eat Pumpkin Praline Bread Pudding?
It’s important to keep this treat away from pets, as the ingredients like sugar, heavy cream, and spices are not suitable for them. It’s always best to stick to pet-friendly snacks to ensure their health and safety!

Pumpkin Praline Bread Pudding

Decadent Pumpkin Praline Bread Pudding for Your Thanksgiving Table

This Pumpkin Praline Bread Pudding is a delightful, creamy alternative to pumpkin pie perfect for your Thanksgiving table.
Prep Time 15 minutes
Cook Time 1 hour
Soaking Time 10 minutes
Total Time 1 hour 25 minutes
Servings: 8 slices
Course: Dessert
Cuisine: American
Calories: 400

Ingredients
  

For the Bread Pudding
  • 1 pound day-old bread (French, Italian, or Challah) use day-old bread for optimal absorption
  • 1 cup heavy cream adds richness; whipping cream can be substituted
  • 1 cup half and half can substitute with whole milk for a lighter option
  • 1 15-ounce can pumpkin puree provides flavor and moisture
  • 1.5 cups granulated sugar or swap for brown sugar for a deeper flavor
  • 3 tablespoons melted butter adds richness and helps bind the mixture
  • 4 large eggs provides structure and sets the pudding
  • 2 teaspoons vanilla extract
  • 1 tablespoon pumpkin pie spice infuses it with holiday flavors
For the Praline Sauce
  • 1 cup unsalted butter for richness in the sauce
  • 1 cup heavy cream for a creamy texture
  • 1 cup brown sugar adds sweetness and caramel flavor
  • 0.5 cup chopped toasted pecans provides crunch
  • spices (for sauce) cinnamon, nutmeg, ground ginger, ground cloves, and ground allspice

Equipment

  • 9x13 baking dish
  • Mixing Bowl
  • Whisk
  • Saucepan

Method
 

Step-by-Step Instructions
  1. Preheat your oven to 350°F (175°C) and prepare a 9x13 baking dish by greasing it.
  2. Tear the day-old bread into small bite-sized pieces and evenly spread it in the baking dish.
  3. In a mixing bowl, combine the heavy cream, half and half, pumpkin puree, granulated sugar, melted butter, eggs, vanilla extract, and pumpkin pie spice. Whisk until smooth.
  4. Pour the custard over the bread pieces and press down gently. Let it sit for 10 minutes.
  5. Bake for about 60 minutes until the top is golden brown and slightly wobbly in the center.
  6. While baking, prepare the praline sauce by combining unsalted butter, heavy cream, and brown sugar in a saucepan. Bring to a boil, then simmer for 5 minutes until thickened.
  7. Stir in the chopped pecans and spices, allowing it to simmer for another minute.
  8. Serve the pudding warm, drizzled with the praline sauce, and optionally with whipped cream or ice cream.

Nutrition

Serving: 1sliceCalories: 400kcalCarbohydrates: 55gProtein: 5gFat: 20gSaturated Fat: 10gPolyunsaturated Fat: 2gMonounsaturated Fat: 5gCholesterol: 140mgSodium: 300mgPotassium: 200mgFiber: 2gSugar: 28gVitamin A: 5000IUVitamin C: 2mgCalcium: 150mgIron: 2mg

Notes

Use day-old bread for best results and allow soaking time for optimal texture.

Tried this recipe?

Let us know how it was!

Guilt-Free Black Milkshake Recipe for Halloween Bliss

As I stood in the kitchen, my mind racing with Halloween ideas, a delightful thought crossed my mind—what if I could recreate the nostalgic taste of Oreos in a drink? That’s when I stumbled upon the magic of a Black Milkshake Recipe. This spooky yet scrumptious treat is not only a feast for the eyes with its deep, mysterious hue, but it’s also a breeze to whip up. Whether you’re catering to a vegan crowd or looking for a paleo adaptation, this recipe accommodates everyone, making it perfect for those festive gatherings or just a cozy night in. Trust me, once you try this creamy delight, you’ll be swept away by its rich flavor and velvety texture—it’s the kind of indulgence that could turn any day into a special occasion. Curious about how to make it? Let’s dive into the delectable details!

Why is this black milkshake special?

Unique Flavor Experience: This milkshake combines the nostalgic taste of Oreos with a twist, providing a rich chocolate flavor without any artificial coloring.

Easy to Make: With just a few simple ingredients and minimal prep time, you’ll have a crowd-pleasing treat ready in no time!

Diet-Friendly Options: Whether you prefer vegan or paleo options, this recipe is versatile enough to cater to everyone’s dietary needs.

Perfect for Celebrations: Its striking black hue makes it not only a delicious treat but also an eye-catching centerpiece for Halloween parties or gatherings.

Endless Customization: From toppings to add-ins, you can personalize this milkshake to suit your tastes, making it a fun and interactive dessert!

If you’re looking for more delightful ideas, try our delicious Mango Coconut Pudding or the scrumptious Grilled Honey BBQ Chicken Kabobs to complement your spooky themes!

Black Milkshake Recipe Ingredients

Unveil the secrets to a creamy delight!

For the Milkshake

  • Vanilla Ice Cream – The base for a rich and creamy texture; substitute with vegan vanilla ice cream for a plant-based version.
  • Milk – Provides the right consistency; use unsweetened cashew milk for a vegan version.
  • Black Cocoa Powder – Offers a deep chocolate flavor reminiscent of Oreos; essential for that striking black color.
  • Maple Syrup – Adds sweetness and enhances the overall flavor; honey can be used for non-vegan versions.
  • Vanilla Extract – Adds depth to the flavor profile; avoid substitutes for the most authentic taste.

For the Toppings

  • Whipped Cream (Optional) – Topping for additional creaminess; use heavy cream or a vegan whipping cream for dairy-free options.
  • Black Sanding Sugar (Optional) – Great for rimming the glass, adding a festive touch to your black milkshake.

With these simple ingredients, you’ll create a show-stopping Black Milkshake Recipe that’s perfect for any celebration! Enjoy!

Step‑by‑Step Instructions for Black Milkshake Recipe

Step 1: Prepare Whipped Cream and Glasses
Start by whipping heavy cream in a chilled bowl using an electric mixer on high speed until stiff peaks form, which should take about 3-5 minutes. For a festive touch, dip the rims of your glasses in maple syrup and then roll them in black sanding sugar to create a sparkling border. Set aside while you prepare the shake.

Step 2: Blend the Milkshake Ingredients
In a high-speed blender, combine 2 cups of vanilla ice cream, 1 cup of milk, 1/4 cup of black cocoa powder, 2 tablespoons of maple syrup, and 1 teaspoon of vanilla extract. Blend on medium-high for about 30 seconds or until the mixture is silky smooth, stopping to scrape down the sides if needed. Adjust the thickness by adding more milk a tablespoon at a time if desired.

Step 3: Taste and Adjust
Once blended, taste your black milkshake mixture to assess the cocoa intensity. If you prefer a richer chocolate flavor, feel free to add a little more black cocoa powder or maple syrup, blending again briefly until well combined. Your black milkshake should have a velvety texture and deep color, strikingly evocative of an Oreo dessert.

Step 4: Serve with Toppings
Pour the black milkshake into the prepared glasses, leaving some room at the top. Generously top each milkshake with the freshly whipped cream you made earlier, creating a delightful dollop that enhances the visual appeal. For an extra spooky touch, consider sprinkling a few black sanding sugar crystals on top of the whipped cream.

Step 5: Enjoy Immediately
Serve your decadent black milkshake right away for the best texture and flavor. This enticing Halloween treat is meant to be sipped and savored as soon as it’s made. Gather friends or family around to marvel at its striking appearance and rich taste, making it a memorable addition to any gathering.

Black Milkshake Recipe Variations

Feel free to get creative with your black milkshake and try one of these delightful twists to make it your own!

  • Vegan Option: Use vegan vanilla ice cream and unsweetened cashew milk to create a creamy plant-based version that everyone can enjoy.

  • Paleo Adaptation: Swap traditional ice cream for a compliant paleo ice cream. Skip the toppings that aren’t paleo-friendly to keep it authentic.

  • Nutty Flavor: Add a tablespoon of almond butter for a delicious nutty twist that complements the chocolate perfectly. It transforms your shake into a rich and satisfying treat!

  • Minty Freshness: Mix in a few drops of peppermint extract for an invigorating mint flavor. This adds a fun, fresh vibe—perfect for festive gatherings!

  • Chocolate Chip Crunch: Stir in mini chocolate chips right before serving. They add a wonderful texture contrast that your taste buds will love!

  • Spicy Kick: For a bit of heat, consider adding a pinch of cinnamon or cayenne pepper. It gives a surprising yet delightful kick to the classic black milkshake flavor!

  • Frozen Fruit: Blend in a handful of blackberries for a fruity twist and natural sweetness. This will enhance both flavor and nutrition, making the treat a bit healthier!

  • Eyeball Treat: For Halloween, pop in some gummy eyeballs or edible spooky decorations right before serving. It’s all about the spooky aesthetic for that festive appeal!

Looking for more delicious recipes? Try making my Zucchini Sweet Potato Beef Skillet or a comforting Hobo Casserole for a family dinner. Happy cooking!

Make Ahead Options

These delightful Black Milkshakes are perfect for busy home cooks looking to save time! You can prepare the milkshake mixture up to 24 hours in advance. Simply blend together the ice cream, milk, black cocoa powder, maple syrup, and vanilla extract, then store it in an airtight container in the refrigerator to maintain its rich flavor. For the whipped cream, whip it fresh and store it separately in the fridge, which helps preserve its texture until you’re ready to serve. When you’re ready to indulge, just pour the shaken mixture into the glasses, top with the whipped cream, and you’ll have a spooky treat that’s just as delicious, but with less last-minute fuss!

Tips for the Best Black Milkshake

  • Cocoa Choice: Always use black cocoa powder for an authentic Oreo flavor; regular cocoa will change the taste and look of your black milkshake recipe.

  • Ice Cream Quality: Opt for high-quality, dense ice cream; airier options may require less milk, ensuring your shake remains creamy.

  • Sweetness Check: Taste the milkshake mixture before serving—adjust sweetness with maple syrup or cocoa powder to achieve your ideal flavor profile.

  • Rimming Glasses: For a fun presentation, rim glasses with maple syrup and dip in black sanding sugar. This adds a festive touch perfect for Halloween!

  • Serving Fresh: Enjoy immediately for the best texture; while it can be stored, frozen shakes may lose their creamy consistency when thawed.

What to Serve with Black Milkshake: A Spooky Delight

Pair this luscious milkshake with delightful sides that enhance its decadent nature and add a festive touch to your gathering.

  • Spooky Brownies: Rich, fudgy brownies topped with dark chocolate ganache create a delightful contrast to the creamy milkshake. Their intense flavor pairs beautifully with the Oreo notes of the shake.

  • Chilling Ghost Cupcakes: Light vanilla cupcakes adorned with ghostly whipped cream make for a playful dessert. Their airy texture balances the richness of the milkshake and will charm guests of all ages.

  • Crunchy Caramel Popcorn: Light and crunchy caramel popcorn adds a sweet, salty crunch, enhancing the overall indulgence while providing a fun texture contrast to the velvet of the black milkshake.

  • Fruit Platter: Bright, fresh fruit like strawberries and oranges can bring a refreshing contrast to the rich flavors. Their natural sweetness and acidity will lighten the palate.

  • Halloween-Themed Cookies: Decorated sugar cookies in spooky shapes are not only festive but also provide just the right amount of sweetness alongside the creamy shake. Decorate them together for added fun!

  • Savory Cheese Platter: Offering a variety of cheeses and crackers alongside sweet treats will surprise your taste buds and create an exciting flavor balance. Aged cheddar or blue cheese would work wonders!

  • Pumpkin Spice Muffins: These warm, spiced muffins echo the fall flavors of the season. Their moist texture embraces the rich milkshake, creating a cozy pairing that feels like a hug in a glass.

  • Iced Herbal Tea: A chilled hibiscus or chamomile tea offers a refreshing beverage choice that can complement the indulgent nature of the milkshake. Its floral notes will refresh the palate.

  • Chocolate-Dipped Apples: Crisp apple slices coated in dark chocolate offer a delightful crunch and a hint of tartness. They enhance the chocolate experience while adding a fresh element to the spread.

How to Store and Freeze Black Milkshake Recipe

Best Enjoyed Fresh: Enjoy your black milkshake immediately after preparation for the best flavor and creaminess.

Fridge: If you have leftovers, store the milkshake in an airtight container in the refrigerator for up to 3 hours; it may lose some texture.

Freezer: For longer storage, freeze the milkshake in an airtight container for up to 1 month. Note that the consistency may alter upon thawing, so re-blend before serving.

Reheating: If frozen, let it sit at room temperature for 10-15 minutes before blending again to achieve a creamy texture similar to the original black milkshake recipe.

Black Milkshake Recipe FAQs

What type of cocoa powder should I use for the black milkshake?
Absolutely! It’s essential to use black cocoa powder for that authentic Oreo flavor and that striking black color. Regular cocoa powder will change both the taste and appearance, making it less visually appealing.

How should I store any leftover black milkshake?
If you have leftovers, store the milkshake in an airtight container in the fridge for up to 3 hours. However, to fully enjoy the texture and flavor, it’s best to sip on it fresh!

Can I freeze the black milkshake, and how should I do it?
Yes, you can freeze your black milkshake! Pour it into an airtight container, allowing some space for expansion, and freeze for up to 1 month. When you’re ready to enjoy it, let it sit out at room temperature for 10-15 minutes, then re-blend to restore its creamy texture.

Are there any dietary considerations for this recipe?
Very! This black milkshake recipe can be easily adapted for different dietary needs. Use vegan ice cream and unsweetened cashew milk for a plant-based version, or choose a paleo-compliant ice cream if you’re following a paleo diet. Always read labels to ensure your ingredients align with any allergies or dietary restrictions.

Can I use regular milk instead of other milk alternatives?
Of course! You can definitely use regular milk instead of alternatives like unsweetened cashew milk, provided there are no dietary restrictions. Whole milk will add to the creaminess, but feel free to use whatever suits your palate best.

What should I do if my milkshake is too thick?
No worries! If your black milkshake turns out thicker than desired, simply add more milk a tablespoon at a time while blending until you reach your preferred consistency. Enjoy the creamy journey!

Black Milkshake Recipe

Guilt-Free Black Milkshake Recipe for Halloween Bliss

A delightful Black Milkshake Recipe perfect for Halloween, combining the nostalgic taste of Oreos in a creamy, diet-friendly treat.
Prep Time 10 minutes
Total Time 10 minutes
Servings: 4 cups
Course: Dessert
Cuisine: American
Calories: 350

Ingredients
  

For the Milkshake
  • 2 cups Vanilla Ice Cream Use vegan vanilla ice cream for a plant-based version.
  • 1 cup Milk Use unsweetened cashew milk for a vegan version.
  • 1/4 cup Black Cocoa Powder Essential for that striking black color.
  • 2 tablespoons Maple Syrup Honey can be used for non-vegan versions.
  • 1 teaspoon Vanilla Extract Avoid substitutes for the most authentic taste.
For the Toppings
  • 1 cup Whipped Cream (Optional) Use heavy cream or a vegan whipping cream for dairy-free options.
  • Black Sanding Sugar (Optional) Great for rimming the glass.

Equipment

  • blender
  • Electric Mixer
  • Chilled bowl

Method
 

Step-by-Step Instructions
  1. Start by whipping heavy cream in a chilled bowl using an electric mixer on high speed until stiff peaks form, about 3-5 minutes. Dip the rims of glasses in maple syrup and roll in black sanding sugar.
  2. In a high-speed blender, combine the milkshake ingredients: vanilla ice cream, milk, black cocoa powder, maple syrup, and vanilla extract. Blend on medium-high for about 30 seconds until silky smooth.
  3. Taste your mixture. Add more black cocoa powder or maple syrup for desired intensity and blend briefly to combine.
  4. Pour the milkshake into prepared glasses and top each with whipped cream.
  5. Serve immediately for the best texture and flavor.

Nutrition

Serving: 1cupCalories: 350kcalCarbohydrates: 50gProtein: 5gFat: 15gSaturated Fat: 8gCholesterol: 40mgSodium: 150mgPotassium: 300mgFiber: 2gSugar: 30gVitamin A: 10IUCalcium: 15mgIron: 2mg

Notes

Enjoy your black milkshake immediately after preparation for the best flavor and creaminess. Can be stored in the fridge for up to 3 hours or frozen for up to 1 month.

Tried this recipe?

Let us know how it was!

Wicked Witch Hat Brownies: A Fun Halloween Delight!

As I rummaged through my kitchen cabinets, an idea sparked that would ignite our Halloween festivities—Wicked Witch Hat Brownies! With their rich chocolatey goodness and whimsical presentation, these brownies turn an ordinary dessert into a playful treat that’s perfect for both kids and adults. Not only are they visually striking, topped with adorable chocolate ice cream cone hats, but they are also incredibly easy to whip up, making them the ideal choice for last-minute preparations. Whether you’re gearing up for a spooky party or a cozy family gathering, these fudgy brownies deliver a crowd-pleasing delight that will leave everyone reaching for seconds. Are you ready to enchant your guests with a dessert that’s both delicious and fun? Let’s dive into this enchanting recipe!

Why Are Wicked Witch Hat Brownies a Must-Try?

Fun and Festive: Transform any Halloween gathering with these playful brownies that are sure to become a hit! Decadent Flavor: Each bite offers a rich chocolate experience, perfectly complemented by a creamy frosting. Creative Presentation: The whimsical witch hats made from ice cream cones are not just adorable but also a conversation starter. Quick and Easy: Only a few steps stand between you and this delightful treat, making it perfect for last-minute baking. Crowd-Pleaser: Ideal for all ages, these brownies will impress kids and adults alike. For other festive inspirations, check out my Fudgy Brownies Indulge or try making these Patriotic Star Brownies as well!

Wicked Witch Hat Brownies Ingredients

For the Brownies

  • Unsalted Butter – 1 cup (225g); adds moisture and richness; substitute with vegan butter for a dairy-free option.
  • Granulated Sugar – 2 cups (400g); provides sweetness; brown sugar can be used for a deeper flavor.
  • Eggs – 4 large; binder that adds structure; for a vegan substitute, use flaxseed meal or applesauce (1 egg = 1 Tbsp flaxseed meal + 3 Tbsp water).
  • Vanilla Extract – 1 teaspoon; enhances flavor; can be replaced with almond extract for a different note.
  • All-Purpose Flour – 1 cup (125g); provides structure; swap with gluten-free flour blend for gluten-free brownies.
  • Unsweetened Cocoa Powder – 1 cup (90g); adds chocolate flavor; Dutch-processed cocoa can provide a milder taste.
  • Salt – 1/2 teaspoon; balances sweetness; no substitute needed.
  • Baking Powder – 1/2 teaspoon; leavens the brownies; ensure it’s fresh for effective rising.

For the Witch Hats

  • Chocolate Ice Cream Cones – 12; forms the “witch hats”; any brand works, or mini cones for smaller treats.
  • Halloween-themed Sprinkles – For decoration; adds festive flair; use any seasonal sprinkles for variety.

For the Frosting

  • Powdered Sugar – 2 cups (300g); main component for frosting, adds sweetness; no significant substitutes.
  • Milk – 1/4 cup (60ml); adds creaminess to frosting; substitute with almond milk for a dairy-free option.
  • Green Food Coloring – To desired shade; for visual appeal; can leave out for a more natural look.

Step‑by‑Step Instructions for Wicked Witch Hat Brownies

Step 1: Prepare Brownie Batter
Begin by melting the unsalted butter in a saucepan over low heat until fully liquid, then allow it to cool slightly. In a large mixing bowl, combine the melted butter with the granulated sugar, stirring until smooth and creamy. Next, beat in the eggs one at a time, ensuring each is fully incorporated before adding the vanilla extract for that delightful flavor.

Step 2: Combine Dry Ingredients
In a separate bowl, whisk together the all-purpose flour, unsweetened cocoa powder, salt, and baking powder. Gradually mix this dry blend into the wet ingredients, stirring gently until just combined. Be cautious not to overmix; the goal is to maintain that fudgy texture characteristic of our Wicked Witch Hat Brownies.

Step 3: Bake
Pour the brownie batter into a greased 9×13 inch baking pan, spreading it evenly to ensure uniform baking. Preheat your oven to 350°F (175°C) and bake for 25-30 minutes. To check for doneness, insert a toothpick; it should come out with a few moist crumbs—this indicates the perfect fudginess. Allow the brownies to cool completely in the pan on a wire rack.

Step 4: Prepare Witch Hats
While the brownies are cooling, enhance your chocolate ice cream cones by dipping the tops in melted chocolate and then sprinkling with Halloween-themed sprinkles if desired. This step adds a festive touch and makes your witch hats pop with color and fun, ready to crown your delicious brownies.

Step 5: Frost Brownies
In a mixing bowl, combine the powdered sugar, milk, vanilla extract, and green food coloring to create a vibrant frosting. Mix until smooth and uniform. Once the brownies are completely cool, spread this delightful green frosting evenly over the top, allowing it to be thick and luscious—just like the Wicked Witch Hat Brownies deserve!

Step 6: Assemble
Finally, it’s time for the fun part! Place an upside-down ice cream cone onto each frosted brownie, creating the whimsical witch hats. Sprinkle some additional Halloween-themed sprinkles on top for that extra festive flair. Stand back and admire your creation; these delightful Wicked Witch Hat Brownies are sure to enchant everyone at your Halloween gathering!

Tips for the Best Wicked Witch Hat Brownies

  • Check Freshness: Ensure your baking powder is fresh for proper rising; stale baking powder can lead to dense brownies.
  • Room Temperature Eggs: Using eggs at room temperature helps them incorporate smoothly into the batter, ensuring that your Wicked Witch Hat Brownies have that desirable fudgy texture.
  • Don’t Overmix: Gently combine wet and dry ingredients; overmixing can lead to tough brownies instead of the soft, rich consistency we aim for.
  • Cool Completely: Let the brownies cool fully before frosting them. This prevents the frosting from melting and sliding off, ensuring a beautiful presentation.
  • Customization: Don’t hesitate to get creative with toppings! Add nuts or use different-colored sprinkles to personalize your Wicked Witch Hat Brownies for your Halloween theme.

Storage Tips for Wicked Witch Hat Brownies

Room Temperature: Store brownies in an airtight container at room temperature for up to 4-5 days to maintain their fudgy texture.

Fridge: If you prefer a chilled treat, keep the brownies in the fridge for up to a week, but allow them to come to room temperature before serving for optimal taste.

Freezer: For long-term storage, freeze brownies in an airtight container for up to 3 months. Thaw at room temperature for a few hours before enjoying your Wicked Witch Hat Brownies again.

Reheating: If you want to warm them up, place the brownies in the microwave for about 10-15 seconds—just until slightly warm, being careful not to overheat.

Make Ahead Options

These Wicked Witch Hat Brownies are perfect for busy home cooks who want to save time during the Halloween rush! You can prepare the brownie batter up to 24 hours in advance by mixing it according to the instructions and refrigerating it in an airtight container. The baked brownies can also be made ahead of time; just cool them completely and store them at room temperature for up to 3 days. When you’re ready to serve, simply frost the cooled brownies and top them with the witch hats just before your guests arrive to keep everything fresh and delicious. This way, you can enjoy the festivities without the last-minute baking stress!

What to Serve with Wicked Witch Hat Brownies

Indulge in the playful spirit of Halloween with delightful sides and drinks that elevate your spooky dessert experience.

  • Pumpkin Spice Lattes: This seasonal favorite’s warm spices beautifully enhance the rich chocolate of the brownies, creating a cozy pairing.
  • Cold Milk: A classic choice; the creamy, coolness contrasts the fudgy brownies while balancing the sweetness for a perfect bite.
  • Spooky Fruit Skewers: Add a fresh element with fruit cut into Halloween shapes; it lightens the meal and adds vibrant colors to the plate.

Try combining the fruit with a yogurt dip for an added layer of flavor and fun!

  • Ghostly Meringues: These light and airy meringue cookies create a delightful textural contrast to the dense brownies while adding to your Halloween theme.

  • Chocolate-Covered Pretzels: Salty meets sweet in this fun snack! Their crunchiness complements the softness of the brownies, keeping the texture varied and engaging.

  • Apple Cider: Whether hot or cold, this drink brings a delightful fall flavor to the table, enhancing the overall festive experience of your gathering.

  • Decorated Sugar Cookies: Adorned with Halloween themes, these cookies make for a festive accompaniment, offering another sweet treat with a different texture.

Embrace these delightful pairings for a Halloween spread that will enchant everyone!

Wicked Witch Hat Brownies Variations

Feel free to put your own spin on these delightful brownies with a few simple twists and substitutions!

  • Gluten-Free Version: Substitute all-purpose flour for a gluten-free blend containing xanthan gum for a delicious alternative.

  • Vegan Option: Replace eggs with flaxseed meal and butter with a vegan alternative while ensuring all other ingredients are plant-based.

  • Nutty Addition: Fold in 1 cup of chopped walnuts or pecans into the brownie batter for an added crunch and flavor boost.

  • Spicy Kick: Add a pinch of cayenne pepper or cinnamon to the brownie batter for a surprising warm spice that complements the chocolate perfectly.

  • Minty Twist: Incorporate 1 teaspoon of peppermint extract into the frosting for a refreshing mint flavor that pairs beautifully with chocolate.

  • Colorful Sprinkles: Switch up the Halloween-themed sprinkles with colorful or seasonal ones for a more festive look. You might even try adding edible glitter for an extra magical touch!

  • Fruity Infusion: Incorporate a handful of chocolate-covered cherries or raspberries on top of the frosting before placing the witch hats to add a burst of fruity flavor.

  • Peanut Butter Swirl: Swirl warmed peanut butter into the brownie batter before baking for a rich, creamy contrast that many adore.

Whichever variation you choose, it’ll surely put a smile on the faces of your guests! For more delicious brownie inspiration, don’t miss out on my Fudgy Brownies Indulge or consider trying these Patriotic Star Brownies. Your Halloween treats are about to get elevated in flavor and fun!

Wicked Witch Hat Brownies Recipe FAQs

How do I choose the best ingredients for my Wicked Witch Hat Brownies?
Absolutely! When selecting ingredients, opt for fresh, high-quality unsalted butter and granulated sugar to ensure a rich flavor. For the cocoa powder, choose unsweetened or Dutch-processed versions depending on your taste preference. Imported Dutch cocoa will offer a smoother taste, while regular unsweetened cocoa packs a punch of intense chocolate flavor. For eggs, look for large, fresh eggs, and consider using organic options for a more wholesome treat.

How should I store my Wicked Witch Hat Brownies?
To keep those brownies fresh, store them in an airtight container at room temperature for up to 4-5 days. If you want to extend their shelf life, you can refrigerate them for about a week—just remember to bring them back to room temperature before serving for that perfect fudgy experience. Alternatively, they can be frozen, where they’ll last for up to 3 months. Just place them in an airtight container and thaw at room temperature when you’re ready to enjoy.

Can I freeze Wicked Witch Hat Brownies?
Certainly! To freeze your Wicked Witch Hat Brownies, first, let them cool completely. Cut them into squares and wrap each piece tightly with plastic wrap or aluminum foil. Then, place them in an airtight freezer-safe container. This way, they’ll maintain their flavor and texture while frozen. When you’re ready to indulge, simply thaw them at room temperature for a couple of hours or microwave for 10-15 seconds for a warm treat.

What if my brownies turned out too dry?
If your brownies are too dry, don’t fret; this can happen for a few reasons, such as overbaking or using too much flour. To remedy this, always check for doneness at the 25-minute mark by inserting a toothpick—look for a few moist crumbs. If they seem dry post-baking, you can revive them by covering them with a damp paper towel and microwaving for a few seconds. For future batches, ensure you’re measuring your flour correctly; spooning it into the measuring cup instead of scooping can help maintain the right consistency.

Are Wicked Witch Hat Brownies suitable for those with dietary restrictions?
Very! This recipe is quite versatile. For vegan options, swap the eggs with flaxseed meal or applesauce, and use plant-based butter and milk. If you’re avoiding gluten, use a gluten-free flour blend to replace the all-purpose flour. Always check labels for any specific allergens, especially with your decorations like sprinkles and cones. It’s so wonderful to gather friends and family for Halloween treats while catering to everyone’s dietary needs!

Wicked Witch Hat Brownies

Wicked Witch Hat Brownies: A Fun Halloween Delight!

Delightful Wicked Witch Hat Brownies combine rich chocolate flavors with festive presentation, perfect for Halloween fun!
Prep Time 20 minutes
Cook Time 30 minutes
Cooling Time 30 minutes
Total Time 1 hour 20 minutes
Servings: 12 brownies
Course: Dessert
Cuisine: American
Calories: 250

Ingredients
  

For the Brownies
  • 1 cup unsalted butter adds moisture and richness; substitute with vegan butter for a dairy-free option
  • 2 cups granulated sugar provides sweetness; brown sugar can be used for a deeper flavor
  • 4 large eggs binder that adds structure; for a vegan substitute, use flaxseed meal or applesauce
  • 1 teaspoon vanilla extract enhances flavor; can be replaced with almond extract for a different note
  • 1 cup all-purpose flour provides structure; swap with gluten-free flour blend for gluten-free brownies
  • 1 cup unsweetened cocoa powder adds chocolate flavor; Dutch-processed cocoa can provide a milder taste
  • 1/2 teaspoon salt balances sweetness; no substitute needed
  • 1/2 teaspoon baking powder leavens the brownies; ensure it's fresh for effective rising
For the Witch Hats
  • 12 chocolate ice cream cones forms the 'witch hats'; any brand works, or mini cones for smaller treats
  • Halloween-themed sprinkles for decoration; adds festive flair
For the Frosting
  • 2 cups powdered sugar main component for frosting, adds sweetness; no significant substitutes
  • 1/4 cup milk adds creaminess to frosting; substitute with almond milk for a dairy-free option
  • green food coloring to desired shade; for visual appeal; can leave out for a more natural look

Equipment

  • 9x13 inch baking pan
  • Mixing bowls
  • Saucepan
  • Whisk
  • Spatula
  • Wire Rack

Method
 

Step-by-Step Instructions for Wicked Witch Hat Brownies
  1. Begin by melting the unsalted butter in a saucepan over low heat until fully liquid, then allow it to cool slightly.
  2. In a large mixing bowl, combine the melted butter with the granulated sugar, stirring until smooth and creamy.
  3. Next, beat in the eggs one at a time, ensuring each is fully incorporated before adding the vanilla extract.
  4. In a separate bowl, whisk together the all-purpose flour, unsweetened cocoa powder, salt, and baking powder.
  5. Gradually mix this dry blend into the wet ingredients, stirring gently until just combined.
  6. Pour the brownie batter into a greased 9x13 inch baking pan, spreading it evenly.
  7. Preheat your oven to 350°F (175°C) and bake for 25-30 minutes, checking for doneness with a toothpick.
  8. Allow the brownies to cool completely in the pan on a wire rack.
  9. Enhance your chocolate ice cream cones by dipping the tops in melted chocolate and then sprinkling with Halloween-themed sprinkles if desired.
  10. In a mixing bowl, combine the powdered sugar, milk, vanilla extract, and green food coloring to create a vibrant frosting.
  11. Once the brownies are completely cool, spread the frosting evenly over the top.
  12. Place an upside-down ice cream cone onto each frosted brownie, creating the whimsical witch hats.
  13. Sprinkle additional Halloween-themed sprinkles on top for extra festive flair.

Nutrition

Serving: 1brownieCalories: 250kcalCarbohydrates: 35gProtein: 3gFat: 12gSaturated Fat: 7gPolyunsaturated Fat: 1gMonounsaturated Fat: 4gCholesterol: 40mgSodium: 150mgPotassium: 120mgFiber: 1gSugar: 20gVitamin A: 200IUCalcium: 20mgIron: 1mg

Notes

Store brownies in an airtight container at room temperature for 4-5 days. Refrigerate for up to a week or freeze for long-term storage. Allow thawing at room temperature before serving.

Tried this recipe?

Let us know how it was!

Savory Seafood Stuffed Crab Recipe for Any Occasion

Take a moment to close your eyes and imagine the lively atmosphere of a New Orleans kitchen, where the tantalizing aroma of seafood dances through the air. That’s the inspiration behind my Seafood Stuffed Crab recipe, a delightful union of sweet crab meat and plump shrimp, all nestled into crispy crab shells. Whether you’re looking for a quick appetizer or a show-stopping dish for your next gathering, this recipe delivers both convenience and culinary flair. In just 30 minutes, you can create a restaurant-quality dish that will leave your guests raving. Plus, it’s easily adaptable; swap in your favorite seafood or adjust the spice level to match your tastes. Are you ready to dive into this irresistible Southern delight? Let’s get cooking!

Why is this recipe a crowd-pleaser?

Irresistible Flavors: The combination of succulent crab and shrimp intertwined with Creole seasoning creates a mouthwatering explosion of taste.
Quick Preparation: In just 30 minutes, you can craft a dish that feels gourmet, perfect for those of us short on time but big on flavor.
Versatile Options: Easily adaptable, swap shrimp for crawfish or experiment with a veggie stuffing for a delightful twist.
Perfect for Gatherings: Whether it’s a cozy dinner or a festive party, these seafood stuffed crabs are sure to impress everyone at the table. Pair it with garlic bread or a crisp salad for a complete meal!
Satisfying Texture: Enjoy the contrast of crispy tops and creamy stuffing that makes each bite a joy to savor—ideal for any seafood lover.
Make-Ahead Friendly: Prepare the stuffing in advance, making it simple to assemble when you’re ready to bake!

Seafood Stuffed Crab Recipe Ingredients

For the Filling

Lump Crab Meat – The star of this dish, offering sweetness and a tender texture; fresh is best, but high-quality canned crab can work too.
Shrimp – Adds a delightful juiciness; feel free to swap it with crawfish if you’re in the mood for a different seafood profile.
Onion – An aromatic base for flavor enhancement; always opt for fresh for the best taste.
Bell Pepper – Contributes sweetness and a splash of color; any variety you adore will do!
Celery – Ensures a satisfying crunch; fresh is always preferred for optimal flavor.
Butter – Used for sautéing the aromatics; consider using olive oil for a lighter alternative.
Garlic – The flavor powerhouse of the dish; minced for even distribution throughout.
Panko Breadcrumbs – Creates binding and texture; gluten-free alternatives are available if needed.
Egg – Acts as the crucial binder in the stuffing, helping to maintain its shape.
Mayonnaise – Provides a creamy texture; swap for Greek yogurt if you’re looking for a lighter option.
Dijon Mustard – Adds an extra layer of depth to the filling.
Worcestershire Sauce – Infuses umami flavor and elevates the overall taste.
Hot Sauce – Adjust according to your spice preference; it’s optional but highly recommended for a kick!
Creole Seasoning – Vital for that authentic Louisiana flair; select your favorite blend to enhance flavors.
Paprika – Adds a burst of sweetness and lovely color to the mixture.
Cayenne Pepper – Provides heat; feel free to reduce for a milder experience.

For the Garnish

Chopped Parsley – Fresh parsley brightens up the presentation and offers a herbaceous note.
Lemon Wedges – Serve alongside for a zesty burst of flavor that complements the seafood stuffed crab beautifully.

Dive into this Seafood Stuffed Crab recipe and savor a dish that’s sure to impress at any gathering!

Step‑by‑Step Instructions for Seafood Stuffed Crab Recipe

Step 1: Preheat the Oven
Begin by preheating your oven to 375°F (190°C). This will ensure that your Seafood Stuffed Crab cooks evenly and gets that perfect golden crust. While the oven heats up, gather your ingredients and prep your workspace for a smooth cooking experience.

Step 2: Sauté the Aromatics
In a large skillet, melt 2 tablespoons of butter over medium heat. Add finely chopped onion, bell pepper, and celery, sautéing them for about 5 minutes until they soften and become fragrant. Toss in minced garlic and continue to sauté for an additional minute before adding peeled and deveined shrimp. Cook until the shrimp turns opaque, approximately 2 minutes.

Step 3: Prepare the Filling
In a spacious mixing bowl, gently fold together your sautéed mixture with lump crab meat, panko breadcrumbs, one egg, mayonnaise, Dijon mustard, Worcestershire sauce, and hot sauce. Season with Creole seasoning, paprika, and cayenne pepper. Be careful not to overmix, as you want to keep those crab lumps intact for enhanced texture in your Seafood Stuffed Crab.

Step 4: Stuff the Crab Shells
Carefully fill your crab shells or ramekins with the delicious seafood stuffing, mounding it high for an appealing presentation. Press the mixture lightly to secure it in the shells, ensuring they are generously filled and ready to embrace the heat of the oven.

Step 5: Bake the Stuffed Crabs
Place the filled crab shells on a baking sheet and slide them into the preheated oven. Bake for 20-25 minutes, or until the tops are beautifully golden brown and bubbling. Keep an eye on them towards the end to ensure they don’t over-bake, resulting in a crunchy topping.

Step 6: Garnish and Serve
Once baked, remove the Seafood Stuffed Crab from the oven and let them cool slightly. Garnish with freshly chopped parsley for a pop of color and serve them with lemon wedges on the side to bring out the delightful flavors of the seafood stuffing. Enjoy your culinary masterpiece!

Seafood Stuffed Crab Recipe Variations

Feel free to explore creative twists on this delightful dish, allowing your culinary imagination to shine!

  • Crawfish Swap: Replace shrimp with crawfish for an authentic Louisiana flavor. This variation adds a unique taste and texture that’s perfect for seafood lovers.

  • Mushroom Medley: For a vegetarian option, use sautéed mushrooms and artichokes as the stuffing base. The earthy flavors will enhance the dish beautifully without sacrificing richness.

  • Spice It Up: Adjust the heat level by increasing cayenne pepper or adding additional hot sauce. For a mild version, simply reduce the quantity of these ingredients to cater to all palates.

  • Cheesy Delight: Incorporate shredded cheese such as cheddar or pepper jack into the filling for an indulgent twist. Melting cheese adds extra creaminess and flavor that’s simply irresistible.

  • Zesty Citrus: Mix in some lemon or lime zest to brighten the flavor profile of the stuffing. This adds a refreshing note amidst the rich crab and seafood filling.

  • Gluten-Free Option: Use gluten-free breadcrumbs instead of panko for those with dietary restrictions. This substitution allows everyone to enjoy the dish without compromising on taste.

  • Herbaceous Touch: Add fresh herbs like dill or tarragon to the filling for a burst of freshness. These herbs pair beautifully with seafood and elevate the overall flavor.

  • Smoky Flavor: Introduce smoked paprika for a new dimension of taste. The smokiness complements the seafood perfectly, giving it an exciting depth reminiscent of outdoor grilling.

Whether you choose a classic approach or decide to experiment, these variations ensure your Seafood Stuffed Crab continues to impress every time. And if you’re craving more seafood goodness, don’t miss my Blackened Salmon Stuffed or Crab Crunchies Snack ideas for your next gathering!

Make Ahead Options

These Seafood Stuffed Crabs are perfect for busy home cooks who want to savor delicious flavors without the rush! You can prepare the stuffing mixture up to 24 hours in advance; just store it in an airtight container in the refrigerator to maintain its freshness and prevent any browning. Alternatively, if you’re looking to streamline your meal prep even further, you can assemble the unbaked stuffed crabs and refrigerate them for up to 3 days. When you’re ready to indulge, simply pop them in the oven and bake as directed for that same delightful, restaurant-quality experience. With these make-ahead tips, you can enjoy effortless entertaining or quick weeknight dinners!

What to Serve with New Orleans Seafood Stuffed Crab

Imagine delighting your guests with a symphony of flavors that harmonize beautifully around this sumptuous seafood dish.

  • Garlic Bread: The crunchy, buttery texture pairs beautifully with the creamy filling, adding a familiar comfort to this elegant appetizer. A warm slice is the perfect thing to scoop up any leftover stuffing!

  • Crisp Green Salad: A refreshing salad composed of mixed greens and citrus dressing brightens up the plate. The lightness beautifully balances the rich flavors of the Seafood Stuffed Crab.

  • Buttery Corn on the Cob: Juicy corn adds a sweet contrast that delights the palate, making each bite a celebration of summer. It’s a traditional side that feels just right with Southern fare.

  • Coleslaw: The creamy crunch of coleslaw introduces a delightful textural component. Its tangy flavor will cut through the richness of the seafood, providing a refreshing counterpart.

  • Roasted Vegetables: Seasoned to perfection, a medley of roasted vegetables like zucchini and bell peppers brings a hearty and colorful element to the meal. The slightly charred flavors mesh well with the spices in the stuffing.

  • Sparkling Wine: A chilled glass of sparkling wine or Sauvignon Blanc enhances the seafood experience, bringing effervescence and acidity that lifts the dish’s richness.

  • Old-Fashioned Lemonade: The tartness of homemade lemonade complements the savory flavors splendidly. A refreshing sip will awaken your taste buds, making each bite of crab even more enjoyable.

Pair these delicious side dishes and drinks with your Seafood Stuffed Crab to create an unforgettable dining experience!

Expert Tips for Seafood Stuffed Crab

  • Use Fresh Ingredients: Always opt for fresh lump crab meat and shrimp, which provide the best flavor and texture in your Seafood Stuffed Crab recipe.

  • Don’t Overmix: When combining the filling, be gentle to keep the crab lumps intact. Overmixing can lead to a dense texture.

  • Adjust Spices to Taste: Taste your filling before baking to ensure the seasoning is just right. You can easily modify the heat with cayenne pepper or hot sauce.

  • Store Filling Ahead: Prepare and refrigerate the stuffing mixture up to 24 hours in advance for a quicker cooking process when you’re ready to bake.

  • Check for Moisture: If your filling feels too moist, simply fold in extra panko breadcrumbs until you reach the desired consistency for stuffing.

  • Perfect Baking Time: Keep an eye on the stuffed crabs towards the end of baking. You’re looking for a golden-brown color and bubbling filling for that perfect seafood dish!

How to Store and Freeze Seafood Stuffed Crab

Fridge: Store leftover seafood stuffed crab in an airtight container for up to 2 days. Reheat gently in the oven to maintain the creamy texture.

Freezer: Wrap unbaked stuffed crabs tightly in plastic wrap and store them in the freezer for up to a month. Bake from frozen, adding extra time to ensure they cook through.

Make-Ahead: Prepare the stuffing mixture up to 24 hours in advance and refrigerate. Just be sure to keep it tightly sealed to avoid drying out.

Reheating: For best results, reheat baked crab at 350°F (175°C) for about 15-20 minutes until heated through and the tops are crispy again.

Seafood Stuffed Crab Recipe FAQs

How do I select the best crab meat for this recipe?
Absolutely! Fresh lump crab meat is always the best choice for maximum flavor and texture. When using canned crab, look for high-quality options that are well-drained. Avoid crab meat that has dark spots or an overly fishy smell, as this can indicate poor quality.

What is the best way to store leftovers from my seafood stuffed crab?
Leftovers should be stored in an airtight container in the refrigerator for up to 2 days. When reheating, place them back in the oven at 350°F (175°C) for about 15-20 minutes to keep the topping crispy and ensure the filling stays creamy.

Can I freeze unbaked stuffed crab?
Yes! You can prepare unbaked stuffed crabs in advance. Wrap each one tightly in plastic wrap, then store in a freezer-safe container or bag for up to a month. When ready to bake, remove from the freezer and bake straight from frozen, adding an extra 5-10 minutes to the cooking time to ensure they are heated through.

What if my filling is too moist?
The more the merrier! If your filling seems too moist, simply fold in more panko breadcrumbs until you achieve the desired consistency. This will help bind the mixture and keep it from becoming soggy, giving you that perfect stuffing texture.

Are there any dietary considerations I should take into account?
Very! For those with seafood allergies, consider swapping out the crab and shrimp with hearty veggies like artichokes or mushrooms for a delicious vegetarian version. Always check the labels of store-bought ingredients like mayonnaise and Worcestershire sauce for any hidden allergens if you’re serving guests with dietary restrictions.

How far in advance can I prep the stuffing mixture?
For a smoother cooking experience, you can prepare the stuffing mixture up to 24 hours in advance. Just store it in an airtight container in the refrigerator. This not only saves time but also allows the flavors to meld together beautifully before you bake!

Seafood Stuffed Crab Recipe

Savory Seafood Stuffed Crab Recipe for Any Occasion

An enticing Seafood Stuffed Crab Recipe that combines sweet crab meat and shrimp for an unforgettable appetizer.
Prep Time 15 minutes
Cook Time 25 minutes
Total Time 30 minutes
Servings: 4 crabs
Course: Appetizer
Cuisine: Creole, Southern
Calories: 320

Ingredients
  

Filling Ingredients
  • 1 lb Lump Crab Meat fresh is best
  • 8 oz Shrimp peeled and deveined
  • 1 medium Onion finely chopped
  • 1 medium Bell Pepper any variety
  • 1 stalk Celery finely chopped
  • 2 tbsp Butter or olive oil
  • 2 cloves Garlic minced
  • 1 cup Panko Breadcrumbs gluten-free alternatives available
  • 1 Egg beaten
  • 1/2 cup Mayonnaise or Greek yogurt for lighter option
  • 1 tbsp Dijon Mustard
  • 1 tbsp Worcestershire Sauce
  • 1 tbsp Hot Sauce to taste
  • 1 tbsp Creole Seasoning to taste
  • 1 tsp Paprika
  • 1/4 tsp Cayenne Pepper to taste
Garnish Ingredients
  • 2 tbsp Chopped Parsley for garnish
  • 2 wedges Lemon for serving

Equipment

  • large skillet
  • Mixing Bowl
  • Baking Sheet

Method
 

Cooking Instructions
  1. Preheat the oven to 375°F (190°C).
  2. Melt butter in a skillet over medium heat. Add onion, bell pepper, and celery; sauté for about 5 minutes. Add garlic and shrimp, cooking until shrimp is opaque, approximately 2 minutes.
  3. In a mixing bowl, fold together the sautéed mixture, crab meat, panko breadcrumbs, egg, mayonnaise, Dijon mustard, Worcestershire sauce, and hot sauce. Season with Creole seasoning, paprika, and cayenne pepper.
  4. Stuff crab shells or ramekins with the filling, mounding high for presentation.
  5. Bake the stuffed crabs in the oven for 20-25 minutes until golden brown and bubbling.
  6. Garnish with parsley and serve with lemon wedges.

Nutrition

Serving: 1crabCalories: 320kcalCarbohydrates: 18gProtein: 22gFat: 18gSaturated Fat: 5gPolyunsaturated Fat: 1gMonounsaturated Fat: 2gCholesterol: 120mgSodium: 650mgPotassium: 500mgFiber: 1gSugar: 2gVitamin A: 500IUVitamin C: 10mgCalcium: 100mgIron: 2mg

Notes

Ensure to use fresh ingredients for the best flavor and texture. You can store the leftover stuffing in the fridge for up to 2 days or freeze unbaked crabs for a month.

Tried this recipe?

Let us know how it was!

Comforting Egg Drop Soup Recipe Ready in Just 20 Minutes

The aroma of simmering broth instantly transports me to comforting evenings spent in cozy kitchens, and this Easy Egg Drop Soup is no exception. Just 20 minutes is all it takes to whip up this delightful bowl of warmth, making it an ideal choice for those rushed weeknights. This egg drop soup recipe is versatile enough to please everyone at the table, whether you enjoy it as-is or with some added veggies for a nutritional boost. Not only is it quick to prepare, but it also brings that homemade touch that can often be lost to takeout. With the silky texture and rich flavors melding together beautifully, you’ll find yourself reaching for a second bowl. Curious to see how easily you can create this comforting classic at home? Let’s dive into the recipe!

Why is This Egg Drop Soup Recipe a Must-Try?

Quick and Easy: Whipping up this delicious soup takes just 20 minutes, making it a perfect solution for busy weeknights.

Comfort in a Bowl: The silky broth offers a warm embrace, transporting you to cozy kitchen moments.

Versatile Delight: Customize it with your favorite veggies or proteins for a unique twist, as seen in other comforting soups like Old Fashioned Soup or Creamy Chicken Mushroom Soup.

Homemade Goodness: Skip the takeout and enjoy the satisfaction of a homemade meal filled with fresh flavors and nutrients.

Family-Friendly: This recipe appeals to everyone at the table, ensuring each spoonful is a hit among kids and adults alike!

Vegan Option: Easily make it plant-based by using vegetable broth and tofu, providing an excellent option for vegan diners.

Egg Drop Soup Recipe Ingredients

For the Broth
Chicken or Vegetable Broth – Forms the flavorful base for the soup; low-sodium varieties allow for better control over saltiness.
Ginger – Adds a hint of warmth; fresh grated ginger brings a vibrant flavor that truly enhances your egg drop soup recipe.
Garlic – Enhances the broth’s taste; minced garlic provides a delicious aroma that fills your kitchen.

For the Soup
Eggs – The star ingredient that creates those silky strands in the soup, giving it that classic texture.
Cornstarch – Used to thicken the broth; mix with water to create a slurry before adding to the soup for perfect consistency.
Soy Sauce – Adds depth and richness; adjust according to taste for a balanced flavor profile.
Green Onions – Offers a fresh garnish with a slight crunch; finely chop for best results.
Sesame Oil – Used sparingly to finish the soup with a nutty aroma that enhances the overall taste.

Optional Add-Ins
Frozen Peas or Carrots – Enhance nutrients and offer a pop of color; easily added for a veggie boost.
Cooked Chicken or Tofu – Provides additional protein, making the soup more filling and satisfying.

Step‑by‑Step Instructions for Egg Drop Soup Recipe

Step 1: Prepare Broth
In a large pot, combine 4 cups of chicken or vegetable broth with 2 minced garlic cloves and 1 tablespoon of freshly grated ginger. Place the pot over medium heat and bring the mixture to a gentle simmer. Allow it to simmer for about 5 minutes, stirring occasionally, until the flavors meld and the broth becomes aromatic and inviting.

Step 2: Thicken Soup
In a small bowl, whisk together 1 tablespoon of cornstarch with 2 tablespoons of water to create a smooth slurry. Gradually stir this mixture into the simmering broth, watching it transform as it thickens. Continue cooking for an additional 2-3 minutes, ensuring the broth achieves a glossy texture that promises a comforting egg drop soup.

Step 3: Add Eggs
With the broth simmering gently, slowly drizzle in 3 beaten eggs while stirring the mixture with a fork or chopsticks. This technique creates those delightful silky strands of egg in your soup. Cook for an extra minute until the eggs are set but still tender, enhancing the overall creamy consistency of your egg drop soup.

Step 4: Enhance Flavor
Stir in 2-3 tablespoons of soy sauce, adjusting to your taste preference, and add a drizzle of sesame oil for added richness. Allow everything to simmer for another minute, letting the flavors blend beautifully. The aroma will fill your kitchen, making it hard to resist the urge to dive in right away.

Step 5: Garnish and Serve
Ladle the hot egg drop soup into bowls and top with finely chopped green onions for a fresh crunch. For an added nutritional boost, feel free to mix in some frozen peas or carrots now. Dive into this comforting egg drop soup, and relish each warm, soothing spoonful straight from your cozy kitchen!

Make Ahead Options

These Easy Egg Drop Soup recipes are perfect for meal prep enthusiasts! You can prepare the broth (without the eggs) and refrigerate it for up to 3 days; simply store it in an airtight container to maintain flavor integrity. If you’re looking to prep even further, chop the garlic and ginger a day in advance and keep them in the fridge. When you’re ready to enjoy this comforting dish, gently reheat the broth, whisk in the cornstarch slurry, and then drizzle in the beaten eggs while stirring. This way, you’ll still get that delightful silky texture, making your egg drop soup just as delicious as when made fresh!

Egg Drop Soup Recipe Variations

Feel free to get creative with this comforting egg drop soup! Each twist offers a new opportunity to tantalize your taste buds.

  • Vegan Option: Swap chicken broth for vegetable broth and omit eggs, using silken tofu for a creamy alternative. The tofu provides a delightful texture without sacrificing flavor.
  • Spicy Kick: Add a splash of sriracha or a sprinkle of red pepper flakes for a delightful heat. Perfect for those chilly nights when you crave something adventurous!
  • Herb Infusion: Toss in freshly chopped herbs like cilantro or basil for a vibrant flavor boost. The herbs add brightness and elevate the soup to a fresh, fragrant experience.
  • Veggie Boost: Incorporate baby spinach, bok choy, or diced bell peppers into the broth. This not only enhances the nutrition but also adds a beautiful array of colors to your soup.
  • Coconut Creaminess: Replace a portion of the broth with coconut milk for an extra-rich, tropical twist. The coconut will bring a lovely sweetness that pairs beautifully with the ginger.
  • Protein Power: Feel free to add cooked chicken or tofu chunks for a heartier meal. This can transform your egg drop soup into a filling dish that’s perfect for a cozy family dinner.
  • Mushroom Medley: Mix in sautéed mushrooms for an earthy depth that complements the broth wonderfully. Their umami flavor marries beautifully with the ginger and garlic.
  • Citrus Zing: Squeeze in some fresh lime or lemon juice just before serving for a refreshing zing. This brightens up the whole dish, creating a lovely balance with the rich soup.

Feel inspired? Try out these variations, and don’t forget to pair it with a slice of crusty bread alongside your easy Coconut Curry Soup for a complete meal!

Storage Tips for Egg Drop Soup

Fridge: Store leftovers in an airtight container for up to 3 days. Keep it refrigerated to maintain freshness and flavor, ensuring a comforting bowl is always within reach.

Freezer: If you want to enjoy your egg drop soup later, freeze it for up to 2 months. Make sure to leave space in the container as the broth may expand.

Reheating: When ready to enjoy, reheat gently on the stove over low heat. Add a splash of water to thin if the soup has thickened, stirring until hot.

Avoid Reheating Eggs: For best results, avoid reheating the soup with eggs multiple times, as this can alter the texture. Make new egg drop soup for a fresh experience whenever possible!

Helpful Tricks for Egg Drop Soup Recipe

Use Fresh Ingredients: Always opt for fresh garlic and ginger to elevate the flavor of your egg drop soup recipe. Dried versions can’t compete!

Slow Egg Drizzle: When incorporating eggs, drizzle them slowly into the broth while stirring gently. This technique ensures those perfect silky strands everyone loves.

Cornstarch Caution: Be careful with the cornstarch; combining it with water first helps avoid clumps in your soup. Too much can make the broth too thick.

Taste as You Go: Adjust the soy sauce gradually to find your perfect flavor balance. It’s easy to oversalt, so add small amounts and taste frequently.

Customize Wisely: When adding extra ingredients like vegetables or proteins, do it sparingly to keep the delicate nature of your egg drop soup intact.

Serving Warm: Serve the soup immediately for the best texture and flavor. Leftover egg drop soup can become overly thick when stored.

What to Serve with Easy Egg Drop Soup

Enjoying a bowl of this comforting soup? Let’s explore the delightful options that will elevate your meal to the next level.

  • Crusty Bread: Perfect for dipping, crusty bread adds a satisfying crunch that complements the silky soup beautifully.

  • Fresh Green Salad: A light salad with mixed greens and a zesty vinaigrette brings freshness to your meal, balancing the warmth of the soup.

  • Steamed Dumplings: Pairing with soft, savory dumplings creates a delightful combination that enhances your dining experience. The flavors mingle perfectly!

  • Savory Spring Rolls: These crispy bites offer a deliciously contrasting texture and flavor, making each bite more exciting. They’re perfect for sharing as well!

  • Sesame Noodles: Serve alongside cold sesame noodles for a delightful fusion of flavors and textures that will keep everyone coming back for more.

  • Chilled Sake: Whether a dinner party or a cozy night in, chilled sake brings a touch of elegance that pairs wonderfully with egg drop soup.

  • Fruit Sorbet: Finish off your meal with a refreshing fruit sorbet to cleanse your palate, bringing a delightful burst of sweetness after the savory soup.

Easy Egg Drop Soup Recipe FAQs

How do I choose the right broth for my egg drop soup?
Absolutely! For the best flavor, I recommend using low-sodium chicken or vegetable broth. It allows you to control the saltiness of the soup better, ensuring it remains balanced and flavorful. Look for broth with no added preservatives for the freshest taste.

How should I store leftovers of the egg drop soup?
Very simple! Store any leftovers in an airtight container in the refrigerator for up to 3 days. Make sure to cool the soup completely before sealing to maintain quality. If you’re planning to keep it longer, consider freezing it instead.

Can I freeze egg drop soup?
Yes, you can freeze your egg drop soup for up to 2 months. To do this, ladle the cooled soup into a freezer-safe container, leaving some space at the top to allow for expansion. For the best texture, I suggest reheating it gently on the stove over low heat, and if it has thickened, you can add a splash of water to bring it back to life!

What should I do if my egg drop soup is too thick?
If your soup has become thicker than you’d like, don’t worry—it happens to the best of us! Simply add a bit of broth or water, and stir gently over low heat until it reaches your desired consistency. If you’re starting from scratch, just be cautious with how much cornstarch you mix in to avoid any future mishaps!

Is this egg drop soup recipe safe for people with allergies?
Absolutely! You can make this egg drop soup recipe more inclusive for various dietary needs. Make sure that the soy sauce you use is gluten-free if you’re serving someone with gluten allergies. Additionally, opting for vegetable broth instead of chicken broth makes it vegan-friendly, and you can substitute eggs with silken tofu for a creamy texture.

Can I add more vegetables to my egg drop soup?
Of course! The more, the merrier! Feel free to incorporate frozen peas, carrots, or even bok choy for added nutrition and color. Just ensure to keep the quantity reasonable so as not to overpower the delicate broth flavor. Enjoy making it your own!

Egg Drop Soup Recipe

Comforting Egg Drop Soup Recipe Ready in Just 20 Minutes

This Egg Drop Soup Recipe is a quick and easy comfort food, perfect for busy weeknights.
Prep Time 10 minutes
Cook Time 10 minutes
Total Time 20 minutes
Servings: 4 bowls
Course: Appetizer
Cuisine: Asian
Calories: 150

Ingredients
  

For the Broth
  • 4 cups chicken or vegetable broth low-sodium varieties preferred
  • 2 cloves garlic minced
  • 1 tablespoon fresh ginger grated
For the Soup
  • 3 large eggs beaten
  • 1 tablespoon cornstarch
  • 2-3 tablespoons soy sauce to taste
  • 2 stalks green onions finely chopped
  • 1 teaspoon sesame oil used to finish
Optional Add-Ins
  • 1 cup frozen peas or carrots for added nutrients
  • 1 cup cooked chicken or tofu for added protein

Equipment

  • large pot
  • small bowl
  • Whisk

Method
 

Step-by-Step Instructions
  1. In a large pot, combine 4 cups of chicken or vegetable broth with 2 minced garlic cloves and 1 tablespoon of freshly grated ginger. Place the pot over medium heat and bring the mixture to a gentle simmer. Allow it to simmer for about 5 minutes, stirring occasionally.
  2. In a small bowl, whisk together 1 tablespoon of cornstarch with 2 tablespoons of water to create a smooth slurry. Gradually stir this mixture into the simmering broth.
  3. Slowly drizzle in 3 beaten eggs while stirring the mixture with a fork or chopsticks. Cook for an extra minute until the eggs are set but still tender.
  4. Stir in 2-3 tablespoons of soy sauce and add a drizzle of sesame oil. Allow everything to simmer for another minute.
  5. Ladle the hot soup into bowls and top with finely chopped green onions. Add frozen peas or carrots if desired.

Nutrition

Serving: 1bowlCalories: 150kcalCarbohydrates: 10gProtein: 8gFat: 8gSaturated Fat: 1gMonounsaturated Fat: 1gCholesterol: 140mgSodium: 800mgPotassium: 250mgFiber: 1gSugar: 1gVitamin A: 500IUVitamin C: 5mgCalcium: 30mgIron: 1mg

Notes

Serve immediately for the best flavor and texture. Leftovers can thicken; add water when reheating if needed.

Tried this recipe?

Let us know how it was!

Corned Beef Tacos with Zesty Slaw for Taco Night Bliss

As I stood in my kitchen, the aroma of sizzling corned beef transported me straight to an Irish pub, mingling harmoniously with the vibrant spirit of a Mexican fiesta. Welcome to my world of Corned Beef Tacos, where comforting flavors collide in a delightful culinary fusion. Each bite envelops tender, crispy beef in warm tortillas, seamlessly paired with creamy Swiss cheese and a zesty caraway slaw. These tacos not only bring a quick and easy dinner solution to your table but also promise to impress your guests during taco night gatherings. These morsels blend the best of both worlds, allowing you to savor two cultures in one dish. Are you ready to elevate your next meal from ordinary to extraordinary?

Why Are Corned Beef Tacos a Must-Try?

Unique Fusion: Experience a delightful blend of Irish and Mexican flavors that transforms your taco night into a flavor-filled adventure.
Easy to Make: With only a few simple ingredients and steps, these tacos are perfect for busy weeknights or spontaneous gatherings.
Crowd-Pleaser: Impress your friends and family with this unexpected twist on traditional tacos that caters to all taste buds.
Versatile Options: Customize the slaw and protein to suit your dietary needs—try jackfruit or lentils for a vegetarian alternative!
Flavor Explosion: Each bite delivers a perfect blend of crispy, creamy, and tangy, making every mouthful a joyful experience.
Don’t forget to check out other exciting dishes like Grilled Fish Tacos or Chili Beef Flavor for your next taco night!

Corned Beef Taco Ingredients

For the Zesty Slaw
Mayonnaise – Adds creaminess to the slaw; Greek yogurt works for a lighter version.
Apple Cider Vinegar – Provides tanginess; substitute with lemon juice if desired.
Chopped Fresh Cilantro – Gives a refreshing taste; parsley can be used instead.
Caraway Seeds – Imparts a unique flavor; fennel seeds make a good alternative.
Granulated Sugar – Balances the slaw’s flavors; honey or sugar substitutes work well.
Kosher Salt – Enhances overall flavor; be cautious if using table salt, as it’s saltier.
Green Cabbage – Major crunchy component; Napa cabbage is a tasty substitute.
Grated Carrots – Adds both sweetness and color; pre-shredded options save prep time.
Sauerkraut – Contributes a tangy sourness; pickles offer a milder option.

For the Tacos
Neutral Oil – Ideal for cooking the corned beef; olive oil adds a delightful flavor.
Corned Beef – The star protein; leftover corned beef works perfectly in tacos!
Guinness Beer – Enhances the beef’s flavor; beef broth or water can be a non-alcoholic substitute.
Flour Tortillas – Serves as the taco base; opt for corn tortillas for gluten-free options.
Swiss Cheese – Delivers a creamy melt; Gruyère or aged cheddar are fantastic substitutes.

With these corned beef taco ingredients, you’re well on your way to creating a dish that will light up your taco night!

Step‑by‑Step Instructions for Corned Beef Tacos

Step 1: Prepare the Slaw
In a large bowl, whisk together the mayonnaise, apple cider vinegar, chopped cilantro, caraway seeds, granulated sugar, and kosher salt until smooth. Add in the green cabbage, grated carrots, and sauerkraut, tossing everything together to ensure an even mix. Let the slaw sit for about 10 minutes to allow the flavors to meld beautifully while you move on to the next step for your Corned Beef Tacos.

Step 2: Cook the Corned Beef
Heat a skillet over medium heat and add a drizzle of neutral oil. Once shimmering, add the corned beef, allowing it to cook for about 6-8 minutes until golden brown and crispy on the edges. Pour in Guinness beer, stirring occasionally, and let it simmer for an additional 2-3 minutes until the liquid reduces slightly. Transfer the beef to a plate, ensuring it’s flavorful and ready to be nestled inside your tacos.

Step 3: Toast the Tortillas
Using the same skillet, toast each flour tortilla for approximately 30 seconds on each side until they become warm and pliable. Once toasted, sprinkle grated Swiss cheese onto one half of each tortilla, fold them over, and toast for an additional 2-3 minutes or until the cheese is melted and gooey. This step adds a delightful creamy layer to your Corned Beef Tacos.

Step 4: Assemble Tacos
Carefully fill each cheese-melted tortilla with a generous portion of the crispy corned beef, followed by a heap of the zesty slaw prepared earlier. Ensure that each taco is brimming with flavor and color for a mouthwatering experience. Serve the Corned Beef Tacos warm and enjoy the harmonious blend of tastes and textures that come together in this unique dish.

How to Store and Freeze Corned Beef Tacos

Fridge: Store leftover corn beef tacos in airtight containers for up to 3 days. Keep the slaw separate to maintain its crunchy texture.

Freezer: For longer storage, freeze the corned beef and slaw separately for up to 3 months. Thaw overnight in the fridge before reheating.

Reheating: To reheat, warm the corned beef in a skillet over medium heat until heated through. Toast tortillas fresh for best results.

Make-Ahead Tip: Prepare your slaw a day in advance for enhanced flavor; just remember to store it separately from the tacos until serving.

What to Serve with Corned Beef Tacos?

Elevate your taco night with these delightful accompaniments that perfectly complement the vibrant flavors of your Corned Beef Tacos.

  • Creamy Avocado Dip: Adds a rich, buttery texture that balances the zesty slaw while providing a refreshing contrast.
  • Zesty Mexican Rice: Fluffy, seasoned rice with a hint of lime brightens your meal and captures the essence of taco night.
  • Crispy Sweet Potato Fries: Their natural sweetness and crunch offer a delicious complementary flavor and texture to the savory tacos.
  • Fresh Tomato Salsa: A tangy, chunky salsa made with ripe tomatoes and jalapeños brings a burst of freshness to each bite.
  • Charred Corn Salad: Sweet, grilled corn mixed with cilantro and lime imbues a summery vibe that pairs beautifully with the richness of the tacos.

Serve these alongside chilled craft lagers or a refreshing Horchata to quench your thirst and make your gathering unforgettable!

Make Ahead Options

These Corned Beef Tacos are a fantastic choice for meal prep! You can prepare the slaw up to 24 hours in advance by mixing all the slaw ingredients and storing it in an airtight container in the refrigerator, which helps the flavors blend beautifully without losing crunch. The corned beef can also be cooked up to 3 days before serving; simply store it in the fridge and reheat it in a skillet to restore its crispy, tender texture. On taco night, just warm the tortillas briefly, fill them with the reheated beef and slaw, and enjoy restaurant-quality tacos that saved you valuable time in the kitchen!

Expert Tips for Corned Beef Tacos

  • Make-Ahead Slaw: Prepare your slaw a day in advance. This allows the flavors to meld together beautifully, making the corned beef tacos even tastier.

  • Stick to Fresh Tortillas: Always toast your tortillas just before serving. This keeps them warm and prevents them from getting soggy when filled with the beef and slaw.

  • Avoid Overcrowding: When cooking corned beef, make sure not to overcrowd the skillet. This ensures even browning; if necessary, cook in batches to maintain that delicious crispiness.

  • Taste as You Go: Adjust flavors based on your preferences; remember, a touch extra sugar or a squeeze of lemon juice can elevate your slaw!

  • Serve with Love: Garnish tacos with extra cilantro or lime wedges just before serving. This not only enhances flavor but also creates a vibrant presentation that’ll wow your guests.

Corned Beef Tacos Variations

Get ready to explore exciting twists on these corned beef tacos that will awaken your taste buds and excite your mealtime routines!

  • Vegetarian Substitute: Swap corned beef with jackfruit or lentils, creating a hearty, plant-based delight that everyone will enjoy. Jackfruit mimics the texture of pulled meat, making it a fabulous alternative!

  • Crispy Crunch: Add crushed tortilla chips or fried shallots for an irresistible crunch in every bite. This twist elevates the texture and takes your tacos to a new level of deliciousness.

  • Hearty Add-ins: Toss in some diced cooked potatoes or roasted sweet potatoes for a filling twist. Not only will they add heartiness, but they also bring a sweet, earthy flavor to complement the savory beef.

  • Citrus Zing: Include lime juice or zest in the slaw for a bright, refreshing taste. The acidity brings a beautiful balance to the richness of the corned beef.

  • Spice It Up: Add sliced jalapeños or a dash of hot sauce to bring some heat. If you’re feeling adventurous, try a chipotle sauce for a smoky kick that pairs wonderfully with the flavors.

  • Cheesy Variation: Experiment with different cheeses like Gruyère or aged cheddar for extra depth. Each cheese brings its unique flavor profile that can really enhance your tacos.

  • Flavorful Broth: Substitute Guinness with beef broth or a non-alcoholic beer for a milder flavor while still keeping that comforting taste. This option works beautifully in those cozy family meals.

  • Sour Twist: Instead of sauerkraut, use pickled vegetables for a tangy contrast. This variation adds a delightful crunch, working harmoniously with the creamy Swiss cheese.

Don’t forget to explore complementary dishes like Barbecue Chicken Tacos or a hearty Ground Beef Potato for your next taco night!

Corned Beef Tacos with Swiss & Caraway Slaw Recipe FAQs

What type of corned beef works best for this recipe?
Absolutely! You can use either freshly cooked corned beef or leftover corned beef for these tacos. If using leftovers, make sure to slice it thinly or shred it for easy filling. If you want to try something new, consider using deli slices or even brisket if you’re feeling adventurous!

How should I store leftover corned beef tacos?
For storing, make sure to place the leftover corned beef tacos into airtight containers. They can stay fresh in the fridge for up to 3 days. To keep the slaw crunchy, it’s best to store it separately. Just reassemble the tacos before serving to maintain their delightful texture!

Can I freeze corned beef tacos?
Certainly! You can freeze the corned beef and slaw separately for up to 3 months. To freeze the corned beef, let it cool completely, then place it in a freezer-safe container or zip-top bag. For reheating, simply thaw overnight in the fridge, then warm in a skillet. Remember to toast fresh tortillas when ready to serve!

What ingredients can I substitute to accommodate dietary restrictions?
Very impressed! If you’re looking for gluten-free options, swap flour tortillas with corn tortillas. For a vegetarian alternative, try jackfruit or lentils in place of corned beef. And if you have any allergies, feel free to swap nut-based mayonnaise with avocado or hummus for the slaw. Always taste and adjust for personal preference!

How can I ensure my slaw stays crunchy when preparing in advance?
Certainly! To keep your slaw crunchy, prepare it a day ahead but store it separately from the rest of the taco ingredients. The trick is to add the sauerkraut and any other wet components just before assembling the tacos. This will maintain the crispness and freshness, ensuring every bite is delightful!

Corned Beef Tacos

Corned Beef Tacos with Zesty Slaw for Taco Night Bliss

Experience a delightful fusion of Irish corned beef and Mexican tacos in this easy and flavorful recipe.
Prep Time 15 minutes
Cook Time 15 minutes
Resting Time 10 minutes
Total Time 40 minutes
Servings: 4 tacos
Course: Beef
Cuisine: Irish, Mexican
Calories: 300

Ingredients
  

For the Zesty Slaw
  • 1/2 cup mayonnaise Greek yogurt works for a lighter version.
  • 2 tablespoons apple cider vinegar Substitute with lemon juice if desired.
  • 1/4 cup chopped fresh cilantro Parsley can be used instead.
  • 1 teaspoon caraway seeds Fennel seeds make a good alternative.
  • 1 tablespoon granulated sugar Honey or sugar substitutes work well.
  • 1/2 teaspoon kosher salt Be cautious if using table salt.
  • 2 cups green cabbage Napa cabbage is a tasty substitute.
  • 1 cup grated carrots Pre-shredded options save prep time.
  • 1/2 cup sauerkraut Pickles offer a milder option.
For the Tacos
  • 2 tablespoons neutral oil Olive oil adds a delightful flavor.
  • 2 cups corned beef Leftover corned beef works perfectly.
  • 1 cup Guinness beer Beef broth or water can be a non-alcoholic substitute.
  • 8 pieces flour tortillas Opt for corn tortillas for gluten-free options.
  • 1 cup Swiss cheese Gruyère or aged cheddar are fantastic substitutes.

Equipment

  • Skillet
  • large bowl

Method
 

Step-by-Step Instructions
  1. In a large bowl, whisk together the mayonnaise, apple cider vinegar, chopped cilantro, caraway seeds, granulated sugar, and kosher salt until smooth. Add in the green cabbage, grated carrots, and sauerkraut, tossing everything together. Let the slaw sit for about 10 minutes.
  2. Heat a skillet over medium heat and add a drizzle of neutral oil. Once shimmering, add the corned beef, allowing it to cook for about 6-8 minutes until crispy. Pour in Guinness beer, stirring occasionally, and let it simmer for an additional 2-3 minutes.
  3. Using the same skillet, toast each tortilla for approximately 30 seconds on each side. Sprinkle grated Swiss cheese onto one half of each tortilla, fold them over, and toast for an additional 2-3 minutes or until melted.
  4. Carefully fill each cheese-melted tortilla with a portion of the corned beef, followed by a heap of the zesty slaw prepared earlier. Serve warm.

Nutrition

Serving: 1tacoCalories: 300kcalCarbohydrates: 35gProtein: 15gFat: 12gSaturated Fat: 4gPolyunsaturated Fat: 1gMonounsaturated Fat: 6gCholesterol: 50mgSodium: 800mgPotassium: 300mgFiber: 3gSugar: 4gVitamin A: 500IUVitamin C: 10mgCalcium: 150mgIron: 2mg

Notes

Prepare your slaw a day in advance for enhanced flavor; store it separately until serving.

Tried this recipe?

Let us know how it was!

Creamy Million Dollar Chicken Casserole for Cozy Evenings

“Can you believe how easy it is to bring a taste of comfort into our homes?” The aroma of melted cheddar and crispy bacon wafts through the air as I prepare to create a dish that feels like a warm hug on a chilly evening: Million Dollar Chicken Casserole. This creamy casserole is not just a delight for the senses; it’s the perfect solution for busy weeknights and gatherings alike. With its rich, velvety texture and crunchy topping, this dish ensures you’re serving up happiness while cutting down on kitchen time. Plus, it’s a guaranteed crowd-pleaser, delighting even the pickiest of eaters. So, are you ready to dive into this easy recipe that transforms your routine dinner into something truly special?

Why is this casserole a game-changer?

Creamy Comfort: The luxurious blend of cream cheese and chicken soup creates a rich, velvety texture that makes every bite feel indulgent.

Quick Preparation: This dish is ready in just a little over an hour, perfect for busy weeknights when time is of the essence.

Crowd-Pleaser: Packed with flavor from crispy bacon and sharp cheddar, it’s a guaranteed hit for family gatherings or casual get-togethers.

Versatile Options: Feel free to switch things up! You can adapt this recipe to include your favorite vegetables or even substitute chicken for turkey.

Effortless Clean-Up: With only one casserole dish required, you can spend less time cleaning and more time enjoying your meal.

Enjoy it with a fresh side salad for a complete experience, just like with our Thai Chicken Meatball dish!

Million Dollar Chicken Casserole Ingredients

• Prepare to bring warmth and satisfaction to your table with these essential ingredients!

For the Casserole
Chicken Breast – 2 pounds, boneless and skinless; provides a lean protein base for the casserole.
Cream Cheese – 1 package (8 oz), softened; adds a rich and creamy texture to the dish.
Cream of Chicken Soup – 1 can; contributes depth of flavor and moisture to the casserole.
Mayonnaise – 1/2 cup; enhances creaminess and binds the ingredients together.
Bacon – 10 slices, crispy and chopped; infuses the casserole with smoky, savory flavor.
Green Onions – 1/2 cup, chopped; adds freshness and a pop of color to balance the richness.
Sharp Cheddar Cheese – 2 cups, shredded; delivers classic cheesy flavor, enhancing the overall taste.
Garlic Powder – 1 teaspoon; introduces aromatic notes, elevating the flavor profile.
Onion Powder – 1 teaspoon; adds subtle sweetness and depth to the dish.
Salt – To taste; essential for enhancing flavors.
Pepper – To taste; provides a hint of spice.

For the Topping
Ritz Crackers – 30, crushed; acts as a buttery, crunchy topping texture.
Unsalted Butter – 1/2 stick, melted; helps bind the cracker crumbs for a crispy finish.

This Million Dollar Chicken Casserole brings a delightful combination of flavors and textures that will make every meal feel special!

Step‑by‑Step Instructions for Million Dollar Chicken Casserole

Step 1: Prepare the Chicken
Start by preheating your oven to 350°F (175°C). Cut 2 pounds of boneless, skinless chicken breast into bite-sized cubes. In a large mixing bowl, combine the cubed chicken with 1 teaspoon of garlic powder, 1 teaspoon of onion powder, and salt and pepper to taste. Ensure the chicken is evenly coated with the seasonings, which will lay the foundation for your delicious Million Dollar Chicken Casserole.

Step 2: Mix Casserole Ingredients
In the same mixing bowl, add 1 can of cream of chicken soup, 1 package (8 oz) of softened cream cheese, and 1/2 cup of mayonnaise. Using a wooden spoon or spatula, mix everything together until smooth and well combined, taking care to meld the cream cheese into a creamy consistency. Next, fold in 2 cups of shredded sharp cheddar cheese, along with half of the crispy, chopped bacon and chopped green onions, blending all the ingredients together.

Step 3: Assemble the Casserole
Grease a 9×13 inch casserole dish with cooking spray or a bit of butter to prevent sticking. Pour the creamy chicken mixture into the prepared dish, spreading it out evenly with a spatula. This will ensure that all the flavors meld together beautifully while baking. You can already smell the comforting aromas from the Million Dollar Chicken Casserole as you prepare to add the final layer!

Step 4: Prepare the Topping
In a small bowl, combine 30 crushed Ritz crackers with 1/2 stick of melted unsalted butter. Mix until the crumbs are evenly coated, creating a buttery topping that will bake to a delightful crunch. Gradually sprinkle this mixture over the chicken mixture in the casserole dish, ensuring an even layer that provides a lovely contrast to the creamy filling.

Step 5: Bake the Casserole
Place the casserole in the preheated oven and bake for 45 to 55 minutes. You’ll know it’s done when the edges are bubbling and the topping is a beautiful golden brown. Keep an eye on it around the 45-minute mark, and if necessary, cover with foil to prevent over-browning while ensuring it stays moist.

Step 6: Cool and Serve
Once the Million Dollar Chicken Casserole is baked to perfection, carefully remove it from the oven and let it cool for about 10 to 15 minutes. This cooling time will help the dish set up a bit for serving. Just before you dig in, sprinkle the remaining bacon and chopped green onions on top for a fresh garnish.

Million Dollar Chicken Casserole Variations

Feel free to get creative with the Million Dollar Chicken Casserole to make it uniquely yours!

  • Turkey Swap: Substitute chicken with cooked turkey or rotisserie chicken for a quick, delightful variation. This makes it perfect for using up holiday leftovers!

  • Cheese Twist: Experiment with different cheeses like mozzarella for a milder taste or pepper jack for extra heat, enhancing the flavor profile. The melty goodness will leave everyone craving more!

  • Veggie Upgrade: Add steamed vegetables like broccoli or spinach to introduce nutrition and vibrant color. These greens not only boost health but also complement the rich flavors beautifully.

  • Gluten-Free Option: Use gluten-free crackers instead of Ritz for a gluten-free version. You can even create a topping with crushed nuts or oats for an exciting crunch!

  • Spicy Kick: Add diced jalapeños or sriracha to the mix for a zesty twist that the heat lovers in your family will appreciate. It’s a simple way to make mealtime more adventurous!

  • Creamy Variation: Swap out mayonnaise for sour cream to create a tangy, creamy base that adds a new depth of flavor to the casserole. This lusciousness will keep everyone coming back for seconds!

  • Herb Infusion: Incorporate fresh herbs like thyme or parsley for a brightness that lightens the dish and adds freshness to each bite. It changes the complex flavor dynamics beautifully!

  • Mixed Protein Delight: Combine chicken with diced ham or crumbled sausage for a meat-lover’s extravaganza. This medley creates a filling dish that will satisfy any hearty appetites you have to feed!

For a delightful pairing, consider serving this casserole alongside a fresh side salad, similar to what we do in our Grilled Chicken Sandwich or Chicken Cashew Broccoli Stir Fry to really elevate your dinner experience!

What to Serve with Million Dollar Chicken Casserole

Elevate your cozy dinner experience with delightful sides and beverages that complement this creamy masterpiece perfectly.

  • Fresh Side Salad: A crunchy green salad with a zesty vinaigrette adds brightness, cutting through the richness of the casserole.

  • Garlic Breadsticks: These buttery, garlicky delights create a wonderful pairing, perfect for soaking up the casserole’s creamy goodness.

  • Steamed Broccoli: Tender, vibrant broccoli adds color and nutrition, providing a nice contrast to the decadent flavors of the casserole.

  • Roasted Asparagus: The slight crisp and earthy flavor of asparagus complements the casserole, making each bite a balanced experience.

  • Creamy Coleslaw: Crunchy and slightly sweet coleslaw brings a refreshing crunch that balances the dish’s creaminess, tempting every taste bud.

  • Apple Crisp for Dessert: A warm apple crisp, with its sweet filling and crumble topping, creates a comforting finish to this satisfying meal.

  • Sparkling Water with Lemon: A sparkling beverage with a hint of citrus refreshes the palate, making it the perfect accompaniment to a creamy dish like this casserole.

Make Ahead Options

These Million Dollar Chicken Casserole is perfect for busy home cooks looking to save time during hectic weeknights! You can prepare the casserole mixture (excluding the topping) up to 24 hours in advance by mixing the cubed chicken with the cream cheese, cream of chicken soup, mayonnaise, and seasonings. Simply cover it tightly and refrigerate overnight. For the topping, you can crush the Ritz crackers and mix them with melted butter a day ahead as well; just store the mixture in a separate container. When you’re ready to serve, assemble the casserole with the topping, bake it as directed, and enjoy the same creamy, cheesy comfort—just with less kitchen fuss!

How to Store and Freeze Million Dollar Chicken Casserole

Fridge: Store leftovers in an airtight container for up to 3 days to maintain freshness and flavor. Reheat portions in the microwave or oven until warmed through.

Freezer: Wrap tightly in plastic wrap and aluminum foil to keep your Million Dollar Chicken Casserole fresh for up to 3 months. Thaw overnight in the fridge before reheating for best results.

Reheating: For best texture, reheat the casserole in the oven at 350°F (175°C) for 20-25 minutes until heated thoroughly, ensuring the topping stays crispy.

Expert Tips for Million Dollar Chicken Casserole

  • Evenly Cubed Chicken: Ensure chicken is cut into uniform pieces for even cooking. This prevents any chewy or undercooked bites.

  • Monitor Baking Time: Check the casserole at the 45-minute mark to avoid overbaking. Cover with foil if it starts browning too quickly and needs more moisture.

  • Add Color and Nutrition: Incorporate vegetables like steamed broccoli or bell peppers for added nutrition and color. This can make your Million Dollar Chicken Casserole even more satisfying.

  • Cream Cheese Softening: Be sure to soften cream cheese before mixing. This helps achieve a smooth, creamy texture, essential for the casserole’s flavor.

  • Use Fresh Ingredients: For the best flavor, opt for fresh bacon and green onions. Fresh ingredients make a significant difference in elevating your casserole’s taste.

Million Dollar Chicken Casserole Recipe FAQs

How do I select the best chicken for the casserole?
Absolutely! It’s best to choose firm, pale chicken breast without any dark spots or unusual odors. Look for chicken that is labeled “fresh” rather than “previously frozen” for optimal taste. Fresh chicken breast will yield the most succulent results in your Million Dollar Chicken Casserole.

What is the best way to store leftover casserole?
Store any leftovers in an airtight container in the refrigerator for up to 3 days. Be sure to let the casserole cool completely before sealing it, which helps retain its moisture. This way, you can enjoy your delicious Million Dollar Chicken Casserole again without any loss of flavor!

Can I freeze the Million Dollar Chicken Casserole?
Yes! It freezes beautifully. To do this, wrap the casserole tightly in plastic wrap, then in aluminum foil, ensuring there are no air pockets. This method keeps it fresh for up to 3 months. When you’re ready to enjoy it again, simply thaw it overnight in the refrigerator and reheat in the oven at 350°F (175°C) for 20-25 minutes until heated thoroughly.

What if my casserole turns out watery?
Very! If your casserole is too watery, it may be due to excess moisture from the chicken or cream of chicken soup. To troubleshoot, consider reducing the amount of soup slightly or add in some cornstarch mixed with water to thicken it up as it bakes. Also, ensure you bake it long enough for the liquid to evaporate, and cover it with foil if it needs more moisture while baking.

Is this casserole suitable for people with specific dietary restrictions?
If you have dietary considerations, this casserole can accommodate various needs! For gluten-free options, simply substitute the Ritz crackers with gluten-free alternatives. If allergies are a concern, substituting mayonnaise with Greek yogurt can provide a similar creaminess, and using low-fat cheese can make it lighter while still being delicious. Always check labels for any hidden allergens!

Million Dollar Chicken Casserole

Creamy Million Dollar Chicken Casserole for Cozy Evenings

This Million Dollar Chicken Casserole is an easy, creamy dish perfect for busy weeknights and gatherings.
Prep Time 15 minutes
Cook Time 55 minutes
Cooling Time 15 minutes
Total Time 1 hour 25 minutes
Servings: 6 servings
Course: Dinner
Cuisine: American
Calories: 600

Ingredients
  

For the Casserole
  • 2 pounds boneless, skinless chicken breast cut into bite-sized cubes
  • 1 package (8 oz) cream cheese softened
  • 1 can cream of chicken soup
  • 1/2 cup mayonnaise
  • 10 slices bacon crispy and chopped
  • 1/2 cup green onions chopped
  • 2 cups sharp cheddar cheese shredded
  • 1 teaspoon garlic powder
  • 1 teaspoon onion powder
  • salt to taste
  • pepper to taste
For the Topping
  • 30 pieces Ritz crackers crushed
  • 1/2 stick unsalted butter melted

Equipment

  • Oven
  • Casserole dish
  • Mixing Bowl

Method
 

Step‑by‑Step Instructions
  1. Preheat your oven to 350°F (175°C). Cut the chicken breast into bite-sized cubes and season with garlic powder, onion powder, salt, and pepper.
  2. In a mixing bowl, combine cream of chicken soup, cream cheese, and mayonnaise. Mix until smooth. Fold in cheddar cheese, half of the bacon, and green onions.
  3. Grease a 9x13 inch casserole dish. Pour the chicken mixture into the prepared dish and spread it out evenly.
  4. Combine crushed Ritz crackers with melted butter in a bowl, then sprinkle over the chicken mixture.
  5. Bake for 45 to 55 minutes until the edges are bubbling and the topping is golden brown. Optionally cover with foil if over-browning.
  6. Allow the casserole to cool for 10 to 15 minutes. Sprinkle with remaining bacon and green onions before serving.

Nutrition

Serving: 1servingCalories: 600kcalCarbohydrates: 20gProtein: 45gFat: 40gSaturated Fat: 15gPolyunsaturated Fat: 5gMonounsaturated Fat: 15gCholesterol: 150mgSodium: 1200mgPotassium: 600mgFiber: 2gSugar: 2gVitamin A: 800IUVitamin C: 2mgCalcium: 300mgIron: 2mg

Notes

For added nutrition, incorporate vegetables like steamed broccoli or bell peppers. Use fresh ingredients for the best flavor.

Tried this recipe?

Let us know how it was!

Sizzling Hibachi Zucchini: Quick, Tasty, and Guilt-Free Delight

The sizzling sound of fresh zucchini caramelizing in a hot skillet transports me to my favorite hibachi restaurant, filled with savory aromas and warm laughter. Today, I’m excited to share my Easy Sizzling Hibachi Zucchini recipe, which not only brings that vibrant taste of the grill to your home but also takes just 20 minutes to make! This vegetarian delight is quick to whip up and healthy enough to make you feel good after every bite. Whether you’re entertaining guests or simply looking for a delicious side dish, this recipe will surely impress. Are you ready to elevate your zucchini game and discover how easy it can be to enjoy a hibachi-inspired meal at home?

Why is Hibachi Zucchini a Must-Try?

Flavor Explosion: Each bite of this dish delivers a burst of umami combined with rich garlic and buttery notes that will have you coming back for more.

Quick & Easy: With just 20 minutes from prep to plate, this recipe is perfect for busy weeknights.

Health-Conscious: Light yet satisfying, it’s a guilt-free option that fits well into any dietary preference, especially for those looking to cut down on carbs.

Versatile Pairing: Whether alongside grilled chicken, steak, or tofu, this dish is the ideal side that complements any meal.

Crowd-Pleaser: Bring it to your next gathering, and watch as it quickly disappears—everyone loves a good hibachi-inspired dish! Looking for more delicious zucchini ideas? Check out our Zucchini Sweet Potato and Ground Turkey Zucchini recipes for more inspiration!

Sizzling Hibachi Zucchini Ingredients

Discover the essential components for your Easy Sizzling Hibachi Zucchini dish!

For the Zucchini

  • Zucchini – Freshness is key; look for firm zucchinis with shiny skin to ensure the best flavor.

For the Flavor Base

  • Unsalted Butter – Adds richness and depth; can substitute with vegan butter for a dairy-free option.
  • Garlic (2 cloves, minced) – Infuses the zucchini with a fragrant kick.
  • Soy Sauce (2 tablespoons) – Introduces a savory touch that enhances flavor; substitute with tamari for gluten-free.
  • Sesame Oil (1 tablespoon) – Adds a delightful nuttiness; can swap for avocado oil for different flavor profiles.
  • Olive Oil (2 tablespoons) – Used for sautéing, ensuring even cooking.

For Seasoning

  • Salt and Freshly Ground Black Pepper – Enhance natural flavors; adjust according to taste.

For Garnish

  • Optional Garnish – Toasted sesame seeds for crunch, sliced green onions for freshness.

Now you’re ready to create your own Sizzling Hibachi Zucchini masterpiece!

Step‑by‑Step Instructions for Sizzling Hibachi Zucchini

Step 1: Prepare Zucchini
Start by washing and drying 2 medium zucchinis thoroughly to remove any dirt. Trim the ends and cut each zucchini in half lengthwise. Then, slice the halves into half-inch crescent-shaped pieces. This creates uniform pieces that will cook evenly, ensuring your Easy Sizzling Hibachi Zucchini has the perfect tender-crisp texture.

Step 2: Heat the Skillet
Place a large skillet or wok over medium-high heat. Add 2 tablespoons of olive oil and let it heat up until shimmering, which should take about 1-2 minutes. This is the ideal temperature for sautéing, as it will give your zucchini that desired golden-brown sear while keeping the insides tender.

Step 3: Sauté Zucchini
Carefully add the sliced zucchini to the hot skillet in a single layer. Cook for 3-5 minutes, stirring occasionally until the pieces are golden-brown and tender-crisp. Look for that beautiful caramelized color to develop on the edges, which adds depth and enhances the flavor of your Sizzling Hibachi Zucchini.

Step 4: Add Butter and Garlic
Once the zucchini is nicely browned, push the slices to one side of the skillet, creating space in the pan. Add 2 tablespoons of unsalted butter to the empty side. As it melts, add 2 cloves of minced garlic, sautéing for about 30 seconds until fragrant. This step is crucial, as the garlic infuses your dish with a rich aroma.

Step 5: Combine Flavors
Mix the sautéed zucchini back with the melted butter and garlic. Drizzle 2 tablespoons of soy sauce over the mixture, then season with salt and freshly ground black pepper to taste. Toss everything together thoroughly to coat the zucchini in the delicious sauce and garlic goodness, enhancing the flavors of your Sizzling Hibachi Zucchini.

Step 6: Finish with Sesame Oil
Remove the skillet from the heat and drizzle 1 tablespoon of sesame oil over the zucchini. Toss everything one last time to ensure an even distribution of flavor. The sesame oil adds a delightful nuttiness and final touch to your dish, making your Sizzling Hibachi Zucchini even more irresistible.

Step 7: Garnish
For an optional finishing touch, sprinkle toasted sesame seeds and sliced green onions over the dish before serving. Not only does this add a visually appealing crunch, but it also enhances the fresh flavors. Present your Easy Sizzling Hibachi Zucchini hot and fresh, ready to be enjoyed as a sensational side dish!

Expert Tips for Sizzling Hibachi Zucchini

  • Cut Evenly: Ensure zucchini slices are uniform for consistent cooking and to prevent mushiness during sautéing.

  • Avoid Overcrowding: Cook the zucchini in batches if necessary to achieve that perfect sear. Overcrowding can lead to steaming rather than browning.

  • Prep Ahead: To save time, pre-slice your zucchini and mince garlic in advance. This makes weeknight cooking quicker while maintaining the flavors and textures of your Sizzling Hibachi Zucchini.

  • Season While Cooking: Taste and adjust salt and pepper levels while cooking to enhance the overall flavor of the dish.

  • Garnish Smartly: Consider adding a sprinkle of fresh herbs like basil or cilantro for brightness, taking your Sizzling Hibachi Zucchini up a notch!

Storage Tips for Sizzling Hibachi Zucchini

Fridge: Refrigerate leftovers in an airtight container for up to 3 days to keep the flavors fresh and prevent spoilage.

Freezer: For longer storage, freeze your Sizzling Hibachi Zucchini in a freezer-safe container for up to 2 months.

Reheating: Reheat gently on the stove over low heat, adding a splash of water or oil if needed to restore that tender-crisp texture.

Prep Tip: Pre-slice your zucchini and garlic ahead of time, storing them in the fridge for quick assembly on busy nights!

What to Serve with Easy Sizzling Hibachi Zucchini

Transform your meal with delightful companions that enhance the vibrant flavors of your zucchini dish.

  • Grilled Chicken: Juicy and smokey, grilled chicken adds a hearty touch to the lightness of the zucchini.

  • Savory Fried Rice: This easy-to-make side brings richness and complements the umami taste without overwhelming the palate.

  • Sesame Ginger Tofu: Lightly seasoned tofu brings a protein-packed, vegetarian option that mirrors the flavors of hibachi cooking.

  • Fresh Asian Slaw: Crisp and refreshing, this slaw combines tangy dressing with crunchy vegetables for an exciting contrast in texture.

  • Warm Noodle Salad: A warm noodle dish tossed with veggies and a light sesame dressing brings comfort and pairs beautifully with the zucchini.

  • Cucumber Salad: Light, crisp cucumber salad enhances the meal’s freshness while providing a cooling effect against the rich flavors.

  • Chilled Green Tea: A refreshing drink that soothes the palate, cooling off the savory bite of hibachi-inspired dishes.

  • Mango Sorbet: For dessert, this fruity sorbet is light and refreshing, providing a sweet end to your hibachi-inspired meal.

Sizzling Hibachi Zucchini Variations & Substitutions

Feel free to tailor this recipe to suit your taste buds and dietary needs—let the creativity flow!

  • Gluten-Free: Substitute soy sauce with tamari for a gluten-free option that doesn’t compromise on flavor.
  • Vegan Delight: Use vegan butter instead of unsalted butter for a delicious dairy-free version that everyone will love.
  • Extra Crunch: Add sliced almonds or cashews for a delightful crunch and extra nutty flavor in your dish.
  • Mushroom Medley: Toss in sliced shiitake or button mushrooms to enhance the heartiness and bring in more umami notes.
  • Herb-Infused: Sprinkle in fresh herbs like basil or cilantro at the end for an aromatic finish that brightens up the dish.
  • Spicy Kick: For those who crave heat, add red pepper flakes or a dash of sriracha while cooking to spice things up.
  • Sweet Twist: Drizzle a touch of honey or maple syrup for a sweet contrast that complements the savory elements beautifully.
  • Asian Fusion: For an exciting twist, incorporate a dash of teriyaki sauce or even a splash of coconut aminos to explore different flavor profiles.

Looking for additional zucchini inspiration? Don’t miss our Zucchini Sweet Potato and Zucchini Leek Fritters for more delicious twists!

Make Ahead Options

These Easy Sizzling Hibachi Zucchini are a fantastic choice for meal prep enthusiasts! You can slice and refrigerate the zucchini up to 24 hours in advance, ensuring they maintain their freshness. Additionally, you can pre-mince the garlic, storing it in an airtight container for added convenience. When you’re ready to serve, simply sauté the zucchini slices in olive oil, add the garlic, and follow the original steps to finish. This approach not only saves you time on busy weeknights but keeps your dish just as delicious and vibrant as if you made it fresh. Enjoy that restaurant-quality flavor with minimal effort!

Easy Sizzling Hibachi Zucchini Recipe FAQs

What should I look for when selecting zucchini?
Absolutely! When choosing zucchini, look for firm zucchinis with shiny, smooth skin. They should feel heavy for their size and free of dark spots or blemishes, which can indicate overripeness or spoilage.

How should I store leftovers from the Sizzling Hibachi Zucchini?
After enjoying your meal, refrigerate any leftovers in an airtight container for up to 3 days. Make sure the container is sealed tightly to maintain freshness and prevent the zucchini from absorbing other odors in the fridge.

Can I freeze Sizzling Hibachi Zucchini and how?
Yes, you can! To freeze, allow the zucchini to cool completely after cooking. Place it in a freezer-safe container or bag, ensuring you remove as much air as possible to prevent freezer burn. It can be stored for up to 2 months. When you’re ready to enjoy it again, simply reheat on the stove over low heat, adding a splash of water or oil to restore the tender-crisp texture.

What if my zucchini turns mushy while cooking?
That’s a common issue! To prevent mushiness, ensure your zucchini slices are cut evenly and not overcrowded in the skillet. If necessary, cook them in batches to achieve that perfect sear without steaming them. Also, avoid cooking them for too long—3 to 5 minutes is ideal for that lovely tender-crisp bite!

Is this recipe suitable for people with dietary restrictions?
Very! This Easy Sizzling Hibachi Zucchini recipe is vegetarian and can be made gluten-free by substituting soy sauce with tamari or coconut aminos. Additionally, for vegans or those avoiding dairy, using vegan butter works beautifully without compromising flavor. Always check specific ingredient labels to ensure they meet your dietary needs.

Can I use different oils or seasonings in this recipe?
Absolutely! While sesame oil adds a unique nuttiness, you can experiment with other oils like avocado oil or use a combination of oils for added flavor. Similarly, feel free to adjust seasonings by adding herbs, spices, or even trying different sauces like teriyaki for a twist!

Sizzling Hibachi Zucchini

Sizzling Hibachi Zucchini: Quick, Tasty, and Guilt-Free Delight

Experience a flavor explosion with this Sizzling Hibachi Zucchini recipe—quick, healthy, and perfect for any meal.
Prep Time 10 minutes
Cook Time 10 minutes
Total Time 20 minutes
Servings: 4 servings
Course: Appetizer
Cuisine: Japanese
Calories: 120

Ingredients
  

For the Zucchini
  • 2 medium zucchini fresh, firm with shiny skin
For the Flavor Base
  • 2 tablespoons unsalted butter can substitute with vegan butter
  • 2 cloves garlic minced
  • 2 tablespoons soy sauce can substitute with tamari for gluten-free
  • 1 tablespoon sesame oil can substitute with avocado oil
  • 2 tablespoons olive oil for sautéing
For Seasoning
  • salt to taste
  • freshly ground black pepper to taste
For Garnish
  • toasted sesame seeds optional for crunch
  • sliced green onions optional for freshness

Equipment

  • large skillet

Method
 

Step-by-Step Instructions
  1. Wash and dry the zucchinis thoroughly. Trim the ends and cut each zucchini in half lengthwise, then slice into half-inch crescent-shaped pieces.
  2. Place a large skillet over medium-high heat. Add olive oil and heat until shimmering.
  3. Add the sliced zucchini to the hot skillet in a single layer and cook for 3-5 minutes until golden-brown and tender-crisp.
  4. Push the zucchini to one side of the skillet and add the unsalted butter. Once melted, add minced garlic and sauté for 30 seconds.
  5. Mix the zucchini back with the butter and garlic. Drizzle soy sauce over, and season with salt and pepper to taste.
  6. Remove from heat and drizzle sesame oil over the zucchini, tossing to combine.
  7. Garnish with toasted sesame seeds and sliced green onions before serving.

Nutrition

Serving: 1servingCalories: 120kcalCarbohydrates: 8gProtein: 2gFat: 9gSaturated Fat: 5gPolyunsaturated Fat: 0.5gMonounsaturated Fat: 3.5gCholesterol: 15mgSodium: 200mgPotassium: 400mgFiber: 2gSugar: 2gVitamin A: 500IUVitamin C: 25mgCalcium: 30mgIron: 1mg

Notes

Cut zucchini evenly for consistent cooking, avoiding overcrowding the skillet for better browning.

Tried this recipe?

Let us know how it was!

Savory Strawberry Turnovers: Flaky Delights in 30 Minutes

“Isn’t it amazing how a simple pastry can evoke such joy?” While whipping up a batch of these Savory Strawberry Turnovers with Creamy Cheese Bliss, I found myself lost in a moment of delight, reminiscent of childhood summers filled with fresh fruit and warm sunshine. Ready in under 30 minutes, these turnovers are perfect for brunch or even a sweet late-night snack. What makes them truly special is their versatility—you can easily swap out the strawberry filling for whatever seasonal fruit you have on hand, making them not just easy but incredibly customizable. And with a quick prep time, you’ll be savoring that flaky, golden crust filled with luscious creamy goodness in no time at all. Curious to see how easily you can craft these delightful pastries? Let’s dive in!

Why are Savory Strawberry Turnovers a must-try?

Quick and Easy: In just 30 minutes, you can whip up these delightful pastries, making them a go-to for busy days.
Versatile Fillings: Swap strawberries for other fruits like peaches or blueberries, allowing you to enjoy seasonal variations.
Decadent Flavors: The combination of creamy cheese and sweet strawberries creates an indulgent taste that is hard to resist.
Crowd-Pleasing Appeal: Perfect for brunch or dessert, everyone will love these turnovers, making them an instant hit at gatherings.
Customizable Options: Whether you want them gluten-free or dairy-free, adjusting ingredients is a breeze! Try using gluten-free puff pastry to fit your dietary needs while maintaining the delicious flavor.

Savory Strawberry Turnover Ingredients

For the Filling

  • Fresh Strawberries – Adds sweetness and flavor. Can substitute with blueberries or raspberries.
  • Sugar – Sweetens the strawberry filling. Adjust according to the sweetness of the berries used.
  • Cream Cheese – Creates a rich, creamy filling. Can replace with Greek yogurt for a lighter option.
  • Unsalted Butter – Helps in cooking the strawberry filling. Margarine can be used as a substitute.
  • Cornstarch – Thickens the strawberry filling. Flour can be used as an alternative.
  • Lemon Juice – Adds acidity to balance sweetness. Lime juice is a good substitute.

For the Crust

  • Puff Pastry – Provides a flaky crust. Opt for gluten-free puff pastry for dietary needs.
  • Egg – Used for the egg wash to achieve a golden finish. Milk can be used for a vegan alternative.

For the Glaze

  • Milk – Adds moisture to the glaze. Plant-based milk can be used for dairy-free options.
  • Vanilla Extract – Enhances the cream cheese flavor. Optional but highly recommended.

Step‑by‑Step Instructions for Savory Strawberry Turnovers

Step 1: Prepare Strawberry Filling
In a medium saucepan, combine sliced fresh strawberries, unsalted butter, sugar, and cornstarch. Cook over medium heat for 5-10 minutes, stirring occasionally until the mixture thickens and turns syrupy. You’ll know it’s ready when the strawberries start breaking down and the filling becomes glossy, showcasing the luscious sweetness that will fill your turnovers.

Step 2: Make Cream Cheese Filling
In a mixing bowl, beat together cream cheese, sugar, and vanilla extract until light and fluffy, about 3-5 minutes. Use a hand mixer on medium speed, ensuring all ingredients are well incorporated and creamy. This rich cream cheese filling will complement the fruity strawberry mix perfectly, adding a delightful creaminess to your savory strawberry turnovers.

Step 3: Prepare Glaze
In a small bowl, whisk powdered sugar, milk, lemon juice, and vanilla extract until the mixture is smooth and has no lumps. Aim for a drizzleable consistency, which will serve as a delicious finishing touch for your turnovers. Set it aside, allowing the flavors to meld while you assemble your pastries.

Step 4: Assemble Turnovers
Thaw your puff pastry sheets and cut them into squares, about 4 inches on each side. Place a spoonful of the strawberry filling in the center of each square, followed by a dollop of the creamy cheese mixture. Fold the pastry over into a triangle shape, ensuring to seal the edges tightly with a fork to keep the flavorful fillings secure during baking.

Step 5: Bake
Preheat your oven to 400°F (200°C). Place your assembled turnovers on a baking sheet lined with parchment paper. Brush the tops with an egg wash to create a golden crust, then bake for 20 minutes or until they puff up and turn a beautiful golden brown. The aroma of freshly baked savory strawberry turnovers will fill your kitchen, teasing your anticipation!

Step 6: Optional Finishing Touch
Once baked to perfection, remove the turnovers from the oven and let them cool slightly. For an extra touch of sweetness, dust them with powdered sugar before serving. This final step adds a touch of elegance and enhances the delightful presentation of your savory strawberry turnovers, making them truly irresistible.

Storage Tips for Savory Strawberry Turnovers

  • Room Temperature: Baked turnovers can be stored at room temperature in an airtight container for up to 2 days. Enjoy them fresh for the best texture!
  • Fridge: For longer storage, keep them in the fridge for up to 3 days. Keep in mind, they may lose some flakiness but will still taste delicious.
  • Freezer: Unbaked savory strawberry turnovers can be frozen for up to 2 months. Bake directly from frozen, adding a few extra minutes to the baking time for perfect results.
  • Reheating: To reheat leftovers, place them in a preheated oven at 350°F (175°C) for about 10-15 minutes until warmed through and flaky again.

Expert Tips for Savory Strawberry Turnovers

  • Thaw Puff Pastry: Ensure the puff pastry is fully thawed before use; this guarantees the desired flakiness when baked.
  • Taste and Adjust: Always taste your strawberries first to adjust the amount of sugar in the filling, ensuring the best balance of flavors in your savory strawberry turnovers.
  • Avoid Overfilling: Be careful not to overfill the pastries. This prevents bursting during baking and maintains that beautiful presentation.
  • Seal Edges Well: Use a fork to seal the edges tightly, keeping those delicious fillings contained as they bake.
  • Golden Brown Finish: Bake until the turnovers are golden brown and puffed for that perfect flaky texture everyone will rave about.
  • Storage Solutions: If making in advance, store fillings in airtight containers in the fridge. Assemble prior to baking for optimal freshness and taste.

What to Serve with Savory Strawberry Turnovers

Indulging in golden, flaky turnovers opens the door to creating a delightful meal that captures your senses.

  • Fresh Arugula Salad: The peppery bite of arugula adds a refreshing contrast to the creamy sweetness of the turnovers, making each bite a harmonious experience. Toss in some cherry tomatoes and a light vinaigrette to elevate this pairing.

  • Herbed Cream Cheese Dip: A cool herbed cream cheese dip will balance the warmth of the turnovers while enhancing their creamy element. Pair it with crispy crudités for a fun, interactive appetizer.

  • Vanilla Ice Cream: The luscious scoop of vanilla ice cream melting over the warm turnovers creates a blissful mix of flavors and temperatures, perfect for a decadent dessert.

  • Citrus Lemonade: A chilled glass of zesty lemonade cuts through the richness, refreshing your palate and brightening the overall dining experience.

  • Savory Soup: A rich tomato or vegetable soup will complement the pastry’s texture, providing warmth and heartiness to your meal. Consider serving the turnovers as crispy dippers alongside the soup.

  • Herbed Quinoa: Fluffy quinoa tossed with fresh herbs adds a nutritious and colorful touch to the plate, enhancing both texture and flavor while keeping your meal light.

  • Sparkling Wine: A flute of bubbly sparkling wine elevates the occasion, offering a crisp and festive note that pairs beautifully with the pastry’s sweetness.

  • Chocolate Drizzle: Drizzling melted dark chocolate over the turnovers brings an elegant twist that enhances the fruitiness in a delightful way, making them perfect for a special celebration.

Savory Strawberry Turnovers Variations & Substitutions

Feel free to explore your creativity in the kitchen with these delightful variations! You can take your turnovers in unexpected directions, enhancing flavor and texture beautifully.

  • Dairy-Free: Substitute cream cheese with a creamy vegan alternative like cashew cream for a rich flavor without dairy.
  • Gluten-Free: Use gluten-free puff pastry to ensure everyone can enjoy these turnovers without the gluten, maintaining that delightful flakiness.
  • Mixed Berry Delight: Replace strawberries with a mix of berries, such as blueberries and raspberries, for a burst of flavor and color that’s irresistibly fresh.
  • Sweet Spice: Add cinnamon or nutmeg to the strawberry filling for a warm, fragrant twist that brings a cozy element to every bite.
  • Savory Surprise: Replace the fruit with a savory filling like sautéed mushrooms and spinach mixed with ricotta for a hearty option perfect for brunch.
  • Zesty Twist: Incorporate some lime zest into the cream cheese filling for a citrusy kick that enhances the overall flavor profile.
  • Cheesy Variation: Swap cream cheese for brie or camembert for a rich, gooey filling that pairs perfectly with the sweetness of strawberries.
  • Chocolate Lovers: Drizzle some melted dark chocolate inside the turnovers along with the strawberries for a decadent dessert vibe that everyone will adore.

Whether you’re in the mood for something sweet or savory, your customizable savory strawberry turnovers are just waiting to be made! With such delightful options, you might also love to try pairing these with a fresh salad like a Strawberry Spinach Salad or enjoy them as dessert alongside some Strawberry Cheesecake Bars or a cool Strawberry Icebox Pie for a truly fantastic feast.

Make Ahead Options

These Savory Strawberry Turnovers are perfect for meal prep enthusiasts! You can make the strawberry filling and creamy cheese filling up to 3 days in advance—just refrigerate them in airtight containers to maintain their delightful flavors. Additionally, assemble the turnovers completely up to 24 hours ahead of baking; simply cover them with plastic wrap in the fridge. To achieve that flaky texture, bake them straight from the fridge without letting them sit at room temperature. When ready to serve, brush with an egg wash and bake for 20 minutes until golden brown. With these make-ahead options, you’ll have fresh, warm pastries waiting for you, saving you precious time on busy weeknights!

Savory Strawberry Turnovers Recipe FAQs

How do I select ripe strawberries for the filling?
Absolutely! Look for strawberries with a deep red color and a sweet smell—these are prime for your turnovers. Avoid any berries that have dark spots or feel mushy, as they might be overripe. If you’re unsure, asking your local farmer’s market vendor can often yield the freshest finds!

What is the best way to store leftover Savory Strawberry Turnovers?
The more the merrier! Store any baked turnovers in an airtight container at room temperature for up to 2 days. If you’d like to keep them longer, refrigerate for up to 3 days. Just keep in mind they might lose a little of their initial flakiness. For the best results, reheat them in a preheated oven.

Can I freeze unbaked Savory Strawberry Turnovers?
Yes, indeed! Freeze your unbaked turnovers for up to 2 months. Just assemble them, place them on a lined baking sheet, and pop them in the freezer until firm. Then, transfer to a freezer-safe bag. When you’re ready to bake, go straight from the freezer to the oven, adding a few extra minutes to your baking time.

What should I do if my filling leaks out while baking?
No worries—it’s a common issue! To prevent leaking, make sure to seal the edges of your turnovers tightly using a fork. Also, avoid overfilling them. If the filling does leak, just keep an eye on them while baking and use the spatula to carefully move the turnovers to catch dripping juices.

Can I make these turnovers gluten-free or dairy-free?
Very much so! You can easily adapt the Savory Strawberry Turnovers to meet your dietary needs. Use gluten-free puff pastry and substitute the cream cheese with a dairy-free option like Greek yogurt or a nut-based cream. This way, you can enjoy the delicious flavors without the worry!

How do I know if my pastry is fully thawed?
For the best results, thaw your puff pastry overnight in the refrigerator or on the counter for about 30-60 minutes until it’s pliable and soft to the touch. Press with your finger, and if it leaves an indentation without feeling cold, it’s ready to go!

Savory Strawberry Turnovers

Savory Strawberry Turnovers: Flaky Delights in 30 Minutes

These Savory Strawberry Turnovers are delightful pastries filled with creamy cheese and fresh strawberries, perfect for dessert.
Prep Time 15 minutes
Cook Time 15 minutes
Total Time 30 minutes
Servings: 8 turnovers
Course: Dessert
Cuisine: American
Calories: 250

Ingredients
  

Filling
  • 2 cups Fresh Strawberries Can substitute with blueberries or raspberries.
  • 1/4 cup Sugar Adjust according to the sweetness of the berries used.
  • 8 oz Cream Cheese Can replace with Greek yogurt for a lighter option.
  • 2 tbsp Unsalted Butter Margarine can be used as a substitute.
  • 2 tbsp Cornstarch Flour can be used as an alternative.
  • 1 tbsp Lemon Juice Lime juice is a good substitute.
Crust
  • 1 sheet Puff Pastry Opt for gluten-free puff pastry for dietary needs.
  • 1 large Egg Milk can be used for a vegan alternative.
Glaze
  • 1 tbsp Milk Plant-based milk can be used for dairy-free options.
  • 1 tsp Vanilla Extract Optional but highly recommended.

Equipment

  • Medium saucepan
  • Mixing Bowl
  • Baking Sheet
  • Whisk
  • Fork

Method
 

Preparation
  1. In a medium saucepan, combine sliced fresh strawberries, unsalted butter, sugar, and cornstarch. Cook over medium heat for 5-10 minutes, stirring occasionally until the mixture thickens and turns syrupy.
  2. In a mixing bowl, beat together cream cheese, sugar, and vanilla extract until light and fluffy, about 3-5 minutes.
  3. In a small bowl, whisk powdered sugar, milk, lemon juice, and vanilla extract until the mixture is smooth and has no lumps.
  4. Thaw your puff pastry sheets and cut them into squares, about 4 inches on each side. Place a spoonful of the strawberry filling in the center of each square, followed by a dollop of the creamy cheese mixture. Fold the pastry over into a triangle shape, ensuring to seal the edges tightly with a fork.
  5. Preheat your oven to 400°F (200°C). Place your assembled turnovers on a baking sheet lined with parchment paper. Brush the tops with an egg wash and bake for 20 minutes or until they puff up and turn golden brown.
  6. Remove the turnovers from the oven and let them cool slightly. Dust them with powdered sugar before serving.

Nutrition

Serving: 1turnoverCalories: 250kcalCarbohydrates: 30gProtein: 3gFat: 14gSaturated Fat: 8gCholesterol: 50mgSodium: 150mgPotassium: 150mgFiber: 1gSugar: 5gVitamin A: 5IUVitamin C: 10mgCalcium: 2mgIron: 4mg

Notes

Ensure the puff pastry is fully thawed for desired flakiness. Adjust sugar based on fruit sweetness for the best flavor balance.

Tried this recipe?

Let us know how it was!