Crispy Copycat Sizzler Malibu Chicken You Can Make Tonight

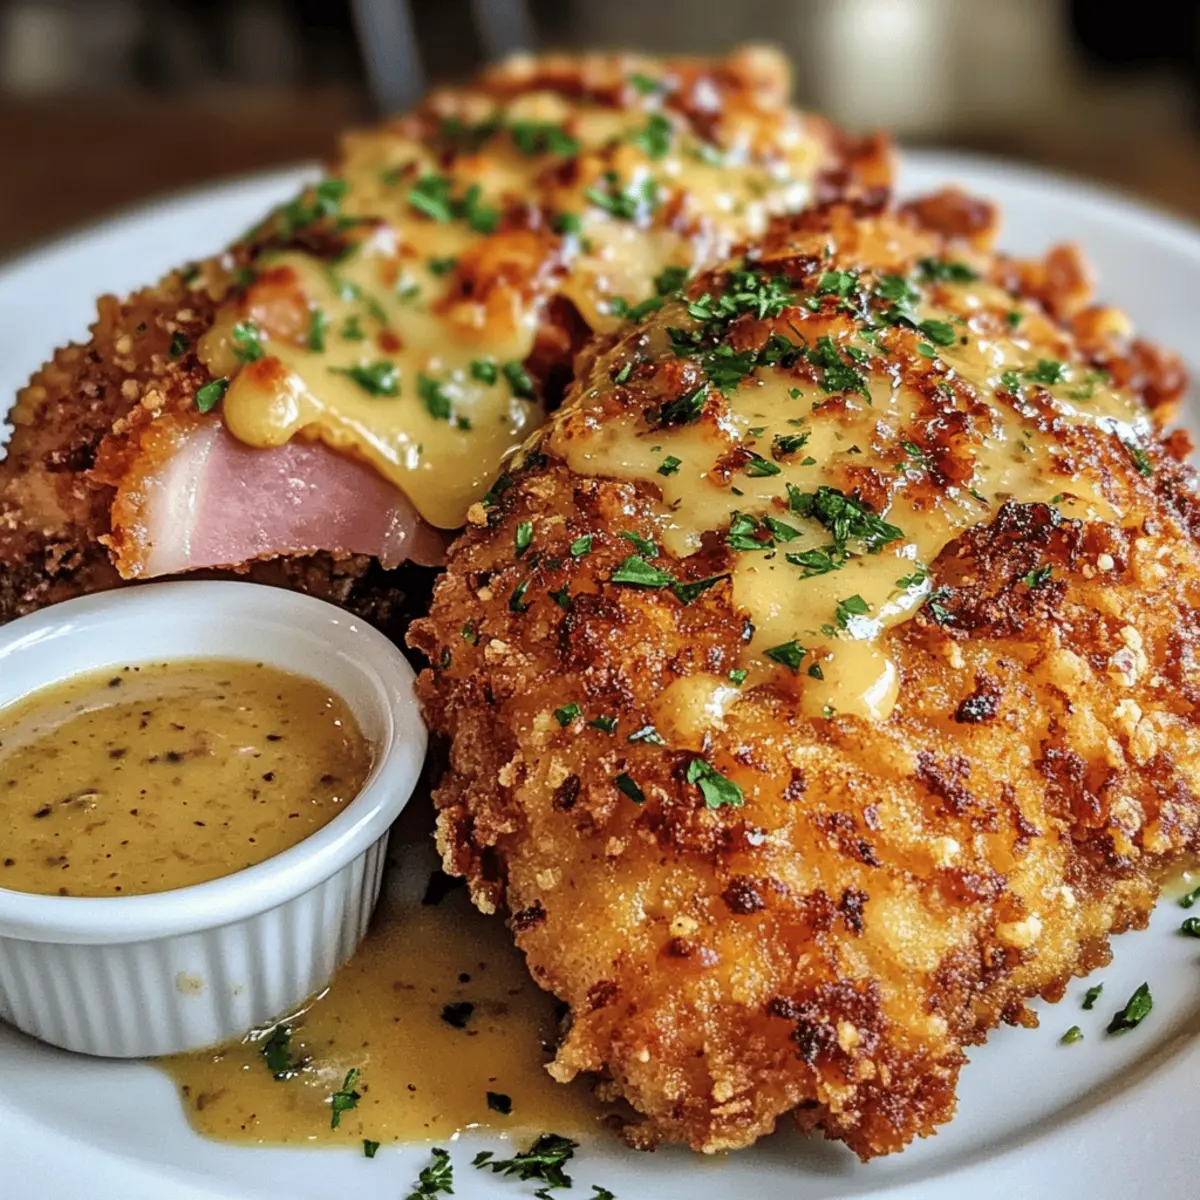
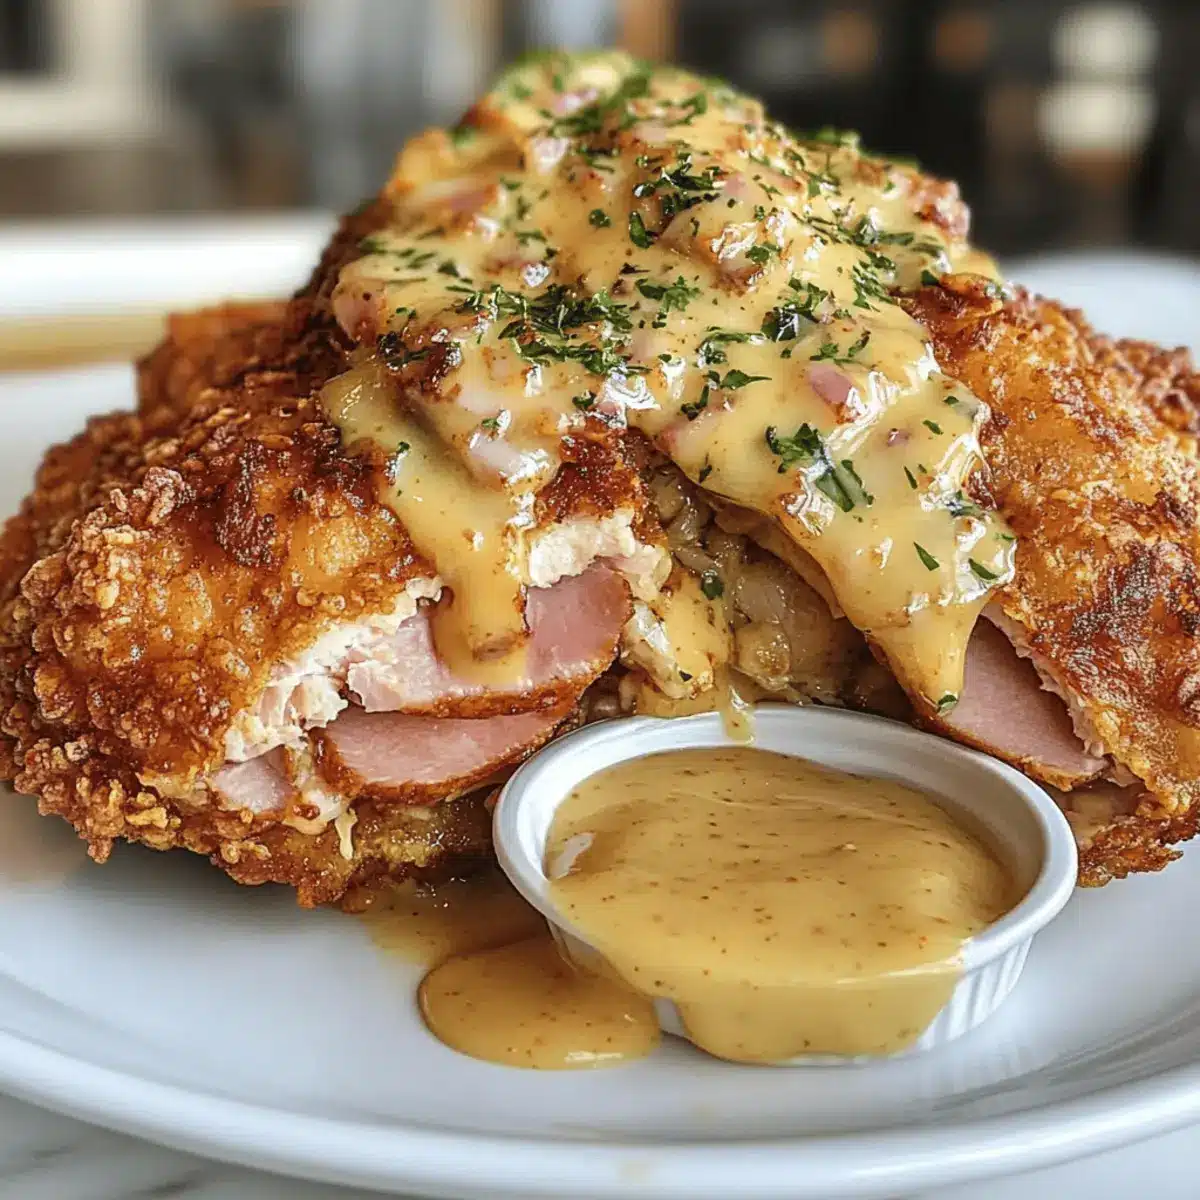
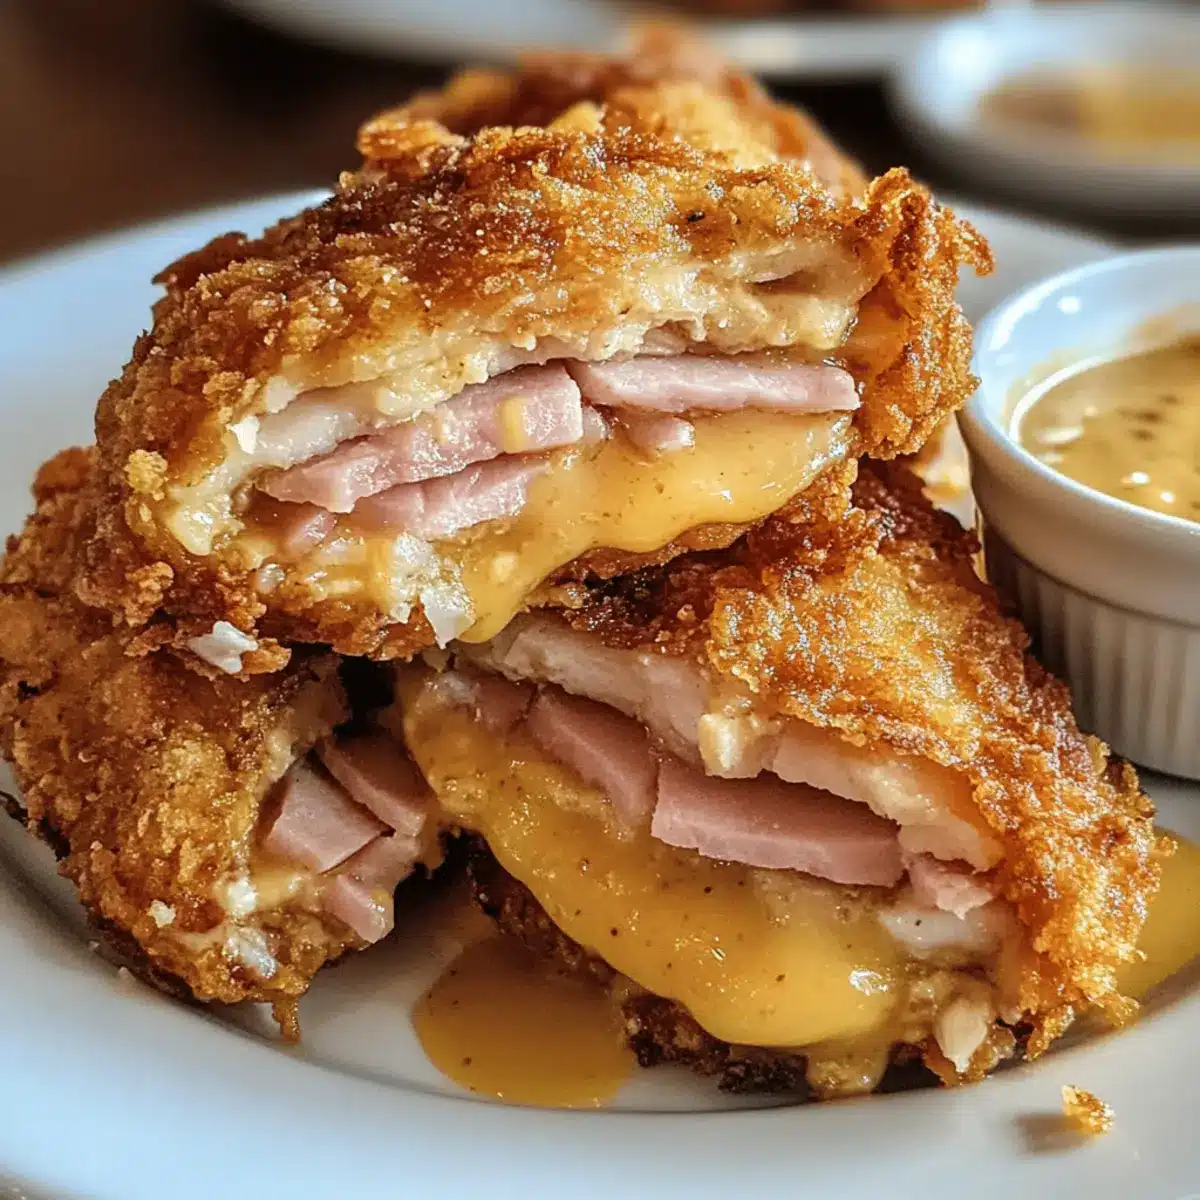
There’s something magical about recreating beloved restaurant dishes in the comfort of your own kitchen. When I decided to tackle the iconic Copycat Sizzler Malibu Chicken, I knew I was in for a treat. This dish wraps juicy, crispy chicken in savory ham and gooey Swiss cheese, topped off with a creamy honey mustard dipping sauce that will have your taste buds dancing. In just 30 minutes, you can whip up a quick dinner that’s not only family-friendly but also a delightful way to indulge without the drive-thru. You’ll love that it’s made from scratch, giving you control over the flavors and ingredients. Ready to bring a taste of nostalgia to your dinner table? Let’s get cooking!

Why is Copycat Sizzler Malibu Chicken a must-try?

Indulgent, Nostalgic Flavor: This dish brings back the comforting tastes you love from the restaurant, all made easily at home.
Quick Family Dinner: With just 30 minutes of prep, it’s perfect for busy weeknights when everyone craves something satisfying.
Crowd-Pleasing Appeal: Crispy chicken, savory ham, and gooey cheese are a combination that delights both kids and adults alike.
Versatile Cooking Options: Whether you prefer deep frying or using an air fryer, it allows for healthy adjustments without sacrificing taste.
Control Over Ingredients: Homemade means you can customize flavors, swap out cheese, or make it gluten-free for dietary needs.

Transform your next family meal with this delightful dish, and if you’re looking for more quick options, check out my delicious Jerk Chicken Burritos with Mango Salsa or Grilled Chicken Sandwich with Avocado Chipotle Mayo. You’re going to love how easy and satisfying homemade meals can be!

Copycat Sizzler Malibu Chicken Ingredients

• Get ready to create this comforting masterpiece at home!

For the Chicken

  • Chicken Breasts – Boneless and skinless for tenderness; pound for even cooking.
  • Ham – A savory layer that enhances flavor; turkey ham is a lighter alternative.
  • Swiss Cheese – Melts beautifully, adding creaminess; feel free to substitute with provolone or mozzarella.

For the Breading

  • All-Purpose Flour – Forms a crispy base; swap with gluten-free flour for a GF option.
  • Buttermilk – Adds moisture and acts as a tenderizer; use milk mixed with vinegar or lemon juice as a substitute.
  • Egg – Binds the breading; for an egg-free version, try a flax egg instead.
  • Panko Breadcrumbs – Offers a crunchy texture; regular breadcrumbs can be used, but will result in a different crispiness.
  • Seasonings (Slap Ya Mama®, garlic salt, onion powder, black pepper, paprika, red pepper flakes) – Amplifies flavor; adjust spice levels to suit your taste.

For Cooking

  • Vegetable Oil & Butter – Ideal for frying; substitute with any high smoke point oil like canola if needed.

For the Dipping Sauce

  • Mayonnaise – Forms the creamy base of the sauce; use Greek yogurt for a lighter option.
  • Dijon Mustard – Adds a tangy kick; yellow mustard can be used for a milder flavor.
  • Honey – Provides sweetness to balance the flavors; maple syrup is a great alternative.

Dive into the comforting flavors of this Copycat Sizzler Malibu Chicken, and get ready to serve up smiles at your dinner table!

Step‑by‑Step Instructions for Copycat Sizzler Malibu Chicken

Step 1: Prepare the Chicken
Begin by placing the chicken breasts between two sheets of plastic wrap and pound them to an even thickness of about ½ inch. This step ensures that your Copycat Sizzler Malibu Chicken cooks evenly, resulting in juicy, tender meat. Once pounded, pat the chicken dry with paper towels, allowing for better adhesion of the breading.

Step 2: Heat the Oil
In a large cast iron skillet, combine 2 tablespoons of vegetable oil and 2 tablespoons of butter over medium heat. Allow the oil to heat up until shimmering, which should take about 3-5 minutes. This mixture creates a deliciously crispy base for frying your chicken, giving it that golden-brown crust we all crave.

Step 3: Set Up the Breading Station
Prepare your breading station by placing all-purpose flour in one bowl, a mixture of buttermilk and beaten egg in a second bowl, and a mixture of Panko breadcrumbs and seasonings in a third bowl. Arrange these bowls in order—flour first, followed by the wet mixture, and finally the flavorful breadcrumb mixture. This setup will make the dredging process seamless and organized.

Step 4: Dredge the Chicken
Take each chicken breast and first coat it in the flour, shaking off any excess. Next, dip it into the buttermilk and egg mixture, ensuring it’s fully covered. Finally, press the chicken into the Panko mixture, coating it thoroughly. Repeat this process for all chicken breasts, ensuring a crispy exterior for your Copycat Sizzler Malibu Chicken.

Step 5: Fry the Chicken
Carefully place the breaded chicken breasts into the hot skillet, being sure not to overcrowd the pan. Fry them in batches, cooking for 6-8 minutes on each side until they achieve a golden brown color. Use tongs to flip the chicken gently, and once done, transfer them to a plate lined with paper towels to drain excessive oil.

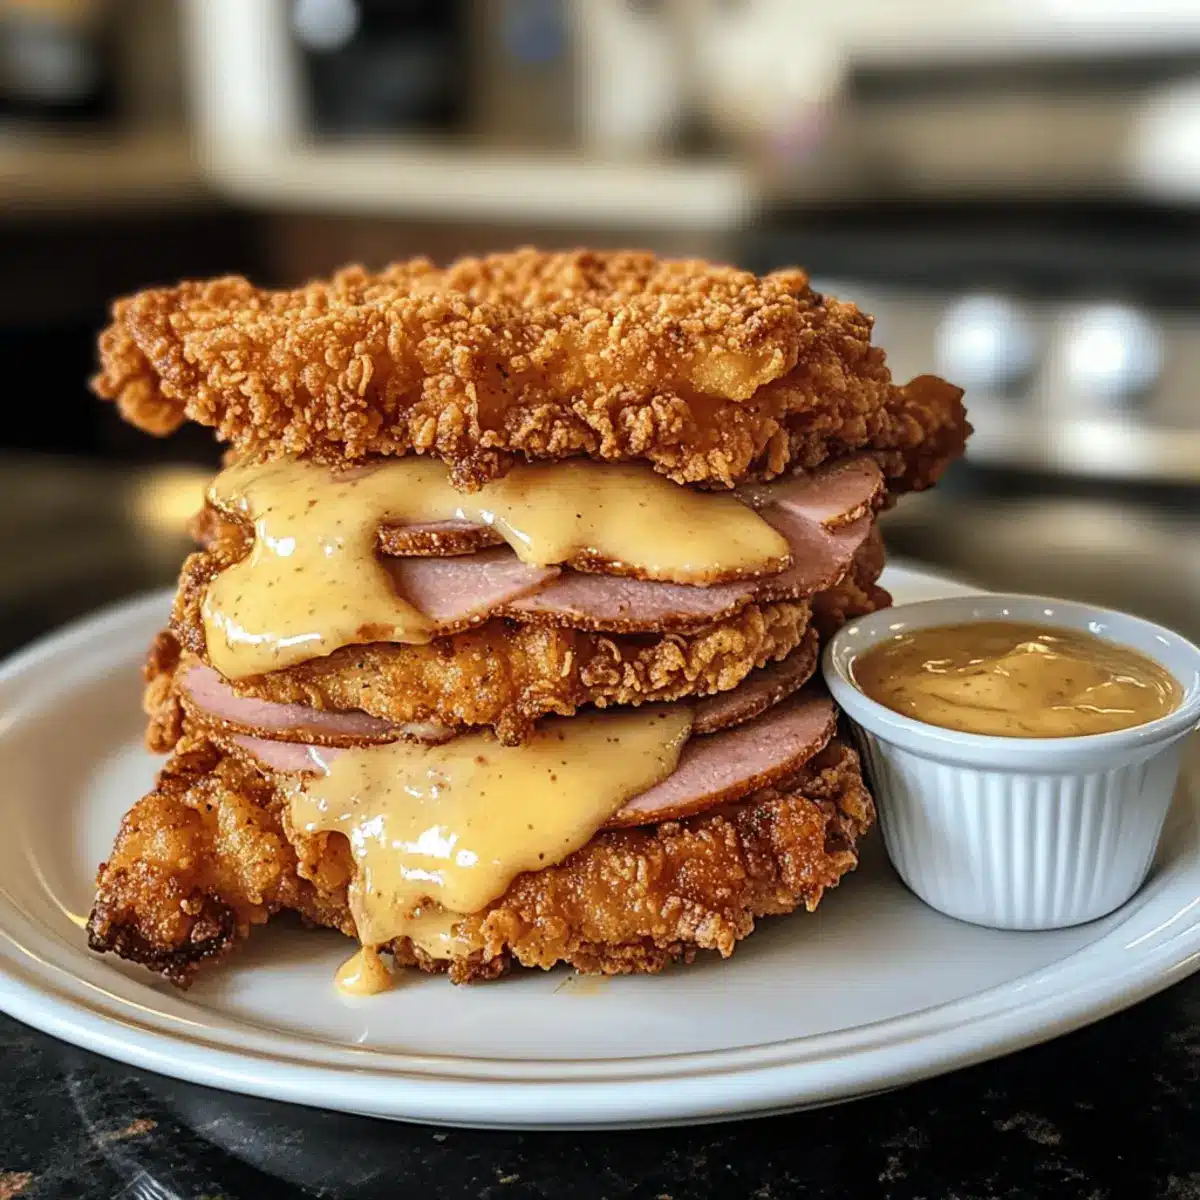
Step 6: Bake with Toppings
Preheat your oven to 350°F (175°C) while the chicken rests on paper towels. Once all chicken is fried, place them on a baking sheet. Layer each piece with a slice of ham and a generous slice of Swiss cheese. Bake in the preheated oven for about 5 minutes, just until the cheese is melted and bubbly, enhancing the overall decadence of your Copycat Sizzler Malibu Chicken.

Step 7: Prepare the Dipping Sauce
In a small mixing bowl, combine mayonnaise, Dijon mustard, yellow mustard, and honey. Stir until smooth and creamy, ensuring all ingredients are well blended. This easy honey mustard dipping sauce adds the perfect touch of sweetness and tang to complement the crispy chicken, bringing your dish full circle.

Step 8: Serve and Enjoy
Once the cheese has melted and the chicken has finished baking, remove the tray from the oven. Serve your Copycat Sizzler Malibu Chicken immediately with the honey mustard dipping sauce on the side. It pairs wonderfully with crispy sides or a fresh garden salad, offering a delightful meal your family will love.

What to Serve with Copycat Sizzler Malibu Chicken

Elevate your dining experience with these delightful side dishes that perfectly complement the crispy, savory flavors of this nostalgic classic.

  • Creamy Mashed Potatoes: The smooth, buttery texture balances the crunch of the chicken, making each bite a comforting delight.

  • Steamed Broccoli: A burst of vibrant green on your plate adds freshness and a healthy crunch, beautifully contrasting the rich flavors.

  • Garden Salad: Crisp lettuce, juicy tomatoes, and a tangy vinaigrette provide a refreshing bite that lightens up the meal.

  • Garlic Bread: The buttery garlic aroma is irresistible, and its warmth creates a cozy atmosphere, ideal for family dinners.

  • Coleslaw: Crunchy, tangy slaw brings in a zesty crunch that complements the smoothness of the honey mustard dipping sauce.

  • Sweet Potato Fries: Their natural sweetness enhances the savory chicken, offering a delightful contrast in flavors and textures.

  • Sparkling Lemonade: A fizzy, citrusy drink to cleanse your palate and beautifully refreshes between bites of hearty chicken.

Enjoy a reminiscent taste of your favorite restaurant while savoring the delightful meal you’ve crafted at home!

Expert Tips for Copycat Sizzler Malibu Chicken

  • Pat Dry First: Ensure your chicken breasts are patted dry before breading. This step helps the coating stick better and achieves a delightful crispiness.

  • Maintaining Oil Temperature: Fry chicken in batches to avoid overcrowding the skillet. This keeps the oil temperature steady, preventing soggy coating on your Copycat Sizzler Malibu Chicken.

  • Watch the Baking Time: Only bake until the cheese melts, about 5 minutes. Overbaking can lead to dry chicken, so keep a close eye on it!

  • Customize Seasonings: Feel free to adjust the seasonings based on your taste preferences. Adding herbs like thyme or substituting spices can elevate the flavor profile of your Copycat Sizzler Malibu Chicken.

  • Air Frying Option: For a healthier twist, consider using the air fryer method! It requires less oil while still achieving that crispy texture you love.

How to Store and Freeze Copycat Sizzler Malibu Chicken

Fridge: Store leftover Copycat Sizzler Malibu Chicken in an airtight container for up to 3 days. Reheat in the oven to retain crispiness.

Freezer: This dish can be frozen for up to 3 months. Wrap each piece tightly in plastic wrap and foil before placing in a freezer bag.

Reheating: To enjoy, reheat from frozen in the oven at 375°F (190°C) for about 20-25 minutes, or until heated through and crispy.

Room Temperature: If left out, consume within 2 hours to ensure food safety.

Copycat Sizzler Malibu Chicken Variations

Feel free to personalize this recipe to your heart’s content—you’ll love the different twists you can create!

  • Air Fryer Option: Use the same breading technique but cook in an air fryer for a crispy, healthier twist. The result? Guilt-free indulgence that still tastes divine.

  • Cheese Swap: Experiment with cheeses like cheddar or pepper jack for a different flavor dimension. Each cheese adds its unique personality to the dish—go creamy or bring the heat!

  • Herb-Infused Breadcrumbs: Mix in fresh or dried herbs like oregano, thyme, or basil to the breading for an aromatic kick. It elevates the flavor profile while brightening up your meal.

  • Spice It Up: Add cayenne pepper or red pepper flakes for a fiery kick. This variation will awaken your taste buds, transforming a comforting dish into something exciting and bold.

  • Turkey Alternative: Swap out the ham for turkey ham or even grilled veggies for a lighter, vegetarian version. This allows you to enjoy the same satisfying flavors, minus the meat.

  • Gluten-Free Version: Substitute all-purpose flour and breadcrumbs with gluten-free varieties to accommodate dietary needs. Everyone deserves a taste of this scrumptious dish, no matter their food preferences!

  • Baking Sheet Method: Instead of frying, coat the chicken and place them on a baking sheet with a drizzle of oil, baking until golden for a more hands-off approach. It’s quick and easy, while still delivering satisfaction.

Want more ways to enrich your family meals? Try pairing your beautiful Copycat Sizzler Malibu Chicken with my crunchy Chicken Cashew Broccoli Stir Fry or indulge in the flavors of Mexican Barbecue Chicken Tacos—your dinner rotation will never be the same!

Make Ahead Options

These Copycat Sizzler Malibu Chicken pieces are perfect for meal prep! You can bread the chicken up to 24 hours in advance; simply keep the breaded chicken in the refrigerator covered tightly in plastic wrap to maintain its crispiness. Additionally, you can prepare the honey mustard dipping sauce ahead of time; it can be stored in an airtight container in the fridge for up to 3 days. When ready to serve, just fry the chicken according to the instructions, bake with ham and Swiss cheese until melted, and enjoy a delicious homemade meal that brings back restaurant nostalgia without the wait. Your busy weeknights just got easier!

Copycat Sizzler Malibu Chicken Recipe FAQs

What type of chicken is best for Copycat Sizzler Malibu Chicken?
For the best results, I recommend using boneless, skinless chicken breasts. They are tender and cook evenly. Don’t forget to pound them to a uniform thickness of about ½ inch for consistent cooking!

How should I store leftover Copycat Sizzler Malibu Chicken?
Store your leftovers in an airtight container in the fridge for up to 3 days. When you’re ready to enjoy them again, reheat gently in the oven at 350°F (175°C) for about 10-15 minutes to help retain that delicious crispiness.

Can I freeze Copycat Sizzler Malibu Chicken?
Absolutely! Wrap each piece tightly in plastic wrap and then in foil before placing them in a freezer bag. This way, they can be stored for up to 3 months. When you want to enjoy them, reheat from frozen in the oven at 375°F (190°C) for about 20-25 minutes until heated through and crispy.

What should I do if the breading doesn’t stick to the chicken?
If you’re having trouble with the breading sticking, make sure your chicken is pounded dry and you coat each piece in flour first, then the buttermilk mixture, and finally the Panko breadcrumbs. Also, don’t rush the dredging process; take your time to ensure a good coating. If things still aren’t sticking well, a sprinkle of water can help the flour adhere better.

Is there a way to make this recipe gluten-free?
Yes! Simply substitute the all-purpose flour with gluten-free flour and use gluten-free Panko breadcrumbs. This makes it easy to enjoy delicious Copycat Sizzler Malibu Chicken without the gluten, ensuring everyone at the table can partake!

What dietary considerations should I keep in mind?
When preparing this dish, be mindful of any allergies, especially to dairy or eggs. You can substitute buttermilk with a non-dairy milk like almond milk mixed with vinegar and replace the egg with a flax egg (1 tablespoon of flaxseed meal combined with 2.5 tablespoons of water). If you’re cooking for pets, remember not to share this dish with them as foods like garlic and onions can be harmful!

Copycat Sizzler Malibu Chicken

Crispy Copycat Sizzler Malibu Chicken You Can Make Tonight

Recreate the beloved Copycat Sizzler Malibu Chicken with juicy chicken, savory ham, and creamy cheese in your kitchen.
Prep Time 30 minutes
Cook Time 20 minutes
Total Time 50 minutes
Servings: 4 pieces
Course: Chicken
Cuisine: American
Calories: 400

Ingredients
  

For the Chicken
  • 4 pieces boneless, skinless chicken breasts pound for even cooking
  • 4 slices ham turkey ham for a lighter alternative
  • 4 slices Swiss cheese can substitute with provolone or mozzarella
For the Breading
  • 1 cup all-purpose flour can substitute with gluten-free flour
  • 1 cup buttermilk or milk mixed with vinegar or lemon juice
  • 1 large egg for egg-free version, use a flax egg
  • 1 cup Panko breadcrumbs can use regular breadcrumbs
  • to taste seasonings (Slap Ya Mama®, garlic salt, onion powder, black pepper, paprika, red pepper flakes) adjust spice levels as desired
For Cooking
  • 2 tablespoons vegetable oil or any high smoke point oil
  • 2 tablespoons butter for frying
For the Dipping Sauce
  • 1/2 cup mayonnaise or Greek yogurt for a lighter option
  • 2 tablespoons Dijon mustard or yellow mustard
  • 2 tablespoons honey or maple syrup as an alternative

Equipment

  • cast-iron skillet
  • Mixing bowls
  • Measuring cups
  • Tongs

Method
 

Step-by-Step Instructions
  1. Begin by placing the chicken breasts between two sheets of plastic wrap and pound them to an even thickness of about ½ inch.
  2. In a large cast iron skillet, combine 2 tablespoons of vegetable oil and 2 tablespoons of butter over medium heat. Allow the oil to heat until shimmering, about 3-5 minutes.
  3. Prepare your breading station by placing all-purpose flour in one bowl, a mixture of buttermilk and beaten egg in a second bowl, and a mixture of Panko breadcrumbs and seasonings in a third bowl.
  4. Take each chicken breast and first coat it in the flour, shaking off any excess, then dip it into the buttermilk and egg mixture, and finally press it into the Panko mixture.
  5. Carefully place the breaded chicken breasts into the hot skillet, frying them in batches for 6-8 minutes on each side until golden brown.
  6. Preheat your oven to 350°F (175°C) while the chicken rests on paper towels. Once all chicken is fried, place them on a baking sheet and layer each piece with a slice of ham and Swiss cheese.
  7. Bake in the preheated oven for about 5 minutes, until the cheese is melted and bubbly.
  8. In a small mixing bowl, combine mayonnaise, Dijon mustard, and honey. Stir until smooth and creamy.
  9. Serve your Copycat Sizzler Malibu Chicken immediately with the honey mustard dipping sauce on the side.

Nutrition

Serving: 1pieceCalories: 400kcalCarbohydrates: 20gProtein: 30gFat: 25gSaturated Fat: 10gPolyunsaturated Fat: 5gMonounsaturated Fat: 10gCholesterol: 100mgSodium: 800mgPotassium: 600mgFiber: 1gSugar: 3gVitamin A: 500IUVitamin C: 1mgCalcium: 200mgIron: 2mg

Notes

Ensure the chicken is patted dry before breading for better adhesion. Fry in batches to maintain oil temperature and avoid sogginess.

Tried this recipe?

Let us know how it was!

Crispy Reuben Balls with Spicy Dipping Sauce Delight

As I stood in my kitchen, the sizzling sound of oil reminded me that culinary creativity often leads to delightful surprises. Enter these Crispy Reuben Balls with Spicy Thousand Island Dipping Sauce—an enticing bite-sized twist on the beloved Reuben sandwich. Perfect for game-day gatherings or a cozy night in, these tasty morsels promise a satisfying crunch with every bite. With a gooey interior of melted Swiss cheese, savory corned beef, and tangy sauerkraut, they deliver comfort food appeal with a gourmet flair. Plus, the spicy dipping sauce adds an irresistible kick, ensuring your taste buds are in for an adventure! Ready to impress your friends and family with this mouthwatering appetizer? Let’s dive into the recipe!

Why Are Reuben Balls So Irresistible?

Crispy Delights: These Reuben Balls offer a fantastic crunch that will have everyone reaching for seconds.

Unique Flavor Fusion: The harmonious blend of tangy sauerkraut, savory corned beef, and melty Swiss cheese brings a delightful surprise to your taste buds.

Perfect for Any Occasion: Whether it’s game day or a cozy movie night, they serve as a crowd-pleasing appetizer.

Quick and Easy: With simple prep and frying, you’ll be enjoying these scrumptious bites in no time.

Customizable: Feel free to experiment by swapping ingredients or serving with various dips to keep things exciting, just like in my Spicy Korean Gochujang recipe!

Reuben Balls with Spicy Ingredients

• Dive into the deliciousness of Reuben Balls!

For the Filling

  • Corned Beef – Provides savory flavor and meaty texture; substitute with pastrami for a different taste.
  • Sauerkraut – Adds tanginess and moisture; use fresh or canned, rinsed and drained.
  • Shredded Swiss Cheese – Offers melty, rich flavor; replace with Gruyère or provolone for variation.
  • Cream Cheese – Enhances creaminess of the filling; can be swapped with mascarpone.
  • Dijon Mustard – Brings a subtle heat and acidity; use yellow mustard for a milder option.

For the Coating

  • Flour – Acts as a coating base; any all-purpose flour will work.
  • Eggs – Binds the coating ingredients; use a flax egg for a vegan option.
  • Breadcrumbs – Provides the crunchy outer layer; choose panko for extra crispiness.

For the Dipping Sauce

  • Mayonnaise – Creamy base for the dipping sauce; substitute with Greek yogurt for a lighter version.
  • Ketchup – Adds sweetness to the sauce; use barbecue sauce for a smoky flavor.
  • Pickle Relish – Delivers tang and crunch; replace with finely chopped dill pickles.
  • Hot Sauce – Provides heat to the sauce; adjust the amount according to spice preference.
  • Smoked Paprika – Adds depth of flavor and color; use regular paprika if unavailable.

For Frying

  • Vegetable Oil – Used for frying; can substitute with canola or peanut oil.

Step‑by‑Step Instructions for Crispy Reuben Balls with Spicy Thousand Island Dipping Sauce

Step 1: Prepare the Filling
In a mixing bowl, combine the corned beef, sauerkraut, shredded Swiss cheese, cream cheese, and Dijon mustard. Stir until the mixture is smooth and well-blended. Cover the bowl with plastic wrap and refrigerate for 30 minutes to allow the flavors to meld and the filling to firm up, making it easier to form into balls.

Step 2: Form the Balls
After chilling, remove the filling from the refrigerator. With clean hands, scoop out portions of the mixture and roll them into 1-inch balls. Place the formed Reuben Balls onto a lined baking sheet. This ensures they don’t stick and makes cleanup easier. Chill the balls in the refrigerator while you prepare the coating to keep them firm.

Step 3: Set Up Your Coating Station
Prepare three shallow bowls to create a coating assembly line. In the first bowl, add a generous amount of flour. In the second bowl, beat a couple of eggs until homogeneous. In the third bowl, place panko breadcrumbs, ensuring they are evenly distributed. This will help the Reuben Balls achieve that crispy perfection.

Step 4: Coat the Balls
Take each ball from the baking sheet one at a time, rolling them in the flour to lightly coat. Next, dip each coated ball into the beaten eggs, allowing any excess to drip off. Finally, roll the balls in the panko breadcrumbs, ensuring an even and thorough coating. Repeat this process until all the Reuben Balls are perfectly coated.

Step 5: Heat the Oil
In a large skillet, pour in about 2 inches of vegetable oil and heat it over medium heat until it reaches 350°F (175°C). To test the temperature, drop a small piece of bread into the oil; it should sizzle and turn golden brown in about 30 seconds. This is the ideal temperature for frying the Reuben Balls, ensuring they become crispy without absorbing too much oil.

Step 6: Fry the Reuben Balls
Carefully add the coated Reuben Balls to the hot oil in batches, making sure not to crowd them in the skillet. Fry for 2-3 minutes, turning occasionally until they are golden brown and crispy all around. Use a slotted spoon to remove the balls from the oil and drain them on a plate lined with paper towels to absorb any excess oil.

Step 7: Prepare the Dipping Sauce
While the Reuben Balls are frying, whisk together the mayonnaise, ketchup, pickle relish, hot sauce, and smoked paprika in a bowl until smooth and well combined. Adjust the amount of hot sauce to your personal heat preference. This spicy Thousand Island dipping sauce perfectly complements the warm Reuben Balls.

Step 8: Serve and Enjoy
Once the Reuben Balls are all fried and slightly cooled, arrange them on a serving platter. Garnish with chopped parsley for a fresh touch and serve them alongside the zesty spicy Thousand Island dipping sauce. These crispy Reuben Balls promise to be a hit at any gathering, showcasing all the great flavors of the classic dish.

Expert Tips for Reuben Balls

  • Oil Temperature Check: Ensure your oil is at 350°F before frying. This prevents the Reuben Balls from becoming greasy and ensures a perfect crispy finish.

  • Avoid Overcrowding: Fry in batches to maintain the oil temperature; overcrowding leads to soggy, unevenly cooked Reuben Balls.

  • Perfect Coating: Make sure to thoroughly coat each ball in flour, egg, and panko. This creates that sought-after crunchy texture on the outside.

  • Chill for Better Shape: Keep the formed balls in the fridge while preparing the coating. This helps them maintain shape and makes frying easier.

  • Hot Sauce Control: Adjust the amount of hot sauce in your spicy Thousand Island dipping sauce based on your preference for heat; a little goes a long way!

What to Serve with Crispy Reuben Balls with Spicy Thousand Island Dipping Sauce

These delightful morsels are just the beginning of a feast that will leave everyone asking for more.

  • Creamy Coleslaw: This crunchy, tangy side balances the rich flavors of the Reuben Balls while adding freshness to your spread.

  • Garlic Dill Pickles: The zesty and briny flavor of pickles perfectly complements the savory bites, enhancing the overall taste experience.

  • Classic Potato Chips: The irresistible crunch of potato chips adds a satisfying texture that pairs beautifully with the crispy Reuben Balls.

  • Savory Cheese Platter: Offer a variety of cheeses alongside sliced meats and crackers to create an elegant touch and flavorful contrast.

  • Wine Pairing: A crisp Riesling or a light-bodied Pinot Noir works wonderfully, cutting through the richness and elevating the meal.

  • Baked Sweet Potato Fries: They provide a sweet, soft counterpoint, creating a delightful contrast to the crispy, savory Reuben Balls.

  • Spicy Corn Chowder: This hearty soup adds warmth and comfort, making it an excellent starter before your guests dive into the Reuben Balls.

Storage Tips for Reuben Balls with Spicy

Fridge: Store leftover Reuben Balls in an airtight container for up to 3 days. This keeps them fresh and prevents them from becoming too soggy.

Freezer: For longer storage, freeze the uncooked or cooked Reuben Balls in a single layer on a baking sheet. Once frozen, transfer them to an airtight container for up to 2 months.

Reheating: To reheat, place cooked Reuben Balls in a preheated oven at 375°F (190°C) for about 10-15 minutes, or until heated through and crispy again.

Serving Fresh: While they can be stored, these Reuben Balls are best enjoyed fresh, with that delightful crunch and savory filling.

Make Ahead Options

These Crispy Reuben Balls with Spicy Thousand Island Dipping Sauce are perfect for meal prep! You can prepare the filling (corned beef, sauerkraut, Swiss cheese, cream cheese, and Dijon mustard) up to 24 hours in advance; simply mix and refrigerate it tightly covered. Additionally, you can form the balls and chill them in the refrigerator for up to 3 days before frying. To maintain their quality, ensure they are stored in an airtight container to prevent moisture loss. When you’re ready to enjoy your appetizer, just heat the oil and fry the chilled balls for about 2-3 minutes until golden brown, avoiding any hassle on busy weeknights!

Reuben Balls with Spicy Variations

Feel free to get creative with your Reuben Balls—there are so many delightful twists you can explore!

  • Dairy-Free: Use vegan cheese and swap cream cheese with cashew cream to keep the flavor intact.
  • Hearty Vegan Option: Substitute the corned beef with finely chopped mushrooms and lentils for a hearty, meatless filling.
  • Extra Crunch: Add crushed potato chips to the breadcrumb mixture for an added layer of texture and flavor.
  • Kick it Up: Mix in jalapeños or diced green chilies with the filling for an extra spicy kick that will excite your palate.
  • Herbed Infusion: Incorporate fresh herbs like dill or parsley into the filling, elevating the classic flavor profile with freshness.
  • Cheesy Twist: For a flavor twist, experiment with aged cheddar or pepper jack cheese for added sharpness and spice.
  • Historical Spin: Dive into history by using pastrami instead of corned beef for a different but equally delicious take on this classic dish.
  • Savory Sweet: For an unexpected surprise, add finely chopped apples or figs to the filling for a sweet contrast to the salty components.

Whether you’re looking for a healthier option or a fun flavor twist, these variations will ensure your Reuben Balls remain a hit, just like my Savory Turkey Patties that will impress your guests!

Reuben Balls with Spicy Thousand Island Dipping Sauce Recipe FAQs

How do I choose the right corned beef for Reuben Balls?
Absolutely! When selecting corned beef, look for cuts that are bright pink with marbling throughout, which indicates tenderness and flavor. If you can, choose high-quality, lean corned beef for the best results. Avoid pieces that are overly fatty or have dark spots on the surface, as they may not provide the best taste in your Reuben Balls.

What’s the best way to store leftover Reuben Balls?
Very good question! Leftover Reuben Balls can be stored in an airtight container in the refrigerator for up to 3 days. To maintain their crunchiness, be sure to separate layers with parchment paper if you stack them. This will help prevent them from becoming too soggy. When ready to enjoy, simply reheat them in a preheated oven at 375°F (190°C) for about 10-15 minutes.

Can I freeze Reuben Balls, and if so, how?
Absolutely! To freeze your Reuben Balls, you can do either of two methods. If you have formed but uncooked balls, place them on a lined baking sheet and freeze them until solid (about 1-2 hours). After that, transfer them to an airtight freezer bag for up to 2 months. If you have leftover cooked Reuben Balls, allow them to cool completely and then store them in a single layer. Remember to label the bags with the date so you can monitor freshness!

What should I do if my Reuben Balls are too greasy?
If your Reuben Balls come out greasy, it’s often due to the oil temperature being too low during frying. Make sure to heat the oil to 350°F (175°C) before adding the balls. Additionally, remember to avoid overcrowding the skillet, as this can lower the oil temperature too much and result in oil absorption. If you find they’re still greasy, placing them on paper towels after frying will help absorb excess oil.

Are there any dietary considerations I should keep in mind when making Reuben Balls?
Great thought! These Reuben Balls contain dairy and meat, so they may not be suitable for vegetarians or those with lactose intolerance. However, you can easily make them vegan by substituting with plant-based corned beef alternatives, and using a flax egg instead of regular eggs for binding. Also, consider using dairy-free cheese options and yogurt in the dipping sauce to accommodate different dietary needs.

How long will the spicy Thousand Island dipping sauce last?
The spicy Thousand Island dipping sauce will stay fresh in the refrigerator for up to 1 week when stored in an airtight container. Be sure to give it a good stir before using it again, as some ingredients may settle. If the sauce develops off-smells or a change in color, it’s best to discard it.

Reuben Balls with Spicy

Crispy Reuben Balls with Spicy Dipping Sauce Delight

Delight in these crispy Reuben Balls with spicy dipping sauce, a fun twist on the classic Reuben sandwich.
Prep Time 30 minutes
Cook Time 20 minutes
Chilling Time 30 minutes
Total Time 1 hour 20 minutes
Servings: 6 balls
Course: Appetizer
Cuisine: American
Calories: 150

Ingredients
  

Filling
  • 1 cup Corned Beef Substitute with pastrami for a different taste
  • 1 cup Sauerkraut Use fresh or canned, rinsed and drained
  • 1 cup Shredded Swiss Cheese Replace with Gruyère or provolone for variation
  • 4 oz Cream Cheese Can be swapped with mascarpone
  • 1 tbsp Dijon Mustard Use yellow mustard for a milder option
Coating
  • 1 cup Flour Any all-purpose flour will work
  • 2 large Eggs Use a flax egg for a vegan option
  • 1 cup Breadcrumbs Choose panko for extra crispiness
Dipping Sauce
  • 1 cup Mayonnaise Substitute with Greek yogurt for a lighter version
  • 1 tbsp Ketchup Use barbecue sauce for a smoky flavor
  • 1 tbsp Pickle Relish Replace with finely chopped dill pickles
  • 1 tbsp Hot Sauce Adjust the amount according to spice preference
  • 1 tsp Smoked Paprika Use regular paprika if unavailable
For Frying
  • 2 inches Vegetable Oil Can substitute with canola or peanut oil

Equipment

  • Mixing Bowl
  • Skillet
  • Baking Sheet
  • Shallow bowls

Method
 

Instructions
  1. In a mixing bowl, combine the corned beef, sauerkraut, shredded Swiss cheese, cream cheese, and Dijon mustard. Stir until smooth and well-blended. Cover and refrigerate for 30 minutes.
  2. Scoop portions of the mixture and roll them into 1-inch balls. Place on a lined baking sheet and refrigerate while preparing the coating.
  3. Prepare three shallow bowls with flour, beaten eggs, and panko breadcrumbs for coating the balls.
  4. Roll each ball in flour, dip into eggs, and then coat with panko breadcrumbs. Repeat for all the balls.
  5. Heat vegetable oil in a skillet to 350°F. Test with a piece of bread; it should sizzle and turn golden brown in about 30 seconds.
  6. Fry the coated balls in batches for 2-3 minutes, turning until golden brown. Drain on paper towels.
  7. Whisk together mayonnaise, ketchup, pickle relish, hot sauce, and smoked paprika for the dipping sauce.
  8. Serve the fried Reuben Balls with the spicy Thousand Island dipping sauce on the side.

Nutrition

Serving: 1ballCalories: 150kcalCarbohydrates: 12gProtein: 5gFat: 10gSaturated Fat: 4gPolyunsaturated Fat: 1gMonounsaturated Fat: 5gCholesterol: 40mgSodium: 300mgPotassium: 100mgFiber: 1gSugar: 1gVitamin A: 200IUVitamin C: 5mgCalcium: 100mgIron: 1mg

Notes

Ensure oil is at 350°F before frying; avoid overcrowding in the skillet to maintain temperature. Adjust hot sauce in the dipping sauce to taste.

Tried this recipe?

Let us know how it was!

Delicious White Pumpkin Pie to Sweeten Your Fall Celebrations

As I was rummaging through the farmers’ market, the pale, smooth skin of white pumpkins caught my eye, whispering promises of a twist on my favorite fall dessert. This White Pumpkin Pie is not just a delightful Thanksgiving treat; it’s a slightly sweeter version of the classic pumpkin pie that will surprise and impress your loved ones. Using white pumpkin brings a creamier texture and rich flavor while reducing the sugar content, making it a must-have for your autumn gatherings. Plus, it’s just as fun to prepare as it is to devour, all while satisfying that craving for comforting, homemade indulgence. Are you ready to elevate your pie game this season? Let’s dive into the creamy goodness!

Why You’ll Love This White Pumpkin Pie

Uniqueness: This White Pumpkin Pie takes the classic dessert up a notch with its unexpected twist, bringing a delightful creamy texture that will leave your guests talking long after the last slice is gone.

Simplicity: With easy-to-follow instructions, you’ll feel like a pro in your own kitchen, impressing family and friends without the stress.

Comforting Flavors: Infused with warm spices, it captures the essence of fall in every bite, making it the perfect addition to your festive table.

Versatile: Whether served at Thanksgiving or a cozy autumn gathering, it can easily be adapted to suit various tastes, ensuring everyone leaves satisfied.

Quick to Prepare: Whip it up in no time with simple ingredients all found in your local market while ensuring you have a show-stopping dessert to enjoy.

You won’t want to miss out on this scrumptious recipe! Check out more delicious fall desserts for more delightful inspiration.

White Pumpkin Pie Ingredients

For the Filling

  • White Pumpkin – Main ingredient providing a sweet and creamy texture; opt for medium-sized pumpkins for best results.
  • Eggs – Essential for binding and giving structure; make sure they’re at room temperature for easier mixing.
  • Sweetened Condensed Milk – Adds that extra creaminess and sweetness; there’s no good substitute for its unique flavor.
  • Pumpkin Pie Spice – Provides that warm, cozy flavor blend; can be swapped with your own mix of cinnamon, nutmeg, and ginger if desired.
  • Salt – Balances the sweetness and enhances flavors; kosher or sea salt works beautifully here.

For the Crust

  • All-Purpose Flour – Forms the base of the crust; essential for achieving a flaky texture—use 1:1 gluten-free flour for a gluten-free version.
  • Granulated Sugar – Sweetens the crust; try brown sugar for a deeper flavor if you prefer.
  • Unsalted Butter – Adds richness and tenderness; ensure it’s cold for easy grating. For dairy-free, a vegan butter substitute will work well.
  • Cold Water – Helps bind the crust together; adjust the amount as needed to achieve the right dough consistency.

Greasing and Preparation

  • Coconut Oil – Ideal for greasing the baking dish; adds a light flavor but can be substituted with any neutral oil to prevent sticking.

This White Pumpkin Pie is a delicious canvas for your fall celebrations! Enjoy the blend of flavors wrapped in a perfect pastry using these simple ingredients.

Step‑by‑Step Instructions for https://thecaglediaries.com/white-pumpkin-pie/

Step 1: Prepare the Pumpkin
Begin by preheating your oven to 375°F (190°C). Carefully halve the white pumpkin and scoop out the seeds. Lightly grease the flesh with coconut oil, sprinkle with a pinch of salt, and place the halves cut-side down on a baking sheet. Bake for 1 hour, or until the flesh is tender. Once cooled, scoop out the soft pumpkin flesh and puree it until smooth, creating the base for your White Pumpkin Pie filling.

Step 2: Make the Filling
In a mixing bowl, combine 2 cups of your freshly made white pumpkin puree with 2 room-temperature eggs. Add in one can of sweetened condensed milk, a teaspoon of pumpkin pie spice, and a pinch of salt. Using a spatula, gently mix everything until it forms a smooth batter, avoiding the incorporation of air. This luscious filling will be the highlight of your pie, ensuring a creamy texture and delightful sweetness.

Step 3: Prepare the Crust
In another bowl, whisk together 1 ½ cups of all-purpose flour, ½ teaspoon of salt, and ¼ cup of granulated sugar. Grate in ½ cup of cold unsalted butter using a box grater, then mix until the texture is crumbly. Gradually add 4 to 6 tablespoons of cold water, mixing until the dough holds together. Wrap it in plastic wrap and chill for 20 minutes to relax the gluten, giving your crust a perfect flaky texture.

Step 4: Assemble
Roll out the chilled dough on a lightly floured surface until it’s about 12 inches in diameter. Transfer the dough into a 9-inch pie dish, gently pressing it into the edges and fluting for a decorative finish. Pour the prepared filling into the crust, smoothing the top with a spatula to create an even layer of your White Pumpkin Pie, ready for the oven.

Step 5: Bake
Place the pie in the oven and bake at 425°F (220°C) for 15 minutes. Then, reduce the temperature to 350°F (175°C) and continue baking for an additional 30 minutes. Check for doneness by gently shaking the pie; the center should be set but slightly jiggle, indicating a perfectly cooked filling.

Step 6: Cool
Once baked, remove the pie from the oven and allow it to cool completely on a wire rack. This cooling process helps the filling firm up, ensuring that your White Pumpkin Pie slices will hold their shape beautifully. After it’s cooled, place the pie in the refrigerator for at least 2 hours before serving, enhancing the flavors and texture.

Variations for White Pumpkin Pie

Customize your delicious White Pumpkin Pie with these fun twists that will make it your own!

  • Gluten-Free Crust: Swap the all-purpose flour for a 1:1 gluten-free flour blend to cater to gluten sensitivities. Your pie will still hold up beautifully!

  • Dairy-Free Delight: Use a vegan butter substitute in your crust and replace sweetened condensed milk with a coconut cream alternative. Enjoy creamy flavors without dairy!

  • Spicy Kick: Enhance the warmth by adding a pinch of cayenne or black pepper to the filling. This twist will surprise your taste buds with a little heat!

  • Nutty Essence: Fold in ½ cup of finely chopped pecans or walnuts into the filling for a delightful crunch and added flavor profile that complements the sweetness perfectly.

  • Chocolate Lovers: Stir in a few tablespoons of cocoa powder to the batter or top with chocolate shavings for a rich, decadent chocolate twist. A sweet surprise for chocolate enthusiasts!

  • Coconut Variation: Add unsweetened shredded coconut to the crust for a tropical flair, providing a delightful texture that pairs wonderfully with the creamy filling.

  • Caramel Drizzle: Top your pie with warm caramel sauce just before serving, providing an extra layer of sweetness and decadence that no one can resist.

  • Fruit Add-Ins: For added freshness, mix in ½ cup of finely diced apples or pears into the filling for a new texture and balance of flavors that brings a touch of fruity joy to every bite.

Feel free to explore these variations and let your creativity shine! And while you’re at it, check out more delicious fall desserts to further satisfy your seasonal cravings!

What to Serve with White Pumpkin Pie

As the leaves turn and the air cools, imagine a heartwarming spread complementing the creamy sweetness of this delightful dessert.

  • Fresh Whipped Cream: A classic topping that adds lightness and enhances the pie’s sweet notes, making every bite feel indulgent.

  • Spiced Apple Cider: Warm, aromatic cider perfectly echoes the fall spices in the pie, deepening the cozy experience with every sip.

  • Ginger Snap Cookies: Crunchy and spicy, these cookies provide a wonderful contrast to the smooth, creamy texture of the pie for delightful flavor harmony.

  • Cranberry Sauce: The tartness of cranberry sauce cuts through the sweetness, offering a refreshing burst to balance the rich filling.

  • Roasted Nuts: A mix of toasted pecans or walnuts provides crunchy texture and earthy flavors, adding warmth and rustic charm to your table.

  • Vanilla Ice Cream: Serve with a scoop of creamy vanilla ice cream as it melts into the warm pie, creating a delightful contrast that’s hard to resist.

Pair any of these suggestions with your White Pumpkin Pie, and watch as your festive gathering transforms into a memorable feast of flavors!

How to Store and Freeze White Pumpkin Pie

Fridge: Store your White Pumpkin Pie in the refrigerator, covered with plastic wrap, for up to 5 days. This keeps it fresh, creamy, and ready for your next dessert craving.

Freezer: If you’re making the pie ahead of time, wrap it tightly in plastic wrap and then foil, and freeze for up to 3 months. This will preserve its delightful flavors for when you need a sweet treat.

Reheating: When ready to enjoy, thaw the pie overnight in the refrigerator. Reheat slices in the microwave for about 20-30 seconds, or enjoy it cold—both are delicious options!

Room Temperature: If served at room temperature, your pie should not sit out for more than 2 hours. Enjoy the creamy, comforting flavors while they are at their best!

Tips for the Best White Pumpkin Pie

  • Choose the Right Pumpkin: Select a medium-sized white pumpkin, which offers the ideal sweetness and creaminess for a perfect pie filling.

  • Egg Temperature Matters: Ensure your eggs are at room temperature before mixing; this helps create a smoother, well-blended filling without added air bubbles.

  • Mix Gently: When preparing the filling, gently combine the ingredients to avoid introducing air, which can create a less desirable texture in your White Pumpkin Pie.

  • Precise Baking: Start baking at a higher temperature to set the crust, then lower it to ensure the filling cooks through without over-browning the crust edges.

  • Cool Thoroughly: Allow the pie to cool completely before refrigerating; this helps the filling set properly, ensuring clean slices when served.

Make Ahead Options

This White Pumpkin Pie is perfect for meal prep, making your holiday baking smoother and less stressful! You can prepare the filling up to 24 hours in advance—just mix the pumpkin puree, eggs, sweetened condensed milk, pumpkin pie spice, and salt, and refrigerate it in an airtight container. The pie crust can be prepped and stored (wrapped tightly) in the refrigerator for up to 3 days; just make sure to chill it properly to keep it flaky. When you’re ready to bake, roll out the dough, fill it with the chilled mixture, and follow the baking instructions as usual. This way, you’ll have a delightful White Pumpkin Pie ready with minimal effort right when you need it!

White Pumpkin Pie Recipe FAQs

What should I look for when choosing a white pumpkin?
Absolutely! For the best white pumpkin pie, select medium-sized white pumpkins that feel heavy for their size and have a smooth skin without dark spots. Look for pumpkins that are firm and slightly soft at the stem, signaling ripeness. Remember, the sweeter the pumpkin, the better your pie will taste!

How should I store my White Pumpkin Pie?
Very! To keep your White Pumpkin Pie fresh, store it in the refrigerator, covered with plastic wrap, for up to 5 days. This helps maintain its creamy texture and preserves those cozy autumn flavors, ensuring that each slice remains as delightful as the first!

Can I freeze my White Pumpkin Pie?
The more the merrier! Yes, you can freeze your pie! Wrap it tightly in plastic wrap and then in aluminum foil to prevent freezer burn. Label it with the date and you can keep it in the freezer for up to 3 months. When you’re ready to indulge, simply thaw it overnight in the refrigerator.

What if my pie cracks while baking?
Don’t worry! If cracks appear in your White Pumpkin Pie, it could be from overbaking or temperature fluctuations. To help prevent this, try baking at a slightly lower temperature once the crust is set, and keep an eye on the baking time. If cracks do happen, topping with whipped cream can be a beautiful way to disguise them!

Are there any dietary considerations for this recipe?
Absolutely! While this White Pumpkin Pie is not specifically designed for dietary restrictions, it can be adapted quite easily. For a gluten-free option, replace all-purpose flour with a 1:1 gluten-free flour blend. If you’re looking for a dairy-free version, opt for vegan butter in the crust and use a plant-based sweetened condensed milk for the filling. Always be mindful of allergies to ingredients like eggs and dairy when serving!

What’s the best way to reheat leftover White Pumpkin Pie?
For the best experience, enjoy your pie cold or at room temperature! If you prefer it warm, you can reheat slices in the microwave for 20-30 seconds. Just make sure not to overheat it, as keeping that creamy consistency is key to enjoying your delicious White Pumpkin Pie!

https://thecaglediaries.com/white-pumpkin-pie/

Delicious White Pumpkin Pie to Sweeten Your Fall Celebrations

This White Pumpkin Pie is a delightful twist on the classic pumpkin pie, perfect for fall celebrations.
Prep Time 30 minutes
Cook Time 1 hour 15 minutes
Chilling Time 20 minutes
Total Time 2 hours 5 minutes
Servings: 8 slices
Course: Dessert
Cuisine: American
Calories: 290

Ingredients
  

For the Filling
  • 1 medium White Pumpkin Provides a sweet and creamy texture.
  • 2 Eggs At room temperature.
  • 1 can Sweetened Condensed Milk Adds creaminess and sweetness.
  • 1 teaspoon Pumpkin Pie Spice Can be substituted with cinnamon, nutmeg, and ginger.
  • 1 pinch Salt Balances sweetness.
For the Crust
  • 1.5 cups All-Purpose Flour Use 1:1 gluten-free flour for gluten-free version.
  • 0.5 teaspoon Salt For flavor.
  • 0.25 cups Granulated Sugar Or brown sugar for deeper flavor.
  • 0.5 cups Unsalted Butter Cold, for easy grating.
  • 4-6 tablespoons Cold Water Adjust as needed for dough consistency.
Greasing and Preparation
  • 1 tablespoon Coconut Oil Ideal for greasing the baking dish.

Equipment

  • Mixing Bowl
  • Baking Sheet
  • Pie Dish
  • Whisk
  • Spatula
  • Grater

Method
 

Step-by-Step Instructions
  1. Preheat your oven to 375°F (190°C). Halve the white pumpkin, scoop out seeds, grease with coconut oil, sprinkle with salt, and bake cut-side down for 1 hour until tender.
  2. In a bowl, mix 2 cups of white pumpkin puree, 2 eggs, sweetened condensed milk, pumpkin pie spice, and salt until smooth.
  3. In another bowl, whisk together flour, salt, and sugar. Grate in cold butter and mix until crumbly. Add cold water gradually until dough holds together. Chill for 20 minutes.
  4. Roll out the chilled dough to about 12 inches, transfer to a 9-inch pie dish. Pour in the filling, smoothing the top.
  5. Bake at 425°F (220°C) for 15 minutes, then reduce to 350°F (175°C) and bake for 30 minutes until the center jiggles slightly.
  6. Cool completely on a wire rack, then refrigerate for at least 2 hours before serving.

Nutrition

Serving: 1sliceCalories: 290kcalCarbohydrates: 35gProtein: 4gFat: 14gSaturated Fat: 8gCholesterol: 50mgSodium: 150mgPotassium: 200mgFiber: 2gSugar: 15gVitamin A: 5000IUCalcium: 50mgIron: 1mg

Notes

Ensure eggs are at room temperature for better blending. Allow the pie to cool completely before refrigerating for best texture.

Tried this recipe?

Let us know how it was!

Creamy Velveeta and Rotel Dip Recipe for Ultimate Snacking

As I stirred the bubbling pot of Velveeta and Rotel Dip, the warm, cheesy aroma enveloped the kitchen, instantly igniting nostalgia for lazy weekends filled with laughter and good friends. This ultimate party snack is not only a crowd-pleaser but also comes together in just 20 minutes with only three simple ingredients. The creamy texture and gentle spice make this Velveeta and Rotel Dip recipe a must-have for any gathering—be it game day, movie night, or holiday festivity. Plus, it’s gluten-free, allowing everyone to indulge without a second thought. Whether you serve it with crunchy tortilla chips or as a topping for nachos, you’re sure to spark joy and keep the snack table buzzing. Are you ready to make a dip that will have everyone asking for the recipe? Let’s dive in!

Why is this dip so irresistible?

Simplicity at its finest: With only three ingredients, this Velveeta and Rotel Dip comes together effortlessly, allowing you to whip it up in just 20 minutes.

Mouthwatering flavor: The combination of creamy Velveeta and zesty Rotel delivers a delicious kick that keeps everyone coming back for more.

Versatile serving options: Whether you pair it with tortilla chips, crunchy veggies, or pour it over nachos, this dip is the perfect companion for any occasion.

Crowd-pleaser: Ideal for game days, movie nights, or holiday gatherings, you’ll love how it brings people together around the snack table.

Make-ahead magic: Prepare it in advance and warm it up when guests arrive, just like with my Korean Steak Sandwich. Convenience has never been tastier!

Velveeta and Rotel Dip Ingredients

For the Dip
Velveeta Cheese – Cut into cubes for quicker melting and that ultimate creamy texture.
Rotel Tomatoes & Chilies – Offers zest and spice; choose mild for a subtle kick or hot for an adventurous burst!
Ground Hamburger – Adds richness; swap for ground turkey or spicy sausage if you prefer a lighter option.

Dive into this Velveeta and Rotel Dip recipe, and let its delightful flavors elevate your next gathering!

Step‑by‑Step Instructions for Velveeta and Rotel Dip Recipe

Step 1: Brown the Hamburger
Begin by heating a large skillet over medium heat. Once the skillet is hot, add the ground hamburger and cook for about 5–7 minutes, stirring occasionally, until it’s browned and no longer pink inside. Use a spatula to break it into smaller pieces as it cooks. Drain any excess fat to keep your dip from becoming too greasy.

Step 2: Prep the Velveeta
While the hamburger is cooking, prepare the Velveeta cheese by cutting it into 1-inch cubes. This will help the cheese melt quicker and blend smoothly into the dip. Once your ground meat is browned and drained, reduce the heat to low to ensure a gentle melting process for the cheese.

Step 3: Combine Ingredients
With the heat on low, add the cubed Velveeta cheese and the entire can of Rotel, including the liquid, into the skillet with the hamburger. Stir continuously for about 5–7 minutes, allowing the cheese to melt completely. You’ll know it’s done when the mixture is smooth and creamy, with no visible chunks of cheese left.

Step 4: Serve
Once your Velveeta and Rotel Dip is perfectly melted and combined, transfer it to a serving dish or a slow cooker set on “warm” to keep it hot. Enjoy this delectable dip with tortilla chips, crunchy vegetables, or even over nachos for a delightful snack that everyone will rave about.

How to Store and Freeze Velveeta and Rotel Dip

Fridge: Store leftover Velveeta and Rotel Dip in an airtight container for up to 4 days. Just reheat gently, stirring to regain that creamy texture.

Freezer: Freeze the dip in individual portions in airtight freezer bags or containers for up to 2 months. Label with the date for easy tracking.

Reheating: When ready to enjoy your frozen dip, thaw overnight in the fridge. Reheat on low heat, stirring occasionally, and add a splash of milk or Rotel liquid if needed.

Room Temperature: Avoid leaving the dip out at room temperature for more than 2 hours to ensure food safety and keep it delicious!

Expert Tips for Velveeta and Rotel Dip

  • Stir Constantly: Make sure to stir continuously while melting the cheese to prevent it from sticking or burning at the bottom of the skillet.

  • Adjust Consistency: If the dip thickens too much after cooling, add a splash of milk or Rotel liquid when reheating to bring it back to that creamy texture.

  • Choose Your Spice: Use the mild Rotel if cooking for a crowd that prefers less heat; the hot variety can easily overwhelm the dip if not everyone enjoys spice.

  • Proper Storage: Store any leftover Velveeta and Rotel Dip in an airtight container in the fridge for up to 4 days, or freeze portions for up to 2 months.

  • Reheat Smartly: Reheat in the microwave or on low heat on the stove, stirring frequently for a smooth consistency when enjoying leftovers.

Make Ahead Options

These Velveeta and Rotel Dip recipe preparations are perfect for busy cooks looking to save time! You can brown the ground hamburger and refrigerate it in an airtight container for up to 3 days. Additionally, you can chop the Velveeta cheese into cubes and store them in the fridge for up to 24 hours. When you’re ready to serve, simply reheat the ground meat gently in a skillet, add the cubed Velveeta and Rotel (including liquid), then stir continuously until melted and smooth, just like the fresh batch. This way, you ensure that the dip remains just as delicious and creamy, minimizing your prep time on the day of your gathering!

What to Serve with Velveeta and Rotel Dip

Pairing this creamy gem with the right sides will elevate your snack game to new heights.

  • Tortilla Chips: The classic choice! Their crispy texture perfectly contrasts the creamy dip, making each bite fun and satisfying.

  • Crunchy Veggies: Carrots, celery, and bell peppers add a vibrant crunch, offering a fresh contrast to the richness of the dip while keeping things light.

  • Nachos: Layer your favorite tortilla chips with Velveeta and Rotel Dip, sprinkle with cheese, and bake until bubbly for an indulgent twist that will leave everyone reaching for seconds.

  • Baked Potatoes: Drizzle this warm dip over fluffy baked potatoes for a comforting dish that’s both hearty and delectable.

  • Savory Sausage Rolls: The rich sausage encased in flaky pastry pairs beautifully with the zesty dip, creating a delightful bite that guests will adore.

  • Cold Beer or Cider: A refreshing beverage complements the richness of the dip, balancing the warmth and spices with something cool and crisp.

  • Chocolate Chip Cookies: For a sweet finish, serve warm cookies nearby! The contrasting flavors of sweet and savory make for a delightful snacking experience.

Velveeta and Rotel Dip Recipe Variations

Invite your taste buds on an exciting journey as you customize this delectable dip to suit your cravings!

  • Turkey Swap: Use ground turkey in place of hamburger for a lighter, leaner dip that still packs flavor. The tender turkey complements the cheese beautifully.

  • Spicy Sausage: For a daring twist, swap in spicy sausage instead of ground beef. This adds a flavor punch that will awaken your taste buds and keep everyone guessing!

  • Veggie-Friendly: Make it vegetarian by removing the meat entirely, using black beans for added protein and fiber without sacrificing richness.

  • Bread Bowl: Serve your dip in a warm, hollowed-out bread bowl for a fun presentation. The crusty bread complements the creamy dip perfectly and is great for dipping!

  • Nacho Delight: Transform your Velveeta and Rotel Dip into a nacho topping by spooning it over crispy tortilla chips and baking until golden and bubbly, just like my Smoky Cheddar Mac.

  • Fresh Garnishes: Elevate your dip with a sprinkle of freshly chopped cilantro, diced jalapeños, or smoked paprika on top for added layers of flavor and a pop of color.

  • Cheesy Surprise: Mix in some extra shredded cheese like cheddar or pepper jack for a gooey, melty indulgence that cheese lovers will adore.

Feel free to experiment and create a version that speaks to your heart (and stomach)! Enjoy every moment around the snack table, and don’t forget to check out my recipe for Cheese Roll Ups for another delightful treat!

Velveeta and Rotel Dip Recipe FAQs

What type of Velveeta cheese should I use?
Use regular Velveeta cheese for the best creamy texture. Avoid using light versions, as they may not melt as smoothly. I recommend cutting the cheese into 1-inch cubes before adding it to the skillet to speed up the melting process.

How long can I store leftover Velveeta and Rotel Dip?
You can store leftover dip in an airtight container in the fridge for up to 4 days. Just make sure it’s completely cooled before sealing. When you’re ready to enjoy it again, simply reheat on low heat, stirring until smooth.

Can I freeze Velveeta and Rotel Dip?
Absolutely! Freeze the dip in individual portions using airtight freezer bags or containers for up to 2 months. When you thaw it, place it in the fridge overnight, and then gently reheat on low heat. If it seems thick, stir in a splash of milk or Rotel liquid to restore the creamy texture.

How can I adjust the spice level in the dip?
To control the heat, choose the mild or original Rotel if you expect sensitive palates. If you want more spice, go for the hot Rotel variety. You can also add fresh jalapeños or hot sauce directly to the dip to customize the kick to your liking.

What if my dip is too thick after refrigerating?
If the dip thickens too much after cooling, don’t worry! Simply stir in a splash of milk or a bit of Rotel liquid while reheating the dip. This will help restore its creamy consistency, and it will taste just as delicious as when it was freshly made.

Is this dip safe for people with gluten allergies?
Yes! The Velveeta and Rotel Dip is gluten-free, making it a great option for gluten-sensitive guests. However, always double-check the labels of the ingredients, especially if using variations of the Rotel product or serving with specific chips or dippers, to ensure they meet your dietary needs.

Velveeta and Rotel Dip Recipe

Creamy Velveeta and Rotel Dip Recipe for Ultimate Snacking

This Velveeta and Rotel Dip is a creamy, spicy appetizer perfect for any occasion.
Prep Time 10 minutes
Cook Time 10 minutes
Total Time 20 minutes
Servings: 6 servings
Course: Appetizer
Calories: 250

Ingredients
  

For the Dip
  • 16 oz Velveeta Cheese Cut into cubes for quicker melting.
  • 10 oz Rotel Tomatoes & Chilies Choose mild or hot based on preference.
  • 1 lb Ground Hamburger Can swap for ground turkey or spicy sausage.

Equipment

  • large skillet

Method
 

Step-by-Step Instructions
  1. Heat a large skillet over medium heat and brown the ground hamburger for 5–7 minutes.
  2. Cut Velveeta cheese into 1-inch cubes while hamburger is cooking.
  3. Add cubed Velveeta and Rotel to the skillet with Hamburger; stir for 5–7 minutes until smooth.
  4. Transfer to a serving dish or slow cooker and enjoy with tortilla chips or veggies.

Nutrition

Serving: 1cupCalories: 250kcalCarbohydrates: 10gProtein: 10gFat: 20gSaturated Fat: 10gCholesterol: 50mgSodium: 800mgPotassium: 250mgFiber: 1gSugar: 2gVitamin A: 500IUVitamin C: 5mgCalcium: 200mgIron: 1mg

Notes

Perfect for game days, movie nights, or holiday gatherings. Store leftovers in the fridge for up to 4 days.

Tried this recipe?

Let us know how it was!

Creamy Cottage Cheese Pizza Recipe for Ultimate Family Nights

Late-night cravings can sometimes spark an unexpected culinary adventure, right in your own kitchen. Have you ever found yourself rummaging for something delicious, only to realize you have cottage cheese waiting to take center stage? This Cottage Cheese Pizza Recipe invites you to create a wholesome delight that not only satisfies those pizza cravings but also brings a twist of nutrition to the table. With its low-carb crust and customizable toppings, it’s a fantastic option for busy weeknights or family movie nights. Plus, it’s a great way to sneak in some protein and veggies without anyone noticing! So, are you ready to discover how easy and fun it can be to whip up your own delicious pizza masterpiece?

Why Choose Cottage Cheese Pizza?

Healthy Twist: This Cottage Cheese Pizza gives you the real pizza experience without the guilt, being low-carb and packed with protein.

Customization Galore: With endless topping options, everyone in the family can personalize their slice. Add your favorite veggies or even leftover meats for a unique twist.

Quick & Easy: Perfect for busy weeknights, you can have this satisfying meal ready in just 30 minutes! Pair it with a refreshing side salad for a complete dinner.

Crowd-Pleaser: Whether it’s game night or a casual gathering, everyone will love this flavorful pizza, making it a go-to for family fun!

Versatile Ingredients: Use ingredients you already have at home, or consider a fun variation by adding colorful toppings, much like my Cheeseburger Pockets Snack to elevate the flavors even more!

Cottage Cheese Pizza Ingredients

• Get ready for an easy and healthy meal everyone will love!

For the Pizza Base

  • Cottage Cheese – Infuses creaminess and protein into your pizza; feel free to swap for low-fat if desired.
  • Pizza Dough – The foundation of your pizza; whether homemade or store-bought, ensure it’s fresh for the best results.
  • Olive Oil – Drizzled for added flavor and moisture; opt for extra virgin for a punch of aroma.

For the Toppings

  • Shredded Mozzarella Cheese – The star ingredient for that melty goodness; whole milk mozzarella is highly recommended for perfect texture.
  • Favorite Toppings – Customize to your heart’s desire with bell peppers, pepperoni, or whatever strikes your fancy!
  • Italian Seasoning – Adds an authentic Italian flair to your Cottage Cheese Pizza; a little goes a long way in flavor enhancement.

Bring your family together over this delightful Cottage Cheese Pizza Recipe and create a masterpiece that’s both nutritious and satisfying!

Step‑by‑Step Instructions for Cottage Cheese Pizza Recipe

Step 1: Preheat the Oven
Begin by preheating your oven to a sizzling 475°F (245°C). This high temperature is crucial for achieving that crispy crust we all adore. While the oven heats up, gather your pizza dough and let it come to room temperature, making it easier to roll out later.

Step 2: Prepare the Dough
On a clean, floured surface, roll out your pizza dough to about half an inch thick. Use a rolling pin to create an even base, ensuring not to overwork the dough. As you roll, you’ll achieve a beautiful, smooth texture that’s ready to hold all those delicious toppings.

Step 3: Mix the Cottage Cheese
In a mixing bowl, combine your creamy cottage cheese with Italian seasoning. Stir well to blend the flavors, ensuring every bite is filled with that savory Italian flair. Once mixed, carefully spread the cottage cheese mixture evenly over your rolled-out dough, letting it peek through the edges.

Step 4: Add the Mozzarella
Generously layer shredded mozzarella cheese over the cottage cheese base you just created. Watch as the cheese starts to glisten, creating a mouthwatering layer that will melt delightfully during baking. Don’t shy away from adding your favorite toppings on this cheesy canvas—bell peppers, pepperoni, or whatever your heart desires!

Step 5: Bake the Pizza
Place your cottage cheese pizza in the preheated oven and bake for 12-15 minutes. Keep an eye on it, and look for that golden brown crust and bubbling cheese. This is that moment when your kitchen fills with irresistible aromas, signaling that dinner is almost ready!

Step 6: Cool and Serve
Once baked, remove the pizza from the oven and let it cool slightly on a cutting board. This brief cooling period ensures you won’t burn your mouth on those delicious, cheesy pieces. Slice into wedges, and serve the piping hot Cottage Cheese Pizza, bringing a smile to the faces gathered around your table!

Cottage Cheese Pizza Recipe Variations

Feel free to let your culinary creativity shine by customizing this delightful Cottage Cheese Pizza to suit your taste buds!

  • Veggie-Packed: Add colorful veggies like spinach, mushrooms, or zucchini for a nutritious boost. The vegetable medley not only enhances flavor but also turns your pizza into a vibrant feast!

  • Spicy Kick: Sprinkle red pepper flakes or drizzle sriracha over the top before baking for an exciting heat. This little addition makes every bite a delightful adventure, perfect for those who crave a spicy twist.

  • Herb-Infused: Instead of Italian seasoning, try fresh herbs like basil and oregano. This brings a freshness that will transport you straight to the Italian countryside, making your pizza even more aromatic.

  • Cheesy Delight: Mix in provolone or gouda with the mozzarella for a richer cheese flavor. Combining different cheeses creates a melty masterpiece that’s packed with deliciousness, which is sure to enchant any cheese lover.

  • Gluten-Free Option: Swap traditional dough for a gluten-free crust or use alternative flours like almond or coconut. This way, everyone can enjoy a slice, regardless of dietary restrictions, making your pizza night inclusive!

  • Barbecue Twist: Replace the standard sauce with BBQ sauce, and top with diced chicken and cilantro. This gives you a deliciously tangy flavor that’s a fun twist on traditional pizza, perfect for summer gatherings.

  • Meat Lovers: Add pepperoni, sausage, or bacon for those who love a hearty pizza. Layering these proteins results in a savory bite that will satisfy even the hungriest of eaters.

  • Mediterranean Flair: Top with feta cheese, olives, and artichokes for a Mediterranean-inspired delight. This combination adds a unique flavor profile that’s sure to impress and takes your pizza global!

Remember, the world of pizza is your oyster. With ideas like these and the option to swap ingredients, you can create something special each time. And if you’re looking for more inspiration for family-friendly meals, try my Cheddar Mac Cheese or these delicious Strawberry Cheesecake Bars for dessert!

Make Ahead Options

These Cottage Cheese Pizza preparations are a game-changer for busy weeknights! You can prepare the crust and store it for up to 3 days in the refrigerator. Just roll out your pizza dough and place it on a baking sheet lined with parchment paper, lightly cover it, and refrigerate until you’re ready to use. The cottage cheese mix can be prepared up to 24 hours in advance—just mix the cottage cheese with Italian seasoning and store it in an airtight container in the fridge to keep it fresh. When you’re ready to pop the pizza in the oven, spread the prepared cottage cheese mixture on the dough, layer your mozzarella and toppings, then bake as per the original instructions for a truly delicious, homemade meal without the hassle!

What to Serve with Cottage Cheese Pizza

Bring your family together with scrumptious sides that perfectly complement this unique take on a pizza classic.

  • Garlic Bread: The warmth and crunch of garlic bread are a perfect accompaniment, allowing you to swipe up the last bites of cheesy goodness.

  • Mixed Green Salad: A refreshing medley of greens can balance the richness of the pizza while adding vibrant colors and nutrients to your meal.

  • Roasted Vegetables: Seasoned roasted veggies provide caramelized flavors that enhance your Cottage Cheese Pizza, adding a delightful depth to your dinner.

  • Pasta Salad: A tangy pasta salad offers a contrasting texture and flavor, transforming your meal into an Italian-inspired feast.

  • Caesar Salad: The creamy dressing and crunchy croutons in a Caesar salad create a savory, satisfying side that pairs beautifully with your pizza.

  • Olive Tapenade: This spread introduces a burst of Mediterranean flavor, perfect for smearing on leftover crusts or adding to your veggie platter.

  • Chardonnay or Zinfandel: A chilled glass of Chardonnay or a fruity Zinfandel can elevate your pizza night, enhancing the overall flavors of your meal.

  • Fruit Sorbet: For dessert, lighten up the meal with a refreshing fruit sorbet, cleansing the palate after the savory pizza experience.

How to Store and Freeze Cottage Cheese Pizza

Fridge: Store leftover Cottage Cheese Pizza in an airtight container for up to 3 days. This helps maintain its freshness and flavor.

Freezer: If you need to keep it longer, freeze slices wrapped tightly in plastic wrap or aluminum foil for up to 2 months. This prevents freezer burn.

Reheating: For best results, reheat the pizza in the oven at 350°F (175°C) for about 10-15 minutes, or until warmed through and crispy again.

Room Temperature: Ideally, avoid leaving the pizza out for more than 2 hours to ensure food safety and quality.

Expert Tips for Cottage Cheese Pizza

  • Crispy Crust Secret: Bake the empty rolled-out dough for 5-7 minutes before adding any toppings to achieve a perfectly crispy crust.
  • Flavor Boost: Experiment with different sauces like pesto or barbecue to elevate your Cottage Cheese Pizza with unique and exciting flavors.
  • Fresh Touch: Add fresh herbs like basil or cilantro after baking to give your pizza a vibrant finish and enhance its freshness.
  • Gluten-Free Option: If you need a gluten-free version, swap regular flour with almond flour or use a pre-made gluten-free pizza crust for great results.
  • Cheese Choices: While cottage cheese is key, don’t hesitate to mix in your favorite cheeses for richer flavor without sacrificing creaminess.

Cottage Cheese Pizza Recipe FAQs

What type of cottage cheese should I use?
Absolutely! Opt for regular or low-fat cottage cheese for that creamy texture. If you prefer a lighter option, low-fat works beautifully without sacrificing flavor. Just be sure it’s fresh—check for any dark spots or off odor!

How long does leftover Cottage Cheese Pizza last in the fridge?
Store any leftover pizza in an airtight container in the fridge for up to 3 days. When you’re ready to enjoy it again, reheat in the oven at 350°F (175°C) for about 10-15 minutes to restore that delightful crispiness.

Can I freeze Cottage Cheese Pizza?
Yes, you can! For longer storage, wrap individual slices tightly in plastic wrap or aluminum foil and place them in a freezer-safe bag. It stays delicious for up to 2 months. When you’re ready to eat, thaw in the fridge overnight, then reheat in the oven at 350°F (175°C) until warmed through.

What if my pizza dough is too sticky?
Very often, dough can be tricky! If it feels sticky, sprinkle a bit of flour on your working surface and your hands to make rolling easier. If needed, add a touch more flour to the dough itself, but be careful not to overdo it as this can affect the texture!

Can dogs eat cottage cheese?
Yes, cottage cheese can be a healthy snack for dogs in moderation as it provides protein and calcium. However, always consult your vet first to ensure your furry friend isn’t lactose intolerant, as some dogs may be sensitive to dairy.

How can I boost the flavor of my Cottage Cheese Pizza?
To elevate the flavor profile, I recommend adding in fresh herbs like basil or cilantro after baking for a burst of freshness. You can also sprinkle red pepper flakes for a kick or drizzle some balsamic glaze for a touch of sweetness. Experiment to find the perfect combo for your family!

Cottage Cheese Pizza Recipe

Creamy Cottage Cheese Pizza Recipe for Ultimate Family Nights

This Cottage Cheese Pizza Recipe is a healthy, low-carb option that satisfies family pizza cravings with deliciousness and nutrition.
Prep Time 15 minutes
Cook Time 15 minutes
Total Time 30 minutes
Servings: 4 slices
Course: Dinner
Cuisine: Italian
Calories: 280

Ingredients
  

For the Pizza Base
  • 1 cup Cottage Cheese Feel free to swap for low-fat if desired.
  • 1 package Pizza Dough Ensure it’s fresh for the best results.
  • 2 tablespoons Olive Oil Opt for extra virgin for a punch of aroma.
For the Toppings
  • 1 cup Shredded Mozzarella Cheese Whole milk mozzarella is highly recommended.
  • 1 cup Favorite Toppings Customize with bell peppers, pepperoni, or your choice.
  • 1 teaspoon Italian Seasoning A little goes a long way in flavor enhancement.

Equipment

  • Oven
  • Rolling Pin
  • Mixing Bowl
  • Baking Sheet
  • cutting board

Method
 

Step-by-Step Instructions
  1. Preheat your oven to a sizzling 475°F (245°C).
  2. Roll out your pizza dough to about half an inch thick on a floured surface.
  3. In a mixing bowl, combine cottage cheese with Italian seasoning and spread it over the dough.
  4. Layer shredded mozzarella cheese generously over the cottage cheese base.
  5. Bake for 12-15 minutes until the crust is golden brown and cheese is bubbling.
  6. Allow to cool slightly before slicing and serve hot.

Nutrition

Serving: 1sliceCalories: 280kcalCarbohydrates: 20gProtein: 15gFat: 12gSaturated Fat: 5gPolyunsaturated Fat: 0.5gMonounsaturated Fat: 6gCholesterol: 30mgSodium: 400mgPotassium: 250mgFiber: 2gSugar: 3gVitamin A: 200IUVitamin C: 2mgCalcium: 250mgIron: 1.5mg

Notes

For an extra crispy crust, bake the empty rolled-out dough for 5-7 minutes before adding toppings. Store leftovers in an airtight container for up to 3 days.

Tried this recipe?

Let us know how it was!

Welsh Anglesey Eggs: Comforting Vegetarian Delight to Savor

As I savored the delightful blend of flavors, I found myself transported to the lush landscapes of Wales, where Welsh Anglesey Eggs originated. This hearty vegetarian dish is a comforting combination of creamy mashed potatoes, sweet leeks, and rich cheese, all beautifully crowned with perfectly halved hard-boiled eggs. Whether you’re looking for a quick weeknight supper or a tempting brunch dish, this recipe offers the best of both worlds—a satisfying meal that’s easy to whip up and sure to impress. With roots dating back to medieval times, it celebrates humble ingredients, transforming them into a luscious experience that connects us to history and the love of home-cooked goodness. Ready to dive into the magic of Welsh cuisine? Let’s bring Anglesey Eggs to your table!

Why Choose Welsh Anglesey Eggs?

Comforting and satisfying, this dish brings a taste of Wales to your home.
Rich flavors from creamy cheese and tender leeks create a delightful experience in every bite.
Easy to prepare, it’s perfect for both busy weeknights and leisurely brunches, appealing to the whole family.
Versatile options allow you to experiment with seasonal veggies or different kinds of cheese, ensuring you can make it your own!
Whether served hot from the oven or cold as leftovers, the delicious combination makes it a go-to recipe. Try serving it alongside a refreshing green salad for a complete meal—your taste buds will thank you!

Welsh Anglesey Eggs Ingredients

For the Egg Layer
5 hard boiled eggs – Provides protein and richness to the dish. Substitution Note: Can use fewer eggs for a lighter version.

For the Potato Base
1.5 pounds potatoes – Acts as the base, creating a filling and hearty texture. Substitution Note: Yukon Gold or Russet may be used for flavor variation.
1/2 cup butter – Adds richness and flavor to the mashed potatoes and the cheese sauce. Substitution Note: Olive oil can be used for a lighter option.
2 cups warm milk – Helps create a creamy texture in the mashed potatoes and cheese sauce. Substitution Note: Any plant-based milk can serve as an alternative for dairy-free options.

For the Leek Mixture
4 large leeks – Contributes a mild, sweet onion flavor, enhancing the dish. Prep Note: Thoroughly wash as leeks often contain sand between layers.

For the Cheese Sauce
2 tbsp flour – Thickens the cheese sauce for a creamy consistency. Substitution Note: Use cornstarch or gluten-free flour for gluten-free needs.
1/2 tsp nutmeg – Adds warmth and depth to the flavor profile. Optional: Freshly grated nutmeg offers superior flavor.
6 oz grated sharp Cheddar cheese – Provides tanginess and a perfect topping for richness. Substitution Note: Gruyère or any sharp cheese can be used for variation.

For Seasoning
Salt, pepper, thyme, and basil – Enhance the overall flavor of the dish according to taste.

Each ingredient plays a subtle yet vital role in crafting the rich and comforting experience that is Welsh Anglesey Eggs!

Step‑by‑Step Instructions for Welsh Anglesey Eggs

Step 1: Prepare Potatoes
Start by bringing a large pot of salted water to a boil. Add 1.5 pounds of peeled potatoes and cook for 10–15 minutes until tender; a fork should easily pierce them. Once done, drain the potatoes thoroughly and mash them in a large bowl with half a cup of butter, seasoning with salt and pepper to taste. This creamy base will be the heart of your Welsh Anglesey Eggs.

Step 2: Boil Eggs
In a separate pot, add 5 eggs and cover them with cold water. Bring the water to a rolling boil, then reduce heat and let simmer for 8–10 minutes. Once cooked, transfer the eggs to an ice bath to cool for easier peeling. Once cooled, gently peel the eggs and halve them lengthwise for the stunning presentation atop your dish.

Step 3: Cook Leeks
While the eggs cool, prepare 4 large leeks by washing them thoroughly to remove any sand between the layers. In the same pot used for the potatoes, boil the leeks in salted water for 4–5 minutes until tender. Drain them well, and then mix the cooked leeks into the mashed potato mixture, ensuring a delicious combination that enhances your Welsh Anglesey Eggs.

Step 4: Make Cheese Sauce
In a medium saucepan, melt the remaining 1/4 cup of butter over medium heat. Once melted, whisk in 2 tablespoons of flour, cooking for about 1–2 minutes until bubbly. Gradually add in 2 cups of warm milk, whisking constantly until the mixture thickens and begins to bubble—this should take about 5 minutes. Stir in 1/2 teaspoon of nutmeg and 6 ounces of grated sharp Cheddar cheese until melting and creamy.

Step 5: Assemble
Preheat your oven to 375°F (190°C). In a greased baking dish, layer the creamy mashed potato and leek mixture evenly across the bottom. Arrange the halved eggs, cut-side up, on top of this layer. Pour the cheese sauce generously over the eggs, ensuring an even distribution. Finally, sprinkle the remaining cheese on top for a golden finish.

Step 6: Bake
With your Welsh Anglesey Eggs assembled, place the baking dish in the preheated oven. Bake for 20–25 minutes or until the top is bubbling and golden brown. Keep an eye on it during the last few minutes to achieve that irresistible crispy crust—your kitchen will smell heavenly as it finishes baking!

What to Serve with Welsh Anglesey Eggs

Imagine a cozy family gathering filled with the warmth of home-cooked delight, and you’ve got the perfect backdrop for enjoying Welsh Anglesey Eggs.

  • Mixed Green Salad: The crispness of fresh greens drizzled with a light vinaigrette complements the rich, creamy texture of the eggs, providing a refreshing balance.

  • Crusty Bread: A slice of warm, crusty bread or a baguette is ideal for scooping up the cheesy goodness, making each bite even more satisfying.

  • Roasted Veggies: Sweet and caramelized roasted root vegetables add earthy flavors and color to your table, enhancing the comfort of the dish.

  • Pickled Beets: Bright and tangy pickled beets provide a delightful contrast to the richness of Welsh Anglesey Eggs, adding a vibrant pop to your plate.

  • Herbed Quinoa: Fluffy quinoa sprinkled with fresh herbs introduces a nutty flavor that complements the dish beautifully, making it a wholesome side.

  • Sparkling Cider: A glass of chilled sparkling cider refreshes the palate while harmonizing with the creamy cheese sauce—perfect for elevating your meal!

Make Ahead Options

Welsh Anglesey Eggs are perfect for meal prep, making weeknight dinners hassle-free! You can prepare the mashed potatoes and leek mixture up to 24 hours in advance. Simply boil and mash the potatoes, then mix in the cooked leeks, and store in an airtight container in the fridge. For the cheese sauce, prepare it and allow it to cool before refrigerating for up to 3 days. When you’re ready to serve, layer the potato mixture in a baking dish, arrange the halved eggs on top, pour the cheese sauce, and sprinkle additional cheese before baking. This way, you’ll enjoy just as delicious a meal with minimal effort on the day of serving!

Expert Tips for Welsh Anglesey Eggs

  • Drain Well: Ensure potatoes are thoroughly drained to prevent a watery mash, which can weigh down your Welsh Anglesey Eggs.

  • Perfectly Boiled Eggs: Avoid overcooking the eggs. Set a timer for 8–10 minutes to achieve the perfect hard-boiled texture without a greenish yolk.

  • Herb Variation: Feel free to substitute thyme and basil for other fresh herbs like dill or parsley to suit your taste profile while enhancing the dish.

  • Creamy Cheese Sauce: Whisk constantly while adding the warm milk to prevent lumps in your cheese sauce, ensuring smooth richness for your Welsh Anglesey Eggs.

  • Experiment with Cheese: If you want new flavors, try mixing different cheeses such as Gruyère or Fontina for a unique twist on this classic recipe.

  • Bake Until Golden: Keep an eye on the baking process; the ideal Welsh Anglesey Eggs should develop a bubbly, golden crust—this signals deliciousness!

Welsh Anglesey Eggs Variations & Substitutions

Feel free to mix and match flavors and ingredients to create your perfect rendition of Welsh Anglesey Eggs!

  • Cheese Swap: Try swapping sharp Cheddar for Gruyère for a nutty, creamy taste that elevates the dish.

Savor the unique essence of each cheese while still keeping the dish true to its comforting roots.

  • Dairy-Free: Substitute milk with almond or oat milk and use vegan butter for a delightful dairy-free version.

This twist keeps the creamy texture without sacrificing flavor, making it friendly for those with dietary restrictions.

  • Seasonal Veggies: Add spinach or asparagus to the potato mixture for an extra pop of color and nutrition.

This not only enhances the dish but also embraces seasonal freshness—every bite will remind you of the vibrant seasons.

  • Herb Variations: Replace thyme and basil with fresh chives or dill for a refreshing take that brightens the flavors.

These herbs lend a lovely aromatic quality that complements the richness of the cheese sauce remarkably well.

  • Texture Boost: Incorporate crispy breadcrumbs on top before baking for a delicious crunchy texture.

Enjoy the contrast of crunch against the creamy base; it adds an exciting layer to your meal.

  • Hot & Spicy: Add a pinch of red pepper flakes or a dash of hot sauce to the cheese sauce for a subtle heat.

This approach will thrill those who love a bit of spice, making the comforting flavors of the dish even more exciting.

  • Protein Twist: For non-vegetarian enthusiasts, fold in some cooked crumbled bacon or sausage before baking for a meaty flavor.

This addition takes the dish from hearty to truly indulgent, perfect for those who adore savory flavors.

By experimenting with these variations, your Welsh Anglesey Eggs can become a delightful family favorite, rich in history and delicious creativity! For more delightful recipe ideas, check out my easy-to-make homemade bread recipes or explore classic potato dishes that will warm your heart.

How to Store and Freeze Welsh Anglesey Eggs

Fridge: Store leftover Welsh Anglesey Eggs in an airtight container for up to 3 days. This ensures freshness and prevents drying out.

Freezer: For longer storage, freeze portions in airtight containers or heavy-duty freezer bags for up to 2 months. Thaw in the fridge overnight before reheating.

Reheating: When ready to enjoy, reheat in the oven at 350°F (175°C) for about 20 minutes or until heated through. This preserves the creamy texture and flavor.

Room Temperature: Do not leave Welsh Anglesey Eggs at room temperature for more than 2 hours to avoid food safety issues.

Welsh Anglesey Eggs Recipe FAQs

How do I select the right potatoes for Welsh Anglesey Eggs?
Absolutely! When choosing potatoes, opt for Yukon Gold or Russet varieties. Yukon Gold provides a buttery flavor and creaminess, while Russet offers fluffiness, both of which create the perfect texture for your dish.

What’s the best way to store leftover Welsh Anglesey Eggs?
Leftovers can be stored in an airtight container in the fridge for up to 3 days. This will keep them fresh and prevent them from drying out. If you’re planning to enjoy them later, it’s best to reheat them in the oven to maintain that fabulous texture and flavor.

Can I freeze Welsh Anglesey Eggs, and how?
Yes! To freeze, allow the dish to cool completely, then cut it into portions. Place each portion in airtight containers or freezer-safe bags, ensuring to remove as much air as possible. Welsh Anglesey Eggs can be frozen for up to 2 months. When ready to enjoy, thaw in the refrigerator overnight, then reheat in the oven at 350°F (175°C) for about 20 minutes until warmed through.

What should I do if my cheese sauce is lumpy?
Don’t worry! If your cheese sauce turns out lumpy, it’s likely due to not whisking enough while adding the warm milk. To fix it, you can use an immersion blender to smooth it out or strain it through a fine mesh sieve for a silky texture. Remember to whisk constantly when adding milk next time for that creamy consistency!

Are there any dietary considerations I should keep in mind for Welsh Anglesey Eggs?
Yes! Since this recipe contains eggs and dairy, it’s important to consider allergies. For a dairy-free variant, substitute regular milk with any plant-based milk and use non-dairy cheese. Additionally, if you’re serving this dish to pets, keep in mind that onions (like leeks) can be harmful to dogs, so it’s best to avoid sharing this delightful dish with them.

How can I enhance the flavor of my Welsh Anglesey Eggs?
Very easily! One great way to elevate the flavor is by sautéing the leeks in garlic butter instead of boiling them. This adds a rich, aromatic layer to the dish. You can also experiment with different cheeses like Gruyère or Parmesan for a unique twist, or add herbs like fresh dill for a delightful freshness.

Welsh Anglesey Eggs

Welsh Anglesey Eggs: Comforting Vegetarian Delight to Savor

Welsh Anglesey Eggs is a hearty vegetarian dish combining creamy mashed potatoes, leeks, cheese, and hard-boiled eggs.
Prep Time 30 minutes
Cook Time 25 minutes
Total Time 55 minutes
Servings: 4 servings
Course: Breakfast
Cuisine: Welsh
Calories: 400

Ingredients
  

For the Egg Layer
  • 5 pieces hard boiled eggs Can use fewer eggs for a lighter version.
For the Potato Base
  • 1.5 pounds potatoes Yukon Gold or Russet may be used for flavor variation.
  • 1/2 cup butter Olive oil can be used for a lighter option.
  • 2 cups warm milk Any plant-based milk can serve as an alternative for dairy-free options.
For the Leek Mixture
  • 4 large leeks Thoroughly wash as leeks often contain sand between layers.
For the Cheese Sauce
  • 2 tbsp flour Use cornstarch or gluten-free flour for gluten-free needs.
  • 1/2 tsp nutmeg Optional: Freshly grated nutmeg offers superior flavor.
  • 6 oz grated sharp Cheddar cheese Gruyère or any sharp cheese can be used for variation.
For Seasoning
  • salt
  • pepper
  • thyme
  • basil

Equipment

  • large pot
  • Medium saucepan
  • Baking dish

Method
 

Step-by-Step Instructions
  1. Start by bringing a large pot of salted water to a boil. Add 1.5 pounds of peeled potatoes and cook for 10–15 minutes until tender. Drain the potatoes thoroughly and mash them in a large bowl with half a cup of butter, seasoning with salt and pepper to taste.
  2. In a separate pot, add 5 eggs and cover them with cold water. Bring the water to a rolling boil, then reduce heat and let simmer for 8–10 minutes. Transfer the eggs to an ice bath to cool for easier peeling. Peel and halve the eggs lengthwise.
  3. While the eggs cool, wash 4 large leeks thoroughly to remove any sand. Boil the leeks in salted water for 4–5 minutes until tender. Drain and mix the leeks into the mashed potato mixture.
  4. In a medium saucepan, melt the remaining 1/4 cup of butter. Whisk in 2 tablespoons of flour, cooking for about 1–2 minutes. Gradually add in 2 cups of warm milk, whisking constantly until thickened. Stir in 1/2 teaspoon of nutmeg and 6 ounces of grated sharp Cheddar cheese until creamy.
  5. Preheat your oven to 375°F (190°C). In a greased baking dish, layer the creamy mashed potato and leek mixture. Arrange the halved eggs cut-side up on top. Pour the cheese sauce over the eggs and sprinkle the remaining cheese on top.
  6. Bake for 20–25 minutes or until the top is bubbling and golden brown.

Nutrition

Serving: 1servingCalories: 400kcalCarbohydrates: 30gProtein: 15gFat: 25gSaturated Fat: 15gPolyunsaturated Fat: 3gMonounsaturated Fat: 5gCholesterol: 200mgSodium: 600mgPotassium: 800mgFiber: 4gSugar: 2gVitamin A: 500IUVitamin C: 20mgCalcium: 300mgIron: 2mg

Notes

Ensure potatoes are thoroughly drained to prevent a watery mash. Avoid overcooking the eggs for perfect hard-boiled texture. Experiment with different cheeses for unique flavors.

Tried this recipe?

Let us know how it was!

Thanksgiving Crunchwrap: Your Leftover Feast in a Wrap

“Late-night cravings hit harder when there are leftover delights in the fridge, and I found myself staring at a mountain of post-Thanksgiving fare. That’s when the idea for the Thanksgiving Crunchwrap struck me—a clever and fun way to repurpose those delicious holiday leftovers into a handheld masterpiece! This recipe transforms traditional favorites like roasted turkey, creamy mashed potatoes, and tangy cranberry sauce into a crispy, satisfying meal that’s as easy to assemble as it is to devour. Not only is it a quick fix for busy weeknight dinners, but it’s also perfect for any holiday enthusiast looking to shake things up and reduce food waste. Curious how to create this portable feast? Keep reading to discover the magic behind this crunchy delight!”

Why is this Crunchwrap a Must-Try?

Simplicity: Whip this up in just minutes—perfect for post-holiday busy lives.
Flavor Explosion: Bursting with holiday favorites, each bite offers rich taste and satisfying crunch!
Customizable: Switch ingredients to suit your cravings or dietary needs—go veggie or try different proteins!
Crowd-Pleasing: Ideal for family meals or gatherings; everyone gets a taste of Thanksgiving in every wrap!
Waste Reduction: A delicious way to use leftovers, helping you minimize waste while creating something wonderful.
With these incredible reasons, the Thanksgiving Crunchwrap is sure to become a beloved classic in your household!

Thanksgiving Crunchwrap Ingredients

For the Wrap

  • Large Flour Tortillas – These serve as the perfect base; try whole wheat for added nutrients.
  • Leftover Mashed Potatoes – Adds creaminess and binds everything together; sweet potatoes provide a delightful twist.

For the Filling

  • Shredded Leftover Turkey – The main protein that makes each bite hearty; chicken is a great alternative if desired.
  • Leftover Green Beans – Offers a fresh crunch and vital nutrients; roasted brussels sprouts can add extra flavor.
  • Leftover Stuffing – Infuses the wrap with traditional flavors and textures; you can swap in quinoa for a gluten-free version.
  • Leftover Cranberry Sauce – Brings a sweet and tangy kick; fruit preserves can substitute if needed.

For the Melty Goodness

  • Shredded White Cheddar – Melts perfectly for that gooey goodness; Monterey Jack is a fantastic alternative for a different flavor profile.

For Serving

  • Gravy (warmed) – Elevates the whole dish with moisture and flavor; use vegetable broth for a lighter dip if preferred.

With these simple yet satisfying Thanksgiving Crunchwrap ingredients, you’re just moments away from transforming your holiday leftovers into a crunchy feast!

Step‑by‑Step Instructions for Thanksgiving Crunchwrap

Step 1: Prepare Fillings
Start by heating your leftover mashed potatoes in a microwave for about 1–2 minutes until hot and creamy. In a small saucepan, warm the gravy over low heat for about 5 minutes, stirring occasionally until just bubbling. These warm fillings will become the heart of your Thanksgiving Crunchwrap, ensuring each bite is rich and flavorful.

Step 2: Assemble Wraps
Lay out a large flour tortilla on a clean surface and spoon a generous portion of warm mashed potatoes in the center. Next, layer in shredded leftover turkey, fresh green beans, a dollop of cranberry sauce, a scoop of stuffing, and a handful of shredded white cheddar. Keep the fillings centered, so the edges remain clear for folding later.

Step 3: Fold & Cook
Carefully fold the tortilla into a wrap by bringing the edges towards the center, creating a pocket for the fillings. Preheat a non-stick skillet over medium heat and lightly grease if needed. Place the wrapped crunchwrap seam-side down in the skillet and cook for 3–4 minutes until golden brown and crispy. Flip it over and brown the other side for another 3–4 minutes, ensuring the cheese melts within.

Step 4: Serve
Once your Thanksgiving Crunchwrap is perfectly crispy and golden, remove it from the skillet and let it cool for a minute. Cut it in half to reveal the delicious layers inside. Serve immediately with warm gravy on the side for dipping, making this handheld meal a delightful post-Thanksgiving treat.

What to Serve with Thanksgiving Crunchwrap

Transform your Thanksgiving leftovers into a delightful feast that doesn’t just fill your belly but also warms your heart.

  • Creamy Mashed Potatoes: Elevate your meal as a classic side that complements the crunchwrap—rich and satisfying, just like your grandma made!
  • Buttery Corn on the Cob: Sweet and juicy, the freshness of corn adds a pop of color and a juicy counterpart to the savory crunchwrap.
  • Tangy Cranberry Relish: A dollop of this vibrant sauce brings out the flavors of the turkey, creating a delicious contrast with each bite.
  • Fresh Green Salad: Crisp greens with a light vinaigrette introduce a refreshing touch, balancing the hearty crunch of the wrap beautifully.
  • Sweet Potato Fries: Their natural sweetness and crispy texture mimic the goodness of the crunchwrap while adding a fun twist to your spread.
  • Homemade Pumpkin Bread: End on a sweet note with this lovely seasonal treat, embodying the essence of autumn and making it an instant favorite.
  • Warm Apple Cider: Cozy up with a glass of spiced cider, enhancing your meal experience with comforting warmth and seasonal flavors.
  • Chocolate Pudding Cups: Dive into these silky desserts for a satisfied sweet tooth, adding a rich finish to your fulfilling meal.

Each of these pairings enhances your Thanksgiving Crunchwrap experience, making your table feel warm and inviting!

Expert Tips for Thanksgiving Crunchwrap

Watch the Moisture: Ensure fillings are not too wet; excess moisture can lead to a soggy wrap.

Medium Heat Magic: Cook on medium heat to achieve golden-brown crunch without burning, allowing cheese to melt perfectly.

Layering Love: Keep a good balance of fillings to ensure even distribution and prevent bursting while cooking.

Fold Tight: Make sure you fold the tortilla tightly. A secure wrap minimizes spillage and enhances your Thanksgiving Crunchwrap experience.

Experiment Freely: Feel free to mix and match ingredients based on your leftover treasures, enhancing creativity while reducing waste.

Make Ahead Options

These Thanksgiving Crunchwraps are fantastic for meal prep, allowing you to enjoy holiday flavors without the fuss! You can prepare the filling components, like mashed potatoes, turkey, and stuffing, up to 3 days in advance and store them in airtight containers in the refrigerator. Simply heat the fillings before assembly to maintain their delicious flavors and textures. For optimal quality, keep the mashed potatoes a bit thicker to prevent excess moisture in the wrap. When you’re ready to enjoy your Thanksgiving Crunchwraps, layer the warmed fillings onto tortillas, fold them up, and cook them for about 6–8 minutes until golden brown. This way, you’ll save time and enjoy a scrumptious meal with minimal effort!

Thanksgiving Crunchwrap Variations & Substitutions

Feel free to get creative with this recipe and use whatever leftover treasures you have on hand!

  • Dairy-Free: Replace cheese with cashew cream or a dairy-free cheese alternative for creamy goodness without lactose.

  • Vegetarian Delight: Omit the turkey and bulk up your wrap with additional veggies like roasted sweet potatoes or sautéed mushrooms—deliciously hearty!

  • Spicy Twist: Add sliced jalapeños or a sprinkle of chili flakes to crank up the heat and give your crunchwrap a zesty kick.

  • Add Greens: Toss in some fresh spinach or arugula for a burst of color and extra nutrients; it adds a delightful crunch too!

  • Herb-Infused: Mix in fresh herbs like thyme or rosemary into the mashed potatoes for a fragrant twist that elevates the classic flavor.

  • Mexican Flair: Substitute shredded turkey with seasoned ground beef or shredded beef, and switch cranberry sauce for a zesty salsa to create a fusion feast.

  • Nutty Crunch: Add a handful of toasted nuts like pecans or walnuts for an unexpected crunch that pairs perfectly with the creamy fillings.

  • Quinoa Swap: If you’re looking for a gluten-free alternative, replace stuffing with quinoa or even a flavorful fried rice for an interesting texture and flavor profile.

With these variations, your Thanksgiving Crunchwrap can become a new favorite that reflects your personal tastes and creativity!

Storage Tips for Thanksgiving Crunchwrap

  • Fridge: Store any leftover Thanksgiving Crunchwraps in an airtight container for up to 3 days. This keeps them fresh and ready for your next meal.
  • Freezer: If you want to freeze the crunchwraps, ensure they are tightly wrapped in foil or plastic wrap. They can be frozen for up to 2 months for long-term storage.
  • Reheating: For the best taste and texture, reheat in a skillet over medium heat for about 5 minutes per side, or until heated through and crispy. Avoid the microwave, as it can make the wrap soggy.
  • Assembling Fresh: If you have leftover fillings but want to enjoy a fresh crunchwrap later, consider storing the components separately and assembling them just before cooking. This keeps everything crispy and delightful!

Thanksgiving Crunchwrap Recipe FAQs

What type of tortillas should I use for the Thanksgiving Crunchwrap?
You can use large flour tortillas as your base, but feel free to experiment! Whole wheat tortillas offer added nutrients, while corn tortillas will bring a unique flavor profile. Just ensure they are pliable enough to wrap around the delicious fillings.

How should I store leftover Thanksgiving Crunchwraps?
Store any leftover crunchwraps in an airtight container in the refrigerator for up to 3 days. This will help maintain their freshness and avoid sogginess. To reheat, place the crunchwrap in a skillet over medium heat for about 5 minutes per side until crispy and heated through.

Can I freeze Thanksgiving Crunchwraps?
Absolutely! You can freeze tightly wrapped crunchwraps in either foil or plastic wrap for up to 2 months. When you’re ready to enjoy, simply thaw them in the refrigerator overnight and reheat in a skillet for the best texture and flavor.

What can I do if my crunchwraps turn out soggy?
Sogginess often arises from too much moisture in the fillings. To avoid this, ensure your mashed potatoes and other ingredients are warm but not overly wet when assembling. If they do turn out soggy, try briefly baking them in the oven at 375°F for 5-10 minutes to crisp up the outside.

Are there any dietary restrictions I should consider for this recipe?
Yes! If you have dietary concerns, you can easily adapt this Thanksgiving Crunchwrap. For a vegetarian version, simply omit the turkey and use extra veggies or beans for protein. Additionally, ensure that any store-bought ingredients like gravies or sauces are free from allergens, such as gluten or dairy, if necessary.

How can I make my crunchwrap more flavorful?
To enhance the flavor, consider adding spices to your fillings, such as garlic powder or paprika, or using a spicy cheese like pepper jack. You can also add layers of sautéed spinach or roasted veggies for extra taste!

Thanksgiving Crunchwrap

Thanksgiving Crunchwrap: Your Leftover Feast in a Wrap

Thanksgiving Crunchwrap transforms holiday leftovers into a delicious handheld meal, perfect for late-night cravings or quick dinners.
Prep Time 10 minutes
Cook Time 8 minutes
Total Time 18 minutes
Servings: 4 wraps
Course: Lunch
Cuisine: American
Calories: 550

Ingredients
  

For the Wrap
  • 2 large flour tortillas try whole wheat for added nutrients
  • 2 cups leftover mashed potatoes sweet potatoes provide a delightful twist
For the Filling
  • 2 cups shredded leftover turkey chicken is a great alternative if desired
  • 1 cup leftover green beans roasted brussels sprouts can add extra flavor
  • 1 cup leftover stuffing swap in quinoa for a gluten-free version
  • 1/2 cup leftover cranberry sauce fruit preserves can substitute if needed
For the Melty Goodness
  • 1 cup shredded white cheddar Monterey Jack is a fantastic alternative
For Serving
  • 1 cup gravy use vegetable broth for a lighter dip if preferred

Equipment

  • Non-stick skillet

Method
 

Step-by-Step Instructions for Thanksgiving Crunchwrap
  1. Start by heating your leftover mashed potatoes in a microwave for about 1–2 minutes until hot and creamy. In a small saucepan, warm the gravy over low heat for about 5 minutes, stirring occasionally until just bubbling.
  2. Lay out a large flour tortilla on a clean surface and spoon a generous portion of warm mashed potatoes in the center. Next, layer in shredded leftover turkey, fresh green beans, a dollop of cranberry sauce, a scoop of stuffing, and a handful of shredded white cheddar.
  3. Carefully fold the tortilla into a wrap by bringing the edges towards the center. Preheat a non-stick skillet over medium heat and lightly grease if needed. Place the wrapped crunchwrap seam-side down in the skillet and cook for 3–4 minutes until golden brown and crispy.
  4. Flip it over and brown the other side for another 3–4 minutes, ensuring the cheese melts within.
  5. Once your Thanksgiving Crunchwrap is perfectly crispy and golden, remove it from the skillet and let it cool for a minute. Cut it in half to reveal the delicious layers inside. Serve immediately with warm gravy on the side for dipping.

Nutrition

Serving: 1wrapCalories: 550kcalCarbohydrates: 60gProtein: 25gFat: 25gSaturated Fat: 12gPolyunsaturated Fat: 2gMonounsaturated Fat: 8gCholesterol: 80mgSodium: 900mgPotassium: 600mgFiber: 4gSugar: 5gVitamin A: 300IUVitamin C: 5mgCalcium: 250mgIron: 3mg

Notes

Ensure fillings are not too wet to avoid sogginess. Experiment with ingredients based on your leftovers for variety.

Tried this recipe?

Let us know how it was!

Zesty Skirt Steak Marinade for Juicy Grilled Perfection

The aroma of sizzling skirt steak on a hot grill can whisk you away to a sun-drenched kitchen, where flavors dance with joy. Today, I’m excited to share my Zesty Skirt Steak Marinade, a vibrant recipe that melds the sweet and tangy punch of fresh orange juice with classic savory seasonings. This quick recipe is perfect for anyone craving a delicious homemade meal without sacrificing time. Not only does this marinade enhance the steak’s tenderness, but it also infuses every bite with irresistible citrus notes, making it a crowd-pleaser at any backyard barbecue. Ready to explore how this zesty delight can transform your next dinner into a flavorful fiesta? Let’s dive in!

Why is this marinade a game-changer?

Flavor Explosion: The zesty combination of orange juice and spices not only speeds up the marinating process but brings your skirt steak to life with vibrant flavor!

Tender and Juicy: With its citrus-infused magic, this marinade works wonders in keeping your meat unbelievably tender and succulent.

Quick and Easy: In just a few simple steps, you can prepare a mouthwatering dish, making it perfect for busy weeknights or lazy weekends.

Versatile Pairing Options: Serve it with your favorite sides like grilled veggies or in delicious tacos—this marinade opens up endless serving possibilities!

Ready to elevate your grilling game? Check out my Grilled Boneless Marinade for another easy yet flavorful addition to your dinner lineup!

Zesty Skirt Steak Marinade Ingredients

Unlock the secrets to a perfectly tender skirt steak with this vibrant marinade!

For the Marinade

  • Orange Juice – Provides acidity for tenderization and enhances sweetness. Fresh-squeezed is recommended for best flavor.
  • Lime Juice – Adds a zesty kick; can be substituted with more orange juice if desired.
  • Olive Oil – Moisturizes and adds richness; alternative oils like avocado work well.
  • Soy Sauce – Introduces umami depth; optional for gluten-free diets where tamari can be used instead.
  • Worcestershire Sauce – Enhances the savory profile; can be omitted for a simpler version of this zesty skirt steak marinade.
  • Apple Cider Vinegar – Adds acidity and balances flavors; white vinegar is a suitable substitute.
  • Garlic – Provides aromatic depth; use fresh minced or garlic powder as alternatives.
  • Red Pepper Flakes – Introduces spice; adjust quantity based on your heat preference.
  • Ground Cumin – Contributes earthiness; can be omitted or replaced with coriander for a different flavor.

Step‑by‑Step Instructions for Zesty Skirt Steak Marinade

Step 1: Prepare the Marinade
In a medium bowl, whisk together the fresh orange juice, lime juice, olive oil, soy sauce, Worcestershire sauce, and apple cider vinegar until fully combined. Add the minced garlic, red pepper flakes, and ground cumin to the mixture, stirring until everything is well blended. This zesty skirt steak marinade not only brings vibrant flavors but also ensures your steak will be mouthwateringly tender.

Step 2: Marinate the Skirt Steak
Place the skirt steak in a large dish or a gallon zip-top bag. Pour the zesty marinade over the steak, making sure it’s coated evenly. If using a bag, seal it tightly while pressing out as much air as possible. If using a dish, cover it with plastic wrap. Refrigerate for 2 to 6 hours, allowing the flavors to penetrate the meat for maximum deliciousness.

Step 3: Preheat the Cooking Surface
While your steak marinates, preheat your grill to high heat, around 450°F-500°F. If you prefer stovetop cooking, heat a large cast-iron skillet over high heat and add a splash of oil to coat the bottom. Getting the cooking surface nice and hot will help achieve that perfect char on your skirt steak.

Step 4: Prepare the Steak for Cooking
After marinating, remove the skirt steak from the marinade and pat it dry with paper towels to ensure a good sear. Season both sides generously with salt and pepper, which will enhance the steak’s natural flavors. With this preparation, your steak is ready for the grill or skillet.

Step 5: Cook the Steak
Carefully place the steak onto the hot grill or skillet. Grill or pan-sear for about 3 to 4 minutes per side for medium-rare, depending on the thickness of your steak. Look for a nice char on the outside, while the center remains juicy and tender. Feel free to adjust cooking time based on your preferred doneness.

Step 6: Let the Steak Rest
Once cooked to your liking, remove the steak from the heat and let it rest on a cutting board for 5 to 10 minutes. This resting period is crucial; it allows the juices to redistribute throughout the meat, ensuring every slice is succulent and filled with the flavors from your zesty skirt steak marinade.

Step 7: Slice and Serve
After resting, slice the steak thinly against the grain to enhance tenderness. Plate it beautifully on a serving dish and pair it with your favorite sides, such as grilled veggies or tacos. With each bite, savor the burst of citrus and rich flavors that make this skirt steak a standout dish!

Expert Tips for Zesty Skirt Steak Marinade

  • Marinating Time: Avoid marinating for more than 8 hours; excess acid can make the meat mushy.

  • Room Temperature: Always bring the steak to room temperature before cooking. This ensures even doneness and a fantastic sear.

  • Cooking Technique: Use an instant-read thermometer for perfect cooking; aim for medium-rare at 135°F for the ideal texture.

  • Resting Period: Let the steak rest for 5-10 minutes post-cooking. This step allows juices to redistribute, creating a juicy bite.

  • Slicing Strategy: Always slice against the grain for maximum tenderness. Each slice should be juicy and full of flavor from your zesty skirt steak marinade.

Storage Tips for Zesty Skirt Steak Marinade

Fridge: Store leftover marinated skirt steak in the fridge for up to 3 days in an airtight container to maintain freshness and flavor.

Freezer: For longer storage, freeze the marinated skirt steak in a resealable freezer bag for up to 3 months. Thaw in the fridge overnight before cooking.

Marinade Storage: If you have leftover marinade, refrigerate it in an airtight container for up to 2 days. Do not reuse marinade that has been in contact with raw meat to ensure food safety.

Reheating: To reheat cooked skirt steak, gently warm it in a skillet over medium heat or in the microwave, ensuring it doesn’t dry out. Enjoy the zesty flavors even when it’s not freshly grilled!

Make Ahead Options

These Zesty Skirt Steak Marinade preparations are perfect for busy home cooks looking to save time during the week! You can prepare the marinade up to 2 days in advance; simply whisk together all the ingredients and refrigerate in an airtight container. The skirt steak can be marinated for up to 6 hours before cooking, but for the best flavor, aim for 2-4 hours. For optimal quality, ensure the steak is sealed tightly if you’re using a zip-top bag—this prevents excess air and preserves the marinade’s vibrant flavors. When you’re ready to cook, just remove the steak from the fridge, let it rest at room temperature for about 30 minutes, and then grill it for a delicious and effortless meal!

Zesty Skirt Steak Marinade Variations

Unlock the potential of your skirt steak marinade with these fun twists that will elevate your dish to new heights!

  • Dairy-Free: Substitute soy sauce with coconut aminos for a sweeter, soy-free option that still packs a flavor punch.
    Flavors meld beautifully, creating a delightful balance between sweetness and zest.

  • Spicy Twist: Add sriracha or cayenne pepper to your marinade for an exciting kick that warms your palate.
    A little heat can take your meat to the next level, perfect for those who love a spicy surprise.

  • Herbaceous Flavor: Introduce fresh herbs, like cilantro or oregano, into your marinade for a fragrant, garden-fresh taste.
    This step infuses the steak with vibrant, aromatic notes, making each bite burst with flavor.

  • Citrus Variety: Swap out orange juice with grapefruit or tangerine juice for a unique citrus flavor profile that intrigues the taste buds.
    Experimenting with different fruits can introduce exciting new layers of zest to your steak.

  • Smoky Delight: Incorporate smoked paprika into your marinade for a rich, smoky element that complements the steak beautifully.
    This small addition can transform your dish into a barbecue-inspired feast.

  • Tropical Flair: Add pineapple juice to your marinade for an exotic sweetness that tenderizes and elevates your skirt steak.
    The unexpected twist of tropical fruit can transport you to a sunny paradise with every bite.

  • Marinade Booster: For a deeper umami flavor, try adding miso paste or finely chopped anchovies to your marinade mix.
    These ingredients pack an intense flavor punch, layering complexity to your steak experience.

Explore these variations and tailor your skirt steak marinade to suit your taste! For a flavorful accompaniment, check out my Steak Fajita Salad or consider grilling some delicious veggies alongside your steak for a perfect plate.

What to Serve with Zesty Skirt Steak Marinade

The excitement of a flavorful meal is just beginning, as you set the scene for an unforgettable dining experience.

  • Grilled Vegetables: A mix of bell peppers, zucchini, and asparagus adds vibrant colors and fresh crunch, balancing the steak’s richness beautifully. Their smoky char enhances the outdoor grilling vibe!

  • Garlic Bread: Warm, crusty garlic bread is irresistible alongside the skirt steak. Its buttery, aromatic notes make every bite even more satisfying.

  • Cilantro-Lime Rice: This fragrant, fluffy rice captures zesty flavors, harmonizing with the marinade while adding a delightful texture contrast on the plate. It’s a lighter addition that complements the meat’s heartiness.

  • Avocado Salad: A crisp avocado salad with cherry tomatoes and cucumbers brings a refreshing coolness to each mouthful. Tossed in lime dressing, it’s a perfect palate cleanser.

  • Pico de Gallo Tacos: Wrap tender slices of skirt steak in soft tortillas with fresh pico de gallo. These handheld bites pack bold flavors with every crunch, making them an instant favorite for taco lovers!

  • Margaritas: Toast your feast with refreshing margaritas. The zesty lime and salty rim pair perfectly with the citrusy skirt steak, enhancing flavors while offering a festive touch.

Each pairing not only complements the zesty skirt steak marinade but elevates the entire meal into a delicious occasion you’ll cherish. Enjoy exploring endless possibilities!

Zesty Skirt Steak Marinade Recipe FAQs

What is the best way to select ripe oranges for the marinade?
Absolutely! Choose oranges that are heavy for their size with a bright, vibrant color. The skin should be smooth and free of dark spots or blemishes. Freshly squeezed orange juice is recommended for the best flavor, so be sure to pick oranges that have a juicy feel when gently squeezed.

How should I store leftover marinated skirt steak?
To maintain freshness, store leftover marinated skirt steak in an airtight container in the fridge for up to 3 days. Make sure to keep it sealed well to avoid any absorption of odors from other foods.

Can I freeze skirt steak after marinating?
Definitely! You can freeze the marinated skirt steak by placing it in a resealable freezer bag, ensuring you press out as much air as possible to prevent freezer burn. It can be safely stored in the freezer for up to 3 months. When you’re ready to cook, simply thaw it in the fridge overnight for best results.

What should I do if my steak turns out tough?
If your steak turns out tougher than expected, it might have been overcooked or marinated for too long. Always aim for medium-rare at an internal temperature of 135°F. In the future, avoid marinating for more than 8 hours, as excessive acid can lead to a mushy texture. If you find yourself in a bind with a tough steak, consider slicing it thinly against the grain to improve tenderness!

Can I use this marinade on other proteins?
Very! This zesty skirt steak marinade is versatile and works beautifully with flank steak, chicken, or even fish! Adjust marinating times accordingly—chicken often benefits from a longer marinade, around 4 to 8 hours, while fish requires just 15 to 30 minutes.

Is this marinade safe for dogs or other pets?
It’s best to avoid giving your pets any marinated meats due to ingredients like garlic and onions, which can be harmful to them. Also, always ensure any cooked meat is cut into appropriate bite-sized pieces, plain and without seasoning for your furry friends!

Zesty Skirt Steak Marinade

Zesty Skirt Steak Marinade for Juicy Grilled Perfection

This Zesty Skirt Steak Marinade enhances flavor and tenderness, perfect for a delicious grilling experience.
Prep Time 10 minutes
Cook Time 10 minutes
Marinating Time 3 hours
Total Time 3 hours 20 minutes
Servings: 4 servings
Course: Beef
Cuisine: American
Calories: 350

Ingredients
  

For the Marinade
  • 1 cup Fresh Orange Juice Fresh-squeezed is recommended for best flavor.
  • 1/4 cup Lime Juice Can be substituted with more orange juice if desired.
  • 1/2 cup Olive Oil Alternative oils like avocado work well.
  • 1/4 cup Soy Sauce Optional for gluten-free diets where tamari can be used instead.
  • 2 tablespoons Worcestershire Sauce Can be omitted for a simpler version.
  • 2 tablespoons Apple Cider Vinegar White vinegar is a suitable substitute.
  • 3 cloves Garlic Use fresh minced or garlic powder as alternatives.
  • 1 teaspoon Red Pepper Flakes Adjust based on heat preference.
  • 1 teaspoon Ground Cumin Can be omitted or replaced with coriander.

Equipment

  • Medium Bowl
  • Whisk
  • Large Dish or Gallon Zip-Top Bag
  • Grill or Cast-Iron Skillet

Method
 

Step-by-Step Instructions
  1. In a medium bowl, whisk together the fresh orange juice, lime juice, olive oil, soy sauce, Worcestershire sauce, and apple cider vinegar until fully combined.
  2. Add the minced garlic, red pepper flakes, and ground cumin to the mixture, stirring until everything is well blended.
  3. Place the skirt steak in a large dish or a gallon zip-top bag. Pour the zesty marinade over the steak, coating evenly.
  4. Seal the bag tightly or cover the dish and refrigerate for 2 to 6 hours.
  5. Preheat your grill to high heat (450°F-500°F) or heat a large cast-iron skillet over high heat.
  6. Remove the skirt steak from the marinade and pat it dry with paper towels. Season both sides with salt and pepper.
  7. Place the steak onto the hot grill or skillet. Grill or pan-sear for 3 to 4 minutes per side for medium-rare.
  8. Once cooked, let the steak rest on a cutting board for 5 to 10 minutes before slicing thinly against the grain.

Nutrition

Serving: 1servingCalories: 350kcalCarbohydrates: 5gProtein: 25gFat: 25gSaturated Fat: 4gMonounsaturated Fat: 19gCholesterol: 70mgSodium: 800mgPotassium: 500mgSugar: 3gVitamin A: 5IUVitamin C: 15mgCalcium: 2mgIron: 15mg

Notes

Do not marinate for more than 8 hours to avoid mushiness. Always bring the steak to room temperature before cooking for even doneness.

Tried this recipe?

Let us know how it was!

Delicious Deep Hamburger Sausage Pie for Comfort Food Lovers

As I stood in my kitchen, that familiar aroma of sizzling sausage and melting cheese wafted through the air, telling me it was time to create something special. Today, we’re diving into the delightful world of my Deep Hamburger Sausage & Pepperoni Pie. This dish is not just a meal; it’s a cozy hug on a plate, perfect for family gatherings or a quiet night in. Imagine the joy of a flaky, golden crust wrapped around seasoned ground beef, zesty pizza sauce, and gooey cheese, all harmonizing beautifully with the comforting taste of pepperoni. It’s a joy to customize, allowing you to experiment with different toppings and flavors, which means it can easily fit any mood or occasion. Plus, it’s freezer-friendly, making it a delicious option for meal prep! Are you ready to indulge in this hearty bite of comfort? Let’s get cooking!

Why You’ll Love This Deep-Dish Pie

Comforting Texture: Each slice features a wonderfully flaky crust that gives way to a melt-in-your-mouth filling of rich meats and cheese, making it a dish you won’t forget.

Customizable Options: You can easily tailor this recipe to fit your preferences by switching up toppings or trying different cheeses, just as you might with my Shrimp Sausage Foil recipe.

Quick Assembly: This pie comes together quickly, saving you precious time without compromising on flavor for busy weeknights or entertaining friends.

Family Appeal: Whether you have picky eaters or gourmet foodies in your circle, this pie is guaranteed to satisfy everyone at your table.

Make-Ahead Friendly: You can prepare it in advance and simply pop it in the oven when you’re ready, making it a stellar option for meal prep or unexpected guests.

Deep Hamburger Sausage Ingredients

For the Crust
Deep-Dish Pie Crust – Essential for structure; you can use homemade or store-bought, just remember to pre-bake it slightly to prevent sogginess.

For the Filling
Ground Beef – Adds savory flavor and protein; consider substituting with turkey for a lighter option.
Sausage – Provides additional texture and spices; you can replace it with extra ground beef if preferred.
Pizza Sauce – Infuses moisture and tanginess; both homemade and store-bought varieties work wonderfully.
Mozzarella Cheese – Key for a gooey texture; feel free to swap in a mix of provolone or cheddar for a unique twist.
Pepperoni – A classic topping that enhances meaty flavors; turkey pepperoni is a leaner alternative.
Parmesan Cheese – Offers a delicious salty finish; it’s an optional ingredient for added richness.
Olive Oil – Used for browning the meat; keeping it enhances the flavor.
Seasonings – Salt, black pepper, garlic powder, and Italian seasoning create a vibrant flavor profile for your deep hamburger sausage pie.

Step‑by‑Step Instructions for Deep Hamburger Sausage & Pepperoni Pie

Step 1: Preheat and Prepare the Crust
Preheat your oven to 375°F (190°C). While it heats, take the deep-dish pie crust and bring it to room temperature. Fit the crust into a deep-dish pan, ensuring it’s snug. Use a fork to prick the base to avoid bubbling, then pre-bake for 10 minutes until it’s just lightly golden but still soft.

Step 2: Brown the Meats
In a large skillet, heat a tablespoon of olive oil over medium heat. Once hot, add the ground beef and sausage, breaking them into small crumbles using a spatula. Cook for about 8-10 minutes or until the meats are browned and cooked through. Season with salt, black pepper, garlic powder, and Italian seasoning for a robust flavor.

Step 3: Assemble the Pie
Carefully spread pizza sauce evenly over the pre-baked crust, ensuring full coverage. Layer half of the mozzarella cheese over the sauce, followed by the browned meat mixture. Add a little more pizza sauce on top of the meat, followed by the remaining mozzarella cheese for a gooey finish.

Step 4: Add the Toppings
Spread the pepperoni slices generously across the top of the assembled pie; feel free to add as much or as little as you desire. If using, sprinkle grated Parmesan cheese over the pepperoni for an extra touch of flavor. This enhances the savory richness of the Deep Hamburger Sausage & Pepperoni Pie.

Step 5: Bake the Pie
Place the assembled pie in the preheated oven and bake for 25-30 minutes. Keep an eye on it; you’ll know it’s done when the cheese is bubbly and golden brown along the edges. Your kitchen should be filled with mouthwatering aromas as it bakes!

Step 6: Cool and Slice
Once baked, remove the deep-dish pie from the oven and let it cool for about 5-10 minutes. This resting period allows the filling to set, preventing it from spilling out when sliced. Grab a sharp knife and cut into generous wedges, ready to serve your hearty Deep Hamburger Sausage & Pepperoni Pie.

Expert Tips for Deep Hamburger Sausage Pie

Pre-bake Wisely: Make sure to pre-bake your pie crust for 10 minutes. This helps maintain a crisp texture and prevents it from becoming soggy.

Don’t Over-Sauce: Avoid adding too much pizza sauce, as oversaturation can lead to a soggy filling. A light layer will suffice for flavor without excess moisture.

Proper Cooling: After baking, allow your deep hamburger sausage pie to cool for 5-10 minutes before slicing. This helps the filling set and ensures clean cuts.

Flavor Variations: Experiment with different cheese blends or toppings. Adding sautéed mushrooms, bell peppers, or even a sprinkle of red pepper flakes can elevate the flavor profile.

Leftover Storage: If making ahead, cover and refrigerate the assembled pie. Bake it fresh when needed, adding 5 extra minutes to the cooking time for best results.

How to Store and Freeze Deep Hamburger Sausage Pie

Fridge: Store any leftover pie in an airtight container in the refrigerator for up to 3 days. Reheat individual slices in the microwave or oven until warmed through.

Freezer: For long-term storage, wrap the pie tightly in plastic wrap and then foil, freezing for up to 2 months. Thaw overnight in the fridge before reheating.

Reheating: To reheat frozen slices, bake at 350°F (175°C) for about 20 minutes or until heated through. A little extra cheese on top can add to the gooey goodness.

Make-Ahead Tip: Assemble the deep hamburger sausage pie a day in advance, cover, and refrigerate. Bake when ready, adding 5 extra minutes to the cooking time for best results.

Deep Hamburger Sausage Pie Variations

Get ready to explore deliciously unique twists that can make your Deep Hamburger Sausage Pie even more enticing and suited to your taste buds!

  • Gluten-Free Crust: Swap the regular deep-dish pie crust for a gluten-free option. This way, everyone can enjoy a slice without worry.

  • Turkey Substitute: Use ground turkey instead of beef for a leaner version that still packs a meaty punch. It’s a great way to lighten up your meal!

  • Vegetable Boost: Add sautéed bell peppers, onions, or mushrooms to the meat mixture. This not only enhances the flavor but also adds delightful texture.

  • Spicy Kick: Toss in some crushed red pepper flakes or jalapeño slices to the filling for a bit of heat. It will take your pie to another level of excitement on the palate!

  • Cheese Variety: Experiment with different cheeses like provolone, gouda, or a sprinkle of feta for a unique taste twist. The gooeyness will keep you coming back for more.

  • Pepperoni Twist: For a different flavor, try adding sliced salami or even ham to mix things up. These options can elevate the overall meatiness of the pie.

  • Herb Infusion: Consider adding fresh basil or oregano into the pizza sauce. This brings a lovely aromatic layer that makes each bite feel extra special.

  • Make it Vegetarian: Replace meat entirely with a blend of hearty vegetables like spinach, zucchini, or even chickpeas for a filling, meat-free option. Trust me, it’s just as satisfying!

These variations not only offer exciting flavors but also ensure that everyone at your table is happy. You can even take a peek at my recipe for Shrimp Sausage Foil for more customization ideas when planning your next family feast. Enjoy the adventure of cooking!

What to Serve with Deep Hamburger Sausage & Pepperoni Pie

Pair this comforting pie with sides that elevate the meal’s warm, hearty flavors and textures.

  • Buttery Garlic Bread: The golden, crunchy bread complements the savory pie beautifully, perfect for soaking up any extra pizza sauce that might fall.

  • Crisp Caesar Salad: Light and refreshing, this salad with its crunchy romaine and tangy dressing provides a great contrast to the rich pie.

  • Oven-Roasted Vegetables: A medley of seasonal vegetables adds a splash of color and a healthy, satisfying crunch to balance the richness of the pie.

  • Tangy Coleslaw: Its crisp texture and acidic notes help cut through the heaviness, making each bite feel lighter and more refreshing.

  • Savory Stuffed Peppers: These vibrant peppers, filled with grains and spices, offer an exciting burst of flavor, enhancing the rustic charm of your meal.

  • Creamy Mashed Potatoes: Smooth and buttery, they create a comforting, indulgent pairing and are perfect for those who love comfort food combinations.

  • Chilled White Wine: A glass of chilled Sauvignon Blanc or Pinot Grigio elevates the meal with its crisp notes, complementing the savory richness of the pie.

  • Chocolate Chip Cookies: End the meal on a sweet note with warm cookies—soft in the center and slightly crispy on the edges, they bring a delightful finish to the evening.

Make Ahead Options

This Deep Hamburger Sausage & Pepperoni Pie is perfect for meal prep, allowing you to enjoy a homemade meal with minimal effort on busy weeknights. You can assemble the entire pie up to 24 hours in advance. Simply prepare the filling, layer it into the pre-baked crust, cover tightly, and refrigerate. For even better results, add 5 extra minutes to the baking time when you’re ready to serve. To prevent the crust from getting soggy, avoid over-saturating with sauce. With these make-ahead tips, you can enjoy a hearty, flavorful pie that tastes just as delicious as if it were freshly made!

Deep Hamburger Sausage & Pepperoni Pie Recipe FAQs

What type of crust should I use for this pie?
I recommend using a deep-dish pie crust, which is essential for holding all the delicious fillings. You can opt for homemade or store-bought varieties; just remember to pre-bake it for about 10 minutes to avoid a soggy bottom.

How can I customize the toppings?
The beauty of this Deep Hamburger Sausage pie is in its versatility! You can easily switch out the sausage for more ground beef, turkey, or even mushrooms for a meatless twist. For additional flavor, sauté bell peppers, onions, or olives before adding them to the pie. Don’t forget to play around with different cheese blends to discover your favorite combination!

What are the best storage methods for leftovers?
Absolutely! Store any leftover pie in an airtight container in the fridge for up to 3 days. For longer storage, wrap the pie tightly in plastic wrap followed by aluminum foil and freeze it for up to 2 months. Thaw overnight in the fridge when you’re ready to enjoy it again!

How can I successfully freeze the pie?
To freeze your Deep Hamburger Sausage & Pepperoni Pie, allow it to cool completely after baking. Then, cover it tightly with plastic wrap, followed by a layer of foil to prevent freezer burn. For best results, consume it within 2 months. To reheat, just bake at 350°F (175°C) for about 20 minutes or until heated through, adding a sprinkle of cheese on top for extra melty goodness.

Are there any dietary considerations I should keep in mind?
Very! If you’re accommodating guests with dietary allergies, you can substitute traditional pizza sauce with a gluten-free option. Additionally, use gluten-free crust if necessary. For those avoiding dairy, try vegan cheese alternatives that melt well or simply omit the cheese altogether while adding flavorful herbs for seasoning.

What should I do if my filling is too watery?
If you notice your filling is too watery, it could be due to oversaturation with sauce or using high-moisture ingredients. To prevent this, ensure you don’t over-sauce your pie, and consider sautéing any vegetables beforehand to release their moisture. If you still find it a bit soggy, you can let the sliced pie cool for a few minutes longer to help it set before serving. Don’t worry; you’ll get a hang of it!

Deep Hamburger Sausage

Delicious Deep Hamburger Sausage Pie for Comfort Food Lovers

Indulge in this hearty Deep Hamburger Sausage filled pie, perfect for comfort food lovers.
Prep Time 15 minutes
Cook Time 30 minutes
Cooling Time 10 minutes
Total Time 55 minutes
Servings: 8 slices
Course: Beef
Cuisine: American
Calories: 450

Ingredients
  

Crust
  • 1 each Deep-Dish Pie Crust pre-baked slightly
Filling
  • 1 pound Ground Beef can substitute with turkey
  • 1 pound Sausage or use more ground beef
  • 1 cup Pizza Sauce homemade or store-bought
  • 2 cups Mozzarella Cheese can substitute with provolone or cheddar
  • 1 cup Pepperoni can use turkey pepperoni
  • 1/2 cup Parmesan Cheese optional for richness
  • 1 tablespoon Olive Oil for browning
  • to taste Seasonings salt, black pepper, garlic powder, Italian seasoning

Equipment

  • large skillet
  • deep-dish pie pan
  • Fork

Method
 

Preparation
  1. Preheat your oven to 375°F (190°C). Bring the deep-dish pie crust to room temperature, fit it into the pan, prick the base, and pre-bake for 10 minutes.
  2. In a large skillet, heat olive oil over medium heat. Add ground beef and sausage, breaking them up until browned and cooked through, about 8-10 minutes. Season with salt, black pepper, garlic powder, and Italian seasoning.
  3. Spread pizza sauce evenly over the pre-baked crust, layer half of the mozzarella cheese, then the meat mixture, more pizza sauce, and the remaining mozzarella cheese.
  4. Spread pepperoni slices over the top and sprinkle Parmesan cheese if using.
  5. Bake for 25-30 minutes until cheese is bubbly and golden brown.
  6. Let the pie cool for 5-10 minutes, then slice into wedges to serve.

Nutrition

Serving: 1sliceCalories: 450kcalCarbohydrates: 30gProtein: 25gFat: 25gSaturated Fat: 10gPolyunsaturated Fat: 2gMonounsaturated Fat: 10gCholesterol: 70mgSodium: 800mgPotassium: 450mgFiber: 2gSugar: 3gVitamin A: 500IUVitamin C: 3mgCalcium: 250mgIron: 3mg

Notes

Can be customized with different toppings; ensure to pre-bake crust for best results.

Tried this recipe?

Let us know how it was!

Cheese & Olive Quick Bread: Irresistibly Savory & Simple

As I pulled a loaf of Savory Cheese & Olive Quick Bread from the oven, the rich, nutty aroma enveloped my kitchen, instantly transforming it into a cozy haven. This crowd-pleaser is not just for special occasions—it’s the ideal solution for quick weekday meals or an impromptu gathering with friends. With its one-bowl, no-yeast preparation, whipping up this savory delight is a breeze, and the combination of gooey cheese and briny olives will have everyone reaching for seconds. Plus, it’s versatile enough to be enjoyed warm as a comforting side or as a snack anytime. Curious how to bring this flavor-packed treat to your table? Let’s dive in!

Why is Cheese & Olive Bread so Irresistible?

Simplicity at Its Best: This Cheese & Olive Quick Bread is a no-yeast, one-bowl wonder, making it perfect for a quick weeknight meal or last-minute gatherings.

Flavor Explosion: The combination of strong cheeses with briny olives offers a taste sensation that’s both savory and satisfying, ensuring every bite is filled with delightful flavors.

Versatile Delight: Serve it warm with butter or pair it with salads for an effortless brunch option—it’s a fantastic addition to your spread!

Time-Saving Treat: With minimal prep and just 45 minutes in the oven, this bread fits perfectly into any busy schedule, allowing you to create delicious meals without the fuss.

Crowd-Pleasing Recipe: Whether sharing at a party or enjoying it solo, this savory bread is sure to become a favorite. Pair it with a refreshing Italian Chopped Salad for a complete meal!

Cheese & Olive Quick Bread Ingredients

For the Bread
All-purpose flour – Structure; can substitute with whole wheat flour for a heartier loaf.
Baking powder – Leavening agent; always check for freshness to ensure a good rise.
Salt – Enhances flavor; adjust according to the saltiness of your cheese.
Sharp cheese (e.g., Gruyère, Cheddar) – Adds flavor and moisture; opt for robust cheeses for maximum melt.
Chopped olives (green or black) – Provides a savory punch; using pitted olives makes prep easier.
Fresh herbs (e.g., rosemary, thyme) – Infuses delicious flavor; dried herbs work well if fresh aren’t at hand.
Eggs – Acts as a binding agent; use room temperature eggs for better mixing.
Milk – Adds moisture and richness; for a dairy-free option, almond milk is a great substitute.
Olive oil – Contributes flavor and moisture; spray on top before baking for a beautifully golden crust.

Step‑by‑Step Instructions for Cheese & Olive Quick Bread

Step 1: Preheat and Prepare
Begin by preheating your oven to 350°F (175°C). While it warms up, line a standard loaf pan with parchment paper, allowing some overhang for easy removal later. This setup ensures your Cheese & Olive Quick Bread comes out beautifully and retains its shape after baking.

Step 2: Mix Dry Ingredients
In a large mixing bowl, whisk together 2 cups of all-purpose flour, 2 tablespoons of baking powder, and 1 teaspoon of salt. It’s essential to ensure these dry ingredients are well combined to promote an even rise. The mixture should look fluffy and void of lumps, setting the foundation for a tender bread.

Step 3: Fold in Flavor
Next, gently fold in 1 cup of grated sharp cheese, such as Gruyère or Cheddar, along with ½ cup of chopped olives and 2 tablespoons of fresh herbs. Use a spatula to blend these ingredients until evenly distributed. The melted cheese and olives will create delightful pockets of flavor in your Cheese & Olive Quick Bread.

Step 4: Combine Wet Ingredients
In a separate bowl, whisk together 1 cup of milk, 2 large eggs, and ¼ cup of olive oil until the mixture is smooth. Make sure the eggs are at room temperature to allow for better emulsification. This wet mixture adds moisture and helps bind the bread together, enhancing its overall texture.

Step 5: Mix Wet and Dry Ingredients
Pour the wet ingredients into the dry mixture and gently fold until just combined. Be careful not to overmix, as this can lead to a tough bread. The batter should remain slightly lumpy; this indicates that the ingredients are well-integrated without losing its tender crumb.

Step 6: Transfer to Loaf Pan
Pour the batter into the prepared loaf pan, using a spatula to smooth the top. Ensure the batter is evenly spread to promote even baking. This step is crucial as it helps the Cheese & Olive Quick Bread rise uniformly while baking, resulting in that perfect golden crust.

Step 7: Add Oil for Crust
Lightly spray the surface of the batter with olive oil before placing it in the oven. This simple step will help promote a beautifully golden and crisp crust on your quick bread, enhancing its visual appeal and texture when served.

Step 8: Bake to Perfection
Bake your bread in the preheated oven for about 45 minutes. The bread is done when it turns a lovely golden brown, and a toothpick inserted into the center comes out clean. Keep an eye on it during the last few minutes to avoid overbaking; a beautifully risen loaf is what you want.

Step 9: Cool and Serve
Once baked, remove the loaf from the oven and allow it to cool in the pan for about 10 minutes. Then, carefully lift it out using the parchment overhang and let it cool completely on a wire rack. Slice your Cheese & Olive Quick Bread when it’s warm or at room temperature, ready to be enjoyed with butter or as a delicious snack!

Make Ahead Options

This Cheese & Olive Quick Bread is perfect for busy home cooks looking for easy meal prep solutions! You can prepare the dry ingredients—2 cups of flour, 2 tablespoons of baking powder, and 1 teaspoon of salt—up to 24 hours in advance, storing them in an airtight container to keep them fresh. Additionally, you can chop your olives and herbs ahead of time, refrigerating them for use later. When ready to bake, simply combine the dry and wet ingredients as per the recipe. With this prep, you’ll have your flavorful bread whipped up in no time, perfect for those hectic weeknight dinners or surprise brunch gatherings!

How to Store and Freeze Cheese & Olive Quick Bread

Room Temperature: Keep the bread in an airtight container at room temperature for up to 3 days to maintain its freshness and flavor.

Fridge: If you plan to keep it longer, wrap it tightly and store in the fridge for up to a week, though it may lose some moisture.

Freezer: For freezing, wrap the loaf tightly in plastic wrap and then foil, ensuring it’s airtight. It can be frozen for up to 3 months.

Reheating: To enjoy, thaw in the refrigerator overnight and reheat in the oven at 350°F (175°C) for about 10-15 minutes or until warmed through.

Cheese & Olive Quick Bread Variations

Feel free to get creative with your Cheese & Olive Quick Bread! Here are some delightful ideas to customize it to your tastes.

  • Different Cheeses: Swap the sharp cheese for feta or pepper jack for a unique flavor twist. Each cheese brings its own character and richness to the bread.

  • Add Sun-Dried Tomatoes: Incorporate chopped sun-dried tomatoes for a touch of sweetness and color. They complement the olives beautifully, adding depth to each bite.

  • Nutty Texture: Toss in some chopped walnuts or pecans for added crunch. The combination of flavors and textures will elevate your savory loaf to new heights.

  • Herb Infusions: Try using fresh basil or dill instead of rosemary and thyme for a fresh herbal twist. The bright, fresh notes will brighten up the bread.

  • Spicy Kick: Add red pepper flakes or chopped jalapeños to give your bread a hint of heat. This fiery addition pairs exceptionally well with creamy cheese.

  • Transform into Muffins: Use a muffin tin instead of a loaf pan for individual servings. Adjust the baking time to about 20-25 minutes for perfectly portioned bites.

  • Seasoned Olives: Experiment with marinated olives for an extra punch of flavor. Whether herbed or spicy, they add a delightful zing to your bread.

  • Serve with Spreads: Pair your warm bread with a side of honey or a savory cheese spread for a delightful appetizer or snack. It complements the bread’s flavors wonderfully.

For even more flavor experiences, consider serving your bread alongside a hearty dish like Hobo Casserole or enjoy a light meal with a refreshing Italian Chopped Salad. Your taste buds will thank you!

What to Serve with Cheese & Olive Quick Bread

Imagine gathering your loved ones around the table, savoring the unctuous flavors and delightful aroma of warm cheese and olive bread alongside complementary dishes that elevate your meal experience.

  • Creamy Tomato Soup: A classic pairing; the acidity of the soup cuts through the richness of the bread, making each bite heavenly.

  • Arugula Salad: Peppery arugula adds a fresh, crisp contrast that beautifully balances the savory notes of the cheese and olives.

  • Greek Tzatziki: This cool, yogurt-based dip brings a delightful tang, enhancing the overall flavor profile of the bread while keeping things refreshing.

  • Savory Quiche: Enjoy with a slice of quiche for a hearty brunch option that pairs perfectly with the bread’s cheesiness.

  • Roasted Veggies: A medley of roasted vegetables enhances the rustic feel; their caramelized edges provide a satisfying texture contrast.

  • Cheesy Garlic Breadsticks: If you can’t get enough cheese, serve these alongside for overloaded cheese goodness, perfect for dipping into soup.

  • Chilled White Wine: A crisp, chilled white wine like Sauvignon Blanc complements the savory notes beautifully and adds a touch of elegance to your meal.

  • Fruit Platter: Fresh fruits, like figs or grapes, offer a sweet counterpoint to the savory bread—an elegant finish to the feast.

  • Herb-Infused Olive Oil: Serve with a dish of olive oil infused with fresh herbs for drizzling; it enhances the flavor and provides dipping magic.

Expert Tips for Cheese & Olive Quick Bread

  • Mix Gently: Avoid overmixing the batter, as this can lead to a tough texture. Fold just until combined for a tender crumb.

  • Choose Wisely: Opt for robust cheeses like Gruyère or aged Cheddar for the best flavor in your Cheese & Olive Quick Bread. Experiment with different olives to enhance the taste.

  • Room Temperature Eggs: Using eggs at room temperature helps them incorporate better into the batter, resulting in a smoother texture.

  • Check Freshness: Ensure your baking powder is fresh for optimal rising and lightness in the bread. Old baking powder can result in a dense loaf.

  • Use Pitted Olives: To save time, buy pitted olives. Chopping them is easier, and the flavor they bring elevates your bread’s savory profile.

  • Easy Muffins: Transform this recipe into muffins by adjusting the baking time and using a muffin tin for fun and portable bites!

Cheese & Olive Quick Bread Recipe FAQs

How should I select the cheese for my Cheese & Olive Quick Bread?
Absolutely! Opt for robust cheeses like Gruyère or aged Cheddar for a flavorful experience. These varieties melt beautifully and provide a rich profile that complements the briny olives. If you’re looking for alternatives, feta or pepper jack can also bring unique flavors to your quick bread.

What is the best way to store leftovers of my Cheese & Olive Quick Bread?
To keep your bread fresh, store it in an airtight container at room temperature for up to 3 days. If you’re planning to enjoy it beyond that, wrapping it tightly in plastic wrap and then foil will allow you to freeze it for up to 3 months. Just remember to thaw it in the fridge overnight before reheating!

How can I freeze Cheese & Olive Quick Bread properly?
To freeze, first let the loaf cool completely. Then, wrap it tightly in plastic wrap, making sure there are no air pockets. Follow with a layer of aluminum foil to further prevent freezer burn. You can keep it in the freezer for up to 3 months. When ready to enjoy, take it out and let it thaw in the refrigerator overnight before reheating in the oven at 350°F for 10-15 minutes.

What should I do if my Cheese & Olive Quick Bread ends up too dense?
If your bread turns out dense, the likely culprit is overmixing. When combining the wet and dry ingredients, use gentle folds, just until no flour is visible. Another potential reason could be expired baking powder—ensure it’s fresh to give your bread the lift it needs. Lastly, make sure your oven is preheated correctly; a too-cool oven might prevent proper rising.

Can I make Cheese & Olive Quick Bread if I have dietary restrictions?
Very! You can easily adapt this recipe to be dairy-free by substituting milk with almond milk and using a dairy-free cheese alternative. For gluten-free options, simply swap out the all-purpose flour with a gluten-free flour blend that measures 1:1. Always check the labels of the ingredients if you have specific allergies to ensure safety.

How long will my Cheese & Olive Quick Bread stay fresh in the fridge?
If stored properly in the fridge, the quick bread can last up to a week. However, it can dry out a bit, so I recommend bringing it back to room temperature or reheating it gently in the oven to revive its moist texture before serving. This will enhance your overall experience when enjoying this savory delight!

Cheese & Olive Quick Bread

Cheese & Olive Quick Bread: Irresistibly Savory & Simple

Cheese & Olive Quick Bread is an easy, no-yeast recipe perfect for quick meals or gatherings.
Prep Time 10 minutes
Cook Time 45 minutes
Cooling Time 10 minutes
Total Time 55 minutes
Servings: 8 slices
Course: Appetizer
Cuisine: American
Calories: 230

Ingredients
  

For the Bread
  • 2 cups all-purpose flour can substitute with whole wheat flour for a heartier loaf
  • 2 tablespoons baking powder always check for freshness to ensure a good rise
  • 1 teaspoon salt adjust according to the saltiness of your cheese
  • 1 cup sharp cheese (e.g., Gruyère, Cheddar) opt for robust cheeses for maximum melt
  • ½ cup chopped olives (green or black) using pitted olives makes prep easier
  • 2 tablespoons fresh herbs (e.g., rosemary, thyme) dried herbs work well if fresh aren’t at hand
  • 2 large eggs use room temperature eggs for better mixing
  • 1 cup milk for a dairy-free option, almond milk is a great substitute
  • ¼ cup olive oil spray on top before baking for a beautifully golden crust

Equipment

  • Loaf Pan
  • Mixing bowls
  • Whisk
  • Spatula
  • Oven

Method
 

Step‑by‑Step Instructions for Cheese & Olive Quick Bread
  1. Preheat your oven to 350°F (175°C) and line a standard loaf pan with parchment paper.
  2. In a large mixing bowl, whisk together 2 cups of all-purpose flour, 2 tablespoons of baking powder, and 1 teaspoon of salt.
  3. Gently fold in 1 cup of grated sharp cheese, ½ cup of chopped olives, and 2 tablespoons of fresh herbs.
  4. In a separate bowl, whisk together 1 cup of milk, 2 large eggs, and ¼ cup of olive oil until smooth.
  5. Pour the wet ingredients into the dry mixture and gently fold until just combined.
  6. Pour the batter into the prepared loaf pan and smooth the top.
  7. Lightly spray the surface of the batter with olive oil before placing it in the oven.
  8. Bake your bread for about 45 minutes until golden brown and a toothpick comes out clean.
  9. Cool the loaf in the pan for about 10 minutes before transferring to a wire rack to cool completely.

Nutrition

Serving: 1sliceCalories: 230kcalCarbohydrates: 30gProtein: 8gFat: 10gSaturated Fat: 3gPolyunsaturated Fat: 1gMonounsaturated Fat: 6gCholesterol: 40mgSodium: 380mgPotassium: 150mgFiber: 2gSugar: 1gVitamin A: 200IUCalcium: 150mgIron: 1.5mg

Notes

Mix gently to avoid a tough texture and opt for robust cheeses for the best flavor.

Tried this recipe?

Let us know how it was!