Savor the Season with Pumpkin Sage & Mushroom Tart Delights

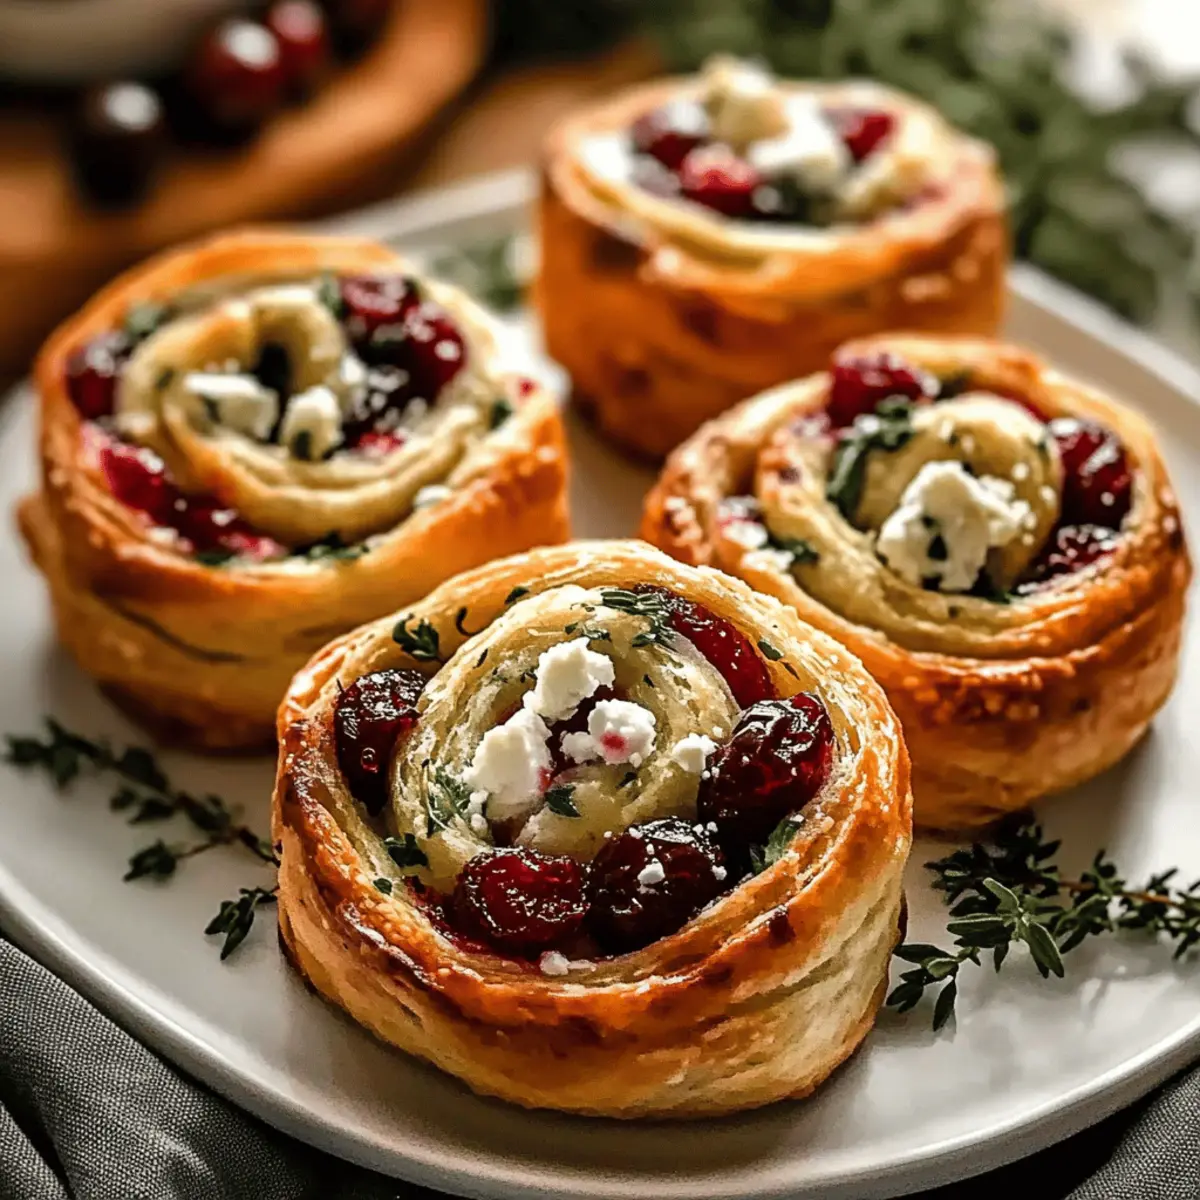
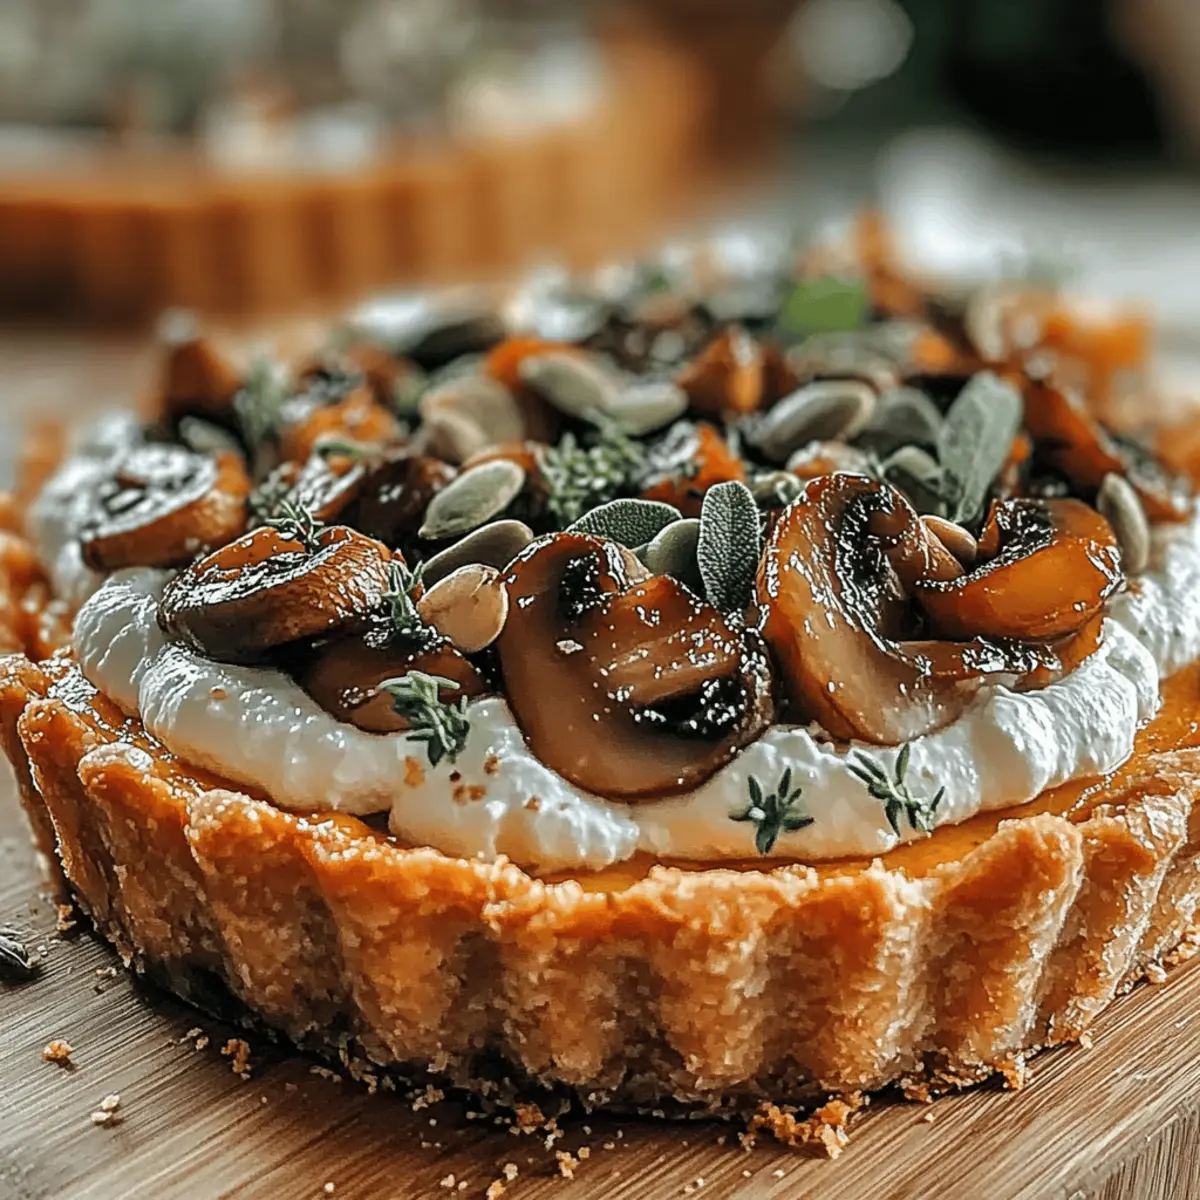
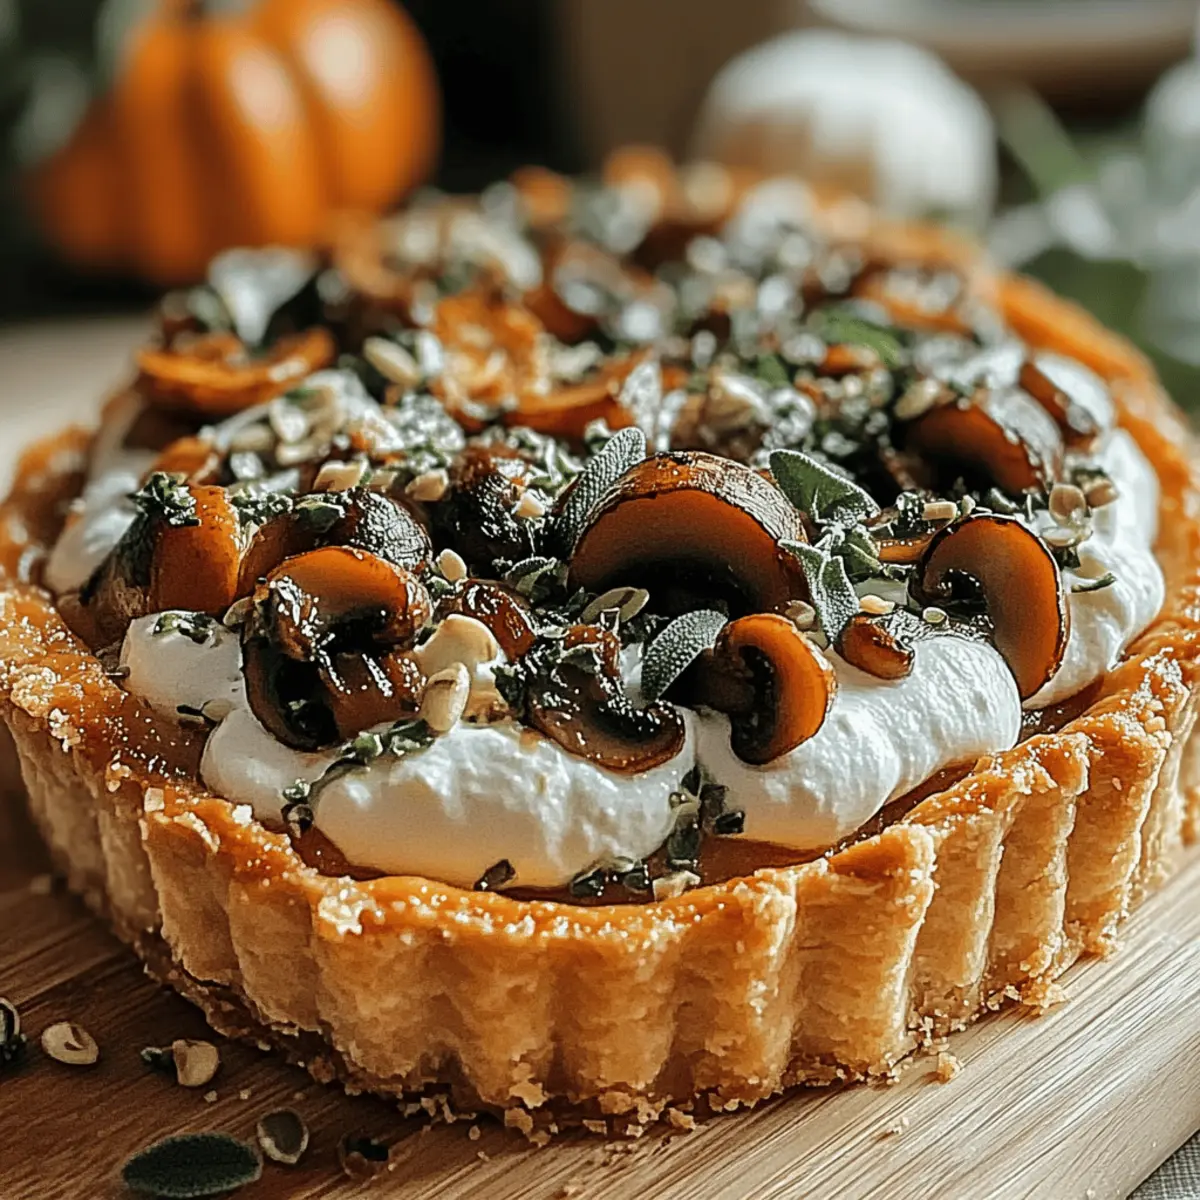
As the leaves turn golden and the air takes on a crisp bite, I can’t help but crave warm, comforting dishes that celebrate the season. This is where my Harvest Delight: Pumpkin Sage & Mushroom Tart comes in, a delightful fusion of creamy pumpkin, earthy cremini mushrooms, and aromatic sage that truly embodies autumn’s essence. With its buttery, flaky puff pastry, this tart isn’t just a feast for the eyes—it’s an easy-to-make comfort food that promises to impress at your next family gathering or cozy dinner. Plus, it’s vegetarian-friendly and can easily adapt for gluten-free or dairy-free diets, making it a versatile option for everyone at the table. Are you ready to savor the flavors of fall? Let’s dive into this scrumptious recipe!

Why will you love this tart?

Seasonal Flavors: This Pumpkin Sage & Mushroom Tart showcases the richness of autumn with its fresh ingredients, perfect for cozy gatherings.
Easy to Prepare: With just a few simple steps, this dish is approachable for both novice and experienced chefs.
Crowd-Pleasing Appeal: Impress your guests with a stunning centerpiece that offers warmth and comfort in each bite.
Versatile Options: Easily adapt the recipe for gluten-free or dairy-free diets without sacrificing flavor.
Elegant Presentation: The flaky puff pastry and vibrant filling create an inviting dish that’s as beautiful as it is delicious. Pair it with a fresh arugula salad for a complete meal, similar to what you’d find in my Mushroom Pasta Delightful recipe!

Pumpkin Sage & Mushroom Tart Ingredients

• You won’t believe how simple it is to gather these seasonal items!

For the Tart Base

  • Puff Pastry – Make sure it’s chilled before using to achieve that delicious flakiness.

For the Filling

  • Pumpkin Puree – The star ingredient that gives a creamy consistency and subtle sweetness; fresh is best!
  • Cremini Mushrooms – Bring umami depth to the dish; sauté them to enhance their natural sweetness.
  • Fresh Sage – This herb beautifully complements the pumpkin; fresh sage enhances flavor prominently.
  • Ricotta Cheese – Adds a smooth, creamy texture that elevates the filling.
  • Parmesan Cheese – Infuses a savory, nutty richness; don’t skip this for ultimate flavor.
  • Eggs – Provide binding for the filling; essential for achieving the right structure.

For Cooking

  • Olive Oil – Use for sautéing vegetables, contributing to an aromatic base.
  • Salt and Pepper – Essential seasonings to heighten all flavors in this Pumpkin Sage & Mushroom Tart.

For Garnish

  • Pumpkin Seeds – Optional, but they add a delightful crunch and visual appeal to your tart.

Step‑by‑Step Instructions for Pumpkin Sage & Mushroom Tart

Step 1: Preheat Your Oven
Begin by preheating your oven to 400°F (200°C). This step is crucial for ensuring a perfectly baked Pumpkin Sage & Mushroom Tart. The right temperature will help the puff pastry become beautifully golden and flaky. While your oven warms up, prepare your tart pan by greasing it lightly or using parchment paper.

Step 2: Prepare the Puff Pastry
Roll out the chilled puff pastry on a lightly floured surface to about ¼ inch thick. Carefully fit the pastry into your tart pan, gently pressing it into the corners. Use a fork to prick the bottom of the pastry; this prevents it from puffing up during baking. Once ready, chill the prepared pastry in the fridge for about 15 minutes to maintain its texture.

Step 3: Sauté the Vegetables
In a large skillet, heat 2 tablespoons of olive oil over medium heat. Add finely chopped onions and minced garlic, sautéing for about 2-3 minutes until they become translucent and fragrant. Next, add the sliced cremini mushrooms, cooking for an additional 5-7 minutes until they turn golden brown. Stir in the fresh sage, seasoning with salt and pepper, and mix well before removing from heat.

Step 4: Mix the Filling
In a large mixing bowl, combine the pumpkin puree, ricotta cheese, and grated Parmesan. Add the sautéed mixture of onions, garlic, and mushrooms to this bowl, along with 2 beaten eggs for binding. Season with additional salt and pepper to taste. Stir until you achieve a smooth and creamy mixture, fully incorporating all the savory ingredients for your Pumpkin Sage & Mushroom Tart filling.

Step 5: Fill the Tart Shell
Carefully spread the pumpkin filling evenly into the pre-baked puff pastry shell, ensuring it’s level for even baking. Use a spatula to smooth out the top for a polished finish. The filling should fill the crust generously, showcasing the beautiful colors and textures.

Step 6: Bake the Tart
Place the filled tart in your preheated oven and bake for 30-35 minutes. Check for doneness when the crust is golden brown and the filling is set — a knife inserted into the center should come out clean with just a few moist crumbs. The aroma of the Pumpkin Sage & Mushroom Tart will fill your kitchen!

Step 7: Cool and Garnish
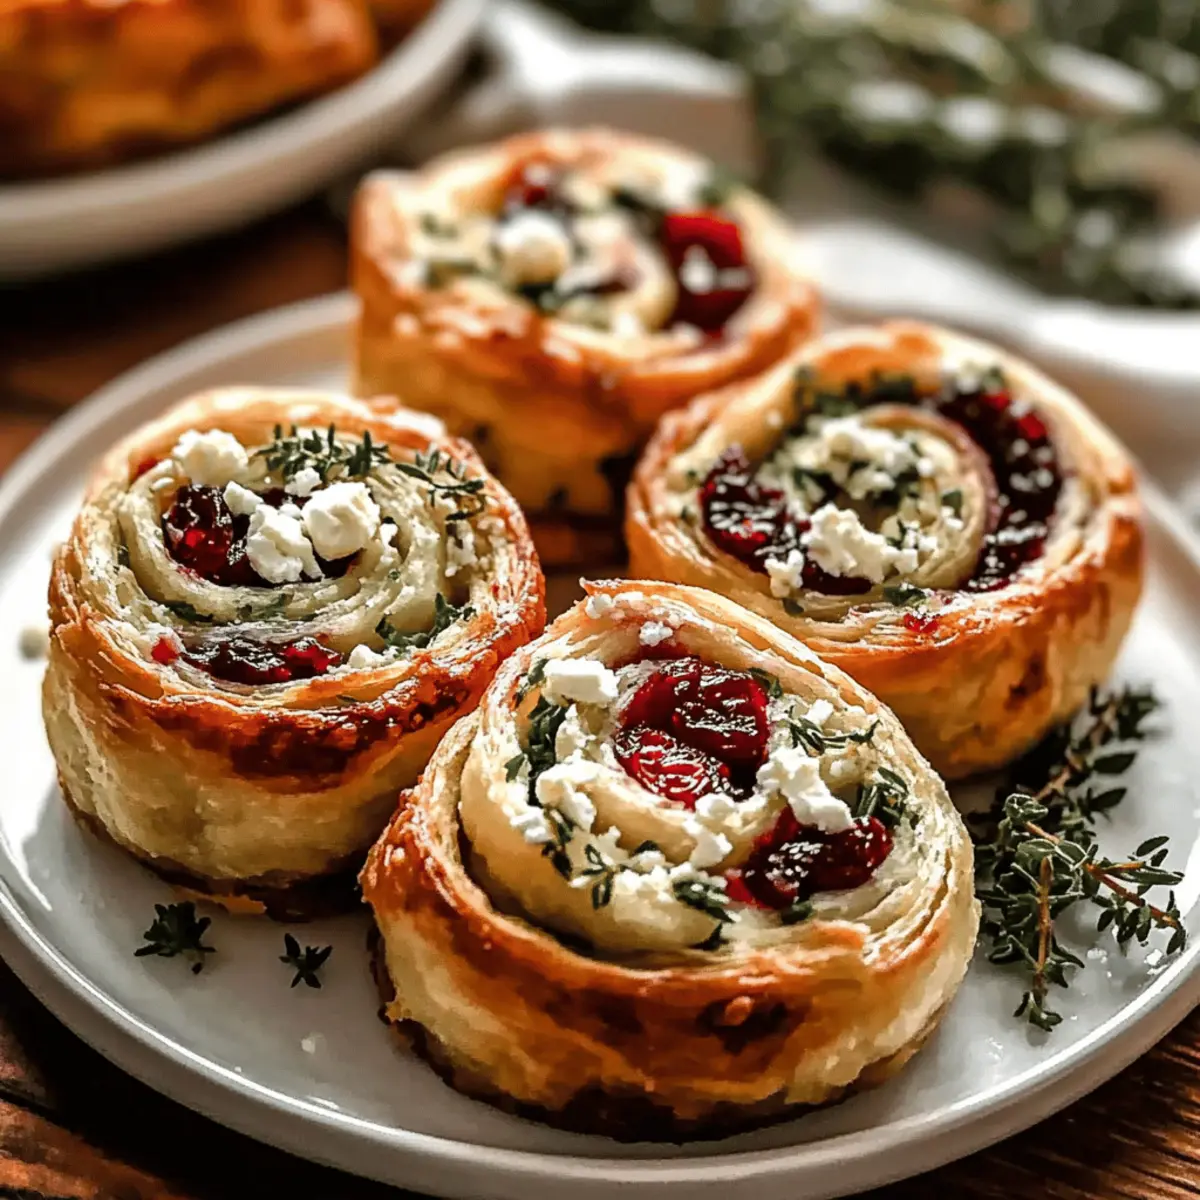
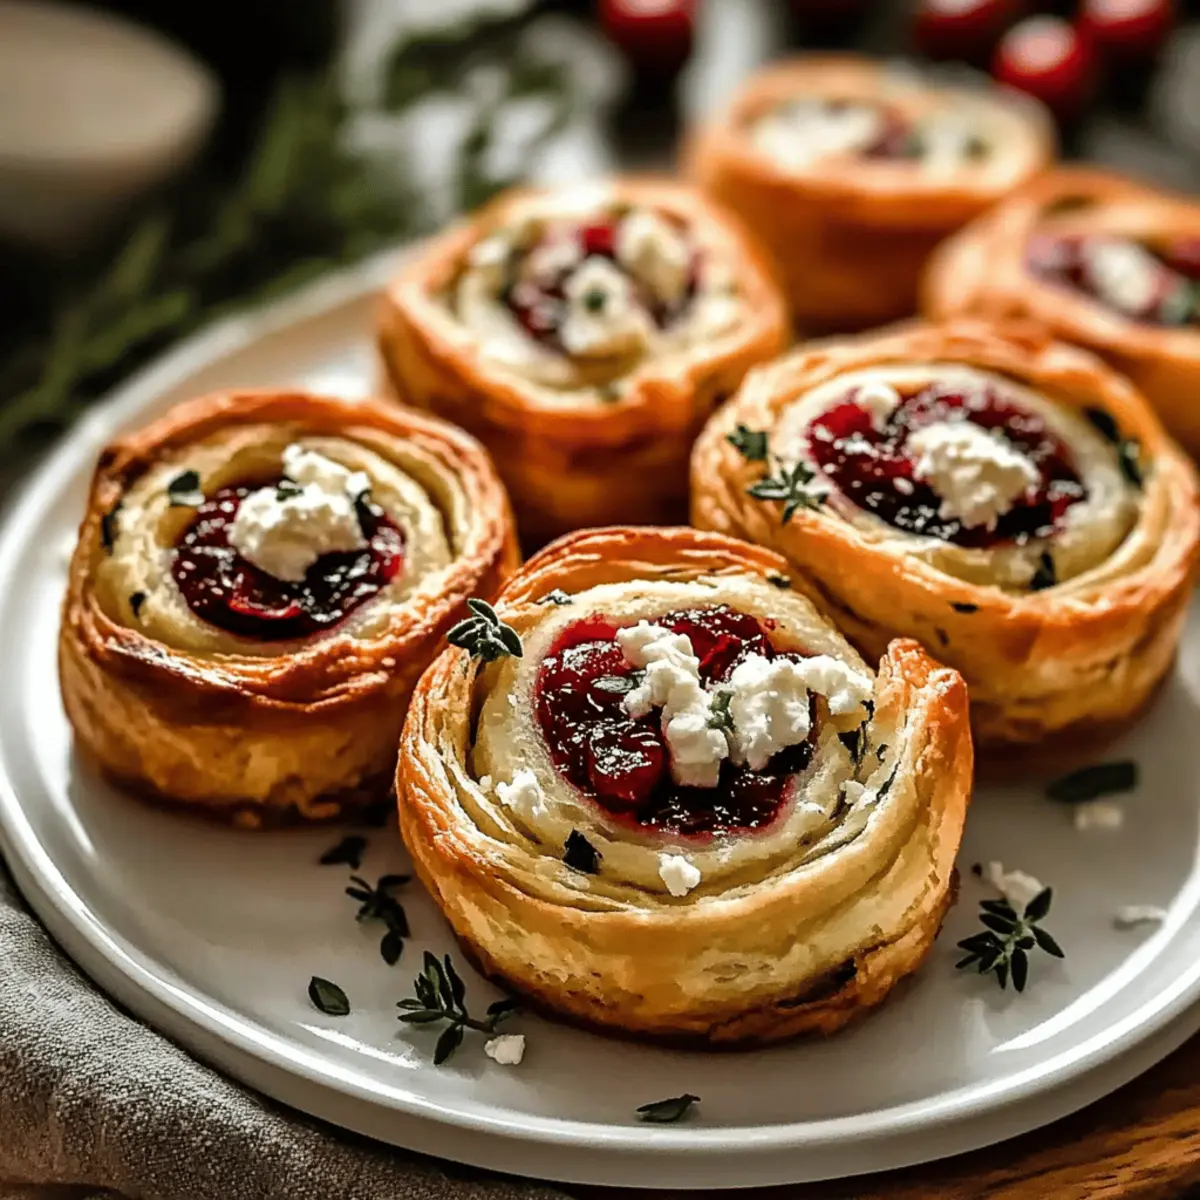
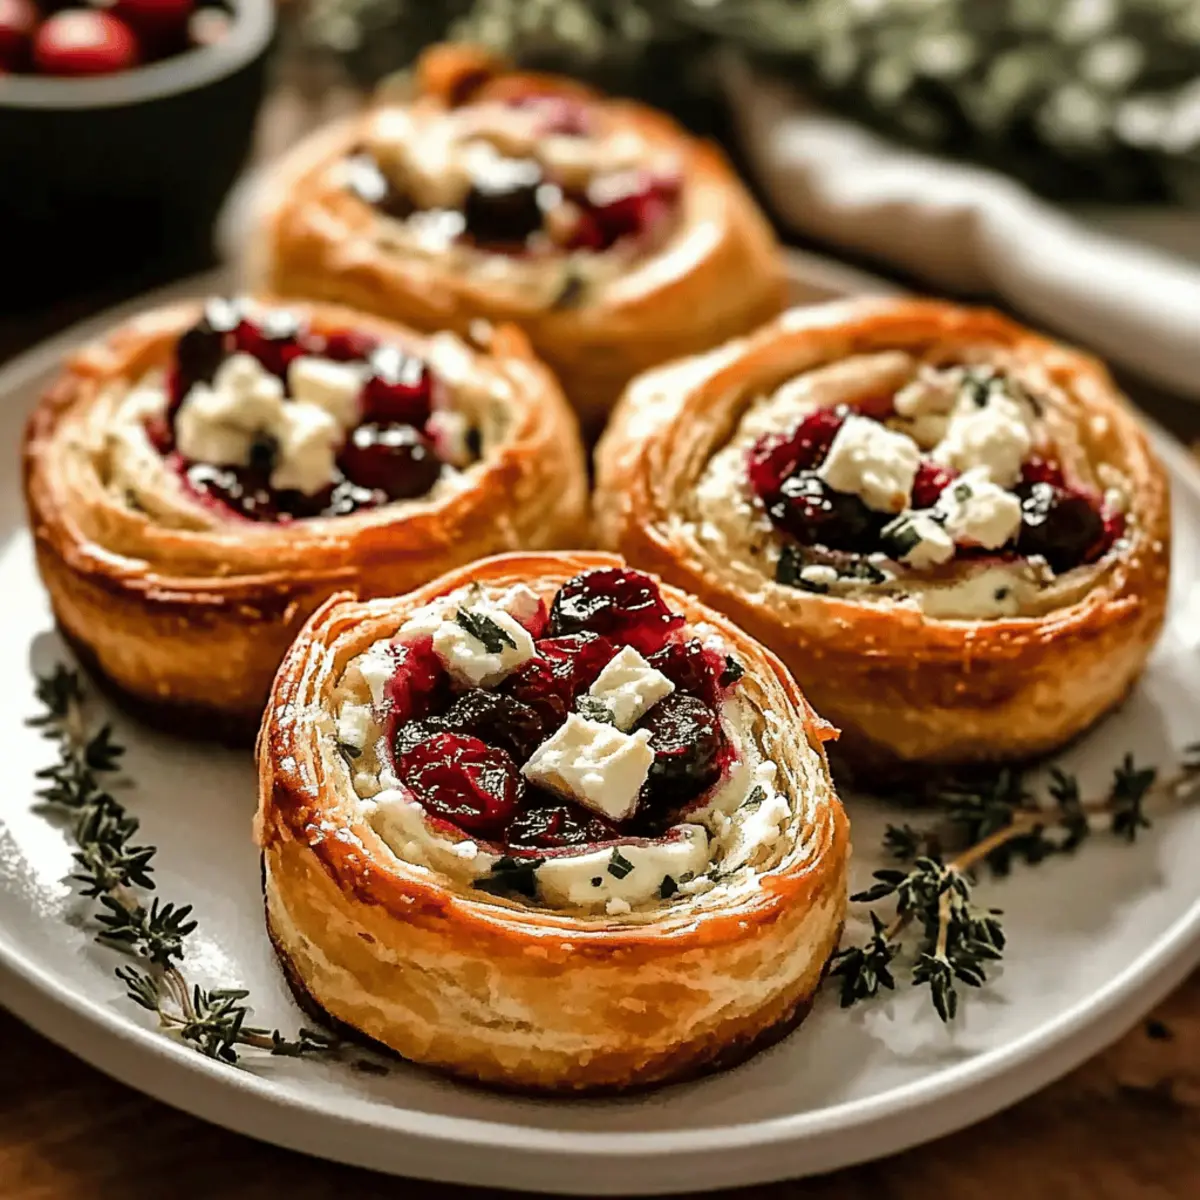
Once baked, remove the tart from the oven and let it cool for about 10 minutes on a wire rack. The cooling process allows the filling to set further, making it easier to slice. For a delightful touch, sprinkle optional pumpkin seeds over the top for added texture and a lovely presentation before serving warm or at room temperature.

What to Serve with Pumpkin Sage & Mushroom Tart

Looking to craft a complete and cozy fall meal? These delightful sides and beverages will elevate your dining experience!

  • Arugula Salad: Tossed with a lemon vinaigrette, it adds a peppery freshness that balances the rich flavors of the tart.
  • Roasted Root Vegetables: Sweet, caramelized carrots and parsnips bring a lovely warmth that perfectly complements the earthy mushrooms.
  • Crispy Potato Wedges: Seasoned with rosemary and sea salt, they offer a satisfying crunch alongside the creamy tart filling.
  • Apple Cider: A warm or chilled glass enriches the autumnal vibe, with a hint of spice that pairs beautifully with pumpkin.
  • Grilled Asparagus: Lightly charred for a smoky flavor, the tender stalks contrast nicely against the tart’s buttery crust.
  • Butternut Squash Soup: Silky and flavorful, this warming soup serves as a fantastic starter or side to echo the pumpkin theme.
  • Honey-Glazed Brussels Sprouts: These savory bites, with a touch of sweetness, harmonize the dish with additional texture and flavor.
  • Cheese Platter: A variety of cheeses like aged cheddar or goat cheese can enhance the meal, adding layers of taste and elegance.
  • Spiced Pear Tart: Follow with this delightful dessert for a sweet ending that complements the savory notes of the Pumpkin Sage & Mushroom Tart.

Pumpkin Sage & Mushroom Tart Variations

Feel free to get creative with this Pumpkin Sage & Mushroom Tart by exploring these delightful twists!

  • Gluten-Free Crust: Swap out the puff pastry for a gluten-free option made from almond or oat flour. It’ll have a different texture but still be delicious!

  • Dairy-Free Creaminess: Use coconut cream or cashew cream in place of ricotta for a velvety filling that is completely dairy-free. This swap doesn’t compromise on flavor!

  • Vegetable Boost: Add in sautéed spinach or kale for an extra nutrient punch. These greens will bring in a hint of brightness and texture to your tart.

  • Cheesy Alternatives: If you’re after even more flavor, try goat cheese or feta instead of ricotta or Parmesan. These cheeses will impart their unique tang, enhancing the savory profile.

  • Herb Variations: Elevate flavor by experimenting with other herbs like thyme or rosemary. Their aromatic qualities pair beautifully with pumpkin and mushrooms.

  • Nutty Crunch: Toss in some toasted walnuts or pecans for an unexpected texture twist. Their nutty richness complements the tart’s earthy flavors.

  • Add Heat: Spice things up with crushed red pepper flakes or a dash of cayenne pepper in the filling. This will add a delightful kick that contrasts wonderfully with the creaminess.

As you savor this dish, consider pairing it with a fresh arugula salad drizzled with lemon vinaigrette, or for a cozy evening in, why not enjoy it alongside a comforting bowl of Rotisserie Chicken Mushroom soup? Happy cooking!

Expert Tips for Pumpkin Sage & Mushroom Tart

  • Keep It Cold: Ensure your puff pastry remains chilled until ready to use; warm pastry can lose its flakiness and texture during baking.

  • Sauté with Care: Avoid overcooking the mushrooms; sauté just until golden to retain their umami flavor in the Pumpkin Sage & Mushroom Tart.

  • Measure Accurately: For even baking, level your filling in the tart shell; an uneven filling can affect cooking times and texture.

  • Test for Doneness: Use a toothpick to check the tart’s center. It should come out clean or with a few moist crumbs, indicating the filling is perfectly set.

  • Cool Before Slicing: Allow the tart to cool for 10 minutes before cutting; this helps achieve cleaner slices and enhances presentation.

How to Store and Freeze Pumpkin Sage & Mushroom Tart

Fridge: Store leftovers in an airtight container for up to 3 days. This helps maintain flavor and keeps the tart fresh.

Freezer: For longer storage, wrap tightly in plastic wrap and then foil. Your Pumpkin Sage & Mushroom Tart can be frozen for up to 3 months without losing its delightful taste.

Reheating: To enjoy leftovers, reheat in the oven at 350°F (175°C) for about 15-20 minutes to restore that flaky crust and warm filling. Avoid microwaving, as it may lead to a soggy tart.

Make Ahead Options

These Pumpkin Sage & Mushroom Tart preparations are perfect for busy home cooks looking to save time! You can prepare the filling up to 3 days in advance; simply mix together the pumpkin puree, ricotta, Parmesan, sautéed vegetables, and eggs, then transfer it to an airtight container and refrigerate. For the crust, roll out the puff pastry and fit it into the tart pan up to 24 hours ahead. Just be sure to wrap it in plastic wrap to keep it from drying out. When you’re ready to serve, pour the filling into the prepared crust and bake as directed. With these make-ahead options, you’ll enjoy a comforting, delectable Pumpkin Sage & Mushroom Tart without the last-minute rush!

Pumpkin Sage & Mushroom Tart Recipe FAQs

What is the best way to select ripe pumpkin for this recipe?
Absolutely! For the best flavor, choose a pumpkin that feels firm and heavy for its size, with a smooth, unblemished skin. Look for a deep orange color, which indicates ripeness—it should also be free from any dark spots. Fresh pumpkin puree made from roasting your own pumpkin will elevate your tart immensely!

How should I store the Pumpkin Sage & Mushroom Tart?
Very good question! Store any leftovers in an airtight container in the refrigerator, where they will stay fresh for up to 3 days. Make sure to allow the tart to cool completely before placing it in the fridge, as this helps retain its flaky texture.

Can I freeze the Pumpkin Sage & Mushroom Tart?
Absolutely! For freezing, first let the tart cool completely. Wrap it tightly in plastic wrap, then in aluminum foil to prevent freezer burn. Your Pumpkin Sage & Mushroom Tart can be kept in the freezer for up to 3 months. When you’re ready to enjoy it, thaw in the refrigerator overnight and reheat in the oven at 350°F (175°C) for about 15-20 minutes.

What should I do if the filling is too runny?
If you find your filling is too runny, consider adding a couple more tablespoons of ricotta cheese or Parmesan to thicken it up. You could also try reducing some of the sautéed vegetable mixture before adding it to the filling. This helps remove excess moisture! Simply keep sautéing until the mixture is drier and thicker.

Can this recipe be adapted for gluten-free or dairy-free diets?
Absolutely! For a gluten-free option, swap the puff pastry with a gluten-free crust made from almond or oat flour. You can also replace ricotta cheese with coconut cream or cashew cream for a creamy dairy-free alternative. Adjusting to accommodate dietary preferences has never been easier!

Can I use dried sage instead of fresh?
While fresh sage provides vibrant flavor, you can use dried sage as a substitute. Just use about one-third of the amount called for in the recipe, as dried herbs are more concentrated in flavor. It’s essential to add it early in the cooking process to help rehydrate the leaves and release their aromatic essence!

Pumpkin Sage & Mushroom Tart

Savor the Season with Pumpkin Sage & Mushroom Tart Delights

Experience the comforting flavors of fall with this Pumpkin Sage & Mushroom Tart, a delightful vegetarian dish perfect for gatherings.
Prep Time 30 minutes
Cook Time 35 minutes
Cooling Time 10 minutes
Total Time 1 hour 15 minutes
Servings: 8 slices
Course: Dinner
Cuisine: Vegetarian
Calories: 320

Ingredients
  

For the Tart Base
  • 1 package Puff Pastry Make sure it’s chilled before using.
For the Filling
  • 1 cup Pumpkin Puree Fresh is best!
  • 8 ounces Cremini Mushrooms Sautéed to enhance flavor.
  • 2 tablespoons Fresh Sage Chopped.
  • 1 cup Ricotta Cheese
  • 1/2 cup Parmesan Cheese Grated.
  • 2 large Eggs Beaten.
For Cooking
  • 2 tablespoons Olive Oil For sautéing.
  • to taste Salt
  • to taste Pepper
For Garnish
  • 1/4 cup Pumpkin Seeds Optional for garnish.

Equipment

  • Oven
  • Skillet
  • Tart Pan
  • Mixing Bowl

Method
 

Step-by-Step Instructions
  1. Preheat your oven to 400°F (200°C). Grease your tart pan lightly or use parchment paper.
  2. Roll out the chilled puff pastry to about ¼ inch thick and fit it into your tart pan.
  3. In a skillet, heat olive oil over medium heat and sauté onions and garlic for 2-3 minutes.
  4. Add sliced cremini mushrooms and cook for 5-7 minutes until golden brown, then stir in fresh sage.
  5. In a mixing bowl, combine pumpkin puree, ricotta cheese, Parmesan, sautéed mixture, and beaten eggs, season with salt and pepper.
  6. Spread the pumpkin filling evenly into the pre-baked pastry shell.
  7. Bake the tart for 30-35 minutes until the crust is golden and filling is set.
  8. Cool the tart for 10 minutes before serving, garnishing with pumpkin seeds if desired.

Nutrition

Serving: 1sliceCalories: 320kcalCarbohydrates: 28gProtein: 9gFat: 20gSaturated Fat: 8gPolyunsaturated Fat: 2gMonounsaturated Fat: 8gCholesterol: 75mgSodium: 400mgPotassium: 350mgFiber: 2gSugar: 3gVitamin A: 600IUVitamin C: 2mgCalcium: 150mgIron: 1.5mg

Notes

Store leftovers in an airtight container for up to 3 days or freeze for up to 3 months. Reheat at 350°F for 15-20 minutes.

Tried this recipe?

Let us know how it was!

Air Fryer Veggie Chips: Crunchy, Guilt-Free Snack Bliss

Crunchy cravings can sneak up on the best of us, often leading to the temptation of reaching for a bag of chips. However, I’ve found a much healthier alternative that satisfies those snack attacks guilt-free: Air Fryer Veggie Chips. This recipe transforms fresh vegetables into nutrient-packed, crispy delights, making them the perfect snacking solution for both kids and adults. Not only are these chips ready in about 30 minutes, but they’re also a fantastic way to enjoy a guilt-free snack that dodges the deep fryer. Plus, you can customize the flavors with your favorite seasonings! Curious how easy it is to whip up this crispy treat? Let’s dive in!

Why choose Air Fryer Veggie Chips?

Crispy, Guilt-Free Delight: These Air Fryer Veggie Chips are an amazing way to satisfy your cravings without the excess calories of traditional snacks.

Customizable Flavors: Use your favorite seasonings or spices to create unique flavors that everyone will love. The possibilities are endless!

Quick Preparation: Whip up a healthy batch in around 30 minutes, making them perfect for spontaneous snacking or a last-minute party treat.

Nutritious Alternatives: Packed with nutrients from fresh vegetables like carrots and zucchini, these chips are a healthier choice that won’t sacrifice taste.

Crowd-Pleasing Snack: Serve them with delightful dips like hummus or guacamole for an irresistible appetizer that will have your guests coming back for more. For even more crispiness, check out my Air Fryer Chicken or consider pairing them with these Air Fryer Baked goodies!

Air Fryer Veggie Chips Ingredients

• Ready to create your own crispy delight?

For the Chips

  • Carrots – Provides a natural sweetness and crunch; substitute with parsnips for a different flavor.
  • Zucchini – Adds moisture and a mild taste; thicker slices may result in a chewier texture.
  • Sweet Potatoes – Offers sweetness and fiber; can be replaced with regular potatoes for a traditional flavor.

For the Seasoning

  • Olive Oil – Helps crisp up the chips and enhances flavor; substitute with avocado oil for a higher smoke point.
  • Salt – Essential for enhancing flavors; adjust based on dietary preferences.
  • Pepper – Adds subtle heat; use cayenne pepper for a spicier version.
  • Paprika – Provides a smoky flavor; swap with garlic powder for a different kick.

Now, let’s turn those vibrant veggies into a deliciously crispy snack that’s perfect for any occasion!

Step‑by‑Step Instructions for Air Fryer Veggie Chips

Step 1: Prepare Veggies
Begin by washing your chosen vegetables thoroughly to remove any dirt. Slice the carrots, zucchini, and sweet potatoes into thin pieces, about 1/8 inch thick. Use a sharp knife or a mandoline slicer for uniformity, as this ensures the Air Fryer Veggie Chips will cook evenly. Set your sliced veggies aside in a large bowl, ready for seasoning.

Step 2: Season
In the bowl with your sliced vegetables, drizzle 1 tablespoon of olive oil over them. Sprinkle in 1 teaspoon of salt, 1/2 teaspoon of pepper, and 1/2 teaspoon of paprika. Toss the vegetables gently until they’re evenly coated, ensuring each piece is flavored. The oil will help to crisp the Air Fryer Veggie Chips while enhancing their taste.

Step 3: Preheat Air Fryer
Set your air fryer to a temperature of 375°F (190°C) and allow it to preheat for approximately 3 to 5 minutes. Preheating is crucial as it ensures even cooking right from the start, contributing to the perfect crispiness of your Air Fryer Veggie Chips. Meanwhile, gather your seasoned veggie slices for cooking.

Step 4: Cook
Once the air fryer is preheated, place the seasoned veggies in a single layer in the fryer basket. It’s important not to overcrowd the basket, so if necessary, cook in batches. Cook the veggies for about 15 to 20 minutes, shaking the basket halfway through to promote even cooking. Look for golden brown edges as a sign that they are turning crispy.

Step 5: Cool
After the cooking time is complete, carefully remove the basket from the air fryer, and transfer the Air Fryer Veggie Chips to a wire rack to cool for a few minutes. This cooling phase will help maintain their crispiness. Once they’ve cooled slightly, they’re ready to be enjoyed as a healthy snack or appetizer.

What to Serve with Air Fryer Veggie Chips?

Elevate your snacking experience by pairing these delightful chips with irresistible additions that will tantalize your taste buds.

  • Creamy Hummus: This rich dip adds a smooth texture that balances the crunch of the chips, making every bite a pleasure.

  • Guacamole: Creamy avocado goodness not only complements the veggie chips but also infuses them with a hearty feel; perfect for a midday snack!

  • Salsa Fresca: The bright flavors of fresh tomatoes and cilantro bring a refreshing contrast, enhancing the natural goodness of your veggie chips.

  • Cheesy Yogurt Dip: A healthier alternative to traditional dips; this tangy yogurt blended with spices offers a creamy counterpart to your crunchy chips.

  • Lightly Salted Mixed Nuts: For an added crunch and a protein boost, these nuts make a satisfying companion while adding delightful texture.

  • Fresh Vegetable Platter: Pairing your veggie chips with a selection of raw veggies creates a vibrant, colorful spread bursting with health.

  • Sparkling Water: A fizzy drink keeps your palate refreshed. Opt for flavored sparkling water to elevate the experience without added sugar.

  • Dark Chocolate Dip: Can you imagine? Dipping your crunchy chips in melted dark chocolate might sound adventurous, but it’s a sweet surprise that satisfies both savory and sweet cravings!

Expert Tips for Air Fryer Veggie Chips

  • Slicing Consistency: Aim for even 1/8 inch thickness to ensure uniform cooking; a mandoline slicer can help achieve this for your Air Fryer Veggie Chips.

  • Avoid Overcrowding: Batch cooking is key! Leaving space between the chips allows for proper air circulation, preventing them from becoming soggy.

  • Monitor Cooking Time: Keep an eye on your chips during the last few minutes of cooking. Air fryer settings may vary, and you don’t want them burning!

  • Experiment with Seasonings: Don’t be afraid to mix it up! Try different herbs and spices for unique flavors; garlic powder or cayenne pepper can give your chips a delightful twist.

  • Storage Tips: To maintain crispiness, store the Air Fryer Veggie Chips in an airtight container at room temperature for 3-4 days.

Make Ahead Options

These Air Fryer Veggie Chips are a fantastic choice for meal prep, saving you precious time on busy days. You can slice and season your vegetables up to 24 hours in advance; just store them in an airtight container in the refrigerator to keep them fresh and prevent browning. Additionally, if you want to further streamline the process, you can cook the chips and allow them to cool, then store them in a sealed container. They will stay crispy for up to 3 days, making them a great snack option to have on hand. When you’re ready to enjoy, simply reheat the chips in the air fryer at 350°F (175°C) for about 2-3 minutes to restore their crunch, ensuring they’re just as delicious as when they were first made!

Air Fryer Veggie Chips: Customization Ideas

Feel free to get creative and make these Air Fryer Veggie Chips your own with these fun variations!

  • Root Veggie Mix: Experiment with beets or turnips for unique flavors. The earthy sweetness of these vegetables creates a colorful and tasty combination, surprising your taste buds!

  • Kale Chips: Swap in kale for a nutritious, crispy alternative. Simply tear the kale into pieces, coat with olive oil and seasoning, and air fry until crunchy. They’ll add a delightful green crunch to your snack time.

  • Herbed Chips: Add different herbs like rosemary or thyme to the seasoning mix for an aromatic twist. Fresh herbs elevate the flavor profile, turning your veggie chips into a gourmet treat.

  • Spicy Kick: For a heat boost, incorporate cayenne pepper or chili powder. This little kick adds an exciting twist that will leave spice lovers grinning from ear to ear!

  • Sweet & Savory: Sprinkle a bit of cinnamon and a touch of maple syrup on your sweet potatoes for a sweet-salty combo that works wonders. It’s irresistibly addictive!

  • Mixed Flavor Variety: Combine different veggie types, like beets, parsnips, and carrots, to create a rainbow of flavors and colors. Your snack will look as delightful as it tastes!

  • Garlic Lovers: If you adore garlic, add garlic powder or minced fresh garlic to the chip mixture. The aromatic flavor will make your snack extra addictive.

  • Cheesy Flavor: For a cheesy taste, sprinkle nutritional yeast over the chips before air frying. It provides a rich, umami flavor while keeping your snack vegan!

Once you’ve experimented with these variations, you’ll wonder how you ever snacked without them. And if you’re craving more delicious air-fried inspiration, consider trying my crispy Air Fryer Chicken or indulge in some delightful Air Fryer Baked treats!

How to Store and Freeze Air Fryer Veggie Chips

Airtight Container: Store the Air Fryer Veggie Chips in an airtight container at room temperature for up to 3-4 days to maintain their delicious crispiness.

Avoid Moisture: Keep them in a cool, dry place away from sunlight. Moisture can make the chips soggy, so ensuring they stay sealed helps preserve their crunch.

Reheating: If your chips lose their crunch, reheat them in the air fryer at 350°F (175°C) for 2-3 minutes, allowing them to regain that satisfying crisp.

Freezing Option: While it’s best to enjoy Air Fryer Veggie Chips fresh, if you have leftovers, you can freeze them. Just pack in an airtight freezer bag for up to 2 months, though be aware that texture may change slightly upon reheating.

Air Fryer Veggie Chips Recipe FAQs

What vegetables work best for Air Fryer Veggie Chips?
Absolutely! You can use a variety of vegetables for Air Fryer Veggie Chips, but carrots, zucchini, and sweet potatoes are popular choices. For a unique twist, consider substituting with parsnips for sweetness or beets for a vibrant color. Just remember to slice them into uniform pieces—about 1/8 inch thick—to achieve that crispy texture.

How should I store leftover Air Fryer Veggie Chips?
To maintain their crispiness, store your Air Fryer Veggie Chips in an airtight container at room temperature for up to 3-4 days. It’s essential to keep them in a cool, dry place away from sunlight, as moisture can lead to sogginess. If they lose their crunch, simply reheat them in the air fryer at 350°F (175°C) for about 2-3 minutes to refresh them.

Can I freeze Air Fryer Veggie Chips?
While I recommend enjoying them fresh for the best taste and texture, you can freeze Air Fryer Veggie Chips if you have leftovers. Pack them in an airtight freezer bag and store them for up to 2 months. Keep in mind that the texture might change a bit when reheated, but they can still be a delightful snack!

What should I do if my veggie chips aren’t crispy?
If your Air Fryer Veggie Chips aren’t turning out crispy, there are a couple of things to check. First, ensure that your vegetable slices are uniform and not too thick; a mandoline slicer can help with consistency. Second, avoid overcrowding the air fryer basket; give the chips space to let air circulate. If necessary, cook in smaller batches. Lastly, monitor them closely during the last few minutes of cooking to prevent burning.

Are Air Fryer Veggie Chips suitable for diets with food allergies?
Yes! These Air Fryer Veggie Chips can be tailored to fit various dietary needs. They’re inherently vegan and can be made gluten-free. For those with allergies, make sure to avoid any specific seasoning that could trigger reactions. Always opt for vegetable toppings and sauces that suit your dietary restrictions, like herb-infused olive oil or non-dairy dips!

Air Fryer Veggie Chips

Air Fryer Veggie Chips: Crunchy, Guilt-Free Snack Bliss

Enjoy Air Fryer Veggie Chips for a crunchy, guilt-free snack that satisfies cravings without excess calories.
Prep Time 10 minutes
Cook Time 20 minutes
Cooling Time 5 minutes
Total Time 35 minutes
Servings: 4 servings
Course: Appetizer
Cuisine: Healthy
Calories: 150

Ingredients
  

For the Chips
  • 2 medium Carrots Provides natural sweetness and crunch
  • 2 medium Zucchini Adds moisture and mild taste
  • 1 large Sweet Potato Offers sweetness and fiber
For the Seasoning
  • 1 tablespoon Olive Oil Helps crisp up the chips
  • 1 teaspoon Salt Essential for enhancing flavors
  • 1/2 teaspoon Pepper Adds subtle heat
  • 1/2 teaspoon Paprika Provides a smoky flavor

Equipment

  • Air fryer

Method
 

Step-by-Step Instructions
  1. Wash your chosen vegetables thoroughly and slice them into thin pieces, about 1/8 inch thick.
  2. Drizzle olive oil over the sliced vegetables, sprinkle salt, pepper, and paprika, and toss gently to coat.
  3. Preheat your air fryer to 375°F (190°C) for approximately 3 to 5 minutes.
  4. Place the seasoned veggies in a single layer in the fryer basket and cook for about 15 to 20 minutes, shaking the basket halfway through.
  5. Remove the basket, transfer the chips to a wire rack to cool before serving.

Nutrition

Serving: 1servingCalories: 150kcalCarbohydrates: 35gProtein: 3gFat: 5gSaturated Fat: 1gPolyunsaturated Fat: 1gMonounsaturated Fat: 3gSodium: 200mgPotassium: 450mgFiber: 5gSugar: 4gVitamin A: 9500IUVitamin C: 15mgCalcium: 50mgIron: 1mg

Notes

Store Air Fryer Veggie Chips in an airtight container at room temperature for 3-4 days to maintain crispiness.

Tried this recipe?

Let us know how it was!

Warm Orange Jam That Will Brighten Your Mornings

As I stood by my kitchen window, the sun streaming in alongside the sweet citrus aroma of freshly peeled oranges, I couldn’t help but feel a rush of warmth—not just from the spices, but from the nostalgia of cozy winters spent savoring homemade treats. This Orange Jam with Warm spices is the ultimate remedy for those quick-fix meals that leave you feeling uninspired. With minimal effort, you can whip up a delightful jar of sunshine, perfect for spreading on toast or gifting to loved ones during the chilly months. Not only is this jam a crowd-pleaser, but it also embraces the vibrant flavors of seasonality, wrapping them in an irresistible homemade charm. So, why not transform those ordinary oranges sitting on your counter into a delicious treasure? Let’s dive into this heartwarming recipe that will surely brighten your winter mornings!

Why is homemade orange jam special?

Unique Flavors: This easy recipe combines bold, sunny orange with warm spices, creating a taste that’s truly festive.
Versatile Ingredients: You can easily switch out oranges for sweeter citrus like tangerines or clementines, making it adaptable to your preferences.
Crowd Pleaser: Serve this jam on toast or pancakes, and watch your family and friends rave about it!
Quick and Simple: There’s minimal prep involved, meaning you can enjoy homemade goodness without a time-consuming process.
Great for Gifting: Package in pretty jars for thoughtful gifts that add a personal touch to your holiday gatherings. Don’t forget to pair it with delightful options like Savory Turkey Patties for a full meal experience!

Orange Jam Ingredients

For the Jam
Oranges – Fresh fruit provides natural sweetness and flavor; consider tangerines or clementines for an even sweeter treat.
Sugar – Balances the sweetness of the oranges; adjust based on the oranges’ natural sugar content, using less for sweeter fruits.
Cinnamon Sticks – Adds warmth and holiday spice; you can replace with ground cinnamon (1 stick = approx. ½ teaspoon ground).
Star Anise and Cloves – Optional spices for a warm hint of flavor; use sparingly to avoid overpowering the jam.

For the Jars
Canning Jars – Make sure they’re sterilized to keep your orange jam with warm spices fresh and tasty.
Lids – Use new lids for a proper seal when preserving your homemade jam.

Enjoy this delightful homemade creation filled with warmth and comfort!

Step‑by‑Step Instructions for Orange Jam with Warm

Step 1: Prepare Oranges
Begin by peeling 3 lbs of fresh oranges, ensuring to remove as much of the white pith as possible to eliminate bitterness. Place the peeled oranges in a large pot, using a sharp knife to segment them into smaller pieces for easier processing. This preparation step is crucial for achieving a smooth and flavorful Orange Jam with Warm spices.

Step 2: Puree
Using an immersion blender, carefully puree the orange pieces in the pot until the mixture is smooth and uniform. This should take about 1-2 minutes. If you don’t have an immersion blender, transfer the orange pieces to a stand blender in batches, then return the puree to the pot. You’ll see a vibrant orange color that signals you’re ready to move on!

Step 3: Combine Ingredients
In the pot with the orange puree, add 1 cup of sugar along with your optional spices like cinnamon sticks, star anise, and cloves. Stir gently to combine, allowing the sweetness to blend harmoniously with the citrus. Let this mixture rest for about 10 minutes to ensure that the flavors start to meld together beautifully in your homemade orange jam with warm notes.

Step 4: Cook
Set the pot over moderate heat and bring the mixture to a gentle simmer, stirring often to prevent sticking. Cook for 20-30 minutes, keeping an eye out for the jam to thicken. You’ll know it’s ready when it coats the back of a spoon and holds a trail. For extra assurance, you can place a plate in the freezer before cooking; test the jam’s consistency by placing a small amount on the cold plate.

Step 5: Jar the Jam
Once your jam has thickened to your liking, remove it from heat and carefully pour into sterilized canning jars. Ensure to leave about 1/4 inch of headspace at the top of each jar to allow for expansion. Wipe down the rims of the jars with a clean cloth to ensure a good seal. The beautiful, bright color of your Orange Jam with Warm spices will be inviting!

Step 6: Preserve
To preserve your jam, process the jars in a water bath canner for 10 minutes. Make sure the water fully covers the jars. Once the time is up, carefully remove the jars and let them cool on a clean towel on the counter for 12-24 hours. You’ll hear the delightful “pop” as the lids seal—a sign of your successful jam-making adventure!

Storage Tips for Orange Jam

Room Temperature: Store sealed jars of orange jam in a cool, dark pantry where they can last for up to 1 year. Keep them away from direct sunlight for optimal freshness.

Fridge: Once opened, refrigerate your orange jam to keep it fresh for up to 3 weeks. Always make sure the jar is tightly sealed when not in use.

Freezer: For longer storage, freeze orange jam in airtight containers or freezer bags. It can last up to 1 year in the freezer without losing flavor.

Reheating: If your jam thickens in the fridge, simply warm it on the stovetop over low heat or in the microwave for a few seconds, stirring gently to restore its luscious consistency.

Orange Jam with Warm Customizations

Feel free to get creative and make this orange jam uniquely yours with some delightful variations!

  • Citrus Swap: Substitute oranges with tangerines or clementines for an even sweeter jam that elevates your breakfast.
    The gentle tartness becomes a perfect balance with spices, making a lovely gift too!

  • Herb Infusion: Add fresh rosemary or thyme to the mix for a surprising herbal twist.
    This aromatic enhancement presents a fresh layer of flavor that transforms your jam into a culinary masterpiece.

  • Zesty Citrus Peel: Incorporate a bit of citrus peel for a hint of bitterness typical of marmalade.
    This adds a rustic charm and complexity to your jam, making it ideal for gourmet toast or as a glaze for meats.

  • Spicy Kick: Introduce fresh ginger or a pinch of red pepper flakes for a warming heat.
    Your taste buds will dance with excitement, and this variation pairs beautifully with savory dishes!

  • Maple Sweetener: Replace half of the sugar with pure maple syrup for a rich, deep flavor profile.
    This twist provides a unique sweetness and can be delightful drizzled over pancakes or waffles.

  • Tropical Touch: Add pineapple or coconut for a sunny tropical vibe.
    This will take your orange jam to a whole new level, making it refreshing and fun, perfect for summer treats.

  • Nutty Crumble: Mix in chopped nuts like pecans or almonds for texture and crunch.
    This addition not only enriches the jam but also makes it a fantastic topping for desserts or yogurt.

  • Canning Plus: For a special touch, jar your orange jam with layerings of spices like cardamom or fennel seed.
    This fancy twist on traditional canning will surely impress at any gathering, enhancing the experience with aromatic flare, similar to what you’ll find in delightful recipes like Coconut Curry Soup or Tuna Macaroni Salad!

Make Ahead Options

These delightful Orange Jam with Warm spices are perfect for busy home cooks looking to save time during the week! You can prep the orange puree up to 24 hours in advance by peeling and pureeing the oranges, then refrigerating the mixture in an airtight container. Alternatively, you can prepare the entire jam up to 3 days ahead; just store it in the refrigerator after cooking. To maintain the quality, ensure that your canning jars are sterilized, and refrigerate any jam that won’t be processed right away. When you’re ready to serve, simply pour the jam into jars, let it come to room temperature before gifting or enjoying, and you’ll have a delicious treat ready with minimal effort!

What to Serve with Simple Orange Jam with Winter Spices

Homemade orange jam isn’t just a treat for your toast; it’s the beginning of a delightful meal experience that warms the heart and soul.

  • Buttermilk Pancakes: Fluffy and light, these are the perfect canvas for your jam, adding a sweet citrus twist to breakfast classics.
  • Creamy Greek Yogurt: The tangy creaminess balances the sweetness of the jam, creating a satisfying and wholesome start to your day.
  • Cheese Platter: Pair with sharp cheddar or creamy brie; the contrast of flavors adds depth to any gathering, making your jam a delightful addition.
  • Warm Croissants: Flaky and buttery, croissants are wonderfully decadent when spread with your home-cooked orange jam, a true French-inspired breakfast treat.

Delve into delightful pairings that not only complement the jam’s bright citrus notes but also create memorable mealtime experiences any day of the week!

Expert Tips for Orange Jam

  • Use Fresh Citrus: Opt for fresh oranges or sweeter tangerines; avoid older fruit as they can lead to runny jam and lack flavor.

  • Sugar Balance: Adjust sugar based on the sweetness of your oranges. Too much can overwhelm the citrus flavor in your orange jam with warm spices.

  • Check Consistency: Always test the jam on a cold plate before jarred to ensure the perfect spreadable texture. If it runs off, cook it a bit longer.

  • Avoid Doubling: Stick to smaller batches while making jam; doubling the recipe can disrupt the cooking process and lead to gelling issues.

  • Spice Infusion: Consider tying whole spices in cheesecloth for easy removal post-cooking, giving you the aromatic essence without the fuss of fishing them out.

Orange Jam with Warm Recipe FAQs

How do I choose ripe oranges for the orange jam?
Absolutely! Look for oranges that feel heavy for their size and have a vibrant, bright color. They should be firm to the touch without any dark spots or soft areas. The more aromatic the orange, the better! If you find tangerines or clementines, they’re often sweeter and work beautifully in this recipe.

How should I store my homemade orange jam?
To keep your orange jam with warm spices fresh, store sealed jars in a cool, dark pantry away from direct sunlight. They can last for up to 1 year at room temperature. Once opened, refrigerate the jam to stay fresh for up to 3 weeks. Always ensure the lid is tightly sealed when not in use.

Can I freeze orange jam, and if so, how?
Yes, freezing is a fantastic option! To freeze your orange jam, ladle the jam into airtight containers or heavy-duty freezer bags, leaving some space for expansion. Be sure to label the bags with the date and type of jam. It can be stored in the freezer for up to 1 year, maintaining its delightful flavor. When you’re ready to use it, thaw it in the refrigerator overnight or warm it gently on the stovetop.

What can I do if my orange jam doesn’t thicken properly?
Very common! If your jam isn’t thickening, it could be due to undercooking or using overly ripe fruit. I recommend simmering it longer—keep cooking for an additional 5-10 minutes while stirring frequently. To test, place a small amount on a cold plate from the freezer; if it doesn’t set up, keep simmering. If all else fails, you can stir in a teaspoon of cornstarch mixed with water, bringing it back to a boil briefly to activate the thickening.

Is the orange jam safe for my pets?
Great question! While the ingredients are safe for humans, it’s best to keep homemade orange jam away from pets, especially dogs and cats. The sugar content can be harmful, and citrus can upset their stomachs. Always enjoy the flavors yourself and consider making pet-friendly treats separately!

Orange Jam with Warm

Warm Orange Jam That Will Brighten Your Mornings

This Orange Jam with Warm spices is a delightful treat that brightens up your mornings with its vibrant flavors.
Prep Time 15 minutes
Cook Time 30 minutes
Resting Time 10 minutes
Total Time 55 minutes
Servings: 8 jars
Course: Dessert
Cuisine: American
Calories: 90

Ingredients
  

For the Jam
  • 3 lbs Fresh Oranges Can substitute with tangerines or clementines
  • 1 cup Sugar Adjust based on sweetness of oranges
  • 1 pieces Cinnamon Sticks Can replace with ½ teaspoon ground cinnamon
  • 1 pieces Star Anise Optional spice
  • 3 pieces Cloves Optional spice
For the Jars
  • Canning Jars Must be sterilized
  • Lids Use new lids for proper seal

Equipment

  • pot
  • immersion blender
  • Canning Jars
  • Lids
  • Water Bath Canner

Method
 

Step-By-Step Instructions
  1. Begin by peeling the oranges, ensuring to remove as much of the white pith as possible. Segment oranges for easier processing.
  2. Using an immersion blender, puree the orange pieces until smooth. Alternatively, use a stand blender in batches.
  3. Add the sugar and optional spices to the orange puree, stirring gently to combine. Let it rest for about 10 minutes.
  4. Cook the mixture over moderate heat, stirring often, for 20-30 minutes, until it thickens.
  5. Pour the thickened jam into sterilized jars, leaving about 1/4 inch of headspace. Wipe down the rims of the jars.
  6. Process jars in a water bath canner for 10 minutes to preserve. Let cool for 12-24 hours.

Nutrition

Serving: 1jarCalories: 90kcalCarbohydrates: 24gSugar: 22g

Notes

Enjoy your homemade Orange Jam with Warm spices on toast or as a thoughtful gift for the holidays.

Tried this recipe?

Let us know how it was!

Irresistibly Sweet Air Fryer Caramelized Bananas Bliss

You won’t believe how easy it is to transform two simple bananas into a warm, heavenly dessert with just your air fryer! These Air Fryer Caramelized Bananas with Brown Sugar and Cinnamon are a delightful way to indulge without the hassle. In a matter of minutes, you’ll enjoy sweet, caramel-laden bananas that are perfect for any occasion—whether it’s a cozy breakfast or a luxurious dessert. The best part? This recipe boasts quick prep and a crowd-pleasing appeal that will leave everyone craving more. What will you serve alongside these delicious caramelized delights?

Why are Air Fryer Caramelized Bananas a Must-Try?

Simplicity at its finest: With just a few ingredients, you can create a restaurant-quality dessert that feels indulgent without the effort.

Warm, gooey goodness: The combination of caramelized brown sugar and cinnamon blankets the bananas in a deliciously sweet hug, making this treat utterly irresistible.

Versatile serving options: Whether paired with classic vanilla ice cream or creamy Greek yogurt, this dish can easily cater to any time of day, from breakfast to dessert.

Quick preparation: Ready in under 10 minutes, these bananas are perfect for busy weeknights or last-minute gatherings when you need a sweet touch.

Crowd-pleaser: Impress your family or guests with this delightful treat that caters to sweet tooths of all ages—everyone will be eagerly asking for seconds!

Try serving them with a drizzle of caramel sauce or elevate your breakfast game with the addition of Air Fryer Baked Potatoes for a balanced brunch!

Air Fryer Caramelized Bananas Ingredients

• Discover the magic of Air Fryer Caramelized Bananas with just a few key ingredients!

For the Bananas

  • 2 ripe bananas – Ensure they’re slightly soft for the sweetest result; overripe bananas work wonders too.
  • 2 tablespoons butter, melted – This adds moisture and helps the caramel cling beautifully. You can substitute with coconut oil for a dairy-free version.

For the Caramel Mixture

  • 1/4 cup brown sugar – This sugar creates that lovely caramel crust; feel free to use dark brown sugar for an even richer flavor.
  • 1 teaspoon ground cinnamon – Adds a warm spice that complements the sweetness; nutmeg is a great alternative for a different kick.

Optional Toppings

  • Caramel sauce – Drizzle it on for an extra treat!
  • Vanilla ice cream – A classic pairing that enhances the warm bananas. Greek yogurt can be a lighter alternative if you prefer.

Step‑by‑Step Instructions for Air Fryer Caramelized Bananas

Step 1: Preheat the Air Fryer
Begin by preheating your air fryer to 350°F for about 5 minutes. This initial step is crucial as it allows the air fryer to reach the desired temperature, ensuring even cooking of the Air Fryer Caramelized Bananas. While waiting, you can gather your ingredients and prepare for the next steps!

Step 2: Prepare the Sugar Mixture
In a small bowl, combine 1/4 cup of brown sugar with 1 teaspoon of ground cinnamon, mixing well to create a fragrant and sweet caramel blend. Set this delightful mixture aside; it will enhance the bananas’ natural sweetness and create that lovely caramel crust when cooked.

Step 3: Slice the Bananas
Take your 2 ripe bananas and peel them, then slice each banana in half lengthwise. This method not only makes for perfect caramelized banana halves but also allows for more surface area to soak up the buttery, sugary goodness. Get ready to coat them next with the melted butter!

Step 4: Coat the Bananas
Brush both sides of each banana half generously with 2 tablespoons of melted butter. Next, sprinkle the brown sugar and cinnamon mixture evenly over the bananas, gently pressing it down to help it stick. This step is crucial for achieving that rich, caramelized exterior when air-fried.

Step 5: Prepare the Air Fryer Basket
Line the air fryer basket with parchment paper, ensuring it fits comfortably without hanging over the edges. Place your banana halves in the basket in a single layer, making sure they aren’t overcrowded. This allows the hot air to circulate freely, ensuring even cooking for your Air Fryer Caramelized Bananas.

Step 6: Air Fry the Bananas
Cook the banana halves in the air fryer at 350°F for about 7 minutes. After this time, check for tenderness; they should be soft, and the sugar should be nicely melted. If they need a little more time, don’t hesitate to add an extra 1-2 minutes, keeping an eye on them to prevent burning.

Step 7: Remove and Serve
Once your Air Fryer Caramelized Bananas are perfectly cooked, carefully lift the parchment paper to remove them from the basket. Serve them warm, and consider adding your favorite toppings like caramel sauce or a scoop of vanilla ice cream for an indulgent treat that elevates this simple dessert.

Air Fryer Caramelized Bananas Variations

Feel free to make these warm, caramelized bananas your own with a few simple tweaks!

  • Nuts: Top with chopped almonds or pecans for a delicious crunch that contrasts beautifully with the soft bananas.

  • Liqueur: Drizzle on Kahlúa or rum before serving; it adds a gourmet touch that elevates the flavor profile wonderfully.

  • Parfait Base: Use the caramelized bananas as a layer in a parfait with yogurt and granola for a delightful breakfast treat or satisfying snack.

  • Choco-licious: Sprinkle some chocolate chips on top right before serving for a sweet additions that pairs well with the caramel flavor.

  • Spicy Kick: Add a pinch of cayenne pepper to the sugar mixture for a surprising heat that balances the sweetness.

  • Coconut Delight: Substitute coconut oil for butter to create a tropical twist while keeping it dairy-free.

  • Fruit Medley: Mix in slices of strawberries or peaches with the bananas for a colorful and fruity dimension.

  • Breakfast Option: Serve these with Air Fryer Baked Potatoes on the side for a balanced brunch that everyone will enjoy.

Each variation is a chance to tantalize your taste buds while experimenting with flavors. Enjoy!

Expert Tips for Air Fryer Caramelized Bananas

  • Choose Ripe Bananas: Using ripe bananas will maximize sweetness and create a better caramel texture; avoid those that are too firm.

  • Parchment Paper Usage: Always line the air fryer basket with parchment paper to prevent the bananas from sticking and breaking apart when cooking.

  • Adjust Cooking Time: Keep in mind that softer bananas will require less cooking time, while firmer ones might need a couple of extra minutes for optimal caramelizing.

  • Butter Application: Ensure you coat the bananas thoroughly with melted butter before adding the sugar mixture, as it helps the caramel adhere better during cooking.

  • Watch for Burnt Sugar: Keep an eye on the bananas while air frying; if you notice the sugar starting to burn, lower the temperature slightly!

  • Serving Varieties: Experiment with different toppings such as chopped nuts or a drizzle of liqueur to elevate your Air Fryer Caramelized Bananas and impress your guests.

What to Serve with Air Fryer Caramelized Bananas

Indulging in warm, caramelized bananas is just the beginning! Here’s how to create a delightful spread that elevates your dessert experience.

  • Creamy Vanilla Ice Cream: The rich creaminess contrasts beautifully with the warm bananas, creating a dessert that’s both cozy and refreshing. The melting ice cream adds a delightful creaminess with each bite.

  • Greek Yogurt Delight: A dollop of tangy Greek yogurt balances the sweetness of the bananas and adds a healthy twist to your dessert. It provides a refreshing counterpart to the caramelized warmth.

  • Crispy Bacon Strips: The savory, crunchy texture of crispy bacon complements the sweet bananas perfectly, making for an unforgettable sweet-and-salty combination. Don’t be surprised if they steal the show!

  • Chopped Nuts: Consider topping with crushed pecans or walnuts for an added crunch. The nutty texture enhances the soft, caramelized bananas, making each bite more exciting.

  • Coffee or Espresso: A warm cup of coffee enhances the dessert experience, as the rich flavors pair wonderfully with the sweetness of the bananas. Sip on your brew while enjoying this warm treat!

  • Caramel Sauce Drizzle: A drizzle of silky caramel sauce not only provides extra sweetness but also makes a beautiful presentation, inviting you to dig in even more!

  • Chocolate Sauce: For chocolate lovers, a rich chocolate sauce adds a decadent twist to the caramelized delight, creating an experience bursting with flavors and textures.

  • Fresh Berries: Add a handful of fresh strawberries or raspberries alongside the bananas for a refreshing burst of flavor and natural sweetness. The tartness balances the richness wonderfully.

  • Fruit Parfait Base: Layer the bananas in a parfait with granola and yogurt for a more elaborate yet equally delightful treat. The crunch and creaminess take your taste buds on a delightful journey.

Make Ahead Options

These Air Fryer Caramelized Bananas are a fantastic option for meal prep, allowing you to enjoy a warm, delicious dessert with minimal effort! You can coat the bananas with melted butter and the brown sugar-cinnamon mixture up to 24 hours in advance and store them in an airtight container in the refrigerator. This not only saves time but also ensures the bananas remain tender. When you’re ready to indulge, simply preheat your air fryer and cook the prepared bananas as instructed, adjusting the cook time slightly if they’re chilled. With this simple prep step, you’ll have a delightful treat ready to impress your family or guests without the last-minute rush!

How to Store and Freeze Air Fryer Caramelized Bananas

Fridge: Store leftover Air Fryer Caramelized Bananas in an airtight container for up to 3 days. They can lose some texture but will still taste great!

Freezer: If you want to freeze, wrap the bananas tightly in plastic wrap and place them in a freezer-safe bag. They can be frozen for up to 2 months for later enjoyment.

Reheating: To reheat, simply place them in the air fryer at 350°F for 2-3 minutes to regain some warmth and texture. Enjoy the gooey goodness again!

Air Fryer Caramelized Bananas Recipe FAQs

What type of bananas should I use for Air Fryer Caramelized Bananas?
For the best results, use ripe bananas that are slightly soft to the touch. They will yield the sweetest and most flavorful caramelized texture. If you have overripe bananas, they work wonderfully too, adding even more natural sweetness to your dessert.

How should I store leftover Air Fryer Caramelized Bananas?
Leftover caramelized bananas can be stored in an airtight container in the refrigerator for up to 3 days. While they may lose some of their crispiness, the flavor remains delicious. Just give them a quick reheat in the air fryer or microwave before serving again!

Can I freeze Air Fryer Caramelized Bananas?
Absolutely! To freeze, wrap each caramelized banana tightly in plastic wrap, then place them in a freezer-safe bag. They can be stored for up to 2 months. When you’re ready to enjoy them, thaw in the refrigerator overnight and reheat in the air fryer at 350°F for 2-3 minutes.

What should I do if my sugar burns while cooking?
If you notice the sugar starting to burn, it’s best to lower the air fryer temperature slightly. Keep an eye on your bananas while they cook; if they seem to be cooking too quickly, reducing the heat can prevent that burnt flavor while still allowing them to caramelize beautifully.

Can I make Air Fryer Caramelized Bananas for someone with allergies?
If you’re serving someone with allergies, there are a couple of substitutions you can make. For those allergic to dairy, substitute butter with coconut oil, which works beautifully. Always check for potential allergens in toppings as well, opting for non-dairy ice cream or Greek yogurt as alternatives if needed.

How can I enhance the flavor of my Air Fryer Caramelized Bananas?
There are plenty of ways to elevate this delicious dessert! Try adding a sprinkle of nutmeg along with the cinnamon for a warm twist, or top your bananas with nuts for added crunch. You might even drizzle some liqueur, like Kahlúa, on top for a gourmet touch!

Air Fryer Caramelized Bananas

Irresistibly Sweet Air Fryer Caramelized Bananas Bliss

Enjoy delicious Air Fryer Caramelized Bananas with brown sugar and cinnamon in just minutes—a perfect dessert for any occasion.
Prep Time 5 minutes
Cook Time 7 minutes
Total Time 12 minutes
Servings: 2 servings
Course: Dessert
Cuisine: American
Calories: 200

Ingredients
  

For the Bananas
  • 2 ripe bananas Ensure they’re slightly soft for the sweetest result; overripe bananas work wonders too.
  • 2 tablespoons butter melted; can substitute with coconut oil for a dairy-free version.
For the Caramel Mixture
  • 1/4 cup brown sugar feel free to use dark brown sugar for an even richer flavor.
  • 1 teaspoon ground cinnamon nutmeg is a great alternative for a different kick.
Optional Toppings
  • caramel sauce drizzle it on for an extra treat!
  • vanilla ice cream a classic pairing that enhances the warm bananas.

Equipment

  • Air fryer

Method
 

Step-by-Step Instructions
  1. Preheat your air fryer to 350°F for about 5 minutes.
  2. In a small bowl, combine 1/4 cup of brown sugar with 1 teaspoon of ground cinnamon.
  3. Peel the bananas and slice each banana in half lengthwise.
  4. Brush both sides of each banana half with melted butter and sprinkle the sugar and cinnamon mixture.
  5. Line the air fryer basket with parchment paper and arrange the banana halves in a single layer.
  6. Cook the banana halves in the air fryer at 350°F for about 7 minutes, checking for tenderness.
  7. Carefully lift the parchment paper to remove the cooked bananas. Serve warm with toppings.

Nutrition

Serving: 1servingCalories: 200kcalCarbohydrates: 30gProtein: 1gFat: 9gSaturated Fat: 5gMonounsaturated Fat: 3gCholesterol: 20mgSodium: 100mgPotassium: 400mgFiber: 2gSugar: 15gVitamin A: 500IUVitamin C: 10mgCalcium: 20mgIron: 0.5mg

Notes

For best results, use ripe bananas and remember to watch the cooking time to prevent burning.

Tried this recipe?

Let us know how it was!

Delicious Monte Cristo Breakfast Casserole for Cozy Mornings

As I opened the fridge this morning, a delightful idea sparked—why not transform the classic Monte Cristo into a cozy breakfast casserole? This Monte Cristo Breakfast Casserole is a glorious blend of savory ham, creamy cheese, and fluffy eggs, all baked to perfection in a satisfying strata. It’s your go-to comfort food that feels indulgent but comes with a healthy twist. With a hint of Dijon and a drizzle of raspberry preserves, you’re just minutes away from an impressive brunch that’s effortlessly simple to prepare. Not only can you get this satisfying dish on the table in no time, but it also makes for a nutritious morning option that keeps you energized throughout the day. Curious how this easy recipe can brighten your breakfast table? Let’s dive in!

Why is Monte Cristo Casserole a Must-Try?

Comforting and Indulgent: The Monte Cristo Breakfast Casserole offers a warm, homey feel that combines beloved breakfast ingredients in one dish.

Effortless Prep: Simply whisk, layer, and bake—this recipe is perfect for busy mornings or when entertaining guests.

Nutrient-Packed: With protein-rich eggs and savory ham, it’s a nourishing start to your day without the guilt.

Endless Variations: Enjoy it as is or switch up the ingredients—swap ham for turkey or use different cheeses based on your palate.

Crowd-Pleasing Delight: This dish is sure to impress family and friends alike, making it a fantastic option for brunch gatherings.

Serve it alongside fresh fruit or yogurt for a complete meal. If you’re looking for more delicious ideas, check out our Hobo Casserole Discover for another hearty dish!

Monte Cristo Breakfast Casserole Ingredients

• A delightful assembly of flavors awaits!

For the Casserole

  • Eggs – Essential for structure and creaminess; using large eggs ensures the best result.
  • Cheese – Adds richness; swap for low-fat cheese if you’re looking to lighten it up.
  • Ham – Provides savory depth; interchangeable with turkey or a plant-based alternative for a lighter option.
  • Bread – The hearty base; choose sturdy French or whole grain, or go gluten-free with your favorite bread.
  • Dijon mustard – Enhances flavor with a kick; omit for a milder taste or use yellow mustard as a substitute.
  • Raspberry preserves – Brings a sweet contrast; feel free to use any fruit preserve or jelly you enjoy.

This delicious Monte Cristo Breakfast Casserole is packed with flavor and perfect for those cozy mornings!

Step‑by‑Step Instructions for Monte Cristo Breakfast Casserole

Step 1: Preheat the Oven
Begin by preheating your oven to 375°F (190°C). This ensures your Monte Cristo Breakfast Casserole will bake evenly, resulting in a fluffy and golden top. While waiting for the oven to reach temperature, gather your baking dish and grease it lightly with cooking spray or butter to prevent sticking.

Step 2: Whisk the Eggs
In a large mixing bowl, crack open the eggs and whisk them vigorously until combined. This should take about 1-2 minutes. Next, fold in the cheese, diced ham, and Dijon mustard, ensuring everything is well blended. The mixture should appear creamy and inviting, setting the stage for your casserole’s rich flavors.

Step 3: Layer the Bread
Take your chosen bread, cut it into bite-sized cubes, and arrange them evenly in the greased baking dish. This sturdy base will soak up the egg mixture beautifully. Once the bread is layered, pour the egg concoction over the top, using a spatula to gently distribute it and ensure even coverage throughout the layers.

Step 4: Let it Soak
Allow the assembled casserole to rest for about 10 minutes. This soaking time is crucial as it permits the bread to absorb the egg mixture, leading to a delectably custardy texture when baked. During this wait, you can prepare any garnishes, like the raspberry preserves, to serve alongside the casserole.

Step 5: Bake the Casserole
Place the prepared casserole in the preheated oven and bake for 30-40 minutes. Keep an eye on it during the last few minutes; the top should be set and lightly browned, indicating it’s ready. A toothpick inserted in the center should come out clean when the Monte Cristo Breakfast Casserole is done.

Step 6: Serve and Enjoy
Once baked, remove the casserole from the oven and let it cool for a couple of minutes. Serve it warm, drizzling each portion with raspberry preserves for a delightful contrast in flavors. This makes for a cozy and inviting breakfast that’s sure to impress everyone at the table!

Make Ahead Options

These Monte Cristo Breakfast Casserole portions are perfect for busy mornings! You can assemble the entire casserole up to 24 hours ahead of time, simply cover it with plastic wrap and refrigerate. For best results, let it sit at room temperature for 30 minutes before baking to ensure even cooking. If you’re short on time, the bread can also be prepped a day in advance by cutting it into cubes and storing it in an airtight container. Just remember to bake it fresh when ready to serve for the best texture and flavor; it will still come out just as delicious! Enjoy the time-saving benefits that make your mornings easier!

Expert Tips for Monte Cristo Breakfast Casserole

  • Bread Choice Matters: Use sturdy bread like French or whole grain to ensure it holds up well in the casserole and absorbs the egg mixture without falling apart.

  • Perfect Egg Mixture: Whisk eggs until fully combined. Adding cheese and ham before mixing helps distribute the flavors evenly throughout the Monte Cristo Breakfast Casserole.

  • Soaking Time: Don’t skip the resting step! Allowing the casserole to sit for about 10 minutes helps the bread absorb the egg mixture, resulting in a custardy and delicious texture.

  • Check for Doneness: Use a toothpick inserted into the center of the casserole; it should come out clean if the Monte Cristo Breakfast Casserole is fully cooked.

  • Customize Your Flavors: Feel free to swap ingredients, like using turkey instead of ham or different cheeses, to tailor the dish to your taste preferences!

  • Make It Ahead: Assemble the casserole the night before and store it in the refrigerator. Just pop it in the oven in the morning for a hassle-free breakfast!

Monte Cristo Breakfast Casserole Variations

Feel free to let your imagination run wild with this recipe, as a delightful twist can elevate the flavors!

  • Bacon or Sausage: Swap ham for cooked bacon or sausage for a smoky flavor. This change brings a hearty richness perfect for breakfast lovers.

  • Cheese Options: Experiment with different cheese types like Swiss, cheddar, or even pepper jack for a spicy kick. Each brings its unique character, creating an endless flavor palette.

  • Fruit Preserves: Replace raspberry preserves with honey, maple syrup, or blueberry jams for a sweeter experience. This little touch amplifies the overall taste while adding a fruity zing.

  • Vegan Version: Use tofu scramble instead of eggs and plant-based cheese for a completely vegan option. This way, you won’t miss the classic flavors while enjoying a compassionate meal.

  • Gluten-Free Bread: Make a gluten-free version by using your favorite gluten-free bread. It ensures everyone can savor this comforting dish without worry.

  • Add Vegetables: Enhance nutrition by adding spinach, bell peppers, or mushrooms. Sauté them before mixing into the egg mixture to keep the casserole lively and flavorful.

  • Italian Twist: Incorporate Italian herbs and marinara sauce instead of Dijon mustard for a pasta-inspired vibe. This twist turns your casserole into a delightful fusion dish!

  • Herb Infusion: Add fresh herbs like chives or parsley into the egg mixture to boost freshness and taste. The fragrant aroma can make your kitchen feel like a cozy bistro!

For those seeking more comforting casseroles, don’t miss our Vegetable Egg Casserole for another easy, delicious option!

Storage Tips for Monte Cristo Breakfast Casserole

Fridge: Keep your casserole in an airtight container for up to 3 days. This ensures it stays fresh and delicious for a quick breakfast option.

Freezer: If you want to store it longer, freeze the casserole (unbaked) for up to 2 months. Wrap it tightly in plastic wrap and foil to prevent freezer burn.

Reheating: To reheat, thaw overnight in the fridge if frozen, then bake at 375°F (190°C) for 20-25 minutes or until heated through. Enjoy your Monte Cristo Breakfast Casserole warm!

Make-Ahead Tip: Feel free to prepare the casserole in advance to enjoy on busy mornings—just bake it fresh when you’re ready to serve!

What to Serve With Monte Cristo Breakfast Casserole

Elevate your breakfast experience with these delightful pairings that not only complement the casserole but make for a wholesome meal.

  • Fresh Berries: Juicy and burstingly sweet, fresh berries add a refreshing contrast that brightens your plate and palate.

  • Greek Yogurt: Creamy and tangy, a dollop of Greek yogurt provides a delicious creaminess that pairs well with the savory casserole.

  • Crispy Hash Browns: Golden brown and perfectly crisp, hash browns offer a satisfying crunch that rounds out your breakfast experience beautifully.

  • Fruit Salad: A vibrant mix of seasonal fruits lends a light, refreshing touch, contrasting the rich flavors of the casserole while adding brightness.

  • Orange Juice: A glass of freshly squeezed orange juice adds a zesty sweetness that perfectly balances the savory elements of the dish.

  • Smoothie Bowl: A thick and fruity smoothie bowl garnished with nuts and seeds offers a healthy, bright side that enhances the meal beautifully.

Each of these pairings creates a lovely symphony of flavors, ensuring that your Monte Cristo Breakfast Casserole is the star of a truly memorable brunch!

Monte Cristo Breakfast Casserole Recipe FAQs

What kind of bread should I use for the casserole?
Absolutely! For the Monte Cristo Breakfast Casserole, you want to choose a sturdy bread like French or whole grain. This keeps the bread from getting too soggy and ensures a great texture. If you prefer gluten-free options, feel free to swap in your favorite gluten-free bread!

How long can I store this casserole in the fridge?
You can store your Monte Cristo Breakfast Casserole in an airtight container in the fridge for up to 3 days. This makes it perfect for quick breakfast options! Just reheat individual portions in the microwave or oven for best results.

Can I freeze the Monte Cristo Breakfast Casserole?
Yes, indeed! If you want to store it longer, you can freeze the unbaked casserole for up to 2 months. Simply wrap it tightly in plastic wrap and aluminum foil to prevent freezer burn. When you’re ready to bake, thaw it overnight in the fridge, then bake at 375°F (190°C) for 30-40 minutes until cooked through.

What are some common troubleshooting tips for this recipe?
Very good question! If your casserole seems too dry, make sure your bread absorbs enough of the egg mixture during the soaking time. Additionally, check for doneness by inserting a toothpick in the center; it should come out clean. If it’s browning too quickly while baking, you can cover it loosely with foil to prevent over-browning.

Are there any dietary considerations for this recipe?
Yes! The Monte Cristo Breakfast Casserole is quite versatile. It’s peanut-free, tree nut-free, soy-free, fish-free, shellfish-free, and alcohol-free, making it suitable for many dietary restrictions. Always double-check your ingredient labels to ensure they meet your dietary needs. Additionally, if serving to kids or pets, ensure there are no ingredients they may be allergic to!

Can I make this casserole ahead of time?
Definitely! You can assemble the Monte Cristo Breakfast Casserole the night before and cover it tightly in the fridge. This way, the flavors meld overnight, and in the morning, all you need to do is pop it in the oven—simple and convenient for busy mornings!

Monte Cristo Breakfast Casserole

Delicious Monte Cristo Breakfast Casserole for Cozy Mornings

This Monte Cristo Breakfast Casserole blends savory ham, creamy cheese, and fluffy eggs for a comforting breakfast that's easy to prepare.
Prep Time 15 minutes
Cook Time 40 minutes
Soaking Time 10 minutes
Total Time 1 hour 5 minutes
Servings: 6 slices
Course: Breakfast
Cuisine: American
Calories: 320

Ingredients
  

For the Casserole
  • 6 large eggs Essential for structure and creaminess.
  • 2 cups cheese Add richness; swap for low-fat cheese if desired.
  • 2 cups ham Provides savory depth; interchangeable with turkey.
  • 6 slices bread Choose sturdy French or whole grain.
  • 2 tablespoons Dijon mustard Enhances flavor with a kick.
  • 1/2 cup raspberry preserves Brings a sweet contrast.

Equipment

  • Baking dish
  • Mixing Bowl
  • Whisk
  • Spatula

Method
 

Preparation Steps
  1. Preheat your oven to 375°F (190°C) and prepare your baking dish with cooking spray or butter.
  2. In a large mixing bowl, whisk the eggs until combined. Fold in the cheese, diced ham, and Dijon mustard.
  3. Cut the bread into bite-sized cubes and arrange them in the greased baking dish. Pour the egg mixture over the bread evenly.
  4. Let the casserole rest for about 10 minutes to allow the bread to soak up the egg mixture.
  5. Bake in the preheated oven for 30-40 minutes until set and lightly browned. A toothpick should come out clean.
  6. Let it cool for a few minutes, then serve warm drizzled with raspberry preserves.

Nutrition

Serving: 1sliceCalories: 320kcalCarbohydrates: 30gProtein: 22gFat: 15gSaturated Fat: 8gPolyunsaturated Fat: 1gMonounsaturated Fat: 4gCholesterol: 250mgSodium: 600mgPotassium: 300mgFiber: 2gSugar: 5gVitamin A: 20IUVitamin C: 2mgCalcium: 15mgIron: 10mg

Notes

Feel free to customize with ingredients like turkey or different cheeses to suit your taste.

Tried this recipe?

Let us know how it was!

Irresistible Chicken Pillows Recipe for Cozy Comfort Nights

As the comforting aroma of baked goods fills the air, I can’t help but feel a wave of nostalgia wash over me. There’s something uniquely satisfying about whipping up a batch of Chicken Pillows with Creamy Parmesan Sauce, a dish that delivers warmth and joy in every bite. This delightful Chicken Pillows recipe is perfect for busy weeknights—quick to prepare and utterly customizable. Whether you’re seeking a cozy family dinner or want to impress friends at your next gathering, these fluffy pastries are here to save the day. Imagine tender shredded chicken wrapped in flaky dough and drizzled with a velvety, cheesy sauce that elevates comfort food to a whole new level. So, what’s your twist going to be? Grab your apron, and let’s create some delicious memories together!

Why is this Chicken Pillows Recipe a must-try?

Warm, Nostalgic Flavors: Each bite of these Chicken Pillows evokes a cozy, nostalgic feeling, reminiscent of family dinners and home-cooked meals.

Quick Prep Time: With just 20 minutes of prep, you can whip up this comforting dish without the hassle, perfect for busy weeknights.

Customizable Options: They’re incredibly versatile! Feel free to experiment with different fillings, sauces, or even try a healthier dough variant.

Impressive Crowd-Pleaser: Whether hosting family or friends, these delightful pillows are sure to WOW your guests and keep them coming back for more.

Perfect for Meal Prep: Make-ahead convenience means you can assemble and refrigerate the pillows, saving time during the week—pair them with Mexican Barbecue Chicken for a fun dinner twist!

Chicken Pillows Recipe Ingredients

• Get ready to create delicious Chicken Pillows with creamy goodness!

For the Filling

  • Cooked Shredded Chicken – Provides protein and heartiness; use leftover rotisserie chicken for extra flavor.
  • Cream Cheese – Binds the filling, creating a creamy texture; substitute with Greek yogurt for a lighter option.
  • Chopped Chives – Adds a mild onion flavor and visual appeal; substitute with green onions if unavailable.
  • Garlic Powder – Infuses warmth and savory notes.
  • Onion Powder – Enhances flavor without overpowering.
  • Salt and Pepper – Essential seasonings; adjust to taste.

For the Pastry

  • Crescent Roll Dough – Forms the outer pastry layer, significantly reducing prep time.

For the Sauce

  • Grated Parmesan Cheese – Melts into the sauce, providing a tangy flavor; freshly grated yields the best results.
  • Heavy Cream – Creates a rich sauce; can substitute with half-and-half for a lighter texture.
  • Chicken Broth – Adds depth of flavor and helps achieve the right sauce consistency.
  • Butter – Contributes richness to the sauce.
  • All-Purpose Flour – Used for thickening the sauce.
  • Ground Nutmeg – Complements the cheese with warmth.

For Brushing

  • Cooking Spray or Melted Butter – For brushing the dough before baking to ensure a golden finish.

Embrace the joy of cooking with this delightful Chicken Pillows recipe that’s fully customizable to suit your family’s tastes!

Step‑by‑Step Instructions for Chicken Pillows Recipe

Step 1: Preheat and Prepare
Begin by preheating your oven to 375°F (190°C). While waiting for the oven to heat, line a baking sheet with parchment paper or lightly coat it with cooking spray. This ensures the Chicken Pillows won’t stick and will bake evenly to a golden brown.

Step 2: Mix the Filling
In a mixing bowl, combine the cooked shredded chicken, cream cheese, chopped chives, garlic powder, onion powder, salt, and pepper. Using a fork or mixer, blend until the mixture is smooth and well integrated, making a delicious filling for your Chicken Pillows. This step takes just a few minutes but is vital for flavor.

Step 3: Prepare the Dough
Carefully separate the crescent roll dough into triangles on a clean surface. Each triangle will serve as the shell for your Chicken Pillows. Ensure the dough stays cold for easier handling, as it will be rolled up around the flavorful filling you prepared in the previous step.

Step 4: Fill the Dough
At the wider end of each crescent roll triangle, place about 2 tablespoons of the chicken filling. Gently fold the narrow end over the filling and pinch the edges together to seal the pillow securely. Repeat this process with the remaining dough and filling, creating a delightful batch of Chicken Pillows ready for the oven.

Step 5: Arrange and Brush
Place the filled Chicken Pillows onto the prepared baking sheet, ensuring there’s space between each one. Brush the tops with melted butter or a light spray of cooking spray for a luscious, golden finish. This will enhance the flavor and improve the visual appeal as they bake.

Step 6: Bake the Pillows
Slide the baking sheet into the preheated oven and bake for 12-15 minutes. Keep a close eye on the Chicken Pillows; they are ready when puffed and golden brown, filling your kitchen with an inviting aroma. This quick bake transforms them into a warm, comforting treat.

Step 7: Make the Creamy Sauce
While your Chicken Pillows bake, prepare the creamy Parmesan sauce. In a saucepan over medium heat, melt 2 tablespoons of butter. Whisk in an equal amount of flour to create a roux, stirring constantly until it turns golden, about 2 minutes, before gradually adding the chicken broth and heavy cream for a velvety texture.

Step 8: Add Cheese and Flavor
Once the mixture is smooth, stir in the grated Parmesan cheese and a dash of ground nutmeg. Continue to cook over medium heat, stirring frequently, until the cheese melts and the sauce thickens, about 3-5 minutes. This rich sauce will enhance your Chicken Pillows beautifully.

Step 9: Serve and Enjoy
Remove the Chicken Pillows from the oven once golden and puffy. Allow them to cool for just a couple of minutes before serving. Drizzle the creamy Parmesan sauce over them or serve it on the side for dipping to elevate your meal. Enjoy the delicious warmth and comfort of your Chicken Pillows!

How to Store and Freeze Chicken Pillows Recipe

Fridge: Store leftover Chicken Pillows in an airtight container for up to 3 days. Reheat in the oven at 350°F (175°C) for about 10-15 minutes for the best texture.

Freezer: Assembled but uncooked Chicken Pillows can be frozen for up to 1 month. Flash-freeze them on a baking sheet before transferring to a freezer-safe bag.

Reheating: If cooked and frozen, bake from frozen at 375°F (190°C) for 25-30 minutes or until heated through and golden. Enjoy the warmth and comfort of this Chicken Pillows recipe anytime!

What to Serve with Chicken Pillows with Creamy Parmesan Sauce

Delight in a well-rounded meal by pairing your Chicken Pillows with these tantalizing sides and beverages that enhance the angelic flavors.

  • Garlic Bread: The warm, buttery flavors of garlic bread add a delightful crunch and complement the creamy sauce beautifully.

  • Caesar Salad: Crisp romaine with tangy Caesar dressing adds freshness and balance, perfect for cutting through the richness of the pillows.

  • Steamed Asparagus: Tender asparagus spears provide a subtle earthiness and a lovely pop of color, creating an elegant plate.

  • Roasted Veggies: A mix of seasonal roasted vegetables introduces sweetness and texture, offering a satisfying contrast to the fluffy pastries.

  • Creamy Mashed Potatoes: Silky mashed potatoes serve as the ultimate comfort food, melding perfectly with the creamy sauce.

  • Wine Pairing: A chilled Chardonnay beautifully complements the richness of the chicken and sauce, enhancing your dining experience.

  • Fruit Salad: A light, refreshing fruit salad adds a sweet and juicy contrast, cleansing the palate between bites.

  • Chocolate Mousse: End the meal on a sweet note with rich chocolate mousse, a luxurious dessert that indulges the senses.

Chicken Pillows Recipe Variations

Feel free to let your creativity shine by customizing this Chicken Pillows recipe with these delicious variations!

  • Turkey Substitute: Use cooked shredded turkey in place of chicken for a delightful twist that’s perfect for post-holiday meals. It adds a unique depth of flavor while keeping that comforting essence intact.

  • Veggie Addition: Fold in finely chopped spinach or cooked broccoli for a pop of color and extra nutrients. These veggies enhance both the flavor and texture, making every bite a bit more vibrant and wholesome.

  • Different Cheeses: Experiment with mozzarella or sharp cheddar for a different taste experience. Each cheese brings its own character, and mixing two can create an irresistible cheesy explosion!

  • Spicy Option: Add red pepper flakes or diced jalapeños if you crave a bit of heat. Spice things up, and let your tastebuds have an adventure. The subtle warmth balances beautifully with the creamy sauce.

  • Herb Enhancement: Incorporate herbs such as basil or parsley for a fresh, aromatic touch. These ingredients elevate the dish, making it as visually appealing as it is delicious.

  • Alternative Sauce: Swap the creamy Parmesan sauce for a vibrant salsa for a refreshing contrast. This twist offers an unexpected but delightful burst of flavor that brightens up each bite.

  • Healthier Dough: Consider whole wheat dough for added nutrition or gluten-free pastry to accommodate dietary needs. This slight change can help you enjoy the same deliciousness while keeping things health-focused.

These variations not only make your Chicken Pillows unique but also open doors for joyful experimentation in the kitchen! If you’re in the mood for more flavor inspiration, check out our Thai Chicken Meatball recipe for a zesty kick or our savory BBQ Pineapple Chicken for a contrasting sweetness. Enjoy your cooking adventure!

Expert Tips for Chicken Pillows Recipe

  • Smooth Filling Essential: Ensure your filling is well-combined and smooth for the best flavor in your Chicken Pillows. Lumpy fillings can create an uneven texture.

  • Seal Securely: Tightly seal the edges of the dough to prevent any filling from leaking out while baking. A good pinch is necessary for a perfect pillow!

  • Watch the Clock: Keep an eye on your baking time! If the pillows were cold from the fridge, they might need a couple of extra minutes in the oven.

  • Make-Ahead Magic: For easier weeknight meals, prepare the filling and creamy sauce up to 24 hours ahead. Assemble and refrigerate your Chicken Pillows, baking them just before serving.

  • Customize to Taste: Feel free to get creative with your fillings and sauces! This Chicken Pillows recipe is versatile, allowing you to try various ingredient substitutions or additions.

Make Ahead Options

These Chicken Pillows with Creamy Parmesan Sauce are perfect for meal prep enthusiasts! You can prepare the filling and sauce up to 24 hours in advance by mixing the cooked shredded chicken, cream cheese, chives, and seasonings in a bowl, then storing it in an airtight container in the refrigerator. Additionally, you can assemble the pillows and refrigerate them for up to 3 days before baking. Just keep them covered to maintain moisture and prevent the dough from drying out. When you’re ready to serve, bake the chilled pillows straight from the fridge, adding a few extra minutes to the baking time if needed, and enjoy a comforting meal with minimal effort!

Chicken Pillows with Creamy Parmesan Sauce Recipe FAQs

What type of chicken is best for this recipe?
Absolutely! Using cooked shredded chicken, like leftover rotisserie chicken, adds incredible flavor and makes prep easy. If you prefer, you can also cook and shred your own chicken breast for a fresh taste.

How should I store leftovers?
Store any leftover Chicken Pillows in an airtight container in the refrigerator for up to 3 days. When it’s time for a snack or meal, simply reheat them in the oven at 350°F (175°C) for about 10-15 minutes to maintain that perfect flaky texture.

Can I freeze Chicken Pillows before cooking?
Yes, you can! Assemble the Chicken Pillows but don’t bake them. Flash-freeze them on a baking sheet before transferring them to a freezer-safe bag. They will keep well in the freezer for up to 1 month! When you’re ready to eat, bake them directly from frozen at 375°F (190°C) for 25-30 minutes.

What if the filling is too lumpy?
If your filling ends up lumpy, don’t worry! Simply use a fork or mixer to blend it until smooth before filling the dough. A smooth filling makes for a delightful texture in the Chicken Pillows, ensuring each bite is creamy and delicious.

Are there any dietary considerations for this recipe?
Very! If you’re accommodating dietary restrictions, you can easily make this recipe gluten-free by using gluten-free crescent roll dough. Additionally, if anyone is lactose intolerant, substituting cream cheese with Greek yogurt or using a dairy-free heavy cream works well without sacrificing taste.

What are good filling variations for this recipe?
The more the merrier! You can mix things up by folding in vegetables like spinach or broccoli, or try different proteins like ground turkey. Feeling spicy? Add diced jalapeños or red pepper flakes for a kick, or play around with different cheeses like mozzarella or cheddar for an exciting twist.

Chicken Pillows Recipe

Irresistible Chicken Pillows Recipe for Cozy Comfort Nights

This Chicken Pillows recipe delivers warmth and joy with tender shredded chicken wrapped in flaky dough and creamy Parmesan sauce.
Prep Time 20 minutes
Cook Time 15 minutes
Total Time 35 minutes
Servings: 4 pillows
Course: Chicken
Cuisine: American
Calories: 300

Ingredients
  

For the Filling
  • 2 cups Cooked Shredded Chicken Use leftover rotisserie chicken for extra flavor.
  • 8 ounces Cream Cheese Substitute with Greek yogurt for a lighter option.
  • 1/4 cup Chopped Chives Substitute with green onions if unavailable.
  • 1 teaspoon Garlic Powder
  • 1 teaspoon Onion Powder
  • 1 teaspoon Salt Adjust to taste.
  • 1 teaspoon Pepper Adjust to taste.
For the Pastry
  • 1 package Crescent Roll Dough Forms the outer pastry layer.
For the Sauce
  • 1 cup Grated Parmesan Cheese Freshly grated yields the best results.
  • 1 cup Heavy Cream Can substitute with half-and-half for a lighter texture.
  • 1 cup Chicken Broth Adds depth of flavor.
  • 2 tablespoons Butter Contributes richness to the sauce.
  • 2 tablespoons All-Purpose Flour Used for thickening the sauce.
  • 1/4 teaspoon Ground Nutmeg Complements the cheese.
For Brushing
  • 1 tablespoon Cooking Spray or Melted Butter For brushing the dough before baking.

Equipment

  • Oven
  • Mixing Bowl
  • Baking Sheet
  • Parchment paper
  • Saucepan

Method
 

Preparation Steps
  1. Preheat your oven to 375°F (190°C) and line a baking sheet with parchment paper.
  2. In a mixing bowl, combine the cooked shredded chicken, cream cheese, chopped chives, garlic powder, onion powder, salt, and pepper. Blend until smooth.
  3. Separate the crescent roll dough into triangles on a clean surface.
  4. At the wider end of each triangle, place about 2 tablespoons of the chicken filling and fold the narrow end over.
  5. Place the filled Chicken Pillows onto the prepared baking sheet and brush with melted butter or cooking spray.
  6. Bake for 12-15 minutes until puffed and golden brown.
  7. In a saucepan, melt 2 tablespoons of butter and whisk in flour to make a roux, then add chicken broth and heavy cream.
  8. Stir in grated Parmesan cheese and ground nutmeg until the cheese melts and the sauce thickens.
  9. Serve the Chicken Pillows drizzled with the creamy Parmesan sauce or on the side.

Nutrition

Serving: 1pillowCalories: 300kcalCarbohydrates: 20gProtein: 15gFat: 20gSaturated Fat: 10gPolyunsaturated Fat: 0.5gMonounsaturated Fat: 2gCholesterol: 60mgSodium: 450mgPotassium: 200mgFiber: 1gSugar: 1gVitamin A: 500IUCalcium: 150mgIron: 1mg

Notes

This Chicken Pillows recipe is versatile and can be customized with various fillings and sauces to suit your taste.

Tried this recipe?

Let us know how it was!

Savor the Best Black Bean Burger for Plant-Based Lovers

The moment those black bean burgers hit the skillet, I can already tell this is going to be something special. As they sizzle away, the enticing aroma of cumin and garlic fills my kitchen, instantly transforming it into a cozy haven. This Savory Epic Black Bean Burger recipe is not just a plant-based delight—it’s a quick and easy answer to mealtime struggles, pleasing both vegans and meat lovers alike! With the hearty texture and rich flavors, it promises to impress at summer BBQs or quiet family dinners. Plus, they’re freezer-friendly, making them a versatile option for any weekday meal. So, are you ready to take a bite into deliciousness and discover how simple it is to create a homemade burger that everyone will crave?

Why is black bean burger a must-try?

Flavor-Packed Delight: Each bite bursts with zesty spices and fresh ingredients that make these burgers incredibly satisfying and enjoyable.

Fast and Easy: In just a few simple steps, you’ll have a delicious meal ready in no time, perfect for busy weeknights or last-minute gatherings.

Vegan and Gluten-Free Options: This recipe easily adapts to suit dietary preferences, ensuring everyone can indulge without compromise.

Crowd-Pleaser: Impress your friends and family at BBQs or dinners—trust me, even the meat-eaters will be coming back for seconds!

Freezer-Friendly: Prep a batch ahead of time! These black bean burgers can be frozen for a quick and convenient meal when you need it.

Dive into more delicious options, like Cheeseburger Pockets Snack or try our flavorful Pizza Burgers Flavor for a variety of tasty experiences!

Black Bean Burger Ingredients

For the Burger Mixture

  • Black Beans – Rinse and drain for the best texture and to reduce sodium.
  • Breadcrumbs – Use seasoned breadcrumbs for an extra flavor boost.
  • Onion – Finely chop for even cooking and sweetness.
  • Garlic – Minced fresh garlic enhances the savory taste.
  • Spices (Cumin, Chili Powder) – Infuse your burgers with warmth; adjust to taste.
  • Egg or Flaxseed Meal – Binds everything together; use 1 tbsp flaxseed meal mixed with 3 tbsp water for a vegan option.
  • Fresh Cilantro – Optional, but it adds a bright flavor that complements the black bean burger beautifully.

For Cooking

  • Burger Buns – Choose your favorite; toasting gives a delightful crunch.

For Toppings

  • Lettuce – Adds a refreshing crunch to every bite.
  • Tomato – Choose ripe for maximum juiciness and flavor.
  • Avocado – Creamy goodness that pairs perfectly with the savory burger.
  • Cheese – Optional, adds richness if you’re not going vegan.

Embrace the delightful flavors of the Black Bean Burger and create a meal that’s sure to impress everyone at your table!

Step‑by‑Step Instructions for Savory Epic Black Bean Burger

Step 1: Rinse and Prepare the Beans
Begin by rinsing one can of black beans thoroughly under cold water, draining off excess liquid. This step not only reduces sodium but also enhances the overall texture of your black bean burger. Set the rinsed beans aside in a mixing bowl to allow them to dry slightly while you prepare the other ingredients.

Step 2: Sauté the Aromatics
In a medium skillet, heat a tablespoon of oil over medium heat. Add finely chopped onion and sauté for about 3-4 minutes, stirring occasionally, until the onions become soft and translucent. Next, incorporate minced garlic, cooking for an additional minute until fragrant. This aromatic mixture will add depth of flavor to your black bean burger.

Step 3: Mash the Black Beans
Transfer the rinsed black beans to a mixing bowl and gently mash them with a fork or a potato masher. Aim for a slightly chunky consistency, leaving some whole beans for texture. Once mashed to your liking, fold in the sautéed onion and garlic mixture, ensuring a harmonious blend of flavors before introducing the binding ingredients.

Step 4: Combine Ingredients
In the same mixing bowl, fold in seasoned breadcrumbs, a beaten egg (or the flaxseed mixture for a vegan option), along with your chosen spices such as cumin and chili powder. Mix until everything is combined thoroughly, ensuring the spices are evenly distributed throughout the black bean burger mixture. If you’re using fresh cilantro, now is the time to fold that in as well!

Step 5: Form the Patties
Divide the black bean mixture into equal portions and shape each portion into patties about 1 inch thick. If you find the mixture a bit soft, consider chilling the patties in the fridge for 15-30 minutes, as this will help them firm up and maintain their shape better during cooking.

Step 6: Cook the Patties
Heat a couple of tablespoons of oil in the skillet over medium-high heat. Once the oil is hot, carefully add the patties to the skillet, cooking for 4-5 minutes on each side. You’ll know they’re ready to flip when they develop a golden-brown crust. This crispy exterior is key to achieving that satisfying texture in your black bean burger.

Step 7: Assemble Your Burger
After cooking, let the patties rest briefly on a plate. Meanwhile, toast your burger buns for a delightful crunch. Then, stack your savory black bean burger with fresh toppings like lettuce, juicy tomato slices, creamy avocado, and, if desired, cheese. Whether piled high or simply dressed, each bite promises to be an irresistible flavor experience!

Storage Tips for Black Bean Burger

Fridge: Store cooked black bean burgers in an airtight container for up to 4 days. Make sure they’re completely cooled for the best freshness.

Freezer: For longer storage, freeze patties in a single layer, then transfer to a freezer bag or container. They’ll stay good for up to 3 months.

Reheating: Reheat in a skillet over medium heat for 4-5 minutes on each side to regain that delicious crispy texture. Alternatively, microwave for 1-2 minutes, but the texture may be less crispy.

Thawing: When ready to enjoy, thaw frozen black bean burgers in the fridge overnight before reheating for the best results.

Make Ahead Options

These Savory Epic Black Bean Burgers are perfect for meal prep enthusiasts! You can prepare the burger mixture up to 24 hours in advance by following the initial steps—rinsing the beans, sautéing the onions and garlic, and mixing in your spices and binders. Store the mixture in an airtight container in the refrigerator to maintain freshness. Additionally, you can form the patties and refrigerate them for up to 3 days before cooking. When ready to serve, simply heat oil in a skillet and cook the patties for about 4-5 minutes on each side until golden and crispy. This way, you can enjoy a homemade burger that’s just as delicious and ready to satisfy your cravings with minimal effort!

What to Serve with Savory Epic Black Bean Burger

Elevate your black bean burger experience with these delicious accompaniments that strike the perfect balance of flavors and textures.

  • Sweet Potato Fries: Their natural sweetness and crispy texture pair perfectly with the savory black bean burger, creating a satisfying contrast you won’t forget.

  • Refreshing Coleslaw: A bright, crunchy slaw with a zesty dressing brings a refreshing crunch that complements the burger’s hearty flavors beautifully.

  • Quinoa Salad: Nutty quinoa mixed with fresh veggies and a tangy dressing adds nutritional value and a delightful chewiness, making your meal balanced and satisfying.

  • Grilled Corn on the Cob: Sweet, charred corn adds a summery touch while enhancing the overall experience with its juicy, mouthwatering flavor.

Add a chilled sparkling water with a hint of lime for a refreshing drink that elevates your meal further. Pairing your burger with any of these sides ensures a memorable and delicious dining experience!

Black Bean Burger Variations & Substitutions

Feel free to customize your black bean burger experience with these delicious and creative swaps!

  • Chickpea Option: Replace black beans with chickpeas for a unique texture and taste; perfect for experimenting!

  • Smoky Flavor: Add smoked paprika or chipotle powder for a deeper, smoky flavor — a twist that elevates each bite.

  • Gluten-Free: Use gluten-free breadcrumbs or oat flour to enjoy a fully gluten-free version without compromising texture.

  • Sweet Corn Addition: Incorporate cooked corn for a delightful sweetness and interesting crunch; it pairs perfectly with the savory flavors.

  • Baked Patties: Try baking patties at 375°F (190°C) for a lighter cooking method, aiming for about 20-25 minutes until golden and crisp — an effortless option!

  • Fresh Herbs Galore: Mix in vibrant fresh herbs like basil or parsley; these add a refreshing twist that complements the burger wonderfully.

  • Extra Heat: If you enjoy a kick, add diced jalapeños for an extra spicy sensation; it brings a whole new level of flavor to the table.

Now you’re ready to create not just any black bean burger, but one that suits your personal cravings! And if you’re looking for more deliciousness, don’t forget to check out our Cheeseburger Pockets Snack or savor the flavors of Pizza Burgers Flavor for more inspiration.

Expert Tips for the Best Black Bean Burger

Chill the Patties: Ensure your black bean burger patties are refrigerated for 15-30 minutes before cooking. This step prevents them from falling apart during cooking.

Oil Temperature: Always check that your oil is hot enough before adding the patties. A hot skillet ensures a crispy exterior that locks in flavor.

Spice Adjustment: Don’t be afraid to adjust spices according to your taste. Adding more chili powder or smoked paprika can elevate the flavor profile of your black bean burger.

Layer It Right: When assembling the burger, start with lettuce at the base to help cradle ingredients. This prevents sogginess and keeps everything in place.

Storage Solutions: Cool and store cooked black bean burgers in an airtight container. They’re good in the fridge for up to 4 days or can be frozen for up to 3 months!

Black Bean Burger Recipe FAQs

What type of black beans should I use?
Absolutely! For convenience, canned black beans are perfect; just make sure to rinse them well under cold water to reduce sodium and improve texture. If you prefer, you can also cook dried black beans from scratch, which will give a fresher flavor and a firmer texture.

How should I store leftover black bean burgers?
After enjoying your delicious black bean burgers, cool any leftovers completely. Store them in an airtight container in the fridge for up to 4 days. For longer storage, you can freeze the patties—just ensure they’re cool, wrap them individually, and place in a freezer bag to keep them fresh for up to 3 months.

Can I freeze uncooked black bean burger patties?
Very! To freeze uncooked patties, shape them as directed and place them on a baking sheet lined with parchment paper. Freeze until solid, then transfer to a freezer bag. They’ll be ready to cook straight from the freezer—just add a few extra minutes to your cooking time. This is a great way to always have a healthy meal on hand!

What should I do if my black bean burger falls apart while cooking?
If your burgers crumble while cooking, it might be due to the mixture being too wet or not chilled long enough. To fix this, try adding a bit more breadcrumbs to the mixture, or refrigerate the patties for 15-30 minutes before cooking. This helps them firm up nicely, so they hold together better in the skillet.

Are there any dietary concerns for this recipe?
Certainly! These black bean burgers are naturally vegan and can easily be made gluten-free by substituting regular breadcrumbs with gluten-free options. Always check ingredient labels for any hidden allergens, especially if you’re serving guests with dietary restrictions. Additionally, if you’re including toppings like cheese, keep in mind potential lactose intolerance for some diners.

How do I know when my black bean burger is fully cooked?
To ensure your black bean burger is fully cooked, look for a nice golden-brown crust on both sides after cooking for about 4-5 minutes per side. You can also check the internal temperature; it should be hot throughout, ideally reaching 165°F (74°C). This not only makes it safe to eat but ensures the flavors are fully developed!

Black Bean Burger

Savor the Best Black Bean Burger for Plant-Based Lovers

This Black Bean Burger recipe is a delicious, plant-based option that's quick and easy to prepare, ideal for both vegans and meat lovers.
Prep Time 15 minutes
Cook Time 20 minutes
Chilling Time 20 minutes
Total Time 55 minutes
Servings: 4 burgers
Course: Dinner
Cuisine: American
Calories: 250

Ingredients
  

For the Burger Mixture
  • 1 can Black Beans Rinse and drain for best texture.
  • 1 cup Breadcrumbs Use seasoned breadcrumbs for extra flavor.
  • 1 medium Onion Finely chopped.
  • 2 cloves Garlic Minced fresh.
  • 1 tsp Cumin Adjust to taste.
  • 1 tsp Chili Powder Adjust to taste.
  • 1 large Egg Use 1 tbsp flaxseed meal mixed with 3 tbsp water for vegan.
  • 1/4 cup Fresh Cilantro Optional.
For Cooking
  • 4 pieces Burger Buns Choose your favorite.
For Toppings
  • 1 cup Lettuce Adds crunch.
  • 1 large Tomato Choose ripe for juiciness.
  • 1 medium Avocado Adds creaminess.
  • 1/2 cup Cheese Optional.

Equipment

  • Skillet
  • Mixing Bowl
  • potato masher

Method
 

Step‑by‑Step Instructions for Savory Epic Black Bean Burger
  1. Rinse one can of black beans thoroughly under cold water, draining off excess liquid.
  2. In a medium skillet, heat a tablespoon of oil over medium heat. Add finely chopped onion and sauté for about 3-4 minutes until soft.
  3. In a mixing bowl, gently mash the rinsed black beans, leaving some whole for texture.
  4. Fold in the sautéed onion and garlic mixture into the mashed beans.
  5. In the same bowl, fold in seasoned breadcrumbs, a beaten egg (or flaxseed mixture), and your spices.
  6. Shape into patties about 1 inch thick. Chill in the fridge for 15-30 minutes if soft.
  7. Heat oil in a skillet over medium-high heat. Cook patties for 4-5 minutes on each side.
  8. Let patties rest, then toast burger buns and assemble with toppings.

Nutrition

Serving: 1burgerCalories: 250kcalCarbohydrates: 30gProtein: 12gFat: 8gSaturated Fat: 1gPolyunsaturated Fat: 1gMonounsaturated Fat: 5gCholesterol: 75mgSodium: 400mgPotassium: 600mgFiber: 8gSugar: 1gVitamin A: 1000IUVitamin C: 5mgCalcium: 100mgIron: 3mg

Notes

These burgers can be frozen for a quick meal, and they’re great for summer BBQs or family dinners.

Tried this recipe?

Let us know how it was!

Zesty Cajun Fish Soup That’ll Spice Up Your Dinner Routine

As my spoon dipped into the bubbling pot, a wave of aromatic goodness filled the air, transporting me to a cozy kitchen in Louisiana. This Zesty Cajun Fish Soup bursts with bold flavors and textures—a delightful mix of tender fish, succulent shrimp, and vibrant vegetables, all dancing in a warm, seasoned broth. What I adore about this recipe is not only its ability to deliver a comforting meal in just 30 minutes, but also the customization options that let you unleash your creativity in the kitchen. Gluten-free and protein-rich, it’s the perfect solution for busy weeknights or intimate gatherings. Ready to explore this culinary journey together? Let’s dive into the details of this delicious dish!

Why Is This Soup a Must-Try?

Comforting Warmth: Each spoonful offers a cozy hug in a bowl, perfect for chilly evenings.
Flavor Explosion: The bold Cajun spices create a vibrant tapestry of taste, while fresh veggies add crunch.
Quick and Easy: Whip up this mouthwatering dish in just 30 minutes—ideal for busy weeknights!
Customizable Goodness: Swap in shrimp or scallops, or even make it vegetarian; the possibilities are endless!
Guilt-Free Indulgence: Naturally gluten-free and protein-rich, this soup allows you to indulge without the fuss.
Pair it with some tasty Old Fashioned Soup for a complete meal or serve it alongside cornbread for a true Southern experience!

Zesty Cajun Fish Soup Ingredients

For the Soup Base
White Fish Fillets – Use cod or tilapia for the best texture in your Zesty Cajun Fish Soup.
Olive Oil – Ideal for sautéing; can substitute with avocado oil for a different flavor.
Onion – Adds a sweet depth; yellow or white onions work well.
Garlic – Fresh minced garlic brings an aromatic kick to the mix.
Green Bell Pepper – A key element in the Cajun holy trinity; can be swapped with red or yellow for sweetness.
Celery – Provides a crisp texture and essential flavor for the soup.
Diced Tomatoes – Brings acidity and texture; use fresh when in season or canned for convenience.
Fish or Vegetable Broth – Choose low-sodium for a healthier option as the soup base.

For the Seasoning
Cajun Seasoning – This imparts the dish’s signature spice; adjust the amount based on how spicy you like it.
Smoked Paprika – Adds an optional smoky flavor that elevates the broth.
Salt – Enhances the overall flavors; be sure to adjust to your taste preference.
Black Pepper – Freshly cracked for maximum flavor impact.

For Serving
Cooked Rice – Optional for added heartiness; can be replaced with quinoa or omitted for a lighter version.
Fresh Parsley or Green Onions – Perfect for garnish, adding a burst of freshness to each bowl.

Embrace the culinary adventure with this Zesty Cajun Fish Soup that warms your heart and satisfies your cravings!

Step‑by‑Step Instructions for Zesty Cajun Fish Soup

Step 1: Sauté Base
In a large pot, heat 2 tablespoons of olive oil over medium heat. Once hot, add 1 diced onion, 2 minced garlic cloves, 1 chopped green bell pepper, and 2 sliced celery stalks. Sauté for about 5 minutes or until the vegetables soften and the onion turns translucent, filling your kitchen with a comforting aroma that sets the stage for the delicious Zesty Cajun Fish Soup.

Step 2: Add Seasonings & Broth
Stir in 2 teaspoons of Cajun seasoning, 1 teaspoon of smoked paprika, and a pinch of salt and black pepper. Follow this by adding 1 can of diced tomatoes and 4 cups of low-sodium fish or vegetable broth. Bring the mixture to a gentle simmer, allowing the flavors to meld together beautifully, approximately 5 minutes or until it bubbles softly.

Step 3: Cook Fish
Carefully lower in 1 pound of white fish fillets, such as cod or tilapia, into your simmering soup. Let the fish cook for 5 to 7 minutes, monitoring until it turns opaque and flakes easily with a fork. This step ensures that the Zesty Cajun Fish Soup is filled with perfectly tender fish, creating a mouthwatering foundation for this hearty dish.

Step 4: Serve
Ladle the rich and vibrant Zesty Cajun Fish Soup into warm bowls. If desired, serve it over a generous scoop of cooked rice for added heartiness. Finish by garnishing each bowl with freshly chopped parsley or sliced green onions, bringing a splash of color and freshness that enhances the overall experience of this delightful soup.

Expert Tips for Zesty Cajun Fish Soup

  • Watch the Fish: Keep an eye on your fish while cooking; overcooking can lead to a rubbery texture. It should flake easily when done.
  • Prep Ahead: You can sauté the vegetable base up to a day in advance, storing it in the fridge to save time when making the soup.
  • Adjust Seasonings: Taste your Zesty Cajun Fish Soup before serving. You may like to add more Cajun seasoning for additional heat or flavor!
  • Use Fresh Ingredients: Fresh garlic and seasonal tomatoes truly elevate the flavor of your soup, making it a culinary delight.
  • Storage Made Easy: Leftovers can be stored in an airtight container for up to 3 days or frozen (without seafood) for up to 3 months.
  • Customize It: Don’t hesitate to experiment with proteins or add-ins. Trying shrimp or corn can add a fun twist to this Zesty Cajun Fish Soup!

Make Ahead Options

These Zesty Cajun Fish Soup preparations are perfect for busy home cooks looking to save time without sacrificing flavor! You can prepare the vegetable base (onions, garlic, bell pepper, and celery) up to 24 hours in advance, storing it in an airtight container in the refrigerator to keep the ingredients fresh and flavorful. When you’re ready to enjoy the soup, simply sauté the prepped vegetables before adding the diced tomatoes and broth. For added convenience, you can also cook a batch of rice up to 3 days ahead and store it separately. This ensures that both the soup and rice maintain their quality; just heat them together before serving for a delicious, quick meal that captures the essence of Louisiana’s vibrant flavors!

How to Store and Freeze Zesty Cajun Fish Soup

Fridge: Store leftovers in an airtight container for up to 3 days, ensuring the soup retains its vibrant flavors and freshness.

Freezer: For longer storage, freeze the Zesty Cajun Fish Soup without seafood for up to 3 months. Let it cool completely before transferring to a freezer-safe container.

Reheating: To reheat, thaw in the fridge overnight or use the microwave. Gently reheat on the stovetop, adding a splash of broth if needed to adjust the consistency.

Serving Reminder: If reheating from frozen, make sure to heat thoroughly until piping hot before serving for the best taste experience!

What to Serve with Zesty Cajun Fish Soup

Cozy up your dining experience with delightful sides and drinks that perfectly complement this vibrant bowl of goodness.

  • Crusty French Bread: Ideal for dipping, its crunchy exterior and soft center soak up the flavorful broth beautifully.

  • Cornbread Muffins: Sweet and crumbly, these muffins add a comforting Southern twist that balances the soup’s bold spices.

  • Cilantro Lime Rice: A zesty rice dish enhances the soup, bringing in brightness and an added layer of flavor.

  • Simple Green Salad: Crisp greens drizzled with a lemon vinaigrette provide a refreshing contrast to the rich soup.

  • Garlic Roasted Vegetables: Earthy and caramelized, these veggies add depth and nutrition, making your meal even more satisfying.

  • Sparkling Water with Lime: A refreshing drink choice that cleanses the palate between rich bites of the Zesty Cajun Fish Soup.

These pairings will elevate your meal and ensure a delightful dining experience, leaving you and your loved ones craving this comforting dish time and again!

Zesty Cajun Fish Soup Variations

Feel free to make this delightful dish your own with these fun adaptations and substitutions!

  • Protein Swaps: Try shrimp, scallops, or crab for a touch of luxury and an extra seafood flavor burst. Each option will transform your soup into a slightly different culinary experience.

  • Vegetarian Option: Replace fish with vibrant zucchini, sweet carrots, or hearty chickpeas. These swaps will enhance the texture and flavor while keeping the soup satisfying.

  • Creamy Variation: For a rich twist, stir in coconut milk or cream to create a luxurious, velvety texture that pairs beautifully with the spices.

  • Spicy Kick: If you’re looking for heat, add cayenne pepper or diced jalapeños to tailor the spice level to your liking. A little goes a long way in making this soup truly unforgettable.

  • Herbed Twist: Enhance freshness by stirring in herbs like thyme or cilantro just before serving. They add a delightful pop of color and flavor to every bowl.

  • Chunky Add-ins: For some hearty texture, incorporate diced potatoes, corn, or okra. These additions not only bulk up the soup but also create a delightful medley of flavors and tastes.

  • Citrus Enhancement: A splash of lemon or lime juice just before serving can brighten the soup and elevate its overall flavor profile. It’ll really make the spices pop!

Soup lovers will also enjoy pairing this dish with a warm bowl of Chicken Mushroom Soup or a comforting serving of Coconut Curry Soup for a delightful meal spread!

Zesty Cajun Fish Soup Recipe FAQs

What kind of fish is best to use for Zesty Cajun Fish Soup?
Absolutely! For this delightful soup, I recommend using cod or tilapia because they offer a nice texture and flake beautifully when cooked. If you’re feeling adventurous, shrimp or scallops are also fantastic alternatives that blend seamlessly with the Cajun flavors.

How should I store leftover Zesty Cajun Fish Soup?
Leftovers can be stored in an airtight container in the fridge for up to 3 days. This way, you’ll maintain the soup’s delicious flavors, and it’s perfect for a quick meal later in the week. Just remember to give it a good stir before serving!

Can I freeze Zesty Cajun Fish Soup? If so, how?
Yes, you can freeze the Zesty Cajun Fish Soup, but it’s best to do so without any fish added to it. Let the soup cool completely, then transfer to a freezer-safe container or bag, ensuring to leave some space for expansion. It should be good for up to 3 months. To reheat, thaw it overnight in the fridge and gently heat on the stovetop, adding a splash of broth if you want to adjust the consistency.

What should I do if my soup turns out too spicy?
Very! If you find that your Zesty Cajun Fish Soup is too spicy, don’t worry! You can balance the heat by adding a dollop of sour cream or a splash of coconut milk. Alternatively, you can add more broth or diced tomatoes to dilute the spice level. This way, you still get to enjoy the flavors without the overwhelming heat.

Are there any dietary considerations for Zesty Cajun Fish Soup?
Absolutely! This soup is naturally gluten-free, making it a safe option for those with gluten sensitivities. However, if you or your guests have allergies to fish or shellfish, consider using a vegetarian protein like chickpeas or diced zucchini. Always double-check your seasoning mix for potential allergens as well!

Zesty Cajun Fish Soup

Zesty Cajun Fish Soup That’ll Spice Up Your Dinner Routine

This Zesty Cajun Fish Soup is a protein-rich, gluten-free dish that bursts with bold flavors in just 30 minutes.
Prep Time 10 minutes
Cook Time 20 minutes
Total Time 30 minutes
Servings: 4 bowls
Course: Dinner
Cuisine: Cajun
Calories: 320

Ingredients
  

Soup Base
  • 1 pound white fish fillets (cod or tilapia)
  • 2 tablespoons olive oil
  • 1 onion (diced) yellow or white onions work well
  • 2 cloves garlic (minced) fresh
  • 1 green bell pepper (chopped)
  • 2 stalks celery (sliced)
  • 1 can diced tomatoes fresh if in season or canned
  • 4 cups fish or vegetable broth low-sodium recommended
Seasoning
  • 2 teaspoons Cajun seasoning adjust for desired spice
  • 1 teaspoon smoked paprika optional
  • to taste salt
  • to taste black pepper freshly cracked
For Serving
  • 1 cup cooked rice optional
  • to taste fresh parsley or green onions (for garnish)

Equipment

  • large pot

Method
 

Step-by-Step Instructions
  1. In a large pot, heat 2 tablespoons of olive oil over medium heat. Once hot, add 1 diced onion, 2 minced garlic cloves, 1 chopped green bell pepper, and 2 sliced celery stalks. Sauté for about 5 minutes or until the vegetables soften and the onion turns translucent.
  2. Stir in 2 teaspoons of Cajun seasoning, 1 teaspoon of smoked paprika, and a pinch of salt and black pepper. Then, add 1 can of diced tomatoes and 4 cups of low-sodium fish or vegetable broth. Bring to a gentle simmer for about 5 minutes.
  3. Carefully add 1 pound of white fish fillets into the simmering soup. Allow to cook for 5 to 7 minutes until the fish is opaque and flakes easily with a fork.
  4. Ladle the soup into warm bowls, optionally served over cooked rice. Garnish with freshly chopped parsley or sliced green onions.

Nutrition

Serving: 1bowlCalories: 320kcalCarbohydrates: 30gProtein: 28gFat: 10gSaturated Fat: 1.5gPolyunsaturated Fat: 2gMonounsaturated Fat: 6gCholesterol: 70mgSodium: 800mgPotassium: 900mgFiber: 4gSugar: 5gVitamin A: 20IUVitamin C: 35mgCalcium: 5mgIron: 8mg

Notes

This recipe is customizable; feel free to swap in shrimp or other proteins!

Tried this recipe?

Let us know how it was!

Delicious Air Fryer Jalapeño Poppers for Guilt-Free Snacking

As the golden hour descends, my kitchen fills with the tantalizing scent of warmth and spice, drawing me in for the ultimate comfort food: Best Air Fryer Jalapeño Poppers. These little wonders pack a creamy, cheesy punch while providing a healthier alternative to the traditional fried version, all thanks to the magic of the air fryer. Not only are they quick to prepare, but they’re also incredibly customizable, allowing you to tweak the filling to suit your taste—think smoky bacon or zesty herbs. Perfect for game day, casual gatherings, or simply indulging in a delicious snack, these poppers are sure to impress family and friends alike. As you dive into the crispy exterior and luscious filling, what flavor combinations will you explore?

Why are these Air Fryer Jalapeño Poppers amazing?

Guilt-Free Indulgence: You can enjoy the Baked texture without the calories of deep-frying.
Customizable Fillings: Mix and match your favorite cheeses or add spices for unique flavors.
Quick Prep Time: With just a few steps, you’ll have delectable poppers in no time—perfect for unexpected guests or game nights.
Crowd Pleaser: Everyone loves these cheesy bites! Serve them alongside Air Fryer Chicken or Air Fryer Baked for a full spread.
Easy Clean-Up: Thanks to the air fryer, there’s minimal mess—simple to make and even simpler to clean!

Air Fryer Jalapeño Poppers Ingredients

For the Filling

  • Cream Cheese – Provides a creamy texture and rich flavor; consider low-fat cream cheese for a lighter option.
  • Colby Jack Cheese – Adds melty goodness and a mild flavor; substitute with cheddar for a sharper taste.
  • Garlic Powder – Infuses the filling with aromatic depth; fresh minced garlic can be substituted for a stronger flavor.
  • Salt – Enhances the flavors of the filling; reduce for low-sodium diets.
  • Pepper – Adds a hint of spice; black pepper is standard, but cayenne can ramp up heat.

For the Jalapeños

  • Jalapeños – The main ingredient, providing the spicy bite; select large, firm jalapeños and remove all seeds for milder poppers.
  • Olive Oil Spray – Prevents sticking in the air fryer and achieves a golden crisp; use any cooking spray as an alternative.

Optional Ingredients

  • Bacon (optional) – Adds a savory crunch; omit for vegetarian or lighter versions.

Step‑by‑Step Instructions for Best Air Fryer Jalapeño Poppers

Step 1: Preheat the Air Fryer
Start by preheating your air fryer to 400°F (200°C) for about 5 minutes. While it warms, give the air fryer basket a light spray with olive oil to ensure your jalapeño poppers come out crispy and avoid sticking. This first step sets the stage for perfect Air Fryer Jalapeño Poppers.

Step 2: Prepare the Jalapeños
Slice the jalapeños in half lengthwise, carefully removing the seeds and veins to control their heat level. Coat the inside of each half lightly with olive oil, which not only adds flavor but also promotes a nice golden crisp. You’ll want to select firm, large jalapeños for the best results.

Step 3: Air Fry the Jalapeños
Place the halved jalapeños in the preheated air fryer basket, ensuring they’re not overcrowded. Air fry them for about 4 minutes. This softens the jalapeños, making them easier to stuff while enhancing their natural flavors. Look for them to become slightly tender during this step.

Step 4: Mix the Filling
In a mixing bowl, combine the cream cheese, garlic powder, salt, pepper, and half of the shredded Colby Jack cheese. Blend these ingredients until they are creamy and well incorporated. This flavorful filling is what makes your Air Fryer Jalapeño Poppers truly irresistible.

Step 5: Stuff the Jalapeños
Carefully fill each jalapeño half with the creamy cheese mixture, mounding it just slightly for a generous filling. Top each popper with the remaining Colby Jack cheese and, if desired, add crumbled bacon for an extra savory crunch. This step will lead to a melty, cheesy surprise with each bite!

Step 6: Air Fry the Poppers
Return the stuffed jalapeños to the air fryer basket. Air fry them at 400°F (200°C) for another 5 minutes, or until the cheese is bubbling and the tops have turned golden brown. Watch for that delightful melty cheese—this is the key to a satisfying Air Fryer Jalapeño Poppers experience.

Step 7: Serve the Poppers
Once cooked, carefully remove the poppers from the air fryer and let them cool for a minute. Serve these delicious Air Fryer Jalapeño Poppers with your favorite dipping sauces or a squeeze of lime juice to enhance their flavors. Enjoy this warm, cheesy delight with friends and family!

Air Fryer Jalapeño Poppers Variations

Customize your Air Fryer Jalapeño Poppers to suit your cravings and bring excitement to every bite!

  • Cheese Variety: Swap out Colby Jack for pepper jack for an extra kick. Let the spicy flavors dance on your palate!
  • Herbed Bliss: Mix in fresh herbs like cilantro or chives for a garden-fresh twist. This adds a vibrant pop of flavor to each popper.
  • Bacon Lovers: Crumble crispy bacon into the cheese filling for a savory crunch. It’s a delightful addition for those who want to level up their snack game!
  • Spicy Upgrade: Add diced jalapeños or a splash of hot sauce to the filling for those who crave more heat. You can always adjust the heat level to fit your taste!
  • Creamy Avocado: Blend in some ripe avocado into your cheese mixture for a creamy, luscious filling. It not only adds richness but also a delightful twist!
  • Sweet and Spicy: Drizzle a bit of honey or balsamic glaze over the finished poppers for a sweet contrast to the heat. It’s a sophisticated touch that will surprise your guests.
  • No-Meat Option: Omit the bacon and try adding sautéed mushrooms for a hearty vegetarian alternative. This brings a lovely earthy flavor to your poppers!
  • Texture Fun: Top with panko breadcrumbs mixed with a dash of parmesan before air frying for an added crunch. The texture will elevate your poppers to the next level!

As you explore these tasty variations, why not serve them alongside some delicious Air Fryer Chicken or crispy Air Fryer Chicken Wings? Enjoy the creativity of your kitchen!

Expert Tips for Air Fryer Jalapeño Poppers

  • Perfect Peppers: Choose large, firm jalapeños without blemishes to ensure a sturdy popper. Wilting jalapeños can lead to soggy results.
  • Heat Control: If you prefer milder poppers, remove all seeds and membranes thoroughly to lessen the spice.
  • Too Much Cheese: Avoid overstuffing the jalapeños, as this can cause them to spill out during cooking. A generous mound is ideal, but keep it contained!
  • Cook Time Variation: Depending on your air fryer model, keep an eye on the cooking time. Perfectly cooked poppers should have bubbly cheese but not be burnt.
  • Flavor Boost: Experiment with adding spices such as smoked paprika or chopped herbs in the filling for unique variations on these Air Fryer Jalapeño Poppers.

Make Ahead Options

These Best Air Fryer Jalapeño Poppers are perfect for meal prep enthusiasts! You can prepare the jalapeños and their filling up to 24 hours in advance, allowing for quick assembly on busy weeknights or game days. Simply slice the jalapeños and remove the seeds, then coat them lightly with olive oil. For the filling, mix cream cheese, garlic powder, salt, pepper, and half of the shredded Colby Jack cheese until creamy. Store the stuffed jalapeños and filling in airtight containers in the refrigerator. When you’re ready to cook, just stuff the jalapeños and air fry them for 5 minutes until the cheese is bubbling—ensuring they’re just as delicious as fresh!

What to Serve with Best Air Fryer Jalapeño Poppers

Indulging in the warm, cheesy goodness of these poppers opens up a world of delightful pairings to elevate your meal.

  • Creamy Ranch Dip: A classic pairing, the cool, creamy ranch balances out the spicy jalapeños for a satisfying contrast.
  • Zesty Guacamole: This fresh, creamy dip adds a layer of texture and flavor, enhancing every bite of your poppers.
  • Crunchy Veggie Platter: Raw carrots, celery, and bell peppers bring a crisp freshness that complements the rich filling beautifully.
  • Crispy Fried Chicken: For a heartier meal, serve alongside juicy fried chicken, creating an irresistible appetizer and main course combo.
  • Savory Chicken Wings: Spice things up with buffalo or honey garlic wings to create a finger-licking game day spread.
  • Cilantro Lime Rice: This refreshing side adds a burst of flavor and a perfect foundation to each spicy popper.
  • Chilled Beer: A light lager or pilsner pairs perfectly, cutting through the richness of the cheese and reinforcing that snack-time vibe.
  • Citrusy Margaritas: Elevate your gathering with zesty margaritas that bring a fiesta feel and enhance the poppers’ bold flavors.
  • Chocolate Mousse: For dessert, consider a silky chocolate mousse; its rich sweetness balances the heat from the poppers wonderfully.

How to Store and Freeze Air Fryer Jalapeño Poppers

Fridge: Store leftover jalapeño poppers in an airtight container for up to 3 days. This helps maintain their freshness and prevents them from drying out.

Freezer: For longer storage, freeze the poppers individually on a baking sheet, then transfer to a freezer-safe bag for up to 2 months. This keeps them crisp when reheated.

Reheating: To enjoy your frozen air fryer jalapeño poppers, preheat your air fryer to 350°F (175°C) and cook for 8-10 minutes until heated through and crispy again.

Make-Ahead Tip: Prepare the filling and jalapeños up to 24 hours ahead. Store the stuffed poppers in the fridge before air frying for a quick snack or appetizer option!

Best Air Fryer Jalapeño Poppers Recipe FAQs

What should I look for when choosing jalapeños?
Absolutely! When selecting jalapeños, opt for large, firm ones with smooth, shiny skin and no blemishes. Avoid any that feel soft or have dark spots, as these may be overripe and can lead to soggy poppers. Firmness is key for maintaining the popper’s shape during cooking!

How do I store leftover Air Fryer Jalapeño Poppers?
Certainly! To store your leftover jalapeño poppers, place them in an airtight container. They will stay fresh for up to 3 days in the refrigerator. Before serving, reheat them in the air fryer at 350°F (175°C) for about 8-10 minutes to maintain their crispy texture.

Can I freeze Air Fryer Jalapeño Poppers?
Yes, you can! To freeze your jalapeño poppers, arrange them in a single layer on a baking sheet and freeze them until solid. Once frozen, transfer them to a freezer-safe bag, where they can last for up to 2 months. When ready to enjoy, cook them from frozen in the air fryer at 350°F (175°C) for about 10-12 minutes until hot and crispy.

What if my jalapeños are too spicy?
No worries! If you find your jalapeños too spicy, be sure to remove all the seeds and membranes inside, as these parts hold most of the heat. You could also mix in a bit more cream cheese to the filling to help mellow out the spice, or consider using a milder pepper variety, like pimento or banana peppers, for a gentler bite.

Are there any dietary considerations for making jalapeño poppers?
Very much so! If you’re catering to vegetarian guests, simply omit the bacon and stick to the cheese filling. For those with lactose intolerance, consider using dairy-free cream cheese and a non-dairy cheese option. Always check with guests about specific allergies, especially regarding cheeses or added ingredients.

Air Fryer Jalapeño Poppers

Delicious Air Fryer Jalapeño Poppers for Guilt-Free Snacking

Enjoy these Air Fryer Jalapeño Poppers, a guilt-free and customizable alternative to the traditional fried snack.
Prep Time 10 minutes
Cook Time 10 minutes
Total Time 20 minutes
Servings: 4 poppers
Course: Appetizer
Cuisine: American
Calories: 150

Ingredients
  

For the Filling
  • 8 oz Cream Cheese Consider low-fat for a lighter option.
  • 1 cup Colby Jack Cheese Can substitute with cheddar for a sharper taste.
  • 1 tsp Garlic Powder Fresh minced garlic can be used for a stronger flavor.
  • 1/2 tsp Salt Reduce for low-sodium diets.
  • 1/4 tsp Pepper Use black pepper, cayenne can increase heat.
For the Jalapeños
  • 6 Jalapeños Select large, firm jalapeños.
  • 1 tbsp Olive Oil Spray Any cooking spray can be used.
Optional Ingredients
  • 4 slices Bacon Omit for vegetarian versions.

Equipment

  • Air fryer

Method
 

Step-by-Step Instructions
  1. Preheat your air fryer to 400°F (200°C) for about 5 minutes and spray the basket with olive oil.
  2. Slice the jalapeños in half lengthwise, removing the seeds and veins.
  3. Place the halved jalapeños in the air fryer basket and air fry for about 4 minutes.
  4. In a mixing bowl, combine cream cheese, garlic powder, salt, pepper, and half of the shredded Colby Jack cheese until creamy.
  5. Stuff each jalapeño half with the creamy cheese mixture, adding more Colby Jack cheese and bacon if desired.
  6. Return the stuffed jalapeños to the air fryer and cook for another 5 minutes at 400°F (200°C) until the cheese is bubbly.
  7. Allow the poppers to cool for a minute before serving, optionally with dipping sauces or lime juice.

Nutrition

Serving: 1popperCalories: 150kcalCarbohydrates: 3gProtein: 6gFat: 12gSaturated Fat: 6gPolyunsaturated Fat: 0.5gMonounsaturated Fat: 4gCholesterol: 30mgSodium: 300mgPotassium: 100mgFiber: 1gSugar: 1gVitamin A: 500IUVitamin C: 15mgCalcium: 250mgIron: 1mg

Notes

Perfect for game day, gatherings, or as a tasty snack. Experiment with different cheese and spice combinations for variety.

Tried this recipe?

Let us know how it was!

Festive Cranberry Cream Cheese Pinwheels to Wow Your Guests

As I stood in my kitchen, the aroma of toasted herbs filled the air, reminding me of festive gatherings overflowing with laughter and joy. That’s the feeling I aim to capture with my Festive Cranberry Cream Cheese Pinwheels. With their creamy, tangy centers nestled within flaky pastry, these appetizers are not only a delight to the taste buds but also a breeze to prepare, allowing you to savor more moments with loved ones instead of drowning in last-minute chaos. Whether you’re hosting a holiday party or looking for a unique dish to bring to a gathering, these pinwheels are perfect for impressing your guests while being vegetarian-friendly. Curious to discover the secret behind these irresistible bites? Let’s roll up our sleeves and dive into this simple, make-ahead recipe that transforms ordinary ingredients into gourmet treats!

Why Are These Pinwheels So Irresistible?

Creamy, Tangy Goodness: The combination of cream cheese and cranberries provides a luscious filling that’s both decadent and refreshing.

Make-Ahead Convenience: Simply prepare them in advance, saving time and reducing stress when hosting guests.

Versatile Ingredients: With options for ingredient swaps, like using goat cheese or adding nuts, you can customize them to your taste.

Crowd-Pleasing Appeal: These bite-sized delights are perfect for holiday gatherings or casual get-togethers—guaranteed to impress!

Unique Flavor Profile: The blend of sweet cranberries, savory feta, and fresh herbs creates a symphony of flavors that feels special yet approachable.

Enjoy your pinwheels alongside a comforting Pumpkin Cream Cold beverage for a delightful experience!

Cranberry Cream Cheese Pinwheels Ingredients

For the Pinwheels

  • Puff Pastry – A flaky, airy base; store-bought makes it easy to whip up these appetizers.
  • Cream Cheese – Adds a luscious creaminess; ensure it’s softened to blend smoothly.
  • Cranberries – Offers a delightful tartness; opt for dried cranberries for an easier mix or sweeten fresh ones.
  • Feta Cheese – Imparts a tangy flavor; substitute with goat cheese for a different twist.
  • Fresh Herbs – Brings brightness; consider using parsley, thyme, or rosemary for a fragrant touch.
  • Egg – Use for an egg wash that gives the pinwheels a beautiful golden finish.
  • Parchment Paper – Essential for lining your baking sheet; it makes cleanup so much simpler.

Storage Tips

  • Make-Ahead Option – Assemble the pinwheels and refrigerate for up to 24 hours before baking for a stress-free preparation.
  • Freezing Tip – Prepare unbaked pinwheels and freeze them on a baking sheet; once solid, store in a container for up to 2 months.

These exquisite Cranberry Cream Cheese Pinwheels will soon become a favorite at your gatherings!

Step‑by‑Step Instructions for Cranberry Cream Cheese Pinwheels

Step 1: Prepare the Puff Pastry
Unroll one sheet of thawed puff pastry onto a lightly floured surface, shaping it into a rectangle that’s about 1/8-inch thick. Keep the pastry cold but at a manageable temperature for easy rolling. If it gets too warm, place it back in the refrigerator for 10 minutes. This ensures a flaky texture in your Cranberry Cream Cheese Pinwheels.

Step 2: Make the Filling
In a medium-sized bowl, combine softened cream cheese with crumbled feta cheese and finely chopped fresh herbs of your choice. Use a hand mixer or spatula to blend everything until you achieve a smooth, creamy consistency. This mixture will serve as the rich, flavorful filling for your pinwheels, creating that decadent contrast with the puff pastry.

Step 3: Spread the Filling
Gently spread the cream cheese mixture evenly over the prepared puff pastry, leaving a small border around the edges to prevent overflow. Use an offset spatula for smooth application. Ensure that the layer is consistent and reaches the corners, setting the stage for your delicious Cranberry Cream Cheese Pinwheels to shine.

Step 4: Add Cranberries
Sprinkle a generous amount of dried or sweetened fresh cranberries over the cream cheese layer, evenly distributing them for balanced flavor in every bite. Press down gently with your fingers to ensure the cranberries adhere to the filling well. Their tartness will add a lovely touch to your pinwheels, enhancing the overall taste.

Step 5: Roll and Slice
Starting from one edge, tightly roll the pastry into a log shape, making sure to keep the filling contained within. Once rolled, use a sharp knife to slice the log into ½-inch thick pieces, which will create bite-sized pinwheels. Be careful not to squish the slices while cutting, ensuring that your Cranberry Cream Cheese Pinwheels maintain a nice shape.

Step 6: Bake
Arrange the slices on a parchment-lined baking sheet, spacing them about an inch apart for even baking. Preheat your oven to 400°F (200°C) and brush the tops of the pinwheels with a light egg wash to achieve a golden, glossy finish. Bake for 15-20 minutes, or until they become puffed and golden brown, filling your kitchen with a delightful aroma.

Step 7: Cool and Serve
Once baked, let the Cranberry Cream Cheese Pinwheels cool on the baking sheet for a few minutes before transferring them to a serving platter. This cooling time helps set the filling while keeping the pinwheels warm and inviting. These treats are best enjoyed fresh from the oven, offering that perfect combination of crunch and creaminess!

What to Serve with Festive Cranberry Cream Cheese Pinwheels?

Delight your senses as you set the stage for a festive gathering with these vibrant, flavorful bites.

  • Creamy Tomato Basil Soup: The rich, tangy flavor complements the sweet and savory notes of the pinwheels, creating a warm, comforting pairing.

  • Mixed Green Salad: A refreshing mix of greens adds a crunchy texture and lightness, perfectly balancing the creaminess of the pinwheels.

  • Cheese Platter: Include a variety of cheeses like sharp cheddar and brie to enhance the flavor profile, inviting guests to enjoy a culinary journey.

  • Sparkling Apple Cider: This bubbly beverage pairs beautifully, bringing a festive sparkle that brightens up every bite and cheers your guests.

  • Roasted Vegetable Medley: Caramelized veggies add a sweet and earthy taste that provides a delightful contrast to the tartness of the cranberries.

  • Nutty Couscous Salad: A side of couscous with toasted nuts and herbs brings a hearty element, rounding out the meal with satisfying textures.

Feel free to mix and match any of these options to create a memorable dining experience centered around your Cranberry Cream Cheese Pinwheels!

Make Ahead Options

These Festive Cranberry Cream Cheese Pinwheels are perfect for meal prep enthusiasts! You can prepare the pinwheels up to 24 hours in advance by assembling them and refrigerating them before baking. Simply wrap the rolled pinwheels tightly in plastic wrap and store them in the fridge; this helps maintain their freshness. When you’re ready to serve, remove them from the fridge, slice them into pieces, and brush with egg wash before baking at 400°F (200°C) for 15-20 minutes until golden brown. This make-ahead option not only saves you time but also allows you to enjoy a stress-free gathering with your loved ones!

Cranberry Cream Cheese Pinwheels Variations

Feel free to get creative with these pinwheels and make them your own with delightful twists!

  • Goat Cheese: Swap the feta for goat cheese for a creamier, slightly tangy flavor that’s simply divine.

  • Nuts Added: Stir in chopped walnuts or pecans into the filling for a satisfying crunch that pairs beautifully with the softness of the cheese.

  • Fruit Fusion: Add finely chopped apples or pears to the cream cheese mixture for a delightful sweetness that complements the tang of cranberries.

  • Dairy-Free Delight: Use vegan cream cheese and dairy-free puff pastry to create a delicious, dairy-free version without sacrificing flavor.

  • Herb Variations: Experiment with different fresh herbs like basil or dill, giving each bite a unique and aromatic twist.

  • Spicy Kick: Incorporate pepper jack cheese into the filling for an unexpected heat that really elevates the flavor profile.

  • Savory Spin: Add some cooked and crumbled sausage for a heartier option that’s perfect for brunch or a casual gathering.

  • Swoosh of Citrus: Grate in some lemon or orange zest to brighten the flavors and give these pinwheels an invigorating citrusy finish.

Pair your amazing pinwheels with a side of Strawberry Cheesecake Bars or a creamy Cheddar Mac Cheese to create a feast that’s nothing short of spectacular!

Expert Tips for Cranberry Cream Cheese Pinwheels

  • Chill Puff Pastry: Keep your puff pastry cold until it’s ready to be baked. This maintains the flaky texture essential for delightful pinwheels.

  • Uniform Slices: Use a sharp knife to cut even slices, ensuring each piece bakes uniformly, resulting in perfectly balanced Cranberry Cream Cheese Pinwheels.

  • Prevent Spillage: Roll the pastry tightly but gently. A too-loose roll may cause ingredients to spill out during baking, affecting the structure.

  • Egg Wash Application: Be generous but not excessive with your egg wash for a golden finish—too much can create a soggy texture, while too little might leave the pastry dull.

  • Freezing Nuggets: If you plan to freeze your pinwheels, flash-freeze unbaked slices on a baking sheet before transferring to a container. This preserves their shape and flavor.

How to Store and Freeze Cranberry Cream Cheese Pinwheels

Fridge: Keep baked pinwheels in an airtight container in the fridge for up to 3 days. This will help maintain their delightful flavor and texture.

Freezer: For longer storage, freeze unbaked pinwheels on a baking sheet until solid, then transfer to a freezer-safe container or bag. They can be kept for up to 2 months.

Reheating: When ready to enjoy, bake frozen pinwheels directly from the freezer at 400°F (200°C) for 20-25 minutes, ensuring that they’re heated through and golden.

Make-Ahead Tip: Assemble the pinwheels and refrigerate for up to 24 hours before baking to save time on event day.

Cranberry Cream Cheese Pinwheels Recipe FAQs

What type of cranberries should I use?
Absolutely! For these pinwheels, you can use either fresh or dried cranberries. If using fresh, I recommend sweetening them with a little sugar to balance the tartness before adding them to your filling. Dried cranberries offer a more convenient option and are sweetened already, making them easier to mix into the cream cheese.

How should I store leftover pinwheels?
Very! Once baked, store your leftovers in an airtight container in the refrigerator for up to 3 days. Just make sure they’ve cooled completely before sealing, which helps to preserve their delightful texture. You can also gently reheat them in the oven at 350°F (175°C) for about 10-15 minutes to restore their warmth and crunch.

Can I freeze the pinwheels?
Absolutely! To freeze them, I suggest preparing the unbaked pinwheels first. Arrange them on a baking sheet and freeze until solid, then transfer them to a freezer-safe container. They’ll stay fresh for up to 2 months. When you’re ready to enjoy, bake them straight from the freezer at 400°F (200°C) for 20-25 minutes. This way, you have a fantastic appetizer ready at a moment’s notice!

What should I do if my puff pastry is too warm during preparation?
Great question! If your puff pastry becomes too warm and difficult to work with, simply place it back in the refrigerator for about 10-15 minutes to chill. This ensures that your pastry remains flaky while baking. Maintaining proper temperature is key to achieving those beautiful, puffed pinwheels.

Are there any dietary considerations I should be aware of?
Yes! These Cranberry Cream Cheese Pinwheels are vegetarian-friendly, but if you have guests with dairy allergies, I recommend using vegan cream cheese and dairy-free puff pastry as substitutes. It allows everyone to enjoy these festive bites without worry!

How do I ensure that my pinwheels look perfect when sliced?
Absolutely! To achieve perfect slices, use a sharp knife and apply even pressure without squishing the pinwheels. A clean, decisive cut will ensure that all the layers remain intact, showcasing the beautiful filling. Aim for ½-inch thick slices for the ideal bite-sized treats!

Cranberry Cream Cheese Pinwheels

Festive Cranberry Cream Cheese Pinwheels to Wow Your Guests

These Cranberry Cream Cheese Pinwheels are creamy, tangy appetizers perfect for festive gatherings.
Prep Time 20 minutes
Cook Time 20 minutes
Chilling Time 10 minutes
Total Time 50 minutes
Servings: 12 pinwheels
Course: Appetizer
Cuisine: Vegetarian
Calories: 150

Ingredients
  

For the Pinwheels
  • 1 sheet Puff Pastry Thawed
  • 8 oz Cream Cheese Softened
  • 1 cup Dried Cranberries Or sweetened fresh cranberries
  • 4 oz Feta Cheese Crumbled, substitute with goat cheese if desired
  • 1/4 cup Fresh Herbs Chopped, such as parsley, thyme, or rosemary
  • 1 large Egg For egg wash
  • 1 sheet Parchment Paper For lining the baking sheet

Equipment

  • Baking Sheet
  • Mixing Bowl
  • Hand mixer
  • Offset Spatula
  • sharp knife

Method
 

Step-by-Step Instructions
  1. Unroll one sheet of thawed puff pastry onto a lightly floured surface, shaping it into a rectangle that’s about 1/8-inch thick.
  2. In a medium-sized bowl, combine softened cream cheese with crumbled feta cheese and finely chopped fresh herbs. Blend until smooth and creamy.
  3. Spread the cream cheese mixture evenly over the prepared puff pastry, leaving a small border around the edges.
  4. Sprinkle a generous amount of dried or sweetened fresh cranberries over the cream cheese layer.
  5. Starting from one edge, tightly roll the pastry into a log shape and slice into ½-inch thick pieces.
  6. Arrange the slices on a parchment-lined baking sheet, brush with egg wash, and bake.
  7. Let the pinwheels cool for a few minutes before transferring them to a serving platter.

Nutrition

Serving: 1pinwheelCalories: 150kcalCarbohydrates: 12gProtein: 4gFat: 10gSaturated Fat: 5gMonounsaturated Fat: 3gCholesterol: 25mgSodium: 150mgPotassium: 50mgFiber: 1gSugar: 3gVitamin A: 300IUVitamin C: 1mgCalcium: 80mgIron: 1mg

Notes

These pinwheels can be prepared ahead of time and stored in the fridge or freezer for convenience.

Tried this recipe?

Let us know how it was!