Savor the Comfort of Easy One-Pot Potato Curry Tonight

The air is infused with enchanting aromas, and my heart is set on creating something memorable tonight. I can already picture the vibrant colors of my Hearty One-Pot Potato Curry with Coconut Milk coming together—a dish that not only warms the soul but also showcases the beauty of simple ingredients. With tender potatoes, crisp peas, and hearty chickpeas bathing in a creamy coconut sauce, this vegan delight is perfect for anyone seeking a hearty meal without the fuss. Plus, it comes together in just one pot, making cleanup a breeze! Whether you’re winding down after a long day or gathering friends for a cozy dinner, this comforting curry is sure to delight. Are you ready to spice up your kitchen? Let’s dive into this satisfying recipe!

Why Choose One-Pot Potato Curry?

Simplicity at Its Best: This recipe is a breeze to prepare, requiring just one pot and minimal fuss.

Vibrant Flavors: The blend of spices like garam masala and cumin creates an aromatic experience in every bite.

Heartfelt Comfort: With creamy coconut milk and tender potatoes, it’s a delicious way to warm up any night.

Versatile and Customizable: Feel free to mix in extra veggies like spinach or carrots for added nutrition or swap chickpeas for lentils for a twist!

Perfect for Meal Prep: Make a large batch, enjoy it throughout the week, and simply reheat it for quick meals!

Crowd-Pleasing Appeal: Trust me, friends and family will be asking for seconds, making it ideal for gatherings!

One-Pot Potato Curry Ingredients

For the Curry Base
Yukon Gold or Russet Potatoes – The main ingredient providing substance and comfort; any starchy potatoes can be used.
Ghee or Vegetable Oil – For sautéing vegetables and adding richness; substitute with olive oil or coconut oil for a plant-based option.
Onion – Adds depth of flavor and sweetness when sautéed; finely diced for even cooking.
Garlic – Provides aromatic flavor; minced for quick and even release of flavor.
Ginger – Fresh ginger enhances warmth and complexity; peeled and grated for best results.
Green Chili Peppers – Optional heat source; adjust according to spice preference.

For the Spices
Garam Masala – A blend of spices that adds warmth and depth; essential for a fragrant One-Pot Potato Curry.
Ground Cumin – Contributes a nutty, peppery flavor; essential for Indian recipes.
Mustard Seeds – Adds a bit of crunch and pop of flavor; toast for best results.
Ground Turmeric – Provides earthiness and vibrant color; critical for curries.
Ground Coriander – Offers a citrusy flavor that complements the other spices.
Kashmiri Red Chili Powder – Adds mild heat and color; substitute with regular chili powder if unavailable.

For the Curry Mixture
Tomatoes – Fresh tomatoes add acidity and balance richness; diced for even cooking.
Vegetable Broth – Provides simmering liquid base with flavor; substitute with water if needed.
Coconut Milk – Gives creaminess and richness; essential for the curry’s texture.
Frozen Peas – Adds sweetness and color; no need to thaw before cooking.
Chickpeas – Nutrient-rich addition that provides protein and texture; drained and rinsed.

Finishing Touches
Salt and Pepper – Essential seasoning; adjust to taste.
Fresh Cilantro – For garnish; adds brightness and flavor to your delicious One-Pot Potato Curry.

Step‑by‑Step Instructions for One-Pot Potato Curry

Step 1: Prep the Potatoes
Begin by scrubbing the potatoes under running water to remove any dirt, then peel them and cut into 1-inch cubes. Set the prepared potatoes aside in a bowl to prevent browning while you prepare the rest of the ingredients for your hearty One-Pot Potato Curry.

Step 2: Sauté the Base
In a large pot, warm 2 tablespoons of ghee or vegetable oil over medium heat. Once hot, add finely diced onions and sauté for 3-5 minutes until they become soft and translucent, stirring occasionally to ensure even cooking. This will create a fragrant base for your curry.

Step 3: Add Aromatics
Stir in minced garlic, grated ginger, and green chili peppers (if used), and sprinkle in the garam masala, ground cumin, mustard seeds, ground turmeric, ground coriander, and Kashmiri red chili powder. Cook for an additional 1-2 minutes, stirring continuously until the spices release their aromas, enhancing the richness of your One-Pot Potato Curry.

Step 4: Combine Ingredients
Add the diced tomatoes and the prepared potato cubes to the pot, mixing well to coat everything in the aromatic spice blend. Pour in 4 cups of vegetable broth, bringing the mixture to a quick boil. Once boiling, reduce the heat to low, covering the pot to let the flavors meld beautifully.

Step 5: Simmer the Curry
Allow the curry to simmer covered for about 15-20 minutes. This gentle simmer will cook the potatoes until they are tender and forkable, releasing their starches to thicken the broth slightly. Stir occasionally to prevent sticking, and keep an eye on the simmering sauce.

Step 6: Finish the Curry
Remove the lid and gently stir in 1 can of coconut milk, along with frozen peas and drained chickpeas. Simmer uncovered for an additional 5-10 minutes, allowing the flavors to combine, and the curry to thicken to your desired consistency, revealing a creamy and inviting dish.

Step 7: Season and Serve
Finally, season your comforting One-Pot Potato Curry with salt and pepper to taste, adjusting according to your preferences. Serve it hot, garnished with fresh cilantro, and enjoy it with fluffy basmati rice or warm naan for a delightful meal that warms the heart.

Storage Tips for One-Pot Potato Curry

Fridge: Store in an airtight container for up to 3-4 days. Make sure to cool it down to room temperature before sealing to prevent condensation.

Freezer: Freeze leftovers in a freezer-safe container for up to 3 months. Allow to cool completely before transferring to avoid ice crystals forming.

Reheating: Gently reheat on the stovetop or in the microwave. Add a splash of water or coconut milk to restore consistency if the curry thickens.

Portioning: Consider freezing in individual portions for quick meals on busy nights, making your One-Pot Potato Curry readily available whenever the craving strikes!

One-Pot Potato Curry Variations

Feel free to let your creativity flow and customize this One-Pot Potato Curry according to your tastes!

  • Extra Veggies: Add fresh spinach or diced carrots for an extra nutrient boost. They will soak up the delicious curry flavors and add a vibrant pop of color.

  • Protein Swap: Substitute chickpeas with lentils or cubed tofu to explore different protein options. These swaps not only change the texture but also enhance the dish’s nutrition profile.

  • Spice Level Adjustments: Vary the heat by increasing or decreasing the amount of green chili peppers. A squeeze of lime at the end can also brighten the flavors beautifully!

  • Coconut-Free Version: If coconut milk isn’t your thing, use unsweetened almond or soy milk for a lighter touch while still keeping it creamy.

  • Herb Infusion: Swap cilantro with fresh mint or Thai basil for a delightful herbal twist. These aromatic herbs can add a refreshing depth to your curry.

  • Curry Powder Twist: For those who love a more complex flavor, try using a curry powder blend instead of garam masala. Experimenting with different spice blends can create a unique taste.

  • Sweet Potato Addition: Replace some or all of the potatoes with sweet potatoes for a hint of sweetness and a beautiful orange color. They will perfectly balance the spices in this curry.

  • Lentil Coconut Curry: Instead of potatoes, use lentils along with the coconut milk and spices for a hearty, nutritious alternative. This variation transforms the dish while maintaining that comforting essence.

Don’t forget, the joy of cooking is all about making each dish your own! For more delicious inspiration, consider checking out these recipes: Smoky Coconut Curry Soup or Ground Turkey Potato. Happy cooking!

Make Ahead Options

These Hearty One-Pot Potato Curry ingredients are perfect for meal prep! You can peel and cube the potatoes up to 24 hours in advance, just soak them in cold water to prevent browning. Additionally, the spice mix can be measured and combined ahead of time, making it quicker to prepare when you’re ready to cook. Simply store the prepped ingredients in the refrigerator, and when ready to serve, sauté the base, add the vegetables, and continue with the cooking process. This prep ensures that on busy nights, you can enjoy a comforting One-Pot Potato Curry just as delicious as when made fresh, with minimal effort!

What to Serve with Hearty One-Pot Potato Curry?

Imagine the comforting aroma of a warm meal shared with loved ones—all set for a delightful evening!

  • Fluffy Basmati Rice: A classic pairing that soaks up the rich curry sauce while adding a light and fluffy texture to your meal.
  • Warm Naan Bread: Ideal for dipping and mopping up the creamy curry, naan adds a satisfying chewiness that complements the dish beautifully.
  • Cucumber Raita: This cooling yogurt-based side offers a refreshing contrast to the spice, enhancing the overall dining experience with its crisp flavors.
  • Roasted Cauliflower: The nutty, caramelized notes of roasted cauliflower add depth and balance to the curry’s creaminess. It’s a lovely way to introduce an additional texture.
  • Spicy Lentil Soup: Adding a bowl of lentil soup on the side enriches the meal with protein and celebrates the hearty, earthy flavors found within your potato curry.
  • Chickpea Salad: A bright and zesty chickpea salad featuring cucumber, tomatoes, and a squeeze of lemon will bring a fresh and vibrant note to the table.
  • Mango Chutney: The sweet and tangy profiles of mango chutney contrast with the spices in the curry, a perfect burst of flavor that elevates every bite.
  • Cardamom-Infused Tea: Adding a warm drink like cardamom tea will offer a cozy finish to your meal, echoing the intriguing spice notes from the curry.
  • Coconut Ice Cream: For dessert, creamy coconut ice cream is a delightful way to end with a sweet, refreshing touch mirroring the main dish’s richness.
  • Fruit Salad: A mix of seasonal fruits will cleanse the palate and add a touch of brightness to the meal, creating a well-rounded finish to your feast.

Expert Tips for One-Pot Potato Curry

Sautéing Spices: Ensure to sauté your spices briefly to activate their flavors; burning can lead to bitterness.

Adjusting Consistency: If the curry thickens too much while reheating, simply add a splash of water or coconut milk to restore desired texture.

Crockpot Version: For a slow-cooked approach, sauté the base ingredients first, then transfer to a crockpot with all other ingredients and cook on low for 6-8 hours.

Versatile Vegetables: Feel free to add extra veggies such as spinach or carrots for enhanced nutrition and flavor in your One-Pot Potato Curry.

Storage Insight: Store leftovers in an airtight container in the refrigerator for up to 3-4 days; reheat gently to maintain texture.

One-Pot Potato Curry Recipe FAQs

What type of potatoes should I use for this curry?
Absolutely! Yukon Gold or Russet potatoes are perfect choices because they provide the best texture for this dish. Any starchy potatoes will work well, so feel free to use what you have on hand. Just make sure to cut them into 1-inch cubes for even cooking.

How long can I store leftover One-Pot Potato Curry?
You can store your leftovers in an airtight container in the refrigerator for up to 3-4 days. Make sure to let it cool to room temperature before sealing to avoid condensation, which can affect the curry’s texture.

Can I freeze One-Pot Potato Curry?
Yes, indeed! To freeze it, allow the curry to cool completely, then transfer it to a freezer-safe container. It can be frozen for up to 3 months. For easy meal prep, consider dividing it into individual portions before freezing so you can simply reheat what you need when hunger strikes!

What if my curry is too thick when reheating?
If you find that your One-Pot Potato Curry has thickened too much, no worries! Just add a splash of water or coconut milk while gently reheating it on the stovetop or in the microwave. Stir until you achieve your desired consistency, and enjoy!

Are there any dietary considerations I should be aware of?
Certainly! This recipe is vegan and packed with nutrients, making it suitable for those following a plant-based diet. However, always be mindful of any allergies—particularly to legumes like chickpeas or spices. If you’re serving it to guests who may have allergies, I recommend checking with them first before preparing this hearty dish!

Can I add extra vegetables to the One-Pot Potato Curry?
Yes, very much! I often add extra veggies like spinach or carrots for added nutrition and flavor. You can throw them in during the last 5-10 minutes of cooking to keep them vibrant and slightly crunchy. Feel free to get creative with what you have in your pantry!

One-Pot Potato Curry

Savor the Comfort of Easy One-Pot Potato Curry Tonight

This One-Pot Potato Curry is a comforting vegan dish featuring tender potatoes and aromatic spices.
Prep Time 20 minutes
Cook Time 40 minutes
Total Time 1 hour
Servings: 4 servings
Course: Dinner
Cuisine: Indian
Calories: 350

Ingredients
  

For the Curry Base
  • 4 cups Yukon Gold or Russet Potatoes cubed
  • 2 tablespoons Ghee or Vegetable Oil for sautéing
  • 1 medium Onion finely diced
  • 4 cloves Garlic minced
  • 1 tablespoon Fresh Ginger peeled and grated
  • 1 small Green Chili Peppers optional
For the Spices
  • 2 teaspoons Garam Masala
  • 1 teaspoon Ground Cumin
  • 1 teaspoon Mustard Seeds toasted
  • 1 teaspoon Ground Turmeric
  • 1 teaspoon Ground Coriander
  • 1 teaspoon Kashmiri Red Chili Powder or regular chili powder
For the Curry Mixture
  • 2 cups Tomatoes diced
  • 4 cups Vegetable Broth or water
  • 1 can Coconut Milk
  • 1 cup Frozen Peas no need to thaw
  • 1 can Chickpeas drained and rinsed
Finishing Touches
  • to taste Salt
  • to taste Pepper
  • 1/4 cup Fresh Cilantro for garnish

Equipment

  • large pot

Method
 

Step-by-Step Instructions
  1. Begin by scrubbing the potatoes under running water to remove any dirt, then peel them and cut into 1-inch cubes. Set aside to prevent browning.
  2. In a large pot, warm 2 tablespoons of ghee or vegetable oil over medium heat. Add finely diced onions and sauté for 3-5 minutes until soft and translucent.
  3. Stir in minced garlic, grated ginger, and green chili peppers (if used), and add all spices. Cook for 1-2 minutes until the spices release their aromas.
  4. Add the diced tomatoes and prepared potato cubes, mixing well. Pour in vegetable broth and bring to a quick boil, then reduce heat and cover.
  5. Allow the curry to simmer covered for about 15-20 minutes until the potatoes are tender, stirring occasionally.
  6. Remove the lid, gently stir in coconut milk, frozen peas, and chickpeas, and simmer uncovered for an additional 5-10 minutes.
  7. Season with salt and pepper to taste, and serve hot, garnished with fresh cilantro.
Nutrition

Serving: 1bowlCalories: 350kcalCarbohydrates: 50gProtein: 10gFat: 15gSaturated Fat: 9gPolyunsaturated Fat: 1gMonounsaturated Fat: 4gSodium: 600mgPotassium: 800mgFiber: 10gSugar: 5gVitamin A: 1600IUVitamin C: 20mgCalcium: 50mgIron: 3mg

Notes

Consider freezing in individual portions for quick meals. Adjust spices according to preference for heat.

Tried this recipe?

Let us know how it was!

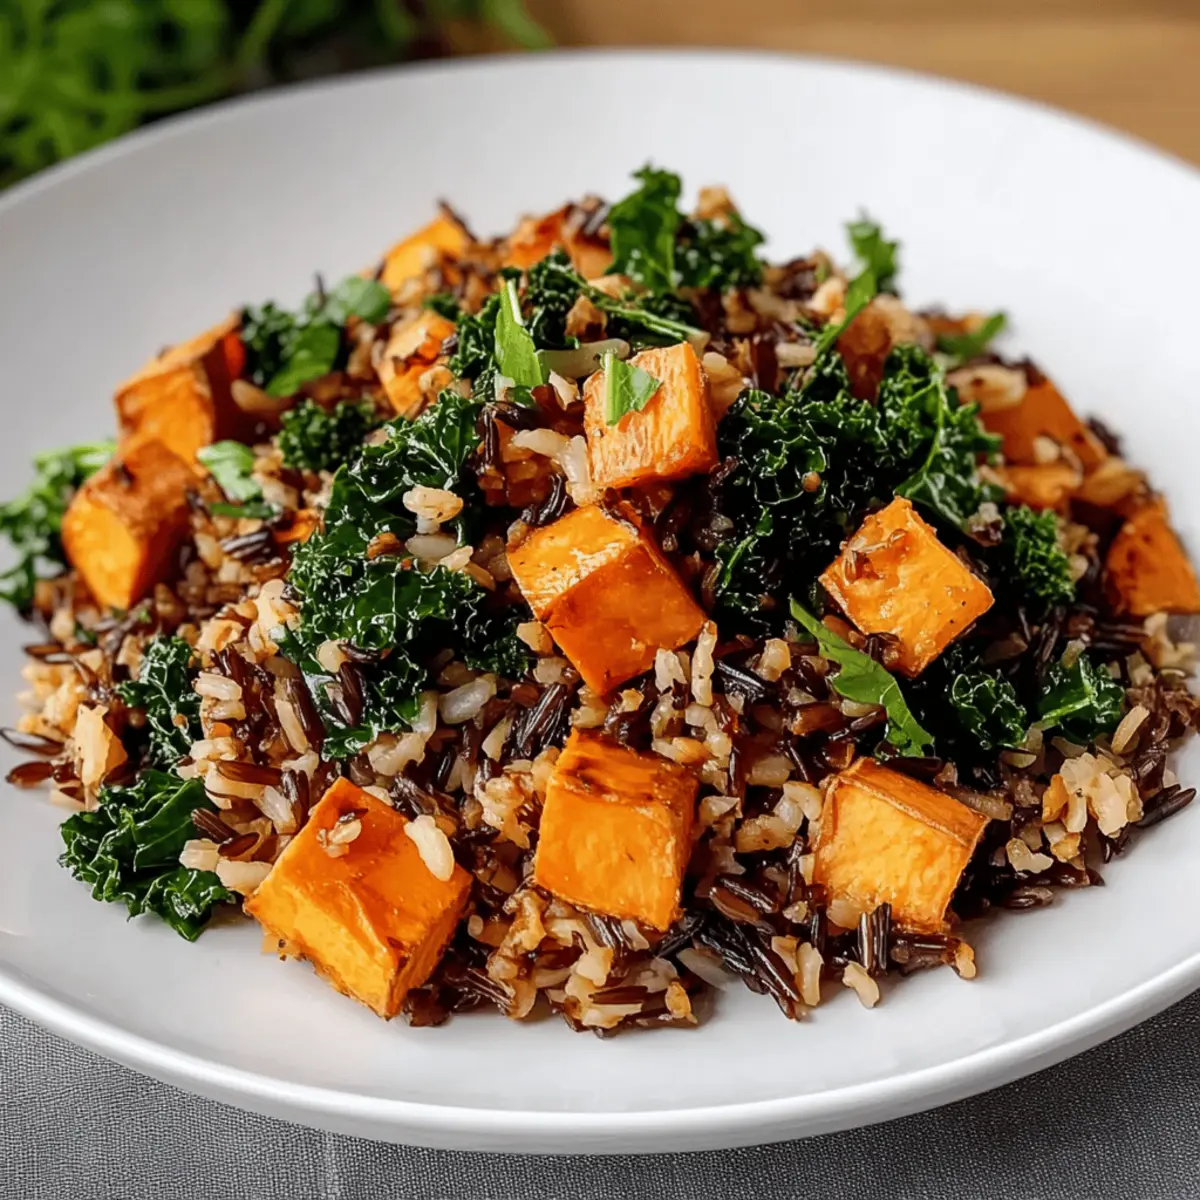
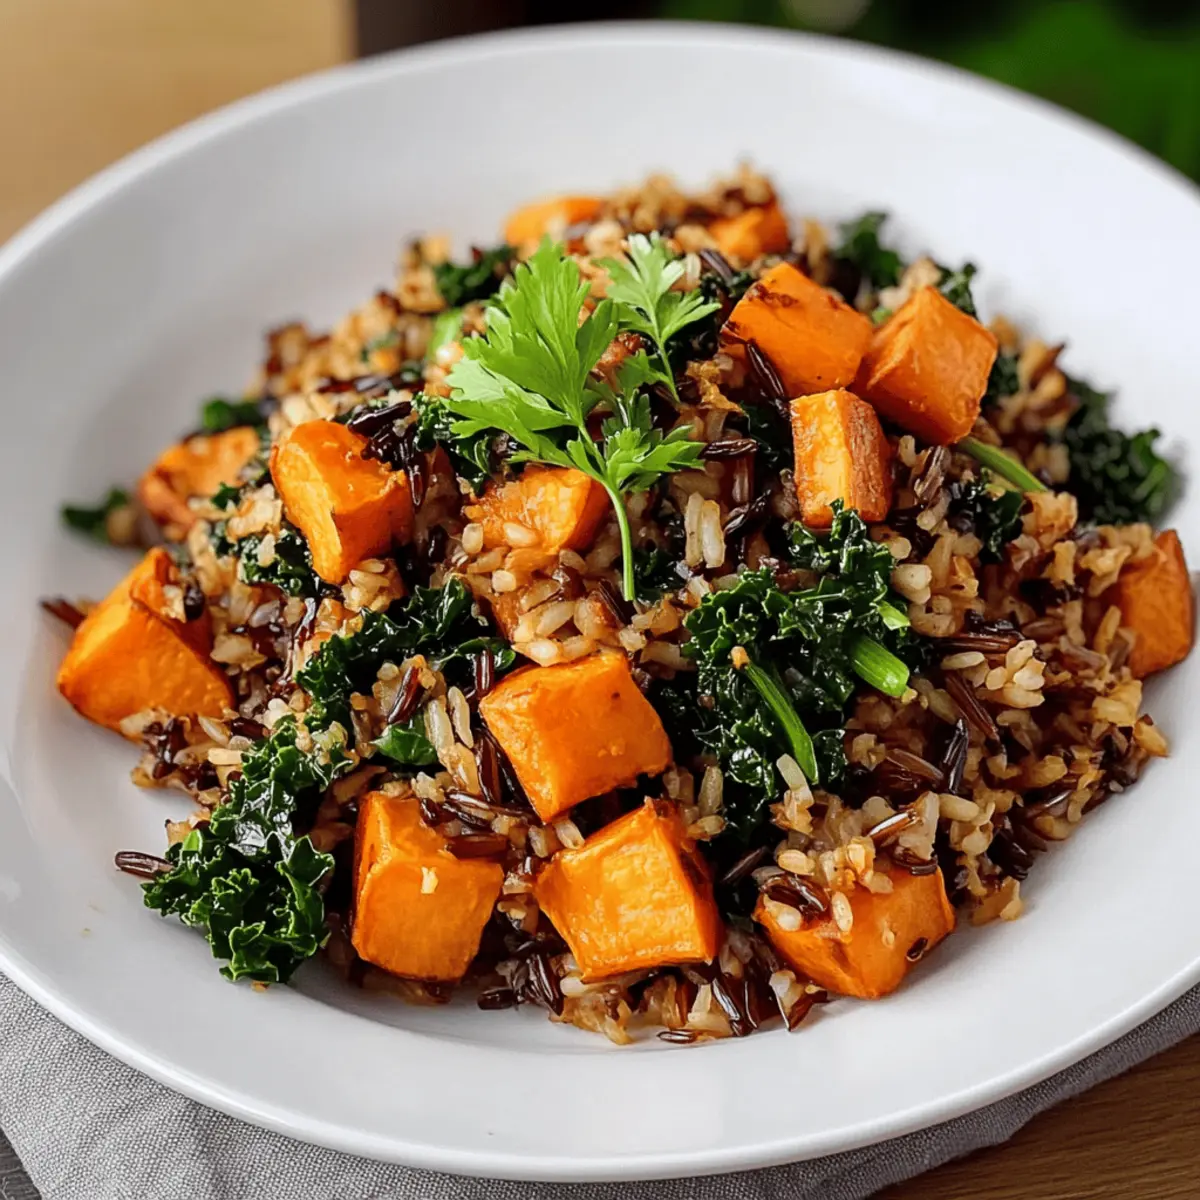
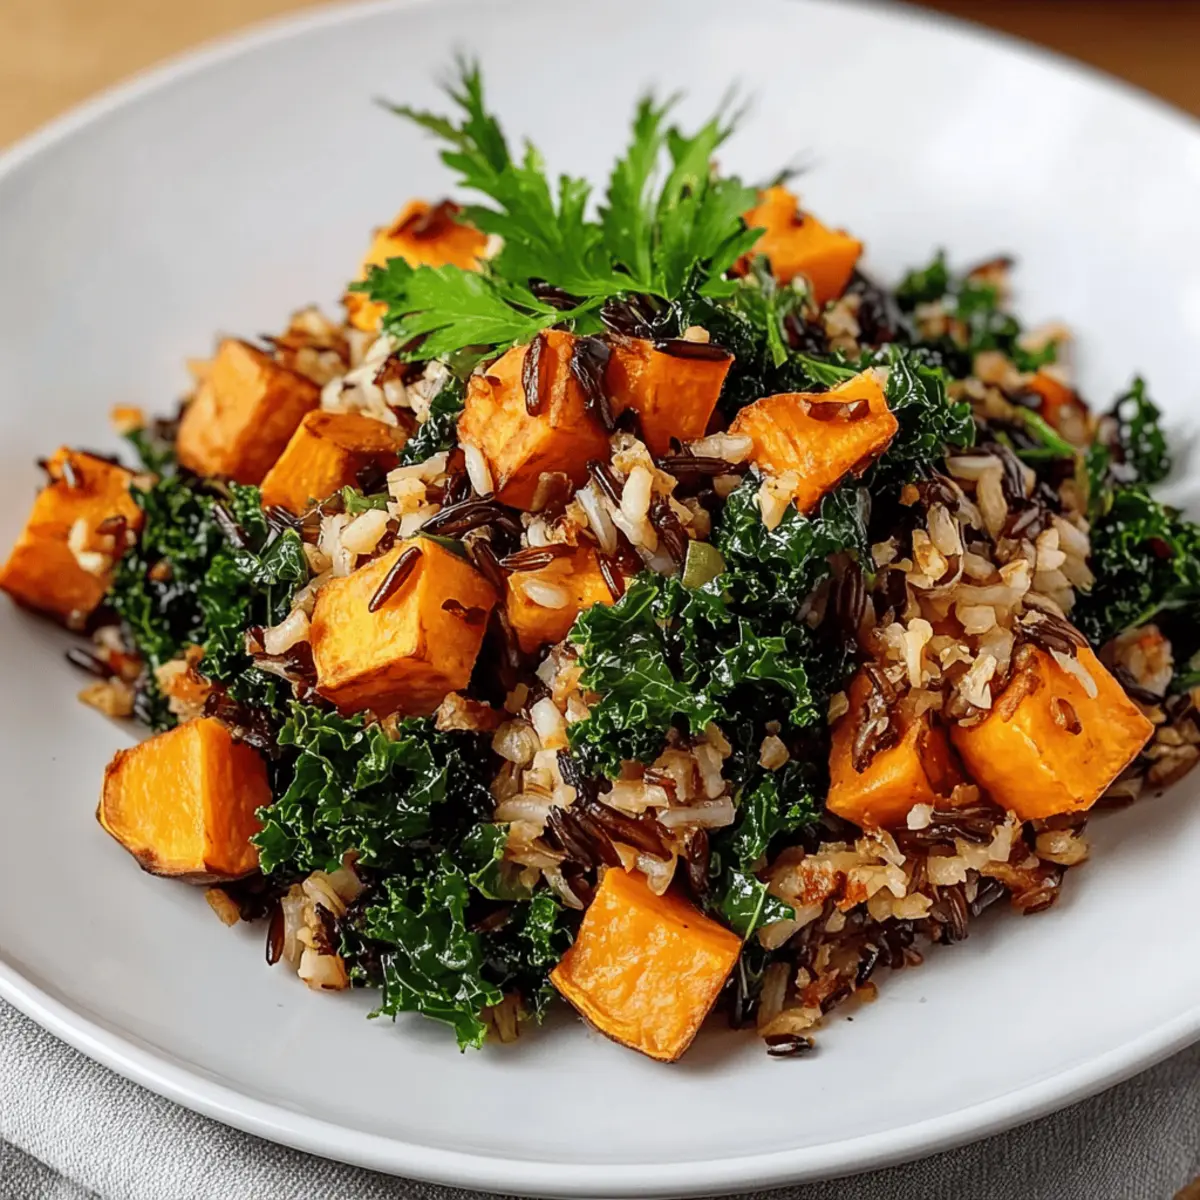
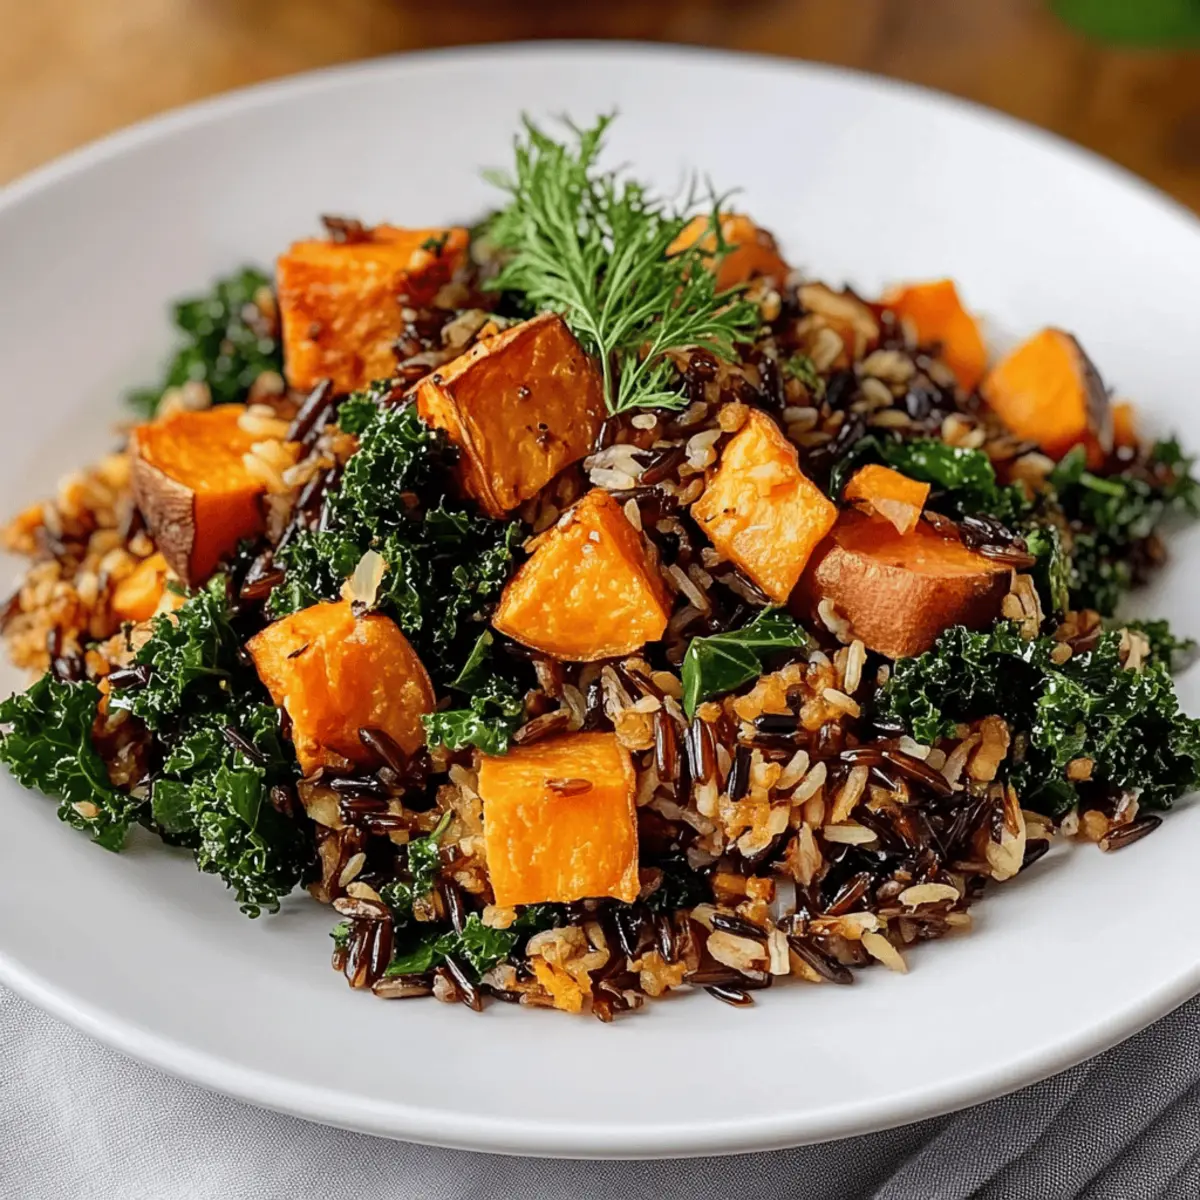
Sweet Potato Kale Rice for a Flavor-Packed Dinner Delight

As I took my first bite of this vibrant Caramelized Sweet Potato and Kale Fried Wild Rice, the combination of earthy flavors and delightful textures left me grinning. This dish is not just a feast for the eyes but a quick, nutritious escape from the overwhelm of busy weeknights. Ready in just 30 minutes, it’s perfect for those of us who crave homemade meals without the fuss. The natural sweetness of caramelized sweet potatoes pairs beautifully with the slight bitterness of kale, all tied together by a lush maple-Dijon vinaigrette. What’s more, this Sweet Potato Kale Rice is not only gluten-free and vegetarian but also completely customizable to suit your pantry. Intrigued? Let’s dive into the details of this wholesome recipe!

Why is Sweet Potato Kale Rice so special?

Nutrient-Dense Goodness: Packed with fiber from sweet potatoes and antioxidants from kale, this dish is a health champion.

Quick Preparation: In just 30 minutes, you can whip up a comforting meal that satisfies the whole family.

Versatile Option: Easily customize by adding proteins like grilled chicken or chickpeas, or swap in seasonal veggies like butternut squash.

Savory Harmony: The unique combination of sweet and savory flavors, enhanced by a maple-Dijon vinaigrette, creates a dish that pleases the palate.

Perfect For Meal Prep: Make extra and enjoy it as a delightful side for roasted meats or as a nutritious lunch throughout the week.

Elevate your culinary experience with this vibrant dish that can be enjoyed any night of the week, and if you’re craving more hearty alternatives, check out our Zucchini Sweet Potato or Ground Beef Potato recipes!

Sweet Potato Kale Rice Ingredients

• Create a flavorful experience with this delightful Sweet Potato Kale Rice!

For the Rice Base

  • Wild Rice Blend – Provides a chewy texture and nutty flavor; for a softer option, use long-grain white rice.
  • Sweet Potato – Adds a natural sweetness and heartiness; make sure to cube and caramelize for maximum flavor.

For the Greens

  • Kale – Offers slight bitterness and chewiness to balance the dish; substitute with spinach if needed, but it will wilt quickly.

For the Vinaigrette

  • Maple-Dijon Vinaigrette – Adds a tangy-sweet depth to the dish; feel free to substitute with a lighter vinaigrette if necessary, but this combination is best for flavor.

For the Finishing Touch

  • Salted Pepitas – Provides a satisfying crunch and nutty finish; you can use any chopped nuts or seeds as an alternative.

Step‑by‑Step Instructions for Sweet Potato Kale Rice

Step 1: Cook Wild Rice
Start by rinsing one cup of wild rice blend under cold water to remove excess starch. In a medium pot, combine the rice with 2.5 cups of chicken stock and bring it to a boil over medium-high heat. Once boiling, reduce the heat to low, cover the pot, and simmer for about 30–35 minutes, or until the rice is tender and pops open.

Step 2: Prepare Vinaigrette
While the rice cooks, grab a small jar or bowl to prepare the maple-Dijon vinaigrette. Combine 3 tablespoons of maple syrup, 1 tablespoon of Dijon mustard, and 1 tablespoon of rice vinegar. Seal the jar and shake vigorously, or whisk together in the bowl until the ingredients are fully blended and creamy. Set aside to allow the flavors to meld while you caramelize the sweet potatoes.

Step 3: Caramelize Sweet Potatoes
In a large skillet, heat 2 tablespoons of butter along with 1 tablespoon of brown sugar over medium heat. Once the butter is melted and bubbly, add 1 cup of cubed sweet potatoes to the skillet. Sauté for 8–10 minutes, stirring occasionally, until the sweet potatoes are golden brown and tender. Watch for a nice caramelization on the edges for that rich flavor.

Step 4: Sauté Kale
Once the sweet potatoes are caramelized, add 2 cups of chopped kale to the skillet. Stir well and cook for about 3–4 minutes, or until the kale is wilted and vibrant green. This step adds a nice contrast to the sweetness of the sweet potatoes, contributing to the delightful balance of flavors in your Sweet Potato Kale Rice.

Step 5: Combine Ingredients
After the kale has wilted, add the cooked wild rice to the skillet. Pour in the prepared maple-Dijon vinaigrette over the mixture and stir gently to incorporate all the ingredients. Let everything cook together for an additional 2–3 minutes on medium heat, allowing the rice to absorb the vinaigrette and all those beautiful flavors to meld.

Step 6: Garnish and Serve
Finally, turn off the heat and transfer your vibrant Sweet Potato Kale Rice to serving dishes. Top each portion with a generous sprinkle of salted pepitas for an extra crunch. This dish can be enjoyed warm or at room temperature, making it a versatile option for any meal.

Storage Tips for Sweet Potato Kale Rice

Fridge: Store leftovers in an airtight container for up to 4 days to keep the Sweet Potato Kale Rice fresh and flavorful.

Freezer: For longer storage, freeze individual portions in airtight freezer bags; it can last up to 3 months. Thaw in the fridge overnight before reheating.

Reheating: Gently reheat in the microwave or on the stovetop with a splash of water or broth to restore moisture and texture, ensuring each bite remains delightful.

Room Temperature: Avoid leaving the dish out for more than 2 hours to prevent spoilage; always refrigerate if not consumed right away.

Sweet Potato Kale Rice Variations

Feel free to get creative with this dish and tailor it to your taste buds for an even more satisfying meal.

  • Protein Boost: Add cubes of seared tofu or grilled chicken for a hearty addition. Alternatively, toss in chickpeas for a refreshing vegetarian protein twist.

  • Seasonal Swap: Try using butternut squash or zucchini instead of sweet potatoes for a different flavor and texture profile that embraces seasonal produce.

  • Leafy Green Alternative: Substitute kale with fresh spinach or Swiss chard for a quick, wilted green that’s also nutrient-rich, though be mindful that spinach will wilt more rapidly.

  • Vinaigrette Variation: Change up the dressing by using balsamic vinaigrette; it brings an extra layer of tangy sweetness that pairs beautifully with sweet potatoes.

  • Nutty Finish: Swap salted pepitas for toasted walnuts or almonds to introduce earthy tones and a satisfying crunch. Just remember to chop them for bite-sized pieces!

  • Quinoa Alternative: For a slightly different texture, use quinoa instead of wild rice for a protein-packed option that still maintains that fluffy feel.

  • Spice it Up: Add a pinch of chili flakes or smoked paprika for a touch of heat that will liven up the dish and elevate the overall flavor.

  • Creative Serving: For a fun presentation, serve this vibrant dish in lettuce wraps or over roasted acorn squash, providing an artistic twist to your table.

If you love straightforward adaptations, check out our delightful Sweet Hawaiian Crockpot for another simple yet delicious recipe!

Make Ahead Options

These Caramelized Sweet Potato and Kale Fried Wild Rice bowls are perfect for busy home cooks looking to save time during the week! You can prepare the sweet potatoes and vinaigrette up to 24 hours in advance. Simply caramelize one cup of cubed sweet potatoes and store them in an airtight container in the refrigerator. The vinaigrette can be whisked together and kept in the jar, ready to dress your rice. Cook the wild rice blend on the day you plan to serve it, and then combine everything in a heated skillet for just a few minutes before serving. This way, you’ll enjoy restaurant-quality results with minimal effort, all while enjoying that delightful blend of flavors!

What to Serve with Caramelized Sweet Potato and Kale Fried Wild Rice

This vibrant dish is perfect for pairing, creating a well-rounded meal full of flavors and textures.

  • Creamy Mashed Potatoes: A side of creamy mashed potatoes adds a rich, velvety counterpart to the crispy caramelized sweet potatoes.

  • Citrusy Roasted Brussels Sprouts: The bright and tangy flavor of roasted Brussels sprouts enhances the dish while providing a satisfying crunch.

  • Grilled Chicken Breast: Juicy grilled chicken brings a protein-packed option that complements the earthy notes of the wild rice beautifully.

  • Quinoa Salad with Lemon: A light, zesty quinoa salad adds a refreshing bite, making it a delightful contrast to the dish’s richness.

  • Garlic Bread: Crunchy garlic bread offers a classic side that is always loved, perfect for scooping up every flavorful bite.

  • Sparkling Lemonade: This refreshing drink is a perfect match, offering a zesty brightness that balances the dish’s sweet and savory notes.

  • Dark Chocolate Mousse: For dessert, a velvety dark chocolate mousse provides a decadent finish to your meal, enhancing the overall dining experience.

Expert Tips for Sweet Potato Kale Rice

Skillet Space: Avoid overcrowding the skillet while caramelizing sweet potatoes to achieve a beautifully golden crust.

Flavor Absorption: Let the wild rice soak in the maple-Dijon vinaigrette for optimal flavor, enhancing your Sweet Potato Kale Rice experience.

Watch Cooking Times: If using beans as a protein, monitor cooking times to ensure they’re heated through without becoming mushy, keeping your dish perfectly balanced.

Seasonal Swaps: Don’t hesitate to substitute seasonal vegetables like butternut squash for a new spin, adding variety to your Sweet Potato Kale Rice.

Storage Know-How: Store leftovers in an airtight container for up to 4 days and reheat gently to maintain texture and taste.

Sweet Potato Kale Fried Wild Rice Recipe FAQs

What is the best way to select ripe sweet potatoes?
Absolutely! When choosing sweet potatoes, look for ones that are firm and smooth with no dark spots or blemishes. A slightly uneven surface is normal, but avoid potatoes with soft spots or wrinkles, as these might indicate spoilage.

How should I store leftover Sweet Potato Kale Rice?
Store your leftovers in an airtight container in the fridge for up to 4 days. For longer storage, freeze individual portions in airtight freezer bags, and they’ll stay fresh for up to 3 months. Remember to label your bags with the date for easy tracking!

Can I freeze Sweet Potato Kale Rice, and if so, how?
Yes, you can! To freeze your Sweet Potato Kale Rice, let it cool completely before portioning it into individual airtight freezer bags. Squeeze out as much air as possible before sealing, and lay the bags flat in your freezer. For reheating, simply thaw overnight in the fridge and reheat gently in the microwave or stovetop with a splash of water to keep the rice moist.

What can I do if my sweet potatoes didn’t caramelize properly?
If your sweet potatoes aren’t caramelizing as expected, ensure your skillet isn’t overcrowded. Give them enough space to cook evenly and get that lovely golden crust. Also, be sure that your heat is at medium, and occasionally stir for even browning. If they’re still bland, try adding a pinch more brown sugar to encourage caramelization!

Are there any common allergens in this recipe?
The Sweet Potato Kale Rice recipe is naturally gluten-free and vegetarian! However, if you’re preparing it for someone with nut allergies, be mindful when adding salted pepitas, as they are seeds. You can also skip them and use sunflower seeds for a similar crunch without any aggravating nut allergies.

Can I substitute the kale with another green?
Very! While kale adds a delightful bitterness and texture, you can easily substitute it with spinach if needed. Just keep in mind, spinach cooks down much quicker, so add it towards the end of your sautéing process to preserve some of its integrity and flavor.

Sweet Potato Kale Rice

Sweet Potato Kale Rice for a Flavor-Packed Dinner Delight

A vibrant Sweet Potato Kale Rice packed with earthy flavors and textures, perfect for a nutritious weeknight dinner.
Prep Time 10 minutes
Cook Time 30 minutes
Total Time 30 minutes
Servings: 4 servings
Course: Dinner
Cuisine: Vegetarian
Calories: 350

Ingredients
  

For the Rice Base
  • 1 cup wild rice blend Rinsed
  • 2.5 cups chicken stock
  • 1 cup sweet potato Cubed and caramelized
For the Greens
  • 2 cups kale Chopped
For the Vinaigrette
  • 3 tablespoons maple syrup
  • 1 tablespoon Dijon mustard
  • 1 tablespoon rice vinegar
For the Finishing Touch
  • 1/4 cup salted pepitas Can substitute with nuts or seeds

Equipment

  • Medium pot
  • large skillet
  • small jar

Method
 

Step-by-Step Instructions
  1. Rinse one cup of wild rice blend under cold water. In a medium pot, combine the rice with 2.5 cups of chicken stock and bring to a boil. Once boiling, reduce heat to low, cover, and simmer for about 30–35 minutes until rice is tender.
  2. While the rice cooks, prepare the maple-Dijon vinaigrette by combining 3 tablespoons of maple syrup, 1 tablespoon of Dijon mustard, and 1 tablespoon of rice vinegar in a small jar. Shake vigorously or whisk until blended.
  3. In a large skillet, heat 2 tablespoons of butter and 1 tablespoon of brown sugar over medium heat. Add 1 cup of cubed sweet potatoes and sauté for 8–10 minutes until golden brown and tender.
  4. Add 2 cups of chopped kale to the skillet and cook for about 3–4 minutes until wilted and vibrant green.
  5. Add the cooked wild rice to the skillet, pour in the prepared vinaigrette, and stir gently to combine. Cook for an additional 2–3 minutes.
  6. Transfer the Sweet Potato Kale Rice to serving dishes and top with salted pepitas. Enjoy warm or at room temperature.

Nutrition

Serving: 1cupCalories: 350kcalCarbohydrates: 58gProtein: 9gFat: 10gSaturated Fat: 3gPolyunsaturated Fat: 2gMonounsaturated Fat: 4gCholesterol: 10mgSodium: 500mgPotassium: 700mgFiber: 6gSugar: 8gVitamin A: 12000IUVitamin C: 30mgCalcium: 80mgIron: 3mg

Notes

Options for customization include swapping in grilled chicken, chickpeas, or seasonal vegetables like butternut squash. Store leftovers in an airtight container in the fridge for up to 4 days.

Tried this recipe?

Let us know how it was!

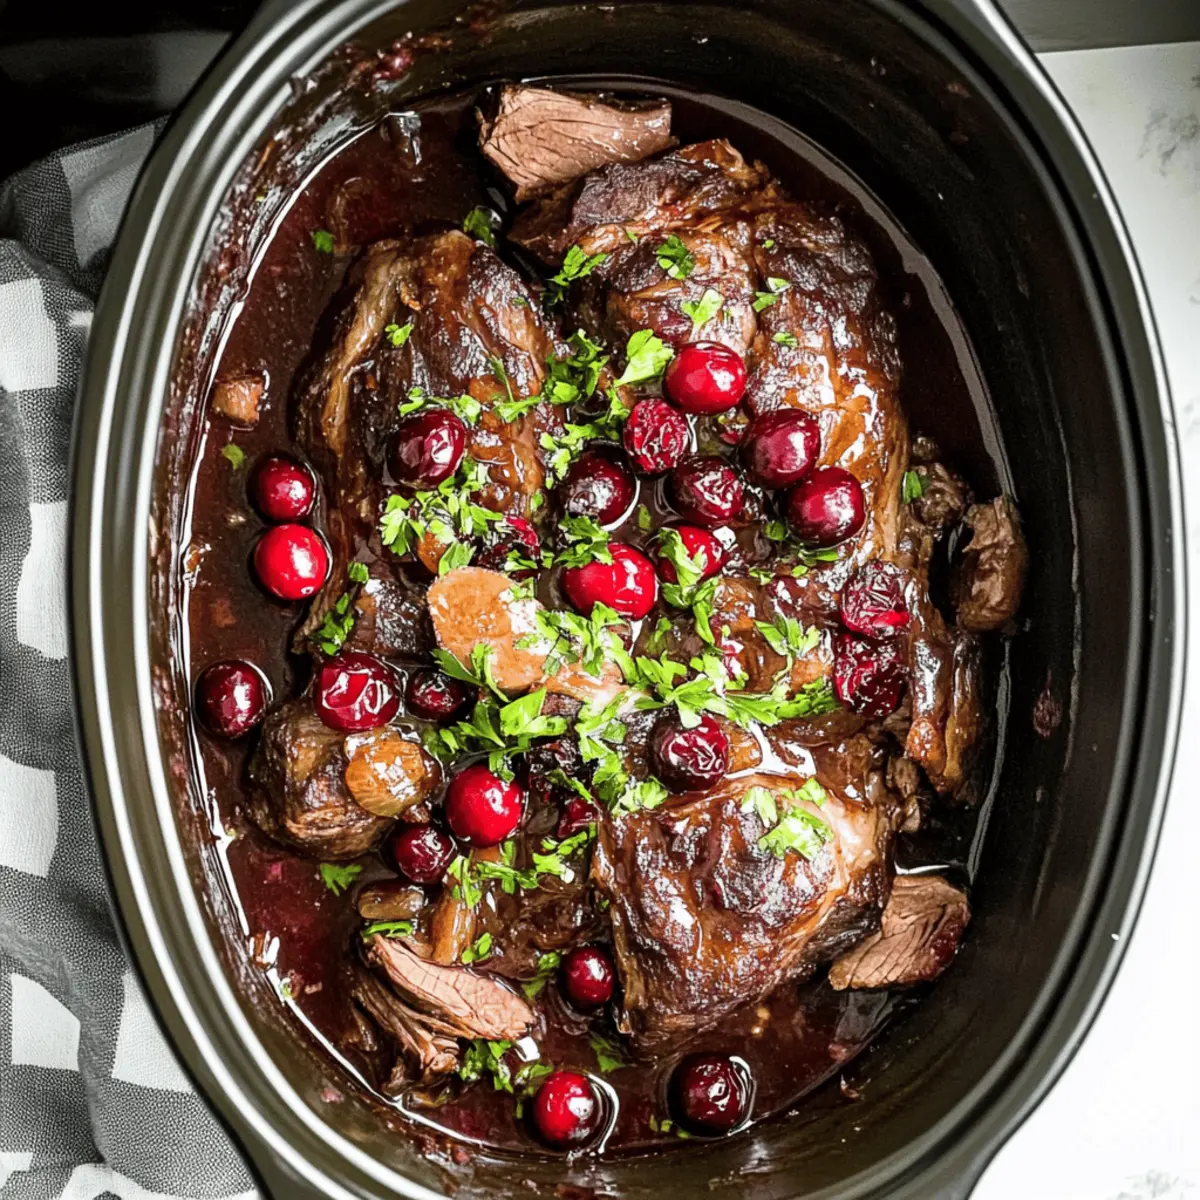
Savory Juicy Christmas Cranberry Pot Roast for Cozy Gatherings

As I stirred the fragrant pot of simmering goodness, I couldn’t help but think about how much warmth and joy perfect holiday dishes like our Juicy Christmas Cranberry Pot Roast can bring to the table. This recipe is a delightful marriage of savory and sweet, featuring tender, slow-cooked meat enveloped in a lush cranberry glaze that dances on your palate. Not only is it incredibly simple to prepare—perfect for busy holiday schedules—but it also brings a festive flair that will leave your guests raving about your culinary skills. Imagine the delicious aromas wafting through your home as this majestic roast cooks, inviting everyone to gather around for a cozy meal. Ready to impress your family this season with a dish that’s both satisfying and versatile? Let’s dive in!

Why is this pot roast so special?

Simplicity at its finest: Just a few simple ingredients turn into a mouthwatering masterpiece that anyone can make, regardless of cooking experience.

Versatile options: Choose your favorite protein—beef, pork, or turkey—tailored to your holiday table preferences.

Delightful flavors: The lush cranberry glaze strikes a perfect balance between sweet and savory, making it a standout centerpiece for festive gatherings.

Make-ahead friendly: Prepare this roast a day in advance to save time for all the joyous holiday activities. Plus, it tastes even better after resting!

Crowd pleaser: This recipe is guaranteed to impress your loved ones, much like our Roasted Strawberry Whipped or White Chocolate Cranberry delights!

Juicy Christmas Cranberry Pot Roast Ingredients

For the Roast
Beef roast – Main protein that provides rich flavor; can be substituted with pork shoulder or turkey breast to match your preferences.
Onion soup mix – Infuses the meat with savory goodness; it’s essential for seasoning this festive dish.
Butter – Adds richness and moisture; substitute with olive oil or coconut oil for a dairy-free option.

For the Glaze
Cranberry sauce – Provides the sweet and tangy glaze; for a lower sugar alternative, mix 1 cup applesauce with 1/2 cup chopped dried cranberries.
Dried cranberries – Enhances sweetness and texture; scatter around the roast to elevate the flavor profile.

Get ready to create a deliciously festive main course that everyone will love—this Juicy Christmas Cranberry Pot Roast is sure to be a highlight at your holiday dinner!

Step‑by‑Step Instructions for Juicy Christmas Cranberry Pot Roast

Step 1: Prepare the Roast
Begin by placing your beef roast in the center of a slow cooker, ensuring it fits snugly. This Juicy Christmas Cranberry Pot Roast will benefit from even cooking, so it’s crucial to position the roast correctly. Take a moment to remove any packaging and trim excess fat if necessary for a leaner dish.

Step 2: Mix the Glaze
In a medium-sized bowl, combine the cranberry sauce and onion soup mix thoroughly. Use a whisk or spoon to blend until smooth, allowing the savory and sweet flavors to meld together beautifully. This glaze is the star of your Juicy Christmas Cranberry Pot Roast, so ensuring it’s well mixed will create a luscious coating for your meat.

Step 3: Apply the Glaze
Pour the cranberry mixture evenly over the beef roast, allowing it to cascade down the sides. For a richer flavor, dot the top of the roast with butter or your chosen dairy-free oil alternative. The glaze will seep into the meat during cooking, creating an irresistible flavor profile that will have everyone raving.

Step 4: Add Dried Cranberries
Scatter dried cranberries around the roast within the slow cooker. These little gems will cook down and expand, infusing sweetness into the pot roast and enhancing the texture. Their vibrant color also adds a festive touch, perfectly complementing your holiday table presentation.

Step 5: Slow Cook the Roast
Cover the slow cooker with its lid and set it to low heat for 6-8 hours or high heat for 4 hours. Avoid lifting the lid during cooking to maintain a steady temperature. The roast is ready when it’s tender enough to shred with a fork, and the glaze has thickened around the meat.

Step 6: Shred and Serve
Once your Juicy Christmas Cranberry Pot Roast is cooked, carefully remove the meat from the slow cooker. Using two forks, shred the meat gently, ensuring it retains its juicy texture. Let it soak in the delicious sauce for a few moments before serving, allowing that rich cranberry glaze to coat every piece.

Step 7: Garnish and Enjoy
For a touch of freshness, garnish your pot roast with chopped parsley just before serving. This adds a pop of color and brightness to the rich flavors of the dish. Now, serve your Juicy Christmas Cranberry Pot Roast with your favorite sides, and watch as your guests are delighted by this festive meal!

What to Serve with Juicy Christmas Cranberry Pot Roast

Cozy gatherings call for delicious side dishes that enhance your festive feast and complement every flavorful bite.

  • Creamy Mashed Potatoes: These rich potatoes provide a velvety contrast to the savory pot roast, soaking up the luscious sauce beautifully. Each bite combines comfort and indulgence, making them the perfect partner for this juicy centerpiece.

  • Roasted Seasonal Vegetables: A medley of roasted carrots, Brussels sprouts, and sweet potatoes adds a delightful crunch and earthy flavor, balancing the sweetness of the cranberry glaze. This vibrant dish brightens up your holiday spread while providing a nourishing touch.

  • Fresh Green Salad: Crisp greens topped with a tangy vinaigrette provide a refreshing counterpoint to the roast’s richness. Toss in some sliced apples or walnuts for added texture and flavor, making every forkful a new surprise.

  • Garlic Bread: Warm, crusty garlic bread gives a satisfying crunch and buttery richness to the meal. Its inviting aroma will entice your guests and create a comforting atmosphere around your holiday table.

  • Cranberry Sauce: For those who can’t get enough of the cranberry goodness, a side of traditional cranberry sauce enhances the dish’s sweet notes. Serve it chilled for a refreshing bite that complements every morsel of meat.

  • Red Wine: A full-bodied red wine, such as Cabernet Sauvignon, beautifully pairs with the robust flavors of the roast. It’s an excellent way to elevate your meal while providing a touch of elegance to your holiday gathering.

  • Pumpkin Pie: For dessert, a slice of warm pumpkin pie topped with whipped cream creates a perfect sweet finish to your festive meal. The spices harmonize wonderfully with the holiday spirit and complete your dining experience on a high note.

Expert Tips for Juicy Christmas Cranberry Pot Roast

  • Choose Your Protein: Experiment with different meats like pork or turkey for your Juicy Christmas Cranberry Pot Roast to suit your family’s taste preferences.

  • Uniform Cooking: Ensure the roast is centered in the slow cooker; this prevents uneven cooking and helps achieve that tender, juicy texture.

  • Glaze Control: Don’t skip mixing the glaze thoroughly; this step is key to a balanced flavor of sweet and savory throughout the roast.

  • Cook Time Matters: Resist the urge to lift the lid while cooking! Maintaining the temperature ensures the roast stays moist and fully absorbs the savory glaze.

  • Easy Shredding: Use two forks to shred the meat gently; this will help maintain its juiciness and create a delightful texture for serving.

Juicy Christmas Cranberry Pot Roast Variations

Feel free to explore these delightful twists on the classic Juicy Christmas Cranberry Pot Roast to suit your taste and dietary needs!

  • Pork Alternative: Swap beef for pork shoulder for a juicy and tender roast with a slightly different flavor profile.

  • Turkey Option: Use turkey breast for a leaner meat choice, perfect for accommodating holiday gatherings.

  • Low Sugar Swap: Replace traditional cranberry sauce with a mix of 1 cup applesauce and 1/2 cup chopped dried cranberries for a delightful lower sugar option. This combination retains the sweetness while cutting down on processed sugar.

  • Dairy-Free Delight: Substitute butter with olive or coconut oil. This not only makes it dairy-free but also adds a lovely depth of flavor, making it accessible to more friends and family at your gathering.

  • Vegetable Infusion: Add chopped root vegetables like carrots or potatoes to the slow cooker for extra nutrition and flavor. They’ll absorb the luscious glaze and create a comforting side dish.

  • Spicy Kick: Toss in a pinch of red pepper flakes or sliced jalapeños for a delightful twist that adds a mild heat to balance the sweetness of the cranberries.

  • Savory Herb Addition: Enhance the flavor with fresh herbs like rosemary or thyme. These aromatic herbs will infuse the roast with an enticing fragrance, perfect for impressing your guests.

  • Culinary Fun: For a festive flair, serve alongside delicious sides like Roasted Carrot Lentil salad or creamy mashed potatoes to elevate your holiday feast!

Experimenting with these variations not only makes your family meal special, but it also provides opportunities for everyone to enjoy their personal favorites. Dive into these ideas and make your Juicy Christmas Cranberry Pot Roast an unforgettable centerpiece this holiday season!

Storage Tips for Juicy Christmas Cranberry Pot Roast

Fridge: Store leftovers in an airtight container in the refrigerator for up to 3 days. This ensures your Juicy Christmas Cranberry Pot Roast maintains its delicious flavors and doesn’t dry out.

Freezer: For longer storage, freeze the pot roast sliced or in portions for up to 3 months. Be sure to use freezer-safe containers or vacuum-seal packs to prevent freezer burn.

Reheating: When ready to enjoy your leftovers, reheat gently in the slow cooker on low until warmed through, or use the microwave in short intervals, stirring occasionally.

Make-Ahead: Consider preparing the pot roast a day in advance. The flavors meld beautifully overnight, and it’s a real time-saver for holiday festivities!

Make Ahead Options

Preparing your Juicy Christmas Cranberry Pot Roast ahead of time is a fantastic way to streamline your holiday cooking! You can season and glaze your roast up to 24 hours in advance by placing it in the slow cooker with the cranberry sauce and onion soup mix. Simply cover it tightly and refrigerate to maintain freshness. On the day of serving, just set your slow cooker to cook on low for 6-8 hours (or high for 4 hours) until tender. This not only saves you precious time but also allows the flavors to deepen, making the dish just as delicious, if not better, when it’s reheated! Just remember to check the roast for doneness before shredding, so you achieve that perfect, juicy texture.

Juicy Christmas Cranberry Pot Roast Recipe FAQs

How do I select the best beef roast for this recipe?
Absolutely! When choosing a beef roast, look for cuts with a good amount of marbling, as this will ensure tenderness and flavor. A chuck roast is a popular choice due to its fat content, which breaks down during cooking, making the meat juicy and flavorful. If you’re selecting pork or turkey, the same principle applies—opt for marbled cuts for enhanced flavor.

What’s the best way to store leftovers for this pot roast?
Very! Store any leftovers in an airtight container in your refrigerator for up to 3 days. When you’re ready to enjoy them, you can gently reheat in the slow cooker on low. If you’ve got extra portions, opt for freezing; they can last up to 3 months when stored in freezer-safe bags or containers. Just make sure to label your containers with the date and contents!

Can I freeze the Juicy Christmas Cranberry Pot Roast?
Of course! To freeze, let the pot roast cool completely, then slice it or portion it into smaller servings if desired. Place them in freezer-safe containers or vacuum-seal bags, squeezing out any excess air. It’ll keep well for up to 3 months. When you’re ready to enjoy it again, thaw in the refrigerator overnight before reheating.

What if my pot roast comes out dry or tough?
Oh no! If your roast turns out dry, it may have cooked for too long or at too high of a temperature. To prevent this, always monitor the cook time closely and avoid lifting the lid during cooking, which can disrupt the temperature. For future attempts, check the roast at the earliest recommended time to gauge tenderness. You can always leave it cooking longer if needed!

Are there any dietary alternatives I should consider when making this pot roast?
Absolutely! For dairy-free options, substitute butter with olive oil or coconut oil. If you’re looking for low-sugar alternatives, consider using a mixture of 1 cup applesauce and 1/2 cup chopped dried cranberries. This will provide sweetness without the added sugar! Just be mindful of any allergies your guests may have, particularly with the proteins and added ingredients.

Can I make this pot roast ahead of time?
Very much so! In fact, I recommend making the Juicy Christmas Cranberry Pot Roast a day in advance. Not only does this save time, but the flavors meld together beautifully overnight, enhancing the overall taste. To reheat, simply warm it up in your slow cooker on low or in the microwave, stirring occasionally to make sure it heats evenly.

Juicy Christmas Cranberry Pot Roast

Savory Juicy Christmas Cranberry Pot Roast for Cozy Gatherings

This Juicy Christmas Cranberry Pot Roast is a delightful blend of savory and sweet, perfect for festive gatherings.
Prep Time 20 minutes
Cook Time 8 hours
Total Time 8 hours 20 minutes
Servings: 8 slices
Course: Dinner
Cuisine: American
Calories: 350

Ingredients
  

For the Roast
  • 1 piece beef roast Main protein; can be substituted with pork shoulder or turkey breast.
  • 1 packet onion soup mix Essential for seasoning.
  • 4 tablespoons butter Adds richness; substitute with olive oil or coconut oil for dairy-free.
For the Glaze
  • 1 cup cranberry sauce Provides sweet and tangy flavor.
  • 1 cup dried cranberries Enhances sweetness and texture.

Equipment

  • Slow Cooker

Method
 

Step-by-Step Instructions
  1. Begin by placing your beef roast in the center of a slow cooker, ensuring it fits snugly.
  2. In a medium-sized bowl, combine the cranberry sauce and onion soup mix thoroughly.
  3. Pour the cranberry mixture evenly over the beef roast.
  4. Scatter dried cranberries around the roast within the slow cooker.
  5. Cover the slow cooker and set it to low heat for 6-8 hours or high heat for 4 hours.
  6. Once cooked, carefully remove the meat from the slow cooker and shred gently using two forks.
  7. Garnish your pot roast with chopped parsley just before serving.

Nutrition

Serving: 1sliceCalories: 350kcalCarbohydrates: 30gProtein: 25gFat: 15gSaturated Fat: 6gPolyunsaturated Fat: 0.5gMonounsaturated Fat: 7gCholesterol: 80mgSodium: 550mgPotassium: 600mgFiber: 3gSugar: 10gVitamin A: 500IUVitamin C: 2mgCalcium: 30mgIron: 3mg

Notes

This pot roast can be made a day in advance for enhanced flavors and convenience during holiday festivities.

Tried this recipe?

Let us know how it was!

Mollet Eggs Florentine: A Creamy Brunch Delight You’ll Love

As the warm aroma of sautéed spinach fills my kitchen, I can’t help but smile at the thought of sharing a delightful brunch. Today, we’re diving into the creamy world of Mollet Eggs Florentine—a dish that’s as elegant as it is easy to whip up. With perfectly soft-boiled eggs cradling luscious, flowing yolks and topped with a rich Mornay sauce, this meal brings a touch of gourmet flair right to your table. It’s not just a feast for the eyes; it’s a quick and healthy option that transforms any gathering into a special occasion. Are you ready to elevate your brunch game and impress your loved ones? Keep scrolling; this recipe is one you won’t want to miss!

Why Are Mollet Eggs Florentine Irresistible?

Creamy Texture: Each bite is a harmony of smooth Mornay sauce and soft-boiled eggs that melt in your mouth.

Quick Preparation: Ready in under 30 minutes, this dish fits perfectly into your busy brunch plans.

Healthy Choice: Packed with fresh spinach, this meal is not just tasty but also loaded with essential nutrients.

Versatile Flavors: Whether you want to stick with traditional Gruyère or experiment with cheddar, the possibilities are endless!

Eye-Catching Presentation: Stunning to look at, these eggs sparkle on any brunch table, making them a guaranteed crowd-pleaser.

If you love exploring fresh breakfast ideas, don’t forget to check out our tips on serving suggestions for elevating your brunch spread!

Mollet Eggs Florentine Ingredients

For the Eggs
Large Eggs – 8 organic eggs offer the main protein source, ensuring those creamy yolks we crave.

For the Spinach
Spinach – 2 pounds add vibrant color and essential vitamins; fresh yields a brighter flavor.
Unsalted Butter – 3 tablespoons for sautéing spinach brings rich flavor; olive oil is a lighter substitution.
Salt – 2 teaspoons balances the flavors; adjust for dietary needs.
Black Pepper – 1/2 teaspoon freshly ground adds a hint of spice; white pepper can be a milder alternative.
Nutmeg – 1/4 teaspoon freshly grated enhances the earthy notes of the spinach; consider a pinch of cinnamon instead.

For the Mornay Sauce
All-Purpose Flour – 1 tablespoon thickens the sauce for a luscious texture; swap with gluten-free flour if needed.
Half-and-Half – 1 cup provides richness for the sauce; opt for milk or a dairy-free alternative for lighter results.
Egg Yolk – 1 large yolk enriches the sauce’s creaminess; omit for a lighter option.

For Serving
Gruyère Cheese – 3 tablespoons grated adds flavor and creaminess; cheddar or mozzarella can work if you prefer.
White Pepper – 1/4 teaspoon is optional; provides a finer taste compared to black pepper.

Elevate your brunch with these Mollet Eggs Florentine ingredients and indulge in a culinary experience that’s as satisfying as it is delicious!

Step‑by‑Step Instructions for Mollet Eggs Florentine

Step 1: Boil the Eggs
Bring 4–6 cups of water to a rolling boil in a shallow saucepan over medium-high heat. Using a needle, prick the round end of each of the 8 large eggs to prevent cracking. Gently lower the eggs into the boiling water and let them simmer for exactly 6 minutes, ensuring they remain submerged.

Step 2: Ice Bath Transition
Once the eggs are done, promptly transfer them to a bowl filled with cold water and ice. This cooling technique will stop the cooking process, making it easier to peel the eggs later. Allow them to sit in the ice bath for about 5–7 minutes, then carefully peel under running water.

Step 3: Prepare the Spinach
In a medium-sized pot, add about 1/2 inch of water and bring it to a boil over medium heat. Add the cleaned 2 pounds of spinach, cover, and let it wilt for 1 minute. After that, drain the spinach in a colander and run cold water over it to preserve its vibrant color.

Step 4: Sauté the Spinach
Chop the cooled spinach into smaller pieces and set aside. In a skillet, melt 3 tablespoons of unsalted butter over medium heat until it starts to brown slightly, then add the chopped spinach along with 1.5 teaspoons of salt, 1/2 teaspoon of black pepper, and 1/4 teaspoon of nutmeg. Sauté this mixture for about 2 minutes, stirring frequently, until heated through.

Step 5: Layer Spinach and Eggs
Preheat your oven’s broiler while you prepare the final dish. In an ovenproof dish, layer the sautéed spinach evenly across the bottom. Next, carefully arrange the peeled mollet eggs on top of the spinach, ensuring they are well spaced for even coverage.

Step 6: Prepare the Mornay Sauce
In a small saucepan, melt 1 tablespoon of butter over medium heat. Once melted, stir in 1 tablespoon of all-purpose flour to create a roux, cooking for about 1 minute until golden. Gradually whisk in 1 cup of half-and-half, season with salt and white pepper, and let it simmer for 6–8 minutes until thickened, stirring occasionally. Remove from heat and vigorously whisk in the egg yolk.

Step 7: Assemble for Broiling
Pour the rich Mornay sauce generously over the eggs, ensuring each egg is well-coated. Sprinkle 3 tablespoons of grated Gruyère cheese evenly on top, allowing it to form a deliciously cheesy crust when broiled.

Step 8: Broil to Perfection
Place the dish under the broiler for about 5 minutes or until the cheese is bubbling and beautifully golden. Keep a close eye, as broiling can quickly turn from perfection to burn. Once browned, remove from the oven and serve your Mollet Eggs Florentine immediately, reveling in the creamy delight!

What to Serve with Mollet Eggs Florentine

Transform your Mollet Eggs Florentine into a memorable brunch experience with these delightful pairings.

  • Toasted English Muffins: Perfect for soaking up that creamy Mornay sauce, these warm muffins add a comforting crunch to your meal. They’re a brunch classic that everyone will love!

  • Crispy Bacon or Pancetta: The salty, savory taste of bacon beautifully contrasts the richness of the eggs, elevating the dish into a truly indulgent affair.

  • Freshly Sliced Avocado: Creamy and smooth, avocado adds a refreshing touch while also providing healthy fats. Its vibrant color and flavor enhance the overall presentation of your brunch spread.

  • Asparagus with Lemon Zest: Lightly sautéed or steamed asparagus drizzled with lemon brings a bright, zesty flavor that complements the richness of the eggs.

  • Roasted Cherry Tomatoes: Their natural sweetness provides a delightful contrast and a pop of color, making each bite of the eggs even more enjoyable.

  • Herbed Quinoa Salad: A light, earthy quinoa salad with fresh herbs offers a nutritious side that balances the creamy, rich textures of the Mollet Eggs Florentine.

  • Sparkling White Wine: For a refined touch, serve a chilled glass of sparkling wine. Its effervescence refreshes your palate between bites and makes for a truly celebratory meal.

  • Fresh Fruit Salad: A mix of sweet berries and tropical fruits adds a vibrant, fresh element to your plate, brightening the meal and pleasing your taste buds.

  • Creamy Potato Gratin: Rich and cheesy, this luxurious side contrasts wonderfully with the lighter notes of your main dish, providing a comfortable yet indulgent feel to your brunch.

How to Store and Freeze Mollet Eggs Florentine

  • Fridge: Enjoy your Mollet Eggs Florentine fresh, but if you have leftovers, store them in an airtight container in the fridge for up to 2 days.

  • Reheating: To reheat, place your eggs on a baking sheet and warm in a preheated oven at 350°F (175°C) for about 10 minutes, ensuring the eggs stay creamy and delicious.

  • Freezer: While not recommended, if you must freeze, separate the components (spinach and sauce) before freezing in airtight containers for up to 1 month. The texture may change after thawing.

  • Cooking Tips: Avoid freezing the assembled dish as this can compromise the delicate texture of the eggs once thawed. Always aim to enjoy your Mollet Eggs Florentine fresh for the best experience!

Make Ahead Options

These Mollet Eggs Florentine are perfect for meal prep, allowing you to enjoy a delightful brunch without the morning rush! You can prepare the eggs and the sautéed spinach up to 24 hours in advance. Simply cook and cool the eggs as directed, then refrigerate them in a covered container. The sautéed spinach can also be made ahead and stored in the fridge, just remember to keep it tightly sealed to maintain freshness. When you’re ready to serve, layer the spinach and eggs in a baking dish, drizzle with Mornay sauce, and pop it under the broiler for just 5 minutes until it’s bubbling and golden. This way, you’ll enjoy all the creamy goodness of Mollet Eggs Florentine with minimal effort on busy mornings!

Expert Tips for Mollet Eggs Florentine

  • Perfect Timing: Watch the clock closely when boiling your eggs. A precise 6 minutes will ensure a beautifully soft yolk without being undercooked.

  • Chill Quickly: After boiling, immerse eggs in ice water immediately. This helps in easy peeling and keeps the yolks creamy.

  • Sauté with Care: Avoid overcooking your spinach. A quick sauté with the right spices keeps it vibrant and flavorful—just 2 minutes is enough!

  • Mornay Sauce Secrets: When whisking in the egg yolk to the sauce, make sure it has cooled slightly to prevent scrambling.

  • Cheese Variation: Feel free to experiment with different cheeses like cheddar or mozzarella for unique flavors while keeping that creamy element intact in your Mollet Eggs Florentine.

  • Broiling Watch: Keep a close eye on the broiler to ensure the cheese turns golden brown without burning. A minute can make all the difference!

Mollet Eggs Florentine Variations

Feel free to let your culinary creativity shine with these delightful twists on Mollet Eggs Florentine!

  • Herb-Infused Spinach: Add fresh herbs like dill or tarragon to elevate the spinach flavor. These herbs bring a refreshing taste that complements the creamy sauce beautifully.

  • Cheese Variations: Try different cheeses such as smoked Gouda or feta for a unique flavor profile. Each cheese adds its personality, transforming the dish into a delightful flavor adventure.

  • Vegetable Boost: Sneak in some sautéed mushrooms or artichoke hearts for extra nutrition and texture. These veggies can add earthiness and complexity, complementing the dish wonderfully.

  • Spicy Kick: Add a pinch of red pepper flakes to the Mornay sauce for a touch of heat. This little twist can awaken the palate and add a delightful surprise to each bite.

  • Smoked Salmon Addition: Layer thin slices of smoked salmon under the eggs for a luxurious twist. This addition transforms the dish into a gourmet experience worthy of any brunch table.

  • Dairy-Free Option: Substitute half-and-half with cashew cream or coconut milk for a creamy, dairy-free sauce. The richness still shines through, allowing everyone to indulge without the dairy.

  • Whole-Grain Twist: Swap regular toast with whole-grain or sourdough bread to serve alongside. This adds a hearty texture and complements the dish while boosting fiber content.

Can’t get enough of those creamy flavors? Don’t forget to check out our serving suggestions for a delightful brunch experience!

Mollet Eggs Florentine Recipe FAQs

How do I know if my eggs are fresh?
Absolutely! To check the freshness of your eggs, you can do the water test. Place the eggs in a bowl of water: if they sink and lay flat on the bottom, they’re fresh; if they stand upright or float, they are no longer good. Fresh eggs result in the best mollet texture!

How long can I store Mollet Eggs Florentine in the fridge?
Best enjoyed fresh, your Mollet Eggs Florentine can be stored in an airtight container in the fridge for up to 2 days. When reheating, use the oven to maintain that delicious creamy texture—just place them on a baking sheet and warm at 350°F (175°C) for about 10 minutes.

Can I freeze Mollet Eggs Florentine?
While I don’t recommend freezing the entire dish since it may affect the eggs’ texture, you can separate its components. Freeze the spinach and Mornay sauce in airtight containers for up to 1 month. When ready to enjoy, thaw and reheat them, but make sure to cook fresh eggs each time!

What if my eggs crack while cooking?
Not a problem! If you notice cracks when boiling, just reduce the heat slightly to prevent the eggs from bouncing around, which can cause further cracking. Keep an eye on them, and if any yolk spills out, don’t worry; it’ll still be deliciously creamy even if slightly less pristine.

Are there any dietary considerations for Mollet Eggs Florentine?
Very good question! This dish contains dairy and eggs, so if you’re managing allergies, consider using dairy-free alternatives for the Mornay sauce. For a lighter option, substitute half-and-half with almond milk or coconut cream; just ensure the flavors complement the dish. If there are any pet concerns, keep the dish out of reach as cooked eggs can upset some pets’ stomachs.

How can I enhance the flavors in this recipe?
If you’re looking to amp up the taste, consider adding spices like garlic powder or smoked paprika when sautéing the spinach. You can also toss in freshly chopped herbs like basil or chives to bring that fresh, aromatic quality to your Mollet Eggs Florentine!

Mollet Eggs Florentine

Mollet Eggs Florentine: A Creamy Brunch Delight You’ll Love

Mollet Eggs Florentine is a delightful brunch recipe featuring soft-boiled eggs, sautéed spinach, and rich Mornay sauce.
Prep Time 10 minutes
Cook Time 20 minutes
Total Time 30 minutes
Servings: 4 servings
Course: Breakfast
Cuisine: French
Calories: 350

Ingredients
  

For the Eggs
  • 8 organic eggs Large Eggs
For the Spinach
  • 2 pounds Spinach Fresh for better flavor
  • 3 tablespoons Unsalted Butter Can substitute with olive oil
  • 2 teaspoons Salt Adjust to dietary needs
  • 1/2 teaspoon Black Pepper Freshly ground
  • 1/4 teaspoon Nutmeg Freshly grated
For the Mornay Sauce
  • 1 tablespoon All-Purpose Flour Can swap with gluten-free flour
  • 1 cup Half-and-Half Dairy-free alternative can be used
  • 1 large yolk Egg Yolk Optional for lighter sauce
For Serving
  • 3 tablespoons Gruyère Cheese Grated; can substitute with cheddar or mozzarella
  • 1/4 teaspoon White Pepper Optional

Equipment

  • Saucepan
  • Skillet
  • colander
  • Ovenproof dish
  • Baking Sheet

Method
 

Cooking Instructions
  1. Boil the Eggs: Bring 4–6 cups of water to a rolling boil in a shallow saucepan. Prick the round end of each egg, then gently lower them into boiling water and simmer for 6 minutes.
  2. Ice Bath Transition: Transfer the eggs to a cold water and ice bowl to stop cooking. Let sit for 5–7 minutes and peel under running water.
  3. Prepare the Spinach: Boil about 1/2 inch of water in a pot. Add spinach, cover, wilt for 1 minute, then drain and run cold water over it.
  4. Sauté the Spinach: Chop cooled spinach. In a skillet, melt butter, add spinach, salt, black pepper, and nutmeg. Sauté for 2 minutes.
  5. Layer Spinach and Eggs: Preheat broiler. Layer sautéed spinach in an ovenproof dish, then arrange peeled eggs on top.
  6. Prepare the Mornay Sauce: Melt butter in a saucepan, stir in flour to create a roux, cook 1 minute. Whisk in half-and-half, season, simmer for 6–8 minutes, then whisk in the egg yolk.
  7. Assemble for Broiling: Pour Mornay sauce over eggs, sprinkle with Gruyère cheese.
  8. Broil to Perfection: Broil for about 5 minutes until cheese is bubbling and golden.

Nutrition

Serving: 1servingCalories: 350kcalCarbohydrates: 10gProtein: 20gFat: 25gSaturated Fat: 15gPolyunsaturated Fat: 1gMonounsaturated Fat: 3gCholesterol: 300mgSodium: 600mgPotassium: 500mgFiber: 3gSugar: 1gVitamin A: 1500IUVitamin C: 25mgCalcium: 200mgIron: 3mg

Notes

Enjoy fresh, but leftovers can be stored in the fridge for up to 2 days. Reheat in a preheated oven at 350°F for about 10 minutes.

Tried this recipe?

Let us know how it was!

One Pan Chorizo Gnocchi Bake for Cozy Family Nights

As I stirred the bubbling pot on the stove, the enticing aroma of spicy chorizo danced through the air, filling my kitchen with warmth and nostalgia. The Easy One Pan Chorizo Gnocchi Bake is more than just a meal; it’s a cozy embrace on a plate, perfect for those busy weeknights when you crave comfort food without the fuss. This one-pan wonder is not only a cinch to prepare, taking just 30 minutes from start to finish, but it’s also budget-friendly and sure to please the whole family. With the soft, pillowy gnocchi mingling with zesty chorizo and a rich, velvety sauce, it’s a dish that sings of home and heart. Ready to dive into a recipe that brings everyone to the table? Let’s get cooking!

Why is this recipe a must-try?

Quick Preparation: This one pan dish comes together in just 30 minutes, making it a perfect choice for busy weeknights.

Comforting Flavors: The spicy chorizo mixed with soft gnocchi delivers a satisfying experience that the whole family will love.

Versatile Options: You can easily customize this recipe by substituting ingredients like chorizo for vegetarian sausage or experimenting with different types of cheeses.

Minimal Cleanup: Cooking everything in just one pan means less cleanup while still delivering delicious results that will leave everyone asking for seconds!

Whether enjoyed with a simple green salad or some warm garlic bread, this Easy One Pan Chorizo Gnocchi Bake is bound to become a new family favorite. Check out our Baked Vegetable Egg or Icebox Pie Bake for more easy meal ideas!

One Pan Chorizo Gnocchi Bake Ingredients

• Get ready for an easy cooking adventure!

For the Bake

  • Olive oil – Used for cooking the chorizo and sautéing the vegetables; can substitute with vegetable oil.
  • Chorizo slices – Adds spicy, smoky flavor and crispy texture to the dish; vegetarian sausage can be used as a substitute.
  • Red onion – Provides a sweet and savory base for the sauce; shallots can be used instead for a milder flavor.
  • Garlic cloves – Enhances the overall flavor with its aromatic quality; garlic powder can be substituted.
  • Gnocchi – The main carbohydrate component offering a soft, chewy texture; use gluten-free gnocchi for a gluten-free version.
  • Tomato and roasted red pepper sauce – Creates a rich and flavorful base for the dish; homemade tomato sauce can be used as a substitute.
  • Chicken broth – Adds depth to the sauce; vegetable broth can be used for a vegetarian option.
  • Spinach – Adds color, freshness, and nutritional value; kale or other leafy greens can be substituted.
  • Basil – Provides a burst of fresh herbaceous flavor; oregano or parsley can be used as alternatives.
  • Fresh mozzarella – Melts to create a creamy topping; other melting cheeses like cheddar or gouda can be substituted.
  • Lemon zest – Adds a bright finish to balance the rich flavors; skip if lemon is not available; it’s optional.

Step‑by‑Step Instructions for One Pan Chorizo Gnocchi Bake

Step 1: Preheat the Oven
Begin your Easy One Pan Chorizo Gnocchi Bake by preheating your oven to 180°C (350°F). This prepares your cooking space for the final bake, ensuring the cheese turns golden and bubbly. While the oven heats, gather your ingredients and equipment to make the cooking process seamless.

Step 2: Cook the Chorizo
In an oven-safe pan, heat a splash of olive oil over medium heat. Add the chorizo slices and cook for about 10 minutes, stirring occasionally until they become crispy and release their flavorful oils. Once done, remove the chorizo from the pan and set it aside on a plate, allowing its rich aroma to fill your kitchen.

Step 3: Sauté the Vegetables
Using the same pan, add a bit more olive oil if needed, and toss in the chopped red onion and minced garlic. Sauté these ingredients for around 5 minutes until the onion is tender and golden, creating a sweet and savory base. Your kitchen will soon be filled with the heavenly scent of sautéed onions!

Step 4: Create the Sauce
Stir in the tomato and roasted red pepper sauce, followed by chicken broth, allowing these ingredients to mingle and form a rich sauce. Let this simmer for about 2 minutes, ensuring all flavors marry together beautifully. The mixture should start to bubble slightly, showing it’s on the right track for your One Pan Chorizo Gnocchi Bake.

Step 5: Incorporate Spinach and Gnocchi
Add a handful of fresh spinach to the sauce, allowing it to wilt and brighten the dish. Then, fold in the gnocchi, letting it absorb the flavors as it simmers in the sauce for about 3 minutes. This is when the magic happens, as the gnocchi begins to soften and soak up all the deliciousness around it.

Step 6: Combine the Ingredients
Now it’s time to reunite the crispy chorizo with the gnocchi mixture. Gently fold it in along with the lemon zest and chopped basil, enhancing the dish with a burst of fresh flavor. Check for seasoning and adjust if needed, ensuring your One Pan Chorizo Gnocchi Bake is full of vibrant taste.

Step 7: Prepare for Baking
Transfer the entire mixture into an ovenproof dish, spreading it out evenly. Top generously with chunks of fresh mozzarella, allowing it to melt beautifully over the gnocchi. This layer of cheese is key for that gooey, comforting final touch that will have everyone craving a bite.

Step 8: Bake Until Golden
Place your dish in the preheated oven and bake for about 15-20 minutes, or until the mozzarella is golden and bubbling. Keep an eye on it to avoid overbaking, and when it’s beautifully browned, remove it from the oven. The enticing aroma will definitely rally everyone to the dinner table.

One Pan Chorizo Gnocchi Bake Variations

Feel free to make this dish your own by exploring these delightful twists!

  • Vegetarian Swap: Replace chorizo with vegetarian sausage or a colorful mix of bell peppers and mushrooms for a hearty, plant-based option.

  • Cheese Substitution: Try different cheeses like creamy feta or sharp cheddar for a new flavor profile that excites your taste buds.

  • Gluten-Free Gnocchi: Opt for gluten-free gnocchi to cater to dietary restrictions, allowing everyone to enjoy this comforting meal without worry.

  • Extra Veggies: Boost nutrition and add texture by including zucchini, artichokes, or cherry tomatoes right into the bake. It’s a delicious way to sneak in more greens!

  • Spice Level Adjustment: Want some heat? Add red pepper flakes or diced jalapeños to the sauce for a fiery kick that complements the chorizo beautifully.

  • Creamy Addition: Stir in a dollop of cream cheese or mascarpone before baking to create a rich and velvety sauce that adds decadence to each bite.

  • Pasta Alternative: Swap out gnocchi for your favorite pasta shape, like penne or rigatoni, for a different texture while still enjoying the flavorful sauce.

Exploring these variations ensures you can tweak the recipe to match your family’s preferences or try something new each time. Pair this amazing bake with a side of warm garlic bread, and consider checking out our crowd-pleasing Baked Vegetable Egg or crispy Air Fryer Baked potatoes to elevate your dinner spread!

What to Serve with Easy One Pan Chorizo Gnocchi Bake

This comforting dish is a feast for the senses, and the right sides can enhance its warmth and taste even more!

  • Garlic Bread: The perfect accompaniment to mop up every bit of that rich sauce. The buttery, garlicky flavors pair beautifully with the spiciness of the chorizo.

  • Simple Green Salad: Fresh greens with a light vinaigrette will add a refreshing crunch, balancing the rich and cheesy goodness of the gnocchi.

  • Roasted Vegetables: Seasoned and tossed with olive oil, they bring a lovely caramelized sweetness that complements the savory gnocchi bake.

  • Crusty Bread: A slice of rustic bread offers a delightful contrast in texture, inviting you to savor each bite of this hearty dish.

  • Chilled White Wine: A crisp Sauvignon Blanc or a light Pinot Grigio will lift the flavors and enhance the overall dining experience.

  • Dessert Option: Finish with a light sorbet or a simple fruit salad to cleanse the palate after the rich and hearty main course.

These side dishes help create a wonderful meal experience, allowing the Easy One Pan Chorizo Gnocchi Bake to shine as the star!

Make Ahead Options

These Easy One Pan Chorizo Gnocchi Bake components are perfect for meal prep, allowing you to enjoy a delicious homemade dinner with minimal fuss! You can chop the red onion and garlic, as well as slice the chorizo up to 24 hours in advance; store them in airtight containers in the refrigerator to maintain freshness. Additionally, you can prepare the sauce (excluding the spinach and gnocchi) and refrigerate it for up to 3 days. When you’re ready to serve, simply reheat the sauce, fold in the spinach, and then incorporate the gnocchi as directed. Finally, top with mozzarella and bake as instructed for comforting results just as delicious as if made fresh!

Expert Tips for One Pan Chorizo Gnocchi Bake

Quality Ingredients: Use high-quality chorizo for a rich, smoky flavor; it dramatically enhances the overall taste of your dish.

Serve Immediately: Enjoy this meal fresh from the oven; the texture of the gnocchi is best before it sits, as it can become mushy if reheated.

Sauce Consistency: If you’re making your tomato sauce from scratch, adjust the chicken broth accordingly to achieve a smooth, sauce-like consistency for your One Pan Chorizo Gnocchi Bake.

Vegetable Varieties: Feel free to mix in various veggies; bell peppers, zucchini, or mushrooms can elevate the dish while adding more nutrients.

Cheese Choices: Experiment with different melting cheeses like gouda or feta for a unique twist on flavor and texture.

Storage Tips for One Pan Chorizo Gnocchi Bake

Fridge: Store any leftovers in an airtight container for up to 3 days. This helps maintain flavor and reduces the risk of spoilage while ensuring your family can enjoy this comforting dish later.

Freezer: For longer storage, freeze individual portions in freezer-safe containers for up to 3 months. Just be sure to let the dish cool completely before sealing to avoid ice crystals.

Reheating: Reheat in the microwave or oven until hot; for oven reheating, cover with foil to prevent drying out and bake at 180°C (350°F) until heated through. Enjoy the comforting flavors of the One Pan Chorizo Gnocchi Bake even after a few days!

Airtight Guidance: Always ensure containers are sealed tightly to prevent freezer burn and maintain the delicious taste of your meal.

One Pan Chorizo Gnocchi Bake Recipe FAQs

What kind of chorizo should I use for this recipe?
Absolutely! For the best flavor, I recommend using high-quality spicy chorizo. Look for ones that are firm and bright red in color. If you’re making a vegetarian version, opt for a flavorful vegetarian sausage that resembles chorizo for that smoky taste.

How do I store leftovers of the One Pan Chorizo Gnocchi Bake?
Leftovers can be stored in an airtight container in the fridge for up to 3 days. Make sure it has cooled down to room temperature before sealing it to retain its texture.

Can I freeze One Pan Chorizo Gnocchi Bake?
Yes, you can! For freezing, let the dish cool completely, then portion it into freezer-safe containers and freeze for up to 3 months. When you’re ready to enjoy it, simply thaw in the refrigerator overnight and reheat in the oven or microwave until heated through.

What should I do if my gnocchi turns mushy?
Very good question! If you find that your gnocchi has become mushy, it often means it was overcooked. To prevent this, add the gnocchi to the sauce just a few minutes before baking, and make sure to keep an eye on it while it simmers. Cooking it in the sauce for about 3 minutes should be sufficient for it to absorb flavors without losing its structure.

Can I substitute the cheese used in the bake?
Yes, definitely! If fresh mozzarella isn’t available, you can use other melting cheeses like gouda or cheddar for delicious results. For a different flavor profile, try feta for a bit of tanginess, or even a sprinkle of parmesan!

Are there any dietary considerations I should be aware of?
For those with dietary restrictions, you can easily customize this recipe. Use gluten-free gnocchi for a gluten-free option and swap chicken broth for vegetable broth to make it vegetarian-friendly. Always check the label for potential allergens, especially with chorizo and cheese!

One Pan Chorizo Gnocchi Bake

One Pan Chorizo Gnocchi Bake for Cozy Family Nights

This One Pan Chorizo Gnocchi Bake brings cozy comfort to the table, perfect for busy weeknights.
Prep Time 10 minutes
Cook Time 20 minutes
Total Time 30 minutes
Servings: 4 servings
Course: Dinner
Cuisine: Italian
Calories: 450

Ingredients
  

For the Bake
  • 1 tablespoon Olive oil can substitute with vegetable oil.
  • 8 ounces Chorizo slices vegetarian sausage can be used as a substitute.
  • 1 medium Red onion shallots can be used instead for a milder flavor.
  • 3 cloves Garlic cloves garlic powder can be substituted.
  • 24 ounces Gnocchi use gluten-free gnocchi for a gluten-free version.
  • 1 cup Tomato and roasted red pepper sauce homemade tomato sauce can be used as a substitute.
  • 1 cup Chicken broth vegetable broth can be used for a vegetarian option.
  • 2 cups Spinach kale or other leafy greens can be substituted.
  • 1 tablespoon Basil oregano or parsley can be used as alternatives.
  • 8 ounces Fresh mozzarella other melting cheeses like cheddar or gouda can be substituted.
  • 1 teaspoon Lemon zest skip if lemon is not available; it’s optional.

Equipment

  • Oven-safe pan
  • Oven
  • Measuring cups
  • knife
  • cutting board

Method
 

Step-by-Step Instructions
  1. Preheat your oven to 180°C (350°F).
  2. In an oven-safe pan, heat a splash of olive oil over medium heat. Add the chorizo slices and cook for about 10 minutes until crispy.
  3. Using the same pan, add more olive oil if needed and sauté the chopped red onion and minced garlic for about 5 minutes.
  4. Stir in the tomato and roasted red pepper sauce and chicken broth, and let simmer for about 2 minutes.
  5. Add spinach and gnocchi, letting them absorb the flavors as they simmer for about 3 minutes.
  6. Fold in the crispy chorizo, lemon zest, and chopped basil. Adjust seasoning if necessary.
  7. Transfer the mixture into an ovenproof dish and top with chunks of fresh mozzarella.
  8. Bake for about 15-20 minutes or until the mozzarella is golden and bubbling.

Nutrition

Serving: 1servingCalories: 450kcalCarbohydrates: 45gProtein: 25gFat: 20gSaturated Fat: 10gPolyunsaturated Fat: 2gMonounsaturated Fat: 6gCholesterol: 60mgSodium: 800mgPotassium: 600mgFiber: 3gSugar: 4gVitamin A: 40IUVitamin C: 30mgCalcium: 20mgIron: 15mg

Notes

Enjoy this meal fresh from the oven for the best texture and flavor. Quality ingredients make all the difference.

Tried this recipe?

Let us know how it was!

Holiday Magic: Christmas Tree Cake Macarons to Delight

The sweet scent of freshly baked macarons filled the air as I stood in my kitchen, flipping through festive recipe ideas. Nothing says “holiday cheer” like these charming Christmas Tree Cake Macarons. With their vibrant green hue and nostalgic creamy filling, they are sure to become the centerpiece of your holiday dessert table. The best part? You can whip up these delightful treats in just under two hours, making them the perfect solution for busy schedules during the holiday rush. Plus, they’re vegetarian-friendly, ensuring that everyone can join in on the celebration. Are you ready to impress your friends and family with a festive twist on a classic French pastry? Let’s embark on this delightful baking adventure together!

Why Are These Macarons So Special?

Festive Vibes: These Christmas Tree Cake Macarons are not just a dessert; they capture the essence of holiday joy with every bite!

Impressive Presentation: With their tree-shaped design and vibrant green coloring, they’re a visual delight that will brighten any gathering.

Nostalgic Filling: The creamy filling, paired with crumbled snack cakes, evokes fond holiday memories, making them perfect for sharing.

Quick and Easy: You’ll love how these come together in under two hours, making them a stress-free option amidst holiday preparations.

Versatile Delight: Feel free to customize with different flavor extracts or sprinkles to match your holiday theme!

These macarons are sure to win over any crowd, combining festive charm with a touch of gourmet elegance. If you’re looking for more delightful holiday treats, check out my Strawberry Cheesecake Bars or the delightful Pistachio Carrot Cake for your dessert table!

Christmas Tree Cake Macaron Ingredients

• Get ready to create these delightful Christmas Tree Cake Macarons with this essential ingredient list!

For the Macaron Shells
Powdered Sugar – Provides sweetness and a smooth texture; no substitutes recommended for optimal results.
Almond Flour – Gives structure and a nutty flavor; substitute with sunflower seed flour for nut-free options.
Egg Whites – Essential for the macaron’s structure; must be at room temperature for the best results.
Granulated Sugar – Sweetens the meringue and stabilizes the egg whites; crucial for achieving stiff peaks.
Cream of Tartar – Stabilizes egg whites during whipping; can be omitted if unavailable.
Green Gel Food Coloring – Used to achieve festive color; alternative colors can be used for different themes.

For the Filling
Butter – Creates a creamy filling; must be softened for easy mixing.
Heavy Cream – Adds richness to the filling; substitute with milk for a lighter option.
Vanilla Extract – Enhances flavor in the filling; use almond extract for a different profile.
Snack Cakes (crumbled) – Imparts a nostalgic holiday flavor; optional to use; can substitute with cake crumbs.

Step‑by‑Step Instructions for Christmas Tree Cake Macarons

Step 1: Sift Ingredients
Begin by sifting the powdered sugar and almond flour together twice in a bowl. This step is crucial for achieving smooth Christmas Tree Cake Macarons, as it removes any lumps and aerates the mixture. Use a fine-mesh sieve and ensure the dry ingredients are well combined before moving on.

Step 2: Beat Egg Whites
In a clean mixing bowl, beat the room-temperature egg whites with an electric mixer until they become foamy. Gradually add the cream of tartar and then the granulated sugar, one tablespoon at a time, continuing to beat until you achieve stiff peaks that stand tall. This process takes about 5-7 minutes and provides the airy texture essential for the macaron shells.

Step 3: Color and Combine
Gently fold in the green gel food coloring into the meringue until fully incorporated. Gradually add the sifted almond flour mixture, using a spatula to fold carefully. The batter should resemble the texture of flowing lava; this means it’s ready for piping once the ingredients are fully mixed and the color is even.

Step 4: Pipe Shapes
Transfer the macaron batter to a piping bag fitted with a round tip. On lined baking sheets, pipe tree shapes or circular disks about 1.5 inches in diameter, making sure to leave space between each. Tap the baking sheets firmly on the counter to release any air bubbles trapped in the batter, which helps in creating smooth shells without cracks.

Step 5: Rest
Allow the piped macaron shells to rest for 30-60 minutes at room temperature. This crucial step enables them to form a skin on the surface, which helps achieve that signature macaron texture. You’ll know they’re ready when they are no longer sticky to the touch and have a slightly hardened exterior.

Step 6: Bake
Preheat your oven to 300°F (150°C). Bake the macaron shells for 14-16 minutes, rotating the trays halfway through to ensure even baking. Watch for the cookies to puff up slightly and develop a smooth, shiny surface. Once done, let them cool on the baking sheets completely before handling.

Step 7: Make Filling
In a mixing bowl, beat the softened butter until fluffy and light in color, taking about 2-3 minutes. Gradually mix in the powdered sugar, vanilla extract, and heavy cream, beating until smooth. Finally, fold in the crumbled snack cakes for that nostalgic flavor, creating a creamy filling perfect for your Christmas Tree Cake Macarons.

Step 8: Assemble Macarons
Once the shells are cool, pipe a generous amount of the filling onto the flat side of one shell. Gently press another shell on top to create a sandwich. For an extra festive touch, drizzle the assembled macarons with melted white chocolate and sprinkle with festive decorations like edible stars or colored sprinkles before serving.

Make Ahead Options

These festive Christmas Tree Cake Macarons are perfect for busy home cooks looking to save time during the hectic holiday season! You can prepare the macaron shells up to 24 hours in advance by baking them and storing them in an airtight container at room temperature to maintain their crispness. For the filling, you can mix it up to 3 days ahead; just be sure to keep it refrigerated in a sealed container to preserve its creamy texture. When you’re ready to serve, simply assemble the macarons by piping the filling onto the shells and sandwiching them together. This way, you can enjoy these delightful treats with minimal hassle while still delivering impressive holiday magic!

Christmas Tree Cake Macarons Variations

Feel free to let your imagination run wild as you customize these festive macarons with delightful twists!

  • Nut-Free: Swap almond flour for sunflower seed flour to create a nut-free version that everyone can enjoy. These creamy treats can bring people together, no matter their dietary needs.

  • Peppermint Infusion: Substitute vanilla extract with peppermint extract for a refreshing minty flavor. With this simple swap, you can create a winter wonderland that dances on your taste buds.

  • Colorful Sprinkles: Use different colored sprinkles or edible glitter to match your holiday theme. This tiny touch can transform your macarons into eye-catching festive delights, perfect for parties.

  • Chocolate Bliss: Add cocoa powder to the almond flour for chocolate-flavored macaron shells. Mixed with creamy filling, they create a rich chocolate experience that will entice cocoa lovers.

  • Coconut Delight: Fold in shredded coconut to the filling for a tropical twist. The added texture and flavor will transport you to festive shores, offering something new and exciting during the holiday season.

  • Spiced Flavors: Mix ground cinnamon or nutmeg into the batter or filling for a warm, spiced profile. This cozy addition embodies the spirit of the holidays and creates a deliciously unique treat.

These variations are just a few ideas to inspire creativity in the kitchen! While you’re at it, why not try your hand at whipping up some lovely festive snacks like Cookies & Cream Cheesecake or indulging in Buttermilk Pancakes for weekend brunch? The holiday season is a wonderful time to explore new flavors!

What to Serve with Christmas Tree Cake Macarons

Indulge in a whimsical holiday spread alongside these festive treats, creating a magical atmosphere for your gatherings.

  • Hot Cocoa Bar: A cozy hot cocoa station allows guests to personalize their drinks. Pair sweet toppings like marshmallows with these macarons for an irresistible combination.

  • Peppermint Bark: This classic holiday confection echoes the flavors of winter and adds a crunchy texture that contrasts beautifully with the creamy macarons.

  • Fruit Salad: A refreshing mix of seasonal fruits provides a light counterpart. Citrus and berries bring a brightness that balances the richness of the macarons.

  • Christmas Cookies: Offer a variety of sugar cookies decorated with festive icing. The different textures and flavors celebrate the holiday spirit, making the macarons shine even more.

  • Eggnog: A creamy, spiced drink that complements the flavors of the macarons while evoking holiday nostalgia, making each bite even more delightful.

  • Charcuterie Board: Include a selection of meats, cheeses, and dried fruits for a savory touch. The saltiness of the cheese pairs surprisingly well with the sweet macarons.

  • Gingerbread Cake: Serve a slice of moist gingerbread cake as a perfect pairing. The warm spices enhance the festive experience, making your dessert table a delicious journey through the holidays.

  • Coffee or Espresso: A strong cup of coffee or espresso not only balances the sweetness of the macarons but also adds an elegant touch to your holiday dessert presentation!

How to Store and Freeze Christmas Tree Cake Macarons

Fridge: Store assembled Christmas Tree Cake Macarons in an airtight container in the fridge for up to 3 days to maintain their freshness and texture.

Freezer: For longer storage, freeze macarons for up to 3 months. Place them in a single layer on a baking sheet to freeze initially, then transfer to an airtight container with parchment paper between layers.

Thawing: To enjoy your frozen macarons, thaw them in the fridge overnight before serving. This helps retain their delicious texture and flavor.

Reheating: It’s not necessary to reheat macarons, but if you prefer them slightly warm, allow them to sit at room temperature for a few minutes after removing from the fridge.

Expert Tips for Christmas Tree Cake Macarons

  • Room Temperature Egg Whites: Ensure your egg whites are at room temperature for optimal meringue consistency, leading to lighter macarons.
  • Monitor Resting Time: Don’t skip the resting step! Allow shells to form a skin before baking to prevent cracks, ensuring perfect Christmas Tree Cake Macarons.
  • Piping Technique: Use a steady, consistent pressure when piping to achieve uniform shapes. Don’t be afraid to practice a few times before committing to the final batch.
  • Cooling Procedure: Be patient and let macarons cool completely on the baking sheet before handling to avoid breakage.
  • Flavor Infusion: Allow assembled macarons to mature in the fridge for 24 hours to enhance the flavors, making them even more delightful!

Christmas Tree Cake Macarons Recipe FAQs

How do I know if my egg whites are at the right consistency?
Absolutely! Room temperature egg whites should be foamy and fluffy after beating, ultimately forming stiff peaks that stand tall when you lift the whisk. This texture is crucial for creating light and airy macaron shells.

How should I store my assembled macarons?
I recommend storing your Christmas Tree Cake Macarons in an airtight container in the refrigerator for up to 3 days. This will help maintain their freshness and chewy interior while preventing them from drying out or absorbing odors.

Can I freeze the macarons?
Yes, you can freeze your Christmas Tree Cake Macarons for up to 3 months. To freeze, place them in a single layer on a baking sheet to prevent sticking. Once frozen, transfer them to an airtight container with parchment paper between layers to preserve their texture and shape.

What should I do if my macarons develop cracks during baking?
Very! Cracks often occur due to insufficient resting time or overmixing the batter. Ensure you let the piped macarons rest for 30-60 minutes until they form a skin. Also, make sure you’re folding the almond flour mixture gently to retain air in the meringue.

Are these macarons safe for those with nut allergies?
If you’re looking for a nut-free version, you can substitute almond flour with sunflower seed flour, which works beautifully and maintains that essential texture. Always check your ingredient labels to ensure they’re safe for everyone at the gathering!

Christmas Tree Cake Macarons

Holiday Magic: Christmas Tree Cake Macarons to Delight

Indulge in festive Christmas Tree Cake Macarons filled with a nostalgic creamy filling, perfect for holiday celebrations.
Prep Time 1 hour 30 minutes
Cook Time 16 minutes
Resting Time 1 hour
Total Time 2 hours 46 minutes
Servings: 12 macarons
Course: Dessert
Cuisine: French
Calories: 120

Ingredients
  

For the Macaron Shells
  • 1 cup Powdered Sugar Provides sweetness and a smooth texture; no substitutes recommended.
  • 1 cup Almond Flour Gives structure and a nutty flavor; substitute with sunflower seed flour for nut-free options.
  • 3 large Egg Whites Must be at room temperature for the best results.
  • 1/2 cup Granulated Sugar Sweetens the meringue and stabilizes the egg whites.
  • 1/4 teaspoon Cream of Tartar Stabilizes egg whites; can be omitted if unavailable.
  • 1 teaspoon Green Gel Food Coloring Used to achieve festive color.
For the Filling
  • 1/2 cup Butter Must be softened for easy mixing.
  • 1/4 cup Heavy Cream Adds richness; substitute with milk for a lighter option.
  • 1 teaspoon Vanilla Extract Enhances flavor; use almond extract for a different profile.
  • 1 cup Snack Cakes (crumbled) Imparts a nostalgic flavor; optional.

Equipment

  • Electric Mixer
  • piping bag
  • fine-mesh sieve
  • Baking Sheets

Method
 

Step-by-Step Instructions
  1. Sift the powdered sugar and almond flour together in a bowl.
  2. Beat egg whites until foamy, then gradually add cream of tartar and granulated sugar until stiff peaks form.
  3. Fold in green gel food coloring, then gradually add the sifted almond flour mixture.
  4. Pipe tree shapes or circular disks on lined baking sheets.
  5. Allow the piped macaron shells to rest for 30-60 minutes at room temperature.
  6. Preheat the oven to 300°F (150°C) and bake the macaron shells for 14-16 minutes.
  7. Beat the softened butter until fluffy, then mix with powdered sugar, vanilla extract, and heavy cream.
  8. Pipe the filling onto one shell and sandwich with another shell.

Nutrition

Serving: 1macaronCalories: 120kcalCarbohydrates: 15gProtein: 2gFat: 6gSaturated Fat: 4gPolyunsaturated Fat: 0.5gMonounsaturated Fat: 1.5gCholesterol: 20mgSodium: 40mgPotassium: 50mgSugar: 10gVitamin A: 200IUCalcium: 20mgIron: 0.5mg

Notes

Store assembled macarons in an airtight container in the fridge for up to 3 days. Freeze for longer storage up to 3 months.

Tried this recipe?

Let us know how it was!

Heavenly Vegetarian Mincemeat for Mince Pies You’ll Love

The kitchen was filled with the enchanting aroma of warm spices and sweet fruit when I decided to whip up a batch of Vegetarian Mincemeat for Mince Pies. It’s amazing how quickly a simple recipe can transform, creating an abundance of joy for the holidays! This delightful vegetarian mincemeat is not just easy to make; it’s also a fantastic way to add a wholesome touch to your festive baking. Packed with a vibrant mix of dried fruits, zesty citrus, and comforting spices, it’s perfect for filling not only traditional mince pies but also frangipane tarts and crumbles. Plus, it makes an excellent homemade gift that’s sure to impress loved ones. Ready to elevate your Christmas treats this year? Let’s dive into this scrumptious recipe that will fill your kitchen with the spirit of the season!

Why Choose Vegetarian Mincemeat?

Irresistible Flavor: This mincemeat bursts with rich, fruity flavors that rival any traditional version, thanks to a delightful medley of dried fruits and spices.

Versatile Creation: Not just for pies! Use it as a filling for frangipane tarts or crumble slices for ultimate holiday treats.

Easy to Make: Enjoy a quick and simple preparation that requires minimal effort, fitting easily into your festive baking schedule.

Perfect for Gifting: Package it in festive jars for charming homemade gifts that your friends and family will cherish.

Plant-Based Goodness: Offers a wholesome vegetarian option that maintains the classic essence of mince pies while being accessible for everyone. Create delightful memories with every bite!

Vegetarian Mincemeat Ingredients

For the Fruit Base

  • Apples – Provide moisture and natural sweetness; ensure they are peeled and diced finely.
  • Dried Fruit (sultanas, currants, cranberries, etc.) – Key for sweetness and texture; mix various dried fruits for a complex flavor.

For the Zesty Brightness

  • Orange Zest – Adds a bright citrus flavor to balance the sweetness of the dried fruit.
  • Lemon Zest and Juice – Enhances the depth of flavor; using fresh lemons gives the best results.

For the Warm Spices

  • Ground Mixed Spice – Introduces warm, aromatic flavors; sub with pumpkin spice if desired.
  • Ground Cinnamon – Adds warmth and enhances fruity flavors; optional for those who like a milder spice.

For Sweetness and Binding

  • Soft Brown Sugar – A sweetening agent that also brings a rich caramel note; coconut sugar can be a great alternative.
  • Butter – Binds the mixture and adds richness; replace with plant-based margarine for a vegan option.

For Flavor Enhancement

  • Brandy – Enriches the flavor and aids in preservation; use fruit juice for a non-alcoholic alternative, but it won’t preserve long.

This fantastic Vegetarian Mincemeat for Mince Pies elevates your festive baking and will delight everyone who enjoys a taste of homemade charm!

Step‑by‑Step Instructions for Delicious Vegetarian Mincemeat for Festive Mince Pies

Step 1: Prepare the Fruit
Start by peeling, coring, and finely dicing 2 medium apples. Aim for small, uniform pieces to ensure even cooking and integration. This will create a delightful moist base for your vegetarian mincemeat for mince pies. Place the diced apples into a large mixing bowl, ready for the next ingredients.

Step 2: Zest and Juice the Citrus
Next, zest and juice one lemon and one orange using a microplane zester and a juicer. Set the zest aside to add brightness to your mixture while the juices will enhance the overall flavor. The fresh citrus aroma will fill your kitchen and perfectly complement the sweet fruits in your mincemeat.

Step 3: Combine Ingredients
In a large saucepan over low heat, combine the diced apples with the orange and lemon zest and juice, along with 300g of mixed dried fruits such as sultanas and cranberries. Then, add 1 teaspoon of ground mixed spice, 1 teaspoon of ground cinnamon, and 150g of soft brown sugar. Stir in 100g of butter until everything is well-coated and combined.

Step 4: Cook the Mixture
Gently heat the fruit mixture for about 10–15 minutes, stirring regularly to prevent sticking. You’ll know it’s ready when the butter has melted completely, and the mixture becomes fragrant and slightly thickened. This cooking step helps to meld all the flavors together, forming a delicious vegetarian mincemeat for mince pies.

Step 5: Add Brandy and Cool
Remove the saucepan from heat and allow the mixture to cool for about 10 minutes. Once slightly cooled, stir in 50ml of brandy to enhance the flavor and preserve your mincemeat. If you prefer a non-alcoholic version, replace the brandy with fruit juice, but note that this will not preserve as well.

Step 6: Transfer and Store
Finally, spoon the vegetarian mincemeat into sterilized jars, leaving some space at the top. Seal them tightly and store in a cool, dark place for several months, or refrigerate if using within a few days. Your delicious vegetarian mincemeat for festive mince pies is now ready to fill your holiday treats!

Make Ahead Options

These Vegetarian Mincemeat for Mince Pies are perfect for meal prep enthusiasts! You can prepare the entire mincemeat mixture up to 3 days in advance, allowing the flavors to meld beautifully. Simply follow the recipe instructions until step 5, then allow the mixture to cool, and either refrigerate it in an airtight container or store it in sterilized jars. Make sure to leave a bit of headspace in the jars for expansion. When you’re ready to use it, stir in the brandy (or juice) as directed, and your delightful filling will be just as delicious as the day you made it. This way, you can enjoy more time with loved ones during the festive season!

Helpful Tricks for Vegetarian Mincemeat

Sterilization Matters: Ensure your jars are thoroughly sterilized before filling them with vegetarian mincemeat for mince pies to prevent spoilage.

Fruit Mix Variety: Experiment with different dried fruits like figs or dates for a unique flavor twist in your mincemeat.

Moisture Management: If your mincemeat seems dry, add a splash of brandy or fruit juice to enhance moisture without compromising flavor.

Flavor Depth: Allow your mincemeat to sit for at least a day before using it; this gives the flavors time to meld and deepen for maximum pleasure.

Gift-Worthy Presentation: For homemade gifts, label jars beautifully with festive ribbons and include serving suggestions to delight the recipients.

Vegetarian Mincemeat for Custom Creations

Feel free to get creative and personalize this vegetarian mincemeat recipe to suit your taste buds!

  • Different Dried Fruits: Swap in your favorites like figs or apricots for a unique fruit medley. Voilà, a personal touch to your festive baking!

  • Spice It Up: Experiment with spices like nutmeg or allspice to give your mincemeat a distinctive flavor profile. A little twist can elevate the aroma, making it even more inviting.

  • Stewed Apple Blend: Combine your mincemeat with stewed apples for a pie filling or crumble base that offers delightful texture and extra sweetness. This makes for a luscious dessert!

  • Nutty Delight: Add chopped nuts such as walnuts or almonds for a satisfying crunch. It brings added richness, enhancing the overall flavor experience.

  • Adjust Sweetness: If you prefer a less sweet blend, reduce the brown sugar slightly or substitute with coconut sugar for a different taste. Your taste buds, your rules!

  • Fruit Juice Alternative: For a non-alcoholic twist, replace brandy with apple or orange juice, infusing your mix with fruity goodness. This option makes it more family-friendly!

  • Flavor the Butter: Infuse your butter with spices or zest before mixing it in for an extra layer of flavor. It’s a small tweak that can make a huge difference in taste.

Using your vegetarian mincemeat, you can fill up some delightful Pie Ground Beef, or get adventurous with a sweet twist and try it in Air Fryer Chicken recipes to impress your guests! Have fun exploring these variations, and don’t hesitate to make them your own!

What to Serve with Delicious Vegetarian Mincemeat for Festive Mince Pies

Elevate your holiday experience by crafting a delightful spread that complements the enchanting flavors of your mincemeat.

  • Flaky Pastry: A tender, buttery crust provides the perfect contrast to the rich, spiced filling inside your pies.
  • Creamy Custard: This luscious accompaniment adds a warm, smooth texture that balances the sweetness of your mincemeat beautifully. Think of a cozy winter night with custard slowly drizzling over each slice.
  • Spiced Apple Cider: A fragrant, warm beverage that enhances the aromatic spices in the mincemeat, creating a sensory feast—perfect for holiday gatherings.
  • Vanilla Ice Cream: The creamy, cool scoop pairs wonderfully with the warm pies, creating a delightful contrast that will excite your palate.
  • Cranberry Sauce: This tangy, slightly tart sauce harmonizes with the sweetness of your vegetarian mincemeat, offering a bright burst of flavor with each bite.
  • Chai-Spiced Tea: Invite the cozy scents of cardamom and cinnamon into your meal, allowing each sip to deepen the festive atmosphere.
  • Macadamia Nut Cookies: These crunchy delights introduce a lovely nuttiness, contrasting the soft texture of the pies while bringing an extra layer of indulgence.
  • Ice Wine: A sweet, aromatic wine that complements the fruity elements of your mincemeat, enriching the overall experience while celebrating the season.
  • Pecan Pie: A rich, nutty dessert that stands out in flavor, adding a robust sweetness to your festive table that pairs delightfully with the mincemeat.

How to Store and Freeze Vegetarian Mincemeat for Mince Pies

Cool Storage: Store your vegetarian mincemeat for mince pies in sterilised jars at room temperature for up to 6 months, keeping them in a cool, dark place.

Refrigeration: If you plan to use it quickly, refrigerate the mincemeat for up to 3 days in an airtight container to maintain freshness.

Freezing: For long-term storage, freeze your mincemeat in airtight containers for up to 12 months. Thaw in the fridge overnight before use.

Reheating: To revive your mincemeat before baking, gently heat it in a saucepan over low heat until warm, ensuring the flavors are well-combined.

Vegetarian Mincemeat for Mince Pies Recipe FAQs

How do I select the best apples for the mincemeat?
Absolutely! Look for firm, crisp apples like Granny Smith or Honeycrisp. They provide the perfect texture and sweetness for the mincemeat. Make sure to avoid any that have dark spots or feel mushy, as these can affect the overall quality of your mincemeat.

What’s the best way to store the mincemeat?
It’s essential to keep your vegetarian mincemeat for mince pies in sterilized jars to ensure a long shelf life. Store them at room temperature in a cool, dark place for up to 6 months. If you choose to refrigerate it, be sure it’s in an airtight container, where it will stay fresh for about 3 days.

Can I freeze vegetarian mincemeat?
Very much so! To freeze your mincemeat, spoon it into airtight containers, leaving some space at the top for expansion. It can be frozen for up to 12 months. When you’re ready to use it, simply thaw it in the fridge overnight, and it will be good as new for your festive baking!

What should I do if my mincemeat appears too dry?
If your mincemeat seems a bit dry, don’t worry! Just stir in a splash of brandy or fruit juice to add moisture back into the mixture. Aim to do this right before you use the mincemeat, and give it a good stir to ensure everything is well-combined and flavorful.

Is this recipe suitable for everyone, including pets and those with allergies?
While this vegetarian mincemeat is a wonderful plant-based option, always check individual ingredients for potential allergens. Make sure to use plant-based butter for vegans or those with dairy allergies. As for pets, keep them away from any alcoholic ingredients like brandy, as these can be harmful. If unsure, always consult with your vet!

How long can I keep my mincemeat in sterilized jars?
Your vegetarian mincemeat for mince pies can be kept in sterilized jars for up to 6 months if stored at room temperature. Ensure these jars are sealed tightly and store them in a cool, dark place to maintain their flavor and freshness. Enjoy making it as a delightful gift or for personal use!

Vegetarian mincemeat for mince pies

Heavenly Vegetarian Mincemeat for Mince Pies You'll Love

Delight your holidays with this easy Vegetarian Mincemeat for mince pies, bursting with sweet fruits and warm spices.
Prep Time 20 minutes
Cook Time 15 minutes
Cooling Time 10 minutes
Total Time 45 minutes
Servings: 8 jars
Course: Dessert
Cuisine: Vegetarian
Calories: 200

Ingredients
  

Fruit Base
  • 2 medium apples peeled and diced finely
  • 300 g mixed dried fruits (sultanas, currants, cranberries, etc.) mix various dried fruits for complex flavor
Zesty Brightness
  • 1 medium orange zest
  • 1 medium lemon zest and juice using fresh lemons gives the best results
Warm Spices
  • 1 teaspoon ground mixed spice sub with pumpkin spice if desired
  • 1 teaspoon ground cinnamon optional for milder spice
Sweetness and Binding
  • 150 g soft brown sugar coconut sugar can be a great alternative
  • 100 g butter replace with plant-based margarine for vegan option
Flavor Enhancement
  • 50 ml brandy use fruit juice for non-alcoholic alternative

Equipment

  • large mixing bowl
  • large saucepan
  • microplane zester
  • juicer
  • sterilized jars

Method
 

Preparation Steps
  1. Start by peeling, coring, and finely dicing 2 medium apples. Place the diced apples into a large mixing bowl.
  2. Zest and juice one lemon and one orange. Set the zest aside and juice will enhance flavor.
  3. In a large saucepan over low heat, combine the diced apples, citrus zest and juice, mixed dried fruits, ground mixed spice, ground cinnamon, and soft brown sugar. Stir in butter until well-coated.
  4. Gently heat the mixture for about 10–15 minutes, stirring regularly until ready and fragrant.
  5. Remove saucepan from heat and cool for about 10 minutes. Stir in brandy or fruit juice.
  6. Spoon the vegetarian mincemeat into sterilized jars, seal tightly, and store appropriately.

Nutrition

Serving: 1jarCalories: 200kcalCarbohydrates: 35gProtein: 2gFat: 8gSaturated Fat: 5gPolyunsaturated Fat: 1gMonounsaturated Fat: 1gCholesterol: 20mgSodium: 10mgPotassium: 150mgFiber: 2gSugar: 20gVitamin A: 150IUVitamin C: 15mgCalcium: 20mgIron: 0.5mg

Notes

Ensure jars are thoroughly sterilized before filling. Experiment with different dried fruits for unique flavors. Allow mincemeat to sit for at least a day for maximum flavor depth.

Tried this recipe?

Let us know how it was!

Delicious Christmas Gooey Butter Cookies for Festive Cheer

Every holiday season, a delightful aroma dances through my kitchen, drawing family and friends nearer. It’s no wonder that my Christmas Gooey Butter Cookies have become a staple at our festive gatherings. These soft and chewy treats require just a handful of ingredients and a simple cake mix base, making them the perfect quick fix for any last-minute cookie swap. Not only do they bring joy to every bite, but they also offer endless variety with mix-ins like chocolate chips or crushed candy canes, catering to every palate. Whether you’re a busy baker or someone looking for a cozy, homemade touch, these cookies encapsulate the spirit of the holidays. Are you ready to create your own batch of sweetness? Let’s dive into this scrumptiously simple recipe!

Why Are These Cookies So Irresistible?

Soft, Chewy Delight: These Christmas Gooey Butter Cookies are the epitome of holiday cheer, with a texture that melts in your mouth.
Quick to Make: With just a handful of pantry staples, including cake mix, they come together effortlessly – perfect for busy bakers!
Endless Variety: Feel free to jazz them up with mix-ins like mini chocolate chips or crushed candy canes for a festive twist.
Crowd-Pleasing Treats: Their delightful sweetness and festive appearance make them a hit at cookie swaps and family gatherings.
Make Ahead: You can easily prepare the dough in advance, allowing for stress-free baking on the day of your celebrations.

Christmas Gooey Butter Cookies Ingredients

For the Cookie Base
Full-fat cream cheese – Ensures a rich, gooey texture for the perfect Christmas Gooey Butter Cookies.
Unsalted butter – Provides the necessary richness; remember to soften it before mixing!
Large egg – Acts as the binder to keep your cookies together and chewy.
Vanilla extract – Adds a delightful flavor boost; consider using almond or peppermint for extra festive flair.
Yellow cake mix – The secret to making these cookies quick and easy; you can swap it with vanilla or white cake mix if you prefer.

For the Toppings
Holiday sprinkles – These add a splash of festive color, but crushed candy canes or mini chocolate chips work beautifully too.
Powdered sugar – Dust your cookies for that iconic sweet finish and eye-catching look; sanding sugar is a fun alternative.

Step‑by‑Step Instructions for Christmas Gooey Butter Cookies

Step 1: Preheat the Oven
Begin by preheating your oven to 350°F (175°C). While the oven heats, take the time to line two baking sheets with parchment paper to prevent sticking. This will set the stage for baking your delicious Christmas Gooey Butter Cookies evenly, ensuring a delightful texture and golden-brown edges.

Step 2: Cream the Ingredients
In a large mixing bowl, combine the softened full-fat cream cheese, unsalted butter, large egg, and vanilla extract. Use an electric mixer on medium speed to beat the mixture until it’s smooth and creamy, about 2-3 minutes. The result should be velvety and well-blended, creating a perfect base for your cookie dough.

Step 3: Add the Cake Mix
Gradually stir in the yellow cake mix until a thick dough is formed, using a spatula or a wooden spoon. Ensure there are no dry spots and that everything is fully incorporated without overmixing. You’ll know it’s ready when the mixture is thick and slightly sticky—this will contribute to the gooey texture of your Christmas Gooey Butter Cookies.

Step 4: Fold in the Sprinkles
Gently fold in your holiday sprinkles, taking care not to overmix the dough. This step adds festive flair to the cookies and ensures that the sprinkles are evenly distributed throughout the dough. You want to see those beautiful pops of color in your cookie batter, hinting at the delightful treats ahead.

Step 5: Chill the Dough
Cover the bowl with plastic wrap and chill the dough in the refrigerator for at least 30 minutes. Chilling helps firm up the dough, making it easier to handle while forming dough balls. This crucial step also keeps the cookies from spreading too much while baking, ensuring your Christmas Gooey Butter Cookies maintain their shape.

Step 6: Form the Cookie Balls
Once chilled, use a cookie scoop or your hands to scoop the dough into 1.5-inch balls. Rolling them gently helps create a smooth surface. After forming each ball, roll it in powdered sugar until it’s fully coated, creating a sweet and snowy finish that will melt in your mouth as you enjoy these festive cookies.

Step 7: Place on Baking Sheets
Arrange the powdered sugar-coated dough balls on the prepared baking sheets, making sure to leave about 2 inches of space between each one. This spacing allows the cookies to spread without touching, resulting in perfectly shaped Christmas Gooey Butter Cookies that are both soft and chewy.

Step 8: Bake the Cookies
Bake in the preheated oven for 10-12 minutes. Watch closely for the edges to set while the centers stay soft and puffy. They should have a slightly golden-hued bottom when finished, signifying that they are ready to be taken out and loved by everyone at your holiday gathering.

Step 9: Cool and Enjoy
Let the cookies cool on the baking sheet for a few minutes. This helps them set and allows the gooey centers to perfect their texture. Then, carefully transfer them to a wire rack to cool completely. Once cooled, your Christmas Gooey Butter Cookies will be irresistible and perfect for sharing or enjoying with a glass of milk.

Expert Tips for Christmas Gooey Butter Cookies

  • Use Block Cream Cheese: Ensure you’re using block-style cream cheese for the best texture; spreadable varieties can lead to thinner, less gooey cookies.

  • Chill the Dough: Don’t skip the chilling step! It’s crucial for maintaining the shape and achieving a soft, chewy consistency for your Christmas Gooey Butter Cookies.

  • Avoid Overmixing: When folding in sprinkles, be gentle and avoid overmixing. This helps keep the dough fluffy and ensures those colorful bits stay intact in your cookies.

  • Monitor Baking Time: Keep an eye on your cookies as they bake—remove them when the edges are set, but the centers appear soft. They’ll firm up while cooling, keeping that signature gooey texture.

  • Experiment with Mix-Ins: Feel free to customize your cookies! Mini chocolate chips or crushed candy canes not only add flavor but also make your Christmas Gooey Butter Cookies even more festive and enjoyable.

Christmas Gooey Butter Cookies Variations

Embrace your creativity with these delightful twists on the classic Christmas Gooey Butter Cookies!

  • Flavor Twist: Add Peppermint Extract in place of vanilla for a refreshing holiday kick. It’s an easy way to elevate your cookies while maintaining that cozy vibe we all love during the season.

  • Dairy-Free: Use Vegan Cream Cheese and Vegan Butter to make these cookies dairy-free. Just like the traditional version, they will still be wonderfully gooey and soft while accommodating those with dietary restrictions.

  • Nutty Texture: Incorporate Chopped Nuts like walnuts or pecans for added crunchiness and flavor depth. The nutty bits add a wonderful surprise in every bite, enhancing that festive feel.

  • Fruity Fusion: Mix in Dried Cranberries or Cherries for a burst of fruity goodness. This not only adds a splash of color to your cookies but also balances the sweetness perfectly – ideal for holiday gatherings!

  • Chocolate Lovers: Swap in Chocolate Cake Mix instead of yellow cake mix for a rich and indulgent chocolate version. Sprinkle in some Chocolate Chips too for that extra touch of joy!

  • Two-Tone Cookies: Divide the dough and color one half with Gel Food Coloring for a visually stunning two-tone cookie that’s as fun to look at as it is to eat. It’s a lovely way to make your cookie platter pop!

  • Spicy Touch: Add a pinch of Cinnamon and Nutmeg for a warm and spiced flavor. This charming twist will evoke the cozy scents of the holiday season, wrapping everyone in nostalgia.

  • Decadent Drizzle: Once baked, drizzle your cookies with White Chocolate for an extra sweet finishing touch. This gives both a lovely aesthetic and a rich flavor that pairs beautifully with the gooiness of the cookies.

For those inspired after these variations, why not try your hand at other festive treats like Honey Butter Brioche or some delightful Garlic Butter Shrimp for a balanced holiday spread?

How to Store and Freeze Christmas Gooey Butter Cookies

Room Temperature: Store cookies in an airtight container at room temperature for up to 3 days to maintain their soft and chewy texture.

Fridge: For longer freshness, you can store cookies in the fridge; they’ll last up to a week while still remaining tasty. Just be sure to let them come to room temperature before serving.

Freezer: Freeze the cookies for up to 3 months. Place them in a freezer-safe container or bag, layered between parchment paper to prevent sticking. Thaw at room temperature before enjoying.

Reheating: If you prefer warm cookies, reheat them in a microwave for about 10-15 seconds. They’ll regain their gooey goodness, ensuring that every bite of your Christmas Gooey Butter Cookies is deliciously satisfying!

What to Serve with Christmas Gooey Butter Cookies

These delightful cookies are perfect for creating a warm, cozy atmosphere during your holiday festivities.

  • Creamy Hot Cocoa: Whip up a cup of rich hot cocoa to complement the soft, gooey texture of the cookies while providing a comforting drink to savor.
  • Peppermint Mocha: A delightful combination of coffee, chocolate, and peppermint brings a festive flair that echoes the cookies’ sweet flavors.
  • Velvety Vanilla Ice Cream: A scoop of vanilla ice cream served alongside enhances the dessert experience, offering a creamy contrast to the chewy cookies.
  • Cozy Apple Pie: The warm spices and sweet apples of apple pie not only evoke holiday nostalgia but also pair beautifully with the cookies’ sweetness.
  • Festive Fruit Salad: A light and refreshing fruit salad adds a burst of freshness, balancing the richness of the cookies and brightening your dessert table.
  • Gingerbread Tea: This aromatic tea infused with holiday spices complements the festive spirit, making it a perfect warm beverage to enjoy with your treats.
  • Sugar Cookie Bars: Keep the holiday spirit alive with another sweet treat that echoes the flavors of the Christmas Gooey Butter Cookies, enticing everyone to indulge.
  • Chocolate Milk: The rich, creamy taste of chocolate milk offers a nostalgic pairing that children and adults alike will enjoy alongside these festive cookies.
  • Pecan Pie: A slice of pecan pie with its crunchy nuts and gooey filling can be a delightful dessert option that adds variety to your holiday spread.

Make Ahead Options

Making Christmas Gooey Butter Cookies ahead of time is a game-changer for busy holiday bakers! You can prepare the dough up to 24 hours in advance; simply refrigerate it in an airtight container to keep it fresh. If you want to get even more ahead, you can roll the dough into balls and coat them in powdered sugar, then store them in the fridge for the same time frame. When you’re ready to bake, just place the chilled dough balls on a baking sheet and bake them directly from the fridge—no need to thaw! This method ensures that your cookies maintain their deliciously gooey texture while saving you time when the festivities kick off.

Christmas Gooey Butter Cookies Recipe FAQs

What type of cream cheese should I use for these cookies?
Absolutely! I recommend using block-style full-fat cream cheese for the best results. Spreadable varieties can introduce excess moisture, making your cookies less gooey and more flat than desired. Block cream cheese creates that rich, soft texture we all love in Christmas Gooey Butter Cookies.

How should I store leftover cookies?
To maintain their soft and chewy texture, store your Christmas Gooey Butter Cookies in an airtight container at room temperature for up to 3 days. If you want them to last longer, you can refrigerate them, where they’ll keep for about a week. Just remember to let them come to room temperature before enjoying for the best flavor!

Can I freeze Christmas Gooey Butter Cookies? If so, how?
Yes, you can freeze these delightful cookies for up to 3 months! First, place the cooled cookies in a single layer on a baking sheet and freeze them for about 1 hour. Once they are firm, transfer them to a freezer-safe container or bag, layering them with parchment paper to prevent sticking. Thaw at room temperature, and they’ll be just as delicious as fresh!

What if my cookies spread too much while baking?
If your Christmas Gooey Butter Cookies spread too much, it could be due to a few factors. Make sure your dough is adequately chilled before baking; this helps maintain the cookies’ shape. Additionally, check the measurement of your cake mix; too little can lead to a runnier dough. If you face this issue again, consider adding a bit of extra flour—1 tablespoon at a time—to help thicken the dough.

Are these cookies safe for pets?
No, it’s best to keep these cookies away from pets! They contain ingredients like butter and sugar, which don’t sit well with animal digestion. Additionally, avoid sharing any baked goods with chocolate or certain flavorings since they can be harmful to pets. Always keep your furry friends safe and stick to treats made specifically for them!

Can I customize the mix-ins for the cookies?
Very much so! The beauty of Christmas Gooey Butter Cookies lies in their versatility. You can incorporate mini chocolate chips, crushed candy canes, or even dried fruit for a festive twist. Just remember to keep the balance of dry and wet ingredients in mind so the dough remains that perfect gooey consistency! Enjoy experimenting with mix-ins!

Christmas Gooey Butter Cookies

Delicious Christmas Gooey Butter Cookies for Festive Cheer

These Christmas Gooey Butter Cookies are soft, chewy, and perfect for festive gatherings, featuring a simple cake mix base and optional mix-ins.
Prep Time 30 minutes
Cook Time 12 minutes
Chilling Time 30 minutes
Total Time 1 hour 12 minutes
Servings: 24 cookies
Course: Dessert
Cuisine: American
Calories: 150

Ingredients
  

For the Cookie Base
  • 8 oz full-fat cream cheese softened
  • 1/2 cup unsalted butter softened
  • 1 large egg
  • 1 tsp vanilla extract or almond/peppermint
  • 1 box yellow cake mix can swap with vanilla or white cake mix
For the Toppings
  • 1/4 cup holiday sprinkles or crushed candy canes/mini chocolate chips
  • 1 cup powdered sugar for dusting

Equipment

  • Mixing Bowl
  • Electric Mixer
  • Cookie Scoop
  • Baking Sheets
  • Parchment paper

Method
 

Step‑by‑Step Instructions
  1. Preheat the oven to 350°F (175°C) and line two baking sheets with parchment paper.
  2. In a large mixing bowl, combine softened cream cheese, butter, egg, and vanilla extract. Beat until smooth and creamy for 2-3 minutes.
  3. Gradually stir in yellow cake mix until a thick dough forms, ensuring all ingredients are fully incorporated.
  4. Fold in holiday sprinkles gently, ensuring even distribution without overmixing.
  5. Cover the bowl and chill the dough in the refrigerator for at least 30 minutes.
  6. Scoop dough into 1.5-inch balls and roll in powdered sugar until fully coated.
  7. Arrange the coated dough balls on baking sheets, leaving about 2 inches of space between each.
  8. Bake for 10-12 minutes, watching closely for edges to set while keeping centers soft.
  9. Allow cookies to cool on baking sheets for a few minutes before transferring to a wire rack.

Nutrition

Serving: 1cookieCalories: 150kcalCarbohydrates: 20gProtein: 2gFat: 7gSaturated Fat: 4gPolyunsaturated Fat: 0.5gMonounsaturated Fat: 2gCholesterol: 30mgSodium: 100mgPotassium: 40mgSugar: 10gVitamin A: 200IUCalcium: 10mgIron: 0.5mg

Notes

For best results, use block cream cheese and do not skip the chilling step to maintain cookie shape.

Tried this recipe?

Let us know how it was!

Irresistible Spiced Gingerbread Wreath Cake for Cozy Gatherings

As I pulled the Spiced Gingerbread Wreath Cake from the oven, the familiar scent of warm spices enveloped my kitchen, instantly transporting me to memory-laden holiday celebrations. This festive delight isn’t just eye-catching; it strikes a perfect balance between rich, spiced flavors and the comfort of homemade sweetness. With its velvety whipped cream frosting, this cake is incredibly simple to make—a true crowd-pleaser that’s sure to impress both novice and seasoned bakers alike. Plus, it comes with gluten-free options, so everyone can join in on the festivities! Whether you’re hosting a cozy gathering or whipping up a treat to share with loved ones, this wreath cake promises to bring warmth and joy to your table. Are you ready to create a holiday masterpiece that will have everyone coming back for seconds?

Why Is This Cake the Perfect Holiday Treat?

Simplicity at its Finest: This Spiced Gingerbread Wreath Cake is incredibly easy to whip up, even if you’re a beginner in the kitchen.

Aromatic Delight: The rich blend of spices fills your home with a comforting warmth that instantly brings the spirit of the season to life.

Customizable for Everyone: With options for gluten-free and dairy-free variations, everyone can savor this holiday gem.

Visually Stunning: Its beautiful wreath shape makes it a showstopper at any gathering, ensuring it stands out on the dessert table.

Crowd-Pleasing Flavor: The combination of molasses and spices offers a classic gingerbread taste that’s both nostalgic and delightfully festive.

If you’re intrigued by other holiday treats, be sure to check out these delightful recipes for Patriotic Poke Cake or Pistachio Carrot Cake for more delicious inspiration!

Spiced Gingerbread Wreath Cake Ingredients

For the Cake
All-purpose flour – Provides structure. Can substitute with gluten-free flour blend for a gluten-free version.
Baking soda – Helps the cake rise. No substitutions necessary.
Ground cinnamon – Adds warmth and flavor. Other ground spices like nutmeg can be used for variation.
Ground ginger – Infuses the cake with a ginger flavor. Fresh ginger can be used, but may alter texture.
Ground cloves – Offers a hint of spice. Skip if preferred; adjust cinnamon to taste.
Salt – Enhances flavor. Essential for balance; do not omit.
Molasses – Provides deep flavor and moisture. Dark corn syrup or honey can be used as a substitute, but with less intensity.
Granulated sugar – Sweetens the cake. Can replace with brown sugar for a richer flavor.
Unsalted butter – Adds richness. Vegetable oil can be a substitute for dairy-free options.
Eggs – Binds the ingredients. Flax eggs can be used for a vegan alternative.

For the Frosting
Whipped cream – For frosting. Chill bowl and whisk to prevent melting; use stabilizers if desired.
Powdered sugar – Sweetens the frosting. Can be adjusted based on sweetness preference.

For Decoration
Rosemary, star anise, cinnamon sticks – For decoration. Use any festive herbs or spices according to preference.

Get ready to dive into the heartwarming flavors of this Spiced Gingerbread Wreath Cake—it’s bound to be a cherished addition to your holiday festivities!

Step‑by‑Step Instructions for Spiced Gingerbread Wreath Cake

Step 1: Preheat and Prepare
Begin by preheating your oven to 350°F (175°C). While it warms up, generously grease a Bundt pan with cooking spray or butter to ensure the cake releases easily after baking. Make sure to cover every nook and cranny for an effortless release once the Spiced Gingerbread Wreath Cake is baked.

Step 2: Combine Dry Ingredients
In a mixing bowl, whisk together the all-purpose flour, baking soda, ground cinnamon, ground ginger, ground cloves, and salt until evenly mixed. This step not only ensures the even distribution of ingredients but also infuses the flour with aromatic spices. Set this mixture aside while you prepare the wet ingredients for your cake.

Step 3: Mix Butter and Sugar
In another bowl, use a hand mixer to cream together the unsalted butter and granulated sugar until the mixture is light and fluffy. This typically takes about 4-5 minutes. Next, beat in the molasses until fully incorporated, followed by the eggs, ensuring everything is well blended. Your mixture should have a smooth consistency and a rich aroma, signaling that the base for your Spiced Gingerbread Wreath Cake is ready.

Step 4: Combine Wet and Dry Mixtures
Gradually add the dry ingredients to your wet mixture, alternating with any additional liquid required. Mix gently until just combined to prevent overworking the batter, which can affect the cake’s texture. The batter should be thick yet pourable, filled with the warmth of holiday spices ready to fill your kitchen with delightful scents as it bakes.

Step 5: Bake the Cake
Pour the batter into the prepared Bundt pan, using a spatula to smooth out the top evenly. Place the pan in the preheated oven and bake for 35-40 minutes. To check for doneness, insert a toothpick into the center; it should come out clean when the Spiced Gingerbread Wreath Cake is perfectly baked and ready to be released from the oven.

Step 6: Cool Before Serving
Once baked, remove the cake from the oven and allow it to cool in the pan for about 10 minutes. This resting period helps set the cake and makes it easier to transfer. After that, carefully invert it onto a wire rack to cool completely. The delightful aromas will continue to entice as your Spiced Gingerbread Wreath Cake cools.

Step 7: Whip the Cream
While the cake is cooling, prepare the whipped cream frosting. In a chilled bowl, combine the heavy cream and powdered sugar, then whip with an electric mixer until soft peaks form. This should take around 3-5 minutes. The whipped cream will add a luscious topping to your Spiced Gingerbread Wreath Cake that beautifully contrasts its rich flavors.

Step 8: Frost and Decorate
Once the cake is completely cooled, generously spread the whipped cream frosting over the top, allowing it to cascade down the sides. For a festive touch, decorate with fresh rosemary, star anise, and cinnamon sticks. These garnishes not only enhance the appearance but also add an extra layer of seasonal aroma to your Spiced Gingerbread Wreath Cake.

Step 9: Dust for Presentation
Just before serving, sprinkle a light dusting of powdered sugar over the frosted cake for an elegant finish. The powdered sugar will create a snowy effect, perfect for the holiday season. Slice and serve your Spiced Gingerbread Wreath Cake alongside warm beverages like spiced cider or eggnog to create a cozy gathering.

Spiced Gingerbread Wreath Cake Variations

Feel free to explore your creativity and put your personal touch on this delightful cake!

  • Gluten-Free: Swap out all-purpose flour for a 1:1 gluten-free flour blend for a completely gluten-free treat. Your guests won’t notice the difference!

  • Dairy-Free: Use vegetable oil instead of butter and coconut whipped cream for a heavenly dairy-free dessert that still tastes indulgent.

  • Vegan: Replace eggs with flax eggs to create a vegan version. The flax will help bind everything together without compromising texture.

  • Flavor Boost: Add a dash of black pepper or a pinch of allspice to elevate the spice profile and add a bit of warmth for that cozy feeling.

  • Texture Twist: Incorporate finely chopped nuts, like walnuts or pecans, into the batter for a delightful crunch that complements the tender cake.

  • Citrus Zest: Grate some fresh orange or lemon zest into the batter to add a bright, refreshing note that balances the rich spices beautifully.

  • Decorative Touch: Instead of rosemary and cinnamon sticks, consider topping your cake with edible flowers or chocolate shavings for a stunning presentation that feels extra special.

  • Caramel Drizzle: Drizzle warm caramel sauce over the top just before serving for an irresistible sweet finish that will make your guests swoon.

Feeling adventurous? For more delightful holiday recipes, explore these delectable options: Buttermilk Pancakes Discover for a classic breakfast twist or treat yourself to some luscious Cookies Cream Cheesecake.

Make Ahead Options

The Spiced Gingerbread Wreath Cake is perfect for meal prep, allowing you to enjoy more time with family and friends during the holidays. You can prepare the cake itself up to 3 days in advance; simply bake it, let it cool, and store it wrapped in plastic wrap in the refrigerator. The whipped cream frosting can be made up to 24 hours ahead; keep it stored in an airtight container in the fridge to maintain its fluffy texture. When you’re ready to serve, frost the cake and decorate it with rosemary, star anise, and cinnamon sticks. This way, you’ll have a show-stopping dessert that’s just as delicious and festive without the last-minute rush!

How to Store and Freeze Spiced Gingerbread Wreath Cake

Fridge: Store leftover cake in an airtight container in the refrigerator for up to 3 days to keep it moist and flavorful. Frost just before serving to maintain texture.

Freezer: For longer storage, wrap the cake tightly in plastic wrap and then in aluminum foil, or place it in a freezer-safe bag. It can be frozen for up to 3 months.

Thawing: To enjoy the cake, thaw overnight in the refrigerator. Reheat individual slices in the microwave for about 10-15 seconds for a cozy treat.

Serving Suggestion: Pair with a warm beverage and a dusting of powdered sugar for a festive touch when serving after storage.

Expert Tips for Spiced Gingerbread Wreath Cake

  • Chill Tools: To achieve perfect whipped cream, chill your mixing bowl and whisk beforehand to prevent deflation and ensure a fluffier texture.
  • Oven Variations: Every oven is different; keep an eye on your cake while it bakes. If you’re using a flat pan instead of a Bundt pan, reduce baking time slightly to avoid overbaking.
  • Taste Adjustments: Feel free to customize your spices! The beauty of this Spiced Gingerbread Wreath Cake is in personalizing the flavor, so adjust spices like cinnamon and ginger to suit your palate.
  • Moisture Check: If using a gluten-free flour blend, adding a tablespoon of applesauce can help maintain moisture and tenderness in the cake.
  • Layering Flavors: For an even richer taste, consider substituting half of the granulated sugar with brown sugar. This adds depth and enhances that classic gingerbread flavor.

What to Serve with Spiced Gingerbread Wreath Cake?

The comforting aroma of this festive delight opens up a world of perfect pairings for a truly memorable holiday feast.

  • Creamy Mashed Potatoes: The buttery richness of mashed potatoes adds a savory contrast to the sweet spiced cake, balancing out the meal beautifully.
  • Warm Spiced Cider: A hot mug of spiced cider perfectly complements the gingerbread flavors, wrapping you in a cozy embrace with each sip.
  • Fresh Pear Salad: Crisp greens topped with roasted pears and a tangy vinaigrette offer a refreshing contrast, enhancing the cake’s warm spices.
  • Rich Eggnog: The creaminess of eggnog, whether spiked or not, makes a festive drink choice that harmonizes elegantly with the cake’s richness.
  • Roasted Brussels Sprouts: A side of caramelized Brussels sprouts brings earthiness and a slight bitterness that balances the cake’s sweetness and spices perfectly.
  • Gingerbread Cookies: Lean into the gingerbread theme with classic cookies; their crunchy texture adds a delightful contrast to the moist cake.
  • Chocolate Fondue: Dipping fruit in rich chocolate fondue alongside cake creates a playful dessert experience that will enchant your guests.
  • Vanilla Ice Cream: A scoop of vanilla ice cream offers a creamy coolness that elevates the gingerbread flavors and makes each bite heavenly.
  • Pumpkin Spice Latte: There’s nothing like curling up with a warm pumpkin spice latte that echoes the seasonal flavors of your cake, making the experience cozy and inviting.

Spiced Gingerbread Wreath Cake Recipe FAQs

What type of flour should I use for the Spiced Gingerbread Wreath Cake?
I recommend using all-purpose flour for this cake, as it provides the perfect structure. However, if you’re looking for a gluten-free option, you can substitute it with a 1:1 gluten-free flour blend. This works exceptionally well, ensuring that everyone can enjoy this festive treat!

How should I store any leftover cake?
To keep your Spiced Gingerbread Wreath Cake moist and flavorful, store it in an airtight container in the refrigerator for up to 3 days. If you frost the cake, it’s best to do so just before serving, as this helps maintain the texture of the frosting.

Can I freeze the Spiced Gingerbread Wreath Cake?
Absolutely! To freeze the cake, wrap it tightly in plastic wrap and then wrap it in aluminum foil or place it in a freezer-safe bag. This cake can be frozen for up to 3 months. When you’re ready to enjoy it, just thaw overnight in the refrigerator. For a delightful warm slice, reheat individual pieces in the microwave for about 10-15 seconds.

What should I do if the whipped cream deflates when I make the frosting?
Ah, that can happen! To prevent deflation, make sure to chill your mixing bowl and whisk beforehand. This keeps the cream cooler during the whipping process. I also suggest using heavy cream and whipping it to soft peaks—this should take about 3-5 minutes. If you notice that your whipped cream isn’t holding its shape, you can add a stabilizer, like gelatin or powdered sugar, to help maintain its texture.

Are there any dietary considerations for this recipe?
Yes! The Spiced Gingerbread Wreath Cake can easily be made suitable for various diets. For a dairy-free or vegan option, substitute the unsalted butter with vegetable oil or a dairy-free butter alternative, and use flax eggs in place of regular eggs. Make sure to read labels for any allergens if you’re serving this at a gathering, as molasses and various flours can sometimes contain hidden additives.

Can I use fresh ginger instead of ground ginger?
Definitely! Fresh ginger adds a vibrant bite, but keep in mind it may alter the cake’s texture slightly. If you choose to use fresh ginger, I suggest using about 1 tablespoon of finely grated fresh ginger for every teaspoon of ground ginger called for in the recipe. It can bring a delightful freshness to your Spiced Gingerbread Wreath Cake!

Spiced Gingerbread Wreath Cake

Irresistible Spiced Gingerbread Wreath Cake for Cozy Gatherings

Experience the warmth of the holidays with this Spiced Gingerbread Wreath Cake, a festive dessert that balances rich spices and sweetness.
Prep Time 20 minutes
Cook Time 40 minutes
Cooling Time 10 minutes
Total Time 1 hour 10 minutes
Servings: 12 slices
Course: Dessert
Cuisine: Holiday
Calories: 350

Ingredients
  

For the Cake
  • 3 cups all-purpose flour Can substitute with gluten-free flour blend for a gluten-free version.
  • 1 teaspoon baking soda No substitutions necessary.
  • 2 teaspoons ground cinnamon Other ground spices like nutmeg can be used for variation.
  • 1 teaspoon ground ginger Fresh ginger can be used, but may alter texture.
  • 1 teaspoon ground cloves Skip if preferred; adjust cinnamon to taste.
  • 1 teaspoon salt Essential for balance; do not omit.
  • 1 cup molasses Dark corn syrup or honey can be used as a substitute, but with less intensity.
  • 1 cup granulated sugar Can replace with brown sugar for a richer flavor.
  • 1/2 cup unsalted butter Vegetable oil can be a substitute for dairy-free options.
  • 2 eggs Flax eggs can be used for a vegan alternative.
For the Frosting
  • 2 cups whipped cream Chill bowl and whisk to prevent melting; use stabilizers if desired.
  • 1 cup powdered sugar Can be adjusted based on sweetness preference.
For Decoration
  • rosemary Use any festive herbs or spices according to preference.
  • star anise Use any festive herbs or spices according to preference.
  • cinnamon sticks Use any festive herbs or spices according to preference.

Equipment

  • Bundt pan
  • Mixing bowls
  • Hand mixer
  • Whisk

Method
 

Step-by-Step Instructions
  1. Preheat your oven to 350°F (175°C) and grease a Bundt pan.
  2. In a mixing bowl, whisk together the flour, baking soda, cinnamon, ginger, cloves, and salt until evenly mixed.
  3. In another bowl, cream together the butter and sugar until light and fluffy, then beat in the molasses and eggs.
  4. Gradually add the dry ingredients to your wet mixture, alternating with any additional liquid required.
  5. Pour the batter into the prepared Bundt pan and bake for 35-40 minutes until a toothpick comes out clean.
  6. Allow the cake to cool in the pan for about 10 minutes before inverting onto a wire rack.
  7. Whip the cream with powdered sugar until soft peaks form.
  8. Spread the whipped cream frosting over the cooled cake and decorate with rosemary, star anise, and cinnamon sticks.
  9. Dust with powdered sugar just before serving.

Nutrition

Serving: 1sliceCalories: 350kcalCarbohydrates: 50gProtein: 3gFat: 15gSaturated Fat: 9gPolyunsaturated Fat: 1gMonounsaturated Fat: 4gCholesterol: 45mgSodium: 150mgPotassium: 150mgFiber: 1gSugar: 25gVitamin A: 300IUCalcium: 30mgIron: 1.5mg

Notes

Chill mixing tools for better whipped cream texture. Adjust spices to personal preference.

Tried this recipe?

Let us know how it was!

Satisfying Rice Krispie Christmas Puds for Guilt-Free Joy

As I stand in my kitchen, a playful aroma of melting chocolate mingles with the crispness of holiday cheer, instantly transporting me back to childhood Christmases filled with laughter and sweet treats. These Slimming-Friendly Rice Krispie Christmas Puds are my go-to festive delight, marrying that nostalgic crunch with a modern, calorie-conscious twist. Perfect for anyone looking to indulge without the guilt, these little bites of joy are as fun to make as they are to share at gatherings. With their simple prep and visually charming presentation, they’re destined to be a hit on any holiday buffet. Ready to wow your guests and keep your resolutions intact? Let’s dive into this deliciously festive treat together!

Why Are These Puds So Irresistible?

Delightfully Guilt-Free: Enjoying festive treats doesn’t have to mean compromising your diet. These Rice Krispie Christmas Puds are a low-calorie indulgence that keeps your resolutions intact.

Fun and Easy to Make: With just a few simple ingredients, the process is a breeze, making them perfect for busy holiday prep.

Versatile Decorations: Customize these puds with your choice of festive toppings or sprinkles, creating a unique treat for every occasion.

Crowd-Pleaser: The delightful crunch paired with a creamy chocolate drizzle guarantees smiles at any gathering—just like those mini cheesecakes you love!

Childhood Nostalgia: Transport yourself back to sweet holiday memories while creating new ones with friends and family. It’s a fun, memory-rich cooking experience!

Rice Krispie Christmas Puds Ingredients

• Here’s what you’ll need to whip up these delightful treats!

For the Base

  • Coco Pops – Provides the crispy texture; use regular Rice Krispies for a less sweet option.
  • Mars Bars (fun size) – Adds sweetness and chocolate flavor; you can substitute with regular-sized Mars Bars if fun sizes are unavailable.
  • Reduced Fat Spread – Acts as a binder, keeping the mixture together without the extra calories.

For the Drizzle

  • White Chocolate – For melting and drizzling to create a decorative touch; any brand suitable for melting works well.

For the Decorations

  • Red Sugar Balls & Herb Leaves – These add a festive flair; feel free to swap for ready-made edible holly decorations for an easier option.

With these Rice Krispie Christmas Puds ingredients, you’ll be well on your way to creating a charming holiday treat that’s both fun and figure-friendly!

Step‑by‑Step Instructions for Rice Krispie Christmas Puds

Step 1: Prepare the Ingredients
Begin by cutting the Mars Bars into halves and placing them in a microwave-safe bowl with the reduced fat spread. This combination will create a rich, creamy base for your Rice Krispie Christmas Puds. Ensure everything is ready before moving on to the next step for a smooth cooking experience.

Step 2: Melt the Chocolate Mixture
Microwave the bowl in short bursts of 20-30 seconds, stirring frequently until the mixture is completely melted and smooth. This should take about 1-2 minutes total. Keep an eye on it to prevent burning; you want a silky consistency that easily blends with the Coco Pops.

Step 3: Combine with Coco Pops
Once the chocolate mixture is ready, remove it from the microwave and gently fold in the Coco Pops. With a spatula, ensure each piece is well-coated in the chocolate. This gives your Rice Krispie Christmas Puds that signature crunch and sweetness. Mix until evenly combined for the best flavor and texture.

Step 4: Shape the Puds
Take tablespoon-sized heaps of the mixture and place them onto a tray lined with baking paper. Use your hands or a scoop to ensure each heap is uniform in size—about a teaspoon will do. Refrigerate for approximately 15 minutes, allowing the mixture to set and firm up before shaping.

Step 5: Form into Balls
After chilling, remove the tray from the refrigerator. With your hands, carefully shape the firm Coco Pops and chocolate mixture into small balls, aiming for a smooth finish. This step is where the puds take on their delightful shape, making them perfect for festive sharing.

Step 6: Melt the White Chocolate
In a separate microwave-safe bowl, melt the white chocolate in 20-second intervals, stirring after each burst until completely smooth. This should take about 1-2 minutes. Once melted, this will serve as a lovely drizzle on your Rice Krispie Christmas Puds, enhancing both appearance and taste.

Step 7: Drizzle the Chocolate
Using a fork or a spoon, drizzle the melted white chocolate over each shaped ball, ensuring an even coating. Allow the chocolate to set slightly before decorating. This step not only adds a creamy richness to each pud but also creates a visually appealing finish for your festive treat.

Step 8: Add Final Decorations
While the chocolate is still slightly tacky, sprinkle red sugar balls and place herb leaves on top of the Rice Krispie Christmas Puds. This addition will bring a festive look to your treats. Once decorated, allow them to sit at room temperature until the chocolate hardens completely, making them ready for serving.

Make Ahead Options

These Slimming-Friendly Rice Krispie Christmas Puds are perfect for busy holiday planners! You can prepare the chocolate and Coco Pops mixture up to 24 hours in advance, refrigerating it after shaping into balls to maintain that delightful firmness. Simply follow the first five steps of the recipe, then store the shaped puds in an airtight container in the fridge. When you’re ready to serve, simply drizzle the melted white chocolate and add your festive decorations—a quick finishing touch that keeps them just as delicious and visually appealing. This way, you’ll have more time to enjoy the festivities while serving up a crowd-pleasing treat!

What to Serve with Rice Krispie Christmas Puds

As you gather around the festive table, complement these delightful treats with other goodies that elevate your holiday spread.

  • Mini Cheesecakes: Their creamy richness beautifully contrasts the crispy texture of the puds, creating a pleasing variety of sensations on the plate. These cheesecakes can offer a fruity twist that echoes the festive spirit.

  • Spiced Biscuits: The warm flavors of cinnamon and nutmeg will delight your guests and enhance the sweetness of the Rice Krispie Christmas Puds. The crunch of the biscuits provides a lovely contrast.

  • Fruit Salad: A fresh, juicy addition that brings brightness to your dessert spread. The natural sweetness helps balance out the richness of chocolate and enhances the overall festive experience.

  • Bedtime Cocoa: A warm, comforting cup of cocoa pairs wonderfully! Its rich flavor coats the palate, making the lighter puds taste even more delightful.

  • Chocolate Dipped Strawberries: These add a touch of elegance and an extra chocolatey bite that festively harmonizes with the puds. Plus, the freshness of strawberries offers a burst of flavor that refreshes the palate.

  • Sparkling Cider: For a non-alcoholic beverage that adds festivity, this bubbly delight complements the sweetness of the treats without overpowering it. Enjoy each sip as much as the puds!

Expert Tips for Rice Krispie Christmas Puds

  • Chill Time Matters: Allow the mixture to chill well before shaping to prevent stickiness. A firm texture helps you make perfect little balls.

  • Sticky Solutions: If the mixture remains too sticky, chill it longer or use mini pastry cases to easily shape your Rice Krispie Christmas Puds.

  • Allergen Awareness: Always double-check ingredient labels for allergens, especially if serving to guests. Safety is key to holiday cheer!

  • Storing Wisely: Keep your treats in an airtight container for up to 3-4 days, but avoid freezing as this can ruin their delightful texture.

  • Experiment with Flavors: Feel free to experiment! Mix in nuts or dried fruits for extra flavor or switch to dark chocolate for a richer taste twist.

Storage Tips for Rice Krispie Christmas Puds

Airtight Container: Store your Rice Krispie Christmas Puds in an airtight container to keep them fresh for up to 3-4 days. This will maintain their delightful crunch and flavor.

Refrigeration: Keeping them in the fridge helps preserve their texture, especially if the weather’s warm. Just ensure the lid of the container fits snugly!

Avoid Freezing: These treats are not suitable for freezing, as the texture may become compromised once thawed.

Serving Tips: When ready to serve, you can let them sit at room temperature for a few minutes to soften slightly for the best eating experience.

Rice Krispie Christmas Puds Variations

Feel free to sprinkle your creativity and give these delightful treats a personal touch!

  • Nutty Burst: Add chopped nuts like almonds or hazelnuts to the chocolate mixture for an irresistible crunch and a protein boost. The added texture pairs beautifully with the sweetness!

  • Fruity Twist: Mix in some dried cranberries or raisins for a fruity flavor that complements the chocolate. This brings a touch of tartness that balances perfectly with the rich sweetness.

  • Dairy-Free Delight: Substitute the white chocolate with a dairy-free chocolate alternative to create a vegan-friendly version of these festive puds. No one will miss the dairy with this swap!

  • Flavor Variations: Use flavored chocolate, such as mint or orange-infused, for a unique twist that adds an unexpected zing to your puds. It’s a fun way to surprise your taste buds this holiday season!

  • Sprinkled Joy: Customize the decorations with your choice of sprinkles or edible glitter to match a theme or occasion, ensuring that each pud is a festive masterpiece on your holiday table!

  • Spicy Kick: Incorporate a pinch of cinnamon or nutmeg for a warm spice note that echoes holiday flavors. This simple addition can elevate your Rice Krispie Christmas Puds to the next level!

  • Chocolate Lovers: Top with a drizzle of dark chocolate instead of white for a rich and decadent finish. This adds depth of flavor while keeping things festive and indulgent.

  • Coconut Magic: Roll the balls in shredded coconut after drizzling for a tropical twist. The coconut adds a lovely texture and visual appeal to these holiday treats.

Enhance your Rice Krispie Christmas Puds with these delightful variations. For even more festive inspirations, consider whipping up some Street Corn Chicken Rice Bowls or included sweet bites like mini cheesecakes to create a lovely dessert spread for your celebrations!

Rice Krispie Christmas Puds Recipe FAQs

How do I choose the right ingredients for these puds?
Absolutely! When selecting your Rice Krispie Christmas Puds ingredients, I recommend looking for fresh Mars Bars without any dark spots or signs of damage. For Coco Pops, check for a crisp texture and avoid any boxes with crushed pieces. The reduced-fat spread should also be fresh—look for a smooth consistency without separation.

What’s the best way to store these puds?
Very! To maintain freshness, keep your Rice Krispie Christmas Puds in an airtight container in the refrigerator. They’ll stay delightful for about 3 to 4 days. Make sure the container is sealed properly to prevent any moisture from spoiling them. If you’re serving them later, take them out and allow them to sit at room temperature for about 10 minutes for the best texture.

Can I freeze Rice Krispie Christmas Puds?
No, it’s best to avoid freezing these treats. Freezing can alter the crispy texture you love and cause them to become chewy once thawed. Instead, keep them stored in the fridge, where they can maintain that perfect crunch for a few days.

What if my mixture is too sticky to shape?
Don’t worry! If you find the mixture is too sticky to handle, simply place it back in the refrigerator to chill for an additional 15-20 minutes. Alternatively, you can also spoon the mixture into mini pastry cases, which will help you create perfectly shaped puds without the stickiness.

Are these puds safe for people with allergies?
Very! However, it’s important to double-check the ingredient labels for any potential allergens, especially chocolate or the reduced fat spread. If you’re making these for guests, I often recommend using allergen-free alternatives to ensure everyone can indulge in the festive fun!

How can I customize these Christmas Puds?
Absolutely!Feel free to enhance your Rice Krispie Christmas Puds with different decorations or mix-ins. Consider adding mini marshmallows or swapping in nuts or dried fruit for added texture. You could even drizzle with milk or dark chocolate for a richer flavor—get creative and have fun with it!

Rice Krispie Christmas Puds

Satisfying Rice Krispie Christmas Puds for Guilt-Free Joy

Enjoy these Rice Krispie Christmas Puds, a low-calorie festive treat that combines nostalgia with modern sweetness.
Prep Time 15 minutes
Cook Time 5 minutes
Chilling Time 15 minutes
Total Time 35 minutes
Servings: 12 puds
Course: Dessert
Cuisine: American
Calories: 120

Ingredients
  

For the Base
  • 3 cups Coco Pops or regular Rice Krispies for a less sweet option
  • 5 fun size Mars Bars can substitute with regular-sized Mars Bars
  • 100 grams Reduced Fat Spread acts as a binder
For the Drizzle
  • 100 grams White Chocolate any brand suitable for melting
For the Decorations
  • 50 grams Red Sugar Balls for a festive flair
  • Herb Leaves or ready-made edible holly decorations

Equipment

  • Microwave-safe bowl
  • Spatula
  • tray
  • baking paper
  • Fork

Method
 

Step-by-Step Instructions
  1. Begin by cutting the Mars Bars into halves and placing them in a microwave-safe bowl with the reduced fat spread.
  2. Microwave the bowl in short bursts of 20-30 seconds, stirring frequently until the mixture is completely melted and smooth.
  3. Once the chocolate mixture is ready, remove it from the microwave and gently fold in the Coco Pops.
  4. Take tablespoon-sized heaps of the mixture and place them onto a tray lined with baking paper. Refrigerate for approximately 15 minutes.
  5. After chilling, carefully shape the firm mixture into small balls.
  6. In a separate bowl, melt the white chocolate in 20-second intervals, stirring after each burst until smooth.
  7. Drizzle the melted white chocolate over each shaped ball.
  8. While the chocolate is still slightly tacky, sprinkle red sugar balls and place herb leaves on top.

Nutrition

Serving: 1pudCalories: 120kcalCarbohydrates: 15gProtein: 1gFat: 7gSaturated Fat: 3gCholesterol: 5mgSodium: 50mgPotassium: 30mgSugar: 8gCalcium: 1mgIron: 1mg

Notes

Store your Rice Krispie Christmas Puds in an airtight container for up to 3-4 days. Avoid freezing to maintain texture.

Tried this recipe?

Let us know how it was!