Creamy Charcuterie Soup: Your New Favorite Cozy Comfort Dish

As I stepped into the kitchen on a chilly evening, the rich aroma of sautéed onions and garlic transported me to a cozy European café. That’s the magic of creamy charcuterie soup—a meal that transforms ordinary moments into something special. With its velvety texture and customizable ingredients, this comfort food isn’t just warming your belly; it’s a gateway to creativity. Whether you’re hosting an elegant dinner or simply seeking solace in a bowl after a long day, this creamy charcuterie soup is your go-to solution. Plus, it’s versatile—swap in your favorite cured meats or make it vegetarian with hearty veggies, ensuring everyone at your table will leave satisfied. Ready to dive into the soothing world of this delightful soup? Let’s get cooking!

Why is Creamy Charcuterie Soup a Must-Try?

Comforting Warmth: This creamy charcuterie soup is the ultimate cozy dish, perfect for chilly evenings and heartwarming gatherings.

Endless Customization: With options for gluten-free and vegetarian versions, you can cater to any dietary preference without sacrificing flavor.

Rich, Savory Indulgence: Each spoonful bursts with the decadent flavors of cured meats and rich cheeses, making it a standout among comfort foods.

Quick Preparation: Whip it up in under 30 minutes, allowing you to enjoy a luscious homemade meal without spending hours in the kitchen.

Deliciously Satisfying: Pair it with crusty bread for dipping and watch it become a family favorite; it’s sure to impress even the pickiest eaters!

Whether you’re in the mood for something comforting after a long day or planning an elegant dinner, this creamy charcuterie soup offers a delightful culinary escape. If you’re also looking for some other cozy options, check out my recipe for Old Fashioned Vegetable Beef Soup or indulge in a comforting bowl of Chicken Fettuccine Alfredo.

Creamy Charcuterie Soup Ingredients

  • For the Base
    Chicken or Vegetable Broth – The essential foundation; choose chicken for richness or vegetable for a lighter version.
    Heavy Cream – Provides a luxurious texture; consider plant-based cream for a lighter take.

  • For the Flavor
    Charcuterie (salami, prosciutto, pepperoni) – The star of your soup, allowing for customization with your preferred cured meats.
    Cheeses (smoked Gouda, Gruyère) – Add richness and depth; Gouda imparts a smoky flavor while Gruyère offers nuttiness.
    Onion – Essential for sweetness; it builds the aromatic base of your soup.
    Garlic – Elevates overall flavor; use fresh minced or garlic powder for convenience.
    Olive Oil – For easily sautéing aromatics; swap with butter if desired.

  • For the Seasoning
    Thyme (fresh/dried) – Imparts earthiness; feel free to enhance with other herbs you enjoy.
    Smoked Paprika – Offers slight heat and promotes a smoky flavor; adjust to your taste preference.
    Salt and Pepper – Essential for bringing all the flavors together; adjust according to your palate.

  • For Garnishing
    Fresh Parsley – This brightens up your dish with color and freshness; it’s the perfect topping for your creamy charcuterie soup.

Gather these ingredients, and you’re all set to create this delicious comfort food that will warm both your heart and home!

Step‑by‑Step Instructions for Creamy Charcuterie Soup

Step 1: Sauté Aromatics
In a large pot, heat 2 tablespoons of olive oil over medium heat. Add 1 chopped onion and sauté until it’s translucent, about 5 minutes. Then, add 2 minced garlic cloves and cook for an additional 1-2 minutes until fragrant, stirring frequently to prevent burning. This creates a flavorful base for your creamy charcuterie soup.

Step 2: Add Broth
Pour in 4 cups of chicken or vegetable broth into the pot and bring the mixture to a gentle simmer, adjusting the heat as necessary. You should see small bubbles forming on the surface, indicating that the broth is warming up properly. This will enhance the richness and depth of your creamy charcuterie soup.

Step 3: Incorporate Charcuterie
Add 1 cup of chopped charcuterie—like salami, prosciutto, or pepperoni—to the simmering broth. Allow the mixture to simmer for 10 minutes, stirring occasionally. This step allows the flavors of the cured meats to infuse into the broth, creating a delectable foundation for the creaminess to come.

Step 4: Stir in Cream
Reduce the heat to low and slowly pour in 1 cup of heavy cream, stirring gently to combine. Allow the cream to melt into the broth’s warmth, blending smoothly without boiling. This step is essential for achieving the velvety texture of your creamy charcuterie soup, so take your time to mix it well.

Step 5: Melt in Cheese
Sprinkle in 1 cup of shredded smoked Gouda and Gruyère cheeses, continually stirring as they melt into the soup. Keep the heat low to prevent boiling and ensure a rich, creamy blend. The cheeses will add depth and a luxurious mouthfeel to your creamy charcuterie soup, making it irresistible.

Step 6: Season the Soup
Add 1 teaspoon of dried thyme, 1 teaspoon of smoked paprika, and season with salt and pepper to taste. Let the soup simmer for an additional 5 minutes on low heat, allowing the flavors to meld together beautifully. This will elevate the overall taste, ensuring each spoonful of your creamy charcuterie soup is delightful.

Step 7: Serve
Ladle the creamy charcuterie soup into bowls, garnishing with freshly chopped parsley for a burst of color and freshness. Serve immediately alongside crusty bread for dipping. The presentation will be as inviting as the comforting flavors, making this soup a perfect centerpiece for any meal.

How to Store and Freeze Creamy Charcuterie Soup

Fridge: Store leftovers in an airtight container in the refrigerator for up to 3 days. Ensure the soup cools to room temperature before sealing to maintain freshness.

Freezer: For longer storage, freeze the creamy charcuterie soup in freezer-safe containers for up to 3 months. Leave some space for expansion, as the soup will thicken upon freezing.

Reheating: To reheat, thaw in the refrigerator overnight and warm gently on the stove over low heat. Stir frequently to bring back the creamy texture without curdling.

Portion Control: Consider freezing individual portions for quick meals. This way, you can enjoy a comforting bowl of creamy charcuterie soup whenever you crave it!

What to Serve with Creamy Charcuterie Soup

Cozy up with this velvety soup that invites you to create the perfect comforting meal.

  • Crusty Artisan Bread: The ideal companion for your soup, perfect for dipping into the creamy goodness. Its chewy texture balances the richness beautifully.
  • Garlic Breadsticks: Hot and crispy, these flavorful breadsticks add a delightful crunch and garlic aroma that pairs wonderfully with the smooth soup.
  • Mixed Green Salad: A refreshing salad with vibrant greens and a tangy dressing lightens the meal, providing a crisp contrast to the creamy soup.
  • Roasted Vegetables: Seasonal roasted vegetables bring a hint of sweetness and texture; their smoky char enhances the soup’s flavors.
  • Cheese Platter: Elevate the experience with a selection of cheeses—think brie, blue cheese, or aged cheddar—to complement the charcuterie notes.
  • Pinot Noir: This medium-bodied red wine with its fruity notes pairs well with the savory elements in the soup for an elevated dining experience.
  • Lemon Sorbet: For dessert, a refreshing lemon sorbet cleanses the palate after the rich soup, offering a bright burst of flavor that’s invigorating.
  • Garlic Parmesan Brussels Sprouts: Roasted until crispy, these savory bites add an earthy element that matches the soup’s sumptuousness.

Each of these options not only pairs beautifully with creamy charcuterie soup but also enhances the overall dining experience through contrasting textures and flavors.

Make Ahead Options

Preparing your creamy charcuterie soup in advance is a game-changer for busy weeknights! You can sauté the aromatics (onions and garlic) and refrigerate them in an airtight container up to 3 days ahead of time. Additionally, you can chop the charcuterie and cheese, storing them separately to preserve their freshness, making them ready to go when you’re ready to cook. When you’re set to enjoy the soup, simply heat the sautéed mixture, add the broth, and stir in the cream and cheeses until melted and smooth just before serving. This way, you’ll enjoy a delicious, homemade creamy charcuterie soup with minimal effort, perfect for cozy evenings!

Tips for the Best Creamy Charcuterie Soup

  • Perfect Temperature: Keep the heat low after adding cream to avoid curdling and maintain a luscious texture in your creamy charcuterie soup.

  • Charcuterie Variety: Experiment with different cured meats for diverse flavors; pairing a mix can elevate your soup’s depth.

  • Season Generously: Always taste and adjust seasonings at the end; remember that charcuterie can be salty, so season judiciously.

  • Cheese Alternatives: If Gouda or Gruyère isn’t available, feel free to use melty cheeses like mozzarella or fontina for a different twist.

  • Garnish Joy: Don’t skip the fresh parsley; it adds brightness and a pop of color, making your creamy charcuterie soup visually appealing!

Variations & Substitutions for Creamy Charcuterie Soup

Feel free to mix and match ingredients to create the perfect version of this delightful soup just for you!

  • Dairy-Free: Swap heavy cream for coconut cream or a nut-based cream to achieve a creamy texture without dairy.
    Coconut cream adds a subtle sweetness while complementing the soup’s richness beautifully, perfect for those avoiding dairy.

  • Veggie Lovers: Replace the charcuterie with a medley of hearty vegetables like mushrooms, zucchini, and bell peppers for a vegetarian delight.
    The combination of veggies not only brings a new flavor profile but also a vibrant color that brightens your bowl.

  • Spicy Kick: Add diced jalapeños or a dash of red pepper flakes to the soup for a delightful heat.
    This touch of spice enhances the savory profile, making each spoonful a lively experience for those who enjoy a little heat!

  • Gluten-Free Option: Ensure your broth and any additional ingredients are certified gluten-free for a delicious option that everyone can enjoy.
    This way, you can indulge without any worries about gluten sneaking in—comfort for all!

  • Herb Infusion: Experiment with fresh herbs like basil or oregano in place of thyme for a unique flavor twist.
    Each herb brings its own personality to the dish, creating variations that can transport you around the world with every spoonful.

  • Cheese Swap: Use a variety of melty cheeses such as fontina or even cheddar for a different flavor experience.
    Each cheese brings its own character to the creamy charcuterie soup, providing delightful variations tailored to preferences!

  • Smoky Flavor Boost: Add a hint of liquid smoke for an intensified smoky flavor that complements the charcuterie beautifully.
    This ingredient can take your creamy charcuterie soup to new heights, making it irresistibly rich and profound.

If you’re looking for more delicious options, try my Coconut Curry Soup with Dumplings or a comforting bowl of Hearty Potato Kielbasa Soup.

Creamy Charcuterie Soup Recipe FAQs

What is the best way to select the right charcuterie for this soup?
Absolutely! When choosing charcuterie, opt for high-quality cured meats that offer rich flavors—salami, prosciutto, and pepperoni are all great options. Look for meats that are firm and have an appealing sheen. If you’re using packaged options, check for freshness dates, and avoid any with dark spots or a slimy texture.

How long can I store leftover creamy charcuterie soup?
Store your leftover creamy charcuterie soup in an airtight container in the refrigerator for up to 3 days. Make sure the soup has cooled to room temperature before sealing it. When you’re ready to enjoy it again, simply reheat gently on the stove over low heat to keep that luxurious creaminess intact.

Can I freeze creamy charcuterie soup?
Yes, you can! To freeze creamy charcuterie soup, pour it into freezer-safe containers, leaving some space at the top for expansion (about an inch). It can be safely stored in the freezer for up to 3 months. When you’re ready to enjoy it, thaw the soup overnight in the refrigerator and reheat it slowly on the stove, stirring frequently to bring back that velvety texture.

How can I adjust the seasoning if my soup turns out too salty?
Very! If you find your soup is too salty, one effective way to balance it is to add a splash of cream or a small amount of additional broth to dilute the flavors. You can also incorporate some cooked diced potatoes or a tablespoon of sugar to help reduce the salty taste. Just remember to stir and taste as you go, adjusting gradually until it’s just right!

Are there any dietary concerns with creamy charcuterie soup?
Definitely! This recipe can be made gluten-free by ensuring your broth and charcuterie are certified gluten-free. For vegetarian options, swap out the charcuterie for hearty vegetables, such as mushrooms or smoked tofu, which will provide a substantial texture. Always check ingredient labels for potential allergens, especially concerning creams and smoked meats, as some may contain various additives.

What should I do if my soup is too thick?
If your creamy charcuterie soup turns out thicker than desired, simply add warm broth or water in small increments while stirring until you reach your desired consistency. Be sure to heat it gently to maintain the creamy texture! Enjoy crafting your perfect bowl!

Creamy Charcuterie Soup

Creamy Charcuterie Soup: Your New Favorite Cozy Comfort Dish

Creamy charcuterie soup is a customizable, comforting dish perfect for chilly evenings and gatherings.
Prep Time 15 minutes
Cook Time 15 minutes
Total Time 30 minutes
Servings: 4 bowls
Course: Dinner
Cuisine: European
Calories: 450

Ingredients
  

For the Base
  • 4 cups chicken or vegetable broth Choose chicken for richness or vegetable for a lighter version.
  • 1 cup heavy cream Consider plant-based cream for a lighter take.
For the Flavor
  • 1 cup charcuterie (salami, prosciutto, pepperoni) Customize with your preferred cured meats.
  • 1 cup cheeses (smoked Gouda, Gruyère) Gouda adds a smoky flavor, Gruyère offers nuttiness.
  • 1 onion Chopped, essential for sweetness.
  • 2 cloves garlic Minced, elevates overall flavor.
  • 2 tablespoons olive oil For sautéing.
For the Seasoning
  • 1 teaspoon thyme (fresh/dried) Imparts earthiness.
  • 1 teaspoon smoked paprika Adjust to taste.
  • salt To taste.
  • pepper To taste.
For Garnishing
  • 1 tablespoon fresh parsley Chopped, for garnishing.

Equipment

  • large pot

Method
 

Step-by-Step Instructions
  1. In a large pot, heat olive oil over medium heat. Add chopped onion and sauté until translucent, about 5 minutes. Then, add minced garlic and cook for an additional 1-2 minutes.
  2. Pour in chicken or vegetable broth and bring to a gentle simmer.
  3. Add chopped charcuterie to the simmering broth and allow it to simmer for 10 minutes, stirring occasionally.
  4. Reduce heat to low and slowly pour in heavy cream, stirring gently to combine.
  5. Sprinkle in shredded smoked Gouda and Gruyère cheeses, continually stirring as they melt into the soup.
  6. Add dried thyme, smoked paprika, salt, and pepper to taste. Let the soup simmer for an additional 5 minutes.
  7. Ladle the soup into bowls, garnishing with freshly chopped parsley. Serve immediately with crusty bread.


Nutrition

Serving: 1bowlCalories: 450kcalCarbohydrates: 30gProtein: 20gFat: 30gSaturated Fat: 15gPolyunsaturated Fat: 2gMonounsaturated Fat: 8gCholesterol: 80mgSodium: 700mgPotassium: 500mgFiber: 2gSugar: 3gVitamin A: 500IUVitamin C: 5mgCalcium: 200mgIron: 2mg

Notes

Keep the heat low after adding cream to avoid curdling for a luscious texture. Experiment with different cured meats and adjust seasonings to taste.

Tried this recipe?

Let us know how it was!

Irresistibly Creamy Spicy Coconut Curry Ramen You’ll Love

A comforting aroma filled my kitchen as the spicy notes of Thai red curry paste mingled with creamy coconut milk, instantly transporting me to a bustling street market in Bangkok. This Ultra-Creamy Spicy Coconut Curry Ramen is a lifesaver for those hectic weeknights when all you crave is a satisfying meal without hours of prep. Ready in just 20 minutes, it combines rich flavors with nourishing ingredients, allowing for endless customization to suit vegetarian diets, dietary restrictions, or personal taste. Featuring essential ingredients like umami-packed shiitake mushrooms and a touch of lime for brightness, this recipe brings warmth and comfort in every slurp. Curious to learn more about how to whip up this delicious bowl at home? Let’s dive in!

Why You’ll Love This Ramen Recipe

Quick and Easy: This dish is ready in just 20 minutes, making it the perfect solution for busy weeknights.

Rich, Creamy Flavor: Thanks to the unsweetened coconut milk and spicy Thai red curry paste, every spoonful is a delightful experience.

Customizable Options: With possibilities like substituting shiitake mushrooms for tofu or adding extra veggies, you can tailor this meal to fit your preferences or dietary needs.

Hearty and Filling: The combination of protein-rich boiled eggs and nourishing noodles keeps you satisfied and cozy.

Crowd-Pleaser Appeal: Whether serving friends or family, this ramen is bound to impress with its vibrant flavors and enticing aroma—perfect alongside a refreshing Pineapple Coconut Mojito to elevate your dinner experience!

Spicy Coconut Curry Ramen Ingredients

Indulge in the rich and creamy flavors of your soon-to-be favorite ramen dish!

For the Broth

  • Toasted Sesame Oil – Adds nutty flavor and depth; you can use any neutral oil if needed.
  • Garlic – Enhances flavor complexity; opt for fresh garlic for the best results.
  • Fresh Ginger – Provides warmth and essential zing; don’t skip it for that perfect balance.
  • Chicken Broth (or Vegetable) – Forms the flavorful base; low-sodium options are great for controlling salt.
  • Ground Turmeric – Adds color and subtle earthiness; omit if you don’t have it.
  • Brown Sugar – Balances the spice flavors; feel free to substitute with honey or agave syrup.
  • Low Sodium Soy Sauce – Imparts saltiness and umami; use tamari or coconut aminos for gluten-free.
  • Fish Sauce – Deepens flavor; omit for vegetarian diets and increase soy sauce for saltiness.
  • Sambal Oelek – Infuses heat; adjust according to your taste preferences.
  • Thai Red Curry Paste – The star flavor component; tailor the heat to your liking.
  • Unsweetened Coconut Milk (Full Fat) – Provides that ultra-creamy richness; essential for a satisfying broth.
  • Lime Juice – Adds brightness; use fresh lime for the best flavor.

For the Noodles and Toppings

  • Instant Ramen Noodles – Quick to cook and the base of your dish; consider cooking separately to prevent sogginess.
  • Shiitake Mushrooms – Bring umami and texture; substitute with sautéed eggplant or firm tofu for a vegetarian option.
  • Chili Oil, Sesame Seeds, Chopped Chives – Perfect for garnishing; optional but highly recommended for added flavor.
  • Boiled Eggs (7 minutes) – Add protein and richness; these can be left out for a vegan version.

Now that you have all the delicious ingredients ready, let’s explore how to bring this Spicy Coconut Curry Ramen to life!

Step‑by‑Step Instructions for Spicy Coconut Curry Ramen

Step 1: Prepare Ingredients
Start by grating 2 cloves of garlic and 1 thumb-sized piece of fresh ginger. Tear 6 ounces of shiitake mushrooms into bite-sized pieces, readying them for that umami magic. Gather all your ingredients and tools, including a large pot and a stirring spoon, to ensure a smooth cooking process.

Step 2: Sauté Shiitakes
In a large pot, heat 1 tablespoon of toasted sesame oil over medium heat. Once the oil is shimmering, add the torn shiitake mushrooms and sauté until they are browned and crispy, about 4–5 minutes. Remove the mushrooms from the pot and set them aside; their savory goodness will be a lovely topping for your Spicy Coconut Curry Ramen.

Step 3: Cook Aromatics
Reduce the heat to medium-low and add another tablespoon of sesame oil to the pot. Then, toss in the grated garlic and ginger, stirring them for about 1 minute until they become fragrant. Keep an eye on them; you want them to soften but not burn, as this will form the aromatic base of your creamy broth.

Step 4: Deglaze Pot
Carefully pour in 4 cups of chicken broth (or vegetable broth for a vegetarian option) to deglaze the pot, scraping up any flavorful bits stuck to the bottom. Increase the heat to bring the mixture to a rolling boil, which should take about 3 minutes. Watch as the lively bubble emerges, setting the stage for your rich broth.

Step 5: Mix Broth Ingredients
Once boiling, stir in 1 teaspoon of ground turmeric, 1 tablespoon of brown sugar, 2 tablespoons of low-sodium soy sauce, 1 tablespoon of fish sauce, 2 tablespoons of Thai red curry paste, 1 tablespoon of sambal oelek, 1 can (14 ounces) of coconut milk, and the juice of 1 lime. Mix everything together, creating a beautifully vibrant broth that smells just heavenly!

Step 6: Cook Ramen Noodles
When the broth is bubbling, add your instant ramen noodles directly into the pot. Cook for about 2–3 minutes until the noodles are tender, stirring occasionally to prevent clumping. Once done, the noodles should absorb some broth, adding to the creamy texture of your Spicy Coconut Curry Ramen.

Step 7: Serve and Garnish
Ladle your delicious Spicy Coconut Curry Ramen into bowls, making sure to distribute those tender noodles and flavorful broth evenly. Top each bowl with the reserved sautéed shiitakes, a drizzle of chili oil, a sprinkle of sesame seeds, chopped chives, and sliced boiled eggs if desired. Your masterpiece is ready to be devoured!

Spicy Coconut Curry Ramen Variations

Feel free to get creative with this recipe! The possibilities are endless, allowing you to personalize your ramen experience.

  • Dairy-Free: Use coconut milk exclusively for creaminess, and skip any dairy-based toppings for a completely vegan dish.
  • Protein Boost: Swap shiitake mushrooms for chicken, shrimp, or chickpeas for a heartier meal that adds extra protein.
  • Noodle Alternatives: Experiment with udon or rice noodles instead of instant ramen for a different texture that still holds the rich broth.

You can even prepare this with zoodles (zucchini noodles) for a lighter, gluten-free option that feels indulgent but is nutritious too!

  • Veggie-Packed: Add fresh spinach, bell peppers, or bok choy when making the broth to infuse vibrant color and additional nutrients.
  • Spicy Kick: Increase the amount of sambal oelek or add fresh Thai chilies to ramp up the heat for those who love a fiery kick.

For an even richer flavor, consider adding a splash of soy sauce or fish sauce, which enhances the umami profile!

  • Fresh Herbs: Sprinkle fresh cilantro or basil before serving for an aromatic finish that brightens the dish and balances the creaminess of the broth.

Looking to complement your meal with some refreshing drinks? This ramen pairs perfectly with a delicious Pineapple Coconut Mojito or even a delightful dessert like Mango Coconut Pudding to round out your evening!

What to Serve with Spicy Coconut Curry Ramen

A bowl of steaming ramen offers a world of flavors and textures, but a perfect meal is all about those delightful pairings!

  • Crispy Spring Rolls: These crunchy bites filled with fresh veggies provide a satisfying contrast to the creamy broth and are great for dipping.

  • Thai Cucumber Salad: Light and refreshing, this salad brings a cool crunch and tartness that balances the spicy warmth of the ramen perfectly.

  • Edamame with Sea Salt: Nutty and tender, these little green pods are not only fun to eat but also add a protein boost that complements the ramen’s heartiness.

  • Mango Sticky Rice: For dessert, indulge in this sweet and creamy dish, which harmonizes beautifully with the spicy flavors of your ramen, leaving you with a sweet ending.

  • Chili-Lime Shrimp Skewers: Juicy and zesty, these skewers add a punch of flavor and a hint of smokiness that meshes well with the ramen’s richness.

  • Jasmine Rice: Simple and fragrant, a side of jasmine rice can soak up leftover broth and create a lovely comfort food experience.

  • Thai Iced Tea: This creamy, sweet beverage helps to cool down the spicy notes of the ramen while providing a delightful finish to your meal.

  • Coconut Macaroons: These chewy delights echo the coconut flavors in your ramen and offer a satisfying sweet treat after the spicy adventure.

  • Pineapple Coconut Mojito: This refreshing cocktail combines tropical flavors, creating a perfect balance of sweetness and flavor that pairs wonderfully with the dish.

Storage Tips for Spicy Coconut Curry Ramen

Fridge: Store leftovers in an airtight container for up to 4 days. Keep the ramen noodles separate from the broth to prevent sogginess until ready to enjoy.

Freezer: You can freeze the broth for up to 3 months. Just make sure to let it cool before transferring it to freezer-safe containers. Noodles should be cooked fresh for best texture.

Reheating: Reheat the broth on the stove or in the microwave until hot. Cook fresh ramen noodles separately, then combine with the reheated broth for a delightful meal.

Airtight Storage: Use airtight containers to maintain freshness for your Spicy Coconut Curry Ramen, preserving all those vibrant flavors for your next meal!

Expert Tips for Spicy Coconut Curry Ramen

  • Taste as You Go: Always sample the broth during cooking to adjust seasonings, ensuring a balance of flavors in your Spicy Coconut Curry Ramen.

  • Avoid Mushy Noodles: If you’re not serving immediately, cook the ramen noodles separately. This will help maintain their texture when you serve.

  • Customize Wisely: Feel free to swap shiitake mushrooms for your favorite proteins or veggies, tailoring your Spicy Coconut Curry Ramen to your personal taste.

  • Mind the Heat: Adjust the amount of sambal oelek and Thai red curry paste based on your spice tolerance. Start low and increase to find your perfect balance.

  • Fresh Is Best: Use fresh garlic and ginger for the most aromatic and delicious broth. Dried alternatives simply can’t replicate that vibrant flavor.

Make Ahead Options

These Spicy Coconut Curry Ramen are perfect for meal prep enthusiasts! You can prepare the broth up to 3 days in advance, storing it in an airtight container in the fridge to maintain its vibrant flavors. Simply sauté the shiitake mushrooms and prepare the aromatics, then combine the broth ingredients and let them chill. When you’re ready to enjoy your ramen, just reheat the broth, cook the instant noodles separately to avoid sogginess, and then stir everything together. For an added touch of freshness, reserve garnishes like chili oil and chives until serving to keep your dish as delicious as the day you made it!

Spicy Coconut Curry Ramen Recipe FAQs

What type of shiitake mushrooms should I use for this recipe?
I recommend using fresh shiitake mushrooms as they provide great umami flavor and texture. Look for firm mushrooms that are free from dark spots or excessive moisture. If fresh shiitakes aren’t available, you can substitute sautéed eggplant or firm tofu for a vegetarian option.

How should I store leftover Spicy Coconut Curry Ramen?
Store leftovers in an airtight container in the fridge for up to 4 days. It’s important to keep the ramen noodles separate from the broth to prevent them from becoming soggy. Simply combine them when you’re ready to reheat!

Can I freeze the broth of my ramen?
Absolutely! You can freeze the broth for up to 3 months. Just let it cool completely before transferring it to freezer-safe containers. Note that fresh ramen noodles should be cooked anew for the best texture when you’re ready to enjoy your meal.

What if my broth is too salty?
If you find your broth too salty, a splash of lime juice can help balance the flavors, adding brightness and acidity. Alternatively, you can add more coconut milk to dilute the saltiness while enhancing the creaminess of the broth.

Are there any dietary considerations for this recipe?
Yes! If you’re looking for a vegetarian option, simply omit the fish sauce and use vegetable broth. For gluten-free needs, opt for tamari or coconut aminos instead of soy sauce. Always check ingredient labels if you have allergies, especially for items like fish sauce and tofu.

Spicy Coconut Curry Ramen

Irresistibly Creamy Spicy Coconut Curry Ramen You'll Love

This Spicy Coconut Curry Ramen brings rich flavors and creamy comfort in just 20 minutes.
Prep Time 10 minutes
Cook Time 10 minutes
Total Time 20 minutes
Servings: 4 bowls
Course: Dinner
Cuisine: Thai
Calories: 450

Ingredients
  

For the Broth
  • 1 tablespoon Toasted Sesame Oil Adds nutty flavor and depth; you can use any neutral oil if needed.
  • 2 cloves Garlic Enhances flavor complexity; opt for fresh garlic for the best results.
  • 1 thumb-sized piece Fresh Ginger Provides warmth and essential zing.
  • 4 cups Chicken Broth (or Vegetable) Forms the flavorful base; low-sodium options are great.
  • 1 teaspoon Ground Turmeric Adds color and subtle earthiness; omit if you don't have it.
  • 1 tablespoon Brown Sugar Balances the spice flavors; feel free to substitute with honey or agave syrup.
  • 2 tablespoons Low Sodium Soy Sauce Imparts saltiness and umami.
  • 1 tablespoon Fish Sauce Deepens flavor; omit for vegetarian diets.
  • 1 tablespoon Sambal Oelek Infuses heat; adjust according to your taste.
  • 2 tablespoons Thai Red Curry Paste The star flavor component; tailor the heat to your liking.
  • 14 ounces Unsweetened Coconut Milk (Full Fat) Provides that ultra-creamy richness.
  • 1 tablespoon Lime Juice Adds brightness; use fresh lime for best flavor.
For the Noodles and Toppings
  • 2 packages Instant Ramen Noodles Quick to cook and the base of your dish.
  • 6 ounces Shiitake Mushrooms Bring umami and texture; substitute with sautéed eggplant or firm tofu.
  • 1 tablespoon Chili Oil Perfect for garnishing; optional.
  • 1 tablespoon Sesame Seeds Perfect for garnishing; optional.
  • 2 tablespoons Chopped Chives Perfect for garnishing; optional.

Equipment

  • large pot
  • Stirring Spoon

Method
 

Cooking Instructions
  1. Start by grating 2 cloves of garlic and 1 thumb-sized piece of fresh ginger. Tear 6 ounces of shiitake mushrooms into bite-sized pieces.
  2. In a large pot, heat 1 tablespoon of toasted sesame oil over medium heat. Add the torn shiitake mushrooms and sauté until browned and crispy, about 4–5 minutes. Remove and set aside.
  3. Reduce heat to medium-low and add another tablespoon of sesame oil. Toss in grated garlic and ginger, stirring for about 1 minute until fragrant.
  4. Carefully pour in 4 cups of chicken broth to deglaze the pot, scraping up any bits stuck to the bottom. Increase heat to bring the mixture to a boil, about 3 minutes.
  5. Once boiling, stir in 1 teaspoon of ground turmeric, 1 tablespoon of brown sugar, 2 tablespoons of low-sodium soy sauce, 1 tablespoon of fish sauce, 2 tablespoons of Thai red curry paste, 1 tablespoon of sambal oelek, 1 can of coconut milk, and the juice of 1 lime.
  6. Add instant ramen noodles directly into the pot. Cook for about 2–3 minutes until tender, stirring occasionally.
  7. Ladle the ramen into bowls, distributing noodles and broth evenly. Top with sautéed shiitakes, chili oil, sesame seeds, chopped chives, and sliced boiled eggs if desired.

Nutrition

Serving: 1bowlCalories: 450kcalCarbohydrates: 60gProtein: 16gFat: 18gSaturated Fat: 14gPolyunsaturated Fat: 1gMonounsaturated Fat: 2gCholesterol: 160mgSodium: 1200mgPotassium: 600mgFiber: 2gSugar: 4gVitamin A: 200IUVitamin C: 5mgCalcium: 100mgIron: 3mg

Notes

Store leftovers in an airtight container for up to 4 days. Keep noodles separate to prevent sogginess until ready to enjoy.

Tried this recipe?

Let us know how it was!

Savory Mini Beef Wellington Bites for Your Next Party

As I prepared for my last gathering, the kitchen buzzed with excitement, but I felt the pressure of delivering the perfect appetizer. That’s when I decided on Mini Beef Wellington Bites, a dish that balances sophistication and simplicity. These delightful morsels include tender beef and rich mushroom duxelles wrapped in flaky pastry, making them an irresistibly gourmet choice for any event. Not only are they quick to whip up, but they also promise to impress your guests, elevating your hosting game without turning the kitchen into a battlefield. Whether it’s a casual get-together or a more formal occasion, these bites are bound to be a hit. Ready to learn how to make this crowd-pleaser? Let’s dive into the recipe!

Why are Mini Beef Wellington Bites a must-try?

Gourmet Experience: These Mini Beef Wellington Bites are your ticket to presenting an impressive dish that feels luxurious yet is remarkably easy to prepare.

Flavor Fusion: The combo of tender beef and earthy mushroom duxelles wrapped in flaky pastry brings layers of flavor that tantalize the taste buds.

Versatile Delight: Perfect for any occasion, they serve as an elegant appetizer for parties or cozy gatherings alike, easily adapting to guest preferences.

Make-Ahead Magic: Not only can you whip them up in a flash, but they’re also freezer-friendly, allowing you to bake them fresh right when you need them.

Crowd-Pleaser: Trust me, these bites will disappear quickly, making them the ultimate crowd-pleaser that your guests will rave about long after the last bite.

Don’t forget to explore more fantastic beef recipes like our flavorful Ground Beef Potato or savory Chili Beef Flavor for your next get-together!

Mini Beef Wellington Bites Ingredients

For the Filling
Beef (tenderloin or filet mignon) – The star of the show, providing a tender and flavorful base. For a vegetarian alternative, consider using sirloin or plant-based meat.
Mushrooms – Adds depth and earthy umami flavor to the duxelles. Feel free to substitute with sautéed vegetables or lentils for a meatless filling.
Shallots – Essential for that sweet and rich flavor in the duxelles mixture. Regular onions work great as an alternative.
Garlic – A flavor enhancer that rounds out the filling beautifully. You can omit it if you’re garlic-sensitive; it’s still delicious without!
Thyme – Imparts aromatic notes to the mushroom mixture. Dried thyme can be used in place of fresh if needed.

For the Pastry
Puff Pastry – Creates the perfectly flaky and crispy exterior. Phyllo dough can serve as an alternative if you prefer a different texture.
Dijon Mustard – Adds a tangy punch; brushed onto the beef. Don’t worry if you prefer a milder taste; you can omit or swap it with a different mustard.
Egg (beaten) – Essential for the egg wash, giving a beautiful golden color. For an egg-free version, you can brush with milk or cream instead.

With this list of ingredients at your fingertips, you’re well on your way to crafting unforgettable Mini Beef Wellington Bites that will dazzle your guests!

Step‑by‑Step Instructions for Mini Beef Wellington Bites

Step 1: Sear the Beef
Begin by heating 1 tablespoon of olive oil in a large skillet over medium-high heat. Season your beef cubes with salt and pepper before carefully placing them in the hot oil. Sear for 2-3 minutes until nicely browned on all sides, creating a delicious crust. Once seared, remove the beef from the skillet and let it cool on a plate.

Step 2: Prepare Duxelles
In the same skillet, add finely chopped mushrooms, shallots, and minced garlic. Sauté over medium heat for 5-7 minutes until the mixture becomes golden brown and emits a rich aroma. Sprinkle in thyme, salt, and pepper, stirring to combine everything thoroughly. Transfer this savory mushroom duxelles to a bowl and allow it to cool while you prepare the pastry.

Step 3: Roll Pastry
On a lightly floured surface, roll out the puff pastry into a rectangle until it’s about 1/8 inch thick. Use a sharp knife to cut it into 3×3 inch squares, aiming for uniform pieces to ensure even baking. Keep the cut squares covered with a damp cloth to prevent them from drying out as you work on the next steps for these Mini Beef Wellington Bites.

Step 4: Assemble Bites
Take each square of pastry and add a spoonful of the cooled mushroom duxelles in the center. Place a seasoned piece of seared beef atop the mushroom layer. Brush the beef lightly with Dijon mustard for extra flavor. Carefully fold the pastry over the filling, sealing the edges firmly with your fingers or a fork to avoid any leaks during baking.

Step 5: Bake
Preheat your oven to 400°F (200°C) while you finish assembling the Mini Beef Wellington Bites. Arrange the bites on a parchment-lined baking sheet, spacing them out evenly. Brush the tops of each pastry with the beaten egg for that gorgeous golden color. Bake for 15-20 minutes until the pastry is puffed and golden brown, indicating they’re perfectly cooked.

Step 6: Serve
Once baked, let your Mini Beef Wellington Bites cool slightly on a wire rack. These tasty morsels are best enjoyed warm, so serve them with your choice of dipping sauces like creamy horseradish or tangy mustard. Your guests will delight in the enticing flavors and flaky texture of these amazing party bites!

Expert Tips for Mini Beef Wellington Bites

  • Mushroom Mastery: Ensure you let the mushrooms cook down completely to release their moisture and deepen the flavor; rushing this step can lead to soggy bites.

  • Perfect Sealing: When sealing the pastry, make sure there are no air pockets. This prevents bursting while baking, preserving the integrity of your Mini Beef Wellington Bites.

  • Make Ahead: These bites can be assembled ahead of time. Freeze before baking and then pop them in the oven directly from the freezer, adding a few extra minutes to the baking time.

  • Find Your Flavor: Feel free to experiment with different types of mushrooms, such as portobello or shiitake, to bring new taste dimensions to your Mini Beef Wellington Bites.

  • Check Your Oven Temperature: Ovens can vary, so keep an eye on your bites for that perfect golden brown color! Adjust baking time as necessary for consistent results.

What to Serve with Mini Beef Wellington Bites

The perfect bites deserve equally delightful companions to create an unforgettable feast at your gathering!

  • Creamy Mashed Potatoes: Luxuriously smooth and buttery, these potatoes provide a comforting element that balances the richness of the beef. A drizzle of gravy wouldn’t hurt either!

  • Garlic Butter Green Beans: Crisp-tender with a hint of garlic, green beans complement the buttery pastry while adding a fresh crunch that contrasts beautifully with the bites’ softness.

  • Roasted Vegetable Medley: A mix of seasonal vegetables, such as carrots, zucchini, and bell peppers, roasted to perfection adds vibrant colors and flavors to your table, enhancing the overall experience.

  • Savory Spinach Salad: Crisp greens with walnuts and a tangy vinaigrette brighten up the plate and provide a refreshing contrast to the hearty flavors of the Mini Beef Wellington Bites.

  • Red Wine: A glass of smooth Cabernet Sauvignon will elevate your meal, harmonizing wonderfully with the savory beef and earthy mushrooms for a truly indulgent experience.

  • Chocolate Lava Cake: End on a sweet note with warm, molten chocolate lava cake. The rich, gooey center perfectly satisfies any sweet tooth after those savory bites.

  • Cheese Platter: Serve an elegant cheese board featuring creamy Brie, aged cheddar, and sharp blue cheese to round out the meal, offering guests a variety of distinct flavors to enjoy alongside the bites.

Make Ahead Options

These Mini Beef Wellington Bites are perfect for meal prep enthusiasts! You can sear the beef and prepare the mushroom duxelles up to 24 hours in advance, storing each component in airtight containers in the refrigerator. Additionally, you can assemble the bites and refrigerate them for up to 3 days before baking, which keeps the pastry crisp and fresh. When you’re ready to serve, simply brush the tops with egg wash and bake at 400°F (200°C) for 15-20 minutes from cold. This makes it easier to impress your guests while saving time on the day of your gathering without sacrificing that gourmet quality!

Mini Beef Wellington Bites Variations

Feel free to get creative with these bites, transforming them into your unique culinary masterpiece!

  • Vegetarian Option: Replace beef with sautéed vegetables or a plant-based alternative for a delicious, meat-free experience. Just ensure the veggies are cooked down to avoid excess moisture.

  • Mushroom Mix: Experiment with different types of mushrooms like portobello, shiitake, or even a blend of wild mushrooms for added depth and flavor. Each variety brings a unique earthiness to the dish.

  • Cheesy Delight: Incorporate a slice of Gruyère or brie cheese inside each bite for creamy richness that beautifully complements the beef and duxelles. Melty cheese creates a delightful surprise in each mouthful.

  • Herb Infusion: Add fresh herbs like rosemary or parsley to the duxelles for a fragrance that elevates the dish. This slight twist can transform the flavor profile to match your gathering’s theme.

  • Spicy Kick: Consider adding a dash of cayenne pepper or chili flakes to the mushroom mixture for a hint of heat. This variation is sure to tantalize those who enjoy a bit of spice with their appetizers.

  • Different Mustards: Swap out Dijon for stone-ground or hot English mustard to introduce a unique tanginess. It can shift the whole aesthetic of your bites with minimal effort!

  • Pesto Power: Spread a thin layer of pesto on the puff pastry before adding the filling for an Italian twist. The basil and garlic notes pair beautifully with the beef and mushrooms.

  • Garnish Upgrade: For an added gourmet touch, sprinkle freshly chopped chives or microgreens on top before serving. They add color and vibrancy, making your presentation pop like a professional!

Explore these variations as you craft your Mini Beef Wellington Bites, and don’t hesitate to check out other inspired recipes like our Savory Vegetable Beef Soup to elevate your entertaining skills!

Storage Tips for Mini Beef Wellington Bites

Room Temperature: Best enjoyed fresh, but you can store uneaten Mini Beef Wellington Bites at room temperature for up to 2 hours. Keep them covered to maintain freshness.

Fridge: If you’ve prepared them in advance or have leftovers, store the bites in an airtight container in the fridge for up to 3 days. Reheat in the oven to restore crispness.

Freezer: For longer storage, freeze the assembled but unbaked Mini Beef Wellington Bites in a single layer on a baking sheet, then transfer to a freezer bag for up to 2 months. Bake directly from frozen.

Reheating: To reheat leftovers, place them on a baking sheet and warm in a preheated oven at 350°F (175°C) for about 10-15 minutes, until warmed through and crispy again.

Mini Beef Wellington Bites Recipe FAQs

How do I select the best beef for Mini Beef Wellington Bites?
When choosing beef, opt for tender cuts like tenderloin or filet mignon for the most succulent results. Look for meat that is bright red in color with minimal marbling. If you want a more budget-friendly option, sirloin can also work well, though the tenderness might be slightly less. Avoid beef with any dark spots or an off smell, as these can indicate spoilage.

How should I store left-over Mini Beef Wellington Bites?
For any uneaten bites, allow them to cool and then store them in an airtight container at room temperature for up to 2 hours. If you have additional leftovers, place them in the refrigerator where they can last for about 3 days. To reheat, simply place them on a baking sheet and warm in an oven preheated to 350°F (175°C) for approximately 10-15 minutes, ensuring they regain their delightful crispiness.

Can I freeze Mini Beef Wellington Bites, and how should I do it?
Absolutely! For freezing, assemble the Mini Beef Wellington Bites but do not bake them. Arrange the unbaked bites in a single layer on a baking sheet and freeze until solid. Then, transfer them to a freezer bag or airtight container for up to 2 months. When you’re ready to bake, preheat your oven and pop them in straight from the freezer, adding an extra few minutes to the baking time to ensure they cook thoroughly.

What dietary considerations should I keep in mind for Mini Beef Wellington Bites?
If you’re hosting guests with dietary restrictions, it’s thoughtful to consider alternatives! For vegetarians, you can easily replace the beef with sautéed mushrooms, lentils, or a plant-based meat alternative. Additionally, if someone is allergic to garlic or gluten, the recipe can be modified by omitting garlic and ensuring you use a gluten-free pastry option.

Why did my Mini Beef Wellington Bites burst while baking?
This can happen due to air pockets trapped within the pastry. To prevent this, make sure to thoroughly seal the edges when assembling the bites. Use a fork to crimp the edges and eliminate any gaps. Also, if the mushroom filling is too moist, it can create steam that causes the pastry to burst; ensure mushrooms are fully cooked down to release excess moisture.

How can I enhance the flavor of the mushroom duxelles?
To take your mushroom duxelles to the next level, consider adding a splash of white wine or brandy during the cooking process. This will deepen the flavor profile. You can also experiment with other herbs like rosemary or add a bit of grated Parmesan cheese for an extra layer of richness. Sauté the mixture gently, allowing enough time for the flavors to meld beautifully before cooling it for assembly.

Mini Beef Wellington Bites

Savory Mini Beef Wellington Bites for Your Next Party

Mini Beef Wellington Bites are gourmet appetizers that are quick to prepare and sure to impress your guests.
Prep Time 30 minutes
Cook Time 20 minutes
Total Time 50 minutes
Servings: 12 bites
Course: Appetizer
Cuisine: Gourmet
Calories: 150

Ingredients
  

For the Filling
  • 1 lb Beef (tenderloin or filet mignon) For a vegetarian alternative, consider using sirloin or plant-based meat.
  • 8 oz Mushrooms Feel free to substitute with sautéed vegetables or lentils for a meatless filling.
  • 2 tbsp Shallots Regular onions work great as an alternative.
  • 2 cloves Garlic You can omit it if you're garlic-sensitive; it's still delicious without!
  • 1 tsp Thyme Dried thyme can be used in place of fresh if needed.
For the Pastry
  • 1 sheet Puff Pastry Phyllo dough can serve as an alternative if you prefer a different texture.
  • 2 tbsp Dijon Mustard You can omit or swap it with a different mustard.
  • 1 large Egg (beaten) For an egg-free version, you can brush with milk or cream instead.

Equipment

  • large skillet
  • Oven
  • Rolling Pin
  • knife
  • Baking Sheet
  • Parchment paper
  • Mixing Bowl

Method
 

Step-by-Step Instructions
  1. Begin by heating 1 tablespoon of olive oil in a large skillet over medium-high heat. Season your beef cubes with salt and pepper and sear for 2-3 minutes until nicely browned. Remove from skillet and let cool.
  2. In the same skillet, add finely chopped mushrooms, shallots, and minced garlic. Sauté over medium heat for 5-7 minutes until golden brown. Add thyme, salt, and pepper, then transfer to a bowl and cool.
  3. On a lightly floured surface, roll out the puff pastry into a rectangle until 1/8 inch thick. Cut into 3x3 inch squares and cover with a damp cloth.
  4. Take each square of pastry, add a spoonful of cooled mushroom duxelles, place a piece of seared beef on top, brush with Dijon mustard, and fold pastry over filling, sealing the edges.
  5. Preheat your oven to 400°F (200°C). Arrange bites on a parchment-lined baking sheet, brush tops with beaten egg, and bake for 15-20 minutes until puffed and golden brown.
  6. Once baked, let cool slightly on a wire rack. Serve warm with dipping sauces like horseradish or mustard.

Nutrition

Serving: 1biteCalories: 150kcalCarbohydrates: 10gProtein: 7gFat: 9gSaturated Fat: 3gPolyunsaturated Fat: 1gMonounsaturated Fat: 4gCholesterol: 40mgSodium: 250mgPotassium: 200mgFiber: 1gSugar: 1gVitamin A: 150IUVitamin C: 1mgCalcium: 10mgIron: 1mg

Notes

These bites can be assembled ahead of time and frozen before baking for convenience. Adjust baking time as necessary for best results.

Tried this recipe?

Let us know how it was!

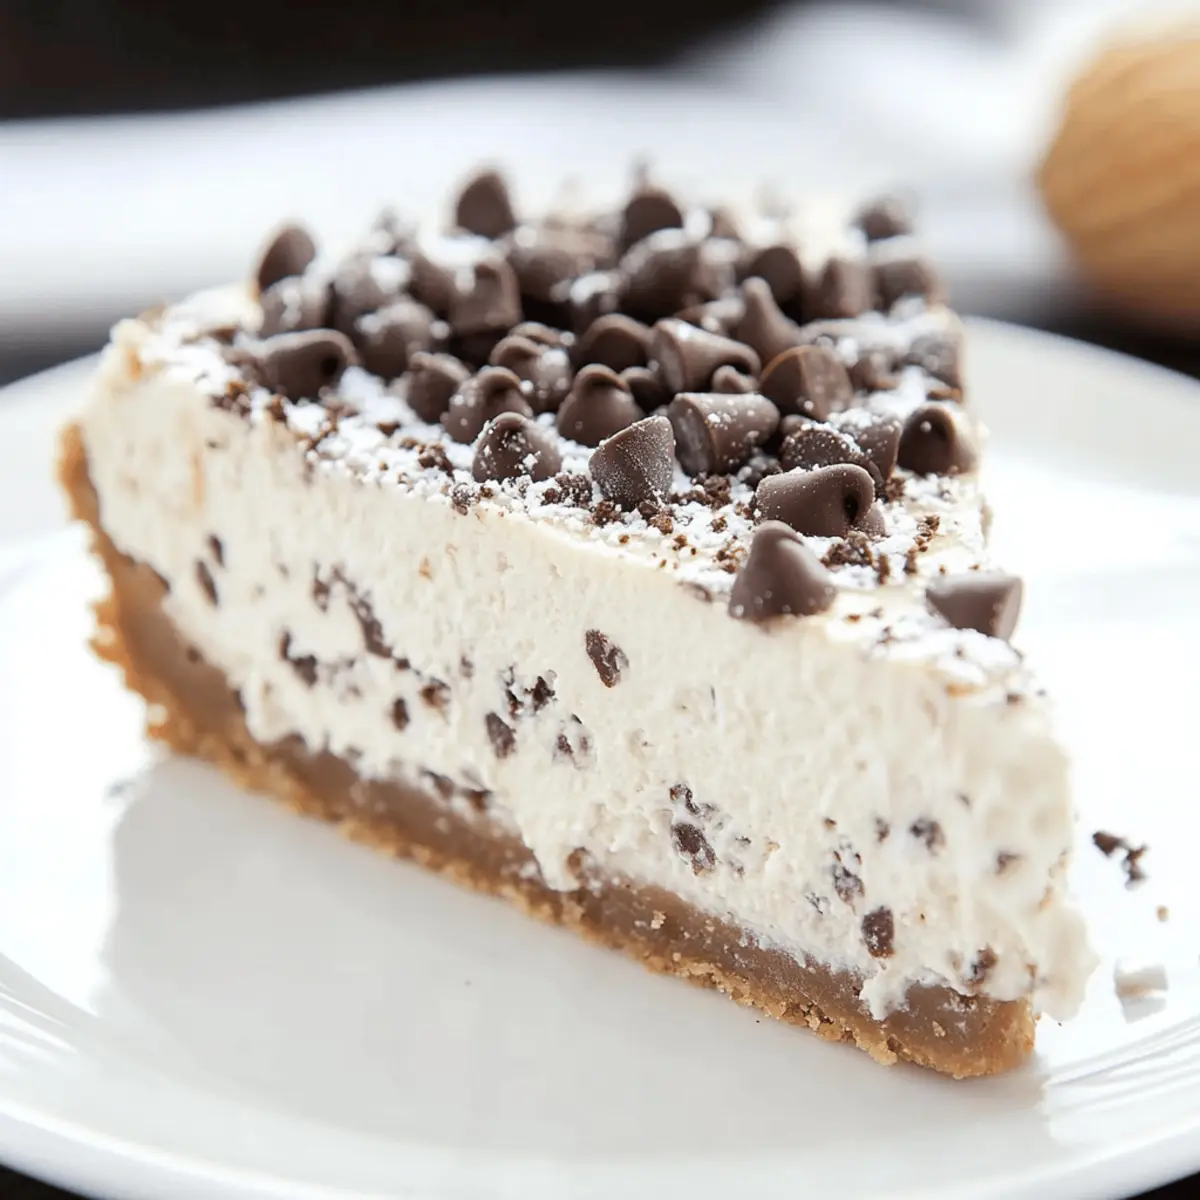
Decadent Cannoli Cheesecake with Crunchy Cone Crust

As I rummaged through my pantry, I stumbled upon leftover cannoli shells, and suddenly, an idea struck me. Why not merge the delightful crunch of these Italian treats with the creamy richness of a cheesecake? Enter my Rich Cannoli Cheesecake, a dessert that beautifully melds classic flavors while offering a unique, mouthwatering twist. This indulgence boasts a crunchy cannoli cone crust and a sumptuous ricotta-mascarpone filling, making it the perfect crowd-pleaser for any gathering. Plus, with the water bath method to ensure a creamy texture and minimal cracks, you’ll elevate your baking game and impress your family and friends. Ready to wow your taste buds? Let’s dive into this delightful dessert that’ll make your next celebration unforgettable!

Why is Cannoli Cheesecake a must-try?

Rich, Creamy Indulgence: This Cannoli Cheesecake delivers a luxurious blend of flavors that highlight the best of classic Italian desserts with creamy ricotta and mascarpone.

Unique Crunch: The crunchy cannoli cone crust adds a delightful twist, setting this cheesecake apart from your typical dessert, making it a showstopper for any occasion.

Effortless Entertaining: Perfect for parties, this dessert can be made a day ahead, allowing you to focus on spending time with loved ones.

Versatile Flavor Options: Want to switch things up? Feel free to swap chocolate chips for pistachios or even add flavored extracts to create your signature flavor!

Excellent Texture: The combination of a smooth filling and crispy crust offers a satisfying mouthfeel that keeps everyone coming back for more, much like my Cookies Cream Cheesecake.

Cannoli Cheesecake Ingredients

Discover the essential ingredients for an unforgettable Cannoli Cheesecake that’ll leave everyone craving more!

For the Crust

  • Graham Cracker Crumbs – These provide the base structure of the crust; crushed cookies can be a fun substitute if desired.
  • Cannoli Shells – They add a unique flavor and delightful crunch; look for these in the Italian aisle or a local bakery. You can use crushed waffle cones as a substitute as well.
  • Butter (melted) – Binds the crust ingredients together ensuring a firm base for your cheesecake.
  • Sugar – Sweetens both the crust and filling; stick with white granulated sugar for optimal results.

For the Filling

  • Ricotta Cheese – The primary base for the cheesecake; use whole milk ricotta for the creamiest experience, making sure to drain if watery.
  • Mascarpone Cheese – Adds an incredible creaminess; cream cheese can be used as a substitute, though the flavor and texture will differ.
  • All-Purpose Flour – This adds stability to the filling; omit it for a gluten-free version, bearing in mind the texture could be affected.
  • Cinnamon (ground) – Infuses warmth and depth into the filling, enhancing its flavor profile.
  • Vanilla Extract – Perfect for enhancing the overall flavor; opt for a high-quality extract for the best results.
  • Eggs – Provide structure and richness; incorporate them one at a time to maintain a smooth mixture.
  • Heavy Cream – Essential for your whipped topping; whipped coconut cream can replace this for a dairy-free option.
  • Powdered Sugar – Sweetens and stabilizes your whipped cream topping, ensuring a delightful finish.
  • Mini Chocolate Chips/Powdered Sugar (optional) – Great for garnishing; you can also use chopped pistachios for an extra touch of flavor.

Each ingredient plays a vital role in crafting this decadent Cannoli Cheesecake, ensuring a dessert that truly shines!

Step‑by‑Step Instructions for Cannoli Cheesecake

Step 1: Preheat the Oven
Begin by preheating your oven to 325°F (163°C). While the oven warms up, prepare a 9-inch springform pan by lining it with parchment paper and generously spraying it with non-stick cooking spray to ensure easy removal of your delicious Cannoli Cheesecake later on.

Step 2: Make the Crust
In a medium mixing bowl, combine graham cracker crumbs, crushed cannoli shells, melted butter, and sugar. Use a fork to mix these ingredients until they resemble damp sand. Press this mixture firmly into the bottom of the prepared springform pan, creating an even layer that will serve as the crunchy base for your cheesecake.

Step 3: Bake the Crust
Place the crust in the preheated oven and bake for about 10 minutes. This step is crucial for setting the crust, giving it a delightful crunch. Once baked, remove it from the oven and allow it to cool slightly, then wrap the exterior of the pan with aluminum foil to prevent any water from seeping in during the next step.

Step 4: Lower the Oven Temperature
After baking the crust, reduce the oven temperature to 300°F (150°C). This lower temperature is essential for the gentle baking of your Cannoli Cheesecake, allowing it to set perfectly without cracking. As the oven cools, you can start preparing the cheesecake filling.

Step 5: Prepare the Filling
In a large mixing bowl, use an electric mixer to beat together the ricotta cheese, mascarpone cheese, granulated sugar, and all-purpose flour until the mixture is smooth and creamy. This heavenly blend forms the base of your Cannoli Cheesecake. Stir in the ground cinnamon and vanilla extract until well incorporated, enhancing the flavors further.

Step 6: Incorporate Eggs
Add the eggs to the mixture one at a time, mixing gently after each addition until just combined. It’s important not to overmix at this stage; you want a smooth, lump-free batter. Once the eggs are fully incorporated, carefully pour the cheesecake batter over the cooled crust in the springform pan.

Step 7: Prepare Water Bath
To ensure even baking and a creamy texture, place the filled springform pan into a larger roasting pan. Pour warm water into the roasting pan, filling it halfway up the sides of the springform pan. This water bath will help maintain moisture during baking and prevent the cheesecake from cracking.

Step 8: Bake the Cheesecake
Transfer the pan to the oven and bake for 105 to 115 minutes. The edges should be set, while the center remains slightly jiggly. This visual cue indicates that your Cannoli Cheesecake is done. Avoid opening the oven door during baking to maintain consistent temperature.

Step 9: Cool the Cheesecake
After baking, turn off the oven and let the cheesecake cool inside for about 30 minutes with the door closed. This gradual cooling prevents sudden temperature changes that could lead to cracking. Then, crack the door open slightly and allow it to cool for an additional 30 minutes.

Step 10: Refrigerate the Cheesecake
Once completely cooled, carefully remove the cheesecake from the water bath and the springform pan. Wrap it in plastic wrap, or cover it with a lid, and refrigerate for at least 4 hours, or overnight if possible. This chilling step is key to achieving the rich, creamy texture of your Cannoli Cheesecake.

Step 11: Prepare the Topping
When you are ready to serve, whip the heavy cream with powdered sugar and ricotta cheese until stiff peaks form. This light and airy topping complements the cheesecake beautifully. Spread the whipped mixture over the chilled cheesecake, ensuring an even layer for a delightful finishing touch.

Step 12: Garnish and Serve
To elevate your Cannoli Cheesecake, garnish the top with mini chocolate chips or a dusting of powdered sugar. Cut into slices and serve chilled, allowing everyone to enjoy the rich flavors and creamy texture. This decadent dessert is sure to be the star of any gathering!

Expert Tips for Cannoli Cheesecake

  • Use Fresh Ingredients: Always opt for fresh ricotta and mascarpone cheese. Their quality significantly impacts the creaminess of your Cannoli Cheesecake.

  • Perfect Water Bath: Don’t skip the water bath! It prevents cracks and ensures an even bake. Wrap the pan tightly to avoid leaks.

  • Keep an Eye on Time: Avoid overbaking; the cheesecake should be slightly jiggly in the center. This ensures a rich and creamy texture.

  • Gradual Cooling: Allow the cheesecake to cool in the oven after baking. This slows down temperature changes, minimizing the risk of cracks.

  • Chill Overnight: For the best flavor and texture, refrigerate your Cannoli Cheesecake overnight. This helps the flavors meld beautifully.

Cannoli Cheesecake Variations & Substitutions

Get ready to sprinkle some magic onto your Cannoli Cheesecake with these exciting variations and substitutions! Each twist encourages you to explore flavors and textures that will elevate your dessert creation.

  • Nutty Delight: Swap chocolate chips for crushed pistachios to introduce a delightful crunch and rich flavor that complements the creamy filling.
    The nutty flavor adds another layer of sophistication, making this cheesecake irresistible!

  • Dairy-Free Option: Replace heavy cream with whipped coconut cream for a luscious topping without dairy.
    This swap keeps the indulgence while making it suitable for dairy-free guests!

  • Gluten-Free Adventure: For a gluten-free version, simply use gluten-free cookie crumbs for the crust.
    It allows everyone to enjoy this delicious treat without missing out!

  • Almond Extract: Try using almond extract instead of vanilla for a unique twist that’ll make your cheesecake feel more like a traditional cannoli.
    Almond adds a wonderful complexity to this already luscious dessert!

  • Chocolate Lovers: Swirl in melted dark chocolate into the filling before baking for a double chocolate delight.
    It not only adds rich flavor but also creates a marbled effect that’s visually stunning!

  • Fruity Flavor: Mix some fresh raspberries or strawberries into the batter for a burst of fruity goodness.
    The vibrant colors and flavors contrast beautifully with the creamy base, offering a refreshing change.

  • Caramel Swirl: Drizzle caramel sauce on top along with the whipped cream for a sweet, gooey finish.
    This variation brings a playful sweetness that will have everyone reaching for seconds!

  • Hearty Spice: Add a pinch of nutmeg and ginger to the cinnamon in the filling for a warm, spiced bite.
    These spices will transport your taste buds, adding a cozy, comforting vibe to each slice.

Feel free to take these suggestions and run with them! Your Cannoli Cheesecake is your canvas and can be tailored to please every palate. Don’t forget to check out my delicious Strawberry Cheesecake Bars or the delightful Cookies Cream Cheesecake for even more inspiration!

What to Serve with Rich Cannoli Cheesecake

Indulge your senses as you create a delightful spread to accompany this rich and creamy dessert, turning any gathering into a memorable feast.

  • Creamy Mashed Potatoes: Their buttery texture and subtle flavor create a striking contrast against the sweetness of the cheesecake, perfect for a balanced meal.

  • Fresh Berries: Juicy strawberries, blueberries, or raspberries add a refreshing zing that complements the richness of the Cannoli Cheesecake, offering a vibrant color pop on the plate.

  • Arugula Salad: This peppery green salad, dressed lightly with lemon vinaigrette, brings a fresh element that balances out the heavier dessert, awakening your palate between bites.

  • Espresso or Coffee: A robust cup of espresso or your favorite coffee varieties enhances the sweet flavors of the cheesecake, creating a truly authentic Italian dessert experience.

  • Chocolate Lava Cake: If you’re feeling adventurous, pair this decadent dessert with a warm, gooey chocolate lava cake. The intense chocolate flavor provides an exciting contrast to the Cannoli Cheesecake.

  • Limoncello Spritz: Add a refreshing twist with a zesty Limoncello spritz, making it a delightful sip that brightens up your dessert table and enhances the cheesecake’s Italian roots.

  • Italian Biscotti: Crisp, almond-flavored biscotti not only pairs wonderfully with coffee but also offers a nice textural contrast to the smoothness of the cheesecake.

  • Vanilla Ice Cream: A scoop of vanilla bean ice cream melts beautifully against the cool cheesecake, creating a luscious harmony of flavors and textures.

With these delightful pairings, your Cannoli Cheesecake will shine as the centerpiece of your meal, ensuring a memorable dining experience for all.

Make Ahead Options

These Cannoli Cheesecake are perfect for busy home cooks looking to streamline their dessert planning! You can prepare the crust and filling up to 24 hours in advance. Simply make the crust and let it cool completely, then pour the cheesecake filling on top. Cover the pan tightly with plastic wrap and refrigerate. When you’re ready to bake, simply remove it from the fridge, place it in the water bath, and bake according to the recipe instructions. This method not only saves time but also allows the flavors to meld beautifully, ensuring your Cannoli Cheesecake is just as delicious when served!

Storage Tips for Cannoli Cheesecake

Fridge: Store your leftover Cannoli Cheesecake in the refrigerator, covered with plastic wrap or foil, for up to 5 days. This preserves its rich and creamy texture.

Freezer: If you wish to keep it longer, wrap individual slices tightly in plastic wrap and store in an airtight container in the freezer for up to 3 months. This allows you to enjoy it later without losing flavor.

Thawing: To enjoy frozen slices, thaw overnight in the fridge before serving. This ensures the cheesecake maintains its delicious flavors and creamy consistency.

Reheating: While best served chilled, if you’d like to warm it slightly, do so in the microwave in short intervals, checking frequently to avoid melting the creamy layers.

Cannoli Cheesecake Recipe FAQs

How do I choose the best ricotta cheese for my Cannoli Cheesecake?
Absolutely! For a rich and creamy Cannoli Cheesecake, I recommend using whole milk ricotta cheese. Always opt for fresh ricotta; if possible, drain it beforehand to remove excess moisture. Look for brands that have a creamy texture and a pleasant, slightly sweet flavor. If you’re in a pinch, searching for ricotta at your local Italian grocery or specialty store often yields the best results!

What’s the best way to store leftover Cannoli Cheesecake?
Very good question! Store any leftovers in the refrigerator, wrapping the cheesecake in plastic wrap or covering it with a lid. This keeps it fresh for up to 5 days. If you have a large batch, cut it into slices, and use an airtight container for optimal storage.

Can I freeze my Cannoli Cheesecake, and how should I do it?
Absolutely! To freeze your Cannoli Cheesecake, first make sure it has cooled completely. Wrap each slice tightly in plastic wrap, then place them in an airtight container or a heavy-duty freezer bag. This method will keep your cheesecake safe for up to 3 months. When you’re ready to indulge again, simply transfer a slice back to the fridge and let it thaw overnight.

What should I do if my cheesecake cracks during baking?
No need to worry! If your Cannoli Cheesecake cracks, it’s not the end of the world. Here are a few steps to minimize this in the future: ensure you’re using the water bath method, which maintains moisture and helps to avoid cracks. Avoid opening the oven door while baking, as sudden changes in temperature can also cause cracks. If it does crack, consider topping it with whipped cream or a dusting of powdered sugar to conceal the imperfections.

Can my Cannoli Cheesecake be enjoyed by people with dairy allergies?
I often recommend a dairy-free alternative for those with dairy allergies! You can substitute traditional ricotta and mascarpone cheeses with plant-based versions, ensuring that your Cannoli Cheesecake remains creamy and delicious. Additionally, use coconut cream in place of heavy cream for the topping. Just ensure to check all other ingredients, as some processed items may contain dairy.

Cannoli Cheesecake

Decadent Cannoli Cheesecake with Crunchy Cone Crust

This Cannoli Cheesecake combines classic Italian flavors with a crunchy cone crust, creating a rich and creamy dessert perfect for any celebration.
Prep Time 30 minutes
Cook Time 2 hours
Chilling Time 4 hours
Total Time 6 hours 30 minutes
Servings: 8 slices
Course: Dessert
Cuisine: Italian
Calories: 350

Ingredients
  

For the Crust
  • 1 cup Graham Cracker Crumbs
  • 1 cup Crushed Cannoli Shells Crushed waffle cones may be used as a substitute.
  • 5 tablespoons Butter (melted)
  • 2 tablespoons Sugar White granulated sugar preferred.
For the Filling
  • 15 ounces Ricotta Cheese Whole milk ricotta for best results.
  • 8 ounces Mascarpone Cheese Can substitute with cream cheese.
  • 1/4 cup All-Purpose Flour Optional for gluten-free version.
  • 1 teaspoon Cinnamon (ground)
  • 1 teaspoon Vanilla Extract Use high-quality extract.
  • 3 large Eggs Add one at a time.
  • 1 cup Heavy Cream Can substitute with whipped coconut cream.
  • 1/4 cup Powdered Sugar
  • Mini Chocolate Chips Optional for garnish.
  • Chopped Pistachios Optional for garnish.

Equipment

  • 9-inch springform pan
  • Mixing bowls
  • Electric Mixer
  • Roasting Pan
  • Parchment paper
  • non-stick cooking spray

Method
 

Preparation
  1. Preheat your oven to 325°F (163°C). Line a 9-inch springform pan with parchment paper and spray it with non-stick cooking spray.
  2. Combine graham cracker crumbs, crushed cannoli shells, melted butter, and sugar in a bowl and mix until it resembles damp sand. Press firmly into the bottom of the prepared pan.
  3. Bake the crust in the preheated oven for about 10 minutes, then allow to cool slightly.
  4. Reduce the oven temperature to 300°F (150°C) and prepare the filling.
  5. Beat together ricotta cheese, mascarpone cheese, granulated sugar, and flour until smooth. Stir in cinnamon and vanilla extract.
  6. Add the eggs one at a time, mixing gently. Pour the batter over the cooled crust.
  7. Place the springform pan in a larger roasting pan and pour warm water halfway up the sides.
  8. Bake for 105 to 115 minutes until edges are set and center is slightly jiggly. Cool in the oven for 30 minutes.
  9. Refrigerate the cheesecake for at least 4 hours or overnight before serving.
  10. Whip the heavy cream with powdered sugar and ricotta until stiff peaks form. Spread over chilled cheesecake.
  11. Garnish with mini chocolate chips or powdered sugar before serving.

Nutrition

Serving: 1sliceCalories: 350kcalCarbohydrates: 38gProtein: 7gFat: 20gSaturated Fat: 12gPolyunsaturated Fat: 1gMonounsaturated Fat: 7gCholesterol: 85mgSodium: 200mgPotassium: 150mgFiber: 1gSugar: 25gVitamin A: 800IUCalcium: 100mgIron: 1mg

Notes

For best flavor and texture, refrigerate the cheesecake overnight. Use fresh ingredients for optimal results. Employ a water bath to prevent cracking.

Tried this recipe?

Let us know how it was!

Irresistible Biscoff Cheesecake That Will Melt Your Heart

As I opened my pantry door, the familiar aroma of caramelized sugar and spice beckoned me in—Biscoff cookies, my secret weapon for building an unforgettable dessert. I’m thrilled to share my recipe for a luscious Biscoff Cheesecake that transforms those beloved cookie flavors into a creamy revelation. This cheesecake is not only incredibly indulgent but surprisingly quick to prepare, making it the perfect dessert for any occasion. With its buttery cookie crust and a melt-in-your-mouth filling that’s infused with cookie butter, it’s a crowd-pleaser that promises to impress. Whether you’re hosting a dinner party or simply treating yourself, this heavenly dessert will surely elevate your culinary adventures. Are you ready to embark on a sweet journey that’ll leave everyone craving another slice?

Why is Biscoff Cheesecake so special?

Decadence at Its Peak: This Biscoff Cheesecake offers an unforgettable dessert experience, blending rich flavors of cookie butter with a creamy filling that melts in your mouth.

Quick & Easy: Despite its impressive taste, it comes together quickly, making it perfect for both casual cookouts and formal gatherings.

Crowd-Pleasing Delight: This cheesecake is sure to be the star of any dessert table—perfect for dinner parties or family nights, it appeals to cookie lovers and cheesecake enthusiasts alike.

Texture Harmony: The contrast between the crunchy Biscoff crust and the silky filling creates a delightful bite that is simply irresistible.

Make-Ahead Marvel: Prepare this beauty in advance for optimal flavor development, allowing you to relax and enjoy your gatherings worry-free.

For more cookie-inspired indulgence, check out my Strawberry Cheesecake Bars or treat yourself to Cookies Cream Cheesecake.

Biscoff Cheesecake Ingredients

• Unleash the joy of baking with this delightful mix of ingredients.

For the Crust

  • Biscoff Cookies – Perfect for a crunchy base; other speculoos cookies work well too.
  • Unsalted Butter – Binds the crust beautifully; substitute with salted butter for a twist.
  • Granulated White Sugar – Sweetens the crust nicely; brown sugar adds a hint of depth if desired.

For the Filling

  • Cream Cheese – The heart of the cheesecake; ensure it’s at room temperature for smooth blending.
  • Corn Starch – Stabilizes the filling; can be replaced with a small amount of flour if necessary.
  • Biscoff Cookie Butter – Provides that irresistible flavor; feel free to swap with another cookie butter if you like.
  • Sour Cream – Adds a touch of richness; plain yogurt is a suitable alternative.
  • Vanilla Extract – Elevates the flavor profile; consider vanilla bean paste for a more luxurious option.
  • Eggs – Vital for structure; no substitutes recommended, but flax eggs can be used for an egg-free version.
  • Egg Yolks – Enhance creaminess; best if used as directed for optimal texture.

For Decoration

  • Whipped Cream – For that beautiful finishing touch; you can opt for Cool Whip or skip this step if desired.

Dive into this Biscoff Cheesecake adventure with these delightful ingredients, and get ready to impress your family and friends!

Step‑by‑Step Instructions for Decadent Biscoff Cheesecake

Step 1: Preheat Your Oven
Begin by preheating your oven to 350°F (175°C) to ensure it’s hot and ready for your Biscoff cheesecake. This initial step is essential for creating the perfect texture in your cheesecake, as well as setting the crust. While the oven warms up, you can prepare your crust mixture.

Step 2: Prepare the Cookie Crust
In a food processor, pulse Biscoff cookies into fine crumbs. Combine these crumbs with melted unsalted butter and granulated sugar until well mixed. The texture should resemble wet sand. Pour this mixture into a 9-inch springform pan, pressing it firmly and evenly against the bottom. Bake in the preheated oven for 10 minutes until slightly golden, then let it cool.

Step 3: Mix the Cheesecake Filling
Using a stand mixer, combine room-temperature cream cheese, corn starch, and granulated sugar until smooth and creamy, about 2 minutes. Gradually add the Biscoff cookie butter, sour cream, and vanilla extract, mixing for an additional minute to incorporate. This luscious filling is the heart of your Biscoff cheesecake, so ensure it’s perfectly blended.

Step 4: Incorporate the Eggs
Add eggs and egg yolks one at a time into the cream cheese mixture, mixing gently after each addition; this prevents over-mixing which could affect the cheesecake’s lightness. The batter should be silky and well-combined, showcasing that delightful Biscoff flavor with every stir. Once mixed, you’re ready to pour.

Step 5: Assemble the Cheesecake
Pour the creamy cheesecake batter into the cooled Biscoff crust in the springform pan. To create a water bath, place the filled pan inside a larger roasting pan and carefully add hot water around the edges—this step helps the cheesecake bake evenly and prevents cracks.

Step 6: Bake to Perfection
Bake the Biscoff cheesecake in the oven for 1 hour. After this time, turn off the oven and leave the cheesecake inside for an additional hour; this gentle cooling period helps set the filling beautifully, giving you that perfect, creamy texture.

Step 7: Cool and Chill
Once cooled, carefully loosen the edges of the cheesecake from the springform pan using a knife. Transfer it to the refrigerator and let it chill for at least 8 hours, or preferably overnight, for the best flavor and texture to develop. This step is crucial for achieving that melt-in-your-mouth quality!

Step 8: Final Touches
When you’re ready to serve the Biscoff cheesecake, gently transfer it to a serving plate. Drizzle melted Biscoff cookie butter over the top for an indulgent finish. You can also decorate with homemade whipped cream if desired, adding a charming, festive touch to your delightful cheesecake.

Expert Tips for Biscoff Cheesecake

  • Room Temperature Ingredients: Ensure all your ingredients, especially cream cheese and eggs, are at room temperature. This helps create a smooth, lump-free batter.

  • Perfect Crust: Don’t skip the baking of the crust! Pre-baking helps it set and prevents it from becoming soggy once the filling is added.

  • Avoid Over-Mixing: When incorporating the eggs into the filling, mix just until combined. Over-mixing can introduce air, causing cracks in your Biscoff cheesecake.

  • Water Bath Method: Always use the water bath to bake your cheesecake. This technique keeps the baking environment moist and prevents drying out, which can lead to a dense texture.

  • Chill for Flavor: Allowing the cheesecake to chill overnight is key to enhancing the flavors. It ensures a richer and more cohesive taste, making each slice irresistibly creamy.

Biscoff Cheesecake Variations & Substitutions

Feel free to explore your culinary creativity with these delightful twists on the Biscoff cheesecake!

  • Dairy-Free: Use coconut cream instead of cream cheese and dairy-free sour cream for a vegan-friendly option.

  • Chocolate Lovers: Swirl in melted dark chocolate into the cheesecake filling for a rich mocha flavor that complements the Biscoff beautifully.

  • Lighter Option: Substitute Neufchâtel cheese for cream cheese and use unsweetened applesauce in place of half the sugar for a lighter dessert.

  • Nutty Addition: Fold in chopped pecans or walnuts into the filling for an added crunch that contrasts wonderfully with the smoothness of the cheesecake.

  • Caramel Drizzle: Drizzle melted caramel sauce on top just before serving for an irresistible sweet finish that complements the Biscoff flavors.

  • Mini Cheesecakes: Make individual cheesecakes in cupcake liners for a cute, portable version. Just adjust the baking time to about 20-25 minutes.

  • Spice It Up: Add a pinch of cinnamon or nutmeg to the filling for a cozy spice twist that brings warmth to your dessert table.

  • Fruit Infusion: Mix in some fresh raspberries or sliced strawberries into the filling for a tart flavor contrast that brightens every bite.

These simple swaps and variations make your Biscoff cheesecake unique and delicious. If you’re in the mood for more cookie-inspired treats, don’t miss my delightful Strawberry Cheesecake Bars or indulge in Cookies Cream Cheesecake for an equally scrumptious experience!

Make Ahead Options

Preparing this Biscoff Cheesecake ahead of time is a game-changer for busy cooks! You can make both the crust and cheesecake filling up to 24 hours in advance, allowing the flavors to meld wonderfully. To do this, prepare the crust, cool it completely, and refrigerate it. Then, mix the cheesecake filling and pour it over the crust, refrigerating it until you’re ready to bake. Not only will it save you time, but this dessert also maintains its delicious quality. On the day you plan to serve, simply follow the remaining baking instructions, and you’ll have an exquisite cheesecake that’s just as delightful, waiting to impress your friends and family!

What to Serve with Decadent Biscoff Cheesecake?

Elevate your dessert experience by pairing this indulgent cheesecake with delightful accompaniments that tease the taste buds.

  • Vanilla Ice Cream: The creamy, cool texture perfectly contrasts the rich cheesecake, enhancing its flavors and adding a refreshing note.
  • Fresh Berries: Juicy strawberries or raspberries provide a tart balance to the sweetness of the cheesecake, bringing in a vibrant color and flavor.
  • Chocolate Drizzle: A pour of melted chocolate adds a luscious touch, deepening the dessert’s complexity and satisfying chocolate cravings.
  • Coffee or Espresso: A hot cup of coffee complements the caramel notes in the Biscoff cheesecake, making each bite feel like a warm embrace.
  • Chantilly Cream: Light and airy, this whipped cream topping adds an elegant finish to your cheesecake experience, making every slice feel special.
  • Mint Sprigs: Sunshiny mint leaves offer a refreshing garnish, enhancing the overall presentation and adding a hint of herbal aroma.
  • Dark Chocolate Shavings: Sprinkle these on top for a luxurious touch, providing a slight bitterness that balances the dessert’s sweetness beautifully.

These thoughtful pairings not only enhance your Biscoff cheesecake but create a well-rounded dessert experience that your guests will love.

How to Store and Freeze Biscoff Cheesecake

Fridge: Store leftover Biscoff cheesecake in an airtight container for up to 5 days. This will keep it fresh and delicious, ready for those late-night cravings!

Freezer: If you want to enjoy this indulgent cheesecake later, wrap individual slices tightly in plastic wrap and then foil. It can be frozen for up to 2 months.

Thawing: When you’re ready to enjoy, transfer the cheesecake to the fridge to thaw overnight. This slow thaw helps maintain its creamy texture.

Reheating: Though it’s best served chilled, if you prefer a warm slice, briefly microwave it on a low setting for about 10-15 seconds. Enjoy the melt-in-your-mouth experience!

Biscoff Cheesecake Recipe FAQs

What type of Biscoff cookies should I use?
You should use original Biscoff cookies for the best flavor in the crust, but you can substitute them with other speculoos cookies if you prefer. Just ensure they have a similar texture and spiced flavor!

How do I store leftover Biscoff cheesecake?
Store your leftover Biscoff cheesecake in an airtight container in the refrigerator for up to 5 days. This will keep it fresh and delicious, ensuring you can indulge in a slice whenever you crave something sweet.

Can I freeze Biscoff cheesecake?
Absolutely! To freeze, wrap individual slices tightly in plastic wrap, followed by a layer of foil to prevent freezer burn. It can be frozen for up to 2 months. When you’re ready to enjoy, simply transfer to the fridge to thaw overnight for the best texture.

What should I do if my cheesecake cracks while baking?
If your cheesecake cracks during baking, don’t fret! This can happen due to temperature changes. Ensure your oven is preheated correctly, and always use a water bath to maintain moisture. If a crack does appear, you can cover it with whipped cream or melted Biscoff for a delicious disguise!

Is there a way to make this Biscoff cheesecake gluten-free?
Yes! To make a gluten-free Biscoff cheesecake, use gluten-free Biscoff-style cookies and double-check that all other ingredients, particularly the cookie butter and vanilla extract, are certified gluten-free. This way, everyone can enjoy that luscious slice!

Can I use a different type of cookie butter?
Certainly! While Biscoff cookie butter is the star of this recipe, you can experiment with other cookie butters, such as speculoos or even chocolate spreads for a fun twist. Just be aware that the flavor profile will change slightly based on your choice!

Biscoff Cheesecake

Irresistible Biscoff Cheesecake That Will Melt Your Heart

A creamy Biscoff Cheesecake that combines cookie butter and a crunchy crust, perfect for any dessert occasion.
Prep Time 20 minutes
Cook Time 1 hour 10 minutes
Chilling Time 8 hours
Total Time 9 hours 30 minutes
Servings: 8 slices
Course: Dessert
Cuisine: American
Calories: 450

Ingredients
  

For the Crust
  • 24 cookies Biscoff Cookies Other speculoos cookies work well too.
  • 6 tablespoons Unsalted Butter Can substitute with salted butter.
  • 2 tablespoons Granulated White Sugar Brown sugar can be used for depth.
For the Filling
  • 16 ounces Cream Cheese At room temperature for smooth blending.
  • 1 tablespoon Corn Starch Can substitute with a small amount of flour.
  • 1 cup Biscoff Cookie Butter Feel free to swap with another cookie butter.
  • 1 cup Sour Cream Plain yogurt is a suitable alternative.
  • 1 teaspoon Vanilla Extract Consider vanilla bean paste for luxury.
  • 3 large Eggs Vital for structure.
  • 2 large Egg Yolks Enhance creaminess.
For Decoration
  • 1 cup Whipped Cream Optional for decoration.

Equipment

  • Food processor
  • Stand Mixer
  • 9-inch springform pan
  • Roasting Pan

Method
 

Preparation Steps
  1. Preheat your oven to 350°F (175°C).
  2. In a food processor, pulse Biscoff cookies into fine crumbs and mix with melted butter and sugar until resembling wet sand. Press into a 9-inch springform pan and bake for 10 minutes.
  3. Using a stand mixer, beat cream cheese, corn starch, and sugar until smooth. Add cookie butter, sour cream, and vanilla, mixing until creamy.
  4. Add eggs and yolks one at a time, mixing gently to avoid over-mixing.
  5. Pour the filling into the crust and create a water bath. Bake for 1 hour, then turn off the oven and leave for an additional hour.
  6. Loosen the cheesecake from the springform pan and chill in the refrigerator for at least 8 hours or overnight.
  7. Before serving, drizzle melted cookie butter on top and decorate with whipped cream if desired.

Nutrition

Serving: 1sliceCalories: 450kcalCarbohydrates: 45gProtein: 7gFat: 30gSaturated Fat: 17gPolyunsaturated Fat: 1gMonounsaturated Fat: 8gCholesterol: 90mgSodium: 300mgPotassium: 150mgFiber: 1gSugar: 28gVitamin A: 500IUCalcium: 80mgIron: 1mg

Notes

Room temperature ingredients are key for a smooth batter. Chilling overnight enhances flavor.

Tried this recipe?

Let us know how it was!

Garlic Herb Roasted Radishes: Your New Favorite Healthy Side

If you’ve ever found yourself stuck in a vegetable rut, longing for a fresh twist, let me introduce you to Garlic Herb Roasted Radishes! These vibrant little gems transform from crunchy and peppery to tender and sweet with just a sprinkle of herbs and a dash of garlic. This exciting recipe not only elevates your meal presentation but also comes together in under 30 minutes, making it perfect for busy weeknights. Plus, being low in calories and packed with nutrients, they fit seamlessly into any healthy eating plan. Imagine surprising your family with this delightfully unexpected side dish – their faces will light up when they take the first bite! So, are you ready to make your meals pop with flavor and nutrition? Let’s dive into this simple yet satisfying recipe!

Why Try Garlic Herb Roasted Radishes?

Flavor Explosion: The rich combination of garlic and aromatic herbs transforms ordinary radishes into a standout side dish that pairs perfectly with any meal.

Quick and Easy: Ready in just under 30 minutes, this recipe is perfect for busy weeknights. No complicated steps—just simple roasting for maximum taste!

Nutrient-Packed Goodness: Radishes are low-calorie yet packed with vitamin C and fiber, making them a heart-healthy choice you can feel good about.

Versatile Sidekick: They’re great alongside grilled meats like Grilled Lemon Herb Salmon or tossed in a salad for extra crunch.

Crowd-Pleasing Appeal: Impress your family or guests with this unexpected twist on a classic veggie. Just wait until they see (and taste) these tender, caramelized delights!

Garlic Herb Roasted Radishes Ingredients

For the Radishes
Radishes – Fresh, firm varieties are best for a crisp texture and peppery flavor.
Olive Oil – This oil assists in caramelization and adds a rich taste; feel free to substitute with avocado or grapeseed oil if preferred.
Garlic – Fresh cloves are ideal for a robust flavor, but garlic powder works in a pinch.

For the Seasoning
Dried Thyme – This herb lends earthy notes; swap it with oregano or dill for a different herbaceous twist.
Dried Rosemary – Adds a pine-like aroma; fresh rosemary can be substituted for an even bolder taste.
Salt – Essential for enhancing the natural sweetness of the radishes; adjust according to your taste.
Black Pepper – Provides a slight kick; using freshly cracked is recommended for optimum flavor.

For the Garnish
Fresh Parsley – Adds color and freshness, but you can use chives or green onions for a different kind of zing.
Lemon Zest (Optional) – This brightens the dish with citrus notes; replace with lime zest if you like a tropical touch!

Elevate your meal with these Garlic Herb Roasted Radishes as a delightful and nutritious side alternative!

Step‑by‑Step Instructions for Garlic Herb Roasted Radishes

Step 1: Preheat the Oven
Begin by preheating your oven to 425°F (220°C). This high temperature will ensure that your Garlic Herb Roasted Radishes develop a beautifully caramelized exterior while becoming tender inside. You’ll want to gather your baking sheet and parchment paper for easy cleanup once you start prepping the veggies.

Step 2: Prepare the Radishes
While the oven is heating, take a moment to clean and trim your radishes. Remove the tops and tails, then slice them in half or quarters, depending on their size. Aim for uniform pieces to ensure even cooking, allowing that delicious peppery flavor to shine through once roasted.

Step 3: Combine Ingredients
In a large mixing bowl, combine your prepared radishes with a generous drizzle of olive oil. Add minced garlic, dried thyme, rosemary, salt, and pepper. Toss everything together thoroughly to coat all the radishes evenly, ensuring they absorb all the aromatic flavors for the best Garlic Herb Roasted Radishes experience.

Step 4: Arrange on Baking Sheet
Next, spread the coated radishes out on a baking sheet lined with parchment paper. Make sure they’re in a single layer, cut-side down, to encourage even roasting and maximize those gorgeous caramelized edges. Give them a little room to breathe, as overcrowding can hinder the roasting process.

Step 5: Roast the Radishes
Place the baking sheet in the preheated oven and roast the radishes for 20-25 minutes. At the halfway point, give them a good stir to promote uniform cooking. You’ll know they’re done when they’re golden brown and fork-tender, releasing a delightful aroma that will fill your kitchen.

Step 6: Garnish and Serve
Once perfectly roasted, remove the Garlic Herb Roasted Radishes from the oven. To finish, sprinkle chopped fresh parsley and lemon zest on top for a bright, fresh touch. Serve these flavorful radishes warm alongside your favorite main dish for a nutritious and inviting side that everyone will enjoy!

Expert Tips for Garlic Herb Roasted Radishes

  • Uniform Size: Cut radishes into similar sizes to ensure even cooking. This prevents some pieces from burning while others remain hard during roasting.

  • Avoid Overcrowding: Spread radishes in a single layer on the baking sheet. Overcrowding will steam them instead of roasting, leading to less flavor and texture.

  • Flavor Boost: For extra depth, experiment with different herbs or spices. A pinch of smoked paprika or chili flakes can add a delightful kick to your Garlic Herb Roasted Radishes.

  • Monitor Roasting Time: Keep a close eye on the radishes as they roast. 20-25 minutes should suffice, but check at the 20-minute mark to prevent burning.

  • Thorough Coating: Make sure to thoroughly coat the radishes with olive oil and seasonings for balanced flavor. This is key to achieving the best results with your dish!

Make Ahead Options

These Garlic Herb Roasted Radishes are perfect for busy cooks looking to streamline meal preparation! You can wash, trim, and cut the radishes up to 24 hours in advance (store them in an airtight container in the refrigerator to maintain their freshness). Additionally, you can combine the olive oil, garlic, and herbs in advance and keep the mixture covered in the fridge for up to 3 days. When you’re ready to serve, simply toss the radishes with the prepped oil mixture, arrange them on a baking sheet, and roast as instructed. This way, you’ll enjoy tender, flavorful radishes with minimal effort — just as delicious and perfect for your weeknight dinners!

Garlic Herb Roasted Radishes Variations

Feel free to mix things up and tailor the Garlic Herb Roasted Radishes to your taste and dietary needs!

  • Herb Combinations: Experiment with different herbs like basil or tarragon for varied flavor profiles. Fresh herbs can significantly enhance the dish, bringing new life to the radishes.

  • Spicy Kick: Add chili flakes or smoked paprika pre-roasting for heat. This twist can turn a mild side into a fiery delight, perfect for the spice lovers at your table.

  • Other Vegetables: Incorporate carrots, parsnips, or sweet potatoes to create a colorful medley. Mixing in these veggies adds additional textures and flavors, making your dish even more enticing.

  • Cheesy Upgrade: Sprinkle grated Parmesan or feta cheese on top before serving for a savory burst. The cheese’s richness beautifully complements the caramelized radishes.

  • Balsamic Glaze: Drizzle balsamic glaze before serving for a touch of sweetness. This can enhance the overall flavor profile, giving your dish a gourmet feel.

  • Tangy Citrus: Swap lemon zest for orange or lime zest to switch up the citrusy notes. Each option adds a unique flair that brightens the dish in its own delightful way.

  • Nutty Flavor: Top with toasted nuts such as almonds or walnuts for added crunch. This textural contrast offers a nutty richness that complements the tender radishes beautifully.

  • Mediterranean Twist: Add olives or sun-dried tomatoes for a Mediterranean flair. These additions infuse the dish with exciting flavors that will transport your taste buds on a culinary journey.

As you enjoy experimenting with these variations, consider pairing these delicious radishes with Lemon Garlic Shrimp or Honey Garlic Shrimp for a perfectly balanced meal that your family will love!

How to Store and Freeze Garlic Herb Roasted Radishes

Fridge: Store leftovers in an airtight container for up to 3 days. When ready to enjoy, reheat in the oven for crispiness, avoiding sogginess.

Freezer: While it’s best to consume garlic herb roasted radishes fresh, they can be frozen for up to 1 month. Place in a freezer-safe container and thaw overnight before reheating.

Reheating: To restore texture, reheat thawed radishes in a preheated oven at 375°F (190°C) for about 10-15 minutes. This method ensures they remain delicious and flavorful.

Note: Fresh radishes are ideal, and it’s recommended to use leftovers creatively in salads or mixed dishes for a boost of flavor!

What to Serve with Garlic Herb Roasted Radishes

Elevate your dining experience by pairing these tender, savory radishes with delightful accompaniments that create a harmonious meal.

  • Grilled Chicken: The smoky, savory flavor of grilled chicken complements the earthy notes of the roasted radishes beautifully. A drizzle of lemon juice enhances their vibrant flavors.

  • Quinoa Salad: This hearty, nutty salad introduces a great textural contrast while providing protein and fiber, balancing the dish perfectly. Toss with fresh herbs and a citrus dressing for brightness.

  • Pan-Seared Salmon: Rich in flavor and healthy omega-3s, salmon’s buttery texture pairs excellently with the radishes’ sweetness, creating a satisfying contrast that will impress any guest.

  • Couscous: Fluffy and light, couscous adds a wonderful base to soak up the garlic-herb goodness from your radishes. Consider sprinkling some almonds or dried cranberries for crunch and sweetness.

  • Roasted Carrots: Their natural sweetness pairs well with radishes, making for a colorful and appetizing side. Roast them alongside for easy prep!

  • Chilled White Wine: A crisp Sauvignon Blanc complements the earthiness of the radishes, enhancing your dining experience with its refreshing acidity on warm evenings.

  • Lemon Sorbet: For a light and refreshing dessert, lemon sorbet cleanses the palate beautifully—a sweet ending that mirrors the bright flavors of your main meal.

  • Fresh Garden Salad: A simple mix of greens and seasonal vegetables rounds out the meal, offering a crunchy, refreshing contrast to the roasted radishes. Add your favorite vinaigrette for zing.

Garlic Herb Roasted Radishes Recipe FAQs

What should I look for in selecting radishes?
When choosing radishes, look for firm, smooth-skinned varieties without dark spots or blemishes. They should feel crisp to the touch and have vibrant colors. Avoid any that are soft or shriveled, as these indicate overripeness and will not yield the best flavor or texture in your Garlic Herb Roasted Radishes.

How should I store leftover Garlic Herb Roasted Radishes?
Store any leftovers in an airtight container in the refrigerator for up to 3 days. When you’re ready to enjoy them again, I recommend reheating them in the oven at 375°F (190°C) for about 10-15 minutes to maintain their crispiness and delicious flavor. Avoid microwaving as this can make them soggy.

Can I freeze Garlic Herb Roasted Radishes?
Absolutely! While it’s best to consume them fresh, you can freeze Garlic Herb Roasted Radishes for up to 1 month. Just place them in a freezer-safe container or bag. To reheat, thaw them overnight in the fridge and then heat in a preheated oven at 375°F (190°C) for about 10-15 minutes. This restores their texture and flavor beautifully.

What if my radishes are not getting caramelized?
If your radishes aren’t caramelizing, it may be due to overcrowding on the baking sheet. Make sure they’re in a single layer to allow heat circulation. Additionally, if they still seem pale after the roasting time, it might be that your oven temperature is lower than expected. Consider checking with an oven thermometer for accuracy, and leave them in for an extra few minutes while keeping an eye on them.

Are Garlic Herb Roasted Radishes safe for pets?
While radishes are safe for most pets in moderation, it’s always wise to consult with your veterinarian about your specific pet’s dietary needs. Avoid feeding them seasoned or roasted radishes, as added ingredients like garlic can be toxic to pets. Stick to plain, raw radishes instead if you want to share a little healthy snack!

Are there any dietary considerations I should be aware of?
Garlic Herb Roasted Radishes are naturally low in calories and rich in vitamin C and fiber, making them a healthy side dish choice. However, those with garlic allergies should avoid this recipe or consider substituting garlic with alternatives like shallots or onion powder. Always adjust seasonings and ingredients based on individual health needs and preferences.

Garlic Herb Roasted Radishes

Garlic Herb Roasted Radishes: Your New Favorite Healthy Side

Garlic Herb Roasted Radishes are a tasty, nutrient-packed side dish that transforms crunchy radishes into tender and sweet bites, perfect for any meal.
Prep Time 10 minutes
Cook Time 25 minutes
Total Time 35 minutes
Servings: 4 servings
Course: Dinner
Cuisine: American
Calories: 70

Ingredients
  

For the Radishes
  • 1 bunch Radishes Fresh, firm varieties are best
  • 2 tablespoons Olive Oil Can substitute with avocado or grapeseed oil
  • 3 cloves Garlic Minced, fresh cloves are ideal
For the Seasoning
  • 1 teaspoon Dried Thyme Earthy notes
  • 1 teaspoon Dried Rosemary Can substitute with fresh rosemary
  • 1 teaspoon Salt Adjust according to taste
  • 1 teaspoon Black Pepper Freshly cracked is recommended
For the Garnish
  • 2 tablespoons Fresh Parsley Chopped
  • 1 teaspoon Lemon Zest Optional, can be replaced with lime zest

Equipment

  • Baking Sheet
  • Parchment paper
  • large mixing bowl

Method
 

Step-by-Step Instructions
  1. Preheat your oven to 425°F (220°C).
  2. Clean and trim the radishes, removing the tops and tails, then slice in half or quarters.
  3. In a large mixing bowl, combine the radishes with olive oil, minced garlic, thyme, rosemary, salt, and pepper. Toss to coat.
  4. Spread the coated radishes on a baking sheet lined with parchment paper in a single layer, cut-side down.
  5. Roast the radishes for 20-25 minutes, stirring halfway, until golden brown and fork-tender.
  6. Sprinkle with chopped parsley and lemon zest before serving warm.

Nutrition

Serving: 1servingCalories: 70kcalCarbohydrates: 10gProtein: 2gFat: 4gSaturated Fat: 1gMonounsaturated Fat: 3gSodium: 150mgPotassium: 450mgFiber: 3gSugar: 2gVitamin C: 15mgCalcium: 30mgIron: 1mg

Notes

Ensure to cut radishes to uniform size for even cooking and avoid overcrowding on the baking sheet to achieve optimal roasting results.

Tried this recipe?

Let us know how it was!

Dill Pickle Lemonade: A Refreshing Twist for Savory Sippers

Sipping on something adventurous can transform an ordinary day into a delightful escape. That’s exactly what you’ll experience with my refreshing Dill Pickle Lemonade—a unique concoction that marries the tangy zest of lemonade with the briny allure of dill pickles. Not only is this drink incredibly easy to make, but it also serves as a fun twist on your typical summer refreshment, making it the perfect option for gatherings or a solo treat. With just a few simple ingredients, you can customize the sweetness to your liking while enjoying a drink that inspires curiosity and conversation. Are you ready to turn heads with this surprising beverage? Let’s dive in!

Why is Dill Pickle Lemonade so special?

Unique Flavor Fusion: This drink combines the tartness of lemonade with the savory undertones of dill pickles, making it a refreshing twist that’s far from ordinary.

Customizable Sweetness: Adjust the sugar level to your taste, ensuring a perfect balance that suits every palate. Don’t hesitate to experiment with flavors and toppings—adding fresh mint leaves can elevate this drink even further!

Perfect Party Drink: Serve this eye-catching beverage at your next summer gathering to wow your guests. It’s a conversation starter that perfectly complements grilled foods or picnic spreads!

Easy to Make: With just a few simple ingredients, creating this delightful drink is as easy as it gets—perfect for busy days or spontaneous get-togethers.

Cool Down Treat: Not only is it refreshing, but its light, briny flavor is also incredibly thirst-quenching on hot days. Who wouldn’t want to sip on something adventurous like Dill Pickles?

Dill Pickle Lemonade Ingredients

• Refreshing and easy to make!

For the Lemonade

  • Water – Use filtered water for best taste.
  • Lemon Juice – Freshly squeezed lemon juice adds the brightest flavor, but bottled works in a pinch.
  • Dill Pickle Juice – This is the star ingredient, providing the unique pickle flavor—choose your favorite brand!
  • Granulated Sugar – Sweetens the drink; replace with sugar alternatives for a healthier option.

For Serving

  • Ice – Crushed or cubed, chilled beverage component for a refreshing sip.
  • Lemon Slices – Optional garnish that not only enhances visual appeal but also adds extra citrusy zest.
  • Dill Pickles – Skewered for serving, these optional garnishes improve presentation and offer a fun eating experience.

This delightful Dill Pickle Lemonade is perfect for those looking to try something new!

Step‑by‑Step Instructions for Dill Pickle Lemonade

Step 1: Prepare the Lemon Mixture
Start by squeezing fresh lemons to collect the juice, aiming for about 1/2 cup. In a medium-sized pourable container, combine the lemon juice with granulated sugar. Stir vigorously for about 2-3 minutes until the sugar fully dissolves, creating a bright, tangy lemon base to kick off your Dill Pickle Lemonade.

Step 2: Add Pickle Juice and Water
Next, pour in 1 cup of dill pickle juice and 2 cups of filtered water into the lemon-sugar mixture. Mix everything thoroughly for 1-2 minutes until well blended. This is where you’ll begin to experience the unique flavor profile that makes Dill Pickle Lemonade so intriguing and refreshing, balancing the tartness with savory notes.

Step 3: Chill and Serve Over Ice
Fill tall glasses with ice—either crushed or cubed, according to your preference. Once the glasses are ready, slowly pour the prepared dill pickle lemonade mixture over the ice. Watch as the drink takes on a vibrant color, and feel how it cools off, making your Dill Pickle Lemonade instantly refreshing for any summer occasion.

Step 4: Garnish for Presentation
For an appealing finish, top each glass with a slice of lemon and, if desired, skewer a small dill pickle on the side. This not only enhances the visual appeal of your Dill Pickle Lemonade but also adds a delightful garnish that invites conversation and curiosity among your guests. Serve immediately and enjoy this unique drink!

Dill Pickle Lemonade Variations

Get ready to personalize your Dill Pickle Lemonade and make it uniquely yours with these fun variations!

  • Minty Fresh: Add fresh mint leaves for a refreshing herbal twist that complements the drink’s tanginess beautifully. You’ll love how the mint uplifts each sip!

  • Spicy Kick: Consider adding a dash of hot sauce or a sprinkle of cayenne pepper for those who enjoy a little heat in their drinks. It’s a surprising twist that turns up the flavor profile!

  • Sweet & Tangy: Switch out the granulated sugar for honey or agave syrup to introduce a different sweetness level and a lovely floral note. Experiment with sugar alternatives to suit your health needs!

  • Fruit Fusion: Blend in some pureed strawberries or raspberries to create a fruity version. This delightful addition not only enhances the drink’s color but also adds a subtle sweetness that pairs perfectly!

  • Citrus Medley: Mix in some grapefruit or lime juice for an exciting zing. The combination of citrus flavors adds depth and complexity, making each sip a delightful experience.

  • Sparkling Wonder: Replace the water with sparkling water or club soda for a fizzy version of your Dill Pickle Lemonade. The bubbles will elevate this drink into a sophisticated, celebratory treat!

  • Herb Infusion: Experiment with other herbs like basil or rosemary for a unique twist. The aromatic fragrances will give your drink a refreshing and elevated feel, perfect for more gourmet gatherings!

Remember, you can always adjust the Dill Pickles to accompany these variations—your imagination is the only limit!

Expert Tips for Dill Pickle Lemonade

  • Adjust to Taste: You can modify the sweetness by adding more or less sugar; start with less and taste as you go, ensuring it’s just right for your palate.

  • Maximize Flavor: For a richer pickle taste, try increasing the dill pickle juice by an ounce—this will elevate that unique briny flavor in your Dill Pickle Lemonade.

  • Serve Chilled: Serve over plenty of ice! This keeps the drink refreshing and prevents it from becoming diluted too quickly, offering a perfect sip every time.

  • Garnish Creatively: Consider adding fresh mint leaves with your lemon slice for an invigorating aroma and appealing visual contrast, making your lemonade even more enticing.

  • Strain Cautiously: If you’re using store-bought pickle juice, remember to strain it well to remove any floating bits, ensuring a smooth drink without any distractions.

What to Serve with Dill Pickle Lemonade

Sipping on a vibrant, tangy drink opens the door to a world of flavorful pairings that bring out the best in each other.

  • Grilled Chicken Skewers: The smoky flavor of grilled chicken complements the tanginess of the lemonade, creating a delicious balance.
    Pairing light and refreshing drinks with grilled meats enhances that summertime essence. Perfect for backyard barbecues!

  • Potato Salad: Creamy potato salad adds a rich, comforting texture that contrasts beautifully with the zesty lemonade.
    A classic picnic food, it ties in with the playful spirit of your Dill Pickle Lemonade, making each bite a delightful adventure.

  • Tortilla Chips and Salsa: The crunchiness of tortilla chips paired with spicy salsa erupts in flavor, beautifully contrasting the drink’s tang.
    This pairing is fantastic for casual gatherings or game days, where everyone can enjoy the refreshing contrast of tastes.

  • Charcuterie Board: Include a variety of cheeses, cured meats, and pickled vegetables to match the pickle vibe of the drink.
    The diverse flavors and textures on a charcuterie board invite conversation and perfectly enhance each sip of your lemonade.

  • Lemon Basil Pasta Salad: This light, herbaceous dish reflects the refreshing lemon zest while the basil adds a fragrant punch.
    Ideal for summer picnics or potlucks, it echoes the unique flavor profile of your Dill Pickle Lemonade while keeping it vibrant.

  • Mint Mojito Mocktail: This refreshing mint drink pairing highlights the coolness of fresh herbs and citrus, topping off your gathering with zing.
    A non-alcoholic option that dances alongside your Dill Pickle Lemonade, providing a cheerful vibe to any summer affair!

  • Peach Cobbler: The sweetness of warm peach cobbler provides a delightful contrast, enhancing the lemonade’s tangy profile.
    This dessert evokes nostalgia, working harmoniously to round out a summer meal with a heartfelt touch.

How to Store and Freeze Dill Pickle Lemonade

Fridge: Store any leftover Dill Pickle Lemonade in a covered container in the refrigerator for up to one week to maintain freshness and flavor.

Freezer: For longer storage, freeze the lemonade in airtight containers for up to three months. Be aware that it may slightly dilute upon thawing, so stir well before serving.

Reheating: Since this is a chilled beverage, simply allow it to thaw in the fridge overnight or place it in a glass at room temperature until melted.

Serving: Give it a good stir after thawing to help reintegrate the flavors before pouring it over ice for a refreshing drink!

Make Ahead Options

These refreshing Dill Pickle Lemonades are a fantastic choice for meal prep enthusiasts! You can mix the lemon juice, sugar, dill pickle juice, and water up to 24 hours in advance. Simply store the mixture in an airtight container in the refrigerator to maintain its vibrant flavors. When you’re ready to serve, just fill your glasses with ice and pour the prepared lemonade over it—ta-da! For the best taste, add the ice right before serving to keep things chilled and prevent dilution. This way, you can enjoy a unique and tangy drink with minimal effort during your busy week!

Dill Pickle Lemonade Recipe FAQs

What type of pickles should I use for Dill Pickle Lemonade?
You can use any brand of dill pickles that you love! What matters most is the quality of the pickle juice. I recommend going for a brand with a taste profile you enjoy, so your lemonade reflects that delicious flavor. Remember, this ingredient is the star of your drink!

How long can I store leftover Dill Pickle Lemonade?
Leftover Dill Pickle Lemonade can be stored in a covered container in the refrigerator for up to one week. For the best taste, consume it within the first few days. If you notice it starting to lose flavor or clarity, that’s usually a sign it’s time to toss it.

Can I freeze Dill Pickle Lemonade? If so, how?
Absolutely! To freeze your Dill Pickle Lemonade, pour it into airtight containers, leaving some space at the top for expansion. It can last in the freezer for up to three months. When you’re ready to enjoy it again, simply let it thaw in the fridge overnight or at room temperature, then stir well before serving over ice!

What should I do if my Dill Pickle Lemonade is too sour?
If your lemonade is on the sour side, don’t fret! You can easily adjust the sweetness. Start by adding more sugar, a teaspoon at a time, until it reaches your desired sweetness level. Alternatively, a drizzle of honey or agave syrup can be a great natural sweetener to consider. Remember to stir until fully dissolved.

Can pets drink Dill Pickle Lemonade?
No, it’s best to keep Dill Pickle Lemonade away from pets. The high acidity from the lemon juice and the sodium from the pickle juice could upset their stomachs or cause other health issues. Instead, treat your furry friends to their special treats while you enjoy this unique beverage!

What if I want to make the lemonade less sweet?
If you prefer a less sweet version of Dill Pickle Lemonade, start with significantly less sugar—maybe half the amount—and taste as you go. You could also substitute with a natural sugar alternative, like stevia or monk fruit, to maintain sweetness while keeping it light.

Dill Pickle Lemonade

Dill Pickle Lemonade: A Refreshing Twist for Savory Sippers

Experience the adventurous savor of Dill Pickle Lemonade, a delightful drink combining tangy lemonade with dill pickles.
Prep Time 10 minutes
Total Time 10 minutes
Servings: 4 glasses
Course: Drinks
Cuisine: American
Calories: 70

Ingredients
  

For the Lemonade
  • 2 cups Water Use filtered water for best taste.
  • 1/2 cup Lemon Juice Freshly squeezed lemon juice adds the brightest flavor.
  • 1 cup Dill Pickle Juice Choose your favorite brand.
  • 1/4 cup Granulated Sugar Sweetens the drink; replace with sugar alternatives for a healthier option.
For Serving
  • Ice Crushed or cubed Chilled beverage component for a refreshing sip.
  • Lemon Slices Optional garnish.
  • Dill Pickles Skewered for serving.

Equipment

  • Medium-sized pourable container
  • Tall glasses

Method
 

Step-by-Step Instructions for Dill Pickle Lemonade
  1. Squeeze fresh lemons to collect about 1/2 cup of juice. Combine the lemon juice with granulated sugar in a medium-sized pourable container and stir vigorously for 2-3 minutes until the sugar dissolves.
  2. Pour in 1 cup of dill pickle juice and 2 cups of filtered water into the lemon-sugar mixture. Mix thoroughly for 1-2 minutes.
  3. Fill tall glasses with ice and slowly pour the prepared dill pickle lemonade mixture over the ice.
  4. Garnish each glass with a slice of lemon and skewer a small dill pickle on the side for a vibrant presentation.

Nutrition

Serving: 1glassCalories: 70kcalCarbohydrates: 18gSodium: 200mgSugar: 16gVitamin C: 15mg

Notes

This delightful Dill Pickle Lemonade is perfect for those looking to try something new, and can be adjusted in sweetness and flavor with additional mint leaves or dill pickle juice.

Tried this recipe?

Let us know how it was!

Ground Turkey Zucchini Casserole: A Comforting Healthy Delight

I’ve been in the kitchen on those frantic weeknights, balancing work and family, when the dinner dilemma hits. Enter the Savory Ground Turkey Zucchini Casserole—my ultimate game changer! This one-dish meal not only offers a healthy twist on comfort food but also transforms everyday ingredients into a nourishing dinner that’s ready in under 45 minutes. Packed with lean turkey, tender zucchini, and wholesome grains, it’s perfect for busy families seeking quick, satisfying meals that don’t skimp on flavor. Plus, it’s a clever way to use any extra zucchini from your garden! Curious about how easy this delicious creation really is? Let’s get started!

Why is Ground Turkey Zucchini Casserole a Must-Try?

Simplicity: This recipe shines with its uncomplicated approach—one pot, minimal prep, and easy clean-up!

Nutritious and Wholesome: Packed with lean protein and fresh vegetables, it’s a guilt-free way to enjoy comfort food.

Versatile Base: Personalize your casserole by swapping in quinoa or brown rice for groats, changing up the cheese, or adding extra veggies for flavor.

Quick Cooking Time: In just under 45 minutes, you can have a hearty dinner that saves you from ordering takeout.

Crowd-Pleaser: Perfect for family dinners, this casserole isn’t just healthy—it’s a dish everyone will love! If you’re looking for more hearty options, check out this delicious Savory Ground Turkey Potato Skillet or try the Zucchini Sweet Potato Beef Skillet for another quick meal idea.

Ground Turkey Zucchini Casserole Ingredients

For the Casserole
Ground Turkey – Provides lean protein; choose 85-93% lean for a perfect moisture balance.
Zucchini – Acts as a low-calorie and flavorful base; salt and drain to avoid excess moisture.
Groats (or Brown Rice/Quinoa) – Adds fiber and heartiness; cook ahead, or use brown rice or quinoa as substitutes.
Diced Tomatoes (drained) – Contributes acidity and moisture; draining prevents a watery casserole.
Onion – Enhances the dish with sweetness; use yellow or white onions for maximum flavor.
Garlic – Adds aromatic depth; opt for fresh minced or crushed for the best flavor.
Oregano & Paprika – Provide seasoning warmth; adjust to your taste preferences.
Basil – Offers a fresh finishing herb; add during baking to keep the flavor vibrant.
Shredded Cheese – Melts beautifully on top for a savory finish; experiment with your favorite cheese blend.

Optional Toppings
Fresh Parsley or Basil – A sprinkle right before serving can elevate the presentation and flavor.
Extra Cheese – Add more cheese as a finishing touch for a gooier, more indulgent dish.

Dive into this Ground Turkey Zucchini Casserole and discover how delightful healthy, homemade meals can truly be!

Step‑by‑Step Instructions for Ground Turkey Zucchini Casserole

Step 1: Preheat Your Oven
Begin by preheating your oven to 350°F (175°C). This ensures the perfect baking environment for your Ground Turkey Zucchini Casserole. While the oven warms up, gather your ingredients and prepare your baking dish by greasing it lightly with cooking spray or oil.

Step 2: Cook the Ground Turkey
In a large skillet, heat a splash of olive oil over medium heat. Add the ground turkey and cook it for about 8-10 minutes, breaking it apart with a spatula as it browns. You’ll know it’s ready when the turkey is fully cooked with no pink remaining, releasing a savory aroma that fills the kitchen.

Step 3: Sauté Onions and Garlic
Once the turkey is cooked, add the diced onion and minced garlic to the skillet. Continue cooking for an additional 2 minutes, stirring occasionally, until the onions are translucent and fragrant. This mix will form a flavorful base for your Ground Turkey Zucchini Casserole.

Step 4: Add Zucchini
Next, stir in the chopped zucchini, cooking for 3-4 minutes until it softens slightly but still holds its shape. This step enhances the texture of the casserole while allowing the zucchini to absorb the flavors of the ground turkey and spices.

Step 5: Combine Remaining Ingredients
Incorporate the pre-cooked groats, drained diced tomatoes, oregano, and paprika into the skillet. Mix everything thoroughly, ensuring that the spices are evenly distributed. This will bring life to your Ground Turkey Zucchini Casserole while creating a colorful and hearty mixture.

Step 6: Transfer to Baking Dish
Pour the mixture into your greased 9×13 baking dish, spreading it out evenly. This step is crucial for ensuring that the casserole cooks uniformly. Once it’s well-distributed, sprinkle your shredded cheese generously on top to create a delicious, gooey finish.

Step 7: Bake the Casserole
Place the baking dish in the oven and let it bake uncovered for about 20-25 minutes. Watch for the cheese to become bubbly and golden brown—this indicates that the casserole is beautifully cooked through and ready to serve.

Step 8: Cool and Serve
After baking, remove the Ground Turkey Zucchini Casserole from the oven and allow it to cool for a few minutes. This brief cooling period will help the casserole set, making it easier to serve. Then, scoop out portions and enjoy your hearty and healthy dish!

What to Serve with Savory Ground Turkey Zucchini Casserole

Pair this comforting one-dish meal with delightful sides to create a well-rounded dinner experience.

  • Crisp Green Salad: A refreshing side that adds crunch and vibrant flavors, balancing the casserole’s heartiness. A zesty vinaigrette will brighten each bite.

  • Garlic Bread: The warm, buttery goodness of garlic bread is perfect for soaking up the flavorful juices of the casserole, enhancing every mouthful.

  • Roasted Vegetables: Colorful roasted veggies like bell peppers and carrots add a sweet, earthy element. Plus, they complement the nutritious vibe of the turkey and zucchini.

  • Sautéed Spinach: This simple dish offers a fantastic nutritional boost. Just a splash of olive oil and garlic will elevate the flavor while adding a vibrant green.

  • Quinoa Pilaf: A light and nutty grain dish that mirrors the casserole’s heartiness. Sprinkle with herbs for an added layer of flavor that ties the meal together beautifully.

  • Chilled White Wine: A crisp Sauvignon Blanc or a light Pinot Grigio will bring brightness and acidity, perfectly matching the savory notes of the casserole.

  • Chocolate Mousse: End on a sweet note with a rich chocolate mousse. The silky texture and deep flavor make it a decadent finale to a healthy meal.

How to Store and Freeze Ground Turkey Zucchini Casserole

Fridge: Store leftovers in an airtight container for up to 4 days. This makes it easy to enjoy this nutritious dish throughout the week!

Freezer: For longer storage, freeze the casserole wrapped tightly in plastic wrap and aluminum foil for up to 3 months. Thaw it in the fridge overnight before baking.

Reheating: When ready to serve, reheat in the oven at 350°F (175°C) for about 20-25 minutes until heated through, or microwave individual portions for convenience. Enjoy your Ground Turkey Zucchini Casserole anytime!

Make-Ahead Tip: Prepare the casserole in advance and refrigerate it, then bake it fresh when you’re ready to eat.

Expert Tips for Ground Turkey Zucchini Casserole

  • Drain Zucchini: Always sprinkle salt and let zucchini sit before mixing. This removes excess moisture, preventing a soggy Ground Turkey Zucchini Casserole.

  • Cook Thoroughly: Make sure the ground turkey is well-cooked (no pink) to ensure food safety and flavor.

  • Cheese Choices: Experiment with different cheese types—sharp cheddar adds a kick, while mozzarella provides creaminess. Both enhance the casserole beautifully.

  • Broiling Boost: If you prefer a golden, bubbly cheese crust, switch to broil for the last 2-3 minutes at the end of baking.

  • Make-Ahead Option: This casserole can be prepped in advance! Assemble it up to a day ahead and store it in the fridge, then bake when ready.

Make Ahead Options

These Savory Ground Turkey Zucchini Casseroles are perfect for meal prep fans looking to save time during the week! You can prepare the filling (ground turkey, zucchini, onions, garlic, and spices) up to 24 hours in advance by cooking and storing it in an airtight container in the refrigerator. For maximum flavor retention, allow the mixture to cool before sealing. When you’re ready to bake, simply transfer the mixture to a greased baking dish, top with shredded cheese, and bake at 350°F for 20-25 minutes until bubbly. This way, you’ll have a delicious, one-dish meal ready with minimal effort after a long day!

Ground Turkey Zucchini Casserole Variations

Feel free to play around with this recipe and make it your own, bursting with flavors and textures!

  • Quinoa Swap: Replace groats with quinoa for a gluten-free option that cooks faster and adds a nutty flavor.

  • Cheese Variety: Explore using feta or pepper jack cheese for a tangy or spicy kick, respectively, adding to the flavor profile wonderfully.

  • Veggie Boost: Toss in chopped bell peppers or spinach for added nutrition and color. The more veggies, the merrier!

  • Heat Level: Add crushed red pepper flakes for a subtle heat that warms up the dish without overpowering the flavors.

  • Ground Beef Alternative: For a heartier taste, substitute ground turkey with lean ground beef. You’ll find it adds a richer flavor while keeping things light.

  • Herbal Twist: Replace dried oregano with fresh herbs like thyme or rosemary for an aromatic touch that brightens the dish.

  • Creamy Element: Stir in a dollop of Greek yogurt or sour cream before baking for a creamy, dreamy texture that makes each bite even more delightful.

  • Seasoning Change-Up: Experiment with taco seasoning or curry powder for a fun twist, taking the casserole to a whole different flavor territory that’s sure to excite your palate.

If you’re searching for more delicious ideas, why not try this Hobo Casserole or the comforting Shepherd’s Pie Ground for another variation on a cozy meal?

Ground Turkey Zucchini Casserole Recipe FAQs

What type of zucchini should I use for the casserole?
It’s best to use fresh, firm zucchini that’s free from dark spots or soft spots. Look for medium-sized zucchini for the best flavor and texture. If you encounter larger zucchinis, they might have more seeds and be less flavorful, so it’s wise to choose those smaller ones!

How do I store leftovers of the Ground Turkey Zucchini Casserole?
Store any leftover casserole in an airtight container in the refrigerator for up to 4 days. This allows you to enjoy this delicious meal multiple times throughout the week without losing flavor or texture. Just reheat portions in the oven or microwave when you’re ready to dig in!

Can I freeze the Ground Turkey Zucchini Casserole?
Absolutely! You can freeze the unbaked casserole. Wrap it tightly in plastic wrap and then in aluminum foil to prevent freezer burn. It can be stored for up to 3 months. When you’re ready to enjoy it, simply thaw it in the refrigerator overnight, then bake it as directed.

What if my casserole turns out watery?
If you find that your casserole is watery, it’s usually due to insufficient drainage of the zucchini or using too many watery ingredients like fresh tomatoes. To avoid this, always salt and let zucchini sit for about 15 minutes before mixing it in. Pat it dry with a paper towel, and ensure you drain canned tomatoes well before using them.

Is this casserole suitable for pets or those with allergies?
While the Ground Turkey Zucchini Casserole is healthy for humans, it’s best to avoid feeding it to pets due to garlic and onions, which can be harmful to them. As for allergies, it’s always a good idea to check for specific ingredients that may trigger allergic reactions, particularly with regards to cheese or grains added in variations of the recipe.

How can I adapt this recipe for gluten-free diets?
For a gluten-free option, simply replace groats with certified gluten-free quinoa or brown rice. Always double-check ingredient labels for any potential gluten-containing additives. This way, you can enjoy the wholesome goodness of the Ground Turkey Zucchini Casserole without any worry!

Ground Turkey Zucchini Casserole

Ground Turkey Zucchini Casserole: A Comforting Healthy Delight

Ground Turkey Zucchini Casserole is a quick, healthy one-dish meal that transforms everyday ingredients into a nourishing dinner.
Prep Time 15 minutes
Cook Time 25 minutes
Cooling Time 5 minutes
Total Time 45 minutes
Servings: 6 servings
Course: Dinner
Cuisine: American
Calories: 350

Ingredients
  

For the Casserole
  • 1 lb Ground Turkey 85-93% lean for moisture balance
  • 2 cups Zucchini Salt and drain to avoid excess moisture
  • 2 cups Groats (or Brown Rice/Quinoa) Cook ahead, or use as substitutes
  • 1 can Diced Tomatoes (drained) Draining prevents a watery casserole
  • 1 medium Onion Yellow or white for maximum flavor
  • 2 cloves Garlic Fresh minced or crushed for best flavor
  • 1 tsp Oregano Season to taste
  • 1 tsp Paprika Season to taste
  • 1 tbsp Basil Add during baking for vibrant flavor
  • 1 cup Shredded Cheese Experiment with your favorite cheese blend
Optional Toppings
  • 1 tbsp Fresh Parsley or Basil For garnish right before serving
  • 1 cup Extra Cheese Add for a gooier finish

Equipment

  • large skillet
  • 9x13 baking dish

Method
 

Step-by-Step Instructions for Ground Turkey Zucchini Casserole
  1. Preheat your oven to 350°F (175°C) and prepare your baking dish.
  2. In a large skillet, heat olive oil and cook ground turkey for about 8-10 minutes.
  3. Add diced onion and minced garlic to the skillet and cook for an additional 2 minutes.
  4. Stir in chopped zucchini and cook for 3-4 minutes until slightly softened.
  5. Incorporate groats, drained tomatoes, oregano, and paprika, mixing thoroughly.
  6. Pour the mixture into a greased 9x13 baking dish and spread evenly.
  7. Sprinkle shredded cheese on top and bake uncovered for 20-25 minutes.
  8. Remove from oven, cool for a few minutes, then serve.

Nutrition

Serving: 1servingCalories: 350kcalCarbohydrates: 30gProtein: 28gFat: 15gSaturated Fat: 7gPolyunsaturated Fat: 3gMonounsaturated Fat: 8gCholesterol: 90mgSodium: 600mgPotassium: 700mgFiber: 4gSugar: 4gVitamin A: 600IUVitamin C: 20mgCalcium: 200mgIron: 3mg

Notes

Always drain zucchini to prevent a soggy casserole. You can experiment with different cheeses for variety.

Tried this recipe?

Let us know how it was!

Gluten Free Reindeer Chow: A Festive Treat for All Ages

As I stood in my kitchen, the air filled with the sweet scent of melted chocolate, the holiday spirit wrapped around me like a cozy blanket. That’s when I decided to whip up a batch of Gluten Free Reindeer Chow, a festive snack that’s not only delightful but also caters to every dietary need. This easy-to-make treat combines the satisfying crunch of Chex mix, popcorn, and pretzels, all coated in creamy dairy-free white chocolate and adorned with vibrant sprinkles. With minimal prep time and no baking required, this festive recipe is perfect for when you’re short on time but want to impress. Plus, it’s a crowd-pleaser that everyone can enjoy, making it an ideal addition to your Christmas celebrations. Curious how to elevate your holiday gatherings with this scrumptious snack? Let’s dive in!

Why Will You Love Gluten Free Reindeer Chow?

Simplicity at Its Best: With no baking required, this recipe is an incredibly quick and easy way to add festive cheer to your holiday spread.
Endless Customization: Feel free to add your favorite mix-ins, whether crushed candy canes or other sprinkles, making each batch uniquely yours.

Crowd-Pleasing Appeal: It’s a delightful treat that caters to everyone—gluten-free, dairy-free, and vegan friends included! Ideal for sharing at parties or packaging as gifts.

Festive Flavor Explosion: The combination of salty pretzels and sweet chocolate creates an irresistible taste that captures the essence of the holidays.

Time-Saving Option: Whip up this treat in just 15 minutes, leaving you more time to enjoy the festivities and perhaps make a warm bowl of Summer Corn Chowder for a comforting addition.

Gluten Free Reindeer Chow Ingredients

For the Base

  • Chex mix – Provides a satisfying crunch; ensure it’s certified gluten-free for the best result.
  • Popcorn – Adds an airy texture; fresh-popped is preferred for maximum flavor.
  • Pretzels – Offers a salty contrast; opt for gluten-free varieties if needed.
  • Dry roasted peanuts – Adds a nice crunch and nutty flavor; choose unsalted if preferred.

For the Coating

  • Dairy-free white chocolate – Delivers sweetness and acts as the binding agent for the chow; essential for gluten-free Reindeer Chow.
  • Coconut oil – Smoothens the melted chocolate, ensuring a perfect coat without overpowering the flavor.

For Festive Touch

  • Christmas sprinkles – Adds visual appeal and fun; mix it up with your favorite colors or shapes!
  • Crushed candy canes – For a minty burst of flavor; a seasonal twist that everyone will adore!

This delightful selection of ingredients makes your Gluten Free Reindeer Chow not only festive but also fit for a variety of dietary preferences. Enjoy the creative process!

Step‑by‑Step Instructions for Gluten Free Reindeer Chow

Step 1: Mix the Base Ingredients
In a large mixing bowl, combine 4 cups of Chex mix, 4 cups of popcorn, 2 cups of pretzels, and 1 cup of dry roasted peanuts. Gently toss these crunchy components together until they are evenly distributed, creating a delightful base for your Gluten Free Reindeer Chow. Set the mixture aside while you prepare the chocolate coating, ensuring the textures are ready to soak up that sweetness.

Step 2: Melt the Chocolate
In a microwave-safe bowl, combine 1 cup of dairy-free white chocolate chips with 2 tablespoons of coconut oil. Heat the mixture in the microwave in 30-second intervals, stirring in between, until the chocolate is smooth and fully melted—this should take about 1-2 minutes total. Keep an eye on it to prevent burning, and once melted, remove it from the microwave to begin coating your crunchy mixture.

Step 3: Coat the Crunchy Mixture
Pour the warm melted chocolate over the prepared Chex mix, popcorn, pretzels, and peanuts. Using a spatula, gently fold and stir the mixture until all the pieces are well-coated in that creamy chocolate goodness. Make sure that every bite of your Gluten Free Reindeer Chow is enveloped in a rich layer of chocolate, creating a delightful blend of flavors and textures.

Step 4: Add Festive Touches
If desired, fold in 1 cup of Christmas sprinkles or any additional festive mix-ins, like crushed candy canes for a minty twist. This step adds visual appeal and enhances the festive spirit of your Gluten Free Reindeer Chow. Stir until the sprinkles are evenly distributed, allowing colors to brighten each bite, making this treat irresistibly cheerful.

Step 5: Set and Chill
Spread the coated mixture evenly onto a parchment-lined baking sheet, ensuring it’s in a single layer for even cooling. Place the sheet in the refrigerator and let it chill for at least 30 minutes, or until the chocolate has fully set. This ensures the pieces of your Gluten Free Reindeer Chow hold together and creates that satisfying crunch everyone loves.

Step 6: Break and Serve
Once set, remove the baking sheet from the refrigerator. Using your hands or a spatula, break the mixture into pieces of your desired size. Serve this scrumptious Gluten Free Reindeer Chow in festive bowls at your holiday gathering or pack them into gift bags for a charming, shareable treat that everyone can enjoy. Store any leftovers in an airtight container at room temperature for up to a week.

Make Ahead Options

These Gluten Free Reindeer Chow are perfect for meal prep, making your holiday festivities stress-free! You can prepare the crunchy base (Chex mix, popcorn, pretzels, and peanuts) up to 3 days in advance and store it in an airtight container at room temperature to maintain freshness. When you’re ready to finish, simply melt the dairy-free white chocolate and coconut oil, coat the crunchy mixture, and fold in your festive sprinkles before refrigerating for at least 30 minutes until set. This way, you can have your party treat ready to go and still enjoy that deliciously crunchy, sweet flavor everyone loves, without the last-minute rush!

What to Serve with Gluten Free Reindeer Chow

Looking to create a festive celebration that dazzles the senses? Let’s put together a holiday spread that complements the joy of this delightful treat!

  • Hot Cocoa Bar: A rich, creamy hot cocoa pairs beautifully, warming chilly days and enhancing the festive atmosphere.

  • Gingerbread Cookies: Their spicy sweetness balances the sweetness of the Reindeer Chow, perfect for holiday sharing with family and friends.

  • Fruit and Nut Platter: A colorful assortment of fresh fruits and crunchy nuts adds a refreshing contrast to the sweetness of the chow, elevating the snack experience.

  • Apple Cider: Serve warm or chilled, this classic drink enhances the spirit of the season while harmonizing with the festive flavors of your treat.

  • Mini Cheesecakes: The creamy texture and tartness of mini cheesecakes create a delightful balance, inviting everyone to indulge in a rich yet light dessert option.

  • Christmas Spritz Cookies: These bite-sized treats offer a buttery flavor that perfectly complements the sweet and crunchy elements of Gluten Free Reindeer Chow. Each bite is a hug for your taste buds!

  • Nutella Dipped Fruit Skewers: Sweet and indulgent, these skewers add a touch of whimsy, drawing everyone to the dessert table with a playful flourish.

  • Sparkling Water with Citrus: A refreshing, fizzy option that cleanses the palate, enhancing the overall flavor experience while keeping things light and festive.

  • Pecan Pie Bites: A sweet treat with layers of flavor, they provide a delightful crunch that matches beautifully with your Reindeer Chow.

  • Eggnog: This creamy holiday classic invites warmth and nostalgia, making it a comforting pairing that ties the meal together deliciously.

How to Store and Freeze Gluten Free Reindeer Chow

Room Temperature: Store in an airtight container at room temperature for up to 7 days, keeping them fresh and crunchy for holiday snacking.

Fridge: If you prefer, you can keep the chow in the refrigerator for up to 2 weeks. Just ensure it’s in an airtight container to prevent it from absorbing any unwanted odors.

Freezer: For longer storage, freeze your Gluten Free Reindeer Chow in an airtight container or freezer bag for up to 3 months. Thaw in the fridge when ready to enjoy.

Reheating: There’s no need to reheat this treat, simply let it come to room temperature after freezing, and it’s ready to serve!

Gluten Free Reindeer Chow Inspirations

Get ready to unleash your creativity and make this festive treat truly yours with delightful twists and swaps.

  • Nut-Free Delight: Substitute peanuts with sunflower seeds or pumpkin seeds for a crunchy kick, ensuring it’s safe for those with nut allergies.

  • Minty Freshness: Swap in peppermint extract for a refreshing twist, or add crushed candy canes for that seasonal mint flavor.

  • Chocolate Lovers Unite: Use dark chocolate chips instead of dairy-free white chocolate to satisfy any chocolate cravings. It’ll deepen the flavor profile beautifully!

  • Fruit Fusion: Add a handful of dried cranberries or chopped dried apricots for a sweet and fruity twist, enhancing both flavor and texture.

  • Spicy Kick: For heat lovers, sprinkle in a pinch of cayenne pepper or chili powder to the chocolate mix for a surprising zing that enhances the sweetness.

  • Decadent Drizzle: Drizzle melted dairy-free chocolate on top after chilling for an extra layer of richness—an indulgent treat that’ll wow anyone!

  • Festive Sprinkles: While traditional Christmas sprinkles are fun, swap in edible glitter or themed candies like gumdrops for a whimsical touch that kids will love.

With these variations, your Gluten Free Reindeer Chow can become a unique contribution to any holiday gathering. Enjoy the festive creativity on your treats, and perhaps think about pairing them with a cozy bowl of Summer Corn Chowder for a heartwarming meal!

Expert Tips for Gluten Free Reindeer Chow

  • Choose Quality Ingredients: Use certified gluten-free Chex mix and dairy-free white chocolate to ensure your Gluten Free Reindeer Chow is safe for everyone.

  • Melt Carefully: When melting chocolate, do it in small increments to avoid burning. Stir frequently for a smooth finish—chocolate should be fluid but not overheated.

  • Cool for Crunch: Let your mix chill in the refrigerator for at least 30 minutes to set perfectly. This will ensure a delightful crunch and ease when breaking into pieces.

  • Add Personal Touches: Feel free to swap peanuts for sunflower seeds or add festive spices. Experimenting brings your unique flair to this Gluten Free Reindeer Chow!

  • Store Properly: Keep your treats in an airtight container at room temperature to maintain freshness for up to a week—it’s hard to resist more than one piece!

Gluten Free Reindeer Chow Recipe FAQs

How do I choose the right Chex mix for this recipe?
Absolutely! When selecting Chex mix, be sure to look for a certified gluten-free label to ensure it’s safe for those with gluten sensitivities. You can use either rice or corn Chex varieties, depending on your preference. A mix of both often adds great texture!

How should I store leftover Gluten Free Reindeer Chow?
You can keep your Gluten Free Reindeer Chow in an airtight container at room temperature for up to 7 days. If you find it less crunchy after a few days, try storing it in the fridge instead, which can help maintain its freshness for about 2 weeks. Just make sure it’s sealed to avoid absorbing odors.

Can I freeze Gluten Free Reindeer Chow?
Absolutely! Freezing is a fantastic option for longer storage. Place your Gluten Free Reindeer Chow in an airtight container or freezer bag, ensuring you squeeze out excess air. It can stay good in the freezer for up to 3 months. When you’re ready to enjoy it, simply let it thaw in the fridge overnight.

What if my chocolate gets too thick when melting?
No worries! If your chocolate thickens or hardens while melting, you can add a teaspoon of coconut oil to regain its fluidity. This helps it smooth out and become easier to coat your mix. Just remember to melt in short intervals, stirring often to prevent scorching, as that will make it thick and lumpy.

Is this recipe suitable for people with nut allergies?
Yes, you can easily modify this recipe to make it nut-free! Simply omit the dry roasted peanuts and substitute them with sunflower seeds or pumpkin seeds for that crunch without the nut allergies. This way, everyone can delight in the flavors of your Gluten Free Reindeer Chow!

Can I use different sprinkles or toppings?
Very! One of the best parts about this recipe is its customizability. Swap out traditional Christmas sprinkles for crushed candy canes, mini chocolate chips, or even dried fruits. Have fun experimenting, and make each batch feel personal according to your taste or seasonal themes!

Gluten Free Reindeer Chow

Gluten Free Reindeer Chow: A Festive Treat for All Ages

Enjoy this delightful Gluten Free Reindeer Chow, a festive snack perfect for all dietary needs and full of holiday spirit.
Prep Time 15 minutes
Chilling Time 30 minutes
Total Time 45 minutes
Servings: 12 servings
Course: Dessert
Cuisine: American
Calories: 200

Ingredients
  

For the Base
  • 4 cups Chex mix Ensure it's certified gluten-free
  • 4 cups Popcorn Fresh-popped is preferred
  • 2 cups Pretzels Opt for gluten-free varieties if needed
  • 1 cup Dry roasted peanuts Choose unsalted if preferred
For the Coating
  • 1 cup Dairy-free white chocolate Essential for gluten-free Reindeer Chow
  • 2 tablespoons Coconut oil Smoothens the melted chocolate
For Festive Touch
  • 1 cup Christmas sprinkles Mix it up with your favorite colors or shapes
  • 1 cup Crushed candy canes For a minty burst of flavor

Equipment

  • Microwave
  • Mixing Bowl
  • Parchment paper
  • Spatula

Method
 

Step-by-Step Instructions
  1. In a large mixing bowl, combine 4 cups of Chex mix, 4 cups of popcorn, 2 cups of pretzels, and 1 cup of dry roasted peanuts. Gently toss these components together.
  2. In a microwave-safe bowl, combine 1 cup of dairy-free white chocolate chips with 2 tablespoons of coconut oil. Heat in 30-second intervals, stirring until smooth.
  3. Pour the melted chocolate over the prepared mixture. Gently fold and stir until all pieces are well-coated.
  4. Fold in 1 cup of Christmas sprinkles or crushed candy canes for a festive touch. Stir until evenly distributed.
  5. Spread the coated mixture onto a parchment-lined baking sheet in a single layer. Chill in the refrigerator for at least 30 minutes.
  6. Once set, break the mixture into pieces and serve in festive bowls or pack into gift bags.

Nutrition

Serving: 1servingCalories: 200kcalCarbohydrates: 24gProtein: 3gFat: 10gSaturated Fat: 5gPolyunsaturated Fat: 1gMonounsaturated Fat: 3gSodium: 150mgPotassium: 100mgFiber: 1gSugar: 12gCalcium: 2mgIron: 4mg

Notes

Store any leftovers in an airtight container at room temperature for up to a week. Chill for a crunchy texture.

Tried this recipe?

Let us know how it was!

Delicious Vanilla Chia Pudding for Creamy Mornings

With the first spoonful, I was instantly transported to a cozy morning, the aromatic scent of cinnamon wafting through the kitchen. What I discovered was a game changer: Vanilla Chia Pudding with Cinnamon. This delightful treat not only delivers a creamy, luxurious texture but also packs a nutritional punch, making it perfect for busy mornings or a nourishing snack anytime. Its versatility means you can effortlessly customize it to suit your taste, whether you prefer it with a hint of chocolate or a tropical twist. Best of all, it’s dairy-free and gluten-free, letting you enjoy a guilt-free indulgence. What will you top yours with—fresh berries, crushed nuts, or a sprinkle of extra cinnamon? Let’s dive into this easy and delicious recipe together!

Why is Vanilla Chia Pudding Amazing?

Creamy Texture: Each spoonful of this pudding is silky smooth, offering a dessert-like experience.

Nutritious Base: Packed with omega-3 fatty acids and fiber from chia seeds, it’s both delicious and health-conscious.

Quick and Simple: With minimal prep time and just a handful of ingredients, busy mornings will never feel overwhelming again!

Versatile Flavors: Customize easily! Enjoy classic vanilla, chocolate, or even a tropical coconut style — your choice!

Make-Ahead Friendly: Perfect for meal prep, it keeps well in the fridge, ready to be enjoyed whenever you need a pick-me-up.

For other delightful meal prep ideas, check out my yummy Mango Coconut Pudding and perfect Rhubarb Scones Vanilla recipes!

Vanilla Chia Pudding Ingredients

• Get ready to create a creamy delight!

For the Pudding

  • Chia Seeds – Essential for that luscious texture; they soak up the milk and expand to create the pudding-like consistency.
  • Almond Milk – A creamy, dairy-free base that enhances the pudding’s richness; feel free to substitute with coconut, oat, or soy milk if desired.
  • Vanilla Extract – It brings a delightful sweetness and warmth; using pure vanilla bean paste can elevate the flavor even more.
  • Maple Syrup – This natural sweetener balances the flavors; if you’re looking for a low-carb option, agave nectar or a sugar-free sweetener works wonderfully.
  • Ground Cinnamon – It adds warmth and depth, complementing the vanilla perfectly; consider other spices like nutmeg for an extra kick.

Optional Toppings

  • Fresh Berries – These add a burst of freshness and antioxidants; strawberries, blueberries, or raspberries are all great options.
  • Crushed Nuts – A fantastic way to add crunch and healthy fats; try almonds or walnuts for a tasty twist.
  • Extra Cinnamon – A light sprinkle can enhance the dish’s cozy aroma and flavor; don’t be shy!

Now you’re all set to whip up this delicious Vanilla Chia Pudding! What will you top yours with?

Step‑by‑Step Instructions for Vanilla Chia Pudding

Step 1: Combine the Ingredients
In a medium mixing bowl, gather your chia seeds, almond milk, vanilla extract, maple syrup, and ground cinnamon. Using a whisk, mix the ingredients together thoroughly until they reach a smooth consistency. This simple blend of flavors creates the foundation for your creamy Vanilla Chia Pudding.

Step 2: Whisk and Rest
After your initial whisking, let the mixture rest for 5 minutes. This allows the chia seeds to absorb the liquid and swell. Once the time is up, whisk the mixture again to avoid clumping. You should see a slightly thicker, more cohesive texture forming as the chia seeds begin to soak.

Step 3: Refrigerate for Thickness
Cover the bowl with plastic wrap or a lid, and place it in the refrigerator. Allow the mixture to chill for at least 2 hours, or ideally, overnight. This resting period is crucial, as it allows the Vanilla Chia Pudding to thicken to the perfect gel-like consistency, making every spoonful silky smooth.

Step 4: Stir Before Serving
Once your pudding has set, take it out of the refrigerator and give it a gentle stir. This will help to break up any clumps that may have formed. The pudding should now have a creamy texture, ready to impress your taste buds.

Step 5: Add Toppings and Serve
Portion the Vanilla Chia Pudding into serving bowls. You can enjoy it plain, or jazz it up with your favorite toppings such as fresh berries, crushed nuts, or an extra sprinkle of cinnamon. This step allows for personalization, turning each bowl into a unique treat that aligns with your taste preferences.

Expert Tips for Vanilla Chia Pudding

  • Whisk Thoroughly: Make sure to whisk the mixture well to avoid any clumping of chia seeds, which can affect the pudding texture.

  • Chill Overnight: For the best flavor and texture, allow the pudding to set in the refrigerator overnight; this gives the chia seeds ample time to absorb the liquid.

  • Storage Guidance: Store any leftover Vanilla Chia Pudding in an airtight container for up to 5 days; just remember to re-whisk before serving to restore creaminess.

  • Experiment with Toppings: Don’t hesitate to get creative with toppings! Pairings like banana slices or almond slices can elevate your Vanilla Chia Pudding experience.

  • Adjust Sweetness: If you find the pudding too sweet or not sweet enough, feel free to adjust the amount of maple syrup to suit your taste preferences.

How to Store and Freeze Vanilla Chia Pudding

Fridge: Store your Vanilla Chia Pudding in an airtight container in the refrigerator for up to 5 days. Remember to give it a gentle re-whisk before enjoying to restore its creamy texture.

Freezer: If you want to freeze your chia pudding for later, transfer it to a freezer-safe container and store it for up to 2 months. Thaw in the fridge overnight before serving.

Portioning: For meal prep, consider storing individual servings in small containers. This makes it easy to grab a nutritious breakfast or snack on busy days.

Toppings: Avoid adding fresh fruit or toppings until you’re ready to serve, as they may alter the texture of your Vanilla Chia Pudding during storage.

Vanilla Chia Pudding Variations

Indulging in this creamy pudding can be an adventure as you explore endless possibilities to customize it!

  • Dairy-Free: Use coconut milk instead of almond milk for a tropical twist that complements the chia beautifully.
  • Chocolate Delight: Replace vanilla extract with cocoa powder, and add dark chocolate chips for an irresistible chocolatey experience.
  • Tropical Paradise: Swap in coconut milk, and top with fresh mango and a sprinkle of toasted coconut for a vibrant flavor burst.
  • Keto Magic: Utilize a sugar-free sweetener and heavy cream to create a keto-friendly version without sacrificing richness.
  • Spiced Twist: Add a pinch of nutmeg or cardamom alongside the cinnamon to deepen the flavor and warmth of the pudding.
  • Nutty Crunch: Top with crushed walnuts or almonds for a pleasant crunch that adds texture to your pudding.
  • Berry Burst: Introduce a medley of fresh fruits like strawberries or blueberries to brighten the flavor and enhance the nutrition.
  • Maple Variance: Experiment with agave nectar or honey for sweetness, offering a different flavor profile that suits your palate.

For even more delightful treats, don’t miss my delicious Mango Coconut Pudding or dive into the perfect combination of flavors in these Rhubarb Scones Vanilla. The possibilities are endless!

Make Ahead Options

These Vanilla Chia Pudding cups are perfect for meal prep to save you time during busy mornings! You can prepare the entire pudding mixture up to 24 hours in advance and store it in the refrigerator. Simply whisk together the chia seeds, almond milk, vanilla extract, maple syrup, and ground cinnamon, then refrigerate it overnight to achieve that silky texture. For the best flavor and consistency, be sure to stir the pudding before serving, as this will promote an even creaminess. Add your desired toppings, like fresh berries or crushed nuts, right before enjoying, ensuring that each serving remains fresh and delicious. This easy make-ahead option allows you to enjoy a nutritious treat without skipping a beat in your schedule!

What to Serve with Vanilla Chia Pudding with Cinnamon

For a deliciously balanced meal, consider these delightful pairings that enhance the creamy flavors of your pudding.

  • Fresh Fruit Salad: A vibrant mix of seasonal fruits adds a refreshing contrast, offering a burst of natural sweetness that complements the pudding beautifully.

  • Yogurt Parfait: Layer dairy-free yogurt with the chia pudding, adding granola for crunch—a satisfying way to start your day.

  • Nut Butter Toast: Pair the pudding with a slice of whole grain toast spread with almond or peanut butter for added richness and protein.

  • Warm Spiced Chai Tea: This cozy beverage, with its blend of spices, offers a comforting note that echoes the warmth of cinnamon in the pudding.

  • Coconut Granola: Crunchy, toasted coconut granola sprinkled over the pudding adds texture and a tropical vibe that pairs perfectly with your creamy base.

  • Dark Chocolate Shavings: For those craving something sweet, a sprinkle of dark chocolate shavings elevates the dish, harmonizing with the vanilla and cinnamon flavors.

Imagine indulging in your Vanilla Chia Pudding while savoring the warmth from a cup of spiced chai, the perfect way to kickstart your morning routine!

Vanilla Chia Pudding Recipe FAQs

How do I choose ripe chia seeds?
Absolutely! When selecting chia seeds, look for ones with a shiny, glossy appearance. Avoid seeds that are clumpy or have dark spots, as this may indicate poor quality. Fresh chia seeds should be plump and free from any signs of rancidity.

What’s the best way to store leftover Vanilla Chia Pudding?
Very simple! Store your delicious Vanilla Chia Pudding in an airtight container in the refrigerator. It will stay fresh for up to 5 days. Just give it a gentle re-whisk before enjoying, to help revive that creamy texture!

Can I freeze my Vanilla Chia Pudding?
Absolutely! To freeze, transfer the pudding into a freezer-safe container, leaving a little space at the top for expansion. It can be stored in the freezer for up to 2 months. When you’re ready to enjoy, thaw it overnight in the refrigerator and stir to restore creaminess before serving.

What if my pudding doesn’t thicken?
If your pudding remains too runny, it’s likely the chia seeds didn’t absorb enough liquid. No worries! Just whisk in another tablespoon of chia seeds and let it sit for an additional 30 minutes. This should help it set properly. Be sure to keep whisking periodically to avoid clumping!

Are chia seeds safe for pets?
Generally, yes! Chia seeds are safe for most pets in small quantities. However, if you’re considering giving chia seeds to your furry friend, consult with your vet first, especially if they have existing health issues or dietary restrictions.

Can I adjust the sweetness in my Vanilla Chia Pudding?
Very easily! If you find the pudding too sweet or not sweet enough, feel free to adjust the maple syrup. You can start with a smaller amount and taste as you go, ensuring it fits your personal palate perfectly.

Vanilla Chia Pudding

Delicious Vanilla Chia Pudding for Creamy Mornings

Creamy and nutritious Vanilla Chia Pudding is perfect for busy mornings or a guilt-free snack, customizable with various toppings.
Prep Time 10 minutes
Resting Time 5 minutes
Total Time 2 hours 5 minutes
Servings: 2 bowls
Course: Breakfast
Cuisine: Vegan
Calories: 220

Ingredients
  

For the Pudding
  • 1/4 cup Chia Seeds Essential for that luscious texture
  • 1 cup Almond Milk Can substitute with coconut, oat, or soy milk
  • 1 teaspoon Vanilla Extract Using pure vanilla bean paste elevates flavor
  • 2 tablespoons Maple Syrup For a low-carb option, use agave nectar or a sugar-free sweetener
  • 1/2 teaspoon Ground Cinnamon Consider adding nutmeg for an extra kick
Optional Toppings
  • 1/2 cup Fresh Berries Strawberries, blueberries, or raspberries are great options
  • 2 tablespoons Crushed Nuts Try almonds or walnuts
  • 1 teaspoon Extra Cinnamon For an additional cozy aroma

Equipment

  • Mixing Bowl
  • Whisk
  • plastic wrap or lid

Method
 

Step-by-Step Instructions
  1. In a medium mixing bowl, combine chia seeds, almond milk, vanilla extract, maple syrup, and ground cinnamon. Whisk together until smooth.
  2. Let the mixture rest for 5 minutes to allow chia seeds to absorb the liquid.
  3. After resting, whisk again to prevent clumping and achieve a thicker texture.
  4. Cover the bowl and refrigerate for at least 2 hours, or ideally overnight.
  5. Once set, stir gently to break up any clumps before serving.
  6. Portion into bowls and add desired toppings like fresh berries, crushed nuts, or extra cinnamon.

Nutrition

Serving: 1bowlCalories: 220kcalCarbohydrates: 36gProtein: 5gFat: 8gSaturated Fat: 1gMonounsaturated Fat: 7gSodium: 150mgPotassium: 320mgFiber: 10gSugar: 8gVitamin A: 10IUVitamin C: 5mgCalcium: 15mgIron: 10mg

Notes

Store in an airtight container for up to 5 days in the fridge. Re-whisk before serving. Freezes well for up to 2 months.

Tried this recipe?

Let us know how it was!