Cheesy Skillet Lasagna: The One-Pan Comfort You Crave

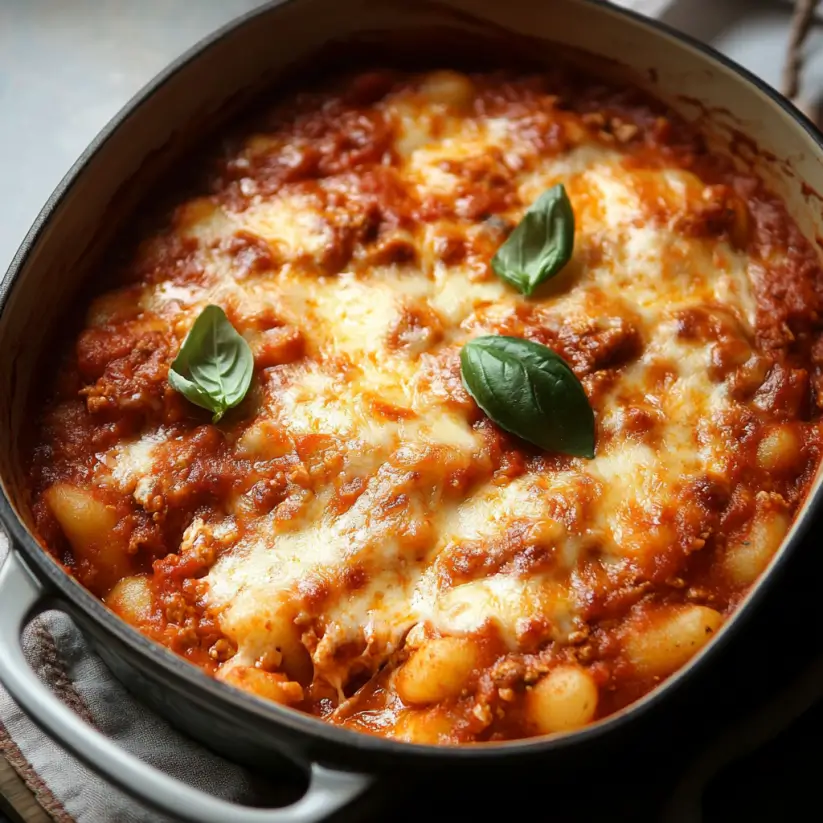
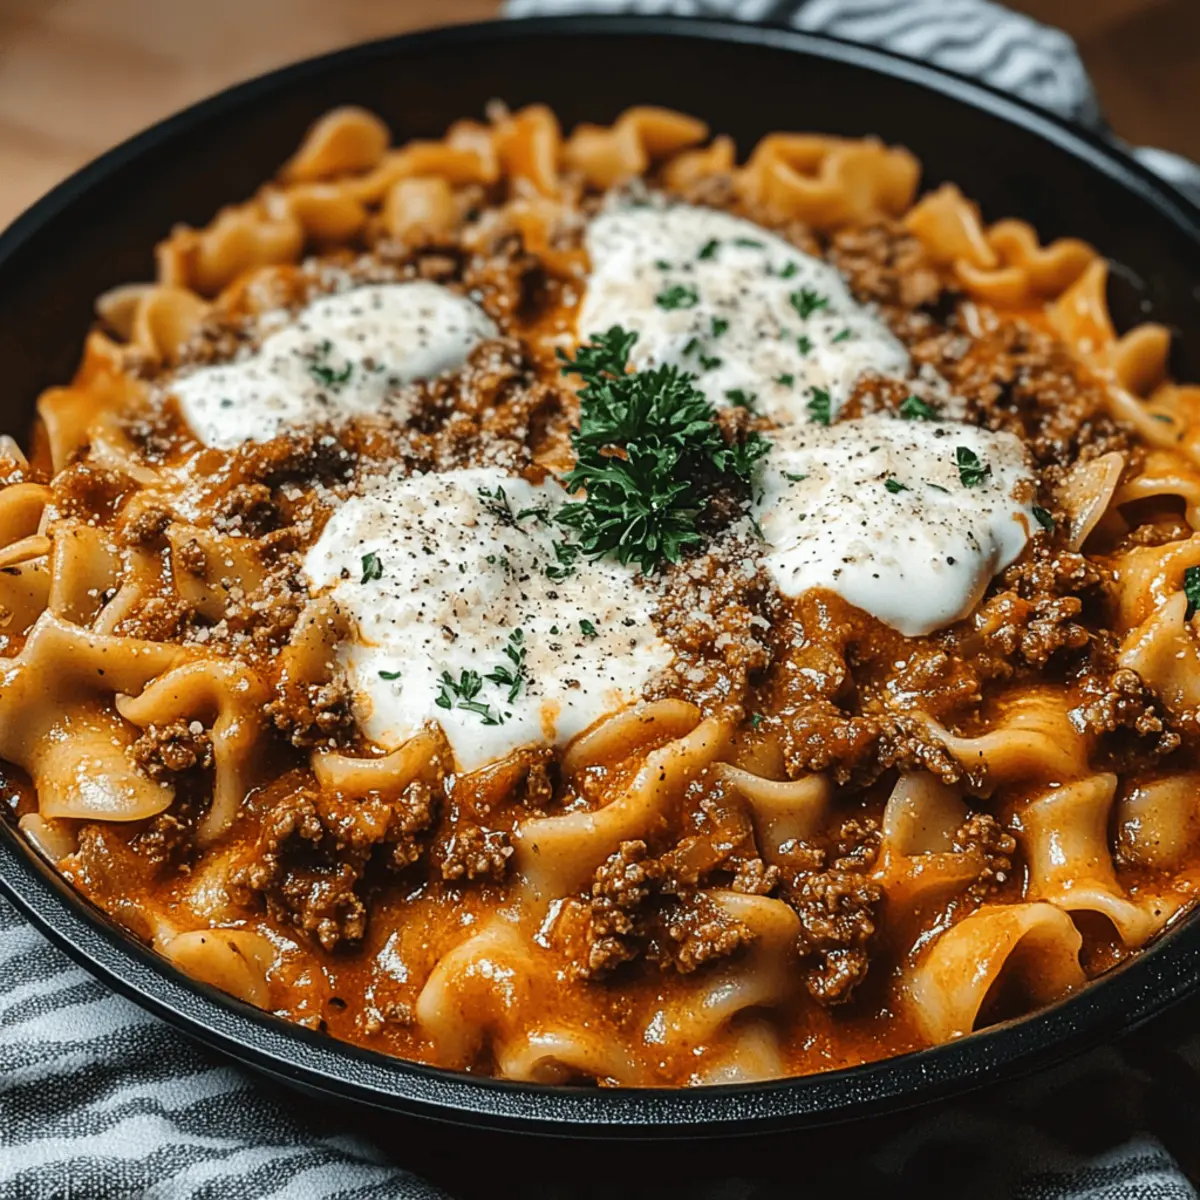
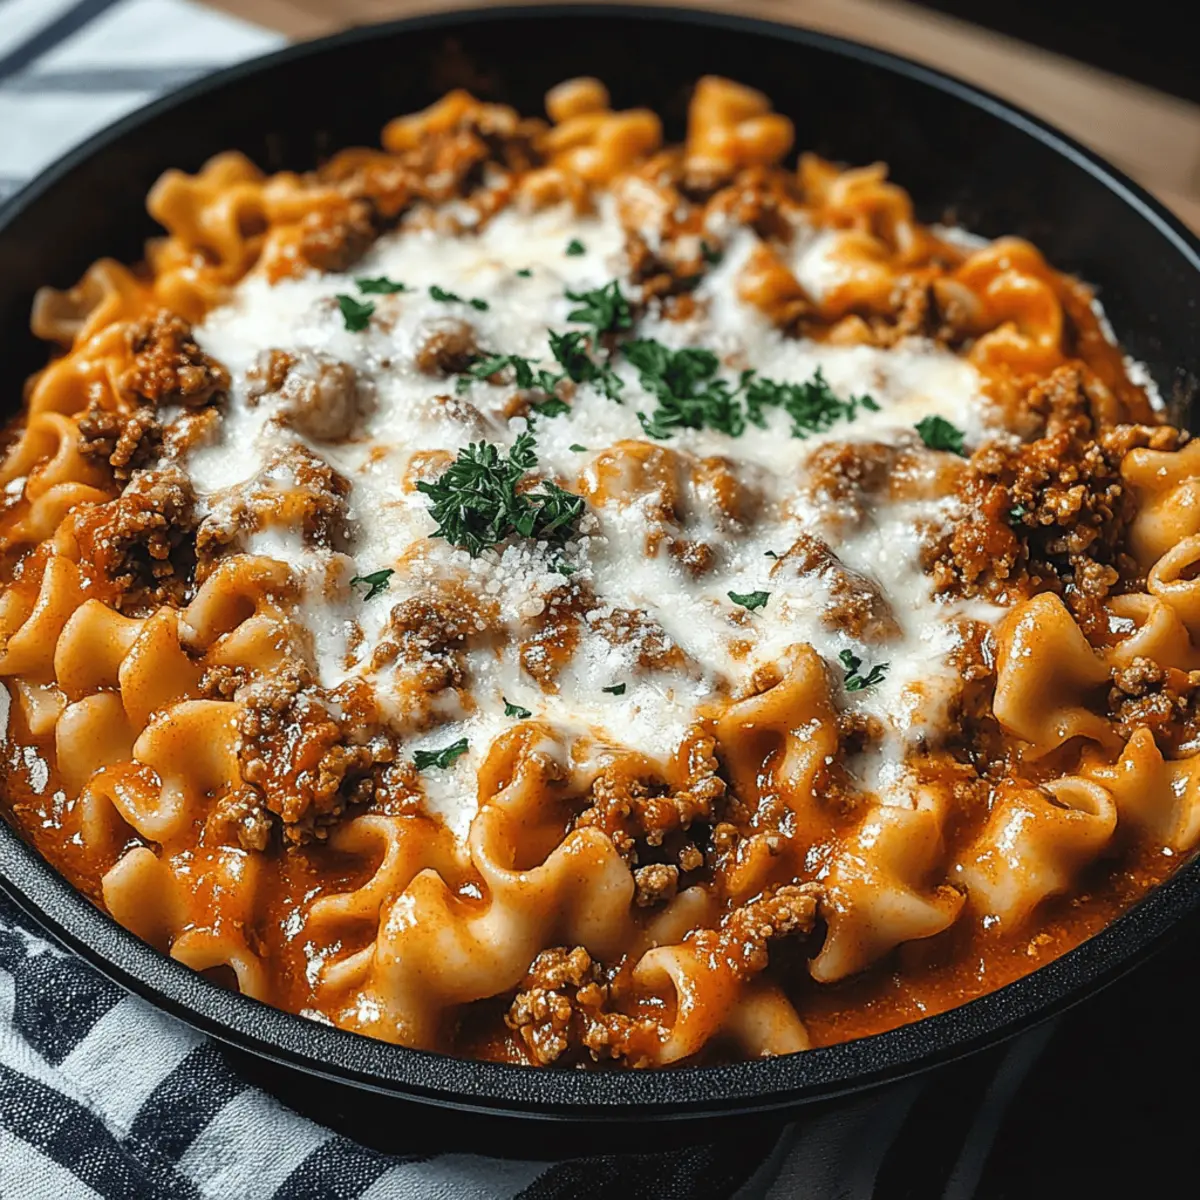
“Can you believe how many meals I’ve made in one skillet?” I overheard a friend exclaim at a dinner party last week. It got me thinking about how as home chefs, we often crave comfort food without the fuss of endless cleanup. Enter my Homestyle Cheesy Skillet Lasagna—a quick dinner that captures all the cozy, cheesy goodness of traditional lasagna but cuts the prep time dramatically! This one-pan wonder is perfect for hectic weeknights when you want something hearty yet satisfying, without spending hours in the kitchen. With lean ground beef, savory tomato broth, and delicate mafalda pasta all topped with molten mozzarella and Parmesan, it’s truly a delight for the senses. Are you ready to whip up this easy and comforting dish that will have everyone asking for seconds? Let’s dive into the recipe!

Why Choose Cheesy Skillet Lasagna?

Simplicity at Its Finest: This recipe boasts straightforward steps that anyone can master, making it perfect for home cooks of all skill levels.

Comfort Food Craving: Each bite is packed with the rich, cheesy flavor reminiscent of classic lasagna, satisfying your cravings effortlessly.

One-Pan Wonder: Enjoy a delicious meal without the hassle of multiple dishes; clean-up is a breeze!

Quick and Convenient: Ready in under an hour, it’s the ultimate solution for busy weeknights.

Versatile Options: Feel free to amp up the nutrition by adding veggies like spinach or bell peppers, or switch out the cheeses for a unique twist. Pair it with a fresh green salad or some garlic bread for a complete meal! If you’re looking for more quick dinner ideas, check out my Zucchini Sweet Skillet or Taco Lasagna Discover.

Cheesy Skillet Lasagna Ingredients

For the Base

  • Lean Ground Beef – This main protein offers a hearty foundation; ground turkey or chicken can be swapped for a lighter option.
  • Olive Oil – Essential for cooking the beef to perfection; any cooking oil like avocado or canola can be substituted.
  • Salt – Enhances the flavors; adjust according to taste preferences.
  • Black Pepper – Adds a hint of heat; freshly ground black pepper is always preferred for depth.
  • Garlic Powder – Provides a rich, aromatic flavor; fresh garlic can be used, with one clove replacing each teaspoon.
  • Onion Powder – Offers sweetness and aroma; fresh onions, finely chopped, can be used if desired.
  • Dried Oregano – Infuses an Italian flavor; you can substitute it with Italian seasoning if available.

For the Sauce

  • Marinara Sauce – The base layer of flavor; feel free to use homemade or your favorite store-bought option.
  • Beef Broth – Adds moisture and richness to the dish; vegetable broth works well for a vegetarian meal.

For the Pasta

  • Mafalda Pasta – This special shape mimics lasagna sheets; any short pasta such as penne or fusilli is an excellent alternative.

For the Topping

  • Grated Parmesan Cheese – A delightful cheesy topping; you can swap with pecorino or nutritional yeast for a dairy-free choice.
  • Shredded Mozzarella Cheese – Essential for that gooey texture; try other melting cheeses like cheddar for a different flair.

By gathering these Cheesy Skillet Lasagna ingredients, you’ll set the stage for a heartwarming meal that brings families together—perfect for those nights when you need comfort food without the lengthy preparation!

Step‑by‑Step Instructions for Cheesy Skillet Lasagna

Step 1: Brown the Beef
In a large skillet over medium heat, pour 1 tablespoon of olive oil and add 1 pound of lean ground beef. Use a wooden spoon to crumble the beef as it cooks, stirring occasionally, until it’s well browned and no longer pink, about 5–7 minutes. Once cooked, carefully drain excess fat from the skillet to keep your Cheesy Skillet Lasagna light and flavorful.

Step 2: Season the Meat
Season the browned beef directly in the skillet with 1 teaspoon of salt, 1 teaspoon of black pepper, 1 teaspoon of garlic powder, 1 teaspoon of onion powder, and 1 teaspoon of dried oregano. Stir everything together for about a minute to let the spices infuse the meat, creating a flavorful base for your Cheesy Skillet Lasagna.

Step 3: Create the Sauce
Next, pour in 2 cups of marinara sauce and 1 cup of beef broth, stirring to combine the ingredients in the skillet. Bring the mixture to a gentle boil, allowing those delicious flavors to meld together for about 2-3 minutes. The combination of marinara and broth will provide a rich sauce for your Cheesy Skillet Lasagna.

Step 4: Add the Pasta
Once boiling, add 8 ounces of mafalda pasta to the skillet, making sure it’s submerged in the sauce. Cover the skillet with a lid, reduce the heat to low, and let it simmer for 15–20 minutes. Stir occasionally to prevent the pasta from sticking and ensure even cooking, until the pasta is tender and has absorbed the flavors.

Step 5: Melt the Cheeses
After the pasta is cooked, sprinkle ½ cup of grated Parmesan cheese and 1 cup of shredded mozzarella cheese over the top. Cover the skillet again and let it sit for 2–3 minutes off the heat. This will allow the cheese to melt beautifully, creating that gooey, cheesy goodness that defines your Cheesy Skillet Lasagna.

Step 6: Serve and Enjoy
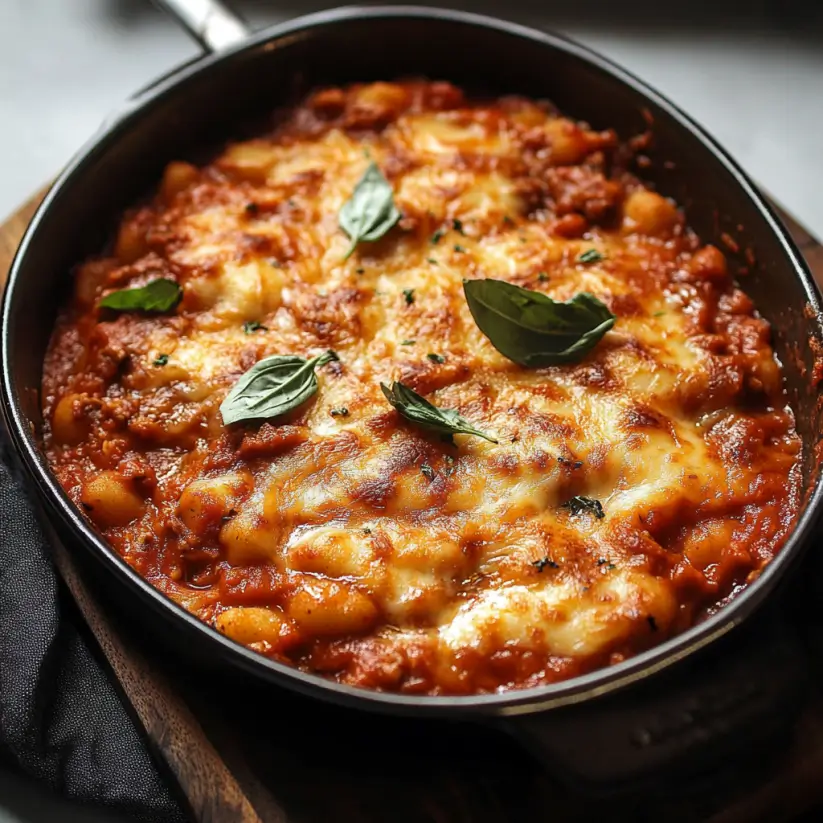
Once the cheese is melted, take off the lid and serve your Cheesy Skillet Lasagna hot. Use a large spoon to scoop out generous portions, making sure to get some of that cheesy topping in each serving. Pair it with garlic bread or a side salad for a balanced meal, and watch everyone come back for seconds!

Make Ahead Options

These Cheesy Skillet Lasagna components are perfect for meal prep! You can brown the ground beef and season it up to 24 hours ahead of time; just refrigerate it in an airtight container. Additionally, you can combine the marinara sauce and beef broth in advance for a quick start. When ready to cook, simply add the prepped beef to the skillet, mix in the marinara mixture, and bring it to a boil before adding the mafalda pasta. By prepping ahead, you’ll save valuable time, and your Cheesy Skillet Lasagna will be just as delicious on the day of serving!

Storage Tips for Cheesy Skillet Lasagna

  • Fridge: Store your Cheesy Skillet Lasagna in an airtight container for up to 3 days. This keeps leftovers fresh and flavorful.
  • Freezer: For longer storage, freeze the dish in a sealed container or freezer bag for up to 2 months. This makes meal prepping a cinch!
  • Reheating: When reheating, add a splash of beef broth or water to prevent it from drying out. Warm gently on the stovetop or in the microwave until heated through.
  • Serving Fresh: For the best taste and texture, enjoy your Cheesy Skillet Lasagna fresh, but don’t hesitate to savor those leftovers!

Expert Tips for Cheesy Skillet Lasagna

  • Mind the Pasta: Stir occasionally to ensure the mafalda pasta doesn’t stick to the skillet while cooking. This keeps your Cheesy Skillet Lasagna creamy and smooth.
  • Adjust Consistency: If the sauce thickens too much, feel free to add a splash of beef broth or water while reheating to maintain that velvety texture.
  • Properly Brown the Meat: Ensure your ground beef is browned evenly—this boosts flavor and prevents any sogginess in the final dish.
  • Trapped Heat Is Key: Covering the skillet allows steam to aid in melting the cheeses perfectly, creating that gooey top layer we all crave.
  • Season to Taste: Don’t hesitate to adjust spices; a bit more salt or pepper can elevate your Cheesy Skillet Lasagna to your family’s preferred flavor profile.

What to Serve with Cheesy Skillet Lasagna?

Pair your comforting Cheesy Skillet Lasagna with delightful sides that enhance every bite and round out your meal.

  • Garlic Bread: This classic side is perfect for scooping up that cheesy goodness, adding a crunchy texture that pairs beautifully with the richness of the lasagna.
  • Fresh Green Salad: A bright mix of greens, tomatoes, and cucumbers dressed in a light vinaigrette provides a refreshing contrast to the hearty skillet meal.
  • Roasted Vegetables: Caramelized carrots, zucchini, and bell peppers bring a sweet and savory element, enhancing the overall flavor profile while adding nutrition.
  • Caesar Salad: Creamy dressing and crisp romaine lettuce elevate the dish, offering a nice balance to the cheesy and savory elements present in your lasagna.
  • Steamed Broccoli: The slight bitterness of broccoli complements the richness of the cheese and meat, providing a wonderful contrast, plus it’s quick to prepare!
  • Red Wine: A glass of Chianti or Merlot can enhance the flavors, as the acidity cuts through the creaminess of the cheese, making each bite more enjoyable.
  • Fruit Sorbet: A light, refreshing dessert after your hearty meal can cleanse the palate perfectly, making it an ideal end to a comforting dinner experience.
  • Sparkling Water: A splash of fizz with a lemon wedge brings a refreshing burst to your meal, balancing the richness of the cheesy skillet dish beautifully.

Cheesy Skillet Lasagna Variations

Unleash your creativity with flavor-packed twists that will make this dish uniquely yours!

  • Veggie Boost: Add fresh spinach, chopped bell peppers, or zucchini for a nutrient kick. These vibrant veggies bring color and health benefits right to your plate!

  • Cheese Blend: Experiment with a mix of cheeses like smoked gouda and mozzarella for a delightful flavor contrast. The smokiness takes this cheesy delight to a whole new level.

  • Mixed Meat Option: Amp up the protein by mixing in cooked sausage or diced ham along with the ground beef. The variety in meats creates a heartier meal that’s simply irresistible.

  • Gluten-Free Swap: Use gluten-free pasta or cauliflower rice for a gluten-free version. This way, everyone at the table can enjoy the comforting flavors without worry.

  • Spicy Kick: Add red pepper flakes or diced jalapeños to the beef for a spicy twist. If you love heat, this little addition will surely elevate your cheesy lasagna experience!

  • Herb Infusion: Fresh herbs such as basil or parsley make a fragrant addition. Stir them in right before serving to add a burst of fresh flavor that brightens the whole dish.

  • Lazy Cheater’s Lasagna: Use pre-cooked noodles to make it even faster. Just layer everything as you would in traditional lasagna, and enjoy the same familiar tastes in half the time.

If you’re looking for more inspiring one-pan recipes, don’t miss checking out my delicious Mexican Lasagna Discover or the crowd-pleasing Cheesy French Onion recipe. Cook up some joy and watch your family delight!

Cheesy Skillet Lasagna Recipe FAQs

How do I choose the right ingredients for my Cheesy Skillet Lasagna?
Absolutely! For the best flavor, select lean ground beef that’s bright red without any dark spots, which indicates freshness. For pasta, if using mafalda, look for a package that isn’t damaged or broken. When choosing marinara sauce, opt for one with simple, recognizable ingredients for an authentic taste.

How should I store leftover Cheesy Skillet Lasagna?
You can store it in an airtight container in the fridge for up to 3 days. Just make sure it’s cooled down first! For optimal freshness, let it cool for about 30 minutes before sealing. Gently reheat it on the stovetop, adding a splash of broth if needed to maintain moisture.

Can I freeze my Cheesy Skillet Lasagna?
Of course! To freeze, let the dish cool completely, then transfer it to a freezer-safe container or bag. It can be stored for up to 2 months. When you’re ready to enjoy it again, thaw it in the fridge overnight, then reheat as instructed. For step-by-step: place in a preheated oven at 350°F (175°C) for about 20-25 minutes until heated through.

What should I do if my Cheesy Skillet Lasagna is too thick when cooking?
If you find that your sauce has thickened too much, simply add a bit of beef broth or water while stirring. Start with a tablespoon and mix until you reach your desired consistency. This will ensure you have a creamy and luscious texture without compromising flavor.

Are there dietary considerations I should be aware of with this recipe?
Definitely! If you’re cooking for anyone with specific dietary needs, this Cheesy Skillet Lasagna can easily be adjusted. For a dairy-free option, substitute the cheese with nutritional yeast and a dairy-free cheese blend. Additionally, you can replace the ground beef with ground turkey or a plant-based meat alternative for a lighter or vegetarian meal.

Cheesy Skillet Lasagna

Cheesy Skillet Lasagna: The One-Pan Comfort You Crave

This Cheesy Skillet Lasagna delivers cozy, cheesy goodness in one pan, perfect for busy weeknights.
Prep Time 10 minutes
Cook Time 30 minutes
Total Time 40 minutes
Servings: 4 servings
Course: Dinner
Cuisine: Italian
Calories: 550

Ingredients
  

For the Base
  • 1 pound lean ground beef can swap for ground turkey or chicken
  • 1 tablespoon olive oil can substitute with avocado or canola oil
  • 1 teaspoon salt adjust according to taste
  • 1 teaspoon black pepper freshly ground preferred
  • 1 teaspoon garlic powder can use fresh garlic, 1 clove per teaspoon
  • 1 teaspoon onion powder can use finely chopped fresh onions
  • 1 teaspoon dried oregano or substitute with Italian seasoning
For the Sauce
  • 2 cups marinara sauce homemade or store-bought
  • 1 cup beef broth vegetable broth for vegetarian option
For the Pasta
  • 8 ounces mafalda pasta can substitute with penne or fusilli
For the Topping
  • ½ cup grated Parmesan cheese can swap with pecorino or nutritional yeast
  • 1 cup shredded mozzarella cheese or other melting cheeses like cheddar

Equipment

  • large skillet

Method
 

Cooking Steps
  1. In a large skillet over medium heat, pour 1 tablespoon of olive oil and add 1 pound of lean ground beef. Brown the beef, about 5–7 minutes. Drain excess fat.
  2. Season the browned beef with 1 teaspoon of salt, 1 teaspoon of black pepper, 1 teaspoon of garlic powder, 1 teaspoon of onion powder, and 1 teaspoon of dried oregano. Stir for about a minute.
  3. Pour in 2 cups of marinara sauce and 1 cup of beef broth. Bring to a gentle boil, stirring for about 2–3 minutes.
  4. Add 8 ounces of mafalda pasta to the skillet. Cover, reduce heat to low, and simmer for 15–20 minutes, stirring occasionally.
  5. Sprinkle ½ cup of grated Parmesan cheese and 1 cup of shredded mozzarella cheese over the top. Cover again and let sit off the heat for 2–3 minutes.
  6. Serve hot, scooping out portions and pairing with garlic bread or a side salad.

Nutrition

Serving: 1servingCalories: 550kcalCarbohydrates: 45gProtein: 30gFat: 25gSaturated Fat: 10gPolyunsaturated Fat: 1gMonounsaturated Fat: 15gCholesterol: 70mgSodium: 800mgPotassium: 700mgFiber: 3gSugar: 6gVitamin A: 15IUVitamin C: 5mgCalcium: 25mgIron: 15mg

Notes

This Cheesy Skillet Lasagna is a delightful one-pan dish that captures the essence of traditional lasagna with significantly less preparation time.

Tried this recipe?

Let us know how it was!

Chewy Cherry Blondies That Will Sweeten Your Day

“On a bright afternoon, the sweet aroma of cherries wafted through my kitchen, igniting a craving I couldn’t resist. That’s when I decided to whip up these Cherry Blondies, guaranteed to bring a twist to your dessert game. Easy to make and budget-friendly, this recipe combines the chewy goodness of blondies with tart cherry splendor and creamy white chocolate, making it a delightful vegetarian treat for any occasion. Ideal for busy days when time is short, they come together quickly, allowing you to satisfy that sweet tooth without the fuss. Whether you’re hosting friends, planning a picnic, or simply indulging in a quiet moment at home, these Cherry Blondies are sure to impress. Curious about how to bring this deliciousness to your own table? Let’s dive into the recipe!”

Why are Cherry Blondies a must-try?

Irresistible flavor combination: The blend of tart cherries, sweet white chocolate, and crunchy almonds creates a taste explosion.

Quick prep time: You can whip these up in just about an hour, perfect for busy days when you’re craving something special.

Versatile options: Feel free to experiment with different nuts or substitute fresh cherries for the pie filling, tailoring the recipe to your taste.

Crowd-pleaser: Whether at a picnic or a weekend gathering, these blondies will be the star of the dessert table, enchanting guests of all ages.

Budget-friendly: All ingredients are affordable and often found in your pantry, proving that delicious desserts don’t have to break the bank.

Cherry Blondies Ingredients

These Cherry Blondies are just a few ingredients away from delight!

For the Batter

  • All-Purpose Flour – Provides structure; substitute with a gluten-free flour blend for a gluten-free version.
  • Baking Powder – Helps the blondies rise; no substitutions are needed to achieve the perfect texture.
  • Salt – Enhances flavor; it’s essential for balancing the sweetness.
  • Egg – Binds ingredients and adds moisture; can be replaced with a flax egg for a vegan option.
  • Vanilla Extract – Adds depth of flavor; use real vanilla for the best results.
  • Almond Extract – Enhances sweetness and nutty notes; be cautious with the amount due to its potency.
  • Cherry Pie Filling – Provides a sweet-tart cherry flavor; fresh pitted cherries can be substituted for a fresher taste.
  • Salted Butter – Contributes richness and helps with texture; unsalted butter can work too—just add a pinch of salt.
  • Granulated Sugar – Sweetens and helps form the texture; coconut sugar can be used for a twist.
  • Brown Sugar – Adds moisture and a chewy texture; light or dark brown sugar can be interchanged.
  • White Chocolate Chips – Adds sweetness and creaminess; try butterscotch chips for a different flavor.
  • Slivered Almonds – Provides that satisfying crunch; can be replaced with chopped walnuts or omitted altogether.

Optional Topping Ideas

  • Extra White Chocolate – Drizzle melted white chocolate on top for added sweetness.
  • Chopped Nuts – Sprinkle additional nuts for more texture and flavor.

These ingredients come together to create a batch of Cherry Blondies that will sweeten your day!

Step‑by‑Step Instructions for Cherry Blondies

Step 1: Preheat and Prepare
Begin by preheating your oven to 350°F (175°C). While the oven heats, grease an 8×8” baking dish and line it with parchment paper, allowing some overhang for easy removal later. This preparation ensures your Cherry Blondies will bake evenly and release effortlessly when they’re done.

Step 2: Mix the Dry Ingredients
In a medium bowl, whisk together 1 cup of all-purpose flour, 1 teaspoon of baking powder, and a pinch of salt. Mixing these dry ingredients helps to distribute the baking powder evenly, ensuring your blondies will rise beautifully. Set aside this mixture while you focus on the wet ingredients.

Step 3: Combine the Wet Ingredients
In a separate bowl, crack 1 egg and add 1 teaspoon each of vanilla extract and almond extract, along with 1 can of cherry pie filling. Use a fork to whisk everything together until well combined. This mixture will impart a delightful cherry flavor to your Cherry Blondies and provide a moist base.

Step 4: Brown the Butter
In a small saucepan over medium heat, melt ½ cup of salted butter, stirring frequently. Continue to cook until the butter foams and turns a deep golden brown—about 5-8 minutes. You’ll know it’s ready when it has a rich, nutty aroma. Remove from heat and let it cool slightly.

Step 5: Combine Butter and Sugars
Pour the browned butter into a large mixing bowl and add ½ cup granulated sugar and ½ cup brown sugar. Using a hand mixer, blend these ingredients on medium speed until thoroughly combined, creating a creamy mixture. This step adds a wonderful buttery richness to your Cherry Blondies.

Step 6: Incorporate the Wet Mixture
Next, carefully incorporate the cherry filling mixture into the butter and sugar blend. Mix on low speed until everything is just combined, ensuring no lumps remain. This step will add that luscious fruity flavor into your batter, setting the stage for your Cherry Blondies.

Step 7: Mix in the Dry Ingredients
Gradually add the dry ingredient mixture into the wet mixture, folding it together with a spatula or spoon. Mix just until combined; be cautious not to overmix, as this keeps your blondies soft and chewy. Once the batter is formed, gently fold in ½ cup of white chocolate chips and ¼ cup of slivered almonds for that delightful texture.

Step 8: Bake the Blondies
Pour the batter into your prepared baking dish, spreading it out evenly. Optionally, top with more white chocolate chips and slivered almonds for added crunch. Bake in the preheated oven for 50-55 minutes, or until a toothpick inserted in the center comes out clean. The edges should be set, with a slightly gooey center.

Step 9: Cool and Serve
Once baked, remove the Cherry Blondies from the oven and let them cool in the pan for about 20 minutes. This cooling period allows them to achieve that perfect chewy texture. After cooling, lift them out using the parchment overhang, slice into squares, and get ready to enjoy these delightful treats!

Storage Tips for Cherry Blondies

Room Temperature: Keep your Cherry Blondies in an airtight container at room temperature for up to 2 days for the best texture and flavor.

Fridge: Store in an airtight container in the fridge for up to 3-4 days. This will help maintain their chewy texture while keeping them fresh.

Freezer: For longer storage, freeze the blondies in a single layer on a baking sheet, then transfer to an airtight container for up to 3 months. Thaw in the fridge before enjoying.

Reheating: To enjoy warm, reheat in the microwave for about 10-15 seconds or in a preheated oven at 350°F (175°C) for 5-7 minutes. Enjoy that delightful homemade taste!

Expert Tips for Cherry Blondies

  • Brown the Butter: Stir consistently while browning the butter to avoid burning. This technique adds a nutty flavor that’s essential for perfect Cherry Blondies.

  • Cool Before Slicing: Allow blondies to cool for about 20 minutes before cutting. This enhances chewiness and ensures they won’t crumble apart.

  • Avoid Overmixing: When combining the wet and dry ingredients, mix just until incorporated. Overmixing can lead to dense blondies instead of the desired chewy texture.

  • Vary the Nuts: Experiment with different nuts like walnuts or pecans to give your Cherry Blondies a personal touch and added crunch.

  • Use Fresh Cherries: If you prefer a fresher taste, substitute cherry pie filling with fresh pitted cherries, adjusting sweetness as needed for ideal flavor balance.

What to Serve with Chewy Cherry Blondies?

Treat your loved ones to a delightful dessert experience that pairs perfectly with these chewy Cherry Blondies.

  • Vanilla Ice Cream: Creamy vanillin harmonizes beautifully with the tart cherry and buttery blondies, enhancing the overall sweetness.

  • Coffee: A hot cup complements the rich flavors of the blondies, offering a lovely contrast with the chewy texture.

  • Fresh Berries: A sprinkle of fresh raspberries or strawberries adds a pop of color and a tartness that balances sweetness, enhancing your dessert plate.

  • Chocolate Drizzle: A warm drizzle of chocolate over the blondies takes the dessert to another level of indulgence, marrying flavors beautifully.

  • Chopped Nuts: Add some chopped walnuts or pecans on top for extra crunch and nuttiness, elevating the textural experience.

  • Sparkling Water: A refreshing sparkling water with a hint of lemon cleanses the palate between bites, making every taste of your blondies even more memorable.

  • Whipped Cream: Light and fluffy whipped cream dolloped on top introduces a velvety element that pairs seamlessly with the fudgy nature of these treats.

  • Caramel Sauce: Drizzling warm caramel over your blondies adds an extra touch of sweetness, complementing the cherries delightfully.

These delicious pairings will enhance your dining experience while making your Cherry Blondies the star of the show!

Make Ahead Options

These Cherry Blondies are perfect for meal prep enthusiasts! You can prep the batter up to 24 hours in advance, allowing you to mix the dry and wet ingredients separately and refrigerate them until you’re ready to bake. Just be sure to keep the wet mix covered to maintain freshness. If you prefer, you can bake them ahead of time and store the finished blondies in an airtight container for up to 3 days in the refrigerator; they’ll stay just as delicious! When ready to serve, simply let them come to room temperature or warm them slightly in the oven for a gooey treat that tastes freshly baked.

Cherry Blondies Variations & Substitutions

Feel free to explore endless possibilities to personalize these delightful Cherry Blondies. Your creativity can take them to new tasty heights!

  • Nut-Free: Omit the almonds entirely, or replace them with sunflower seeds for a nut-free option without sacrificing crunch.
  • Vegan: Substitute the egg with a flax egg and use coconut oil instead of butter. Almond milk complements the mixture beautifully!
  • Gluten-Free: Replace all-purpose flour with a gluten-free flour blend. This ensures everyone can enjoy your delicious creation.
  • Tropical Twist: Add ½ cup of shredded coconut along with the cherries for a tropical vibe. This will transport your taste buds to paradise!
  • Extra Chocolate: Mix in dark chocolate chips or chunks instead of white chocolate for a richer flavor that chocolate lovers will adore.
  • Spiced Up: Stir in a teaspoon of cinnamon or nutmeg to warm up the flavor profile. It adds a cozy, inviting aroma to your kitchen!
  • Dried Fruit: Replace cherry pie filling with a mix of raisins and chopped dried apricots. This gives a sweet chewiness that surprises and delights.
  • Spicy Variant: Add a pinch of cayenne pepper for a surprising twist. The slight heat will elevate the sweetness and intrigue your palate.

Don’t hesitate to experiment; these Cherry Blondies are a canvas waiting for your artistic touch. For more ideas, check out our Nut Variations and Fruit Options for further inspiration!

Cherry Blondies Recipe FAQs

How do I choose ripe cherries for my Cherry Blondies?
Absolutely! When selecting cherries, look for ones that are plump, shiny, and deep red in color. Avoid any with blemishes or dark spots, which can indicate overripeness. If using cherry pie filling, check for the quality of the brand for optimal flavor!

What is the best storage method for Cherry Blondies?
You can store your Cherry Blondies in an airtight container at room temperature for up to 2 days. If you prefer them cold or want to keep them longer, refrigerate them for up to 3-4 days. This method helps maintain their chewy texture and delicious flavor!

Can Cherry Blondies be frozen?
Very! To freeze your Cherry Blondies, allow them to cool completely, then slice them into squares. Place them in a single layer on a baking sheet and flash freeze for 1-2 hours. Once solid, transfer them to an airtight container or freezer bag, layering with parchment paper. They can be kept for up to 3 months. When ready to enjoy, thaw them in the refrigerator overnight before serving.

What should I do if my Blondies turn out dry?
Ah, that can happen sometimes! To achieve a moist texture, be sure not to overbake your blondies. If they’re dry, you might have left them in the oven too long. Use a toothpick to test; it should come out with just a few moist crumbs. For future batches, consider baking them for a shorter time and allowing them to cool properly for that chewy ideal.

Are there any dietary considerations for Cherry Blondies?
Certainly! This recipe is vegetarian-friendly, and you can make it vegan by using a flax egg instead of a traditional egg. For nut allergies, simply substitute the almonds with seeds like sunflower seeds, or omit them entirely. Always double-check with your guests to ensure everyone can enjoy this delightful treat!

Can I use fresh cherries instead of cherry pie filling in my Cherry Blondies?
Absolutely! Fresh cherries will yield a wonderfully authentic taste. Just make sure to pit and chop them before adding. The sweetness may vary, so you might want to adjust the sugar in the recipe slightly to avoid making your blondies too tart. Enjoy experimenting!

Cherry Blondies

Chewy Cherry Blondies That Will Sweeten Your Day

These Cherry Blondies are a perfect combination of chewy texture, tart cherries, and sweet white chocolate, making them an irresistible dessert option.
Prep Time 15 minutes
Cook Time 55 minutes
Cooling Time 20 minutes
Total Time 1 hour 30 minutes
Servings: 9 slices
Course: Dessert
Cuisine: American
Calories: 210

Ingredients
  

For the Batter
  • 1 cup All-Purpose Flour Substitute with a gluten-free flour blend for a gluten-free version.
  • 1 teaspoon Baking Powder No substitutions needed.
  • 1 pinch Salt Essential for balancing sweetness.
  • 1 large Egg Can be replaced with a flax egg for a vegan option.
  • 1 teaspoon Vanilla Extract Use real vanilla for best results.
  • 1 teaspoon Almond Extract Be cautious with the amount.
  • 1 can Cherry Pie Filling Fresh pitted cherries can be substituted.
  • ½ cup Salted Butter Unsalted butter can work too—add a pinch of salt.
  • ½ cup Granulated Sugar Coconut sugar can be used for a twist.
  • ½ cup Brown Sugar Light or dark brown sugar can be interchanged.
  • ½ cup White Chocolate Chips Butterscotch chips can be used for a different flavor.
  • ¼ cup Slivered Almonds Can be replaced with chopped walnuts or omitted.
Optional Topping Ideas
  • 1 cup Extra White Chocolate For drizzling on top.
  • ½ cup Chopped Nuts For additional texture and flavor.

Equipment

  • 8x8 baking dish
  • Mixing bowls
  • Hand mixer
  • Saucepan

Method
 

Step-by-Step Instructions
  1. Preheat your oven to 350°F (175°C) and prepare an 8x8” baking dish by greasing it and lining with parchment paper.
  2. In a medium bowl, whisk together the flour, baking powder, and salt. Set aside.
  3. In a separate bowl, combine the egg, vanilla extract, almond extract, and cherry pie filling. Mix well.
  4. Melt the butter in a small saucepan over medium heat, cooking until browned. Remove from heat and cool slightly.
  5. In a large bowl, combine the browned butter with granulated sugar and brown sugar, mixing until creamy.
  6. Incorporate the cherry mixture into the butter-sugar blend, mixing just until combined.
  7. Gradually fold the dry ingredients into the wet mixture, being careful not to overmix. Stir in white chocolate chips and slivered almonds.
  8. Pour the batter into the prepared dish, spreading evenly. Optionally, top with more white chocolate chips and almonds. Bake for 50-55 minutes.
  9. After baking, let the blondies cool in the pan for about 20 minutes before lifting them out and slicing.

Nutrition

Serving: 1sliceCalories: 210kcalCarbohydrates: 30gProtein: 2gFat: 9gSaturated Fat: 5gPolyunsaturated Fat: 1gMonounsaturated Fat: 3gCholesterol: 25mgSodium: 150mgPotassium: 100mgFiber: 1gSugar: 15gVitamin A: 200IUVitamin C: 1mgCalcium: 30mgIron: 1mg

Notes

For best results, allow the blondies to cool before slicing to enhance chewiness. Experiment with different nuts for personal touch.

Tried this recipe?

Let us know how it was!

Sheet Pan Chili Dijon Salmon with Vegetables Made Easy!

Introduction to Sheet Pan Chili Dijon Salmon with Vegetables

Cooking can sometimes feel like a race against the clock, especially on those busy weeknights. That’s where my Sheet Pan Chili Dijon Salmon with Vegetables comes in, a dish that’s not only quick but also bursting with flavor.

Imagine a meal that requires minimal cleanup while delivering a satisfying dinner that impresses your loved ones. This recipe is perfect for those evenings when you want something healthy yet delicious without spending hours in the kitchen.

With just a few simple ingredients, you can whip up a delightful dinner that everyone will love. Let’s dive in!

Why You’ll Love This Sheet Pan Chili Dijon Salmon with Vegetables

This recipe is a game-changer for anyone juggling a busy schedule.

It’s incredibly easy to prepare, taking just 30 minutes from start to finish.

The combination of zesty Dijon and sweet honey elevates the salmon, while the vibrant veggies add color and nutrition.

Plus, the one-pan method means less time scrubbing dishes and more time enjoying your meal.

Trust me, your taste buds will thank you!

Ingredients for Sheet Pan Chili Dijon Salmon with Vegetables

Creating a delicious Sheet Pan Chili Dijon Salmon with Vegetables starts with gathering the right ingredients. Here’s what you’ll need:

  • Salmon fillets: Fresh or frozen, salmon is rich in omega-3 fatty acids and protein, making it a healthy choice.
  • Dijon mustard: This adds a tangy kick that pairs beautifully with the sweetness of honey.
  • Honey: A natural sweetener that balances the heat from the chili powder.
  • Chili powder: This spice brings warmth and depth to the dish, enhancing the overall flavor.
  • Garlic powder: A must-have for that savory aroma and taste.
  • Onion powder: Adds a subtle sweetness and depth without the hassle of chopping onions.
  • Olive oil: Essential for cooking and helps the salmon and veggies roast beautifully.
  • Broccoli florets: These add a nice crunch and are packed with vitamins.
  • Baby carrots: Sweet and tender, they complement the other veggies perfectly.
  • Bell peppers: Colorful and crunchy, they bring a fresh taste to the dish.
  • Salt and pepper: Simple seasonings that enhance all the flavors.
  • Lemon wedges: For serving, they add a zesty brightness that elevates the dish.

Feel free to mix and match with your favorite vegetables, like zucchini or asparagus, to keep things interesting.

For exact measurements, check the bottom of the article where you can find everything available for printing.

How to Make Sheet Pan Chili Dijon Salmon with Vegetables

Cooking doesn’t have to be complicated. With my Sheet Pan Chili Dijon Salmon with Vegetables, you’ll find that simplicity is key. Let’s break it down step by step, ensuring you have a delicious meal ready in no time.

Step 1: Preheat the Oven

Start by preheating your oven to 400°F (200°C).

This step is crucial because it ensures even cooking.

While the oven heats up, line a large sheet pan with parchment paper.

This makes cleanup a breeze, allowing you to focus on enjoying your meal instead of scrubbing dishes later.

Step 2: Prepare the Chili Dijon Mixture

In a small bowl, whisk together the Dijon mustard, honey, chili powder, garlic powder, onion powder, and olive oil.

This mixture is the star of the show, infusing the salmon with a delightful blend of flavors.

Make sure everything is well combined; you want that sweet and spicy goodness to coat the salmon perfectly.

Step 3: Arrange the Salmon

Place the salmon fillets on one side of the prepared sheet pan.

Generously brush the chili Dijon mixture over the top of each fillet.

Don’t be shy! This marinade is what makes the salmon shine.

Let it sit for a moment while you prepare the veggies.

Step 4: Prepare the Vegetables

In a separate bowl, toss the broccoli, baby carrots, and bell peppers with a drizzle of olive oil, salt, and pepper.

Make sure they’re well coated; this will enhance their natural flavors.

Spread the seasoned vegetables on the other side of the sheet pan, creating a colorful medley that complements the salmon beautifully.

Step 5: Bake to Perfection

Slide the sheet pan into your preheated oven and bake for 15-20 minutes.

Keep an eye on the salmon; it’s done when it flakes easily with a fork.

The veggies should be tender but still vibrant.

If you want to be sure, a quick poke with a fork will tell you everything you need to know.

Step 6: Serve and Enjoy

Once everything is cooked to perfection, remove the pan from the oven.

Let it cool for a couple of minutes before serving.

For an extra burst of flavor, serve with lemon wedges on the side.

Squeeze a little lemon juice over the salmon and veggies, and you’re ready to dig in!

Tips for Success

  • Marinate the salmon for 30 minutes in the chili Dijon mixture for deeper flavor.
  • Use a meat thermometer; salmon is perfectly cooked at 145°F (63°C).
  • Don’t overcrowd the sheet pan; give the veggies space to roast evenly.
  • Experiment with different vegetables based on what’s in season or your personal favorites.
  • For a spicy kick, add a pinch of cayenne pepper to the marinade.

Equipment Needed

  • Sheet pan: A large baking sheet is essential. If you don’t have one, a roasting pan works too.
  • Parchment paper: For easy cleanup. Aluminum foil can be a good substitute.
  • Mixing bowl: Any bowl will do for whisking the marinade.
  • Whisk or fork: To combine the ingredients smoothly.
  • Spatula: For spreading the marinade and serving the dish.

Variations

  • Herb-Infused: Add fresh herbs like dill or parsley to the marinade for an aromatic twist.
  • Spicy Kick: Incorporate a teaspoon of sriracha or hot sauce into the chili Dijon mixture for extra heat.
  • Vegetarian Option: Substitute salmon with firm tofu or tempeh, marinating them in the same chili Dijon sauce.
  • Low-Carb Version: Replace carrots with zucchini noodles or cauliflower florets for a lighter dish.
  • Asian Flair: Use soy sauce instead of Dijon mustard and add sesame oil for a different flavor profile.

Serving Suggestions

  • Pair with a light quinoa salad for a refreshing side.
  • Serve with a chilled glass of white wine, like Sauvignon Blanc.
  • Garnish with fresh herbs for a pop of color.
  • Consider a side of garlic bread to soak up the delicious juices.
  • For a complete meal, add a fruit salad for dessert.

FAQs about Sheet Pan Chili Dijon Salmon with Vegetables

Can I use frozen salmon for this recipe?

Absolutely! Just make sure to thaw the salmon completely before marinating and cooking. Frozen salmon can be just as delicious when prepared correctly.

What vegetables can I substitute in this recipe?

You can easily swap out the broccoli, carrots, and bell peppers for your favorites. Zucchini, asparagus, or even snap peas work wonderfully, adding their unique flavors and textures.

How do I know when the salmon is done cooking?

The salmon is perfectly cooked when it flakes easily with a fork and reaches an internal temperature of 145°F (63°C). A meat thermometer is a handy tool for this!

Can I prepare this dish ahead of time?

Yes! You can marinate the salmon and chop the vegetables a few hours in advance. Just keep everything covered in the fridge until you’re ready to bake.

Is this recipe gluten-free?

Yes, this Sheet Pan Chili Dijon Salmon with Vegetables is gluten-free! Just ensure that the Dijon mustard you use is labeled gluten-free to keep it safe for those with dietary restrictions.

Final Thoughts

Cooking should be a joyful experience, and my Sheet Pan Chili Dijon Salmon with Vegetables embodies that spirit.

It’s not just about the meal; it’s about the moments shared around the table.

With its vibrant colors and mouthwatering flavors, this dish transforms a simple weeknight into something special.

Whether you’re cooking for yourself or loved ones, the ease of preparation and cleanup means you can focus on what truly matters—enjoying good food and great company.

So, roll up your sleeves, embrace the process, and savor every bite of this delightful creation!

Ranis

Sheet Pan Chili Dijon Salmon with Vegetables Made Easy!

A delicious and easy recipe for Sheet Pan Chili Dijon Salmon with Vegetables, perfect for a quick weeknight dinner.
Prep Time 10 minutes
Cook Time 20 minutes
Total Time 30 minutes
Servings: 2 servings
Course: Dinner
Cuisine: American
Calories: 350

Ingredients
  

  • 2 6-ounce salmon fillets
  • 2 tablespoons Dijon mustard
  • 1 tablespoon honey
  • 1 teaspoon chili powder
  • 1 teaspoon garlic powder
  • 1 teaspoon onion powder
  • 1 tablespoon olive oil
  • 1 cup broccoli florets
  • 1 cup baby carrots
  • 1 cup bell peppers sliced
  • Salt and pepper to taste
  • Lemon wedges for serving

Method
 

  1. Preheat your oven to 400°F (200°C). Line a large sheet pan with parchment paper for easy cleanup.
  2. In a small bowl, whisk together the Dijon mustard, honey, chili powder, garlic powder, onion powder, and olive oil until well combined.
  3. Place the salmon fillets on one side of the prepared sheet pan. Brush the chili Dijon mixture evenly over the top of the salmon.
  4. In a separate bowl, toss the broccoli, baby carrots, and bell peppers with a drizzle of olive oil, salt, and pepper until well coated. Spread the vegetables on the other side of the sheet pan.
  5. Bake in the preheated oven for 15-20 minutes, or until the salmon flakes easily with a fork and the vegetables are tender.
  6. Remove from the oven and let cool for a couple of minutes. Serve with lemon wedges on the side for an extra burst of flavor.

Nutrition

Serving: 1servingCalories: 350kcalCarbohydrates: 12gProtein: 34gFat: 18gSaturated Fat: 3gPolyunsaturated Fat: 15gCholesterol: 70mgSodium: 300mgFiber: 3gSugar: 6g

Notes

  • For added flavor, marinate the salmon in the Dijon mixture for 30 minutes before cooking.
  • Feel free to substitute the vegetables with your favorites, such as zucchini or asparagus, for a different taste.

Tried this recipe?

Let us know how it was!

Matcha Nama Chocolate: A Decadent Recipe to Try!

Introduction to Matcha Nama Chocolate

There’s something magical about chocolate that brings back memories of childhood treats and cozy afternoons. Now, imagine that rich, creamy goodness infused with the earthy notes of matcha. That’s where Matcha Nama Chocolate comes in—a delightful fusion that’s perfect for chocolate lovers and matcha enthusiasts alike. This recipe is not just a quick solution for a busy day; it’s a chance to impress your loved ones with a unique dessert. With just a few simple ingredients, you can create a decadent treat that’s sure to leave everyone craving more.

Why You’ll Love This Matcha Nama Chocolate

This Matcha Nama Chocolate is a game-changer for dessert lovers. It’s incredibly easy to whip up, taking just 15 minutes of prep time. The rich, velvety texture melts in your mouth, while the matcha adds a unique twist that elevates the classic chocolate experience. Plus, it’s a no-bake treat, making it perfect for those hot summer days when you want something sweet without heating up the kitchen.

Ingredients for Matcha Nama Chocolate

Creating Matcha Nama Chocolate is a delightful journey, and it all starts with the right ingredients. Here’s what you’ll need:

  • High-quality dark chocolate: Aim for chocolate with 70% cocoa or higher. This gives your treat a rich, deep flavor that pairs beautifully with matcha.
  • Matcha powder: This vibrant green powder is the star of the show. It adds a unique taste and a beautiful color, making your chocolate not just delicious but visually stunning.
  • Heavy cream: This ingredient provides the creamy texture that makes the chocolate melt in your mouth. You can substitute it with coconut cream for a dairy-free option.
  • Unsalted butter: A touch of butter enhances the richness of the chocolate. If you’re looking for a vegan alternative, try using coconut oil instead.
  • Powdered sugar: This sweetener helps balance the bitterness of the dark chocolate and matcha. Adjust the amount to suit your taste preferences.
  • Sea salt: Just a pinch elevates the flavors, bringing out the sweetness and richness of the chocolate.

For those who want to experiment, consider adding a few drops of vanilla extract for an extra layer of flavor. If matcha isn’t your thing, you can swap it out for espresso powder to create a coffee-flavored version. The exact quantities for these ingredients are available at the bottom of the article for easy printing.

How to Make Matcha Nama Chocolate

Making Matcha Nama Chocolate is a straightforward process that yields delicious results. Follow these simple steps, and you’ll be on your way to creating a delightful treat that impresses everyone.

Step 1: Prepare the Chocolate

Start by finely chopping the dark chocolate. The smaller the pieces, the easier they will melt. Place the chopped chocolate in a heatproof bowl. This bowl will be your melting station, so make sure it’s sturdy and can handle some heat.

Step 2: Heat the Cream

Next, pour the heavy cream into a small saucepan. Heat it over medium heat until it just begins to simmer. You’ll see tiny bubbles forming around the edges. Once it reaches this point, remove it from the heat immediately. This step is crucial; you don’t want to boil the cream.

Step 3: Combine Ingredients

Now, pour the hot cream over the chopped chocolate. Let it sit for about 2-3 minutes. This waiting period allows the chocolate to soften. After that, add the unsalted butter, matcha powder, powdered sugar, and a pinch of sea salt. Stir gently until everything is completely melted and well combined. The mixture should be smooth and glossy, a true chocolate lover’s dream!

Step 4: Prepare the Dish

Line an 8-inch square baking dish with parchment paper. Leave some overhang on the sides; this will make it easier to lift the chocolate out later. Make sure the parchment is pressed into the corners so that the chocolate mixture doesn’t seep underneath.

Step 5: Chill the Mixture

Pour the chocolate mixture into the prepared dish. Spread it evenly with a spatula. Now, it’s time to refrigerate! Let it chill for at least 2 hours or until it’s firm. This step is essential for achieving that perfect, melt-in-your-mouth texture.

Step 6: Cut and Serve

Once the chocolate is set, lift it out of the dish using the parchment paper. Place it on a cutting board and cut it into small squares. For a finishing touch, dust the pieces with additional matcha powder or cocoa powder. This not only enhances the flavor but also makes for a beautiful presentation!

Tips for Success

  • Use a sharp knife to cut the chocolate into even squares for a professional look.
  • Make sure your bowl is completely dry; any moisture can affect the chocolate’s texture.
  • Experiment with different matcha brands to find your favorite flavor profile.
  • For a smoother texture, let the chocolate mixture cool slightly before pouring it into the dish.
  • Store any leftovers in an airtight container in the fridge for up to a week.

Equipment Needed

  • Heatproof bowl: A glass or metal bowl works best for melting chocolate.
  • Small saucepan: Any saucepan will do, but a non-stick one makes cleanup easier.
  • Spatula: A silicone spatula is great for mixing and scraping.
  • Baking dish: An 8-inch square dish is ideal, but any similar-sized dish will work.
  • Knife: A sharp knife is essential for cutting the chocolate into neat squares.

Variations of Matcha Nama Chocolate

  • Mint Matcha: Add a few drops of peppermint extract to the chocolate mixture for a refreshing twist.
  • Nutty Delight: Stir in finely chopped nuts like almonds or hazelnuts for added crunch and flavor.
  • Spicy Kick: Incorporate a pinch of cayenne pepper or chili powder for a surprising heat that complements the chocolate.
  • Fruit Infusion: Mix in dried fruits like cranberries or apricots for a chewy texture and a burst of sweetness.
  • Vegan Version: Substitute the heavy cream with coconut cream and the butter with coconut oil for a delicious dairy-free treat.

Serving Suggestions for Matcha Nama Chocolate

  • Pair with a cup of green tea for a harmonious flavor experience.
  • Serve alongside fresh berries for a pop of color and tartness.
  • Dust with extra matcha or cocoa powder for an elegant presentation.
  • Top with a dollop of whipped cream for added indulgence.
  • Enjoy with a scoop of vanilla ice cream for a delightful contrast.

FAQs about Matcha Nama Chocolate

Curious about Matcha Nama Chocolate? You’re not alone! Here are some common questions that might pop into your mind as you embark on this delicious journey.

Can I use white chocolate instead of dark chocolate?

While you can use white chocolate, it will change the flavor profile significantly. Dark chocolate provides a rich base that complements the matcha beautifully. If you’re feeling adventurous, give it a try!

How long can I store Matcha Nama Chocolate?

You can store it in an airtight container in the fridge for up to a week. Just make sure to keep it away from strong odors, as chocolate can absorb them.

Is Matcha Nama Chocolate gluten-free?

Yes! All the ingredients in this recipe are gluten-free, making it a safe treat for those with gluten sensitivities.

Can I make this recipe vegan?

Absolutely! Substitute the heavy cream with coconut cream and the butter with coconut oil. You’ll still get that creamy texture and delicious flavor without any dairy.

What’s the best way to serve Matcha Nama Chocolate?

Serve it chilled, dusted with extra matcha or cocoa powder. Pair it with a cup of green tea or fresh berries for a delightful experience. Enjoy!

Final Thoughts

Creating Matcha Nama Chocolate is more than just a cooking project; it’s an experience that brings joy and satisfaction. The rich, creamy texture combined with the earthy notes of matcha creates a delightful treat that’s perfect for any occasion. Whether you’re sharing it with friends or indulging in a quiet moment alone, each bite is a reminder of the simple pleasures in life. Plus, the ease of preparation means you can whip it up anytime the craving strikes. So, roll up your sleeves, gather your ingredients, and let this decadent chocolate treat brighten your day!

Ranis

Matcha Nama Chocolate: A Decadent Recipe to Try!

A rich and creamy chocolate treat infused with matcha, perfect for chocolate lovers and matcha enthusiasts alike.
Prep Time 15 minutes
Cook Time 5 minutes
Total Time 2 hours 20 minutes
Servings: 16 servings
Course: Dessert
Cuisine: Japanese
Calories: 120

Ingredients
  

  • 8 ounces high-quality dark chocolate 70% cocoa or higher
  • 2 tablespoons matcha powder
  • 1/2 cup heavy cream
  • 1 tablespoon unsalted butter
  • 1/4 cup powdered sugar adjust to taste
  • Pinch of sea salt

Method
 

  1. Begin by finely chopping the dark chocolate and placing it in a heatproof bowl.
  2. In a small saucepan, heat the heavy cream over medium heat until it just begins to simmer. Remove from heat.
  3. Pour the hot cream over the chopped chocolate and let it sit for 2-3 minutes to soften the chocolate.
  4. Add the butter, matcha powder, powdered sugar, and sea salt to the chocolate mixture. Stir gently until everything is completely melted and well combined.
  5. Line an 8-inch square baking dish with parchment paper, leaving some overhang for easy removal.
  6. Pour the chocolate mixture into the prepared dish and spread it evenly.
  7. Refrigerate for at least 2 hours or until firm.
  8. Once set, lift the chocolate out of the dish using the parchment paper and cut it into small squares.
  9. Dust the pieces with additional matcha powder or cocoa powder for presentation, if desired.

Nutrition

Serving: 1squareCalories: 120kcalCarbohydrates: 15gProtein: 2gFat: 10gSaturated Fat: 6gPolyunsaturated Fat: 4gCholesterol: 10mgSodium: 50mgFiber: 1gSugar: 5g

Notes

  • To enhance the flavor, consider adding a few drops of vanilla extract to the chocolate mixture before chilling.
  • For a different twist, substitute the matcha powder with espresso powder for a coffee-flavored version.

Tried this recipe?

Let us know how it was!

Cinnamon Sugar French Toast Muffins: An Irresistible Treat!

Introduction to Cinnamon Sugar French Toast Muffins

There’s something magical about the aroma of cinnamon wafting through the kitchen, isn’t there? It takes me back to lazy Sunday mornings, where breakfast was a cherished ritual rather than a rushed affair. These Cinnamon Sugar French Toast Muffins capture that essence perfectly. They’re not just muffins; they’re a delightful blend of comfort and convenience. Whether you’re looking for a quick solution on a busy weekday or a treat to impress your loved ones, these muffins are your answer. Easy to whip up and even easier to enjoy, they’re bound to become a family favorite!

Why You’ll Love This Cinnamon Sugar French Toast Muffins

These Cinnamon Sugar French Toast Muffins are a game-changer for breakfast lovers. They combine the classic flavors of French toast with the convenience of muffins, making them perfect for busy mornings. With just a few simple ingredients and minimal prep time, you can enjoy a warm, comforting treat that’s bursting with flavor. Plus, they’re versatile enough to please even the pickiest eaters in your family!

Ingredients for Cinnamon Sugar French Toast Muffins

Gathering the right ingredients is the first step to creating these delightful Cinnamon Sugar French Toast Muffins. Here’s what you’ll need:

  • Bread cubes: Use about four slices of stale bread. Stale bread absorbs the milk better, giving you that perfect texture.
  • Milk: A cup of milk adds moisture and richness. You can substitute with almond or oat milk for a dairy-free option.
  • Eggs: Three large eggs bind everything together, providing structure and a fluffy texture.
  • Granulated sugar: A quarter cup sweetens the muffins. You can use brown sugar for a deeper flavor.
  • Vanilla extract: Just a teaspoon enhances the overall flavor, making each bite more aromatic.
  • Ground cinnamon: One teaspoon adds that warm, comforting spice we all love. Feel free to adjust to your taste!
  • Salt: A pinch of salt balances the sweetness and enhances the flavors.
  • Unsalted butter: Melted butter gives richness and helps the muffins brown beautifully.
  • Cinnamon sugar topping: Combine half a cup of sugar with a tablespoon of cinnamon for that irresistible finish.

For a fun twist, consider adding chocolate chips or chopped nuts to the bread mixture before baking. You can also experiment with different types of bread, like brioche or challah, for a richer flavor and texture. Exact measurements for these ingredients are available at the bottom of the article for easy printing!

How to Make Cinnamon Sugar French Toast Muffins

Step 1: Preheat the Oven

Start by preheating your oven to 350°F (175°C). This step is crucial for even baking. While the oven heats up, grease your muffin tin with cooking spray or butter. A well-prepared tin ensures your muffins pop out easily, keeping their delightful shape intact.

Step 2: Soak the Bread

In a large mixing bowl, combine the bread cubes with milk. Let them soak for about 10 minutes. This soaking process is key; it allows the bread to absorb the milk, creating a moist and tender muffin. Trust me, you’ll love the texture!

Step 3: Prepare the Egg Mixture

In a separate bowl, whisk together the eggs, sugar, vanilla extract, cinnamon, and salt. Mix until everything is well combined. This egg mixture is what binds the muffins together, giving them that classic French toast flavor. It’s the heart of your muffins!

Step 4: Combine and Fill

Gently fold the egg mixture into the soaked bread cubes. Make sure every piece of bread is coated. Then, spoon the mixture into your prepared muffin tin, filling each cup about three-quarters full. This ensures they have room to rise without overflowing.

Step 5: Bake the Muffins

Place the muffin tin in the preheated oven and bake for 20-25 minutes. Keep an eye on them! You’ll know they’re done when they’re golden brown and a toothpick inserted in the center comes out clean. Perfectly baked muffins are a sight to behold!

Step 6: Add the Cinnamon Sugar Topping

While the muffins are baking, mix together the sugar and cinnamon for the topping. Once the muffins are out of the oven, let them cool for about 5 minutes. Brush the tops with melted butter and sprinkle the cinnamon sugar generously over each muffin. This adds that irresistible crunch!

Step 7: Serve and Enjoy

These muffins are best served warm or at room temperature. Pair them with a cup of coffee or a glass of milk for a delightful breakfast or snack. Enjoy every bite, and don’t forget to share with family and friends—if you can!

Tips for Success

  • Use stale bread for the best texture; fresh bread can become too mushy.
  • Don’t skip the soaking time; it’s essential for flavor and moisture.
  • Experiment with different types of bread for unique flavors.
  • Keep an eye on the baking time; ovens can vary.
  • For extra sweetness, drizzle with maple syrup before serving.

Equipment Needed

  • Muffin tin: Essential for baking your muffins. If you don’t have one, use a cupcake pan as an alternative.
  • Mixing bowls: A couple of medium-sized bowls will do the trick for mixing ingredients.
  • Whisk: Perfect for combining the egg mixture. A fork can work in a pinch!
  • Measuring cups and spoons: For accurate ingredient measurements, though you can eyeball it if you’re feeling adventurous.

Variations

  • Chocolate Chip Delight: Add a handful of chocolate chips to the bread mixture for a sweet twist that chocolate lovers will adore.
  • Nutty Crunch: Incorporate chopped nuts like walnuts or pecans for added texture and flavor.
  • Fruit Fusion: Toss in some diced apples or berries to introduce a fresh, fruity element to your muffins.
  • Gluten-Free Option: Substitute regular bread with gluten-free bread to make these muffins suitable for gluten-sensitive eaters.
  • Dairy-Free Version: Use almond or coconut milk instead of regular milk and replace butter with a dairy-free alternative.

Serving Suggestions

  • Pair your Cinnamon Sugar French Toast Muffins with a side of fresh fruit, like berries or sliced bananas, for a refreshing contrast.
  • Enjoy them with a hot cup of coffee or a chilled glass of milk to enhance the flavors.
  • For a special touch, dust with powdered sugar before serving for an elegant presentation.

FAQs about Cinnamon Sugar French Toast Muffins

Can I use fresh bread instead of stale bread?

While you can use fresh bread, stale bread works best for these Cinnamon Sugar French Toast Muffins. It absorbs the milk better, resulting in a moist and fluffy texture. If you only have fresh bread, let it sit out for a few hours to dry out a bit.

How do I store leftover muffins?

Store any leftover muffins in an airtight container at room temperature for up to three days. For longer storage, you can freeze them. Just wrap each muffin tightly in plastic wrap and place them in a freezer bag. They’ll be ready to enjoy later!

Can I make these muffins ahead of time?

Absolutely! You can prepare the batter the night before and store it in the fridge. Just fill the muffin tin and bake them fresh in the morning. This makes for a quick and easy breakfast option!

What can I substitute for eggs in this recipe?

If you’re looking for an egg substitute, try using flaxseed meal or applesauce. For each egg, mix one tablespoon of flaxseed meal with three tablespoons of water and let it sit for a few minutes. Alternatively, use a quarter cup of applesauce for each egg.

Can I add other flavors to the muffins?

Definitely! Feel free to get creative. You can add a splash of almond extract, a sprinkle of nutmeg, or even some citrus zest for a unique twist on these Cinnamon Sugar French Toast Muffins. The possibilities are endless!

Final Thoughts

Creating these Cinnamon Sugar French Toast Muffins is more than just baking; it’s about crafting moments of joy. The warm, inviting aroma fills your kitchen, wrapping you in a cozy embrace. Each bite is a delightful reminder of simpler times, where breakfast was a celebration. Whether you’re sharing them with family or savoring them solo, these muffins bring a smile to your face. They’re perfect for any occasion, from busy mornings to leisurely brunches. So, roll up your sleeves, embrace the process, and enjoy the sweet satisfaction of homemade goodness!

Ranis

Cinnamon Sugar French Toast Muffins: An Irresistible Treat!

Cinnamon Sugar French Toast Muffins are a delightful treat that combines the classic flavors of French toast in a convenient muffin form, perfect for breakfast or a snack.
Prep Time 15 minutes
Cook Time 25 minutes
Total Time 40 minutes
Servings: 12 muffins
Course: Breakfast
Cuisine: American
Calories: 150

Ingredients
  

  • 2 cups bread cubes about 4 slices of bread, preferably stale
  • 1 cup milk
  • 3 large eggs
  • 1/4 cup granulated sugar
  • 1 teaspoon vanilla extract
  • 1 teaspoon ground cinnamon
  • 1/4 teaspoon salt
  • 1/4 cup unsalted butter melted
  • 1/2 cup granulated sugar for topping
  • 1 tablespoon ground cinnamon for topping

Method
 

  1. Preheat the oven to 350°F (175°C) and grease a muffin tin with cooking spray or butter.
  2. In a large mixing bowl, combine the bread cubes and milk. Let it sit for about 10 minutes to allow the bread to soak up the milk.
  3. In a separate bowl, whisk together the eggs, 1/4 cup sugar, vanilla extract, 1 teaspoon cinnamon, and salt until well combined. Pour this mixture over the soaked bread cubes and gently fold until the bread is evenly coated.
  4. Spoon the mixture into the prepared muffin tin, filling each cup about 3/4 full. Bake in the preheated oven for 20-25 minutes, or until the muffins are golden brown and a toothpick inserted in the center comes out clean.
  5. While the muffins are baking, mix together 1/2 cup sugar and 1 tablespoon cinnamon in a small bowl for the topping.
  6. Once the muffins are done, remove them from the oven and let them cool for about 5 minutes. While they are still warm, brush the tops with melted butter and sprinkle the cinnamon sugar mixture generously over each muffin.
  7. Serve warm or at room temperature. Enjoy!

Nutrition

Serving: 1muffinCalories: 150kcalCarbohydrates: 20gProtein: 3gFat: 6gSaturated Fat: 3gPolyunsaturated Fat: 2gCholesterol: 70mgSodium: 150mgFiber: 1gSugar: 10g

Notes

  • For a fun twist, add chocolate chips or chopped nuts to the bread mixture before baking.
  • Try using different types of bread, such as brioche or challah, for a richer flavor and texture.

Tried this recipe?

Let us know how it was!

Stovetop Gnocchi Lasagna: A Quick & Delicious Dish!

Introduction to Stovetop Gnocchi Lasagna

After a long day, the last thing I want is to spend hours in the kitchen. That’s where my Stovetop Gnocchi Lasagna comes to the rescue! This dish is a delightful blend of comfort and convenience, perfect for those busy evenings when you crave something hearty yet quick. With savory ground meat, rich cheeses, and tender gnocchi, it’s a meal that impresses without the fuss. Whether you’re cooking for family or just treating yourself, this recipe is sure to become a go-to in your culinary repertoire.

Why You’ll Love This Stovetop Gnocchi Lasagna

This Stovetop Gnocchi Lasagna is a game-changer for anyone who loves delicious food but hates spending hours cooking. It’s quick to whip up, taking just 35 minutes from start to finish. The flavors meld beautifully, creating a comforting dish that feels like a warm hug. Plus, it’s versatile! You can easily customize it to suit your taste or dietary needs, making it a perfect weeknight dinner for everyone.

Ingredients for Stovetop Gnocchi Lasagna

Gathering the right ingredients is the first step to creating a fantastic Stovetop Gnocchi Lasagna. Here’s what you’ll need:

  • Olive oil: A staple in Italian cooking, it adds richness and helps sauté the aromatics.
  • Onion: Diced onion brings sweetness and depth to the dish, enhancing the overall flavor.
  • Garlic: Minced garlic adds a fragrant kick that elevates the taste of your lasagna.
  • Ground beef or Italian sausage: Choose your favorite for a hearty protein base. For a lighter option, turkey or chicken works well too.
  • Dried oregano and basil: These herbs are essential for that classic Italian flavor. Fresh herbs can be used if you have them on hand.
  • Red pepper flakes: Optional, but they add a nice touch of heat if you like a little spice.
  • Crushed tomatoes: The heart of the sauce, providing a rich, tangy base for the lasagna.
  • Gnocchi: These little potato dumplings are the star of the show, offering a unique twist on traditional lasagna noodles.
  • Ricotta cheese: Creamy and mild, it adds a luscious layer that complements the other cheeses.
  • Shredded mozzarella cheese: Melts beautifully, creating that gooey, cheesy goodness we all love.
  • Grated Parmesan cheese: A sprinkle of this adds a salty, nutty flavor that rounds out the dish.
  • Salt and pepper: Essential for seasoning, ensuring every bite is flavorful.
  • Fresh basil leaves: Optional for garnish, they add a pop of color and freshness to your finished dish.

For those looking to mix things up, consider substituting the meat with sautéed mushrooms or a medley of your favorite vegetables. You can also layer in some spinach or kale for added nutrition. Exact quantities for each ingredient can be found at the bottom of the article, ready for printing!

How to Make Stovetop Gnocchi Lasagna

Creating this Stovetop Gnocchi Lasagna is a breeze! Follow these simple steps, and you’ll have a delicious meal ready in no time. Let’s dive in!

Step 1: Sauté the Aromatics

Start by heating the olive oil in a large skillet over medium heat. Once it’s shimmering, toss in the diced onion. Sauté for about 3-4 minutes until it softens and becomes translucent. The aroma will fill your kitchen, making your mouth water. Add the minced garlic and cook for another minute. Trust me, this step sets the flavor foundation!

Step 2: Brown the Meat

Next, add your choice of ground beef or Italian sausage to the skillet. Break it apart with a spoon as it cooks, about 5-7 minutes, until it’s nicely browned. If there’s excess fat, drain it off. This step is crucial for a rich, meaty flavor that pairs perfectly with the gnocchi.

Step 3: Add the Sauce

Now, stir in the dried oregano, dried basil, and red pepper flakes if you’re feeling spicy. Pour in the crushed tomatoes, and season with salt and pepper. Bring the mixture to a simmer and let it cook for about 10 minutes. This allows the flavors to meld beautifully, creating a savory sauce that will coat the gnocchi perfectly.

Step 4: Cook the Gnocchi

Time to add the star of the show! Gently stir in the gnocchi, ensuring they’re well-coated in the sauce. Cover the skillet and let it cook for an additional 5-7 minutes. The gnocchi will puff up and become tender, soaking up all those delicious flavors. Keep an eye on them; you want them just right!

Step 5: Layer the Cheeses

Once the gnocchi are cooked, remove the skillet from heat. Dollop the ricotta cheese over the top, spreading it out a bit. Then, sprinkle the shredded mozzarella and grated Parmesan evenly over the ricotta. This cheesy layer is what dreams are made of!

Step 6: Let it Rest

Cover the skillet again and let it sit for about 5 minutes. This resting time allows the cheese to melt and become gooey. When you finally serve it, the melty cheese will be the cherry on top of this comforting dish. Garnish with fresh basil leaves if you like, and get ready to dig in!

Tips for Success

  • Use a non-stick skillet to prevent sticking and make cleanup easier.
  • Don’t rush the sautéing process; it builds flavor.
  • Feel free to adjust the spice level by adding more or less red pepper flakes.
  • For a creamier texture, mix some heavy cream into the sauce.
  • Let leftovers cool completely before storing them in an airtight container.

Equipment Needed

  • Large skillet: A non-stick skillet works best, but any large pan will do.
  • Wooden spoon: Perfect for stirring and breaking up the meat.
  • Measuring cups and spoons: Essential for accurate ingredient measurements.
  • Spatula: Handy for serving up those delicious portions.

Variations

  • Vegetarian Delight: Swap the meat for sautéed mushrooms, zucchini, or a mix of your favorite vegetables for a hearty vegetarian option.
  • Cheesy Spinach: Add a layer of fresh spinach or kale for extra nutrients and a pop of color. Stir it in with the gnocchi or layer it with the cheeses.
  • Gluten-Free Option: Use gluten-free gnocchi to make this dish suitable for those with gluten sensitivities.
  • Spicy Kick: Increase the red pepper flakes or add sliced jalapeños for a spicier version that packs a punch.
  • Herb Infusion: Experiment with fresh herbs like thyme or rosemary for a different flavor profile that complements the dish beautifully.

Serving Suggestions

  • Garlic Bread: Serve with warm, buttery garlic bread for a classic Italian touch.
  • Side Salad: A fresh green salad with a light vinaigrette balances the richness of the lasagna.
  • Wine Pairing: Enjoy with a glass of Chianti or a crisp Pinot Grigio.
  • Presentation: Garnish with extra fresh basil for a pop of color and flavor.

FAQs about Stovetop Gnocchi Lasagna

Can I make Stovetop Gnocchi Lasagna ahead of time?

Absolutely! You can prepare the sauce and cook the gnocchi in advance. Just store them separately in the fridge. When you’re ready to eat, combine them and layer the cheeses before heating everything up on the stovetop.

Is Stovetop Gnocchi Lasagna suitable for meal prep?

Yes! This dish is perfect for meal prep. You can portion it out into individual servings and store them in airtight containers. Just reheat in the microwave or on the stovetop when you’re ready to enjoy a quick meal.

Can I freeze Stovetop Gnocchi Lasagna?

While it’s best enjoyed fresh, you can freeze leftovers. Just make sure to let it cool completely before transferring it to a freezer-safe container. When you’re ready to eat, thaw it in the fridge overnight and reheat on the stovetop.

What can I serve with Stovetop Gnocchi Lasagna?

Pair it with a simple side salad or some garlic bread for a complete meal. A glass of red wine, like Chianti, complements the flavors beautifully!

Can I customize the ingredients in this recipe?

Definitely! Feel free to swap out the meat for vegetables or use different cheeses. You can also adjust the spices to suit your taste. This recipe is all about making it your own!

Final Thoughts

Cooking should be a joyful experience, and my Stovetop Gnocchi Lasagna embodies that spirit. It’s not just a meal; it’s a celebration of flavors and comfort that brings people together. The ease of preparation means you can spend less time in the kitchen and more time enjoying the company of loved ones. Each bite is a reminder of the simple pleasures in life, from the gooey cheese to the tender gnocchi. So, whether it’s a weeknight dinner or a special occasion, this dish is sure to create lasting memories around the table.

Ranis

Stovetop Gnocchi Lasagna: A Quick & Delicious Dish!

A quick and delicious stovetop gnocchi lasagna that combines savory ground meat, rich cheeses, and tender gnocchi for a comforting meal.
Prep Time 10 minutes
Cook Time 25 minutes
Total Time 35 minutes
Servings: 4 servings
Course: Main Course
Cuisine: Italian
Calories: 450

Ingredients
  

  • 2 tablespoons olive oil
  • 1 medium onion diced
  • 2 cloves garlic minced
  • 1 pound ground beef or Italian sausage
  • 1 teaspoon dried oregano
  • 1 teaspoon dried basil
  • 1/2 teaspoon red pepper flakes optional
  • 1 28-ounce can crushed tomatoes
  • 1 16-ounce package gnocchi
  • 1 cup ricotta cheese
  • 1 cup shredded mozzarella cheese
  • 1/2 cup grated Parmesan cheese
  • Salt and pepper to taste
  • Fresh basil leaves for garnish optional

Method
 

  1. In a large skillet, heat the olive oil over medium heat. Add the diced onion and sauté for about 3-4 minutes until softened. Stir in the minced garlic and cook for an additional minute until fragrant.
  2. Add the ground beef or sausage to the skillet. Cook until browned, breaking it apart with a spoon, about 5-7 minutes. Drain any excess fat if necessary.
  3. Stir in the dried oregano, dried basil, red pepper flakes (if using), crushed tomatoes, salt, and pepper. Bring the mixture to a simmer and let it cook for about 10 minutes, allowing the flavors to meld.
  4. Add the gnocchi to the skillet, stirring gently to combine. Cover and cook for an additional 5-7 minutes, or until the gnocchi are cooked through and tender.
  5. Remove the skillet from heat and dollop the ricotta cheese over the top. Sprinkle the shredded mozzarella and grated Parmesan evenly over the ricotta.
  6. Cover the skillet again and let it sit for about 5 minutes, allowing the cheese to melt.
  7. Garnish with fresh basil leaves if desired before serving.

Nutrition

Serving: 1servingCalories: 450kcalCarbohydrates: 35gProtein: 25gFat: 25gSaturated Fat: 10gPolyunsaturated Fat: 15gCholesterol: 70mgSodium: 800mgFiber: 2gSugar: 6g

Notes

  • For a vegetarian version, substitute the meat with sautéed mushrooms or a mix of your favorite vegetables.
  • Add a layer of spinach or kale for extra nutrients and flavor. You can stir it in with the gnocchi or layer it with the cheeses.

Tried this recipe?

Let us know how it was!

Knock You Naked Bars: Indulge in This Irresistible Recipe!

Introduction to Knock You Naked Bars

There’s something magical about a dessert that can turn an ordinary day into a celebration. Knock You Naked Bars are just that—an irresistible blend of chocolate, caramel, and nuts that will have your taste buds dancing.

Whether you’re looking for a quick solution to satisfy a sweet craving or a showstopper to impress friends at your next gathering, these bars deliver.

With just a handful of ingredients and minimal prep time, you can whip up a batch that will leave everyone asking for seconds. Trust me, once you try these, you’ll understand why they’re called “Knock You Naked”!

Why You’ll Love This Knock You Naked Bars

These Knock You Naked Bars are a game-changer in the dessert world.

They come together in no time, making them perfect for busy weeknights or last-minute gatherings.

The rich combination of chocolate and caramel creates a flavor explosion that’s hard to resist.

Plus, they’re incredibly versatile—great for sharing or indulging solo.

Once you take a bite, you’ll see why they’re a favorite among friends and family!

Ingredients for Knock You Naked Bars

Creating these Knock You Naked Bars is a breeze, thanks to a simple list of ingredients that you probably already have in your pantry.

Here’s what you’ll need:

  • All-purpose flour: The backbone of the bars, providing structure and a soft texture.
  • Brown sugar: Adds moisture and a rich, caramel-like flavor that complements the chocolate.
  • Granulated sugar: Balances the sweetness and helps achieve that perfect chewy consistency.
  • Unsalted butter: Brings richness and helps bind everything together; make sure it’s softened for easy mixing.
  • Large egg: Acts as a binding agent, giving the bars a lovely, tender crumb.
  • Vanilla extract: A splash of this adds depth and enhances the overall flavor profile.
  • Baking soda: This leavening agent helps the bars rise slightly, creating a delightful texture.
  • Salt: Just a pinch enhances the sweetness and balances the flavors.
  • Chocolate chips: The star of the show! Choose semi-sweet or dark for a rich chocolate experience.
  • Chopped pecans (optional): For those who love a nutty crunch, these add a delightful texture and flavor.
  • Caramel sauce: The gooey goodness that ties everything together; you can use store-bought or homemade for a personal touch.

For exact measurements, check the bottom of the article where you can find everything listed for easy printing.

With these ingredients, you’re just a few steps away from a dessert that’s sure to impress!

How to Make Knock You Naked Bars

Step 1: Preheat and Prepare

Preheat your oven to 350°F (175°C).

While it warms up, grease a 9×13-inch baking pan or line it with parchment paper.

This makes for easy removal later. Trust me, you’ll want every last crumb of these delicious bars!

Step 2: Cream the Butter and Sugars

In a large mixing bowl, combine the softened butter, brown sugar, and granulated sugar.

Mix until the mixture is light and fluffy.

Then, add in the egg and vanilla extract, blending until everything is well combined.

This step is crucial for that perfect texture!

Step 3: Combine Dry Ingredients

In a separate bowl, whisk together the all-purpose flour, baking soda, and salt.

Gradually add this dry mixture to your wet ingredients, stirring gently until just combined.

Be careful not to overmix; we want those bars to be soft and chewy!

Step 4: Layer the Batter and Caramel

Spread half of the batter evenly in your prepared baking pan.

Drizzle half of the caramel sauce over the batter, letting it seep in.

Spoon the remaining batter on top, spreading it gently, and finish with a drizzle of the rest of the caramel.

This layering creates that gooey goodness!

Step 5: Bake to Perfection

Place the pan in your preheated oven and bake for 25-30 minutes.

You’ll know they’re done when the edges are golden and a toothpick inserted in the center comes out with a few moist crumbs.

The aroma will be irresistible!

Step 6: Cool and Serve

Once baked, allow the bars to cool in the pan for about 10 minutes.

Then, transfer them to a wire rack to cool completely.

Cut into squares and serve. Enjoy the delightful combination of chocolate and caramel in every bite!

Tips for Success

  • Make sure your butter is softened for easy mixing; it should be at room temperature.
  • Don’t overmix the batter; a few lumps are okay for that chewy texture.
  • For an extra flavor boost, sprinkle a pinch of sea salt on top of the caramel before baking.
  • Let the bars cool completely before cutting to avoid crumbling.
  • Store leftovers in an airtight container to keep them fresh and chewy.

Equipment Needed

  • Baking pan: A 9×13-inch pan is ideal, but you can use any similar-sized dish.
  • Mixing bowls: Have a large bowl for wet ingredients and a smaller one for dry.
  • Whisk: Perfect for combining dry ingredients; a fork works in a pinch.
  • Spatula: Essential for spreading the batter evenly and scraping the bowl clean.
  • Wire rack: Great for cooling; if you don’t have one, a plate will do.

Variations

  • Nut-Free: Omit the pecans for a nut-free version, perfect for those with allergies.
  • Gluten-Free: Substitute all-purpose flour with a gluten-free blend to accommodate dietary needs.
  • Vegan: Use a flax egg (1 tablespoon ground flaxseed mixed with 2.5 tablespoons water) and replace butter with coconut oil for a vegan-friendly treat.
  • Flavor Twist: Experiment with butterscotch chips instead of chocolate for a different flavor profile.
  • Spicy Kick: Add a pinch of cayenne pepper or cinnamon to the batter for a surprising twist!

Serving Suggestions

  • Pair these Knock You Naked Bars with a scoop of vanilla ice cream for a delightful contrast.
  • Serve with a hot cup of coffee or a cold glass of milk to enhance the flavors.
  • For a festive touch, dust with powdered sugar before serving.
  • Consider adding fresh berries on the side for a pop of color and freshness.

FAQs about Knock You Naked Bars

Can I make Knock You Naked Bars ahead of time?

Absolutely! These bars store well. You can make them a day in advance and keep them in an airtight container. Just let them cool completely before storing to maintain their chewy texture.

What can I substitute for the caramel sauce?

If you’re looking for alternatives, you can use homemade caramel or even chocolate fudge sauce for a different twist. Both will add that gooey goodness we love!

How do I know when the bars are done baking?

Keep an eye on the edges; they should be golden brown. A toothpick inserted in the center should come out with a few moist crumbs, indicating they’re perfectly baked.

Can I freeze Knock You Naked Bars?

Yes! These bars freeze beautifully. Just wrap them tightly in plastic wrap and then in aluminum foil. They can last up to three months in the freezer. Thaw them at room temperature before serving.

What’s the best way to cut these bars?

For clean cuts, use a sharp knife and wipe it clean between cuts. This helps prevent the gooey caramel from sticking to the knife, giving you those perfect squares!

Final Thoughts

Baking these Knock You Naked Bars is more than just a culinary adventure; it’s a delightful experience that brings joy to your kitchen.

The aroma of melting chocolate and caramel fills the air, creating a warm, inviting atmosphere.

Each bite is a sweet reminder of life’s simple pleasures, perfect for sharing with loved ones or savoring solo.

Whether you’re celebrating a special occasion or just treating yourself, these bars are sure to impress.

So roll up your sleeves, gather your ingredients, and let the magic unfold. You won’t just make bars; you’ll create memories!

Ranis

Knock You Naked Bars: Indulge in This Irresistible Recipe!

Indulge in these delicious Knock You Naked Bars, a perfect blend of chocolate, caramel, and nuts that will satisfy your sweet tooth.
Prep Time 15 minutes
Cook Time 30 minutes
Total Time 45 minutes
Servings: 12 servings
Course: Dessert
Cuisine: American
Calories: 250

Ingredients
  

  • 1 cup all-purpose flour
  • 1 cup packed brown sugar
  • 1/2 cup granulated sugar
  • 1/2 cup unsalted butter softened
  • 1 large egg
  • 1 teaspoon vanilla extract
  • 1/2 teaspoon baking soda
  • 1/4 teaspoon salt
  • 1 cup chocolate chips
  • 1 cup chopped pecans optional
  • 1 cup caramel sauce

Method
 

  1. Preheat your oven to 350°F (175°C). Grease a 9x13-inch baking pan or line it with parchment paper for easy removal.
  2. In a large mixing bowl, cream together the softened butter, brown sugar, and granulated sugar until light and fluffy. Add the egg and vanilla extract, mixing until well combined.
  3. In a separate bowl, whisk together the flour, baking soda, and salt. Gradually add the dry ingredients to the wet mixture, stirring until just combined. Fold in the chocolate chips and chopped pecans if using.
  4. Spread half of the batter evenly in the prepared baking pan. Drizzle half of the caramel sauce over the batter. Spoon the remaining batter on top, spreading it gently to cover the caramel. Drizzle the rest of the caramel sauce over the top.
  5. Bake in the preheated oven for 25-30 minutes, or until the edges are golden and a toothpick inserted in the center comes out with a few moist crumbs.
  6. Allow the bars to cool in the pan for about 10 minutes before transferring them to a wire rack to cool completely. Cut into squares and serve.

Nutrition

Serving: 1barCalories: 250kcalCarbohydrates: 30gProtein: 3gFat: 12gSaturated Fat: 7gPolyunsaturated Fat: 5gCholesterol: 30mgSodium: 100mgFiber: 1gSugar: 20g

Notes

  • For a richer flavor, try adding a pinch of sea salt on top of the caramel before baking.
  • You can also substitute the chocolate chips with butterscotch chips for a different taste.

Tried this recipe?

Let us know how it was!

Crispy Rice Paper Crab Rangoons: Discover the Recipe!

Introduction to Crispy Rice Paper Crab Rangoons

There’s something magical about the crunch of a perfectly fried appetizer, isn’t there? Crispy Rice Paper Crab Rangoons bring that delightful texture to your table, making them an irresistible treat. Whether you’re hosting friends for game night or just looking for a quick solution to satisfy your cravings, these rangoons are a fantastic choice. With a creamy crab filling wrapped in delicate rice paper, they’re not just delicious; they’re also a fun way to impress your loved ones. Let’s dive into this easy recipe that’s sure to become a favorite in your kitchen!

Why You’ll Love This Crispy Rice Paper Crab Rangoons

These Crispy Rice Paper Crab Rangoons are a game-changer for any home cook. They come together in just 35 minutes, making them perfect for busy weeknights or last-minute gatherings. The combination of creamy crab and crispy rice paper creates a flavor explosion that’s hard to resist. Plus, they’re gluten-free, so everyone can enjoy them. Trust me, once you try these, they’ll become your go-to appetizer!

Ingredients for Crispy Rice Paper Crab Rangoons

Gathering the right ingredients is the first step to creating these delightful Crispy Rice Paper Crab Rangoons. Here’s what you’ll need:

  • Cream cheese: This creamy base adds richness and helps bind the filling together.
  • Crab meat: Fresh or canned, this is the star of the show, providing that sweet, oceanic flavor.
  • Green onions: These add a fresh, mild onion flavor that brightens up the filling.
  • Garlic powder: A dash of this brings a savory depth to the mixture.
  • Worcestershire sauce: This adds a tangy umami kick that enhances the overall taste.
  • Soy sauce: A splash of this salty sauce rounds out the flavors beautifully.
  • Rice paper wrappers: These delicate wrappers are what make the rangoons crispy and light.
  • Vegetable oil: Essential for frying, it gives the rangoons that golden, crispy exterior.

For those looking to spice things up, consider adding a teaspoon of sriracha or chili paste to the crab mixture. If you want to switch things up, you can substitute the crab meat with cooked shrimp or even mashed avocado for a vegetarian twist. All ingredient quantities are listed at the bottom of the article for easy reference and printing!

How to Make Crispy Rice Paper Crab Rangoons

Now that you have all your ingredients ready, it’s time to bring these Crispy Rice Paper Crab Rangoons to life! Follow these simple steps, and you’ll be on your way to creating a delicious appetizer that will wow your friends and family.

Step 1: Prepare the Filling

Start by grabbing a mixing bowl. Combine the softened cream cheese, shredded crab meat, finely chopped green onions, garlic powder, Worcestershire sauce, and soy sauce. Mix everything together until it’s creamy and well-blended. This filling is the heart of your rangoons, so make sure it’s smooth and flavorful!

Step 2: Soften the Rice Paper

Next, fill a shallow dish with warm water. Dip one rice paper wrapper into the water for about 10-15 seconds. You want it to become pliable but not too soggy. Once it’s ready, gently lay it on a clean surface. This step is crucial for achieving that perfect crispy texture when frying!

Step 3: Assemble the Rangoons

Now comes the fun part! Place about 1 tablespoon of the crab mixture in the center of the softened rice paper wrapper. Fold the sides over the filling, then roll it up tightly from the bottom to the top, sealing the edges as you go. Repeat this process with the remaining wrappers and filling. Each one should look like a little package of joy!

Step 4: Fry the Rangoons

In a large skillet, heat about 1 inch of vegetable oil over medium heat. Once the oil is hot, carefully add the rangoons in batches. Fry them until they turn golden brown and crispy, which should take about 3-4 minutes per side. Keep an eye on them; you want that perfect crunch without burning!

Step 5: Drain and Serve

Once they’re beautifully golden, remove the rangoons from the oil and place them on a paper towel-lined plate to drain any excess oil. Serve them warm with your favorite dipping sauce, like sweet and sour sauce or soy sauce. Trust me, these crispy delights will disappear in no time!

Tips for Success

  • Make sure your cream cheese is softened for easy mixing.
  • Don’t over-soak the rice paper; it should be pliable, not mushy.
  • Fry in small batches to maintain oil temperature and achieve even crispiness.
  • Use a thermometer to check oil temperature; it should be around 350°F.
  • Experiment with different dipping sauces to find your favorite flavor combination!

Equipment Needed

  • Mixing bowl: A standard bowl works, but a large one makes mixing easier.
  • Shallow dish: Use a pie plate or any wide dish for soaking rice paper.
  • Skillet: A deep skillet or wok is ideal for frying.
  • Slotted spoon: This helps remove the rangoons from hot oil safely.
  • Paper towels: Essential for draining excess oil after frying.

Variations

  • Spicy Crab Rangoons: Add a teaspoon of sriracha or chili paste to the filling for a fiery kick.
  • Shrimp Rangoons: Substitute crab meat with cooked shrimp for a different seafood flavor.
  • Vegetarian Option: Use mashed avocado or a mix of sautéed vegetables for a creamy, plant-based filling.
  • Cheesy Rangoons: Mix in shredded cheese like mozzarella or cheddar for an extra cheesy twist.
  • Herbed Rangoons: Add fresh herbs like cilantro or dill to the filling for a burst of freshness.

Serving Suggestions

  • Pair your Crispy Rice Paper Crab Rangoons with a refreshing cucumber salad for a light side.
  • Serve with sweet and sour sauce or a zesty soy dipping sauce for added flavor.
  • For drinks, consider a chilled beer or a crisp white wine to complement the dish.
  • Garnish with fresh herbs like cilantro or parsley for a pop of color.

FAQs about Crispy Rice Paper Crab Rangoons

Can I make Crispy Rice Paper Crab Rangoons ahead of time?

Absolutely! You can prepare the filling and assemble the rangoons in advance. Just store them in the fridge, covered, until you’re ready to fry. This makes for a quick appetizer when guests arrive!

What dipping sauces pair well with these rangoons?

These crispy delights are fantastic with a variety of dipping sauces. Sweet and sour sauce, soy sauce, or even a spicy mayo can elevate the flavor. Feel free to experiment!

Can I bake the rangoons instead of frying them?

While frying gives the best crispy texture, you can bake them for a healthier option. Brush the assembled rangoons with oil and bake at 400°F for about 15-20 minutes, flipping halfway through.

What can I substitute for crab meat?

If crab isn’t your thing, you can use cooked shrimp or even mashed avocado for a vegetarian version. Both options will still deliver a delicious flavor!

How do I store leftover rangoons?

Store any leftover Crispy Rice Paper Crab Rangoons in an airtight container in the fridge for up to 2 days. Reheat them in the oven to regain some crispiness before serving again.

Final Thoughts

Creating Crispy Rice Paper Crab Rangoons is more than just cooking; it’s about sharing joy and deliciousness with those you love. The satisfying crunch, the creamy filling, and the delightful dipping sauces come together to create a memorable experience. Whether you’re serving them at a party or enjoying them on a quiet evening, these rangoons are sure to bring smiles. Plus, the versatility of this recipe means you can adapt it to suit any taste. So roll up your sleeves, gather your ingredients, and let the magic happen in your kitchen!

Ranis

Crispy Rice Paper Crab Rangoons: Discover the Recipe!

Crispy Rice Paper Crab Rangoons are a delicious appetizer featuring a creamy crab filling wrapped in crispy rice paper, perfect for dipping.
Prep Time 20 minutes
Cook Time 15 minutes
Total Time 35 minutes
Course: Appetizer
Cuisine: Asian
Calories: 250

Ingredients
  

  • 8 ounces cream cheese softened
  • 1 cup crab meat shredded
  • 1/4 cup green onions finely chopped
  • 1 teaspoon garlic powder
  • 1 teaspoon Worcestershire sauce
  • 1/2 teaspoon soy sauce
  • 1 package 8 ounces rice paper wrappers
  • Vegetable oil for frying

Method
 

  1. In a mixing bowl, combine the softened cream cheese, crab meat, green onions, garlic powder, Worcestershire sauce, and soy sauce. Mix until well combined and creamy.
  2. Fill a shallow dish with warm water. Dip one rice paper wrapper into the water for about 10-15 seconds until it becomes pliable.
  3. Lay the softened rice paper wrapper on a clean surface. Place about 1 tablespoon of the crab mixture in the center of the wrapper.
  4. Fold the sides of the wrapper over the filling, then roll it up tightly from the bottom to the top, sealing the edges. Repeat with the remaining wrappers and filling.
  5. In a large skillet, heat about 1 inch of vegetable oil over medium heat. Once the oil is hot, carefully add the rangoons in batches, frying until golden brown and crispy, about 3-4 minutes per side.
  6. Remove the rangoons from the oil and place them on a paper towel-lined plate to drain excess oil.
  7. Serve warm with your favorite dipping sauce, such as sweet and sour sauce or soy sauce.

Nutrition

Serving: 1servingCalories: 250kcalCarbohydrates: 10gProtein: 8gFat: 20gSaturated Fat: 10gPolyunsaturated Fat: 5gCholesterol: 50mgSodium: 300mgFiber: 1gSugar: 1g

Notes

  • For a spicy kick, add a teaspoon of sriracha or chili paste to the crab mixture.
  • Substitute the crab meat with cooked shrimp or a vegetarian option like mashed avocado for a different flavor profile.

Tried this recipe?

Let us know how it was!

Fiesta Bean Wraps: Discover a Flavorful Recipe Today!

Introduction to Fiesta Bean Wraps

Life can get hectic, and sometimes, you just need a quick solution that doesn’t skimp on flavor. That’s where my Fiesta Bean Wraps come in! These wraps are not only a breeze to whip up, but they also pack a punch of taste and nutrition. Whether you’re looking for a satisfying lunch or a light dinner, this recipe is perfect for busy days or when you want to impress your loved ones with minimal effort. Trust me, once you try these wraps, they’ll become a staple in your kitchen!

Why You’ll Love This Fiesta Bean Wraps

Fiesta Bean Wraps are the ultimate answer to your mealtime dilemmas. They’re quick to prepare, taking just 25 minutes from start to finish. The vibrant flavors will dance on your taste buds, making every bite a delight. Plus, they’re packed with protein and fiber, keeping you full and satisfied. Whether you’re cooking for yourself or a crowd, these wraps are sure to impress without the stress!

Ingredients for Fiesta Bean Wraps

Gathering the right ingredients is the first step to creating these delicious Fiesta Bean Wraps. Here’s what you’ll need:

  • Black beans: These hearty beans add a rich flavor and are packed with protein.
  • Pinto beans: Creamy and slightly sweet, they complement the black beans perfectly.
  • Corn kernels: Fresh, frozen, or canned, corn brings a sweet crunch to the mix.
  • Red bell pepper: This vibrant veggie adds color and a hint of sweetness.
  • Red onion: A touch of sharpness that balances the other flavors beautifully.
  • Garlic: Minced garlic infuses the dish with a warm, aromatic essence.
  • Ground cumin: This spice adds a warm, earthy flavor that’s essential in Mexican cuisine.
  • Chili powder: A dash of heat that elevates the flavor profile of the wraps.
  • Olive oil: Used for sautéing, it adds richness and helps the veggies soften.
  • Salt and pepper: Essential seasonings to enhance all the flavors.
  • Whole wheat tortillas: A healthier option that holds all the delicious fillings together.
  • Shredded lettuce: Adds a refreshing crunch and a pop of color.
  • Diced tomatoes: Juicy and vibrant, they bring freshness to each bite.
  • Avocado: Creamy slices that add richness and healthy fats.
  • Salsa: A zesty topping that ties all the flavors together.
  • Shredded cheese (optional): For those who love a cheesy finish, this is a great addition.

For exact measurements, check the bottom of the article where you can find everything listed for easy printing. Feel free to get creative with substitutions; lentils or chickpeas can be great alternatives to the beans if you’re looking for a different texture or taste!

How to Make Fiesta Bean Wraps

Creating these Fiesta Bean Wraps is as easy as pie, or should I say, as easy as a wrap! Follow these simple steps, and you’ll have a delicious meal ready in no time. Let’s dive in!

Step 1: Sauté the Vegetables

Start by heating a tablespoon of olive oil in a large skillet over medium heat. Once the oil is shimmering, toss in the diced red onion and bell pepper. Sauté them for about 5 minutes, stirring occasionally, until they soften and become fragrant. This step is crucial; it sets the stage for the flavor explosion to come!

Step 2: Add Spices and Garlic

Next, it’s time to amp up the flavor! Add the minced garlic, ground cumin, chili powder, salt, and pepper to the skillet. Cook everything together for another minute, stirring constantly. The aroma will be heavenly, and you’ll know you’re on the right track!

Step 3: Mix in the Beans and Corn

Now, stir in the black beans, pinto beans, and corn. Mix everything well and let it cook for about 5-7 minutes, stirring occasionally. You want the beans to be heated through and the flavors to meld together beautifully. This is where the magic happens!

Step 4: Prepare the Tortillas

While the bean mixture is cooking, warm the whole wheat tortillas. You can do this in a separate pan or pop them in the microwave for a few seconds until they’re pliable. This makes rolling them up a breeze and prevents tearing!

Step 5: Assemble the Wraps

It’s assembly time! Take a warm tortilla and place a generous scoop of the bean mixture in the center. Top it off with shredded lettuce, diced tomatoes, avocado slices, and a dollop of salsa. If you’re feeling cheesy, sprinkle some shredded cheese on top. Now, fold in the sides of the tortilla and roll it up tightly from the bottom. Voila, your wrap is ready!

Step 6: Serve or Store

Enjoy your Fiesta Bean Wraps immediately for the best flavor and texture. If you’re not eating them right away, wrap them in foil to keep them fresh for later. These wraps are perfect for meal prep or a quick snack on the go!

Tips for Success

  • Don’t skip the sautéing step; it enhances the flavors of the veggies.
  • Experiment with spices! A pinch of smoked paprika can add a nice twist.
  • For extra freshness, add a squeeze of lime juice before serving.
  • Wraps can be made ahead of time; just store them in the fridge.
  • Feel free to customize toppings based on your preferences!

Equipment Needed

  • Large skillet: A non-stick skillet works wonders for easy cooking and cleanup.
  • Spatula: Use a sturdy spatula to stir and serve your delicious wraps.
  • Microwave or pan: For warming tortillas, either method gets the job done.
  • Cutting board and knife: Essential for chopping veggies with ease.

Variations

  • Spicy Kick: Add jalapeños or a splash of hot sauce to the bean mixture for an extra kick.
  • Protein Boost: Incorporate grilled chicken or turkey for a heartier wrap.
  • Vegan Delight: Skip the cheese and use a dairy-free alternative to keep it plant-based.
  • Grain Swap: Try quinoa or brown rice instead of beans for a different texture and flavor.
  • Herb Infusion: Mix in fresh cilantro or parsley for a burst of freshness.

Serving Suggestions

  • Side Salad: Pair your wraps with a light mixed greens salad drizzled with vinaigrette.
  • Chips and Salsa: Serve with tortilla chips and your favorite salsa for a crunchy side.
  • Refreshing Drink: Enjoy with a cold glass of iced tea or a zesty limeade.
  • Presentation: Cut wraps in half and arrange on a colorful platter for a festive look.

FAQs about Fiesta Bean Wraps

Got questions about these delicious Fiesta Bean Wraps? You’re not alone! Here are some common queries that might pop up as you whip up this tasty dish.

Can I make Fiesta Bean Wraps ahead of time?

Absolutely! You can prepare the bean mixture in advance and store it in the fridge. Just warm it up when you’re ready to assemble your wraps. This makes for a quick meal on busy days!

What can I substitute for the beans?

If you’re looking for a change, lentils or chickpeas work wonderfully in place of black and pinto beans. They’ll add a different texture while still keeping the wraps hearty and satisfying.

Are Fiesta Bean Wraps suitable for meal prep?

Yes! These wraps are perfect for meal prep. Just wrap them in foil or store them in airtight containers. They’ll stay fresh in the fridge for a few days, making them a convenient grab-and-go option.

Can I make these wraps gluten-free?

Definitely! Simply swap out the whole wheat tortillas for gluten-free ones. This way, everyone can enjoy the fiesta, regardless of dietary restrictions!

How can I make these wraps spicier?

If you like a little heat, add jalapeños or a splash of your favorite hot sauce to the bean mixture. You can also sprinkle some crushed red pepper flakes for an extra kick!

Final Thoughts

Fiesta Bean Wraps are more than just a meal; they’re a celebration of flavors and a testament to how simple ingredients can create something extraordinary. Each bite is a delightful mix of textures and tastes, making it hard to believe they’re so easy to prepare. Whether you’re enjoying them on a busy weeknight or serving them at a gathering, these wraps bring joy and satisfaction to the table. Plus, they’re versatile enough to adapt to your cravings. So, roll up your sleeves, gather your ingredients, and let the fiesta begin in your kitchen!

Ranis

Fiesta Bean Wraps: Discover a Flavorful Recipe Today!

A delicious and nutritious recipe for Fiesta Bean Wraps, perfect for a quick meal or snack.
Prep Time 10 minutes
Cook Time 15 minutes
Total Time 25 minutes
Servings: 4 servings
Course: Main Dish
Cuisine: Mexican
Calories: 380

Ingredients
  

  • 1 can 15 oz black beans, drained and rinsed
  • 1 can 15 oz pinto beans, drained and rinsed
  • 1 cup corn kernels fresh, frozen, or canned
  • 1 red bell pepper diced
  • 1 small red onion diced
  • 2 cloves garlic minced
  • 1 teaspoon ground cumin
  • 1 teaspoon chili powder
  • 1 tablespoon olive oil
  • Salt and pepper to taste
  • 4 large whole wheat tortillas
  • 1 cup shredded lettuce
  • 1 cup diced tomatoes
  • 1 avocado sliced
  • 1/2 cup salsa
  • 1/2 cup shredded cheese optional

Method
 

  1. In a large skillet, heat the olive oil over medium heat. Add the diced red onion and bell pepper, and sauté for about 5 minutes until softened.
  2. Add the minced garlic, cumin, chili powder, salt, and pepper. Cook for another minute until fragrant.
  3. Stir in the black beans, pinto beans, and corn. Cook for about 5-7 minutes, stirring occasionally, until heated through.
  4. Warm the tortillas in a separate pan or microwave until pliable.
  5. To assemble, place a generous scoop of the bean mixture in the center of each tortilla. Top with shredded lettuce, diced tomatoes, avocado slices, and salsa. Add cheese if desired.
  6. Fold in the sides of the tortilla and roll it up tightly from the bottom.
  7. Serve immediately or wrap in foil for later.

Nutrition

Serving: 1wrapCalories: 380kcalCarbohydrates: 45gProtein: 15gFat: 12gSaturated Fat: 2gPolyunsaturated Fat: 10gSodium: 400mgFiber: 12gSugar: 2g

Notes

  • For added flavor, consider adding a squeeze of lime juice or fresh cilantro to the filling.
  • Substitute the beans with lentils or chickpeas for a different texture and taste.

Tried this recipe?

Let us know how it was!

Dill Pickle Parmesan Chicken: A Unique Flavor Explosion!

Introduction to Dill Pickle Parmesan Chicken

There’s something magical about the combination of flavors that can transform a simple chicken dinner into a culinary adventure. Dill Pickle Parmesan Chicken is just that—a delightful twist that brings together the tangy zest of dill pickles and the rich, savory notes of Parmesan cheese. This dish is perfect for those busy weeknights when you want to impress your family without spending hours in the kitchen. With just a few ingredients and minimal prep, you can create a meal that’s not only delicious but also a conversation starter at the dinner table.

Why You’ll Love This Dill Pickle Parmesan Chicken

This Dill Pickle Parmesan Chicken is a game-changer for your dinner routine. It’s incredibly easy to whip up, making it perfect for those hectic evenings when time is tight. The unique flavor profile will tantalize your taste buds, leaving everyone at the table asking for seconds. Plus, it’s baked, not fried, so you can enjoy a crispy, guilt-free meal that doesn’t skimp on taste. What’s not to love?

Ingredients for Dill Pickle Parmesan Chicken

Gathering the right ingredients is the first step to culinary success. For this Dill Pickle Parmesan Chicken, you’ll need:

  • Chicken breasts: The star of the show! Choose large, boneless chicken breasts for even cooking and juicy results.
  • Dill pickle juice: This tangy liquid not only marinates the chicken but also infuses it with a delightful flavor that’s hard to resist.
  • Breadcrumbs: Panko breadcrumbs are ideal for that extra crunch, but regular breadcrumbs work too. They create a crispy coating that’s simply irresistible.
  • Parmesan cheese: Grated Parmesan adds a savory depth to the dish. It melts beautifully and enhances the overall flavor.
  • Garlic powder: A must-have for that aromatic kick. It complements the chicken and adds a layer of flavor.
  • Onion powder: This ingredient brings a subtle sweetness and depth, balancing the tanginess of the pickles.
  • Black pepper and salt: Essential seasonings that elevate the dish. Adjust to your taste preference.
  • Egg: This acts as a binder, helping the breadcrumbs stick to the chicken for a perfect crust.
  • Dijon mustard: A touch of Dijon adds a hint of sharpness, enhancing the overall flavor profile.
  • Cooking spray or olive oil: A light spray or drizzle ensures a crispy finish without the extra calories.

For those looking to spice things up, consider adding cayenne pepper to the breadcrumb mixture for a kick. You can find the exact quantities for each ingredient at the bottom of the article, ready for printing!

How to Make Dill Pickle Parmesan Chicken

Creating Dill Pickle Parmesan Chicken is a straightforward process that yields delicious results. Follow these simple steps, and you’ll have a crispy, flavorful dish that will impress everyone at the table.

Step 1: Marinate the Chicken

Start by placing the chicken breasts in a large bowl. Pour in the dill pickle juice, ensuring the chicken is fully submerged. Cover the bowl and let it marinate in the refrigerator for at least an hour. If you have time, letting it sit overnight will deepen the flavor.

Step 2: Preheat the Oven

While the chicken is marinating, preheat your oven to 400°F (200°C). This step is crucial for achieving that perfect golden-brown crust. Line a baking sheet with parchment paper or lightly grease it with cooking spray to prevent sticking.

Step 3: Prepare the Coating

In a shallow dish, combine the breadcrumbs, grated Parmesan cheese, garlic powder, onion powder, black pepper, and salt. Mix well to ensure an even distribution of flavors. This coating will give your chicken that irresistible crunch.

Step 4: Mix the Egg and Mustard

In another bowl, whisk together the egg and Dijon mustard until smooth. This mixture acts as a glue, helping the breadcrumb coating stick to the chicken. It’s a simple yet effective step that makes all the difference.

Step 5: Coat the Chicken

Remove the chicken from the pickle juice and pat it dry with paper towels. Dip each chicken breast into the egg mixture, allowing any excess to drip off. Then, coat it thoroughly in the breadcrumb mixture, pressing gently to ensure it adheres well.

Step 6: Bake the Chicken

Place the coated chicken breasts on the prepared baking sheet. For an extra crispy finish, lightly spray the tops with cooking spray or drizzle with olive oil. Bake in the preheated oven for 25-30 minutes. The chicken is done when it’s golden brown and reaches an internal temperature of 165°F (75°C).

Step 7: Rest and Serve

Once baked, let the chicken rest for about 5 minutes before slicing. This allows the juices to redistribute, ensuring each bite is juicy and flavorful. Serve it up with your favorite sides, and enjoy the delightful explosion of flavors!

Tips for Success

  • Marinate the chicken overnight for maximum flavor absorption.
  • Use a meat thermometer to check for doneness; it should read 165°F (75°C).
  • For extra crunch, consider double-coating the chicken by repeating the egg and breadcrumb steps.
  • Experiment with different seasonings in the breadcrumb mixture to customize the flavor.
  • Let the chicken rest after baking to keep it juicy and tender.

Equipment Needed

  • Baking sheet: A standard baking sheet works well, but a wire rack can elevate the chicken for even crispiness.
  • Parchment paper: This helps prevent sticking; aluminum foil is a good alternative.
  • Mixing bowls: Use two bowls for marinating and coating.
  • Whisk: A simple whisk is perfect for mixing the egg and mustard.
  • Meat thermometer: Essential for checking the chicken’s doneness; a simple knife can also help check if juices run clear.

Variations

  • Spicy Dill Pickle Parmesan Chicken: Add a teaspoon of cayenne pepper or red pepper flakes to the breadcrumb mixture for a fiery kick.
  • Herb-Infused Coating: Mix in dried herbs like oregano, thyme, or Italian seasoning to the breadcrumb mixture for an aromatic twist.
  • Gluten-Free Option: Substitute regular breadcrumbs with gluten-free panko or crushed gluten-free crackers to accommodate dietary needs.
  • Cheesy Delight: Incorporate shredded mozzarella or cheddar cheese into the breadcrumb mixture for an extra cheesy crust.
  • Air Fryer Version: Cook the coated chicken in an air fryer at 375°F (190°C) for about 15-20 minutes for a quicker, healthier option.

Serving Suggestions

  • Coleslaw: A refreshing side that complements the tangy chicken perfectly.
  • Garden Salad: Crisp greens with a light vinaigrette add a fresh contrast.
  • Mashed Potatoes: Creamy potatoes provide a comforting base for the dish.
  • Pair with Beer: A light lager or pale ale enhances the flavors.
  • Presentation: Serve on a rustic wooden board for a homey touch.

FAQs about Dill Pickle Parmesan Chicken

Can I use chicken thighs instead of breasts?

Absolutely! Chicken thighs will add a richer flavor and remain juicy. Just adjust the cooking time slightly, as thighs may take a bit longer to cook through.

How do I store leftovers?

Store any leftover Dill Pickle Parmesan Chicken in an airtight container in the refrigerator for up to three days. Reheat in the oven for the best texture.

Can I make this dish ahead of time?

Yes! You can marinate the chicken the night before and coat it just before baking. This makes for a quick dinner solution on busy nights.

What can I serve with Dill Pickle Parmesan Chicken?

This dish pairs wonderfully with coleslaw, a fresh garden salad, or even creamy mashed potatoes. The tangy flavors complement a variety of sides!

Is this recipe gluten-free?

To make Dill Pickle Parmesan Chicken gluten-free, simply substitute regular breadcrumbs with gluten-free panko or crushed gluten-free crackers. Enjoy without worry!

Final Thoughts

Cooking Dill Pickle Parmesan Chicken is more than just preparing a meal; it’s about creating a memorable experience. The delightful crunch of the coating, paired with the tangy flavor of dill pickles, brings a unique twist to your dinner table. Each bite is a celebration of flavors that can spark joy and conversation among family and friends. Whether you’re a seasoned chef or a kitchen novice, this recipe is a fantastic way to impress without the fuss. So, roll up your sleeves, embrace the culinary adventure, and enjoy the delicious rewards of your efforts!

Ranis

Dill Pickle Parmesan Chicken: A Unique Flavor Explosion!

Dill Pickle Parmesan Chicken is a unique and flavorful dish that combines the tanginess of dill pickles with the savory taste of Parmesan cheese, creating a deliciously crispy chicken meal.
Prep Time 1 hour
Cook Time 30 minutes
Total Time 1 hour 30 minutes
Servings: 4 servings
Course: Main Course
Cuisine: American
Calories: 320

Ingredients
  

  • 2 large chicken breasts about 1 pound
  • 1 cup dill pickle juice
  • 1 cup breadcrumbs preferably panko
  • ½ cup grated Parmesan cheese
  • 1 teaspoon garlic powder
  • 1 teaspoon onion powder
  • ½ teaspoon black pepper
  • ½ teaspoon salt
  • 1 large egg
  • 1 tablespoon Dijon mustard
  • Cooking spray or olive oil for baking

Method
 

  1. In a large bowl, combine the chicken breasts and dill pickle juice. Cover and marinate in the refrigerator for at least 1 hour, or up to overnight for more flavor.
  2. Preheat your oven to 400°F (200°C). Line a baking sheet with parchment paper or lightly grease it with cooking spray.
  3. In a shallow dish, mix together the breadcrumbs, Parmesan cheese, garlic powder, onion powder, black pepper, and salt.
  4. In another bowl, whisk together the egg and Dijon mustard until well combined.
  5. Remove the chicken from the pickle juice and pat dry with paper towels. Dip each chicken breast into the egg mixture, allowing excess to drip off, then coat thoroughly in the breadcrumb mixture.
  6. Place the coated chicken breasts on the prepared baking sheet. Lightly spray the tops with cooking spray or drizzle with olive oil for extra crispiness.
  7. Bake in the preheated oven for 25-30 minutes, or until the chicken is cooked through and the coating is golden brown. The internal temperature should reach 165°F (75°C).
  8. Let the chicken rest for 5 minutes before slicing and serving.

Nutrition

Serving: 1pieceCalories: 320kcalCarbohydrates: 10gProtein: 30gFat: 18gSaturated Fat: 4gPolyunsaturated Fat: 14gCholesterol: 150mgSodium: 600mgFiber: 1g

Notes

  • For a spicier kick, add a teaspoon of cayenne pepper to the breadcrumb mixture.
  • Serve with a side of coleslaw or a fresh garden salad for a complete meal.

Tried this recipe?

Let us know how it was!