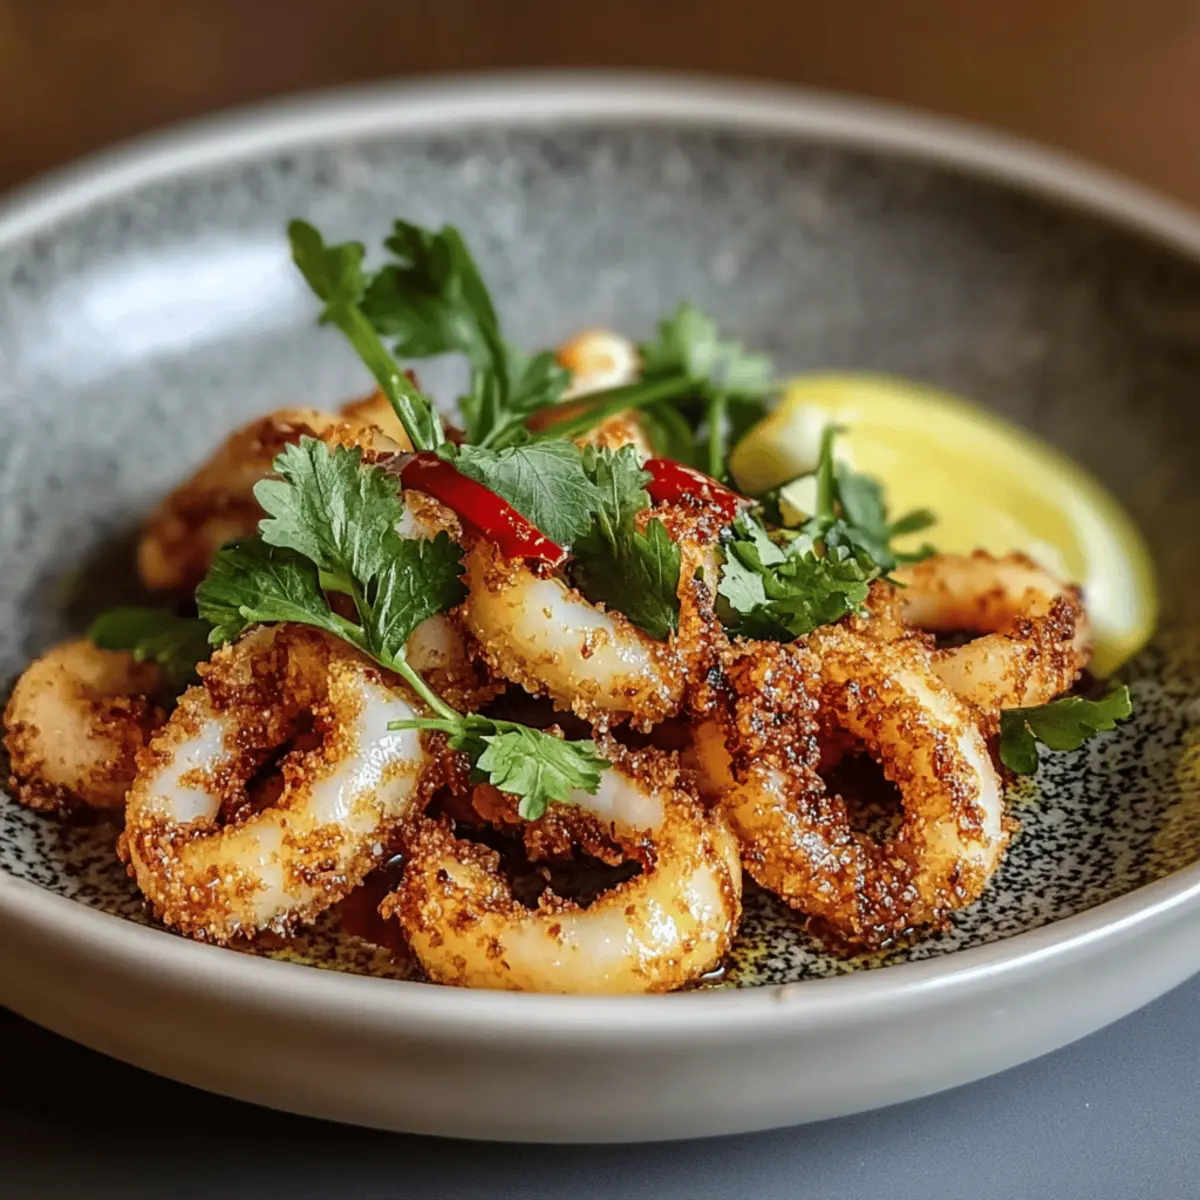
Indulgent Hot Butter Calamari Recipe You’ll Crave Again!

As I stood in my kitchen, the enticing aroma of sizzling garlic filled the air, setting the stage for a delightful creation: my Indulgent Hot Butter Calamari Recipe. This dish isn’t just another dinner; it’s a quick escape into the realm of seafood heaven, where tender calamari dances in a rich, buttery embrace. Perfect for those busy weeknights, this recipe allows you to whip up an impressive meal in no time, satisfying your cravings without the fuss of takeout. Plus, it’s gluten-free, making it a delightful option for everyone at the table. Are you ready to elevate your home cooking game with a touch of oceanic indulgence?
Why is Hot Butter Calamari irresistible?

Indulgent flavors come together in this dish, making it a seafood lover’s dream!
Quick and easy preparation reduces time in the kitchen, perfect for any busy weeknight.
Gluten-free goodness ensures everyone can dive into this delicious experience guilt-free.
Versatile serving suggestions like crusty bread or a light salad complement this dish beautifully.
And the impressive presentation means it’s ideal for entertaining friends or family. Don’t forget to check out my Garlic Butter Shrimp for a quick seafood fix on another occasion!

Indulgent Hot Butter Calamari Ingredients

• Here’s what you need for this delectable dish!

For the Calamari
Calamari – Fresh or frozen, ensure it’s thawed and patted dry for the best texture.
Butter – Unsalted butter works best, allowing you to control the seasoning.

For the Flavor
Garlic – Minced garlic provides aromatic depth; you can substitute with garlic powder if needed.
Lemon Juice – Freshly squeezed adds brightness; lime juice is a tasty alternative.
Salt – Use to taste, carefully adjusting to enhance the calamari’s natural flavors.
Black Pepper – Adds a mild warmth; substitute with white pepper for a milder profile.
Paprika – For color and warmth; smoked paprika can offer an extra layer of flavor.

For Garnish
Fresh Parsley or Cilantro – For a pop of freshness; green onions can be used as a substitute.

Dive into the delightful world of this Indulgent Hot Butter Calamari Recipe today!

Step‑by‑Step Instructions for Indulgent Hot Butter Calamari Recipe

Step 1: Clean the Calamari
Begin by preparing the calamari: rinse under cold water, then remove the heads, tentacles, and innards. Slice the body into ½-inch rings and pat them dry with paper towels. This helps ensure that the calamari will sear beautifully when you’re ready to cook, contributing to the delightful texture of the Indulgent Hot Butter Calamari.

Step 2: Sauté the Garlic
In a large skillet, melt 3 tablespoons of unsalted butter over medium heat. Add the minced garlic and sauté for about 30 seconds or until fragrant, stirring continuously to avoid burning. The garlic should begin to turn a light golden color, releasing its delicious aroma and creating a flavorful base for your calamari.

Step 3: Cook the Calamari
Gently add the calamari rings to the skillet and toss them in the garlic butter to coat evenly. Cook for approximately 2 to 3 minutes, stirring occasionally, until the calamari turns opaque and tender. Be careful not to overcook, as this can lead to toughness, diminishing the experience of your Indulgent Hot Butter Calamari.

Step 4: Season and Serve
Once the calamari is cooked, remove the skillet from heat and drizzle about 1 tablespoon of fresh lemon juice over the dish. Season generously with salt, black pepper, and paprika. Toss everything together to combine flavors, allowing the warm butter sauce to beautifully coat the calamari and bringing the dish to life.

Step 5: Presentation
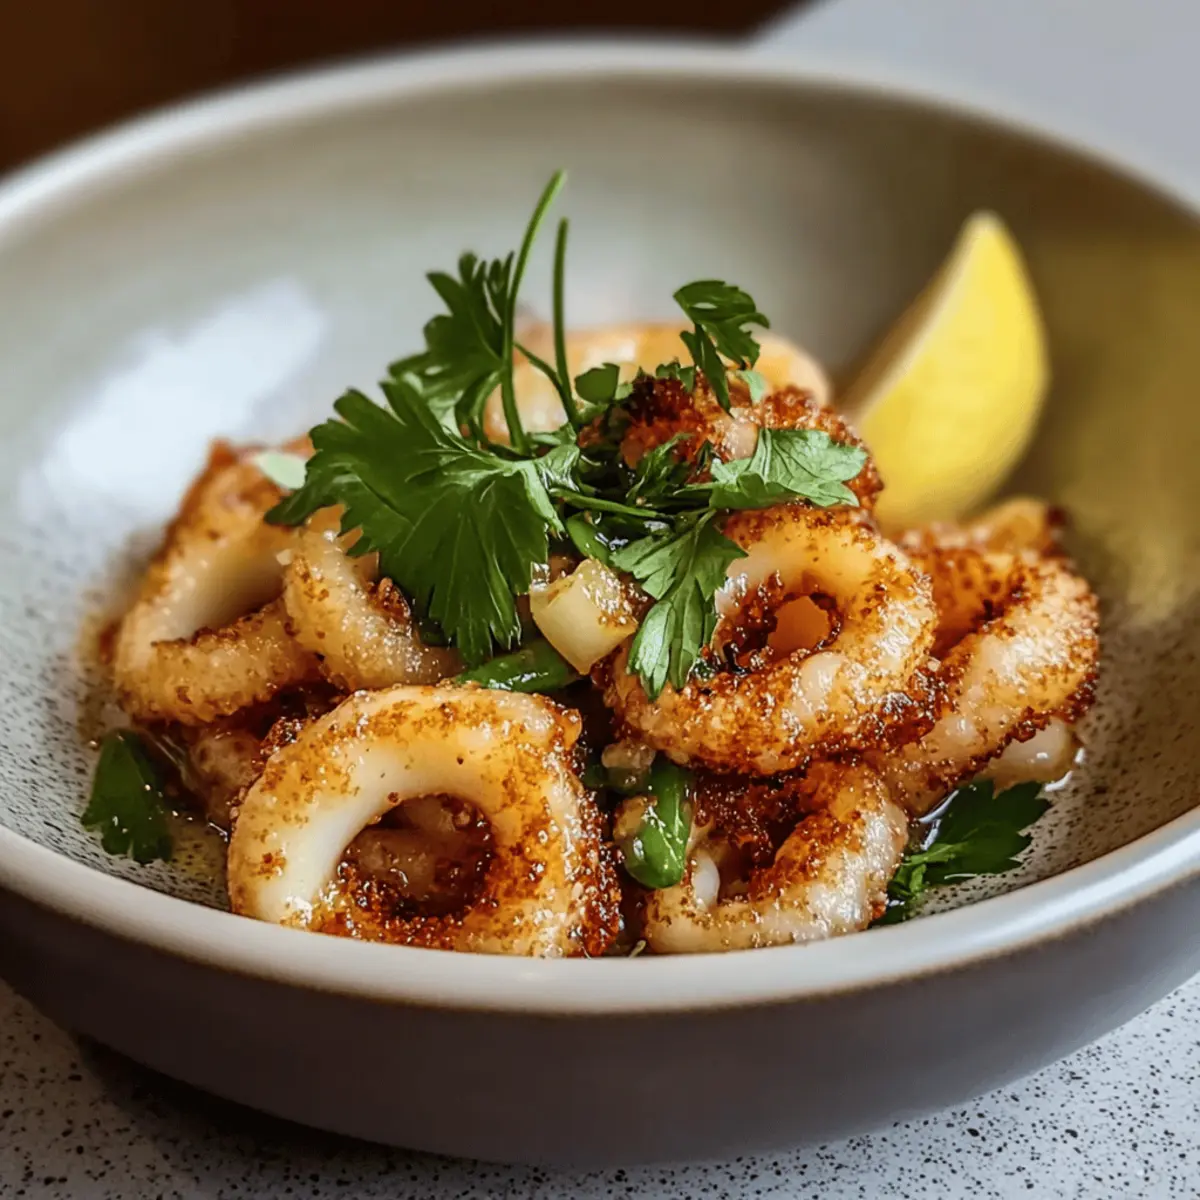
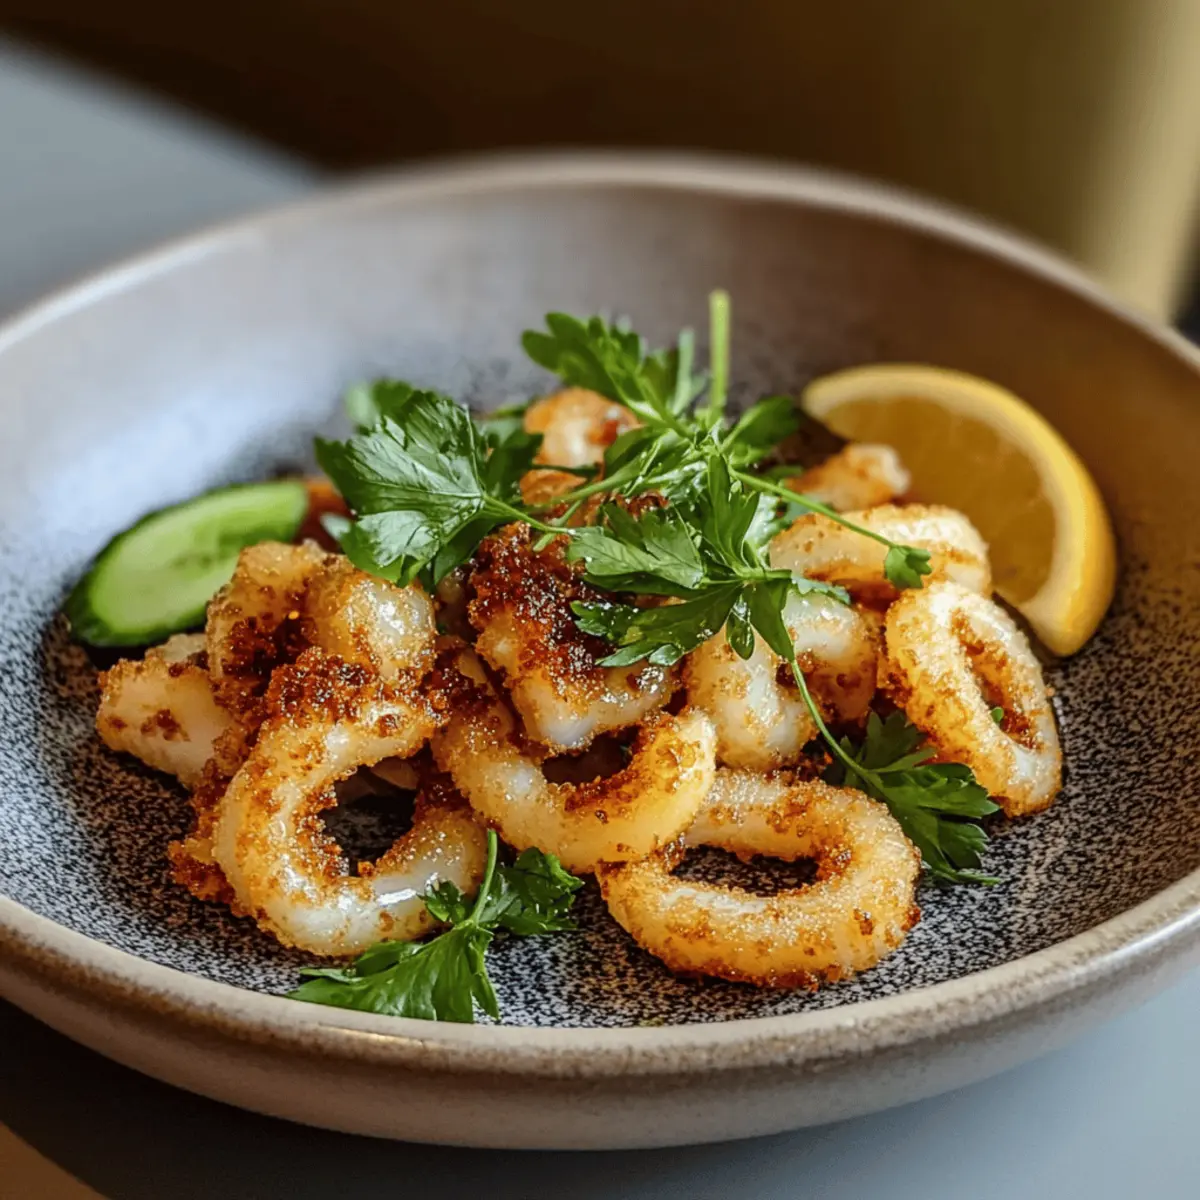
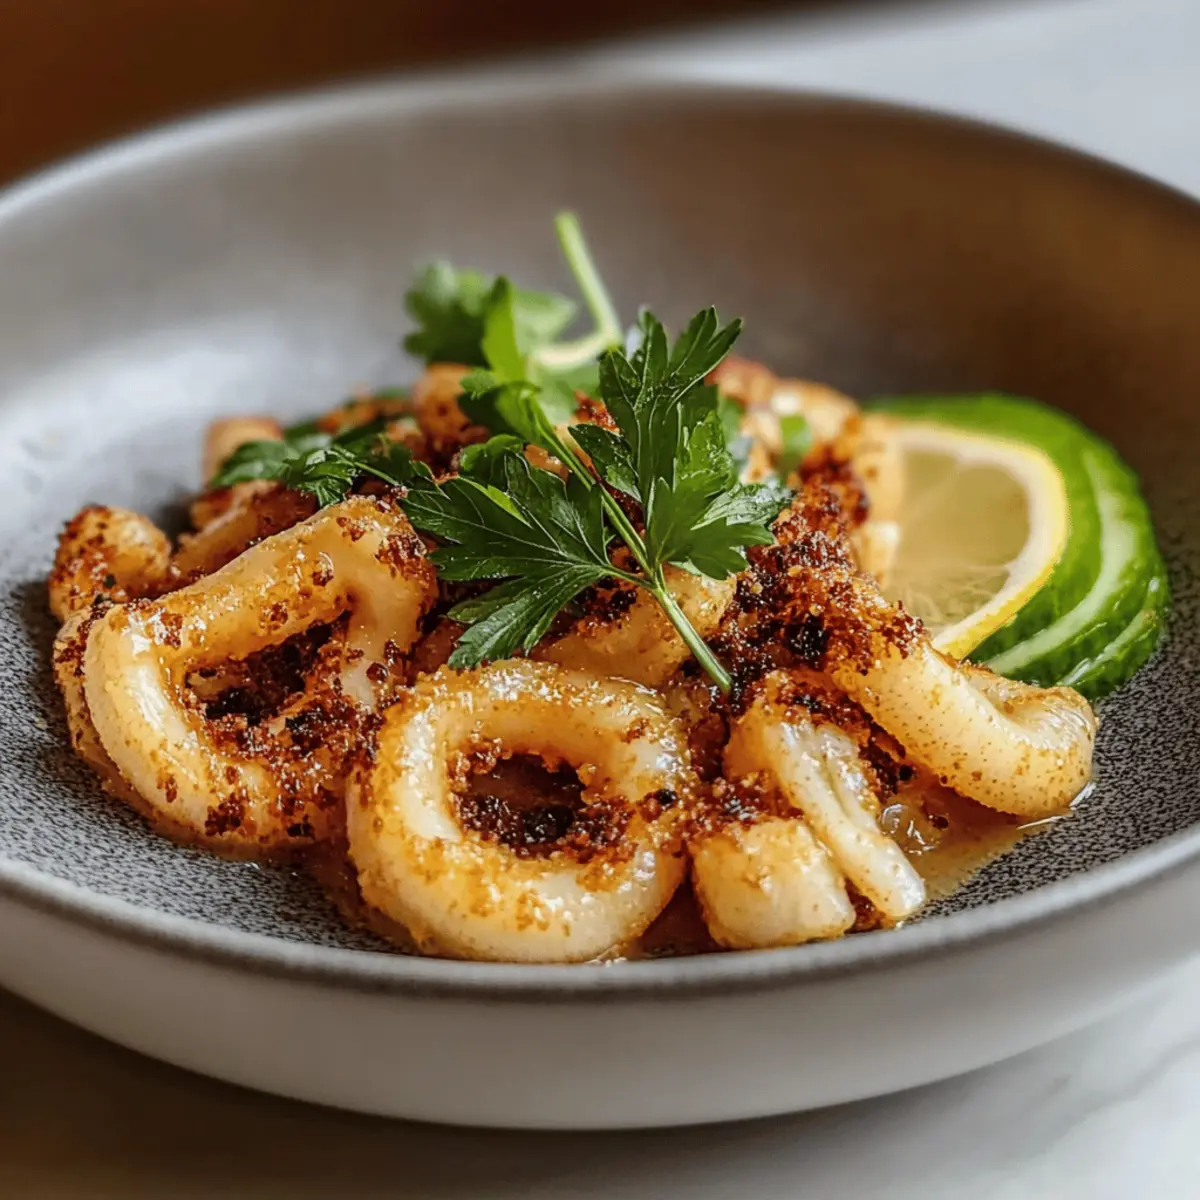
For a stunning presentation, serve your Indulgent Hot Butter Calamari in a shallow bowl or on a rustic platter. Garnish with freshly chopped parsley or cilantro for a pop of color and a burst of freshness. Optionally, add lemon wedges on the side to enhance the dish and provide extra zing for those who desire it.
Storage Tips for Indulgent Hot Butter Calamari

Fridge: Store leftovers in an airtight container for up to 2 days. Reheat gently in a skillet over low heat to preserve tenderness without overcooking.

Freezer: Cooked calamari can be frozen for up to a month; however, this may alter the texture. Wrap tightly in plastic wrap followed by aluminum foil for best results.

Reheating: To enjoy again, thaw overnight in the fridge and reheat in a skillet with a touch of butter for enhanced flavor and moistness.

Avoid Room Temperature: Keep any leftover Indulgent Hot Butter Calamari at room temperature for no longer than 2 hours to maintain food safety.

Make Ahead Options

These Indulgent Hot Butter Calamari are perfect for meal prep enthusiasts! You can clean and slice the calamari up to 24 hours in advance, then store them in an airtight container in the refrigerator to maintain their freshness. Prepare the garlic butter sauce ahead of time by melting the butter and sautéing the garlic, then refrigerate it separately. When you’re ready to serve, simply reheat the sauce and cook the calamari for just 2-3 minutes until tender and opaque. This way, you’ll have a delightful seafood dinner with all the richness and flavor, ready in a flash—ideal for those busy weeknights!

Expert Tips for Indulgent Hot Butter Calamari

  • Avoid Overcooking: Calamari cooks quickly; anything longer than 3 minutes can lead to toughness. Keep an eye on them for the best texture.
  • Prep Ahead: Make your garlic butter sauce beforehand for a speedy cooking process. Sauté calamari just before serving for fresh results.
  • Use Quality Ingredients: Opt for fresh or high-quality frozen calamari for the best flavor and texture in your Indulgent Hot Butter Calamari recipe.
  • Adjust Seasoning: The right amount of salt enhances flavors. Start with less; you can always add more at the end if needed.
  • Experiment with Heat: If you love spice, feel free to toss in red pepper flakes or fresh chilies to add a kick to your dish!

Indulgent Hot Butter Calamari Variations

Feel free to personalize this delectable dish with your own twist, adding layers of flavor and fun!

  • Spicy Kick: Add red pepper flakes or fresh chilies while sautéing for a delightful heat that dances on your palate.
  • Herbaceous Twist: Incorporate fresh dill or tarragon to introduce a new herbal dimension that brightens the dish.
  • Crispy Texture: Finish up in an air fryer after sautéing for a satisfying crunch that contrasts with the tender calamari.
  • Zesty Remix: Swap lemon juice for lime juice for a refreshing citrus twist that adds a unique zing.
  • Hearty Base: Serve your calamari over pasta or rice, transforming this elegant dish into a fulfilling meal.
  • Smoky Flavor: Use smoked paprika instead of regular to infuse a deeper, barbecue-like smokiness into the dish.
  • Creamy Addition: For an indulgent variation, mix in a splash of cream at the end for a richer sauce that envelopes the calamari beautifully.
  • Umami Boost: Add a splash of soy sauce or tamari for an unexpected umami flavor that enhances the dish’s richness.

No matter how you choose to customize your Hot Butter Calamari, these variations promise to excite the taste buds—just like my Honey Butter Brioche pairs beautifully with savory dishes!

What to Serve with Indulgent Hot Butter Calamari

Delight your senses while creating a complete meal that perfectly enhances the rich, buttery flavors of this seafood delicacy.

  • Garlic Bread: Slice into golden, crunchy perfection; it’s ideal for soaking up every drop of the luscious garlic butter.

  • Light Salad: A refreshing mix of greens with a tangy vinaigrette brightens the palate, offering a refreshing contrast to the rich calamari.

  • Lemon Rice: Fluffy rice infused with lemon zest complements the dish beautifully, harmonizing the flavors while adding a lovely citrus lift.

  • Sautéed Vegetables: A medley of colorful seasonal vegetables provides a crunch and brightness that balances the dish’s buttery richness.

  • Chilled White Wine: A crisp Sauvignon Blanc or a light Pinot Grigio accentuates the seafood’s delicate flavors, creating a refreshing dining experience.

  • Coconut Cream Pie: End your meal on a sweet note; the creamy texture and subtle sweetness of this dessert provide a delightful contrast to the savory calamari.
Indulgent Hot Butter Calamari Recipe FAQs

What is the best way to select fresh calamari?
Absolutely! When selecting calamari, look for fresh, firm flesh that is bright white to slightly off-white without any dark spots or signs of browning. If you’re opting for frozen calamari, ensure it’s properly sealed and without ice crystals. If thawed, it should not have an off smell; fresh should carry a light briny aroma.

How long can I store leftover hot butter calamari?
You can store leftovers of the Indulgent Hot Butter Calamari in an airtight container in the refrigerator for up to 2 days. When reheating, gently warm it on low heat in a skillet to help maintain that tender texture without overcooking.

Can I freeze Indulgent Hot Butter Calamari?
Definitely! You can freeze cooked calamari for up to 1 month. To do this, allow the dish to cool completely. Then, wrap it tightly in plastic wrap, followed by aluminum foil or place it in a freezer-safe container. To reheat, thaw it in the fridge overnight, and then warm it in a skillet with a touch of butter to restore moisture.

What should I do if my calamari turns out tough?
No worries, this can happen! Generally, if calamari is overcooked, it becomes chewy or rubbery. For perfect tenderness, aim to cook it for only 2-3 minutes until it turns opaque. If you find your calamari tough upon cooking, ensure you decrease the heat and monitor the cooking time closely next time.

Is Indulgent Hot Butter Calamari safe for people with shellfish allergies?
Unfortunately, no. Calamari is a type of seafood and is not safe for those with shellfish allergies. Always check with your guests about allergies or dietary restrictions before serving, or consider alternatives like grilled vegetables for a similar presentation without the seafood.

How can I make Indulgent Hot Butter Calamari lighter?
Great question! To lighten up this recipe, consider using olive oil instead of butter. You can also sauté the calamari with a splash of vegetable broth, which will keep it moist while reducing fat. Adding more vegetables as a side can also enhance the dish and create a more balanced meal!
Indulgent Hot Butter Calamari Recipe

Indulgent Hot Butter Calamari Recipe You'll Crave Again!

This Indulgent Hot Butter Calamari Recipe is a quick and gluten-free delight that seafood lovers will crave over and over.
Prep Time 10 minutes
Cook Time 10 minutes
Total Time 20 minutes
Servings: 4 servings
Course: Appetizer
Cuisine: Seafood
Calories: 250

Ingredients
  

For the Calamari
  • 1 pound Calamari Fresh or frozen, thawed and patted dry
  • 3 tablespoons Butter Unsalted works best
For the Flavor
  • 3 cloves Garlic Minced
  • 1 tablespoon Lemon Juice Freshly squeezed
  • to taste Salt
  • to taste Black Pepper
  • 1 teaspoon Paprika Smoked paprika optional
For Garnish
  • 1/4 cup Fresh Parsley or Cilantro Chopped

Equipment

  • Skillet
  • Measuring spoons
  • knife
  • cutting board
  • paper towels

Method
 

Step-by-Step Instructions
  1. Begin by preparing the calamari: rinse under cold water, then remove the heads, tentacles, and innards. Slice the body into ½-inch rings and pat them dry with paper towels.
  2. In a large skillet, melt the butter over medium heat. Add the minced garlic and sauté for about 30 seconds or until fragrant.
  3. Gently add the calamari rings to the skillet and toss them in the garlic butter. Cook for 2 to 3 minutes until the calamari turns opaque.
  4. Once the calamari is cooked, remove from heat and drizzle with lemon juice. Season with salt, black pepper, and paprika.
  5. For a stunning presentation, serve the calamari in a shallow bowl or on a platter. Garnish with freshly chopped parsley or cilantro.
Nutrition

Serving: 1servingCalories: 250kcalCarbohydrates: 2gProtein: 20gFat: 18gSaturated Fat: 10gPolyunsaturated Fat: 0.5gMonounsaturated Fat: 6gCholesterol: 220mgSodium: 500mgPotassium: 350mgVitamin A: 200IUVitamin C: 5mgCalcium: 60mgIron: 1.5mg

Notes

Calamari cooks quickly; keep an eye on them to avoid toughness. Store leftovers in an airtight container for up to 2 days.

Tried this recipe?

Let us know how it was!

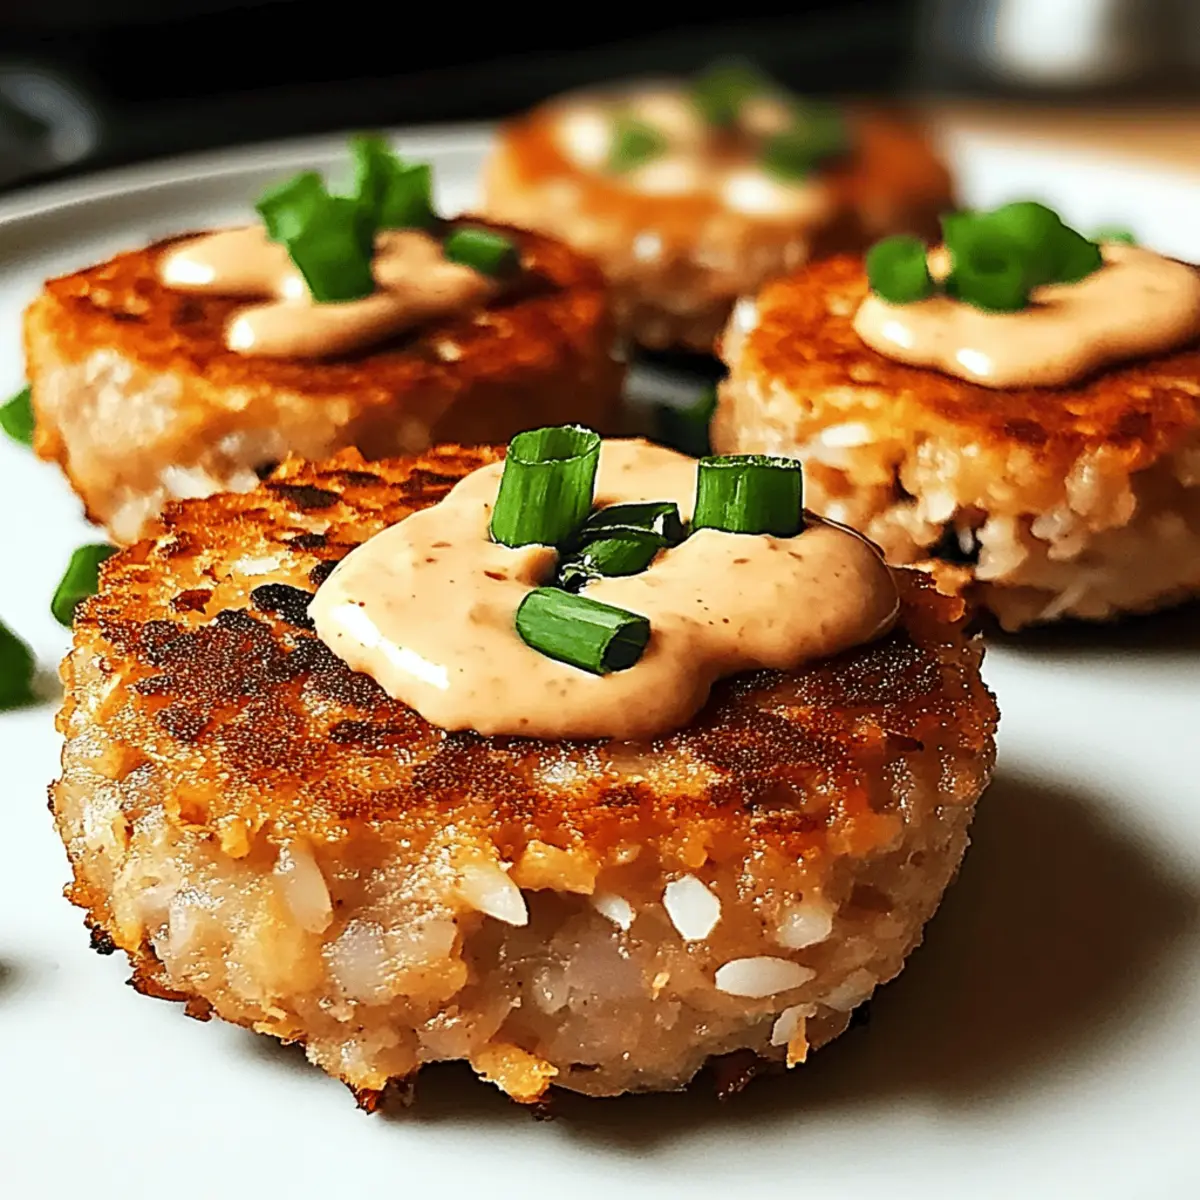
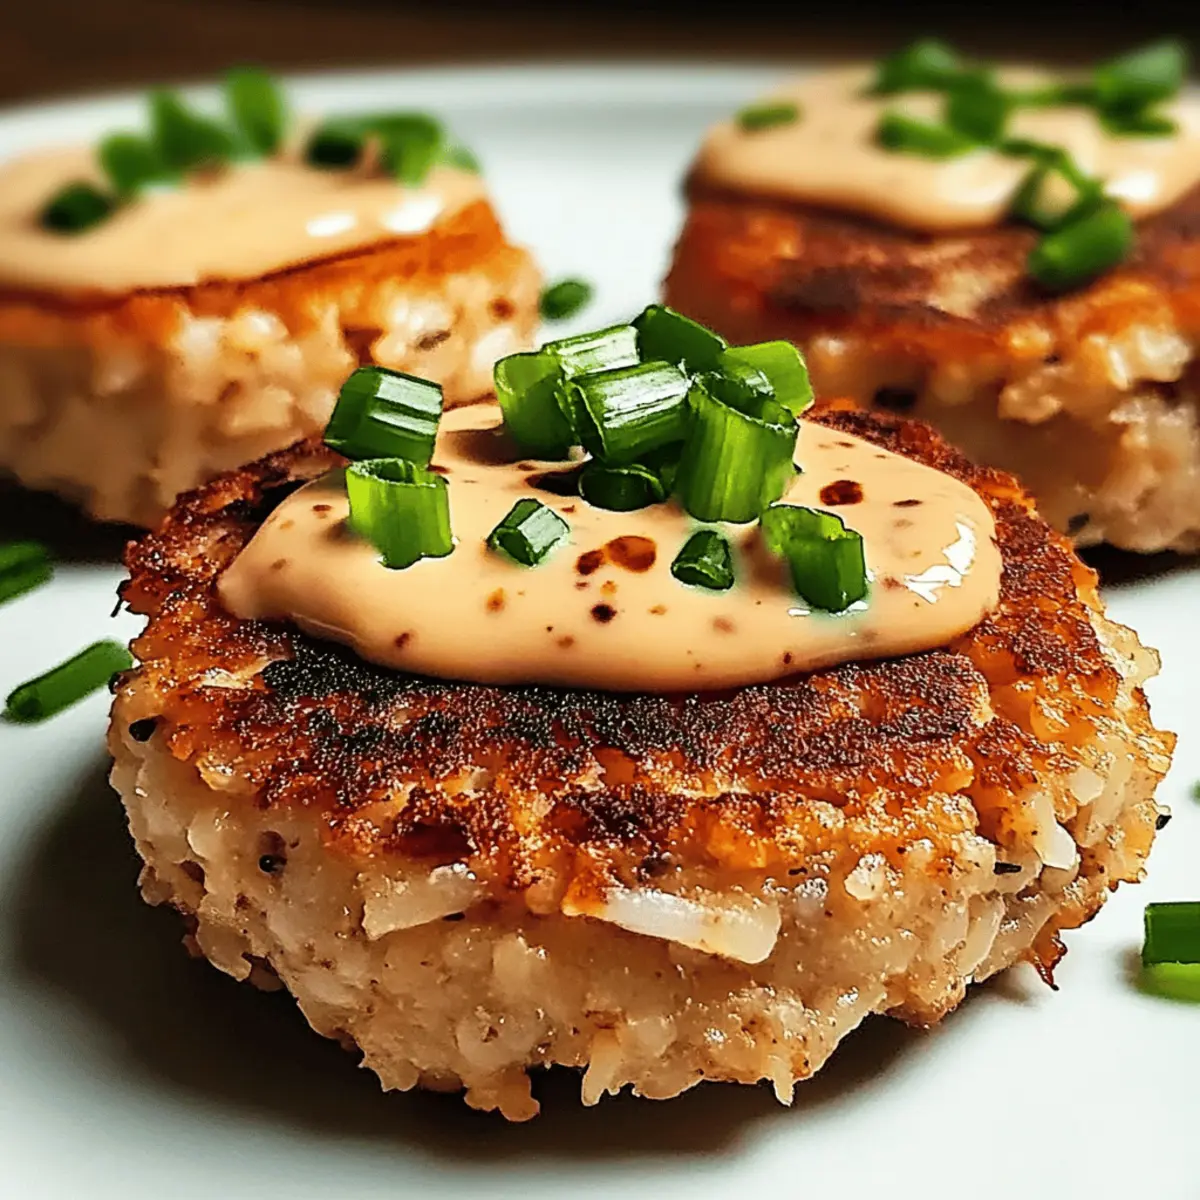
Crispy Asian-Style Tuna Cakes with Zesty Spicy Mayo Delight

Once, while experimenting in the kitchen, I stumbled upon a wonderful combination that changed my weeknight dinners forever: Asian-Style Tuna Cakes. With a crispy exterior and a tender inside, these delightful patties deliver big on savory flavors—all ready in under 30 minutes! The best part? They’re not only a quick meal option but also packed with high protein and low carbs, making them perfect for those busy days when you crave something homemade yet convenient. Drizzled with a zesty spicy mayo, these cakes stand out as a versatile choice for dinner, lunch, or even as appetizers at your next gathering. Are you ready to elevate your cooking routine with this amazing recipe?

Why are these Tuna Cakes a must-try?

Quick to prepare: Whip up these Asian-Style Tuna Cakes in under 30 minutes, ideal for those hectic weeknights.
Flavor-packed: The fusion of soy sauce, garlic, and zesty mayo creates an irresistible taste that’ll impress your family and friends.
Healthy option: With a delightful balance of high protein and low carbs, these cakes are perfect for health-conscious eaters.
Endless versatility: Serve them as a main dish, a light lunch, or finger foods for parties—everyone will love them!
Easy swaps: Tailor the recipe to your taste by using gluten-free breadcrumbs or adjusting the spice level in the mayo. For more quick meal ideas, check out these delicious Tuna Salad Sandwich or Fluffy Buttermilk Pancakes recipes!

Asian-Style Tuna Cakes Ingredients

For the Cakes

  • Canned Tuna – Choose high-quality, sustainably sourced tuna for the best flavor and texture.
  • Green Onions – Using both the white and green parts adds freshness and depth to your cakes.
  • Egg – This acts as a binding agent, helping the patties hold together beautifully.
  • Soy Sauce – Provide a savory umami flavor; tamari or coconut aminos can be used for a gluten-free option.
  • Arrowroot Powder (or All-Purpose Flour) – Acts as a binder; swap with gluten-free flour if needed.
  • Mayonnaise – Adds creaminess and enhances the overall flavor of the tuna cakes.
  • Garlic – Fresh garlic brings aromatic depth; don’t skimp on it!
  • Salt and Black Pepper – Essential for seasoning to taste.
  • Breadcrumbs (Panko or Gluten-Free) – Creates a crispy exterior; toasting them first can enhance the crunch.
  • Avocado Oil and Sesame Oil – Great for frying, giving healthy fats and a distinct flavor profile.

For the Spicy Mayo

  • Mayonnaise – Acts as the creamy base for this zesty sauce.
  • Lime Juice – Adds a refreshing acidity; freshly squeezed is always best!
  • Sriracha Sauce – Introduces the heat; adjust according to your spice preference.
  • Salt and Black Pepper – Use for seasoning to taste.

These Asian-Style Tuna Cakes are not just a dish; they’re a delightful experience, combining crispy textures with vibrant flavors that will surely brighten your meal times!

Step‑by‑Step Instructions for Asian-Style Tuna Cakes

Step 1: Prepare Ingredients
Begin by gathering your ingredients to make the Asian-Style Tuna Cakes. Chop the green onions, keeping the white parts separate from the green tops for garnishing. Make sure your canned tuna is well-drained to reduce moisture, as excess liquid can affect the patty’s texture.

Step 2: Make the Spicy Mayo
In a small bowl, combine mayonnaise, freshly squeezed lime juice, and sriracha sauce. Season it with a pinch of salt and black pepper to taste. Mix well until smooth and creamy, then cover the bowl and refrigerate the spicy mayo while you prepare the tuna cakes for an enhanced flavor.

Step 3: Mix Tuna Cake Ingredients
In a large mixing bowl, combine the drained tuna, chopped white parts of the green onions, beaten egg, soy sauce, arrowroot powder (or flour), mayonnaise, minced garlic, and a pinch of salt and pepper. Use a fork to blend everything together until you achieve a uniform mixture, ensuring the ingredients are well incorporated for your Asian-Style Tuna Cakes.

Step 4: Form Patties
With your mixture ready, shape it into 2-inch patties using your hands. Lightly press each patty into breadcrumbs, ensuring an even coating on both sides for a golden, crispy exterior. Place the formed patties on a plate, ready for frying.

Step 5: Fry the Tuna Cakes
Heat a nonstick skillet over medium heat and add a combination of avocado oil and sesame oil. Once the oil is hot, carefully place the patties in the skillet, frying them for about 2 minutes on each side until they are golden brown and crispy. Fry in batches to avoid overcrowding the pan, ensuring they cook evenly.

Step 6: Serve and Garnish
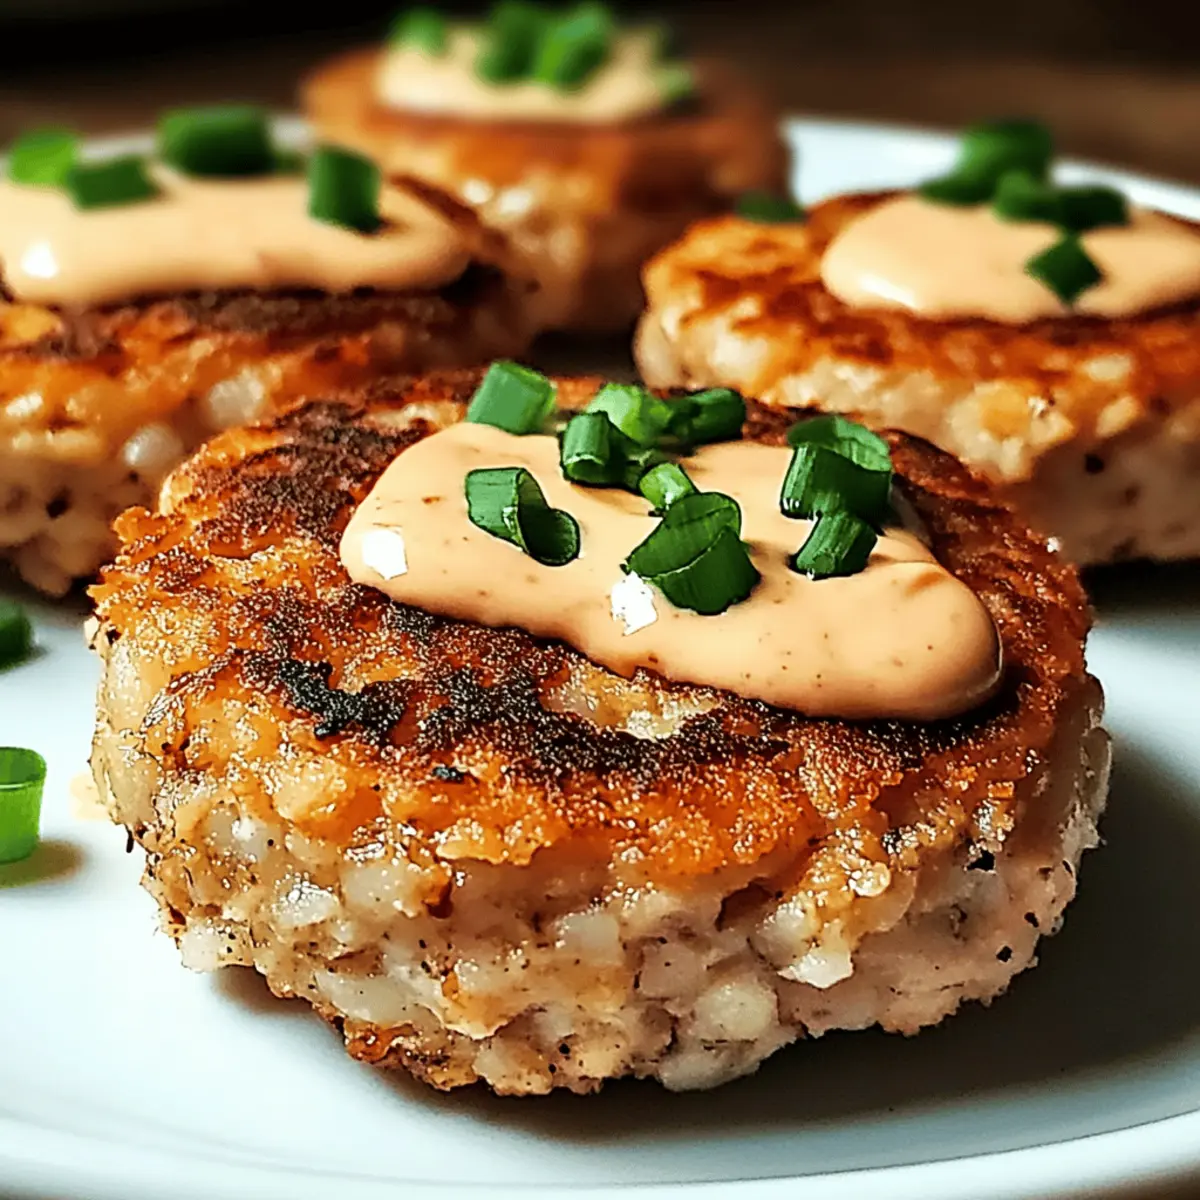
After cooking, transfer the crispy Asian-Style Tuna Cakes to a plate lined with paper towels to absorb excess oil. Drizzle the zesty spicy mayo over the top and garnish with the reserved green tops of the chopped green onions or sesame seeds for a lovely presentation before serving.

What to Serve with Asian-Style Tuna Cakes

Elevate your dining experience with these delightful pairings that perfectly complement the vibrant flavors of your tuna cakes.

  • Coconut Rice: The subtle sweetness of coconut rice balances the savory tuna cakes and adds a touch of tropical flair.

  • Asian Slaw: Crisp, fresh slaw made with cabbage, carrots, and a light dressing offers a refreshing crunch to your meal. Its flavors harmonize beautifully with the rich tuna.

  • Stir-Fried Vegetables: A colorful medley of bell peppers, broccoli, and snap peas brings texture and nutrients while tying in the Asian theme, making each bite pop with flavor.

  • Pickled Vegetables: Serve pickled carrots or daikon on the side for a tangy kick that cuts through the richness of the tuna. Their crunch adds an exciting contrast.

  • Sesame Noodles: These flavorful noodles tossed in a savory sauce enhance the Asian-inspired meal and provide a satisfying, comforting element.

  • Chilled Sake or Green Tea: For beverages, chilled sake is a classic pairing that complements the umami of the tuna. Alternatively, a refreshing cup of iced green tea cleanses the palate beautifully.

With these delightful accompaniments, you’re set for a well-rounded meal that brings out the best in your Asian-Style Tuna Cakes!

Make Ahead Options

These Asian-Style Tuna Cakes are fantastic for meal prep, making your busy weeknights easier and more delicious! You can prepare the patties in advance, refrigerating them for up to 3 days before cooking. To maintain their quality, ensure your tuna is well-drained, and store the uncooked patties in an airtight container. When you’re ready to enjoy them, simply heat avocado and sesame oil in a skillet and fry the patties for about 2 minutes on each side until golden brown. If you want to prep even further ahead, you can freeze the uncooked patties on a baking sheet, then transfer them to a freezer-safe container for cooking directly from frozen, adding a few extra minutes to the fry time. Enjoy these delightful cakes just as freshly made!

Expert Tips for Perfect Tuna Cakes

  • Use Well-Drained Tuna: Make sure your canned tuna is thoroughly drained to prevent sogginess in the mixture, which can lead to patties that fall apart.

  • Breadcrumb Coating: For an extra crispy texture, consider toasting the breadcrumbs before using them to coat your Asian-Style Tuna Cakes.

  • Avoid Overcrowding: Fry the patties in batches. Overcrowding the pan can lead to uneven cooking and soggy cakes instead of that glorious crispiness.

  • Adjust Spiciness: If you’re cooking for those sensitive to heat, start with less sriracha in the spicy mayo and let everyone adjust their sauce to taste.

  • Chill Before Cooking: If time allows, chill the formed patties in the refrigerator for 15-30 minutes before cooking. This helps them hold their shape better while frying.

How to Store and Freeze Asian-Style Tuna Cakes

Fridge: Keep cooked tuna cakes in an airtight container for up to 3 days. Reheat in a skillet over medium heat for 2-3 minutes per side until warmed through.

Freezer: Freeze uncooked patties on a baking sheet until firm, then transfer to a freezer-safe container. They can be stored for up to 2 months; cook from frozen, adding a few extra minutes to the cooking time.

Make-Ahead: You can prepare and refrigerate the uncooked patties for up to 3 days. This makes for a quick meal during busy weeknights—just fry them up when you’re ready!

Reheating: For best results, reheat cooked tuna cakes in a skillet rather than a microwave to maintain their crispy texture.

Asian-Style Tuna Cakes Variations & Substitutions

Feel free to make these Asian-Style Tuna Cakes your own with these delightful twists and swaps that’ll suit your taste buds perfectly!

  • Gluten-Free: Substitute regular breadcrumbs with gluten-free panko or almond flour to keep the recipe celiac-friendly. Enjoy all the crunchiness without the gluten!

  • Extra Spicy: Add a teaspoon of chili flakes into the tuna mixture or double the sriracha in the spicy mayo. Let the heat dance on your palate!

  • Low-Carb Delight: Wrap the tuna cakes in lettuce leaves or nori instead of serving with bread for a refreshing, lighter option. Perfect for those watching their carb intake!

  • Herb-Infused: Incorporate fresh herbs like cilantro or basil into the tuna mixture for an aromatic touch that elevates the flavor profile. Freshness is always a win!

  • Veggie Boost: Add finely diced bell peppers or grated zucchini to the mixture for a colorful and nutritious twist. It’s a beautiful way to sneak in more veggies!

  • Lemon Zest: Mix in a teaspoon of lemon zest with the mayo for a citrusy kick that pairs beautifully with the savory flavors of the tuna cakes. Brighten up your bites!

  • Coconut Flavor: Replace half the mayonnaise with coconut yogurt for a tropical flavor and a creamy imitation that still keeps the dish rich. Tropical vibes in every bite!

For more cooking ideas that celebrate flavor and health, don’t miss the Tuna Salad Sandwich or check out the fluffy goodness of Fluffy Buttermilk Pancakes. Happy cooking!

Asian-Style Tuna Cakes with Spicy Mayo Recipe FAQs

What type of canned tuna should I use?
Absolutely! Choosing high-quality, sustainably sourced tuna will elevate the flavor of your Asian-Style Tuna Cakes. Look for tuna packed in water rather than oil for a leaner profile, and ensure it’s well-drained before use to maintain the correct texture.

How should I store leftover tuna cakes?
Store any leftover cooked tuna cakes in an airtight container in the refrigerator for up to 3 days. When you’re ready to enjoy them again, simply reheat in a skillet over medium heat for about 2-3 minutes per side until warmed through. This method helps preserve their crispy texture.

Can I freeze uncooked tuna cakes?
Of course! To freeze uncooked patties, lay them out on a baking sheet in a single layer and freeze until firm—about 1-2 hours. Once frozen, transfer them to a freezer-safe container or zip-top bag, where they can last for up to 3 months. When ready to cook, simply fry them from frozen, adding a couple of extra minutes to the cooking time.

What if my tuna cakes are falling apart while frying?
Don’t worry, that’s a common hiccup! If your patties are crumbly, it likely means they’re not holding enough moisture. Make sure your tuna is well-drained, and consider adding an extra egg or a bit more mayonnaise to the mixture. Also, chilling the patties for 15-30 minutes before frying can help them hold together better.

Are there any allergy considerations with this recipe?
Yes, definitely! If you’re making these cakes for someone with allergies or dietary restrictions, always check the labels of your ingredients. The soy sauce can be substituted with tamari or coconut aminos to make it gluten-free. Additionally, adjust the mayonnaise and sriracha to cater to any egg or spice sensitivities.

How long can I keep uncooked tuna cakes in the fridge?
You can refrigerate uncooked patties for up to 3 days. This advance prep is fantastic for busy weeknights when you want a homemade meal but need it quick—just fry them up fresh as needed!

Asian-Style Tuna Cakes

Crispy Asian-Style Tuna Cakes with Zesty Spicy Mayo Delight

These Asian-Style Tuna Cakes are crispy on the outside and tender inside, making them a must-try recipe full of flavor.
Prep Time 15 minutes
Cook Time 15 minutes
Chilling Time 15 minutes
Total Time 30 minutes
Servings: 4 cakes
Course: Dinner
Cuisine: Asian
Calories: 250

Ingredients
  

For the Cakes
  • 1 can Canned Tuna Choose high-quality, sustainably sourced tuna.
  • 3 stalks Green Onions Use both white and green parts.
  • 1 large Egg Acts as a binding agent.
  • 2 tablespoons Soy Sauce Can substitute with tamari or coconut aminos.
  • 2 tablespoons Arrowroot Powder Or use all-purpose flour.
  • 3 tablespoons Mayonnaise Adds creaminess.
  • 2 cloves Garlic Minced for flavor.
  • to taste teaspoon Salt Essential for seasoning.
  • to taste teaspoon Black Pepper Essential for seasoning.
  • 1 cup Breadcrumbs Panko or gluten-free.
  • 2 tablespoons Avocado Oil For frying.
  • 1 tablespoon Sesame Oil For frying.
For the Spicy Mayo
  • 3 tablespoons Mayonnaise Acts as the creamy base.
  • 1 tablespoon Lime Juice Freshly squeezed is best.
  • 1 tablespoon Sriracha Sauce Adjust according to spice preference.
  • to taste teaspoon Salt For seasoning.
  • to taste teaspoon Black Pepper For seasoning.

Equipment

  • nonstick skillet
  • Mixing Bowl
  • small bowl

Method
 

Step-by-Step Instructions
  1. Gather all ingredients and prepare them. Chop the green onions, keeping the white parts separate for mixing and the green tops for garnishing.
  2. In a small bowl, combine mayonnaise, lime juice, and sriracha sauce. Season with salt and pepper, mix until smooth, and refrigerate.
  3. In a large mixing bowl, combine drained tuna, chopped white parts of green onions, beaten egg, soy sauce, arrowroot powder, mayonnaise, minced garlic, salt, and pepper. Mix well.
  4. Shape the mixture into 2-inch patties and coat lightly with breadcrumbs, pressing to ensure even coverage.
  5. Heat oils in a nonstick skillet over medium heat. Fry the patties for about 2 minutes on each side until golden brown.
  6. Transfer the cooked cakes to a plate lined with paper towels. Drizzle with spicy mayo and garnish with green onion tops before serving.

Nutrition

Serving: 1cakeCalories: 250kcalCarbohydrates: 15gProtein: 20gFat: 12gSaturated Fat: 2gPolyunsaturated Fat: 4gMonounsaturated Fat: 6gCholesterol: 60mgSodium: 400mgPotassium: 300mgFiber: 2gSugar: 1gVitamin A: 200IUVitamin C: 2mgCalcium: 50mgIron: 1mg

Notes

Make sure the tuna is well-drained to avoid sogginess. Chill patties before cooking for better shape retention.

Tried this recipe?

Let us know how it was!

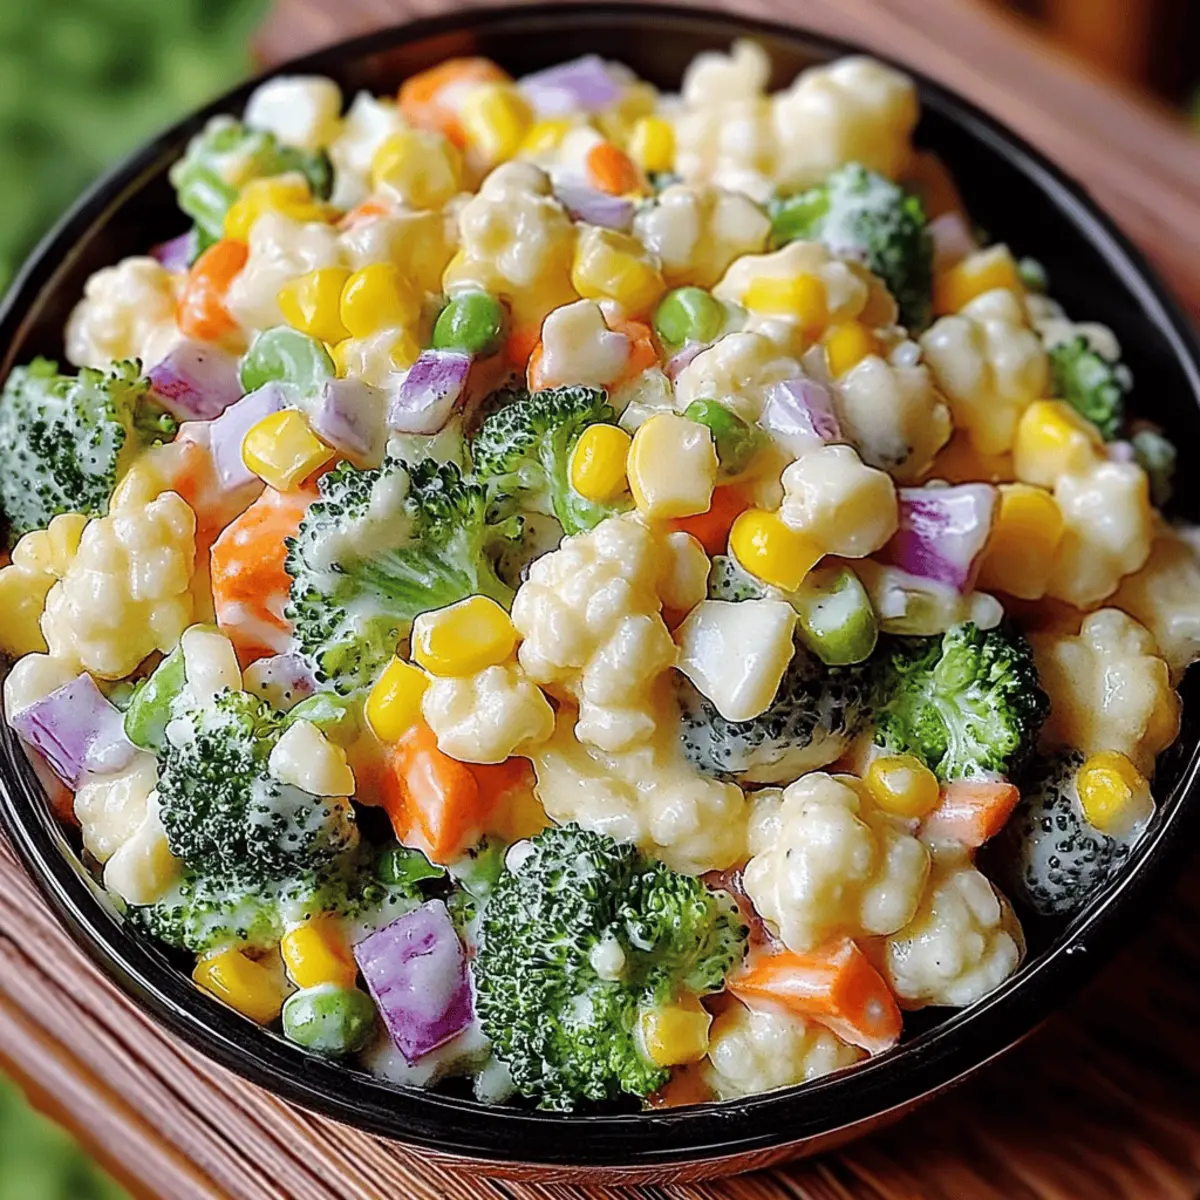
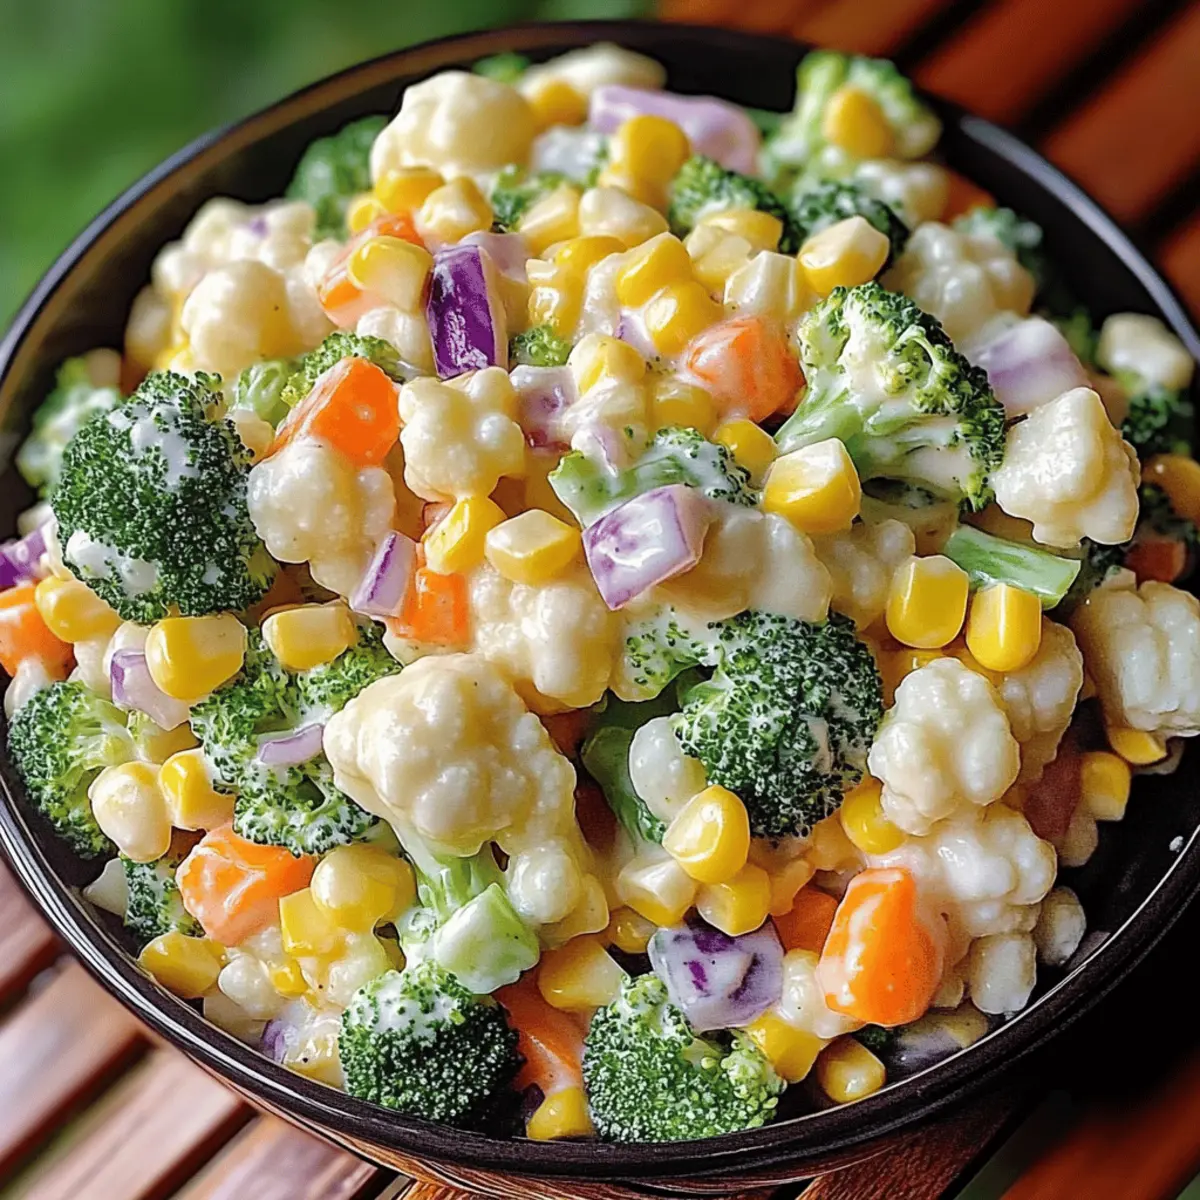
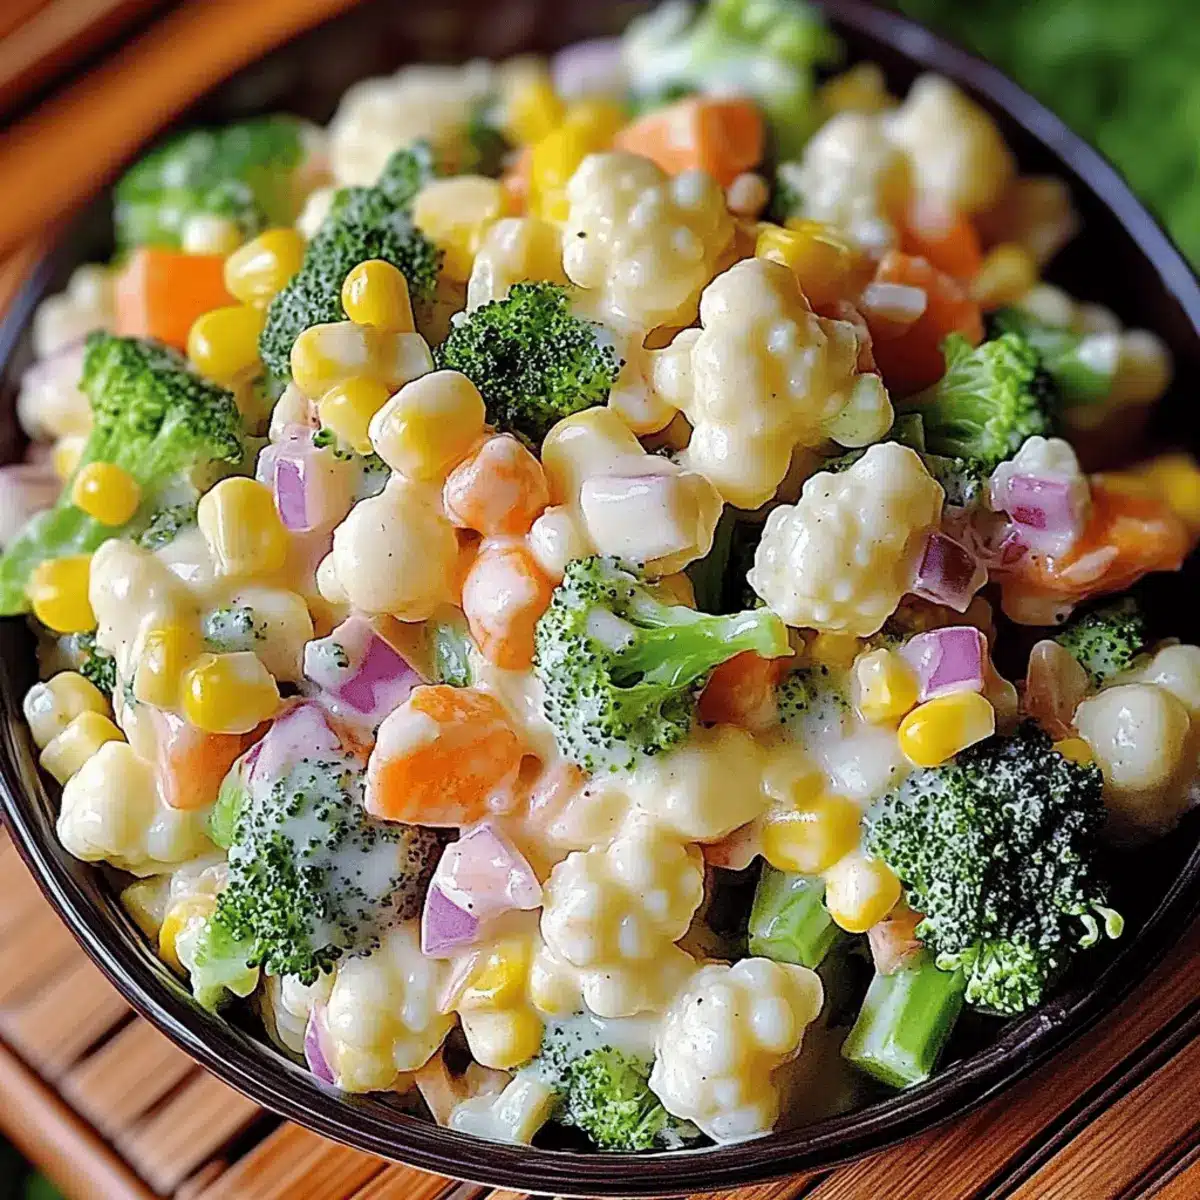
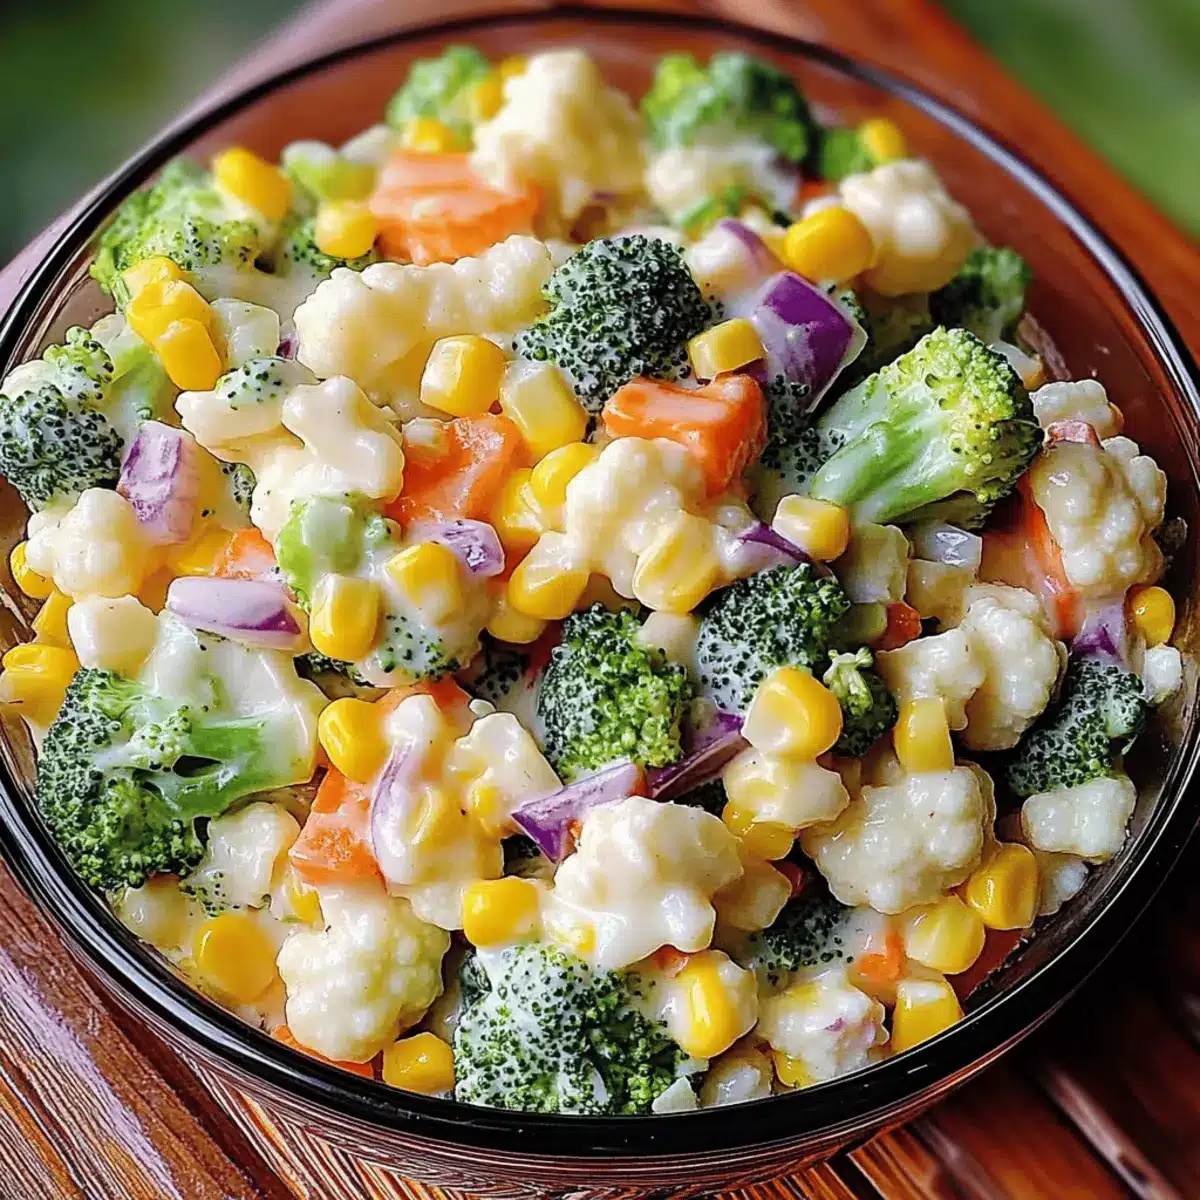
Creamy Broccoli Cauliflower Corn Salad for Vibrant Summer Dishes

The aroma of fresh vegetables melding together in a creamy dressing is enough to make anyone’s mouth water. I recently whipped up a batch of this Creamy Broccoli Cauliflower Corn Salad, and it instantly transformed my simple lunch into a vibrant feast. Not only is this dish loaded with nutritious ingredients, but it’s also incredibly versatile—perfect as a crowd-pleasing side at potlucks or BBQs. With a quick prep time and the option to make it dairy-free, you’ll find it fits beautifully into any meal plan. Imagine crunching through the crisp broccoli and cauliflower, the sweetness of corn creating a satisfying contrast, while the creamy dressing makes everything come together in delicious harmony. Ready to elevate your next meal with this delightful salad?

Why is this salad a must-try?

Vibrant Colors: The mix of green broccoli, white cauliflower, and golden corn creates a stunning visual appeal that brightens any meal.

Nutritious Ingredients: Packed with fiber and vitamins, this salad promotes healthy eating without sacrificing taste.

Versatile Options: Whether you’re looking for a light side or a hearty main with additions like grilled chicken, it adapts effortlessly to your needs.

Quick Preparation: In just a few minutes, you can whip up this crowd-pleaser, making it perfect for busy days.

Make-Ahead Friendly: Prepare it in advance for potlucks, ensuring the flavors meld beautifully overnight—just like in my Summer Corn Chowder recipe!

Elevate your meals with this refreshing salad that’s bound to impress!

Creamy Broccoli Cauliflower Corn Salad Ingredients

For the Salad
Broccoli Florets – Provides crunch and vibrant color; substitutable with frozen broccoli that you’ve thawed, patted dry, and chopped.
Cauliflower Florets – Offers a mild taste and excellent texture; frozen is fine too, just remember to dry thoroughly after thawing.
Carrots – Adds sweetness and extra crunch; either fresh or pre-sliced options work wonders.
Sweet Corn – Brings sweetness and color; opt for fresh corn when in season or use drained canned corn.
Red Onion – Contributes a sharp flavor contrast; green onions can be used if you prefer a milder taste.

For the Dressing
Sharp Cheddar Cheese – Adds creaminess and flavor; replace it with plant-based cheese for a dairy-free option.
Mayonnaise – Forms the base of the dressing; consider Greek yogurt for a lighter twist.
Sour Cream/Kefir/Greek Yogurt – Enhances creaminess; pick based on your dietary preference.
Dry Ranch Mix – Provides essential seasoning; taste and adjust or use homemade ranch for an extra touch.
Lemon Juice – Adds brightness and acidity; make sure it’s fresh for the best flavor experience.
Honey – Balances the tartness in the dressing; use maple syrup as a vegan alternative if needed.
Salt – Enhances the overall flavor; adjust according to your personal taste.

This Creamy Broccoli Cauliflower Corn Salad ingredient lineup will transform your meals, offering delightful textures and fresh flavors while accommodating various diets!

Step‑by‑Step Instructions for Creamy Broccoli Cauliflower Corn Salad

Step 1: Prepare the Vegetables
Begin by finely chopping 2 cups of broccoli florets, 2 cups of cauliflower florets, and 1 cup of carrots. If using canned corn, open it and drain thoroughly. Ensure all vegetables are fresh and vibrant, giving a gorgeous look to your Creamy Broccoli Cauliflower Corn Salad. Place each chopped vegetable into a large mixing bowl, ready for further mixing.

Step 2: Make the Dressing
In a medium bowl, combine 1 cup of mayonnaise, ½ cup of sour cream, and 1 packet of dry ranch mix. Whisk these ingredients together until they form a smooth and creamy dressing. For a lighter option, swap the mayonnaise with Greek yogurt. Taste your dressing and adjust the seasoning, ensuring it complements the flavors of the salad.

Step 3: Combine Ingredients
In the large bowl with the chopped vegetables, add 1 cup of drained sweet corn and 1 cup of sharp cheddar cheese (or plant-based cheese for a dairy-free version). Gradually pour the prepared dressing over the veggie mix, ensuring an even coating of flavors. Use a spatula to gently fold everything together until every bite is enveloped in that creamy goodness.

Step 4: Chill and Serve
Transfer your Creamy Broccoli Cauliflower Corn Salad to an airtight container and refrigerate for at least 30 minutes. This chilling time allows the flavors to meld beautifully, enhancing the overall taste. If you prefer, serve it immediately, but know that a little chill will make it even more refreshing. For best freshness, keep the dressing separate until just before serving if you make it ahead of time.

Expert Tips for Creamy Broccoli Cauliflower Corn Salad

Vegetable Freshness: Use fresh, vibrant vegetables for the best flavor and texture. Avoid limp or overripe produce to ensure your salad shines.

Dressing Adjustments: Taste your dressing before mixing to ensure a balanced flavor. If it’s too tangy, a touch more honey can balance it out beautifully.

Texture Matters: For a crunchier bite, consider blanching broccoli and cauliflower for just 1-2 minutes and then ice bathing to stop cooking, maintaining a vibrant color.

Mixing Techniques: Gently fold your ingredients to maintain that delightful crunch in your Creamy Broccoli Cauliflower Corn Salad. Avoid over-mixing, which can lead to mushy veggies.

Storage Guidelines: If prepping in advance, store dressing separately until serving to keep everything fresh and crunchy. This little step makes a big difference!

Enjoy crafting this delightful dish that perfectly blends flavors and textures, bringing everyone back for seconds!

Make Ahead Options

This Creamy Broccoli Cauliflower Corn Salad is perfect for meal prep, making your busy weeknights a breeze! You can chop the broccoli, cauliflower, and carrots up to 24 hours in advance, storing them in an airtight container in the refrigerator to keep them fresh and crisp. If you like, you can also prepare the dressing up to 3 days ahead; just keep it in a separate container to maintain its creamy texture. When you’re ready to serve, simply combine the prepped vegetables with the dressing, corn, and cheese, mixing until evenly coated. This way, you’ll enjoy a delightful salad that tastes just as fresh and flavorful as if you made it that day!

What to Serve with Creamy Broccoli Cauliflower Corn Salad

This creamy, vibrant salad pairs wonderfully with a variety of dishes to create a full and satisfying meal experience.

  • Grilled Chicken: Juicy, smoky grilled chicken complements the salad’s creaminess and adds protein, making it a balanced meal.

  • Savory Quinoa Pilaf: Nutty quinoa with herbs offers a delightful contrast in texture and a healthy grain option that enhances the overall nutrition.

  • Tomato Gazpacho: This chilled soup brings refreshing acidity and a burst of flavor, creating a beautiful balance with the salad’s creamy elements.

  • Corn on the Cob: Sweet, buttery corn freshly grilled or boiled provides a delightful connection to the corn in the salad, amplifying summer vibes.

  • Creamy Garlic Mashed Potatoes: The rich creaminess of the mashed potatoes echoes the dressing, while the garlic adds depth and warmth to the meal.

  • Refreshing Lemonade: Sweet and tangy lemonade balances the richness of the salad, making it a perfect thirst-quencher for summer gatherings.

  • Crusty French Bread: A side of crusty bread allows diners to savor the creamy dressing, soaking up every last bit of flavor for an indulgent touch.

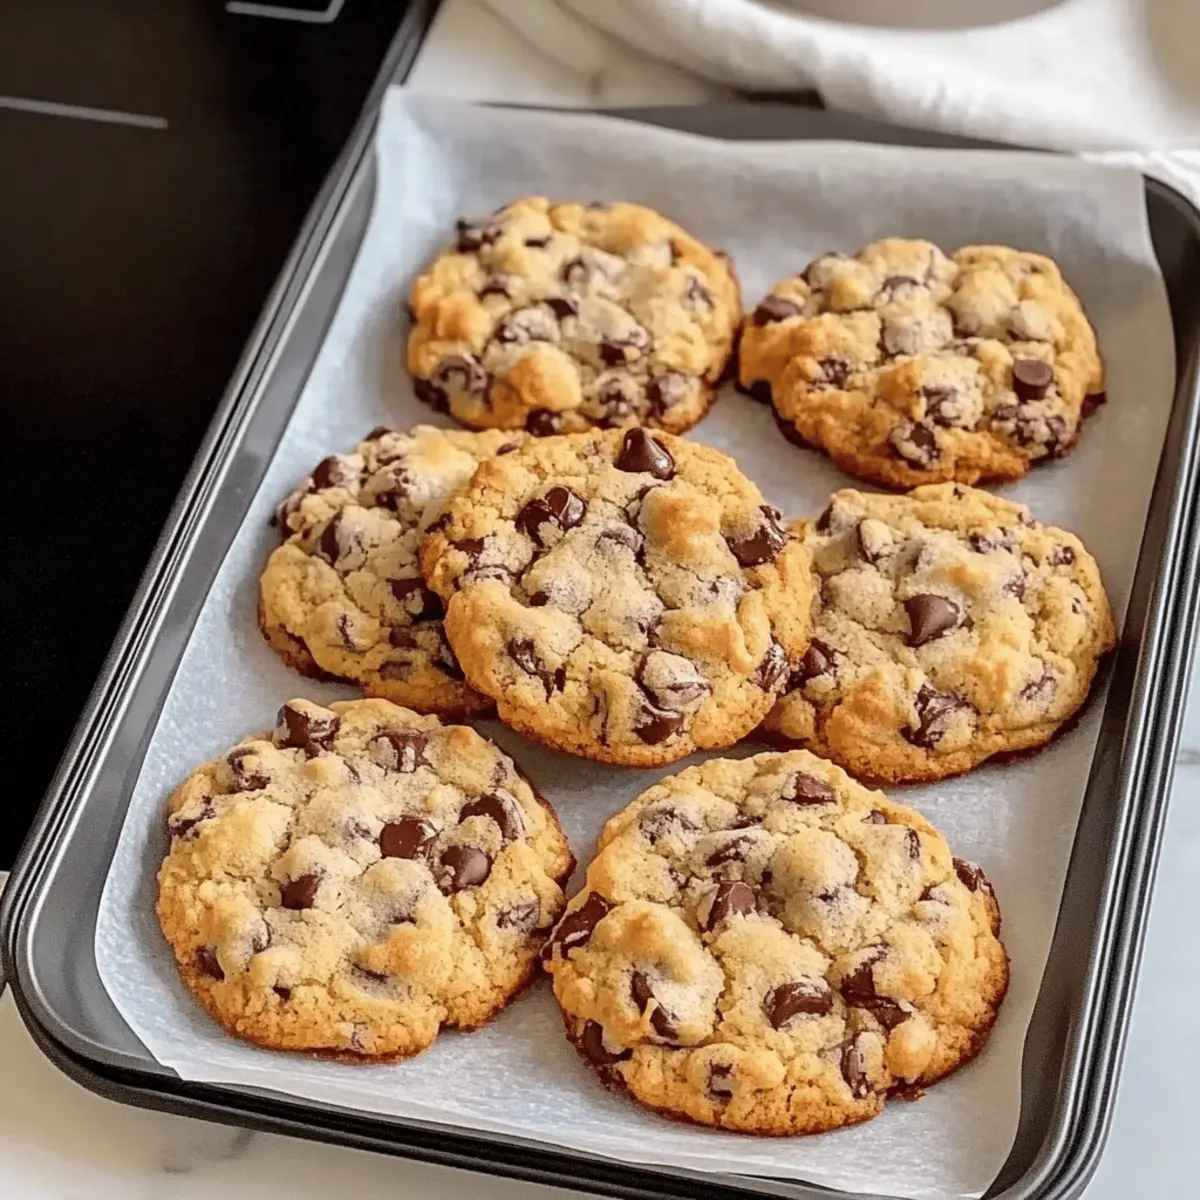
  • Chocolate Chip Cookies: End your meal on a sweet note with warm cookies that provide a delightful contrast to the fresh salad.

Transform mealtime into a feast with these all-star pairings!

Creamy Broccoli Cauliflower Corn Variations

Feel free to make this salad uniquely yours by exploring these exciting variations!

  • Dairy-Free: Substitute sharp cheddar with a plant-based cheese for the perfect vegan twist. Your friends won’t even notice the difference!
  • Protein-Packed: Add diced grilled chicken or crispy bacon for a hearty main dish. This elevates the salad into a satisfying meal that’s perfect for any gathering.
  • Veggie Boost: Toss in seasonal produce like cherry tomatoes or thinly sliced apples for a bright burst of flavor. Each bite becomes a delightful surprise, keeping your palate engaged.
  • Crunchy Surprise: Use sunflower seeds or chopped nuts for texture contrast. The added crunch brings an enjoyable twist to the creamy, smooth dressing.
  • Low-Carb Option: Switch to cauliflower rice instead of the florets for a low-carb, grain-free alternative. It’s a clever culinary substitution that won’t compromise taste!
  • Zesty Heat: For spice lovers, sprinkle in some diced jalapeños or a dash of cayenne pepper. Just a hint of heat can elevate this salad to another level of flavor goodness!
  • Herb Infusion: Fresh herbs like dill or chives pack flavor without calories—add them to the dressing for an aromatic herbal twist! Who knew fresh could be so vibrant?

Your journey with this salad continues! Feel inspired to explore and make this dish yours, just like my Garlic Shrimp Broccoli or Chicken Fettuccine Alfredo. Enjoy the process of creating!

How to Store and Freeze Creamy Broccoli Cauliflower Corn Salad

Fridge: Store any leftover salad in an airtight container for up to 3 days. Flavors actually improve after a few hours in the fridge, but keep dressing on the side if you mix ahead of time.

Freezer: It’s best not to freeze this salad as the creamy dressing and fresh vegetables may change texture when thawed. Enjoy it fresh for the best experience!

Reheating: If you’ve added proteins like chicken or bacon, you can simply reheat those portions in the microwave. Ensure the salad is served chilled for maximum freshness and flavor.

Make-Ahead: Prepare your salad up to 24 hours in advance for optimal taste. Just remember to add dressing shortly before serving to maintain that delightful crunch in your Creamy Broccoli Cauliflower Corn Salad.

Creamy Broccoli Cauliflower Corn Salad Recipe FAQs

How do I select ripe broccoli and cauliflower?
When choosing broccoli, look for vibrant green florets that are tightly packed, avoiding any yellowing or dark spots. For cauliflower, select heads that are white and firm, with no brown or mushy spots. If fresh isn’t an option, frozen broccoli and cauliflower can work; just be sure to thaw, pat dry, and chop them for the best results.

How should I store the Creamy Broccoli Cauliflower Corn Salad?
Store your salad in an airtight container in the refrigerator for up to 3 days. The flavors usually develop and improve after a few hours in the fridge, but for the best crunchiness, I’d recommend keeping the dressing separate until ready to serve.

Can I freeze Creamy Broccoli Cauliflower Corn Salad?
It’s best not to freeze this salad because the creamy dressing and delicate vegetables may lose their texture when thawed. Instead, enjoy it fresh! If you want to prep ahead, consider making it 24 hours in advance and adding the dressing just before serving.

What if my salad dressing is too tangy?
Absolutely! If you find your dressing too tangy, you can easily balance it out. Start by adding a teaspoon of honey or a dash of maple syrup to mellow the flavors. Taste as you go until you achieve the desired sweetness, and don’t forget to recheck your seasoning before mixing it into the salad.

Are there any dietary considerations for this salad?
Yes! This Creamy Broccoli Cauliflower Corn Salad is naturally vegetarian and can easily be made dairy-free by using plant-based cheese and yogurt. Always check the labels of any store-bought dressing or seasonings for potential allergens, especially if you’re serving guests with specific dietary needs.

Creamy Broccoli Cauliflower Corn

Creamy Broccoli Cauliflower Corn Salad for Vibrant Summer Dishes

A deliciously vibrant Creamy Broccoli Cauliflower Corn salad, packed with nutritious ingredients and perfect for summer gatherings.
Prep Time 10 minutes
Chill Time 30 minutes
Total Time 40 minutes
Servings: 6 servings
Course: Salad
Cuisine: American
Calories: 180

Ingredients
  

For the Salad
  • 2 cups broccoli florets fresh or thawed from frozen
  • 2 cups cauliflower florets fresh or thawed from frozen
  • 1 cup carrots fresh or pre-sliced
  • 1 cup sweet corn drained canned or fresh
  • 1 small red onion or green onions for milder flavor
For the Dressing
  • 1 cup mayonnaise or Greek yogurt for lighter option
  • ½ cup sour cream or kefir, based on preference
  • 1 packet dry ranch mix adjust to taste
  • 1 tablespoon lemon juice fresh
  • 1 tablespoon honey or maple syrup as vegan alternative
  • to taste salt

Equipment

  • Mixing Bowl
  • Whisk
  • Spatula
  • airtight container

Method
 

Preparation
  1. Finely chop the broccoli florets, cauliflower florets, and carrots. If using canned corn, drain thoroughly. Place chopped vegetables into a large mixing bowl.
  2. In a medium bowl, combine mayonnaise, sour cream, and dry ranch mix. Whisk until smooth.
  3. Add sweet corn and cheddar cheese (or plant-based cheese) to the vegetable mix. Pour the dressing over and gently fold until well combined.
  4. Transfer to an airtight container and refrigerate for at least 30 minutes before serving.

Nutrition

Serving: 1cupCalories: 180kcalCarbohydrates: 15gProtein: 5gFat: 12gSaturated Fat: 3gPolyunsaturated Fat: 1gMonounsaturated Fat: 5gCholesterol: 20mgSodium: 350mgPotassium: 400mgFiber: 3gSugar: 2gVitamin A: 300IUVitamin C: 60mgCalcium: 150mgIron: 1mg

Notes

For a crunchier texture, blanch broccoli and cauliflower briefly, then ice bath. Use fresh, vibrant vegetables for best flavor and store dressing separately if making ahead.

Tried this recipe?

Let us know how it was!

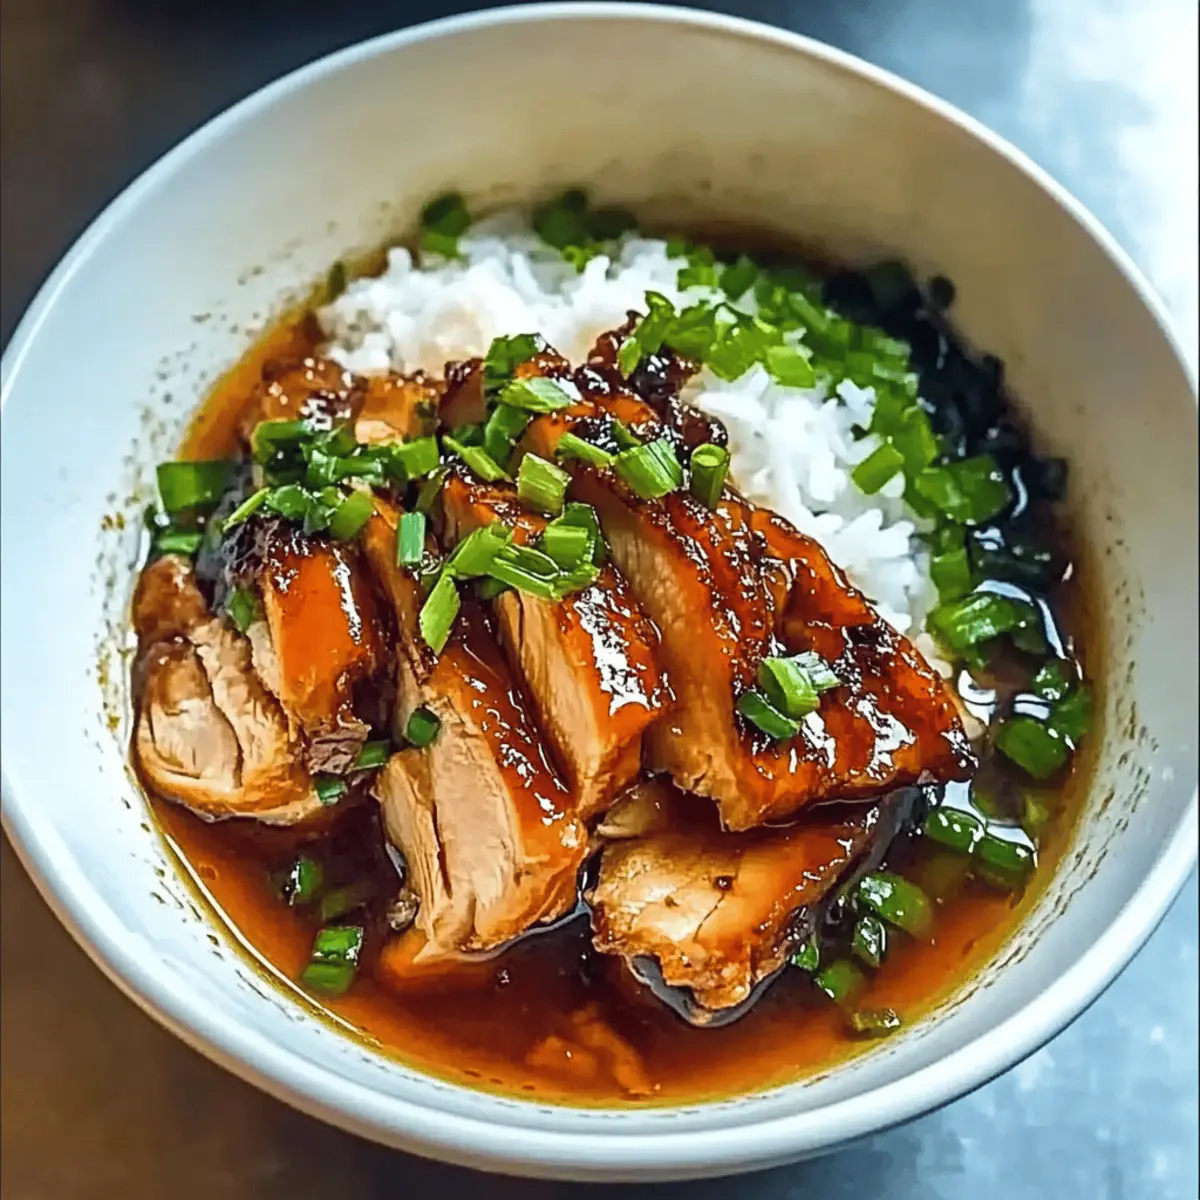
Caramelised Soy Chicken: A Cozy Dinner in Garlic Ginger Broth

The aroma wafting through my kitchen transported me straight to my favorite Asian eatery, where each bite of tender chicken brings comfort like a warm hug. Today, I’m sharing my take on Caramelised Soy Chicken in Garlic Ginger Broth with Fluffy Jasmine Rice—a dish that’s both simple and satisfying. This recipe is a perfect solution for those hectic weeknights or when you crave a warm, flavorful meal without breaking a sweat. With just a handful of ingredients, you’ll whip up a cozy bowl of umami goodness that skirts the line between easy weeknight fare and gourmet dining. Plus, it’s freezer-friendly, making it a great option for meal prep! Ready to dive into this culinary delight? Let’s get started!

Why is this recipe a must-try?

Simplicity at its core: With only a few ingredients, you’ll have a delightful meal on the table in no time, perfect for busy days.
Flavor-packed goodness: The marriage of soy sauce, garlic, and ginger creates a broth that’s irresistibly rich and comforting.
Versatile twists: Want to switch it up? Try adding your favorite veggies or swap chicken for tofu.
Perfectly fluffy jasmine rice: This dish pairs harmoniously with light and airy rice that soaks up all the savory goodness.
Crowd-pleaser appeal: Whether for a family dinner or a cozy gathering, this recipe is sure to impress; who can resist tender, caramelized chicken?
For more comforting options, check out my Jerk Chicken Burritos or Thai Chicken Meatballs.

Ingredients for Caramelised Soy Chicken

• Your journey to flavorful comfort starts here.

For the Chicken

  • Chicken Thighs – Boneless and skinless ensures easy cooking and maximum tenderness; feel free to use chicken breasts if preferred.

For the Marinade

  • Soy Sauce – Provides essential umami and saltiness; tamari can be used for a gluten-free option.
  • Sesame Oil – Adds rich, nutty flavor; swap it for canola oil for a lighter taste.
  • Garlic – Fresh minced garlic is best for depth of flavor; powdered garlic is a quick substitute if needed.
  • Ginger – Fresh ginger enhances the zesty warmth; ground ginger works in a pinch, but may alter the taste.
  • Brown Sugar – Balances flavors and helps with caramelization; you can use coconut sugar for a healthier alternative.

For the Broth

  • Chicken Broth – Creates a savory base; opt for homemade or low-sodium store-bought for lesser salt.
  • Rice Vinegar – Gives a subtle tang; apple cider vinegar can be a good alternative.
  • Cornstarch – Thickens the broth beautifully; arrowroot powder can be used if preferred.

For Cooking

  • Jasmine Rice – Provides a fluffy base that soaks up the broth; basmati rice is another delightful option.
  • Water – Necessary for cooking the rice; ensure it’s filtered for best results.

For Garnish

  • Green Onions – Adds freshness and color; regular onions can work as a substitute, but with a stronger flavor.

Step‑by‑Step Instructions for Caramelised Soy Chicken

Step 1: Prepare Chicken
Begin by cutting the boneless, skinless chicken thighs into bite-sized pieces, making them easier to cook and enjoy. Season the pieces with a generous pinch of salt and pepper, ensuring each piece is coated. This foundational step enhances the flavor of the Caramelised Soy Chicken.

Step 2: Marinate
In a mixing bowl, combine soy sauce, sesame oil, minced garlic, grated ginger, and brown sugar to create a rich marinade. Add the cut chicken pieces, tossing them until they’re fully coated in this flavorful mix. Allow the chicken to marinate for at least 10 minutes; this helps the flavors penetrate, making the dish more delicious.

Step 3: Cook Rice
While the chicken marinates, rinse 1 cup of jasmine rice under cold water until the water runs clear to remove excess starch. In a medium saucepan, bring 2 cups of water to a rolling boil, then stir in the rinsed rice. Cover the pot, reduce the heat to low, and simmer for 15 minutes until tender. Fluff the rice with a fork once cooked.

Step 4: Sauté Chicken
Heat a large pot over medium-high heat and add a splash of oil to prevent sticking. Once hot, add the marinated chicken pieces, spacing them apart for even cooking. Sauté for 5 to 7 minutes, or until the chicken is caramelized on the outside and cooked through, stirring occasionally for even browning.

Step 5: Add Broth
Pour in the chicken broth and rice vinegar to the pot, stirring gently to combine with the chicken. Bring the mixture to a boil, allowing the flavors to meld beautifully. Once boiling, reduce the heat to a gentle simmer, letting it bubble away for about 5 minutes, enriching the broth with the chicken’s juices.

Step 6: Thicken Broth
In a small bowl, mix a tablespoon of cornstarch with a few tablespoons of cold water to form a slurry. Slowly stir this mixture into the simmering broth, continuing to cook for another 5 minutes. The broth will begin to thicken, transforming into a luscious sauce for your Caramelised Soy Chicken.

Step 7: Final Adjustments
As the broth thickens, taste it and adjust the seasoning if necessary, adding more salt or pepper. This is your chance to perfect the flavors before serving. If it’s too salty, a splash of water can help balance it out for a pleasing taste.

Step 8: Serve
To plate, ladle a generous portion of chicken and broth over a serving of fluffy jasmine rice. The rice will absorb the delicious broth, making each bite satisfying. This comforting dish marries the savory elements beautifully, providing a hearty meal.

Step 9: Garnish
Finish your Caramelised Soy Chicken by sprinkling thinly sliced green onions on top for a fresh touch and a pop of color. This final flourish not only adds visual appeal but also a delightful crunch and flavor that complements the warm broth.

Storage Tips for Caramelised Soy Chicken

  • Fridge: Store leftovers in an airtight container for up to 3 days. It’s best to keep chicken and rice separate to maintain the rice’s fluffiness.

  • Freezer: Freeze portions in airtight containers for up to 2 months. Thaw in the refrigerator overnight before reheating for optimal texture.

  • Reheating: Gently reheat on the stove over low heat, adding a splash of chicken broth to restore moisture. Microwave in short intervals with a cover to prevent drying out.

  • Airtight Storage: Ensure all containers are sealed well to prevent freezer burn and maintain the delightful flavors of your Caramelised Soy Chicken.

Make Ahead Options

These Caramelised Soy Chicken in Garlic Ginger Broth are perfect for meal prep enthusiasts! You can marinate the chicken in the savory sauce up to 24 hours in advance, allowing the flavors to deepen. To maintain quality, store it in an airtight container in the refrigerator. You can also prepare the garlic-ginger broth separately and refrigerate it for up to 3 days. When you’re ready to enjoy this comforting dish, simply sauté the marinated chicken, add the broth, and cook until heated through. Serve it over fresh jasmine rice for a quick, cozy meal that saves you time and effort on busy weeknights.

What to Serve with Caramelised Soy Chicken in Garlic Ginger Broth

Imagine a comforting table filled with vibrant dishes that perfectly complement the savory depths of this luscious chicken broth.

  • Steamed Broccoli: Adding steamed broccoli provides a crunchy contrast and a pop of color, enhancing the meal’s visual appeal. Its mild flavor balances the rich broth beautifully.

  • Crispy Spring Rolls: These delightful bites bring a satisfying crunch, filled with fresh vegetables or meat. Pairing with a sweet chili sauce adds another layer of flavor to the meal.

  • Garlic Bok Choy: Lightly sautéed garlic bok choy elevates your dish with its crispy leaves and mild bitterness, making it a vibrant fresh addition to the comforting chicken broth.

  • Soy Sauce Glazed Carrots: Sweet and tender carrots glazed with soy sauce tie in the umami theme, creating harmony with the chicken’s rich flavors while contributing a vibrant hue to your plate.

  • Miso Soup: A bowl of light miso soup brightens your palate between bites, offering a refreshing contrast that enhances the meal’s overall comfort without overpowering it.

  • Coconut Rice Pudding: For dessert, a creamy coconut rice pudding serves as a sweet finish, harmonizing with the Asian-inspired theme and providing a soothing end to your dinner.

  • Chilled Green Tea: This refreshing drink offers a soothing cleanse between bites, perfectly soothing the palate while blending seamlessly with your comforting chicken dish.

Let these pairings turn a simple recipe for Caramelised Soy Chicken into a memorable feast that warms both body and soul.

Caramelised Soy Chicken: Variations and Substitutions

Feel free to explore these irresistible twists and substitutions to make this dish your own and elevate each bite to new heights!

  • Vegetarian Delight: Substitute chicken thighs with tofu or chickpeas for a hearty plant-based experience, offering a different texture and flavor profile while keeping it satisfying.

  • Hearty Veggies: Add in vegetables like bok choy, carrots, or bell peppers for a burst of color and nutrients; not only do they complement the broth’s flavor, but they also turn this dish into a nourishing one-pot meal.

  • Gluten-Free Switch: Use tamari instead of regular soy sauce to ensure a gluten-free version; this minor swap doesn’t compromise on taste while accommodating dietary needs.

  • Spicy Kick: Incorporate chili flakes or a splash of sriracha for those who love a bit of heat; this twist will awaken your taste buds and add complexity to the savory broth.

  • Nutty Creaminess: Replace sesame oil with a spoonful of peanut or almond butter for a nutty flavor that elevates the dish and adds a unique, creamy texture.

  • Citrus Zing: Squeeze fresh lime or lemon juice into the broth before serving to brighten the flavors; this zingy enhancement cuts through the richness for a perfectly balanced taste.

  • Rice Variety: Instead of jasmine rice, try basmati rice for a different aroma and a slightly nuttier flavor; it pairs beautifully with the savory broth.

  • Sweetness Level: Adjust the sweetness by swapping brown sugar for maple syrup or honey; each option impacts the broth’s flavor, creating a unique profile worth exploring.

If you’re looking for more comforting chicken dishes, consider trying out my Grilled Chicken Sandwich or whip up some Mexican Barbecue Chicken for a family-friendly feast!

Expert Tips for Caramelised Soy Chicken

  • Marinade Time Matters: Allow the chicken to marinate for at least 10 minutes to fully soak in the delicious flavors; overnight is even better for maximum taste.

  • Rinse the Rice: Rinse jasmine rice until the water runs clear to remove excess starch; this prevents it from becoming gummy and allows for a perfect fluffy texture.

  • Thicken Wisely: Gradually add the cornstarch slurry to the simmering broth and stir continuously to avoid lumps, ensuring your broth is silky smooth and cohesive.

  • Balance the Flavors: Always taste the broth before serving; a pinch of salt or a dash of water can adjust the final flavor profile of your Caramelised Soy Chicken for perfection.

  • Keep It Cozy: For added warmth, include vegetables like bok choy or carrots while cooking the chicken, enriching the dish’s flavor and nutritional value.

Caramelised Soy Chicken Recipe FAQs

What type of chicken is best for this recipe?
Absolutely! Boneless, skinless chicken thighs are ideal for this dish because they remain juicy and tender during cooking. However, if you prefer a leaner option, feel free to substitute chicken breasts. Just keep in mind that they may require slightly less cooking time, so Always monitor for doneness.

How should I store leftovers of Caramelised Soy Chicken?
Certainly! Store any leftovers in an airtight container in the refrigerator for up to 3 days. If you keep the chicken and rice separate, it will help maintain the rice’s fluffy texture. When ready to enjoy, simply reheat on the stove or in the microwave.

Can I freeze Caramelised Soy Chicken?
Yes, you can! To freeze, portion the chicken and broth into airtight containers or freezer bags and store for up to 2 months. It’s best to cool the dish completely before freezing. When you’re ready to eat, thaw it in the refrigerator overnight, then gently reheat on the stove for the best texture.

What can I do if the broth is too salty?
Very good question! If your broth turns out too salty, don’t panic. You can add a splash of water or low-sodium chicken broth to dilute it slightly. Another helpful trick is to add a small peeled potato to the pot while it simmers, which can absorb some saltiness. Just remember to remove the potato before serving!

Is this recipe suitable for gluten-free diets?
Yes, it can be! By using tamari instead of regular soy sauce, you can easily make this Caramelised Soy Chicken gluten-free. Additionally, double-check that your chicken broth and any additional ingredients you use are gluten-free as well.

How do I know if my chicken is cooked through?
Of course! To ensure your chicken is properly cooked, use a meat thermometer to check for an internal temperature of 165°F (75°C). If you don’t have a thermometer, no worries! Simply slice into a piece and check that it’s no longer pink in the center and the juices run clear.

Caramelised Soy Chicken

Caramelised Soy Chicken: A Cozy Dinner in Garlic Ginger Broth

Caramelised Soy Chicken is a flavorful dish that brings comfort with tender chicken in a rich garlic ginger broth.
Prep Time 10 minutes
Cook Time 30 minutes
Total Time 40 minutes
Servings: 4 servings
Course: Chicken
Cuisine: Asian
Calories: 350

Ingredients
  

For the Chicken
  • 1 pound Boneless, skinless chicken thighs
For the Marinade
  • 1/4 cup Soy sauce Tamari can be used for gluten-free option.
  • 2 tablespoons Sesame oil Can swap for canola oil.
  • 3 cloves Garlic Minced fresh.
  • 1 tablespoon Fresh ginger Grated.
  • 2 tablespoons Brown sugar Coconut sugar can be used.
For the Broth
  • 2 cups Chicken broth Low-sodium is preferable.
  • 2 tablespoons Rice vinegar Apple cider vinegar can be an alternative.
  • 1 tablespoon Cornstarch Can use arrowroot powder.
For Cooking
  • 1 cup Jasmine rice Basmati is a good alternative.
  • 2 cups Water Filtered water is ideal.
For Garnish
  • 2 stalks Green onions Thinly sliced.

Equipment

  • large pot
  • Medium saucepan
  • Mixing Bowl

Method
 

Step-by-Step Instructions
  1. Begin by cutting the boneless, skinless chicken thighs into bite-sized pieces, seasoning with salt and pepper.
  2. In a mixing bowl, combine soy sauce, sesame oil, minced garlic, grated ginger, and brown sugar for marinade. Toss chicken in the marinade and let it sit for at least 10 minutes.
  3. Rinse jasmine rice under cold water until clear. In a medium saucepan, bring water to a boil and stir in rice. Cover and simmer for 15 minutes.
  4. Heat a large pot and add oil. Once hot, add marinated chicken and sauté for 5 to 7 minutes until caramelized and cooked through.
  5. Pour in chicken broth and rice vinegar, stirring to combine. Bring to a boil, then reduce to a simmer for about 5 minutes.
  6. Mix cornstarch with cold water into a slurry and stir into the broth. Cook for another 5 minutes until the broth thickens.
  7. Taste and adjust seasoning if necessary before serving.
  8. Ladle chicken and broth over fluffy jasmine rice and garnish with green onions.

Nutrition

Serving: 1servingCalories: 350kcalCarbohydrates: 40gProtein: 30gFat: 12gSaturated Fat: 2gPolyunsaturated Fat: 1gMonounsaturated Fat: 5gCholesterol: 90mgSodium: 800mgPotassium: 500mgFiber: 2gSugar: 5gVitamin A: 500IUVitamin C: 2mgCalcium: 30mgIron: 2mg

Notes

For best flavor, marinate chicken longer, rinse rice well, and adjust broth seasoning before serving. Add vegetables for extra nutrition and flavor.

Tried this recipe?

Let us know how it was!

Monster Croissant Magic: Whimsical Breakfast for All

As I watched my kids eye the breakfast table with the enthusiasm of little explorers, I realized we needed a fun twist to our morning routine. Enter the delightful Monster Croissants! These whimsical pastries, stuffed with fluffy scrambled eggs and ooey-gooey cheese, wrap up breakfast in a way that sparks joy and imagination. The beauty of this recipe lies in its versatility; whether you’re catering to picky eaters or accommodating dietary preferences, these croissants can be easily customized. With options for vegetarian and vegan alternatives, you won’t just make breakfast—you’ll create a magical adventure for the family. So, are you ready to turn your mornings into a cheerful culinary experience? Let’s dive into the Monster Croissant magic together!

Why Are Monster Croissants a Must-Try?

Whimsy: These Monster Croissants transform a simple breakfast into a delightful experience, complete with fun candy eyes that will make your kids smile.
Customizable: Adapt the filling to suit everyone’s taste; add veggies or swap cheeses to create your own version!
Versatile: Perfect for any dietary need, you can easily make them vegetarian or vegan without losing any flavor.
Time-Saving: Quick to prepare, these croissants can be ready in no time—ideal for busy mornings or leisurely weekends.
Crowd-Pleaser: Parents and kids alike will adore these fun-filled pastries, making them a hit at family gatherings or playdates. Don’t forget to pair them with a fresh fruit salad or, if you’re feeling adventurous, try out the Overnight Croissant Breakfast for an extra treat!

Monster Croissant Ingredients

Turn your mornings into a fun-filled adventure with delicious Monster Croissants, perfect for the whole family!

For the Filling

  • Eggs – They provide structure and rich flavor; choose free-range or organic for the best taste.
  • Milk – Adds creaminess to the eggs; any type works well, including dairy-free options.
  • Cheddar Cheese – Offers gooeyness and flavor; substitute with mozzarella or pepper jack for a different twist.

For the Croissants

  • Croissants – Flaky, buttery pastry; store-bought is recommended for convenience.

For Decoration

  • Candy Eyes – These fun little decorations bring the monster theme to life; easily found at baking or craft stores.

For Dipping

  • Ketchup/Hot Sauce – A delightful dipping sauce to enhance flavor; try it with spicy variants for an extra kick.

With these ingredients, you’re just a few steps away from creating the enchanting Monster Croissants that will leave everyone smiling! Enjoy the magic of customizable options to tailor this recipe to your family’s needs, making every bite truly memorable.

Step‑by‑Step Instructions for Monster Croissant Magic

Step 1: Prep Egg Mixture
Start by cracking 4 large eggs into a medium mixing bowl. Whisk in ¼ cup of milk, a pinch of salt, and a dash of pepper until the mixture becomes frothy and bubbly, which should take about 2 minutes. This flavorful egg base is crucial for achieving that fluffy texture inside your Monster Croissants.

Step 2: Prepare Croissants
Preheat your oven to 350°F (175°C), ensuring it’s nicely heated for the final bake. Carefully slice 4 store-bought croissants in half lengthwise to create a generous pocket for the egg filling. Lay them open on a baking sheet lined with parchment paper, ready to be filled with your delicious mixture.

Step 3: Cook Eggs
Heat a skillet over medium heat and add a little oil or butter to coat the bottom. Pour in your whisked egg mixture and cook for about 3-5 minutes, stirring gently. Watch for the eggs to fluff up; when they look softly set and slightly runny, stir in 1 cup of shredded cheese until it melts beautifully into the eggs, creating a gooey filling.

Step 4: Assemble Croissants
With the cheesy scrambled egg filling ready, it’s time to assemble your Monster Croissants. Generously scoop the egg mixture into the pocket of each croissant half, allowing it to overflow slightly for that monster effect. Top each with fun candy eyes, giving them personality and a whimsical touch that the kids will love.

Step 5: Serve
Place the assembled croissants back onto your baking sheet and slide them into the preheated oven for about 5-7 minutes. Bake until they’re warmed through and the edges are golden and slightly crispy. Serve immediately with a side of ketchup or hot sauce for dipping, and watch as the Monster Croissant magic brings smiles to the breakfast table!

Make Ahead Options

These Monster Croissants are perfect for meal prep enthusiasts looking to streamline their busy mornings! You can whisk together the egg mixture (4 large eggs, ¼ cup milk, a pinch of salt, and pepper) and store it in the refrigerator for up to 24 hours. Additionally, slice the croissants in advance and keep them in an airtight container at room temperature to maintain their flakiness. When you’re ready to serve, just scramble the eggs, fill each croissant, add candy eyes, and bake for about 5-7 minutes. This way, you’ll enjoy delicious, whimsical Monster Croissants with minimal effort while saving precious time on your hectic mornings!

What to Serve with Monster Croissants

Imagine your family’s breakfast table bursting with color and flavors, ready to elevate your morning routine to something truly special.

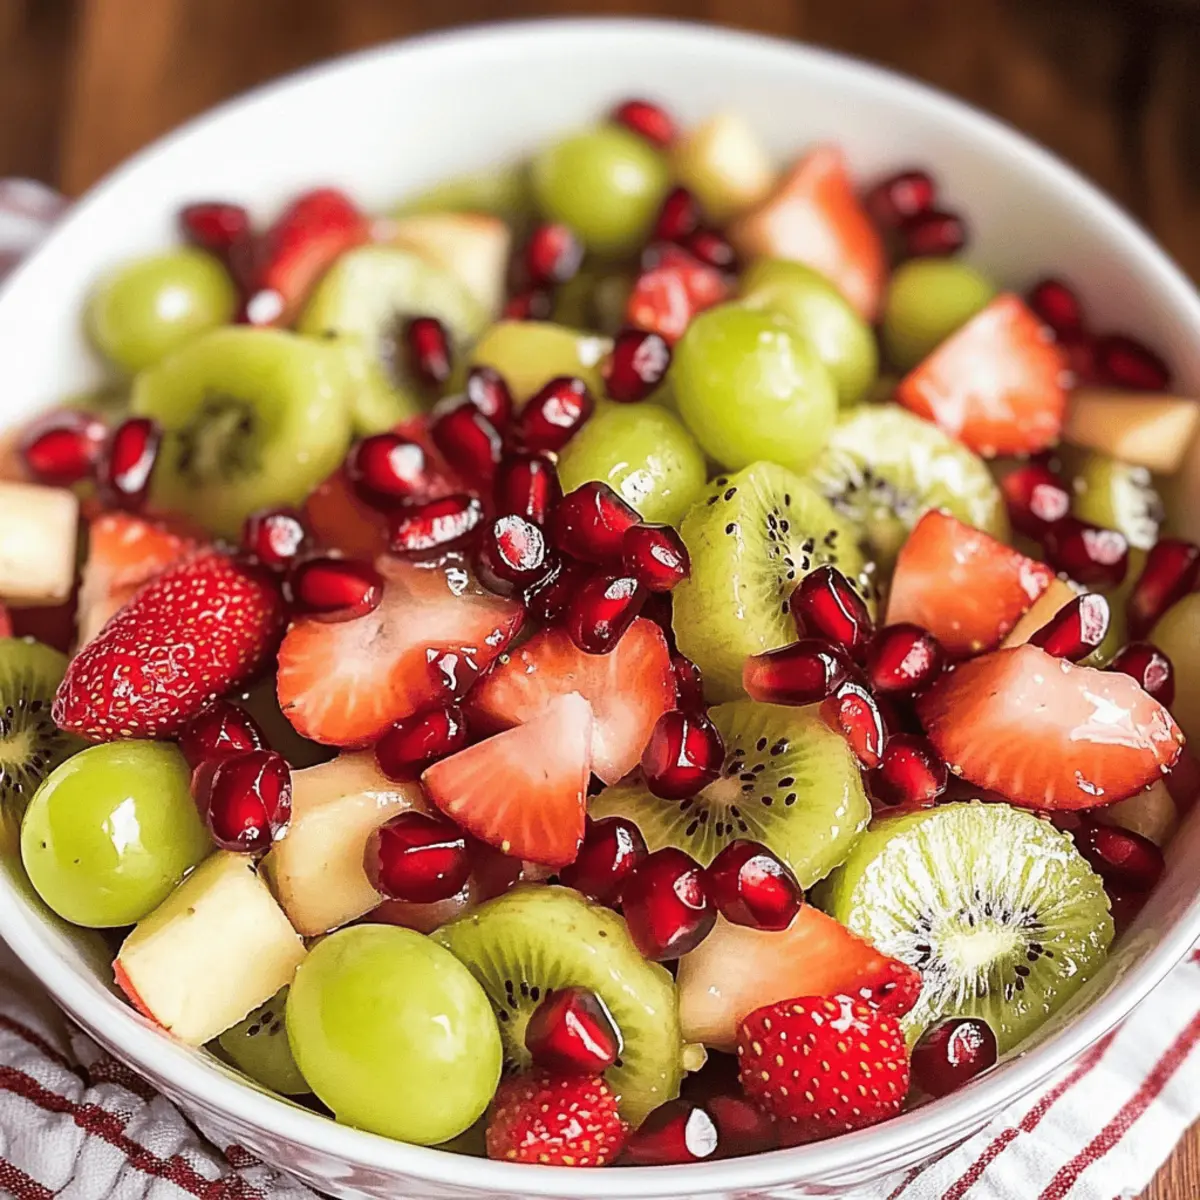
  • Fresh Fruit Salad: Bright, juicy fruits add a refreshing contrast, balancing the rich flavors of the croissants beautifully.
  • Crispy Hash Browns: Adding a crispy texture, these golden bites offer a hearty complement, making your breakfast complete and satisfying.
  • Yogurt Parfait: Layered with granola and berries, a yogurt parfait brings a creamy sweetness to the table that pairs perfectly with your savory croissants.
  • Savory Sautéed Veggies: Adding spinach, bell peppers, or mushrooms not only boosts nutrition but also enhances the flavors and colors, making each bite vibrant.
  • Cheesy Gratin Potatoes: These creamy, cheesy potatoes echo the delightful gooeyness of the croissants and create a comforting dish that warms the heart.
  • Coffee or Herbal Tea: A cup of freshly brewed coffee or a calming herbal tea grounds your meal, offering a perfect beverage match to your whimsical breakfast adventure.
  • Chocolate Milk: Treat the kids to a nostalgic, sweet sip because nothing says “happy breakfast” quite like a glass of rich chocolate milk beside those monster creations!
  • Farm-Fresh Juice: Brighten your table with a glass of fresh orange or apple juice, offering a fruity kick that complements the savory elements wonderfully.
  • Mini Fruit & Nut Muffins: These add a touch of sweetness and a delightful contrast in texture, creating a delightful spread that the whole family will enjoy.

How to Store and Freeze Monster Croissants

  • Room Temperature: Enjoy your Monster Croissants fresh for the best taste. If you have leftovers, store them at room temperature for up to 2 days in an airtight container.
  • Fridge: For slightly longer storage, keep them in the fridge for up to 3 days. Reheat in the oven at 350°F for 5 minutes to restore their crispy texture.
  • Freezer: To keep them for longer, wrap each croissant individually in plastic wrap and then in aluminum foil. They can be frozen for up to 3 months.
  • Reheating: When ready to enjoy your frozen Monster Croissants, simply preheat the oven to 350°F and bake directly from frozen for about 10 minutes, ensuring they’re warmed through and flaky.

Monster Croissant Magic Variations

Embrace the opportunity to get creative with your Monster Croissants and make them uniquely yours!

  • Vegetable-Packed:
    Add sautéed spinach, bell peppers, or mushrooms for a nutritious and colorful twist. A dash of garlic can add an extra depth of flavor.

  • Spicy Kick:
    Swap out cheddar for pepper jack cheese to introduce a zesty flavor explosion that the adventurous eaters will love. It’s a small change that makes a big impact!

  • Vegan Delight:
    Substitute eggs with a tofu scramble, and use vegan cheese to keep it plant-based while still delightfully gooey. Enjoy a hearty breakfast without sacrificing taste!

  • Worldly Flavors:
    Incorporate sun-dried tomatoes and feta cheese for a Mediterranean flair that will transport you right to the gorgeous coastlines.

  • Breakfast Meat:
    Fold in crispy bacon or sausage for a savory, hearty option that satisfies those morning cravings. A protein-packed twist the whole family will adore!

  • Herb Infusion:
    Mix in fresh herbs like chives, parsley, or basil into your egg mixture for brightness and a fresh flavor that elevates your croissants.

  • Sweet Surprise:
    For a fun dessert version, use cream cheese and raspberry jam, and replace candy eyes with chocolate chips for an after-dinner treat!

Don’t forget, these options allow you to make every meal an adventure! If you’re looking for more deliciousness, check out the Overnight Croissant Breakfast for an equally whimsical dish that will brighten your breakfast table!

Expert Tips for Monster Croissants

  • Fresh Croissants: Use fresh, quality croissants for the best texture. Stale croissants can turn mushy and lose their delightful flakiness.
  • Perfect Eggs: Avoid rubbery eggs by cooking them gently; they should be softly set and fluffy. Stir continuously while cooking for even texture.
  • Custom Fillings: Don’t shy away from personalization! Mix in your family’s favorite veggies or swap cheeses to make each Monster Croissant unique and appealing.
  • Dairy-Free Options: For a vegan Monster Croissant magic, substitute eggs with a tofu scramble or chickpea flour, and choose dairy-free cheese to delight everyone at the breakfast table.
  • Fun Presentation: Make it memorable! Use colorful candy eyes and serve with dips to keep the meal playful and vibrant, perfect for kids and adults alike.

Monster Croissants Recipe FAQs

What type of croissants should I use for Monster Croissants?
I recommend using fresh, store-bought croissants for the best flavor and texture. If you can find flaky, buttery ones, they will hold up wonderfully during the baking process. Avoid stale croissants, as they may become mushy and lose their delightful flakiness.

How long can I store leftover Monster Croissants?
You can store any leftover Monster Croissants at room temperature in an airtight container for up to 2 days. If you want to extend their freshness, pop them in the fridge for up to 3 days. Just remember to reheat them in a preheated oven at 350°F (175°C) for about 5 minutes to revive their crispy exterior!

Can I freeze Monster Croissants?
Absolutely! To freeze your Monster Croissants, wrap each one individually in plastic wrap and then in aluminum foil to prevent freezer burn. They can be stored in the freezer for up to 3 months. When you’re ready to enjoy them, simply preheat your oven to 350°F (175°C) and bake the frozen croissants directly for about 10 minutes, until they’re warmed through and flaky again.

What can I do if my eggs turn out rubbery?
If you find your eggs turning rubbery, it might be due to cooking them at too high a heat or for too long. To avoid this, cook the eggs gently over medium heat, stirring continuously. Keep an eye on them; they should be softly set and fluffy, typically taking about 3-5 minutes. If they look slightly runny, that’s okay! Stir in your cheese at this point for a creamy finish.

Can I make Monster Croissants vegan?
Yes, you absolutely can! For a delightful vegan version, substitute the eggs with a tofu scramble or a chickpea flour mixture. Use your favorite dairy-free cheese to provide that gooey texture, and you can create delicious custom fillings with veggies like spinach or mushrooms without missing out on flavor. Enjoy the Monster Croissant magic without compromising on dietary needs!

Are there any allergies I should consider with this recipe?
Certainly! This recipe uses eggs and cheese, which are common allergens. If you’re making these for someone with egg allergies, be sure to use an egg substitute like a tofu scramble or chickpea flour mix. For dairy allergies, opt for dairy-free cheese and ensure any additional ingredients, like hot sauce, are free from allergens. Always check labels and adapt the ingredients according to specific dietary needs.

Monster Croissant Magic

Monster Croissant Magic: Whimsical Breakfast for All

Discover the joy of Monster Croissant Magic, a fun-filled breakfast perfect for families.
Prep Time 10 minutes
Cook Time 15 minutes
Total Time 25 minutes
Servings: 4 croissants
Course: Breakfast
Cuisine: American
Calories: 300

Ingredients
  

For the Filling
  • 4 large eggs free-range or organic for best taste.
  • 1/4 cup milk any type including dairy-free options.
  • 1 cup cheddar cheese shredded; substitute with mozzarella or pepper jack.
For the Croissants
  • 4 croissants store-bought is recommended for convenience.
For Decoration
  • 1 pack candy eyes fun decoration found at baking or craft stores.
For Dipping
  • 1 bottle ketchup/hot sauce for flavor enhancement.

Equipment

  • Mixing Bowl
  • Skillet
  • Baking Sheet
  • Oven
  • Whisk

Method
 

Step-by-Step Instructions
  1. Start by cracking 4 large eggs into a medium mixing bowl. Whisk in ¼ cup of milk, a pinch of salt, and a dash of pepper until the mixture becomes frothy and bubbly, which should take about 2 minutes.
  2. Preheat your oven to 350°F (175°C), then slice 4 croissants in half lengthwise and lay them open on a baking sheet lined with parchment paper.
  3. Heat a skillet over medium heat and add oil or butter. Pour in the whisked egg mixture and cook for about 3-5 minutes, stirring gently until set, then stir in 1 cup of shredded cheese.
  4. Scoop the cheesy scrambled egg mixture into each croissant half, allowing it to overflow slightly, then top with candy eyes.
  5. Place the croissants on a baking sheet and bake for about 5-7 minutes until warmed through and golden.

Nutrition

Serving: 1croissantCalories: 300kcalCarbohydrates: 35gProtein: 12gFat: 15gSaturated Fat: 8gPolyunsaturated Fat: 1gMonounsaturated Fat: 6gCholesterol: 210mgSodium: 400mgPotassium: 250mgFiber: 2gSugar: 3gVitamin A: 500IUVitamin C: 1mgCalcium: 200mgIron: 1.5mg

Notes

Customize your fillings with veggies or different cheeses. Great for making a fun breakfast experience for kids and adults alike.

Tried this recipe?

Let us know how it was!

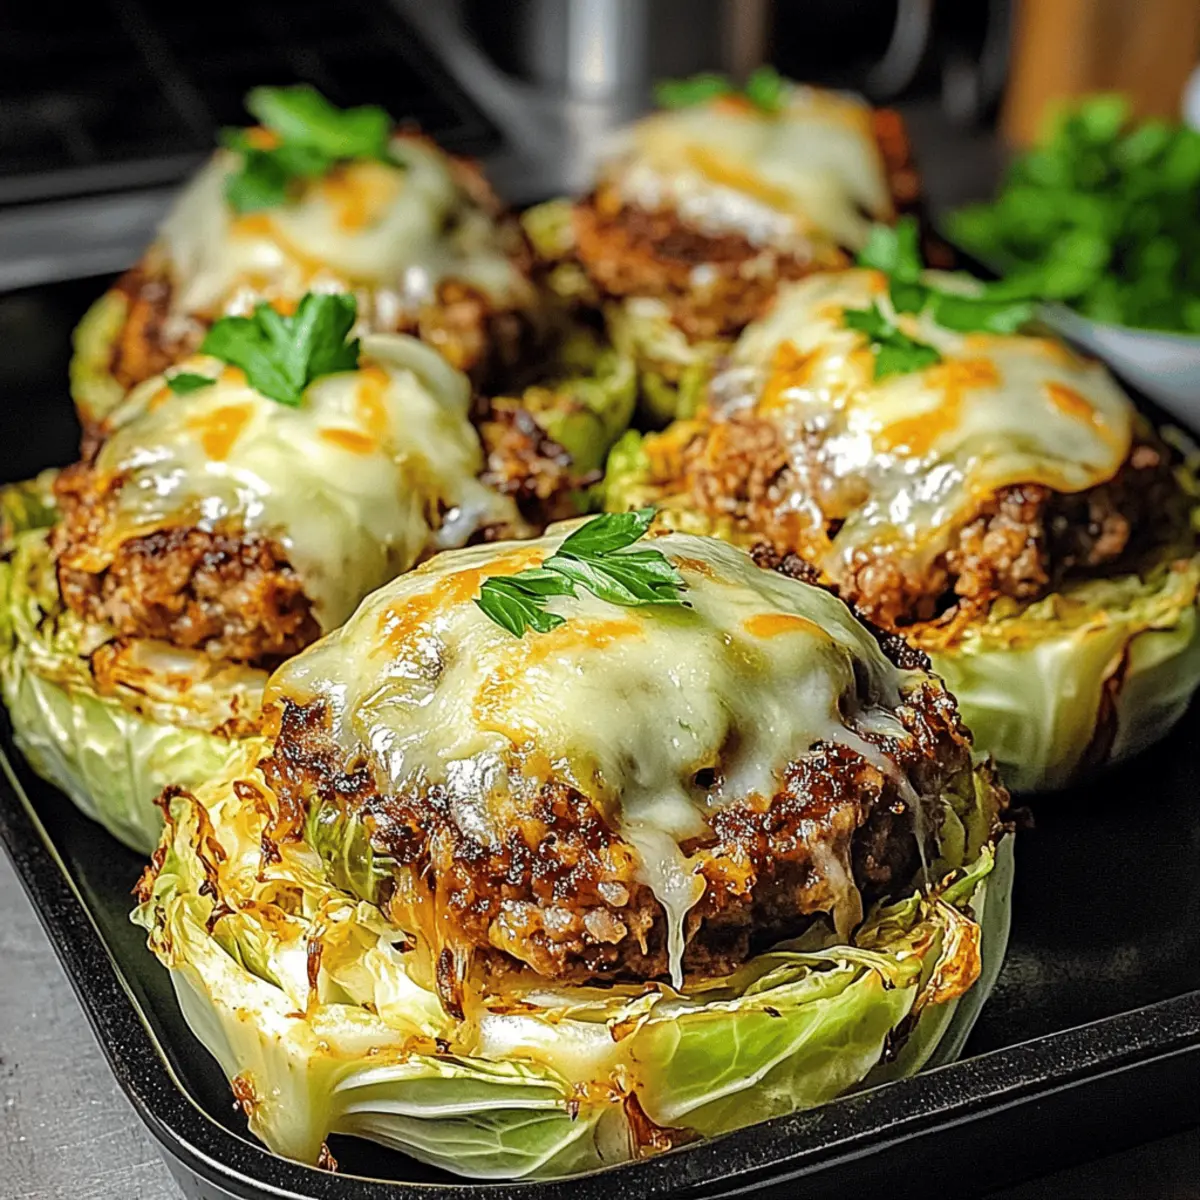
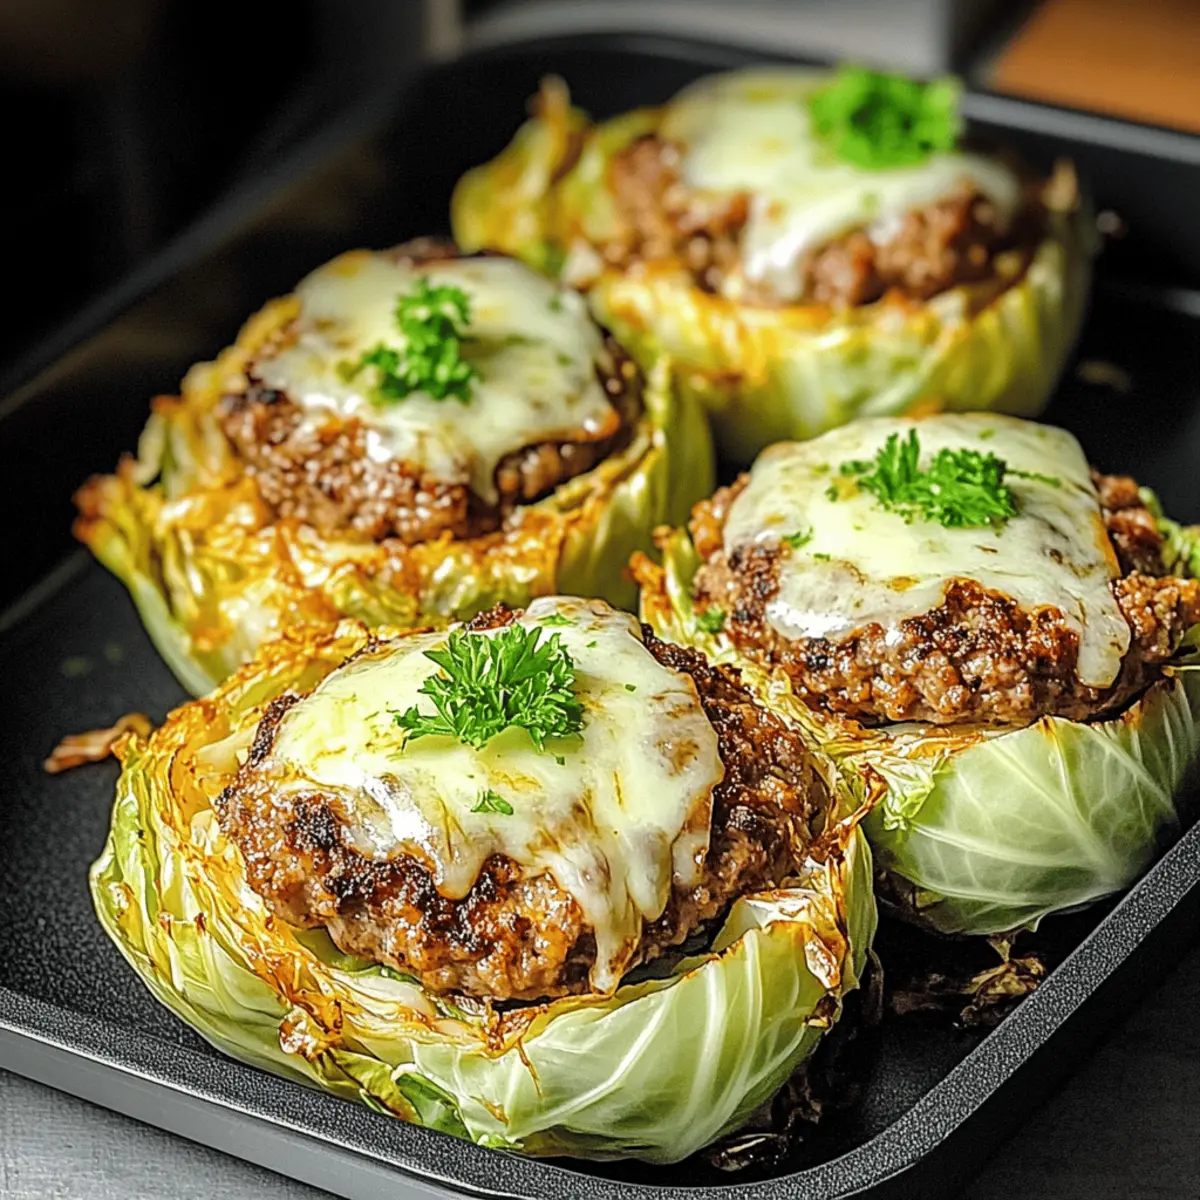
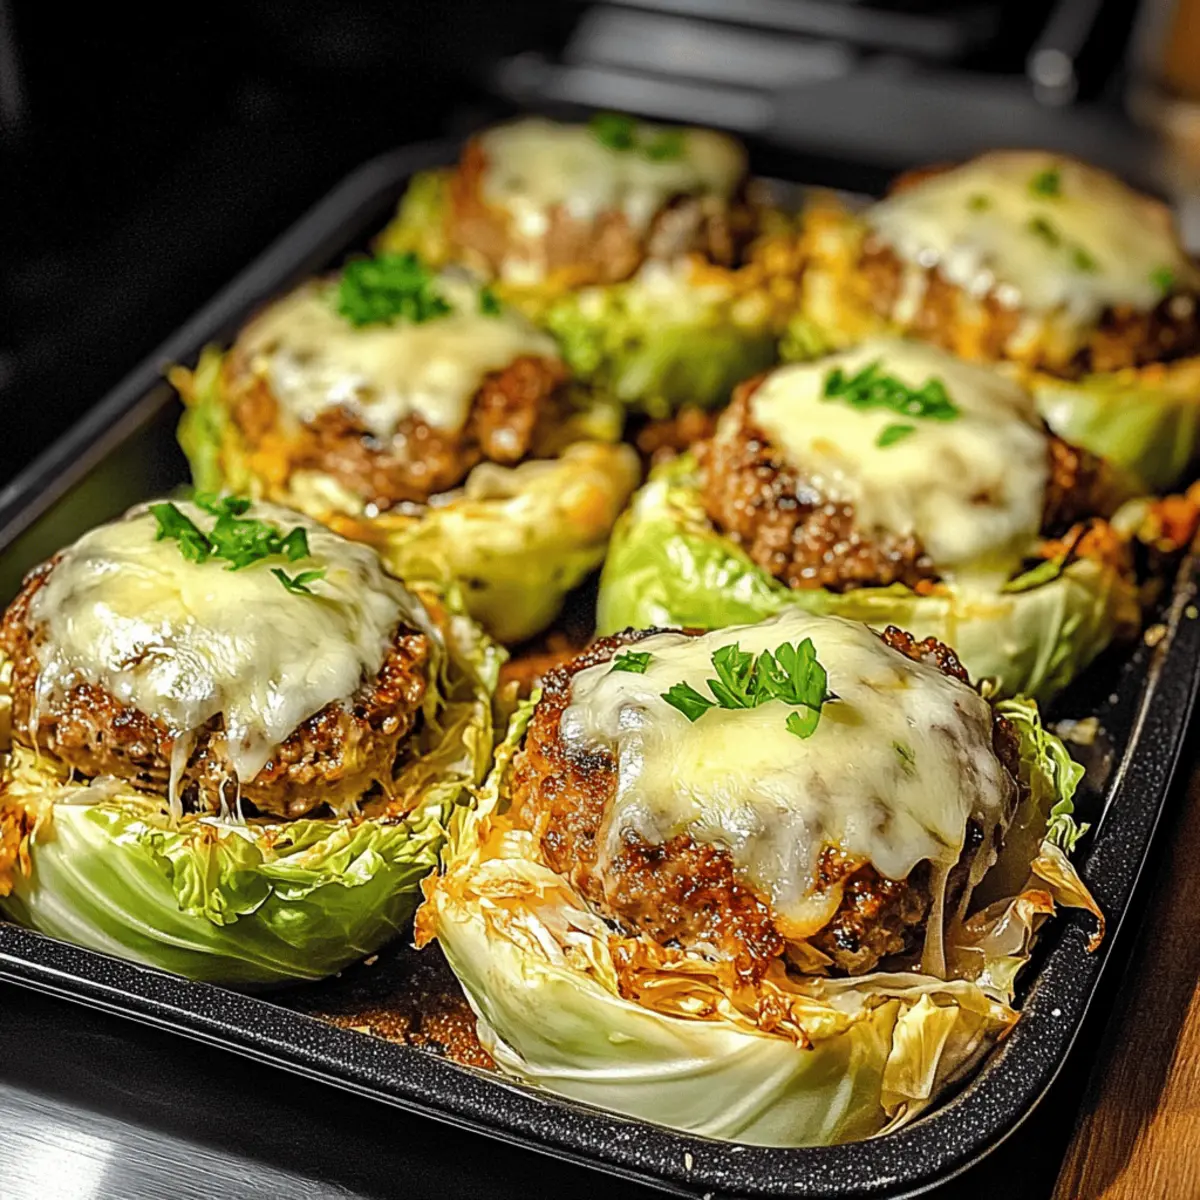
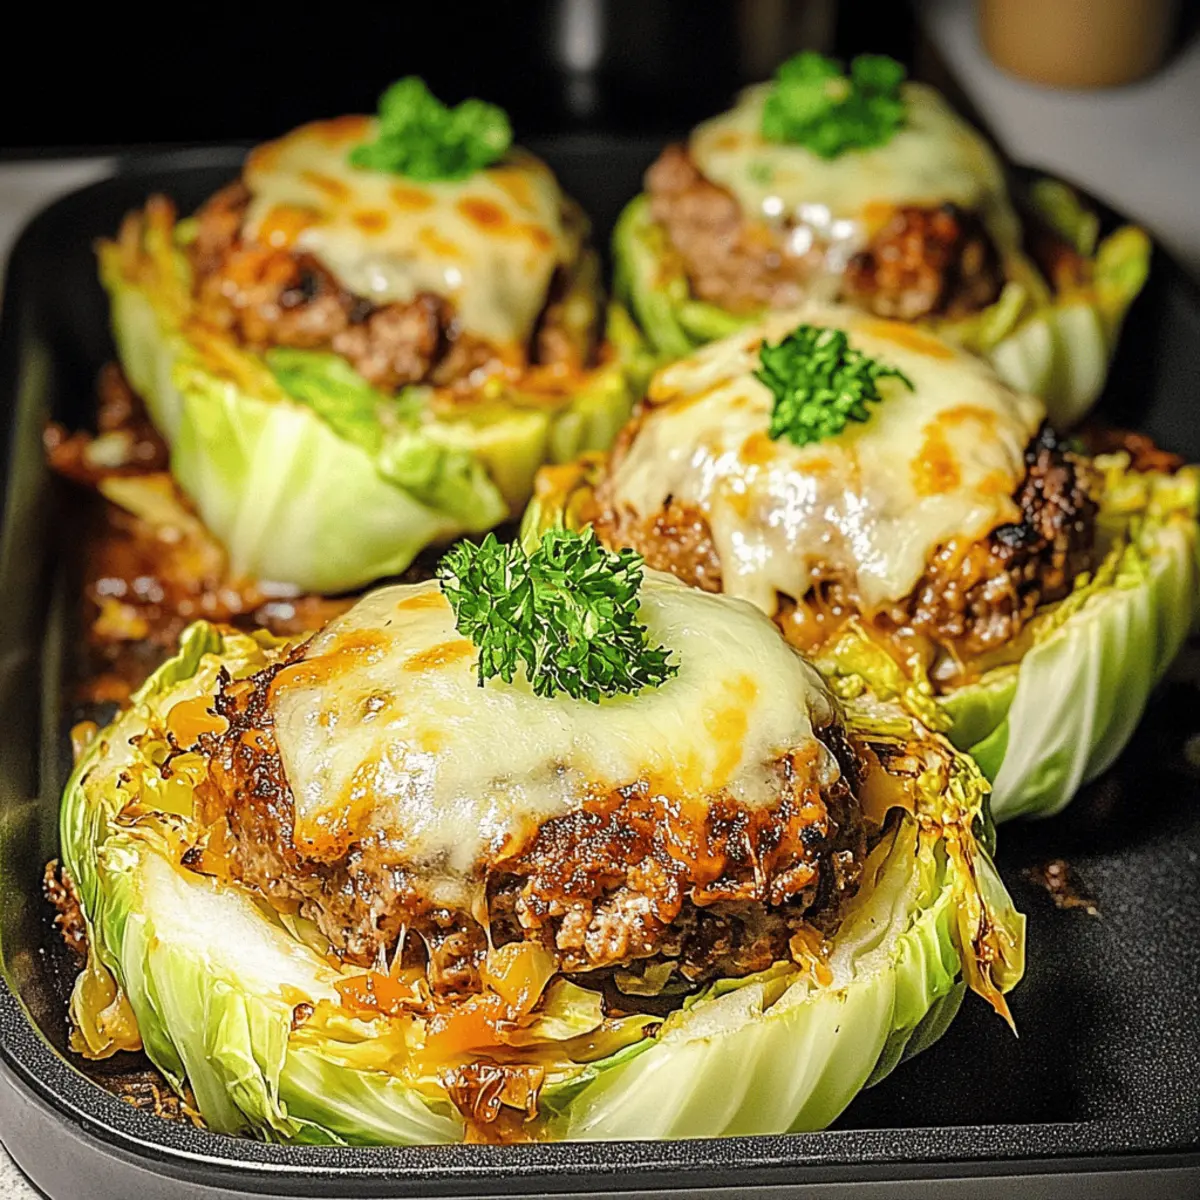
Oven-Baked Cabbage Burgers: A Healthy Twist on Classic Flavor

As I watched my son dive into a classic burger, I felt the familiar tug of nostalgia paired with a dash of guilt. That’s when the idea struck: why not swap traditional buns for something lighter and healthier? Enter these Oven-Baked Cabbage Burgers! This innovative recipe offers a deliciously satisfying alternative without the carb overload, making it perfect for those busy weeknights when quick meals are a must. Not only are these burgers customizable with various meat options—beef, turkey, chicken, or even plant-based alternatives—but they also guarantee a mouthwatering crunch that you won’t want to resist. Curious about how to pull this dinner transformation off? Let’s get cooking!

Why Choose Oven-Baked Cabbage Burgers?

Innovative Twist: These Oven-Baked Cabbage Burgers offer a creative and healthy alternative to your regular burger experience.

Low-Carb Delight: Embrace the low-carb lifestyle without sacrificing flavor—enjoy all the satisfaction with none of the guilt!

Quick and Easy: Perfect for busy weeknights, this recipe requires minimal prep and cooks up in just 25 minutes.

Versatile Options: Customize your burgers with your choice of meat—beef, turkey, chicken, or plant-based—making it a crowd-pleaser for everyone.

Crunchy Satisfaction: The crispy cabbage gives a delightful textural contrast to the juicy meat, elevating your burger experience.

For an extra flavor adventure, consider pairing these burgers with some zesty dipping sauces or serving them alongside a fresh salad. You’ll love how simple and delicious healthy eating can be!

Oven-Baked Cabbage Burgers Ingredients

For the Cabbage:
Cabbage – A satisfying low-carb alternative to traditional burger buns; choose a small head of cabbage cut into thick slices.
Olive Oil – Brush both sides of the cabbage with olive oil for crispiness and added flavor.

For the Meat Mixture:
Ground Beef or Turkey – The star protein; feel free to swap in ground chicken or plant-based options for variety.
Onion (finely chopped) – Adds a touch of sweetness and depth to your meat mixture.
Garlic (minced) – Brings an aromatic kick that enhances overall flavor.
Salt and Black Pepper – Basic seasonings to elevate the taste to perfection.
Smoked Paprika – Introduces a delightful smoky flavor that will surprise your palate.
Worcestershire Sauce – Adds umami and moisture to keep the burgers juicy.
Egg (optional) – A binding agent to hold the mixture together; omit for a lower-carb option.

For Topping (Optional):
Cheese – Sprinkle on top before broiling if you want that creamy, melted goodness.

These Oven-Baked Cabbage Burgers are your ticket to a healthier, flavor-packed meal that the whole family will enjoy!

Step‑by‑Step Instructions for Oven-Baked Cabbage Burgers

Step 1: Preheat the Oven
Start by preheating your oven to 375°F (190°C). This step is crucial for ensuring that your Oven-Baked Cabbage Burgers cook evenly and achieve that perfect golden-brown finish. While the oven heats, you can gather the ingredients and prepare the cabbage and meat mixture.

Step 2: Prepare the Cabbage
Slice a small head of cabbage into thick ½ inch slices. Arrange the cabbage rounds on a lined baking sheet and brush both sides generously with olive oil. This will contribute to a lovely crisp texture when baked and prevent sticking. Make sure they’re evenly coated for that beautiful crunch and vibrant color.

Step 3: Mix the Meat Mixture
In a large mixing bowl, combine your ground beef or turkey, finely chopped onion, minced garlic, smoked paprika, Worcestershire sauce, salt, and black pepper. If you’re using an egg for binding, add it now. Mix everything together until well-combined, ensuring every bite of your Oven-Baked Cabbage Burgers is full of flavor.

Step 4: Shape the Patties
Once your meat mixture is ready, it’s time to form the patties. Grab a handful of the mixture and shape it into a patty, making sure it fits comfortably atop the cabbage slices. Place each patty on a cabbage round, ensuring they are evenly spaced to allow for even cooking and browning.

Step 5: Bake the Burgers
Slide the baking sheet with your cabbage burgers into the preheated oven. Bake for about 25 minutes, or until the meat is fully cooked and reaches an internal temperature of 160°F (71°C). You’ll know they are ready when the cabbage is tender and the patties are nicely browned.

Step 6: Broil with Cheese
If you’re a fan of melted cheese, remove the pan from the oven and sprinkle your choice of cheese over each patty. Return them to the oven and set to broil for an additional 3 to 5 minutes, keeping a close watch until the cheese is melted and bubbly, with a delightful golden color.

Step 7: Serve and Enjoy
Once broiling is done, remove the Oven-Baked Cabbage Burgers from the oven. If desired, garnish with fresh chopped parsley for a pop of color. Serve with your favorite dipping sauces or alongside a fresh salad for a complete and satisfying meal.

Make Ahead Options

These Oven-Baked Cabbage Burgers are perfect for meal prep enthusiasts looking to save time during busy weeknights! You can prepare the meat mixture up to 24 hours in advance by combining the ground meat, onion, garlic, and seasonings, then refrigerate in an airtight container. The cabbage can be sliced and brushed with olive oil up to 3 days ahead; just keep it covered in the fridge to maintain freshness. When you’re ready to eat, simply place the patties on the cabbage slices and bake as directed, making for hassle-free and wholesome dinners without sacrificing flavor! Enjoy the same delicious experience with minimal effort!

What to Serve With Oven-Baked Cabbage Burgers?

The aromatic warmth and crunchy texture of these burgers can be perfectly complemented with a variety of sides that elevate your meal experience.

  • Crispy Sweet Potato Fries: These offer a delightful sweetness and crunch that pairs beautifully with the savory cabbage burgers, making every bite a joy.

  • Zesty Coleslaw: A refreshing mix of cabbage and carrots with a tangy dressing adds brightness and crunch, balancing the richness of the burger.

  • Garlic Roasted Broccoli: The nutty, caramelized flavor of roasted broccoli enhances the taste while providing a healthy, flavorful contrast to the burgers.

  • Quinoa Salad: This nutritious side, filled with crunchy veggies and a light dressing, offers a satisfying grainy texture that complements the burgers well.

  • Creamy Avocado Dip: A smooth avocado blend brings a luscious creaminess, elevating the taste of your cabbage burgers while providing healthy fats.

  • Chilled Pickles: The tang and crunch of pickles can cut through the richness and provide a punch of flavor that’s simply delightful alongside the burgers.

  • Sparkling Water with Lime: Refresh your palate with this fizzy drink, its citrus complementing the savory notes, perfect for keeping you cool and satisfied.

Each of these pairings brings something unique to the table, ensuring your Oven-Baked Cabbage Burgers shine even brighter at mealtime!

Expert Tips for Oven-Baked Cabbage Burgers

  • Optimal Cabbage Choice: Use small heads of cabbage for consistent sizing in your burgers, ensuring even cooking throughout each cabbage slice.

  • Meat Temperature: Always verify that the meat has reached an internal temperature of 160°F (71°C) to ensure safety while enjoying your delicious Oven-Baked Cabbage Burgers.

  • Flavor Boost: Incorporate fresh herbs like parsley or dill into the meat mixture for an extra burst of flavor that elevates your burgers even further.

  • Browning Technique: Avoid overcrowding the baking sheet; give each burger space to achieve that perfect golden brown and crunchy texture.

  • Cheese Melting Tip: For an even melt, place the cheese under the broiler for just a minute or so, watching closely to prevent burning—this enhances the overall taste.

  • Meal Prep Friendly: Consider doubling the recipe and freezing extras for quick weekday meals—just bake them straight from frozen!

Oven-Baked Cabbage Burgers Variations

Feel free to customize your Oven-Baked Cabbage Burgers and make them uniquely yours!

  • Turkey Swap: Substitute ground beef with lean turkey for a lighter protein option without losing flavor. It brings a slightly different taste but remains juicy and satisfying.

  • Vegetarian Choice: Use mashed beans or lentils instead of meat for a hearty, plant-based burger. You’ll be amazed at how well the spices hold up and keep every bite delicious!

  • Spice It Up: Add chili powder or jalapeños for a spicy kick. This variation transforms your burgers into a flavor-packed fiesta right at home.

  • Herb Infusion: Incorporate fresh herbs like basil or cilantro into the meat mixture. These bright notes elevate the dish and add a refreshing twist, truly enhancing the flavor profile.

  • Cheese Lover’s Delight: Mix shredded cheese into the meat before shaping patties. The melty goodness inside will surprise your taste buds with every bite of these scrumptious burgers!

  • Dipping Sauce Array: Experiment with different sauces—think sriracha mayo or garlic yogurt. A versatile array of sauces can turn your meal into a delightful tasting party!

For more exciting flavor ideas, consider checking out our Pizza Burgers Flavor that might inspire you to get creative! These Oven-Baked Cabbage Burgers are perfect for whatever culinary adventure you choose!

How to Store and Freeze Oven-Baked Cabbage Burgers

Fridge: Store leftover Oven-Baked Cabbage Burgers in an airtight container for up to 3 days. This keeps them fresh and ready for quick reheating.

Freezer: For longer storage, freeze the assembled burgers on a baking sheet until solid. Then, transfer them to a freezer bag for up to 3 months.

Reheating: Reheat in the oven at 375°F (190°C) for about 15-20 minutes, or until heated through. This helps retain the crispiness of the cabbage.

Prevent Freezer Burn: To avoid freezer burn, make sure to remove excess air from the freezer bag before sealing. This keeps your burgers tasting fresh and delicious!

Oven-Baked Cabbage Burgers Recipe FAQs

How do I choose the right cabbage for this recipe?
Absolutely! Look for a small head of cabbage that feels firm and has vibrant green leaves. Avoid any with dark spots or wilting, as these can indicate overripeness. Fresh cabbage will slice better and provide the crunch you’re looking for in your Oven-Baked Cabbage Burgers.

How long can I store leftover cabbage burgers in the fridge?
You can store your leftover Oven-Baked Cabbage Burgers in an airtight container for up to 3 days. They make for a quick and delicious meal option when you’re short on time!

Can I freeze the cabbage burgers before baking them?
Very! To freeze, arrange the assembled cabbage burgers on a baking sheet and place them in the freezer until solid. Then, transfer them to a freezer bag for up to 3 months. When you’re ready to enjoy, bake them straight from frozen; just add a few extra minutes to the cooking time.

What should I do if my cabbage slices are too small?
Don’t fret! If your cabbage slices are thinner than ½ inch, you can stack two slices together when preparing your burgers. This will help them hold up better and maintain a satisfying crunch during baking.

Are these burgers suitable for people with dietary restrictions?
Absolutely! These Oven-Baked Cabbage Burgers can be made with various meats or vegetarian options to cater to different diets. Just ensure you check the labels on any store-bought ingredients for potential allergens, and feel free to modify the ingredients to fit your needs.

What’s the best way to reheat leftover cabbage burgers?
To reheat, preheat your oven to 375°F (190°C). Place the leftover burgers on a baking sheet and heat for about 15-20 minutes or until warmed through. This method preserves the texture and flavor, helping you enjoy your delicious Oven-Baked Cabbage Burgers as if they were freshly made!

Oven-Baked Cabbage Burgers

Oven-Baked Cabbage Burgers: A Healthy Twist on Classic Flavor

Oven-Baked Cabbage Burgers offer a low-carb, healthy alternative to traditional burgers, perfect for busy weeknights.
Prep Time 10 minutes
Cook Time 25 minutes
Broiling Time 5 minutes
Total Time 40 minutes
Servings: 4 burgers
Course: Dinner
Cuisine: Healthy
Calories: 250

Ingredients
  

For the Cabbage
  • 1 small head Cabbage cut into thick slices
  • 2 tablespoons Olive Oil for brushing
For the Meat Mixture
  • 1 pound Ground Beef or Turkey or ground chicken or plant-based options
  • 1 medium Onion finely chopped
  • 2 cloves Garlic minced
  • 1 teaspoon Salt
  • 1 teaspoon Black Pepper
  • 1 teaspoon Smoked Paprika
  • 1 tablespoon Worcestershire Sauce
  • 1 large Egg optional, for binding
For Topping (Optional)
  • 1 cup Cheese for sprinkling on top

Equipment

  • Oven
  • Baking Sheet
  • Mixing Bowl

Method
 

Step-by-Step Instructions
  1. Preheat your oven to 375°F (190°C).
  2. Slice a small head of cabbage into thick ½ inch slices and brush both sides generously with olive oil.
  3. In a large mixing bowl, combine the ground beef or turkey, onion, garlic, smoked paprika, Worcestershire sauce, salt, and black pepper. Mix well and add the egg if using.
  4. Form the meat mixture into patties and place them on cabbage slices.
  5. Bake the burgers in the preheated oven for about 25 minutes or until fully cooked.
  6. If desired, sprinkle cheese on top and broil for an additional 3 to 5 minutes until melted.
  7. Serve and enjoy, garnished with fresh parsley if desired.

Nutrition

Serving: 1burgerCalories: 250kcalCarbohydrates: 10gProtein: 20gFat: 15gSaturated Fat: 5gPolyunsaturated Fat: 2gMonounsaturated Fat: 8gCholesterol: 70mgSodium: 400mgPotassium: 300mgFiber: 3gSugar: 2gVitamin A: 500IUVitamin C: 30mgCalcium: 150mgIron: 2mg

Notes

Store leftover burgers in an airtight container for up to 3 days, or freeze for up to 3 months.

Tried this recipe?

Let us know how it was!

Garbage Bread: Customize This Comfort Food Delight Today

As I was digging through my fridge one evening, I suddenly found myself surrounded by leftover odds and ends, the remnants of various meals calling out for redemption. That’s when I decided to whip up a batch of Garbage Bread! This quick and easy recipe is a family-friendly feast that cleverly combines the convenience of ready-made French bread dough with a mouthwatering filling of ground beef, crispy bacon, and a medley of your favorite condiments. In just 40 minutes, you can have this versatile dish ready, perfect for busy weeknights or impromptu gatherings. Not only does it cater to varying tastes thanks to its customizable nature, but it also makes for a deliciously portable snack for game day. Ready to dive into this delightful clutter of flavors? Let’s make something truly scrumptious together!

Why is Garbage Bread So Irresistible?

Simplicity: Prepare this tasty dish with just a few basic ingredients and minimal cooking time—ideal for those who want a quick meal without sacrificing flavor.

Endless Customization: Use whatever leftovers or favorite fillings you have on hand, from veggies to different meats. This recipe easily adapts to your palate!

Crowd-Pleasing: Serve it at parties or family dinners; it’s guaranteed to disappear quickly. Everyone loves a deliciously stuffed bread, making it a hit for any occasion!

Versatile Serving Options: Pair it with various dipping sauces like BBQ or ranch for added flavor and an exciting twist.

Budget-Friendly: With affordable ingredients, this Garbage Bread is a great way to stretch your dollar while creating a hearty meal. Don’t miss our tips on storage and reheating to keep leftovers fresh and tasty!

Garbage Bread Ingredients

For the Filling

  • Ground Beef – This protein-rich base adds depth and savory flavor; switch it with ground turkey or chicken for a lighter touch.
  • Diced Onion – Adding sweetness and flavor, this can easily be replaced with shallots or omitted for those who prefer milder flavors.
  • Bacon – It contributes a wonderful crunch and smoky flavor; feel free to use turkey bacon if you’re looking for a healthier option.
  • Chopped Pickles – These provide a zesty crunch; consider jalapeños for a spicy kick or skip them if you want a simpler taste.
  • American Cheese – Melts beautifully for a creamy texture; cheddar or mozzarella can be fun substitutes for unique flavor profiles.

For the Dough

  • French Bread Dough – This convenient option forms a delicious crust; store-bought saves time, but homemade is a delightful alternative if you have the time.

For the Condiment Layer

  • Ketchup – Acts as a flavorful base; BBQ sauce or mustard can be great swaps for those who enjoy a different twist.
  • Mustard – Adds an extra kick; if you’re feeling adventurous, ranch dressing is a tasty alternative.

For the Garnish

  • Egg (for wash) – This gives your bread a golden, glossy finish; skipping it will still result in tasty bread, though not as shiny.
  • Sesame Seeds – Optional but fantastic for an added texture; poppy seeds can work as well or omit entirely for a simpler look.

Now that you have all the essential ingredients ready, you’re one step closer to creating your very own Garbage Bread masterpiece! This dish will not only fill your belly but will also spark joy in your cooking adventure. Happy baking!

Step‑by‑Step Instructions for Garbage Bread

Step 1: Preheat the Oven
Begin by preheating your oven to 350°F (175°C). While the oven heats, prepare a baking sheet lined with parchment paper or lightly coated with non-stick spray. This ensures your delicious Garbage Bread doesn’t stick while baking and allows for easy cleanup.

Step 2: Cook the Filling
In a medium skillet, heat over medium heat and add ground beef and diced onion. Cook until the beef is browned, about 5-7 minutes, breaking it up with a spatula. Once browned, drain excess grease and season with salt and pepper. This savory filling will be the heart of your Garbage Bread, so stir well to combine the flavors.

Step 3: Roll Out the Dough
On a lightly floured surface, roll out your French bread dough into a large rectangle, approximately 12×18 inches. Ensure it’s evenly flattened to help encase the filling properly. The dough should feel soft and pliable, which makes it easier to roll later.

Step 4: Add Condiments
Spread a layer of ketchup and mustard evenly over the dough, leaving about an inch of border around the edges. This condiment base adds flavor and moisture to your Garbage Bread. Feel free to adjust the amount based on your taste preferences, keeping in mind a balance between flavor and overall moisture.

Step 5: Layer the Filling
Carefully layer the cooked beef mixture, crispy bacon, chopped pickles, and American cheese over the condiments. Make sure to distribute them evenly, ensuring each bite of the Garbage Bread is packed with flavor. Avoid overfilling, as this may cause the bread to tear or leak during baking.

Step 6: Roll the Dough
Starting from one of the longer edges, gently roll the dough tightly around the filling, sealing the edges as you go. Once fully rolled up, pinch the seam to secure it and tuck the ends under. This creates a snug log of happiness filled with your deliciously prepared Garbage Bread ingredients.

Step 7: Prepare for Baking
Place the rolled Garbage Bread seam side down on the prepared baking sheet. In a small bowl, whisk an egg and use a brush to coat the top of the bread, giving it that beautiful golden finish as it bakes. If desired, sprinkle sesame seeds on top for added texture and flavor.

Step 8: Bake
Transfer the baking sheet to your preheated oven and bake for 20-25 minutes. Keep an eye on it, and you’ll know it’s ready when the bread turns a lovely golden brown and the aroma fills your kitchen. This is where the magic happens!

Step 9: Cool and Serve
Once baked, remove the Garbage Bread from the oven and allow it to cool for about 5 minutes on a wire rack. This cooling time helps set the filling, making it easier to slice without the insides spilling out. Serve warm with dips like Thousand Island dressing for a tasty treat.

Make Ahead Options

Garbage Bread is perfect for meal prep, allowing you to save time on busy weeknights! You can prepare the filling (ground beef, bacon, and any veggies) up to 3 days in advance; simply store it in an airtight container in the refrigerator. Additionally, you can roll the bread and assemble it up to 24 hours ahead—just tightly wrap it in plastic wrap to maintain quality. When it’s time to bake, remove the wrapping, brush with egg wash, and pop it in the oven straight from the fridge. This way, you’ll enjoy fresh, gooey Garbage Bread just as delicious as if made on the spot, with minimal evening fuss!

Garbage Bread: Customize for More Flavor!

Feel free to let your creativity shine as you explore different twists on this beloved recipe!

  • Veggie Delight: Add bell peppers, mushrooms, or spinach for extra nutrition and flavor. Their fresh crunch will complement the savory filling beautifully.
  • Spice It Up: Incorporate jalapeños or a dash of hot sauce for a delicious kick. The heat balances wonderfully with the cheese and beef.
  • Dairy-Free Option: Use dairy-free cheese alternatives to keep it creamy without the lactose. Cashew-based or almond cheeses melt wonderfully and offer great taste!
  • Meat Swap: Try using ground sausage or chicken for a different protein flavor. Chicken gives a lighter touch, while sausage adds a nice spice!
  • Comforting Cheddar: Swap American cheese for sharp cheddar or pepper jack for added flavor complexity. Every mouthful will be a delightful surprise!
  • Sweet & Savory: Incorporate caramelized onions or even apple slices for a dash of sweetness—you’ll love this contrasting flavor profile!
  • Herb Infusion: Sprinkle fresh herbs like parsley or dill into the filling for a burst of freshness. They elevate the taste significantly!
  • Twist on Dipping Sauce: Serve with homemade ranch dressing or garlic aioli to dip your slices into; it adds an irresistible richness!

Embrace the fun of tweaking this dish, turning it into a new family favorite!

Storage Tips for Garbage Bread

  • Airtight Container: Store leftover Garbage Bread in an airtight container in the fridge for up to 3-4 days to maintain freshness and flavor.

  • Freezer-Friendly: For long-term storage, tightly wrap the cooled Garbage Bread in plastic wrap and foil, then freeze for up to 2 months.

  • Reheating Oven Instructions: When ready to enjoy, reheat in the oven wrapped in foil at 350°F for 15-20 minutes until heated through, keeping that delicious crispy crust!

  • Microwave Option: If you’re short on time, heat individual slices in the microwave on medium power for 1-2 minutes, though the crust may not be as crunchy.

Expert Tips for Garbage Bread

  • Cool Before Slicing: Allow the Garbage Bread to cool for a few minutes after baking to prevent the filling from spilling out when you cut it.

  • Watch the Cheese: Use cheeses that melt well, like American or mozzarella, as substituting may result in a less desirable texture.

  • Don’t Overfill: Avoid the temptation to pack in too much filling. Keep it balanced to prevent leaks while baking!

  • Dough Handling: If using store-bought dough, let it come to room temperature for easier rolling and shaping, enhancing the final results.

  • Flavor Variations: Experiment with different fillings, like veggies or spices, to elevate your Garbage Bread and tailor it to your family’s tastes.

What to Serve with Garbage Bread?

Each bite of this savory delight begs for the perfect companion to create a truly satisfying meal.

  • Crispy Garden Salad: Fresh mixed greens with cherry tomatoes and a tangy vinaigrette add brightness and crunch that balance the richness of the Garbage Bread. Enjoy the contrast of textures with every bite.

  • Creamy Coleslaw: A cool, creamy coleslaw provides a refreshing crunch and a tangy flavor that complements the savory filling beautifully. It’s a classic pairing that’s always a hit!

  • Zesty Dipping Sauces: Serve with BBQ sauce, ranch, or Thousand Island dressing to dip your slices in. Each sauce elevates the overall flavor, enticing your palate.

  • Roasted Vegetables: A mix of seasonal veggies roasted to perfection brings an earthy sweetness that enhances the Garbage Bread’s savory notes. The vibrant colors and flavors create a feast for the eyes too!

  • Sweet Potato Fries: The slight sweetness and crispiness of these fries make them a delicious accompaniment, contrasting with the savory bread and providing a hearty, satisfying flavor.

  • Mini Cheese Platter: Offer a selection of cheeses, crackers, and fruits for a sophisticated touch. This variety adds a touch of elegance and invites delightful exploration of flavors.

  • Refreshing Lemonade: A glass of freshly squeezed lemonade, with a balance of sweet and tart, is the perfect drink to cut through the richness, providing a refreshing finish!

  • Chocolate Chip Cookies: A warm batch of cookies for dessert offers a delightful sweet note to end your meal. The comfort of cookies perfectly complements the heartiness of Garbage Bread!

Garbage Bread Recipe FAQs

How do I choose the right ground beef for Garbage Bread?
Absolutely! When selecting ground beef, aim for an 80/20 ratio of lean meat to fat for optimal flavor and juiciness. Look for beef that is bright red with minimal dark spots. For a leaner option, ground turkey or chicken works wonderfully, maintaining tenderness while keeping calories in check.

How should I store leftovers of Garbage Bread?
I recommend storing any leftover Garbage Bread in an airtight container in the fridge for up to 3-4 days. This keeps it fresh and ready for you to enjoy again! Just make sure it’s fully cooled before sealing. For longer storage, wrap it tightly in plastic wrap and then aluminum foil, and freeze for up to 2 months.

Can I freeze Garbage Bread and how?
Certainly! To freeze your Garbage Bread, first let it cool completely. Then, wrap each piece tightly in plastic wrap to prevent freezer burn, followed by aluminum foil for extra protection. This method can keep them fresh for up to 2 months! When you’re ready to enjoy, bake it straight from frozen or thaw overnight in the fridge first.

What can I do if my filling leaks during baking?
No worries! If your filling leaks while baking, it’s often due to overfilling or not sealing the edges tightly. For next time, just ensure you don’t pack the filling too heavily and pinch the seams firmly closed. If it does happen, simply let it cool a bit, and use a spatula to scoop up the delicious bits that may have fallen out!

Is Garbage Bread safe for kids? Are there any dietary considerations?
Very! Garbage Bread is a family-friendly meal, perfect for kids and adults alike. However, keep in mind allergies—if your little ones have sensitivities to gluten or dairy, consider using gluten-free dough and dairy-free cheese options. Always check ingredient labels to ensure safety for everyone at the table.

Can I customize the ingredients in my Garbage Bread?
The more the merrier! You can absolutely customize your Garbage Bread to your taste. Feel free to swap ground meats, add veggies like bell peppers or mushrooms, or even switch cheeses for a new flavor experience. This recipe encourages creativity, so get inventive with what’s in your fridge!

Garbage Bread

Garbage Bread: Customize This Comfort Food Delight Today

Garbage Bread combines leftovers into a delicious dish, perfect for busy nights or gatherings.
Prep Time 15 minutes
Cook Time 25 minutes
Cooling Time 5 minutes
Total Time 40 minutes
Servings: 4 slices
Course: Dinner
Cuisine: American
Calories: 350

Ingredients
  

For the Filling
  • 1 lb Ground Beef can substitute with turkey or chicken
  • 1 cup Diced Onion optional to omit
  • 6 slices Bacon can use turkey bacon
  • 1 cup Chopped Pickles jalapeños can be used for spice
  • 8 oz American Cheese cheddar or mozzarella can be used
For the Dough
  • 1 lb French Bread Dough store-bought or homemade
For the Condiment Layer
  • 1/2 cup Ketchup BBQ sauce is a good alternative
  • 2 tbsp Mustard ranch dressing can also be used
For the Garnish
  • 1 large Egg for wash
  • 2 tbsp Sesame Seeds optional

Equipment

  • medium skillet
  • Baking Sheet
  • Parchment paper
  • Spatula
  • Whisk
  • Brush
  • Wire Rack

Method
 

Step-by-Step Instructions for Garbage Bread
  1. Preheat your oven to 350°F (175°C) and prepare a baking sheet lined with parchment paper or non-stick spray.
  2. In a medium skillet, cook ground beef and diced onion over medium heat until the beef is browned, about 5-7 minutes. Drain excess grease and season.
  3. Roll out your French bread dough into a large rectangle, about 12x18 inches.
  4. Spread a layer of ketchup and mustard on the dough, leaving an inch border around the edges.
  5. Layer the cooked beef mixture, crispy bacon, chopped pickles, and American cheese evenly over the condiments.
  6. Roll the dough tightly around the filling, sealing edges, and pinch the seam.
  7. Place the rolled Garbage Bread seam side down on the baking sheet. Brush the top with egg wash and sprinkle with sesame seeds.
  8. Bake for 20-25 minutes until golden brown.
  9. Let cool for about 5 minutes before slicing. Serve warm with dips.

Nutrition

Serving: 1sliceCalories: 350kcalCarbohydrates: 30gProtein: 20gFat: 18gSaturated Fat: 7gPolyunsaturated Fat: 1gMonounsaturated Fat: 10gCholesterol: 60mgSodium: 800mgPotassium: 300mgFiber: 2gSugar: 4gVitamin A: 500IUVitamin C: 2mgCalcium: 200mgIron: 2mg

Notes

Garbage Bread can be customized with various ingredients and is perfect for using leftovers.

Tried this recipe?

Let us know how it was!

Delightful Pink Witch Punch: The Sparkling Party Favorite

As I mixed up the vibrant hues in my pitcher, a wave of nostalgia washed over me—like a childhood memory resurfacing during a festive gathering. This delightful Pink Witch Punch brings together the refreshing sweetness of pink lemonade, the bubbly sparkle of ginger ale, and the tartness of cranberry juice into one stunning drink that will captivate both the young and young at heart. Not only is this non-alcoholic punch a breeze to whip up, making it an ideal choice for busy party hosts, but it also adds a magical touch to any celebration, from birthday bashes to baby showers. Ready to add a splash of cheer to your next gathering? Let’s dive into this easy recipe that promises to make your guests smile!

Why is Pink Witch Punch a Party Must-Have?

Delightful flavors: The sweet and tart blend of pink lemonade, ginger ale, and cranberry juice ensures every sip is a celebration in itself.

Visually Stunning: Its striking pink hue and sparkly garnishes make it the centerpiece of any table, guaranteed to impress guests.

Kid-Friendly Fun: This non-alcoholic option means everyone can enjoy it, making it perfect for family-friendly events.

Effortless preparation: With just a few simple ingredients and steps, you can whip up this drink in no time.

Versatile variations: Feel free to customize with fruits or adjust sweetness levels – it’s your punch, your way!

Wonderful pairing: Serve this punch alongside delicious snacks like Beef Cheese Roll or colorful veggie platters for a festive feast.

Delightful Pink Witch Punch Ingredients

For the Punch Base

  • Ginger Ale – Adds effervescence and sweetness; ensure it’s chilled for maximum fizz.
  • Pink Lemonade – Provides a fruity base and vibrant color; substitute with regular lemonade mixed with cranberry juice for a similar hue.
  • Cranberry Juice – Gives a delightful tartness and beautiful rose color; opt for unsweetened juice for a less sweet taste.

For the Garnish

  • Whipped Topping – Lends a creamy texture and festive look; can be replaced with whipped coconut cream for a dairy-free option.
  • Edible Pink Glitter – Enhances visual appeal, adding a touch of magic; use sparingly for best effect.
  • Pink Sanding Sugar – Perfect for rimming glasses, adding decorative flair and sugary flavor.
  • Sliced Fruit – Elevates presentation with colors and flavors; use strawberries, oranges, or lemons for added zest.

Extras

  • Ice – Keeps the punch chilled and refreshing; avoid large cubes to prevent choking hazards for kids.

This delightful Pink Witch Punch is not just a drink; it’s a showstopper that adds joy and sparkle to any gathering!

Step‑by‑Step Instructions for Delightful Pink Witch Punch

Step 1: Chill Ingredients
Begin by ensuring that your pink lemonade, ginger ale, and cranberry juice are thoroughly chilled—about 2 hours in the refrigerator is ideal. This not only enhances the refreshing quality of the punch but also keeps the delightful Pink Witch Punch nicely fizzy when served.

Step 2: Rim the Glasses (Optional)
To add a touch of sparkly elegance, wet the rims of your glasses with lemon juice or plain water. Then dip each rim into the pink sanding sugar to create a delightful sugary finish. Set the glasses aside to dry while you prepare the punch, allowing the sugar to stick perfectly.

Step 3: Mix the Base
In a large punch bowl, gently combine the chilled pink lemonade and cranberry juice—about 4 cups of each. As you mix, stir slowly but thoroughly, ensuring the colors blend beautifully without losing their vibrancy. This colorful mixture forms the flavorful base of your delightful Pink Witch Punch.

Step 4: Add Ginger Ale
Taking your chilled ginger ale, slowly pour it into the punch bowl while lightly stirring to preserve the effervescence. Aim to mix in about 6 cups, allowing the carbonated bubbles to dance around the mixture. You’ll know it’s perfect when your punch glows a lively pink and is bubbling invitingly.

Step 5: Garnish
To elevate the festive appearance, dollop some whipped topping on top of the punch, and sprinkle with edible pink glitter for that magical touch. Add slices of colorful fruit like strawberries and oranges, floating them on the surface to create a striking visual feast in your delightful Pink Witch Punch.

Step 6: Serve Immediately
Using a ladle, gently pour the punch into each glass—filled halfway will keep it refreshing. Serve right away while it’s nice and cold to maximize that fizzy experience. The vibrant hues and delightful presentations will surely capture your guests’ hearts at your next event!

What to Serve with Delightful Pink Witch Punch

Create a magical gathering that tantalizes taste buds and delights all ages with these perfect pairings!

  • Cheesy Appetizers: Perfectly paired with savory bites, gooey cheese pulls will complement the punch’s sweetness beautifully. Consider serving stuffed mushrooms or cheese-stuffed jalapeños for a contrasting flavor profile.

  • Fruit Skewers: Vibrant and fresh, these add a crunchy texture and refreshing bite. Mix strawberries, pineapple, and kiwi for a colorful display that mirrors the enchanting hues of your punch.

  • Mini Sandwiches: Create a variety of flavors for a delightful spread. Think ham and cheese, cucumber and cream cheese, or turkey club-style, which all balance well against the fruity drink.

  • Sugar Cookies: Sweet and soft, these treats are a fun way to tie in the festive spirit. Consider decorating them with pink icing and sprinkles to match the enchanting theme.

  • Colorful Veggie Platters: Offer crisp veggies like carrots, bell peppers, and cherry tomatoes for a fresh contrast. Serve them with a dip that will round off the meal nicely without overpowering the fizzy punch.

  • Sparkling Water: To keep the bubbly vibe going, offer flavored sparkling water as a lighter alternative. This can also serve as a mixer for other guests who might enjoy a less sweet option.

These pairings will not only enhance your delightful Pink Witch Punch but also create a memorable experience for all your guests!

How to Store and Freeze Delightful Pink Witch Punch

Fridge: Store any leftover Pink Witch Punch in an airtight container in the refrigerator for up to 2 days to maintain its refreshing taste.

Freezer: For longer storage, freeze the punch in ice cube trays. Use within 3 months; these cubes can be added to future beverages for an extra festive touch.

Reheating: This punch is best served cold and does not require reheating, ensuring the delightful Pink Witch Punch is enjoyed at its fizziest.

Serving: If serving after refrigeration, give the punch a gentle stir to refresh the flavors and carbonation before serving.

Make Ahead Options

If you’re a busy home cook looking to simplify your party planning, this delightful Pink Witch Punch is perfect for meal prep! You can mix the punch base (pink lemonade and cranberry juice) up to 24 hours in advance, storing it in the refrigerator to maintain its fizz. However, wait to add the ginger ale until just before serving to ensure the punch stays bubbly and refreshing. For garnishes, prepare the sliced fruit up to 3 days ahead and keep them refrigerated in an airtight container. Just before serving, add the chilled ginger ale, garnish with whipped topping and edible glitter, and enjoy your time-saving punch, bursting with flavor and festivity!

Delightful Pink Witch Punch Variations

Feel free to get creative with your Pink Witch Punch to make it even more special for your occasion!

  • Citrus Twist: Mix in some freshly squeezed lemon or orange juice for a zesty kick that elevates the flavor. A splash of citrus can add brightness to the sweet and tart balance.

  • Berry Boost: Add muddled strawberries or raspberries to the punch for a fruity explosion. This not only enhances the taste but adds beautiful visual appeal as the berries float.

  • Tropical Vibe: Swap pink lemonade for coconut water for a refreshing tropical twist that’s both hydrating and delicious. You’ll find the coconut flavor perfectly complements the sweetness of the punch.

  • Sparkling Punch: For a fizzy flair, substitute some ginger ale with sparkling water or club soda to lighten up the punch. It may not be as sweet, but it’s perfectly refreshing, too!

  • Herbal Infusion: Add a few fresh mint leaves to the mix for a refreshing herbal touch. It’s a simple way to elevate your punch with unexpected freshness.

  • Candy Crush: Top with crushed strawberry or watermelon candies for a sweet layer and a pop of color. The candies will dissolve slightly, imparting a fun sweetness!

  • Frozen Fruit Cubes: Instead of ice, use frozen fruit cubes made from juice or pureed fruit. This not only keeps the punch cool but impressively showcases the vibrant colors as they melt.

  • Customized Sweetness: Adjust the sweetness level by using less cranberry juice or switching to a stevia-sweetened lemonade, ideal for those who prefer a lighter drink. It’s a great way to tailor the punch to your guests’ tastes.

These variations will not only personalize your delightful Pink Witch Punch but also create delightful surprises for your guests! For more delicious pairing ideas, check out Mushroom Pasta Delightful or refresh your palate with Strawberry Whipped Ricotta. Enjoy the celebration!

Expert Tips for Delightful Pink Witch Punch

Chill Ingredients: Ensure all liquid ingredients are thoroughly chilled to preserve the fizzy effect and enhance the refreshing taste of your delightful Pink Witch Punch.

Mix Gently: Stir the mixture slowly while combining ingredients to maintain the vibrant colors and carbonation; aggressive stirring can flatten the fizz.

Garnish Smartly: Add whipped topping and edible glitter just before serving to prevent deflation and keep the sparkling appearance intact for an enticing presentation.

Slicing Strategy: Choose fruit slices that complement both the color and flavor of your punch, like strawberries or oranges, to enhance both taste and aesthetics.

Serve Right Away: For the best experience, serve your delightful Pink Witch Punch immediately after mixing to ensure maximum fizz and visual appeal with every glass.

Delightful Pink Witch Punch Recipe FAQs

What kind of pink lemonade should I use?
Absolutely! You can use store-bought pink lemonade for convenience or make your own using fresh lemons and cranberry juice. If you’re feeling adventurous, a mix of regular lemonade and cranberry juice can also create a beautiful pink hue.

How should I store leftover Pink Witch Punch?
For sure! Store any leftover Pink Witch Punch in an airtight container in the refrigerator for up to 2 days. This helps maintain its fizz and flavors. Just remember to give it a gentle stir before serving again to refresh its vibrant personality!

Can I freeze Pink Witch Punch?
Yes, you can! To freeze, pour the leftover punch into ice cube trays and freeze for up to 3 months. These delightful Pink Witch Punch cubes can be used in future beverages to add a burst of flavor and sparkle, making it a fun way to enjoy later on!

What if my punch loses its fizz?
Very good question! If your punch isn’t as bubbly as you’d like, it might be that the ginger ale was stirred too aggressively. To avoid this next time, gently mix your ingredients, especially after adding the ginger ale. Also, ensure your ingredients are well chilled before mixing.

Is this punch suitable for children and pets?
Absolutely! This punch is a non-alcoholic treat perfect for kids, making it an excellent choice for family gatherings. Just a heads-up: while the ingredients are safe for kids, always keep an eye on pets around sugary drinks, as the sugar content isn’t suitable for them.

What if I want to make the punch less sweet?
Very easily done! If you find the punch a bit too sweet, consider using unsweetened cranberry juice and reducing the amount of pink lemonade. You can also add more ginger ale to balance the sweetness while maintaining that delightful sparkle!

Delightful Pink Witch Punch

Delightful Pink Witch Punch: The Sparkling Party Favorite

Delightful Pink Witch Punch combines pink lemonade, ginger ale, and cranberry juice for a refreshing, non-alcoholic party drink.
Prep Time 10 minutes
Chilling Time 2 hours
Total Time 2 hours 10 minutes
Servings: 8 cups
Course: Drinks
Cuisine: American
Calories: 90

Ingredients
  

For the Punch Base
  • 6 cups Ginger Ale Ensure it's chilled for maximum fizz.
  • 4 cups Pink Lemonade Provides a fruity base.
  • 4 cups Cranberry Juice Opt for unsweetened for less sweetness.
For the Garnish
  • 1 cup Whipped Topping For a creamy texture.
  • 1 tablespoon Edible Pink Glitter Enhances visual appeal.
  • 1 cup Pink Sanding Sugar For rimming glasses.
  • 1 cup Sliced Fruit Use strawberries, oranges, or lemons.
Extras
  • 1 bowl Ice Avoid large cubes for safety.

Equipment

  • large punch bowl
  • ladle
  • glasses

Method
 

Step-by-Step Instructions
  1. Chill all liquid ingredients in the refrigerator for at least 2 hours.
  2. Wet the rims of your glasses and dip into pink sanding sugar to create a sugary finish.
  3. In a large punch bowl, combine chilled pink lemonade and cranberry juice.
  4. Slowly pour in the ginger ale while gently stirring.
  5. Dollop whipped topping and sprinkle edible pink glitter on top.
  6. Serve right away in glasses, filling halfway.

Nutrition

Serving: 1cupCalories: 90kcalCarbohydrates: 22gSodium: 10mgSugar: 20gVitamin C: 15mg

Notes

This punch can be stored in an airtight container in the fridge for up to 2 days, or frozen in ice cube trays for up to 3 months.

Tried this recipe?

Let us know how it was!

Sweet Chocolate Chip Cookies That Melt in Your Mouth

The sweet aroma of baking cookies wafting through my kitchen can instantly brighten my mood, especially when it involves these delightful Sweet Chocolate Chip and Toffee Shortbread Cookies. The moment you sink your teeth into this buttery goodness, you’re met with a satisfying crunch from the toffee bits followed by the rich sweetness of mini chocolate morsels. What I love most about this recipe is that it’s not only an indulgent treat but also incredibly easy to whip up, making it perfect for anyone, from busy families to novice bakers. Plus, these cookies are sure to impress at any gathering, bringing friends and loved ones together over a warm plate of goodness. Ready to satisfy your sweet tooth? Let’s get baking!

Why Are These Cookies So Irresistible?

Deliciously Melty: The heavenly combination of mini chocolate morsels and crunchy toffee creates a flavor explosion in every bite.

Easy to Make: Perfect for beginners, this recipe is straightforward, requiring just a few simple ingredients you likely have on hand.

Ideal for Gatherings: Whether it’s a holiday party or a casual get-together, these cookies always steal the spotlight and bring smiles to everyone who tries them.

Versatile Treat: Feel free to customize by substituting toffee pieces with chopped nuts or dried fruit, catering to different tastes and preferences.

Perfect Pairing: Enjoy them with a cup of coffee or a scoop of vanilla ice cream for an ultimate treat, similar to how I relish my Sweet Hawaiian Crockpot Chicken after a long day. These cookies won’t just satisfy your cravings—they’re bound to become a staple in your baking repertoire!

Sweet Chocolate Chip Ingredients

For the Cookie Dough

  • Salted Butter – Provides a rich flavor; using room-temperature butter ensures a creamy consistency.
  • Confectioners’ Sugar – Sweetens the dough while creating a tender texture; don’t skip this for the right mouthfeel.
  • Vanilla Extract – Enhances overall flavor with a delightful aroma; pure extract has the best taste.
  • All-Purpose Flour – Gives the cookies structure; avoid overmixing to keep them crumbly and light.
  • Mini Chocolate Morsels – Adds a decadent sweetness; coat them in flour before mixing to prevent sinking.
  • Toffee Pieces – Infuses the cookies with a crunchy, caramel flavor; can easily be swapped with chopped nuts for a twist.

Enjoy baking these Sweet Chocolate Chip cookies that melt in your mouth!

Step‑by‑Step Instructions for Sweet Chocolate Chip and Toffee Shortbread Cookies

Step 1: Preheat the Oven
Begin by preheating your oven to 350°F (175°C) and lining baking sheets with parchment paper. This preparation step ensures your cookies bake evenly and don’t stick. Set your baking sheets aside while you move on to mixing the dough, keeping your workspace organized and clean for the best results.

Step 2: Cream the Butter and Sugar
In a mixing bowl, add room-temperature salted butter and confectioners’ sugar. Beat them together using an electric mixer on medium speed until the mixture is light and fluffy, which should take about 2-3 minutes. You’ll know it’s ready when it turns a pale color and has a creamy texture that’s smooth to the touch.

Step 3: Add Vanilla
Next, mix in the vanilla extract, blending until fully incorporated. The aroma of the vanilla will elevate your Sweet Chocolate Chip and Toffee Shortbread Cookies, adding depth to the overall flavor. Take a moment to scrape down the sides of the bowl with a spatula to ensure everything is combined evenly for a perfect mix.

Step 4: Incorporate the Flour
Gradually add the all-purpose flour to the bowl, mixing on low speed just until a soft dough forms. It’s crucial to avoid overmixing to keep your cookies crumbly and tender. When fully combined, you’ll notice the dough clumps together without being sticky, signaling that it’s ready for the chocolate and toffee.

Step 5: Fold in Chocolate and Toffee
With a spatula, gently fold in the mini chocolate morsels and toffee pieces, ensuring they are evenly distributed throughout the dough. This step adds delightful sweetness and crunchy texture to each bite of your cookies. Be careful not to overmix; you want to keep the dough light and airy.

Step 6: Shape the Cookies
Using a cookie scoop or your hands, scoop out 1-inch balls of dough and place them on the prepared baking sheet, spacing them about 1 inch apart. Lightly flatten each ball for even baking and to create a desirable shape. This will help your Sweet Chocolate Chip and Toffee Shortbread Cookies look appetizing once baked!

Step 7: Chill the Dough
If your kitchen is warm, consider chilling the shaped dough for 10-15 minutes. Chilling helps the cookies maintain their shape while baking, resulting in a beautiful final product. If your environment is cooler, you can skip this step and head straight to the oven.

Step 8: Bake the Cookies
Place the baking sheets in the preheated oven and bake for 12-14 minutes. Keep an eye on them; they should feel firm to the touch and have lightly golden edges. The delightful aroma will fill your kitchen, heightening the anticipation of indulging in your Sweet Chocolate Chip and Toffee Shortbread Cookies.

Step 9: Cooling Time
Once baked, remove the cookies from the oven and let them cool on the baking sheet for about 5 minutes. This resting period allows them to set before transferring to a cooling rack. You’ll want a sturdy texture, so giving them this time is essential for your cookies’ success.

Expert Tips for Sweet Chocolate Chip Cookies

Room Temperature Matters: Always use room-temperature butter for a smooth dough and to avoid tough cookies.

Don’t Overmix: When adding flour, mix just until incorporated to keep your Sweet Chocolate Chip cookies tender and crumbly.

Chill for Shape: If it’s warm in your kitchen, chill the dough for 10-15 minutes before baking to prevent spreading and maintain shape.

Watch Baking Time: Keep a close eye on the cookies as they bake; remove them when the edges are golden to avoid dryness.

Cool Before Storing: Allow cookies to cool properly on the baking sheet before transferring to a cooling rack to set their texture.

Sweet Chocolate Chip Variations

Feel free to get creative with these delicious cookies, exploring flavors and textures that speak to you!

  • Nutty Delight: Swap toffee pieces for chopped walnuts or pecans to add a wholesome crunch. The earthiness of nuts pairs beautifully with chocolate.

  • Fruit Fusion: Substitute mini chocolate morsels with dried cranberries or cherries. This sweet-tart addition will give a refreshing twist that elevates every bite.

  • Double Chocolate: Replace half of the all-purpose flour with unsweetened cocoa powder. This swap creates rich chocolate cookies that chocolate lovers will adore.

  • Cinnamon Spice: Add a teaspoon of ground cinnamon to the dough for a warm, spicy flavor. This is perfect for cozy winter evenings, pairing wonderfully with a hot beverage.

  • Gluten-Free Goodness: Use a 1:1 gluten-free baking blend instead of all-purpose flour. Enjoy the same delightful taste without the gluten!

  • Caramel Drizzle: Top baked cookies with a warm caramel sauce. This extra layer of sweetness complements the toffee and chocolate, taking indulgence to a whole new level!

  • Salted Caramel: Sprinkle flake sea salt on top of the cookies right before baking. The salty-sweet flavor will create an irresistible crunch.

  • Spicy Kick: Add a pinch of cayenne pepper or chili powder to the dough for a unique and surprising heat. This twist will tantalize your taste buds with a sweet and spicy combination.

As you experiment, remember to enjoy these cookies with a cozy drink or even try pairing them with some of my favorite recipes like White Chocolate Cranberry or Zucchini Sweet Potato Skillet for delightful variations in your baking adventures!

Storage Tips for Sweet Chocolate Chip Cookies

Room Temperature: Store your Sweet Chocolate Chip and Toffee Shortbread Cookies in an airtight container at room temperature for up to a week. Layer them with parchment paper to prevent sticking.

Fridge: If you prefer storing them in the fridge, they can last for up to 10 days. Make sure to seal them well to maintain their flavor and texture.

Freezer: For longer storage, freeze the cookies in a single layer on a baking sheet, then transfer to an airtight container or freezer bag for up to 3 months.

Reheating: To enjoy fresh-tasting cookies, reheat frozen cookies in a preheated oven at 350°F (175°C) for about 5-7 minutes. This will revive their melty chocolate goodness!

What to Serve with Sweet Chocolate Chip and Toffee Shortbread Cookies

Imagine the delightful companionship of flavors that can take your cookie experience to the next level, making it truly memorable.

  • Warm Milk: The classic pairing; dunking these cookies into warm milk enhances their sweetness while providing a comforting element.
  • Coffee Bliss: A robust cup of coffee counters the sweetness of the cookies, creating a delightful balance to fuel your afternoon.
  • Vanilla Ice Cream: Serve these cookies warm with a scoop of vanilla ice cream for an indulgent dessert that combines textures and temperatures beautifully.
  • Fruit Salad: A refreshing fruit salad adds a vibrant, tangy contrast that brightens the richness of the cookies and cleanses the palate.
  • Hot Chocolate: For those cozy nights, a steaming mug of rich hot chocolate will beautifully complement the sweet chocolate and toffee notes.
  • Caramel Sauce: Drizzle warm caramel sauce over the cookies for an extra layer of decadence that will surely please your guests.
  • Red Wine: A glass of fruity red wine can elevate the cookie’s flavors, making dessert feel a bit more sophisticated and indulgent.
  • Cheese Plate: Pair with soft cheeses like brie for those who enjoy a sweet and savory contrast, it adds a gourmet touch to your cookie experience.
  • Chocolate Milkshake: For a fun twist, make a chocolate milkshake to enjoy alongside these cookies for a nostalgic, delicious treat!
  • Coconut Macaroon Cookies: Enhance your cookie platter with chewy coconut macaroons for varied flavors and textures that will delight the entire family.

Make Ahead Options

These Sweet Chocolate Chip and Toffee Shortbread Cookies are perfect for busy home cooks who want to save time during the week! You can prepare the cookie dough up to 3 days in advance by mixing everything as instructed and then covering it tightly with plastic wrap before refrigerating. This way, the flavors meld beautifully, ensuring that your cookies taste just as delightful as if they were made fresh that day. When you’re ready to bake, simply scoop and shape the chilled dough into balls, then bake as directed. Enjoy the convenience of having homemade cookies at your fingertips without the last-minute rush!

Sweet Chocolate Chip and Toffee Shortbread Cookies Recipe FAQs

What type of butter should I use?
I highly recommend using salted butter for that rich flavor that enhances the overall taste of your Sweet Chocolate Chip and Toffee Shortbread Cookies. European-style butter can elevate your treat even further, but any good-quality salted butter at room temperature will work beautifully.

How long can I store these cookies, and how?
Store your Sweet Chocolate Chip and Toffee Shortbread Cookies in an airtight container at room temperature for up to a week. If you layer them with parchment paper, it will prevent them from sticking together. For longer storage, freeze them in an airtight container or freezer bag for up to 3 months.

Can I freeze the cookie dough?
Absolutely! To freeze the dough, scoop the 1-inch balls and place them on a baking sheet in a single layer. Freeze until solid, then transfer them to a freezer bag or container. You can store the frozen dough for up to 3 months. When you’re ready to bake, just add an additional minute or two to the usual baking time.

What do I do if my cookies come out flat?
If your Sweet Chocolate Chip and Toffee Shortbread Cookies spread too much, it may be due to warm butter or overmixing the dough. To remedy this, I suggest chilling the dough for about 30 minutes before baking. Additionally, ensure your butter is just soft and not melting. Measures like these can help keep your cookies nice and thick!

Are there any dietary considerations for these cookies?
These cookies contain gluten and dairy. For gluten-free options, substitute all-purpose flour with a gluten-free blend; try using a 1:1 flour substitute for the best results. If there are concerns regarding allergies, remember the recipe contains butter and chocolate, which may not be suitable for everyone. Always check ingredient labels if you’re baking for those with special dietary needs.

Sweet Chocolate Chip

Sweet Chocolate Chip Cookies That Melt in Your Mouth

Indulge in these Sweet Chocolate Chip cookies that are easy to make and perfect for any gathering.
Prep Time 15 minutes
Cook Time 14 minutes
Chilling Time 15 minutes
Total Time 44 minutes
Servings: 24 cookies
Course: Dessert
Calories: 120

Ingredients
  

For the Cookie Dough
  • 1 cup Salted Butter Room temperature
  • 1 cup Confectioners' Sugar For sweetness and texture
  • 1 teaspoon Vanilla Extract Use pure for best flavor
  • 2 cups All-Purpose Flour Avoid overmixing
  • 1 cup Mini Chocolate Morsels Coat in flour to prevent sinking
  • 1 cup Toffee Pieces Can substitute with chopped nuts

Equipment

  • Mixing Bowl
  • Electric Mixer
  • Cookie Scoop
  • Baking Sheets
  • Parchment paper

Method
 

Step-by-Step Instructions
  1. Preheat your oven to 350°F (175°C) and line baking sheets with parchment paper.
  2. In a mixing bowl, beat room-temperature salted butter and confectioners' sugar together until light and fluffy, about 2-3 minutes.
  3. Mix in the vanilla extract until fully incorporated, scraping down the sides of the bowl as needed.
  4. Gradually add the all-purpose flour on low speed until a soft dough forms, being careful to avoid overmixing.
  5. Gently fold in mini chocolate morsels and toffee pieces until evenly distributed throughout the dough.
  6. Scoop out 1-inch balls of dough and place them on the prepared baking sheet, spacing about 1 inch apart.
  7. Chill the shaped dough for 10-15 minutes if it's warm in your kitchen.
  8. Bake for 12-14 minutes until firm to the touch and with lightly golden edges.
  9. Let the cookies cool on the baking sheet for about 5 minutes before transferring them to a cooling rack.

Nutrition

Serving: 1cookieCalories: 120kcalCarbohydrates: 18gProtein: 1gFat: 6gSaturated Fat: 3gCholesterol: 15mgSodium: 80mgPotassium: 30mgSugar: 9gVitamin A: 200IUCalcium: 10mgIron: 0.3mg

Notes

These cookies can be stored in an airtight container at room temperature for up to a week.

Tried this recipe?

Let us know how it was!

Delightful Christmas Fruit Salad to Brighten Your Holidays

There’s a unique magic in the air as the holiday season rolls around—the twinkle of lights, the warmth of family gatherings, and the tantalizing aroma of festive dishes. This year, why not showcase that magic with a vibrant Christmas Fruit Salad that’s as beautiful as it is delicious? Bursting with sweet and tangy summer fruits, this dish not only adds a festive touch to your table but also serves as a light and refreshing counterbalance to the heavier holiday fare. With quick prep and a dazzling presentation, it’s the perfect crowd-pleaser for potlucks or elegant Christmas dinners. Fancy a twist on your holiday spread? Let’s dive into the delightful world of this festive gem that will leave everyone asking for seconds!

Why is this Christmas Fruit Salad a must-try?

Vibrant Colors: The vivid reds and greens create a stunning centerpiece that enhances your festive table.
Bursting Flavors: A delightful mix of sweet, tart, and juicy fruits keeps every bite exciting.
Quick to Prepare: Perfect for the busy holiday season, it can be made in just minutes.
Healthy Indulgence: Guilt-free and refreshing, it adds a nutritious balance to heavier dishes.
Crowd-Pleasing: Whether at a potluck or your family gathering, this salad will have guests coming back for more! For an added treat, consider pairing it with a Strawberry Spinach Salad as a complementary side.

Christmas Fruit Salad Ingredients

For the Fruit
Green Grapes – Adds sweetness and freshness; can use other seedless grapes as a substitute.
Kiwi – Offers a tangy flavor and vibrant green color; remember to peel and slice before adding.
Apples – Provide a crunchy texture and sweetness; try tart varieties like Granny Smith for a delightful contrast.
Raspberries – Juicy and tangy, these add a pop of red; using fresh yields the best flavor.
Strawberries – Sweet and juicy, slice them before mixing for a beautiful presentation.
Pomegranate Arils – Gives tartness and crunch for a festive touch; can be swapped with cranberries if unavailable.

For the Dressing
Honey – Acts as a sweet and binding agent; using raw honey enhances flavor richness.
Fresh Orange Juice – Adds bright acidity to complement the sweetness of the fruits; lemon juice works for a tart finish as well.
Poppyseeds – Provides texture and a nutty flavor; these are optional but make a lovely garnish.

Now you’re all set to create a delightful Christmas Fruit Salad that will brighten your holidays with every bite!

Step‑by‑Step Instructions for Christmas Fruit Salad

Step 1: Prepare the Fruit
Begin by washing all your fruits thoroughly under cold water. Next, slice the green grapes in half and peel and dice the kiwi into bite-sized pieces, making sure they’re bright green and fresh. Dice the apples while keeping them submerged in a bowl of fresh orange juice to prevent browning. Rinse the raspberries gently to maintain their shape, and slice the strawberries, revealing their juicy interior.

Step 2: Combine the Fruit
In a large mixing bowl, gently add all your prepared fruits: green grapes, kiwi, apples, raspberries, strawberries, and pomegranate arils. Carefully toss them together, taking care not to squish any of the delicate berries. Aim for a colorful mix; the vibrant hues of red and green will create a visually stunning Christmas Fruit Salad that will catch everyone’s eye!

Step 3: Make the Dressing
In a separate small bowl, whisk together the honey, fresh orange juice, and poppyseeds until well combined. The honey should dissolve smoothly, creating a glossy, aromatic dressing that enhances the natural flavors of the fruit. Aim for a consistency that coats the back of a spoon, and don’t be afraid to taste and adjust the sweetness to your liking.

Step 4: Dress the Salad
Just before serving, drizzle the honey poppyseed dressing over the bowl of mixed fruits. Gently toss the salad using a large spoon or spatula to ensure every piece is coated evenly without mashing the fruits. The dressing should tie all components together beautifully, adding a sweet, tangy finish to your festive Christmas Fruit Salad.

Step 5: Chill Before Serving
If you’re not serving the Christmas Fruit Salad immediately, cover the bowl with plastic wrap and refrigerate it for up to six hours. This allows the flavors to meld together while preserving the freshness of the fruits. If you’ve made the dressing ahead of time, store it separately until just before serving to keep the salad vibrant and crisp.

Step 6: Serve with Flair
When ready to impress, scoop the fruit salad into a large glass bowl to showcase its colorful appearance. For an extra festive touch, consider garnishing with additional poppyseeds or a sprig of mint. Your beautifully crafted Christmas Fruit Salad is now ready to brighten your holiday gathering, delighting taste buds with every refreshing bite!

What to Serve with Christmas Fruit Salad

Elevate your holiday feast by pairing this refreshing medley with delightful side dishes that complement its vibrant flavors.

  • Creamy Mashed Potatoes: The smooth and buttery texture offers a comforting contrast to the crisp fruits, creating a well-rounded meal.

  • Honey-Glazed Carrots: Sweet and tender, these glazed carrots enhance the fruity notes with their natural sweetness and festive hue.

  • Spinach Salad with Cranberries: This salad brings a refreshing bitterness and tartness from cranberries, balancing the sweetness of the fruit salad beautifully.

  • Herbed Turkey Breast: Juicy and savory, a well-seasoned turkey pairs deliciously, balancing the fruit’s sweetness with rich flavors.

  • Stuffed Acorn Squash: The hearty and wholesome stuffing inside the squash provides warmth and earthiness, enriching the festive dining experience.

  • Sparkling White Wine: This bubbly drink refreshes the palate and elevates the festive atmosphere, perfect for toasting during holiday celebrations.

  • Gingerbread Cookies: A sweet and spicy dessert that pairs wonderfully, offering a delightful contrast to the lightness of the Christmas Fruit Salad.

  • Chocolate Fondue: Indulge guests with luscious melted chocolate for dipping leftover fruits as a fun and interactive dessert option.

Expert Tips for Christmas Fruit Salad

  • Prevent Browning: Coat apple slices in citrus juice to keep them looking fresh and vibrant in your Christmas Fruit Salad.

  • Add Pomegranate Last: Wait to mix in the pomegranate arils until serving. This keeps their color and texture intact, enhancing your salad’s visual appeal.

  • Use Fresh Ingredients: Always opt for fresh fruits. Frozen can alter the texture, making your salad less enjoyable.

  • Taste as You Go: Don’t hesitate to adjust the sweetness of your dressing. Add more honey if needed; it brings the flavors of the Christmas Fruit Salad to life.

  • Prep Ahead: Wash and cut fruits the day before. Store them in airtight containers to save time and maintain freshness on serving day.

How to Store and Freeze Christmas Fruit Salad

Fridge: Store any leftover Christmas Fruit Salad in an airtight container in the refrigerator for up to 3 days to maintain freshness.

Room Temperature: Avoid leaving the salad out at room temperature for more than 2 hours to prevent spoilage, especially if served at holiday gatherings.

Reheating: This salad is best served chilled and fresh; there’s no need to reheat. Keep the dressing separate until just before serving for optimal flavor and texture.

Make-Ahead: Prepare the fruits a day in advance, storing them in airtight containers, and mix with the dressing on the day of serving to ensure quality and taste.

Christmas Fruit Salad Variations & Substitutions

Feel free to unleash your creativity and personalize this delightful Christmas Fruit Salad with these tasty twists!

  • Seasonal Swap: Use clementines or tangerines instead of oranges for a sweet, citrusy twist that brings extra brightness to your salad.

  • Berry Burst: Try substituting blueberries for raspberries to add a splash of color and a pop of sweetness that pairs beautifully with the dressing.

  • Creamy Addition: For a decadent touch, mix in a dollop of whipped cream or Greek yogurt into the dressing for a richer, creamier salad experience.

  • Extra Crunch: Add toasted nuts like almonds or walnuts for a satisfying crunch that contrasts beautifully with the soft fruits.

  • Zesty Kick: For a surprise zing, mix in a pinch of cinnamon or fresh ginger to the dressing. This will add depth and warmth, perfect for the holiday season.

  • Tropical Vibes: Replace kiwis with chunks of fresh pineapple or mango for a tropical flair that will make your Christmas Fruit Salad truly unforgettable.

  • Adding Heat: If you love a spicy kick, a sprinkle of red pepper flakes can elevate the flavors and give your salad an exciting edge.

  • Frozen Treat: Turn this fruit salad into a refreshing dessert by blending the fruits with some ice and serving it as a slushy treat. It’s a fun and unique way to enjoy the classic flavors!

As you explore these variations, don’t forget to pair your festive creation with other options like a delicious Tuna Macaroni Salad or an elegant Strawberry Spinach Salad to make your holiday table shine!

Make Ahead Options

These Christmas Fruit Salad preparations are perfect for busy home cooks looking to save time during the hectic holiday season! You can wash and chop all your fruits up to 24 hours in advance, storing them separately in airtight containers in the refrigerator to maintain their freshness and prevent browning (especially the apples). The honey poppyseed dressing can also be prepped ahead of time and stored in a sealed jar for up to 3 days. Just remember to keep the dressing separate until you’re ready to serve, ensuring the salad remains crisp and vibrant. When it’s time to gather around the table, simply mix everything together, and your festive fruit salad will be just as delightful and refreshing!

Christmas Fruit Salad Recipe FAQs

How do I choose ripe fruits for my Christmas Fruit Salad?
Absolutely! When selecting fruits, look for firm grapes without any dark spots, bright green kiwis that yield slightly to pressure, and apples that are crisp with shiny skins. Raspberries should be plump and red, while strawberries need to be deep red and fragrant for the best flavor.

How should I store leftover Christmas Fruit Salad?
For any leftovers, store the Christmas Fruit Salad in an airtight container in the refrigerator. It should stay fresh for up to 3 days. Just remember to keep the dressing separate until you’re ready to serve to maintain the crunch of the fruits.

Can I freeze Christmas Fruit Salad?
While fresh fruit salad isn’t ideal for freezing due to texture changes, you can prep the individual fruits and freeze them. To do this, wash and cut your fruits, spread them on a baking sheet in a single layer, freeze for 2 hours, and then pack in an airtight container. They can last up to 3 months, though they may lose some texture.

How can I prevent the apples from browning in the Christmas Fruit Salad?
Very simply! To keep apple slices looking fresh, coat them in citrus juice, like lemon or orange, immediately after cutting. This not only preserves their color but also adds a nice zing to your salad.

Are there any dietary restrictions I should be aware of with this fruit salad?
Absolutely! While this Christmas Fruit Salad is naturally vegan and packed with vitamins, it’s crucial to check for allergies, especially with fruits like kiwi and pomegranate. If serving to a group, consider labeling the dish for anyone with fruit allergies. Also, if you want a nutty flavor, opt for poppyseeds carefully as some people may have allergies to seeds.

What are some common troubleshooting tips for this Christmas Fruit Salad?
If your salad seems too soggy, limit the time the dressing sits on the fruits. Infuse flavor by mixing the dressing with the fruits just before serving. Additionally, for a sweeter taste, adjust the honey in the dressing to your preference. Enjoy your delicious creation to the very last scoop!

Christmas Fruit Salad

Delightful Christmas Fruit Salad to Brighten Your Holidays

Enjoy a refreshing Christmas Fruit Salad that bursts with summer fruit flavors, perfect for holiday gatherings.
Prep Time 15 minutes
Chill Time 30 minutes
Total Time 45 minutes
Servings: 8 servings
Course: Salad
Cuisine: American
Calories: 120

Ingredients
  

For the Fruit
  • 2 cups Green Grapes Can use other seedless grapes as a substitute.
  • 2 medium Kiwis Peel and slice before adding.
  • 2 medium Apples Tart varieties like Granny Smith work best.
  • 1 cup Raspberries Using fresh yields the best flavor.
  • 1 cup Strawberries Slice them before mixing for presentation.
  • 1 cup Pomegranate Arils Can be swapped with cranberries if unavailable.
For the Dressing
  • 1/4 cup Honey Using raw honey enhances flavor richness.
  • 1/4 cup Fresh Orange Juice Lemon juice works for a tart finish.
  • 1 tablespoon Poppyseeds Optional but a lovely garnish.

Equipment

  • large mixing bowl
  • small bowl
  • Whisk

Method
 

Step-by-Step Instructions
  1. Wash all fruits thoroughly. Slice green grapes in half and peel and dice the kiwi. Dice apples while submerged in orange juice to prevent browning. Rinse raspberries and slice strawberries.
  2. In a large mixing bowl, add all prepared fruits. Toss gently to mix without squishing berries.
  3. In a small bowl, whisk together honey, fresh orange juice, and poppyseeds until smooth.
  4. Drizzle dressing over mixed fruits and toss gently to coat.
  5. If not serving immediately, cover and refrigerate for up to six hours.
  6. Serve in a glass bowl and garnish with extra poppyseeds or mint if desired.

Nutrition

Serving: 1cupCalories: 120kcalCarbohydrates: 30gProtein: 1gSodium: 5mgPotassium: 250mgFiber: 3gSugar: 20gVitamin A: 5IUVitamin C: 60mgCalcium: 2mgIron: 2mg

Notes

For best results, use fresh ingredients and prepare fruits a day in advance. Adjust dressing sweetness to taste.

Tried this recipe?

Let us know how it was!