Grilled Chicken Nuggets: A Simple, Flavor-Packed Recipe!

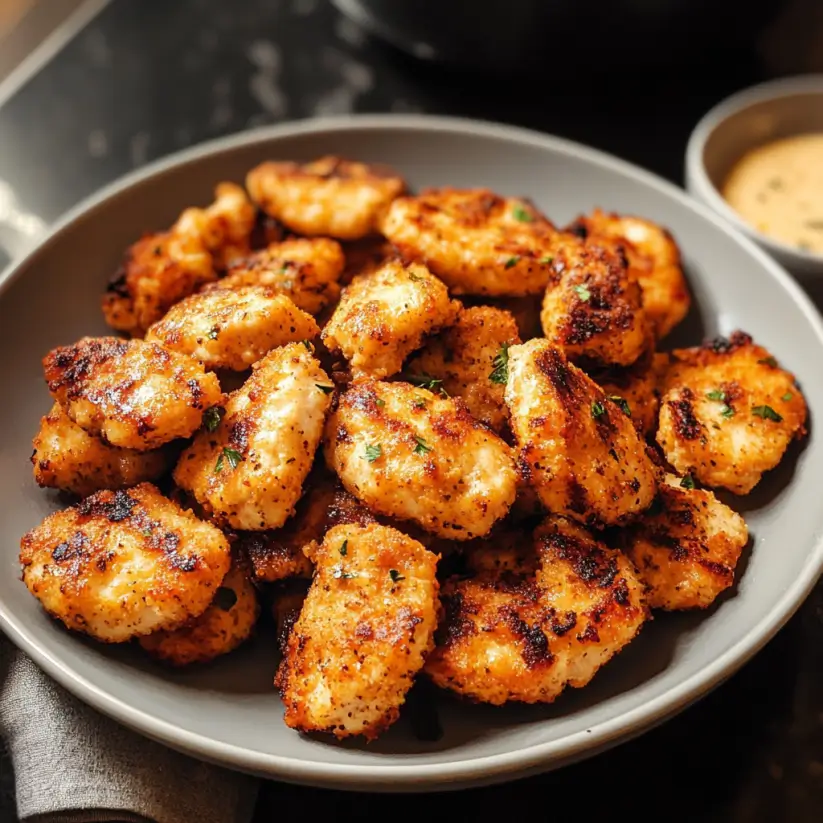
Introduction to Grilled Chicken Nuggets

Grilled Chicken Nuggets are more than just a meal; they’re a ticket to flavor town, especially when life gets hectic. I remember those busy weeknights when cooking felt like a chore. But these nuggets? They’re a quick solution that brings joy to the table without the fuss. Perfect for a family dinner or a snack while binge-watching your favorite show, they’re easy to whip up and even easier to devour. With a handful of ingredients and a grill, you can create something that impresses everyone, from picky eaters to culinary adventurers. Let’s dive into this delicious recipe!

Why You’ll Love This Grilled Chicken Nuggets

These Grilled Chicken Nuggets are a game-changer for anyone looking for a quick, tasty meal. They come together in just 25 minutes, making them perfect for busy weeknights or spontaneous gatherings. The flavor? Absolutely mouthwatering! With a smoky, savory kick, they’ll satisfy your cravings without weighing you down. Plus, they’re a healthier alternative to traditional fried nuggets, so you can indulge guilt-free. What’s not to love?

Ingredients for Grilled Chicken Nuggets

Gathering the right ingredients is the first step to creating these delightful Grilled Chicken Nuggets. Here’s what you’ll need:

  • Boneless, skinless chicken breasts: The star of the show! Tender and juicy, they’re perfect for cutting into bite-sized pieces.
  • Garlic powder: Adds a savory depth that elevates the flavor profile. It’s a must-have in any kitchen!
  • Onion powder: This brings a subtle sweetness and enhances the overall taste without the hassle of chopping onions.
  • Smoked paprika: A game-changer! It imparts a smoky flavor that makes these nuggets irresistible.
  • Salt: Essential for bringing out the natural flavors of the chicken and spices.
  • Black pepper: A dash of heat that complements the other spices beautifully.
  • Cayenne pepper (optional): For those who like a little kick! Adjust the amount to your heat preference.
  • Olive oil: Helps to keep the chicken moist while grilling and adds a rich flavor.
  • Lemon juice: A splash of acidity that brightens the dish and balances the richness of the chicken.
  • Fresh parsley (for garnish): Not just for looks! It adds a fresh, herbal note that enhances the dish.

For exact measurements, check the bottom of the article where you can find everything listed for easy printing. Feel free to get creative with your ingredients! You can swap in your favorite spices or even add a tablespoon of barbecue sauce to the marinade for a different flavor twist.

How to Make Grilled Chicken Nuggets

Creating these Grilled Chicken Nuggets is a straightforward process that anyone can master. Follow these simple steps, and you’ll have a delicious meal ready in no time!

Step 1: Preheat the Grill

Start by preheating your grill or grill pan to medium-high heat. This step is crucial! A hot grill ensures even cooking and helps develop those beautiful grill marks. Plus, it locks in the flavors, giving your chicken nuggets that irresistible smoky taste.

Step 2: Prepare the Marinade

In a large bowl, combine the garlic powder, onion powder, smoked paprika, salt, black pepper, cayenne pepper, olive oil, and lemon juice. Mix well until everything is blended. This marinade is where the magic happens! It infuses the chicken with flavor, making each bite a burst of deliciousness.

Step 3: Marinate the Chicken

Add the bite-sized chicken pieces to the marinade, tossing them until they’re well coated. Let the chicken marinate for at least 15 minutes. If you have time, marinate for up to 2 hours in the refrigerator. The longer it sits, the more flavorful it becomes. Trust me, your taste buds will thank you!

Step 4: Skewer the Chicken

Once marinated, it’s time to skewer the chicken. Thread the pieces onto skewers, leaving a little space between each nugget. This spacing allows for even cooking and helps the heat circulate around each piece. If you’re using wooden skewers, soak them in water for about 30 minutes beforehand to prevent burning.

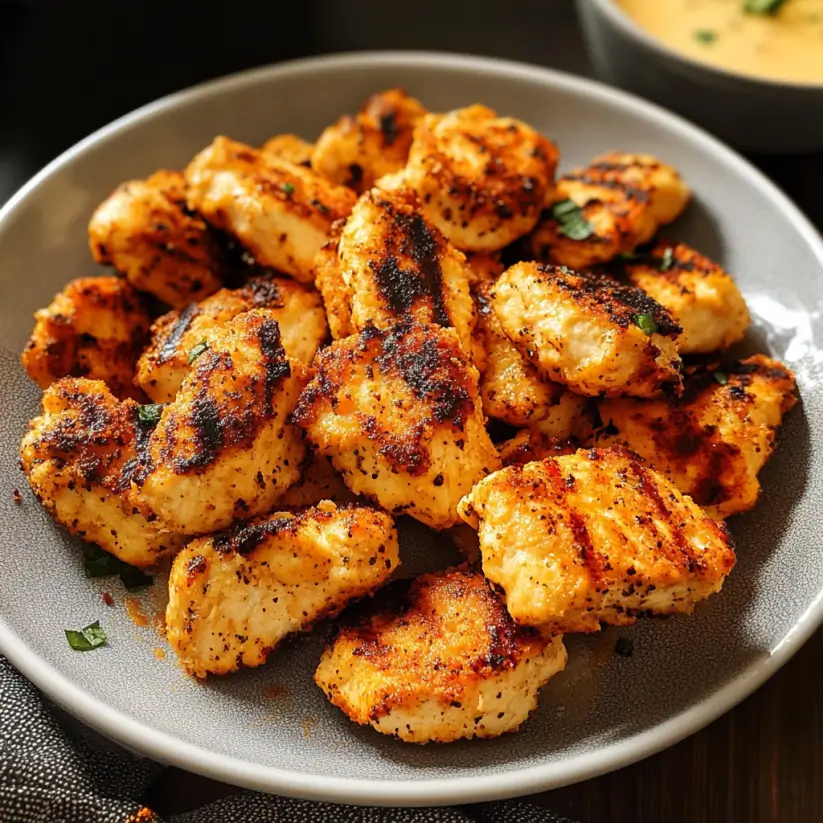
Step 5: Grill the Chicken

Place the skewers on the preheated grill. Cook for about 4-5 minutes on each side. Keep an eye on them! You want the chicken to reach an internal temperature of 165°F. That’s when it’s perfectly cooked and safe to eat. Look for those lovely grill marks as a sign of deliciousness!

Step 6: Rest and Garnish

After grilling, remove the chicken from the grill and let it rest for a few minutes. This resting period allows the juices to redistribute, keeping your nuggets juicy and tender. Finally, garnish with fresh parsley for a pop of color and a hint of freshness. Now, you’re ready to serve!

Tips for Success

  • Always preheat your grill for even cooking and better flavor.
  • Don’t skip the marinating step; it’s key for flavor infusion.
  • Use a meat thermometer to ensure your chicken reaches 165°F.
  • Experiment with different spices or sauces in the marinade for variety.
  • Let the chicken rest after grilling to keep it juicy.

Equipment Needed

  • Grill or Grill Pan: A standard outdoor grill works best, but a stovetop grill pan is a great alternative.
  • Skewers: Wooden or metal skewers are perfect for threading the chicken. If using wooden, soak them first.
  • Mixing Bowl: For combining the marinade and chicken.
  • Meat Thermometer: Essential for checking doneness.

Variations

  • Spicy Buffalo Style: Add a few tablespoons of hot sauce to the marinade for a fiery kick that’s perfect for spice lovers.
  • Herb-Infused: Mix in fresh herbs like thyme or rosemary to the marinade for a fragrant twist.
  • Honey Mustard Glaze: Replace olive oil with honey mustard for a sweet and tangy flavor profile.
  • Asian-Inspired: Incorporate soy sauce, ginger, and sesame oil into the marinade for a delicious Asian flair.
  • Low-Carb Option: Serve with a side of grilled vegetables instead of traditional sides for a healthier meal.

Serving Suggestions

  • Fresh Salad: Pair your nuggets with a crisp garden salad for a refreshing contrast.
  • Dipping Sauces: Serve with honey mustard, ranch, or barbecue sauce for extra flavor.
  • Grilled Veggies: Complement with seasonal grilled vegetables for a colorful plate.
  • Cold Beverages: Enjoy with iced tea or a light beer to balance the meal.

FAQs about Grilled Chicken Nuggets

Can I use chicken thighs instead of breasts for grilled chicken nuggets?

Absolutely! Chicken thighs are juicier and can add a richer flavor to your grilled chicken nuggets. Just be sure to adjust the cooking time slightly, as thighs may take a bit longer to cook through.

How can I make grilled chicken nuggets ahead of time?

To prep ahead, marinate the chicken pieces and store them in the refrigerator for up to 2 hours. You can also grill them in advance and reheat them on the grill or in the oven just before serving. This way, you’ll have a quick meal ready to go!

What dipping sauces pair well with grilled chicken nuggets?

There are plenty of delicious options! Honey mustard, ranch dressing, and barbecue sauce are all fantastic choices. You can even whip up a quick yogurt-based dip for a healthier twist.

Can I freeze grilled chicken nuggets?

Yes, you can! After grilling, let the nuggets cool completely, then store them in an airtight container or freezer bag. They can be frozen for up to three months. Just reheat them in the oven or on the grill when you’re ready to enjoy!

What’s the best way to check if my grilled chicken nuggets are done?

The best way is to use a meat thermometer. Make sure the internal temperature reaches 165°F for safe consumption. If you don’t have one, cut into a nugget; it should be opaque and juices should run clear.

Final Thoughts

Grilled Chicken Nuggets are more than just a meal; they’re a celebration of flavor and simplicity. Each bite is a reminder that cooking can be both fun and rewarding, especially when you share it with family and friends. Whether you’re whipping them up for a quick weeknight dinner or serving them at a weekend gathering, these nuggets are sure to impress. The joy of grilling, the aroma wafting through the air, and the satisfaction of a delicious, healthy dish make this recipe a true winner. So fire up that grill and enjoy the deliciousness!

Ranis

Grilled Chicken Nuggets: A Simple, Flavor-Packed Recipe!

A simple and flavorful recipe for grilled chicken nuggets that are perfect for a quick meal or snack.
Prep Time 15 minutes
Cook Time 10 minutes
Total Time 25 minutes
Servings: 4 servings
Course: Main Dish
Cuisine: American
Calories: 210

Ingredients
  

  • 1 pound boneless skinless chicken breasts, cut into bite-sized pieces
  • 1 teaspoon garlic powder
  • 1 teaspoon onion powder
  • 1 teaspoon smoked paprika
  • 1 teaspoon salt
  • 1/2 teaspoon black pepper
  • 1/4 teaspoon cayenne pepper optional, for heat
  • 2 tablespoons olive oil
  • 1 tablespoon lemon juice
  • 1 tablespoon fresh parsley chopped (for garnish)

Method
 

  1. Preheat your grill or grill pan to medium-high heat.
  2. In a large bowl, combine the chicken pieces, garlic powder, onion powder, smoked paprika, salt, black pepper, cayenne pepper, olive oil, and lemon juice. Toss until the chicken is evenly coated.
  3. Let the chicken marinate for at least 15 minutes to absorb the flavors. For best results, marinate for up to 2 hours in the refrigerator.
  4. Thread the marinated chicken pieces onto skewers, leaving a little space between each piece for even cooking.
  5. Place the skewers on the preheated grill. Cook for about 4-5 minutes on each side, or until the chicken is cooked through and has nice grill marks. The internal temperature should reach 165°F.
  6. Remove the chicken from the grill and let it rest for a few minutes. Garnish with fresh parsley before serving.

Nutrition

Serving: 1servingCalories: 210kcalCarbohydrates: 1gProtein: 30gFat: 10gSaturated Fat: 1.5gPolyunsaturated Fat: 8.5gCholesterol: 70mgSodium: 500mg

Notes

  • For a different flavor, try adding a tablespoon of your favorite barbecue sauce to the marinade.
  • Serve the chicken nuggets with a side of dipping sauce, such as honey mustard or ranch, for added flavor.

Tried this recipe?

Let us know how it was!

Classic Guacamole: Discover the Perfect Recipe Today!

Introduction to Classic Guacamole

There’s something magical about a bowl of classic guacamole. It’s not just a dip; it’s a celebration of flavor and freshness. I remember the first time I made it for friends, and their eyes lit up with delight. This recipe is perfect for any occasion, whether you’re hosting a game night or just need a quick snack after a long day. With just a handful of ingredients, you can whip up a creamy, zesty guacamole that will impress everyone. Trust me, once you try this, you’ll never reach for store-bought again!

Why You’ll Love This Classic Guacamole

This classic guacamole is a game-changer in the kitchen. It’s incredibly easy to make, taking just 10 minutes from start to finish. The fresh ingredients create a burst of flavor that elevates any meal or snack. Plus, it’s versatile! Whether you’re dipping chips, topping tacos, or spreading it on sandwiches, this guacamole adds a delicious twist. You’ll love how it brings people together, making every gathering feel special.

Ingredients for Classic Guacamole

Gathering the right ingredients is the first step to creating your classic guacamole masterpiece. Here’s what you’ll need:

  • Ripe avocados: The star of the show! Look for avocados that yield slightly to gentle pressure for the best creaminess.
  • Medium tomato: Adds a fresh, juicy element. Choose a ripe one for maximum flavor.
  • Small onion: Finely chopped, it brings a nice crunch and sharpness to balance the creaminess of the avocados.
  • Garlic: Just a clove, minced. It adds depth and a savory kick that elevates the dish.
  • Lime: Freshly squeezed lime juice brightens the flavors and prevents the avocados from browning.
  • Salt: A pinch enhances all the flavors, making them pop.
  • Black pepper: Just a dash for a subtle warmth and complexity.
  • Cilantro (optional): If you love it, this herb adds a fresh, vibrant note. If not, feel free to skip it!
  • Jalapeño (optional): For those who like a little heat, minced jalapeño can spice things up. Remove the seeds for a milder flavor.

For exact quantities, check the bottom of the article where you can find everything listed for easy printing. Happy cooking!

How to Make Classic Guacamole

Making classic guacamole is a breeze! Follow these simple steps, and you’ll have a delicious dip ready in no time. Let’s dive in!

Step 1: Prepare the Avocados

Start by cutting the avocados in half. Use a sharp knife to slice around the pit, then twist the halves to separate them. Carefully remove the pit with a spoon or knife. Scoop the creamy flesh into a mixing bowl. The riper the avocados, the easier this will be!

Step 2: Mash the Avocados

Now, grab a fork or a potato masher. Mash the avocados to your desired creaminess. Some like it smooth, while others prefer a bit of chunkiness. Just remember, the more you mash, the creamier it gets!

Step 3: Add Fresh Ingredients

Time to bring in the flavor! Add the diced tomato, chopped onion, minced garlic, lime juice, salt, and black pepper to the bowl. Each ingredient plays a role in creating that classic guacamole taste. Mix them in gently, ensuring everything is well combined.

Step 4: Incorporate Optional Ingredients

If you’re feeling adventurous, stir in the chopped cilantro and minced jalapeño. The cilantro adds a fresh burst, while the jalapeño brings a kick. Adjust the amount based on your heat preference. Not a fan of cilantro? No problem—leave it out!

Step 5: Mix and Taste

Give everything a good mix. Now’s the time to taste your guacamole! Adjust the seasoning if needed. A little more salt or lime juice can make a big difference. Trust your palate; it knows best!

Step 6: Serve or Store

Serve your classic guacamole immediately with tortilla chips, or use it as a topping for tacos or burritos. If you need to store it, cover the surface with plastic wrap to prevent browning. It’ll keep in the fridge for a few hours, but fresh is always best!

Tips for Success

  • Choose ripe avocados for the best flavor and texture; they should yield slightly to pressure.
  • Use fresh lime juice to enhance flavor and keep your guacamole vibrant.
  • For a smoother texture, mash the avocados longer; for a chunkier dip, stop mashing sooner.
  • Adjust seasoning to your taste; don’t be afraid to experiment!
  • Serve immediately for the freshest taste, but store properly if needed.

Equipment Needed

  • Mixing bowl: A medium-sized bowl works best. Any bowl will do if you’re in a pinch!
  • Fork or potato masher: Use either to mash the avocados. A fork gives you more control.
  • Knife: A sharp knife is essential for cutting the avocados and tomato.
  • Spoon: Perfect for scooping out the avocado flesh and mixing ingredients.

Variations of Classic Guacamole

  • Spicy Guacamole: Add more minced jalapeño or a dash of hot sauce for an extra kick.
  • Smoky Guacamole: Incorporate a pinch of smoked paprika or chipotle powder for a rich, smoky flavor.
  • Fruit-Infused Guacamole: Mix in diced mango or pineapple for a sweet twist that pairs beautifully with the creamy avocado.
  • Greek Yogurt Guacamole: Substitute some avocado with Greek yogurt for a tangy, protein-packed version.
  • Herbed Guacamole: Experiment with different herbs like dill or parsley for a unique flavor profile.

Serving Suggestions for Classic Guacamole

  • Pair with crispy tortilla chips for a classic snack.
  • Use as a topping for tacos or burritos to elevate your meal.
  • Serve alongside grilled meats for a fresh contrast.
  • Accompany with a refreshing margarita or cold beer.
  • Present in a colorful bowl, garnished with extra cilantro for a vibrant touch.

FAQs about Classic Guacamole

How do I keep my guacamole from turning brown?

To prevent browning, press plastic wrap directly onto the surface of the guacamole before refrigerating. You can also add extra lime juice, as the acidity helps slow down oxidation.

Can I make guacamole ahead of time?

Yes, you can prepare guacamole a few hours in advance. Just remember to store it properly to maintain freshness. The sooner you serve it, the better the flavor!

What can I use instead of lime juice?

If you don’t have lime juice, lemon juice is a great substitute. It offers a similar acidity and bright flavor that complements the avocados beautifully.

Is guacamole healthy?

Absolutely! Classic guacamole is packed with healthy fats from avocados, fiber, and essential nutrients. It’s a nutritious dip that can enhance your meals without guilt.

Can I freeze guacamole?

While it’s best enjoyed fresh, you can freeze guacamole. Just make sure to store it in an airtight container, leaving some space for expansion. Thaw it in the fridge before serving, but expect some texture changes.

Final Thoughts

Creating classic guacamole is more than just a recipe; it’s an experience that brings joy to any gathering. The vibrant colors and fresh flavors invite everyone to dig in and share stories. Each scoop is a reminder of sunny days and good times with friends and family. Whether you’re enjoying it on game day or as a simple snack, this guacamole adds a special touch to every moment. So, roll up your sleeves, gather your ingredients, and let the magic of homemade guacamole transform your next meal into a celebration of flavor and togetherness!

Ranis

Classic Guacamole: Discover the Perfect Recipe Today!

A simple and delicious recipe for classic guacamole, perfect for any occasion.
Prep Time 10 minutes
Total Time 10 minutes
Servings: 4 servings
Course: Appetizer
Cuisine: Mexican
Calories: 150

Ingredients
  

  • 2 ripe avocados
  • 1 medium tomato diced
  • 1 small onion finely chopped
  • 1 clove garlic minced
  • 1 lime juiced
  • 1/2 teaspoon salt
  • 1/4 teaspoon black pepper
  • 1 tablespoon fresh cilantro chopped (optional)
  • 1 small jalapeño seeded and minced (optional)

Method
 

  1. Cut the avocados in half, remove the pit, and scoop the flesh into a mixing bowl.
  2. Mash the avocados with a fork or potato masher until you reach your desired level of creaminess.
  3. Add the diced tomato, chopped onion, minced garlic, lime juice, salt, and black pepper to the bowl.
  4. If using, stir in the chopped cilantro and minced jalapeño for added flavor and heat.
  5. Mix all the ingredients until well combined. Taste and adjust seasoning if necessary.
  6. Serve immediately with tortilla chips, or cover with plastic wrap pressed directly onto the surface of the guacamole to prevent browning and refrigerate until ready to serve.

Nutrition

Serving: 1/4 of the recipeCalories: 150kcalCarbohydrates: 8gProtein: 2gFat: 14gSaturated Fat: 2gPolyunsaturated Fat: 12gSodium: 200mgFiber: 6gSugar: 1g

Notes

  • For a smoky flavor, add a dash of smoked paprika or chipotle powder.
  • Substitute lime juice with lemon juice for a different citrus twist.

Tried this recipe?

Let us know how it was!

Strawberries and Cream Overnight Oats: A Delicious Start!

Introduction to Strawberries and Cream Overnight Oats

There’s something magical about waking up to a breakfast that’s ready and waiting for you. Strawberries and Cream Overnight Oats are just that—a delightful morning treat that combines the sweetness of fresh strawberries with the creamy goodness of yogurt and oats. This recipe is perfect for those busy mornings when you need a quick solution without sacrificing flavor. Whether you’re rushing to work or enjoying a leisurely weekend brunch, these oats will impress your taste buds and keep you fueled for the day ahead. Trust me, once you try them, you’ll wonder how you ever lived without this easy breakfast!

Why You’ll Love This Strawberries and Cream Overnight Oats

Strawberries and Cream Overnight Oats are a game-changer for breakfast lovers. They’re incredibly easy to whip up, taking just 10 minutes of your time. Plus, they’re versatile—perfect for customizing with your favorite fruits or toppings. The creamy texture and sweet strawberry flavor make each bite a delight. Best of all, they’re a healthy option that keeps you satisfied and energized throughout your busy morning. What’s not to love?

Ingredients for Strawberries and Cream Overnight Oats

Gathering the right ingredients is the first step to creating your delicious Strawberries and Cream Overnight Oats. Here’s what you’ll need:

  • Rolled oats: The base of your dish, providing fiber and a hearty texture.
  • Milk: Choose dairy or non-dairy options like almond or oat milk for creaminess.
  • Fresh strawberries: Sweet and juicy, they add a burst of flavor and color.
  • Greek yogurt: This adds creaminess and a protein boost; plain or vanilla works well.
  • Honey or maple syrup: A touch of sweetness to balance the tartness of the strawberries.
  • Vanilla extract: Enhances the overall flavor, making it more aromatic and delicious.
  • Salt: Just a pinch to elevate all the flavors in the dish.

Feel free to get creative! You can substitute strawberries with other fruits like blueberries, bananas, or peaches for a different flavor profile. For those who like a bit of crunch, consider adding nuts or granola on top before serving. Exact quantities for each ingredient are available at the bottom of the article for easy printing.

How to Make Strawberries and Cream Overnight Oats

Making Strawberries and Cream Overnight Oats is as simple as it gets. With just a few steps, you’ll have a delicious breakfast ready to go. Let’s dive into the process!

Step 1: Combine the Base Ingredients

Start by grabbing a medium bowl. Toss in the rolled oats, milk, Greek yogurt, honey (or maple syrup), vanilla extract, and a pinch of salt. Stir everything together until it’s well mixed. The oats should be fully coated in the creamy mixture. This is where the magic begins, as the oats soak up all that goodness!

Step 2: Add the Strawberries

Next, gently fold in the sliced strawberries. Be careful not to mash them; you want those beautiful pieces to stay intact. Reserve a few slices for topping later. This will add a fresh touch when you’re ready to dig in!

Step 3: Portion into Jars

Now it’s time to divide the mixture into two jars or containers with lids. I love using mason jars for this—they’re perfect for breakfast on the go! Make sure to leave a little space at the top, as the oats will expand as they soak.

Step 4: Refrigerate Overnight

Seal the jars tightly and pop them in the fridge. It’s crucial to let them chill for at least 4 hours, but overnight is best. This allows the oats to soften and absorb all the flavors, creating a creamy, dreamy breakfast.

Step 5: Serve and Enjoy

When morning arrives, give the oats a good stir. Top with the reserved strawberries for that fresh burst of flavor. You can enjoy them cold straight from the fridge or warm them up in the microwave for about 30 seconds. Either way, you’re in for a treat!

Tips for Success

  • Use old-fashioned rolled oats for the best texture; quick oats can become mushy.
  • For creamier oats, opt for full-fat Greek yogurt or a rich non-dairy alternative.
  • Experiment with different fruits to keep breakfast exciting—try bananas or peaches!
  • Make a larger batch and store in the fridge for up to 5 days for easy breakfasts.
  • Adjust sweetness to your taste; add more honey or maple syrup if desired.

Equipment Needed

  • Medium bowl: For mixing the ingredients; a large mixing bowl works too.
  • Spoon or spatula: To stir everything together; a whisk can also be handy.
  • Jars or containers: Mason jars are perfect for storage; any airtight container will do.
  • Measuring cups: For accurate ingredient portions; you can use any standard measuring tools.

Variations

  • Berry Medley: Swap out strawberries for a mix of berries like blueberries, raspberries, and blackberries for a colorful twist.
  • Nutty Delight: Add a tablespoon of almond or peanut butter for a nutty flavor and extra protein.
  • Chocolate Lovers: Stir in a tablespoon of cocoa powder or chocolate chips for a decadent treat.
  • Spiced Up: Sprinkle in some cinnamon or nutmeg for a warm, cozy flavor that pairs beautifully with the oats.
  • Vegan Option: Use plant-based yogurt and maple syrup to keep it completely vegan while still delicious.

Serving Suggestions

  • Pair your oats with a side of crispy bacon or turkey sausage for a savory contrast.
  • Enjoy with a refreshing glass of orange juice or a hot cup of coffee to kickstart your day.
  • For a beautiful presentation, layer the oats in a clear glass and top with mint leaves.

FAQs about Strawberries and Cream Overnight Oats

Can I use frozen strawberries instead of fresh?

Absolutely! Frozen strawberries work well, especially if you let them thaw a bit before adding them to the oats. Just keep in mind they may release more liquid, so adjust the milk accordingly.

How long do these overnight oats last in the fridge?

Strawberries and Cream Overnight Oats can last up to 5 days in the fridge. Just make sure to store them in airtight containers to keep them fresh!

Can I make these oats vegan?

Yes! Simply swap the Greek yogurt for a plant-based yogurt and use maple syrup instead of honey. You’ll still enjoy a delicious and creamy breakfast!

What can I add for extra protein?

To boost the protein content, consider adding a scoop of protein powder, some chia seeds, or even a dollop of nut butter. It’s a great way to keep you full longer!

Can I warm up the overnight oats?

Definitely! If you prefer a warm breakfast, just pop your oats in the microwave for about 30 seconds. Stir well and enjoy a cozy start to your day!

Final Thoughts

Strawberries and Cream Overnight Oats are more than just a breakfast; they’re a delightful way to start your day with joy and flavor. The creamy texture, combined with the sweetness of fresh strawberries, creates a symphony of taste that dances on your palate. Plus, the convenience of preparing them the night before means you can savor a delicious meal even on the busiest mornings. Whether you’re enjoying them at home or on the go, these oats bring a little happiness to your routine. Trust me, once you embrace this recipe, breakfast will never be the same!

Ranis

Strawberries and Cream Overnight Oats: A Delicious Start!

A delicious and easy recipe for Strawberries and Cream Overnight Oats, perfect for a quick breakfast.
Prep Time 10 minutes
Total Time 4 hours 10 minutes
Servings: 2 servings
Course: Breakfast
Cuisine: American
Calories: 350

Ingredients
  

  • 1 cup rolled oats
  • 2 cups milk dairy or non-dairy
  • 1 cup fresh strawberries hulled and sliced
  • 1/2 cup Greek yogurt plain or vanilla
  • 2 tablespoons honey or maple syrup
  • 1 teaspoon vanilla extract
  • 1/4 teaspoon salt

Method
 

  1. In a medium bowl, combine the rolled oats, milk, Greek yogurt, honey (or maple syrup), vanilla extract, and salt. Stir well until all ingredients are fully combined.
  2. Gently fold in the sliced strawberries, reserving a few for topping.
  3. Divide the mixture evenly into two jars or containers with lids.
  4. Seal the jars and refrigerate overnight (or at least 4 hours) to allow the oats to soak and soften.
  5. In the morning, give the oats a good stir and top with the reserved strawberries. Enjoy cold or warm them up in the microwave for about 30 seconds if desired.

Nutrition

Serving: 1servingCalories: 350kcalCarbohydrates: 45gProtein: 15gFat: 7gSaturated Fat: 2gPolyunsaturated Fat: 5gCholesterol: 10mgSodium: 200mgFiber: 5gSugar: 15g

Notes

  • For added crunch, sprinkle some chopped nuts or granola on top before serving.
  • Substitute strawberries with other fruits like blueberries, bananas, or peaches for a different flavor profile.

Tried this recipe?

Let us know how it was!

Breakfast Club Sandwich: A Flavor Explosion Awaits!

Introduction to Breakfast Club Sandwich

There’s something magical about a hearty Breakfast Club Sandwich that can turn any morning into a delightful experience. Whether you’re rushing out the door or enjoying a leisurely weekend brunch, this sandwich is your go-to solution. Packed with crispy bacon, fluffy scrambled eggs, and fresh veggies, it’s a flavor explosion that satisfies both hunger and taste buds. Plus, it’s easy to whip up, making it perfect for busy days or impressing your loved ones. Trust me, once you take a bite, you’ll wonder how you ever started your mornings without it!

Why You’ll Love This Breakfast Club Sandwich

This Breakfast Club Sandwich is a game-changer for your mornings. It’s quick to prepare, taking just 30 minutes from start to finish. The combination of crispy bacon, creamy avocado, and fresh spinach creates a taste sensation that’s hard to resist. Plus, it’s versatile enough to cater to different dietary preferences. Whether you’re feeding a crowd or just yourself, this sandwich delivers satisfaction every time!

Ingredients for Breakfast Club Sandwich

Gathering the right ingredients is key to crafting the perfect Breakfast Club Sandwich. Here’s what you’ll need:

  • Whole grain bread: This forms the sturdy base of your sandwich, adding fiber and a nutty flavor.
  • Bacon: Crispy bacon brings a savory crunch that elevates the entire dish. You can swap it for turkey bacon for a lighter option.
  • Eggs: Fluffy scrambled eggs add protein and richness, making your sandwich hearty and satisfying.
  • Fresh spinach: This leafy green adds a pop of color and a nutritious boost, balancing the richness of the bacon and eggs.
  • Tomato: Sliced tomatoes provide juiciness and a refreshing contrast to the other ingredients.
  • Avocado: Creamy avocado slices not only enhance flavor but also add healthy fats.
  • Mayonnaise: A spread of mayo adds creaminess; consider using a flavored variety for an extra kick.
  • Dijon mustard: This tangy condiment complements the richness of the sandwich beautifully.
  • Salt and pepper: Essential for seasoning, these staples enhance the flavors of your ingredients.
  • Butter: A little butter for grilling gives your sandwich a golden, crispy exterior.

For those looking to spice things up, consider adding sliced jalapeños or a dash of hot sauce. If you prefer a vegetarian version, plant-based bacon alternatives work wonderfully. You can find the exact quantities for each ingredient at the bottom of the article, ready for printing!

How to Make Breakfast Club Sandwich

Creating a Breakfast Club Sandwich is a straightforward process that yields delicious results. Follow these simple steps, and you’ll have a mouthwatering breakfast ready in no time!

Step 1: Cook the Bacon

Start by heating a skillet over medium heat. Lay the bacon strips in the pan, letting them sizzle until they’re crispy. This usually takes about 5-7 minutes. Once done, transfer the bacon to a plate lined with paper towels to absorb excess grease. The aroma of bacon cooking is a morning delight that sets the tone for your sandwich!

Step 2: Toast the Bread

In the same skillet, reduce the heat to low. Place your slices of whole grain bread in the pan, toasting them until they’re golden brown on both sides. This should take about 2-3 minutes per side. Toasting the bread adds a lovely crunch that complements the soft fillings. Keep an eye on it; burnt toast is not the goal!

Step 3: Scramble the Eggs

Next, crack the eggs into a bowl and whisk them with a pinch of salt and pepper. Pour the eggs into the skillet, cooking them gently. Stir occasionally until they’re fluffy and fully cooked, which should take about 3-4 minutes. Fluffy scrambled eggs are the heart of this Breakfast Club Sandwich, adding richness and protein.

Step 4: Assemble the Sandwich

Now it’s time to build your masterpiece! Spread mayonnaise and Dijon mustard on one side of each slice of toasted bread. On four slices, layer the crispy bacon, scrambled eggs, fresh spinach, tomato slices, and creamy avocado. The combination of flavors and textures is what makes this breakfast sandwich truly special.

Step 5: Grill the Sandwich

Heat a little butter in the skillet over medium heat. Carefully place each assembled sandwich in the pan, grilling them for about 2-3 minutes on each side. You want them golden brown and heated through. This step gives your Breakfast Club Sandwich that irresistible crispy exterior. Don’t rush it; let the magic happen!

Step 6: Serve and Enjoy

Once grilled to perfection, remove the sandwiches from the skillet. Slice them in half for easy handling and serve immediately. The warm, gooey goodness inside will have everyone coming back for seconds. Enjoy your Breakfast Club Sandwich with a side of fresh fruit or a hot cup of coffee for the ultimate breakfast experience!

Tips for Success

  • Use fresh ingredients for the best flavor; ripe avocados and juicy tomatoes make a difference.
  • Don’t overcrowd the skillet when cooking bacon; this ensures even crispiness.
  • Experiment with different breads, like sourdough or rye, for unique flavors.
  • Let the eggs cool slightly before assembling to prevent soggy bread.
  • For extra crunch, add some sliced pickles or crispy onions inside the sandwich.

Equipment Needed

  • Skillet: A non-stick skillet works best, but any frying pan will do.
  • Spatula: A sturdy spatula helps flip the sandwiches without falling apart.
  • Whisk: For beating the eggs; a fork can work in a pinch.
  • Knife: Essential for slicing tomatoes and avocados.
  • Cutting board: A safe surface for all your chopping needs.

Variations

  • Vegetarian Delight: Swap the bacon for grilled mushrooms or tempeh bacon for a hearty, meat-free option.
  • Spicy Kick: Add sliced jalapeños or a drizzle of sriracha for those who love a bit of heat.
  • Cheesy Goodness: Layer in your favorite cheese, like cheddar or pepper jack, for an extra creamy texture.
  • Herb Infusion: Mix fresh herbs like basil or cilantro into the scrambled eggs for a burst of flavor.
  • Breakfast Wrap: For a portable option, wrap all the ingredients in a tortilla instead of using bread.

Serving Suggestions

  • Pair your Breakfast Club Sandwich with a side of crispy hash browns for a satisfying crunch.
  • A fresh fruit salad adds a refreshing touch and balances the richness of the sandwich.
  • Serve with a hot cup of coffee or a chilled glass of orange juice for a classic breakfast combo.
  • For a fun presentation, cut the sandwiches into quarters and serve on a platter.

FAQs about Breakfast Club Sandwich

Can I make the Breakfast Club Sandwich ahead of time?

Absolutely! You can prepare the components in advance. Cook the bacon, scramble the eggs, and even toast the bread. Just assemble the sandwich when you’re ready to eat. This makes it a great option for busy mornings!

What can I substitute for bacon in the Breakfast Club Sandwich?

If you’re looking for alternatives, turkey bacon or plant-based bacon work wonderfully. You can also try grilled vegetables like zucchini or eggplant for a delicious twist.

How can I make this Breakfast Club Sandwich healthier?

To lighten it up, use whole grain bread, reduce the amount of mayonnaise, or skip it altogether. Adding more veggies like bell peppers or cucumbers can also boost the nutrition without sacrificing flavor.

Can I freeze the Breakfast Club Sandwich?

While it’s best enjoyed fresh, you can freeze the components separately. Just reheat the bacon and eggs before assembling the sandwich. This way, you can enjoy a quick breakfast anytime!

What drinks pair well with a Breakfast Club Sandwich?

A hot cup of coffee or a refreshing iced tea complements the flavors perfectly. For a fruity option, a glass of fresh orange juice adds a nice citrusy balance to your meal.

Final Thoughts

Creating a Breakfast Club Sandwich is more than just cooking; it’s about crafting a moment of joy to kickstart your day. The combination of crispy bacon, creamy avocado, and fluffy eggs brings a satisfying harmony of flavors that can brighten even the busiest mornings. Whether you’re enjoying it solo or sharing it with family, this sandwich is a delightful way to fuel your day. Plus, the versatility allows you to make it your own. So, roll up your sleeves, gather your ingredients, and dive into this delicious breakfast adventure. You won’t regret it!

Ranis

Breakfast Club Sandwich: A Flavor Explosion Awaits!

A delicious and hearty Breakfast Club Sandwich packed with flavors and nutritious ingredients.
Prep Time 15 minutes
Cook Time 15 minutes
Total Time 30 minutes
Servings: 4 servings
Course: Breakfast
Cuisine: American
Calories: 550

Ingredients
  

  • 8 slices of whole grain bread
  • 8 slices of cooked bacon
  • 4 large eggs
  • 1 cup of fresh spinach
  • 1 medium tomato sliced
  • 1 avocado sliced
  • 1/2 cup of mayonnaise
  • 1 tablespoon of Dijon mustard
  • Salt and pepper to taste
  • Butter for grilling

Method
 

  1. Begin by cooking the bacon in a skillet over medium heat until crispy. Remove and place on paper towels to drain excess grease.
  2. In the same skillet, reduce the heat to low and toast the bread slices until golden brown on both sides. Set aside.
  3. In a bowl, whisk the eggs and season with salt and pepper. Pour the eggs into the skillet and scramble until fully cooked.
  4. Spread mayonnaise and Dijon mustard on one side of each slice of toasted bread.
  5. On four slices of bread, layer the cooked bacon, scrambled eggs, fresh spinach, tomato slices, and avocado.
  6. Top each sandwich with the remaining slices of bread, mayonnaise side down.
  7. Heat a little butter in the skillet over medium heat and grill each sandwich for 2-3 minutes on each side, or until golden brown and heated through.
  8. Remove from the skillet, slice in half, and serve immediately.

Nutrition

Serving: 1sandwichCalories: 550kcalCarbohydrates: 30gProtein: 20gFat: 35gSaturated Fat: 10gPolyunsaturated Fat: 20gCholesterol: 200mgSodium: 800mgFiber: 5gSugar: 3g

Notes

  • For a spicy kick, add sliced jalapeños or a dash of hot sauce to the sandwich layers.
  • Substitute turkey bacon or a plant-based bacon alternative for a lighter version.

Tried this recipe?

Let us know how it was!

Cheesy Queso Enchiladas: A Delicious Recipe to Try!

Introduction to Cheesy Queso Enchiladas

There’s something magical about a warm plate of Cheesy Queso Enchiladas that instantly transports me back to family gatherings. The aroma of melted cheese and savory chicken fills the air, making it impossible to resist. This dish is not just a meal; it’s a comforting hug on a plate. Whether you’re looking for a quick solution after a long day or a way to impress your loved ones, these enchiladas are your go-to. They’re easy to whip up, and trust me, everyone will be asking for seconds!

Why You’ll Love This Cheesy Queso Enchiladas

These Cheesy Queso Enchiladas are a game-changer for busy weeknights. They come together in just 40 minutes, making them perfect for those evenings when time is tight. The combination of creamy queso and tender chicken creates a flavor explosion that will have your taste buds dancing. Plus, they’re versatile enough to please everyone at the table, from picky eaters to spice lovers. You’ll find yourself making these again and again!

Ingredients for Cheesy Queso Enchiladas

Gathering the right ingredients is the first step to creating your delicious Cheesy Queso Enchiladas. Here’s what you’ll need:

  • Cooked shredded chicken: This is the heart of the dish, providing protein and flavor. You can use rotisserie chicken for convenience or cook your own.
  • Queso blanco cheese: This creamy cheese melts beautifully, adding richness. Feel free to substitute with Monterey Jack or cheddar if you prefer.
  • Enchilada sauce: A flavorful sauce that ties everything together. You can use store-bought or make your own for a personal touch.
  • Corn tortillas: These are the perfect vessel for your filling. Look for fresh or homemade tortillas for the best texture.
  • Black beans: They add a hearty element and extra fiber. Rinse them well to remove excess sodium.
  • Corn: Whether frozen or canned, corn adds sweetness and color. It’s a great way to sneak in some veggies!
  • Cumin: This spice brings warmth and depth to the dish. It’s a staple in Mexican cuisine.
  • Garlic powder: A must-have for flavor. Fresh garlic works too, but the powder is convenient.
  • Salt and black pepper: Essential for seasoning. Adjust to your taste preferences.
  • Sour cream: This creamy topping adds a cool contrast to the warm enchiladas. You can also use Greek yogurt for a healthier option.
  • Fresh cilantro: A garnish that brightens up the dish. If you’re not a fan, feel free to skip it!

For exact measurements, check the bottom of the article where you can find everything listed for easy printing. Happy cooking!

How to Make Cheesy Queso Enchiladas

Creating Cheesy Queso Enchiladas is a straightforward process that anyone can master. Follow these simple steps, and you’ll have a delicious meal ready in no time!

Step 1: Preheat the Oven

Start by preheating your oven to 350°F (175°C). This step is crucial because it ensures that your enchiladas cook evenly. A hot oven helps the cheese melt beautifully and gives the dish that golden, bubbly finish we all crave.

Step 2: Prepare the Filling

In a large mixing bowl, combine the cooked shredded chicken, half of the queso blanco cheese, black beans, corn, cumin, garlic powder, salt, and black pepper. Mix everything well until the flavors meld together. The cumin and garlic powder will add a warm, aromatic touch that makes your kitchen smell amazing!

Step 3: Warm the Tortillas

Next, warm the corn tortillas. You can do this in a skillet over low heat or in the microwave for about 30 seconds. Warming them makes them pliable, which is essential for easy rolling. If they’re too stiff, they might crack, and nobody wants that!

Step 4: Assemble the Enchiladas

Now it’s time to roll! Spoon about 1/4 cup of the chicken mixture into each tortilla. Roll them up tightly and place them seam-side down in a greased 9×13 inch baking dish. This helps keep everything together and ensures a neat presentation.

Step 5: Add Sauce and Cheese

Pour the enchilada sauce evenly over the rolled tortillas, making sure they’re well covered. This sauce is what brings everything together. Then, sprinkle the remaining queso blanco cheese on top. This will create a deliciously cheesy crust as it bakes!

Step 6: Bake to Perfection

Place the baking dish in the preheated oven and bake for 20-25 minutes. Keep an eye on them! You’ll know they’re done when the cheese is melted and bubbly, and the edges of the tortillas start to crisp up. That’s when the magic happens!

Step 7: Serve and Enjoy

Once out of the oven, let the enchiladas cool for a few minutes. This helps the cheese set a bit, making them easier to serve. Top with sour cream and fresh cilantro before diving in. Trust me, the wait will be worth it!

Tips for Success

  • Use fresh tortillas for the best texture; they roll easier and taste better.
  • Don’t skip the preheating step; it ensures even cooking and perfect cheese melt.
  • Feel free to customize the filling with your favorite veggies or proteins.
  • Let the enchiladas cool slightly before serving to avoid a cheesy mess.
  • Experiment with different toppings like avocado or salsa for added flavor.

Equipment Needed

  • Baking dish: A 9×13 inch dish works best, but any oven-safe dish will do.
  • Mixing bowl: Use a large bowl for combining ingredients; a sturdy one is ideal.
  • Skillet: Great for warming tortillas; a microwave can also do the trick.
  • Measuring cups: Handy for portioning ingredients accurately.

Variations of Cheesy Queso Enchiladas

  • Vegetarian Delight: Swap the chicken for sautéed mushrooms, zucchini, or additional black beans for a hearty vegetarian option.
  • Spicy Kick: Add sliced jalapeños or diced green chilies to the filling for an extra layer of heat that spice lovers will adore.
  • Cheesy Spinach: Incorporate fresh spinach into the chicken mixture for a nutritious twist that adds color and flavor.
  • Southwestern Style: Mix in roasted corn and diced bell peppers for a vibrant, southwestern flair that enhances the dish.
  • Low-Carb Option: Use cauliflower tortillas instead of corn tortillas to create a low-carb version that still satisfies.

Serving Suggestions for Cheesy Queso Enchiladas

  • Side Salad: Pair with a fresh garden salad topped with avocado and lime vinaigrette for a refreshing contrast.
  • Rice: Serve alongside Mexican rice or cilantro-lime rice for a hearty meal.
  • Drinks: Enjoy with a cold cerveza or a zesty margarita to elevate the experience.
  • Presentation: Garnish with extra cilantro and lime wedges for a vibrant touch.

FAQs about Cheesy Queso Enchiladas

Can I make Cheesy Queso Enchiladas ahead of time?

Absolutely! You can prepare the enchiladas and assemble them in the baking dish. Just cover and refrigerate them for up to 24 hours. When you’re ready to bake, add a few extra minutes to the cooking time.

What can I substitute for queso blanco cheese?

If you can’t find queso blanco, Monterey Jack or even a mild cheddar works well. Both melt beautifully and will give you that creamy texture you crave in these enchiladas.

Can I freeze Cheesy Queso Enchiladas?

Yes, these enchiladas freeze wonderfully! Just wrap them tightly in plastic wrap and then foil. When you’re ready to enjoy, thaw in the fridge overnight and bake as directed.

How can I make these enchiladas spicier?

For a spicy kick, add diced jalapeños or a splash of hot sauce to the chicken mixture. You can also use a spicier enchilada sauce to amp up the heat!

What sides pair well with Cheesy Queso Enchiladas?

These enchiladas are delicious on their own, but they pair beautifully with a fresh salad, Mexican rice, or even some refried beans for a complete meal.

Final Thoughts

Making Cheesy Queso Enchiladas is more than just cooking; it’s about creating memories and sharing joy with those you love. The blend of flavors, the gooey cheese, and the comforting warmth of this dish can turn an ordinary evening into something special. Whether it’s a weeknight dinner or a gathering with friends, these enchiladas are sure to impress. I hope you find as much happiness in preparing and enjoying them as I do. So roll up your sleeves, gather your ingredients, and let the deliciousness unfold. Happy cooking!

Ranis

Cheesy Queso Enchiladas: A Delicious Recipe to Try!

Cheesy Queso Enchiladas are a delicious and comforting dish made with shredded chicken, queso blanco cheese, and enchilada sauce, perfect for any meal.
Prep Time 15 minutes
Cook Time 25 minutes
Total Time 40 minutes
Servings: 4 servings
Course: Main Course
Cuisine: Mexican
Calories: 450

Ingredients
  

  • 2 cups cooked shredded chicken
  • 1 cup queso blanco cheese shredded
  • 1 cup enchilada sauce
  • 8 corn tortillas
  • 1 cup black beans drained and rinsed
  • 1 cup corn frozen or canned
  • 1 teaspoon cumin
  • 1 teaspoon garlic powder
  • 1/2 teaspoon salt
  • 1/2 teaspoon black pepper
  • 1/2 cup sour cream for topping
  • 1/4 cup fresh cilantro chopped (for garnish)

Method
 

  1. Preheat your oven to 350°F (175°C).
  2. In a large mixing bowl, combine the cooked shredded chicken, 1/2 cup of queso blanco cheese, black beans, corn, cumin, garlic powder, salt, and black pepper. Mix well until all ingredients are evenly combined.
  3. Warm the corn tortillas in a skillet or microwave until pliable.
  4. Spoon about 1/4 cup of the chicken mixture into each tortilla, roll them up tightly, and place them seam-side down in a greased 9x13 inch baking dish.
  5. Pour the enchilada sauce evenly over the rolled tortillas, ensuring they are well covered.
  6. Sprinkle the remaining 1/2 cup of queso blanco cheese on top of the enchiladas.
  7. Bake in the preheated oven for 20-25 minutes, or until the cheese is melted and bubbly.
  8. Remove from the oven and let cool for a few minutes. Serve hot, topped with sour cream and garnished with fresh cilantro.

Nutrition

Serving: 1enchiladaCalories: 450kcalCarbohydrates: 30gProtein: 32gFat: 22gSaturated Fat: 10gPolyunsaturated Fat: 8gCholesterol: 80mgSodium: 800mgFiber: 5gSugar: 3g

Notes

  • For a vegetarian option, substitute the chicken with sautéed mushrooms or additional beans.
  • Add sliced jalapeños or diced green chilies to the chicken mixture for an extra kick of heat.

Tried this recipe?

Let us know how it was!

Creamy Shrimp Alfredo: A Delicious Dinner Recipe!

Introduction to Creamy Shrimp Alfredo

There’s something undeniably comforting about a plate of Creamy Shrimp Alfredo. It’s like a warm hug after a long day. This dish is perfect for those busy evenings when you want to whip up something delicious without spending hours in the kitchen. With its rich, velvety sauce and succulent shrimp, it’s sure to impress your loved ones. Whether you’re cooking for a special occasion or just treating yourself, this recipe is a quick solution that brings a taste of Italy right to your dining table. Let’s dive into this culinary adventure together!

Why You’ll Love This Creamy Shrimp Alfredo

This Creamy Shrimp Alfredo is a game-changer for your dinner routine. It’s quick to prepare, taking just 30 minutes from start to finish. The combination of tender shrimp and a rich, creamy sauce over fettuccine is simply irresistible. Plus, it’s a one-pan dish, which means less cleanup for you. Whether you’re a seasoned chef or a kitchen novice, this recipe guarantees a satisfying meal that will leave everyone asking for seconds!

Ingredients for Creamy Shrimp Alfredo

Gathering the right ingredients is the first step to creating a mouthwatering Creamy Shrimp Alfredo. Here’s what you’ll need:

  • Fettuccine pasta: This wide, flat pasta is perfect for holding onto the creamy sauce. You can also use gluten-free pasta if needed.
  • Olive oil: A staple in Italian cooking, it adds flavor and helps cook the shrimp to perfection.
  • Large shrimp: Fresh or frozen, these little gems are the star of the dish. Make sure they’re peeled and deveined for easy eating.
  • Garlic: Minced garlic brings a fragrant aroma and depth of flavor to the sauce.
  • Heavy cream: This is what makes the sauce rich and creamy. For a lighter option, consider half-and-half.
  • Parmesan cheese: Grated Parmesan adds a nutty, salty flavor that complements the cream beautifully.
  • Italian seasoning: A blend of herbs that enhances the dish with a touch of Mediterranean flair.
  • Salt and pepper: Essential for seasoning, these will elevate the flavors of your dish.
  • Fresh parsley: Chopped parsley not only adds a pop of color but also a fresh taste as a garnish.

For those looking to mix things up, consider adding steamed broccoli or spinach for extra veggies. You can find the exact quantities of each ingredient at the bottom of the article, ready for printing!

How to Make Creamy Shrimp Alfredo

Now that you have your ingredients ready, let’s get cooking! This Creamy Shrimp Alfredo comes together in just a few simple steps. Follow along, and you’ll have a delicious dinner on the table in no time.

Step 1: Cook the Fettuccine Pasta

Start by boiling a large pot of salted water. Once it’s bubbling, add the fettuccine pasta. Cook it according to the package instructions until it’s al dente, which means it should still have a slight bite to it. This usually takes about 8-10 minutes. Once done, drain the pasta and set it aside. Don’t forget to save a little pasta water; it can help adjust the sauce later if needed!

Step 2: Sauté the Shrimp

In a large skillet, heat a tablespoon of olive oil over medium heat. Once the oil is shimmering, add the peeled and deveined shrimp. Cook them for about 2-3 minutes on each side. You’ll know they’re ready when they turn pink and opaque. Remove the shrimp from the skillet and set them aside. This step is crucial; perfectly cooked shrimp are the heart of your Creamy Shrimp Alfredo!

Step 3: Prepare the Sauce

In the same skillet, add the minced garlic. Sauté it for about a minute until it’s fragrant, but be careful not to burn it! Next, pour in the heavy cream and bring it to a gentle simmer. Stir in the grated Parmesan cheese and Italian seasoning, mixing until the cheese melts and the sauce is smooth. This creamy concoction is what makes your dish so indulgent!

Step 4: Combine Ingredients

Now it’s time to bring everything together. Add the cooked fettuccine and sautéed shrimp back into the skillet. Toss everything gently to coat the pasta and shrimp in that luscious creamy sauce. If the sauce seems too thick, add a splash of the reserved pasta water to loosen it up. This step ensures every bite is packed with flavor!

Step 5: Serve

Once everything is well combined and heated through, it’s time to serve! Plate your Creamy Shrimp Alfredo and garnish with freshly chopped parsley. This not only adds a pop of color but also a fresh taste that brightens the dish. Serve immediately and watch as everyone digs in with delight!

Tips for Success

  • Don’t overcook the shrimp; they should be tender and juicy, not rubbery.
  • Reserve some pasta water to adjust the sauce consistency if needed.
  • Use freshly grated Parmesan for the best flavor; pre-grated cheese can be drier.
  • Feel free to add your favorite veggies for extra nutrition and color.
  • Serve immediately for the creamiest experience; leftovers can thicken up.

Equipment Needed

  • Large pot: For boiling the fettuccine. A Dutch oven works well too.
  • Skillet: A non-stick skillet is ideal for sautéing shrimp and making the sauce.
  • Colander: To drain the pasta. A slotted spoon can be a handy alternative.
  • Measuring cups and spoons: Essential for accurate ingredient measurements.
  • Wooden spoon or spatula: For stirring and combining ingredients smoothly.

Variations

  • Spicy Shrimp Alfredo: Add a pinch of red pepper flakes or a dash of hot sauce to the sauce for a kick of heat.
  • Lemon Garlic Shrimp Alfredo: Squeeze fresh lemon juice into the sauce and add lemon zest for a bright, zesty flavor.
  • Vegetable Alfredo: Toss in sautéed bell peppers, zucchini, or asparagus for a colorful and nutritious twist.
  • Whole Wheat Pasta: Substitute regular fettuccine with whole wheat pasta for a healthier option.
  • Vegan Alfredo: Use cashew cream or coconut milk instead of heavy cream, and nutritional yeast for a cheesy flavor.

Serving Suggestions

  • Garlic Bread: Serve warm, buttery garlic bread on the side for a delightful crunch.
  • Salad: A fresh Caesar or mixed greens salad pairs perfectly with the richness of the Alfredo.
  • Wine: A crisp white wine, like Pinot Grigio, complements the flavors beautifully.
  • Presentation: Serve in shallow bowls and sprinkle extra Parmesan on top for an elegant touch.

FAQs about Creamy Shrimp Alfredo

Can I use frozen shrimp for this recipe?

Absolutely! Frozen shrimp work just fine. Just make sure to thaw them completely before cooking. This way, you’ll still get that tender, juicy texture in your Creamy Shrimp Alfredo.

What can I substitute for heavy cream?

If you’re looking for a lighter option, half-and-half is a great substitute. You can also use whole milk, but keep in mind that the sauce may not be as rich and creamy.

How do I store leftovers?

Store any leftovers in an airtight container in the fridge for up to 2 days. Just remember, the sauce may thicken as it cools, so you might need to add a splash of milk or pasta water when reheating.

Can I make this dish ahead of time?

While it’s best enjoyed fresh, you can prepare the sauce and shrimp ahead of time. Just cook the pasta right before serving to keep everything perfectly al dente!

What sides pair well with Creamy Shrimp Alfredo?

Garlic bread and a fresh salad are classic choices. They balance the richness of the Alfredo and add a nice crunch to your meal!

Final Thoughts

Cooking Creamy Shrimp Alfredo is more than just preparing a meal; it’s about creating a moment. The rich, creamy sauce enveloping the tender shrimp and fettuccine brings a taste of Italy right to your kitchen. Each bite is a reminder of the joy that comes from sharing good food with family and friends. Whether it’s a weeknight dinner or a special occasion, this dish is sure to impress. So, roll up your sleeves, embrace the process, and enjoy the delicious rewards. Trust me, your taste buds will thank you, and so will everyone at the table!

Ranis

Creamy Shrimp Alfredo: A Delicious Dinner Recipe!

Creamy Shrimp Alfredo is a delicious and rich pasta dish featuring succulent shrimp in a creamy Parmesan sauce served over fettuccine.
Prep Time 10 minutes
Cook Time 20 minutes
Total Time 30 minutes
Servings: 4 servings
Course: Dinner
Cuisine: Italian
Calories: 550

Ingredients
  

  • 8 ounces fettuccine pasta
  • 1 tablespoon olive oil
  • 1 pound large shrimp peeled and deveined
  • 3 cloves garlic minced
  • 1 cup heavy cream
  • 1 cup grated Parmesan cheese
  • 1 teaspoon Italian seasoning
  • Salt and pepper to taste
  • Fresh parsley chopped (for garnish)

Method
 

  1. Cook the fettuccine pasta according to package instructions until al dente. Drain and set aside.
  2. In a large skillet, heat the olive oil over medium heat. Add the shrimp and cook for about 2-3 minutes on each side until they turn pink and opaque. Remove the shrimp from the skillet and set aside.
  3. In the same skillet, add the minced garlic and sauté for about 1 minute until fragrant.
  4. Pour in the heavy cream and bring to a gentle simmer. Stir in the Parmesan cheese and Italian seasoning, mixing until the cheese is melted and the sauce is smooth.
  5. Season the sauce with salt and pepper to taste.
  6. Add the cooked fettuccine and shrimp to the skillet, tossing to coat everything evenly in the creamy sauce.
  7. Cook for an additional 2-3 minutes until heated through.
  8. Serve immediately, garnished with fresh parsley.

Nutrition

Serving: 1servingCalories: 550kcalCarbohydrates: 40gProtein: 30gFat: 30gSaturated Fat: 15gPolyunsaturated Fat: 10gCholesterol: 200mgSodium: 800mgFiber: 2gSugar: 1g

Notes

  • For a lighter version, substitute half-and-half for the heavy cream.
  • Add steamed broccoli or spinach for extra veggies and color in the dish.

Tried this recipe?

Let us know how it was!

Baked Crunchy Hot Honey Chicken: A Must-Try Recipe!

Introduction to Baked Crunchy Hot Honey Chicken

There’s something magical about the combination of sweet and spicy, isn’t there? Baked Crunchy Hot Honey Chicken brings that delightful contrast right to your dinner table. This dish is not just a meal; it’s an experience that can turn an ordinary weeknight into something special. Whether you’re looking to impress your family or simply want a quick solution for a busy day, this recipe has got you covered. With its crispy exterior and a hint of heat, it’s bound to become a favorite in your household. Let’s dive into this culinary adventure together!

Why You’ll Love This Baked Crunchy Hot Honey Chicken

This Baked Crunchy Hot Honey Chicken is a game-changer for your dinner routine. It’s incredibly easy to whip up, making it perfect for those hectic weeknights. The crispy coating delivers a satisfying crunch, while the sweet heat of the honey elevates the flavor to new heights. Plus, it’s baked, not fried, so you can enjoy a guilt-free indulgence that still feels like a treat. What’s not to love?

Ingredients for Baked Crunchy Hot Honey Chicken

Gathering the right ingredients is the first step to culinary success. For this Baked Crunchy Hot Honey Chicken, you’ll need a few staples that pack a punch. Here’s what you’ll need:

  • Chicken thighs: Boneless and skinless, they stay juicy and tender while baking.
  • Buttermilk: This adds moisture and a tangy flavor, helping the spices cling to the chicken.
  • Garlic powder: A must-have for that savory depth, it enhances the overall flavor.
  • Onion powder: It complements the garlic and adds a subtle sweetness.
  • Smoked paprika: This gives a lovely smoky flavor and a vibrant color to the dish.
  • Salt: Essential for bringing out the flavors in the chicken and the coating.
  • Black pepper: A dash of heat that balances the sweetness of the honey.
  • All-purpose flour: This forms the base of the crunchy coating, giving it that satisfying crunch.
  • Panko breadcrumbs: These Japanese-style breadcrumbs add extra crispiness to the coating.
  • Hot honey: The star of the show! It combines sweetness with a spicy kick. You can mix regular honey with hot sauce if you can’t find hot honey.
  • Olive oil: A drizzle helps the chicken crisp up beautifully in the oven.

For those looking to switch things up, consider adding crushed cornflakes to the breadcrumb mixture for an even crunchier texture. If you prefer a milder flavor, reduce the hot sauce in the honey or swap it for sweet chili sauce. You can find the exact quantities for these ingredients at the bottom of the article, ready for printing!

How to Make Baked Crunchy Hot Honey Chicken

Step 1: Preheat and Prepare

Start by preheating your oven to 400°F (200°C). This ensures your chicken gets that perfect crispy texture. While the oven heats up, line a baking sheet with parchment paper. This simple step makes cleanup a breeze and prevents the chicken from sticking. Trust me, your future self will thank you!

Step 2: Marinate the Chicken

In a large bowl, combine the buttermilk, garlic powder, onion powder, smoked paprika, salt, and black pepper. This mixture is where the magic begins! Add the chicken thighs, making sure they’re well coated in the marinade. Cover the bowl and let it chill in the fridge for at least 30 minutes. If you have time, letting it marinate for up to 2 hours will deepen the flavors. The buttermilk tenderizes the chicken, making it juicy and flavorful. You’ll be amazed at the difference!

Step 3: Coat the Chicken

Now it’s time to create that irresistible crunch! In a shallow dish, mix together the all-purpose flour and panko breadcrumbs. This combination is key for achieving that crispy coating. Remove the chicken from the buttermilk marinade, allowing any excess to drip off. Dredge each piece in the flour and panko mixture, pressing lightly to ensure it sticks. This step is crucial for that satisfying crunch. Place the coated chicken on the prepared baking sheet, ready for the oven!

Step 4: Bake the Chicken

Place the baking sheet in your preheated oven and let the chicken bake for 25-30 minutes. The goal is to achieve a golden brown color and ensure the chicken is cooked through. You can check the internal temperature; it should reach 165°F. The aroma wafting through your kitchen will be irresistible!

Step 5: Add the Hot Honey

In the last 5 minutes of baking, drizzle the hot honey over the chicken. This step is where the sweet heat comes into play! The honey will caramelize slightly, creating a beautiful glaze that enhances the flavor. Keep an eye on it; you want that perfect balance of sweetness and spice!

Step 6: Rest and Serve

Once the chicken is done baking, remove it from the oven and let it rest for a few minutes. This allows the juices to redistribute, ensuring each bite is juicy and tender. Serve it up hot, and watch as your family digs in with delight!

Tips for Success

  • Let the chicken marinate longer for deeper flavor—up to 2 hours is ideal.
  • Use a meat thermometer to ensure the chicken reaches 165°F for perfect doneness.
  • For extra crunch, consider adding crushed cornflakes to the breadcrumb mixture.
  • Don’t skip the olive oil drizzle; it’s key for achieving that golden crisp.
  • Experiment with different hot honey brands for unique flavor profiles.

Equipment Needed

  • Baking sheet: A standard sheet works, but a wire rack on top can help with airflow.
  • Parchment paper: This makes cleanup easy; aluminum foil is a good alternative.
  • Large bowl: For marinating; any mixing bowl will do.
  • Shallow dish: Perfect for coating the chicken; a plate can work too.
  • Meat thermometer: Essential for checking doneness; a simple knife can also help cut into the chicken.

Variations

  • Spicy Garlic Version: Add minced garlic to the buttermilk marinade for an extra punch of flavor.
  • Herb-Infused: Mix in fresh herbs like rosemary or thyme into the breadcrumb mixture for a fragrant twist.
  • Gluten-Free Option: Substitute all-purpose flour with almond flour and use gluten-free panko breadcrumbs.
  • Honey Mustard Twist: Replace hot honey with a mixture of honey and Dijon mustard for a tangy flavor.
  • Vegetarian Alternative: Use cauliflower florets or eggplant slices instead of chicken for a delicious plant-based option.

Serving Suggestions

  • Classic Coleslaw: A refreshing side that balances the heat of the chicken.
  • Garlic Mashed Potatoes: Creamy and comforting, they pair perfectly with the crispy chicken.
  • Cold Beer: A crisp lager or pale ale complements the spicy sweetness beautifully.
  • Presentation Tip: Serve on a wooden board with fresh herbs for a rustic touch.

FAQs about Baked Crunchy Hot Honey Chicken

Can I use chicken breasts instead of thighs? Absolutely! While chicken thighs are juicier, chicken breasts can work too. Just be mindful of the cooking time, as they may cook faster.

What if I don’t have hot honey? No worries! You can easily mix regular honey with your favorite hot sauce to create your own spicy honey. Adjust the heat to your liking!

How do I store leftovers? Store any leftover Baked Crunchy Hot Honey Chicken in an airtight container in the fridge for up to 3 days. Reheat in the oven for the best texture.

Can I freeze this dish? Yes! You can freeze the cooked chicken. Just make sure it’s cooled completely before placing it in a freezer-safe container. It should last for about 2 months.

What sides pair well with this chicken? This dish goes great with classic coleslaw, garlic mashed potatoes, or even a simple green salad. The sweet and spicy flavors complement a variety of sides!

Final Thoughts

Baked Crunchy Hot Honey Chicken is more than just a meal; it’s a celebration of flavors that brings everyone together. The crispy texture combined with the sweet and spicy notes creates a dish that’s both comforting and exciting. Whether you’re cooking for family or friends, this recipe is sure to impress and spark joy around the dinner table. Plus, it’s easy enough to whip up on a busy weeknight, making it a go-to favorite. So roll up your sleeves, embrace the culinary adventure, and enjoy every delicious bite of this delightful dish!

Ranis

Baked Crunchy Hot Honey Chicken: A Must-Try Recipe!

Baked Crunchy Hot Honey Chicken is a delicious and crispy dish that combines the sweetness of honey with a spicy kick, perfect for a family dinner.
Prep Time 30 minutes
Cook Time 30 minutes
Total Time 1 hour
Servings: 4 servings
Course: Main Course
Cuisine: American
Calories: 450

Ingredients
  

  • 2 pounds chicken thighs boneless and skinless
  • 1 cup buttermilk
  • 1 teaspoon garlic powder
  • 1 teaspoon onion powder
  • 1 teaspoon smoked paprika
  • 1 teaspoon salt
  • 1/2 teaspoon black pepper
  • 1 cup all-purpose flour
  • 1 cup panko breadcrumbs
  • 1/4 cup hot honey or regular honey mixed with hot sauce to taste
  • 2 tablespoons olive oil

Method
 

  1. Preheat your oven to 400°F (200°C) and line a baking sheet with parchment paper.
  2. In a large bowl, combine buttermilk, garlic powder, onion powder, smoked paprika, salt, and black pepper. Add the chicken thighs and ensure they are well coated. Cover and refrigerate for at least 30 minutes, or up to 2 hours for more flavor.
  3. In a shallow dish, mix the flour and panko breadcrumbs together. Remove the chicken from the buttermilk marinade, allowing excess to drip off, then dredge each piece in the flour and panko mixture, pressing lightly to adhere.
  4. Place the coated chicken on the prepared baking sheet. Drizzle olive oil over the chicken to help it crisp up while baking.
  5. Bake in the preheated oven for 25-30 minutes, or until the chicken is golden brown and cooked through (internal temperature should reach 165°F).
  6. In the last 5 minutes of baking, drizzle the hot honey over the chicken and return to the oven to caramelize slightly.
  7. Remove from the oven and let rest for a few minutes before serving.

Nutrition

Serving: 1pieceCalories: 450kcalCarbohydrates: 30gProtein: 30gFat: 20gSaturated Fat: 3gPolyunsaturated Fat: 15gCholesterol: 100mgSodium: 800mgFiber: 2gSugar: 10g

Notes

  • For extra crunch, try adding crushed cornflakes to the breadcrumb mixture.
  • For a milder flavor, reduce the amount of hot sauce in the honey or use a sweet chili sauce instead.

Tried this recipe?

Let us know how it was!

Zesty Shrimp Ceviche: A Refreshing Delight You Must Try!

Introduction to Zesty Shrimp Ceviche

There’s something magical about a dish that can transport you to sun-soaked beaches with just one bite. Zesty Shrimp Ceviche does just that! This refreshing delight is not only a feast for the eyes but also a quick solution for those busy days when you crave something light yet satisfying. Whether you’re hosting friends or simply treating yourself, this ceviche is sure to impress. With vibrant flavors and a burst of freshness, it’s the perfect appetizer or light meal that brings a taste of summer to your table, no matter the season.

Why You’ll Love This Zesty Shrimp Ceviche

This Zesty Shrimp Ceviche is a game-changer for anyone looking to whip up a delicious meal in no time. With minimal prep and no cooking required, it’s perfect for those hectic weeknights or spontaneous gatherings. The vibrant flavors of fresh ingredients come together effortlessly, making it a crowd-pleaser. Plus, it’s light and healthy, so you can indulge without the guilt. Trust me, your taste buds will thank you!

Ingredients for Zesty Shrimp Ceviche

Gathering the right ingredients is key to making a fantastic Zesty Shrimp Ceviche. Here’s what you’ll need:

  • Raw shrimp: Fresh, peeled, and deveined shrimp are the stars of this dish. They soak up the lime juice beautifully, transforming into a tender delight.
  • Fresh lime juice: This is the magic ingredient that “cooks” the shrimp. The acidity brightens the flavors and adds that zesty kick.
  • Diced tomatoes: Juicy and vibrant, tomatoes add a pop of color and sweetness, balancing the tanginess of the lime.
  • Diced cucumber: Crisp and refreshing, cucumber brings a cool crunch that complements the other ingredients perfectly.
  • Finely chopped red onion: This adds a sharp bite and a lovely crunch. Soaking it in lime juice can mellow its intensity if you prefer.
  • Chopped fresh cilantro: A must for that fresh, herby flavor. If you’re not a fan, parsley can be a good substitute.
  • Jalapeño pepper: For those who like a little heat, minced jalapeño adds a spicy kick. Remove the seeds for a milder flavor.
  • Salt and black pepper: Essential for seasoning, these enhance all the flavors in your ceviche.
  • Diced avocado (optional): Creamy avocado adds richness and a luxurious texture. It’s a great addition if you want to elevate your dish.
  • Tortilla chips: Perfect for scooping up the ceviche, they add a satisfying crunch and are a classic pairing.

For exact measurements, check the bottom of the article where you can find everything listed for easy printing. Happy cooking!

How to Make Zesty Shrimp Ceviche

Creating Zesty Shrimp Ceviche is a breeze! Follow these simple steps, and you’ll have a refreshing dish ready to impress in no time. Let’s dive in!

Step 1: Marinate the Shrimp

Start by placing your raw shrimp in a medium bowl. Pour in the fresh lime juice, ensuring the shrimp are fully submerged. This is where the magic happens! Cover the bowl and refrigerate for about 2 hours. You’ll know they’re ready when the shrimp turn pink and opaque. It’s like watching a culinary transformation unfold!

Step 2: Drain Excess Juice

Once the shrimp are beautifully marinated, it’s time to drain some of that lime juice. You want to keep a little for flavor, but too much can make your ceviche soupy. Just tilt the bowl gently and let the excess juice flow out. This step is crucial for achieving the perfect texture.

Step 3: Combine Ingredients

Now, it’s time to bring everything together! Add the diced tomatoes, cucumber, red onion, cilantro, jalapeño, salt, and black pepper to the shrimp. Gently toss everything to combine. The colors will pop, and the aroma will be irresistible. This is where the zesty flavors really start to shine!

Step 4: Add Avocado (Optional)

If you’re feeling a bit fancy, fold in the diced avocado just before serving. It adds a creamy richness that takes your ceviche to the next level. But if you prefer to keep it light, feel free to skip this step. Either way, it’s going to be delicious!

Step 5: Serve with Tortilla Chips

Finally, it’s time to dig in! Serve your Zesty Shrimp Ceviche chilled, alongside a bowl of crispy tortilla chips. The crunch of the chips pairs perfectly with the fresh ceviche. Trust me, this dish will be a hit at any gathering!

Tips for Success

  • Use the freshest shrimp you can find for the best flavor and texture.
  • Don’t skip the marinating time; it’s essential for the shrimp to “cook” properly.
  • Adjust the jalapeño to your spice preference—more seeds for heat, less for mild.
  • Chill your serving bowl for an extra refreshing experience.
  • Feel free to experiment with other veggies like bell peppers or mango for a twist!

Equipment Needed

  • Medium bowl: A standard mixing bowl works well. If you have a glass bowl, it’s great for showcasing those vibrant colors!
  • Measuring cups: Essential for accuracy, but you can eyeball it if you’re feeling adventurous.
  • Cutting board and knife: For chopping veggies. A sharp knife makes the task easier and safer.
  • Refrigerator: To marinate the shrimp. A cooler can work in a pinch if you’re outdoors.

Variations of Zesty Shrimp Ceviche

  • Fish Ceviche: Swap shrimp for diced fish like tilapia or scallops for a different texture and flavor.
  • Mango Salsa Twist: Add diced mango for a sweet contrast to the zesty lime, creating a tropical vibe.
  • Herb Infusion: Experiment with different herbs like mint or basil for a unique flavor profile.
  • Spicy Kick: Incorporate diced serrano peppers or a splash of your favorite hot sauce for an extra heat boost.
  • Vegan Option: Replace shrimp with diced hearts of palm or marinated tofu for a plant-based ceviche.

Serving Suggestions for Zesty Shrimp Ceviche

  • Pair with a refreshing margarita or a light beer for a perfect summer vibe.
  • Serve alongside a fresh green salad for a complete meal.
  • Garnish with extra cilantro and lime wedges for a vibrant presentation.
  • Consider adding a side of guacamole for an extra creamy dip.
  • Use colorful serving dishes to enhance the visual appeal of your ceviche.

FAQs about Zesty Shrimp Ceviche

Can I use frozen shrimp for this recipe?
Absolutely! Just make sure to thaw the shrimp completely before marinating. Fresh shrimp is ideal, but frozen can work just as well if you’re in a pinch.

How long can I store leftover ceviche?
Leftover Zesty Shrimp Ceviche can be stored in the refrigerator for up to 2 days. However, it’s best enjoyed fresh, as the shrimp can become mushy over time.

Is ceviche safe to eat?
Yes, as long as you use fresh shrimp and marinate it properly in lime juice, the acidity will “cook” the shrimp, making it safe to eat. Just ensure everything is fresh and handled correctly.

Can I make this ceviche ahead of time?
You can prepare the ceviche a few hours in advance. Just wait to add the avocado until right before serving to keep it fresh and vibrant.

What can I substitute for shrimp in this ceviche?
If shrimp isn’t your thing, you can use diced fish like tilapia or scallops. For a vegetarian option, try hearts of palm or marinated tofu for a delightful twist!

Final Thoughts

Making Zesty Shrimp Ceviche is more than just preparing a dish; it’s about creating a moment. The vibrant colors and fresh flavors bring joy to any gathering, making it a perfect centerpiece for summer barbecues or casual get-togethers. Each bite is a reminder of sunny days and good company, evoking memories of laughter and shared stories. Plus, the ease of preparation means you can focus on what truly matters—enjoying time with loved ones. So, whether you’re a seasoned chef or a kitchen novice, this ceviche is sure to become a cherished recipe in your culinary repertoire.

Ranis

Zesty Shrimp Ceviche: A Refreshing Delight You Must Try!

A refreshing and zesty shrimp ceviche that is perfect for a light meal or appetizer.
Prep Time 10 minutes
Cook Time 2 hours
Total Time 2 hours 10 minutes
Course: Appetizer
Cuisine: Mexican
Calories: 180

Ingredients
  

  • 1 pound raw shrimp peeled and deveined
  • 1 cup fresh lime juice about 8-10 limes
  • 1 cup diced tomatoes
  • 1 cup diced cucumber
  • 1/2 cup finely chopped red onion
  • 1/2 cup chopped fresh cilantro
  • 1 jalapeño pepper seeded and minced
  • 1 teaspoon salt
  • 1/2 teaspoon black pepper
  • 1 avocado diced (optional)
  • Tortilla chips for serving

Method
 

  1. In a medium bowl, combine the shrimp and lime juice. Ensure the shrimp are fully submerged in the juice. Cover and refrigerate for about 2 hours, or until the shrimp turn pink and opaque.
  2. After the shrimp are cooked in the lime juice, drain off some of the juice, leaving a little for flavor.
  3. Add the diced tomatoes, cucumber, red onion, cilantro, jalapeño, salt, and black pepper to the shrimp. Gently toss to combine all ingredients.
  4. If using, gently fold in the diced avocado just before serving.
  5. Serve chilled with tortilla chips on the side.

Nutrition

Serving: 1servingCalories: 180kcalCarbohydrates: 8gProtein: 22gFat: 7gSaturated Fat: 1gPolyunsaturated Fat: 6gCholesterol: 150mgSodium: 500mgFiber: 2gSugar: 2g

Notes

  • For a spicier kick, leave some seeds in the jalapeño or add a dash of hot sauce.
  • Substitute the shrimp with diced fish like tilapia or scallops for a different ceviche experience.

Tried this recipe?

Let us know how it was!

Parmesan-Crusted Salmon with Lemon Cream Sauce delights!

Introduction to Parmesan-Crusted Salmon with Lemon Cream Sauce

Cooking can sometimes feel like a chore, especially on those busy weeknights when you just want something delicious without the fuss. That’s where this Parmesan-Crusted Salmon with Lemon Cream Sauce comes in. It’s a dish that not only impresses but also brings a burst of flavor to your table. Imagine the crispy, cheesy crust paired with a creamy lemon sauce that dances on your palate. This recipe is perfect for a quick weeknight dinner or a special occasion, making it a go-to for any home cook looking to elevate their meal game.

Why You’ll Love This Parmesan-Crusted Salmon with Lemon Cream Sauce

This Parmesan-Crusted Salmon with Lemon Cream Sauce is a culinary gem that checks all the boxes. It’s incredibly easy to whip up, taking just 25 minutes from start to finish. The combination of crispy Parmesan and creamy lemon sauce creates a flavor explosion that will have your taste buds singing. Plus, it’s a healthy option packed with protein, making it perfect for those busy nights when you still want to eat well.

Ingredients for Parmesan-Crusted Salmon with Lemon Cream Sauce

Gathering the right ingredients is the first step to culinary success. For this Parmesan-Crusted Salmon with Lemon Cream Sauce, you’ll need a few key players that come together to create a delightful dish.

  • Salmon fillets: Fresh, high-quality salmon is essential. Look for vibrant color and firm texture.
  • Grated Parmesan cheese: This adds a rich, nutty flavor and a crispy crust. Freshly grated is best for maximum taste.
  • Panko breadcrumbs: These Japanese-style breadcrumbs provide an extra crunch. They’re lighter than regular breadcrumbs, making your crust even more delightful.
  • Fresh parsley: A sprinkle of chopped parsley adds a pop of color and freshness to the dish.
  • Garlic powder: This brings a savory depth to the crust without overpowering the salmon.
  • Onion powder: A subtle sweetness that complements the garlic and enhances the overall flavor.
  • Salt and pepper: Essential for seasoning, these staples elevate the taste of every ingredient.
  • Olive oil: This helps the crust adhere to the salmon and adds a touch of richness.
  • Dijon mustard: A hint of tanginess that brightens the dish and enhances the flavors.
  • Lemon juice: Freshly squeezed lemon juice adds acidity, balancing the richness of the cream sauce.
  • Heavy cream: The base of the luscious lemon cream sauce, providing a velvety texture.
  • Lemon zest: This adds a burst of citrus aroma and flavor, making the sauce even more vibrant.

For those looking to spice things up, consider adding a pinch of red pepper flakes to the breadcrumb mixture. If you’re short on time, pre-grated cheese and store-bought breadcrumbs can work in a pinch. You can find the exact quantities for each ingredient at the bottom of the article, ready for printing!

How to Make Parmesan-Crusted Salmon with Lemon Cream Sauce

Now that you have all your ingredients ready, let’s dive into the steps for creating this mouthwatering Parmesan-Crusted Salmon with Lemon Cream Sauce. Each step is straightforward, ensuring you can whip this up without breaking a sweat.

Step 1: Preheat and Prepare

First things first, preheat your oven to 400°F (200°C). This ensures your salmon cooks evenly and gets that perfect golden crust. While the oven heats up, line a baking sheet with parchment paper. This little trick makes cleanup a breeze!

Step 2: Mix the Crust

In a mixing bowl, combine the grated Parmesan cheese, panko breadcrumbs, chopped parsley, garlic powder, onion powder, salt, and pepper. Stir until everything is well mixed. This flavorful topping is what makes the salmon shine, so don’t skimp on the mixing!

Step 3: Prepare the Salmon

In another bowl, whisk together the olive oil, Dijon mustard, and lemon juice. This mixture not only adds flavor but also helps the crust stick to the salmon. Brush this mixture generously over each salmon fillet, ensuring they’re well coated.

Step 4: Coat the Salmon

Now comes the fun part! Take your breadcrumb mixture and press it firmly onto the top of each salmon fillet. Make sure to cover the entire surface for that delicious, crunchy crust. The more even the coating, the better the texture!

Step 5: Bake the Salmon

Place the coated salmon fillets on your prepared baking sheet. Slide them into the oven and bake for 12-15 minutes. You’ll know they’re done when the crust is golden brown and the salmon flakes easily with a fork. Keep an eye on them; nobody likes overcooked fish!

Step 6: Make the Lemon Cream Sauce

While the salmon is baking, it’s time to whip up the lemon cream sauce. In a saucepan over medium heat, combine the heavy cream, lemon zest, and a pinch of salt. Stir frequently for about 5 minutes until the sauce thickens slightly. This creamy goodness will elevate your dish to a whole new level!

Step 7: Serve and Enjoy

Once the salmon is out of the oven, let it rest for a few minutes. This helps the juices redistribute, making each bite tender and juicy. Drizzle the luscious lemon cream sauce over the salmon just before serving. Trust me, your taste buds will thank you!

Tips for Success

  • Use fresh salmon for the best flavor and texture.
  • Don’t skip the resting time after baking; it makes a difference!
  • Feel free to experiment with herbs like dill or thyme for added flavor.
  • For a crispier crust, broil the salmon for the last minute of cooking.
  • Pair with a light white wine to enhance the meal experience.

Equipment Needed

  • Baking sheet: A standard baking sheet works well; a cast iron skillet can add extra crispiness.
  • Parchment paper: For easy cleanup; aluminum foil is a good alternative.
  • Mixing bowls: Use any size; a large bowl is great for mixing the crust.
  • Whisk: Essential for blending the olive oil mixture; a fork can do the job too.
  • Spatula: Perfect for transferring the salmon; tongs can also be handy.

Variations

  • Herb-Infused Crust: Add fresh herbs like dill, thyme, or basil to the breadcrumb mixture for an aromatic twist.
  • Spicy Kick: Mix in a pinch of cayenne pepper or red pepper flakes to the crust for a zesty flavor boost.
  • Gluten-Free Option: Substitute panko breadcrumbs with gluten-free breadcrumbs or crushed nuts for a crunchy topping.
  • Mustard Variations: Swap Dijon mustard for whole grain or honey mustard for a different flavor profile.
  • Vegetable Pairing: Serve with roasted vegetables like Brussels sprouts or zucchini for a colorful, nutritious side.

Serving Suggestions

  • Steamed Asparagus: A light, crunchy side that complements the richness of the salmon.
  • Garden Salad: Fresh greens with a tangy vinaigrette add a refreshing contrast.
  • White Wine: A chilled Sauvignon Blanc pairs beautifully with the lemon cream sauce.
  • Presentation: Garnish with lemon wedges and parsley for a vibrant touch.

FAQs about Parmesan-Crusted Salmon with Lemon Cream Sauce

Can I use frozen salmon for this recipe?

Absolutely! Just make sure to thaw the salmon completely before cooking. Frozen salmon can still be delicious, but it’s best to ensure it’s fully defrosted for even cooking.

What can I substitute for heavy cream in the lemon sauce?

If you’re looking for a lighter option, you can use half-and-half or even Greek yogurt. Just remember that the texture and richness will vary slightly, but it will still taste great!

How do I know when the salmon is done cooking?

The salmon is perfectly cooked when it flakes easily with a fork and reaches an internal temperature of 145°F (63°C). Keep an eye on it to avoid overcooking!

Can I make the lemon cream sauce ahead of time?

Yes, you can prepare the sauce in advance! Just reheat it gently on the stove before serving. It’s a great way to save time on busy nights.

What sides pair well with Parmesan-Crusted Salmon?

Steamed asparagus, a fresh garden salad, or roasted vegetables make excellent companions. They balance the richness of the salmon and add a colorful touch to your plate!

Final Thoughts

Cooking this Parmesan-Crusted Salmon with Lemon Cream Sauce is more than just preparing a meal; it’s about creating a moment. The aroma of the salmon baking, the vibrant colors on your plate, and that first bite of crispy, cheesy goodness paired with the creamy sauce—it’s pure joy. Whether you’re impressing guests or enjoying a quiet dinner at home, this dish brings a sense of accomplishment and satisfaction. It’s a reminder that with a few simple ingredients, you can create something truly special. So, roll up your sleeves and dive into this culinary adventure!

Ranis

Parmesan-Crusted Salmon with Lemon Cream Sauce delights!

A delicious and easy recipe for Parmesan-Crusted Salmon topped with a creamy lemon sauce.
Prep Time 10 minutes
Cook Time 15 minutes
Total Time 25 minutes
Servings: 4 servings
Course: Main Course
Cuisine: American
Calories: 450

Ingredients
  

  • 4 6-ounce salmon fillets
  • 1 cup grated Parmesan cheese
  • 1 cup panko breadcrumbs
  • 2 tablespoons fresh parsley chopped
  • 1 teaspoon garlic powder
  • 1 teaspoon onion powder
  • Salt and pepper to taste
  • 2 tablespoons olive oil
  • 1 tablespoon Dijon mustard
  • 1 tablespoon lemon juice
  • 1 cup heavy cream
  • 1 tablespoon lemon zest

Method
 

  1. Preheat your oven to 400°F (200°C). Line a baking sheet with parchment paper.
  2. In a bowl, mix together the Parmesan cheese, panko breadcrumbs, parsley, garlic powder, onion powder, salt, and pepper.
  3. In a separate bowl, whisk together the olive oil, Dijon mustard, and lemon juice. Brush this mixture over the salmon fillets.
  4. Press the Parmesan and breadcrumb mixture onto the top of each salmon fillet, ensuring an even coating.
  5. Place the salmon fillets on the prepared baking sheet and bake for 12-15 minutes, or until the salmon is cooked through and the crust is golden brown.
  6. While the salmon is baking, prepare the lemon cream sauce. In a saucepan over medium heat, combine the heavy cream, lemon zest, and a pinch of salt. Cook for about 5 minutes, stirring frequently, until the sauce thickens slightly.
  7. Once the salmon is done, remove it from the oven and let it rest for a few minutes. Serve with the lemon cream sauce drizzled over the top.

Nutrition

Serving: 1filletCalories: 450kcalCarbohydrates: 6gProtein: 36gFat: 30gSaturated Fat: 15gPolyunsaturated Fat: 10gCholesterol: 100mgSodium: 500mgSugar: 1g

Notes

  • For a spicier kick, add a pinch of red pepper flakes to the breadcrumb mixture.
  • Serve with a side of steamed asparagus or a fresh garden salad for a complete meal.

Tried this recipe?

Let us know how it was!

Creamy Italian Spaghetti with Ground Beef is Irresistible!

Introduction to Creamy Italian Spaghetti with Ground Beef

There’s something undeniably comforting about a plate of Creamy Italian Spaghetti with Ground Beef.

It takes me back to family dinners where laughter filled the air, and the aroma of rich sauces danced through the kitchen.

This dish is not just a meal; it’s a quick solution for those busy weeknights when you want to impress your loved ones without spending hours in the kitchen.

With its creamy texture and hearty flavors, it’s bound to become a favorite in your home.

Let’s dive into this delicious recipe that’s as easy to make as it is satisfying!

Why You’ll Love This Creamy Italian Spaghetti with Ground Beef

This Creamy Italian Spaghetti with Ground Beef is a game-changer for any home cook.

It’s not just about the rich, savory flavors; it’s also incredibly easy to whip up.

In just 30 minutes, you can serve a hearty meal that feels gourmet.

Whether you’re feeding a hungry family or impressing friends, this dish delivers satisfaction without the stress.

Trust me, once you try it, you’ll be hooked!

Ingredients for Creamy Italian Spaghetti with Ground Beef

To create this delightful Creamy Italian Spaghetti with Ground Beef, you’ll need a handful of simple yet flavorful ingredients.

Here’s what you’ll gather:

  • Spaghetti: The classic pasta choice that holds the creamy sauce beautifully.
  • Ground Beef: Adds richness and protein, making the dish hearty and satisfying.
  • Olive Oil: A staple in Italian cooking, it enhances flavor and helps sauté the vegetables.
  • Onion: Finely chopped, it brings sweetness and depth to the sauce.
  • Garlic: Minced for that aromatic kick that elevates the entire dish.
  • Diced Tomatoes: Canned for convenience, they add acidity and moisture to the sauce.
  • Italian Seasoning: A blend of herbs that infuses the dish with classic Italian flavors.
  • Salt and Black Pepper: Essential for seasoning, enhancing all the other flavors.
  • Heavy Cream: The star of the show, creating that luscious, creamy texture.
  • Parmesan Cheese: Grated for a salty, nutty finish that ties everything together.
  • Fresh Basil: Optional, but it adds a pop of color and freshness when garnished.

Feel free to get creative!

You can mix in some spinach or mushrooms for added nutrition.

If you’re looking for a lighter option, ground turkey or chicken works well, and half-and-half can replace heavy cream.

For exact measurements, check the bottom of the article where you can find everything available for printing.

How to Make Creamy Italian Spaghetti with Ground Beef

Making Creamy Italian Spaghetti with Ground Beef is a straightforward process that anyone can master.

Follow these simple steps, and you’ll have a delicious meal ready in no time!

Step 1: Cook the Spaghetti

Start by boiling a large pot of salted water.

Once it’s bubbling, add the spaghetti and cook according to the package instructions until al dente.

This usually takes about 8-10 minutes.

Don’t forget to stir occasionally to prevent sticking!

When it’s done, drain the spaghetti and set it aside.

A little drizzle of olive oil can keep it from clumping together.

Step 2: Sauté the Onion

In a large skillet, heat a tablespoon of olive oil over medium heat.

Add the finely chopped onion and sauté for about 3-4 minutes.

You want it to become translucent and fragrant.

This step builds a flavorful base for your sauce, so don’t rush it!

Step 3: Brown the Ground Beef

Next, toss in the minced garlic and ground beef.

Cook until the beef is browned and fully cooked, breaking it apart with a spoon.

This should take about 5-7 minutes.

If there’s excess fat, drain it off to keep your dish from being greasy.

Step 4: Add Tomatoes and Seasoning

Now, stir in the can of diced tomatoes along with their juice.

Add the Italian seasoning, salt, and black pepper.

Let this simmer for about 5 minutes.

This allows the flavors to meld beautifully, creating a rich sauce.

Step 5: Stir in Cream and Cheese

Reduce the heat to low and pour in the heavy cream.

Add the grated Parmesan cheese and stir until everything is well combined.

Cook for an additional 2-3 minutes until the sauce is heated through and slightly thickened.

This is where the magic happens—your sauce should be creamy and luscious!

Step 6: Combine with Spaghetti

Add the cooked spaghetti to the skillet.

Toss everything together gently, ensuring the pasta is evenly coated with the creamy sauce.

Cook for another minute to heat everything through.

This step is crucial for that perfect blend of flavors.

Step 7: Serve and Garnish

Finally, serve your Creamy Italian Spaghetti with Ground Beef immediately.

If you like, garnish with fresh basil leaves for a pop of color and flavor.

This dish is best enjoyed hot, so dig in and savor every bite!

Tips for Success

  • Always salt your pasta water; it enhances the flavor of the spaghetti.
  • Don’t rush the sautéing process; caramelizing the onions adds depth to your sauce.
  • For a creamier sauce, let it simmer a bit longer after adding the cream and cheese.
  • Experiment with herbs; fresh parsley or oregano can elevate the dish.
  • Save some pasta water to adjust the sauce consistency if needed.

Equipment Needed

  • Large Pot: For boiling spaghetti; a deep saucepan works too.
  • Skillet: A large non-stick skillet is ideal for making the sauce.
  • Colander: To drain the spaghetti; a slotted spoon can be a quick alternative.
  • Wooden Spoon: Perfect for stirring; a spatula can also do the job.

Variations

  • Vegetarian Option: Swap the ground beef for lentils or a plant-based meat substitute for a hearty vegetarian dish.
  • Spicy Kick: Add red pepper flakes or diced jalapeños to the sauce for a spicy twist that’ll wake up your taste buds.
  • Cheesy Delight: Mix in additional cheeses like mozzarella or ricotta for an even creamier and cheesier experience.
  • Herb Infusion: Experiment with fresh herbs like thyme or rosemary for a fragrant and flavorful sauce.
  • Low-Carb Version: Substitute spaghetti with zucchini noodles or spaghetti squash for a lighter, low-carb alternative.

Serving Suggestions

  • Garlic Bread: Serve with warm, buttery garlic bread for a classic pairing.
  • Salad: A fresh Caesar or mixed greens salad adds a crisp contrast.
  • Wine: Pair with a glass of red wine, like Chianti, to enhance the flavors.
  • Presentation: Serve in a large bowl, garnished with extra Parmesan and basil for a beautiful touch.

FAQs about Creamy Italian Spaghetti with Ground Beef

Can I use a different type of meat in this recipe?

Absolutely! Ground turkey or chicken can be great alternatives for a leaner option. You can even try ground pork for a different flavor profile.

How can I make this dish gluten-free?

To make Creamy Italian Spaghetti with Ground Beef gluten-free, simply substitute regular spaghetti with gluten-free pasta. There are many delicious options available that hold up well in this creamy sauce.

Can I prepare this dish ahead of time?

Yes! You can cook the sauce ahead of time and store it in the fridge. Just reheat it when you’re ready to serve, and cook the spaghetti fresh for the best texture.

What can I serve with Creamy Italian Spaghetti?

This dish pairs wonderfully with garlic bread, a fresh salad, or even roasted vegetables. A glass of red wine can elevate the meal even further!

How do I store leftovers?

Store any leftovers in an airtight container in the fridge for up to 3 days. Reheat gently on the stovetop, adding a splash of cream or pasta water to loosen the sauce if needed.

Final Thoughts

Cooking Creamy Italian Spaghetti with Ground Beef is more than just preparing a meal; it’s about creating memories.

The rich, creamy sauce enveloping the tender spaghetti brings warmth to the table, making it perfect for family gatherings or cozy nights in.

Each bite is a delightful blend of flavors that transports you to an Italian trattoria, even if you’re just in your kitchen.

This dish is a reminder that good food doesn’t have to be complicated.

So, roll up your sleeves, gather your loved ones, and enjoy the joy that comes from sharing a delicious homemade meal!

Ranis

Creamy Italian Spaghetti with Ground Beef is Irresistible!

Creamy Italian Spaghetti with Ground Beef is a delicious and hearty pasta dish that combines tender spaghetti with a rich and creamy sauce made from ground beef, tomatoes, and Parmesan cheese.
Prep Time 10 minutes
Cook Time 20 minutes
Total Time 30 minutes
Servings: 4 servings
Course: Main Course
Cuisine: Italian
Calories: 550

Ingredients
  

  • 8 ounces spaghetti
  • 1 pound ground beef
  • 1 tablespoon olive oil
  • 1 small onion finely chopped
  • 2 cloves garlic minced
  • 1 can 14.5 ounces diced tomatoes, undrained
  • 1 teaspoon Italian seasoning
  • 1/2 teaspoon salt
  • 1/4 teaspoon black pepper
  • 1 cup heavy cream
  • 1/2 cup grated Parmesan cheese
  • Fresh basil leaves for garnish optional

Method
 

  1. Cook the spaghetti according to package instructions in a large pot of salted boiling water until al dente. Drain and set aside.
  2. In a large skillet, heat the olive oil over medium heat. Add the chopped onion and sauté for about 3-4 minutes until translucent.
  3. Add the minced garlic and ground beef to the skillet. Cook until the beef is browned and cooked through, breaking it apart with a spoon, about 5-7 minutes. Drain excess fat if necessary.
  4. Stir in the diced tomatoes (with juice), Italian seasoning, salt, and black pepper. Simmer for 5 minutes to allow the flavors to meld.
  5. Reduce the heat to low and stir in the heavy cream and Parmesan cheese. Cook for an additional 2-3 minutes until the sauce is heated through and slightly thickened.
  6. Add the cooked spaghetti to the skillet and toss to coat the pasta evenly with the creamy sauce. Cook for another minute until everything is heated through.
  7. Serve immediately, garnished with fresh basil leaves if desired.

Nutrition

Serving: 1servingCalories: 550kcalCarbohydrates: 45gProtein: 28gFat: 30gSaturated Fat: 15gPolyunsaturated Fat: 10gCholesterol: 100mgSodium: 600mgFiber: 2gSugar: 4g

Notes

  • For added vegetables, consider mixing in spinach or mushrooms when sautéing the onion and garlic.
  • Substitute ground turkey or chicken for a leaner option, and use half-and-half instead of heavy cream for a lighter sauce.

Tried this recipe?

Let us know how it was!