Creamy Salmon Pasta: A Decadent Dinner Delight!

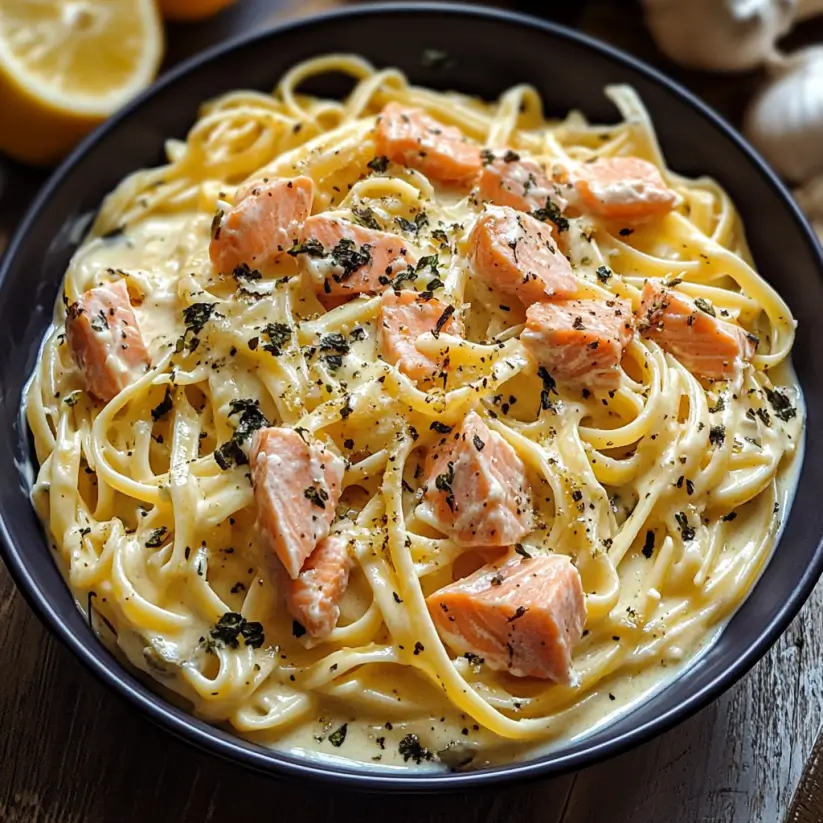
Introduction to Creamy Salmon Pasta

There’s something magical about a plate of creamy salmon pasta that instantly transports me back to cozy family dinners. This dish is not just a meal; it’s a warm embrace on a busy day. Whether you’re looking to impress your loved ones or simply treat yourself, this creamy salmon pasta is the answer. It’s rich, satisfying, and surprisingly easy to whip up. In just 30 minutes, you can create a decadent dinner that feels gourmet without the fuss. Let’s dive into this delightful recipe that’s sure to become a favorite in your kitchen!

Why You’ll Love This Creamy Salmon Pasta

This creamy salmon pasta is a game-changer for your weeknight dinners. It’s quick to prepare, taking just 30 minutes from start to finish. The rich flavors of salmon and cream create a comforting dish that feels indulgent yet simple. Plus, it’s versatile enough to please even the pickiest eaters. With minimal cleanup and maximum taste, this recipe is bound to become a staple in your culinary repertoire!

Ingredients for Creamy Salmon Pasta

Gathering the right ingredients is the first step to creating this creamy salmon pasta masterpiece. Here’s what you’ll need:

  • Pasta: Fettuccine or spaghetti works beautifully, providing a perfect base for the creamy sauce.
  • Olive Oil: A splash of olive oil adds richness and helps sauté the onions to perfection.
  • Onion: A small, finely chopped onion brings sweetness and depth to the dish.
  • Garlic: Minced garlic infuses the sauce with a fragrant kick that elevates the flavors.
  • Salmon: Fresh or canned salmon is the star of the show, offering a hearty protein source and a delightful taste.
  • Heavy Cream: This is what makes the sauce luxuriously creamy and indulgent.
  • Spinach: Fresh or frozen spinach adds a pop of color and nutrition, making the dish more wholesome.
  • Lemon Juice: A splash of lemon juice brightens the flavors and balances the richness of the cream.
  • Salt and Pepper: Essential for seasoning, these staples enhance all the flavors in the dish.
  • Parmesan Cheese: Grated Parmesan adds a salty, nutty finish that ties everything together.
  • Dill: Fresh dill is optional but highly recommended for a burst of fresh flavor.

For those looking to lighten things up, consider substituting half-and-half for the heavy cream. You can also toss in cherry tomatoes or asparagus for an extra flavor boost. Exact measurements for each ingredient can be found at the bottom of the article, ready for printing!

How to Make Creamy Salmon Pasta

Now that you have your ingredients ready, let’s get cooking! This creamy salmon pasta comes together in just a few simple steps. Follow along, and you’ll have a delicious dinner on the table in no time.

Step 1: Cook the Pasta

Start by boiling a large pot of salted water. Once it’s bubbling, add your fettuccine or spaghetti. Cook according to the package instructions until it’s al dente. This usually takes about 8-10 minutes. Remember to reserve half a cup of that pasta water before draining. It’s liquid gold for your sauce!

Step 2: Sauté the Onion

In a large skillet, heat a tablespoon of olive oil over medium heat. Toss in the finely chopped onion and sauté for about 3-4 minutes. You want it soft and translucent, not browned. The aroma will start to fill your kitchen, and trust me, it’s a good sign!

Step 3: Add Garlic and Salmon

Next, add the minced garlic to the skillet. Cook it for about a minute until it’s fragrant. Then, gently fold in the flaked salmon. If you’re using canned salmon, make sure it’s well-drained. Let it warm through for 2-3 minutes. This step is where the magic begins!

Step 4: Create the Cream Sauce

Pour in the heavy cream and bring the mixture to a gentle simmer. Stir in the spinach and lemon juice. If you’re using fresh spinach, cook until it wilts. If it’s frozen, just heat it through. Season with salt and pepper to taste. If the sauce feels too thick, add a splash of that reserved pasta water until it reaches your desired consistency.

Step 5: Combine Pasta and Sauce

Now it’s time to bring it all together! Toss the drained pasta into the skillet with the creamy salmon sauce. Mix well, ensuring every strand is coated in that luscious sauce. This is where the dish transforms into a comforting bowl of goodness.

Step 6: Finish with Cheese and Dill

Remove the skillet from heat and stir in the grated Parmesan cheese. This adds a salty, nutty flavor that elevates the dish. If you’re feeling fancy, sprinkle in some fresh dill for an extra burst of flavor. Serve immediately, and watch your loved ones dig in!

Tips for Success

  • Always reserve pasta water; it’s perfect for adjusting sauce consistency.
  • Don’t overcook the pasta; it should be al dente for the best texture.
  • Use fresh ingredients whenever possible for maximum flavor.
  • Experiment with herbs like basil or parsley for a different twist.
  • For a kick, add a pinch of red pepper flakes to the sauce.

Equipment Needed

  • Large Pot: For boiling pasta; a deep skillet can work in a pinch.
  • Skillet: A non-stick skillet is ideal for sautéing and making the sauce.
  • Colander: Essential for draining pasta; a slotted spoon can be a quick alternative.
  • Measuring Cups: Handy for measuring cream and cheese; eyeballing works too!

Variations

  • Lightened Up: Swap heavy cream for half-and-half or Greek yogurt for a lighter version without sacrificing creaminess.
  • Vegetarian Option: Replace salmon with sautéed mushrooms or chickpeas for a hearty, meatless dish.
  • Spicy Kick: Add a teaspoon of red pepper flakes or a dash of hot sauce to the cream sauce for some heat.
  • Herb Infusion: Experiment with different herbs like basil, thyme, or tarragon for a unique flavor profile.
  • Extra Veggies: Toss in cherry tomatoes, asparagus, or bell peppers for added nutrition and color.

Serving Suggestions

  • Side Salad: Pair with a crisp green salad dressed in lemon vinaigrette for a refreshing contrast.
  • Garlic Bread: Serve with warm garlic bread to soak up the creamy sauce.
  • Wine Pairing: A chilled Sauvignon Blanc complements the dish beautifully.
  • Presentation: Garnish with extra dill and a sprinkle of Parmesan for an elegant touch.

FAQs about Creamy Salmon Pasta

As you embark on your culinary journey with creamy salmon pasta, you might have a few questions. Here are some common queries that can help you navigate this delicious dish:

Can I use canned salmon instead of fresh?

Absolutely! Canned salmon is a convenient option and works perfectly in this creamy salmon pasta. Just make sure to drain it well before adding it to the skillet.

How can I make this dish gluten-free?

To make a gluten-free version, simply swap out regular pasta for gluten-free fettuccine or spaghetti. The creamy sauce will still shine through!

What can I substitute for heavy cream?

If you’re looking for a lighter option, half-and-half or Greek yogurt can be great substitutes. They’ll still give you that creamy texture without the extra calories.

Can I add more vegetables to the recipe?

Definitely! Feel free to toss in cherry tomatoes, asparagus, or even zucchini. They’ll add color and nutrition to your creamy salmon pasta.

How do I store leftovers?

Store any leftovers in an airtight container in the fridge for up to 3 days. Reheat gently on the stovetop, adding a splash of water or cream to loosen the sauce.
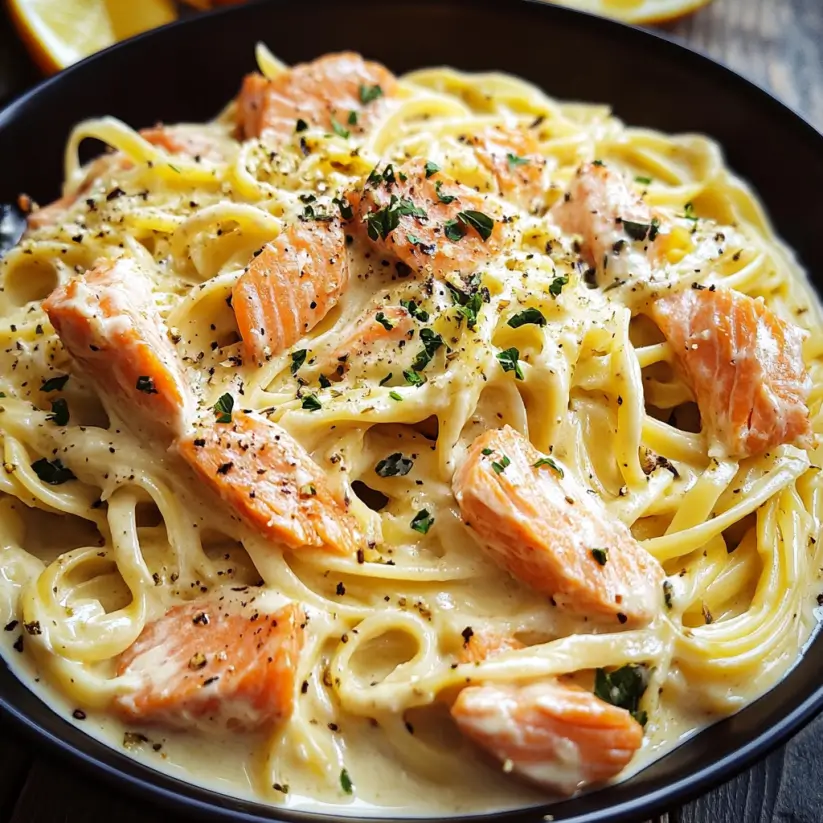
Final Thoughts

Cooking this creamy salmon pasta is more than just preparing a meal; it’s about creating moments. The rich, velvety sauce enveloping the tender pasta brings comfort and joy to the table. Each bite is a reminder of the simple pleasures in life, whether shared with family or enjoyed solo after a long day. This dish is a celebration of flavors and a testament to how easy it can be to impress. So, roll up your sleeves, embrace the process, and let this creamy salmon pasta become a cherished part of your culinary adventures!

Ranis

Creamy Salmon Pasta: A Decadent Dinner Delight!

A rich and creamy salmon pasta dish that is perfect for a decadent dinner.
Prep Time 10 minutes
Cook Time 20 minutes
Total Time 30 minutes
Servings: 4 servings
Course: Dinner
Cuisine: Italian
Calories: 450

Ingredients
  

  • 8 ounces fettuccine or spaghetti
  • 1 tablespoon olive oil
  • 1 small onion finely chopped
  • 2 cloves garlic minced
  • 8 ounces fresh or canned salmon drained and flaked
  • 1 cup heavy cream
  • 1 cup spinach fresh or frozen
  • 1 teaspoon lemon juice
  • Salt and pepper to taste
  • ¼ cup grated Parmesan cheese
  • 2 tablespoons fresh dill chopped (optional)

Method
 

  1. Cook the fettuccine or spaghetti according to package instructions until al dente. Drain and set aside, reserving ½ cup of the pasta water.
  2. In a large skillet, heat the olive oil over medium heat. Add the chopped onion and sauté for about 3-4 minutes until softened.
  3. Add the minced garlic and cook for an additional 1 minute until fragrant.
  4. Stir in the flaked salmon and cook for 2-3 minutes, allowing it to warm through.
  5. Pour in the heavy cream and bring to a gentle simmer. Stir in the spinach and lemon juice, cooking until the spinach is wilted (if using fresh) or heated through (if using frozen).
  6. Season with salt and pepper to taste. If the sauce is too thick, add some reserved pasta water until desired consistency is reached.
  7. Toss the cooked pasta into the skillet with the sauce, mixing well to coat.
  8. Remove from heat and stir in the grated Parmesan cheese and fresh dill, if using. Serve immediately.

Nutrition

Serving: 1servingCalories: 450kcalCarbohydrates: 40gProtein: 20gFat: 25gSaturated Fat: 12gPolyunsaturated Fat: 8gCholesterol: 80mgSodium: 300mgFiber: 2gSugar: 1g

Notes

  • For a lighter version, substitute half-and-half for heavy cream.
  • Add cherry tomatoes or asparagus for extra flavor and nutrition.

Tried this recipe?

Let us know how it was!

Sausage and Butternut Squash Soup: A Cozy Delight!

Introduction to Sausage and Butternut Squash Soup

As the leaves turn and the air gets crisp, nothing warms the soul quite like a bowl of Sausage and Butternut Squash Soup. This cozy delight is more than just a meal; it’s a hug in a bowl, perfect for those chilly evenings when you want something hearty yet simple. With just a handful of ingredients, you can whip up a dish that impresses your loved ones and fills your home with inviting aromas. Whether you’re coming in from a long day or hosting friends, this soup is your go-to solution for comfort and flavor.

Why You’ll Love This Sausage and Butternut Squash Soup

This Sausage and Butternut Squash Soup is a game-changer for busy weeknights. It’s quick to prepare, taking just 40 minutes from start to finish. The combination of savory Italian sausage and sweet butternut squash creates a flavor explosion that’s both comforting and satisfying. Plus, it’s versatile enough to adapt to your taste, making it a perfect dish for everyone at the table. You’ll find yourself reaching for this recipe time and again!

Ingredients for Sausage and Butternut Squash Soup

Gathering the right ingredients is the first step to creating this delightful Sausage and Butternut Squash Soup. Here’s what you’ll need:

  • Olive oil: A staple in many kitchens, it adds richness and helps sauté the sausage and vegetables.
  • Italian sausage: The star of the show! Its savory flavor infuses the soup with warmth and depth.
  • Onion: Diced onions bring sweetness and a savory base to the soup, enhancing the overall flavor.
  • Garlic: Minced garlic adds a fragrant kick that elevates the dish to new heights.
  • Butternut squash: This sweet, nutty squash is the perfect complement to the sausage, providing a creamy texture when cooked.
  • Chicken broth: A flavorful liquid that forms the soup’s base, adding moisture and richness.
  • Dried thyme: This herb brings an earthy note, enhancing the soup’s comforting profile.
  • Dried oregano: Another herb that adds a hint of Italian flair, balancing the flavors beautifully.
  • Salt and pepper: Essential seasonings to taste, ensuring every bite is perfectly seasoned.
  • Kale (optional): For a nutritional boost and a pop of color, kale can be added for extra texture.
  • Apple cider vinegar: A splash at the end brightens the flavors, giving the soup a delightful tang.

For exact measurements, check the bottom of the article where you can find everything listed for easy printing. Feel free to experiment with substitutions, like using sweet potatoes instead of butternut squash for a different twist!

How to Make Sausage and Butternut Squash Soup

Creating this Sausage and Butternut Squash Soup is a straightforward process that anyone can master. Follow these simple steps, and you’ll have a delicious, hearty soup ready in no time!

Step 1: Brown the Sausage

Start by heating two tablespoons of olive oil in a large pot over medium heat. Once the oil is shimmering, add the pound of Italian sausage, breaking it up with a spoon. Cook until it’s browned, about 5-7 minutes. This step is crucial; the sausage adds a rich flavor that forms the base of your soup.

Step 2: Sauté the Vegetables

Next, toss in the diced onion. Sauté it for about 3-4 minutes until it softens and becomes translucent. Then, stir in the minced garlic and cook for an additional minute. The aroma of garlic mingling with the sausage is simply irresistible!

Step 3: Combine Ingredients

Now it’s time to add the star of the show: the butternut squash. Pour in the cubed squash along with the chicken broth, dried thyme, and dried oregano. Season with salt and pepper to taste. Stir everything together, ensuring the squash is well-coated with the flavorful mixture.

Step 4: Simmer the Soup

Bring the pot to a boil, then reduce the heat to low. Let the soup simmer for 20-25 minutes. This allows the squash to become tender and the flavors to meld beautifully. You’ll know it’s ready when the squash can be easily pierced with a fork.

Step 5: Add Optional Ingredients

If you’re using kale, stir it in during the last 5 minutes of cooking. This adds a lovely color and a nutritional boost. If you like a bit of heat, consider adding a pinch of red pepper flakes at this stage for a spicy kick!

Step 6: Finish and Serve

Once the soup is done simmering, remove it from the heat. Stir in a tablespoon of apple cider vinegar to brighten the flavors. Taste and adjust the seasoning if needed. Serve hot, garnished with fresh herbs if you like. Enjoy your cozy bowl of Sausage and Butternut Squash Soup!

Tips for Success

  • Always taste as you go! Adjust seasoning to your preference for the best flavor.
  • For a creamier texture, blend half the soup and mix it back in.
  • Use fresh herbs for garnish; they elevate the dish visually and flavor-wise.
  • Don’t rush the simmering process; it’s key for developing rich flavors.
  • Store leftovers in an airtight container for up to three days for easy meals.

Equipment Needed

  • Large pot: A Dutch oven works great, but any heavy-bottomed pot will do.
  • Wooden spoon: Perfect for stirring and breaking up the sausage.
  • Knife and cutting board: Essential for chopping vegetables.
  • Measuring cups and spoons: Handy for precise ingredient amounts.

Variations

  • Spicy Twist: Add diced jalapeños or a pinch of cayenne pepper for a fiery kick.
  • Vegetarian Option: Substitute the sausage with plant-based sausage or mushrooms for a hearty, meat-free version.
  • Herb Infusion: Experiment with fresh herbs like rosemary or sage for a unique flavor profile.
  • Creamy Delight: Stir in a splash of heavy cream or coconut milk for a richer, creamier soup.
  • Root Veggie Medley: Mix in other root vegetables like carrots or parsnips for added sweetness and texture.

Serving Suggestions

  • Crusty Bread: Serve with a warm, crusty baguette or garlic bread for dipping.
  • Salad Pairing: A light arugula salad with lemon vinaigrette complements the soup beautifully.
  • Wine Selection: Enjoy with a glass of Pinot Grigio or a light red wine.
  • Garnish: Top with fresh parsley or a sprinkle of Parmesan for added flavor.

FAQs about Sausage and Butternut Squash Soup

Can I make this Sausage and Butternut Squash Soup ahead of time?

Absolutely! This soup actually tastes even better the next day as the flavors meld together. Just store it in an airtight container in the fridge for up to three days. Reheat on the stove or in the microwave before serving.

Is this soup gluten-free?

Yes, this Sausage and Butternut Squash Soup is gluten-free! Just ensure that the chicken broth you use is labeled gluten-free, and you’re all set for a delicious meal.

Can I freeze the soup?

Definitely! This soup freezes well. Allow it to cool completely, then transfer it to freezer-safe containers. It can be stored for up to three months. Just thaw in the fridge overnight before reheating.

What can I substitute for Italian sausage?

If you’re looking for alternatives, try using turkey sausage or a plant-based sausage for a lighter or vegetarian option. Both will still provide great flavor in your Sausage and Butternut Squash Soup.

How can I make this soup spicier?

For a spicy kick, add red pepper flakes or diced jalapeños during the cooking process. You can also serve it with a dash of hot sauce on top for those who like it fiery!

Final Thoughts

There’s something truly special about a bowl of Sausage and Butternut Squash Soup. It’s not just a meal; it’s a moment of comfort, a chance to gather around the table with loved ones, and a reminder of the simple joys in life. The rich flavors and heartwarming aroma create an inviting atmosphere that makes any evening feel cozy. Whether you’re enjoying it on a chilly night or sharing it with friends, this soup brings warmth and happiness to your kitchen. So grab your spoon, dig in, and savor every delightful bite of this comforting dish!

Ranis

Sausage and Butternut Squash Soup: A Cozy Delight!

A warm and hearty soup made with Italian sausage and butternut squash, perfect for cozy nights.
Prep Time 10 minutes
Cook Time 30 minutes
Total Time 40 minutes
Servings: 6 servings
Course: Soup
Cuisine: Italian
Calories: 290

Ingredients
  

  • 2 tablespoons olive oil
  • 1 pound Italian sausage casings removed
  • 1 medium onion diced
  • 2 cloves garlic minced
  • 1 medium butternut squash peeled and cubed (about 4 cups)
  • 4 cups chicken broth
  • 1 teaspoon dried thyme
  • 1 teaspoon dried oregano
  • Salt and pepper to taste
  • 1 cup kale chopped (optional)
  • 1 tablespoon apple cider vinegar

Method
 

  1. Heat olive oil in a large pot over medium heat. Add the sausage and cook until browned, breaking it up with a spoon, about 5-7 minutes.
  2. Add the diced onion and cook until softened, about 3-4 minutes. Stir in the minced garlic and cook for an additional minute until fragrant.
  3. Add the cubed butternut squash, chicken broth, thyme, oregano, salt, and pepper. Bring to a boil, then reduce heat and let simmer for 20-25 minutes, or until the squash is tender.
  4. If using kale, stir it in during the last 5 minutes of cooking.
  5. Remove from heat and stir in the apple cider vinegar. Adjust seasoning if necessary.
  6. Serve hot, garnished with fresh herbs if desired.

Nutrition

Serving: 1cupCalories: 290kcalCarbohydrates: 12gProtein: 18gFat: 18gSugar: 3g

Notes

  • For a creamier soup, blend half of the soup with an immersion blender and then mix it back in.
  • Try adding a pinch of red pepper flakes for a spicy kick.
  • Substitute the butternut squash with sweet potatoes for a different flavor profile.

Tried this recipe?

Let us know how it was!

Shrimp Salad on Cucumber Slices: A Refreshing Delight!

Introduction to Shrimp Salad on Cucumber Slices

There’s something undeniably refreshing about a light appetizer that feels both elegant and effortless. Shrimp salad on cucumber slices is just that—a delightful combination that’s perfect for any occasion. Whether you’re hosting friends for a casual get-together or simply looking for a quick solution for a busy day, this dish shines. The crispness of the cucumber pairs beautifully with the creamy shrimp salad, making it a crowd-pleaser. Plus, it’s a fantastic way to impress your loved ones without spending hours in the kitchen. Let’s dive into this refreshing delight!

Why You’ll Love This Shrimp Salad on Cucumber Slices

This shrimp salad on cucumber slices is a game-changer for busy days. It’s quick to whip up, taking just 10 minutes of prep time. The flavors meld beautifully, creating a taste that’s both light and satisfying. Plus, it’s a low-calorie option that doesn’t skimp on flavor. Whether you’re entertaining guests or enjoying a snack, this dish is sure to impress without the fuss.

Ingredients for Shrimp Salad on Cucumber Slices

Gathering the right ingredients is key to making this shrimp salad on cucumber slices a hit. Here’s what you’ll need:

  • Cooked shrimp: Peeled and deveined, these little gems are the star of the dish, providing a protein-packed punch.
  • Mayonnaise: This creamy base adds richness. For a lighter twist, consider using Greek yogurt instead.
  • Dijon mustard: A touch of tanginess that elevates the flavor profile, making it more sophisticated.
  • Lemon juice: Freshly squeezed is best! It brightens the salad and balances the creaminess.
  • Celery: Finely chopped, it adds a satisfying crunch and a hint of freshness.
  • Red onion: This brings a mild sweetness and a pop of color to the dish.
  • Garlic powder: A sprinkle of this enhances the overall flavor without overpowering the shrimp.
  • Salt and pepper: Essential for seasoning, adjust to your taste for the perfect balance.
  • Cucumbers: Sliced into rounds, they serve as the perfect base, adding a refreshing crunch.
  • Fresh dill or parsley: Optional, but these herbs make for a beautiful garnish and add a burst of flavor.

For those who like a bit of heat, consider adding a dash of hot sauce or cayenne pepper to the mix. You can find the exact quantities for each ingredient at the bottom of the article, ready for printing!

How to Make Shrimp Salad on Cucumber Slices

Creating this shrimp salad on cucumber slices is a breeze. Follow these simple steps, and you’ll have a delicious appetizer ready in no time. Let’s get started!

Step 1: Prepare the Shrimp Salad

In a large bowl, combine the cooked shrimp, mayonnaise, Dijon mustard, and lemon juice. Add the finely chopped celery and red onion, then sprinkle in the garlic powder, salt, and pepper. Mix everything together until the shrimp is well-coated. The creamy dressing should hug each piece of shrimp, making it irresistible.

Step 2: Chill the Salad

Cover the bowl with plastic wrap and pop it in the fridge for at least 30 minutes. This chilling time allows the flavors to meld beautifully. Trust me, the wait is worth it! You’ll be rewarded with a salad that’s bursting with flavor.

Step 3: Slice the Cucumbers

While the salad is chilling, grab your cucumbers. Slice them into 1/2-inch thick rounds. These will serve as the perfect base for your shrimp salad. The crunch of the cucumber adds a refreshing contrast to the creamy salad.

Step 4: Assemble the Dish

Once the shrimp salad is ready, it’s time to assemble! Arrange the cucumber slices on a serving platter. Spoon a generous amount of the shrimp salad onto each cucumber slice. Don’t be shy—make them heaping! This is where the fun begins.

Step 5: Garnish and Serve

For that final touch, garnish each cucumber slice with fresh dill or parsley if you like. This adds a pop of color and a hint of freshness. Serve immediately, and watch your guests enjoy every bite of this delightful shrimp salad on cucumber slices!

Tips for Success

  • Use fresh, high-quality shrimp for the best flavor. Frozen shrimp works too, just ensure it’s fully thawed.
  • Chill the salad longer if you can; it enhances the flavors even more.
  • Experiment with different herbs like cilantro or chives for a unique twist.
  • For a crunchier texture, add diced bell peppers or radishes to the salad.
  • Serve on a chilled platter to keep everything fresh and cool.

Equipment Needed

  • Mixing bowl: A large bowl for combining ingredients. A sturdy pot can work in a pinch.
  • Cutting board: Essential for slicing cucumbers. Any flat surface will do.
  • Knife: A sharp knife for clean cuts. A butter knife can suffice for softer veggies.
  • Plastic wrap: To cover the bowl while chilling. A lid or plate can also work.

Variations

  • Spicy Shrimp Salad: Add diced jalapeños or a few dashes of hot sauce for a kick that’ll wake up your taste buds.
  • Avocado Twist: Incorporate diced avocado for a creamy texture and a boost of healthy fats.
  • Herbed Delight: Swap out dill or parsley for fresh basil or cilantro to give the salad a different flavor profile.
  • Low-Carb Option: Serve the shrimp salad in lettuce cups instead of cucumbers for a keto-friendly alternative.
  • Fruit Fusion: Mix in diced mango or pineapple for a sweet and tropical twist that complements the shrimp beautifully.

Serving Suggestions

  • Pair with a crisp white wine, like Sauvignon Blanc, to enhance the flavors.
  • Serve alongside a light green salad for a refreshing meal.
  • For a fun presentation, arrange cucumber slices on a bed of mixed greens.
  • Offer lemon wedges for an extra zesty touch.

FAQs about Shrimp Salad on Cucumber Slices

Can I use frozen shrimp for this recipe?

Absolutely! Just make sure to thaw the shrimp completely before using them. Frozen shrimp can be just as tasty as fresh when prepared correctly.

How long can I store leftover shrimp salad?

You can keep leftover shrimp salad in the fridge for up to two days. Just make sure to store it in an airtight container to maintain freshness.

What can I substitute for mayonnaise?

If you’re looking for a lighter option, Greek yogurt is a fantastic substitute. It adds creaminess while cutting down on calories.

Is this shrimp salad suitable for meal prep?

Definitely! This shrimp salad on cucumber slices is perfect for meal prep. Just keep the salad and cucumber slices separate until you’re ready to serve to maintain that crisp texture.

Can I make this shrimp salad ahead of time?

Yes, you can prepare the shrimp salad a day in advance. Just remember to chill it in the fridge to let those flavors meld beautifully before serving.

Final Thoughts

Creating shrimp salad on cucumber slices is more than just a recipe; it’s an experience that brings joy to any gathering. The vibrant colors and refreshing flavors make it a feast for the eyes and the palate. Each bite is a delightful crunch, perfectly balanced with the creamy shrimp salad. Whether you’re enjoying it at a summer barbecue or a cozy dinner at home, this dish is sure to spark conversations and smiles. So, roll up your sleeves, gather your ingredients, and let this refreshing delight become a staple in your culinary repertoire. You won’t regret it!

Ranis

Shrimp Salad on Cucumber Slices: A Refreshing Delight!

A refreshing shrimp salad served on cucumber slices, perfect for a light appetizer or snack.
Prep Time 10 minutes
Total Time 40 minutes
Servings: 6 servings
Course: Appetizer
Cuisine: American
Calories: 150

Ingredients
  

  • 1 pound cooked shrimp peeled and deveined
  • 1/2 cup mayonnaise
  • 1 tablespoon Dijon mustard
  • 1 tablespoon lemon juice
  • 1/4 cup celery finely chopped
  • 1/4 cup red onion finely chopped
  • 1/4 teaspoon garlic powder
  • Salt and pepper to taste
  • 2 large cucumbers sliced into 1/2-inch rounds
  • Fresh dill or parsley for garnish optional

Method
 

  1. In a large bowl, combine the cooked shrimp, mayonnaise, Dijon mustard, lemon juice, celery, red onion, garlic powder, salt, and pepper. Mix well until all ingredients are evenly coated.
  2. Cover the bowl with plastic wrap and refrigerate the shrimp salad for at least 30 minutes to allow the flavors to meld.
  3. While the salad is chilling, slice the cucumbers into 1/2-inch thick rounds and arrange them on a serving platter.
  4. Once the shrimp salad is ready, spoon a generous amount onto each cucumber slice.
  5. Garnish with fresh dill or parsley if desired, and serve immediately.

Nutrition

Serving: 1servingCalories: 150kcalCarbohydrates: 3gProtein: 15gFat: 9gSaturated Fat: 1gPolyunsaturated Fat: 8gCholesterol: 150mgSodium: 300mgFiber: 1gSugar: 1g

Notes

  • For a spicy kick, add a few dashes of hot sauce or a pinch of cayenne pepper to the shrimp salad mixture.
  • Substitute Greek yogurt for half of the mayonnaise for a lighter version of the salad.

Tried this recipe?

Let us know how it was!

Cheesy Chicken Cauliflower Bake: A Creamy Delight!

Introduction to Cheesy Chicken Cauliflower Bake

There’s something magical about a dish that brings comfort and satisfaction, especially after a long day. The Cheesy Chicken Cauliflower Bake is just that—a creamy delight that warms the soul. I remember the first time I made it; the aroma filled my kitchen, and my family couldn’t wait to dig in. This recipe is perfect for busy weeknights or when you want to impress your loved ones without spending hours in the kitchen. With its rich flavors and simple preparation, it’s a go-to meal that everyone will love.

Why You’ll Love This Cheesy Chicken Cauliflower Bake

This Cheesy Chicken Cauliflower Bake is a game-changer for anyone juggling a busy schedule. It’s quick to prepare, taking just 15 minutes of your time, and the oven does the rest. The creamy texture and cheesy goodness make it a hit with both kids and adults. Plus, it’s low-carb, so you can indulge without the guilt. Trust me, this dish will become a staple in your home!

Ingredients for Cheesy Chicken Cauliflower Bake

Gathering the right ingredients is the first step to creating this delicious Cheesy Chicken Cauliflower Bake. Here’s what you’ll need:

  • Cauliflower florets: Fresh or frozen, they provide a tender base for the dish.
  • Cooked chicken: Shredded or diced, this adds protein and heartiness.
  • Shredded cheddar cheese: The star of the show, it melts beautifully and adds that cheesy flavor.
  • Cream cheese: Softened, it creates a rich, creamy texture that binds everything together.
  • Sour cream: Adds tanginess and creaminess, enhancing the overall flavor.
  • Chicken broth: This keeps the dish moist and infuses it with savory goodness.
  • Garlic powder: A must for flavor; it brings warmth and depth.
  • Onion powder: Adds a subtle sweetness and enhances the savory profile.
  • Salt and black pepper: Essential for seasoning; adjust to your taste.
  • Paprika: For a hint of smokiness and color.
  • Red pepper flakes: Optional, but they give a nice kick if you like some heat.
  • Grated Parmesan cheese: A finishing touch that adds a nutty flavor and a crispy top.

For those looking to mix things up, consider adding cooked bacon or sautéed mushrooms for extra flavor. You can also swap the chicken for ground turkey or sausage if you prefer a different protein. Exact measurements for these ingredients can be found at the bottom of the article, ready for printing!

How to Make Cheesy Chicken Cauliflower Bake

Creating this Cheesy Chicken Cauliflower Bake is a breeze! Follow these simple steps, and you’ll have a comforting meal ready in no time. Let’s dive in!

Step 1: Preheat the Oven

First things first, preheat your oven to 350°F (175°C). This ensures that your dish bakes evenly. While the oven warms up, grab a 9×13-inch baking dish and grease it with cooking spray or butter. This will help prevent sticking and make cleanup easier.

Step 2: Prepare the Cauliflower

Next, it’s time to prepare the cauliflower. If you’re using fresh florets, steam them until they’re tender, which should take about 5-7 minutes. If frozen, just pop them in the microwave according to the package instructions until heated through. Tender cauliflower is key for that perfect texture!

Step 3: Make the Creamy Mixture

In a large bowl, combine the softened cream cheese, sour cream, chicken broth, garlic powder, onion powder, salt, black pepper, paprika, and red pepper flakes. Mix everything until it’s smooth and well combined. This creamy mixture is what makes the dish so indulgent!

Step 4: Combine Ingredients

Now, add the cooked chicken and steamed cauliflower to the bowl. Stir gently until everything is evenly coated with that luscious creamy mixture. You want every bite to be packed with flavor!

Step 5: Transfer to Baking Dish

Transfer the mixture to your prepared baking dish, spreading it out evenly. This helps it cook uniformly. Now, sprinkle the shredded cheddar cheese and grated Parmesan cheese on top. This cheesy layer will create a delicious, bubbly crust.

Step 6: Bake

Place the baking dish in the preheated oven and bake for 25-30 minutes. Keep an eye on it! You’re looking for the cheese to be bubbly and golden brown. That’s when you know it’s ready to come out!

Step 7: Cool and Serve

Once it’s out of the oven, let the dish cool for a few minutes. This helps the flavors settle and makes it easier to serve. Then, dig in and enjoy your Cheesy Chicken Cauliflower Bake!

Tips for Success

  • Use a mix of fresh and frozen cauliflower for added texture.
  • Don’t skip the cooling time; it helps the dish set up nicely.
  • For extra flavor, consider adding herbs like thyme or rosemary.
  • Experiment with different cheeses, like mozzarella or gouda, for a unique twist.
  • Make it ahead of time and reheat for a quick meal during busy nights.

Equipment Needed

  • Baking dish: A 9×13-inch dish works best, but any oven-safe dish will do.
  • Mixing bowl: A large bowl for combining ingredients; a stand mixer can save time.
  • Steamer or microwave: For cooking the cauliflower; a pot with a lid can also work.
  • Measuring cups and spoons: Essential for accuracy, but you can eyeball it if you’re confident!

Variations

  • Vegetarian Option: Replace the chicken with cooked lentils or chickpeas for a hearty, plant-based meal.
  • Spicy Kick: Add diced jalapeños or a splash of hot sauce to the creamy mixture for an extra layer of heat.
  • Cheesy Broccoli Bake: Mix in steamed broccoli florets along with the cauliflower for added nutrition and flavor.
  • Herb Infusion: Incorporate fresh herbs like basil or parsley into the creamy mixture for a burst of freshness.
  • Low-Fat Version: Use low-fat cream cheese and Greek yogurt instead of sour cream to cut down on calories.

Serving Suggestions

  • Side Salad: Pair with a crisp green salad dressed in a light vinaigrette for a refreshing contrast.
  • Garlic Bread: Serve with warm garlic bread to soak up the creamy goodness.
  • Wine Pairing: A chilled Chardonnay complements the richness of the dish beautifully.
  • Presentation: Garnish with fresh parsley or chives for a pop of color.

FAQs about Cheesy Chicken Cauliflower Bake

Can I make this Cheesy Chicken Cauliflower Bake ahead of time?

Absolutely! You can prepare the dish a day in advance and store it in the fridge. Just cover it tightly with plastic wrap. When you’re ready to bake, let it sit at room temperature for about 30 minutes before popping it in the oven.

What can I substitute for chicken in this recipe?

If you’re looking for alternatives, cooked ground turkey or sausage works great. For a vegetarian option, try using cooked lentils or chickpeas. They’ll add protein and heartiness without sacrificing flavor!

How do I store leftovers of the Cheesy Chicken Cauliflower Bake?

Store any leftovers in an airtight container in the fridge for up to three days. Reheat in the microwave or oven until warmed through. It’s just as delicious the next day!

Can I freeze this dish?

Yes, you can freeze the Cheesy Chicken Cauliflower Bake! Just make sure it’s completely cooled before transferring it to a freezer-safe container. It can last up to three months in the freezer. Thaw it overnight in the fridge before baking.

What can I serve with this dish?

This creamy chicken bake pairs wonderfully with a fresh side salad or some garlic bread. You could also serve it alongside roasted vegetables for a complete meal. Enjoy!

Final Thoughts

Cooking the Cheesy Chicken Cauliflower Bake is more than just preparing a meal; it’s about creating moments. The rich, creamy flavors and cheesy goodness bring everyone together around the table, sparking laughter and conversation. I love how this dish transforms simple ingredients into something extraordinary, making it a favorite in my home. Whether it’s a busy weeknight or a cozy family gathering, this recipe never fails to impress. So, roll up your sleeves, embrace the joy of cooking, and let this delightful bake become a cherished part of your culinary repertoire!

Ranis

Cheesy Chicken Cauliflower Bake: A Creamy Delight!

A creamy and cheesy dish featuring tender cauliflower and shredded chicken, perfect for a comforting meal.
Prep Time 15 minutes
Cook Time 30 minutes
Total Time 45 minutes
Servings: 6 servings
Course: Main Dish
Cuisine: American
Calories: 320

Ingredients
  

  • 2 cups cauliflower florets fresh or frozen
  • 2 cups cooked chicken shredded or diced
  • 1 cup shredded cheddar cheese
  • 1 cup cream cheese softened
  • 1/2 cup sour cream
  • 1/2 cup chicken broth
  • 1 teaspoon garlic powder
  • 1 teaspoon onion powder
  • 1/2 teaspoon salt
  • 1/4 teaspoon black pepper
  • 1/4 teaspoon paprika
  • 1/4 teaspoon red pepper flakes optional
  • 1/2 cup grated Parmesan cheese

Method
 

  1. Preheat your oven to 350°F (175°C). Grease a 9x13-inch baking dish with cooking spray or butter.
  2. If using fresh cauliflower, steam the florets until tender, about 5-7 minutes. If using frozen, microwave according to package instructions until heated through.
  3. In a large bowl, combine the softened cream cheese, sour cream, chicken broth, garlic powder, onion powder, salt, black pepper, paprika, and red pepper flakes. Mix until smooth and well combined.
  4. Add the cooked chicken and steamed cauliflower to the bowl. Stir gently until everything is evenly coated with the creamy mixture.
  5. Transfer the mixture to the prepared baking dish, spreading it out evenly. Sprinkle the shredded cheddar cheese and grated Parmesan cheese on top.
  6. Bake in the preheated oven for 25-30 minutes, or until the cheese is bubbly and golden brown.
  7. Let the dish cool for a few minutes before serving.

Nutrition

Serving: 1servingCalories: 320kcalCarbohydrates: 6gProtein: 30gFat: 20gSaturated Fat: 10gPolyunsaturated Fat: 8gCholesterol: 90mgSodium: 600mgFiber: 2gSugar: 2g

Notes

  • For added flavor, mix in some cooked bacon or sautéed mushrooms before baking.
  • Substitute the chicken with cooked ground turkey or sausage for a different protein option.

Tried this recipe?

Let us know how it was!

Cucumber Melon Salad: A Refreshing Summer Delight!

Introduction to Cucumber Melon Salad

Summer days call for something light, refreshing, and oh-so-delicious. That’s where my Cucumber Melon Salad comes in! This vibrant dish combines the crispness of cucumbers with the sweet juiciness of melons, creating a perfect balance that dances on your taste buds. Whether you’re hosting a backyard barbecue or just looking for a quick solution for a busy day, this salad is your go-to. It’s not only easy to whip up but also a delightful way to impress your loved ones with minimal effort. Trust me, they’ll be asking for seconds!

Why You’ll Love This Cucumber Melon Salad

This Cucumber Melon Salad is a game-changer for summer meals. It’s incredibly easy to prepare, taking just 15 minutes of your time. The combination of flavors is refreshing, making it a perfect side dish or light lunch. Plus, it’s a healthy option that won’t weigh you down. With its vibrant colors and delightful crunch, this salad is sure to brighten up any table and impress your guests!

Ingredients for Cucumber Melon Salad

Gathering the right ingredients is key to making a fantastic Cucumber Melon Salad. Here’s what you’ll need:

  • Cucumber: The star of the show! Choose firm, fresh cucumbers for that satisfying crunch.
  • Cantaloupe: Sweet and juicy, this melon adds a delightful flavor that pairs perfectly with cucumber.
  • Honeydew Melon: Another sweet addition, honeydew brings a subtle sweetness and a lovely color contrast.
  • Red Onion: Finely chopped, it adds a zesty kick that balances the sweetness of the melons.
  • Fresh Mint Leaves: These aromatic leaves provide a refreshing burst of flavor, elevating the salad.
  • Olive Oil: A drizzle of good-quality olive oil enhances the overall taste and adds richness.
  • Lime Juice: This zesty ingredient brightens the salad and adds a tangy twist.
  • Honey: A touch of honey brings everything together with a hint of sweetness.
  • Salt and Pepper: Essential for seasoning, these staples help to enhance all the flavors.

For those looking to add a little extra crunch, consider tossing in some chopped walnuts or pecans. If you’re not a fan of mint, fresh basil can be a delightful substitute, offering a different flavor profile. You can find the exact quantities for each ingredient at the bottom of the article, ready for printing!

How to Make Cucumber Melon Salad

Step 1: Prepare the Ingredients

Start by dicing the cucumbers into bite-sized pieces. Next, take your cantaloupe and honeydew melons, removing the rind and seeds before dicing them as well. For the red onion, finely chop it to ensure its flavor blends well. Finally, give the fresh mint leaves a rough chop to release their aromatic oils. This prep work sets the stage for a delicious salad!

Step 2: Mix the Base

In a large mixing bowl, combine the diced cucumber, cantaloupe, honeydew, and red onion. Gently stir the ingredients together, allowing the colors to mingle. This vibrant mix is the heart of your Cucumber Melon Salad, and it’s already looking fantastic!

Step 3: Whisk the Dressing

In a small bowl, whisk together the olive oil, lime juice, honey, salt, and pepper. This dressing is where the magic happens! The combination of zesty lime and sweet honey will elevate the salad. Make sure everything is well blended for a uniform flavor.

Step 4: Combine and Toss

Pour the dressing over the salad mixture. Using a large spoon, gently toss everything together to ensure each piece is coated. Be careful not to mash the ingredients; you want that lovely crunch from the cucumbers and melons to shine through!

Step 5: Add Fresh Mint

Now, sprinkle in the chopped mint leaves. Toss everything lightly once more to incorporate the mint without bruising it. This step adds a refreshing burst of flavor that perfectly complements the sweetness of the melons.

Step 6: Chill and Serve

For the best flavor, chill the salad in the refrigerator for at least 30 minutes. This allows the ingredients to meld beautifully. When you’re ready to serve, scoop it into a bowl and enjoy this refreshing summer delight!

Tips for Success

  • Choose ripe melons for maximum sweetness; they should feel heavy and fragrant.
  • Use a sharp knife for clean cuts, ensuring your cucumbers and melons stay crisp.
  • Let the salad chill longer if possible; the flavors deepen with time.
  • Adjust the dressing to your taste; add more lime for tang or honey for sweetness.
  • Experiment with different herbs like cilantro for a unique twist!

Equipment Needed

  • Cutting Board: A sturdy surface for chopping your ingredients. A plastic or wooden board works well.
  • Sharp Knife: Essential for dicing melons and cucumbers. A chef’s knife is ideal.
  • Mixing Bowl: A large bowl to combine everything. Any size will do, but a big one is best.
  • Whisk: For mixing the dressing. A fork can work in a pinch!
  • Measuring Spoons: Handy for precise dressing measurements, though you can eyeball it too.

Variations

  • Spicy Kick: Add a diced jalapeño for a spicy twist that contrasts beautifully with the sweetness of the melons.
  • Cheese Lover’s Delight: Crumble feta or goat cheese on top for a creamy texture that complements the salad.
  • Fruit Medley: Mix in other fruits like strawberries or blueberries for a colorful and flavorful twist.
  • Nutty Crunch: Toss in some toasted almonds or sunflower seeds for added crunch and nutrition.
  • Vegan Option: Keep it plant-based by using agave syrup instead of honey for sweetness.

Serving Suggestions

  • Pair this Cucumber Melon Salad with grilled chicken or fish for a light, balanced meal.
  • Serve it alongside a refreshing glass of iced tea or lemonade to enhance the summer vibe.
  • For a beautiful presentation, serve in a clear bowl to showcase the vibrant colors.
  • Garnish with extra mint leaves for a pop of freshness and visual appeal.

FAQs about Cucumber Melon Salad

Can I make Cucumber Melon Salad ahead of time?

Absolutely! You can prepare the salad a few hours in advance. Just remember to keep it chilled in the refrigerator. The flavors will meld beautifully, making it even more delicious!

What can I substitute for honey in this salad?

If you prefer a vegan option, agave syrup works wonderfully as a substitute for honey. It adds sweetness without compromising the flavor.

How long will leftovers last?

Leftover Cucumber Melon Salad can be stored in an airtight container in the fridge for up to two days. However, it’s best enjoyed fresh for that delightful crunch!

Can I add other fruits to this salad?

Definitely! Feel free to mix in other fruits like strawberries, blueberries, or even pineapple. This adds a fun twist and enhances the flavor profile of your Cucumber Melon Salad.

Is this salad suitable for a low-carb diet?

Yes! Cucumber Melon Salad is low in carbs and packed with nutrients, making it a great choice for those watching their carbohydrate intake. Enjoy guilt-free!

Final Thoughts

Creating this Cucumber Melon Salad is more than just a cooking task; it’s an experience that brings joy to your summer gatherings. The vibrant colors and refreshing flavors can instantly lift your spirits, making every bite a celebration of the season. Whether you’re enjoying it solo or sharing it with friends, this salad is a reminder of the simple pleasures in life. It’s quick, healthy, and bursting with flavor, making it a staple in my kitchen. So, grab those fresh ingredients and dive into this delightful dish that’s sure to become a favorite for years to come!

Ranis

Cucumber Melon Salad: A Refreshing Summer Delight!

A refreshing and light salad perfect for summer, combining the sweetness of melons with the crunch of cucumbers and a zesty dressing.
Prep Time 15 minutes
Total Time 45 minutes
Servings: 6 servings
Course: Salad
Cuisine: American
Calories: 80

Ingredients
  

  • 2 cups cucumber diced
  • 2 cups cantaloupe diced
  • 1 cup honeydew melon diced
  • 1/4 cup red onion finely chopped
  • 1/4 cup fresh mint leaves chopped
  • 2 tablespoons olive oil
  • 1 tablespoon lime juice
  • 1 tablespoon honey
  • Salt and pepper to taste

Method
 

  1. In a large mixing bowl, combine the diced cucumber, cantaloupe, honeydew melon, and red onion.
  2. In a small bowl, whisk together the olive oil, lime juice, honey, salt, and pepper until well combined.
  3. Pour the dressing over the melon and cucumber mixture. Gently toss to coat all the ingredients evenly.
  4. Add the chopped mint leaves and toss again lightly.
  5. Chill the salad in the refrigerator for at least 30 minutes before serving to allow the flavors to meld.

Nutrition

Serving: 1servingCalories: 80kcalCarbohydrates: 10gProtein: 1gFat: 4gSaturated Fat: 0.5gPolyunsaturated Fat: 3.5gSodium: 50mgFiber: 1gSugar: 7g

Notes

  • For added crunch, consider adding 1/4 cup of chopped walnuts or pecans.
  • Substitute the mint with fresh basil for a different flavor profile.

Tried this recipe?

Let us know how it was!

Shrimp Boil Kabobs: Discover the Ultimate Summer Delight!

Introduction to Shrimp Boil Kabobs

Summer is the season of backyard barbecues, laughter, and delicious food. When I think of warm evenings spent with friends, Shrimp Boil Kabobs come to mind. This dish is not just a meal; it’s an experience that brings everyone together. With juicy shrimp, tender baby potatoes, and sweet corn on the cob, these kabobs are a quick solution for busy days or a way to impress your loved ones. They’re easy to prepare and even easier to enjoy, making them the perfect addition to your summer menu. Let’s dive into this delightful recipe!

Why You’ll Love This Shrimp Boil Kabobs

These Shrimp Boil Kabobs are a game-changer for summer cooking. They come together in just 27 minutes, making them perfect for those busy weeknights or spontaneous weekend gatherings. The combination of flavors is simply irresistible, with the smoky grill enhancing the sweetness of the shrimp and corn. Plus, they’re a fun, hands-on meal that everyone can enjoy, whether you’re hosting a barbecue or just cooking for the family.

Ingredients for Shrimp Boil Kabobs

Gathering the right ingredients is the first step to creating these mouthwatering Shrimp Boil Kabobs. Here’s what you’ll need:

  • Large shrimp: Peeled and deveined, these are the stars of the show. They soak up flavors beautifully and cook quickly on the grill.
  • Baby potatoes: Halved for even cooking, they add a hearty texture and absorb the seasoning well.
  • Corn on the cob: Cut into 1-inch pieces, this sweet addition brings a burst of flavor and color to your kabobs.
  • Olive oil: A drizzle helps everything stick together and enhances the grilling process.
  • Old Bay seasoning: This classic blend adds a unique, zesty kick that’s synonymous with seafood dishes.
  • Garlic powder: A must-have for that aromatic depth, it complements the shrimp perfectly.
  • Paprika: This spice not only adds color but also a subtle smokiness that elevates the dish.
  • Salt and pepper: Essential for balancing flavors, these staples are a must in any kitchen.
  • Lemon wedges: For serving, they add a refreshing zing that brightens up the kabobs.
  • Fresh parsley: Chopped for garnish, it adds a pop of color and freshness to your presentation.

For those looking to mix things up, consider substituting shrimp with chicken or tofu for a different protein option. You can also add a pinch of cayenne pepper to the seasoning mix for an extra kick. Exact quantities for each ingredient are available at the bottom of the article for easy printing.

How to Make Shrimp Boil Kabobs

Creating Shrimp Boil Kabobs is a straightforward process that anyone can master. Follow these simple steps, and you’ll have a delicious meal ready in no time. Let’s get grilling!

Step 1: Preheat the Grill

Start by preheating your grill to medium-high heat. This step is crucial because a hot grill ensures that your kabobs cook evenly and develop those beautiful grill marks. If you’re using wooden skewers, soak them in water for about 30 minutes. This prevents them from burning and keeps your kabobs intact while grilling.

Step 2: Prepare the Ingredients

In a large bowl, combine the shrimp, halved baby potatoes, and corn pieces. Drizzle everything with olive oil, then sprinkle on the Old Bay seasoning, garlic powder, paprika, salt, and pepper. Toss gently until all the ingredients are evenly coated. This step is where the magic begins, as the flavors meld together beautifully.

Step 3: Assemble the Kabobs

Now it’s time to thread the ingredients onto the skewers. Start with a potato half, followed by a piece of corn, and then a shrimp. Repeat this pattern until the skewer is filled, leaving a little space at the ends for easy handling. This not only looks great but also ensures even cooking. Don’t overcrowd the skewers; give each piece some room to breathe!

Step 4: Grill the Kabobs

Place the assembled kabobs on the preheated grill. Cook them for about 10-12 minutes, turning occasionally. You’ll know they’re done when the shrimp turn pink and opaque, and the potatoes are tender. Keep an eye on them to avoid overcooking, as shrimp can become rubbery if left on the grill too long.

Step 5: Serve and Enjoy

Once grilled to perfection, remove the kabobs from the grill and let them rest for a few minutes. This resting time allows the juices to redistribute, making each bite even more flavorful. Serve your Shrimp Boil Kabobs with lemon wedges for a zesty kick and garnish with fresh parsley for that extra touch. Enjoy the smiles around the table!

Tips for Success

  • Always preheat your grill for even cooking and those perfect grill marks.
  • Soak wooden skewers to prevent burning and ensure your kabobs stay intact.
  • Don’t overcrowd the skewers; leave space for heat circulation.
  • Use fresh ingredients for the best flavor and texture.
  • Experiment with different seasonings to customize your kabobs.

Equipment Needed

  • Grill: A gas or charcoal grill works perfectly for that smoky flavor.
  • Skewers: Use metal skewers for durability or soak wooden ones to prevent burning.
  • Bowl: A large mixing bowl for combining ingredients.
  • Tongs: Essential for flipping kabobs with ease.

Variations

  • Spicy Shrimp Boil Kabobs: Add a pinch of cayenne pepper or red pepper flakes to the seasoning for an extra kick.
  • Vegetarian Option: Substitute shrimp with firm tofu or marinated tempeh for a plant-based delight.
  • Herb-Infused Kabobs: Mix in fresh herbs like dill or cilantro for a burst of freshness.
  • Seasonal Veggies: Swap out corn and potatoes for seasonal vegetables like zucchini, bell peppers, or cherry tomatoes.
  • Garlic Butter Glaze: Brush the kabobs with melted garlic butter during the last few minutes of grilling for a rich flavor.

Serving Suggestions

  • Side Salad: Pair your kabobs with a refreshing cucumber and tomato salad for a light touch.
  • Grilled Veggies: Serve alongside grilled asparagus or bell peppers for added color and flavor.
  • Cold Drinks: Enjoy with a chilled lemonade or a crisp white wine to complement the meal.
  • Presentation: Arrange kabobs on a platter with lemon wedges and parsley for a vibrant display.

FAQs about Shrimp Boil Kabobs

Can I use frozen shrimp for Shrimp Boil Kabobs?

Absolutely! Just make sure to thaw the shrimp completely before marinating and grilling. Frozen shrimp can be just as delicious as fresh when cooked properly.

What can I substitute for Old Bay seasoning?

If you don’t have Old Bay on hand, a mix of paprika, celery salt, and black pepper can work well. You can also try a seafood seasoning blend for a similar flavor profile.

How do I know when the shrimp are done cooking?

Perfectly cooked shrimp should be pink and opaque. If they curl tightly, they may be overcooked, so keep an eye on them while grilling!

Can I make Shrimp Boil Kabobs ahead of time?

Yes! You can prep the kabobs a few hours in advance and store them in the fridge. Just remember to grill them fresh for the best taste and texture.

What sides pair well with Shrimp Boil Kabobs?

These kabobs are fantastic with a side of coleslaw, corn salad, or even a light pasta dish. They complement a variety of flavors, making them versatile for any meal!

Final Thoughts

Cooking Shrimp Boil Kabobs is more than just preparing a meal; it’s about creating memories. The sizzle of shrimp on the grill, the laughter of friends, and the vibrant colors of fresh ingredients all come together to form a delightful experience. Each bite bursts with flavor, transporting you to sun-soaked summer days. Whether you’re hosting a backyard barbecue or enjoying a quiet dinner with family, these kabobs are sure to impress. So fire up that grill, gather your loved ones, and savor the joy that comes from sharing delicious food. Happy grilling!

Ranis

Shrimp Boil Kabobs: Discover the Ultimate Summer Delight!

Shrimp Boil Kabobs are a delightful summer dish featuring grilled shrimp, baby potatoes, and corn on the cob, seasoned to perfection.
Prep Time 15 minutes
Cook Time 12 minutes
Total Time 27 minutes
Servings: 4 servings
Course: Main Dish
Cuisine: American
Calories: 320

Ingredients
  

  • 1 pound large shrimp peeled and deveined
  • 1 pound baby potatoes halved
  • 1 pound corn on the cob cut into 1-inch pieces
  • 1 tablespoon olive oil
  • 2 teaspoons Old Bay seasoning
  • 1 teaspoon garlic powder
  • 1 teaspoon paprika
  • Salt and pepper to taste
  • Lemon wedges for serving
  • Fresh parsley chopped, for garnish

Method
 

  1. Preheat your grill to medium-high heat. If using wooden skewers, soak them in water for 30 minutes to prevent burning.
  2. In a large bowl, combine the shrimp, baby potatoes, and corn. Drizzle with olive oil and sprinkle with Old Bay seasoning, garlic powder, paprika, salt, and pepper. Toss until everything is evenly coated.
  3. Thread the shrimp, potatoes, and corn onto the skewers, alternating between the ingredients.
  4. Place the skewers on the grill and cook for about 10-12 minutes, turning occasionally, until the shrimp are pink and opaque and the potatoes are tender.
  5. Remove from the grill and let rest for a few minutes. Serve with lemon wedges and garnish with fresh parsley.

Nutrition

Serving: 1skewerCalories: 320kcalCarbohydrates: 20gProtein: 25gFat: 12gSaturated Fat: 2gPolyunsaturated Fat: 8gCholesterol: 200mgSodium: 600mgFiber: 3gSugar: 2g

Notes

  • For a spicier kick, add a pinch of cayenne pepper to the seasoning mix.
  • You can substitute the shrimp with chicken or tofu for a different protein option.

Tried this recipe?

Let us know how it was!

Italian Sausage and Orzo Stuffed Peppers Recipe Delight!

Introduction to Italian Sausage and Orzo Stuffed Peppers

There’s something magical about a dish that brings warmth and comfort to the table, and Italian Sausage and Orzo Stuffed Peppers do just that. This recipe is not just a meal; it’s a celebration of flavors that can turn an ordinary evening into something special. Whether you’re looking for a quick solution for a busy weeknight or a dish to impress your loved ones, these stuffed peppers are your answer. They’re hearty, satisfying, and packed with deliciousness, making them perfect for any occasion. Let’s dive into this culinary adventure together!

Why You’ll Love This Italian Sausage and Orzo Stuffed Peppers

These Italian Sausage and Orzo Stuffed Peppers are a game-changer for your dinner routine. They come together quickly, making them perfect for those hectic evenings when time is short. The combination of savory sausage, tender orzo, and vibrant peppers creates a flavor explosion that will have everyone asking for seconds. Plus, they’re versatile enough to adapt to your taste, ensuring every bite is a delight!

Ingredients for Italian Sausage and Orzo Stuffed Peppers

Gathering the right ingredients is the first step to creating a delicious dish. For these Italian Sausage and Orzo Stuffed Peppers, you’ll need a mix of hearty and flavorful components:

  • Italian sausage: Choose between mild or spicy, depending on your heat preference. This is the star of the show, bringing rich flavor.
  • Orzo pasta: This tiny pasta resembles rice and adds a delightful texture to the filling. It absorbs flavors beautifully.
  • Bell peppers: Any color works! They provide a sweet crunch and vibrant color, making your dish visually appealing.
  • Onion: Diced onion adds depth and sweetness to the filling. Sautéing it first enhances its flavor.
  • Garlic: Minced garlic brings an aromatic punch that elevates the entire dish. You can never have too much garlic!
  • Diced tomatoes: Canned tomatoes add moisture and a hint of acidity, balancing the richness of the sausage.
  • Italian seasoning: A blend of herbs that captures the essence of Italian cuisine, enhancing the overall flavor.
  • Salt and black pepper: Essential for seasoning, these staples help bring out the flavors of all the ingredients.
  • Shredded mozzarella cheese: This melty cheese creates a gooey topping that everyone loves. It’s comfort food at its finest!
  • Grated Parmesan cheese: A sprinkle of this adds a nutty flavor and a touch of sophistication to your stuffed peppers.
  • Olive oil: Used for sautéing, it adds richness and helps in cooking the vegetables to perfection.
  • Fresh basil leaves: Optional, but they make a lovely garnish that adds freshness and a pop of color.

For those looking to mix things up, consider substituting turkey sausage for a lighter option or adding chopped spinach or zucchini to the filling for extra nutrition. You can find the exact quantities of these ingredients at the bottom of the article, ready for printing!

How to Make Italian Sausage and Orzo Stuffed Peppers

Creating Italian Sausage and Orzo Stuffed Peppers is a straightforward process that yields delicious results. Follow these simple steps, and you’ll have a hearty meal ready in no time!

Step 1: Preheat the Oven

Start by preheating your oven to 375°F. This step is crucial for even cooking. A hot oven ensures that your stuffed peppers bake perfectly, allowing the flavors to meld beautifully while the cheese gets that irresistible golden crust.

Step 2: Sauté the Vegetables

In a large skillet, heat the olive oil over medium heat. Add the diced onion and sauté for about three minutes until it becomes translucent. The aroma of the onion cooking is simply delightful! Then, toss in the minced garlic and cook for an additional minute. This step builds a flavor foundation that will elevate your dish.

Step 3: Cook the Italian Sausage

Next, add the Italian sausage to the skillet. Use a spoon to break it apart as it cooks. Aim for a nice brown color, which should take about 5-7 minutes. Once cooked, drain any excess fat. This keeps your dish from becoming greasy and allows the flavors of the sausage to shine through.

Step 4: Combine Ingredients

Now it’s time to mix in the orzo, diced tomatoes, Italian seasoning, salt, and black pepper. Stir everything together and let it cook for another 2-3 minutes. This is where the magic happens! The orzo will soak up all those savory flavors, creating a delicious filling.

Step 5: Prepare the Bell Peppers

While the filling cools slightly, prepare your bell peppers. Cut the tops off and remove the seeds and membranes. Make sure to keep the peppers upright in a baking dish. This will help them hold all that tasty filling without tipping over!

Step 6: Stuff the Peppers

Now comes the fun part—stuffing the peppers! Spoon the sausage and orzo mixture into each pepper, packing it down gently. Don’t be shy; fill them up! Top each stuffed pepper with the remaining mozzarella cheese and sprinkle with Parmesan cheese for that extra cheesy goodness.

Step 7: Bake the Stuffed Peppers

Cover the baking dish with aluminum foil and pop it in the oven for 25 minutes. After that, remove the foil and bake for an additional 10-15 minutes. You want the cheese to be bubbly and golden. The aroma wafting through your kitchen will have everyone eagerly waiting for dinner!

Tips for Success

  • Use a mix of mild and spicy Italian sausage for a balanced flavor.
  • Don’t overcook the orzo; it will continue to cook in the oven.
  • Feel free to add extra veggies like spinach or zucchini for added nutrition.
  • Let the stuffed peppers cool for a few minutes before serving to avoid burns.
  • Experiment with different cheeses for unique flavor profiles.

Equipment Needed

  • Large skillet: A non-stick skillet works great, but any large pan will do.
  • Baking dish: Use a glass or ceramic dish; a metal one is fine too.
  • Cutting board: Essential for prepping your veggies.
  • Sharp knife: A good knife makes cutting the peppers a breeze.
  • Spoon: For stuffing the peppers and mixing ingredients.

Variations

  • Turkey Sausage: Swap out Italian sausage for turkey sausage for a leaner option without sacrificing flavor.
  • Vegetarian Delight: Use a mix of black beans, corn, and diced zucchini instead of sausage for a hearty vegetarian version.
  • Spicy Kick: Add crushed red pepper flakes or diced jalapeños to the filling for an extra kick of heat.
  • Cheesy Twist: Experiment with different cheeses like feta or pepper jack for a unique flavor profile.
  • Quinoa Substitute: Replace orzo with cooked quinoa for a gluten-free alternative that’s packed with protein.

Serving Suggestions

  • Pair with a crisp green salad drizzled with balsamic vinaigrette for a refreshing contrast.
  • Serve alongside garlic bread to soak up any delicious juices.
  • A glass of red wine, like Chianti, complements the flavors beautifully.
  • Garnish with fresh basil for a pop of color and flavor.

FAQs about Italian Sausage and Orzo Stuffed Peppers

Can I make Italian Sausage and Orzo Stuffed Peppers ahead of time?

Absolutely! You can prepare the stuffed peppers a day in advance. Just assemble them, cover with foil, and refrigerate. When you’re ready to bake, add a few extra minutes to the cooking time.

What can I substitute for orzo in this recipe?

If you don’t have orzo on hand, you can use rice or quinoa as a substitute. Just make sure to adjust the cooking time accordingly, as rice may require more liquid.

How do I store leftovers of Italian Sausage and Orzo Stuffed Peppers?

Store any leftovers in an airtight container in the fridge for up to three days. Reheat in the oven or microwave until warmed through. They make for a great lunch the next day!

Can I freeze stuffed peppers?

Yes! These stuffed peppers freeze well. Just wrap them tightly in plastic wrap and then foil. When you’re ready to enjoy, thaw in the fridge overnight and bake as directed.

What sides pair well with Italian Sausage and Orzo Stuffed Peppers?

These stuffed peppers are hearty on their own, but they pair wonderfully with a simple green salad or some roasted vegetables. A side of garlic bread is also a fantastic choice!

Final Thoughts

Cooking Italian Sausage and Orzo Stuffed Peppers is more than just preparing a meal; it’s about creating memories around the dinner table. The vibrant colors, enticing aromas, and comforting flavors come together to make every bite a joy. Whether you’re sharing them with family or enjoying a quiet night in, these stuffed peppers are sure to bring smiles and satisfaction. Plus, the versatility of this dish means you can make it your own, adapting it to suit your tastes. So roll up your sleeves, embrace the process, and savor the delightful experience that comes with each stuffed pepper!

Ranis

Italian Sausage and Orzo Stuffed Peppers Recipe Delight!

A delicious recipe for Italian Sausage and Orzo Stuffed Peppers, perfect for a hearty meal.
Prep Time 15 minutes
Cook Time 40 minutes
Total Time 55 minutes
Servings: 4 servings
Course: Main Course
Cuisine: Italian
Calories: 450

Ingredients
  

  • 1 pound Italian sausage mild or spicy, based on preference
  • 1 cup orzo pasta
  • 4 large bell peppers any color
  • 1 medium onion diced
  • 3 cloves garlic minced
  • 1 can 14.5 ounces diced tomatoes, drained
  • 1 teaspoon Italian seasoning
  • 1 teaspoon salt
  • ½ teaspoon black pepper
  • 1 cup shredded mozzarella cheese
  • ¼ cup grated Parmesan cheese
  • 2 tablespoons olive oil
  • Fresh basil leaves for garnish optional

Method
 

  1. Preheat the oven to 375°F.
  2. In a large skillet over medium heat, add the olive oil. Once hot, add the diced onion and sauté for about 3 minutes until translucent. Add the minced garlic and cook for an additional minute.
  3. Add the Italian sausage to the skillet, breaking it apart with a spoon. Cook until browned and cooked through, about 5-7 minutes. Drain any excess fat.
  4. Stir in the orzo, diced tomatoes, Italian seasoning, salt, and black pepper. Cook for another 2-3 minutes, allowing the flavors to meld. Remove from heat and stir in half of the mozzarella cheese.
  5. While the filling is cooling slightly, prepare the bell peppers. Cut the tops off the peppers and remove the seeds and membranes. Place them upright in a baking dish.
  6. Spoon the sausage and orzo mixture into each bell pepper, packing it down gently. Top each stuffed pepper with the remaining mozzarella cheese and sprinkle with Parmesan cheese.
  7. Cover the baking dish with aluminum foil and bake for 25 minutes. Remove the foil and bake for an additional 10-15 minutes, or until the cheese is bubbly and golden.
  8. Let the stuffed peppers cool for a few minutes before serving. Garnish with fresh basil leaves if desired.

Nutrition

Serving: 1stuffed pepperCalories: 450kcalCarbohydrates: 30gProtein: 25gFat: 25gSaturated Fat: 10gPolyunsaturated Fat: 15gCholesterol: 70mgSodium: 800mgFiber: 2gSugar: 3g

Notes

  • For a healthier option, substitute turkey sausage for Italian sausage.
  • Add chopped spinach or zucchini to the filling for extra veggies and nutrition.

Tried this recipe?

Let us know how it was!

Apple Cinnamon Cereal Donuts: A Sweet, Easy Recipe!

Introduction to Apple Cinnamon Cereal Donuts

There’s something magical about the aroma of cinnamon wafting through the kitchen, isn’t there? It takes me back to cozy mornings spent with my family, where breakfast was a delightful affair. Today, I’m excited to share a recipe for Apple Cinnamon Cereal Donuts that’s not just delicious but also incredibly easy to whip up. Whether you’re looking for a quick solution for a busy day or a fun treat to impress your loved ones, these donuts are the perfect choice. They combine the comforting flavors of apple and cinnamon in a delightful donut shape that everyone will love!

Why You’ll Love This Apple Cinnamon Cereal Donuts

These Apple Cinnamon Cereal Donuts are a game-changer for busy mornings. They come together in just 27 minutes, making them a quick and satisfying breakfast option. The delightful combination of apple and cinnamon creates a flavor explosion that’s hard to resist. Plus, they’re baked, not fried, so you can enjoy a guilt-free treat that’s perfect for the whole family. Trust me, once you try them, you’ll be hooked!

Ingredients for Apple Cinnamon Cereal Donuts

Gathering the right ingredients is the first step to creating these delightful Apple Cinnamon Cereal Donuts. Here’s what you’ll need:

  • Apple Cinnamon Cereal: This is the star of the show! It adds flavor and texture, making your donuts uniquely delicious.
  • All-Purpose Flour: A staple in baking, it provides structure to your donuts, ensuring they hold their shape.
  • Baking Powder: This leavening agent helps the donuts rise, giving them that fluffy texture we all love.
  • Baking Soda: Works alongside baking powder to create a light and airy donut.
  • Salt: Just a pinch enhances the flavors, balancing the sweetness of the donuts.
  • Ground Cinnamon: Adds warmth and spice, making each bite feel like a cozy hug.
  • Granulated Sugar: Sweetens the batter, making these donuts a treat for your taste buds.
  • Unsweetened Applesauce: This ingredient keeps the donuts moist and adds a subtle apple flavor without extra sugar.
  • Milk: Helps to bind the ingredients together, creating a smooth batter.
  • Vegetable Oil: Adds moisture and richness, ensuring your donuts are tender.
  • Large Egg: Acts as a binder, helping to hold everything together while adding protein.
  • Vanilla Extract: A splash of this adds depth and enhances the overall flavor profile.

For those looking to customize, consider adding chopped nuts for a crunchy topping or a simple glaze made from powdered sugar and milk for an extra sweet finish. You can find the exact measurements for these ingredients at the bottom of the article, ready for printing!

How to Make Apple Cinnamon Cereal Donuts

Making Apple Cinnamon Cereal Donuts is a breeze! Follow these simple steps, and you’ll have a batch of delicious donuts ready in no time. Let’s dive in!

Step 1: Preheat the Oven

Start by preheating your oven to 350°F (175°C). This step is crucial because it ensures your donuts bake evenly. While the oven heats up, lightly grease your donut pan. A well-greased pan prevents sticking, making it easier to pop those donuts out once they’re baked.

Step 2: Prepare the Cereal

Next, grab your apple cinnamon cereal and crush it into smaller pieces. You can use a rolling pin or simply crush it with your hands. This step is essential for texture; smaller pieces will blend better into the batter, giving your donuts that delightful crunch without being too chunky.

Step 3: Mix Dry Ingredients

In a large mixing bowl, combine the crushed cereal with all-purpose flour, baking powder, baking soda, salt, and ground cinnamon. Mixing these dry ingredients well is important because it ensures that the leavening agents are evenly distributed, which helps your donuts rise perfectly.

Step 4: Combine Wet Ingredients

In another bowl, whisk together the granulated sugar, unsweetened applesauce, milk, vegetable oil, egg, and vanilla extract until smooth. This step is key! Whisking until smooth helps to incorporate air into the mixture, which contributes to a light and fluffy donut.

Step 5: Combine Wet and Dry Mixtures

Now, pour the wet ingredients into the bowl with the dry ingredients. Gently stir until just combined. Be careful not to overmix! Overmixing can lead to dense donuts, and nobody wants that. A few lumps are perfectly fine.

Step 6: Fill the Donut Pan

Using a spoon or a piping bag, fill each cavity of the donut pan about 2/3 full. This allows room for the donuts to rise without overflowing. If you want perfectly shaped donuts, try to be consistent with the amount you add to each cavity.

Step 7: Bake the Donuts

Place the filled donut pan in the preheated oven and bake for 10-12 minutes. To check for doneness, insert a toothpick into the center of a donut. If it comes out clean, they’re ready! If not, give them a couple more minutes.

Step 8: Cool the Donuts

Once baked, allow the donuts to cool in the pan for about 5 minutes. This cooling period is important because it helps them firm up a bit. After that, transfer them to a wire rack to cool completely. This step prevents sogginess and ensures your donuts stay light and fluffy!

Tips for Success

  • Use fresh ingredients for the best flavor and texture.
  • Don’t skip preheating the oven; it’s key for even baking.
  • Be gentle when mixing to keep your donuts light and fluffy.
  • Experiment with toppings like nuts or a glaze for added flair.
  • Store leftovers in an airtight container to maintain freshness.

Equipment Needed

  • Donut Pan: Essential for shaping your donuts. If you don’t have one, a muffin tin can work in a pinch.
  • Mixing Bowls: Use at least two for wet and dry ingredients. Any size will do!
  • Whisk: Perfect for combining wet ingredients smoothly. A fork can also do the trick.
  • Spoon or Piping Bag: For filling the donut pan. A zip-top bag with a corner cut off works well too.

Variations

  • Gluten-Free: Substitute all-purpose flour with a gluten-free blend to make these donuts suitable for gluten-sensitive diets.
  • Vegan: Replace the egg with a flax egg (1 tablespoon ground flaxseed mixed with 2.5 tablespoons water) and use plant-based milk and oil.
  • Spiced Up: Add a pinch of nutmeg or ginger for an extra layer of warmth and spice in your donuts.
  • Fruit-Infused: Mix in some diced apples or raisins for added texture and flavor.
  • Chocolate Drizzle: Top with melted chocolate for a decadent twist that pairs beautifully with the apple and cinnamon.

Serving Suggestions

  • Pair your Apple Cinnamon Cereal Donuts with a hot cup of coffee or tea for a cozy breakfast experience.
  • Serve with a side of fresh fruit, like sliced apples or berries, to add a refreshing contrast.
  • For a fun presentation, dust the donuts with powdered sugar or drizzle with a simple glaze.

FAQs about Apple Cinnamon Cereal Donuts

Got questions about these delightful Apple Cinnamon Cereal Donuts? You’re not alone! Here are some common queries that might help you out:

Can I use a different type of cereal?
Absolutely! While apple cinnamon cereal is the star here, you can experiment with other flavors. Just keep in mind that the taste and texture may vary.

How do I store leftover donuts?
To keep your donuts fresh, store them in an airtight container at room temperature for up to three days. You can also freeze them for longer storage—just thaw before enjoying!

Can I make these donuts ahead of time?
Yes! You can prepare the batter the night before and store it in the fridge. Just give it a good stir before filling the donut pan and baking in the morning.

What can I use instead of applesauce?
If you don’t have applesauce on hand, mashed bananas or yogurt can work as substitutes. They’ll add moisture and a hint of flavor, keeping your donuts delicious!

Are these donuts suitable for kids?
Definitely! These Apple Cinnamon Cereal Donuts are a fun and tasty treat that kids will love. Plus, they’re baked, making them a healthier option compared to traditional fried donuts.

Final Thoughts

Creating these Apple Cinnamon Cereal Donuts is more than just baking; it’s about crafting memories. The delightful aroma fills your kitchen, inviting everyone to gather around. Each bite is a warm hug, blending the sweetness of apples with the comforting spice of cinnamon. Whether you’re enjoying them on a busy morning or sharing them with friends, these donuts bring joy and satisfaction. Plus, they’re so easy to make that you’ll find yourself whipping up a batch again and again. Trust me, once you take that first bite, you’ll understand why they’re a family favorite!

Ranis

Apple Cinnamon Cereal Donuts: A Sweet, Easy Recipe!

A delicious and easy recipe for Apple Cinnamon Cereal Donuts that combines the flavors of apple and cinnamon in a fun donut shape.
Prep Time 15 minutes
Cook Time 12 minutes
Total Time 27 minutes
Servings: 12 donuts
Course: Dessert
Cuisine: American
Calories: 130

Ingredients
  

  • 2 cups apple cinnamon cereal
  • 1 cup all-purpose flour
  • 1 teaspoon baking powder
  • 1/2 teaspoon baking soda
  • 1/2 teaspoon salt
  • 1 teaspoon ground cinnamon
  • 1/2 cup granulated sugar
  • 1/2 cup unsweetened applesauce
  • 1/4 cup milk
  • 1/4 cup vegetable oil
  • 1 large egg
  • 1 teaspoon vanilla extract

Method
 

  1. Preheat your oven to 350°F (175°C) and lightly grease a donut pan.
  2. In a large mixing bowl, crush the apple cinnamon cereal into smaller pieces. You can use a rolling pin or your hands for this.
  3. Add the flour, baking powder, baking soda, salt, and ground cinnamon to the bowl with the crushed cereal. Mix until well combined.
  4. In another bowl, whisk together the granulated sugar, applesauce, milk, vegetable oil, egg, and vanilla extract until smooth.
  5. Pour the wet ingredients into the dry ingredients and stir until just combined. Be careful not to overmix.
  6. Spoon the batter into the prepared donut pan, filling each cavity about 2/3 full.
  7. Bake in the preheated oven for 10-12 minutes, or until a toothpick inserted into the center comes out clean.
  8. Allow the donuts to cool in the pan for 5 minutes before transferring them to a wire rack to cool completely.

Nutrition

Serving: 1donutCalories: 130kcalCarbohydrates: 22gProtein: 2gFat: 4gSaturated Fat: 0.5gPolyunsaturated Fat: 3.5gCholesterol: 20mgSodium: 150mgFiber: 1gSugar: 6g

Notes

  • For a sweeter treat, drizzle a simple glaze made from powdered sugar and milk over the cooled donuts.
  • To add a bit of crunch, sprinkle some chopped nuts or additional crushed cereal on top before baking.

Tried this recipe?

Let us know how it was!

Beef and Broccoli Ramen Stir-Fry: A Quick Delight!

Introduction to Beef and Broccoli Ramen Stir-Fry

After a long day, the last thing I want is to spend hours in the kitchen. That’s where my Beef and Broccoli Ramen Stir-Fry comes in. It’s a quick solution for busy evenings, combining tender beef, vibrant broccoli, and flavorful ramen noodles in just 25 minutes. This dish not only satisfies your hunger but also impresses your loved ones with its deliciousness. Whether you’re cooking for yourself or hosting friends, this recipe is a delightful way to bring everyone together around the table. Let’s dive into this culinary adventure!

Why You’ll Love This Beef and Broccoli Ramen Stir-Fry

This Beef and Broccoli Ramen Stir-Fry is a game-changer for anyone who craves a delicious meal without the fuss. It’s incredibly easy to whip up, making it perfect for weeknight dinners. The flavors meld beautifully, creating a dish that’s both comforting and satisfying. Plus, it’s versatile! You can customize it to suit your taste, ensuring everyone at the table leaves happy and full.

Ingredients for Beef and Broccoli Ramen Stir-Fry

Gathering the right ingredients is key to making a fantastic Beef and Broccoli Ramen Stir-Fry. Here’s what you’ll need:

  • Flank steak: This cut is tender and flavorful, perfect for quick cooking. Slice it thinly against the grain for the best texture.
  • Soy sauce: A staple in Asian cuisine, it adds depth and umami to the dish. Opt for low-sodium if you’re watching your salt intake.
  • Cornstarch: This helps to tenderize the beef and create a nice glaze when stir-frying.
  • Vegetable oil: A neutral oil is ideal for high-heat cooking. You can also use canola or peanut oil.
  • Broccoli florets: Fresh broccoli not only adds color but also a satisfying crunch. Feel free to use frozen if that’s what you have on hand.
  • Garlic: Minced garlic brings a fragrant aroma and enhances the overall flavor of the dish.
  • Ginger: Fresh ginger adds a zesty kick. If you don’t have fresh, ground ginger can work in a pinch.
  • Cooked ramen noodles: These are the heart of the dish. You can use fresh or dried noodles, just make sure they’re cooked before adding them to the stir-fry.
  • Beef broth: This adds moisture and richness. You can substitute with chicken broth or vegetable broth for a lighter option.
  • Oyster sauce: A key ingredient for that authentic stir-fry flavor. If you’re vegetarian, look for mushroom-based alternatives.
  • Sesame oil: A drizzle of this oil at the end gives a nutty finish that elevates the dish.
  • Red pepper flakes: Optional, but they add a nice heat. Adjust according to your spice preference.
  • Green onions: Sliced for garnish, they add a fresh crunch and a pop of color.

For exact measurements, check the bottom of the article where you can find everything available for printing. Happy cooking!

How to Make Beef and Broccoli Ramen Stir-Fry

Now that you have all your ingredients ready, let’s get cooking! This Beef and Broccoli Ramen Stir-Fry is straightforward and quick, making it perfect for any night of the week. Follow these simple steps, and you’ll have a delicious meal in no time.

Step 1: Marinate the Beef

Start by marinating the flank steak. In a medium bowl, combine the sliced beef with soy sauce and cornstarch. Mix everything well, ensuring the beef is evenly coated. Let it sit for about 15 minutes. This step is crucial; it tenderizes the meat and infuses it with flavor.

Step 2: Stir-Fry the Beef

Heat 1 tablespoon of vegetable oil in a large skillet or wok over medium-high heat. Once the oil is hot, add the marinated beef. Stir-fry for about 3-4 minutes until the beef is browned and cooked through. Remember to keep it moving in the pan to avoid burning. Once done, remove the beef from the skillet and set it aside.

Step 3: Cook the Broccoli

In the same skillet, add the remaining tablespoon of vegetable oil. Toss in the broccoli florets, minced garlic, and ginger. Stir-fry for 2-3 minutes until the broccoli is bright green and tender-crisp. This step adds a lovely crunch and vibrant color to your dish.

Step 4: Combine Ingredients

Now it’s time to bring everything together! Return the cooked beef to the skillet. Add the cooked ramen noodles, beef broth, oyster sauce, and sesame oil. If you like a bit of heat, sprinkle in some red pepper flakes. Toss everything together and cook for another 2-3 minutes until everything is heated through. The flavors will meld beautifully!

Step 5: Serve and Garnish

Once everything is well combined, it’s time to serve. Dish out the Beef and Broccoli Ramen Stir-Fry onto plates or bowls. Garnish with sliced green onions for that fresh touch. Enjoy your meal hot, and watch everyone dig in with delight!

Tips for Success

  • Prep all ingredients before starting to cook. It makes the process smoother.
  • Don’t overcrowd the skillet; cook in batches if necessary for even browning.
  • Use high heat for a quick stir-fry, ensuring the beef stays tender.
  • Feel free to customize with your favorite veggies like bell peppers or snap peas.
  • For extra flavor, add a splash of soy sauce just before serving.

Equipment Needed

  • Large skillet or wok: Essential for stir-frying. A non-stick skillet works well too.
  • Medium bowl: For marinating the beef.
  • Spatula or wooden spoon: Perfect for tossing ingredients without scratching your cookware.
  • Knife and cutting board: For slicing the beef and veggies.

Variations

  • Protein Swap: Substitute flank steak with chicken, shrimp, or tofu for a different protein option.
  • Vegetable Medley: Add bell peppers, snap peas, or carrots for extra color and nutrition.
  • Gluten-Free Option: Use gluten-free soy sauce and ramen noodles to keep it gluten-free.
  • Spicy Twist: Incorporate sriracha or chili paste for a fiery kick that elevates the flavor.
  • Herb Infusion: Toss in fresh basil or cilantro at the end for a burst of freshness.

Serving Suggestions

  • Side Dishes: Pair with steamed jasmine rice or a light cucumber salad for a refreshing contrast.
  • Drinks: Enjoy with a cold beer or a crisp iced tea to complement the flavors.
  • Presentation: Serve in deep bowls, garnished with sesame seeds for an appealing touch.

FAQs about Beef and Broccoli Ramen Stir-Fry

Can I use other types of noodles for this stir-fry?

Absolutely! While ramen noodles are traditional, you can swap them for udon, soba, or even rice noodles. Just make sure to adjust the cooking time accordingly.

How can I make this dish vegetarian?

To make a vegetarian version of Beef and Broccoli Ramen Stir-Fry, simply replace the flank steak with tofu or tempeh. Use vegetable broth instead of beef broth, and ensure your sauces are plant-based.

What can I do with leftovers?

Leftovers can be stored in an airtight container in the fridge for up to three days. Reheat in a skillet over medium heat, adding a splash of water or broth to keep it moist.

Can I prepare this dish in advance?

While it’s best enjoyed fresh, you can marinate the beef and chop the vegetables ahead of time. Just store them separately in the fridge until you’re ready to cook.

What can I serve with Beef and Broccoli Ramen Stir-Fry?

This dish pairs wonderfully with steamed rice, a light salad, or even some crispy spring rolls. The options are endless!

Final Thoughts

Cooking this Beef and Broccoli Ramen Stir-Fry is more than just preparing a meal; it’s about creating a moment of joy. The vibrant colors, enticing aromas, and satisfying flavors come together to make a dish that warms the heart. Whether you’re sharing it with family or enjoying a quiet dinner alone, this recipe brings a sense of accomplishment and comfort. Plus, it’s quick enough to fit into any busy schedule, proving that delicious food doesn’t have to be complicated. So grab your skillet, and let’s make some memories around the dinner table!

Ranis

Beef and Broccoli Ramen Stir-Fry: A Quick Delight!

A quick and delicious Beef and Broccoli Ramen Stir-Fry that combines tender beef, fresh broccoli, and flavorful ramen noodles.
Prep Time 15 minutes
Cook Time 10 minutes
Total Time 25 minutes
Servings: 4 servings
Course: Main Dish
Cuisine: Asian
Calories: 450

Ingredients
  

  • 1 pound flank steak thinly sliced against the grain
  • 2 tablespoons soy sauce
  • 1 tablespoon cornstarch
  • 2 tablespoons vegetable oil divided
  • 2 cups broccoli florets
  • 2 cloves garlic minced
  • 1 teaspoon ginger minced
  • 4 cups cooked ramen noodles
  • 1/4 cup beef broth
  • 2 tablespoons oyster sauce
  • 1 tablespoon sesame oil
  • 1 teaspoon red pepper flakes optional
  • 2 green onions sliced for garnish

Method
 

  1. In a medium bowl, combine the sliced flank steak, soy sauce, and cornstarch. Mix well and let marinate for 15 minutes.
  2. In a large skillet or wok, heat 1 tablespoon of vegetable oil over medium-high heat. Add the marinated beef and stir-fry for about 3-4 minutes until browned. Remove the beef from the skillet and set aside.
  3. In the same skillet, add the remaining tablespoon of vegetable oil. Add the broccoli, garlic, and ginger, and stir-fry for 2-3 minutes until the broccoli is bright green and tender-crisp.
  4. Return the beef to the skillet and add the cooked ramen noodles, beef broth, oyster sauce, sesame oil, and red pepper flakes if using. Toss everything together and cook for another 2-3 minutes until heated through.
  5. Serve hot, garnished with sliced green onions.

Nutrition

Serving: 1servingCalories: 450kcalCarbohydrates: 40gProtein: 30gFat: 20gSaturated Fat: 5gPolyunsaturated Fat: 15gCholesterol: 70mgSodium: 800mgFiber: 2gSugar: 2g

Notes

  • For a spicier kick, add a tablespoon of sriracha sauce to the stir-fry.
  • You can substitute the flank steak with chicken or tofu for a different protein option.

Tried this recipe?

Let us know how it was!

Turkey Taco Salad Bowl: Discover a Flavorful Recipe!

Introduction to Turkey Taco Salad Bowl

There’s something special about a meal that feels like a fiesta in a bowl. The Turkey Taco Salad Bowl is just that—a vibrant, flavorful dish that’s as satisfying as it is healthy. Whether you’re racing against the clock after a long day or looking to impress friends at a casual gathering, this recipe has your back. Packed with protein and fresh ingredients, it’s a quick solution for busy days and a delightful way to enjoy a classic taco experience without the guilt. Let’s dive into this delicious adventure together!

Why You’ll Love This Turkey Taco Salad Bowl

This Turkey Taco Salad Bowl is a game-changer for anyone who craves flavor without the fuss. It’s quick to whip up, taking just 25 minutes from start to finish. The combination of lean ground turkey and fresh veggies makes it a nutritious choice that doesn’t skimp on taste. Plus, it’s customizable! You can easily adjust the ingredients to suit your mood or dietary needs, making it a versatile staple in your kitchen.

Ingredients for Turkey Taco Salad Bowl

Gathering the right ingredients is the first step to creating your Turkey Taco Salad Bowl masterpiece. Here’s what you’ll need:

  • Ground turkey: A lean protein that keeps the dish light yet filling. It’s a healthier alternative to beef.
  • Olive oil: This adds a touch of richness and helps cook the turkey to perfection.
  • Chili powder: A must for that classic taco flavor. It brings warmth and depth to the dish.
  • Cumin: Earthy and aromatic, cumin enhances the overall taste, making it irresistible.
  • Garlic powder: For a savory kick, garlic powder is a pantry staple that elevates any dish.
  • Onion powder: Adds sweetness and depth without the hassle of chopping onions.
  • Salt and pepper: Essential for seasoning, these two bring all the flavors together.
  • Romaine lettuce: Crisp and refreshing, it forms the base of your salad, adding crunch.
  • Cherry tomatoes: Sweet and juicy, they provide a burst of flavor and color.
  • Corn: Whether canned or frozen, corn adds a delightful sweetness and texture.
  • Black beans: Packed with protein and fiber, they make the salad hearty and satisfying.
  • Avocado: Creamy and rich, avocado adds a luxurious touch and healthy fats.
  • Shredded cheddar cheese: A classic topping that brings a melty, cheesy goodness.
  • Salsa: For a zesty kick, salsa ties all the flavors together beautifully.
  • Sour cream: A dollop of sour cream adds creaminess and balances the spices.
  • Tortilla chips: Perfect for scooping and adding crunch, they’re the finishing touch to your bowl.

Feel free to get creative! You can swap ground turkey for ground beef or even a plant-based alternative if you prefer. For those who like it spicy, consider adding diced jalapeños or a splash of hot sauce to the turkey mixture. The exact quantities for each ingredient are listed at the bottom of the article for your convenience.

How to Make Turkey Taco Salad Bowl

Creating your Turkey Taco Salad Bowl is a breeze! Follow these simple steps, and you’ll have a delicious meal ready in no time. Let’s get cooking!

Step 1: Cook the Ground Turkey

Start by heating a tablespoon of olive oil in a large skillet over medium heat. Once the oil is shimmering, add 1 pound of ground turkey. Cook it for about 5-7 minutes, breaking it apart with a spatula. You want it browned and cooked through. The aroma will fill your kitchen, making your mouth water!

Step 2: Season the Turkey

Now, it’s time to amp up the flavor! Stir in 1 teaspoon each of chili powder, cumin, garlic powder, and onion powder. Don’t forget to sprinkle in some salt and pepper to taste. Cook for another 2-3 minutes, allowing the spices to meld with the turkey. This step is where the magic happens, transforming plain turkey into a fiesta of flavors!

Step 3: Prepare the Salad Base

While the turkey is cooking, grab a large bowl. Chop up 1 head of romaine lettuce and toss it in. Add 1 cup of halved cherry tomatoes, 1 cup of corn (canned or frozen), and 1 cup of drained and rinsed black beans. Finally, dice 1 avocado and throw that in too. This colorful mix is not just pretty; it’s packed with nutrients!

Step 4: Combine Ingredients

Once the turkey is seasoned and your salad base is ready, it’s time to combine! Add the cooked turkey mixture to the bowl of veggies. Gently toss everything together until well mixed. The vibrant colors and textures will make you want to dive right in!

Step 5: Add Toppings

Now for the fun part—toppings! Sprinkle 1 cup of shredded cheddar cheese over the salad. Then, add 1/2 cup of salsa and a dollop of 1/4 cup of sour cream. These toppings not only enhance the flavor but also add a creamy texture that balances the crunch of the salad.

Step 6: Serve with Tortilla Chips

Finally, it’s time to serve! Dish out generous portions of your Turkey Taco Salad Bowl and place some tortilla chips on the side. These chips are perfect for scooping up the salad and adding that satisfying crunch. Enjoy your creation with family or friends, and watch them rave about your culinary skills!

Tips for Success

  • Prep your ingredients ahead of time to save on cooking time.
  • Don’t skip the seasoning; it’s key to a flavorful Turkey Taco Salad Bowl.
  • Feel free to customize toppings based on your preferences.
  • For extra crunch, add crushed tortilla chips right before serving.
  • Store leftovers in an airtight container for up to 2 days.

Equipment Needed

  • Large skillet: Essential for cooking the turkey. A non-stick pan works well too.
  • Spatula: Perfect for breaking up the turkey as it cooks.
  • Large bowl: Needed for mixing the salad ingredients. A mixing bowl will do.
  • Measuring spoons: Handy for accurate seasoning.

Variations

  • Spicy Kick: Add diced jalapeños or a splash of hot sauce to the turkey for an extra kick.
  • Vegetarian Option: Substitute ground turkey with a plant-based meat alternative or sautéed mushrooms for a hearty, meat-free version.
  • Grain Bowl: Serve the salad over cooked quinoa or brown rice for added texture and nutrition.
  • Cheese Swap: Try crumbled feta or pepper jack cheese instead of cheddar for a different flavor profile.
  • Fresh Herbs: Toss in some chopped cilantro or green onions for a burst of freshness.

Serving Suggestions

  • Side Dishes: Pair your Turkey Taco Salad Bowl with a side of Mexican rice or refried beans for a complete meal.
  • Drinks: Enjoy with a refreshing iced tea or a cold cerveza to complement the flavors.
  • Presentation: Serve in colorful bowls and garnish with fresh cilantro for a vibrant touch.

FAQs about Turkey Taco Salad Bowl

Got questions about the Turkey Taco Salad Bowl? You’re not alone! Here are some common queries that might help you out:

Can I make this Turkey Taco Salad Bowl ahead of time?

Absolutely! You can prepare the turkey and chop the veggies in advance. Just store them separately in the fridge. When you’re ready to eat, combine everything and add the toppings for a fresh meal.

Is this salad suitable for meal prep?

Yes! This Turkey Taco Salad Bowl is perfect for meal prep. Just keep the dressing and toppings separate until you’re ready to enjoy. It stays fresh for a couple of days in the fridge.

What can I substitute for ground turkey?

If you’re not a fan of ground turkey, feel free to swap it out for ground beef, chicken, or even a plant-based meat alternative. Each option brings its own unique flavor to the dish!

How can I make this salad spicier?

For a spicy kick, add diced jalapeños or a few dashes of your favorite hot sauce to the turkey mixture. You can also use spicy salsa for an extra layer of heat.

Can I add more vegetables to the salad?

Definitely! Feel free to toss in any of your favorite veggies, like bell peppers, cucumbers, or even shredded carrots. The more colorful, the better!

Final Thoughts

Creating a Turkey Taco Salad Bowl is more than just cooking; it’s about bringing joy to your table. Each bite bursts with flavor, reminding me of sunny days and family gatherings. This dish is a celebration of fresh ingredients and vibrant tastes, perfect for any occasion. Whether you’re enjoying it solo or sharing with loved ones, it’s a meal that satisfies both the palate and the soul. Plus, the ease of preparation means you can spend less time in the kitchen and more time enjoying life. Dive into this delicious adventure, and let the flavors take you away!

Ranis

Turkey Taco Salad Bowl: Discover a Flavorful Recipe!

A delicious and healthy Turkey Taco Salad Bowl packed with flavor and nutrients.
Prep Time 15 minutes
Cook Time 10 minutes
Total Time 25 minutes
Servings: 4 servings
Course: Salad
Cuisine: Mexican
Calories: 450

Ingredients
  

  • 1 pound ground turkey
  • 1 tablespoon olive oil
  • 1 teaspoon chili powder
  • 1 teaspoon cumin
  • 1 teaspoon garlic powder
  • 1 teaspoon onion powder
  • Salt and pepper to taste
  • 1 head romaine lettuce chopped
  • 1 cup cherry tomatoes halved
  • 1 cup corn canned or frozen
  • 1 cup black beans drained and rinsed
  • 1 avocado diced
  • 1 cup shredded cheddar cheese
  • 1/2 cup salsa
  • 1/4 cup sour cream
  • Tortilla chips for serving

Method
 

  1. In a large skillet, heat the olive oil over medium heat. Add the ground turkey and cook until browned, about 5-7 minutes.
  2. Stir in the chili powder, cumin, garlic powder, onion powder, salt, and pepper. Cook for an additional 2-3 minutes until the spices are well combined with the turkey. Remove from heat.
  3. In a large bowl, combine the chopped romaine lettuce, cherry tomatoes, corn, black beans, and diced avocado.
  4. Add the cooked turkey mixture to the salad and toss gently to combine.
  5. Top with shredded cheddar cheese, salsa, and sour cream.
  6. Serve with tortilla chips on the side for added crunch.

Nutrition

Serving: 1bowlCalories: 450kcalCarbohydrates: 20gProtein: 30gFat: 25gSaturated Fat: 10gPolyunsaturated Fat: 15gCholesterol: 80mgSodium: 600mgFiber: 8gSugar: 3g

Notes

  • For a spicier kick, add diced jalapeños or a dash of hot sauce to the turkey mixture.
  • Substitute ground turkey with ground beef or a plant-based meat alternative for a different flavor profile.

Tried this recipe?

Let us know how it was!