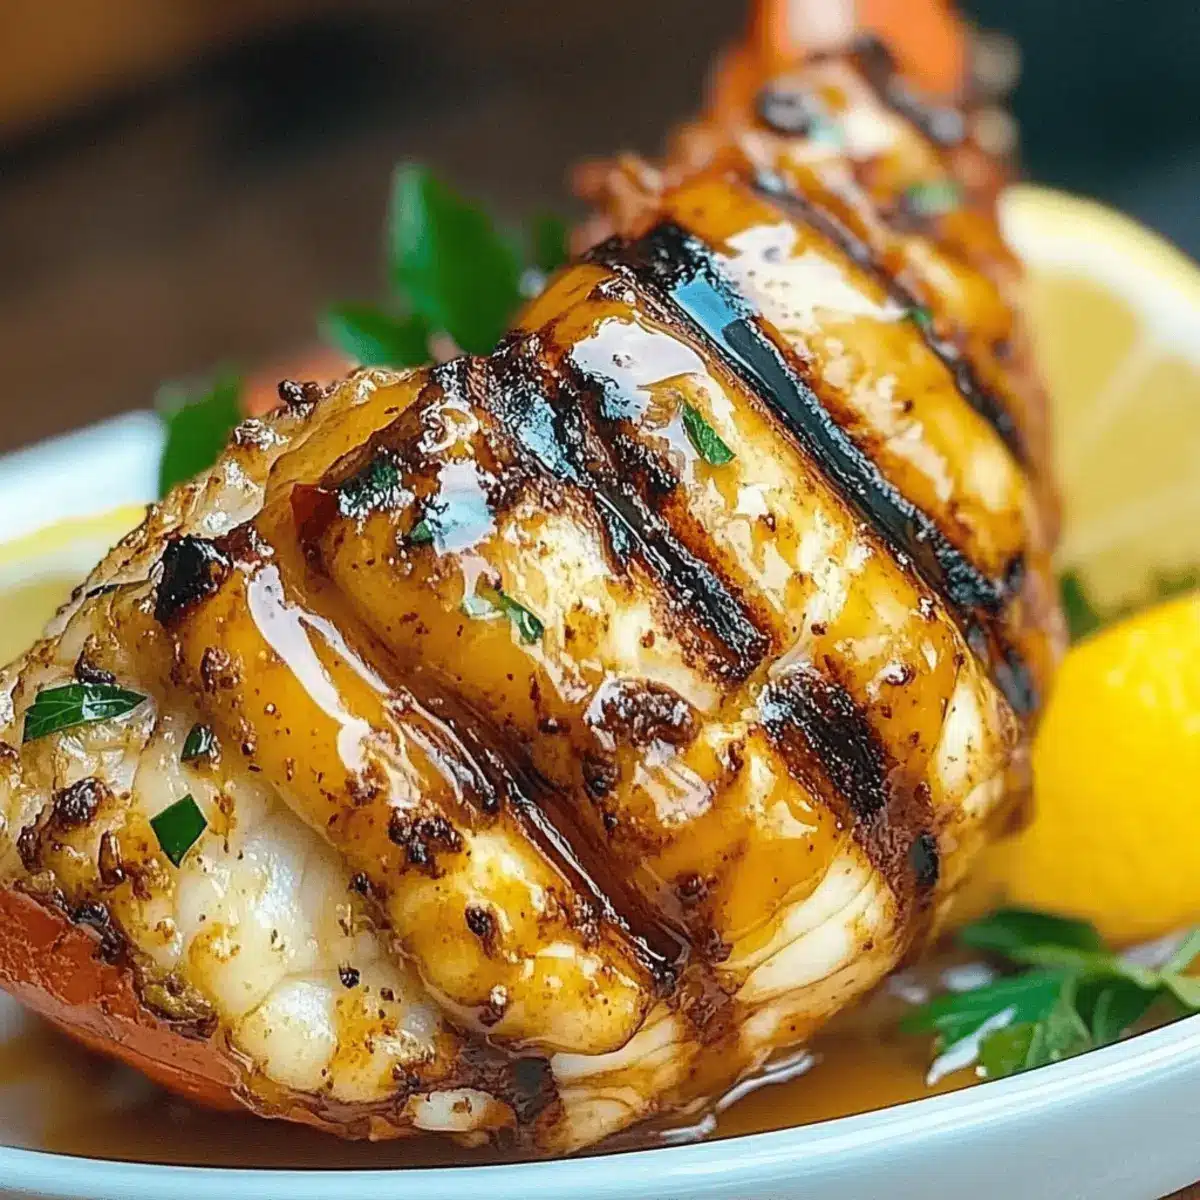
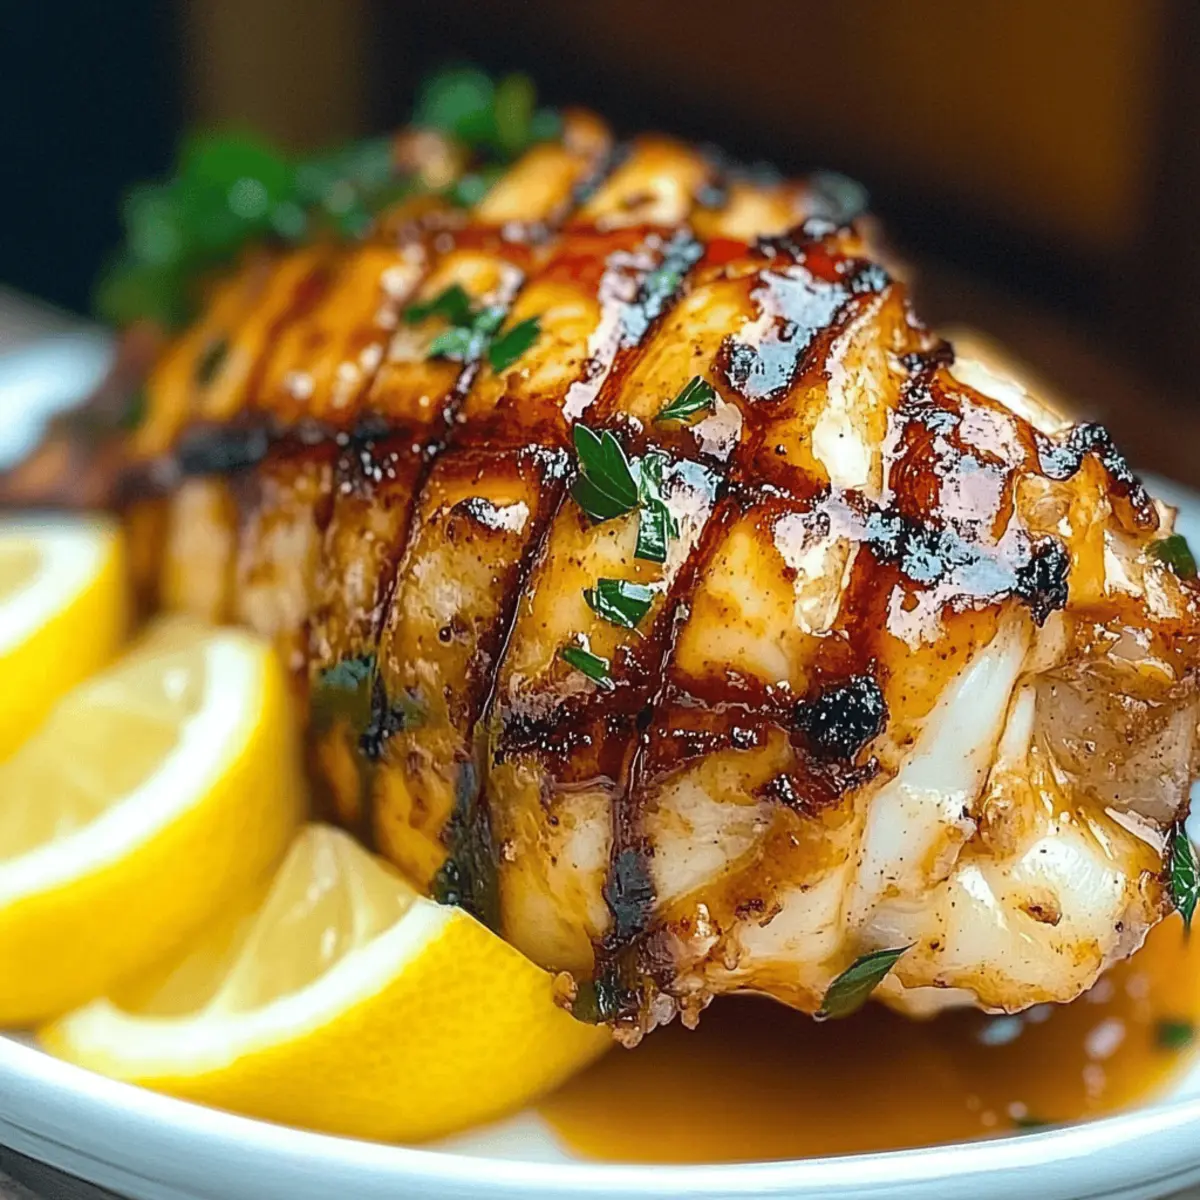
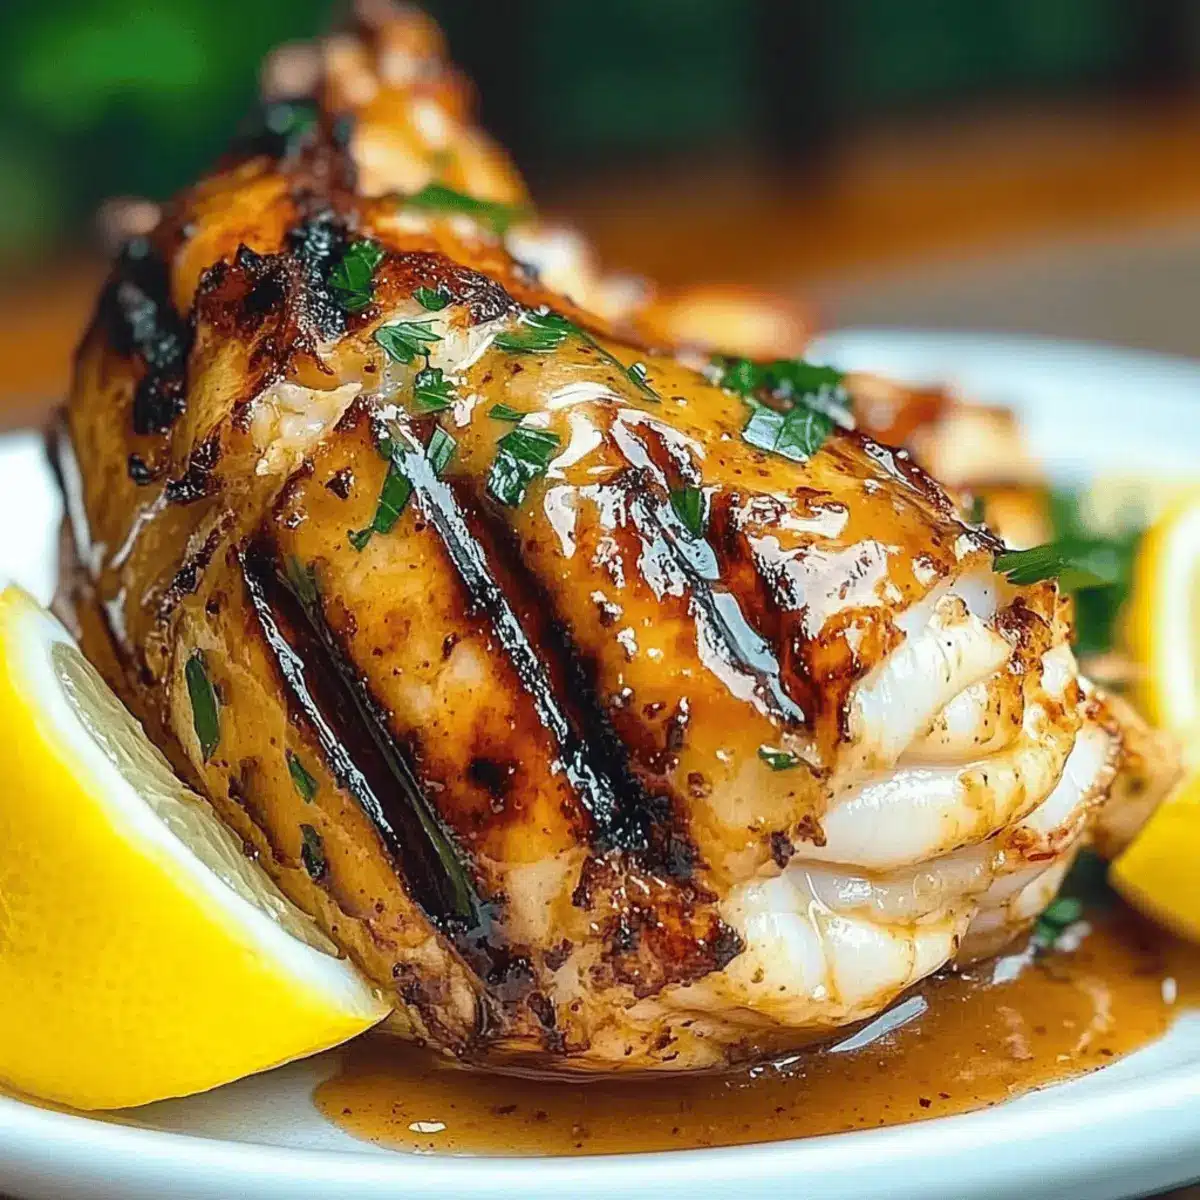
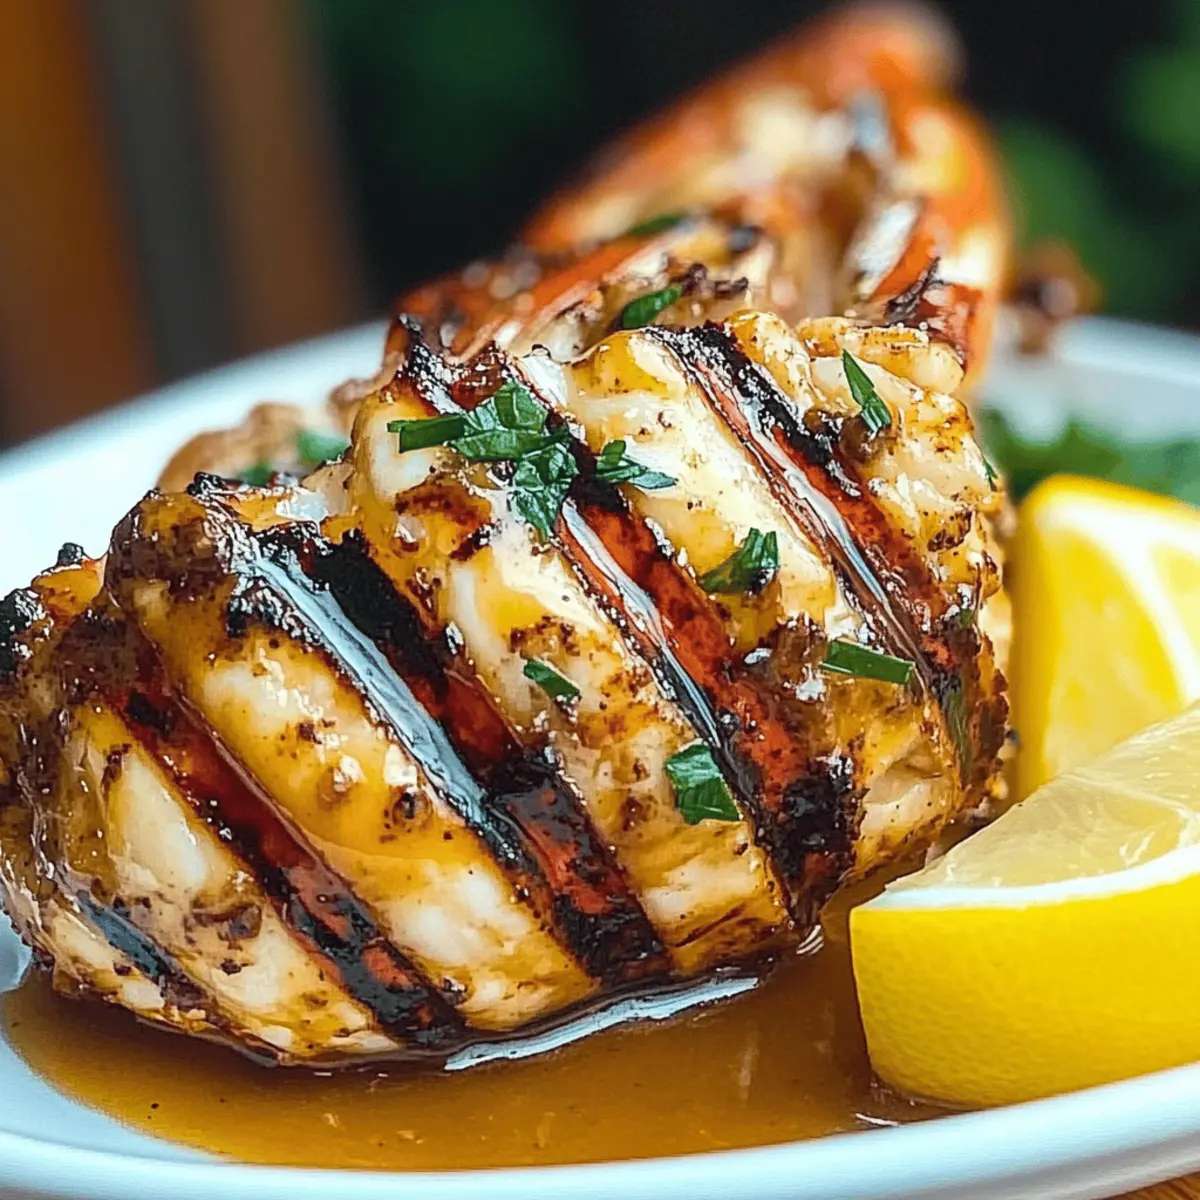
Savor Chicken Kofta with Creamy Garlic Yogurt Sauce Tonight

As I flipped through my favorite Middle Eastern cookbook, the vibrant colors and tantalizing aromas bounced off the pages, instantly transporting me to a bustling market. That’s when I discovered the joy of Chicken Kofta with Garlic Yogurt Sauce, a dish that combines juicy ground chicken with aromatic spices and fresh herbs, crafted into delightful patties. This gluten-free gem is not only a breeze to whip up for busy weeknights, but it also packs a flavor punch that will make your taste buds dance. The creamy garlic yogurt sauce adds a refreshing twist that perfectly complements the grilled kofta, making it a hit whether served in warm pita breads or over fluffy rice. Ready to add an easy dinner to your repertoire that your family will love? Let’s dive into this comforting recipe that’s sure to become a staple in your kitchen!

Why is Chicken Kofta a Must-Try?

Deliciously Unique: This Chicken Kofta is not your everyday meat dish; infused with spices like cumin and coriander, each bite offers a taste of Middle Eastern cuisine that’s both bold and comforting.
Easy to Make: With a foolproof method, you’ll impress your family in no time. The grilling technique keeps the kofta juicy without the fuss of deep-frying.
Versatile Pairing: Whether served in a warm pita or alongside a refreshing salad, this dish adapts to your preferred dining style. For a fully rounded meal, try pairing it with grilled veggies or a side of Honey Garlic Shrimp.
Crowd-Pleaser: Perfect for family dinners or casual gatherings, its gluten-free nature makes it a friendly option for guests with dietary needs.
Customizable Flavors: Feel free to spice things up with variations like ground turkey or a zesty yogurt twist—there’s truly something for everyone!

Chicken Kofta with Garlic Yogurt Sauce Ingredients

For the Kofta

  • Ground Chicken – The star protein that brings moisture and flavor; you can substitute with ground turkey for a leaner option.
  • Onion (finely chopped) – Adds depth and moisture to the kofta.
  • Garlic (minced) – Essential for enhancing flavor; it’s used in both the kofta and the yogurt sauce.
  • Fresh Parsley (chopped) – Provides a burst of freshness and vibrant color to your dish.
  • Ground Cumin – Adds the warm, earthy flavor characteristic of Middle Eastern cuisine.
  • Ground Coriander – Complements cumin with its citrusy notes, enhancing overall flavor.
  • Salt & Black Pepper – Key seasonings that elevate the dish’s flavor profile.
  • Olive Oil – Used for grilling and adds a bit of richness to the kofta.

For the Garlic Yogurt Sauce

  • Plain Yogurt – The creamy base for the sauce; for a dairy-free option, try using coconut yogurt.
  • Lemon Juice – Brightens the sauce and brings a lovely acidity that cuts through richness.
  • Additional Garlic (optional) – Boosts the garlic flavor for those who can’t get enough!

Step‑by‑Step Instructions for Chicken Kofta with Garlic Yogurt Sauce

Step 1: Mix the Ingredients
In a large mixing bowl, combine the ground chicken, finely chopped onion, minced garlic, chopped parsley, ground cumin, and ground coriander. Season the mixture with salt and black pepper to taste. Using your hands, mix thoroughly until all ingredients are fully integrated. This ensures that each bite of your Chicken Kofta is packed with vibrant flavor.

Step 2: Shape the Kofta Patties
Wet your hands to prevent sticking and shape the Chicken Kofta mixture into 10-12 elongated oval patties. Aim for about 3 inches in length. This uniformity helps them cook evenly and gives a pleasing presentation. Place them on a clean plate as you shape each one, making sure not to overcrowd them.

Step 3: Preheat Your Grill
Preheat your grill or grill pan to medium-high heat, ensuring a sizzling surface ideal for cooking. Lightly oil the grill grates or the pan with olive oil to prevent sticking. This step is crucial for getting those beautiful grill marks while keeping your Chicken Kofta juicy and tender.

Step 4: Grill the Kofta
Carefully place the patties on the preheated grill and cook for 5-7 minutes on each side. Monitor them closely; they should be golden brown and firm to the touch. For safety, check that the internal temperature reaches 75°C (165°F). This grilling method enhances the flavor while giving your Chicken Kofta a delightful texture.

Step 5: Prepare the Garlic Yogurt Sauce
While the kofta cooks, prepare the creamy garlic yogurt sauce. In a separate bowl, combine plain yogurt with freshly squeezed lemon juice and a pinch of salt. For an extra kick, you can add minced garlic. Whisk together until smooth and creamy. Set aside, allowing the flavors to meld while your kofta finishes cooking.

Step 6: Serve Warm
Once cooked, remove the Chicken Kofta from the grill and let them rest for a moment. Serve them warm alongside the garlic yogurt sauce. This dish is fantastic on its own, or for an exciting twist, wrap them in warm pita bread or serve over rice, creating a delicious meal everyone will love.

Make Ahead Options

These Chicken Kofta with Garlic Yogurt Sauce are perfect for meal prep enthusiasts! You can mix the chicken kofta ingredients (ground chicken, onion, garlic, parsley, cumin, and coriander) up to 24 hours in advance and refrigerate the mixture in an airtight container to allow the flavors to meld. Additionally, you can shape the patties and store them either in the fridge for up to 3 days or freeze them for longer storage. When you’re ready to enjoy, simply grill the kofta from the fridge or frozen state—if frozen, just add a few extra minutes to the cook time. Serve alongside the prepared garlic yogurt sauce to keep the flavors fresh and vibrant. Enjoy the ease of this time-saving method for busy weeknights!

What to Serve with Chicken Kofta with Garlic Yogurt Sauce?

Elevate your meal experience with delightful pairings that bring balance, freshness, and a touch of excitement to your Chicken Kofta dinner.

  • Grilled Vegetables:
    Charred seasonal vegetables like zucchini and bell peppers add a smoky flavor and vibrant colors to your plate, creating a beautiful presentation.

  • Fresh Salad:
    A crisp cucumber and tomato salad tossed in lemon vinaigrette provides a refreshing crunch, cutting through the richness of the garlic yogurt sauce.

  • Fluffy Rice:
    Serve your kofta over a bed of fluffy basmati rice, allowing the grains to soak up the juices and enhance each bite with a tender texture.

  • Warm Pita Bread:
    Soft, warm pita bread is perfect for scooping up kofta and sauce, making every mouthful a flavorful experience that invites hands-on enjoyment.

  • Herbed Quinoa:
    Lightly seasoned quinoa with fresh herbs is a delicious gluten-free alternative that pairs well with the spices in the kofta, adding nutritious content.

  • Spicy Hummus:
    A side of spicy hummus delivers a creamy and zesty contrast, perfect for dipping and creating a fun appetizer before the main meal.

  • Mint Lemonade:
    Cool down your taste buds with a refreshing mint lemonade, which offers a bright, tangy flavor that complements the aromatic spices of the kofta.

  • Baklava:
    For dessert, serve traditional baklava drizzled with honey; its flaky, nutty sweetness pairs beautifully with the savory kofta for a satisfying meal finale.

Storage Tips for Chicken Kofta with Garlic Yogurt Sauce

  • Fridge: Store leftover Chicken Kofta in an airtight container for up to 3 days. Keeping the kofta and garlic yogurt sauce separate will help maintain the texture.
  • Freezer: Freeze kofta patties individually on a baking sheet before transferring to an airtight container or freezer bag for up to 3 months. Thaw in the fridge before grilling again.
  • Reheating: When ready to enjoy leftovers, reheat the kofta in a preheated oven at 180°C (350°F) for about 10-15 minutes or until heated through, ensuring they stay juicy.
  • Sauce Storage: The garlic yogurt sauce can be stored in the fridge for up to 5 days. Stir well before serving to recombine the ingredients.

Chicken Kofta with Garlic Yogurt Sauce Variations

Feel free to explore these variations to make this delightful dish your own and cater to your family’s taste buds!

  • Ground Turkey: Swap ground chicken for ground turkey for a leaner option that’s just as tasty. The spices will shine through beautifully in both versions!

  • Dairy-Free Delight: Replace plain yogurt with coconut yogurt to create a creamy, dairy-free garlic sauce. You might also enjoy the tropical hint in the mix while keeping it light and refreshing.

  • Spicy Kick: Add cayenne pepper or finely chopped fresh chili to the garlic yogurt sauce for an exciting heat that will elevate the flavors. If you’re a spice lover, this zesty twist will awaken your taste buds!

  • Herb Infusion: Mix in different fresh herbs like mint or dill for a unique spin. These herbs add a bright, aromatic flavor profile that enhances the aromatic experience of your kofta.

  • Savory Additions: Consider adding grated zucchini or carrot into the kofta mixture for a hint of sweetness and added moisture. These veggies meld wonderfully with the spices, creating an even heartier patty!

  • Flavorful Marinade: Try marinating your kofta in spices like smoked paprika or sumac before grilling for an extra layer of flavor. This step enhances the taste and makes every bite unforgettable.

  • Creamy Avocado Sauce: For a new sauce alternative, mash ripe avocado with lemon juice and garlic for a creamy twist that complements the dish beautifully. This will lend a rich texture while keeping things refreshing.

  • Mediterranean Twist: Add chopped olives or sun-dried tomatoes to the kofta mix for a Mediterranean flair. These ingredients bring a savory depth that perfectly balances with the garlic yogurt sauce.

You can customize your Chicken Kofta with Garlic Yogurt Sauce in so many delightful ways! And if you’re looking for more delicious grilled options, don’t forget to check out Grilled Boneless Chicken or try a flavorful Jerk Chicken Burrito for a fun twist on dinner!

Expert Tips for Chicken Kofta

  • Mix Thoroughly: Use your hands to ensure the spices blend evenly, avoiding uneven flavor distribution in your Chicken Kofta.
  • Avoid Overcooking: Keep an eye on cooking time; overcooked kofta can become dry. Aim for a golden exterior while retaining juiciness.
  • Internal Temperature Check: Use a meat thermometer to ensure safe cooking. Chicken should reach 75°C (165°F) for perfect texture and flavor.
  • Hearty Substitutes: If using ground turkey, consider adding a small amount of olive oil for moisture, as turkey can be leaner than chicken.
  • Custom Sauce: For an exciting twist, mix in fresh herbs or spices to the garlic yogurt sauce, adding depth and personal flair to this delicious dish.

Chicken Kofta with Garlic Yogurt Sauce Recipe FAQs

What kind of ground chicken should I use for the kofta?
Absolutely! You can use freshly ground chicken for the best flavor and texture. If you’re looking for a leaner option, ground turkey is a great substitute, but be mindful that it may require a bit more binding or fat to keep the patties moist.

How do I store leftover Chicken Kofta?
You can store leftover Chicken Kofta in an airtight container in the refrigerator for up to 3 days. To preserve their delicious texture, I recommend keeping the kofta and the garlic yogurt sauce separate until you’re ready to indulge in those juicy bites again.

Can I freeze Chicken Kofta, and if so, how?
Very! Freezing Chicken Kofta is a smart way to meal prep. After shaping the patties, lay them out on a baking sheet and freeze them individually for about an hour. Once they’re firm, transfer them to an airtight container or freezer bag, where they can stay fresh for up to 3 months. When you’re ready to cook, just thaw them in the fridge overnight before grilling.

What if my kofta falls apart on the grill?
If your Chicken Kofta falls apart while grilling, it may be due to insufficient binding or not mixing the ingredients thoroughly. Make sure you blend the mixture well and consider adding an egg or breadcrumbs for better cohesion. Also, wetting your hands while shaping the patties can help prevent them from disintegrating.

Is this recipe suitable for people with allergies?
Yes, this dish can be customized for various dietary preferences. If you’re concerned about dairy, use coconut yogurt instead of plain yogurt for the garlic sauce. Always check the spice blends for allergens, and feel free to substitute any ingredient that may not fit your dietary requirements!

How long does the garlic yogurt sauce last in the fridge?
The garlic yogurt sauce can be safely stored in the refrigerator for up to 5 days. To keep those flavors fresh, give it a good stir before serving, as the ingredients may separate over time. Enjoy the creamy magic along with your Chicken Kofta!

Chicken Kofta with Garlic Yogurt Sauce

Savor Chicken Kofta with Creamy Garlic Yogurt Sauce Tonight

Enjoy Chicken Kofta with Garlic Yogurt Sauce, a gluten-free, flavorful dish that's easy to make and perfect for busy weeknights.
Prep Time 15 minutes
Cook Time 15 minutes
Total Time 30 minutes
Servings: 4 patties
Course: Dinner
Cuisine: Middle Eastern
Calories: 250

Ingredients
  

For the Kofta
  • 1 pound Ground Chicken can substitute with ground turkey
  • 1 medium Onion (finely chopped)
  • 3 cloves Garlic (minced) also used in sauce
  • 1/4 cup Fresh Parsley (chopped)
  • 1 teaspoon Ground Cumin
  • 1 teaspoon Ground Coriander
  • 1 teaspoon Salt
  • 1/2 teaspoon Black Pepper
  • 1 tablespoon Olive Oil for grilling
For the Garlic Yogurt Sauce
  • 1 cup Plain Yogurt or coconut yogurt for dairy-free
  • 2 tablespoons Lemon Juice
  • 1 clove Additional Garlic (optional) for more flavor

Equipment

  • Grill
  • Mixing Bowl
  • Whisk
  • Meat Thermometer

Method
 

Step-by-Step Instructions
  1. In a large mixing bowl, combine the ground chicken, onion, garlic, parsley, cumin, and coriander. Season with salt and black pepper. Mix thoroughly until integrated.
  2. Wet your hands and shape the mixture into 10-12 elongated oval patties, about 3 inches long.
  3. Preheat your grill or grill pan to medium-high heat, lightly oiling to prevent sticking.
  4. Grill patties for 5-7 minutes on each side until golden brown and firm. Check that internal temperature reaches 75°C (165°F).
  5. While cooking, prepare garlic yogurt sauce by combining yogurt, lemon juice, and a pinch of salt in a bowl. Optionally add minced garlic.
  6. Once cooked, remove kofta from the grill, let rest, and serve warm with yogurt sauce.
Nutrition

Serving: 1pattyCalories: 250kcalCarbohydrates: 5gProtein: 32gFat: 12gSaturated Fat: 3gPolyunsaturated Fat: 1gMonounsaturated Fat: 7gCholesterol: 80mgSodium: 400mgPotassium: 400mgFiber: 1gSugar: 1gVitamin A: 500IUVitamin C: 5mgCalcium: 60mgIron: 2mg

Notes

Mix thoroughly to ensure spices blend evenly and avoid overcooking for juicy kofta. Store leftovers properly.

Tried this recipe?

Let us know how it was!

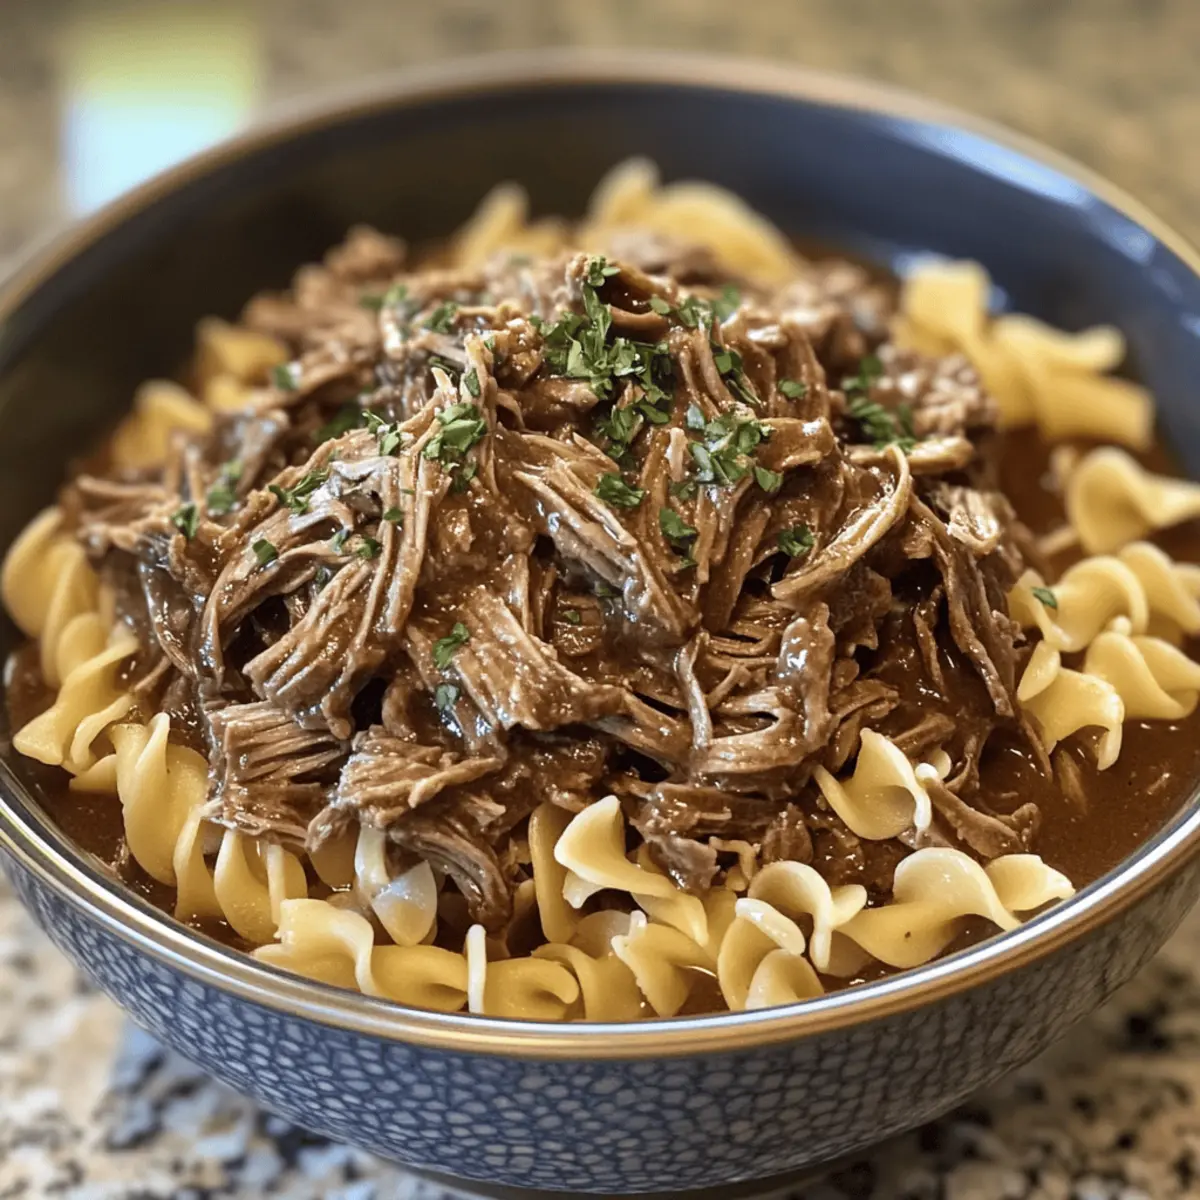
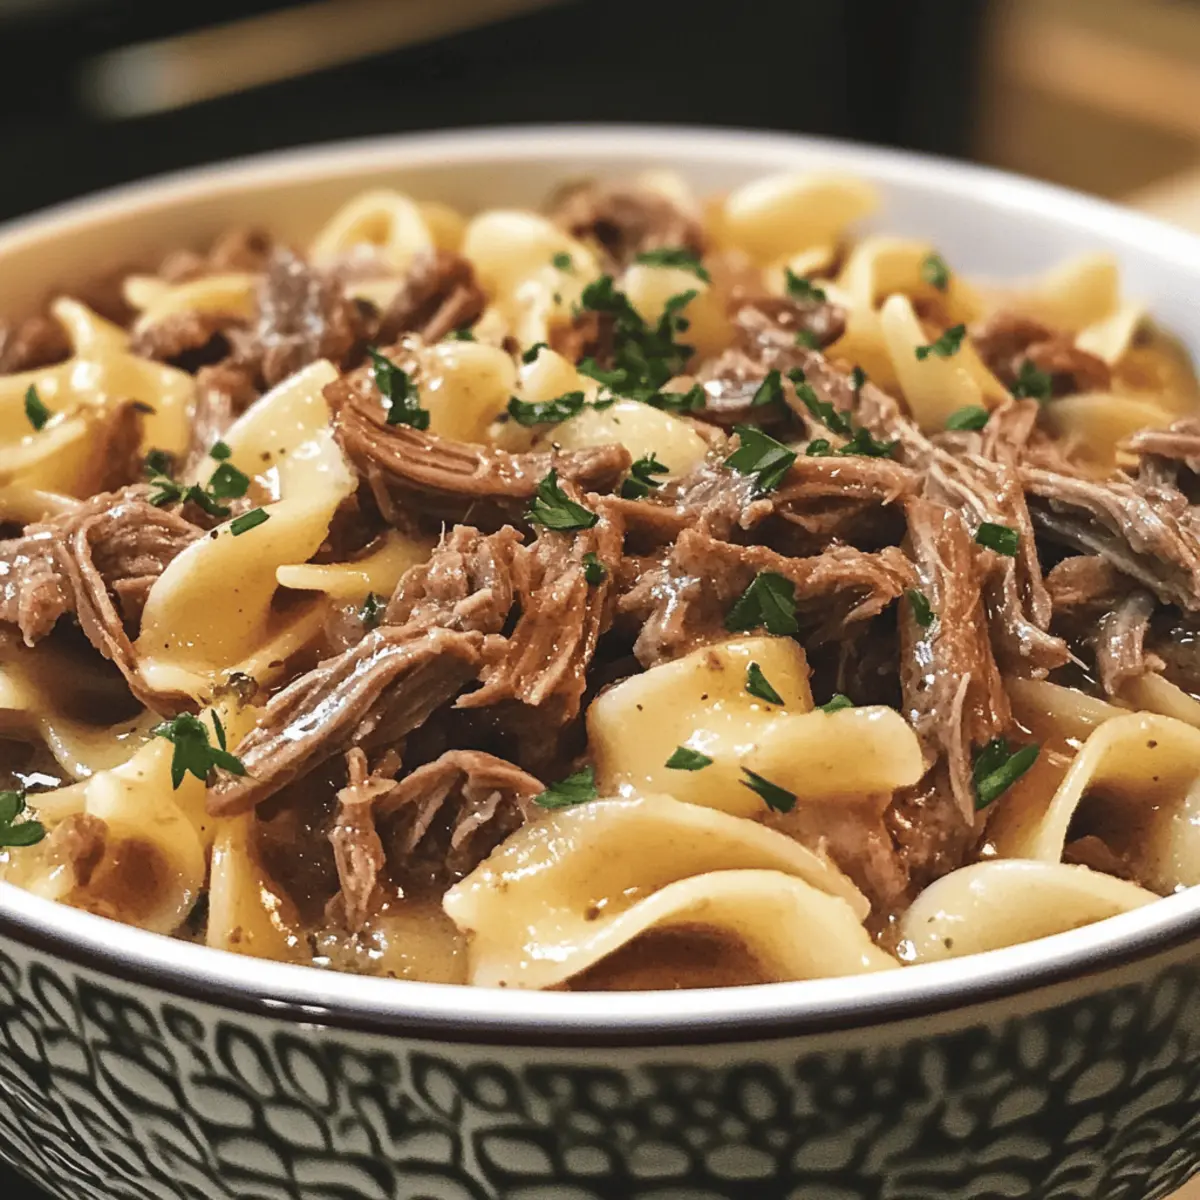
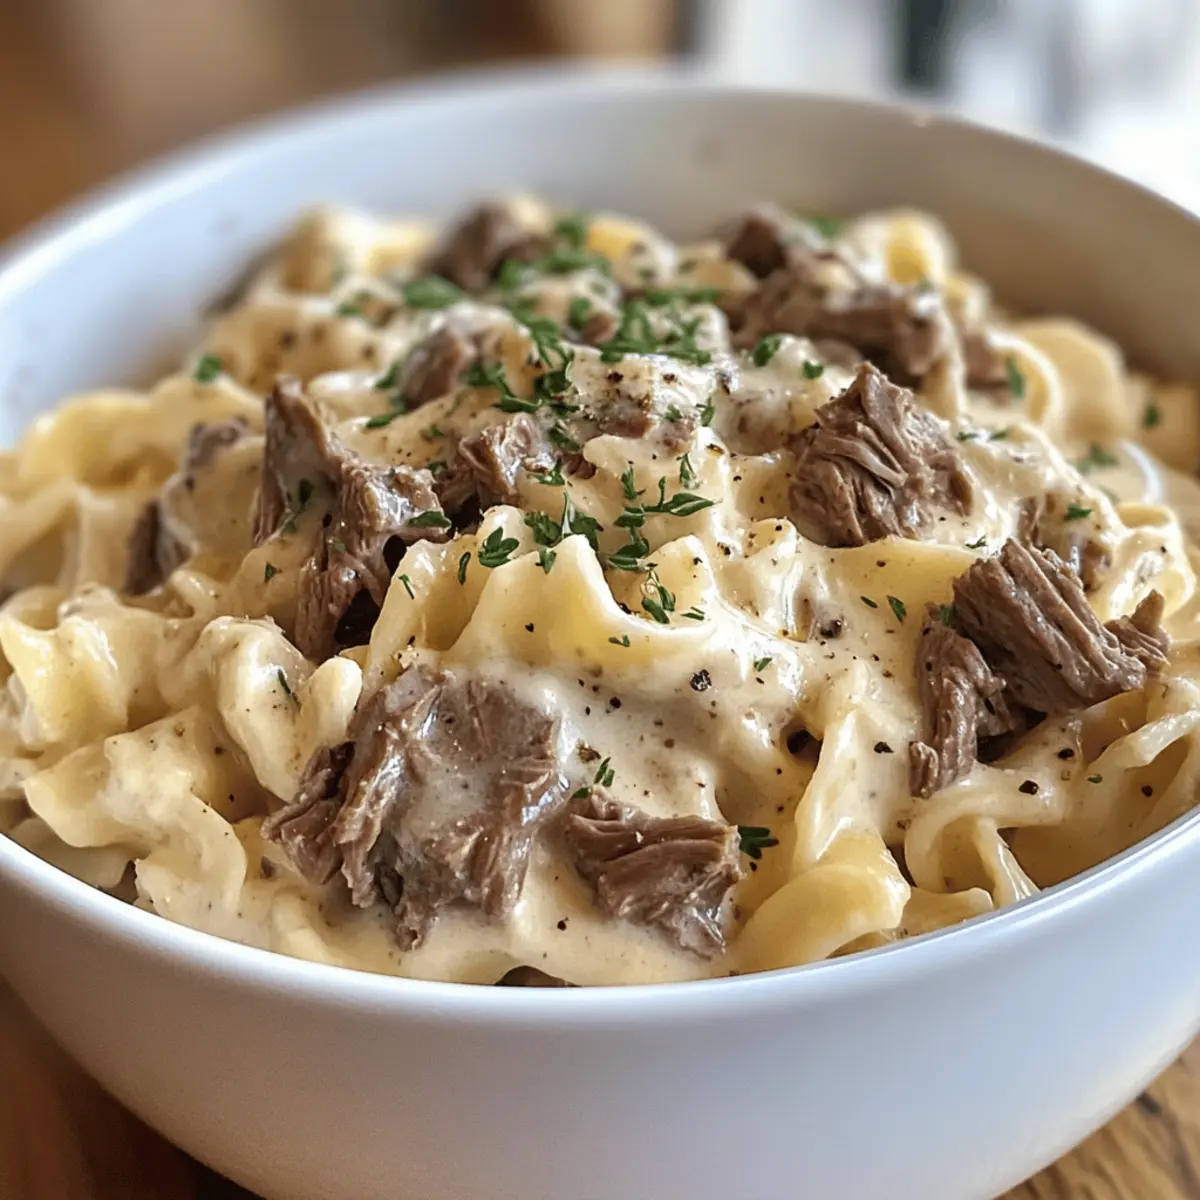
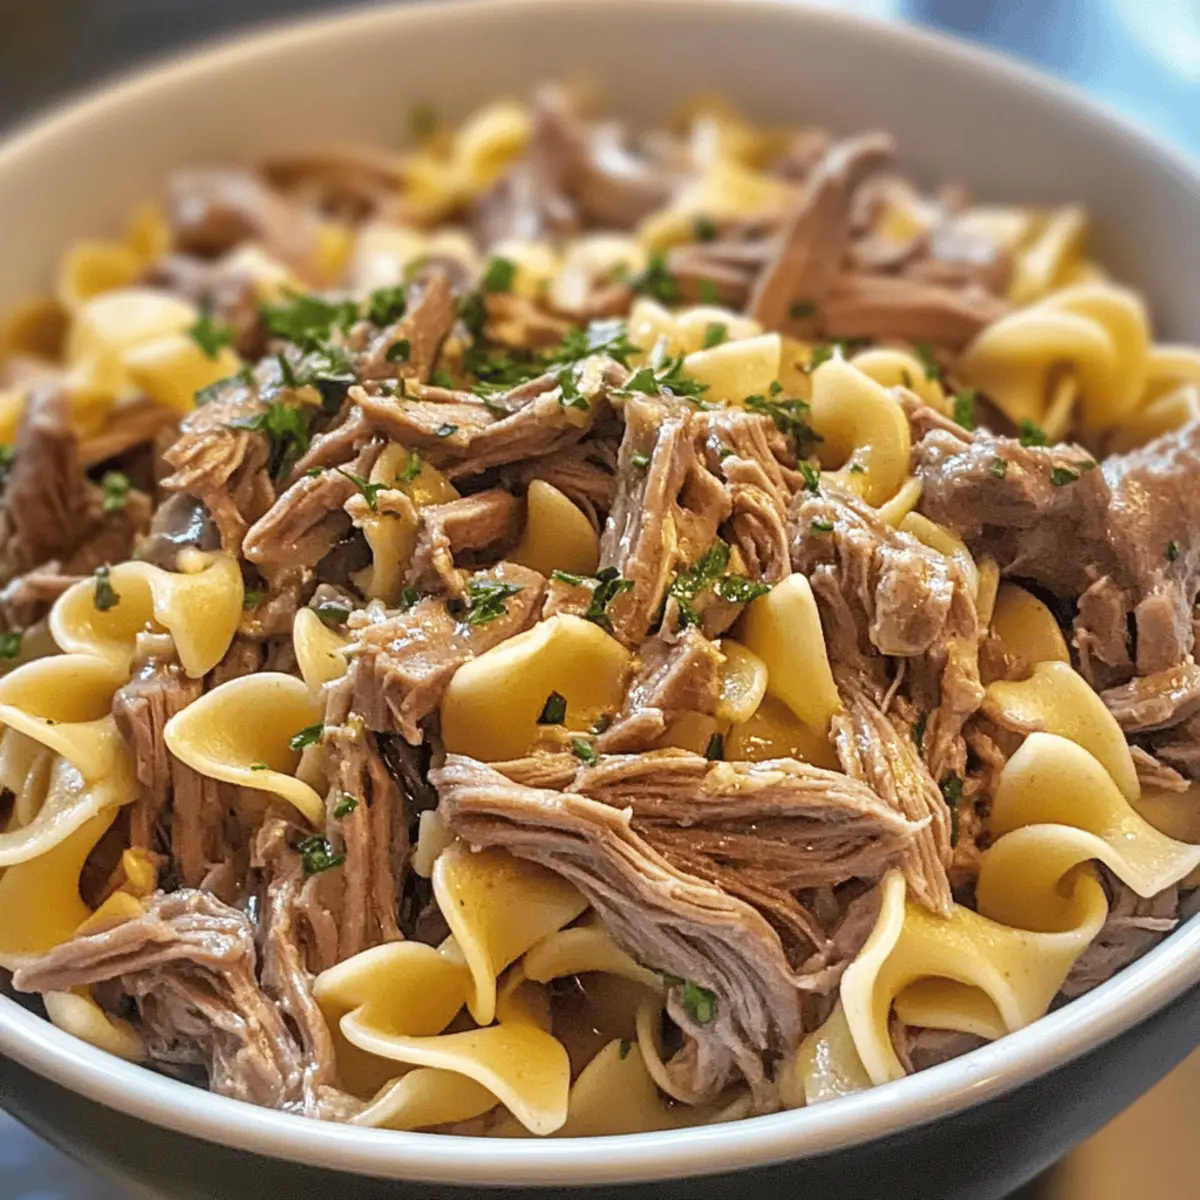
Slow Cooker Beef and Noodles for Cozy Weeknight Dinners

As I walked through the bustling farmer’s market, the rich aroma of simmering beef and herbs wafted through the air, making my stomach rumble with anticipation. It’s that comforting scent that inspired me to share my beloved Slow Cooker Beef and Noodles recipe — a dish that effortlessly combines tenderness and flavor, perfect for busy weeknights. This heartwarming comfort food not only requires minimal prep time but also allows for plenty of customization, whether you prefer a thick, hearty broth or a lighter soup-like consistency. It’s an easy way to bring a taste of home to your table, enveloping you in warmth with every bite. Are you ready to discover how to turn a few simple ingredients into a meal that feels like a hug in a bowl?

Why is Slow Cooker Beef and Noodles a Must-Try?

Hearty Comfort Food: This recipe is the epitome of comforting meals that feel like a warm hug on a chilly evening.

Easy Preparation: Simply combine your ingredients in a slow cooker and let it do the work for you.

Flexible Broth Option: Customize the broth to suit your family’s taste—thicker or more soup-like, it’s all up to you!

Crowd-Pleaser: Perfect for family dinners or gatherings, this dish is sure to satisfy everyone at the table.

Nostalgic Flavors: Bring back memories of home-cooked goodness with every savory bite, reminiscent of classic family recipes.

Pair it Right: Enjoy it alongside some crusty bread or a fresh side salad for a well-rounded meal that everyone will love. If you’re interested in more hearty options, try our Slow Cooked Summer Beef for a delightful variation!

Slow Cooker Beef and Noodles Ingredients

For the Beef Base
Beef Roast – 2-3 pounds is ideal for optimal flavor and tenderness.
Reduced-sodium Beef Broth (14 oz) – Adds moisture; feel free to substitute with your homemade broth for a richer taste.
Beefy Onion Soup Mix (1 envelope) – Boosts the flavor profile; can be swapped with homemade onion seasoning for a personal touch.
Cream of Celery or Mushroom Soup (1 can, undiluted) – Provides creaminess; replace it with a healthier homemade creamy sauce if desired.
Garlic (3-4 cloves, minced) – Fresh garlic adds a lovely aroma; garlic powder (1 tsp) can be a convenient substitute.

For the Broth
Beef Broth or Water (6-8 cups) – Adjust to achieve your desired broth consistency; add more for a soup-like texture.

For the Noodles
Frozen Home-Style Egg Noodles (1 package, 24 oz) – These noodles add heartiness; fresh noodles can be used, just account for varied cooking times.

To Taste
Salt and Pepper – Essential for enhancing the flavors of this Slow Cooker Beef and Noodles dish.

Step‑by‑Step Instructions for Slow Cooker Beef and Noodles

Step 1: Prep the Beef
Begin by placing your 2-3 pound beef roast right in the slow cooker. Ensure the meat is trimmed of any excess fat for a cleaner flavor. This heartwarming dish begins by setting the foundation of tender beef that will be cooked low and slow, so get the slow cooker ready on a stable surface.

Step 2: Mix Ingredients
In a separate bowl, combine 14 oz of reduced-sodium beef broth, one envelope of beefy onion soup mix, one can of cream of celery or mushroom soup, and 3-4 minced garlic cloves. Stir the ingredients until well-blended, then pour this savory mixture over the beef roast. The aroma will start to fill the air, enticing everyone in the house!

Step 3: Cook on Low
Cover the slow cooker with its lid and set it to cook on low for 16-17 hours. During this time, the beef will become incredibly tender, soaking in all the flavors from the broth and seasonings. You’ll know it’s done when the beef is succulent and shreds easily with a fork—perfect for your Slow Cooker Beef and Noodles.

Step 4: Shred the Beef
Once the cooking time is complete, carefully remove the beef from the slow cooker using tongs or a slotted spoon. Place it on a large cutting board and shred it into bite-sized pieces using two forks. If desired, stir in additional beef broth at this stage to achieve your preferred broth consistency, whether thicker or soupy.

Step 5: Add Noodles
About one hour before serving, add the frozen home-style egg noodles to the slow cooker. Stir gently to ensure the noodles are fully submerged in the flavorful broth. Cook for the remaining hour, watching as the noodles become tender and soak up the delicious flavors of the Slow Cooker Beef and Noodles.

Step 6: Serve
Before serving, taste the dish, and adjust the seasoning with salt and pepper according to your preference. Ladle generous portions into bowls, making sure to include both beef and noodles. This delightful mix of savory goodness is ready to be enjoyed—perfect for cozy weeknight dinners that feel like a warm hug!

Make Ahead Options

These Slow Cooker Beef and Noodles are perfect for meal prep, allowing you to enjoy delicious home-cooked flavors with minimal effort! You can prep the beef and broth mixture up to 24 hours in advance—simply combine the reduced-sodium beef broth, onion soup mix, cream of soup, and minced garlic with the beef roast in the slow cooker insert. Cover and refrigerate until you’re ready to cook. On the day of serving, just transfer the insert to the slow cooker and set it on low for 16-17 hours. About an hour before you’re ready to enjoy this comforting dish, add the frozen noodles. To maintain quality, ensure everything is kept airtight and refrigerated. You’ll find that this dish remains just as delicious, ready to embrace your family in warmth and comfort with every bite!

Slow Cooker Beef and Noodles Variations

Feel free to tweak this recipe to suit your tastes and dietary needs! Let your creativity shine in the kitchen.

  • Vegetable Boost: Add a bag of frozen mixed vegetables when adding the noodles for a pop of color and nutrition—a delicious way to make this dish even heartier.

  • Broth Swap: Try using cream of chicken soup instead of cream of celery or mushroom for a different flavor profile; it’s a fun twist that keeps the dish creamy.

  • Meat Alternative: Swap the beef roast for chicken or turkey for a lighter version. This adjustment will give you a different but equally delightful comfort bowl.

  • Spice it Up: Add a teaspoon of red pepper flakes or a splash of hot sauce for a little kick. It’s a simple way to elevate the flavor and add some warmth.

  • Homemade Seasoning: Replace the beefy onion soup mix with a homemade mix of onion powder, garlic powder, and dried herbs for a more personalized touch. It’s fun to experiment with your spice blends!

  • Noodle Variations: Use fresh egg noodles instead of frozen for a tender texture. Just keep an eye on the cooking time so they don’t get too mushy.

  • Creamy Dream: Stir in a splash of heavy cream or a dollop of sour cream just before serving for an extra layer of richness. This elevates the comfort factor and takes it to the next level!

If you’re on a flavor journey, consider pairing this dish with our comforting Ground Beef Potato Taco Bowl or the vibrant taste of Korean Gochujang Beef for different mealtime experiences. Enjoy experimenting!

What to Serve with Slow Cooker Beef and Noodles

Enhancing your meal with complementary sides can elevate this cozy dish to new heights.

  • Crusty Bread: Perfect for soaking up the rich broth, crusty bread adds a satisfying crunch that contrasts beautifully with the tenderness of the beef and noodles.

  • Fresh Garden Salad: A light salad featuring mixed greens, cherry tomatoes, and a tangy vinaigrette provides a refreshing burst of flavor, balancing the hearty meal beautifully. The crispness of fresh vegetables is a delightful way to introduce a crunch.

  • Roasted Vegetables: Seasoned with herbs and olive oil, roasted vegetables like carrots, broccoli, and bell peppers add color and nutrients. Their caramelized sweetness pairs harmoniously with the savory notes of the beef.

  • Creamy Mashed Potatoes: These velvety potatoes create a perfect counterpart, making your plate even more indulgent when served alongside the beef. They absorb the delicious sauces and flavors, making every bite incredibly comforting.

  • Apple Crisp: For a sweet finish, a warm apple crisp drizzled with caramel sauce evokes nostalgia and warmth, contrasting beautifully with your savory meal. The sweet, crunchy topping invites everyone to savor dessert’s sweetness.

  • Wine Suggestion: A smooth Cabernet Sauvignon harmonizes with the richness of the beef while enhancing the overall flavor of the meal. It’s the ideal way to enjoy a lovely evening under the stars.

Your Slow Cooker Beef and Noodles will shine even brighter with these delightful pairings, creating an unforgettable dining experience.

Expert Tips for Slow Cooker Beef and Noodles

Timing is Key: Start the cooking process the night before for peak tenderness of the beef, ensuring a hassle-free dinner.

Broth Balance: Adjust the amount of broth based on your desired consistency; use less for a hearty dish or more for a comforting soup-like experience.

Noodle Awareness: If using fresh home-style noodles, remember to reduce the cooking time after adding them to avoid overcooking.

Seasoning Check: Before serving, always taste the dish and adjust salt and pepper as needed to enhance the flavors in your Slow Cooker Beef and Noodles.

Vegetable Boost: Consider adding a bag of frozen mixed vegetables to the pot when you add the noodles for added color, nutrition, and flavor.

How to Store and Freeze Slow Cooker Beef and Noodles

Fridge: Store leftovers in an airtight container for up to 3 days to maintain freshness and flavor.

Freezer: This dish freezes well! Place cooled portions in freezer-safe bags or containers, ensuring all air is expelled, and freeze for up to 3 months.

Reheating: Thaw overnight in the fridge before reheating. Warm in a pot over low heat, adding a splash of beef broth to restore moisture if needed.

Leftovers: Enjoy this Slow Cooker Beef and Noodles as is, or repurpose them by adding fresh vegetables or serving over rice for a new meal experience.

Slow Cooker Beef and Noodles Recipe FAQs

What kind of roast is best for Slow Cooker Beef and Noodles?
Absolutely! For this recipe, a chuck roast is ideal because it’s rich in marbling and becomes wonderfully tender when cooked low and slow. If you can’t find chuck, a brisket or round roast can also work, but they might require slightly different cooking times.

How should I store leftovers of Slow Cooker Beef and Noodles?
I recommend placing any leftovers in an airtight container and storing them in the fridge for up to 3 days. Make sure to allow it to cool before sealing the container to preserve that wonderful flavor and moisture.

Can I freeze Slow Cooker Beef and Noodles?
Very! This dish freezes beautifully. Once cooled, transfer the beef and noodles into freezer-safe bags or containers. Be sure to squeeze out as much air as possible to avoid freezer burn. It can be frozen for up to 3 months!

What if my beef isn’t shredding easily after cooking?
If your beef isn’t shredding as expected, it may need more time in the slow cooker. Make sure the cooker is covered well to retain moisture and heat. If necessary, add a bit more broth and continue cooking for 1-2 hours, checking occasionally until the meat reaches that tender, shreddable state.

Can I use fresh noodles instead of frozen in my Slow Cooker Beef and Noodles?
Absolutely! Just keep in mind that fresh noodles cook faster. You’ll want to add them to the slow cooker about 30 minutes before you plan to serve, stirring to ensure they’re thoroughly coated in the broth and flavorful juices. This will prevent them from becoming mushy.

Are there any dietary considerations for this recipe?
Yes, definitely! If anyone in your family has dietary restrictions, you can easily customize this recipe. For a gluten-free option, use gluten-free noodles and ensure your broth is also gluten-free. The cream soup can be substituted with a homemade alternative using coconut milk and a gluten-free thickener if dairy is a concern. Always check labels for potential allergens!

Slow Cooker Beef and Noodles

Slow Cooker Beef and Noodles for Cozy Weeknight Dinners

Enjoy the heartwarming flavor of Slow Cooker Beef and Noodles, a comforting dish perfect for busy weeknights.
Prep Time 20 minutes
Cook Time 16 hours
Total Time 16 hours 20 minutes
Servings: 6 servings
Course: Beef
Cuisine: American
Calories: 400

Ingredients
  

For the Beef Base
  • 2-3 pounds Beef Roast Trimming excess fat recommended.
  • 14 ounces Reduced-sodium Beef Broth Can substitute with homemade broth.
  • 1 envelope Beefy Onion Soup Mix Can be swapped with homemade onion seasoning.
  • 1 can Cream of Celery or Mushroom Soup Use undiluted for creaminess.
  • 3-4 cloves Garlic, minced Fresh preferred, garlic powder as a substitute.
For the Broth
  • 6-8 cups Beef Broth or Water Adjust for desired consistency.
For the Noodles
  • 24 ounces Frozen Home-Style Egg Noodles Fresh noodles can be used; adjust cooking time.
To Taste
  • Salt Essential for flavor enhancement.
  • Pepper Essential for flavor enhancement.

Equipment

  • Slow Cooker

Method
 

Step-by-Step Instructions
  1. Begin by placing your 2-3 pound beef roast right in the slow cooker. Ensure the meat is trimmed of any excess fat for a cleaner flavor.
  2. In a separate bowl, combine 14 oz of reduced-sodium beef broth, one envelope of beefy onion soup mix, one can of cream of celery or mushroom soup, and 3-4 minced garlic cloves. Stir until well-blended, then pour over the beef roast.
  3. Cover the slow cooker with its lid and set it to cook on low for 16-17 hours.
  4. Once the cooking time is complete, carefully remove the beef from the slow cooker and shred it into bite-sized pieces.
  5. About one hour before serving, add the frozen home-style egg noodles to the slow cooker. Stir gently to ensure the noodles are fully submerged.
  6. Before serving, taste and adjust the seasoning with salt and pepper. Ladle portions into bowls and serve warm.

Nutrition

Serving: 1bowlCalories: 400kcalCarbohydrates: 35gProtein: 30gFat: 15gSaturated Fat: 5gCholesterol: 80mgSodium: 600mgPotassium: 800mgFiber: 2gSugar: 2g

Notes

If desired, add frozen mixed vegetables for extra nutrition and flavor. This dish can be easily stored and frozen for future meals.

Tried this recipe?

Let us know how it was!

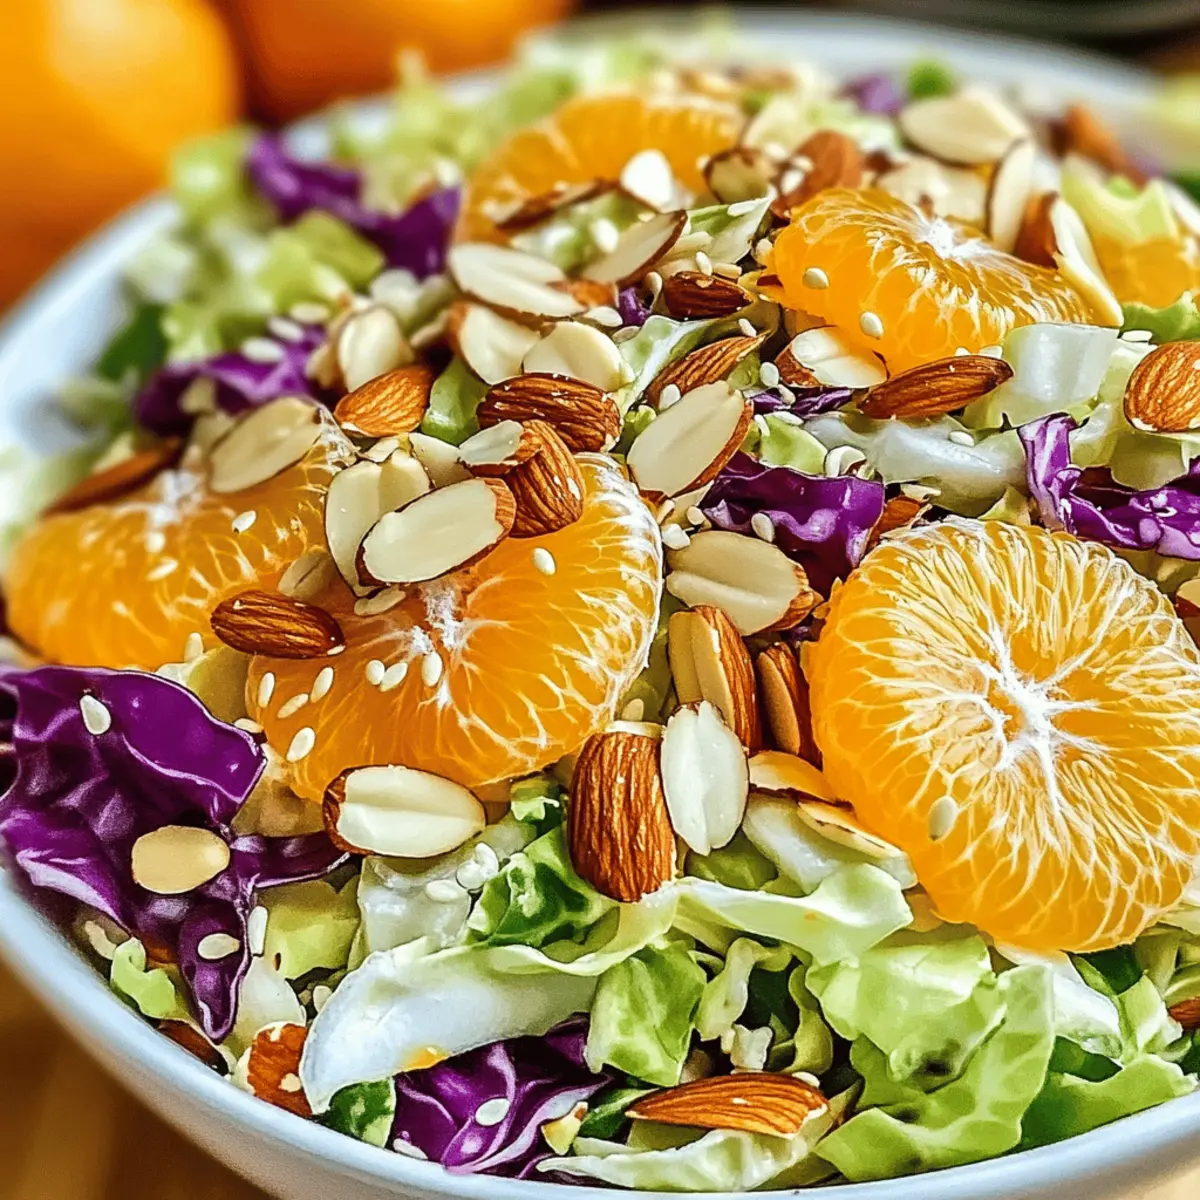
Crazy Good Asian Cabbage Salad That Stole My Heart

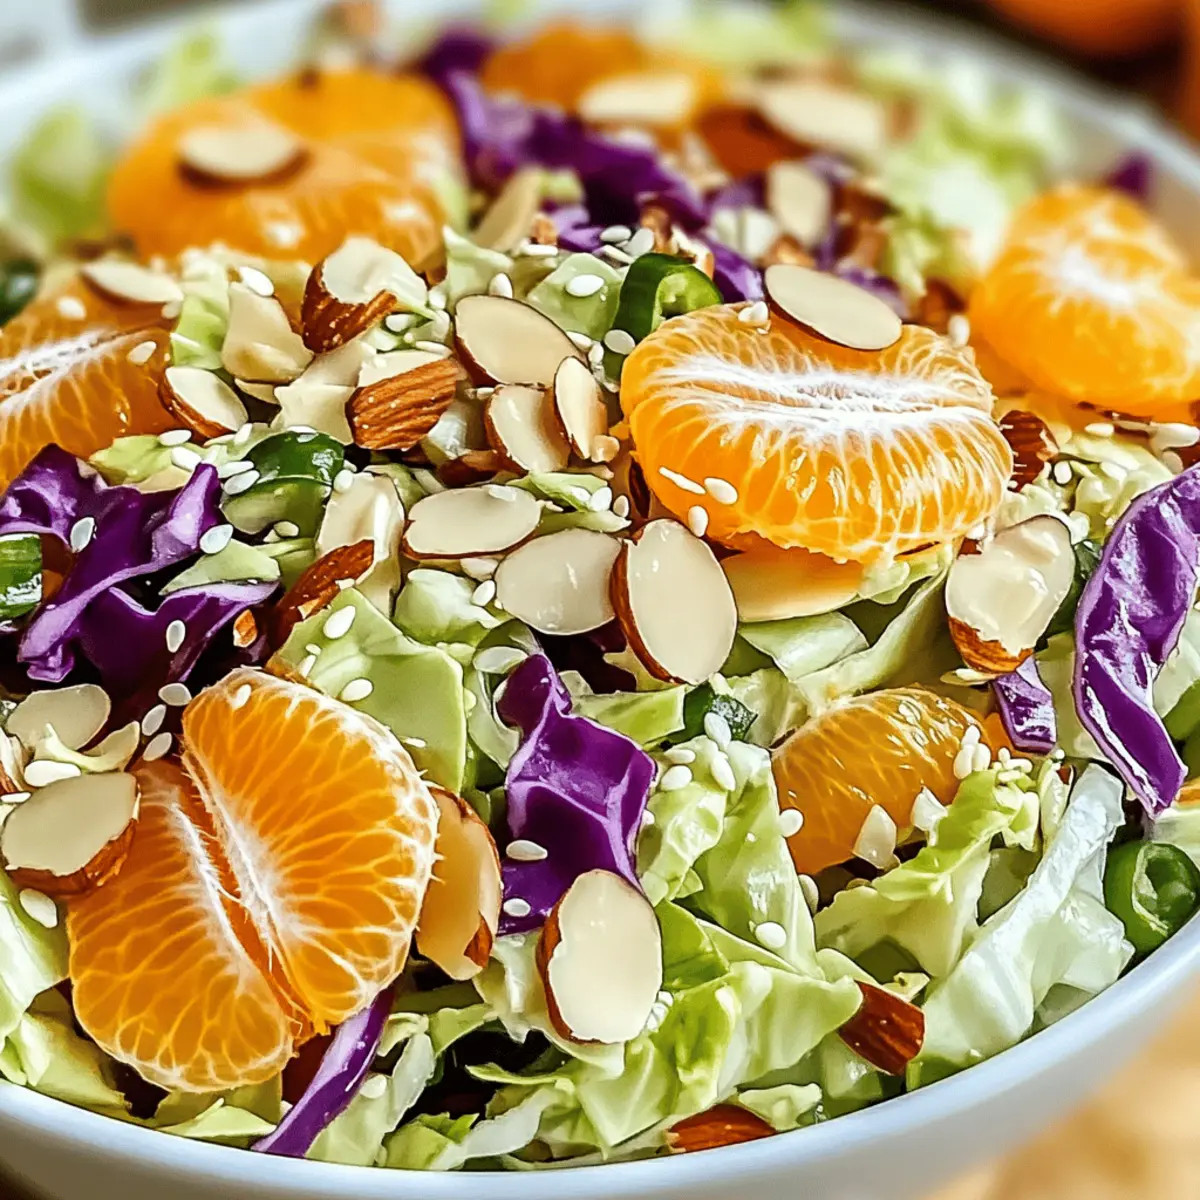
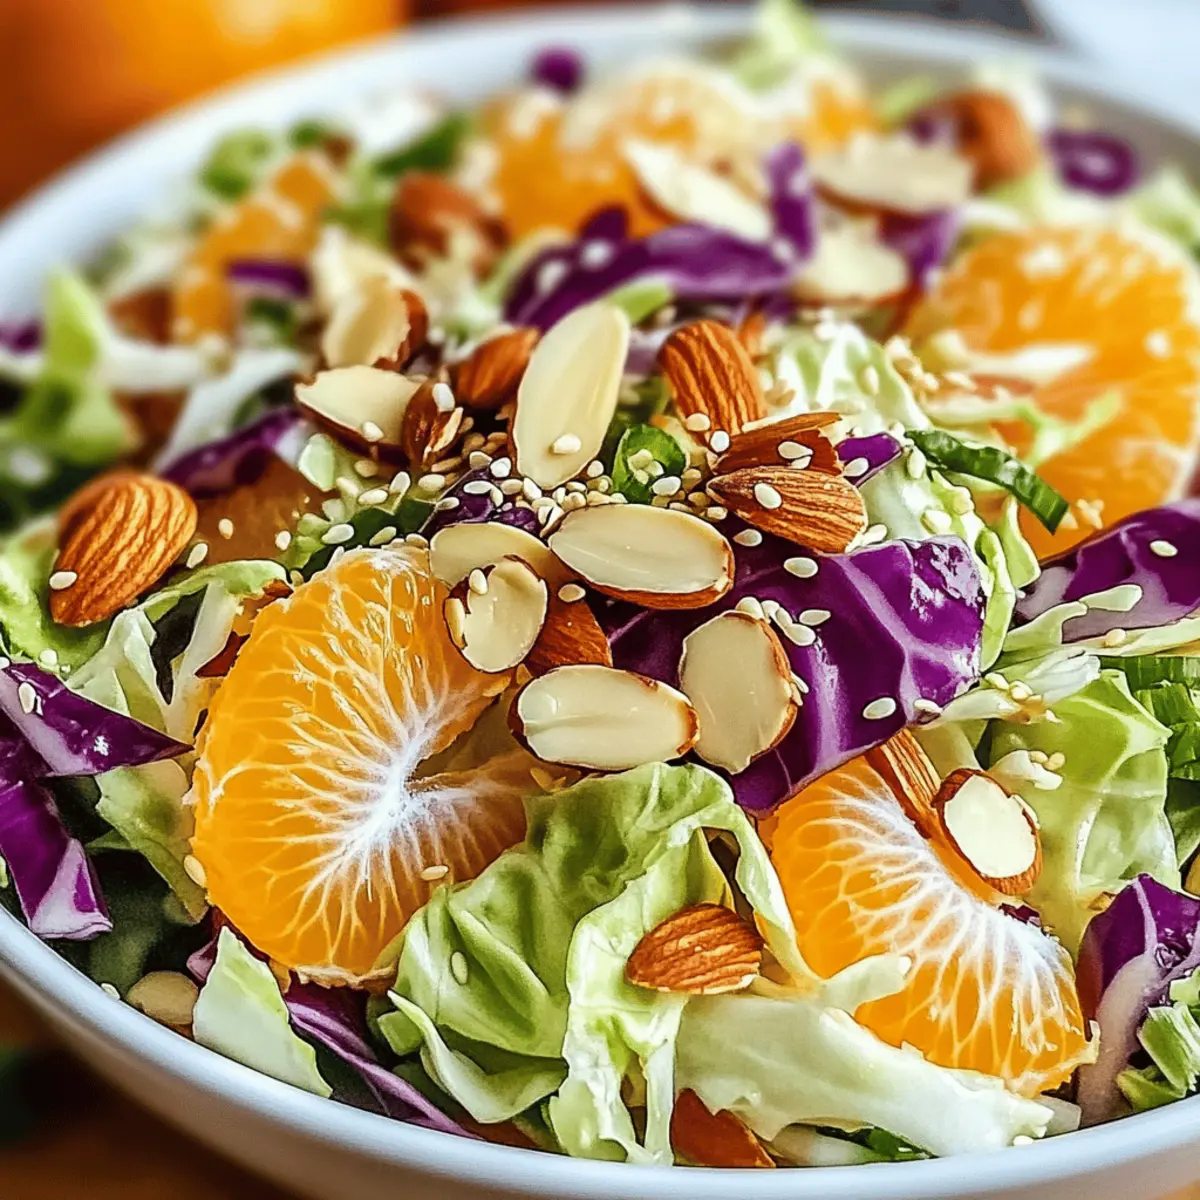
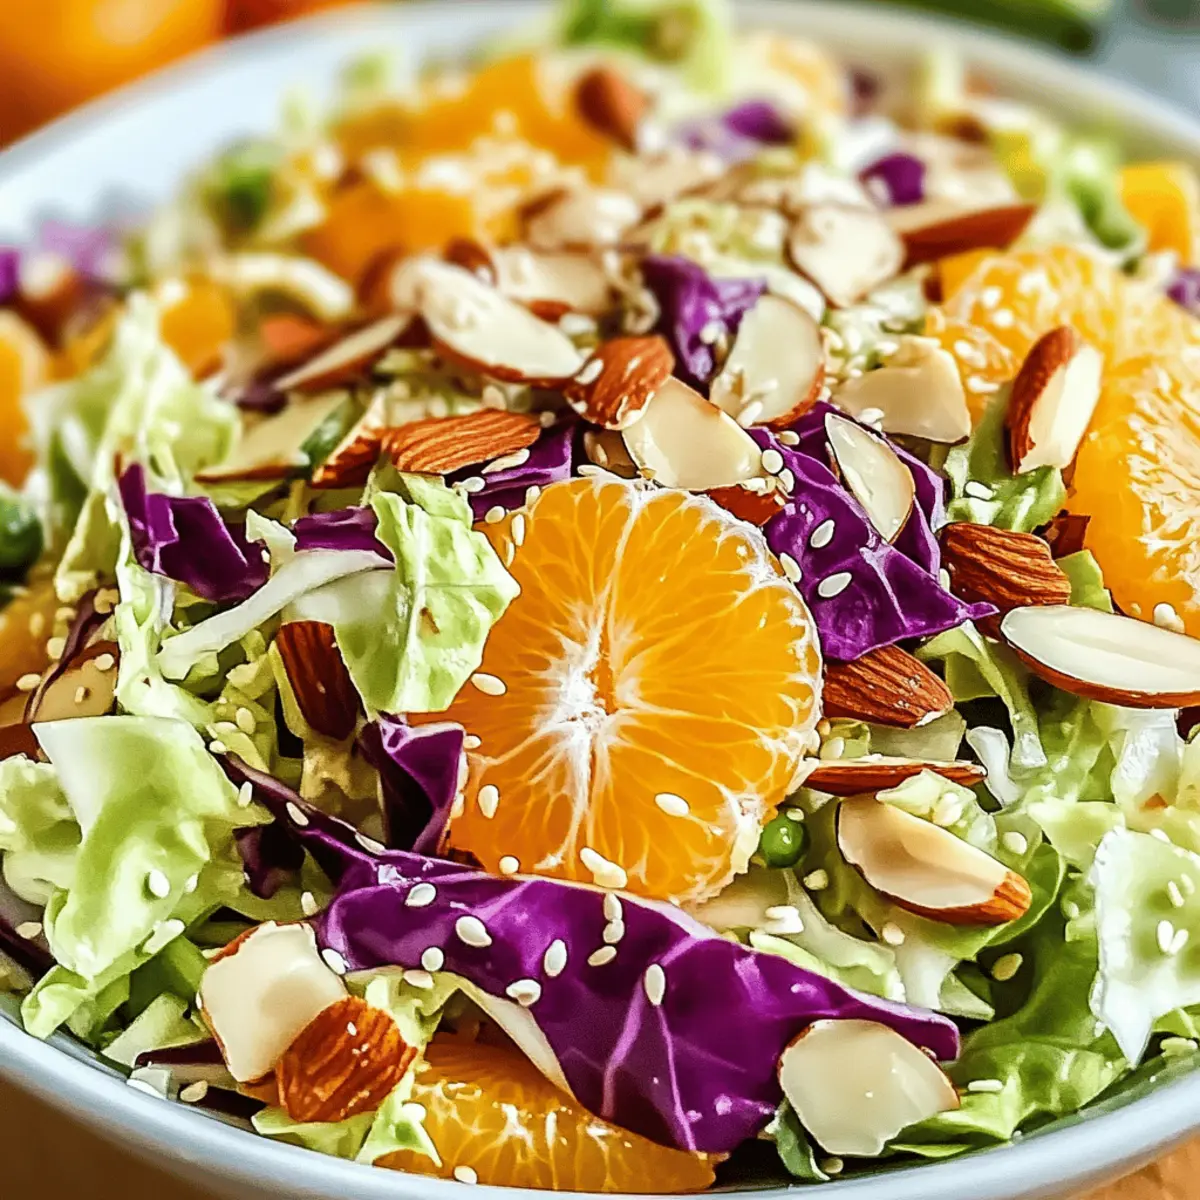
As I watched colorful vegetables tumble into the bowl, the excitement of creating my Addictive Asian Cabbage Salad grew. This vibrant dish brings a satisfying crunch paired with a sweet-spicy dressing that’s nothing short of a culinary celebration. Perfect for barbecues or as a make-ahead meal prep option, this salad is not just quick to whip up; it’s also incredibly customizable to fit your taste. You can swap ingredients easily, whether you want to toss in some grilled chicken or experiment with different nuts. With its mix of fresh flavors and textures, this salad promises to be a highlight at any gathering. Curious about how to bring this delicious medley to life? Let’s dive into the recipe!

Why Is This Asian Cabbage Salad Addictive?

Freshness at Its Core: The combination of crisp cabbage, vibrant carrots, and sweet mandarin oranges creates a delightful crunch that dances on your palate.

Flavor Explosion: A sweet-spicy dressing with just the right amount of tang elevates each bite, making it impossible to resist.

Customization Galore: Easily modify ingredients to suit your dietary preferences—swap nuts, add proteins, or include seasonal veggies for variety.

Meal Prep Winner: This salad is a fantastic make-ahead option—prep it in advance and enjoy it throughout the week!

Crowd-Pleasing Delight: Whether served at a barbecue or during a quiet dinner at home, this colorful dish is sure to impress anyone’s taste buds.

You can enjoy this alongside a savory dish like a Steak Fajita Salad or as a refreshing side to your favorite grilled meats.

Asian Cabbage Salad Ingredients

For the Base
Cabbage – Use green cabbage or a vibrant mix of green and purple for added color.
Carrots – Shredded or julienned for that perfect crunch and natural sweetness.
Mandarin Oranges – Provides a juicy sweetness; can be replaced with fresh pineapple for a twist.
Romaine Lettuce – Adds extra crunch; mix it in just before serving for optimal texture.
Red Bell Peppers – Brings color and sweetness; feel free to swap with yellow or orange bell peppers for variety.

For the Crunch
Sliced Almonds – They introduce a lovely nuttiness; sunflower seeds can be used for a nut-free salad.
Sesame Seeds – Adds a toasty flavor; pumpkin seeds can be a great substitute.

For the Dressing
Honey – Sweetens the dressing nicely; maple syrup works for a vegan adaptation.
Soy Sauce – Infuses a salty, umami flavor; use tamari for a gluten-free version.
Rice Vinegar – Delivers a lovely acidity; apple cider vinegar can work in a pinch.
Sesame Oil – Adds richness to your dressing; canola oil or olive oil are lighter alternatives.

This Asian Cabbage Salad promises to be a delightful dish that shines on any table!

Step‑by‑Step Instructions for Addictive Asian Cabbage Salad

Step 1: Chop the Veggies
Begin by finely chopping green cabbage and shredding or julienning the carrots. Add these vibrant veggies to a large mixing bowl or storage container. Next, peel and segment the mandarin oranges, gently mixing them in with the cabbage and carrots for that sweet touch. Aim for an inviting medley of colors as you combine the fresh ingredients.

Step 2: Prepare the Dressing
In a well-sealed jar, combine the honey, soy sauce, rice vinegar, and sesame oil. Tightly close the lid and shake vigorously for about 20-30 seconds, ensuring the honey is fully dissolved and well-blended with the other dressing ingredients. This sweet-spicy dressing will be the star of your Addictive Asian Cabbage Salad, so take your time to achieve a smooth consistency.

Step 3: Dress the Salad
Pour half to three-quarters of your freshly made dressing over the mixed vegetables in the bowl. Toss the salad ingredients gently for about 30 seconds to ensure an even coating, allowing the flavors to meld beautifully. If you’re not serving immediately, refrigerate the salad for up to an hour to let it chill and enhance the taste.

Step 4: Keep the Crunch
To maintain the romaine and red bell peppers’ crispness, store them separately until just before serving. This way, you’ll ensure that every bite delivers that delightful crunch. Slice the romaine into bite-sized pieces and chop the red bell peppers, leaving them ready to mix in for a fresh texture at the last moment.

Step 5: Toast the Nuts & Seeds
In a skillet, over medium heat, toast the sliced almonds and sesame seeds for about 3-5 minutes. Stir frequently to prevent burning, and remove them from heat once they’re lightly browned and fragrant. This step adds a comforting nuttiness to your Addictive Asian Cabbage Salad that perfectly complements the fresh flavors.

Step 6: Combine and Serve
Just before you serve, mix the previously set-aside romaine and red bell peppers into the salad. Top it off with the toasted almonds and sesame seeds for that extra crunch and flavor. Present your dish in a beautiful serving bowl, showcasing the vibrant colors and textures—your guests will be eager to dig in!

Step 7: Customize at the Table
To take this Addictive Asian Cabbage Salad to the next level, offer additional dressing on the side. This way, everyone can adjust their salad to their liking, adding more of that sweet-spicy goodness if desired. Enjoy watching your loved ones savor each colorful, crunchy bite!

Asian Cabbage Salad Variations

Feel free to let your creativity run wild as you customize this vibrant salad just the way you like it!

  • Crunchy Cucumbers: Add sliced cucumbers for that refreshing crunch—perfect for hydration on a hot day. Their crisp texture complements the salad beautifully.

  • Protein Boost: Incorporate grilled chicken or shrimp to create a heartier meal. This richness brings the salad to a new level, transforming it from a side dish into a satisfying main.

  • Nutty Swaps: Swap sliced almonds for peanuts or cashews for a different flavor twist. Their unique tastes will enhance the overall profile of your Asian Cabbage Salad.

  • Extra Sweetness: Use fresh pineapple instead of mandarin oranges for a tropical spin. The pineapple’s juicy sweetness adds a delightful surprise that’ll keep everyone coming back for more.

  • Spicy Kick: Add a sprinkle of chili flakes or sriracha in the dressing for those who crave a bit of heat. It elevates the flavor and adds a delicious kick that pairs well with the sweet-spicy balance.

  • Seed Mix: Replace sesame seeds with toasted pumpkin seeds for a nut-free alternative that still adds delightful crunch and nutty flavor. Each bite will be a new texture experience.

  • Herb Infusion: Toss in chopped fresh cilantro or mint for a refreshing herbal lift. Their aroma and taste will brighten your salad, making it even more inviting.

  • Vegan Twist: Use maple syrup instead of honey for a completely vegan-friendly version, ensuring everyone can enjoy this delicious dish. It’s an easy swap that maintains the salad’s beloved sweetness.

Looking for more ways to enjoy fresh ingredients? Pair this salad with a delicious Tuna Macaroni Salad for a delightful spread or try out my Strawberry Spinach Salad with Poppy Seed Dressing for a fruity twist!

What to Serve with Addictive Asian Cabbage Salad

Creating a delightful meal involves pairing your refreshing salad with complementary dishes that enhance the experience.

  • Grilled Chicken Skewers: Juicy and tender, these skewers are a great source of protein that pairs beautifully with the lightness of the salad.
  • Teriyaki Salmon: The sweet and savory flavors of teriyaki salmon create a delicious contrast to the crunch of the salad, enhancing each bite.
  • Coconut Rice: Creamy coconut rice adds a rich, velvety texture that balances the salad’s crunchiness, elevating the dining experience.
  • Vegetable Spring Rolls: Fresh and crispy, these springs rolls offer a delightful bite that mirrors the crunch in the salad, plus a layer of flavor with dipping sauces.
  • Tofu Stir-Fry: Whether marinated or seasoned, the savory profile of stir-fried tofu complements the sweet and spicy dressing, creating a harmonious meal.

For a simple yet sophisticated twist, serve with icy green tea or a refreshing ginger lemonade. Dessert options like light coconut sorbet can offer a sweet finish without overpowering the palate.

Storage Tips for Asian Cabbage Salad

Fridge: Store your assembled Asian Cabbage Salad in an airtight container for up to 3 days, ensuring that the dressing is kept separate to maintain freshness and crunch.

Freezer: While it’s best to enjoy this salad fresh, if you must freeze it, keep the vegetables and dressing separate. You can freeze the veggies for up to 2 months, but note that the texture may change.

Prepping Ahead: For meal prep, chop your vegetables a day in advance and keep them in the fridge. Dress them just before serving to keep the salad vibrant and crunchy.

Reheating: This salad is best served cold and will not require reheating. Simply toss the salad with fresh dressing right before serving for maximum flavor.

Expert Tips for the Best Asian Cabbage Salad

Chop Evenly: Ensure that all ingredients are chopped uniformly for consistent flavor and texture in every bite.

Toast Carefully: When toasting nuts and seeds, keep a close eye on them to prevent burning; a little time goes a long way in enhancing their flavor.

Dress Just Before Serving: Avoid over-dressing the spinach or lettuce prior to serving. Mix in delicate ingredients like the romaine and bell peppers right before to keep them crispy.

Flavor Boosters: Experiment with flavors by adding a splash of lime juice or a sprinkle of chili flakes for an extra kick in your Asian Cabbage Salad.

Make Ahead Wisely: Prep ingredients like cabbage and carrots in advance but store dressing and crunchy elements separately until serving. This keeps everything fresh and delightful!

Make Ahead Options

This Addictive Asian Cabbage Salad is an excellent meal prep option that can save you time during busy weeknights! You can chop the cabbage, carrots, and mandarin oranges and combine them in a bowl up to 24 hours in advance; just be sure to refrigerate to maintain freshness. For the dressing, mix together the honey, soy sauce, rice vinegar, and sesame oil, and store it in a jar in the fridge for up to 3 days. However, keep the romaine and red bell peppers separate until you’re ready to serve to ensure they retain their delightful crunch. When you’re ready to enjoy, simply toss the salad with the dressing, add the reserved romaine and red bell peppers, and top with toasted almonds and sesame seeds for that extra flair.

Addictive Asian Cabbage Salad Recipe FAQs

How do I choose the right cabbage for my salad?
Absolutely! Look for green cabbage or a vibrant mix of green and purple. Choose heads that are firm and heavy for their size, avoiding any with dark spots or wilting leaves. Fresh cabbage has a crisp texture that enhances your salad’s flavor.

How should I store the Asian Cabbage Salad?
To keep your salad fresh, store it in an airtight container in the fridge for up to 3 days. Make sure to keep the dressing separate until you’re ready to serve, as this preserves the crunchiness of the ingredients.

Can I freeze the Asian Cabbage Salad?
Yes, but with a little caveat! If you’re looking to freeze it, store the chopped vegetables and the dressing separately in airtight containers. The veggies can last up to 2 months in the freezer, but do keep in mind that they may lose some crunchiness once thawed.

What if my salad dressing is too thick?
Very! If your dressing turns out thicker than you’d like, simply whisk in a teaspoon of warm water or a splash of additional rice vinegar until you achieve your desired consistency. This will help balance the flavors and make it easier to coat the salad.

Are there any allergy considerations I should know about?
Definitely! Be mindful if guests have nut allergies when using almonds or sesame seeds. You can easily swap these out for sunflower seeds or omit them altogether. Always be sure to check labels on soy sauce to ensure it meets any dietary restrictions, especially for gluten intolerance.

Can I make the salad ahead of time?
Absolutely! You can chop the vegetables and prepare the dressing a day in advance. Store everything separately in the fridge, and combine them just before serving to ensure that delightful crunch and flavor. This way, your salad will be fresh, vibrant, and ready for enjoyment!

Asian Cabbage Salad

Crazy Good Asian Cabbage Salad That Stole My Heart

A vibrant Asian Cabbage Salad that combines crisp vegetables with a sweet-spicy dressing, perfect for any gathering.
Prep Time 20 minutes
Cook Time 5 minutes
Chilling Time 1 hour
Total Time 1 hour 25 minutes
Servings: 4 servings
Course: Salad
Cuisine: Asian
Calories: 180

Ingredients
  

For the Base
  • 1 head green cabbage or a mix of green and purple
  • 2 medium carrots shredded or julienned
  • 1 cup mandarin oranges
  • 1 cup romaine lettuce mixed in just before serving
  • 1 medium red bell pepper or yellow/orange for variety
For the Crunch
  • 1/2 cup sliced almonds or sunflower seeds for a nut-free option
  • 2 tablespoons sesame seeds or pumpkin seeds
For the Dressing
  • 2 tablespoons honey or maple syrup for vegan
  • 3 tablespoons soy sauce or tamari for gluten-free
  • 2 tablespoons rice vinegar or apple cider vinegar
  • 2 tablespoons sesame oil or canola/olive oil

Equipment

  • Mixing Bowl
  • Jar for dressing
  • Skillet

Method
 

Step-by-Step Instructions
  1. Chop the green cabbage and shred or julienne the carrots. Add to a large mixing bowl. Peel and segment the mandarin oranges, mixing them in.
  2. In a jar, combine the honey, soy sauce, rice vinegar, and sesame oil. Close and shake vigorously for about 20-30 seconds.
  3. Pour half to three-quarters of the dressing over the vegetables. Toss gently for about 30 seconds. Refrigerate if not serving immediately.
  4. Store romaine and red bell peppers separately until serving. Mix in for freshness right before serving.
  5. Toast the sliced almonds and sesame seeds in a skillet over medium heat for about 3-5 minutes, stirring frequently.
  6. Combine the romaine and red bell peppers into the salad and top with toasted almonds and sesame seeds before serving.
  7. Offer additional dressing on the side so guests can customize their salad.

Nutrition

Serving: 1servingCalories: 180kcalCarbohydrates: 20gProtein: 3gFat: 9gSaturated Fat: 1gPolyunsaturated Fat: 3gMonounsaturated Fat: 4gSodium: 450mgPotassium: 380mgFiber: 3gSugar: 6gVitamin A: 5000IUVitamin C: 30mgCalcium: 45mgIron: 1mg

Notes

Ensure ingredients are chopped uniformly for the best flavor and texture. Dress the salad just before serving to maintain crispness and freshness.

Tried this recipe?

Let us know how it was!

Spooky Halloween Augapfel Cupcakes That Wow Every Guest

As I scrolled through vibrant Pinterest boards full of spooky inspirations, I stumbled upon a picture that immediately made my heart race: Halloween Augapfel Cupcakes adorned with playful fondant eyeballs. These easy-to-make red velvet treats are not only visually striking but also perfectly capture the spirit of Halloween gatherings. With their moist texture and whimsical appeal, they are a crowd-pleaser whether you’re a novice baker or a seasoned pro. Imagine delighting friends and family with these colorful confections that meld the flavors we love with the festive fun of the season! Are you ready to make baking magic happen? Let’s dive into the recipe!

Why Are Halloween Augapfel Cupcakes a Must?

Visual Appeal: With their playful fondant eyeballs, these cupcakes are sure to be the highlight of your spooky spread, captivating guests from the moment they see them.

Easy-to-Make: Even if you’re a beginner, these cupcakes require minimal effort, allowing you to create a show-stopping dessert without stress.

Moist & Flavorful: The rich red velvet base paired with luscious cream cheese frosting makes for an unforgettable flavor that’s both festive and delicious.

Versatile Decorating: Customize your cupcakes with various toppings, like chocolate ganache or vibrant sprinkles, letting your creativity shine and ensuring each cupcake is unique.

Perfect for Gatherings: Whether it’s a Halloween party or a cozy family night, these cupcakes are sure to wow your audience and spark delightful conversations! For more fun treats, don’t miss our spooky-themed drinks.

Halloween Augapfel Cupcake Ingredients

For the Cupcakes
Red Velvet Cake Mix – This easy-to-use base guarantees moist and fluffy cupcakes; swap it for chocolate or vanilla for a unique twist.
Eggs – Essential for structure and moisture; consider flaxseed or applesauce as great substitutes for a vegan version.
Vegetable Oil – Adds richness and moisture; melted coconut oil is a fantastic alternative for healthier options.
Water – Hydrates the mix; for an extra flavor punch, use milk instead.

For the Frosting
Cream Cheese Frosting – Creamy topping that perfectly complements the cupcakes; store-bought works, but homemade brings a richer flavor.

For Decoration
Fondant or Candy Eyes – These fun elements create spooky eyeballs that will enchant your guests; swap them for chocolate chips or whipped cream for an easy alternative.

These Halloween Augapfel Cupcakes are bound to be a hit at your next Halloween gathering!

Step‑by‑Step Instructions for Halloween Augapfel Cupcakes

Step 1: Preheat the Oven
Begin by preheating your oven to 350°F (175°C), according to the instructions on the red velvet cake mix package. This ensures that your Halloween Augapfel Cupcakes will bake evenly. While the oven heats up, line your muffin tin with cupcake liners, making it easy to remove the cupcakes after baking.

Step 2: Prepare the Batter
In a large mixing bowl, combine the red velvet cake mix, eggs, vegetable oil, and water. Use a whisk or electric mixer to blend the ingredients until smooth, about 2-3 minutes. The batter should be rich and velvety, with a vibrant red hue that’s visually appealing.

Step 3: Bake the Cupcakes
Pour the cake batter into the prepared cupcake liners, filling each about two-thirds full to allow room for rising. Bake the cupcakes in the preheated oven for 18-22 minutes, or until a toothpick inserted into the center comes out clean. You’ll know they’re ready when the tops are slightly domed and spring back when touched.

Step 4: Cool Completely
Once baked, remove the cupcakes from the oven and let them cool in the pan for 5 minutes. Carefully transfer them to a wire rack to cool completely, which may take about 30 minutes. This step is crucial for ensuring that the cupcakes don’t become soggy when frosted, retaining their delightful fluffiness.

Step 5: Prepare the Frosting
While the cupcakes are cooling, take this time to prepare your cream cheese frosting. If using store-bought frosting, simply transfer it to a piping bag for easy decorating. On the other hand, if you’re making homemade frosting, mix cream cheese and powdered sugar until smooth and creamy; set it aside until the cupcakes are fully cooled.

Step 6: Decorate the Cupcakes
Once the cupcakes have cooled, it’s time to frost! Generously apply the cream cheese frosting atop each cupcake using your piping bag. For the finishing touch, decorate with fondant or candy eyes to create the playful spooky effect reminiscent of Halloween Augapfel Cupcakes. Get creative with the placement for extra fun!

Step 7: Serve and Enjoy
Gather your friends and family around to marvel at your Halloween Augapfel Cupcakes. These delightful treats are not only visually striking but also packed with flavor, making them perfect for any Halloween gathering. Don’t forget to capture a photo of your delicious creation before everyone digs in!

Expert Tips for Halloween Augapfel Cupcakes

  • Cool Completely: Always let the cupcakes cool fully before frosting to prevent melting and ensure the cream cheese topping stays beautifully intact.

  • Use a Piping Bag: For a professional-looking finish, use a piping bag to frost your cupcakes. This technique also makes it easier to apply decorative swirls.

  • Play with Toppings: Feel free to get creative with different toppings! Consider using colorful sprinkles or unique candies to add a personal touch to your Halloween Augapfel Cupcakes.

  • Check Baking Time: Keep a close eye on the baking time. Ovens can vary, so always use a toothpick to check for doneness, pulling them out as soon as the toothpick comes out clean.

  • Storage Secrets: If you have any leftovers, store the cupcakes in an airtight container in the fridge for up to 3 days for best flavor and texture.

Make Ahead Options

These Halloween Augapfel Cupcakes are ideal for busy home cooks looking to save time during the festive season! You can prepare the batter up to 24 hours in advance; simply mix all your ingredients and store the bowl covered in the refrigerator. For even more convenience, bake the cupcakes and let them cool, then frost them up to 3 days before serving—just be sure to refrigerate the frosted cupcakes in an airtight container to keep them fresh and avoid sogginess. When you’re ready to impress your guests, simply bring them back to room temperature for the perfect deliciousness. With these make-ahead options, you’ll enjoy stress-free entertaining!

Storage Tips for Halloween Augapfel Cupcakes

Fridge: Store cupcakes in an airtight container in the refrigerator for up to 3 days to maintain their moisture and flavor.

Freezer: Freeze leftover Halloween Augapfel Cupcakes for up to 3 months. Wrap them individually in plastic wrap and place in a freezer bag for easy access.

Reheating: To enjoy a cupcake straight from the freezer, thaw overnight in the fridge. You can warm it slightly in the microwave for about 10-15 seconds before serving.

Frosting Storage: If frosting separately, keep it in the fridge in an airtight container for up to a week. Re-whip before using for a fresh texture.

What to Serve with Halloween Augapfel Cupcakes

Pair these playful treats with complementary delights that will elevate your Halloween gathering into a full-on feast of fun!

  • Witch’s Brew Punch: A fizzy, green mocktail that adds a refreshing, spooky vibe while balancing the sweetness of the cupcakes. It’s an instant hit with kids and adults alike!

  • Ghostly Vanilla Ice Cream: Creamy vanilla ice cream provides a delightful contrast to the rich red velvet cupcakes, adding a cool and soothing element that everyone will enjoy.

  • Savory Spinach Dip: This creamy, cheesy dip served with crunchy bread or veggies can contrast beautifully with the sweet cupcakes, offering a balanced variety of flavors on your Halloween spread.

  • Candy Corn Popcorn: With its sweet and salty crunch, this colorful treat not only looks festive but also satisfies those who crave something to munch on while celebrating.

  • Caramel Apple Slices: Fresh apple slices drizzled with warm caramel introduce a crisp, tart contrast to the cupcakes’ sweetness, offering a balanced flavor profile that’s perfect for the fall season.

  • Haunted Hot Chocolate: A rich, warm beverage topped with whipped cream and spooky sprinkles, this drink ties in beautifully with the cupcakes, inviting guests to indulge in the cozy flavors of Halloween.

  • Pumpkin Spice Cupcakes: Keep the festive spirit alive by offering these alongside your Halloween Augapfel Cupcakes. The pumpkin flavor complements the holiday vibe while providing a delightful variety.

  • Blood Orange Mimosa: For an adult twist, this vibrant cocktail not only looks stunning but brings a zesty brightness that enhances the flavors of the cupcakes, perfect for toasting the spooky season!

Halloween Augapfel Cupcakes Variations

Feel empowered to put your own spin on these delightful treats with a few fun swaps and twists!

  • Dairy-Free: Replace cream cheese frosting with a coconut cream or cashew-based frosting for a luscious yet dairy-free delight.
    Experiment with flavors! A hint of vanilla or a touch of cocoa can enhance the overall taste while keeping it plant-based.

  • Gluten-Free: Swap the red velvet cake mix for a gluten-free version to ensure everyone can enjoy these spooky cupcakes.
    Look for blends designed for baking; they often yield great results without sacrificing flavor or texture.

  • Nutty Addition: Stir in chopped walnuts or pecans into the batter for added crunch and a nutty twist.
    This not only boosts the texture but also infuses each bite with an inviting warmth.

  • Chocolate Lovers: Use chocolate cake mix instead of red velvet for a decadent chocolate version that pairs beautifully with cream cheese frosting.
    It’s perfect for those who crave a rich, chocolatey treat while keeping all the fun toppings!

  • Spicy Twang: Add a pinch of cinnamon and nutmeg to the batter for a warm spice profile that will make these cupcakes even more comforting.
    The blend of spices can create a cozy flavor that complements the sweetness of the frosting perfectly.

  • Fruit Infusion: Fold in finely chopped strawberries or raspberries into your batter for a fruity surprise that brightens the flavor profile.
    The burst of fruit not only adds freshness but also creates a stunning visual appeal when you bite in!

  • Candy Explosion: Top with assorted Halloween candies like M&M’s, gummy worms, or crushed candy corn for a fun and festive crunch.
    This vibrant decoration makes each cupcake a treat on its own, turning them into delightful mini dessert adventures!

For even more creativity, consider browsing our ideas for spooky-themed drinks to pair with your cupcakes or check out our favorite Halloween desserts for more inspiration!

Halloween Augapfel Cupcakes Recipe FAQs

How do I choose the best red velvet cake mix?
Absolutely! Look for a cake mix that has a rich, vibrant color and includes ingredients like cocoa powder, which enhances the flavor. Check for brands that offer moist texture and great reviews. If you prefer experimenting, consider trying a homemade red velvet recipe—just be sure to achieve that signature color!

What’s the best way to store leftover Halloween Augapfel Cupcakes?
To keep your cupcakes fresh, store them in an airtight container in the refrigerator for up to 3 days. This will help maintain their moisture and flavor. If you want to save them longer, you can freeze them for up to 3 months. Just wrap each cupcake in plastic wrap, place them in a freezer-safe bag, and label them with the date!

Can I freeze Halloween Augapfel Cupcakes?
Absolutely! To freeze your cupcakes, first let them cool completely after baking. Wrap each cupcake tightly in plastic wrap, then place them in a freezer bag or an airtight container. They can be stored like this for up to 3 months. When you’re ready to enjoy, just thaw them in the refrigerator overnight and warm them slightly in the microwave if desired.

What should I do if my cupcakes sink in the middle?
Very! If your cupcakes are sinking, it could be due to overmixing the batter or underbaking them. Make sure to mix just until combined to prevent air pockets and check them a minute or two before the indicated baking time. Also, remember that different ovens may vary, so using a toothpick to check for doneness is key!

Are Halloween Augapfel Cupcakes suitable for people with dietary restrictions?
I often make a few adjustments to accommodate guests! While these cupcakes are generally not gluten-free, you can use a gluten-free cake mix for a gluten-sensitive audience. For vegans, swap eggs for flaxseed meal (1 tablespoon of flaxseed mixed with 3 tablespoons of water per egg) and use plant-based oil and frosting as well. Just be sure to let everyone know about any ingredient swaps!

How can I make my cupcakes visually striking?
Let your creativity shine! After frosting, you can use colorful sprinkles, edible glitter, or even small candy decorations in addition to the fondant or candy eyes for an extra festive look. You might also consider drizzling melted chocolate or colored icing to create fun designs—there’s no limit when it comes to spooky decoration!

Halloween Augapfel Cupcakes

Spooky Halloween Augapfel Cupcakes That Wow Every Guest

Halloween Augapfel Cupcakes are visually striking, easy-to-make red velvet treats that delight guests at any Halloween gathering.
Prep Time 30 minutes
Cook Time 22 minutes
Cooling Time 30 minutes
Total Time 1 hour 22 minutes
Servings: 12 cupcakes
Course: Dessert
Cuisine: American
Calories: 220

Ingredients
  

For the Cupcakes
  • 1 box Red Velvet Cake Mix or chocolate/vanilla mix
  • 3 large Eggs can substitute with flaxseed or applesauce for vegan version
  • 1/2 cup Vegetable Oil or melted coconut oil
  • 1 cup Water milk can be used for added flavor
For the Frosting
  • 1 batch Cream Cheese Frosting store-bought or homemade
For Decoration
  • 1 pack Fondant or Candy Eyes use chocolate chips or whipped cream as alternatives

Equipment

  • Muffin Tin
  • Mixing Bowl
  • piping bag

Method
 

Step‑by‑Step Instructions
  1. Preheat the oven to 350°F (175°C) and line muffin tin with cupcake liners.
  2. In a large mixing bowl, combine the red velvet cake mix, eggs, vegetable oil, and water and mix until smooth, about 2-3 minutes.
  3. Pour the batter into prepared cupcake liners, filling each two-thirds full, and bake for 18-22 minutes or until a toothpick comes out clean.
  4. Let the cupcakes cool in the pan for 5 minutes, then transfer to a wire rack to cool completely.
  5. Prepare your cream cheese frosting; either use store-bought or mix cream cheese and powdered sugar until smooth.
  6. Once cooled, frost each cupcake with cream cheese frosting and decorate with fondant or candy eyes.
  7. Serve the cupcakes and enjoy with friends and family, celebrating the spooky spirit.

Nutrition

Serving: 1cupcakeCalories: 220kcalCarbohydrates: 30gProtein: 3gFat: 10gSaturated Fat: 3gPolyunsaturated Fat: 1gMonounsaturated Fat: 5gCholesterol: 40mgSodium: 200mgPotassium: 150mgFiber: 1gSugar: 15gVitamin A: 200IUCalcium: 20mgIron: 1mg

Notes

Ensure cupcakes are cooled completely before frosting to maintain frosting integrity.

Tried this recipe?

Let us know how it was!

Magical Polyjuice Potion Swirl Cheesecake Recipe to Enchant You

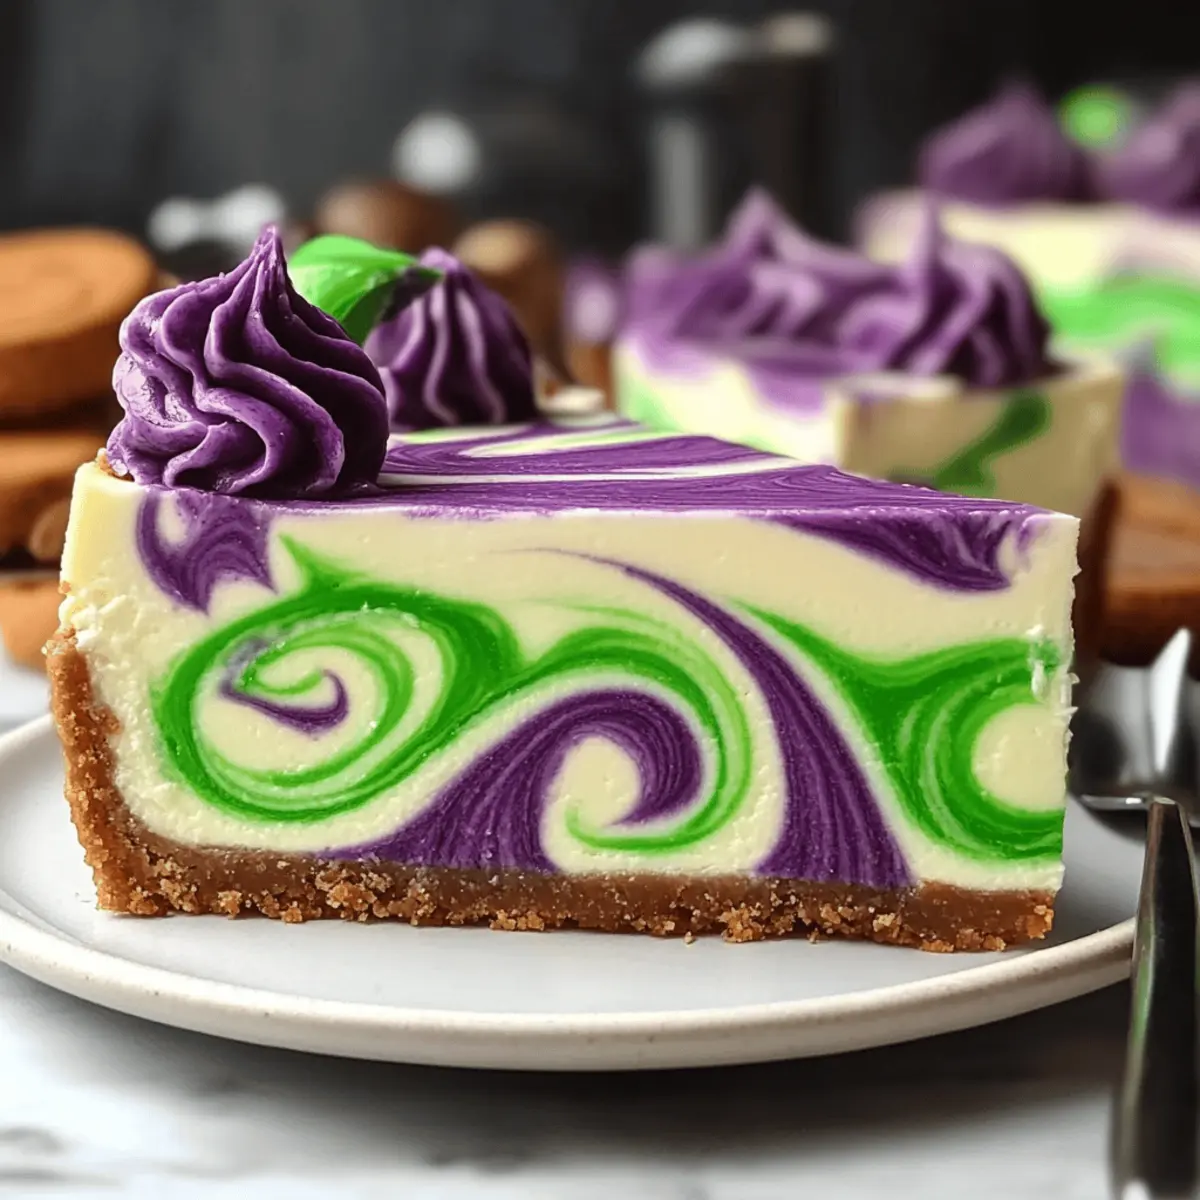
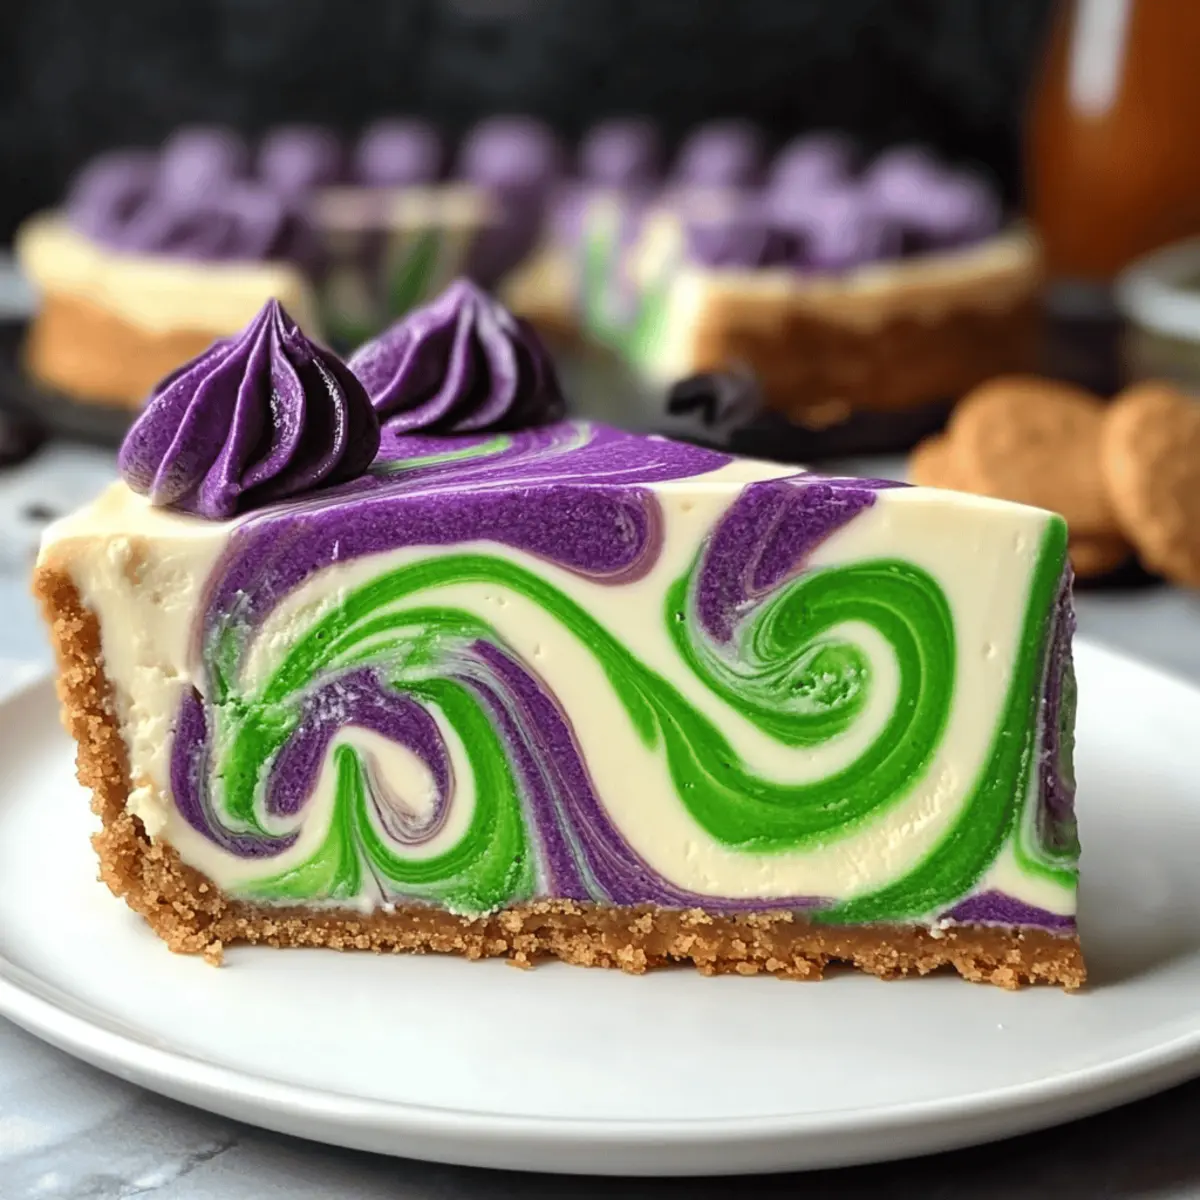
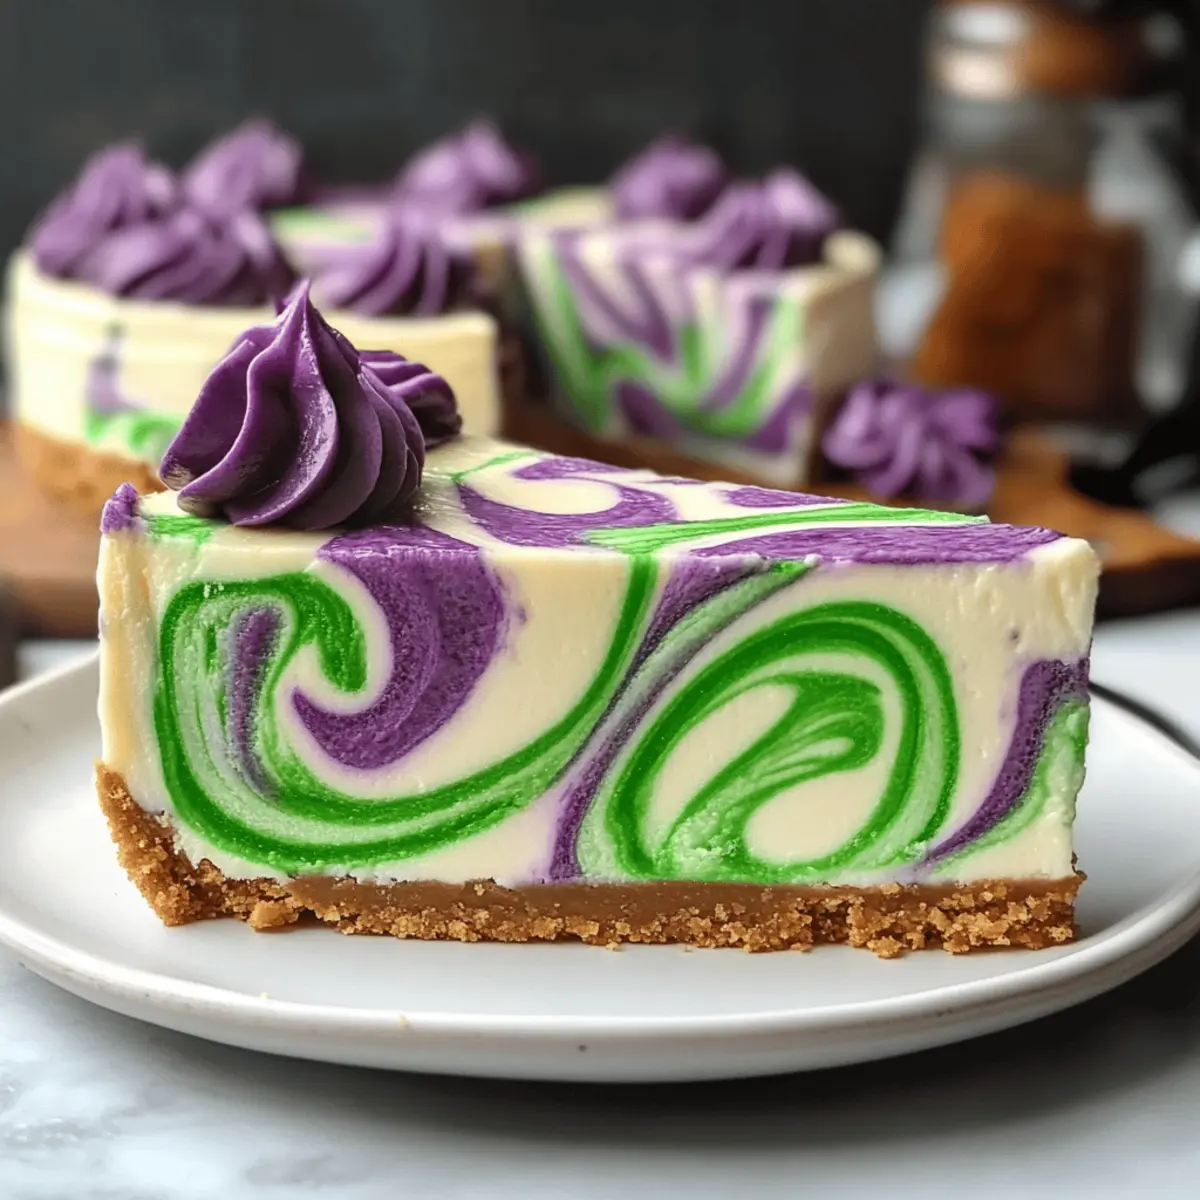
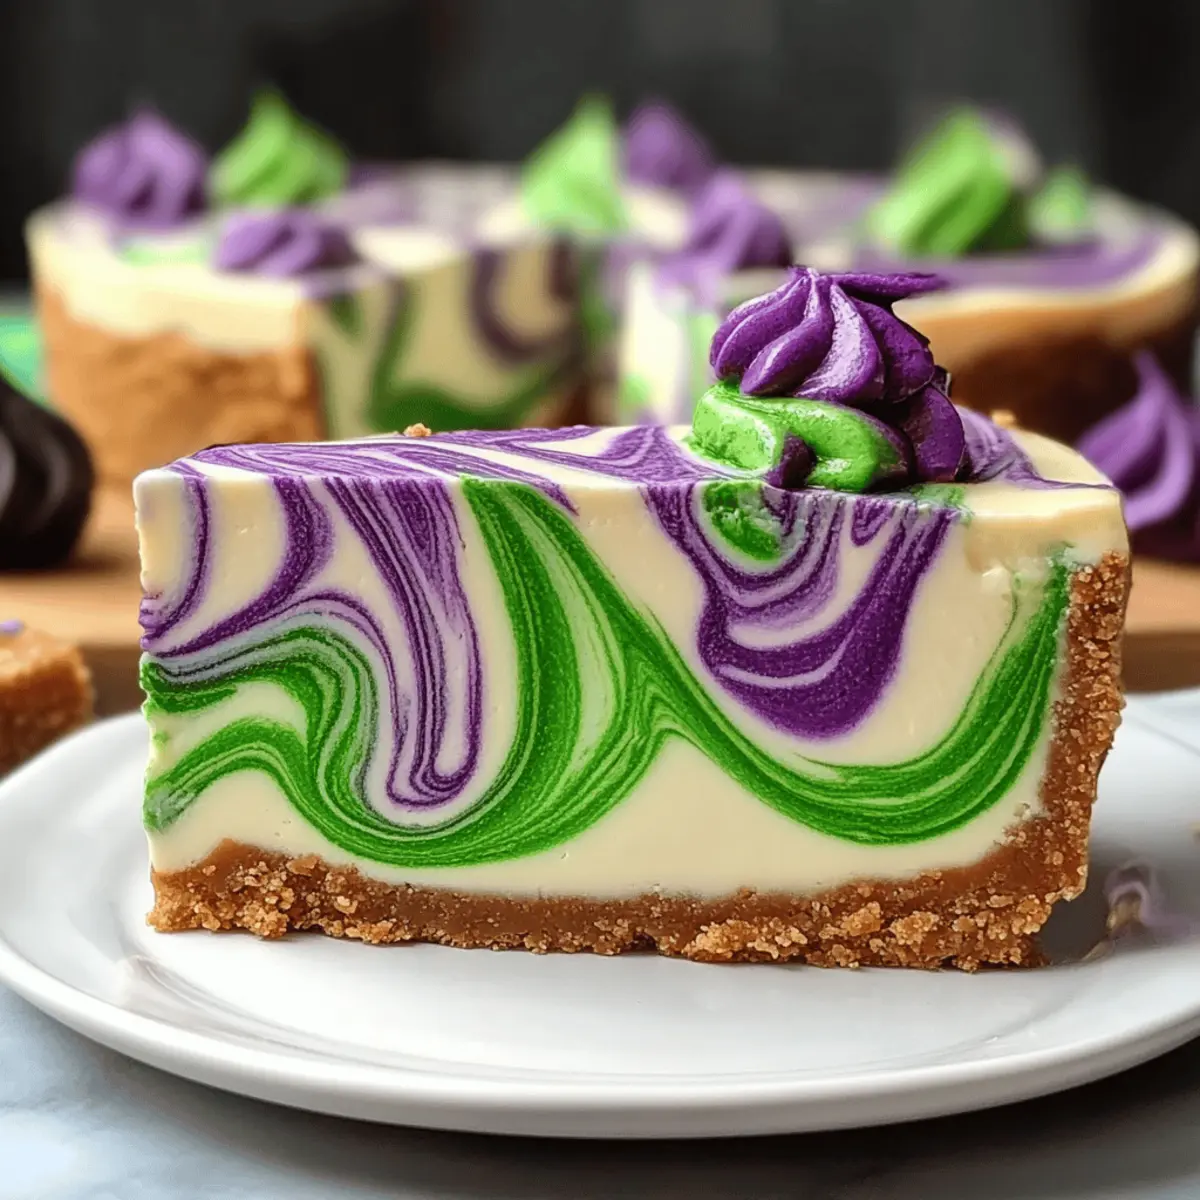
As I carefully swirled the vibrant green and purple mixtures into my cheesecake batter, I felt an unmistakable sense of magic bubbling over—much like what I imagine brewing the legendary Polyjuice Potion would be like. If you’re looking to add a touch of whimsy to your dessert table, this Polyjuice Potion Swirl Cheesecake is perfect for you! This delightful creation not only resembles a potion straight from the Harry Potter universe but also combines a creamy texture with a bold visual appeal that’s bound to impress your guests. Whether you’re hosting a themed party or just want to treat yourself (why not, right?), this vegetarian dessert boasts quick prep time and is a fun way to unleash your creativity in the kitchen. Are you ready to whip up some enchanting slices that taste as magical as they look? Let’s dive into the recipe!

Why is this cheesecake so enchanting?

Whimsical Inspiration: This cheesecake is a playful tribute to the beloved Harry Potter universe, making it a hit for fans and newcomers alike.
Stunning Presentation: The vibrant green and purple swirls create a visual masterpiece that will leave your guests in awe.
Quick Prep Time: With a straightforward process, you’ll spend less time in the kitchen and more time enjoying your creation.
Versatile Creativity: Customize the colors for any themed event—pair with Cookies Cream Cheesecake or other festive treats!
Crowd-Pleasing Flavor: A creamy filling balanced by a crunchy crust, this dessert ensures everyone at your gathering will be enchanted by every bite.
Impressive yet Simple: Even baking novices can master this magical treat, making it perfect for those looking to impress without stress!

Polyjuice Potion Swirl Cheesecake Ingredients

• Create your magical dessert with the ingredients below!

For the Crust

  • Graham Cracker Crumbs – Provides structure and a crunchy base. Substitution: Digestive biscuits for a slightly different flavor.
  • Granulated Sugar – Adds sweetness to the crust and filling. Substitution: Coconut sugar for a caramel-like flavor.
  • Unsalted Butter – Binds the crust together and adds richness. Substitution: Coconut oil for a dairy-free option.

For the Filling

  • Cream Cheese – Creates the rich filling essential for cheesecake. Substitution: Neufchâtel cheese for lower fat or dairy-free cream cheese for a vegan version.
  • Sour Cream – Contributes a creamy texture and a touch of tang. Substitution: Greek yogurt for a similar taste profile.
  • Vanilla Extract – Enhances the overall flavor of the cheesecake. Substitution: Almond extract for an interesting twist.
  • Eggs – Provides stability and structure to the cheesecake filling. Note: For a vegan option, use aquafaba as a substitute.
  • Heavy Cream – Used in the swirl mixture to enhance richness. Substitution: Full-fat coconut milk for a dairy-free delight.

For the Swirl Mixture

  • Brown Sugar – Adds depth of flavor to the colorful swirls. Substitution: Maple syrup for a natural sweetener.
  • Gel Food Coloring (Green & Purple) – Creates vibrant swirls reminiscent of the Polyjuice Potion. Note: Liquid food coloring could affect the consistency, so gel is preferred.
  • Edible Glitter/Silver Dust – Optional decoration that adds an enchanting touch to the dessert.

With these ingredients prepped and ready, you’re on your way to making an unforgettable Polyjuice Potion Swirl Cheesecake that will delight both the taste buds and the eyes!

Step‑by‑Step Instructions for Polyjuice Potion Swirl Cheesecake

Step 1: Preheat and Prepare
Begin by preheating your oven to 325°F (160°C). Take a 9-inch springform pan and line the bottom with parchment paper or lightly grease the sides. This will ensure that your Polyjuice Potion Swirl Cheesecake releases easily after baking, making for a clean presentation.

Step 2: Make the Crust
In a medium bowl, combine the graham cracker crumbs and granulated sugar. Pour in melted unsalted butter and mix until the crumbs are evenly coated and resemble wet sand. Press this mixture firmly into the bottom of the prepared pan, creating an even layer. Bake for 8–10 minutes, or until lightly golden, then allow it to cool completely.

Step 3: Prepare the Creamy Filling
In a large mixing bowl, use an electric mixer to beat the softened cream cheese and granulated sugar until smooth and creamy, about 2–3 minutes. Add sour cream and vanilla extract, mixing until fully incorporated. Then, add the eggs one at a time, ensuring each is blended in before adding the next. Be careful not to overmix your batter to prevent cracks in your cheesecake.

Step 4: Make the Swirl Mixture
In a small saucepan over medium heat, combine the heavy cream, brown sugar, and a tablespoon of unsalted butter. Stir the mixture until the sugar dissolves and the cream thickens slightly, about 4–5 minutes. Remove from heat and divide the mixture into two bowls, coloring one green and the other purple using gel food coloring.

Step 5: Assemble the Cheesecake
Pour the cheesecake filling over the cooled crust, smoothing the top with a spatula. Drizzle the colored swirl mixtures on top of the filling in patches, alternating between the green and purple. Use a toothpick or skewer to gently swirl the colors together, creating a marbled effect that captures the magic of the Polyjuice Potion.

Step 6: Bake to Perfection
Place the cheesecake in your preheated oven and bake for 50–60 minutes, or until the edges are set, but the center still jiggles slightly when shaken. Once done, turn off the oven and leave the cheesecake inside to cool gradually with the door ajar for about 1 hour. This helps prevent cracks from forming as it cools.

Step 7: Chill for the Perfect Texture
After the cheesecake has cooled, transfer it to the refrigerator to chill for at least 4 hours, or overnight if you have the time. This step is crucial for the flavors to meld and for the cheesecake to firm up to the perfect sliceable consistency.

Step 8: Serve and Decorate
Once fully chilled, carefully remove the cheesecake from the springform pan. For a magical touch, decorate the top with additional colorful swirls and a sprinkle of edible glitter or silver dust. For clean slices, use a hot knife; simply dip the knife in hot water, wipe dry, and slice your Polyjuice Potion Swirl Cheesecake to reveal the enchanting layers within.

Make Ahead Options

These enchanting Polyjuice Potion Swirl Cheesecakes are perfect for meal prep enthusiasts! You can prepare the crust and filling up to 24 hours in advance, storing them separately in the refrigerator (wrap the crust tightly to prevent it from getting soggy). To maintain the vibrant swirls, mix the heavy cream and swirl ingredients the same day you’ll be baking. When you’re ready to serve, simply pour the filling over the crust, add the swirls, and bake according to the recipe. This way, you’ll save time and still impress your guests with a dessert that’s just as delicious!

Storage Tips for Polyjuice Potion Swirl Cheesecake

  • Fridge: Keep your leftover Polyjuice Potion Swirl Cheesecake in an airtight container for up to 5 days. This way, it stays fresh and delicious for every magical bite.
  • Freezer: For longer storage, freeze the uncut cheesecake for up to 2 months. Wrap it tightly in plastic wrap and then foil to prevent freezer burn. Thaw overnight in the fridge before serving.
  • Reheating: Although cheesecake is best enjoyed cold, if you prefer it slightly warmed, gently heat individual slices in the microwave for about 10-15 seconds. Enjoy the creamy texture!

What to Serve with Polyjuice Potion Swirl Cheesecake

Elevate your dessert experience and create a magical spread with these delightful pairings that perfectly complement your enchanting cheesecake.

  • Butterbeer Cupcakes: These sweet, spiced cupcakes echo the flavors of the iconic drink from the series, making them a whimsical choice. Imagine biting into the soft cake topped with creamy butterscotch frosting alongside your cheesecake.

  • Chocolate Frogs: Perfect for a Harry Potter-themed gathering, these fun treats add a playful element to your dessert table, delighting both kids and adults. Their rich chocolate flavor pairs beautifully with the creamy texture of the cheesecake.

  • Gryffindor Gummy Bears: Bright and colorful, these gummy treats can mirror the vibrant hues of the cheesecake, providing a chewy contrast that will please any sweet tooth.

  • Lavender Lemonade: A refreshing drink option, this floral and citrusy beverage adds brightness to the dessert experience. The lightness of the lemonade balances the richness of the cheesecake, offering a lovely palate cleanser.

  • Pumpkin Pasties: Channeling the flavors of the season, these mini pastries offer a cozy taste that complements the cheesecake’s sweetness. Served warm, they provide a delightful texture contrast.

  • Magical Fruit Platter: Include vibrant fruits like strawberries, kiwis, and blueberries, which not only add freshness but also make the presentation incredibly eye-catching. The natural tartness of the fruit can enhance the rich flavors of the cheesecake.

Sharing this whimsical spread with your Polyjuice Potion Swirl Cheesecake will create an unforgettable experience, taking your gathering from delightful to downright magical!

Tips for the Best Polyjuice Potion Swirl Cheesecake

  • Prevent Cracks: Avoid overmixing the batter to maintain a smooth texture and prevent unsightly cracks from forming in your Polyjuice Potion Swirl Cheesecake.

  • Gradual Cooling: Let the cheesecake cool gradually in the oven with the door ajar to minimize temperature shock, ensuring a beautifully set filling.

  • Vibrant Colors: To achieve stunning swirls, opt for gel food coloring instead of liquid. This will help maintain the desired texture and intensity in your colors.

  • Slice Smartly: For the cleanest cuts, use a knife dipped in hot water. Wipe it clean between slices for a pretty presentation.

  • Flavor Adjustments: Feel free to experiment with the flavor of your cheesecake by incorporating different extracts, such as peppermint or almond, for an exciting twist!

Polyjuice Potion Swirl Cheesecake Variations

Embrace your creative flair by customizing this whimsical cheesecake to suit your taste and celebration!

  • Gryffindor Colors: Use red and gold gel food coloring to represent Gryffindor. This adds a festive touch to any themed gathering!
  • Nutty Crust: Swap graham cracker crumbs for crushed almonds or pecans for a delightful nutty flavor that elevates the cheesecake experience.
  • Chocolate Swirls: Integrate melted chocolate into your swirl mixture for a decadent chocolate version, bringing an extra layer of richness to each bite.
  • Fruit Infusion: Add a fruit puree (like raspberry or mango) to the swirl mixture for a bright and tangy twist that complements the creamy filling beautifully.
  • Spiced Version: Incorporate a sprinkle of cinnamon and nutmeg into the filling for a warm, cozy flavor profile reminiscent of holiday treats.
  • Low-Sugar Option: Use a sugar substitute, like erythritol or stevia, for a guilt-free indulgence without sacrificing flavor!
  • Vegan Delight: Substitute cream cheese with vegan cream cheese and use aquafaba instead of eggs to create a delicious vegan version of this enchanting cheesecake.
  • Layered Cheesecake: Make mini layered cheesecakes in jars using the same swirl concept, allowing guests to enjoy individual servings of this magical treat.

As you let your imagination run wild with these variations, consider pairing your slices with lovely treats like Cookies Cream Cheesecake for a delightful dessert spread that will leave everyone enchanted!

Polyjuice Potion Swirl Cheesecake Recipe FAQs

How do I know if my cream cheese is fresh enough?
Look for cream cheese that is smooth and without any dark spots or odd odors. Fresh cream cheese should be firm to the touch but creamy. If it has an off-smell or granular texture, it’s best to discard it. Always check the expiration date before using any dairy products!

What’s the best way to store my leftovers?
Store any leftover Polyjuice Potion Swirl Cheesecake in an airtight container in the refrigerator for up to 5 days. This keeps it fresh and delicious. If you want to enjoy it later, you can freeze the uncut cheesecake. Wrap it tightly in plastic wrap and a layer of aluminum foil to prevent freezer burn for up to 2 months!

Can I freeze the cheesecake? If so, how?
Absolutely! To freeze your cheesecake, first make sure it’s completely cooled and set. Wrap it tightly in plastic wrap to avoid freezer burns and then place it in a suitable container or a Ziploc freezer bag. This way, your magical dessert will be protected. When you’re ready to enjoy it, thaw it overnight in the refrigerator before slicing into it!

What should I do if the cheesecake cracks while baking?
If cracks appear, don’t worry too much! The beauty of the Polyjuice Potion Swirl Cheesecake is in its swirls. Keep the cheesecake in the oven while it cools with the door slightly ajar to help minimize cracks from sudden temperature changes. For future bakes, be careful not to overmix the batter, as this can introduce too much air, leading to cracks.

Is this cheesecake suitable for vegetarians?
Yes, the Polyjuice Potion Swirl Cheesecake is vegetarian-friendly! However, if you have dietary restrictions or allergies (like dairy or eggs), consider substituting with plant-based ingredients. You can use dairy-free cream cheese and aquafaba (chickpea brine) in place of eggs for a delightful vegan version!

Can I adjust the colors for different themes?
Very! You can switch up the gel food coloring to match any theme. For instance, a colorful array of red and gold would be perfect for a Gryffindor gathering! Just be mindful to use gel food coloring for the best results to maintain the cheesecake’s texture.

Polyjuice Potion Swirl Cheesecake

Magical Polyjuice Potion Swirl Cheesecake Recipe to Enchant You

Indulge in the enchanting Polyjuice Potion Swirl Cheesecake, a creamy dessert with vibrant swirls that delights both the eyes and the palate.
Prep Time 20 minutes
Cook Time 1 hour
Chilling Time 4 hours
Total Time 5 hours 20 minutes
Servings: 8 slices
Course: Dessert
Cuisine: Magical
Calories: 350

Ingredients
  

For the Crust
  • 1.5 cups Graham Cracker Crumbs Substitution: Digestive biscuits for a slightly different flavor.
  • 0.25 cups Granulated Sugar Substitution: Coconut sugar for a caramel-like flavor.
  • 0.5 cups Unsalted Butter Substitution: Coconut oil for a dairy-free option.
For the Filling
  • 16 oz Cream Cheese Substitution: Neufchâtel cheese for lower fat or dairy-free cream cheese for a vegan version.
  • 0.5 cups Sour Cream Substitution: Greek yogurt for a similar taste profile.
  • 1 teaspoon Vanilla Extract Substitution: Almond extract for an interesting twist.
  • 3 large Eggs For a vegan option, use aquafaba as a substitute.
  • 0.5 cups Heavy Cream Substitution: Full-fat coconut milk for a dairy-free delight.
For the Swirl Mixture
  • 0.5 cups Brown Sugar Substitution: Maple syrup for a natural sweetener.
  • 1 tablespoon Gel Food Coloring (Green & Purple) Gel is preferred to maintain consistency.
  • Edible Glitter/Silver Dust Optional decoration.

Equipment

  • 9-inch springform pan
  • Electric Mixer
  • Small saucepan

Method
 

Step-by-Step Instructions
  1. Preheat your oven to 325°F (160°C). Line the bottom of a 9-inch springform pan with parchment paper or lightly grease the sides.
  2. In a medium bowl, combine graham cracker crumbs and granulated sugar. Pour in melted unsalted butter and mix until the crumbs resemble wet sand. Press this mixture into the bottom of the pan and bake for 8-10 minutes until golden.
  3. In a large mixing bowl, beat the softened cream cheese and granulated sugar until smooth. Add sour cream and vanilla extract, mixing until incorporated. Add eggs one at a time, blending well each time. Avoid overmixing.
  4. In a small saucepan over medium heat, combine the heavy cream, brown sugar, and a tablespoon of unsalted butter. Stir until sugar dissolves and mixture thickens slightly, about 4-5 minutes. Divide into two bowls, color one green and the other purple.
  5. Pour the cheesecake filling over the cooled crust. Drizzle the colored swirl mixtures on top, alternating between colors. Swirl gently with a toothpick to create a marbled effect.
  6. Bake in the preheated oven for 50-60 minutes until the edges are set but the center jiggles slightly. Turn off the oven and let it cool inside with the door ajar for 1 hour.
  7. Transfer to the refrigerator to chill for at least 4 hours or overnight. This ensures flavors meld and the cheesecake firms up.
  8. Carefully remove the cheesecake from the pan. Decorate with additional colorful swirls and edible glitter. For clean slices, use a hot knife.

Nutrition

Serving: 1sliceCalories: 350kcalCarbohydrates: 30gProtein: 5gFat: 24gSaturated Fat: 15gPolyunsaturated Fat: 0.5gMonounsaturated Fat: 5gCholesterol: 80mgSodium: 300mgPotassium: 150mgFiber: 1gSugar: 20gVitamin A: 500IUCalcium: 80mgIron: 1mg

Notes

To prevent cracks, avoid overmixing the batter and allow gradual cooling in the oven. Use gel food coloring for vibrant swirls and hot water for clean cuts.

Tried this recipe?

Let us know how it was!

Refreshing Strawberry Coconut Tapioca Dessert for Sweet Moments

It’s a hot summer afternoon, and I find myself dreaming of tropical beaches while standing in my kitchen. That’s when I decided to whip up a batch of Strawberry Coconut Tapioca Dessert, a delightful treat that blends the creamy richness of coconut milk with the vibrant sweetness of fresh strawberries. This dessert is not only a breeze to prepare ahead of time, but it’s also naturally gluten-free, making it a perfect option for friends with dietary restrictions. Each spoonful delivers a delightful chewiness from the tapioca pearls, complemented by refreshing bursts of fruitiness. Whether serving it at a summer gathering or as a comforting weeknight indulgence, this creamy delight will have everyone coming back for seconds. Ready to dive into a dessert that transports you straight to paradise? Let’s get started!

Why is This Dessert a Must-Try?

Creamy Bliss: The rich combination of coconut milk and sweet strawberries creates a luxurious base that melts in your mouth.

Chewy Texture: With tender tapioca pearls, each bite delivers an irresistible chewiness that’s hard to resist, making it a fun dessert experience.

Prep-Ahead Perfection: Easily prepared in advance, this dish is perfect for busy days when you want to impress guests without spending hours in the kitchen.

Naturally Gluten-Free: This dessert caters to various dietary needs, ensuring everyone can enjoy a tropical treat without worry.

Versatile Variations: Feel free to experiment with different fruits like mango or peach, or switch coconut milk for almond milk to customize it to your taste.

This Strawberry Coconut Tapioca Dessert is truly the highlight of any meal—whether served at a summer gathering or as a delightful pick-me-up during the week! If you’re looking for more delicious fruity options, don’t forget to check out the Strawberry Cheesecake Bars or the refreshing Pineapple Coconut Mojito.

Strawberry Coconut Tapioca Dessert Ingredients

For the Base
Tapioca Pearls – Essential for that delightful chewy texture; small pearls work best for this dessert.
Fresh Strawberries – Use ripe strawberries for the sweetest flavor; frozen ones can be an alternative in a pinch.
Coconut Milk – This brings a rich, creamy tropical essence to your dessert.
Milk – Balances the coconut’s richness and adds depth to the flavor.
Strawberry Jam – Boosts the strawberry flavor while adding sweetness.

For Sweetening
Sweetened Condensed Milk – Introduces a luscious sweetness; can be substituted with honey or maple syrup for a lighter option.

For Texture
Coconut Jellies (Nata de Coco) – For chewy, juicy bites that enhance the fun; alternate options include boba pearls or diced fruits for variation.

This delightful Strawberry Coconut Tapioca Dessert is perfect to prepare ahead and will surely be a showstopper at your next gathering!

Step‑by‑Step Instructions for Strawberry Coconut Tapioca Dessert

Step 1: Cook the Tapioca Pearls
Begin by bringing a large pot of water to a rolling boil over high heat. Carefully add the small tapioca pearls to the boiling water and reduce the heat to medium-low. Simmer for 25–30 minutes while stirring occasionally. You’ll know they’re ready when they turn fully translucent—if any white centers remain, continue boiling for a few more minutes until soft.

Step 2: Drain and Cool
Once the tapioca pearls are cooked to perfection, drain them in a fine-mesh sieve and rinse them thoroughly under cold running water. This helps remove excess starch, ensuring a delightful chewiness in your Strawberry Coconut Tapioca Dessert. Transfer the rinsed pearls to a mixing bowl, allowing them to cool while you prepare the creamy base.

Step 3: Blend the Creamy Base
In a blender, combine half of the chopped fresh strawberries, coconut milk, regular milk, and strawberry jam. Blend the mixture on high speed until it’s completely smooth and creamy, creating a luscious base for your dessert. Pour this delightful mixture over the cooled tapioca pearls in the bowl, carefully stirring to combine and absorb all those tropical coconut and strawberry flavors.

Step 4: Add Toppings and Sweetener
Next, gently fold in the remaining chopped strawberries, sweetened condensed milk, and coconut jellies to the tapioca mixture. The sweetened condensed milk adds a velvety sweetness, balancing the berry flavor while the coconut jellies provide a fun chewy texture. Mix everything until it’s well combined, ensuring each component shines in your Strawberry Coconut Tapioca Dessert.

Step 5: Chill or Serve
At this point, you can either serve your refreshing Strawberry Coconut Tapioca Dessert immediately at room temperature or chill it in the fridge for about 1 hour. The cold treatment allows it to thicken slightly and enhances its flavors, making every bite even more delightful. It’s perfect for hot summer days or any occasion when you want a light yet satisfying treat!

How to Store and Freeze Strawberry Coconut Tapioca Dessert

Fridge: Store any leftovers in an airtight container in the refrigerator for up to 2–3 days. The flavors will continue to meld, enhancing the dessert’s taste.

Freezer: Freezing is not recommended for this Strawberry Coconut Tapioca Dessert, as the tapioca pearls may lose their delightful chewiness and become mushy after thawing.

Reheating: If you’ve chilled the dessert, simply serve it cold or let it sit at room temperature for 15–20 minutes before serving for a softer texture.

Preparation: For best results, prepare this dessert ahead of time. It stays fresh in the fridge, ensuring you have a scrumptious treat ready to impress your guests!

Strawberry Coconut Tapioca Dessert Variations

Feel free to let your creative juices flow and customize this delightful dessert to match your taste buds!

  • Mango Twist: Swap strawberries for ripe mangoes for a tropical flair that adds a sunny sweetness and vibrant color.
  • Almond Milk: Use almond milk instead of coconut milk for a nutty flavor that pairs well with the fruity elements.
  • Fragrant Additions: Add a splash of rose water or a few drops of pandan essence for an enchanting aroma and floral hint.
  • Jelly Swap: Experiment with lychee or peach jellies instead of coconut jellies for added sweetness and a new chewy texture.
  • More Fruity Layers: Incorporate blueberries or raspberries alongside strawberries for a mixed berry sensation that tantalizes the palate.
  • Coconut Cream: For an extra creamy dessert, layer in some whipped coconut cream just before serving, elevating the indulgence factor.
  • Spicy Kick: Add a pinch of cayenne pepper or chili powder for a surprising burst of heat that beautifully contrasts the dessert’s sweetness.
  • Freeze Pops: Pour the mixture into popsicle molds before freezing for a fun, portable version of this dessert—perfect for hot summer days!

If you’re craving more fruity delights, try the delightful Roasted Strawberry Whipped Ricotta Toast or a refreshing Coconut Curry Soup for a savory twist. Enjoy experimenting!

Expert Tips for Strawberry Coconut Tapioca Dessert

  • Perfect Pearls: Ensure the tapioca pearls are fully translucent by cooking them thoroughly; any white centers will lead to a chewy, unpleasant texture.

  • Rinse Well: After cooking, rinse the pearls under cold water. This step removes excess starch and ensures a smoother mouthfeel in your Strawberry Coconut Tapioca Dessert.

  • Taste Test the Base: Adjust sweetness based on your preference—add more sweetened condensed milk or strawberry jam if necessary before combining with the pearls.

  • Chill for Flavor: Refrigerating the dessert enhances the flavors; the longer it sits, the more the ingredients meld together for a richer taste experience.

  • Garnish Creatively: Consider topping each serving with a sprig of fresh mint or a sprinkle of toasted coconut flakes for added visual appeal and texture to your dessert.

What to Serve with Strawberry Coconut Tapioca Dessert

Picture a lovely afternoon gathering or a cozy family dinner where this delightful dessert complements the flavors of your meal and elevates the experience.

  • Grilled Pineapple: The caramelized sweetness of grilled pineapple adds a smoky depth that pairs beautifully with the creamy dessert.

  • Coconut Rice: Fluffy, fragrant coconut rice brings a subtle tropical flavor that echoes the tapioca, creating a harmonious palate experience.

  • Minty Cucumber Salad: A refreshing salad with crisp cucumbers and mint provides a cool contrast, balancing the sweetness of the dessert.

  • Spiced Rum Cocktails: A light spiced rum drink enhances the tropical vibes while complementing the flavors of coconut and strawberries effortlessly.

  • Chocolate-Dipped Fruit: Offering a luxurious flavor punch, chocolate-dipped strawberries or bananas add a rich element to contrast with the lightness of the tapioca.

  • Tropical Fruit Platter: A colorful assortment of mango, kiwi, and dragon fruit not only provides visual appeal but also adds refreshing notes that echo the dessert’s tropical essence.

  • Lemon Sorbet: This tart and icy treat bows to seasonality, cleansing the palate while enhancing the lusciousness of the tapioca dessert.

  • Chilled Iced Tea: A lightly sweetened herbal iced tea with a hint of citrus brings a refreshing drink option that complements the dessert’s flavors.

Incorporating these pairings will create a delightful culinary symphony that enhances your Strawberry Coconut Tapioca Dessert and leaves your guests satisfied!

Make Ahead Options

Preparing the Strawberry Coconut Tapioca Dessert ahead of time is a fantastic way to save you precious moments in the kitchen, especially on busy days! You can cook and chill the tapioca pearls up to 24 hours in advance, ensuring they retain their delightful chewiness by rinsing them thoroughly after cooking. Additionally, blend the creamy coconut and strawberry base and refrigerate it for up to 3 days for maximum flavor infusion. When it’s time to serve, simply combine the reserved strawberries and coconut jellies with the prepped tapioca and creamy mixture, and it’s ready to impress your guests. Trust me, this dessert will be just as delicious, offering a tropical escape at a moment’s notice!

Strawberry Coconut Tapioca Dessert Recipe FAQs

How do I choose ripe strawberries for this dessert?
Absolutely! For the best flavor in your Strawberry Coconut Tapioca Dessert, pick strawberries that are deep red, firm, and fragrant. Avoid those with dark spots or signs of softness. If you can’t find fresh ones, frozen strawberries are a great alternative, although they may release more juice.

How long can I store the leftovers?
Very! You can store any remaining Strawberry Coconut Tapioca Dessert in an airtight container in the fridge for about 2–3 days. The flavors will meld beautifully, making it even more delicious. Just remember, if it’s been chilled, you can serve it straight from the fridge for a refreshing treat.

Can I freeze the Strawberry Coconut Tapioca Dessert?
Not typically recommended! Freezing this dessert isn’t ideal because tapioca pearls can lose their delightful chewiness and become mushy when thawed. It’s best enjoyed fresh or after a short stay in the fridge, where the flavors can develop without compromising the texture.

What should I do if my tapioca pearls are still white after cooking?
Don’t worry; it happens! If you notice white centers in your tapioca pearls, just continue cooking them on low heat for an additional 5 to 10 minutes until they are fully translucent. Make sure to stir occasionally to prevent them from sticking together. Rinsing them well afterward is crucial for achieving that perfect texture in your dessert!

Is this dessert suitable for people with allergies?
Very much so! The Strawberry Coconut Tapioca Dessert is naturally gluten-free and can easily be made vegan by substituting dairy milk with plant-based milk and sweetened condensed milk with coconut condensed milk or another sweetener. Always check the labels on all ingredients for potential allergens, especially if you’re serving guests.

What can I substitute if I can’t find coconut jellies?
No problem! If coconut jellies (Nata de Coco) aren’t available, you can replace them with boba pearls, diced fruit, or even gelly cubes for a playful texture. Just ensure that any alternative complements the flavors of the Strawberry Coconut Tapioca Dessert for a wonderful blend.

Strawberry Coconut Tapioca Dessert

Refreshing Strawberry Coconut Tapioca Dessert for Sweet Moments

A delightful Strawberry Coconut Tapioca Dessert that blends creamy coconut milk with fresh strawberries. Perfect for summer gatherings and naturally gluten-free.
Prep Time 15 minutes
Cook Time 30 minutes
Chill Time 1 hour
Total Time 1 hour 45 minutes
Servings: 4 servings
Course: Dessert
Cuisine: Tropical
Calories: 250

Ingredients
  

For the Base
  • 1 cup Tapioca Pearls Small pearls work best
  • 2 cups Fresh Strawberries Chopped
  • 1 can Coconut Milk Rich and creamy
  • 1 cup Milk Regular dairy or non-dairy
  • 1/2 cup Strawberry Jam To boost flavor
For Sweetening
  • 1/2 cup Sweetened Condensed Milk Can be substituted with honey or maple syrup
For Texture
  • 1 cup Coconut Jellies (Nata de Coco) Or alternate options like boba pearls

Equipment

  • large pot
  • fine-mesh sieve
  • blender
  • Mixing Bowl

Method
 

Step-by-Step Instructions
  1. Cook the tapioca pearls by bringing a large pot of water to a boil and simmering the pearls for 25-30 minutes until fully translucent.
  2. Drain the cooked tapioca pearls in a fine-mesh sieve and rinse them under cold running water to remove excess starch.
  3. Blend half of the strawberries, coconut milk, regular milk, and strawberry jam in a blender until smooth and creamy.
  4. Pour the creamy mixture over the cooled tapioca pearls in a bowl and stir to combine.
  5. Gently fold in remaining strawberries, sweetened condensed milk, and coconut jellies until well combined.
  6. Chill in the fridge for about 1 hour or serve immediately.

Nutrition

Serving: 1cupCalories: 250kcalCarbohydrates: 45gProtein: 4gFat: 10gSaturated Fat: 8gPolyunsaturated Fat: 0.5gMonounsaturated Fat: 1gCholesterol: 5mgSodium: 90mgPotassium: 200mgFiber: 2gSugar: 22gVitamin A: 150IUVitamin C: 30mgCalcium: 150mgIron: 1mg

Notes

This dessert should be prepared ahead of time for the best flavor. Store leftovers in an airtight container for up to 2-3 days.

Tried this recipe?

Let us know how it was!

Vegan Cookie Monster Ice Cream: Creamy, Colorful Fun Awaits

As I strolled through the local farmer’s market, a vibrant splash of blue caught my eye, reminding me of childhood ice cream days. Today, I’m excited to recreate a nostalgic favorite with a delightful twist: Vegan Cookie Monster Ice Cream! This vegan and dairy-free treat is a simple yet indulgent way to enjoy a classic without any guilt. With just six easy-to-find ingredients, you can whip up a creamy concoction that’s not only a crowd-pleaser but also perfect for those warm summer nights. Loaded with chunks of Oreo and chocolate chip cookies, this recipe offers a fun and playful take on a beloved flavor—even the kids will be begging for a scoop! Are you ready to dive into this colorful world of homemade goodness? Let’s get started!

Why is Vegan Cookie Monster Ice Cream irresistible?

Deliciously Unique: This ice cream marries the nostalgia of childhood treats with modern dietary needs, ensuring everyone can enjoy a scoop.
Easy Preparation: With just six ingredients and no special tools, you’ll be serving up creamy bliss in no time.
Crowd-Pleasing Treat: Loaded with Oreo and chocolate chip cookie chunks, this delightful dessert is sure to impress kids and adults alike.
Vibrant Color: Thanks to blue spirulina, it’s as visually appealing as it is tasty—perfect for parties or a fun family treat.
Versatile Options: Customize your flavors by swapping cookies or using different non-dairy milk for a unique twist every time! Whether you’re entertaining guests or seeking a sweet indulgence, this Vegan Cookie Monster Ice Cream makes every moment special.

Vegan Cookie Monster Ice Cream Ingredients

For the Base
Coconut Milk – The rich and creamy foundation of this ice cream; opt for almond milk for a lighter treat, but it may change the texture.
Granulated Sugar – Sweetens the ice cream to perfection; consider coconut sugar for a lower glycemic alternative.
Vanilla Extract – Elevates the flavor profile; always choose pure vanilla extract for the best results.
Blue Spirulina Powder – This natural colorant gives it that fun blue hue without artificial additives; try butterfly pea powder for a unique color twist.
Salt – Just a pinch balances the sweetness beautifully.

For the Mix-Ins
Oreo Cookies – Provides the classic cookie crunch; gluten-free Oreos can be used for a gluten-free option.
Chocolate Chip Cookies – Adds extra texture and sweetness; feel free to swap these for any favorite cookie you might have!

Now you’re all set to make your delicious Vegan Cookie Monster Ice Cream, a treat that’s as much about fun as it is about flavor!

Step‑by‑Step Instructions for Vegan Cookie Monster Ice Cream

Step 1: Prep Ice Cream Maker
Before you start making your Vegan Cookie Monster Ice Cream, ensure that your ice cream maker bowl has been frozen for at least 24 hours. This step is crucial for achieving that creamy texture we all crave. Place the bowl in your freezer a day in advance, so it’s perfectly chilled and ready to churn the mixture to creamy perfection.

Step 2: Blend Ingredients
In a high-speed blender, combine the rich coconut milk, granulated sugar, pure vanilla extract, blue spirulina powder, and a pinch of salt. Blend for about 2-3 minutes or until the mixture is smooth and creamy, resembling a luscious milkshake. You’ll notice the vibrant blue color forming, making this base the perfect beginning for your Vegan Cookie Monster Ice Cream.

Step 3: Churn the Mixture
Once the mixture is well-blended, pour it into your pre-frozen ice cream maker bowl. Follow your manufacturer’s instructions for churning, typically around 20-30 minutes, until the ice cream thickens and resembles soft serve. During the last 1-2 minutes of churning, add in the chopped Oreo and chocolate chip cookies, allowing them to be evenly distributed throughout your delicious ice cream.

Step 4: Freeze for Firmness
After churning, transfer the ice cream into an airtight container, smoothing the top with a spatula. Cover tightly and place it in the freezer for at least 4 hours, or until it’s firm enough to scoop. If you prefer a soft serve texture, you can enjoy it immediately after churning—just prepare for a delightful, creamy treat that everyone will love!

Step 5: Serve with Ease
When you’re ready to serve your Vegan Cookie Monster Ice Cream, remove it from the freezer and let it sit at room temperature for about 5-10 minutes. This gentle warming will make scooping much easier, allowing for those perfect, beautiful scoops. Dish it up and watch everyone delight in your colorful creation, bursting with cookies and fun!

Storage Tips for Vegan Cookie Monster Ice Cream

Fridge: Enjoy the ice cream fresh for up to 3 days if stored in an airtight container, although it’s best served frozen for the full experience.

Freezer: Keep your Vegan Cookie Monster Ice Cream in the freezer for up to 2 weeks for the best flavor and texture; ensure it’s in a well-sealed, airtight container to prevent freezer burn.

Thawing: When ready to enjoy, remove the ice cream from the freezer and let it sit at room temperature for 5-10 minutes to make scooping effortless.

Reviving Texture: If your ice cream becomes too hard after long storage, you can microwave it for about 10-15 seconds or let it sit at room temperature briefly for the ideal creamy consistency.

Vegan Cookie Monster Ice Cream Variations

Let your imagination run wild with these fun twists on Vegan Cookie Monster Ice Cream that bring an exciting spin to every scoop!

  • Nut Butter Bliss: Add a dollop of almond or peanut butter to the base before blending for a nutty richness. This addition complements the cookie crunch beautifully.
  • Chocolate Swirl: Drizzle in some dairy-free chocolate fudge during churning for a decadent swirl. Each scoop will surprise you with luscious chocolatey goodness!
  • Minty Fresh: Incorporate a few drops of peppermint extract to mix in a refreshing zing. The combination with chocolate cookies tastes like a thin mint, perfect for the mint lovers!
  • Berry Surprise: Toss in a cup of crushed raspberries or blueberries for a fruity twist. This fresh addition brightens the flavor profile and adds pleasing textures.
  • Coconut Chunks: Fold in shredded coconut for a tropical flair that complements the coconut milk base. This also adds delightful chewiness to every spoonful.
  • Brownie Bits: Swap in brownie pieces instead of cookies for a fudgy twist that pairs harmoniously with the creamy ice cream. Every bite will be a chocolate lover’s dream!
  • Spicy Kick: Sprinkle in a pinch of cayenne pepper or chili powder for a spicy surprise. The heat contrasts beautifully with the sweetness for an adventurous flavor experience.

Feeling creative? Explore these variations and don’t hesitate to customize your ice cream creation, just like I do when whipping up a batch of Chocolate Chip Cookie or indulging in a delicious Chicken Fettuccine Alfredo for dinner!

Expert Tips for Vegan Cookie Monster Ice Cream

  • Chill Your Bowl: Ensure your ice cream maker bowl is thoroughly frozen for at least 24 hours for the best texture; this prevents icy lumps from forming.
  • Adjust Consistency: If using a no-churn method, remember that the texture will vary from traditional ice cream. Blend thoroughly for a smoother result.
  • Mix-In Choices: Double-check that all cookie mix-ins are gluten-free if you’re preparing a gluten-free version of Vegan Cookie Monster Ice Cream.
  • Storage Matters: Store your ice cream in an airtight container and try to consume it within two weeks for optimal freshness and taste.
  • Let It Sit: Before serving, always allow the ice cream to soften at room temperature for 5-10 minutes. This makes scooping easier and more enjoyable!

Make Ahead Options

These Vegan Cookie Monster Ice Cream preparations are perfect for busy home cooks looking to save time without sacrificing flavor! You can blend the ice cream base and store it in the refrigerator for up to 24 hours; just make sure to keep it sealed to maintain freshness. You can also chop the Oreo and chocolate chip cookies in advance and store them in an airtight container for up to 3 days. When you’re ready to serve, simply pour the blended mixture into the pre-frozen ice cream maker bowl, churn as instructed, and mix in your cookies during the last few minutes. This way, each scoop remains just as delicious and creamy on busy weeknights!

What to Serve With Vegan Cookie Monster Ice Cream

There’s nothing quite like the joy of creating a delightful spread to accompany your homemade Vegan Cookie Monster Ice Cream, enhancing every delicious scoop.

  • Fresh Berries: Strawberries or blueberries add a refreshing contrast to the sweet ice cream, balancing flavors perfectly.
  • Coconut Macaroons: These chewy, tropical treats offer a delightful crunchy texture that pairs beautifully with the creamy ice cream.
  • Chocolate Sauce: A drizzle of dairy-free chocolate sauce ramps up the indulgence, adding rich flavor without compromising on vegan principles.
  • Waffle Cones: Crunchy and light, waffle cones serve as the perfect vessel for your colorful ice cream, elevating the experience with each bite.
  • Fruit Salad: A bright and zesty fruit salad provides a refreshing balance, lightening the richness of the ice cream with its natural sweetness.
  • Caramelized Bananas: Warm, caramelized bananas bring a breathtaking contrast to the cold ice cream, creating a sensational, mouthwatering dessert.
  • Mint Leaves: Garnish with fresh mint for a pop of color and a refreshing herbal note that complements the sweetness of the ice cream.
  • Vegan Chocolate Cake: For an indulgent affair, pair with a slice of moist vegan chocolate cake—chocolate lovers will swoon over this dream combination!

Vegan Cookie Monster Ice Cream Recipe FAQs

What type of coconut milk should I use for the ice cream?
Absolutely! I recommend using full-fat coconut milk for the creamiest texture. If you prefer a lighter version, you can use light coconut milk, but it may slightly change the consistency. Always check the can for any stabilizers or additives that could affect the flavor.

How should I store the Vegan Cookie Monster Ice Cream?
To keep your ice cream fresh, store it in an airtight container in the freezer. It’s best consumed within two weeks to enjoy its optimal flavor and texture. Make sure to smooth the surface to minimize air exposure, which can lead to freezer burn.

Can I freeze this ice cream for longer than two weeks?
While you can technically keep it frozen for up to three months, the texture and flavor may decline significantly. If you notice any large ice crystals forming, that’s a sign it’s time to enjoy your creation rather than prolong storage!

What can I do if my ice cream becomes too hard in the freezer?
No worries! If your Vegan Cookie Monster Ice Cream is too hard to scoop after being stored, simply let it sit at room temperature for about 5-10 minutes to soften. If it’s still too icy, you can microwave it in 10-second intervals to gently soften the edges without melting it completely.

Can I make this ice cream gluten-free?
Very much so! You can easily make your Vegan Cookie Monster Ice Cream gluten-free by using gluten-free Oreo cookies and any preferred gluten-free chocolate chip cookies. Always double-check the labels to ensure they meet your dietary needs.

What’s the best way to incorporate cookie mix-ins without them sinking?
Great question! To prevent your cookie chunks from sinking during the churning process, add them during the last minute or two of churning. This allows them to be evenly distributed throughout the ice cream without settling at the bottom. Enjoy experimenting with your favorite cookies!

Vegan Cookie Monster Ice Cream

Vegan Cookie Monster Ice Cream: Creamy, Colorful Fun Awaits

Vegan Cookie Monster Ice Cream is a delicious, dairy-free treat loaded with Oreo and chocolate chip cookie chunks.
Prep Time 10 minutes
Cook Time 30 minutes
Freezing Time 4 hours
Total Time 4 hours 40 minutes
Servings: 6 scoops
Course: Dessert
Cuisine: Vegan
Calories: 250

Ingredients
  

For the Base
  • 2 cups Coconut Milk Opt for almond milk for a lighter treat.
  • 3/4 cup Granulated Sugar Consider coconut sugar for a lower glycemic alternative.
  • 2 teaspoons Vanilla Extract Choose pure vanilla extract for the best results.
  • 1 tablespoon Blue Spirulina Powder Try butterfly pea powder for a unique color twist.
  • 1/4 teaspoon Salt Balances the sweetness beautifully.
For the Mix-Ins
  • 1 cup Oreo Cookies Gluten-free Oreos can be used.
  • 1 cup Chocolate Chip Cookies Feel free to swap for any favorite cookie.

Equipment

  • Ice Cream Maker
  • High-Speed Blender

Method
 

Step-by-Step Instructions
  1. Prep Ice Cream Maker: Freeze the ice cream maker bowl for at least 24 hours.
  2. Blend Ingredients: Combine coconut milk, sugar, vanilla, spirulina, and salt. Blend until smooth.
  3. Churn the Mixture: Pour blend into the ice cream maker and churn per manufacturer’s instructions, adding mix-ins in the last 2 minutes.
  4. Freeze for Firmness: Transfer to container and freeze for at least 4 hours.
  5. Serve with Ease: Let it sit for 5-10 minutes before serving.

Nutrition

Serving: 1scoopCalories: 250kcalCarbohydrates: 30gProtein: 2gFat: 12gSaturated Fat: 10gPolyunsaturated Fat: 0.5gMonounsaturated Fat: 0.5gSodium: 100mgPotassium: 250mgFiber: 2gSugar: 20gCalcium: 20mgIron: 1mg

Notes

This recipe is perfect for summer and can be customized with different cookie flavors.

Tried this recipe?

Let us know how it was!

Butternut Squash Quiche: Your New Favorite Cozy Brunch Treat

Amid the hustle and bustle of daily life, finding time to whip up a homemade meal can sometimes feel like a mini crisis. But what if I told you that a comforting dish like Butternut Squash Quiche could not only save the day but also become a delightful centerpiece at your next brunch or dinner gathering? This cozy, vegetarian-friendly quiche effortlessly combines roasted butternut squash, sharp cheddar cheese, and fragrant herbs in a flaky crust, creating a dish that pleases both the palate and the eye. With quick prep time and the ability to impress family and friends alike, it’s a surefire way to bring warmth to your table. Ready to tickle your taste buds and fill your home with delightful aromas? Let’s dive into making this creamy quiche!

Why is Butternut Squash Quiche a Must-Try?

Comforting Taste: This Butternut Squash Quiche brings a deliciously creamy texture that feel like a warm hug on a plate, perfect for cozy gatherings.
Vibrant Ingredients: Featuring roasted butternut squash and sharp cheddar, it combines sweetness and savory notes in every bite.
Versatile Dish: Whether for brunch or a light dinner, this quiche is easily adaptable; try it with sautéed spinach or different cheeses for a unique twist!
Quick Prep Time: With a simple recipe, this dish can come together in no time at all, making it a great choice for busy days.
Crowd-Pleasing Appeal: Not only is it vegetarian-friendly, but it also visually captivates, making it ideal for impressing guests. Embrace homemade goodness with this delightful Brunch Quiche!

Butternut Squash Quiche Ingredients

For the Crust

  • Pie Crust – Store-bought frozen crust is convenient; making it from scratch can add a personal touch.

For the Filling

  • Butternut Squash – Choose firm squash with smooth skin; roasting enhances sweetness.
  • Eggs – Use fresh eggs for best results, adding richness and binding the filling together.
  • Heavy Cream – Adds luxurious creaminess; can be substituted with milk or plant-based alternatives for lighter versions.
  • Cheddar Cheese – Sharp cheddar is preferred for bold flavor; try feta or goat cheese for a unique twist.
  • Onion – Sweet onions caramelize beautifully when sautéed, adding depth to the quiche.
  • Fresh Thyme – This herb elevates the flavor profile and pairs especially well with butternut squash.
  • Salt and Pepper – Essential seasonings to enhance all flavors in the Butternut Squash Quiche.

For Sautéing

  • Butter – Needed to sauté the onions; feel free to use olive oil for a healthier option.

Embrace the joy of cooking this delightful quiche and savor every delicious bite!

Step‑by‑Step Instructions for Butternut Squash Quiche

Step 1: Preheat and Prepare the Squash
Begin by preheating your oven to 400°F (200°C). Carefully cut the butternut squash in half and scoop out the seeds. This step will ensure that your squash is ready for roasting, enhancing its natural sweetness and flavor for the Butternut Squash Quiche.

Step 2: Roast the Squash
Brush the cut sides of the butternut squash with a drizzle of olive oil and sprinkle with salt. Place the squash cut-side down on a baking sheet. Roast in the preheated oven for 30-40 minutes, until the flesh is tender and can be easily pierced with a fork, signaling that it’s ready to create the creamy filling.

Step 3: Sauté Onions and Thyme
While the squash roasts, heat a pan over medium heat and add butter. Once melted, add diced onions and fresh thyme, stirring occasionally. Sauté for about 5-7 minutes until the onions are soft and translucent, allowing their sweetness to infuse and enhance the flavor of your Butternut Squash Quiche.

Step 4: Whisk the Custard
In a mixing bowl, vigorously whisk together fresh eggs, heavy cream, salt, and pepper until all ingredients are well combined. This custard mixture will create the rich, creamy filling of your quiche. Set it aside as you finalize the preparation of your roasted squash.

Step 5: Blend the Squash
After the squash is roasted and cool enough to handle, scoop out the flesh into a blender or food processor. Blend until smooth while adding half of the sharp cheddar cheese. Aim for a mixture that retains a slight texture, ready to marry well with the custard in the Butternut Squash Quiche.

Step 6: Assemble the Quiche
Spread the sautéed onion and thyme mixture evenly in the pie crust. Then, pour the blended squash mixture over the onions, ensuring an even distribution. Finish by sprinkling the remaining cheddar cheese on top. This layering creates a delightful medley of flavors in your quiche.

Step 7: Bake the Quiche
Lower the oven temperature to 350°F (175°C) and place the assembled quiche in the oven. Bake for 35-40 minutes, or until the filling is set and the top is golden brown. The aroma of the Butternut Squash Quiche will fill your kitchen, leading you to a delicious final step.

Step 8: Cool and Serve
Once baked, remove the quiche from the oven and allow it to cool for about 10 minutes before slicing. This will help the filling to set further. Serve warm, perhaps alongside a mixed green salad, and enjoy a lovely brunch or dinner featuring this comforting dish!

Butternut Squash Quiche Variations & Substitutions

Feel free to let your creativity shine by customizing your Butternut Squash Quiche with these delightful variations!

  • Sweet Potato: Swap butternut squash for sweet potatoes for a similarly sweet flavor with a bit more earthiness.
  • Dairy-Free: Use coconut milk or almond milk instead of heavy cream to enjoy a lighter, dairy-free version that still maintains creamy goodness.
  • Cheese Variety: Experiment with different cheeses like feta or goat cheese for a tangy twist that complements the squash beautifully. The richness of goat cheese can add a surprisingly delightful flavor!
  • Heat Level: For those who enjoy a kick, add finely chopped jalapeños or a sprinkle of red pepper flakes to the onion sauté for a subtle heat that sparks the senses.
  • Leafy Greens: Boost the nutritional value by mixing in sautéed spinach or kale; they create a wonderful contrast of textures and flavors within your quiche.
  • Herb Infusion: Exchange fresh thyme for rosemary or even sage. Each herb brings its own unique bouquet and complements the butternut squash in different, tantalizing ways.
  • Crust Alternative: For a gluten-free option, try using a crust made from almond flour or a chickpea flour crust. This adds a nutty flavor and keeps it light!
  • Make it Mini: Consider making mini quiches in muffin tins for perfect individual servings that are great for gatherings or meal prep.

Don’t forget, these tasty variations mean you can enjoy a different Butternut Squash Quiche each time! Each twist enhances the classic experience and allows for exciting flavor adventures. Plus, if you want a heartier option, why not pair your quiche with a side of mixed green salad? Enjoy!

Expert Tips for Butternut Squash Quiche

  • Roast Thoroughly: Ensure butternut squash is fully roasted; this enhances its sweetness and depth of flavor in the quiche.
  • Pre-bake for Crispness: Briefly pre-baking the pie crust prevents sogginess, keeping your Butternut Squash Quiche perfectly flaky.
  • Fresh Ingredients: Always choose fresh eggs and herbs; they’ll elevate the richness and taste of your dish significantly.
  • Experiment with Cheese: While sharp cheddar is classic, don’t hesitate to experiment with feta or goat cheese for a unique flavor profile.
  • Mind the Cooling Time: Allow the quiche to cool for about 10 minutes before slicing; this helps the filling set for neater slices.

What to Serve with Butternut Squash Quiche

A beautifully crafted meal deserves the perfect companions to enhance its charm and flavor.

  • Mixed Green Salad: A light, refreshing salad with a tangy vinaigrette adds brightness and crunch, balancing the quiche’s creaminess.
  • Herb Roasted Potatoes: Crispy roasted potatoes seasoned with rosemary and thyme complement the hearty filling, offering a delightful texture contrast.
  • Sautéed Spinach: Quick, garlicky sautéed spinach brings a vibrant green touch, enhancing the dish with both nutrition and flavor elements.
  • Savory Fruit Chutney: A sweet and tangy chutney, such as apple or cranberry, provides a surprising contrast that brightens each savory bite.
  • Tomato Basil Soup: A warm, comforting soup pairs wonderfully, allowing the flavors of the quiche to shine against the backdrop of its rich, comforting broth.
  • Sparkling Cider: This bubbly beverage adds a festive flair, making your brunch or dinner gathering feel extra special while complementing the savory flavors.
  • Dark Chocolate Mousse: For dessert, a rich, velvety mousse creates a lovely finish, satisfying a sweet tooth while contrasting elegantly with the quiche’s savory notes.
  • Garlic Bread: Crusty, buttery garlic bread offers a delightful option for dipping, rounding out the meal with a satisfying crunch and familiar flavor.

How to Store and Freeze Butternut Squash Quiche

Fridge: Store leftovers in an airtight container for up to 3 days. Reheat in the oven at 350°F for about 15-20 minutes for optimal texture.

Freezer: If you wish to freeze the Butternut Squash Quiche, wrap it tightly in plastic wrap and foil. It can be frozen for up to 3 months.

Defrosting: To use frozen quiche, thaw it in the fridge overnight before reheating. This ensures even warming and maintains its creamy consistency.

Make-Ahead: You can prepare the quiche a day in advance; simply leave it unbaked in the fridge overnight, then bake the following day.

Make Ahead Options

These Butternut Squash Quiches are a fantastic solution for busy weeknights or brunch prep! You can prepare the filling—roasted squash, sautéed onions, and custard mixture—up to 24 hours in advance. Simply allow the components to cool completely, then refrigerate them in airtight containers. When you’re ready to bake, assemble the quiche by spreading the onion mixture in the crust, pouring the butternut squash filling over it, and sprinkling the cheese. Bake it fresh at 350°F (175°C) for about 35-40 minutes until golden brown, ensuring you enjoy just as delicious a quiche as if it were freshly made! This make-ahead strategy not only saves you time but also means you’ll have a warm, comforting dish ready to impress your family or guests.

Butternut Squash Quiche Recipe FAQs

What type of butternut squash should I choose?
Absolutely! When selecting butternut squash, look for ones that are firm with smooth skin. Avoid any that have dark spots or soft patches, as these may indicate overripeness. Roasting high-quality, fresh squash not only enhances its sweetness but also makes a decadent filling for your Butternut Squash Quiche!

How should I store leftover Butternut Squash Quiche?
Very! You can store leftover quiche in an airtight container in the refrigerator for up to 3 days. Just reheat it in the oven at 350°F (175°C) for about 15-20 minutes to bring back that delightful texture you love!

Can I freeze Butternut Squash Quiche?
Absolutely! To freeze your Butternut Squash Quiche, wrap it tightly with plastic wrap and then with aluminum foil to prevent freezer burn. It will keep well for up to 3 months. When ready to enjoy, simply thaw it in the refrigerator overnight before reheating softly in the oven.

What if my quiche didn’t set properly?
Oh no! If your quiche didn’t set properly, it might not have baked long enough, or there could have been too much liquid in the filling. For future reference, make sure to thoroughly whisk the eggs with the cream and avoid overloading the filling. For the next quiche, bake a few extra minutes and check for doneness—look for a firm, slightly jiggly filling that holds shape.

Can my pet have a bit of Butternut Squash Quiche?
Not really! While butternut squash is safe for pets, the other ingredients like onions, cheese, and cream may not be suitable. Onions are particularly toxic to dogs, so it’s best to keep this dish just for you and avoid any potentially harmful human foods for your furry friends!

Can I make adjustments for dietary restrictions?
Of course! This Butternut Squash Quiche is quite versatile. If you’re looking for a dairy-free option, substitute heavy cream with a plant-based milk like almond or coconut milk. You can also use a gluten-free pie crust or try a crustless version by baking the filling in a greased dish. The more the merrier when it comes to accommodating various diets!

Butternut Squash Quiche

Butternut Squash Quiche: Your New Favorite Cozy Brunch Treat

This Butternut Squash Quiche is a comforting, vegetarian-friendly dish perfect for brunch.
Prep Time 20 minutes
Cook Time 40 minutes
Cooling Time 10 minutes
Total Time 1 hour 10 minutes
Servings: 8 slices
Course: Breakfast
Cuisine: Vegetarian
Calories: 320

Ingredients
  

For the Crust
  • 1 crust Pie Crust Store-bought frozen crust
For the Filling
  • 1 medium Butternut Squash Roasted enhances sweetness
  • 3 large Eggs Use fresh for best results
  • 1 cup Heavy Cream Can be substituted with milk or plant-based alternatives
  • 1 cup Cheddar Cheese Sharp cheddar preferred
  • 1 medium Onion Sweet onions recommended
  • 2 teaspoons Fresh Thyme Pairs well with butternut squash
  • 1 teaspoon Salt
  • 1 teaspoon Pepper
For Sautéing
  • 2 tablespoons Butter Can substitute with olive oil

Equipment

  • Oven
  • Baking Sheet
  • Pan
  • Mixing Bowl
  • Blender or Food Processor

Method
 

Step-by-Step Instructions
  1. Preheat your oven to 400°F (200°C). Cut the butternut squash in half and scoop out the seeds.
  2. Brush cut sides of the butternut squash with olive oil and sprinkle with salt. Roast cut-side down for 30-40 minutes.
  3. Heat a pan over medium heat and add butter. Sauté diced onions and thyme for 5-7 minutes until translucent.
  4. Whisk together eggs, heavy cream, salt, and pepper in a mixing bowl until combined.
  5. Blend the roasted squash and half of the cheddar cheese until smooth.
  6. Spread sautéed onion and thyme in the pie crust, pour in the squash mixture, and sprinkle remaining cheddar on top.
  7. Bake at 350°F (175°C) for 35-40 minutes until filling is set and top is golden brown.
  8. Allow to cool for 10 minutes before slicing.

Nutrition

Serving: 1sliceCalories: 320kcalCarbohydrates: 25gProtein: 10gFat: 20gSaturated Fat: 10gPolyunsaturated Fat: 2gMonounsaturated Fat: 5gCholesterol: 120mgSodium: 500mgPotassium: 400mgFiber: 2gSugar: 5gVitamin A: 5000IUVitamin C: 20mgCalcium: 200mgIron: 2mg

Notes

Serve warm with a mixed green salad for a lovely brunch or dinner.

Tried this recipe?

Let us know how it was!

Grilled Lobster Tail with Honey Cajun Butter: Your Luxurious Treat

The sun dips low, casting a golden hue over the grill as you prepare for an unforgettable evening. Nothing quite compares to the exhilarating rush of grilling a flawless dish, and this Grilled Lobster Tail with Honey Cajun Butter does just that. Not only does this recipe elevate any dining experience with its rich flavors and luxurious presentation, but it also promises simple preparation, leaving you more time to savor the moment. The smoky aroma of lobster mingles with the sweet, spicy caress of honey and Cajun butter, creating a remarkable dish perfect for special occasions or a cozy dinner at home. Ready to dive into a culinary adventure that will impress anyone at your table? Let’s get to it!

Why is Grilled Lobster Tail Amazing?

Indulgence at its Finest: The Grilled Lobster Tail with Honey Cajun Butter is a sumptuous dish that elevates any gathering, making it a stunning centerpiece for special occasions.

Flavor Explosion: Its unique combination of rich butter, sweet honey, and spicy Cajun seasoning creates an unforgettable flavor harmony that delights the palate.

Simple Preparation: This recipe offers a straightforward cooking method that allows even novice cooks to master an impressive dish within minutes.

Visually Striking: Presenting beautifully grilled lobster tails garnished with lemon wedges ensures a gorgeous plate that wows dinner guests.

Versatile Pairing: Enjoy it alongside a fresh salad or grilled vegetables for a balanced meal that suits any occasion.

Dive into this flavorful adventure and impress everyone from family to friends with your culinary skills!

Grilled Lobster Tail Ingredients

For the Lobster
Lobster Tails – Fresh or live lobster tails are essential for the best seafood flavor and texture.
Salt – Enhances the natural sweetness of the lobster and balances the dish.
Pepper – Freshly ground black pepper adds a comforting warmth to the seasoning.

For the Honey Cajun Butter
Unsalted Butter – Provides a rich, creamy base for the glaze; it’s best to use unsalted for better control of flavor.
Honey – Adds a touch of sweetness that perfectly balances the spiciness of the Cajun seasoning.
Cajun Seasoning – A flavorful mix that introduces heat and depth; feel free to modify it according to your heat preference.
Garlic – Fresh minced garlic infuses the butter with a delightful aroma and richness.
Lemon Juice – Freshly squeezed lemon juice brightens up the dish and brings out the natural flavors of the lobster.

For Serving
Lemon Wedges – Fresh lemon wedges provide a tangy burst, enhancing the grilled lobster experience.
Fresh Parsley – A sprinkle of chopped parsley adds a pop of color and freshness to your presentation.

Indulge in the luxurious experience of making this Grilled Lobster Tail with Honey Cajun Butter, perfect for those special moments!

Step‑by‑Step Instructions for Grilled Lobster Tail with Honey Cajun Butter

Step 1: Prepare the Grill
Begin by preheating your grill to medium-high heat, around 350°F to 400°F (175°C to 200°C). Clean the grill grates thoroughly to remove any previous residue and oil them lightly to prevent the lobster tails from sticking. This preparation is key to achieving those beautiful grill marks and ensuring an even cook on your grilled lobster tails.

Step 2: Make the Honey Cajun Butter
In a mixing bowl, combine 1/2 cup of melted unsalted butter, 2 tablespoons of honey, 1 tablespoon of Cajun seasoning, 2 minced garlic cloves, and the juice of one fresh lemon. Whisk the mixture until well combined, allowing the flavors to meld beautifully together. This honey Cajun butter will be brushed onto the lobster tails, providing a sweet and spicy glaze.

Step 3: Prep the Lobster Tails
Using kitchen shears, carefully cut the top shell of each lobster tail lengthwise, stopping just before the tail fin to maintain the shell’s integrity. Gently pry open the shell to expose the lobster meat, ensuring you keep it intact for easy seasoning and grilling. This technique allows the honey Cajun butter to penetrate the meat and enhances the presentation for your grilled lobster tails.

Step 4: Season Lobster Tails
Use a brush to generously coat the exposed lobster meat with the honey Cajun butter mixture. Make sure to cover it evenly for a delightful burst of flavor in every bite. Don’t forget to sprinkle a pinch of salt and freshly ground black pepper over the lobsters to further enhance their natural sweetness and elevate your grilled lobster tail with honey Cajun butter experience.

Step 5: Grill the Lobster
Place the lobster tails meat-side down on the preheated grill, ensuring they have enough space to cook evenly. Grill them for 5 to 6 minutes, watching for the meat to become opaque and slightly charred. Flip the tails over, brush them with additional honey Cajun butter, and grill for another 4 to 5 minutes, until the meat is firm and fully cooked.

Step 6: Serve
Once the lobster tails are perfectly grilled, carefully remove them from the grill using tongs. Serve immediately on a platter with fresh lemon wedges for squeezing over the meat, enhancing the flavors beautifully. Optionally, garnish with chopped parsley for a pop of color, completing your stunning presentation of grilled lobster tails with honey Cajun butter that will impress anyone at your table.

Grilled Lobster Tail with Honey Cajun Butter Variations

Feel free to elevate your grilled lobster experience with these delightful twists that embrace your tastes and preferences!

  • Spice Variation: Swap Cajun seasoning for Old Bay for a more classic seafood flavor. This will give your lobster a comforting, unique taste that’s perfect for seafood lovers.

  • Citrus Burst: Add Orange Zest to the honey Cajun butter to introduce a fresh and zesty twist. This brightens the dish even further, making it a refreshing summer treat.

  • Heat Level Adjustments: For those who enjoy a bit more kick, incorporate ** cayenne pepper** into the Cajun butter. The extra heat heightens the flavor while complementing the sweetness of honey beautifully.

  • Herbaceous Delight: Mix in fresh herbs like thyme or rosemary into the butter for an aromatic addition. These herbs provide a lovely layer of complexity, making your lobster dish more sophisticated.

  • Tropical Twist: Drizzle mango puree over the grilled lobster for a tropical flair. The sweetness of mango pairs perfectly with the rich seafood, creating a refreshing, exotic experience.

  • Garlic Lovers: Use roasted garlic instead of fresh for a deeper, sweeter flavor. Roast the garlic ahead of time, mix it in, and experience an added layer of richness in every bite.

  • Nutty Flavor: Blend toasted pecans into the butter for a delightful crunch. The nutty texture enlivens your dish and adds a delightful surprise with each mouthful.

  • Bold Asian Influence: Mix in soy sauce and a touch of ginger to the honey Cajun butter for a fusion twist. This combination offers an unexpected, savory contrast to the sweetness of the honey.

Why not accompany your amusing culinary endeavors with a side of grilled vegetables, like grilled honey-glazed carrots, for a delightful balance? With these variations, you can easily transform your Grilled Lobster Tail with Honey Cajun Butter into a dish that suits your style!

What to Serve with Grilled Lobster Tail with Honey Cajun Butter

The anticipation of a delightful meal is heightened when you can complement the rich, buttery lobster with perfect pairings.

  • Crispy Garlic Bread: A crunchy, garlicky delight that soaks up any extra butter, enhancing every succulent bite of lobster.
  • Fresh Garden Salad: Light and refreshing, a salad with mixed greens, citrus segments, and a light vinaigrette balances the richness of the dish beautifully.
  • Grilled Asparagus: Slightly charred asparagus adds a touch of earthy flavor and a satisfying crunch; it’s a perfect companion for the luxurious lobster.
  • Lemon Rice Pilaf: Fluffy rice infused with refreshing lemon zest provides a bright and mild backdrop, allowing the lobster to shine.
  • Roasted Potatoes: Crispy on the outside and tender inside, these potatoes bring a satisfying heartiness that pairs excellently with rich seafood.
  • Sparkling White Wine: A chilled glass of quality sparkling wine elevates the dining experience, offering refreshing acidity that cuts through the buttery lobster.
  • Chocolate Fondue: End the meal on a sweet note with warm chocolate fondue and fresh fruits, allowing for a decadent finish after the savory lobster.

Make Ahead Options

These Grilled Lobster Tail with Honey Cajun Butter are a fantastic choice for meal prep, allowing you to save precious time on busy weeknights! You can prepare the honey Cajun butter (mixing together the melted butter, honey, Cajun seasoning, minced garlic, and lemon juice) up to 3 days in advance and store it in an airtight container in the refrigerator. Additionally, feel free to season the lobster tails by cutting the shells and brushing them with the butter mixture up to 24 hours ahead; this will enhance their flavor while keeping them fresh. When it’s time to serve, simply grill the lobster tails as directed until cooked through, and you’ll enjoy a luxurious meal with minimal effort!

Expert Tips for Grilled Lobster Tail

  • Freshness Matters: Always opt for fresh or live lobster tails to enhance the flavor and texture of your Grilled Lobster Tail with Honey Cajun Butter. Frozen can work in a pinch but may lack the same quality.

  • Careful Cooking: Overcooking is a common mistake; aim for a firm, opaque color. Use a meat thermometer to ensure the internal temperature reaches 145°F (63°C) for perfect doneness.

  • Butter Application: Brush the honey Cajun butter generously on both sides of the lobster. This not only adds flavor but also helps prevent drying out during grilling.

  • Watch the Temperature: Maintain a steady medium-high heat. Too hot, and you risk burning; too cool, and the lobster will not cook properly.

  • Squeeze for Flavor: Serve with fresh lemon wedges! A squeeze of lemon over the lobster tail enhances its natural sweetness and adds a refreshing zing.

Storage Tips for Grilled Lobster Tail with Honey Cajun Butter

Fridge: Store leftover grilled lobster tail in an airtight container in the refrigerator for up to 2 days to maintain freshness and flavor.

Freezer: For longer storage, you can freeze cooked lobster tails; wrap them tightly in plastic wrap, then place in a freezer bag for up to 3 months.

Reheating: Reheat gently in the microwave or a skillet over low heat to prevent drying out, making sure not to exceed 145°F (63°C).

Avoiding Quality Loss: To retain its rich flavor, avoid refreezing once thawed. The Grilled Lobster Tail with Honey Cajun Butter is best enjoyed freshly cooked!

Grilled Lobster Tail with Honey Cajun Butter Recipe FAQs

How do I choose fresh lobster tails?
Absolutely! When selecting lobster tails, look for those that feel firm to the touch and have a glossy shell. Avoid any with dark spots or a strong fishy smell. Fresh or live lobster tails will provide the best flavor and texture, while frozen should be as recent as possible.

What is the best way to store leftover grilled lobster tails?
After enjoying your delicious Grilled Lobster Tail with Honey Cajun Butter, allow any leftovers to cool to room temperature, then transfer them to an airtight container. Properly stored, they will last in the refrigerator for up to 2 days. If you’d like to keep them longer, consider freezing them.

Can I freeze grilled lobster tails?
Of course! To freeze your grilled lobster tails, wrap them tightly in plastic wrap and place them into a freezer bag. Ensure to squeeze out any excess air to prevent freezer burn. You can store them this way for up to 3 months. When you’re ready to enjoy them again, thaw them in the refrigerator overnight, and then reheat gently to preserve their delectable flavor.

What should I do if my lobster tails are overcooked?
No worries! If your lobster turns out overcooked and tough, adding a bit of moisture can help. Consider making a simple garlic butter sauce or a creamy dipping sauce that you can drizzle over the lobster to add some richness and disguise any dryness.

Are there any dietary considerations I should be aware of?
Very! If you’re serving guests, it’s essential to ask about allergies, especially since lobster is a common allergen. Additionally, ensure the Cajun seasoning does not contain any ingredients that may affect those with dietary restrictions, such as gluten or MSG.

Can I use frozen lobster tails for this recipe?
Certainly! While fresh lobster tails are preferred for optimal taste, if you only have frozen tails on hand, just ensure to thaw them properly before grilling. Place them in the refrigerator overnight or seal them in a waterproof bag and submerge in cold water for about 30 minutes.

Grilled Lobster Tail with Honey Cajun Butter

Grilled Lobster Tail with Honey Cajun Butter: Your Luxurious Treat

Experience luxurious flavors with Grilled Lobster Tail with Honey Cajun Butter, a simple yet elegant dish perfect for special occasions.
Prep Time 15 minutes
Cook Time 15 minutes
Total Time 30 minutes
Servings: 2 servings
Course: Dinner
Cuisine: Seafood
Calories: 320

Ingredients
  

For the Lobster
  • 2 pieces Lobster Tails Fresh or live for best flavor
  • 1 teaspoon Salt
  • 1 teaspoon Pepper Freshly ground
For the Honey Cajun Butter
  • 1/2 cup Unsalted Butter Melted
  • 2 tablespoons Honey
  • 1 tablespoon Cajun Seasoning
  • 2 cloves Garlic Minced
  • 1 tablespoon Lemon Juice Freshly squeezed
For Serving
  • 2 pieces Lemon Wedges
  • 2 tablespoons Fresh Parsley Chopped

Equipment

  • Grill
  • Mixing Bowl
  • Kitchen Shears
  • Brush

Method
 

Step-by-Step Instructions
  1. Prepare the grill by preheating it to medium-high heat (350°F to 400°F). Clean and oil the grill grates.
  2. In a bowl, mix melted butter, honey, Cajun seasoning, minced garlic, and lemon juice until well combined.
  3. Cut the top shell of each lobster tail lengthwise and gently pry open the shell to expose the meat.
  4. Brush the lobster meat generously with the honey Cajun butter, then sprinkle with salt and pepper.
  5. Grill lobster tails meat-side down for 5-6 minutes until opaque, then flip and grill for another 4-5 minutes.
  6. Remove from grill and serve immediately with lemon wedges and garnish with parsley if desired.

Nutrition

Serving: 1servingCalories: 320kcalCarbohydrates: 4gProtein: 28gFat: 22gSaturated Fat: 10gPolyunsaturated Fat: 1gMonounsaturated Fat: 9gCholesterol: 120mgSodium: 800mgPotassium: 600mgSugar: 3gVitamin A: 800IUVitamin C: 10mgCalcium: 50mgIron: 1mg

Notes

Fresh lobster tails provide the best flavor and texture. Avoid overcooking for optimal results.

Tried this recipe?

Let us know how it was!

Grilled Lobster Tail with Honey Cajun Butter: Your Luxurious Treat

The sun dips low, casting a golden hue over the grill as you prepare for an unforgettable evening. Nothing quite compares to the exhilarating rush of grilling a flawless dish, and this Grilled Lobster Tail with Honey Cajun Butter does just that. Not only does this recipe elevate any dining experience with its rich flavors and luxurious presentation, but it also promises simple preparation, leaving you more time to savor the moment. The smoky aroma of lobster mingles with the sweet, spicy caress of honey and Cajun butter, creating a remarkable dish perfect for special occasions or a cozy dinner at home. Ready to dive into a culinary adventure that will impress anyone at your table? Let’s get to it!

Why is Grilled Lobster Tail Amazing?

Indulgence at its Finest: The Grilled Lobster Tail with Honey Cajun Butter is a sumptuous dish that elevates any gathering, making it a stunning centerpiece for special occasions.

Flavor Explosion: Its unique combination of rich butter, sweet honey, and spicy Cajun seasoning creates an unforgettable flavor harmony that delights the palate.

Simple Preparation: This recipe offers a straightforward cooking method that allows even novice cooks to master an impressive dish within minutes.

Visually Striking: Presenting beautifully grilled lobster tails garnished with lemon wedges ensures a gorgeous plate that wows dinner guests.

Versatile Pairing: Enjoy it alongside a fresh salad or grilled vegetables for a balanced meal that suits any occasion.

Dive into this flavorful adventure and impress everyone from family to friends with your culinary skills!

Grilled Lobster Tail Ingredients

For the Lobster
Lobster Tails – Fresh or live lobster tails are essential for the best seafood flavor and texture.
Salt – Enhances the natural sweetness of the lobster and balances the dish.
Pepper – Freshly ground black pepper adds a comforting warmth to the seasoning.

For the Honey Cajun Butter
Unsalted Butter – Provides a rich, creamy base for the glaze; it’s best to use unsalted for better control of flavor.
Honey – Adds a touch of sweetness that perfectly balances the spiciness of the Cajun seasoning.
Cajun Seasoning – A flavorful mix that introduces heat and depth; feel free to modify it according to your heat preference.
Garlic – Fresh minced garlic infuses the butter with a delightful aroma and richness.
Lemon Juice – Freshly squeezed lemon juice brightens up the dish and brings out the natural flavors of the lobster.

For Serving
Lemon Wedges – Fresh lemon wedges provide a tangy burst, enhancing the grilled lobster experience.
Fresh Parsley – A sprinkle of chopped parsley adds a pop of color and freshness to your presentation.

Indulge in the luxurious experience of making this Grilled Lobster Tail with Honey Cajun Butter, perfect for those special moments!

Step‑by‑Step Instructions for Grilled Lobster Tail with Honey Cajun Butter

Step 1: Prepare the Grill
Begin by preheating your grill to medium-high heat, around 350°F to 400°F (175°C to 200°C). Clean the grill grates thoroughly to remove any previous residue and oil them lightly to prevent the lobster tails from sticking. This preparation is key to achieving those beautiful grill marks and ensuring an even cook on your grilled lobster tails.

Step 2: Make the Honey Cajun Butter
In a mixing bowl, combine 1/2 cup of melted unsalted butter, 2 tablespoons of honey, 1 tablespoon of Cajun seasoning, 2 minced garlic cloves, and the juice of one fresh lemon. Whisk the mixture until well combined, allowing the flavors to meld beautifully together. This honey Cajun butter will be brushed onto the lobster tails, providing a sweet and spicy glaze.

Step 3: Prep the Lobster Tails
Using kitchen shears, carefully cut the top shell of each lobster tail lengthwise, stopping just before the tail fin to maintain the shell’s integrity. Gently pry open the shell to expose the lobster meat, ensuring you keep it intact for easy seasoning and grilling. This technique allows the honey Cajun butter to penetrate the meat and enhances the presentation for your grilled lobster tails.

Step 4: Season Lobster Tails
Use a brush to generously coat the exposed lobster meat with the honey Cajun butter mixture. Make sure to cover it evenly for a delightful burst of flavor in every bite. Don’t forget to sprinkle a pinch of salt and freshly ground black pepper over the lobsters to further enhance their natural sweetness and elevate your grilled lobster tail with honey Cajun butter experience.

Step 5: Grill the Lobster
Place the lobster tails meat-side down on the preheated grill, ensuring they have enough space to cook evenly. Grill them for 5 to 6 minutes, watching for the meat to become opaque and slightly charred. Flip the tails over, brush them with additional honey Cajun butter, and grill for another 4 to 5 minutes, until the meat is firm and fully cooked.

Step 6: Serve
Once the lobster tails are perfectly grilled, carefully remove them from the grill using tongs. Serve immediately on a platter with fresh lemon wedges for squeezing over the meat, enhancing the flavors beautifully. Optionally, garnish with chopped parsley for a pop of color, completing your stunning presentation of grilled lobster tails with honey Cajun butter that will impress anyone at your table.

Make Ahead Options

These Grilled Lobster Tails with Honey Cajun Butter are perfect for meal prep enthusiasts looking to save time on busy weeknights or special occasions! You can prepare the honey Cajun butter up to 3 days in advance, storing it in an airtight container in the refrigerator. Simply combine the melted butter, honey, Cajun seasoning, garlic, and lemon juice, then refrigerate. For the lobster tails, you can cut and season them up to 24 hours before grilling; just remember to keep them covered in the fridge, which helps maintain their freshness. When ready to grill, take out the lobster tails and brush them with the prepared butter, then grill as directed for restaurant-quality results with minimal effort!

What to Serve with Grilled Lobster Tail with Honey Cajun Butter

The anticipation of a delightful meal is heightened when you can complement the rich, buttery lobster with perfect pairings.

  • Crispy Garlic Bread: A crunchy, garlicky delight that soaks up any extra butter, enhancing every succulent bite of lobster.
  • Fresh Garden Salad: Light and refreshing, a salad with mixed greens, citrus segments, and a light vinaigrette balances the richness of the dish beautifully.
  • Grilled Asparagus: Slightly charred asparagus adds a touch of earthy flavor and a satisfying crunch; it’s a perfect companion for the luxurious lobster.
  • Lemon Rice Pilaf: Fluffy rice infused with refreshing lemon zest provides a bright and mild backdrop, allowing the lobster to shine.
  • Roasted Potatoes: Crispy on the outside and tender inside, these potatoes bring a satisfying heartiness that pairs excellently with rich seafood.
  • Sparkling White Wine: A chilled glass of quality sparkling wine elevates the dining experience, offering refreshing acidity that cuts through the buttery lobster.
  • Chocolate Fondue: End the meal on a sweet note with warm chocolate fondue and fresh fruits, allowing for a decadent finish after the savory lobster.

Storage Tips for Grilled Lobster Tail with Honey Cajun Butter

Fridge: Store leftover grilled lobster tail in an airtight container in the refrigerator for up to 2 days to maintain freshness and flavor.

Freezer: For longer storage, you can freeze cooked lobster tails; wrap them tightly in plastic wrap, then place in a freezer bag for up to 3 months.

Reheating: Reheat gently in the microwave or a skillet over low heat to prevent drying out, making sure not to exceed 145°F (63°C).

Avoiding Quality Loss: To retain its rich flavor, avoid refreezing once thawed. The Grilled Lobster Tail with Honey Cajun Butter is best enjoyed freshly cooked!

Grilled Lobster Tail with Honey Cajun Butter Variations

Feel free to let your culinary creativity flow with these delightful twists and substitutions!

  • Spice Swap: Change the Cajun seasoning to lemon pepper for a zesty, refreshed flavor. This simple swap can lighten the dish while still keeping it delicious.
  • Tropical Twist: Add a splash of pineapple juice to the honey Cajun butter for a hint of sweetness. This creates an exciting tropical profile that will remind you of sunny beach days.
  • Garlic-Infused: For an extra kick, incorporate roasted garlic into the butter blend. This will give your dish a rich and mellow garlic flavor that pairs beautifully with lobster.
  • Garnish Options: Instead of parsley, try using chives or dill as a fresh garnish. Each herb brings its unique note, adding vibrant color and an aromatic finish to the dish.
  • Creamy Addition: Mix in a tablespoon of cream cheese into the butter for a richer texture and flavor. This luscious addition adds a delightful richness to the overall experience.
  • Grill the Accompaniments: Throw some grilled vegetables onto the grill alongside the lobster. Bell peppers, zucchini, and asparagus will enhance your meal with vibrant colors and flavors.
  • Heat Lovers: Add a pinch of cayenne pepper to the butter if you crave more heat. This small change can elevate the flavor profile, making it an adventure for spice enthusiasts!
  • Flavor Layering: Brush on melted herb butter before grilling. It enhances the fried flavor and adds layers of taste that will make your seafood truly unforgettable.

Consider trying these variations while serving the delectable Grilled Lobster Tail with Honey Cajun Butter alongside light salads or grilled honey glazed carrots for a refreshing balance.

Expert Tips for Grilled Lobster Tail

  • Freshness Matters: Always opt for fresh or live lobster tails to enhance the flavor and texture of your Grilled Lobster Tail with Honey Cajun Butter. Frozen can work in a pinch but may lack the same quality.

  • Careful Cooking: Overcooking is a common mistake; aim for a firm, opaque color. Use a meat thermometer to ensure the internal temperature reaches 145°F (63°C) for perfect doneness.

  • Butter Application: Brush the honey Cajun butter generously on both sides of the lobster. This not only adds flavor but also helps prevent drying out during grilling.

  • Watch the Temperature: Maintain a steady medium-high heat. Too hot, and you risk burning; too cool, and the lobster will not cook properly.

  • Squeeze for Flavor: Serve with fresh lemon wedges! A squeeze of lemon over the lobster tail enhances its natural sweetness and adds a refreshing zing.

Grilled Lobster Tail with Honey Cajun Butter Recipe FAQs

What should I look for when selecting lobster tails?
Absolutely! When choosing lobster tails, it’s important to look for ones that are fresh or live. If you opt for frozen, make sure they’re flash-frozen, which preserves flavor and texture. Avoid tails with dark spots or a dry appearance on the shell, as these can indicate spoilage.

How do I store leftover grilled lobster tails?
Very! You can store leftover grilled lobster tails in an airtight container in the refrigerator for up to 2 days. Make sure they cool completely before sealing to maintain moisture. If properly stored, they’ll still taste delicious when reheated!

Can I freeze grilled lobster tails?
Yes, you can! To freeze your grilled lobster tails, wrap them tightly in plastic wrap, followed by aluminum foil for added protection. Make sure to use them within 2 months for the best flavor and texture. When ready to eat, thaw them in the refrigerator overnight before reheating.

What’s the best way to reheat grilled lobster tails?
For the perfect reheating experience, preheat your oven to 350°F (175°C). Place the lobster tails on a baking sheet and brush them lightly with honey Cajun butter to keep them moist. Heat them for about 10-15 minutes until warmed through. Be cautious not to overcook, as this can dry out the meat.

Are there any dietary considerations for this recipe?
Definitely! This recipe contains shellfish and dairy, so if you have shellfish allergies, it’s best to avoid it. For those lactose intolerant, you can experiment with dairy-free butter alternatives, which can still offer richness to your honey Cajun butter sauce.

Why does my grilled lobster tail turn out tough?
Ah, that’s a common issue! The key is in the cooking time—lobster tails can turn rubbery if overcooked. Grill them until they reach an internal temperature of 145°F (63°C) and watch for the meat to turn opaque. If you’re using smaller tails, check for doneness a minute or two earlier to prevent overcooking.

Grilled Lobster Tail with Honey Cajun Butter

Grilled Lobster Tail with Honey Cajun Butter: Your Luxurious Treat

Indulge in the exquisite flavors of Grilled Lobster Tail with Honey Cajun Butter, a luxurious dish that promises simple preparation and an unforgettable dining experience.
Prep Time 15 minutes
Cook Time 12 minutes
Total Time 27 minutes
Servings: 2 tails
Course: Dinner
Cuisine: Seafood
Calories: 260

Ingredients
  

For the Lobster
  • 2 pieces Lobster Tails Fresh or live for best flavor
  • 1 teaspoon Salt To enhance sweetness
  • 1 teaspoon Pepper Freshly ground black
For the Honey Cajun Butter
  • 1/2 cup Unsalted Butter Melted
  • 2 tablespoons Honey For sweetness
  • 1 tablespoon Cajun Seasoning Adjust to taste
  • 2 cloves Garlic Minced
  • 1 tablespoon Lemon Juice Freshly squeezed
For Serving
  • 2 pieces Lemon Wedges For garnish
  • 2 tablespoons Fresh Parsley Chopped

Equipment

  • Grill
  • Mixing Bowl
  • Kitchen Shears
  • Basting Brush

Method
 

Step-by-Step Instructions
  1. Prepare the Grill: Preheat your grill to medium-high heat, around 350°F to 400°F. Clean and oil the grill grates.
  2. Make the Honey Cajun Butter: In a mixing bowl, combine melted butter, honey, Cajun seasoning, minced garlic, and lemon juice. Whisk until well combined.
  3. Prep the Lobster Tails: Cut the top shell lengthwise with kitchen shears, stopping before the tail fin. Open the shell to expose the meat.
  4. Season Lobster Tails: Brush the lobster meat with the honey Cajun butter mixture, then sprinkle with salt and pepper.
  5. Grill the Lobster: Grill meat-side down for 5-6 minutes. Flip, baste with butter, and grill for another 4-5 minutes until fully cooked.
  6. Serve: Remove from grill and serve with lemon wedges and parsley garnish.

Nutrition

Serving: 1tailCalories: 260kcalCarbohydrates: 2gProtein: 32gFat: 14gSaturated Fat: 8gPolyunsaturated Fat: 1gMonounsaturated Fat: 5gCholesterol: 123mgSodium: 360mgPotassium: 420mgSugar: 1gVitamin A: 600IUVitamin C: 2mgCalcium: 40mgIron: 1mg

Notes

Choose fresh or live lobster for the best flavor. Don’t overcook, and feel free to experiment with different seasonings.

Tried this recipe?

Let us know how it was!