Thai Chicken Noodle Soup: A Flavorful Delight Awaits!

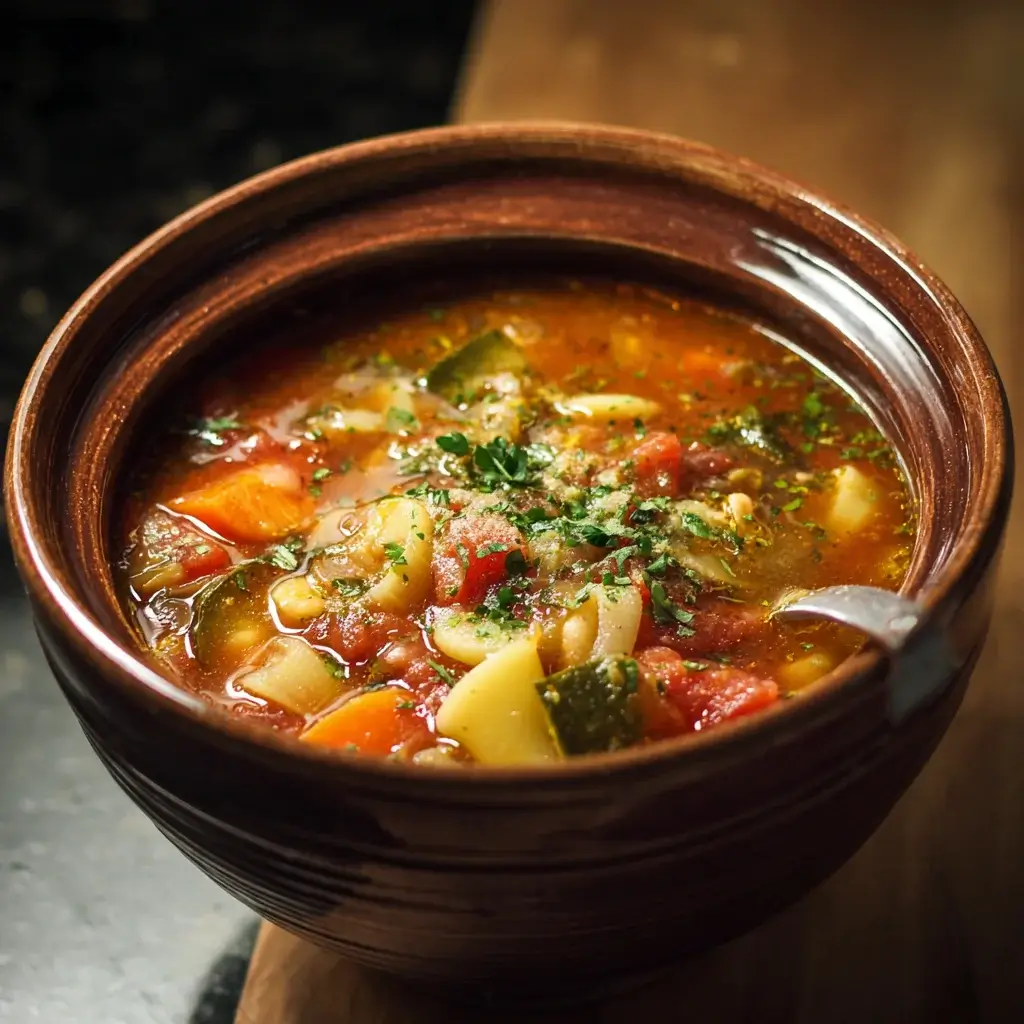
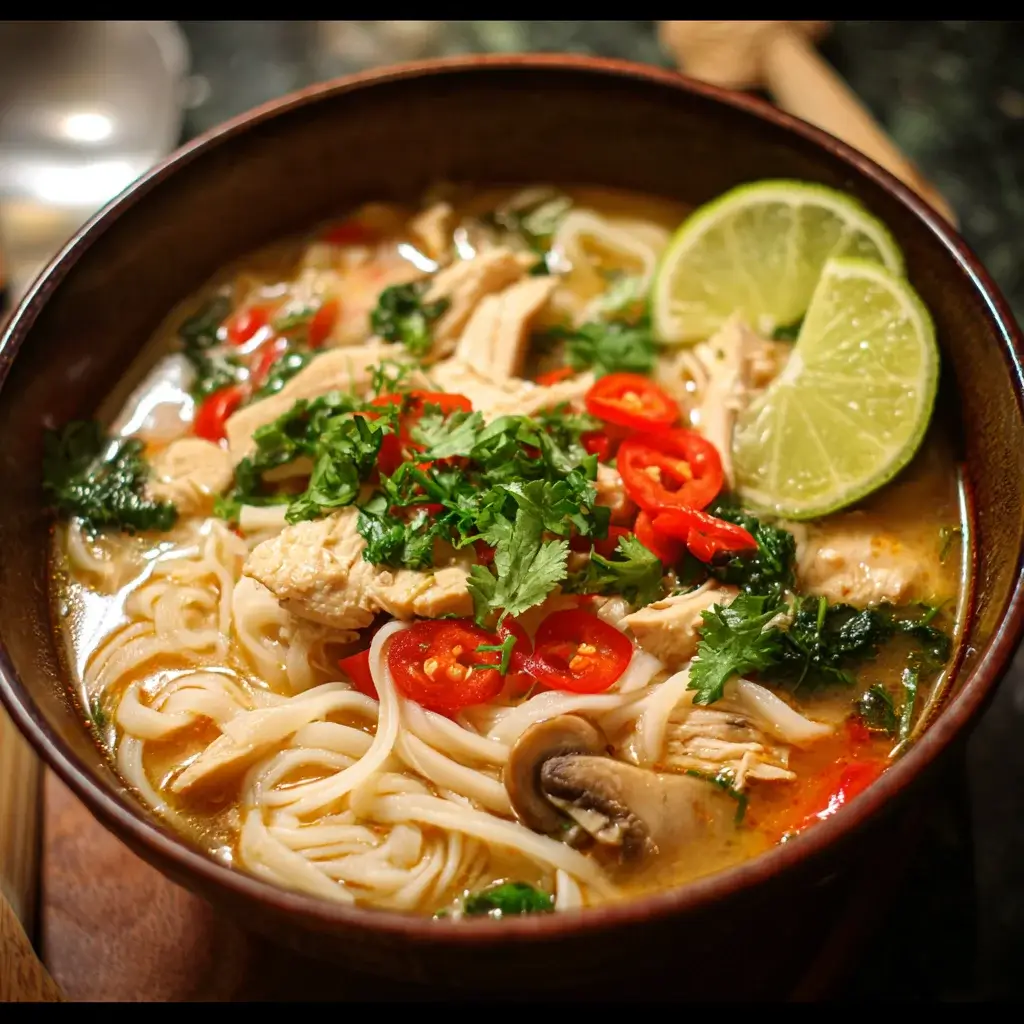
Introduction to Thai Chicken Noodle Soup

There’s something magical about a warm bowl of soup, especially when it’s a comforting Thai Chicken Noodle Soup. This dish is like a hug in a bowl, perfect for those chilly evenings or when you need a quick solution after a long day. The blend of tender chicken, fresh veggies, and creamy coconut broth creates a symphony of flavors that will impress your loved ones. Plus, it’s easy to whip up in just 30 minutes! Trust me, once you try this recipe, it’ll become a staple in your kitchen.

Why You’ll Love This Thai Chicken Noodle Soup

This Thai Chicken Noodle Soup is a game-changer for busy weeknights. It’s not just quick to make; it’s bursting with flavor that’ll make your taste buds dance. The creamy coconut broth wraps around tender chicken and vibrant veggies, creating a dish that’s both satisfying and nourishing. Plus, it’s gluten-free, making it a great option for everyone at the table. You’ll find yourself reaching for this recipe time and again!

Ingredients for Thai Chicken Noodle Soup

Gathering the right ingredients is key to making a delicious Thai Chicken Noodle Soup. Here’s what you’ll need:

  • Chicken broth: This forms the base of your soup, providing a rich, savory flavor.
  • Coconut milk: Adds creaminess and a hint of sweetness, balancing the spices beautifully.
  • Red curry paste: A blend of spices that brings warmth and depth to the dish. Adjust the amount based on your heat preference.
  • Fish sauce: A staple in Thai cooking, it adds umami and saltiness. If you’re vegetarian, consider using soy sauce instead.
  • Lime juice: Freshens up the soup with a zesty kick, enhancing all the flavors.
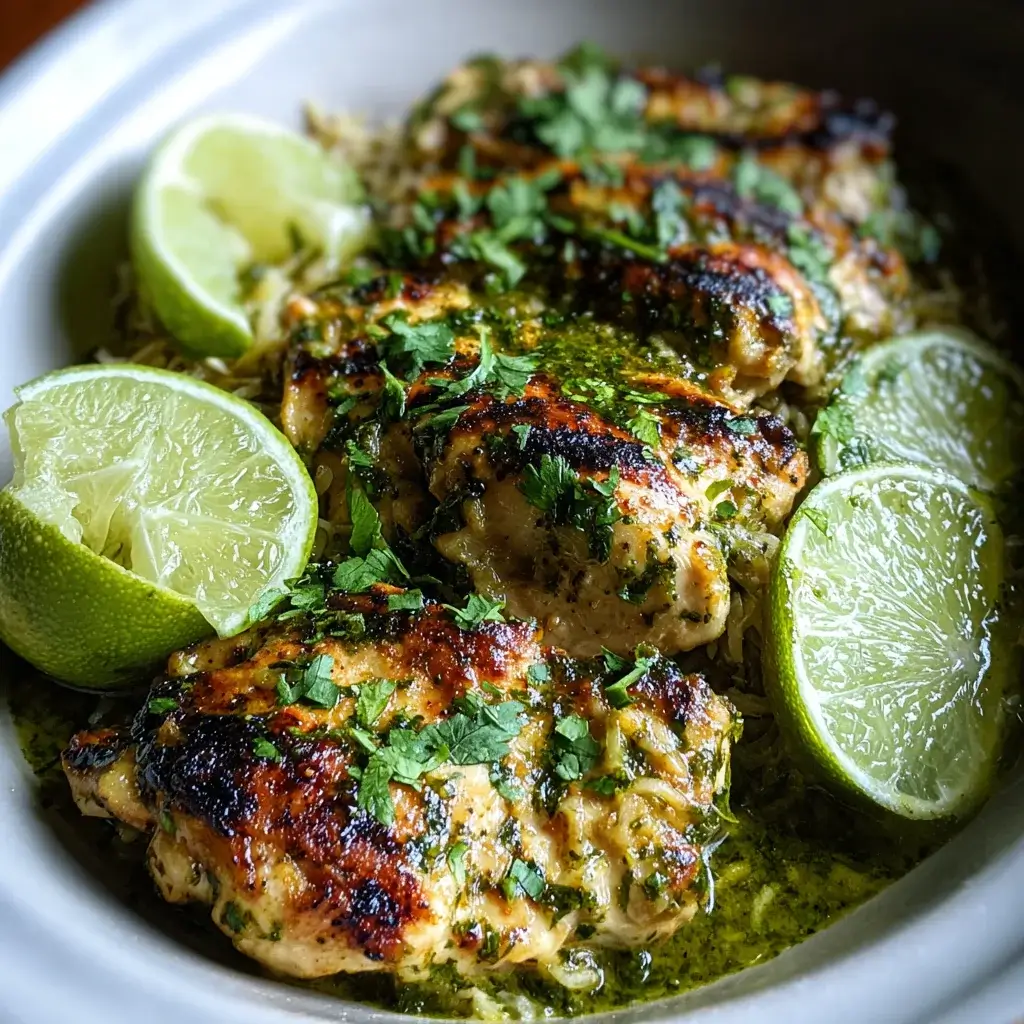
  • Cooked chicken: Shredded chicken adds protein and heartiness. You can use rotisserie chicken for convenience.
  • Rice noodles: These are the perfect vehicle for the soup, soaking up all the delicious broth.
  • Bell peppers: Sliced for crunch and color, they add a sweet note to the mix.
  • Carrots: Julienned for a touch of sweetness and vibrant color.
  • Snap peas: These add a fresh, crisp texture that contrasts nicely with the soft noodles.
  • Green onions: Sliced for garnish, they provide a mild onion flavor and a pop of color.
  • Fresh cilantro: A must for garnish, it adds a burst of freshness. If you’re not a fan, parsley works too.
  • Lime wedges: Serve on the side for an extra squeeze of citrus when you dig in.

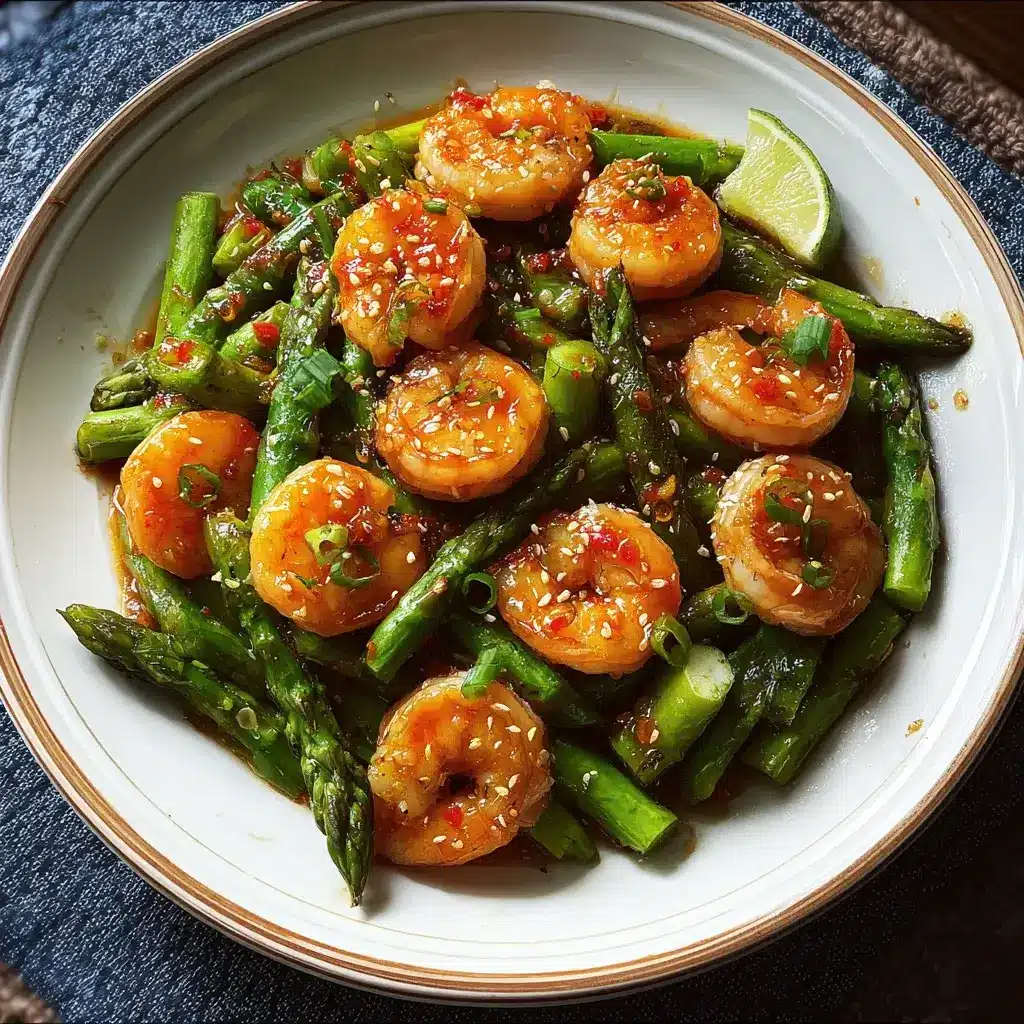
For those who like a bit of heat, consider adding sliced jalapeños or a dash of sriracha when serving. You can also substitute shrimp or tofu for the chicken if you’re looking for a different protein option. Exact quantities for each ingredient can be found at the bottom of the article, ready for printing!

How to Make Thai Chicken Noodle Soup

Making Thai Chicken Noodle Soup is a breeze! Follow these simple steps, and you’ll have a delicious meal ready in no time. Let’s dive in!

Step 1: Prepare the Broth

Start by grabbing a large pot. Pour in the chicken broth and coconut milk, then add the red curry paste, fish sauce, and lime juice. Stir everything together until the curry paste is fully dissolved. Bring this mixture to a gentle simmer over medium heat. The aroma will start to fill your kitchen, and trust me, it’s heavenly!

Step 2: Add the Chicken and Vegetables

Once your broth is simmering, it’s time to add the shredded chicken, bell peppers, carrots, and snap peas. Stir them in and let everything cook for about 5-7 minutes. You want the veggies to be tender but still vibrant. This is where the magic happens, as the flavors meld together beautifully.

Step 3: Cook the Noodles

While the soup is bubbling away, prepare the rice noodles according to the package instructions. Usually, this means boiling them for just a few minutes. Once they’re cooked, drain them and set aside. Don’t forget to taste a noodle or two; they should be soft yet slightly chewy!

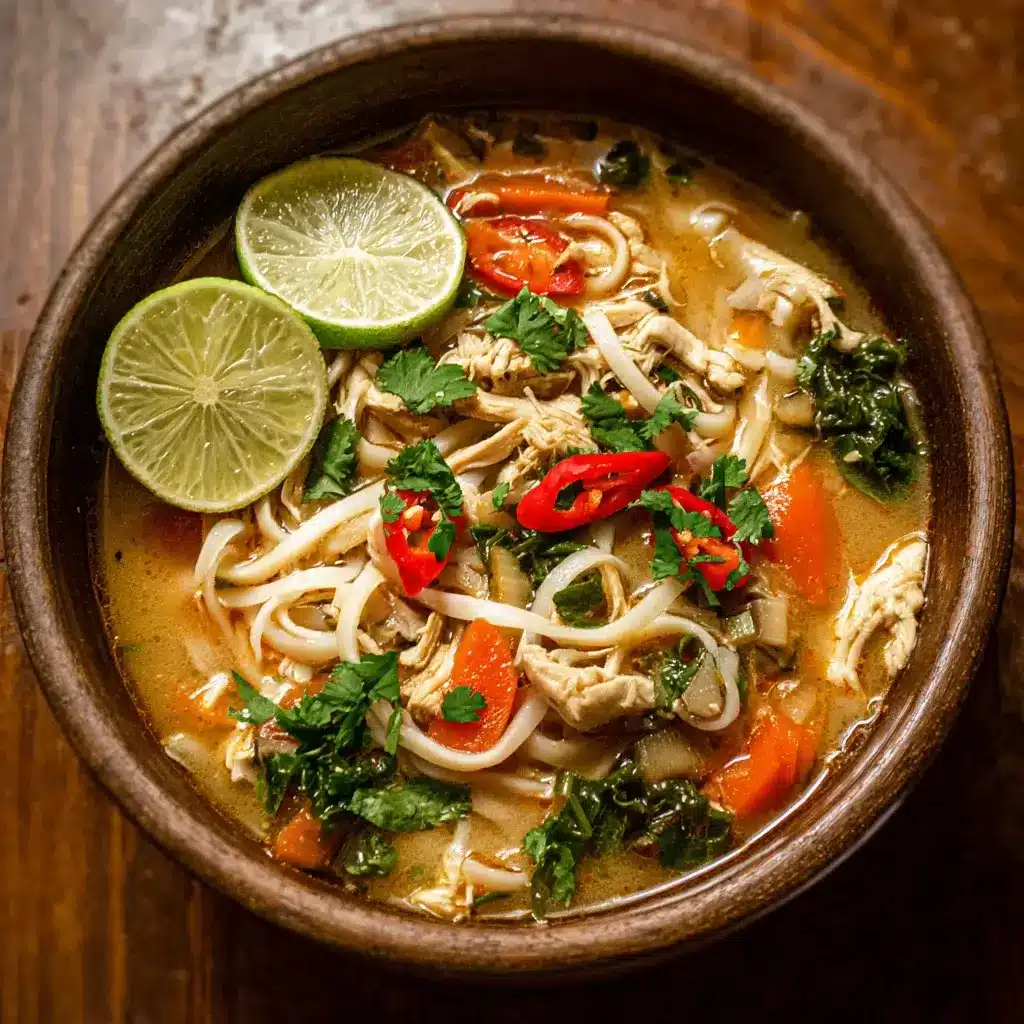
Step 4: Combine and Serve

Now, it’s time to bring it all together! Add the cooked rice noodles to the pot and stir gently to combine everything. Serve the soup hot, garnished with sliced green onions, fresh cilantro, and lime wedges on the side. Each bowl is a burst of flavor, and you’ll be amazed at how quickly it disappears!

Tips for Success

  • Prep your ingredients before starting to cook. It makes the process smoother and more enjoyable.
  • Adjust the spice level by adding more or less red curry paste to suit your taste.
  • For a creamier soup, use full-fat coconut milk.
  • Don’t overcook the vegetables; they should be tender yet crisp.
  • Garnish generously with cilantro and lime for a fresh finish.

Equipment Needed

  • Large pot: Essential for simmering the soup. A Dutch oven works great too.
  • Cutting board: For chopping veggies and prepping ingredients.
  • Sharp knife: A must for easy slicing and dicing.
  • Measuring cups and spoons: To ensure accurate ingredient amounts.
  • Colander: For draining the rice noodles after cooking.

Variations

  • Vegetarian Option: Swap the chicken for tofu or chickpeas, and use vegetable broth instead of chicken broth for a hearty vegetarian version.
  • Seafood Twist: Replace chicken with shrimp or fish for a delightful seafood Thai Chicken Noodle Soup.
  • Spicy Kick: Add sliced jalapeños or a spoonful of sriracha for an extra layer of heat that’ll wake up your taste buds.
  • Herb Infusion: Experiment with different herbs like basil or mint for a fresh twist on the traditional flavors.
  • Low-Carb Version: Substitute rice noodles with zucchini noodles or shirataki noodles for a low-carb alternative.

Serving Suggestions

  • Side Salad: Pair your soup with a light Thai cucumber salad for a refreshing contrast.
  • Beverage: Enjoy with a cold Thai iced tea or a crisp lager to complement the flavors.
  • Presentation: Serve in vibrant bowls and sprinkle extra cilantro on top for a pop of color.

FAQs about Thai Chicken Noodle Soup

Can I make Thai Chicken Noodle Soup ahead of time?

Absolutely! You can prepare the soup in advance and store it in the fridge for up to three days. Just keep the noodles separate until you’re ready to serve to prevent them from getting mushy.

What can I substitute for chicken in this recipe?

If you’re looking for alternatives, shrimp or tofu work wonderfully in this Thai Chicken Noodle Soup. Both options will absorb the flavors of the broth beautifully.

Is this soup gluten-free?

Yes! This Thai Chicken Noodle Soup is gluten-free, especially if you use rice noodles. Just double-check the labels on your broth and fish sauce to ensure they meet your dietary needs.

How can I make this soup spicier?

For those who love a kick, add more red curry paste or toss in some sliced jalapeños. A dash of sriracha when serving can also elevate the heat level!

Can I freeze Thai Chicken Noodle Soup?

While you can freeze the broth and chicken, it’s best to freeze them separately from the noodles. When you’re ready to enjoy, just reheat and add freshly cooked noodles for the best texture.

Final Thoughts

Cooking Thai Chicken Noodle Soup is more than just preparing a meal; it’s about creating a moment of joy. The vibrant colors, enticing aromas, and comforting flavors come together to make each bowl a delightful experience. Whether you’re sharing it with family or enjoying a quiet night in, this soup warms the heart and satisfies the soul. Plus, it’s a fantastic way to impress your friends with your culinary skills. So, roll up your sleeves, gather your ingredients, and let this recipe bring a little taste of Thailand into your kitchen. You won’t regret it!

Ranis

Thai Chicken Noodle Soup: A Flavorful Delight Awaits!

A flavorful and comforting Thai Chicken Noodle Soup that combines tender chicken, fresh vegetables, and aromatic spices in a creamy coconut broth.
Prep Time 15 minutes
Cook Time 15 minutes
Total Time 30 minutes
Servings: 4 servings
Course: Soup
Cuisine: Thai
Calories: 350

Ingredients
  

  • 3 cups chicken broth
  • 1 cup coconut milk
  • 1 tablespoon red curry paste
  • 1 tablespoon fish sauce
  • 1 tablespoon lime juice
  • 2 cups cooked chicken shredded
  • 8 ounces rice noodles
  • 1 cup bell peppers sliced
  • 1 cup carrots julienned
  • 1 cup snap peas
  • 2 green onions sliced
  • Fresh cilantro for garnish
  • Lime wedges for serving

Method
 

  1. In a large pot, combine the chicken broth, coconut milk, red curry paste, fish sauce, and lime juice. Bring to a simmer over medium heat.
  2. Add the shredded chicken, bell peppers, carrots, and snap peas to the pot. Cook for about 5-7 minutes, until the vegetables are tender.
  3. Meanwhile, prepare the rice noodles according to package instructions. Drain and set aside.
  4. Once the vegetables are cooked, add the cooked rice noodles to the soup and stir gently to combine.
  5. Serve hot, garnished with sliced green onions, fresh cilantro, and lime wedges on the side.

Nutrition

Serving: 1bowlCalories: 350kcalCarbohydrates: 30gProtein: 25gFat: 15gSaturated Fat: 10gPolyunsaturated Fat: 5gCholesterol: 70mgSodium: 800mgFiber: 2gSugar: 5g

Notes

  • For added heat, include sliced jalapeños or a dash of sriracha when serving.
  • Substitute shrimp or tofu for the chicken for a different protein option.

Tried this recipe?

Let us know how it was!

Blended Overnight Oats with Berries: A Tasty Boost!

Introduction to Blended Overnight Oats with Berries

Every morning feels like a race against the clock, doesn’t it? Between getting ready for work and making sure the kids are fed, breakfast often takes a backseat. That’s where Blended Overnight Oats with Berries come in—a delicious and nutritious breakfast option that’s as easy as it is satisfying. Imagine waking up to a creamy, berry-packed delight waiting for you in the fridge. This recipe is perfect for busy days or when you want to impress your loved ones with minimal effort. Trust me, once you try it, you’ll wonder how you ever lived without it!

Why You’ll Love This Blended Overnight Oats with Berries

Let’s face it—mornings can be chaotic. That’s why these Blended Overnight Oats with Berries are a game changer. They’re quick to prepare, taking just 10 minutes of your time. Plus, they’re packed with nutrients to fuel your day. The creamy texture and burst of berry flavor make each bite a delight. You’ll love how easy it is to customize them, ensuring breakfast never gets boring!

Ingredients for Blended Overnight Oats with Berries

Gathering the right ingredients is the first step to creating your Blended Overnight Oats with Berries. Here’s what you’ll need:

  • Rolled oats: The base of your dish, providing fiber and a hearty texture.
  • Milk: Choose dairy or non-dairy options like almond or oat milk for creaminess.
  • Greek yogurt: Adds protein and a tangy flavor, making your oats extra creamy.
  • Honey or maple syrup: A touch of sweetness to balance the tartness of the berries.
  • Vanilla extract: Enhances the overall flavor, giving a warm, inviting aroma.
  • Mixed berries: Fresh or frozen, they bring vibrant color and antioxidants to your breakfast.
  • Salt: Just a pinch to elevate all the flavors in your dish.
  • Optional toppings: Get creative! Sliced bananas, nuts, seeds, or extra berries can add texture and flavor.

For exact measurements, check the bottom of the article where you can find everything listed for easy printing. Feel free to swap out ingredients based on your preferences or what you have on hand. The beauty of this recipe lies in its flexibility!

How to Make Blended Overnight Oats with Berries

Step 1: Blend the Ingredients

Start by gathering all your ingredients. In a blender, combine the rolled oats, milk, Greek yogurt, honey or maple syrup, vanilla extract, mixed berries, and a pinch of salt. Blend everything together until the mixture is smooth and creamy. This step is where the magic happens! The oats will break down, and the berries will create a beautiful, vibrant color. You’ll be left with a luscious blend that’s ready to be transformed into breakfast.

Step 2: Prepare for Refrigeration

Once your mixture is blended to perfection, it’s time to pour it into jars or containers. Make sure to leave some space at the top of each jar. This allows for expansion as the oats soak up the liquid. It’s a simple step, but it’s crucial for achieving that perfect texture!

Step 3: Refrigerate Overnight

Seal the jars tightly and place them in the refrigerator. Let them chill for at least 4 hours, but overnight is best. This soaking time allows the oats to soften and absorb all those delicious flavors. You’ll wake up to a ready-made breakfast that’s both nutritious and satisfying.

Step 4: Serve and Enjoy

In the morning, give your oats a good stir. If you prefer a thinner consistency, add a splash of milk to loosen it up. Now comes the fun part—topping! Add sliced bananas, a sprinkle of nuts, seeds, or even more berries for an extra burst of flavor. Each bite will be a delightful mix of creamy oats and fruity goodness, making your breakfast a true treat!

Tips for Success

  • Use rolled oats for the best texture; quick oats can become mushy.
  • Experiment with different milk types to find your favorite flavor.
  • For a thicker consistency, reduce the amount of milk slightly.
  • Make a double batch to enjoy throughout the week—just grab and go!
  • Don’t skip the soaking time; it’s key for creamy oats.

Equipment Needed

  • Blender: A high-speed blender works best, but a regular one will do.
  • Jars or containers: Use mason jars or any airtight containers for easy storage.
  • Measuring cups: Essential for accurate ingredient portions.
  • Spoon: For stirring and serving your delicious oats.

Variations

  • Chocolate Delight: Add 2 tablespoons of cocoa powder to the blender for a rich, chocolatey twist.
  • Nutty Banana: Mix in sliced bananas and a tablespoon of almond butter for a creamy, nutty flavor.
  • Peachy Keen: Swap out mixed berries for fresh peaches or nectarines for a summery vibe.
  • Spiced Apple: Add diced apples and a sprinkle of cinnamon for a warm, comforting breakfast.
  • Protein Boost: Stir in a scoop of your favorite protein powder for an extra kick of nutrition.

Serving Suggestions

  • Pair your Blended Overnight Oats with Berries with a side of crispy bacon or turkey sausage for a savory contrast.
  • Enjoy with a refreshing glass of orange juice or a smoothie for a complete breakfast experience.
  • For a beautiful presentation, layer the oats in a clear glass, showcasing the vibrant colors of the berries.

FAQs about Blended Overnight Oats with Berries

Can I use instant oats instead of rolled oats?

While you can use instant oats, I recommend sticking with rolled oats for the best texture. Instant oats can become mushy and lose that delightful chewiness.

How long do blended overnight oats last in the fridge?

Your Blended Overnight Oats with Berries will stay fresh for up to 5 days in the fridge. Just make sure to keep them sealed in airtight containers!

Can I make these oats vegan?

Absolutely! Simply swap the Greek yogurt for a plant-based yogurt and use non-dairy milk. You’ll still enjoy a creamy and delicious breakfast.

What can I add for extra protein?

For a protein boost, consider adding a scoop of protein powder or some nut butter. Both options blend well and enhance the flavor of your oats.

Can I freeze blended overnight oats?

Yes, you can freeze them! Just make sure to leave some space in the container for expansion. Thaw them overnight in the fridge before enjoying.

Final Thoughts

There’s something truly special about starting your day with Blended Overnight Oats with Berries. It’s not just a meal; it’s a moment of joy wrapped in convenience. The creamy texture and vibrant flavors make breakfast feel like a treat, even on the busiest mornings. Plus, knowing you’ve prepared something nutritious in advance gives you a sense of accomplishment. Whether you’re fueling up for a hectic day or enjoying a leisurely weekend brunch, these oats are sure to bring a smile to your face. Give them a try, and let the deliciousness elevate your mornings!

Ranis

Blended Overnight Oats with Berries: A Tasty Boost!

A delicious and nutritious breakfast option made with blended oats and mixed berries, perfect for a quick and healthy start to your day.
Prep Time 10 minutes
Total Time 4 hours 10 minutes
Servings: 4 servings
Course: Breakfast
Cuisine: American
Calories: 320

Ingredients
  

  • 2 cups rolled oats
  • 2 cups milk dairy or non-dairy
  • 1 cup Greek yogurt plain or flavored
  • 1 tablespoon honey or maple syrup
  • 1 teaspoon vanilla extract
  • 1 cup mixed berries fresh or frozen
  • 1/4 teaspoon salt
  • Optional toppings: sliced bananas nuts, seeds, or additional berries

Method
 

  1. In a blender, combine the rolled oats, milk, Greek yogurt, honey or maple syrup, vanilla extract, mixed berries, and salt. Blend until smooth and creamy.
  2. Pour the blended mixture into individual jars or containers, leaving some space at the top for expansion.
  3. Seal the jars or containers and refrigerate overnight, or for at least 4 hours, to allow the oats to soak and soften.
  4. In the morning, stir the oats and add a splash of milk if a thinner consistency is desired.
  5. Top with your choice of sliced bananas, nuts, seeds, or additional berries before serving.

Nutrition

Serving: 1servingCalories: 320kcalCarbohydrates: 40gProtein: 12gFat: 8gSaturated Fat: 2gPolyunsaturated Fat: 6gCholesterol: 10mgSodium: 150mgFiber: 5gSugar: 10g

Notes

  • For a chocolate twist, add 2 tablespoons of cocoa powder to the blender before mixing.
  • Substitute the mixed berries with your favorite fruits, such as peaches or apples, for a different flavor profile.

Tried this recipe?

Let us know how it was!

Crispy Spanish Air Fryer Chicken: Cook It Perfectly!

Introduction to Crispy Spanish Air Fryer Chicken

There’s something magical about the aroma of spices wafting through the kitchen, isn’t there? When I first discovered the joy of making Crispy Spanish Air Fryer Chicken, it felt like a culinary revelation. This dish is not just a meal; it’s a quick solution for those busy weeknights when you want something flavorful without spending hours in the kitchen. With just a handful of ingredients and the help of an air fryer, you can impress your loved ones with a crispy, golden delight that’s bursting with Spanish flair. Let’s dive into this delicious adventure!

Why You’ll Love This Crispy Spanish Air Fryer Chicken

This Crispy Spanish Air Fryer Chicken is a game-changer for anyone who craves flavor without the fuss. It’s incredibly easy to whip up, making it perfect for busy weeknights or last-minute gatherings. The air fryer ensures that the chicken comes out perfectly crispy on the outside while remaining juicy inside. Plus, the vibrant spices transport your taste buds straight to Spain, making every bite a delightful experience!

Ingredients for Crispy Spanish Air Fryer Chicken

Gathering the right ingredients is the first step to culinary success. For this Crispy Spanish Air Fryer Chicken, you’ll need:

  • Bone-in, skin-on chicken thighs: These are perfect for achieving that crispy skin while keeping the meat juicy and flavorful.
  • Smoked paprika: This spice adds a rich, smoky flavor that’s essential for that Spanish flair.
  • Garlic powder: A must-have for depth and aroma, it enhances the overall taste of the chicken.
  • Onion powder: This brings a subtle sweetness and savory note to the spice mix.
  • Dried oregano: A classic herb in Spanish cuisine, it adds a fresh, earthy flavor.
  • Salt: Essential for seasoning, it helps to bring out the flavors of the other ingredients.
  • Black pepper: A dash of this adds a bit of heat and complexity.
  • Cayenne pepper (optional): If you like a kick, this spice will elevate the heat level.
  • Olive oil: This not only helps the spices stick but also contributes to that crispy texture.
  • Lemon: Fresh lemon wedges are perfect for squeezing over the chicken, adding brightness and acidity.

For those looking to mix things up, consider marinating the chicken in the spice mixture for extra flavor. You can also substitute chicken breasts for a leaner option or toss in your favorite vegetables in the air fryer for a complete meal. Exact quantities for each ingredient can be found at the bottom of the article, ready for printing!

How to Make Crispy Spanish Air Fryer Chicken

Now that you have your ingredients ready, let’s get cooking! Making Crispy Spanish Air Fryer Chicken is straightforward and fun. Follow these simple steps to achieve that perfect crunch and flavor.

Step 1: Preheat the Air Fryer

First things first, preheat your air fryer to 400°F. This step is crucial for even cooking and achieving that golden, crispy skin. Think of it as warming up your car before a long drive; it just makes everything run smoother!

Step 2: Prepare the Spice Mixture

In a large bowl, combine the smoked paprika, garlic powder, onion powder, dried oregano, salt, black pepper, and cayenne pepper if you’re feeling adventurous. Mix them well! This spice blend is the heart of your air fryer chicken, infusing it with rich flavors that will transport you straight to Spain.

Step 3: Coat the Chicken

Now, add the chicken thighs to the bowl and drizzle them with olive oil. Toss everything together until the chicken is evenly coated with the spice mixture. This step not only adds flavor but also helps achieve that crispy texture we all crave. Don’t be shy; get your hands in there!

Step 4: Arrange in the Air Fryer

Carefully place the chicken thighs in the air fryer basket, skin side up. Make sure they’re in a single layer to allow for optimal cooking. If they’re too crowded, they won’t crisp up as nicely. Think of it as giving each piece its own space to shine!

Step 5: Cook the Chicken

Cook the chicken for 25-30 minutes, flipping them halfway through. This ensures even cooking and that delightful crunch on both sides. To check for doneness, use a meat thermometer; the internal temperature should reach 165°F. Trust me, you want to avoid undercooked chicken!

Step 6: Serve with Lemon

Once your chicken is perfectly cooked, it’s time to serve! Plate the crispy thighs and add lemon wedges on the side. Squeezing fresh lemon juice over the chicken adds a burst of brightness that complements the spices beautifully. Enjoy every bite of this delicious dish!

Tips for Success

  • Marinate the chicken for at least 30 minutes to enhance flavor.
  • Use a meat thermometer to ensure perfect doneness.
  • Don’t overcrowd the air fryer; give each piece room to crisp up.
  • Experiment with different spices for a unique twist.
  • Let the chicken rest for a few minutes before serving for juiciness.

Equipment Needed

  • Air Fryer: The star of the show! Any model will do, but a basket-style fryer works best for even cooking.
  • Mixing Bowl: A large bowl for combining your spices and chicken.
  • Meat Thermometer: Essential for checking doneness; a simple instant-read thermometer will suffice.
  • Tongs: Perfect for flipping the chicken without losing that crispy skin.

Variations

  • Herb-Infused Chicken: Add fresh herbs like rosemary or thyme to the spice mix for an aromatic twist.
  • Spicy Kick: Increase the cayenne pepper or add a dash of hot sauce to the olive oil for extra heat.
  • Vegetable Medley: Toss in bell peppers, zucchini, or onions in the air fryer for a colorful and nutritious side.
  • Gluten-Free Option: This recipe is naturally gluten-free, making it perfect for those with dietary restrictions.
  • Marinated Delight: Try marinating the chicken in yogurt and spices overnight for a tender, flavorful result.

Serving Suggestions

  • Pair with Rice: Serve the chicken over a bed of fluffy Spanish rice for a hearty meal.
  • Fresh Salad: A crisp green salad with a light vinaigrette complements the richness of the chicken.
  • Wine Selection: Enjoy with a chilled glass of white wine or a light red for a delightful pairing.
  • Presentation: Garnish with fresh parsley or cilantro for a pop of color and freshness.

FAQs about Crispy Spanish Air Fryer Chicken

Can I use chicken breasts instead of thighs? Absolutely! While I love the juiciness of bone-in, skin-on thighs, chicken breasts can be a leaner option. Just keep an eye on the cooking time, as they may cook faster.

How do I know when the chicken is done? The best way to check is by using a meat thermometer. The internal temperature should reach 165°F for perfectly cooked chicken. This ensures it’s safe to eat while still juicy!

Can I make this recipe ahead of time? Yes! You can marinate the chicken in the spice mixture a day in advance. Just store it in the refrigerator until you’re ready to cook. This will enhance the flavors even more!

What can I serve with Crispy Spanish Air Fryer Chicken? This dish pairs wonderfully with a fresh salad, Spanish rice, or roasted vegetables. You can also enjoy it with a side of crusty bread to soak up any juices.

Is this recipe gluten-free? Yes! The Crispy Spanish Air Fryer Chicken is naturally gluten-free, making it a great choice for those with gluten sensitivities. Enjoy without worry!

Final Thoughts

Cooking Crispy Spanish Air Fryer Chicken is more than just preparing a meal; it’s about creating moments. The sizzle of the chicken, the vibrant colors of the spices, and the aroma filling your kitchen all come together to make cooking a joyful experience. Whether you’re impressing friends or enjoying a cozy dinner at home, this dish brings a taste of Spain right to your table. Plus, the ease of the air fryer means you can savor delicious flavors without the hassle. So, roll up your sleeves and dive into this culinary adventure—you won’t regret it!

Ranis

Crispy Spanish Air Fryer Chicken: Cook It Perfectly!

A delicious and crispy Spanish-style chicken made in an air fryer, perfect for a quick and flavorful meal.
Prep Time 10 minutes
Cook Time 30 minutes
Total Time 40 minutes
Servings: 4 servings
Course: Main Course
Cuisine: Spanish
Calories: 360

Ingredients
  

  • 2 pounds bone-in skin-on chicken thighs
  • 2 teaspoons smoked paprika
  • 1 teaspoon garlic powder
  • 1 teaspoon onion powder
  • 1 teaspoon dried oregano
  • 1 teaspoon salt
  • 1/2 teaspoon black pepper
  • 1/4 teaspoon cayenne pepper optional for heat
  • 2 tablespoons olive oil
  • 1 lemon cut into wedges

Method
 

  1. Preheat the air fryer to 400°F.
  2. In a large bowl, combine smoked paprika, garlic powder, onion powder, dried oregano, salt, black pepper, and cayenne pepper.
  3. Add the chicken thighs to the bowl and drizzle with olive oil. Toss until the chicken is evenly coated with the spice mixture.
  4. Place the chicken thighs in the air fryer basket in a single layer, skin side up.
  5. Cook for 25-30 minutes, flipping halfway through, until the chicken is golden brown and reaches an internal temperature of 165°F.
  6. Serve with lemon wedges for squeezing over the chicken.

Nutrition

Serving: 1chicken thighCalories: 360kcalProtein: 28gFat: 27gSaturated Fat: 7gPolyunsaturated Fat: 20gCholesterol: 120mgSodium: 800mg

Notes

  • For extra flavor, marinate the chicken in the spice mixture for at least 30 minutes or overnight in the refrigerator.
  • Try substituting chicken breasts for a leaner option or add your favorite vegetables to the air fryer for a complete meal.

Tried this recipe?

Let us know how it was!

Sweet Chili Shrimp and Asparagus Stir-Fry for Dinner Delight

Introduction to Sweet Chili Shrimp and Asparagus Stir-Fry

After a long day, the last thing I want is to spend hours in the kitchen. That’s where my Sweet Chili Shrimp and Asparagus Stir-Fry comes in. It’s a delightful dish that’s not only quick to whip up but also bursting with flavor. Picture succulent shrimp mingling with crisp asparagus and vibrant bell peppers, all coated in a sweet and savory sauce. This recipe is perfect for impressing your loved ones or simply treating yourself to a satisfying meal. Trust me, it’s a dinner delight that will have everyone asking for seconds!

Why You’ll Love This Sweet Chili Shrimp and Asparagus Stir-Fry

This Sweet Chili Shrimp and Asparagus Stir-Fry is a game-changer for busy weeknights. It’s quick, taking just 25 minutes from start to finish, and it’s packed with flavor that will make your taste buds dance. The combination of tender shrimp and crisp veggies creates a satisfying meal that feels gourmet without the fuss. Plus, it’s a healthy option that doesn’t skimp on taste, making it a win-win for everyone!

Ingredients for Sweet Chili Shrimp and Asparagus Stir-Fry

Gathering the right ingredients is key to making this Sweet Chili Shrimp and Asparagus Stir-Fry a success. Here’s what you’ll need:

  • Shrimp: Large, peeled, and deveined shrimp are the star of this dish, providing a juicy and tender protein.
  • Olive Oil: A tablespoon of olive oil helps to sauté the shrimp and vegetables, adding a rich flavor.
  • Asparagus: Fresh asparagus, trimmed and cut into bite-sized pieces, brings a delightful crunch and vibrant color.
  • Red Bell Pepper: Sliced red bell pepper adds sweetness and a pop of color, enhancing the dish’s visual appeal.
  • Garlic: Minced garlic infuses the stir-fry with a robust aroma and depth of flavor.
  • Ginger: Freshly grated ginger adds a zesty kick that complements the sweetness of the chili sauce.
  • Sweet Chili Sauce: This sauce is the secret weapon, providing a perfect balance of sweetness and heat.
  • Soy Sauce: A splash of soy sauce adds umami and saltiness, enhancing the overall flavor profile.
  • Rice Vinegar: A touch of rice vinegar brightens the dish, cutting through the richness of the shrimp.
  • Sesame Oil: Just a hint of sesame oil adds a nutty aroma that elevates the dish.
  • Salt and Pepper: Simple seasonings to taste, ensuring everything is perfectly balanced.
  • Cooked Rice or Quinoa: Serve your stir-fry over rice or quinoa for a hearty base that soaks up the delicious sauce.

For those looking to add a little crunch, consider tossing in some chopped cashews or peanuts before serving. If shrimp isn’t your thing, feel free to substitute with chicken or tofu for a different protein option. You can find the exact quantities for each ingredient at the bottom of the article, ready for printing!

How to Make Sweet Chili Shrimp and Asparagus Stir-Fry

Creating this Sweet Chili Shrimp and Asparagus Stir-Fry is a breeze! Follow these simple steps, and you’ll have a delicious meal ready in no time.

Step 1: Prepare the Shrimp

Start by heating a tablespoon of olive oil in a large skillet or wok over medium-high heat. Once the oil is shimmering, add the shrimp. Cook them for about 2-3 minutes, just until they turn a lovely pink color. This is crucial—overcooking shrimp can make them rubbery and tough. So, keep an eye on them!

Step 2: Stir-Fry the Vegetables

Next, toss in the asparagus and sliced red bell pepper. Stir-fry these vibrant veggies for about 4-5 minutes. You want them to be tender-crisp, maintaining that delightful crunch. This texture not only adds to the dish’s appeal but also keeps the nutrients intact. Trust me, your taste buds will thank you!

Step 3: Add Aromatics

Now, it’s time to amp up the flavor! Add the minced garlic and freshly grated ginger to the skillet. Stir them in for about 30 seconds until they become fragrant. The aroma will fill your kitchen, making it hard to resist sneaking a taste. These aromatics are the secret to elevating your stir-fry!

Step 4: Combine and Cook

Return the cooked shrimp to the skillet, and pour in the sweet chili sauce, soy sauce, rice vinegar, and sesame oil. Stir everything together, ensuring the shrimp and veggies are well coated in that luscious sauce. Cook for an additional 2-3 minutes until everything is heated through. Season with salt and pepper to taste, and you’re almost there!

Step 5: Serve

Finally, serve your stir-fry over a bed of cooked rice or quinoa. This will soak up all the delicious sauce. For an extra crunch, consider topping it with some chopped cashews or peanuts. Enjoy your Sweet Chili Shrimp and Asparagus Stir-Fry—it’s a meal that’s sure to impress!

Tips for Success

  • Prep all ingredients before cooking to streamline the process.
  • Use a high heat to achieve that perfect stir-fry sear.
  • Don’t overcrowd the pan; cook in batches if necessary.
  • Adjust the sweetness of the sauce to your taste by adding more or less sweet chili sauce.
  • Experiment with different vegetables for variety and nutrition.

Equipment Needed

  • Large Skillet or Wok: Essential for stir-frying; a non-stick pan works too.
  • Spatula or Wooden Spoon: For stirring and flipping ingredients.
  • Measuring Cups and Spoons: Handy for precise ingredient measurements.
  • Cutting Board and Knife: For prepping your veggies and shrimp.

Variations

  • Protein Swap: Substitute shrimp with chicken, beef, or tofu for a different protein experience.
  • Vegetable Medley: Add broccoli, snap peas, or carrots for extra color and nutrition.
  • Spicy Kick: Incorporate sliced jalapeños or a dash of sriracha for those who love heat.
  • Gluten-Free Option: Use tamari instead of soy sauce to keep it gluten-free.
  • Low-Carb Version: Serve over cauliflower rice instead of traditional rice or quinoa.

Serving Suggestions

  • Pair your Sweet Chili Shrimp and Asparagus Stir-Fry with a side of steamed jasmine rice or fluffy quinoa for a hearty meal.
  • Consider a light cucumber salad dressed with rice vinegar for a refreshing contrast.
  • For drinks, a chilled Asian lager or a crisp white wine complements the flavors beautifully.
  • Garnish with sesame seeds and fresh cilantro for an appealing presentation.

FAQs about Sweet Chili Shrimp and Asparagus Stir-Fry

Can I use frozen shrimp for this recipe?

Absolutely! Just make sure to thaw the shrimp completely before cooking. Frozen shrimp can be a convenient option, and they’ll still turn out delicious in your Sweet Chili Shrimp and Asparagus Stir-Fry.

What can I substitute for asparagus?

If asparagus isn’t your favorite, feel free to swap it out for broccoli, snap peas, or even bell peppers. Each vegetable brings its own unique flavor and texture to the dish, keeping your stir-fry exciting!

How can I make this dish spicier?

For those who crave a little heat, add sliced jalapeños or a splash of sriracha to the stir-fry. This will elevate the flavor profile and give your Sweet Chili Shrimp and Asparagus Stir-Fry a fiery kick!

Can I make this dish ahead of time?

While stir-fries are best enjoyed fresh, you can prep the ingredients in advance. Chop the veggies and marinate the shrimp, then cook everything just before serving for the best taste and texture.

Is this stir-fry suitable for meal prep?

Definitely! This Sweet Chili Shrimp and Asparagus Stir-Fry stores well in the fridge for a couple of days. Just reheat it gently on the stove or in the microwave, and you’ll have a quick meal ready to go!

Final Thoughts

Cooking this Sweet Chili Shrimp and Asparagus Stir-Fry is more than just preparing a meal; it’s about creating a moment of joy in your kitchen. The vibrant colors, enticing aromas, and delightful flavors come together to make dinner feel special, even on the busiest nights. Each bite is a reminder that good food doesn’t have to be complicated. Whether you’re sharing it with family or enjoying it solo, this dish brings a sense of satisfaction and warmth. So, roll up your sleeves, embrace the process, and let this stir-fry become a staple in your culinary repertoire!

Ranis

Sweet Chili Shrimp and Asparagus Stir-Fry for Dinner Delight

A delicious and quick Sweet Chili Shrimp and Asparagus Stir-Fry that combines succulent shrimp with fresh asparagus and vibrant bell peppers, all tossed in a sweet and savory sauce.
Prep Time 10 minutes
Cook Time 15 minutes
Total Time 25 minutes
Servings: 4 servings
Course: Dinner
Cuisine: Asian
Calories: 280

Ingredients
  

  • 1 pound large shrimp peeled and deveined
  • 1 tablespoon olive oil
  • 1 pound asparagus trimmed and cut into 2-inch pieces
  • 1 red bell pepper sliced
  • 3 cloves garlic minced
  • 1 teaspoon fresh ginger grated
  • 1/4 cup sweet chili sauce
  • 2 tablespoons soy sauce
  • 1 tablespoon rice vinegar
  • 1 teaspoon sesame oil
  • Salt and pepper to taste
  • Cooked rice or quinoa for serving

Method
 

  1. In a large skillet or wok, heat the olive oil over medium-high heat. Add the shrimp and cook for 2-3 minutes until they turn pink. Remove the shrimp from the skillet and set aside.
  2. In the same skillet, add the asparagus and red bell pepper. Stir-fry for about 4-5 minutes until the vegetables are tender-crisp.
  3. Add the minced garlic and grated ginger to the skillet, stirring for about 30 seconds until fragrant.
  4. Return the shrimp to the skillet and pour in the sweet chili sauce, soy sauce, rice vinegar, and sesame oil. Stir well to combine and cook for an additional 2-3 minutes until everything is heated through. Season with salt and pepper to taste.
  5. Serve the stir-fry over cooked rice or quinoa.

Nutrition

Serving: 1servingCalories: 280kcalCarbohydrates: 20gProtein: 25gFat: 10gSaturated Fat: 1gPolyunsaturated Fat: 9gCholesterol: 200mgSodium: 800mgFiber: 2gSugar: 6g

Notes

  • For added crunch, toss in some chopped cashews or peanuts before serving.
  • Substitute the shrimp with chicken or tofu for a different protein option.

Tried this recipe?

Let us know how it was!

Peanut Butter and Jelly Cobbler: A Delicious Twist!

Introduction to Peanut Butter and Jelly Cobbler

There’s something undeniably comforting about the classic combination of peanut butter and jelly.

It takes me back to my childhood, where lunchboxes were filled with those iconic sandwiches.

Now, imagine that nostalgic flavor transformed into a warm, gooey dessert: Peanut Butter and Jelly Cobbler.

This recipe is perfect for those busy weeknights when you crave something sweet but don’t have hours to spend in the kitchen.

With just a few simple ingredients, you can whip up a delightful treat that will impress your loved ones and satisfy your sweet tooth.

Let’s dive into this delicious twist on a classic!

Why You’ll Love This Peanut Butter and Jelly Cobbler

This Peanut Butter and Jelly Cobbler is a game-changer for dessert lovers.

It’s incredibly easy to make, requiring minimal prep time and just one bowl.

In about 45 minutes, you’ll have a warm, comforting dessert that’s bursting with flavor.

The combination of creamy peanut butter and sweet jelly creates a delightful harmony that will have everyone coming back for seconds.

Trust me, this is a dessert you won’t want to miss!

Ingredients for Peanut Butter and Jelly Cobbler

To create this delightful Peanut Butter and Jelly Cobbler, you’ll need a handful of simple ingredients that you might already have in your pantry.

Here’s what you’ll need:

  • All-purpose flour: The base of your cobbler, providing structure and a soft texture.
  • Granulated sugar: Sweetens the dish and helps create that golden crust.
  • Baking powder: This leavening agent gives the cobbler its light and fluffy texture.
  • Salt: Just a pinch enhances the flavors and balances the sweetness.
  • Milk: Adds moisture and richness to the batter.
  • Unsalted butter: Melted butter brings a rich flavor and helps bind the ingredients together.
  • Peanut butter: The star of the show! Choose creamy or crunchy based on your preference.
  • Jelly or jam: Any flavor you love will work here, from grape to raspberry. It adds that sweet, fruity swirl.
  • Vanilla extract: A splash of vanilla elevates the overall flavor profile.

Feel free to get creative! You can swap out the jelly for fresh fruit like sliced strawberries or blueberries for a refreshing twist.

For a richer flavor, consider using chocolate peanut butter instead of regular peanut butter.

Exact measurements for these ingredients are available at the bottom of the article for easy printing.

How to Make Peanut Butter and Jelly Cobbler

Making Peanut Butter and Jelly Cobbler is a breeze!

Follow these simple steps, and you’ll have a delicious dessert ready in no time.

Let’s get started!

Step 1: Preheat the Oven

First things first, preheat your oven to 350°F (175°C).

This step is crucial because it ensures even baking.

A hot oven helps the cobbler rise beautifully and develop that golden crust we all love.

Step 2: Mix Dry Ingredients

In a large mixing bowl, combine the all-purpose flour, granulated sugar, baking powder, and salt.

Stir them together until they’re well mixed.

This step is important because it ensures that the baking powder is evenly distributed, which helps the cobbler rise properly.

Step 3: Combine Wet Ingredients

Now, it’s time to add the wet ingredients.

Pour in the milk, melted butter, peanut butter, and vanilla extract.

Mix everything together until just combined.

Be careful not to overmix; a few lumps are perfectly fine.

This will keep your cobbler light and fluffy.

Step 4: Prepare the Baking Dish

Grab a greased 9×13-inch baking dish.

Pour the batter into the dish, spreading it evenly.

This is where the magic happens, so make sure it’s nice and smooth!

Step 5: Add Jelly or Jam

Spoon your favorite jelly or jam evenly over the top of the batter.

Don’t worry about being perfect; a little randomness adds character!

Using a knife or skewer, gently swirl the jelly into the batter to create a marbled effect.

This step not only looks beautiful but also ensures that every bite is packed with flavor.

Step 6: Bake the Cobbler

Place the baking dish in the preheated oven and bake for 30-35 minutes.

Keep an eye on it!

You’ll know it’s done when the top is golden brown and a toothpick inserted in the center comes out clean.

The aroma will fill your kitchen, making it hard to wait!

Step 7: Cool and Serve

Once baked, allow the cobbler to cool for about 10 minutes before serving.

This cooling time helps the cobbler set up a bit, making it easier to slice.

For an extra treat, serve it warm with a scoop of vanilla ice cream on top.

Trust me, it’s a match made in dessert heaven!

Tips for Success

  • Measure your ingredients accurately for the best results.
  • Don’t overmix the batter; a few lumps are okay!
  • Experiment with different jelly flavors to find your favorite.
  • Let the cobbler cool slightly before serving for easier slicing.
  • For a fun twist, add chocolate chips or nuts to the batter.

Equipment Needed

  • Mixing bowl: A large bowl for combining ingredients; a sturdy pot can work in a pinch.
  • Whisk or spoon: For mixing; a fork can also do the job.
  • Baking dish: A 9×13-inch dish is ideal; any similar-sized oven-safe dish will suffice.
  • Measuring cups and spoons: Essential for accuracy; use a kitchen scale if you prefer weight measurements.

Variations

  • Fruit Swap: Replace jelly with fresh fruit like sliced peaches or mixed berries for a lighter, fresher taste.
  • Nutty Delight: Add chopped nuts, such as walnuts or pecans, to the batter for an extra crunch.
  • Chocolate Lovers: Use chocolate peanut butter and add chocolate chips for a rich, decadent twist.
  • Gluten-Free Option: Substitute all-purpose flour with a gluten-free flour blend for a gluten-free version.
  • Vegan Adaptation: Use plant-based milk and a vegan butter substitute to make this dessert vegan-friendly.

Serving Suggestions

  • Pair your Peanut Butter and Jelly Cobbler with a scoop of vanilla ice cream for a delightful contrast.
  • Serve it warm with a drizzle of chocolate sauce for an indulgent touch.
  • Accompany with a cup of coffee or a glass of cold milk for a classic combo.
  • Garnish with fresh berries or a sprinkle of powdered sugar for a beautiful presentation.

FAQs about Peanut Butter and Jelly Cobbler

Can I use natural peanut butter for this recipe?

Absolutely! Natural peanut butter works well, but keep in mind it may alter the texture slightly. Just make sure to stir it well before measuring, as it can separate.

What type of jelly or jam is best for this cobbler?

It really depends on your taste! Classic grape jelly is a favorite, but raspberry or strawberry jam adds a delightful twist. Feel free to experiment with your favorite flavors!

Can I make this cobbler ahead of time?

Yes, you can prepare the batter and store it in the fridge for a day. Just add the jelly and bake when you’re ready to serve. It’s a great way to save time!

How should I store leftovers?

Store any leftovers in an airtight container in the fridge for up to three days. Reheat in the microwave for a few seconds before enjoying again!

Can I freeze Peanut Butter and Jelly Cobbler?

Yes, you can freeze it! Just wrap it tightly in plastic wrap and then foil. It should last for about two months. Thaw in the fridge before reheating.

Final Thoughts

Creating a Peanut Butter and Jelly Cobbler is more than just baking; it’s about reliving those cherished childhood moments.

The warm, gooey dessert brings a sense of nostalgia that wraps around you like a cozy blanket.

Each bite is a delightful blend of flavors that can spark joy in any gathering.

Whether you’re serving it at a family dinner or enjoying a quiet night in, this cobbler is sure to impress.

So, roll up your sleeves, gather your ingredients, and let the sweet aroma fill your kitchen.

Trust me, this dessert will become a beloved favorite in no time!

Ranis

Peanut Butter and Jelly Cobbler: A Delicious Twist!

Peanut Butter and Jelly Cobbler is a delicious dessert that combines the classic flavors of peanut butter and jelly in a warm, comforting cobbler.
Prep Time 15 minutes
Servings: 8 servings
Course: Dessert
Cuisine: American
Calories: 320

Ingredients
  

  • 1 cup all-purpose flour
  • 1 cup granulated sugar
  • 2 teaspoons baking powder
  • 1/2 teaspoon salt
  • 1 cup milk
  • 1/2 cup unsalted butter melted
  • 1 cup peanut butter
  • 1 cup jelly or jam your choice of flavor
  • 1 teaspoon vanilla extract

Method
 

  1. Preheat your oven to 350°F (175°C).
  2. In a large mixing bowl, combine the flour, sugar, baking powder, and salt. Stir until well mixed.
  3. Add the milk, melted butter, peanut butter, and vanilla extract to the dry ingredients. Mix until just combined; do not overmix.
  4. Pour the batter into a greased 9x13-inch baking dish.
  5. Spoon the jelly or jam evenly over the top of the batter.
  6. Using a knife or a skewer, gently swirl the jelly into the batter to create a marbled effect.
  7. Bake in the preheated oven for 30-35 minutes, or until the top is golden brown and a toothpick inserted in the center comes out clean.
  8. Allow the cobbler to cool for about 10 minutes before serving.

Nutrition

Serving: 1sliceCalories: 320kcalCarbohydrates: 40gProtein: 8gFat: 15gSaturated Fat: 5gPolyunsaturated Fat: 10gCholesterol: 30mgSodium: 200mgFiber: 2gSugar: 20g

Notes

  • For a richer flavor, try using chocolate peanut butter instead of regular peanut butter.
  • You can substitute the jelly with fresh fruit like sliced strawberries or blueberries for a fresh twist.
  • Serve warm with a scoop of vanilla ice cream for an extra treat!

Tried this recipe?

Let us know how it was!

Classic Rice Krispies Treats: Discover the Easy Recipe!

Introduction to Classic Rice Krispies Treats

There’s something magical about the simplicity of Classic Rice Krispies Treats. Growing up, I remember the sweet aroma wafting through the kitchen as my mom whipped up a batch. It was a quick solution for busy days, a delightful treat that brought smiles to our faces. With just a handful of ingredients, these treats are not only easy to make but also a fantastic way to impress your loved ones. Whether you’re hosting a gathering or just need a sweet pick-me-up, this recipe is your go-to. Let’s dive into the world of gooey marshmallows and crispy cereal!

Why You’ll Love This Classic Rice Krispies Treats

Classic Rice Krispies Treats are the ultimate dessert for anyone short on time but big on flavor. They come together in just 20 minutes, making them perfect for last-minute cravings or unexpected guests. The combination of buttery marshmallows and crispy cereal creates a delightful texture that’s hard to resist. Plus, they’re a hit with kids and adults alike, ensuring smiles all around. Who wouldn’t love a treat that’s both nostalgic and delicious?

Ingredients for Classic Rice Krispies Treats

Gathering the right ingredients is the first step to creating your Classic Rice Krispies Treats. Here’s what you’ll need:

  • Unsalted butter: This adds richness and helps bind the marshmallows and cereal together.
  • Mini marshmallows: The star of the show! They melt down to create that gooey, sweet goodness.
  • Rice Krispies cereal: This provides the signature crunch and texture that makes these treats so delightful.
  • Vanilla extract (optional): A splash of this adds a warm, aromatic flavor that enhances the overall taste.
  • Pinch of salt (optional): Just a hint can balance the sweetness and elevate the flavors.

For those looking to mix things up, consider adding chocolate chips, sprinkles, or dried fruit for extra flavor and texture. You can find the exact quantities for each ingredient at the bottom of the article, ready for printing!

How to Make Classic Rice Krispies Treats

Making Classic Rice Krispies Treats is as easy as pie—well, easier! Follow these simple steps, and you’ll have a batch of gooey goodness ready in no time. Let’s get started!

Step 1: Melt the Butter and Marshmallows

Begin by grabbing a large saucepan. Over low heat, melt the unsalted butter. It should be bubbling gently, not boiling. Once the butter is melted, toss in the mini marshmallows. Stir continuously until they’re completely melted and smooth. If you’re feeling adventurous, add a splash of vanilla extract and a pinch of salt for that extra flavor boost. Trust me, it makes a difference!

Step 2: Combine with Rice Krispies

Now, it’s time to bring in the star of the show—Rice Krispies cereal! Remove the saucepan from heat and quickly add the cereal to the melted marshmallow mixture. Stir it all together until every piece of cereal is coated in that sweet, sticky goodness. This is where the magic happens, so make sure you mix well!

Step 3: Prepare the Baking Dish

Grab a 9×13-inch baking dish and grease it with butter or non-stick spray. This step is crucial to prevent sticking. Once greased, pour the Rice Krispies mixture into the dish. Use a spatula or your hands (damp hands work wonders here) to press it down evenly. You want it compact, but not too squished. This ensures your treats hold together nicely!

Step 4: Cool and Cut the Treats

Patience is key! Allow the treats to cool at room temperature for about 30 minutes. This waiting game is worth it. Once they’re set, take a sharp knife and cut them into squares. Serve them up and watch the smiles appear. You’ve just created a classic dessert that’s sure to impress!

Tips for Success

  • Use fresh marshmallows for the best texture and flavor.
  • Grease your hands or spatula to prevent sticking when pressing the mixture into the dish.
  • Don’t overheat the marshmallows; low and slow is the way to go.
  • For a fun twist, mix in your favorite add-ins like nuts or candy.
  • Store leftovers in an airtight container to keep them fresh.

Equipment Needed

  • Large saucepan: A heavy-bottomed pot works well if you don’t have a saucepan.
  • Spatula: A wooden spoon can also do the trick for mixing.
  • Baking dish: Any 9×13-inch dish will suffice; just ensure it’s greased.
  • Measuring cups: Use any standard measuring tools for accuracy.

Variations

  • Chocolate Lovers: Drizzle melted chocolate over the cooled treats or mix in chocolate chips before pressing into the dish for a rich twist.
  • Nutty Delight: Add 1/2 cup of chopped nuts like almonds or pecans for a crunchy texture and added flavor.
  • Fruity Fun: Toss in dried fruits such as cranberries or raisins for a chewy surprise in every bite.
  • Colorful Sprinkles: Mix in colorful sprinkles to make these treats festive for parties or celebrations.
  • Gluten-Free Option: Substitute Rice Krispies with gluten-free cereal to accommodate dietary needs without sacrificing taste.

Serving Suggestions

  • Pair your Classic Rice Krispies Treats with a glass of cold milk for a nostalgic experience.
  • Serve them alongside fresh fruit for a balanced snack.
  • For a fun presentation, stack them on a colorful plate and sprinkle with extra toppings.
  • Wrap individual treats in cellophane for a delightful party favor.

FAQs about Classic Rice Krispies Treats

As you embark on your journey to create Classic Rice Krispies Treats, you might have a few questions. Here are some common queries that can help you along the way:

Can I use regular marshmallows instead of mini marshmallows?

Absolutely! Regular marshmallows work just fine. Just cut them into smaller pieces to ensure they melt evenly.

How should I store leftover Rice Krispies Treats?

Store them in an airtight container at room temperature. They’ll stay fresh for about a week, but I doubt they’ll last that long!

Can I make these treats ahead of time?

Yes! You can make them a day in advance. Just keep them stored properly, and they’ll be ready to enjoy when you are.

What can I add to make them more exciting?

Consider adding chocolate chips, nuts, or dried fruit for a fun twist. The possibilities are endless!

Are Classic Rice Krispies Treats gluten-free?

They can be! Just make sure to use gluten-free Rice Krispies cereal to accommodate dietary restrictions.

Final Thoughts

Creating Classic Rice Krispies Treats is more than just a cooking task; it’s a delightful experience that brings back cherished memories. The joy of melting marshmallows and mixing in that crispy cereal is a simple pleasure that anyone can enjoy. Whether you’re making them for a family gathering or just to satisfy a sweet tooth, these treats are sure to bring smiles. Plus, the versatility of this recipe means you can customize it to your heart’s content. So, roll up your sleeves, gather your ingredients, and let the nostalgia and sweetness fill your kitchen!

Ranis

Classic Rice Krispies Treats: Discover the Easy Recipe!

Classic Rice Krispies Treats are a simple and delicious dessert made with marshmallows, butter, and Rice Krispies cereal.
Prep Time 10 minutes
Cook Time 10 minutes
Total Time 20 minutes
Servings: 12 servings
Course: Dessert
Cuisine: American
Calories: 140

Ingredients
  

  • 3 tablespoons unsalted butter
  • 1 package 10 oz mini marshmallows
  • 6 cups Rice Krispies cereal
  • 1/2 teaspoon vanilla extract optional
  • Pinch of salt optional

Method
 

  1. In a large saucepan over low heat, melt the butter. Once melted, add the mini marshmallows and stir continuously until completely melted and smooth. If using, stir in the vanilla extract and a pinch of salt for added flavor.
  2. Remove the saucepan from heat and quickly add the Rice Krispies cereal. Stir until the cereal is evenly coated with the marshmallow mixture.
  3. Grease a 9x13-inch baking dish with butter or non-stick spray. Pour the mixture into the dish and press it down evenly with a spatula or your hands (damp hands work best to prevent sticking).
  4. Allow the treats to cool at room temperature for about 30 minutes before cutting them into squares.
  5. Serve and enjoy your delicious Rice Krispies treats!

Nutrition

Serving: 1squareCalories: 140kcalCarbohydrates: 27gProtein: 1gFat: 5gSaturated Fat: 3gPolyunsaturated Fat: 2gCholesterol: 15mgSodium: 90mgSugar: 10g

Notes

  • For a chocolate twist, drizzle melted chocolate over the cooled treats or mix in chocolate chips before pressing into the dish.
  • Add 1/2 cup of mini chocolate chips, sprinkles, or dried fruit to the mixture for extra flavor and texture.

Tried this recipe?

Let us know how it was!

Hearty Slow Cooker Minestrone Soup for a Cozy Meal!

Introduction to Hearty Slow Cooker Minestrone Soup

There’s something magical about a warm bowl of soup on a chilly evening. My go-to is always a Hearty Slow Cooker Minestrone Soup. It’s like a hug in a bowl, perfect for those busy days when you want comfort without the fuss. Just toss everything in the slow cooker, and let it work its magic while you tackle your to-do list. This recipe is not just about filling your belly; it’s about creating a cozy atmosphere that brings loved ones together. Trust me, once you try it, you’ll want to make it a regular in your kitchen!

Why You’ll Love This Hearty Slow Cooker Minestrone Soup

This Hearty Slow Cooker Minestrone Soup is a game-changer for anyone juggling a busy life. It’s incredibly easy to prepare, requiring minimal hands-on time. Just chop, toss, and let the slow cooker do the work. The flavors meld beautifully, creating a rich, satisfying taste that warms your soul. Plus, it’s packed with veggies, making it a nutritious choice that even picky eaters will love. What’s not to adore?

Ingredients for Hearty Slow Cooker Minestrone Soup

Gathering the right ingredients is the first step to creating your Hearty Slow Cooker Minestrone Soup. Here’s what you’ll need:

  • Olive oil: A splash of this liquid gold adds richness and depth to your soup.
  • Onion: Diced onions provide a sweet base flavor that enhances the overall taste.
  • Garlic: Minced garlic brings a fragrant kick that elevates the dish.
  • Carrots: Diced carrots add natural sweetness and a pop of color.
  • Celery: This crunchy veggie contributes a refreshing crunch and savory notes.
  • Zucchini: Diced zucchini adds a tender texture and absorbs the soup’s flavors.
  • Green beans: Chopped green beans provide a satisfying bite and vibrant green color.
  • Diced tomatoes: A can of these juicy gems adds acidity and richness to the broth.
  • Vegetable broth: The heart of the soup, this broth infuses everything with flavor.
  • Kidney beans: These hearty beans add protein and a creamy texture; feel free to swap them for cannellini beans or chickpeas for a twist.
  • Dried oregano and basil: These herbs bring an Italian flair, enhancing the soup’s aroma.
  • Salt and pepper: Essential for seasoning, they help balance the flavors.
  • Small pasta: Pasta like ditalini or elbow adds heartiness; it’s the perfect vehicle for the soup’s goodness.
  • Fresh spinach: Stirring in fresh spinach at the end adds a burst of color and nutrients.
  • Grated Parmesan cheese: Optional, but a sprinkle on top adds a delightful creaminess.

For exact measurements, check the bottom of the article where you can find everything listed for easy printing. Happy cooking!

How to Make Hearty Slow Cooker Minestrone Soup

Making this Hearty Slow Cooker Minestrone Soup is a breeze. Follow these simple steps, and you’ll have a delicious meal ready to warm your soul. Let’s dive in!

Step 1: Sauté the Aromatics

Start by heating the olive oil in a large skillet over medium heat. Once it’s shimmering, toss in the diced onion. Sauté for about 3-4 minutes until it softens and becomes translucent. Then, add the minced garlic and cook for another minute. The aroma will fill your kitchen, making it hard to resist sneaking a taste!

Step 2: Combine Ingredients in the Slow Cooker

Transfer the sautéed onion and garlic into your slow cooker. Now, it’s time to add the diced carrots, celery, zucchini, and chopped green beans. Pour in the can of diced tomatoes along with the vegetable broth. Don’t forget the kidney beans, oregano, basil, salt, and pepper. Stir everything together until well combined. It’s like a colorful garden in your slow cooker!

Step 3: Cook Until Tender

Cover the slow cooker and set it to low for 6-8 hours or high for 3-4 hours. The longer, the better! This allows the flavors to meld beautifully. You’ll know it’s ready when the vegetables are tender and the kitchen smells heavenly. Patience is key here!

Step 4: Add Pasta and Spinach

About 30 minutes before you’re ready to serve, stir in the small pasta and fresh spinach. Cover it again and let it cook until the pasta is al dente. The spinach will wilt down, adding a lovely green hue to your soup. It’s a delightful sight!

Step 5: Adjust Seasoning and Serve

Once everything is cooked, taste your soup. Adjust the seasoning with more salt and pepper if needed. Serve it hot, garnished with a sprinkle of grated Parmesan cheese if you like. Each bowl is a warm embrace, perfect for sharing with family or enjoying solo on a cozy night.

Tips for Success

  • Prep your veggies the night before to save time in the morning.
  • Don’t skip the sautéing step; it enhances the flavors significantly.
  • Feel free to customize with your favorite vegetables or beans.
  • For a thicker soup, add more pasta or a splash of tomato sauce.
  • Store leftovers in the fridge for up to three days; it tastes even better the next day!

Equipment Needed

  • Slow Cooker: A must-have for this recipe; any size will do, but a 6-quart is ideal.
  • Large Skillet: For sautéing the aromatics; a non-stick pan works great.
  • Cutting Board and Knife: Essential for chopping your veggies.
  • Measuring Cups and Spoons: Handy for precise ingredient amounts.

Variations

  • Protein Boost: Add cooked sausage or shredded chicken for a heartier soup.
  • Gluten-Free Option: Use gluten-free pasta or skip the pasta altogether for a low-carb version.
  • Spicy Kick: Toss in some red pepper flakes or diced jalapeños for a spicy twist.
  • Herb Infusion: Experiment with fresh herbs like thyme or rosemary for a fragrant touch.
  • Seasonal Veggies: Swap in seasonal vegetables like butternut squash or kale for variety.

Serving Suggestions

  • Crusty Bread: Serve with a warm, crusty baguette or garlic bread for dipping.
  • Salad: Pair with a fresh green salad drizzled with balsamic vinaigrette.
  • Wine: A glass of Chianti or a light white wine complements the flavors beautifully.
  • Presentation: Garnish each bowl with fresh basil or parsley for a pop of color.

FAQs about Hearty Slow Cooker Minestrone Soup

Can I freeze Hearty Slow Cooker Minestrone Soup?

Absolutely! This soup freezes beautifully. Just let it cool completely before transferring it to airtight containers. It can last up to three months in the freezer. When you’re ready to enjoy it, simply thaw and reheat on the stove or in the microwave.

How can I make this soup spicier?

If you’re looking to add some heat, consider tossing in red pepper flakes or diced jalapeños during the cooking process. You can also serve it with a side of hot sauce for those who like to spice things up!

What can I substitute for kidney beans?

No problem! You can easily swap kidney beans for cannellini beans or chickpeas. Both options will add a different flavor and texture while keeping the soup hearty and satisfying.

Is this soup suitable for meal prep?

Definitely! This Hearty Slow Cooker Minestrone Soup is perfect for meal prep. Make a big batch, portion it out, and store it in the fridge for quick lunches or dinners throughout the week. It tastes even better the next day!

Can I add meat to this recipe?

Sure thing! If you want to add some protein, cooked sausage or shredded chicken can be great additions. Just stir them in during the last 30 minutes of cooking to heat through.

Final Thoughts

Cooking this Hearty Slow Cooker Minestrone Soup is more than just preparing a meal; it’s about creating a moment of warmth and connection. The aroma wafting through your home invites everyone to gather around the table, sharing stories and laughter. Each spoonful is a reminder of the simple joys in life, nourishing both body and soul. Whether you’re enjoying it solo or with loved ones, this soup brings comfort and satisfaction. So, roll up your sleeves, embrace the process, and let this delightful recipe become a cherished part of your culinary repertoire. You won’t regret it!

Ranis

Hearty Slow Cooker Minestrone Soup for a Cozy Meal!

A comforting and hearty minestrone soup made in a slow cooker, perfect for cozy meals.
Prep Time 15 minutes
Servings: 6 servings
Course: Soup
Cuisine: Italian
Calories: 210

Ingredients
  

  • 2 tablespoons olive oil
  • 1 medium onion diced
  • 2 cloves garlic minced
  • 2 medium carrots diced
  • 2 celery stalks diced
  • 1 zucchini diced
  • 1 cup green beans chopped
  • 1 can 14.5 ounces diced tomatoes, undrained
  • 4 cups vegetable broth
  • 1 can 15 ounces kidney beans, drained and rinsed
  • 1 teaspoon dried oregano
  • 1 teaspoon dried basil
  • Salt and pepper to taste
  • 1 cup small pasta like ditalini or elbow
  • 2 cups fresh spinach
  • Grated Parmesan cheese for serving optional

Method
 

  1. In a large skillet, heat olive oil over medium heat. Add the diced onion and sauté for about 3-4 minutes until softened. Add the minced garlic and cook for an additional minute until fragrant.
  2. Transfer the sautéed onion and garlic to the slow cooker. Add the diced carrots, celery, zucchini, green beans, diced tomatoes, vegetable broth, kidney beans, oregano, basil, salt, and pepper. Stir to combine.
  3. Cover and cook on low for 6-8 hours or on high for 3-4 hours, until the vegetables are tender.
  4. About 30 minutes before serving, stir in the pasta and fresh spinach. Cover and continue cooking until the pasta is al dente.
  5. Taste and adjust seasoning if necessary. Serve hot, garnished with grated Parmesan cheese if desired.

Nutrition

Serving: 1bowlCalories: 210kcalCarbohydrates: 30gProtein: 10gFat: 5gSaturated Fat: 1gPolyunsaturated Fat: 4gSodium: 400mgFiber: 8gSugar: 4g

Notes

  • For a heartier soup, add diced potatoes or butternut squash.
  • Substitute the kidney beans with cannellini beans or chickpeas for a different flavor profile.

Tried this recipe?

Let us know how it was!

Cilantro Lime Chicken: Discover the Perfect Recipe Today!

Introduction to Cilantro Lime Chicken

There’s something magical about the combination of cilantro and lime that instantly transports me to sun-soaked days and vibrant flavors. This Cilantro Lime Chicken recipe is not just a meal; it’s a celebration of taste and simplicity. Perfect for those busy weeknights or when you want to impress friends at a gathering, this dish is a breeze to whip up. With just a few ingredients and a slow cooker, you can create a flavorful masterpiece that will have everyone asking for seconds. Let’s dive into this culinary adventure together!

Why You’ll Love This Cilantro Lime Chicken

This Cilantro Lime Chicken is a game-changer for anyone juggling a busy schedule. It’s incredibly easy to prepare, requiring minimal effort while delivering maximum flavor. The slow cooker does all the heavy lifting, allowing you to focus on other things. Plus, the zesty lime and fresh cilantro create a taste explosion that will leave your taste buds dancing. It’s a dish that’s sure to impress without the stress!

Ingredients for Cilantro Lime Chicken

Gathering the right ingredients is the first step to culinary success. For this Cilantro Lime Chicken, you’ll need a few key players that come together to create a symphony of flavors.

  • Boneless, skinless chicken breasts: The star of the show! Tender and juicy, they soak up all the delicious marinade.
  • Chicken broth: This adds depth and moisture, ensuring your chicken stays succulent throughout the cooking process.
  • Fresh lime juice: The zesty kick that brightens the dish. Freshly squeezed is best for that vibrant flavor.
  • Chopped fresh cilantro: This herb brings a refreshing taste and aroma, making every bite feel like a fiesta.
  • Garlic: Minced garlic adds a savory punch that complements the other flavors beautifully.
  • Ground cumin: A warm spice that adds an earthy note, enhancing the overall flavor profile.
  • Chili powder: For a hint of heat and a touch of smokiness, this spice is a must-have.
  • Salt and black pepper: Essential seasonings that elevate the dish, bringing all the flavors together.
  • Red pepper flakes (optional): If you like a little extra heat, toss these in for a spicy kick!

For those looking to mix things up, consider adding diced jalapeños for an extra layer of flavor. You can find all the exact measurements at the bottom of the article, ready for printing!

How to Make Cilantro Lime Chicken

Creating this Cilantro Lime Chicken is as easy as pie. With just a few steps, you’ll have a delicious meal ready to impress. Let’s break it down step by step.

Step 1: Prepare the Chicken

Start by placing your boneless, skinless chicken breasts in the bottom of your slow cooker. Make sure they’re spread out evenly. This helps them cook uniformly. If you have time, pat them dry with a paper towel. This little trick helps the marinade stick better!

Step 2: Mix the Marinade

In a mixing bowl, combine the chicken broth, fresh lime juice, chopped cilantro, minced garlic, ground cumin, chili powder, salt, black pepper, and red pepper flakes if you’re feeling adventurous. Stir it all together until well mixed. The aroma will be intoxicating! This marinade is what makes your chicken so flavorful.

Step 3: Combine in Slow Cooker

Pour the marinade over the chicken in the slow cooker. Make sure every piece is well coated. This is where the magic happens! The chicken will absorb all those vibrant flavors as it cooks. Cover the slow cooker with its lid, sealing in all that goodness.

Step 4: Cook to Perfection

Set your slow cooker to low for 6-8 hours or high for 3-4 hours. The longer, the better! You want the chicken to be tender and easy to shred. If you’re home, sneak a taste of the sauce halfway through. It’s a great way to check the seasoning!

Step 5: Shred and Serve

Once the chicken is cooked through, use two forks to shred it right in the slow cooker. Stir it back into the sauce to soak up even more flavor. Serve warm, garnished with extra cilantro and lime wedges for that fresh touch. Your Cilantro Lime Chicken is now ready to be devoured!

Tips for Success

  • Always use fresh lime juice for the best flavor; it makes a noticeable difference.
  • Don’t skip the marinating step; it’s key to infusing the chicken with flavor.
  • For extra tenderness, let the chicken rest for a few minutes after cooking before shredding.
  • Experiment with spices; add your favorites to customize the flavor profile.
  • Leftovers are great! Use them in salads, wraps, or tacos for quick meals.

Equipment Needed

  • Slow Cooker: The star of the show! If you don’t have one, a Dutch oven works too.
  • Mixing Bowl: For combining your marinade. Any bowl will do, just make sure it’s big enough.
  • Measuring Cups and Spoons: Essential for accuracy. A simple set will suffice.
  • Two Forks: Perfect for shredding the chicken. You can also use tongs if you prefer.

Variations

  • Spicy Cilantro Lime Chicken: Add diced jalapeños or a splash of hot sauce to the marinade for an extra kick.
  • Herb-Infused Version: Mix in other fresh herbs like parsley or mint along with cilantro for a unique twist.
  • Grilled Cilantro Lime Chicken: Marinate the chicken and then grill it for a smoky flavor. Just adjust the cooking time accordingly.
  • Low-Carb Option: Serve the shredded chicken in lettuce wraps instead of tortillas for a healthier choice.
  • Vegetarian Adaptation: Substitute chicken with firm tofu or tempeh, adjusting cooking times as needed.

Serving Suggestions

  • Rice: Serve the chicken over fluffy white or brown rice to soak up the delicious sauce.
  • Tacos: Use warm tortillas to create mouthwatering tacos, topped with avocado and salsa.
  • Salad: Pair with a fresh green salad for a light and refreshing meal.
  • Drinks: Enjoy with a cold beer or a zesty margarita to complement the flavors.

FAQs about Cilantro Lime Chicken

As you embark on your culinary journey with Cilantro Lime Chicken, you might have a few questions. Here are some common queries that can help you along the way.

Can I use frozen chicken for this recipe?

Absolutely! You can use frozen chicken breasts. Just increase the cooking time by an hour or so. The slow cooker will work its magic, ensuring the chicken is tender and flavorful.

What can I serve with Cilantro Lime Chicken?

This dish pairs wonderfully with rice, tacos, or a fresh salad. You can also enjoy it in wraps or on top of nachos for a fun twist!

How do I store leftovers?

Store any leftovers in an airtight container in the fridge for up to 4 days. You can also freeze it for up to 3 months. Just make sure to thaw it in the fridge before reheating.

Can I make this recipe in advance?

Yes! You can prepare the marinade and chicken the night before. Just let it marinate in the fridge overnight for even more flavor. Then, pop it in the slow cooker the next day!

Is this recipe gluten-free?

Yes, Cilantro Lime Chicken is naturally gluten-free! Just ensure that your chicken broth is gluten-free as well, and you’re good to go.

Final Thoughts

Cooking this Cilantro Lime Chicken is more than just preparing a meal; it’s about creating memories and sharing joy with those you love. The vibrant flavors and tender chicken come together to make every bite a celebration. Whether it’s a busy weeknight or a weekend gathering, this dish fits seamlessly into any occasion. Plus, the ease of the slow cooker means you can focus on what truly matters—enjoying time with family and friends. So, roll up your sleeves, embrace the aromas, and let this recipe bring a little sunshine to your table!

Ranis

Cilantro Lime Chicken: Discover the Perfect Recipe Today!

A flavorful and easy-to-make cilantro lime chicken recipe perfect for any occasion.
Prep Time 15 minutes
Servings: 6 servings
Course: Main Dish
Cuisine: Mexican
Calories: 220

Ingredients
  

  • 2 pounds boneless skinless chicken breasts
  • 1 cup chicken broth
  • 1/4 cup fresh lime juice about 2 limes
  • 1/4 cup chopped fresh cilantro
  • 4 cloves garlic minced
  • 1 teaspoon ground cumin
  • 1 teaspoon chili powder
  • 1/2 teaspoon salt
  • 1/4 teaspoon black pepper
  • 1/4 teaspoon red pepper flakes optional

Method
 

  1. Place the chicken breasts in the bottom of a slow cooker.
  2. In a mixing bowl, combine the chicken broth, lime juice, cilantro, garlic, cumin, chili powder, salt, black pepper, and red pepper flakes (if using). Stir well to combine.
  3. Pour the mixture over the chicken in the slow cooker, ensuring the chicken is well coated.
  4. Cover and cook on low for 6-8 hours or on high for 3-4 hours, until the chicken is cooked through and tender.
  5. Once cooked, shred the chicken using two forks and stir it back into the sauce in the slow cooker.
  6. Serve warm, garnished with additional cilantro and lime wedges if desired.

Nutrition

Serving: 1servingCalories: 220kcalCarbohydrates: 2gProtein: 36gFat: 7gSaturated Fat: 1gPolyunsaturated Fat: 6gCholesterol: 90mgSodium: 500mgSugar: 1g

Notes

  • For a spicier kick, add diced jalapeños to the slow cooker.
  • Serve the chicken over rice or in tacos for a delicious meal variation.

Tried this recipe?

Let us know how it was!

Hearty Crockpot Beef and Veggie Stew: A Comforting Delight!

Introduction to Hearty Crockpot Beef and Veggie Stew

There’s something magical about a warm bowl of stew on a chilly evening. The aroma wafting through the house, the anticipation of a comforting meal—it’s pure bliss. My Hearty Crockpot Beef and Veggie Stew is just that: a cozy dish that brings family together. Whether you’re coming home from a long day or hosting friends, this recipe is your go-to solution. It’s simple, satisfying, and perfect for impressing your loved ones without spending hours in the kitchen. Let’s dive into this delightful comfort food that warms both the heart and the belly!

Why You’ll Love This Hearty Crockpot Beef and Veggie Stew

This Hearty Crockpot Beef and Veggie Stew is a game-changer for busy weeknights. With minimal prep, you can set it and forget it, letting the flavors meld beautifully while you tackle your day. The rich, savory taste will have everyone asking for seconds. Plus, it’s a one-pot wonder, making cleanup a breeze. Comfort food doesn’t get easier or tastier than this!

Ingredients for Hearty Crockpot Beef and Veggie Stew

Gathering the right ingredients is the first step to creating this delicious stew. Here’s what you’ll need:

  • Beef chuck: This cut is perfect for stewing, becoming tender and flavorful as it cooks.
  • Carrots: Sweet and vibrant, they add color and a hint of sweetness to the dish.
  • Potatoes: They provide heartiness and soak up all the delicious flavors.
  • Onion: A must-have for depth of flavor, it caramelizes beautifully in the slow cooker.
  • Garlic: Adds a fragrant kick that elevates the overall taste.
  • Celery: This crunchy veggie brings a fresh note and balances the richness of the beef.
  • Green beans: They add a pop of color and a slight crunch, making the stew more interesting.
  • Beef broth: The base of your stew, it infuses everything with savory goodness.
  • Diced tomatoes: These add acidity and a touch of sweetness, enhancing the stew’s flavor.
  • Tomato paste: A concentrated form of tomato that thickens the stew and deepens the flavor.
  • Worcestershire sauce: This adds a complex umami flavor that rounds out the dish.
  • Dried thyme and rosemary: These herbs bring warmth and earthiness, perfect for a cozy stew.
  • Salt and pepper: Essential for seasoning, they enhance all the other flavors.
  • Olive oil: Used for browning the beef, it adds richness and helps develop flavor.
  • Cornstarch and water (optional): If you prefer a thicker stew, this mixture will do the trick.

For those looking to spice things up, consider adding red pepper flakes or a diced jalapeño for a kick. If you want a lighter version, swap the beef for chicken or try lentils for a vegetarian option. You can find the exact quantities for each ingredient at the bottom of the article, ready for printing!

How to Make Hearty Crockpot Beef and Veggie Stew

Now that you have your ingredients ready, let’s get cooking! This Hearty Crockpot Beef and Veggie Stew is straightforward and rewarding. Follow these simple steps to create a dish that will have everyone raving.

Step 1: Brown the Beef

Start by heating olive oil in a large skillet over medium-high heat. Once the oil is shimmering, add the beef cubes. Brown them on all sides for about 5-7 minutes. This step is crucial; it locks in flavor and gives your stew a rich base. After browning, transfer the beef to your crockpot. Don’t worry if some bits stick to the pan; they’ll add depth to your stew later!

Step 2: Sauté the Aromatics

In the same skillet, toss in the chopped onions and minced garlic. Sauté them for 2-3 minutes until they soften and become fragrant. This step is like a warm hug for your stew, enhancing the overall flavor. Once they’re ready, add them to the crockpot with the beef. Trust me, your kitchen will smell amazing!

Step 3: Combine Ingredients in the Crockpot

Now it’s time to bring everything together. Add the sliced carrots, diced potatoes, celery, and green beans to the crockpot. Pour in the beef broth, undrained diced tomatoes, and tomato paste. Don’t forget the Worcestershire sauce, thyme, rosemary, salt, and pepper. Stir everything well to combine. This is where the magic begins, as all those flavors meld together beautifully!

Step 4: Cook to Perfection

Cover the crockpot and set it to cook. You can choose low for 8 hours or high for 4 hours, depending on your schedule. The longer it cooks, the more tender the beef will become. Just imagine coming home to a warm, hearty stew waiting for you. It’s the ultimate comfort food experience!

Step 5: Thicken the Stew (Optional)

If you prefer a thicker stew, here’s a quick trick. About 30 minutes before serving, mix cornstarch with water in a small bowl to create a slurry. Stir this mixture into the stew and let it cook for the remaining time. This will give your Hearty Crockpot Beef and Veggie Stew a luscious, satisfying texture that’s hard to resist!

Tips for Success

  • Always brown the beef for maximum flavor; it’s worth the extra step!
  • Chop your veggies uniformly for even cooking.
  • Feel free to adjust seasoning to your taste; don’t be shy!
  • For a richer flavor, let the stew sit for a few hours after cooking.
  • Store leftovers in an airtight container for up to three days.

Equipment Needed

  • Crockpot: The star of the show! A slow cooker is essential for this recipe.
  • Large skillet: For browning the beef; a frying pan works too.
  • Cutting board and knife: To chop your veggies with ease.
  • Measuring cups and spoons: For accurate ingredient portions.
  • Wooden spoon: Perfect for stirring everything together.

Variations

  • Spicy Kick: Add 1 teaspoon of red pepper flakes or a diced jalapeño for a fiery twist.
  • Chicken Stew: Substitute beef with chicken thighs for a lighter, yet equally hearty option.
  • Vegetarian Delight: Replace the beef with lentils or chickpeas for a plant-based version that’s just as satisfying.
  • Herb Infusion: Experiment with fresh herbs like parsley or basil for a burst of freshness.
  • Root Veggie Medley: Swap in parsnips or sweet potatoes for a unique flavor profile.

Serving Suggestions

  • Crusty Bread: Serve with a warm, crusty baguette or homemade bread for dipping.
  • Salad: A fresh green salad with a tangy vinaigrette complements the stew perfectly.
  • Wine Pairing: Enjoy with a glass of red wine, like Cabernet Sauvignon, to enhance the flavors.
  • Garnish: Top with fresh parsley or a sprinkle of grated Parmesan for an elegant touch.

FAQs about Hearty Crockpot Beef and Veggie Stew

Can I use frozen beef for this stew?
Yes, you can use frozen beef, but it’s best to thaw it first for even cooking. If you’re in a pinch, you can add it directly to the crockpot, but increase the cooking time.

How can I make this stew gluten-free?
This Hearty Crockpot Beef and Veggie Stew is naturally gluten-free! Just ensure that your beef broth and Worcestershire sauce are gluten-free, as some brands may contain gluten.

Can I add more vegetables?
Absolutely! Feel free to toss in your favorite veggies like bell peppers, zucchini, or mushrooms. Just remember to adjust the cooking time if you add more ingredients.

How do I store leftovers?
Store any leftovers in an airtight container in the fridge for up to three days. You can also freeze the stew for up to three months. Just reheat it on the stove or in the microwave when you’re ready to enjoy it again!

What can I serve with this stew?
This stew pairs wonderfully with crusty bread, a fresh salad, or even over rice or mashed potatoes for a heartier meal. The options are endless!

Final Thoughts

Cooking this Hearty Crockpot Beef and Veggie Stew is more than just preparing a meal; it’s about creating memories. The aroma that fills your home, the laughter shared around the table, and the satisfaction of a hearty dish that warms the soul are what make this recipe special. It’s a comforting hug in a bowl, perfect for any occasion. Whether you’re feeding a crowd or enjoying a quiet night in, this stew brings joy and nourishment. So grab your crockpot, gather your loved ones, and let the magic of this stew create moments you’ll cherish for years to come!

Ranis

Hearty Crockpot Beef and Veggie Stew: A Comforting Delight!

A comforting and hearty beef and veggie stew made in a crockpot, perfect for a family meal.
Prep Time 20 minutes
Servings: 6 servings
Course: Main Course
Cuisine: American
Calories: 350

Ingredients
  

  • 2 pounds beef chuck cut into 1-inch cubes
  • 4 medium carrots sliced
  • 3 medium potatoes diced
  • 1 medium onion chopped
  • 3 cloves garlic minced
  • 1 cup celery sliced
  • 1 cup green beans trimmed and cut into 1-inch pieces
  • 4 cups beef broth
  • 1 can 14.5 ounces diced tomatoes, undrained
  • 2 tablespoons tomato paste
  • 2 teaspoons Worcestershire sauce
  • 1 teaspoon dried thyme
  • 1 teaspoon dried rosemary
  • Salt and pepper to taste
  • 2 tablespoons olive oil
  • 2 tablespoons cornstarch optional, for thickening
  • 2 tablespoons water optional, for thickening

Method
 

  1. In a large skillet, heat olive oil over medium-high heat. Add the beef cubes and brown on all sides, about 5-7 minutes. Transfer the beef to the crockpot.
  2. In the same skillet, add the onions and garlic, sautéing for 2-3 minutes until softened. Add to the crockpot.
  3. Add the carrots, potatoes, celery, green beans, diced tomatoes, beef broth, tomato paste, Worcestershire sauce, thyme, rosemary, salt, and pepper to the crockpot. Stir to combine.
  4. Cover and cook on low for 8 hours or on high for 4 hours, until the beef is tender and the vegetables are cooked through.
  5. If you prefer a thicker stew, mix the cornstarch with water in a small bowl to create a slurry. Stir this into the stew during the last 30 minutes of cooking.
  6. Taste and adjust seasoning if necessary before serving.

Nutrition

Serving: 1servingCalories: 350kcalCarbohydrates: 30gProtein: 30gFat: 12gSaturated Fat: 4gPolyunsaturated Fat: 8gCholesterol: 80mgSodium: 800mgFiber: 5gSugar: 5g

Notes

  • For a spicier kick, add 1 teaspoon of red pepper flakes or a diced jalapeño.
  • Substitute the beef with chicken for a lighter version or use lentils for a vegetarian option.

Tried this recipe?

Let us know how it was!

Chocolate Munchkin Donut Holes: Indulge in Bliss Today!

Introduction to Chocolate Munchkin Donut Holes

There’s something magical about the aroma of freshly baked goods wafting through the kitchen. It takes me back to my childhood, where weekends meant cozy mornings filled with sweet treats. Today, I’m excited to share my recipe for Chocolate Munchkin Donut Holes. These little bites of bliss are perfect for any occasion, whether you’re looking to impress guests or simply indulge yourself after a long day. They’re quick to whip up and even quicker to disappear! Trust me, once you try these, you’ll want to make them a regular part of your dessert rotation.

Why You’ll Love This Chocolate Munchkin Donut Holes

These Chocolate Munchkin Donut Holes are a game-changer for any dessert lover. They’re incredibly easy to make, requiring just a handful of ingredients and minimal prep time. In about 27 minutes, you can have a batch of warm, chocolatey goodness ready to enjoy. Plus, their bite-sized nature makes them perfect for sharing—or not! Each donut hole is a delightful explosion of flavor that will leave you craving more.

Ingredients for Chocolate Munchkin Donut Holes

Gathering the right ingredients is the first step to creating these delightful Chocolate Munchkin Donut Holes. Here’s what you’ll need:

  • All-purpose flour: The backbone of your donut holes, providing structure and a soft texture.
  • Granulated sugar: Sweetens the batter and helps create that irresistible crust.
  • Unsweetened cocoa powder: Adds rich chocolate flavor without extra sweetness, making these treats truly decadent.
  • Baking powder: The leavening agent that gives your donut holes their fluffy rise.
  • Salt: Just a pinch enhances the flavors and balances the sweetness.
  • Whole milk: Contributes moisture and richness, making each bite melt in your mouth.
  • Vegetable oil: Keeps the donut holes moist and tender, ensuring they don’t dry out.
  • Large eggs: Bind the ingredients together and add a lovely richness to the batter.
  • Vanilla extract: A splash of this classic flavor elevates the overall taste profile.
  • Powdered sugar: For coating, it adds a sweet finish and a touch of elegance.
  • Chocolate chips (optional): For those who crave an extra chocolatey experience, fold these into the batter for delightful surprises.

For exact measurements, check the bottom of the article where you can find everything listed for easy printing. Happy baking!

How to Make Chocolate Munchkin Donut Holes

Creating these Chocolate Munchkin Donut Holes is a breeze! Follow these simple steps, and you’ll have a batch of delightful treats in no time. Let’s dive in!

Step 1: Preheat and Prepare

First things first, preheat your oven to 350°F (175°C). This ensures your donut holes bake evenly. While that’s heating up, grease a mini muffin pan or grab some silicone molds. The right pan makes all the difference in achieving that perfect shape!

Step 2: Mix Dry Ingredients

In a large mixing bowl, whisk together the all-purpose flour, granulated sugar, unsweetened cocoa powder, baking powder, and salt. Make sure everything is well combined. This step is crucial for a uniform texture in your Chocolate Munchkin Donut Holes.

Step 3: Combine Wet Ingredients

In another bowl, mix the whole milk, vegetable oil, large eggs, and vanilla extract until smooth. This mixture adds moisture and richness to your batter. Don’t rush this step; a smooth blend will lead to fluffy donut holes!

Step 4: Combine Wet and Dry Mixtures

Now, pour the wet ingredients into the dry ingredients. Stir gently until just combined. Be careful not to overmix; a few lumps are perfectly fine! If you’re feeling adventurous, fold in the chocolate chips for an extra chocolatey surprise.

Step 5: Fill Muffin Cups

Using a spoon or a small scoop, fill each muffin cup about 2/3 full with the batter. This allows room for the donut holes to rise without overflowing. Trust me, you want to avoid a chocolatey mess in your oven!

Step 6: Bake

Pop the muffin pan into your preheated oven and bake for 10-12 minutes. Keep an eye on them! You’ll know they’re done when a toothpick inserted into the center comes out clean. The smell will be heavenly, so be prepared for some eager taste testers!

Step 7: Cool and Coat

Once baked, allow the donut holes to cool in the pan for about 5 minutes. Then, transfer them to a wire rack to cool completely. Once they’re cool, roll each donut hole in powdered sugar until fully coated. This adds a sweet finish that’s simply irresistible!

Tips for Success

  • Measure your ingredients accurately for the best results.
  • Don’t overmix the batter; a few lumps are okay!
  • Use a toothpick to check for doneness; it should come out clean.
  • Experiment with flavors by adding a pinch of cinnamon or nutmeg.
  • For a richer taste, try dipping the cooled donut holes in melted chocolate instead of powdered sugar.

Equipment Needed

  • Mini muffin pan: Essential for shaping your donut holes. Silicone molds work great too!
  • Mixing bowls: A large bowl for dry ingredients and a medium one for wet.
  • Whisk: Perfect for blending ingredients smoothly.
  • Spoon or small scoop: For filling the muffin cups with batter.
  • Wire rack: Ideal for cooling your delicious creations.

Variations

  • Gluten-Free: Substitute all-purpose flour with a gluten-free blend for a delicious alternative.
  • Vegan: Replace eggs with flaxseed meal and use almond milk instead of whole milk.
  • Spicy Kick: Add a pinch of cayenne pepper or chili powder for a surprising heat that complements the chocolate.
  • Nutty Flavor: Fold in chopped nuts like walnuts or pecans for added texture and flavor.
  • Fruit Infusion: Mix in some mashed bananas or applesauce for a fruity twist and extra moisture.

Serving Suggestions

  • Pair with a hot cup of coffee or a glass of cold milk for the ultimate treat.
  • Serve on a decorative platter, dusted with extra powdered sugar for a beautiful presentation.
  • Add a scoop of vanilla ice cream on the side for a decadent dessert.
  • Top with fresh berries for a pop of color and flavor.

FAQs about Chocolate Munchkin Donut Holes

Curious about these delightful Chocolate Munchkin Donut Holes? Here are some frequently asked questions that might help you out!

Can I make these donut holes ahead of time?

Absolutely! You can prepare the batter a day in advance and store it in the fridge. Just remember to bring it to room temperature before baking for the best results.

How do I store leftover donut holes?

Keep any leftover Chocolate Munchkin Donut Holes in an airtight container at room temperature for up to three days. If you want to keep them longer, consider freezing them!

Can I use different types of chocolate?

Definitely! Feel free to experiment with dark chocolate, milk chocolate, or even white chocolate chips for a unique twist on these chocolate donuts.

What can I serve with these donut holes?

These donut holes pair wonderfully with coffee, milk, or even a scoop of ice cream. They’re perfect for brunch or as a sweet snack anytime!

Are these donut holes suitable for kids?

Yes! Kids love these Chocolate Munchkin Donut Holes. They’re bite-sized and packed with chocolatey goodness, making them a hit at any gathering!

Final Thoughts

Making Chocolate Munchkin Donut Holes is more than just baking; it’s about creating moments of joy. Each bite transports you to a place of comfort and happiness, reminiscent of childhood treats. Whether you’re sharing them with friends or savoring them solo, these little delights bring smiles all around. The simplicity of the recipe means you can whip them up anytime, making them a go-to for any occasion. So, roll up your sleeves, embrace the chocolatey goodness, and let these donut holes become a cherished part of your dessert repertoire. Trust me, you won’t regret it!

Ranis

Chocolate Munchkin Donut Holes: Indulge in Bliss Today!

Delicious and indulgent Chocolate Munchkin Donut Holes that are perfect for any occasion.
Prep Time 15 minutes
Cook Time 12 minutes
Total Time 27 minutes
Servings: 24 donut holes
Course: Dessert
Cuisine: American
Calories: 90

Ingredients
  

  • 2 cups all-purpose flour
  • 1 cup granulated sugar
  • 1/2 cup unsweetened cocoa powder
  • 1 tablespoon baking powder
  • 1/2 teaspoon salt
  • 1/2 cup whole milk
  • 1/2 cup vegetable oil
  • 2 large eggs
  • 1 teaspoon vanilla extract
  • 1/2 cup powdered sugar for coating
  • 1/4 cup chocolate chips optional for filling

Method
 

  1. Preheat your oven to 350°F (175°C) and grease a mini muffin pan or use silicone molds.
  2. In a large mixing bowl, whisk together the flour, granulated sugar, cocoa powder, baking powder, and salt until well combined.
  3. In another bowl, mix the milk, vegetable oil, eggs, and vanilla extract until smooth.
  4. Pour the wet ingredients into the dry ingredients and stir until just combined. If using, fold in the chocolate chips.
  5. Fill each muffin cup about 2/3 full with the batter.
  6. Bake in the preheated oven for 10-12 minutes or until a toothpick inserted into the center comes out clean.
  7. Allow the donut holes to cool in the pan for 5 minutes before transferring them to a wire rack.
  8. Once cooled, roll each donut hole in powdered sugar until fully coated.

Nutrition

Serving: 1donut holeCalories: 90kcalCarbohydrates: 12gProtein: 1gFat: 4gSaturated Fat: 1gPolyunsaturated Fat: 3gCholesterol: 30mgSodium: 50mgFiber: 1gSugar: 6g

Notes

  • For a fun twist, add a pinch of cinnamon to the batter for a warm flavor.
  • You can dip the cooled donut holes in melted chocolate instead of rolling them in powdered sugar for an extra indulgent treat.

Tried this recipe?

Let us know how it was!