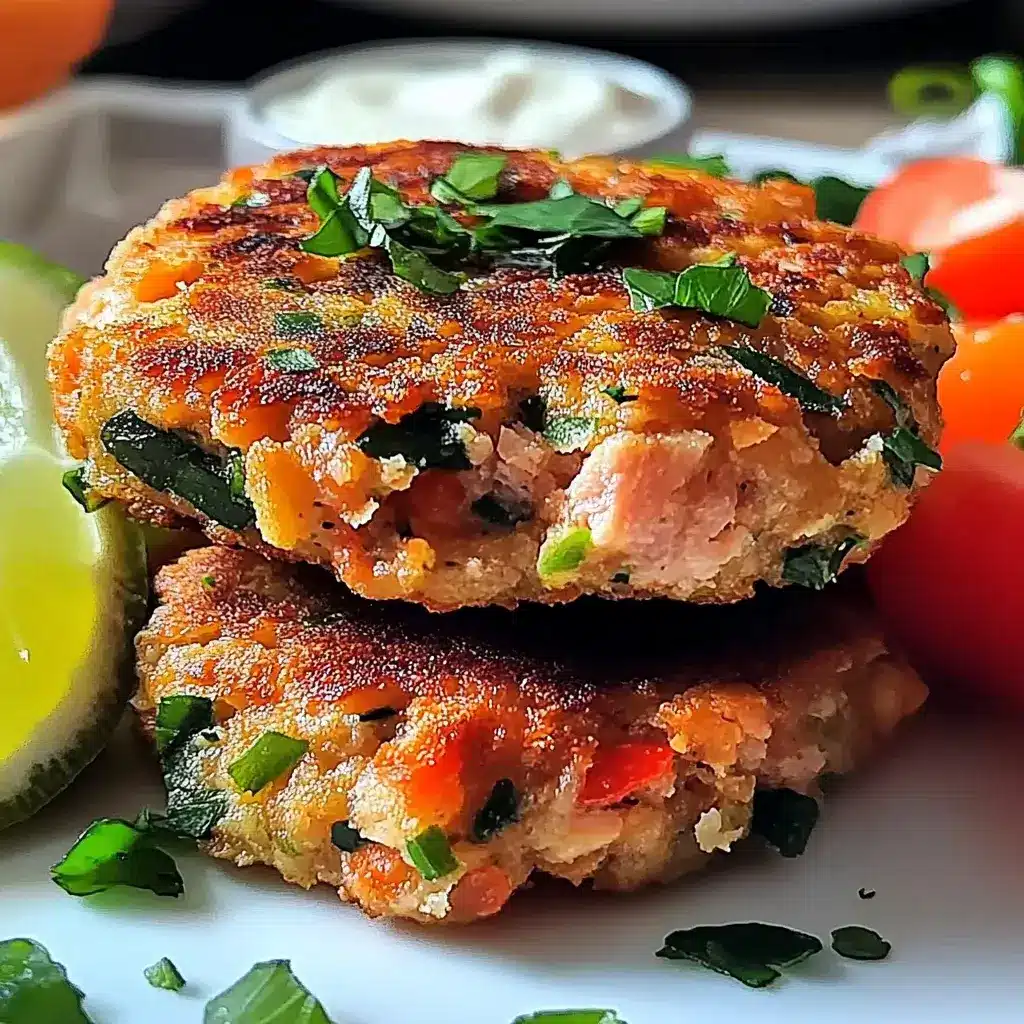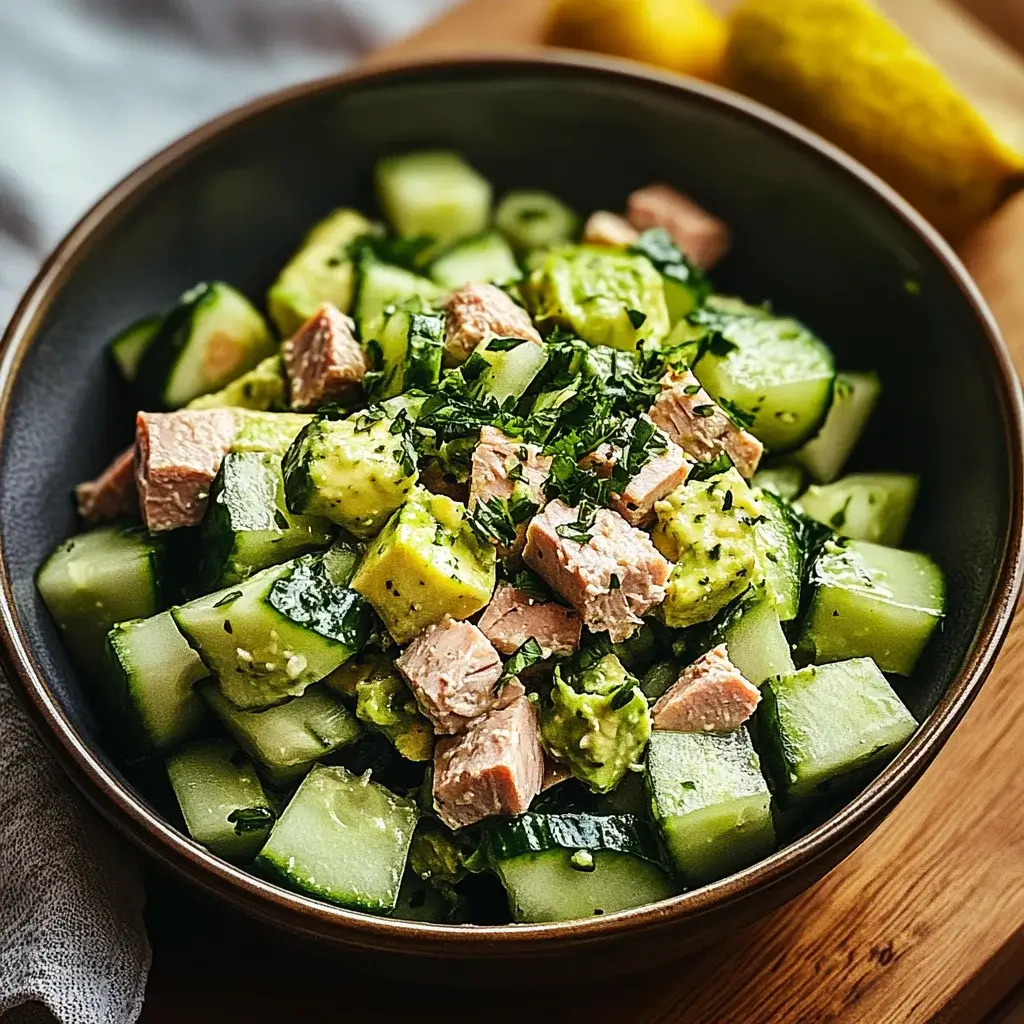
Cucumber Avocado Tuna Salad: A Refreshing Delight!

Introduction to Cucumber Avocado Tuna Salad

There’s something magical about a dish that comes together in a flash, isn’t there? The Cucumber Avocado Tuna Salad is just that—a refreshing delight that’s perfect for those busy days when you want something nutritious without the fuss. I remember the first time I made this salad; it was a hot summer afternoon, and I craved something light yet satisfying. This salad not only quenches your hunger but also impresses your loved ones with its vibrant colors and flavors. Let’s dive into this easy recipe that’s bound to become a staple in your kitchen!

Why You’ll Love This Cucumber Avocado Tuna Salad

This Cucumber Avocado Tuna Salad is a game-changer for anyone juggling a busy lifestyle. It’s quick to whip up, taking just 10 minutes from start to finish. The combination of creamy avocado and crunchy cucumber creates a delightful texture that dances on your palate. Plus, it’s packed with protein and healthy fats, making it a guilt-free choice for lunch or a snack. You’ll love how satisfying it is without weighing you down!

Ingredients for Cucumber Avocado Tuna Salad

Gathering the right ingredients is the first step to creating a delicious Cucumber Avocado Tuna Salad. Here’s what you’ll need:

  • Tuna: A can of drained tuna is the star of this dish, providing a hearty protein boost.
  • Cucumber: Diced cucumber adds a refreshing crunch, perfect for balancing the creaminess of the avocado.
  • Avocado: Ripe avocado brings a rich, buttery texture that elevates the salad to a whole new level.
  • Red Onion: Finely chopped red onion adds a zesty bite, enhancing the overall flavor profile.
  • Cherry Tomatoes: Halved cherry tomatoes introduce a pop of sweetness and color, making the salad visually appealing.
  • Lemon Juice: Fresh lemon juice brightens the dish, adding a tangy freshness that ties everything together.
  • Olive Oil: A drizzle of olive oil enriches the salad, providing healthy fats and a smooth finish.
  • Salt and Pepper: Essential for seasoning, these staples enhance the flavors of the ingredients.
  • Fresh Herbs: Optional dill or parsley can be sprinkled on top for an aromatic touch and added freshness.

For those looking to mix things up, consider adding diced bell peppers or celery for extra crunch. If you’re not a fan of tuna, canned chicken or chickpeas can be great substitutes. The exact quantities for each ingredient are listed at the bottom of the article for your convenience.

How to Make Cucumber Avocado Tuna Salad

Creating this Cucumber Avocado Tuna Salad is as easy as pie, and trust me, it’s just as satisfying! Follow these simple steps, and you’ll have a delicious meal ready in no time.

Step 1: Combine the Base Ingredients

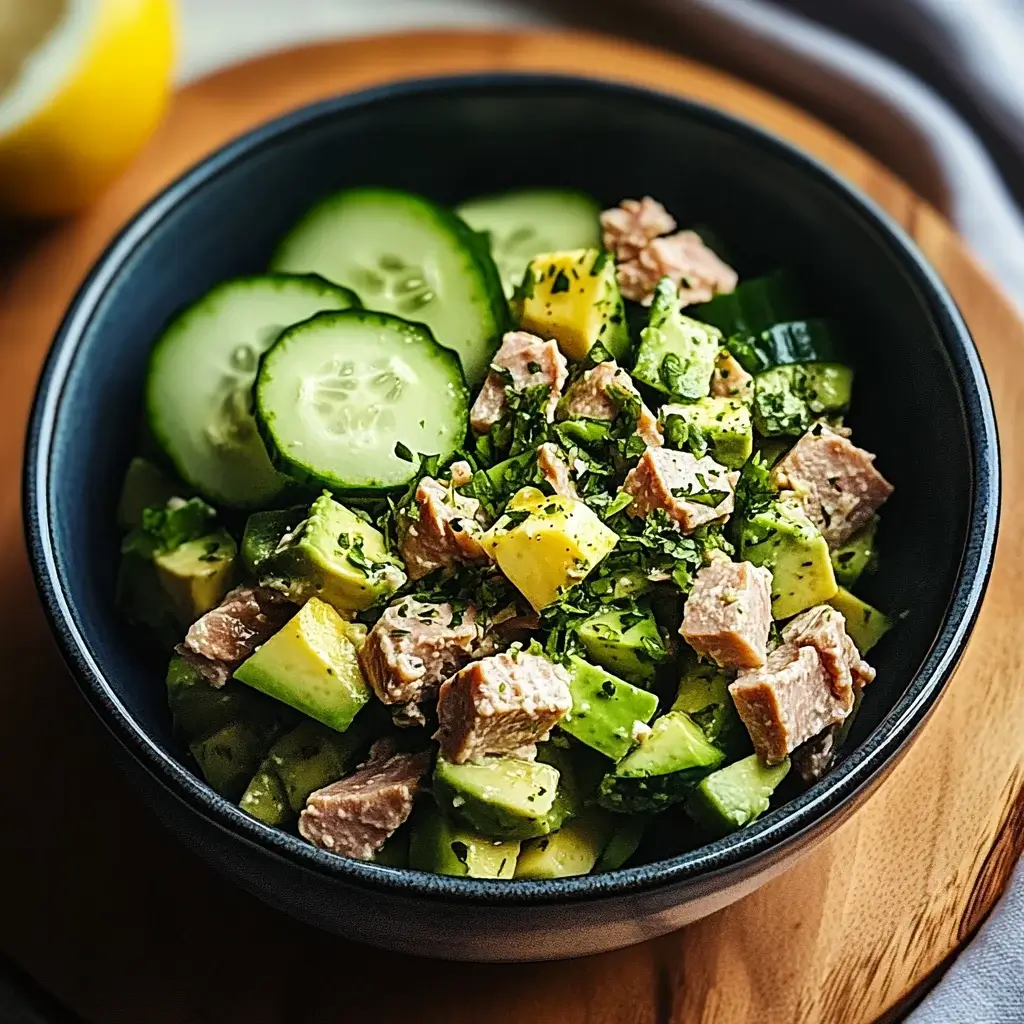
Start by grabbing a medium bowl. In it, combine the drained tuna, diced cucumber, diced avocado, finely chopped red onion, and halved cherry tomatoes. This colorful mix is not just a feast for the eyes; it’s the foundation of your salad. Make sure to use a fork to flake the tuna gently, ensuring it blends well with the other ingredients.

Step 2: Prepare the Dressing

In a small bowl, whisk together the fresh lemon juice, olive oil, salt, and pepper. This dressing is the magic that ties everything together. The lemon juice adds a zesty kick, while the olive oil brings a smooth richness. Whisk until it’s well combined, and you can almost smell the freshness!

Step 3: Mix Everything Together

Now, pour that delightful dressing over your tuna mixture. Gently toss everything together, being careful not to mash the avocado. You want those creamy chunks to stay intact, adding a lovely texture to your salad. This step is where the flavors start to meld, creating a harmonious blend.

Step 4: Add Fresh Herbs

If you’re feeling fancy, sprinkle some fresh dill or parsley on top. This optional step adds a burst of color and an aromatic touch. Give it a final gentle toss to incorporate the herbs without losing the salad’s structure. Trust me, those herbs make a difference!

Step 5: Serve or Chill

Your Cucumber Avocado Tuna Salad is almost ready! You can serve it immediately for a fresh, vibrant meal. Alternatively, if you have a bit of patience, chill it in the refrigerator for 15-30 minutes. This allows the flavors to deepen and mingle, making each bite even more delicious.
Tips for Success

  • Choose ripe avocados for the best creaminess; they should yield slightly to gentle pressure.
  • For extra crunch, add diced bell peppers or celery to the mix.
  • Don’t skip the chilling step; it enhances the flavors beautifully.
  • Use high-quality tuna for a richer taste; look for sustainably sourced options.
  • Feel free to customize with your favorite herbs or spices for a personal touch.

Equipment Needed

  • Medium Bowl: Essential for mixing ingredients; a large mixing bowl works too.
  • Small Bowl: Perfect for whisking the dressing; a jar with a lid can substitute.
  • Fork: Great for flaking tuna and mixing; a whisk can also do the job.
  • Knife and Cutting Board: Necessary for chopping veggies; a sturdy plate can work in a pinch.

Variations

  • Spicy Kick: Add diced jalapeños or a dash of hot sauce for a spicy twist that wakes up your taste buds.
  • Greek Style: Incorporate feta cheese and Kalamata olives for a Mediterranean flair that pairs beautifully with the other ingredients.
  • Quinoa Boost: Mix in cooked quinoa for added protein and a heartier texture, making it a more filling meal.
  • Vegan Option: Substitute tuna with chickpeas or black beans for a plant-based protein that still delivers on flavor.
  • Herb Variations: Experiment with different herbs like cilantro or basil to change the flavor profile and keep things interesting.

Serving Suggestions

  • Pair your Cucumber Avocado Tuna Salad with whole-grain crackers for a satisfying crunch.
  • Serve it on a bed of mixed greens for a colorful presentation.
  • Complement with a chilled glass of iced tea or sparkling water for a refreshing drink.
  • Garnish with extra herbs for a pop of color and flavor.

FAQs about Cucumber Avocado Tuna Salad

Got questions about this Cucumber Avocado Tuna Salad? You’re not alone! Here are some common queries that might pop up as you whip up this refreshing dish.

Can I make this salad ahead of time?

Absolutely! You can prepare the salad a few hours in advance. Just keep it in the fridge, but add the avocado right before serving to prevent browning.

What can I substitute for tuna?

If tuna isn’t your thing, canned chicken or chickpeas work wonderfully. Both options provide a great protein boost while keeping the salad delicious.

How long does this salad last in the fridge?

This Cucumber Avocado Tuna Salad is best enjoyed fresh, but it can last up to two days in the fridge. Just remember that the avocado may brown over time.

Can I add more vegetables?

Definitely! Feel free to toss in diced bell peppers, celery, or even shredded carrots for extra crunch and nutrition. The more, the merrier!

Is this salad suitable for meal prep?

Yes! It’s a fantastic option for meal prep. Just store it in airtight containers, and you’ll have a quick, healthy meal ready to go throughout the week.

Final Thoughts

Creating this Cucumber Avocado Tuna Salad is more than just a cooking task; it’s an experience that brings joy and satisfaction. Each bite is a celebration of fresh flavors and textures, reminding me of sunny days and simple pleasures. Whether you’re enjoying it solo or sharing it with friends, this salad is a delightful way to nourish your body and spirit. Plus, its versatility means you can make it your own. So, roll up your sleeves, gather your ingredients, and let this refreshing dish become a cherished part of your culinary repertoire!

Ranis

Cucumber Avocado Tuna Salad: A Refreshing Delight!

A refreshing and nutritious salad combining tuna, cucumber, and avocado, perfect for a light meal or snack.
Prep Time 10 minutes
Total Time 10 minutes
Servings: 2 -3 servings
Course: Salad
Cuisine: American
Calories: 250

Ingredients
  

  • 1 can 5 oz tuna, drained
  • 1 medium cucumber diced
  • 1 ripe avocado diced
  • 1/4 cup red onion finely chopped
  • 1/4 cup cherry tomatoes halved
  • 2 tablespoons fresh lemon juice
  • 1 tablespoon olive oil
  • Salt and pepper to taste
  • 1 tablespoon fresh dill or parsley chopped (optional)

Method
 

  1. In a medium bowl, combine the drained tuna, diced cucumber, diced avocado, red onion, and cherry tomatoes.
  2. In a small bowl, whisk together the lemon juice, olive oil, salt, and pepper until well combined.
  3. Pour the dressing over the tuna mixture and gently toss to combine, being careful not to mash the avocado.
  4. If using, sprinkle fresh dill or parsley on top and give it a final gentle toss.
  5. Serve immediately or chill in the refrigerator for 15-30 minutes to enhance the flavors.

Nutrition

Serving: 1servingCalories: 250kcalCarbohydrates: 8gProtein: 20gFat: 15gSaturated Fat: 2gPolyunsaturated Fat: 13gCholesterol: 40mgSodium: 300mgFiber: 3gSugar: 2g

Notes

  • For added crunch, mix in some diced bell peppers or celery.
  • Substitute the tuna with canned chicken or chickpeas for a different protein option.
Tried this recipe?

Let us know how it was!

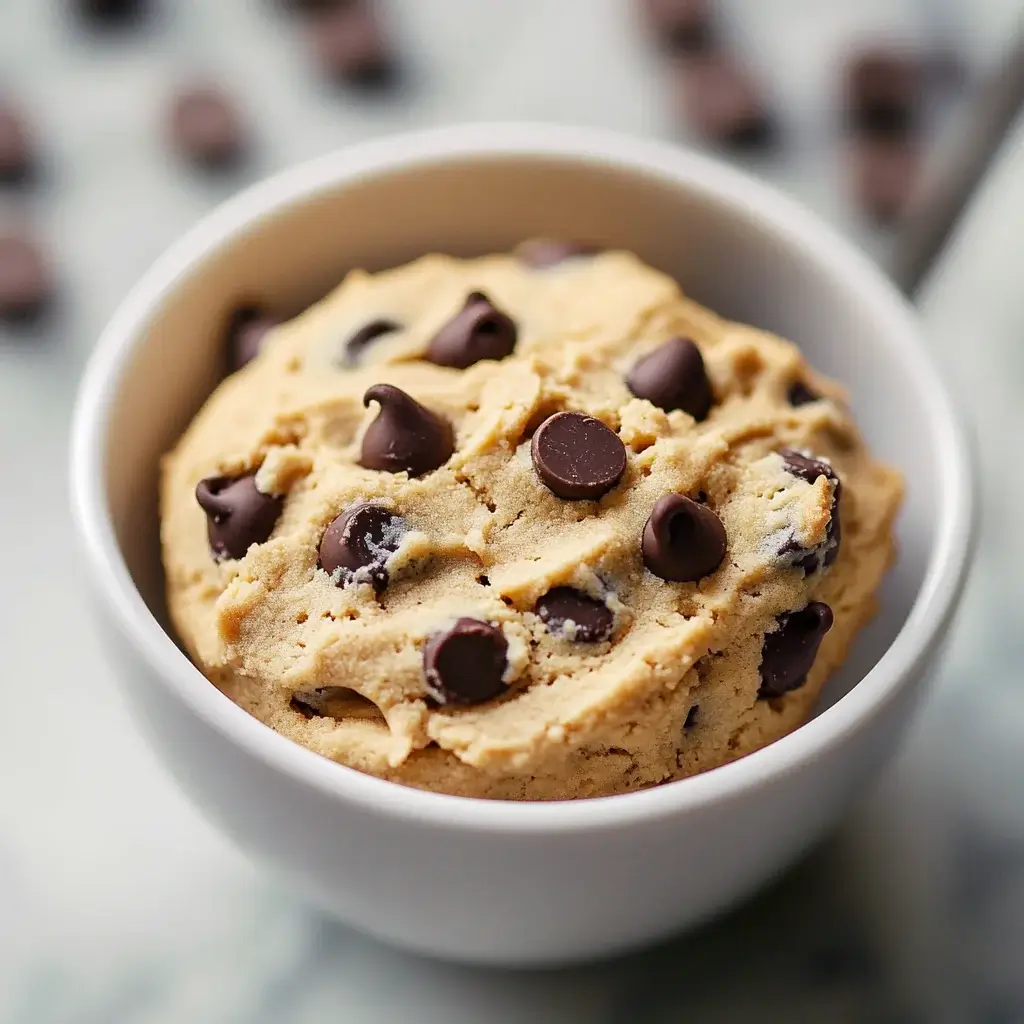
Cottage Cheese Chocolate Chip Cookies that Delight!

Introduction to Cottage Cheese Chocolate Chip Cookies

There’s something magical about cookies fresh from the oven, isn’t there?

Cottage cheese chocolate chip cookies bring a delightful twist to a classic favorite.

These cookies are not just delicious; they’re soft, chewy, and surprisingly easy to whip up.

Whether you’re looking for a quick solution for a busy day or a sweet treat to impress your loved ones, this recipe has you covered.

With just a handful of ingredients, you can create a batch that will have everyone asking for seconds.

Let’s dive into this delightful baking adventure together!

Why You’ll Love This Cottage Cheese Chocolate Chip Cookies

These cottage cheese chocolate chip cookies are a game changer.

They’re incredibly easy to make, perfect for those busy weeknights when you crave something sweet.

The unique addition of cottage cheese keeps them soft and moist, while the chocolate chips add that irresistible sweetness.

Plus, they bake up in just 12 minutes!

You’ll love how quickly you can satisfy your cookie cravings without the fuss.

Ingredients for Cottage Cheese Chocolate Chip Cookies

Gathering the right ingredients is the first step to cookie bliss.

Here’s what you’ll need for these cottage cheese chocolate chip cookies:

  • Cottage cheese: This creamy base adds moisture and a unique texture, making your cookies soft and delightful.
  • Unsalted butter: Softened butter is essential for that rich flavor and tender crumb.
  • Brown sugar: Packed brown sugar brings a deep, caramel-like sweetness that complements the chocolate perfectly.
  • Granulated sugar: A touch of granulated sugar balances the flavors and helps achieve that lovely golden color.
  • Vanilla extract: This aromatic ingredient enhances the overall flavor, making each bite irresistible.
  • Eggs: Eggs provide structure and moisture, helping the cookies rise and hold their shape.
  • All-purpose flour: The backbone of your cookie dough, it gives the cookies their structure.
  • Baking soda: This leavening agent helps the cookies rise, creating that perfect soft texture.
  • Salt: A pinch of salt enhances the sweetness and balances the flavors.
  • Semi-sweet chocolate chips: The star of the show! These little morsels melt beautifully and add a delightful sweetness.

For those looking to mix things up, consider adding chopped nuts for a nutty crunch or substituting half of the all-purpose flour with whole wheat flour for a healthier twist.

All ingredient measurements can be found at the bottom of the article for easy printing.

How to Make Cottage Cheese Chocolate Chip Cookies

Baking these cottage cheese chocolate chip cookies is a breeze.

Follow these simple steps, and you’ll have a batch of warm, gooey cookies in no time.

Let’s get started!

Step 1: Preheat the Oven

First things first, preheat your oven to 350°F (175°C).

While it warms up, line a baking sheet with parchment paper.

This will prevent the cookies from sticking and make cleanup a snap.

Step 2: Mix Wet Ingredients

In a large mixing bowl, combine the drained cottage cheese and softened butter.

Mix them together until they’re well blended.

You want a smooth, creamy base that will keep your cookies soft.

Step 3: Add Sugars and Eggs

Next, add the packed brown sugar, granulated sugar, and vanilla extract to the bowl.

Beat in the eggs one at a time, ensuring each is fully incorporated before adding the next.

This step is crucial for achieving that perfect texture.

Step 4: Combine Dry Ingredients

In a separate bowl, whisk together the all-purpose flour, baking soda, and salt.

This helps to evenly distribute the leavening agent and ensures your cookies rise beautifully.

Step 5: Mix Wet and Dry Ingredients

Gradually add the dry ingredients to the wet mixture.

Stir gently until just combined.

Be careful not to overmix; a few lumps are perfectly fine!

Step 6: Fold in Chocolate Chips

Now, it’s time for the star of the show!

Fold in the semi-sweet chocolate chips until they’re evenly distributed throughout the dough.

This is where the magic happens!

Step 7: Shape and Bake

Drop rounded tablespoons of dough onto the prepared baking sheet, spacing them about 2 inches apart.

Bake in the preheated oven for 10-12 minutes.

The edges should be lightly golden, while the centers may look slightly underbaked.

Don’t worry; they’ll firm up as they cool.

Step 8: Cool the Cookies

Allow the cookies to cool on the baking sheet for 5 minutes.

Then, transfer them to a wire rack to cool completely.

This step is essential for achieving that perfect chewy texture.

Tips for Success

  • Make sure your cottage cheese is well-drained to avoid excess moisture in the dough.
  • Use room temperature butter for easier mixing and a smoother texture.
  • Don’t skip the parchment paper; it makes for easy removal and cleanup.
  • For extra flavor, consider adding a pinch of cinnamon or nutmeg to the dry ingredients.
  • Store cookies in an airtight container to keep them fresh and chewy.

Equipment Needed

  • Mixing bowls: A large bowl for wet ingredients and a medium bowl for dry ingredients. Any size will do!
  • Whisk: Perfect for combining dry ingredients. A fork works in a pinch.
  • Baking sheet: A standard sheet pan is ideal, but any flat baking surface will work.
  • Parchment paper: For easy cleanup. Aluminum foil can be a substitute.
  • Cookie scoop or spoon: For portioning dough. A tablespoon works just fine!

Variations

  • Nutty Delight: Add 1/2 cup of chopped walnuts or pecans for a crunchy texture and nutty flavor.
  • Whole Wheat Twist: Substitute half of the all-purpose flour with whole wheat flour for a healthier option.
  • Chocolate Lovers: Use dark chocolate chips instead of semi-sweet for a richer taste.
  • Fruit Fusion: Mix in 1/2 cup of dried cranberries or raisins for a fruity burst in every bite.
  • Spiced Up: Add a teaspoon of cinnamon or a pinch of nutmeg to the dry ingredients for a warm, cozy flavor.

Serving Suggestions

  • Pair these cookies with a glass of cold milk for a classic treat.
  • Serve warm with a scoop of vanilla ice cream for an indulgent dessert.
  • For a fun twist, drizzle melted chocolate over the cookies before serving.
  • Present them on a colorful platter for a festive touch.

FAQs about Cottage Cheese Chocolate Chip Cookies

Curious about cottage cheese chocolate chip cookies? You’re not alone! Here are some common questions I’ve encountered, along with answers to help you bake the perfect batch.

Can I use low-fat cottage cheese in this recipe?

Absolutely! Low-fat cottage cheese works just as well. It will still keep your cookies moist and delicious without compromising flavor.

How do I store leftover cookies?

To keep your cookies fresh, store them in an airtight container at room temperature. They’ll stay chewy for several days, if they last that long!

Can I freeze the cookie dough?

Yes, you can freeze the dough! Just scoop it onto a baking sheet, freeze until solid, then transfer to a freezer bag. When you’re ready to bake, just add a couple of extra minutes to the baking time.

What can I substitute for eggs in this recipe?

If you need an egg substitute, try using 1/4 cup of unsweetened applesauce or a flax egg (1 tablespoon of ground flaxseed mixed with 2.5 tablespoons of water). Both options work well in keeping the cookies moist.

Are these cookies suitable for a vegetarian diet?

Yes! These cottage cheese chocolate chip cookies are vegetarian-friendly, making them a great treat for everyone to enjoy.

Final Thoughts

Baking cottage cheese chocolate chip cookies is more than just a recipe; it’s an experience filled with warmth and joy.

The delightful aroma wafting through your kitchen will transport you back to simpler times, where cookies were a symbol of love and comfort.

Each bite offers a perfect balance of soft, chewy goodness and rich chocolatey sweetness.

Whether you’re sharing them with family or enjoying them solo, these cookies are sure to bring smiles.

So, roll up your sleeves, embrace the mess, and let the magic of baking fill your home with happiness!

Ranis

Cottage Cheese Chocolate Chip Cookies that Delight!

Delicious and soft cottage cheese chocolate chip cookies that are perfect for any occasion.
Prep Time 15 minutes
Cook Time 12 minutes
Total Time 27 minutes
Servings: 24 cookies
Course: Dessert
Cuisine: American
Calories: 120

Ingredients
  

  • 1 cup cottage cheese drained
  • 1/2 cup unsalted butter softened
  • 1 cup brown sugar packed
  • 1/2 cup granulated sugar
  • 1 teaspoon vanilla extract
  • 2 large eggs
  • 2 cups all-purpose flour
  • 1 teaspoon baking soda
  • 1/2 teaspoon salt
  • 1 cup semi-sweet chocolate chips

Method
 

  1. Preheat your oven to 350°F (175°C) and line a baking sheet with parchment paper.
  2. In a large mixing bowl, combine the drained cottage cheese and softened butter. Mix until well blended.
  3. Add the brown sugar, granulated sugar, and vanilla extract to the bowl. Beat in the eggs one at a time until fully incorporated.
  4. In a separate bowl, whisk together the all-purpose flour, baking soda, and salt.
  5. Gradually add the dry ingredients to the wet mixture, stirring until just combined. Be careful not to overmix.
  6. Fold in the chocolate chips until evenly distributed throughout the dough.
  7. Drop rounded tablespoons of dough onto the prepared baking sheet, spacing them about 2 inches apart.
  8. Bake in the preheated oven for 10-12 minutes, or until the edges are lightly golden. The centers may look slightly underbaked; they will firm up as they cool.
  9. Allow the cookies to cool on the baking sheet for 5 minutes before transferring them to a wire rack to cool completely.

Nutrition

Serving: 1cookieCalories: 120kcalCarbohydrates: 15gProtein: 2gFat: 6gSaturated Fat: 3gPolyunsaturated Fat: 2gCholesterol: 20mgSodium: 100mgSugar: 8g

Notes

  • For a nutty flavor, add 1/2 cup of chopped walnuts or pecans to the dough.
  • Substitute half of the all-purpose flour with whole wheat flour for a healthier twist.

Tried this recipe?

Let us know how it was!

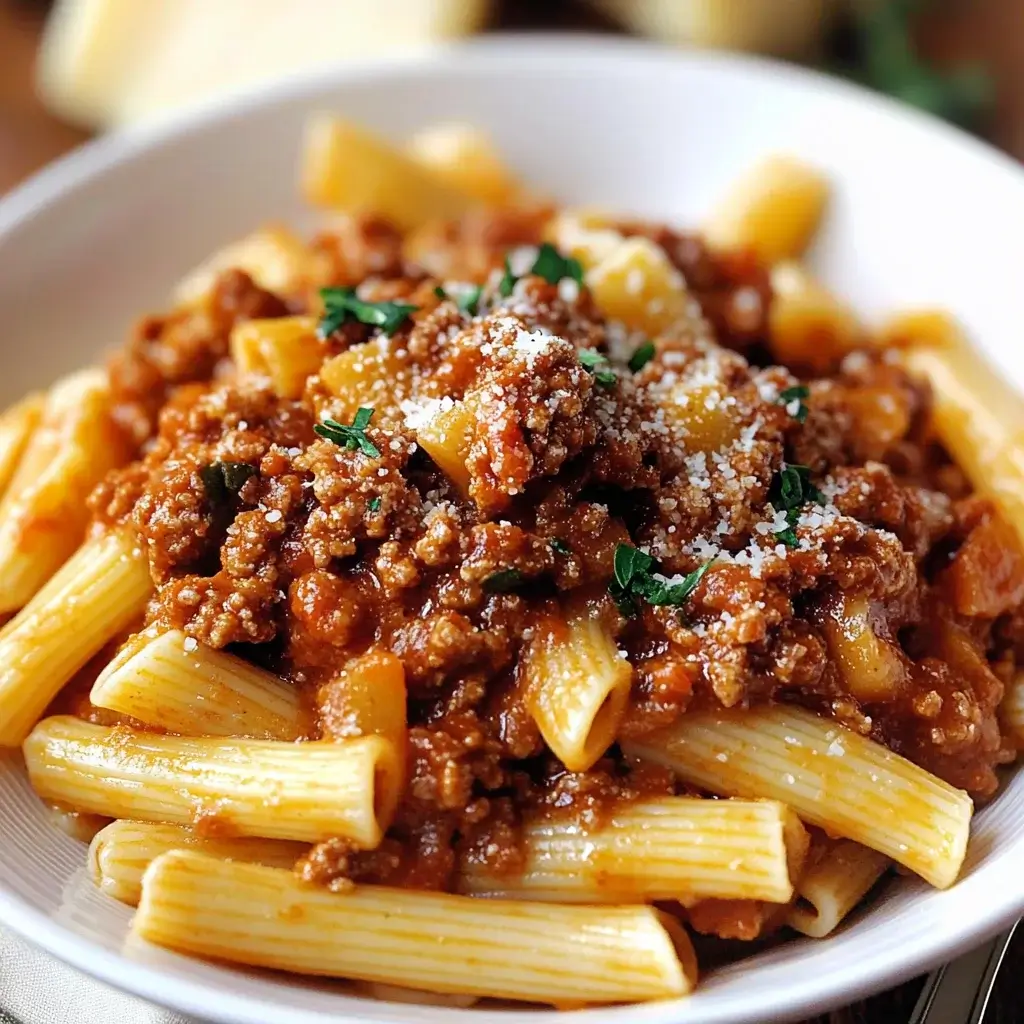
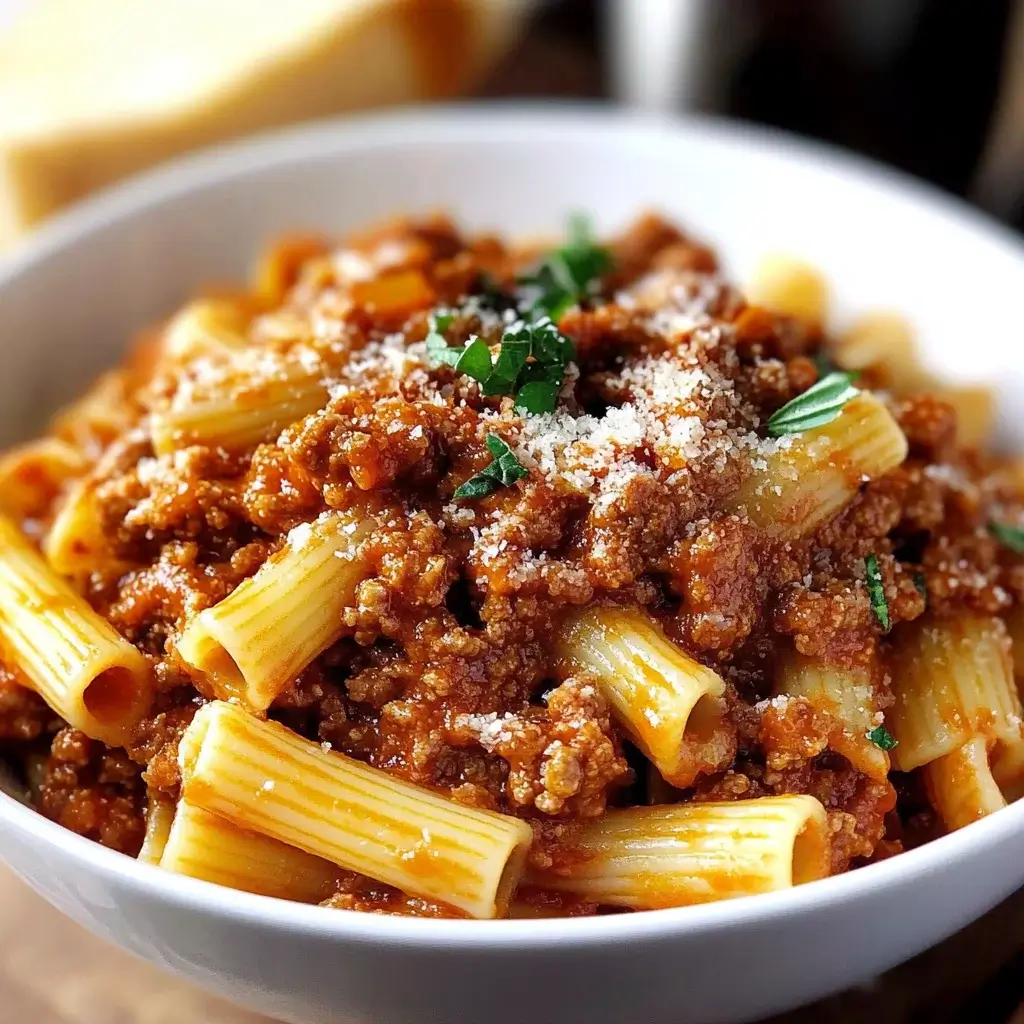
Hearty Gluten-Free Bolognese Pasta: Easy Recipe Inside!

Introduction to Hearty Gluten-Free Bolognese Pasta

There’s something magical about a steaming bowl of pasta, especially when it’s a Hearty Gluten-Free Bolognese Pasta. This dish isn’t just a meal; it’s a warm hug on a plate. Whether you’re coming home after a long day or hosting friends for dinner, this recipe is your go-to solution. It’s easy to whip up, packed with flavor, and sure to impress even the pickiest eaters. Plus, it’s gluten-free, so everyone can enjoy it without worry. Let’s dive into this comforting classic that brings joy to the table and warmth to the heart!

Why You’ll Love This Hearty Gluten-Free Bolognese Pasta

This Hearty Gluten-Free Bolognese Pasta is a game-changer for busy weeknights. It’s quick to prepare, taking just 45 minutes from start to finish. The rich, savory flavors will have your taste buds dancing, while the gluten-free pasta ensures everyone can dig in without a second thought. Plus, it’s versatile enough to adapt to your pantry staples, making it a reliable choice for any occasion. You’ll find yourself reaching for this recipe time and again!

Ingredients for Hearty Gluten-Free Bolognese Pasta

Gathering the right ingredients is the first step to creating a delicious Hearty Gluten-Free Bolognese Pasta. Here’s what you’ll need:

  • Ground beef or turkey: This is the protein base, adding richness and heartiness to the sauce. Feel free to swap it for lentils or mushrooms for a vegetarian twist.
  • Onion: Diced onion brings sweetness and depth to the dish, enhancing the overall flavor profile.
  • Garlic: Minced garlic adds a fragrant kick that elevates the sauce to new heights.
  • Carrot: Finely chopped carrot contributes a subtle sweetness and a pop of color.
  • Celery: This adds a nice crunch and balances the flavors in the sauce.
  • Crushed tomatoes: The star of the show! They form the base of the sauce, providing a rich, tangy flavor.
  • Tomato paste: A small amount intensifies the tomato flavor, making the sauce even more robust.
  • Dried oregano and basil: These herbs bring an Italian flair, infusing the dish with aromatic goodness.
  • Salt and black pepper: Essential for seasoning, they enhance all the flavors in the sauce.
  • Red pepper flakes (optional): For those who like a little heat, these add a nice kick.
  • Beef or vegetable broth: This adds moisture and depth, making the sauce luscious.
  • Gluten-free pasta: Choose your favorite shape, like penne or spaghetti, to serve as the perfect vehicle for the sauce.
  • Olive oil: Used for sautéing, it adds a lovely richness to the dish.
  • Fresh basil or parsley (optional): These herbs make for a beautiful garnish, adding freshness and color.
  • Grated Parmesan cheese (optional): A sprinkle on top brings a creamy, salty finish that’s hard to resist.

For exact measurements, check the bottom of the article where you can find everything listed for easy printing!

How to Make Hearty Gluten-Free Bolognese Pasta

Creating a Hearty Gluten-Free Bolognese Pasta is a straightforward process that brings together fresh ingredients and rich flavors. Follow these simple steps, and you’ll have a comforting meal ready in no time!

Step 1: Sauté the Vegetables

Start by heating olive oil in a large skillet over medium heat. Once the oil shimmers, toss in the diced onion, finely chopped carrot, and celery. Sauté these veggies for about 5 minutes until they soften and become fragrant. This step is crucial; it builds the foundation of flavor for your sauce. The sweetness from the onion and carrot will enhance the overall taste.

Step 2: Brown the Meat

Next, increase the heat to medium-high and add your choice of ground beef or turkey. Cook it for about 5 to 7 minutes, breaking it apart with a spoon until it’s nicely browned. Don’t forget to drain any excess fat; this keeps your dish from becoming greasy and allows the flavors to shine through.

Step 3: Add the Sauce Ingredients

Now it’s time to stir in the crushed tomatoes, tomato paste, dried oregano, basil, salt, black pepper, and red pepper flakes if you’re feeling adventurous. Mix everything well, ensuring the meat and veggies are coated in that rich tomato goodness. This step is vital; it allows the flavors to meld together beautifully.

Step 4: Simmer the Sauce

Pour in the beef or vegetable broth and bring the mixture to a gentle simmer. Once it’s bubbling, reduce the heat to low, cover the skillet, and let it simmer for 20 to 30 minutes. This low and slow cooking allows the flavors to deepen and develop, creating a sauce that’s truly hearty and satisfying.

Step 5: Cook the Pasta

While your sauce is simmering, cook the gluten-free pasta according to the package instructions. Timing is key here; you want the pasta to be perfectly al dente when the sauce is ready. Drain the pasta and set it aside, but don’t rinse it! This helps the sauce cling better.

Step 6: Combine and Serve

Once the sauce has thickened to your liking, it’s time to serve! Place the cooked pasta on plates and ladle the hearty Bolognese sauce over the top. For a finishing touch, garnish with fresh basil or parsley and a sprinkle of grated Parmesan cheese if desired. This not only adds flavor but also makes your dish look restaurant-worthy!

Tips for Success

  • Prep your ingredients ahead of time to streamline the cooking process.
  • Don’t skip the simmering step; it’s essential for flavor development.
  • Use a mix of ground meats for a richer taste.
  • Adjust seasoning to your preference; taste as you go!
  • For extra depth, add a splash of red wine while simmering.

Equipment Needed

  • Large skillet: A non-stick or cast-iron skillet works great for even cooking.
  • Wooden spoon: Perfect for stirring and breaking up the meat.
  • Measuring cups and spoons: Essential for accurate ingredient measurements.
  • Colander: Useful for draining the pasta.
  • Chef’s knife: A sharp knife makes chopping veggies a breeze.

Variations

  • Vegetarian Option: Swap the ground meat for lentils or finely chopped mushrooms for a hearty, plant-based version.
  • Spicy Kick: Add more red pepper flakes or a dash of hot sauce to the sauce for an extra layer of heat.
  • Herb Infusion: Experiment with fresh herbs like thyme or rosemary for a different flavor profile.
  • Cheesy Delight: Mix in some ricotta or mozzarella cheese into the sauce for a creamy texture.
  • Low-Carb Version: Use spiralized zucchini or spaghetti squash instead of gluten-free pasta for a lighter meal.

Serving Suggestions

  • Garlic Bread: Serve with warm, crusty garlic bread for a classic pairing.
  • Side Salad: A fresh green salad with a light vinaigrette complements the richness of the pasta.
  • Wine Pairing: Enjoy with a glass of Chianti or a light Pinot Grigio.
  • Presentation: Serve in deep bowls, garnished with fresh herbs for a pop of color.

FAQs about Hearty Gluten-Free Bolognese Pasta

Can I make this Hearty Gluten-Free Bolognese Pasta ahead of time?

Absolutely! This dish actually tastes even better the next day as the flavors meld together. Just store the sauce and pasta separately in airtight containers in the fridge. When you’re ready to enjoy, simply reheat the sauce and toss it with the pasta.

What gluten-free pasta works best for this recipe?

I recommend using gluten-free penne or spaghetti, as they hold up well with the hearty sauce. Look for brands made from brown rice or chickpeas for added flavor and nutrition.

Can I freeze the Hearty Gluten-Free Bolognese Pasta?

Yes, you can freeze the sauce for up to three months. Just make sure to cool it completely before transferring it to a freezer-safe container. When you’re ready to eat, thaw it in the fridge overnight and reheat on the stovetop.

How can I make this dish vegetarian?

For a vegetarian version, simply replace the ground meat with lentils or finely chopped mushrooms. You can also add more vegetables like zucchini or bell peppers for extra texture and flavor.

What can I serve with Hearty Gluten-Free Bolognese Pasta?

This dish pairs wonderfully with garlic bread, a fresh side salad, or even roasted vegetables. A glass of red wine, like Chianti, complements the rich flavors beautifully!

Final Thoughts

Cooking this Hearty Gluten-Free Bolognese Pasta is more than just preparing a meal; it’s about creating memories around the dinner table. The rich aroma wafting through your kitchen will draw everyone in, sparking conversations and laughter. Each bite is a comforting reminder of home, warmth, and togetherness. Whether you’re enjoying it solo or sharing it with loved ones, this dish brings joy and satisfaction. Plus, knowing it’s gluten-free means everyone can indulge without worry. So, roll up your sleeves, embrace the process, and let this recipe become a cherished part of your culinary repertoire!

Ranis

Hearty Gluten-Free Bolognese Pasta: Easy Recipe Inside!

A hearty and delicious gluten-free bolognese pasta recipe that is easy to make and perfect for a comforting meal.
Prep Time 15 minutes
Cook Time 30 minutes
Total Time 45 minutes
Servings: 4 servings
Course: Main Course
Cuisine: Italian
Calories: 450

Ingredients
  

  • 1 pound ground beef or turkey
  • 1 medium onion diced
  • 2 cloves garlic minced
  • 1 medium carrot finely chopped
  • 1 medium celery stalk finely chopped
  • 1 can 15 ounces crushed tomatoes
  • 2 tablespoons tomato paste
  • 1 teaspoon dried oregano
  • 1 teaspoon dried basil
  • 1/2 teaspoon salt
  • 1/4 teaspoon black pepper
  • 1/4 teaspoon red pepper flakes optional
  • 1 cup beef or vegetable broth
  • 8 ounces gluten-free pasta such as penne or spaghetti
  • 2 tablespoons olive oil
  • Fresh basil or parsley for garnish optional
  • Grated Parmesan cheese for serving optional

Method
 

  1. In a large skillet, heat olive oil over medium heat. Add the diced onion, carrot, and celery. Sauté for about 5 minutes until the vegetables are softened. Add minced garlic and cook for an additional minute until fragrant.
  2. Increase the heat to medium-high and add the ground beef or turkey. Cook until browned, breaking it apart with a spoon, about 5-7 minutes. Drain excess fat if necessary.
  3. Stir in the crushed tomatoes, tomato paste, oregano, basil, salt, black pepper, and red pepper flakes (if using). Mix well and cook for 2 minutes.
  4. Pour in the broth and bring the mixture to a simmer. Reduce heat to low, cover, and let it simmer for 20-30 minutes, stirring occasionally.
  5. While the sauce simmers, cook the gluten-free pasta according to package instructions. Drain and set aside.
  6. Once the sauce has thickened, taste and adjust seasoning if necessary. Serve the sauce over the cooked pasta. Garnish with fresh basil or parsley and sprinkle with grated Parmesan cheese if desired.

Nutrition

Serving: 1servingCalories: 450kcalCarbohydrates: 35gProtein: 30gFat: 20gSaturated Fat: 7gPolyunsaturated Fat: 13gCholesterol: 80mgSodium: 600mgFiber: 3gSugar: 6g

Notes

  • For a vegetarian version, substitute the ground meat with lentils or mushrooms.
  • Add a splash of red wine to the sauce for extra depth of flavor while it simmers.

Tried this recipe?

Let us know how it was!

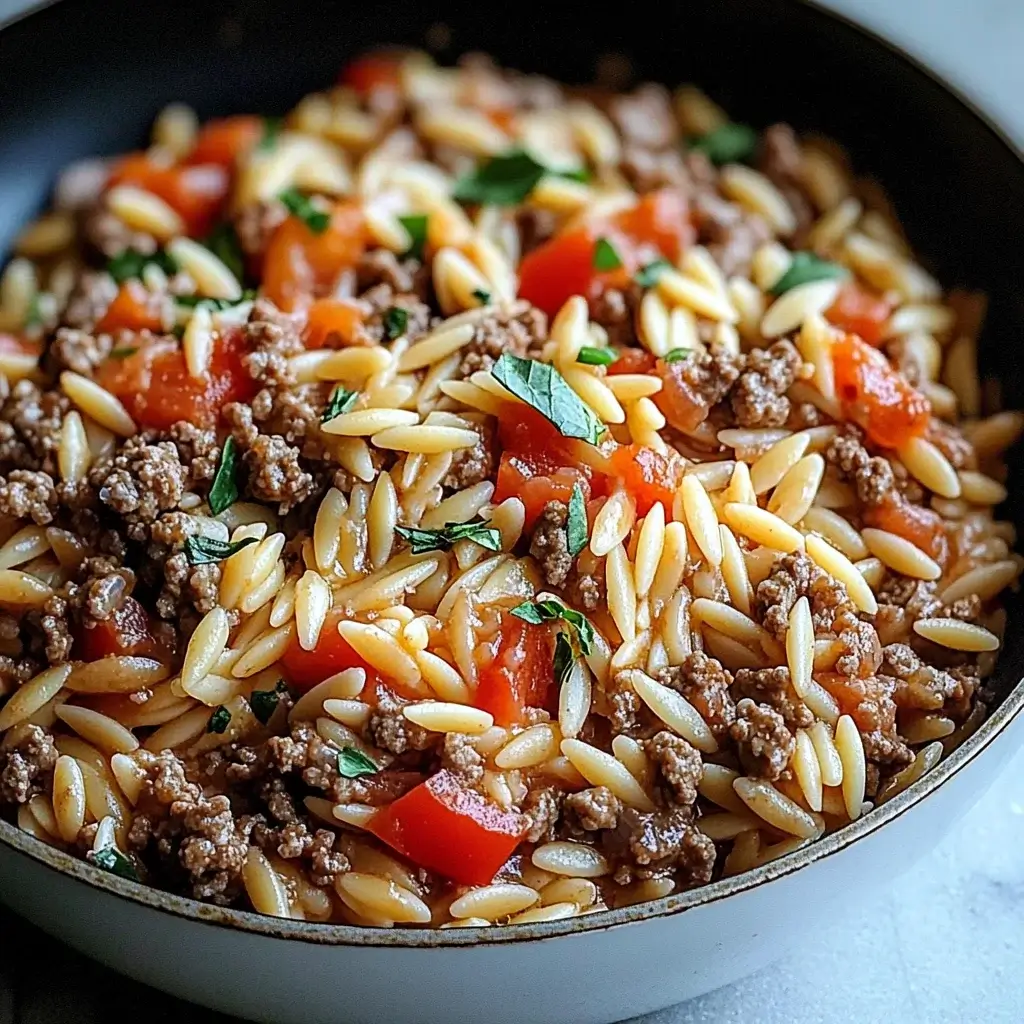
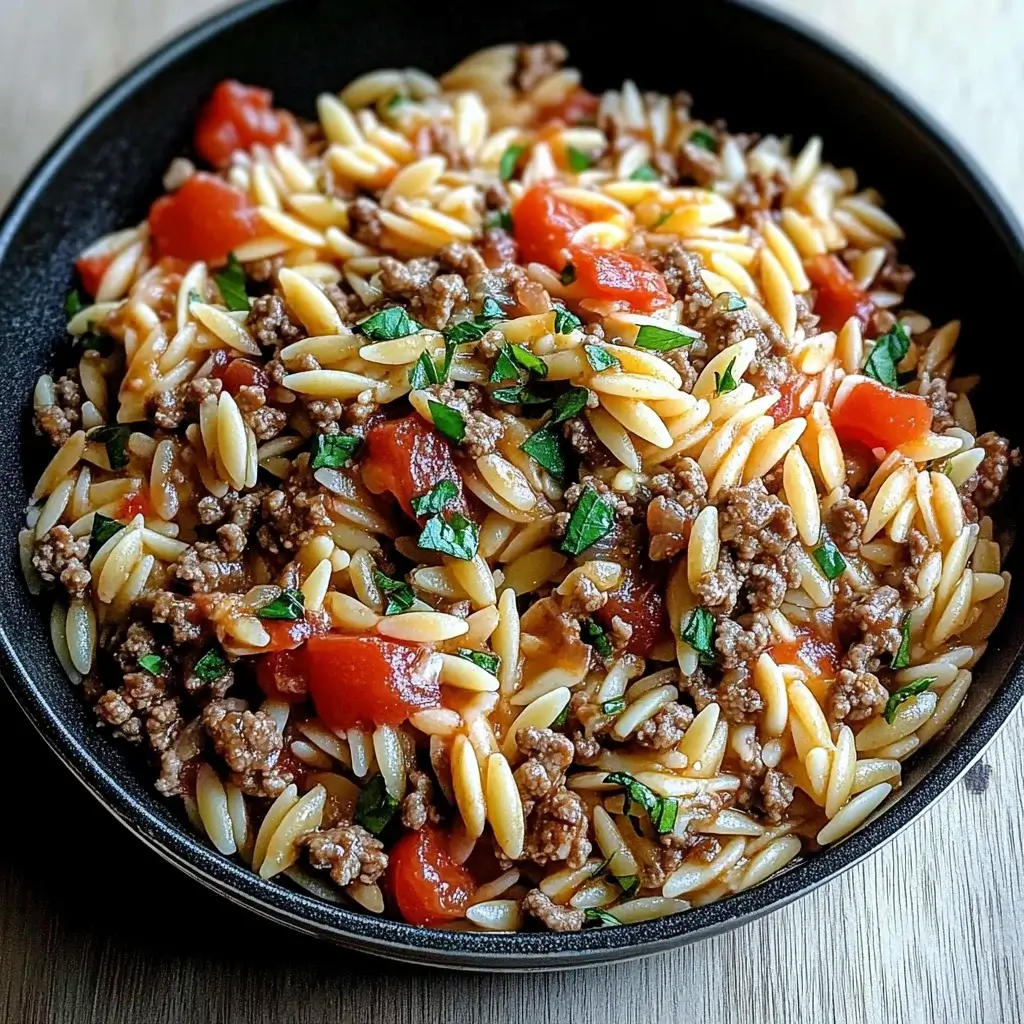
One-Pan Ground Beef and Orzo Skillet Made Easy!

Introduction to One-Pan Ground Beef and Orzo Skillet

After a long day, the last thing I want to do is spend hours in the kitchen. That’s where my One-Pan Ground Beef and Orzo Skillet comes to the rescue! This dish is not just a meal; it’s a comforting hug in a bowl. With just one pan, you can whip up a delicious dinner that’s perfect for busy weeknights or impressing friends. The combination of savory ground beef and tender orzo pasta creates a satisfying experience that everyone will love. Trust me, this recipe will quickly become a staple in your home!

Why You’ll Love This One-Pan Ground Beef and Orzo Skillet

This One-Pan Ground Beef and Orzo Skillet is a game-changer for anyone who craves a hearty meal without the fuss. It’s quick to prepare, taking just 30 minutes from start to finish. The best part? Cleanup is a breeze since everything cooks in one pan! Plus, the rich flavors meld beautifully, making it a dish that satisfies both the stomach and the soul. You’ll find yourself reaching for this recipe time and again!

Ingredients for One-Pan Ground Beef and Orzo Skillet

Gathering the right ingredients is the first step to creating a fantastic One-Pan Ground Beef and Orzo Skillet. Here’s what you’ll need:

  • Ground Beef: The star of the show! Choose lean ground beef for a healthier option without sacrificing flavor.
  • Orzo Pasta: This tiny pasta cooks quickly and absorbs all the delicious flavors from the dish.
  • Onion: A medium onion, diced, adds sweetness and depth to the dish.
  • Garlic: Two cloves of minced garlic bring a fragrant aroma and a punch of flavor.
  • Diced Tomatoes: A can of diced tomatoes, undrained, adds moisture and a hint of acidity.
  • Beef Broth: This is the liquid gold that ties everything together, enhancing the beefy flavor.
  • Italian Seasoning: A teaspoon of this blend adds a touch of the Mediterranean to your skillet.
  • Salt and Pepper: Essential for seasoning, these staples elevate the overall taste.
  • Shredded Mozzarella Cheese: This melty goodness on top makes the dish irresistible.
  • Olive Oil: A couple of tablespoons for sautéing the onions and beef, adding richness.
  • Fresh Basil Leaves: Optional, but they add a fresh, aromatic finish to your meal.

For those looking to mix things up, consider substituting ground turkey or chicken for a lighter option. You can also toss in some spinach or bell peppers for added nutrition and color. If you want exact measurements, they’re available at the bottom of the article for easy printing!

How to Make One-Pan Ground Beef and Orzo Skillet

Now that you have all your ingredients ready, let’s dive into the fun part: cooking! This One-Pan Ground Beef and Orzo Skillet is straightforward and quick, making it perfect for any night of the week. Follow these simple steps, and you’ll have a delicious meal in no time!

Step 1: Sauté the Onions

Start by heating two tablespoons of olive oil in a large skillet over medium heat. Once the oil is shimmering, toss in the diced onion. Sauté it for about 3-4 minutes, stirring occasionally, until the onions become translucent. This step builds a flavorful base for your dish, so don’t rush it!

Step 2: Brown the Ground Beef

Next, add the minced garlic and ground beef to the skillet. Use a wooden spoon to break the beef apart as it cooks. You want it browned and crumbly, which should take about 5-7 minutes. If there’s excess fat, drain it off. This step is crucial for achieving that rich, savory flavor!

Step 3: Combine Ingredients

Now it’s time to bring everything together! Stir in the orzo, undrained diced tomatoes, beef broth, Italian seasoning, salt, and pepper. Give it a good mix and bring the mixture to a boil. The orzo will soak up all those delicious flavors as it cooks!

Step 4: Simmer

Once boiling, reduce the heat to low and cover the skillet. Let it simmer for about 10-12 minutes. Stir occasionally to prevent the orzo from sticking to the bottom. You’ll know it’s ready when the orzo is tender and has absorbed most of the liquid. It’s like magic watching it transform!

Step 5: Add Cheese

When the orzo is cooked to perfection, sprinkle the shredded mozzarella cheese over the top. Cover the skillet again and let it sit for 2-3 minutes. This allows the cheese to melt into gooey goodness. Trust me, this is the moment you’ve been waiting for!

Step 6: Garnish and Serve

Finally, if you’re feeling fancy, garnish with fresh basil leaves for a pop of color and flavor. Serve your One-Pan Ground Beef and Orzo Skillet hot, and watch everyone dig in with delight. Enjoy the compliments that come your way!

Tips for Success

  • Always taste as you go! Adjust seasoning to your preference.
  • For extra flavor, brown the beef well before adding other ingredients.
  • Stir occasionally while simmering to prevent sticking.
  • Let the dish sit for a few minutes after cooking for better flavor melding.
  • Experiment with different cheeses like cheddar or feta for a twist!

Equipment Needed

  • Large Skillet: A non-stick skillet works best, but any large pan will do.
  • Wooden Spoon: Perfect for stirring and breaking up the beef.
  • Measuring Cups: Handy for measuring orzo and broth.
  • Knife and Cutting Board: Essential for dicing onions and garlic.

Variations

  • Vegetarian Option: Swap the ground beef for lentils or a plant-based meat substitute for a hearty vegetarian dish.
  • Spicy Kick: Add red pepper flakes or diced jalapeños for a spicy twist that will wake up your taste buds.
  • Cheesy Delight: Mix in cream cheese or ricotta along with the mozzarella for an extra creamy texture.
  • Herb Infusion: Experiment with fresh herbs like thyme or oregano to enhance the flavor profile.
  • One-Pan Mediterranean: Toss in olives and artichoke hearts for a Mediterranean flair that’s bursting with flavor.

Serving Suggestions

  • Side Salad: A crisp green salad with a light vinaigrette complements the richness of the skillet.
  • Garlic Bread: Serve with warm garlic bread for a delightful, hearty pairing.
  • Wine Pairing: A glass of red wine, like Merlot, enhances the flavors beautifully.
  • Presentation: Serve in bowls topped with extra basil for a pop of color.

FAQs about One-Pan Ground Beef and Orzo Skillet

Can I use a different type of pasta? Absolutely! While orzo is perfect for this dish, you can substitute it with other small pasta shapes like ditalini or even rice. Just adjust the cooking time accordingly.

How can I make this One-Pan Ground Beef and Orzo Skillet gluten-free? To make this dish gluten-free, simply use gluten-free orzo or a similar gluten-free pasta. Always check the labels to ensure they meet your dietary needs.

Can I prepare this meal in advance? Yes! You can prep the ingredients ahead of time. Just store the chopped vegetables and uncooked orzo in the fridge. When you’re ready to cook, it’ll come together quickly!

What can I do with leftovers? Leftovers can be stored in an airtight container in the fridge for up to three days. Reheat in the microwave or on the stovetop, adding a splash of broth to keep it moist.

Is this dish suitable for kids? Definitely! The flavors are mild and comforting, making it a hit with kids. You can even sneak in some veggies without them noticing!

Final Thoughts

Cooking the One-Pan Ground Beef and Orzo Skillet is more than just preparing a meal; it’s about creating moments. The aroma wafting through your kitchen, the laughter around the table, and the satisfaction of a hearty dish all come together beautifully. This recipe is a reminder that delicious food doesn’t have to be complicated. It’s a comforting, easy solution for busy nights or a cozy gathering. I hope this dish brings as much joy to your home as it has to mine. So grab your skillet and let the culinary adventure begin!

Ranis

One-Pan Ground Beef and Orzo Skillet Made Easy!

A delicious and easy one-pan meal featuring ground beef and orzo pasta, perfect for a quick weeknight dinner.
Prep Time 10 minutes
Cook Time 20 minutes
Total Time 30 minutes
Servings: 4 servings
Course: Main Course
Cuisine: American
Calories: 450

Ingredients
  

  • 1 pound ground beef
  • 1 cup orzo pasta
  • 1 medium onion diced
  • 2 cloves garlic minced
  • 1 can 14.5 ounces diced tomatoes, undrained
  • 2 cups beef broth
  • 1 teaspoon Italian seasoning
  • Salt and pepper to taste
  • 1 cup shredded mozzarella cheese
  • 2 tablespoons olive oil
  • Fresh basil leaves for garnish optional

Method
 

  1. In a large skillet, heat the olive oil over medium heat. Add the diced onion and cook until translucent, about 3-4 minutes.
  2. Add the minced garlic and ground beef to the skillet. Cook until the beef is browned, breaking it apart with a spoon, about 5-7 minutes. Drain excess fat if necessary.
  3. Stir in the orzo, diced tomatoes (with juice), beef broth, Italian seasoning, salt, and pepper. Bring the mixture to a boil.
  4. Reduce the heat to low, cover the skillet, and simmer for about 10-12 minutes, or until the orzo is tender and has absorbed most of the liquid. Stir occasionally to prevent sticking.
  5. Once the orzo is cooked, sprinkle the shredded mozzarella cheese over the top. Cover the skillet again and let it sit for 2-3 minutes until the cheese is melted.
  6. Garnish with fresh basil leaves if desired and serve hot.

Nutrition

Serving: 1servingCalories: 450kcalCarbohydrates: 38gProtein: 30gFat: 22gSaturated Fat: 10gPolyunsaturated Fat: 8gCholesterol: 80mgSodium: 800mgFiber: 2gSugar: 4g

Notes

  • For a healthier option, substitute ground turkey or chicken for the beef.
  • Add vegetables like spinach or bell peppers during the cooking process for extra nutrition and flavor.

Tried this recipe?

Let us know how it was!

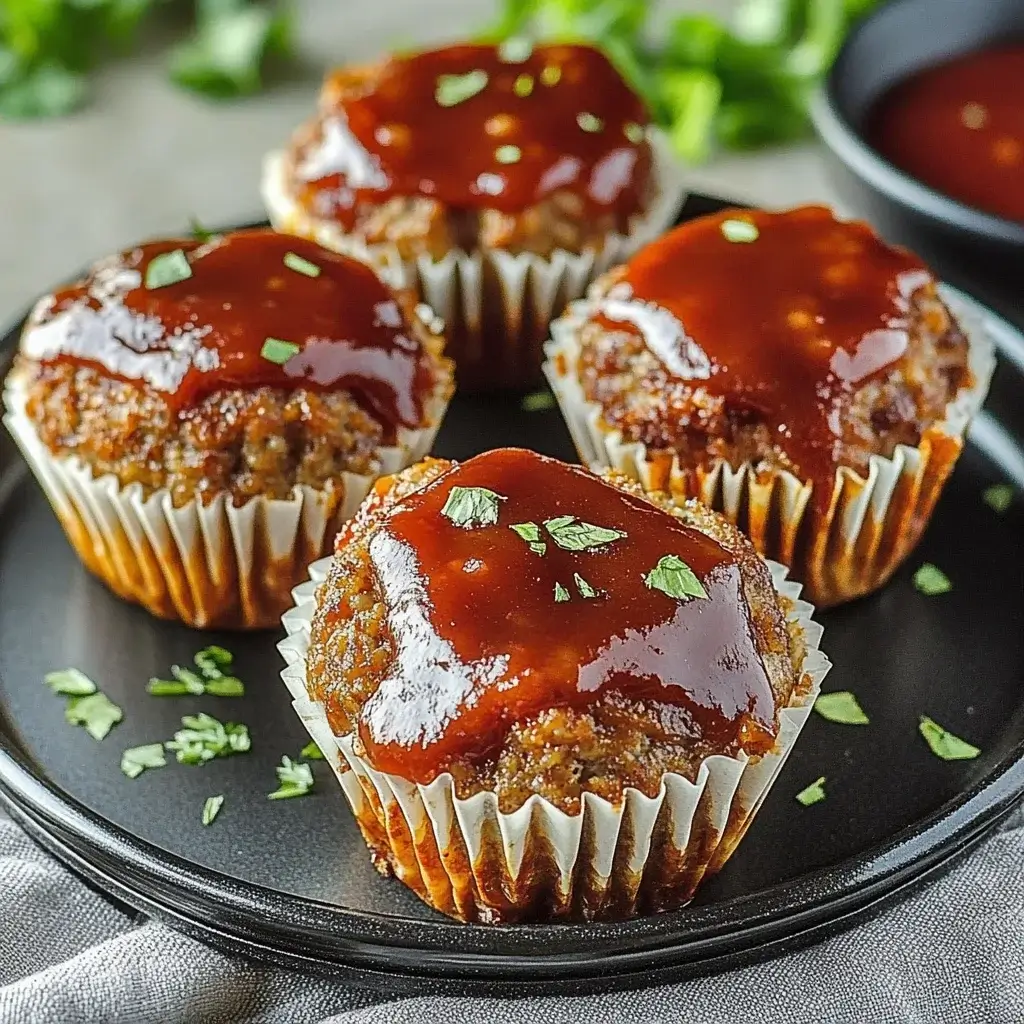
BBQ Meatloaf Muffins: A Delicious Twist You’ll Love!

Introduction to BBQ Meatloaf Muffins

When I think of comfort food, BBQ Meatloaf Muffins always come to mind. They’re like a warm hug on a plate, perfect for those busy weeknights when you want something hearty yet easy to prepare.

These little gems are not just a twist on traditional meatloaf; they’re a fun, portable version that makes serving a breeze. Whether you’re feeding a hungry family or impressing friends at a casual gathering, these muffins are sure to be a hit.

Let’s dive into this delicious recipe that’s bound to become a staple in your kitchen!

Why You’ll Love This BBQ Meatloaf Muffins

BBQ Meatloaf Muffins are a game-changer for anyone who craves comfort food without the fuss.

They come together in just 45 minutes, making them a quick solution for busy evenings.

The flavor is out of this world, with a smoky BBQ kick that elevates the classic meatloaf experience.

Plus, they’re perfectly portioned, so you can enjoy a satisfying meal without the guilt.

What’s not to love?

Ingredients for BBQ Meatloaf Muffins

Creating BBQ Meatloaf Muffins is a delightful adventure, and it all starts with gathering the right ingredients. Here’s what you’ll need:

  • Ground beef: The star of the show! It provides a rich flavor and satisfying texture. You can also swap it for ground turkey or chicken for a lighter option.
  • Breadcrumbs: These help bind the mixture together while adding a bit of crunch. Feel free to use whole wheat or gluten-free breadcrumbs if you prefer.
  • Parmesan cheese: A sprinkle of this adds a savory depth. If you’re feeling adventurous, try using cheddar or feta for a different twist.
  • Onion: Chopped onion brings sweetness and moisture. You can use red, yellow, or even green onions for a milder flavor.
  • Bell pepper: Adds color and a slight crunch. Any color works, but red or yellow will give a sweeter taste.
  • Garlic: Minced garlic infuses the muffins with a warm, aromatic flavor. Fresh is best, but garlic powder can work in a pinch.
  • Egg: This acts as a binder, helping everything stick together. If you’re looking for a vegan option, flaxseed meal can be a great substitute.
  • BBQ sauce: The secret ingredient that gives these muffins their signature flavor. Choose your favorite brand or make your own for a personal touch.
  • Worcestershire sauce: A dash of this adds umami and complexity. It’s a must-have in any savory dish!
  • Salt and black pepper: Essential for seasoning. Adjust to your taste, but don’t skip them!
  • Smoked paprika: This gives a lovely smoky flavor that complements the BBQ sauce perfectly. If you like heat, add a pinch of cayenne pepper.
  • Fresh parsley: For garnish, it adds a pop of color and freshness. You can also use chives or cilantro if you prefer.

For exact measurements, check the bottom of the article where you can find everything listed for easy printing. Happy cooking!

How to Make BBQ Meatloaf Muffins

Making BBQ Meatloaf Muffins is a straightforward process that yields delicious results. Follow these simple steps, and you’ll have a meal that’s sure to impress.

Step 1: Preheat the Oven

Start by preheating your oven to 350°F. This step is crucial because it ensures even cooking.

While the oven heats up, grease your muffin tin or line it with muffin liners. This will make it easier to remove the muffins later and keep them from sticking.

Step 2: Mix the Ingredients

In a large mixing bowl, combine all your ingredients.

Use your hands or a spatula to mix everything until well combined.

Be careful not to overmix, as this can make the muffins tough.

You want a nice, cohesive mixture that holds together but still has a bit of texture.

Step 3: Fill the Muffin Cups

Now it’s time to fill those muffin cups!

Scoop the meat mixture into each cup, filling them about three-quarters full.

This allows space for the muffins to expand as they bake.

If you like, drizzle a little extra BBQ sauce on top for added flavor.

Step 4: Bake the Muffins

Place the muffin tin in the preheated oven and bake for 25-30 minutes.

To check for doneness, use a meat thermometer.

The internal temperature should reach 160°F.

If you don’t have a thermometer, cut one open to ensure it’s no longer pink inside.

Step 5: Garnish and Serve

Once baked, let the muffins cool for a few minutes before removing them from the tin.

Garnish with chopped fresh parsley for a pop of color and freshness.

Serve them warm, and watch as everyone digs in!

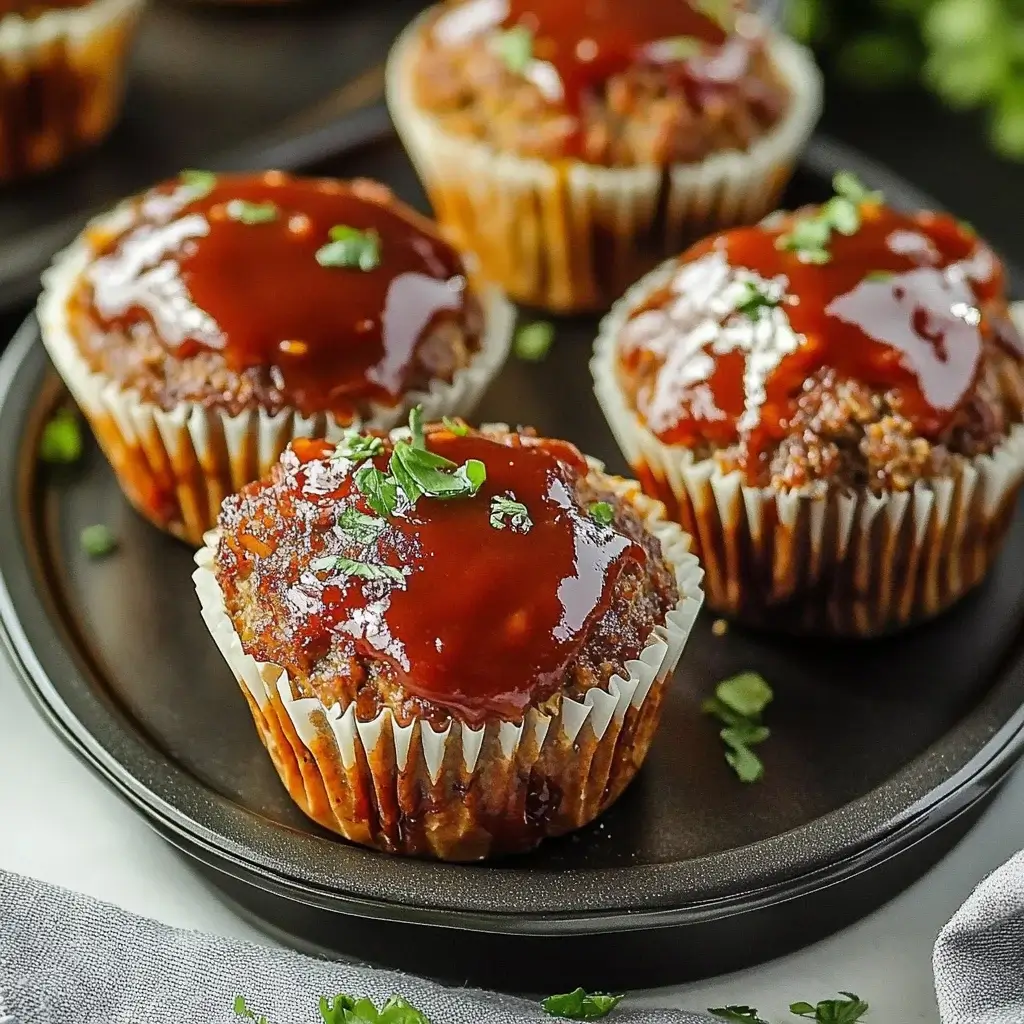
These BBQ Meatloaf Muffins are not just tasty; they’re also a feast for the eyes.

Tips for Success

  • Use lean ground beef for a healthier option without sacrificing flavor.
  • Don’t skip the resting time after baking; it helps the muffins firm up.
  • Experiment with different BBQ sauces to find your favorite flavor profile.
  • For extra moisture, add a splash of beef broth to the mixture.
  • Make a double batch and freeze leftovers for a quick meal later.

Equipment Needed

  • Muffin tin: Essential for shaping the muffins. If you don’t have one, a cupcake pan works too.
  • Mixing bowl: A large bowl for combining ingredients. Any size will do, just make sure it’s sturdy.
  • Measuring cups and spoons: For accurate ingredient measurements. You can also use a kitchen scale if you prefer.
  • Spatula or wooden spoon: Great for mixing. Your hands work too, but a spatula keeps it cleaner!

Variations

  • Turkey or Chicken: Swap ground beef for ground turkey or chicken for a lighter, leaner option.
  • Vegetable Boost: Add finely chopped vegetables like zucchini, carrots, or spinach for extra nutrition and flavor.
  • Spicy Kick: Mix in diced jalapeños or a dash of hot sauce for those who love a bit of heat.
  • BBQ Sauce Variety: Experiment with different BBQ sauces, such as honey BBQ or spicy chipotle, to change the flavor profile.
  • Cheese Lovers: Incorporate shredded cheese like cheddar or pepper jack into the mixture for a gooey surprise.

Serving Suggestions

  • Classic Sides: Pair with creamy mashed potatoes or buttery corn on the cob for a comforting meal.
  • Fresh Salad: A crisp green salad with a tangy vinaigrette balances the richness of the muffins.
  • Drink Pairing: Serve with a cold beer or a refreshing iced tea to complement the BBQ flavors.
  • Presentation: Arrange the muffins on a colorful platter and garnish with extra parsley for a vibrant touch.

FAQs about BBQ Meatloaf Muffins

Can I make BBQ Meatloaf Muffins ahead of time?

Absolutely! You can prepare the meat mixture a day in advance and store it in the fridge. Just fill the muffin cups and bake when you’re ready to serve. This makes for a quick dinner solution!

How do I store leftovers?

Leftover BBQ Meatloaf Muffins can be stored in an airtight container in the fridge for up to three days. You can also freeze them for up to three months. Just reheat in the oven or microwave when you’re ready to enjoy them again.

Can I use a different type of meat?

Yes! Ground turkey or chicken works well for a lighter version. You can even try ground pork for a different flavor profile. Just remember to adjust cooking times if needed.

What can I serve with BBQ Meatloaf Muffins?

These muffins pair wonderfully with classic sides like mashed potatoes, coleslaw, or a fresh garden salad. They also make a great addition to a BBQ spread!

Can I make these muffins gluten-free?

Definitely! Just substitute regular breadcrumbs with gluten-free breadcrumbs. You can also use oats or crushed gluten-free crackers as a binder. Enjoy your delicious BBQ Meatloaf Muffins without worry!

Final Thoughts

BBQ Meatloaf Muffins are more than just a meal; they’re a celebration of flavors and memories.

Each bite brings a delightful mix of smoky BBQ and savory goodness, making them a hit at any table.

Whether you’re cooking for family or hosting friends, these muffins are sure to spark joy and conversation.

Plus, their easy preparation means you can spend less time in the kitchen and more time enjoying the company of loved ones.

So, roll up your sleeves and dive into this recipe.

You’ll find that these little muffins pack a big punch of happiness!

Ranis

BBQ Meatloaf Muffins: A Delicious Twist You’ll Love!

BBQ Meatloaf Muffins are a delicious twist on traditional meatloaf, baked in muffin tins for easy serving and a fun presentation.
Prep Time 15 minutes
Cook Time 30 minutes
Total Time 45 minutes
Servings: 6 servings
Course: Main Dish
Cuisine: American
Calories: 250

Ingredients
  

  • 1 pound ground beef
  • 1 cup breadcrumbs
  • 1/2 cup grated Parmesan cheese
  • 1/2 cup chopped onion
  • 1/2 cup chopped bell pepper
  • 2 cloves garlic minced
  • 1 large egg
  • 1/4 cup BBQ sauce plus extra for topping
  • 1 teaspoon Worcestershire sauce
  • 1 teaspoon salt
  • 1/2 teaspoon black pepper
  • 1/2 teaspoon smoked paprika
  • 1/4 teaspoon cayenne pepper optional
  • 1/4 cup chopped fresh parsley for garnish

Method
 

  1. Preheat the oven to 350°F. Grease a muffin tin or line with muffin liners.
  2. In a large mixing bowl, combine the ground beef, breadcrumbs, Parmesan cheese, onion, bell pepper, garlic, egg, BBQ sauce, Worcestershire sauce, salt, black pepper, smoked paprika, and cayenne pepper (if using). Mix until well combined.
  3. Divide the meat mixture evenly among the muffin cups, filling each about three-quarters full. Drizzle a little extra BBQ sauce on top of each muffin.
  4. Bake in the preheated oven for 25-30 minutes, or until the meatloaf muffins are cooked through and reach an internal temperature of 160°F. Let them cool for a few minutes before removing from the tin.
  5. Garnish with chopped parsley before serving.

Nutrition

Serving: 1muffinCalories: 250kcalCarbohydrates: 10gProtein: 20gFat: 15gSaturated Fat: 6gPolyunsaturated Fat: 9gCholesterol: 70mgSodium: 600mgFiber: 1gSugar: 2g

Notes

  • For a healthier twist, substitute ground turkey or chicken for the beef.
  • You can also add finely chopped vegetables like zucchini or carrots for extra nutrition.
  • For a spicy kick, mix in some diced jalapeños or a dash of hot sauce into the meat mixture.

Tried this recipe?

Let us know how it was!

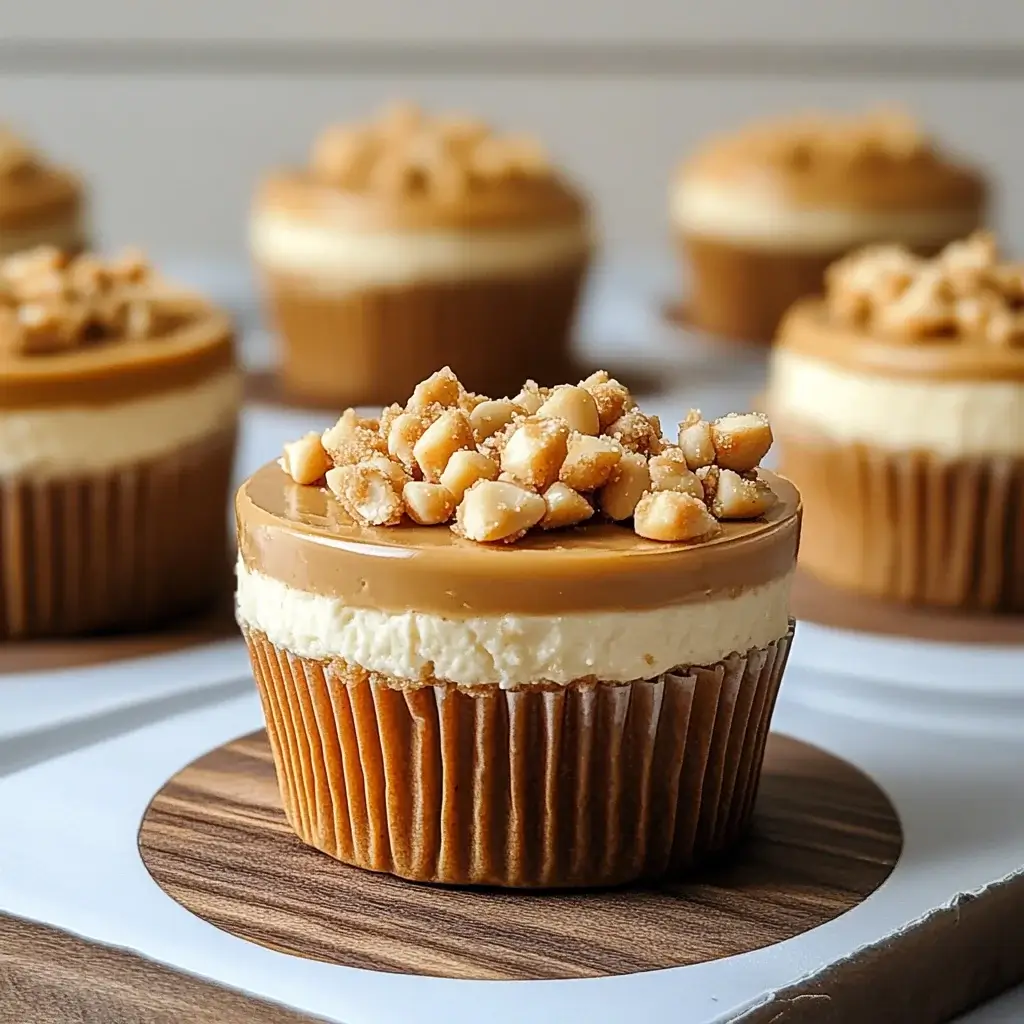
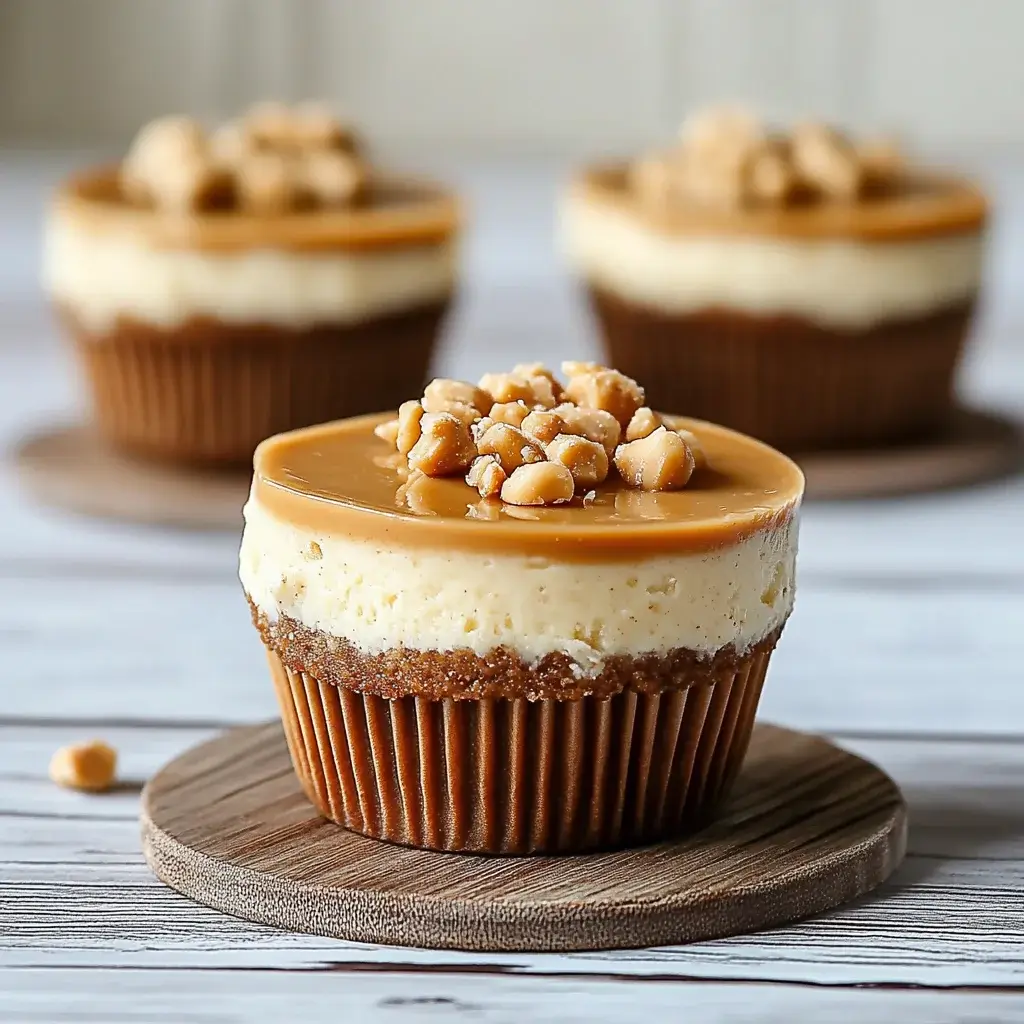
Peanut Butter Cottage Cheese Cheesecake Cups are irresistible!

Introduction to Peanut Butter Cottage Cheese Cheesecake Cups

There’s something magical about desserts that come together in a flash, and these Peanut Butter Cottage Cheese Cheesecake Cups are no exception.

As a busy home cook, I often find myself juggling work, family, and the occasional craving for something sweet.

These little cups are a quick solution for those hectic days when you want to impress your loved ones without spending hours in the kitchen.

With creamy peanut butter and the unexpected twist of cottage cheese, they deliver a delightful taste that’s both satisfying and guilt-free.

Trust me, your taste buds will thank you!

Why You’ll Love This Peanut Butter Cottage Cheese Cheesecake Cups

These Peanut Butter Cottage Cheese Cheesecake Cups are a game-changer for dessert lovers.

They’re incredibly easy to whip up, taking just 15 minutes of prep time.

The creamy texture and rich flavor will have you savoring every bite.

Plus, they’re a healthier alternative to traditional cheesecake, making them perfect for those who want to indulge without the guilt.

You’ll find yourself reaching for these delightful cups again and again!

Ingredients for Peanut Butter Cottage Cheese Cheesecake Cups

Creating these Peanut Butter Cottage Cheese Cheesecake Cups is a breeze, and the ingredients are simple yet delightful.

Here’s what you’ll need:

  • Cottage cheese: This creamy base adds protein and a unique texture, making the cheesecake light yet satisfying.
  • Creamy peanut butter: The star of the show! It brings a rich, nutty flavor that pairs perfectly with the cottage cheese.
  • Honey or maple syrup: A natural sweetener that balances the flavors and adds a touch of sweetness.
  • Vanilla extract: Just a splash enhances the overall flavor, giving it that classic cheesecake essence.
  • Powdered sugar: This fine sugar dissolves easily, ensuring a smooth filling without any gritty texture.
  • Lemon juice: A hint of acidity brightens the flavors and adds a refreshing twist.
  • Whipped cream (optional): For those who want an extra layer of indulgence, this topping adds a light and airy finish.
  • Crushed graham crackers: These create a delicious crust that adds crunch and a hint of sweetness.
  • Melted butter: This binds the graham cracker crumbs together, ensuring a sturdy base for your cheesecake cups.

Feel free to get creative! You can substitute Greek yogurt for cottage cheese if you prefer a creamier texture.

For those with a sweet tooth, adding chocolate chips or a drizzle of chocolate sauce can elevate these cups to a whole new level.

Exact quantities for each ingredient are available at the bottom of the article for easy printing.

How to Make Peanut Butter Cottage Cheese Cheesecake Cups

Making these Peanut Butter Cottage Cheese Cheesecake Cups is a delightful journey that’s as easy as pie—well, easier!

Let’s dive into the steps that will have you enjoying these creamy treats in no time.

Step 1: Prepare the Graham Cracker Crust

Start by grabbing a medium bowl.

Combine the crushed graham crackers with the melted butter.

Mix them together until the crumbs are evenly coated.

Now, divide this mixture among your serving cups.

Press down gently to compact the crust.

This step is crucial; a well-formed crust will hold everything together beautifully.

Step 2: Blend the Filling

Next, it’s time to create that luscious filling.

In a blender or food processor, add the cottage cheese, creamy peanut butter, honey or maple syrup, vanilla extract, powdered sugar, and lemon juice.

Blend until the mixture is smooth and creamy.

Don’t forget to scrape down the sides as needed.

This ensures every bit of goodness is mixed in, creating a velvety texture that’s simply irresistible.

Step 3: Assemble the Cups

Now comes the fun part—assembling your cheesecake cups!

Spoon the peanut butter mixture over the crust in each cup.

Fill them about three-quarters full, leaving a little room for toppings if you choose to add them later.

The layers of crust and filling create a beautiful contrast that’s as pleasing to the eye as it is to the palate.

Step 4: Add Whipped Cream

If you’re feeling indulgent, this step is for you!

Top each cup with a dollop of whipped cream.

This optional addition adds a light and airy richness that complements the creamy filling perfectly.

It’s like the cherry on top of an already fantastic dessert!

Step 5: Chill and Serve

Finally, it’s time to let these cups chill out.

Refrigerate them for at least 2 hours.

This step is essential for allowing the flavors to meld and the cups to set properly.

When you’re ready to serve, just pull them out, and enjoy the delightful combination of peanut butter and cottage cheese in every bite!

Tips for Success

  • Use room temperature ingredients for a smoother filling.
  • Don’t skip the chilling time; it enhances the flavors and texture.
  • For a crunchier crust, bake the graham cracker mixture for 5-7 minutes before adding the filling.
  • Experiment with different nut butters for unique flavors.
  • Keep leftovers covered in the fridge for up to three days.

Equipment Needed

  • Medium bowl: For mixing the graham cracker crust. A large mixing bowl works too.
  • Blender or food processor: Essential for creating a smooth filling. A hand mixer can also do the job.
  • Serving cups: Use small glasses or ramekins for a charming presentation.

Variations

  • Chocolate Peanut Butter Cups: Add 2 tablespoons of cocoa powder to the filling for a rich chocolate flavor.
  • Nut-Free Option: Substitute sunflower seed butter for peanut butter to make it nut-free.
  • Fruit-Infused Cups: Mix in some mashed bananas or pureed strawberries for a fruity twist.
  • Vegan Version: Use a plant-based yogurt instead of cottage cheese and maple syrup for sweetness.
  • Spiced Variation: Add a pinch of cinnamon or nutmeg to the filling for a warm, spiced flavor.

Serving Suggestions

  • Pair these cheesecake cups with fresh fruit like sliced strawberries or blueberries for a refreshing contrast.
  • Serve alongside a cup of coffee or a glass of cold milk to enhance the flavors.
  • For a fun presentation, garnish with crushed nuts or a drizzle of chocolate sauce.

FAQs about Peanut Butter Cottage Cheese Cheesecake Cups

Curious about these delightful Peanut Butter Cottage Cheese Cheesecake Cups? You’re not alone! Here are some common questions I’ve encountered, along with answers to help you on your culinary journey.

Can I use Greek yogurt instead of cottage cheese?

Absolutely! Greek yogurt can be a fantastic substitute for cottage cheese. It will give your cheesecake cups a creamier texture and a slightly tangy flavor that complements the peanut butter beautifully.

How long do these cheesecake cups last in the fridge?

These cups can be stored in the refrigerator for up to three days. Just make sure to keep them covered to maintain their freshness and flavor.

Can I make these cheesecake cups ahead of time?

Yes! In fact, making them a day in advance is a great idea. The flavors meld beautifully as they chill, making them even more delicious when you’re ready to serve.

What can I use instead of graham crackers for the crust?

If you’re looking for alternatives, crushed cookies like Oreos or digestive biscuits work well. You can also use crushed nuts for a gluten-free option!

Are these cheesecake cups suitable for a gluten-free diet?

To make these cups gluten-free, simply use gluten-free graham crackers or any gluten-free cookie for the crust. The filling is naturally gluten-free, so you’re good to go!

Final Thoughts

Creating these Peanut Butter Cottage Cheese Cheesecake Cups is more than just whipping up a dessert; it’s about bringing joy to your kitchen and delighting those you love.

Each bite is a creamy, nutty explosion that feels indulgent yet guilt-free.

Whether you’re treating yourself after a long day or impressing friends at a gathering, these cups are sure to be a hit.

The best part? They’re simple enough to make any day of the week.

So, roll up your sleeves, gather your ingredients, and let the magic of these cheesecake cups brighten your day!

Ranis

Peanut Butter Cottage Cheese Cheesecake Cups are irresistible!

Peanut Butter Cottage Cheese Cheesecake Cups are a delicious and creamy dessert that combines the rich flavors of peanut butter and cottage cheese, topped with a graham cracker crust.
Prep Time 15 minutes
Total Time 2 hours 15 minutes
Course: Dessert
Cuisine: American
Calories: 290

Ingredients
  

  • 1 cup cottage cheese
  • 1/2 cup creamy peanut butter
  • 1/4 cup honey or maple syrup
  • 1 teaspoon vanilla extract
  • 1/4 cup powdered sugar
  • 1/2 teaspoon lemon juice
  • 1/2 cup whipped cream optional, for topping
  • 1/4 cup crushed graham crackers for crust
  • 1 tablespoon melted butter for crust

Method
 

  1. In a medium bowl, combine the crushed graham crackers and melted butter. Mix until the crumbs are evenly coated. Divide the mixture evenly among serving cups to form the crust at the bottom. Press down gently to compact it.
  2. In a blender or food processor, add the cottage cheese, peanut butter, honey (or maple syrup), vanilla extract, powdered sugar, and lemon juice. Blend until smooth and creamy, scraping down the sides as needed.
  3. Spoon the peanut butter mixture over the crust in each cup, filling them about three-quarters full.
  4. If using, top each cup with whipped cream for added richness.
  5. Refrigerate the cheesecake cups for at least 2 hours to allow them to set and chill before serving.

Nutrition

Serving: 1cupCalories: 290kcalCarbohydrates: 18gProtein: 12gFat: 20gSaturated Fat: 4gPolyunsaturated Fat: 16gCholesterol: 10mgSodium: 150mgFiber: 2gSugar: 10g

Notes

  • For a chocolate twist, add 2 tablespoons of cocoa powder to the peanut butter mixture before blending.
  • You can substitute Greek yogurt for cottage cheese for a creamier texture and a tangy flavor.

Tried this recipe?

Let us know how it was!

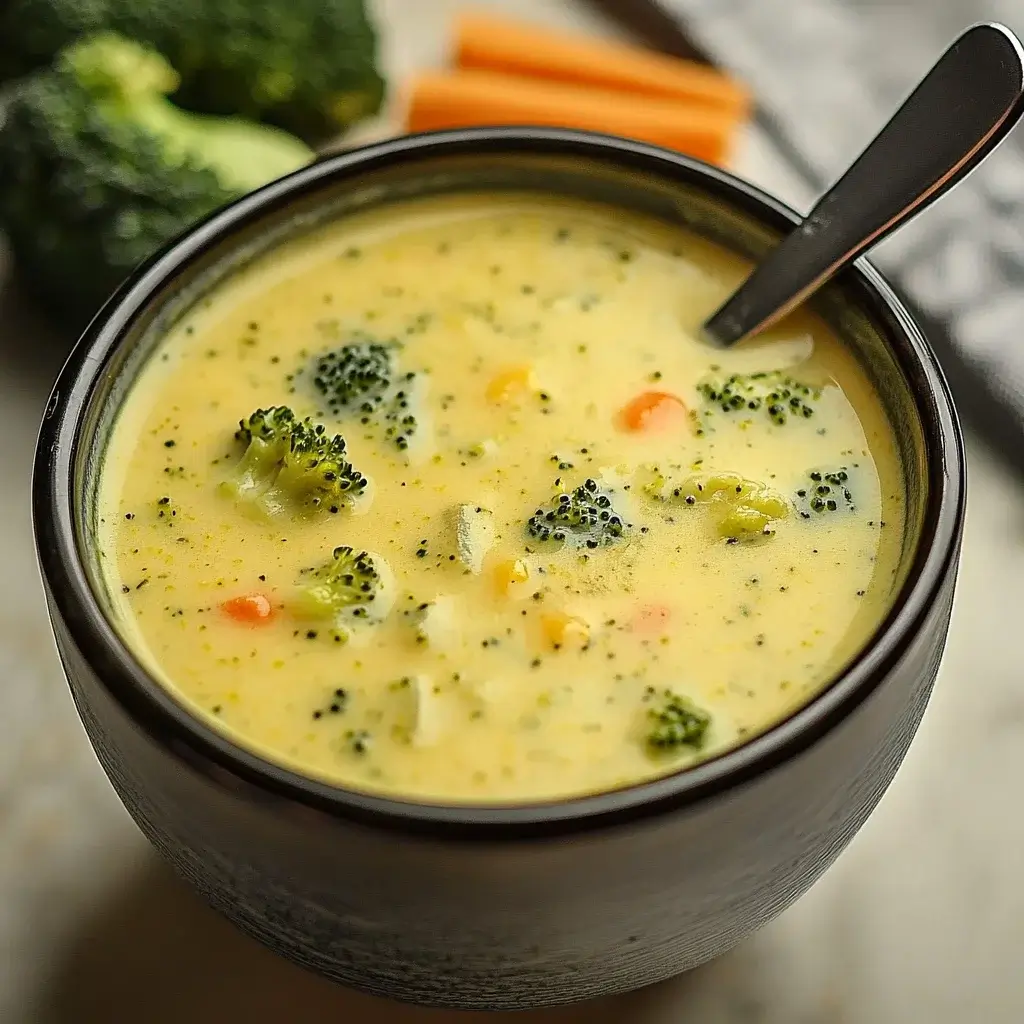
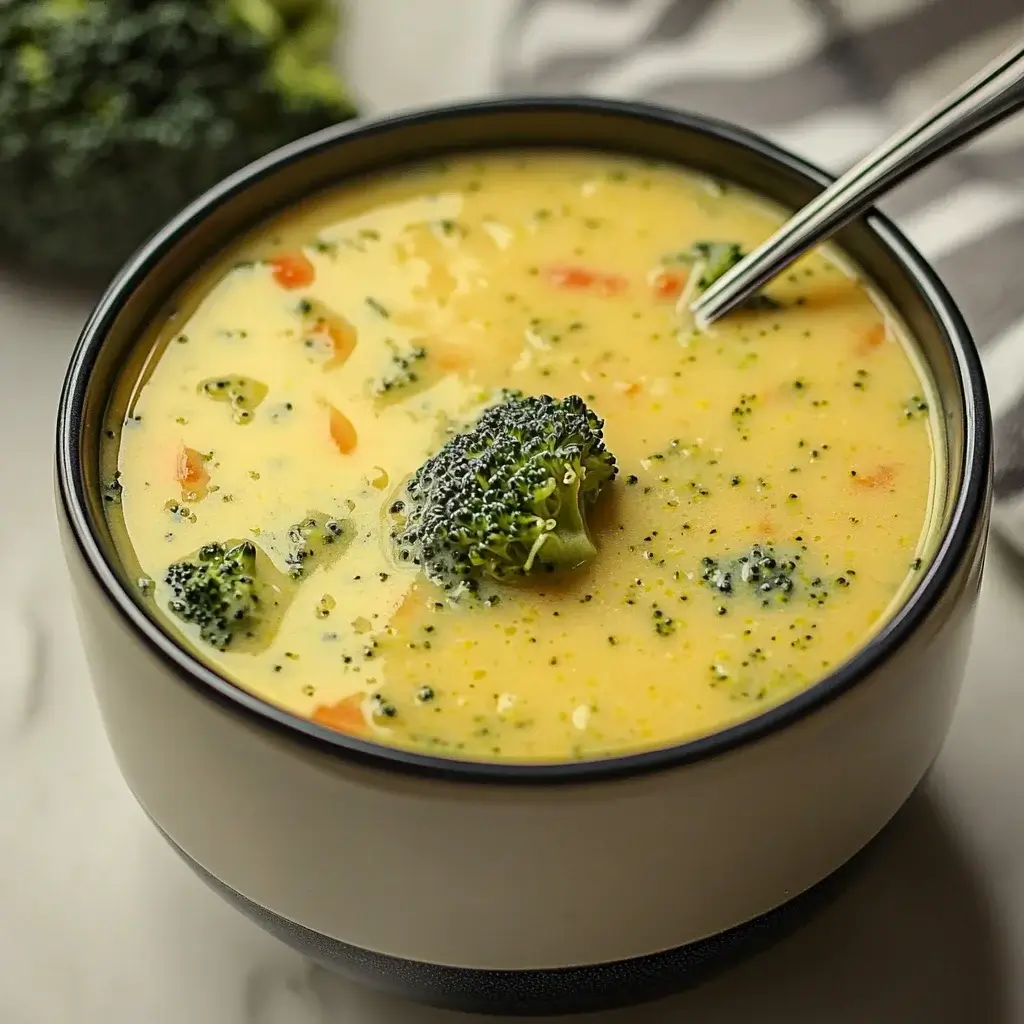
Creamy Broccoli Cheddar Soup: Quick & Delicious Recipe!

Introduction to Creamy Broccoli Cheddar Soup

There’s something magical about a warm bowl of soup, especially when it’s a creamy broccoli cheddar soup. This dish is like a cozy hug on a chilly evening, perfect for those busy days when you need a quick solution. I remember my mom whipping up a similar recipe when I was a kid, filling the house with that irresistible cheesy aroma. It’s a comforting meal that not only satisfies your hunger but also warms your heart. Whether you’re looking to impress your loved ones or just need a simple dinner, this creamy broccoli cheddar soup is your go-to recipe.

Why You’ll Love This Creamy Broccoli Cheddar Soup

This creamy broccoli cheddar soup is a game-changer for busy weeknights. It’s quick to prepare, taking just 30 minutes from start to finish. The rich, cheesy flavor combined with tender broccoli creates a delightful comfort food experience. Plus, it’s versatile enough to please even the pickiest eaters. You’ll find yourself making this soup again and again, not just for its taste but for the joy it brings to your table.

Ingredients for Creamy Broccoli Cheddar Soup

Gathering the right ingredients is the first step to creating a delicious creamy broccoli cheddar soup. Here’s what you’ll need:

  • Unsalted butter: This adds richness and depth to the soup. You can use olive oil as a lighter alternative.
  • Onion: Diced onion brings a sweet, aromatic base that enhances the overall flavor.
  • Garlic: Minced garlic adds a punch of flavor, making the soup even more irresistible.
  • Fresh broccoli florets: The star of the show! Fresh broccoli not only provides nutrition but also a vibrant color.
  • Vegetable or chicken broth: This forms the soup’s foundation. Choose vegetable broth for a vegetarian option or chicken broth for added flavor.
  • Whole milk: Creaminess is key! Whole milk gives the soup a luscious texture, but you can swap it for unsweetened almond milk for a lighter version.
  • Shredded sharp cheddar cheese: This is what makes the soup cheesy and comforting. Feel free to experiment with different cheese varieties.
  • Salt: Essential for enhancing all the flavors in the soup.
  • Black pepper: A dash of black pepper adds a subtle heat.
  • Red pepper flakes (optional): For those who like a little kick, these flakes can elevate the flavor profile.
  • Cornstarch mixed with cold water (optional): If you prefer a thicker soup, this mixture can help achieve that creamy consistency.

For exact quantities, check the bottom of the article where you can find everything listed for easy printing. Happy cooking!

How to Make Creamy Broccoli Cheddar Soup

Now that you have your ingredients ready, let’s dive into the steps to create this creamy broccoli cheddar soup. Each step is simple, and I promise you’ll be rewarded with a delicious bowl of comfort.

Step 1: Sauté the Aromatics

Start by melting the unsalted butter in a large pot over medium heat. Once it’s bubbling, toss in the diced onion. Sauté it for about 5 minutes until it turns translucent. The aroma will fill your kitchen, making your mouth water. Add the minced garlic and cook for another minute. This step lays the flavorful foundation for your soup.

Step 2: Add Broccoli and Broth

Next, it’s time to add the fresh broccoli florets and your choice of vegetable or chicken broth. Bring the mixture to a boil, then reduce the heat and let it simmer for about 15 minutes. You want the broccoli to become tender but still vibrant. This is where the magic begins, as the flavors meld together beautifully.

Step 3: Blend the Soup

Once the broccoli is tender, grab your immersion blender. Carefully blend the soup until it’s smooth. If you prefer a chunkier texture, blend only half and leave the rest as is. This gives you that delightful contrast of creamy and chunky in every spoonful. If you don’t have an immersion blender, a regular blender works too—just be cautious with the hot liquid!

Step 4: Incorporate Milk and Cheese

Now, stir in the whole milk and shredded sharp cheddar cheese. Watch as the cheese melts into the soup, creating a rich, creamy texture. This is the moment when your kitchen transforms into a cheesy paradise. Don’t forget to season with salt, black pepper, and red pepper flakes if you’re feeling adventurous!

Step 5: Thicken the Soup (Optional)

If you like your soup on the thicker side, mix cornstarch with cold water in a small bowl. Stir this mixture into the soup and cook for an additional 2-3 minutes. You’ll notice the soup becoming luxuriously thick. It’s all about personal preference here, so adjust to your liking!

Step 6: Final Seasoning

Before serving, taste your soup and adjust the seasoning as needed. A little extra salt or pepper can make a world of difference. Once you’re satisfied, it’s time to ladle this creamy broccoli cheddar soup into bowls and enjoy the fruits of your labor!

Tips for Success

  • Use fresh broccoli for the best flavor and texture.
  • Don’t rush the sautéing process; it builds a rich base.
  • Adjust the thickness by adding more or less cornstarch mixture.
  • Experiment with different cheeses for unique flavors.
  • For a smoother soup, blend longer until desired consistency is reached.

Equipment Needed

  • Large pot: Essential for cooking the soup. A Dutch oven works great too.
  • Immersion blender: Perfect for blending the soup smoothly. A regular blender can be used if you don’t have one.
  • Cutting board and knife: For chopping your veggies.
  • Measuring cups: Handy for accurate ingredient portions.

Variations

  • Cheesy Broccoli and Cauliflower: Mix in cauliflower florets for a delightful twist on the classic flavor.
  • Spicy Broccoli Cheddar: Add diced jalapeños or a splash of hot sauce for an extra kick.
  • Protein-Packed: Stir in cooked chicken, turkey, or even crispy bacon for a heartier meal.
  • Vegan Version: Substitute whole milk with coconut milk and use vegan cheese for a plant-based option.
  • Herb-Infused: Add fresh herbs like thyme or basil for a burst of freshness and flavor.

Serving Suggestions

  • Crusty Bread: Serve with a warm, crusty baguette or sourdough for dipping.
  • Salad: Pair with a light side salad for a refreshing contrast.
  • Wine: A glass of white wine, like Chardonnay, complements the soup beautifully.
  • Garnish: Top with extra cheese or a sprinkle of fresh herbs for a pop of color.

FAQs about Creamy Broccoli Cheddar Soup

Can I make creamy broccoli cheddar soup ahead of time?

Absolutely! This soup stores well in the fridge for up to three days. Just reheat gently on the stove, adding a splash of milk if it thickens too much.

Can I freeze creamy broccoli cheddar soup?

Yes, you can freeze it! Just make sure to let it cool completely before transferring it to an airtight container. It can last up to three months in the freezer. Thaw in the fridge overnight before reheating.

What can I use instead of cheddar cheese?

If you’re looking for alternatives, try Gruyère or Monterey Jack for a different flavor profile. You can even mix cheeses for a unique twist!

How can I make this soup spicier?

For a spicy kick, add diced jalapeños or a few dashes of hot sauce. Red pepper flakes are also a great option to elevate the heat level.

Is this soup gluten-free?

Yes, as long as you use gluten-free broth and skip the cornstarch or use a gluten-free thickener, this creamy broccoli cheddar soup can be enjoyed by everyone!

Final Thoughts

Creating this creamy broccoli cheddar soup is more than just cooking; it’s about crafting a moment of joy. Each spoonful brings warmth and comfort, reminding me of cozy family dinners and laughter around the table. The rich, cheesy flavor combined with the vibrant broccoli makes it a dish that pleases both the palate and the soul. Whether you’re enjoying it solo or sharing it with loved ones, this soup has a way of turning an ordinary day into something special. So, grab your ingredients and let the magic unfold in your kitchen!

Ranis

Creamy Broccoli Cheddar Soup: Quick & Delicious Recipe!

A quick and delicious recipe for creamy broccoli cheddar soup, perfect for a comforting meal.
Prep Time 10 minutes
Cook Time 20 minutes
Total Time 30 minutes
Servings: 6 servings
Course: Soup
Cuisine: American
Calories: 220

Ingredients
  

  • 2 tablespoons unsalted butter
  • 1 medium onion diced
  • 2 cloves garlic minced
  • 4 cups fresh broccoli florets
  • 4 cups vegetable or chicken broth
  • 1 cup whole milk
  • 1 cup shredded sharp cheddar cheese
  • 1 teaspoon salt
  • 1/2 teaspoon black pepper
  • 1/4 teaspoon red pepper flakes optional
  • 1 tablespoon cornstarch mixed with 2 tablespoons cold water optional for thickening

Method
 

  1. In a large pot, melt the butter over medium heat. Add the diced onion and sauté until translucent, about 5 minutes. Stir in the minced garlic and cook for an additional minute until fragrant.
  2. Add the broccoli florets and broth to the pot. Bring to a boil, then reduce the heat and let it simmer for about 15 minutes, or until the broccoli is tender.
  3. Using an immersion blender, carefully blend the soup until smooth. If you prefer a chunkier texture, blend only half of the soup and leave the rest as is.
  4. Stir in the whole milk and shredded cheddar cheese until melted and well combined. Season with salt, black pepper, and red pepper flakes if using.
  5. If you prefer a thicker soup, stir in the cornstarch mixture and cook for an additional 2-3 minutes until the soup thickens.
  6. Taste and adjust seasoning as needed before serving.

Nutrition

Serving: 1cupCalories: 220kcalCarbohydrates: 10gProtein: 10gFat: 15gSaturated Fat: 9gPolyunsaturated Fat: 3gCholesterol: 40mgSodium: 800mgFiber: 2gSugar: 3g

Notes

  • For a lighter version, substitute whole milk with unsweetened almond milk.
  • Add cooked chicken or turkey for extra protein and heartiness.

Tried this recipe?

Let us know how it was!

Cottage Cheese Bagels: Discover a Delicious Recipe!

Introduction to Cottage Cheese Bagels

There’s something magical about the smell of freshly baked bagels wafting through the kitchen. It takes me back to lazy Sunday mornings, where breakfast was a family affair. Today, I’m excited to share my recipe for Cottage Cheese Bagels. These delightful bagels are not only easy to whip up but also a fantastic way to kickstart your day. Whether you’re rushing out the door or enjoying a leisurely brunch, these bagels are the perfect solution. They’re fluffy, flavorful, and packed with protein, making them a delicious choice for breakfast or a snack. Let’s dive in!

Why You’ll Love This Cottage Cheese Bagels

These Cottage Cheese Bagels are a game-changer for busy mornings. They come together in just 40 minutes, making them a quick and satisfying option. The combination of cottage cheese and a hint of honey creates a delightful flavor that’s both savory and slightly sweet. Plus, they’re versatile! You can enjoy them plain, topped with cream cheese, or even as a base for your favorite sandwich. Trust me, you’ll be hooked!

Ingredients for Cottage Cheese Bagels

Gathering the right ingredients is the first step to creating your delicious Cottage Cheese Bagels. Here’s what you’ll need:

  • All-purpose flour: The backbone of your bagels, providing structure and chewiness.
  • Baking powder: This helps the bagels rise, giving them that fluffy texture.
  • Baking soda: A little boost for browning and flavor enhancement.
  • Salt: Essential for balancing flavors and enhancing the overall taste.
  • Cottage cheese: The star ingredient! It adds moisture and protein, making these bagels unique.
  • Egg: Acts as a binder, helping to hold everything together while adding richness.
  • Honey: A touch of sweetness that complements the savory elements beautifully.
  • Olive oil: Adds moisture and a hint of flavor, making the bagels tender.
  • Shredded cheddar cheese (optional): For those who crave a cheesy twist, this adds a delightful flavor.
  • Sesame seeds or everything bagel seasoning (optional): Perfect for topping, adding crunch and extra flavor.

For exact measurements, check the bottom of the article where you can find everything listed for easy printing. Feel free to get creative with substitutions! Whole wheat flour can be used for a healthier option, or you can swap honey for maple syrup if you prefer. The possibilities are endless!

How to Make Cottage Cheese Bagels

Now that you have your ingredients ready, let’s get to the fun part: making those delicious Cottage Cheese Bagels. Follow these simple steps, and you’ll have fresh bagels in no time!

Step 1: Preheat and Prepare

First things first, preheat your oven to 375°F (190°C). This ensures your bagels bake evenly and come out perfectly golden. While the oven warms up, line a baking sheet with parchment paper. This little trick makes cleanup a breeze!

Step 2: Mix Dry Ingredients

In a large mixing bowl, combine the all-purpose flour, baking powder, baking soda, and salt. Give it a good stir to mix everything together. This step is crucial because it ensures that your bagels rise beautifully and have a balanced flavor.

Step 3: Combine Wet Ingredients

In another bowl, whisk together the cottage cheese, egg, honey, and olive oil until smooth. The cottage cheese is the secret weapon here, adding moisture and protein. Make sure there are no lumps; you want a creamy mixture that blends well with the dry ingredients.

Step 4: Form the Dough

Now, pour the wet ingredients into the dry mixture. Stir until a dough forms. If you’re feeling adventurous, fold in the shredded cheddar cheese at this point for an extra cheesy kick. The dough should be slightly sticky but manageable.

Step 5: Shape the Bagels

Turn the dough out onto a lightly floured surface. Knead it gently for about a minute until it’s smooth. Then, divide the dough into six equal portions. Roll each portion into a ball and poke a hole in the center to create that classic bagel shape. Don’t worry if they’re not perfect; they’ll taste amazing regardless!

Step 6: Bake the Bagels

Place your shaped bagels on the prepared baking sheet. If you like, sprinkle sesame seeds or everything bagel seasoning on top for added flavor. Bake in the preheated oven for 20-25 minutes, or until they’re golden brown. The aroma will fill your kitchen, and you’ll be counting down the minutes until you can dig in!

Tips for Success

  • Use room temperature ingredients for better mixing and texture.
  • Don’t over-knead the dough; a minute is all you need for a smooth finish.
  • Experiment with toppings! Try poppy seeds or dried herbs for a unique twist.
  • For a chewier bagel, let the shaped dough rest for 10 minutes before baking.
  • Store leftovers in an airtight container to keep them fresh.

Equipment Needed

  • Mixing bowls: A large bowl for dry ingredients and a smaller one for wet ingredients.
  • Measuring cups and spoons: Essential for accurate ingredient amounts.
  • Baking sheet: A standard sheet works, but a stone or cast iron can enhance browning.
  • Parchment paper: For easy cleanup; aluminum foil is a good alternative.
  • Rolling pin: Not necessary, but helpful for shaping the dough evenly.

Variations

  • Herb-Infused Bagels: Add dried herbs like rosemary or thyme to the dough for a fragrant twist.
  • Spicy Kick: Mix in some crushed red pepper flakes or jalapeños for a spicy version.
  • Sweet Cinnamon Bagels: Incorporate cinnamon and a bit of sugar into the dough for a sweet treat.
  • Gluten-Free Option: Substitute all-purpose flour with a gluten-free blend for a celiac-friendly version.
  • Nutty Flavor: Add chopped nuts or seeds like sunflower or flaxseed for added crunch and nutrition.

Serving Suggestions

  • Pair your Cottage Cheese Bagels with a smear of cream cheese or avocado for a creamy contrast.
  • Serve alongside fresh fruit or a light salad for a balanced meal.
  • Enjoy with a hot cup of coffee or herbal tea to elevate your breakfast experience.
  • For a fun presentation, slice the bagels and create a mini bagel sandwich bar with various toppings.

FAQs about Cottage Cheese Bagels

As you embark on your journey to make Cottage Cheese Bagels, you might have a few questions. Here are some common queries that can help you along the way:

Can I use low-fat cottage cheese?

Absolutely! Low-fat cottage cheese works just as well. It will still provide moisture and protein, keeping your bagels deliciously fluffy.

How do I store leftover bagels?

To keep your bagels fresh, store them in an airtight container at room temperature for up to three days. You can also freeze them for longer storage. Just pop them in the toaster when you’re ready to enjoy!

Can I make these bagels ahead of time?

Yes! You can prepare the dough and shape the bagels, then refrigerate them for up to 24 hours before baking. Just let them sit at room temperature for about 15 minutes before popping them in the oven.

What can I use instead of honey?

If you prefer a different sweetener, maple syrup or agave nectar can be great alternatives. They’ll add a unique flavor while keeping the sweetness intact.

Are these bagels suitable for a vegetarian diet?

Yes! These Cottage Cheese Bagels are vegetarian-friendly, making them a perfect choice for anyone looking for a tasty breakfast option.

Final Thoughts

Making Cottage Cheese Bagels is more than just a cooking task; it’s a delightful experience that fills your kitchen with warmth and mouthwatering aromas. Each bite is a reminder of the joy that comes from creating something delicious at home. Whether you enjoy them fresh out of the oven or toasted with your favorite spread, these bagels are sure to bring a smile to your face. Plus, they’re a fantastic way to impress family and friends. So roll up your sleeves, gather your ingredients, and let the magic of homemade bagels brighten your day!

Ranis

Cottage Cheese Bagels: Discover a Delicious Recipe!

A delicious recipe for homemade cottage cheese bagels that are easy to make and perfect for breakfast or a snack.
Prep Time 15 minutes
Cook Time 25 minutes
Total Time 40 minutes
Servings: 6 bagels
Course: Breakfast
Cuisine: American
Calories: 180

Ingredients
  

  • 2 cups all-purpose flour
  • 1 teaspoon baking powder
  • 1/2 teaspoon baking soda
  • 1/2 teaspoon salt
  • 1 cup cottage cheese
  • 1 large egg
  • 1 tablespoon honey
  • 1 tablespoon olive oil
  • 1/4 cup shredded cheddar cheese optional
  • Sesame seeds or everything bagel seasoning for topping optional

Method
 

  1. Preheat your oven to 375°F (190°C) and line a baking sheet with parchment paper.
  2. In a large mixing bowl, combine the flour, baking powder, baking soda, and salt. Mix well.
  3. In another bowl, whisk together the cottage cheese, egg, honey, and olive oil until smooth.
  4. Pour the wet ingredients into the dry ingredients and stir until a dough forms. If using, fold in the shredded cheddar cheese.
  5. Turn the dough out onto a lightly floured surface and knead gently for about 1 minute until smooth.
  6. Divide the dough into 6 equal portions. Roll each portion into a ball and then poke a hole in the center to form a bagel shape.
  7. Place the bagels on the prepared baking sheet. If desired, sprinkle sesame seeds or everything bagel seasoning on top.
  8. Bake in the preheated oven for 20-25 minutes, or until golden brown.
  9. Allow the bagels to cool slightly on a wire rack before serving.

Nutrition

Serving: 1bagelCalories: 180kcalCarbohydrates: 24gProtein: 8gFat: 5gSaturated Fat: 1gPolyunsaturated Fat: 4gCholesterol: 30mgSodium: 300mgFiber: 1gSugar: 1g

Notes

  • For a sweeter bagel, add 1-2 tablespoons of sugar or a sprinkle of cinnamon to the dough.
  • Try adding herbs like garlic powder or onion powder to the dough for extra flavor.

Tried this recipe?

Let us know how it was!

Crispy Salmon Patties: Discover Your New Favorite Recipe!

Introduction to Crispy Salmon Patties

There’s something special about a dish that brings back memories of family gatherings and laughter around the dinner table. Crispy Salmon Patties are just that—a delightful blend of flavors and textures that can turn any meal into a celebration. Whether you’re racing against the clock on a busy weeknight or looking to impress your friends at a weekend get-together, these patties are your go-to solution. They’re quick to whip up, satisfying, and packed with nutrition. Trust me, once you try them, they’ll become a staple in your kitchen!

Why You’ll Love This Crispy Salmon Patties

These Crispy Salmon Patties are a game-changer for anyone who craves deliciousness without the fuss. They come together in just 25 minutes, making them perfect for those hectic evenings. The combination of flaky salmon and crunchy breadcrumbs creates a satisfying bite that’s hard to resist. Plus, they’re versatile enough to serve as a snack, a main dish, or even a sandwich. You’ll love how easy they are to make and how great they taste!

Ingredients for Crispy Salmon Patties

Gathering the right ingredients is the first step to creating these mouthwatering Crispy Salmon Patties. Here’s what you’ll need:

  • Pink Salmon: The star of the show! Canned pink salmon is convenient and packed with flavor. You can also use fresh salmon if you prefer.
  • Breadcrumbs: These add the perfect crunch. Use plain or seasoned breadcrumbs, or even panko for extra crispiness.
  • Onion: Finely chopped onion brings a subtle sweetness and depth to the patties.
  • Bell Pepper: Any color works! It adds a pop of color and a fresh crunch.
  • Mayonnaise: This creamy ingredient binds everything together and adds moisture. Greek yogurt can be a lighter alternative.
  • Egg: Acts as a binder, helping the patties hold their shape while cooking.
  • Dijon Mustard: A touch of tanginess that elevates the flavor profile.
  • Garlic Powder: For that aromatic kick. Fresh garlic can be used if you prefer a stronger flavor.
  • Salt and Black Pepper: Essential seasonings to enhance all the flavors.
  • Fresh Parsley: Optional, but it adds a lovely freshness and color.
  • Olive Oil: For frying, giving the patties that golden, crispy exterior.

For exact measurements, check the bottom of the article where you can find everything listed for easy printing. Happy cooking!

How to Make Crispy Salmon Patties

Creating these Crispy Salmon Patties is a breeze! Follow these simple steps, and you’ll have a delicious meal ready in no time. Let’s dive into the process and get cooking!

Step 1: Prepare the Mixture

Start by grabbing a large bowl. In it, combine the flaked salmon, breadcrumbs, chopped onion, bell pepper, mayonnaise, egg, Dijon mustard, garlic powder, salt, black pepper, and parsley if you’re using it. Mix everything together until it’s well combined. You want a cohesive mixture that holds together nicely. This is where the magic begins, so don’t rush it!

Step 2: Form the Patties

Now, it’s time to shape the mixture into patties. Aim for about 2 to 3 inches in diameter. This size ensures they cook evenly. Make sure they’re uniform, so they all get that perfect crispy texture. You should end up with around eight patties.

Step 3: Heat the Skillet

Grab a large skillet and pour in the olive oil. Heat it over medium heat until it shimmers. This is crucial for achieving that golden-brown crust. If the oil isn’t hot enough, the patties will absorb too much oil and lose their crispiness. Patience is key here!

Step 4: Cook the Patties

Once the skillet is hot, carefully add the patties in batches. Avoid overcrowding the pan, as this can lower the temperature and lead to soggy patties. Cook them for about 4-5 minutes on each side. You’re looking for a beautiful golden-brown color and a crispy exterior. Flip them gently to keep them intact. The aroma will be irresistible!

Step 5: Drain and Serve

After cooking, remove the patties from the skillet and place them on a paper towel-lined plate. This helps absorb any excess oil, keeping them crispy. Serve them warm, either on their own or as a delicious sandwich. Enjoy every bite!

Tips for Success

  • Chill the mixture for 15 minutes before forming patties. This helps them hold their shape better.
  • Use a non-stick skillet or cast iron for even cooking and easy flipping.
  • Experiment with spices like paprika or cayenne for an extra kick.
  • Don’t skip the paper towels after frying; they keep your patties crispy.
  • Serve with a zesty dipping sauce for added flavor!

Equipment Needed

  • Large Bowl: For mixing the ingredients. A mixing bowl works just as well.
  • Skillet: A non-stick or cast iron skillet is ideal for frying.
  • Spatula: To flip the patties gently without breaking them.
  • Paper Towels: For draining excess oil after frying.

Variations

  • Spicy Salmon Patties: Add diced jalapeños or a dash of hot sauce to the mixture for a fiery kick.
  • Herbed Salmon Patties: Mix in fresh dill or cilantro for a burst of herbal flavor that complements the salmon beautifully.
  • Cheesy Salmon Patties: Incorporate shredded cheese, like cheddar or feta, for a creamy, savory twist.
  • Gluten-Free Option: Substitute breadcrumbs with crushed gluten-free crackers or almond flour for a gluten-free version.
  • Vegetable-Loaded Patties: Add grated zucchini or carrots for extra nutrition and moisture.

Serving Suggestions

  • Pair your Crispy Salmon Patties with a refreshing side salad for a light meal.
  • Serve them on a toasted bun with lettuce, tomato, and a dollop of tartar sauce for a delicious sandwich.
  • Complement with crispy sweet potato fries or coleslaw for added crunch.
  • Enjoy with a chilled glass of white wine or a light beer.

FAQs about Crispy Salmon Patties

Got questions about making the perfect Crispy Salmon Patties? You’re not alone! Here are some common queries that might help you out:

Can I use fresh salmon instead of canned?

Absolutely! Fresh salmon can be used for a richer flavor. Just make sure to cook it first and flake it before mixing.

How do I store leftover salmon patties?

Store any leftovers in an airtight container in the fridge for up to three days. Reheat them in a skillet for that crispy texture.

Can I freeze the patties?

Yes! Freeze the uncooked patties on a baking sheet, then transfer them to a freezer bag. They can be cooked straight from frozen; just add a few extra minutes to the cooking time.

What can I serve with Crispy Salmon Patties?

These patties pair wonderfully with a side salad, coleslaw, or even on a bun as a sandwich. Don’t forget a zesty dipping sauce!

Are these salmon patties healthy?

Definitely! They’re low in calories and packed with protein, making them a nutritious choice for any meal. Enjoy guilt-free!

Final Thoughts

Cooking Crispy Salmon Patties is more than just preparing a meal; it’s about creating moments. The joy of watching them sizzle in the skillet, the aroma wafting through your kitchen, and the satisfaction of biting into that crispy exterior is unmatched. These patties are not only delicious but also versatile, making them perfect for any occasion. Whether you’re enjoying them as a quick weeknight dinner or serving them at a gathering, they’re sure to impress. So roll up your sleeves, gather your ingredients, and let the magic happen. Your taste buds will thank you!

Ranis

Crispy Salmon Patties: Discover Your New Favorite Recipe!

Crispy Salmon Patties are a delicious and easy-to-make dish that combines flaked salmon with breadcrumbs, vegetables, and seasonings, perfect for a quick meal or snack.
Prep Time 15 minutes
Cook Time 10 minutes
Total Time 25 minutes
Servings: 4 servings (2 patties per serving)
Course: Main Course
Cuisine: American
Calories: 280

Ingredients
  

  • 1 can 15 ounces pink salmon, drained and flaked
  • 1/2 cup breadcrumbs
  • 1/4 cup finely chopped onion
  • 1/4 cup finely chopped bell pepper any color
  • 1/4 cup mayonnaise
  • 1 large egg
  • 1 teaspoon Dijon mustard
  • 1 teaspoon garlic powder
  • 1/2 teaspoon salt
  • 1/4 teaspoon black pepper
  • 2 tablespoons fresh parsley chopped (optional)
  • 2 tablespoons olive oil for frying

Method
 

  1. In a large bowl, combine the flaked salmon, breadcrumbs, onion, bell pepper, mayonnaise, egg, Dijon mustard, garlic powder, salt, black pepper, and parsley (if using). Mix until well combined.
  2. Form the mixture into patties, about 2 to 3 inches in diameter. You should have about 8 patties.
  3. Heat the olive oil in a large skillet over medium heat. Once hot, add the patties in batches, being careful not to overcrowd the pan.
  4. Cook for about 4-5 minutes on each side, or until golden brown and crispy.
  5. Remove the patties from the skillet and place them on a paper towel-lined plate to absorb excess oil.
  6. Serve warm with your favorite dipping sauce or on a bun as a sandwich.

Nutrition

Serving: 2pattiesCalories: 280kcalCarbohydrates: 15gProtein: 20gFat: 15gSaturated Fat: 2gPolyunsaturated Fat: 10gCholesterol: 70mgSodium: 500mgFiber: 1gSugar: 1g

Notes

  • For added flavor, try mixing in some shredded cheese or spices like paprika or cayenne pepper.
  • Serve the salmon patties with a side of coleslaw or a fresh salad for a complete meal.

Tried this recipe?

Let us know how it was!

Roasted Cabbage Steaks with Garlic and Parmesan Delight!

Introduction to Roasted Cabbage Steaks with Garlic and Parmesan

There’s something magical about transforming humble ingredients into a dish that feels like a celebration. Roasted cabbage steaks with garlic and Parmesan are just that—a delightful way to elevate your meals without breaking a sweat. Whether you’re looking for a quick solution for a busy weeknight or a side dish that will impress your friends at dinner, this recipe has you covered. The crispy edges and savory cheese create a flavor explosion that even the pickiest eaters will love. Trust me, once you try these, they’ll become a staple in your kitchen!

Why You’ll Love This Roasted Cabbage Steaks with Garlic and Parmesan

These roasted cabbage steaks are a game-changer in the kitchen. They’re incredibly easy to prepare, taking just 10 minutes of your time before they roast to perfection. The combination of garlic and Parmesan creates a mouthwatering flavor that’s hard to resist. Plus, they’re a healthy option that doesn’t skimp on taste. Whether as a side dish or a snack, they’ll quickly become a favorite in your household!

Ingredients for Roasted Cabbage Steaks with Garlic and Parmesan

Gathering the right ingredients is the first step to culinary success. For these roasted cabbage steaks with garlic and Parmesan, you’ll need a few simple yet flavorful components:

  • Green Cabbage: The star of the show! Choose firm heads for the best texture.
  • Olive Oil: This adds richness and helps the seasonings stick. Extra virgin is a great choice for flavor.
  • Garlic Powder: A must-have for that aromatic kick. It’s convenient and blends beautifully with the cabbage.
  • Onion Powder: This enhances the savory profile, giving depth to each bite.
  • Salt: Essential for bringing out the natural flavors of the cabbage.
  • Black Pepper: A dash of heat that complements the other spices perfectly.
  • Parmesan Cheese: The crowning glory! It adds a salty, nutty flavor that crisps up beautifully in the oven.
  • Fresh Parsley: A pop of color and freshness for garnish, making your dish visually appealing.

For those looking to mix things up, consider adding a sprinkle of red pepper flakes for a spicy kick. If you’re not a fan of Parmesan, feta or goat cheese can be delightful alternatives. You can find all the exact measurements at the bottom of the article, ready for printing!

How to Make Roasted Cabbage Steaks with Garlic and Parmesan

Creating roasted cabbage steaks with garlic and Parmesan is a straightforward process that yields delicious results. Follow these simple steps, and you’ll have a dish that’s not only tasty but also visually appealing!

Step 1: Preheat the Oven

Start by preheating your oven to 425°F. This step is crucial because a hot oven ensures that the cabbage steaks roast evenly and develop those crispy edges we all love. While the oven heats up, line a baking sheet with parchment paper. This makes cleanup a breeze and prevents the cabbage from sticking.

Step 2: Prepare the Cabbage

Next, grab your green cabbage heads. Remove the outer leaves, as they can be tough. Slice each cabbage head into 1-inch thick steaks. You should get about 4-6 steaks from each head, depending on its size. Aim for uniform thickness to ensure even cooking. These steaks will be the perfect canvas for all those delicious flavors!

Step 3: Mix the Seasoning

In a small bowl, combine the olive oil, garlic powder, onion powder, salt, and black pepper. This seasoning mix is where the magic happens! The olive oil helps the spices adhere to the cabbage, while the garlic and onion powders infuse each bite with savory goodness. Give it a good stir until everything is well blended.

Step 4: Brush the Cabbage Steaks

Now it’s time to brush the cabbage steaks with your seasoning mixture. Use a pastry brush or the back of a spoon to apply the oil mixture generously on both sides of each steak. This ensures that every inch is coated, maximizing flavor and crispiness. Don’t be shy—get in there and make sure they’re well covered!

Step 5: Add the Parmesan

Sprinkle the grated Parmesan cheese evenly over the top of each cabbage steak. This step is essential for that cheesy, crispy finish. Make sure to distribute the cheese evenly so that every bite is packed with flavor. If you’re feeling adventurous, you can even add a little extra cheese for a more indulgent treat!

Step 6: Roast the Cabbage Steaks

Place the baking sheet in the preheated oven and roast the cabbage steaks for 25-30 minutes. Flip them halfway through to ensure they cook evenly. You’ll know they’re done when the edges are crispy and the cabbage is tender. Keep an eye on them; every oven is a little different, and you want to catch that perfect golden-brown color!

Step 7: Garnish and Serve

Once out of the oven, let the cabbage steaks cool for a minute. Then, garnish with freshly chopped parsley for a pop of color and freshness. This simple touch elevates the dish, making it look as good as it tastes. Serve them warm, and watch as your family and friends devour these delicious roasted cabbage steaks!

Tips for Success

  • Choose firm, heavy cabbage heads for the best texture.
  • Don’t skip the preheating step; it’s key for crispy edges.
  • Experiment with different cheeses like feta or goat cheese for variety.
  • For extra flavor, add a sprinkle of red pepper flakes before roasting.
  • Store leftovers in an airtight container for up to three days.

Equipment Needed

  • Baking Sheet: A standard sheet works, but a rimmed one prevents spills.
  • Parchment Paper: For easy cleanup; aluminum foil is a good alternative.
  • Sharp Knife: Essential for slicing the cabbage; a serrated knife can also do the trick.
  • Pastry Brush: Great for applying the oil mixture; a spoon can work in a pinch.

Variations

  • Spicy Kick: Add a sprinkle of red pepper flakes or cayenne pepper to the seasoning mix for a fiery twist.
  • Herb Infusion: Mix in dried herbs like oregano or thyme with the seasoning for an aromatic boost.
  • Cheesy Delight: Swap out Parmesan for crumbled feta or goat cheese for a tangy flavor profile.
  • Vegan Option: Omit the cheese or use a dairy-free cheese alternative to make it vegan-friendly.
  • Asian Flair: Brush the cabbage with a mixture of soy sauce, sesame oil, and ginger for an Asian-inspired version.

Serving Suggestions

  • Pair with grilled chicken or fish for a balanced meal.
  • Serve alongside quinoa or brown rice for added texture.
  • Complement with a light vinaigrette salad for freshness.
  • Enjoy with a crisp white wine, like Sauvignon Blanc.
  • Garnish with lemon wedges for a zesty finish.

FAQs about Roasted Cabbage Steaks with Garlic and Parmesan

Can I make roasted cabbage steaks ahead of time?
Absolutely! You can prepare the cabbage steaks and brush them with the seasoning mix in advance. Just store them in the fridge until you’re ready to roast. This makes for a quick and easy side dish on busy nights.

What can I serve with roasted cabbage steaks?
These delicious roasted cabbage steaks pair wonderfully with grilled meats, fish, or even a hearty grain like quinoa. They also make a fantastic addition to a salad for extra crunch and flavor.

How do I store leftovers?
If you have any leftovers, store them in an airtight container in the fridge. They’ll stay fresh for up to three days. Just reheat them in the oven for a few minutes to regain that crispy texture!

Can I use other types of cabbage?
Certainly! While green cabbage is the star here, you can experiment with red cabbage or Savoy cabbage for a different flavor and color. Just keep in mind that cooking times may vary slightly.

Is this recipe suitable for a vegetarian diet?
Yes! These roasted cabbage steaks with garlic and Parmesan are a perfect vegetarian dish. They’re packed with flavor and nutrients, making them a great option for anyone looking to enjoy a healthy meal.

Final Thoughts

Roasted cabbage steaks with garlic and Parmesan are more than just a side dish; they’re a celebration of flavor and simplicity. Each bite offers a delightful crunch, paired with the savory richness of cheese and the aromatic allure of garlic. This recipe is a reminder that healthy eating doesn’t have to be boring. Whether you’re enjoying them solo or alongside your favorite protein, these cabbage steaks bring joy to the table. So, roll up your sleeves, embrace the cooking adventure, and let these delicious steaks become a cherished part of your culinary repertoire!

Ranis

Roasted Cabbage Steaks with Garlic and Parmesan Delight!

Delicious roasted cabbage steaks topped with garlic and Parmesan cheese, perfect as a side dish or a healthy snack.
Prep Time 10 minutes
Cook Time 30 minutes
Total Time 40 minutes
Servings: 4 servings
Course: Side Dish
Cuisine: American
Calories: 180

Ingredients
  

  • 2 medium green cabbage heads
  • 1/4 cup olive oil
  • 1 teaspoon garlic powder
  • 1 teaspoon onion powder
  • 1 teaspoon salt
  • 1/2 teaspoon black pepper
  • 1/2 cup grated Parmesan cheese
  • 1 tablespoon fresh parsley chopped (for garnish)

Method
 

  1. Preheat your oven to 425°F. Line a baking sheet with parchment paper.
  2. Remove the outer leaves of the cabbage and slice each head into 1-inch thick steaks. You should get about 4-6 steaks from each cabbage.
  3. In a small bowl, mix together the olive oil, garlic powder, onion powder, salt, and black pepper.
  4. Brush both sides of each cabbage steak generously with the olive oil mixture. Place the steaks on the prepared baking sheet.
  5. Sprinkle the grated Parmesan cheese evenly over the top of each cabbage steak.
  6. Roast in the preheated oven for 25-30 minutes, flipping halfway through, until the edges are crispy and the cabbage is tender.
  7. Remove from the oven and garnish with chopped parsley before serving.

Nutrition

Serving: 1steakCalories: 180kcalCarbohydrates: 5gProtein: 8gFat: 15gSaturated Fat: 4gPolyunsaturated Fat: 11gCholesterol: 10mgSodium: 400mgFiber: 2gSugar: 2g

Notes

  • For added flavor, try adding a sprinkle of red pepper flakes before roasting for a spicy kick.
  • You can also substitute the Parmesan cheese with feta or goat cheese for a different taste.

Tried this recipe?

Let us know how it was!