Irresistible Spiced Gingerbread Wreath Cake for Cozy Gatherings

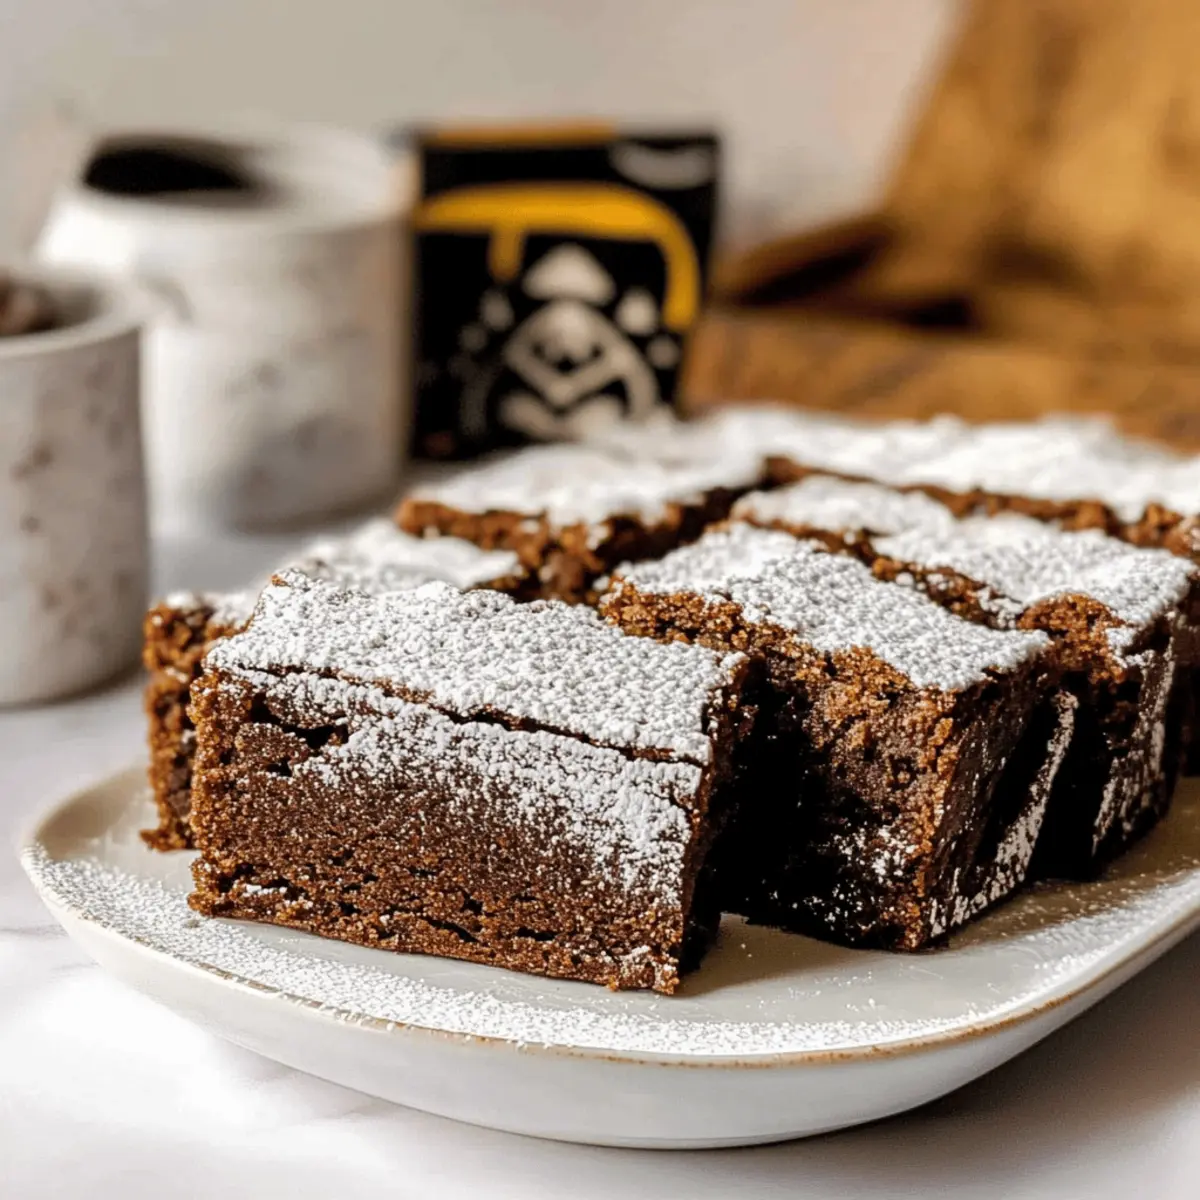
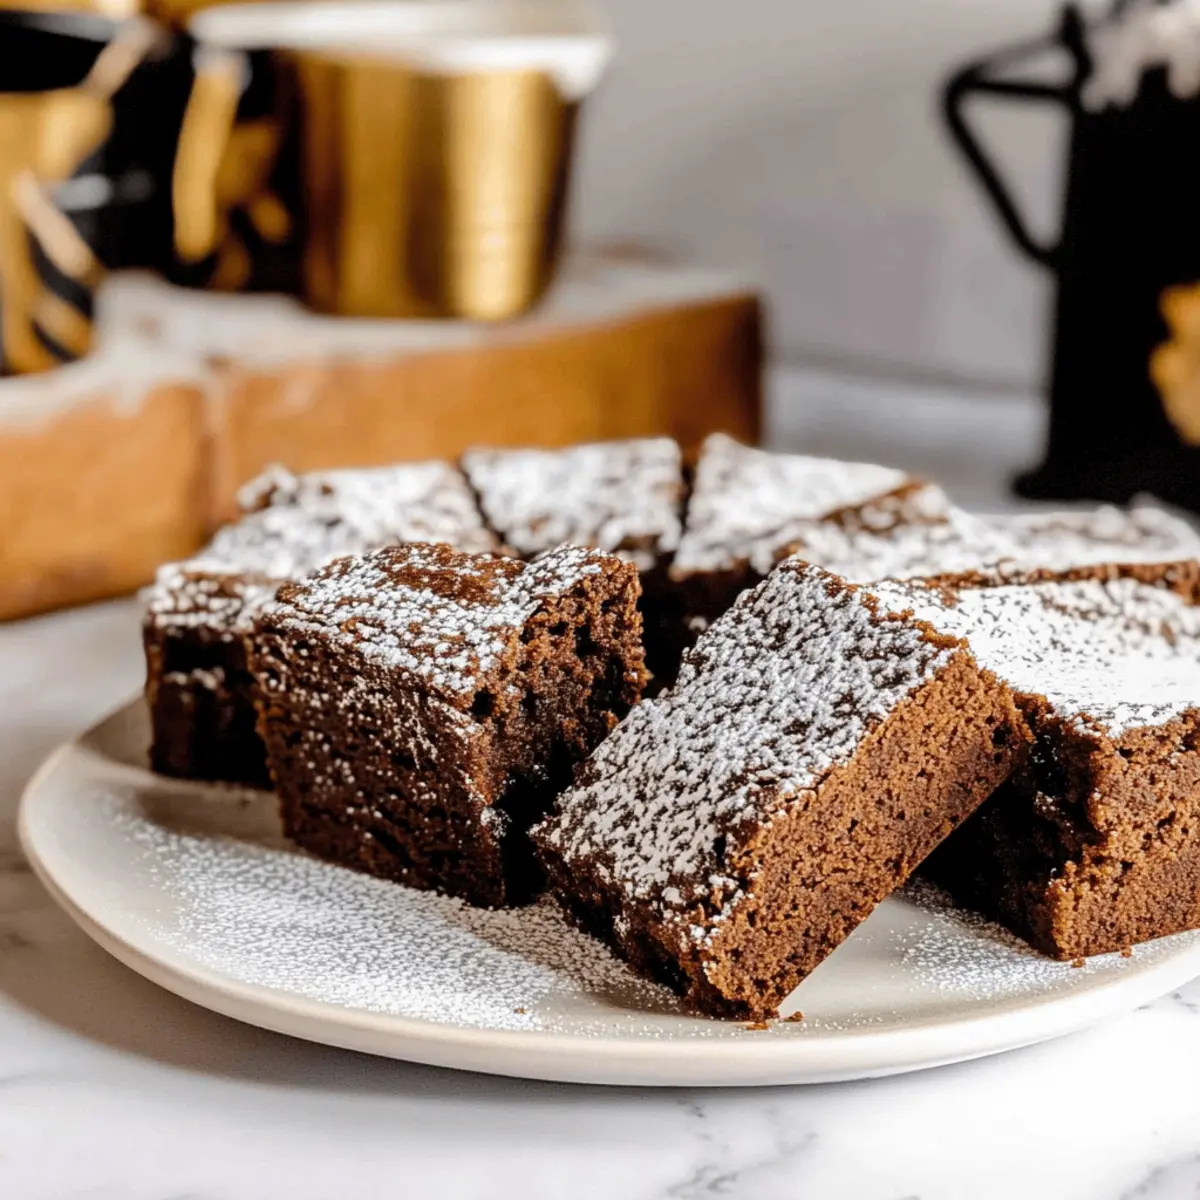
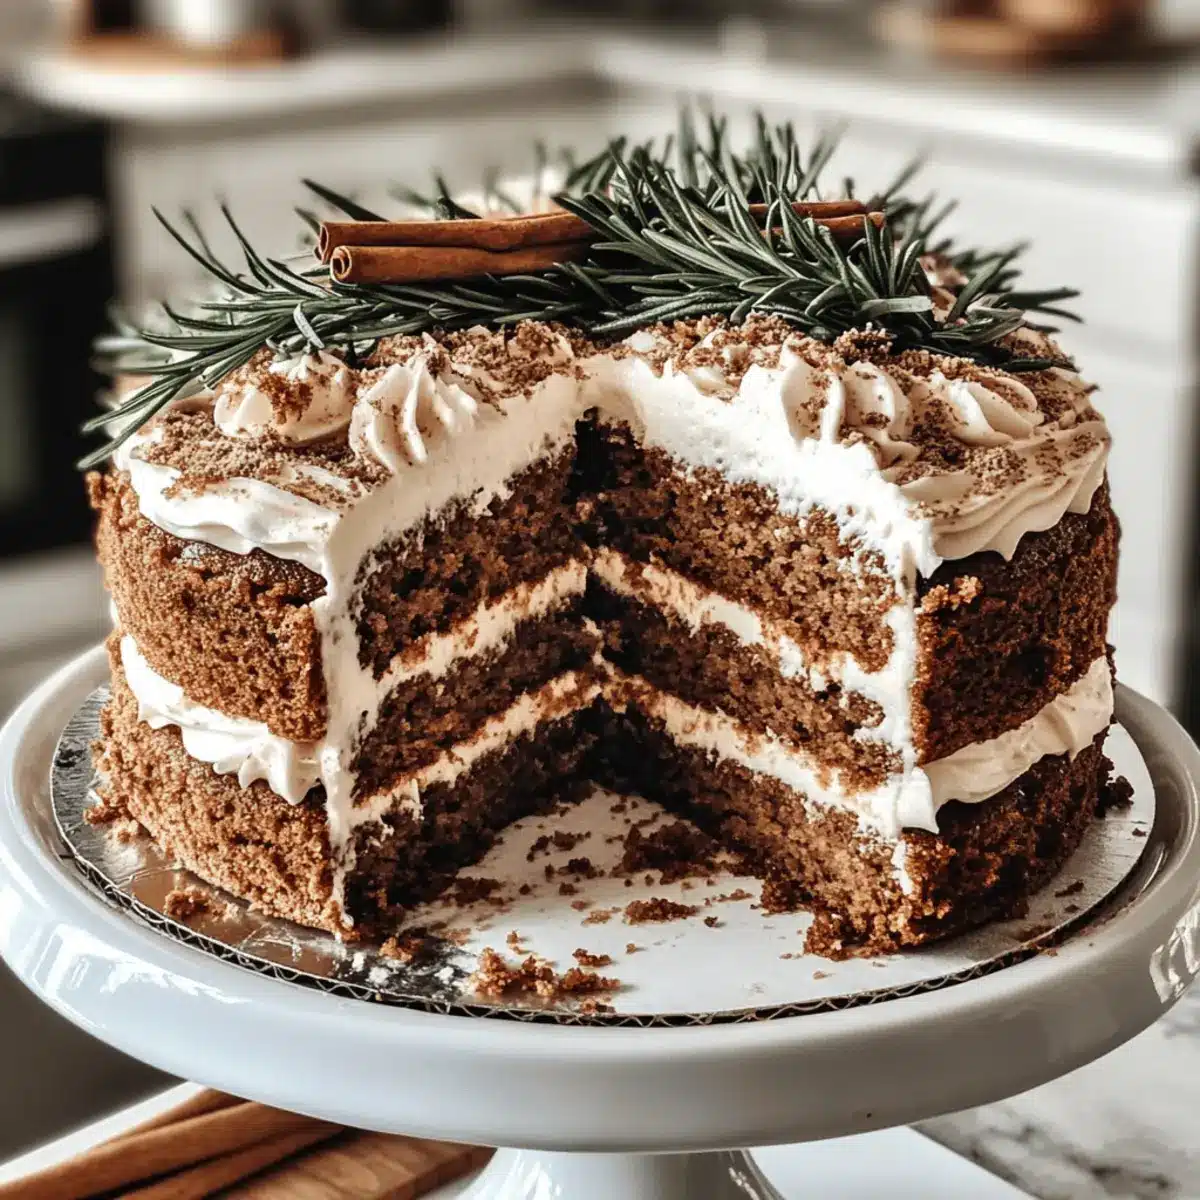
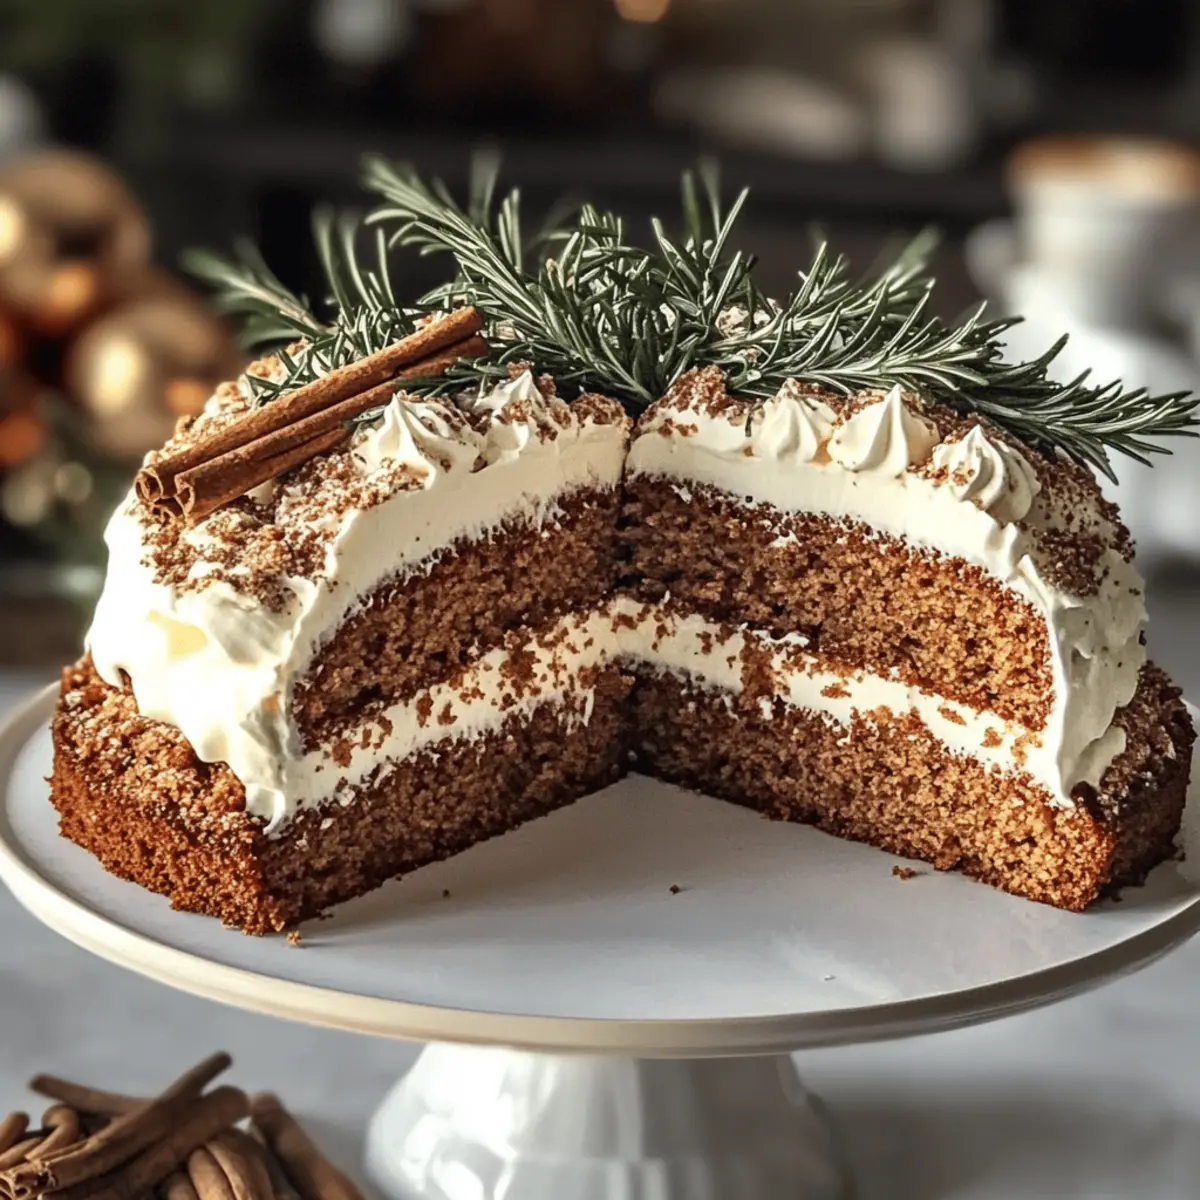
As I pulled the Spiced Gingerbread Wreath Cake from the oven, the familiar scent of warm spices enveloped my kitchen, instantly transporting me to memory-laden holiday celebrations. This festive delight isn’t just eye-catching; it strikes a perfect balance between rich, spiced flavors and the comfort of homemade sweetness. With its velvety whipped cream frosting, this cake is incredibly simple to make—a true crowd-pleaser that’s sure to impress both novice and seasoned bakers alike. Plus, it comes with gluten-free options, so everyone can join in on the festivities! Whether you’re hosting a cozy gathering or whipping up a treat to share with loved ones, this wreath cake promises to bring warmth and joy to your table. Are you ready to create a holiday masterpiece that will have everyone coming back for seconds?

Why Is This Cake the Perfect Holiday Treat?

Simplicity at its Finest: This Spiced Gingerbread Wreath Cake is incredibly easy to whip up, even if you’re a beginner in the kitchen.

Aromatic Delight: The rich blend of spices fills your home with a comforting warmth that instantly brings the spirit of the season to life.

Customizable for Everyone: With options for gluten-free and dairy-free variations, everyone can savor this holiday gem.

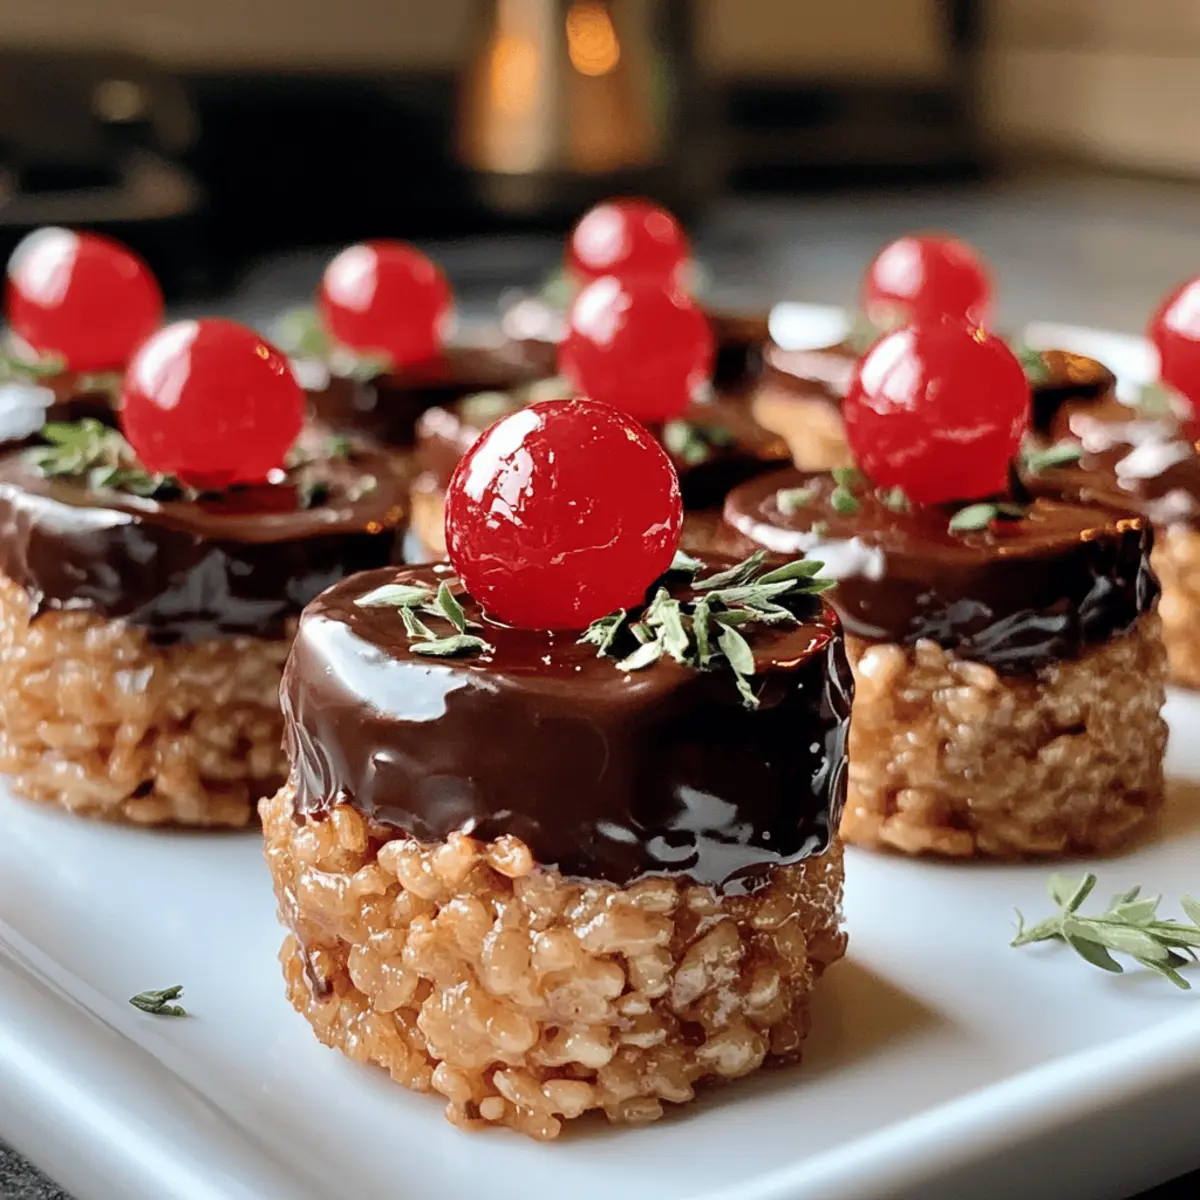
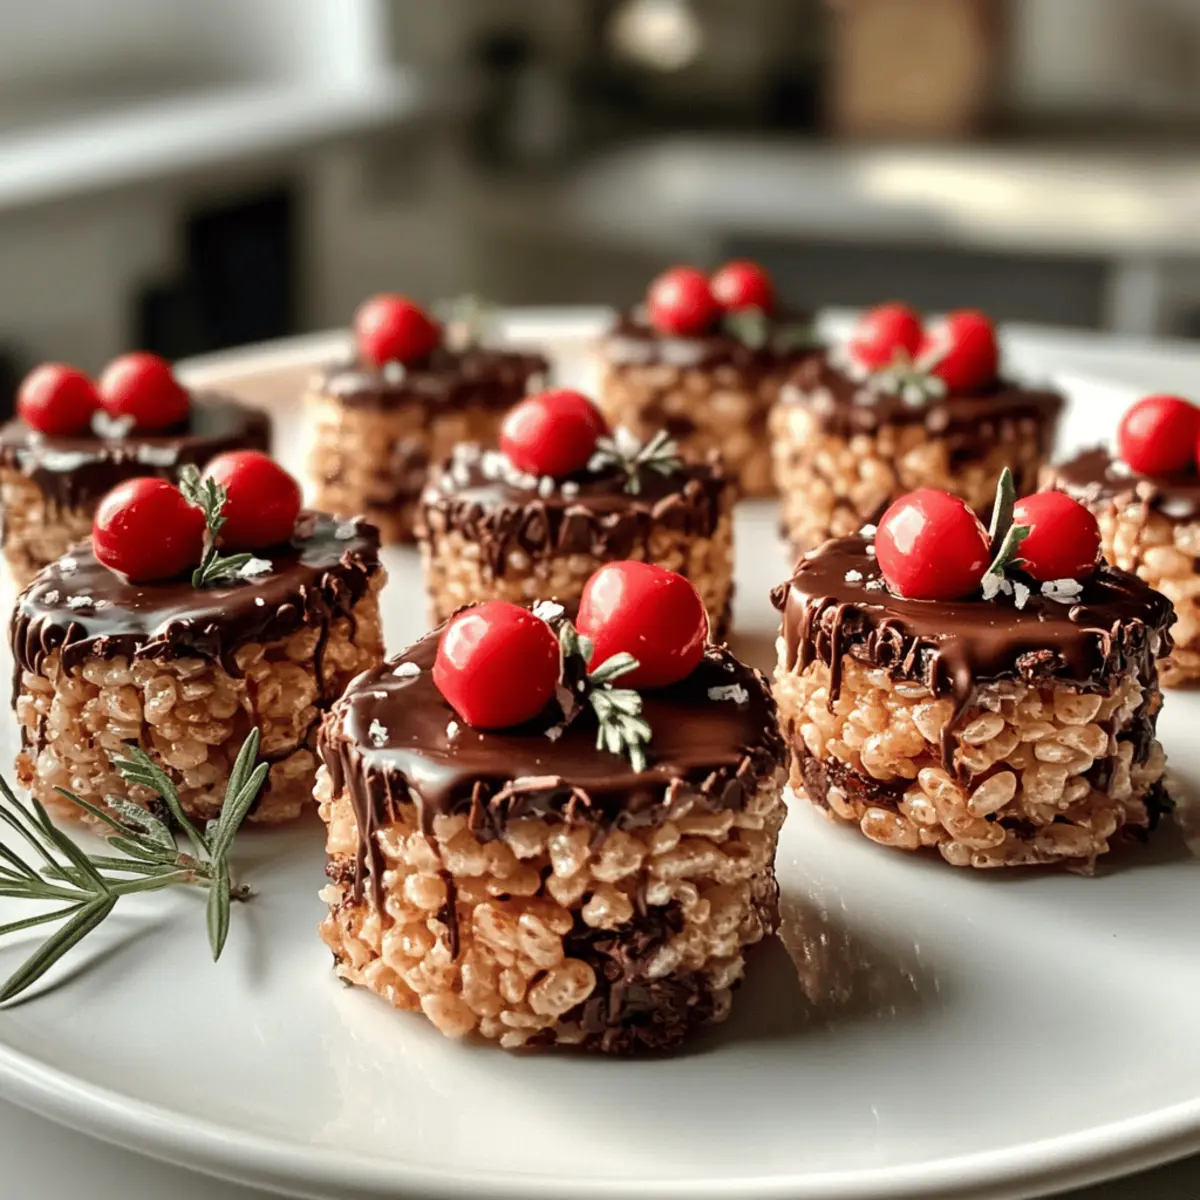
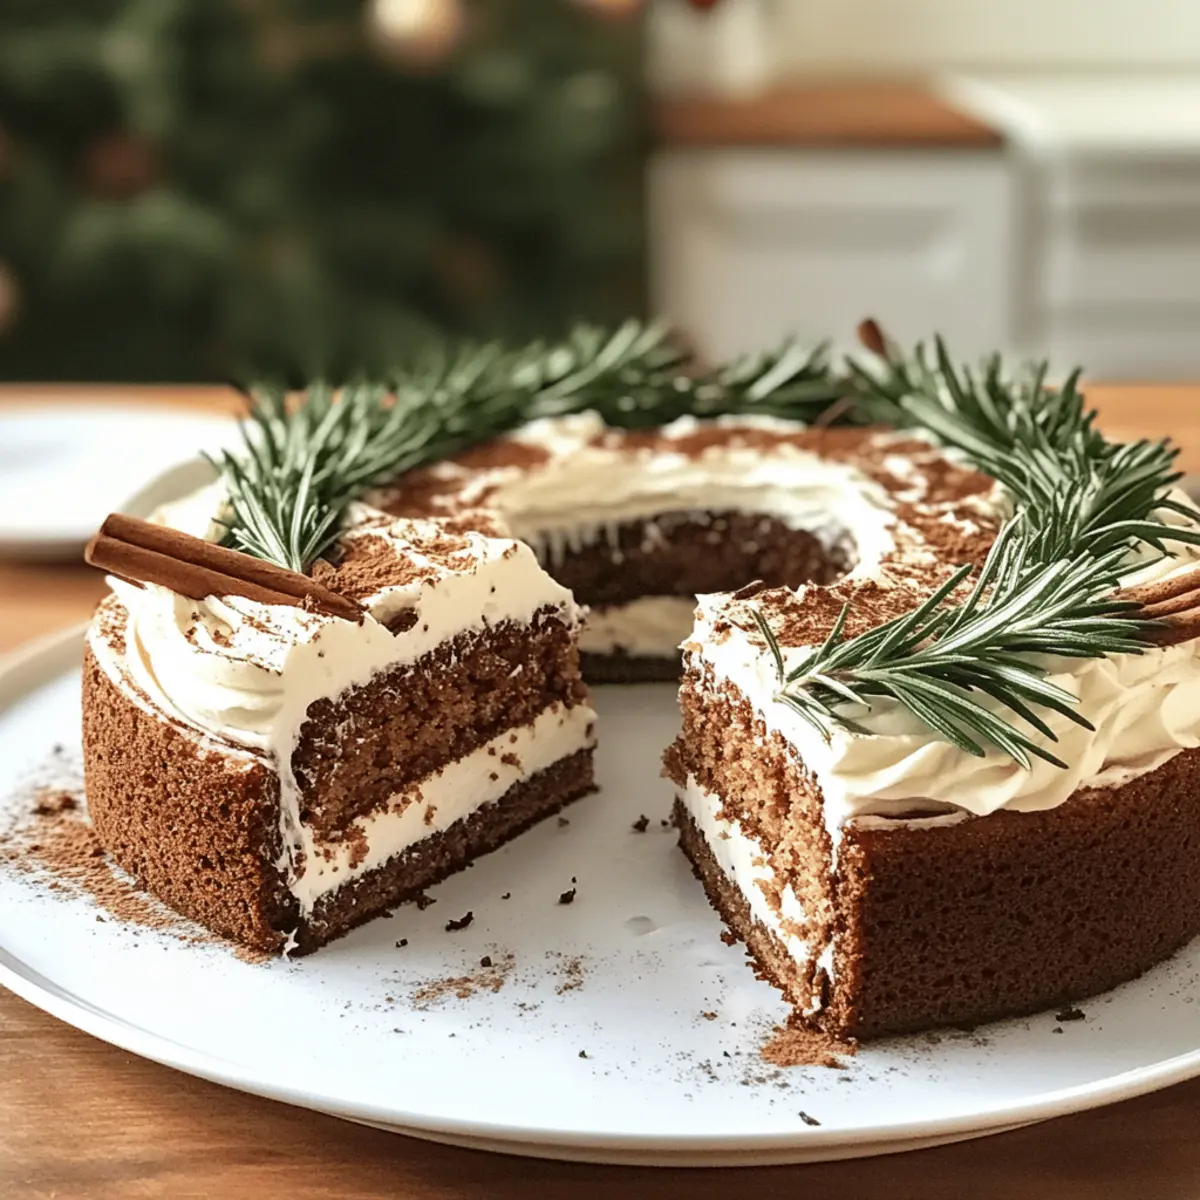
Visually Stunning: Its beautiful wreath shape makes it a showstopper at any gathering, ensuring it stands out on the dessert table.

Crowd-Pleasing Flavor: The combination of molasses and spices offers a classic gingerbread taste that’s both nostalgic and delightfully festive.

If you’re intrigued by other holiday treats, be sure to check out these delightful recipes for Patriotic Poke Cake or Pistachio Carrot Cake for more delicious inspiration!

Spiced Gingerbread Wreath Cake Ingredients

For the Cake
All-purpose flour – Provides structure. Can substitute with gluten-free flour blend for a gluten-free version.
Baking soda – Helps the cake rise. No substitutions necessary.
Ground cinnamon – Adds warmth and flavor. Other ground spices like nutmeg can be used for variation.
Ground ginger – Infuses the cake with a ginger flavor. Fresh ginger can be used, but may alter texture.
Ground cloves – Offers a hint of spice. Skip if preferred; adjust cinnamon to taste.
Salt – Enhances flavor. Essential for balance; do not omit.
Molasses – Provides deep flavor and moisture. Dark corn syrup or honey can be used as a substitute, but with less intensity.
Granulated sugar – Sweetens the cake. Can replace with brown sugar for a richer flavor.
Unsalted butter – Adds richness. Vegetable oil can be a substitute for dairy-free options.
Eggs – Binds the ingredients. Flax eggs can be used for a vegan alternative.

For the Frosting
Whipped cream – For frosting. Chill bowl and whisk to prevent melting; use stabilizers if desired.
Powdered sugar – Sweetens the frosting. Can be adjusted based on sweetness preference.

For Decoration
Rosemary, star anise, cinnamon sticks – For decoration. Use any festive herbs or spices according to preference.

Get ready to dive into the heartwarming flavors of this Spiced Gingerbread Wreath Cake—it’s bound to be a cherished addition to your holiday festivities!

Step‑by‑Step Instructions for Spiced Gingerbread Wreath Cake

Step 1: Preheat and Prepare
Begin by preheating your oven to 350°F (175°C). While it warms up, generously grease a Bundt pan with cooking spray or butter to ensure the cake releases easily after baking. Make sure to cover every nook and cranny for an effortless release once the Spiced Gingerbread Wreath Cake is baked.

Step 2: Combine Dry Ingredients
In a mixing bowl, whisk together the all-purpose flour, baking soda, ground cinnamon, ground ginger, ground cloves, and salt until evenly mixed. This step not only ensures the even distribution of ingredients but also infuses the flour with aromatic spices. Set this mixture aside while you prepare the wet ingredients for your cake.

Step 3: Mix Butter and Sugar
In another bowl, use a hand mixer to cream together the unsalted butter and granulated sugar until the mixture is light and fluffy. This typically takes about 4-5 minutes. Next, beat in the molasses until fully incorporated, followed by the eggs, ensuring everything is well blended. Your mixture should have a smooth consistency and a rich aroma, signaling that the base for your Spiced Gingerbread Wreath Cake is ready.

Step 4: Combine Wet and Dry Mixtures
Gradually add the dry ingredients to your wet mixture, alternating with any additional liquid required. Mix gently until just combined to prevent overworking the batter, which can affect the cake’s texture. The batter should be thick yet pourable, filled with the warmth of holiday spices ready to fill your kitchen with delightful scents as it bakes.

Step 5: Bake the Cake
Pour the batter into the prepared Bundt pan, using a spatula to smooth out the top evenly. Place the pan in the preheated oven and bake for 35-40 minutes. To check for doneness, insert a toothpick into the center; it should come out clean when the Spiced Gingerbread Wreath Cake is perfectly baked and ready to be released from the oven.

Step 6: Cool Before Serving
Once baked, remove the cake from the oven and allow it to cool in the pan for about 10 minutes. This resting period helps set the cake and makes it easier to transfer. After that, carefully invert it onto a wire rack to cool completely. The delightful aromas will continue to entice as your Spiced Gingerbread Wreath Cake cools.

Step 7: Whip the Cream
While the cake is cooling, prepare the whipped cream frosting. In a chilled bowl, combine the heavy cream and powdered sugar, then whip with an electric mixer until soft peaks form. This should take around 3-5 minutes. The whipped cream will add a luscious topping to your Spiced Gingerbread Wreath Cake that beautifully contrasts its rich flavors.

Step 8: Frost and Decorate
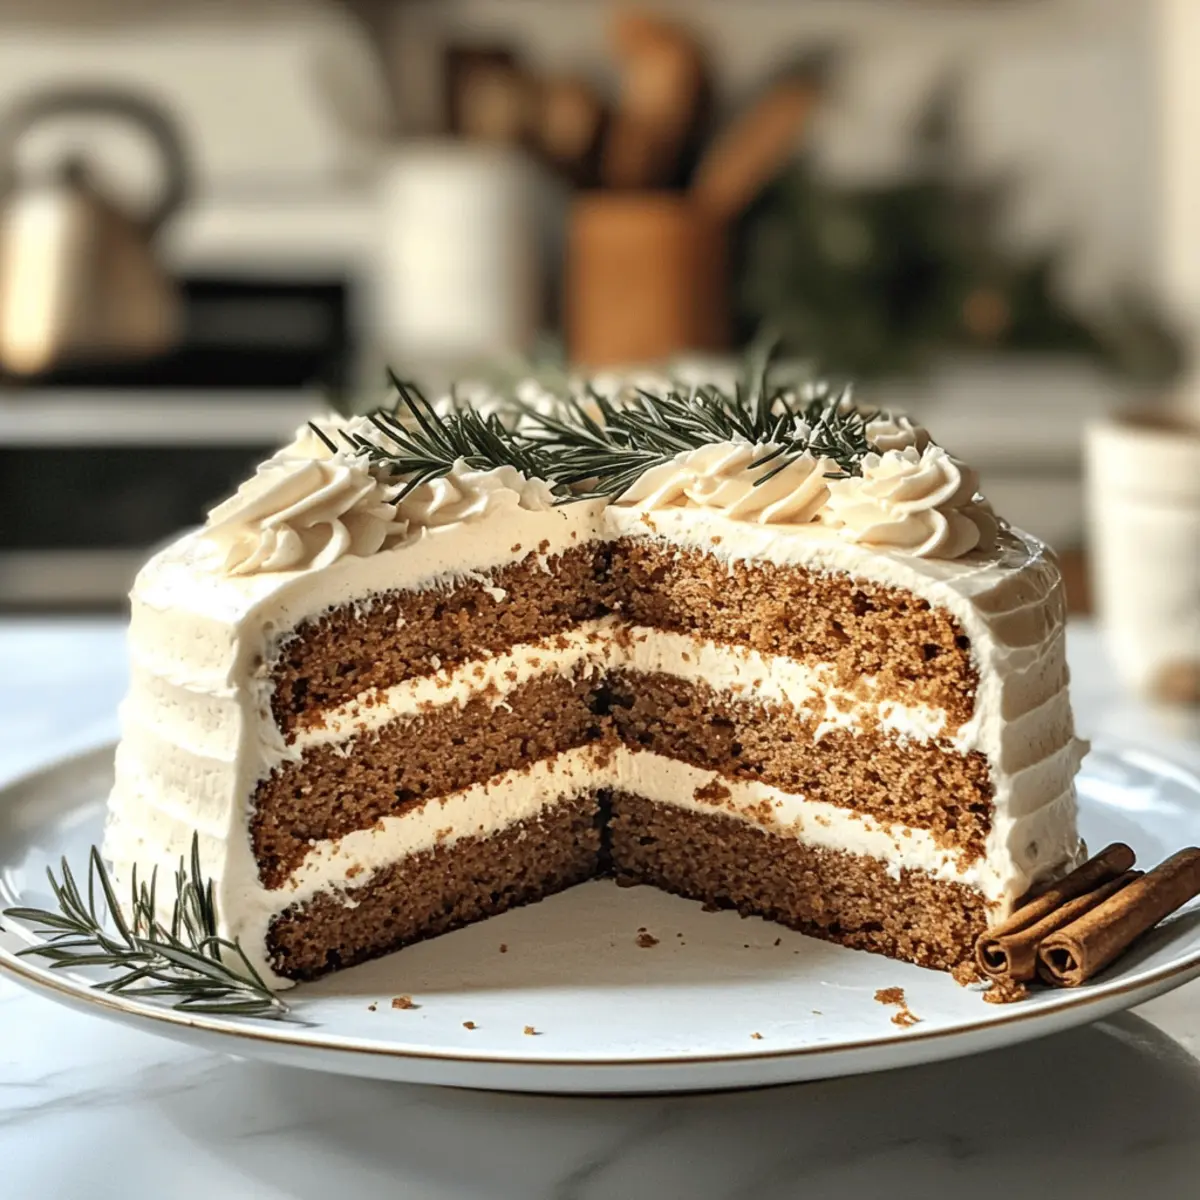
Once the cake is completely cooled, generously spread the whipped cream frosting over the top, allowing it to cascade down the sides. For a festive touch, decorate with fresh rosemary, star anise, and cinnamon sticks. These garnishes not only enhance the appearance but also add an extra layer of seasonal aroma to your Spiced Gingerbread Wreath Cake.

Step 9: Dust for Presentation
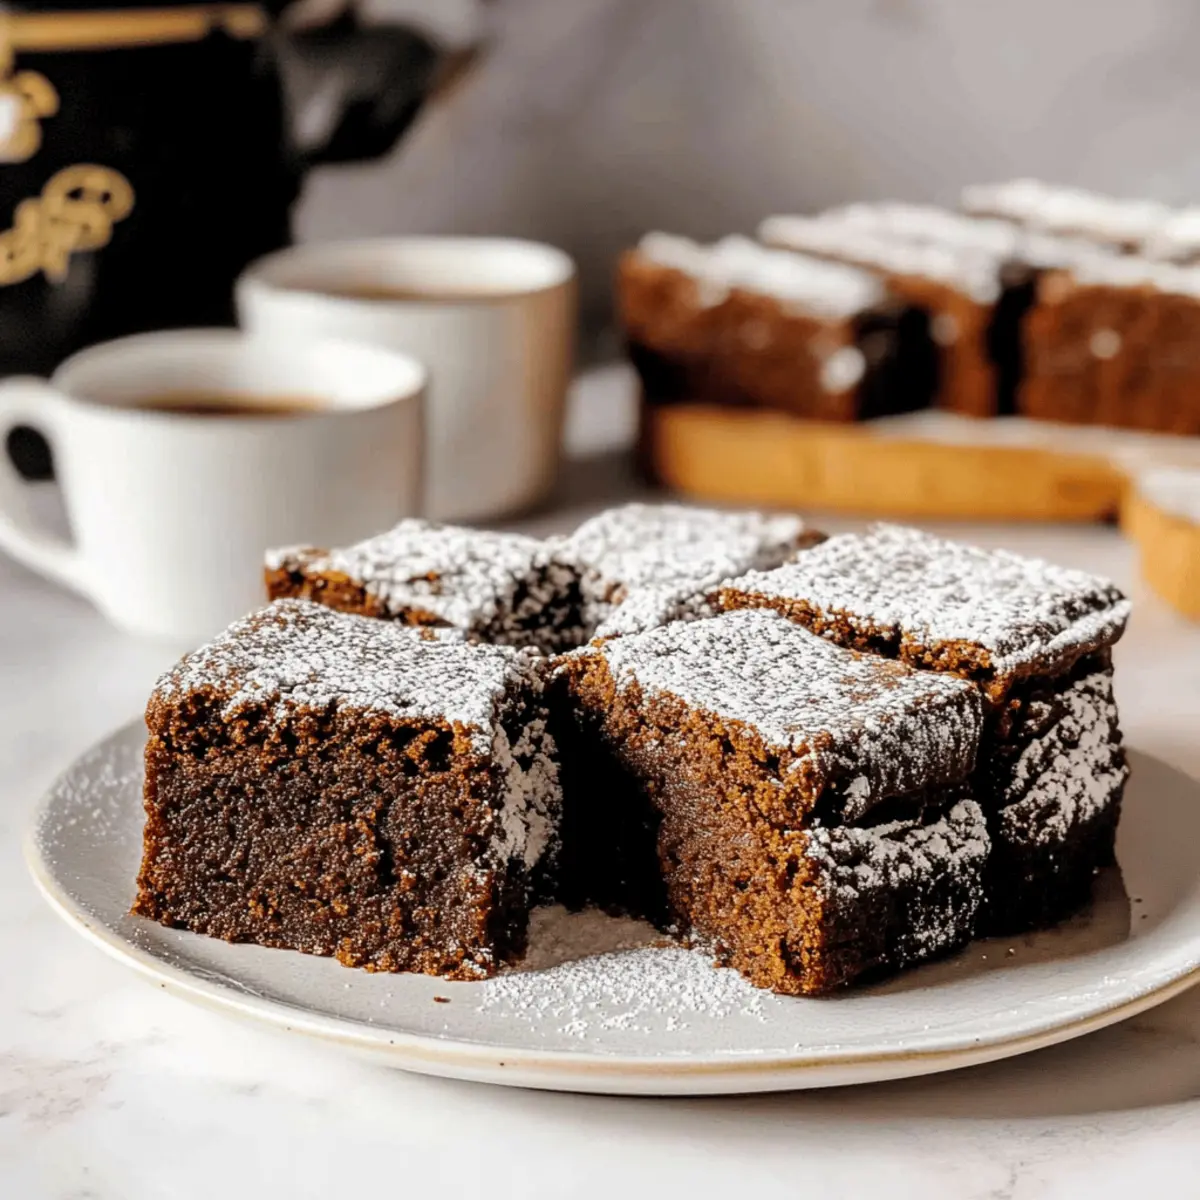
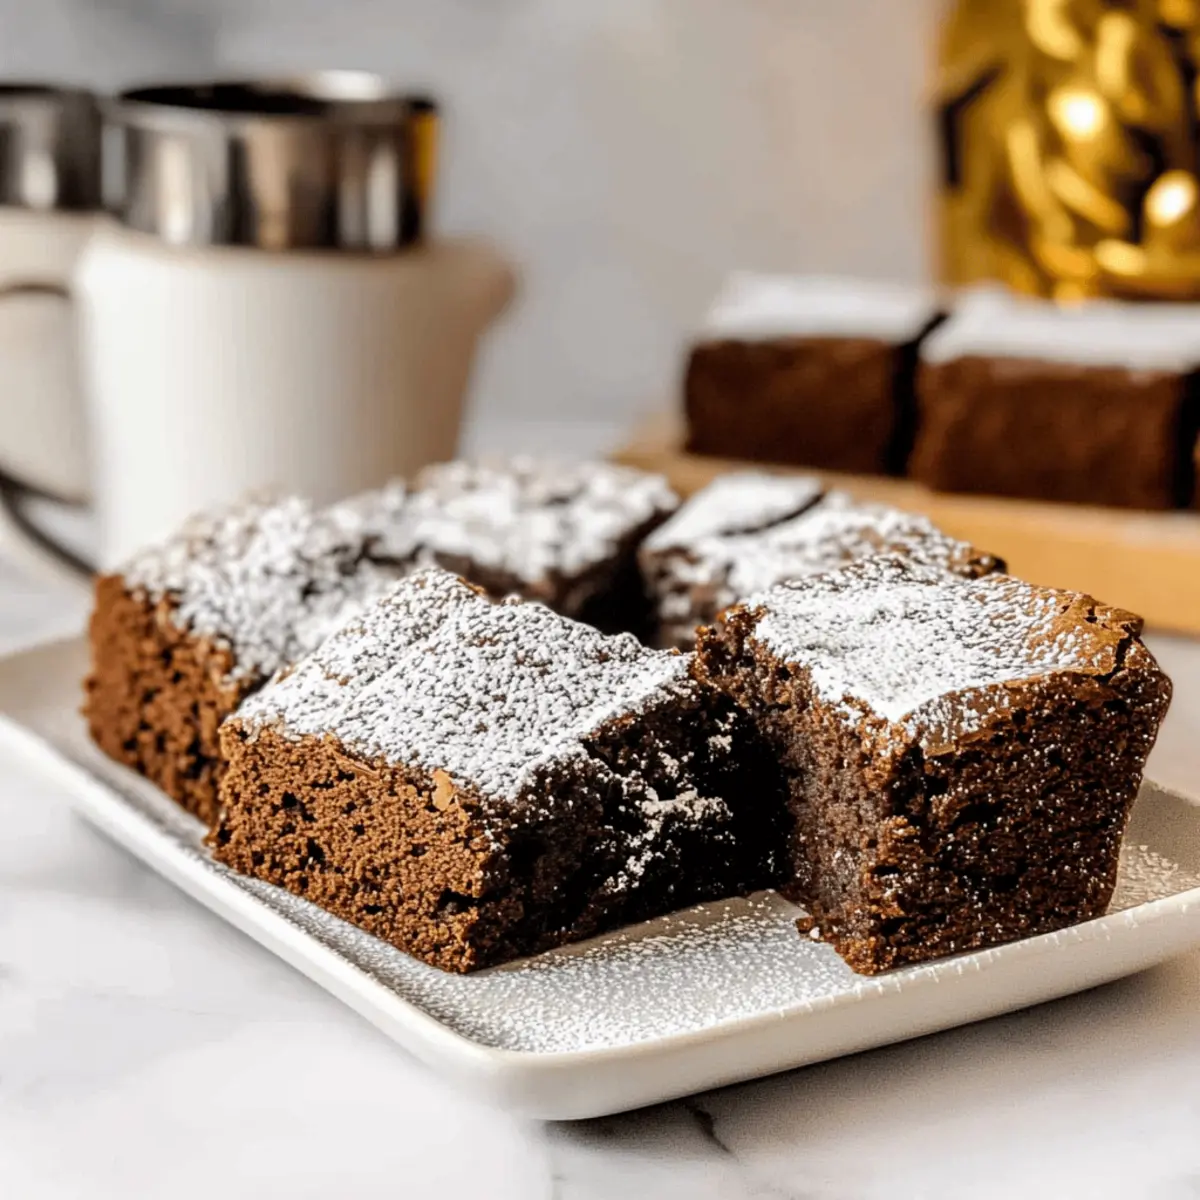
Just before serving, sprinkle a light dusting of powdered sugar over the frosted cake for an elegant finish. The powdered sugar will create a snowy effect, perfect for the holiday season. Slice and serve your Spiced Gingerbread Wreath Cake alongside warm beverages like spiced cider or eggnog to create a cozy gathering.

Spiced Gingerbread Wreath Cake Variations

Feel free to explore your creativity and put your personal touch on this delightful cake!

  • Gluten-Free: Swap out all-purpose flour for a 1:1 gluten-free flour blend for a completely gluten-free treat. Your guests won’t notice the difference!

  • Dairy-Free: Use vegetable oil instead of butter and coconut whipped cream for a heavenly dairy-free dessert that still tastes indulgent.

  • Vegan: Replace eggs with flax eggs to create a vegan version. The flax will help bind everything together without compromising texture.

  • Flavor Boost: Add a dash of black pepper or a pinch of allspice to elevate the spice profile and add a bit of warmth for that cozy feeling.

  • Texture Twist: Incorporate finely chopped nuts, like walnuts or pecans, into the batter for a delightful crunch that complements the tender cake.

  • Citrus Zest: Grate some fresh orange or lemon zest into the batter to add a bright, refreshing note that balances the rich spices beautifully.

  • Decorative Touch: Instead of rosemary and cinnamon sticks, consider topping your cake with edible flowers or chocolate shavings for a stunning presentation that feels extra special.

  • Caramel Drizzle: Drizzle warm caramel sauce over the top just before serving for an irresistible sweet finish that will make your guests swoon.

Feeling adventurous? For more delightful holiday recipes, explore these delectable options: Buttermilk Pancakes Discover for a classic breakfast twist or treat yourself to some luscious Cookies Cream Cheesecake.

Make Ahead Options

The Spiced Gingerbread Wreath Cake is perfect for meal prep, allowing you to enjoy more time with family and friends during the holidays. You can prepare the cake itself up to 3 days in advance; simply bake it, let it cool, and store it wrapped in plastic wrap in the refrigerator. The whipped cream frosting can be made up to 24 hours ahead; keep it stored in an airtight container in the fridge to maintain its fluffy texture. When you’re ready to serve, frost the cake and decorate it with rosemary, star anise, and cinnamon sticks. This way, you’ll have a show-stopping dessert that’s just as delicious and festive without the last-minute rush!

How to Store and Freeze Spiced Gingerbread Wreath Cake

Fridge: Store leftover cake in an airtight container in the refrigerator for up to 3 days to keep it moist and flavorful. Frost just before serving to maintain texture.

Freezer: For longer storage, wrap the cake tightly in plastic wrap and then in aluminum foil, or place it in a freezer-safe bag. It can be frozen for up to 3 months.

Thawing: To enjoy the cake, thaw overnight in the refrigerator. Reheat individual slices in the microwave for about 10-15 seconds for a cozy treat.

Serving Suggestion: Pair with a warm beverage and a dusting of powdered sugar for a festive touch when serving after storage.

Expert Tips for Spiced Gingerbread Wreath Cake

  • Chill Tools: To achieve perfect whipped cream, chill your mixing bowl and whisk beforehand to prevent deflation and ensure a fluffier texture.
  • Oven Variations: Every oven is different; keep an eye on your cake while it bakes. If you’re using a flat pan instead of a Bundt pan, reduce baking time slightly to avoid overbaking.
  • Taste Adjustments: Feel free to customize your spices! The beauty of this Spiced Gingerbread Wreath Cake is in personalizing the flavor, so adjust spices like cinnamon and ginger to suit your palate.
  • Moisture Check: If using a gluten-free flour blend, adding a tablespoon of applesauce can help maintain moisture and tenderness in the cake.
  • Layering Flavors: For an even richer taste, consider substituting half of the granulated sugar with brown sugar. This adds depth and enhances that classic gingerbread flavor.

What to Serve with Spiced Gingerbread Wreath Cake?

The comforting aroma of this festive delight opens up a world of perfect pairings for a truly memorable holiday feast.

  • Creamy Mashed Potatoes: The buttery richness of mashed potatoes adds a savory contrast to the sweet spiced cake, balancing out the meal beautifully.
  • Warm Spiced Cider: A hot mug of spiced cider perfectly complements the gingerbread flavors, wrapping you in a cozy embrace with each sip.
  • Fresh Pear Salad: Crisp greens topped with roasted pears and a tangy vinaigrette offer a refreshing contrast, enhancing the cake’s warm spices.
  • Rich Eggnog: The creaminess of eggnog, whether spiked or not, makes a festive drink choice that harmonizes elegantly with the cake’s richness.
  • Roasted Brussels Sprouts: A side of caramelized Brussels sprouts brings earthiness and a slight bitterness that balances the cake’s sweetness and spices perfectly.
  • Gingerbread Cookies: Lean into the gingerbread theme with classic cookies; their crunchy texture adds a delightful contrast to the moist cake.
  • Chocolate Fondue: Dipping fruit in rich chocolate fondue alongside cake creates a playful dessert experience that will enchant your guests.
  • Vanilla Ice Cream: A scoop of vanilla ice cream offers a creamy coolness that elevates the gingerbread flavors and makes each bite heavenly.
  • Pumpkin Spice Latte: There’s nothing like curling up with a warm pumpkin spice latte that echoes the seasonal flavors of your cake, making the experience cozy and inviting.

Spiced Gingerbread Wreath Cake Recipe FAQs

What type of flour should I use for the Spiced Gingerbread Wreath Cake?
I recommend using all-purpose flour for this cake, as it provides the perfect structure. However, if you’re looking for a gluten-free option, you can substitute it with a 1:1 gluten-free flour blend. This works exceptionally well, ensuring that everyone can enjoy this festive treat!

How should I store any leftover cake?
To keep your Spiced Gingerbread Wreath Cake moist and flavorful, store it in an airtight container in the refrigerator for up to 3 days. If you frost the cake, it’s best to do so just before serving, as this helps maintain the texture of the frosting.

Can I freeze the Spiced Gingerbread Wreath Cake?
Absolutely! To freeze the cake, wrap it tightly in plastic wrap and then wrap it in aluminum foil or place it in a freezer-safe bag. This cake can be frozen for up to 3 months. When you’re ready to enjoy it, just thaw overnight in the refrigerator. For a delightful warm slice, reheat individual pieces in the microwave for about 10-15 seconds.

What should I do if the whipped cream deflates when I make the frosting?
Ah, that can happen! To prevent deflation, make sure to chill your mixing bowl and whisk beforehand. This keeps the cream cooler during the whipping process. I also suggest using heavy cream and whipping it to soft peaks—this should take about 3-5 minutes. If you notice that your whipped cream isn’t holding its shape, you can add a stabilizer, like gelatin or powdered sugar, to help maintain its texture.

Are there any dietary considerations for this recipe?
Yes! The Spiced Gingerbread Wreath Cake can easily be made suitable for various diets. For a dairy-free or vegan option, substitute the unsalted butter with vegetable oil or a dairy-free butter alternative, and use flax eggs in place of regular eggs. Make sure to read labels for any allergens if you’re serving this at a gathering, as molasses and various flours can sometimes contain hidden additives.

Can I use fresh ginger instead of ground ginger?
Definitely! Fresh ginger adds a vibrant bite, but keep in mind it may alter the cake’s texture slightly. If you choose to use fresh ginger, I suggest using about 1 tablespoon of finely grated fresh ginger for every teaspoon of ground ginger called for in the recipe. It can bring a delightful freshness to your Spiced Gingerbread Wreath Cake!

Spiced Gingerbread Wreath Cake

Irresistible Spiced Gingerbread Wreath Cake for Cozy Gatherings

Experience the warmth of the holidays with this Spiced Gingerbread Wreath Cake, a festive dessert that balances rich spices and sweetness.
Prep Time 20 minutes
Cook Time 40 minutes
Cooling Time 10 minutes
Total Time 1 hour 10 minutes
Servings: 12 slices
Course: Dessert
Cuisine: Holiday
Calories: 350

Ingredients
  

For the Cake
  • 3 cups all-purpose flour Can substitute with gluten-free flour blend for a gluten-free version.
  • 1 teaspoon baking soda No substitutions necessary.
  • 2 teaspoons ground cinnamon Other ground spices like nutmeg can be used for variation.
  • 1 teaspoon ground ginger Fresh ginger can be used, but may alter texture.
  • 1 teaspoon ground cloves Skip if preferred; adjust cinnamon to taste.
  • 1 teaspoon salt Essential for balance; do not omit.
  • 1 cup molasses Dark corn syrup or honey can be used as a substitute, but with less intensity.
  • 1 cup granulated sugar Can replace with brown sugar for a richer flavor.
  • 1/2 cup unsalted butter Vegetable oil can be a substitute for dairy-free options.
  • 2 eggs Flax eggs can be used for a vegan alternative.
For the Frosting
  • 2 cups whipped cream Chill bowl and whisk to prevent melting; use stabilizers if desired.
  • 1 cup powdered sugar Can be adjusted based on sweetness preference.
For Decoration
  • rosemary Use any festive herbs or spices according to preference.
  • star anise Use any festive herbs or spices according to preference.
  • cinnamon sticks Use any festive herbs or spices according to preference.

Equipment

  • Bundt pan
  • Mixing bowls
  • Hand mixer
  • Whisk

Method
 

Step-by-Step Instructions
  1. Preheat your oven to 350°F (175°C) and grease a Bundt pan.
  2. In a mixing bowl, whisk together the flour, baking soda, cinnamon, ginger, cloves, and salt until evenly mixed.
  3. In another bowl, cream together the butter and sugar until light and fluffy, then beat in the molasses and eggs.
  4. Gradually add the dry ingredients to your wet mixture, alternating with any additional liquid required.
  5. Pour the batter into the prepared Bundt pan and bake for 35-40 minutes until a toothpick comes out clean.
  6. Allow the cake to cool in the pan for about 10 minutes before inverting onto a wire rack.
  7. Whip the cream with powdered sugar until soft peaks form.
  8. Spread the whipped cream frosting over the cooled cake and decorate with rosemary, star anise, and cinnamon sticks.
  9. Dust with powdered sugar just before serving.

Nutrition

Serving: 1sliceCalories: 350kcalCarbohydrates: 50gProtein: 3gFat: 15gSaturated Fat: 9gPolyunsaturated Fat: 1gMonounsaturated Fat: 4gCholesterol: 45mgSodium: 150mgPotassium: 150mgFiber: 1gSugar: 25gVitamin A: 300IUCalcium: 30mgIron: 1.5mg

Notes

Chill mixing tools for better whipped cream texture. Adjust spices to personal preference.

Tried this recipe?

Let us know how it was!

Satisfying Rice Krispie Christmas Puds for Guilt-Free Joy

As I stand in my kitchen, a playful aroma of melting chocolate mingles with the crispness of holiday cheer, instantly transporting me back to childhood Christmases filled with laughter and sweet treats. These Slimming-Friendly Rice Krispie Christmas Puds are my go-to festive delight, marrying that nostalgic crunch with a modern, calorie-conscious twist. Perfect for anyone looking to indulge without the guilt, these little bites of joy are as fun to make as they are to share at gatherings. With their simple prep and visually charming presentation, they’re destined to be a hit on any holiday buffet. Ready to wow your guests and keep your resolutions intact? Let’s dive into this deliciously festive treat together!

Why Are These Puds So Irresistible?

Delightfully Guilt-Free: Enjoying festive treats doesn’t have to mean compromising your diet. These Rice Krispie Christmas Puds are a low-calorie indulgence that keeps your resolutions intact.

Fun and Easy to Make: With just a few simple ingredients, the process is a breeze, making them perfect for busy holiday prep.

Versatile Decorations: Customize these puds with your choice of festive toppings or sprinkles, creating a unique treat for every occasion.

Crowd-Pleaser: The delightful crunch paired with a creamy chocolate drizzle guarantees smiles at any gathering—just like those mini cheesecakes you love!

Childhood Nostalgia: Transport yourself back to sweet holiday memories while creating new ones with friends and family. It’s a fun, memory-rich cooking experience!

Rice Krispie Christmas Puds Ingredients

• Here’s what you’ll need to whip up these delightful treats!

For the Base

  • Coco Pops – Provides the crispy texture; use regular Rice Krispies for a less sweet option.
  • Mars Bars (fun size) – Adds sweetness and chocolate flavor; you can substitute with regular-sized Mars Bars if fun sizes are unavailable.
  • Reduced Fat Spread – Acts as a binder, keeping the mixture together without the extra calories.

For the Drizzle

  • White Chocolate – For melting and drizzling to create a decorative touch; any brand suitable for melting works well.

For the Decorations

  • Red Sugar Balls & Herb Leaves – These add a festive flair; feel free to swap for ready-made edible holly decorations for an easier option.

With these Rice Krispie Christmas Puds ingredients, you’ll be well on your way to creating a charming holiday treat that’s both fun and figure-friendly!

Step‑by‑Step Instructions for Rice Krispie Christmas Puds

Step 1: Prepare the Ingredients
Begin by cutting the Mars Bars into halves and placing them in a microwave-safe bowl with the reduced fat spread. This combination will create a rich, creamy base for your Rice Krispie Christmas Puds. Ensure everything is ready before moving on to the next step for a smooth cooking experience.

Step 2: Melt the Chocolate Mixture
Microwave the bowl in short bursts of 20-30 seconds, stirring frequently until the mixture is completely melted and smooth. This should take about 1-2 minutes total. Keep an eye on it to prevent burning; you want a silky consistency that easily blends with the Coco Pops.

Step 3: Combine with Coco Pops
Once the chocolate mixture is ready, remove it from the microwave and gently fold in the Coco Pops. With a spatula, ensure each piece is well-coated in the chocolate. This gives your Rice Krispie Christmas Puds that signature crunch and sweetness. Mix until evenly combined for the best flavor and texture.

Step 4: Shape the Puds
Take tablespoon-sized heaps of the mixture and place them onto a tray lined with baking paper. Use your hands or a scoop to ensure each heap is uniform in size—about a teaspoon will do. Refrigerate for approximately 15 minutes, allowing the mixture to set and firm up before shaping.

Step 5: Form into Balls
After chilling, remove the tray from the refrigerator. With your hands, carefully shape the firm Coco Pops and chocolate mixture into small balls, aiming for a smooth finish. This step is where the puds take on their delightful shape, making them perfect for festive sharing.

Step 6: Melt the White Chocolate
In a separate microwave-safe bowl, melt the white chocolate in 20-second intervals, stirring after each burst until completely smooth. This should take about 1-2 minutes. Once melted, this will serve as a lovely drizzle on your Rice Krispie Christmas Puds, enhancing both appearance and taste.

Step 7: Drizzle the Chocolate
Using a fork or a spoon, drizzle the melted white chocolate over each shaped ball, ensuring an even coating. Allow the chocolate to set slightly before decorating. This step not only adds a creamy richness to each pud but also creates a visually appealing finish for your festive treat.

Step 8: Add Final Decorations
While the chocolate is still slightly tacky, sprinkle red sugar balls and place herb leaves on top of the Rice Krispie Christmas Puds. This addition will bring a festive look to your treats. Once decorated, allow them to sit at room temperature until the chocolate hardens completely, making them ready for serving.

Make Ahead Options

These Slimming-Friendly Rice Krispie Christmas Puds are perfect for busy holiday planners! You can prepare the chocolate and Coco Pops mixture up to 24 hours in advance, refrigerating it after shaping into balls to maintain that delightful firmness. Simply follow the first five steps of the recipe, then store the shaped puds in an airtight container in the fridge. When you’re ready to serve, simply drizzle the melted white chocolate and add your festive decorations—a quick finishing touch that keeps them just as delicious and visually appealing. This way, you’ll have more time to enjoy the festivities while serving up a crowd-pleasing treat!

What to Serve with Rice Krispie Christmas Puds

As you gather around the festive table, complement these delightful treats with other goodies that elevate your holiday spread.

  • Mini Cheesecakes: Their creamy richness beautifully contrasts the crispy texture of the puds, creating a pleasing variety of sensations on the plate. These cheesecakes can offer a fruity twist that echoes the festive spirit.

  • Spiced Biscuits: The warm flavors of cinnamon and nutmeg will delight your guests and enhance the sweetness of the Rice Krispie Christmas Puds. The crunch of the biscuits provides a lovely contrast.

  • Fruit Salad: A fresh, juicy addition that brings brightness to your dessert spread. The natural sweetness helps balance out the richness of chocolate and enhances the overall festive experience.

  • Bedtime Cocoa: A warm, comforting cup of cocoa pairs wonderfully! Its rich flavor coats the palate, making the lighter puds taste even more delightful.

  • Chocolate Dipped Strawberries: These add a touch of elegance and an extra chocolatey bite that festively harmonizes with the puds. Plus, the freshness of strawberries offers a burst of flavor that refreshes the palate.

  • Sparkling Cider: For a non-alcoholic beverage that adds festivity, this bubbly delight complements the sweetness of the treats without overpowering it. Enjoy each sip as much as the puds!

Expert Tips for Rice Krispie Christmas Puds

  • Chill Time Matters: Allow the mixture to chill well before shaping to prevent stickiness. A firm texture helps you make perfect little balls.

  • Sticky Solutions: If the mixture remains too sticky, chill it longer or use mini pastry cases to easily shape your Rice Krispie Christmas Puds.

  • Allergen Awareness: Always double-check ingredient labels for allergens, especially if serving to guests. Safety is key to holiday cheer!

  • Storing Wisely: Keep your treats in an airtight container for up to 3-4 days, but avoid freezing as this can ruin their delightful texture.

  • Experiment with Flavors: Feel free to experiment! Mix in nuts or dried fruits for extra flavor or switch to dark chocolate for a richer taste twist.

Storage Tips for Rice Krispie Christmas Puds

Airtight Container: Store your Rice Krispie Christmas Puds in an airtight container to keep them fresh for up to 3-4 days. This will maintain their delightful crunch and flavor.

Refrigeration: Keeping them in the fridge helps preserve their texture, especially if the weather’s warm. Just ensure the lid of the container fits snugly!

Avoid Freezing: These treats are not suitable for freezing, as the texture may become compromised once thawed.

Serving Tips: When ready to serve, you can let them sit at room temperature for a few minutes to soften slightly for the best eating experience.

Rice Krispie Christmas Puds Variations

Feel free to sprinkle your creativity and give these delightful treats a personal touch!

  • Nutty Burst: Add chopped nuts like almonds or hazelnuts to the chocolate mixture for an irresistible crunch and a protein boost. The added texture pairs beautifully with the sweetness!

  • Fruity Twist: Mix in some dried cranberries or raisins for a fruity flavor that complements the chocolate. This brings a touch of tartness that balances perfectly with the rich sweetness.

  • Dairy-Free Delight: Substitute the white chocolate with a dairy-free chocolate alternative to create a vegan-friendly version of these festive puds. No one will miss the dairy with this swap!

  • Flavor Variations: Use flavored chocolate, such as mint or orange-infused, for a unique twist that adds an unexpected zing to your puds. It’s a fun way to surprise your taste buds this holiday season!

  • Sprinkled Joy: Customize the decorations with your choice of sprinkles or edible glitter to match a theme or occasion, ensuring that each pud is a festive masterpiece on your holiday table!

  • Spicy Kick: Incorporate a pinch of cinnamon or nutmeg for a warm spice note that echoes holiday flavors. This simple addition can elevate your Rice Krispie Christmas Puds to the next level!

  • Chocolate Lovers: Top with a drizzle of dark chocolate instead of white for a rich and decadent finish. This adds depth of flavor while keeping things festive and indulgent.

  • Coconut Magic: Roll the balls in shredded coconut after drizzling for a tropical twist. The coconut adds a lovely texture and visual appeal to these holiday treats.

Enhance your Rice Krispie Christmas Puds with these delightful variations. For even more festive inspirations, consider whipping up some Street Corn Chicken Rice Bowls or included sweet bites like mini cheesecakes to create a lovely dessert spread for your celebrations!

Rice Krispie Christmas Puds Recipe FAQs

How do I choose the right ingredients for these puds?
Absolutely! When selecting your Rice Krispie Christmas Puds ingredients, I recommend looking for fresh Mars Bars without any dark spots or signs of damage. For Coco Pops, check for a crisp texture and avoid any boxes with crushed pieces. The reduced-fat spread should also be fresh—look for a smooth consistency without separation.

What’s the best way to store these puds?
Very! To maintain freshness, keep your Rice Krispie Christmas Puds in an airtight container in the refrigerator. They’ll stay delightful for about 3 to 4 days. Make sure the container is sealed properly to prevent any moisture from spoiling them. If you’re serving them later, take them out and allow them to sit at room temperature for about 10 minutes for the best texture.

Can I freeze Rice Krispie Christmas Puds?
No, it’s best to avoid freezing these treats. Freezing can alter the crispy texture you love and cause them to become chewy once thawed. Instead, keep them stored in the fridge, where they can maintain that perfect crunch for a few days.

What if my mixture is too sticky to shape?
Don’t worry! If you find the mixture is too sticky to handle, simply place it back in the refrigerator to chill for an additional 15-20 minutes. Alternatively, you can also spoon the mixture into mini pastry cases, which will help you create perfectly shaped puds without the stickiness.

Are these puds safe for people with allergies?
Very! However, it’s important to double-check the ingredient labels for any potential allergens, especially chocolate or the reduced fat spread. If you’re making these for guests, I often recommend using allergen-free alternatives to ensure everyone can indulge in the festive fun!

How can I customize these Christmas Puds?
Absolutely!Feel free to enhance your Rice Krispie Christmas Puds with different decorations or mix-ins. Consider adding mini marshmallows or swapping in nuts or dried fruit for added texture. You could even drizzle with milk or dark chocolate for a richer flavor—get creative and have fun with it!

Rice Krispie Christmas Puds

Satisfying Rice Krispie Christmas Puds for Guilt-Free Joy

Enjoy these Rice Krispie Christmas Puds, a low-calorie festive treat that combines nostalgia with modern sweetness.
Prep Time 15 minutes
Cook Time 5 minutes
Chilling Time 15 minutes
Total Time 35 minutes
Servings: 12 puds
Course: Dessert
Cuisine: American
Calories: 120

Ingredients
  

For the Base
  • 3 cups Coco Pops or regular Rice Krispies for a less sweet option
  • 5 fun size Mars Bars can substitute with regular-sized Mars Bars
  • 100 grams Reduced Fat Spread acts as a binder
For the Drizzle
  • 100 grams White Chocolate any brand suitable for melting
For the Decorations
  • 50 grams Red Sugar Balls for a festive flair
  • Herb Leaves or ready-made edible holly decorations

Equipment

  • Microwave-safe bowl
  • Spatula
  • tray
  • baking paper
  • Fork

Method
 

Step-by-Step Instructions
  1. Begin by cutting the Mars Bars into halves and placing them in a microwave-safe bowl with the reduced fat spread.
  2. Microwave the bowl in short bursts of 20-30 seconds, stirring frequently until the mixture is completely melted and smooth.
  3. Once the chocolate mixture is ready, remove it from the microwave and gently fold in the Coco Pops.
  4. Take tablespoon-sized heaps of the mixture and place them onto a tray lined with baking paper. Refrigerate for approximately 15 minutes.
  5. After chilling, carefully shape the firm mixture into small balls.
  6. In a separate bowl, melt the white chocolate in 20-second intervals, stirring after each burst until smooth.
  7. Drizzle the melted white chocolate over each shaped ball.
  8. While the chocolate is still slightly tacky, sprinkle red sugar balls and place herb leaves on top.

Nutrition

Serving: 1pudCalories: 120kcalCarbohydrates: 15gProtein: 1gFat: 7gSaturated Fat: 3gCholesterol: 5mgSodium: 50mgPotassium: 30mgSugar: 8gCalcium: 1mgIron: 1mg

Notes

Store your Rice Krispie Christmas Puds in an airtight container for up to 3-4 days. Avoid freezing to maintain texture.

Tried this recipe?

Let us know how it was!

Nutty Chocolate Ball Cookies with a Creamy Center Bliss

Winter evenings invite a cozy retreat into the kitchen, where the aroma of freshly baked cookies fills the air. When I decided to create Nutty Chocolate Ball Cookies with a Creamy Center, I knew I wanted to blend comfort and delight into each bite. These cookies offer the perfect balance of a crunchy nutty exterior and a rich, fudgy interior that melts in your mouth—ideal for those nights when you crave something indulgent yet simple. With quick prep time and the option to customize your nuts and chocolate, they make for a perfect homemade treat or a sweet gift for friends. Who wouldn’t want to share—or keep for themselves—these little bites of joy? Let’s dive into this satisfying recipe that promises to elevate your cookie game!

Why Are These Cookies Irresistible?

Comforting and satisfying, these Nutty Chocolate Ball Cookies bring the joy of baking right into your home. Customizable with different nut and chocolate options, they cater to every taste preference. Quick to prepare, they fit perfectly into busy schedules while promising an indulgent treat. Ideal for sharing, they make wonderful gifts or festive additions to cookie platters. Treat yourself and your loved ones to a delicious experience that elevates cozy evenings and festive gatherings!

Nutty Chocolate Ball Cookies Ingredients

• Dive into the delightful world of Nutty Chocolate Ball Cookies with a Creamy Center, where each ingredient plays a crucial role in crafting this blissful treat!

For the Cookie Dough

  • 1 cup unsalted butter – Provides richness and moisture; ensure it’s softened for easier mixing.
  • 1/2 cup granulated sugar – Adds sweetness that enhances the chocolate flavor.
  • 1 teaspoon vanilla extract – Infuses warmth and depth to the cookie’s aroma.
  • 1/4 teaspoon salt – Balances sweetness and enhances other flavors.
  • 2 cups all-purpose flour – Forms the structure of the cookie; no substitutions recommended for best texture.
  • 1/2 cup unsweetened cocoa powder – Introduces a rich chocolate flavor; use high-quality cocoa for better taste.

For the Creamy Center

  • 1 cup dark chocolate chips – Provides a gooey chocolate center when melted; can substitute with milk chocolate for a sweeter taste.
  • 1/2 cup heavy cream – Creates a luscious filling; chilling may be necessary to firm up if too runny.

For the Coating

  • 1 cup finely crushed mixed nuts (walnuts, pecans, or hazelnuts) – Adds a crunchy texture and nutty flavor; feel free to mix and match with your favorites.
  • Powdered sugar for dusting (optional) – Enhances aesthetics and adds a touch of sweetness.

Prepare these ingredients to set the stage for making your Nutty Chocolate Ball Cookies with a Creamy Center that everyone will love!

Step‑by‑Step Instructions for Nutty Chocolate Ball Cookies with a Creamy Center

Step 1: Prepare the Chocolate Filling
Begin by melting the dark chocolate chips in a microwave-safe bowl. Heat in 20-second intervals, stirring in between until fully melted and smooth. Next, mix in the heavy cream until well combined, creating a luscious chocolate filling. Transfer this mixture to the refrigerator and chill for about 30 minutes, or until the filling is firm enough to scoop.

Step 2: Make the Cookie Dough
In a large mixing bowl, cream together the softened unsalted butter and granulated sugar using an electric mixer until fluffy and pale, about 2-3 minutes. Add in the vanilla extract and salt, mixing well. Gradually incorporate the all-purpose flour and cocoa powder, mixing on low speed until a cohesive dough forms. This Nutty Chocolate Ball Cookies dough should be slightly sticky but firm.

Step 3: Shape the Cookies
Preheat your oven to 350°F (175°C) and line a baking sheet with parchment paper. Scoop out about a tablespoon of cookie dough and flatten it slightly in your palm. Place a teaspoon of the chilled chocolate filling in the center, then carefully fold the edges of the dough over the filling, rolling it back into a ball. Repeat this for the remaining dough.

Step 4: Coat with Nuts
Once all the cookie dough balls are shaped, roll each one in the finely crushed mixed nuts until completely covered. This not only adds a beautiful texture to your Nutty Chocolate Ball Cookies but also enhances the flavor. Make sure the nuts are pressed in slightly so they stick well during baking.

Step 5: Bake the Cookies
Arrange the nut-coated cookie balls on the prepared baking sheet, leaving some space between them. Bake in the preheated oven for 10 to 12 minutes, until they appear set but are still slightly soft in the center. This ensures the cookies will have that irresistible fudgy texture.

Step 6: Cool and Dust
Once baked, remove the cookies from the oven and let them cool on the baking sheet for about 5 minutes. Then, carefully transfer them to a wire rack to cool completely. If you desire an extra touch of elegance, dust the cooled cookies with powdered sugar before serving. Enjoy these delightful Nutty Chocolate Ball Cookies with a Creamy Center with a warm beverage or share them with loved ones!

What to Serve with Nutty Chocolate Ball Cookies with a Creamy Center

Indulging in these delightful cookies is a full sensory experience, inviting you to think of the perfect companions to complement their rich flavors.

  • Glass of Milk: A classic pairing that enhances the creamy center while balancing the cookie’s sweetness, evoking childhood nostalgia.
  • Espresso: The boldness of coffee enhances the chocolate notes, making for a decadent dessert experience that warms the soul.
  • Vanilla Ice Cream: Pairing these cookies with a scoop of creamy vanilla ice cream creates a delightful temperature contrast, making each bite unforgettable.
  • Fresh Berries: The brightness of strawberries or raspberries cuts through the richness of the cookies, adding a touch of freshness and color to your plate.
  • Hot Chocolate: A heavenly option for chocolate lovers, rich hot cocoa pairs beautifully with the fudgy texture of these cookies.
  • Cheese Platter: A mix of brie or goat cheese brings a savory component, balancing the sweetness and creating an exciting flavor contrast.
  • Chocolate Dipping Sauce: For an extra indulgent experience, drizzle warm chocolate sauce over the cookies for a truly luxurious treat.
  • Nutty Dessert Wine: A glass of port or sweet sherry complements the rich flavors of the cookie and elevates the overall dessert experience.
  • Ginger Tea: The warmth and spice of ginger tea create a comforting pairing, enhancing the cookies without overwhelming your palate.
  • Dessert Charcuterie Board: Assemble a board with nuts, dried fruits, and chocolate-covered treats alongside the cookies for a visually stunning and varied dessert experience.

Nutty Chocolate Ball Cookies Variations

Feel free to embark on a delicious journey by customizing your Nutty Chocolate Ball Cookies with these creative twists!

  • Milk Chocolate: Swap dark chocolate for milk chocolate for a sweeter, creamier center that appeals to those with a sweeter palate.

  • Nut-Free: Use sunflower seed butter and omit the nuts entirely for a nut-free version, perfect for school lunches or allergy-friendly treats.

  • Spicy Hint: Add a pinch of cayenne pepper or cinnamon to the cookie dough for a warm, surprising kick that enhances the chocolatey goodness.

  • Dried Fruit Delight: Mix in some finely chopped dried cherries or cranberries to the cookie dough for a delightful tart contrast that adds a chewiness to every bite.

  • Gluten-Free: Replace all-purpose flour with a 1:1 gluten-free flour blend to accommodate gluten sensitivities without sacrificing flavor or texture.

  • Sugar-Free: Use a sugar substitute like erythritol in place of granulated sugar for a low-calorie treat that still delivers on taste.

  • Richer Flavor: Infuse your heavy cream with espresso powder before mixing it with the chocolate for a luxurious mocha filling that coffee lovers will adore.

  • Try a Twist: Experiment by rolling the cookie balls in crushed cookies instead of nuts for a fun texture twist—try using crushed Chocolate Cranberry Cookies or even crushed Oreo cookies for something truly indulgent.

Let your creativity shine and turn these Nutty Chocolate Ball Cookies into your ultimate homemade treat!

Make Ahead Options

These Nutty Chocolate Ball Cookies with a Creamy Center are a fantastic treat to prepare ahead of time! You can make the chocolate filling up to 3 days in advance—just melt the dark chocolate, mix it with heavy cream, and refrigerate until firm. Additionally, the cookie dough can be prepared and stored in the refrigerator for up to 24 hours before baking. To maintain that rich flavor and texture, be sure to wrap the dough tightly in plastic wrap. When you’re ready to bake, simply scoop out the dough, encase the chilled filling, roll in nuts, and bake as instructed. Enjoy the time-saving benefits while still delivering delicious homemade cookies!

Expert Tips for Nutty Chocolate Ball Cookies

  • Chill Dough: If your cookie dough becomes too soft while working, chill it for about 15 minutes. This makes it easier to handle and prevents leaks during baking.

  • Quality Ingredients: Use high-quality dark chocolate for the filling to boost flavor. This will ensure your Nutty Chocolate Ball Cookies taste gourmet and indulgent.

  • Avoid Overbaking: Keep an eye on your cookies as they bake. They should be set on the outside but still soft in the center, which creates that desired fudgy texture.

  • Experiment with Nuts: Don’t hesitate to mix and match different nuts according to your preference. This allows personal flair in your Nutty Chocolate Ball Cookies!

  • Dusting Option: A light dusting of powdered sugar can enhance the presentation. Dust only after the cookies have completely cooled for the best effects.

Storage Tips for Nutty Chocolate Ball Cookies

  • Room Temperature: Store cookies in an airtight container at room temperature for up to 5 days to maintain freshness and texture.
  • Fridge: If you prefer, keep the cookies in the fridge to extend their shelf life, lasting about 7 days, but remember they may lose some of their original texture.
  • Freezer: For longer storage, freeze the Nutty Chocolate Ball Cookies individually wrapped in plastic wrap, then place them in a freezer-safe bag for up to 3 months.
  • Reheating: To enjoy warm cookies, reheat in the oven at 350°F (175°C) for about 5 minutes or until warmed through, bringing back their delightful fudgy center.

Nutty Chocolate Ball Cookies with a Creamy Center Recipe FAQs

How do I select the right ripeness for my ingredients?
Absolutely! For the creamiest filling, use fresh heavy cream that isn’t nearing its expiration date. Look for chocolate chips that have a shiny appearance, indicating freshness. Fresh nuts are key, too; avoid any that are stale or have dark spots, which can ruin the flavor of your wholesome Nutty Chocolate Ball Cookies.

How should I store my Nutty Chocolate Ball Cookies?
To keep these cookies at their best, store them in an airtight container at room temperature for up to 5 days. If you’d like to extend their shelf life, you can refrigerate them, which allows them to last about 7 days. Just remember, chilling might slightly change their texture, making them firmer but still delicious!

Can I freeze Nutty Chocolate Ball Cookies?
Yes! To freeze your cookies, first wrap each one individually in plastic wrap, then place them in a freezer-safe bag or container. They can last up to 3 months this way. When you’re ready to enjoy them, simply reheat in the oven at 350°F (175°C) for about 5 minutes, and they’ll regain their gooey center.

What should I do if my cookies spread too much while baking?
If your Nutty Chocolate Ball Cookies spread too much, don’t worry! This can happen if the dough is too warm or if you’ve added too much liquid. A quick fix is to chill the dough for about 15 minutes before baking to help maintain shape. Alternatively, make sure to keep the baking sheet in a cooler place while you work with the dough.

Are these cookies safe for people with nut allergies?
Not quite! Since these cookies contain mixed nuts, they are not suitable for individuals with nut allergies. However, you can modify the recipe by omitting the nuts entirely and rolling the cookies in chocolate sprinkles or coconut flakes for a different texture and look.

Can I substitute any ingredients for a healthier version?
Absolutely! For a healthier take on your Nutty Chocolate Ball Cookies, consider using almond flour instead of all-purpose flour for a gluten-free option. You can also replace the sugar with coconut sugar or a sugar substitute that you enjoy. Just be sure to adjust the measurements accordingly, as some substitutes may vary in sweetness!

Nutty Chocolate Ball Cookies with a Creamy Center

Nutty Chocolate Ball Cookies with a Creamy Center Bliss

Indulge in Nutty Chocolate Ball Cookies with a Creamy Center that offers a crunchy exterior and a rich, fudgy interior—perfect for cozy evenings or festive gatherings.
Prep Time 30 minutes
Cook Time 12 minutes
Chilling Time 30 minutes
Total Time 1 hour 12 minutes
Servings: 24 cookies
Course: Dessert
Cuisine: American
Calories: 150

Ingredients
  

For the Cookie Dough
  • 1 cup unsalted butter Ensure it's softened for easier mixing.
  • 1/2 cup granulated sugar Adds sweetness that enhances the chocolate flavor.
  • 1 teaspoon vanilla extract Infuses warmth and depth to the cookie's aroma.
  • 1/4 teaspoon salt Balances sweetness and enhances other flavors.
  • 2 cups all-purpose flour No substitutions recommended for best texture.
  • 1/2 cup unsweetened cocoa powder Use high-quality cocoa for better taste.
For the Creamy Center
  • 1 cup dark chocolate chips Can substitute with milk chocolate for a sweeter taste.
  • 1/2 cup heavy cream Chilling may be necessary to firm up if too runny.
For the Coating
  • 1 cup finely crushed mixed nuts (walnuts, pecans, or hazelnuts) Feel free to mix and match with your favorites.
  • powdered sugar for dusting (optional)

Equipment

  • Microwave-safe bowl
  • Electric Mixer
  • Baking Sheet
  • Parchment paper
  • Wire Rack

Method
 

Step-by-Step Instructions
  1. Begin by melting the dark chocolate chips in a microwave-safe bowl. Heat in 20-second intervals, stirring in between until fully melted and smooth. Mix in the heavy cream until well combined, creating a luscious chocolate filling. Chill for about 30 minutes, or until firm enough to scoop.
  2. In a large mixing bowl, cream together the softened unsalted butter and granulated sugar using an electric mixer until fluffy and pale, about 2-3 minutes. Add in the vanilla extract and salt, mixing well. Gradually incorporate all-purpose flour and cocoa powder, mixing on low speed until a cohesive dough forms.
  3. Preheat your oven to 350°F (175°C) and line a baking sheet with parchment paper. Scoop out about a tablespoon of cookie dough, flatten it slightly, and place a teaspoon of the chilled chocolate filling in the center. Fold the edges over the filling and roll it back into a ball.
  4. Roll each cookie ball in the finely crushed mixed nuts until completely covered, pressing the nuts in slightly to stick during baking.
  5. Arrange the nut-coated cookie balls on the baking sheet, leaving space between them. Bake for 10 to 12 minutes until set but slightly soft in the center.
  6. Once baked, let the cookies cool on the baking sheet for about 5 minutes, then transfer to a wire rack to cool completely. Dust with powdered sugar before serving if desired.

Nutrition

Serving: 1cookieCalories: 150kcalCarbohydrates: 20gProtein: 2gFat: 8gSaturated Fat: 4gPolyunsaturated Fat: 2gMonounsaturated Fat: 2gCholesterol: 20mgSodium: 50mgPotassium: 90mgFiber: 1gSugar: 10gVitamin A: 200IUCalcium: 20mgIron: 1mg

Notes

Chill the dough for easier handling if it becomes too soft. Use quality ingredients for best flavor and avoid overbaking for a fudgy texture.

Tried this recipe?

Let us know how it was!

Irresistible Gingerbread Brownies for a Cozy Holiday Treat

As I stood in my kitchen and inhaled the spicy aroma of cinnamon and ginger mingling with rich chocolate, I knew I had stumbled upon something special. These Gingerbread Brownies are the perfect fusion of traditional holiday flavors, wrapped in a fudgy, decadent dessert. Not only do they offer a delightful twist on your classic holiday treats, but the recipe is also incredibly quick to whip up—making it an ideal choice for festive gatherings or cozy nights at home. Plus, they’re versatile enough to adapt to various dietary needs, including a gluten-free option! Ready to bring a bit of warmth and joy into your kitchen? Let’s dive into this sweet holiday adventure!

Why Are These Brownies So Irresistible?

Fudgy Delight: These Gingerbread Brownies deliver an unbelievably fudgy texture that melts in your mouth with each bite!
Festive Flavors: Packed with warming spices like cinnamon and ginger, they embody the essence of the holiday season.
Quick & Easy: Whip them up in no time—perfect for last-minute gatherings or cozy nights with family.
Diet-Friendly: Need a gluten-free option? Simply swap in gluten-free flour, and everyone can enjoy this treat!
Versatile Treat: Tailor them to your liking—add nuts or a swirl of cream cheese frosting to customize your brownies!
Crowd Pleaser: Serve them warm with ice cream for an irresistibly rich dessert that will delight both friends and family. For more brownie inspiration, check out my Fudgy Brownies Indulge recipe!

Gingerbread Brownie Ingredients

For the Batter
Unsalted Butter – Provides fat for rich texture; can be replaced with coconut oil for dairy-free brownies.
Unsulphured Molasses – Adds sweetness and depth; honey or maple syrup can be used as substitutes but will alter the brownie flavor slightly.
Eggs – Bind the ingredients and provide moisture; use flax eggs for a vegan alternative.
All-Purpose Flour – Gives structure; substitute with gluten-free flour for a gluten-free version.
Granulated Sugar – Sweetens and adds texture; brown sugar can add extra moisture and flavor.
Baking Soda – Acts as a leavening agent; avoid substitutions, as it’s essential for rise.
Cocoa Powder – Provides rich chocolate flavor; can substitute with melted semi-sweet chocolate (½ cup) for a varied experience.
Salt – Enhances flavor; omit only if using salted butter.
Ground Ginger, Ground Cinnamon, Ground Cloves – These spices impart warmth and that delightful holiday flavor; all can be adjusted according to taste.

For the Garnish
Powdered Sugar – For dusting before serving; optional but highly recommended for presentation.

Get ready to embark on a festive baking adventure with these delightful Gingerbread Brownies!

Step‑by‑Step Instructions for Gingerbread Brownies

Step 1: Preheat and Prepare
Preheat your oven to 350°F (175°C) and prepare a 9×9-inch baking dish by greasing it with baking spray or lining it with parchment paper. This will ensure your Gingerbread Brownies release easily after baking. While the oven heats, take a moment to gather your ingredients and equipment, creating an inviting workspace.

Step 2: Whisk Dry Ingredients
In a medium mixing bowl, combine the all-purpose flour, baking soda, salt, ground cinnamon, ground ginger, and ground cloves. Whisk the dry ingredients together until they’re well blended, creating a fragrant spice mix that captures the essence of the holidays. This step ensures even distribution of the leavening agent and spices, crucial for your brownies’ texture.

Step 3: Melt Butter and Mix
In a large microwave-safe bowl, melt the unsalted butter in the microwave for about 30-45 seconds, taking care not to overheat. Once melted, mix in the unsulphured molasses and granulated sugar, stirring until everything is smooth and well combined. The glossy mixture will signal it’s ready for the next step, filling your kitchen with warm aromas.

Step 4: Beat in Eggs
Add the eggs to the butter mixture and beat them in gently until just combined. This should take about 30 seconds. The mixture should look glossy and cohesive, which will help create a tender, fudgy texture in your Gingerbread Brownies. Avoid overmixing to keep your brownies tender.

Step 5: Incorporate Cocoa Powder
Stir in the cocoa powder until it is fully incorporated, ensuring the chocolate flavor becomes part of your brownie batter. The mixture will darken and gain a rich hue, signaling that the fudgy base is coming together beautifully. Be thorough, but gentle; you want a smooth batter without lumps.

Step 6: Combine Wet and Dry Ingredients
Gently fold the dry ingredients into the wet mixture using a spatula. Mix until just combined, being careful not to overwork the batter. You want smoothness without gluten development. The result will be a thick, luscious batter full of holiday spices, ready to turn into decadent Gingerbread Brownies.

Step 7: Pour Into Baking Dish
Pour the brownie batter into the prepared baking dish and spread it evenly with a spatula. The batter should fill the dish generously, creating an anticipation of gooey goodness. Make sure it is smooth on top to ensure even baking for your festive treat.

Step 8: Bake to Perfection
Place the baking dish in the preheated oven and bake for 15-20 minutes. To check for doneness, insert a toothpick into the center; it should come out with a few moist crumbs, but not wet batter. Keep an eye on the time to avoid overbaking, preserving the fudgy delight of your Gingerbread Brownies.

Step 9: Cool and Slice
Once baked, remove the brownies from the oven and allow them to cool in the pan for about 10 minutes. Then, carefully transfer them to a wire rack to cool completely. This cooling period is crucial for achieving the right texture; slicing too soon may lead to a messy, crumbly result.

Step 10: Dust and Serve
Before serving, lightly dust the top of your cooled Gingerbread Brownies with powdered sugar for a beautiful presentation. Use a fine mesh sieve to evenly distribute the sugar. Then, slice them into squares, and they are ready to be enjoyed—perfect for cozying up with loved ones during the holiday season!

Expert Tips for Perfect Gingerbread Brownies

  • Check for Doneness: Keep an eye on the clock! Insert a toothpick a few minutes before the timer goes off—this helps you avoid overbaking and ensures fudginess.
  • Cooling Matters: Let your Gingerbread Brownies cool completely before cutting. This prevents them from becoming too crumbly and ensures clean slices.
  • Proper Mixing: Use a spatula to fold dry ingredients into the wet mix gently. Overmixing can lead to tough brownies—keep it light and smooth!
  • Use Quality Ingredients: Fresh spices and good-quality cocoa powder make a huge difference in flavor—don’t skimp on quality for a cozy, flavorful treat.
  • Experiment with Flavors: Don’t hesitate to add your touch! Swirl in some cream cheese frosting or throw in chocolate chips for added richness and texture.

Storage Tips for Gingerbread Brownies

Room Temperature: Store brownies in an airtight container at room temperature for up to 3-4 days to keep them fresh and fudgy.

Freezer: For long-term storage, individually wrap Gingerbread Brownies and freeze for up to 3 months. This keeps their texture intact.

Thawing: When ready to enjoy, simply thaw the brownies at room temperature for about 1-2 hours. Reheat in the microwave for a few seconds if you prefer them warm.

Reheating: For a delightful treat, warm the brownies in the microwave for 10-15 seconds, and serve with a scoop of vanilla ice cream for an unforgettable dessert!

Gingerbread Brownies Variations

Feel free to explore these delightful variations that will make your Gingerbread Brownies uniquely yours!

  • Dairy-Free: Swap unsalted butter with coconut oil to keep it rich and creamy without dairy.
  • Gluten-Free: Use a 1:1 gluten-free flour blend to make these brownies suitable for everyone at your gathering.
  • Extra Spices: Add an extra teaspoon of ground cinnamon or a pinch of nutmeg for a spicier kick that enhances the holiday flavors.
  • Nutty Goodness: Toss in chopped pecans or walnuts for a delightful crunch that contrasts with the soft, fudgy texture.
  • Mocha Twist: Substitute half of the cocoa powder with ground espresso for a rich mocha flavor that complements the gingerbread spices beautifully.
  • Minty Fresh: Add a drop of peppermint extract to the batter for a refreshing, holiday-inspired minty taste.
  • Cream Cheese Frosting: Consider swirling some cream cheese frosting on top before cutting—this adds an indulgent layer of sweetness!
  • Chocolate Swirls: Swirl in melted semi-sweet chocolate for even more chocolatey goodness—decadence never tasted so good!

No matter how you choose to adapt these Gingerbread Brownies, they’re sure to be a hit during your holiday celebrations. For more inspiration, don’t forget to check out my popular Patriotic Star Brownies for a fun twist on classic treats!

Make Ahead Options

These Gingerbread Brownies are perfect for meal prep enthusiasts! You can prepare the brownie batter up to 24 hours in advance by mixing all the ingredients and sealing it tightly in an airtight container. Just refrigerate the batter until you’re ready to bake—this helps the flavors meld beautifully. For even more convenience, you can bake the brownies ahead of time and store them in an airtight container at room temperature for up to 3 days. When ready to serve, simply dust with powdered sugar and slice them up for a delightful treat, just as delicious as the day they were made!

What to Serve with Gingerbread Brownies

Indulge in the festive spirit with delightful pairings that elevate your baking adventure!

  • Vanilla Ice Cream: A classic companion, the creamy richness of vanilla ice cream contrasts perfectly with the warm spices of gingerbread.
  • Spiced Hot Chocolate: Intensify the cozy vibes by sipping on a cup of rich spiced hot chocolate—an ideal warm complement.
  • Whipped Cream: Light and airy, a dollop of freshly whipped cream adds a luscious touch, enhancing the sugared frosting on your brownies.
  • Gingerbread Cookies: For a delightful flavor echo, serve with crispy gingerbread cookies that will leave everyone craving more!
  • Cranberry Sauce: A touch of tartness from fresh cranberry sauce complements the sweetness of the brownies, providing a balance of flavors.
  • Chai Tea: The aromatic spices in chai tea mirror the flavors in your brownies, making for an inviting and warming drink option.
  • Pecan Pie: Celebrate the holidays with a slice of pecan pie; the crunchy nuts and sweet filling create a sensational duet with your brownies.
  • Spiced Apple Cider: Warm spiced apple cider enhances seasonal flavors and adds a refreshing touch to your dessert experience.
  • Cream Cheese Frosting: Jazz up your brownies with a swirl of cream cheese frosting for an extra decadent treat that sings with sweetness!

Gingerbread Brownies Recipe FAQs

What type of molasses should I use for Gingerbread Brownies?
Absolutely! I recommend using unsulphured molasses as it adds the perfect depth of flavor to these brownies. Avoid blackstrap molasses, as it can be too bitter. If you don’t have molasses on hand, honey or maple syrup can work in a pinch, but keep in mind that these substitutes will slightly alter the flavor profile of your brownies.

How should I store leftover Gingerbread Brownies?
Store leftovers in an airtight container at room temperature for up to 3-4 days. This keeps them fresh while maintaining their fudgy texture. For even longer storage, wrap each brownie individually in plastic wrap, followed by aluminum foil, and freeze for up to 3 months. When you’re ready to enjoy, simply thaw at room temperature for about 1-2 hours.

Can I make these Gingerbread Brownies gluten-free?
Very much so! To make these delightful brownies gluten-free, substitute the all-purpose flour with a gluten-free flour blend. I recommend checking that the blend contains xanthan gum, which helps to mimic the elasticity that gluten provides. This small adjustment means everyone can join in on the festive fun!

What if my brownies turn out too dry?
It’s easy to remedy a dry brownie situation! Overbaking is often the culprit, so keeping a close eye towards the end is essential. Bake just until a toothpick inserted into the center comes out with a few moist crumbs. If you find yourself with dry brownies, try adding a drizzle of warm chocolate sauce or serve them with a scoop of vanilla ice cream to bring some moisture back in.

How can I add a personal twist to my Gingerbread Brownies?
The more the merrier! You can add nuts, chocolate chips, or even a swirl of cream cheese frosting on top to elevate these brownies to the next level. Chopped walnuts or pecans add a lovely crunch, while chocolate chips bring extra richness. For a festive flair, a splash of peppermint extract can give them a delightful holiday twist!

Gingerbread Brownies

Irresistible Gingerbread Brownies for a Cozy Holiday Treat

These Gingerbread Brownies combine traditional holiday flavors with rich chocolate for a delightful treat that's quick to make.
Prep Time 15 minutes
Cook Time 20 minutes
Cooling Time 10 minutes
Total Time 45 minutes
Servings: 12 slices
Course: Dessert
Cuisine: American
Calories: 200

Ingredients
  

For the Batter
  • 1 cup Unsalted Butter or coconut oil for dairy-free
  • 1 cup Unsulphured Molasses or honey/maple syrup as substitutes
  • 2 large Eggs or flax eggs for vegan alternative
  • 1 cup All-Purpose Flour or gluten-free flour for gluten-free version
  • 1 cup Granulated Sugar or brown sugar for extra moisture
  • 1 teaspoon Baking Soda essential for rise
  • ½ cup Cocoa Powder or melted semi-sweet chocolate for variation
  • ¼ teaspoon Salt omit if using salted butter
  • 1 teaspoon Ground Ginger
  • 1 teaspoon Ground Cinnamon
  • ¼ teaspoon Ground Cloves
For the Garnish
  • ½ cup Powdered Sugar optional, for dusting before serving

Equipment

  • 9x9 inch baking dish
  • Mixing bowls
  • Spatula
  • Whisk
  • Microwave
  • Wire Rack

Method
 

Step-by-Step Instructions
  1. Preheat your oven to 350°F (175°C) and grease a 9x9-inch baking dish.
  2. In a medium mixing bowl, whisk together the flour, baking soda, salt, cinnamon, ginger, and cloves.
  3. In a large bowl, melt the unsalted butter and then mix in the molasses and sugar.
  4. Beat in the eggs gently until just combined.
  5. Stir in the cocoa powder until fully incorporated.
  6. Gently fold the dry ingredients into the wet mixture until just combined.
  7. Pour the batter into the prepared baking dish and smooth the top.
  8. Bake for 15-20 minutes, checking for doneness with a toothpick.
  9. Allow the brownies to cool in the pan for 10 minutes before transferring to a wire rack.
  10. Dust with powdered sugar before serving and slice into squares.

Nutrition

Serving: 1sliceCalories: 200kcalCarbohydrates: 30gProtein: 2gFat: 9gSaturated Fat: 5gPolyunsaturated Fat: 1gMonounsaturated Fat: 3gCholesterol: 40mgSodium: 180mgPotassium: 120mgFiber: 1gSugar: 18gVitamin A: 200IUCalcium: 15mgIron: 1mg

Notes

For best results, ensure ingredients are at room temperature before mixing.

Tried this recipe?

Let us know how it was!

Mini Grilled Cheese Sandwiches with White Cheddar & Pesto Bliss

The aroma of melting cheese mingled with the herbal zing of basil fills the air as you whip up these Mini Grilled Cheese Sandwiches with White Cheddar & Pesto. In just a matter of minutes, you can create these delightful bites that pack a punch of flavor without spending all day in the kitchen. Not only are they a fantastic appetizer for gatherings, but they also serve as a perfect side for your favorite soup on a cozy night in. With the ability to customize the cheese and pesto ratios to suit your taste, these sandwiches invite creativity and comfort all at once. How do you like your grilled cheese – with extra pesto or a twist of a different cheese?

Why are these grilled cheese so special?

Simplicity: This recipe features straightforward steps, making it accessible for anyone craving homemade comfort food.

Customizable: Adjust the ingredients to match your personal favorites, whether swapping cheeses or adding flavorful toppings.

Flavor Explosion: The creamy white cheddar and zesty pesto combine into a savory bite that satisfies your taste buds.

Perfect Pairing: Serve these sandwiches alongside tomato soup or arrange them on a platter for gatherings, much like our delicious Grilled Fish Tacos or a refreshing Grilled Citrus Chicken.

Quick and Easy: Whip these up in a flash, making them a go-to option for busy weeknights or spontaneous gatherings!

Whether you’re a seasoned chef or a beginner, you’ll adore how these mini grilled cheese sandwiches elevate any meal with their rich flavors and cozy vibes.

Mini Grilled Cheese Sandwich Ingredients

Get ready to create the most delightful bites of joy!

For the Sandwiches

  • Long French Baguette – Slice thinly to ensure crispy edges that cradle the cheese perfectly.
  • White Cheddar – Offers a rich, creamy flavor; feel free to swap with your favorite cheese for a unique twist.
  • Pesto – Introduces herbal brightness; use jarred for convenience, or make your own for that fresh touch.
  • Mayonnaise or Butter – Essential for grilling to achieve a delicious golden-brown crust; choose based on your preference.
  • Salt and Pepper – Elevates the flavors; adjust these seasonings to suit your taste buds.

Enjoy experimenting with these ingredients in your Mini Grilled Cheese Sandwiches with White Cheddar & Pesto!

Step‑by‑Step Instructions for Mini Grilled Cheese Sandwiches with White Cheddar & Pesto

Step 1: Slice the Baguette
Begin by slicing the long French baguette into 28–32 thin slices, about a quarter inch thick. This will ensure each piece crisps up beautifully, creating the perfect vessel for your mini grilled cheese sandwiches. Aim for even slices, as this helps with uniform cooking and a delightful texture.

Step 2: Prepare the Breading
Spread a thin layer of mayonnaise or melted butter on one side of each bread slice. This helps achieve that golden, crispy exterior we love in grilled cheese sandwiches. As you assemble, keep the buttered sides facing outwards for a perfect finish when grilling.

Step 3: Assemble the Sandwiches
On half of the prepared bread slices, generously spread about a teaspoon of pesto. The vibrant flavor will infuse the sandwiches, balancing the rich white cheddar beautifully. Top each slice with a handful of shredded white cheddar, and sprinkle a bit of black pepper and sea salt to enhance the flavors.

Step 4: Close the Sandwiches
Place the remaining bread slices on top of the pesto and cheese to form your mini grilled cheese sandwiches. Press them gently to ensure they hold together during cooking. This step is crucial for making sure every bite is packed with the enjoyable essence of the Mini Grilled Cheese Sandwiches with White Cheddar & Pesto.

Step 5: Heat the Pan
Heat a large skillet or frying pan over medium heat for about 5 minutes. It’s important to wait for the pan to reach the right temperature so the sandwiches grill evenly and don’t stick. This will create a perfect sear that seals in the cheesy goodness and flavor.

Step 6: Grill the Sandwiches
Carefully add 5-7 sandwiches to the hot pan, ensuring they don’t overcrowd the space. Grill them for about 3-4 minutes on each side, or until they turn a delicious golden-brown. Keep an eye on them, using a spatula to peek underneath—this way, you can ensure they’re cooking to perfection.

Step 7: Serve and Enjoy
Once all sides are golden and the cheese has melted beautifully, transfer the mini grilled cheese sandwiches to a serving platter. These delightful bites are best served hot and are a wonderful accompaniment to soup or enjoyed on their own. Experience the comforting flavors of your homemade Mini Grilled Cheese Sandwiches with White Cheddar & Pesto!

What to Serve with Mini Grilled Cheese Sandwiches with White Cheddar & Pesto

Every bite of these delightful sandwiches deserves a scrumptious companion, enhancing your dining experience and celebration of flavors.

  • Creamy Tomato Soup: The classic pairing features a rich and velvety texture, balancing the crispy sandwich with its warm embrace. Just imagine dipping your sandwich into the comforting soup—a match made in heaven!

  • Fresh Arugula Salad: A light, peppery arugula salad brings a crisp freshness, cutting through the richness of the cheese. Toss it with a tangy vinaigrette for an uplifting contrast.

  • Pickles or Pickled Vegetables: The sharp acidity of pickles complements the savory nature of the sandwiches, providing a delightful crunch that enhances every bite. Their tangy notes provide a refreshing balance.

  • Roasted Tomato Bruschetta: A burst of juicy tomatoes on toasted bread offers a sweet and savory contrast to the cheesy goodness. This vibrant dish adds a colorful touch to your table and is perfect for sharing.

  • Chardonnay or Light Beer: Pair your sandwiches with a chilled glass of Chardonnay or a light, crisp beer. The subtle notes of these beverages enhance the flavors without overpowering them, making every sip enjoyable.

  • Herb-Infused Olive Oil: Drizzle this over your sandwiches for an extra pop of flavor. The herby richness elevates the overall experience, making for a gourmet treat that guests will adore.

  • Fruit Skewers: For a refreshing dessert option, serve skewers of seasonal fruits. Their natural sweetness contrasts beautifully with the savory sandwiches, creating a well-rounded meal that delights the palate.

Elevate your meal with these perfect accompaniments, and enjoy the harmony of flavors as you indulge in your Mini Grilled Cheese Sandwiches with White Cheddar & Pesto!

Mini Grilled Cheese Sandwich Variations

Invite your inner chef to play with flavors and textures by customizing these sandwiches to your liking!

  • Cheese Swap: Try gouda or mozzarella for a different flavor profile, or mix multiple cheeses for a gooey delight. The beauty of grilled cheese lies in the variety!
  • Herb Boost: Add fresh basil or spinach to the pesto for an extra layer of freshness that complements the cheese beautifully.
  • Tomato Twist: Layer in slices of ripe tomato for a burst of juicy flavor that balances the rich cheese. This addition transforms your sandwich into a delightful garden treat!
  • Spicy Kick: Incorporate pepper jack cheese or add a drizzle of hot sauce for those who love a bit of heat in their bites. Embrace the spice; your taste buds will thank you!
  • Infused Oils: Swap the pesto for infused oils like truffle or garlic for a gourmet touch that elevates each sandwich into a savory indulgence. Each bite becomes a flavor adventure!
  • Variety of Breads: Experiment with different breads, like sourdough or ciabatta, to create unique textures that offer a delightful twist on the classic grilled cheese experience. Soft and chewy versus crunchy and crusty—what’s your choice?
  • Dipping Sauces: Serve alongside a tangy balsamic reduction or a creamy ranch dip to bring a new dimension to your mini sandwiches. It’s all about that perfect dip!
  • Gourmet Accents: Give these sandwiches a twist by adding caramelized onions or sun-dried tomatoes, making them not only tasty appetizers but also a delightful part of your charcuterie board. Pair them with our delicious Grilled Fish Tacos for a crowd-pleasing spread!

Make Ahead Options

These Mini Grilled Cheese Sandwiches with White Cheddar & Pesto are perfect for meal prep enthusiasts! You can slice the baguette and assemble the sandwiches up to 24 hours in advance, covering them tightly with plastic wrap to keep them fresh and avoid browning. Additionally, you can prepare the pesto ahead of time and refrigerate it for up to 3 days, allowing the flavors to meld beautifully. When you’re ready to serve, simply heat a pan over medium heat, grill the sandwiches for about 3-4 minutes per side until golden brown, and enjoy effortless, delicious bites that taste just as fresh as if you made them that day!

Expert Tips for Mini Grilled Cheese Sandwiches

  • Slice Evenly: Ensure uniform slices of the baguette. This allows each sandwich to cook evenly, preventing any from being too hard or too soft.

  • Cheese Substitutions: Don’t hesitate to mix cheeses! Gouda or mozzarella offers a milder flavor, while pepper jack adds a delightful kick—experiment to find your favorite combo.

  • Pesto Balance: Adjust the amount of pesto based on your preference. More pesto packs in that aromatic basil punch, but too much may overwhelm the cheese’s creaminess.

  • Pan Temperature: Patience is key! Make sure your pan is adequately heated before adding the sandwiches. This prevents sticking and ensures a beautiful golden crust.

  • Grill in Batches: Avoid overcrowding the pan. Cooking smaller batches allows the sandwiches to grill perfectly without steaming, ensuring that crispiness you crave.

  • Serving Fresh: These sandwiches are best enjoyed immediately. If you need to store extra, reheat in a pan for that fresh-off-the-grill texture.

Storage Tips for Mini Grilled Cheese Sandwiches

  • Fridge: Store any leftover mini grilled cheese sandwiches in an airtight container for up to 2 days. This will preserve their freshness while keeping them safe to eat.

  • Freezer: For longer storage, freeze the assembled sandwiches wrapped tightly in plastic wrap or foil for up to 1 month. Thaw overnight in the fridge before reheating.

  • Reheating: To maintain the crispy texture, reheat the sandwiches in a pan over medium heat for about 3-4 minutes on each side until warmed through and the cheese is melted.

  • Notes: While these mini grilled cheese sandwiches with white cheddar & pesto are best enjoyed fresh, utilizing proper storage will help you savor leftovers without sacrificing flavor!

Mini Grilled Cheese Sandwiches with White Cheddar & Pesto Recipe FAQs

How do I choose the right baguette for these sandwiches?
Absolutely! Look for a long French baguette that has a crusty exterior and a soft interior. When you slice it, aim for thin pieces (about a quarter inch) to achieve that perfect crispy edge that holds the creamy cheese beautifully. Avoid baguettes with dark spots or excessive dryness, as they won’t provide the ideal texture for your mini grilled cheese.

What’s the best way to store leftover mini grilled cheese sandwiches?
Very good question! Store any leftover mini grilled cheese sandwiches in an airtight container in the refrigerator for up to 2 days. If you plan to keep them longer, I recommend wrapping the sandwiches tightly in plastic wrap or aluminum foil and placing them in the freezer for up to 1 month. Just be sure to thaw them overnight in the fridge before reheating!

Can I freeze these mini grilled cheese sandwiches? If so, how?
Definitely! Freezing is a great option. To freeze, first assemble the sandwiches but avoid grilling them. Wrap each sandwich tightly in plastic wrap or aluminum foil to prevent freezer burn. Place them in a freezer-safe bag or container. They can be frozen for up to 1 month. When you’re ready to enjoy, thaw them overnight in the fridge, then grill them in a pan to achieve that crispy texture once again.

What should I do if my sandwiches are not getting crispy?
If your sandwiches aren’t turning crispy, it could be due to the pan temperature. Ensure your pan is hot enough by preheating it for about 5 minutes before adding the sandwiches. Another tip is to cover the pan while grilling, which helps retain heat and moisture for even cooking. Use enough mayo or butter on the outer sides, too; this creates that golden crust we all love!

Are these mini grilled cheese sandwiches safe for people with lactose intolerance?
It’s important to note that these mini grilled cheese sandwiches contain cheese, which is dairy-based and can be problematic for those with lactose intolerance. However, you can easily make them lactose-free by swapping the white cheddar for a lactose-free cheese alternative. There are many delicious lactose-free cheeses available, allowing everyone to enjoy this comfort food!

Can I use different types of cheese in this recipe?
Absolutely! The beauty of these mini grilled cheese sandwiches with white cheddar & pesto is their versatility. Feel free to experiment with cheese varieties—gouda, mozzarella, or even a sharp cheddar can all offer unique flavors and textures. If you want to add a bit of spice, try pepper jack, or for a nutty twist, Swiss cheese works wonderfully too! Mix and match to find your favorite combination.

Mini Grilled Cheese Sandwiches with White Cheddar & Pesto

Mini Grilled Cheese Sandwiches with White Cheddar & Pesto Bliss

Delightful Mini Grilled Cheese Sandwiches with White Cheddar & Pesto, perfect for appetizers or a cozy night.
Prep Time 10 minutes
Cook Time 15 minutes
Total Time 25 minutes
Servings: 4 sandwiches
Course: Appetizer
Cuisine: American
Calories: 300

Ingredients
  

For the Sandwiches
  • 1 loaf Long French Baguette Slice thinly
  • 8 ounces White Cheddar Shredded
  • 4 tablespoons Pesto Jarred or homemade
  • 4 tablespoons Mayonnaise or Butter For grilling
  • Salt and Pepper To taste

Equipment

  • Skillet
  • cutting board
  • knife

Method
 

Step-by-Step Instructions
  1. Begin by slicing the long French baguette into 28–32 thin slices, about a quarter inch thick.
  2. Spread a thin layer of mayonnaise or melted butter on one side of each bread slice.
  3. On half of the prepared bread slices, generously spread about a teaspoon of pesto and top with shredded white cheddar, black pepper, and sea salt.
  4. Place the remaining bread slices on top and press gently to hold them together.
  5. Heat a large skillet over medium heat for about 5 minutes.
  6. Add 5-7 sandwiches to the hot pan and grill for about 3-4 minutes on each side.
  7. Once golden and the cheese is melted, transfer sandwiches to a serving platter.

Nutrition

Serving: 1sandwichCalories: 300kcalCarbohydrates: 30gProtein: 12gFat: 18gSaturated Fat: 10gPolyunsaturated Fat: 1gMonounsaturated Fat: 7gCholesterol: 45mgSodium: 500mgPotassium: 200mgFiber: 1gSugar: 1gVitamin A: 500IUVitamin C: 1mgCalcium: 200mgIron: 1mg

Notes

These sandwiches are best enjoyed immediately but can be stored in an airtight container for up to 2 days.

Tried this recipe?

Let us know how it was!

Creamy Hazelnut White Russian Cocktail with a Nutty Twist

As the sun dips below the horizon, there’s nothing quite like unwinding with a comforting drink in hand. Enter the Nutty Hazelnut White Russian—a delightful twist on the classic cocktail that takes your evening relaxation to a whole new level. This creamy cocktail is a breeze to make, requiring just a few simple ingredients to conjure up its luxurious flavor. Imagine silky vodka harmonizing with rich coffee liqueur and the nutty goodness of hazelnut liqueur; it’s pure bliss in a glass! Not only is it an easy recipe for anyone craving a homemade indulgence, but it also adds a touch of decadence to a cozy night in. Whether you’re hosting a gathering or simply treating yourself, this cocktail promises to impress and satisfy. Ready to dive into this nutty goodness?

Why is the Hazelnut White Russian a Must-Try?

Creamy Indulgence: This cocktail brings together velvety cream and rich liqueurs for a luxurious experience that melts in your mouth.
Nutty Flavor: The addition of hazelnut liqueur elevates the classic White Russian, adding a delightful twist that’s simply irresistible.
Quick and Easy: With just four ingredients and straightforward steps, you can whip up this delicious drink in minutes, making it perfect for unexpected guests.
Versatile Ingredients: Feel free to switch up the liqueurs and create variations—like an almond-flavored version with amaretto or a chocolate twist!
Crowd-Pleaser: Ideal for parties or cozy evenings, this cocktail is bound to impress your friends or simply treat yourself to a well-deserved indulgence. For more delicious ideas, check out these Red White Blue recipes that bring festive fun to any occasion!

Hazelnut White Russian Ingredients

For the Cocktail
Vodka – Main spirit to give your Hazelnut White Russian its smooth base; choose a high-quality brand for the best flavor.
Coffee Liqueur – Adds the sweetness and coffee notes; feel free to swap with chocolate liqueur for a different flavor experience.
Hazelnut Liqueur – Brings the nutty goodness that elevates this classic cocktail; almond liqueur can be a delightful substitute for a different twist.
Cream – Ensures the drink’s signature creaminess; heavy cream creates a richer texture, while milk or lactose-free alternatives offer a lighter option.

Step‑by‑Step Instructions for Hazelnut White Russian

Step 1: Prepare Your Glass
Begin by filling a rocks glass with ice cubes. Ensure the glass is chilled by using fresh, cracked ice, which will maintain the drink’s optimal temperature. Aim for a nice layer of ice at the bottom to cool your Hazelnut White Russian thoroughly and add a refreshing crunch as you sip.

Step 2: Add the Liqueurs
Pour 2 oz of vodka over the ice in your prepared glass. Next, introduce 1 oz of coffee liqueur, followed by 1 oz of hazelnut liqueur. Watch the liqueurs cascade over the ice, creating a beautiful layered effect. This combination of flavors is crucial for the nutty twist that defines your Hazelnut White Russian.

Step 3: Drizzle in the Cream
Slowly drizzle 1 oz of cream over the top of your liqueur mixture. Use the back of a spoon to help it flow gently, creating a stunning swirl that showcases the distinctive layers. This will not only enhance the visual appeal but also allow the creamy goodness to meld with the nutty flavors at the bottom.

Step 4: Stir to Integrate Flavors
Gently stir the cocktail with a bar spoon if you prefer a more uniform flavor throughout. Doing this will help blend the cream with the liqueurs, forming a cohesive, indulgent mix that is visually inviting and delicious. The result is a creamy Hazelnut White Russian that is both fragrant and tempting.

Step 5: Garnish and Serve
For an elegant touch, consider garnishing your Hazelnut White Russian with crushed hazelnuts on top. This adds both a pop of flavor and texture to your drink. Serve immediately to enjoy the best creamy experience, and watch as your guests marvel at your beautifully crafted cocktail, perfect for cozy evenings or gatherings.

Expert Tips for Hazelnut White Russian

  • Quality Ingredients: Always use high-quality vodka and liqueurs for a smoother, richer flavor in your Hazelnut White Russian.
  • Chill Your Glass: Pre-chill your rocks glass to keep your cocktail colder longer, enhancing the overall drinking experience.
  • Customize Your Sweetness: Adjust the amount of coffee and hazelnut liqueurs based on your taste preference; opt for less if you prefer a lighter drink.
  • Gently Stir: If you prefer even mixing, gently stir the cocktail but avoid vigorous shaking to maintain its creamy texture.
  • Garnish for Flair: Don’t skip the garnish! Crushed hazelnuts not only enhance flavor but also add a charming visual element to your drink.

What to Serve with Hazelnut White Russian

As you sip on this creamy indulgence, consider pairing it with delightful bites that complement its nutty sweetness.

  • Chocolate-Dipped Strawberries: The rich chocolate adds sweetness and a juicy contrast, creating a divine dessert experience.
  • Spiced Nuts: Crunchy, savory nuts enhance the drink’s creaminess while mirroring the hazelnut notes, making for a perfect snack.
  • Mini Cheesecakes: Creamy and rich, these little treats harmonize beautifully with the cocktail’s texture, providing a balanced end to an evening.
  • Vanilla Ice Cream: A scoop of vanilla ice cream melds the flavors, turning your drink into an unforgettable dessert cocktail.
  • Fruit Tart: The freshness of seasonal fruits against the creamy cocktail creates a delightful fruit-forward balance.
  • Dark Chocolate Mousse: Silky and rich, this pairing elevates the experience with strong cocoa flavors that resonate beautifully with the hazelnut liqueur.
  • Coffee Cake: The moist cake combined with a hint of coffee complements the cocktail’s coffee liqueur, creating a harmonious flavor connection.
  • Sparkling Water With Lime: A refreshing, zesty drink to cleanse the palate between sips, ensuring every taste remains vibrant.
  • Phyllo Pastry Bites: Crispy and flaky, these light bites offer a delightful texture contrast, making every sip and bite a surprising treat.

How to Store and Freeze Hazelnut White Russian

Freshness: This cocktail is best enjoyed fresh, as the flavors are most vibrant. Aim to mix the Hazelnut White Russian right before serving for the ultimate experience.

Fridge: If you have leftover mixed ingredients (without cream), they can be stored in an airtight container in the fridge for up to 3 days. Just be sure to shake well before pouring!

Freezer: Avoid freezing as the cocktail ingredients, especially cream, can separate or change texture when thawed, ruining the creamy experience.

Reheating: Since this cocktail is served cold, there’s no reheating involved. Simply serve it immediately after preparation for the best taste!

Hazelnut White Russian Variations

Feel free to personalize your Hazelnut White Russian with these delightful twists that will elevate your cocktail experience!

  • Almond Delight: Substitute hazelnut liqueur with amaretto for a sweet almond flavor that’s equally delicious.

  • Chocolate Twist: Swap coffee liqueur with chocolate liqueur to create a dessert-like drink that satisfies your sweet cravings. Picture rich, chocolaty goodness in every sip!

  • Vegan Version: Use coconut cream instead of regular cream for a dairy-free option that still brings a delightful richness to this cocktail.

  • Spiced Rum Lift: Experiment by swapping vodka with spiced rum to add warmth and complexity to your Hazelnut White Russian. This variation is perfect for cozy, chilly evenings.

  • Nutty Duo: Mix equal parts of hazelnut and almond liqueur for a delicious blend that brings out a double nutty flavor profile, making every sip unforgettable.

  • Maple Infusion: Drizzle in a bit of pure maple syrup along with the cream for a subtly sweet and inviting twist on the classic recipe.

  • Iced Version: Blend the ingredients with ice for a frozen twist that’s perfect for hot summer days! This icy treat retains that creamy goodness while refreshing your palate.

  • Coffee Boost: Add a shot of freshly brewed espresso to supercharge your cocktail with an extra caffeine kick, perfect for those early evenings or brunch gatherings.

If you’re looking for more creative ideas, consider these festive recipes like Red White Blue Rice Krispie Treats or indulge in the sweet flavor of White Chocolate Cranberry Cookies. Enjoy your cocktail experimentation!

Make Ahead Options

Preparing your Nutty Hazelnut White Russian ahead of time can really save you precious moments during busy gatherings! To make this cocktail even more convenient, you can combine the vodka, coffee liqueur, and hazelnut liqueur in a sealed container and refrigerate it for up to 3 days. This way, the flavors meld beautifully while it sits, ensuring a rich drinking experience. When you’re ready to serve, simply pour the mixture over ice and drizzle in the cream right before serving; this maintains that signature creaminess and delightful swirl. Just remember to chill your glass to enhance the refreshing experience!

Hazelnut White Russian Recipe FAQs

What is the best type of vodka to use for my Hazelnut White Russian?
Absolutely! When crafting your Hazelnut White Russian, I recommend using a high-quality vodka, as this is the primary spirit that provides the cocktail’s smooth base. Brands like Grey Goose or Tito’s Handmade Vodka are great choices that can elevate the overall flavor.

How can I store leftover ingredients for my Hazelnut White Russian?
The best way to store any leftovers is to keep the mixed ingredients (vodka, coffee liqueur, hazelnut liqueur) in an airtight container in the fridge for up to 3 days. Just be sure to leave out the cream, as it’s best to mix that fresh right before you’re ready to serve.

Can I freeze my Hazelnut White Russian for later?
It’s best to avoid freezing your Hazelnut White Russian, especially due to the cream. Freezing can lead to separation and a change in texture when thawed, which would ruin the creamy experience we’ve crafted. Instead, enjoy it fresh to fully indulge in its delightful flavors.

What can I use as a substitute for hazelnut liqueur?
If you don’t have hazelnut liqueur on hand, you can absolutely substitute it with amaretto for a delicious almond-flavored twist. Alternatively, a chocolate liqueur can add a different yet equally rich flavor profile, so feel free to get creative!

Are there any dietary considerations I should be aware of with this cocktail?
Good question! This Hazelnut White Russian contains alcohol, so please be mindful of your consumption, especially if you’re serving it to guests. Additionally, if you or your guests have nut allergies, it’s essential to skip the hazelnut liqueur and either use alternatives like amaretto or simplify with just vodka and coffee liqueur for a classic take.

Hazelnut White Russian

Creamy Hazelnut White Russian Cocktail with a Nutty Twist

Indulge in a Hazelnut White Russian, a creamy and nutty twist on the classic cocktail perfect for relaxation.
Prep Time 5 minutes
Total Time 5 minutes
Servings: 1 cocktail
Course: Drinks
Cuisine: American
Calories: 250

Ingredients
  

For the Cocktail
  • 2 oz Vodka Choose a high-quality brand for the best flavor.
  • 1 oz Coffee Liqueur Can swap with chocolate liqueur for a different flavor.
  • 1 oz Hazelnut Liqueur Almond liqueur can be a delightful substitute.
  • 1 oz Cream Heavy cream creates a richer texture.

Equipment

  • Rocks glass
  • Bar spoon

Method
 

Step‑by‑Step Instructions for Hazelnut White Russian
  1. Begin by filling a rocks glass with ice cubes. Ensure the glass is chilled by using fresh, cracked ice, which will maintain the drink's optimal temperature.
  2. Pour 2 oz of vodka over the ice in your prepared glass. Next, add 1 oz of coffee liqueur and then 1 oz of hazelnut liqueur, creating a beautiful layered effect.
  3. Slowly drizzle 1 oz of cream over the top of your liqueur mixture using the back of a spoon to create a stunning swirl.
  4. Gently stir the cocktail with a bar spoon to blend the flavors together.
  5. Garnish the cocktail with crushed hazelnuts on top and serve immediately.

Nutrition

Serving: 1cocktailCalories: 250kcalCarbohydrates: 15gProtein: 1gFat: 20gSaturated Fat: 10gMonounsaturated Fat: 5gCholesterol: 40mgSodium: 70mgPotassium: 150mgSugar: 10gVitamin A: 200IUCalcium: 100mg

Notes

This cocktail is best enjoyed fresh. Avoid freezing due to potential texture changes in the cream.

Tried this recipe?

Let us know how it was!

Creamy Garlic Sauce Baby Potatoes for Cozy Nights In

As I watched my friends gather around the dinner table, I could feel the anticipation in the air. “What’s that heavenly aroma?” one of them asked, their eyes lighting up at the sight of my Creamy Garlic Sauce Baby Potatoes. This dish effortlessly combines tender, buttery baby potatoes with a rich, velvety garlic sauce, making it a true comfort food favorite. Not only is it a fantastic side dish that complements nearly any main course, but it’s also incredibly easy to whip up, perfect for those bustling weeknights or special family gatherings. With a delicious, party-ready vibe and simple ingredients you likely already have on hand, these potatoes are bound to become your go-to recipe. Are you ready to elevate your potato game?

Why Are These Potatoes Irresistible?

Comforting, with their soft texture and savory sauce that invites seconds. Versatile, this dish pairs beautifully with roasted meats or grilled main courses—think Garlic Butter Shrimp or Grilled Garlic Potatoes for an unforgettable meal. Time-saving, no peeling is required; simply wash and halve the potatoes. Crowd-pleasing, it has that “wow” factor for family and guests alike, while being vegetarian-friendly. Elevate Your Experience by adding a sprinkle of Parmesan for extra flavor depth!

Creamy Garlic Sauce Baby Potatoes Ingredients

For the Potatoes

Baby Potatoes – These tender, naturally sweet gems are the star of the dish—no peeling required!
Olive Oil or Butter – Adds richness and enhances that delicious garlic flavor; opt for unsalted for greater control.

For the Sauce

Garlic – Fresh minced garlic delivers bold flavor; try roasted garlic for a sweeter touch.
Onion (optional) – Finely chopped for added depth; enhances the overall savory profile.
Heavy Cream – This forms the luxurious sauce; avoid milk for the richest texture.
Chicken or Vegetable Broth – Enriches the flavor of the sauce; choose broth based on dietary preferences.
Salt – A key ingredient that enhances all flavors; adjust according to your taste.
Black Pepper – Provides a subtle heat that balances the creaminess.
Dried Thyme or Italian Seasoning – Adds aromatic depth, making each bite delightful.
Parmesan Cheese (optional) – Introduces a nutty edge to the creamy sauce for added richness.
Fresh Parsley – Great for garnish; adds a pop of color and a hint of freshness.

These creamy garlic sauce baby potatoes are a fantastic side dish that will transform your dining experience!

Step‑by‑Step Instructions for Creamy Garlic Sauce Baby Potatoes

Step 1: Prep the Potatoes
Begin by thoroughly washing and scrubbing the baby potatoes to remove any dirt. Once clean, halve them to ensure even cooking. This preparation takes just a few minutes and sets the stage for your Creamy Garlic Sauce Baby Potatoes to shine.

Step 2: Cook the Potatoes
In a large pot, bring salted water to a rolling boil over medium-high heat. Carefully add the halved potatoes and cook until they are fork-tender, approximately 12-15 minutes. Drain the potatoes in a colander, shaking gently to release excess water, and set them aside while you prepare the creamy garlic sauce.

Step 3: Make the Sauce Base
In a large skillet, heat 2 tablespoons of olive oil or butter over medium heat until melted. Add minced garlic and finely chopped onion (if using), sautéing for 1-2 minutes until fragrant but not browned—avoid burning the garlic to keep the flavor bright. This step is crucial for developing the rich foundation of your creamy sauce.

Step 4: Add Cream
Stir in 1 cup of heavy cream along with ½ cup of chicken or vegetable broth into the skillet. Season the mixture with salt, black pepper, and a sprinkle of dried thyme or Italian seasoning. Allow the sauce to simmer gently for 3-4 minutes, thickening slightly as it cooks. The colors will deepen, and a luscious aroma will fill your kitchen, making it inviting.

Step 5: Combine Potatoes and Sauce
Carefully add the cooked baby potatoes into the creamy garlic sauce, tossing them to evenly coat. For a cheesy touch, stir in ½ cup of grated Parmesan cheese and gently mix. Let the potatoes simmer with the sauce for another 2-3 minutes, allowing the flavors to meld beautifully. Your Creamy Garlic Sauce Baby Potatoes are nearly complete!

Step 6: Serve
Once everything is well combined and heated through, remove from heat. Garnish your Creamy Garlic Sauce Baby Potatoes with freshly chopped parsley for a pop of color and freshness. Serve warm as a delightful side dish that pairs wonderfully with your favorite main courses, and enjoy the delightful flavors!

Storage Tips for Creamy Garlic Sauce Baby Potatoes

Fridge: Store leftovers in an airtight container for up to 3 days. This will keep your Creamy Garlic Sauce Baby Potatoes fresh and flavorful.

Freezer: For longer storage, freeze the potatoes in an airtight container for up to 2 months. When ready to enjoy, thaw in the fridge overnight before reheating.

Reheating: Gently reheat on the stovetop over low heat, adding a splash of cream to restore the sauce’s consistency and avoid drying out the potatoes.

Airtight Guidance: Always ensure your container is properly sealed to prevent freezer burn or spoilage. For best results, consume the leftovers within the recommended timeframes!

Make Ahead Options

These Creamy Garlic Sauce Baby Potatoes are perfect for meal prep enthusiasts! To save time, you can cook and cool the potatoes up to 24 hours in advance; simply store them in an airtight container in the refrigerator to maintain their freshness. You can also prepare the creamy garlic sauce separately; keep it in the fridge for up to 3 days. When you’re ready to serve, gently reheat the sauce on the stovetop, adding a splash of additional cream if necessary to restore consistency. Finally, combine the potatoes with the sauce and simmer briefly to ensure they are heated through, delivering restaurant-quality results with minimal effort!

Expert Tips for Creamy Garlic Sauce Baby Potatoes

Choose the Right Potatoes: Use small, tender baby potatoes for the best texture and flavor. Larger potatoes should be cut into uniform pieces to ensure even cooking.

Garlic Care: Watch your garlic closely while sautéing; over-browning can lead to bitterness. Cook just until fragrant for that perfect golden hue!

Thickening the Sauce: If your sauce seems too thin, let it simmer a bit longer to thicken. Remember, the Creamy Garlic Sauce will continue to thicken as it cools.

Make Ahead: For convenience, prepare the potatoes and sauce separately. Combine them right before serving to ensure freshness and avoid sogginess.

Cheese Tip: If adding cheese, incorporate Parmesan as it melts beautifully and enhances the sauce. Don’t forget to mix well for even distribution!

Garnish Flare: A sprinkle of fresh parsley not only adds color but also a refreshing note that brightens the rich flavors in your Creamy Garlic Sauce Baby Potatoes.

What to Serve with Creamy Garlic Sauce Baby Potatoes

Looking to create a scrumptious meal that will leave your loved ones raving? Enhance your dinner experience with these delightful pairings.

  • Roasted Chicken: The juicy, savory notes of roasted chicken perfectly complement the creamy garlic sauce, creating a wonderfully balanced dish.

  • Grilled Salmon: The richness of grilled salmon provides a fresh yet smoky contrast to the indulgent potatoes, making for a delightful flavor duo.

  • Garlic Butter Shrimp: Add a pop of seafood brilliance with garlic butter shrimp—this pairing brings out the garlic flavors in both dishes, ensuring every bite is a treat.

  • Steamed Broccoli: Crisp steamed broccoli offers a refreshing crunch, providing a bright counterpoint to the creamy richness of the potatoes. Picture every forkful, a symphony of textures!

  • Caesar Salad: A classic Caesar salad with crisp romaine, creamy dressing, and crunchy croutons enhances your plate with fresh flavors and satisfying crunch, making it an ideal accompaniment.

  • Red Wine: A glass of full-bodied red wine elevates your meal with its bold flavors, making every sip a perfect partner to the comforting potatoes.

  • Chocolate Mousse: For dessert, a light yet decadent chocolate mousse adds a sweet finish that balances the savory tones of the meal, leaving everyone with a smile.

Creamy Garlic Sauce Baby Potatoes Variations

Feel free to personalize these creamy garlic sauce baby potatoes with some delightful twists that will tickle your taste buds!

  • Vegan Option: Replace butter with olive oil and use plant-based cream to create a creamy, dairy-free delight. Woo your vegan friends with this deliciously compassionate choice!

  • Cheesy Upgrade: Add shredded mozzarella or cheddar to the sauce for an extra layer of cheesy goodness. The melted cheese creates a delightful stretch that complements the potatoes perfectly.

  • Spicy Kick: Incorporate red pepper flakes or diced jalapenos for a zesty boost. This fiery twist turns ordinary potatoes into a spicy sensation that will light up your dinner table.

  • Herb-loaded: Experiment with fresh herbs like dill or basil, giving the dish a bright, aromatic lift. Fresh herbs pack a flavorful punch and elevate the comforting nature of these potatoes to gourmet heights!

  • Bacon Twist: For a smoky flavor, garnish with crispy bacon bits. The savory crunch adds an irresistibly delicious contrast to the velvety sauce—a definite crowd-pleaser at gatherings!

  • Baked Version: Transfer the creamy mixture to a baking dish, sprinkle with cheese, and bake at 375°F (190°C) for a gratin-style dish. This method creates a delightful crispy topping and even more comfort food nostalgia.

  • Lemon Zest: Add a splash of lemon juice or a zest of lemon peel for brightness. This citrusy note balances the richness of the sauce and refreshes the palate beautifully.

  • Garlic Lovers’ Dream: Up the garlic ante by adding roasted garlic cloves. Roasted garlic brings a sweet, caramelized richness that makes every bite utterly indulgent.

These variations not only enhance the flavor profile but also let you tailor the dish to suit any occasion. Enjoy experimenting while making your Creamy Garlic Sauce Baby Potatoes!

Creamy Garlic Sauce Baby Potatoes Recipe FAQs

How do I choose the right baby potatoes?
Absolutely! When selecting baby potatoes, look for ones that are firm, smooth, and free of dark spots or bruises. Varieties like red, yellow, or mixed small potatoes are great choices to ensure a tender and naturally sweet bite. Picking potatoes that are approximately 1-2 inches in size will offer the best texture, and remember, there’s no peeling necessary!

How should I store leftovers of Creamy Garlic Sauce Baby Potatoes?
Very simple! To store leftovers, place them in an airtight container and refrigerate for up to 3 days. This keeps your dish fresh and delicious. If you’re planning to keep them longer, you can freeze the creamy garlic sauce baby potatoes in an airtight container for up to 2 months. Just remember to thaw them in the fridge overnight before reheating!

What’s the best method for reheating?
Reheating is key to maintaining that creamy texture! I recommend gently reheating the potatoes on the stovetop over low heat. For optimal results, add a splash of heavy cream as you stir—this will help restore the sauce’s consistency and keep the potatoes from drying out. Keep stirring until everything is warmed through, and soon you’ll be enjoying those delightful flavors again!

Can I modify the recipe for dietary needs?
Of course! If you’re looking for a vegan option, simply replace the butter with olive oil and use plant-based cream for the sauce. Additionally, if you’re concerned about lactose, you can skip the cheese or opt for a dairy-free variety. This recipe is quite versatile, so feel free to adjust it according to your dietary preferences without sacrificing flavor!

What might I do if my garlic sauce turns out too thin?
If your creamy garlic sauce is a bit thin, don’t fret! Let the sauce simmer for a little longer over low heat, allowing it to thicken naturally. This process usually takes about 3-5 minutes. If you prefer a quicker solution, you can also mix a teaspoon of cornstarch with a small amount of cold broth or water, then stir it into the simmering sauce, allowing it to thicken quickly!

Can I use larger potatoes for this recipe?
Absolutely! If you only have larger potatoes on hand, just make sure to cut them into uniform quarters to ensure they cook evenly. You want them to reach that fork-tender perfection just like the baby potatoes. Be mindful of the cooking time, as larger chunks may require a slight adjustment, typically an additional 3-5 minutes.

Creamy Garlic Sauce Baby Potatoes

Creamy Garlic Sauce Baby Potatoes for Cozy Nights In

Discover the delightful Creamy Garlic Sauce Baby Potatoes, a comforting side dish that impresses with its rich flavors and tender texture.
Prep Time 10 minutes
Cook Time 15 minutes
Total Time 25 minutes
Servings: 4 servings
Course: Dinner
Cuisine: Comfort Food
Calories: 250

Ingredients
  

For the Potatoes
  • 1 pound Baby Potatoes No peeling required
  • 2 tablespoons Olive Oil or Butter Use unsalted for greater control
For the Sauce
  • 4 cloves Garlic Fresh minced or roasted
  • 1 medium Onion Finely chopped, optional
  • 1 cup Heavy Cream Avoid milk for richest texture
  • 1/2 cup Chicken or Vegetable Broth Based on dietary preferences
  • 1 teaspoon Salt Adjust according to taste
  • 1/2 teaspoon Black Pepper Provides subtle heat
  • 1 teaspoon Dried Thyme or Italian Seasoning
  • 1/2 cup Parmesan Cheese Optional, for extra flavor
  • 2 tablespoons Fresh Parsley For garnish

Equipment

  • large pot
  • Skillet
  • colander

Method
 

Step-by-Step Instructions
  1. Wash and scrub the baby potatoes, then halve them.
  2. Boil salted water in a large pot, add the halved potatoes, and cook for 12-15 minutes until fork-tender. Drain and set aside.
  3. In a skillet, heat olive oil or butter, add minced garlic and onion, and sauté for 1-2 minutes until fragrant.
  4. Stir in heavy cream and broth, season with salt, pepper, and thyme. Simmer for 3-4 minutes until thickened.
  5. Add the cooked baby potatoes to the sauce, toss to coat, and stir in Parmesan cheese. Simmer for another 2-3 minutes.
  6. Garnish with parsley and serve warm.

Nutrition

Serving: 1servingCalories: 250kcalCarbohydrates: 30gProtein: 4gFat: 12gSaturated Fat: 7gPolyunsaturated Fat: 1gMonounsaturated Fat: 4gCholesterol: 30mgSodium: 600mgPotassium: 600mgFiber: 3gSugar: 1gVitamin A: 300IUVitamin C: 25mgCalcium: 150mgIron: 2mg

Notes

These Creamy Garlic Sauce Baby Potatoes make an ideal side dish for any gathering, elevating the dining experience with ease.

Tried this recipe?

Let us know how it was!

Healthy Overnight Oats with Cherry Chia Seed Jam Bliss

As I spooned the first bite of these Healthy Overnight Oats with Cherry Chia Seed Jam, a wave of excitement washed over me—this was not just breakfast; it was a morning triumph! Bursting with the vibrant sweetness of tart cherries layered over creamy oats, this vegan and gluten-free dish truly serves up the best of both worlds. The beauty of this recipe lies in its simplicity—ready in minutes, it transforms overnight into a deliciously wholesome meal, making it perfect for those hectic mornings. Plus, the satisfying blend of nutrients and flavors keeps you fueled and content without compromising on taste. Are you ready to elevate your breakfast game? Let’s dive into this delightful recipe that’s just waiting to brighten your mornings!

Why are Healthy Oats a Breakfast Winner?

Simplicity: This recipe is incredibly easy to prepare, allowing you to whip up a nutritious breakfast in just minutes.

Deliciously Unique: The cherry chia seed jam offers a burst of fruity flavor that elevates the classic overnight oats experience.

Make-Ahead Delight: Perfect for busy mornings, you can prepare these oats the night before, saving time without sacrificing taste.

Nutrient-Rich: Packed with protein and fiber, these oats keep you satisfied and energized throughout the day—perfect for those who enjoy homemade food.

Versatile Options: Feel free to adapt the recipe with seasonal fruits like blueberries or peaches, making each batch a delightful new adventure! For another refreshing dish, check out my Spinach Salad Poppy for a great lunch pairing!

Healthy Overnight Oats Ingredients

• Ready to create your Healthy Overnight Oats with Cherry Chia Seed Jam? Here’s what you’ll need!

For the Oats

  • Gluten Free Rolled Oats – The heart of this dish, providing a chewy texture; make sure they are certified gluten-free for safety.
  • Plant-based Vanilla Protein Powder – Boosts your breakfast with protein to keep you full; any unflavored protein powder can be substituted easily.
  • Unsweetened Vanilla Almond Milk – Adds moisture and creaminess; feel free to swap for your favorite non-dairy milk.
  • Unsweetened Coconut Yogurt (or Greek Yogurt) – This ingredient enriches the dish with tangy creaminess; any plant-based yogurt works for a dairy-free option.
  • Pure Maple Syrup – Provides natural sweetness, which you can adjust based on your taste preference.
  • Vanilla Extract – Uplifts the overall flavor profile with a touch of warmth.
  • Pinch of Salt – Essential to enhance the sweetness and balance flavors.
  • Almond Butter – Offers healthy fats and creaminess; consider peanut butter or sun butter for a twist.

For the Cherry Chia Seed Jam

  • Fresh Cherries, Pitted – The star of the show for that tart and sweet jam texture; other berries can be used as substitutes.
  • Chia Seeds – Key for thickening the jam and adding fiber; no substitutes recommended as they provide unique benefits.

Optional Toppings

  • Hemp Seeds – A nutritious sprinkle on top for crunch and added texture; feel free to leave them out if desired.

With these wholesome ingredients on hand, you’re set to take breakfast to new heights with your Healthy Overnight Oats!

Step‑by‑Step Instructions for Healthy Overnight Oats with Cherry Chia Seed Jam

Step 1: Prep Cherry Chia Jam
Begin by microwaving 1 cup of pitted fresh cherries in a microwave-safe bowl for about 30 seconds until softened. Once heated, mash the cherries with a fork until they’re juicy and well-blended. Stir in chia seeds, a splash of maple syrup for sweetness, and a few drops of vanilla extract. Refrigerate this mixture for at least 20 minutes to allow it to thicken into a delightful cherry chia seed jam.

Step 2: Combine Oats Mix
In a medium mixing bowl, combine 1 cup of gluten-free rolled oats, 1 scoop of plant-based vanilla protein powder, and a pinch of salt. Pour in 1 cup of unsweetened vanilla almond milk, followed by 1/2 cup of unsweetened coconut yogurt and a drizzle of maple syrup. Whisk everything together until the mixture is well-combined and creamy, setting the foundation for your Healthy Overnight Oats.

Step 3: Layer Ingredients
Grab a mason jar or container, and begin layering your ingredients. Start by spooning half of the oatmeal mixture into the bottom, then add half of your chilled cherry chia seed jam on top of the oats. Repeat this process with the remaining oats and jam, creating beautiful layers. Top off your creation with a generous scoop of almond butter for an extra creamy finish.

Step 4: Chill Overnight
Seal the mason jar tightly with a lid and place it in your refrigerator. Allow the Healthy Overnight Oats to chill and absorb all those delicious flavors for at least 12 hours, preferably overnight. This ensures the oats soften beautifully, resulting in a rich and creamy texture ready for your morning enjoyment.

Step 5: Serve
When morning arrives, remove your Healthy Overnight Oats from the fridge. You can enjoy them straight out of the jar or gently warm them in the microwave for about 30 seconds if you prefer a cozy dish. Top with slivered almonds or a sprinkle of hemp seeds for a crunchy contrast, and savor the vibrant flavors of your breakfast creation!

Make Ahead Options

These Healthy Overnight Oats with Cherry Chia Seed Jam are perfect for meal prep enthusiasts! You can prepare the cherry chia seed jam and the oats mixture up to 24 hours in advance, significantly simplifying your morning routine. To do this, make the cherry chia jam, refrigerate it for at least 20 minutes, and store it in an airtight container. Combine the oats, protein powder, almond milk, yogurt, maple syrup, and salt in a bowl, and refrigerate overnight for optimal texture. When you’re ready to serve, simply layer the prepped oats and jam in a mason jar, top with almond butter, and enjoy a delicious, nutrient-packed breakfast that feels just as fresh as when you made it!

Healthy Overnight Oats Variations

Feel free to get creative and make this recipe your own; there are so many delicious possibilities!

  • Berry Medley: Swap out cherries for a mix of your favorite berries like blueberries or raspberries for a colorful fusion.
  • Nut Butter Swap: Replace almond butter with peanut or cashew butter for a different flavor profile and creaminess.
  • Spice It Up: Add a pinch of cinnamon or nutmeg to the oats for a warm, inviting aroma that will elevate breakfast.
  • Coconut Dream: Use coconut milk in place of almond milk for a richer, tropical flavor that pairs beautifully with the cherries.
  • Sweet Swaps: Incorporate a splash of agave syrup or honey (if not vegan) to change up the sweetness to your liking.
  • Nutty Crunch: Top with sliced almonds, pecans, or walnuts just before serving for an added crunch and healthy fats.
  • Tropical Twist: Include diced mango or pineapple in the jam for a refreshing tropical vibe that’s perfect for summer.

If you loved the ease and flavor of this recipe, why not explore more delightful dishes like my Overnight Croissant Breakfast or enjoy a vibrant Spinach Salad Poppy for lunch? Customize your meals and bring joy to your dining table!

How to Store and Freeze Healthy Overnight Oats

Fridge: Store your Healthy Overnight Oats with Cherry Chia Seed Jam in an airtight container for up to 3 days. This makes them convenient for meal prep!

Freezer: For longer storage, freeze the oats in individual containers for up to 2 months. Thaw them in the fridge overnight before enjoying.

Reheating: If you prefer your oats warm, simply microwave the chilled oats for 30 seconds to 1 minute, adding a splash of almond milk to achieve your desired consistency.

Layer Freshness: Keep toppings like almond butter or nuts separate until serving to retain their crunchiness and texture.

Expert Tips for Healthy Overnight Oats

  • Perfect Timing: For optimal results, let the oats soak overnight. This ensures a creamy texture and enhances the flavors of the Healthy Overnight Oats with Cherry Chia Seed Jam.

  • Avoiding Clumps: Stir the oat mixture well to prevent clumping. This will ensure every bite is evenly balanced between creamy oats and sweet cherry chia jam.

  • Sweetness Check: Taste the cherry jam before adding too much maple syrup. Remember, you can always adjust the sweetness later as desired!

  • Substitutions Wisdom: Feel free to explore substitutes, but remember that chia seeds are essential for the jam’s texture; avoid skipping them!

  • Serving Variety: Get creative with toppings! Consider fresh fruits or a sprinkle of nuts for added crunch and flavor varietal with your morning oats.

What to Serve with Healthy Overnight Oats with Cherry Chia Seed Jam

Elevate your breakfast experience by pairing these vibrant oats with delightful accompaniments that enhance their flavors and textures.

  • Fresh Berries: Juicy strawberries or blueberries provide a refreshing burst of flavor that complements the cherry jam beautifully.

  • Nutty Granola: A handful of crunchy granola adds a satisfying texture contrast to the creamy oats, making each bite enjoyable.

  • Coconut Yogurt: A scoop of dairy-free coconut yogurt on the side enriches the meal with a creamy, tangy element, enhancing the dish’s overall decadence.

  • Maple Sausage Links: Savory maple sausage offers a delightful sweet and savory balance, making it a perfect match for the fruity oats.

  • Herbal Tea: A warm cup of chamomile or peppermint tea creates a soothing atmosphere, enhancing your morning routine with comforting notes.

  • Banana Slices: Creamy banana slices add natural sweetness and nutrition, syncing perfectly with the cherry chia seed jam’s tartness.

  • Almond Milk Smoothie: A chilled smoothie made with almond milk and spinach provides an energizing boost alongside your wholesome oats.

  • Dark Chocolate Shavings: A sprinkle of dark chocolate flakes adds a touch of indulgence, resulting in a treat that satisfies both health and sweet cravings.

Healthy Overnight Oats with Cherry Chia Seed Jam Recipe FAQs

How do I choose ripe cherries for the cherry chia seed jam?
Absolutely! Look for cherries that are vibrant red and firm to the touch. Avoid any with dark spots or wrinkles, as these are signs of overripeness. Ideally, cherries should be sweet and slightly juicy when bitten into.

How should I store my Healthy Overnight Oats with Cherry Chia Seed Jam?
For best results, store your Healthy Overnight Oats in an airtight container in the fridge for up to 3 days. This is perfect for meal prepping, allowing you to enjoy a quick breakfast throughout the week.

Can I freeze Healthy Overnight Oats with Cherry Chia Seed Jam?
Very! You can freeze these oats in individual containers for up to 2 months. To thaw, simply place them in the fridge overnight. For a quick breakfast, you can microwave them for 30 seconds to 1 minute, adding a little splash of almond milk if they seem too thick.

What if my cherry chia jam turns out too runny?
No worries! If your jam doesn’t thicken as expected, simply add a bit more chia seeds (1 tablespoon at a time) and let it sit for another 15-20 minutes in the fridge. This will help absorb excess moisture and create a thicker consistency.

Are there any dietary considerations for the ingredients?
Absolutely! This recipe is vegan, gluten-free, and dairy-free, making it suitable for many diets. Be sure to check any specific protein powders and yogurts you use for allergens. If you’re serving this to pets, remember that foods like cherries can be harmful, so keep this treat strictly for human enjoyment.

Can I use frozen cherries instead of fresh for the chia jam?
Yes, you can! If using frozen cherries, simply thaw them and mash them as directed in the recipe. They’ll still create a delightful cherry chia seed jam that works wonders in your Healthy Overnight Oats, though the texture may be slightly different.

Healthy Overnight Oats with Cherry Chia Seed Jam

Healthy Overnight Oats with Cherry Chia Seed Jam Bliss

Discover a deliciously simple way to start your day with Healthy Overnight Oats with Cherry Chia Seed Jam.
Prep Time 10 minutes
Chilling Time 12 hours
Total Time 12 hours 10 minutes
Servings: 2 servings
Course: Breakfast
Cuisine: Gluten-Free, Vegan
Calories: 300

Ingredients
  

For the Oats
  • 1 cup Gluten Free Rolled Oats Make sure they are certified gluten-free
  • 1 scoop Plant-based Vanilla Protein Powder Any unflavored protein powder can be substituted
  • 1 cup Unsweetened Vanilla Almond Milk Feel free to swap for your favorite non-dairy milk
  • 1/2 cup Unsweetened Coconut Yogurt Any plant-based yogurt works for a dairy-free option
  • 2 tablespoons Pure Maple Syrup Adjust based on your taste preference
  • 1 teaspoon Vanilla Extract
  • 1 pinch Salt
  • 2 tablespoons Almond Butter Consider peanut butter or sun butter for a twist
For the Cherry Chia Seed Jam
  • 1 cup Fresh Cherries, Pitted Other berries can be used as substitutes
  • 2 tablespoons Chia Seeds No substitutes recommended
Optional Toppings
  • 2 tablespoons Hemp Seeds Feel free to leave them out if desired

Equipment

  • Microwave
  • Mason Jar
  • Mixing Bowl

Method
 

Step-by-Step Instructions
  1. Microwave 1 cup of pitted fresh cherries in a microwave-safe bowl for about 30 seconds until softened. Mash the cherries with a fork, then stir in chia seeds, a splash of maple syrup, and vanilla extract. Refrigerate for at least 20 minutes.
  2. In a mixing bowl, combine 1 cup of gluten-free rolled oats, 1 scoop of plant-based vanilla protein powder, and a pinch of salt. Pour in 1 cup of almond milk, add 1/2 cup of coconut yogurt and drizzle with maple syrup. Whisk until creamy.
  3. Layer half of the oatmeal mixture in a jar, followed by half of the cherry chia jam. Repeat with remaining oats and jam and top with almond butter.
  4. Seal the jar and refrigerate overnight to soften the oats. This allows the flavors to meld and results in a creamy texture.
  5. In the morning, enjoy straight from the jar or warm in the microwave for 30 seconds. Top with slivered almonds or hemp seeds if desired.

Nutrition

Serving: 1servingCalories: 300kcalCarbohydrates: 45gProtein: 10gFat: 10gSaturated Fat: 2gPolyunsaturated Fat: 1gMonounsaturated Fat: 4gSodium: 150mgPotassium: 350mgFiber: 8gSugar: 10gVitamin A: 50IUVitamin C: 7mgCalcium: 150mgIron: 2mg

Notes

Store in an airtight container for up to 3 days in the fridge. For longer storage, freeze for up to 2 months.

Tried this recipe?

Let us know how it was!

The Best Pasta with Lentils – A Cozy, Healthy Hug in a Bowl

As I stood in my kitchen, the fragrant aroma of sautéed garlic and onions filled the air like a warm embrace. This isn’t just any dish; it’s the best pasta with lentils—a nourishing one-pot marvel that transforms humble ingredients into a comforting meal. Perfect for busy weeknights, this vegan delight is not only quick to whip up but also budget-friendly, making it accessible for everyone looking to savor homemade goodness. Packed with protein and fiber, it’s a wholesome choice that leaves you feeling satisfied. Plus, it’s an excellent make-ahead option, as the flavors deepen beautifully overnight. Ready to discover how this hearty dish can elevate your dining experience? Let’s dive into the recipe!

Why Is This Pasta with Lentils Incredible?

Comforting: The combination of lentils and pasta creates a warm hug in a bowl, making it the ultimate comfort food. Nutritious: Packed with protein and fiber, this recipe not only satisfies your hunger but nourishes your body. Versatile: Use different pasta shapes like ditalini or mezzi rigatoni to keep things exciting. For a pop of flavor, consider adding spices like smoked paprika. Quick & Easy: With just one pot needed, cleanup is a breeze, perfect for busy weeknights. Pair it with a side of crusty bread or a vibrant salad for a complete meal! Don’t forget to check out my Savory Turkey Patties as a delightful side option.

The Best Pasta with Lentils Ingredients

For the Pasta and Lentils

  • Dried Brown or Green Lentils – Choose brown lentils as they require no soaking and provide great texture and protein.
  • Short Pasta Shapes (Ditalini, Elbows, Orecchiette, Mezzi Rigatoni) – These pasta types help create a hearty, filling dish; feel free to mix them up for variety!

For the Flavor Base

  • Vegetable or Chicken Broth – Use low-sodium broth for better control over seasoning and to enhance the stew’s flavor.
  • Cherry Tomatoes – Fresh cherry tomatoes bring sweetness and acidity, and canned tomatoes work in a pinch if fresh aren’t available.
  • Olive Oil – A drizzle before serving enhances flavor and adds healthy fats to this healthy dish.
  • Garlic (Minced) – This aromatic ingredient infuses each bite with a rich, savory flavor.
  • Onion (Diced) – Add sweetness and depth to your dish; sautéing it first will really boost its flavor profile.
  • Tomato Paste – Concentrates the tomato flavor, adding richness and body to your lentil and pasta stew.

For Seasoning

  • Ground Cumin – This warm spice adds an earthy note to the best pasta with lentils, deepening the flavor experience.
  • Fine Salt – Essential for perfect seasoning; adjust as needed based on the saltiness of your broth.
  • Black Pepper – Offers a gentle heat that can be dialed up or down according to your preference.

With these simple but vital ingredients, you’ll be well on your way to creating the best pasta with lentils—an affordable and satisfying meal you’ll want to make again and again!

Step‑by‑Step Instructions for THE BEST PASTA WITH LENTILS

Step 1: Sauté the Base
In a large pot, heat 2 tablespoons of olive oil over medium heat. Once the oil shimmers, add 1 diced onion and sauté for about 5 minutes until it’s softened and translucent. This step lays the flavorful foundation for the best pasta with lentils, filling your kitchen with an inviting aroma.

Step 2: Add Aromatics and Tomatoes
Next, introduce 4 cloves of minced garlic along with 1 cup of halved cherry tomatoes and 2 bay leaves to the pot. Stir the mixture for 1 minute until the garlic is fragrant and the tomatoes start to soften, infusing the oil with delightful flavors that enhance the dish.

Step 3: Incorporate Lentils and Broth
Add 1 cup of rinsed brown or green lentils to the pot, followed by 1 tablespoon of tomato paste, 1 teaspoon of ground cumin, and 4 cups of low-sodium vegetable or chicken broth. Season with black pepper to taste. Stir well, bring to a gentle simmer, then cover the pot, reducing the heat to medium-low. Cook the mixture for about 20-25 minutes, until the lentils are tender.

Step 4: Adjust Seasoning
Once the lentils have softened, taste your stew and adjust the seasoning as needed. This is the perfect time to add fine salt to enhance the flavors. The best pasta with lentils is all about achieving the right balance—don’t hesitate to tweak it to suit your palate.

Step 5: Cook the Pasta
Stir in 2 cups of your chosen short pasta (like ditalini or orecchiette) into the pot. Keep the pot covered while simmering for an additional 8-10 minutes. Stir frequently to prevent the pasta from sticking, ensuring it cooks to al dente perfection while soaking up all the lovely flavors.

Step 6: Adjust Consistency
As the pasta cooks, monitor the consistency of your dish. If it becomes too thick, gradually add more broth or water, stirring until you reach your desired stew-like consistency. This step is crucial for achieving the comforting texture that makes the best pasta with lentils a satisfying meal.

Step 7: Final Touches and Serve
When everything is cooked to your liking, remove the pot from heat. Serve the pasta with lentils in bowls, drizzling a touch of olive oil on top, and finish with extra black pepper for added flavor. Consider garnishing with parmesan, chili flakes, or fresh parsley to elevate your cozy dish.

Make Ahead Options

These delightful stirrings of the best pasta with lentils are perfect for meal prep enthusiasts! You can prepare the lentils and flavor base (including the sautéed onion and garlic) up to 24 hours in advance by storing them in an airtight container in the refrigerator. Similarly, cook the pasta separately and keep it refrained from the lentils until you’re ready to serve, as this helps prevent mushiness. When it’s time to enjoy your meal, simply combine the prepped lentils and pasta in a pot, heat over medium, and add a splash of broth if needed for smoothness. This way, you’ll achieve comforting, restaurant-quality results with minimal effort, allowing you to savor your homemade goodness even on the busiest nights!

What to Serve with The Best Pasta with Lentils

Pairing a wholesome side to balance this delicious, hearty dish can elevate your dining experience even further.

  • Crusty Bread: This warm, rustic bread is perfect for soaking up the savory sauce, adding a delightful crisp texture to each bite.
  • Green Salad: A fresh salad with mixed greens, cucumber, and a zesty vinaigrette provides a refreshing contrast to the richness of the lentils.
  • Roasted Vegetables: Choose seasonal veggies for roasting. Their caramelized sweetness complements the earthy flavors in your hearty pasta.
  • Garlic Bread: Crispy, buttery garlic bread pairs exceptionally well, infusing your meal with aromatic goodness, enhancing every mouthful.
  • Chili Flavored Oil: Drizzling this over your dish adds an exciting kick and enhances the overall flavor, making each bite unforgettable.
  • Sparkling Water with Lime: Keeping things light, this refreshing drink cleanses the palate, allowing the delightful flavors of the pasta to shine even brighter.
  • Vegan Chocolate Mousse: For a sweet finish, serve a luxurious vegan dessert that contrasts nicely with the savory dish while still being indulgent.
  • Stuffed Mushrooms: These savory bites stuffed with herbs and breadcrumbs offer an umami-packed addition, harmonizing beautifully with your pasta.

How to Store and Freeze The Best Pasta with Lentils

  • Fridge: Store leftover pasta with lentils in an airtight container for up to 2 days. Reheat gently on the stovetop with a splash of water to restore its creamy consistency.
  • Freezer: For long-term storage, freeze the dish in individual portions in airtight containers for up to 3 months. Thaw overnight in the fridge before reheating.
  • Reheating: When ready to enjoy, reheat on the stovetop over low heat, stirring occasionally. Add a bit of broth or water if it thickens too much during freezing.
  • Room Temperature: Avoid leaving the pasta with lentils at room temperature for more than 2 hours to ensure food safety.

Variations on THE BEST PASTA WITH LENTILS

Feel free to play with this recipe and make it your own with these creative twists that will delight your taste buds!

  • Gluten-Free Pasta: Substitute regular pasta with gluten-free options like brown rice or quinoa pasta for a wholesome gluten-free meal. It retains that satisfying texture while being kind to your tummy!

  • Spicy Kick: Add a teaspoon of red pepper flakes or a diced jalapeño for a delightful heat that warms you from the inside out. Spice lovers will appreciate how it elevates the overall flavor profile.

  • Extra Greens: Toss in a couple of cups of fresh spinach or kale during the last few minutes of cooking for a vibrant color and a nutritional powerhouse. The greens wilt beautifully into the dish, adding freshness and a pop of color.

  • Different Legumes: Swap lentils for chickpeas or black beans for a refreshing variation in texture and taste. Each legume offers a unique flavor and nutrient profile, making this dish even more versatile!

  • Sundried Tomatoes: Incorporate chopped sundried tomatoes for an added layer of richness and tangy sweetness. They provide a delightful contrast to the earthy lentils and serve as a flavor booster.

  • Herbs & Spices: Experiment with fresh herbs like basil or cilantro, or sprinkle some smoked paprika for an unexpected twist on the ordinary. Fresh herbs brighten the flavors and bring a fragrant note to the dish.

  • Creamy Addition: Stir in a dollop of coconut milk or a splash of plant-based cream for a dreamy, creamy texture. It not only adds richness but also balances the spices nicely.

For a comforting meal that feels truly special, try serving your pasta with lentils alongside a side of my delicious Coconut Curry Soup or a refreshing Roasted Carrot Lentil salad! Let these variations inspire your kitchen creativity and satisfy your family’s cravings.

Expert Tips for the Best Pasta with Lentils

  • Rinse Lentils Thoroughly: Always rinse your lentils to remove any debris or impurities for a clean flavor. This avoids any grit in the best pasta with lentils.
  • Adjust Broth Carefully: Adapt the amount of broth based on the pasta used. Stir frequently to prevent sticking—especially important for shorter pasta shapes.
  • Incorporate Extra Veggies: Boost nutrition and color by adding vegetables like spinach or diced carrots towards the end of cooking.
  • Monitor Consistency: If your dish becomes too thick, gradually add more broth or water to achieve the ideal stew-like texture.
  • Season to Taste: Always taste the dish before serving. Adjust salt and spice levels to create the perfect flavor balance in your best pasta with lentils.

The Best Pasta with Lentils Recipe FAQs

What type of lentils should I use for the best pasta with lentils?
Absolutely! For this recipe, I recommend using dried brown lentils since they don’t require soaking and lend a wonderfully hearty texture to the dish. If you only have green lentils, they will work too, but they may take slightly longer to cook, so keep an eye on them.

How do I store leftovers of the best pasta with lentils?
The best way to store leftovers is in an airtight container in the refrigerator for up to 2 days. When you’re ready to enjoy, simply reheat gently on the stovetop with a splash of water or broth to restore the dish’s creamy consistency.

Can I freeze the best pasta with lentils?
Yes! Freezing is a great option. To freeze, place the cooled dish in airtight containers or freezer bags, portioned out for easy servings. It can be frozen for up to 3 months. When you want to eat it, just thaw it overnight in the fridge and reheat on the stovetop over low heat, stirring occasionally, and adding a little broth if it’s too thick.

What should I do if my pasta is sticking together while cooking?
Very good question! If you notice the pasta sticking, it’s likely due to not stirring frequently or not enough liquid. To troubleshoot, make sure to stir the pasta frequently during the cooking process. If it does stick, you can add a splash of broth or water to help loosen it up.

Is this recipe suitable for gluten-free diets?
Certainly! To make the best pasta with lentils gluten-free, simply swap traditional pasta with a gluten-free pasta variety. There are plenty of options available, such as gluten-free ditalini or elbows, which will keep the heartiness of the dish intact while accommodating dietary needs.

Can I add other vegetables to the best pasta with lentils?
Yes, absolutely! For a nutritional boost, feel free to add vegetables like spinach, diced carrots, or bell peppers towards the end of cooking. This is a great way to enhance the dish with more colors and flavors, giving it even greater nutritional value!

THE BEST PASTA WITH LENTILS

The Best Pasta with Lentils – A Cozy, Healthy Hug in a Bowl

Discover the best pasta with lentils, a cozy, healthy dish packed with protein and fiber.
Prep Time 10 minutes
Cook Time 35 minutes
Total Time 45 minutes
Servings: 4 bowls
Course: Dinner
Cuisine: Vegan
Calories: 350

Ingredients
  

For the Pasta and Lentils
  • 1 cup Dried Brown or Green Lentils Choose brown lentils as they require no soaking.
  • 2 cups Short Pasta Shapes (Ditalini, Elbows, Orecchiette, Mezzi Rigatoni) Feel free to mix them up for variety.
For the Flavor Base
  • 4 cups Vegetable or Chicken Broth Use low-sodium broth for better control over seasoning.
  • 1 cup Cherry Tomatoes Fresh cherries bring sweetness; canned work in a pinch.
  • 2 tablespoons Olive Oil Drizzle before serving for enhanced flavor.
  • 4 cloves Garlic (Minced) Infuses flavor into the dish.
  • 1 medium Onion (Diced) Add sweetness and depth.
  • 1 tablespoon Tomato Paste Concentrates tomato flavor.
For Seasoning
  • 1 teaspoon Ground Cumin Adds earthy flavor.
  • to taste Fine Salt Essential for perfect seasoning.
  • to taste Black Pepper Offers gentle heat.

Equipment

  • large pot

Method
 

Step-by-Step Instructions for THE BEST PASTA WITH LENTILS
  1. In a large pot, heat 2 tablespoons of olive oil over medium heat. Add 1 diced onion and sauté for about 5 minutes until softened and translucent.
  2. Add 4 cloves of minced garlic, 1 cup halved cherry tomatoes, and 2 bay leaves to the pot. Stir for 1 minute until the garlic is fragrant.
  3. Add 1 cup of rinsed lentils, 1 tablespoon of tomato paste, 1 teaspoon of ground cumin, and 4 cups of broth. Season with black pepper, stir well, and simmer.
  4. Taste and adjust seasoning with fine salt as needed for flavor balance.
  5. Stir in 2 cups of pasta and simmer for an additional 8-10 minutes, stirring frequently.
  6. Monitor consistency; add more broth if it becomes too thick.
  7. Serve in bowls, drizzling olive oil on top and finishing with extra black pepper, optionally garnished with parmesan.

Nutrition

Serving: 1bowlCalories: 350kcalCarbohydrates: 55gProtein: 18gFat: 8gSaturated Fat: 1gPolyunsaturated Fat: 2gMonounsaturated Fat: 4gSodium: 600mgPotassium: 750mgFiber: 12gSugar: 5gVitamin A: 15IUVitamin C: 25mgCalcium: 4mgIron: 20mg

Notes

Rinse lentils thoroughly before use. Adjust broth based on pasta shape and taste before serving for perfect flavor balance.

Tried this recipe?

Let us know how it was!

Creamy Poblano Chicken Soup: A Cozy, Flavorful Hug in a Bowl

A rich, smoky aroma wafted through my kitchen, instantly drawing me back to a sun-soaked afternoon spent in a vibrant Mexican market. That’s when I first tasted the magic of roasted Poblano peppers, which inspired this Creamy Chicken Poblano Soup. It’s perfect for those busy weeknights when you want to impress your family with a comforting dish that feels like a warm hug. This easy-to-make soup, ready in under an hour, is not only delicious but also adaptable for different dietary preferences—simply swap the chicken for beans for a vegetarian twist. With each spoonful, you’ll savor the velvety texture that holds together the heartiness of chicken and beans, making it a family favorite. Are you ready to dive into this delightful bowl of flavor? Let’s get cooking!

Why is Creamy Poblano Chicken Soup a Must-Try?

Comforting, Creamy Goodness: Each spoonful envelops you in a rich texture that’s simply irresistible.
Flavor Explosion: The roasted Poblano peppers provide a smoky sweetness, elevating the taste to another level.
Quick & Easy: Prepared in less than an hour, it’s perfect for those busy weeknights when time is of the essence.
Family-Friendly: This dish appeals to everyone, young and old, making weeknight dinners a breeze.
Adaptable Options: Whether you prefer a vegetarian version or want to spice it up with jalapeños, the possibilities are endless! So why not pair this soup with some delicious Parmesan Crusted Chicken for an unbeatable meal?

Creamy Poblano Chicken Soup Ingredients

• Discover the secret to a delightful soup!

For the Soup Base

  • Butter – Adds richness and flavor; substitute with olive oil for a lighter option.
  • Onion – Provides aromatic depth; shallots can be used for a milder taste.
  • Garlic – Enhances overall flavor; opt for fresh or powdered depending on your preference.
  • Poblano Peppers – Key flavor ingredient that’s roasted for sweetness; try Anaheim peppers for a milder kick.
  • Dried Oregano – Adds herbal notes; can be substituted with dried thyme or basil.
  • Smoked Paprika – Contributes a smoky essence; regular paprika works if you prefer less intensity.
  • Cumin – Offers warmth and earthiness; while there’s no direct substitute, coriander can enhance this flavor.

For Creaminess and Broth

  • Cream Cheese – Provides creaminess and thickness; use Greek yogurt for a lighter option.
  • Chicken Bone Broth – The main liquid for the soup, adding deep flavor; substitute with vegetable broth for a vegetarian version.

For Protein and Texture

  • Pinto Beans – Adds protein and heartiness; black beans are a great alternative, or omit for a lower-carb choice.
  • Frozen Fire Roasted Corn – Provides sweetness and texture; feel free to use regular frozen corn or fresh corn if available.
  • Shredded Cooked Chicken – Essential protein; canned beans can replace chicken for a vegetarian twist.
  • Shredded Sharp Cheddar Cheese – Enhances flavor and creaminess; any shredded cheese works, or omit for a dairy-free version.

For Finishing Touches

  • Salt and Freshly Ground Pepper – Essential for seasoning; adjust to taste.
  • Juice of One Lime – Brightens the soup; lemon juice can be used for a different citrus flavor.

With these ingredients for your Creamy Poblano Chicken Soup, you’re well on your way to creating a comforting dish that the whole family will enjoy!

Step‑by‑Step Instructions for Creamy Poblano Chicken Soup

Step 1: Roast Peppers
Begin by roasting your Poblano peppers directly over a medium-high flame on your gas stovetop. Continuously turn them with tongs until all sides are nicely charred, about 8-10 minutes. Once finished, wrap the hot peppers in foil or cover them in a bowl to steam for 10 minutes. This will make peeling easier—once cooled, peel off the charred skin, remove the seeds, and chop the peppers.

Step 2: Cook Aromatics
In a large pot or Dutch oven, melt 2 tablespoons of butter over medium heat. Once melted, add a diced onion and sauté for about 5 minutes until softened and translucent. The aroma will be delightful, setting the stage for your Creamy Poblano Chicken Soup. Follow this with minced garlic and cook for an additional minute, allowing those flavors to marry beautifully.

Step 3: Add Flavors
Next, incorporate the roasted Poblano peppers into the pot along with 1 teaspoon of dried oregano, 1 teaspoon of cumin, and 1 teaspoon of smoked paprika. Stir well to combine and cook for about 3 minutes, letting the spices bloom in the heat while enveloping the mixture in a robust aroma. This step is key to enhancing the flavors of your soup.

Step 4: Combine Base
Stir in 8 ounces of softened cream cheese into the pot until it begins to melt, followed by 4 cups of chicken bone broth. Keep the heat on medium, stirring occasionally for about 10 minutes, or until the cream cheese is fully integrated and the mixture is smooth and creamy. At this stage, your Creamy Poblano Chicken Soup’s base is coming together beautifully.

Step 5: Blend
Using an immersion blender, carefully puree the soup mixture until it reaches a silky-smooth consistency. Make sure to blend thoroughly to achieve that creamy texture, creating a delightful base for the soup. If you don’t have an immersion blender, you can transfer the soup in batches to a countertop blender—just be cautious with hot liquids!

Step 6: Add Ingredients
Now, mix in 1 can of drained pinto beans, 1 cup of frozen fire-roasted corn, and 2 cups of shredded cooked chicken. Allow the soup to simmer for an additional 10 minutes on medium heat, letting the ingredients meld together while vibrant flavors develop. Your kitchen will start to fill with the enticing scents that make this soup so comforting.

Step 7: Finish Soup
Remove the pot from the heat and gently stir in the juice from one lime along with 1 cup of shredded sharp cheddar cheese. The cheese will melt beautifully, adding an extra layer of richness to your Creamy Poblano Chicken Soup. Ensure everything is well combined, creating that luscious creamy texture and flavor.

Step 8: Taste & Adjust
Finally, give your soup a taste and adjust the seasoning with salt and freshly ground pepper to your liking. This is your final touch to ensure that every spoonful is packed with flavor. Your Creamy Poblano Chicken Soup is ready to serve, inviting everyone to enjoy a hearty, comforting bowl of goodness!

Expert Tips for Creamy Poblano Chicken Soup

  • Room Temperature Cream Cheese: Ensure your cream cheese is at room temperature to avoid lumps and achieve a silky smooth texture in your Creamy Poblano Chicken Soup.
  • Chunkier Texture: For a heartier mouthfeel, reserve some of the roasted Poblano peppers and gently fold them back into the pureed soup before serving.
  • Evenly Roasted Peppers: When charring your Poblano peppers, turn them frequently to ensure all sides get that perfect smoky flavor and sweetness.
  • Adjusting Spice Levels: If you enjoy heat, add diced jalapeños alongside the other spices during cooking; conversely, omit them for a milder dish.
  • Leftover Love: This soup tastes even better the next day—make a big batch and savor the flavors as they deepen overnight!
  • Freezing Tips: Don’t forget, Creamy Poblano Chicken Soup can be frozen for up to 3 months; just remember to leave out the cheese until reheating for the best texture.

Creamy Poblano Chicken Soup Variations

Feel free to put your unique spin on this delightful soup, and let your creativity shine in the kitchen!

  • Vegetarian Delight: Omit the chicken and replace it with extra pinto beans or black beans for a hearty, protein-rich option. This twist keeps the essence of the dish alive while catering to vegetarian preferences.

  • Dairy-Free Option: Substitute cream cheese with coconut cream or cashew cream for a creamy texture without dairy. You’ll still enjoy all the delicious flavors but with a lightened approach.

  • Extra Veggies: Boost the nutritional value by adding diced zucchini or bell peppers. These additions bring more color and freshness, enhancing both flavor and texture in your soup.

  • Zesty Kick: Incorporate freshly chopped jalapeños while sautéing the onions for an extra layer of heat. This simple addition transforms the soup into a spicy sensation that’s sure to warm you up!

  • Smoky Twist: Add a few drops of liquid smoke or smoked chipotle pepper for an intensified smoky aroma that complements the roasted Poblano flavor beautifully.

  • Protein Swap: Use shredded turkey or rotisserie chicken in place of cooked chicken for a delicious alternative that’s great for using up leftovers. This swap gives a delightful twist without sacrificing flavor.

  • Corn-Infused: Mix in some corn tortillas cut into strips for added texture and a touch of crunch. They soak up flavor and make the soup even more satisfying!

  • Herby Finish: Garnish your creamy soup with fresh cilantro or a dollop of crema to add brightness. This finishing touch elevates the dish and offers a contrasting flavor that pops on the palate.

If you’re up for more culinary adventures, consider trying out this comforting Chicken Mushroom Soup or the delicious Creamy Seafood Bisque Soup. Enjoy cooking and let your creativity flow!

Make Ahead Options

These Creamy Chicken Poblano Soup ingredients are perfect for meal prep, making your busy weeknights a breeze! You can roast and chop the Poblano peppers up to 24 hours in advance—simply store them in an airtight container in the refrigerator. Additionally, you can sauté the onions and garlic ahead of time, and refrigerate them for up to 3 days. When you’re ready to enjoy your soup, just combine the prepped components with the remaining ingredients, simmer for a few minutes to meld the flavors, and finish with lime juice and cheddar cheese for that creamy, comforting touch. This allows for hassle-free cooking while ensuring each bite is just as delicious!

How to Store and Freeze Creamy Poblano Chicken Soup

Fridge: Store any leftover Creamy Poblano Chicken Soup in an airtight container for up to 3-4 days. Reheat gently on the stovetop for the best texture.

Freezer: This soup can be frozen for up to 3 months. Allow it to cool completely before transferring to freezer-safe containers. Leave out the cheese until reheating toMaintain optimal texture.

Reheating: When you’re ready to enjoy your soup, thaw overnight in the refrigerator. Reheat on the stovetop over low heat, adding a splash of broth to loosen if necessary.

Make-Ahead: This soup can be made in advance and actually tastes better the next day, as the flavors continue to meld and develop, making it the perfect comfort food for busy nights.

What to Serve with Creamy Chicken Poblano Soup

Imagine a cozy gathering around the table, laughter filling the air as you dive into a comforting meal that warms your heart and soul.

  • Fried Tortilla Strips: Adding a crunchy texture, these perfectly crispy strips are delightful for dipping into the creamy soup, enhancing each bite with contrast.
  • Avocado Salad: A refreshing avocado salad with lime and cilantro brings a burst of freshness that complements the rich, smoky flavors beautifully.
  • Spanish Rice: Fluffy Spanish rice, infused with saffron and a touch of garlic, acts as an ideal sidekick, absorbing the creamy goodness and making each mouthful satisfying.
  • Grilled Shrimp Tacos: Tender shrimp, seasoned and grilled, served in warm tortillas echo the Mexican flavor profile, bringing a delightful twist to your meal.
  • Cornbread Muffins: Soft and sweet cornbread muffins offer a comforting sweetness that pairs harmoniously with the roasted pepper soup, making it a perfect addition to your bowl.
  • Chips and Salsa: Crunchy tortilla chips served with fresh salsa add a zesty kick, inviting you to savor each crunchy bite alongside the creamy sensation.
  • Margaritas: A refreshing margarita balances the meal’s richness, with its zesty citrus notes enhancing the overall experience of each comforting spoonful.
  • Flan: For dessert, a smooth and creamy flan brings a sweet ending, its caramel notes complementing the smoky flavors from the soup.

Creamy Poblano Chicken Soup Recipe FAQs

How do I choose ripe Poblano peppers?
Absolutely! When selecting Poblano peppers, look for ones that are firm, shiny, and deep green in color. Avoid any with dark spots or wrinkles, as these may indicate overripeness. If you’re after a sweeter flavor, look for peppers that are slightly brown or have ripened to a red hue.

How do I store leftover Creamy Poblano Chicken Soup?
You can store any leftover Creamy Poblano Chicken Soup in an airtight container in the refrigerator for 3-4 days. I recommend reheating it on the stovetop over low heat for the best texture. If you need to, you can add a little extra broth to refresh the soup.

Can I freeze Creamy Poblano Chicken Soup?
Yes, you absolutely can! Allow the soup to cool completely before transferring it to freezer-safe containers. I suggest omitting the cheese until you reheat it later to maintain the optimal texture. The soup will keep well for up to 3 months in the freezer. When you’re ready to enjoy it, simply thaw it overnight in the fridge and reheat on the stovetop, stirring frequently.

What can I do if my soup is too thick?
If you find your soup is thicker than desired, don’t worry! Just add a splash of chicken broth or water while gently reheating it on the stovetop. Stir well until you reach your desired consistency. Adding some extra lime juice can also brighten the flavors while adjusting the texture!

Is there a vegetarian option for Creamy Poblano Chicken Soup?
Very much so! To make a vegetarian version, simply omit the shredded chicken and replace the chicken bone broth with vegetable broth. You can use canned beans for protein, as well as Greek yogurt instead of cream cheese to keep it creamy. This way, you’ll still enjoy a hearty and delicious soup that everyone will love!

Can my pets eat this soup?
It’s best to avoid giving your pets any part of this Creamy Poblano Chicken Soup. Ingredients like garlic and onions can be toxic to dogs and cats. However, if you’re looking for a pet-friendly treat, consider cooking plain chicken and vegetables without seasoning for them instead.

Creamy Poblano Chicken Soup

Creamy Poblano Chicken Soup: A Cozy, Flavorful Hug in a Bowl

Creamy Poblano Chicken Soup is a comforting dish that combines rich flavors and velvety textures, making every spoonful a warm hug.
Prep Time 10 minutes
Cook Time 30 minutes
Total Time 40 minutes
Servings: 6 cups
Course: Dinner
Cuisine: Mexican
Calories: 350

Ingredients
  

For the Soup Base
  • 2 tablespoons Butter Add richness and flavor; substitute with olive oil for a lighter option.
  • 1 cup Onion Provides aromatic depth; shallots can be used for a milder taste.
  • 3 cloves Garlic Enhances overall flavor; opt for fresh or powered depending on your preference.
  • 2 medium Poblano Peppers Key flavor ingredient that’s roasted for sweetness; try Anaheim peppers for a milder kick.
  • 1 teaspoon Dried Oregano Adds herbal notes; can be substituted with dried thyme or basil.
  • 1 teaspoon Smoked Paprika Contributes a smoky essence; regular paprika works if you prefer less intensity.
  • 1 teaspoon Cumin Offers warmth and earthiness; while there's no direct substitute, coriander can enhance this flavor.
For Creaminess and Broth
  • 8 ounces Cream Cheese Provides creaminess and thickness; use Greek yogurt for a lighter option.
  • 4 cups Chicken Bone Broth The main liquid for the soup, adding deep flavor; substitute with vegetable broth for a vegetarian version.
For Protein and Texture
  • 1 can Pinto Beans Adds protein and heartiness; black beans are a great alternative, or omit for a lower-carb choice.
  • 1 cup Frozen Fire Roasted Corn Provides sweetness and texture; feel free to use regular frozen corn or fresh corn if available.
  • 2 cups Shredded Cooked Chicken Essential protein; canned beans can replace chicken for a vegetarian twist.
  • 1 cup Shredded Sharp Cheddar Cheese Enhances flavor and creaminess; any shredded cheese works, or omit for a dairy-free version.
For Finishing Touches
  • to taste Salt Essential for seasoning; adjust to taste.
  • to taste Freshly Ground Pepper Essential for seasoning; adjust to taste.
  • 1 Juice Lime Brightens the soup; lemon juice can be used for a different citrus flavor.

Equipment

  • large pot
  • immersion blender
  • Tongs
  • bowl

Method
 

Step‑by‑Step Instructions for Creamy Poblano Chicken Soup
  1. Roast the Poblano peppers over a medium-high flame, turning until charred on all sides. Wrap in foil to steam for 10 minutes, peel, remove seeds, and chop.
  2. Melt 2 tablespoons of butter in a large pot over medium heat. Add diced onion and sauté until softened, about 5 minutes. Add minced garlic and cook for 1 additional minute.
  3. Incorporate the roasted Poblano peppers, dried oregano, cumin, and smoked paprika. Stir well and let cook for about 3 minutes.
  4. Stir in 8 ounces of softened cream cheese until melted, followed by 4 cups of chicken bone broth. Stir until smooth and creamy, about 10 minutes.
  5. Utilize an immersion blender to puree the soup until silky-smooth.
  6. Mix in drained pinto beans, frozen corn, and shredded cooked chicken. Simmer for an additional 10 minutes.
  7. Remove from heat and stir in the juice from one lime and shredded cheddar cheese. Combine until well mixed.
  8. Taste and adjust seasoning with salt and pepper as desired. Serve hot.

Nutrition

Serving: 1cupCalories: 350kcalCarbohydrates: 32gProtein: 24gFat: 18gSaturated Fat: 9gPolyunsaturated Fat: 2gMonounsaturated Fat: 8gCholesterol: 65mgSodium: 800mgPotassium: 700mgFiber: 7gSugar: 4gVitamin A: 1500IUVitamin C: 40mgCalcium: 200mgIron: 3mg

Notes

Ensure cream cheese is at room temperature for best texture. This soup can be stored in the fridge for up to 3-4 days or frozen for up to 3 months, leaving out cheese until reheating.

Tried this recipe?

Let us know how it was!