It was a busy afternoon, and I needed a quick, satisfying meal that wouldn’t weigh me down. That’s when I stumbled upon these Irresistible Cottage Cheese Wraps—a delightful solution that combines protein-packed goodness with low prep time, perfect for a guilt-free breakfast, lunch, or dinner! What I love most about this recipe is how effortlessly it adapts to your tastes; whether you’re craving something fresh and crunchy or savory and warm, the customizable fillings ensure every bite is just right. Plus, they’re meal prep-friendly, so you can whip up a batch ahead of time and dive into healthy, homemade goodness without the fuss. Want to discover how easy it is to make your own wraps that are not only delicious but also stay vibrant and fresh? Let’s jump in and create a wrap that’s totally your own!
Why You’ll Crave These Wraps
Customizable fillings let you tailor each wrap to your unique cravings—swap in grilled chicken or roasted veggies for endless flavor combinations! Protein-Packed goodness ensures you stay full and satisfied, making it a great option for any meal. Quick Preparation fits seamlessly into your busy schedule; in under an hour, you can enjoy these delicious wraps! Plus, they’re meal prep friendly, allowing you to easily whip up a batch to enjoy throughout the week. If you love creative, nutritious dishes, these Cheeseburger Pockets or savory Cheddar Mac Cheese are fantastic pairings for a complete meal.
Irresistible Cottage Cheese Wrap Ingredients
Want to make the most delicious and satisfying cottage cheese wraps? Here’s everything you need!
For the Wraps
- Cottage Cheese – This is the star ingredient that provides protein and structure; feel free to choose full-fat for more sturdiness!
- Egg – Acts as a binder to hold your wraps together perfectly.
- Salt – A little goes a long way in enhancing the flavor of your wraps.
- Italian Seasoning – Adds a savory depth; switch it with oregano or basil for a twist.
- Garlic Powder – Infuses the wrap with delicious flavor, but can be omitted for a milder taste.
For the Fillings
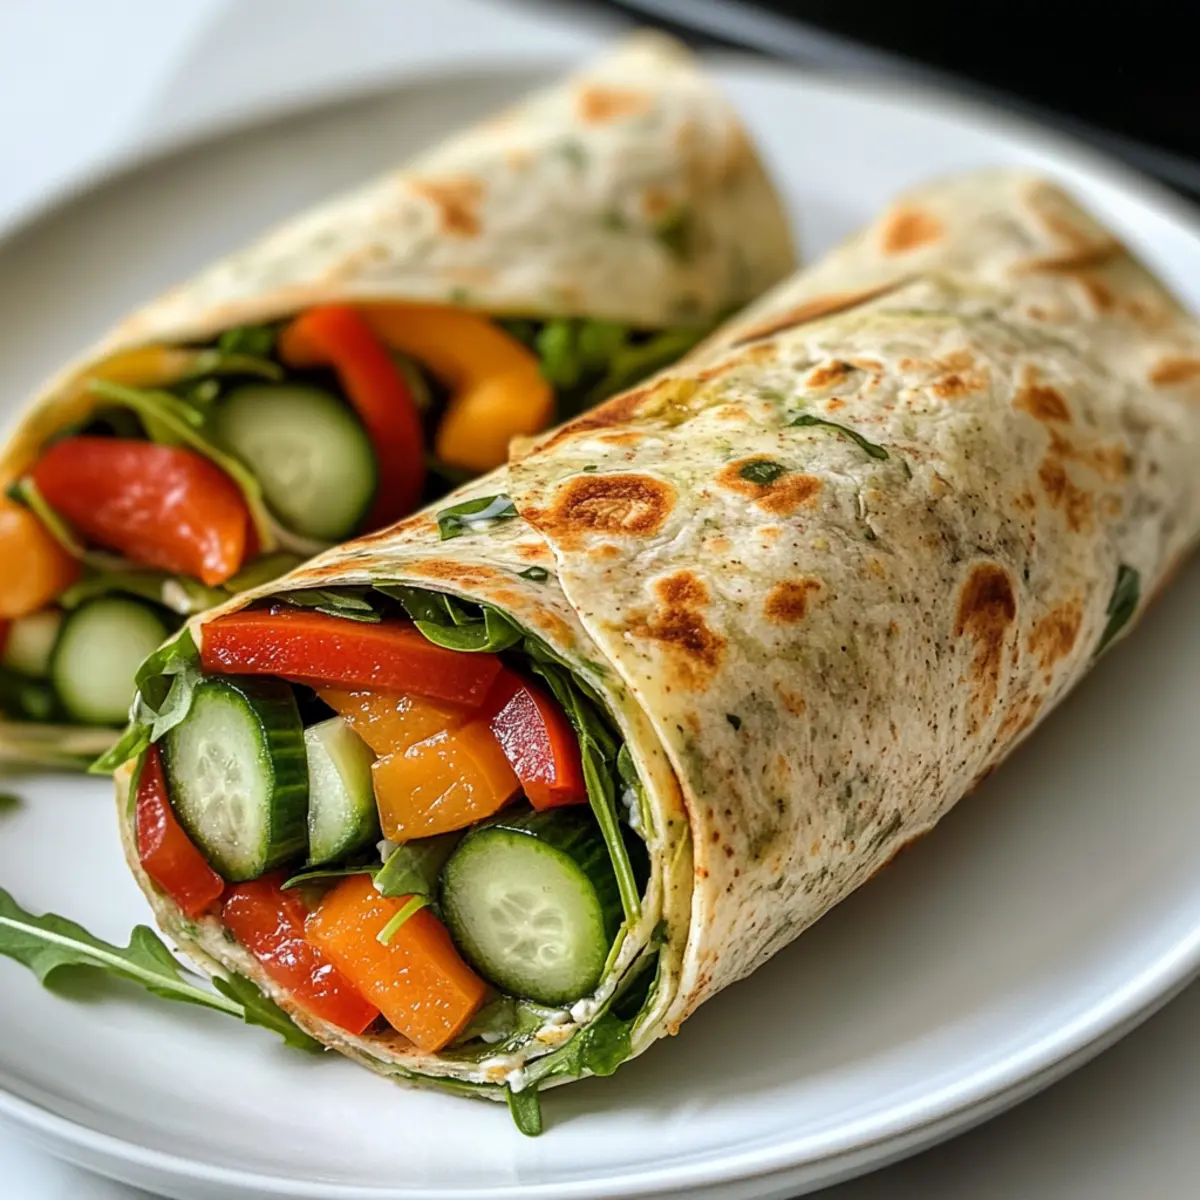
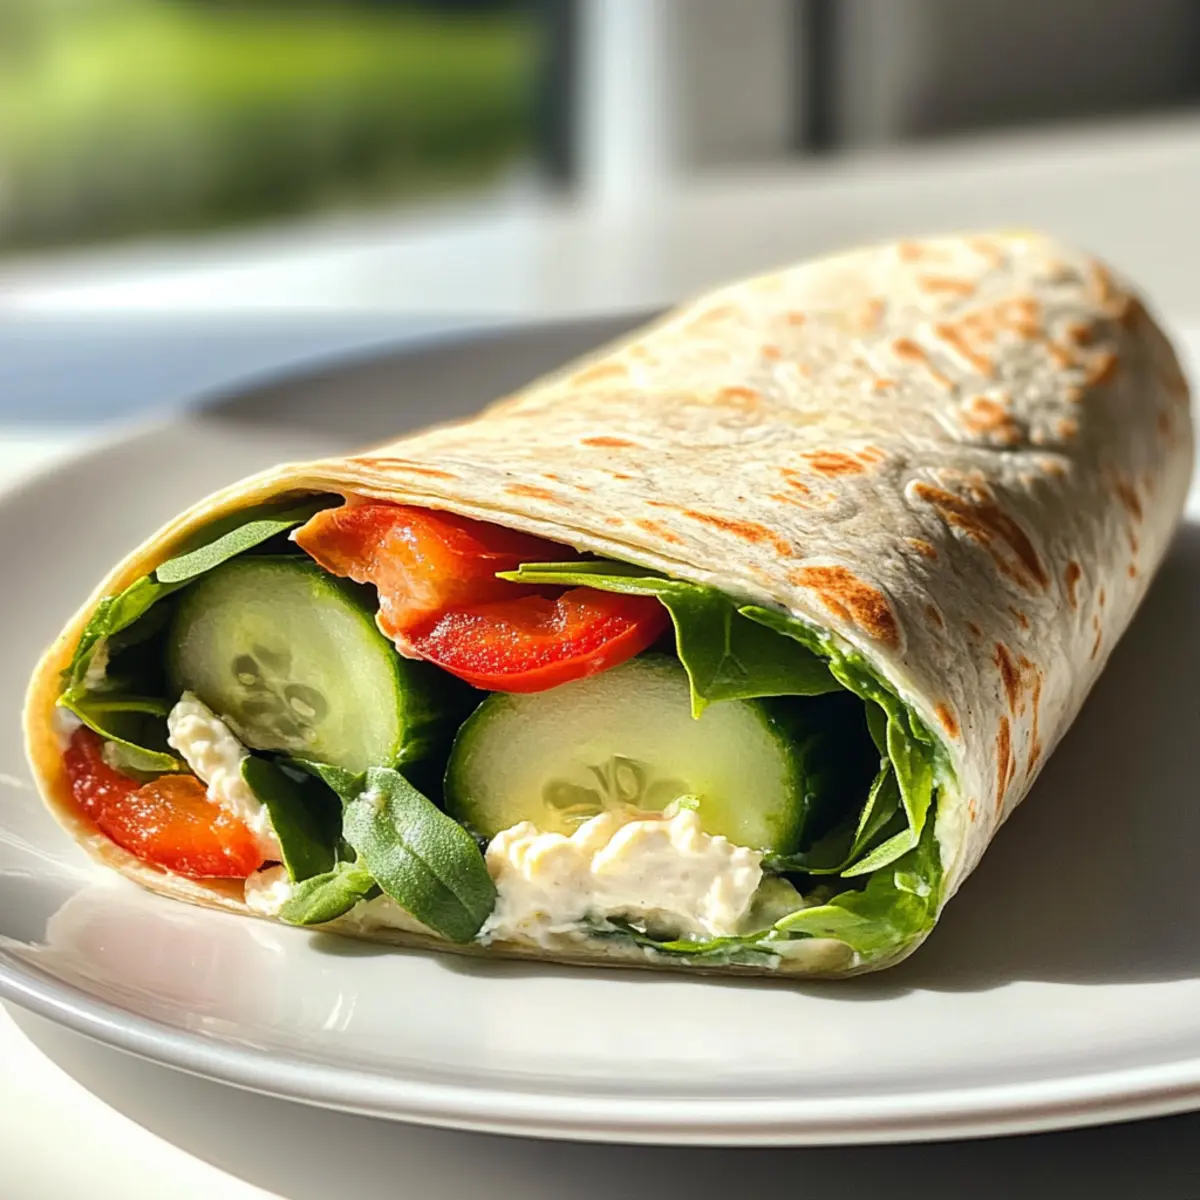
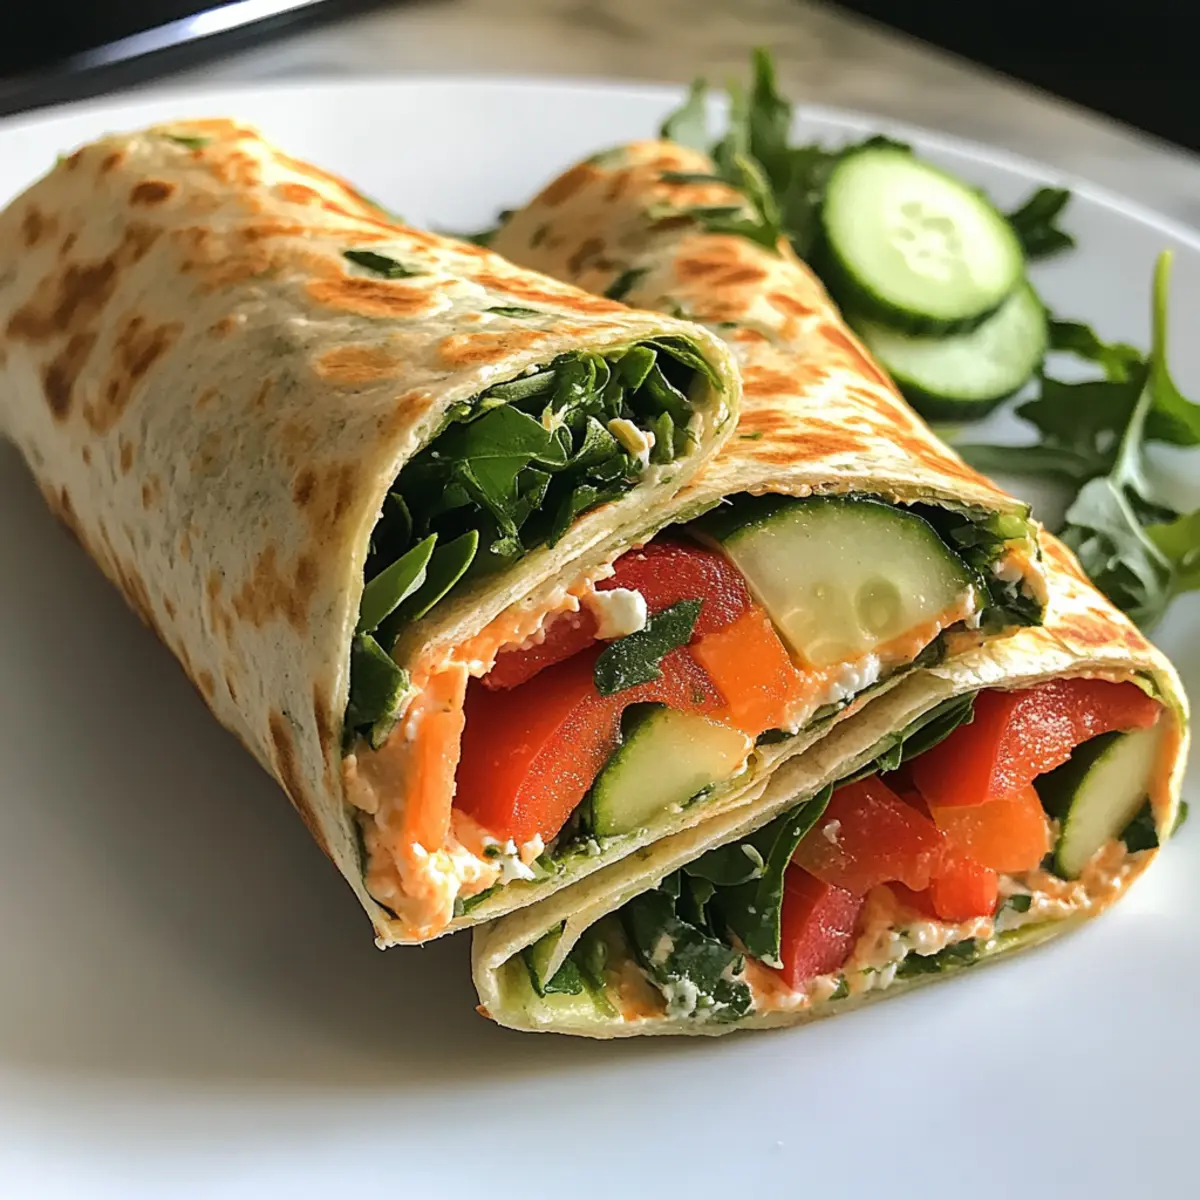
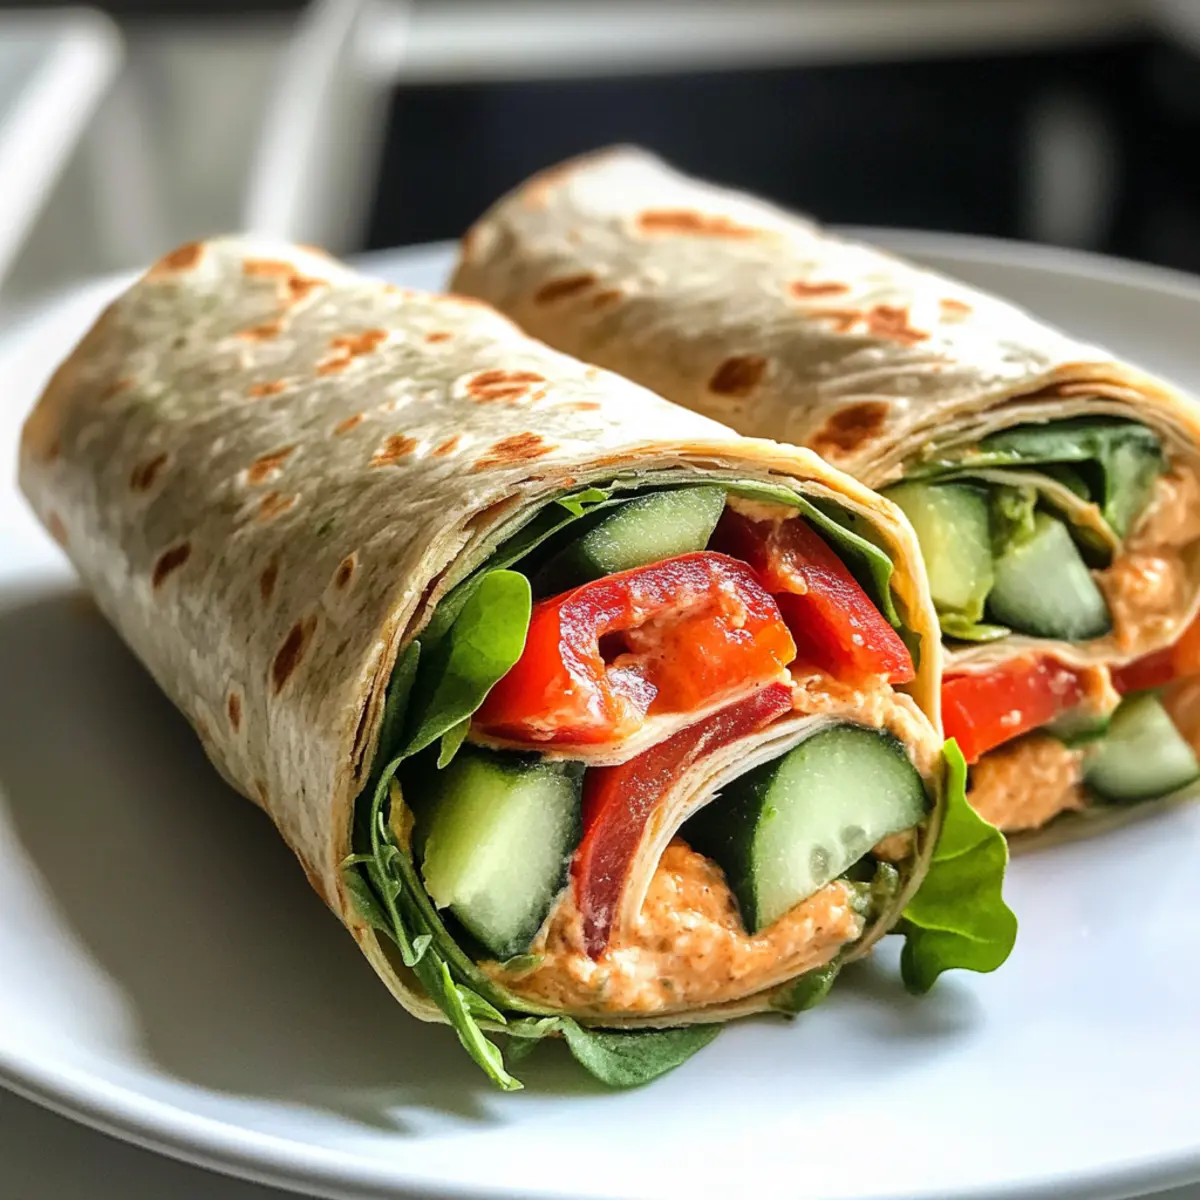
- Mozzarella Cheese – Creamy goodness that melts beautifully, helping to hold your wrap together.
- Arugula – Provides a peppery freshness that brightens up the flavors.
- Roasted Red Peppers – Add sweetness and a delightful texture; fresh bell peppers work too!
- Cucumber – Offers that crispy crunch; zucchini is a great alternative if you prefer.
- Avocado – Adds richness and creaminess, making every bite more luxurious.
For Drizzling
- Balsamic Glaze – A tangy finish that elevates the entire dish; use it sparingly to keep wraps from getting soggy.
For Garnishing
- Basil – Freshness that complements all the flavors; feel free to swap with spinach or leave it out if you prefer.
Now you’re ready to bring your Irresistible Cottage Cheese Wraps to life! Enjoy the process of creating and customizing these delightful and nutritious wraps.
Step‑by‑Step Instructions for Irresistible Cottage Cheese Wraps
Step 1: Blend the Batter
In a blender or food processor, combine the cottage cheese, egg, salt, Italian seasoning, and garlic powder. Blend until the mixture is smooth and creamy, which should take about 30 seconds. This flavorful batter will be the foundation for your Irresistible Cottage Cheese Wraps.
Step 2: Prepare the Oven
Preheat your oven to 350°F (175°C) while you prepare the baking sheet. Line a large baking sheet with parchment paper to prevent sticking. This ensures that your wraps bake evenly and come off the sheet without any hassle.
Step 3: Spread the Batter
Using a spatula, carefully spread the cottage cheese batter onto the lined baking sheet, creating an even layer about 1/8 inch thick. It’s important to keep it thin for optimal texture. Make sure the edges are neat so the wraps bake uniformly for that perfect pliability.
Step 4: Bake the Wraps
Place the baking sheet in the preheated oven and bake for 25-35 minutes. You’ll know the wraps are ready when they turn golden and set, being flexible enough to gently press with your fingers. Keep an eye on them to prevent over-baking, which can lead to dryness.
Step 5: Cool for Handling
Once baked, remove the wraps from the oven and allow them to cool for about 5 minutes. This cooling period helps firm up the wraps, making them easier to handle without tearing. Enjoy the delightful aroma wafting through your kitchen.
Step 6: Slice and Prepare Fillings
While the wraps cool, take this time to prepare your fillings. Slice the cucumber and avocado, and gather your arugula, roasted red peppers, and any additional toppings you wish to include. This step allows you to customize your Irresistible Cottage Cheese Wraps to your taste!
Step 7: Assemble the Wraps
Begin layering your fillings by placing mozzarella cheese, arugula, roasted red peppers, cucumber slices, avocado, and basil in the center of each wrap. Depending on your preference, feel free to sprinkle a pinch of salt and pepper over the fillings before you roll.
Step 8: Roll the Wraps
Carefully roll each wrap tightly like a burrito, starting from the side where you’ve laid down your fillings. Ensuring they are snug will help keep everything together when you slice them for serving. The cottage cheese wrap should hold its shape beautifully without falling apart.
Step 9: Drizzle and Serve
Just before serving, drizzle each wrap lightly with balsamic glaze for a tangy and delicious finish. Serve immediately for the best experience, showcasing your Irresistible Cottage Cheese Wraps as a delightful meal perfect for any time of day.
Expert Tips for Irresistible Cottage Cheese Wraps
-
Spread Thinly: A thin battery layer ensures pliability; thick wraps can turn rubbery and hard to roll.
-
Cool Completely: Let the wraps cool for at least 5 minutes; this helps prevent tearing when you handle them.
-
Avoid Sogginess: Don’t overload your wraps with wet ingredients; use drier fillings to keep them crisp.
-
Use Quality Cheese: Opt for high-quality mozzarella, like Galbani, as it melts beautifully and binds your wrap together seamlessly.
-
Customize Wisely: Experiment with fillings, but balance wet and dry ingredients for the best texture in your Irresistible Cottage Cheese Wraps.
Irresistible Cottage Cheese Wraps Variations
Get ready to personalize your cottage cheese wraps and create a delightful meal bursting with flavors and textures!
-
Dairy-Free: Substitute cottage cheese with blended silken tofu for a creamy, non-dairy alternative that still packs a protein punch. You’ll find this version incredibly versatile and delicious.
-
Spicy Kick: Add some diced jalapeños or a sprinkle of crushed red pepper to your fillings for a fiery twist. This will elevate the flavor profile, igniting your taste buds with every bite!
-
Savory Turkey: Swap in sliced turkey breast for a lean protein option that pairs beautifully with the wraps’ creamy fillings. This could be a fantastic lunch idea that keeps things interesting yet satisfying.
-
Mediterranean Flair: Use feta cheese, tomatoes, and olives for a Mediterranean twist on your wraps. The tang of feta combined with fresh herbs like oregano creates an explosion of vibrant flavors!
-
Breakfast Boost: Fill your wraps with scrambled eggs, spinach, and a sprinkle of feta for a hearty breakfast option. The added protein will keep you fueled throughout the morning while offering satisfying flavor.
-
Crunchy Alternatives: Experiment with different textures by adding shredded carrots or thinly sliced radishes. These add a delightful crunch and fresh flavor that complements the creamy components perfectly.
-
Sweet Option: Combine cottage cheese with sliced strawberries and a drizzle of honey for a sweet wrap. It’s a unique way to enjoy this recipe for a light dessert or breakfast treat!
-
Gourmet Greens: Try using arugula or kale, instead of traditional lettuce, for added depth and nutrient density. These leafy greens pack a refreshing punch, making your wraps exciting and colorful.
Feel free to let your creativity shine and mix up these delicious variations whenever you’re in the mood for something different! If you’re looking for more ideas, try pairing these wraps with a vibrant salad or give my Strawberry Cheesecake Bars a go for dessert after!
Storage Tips for Irresistible Cottage Cheese Wraps
- Fridge: Store leftover wraps in an airtight container for up to 3 days. Keep the fillings separate to avoid sogginess, ensuring your delicious wraps remain fresh.
- Freezer: For longer storage, freeze the plain cottage cheese wraps for up to 1 month. Wrap them tightly in plastic wrap and store them in a freezer bag to prevent freezer burn.
- Reheating: When ready to enjoy, thaw the wraps in the fridge overnight, then reheat in a skillet or microwave until warmed through. Fill them with your favorite fresh ingredients just before serving for the best taste.
- Make-Ahead: Consider making a batch of wraps and fillings in advance for convenient meals. The wraps freeze well, and you can prepare fresh fillings whenever a craving strikes!
Make Ahead Options
These Irresistible Cottage Cheese Wraps are perfect for busy weeknights and meal prep enthusiasts! You can prepare the wraps themselves up to 3 days in advance by following the baking instructions and then storing them in the refrigerator, ensuring they’re completely cooled to maintain their flexibility. Layer your chosen fillings separately (like cucumber, avocado, and arugula) and keep them in airtight containers, which allows you to customize each wrap right before serving. Simply reheat the wraps for a few seconds in the microwave or enjoy them cold, then assemble your wraps with fresh ingredients. This way, you’ll have a quick and nutritious meal ready to enjoy without compromising on quality!
What to Serve with Irresistible Cottage Cheese Wraps
Pair your delicious wraps with these complementary sides that elevate your meal experience and satisfy your cravings.
-
Side Salad: A fresh mix of greens dressed with olive oil and lemon accentuates the flavors of the wraps while adding a refreshing crunch.
-
Tomato Soup: This classic pairing offers warmth and comforting richness that contrasts beautifully with the lightness of the wraps.
-
Crispy Sweet Potato Fries: Their natural sweetness and crispy texture create a delightful contrast that makes for a memorable meal.
-
Grilled Vegetables: Smoky, charred veggies introduce hearty flavor and a satisfying bite, enhancing the wholesome goodness of your wraps.
-
Quinoa Salad: Light and nutty, a side of quinoa salad packed with herbs adds a protein boost to your plate while keeping it balanced and filling.
-
Fruit Smoothie: A refreshing smoothie made with your favorite fruits not only quenches your thirst but also adds a burst of vitamins to your meal.
-
Chickpea Hummus: Creamy and rich, hummus is perfect for dipping and spreads a luxurious texture that pairs well with the fillings in your wraps.
-
Herbed Yogurt Dip: A cool, tangy dip made with Greek yogurt and fresh herbs is an ideal accompaniment that complements the wraps’ savory flavors.
Irresistible Cottage Cheese Wraps Recipe FAQs
What type of cottage cheese should I use?
You can use any type of cottage cheese—full-fat varieties yield sturdier wraps, while lower-fat options work for a lighter choice. Choosing well-drained cottage cheese will help prevent excess moisture.
How should I store leftover wraps?
Store leftover wraps in an airtight container in the fridge for up to 3 days. Always keep the fillings separate to prevent sogginess and ensure the wraps maintain their delightful texture.
Can I freeze the wraps?
Absolutely! To freeze, wrap the plain cottage cheese wraps tightly in plastic wrap and place them in a freezer bag. They can be stored for up to 1 month. When you’re ready to enjoy, thaw them overnight in the fridge and fill with fresh ingredients just before serving.
What can I do if my wraps are too thick?
If your wraps come out too thick and rubbery, that could be due to spreading the batter too heavily. For next time, aim for an even layer about 1/8 inch thick. This ensures they bake properly, making them pliable and easy to roll.
Is this recipe suitable for people with dietary restrictions?
This recipe can be made gluten-free depending on the fillings you choose. For a dairy-free version, consider substituting the cottage cheese with blended silken tofu. Always check the labels of your ingredients to avoid any allergens!
How do I prevent my wraps from getting soggy?
To keep your wraps fresh and crispy, avoid overloading them with wet ingredients. Stick to drier fillings and ensure that any ingredients like cucumbers or tomatoes are well-drained. This way, you can savor every bite of your Irresistible Cottage Cheese Wraps without any sogginess!
Irresistible Cottage Cheese Wraps: A Protein-Packed Delight
Ingredients
Equipment
Method
- Blend the Batter: In a blender, combine cottage cheese, egg, salt, Italian seasoning, and garlic powder. Blend until smooth, about 30 seconds.
- Prepare the Oven: Preheat your oven to 350°F (175°C) and line a baking sheet with parchment paper.
- Spread the Batter: Spread the cottage cheese batter onto the prepared baking sheet, creating an even layer about 1/8 inch thick.
- Bake the Wraps: Bake in the oven for 25-35 minutes until golden and flexible.
- Cool for Handling: Allow the wraps to cool for about 5 minutes before handling.
- Slice and Prepare Fillings: While cooling, prepare the fillings by slicing cucumber and avocado, and gathering arugula and roasted red peppers.
- Assemble the Wraps: Layer mozzarella cheese, arugula, roasted red peppers, cucumber, avocado, and basil in the center of each wrap.
- Roll the Wraps: Roll each wrap tightly like a burrito, ensuring they are snug.
- Drizzle and Serve: Drizzle each wrap with balsamic glaze and serve immediately.