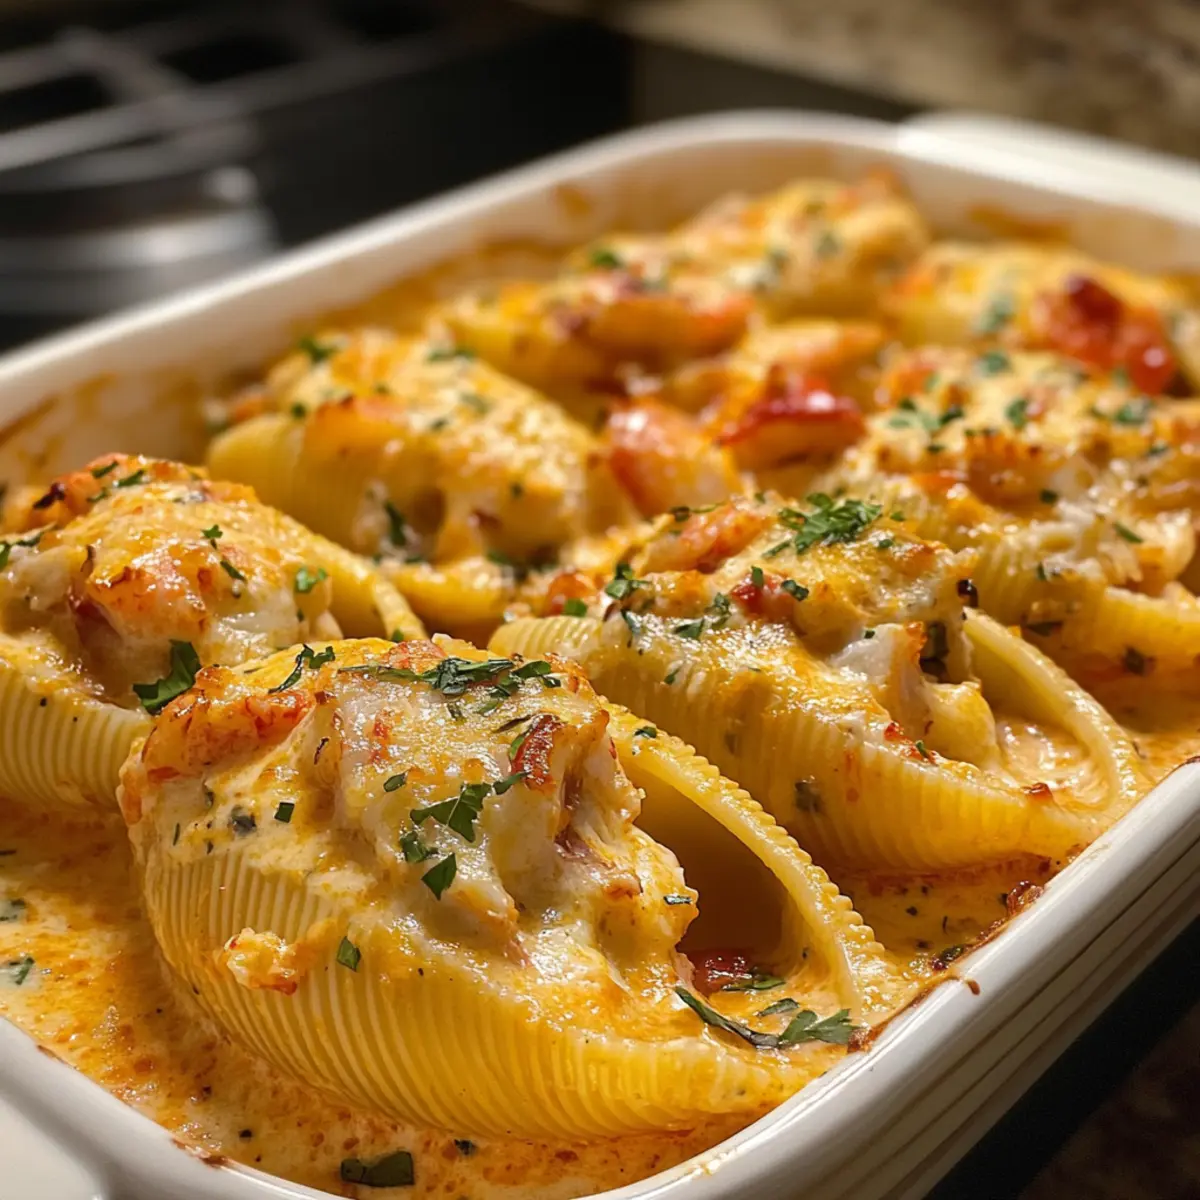
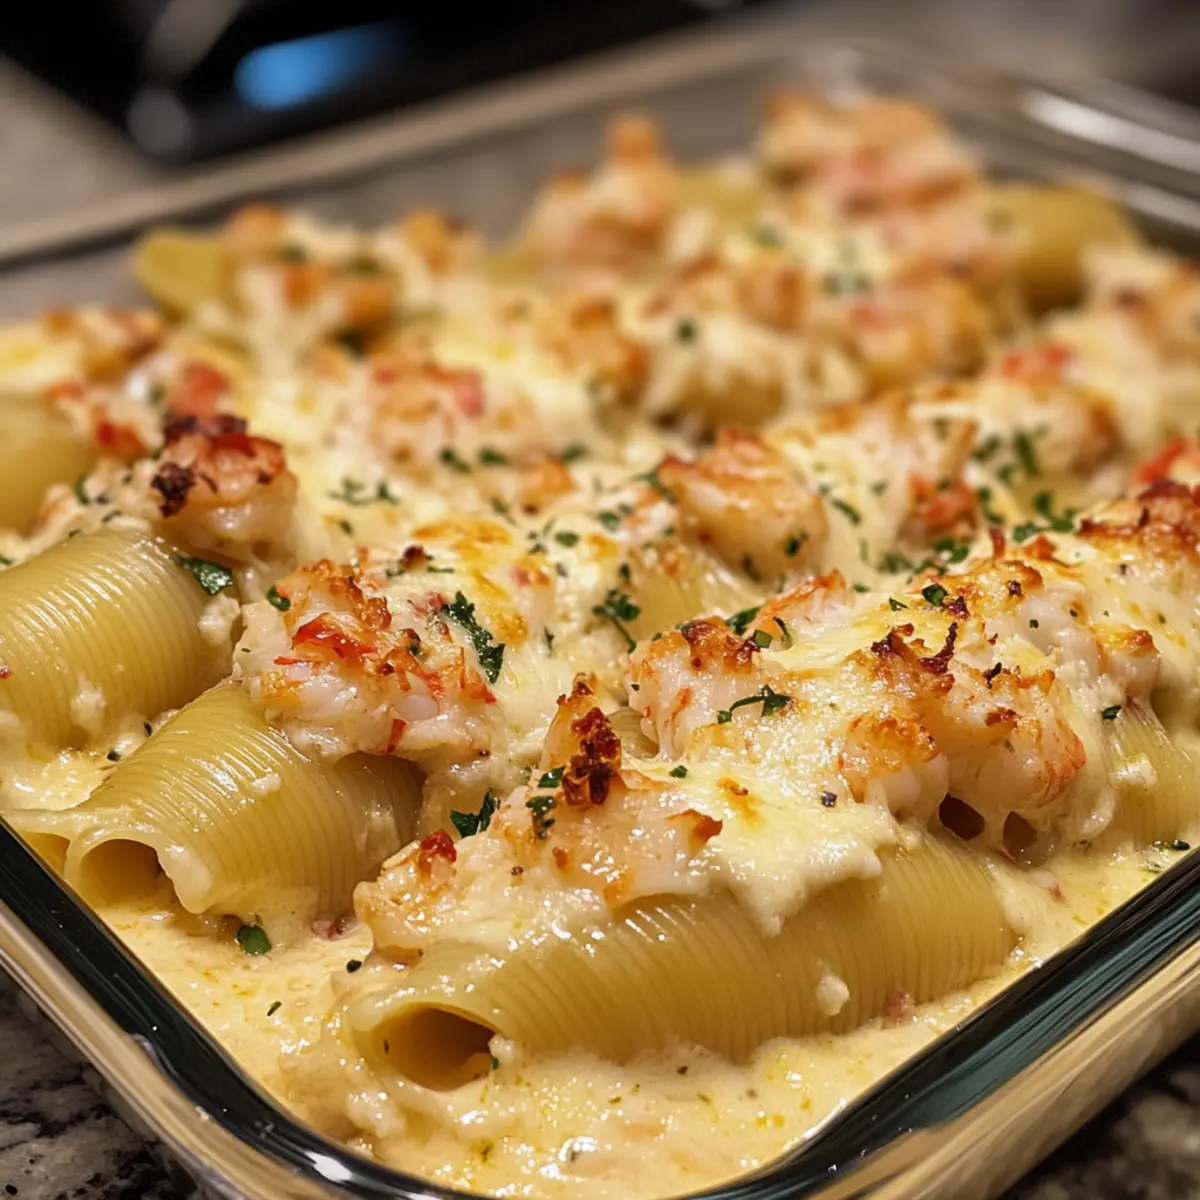
As I pulled the creamy seafood stuffed shells from the oven, the aroma wafting through my kitchen felt like an embrace from a long-lost friend. These delectable pasta shells, brimming with a luxurious blend of lobster, crab, and shrimp, are the ultimate comfort food—perfect for cozy nights and gatherings alike. What I adore about this recipe is its versatility; you can swap in your favorite seafood or even jazz it up with fresh veggies to suit your taste. Plus, they are make-ahead friendly, allowing you to savor every moment with your guests rather than be glued to the stove. So, are you ready to indulge in a dish that’s as elegant as it is satisfying? Let’s dive into this culinary delight!
Why Will You Love These Shells?
Irresistible Comfort: These creamy seafood stuffed shells embody the essence of comfort food, with a rich filling that warms your soul.
Customizable Perfection: Feel free to mix and match seafood according to your preferences—lobster, crab, shrimp, or even scallops—you’re in control!
Make-Ahead Marvel: Prep in advance and refrigerate, allowing the flavors to meld beautifully for an effortless dinner party, much like our Buffalo Chicken Stuffed option.
Gourmet Experience at Home: You’ll impress your family or guests with a meal that tastes like it came from a five-star restaurant, yet it’s simple enough for any home cook.
Effortless Clean-Up: With easy cooking steps and minimal dishes, you can focus on enjoying this dish with loved ones rather than spending hours on clean-up. Enjoy these scrumptious shells and elevate your mealtime with this delicious recipe!
Creamy Seafood Stuffed Shells Ingredients
For the Filling
- Jumbo Pasta Shells – Essential for holding the rich filling; ensure they are cooked al dente to prevent breakage while stuffing.
- Lobster Meat – Adds a sweet, luxurious flavor; opt for fresh for the best results.
- Crab Meat – Provides a succulent texture; fresh is preferred for optimal taste.
- Shrimp – Enhances the overall seafood richness; can easily substitute with other seafood like scallops.
- Cream Cheese – Contributes to a smooth, creamy texture; light cream cheese can be used for a healthier option.
- Mozzarella Cheese – Ensures a melted, gooey filling; freshly shredded is best for ideal melting.
For the Sauce
- Butter – Used for sautéing seafood and creating the sauce; add flavor and richness to the dish.
- Flour – Thickens the sauce; for a gluten-free version, use gluten-free flour.
- Heavy Cream – The main component of the sauce, creating a indulgent creamy texture; can be swapped with half-and-half if desired.
- Parmesan Cheese – Adds depth to the sauce; a must-have for added flavor.
- Garlic – Enhances the flavor profile; always mince for even distribution.
- Salt and Pepper – Essential seasoning to elevate all the flavors.
Step‑by‑Step Instructions for Creamy Seafood Stuffed Shells
Step 1: Sauté the Seafood
In a large skillet, melt 2 tablespoons of butter over medium heat. Add minced garlic and sauté for about 1 minute until fragrant. Then, gently stir in the lobster and crab meat, cooking for 2-3 minutes until just opaque and heated through. This step infuses your seafood with garlic flavor while keeping it tender, making it perfect for the creamy seafood stuffed shells.
Step 2: Make the Filling
In a mixing bowl, combine the sautéed seafood with cream cheese, shredded mozzarella, salt, and pepper. Use a fork or mixer to blend everything until smooth and creamy, ensuring all the ingredients are well incorporated. This filling creates a luxurious texture that will encase your jumbo pasta shells in flavor, making your creamy seafood stuffed shells utterly irresistible.
Step 3: Prepare the Pasta Shells
Bring a large pot of salted water to a boil and carefully add your jumbo pasta shells. Cook them according to the package instructions until al dente, typically around 8-10 minutes. Once cooked, drain and rinse under cold water to stop the cooking process. Allow the shells to cool slightly, making them easier to handle as you prepare to stuff them.
Step 4: Create the Sauce
In the same skillet used for the seafood, melt the remaining 2 tablespoons of butter over medium heat. Sprinkle in the flour and whisk for 1 minute until a roux forms. Gradually pour in the heavy cream and add grated Parmesan cheese, whisking until the sauce is smooth and thickened, about 3-4 minutes. This creamy sauce will serve as both a filling and a luscious topping for your stuffed shells.
Step 5: Assemble the Dish
Preheat your oven to 375°F (190°C). Spread a layer of the creamy sauce on the bottom of a baking dish. Carefully stuff each pasta shell with the seafood filling and arrange them in the dish. Pour the remaining sauce over the stuffed shells, ensuring they are generously coated for optimal creaminess. The combination of pasta, seafood, and sauce will make your creamy seafood stuffed shells shine.
Step 6: Bake
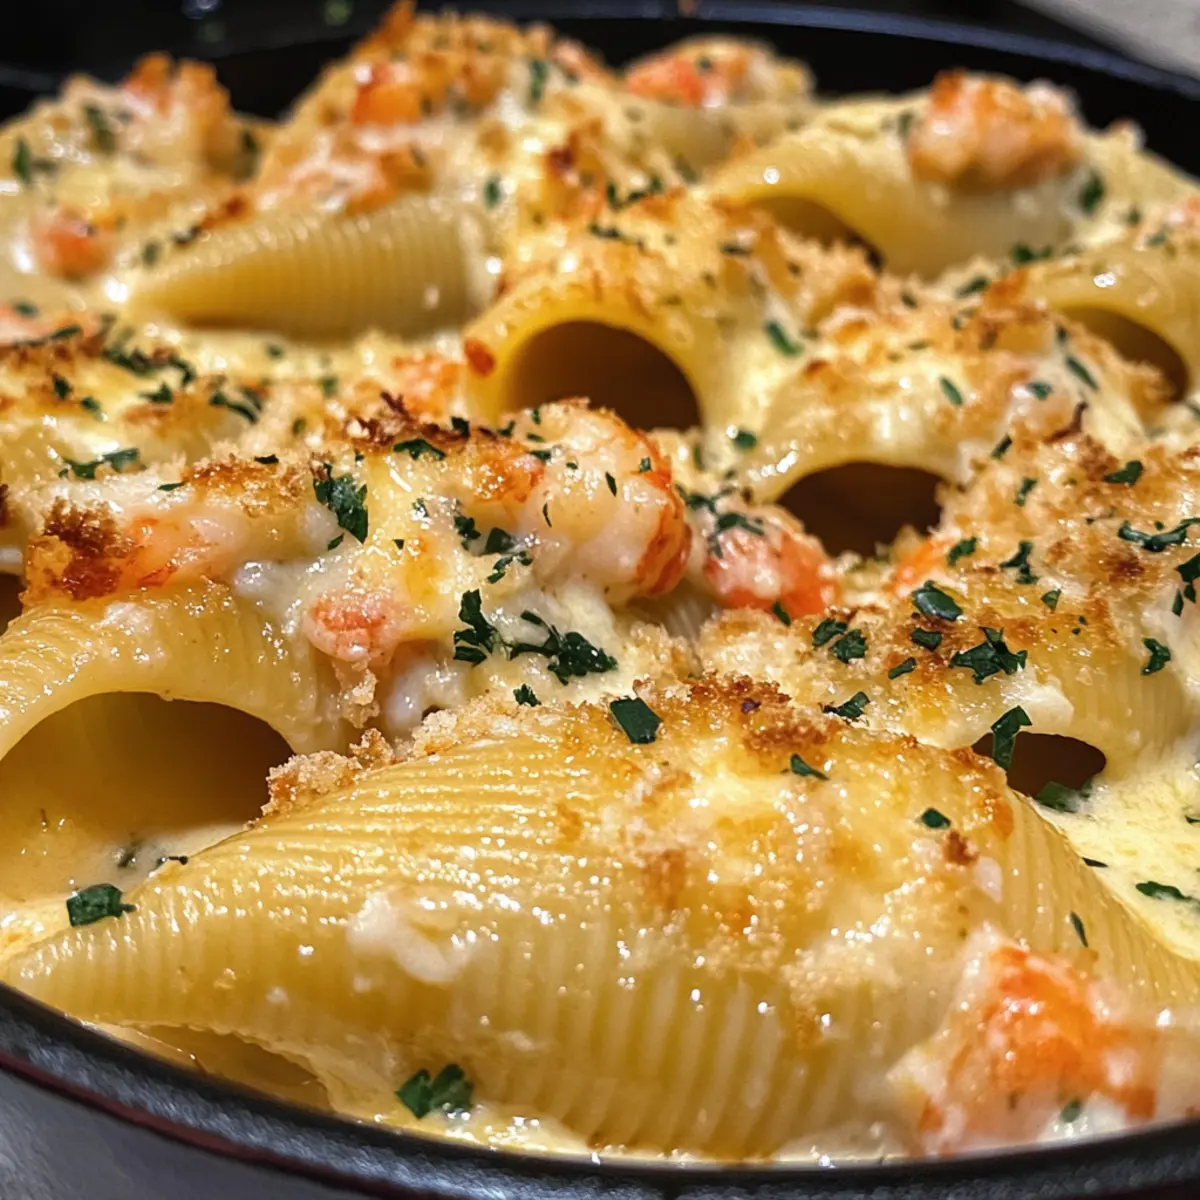
Cover the baking dish with aluminum foil and place it in the preheated oven. Bake for 20 minutes to heat everything through. Afterward, remove the foil and bake for an additional 10 minutes, allowing the top to bubble and turn golden brown. This step ensures your creamy seafood stuffed shells are delightful and visually appealing with a golden, inviting appearance.
Step 7: Serve and Enjoy
Once baked, allow the creamy seafood stuffed shells to cool for a few minutes. Garnish with extra Parmesan cheese or fresh herbs, if desired. Serve warm and savor the comforting flavors of this dish. Each stuffed shell promises a delightful balance of seafood richness and creamy potential that will make it a new family favorite.

Expert Tips for Creamy Seafood Stuffed Shells
-
Gentle Handling: Handle pasta shells with care to prevent breakage. Cooking them al dente is key to easy stuffing and maintaining their shape.
-
Ample Sauce: Ensure you have enough creamy sauce to keep the shells moist. Left too dry, the stuffed shells can become tough and chewy.
-
Flavor Boost: A squeeze of lemon juice enhances the flavors beautifully. It cuts through the richness of the seafood filling and adds brightness to the dish.
-
Make Ahead: Don’t hesitate to assemble these creamy seafood stuffed shells a day in advance. Refrigerate before baking for more developed flavors and effortless entertaining.
-
Storage Tips: If you have leftovers, store them in an airtight container for up to 3 days, or freeze for up to 3 months. Just reheat gently to enjoy later!
Creamy Seafood Stuffed Shells Variations
Feel free to explore these delightful twists to make the recipe uniquely yours!
- Dairy-Free: Use cashew cream or coconut cream instead of heavy cream and cream cheese for a delicious dairy-free version.
- Seafood Swap: Substitute lobster or crab with scallops or even fish like salmon for a new seafood experience. The beauty of this dish lies in its versatility—get creative!
- Vegetarian Twist: Omit seafood entirely and add sautéed vegetables like spinach, mushrooms, or artichokes in the filling for a vibrant vegetarian delight.
- Spicy Kick: Add red pepper flakes or diced jalapeños to the filling or sauce for a hint of heat, giving these stuffed shells an exciting flavor boost.
- Gluten-Free Option: Use gluten-free pasta shells and flour to make the sauce gluten-free so that everyone can enjoy this fabulous dish.
- Herb Infusion: Incorporate fresh herbs like basil, dill, or parsley into the filling or sauce to introduce a refreshing flavor note that complements the seafood.
- Extra Cheesy: Boost the cheesy goodness by adding more mozzarella and Parmesan in the filling as well as on top for a glorious cheesy crust.
- Make-Ahead Magic: Assemble the shells a day in advance and refrigerate, allowing the flavors to meld beautifully, just like our scrumptious Italian Stuffed Flank.
Customizing your creamy seafood stuffed shells makes them an even more personal and heartfelt dish to share with those you love!
Make Ahead Options
These creamy seafood stuffed shells are a fantastic option for meal prep! You can assemble the entire dish up to 24 hours in advance, simply cover it tightly with foil and refrigerate. To maintain the delicious quality, make sure not to overcook the jumbo pasta shells when boiling, so they hold their shape during storing. When you’re ready to serve, bake the stuffed shells directly from the refrigerator, adding an extra 5 minutes to the baking time. This allows the flavors to meld beautifully, and your dish will still taste just as scrumptious, with creamy goodness waiting to be savored on busy weeknights!
What to Serve with Creamy Seafood Stuffed Shells
Elevate your dinner table experience by pairing these indulgent shells with a selection of delightful sides and drinks.
- Garlic Bread: The warm, buttery crunch of garlic bread complements the creamy filling beautifully, providing a satisfying contrast in texture.
- Fresh Green Salad: A light, crisp salad with mixed greens and a zesty vinaigrette balances the richness of the stuffed shells, refreshing the palate.
- Steamed Asparagus: Tender asparagus drizzled with lemon and olive oil brings a bright, vibrant flavor to the meal while adding a pop of color.
- Roasted Vegetables: A medley of roasted bell peppers, zucchini, and carrots adds warmth and earthiness, perfectly pairing with the seafood flavors.
- Chilled Chardonnay: This white wine enhances the taste of the seafood, its crispness cutting through the richness of the cream sauce for a delightful sip.
- Lemon Herb Quinoa: Nutty quinoa infused with lemon and herbs adds a wholesome touch to the meal, introducing a delightful chewiness alongside the shells.
- Berry Sorbet: For dessert, a refreshing berry sorbet can cleanse the palate after this rich dish, making for a light and satisfying finish.
- Sparkling Water with Mint: To keep things refreshing, serve up fizzy water with a hint of mint—a perfect non-alcoholic option that complements the meal beautifully.
How to Store and Freeze Creamy Seafood Stuffed Shells
Fridge: Store leftovers in an airtight container for up to 3 days. This helps maintain their creamy texture while keeping them safe to eat.
Freezer: For longer storage, freeze stuffed shells in a freezer-safe container for up to 3 months. Allow to cool completely before freezing to prevent ice crystals.
Reheating: To reheat, thaw in the fridge overnight, then bake at 350°F (175°C) until heated through, about 20-25 minutes. Cover with foil to keep moisture in during reheating.
Make-Ahead Tip: These creamy seafood stuffed shells can be assembled a day in advance and refrigerated before baking. This not only saves time but also allows the flavors to meld beautifully!
Creamy Seafood Stuffed Shells Recipe FAQs
What should I look for when selecting seafood?
Absolutely! When choosing seafood for your creamy seafood stuffed shells, freshness is key. Look for lobster, crab, or shrimp with a clean, briny smell, and avoid anything with dark spots or a strong fishy odor. Fresh seafood should have a firm texture and vibrant color, making it a delightful addition to your filling.
How should I store leftover stuffed shells?
Very! If you have leftovers, store them in an airtight container in the fridge for up to 3 days. To keep them fresh, ensure the container is sealed tightly. If you want to save them for longer, consider freezing them. They can last in the freezer for up to 3 months, just make sure they cool completely before transferring to a freezer-safe container.
Can I freeze my stuffed shells? If so, how?
Definitely! To freeze your creamy seafood stuffed shells, assemble them in a suitable baking dish, but do not bake them first. Cover the dish tightly with plastic wrap and aluminum foil to prevent freezer burn. When ready to eat, thaw in the refrigerator overnight, then bake as per the original instructions, adding a few extra minutes if necessary to ensure they are heated through.
What if my sauce is too thin?
No worries! If you find your sauce is too thin, add a bit more flour to thicken it up. Create a slurry by mixing 1-2 tablespoons of flour with a tablespoon of cold water in a separate bowl to prevent clumping, then slowly whisk it into your sauce while simmering. This will help achieve that desired creamy consistency that pairs perfectly with the seafood filling.
Are there any dietary considerations I should keep in mind?
Absolutely! When preparing your creamy seafood stuffed shells, consider any allergies or dietary restrictions. For gluten-free options, you can swap out regular flour for gluten-free flour. Also, be cautious if serving to pets, as ingredients like garlic and cheese can be harmful to them in large quantities. Always choose seafood that aligns with your dietary preferences, such as substituting with plant-based seafood alternatives if desired.
Creamy Seafood Stuffed Shells for a Cozy Dinner Delight
Ingredients
Equipment
Method
- In a large skillet, melt 2 tablespoons of butter over medium heat. Add minced garlic and sauté for about 1 minute until fragrant.
- Gently stir in the lobster and crab meat, cooking for 2-3 minutes until just opaque and heated through.
- In a mixing bowl, combine the sautéed seafood with cream cheese, shredded mozzarella, salt, and pepper.
- Use a fork or mixer to blend everything until smooth and creamy.
- Bring a large pot of salted water to a boil and carefully add your jumbo pasta shells. Cook them until al dente, about 8-10 minutes.
- After cooking, drain and rinse under cold water to stop cooking, allowing shells to cool slightly.
- In the same skillet, melt the remaining 2 tablespoons of butter over medium heat. Sprinkle in the flour and whisk for 1 minute.
- Gradually pour in the heavy cream and add grated Parmesan cheese, whisking until the sauce is smooth and thickened, about 3-4 minutes.
- Preheat your oven to 375°F (190°C). Spread a layer of the creamy sauce on the bottom of a baking dish.
- Carefully stuff each pasta shell with the seafood filling and arrange them in the dish. Pour the remaining sauce over the stuffed shells.
- Cover the baking dish with aluminum foil and bake for 20 minutes. Remove the foil and bake for an additional 10 minutes.
- Once baked, allow the stuffed shells to cool for a few minutes. Garnish with extra Parmesan or fresh herbs, then serve warm.