Chicken and Mushroom Puff Pie: A Delicious Recipe!

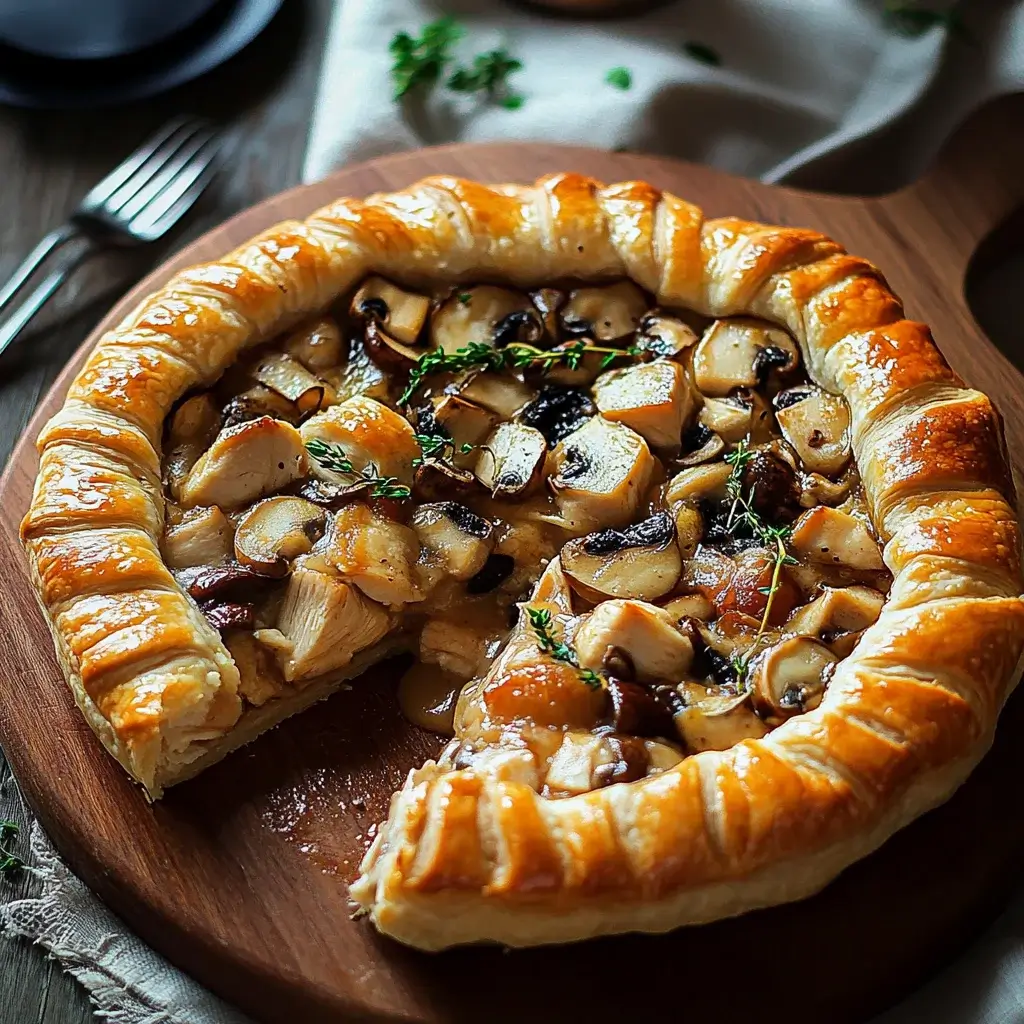
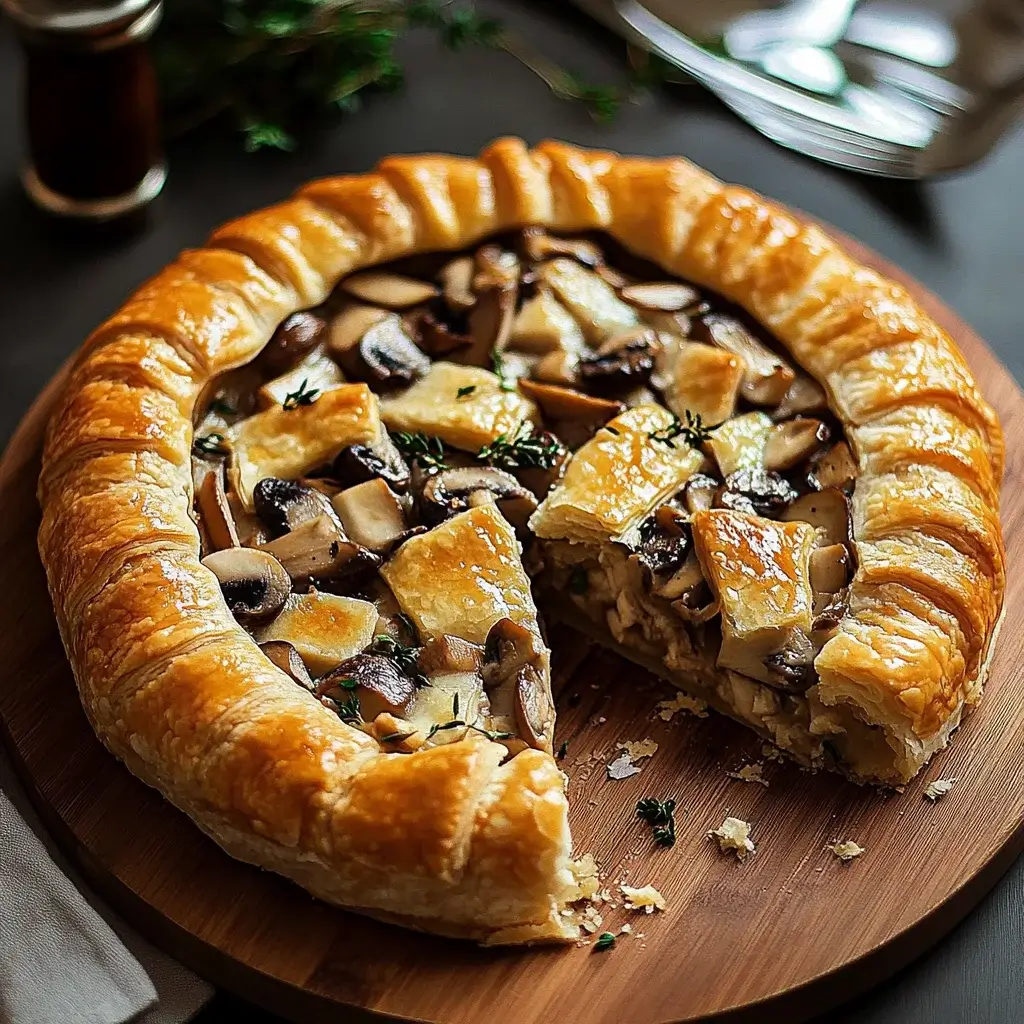
Introduction to Chicken and Mushroom Puff Pie

There’s something magical about a warm, flaky Chicken and Mushroom Puff Pie that brings back memories of cozy family dinners. This dish is not just a meal; it’s a hug on a plate. Perfect for those busy weeknights or when you want to impress your loved ones, this recipe combines tender chicken, earthy mushrooms, and sweet peas in a creamy sauce, all wrapped in golden puff pastry. It’s a delightful way to gather around the table, share stories, and enjoy a comforting meal that feels like home. Let’s dive into this delicious adventure!

Why You’ll Love This Chicken and Mushroom Puff Pie

This Chicken and Mushroom Puff Pie is a game-changer for any home cook. It’s quick to prepare, making it perfect for those hectic evenings when time is short. The rich, creamy filling paired with the flaky pastry creates a taste sensation that’s hard to resist. Plus, it’s versatile! You can easily customize it to suit your family’s preferences, ensuring everyone leaves the table satisfied and happy.

Ingredients for Chicken and Mushroom Puff Pie

Gathering the right ingredients is the first step to creating a mouthwatering Chicken and Mushroom Puff Pie. Here’s what you’ll need:

  • Cooked chicken: Shredded chicken adds protein and heartiness. You can use rotisserie chicken for convenience.
  • Mushrooms: Sliced mushrooms bring an earthy flavor. Button or cremini mushrooms work beautifully.
  • Frozen peas: These little green gems add sweetness and color. No need to thaw them before cooking!
  • Onion: Diced onion provides a savory base. Yellow or white onions are perfect for this dish.
  • Garlic: Minced garlic enhances the overall flavor. Fresh garlic is best, but garlic powder can be a quick substitute.
  • Chicken broth: This adds depth to the filling. Homemade broth is ideal, but store-bought works just fine.
  • Heavy cream: For a rich, creamy texture, heavy cream is essential. You can substitute with half-and-half for a lighter version.
  • Olive oil: Used for sautéing, olive oil adds a nice flavor. Feel free to use butter for a richer taste.
  • Dried thyme: This herb complements the chicken and mushrooms perfectly. Fresh thyme can be used if you have it on hand.
  • Salt and pepper: Essential for seasoning, adjust to your taste.
  • Puff pastry: The star of the show! Frozen puff pastry is convenient and creates that flaky crust we all love.
  • Egg: A beaten egg is used for the egg wash, giving the pie a beautiful golden finish.

For those looking to mix things up, consider adding fresh herbs like parsley or rosemary for an extra flavor boost. You can also swap the chicken for turkey or toss in different veggies like spinach or bell peppers. The possibilities are endless! For exact measurements, check the bottom of the article where you can find everything available for printing.

How to Make Chicken and Mushroom Puff Pie

Creating a Chicken and Mushroom Puff Pie is a delightful journey that fills your kitchen with mouthwatering aromas. Follow these simple steps, and you’ll have a dish that’s sure to impress!

Step 1: Preheat the Oven

Start by preheating your oven to 400°F (200°C). This step is crucial because a hot oven ensures that the puff pastry rises beautifully, creating that flaky texture we all crave. Trust me, you don’t want to skip this part!

Step 2: Sauté the Onions

In a large skillet, heat the olive oil over medium heat. Add the diced onion and sauté until it turns translucent, about 5 minutes. This process releases the onion’s natural sweetness, laying a flavorful foundation for your Chicken and Mushroom Puff Pie.

Step 3: Cook the Mushrooms and Garlic

Next, toss in the minced garlic and sliced mushrooms. Cook them for about 5-7 minutes until the mushrooms are tender and have released their moisture. You want them to be soft and slightly golden, adding depth to your filling.

Step 4: Combine Ingredients

Now, stir in the shredded chicken, frozen peas, dried thyme, salt, and pepper. Cook for another 2 minutes to let the flavors meld. Then, pour in the chicken broth and heavy cream, stirring to combine. Let this mixture simmer for about 5 minutes until it thickens slightly. Remove from heat and let it cool a bit.

Step 5: Prepare the Puff Pastry

While your filling cools, roll out one sheet of puff pastry on a floured surface. You want it to fit your pie dish perfectly. Gently place it in the dish, pressing down to fit. This will be the cozy home for your delicious filling.

Step 6: Assemble the Pie

Pour the chicken and mushroom mixture into the pastry-lined pie dish. Roll out the second sheet of puff pastry and place it over the filling. Seal the edges by crimping them with a fork. Don’t forget to cut a few slits in the top to let steam escape. This step is key to avoiding a soggy pie!

Step 7: Bake the Pie

Brush the top with the beaten egg for that golden finish. Bake in your preheated oven for 25-30 minutes, or until the pastry is puffed and golden brown. To check for doneness, look for a beautifully browned crust and bubbling filling. Let it cool for 5-10 minutes before serving, allowing the flavors to settle.

Tips for Success

  • Always preheat your oven; it’s essential for that perfect puff pastry.
  • Let the filling cool slightly before assembling to prevent sogginess.
  • Use a sharp knife to cut slits in the pastry for steam to escape.
  • Experiment with herbs and spices to customize the flavor to your liking.
  • For a golden crust, don’t skip the egg wash!

Equipment Needed

  • Pie dish: A standard 9-inch pie dish works well. A cast-iron skillet can be a great alternative.
  • Skillet: A large skillet for sautéing. Any non-stick pan will do.
  • Rolling pin: Essential for rolling out puff pastry. A wine bottle can work in a pinch!
  • Sharp knife: For cutting slits in the pastry. A kitchen scissors can also be handy.

Variations

  • Vegetarian Option: Swap the chicken for hearty vegetables like zucchini, bell peppers, or even lentils for a filling meatless version.
  • Spicy Kick: Add a pinch of red pepper flakes or diced jalapeños to the filling for a spicy twist that’ll wake up your taste buds.
  • Herb Infusion: Experiment with fresh herbs like dill or basil to give your pie a unique flavor profile that stands out.
  • Cheesy Delight: Mix in some shredded cheese, like cheddar or mozzarella, into the filling for an extra creamy and cheesy experience.
  • Gluten-Free Option: Use gluten-free puff pastry to make this dish suitable for those with gluten sensitivities.

Serving Suggestions

  • Side Salad: Pair your Chicken and Mushroom Puff Pie with a fresh green salad dressed in a light vinaigrette for a refreshing contrast.
  • Wine Pairing: A crisp white wine, like Sauvignon Blanc, complements the creamy filling beautifully.
  • Presentation: Serve slices on warm plates, garnished with fresh herbs for a pop of color.

FAQs about Chicken and Mushroom Puff Pie

Can I use fresh chicken instead of cooked chicken?

Absolutely! If you prefer fresh chicken, just cook it first. Sauté it in the skillet until fully cooked, then shred it before adding to the filling. This will give your Chicken and Mushroom Puff Pie a fresh flavor.

How do I store leftovers?

Leftover Chicken and Mushroom Puff Pie can be stored in an airtight container in the fridge for up to three days. Reheat in the oven for the best texture, ensuring the pastry stays flaky.

Can I freeze the pie before baking?

Yes, you can freeze the assembled pie before baking. Just wrap it tightly in plastic wrap and foil. When you’re ready to bake, no need to thaw; just add a few extra minutes to the baking time.

What can I serve with Chicken and Mushroom Puff Pie?

This dish pairs wonderfully with a light side salad or steamed vegetables. A glass of white wine also complements the creamy filling beautifully, enhancing your dining experience.

Is this Chicken and Mushroom Puff Pie gluten-free?

To make it gluten-free, simply use gluten-free puff pastry. The filling is naturally gluten-free, so you can enjoy this comforting dish without worry!

Final Thoughts

Cooking this Chicken and Mushroom Puff Pie is more than just preparing a meal; it’s about creating memories. The aroma wafting through your kitchen will draw everyone in, sparking conversations and laughter. Each flaky bite is a reminder of the comfort food that warms the soul. Whether it’s a weeknight dinner or a special occasion, this dish brings a sense of joy and satisfaction. Plus, the versatility allows you to make it your own. So roll up your sleeves, gather your loved ones, and enjoy the delightful experience of sharing this delicious pie together!

Ranis

Chicken and Mushroom Puff Pie: A Delicious Recipe!

A delicious Chicken and Mushroom Puff Pie recipe that combines tender chicken, mushrooms, and peas in a creamy sauce, all encased in flaky puff pastry.
Prep Time 20 minutes
Cook Time 30 minutes
Total Time 50 minutes
Servings: 6 servings
Course: Main Course
Cuisine: American
Calories: 450

Ingredients
  

  • 2 cups cooked chicken shredded
  • 1 cup mushrooms sliced
  • 1 cup frozen peas
  • 1 medium onion diced
  • 2 cloves garlic minced
  • 1 cup chicken broth
  • 1 cup heavy cream
  • 2 tablespoons olive oil
  • 1 teaspoon dried thyme
  • Salt and pepper to taste
  • 1 package 17.3 ounces frozen puff pastry, thawed
  • 1 egg beaten (for egg wash)

Method
 

  1. Preheat the oven to 400°F (200°C).
  2. In a large skillet, heat the olive oil over medium heat. Add the diced onion and sauté until translucent, about 5 minutes.
  3. Add the minced garlic and sliced mushrooms to the skillet. Cook until the mushrooms are tender, about 5-7 minutes.
  4. Stir in the shredded chicken, frozen peas, dried thyme, salt, and pepper. Cook for another 2 minutes.
  5. Pour in the chicken broth and heavy cream, stirring to combine. Let the mixture simmer for about 5 minutes until slightly thickened. Remove from heat and let cool slightly.
  6. Roll out one sheet of puff pastry on a floured surface to fit your pie dish. Place it in the dish, pressing down gently to fit.
  7. Pour the chicken and mushroom mixture into the pastry-lined pie dish.
  8. Roll out the second sheet of puff pastry and place it over the filling. Seal the edges by crimping with a fork. Cut a few slits in the top to allow steam to escape.
  9. Brush the top with the beaten egg for a golden finish.
  10. Bake in the preheated oven for 25-30 minutes, or until the pastry is golden brown and puffed.
  11. Allow to cool for 5-10 minutes before serving.

Nutrition

Serving: 1sliceCalories: 450kcalCarbohydrates: 30gProtein: 25gFat: 30gSaturated Fat: 15gPolyunsaturated Fat: 10gCholesterol: 120mgSodium: 600mgFiber: 2gSugar: 2g

Notes

  • For added flavor, try incorporating fresh herbs like parsley or rosemary into the filling.
  • Substitute the chicken with turkey or add different vegetables like spinach or bell peppers for a unique twist.

Tried this recipe?

Let us know how it was!

Baked Cream Cheese Wonton Cups: A Must-Try Recipe!

Introduction to Baked Cream Cheese Wonton Cups

There’s something magical about appetizers that bring people together, and Baked Cream Cheese Wonton Cups are no exception. These little bites of joy are not just easy to whip up; they’re a guaranteed crowd-pleaser. Whether you’re hosting a game night or just looking for a quick solution for a busy day, these wonton cups fit the bill perfectly. With a creamy filling nestled in crispy wrappers, they’re sure to impress your loved ones. Trust me, once you make these, they’ll be the star of your next gathering!

Why You’ll Love This Baked Cream Cheese Wonton Cups

These Baked Cream Cheese Wonton Cups are a game-changer in the kitchen. They come together in just 30 minutes, making them perfect for those busy weeknights or last-minute gatherings. The combination of creamy filling and crispy wonton wrappers creates a delightful texture that’s hard to resist. Plus, they’re versatile enough to customize with your favorite flavors, ensuring everyone at the table will be satisfied. What’s not to love?

Ingredients for Baked Cream Cheese Wonton Cups

Gathering the right ingredients is the first step to creating these delightful Baked Cream Cheese Wonton Cups. Here’s what you’ll need:

  • Cream Cheese: The star of the show! Softened cream cheese provides that rich, creamy base that makes these cups irresistible.
  • Sour Cream: Adds a tangy flavor and smooth texture. You can swap it for Greek yogurt for a healthier twist.
  • Green Onions: Chopped green onions bring a fresh, mild onion flavor that brightens up the filling.
  • Garlic Powder: A pinch of garlic powder enhances the savory notes, making each bite more flavorful.
  • Onion Powder: This adds depth to the filling without overpowering the other flavors.
  • Salt and Black Pepper: Essential seasonings that elevate the taste of the cream cheese mixture.
  • Wonton Wrappers: These crispy shells hold the filling perfectly. You can find them in the refrigerated section of most grocery stores.
  • Olive Oil: A light brush of olive oil helps the wonton cups crisp up beautifully in the oven.
  • Cooking Spray: An alternative to olive oil, it ensures the wonton wrappers don’t stick to the muffin tin.

For those who like a little heat, consider adding a teaspoon of sriracha or your favorite hot sauce to the cream cheese mixture. This recipe is flexible, so feel free to get creative! Exact measurements are available at the bottom of the article for easy printing.

How to Make Baked Cream Cheese Wonton Cups

Creating Baked Cream Cheese Wonton Cups is a straightforward process that anyone can master. Follow these simple steps, and you’ll have a delicious appetizer ready in no time!

Step 1: Preheat the Oven

Start by preheating your oven to 375°F. This step is crucial because it ensures even cooking. A hot oven helps the wonton wrappers crisp up beautifully, giving you that perfect texture. Trust me, you don’t want to skip this part!

Step 2: Prepare the Cream Cheese Mixture

In a mixing bowl, combine the softened cream cheese, sour cream, chopped green onions, garlic powder, onion powder, salt, and black pepper. Mix until everything is smooth and well blended. If the mixture feels too thick, don’t hesitate to add a splash of milk to achieve the right consistency. You want it creamy but not runny!

Step 3: Prepare the Muffin Tin

Lightly brush a muffin tin with olive oil or spray it with cooking spray. This step prevents the wonton wrappers from sticking. Now, take a wonton wrapper and press it into each muffin cup, allowing the edges to hang over the sides. This creates a lovely little cup for your filling!

Step 4: Fill the Wonton Cups

Using a spoon, fill each wonton cup with about 1 tablespoon of the cream cheese mixture. Be careful not to overfill; you want the filling to stay contained while baking. A little goes a long way, and you’ll want to avoid any overflow!

Step 5: Bake to Perfection

Place the muffin tin in the preheated oven and bake for 12-15 minutes. Keep an eye on them! You’re looking for golden brown edges on the wonton wrappers. This is when they’re perfectly crispy and ready to be devoured.

Step 6: Cool and Serve

Once baked, remove the wonton cups from the oven and let them cool for a few minutes. This cooling time allows the filling to set a bit. Serve them warm for the best experience. They’re perfect as is, or you can pair them with your favorite dipping sauce!

Tips for Success

  • Make sure your cream cheese is softened for easy mixing.
  • Don’t skip preheating the oven; it’s key for crispy wonton cups.
  • Experiment with different herbs or spices in the filling for unique flavors.
  • Keep an eye on the baking time; ovens can vary.
  • Let the cups cool slightly before serving to avoid burns.

Equipment Needed

  • Muffin Tin: Essential for shaping the wonton cups. A standard 12-cup muffin tin works perfectly.
  • Mixing Bowl: Any medium-sized bowl will do for combining the filling.
  • Spoon: Use a regular spoon for filling the cups, or a small cookie scoop for precision.
  • Brush or Cooking Spray: For greasing the muffin tin, either a pastry brush or cooking spray will suffice.

Variations

  • Spicy Kick: Add a teaspoon of sriracha or your favorite hot sauce to the cream cheese mixture for a fiery twist.
  • Herb Infusion: Mix in fresh herbs like basil or cilantro for a burst of flavor and freshness.
  • Meat Lover’s Delight: Incorporate cooked and crumbled bacon or sausage into the filling for a savory upgrade.
  • Vegetable Medley: Add finely chopped bell peppers, spinach, or mushrooms to the cream cheese mixture for extra nutrition.
  • Gluten-Free Option: Use gluten-free wonton wrappers to make this dish suitable for those with dietary restrictions.

Serving Suggestions

  • Pair with a sweet chili sauce for a delightful dipping experience.
  • Serve alongside a fresh garden salad for a balanced meal.
  • Complement with a chilled white wine or sparkling water for a refreshing drink.
  • Garnish with extra green onions or sesame seeds for a pop of color.

FAQs about Baked Cream Cheese Wonton Cups

Can I make Baked Cream Cheese Wonton Cups ahead of time?

Absolutely! You can prepare the wonton cups and filling in advance. Just assemble them and store in the fridge for a few hours before baking. This makes them a fantastic option for parties!

How do I store leftovers?

Store any leftover Baked Cream Cheese Wonton Cups in an airtight container in the fridge for up to three days. Reheat them in the oven for a few minutes to regain that crispy texture.

Can I freeze these wonton cups?

Yes, you can freeze the assembled cups before baking. Just place them on a baking sheet, freeze until solid, then transfer to a freezer bag. Bake from frozen, adding a few extra minutes to the cooking time.

What can I serve with Baked Cream Cheese Wonton Cups?

These cups pair wonderfully with sweet chili sauce, soy sauce, or even a tangy ranch dip. They also make a great addition to a charcuterie board!

Are there any dietary modifications I can make?

Definitely! You can substitute Greek yogurt for sour cream for a healthier option. For a gluten-free version, just use gluten-free wonton wrappers. The possibilities are endless!

Final Thoughts

Baked Cream Cheese Wonton Cups are more than just an appetizer; they’re a celebration of flavors and textures that can elevate any gathering. The joy of watching friends and family savor each crispy bite is truly rewarding. Whether you’re enjoying them during a casual weeknight dinner or serving them at a festive party, these little cups are bound to create lasting memories. Plus, their versatility means you can adapt them to suit any palate. So, roll up your sleeves, get creative, and let these delightful wonton cups bring a smile to your table!

Ranis

Baked Cream Cheese Wonton Cups: A Must-Try Recipe!

Baked Cream Cheese Wonton Cups are a delicious and easy appetizer made with creamy filling and crispy wonton wrappers.
Prep Time 15 minutes
Cook Time 15 minutes
Total Time 30 minutes
Servings: 12 servings
Course: Appetizer
Cuisine: Asian Fusion
Calories: 120

Ingredients
  

  • 8 ounces cream cheese softened
  • 1/2 cup sour cream
  • 1/4 cup green onions chopped
  • 1/2 teaspoon garlic powder
  • 1/2 teaspoon onion powder
  • 1/4 teaspoon salt
  • 1/4 teaspoon black pepper
  • 24 wonton wrappers
  • 1 tablespoon olive oil
  • Cooking spray

Method
 

  1. Preheat the oven to 375°F.
  2. In a mixing bowl, combine the softened cream cheese, sour cream, green onions, garlic powder, onion powder, salt, and black pepper. Mix until smooth and well combined.
  3. Lightly brush a muffin tin with olive oil or spray with cooking spray.
  4. Press one wonton wrapper into each muffin cup, allowing the edges to hang over the sides.
  5. Spoon about 1 tablespoon of the cream cheese mixture into each wonton cup.
  6. Bake in the preheated oven for 12-15 minutes, or until the wonton edges are golden brown and crispy.
  7. Remove from the oven and let cool for a few minutes before serving.

Nutrition

Serving: 1cupCalories: 120kcalCarbohydrates: 4gProtein: 3gFat: 10gSaturated Fat: 5gPolyunsaturated Fat: 3gCholesterol: 30mgSodium: 200mgSugar: 1g

Notes

  • For a spicy kick, add a teaspoon of sriracha or your favorite hot sauce to the cream cheese mixture.
  • To make it a bit healthier, substitute Greek yogurt for sour cream.

Tried this recipe?

Let us know how it was!

Blueberry Cottage Cheese Breakfast Bake: A Delightful Start!

Introduction to Blueberry Cottage Cheese Breakfast Bake

There’s something magical about waking up to the aroma of a warm breakfast bake wafting through the house. The Blueberry Cottage Cheese Breakfast Bake is not just a dish; it’s a hug in a pan. Perfect for those busy mornings or lazy weekends, this recipe combines the sweetness of blueberries with the creamy goodness of cottage cheese. It’s nutritious, satisfying, and incredibly easy to whip up. Whether you’re feeding a family or just treating yourself, this breakfast bake is sure to brighten your day and keep you fueled for whatever lies ahead.

Why You’ll Love This Blueberry Cottage Cheese Breakfast Bake

This Blueberry Cottage Cheese Breakfast Bake is a game-changer for your morning routine. It’s quick to prepare, taking just 10 minutes of your time, and then it bakes while you sip your coffee. The delightful combination of flavors makes it a treat for your taste buds, while the wholesome ingredients ensure you start your day on a healthy note. Plus, it’s versatile enough to please even the pickiest eaters!

Ingredients for Blueberry Cottage Cheese Breakfast Bake

Gathering the right ingredients is the first step to creating this delightful Blueberry Cottage Cheese Breakfast Bake. Here’s what you’ll need:

  • Blueberries: Fresh or frozen, these little gems add natural sweetness and a burst of flavor.
  • Cottage Cheese: The star of the show! It brings creaminess and protein, making your breakfast both satisfying and nutritious.
  • Rolled Oats: They provide a hearty base, giving the bake a lovely texture and helping to keep you full.
  • Milk: Use your favorite type—dairy or non-dairy—to create a smooth batter.
  • Honey or Maple Syrup: A touch of sweetness to balance the tartness of the blueberries. Choose based on your preference!
  • Eggs: They act as a binder, helping everything come together beautifully.
  • Vanilla Extract: A splash of this adds warmth and depth to the flavor profile.
  • Baking Powder: This is your leavening agent, ensuring the bake rises to perfection.
  • Cinnamon: A sprinkle of this spice brings a cozy aroma and enhances the overall taste.
  • Salt: Just a pinch to elevate all the flavors.
  • Chopped Nuts (optional): For added crunch and healthy fats, toss in some walnuts or almonds if you like.

For exact measurements, check the bottom of the article where you can find everything listed for easy printing. Feel free to mix and match ingredients based on what you have on hand or your dietary preferences!

How to Make Blueberry Cottage Cheese Breakfast Bake

Creating this Blueberry Cottage Cheese Breakfast Bake is a breeze! Follow these simple steps, and you’ll have a delicious breakfast ready in no time. Let’s dive in!

Step 1: Preheat the Oven

First things first, preheat your oven to 350°F (175°C). This ensures your bake cooks evenly. While the oven warms up, lightly grease an 8×8-inch baking dish. A little oil or cooking spray will do the trick!

Step 2: Prepare the Wet Ingredients

In a large mixing bowl, combine the cottage cheese, milk, honey (or maple syrup), eggs, and vanilla extract. Mix well until smooth. This creamy base is what makes the bake so delightful. Don’t rush; take your time to blend it all together!

Step 3: Mix the Dry Ingredients

In another bowl, whisk together the rolled oats, baking powder, cinnamon, and salt. This step is crucial for ensuring your baked oatmeal rises perfectly. The cinnamon will add a warm aroma that fills your kitchen!

Step 4: Combine Wet and Dry Ingredients

Now, gradually add the dry ingredients to the wet mixture. Stir gently until just combined. You want to avoid overmixing, as that can make your bake dense. A few lumps are perfectly fine!

Step 5: Add Blueberries and Nuts

Gently fold in the blueberries and nuts (if using) until evenly distributed. This is where the magic happens! Those juicy blueberries will burst with flavor as they bake, creating a delightful contrast with the creamy base.

Step 6: Bake the Mixture

Pour the mixture into the prepared baking dish and spread it evenly. Bake in the preheated oven for 30-35 minutes. You’ll know it’s done when the top is golden brown and a toothpick inserted in the center comes out clean. The anticipation will be worth it!

Step 7: Cool and Serve

Once baked, allow it to cool for a few minutes before slicing into squares. This helps the bake set up nicely. Serve warm, and enjoy the delightful flavors of your Blueberry Cottage Cheese Breakfast Bake!

Tips for Success

  • Use fresh blueberries for the best flavor, but frozen works just as well.
  • For a creamier texture, opt for full-fat cottage cheese.
  • Don’t skip the resting time after baking; it helps the squares hold their shape.
  • Experiment with spices like nutmeg for a unique twist.
  • Store leftovers in an airtight container for up to three days.

Equipment Needed

  • 8×8-inch baking dish: A square dish is ideal, but a round one works too!
  • Mixing bowls: Use any size you have; just make sure they’re big enough for mixing.
  • Whisk: A fork can substitute if you don’t have one.
  • Measuring cups and spoons: Essential for accuracy, but eyeballing can work in a pinch!

Variations

  • Fruit Swap: Try using raspberries, diced apples, or even peaches for a different flavor profile.
  • Nut-Free Option: Omit the nuts or replace them with seeds like sunflower or pumpkin for added crunch without the allergens.
  • Vegan Version: Substitute eggs with flaxseed meal mixed with water and use plant-based milk and dairy-free yogurt instead of cottage cheese.
  • Spice It Up: Add a pinch of nutmeg or ginger for an extra layer of warmth and flavor.
  • Chocolate Lovers: Fold in some dark chocolate chips for a decadent twist that pairs beautifully with the blueberries.

Serving Suggestions

  • Pair your Blueberry Cottage Cheese Breakfast Bake with a dollop of Greek yogurt for extra creaminess.
  • Serve alongside crispy bacon or turkey sausage for a savory contrast.
  • Enjoy with a hot cup of coffee or a refreshing glass of orange juice.
  • Garnish with fresh mint leaves for a pop of color and flavor.

FAQs about Blueberry Cottage Cheese Breakfast Bake

Can I use frozen blueberries in this recipe?

Absolutely! Frozen blueberries work just as well as fresh ones. They may release a bit more juice, but that just adds to the flavor of your Blueberry Cottage Cheese Breakfast Bake.

How do I store leftovers?

Store any leftovers in an airtight container in the fridge for up to three days. Just reheat in the microwave for a quick breakfast treat!

Can I make this bake ahead of time?

Yes! You can prepare the mixture the night before and store it in the fridge. Just pour it into the baking dish and pop it in the oven in the morning for a fresh breakfast.

Is this recipe suitable for meal prep?

Definitely! This baked oatmeal is perfect for meal prep. You can cut it into squares and grab a piece on your way out the door for a nutritious breakfast.

What can I substitute for cottage cheese?

If you’re not a fan of cottage cheese, you can use Greek yogurt or a dairy-free yogurt alternative. Just keep in mind that the texture and flavor will vary slightly.

Final Thoughts

Creating the Blueberry Cottage Cheese Breakfast Bake is more than just making a meal; it’s about embracing the joy of cooking and sharing. Each bite is a delightful blend of flavors and textures that can brighten even the busiest mornings. The ease of preparation means you can enjoy a wholesome breakfast without the fuss. Plus, it’s a fantastic way to sneak in some nutrition while satisfying your sweet tooth. Whether you’re enjoying it solo or with loved ones, this bake is sure to become a cherished part of your breakfast routine. Happy baking!

Ranis

Blueberry Cottage Cheese Breakfast Bake: A Delightful Start!

A delicious and nutritious breakfast bake featuring blueberries and cottage cheese, perfect for a delightful start to your day.
Prep Time 10 minutes
Servings: 6 servings
Course: Breakfast
Cuisine: American
Calories: 180

Ingredients
  

  • 2 cups fresh or frozen blueberries
  • 1 cup cottage cheese
  • 1 cup rolled oats
  • 1/2 cup milk
  • 1/4 cup honey or maple syrup
  • 2 large eggs
  • 1 teaspoon vanilla extract
  • 1 teaspoon baking powder
  • 1/2 teaspoon cinnamon
  • 1/4 teaspoon salt
  • 1/4 cup chopped nuts optional

Method
 

  1. Preheat your oven to 350°F (175°C) and lightly grease an 8x8-inch baking dish.
  2. In a large mixing bowl, combine the cottage cheese, milk, honey (or maple syrup), eggs, and vanilla extract. Mix well until smooth.
  3. In another bowl, whisk together the rolled oats, baking powder, cinnamon, and salt.
  4. Gradually add the dry ingredients to the wet mixture, stirring until just combined.
  5. Gently fold in the blueberries and nuts (if using) until evenly distributed.
  6. Pour the mixture into the prepared baking dish and spread it evenly.
  7. Bake in the preheated oven for 30-35 minutes, or until the top is golden brown and a toothpick inserted in the center comes out clean.
  8. Allow to cool for a few minutes before slicing into squares and serving.

Nutrition

Serving: 1squareCalories: 180kcalCarbohydrates: 22gProtein: 10gFat: 5gSaturated Fat: 2gPolyunsaturated Fat: 3gCholesterol: 70mgSodium: 150mgFiber: 3gSugar: 10g

Notes

  • For a creamier texture, use full-fat cottage cheese.
  • You can substitute the blueberries with other fruits like raspberries or diced apples for a different flavor.
  • For added sweetness, sprinkle a bit of brown sugar on top before baking.

Tried this recipe?

Let us know how it was!

French Onion Baked Chicken: A Savory Delight Awaits!

Introduction to French Onion Baked Chicken

There’s something magical about the aroma of caramelized onions wafting through the kitchen. It takes me back to family dinners where laughter mingled with the scent of savory dishes. Today, I’m excited to share my take on a classic: French Onion Baked Chicken. This dish is not just a meal; it’s a warm hug on a plate. Perfect for busy weeknights or impressing guests, it combines tender chicken with rich flavors and gooey cheese. Trust me, this recipe will quickly become a favorite in your home, bringing comfort and joy to your dinner table.

Why You’ll Love This French Onion Baked Chicken

This French Onion Baked Chicken is a game-changer for your dinner routine. It’s incredibly easy to whip up, making it perfect for those hectic evenings when time is short. The rich, savory flavors will have your taste buds dancing, while the gooey cheese adds a delightful touch. Plus, it’s a one-pan wonder, which means less cleanup for you. Who wouldn’t love that?

Ingredients for French Onion Baked Chicken

Gathering the right ingredients is the first step to culinary success. For this French Onion Baked Chicken, you’ll need a few key players that come together to create a symphony of flavors.

  • Boneless, skinless chicken breasts: The star of the show! They’re tender and soak up all the delicious flavors.
  • Large onion: Thinly sliced, this will caramelize beautifully, adding sweetness and depth to the dish.
  • Olive oil: A staple in any kitchen, it helps in caramelizing the onions and adds a rich flavor.
  • Salt and black pepper: Essential seasonings that enhance the natural flavors of the chicken and onions.
  • Garlic powder: A sprinkle of this adds a savory kick that complements the other ingredients.
  • Dried thyme: This herb brings an earthy aroma, reminiscent of classic French cuisine.
  • Beef broth: It infuses moisture and a robust flavor, making the chicken juicy and tender.
  • Shredded Swiss cheese: Melts beautifully, creating a gooey topping that’s hard to resist.
  • Grated Parmesan cheese: Adds a salty, nutty flavor that elevates the dish.
  • Fresh parsley: A pop of color and freshness, perfect for garnishing your masterpiece.

For those looking to mix things up, consider marinating the chicken in olive oil, garlic, and herbs for a few hours before cooking. You can also swap the Swiss cheese for Gruyère or mozzarella if you prefer a different taste. Exact quantities for each ingredient can be found at the bottom of the article, ready for printing!

How to Make French Onion Baked Chicken

Now that you have your ingredients ready, let’s dive into the steps for making this delicious French Onion Baked Chicken. Each step is simple, yet crucial for achieving that perfect blend of flavors. Follow along, and you’ll have a mouthwatering dish in no time!

Step 1: Preheat the Oven

Start by preheating your oven to 375°F (190°C). This step is essential because it ensures that your chicken cooks evenly. A hot oven helps seal in the juices, keeping the chicken tender and moist. Trust me, you don’t want to skip this part!

Step 2: Caramelize the Onions

In a large skillet, heat the olive oil over medium heat. Add the thinly sliced onions and let them cook, stirring occasionally. Aim for about 15-20 minutes until they turn golden brown and caramelized. This process brings out their natural sweetness, adding depth to your dish. If they start to stick, just add a splash of beef broth to loosen them up.

Step 3: Season the Chicken

While the onions are caramelizing, it’s time to season the chicken breasts. Sprinkle salt, black pepper, garlic powder, and dried thyme evenly over both sides. This seasoning is key to enhancing the chicken’s flavor. Don’t be shy—make sure every inch is covered!

Step 4: Assemble the Dish

Now, let’s put it all together! Place the seasoned chicken breasts in a baking dish. Pour the beef broth over them, which will keep the chicken juicy. Next, layer the caramelized onions on top, followed by a generous sprinkle of Swiss and Parmesan cheese. This cheesy topping is what makes this dish truly irresistible!

Step 5: Bake the Chicken

Cover the baking dish with aluminum foil and pop it in the preheated oven. Bake for 25 minutes, then remove the foil and bake for an additional 15-20 minutes. Keep an eye on it! The chicken is done when it reaches an internal temperature of 165°F (75°C) and the cheese is bubbly and golden.

Step 6: Rest and Garnish

Once out of the oven, let the dish rest for about 5 minutes. This resting period allows the juices to redistribute, making each bite more flavorful. Before serving, garnish with freshly chopped parsley for a pop of color and freshness. Your French Onion Baked Chicken is now ready to impress!

Tips for Success

  • Always preheat your oven to ensure even cooking.
  • For perfectly caramelized onions, stir occasionally and be patient; good things take time!
  • Don’t skip seasoning the chicken; it’s crucial for flavor.
  • Use a meat thermometer to check for doneness—165°F (75°C) is the magic number.
  • Let the dish rest before serving to enhance the flavors.

Equipment Needed

  • Large skillet: Essential for caramelizing onions. A non-stick pan works well too.
  • Baking dish: A glass or ceramic dish is perfect for this recipe.
  • Aluminum foil: Helps retain moisture while baking.
  • Meat thermometer: Ensures your chicken is cooked to perfection.
  • Cutting board and knife: For slicing onions and prepping chicken.

Variations

  • Herb-Infused Chicken: Add fresh herbs like rosemary or basil to the seasoning mix for an aromatic twist.
  • Vegetarian Option: Substitute chicken with portobello mushrooms or eggplant for a hearty, meatless version.
  • Spicy Kick: Incorporate a pinch of red pepper flakes or a dash of hot sauce to the beef broth for some heat.
  • Cheese Swap: Experiment with different cheeses like Gouda or cheddar for a unique flavor profile.
  • Low-Sodium Version: Use low-sodium beef broth and reduce the salt to make it heart-healthier.

Serving Suggestions

  • Side Salad: A crisp green salad with a light vinaigrette complements the richness of the chicken.
  • Roasted Vegetables: Serve with seasonal roasted veggies for a colorful and nutritious addition.
  • Wine Pairing: A glass of Chardonnay or a light red wine enhances the meal beautifully.
  • Presentation: Serve on a rustic wooden board for a charming, homey feel.

FAQs about French Onion Baked Chicken

Can I use chicken thighs instead of breasts?

Absolutely! Chicken thighs will add even more flavor and tenderness to your French Onion Baked Chicken. Just adjust the cooking time slightly, as thighs may take a bit longer to cook through.

What can I serve with French Onion Baked Chicken?

This dish pairs wonderfully with a side salad, roasted vegetables, or even creamy mashed potatoes. The rich flavors of the chicken complement lighter sides beautifully.

Can I make this dish ahead of time?

Yes! You can prepare the chicken and onions in advance, then store them in the fridge. When you’re ready to eat, just assemble and bake. It’s a great time-saver for busy nights!

How do I store leftovers?

Store any leftovers in an airtight container in the fridge for up to three days. Reheat in the oven or microwave until warmed through. The flavors will still be delicious!

Can I freeze French Onion Baked Chicken?

Yes, you can freeze it! Just make sure to let it cool completely before transferring it to a freezer-safe container. It can be frozen for up to three months. Thaw in the fridge before reheating.

Final Thoughts

Cooking French Onion Baked Chicken is more than just preparing a meal; it’s about creating memories. The rich aroma fills your kitchen, inviting everyone to gather around the table. Each bite is a delightful blend of tender chicken, sweet caramelized onions, and gooey cheese that warms the soul. Whether it’s a cozy weeknight dinner or a special occasion, this dish brings comfort and joy to your dining experience. I hope you enjoy making it as much as I do, and that it becomes a cherished recipe in your home, just like it has in mine.

Ranis

French Onion Baked Chicken: A Savory Delight Awaits!

A savory and delicious French Onion Baked Chicken recipe that combines tender chicken breasts with caramelized onions and melted cheese.
Prep Time 10 minutes
Total Time 55 minutes
Servings: 4 servings
Course: Main Dish
Cuisine: French
Calories: 350

Ingredients
  

  • 4 boneless skinless chicken breasts (about 1.5 pounds)
  • 1 large onion thinly sliced
  • 2 tablespoons olive oil
  • 1 teaspoon salt
  • 1/2 teaspoon black pepper
  • 1 teaspoon garlic powder
  • 1 teaspoon dried thyme
  • 1 cup beef broth
  • 1 cup shredded Swiss cheese
  • 1/2 cup grated Parmesan cheese
  • Fresh parsley chopped (for garnish)

Method
 

  1. Preheat your oven to 375°F (190°C).
  2. In a large skillet, heat the olive oil over medium heat. Add the sliced onions and cook, stirring occasionally, for about 15-20 minutes until they are caramelized and golden brown.
  3. Season the chicken breasts with salt, pepper, garlic powder, and thyme. Place them in a baking dish.
  4. Pour the beef broth over the chicken breasts. Top each chicken breast with the caramelized onions, then sprinkle the Swiss cheese and Parmesan cheese evenly over the top.
  5. Cover the baking dish with aluminum foil and bake in the preheated oven for 25 minutes.
  6. Remove the foil and bake for an additional 15-20 minutes, or until the chicken is cooked through and the cheese is bubbly and golden.
  7. Let the dish rest for 5 minutes before serving. Garnish with fresh parsley.

Nutrition

Serving: 1chicken breast with toppingsCalories: 350kcalCarbohydrates: 4gProtein: 40gFat: 18gSaturated Fat: 7gPolyunsaturated Fat: 9gCholesterol: 100mgSodium: 800mgSugar: 2g

Notes

  • For added flavor, consider marinating the chicken in a mixture of olive oil, garlic, and herbs for a few hours before cooking.
  • You can substitute the Swiss cheese with Gruyère or mozzarella for a different taste.

Tried this recipe?

Let us know how it was!

Cream Cheese Banana Bread: Discover the Best Recipe!

Introduction to Cream Cheese Banana Bread

There’s something magical about the aroma of freshly baked bread wafting through the house. It takes me back to my childhood, where weekends meant cozy mornings filled with warm treats. This Cream Cheese Banana Bread is a delightful twist on a classic favorite, combining the rich flavors of ripe bananas and creamy goodness. Whether you’re looking for a quick solution for a busy day or a dish to impress your loved ones, this recipe is your ticket to comfort. Trust me, once you take a bite, you’ll understand why this bread is a must-try!

Why You’ll Love This Cream Cheese Banana Bread

This Cream Cheese Banana Bread is not just a treat; it’s a game-changer in the kitchen. It’s incredibly easy to whip up, making it perfect for those busy mornings or lazy afternoons. The combination of moist banana and rich cream cheese creates a flavor explosion that’s hard to resist. Plus, it’s versatile enough to enjoy as breakfast, a snack, or even dessert. You’ll find yourself reaching for seconds—trust me!

Ingredients for Cream Cheese Banana Bread

Gathering the right ingredients is the first step to creating this delicious Cream Cheese Banana Bread. Here’s what you’ll need:

  • Ripe Bananas: The star of the show! Look for bananas with plenty of brown spots for maximum sweetness and flavor.
  • Cream Cheese: This adds a rich, creamy texture that elevates the bread to a whole new level.
  • Unsalted Butter: Softened butter helps create a moist crumb. Unsalted allows you to control the saltiness.
  • Granulated Sugar: For sweetness and a lovely golden crust.
  • Brown Sugar: Adds depth and a hint of caramel flavor, making the bread even more irresistible.
  • Large Eggs: They bind everything together and contribute to the bread’s fluffiness.
  • Vanilla Extract: A splash of vanilla enhances the overall flavor profile, making it more aromatic.
  • Baking Soda: This is your leavening agent, helping the bread rise beautifully.
  • Baking Powder: Works alongside baking soda for extra lift, ensuring a light texture.
  • Salt: Just a pinch enhances all the flavors and balances the sweetness.
  • All-Purpose Flour: The base of the bread, providing structure and body.
  • Chopped Walnuts or Pecans (optional): For a delightful crunch and nutty flavor. Feel free to skip if you prefer a smoother texture.

For those looking to mix things up, consider adding chocolate chips for a sweet twist or substituting half of the all-purpose flour with whole wheat flour for a healthier option. Exact measurements for these ingredients can be found at the bottom of the article, ready for printing!

How to Make Cream Cheese Banana Bread

Now that you have all your ingredients ready, let’s dive into the fun part—making this Cream Cheese Banana Bread! Follow these simple steps, and you’ll have a delicious loaf in no time.

Step 1: Preheat the Oven

First things first, preheat your oven to 350°F (175°C). This ensures that your bread bakes evenly. While the oven warms up, prepare your loaf pan by greasing it or lining it with parchment paper. This will make it easier to remove the bread later.

Step 2: Cream the Mixture

In a large mixing bowl, combine the softened butter, cream cheese, granulated sugar, and brown sugar. Use a hand mixer or a sturdy whisk to cream these ingredients together until the mixture is smooth and fluffy. This step is crucial for achieving that light texture in your Cream Cheese Banana Bread.

Step 3: Add Wet Ingredients

Next, add the mashed bananas, eggs, and vanilla extract to your creamed mixture. Beat everything together until well combined. The bananas should blend in nicely, creating a lovely, aromatic batter that’s hard to resist!

Step 4: Combine Dry Ingredients

In another bowl, whisk together the all-purpose flour, baking soda, baking powder, and salt. This step helps to evenly distribute the leavening agents, ensuring your bread rises perfectly. It’s a small but important detail!

Step 5: Mix Wet and Dry Ingredients

Now, gradually add the dry ingredients to the wet mixture. Stir gently until just combined. Be careful not to overmix; a few lumps are perfectly fine. Overmixing can lead to a dense loaf, and we want that moist, fluffy texture!

Step 6: Fold in Nuts

If you’re feeling adventurous, fold in the chopped walnuts or pecans at this stage. They add a delightful crunch and nutty flavor to your Cream Cheese Banana Bread. If you prefer a smoother texture, feel free to skip this step.

Step 7: Bake the Bread

Pour the batter into your prepared loaf pan and smooth the top with a spatula. Bake in the preheated oven for 60-70 minutes. To check for doneness, insert a toothpick into the center. If it comes out clean, your bread is ready!

Step 8: Cool the Bread

Once baked, allow the bread to cool in the pan for about 10 minutes. This makes it easier to remove. After that, transfer it to a wire rack to cool completely. The aroma will be irresistible, and you’ll be counting down the minutes until you can slice into it!

Tips for Success

  • Use overripe bananas for maximum sweetness and flavor.
  • Don’t skip the creaming step; it’s key for a light texture.
  • Measure flour accurately; spoon it into the measuring cup instead of scooping.
  • Let the bread cool completely before slicing for cleaner cuts.
  • Store leftovers in an airtight container to keep it moist.

Equipment Needed

  • Loaf Pan: A standard 9×5-inch loaf pan works best. If you don’t have one, a round cake pan can do in a pinch.
  • Mixing Bowls: Use at least two—one for wet ingredients and one for dry.
  • Hand Mixer or Whisk: A hand mixer makes it easier, but a whisk will work just fine.
  • Measuring Cups and Spoons: Essential for accurate ingredient measurements.
  • Spatula: Great for scraping down the sides of the bowl and smoothing the batter.

Variations

  • Chocolate Chip Cream Cheese Banana Bread: Add 1/2 cup of chocolate chips to the batter for a sweet twist that chocolate lovers will adore.
  • Nut-Free Option: Skip the nuts entirely for a smooth texture, perfect for those with nut allergies.
  • Whole Wheat Flour: Substitute half of the all-purpose flour with whole wheat flour for a healthier, heartier loaf.
  • Spiced Banana Bread: Add a teaspoon of cinnamon or nutmeg to the dry ingredients for a warm, spiced flavor.
  • Fruit Add-Ins: Toss in some dried cranberries or blueberries for a fruity burst in every bite.

Serving Suggestions

  • Fresh Fruit: Serve with a side of sliced strawberries or a fruit salad for a refreshing contrast.
  • Coffee or Tea: Pair with a hot cup of coffee or herbal tea for a cozy afternoon treat.
  • Toast with Butter: Enjoy warm slices with a pat of butter for extra richness.
  • Presentation: Dust with powdered sugar or drizzle with a simple glaze for a beautiful finish.

FAQs about Cream Cheese Banana Bread

As you embark on your baking adventure with this Cream Cheese Banana Bread, you might have a few questions. Here are some common queries that can help you along the way:

Can I use frozen bananas for this recipe?

Absolutely! Frozen bananas work great in this Cream Cheese Banana Bread. Just thaw them first and mash them up. They’ll add the same delicious flavor and moisture.

How do I store leftover banana bread?

To keep your Cream Cheese Banana Bread fresh, store it in an airtight container at room temperature for up to three days. For longer storage, wrap it tightly in plastic wrap and freeze it for up to three months.

Can I make this recipe without cream cheese?

While cream cheese adds a unique richness, you can substitute it with Greek yogurt or sour cream. This will still yield a moist banana bread, though the flavor will differ slightly.

What can I add to enhance the flavor?

Consider adding spices like cinnamon or nutmeg for warmth. You can also mix in chocolate chips, dried fruits, or even a splash of rum for an adult twist!

Is this banana bread suitable for a gluten-free diet?

To make a gluten-free version of this Cream Cheese Banana Bread, substitute the all-purpose flour with a gluten-free flour blend. Just ensure it contains a binding agent like xanthan gum for the best texture.

Final Thoughts

Baking this Cream Cheese Banana Bread is more than just a culinary task; it’s an experience that fills your home with warmth and nostalgia. Each slice offers a delightful balance of flavors, making it perfect for any occasion. Whether you’re enjoying it with your morning coffee or sharing it with friends, this bread brings smiles and comfort. Plus, the joy of creating something delicious from simple ingredients is truly rewarding. So, roll up your sleeves, embrace the process, and let this recipe become a cherished part of your kitchen adventures. You won’t regret it!

Ranis

Cream Cheese Banana Bread: Discover the Best Recipe!

A delicious and moist cream cheese banana bread that combines the rich flavors of ripe bananas and cream cheese for a delightful treat.
Prep Time 15 minutes
Cook Time 1 hour 10 minutes
Total Time 1 hour 25 minutes
Servings: 8 servings
Course: Dessert
Cuisine: American
Calories: 250

Ingredients
  

  • 3 ripe bananas mashed
  • 8 ounces cream cheese softened
  • 1/2 cup unsalted butter softened
  • 1 cup granulated sugar
  • 1/2 cup brown sugar packed
  • 3 large eggs
  • 1 teaspoon vanilla extract
  • 1 teaspoon baking soda
  • 1/2 teaspoon baking powder
  • 1/2 teaspoon salt
  • 2 cups all-purpose flour
  • 1/2 cup chopped walnuts or pecans optional

Method
 

  1. Preheat your oven to 350°F (175°C). Grease a 9x5-inch loaf pan or line it with parchment paper.
  2. In a large mixing bowl, cream together the softened butter, cream cheese, granulated sugar, and brown sugar until smooth and fluffy.
  3. Add the mashed bananas, eggs, and vanilla extract to the mixture. Beat until well combined.
  4. In another bowl, whisk together the flour, baking soda, baking powder, and salt.
  5. Gradually add the dry ingredients to the wet mixture, stirring until just combined. Be careful not to overmix.
  6. If using, fold in the chopped walnuts or pecans.
  7. Pour the batter into the prepared loaf pan and smooth the top.
  8. Bake for 60-70 minutes, or until a toothpick inserted into the center comes out clean.
  9. Allow the bread to cool in the pan for about 10 minutes before transferring it to a wire rack to cool completely.

Nutrition

Serving: 1sliceCalories: 250kcalCarbohydrates: 35gProtein: 4gFat: 10gSaturated Fat: 5gPolyunsaturated Fat: 3gCholesterol: 70mgSodium: 200mgFiber: 1gSugar: 20g

Notes

  • For a chocolate twist, add 1/2 cup of chocolate chips to the batter before baking.
  • Substitute half of the all-purpose flour with whole wheat flour for a healthier option.

Tried this recipe?

Let us know how it was!

Cottage Cheese Cloud Bread: Discover the Fluffiest Recipe!

Introduction to Cottage Cheese Cloud Bread

There’s something magical about discovering a recipe that feels like a warm hug on a busy day. Cottage Cheese Cloud Bread is just that—a light, fluffy alternative to traditional bread that won’t weigh you down. Whether you’re looking to impress your loved ones or simply want a quick solution for a low-carb meal, this recipe has you covered. With just a handful of ingredients, you can whip up a delightful bread that’s perfect for sandwiches, snacks, or even breakfast. Trust me, once you try it, you’ll wonder how you ever lived without it!

Why You’ll Love This Cottage Cheese Cloud Bread

This Cottage Cheese Cloud Bread is a game-changer for anyone seeking a quick, delicious, and low-carb option. It’s incredibly easy to make, taking just 40 minutes from start to finish. The taste? Light and airy, with a hint of savory goodness if you choose to add spices. Plus, it’s versatile enough to pair with your favorite toppings or stand alone as a satisfying snack. You’ll find yourself reaching for this recipe time and again!

Ingredients for Cottage Cheese Cloud Bread

Gathering the right ingredients is the first step to creating your Cottage Cheese Cloud Bread masterpiece. Here’s what you’ll need:

  • Cottage Cheese: The star of the show! It provides the fluffy texture and protein boost.
  • Eggs: You’ll use both the yolks and whites. The yolks add richness, while the whipped whites create that cloud-like fluffiness.
  • Cream of Tartar: This little gem stabilizes the egg whites, helping them hold their shape when whipped.
  • Garlic Powder (optional): A sprinkle of this adds a savory kick. Perfect for those who love a bit of flavor.
  • Onion Powder (optional): Another optional ingredient that enhances the taste, giving your bread a delightful depth.
  • Salt: Just a pinch to elevate all the flavors. It’s a must for any bread recipe.
  • Black Pepper: A dash of this adds a subtle warmth and complexity to the bread.

For those looking to sweeten the deal, consider adding a teaspoon of vanilla extract and a tablespoon of sweetener for a sweeter version. Feel free to experiment with different seasonings like Italian herbs or smoked paprika to customize the flavor of your cloud bread. Exact measurements are available at the bottom of the article for easy printing!

How to Make Cottage Cheese Cloud Bread

Now that you have your ingredients ready, let’s dive into the fun part—making your Cottage Cheese Cloud Bread! This process is straightforward and rewarding. Follow these steps, and you’ll be on your way to enjoying a fluffy, low-carb delight.

Step 1: Preheat the Oven

First things first, preheat your oven to 300°F (150°C). This is crucial for achieving that perfect golden-brown finish. While the oven warms up, line a baking sheet with parchment paper. This will prevent sticking and make cleanup a breeze.

Step 2: Mix Cottage Cheese and Egg Yolks

In a mixing bowl, combine the cottage cheese and egg yolks. Use a fork or whisk to mix until smooth. This mixture is the base of your cloud bread, so make sure it’s well blended. The creaminess of the cottage cheese will give your bread its signature texture.

Step 3: Beat Egg Whites

In a separate bowl, beat the egg whites with the cream of tartar until stiff peaks form. This step is where the magic happens! The cream of tartar helps stabilize the egg whites, ensuring they hold their shape. When you lift the whisk, the peaks should stand tall and proud.

Step 4: Fold Egg Whites into Mixture

Now, gently fold the egg whites into the cottage cheese mixture. Use a spatula and be careful not to deflate the egg whites. This folding technique is key to keeping your cloud bread light and airy. It’s like cradling a fluffy cloud—gentle and loving!

Step 5: Add Seasonings

Next, add the garlic powder, onion powder, salt, and pepper to the mixture. Fold gently until just combined. These seasonings will elevate the flavor of your cloud bread, making it even more delicious. Feel free to adjust the spices to suit your taste!

Step 6: Spoon onto Baking Sheet

Using a spoon, scoop the mixture onto the prepared baking sheet, forming 6 to 8 mounds. Don’t worry about making them perfect; they’ll spread a bit while baking. Just make sure to leave some space between each mound for even cooking.

Step 7: Bake

Now it’s time to bake! Place the baking sheet in the preheated oven and bake for 25-30 minutes. Keep an eye on them; you want them to be golden brown and set. The aroma wafting through your kitchen will be irresistible!

Step 8: Cool and Serve

Once baked, allow the cloud bread to cool for a few minutes before serving. This will help them firm up a bit. Enjoy them warm, or let them cool completely for later. Either way, you’re in for a treat!

Tips for Success

  • Use fresh cottage cheese for the best flavor and texture.
  • Ensure your egg whites are at room temperature for easier whipping.
  • Don’t rush the folding process; be gentle to maintain that airy texture.
  • Experiment with different spices to find your favorite flavor combination.
  • Store leftovers in an airtight container for up to three days.

Equipment Needed

  • Mixing Bowls: A set of two bowls—one for the cottage cheese mixture and one for the egg whites.
  • Whisk or Electric Mixer: For beating the egg whites to stiff peaks; a hand whisk works too, but it takes more effort.
  • Spatula: Essential for gently folding the mixtures together.
  • Baking Sheet: A standard sheet lined with parchment paper for easy cleanup.

Variations

  • Herbed Cloud Bread: Add a teaspoon of dried Italian herbs or fresh chopped herbs like rosemary or thyme for a fragrant twist.
  • Spicy Kick: Mix in a pinch of cayenne pepper or red pepper flakes for a zesty flavor that packs a punch.
  • Cheesy Delight: Fold in shredded cheese, such as cheddar or mozzarella, for a cheesy version that’s perfect for snacking.
  • Sweet Cloud Bread: For a dessert option, add a teaspoon of vanilla extract and a tablespoon of sweetener to the mixture.
  • Nutty Flavor: Incorporate ground flaxseed or chia seeds for added nutrition and a nutty taste.

Serving Suggestions

  • Pair your Cottage Cheese Cloud Bread with avocado slices and a sprinkle of salt for a fresh, creamy treat.
  • Serve with a side of homemade salsa or guacamole for a delightful dip.
  • Top with your favorite nut butter and banana slices for a quick breakfast.
  • Enjoy with a warm bowl of soup for a comforting meal.
  • For a fun presentation, stack them with layers of smoked salmon and cream cheese.

FAQs about Cottage Cheese Cloud Bread

As you embark on your journey to make Cottage Cheese Cloud Bread, you might have a few questions. Here are some common queries that can help you along the way:

Can I use low-fat cottage cheese?

Absolutely! Low-fat cottage cheese works just as well in this recipe. It will still provide that fluffy texture while keeping the calories in check. Just make sure it’s fresh for the best results.

How do I store leftover cloud bread?

Store any leftover Cottage Cheese Cloud Bread in an airtight container in the fridge. They’ll stay fresh for up to three days. You can also freeze them for longer storage—just make sure to separate layers with parchment paper.

Can I make this recipe dairy-free?

While traditional Cottage Cheese Cloud Bread relies on cottage cheese, you can experiment with dairy-free alternatives. Look for plant-based cream cheese or a thick nut-based yogurt. The texture may vary, but it’s worth a try!

What can I serve with Cottage Cheese Cloud Bread?

This fluffy bread pairs wonderfully with a variety of toppings. Try it with avocado, smoked salmon, or even a simple spread of butter. It’s versatile enough to complement both savory and sweet dishes!

Is this recipe suitable for a keto diet?

Yes! Cottage Cheese Cloud Bread is a fantastic low-carb option, making it perfect for those following a keto diet. With minimal carbs and a good amount of protein, it’s a satisfying choice for any meal.

Final Thoughts

Creating Cottage Cheese Cloud Bread is more than just a cooking task; it’s an experience that brings joy and satisfaction. The light, airy texture and delightful flavor make it a versatile addition to any meal. Whether you’re enjoying it fresh out of the oven or experimenting with toppings, each bite is a reminder of how simple ingredients can transform into something extraordinary. This recipe not only caters to your taste buds but also aligns with a low-carb lifestyle. So, roll up your sleeves, embrace the fluffiness, and let this cloud bread elevate your culinary adventures!

Ranis

Cottage Cheese Cloud Bread: Discover the Fluffiest Recipe!

Cottage Cheese Cloud Bread is a light and fluffy bread alternative made primarily with cottage cheese and eggs, perfect for low-carb diets.
Prep Time 10 minutes
Cook Time 30 minutes
Total Time 40 minutes
Servings: 6 servings
Course: Bread
Cuisine: American
Calories: 70

Ingredients
  

  • 1 cup cottage cheese
  • 3 large eggs
  • 1/4 teaspoon cream of tartar
  • 1/2 teaspoon garlic powder optional
  • 1/2 teaspoon onion powder optional
  • 1/4 teaspoon salt
  • 1/4 teaspoon black pepper

Method
 

  1. Preheat your oven to 300°F (150°C) and line a baking sheet with parchment paper.
  2. In a mixing bowl, combine the cottage cheese and egg yolks. Mix until smooth.
  3. In a separate bowl, beat the egg whites with the cream of tartar until stiff peaks form.
  4. Gently fold the egg whites into the cottage cheese mixture, being careful not to deflate the egg whites.
  5. Add garlic powder, onion powder, salt, and pepper to the mixture, folding gently until just combined.
  6. Spoon the mixture onto the prepared baking sheet, forming 6 to 8 mounds.
  7. Bake for 25-30 minutes, or until the cloud bread is golden brown and set.
  8. Allow to cool for a few minutes before serving.

Nutrition

Serving: 1pieceCalories: 70kcalCarbohydrates: 1gProtein: 6gFat: 4gSaturated Fat: 2gPolyunsaturated Fat: 2gCholesterol: 150mgSodium: 200mgSugar: 1g

Notes

  • For a sweeter version, add a teaspoon of vanilla extract and a tablespoon of sweetener to the cottage cheese mixture.
  • Use different seasonings like Italian herbs or smoked paprika to customize the flavor of your cloud bread.

Tried this recipe?

Let us know how it was!

Garlic Parmesan Chicken Meatloaves: A Flavorful Delight!

Introduction to Garlic Parmesan Chicken Meatloaves

When I think of comfort food, Garlic Parmesan Chicken Meatloaves always come to mind.

This dish is not just a meal; it’s a warm hug on a plate.

Perfect for busy weeknights or a cozy family dinner, these meatloaves are a quick solution that doesn’t skimp on flavor.

With the savory notes of garlic and the rich taste of Parmesan, they’re bound to impress your loved ones.

Plus, they’re healthy, making them a win-win for everyone at the table.

Let’s dive into this delightful recipe that’s sure to become a staple in your kitchen!

Why You’ll Love This Garlic Parmesan Chicken Meatloaves

These Garlic Parmesan Chicken Meatloaves are a game-changer for any home cook.

They come together in just 45 minutes, making them perfect for those hectic evenings.

The combination of juicy ground chicken and zesty Parmesan creates a flavor explosion that will have everyone asking for seconds.

Plus, they’re a healthier alternative to traditional meatloaf, so you can indulge without the guilt.

What’s not to love?

Ingredients for Garlic Parmesan Chicken Meatloaves

Creating these Garlic Parmesan Chicken Meatloaves is a breeze, especially with the right ingredients.

Here’s what you’ll need to whip up this delicious dish:

  • Ground chicken: The star of the show! It’s lean and packed with protein, making it a healthier choice.
  • Breadcrumbs: These add texture and help bind the meatloaf together. You can use regular or whole wheat for a healthier option.
  • Grated Parmesan cheese: This brings a rich, nutty flavor that elevates the dish. Freshly grated is best, but pre-grated works too.
  • Chopped fresh parsley: A pop of color and freshness! It brightens up the flavors and adds a touch of herbaceous goodness.
  • Garlic: Minced garlic is essential for that aromatic kick. It’s what makes the meatloaf truly irresistible.
  • Large egg: This acts as a binder, helping to hold everything together while adding moisture.
  • Salt and black pepper: Simple seasonings that enhance the overall flavor. Adjust to your taste!
  • Dried oregano: A classic herb that adds a warm, earthy note. It pairs beautifully with the chicken.
  • Onion powder: For a subtle sweetness and depth of flavor without the crunch of fresh onions.
  • Milk: A splash of milk keeps the meatloaf moist and tender. You can substitute with almond milk for a dairy-free option.
  • Marinara sauce: This is the finishing touch! Spoon it over the top for added flavor and a beautiful presentation.

For exact measurements, check the bottom of the article where you can find everything listed for easy printing.

With these ingredients, you’re well on your way to creating a meal that’s not only delicious but also healthy!

How to Make Garlic Parmesan Chicken Meatloaves

Making Garlic Parmesan Chicken Meatloaves is a straightforward process that anyone can master.

Follow these simple steps, and you’ll have a delicious meal ready in no time!

Step 1: Preheat the Oven

Start by preheating your oven to 375°F.

This step is crucial because it ensures even cooking.

A hot oven helps the meatloaves rise and develop a nice crust, locking in all those savory flavors.

Step 2: Mix the Ingredients

In a large mixing bowl, combine the ground chicken, breadcrumbs, Parmesan cheese, parsley, garlic, egg, salt, pepper, oregano, onion powder, and milk.

Use your hands or a spoon to mix everything together gently.

Be careful not to overmix; you want a tender meatloaf, not a dense one.

Just mix until everything is combined, and you’re good to go!

Step 3: Shape the Meatloaves

Now it’s time to shape the mixture into loaves.

Divide the mixture into four equal portions.

Wet your hands slightly to prevent sticking, then form each portion into a loaf shape.

Place them on a baking sheet lined with parchment paper for easy cleanup.

Step 4: Add Marinara Sauce

Spoon marinara sauce generously over the top of each meatloaf.

This not only adds flavor but also keeps the meatloaf moist while baking.

Plus, it gives a beautiful, appetizing finish that’s hard to resist!

Step 5: Bake the Meatloaves

Pop the baking sheet into your preheated oven and bake for 25-30 minutes.

To check for doneness, use a meat thermometer; the internal temperature should reach 165°F.

This ensures your Garlic Parmesan Chicken Meatloaves are cooked through and safe to eat.

Step 6: Rest Before Serving

Once they’re done baking, let the meatloaves rest for about 5 minutes.

This resting period allows the juices to redistribute, making each bite tender and flavorful.

Trust me, it’s worth the wait!

Tips for Success

  • Use fresh ingredients for the best flavor, especially the garlic and parsley.
  • Don’t overmix the meat mixture; it can lead to a tough texture.
  • Experiment with different herbs like basil or thyme for a unique twist.
  • For extra moisture, consider adding a splash of Worcestershire sauce.
  • Let the meatloaves rest before slicing to keep them juicy.

Equipment Needed

  • Mixing bowl: A large bowl for combining ingredients. A sturdy pot can work in a pinch.
  • Baking sheet: A rimmed baking sheet for catching drips. A casserole dish is a good alternative.
  • Parchment paper: For easy cleanup. Aluminum foil can be used if you don’t have parchment.
  • Meat thermometer: To check doneness. If you don’t have one, cut into the meatloaf to check for pinkness.

Variations of Garlic Parmesan Chicken Meatloaves

  • Spinach and Feta: Add chopped fresh spinach and crumbled feta cheese for a Mediterranean twist that’s both flavorful and nutritious.
  • Sun-Dried Tomato: Mix in chopped sun-dried tomatoes for a burst of tangy flavor that complements the garlic and Parmesan beautifully.
  • Cheesy Stuffed Meatloaf: Create a pocket in the center of each meatloaf and fill it with mozzarella cheese for a gooey surprise.
  • Gluten-Free Option: Substitute breadcrumbs with gluten-free alternatives like almond flour or crushed gluten-free crackers.
  • Spicy Kick: Add a pinch of red pepper flakes or diced jalapeños to the mixture for a spicy version that packs a punch.

Serving Suggestions for Garlic Parmesan Chicken Meatloaves

  • Side Salad: Pair with a fresh garden salad drizzled with balsamic vinaigrette for a light contrast.
  • Roasted Vegetables: Serve alongside roasted broccoli or asparagus for a colorful plate.
  • Mashed Potatoes: Creamy mashed potatoes make a comforting side that complements the meatloaf perfectly.
  • Wine Pairing: A glass of Pinot Noir enhances the flavors beautifully.
  • Presentation: Garnish with extra parsley for a pop of color and freshness.

FAQs about Garlic Parmesan Chicken Meatloaves

Can I use ground turkey instead of chicken?

Absolutely! Ground turkey is a great substitute for chicken in this recipe. It offers a similar texture and flavor while being just as healthy. Just keep an eye on the cooking time, as turkey may require a few extra minutes.

How do I store leftovers?

Leftover Garlic Parmesan Chicken Meatloaves can be stored in an airtight container in the refrigerator for up to three days. They also freeze well, so you can enjoy them later. Just make sure to wrap them tightly before freezing!

Can I make these meatloaves ahead of time?

Yes! You can prepare the meat mixture a day in advance and store it in the fridge. When you’re ready to cook, simply shape the loaves and bake them. This makes for a quick dinner solution on busy nights!

What can I serve with Garlic Parmesan Chicken Meatloaves?

These meatloaves pair wonderfully with a variety of sides. Consider serving them with roasted vegetables, a fresh salad, or creamy mashed potatoes for a complete meal that everyone will love.

Are Garlic Parmesan Chicken Meatloaves kid-friendly?

Definitely! The flavors are mild yet delicious, making them appealing to kids. Plus, the fun shape of meatloaves can make dinner more exciting for little ones. You might even get them to help shape the loaves!

Final Thoughts

Cooking Garlic Parmesan Chicken Meatloaves is more than just preparing a meal; it’s about creating memories around the dinner table.

The aroma of garlic wafting through the kitchen brings a sense of warmth and comfort that’s hard to beat.

Each bite is a delightful blend of flavors, making it a dish everyone can enjoy.

Whether you’re feeding a hungry family or impressing friends, these meatloaves are sure to be a hit.

So roll up your sleeves, gather your ingredients, and let the joy of cooking fill your home with love and laughter!

Ranis

Garlic Parmesan Chicken Meatloaves: A Flavorful Delight!

Garlic Parmesan Chicken Meatloaves are a flavorful and healthy dish made with ground chicken, Parmesan cheese, and a blend of herbs and spices.
Prep Time 15 minutes
Cook Time 30 minutes
Total Time 45 minutes
Servings: 4 servings
Course: Main Dish
Cuisine: American
Calories: 290

Ingredients
  

  • 1 pound ground chicken
  • 1 cup breadcrumbs
  • 1/2 cup grated Parmesan cheese
  • 1/4 cup chopped fresh parsley
  • 2 cloves garlic minced
  • 1 large egg
  • 1 teaspoon salt
  • 1/2 teaspoon black pepper
  • 1/2 teaspoon dried oregano
  • 1/2 teaspoon onion powder
  • 1/4 cup milk
  • 1/4 cup marinara sauce for topping

Method
 

  1. Preheat the oven to 375°F.
  2. In a large mixing bowl, combine ground chicken, breadcrumbs, Parmesan cheese, parsley, garlic, egg, salt, pepper, oregano, onion powder, and milk. Mix until just combined, being careful not to overmix.
  3. Divide the mixture into 4 equal portions and shape each portion into a loaf. Place the loaves on a baking sheet lined with parchment paper.
  4. Spoon marinara sauce over the top of each meatloaf.
  5. Bake in the preheated oven for 25-30 minutes, or until the internal temperature reaches 165°F.
  6. Let the meatloaves rest for 5 minutes before serving.

Nutrition

Serving: 1meatloafCalories: 290kcalCarbohydrates: 18gProtein: 30gFat: 12gSaturated Fat: 4gPolyunsaturated Fat: 8gCholesterol: 100mgSodium: 600mgFiber: 1gSugar: 1g

Notes

  • For added flavor, try mixing in some chopped spinach or sun-dried tomatoes into the meat mixture.
  • You can also substitute ground turkey for the chicken for a different taste.

Tried this recipe?

Let us know how it was!

Mango Orange Smoothie: A Refreshing, Creamy Delight!

Introduction to Mango Orange Smoothie

There’s something magical about a refreshing drink that can brighten your day. The Mango Orange Smoothie is just that—a creamy delight that’s perfect for busy mornings or a quick afternoon pick-me-up. I remember the first time I blended mango and orange together; the vibrant colors and sweet aroma filled my kitchen, instantly lifting my spirits. This smoothie is not only delicious but also packed with nutrients, making it a fantastic choice for anyone looking to fuel their day. Whether you’re impressing friends or simply treating yourself, this smoothie is a delightful way to enjoy a taste of the tropics.

Why You’ll Love This Mango Orange Smoothie

This Mango Orange Smoothie is a game-changer for anyone juggling a busy lifestyle. It’s quick to whip up, taking just five minutes from start to finish. The combination of sweet mango and zesty orange creates a flavor explosion that’s both refreshing and satisfying. Plus, it’s a healthy option that doesn’t skimp on taste, making it perfect for breakfast or a snack. You’ll find yourself reaching for this recipe again and again!

Ingredients for Mango Orange Smoothie

Gathering the right ingredients is key to crafting the perfect Mango Orange Smoothie. Here’s what you’ll need:

  • Frozen mango chunks: These provide the creamy base and tropical sweetness. Using frozen mango ensures a thick texture without needing ice.
  • Medium ripe banana: Bananas add natural sweetness and creaminess, making your smoothie rich and satisfying.
  • Orange juice: Freshly squeezed is best, but store-bought works too. It brings a zesty brightness that complements the mango beautifully.
  • Plain Greek yogurt: This ingredient boosts the protein content and adds a creamy texture. It’s a healthier alternative to ice cream!
  • Honey (optional): If you like your smoothies sweeter, a drizzle of honey can enhance the flavor without overpowering it.
  • Vanilla extract: Just a hint of vanilla adds depth and warmth to the overall flavor profile.
  • Ice cubes (optional): If you prefer a thicker smoothie, toss in some ice cubes. They’ll chill it perfectly without watering it down.

For those looking to sneak in some greens, consider adding a handful of spinach or kale. You won’t taste them, but they’ll boost the nutrition! If you want a different twist, swap the orange juice for coconut water for a refreshing variation.

Exact measurements for each ingredient can be found at the bottom of the article, ready for printing!

How to Make Mango Orange Smoothie

Making a Mango Orange Smoothie is as easy as pie—well, maybe easier! Follow these simple steps, and you’ll have a delicious, creamy drink in no time. Let’s dive in!

Step 1: Combine Ingredients

Start by gathering all your ingredients. In a blender, toss in the frozen mango chunks, ripe banana, orange juice, Greek yogurt, honey (if you’re using it), and vanilla extract. The order doesn’t matter much, but I like to add the liquids first. This helps everything blend smoothly. Trust me, you want a silky texture!

Step 2: Blend Until Smooth

Now, it’s time to blend! Secure the lid on your blender and blend on high until everything is smooth and creamy. This usually takes about 30 seconds. If you want a thicker smoothie, add a few ice cubes and blend again. The sound of the blender whirring is music to my ears—it means deliciousness is on the way!

Step 3: Adjust Sweetness

Once blended, take a moment to taste your smoothie. If you prefer it sweeter, feel free to add a little more honey. Blend again for a few seconds to mix it in. This is your smoothie, so make it just how you like it!

Step 4: Serve Immediately

Pour the smoothie into glasses and serve it right away. The vibrant colors will make your mouth water! You can garnish with a slice of orange or a sprig of mint for a fancy touch. Enjoy your refreshing Mango Orange Smoothie!

Tips for Success

  • Use ripe bananas for maximum sweetness and creaminess.
  • Freeze your mango chunks ahead of time for a thicker texture.
  • Experiment with different types of orange juice—blood orange adds a unique twist!
  • Don’t skip the vanilla extract; it enhances the overall flavor.
  • Blend in a handful of spinach for added nutrients without changing the taste.

Equipment Needed

  • Blender: A high-speed blender works best for a smooth texture, but a regular blender will do.
  • Measuring cups: Essential for accurate ingredient portions; you can also use a kitchen scale.
  • Spatula: Handy for scraping down the sides of the blender.

Variations

  • Tropical Twist: Add a handful of pineapple chunks for an extra burst of tropical flavor.
  • Berry Boost: Toss in a handful of frozen berries like strawberries or blueberries for a colorful and antioxidant-rich smoothie.
  • Nutty Delight: Blend in a tablespoon of almond or peanut butter for added creaminess and protein.
  • Vegan Option: Substitute Greek yogurt with a plant-based yogurt to keep it dairy-free.
  • Protein Power: Add a scoop of your favorite protein powder to make it a post-workout recovery drink.

Serving Suggestions

  • Pair your Mango Orange Smoothie with a slice of whole-grain toast topped with avocado for a balanced breakfast.
  • Serve it alongside a light salad for a refreshing lunch option.
  • Garnish with fresh mint or a slice of orange for a pop of color.
  • Enjoy with a handful of nuts for a satisfying snack.

FAQs about Mango Orange Smoothie

Can I use fresh mango instead of frozen?

Absolutely! Fresh mango will work, but you might want to add a few ice cubes to achieve that creamy, thick texture. Frozen mango chunks are convenient and help keep your smoothie cold.

Is this Mango Orange Smoothie suitable for kids?

Definitely! This smoothie is a hit with kids. It’s sweet, creamy, and packed with nutrients. Plus, you can sneak in some spinach without them noticing!

How can I make this smoothie dairy-free?

To make a dairy-free Mango Orange Smoothie, simply swap the Greek yogurt for a plant-based yogurt. Almond or coconut yogurt works great and keeps the creamy texture.

Can I prepare this smoothie in advance?

While it’s best enjoyed fresh, you can prepare the ingredients the night before. Just blend in the morning for a quick, nutritious breakfast. If you store it, give it a good shake before drinking!

What can I add for extra protein?

For a protein boost, consider adding a scoop of protein powder, a tablespoon of nut butter, or even some chia seeds. These additions will keep you full and satisfied longer!

Final Thoughts

Creating a Mango Orange Smoothie is more than just blending ingredients; it’s about capturing a moment of joy in a glass. Each sip transports me to sun-soaked beaches, where the vibrant flavors dance on my palate. This smoothie is a reminder that healthy choices can be delicious and satisfying. Whether you’re starting your day or taking a refreshing break, this creamy delight is sure to brighten your mood. I hope you enjoy making it as much as I do, and that it brings a little taste of paradise into your everyday routine!

Ranis

Mango Orange Smoothie: A Refreshing, Creamy Delight!

A refreshing and creamy mango orange smoothie that is perfect for a healthy breakfast or snack.
Prep Time 5 minutes
Total Time 5 minutes
Servings: 2 servings
Course: Beverage
Cuisine: American
Calories: 210

Ingredients
  

  • 1 cup frozen mango chunks
  • 1 medium ripe banana
  • 1 cup orange juice
  • 1/2 cup plain Greek yogurt
  • 1 tablespoon honey optional
  • 1/2 teaspoon vanilla extract
  • Ice cubes optional, for a thicker texture

Method
 

  1. In a blender, combine the frozen mango chunks, banana, orange juice, Greek yogurt, honey (if using), and vanilla extract.
  2. Blend on high until smooth and creamy. If you prefer a thicker smoothie, add a few ice cubes and blend again.
  3. Taste the smoothie and adjust sweetness if needed by adding more honey.
  4. Pour the smoothie into glasses and serve immediately.

Nutrition

Serving: 1servingCalories: 210kcalCarbohydrates: 32gProtein: 7gFat: 1gCholesterol: 5mgSodium: 50mgFiber: 3gSugar: 30g

Notes

  • For a tropical twist, add a handful of spinach or kale for extra nutrients without altering the flavor significantly.
  • You can also substitute the orange juice with coconut water for a refreshing variation.

Tried this recipe?

Let us know how it was!

Cottage Cheese and Ground Beef Sweet Potato Casserole: A Delicious, Hearty Recipe!

Introduction to Cottage Cheese and Ground Beef Sweet Potato Casserole

There’s something incredibly comforting about a warm casserole, especially when it’s packed with flavors and nutrients. My Cottage Cheese and Ground Beef Sweet Potato Casserole is just that—a hearty dish that brings together the richness of ground beef, the creaminess of cottage cheese, and the natural sweetness of sweet potatoes. It’s perfect for those busy weeknights when you want to whip up something delicious without spending hours in the kitchen. Plus, it’s a fantastic way to impress your loved ones with minimal effort. Trust me, this casserole will quickly become a family favorite!

Why You’ll Love This Cottage Cheese and Ground Beef Sweet Potato Casserole

This Cottage Cheese and Ground Beef Sweet Potato Casserole is a game-changer for busy cooks. It’s not just easy to make; it’s also a one-dish wonder that minimizes cleanup. The combination of savory beef and sweet potatoes creates a flavor explosion that’s both satisfying and nutritious. Plus, it’s versatile enough to adapt to your family’s tastes, making it a go-to recipe for any occasion. You’ll love how quickly it comes together!

Ingredients for Cottage Cheese and Ground Beef Sweet Potato Casserole

Gathering the right ingredients is the first step to creating this delicious Cottage Cheese and Ground Beef Sweet Potato Casserole. Here’s what you’ll need:

  • Sweet Potatoes: These vibrant tubers add natural sweetness and a creamy texture. They’re also packed with vitamins and fiber.
  • Ground Beef: A hearty protein that brings richness to the dish. You can swap it for ground turkey or chicken for a lighter option.
  • Onion: Diced onions provide a savory base, enhancing the overall flavor profile of the casserole.
  • Garlic: Minced garlic adds a fragrant kick that elevates the dish. Fresh is best, but you can use garlic powder in a pinch.
  • Salt and Black Pepper: Essential seasonings that bring out the flavors of the other ingredients. Adjust to your taste.
  • Paprika: This spice adds a subtle smokiness and a pop of color. Feel free to use smoked paprika for an extra depth of flavor.
  • Cottage Cheese: The star of the show! It adds creaminess and protein, making the casserole hearty and satisfying.
  • Shredded Cheddar Cheese: A melty topping that creates a delicious crust. You can use any cheese you prefer, like mozzarella or Monterey Jack.
  • Milk: This helps to blend the cottage cheese smoothly, creating a creamy consistency. Use whole or low-fat milk based on your preference.
  • Olive Oil: Used for sautéing the onions and garlic, it adds healthy fats and flavor. You can substitute with butter if you like.
  • Dried Oregano and Thyme: These herbs add an aromatic touch. Fresh herbs can be used if you have them on hand.
  • Fresh Parsley: Optional for garnish, it adds a pop of color and freshness to the finished dish.

For exact measurements, check the bottom of the article where you can find everything listed for easy printing!

How to Make Cottage Cheese and Ground Beef Sweet Potato Casserole

Now that you have all your ingredients ready, let’s dive into the steps to create this delicious Cottage Cheese and Ground Beef Sweet Potato Casserole. Each step is straightforward, ensuring you can whip this up without a hitch. Let’s get cooking!

Step 1: Preheat and Prepare

First things first, preheat your oven to 375°F (190°C). This ensures your casserole bakes evenly. While that’s heating up, grab a 9×13-inch baking dish and grease it with cooking spray or a drizzle of olive oil. This will help prevent sticking and make cleanup a breeze.

Step 2: Cook the Sweet Potatoes

Next, bring a large pot of water to a boil. Toss in your diced sweet potatoes and let them cook for about 10-15 minutes, or until they’re tender enough to pierce with a fork. Once they’re done, drain the water and set the sweet potatoes aside. This step is crucial for achieving that creamy texture in your casserole.

Step 3: Sauté the Aromatics

In a large skillet, heat a tablespoon of olive oil over medium heat. Add the diced onion and sauté for about 3-4 minutes until it becomes translucent. Then, throw in the minced garlic and cook for another minute. The aroma will be heavenly, and this fragrant base is key to enhancing the flavors of your casserole.

Step 4: Brown the Ground Beef

Now, it’s time to add the ground beef to the skillet. Break it apart with a spoon and cook until it’s browned, which should take about 5-7 minutes. Season it with salt, black pepper, paprika, oregano, and thyme. Stir occasionally to ensure even cooking. This step adds a savory depth that pairs beautifully with the sweet potatoes.

Step 5: Combine Ingredients

In a large mixing bowl, combine the cooked sweet potatoes, cottage cheese, and milk. Mix everything until it’s well blended. This creamy mixture will be the heart of your casserole, providing both flavor and texture. Don’t be shy—get in there and mix it up!

Step 6: Layer the Casserole

Now, let’s assemble the casserole. Start by layering half of the sweet potato mixture at the bottom of your prepared baking dish. Next, add the cooked ground beef mixture on top. Finally, spread the remaining sweet potato mixture over the beef. To finish it off, sprinkle the shredded cheddar cheese evenly across the top. This will create a deliciously gooey crust when baked.

Step 7: Bake to Perfection

Cover the baking dish with aluminum foil and pop it in the preheated oven. Bake for 25 minutes. After that, remove the foil and bake for an additional 10-15 minutes, or until the cheese is bubbly and golden. The anticipation will be worth it as the aroma fills your kitchen!

Tips for Success

  • Prep your ingredients ahead of time to streamline the cooking process.
  • Don’t skip the seasoning; it’s key to enhancing the flavors of the beef and sweet potatoes.
  • For a creamier texture, use full-fat cottage cheese.
  • Let the casserole cool for a few minutes before serving; it helps the layers set.
  • Feel free to experiment with spices to suit your taste!

Equipment Needed

  • 9×13-inch Baking Dish: Essential for layering your casserole. A similar-sized dish will work too.
  • Large Pot: For boiling sweet potatoes. A deep skillet can also do the job.
  • Skillet: Needed for sautéing. Any non-stick skillet will suffice.
  • Mixing Bowl: For combining ingredients. A large bowl or even a pot can work.
  • Cooking Spoon: For stirring. A spatula or wooden spoon is perfect.

Variations

  • Vegetarian Option: Substitute the ground beef with lentils or black beans for a hearty, meatless version.
  • Spicy Kick: Add diced jalapeños or a sprinkle of cayenne pepper to the beef mixture for some heat.
  • Extra Veggies: Toss in chopped spinach, bell peppers, or zucchini to boost the nutritional value and flavor.
  • Cheese Lovers: Mix in different cheeses like feta or pepper jack for a unique twist on the classic flavor.
  • Herb Infusion: Experiment with fresh herbs like basil or cilantro for a fresh, aromatic touch.

Serving Suggestions

  • Side Salad: Pair the casserole with a fresh green salad drizzled with vinaigrette for a refreshing contrast.
  • Garlic Bread: Serve with warm garlic bread to soak up the delicious flavors.
  • Drink Pairing: A chilled glass of iced tea or a light red wine complements the dish beautifully.
  • Presentation: Garnish with fresh parsley for a pop of color and added freshness.

FAQs about Cottage Cheese and Ground Beef Sweet Potato Casserole

Can I make this casserole ahead of time?
Absolutely! You can prepare the casserole a day in advance. Just assemble it, cover it tightly, and store it in the fridge. When you’re ready to bake, add a few extra minutes to the cooking time.

Is this casserole gluten-free?
Yes, this Cottage Cheese and Ground Beef Sweet Potato Casserole is naturally gluten-free. Just ensure that any additional ingredients you use, like spices or sauces, are also gluten-free.

Can I freeze leftovers?
Definitely! This casserole freezes well. Just let it cool completely, then wrap it tightly in plastic wrap and aluminum foil. It can be stored in the freezer for up to three months. When ready to eat, thaw it in the fridge overnight and reheat in the oven.

What can I substitute for cottage cheese?
If you’re not a fan of cottage cheese, you can use ricotta cheese or Greek yogurt as a substitute. Both will provide a creamy texture and add protein to the dish.

How can I make this casserole spicier?
For a spicy kick, consider adding diced jalapeños or a sprinkle of red pepper flakes to the ground beef mixture. You can also use spicy cheese varieties for an extra layer of heat!

Final Thoughts

Cooking this Cottage Cheese and Ground Beef Sweet Potato Casserole is more than just preparing a meal; it’s about creating a warm, inviting experience for family and friends. The blend of flavors and textures brings comfort to the table, making it a dish that sparks joy and conversation. Whether it’s a busy weeknight or a cozy weekend gathering, this casserole is sure to impress. Plus, the ease of preparation means you can focus on what truly matters—enjoying time with your loved ones. So, roll up your sleeves and dive into this delightful recipe; you won’t regret it!

Ranis

Cottage Cheese and Ground Beef Sweet Potato Casserole: A Delicious, Hearty Recipe!

A delicious and hearty casserole made with cottage cheese, ground beef, and sweet potatoes, perfect for a comforting meal.
Prep Time 15 minutes
Cook Time 40 minutes
Total Time 55 minutes
Servings: 6 servings
Course: Casserole
Cuisine: American
Calories: 320

Ingredients
  

  • 2 medium sweet potatoes peeled and diced (about 3 cups)
  • 1 pound ground beef
  • 1 small onion diced
  • 2 cloves garlic minced
  • 1 teaspoon salt
  • 1/2 teaspoon black pepper
  • 1 teaspoon paprika
  • 1 cup cottage cheese
  • 1 cup shredded cheddar cheese
  • 1/2 cup milk
  • 1 tablespoon olive oil
  • 1/2 teaspoon dried oregano
  • 1/2 teaspoon dried thyme
  • Fresh parsley for garnish (optional)

Method
 

  1. Preheat the oven to 375°F (190°C). Grease a 9x13-inch baking dish with cooking spray or a little olive oil.
  2. In a large pot, bring water to a boil. Add the diced sweet potatoes and cook for about 10-15 minutes, or until tender. Drain and set aside.
  3. In a large skillet, heat the olive oil over medium heat. Add the diced onion and cook until translucent, about 3-4 minutes. Add the minced garlic and cook for an additional minute.
  4. Add the ground beef to the skillet and cook until browned, breaking it apart with a spoon. Season with salt, black pepper, paprika, oregano, and thyme. Cook for another 5 minutes, stirring occasionally.
  5. In a large bowl, combine the cooked sweet potatoes, cottage cheese, and milk. Mix until well combined.
  6. In the prepared baking dish, layer half of the sweet potato mixture on the bottom. Top with the cooked ground beef mixture, then add the remaining sweet potato mixture on top. Sprinkle the shredded cheddar cheese evenly over the casserole.
  7. Cover the baking dish with aluminum foil and bake for 25 minutes. Remove the foil and bake for an additional 10-15 minutes, or until the cheese is bubbly and golden.
  8. Let the casserole cool for a few minutes before serving. Garnish with fresh parsley, if desired.

Nutrition

Serving: 1servingCalories: 320kcalCarbohydrates: 22gProtein: 24gFat: 16gSaturated Fat: 7gPolyunsaturated Fat: 9gCholesterol: 70mgSodium: 500mgFiber: 3gSugar: 5g

Notes

  • For a healthier twist, substitute ground turkey or chicken for the ground beef.
  • Add your favorite vegetables, such as spinach or bell peppers, to the beef mixture for extra nutrition and flavor.

Tried this recipe?

Let us know how it was!

Creamy Hamburger Stroganoff: A Quick Dinner Delight

Introduction to Creamy Hamburger Stroganoff

When I think of comfort food, Creamy Hamburger Stroganoff always comes to mind. It’s that warm hug on a plate, perfect for those busy weeknights when you want something delicious without spending hours in the kitchen.

This dish combines ground beef, mushrooms, and a rich sour cream sauce, all served over tender egg noodles. It’s a quick solution for a hectic day or a delightful way to impress your loved ones. Trust me, once you try this recipe, it’ll become a staple in your home, bringing smiles and satisfied bellies around the dinner table.

Why You’ll Love This Creamy Hamburger Stroganoff

This Creamy Hamburger Stroganoff is a lifesaver for anyone juggling a busy schedule.

It’s not just quick to make; it’s also incredibly satisfying.

The rich flavors meld together beautifully, creating a dish that feels gourmet without the fuss.

Plus, it’s versatile enough to please even the pickiest eaters.

In just 30 minutes, you can serve up a meal that warms the heart and fills the stomach.

Ingredients for Creamy Hamburger Stroganoff

Gathering the right ingredients is the first step to creating this delightful dish.

Here’s what you’ll need:

  • Ground beef: The star of the show, providing rich flavor and protein. You can also use ground turkey or chicken for a lighter option.
  • Onion: Adds sweetness and depth. A medium onion, chopped, will do the trick.
  • Garlic: Just a couple of cloves, minced, to bring a fragrant kick to the dish.
  • Mushrooms: Sliced mushrooms add an earthy flavor and a nice texture. Fresh or canned work well.
  • Salt and black pepper: Essential seasonings to enhance all the flavors. Adjust to your taste.
  • Paprika: This spice adds warmth and a hint of smokiness, elevating the dish.
  • Worcestershire sauce: A splash of this sauce brings umami and complexity to the sauce.
  • Beef broth: The base for your sauce, adding richness. You can use low-sodium broth for a healthier option.
  • Sour cream: This is what makes the stroganoff creamy and tangy. Full-fat or light versions both work.
  • All-purpose flour: Used to thicken the sauce, creating that luscious texture.
  • Egg noodles: The perfect vehicle for your creamy sauce. They cook quickly and soak up all the flavors.
  • Olive oil: For sautéing the aromatics, adding a touch of healthy fat.
  • Fresh parsley: A sprinkle on top for color and freshness. It’s optional but highly recommended!

For exact measurements, check the bottom of the article where you can find everything listed for easy printing.

With these ingredients in hand, you’re well on your way to whipping up a comforting bowl of Creamy Hamburger Stroganoff!

How to Make Creamy Hamburger Stroganoff

Creating this Creamy Hamburger Stroganoff is a breeze.

Follow these simple steps, and you’ll have a delicious meal ready in no time.

Step 1: Sauté the Aromatics

Start by heating the olive oil in a large skillet over medium heat.

Add the chopped onion and minced garlic.

Sauté them for about 3-4 minutes until the onion turns translucent.

This step builds a flavorful base for your dish.

Step 2: Brown the Ground Beef

Next, add the ground beef to the skillet.

Break it apart with a spatula as it cooks.

You want it browned, which should take about 5-7 minutes.

If there’s excess fat, drain it off to keep the dish from being greasy.

Step 3: Add the Mushrooms and Seasonings

Now, stir in the sliced mushrooms, salt, black pepper, paprika, and Worcestershire sauce.

Cook this mixture for another 3-4 minutes until the mushrooms are tender.

The aroma will be irresistible, and your kitchen will feel like a cozy bistro.

Step 4: Create the Sauce

In a small bowl, mix the flour with a few tablespoons of beef broth to create a slurry.

Pour this slurry into the skillet along with the remaining beef broth.

Stir well to combine everything.

Bring the mixture to a simmer and let it cook for about 5 minutes.

This allows the sauce to thicken beautifully.

Step 5: Combine with Sour Cream

Reduce the heat to low and gently stir in the sour cream.

Make sure it’s well combined, but don’t let it boil after adding the sour cream.

This step is crucial for that creamy texture we all love in stroganoff.

Step 6: Cook the Egg Noodles

While the sauce is simmering, cook the egg noodles according to the package instructions.

Once they’re done, drain them and set aside.

These noodles will soak up all that delicious sauce, making every bite heavenly.

Step 7: Serve and Garnish

Now it’s time to bring it all together.

Serve the creamy hamburger stroganoff over the cooked egg noodles.

Don’t forget to garnish with chopped parsley for a pop of color and freshness.

Enjoy your meal, and watch as everyone digs in with smiles on their faces!

Tips for Success

  • Always taste as you go! Adjust seasonings to suit your palate.
  • For extra creaminess, use full-fat sour cream.
  • Don’t rush the browning of the beef; it adds depth of flavor.
  • Consider adding a splash of white wine for a gourmet touch.
  • Leftovers? This dish reheats beautifully for lunch the next day!

Equipment Needed

  • Large skillet: A non-stick skillet works great, but any large pan will do.
  • Spatula: For breaking up the ground beef and stirring.
  • Measuring cups and spoons: Essential for accuracy, but you can eyeball it if you’re confident.
  • Pot: For cooking the egg noodles; a medium-sized pot is perfect.

Variations

  • Swap the Protein: Use ground turkey or chicken for a lighter version. You can even try plant-based ground meat for a vegetarian option.
  • Add Veggies: Toss in some frozen peas, spinach, or bell peppers for added nutrition and color. They’ll blend right in with the creamy sauce.
  • Spice it Up: For a kick, add a pinch of red pepper flakes or a dash of hot sauce. It’ll elevate the flavor profile beautifully.
  • Herb Infusion: Experiment with fresh herbs like thyme or dill for a unique twist. They add freshness and complexity to the dish.
  • Cheesy Goodness: Stir in some grated Parmesan or cheddar cheese for an extra creamy and cheesy stroganoff experience.

Serving Suggestions

  • Side Salad: A crisp green salad with a tangy vinaigrette complements the richness of the stroganoff.
  • Garlic Bread: Serve with warm garlic bread for a delightful crunch and extra flavor.
  • Wine Pairing: A glass of red wine, like Merlot, enhances the meal beautifully.
  • Presentation: Serve in shallow bowls and sprinkle with extra parsley for a pop of color.

FAQs about Creamy Hamburger Stroganoff

Can I make Creamy Hamburger Stroganoff ahead of time?

Absolutely! You can prepare the stroganoff in advance and store it in the fridge for up to three days. Just reheat gently on the stove, adding a splash of beef broth if it thickens too much.

What can I substitute for sour cream?

If you’re out of sour cream, Greek yogurt works as a great substitute. It’ll give you that creamy texture with a bit of tang, just like the original recipe.

Can I freeze Creamy Hamburger Stroganoff?

Yes, you can freeze it! Just make sure to cool it completely before transferring it to an airtight container. It should last for about two months in the freezer. Thaw overnight in the fridge before reheating.

What can I serve with Creamy Hamburger Stroganoff?

This dish pairs wonderfully with a side salad or garlic bread. You can also serve it with steamed vegetables for a balanced meal.

Is this recipe suitable for picky eaters?

Definitely! The creamy sauce and familiar flavors make it a hit with even the pickiest eaters. Plus, you can customize it with their favorite veggies or proteins!

Final Thoughts

Cooking Creamy Hamburger Stroganoff is more than just preparing a meal; it’s about creating moments.

The rich, creamy sauce enveloping the tender egg noodles brings a sense of warmth and comfort that’s hard to beat.

Whether you’re sharing it with family or enjoying a quiet dinner alone, this dish has a way of making any day feel special.

With its quick prep and delightful flavors, it’s a recipe that invites you to gather around the table.

So, roll up your sleeves, embrace the joy of cooking, and let this stroganoff become a cherished part of your culinary repertoire!

Ranis

Creamy Hamburger Stroganoff: A Quick Dinner Delight

Creamy Hamburger Stroganoff is a quick and delicious dinner option that combines ground beef, mushrooms, and a rich sour cream sauce served over egg noodles.
Prep Time 10 minutes
Cook Time 20 minutes
Total Time 30 minutes
Servings: 4 servings
Course: Dinner
Cuisine: American
Calories: 450

Ingredients
  

  • 1 pound ground beef
  • 1 medium onion chopped
  • 2 cloves garlic minced
  • 1 cup mushrooms sliced
  • 1 teaspoon salt
  • 1/2 teaspoon black pepper
  • 1 teaspoon paprika
  • 1 tablespoon Worcestershire sauce
  • 1 cup beef broth
  • 1 cup sour cream
  • 2 tablespoons all-purpose flour
  • 8 ounces egg noodles
  • 2 tablespoons olive oil
  • Fresh parsley chopped (for garnish)

Method
 

  1. In a large skillet, heat the olive oil over medium heat. Add the chopped onion and minced garlic, and sauté until the onion is translucent, about 3-4 minutes.
  2. Add the ground beef to the skillet, breaking it apart with a spatula. Cook until browned, about 5-7 minutes. Drain excess fat if necessary.
  3. Stir in the sliced mushrooms, salt, black pepper, paprika, and Worcestershire sauce. Cook for another 3-4 minutes until the mushrooms are tender.
  4. In a small bowl, mix the flour with a few tablespoons of the beef broth to create a slurry. Pour this mixture into the skillet along with the remaining beef broth. Stir well to combine.
  5. Bring the mixture to a simmer and cook for about 5 minutes, allowing it to thicken.
  6. Reduce the heat to low and stir in the sour cream until well combined. Do not let it boil after adding the sour cream.
  7. Meanwhile, cook the egg noodles according to package instructions. Drain and set aside.
  8. Serve the creamy hamburger stroganoff over the cooked egg noodles and garnish with chopped parsley.

Nutrition

Serving: 1servingCalories: 450kcalCarbohydrates: 30gProtein: 25gFat: 25gSaturated Fat: 10gPolyunsaturated Fat: 15gCholesterol: 80mgSodium: 800mgFiber: 2gSugar: 3g

Notes

  • For a healthier option, substitute ground turkey or chicken for the beef.
  • Add a splash of white wine for extra flavor or toss in some frozen peas for added nutrition and color.

Tried this recipe?

Let us know how it was!