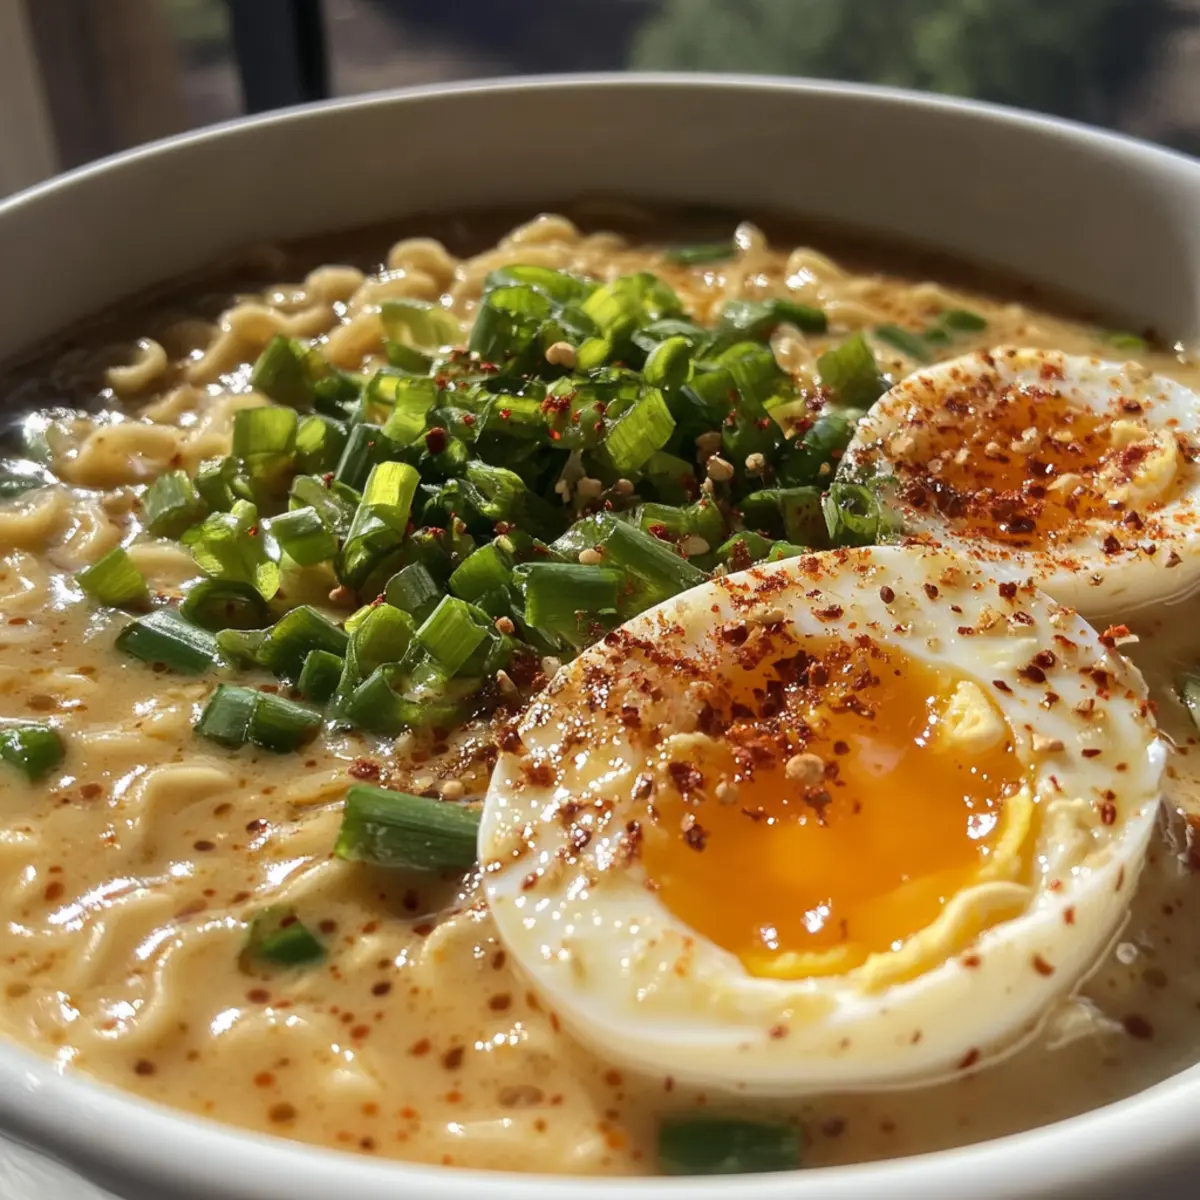
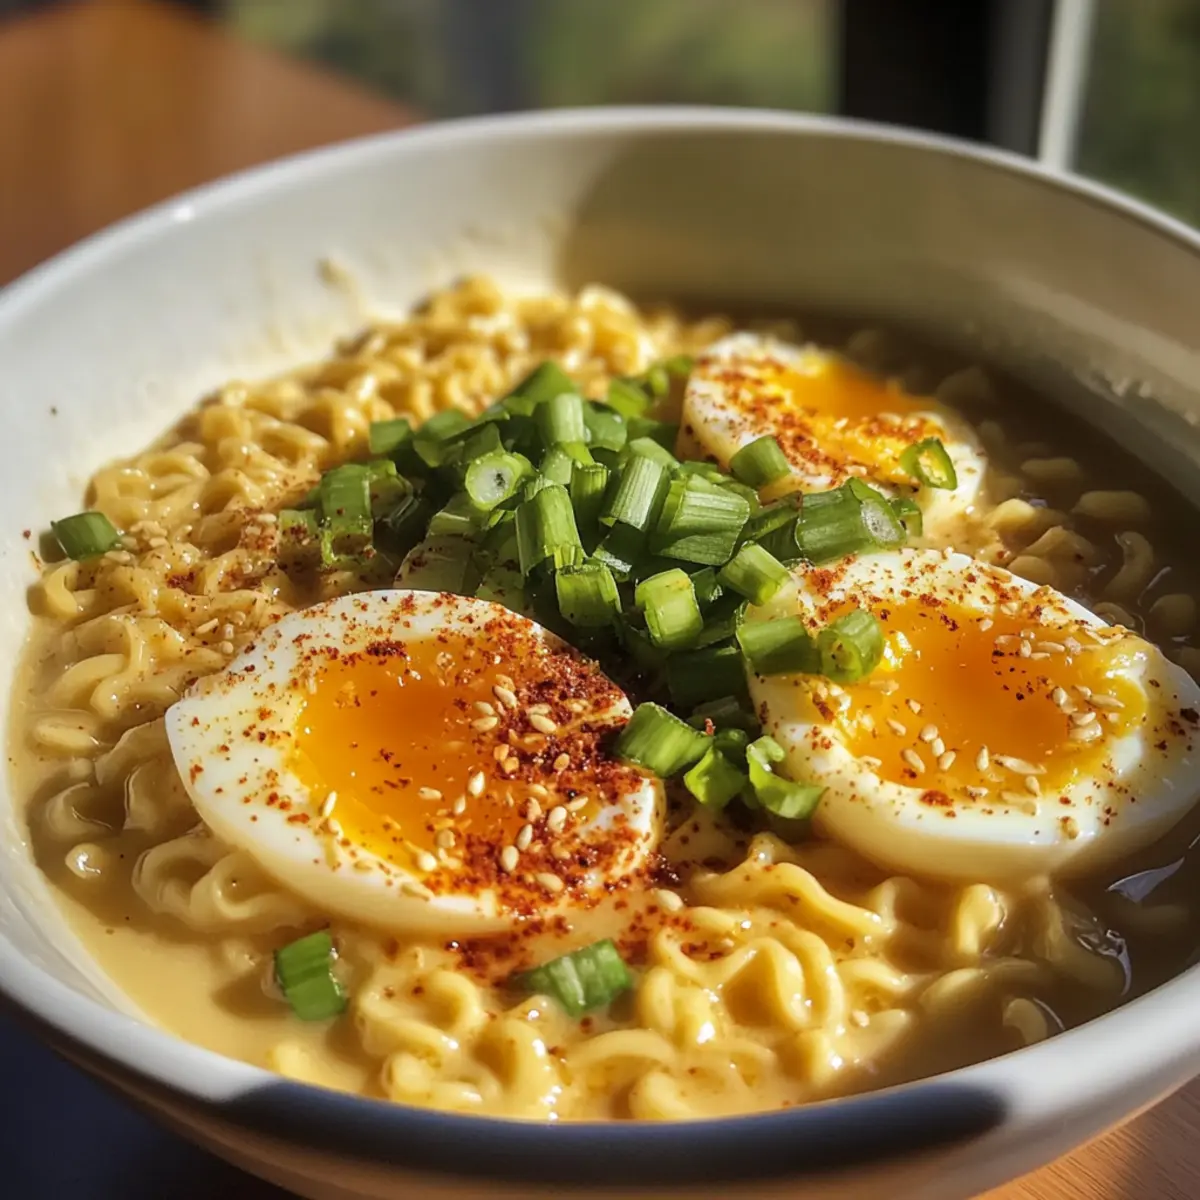
As I stirred the pot, the air filled with a warm, savory aroma that instantly transported me to a cozy corner of Japan. This 30-Minute Miso Ramen Pastina is a delightful fusion dish that combines the rich, comforting essence of Japanese ramen with the delicate charm of Italian pastina. Each spoonful is a testament to how quickly comfort food can come together without sacrificing flavor. With its quick prep time and the luxurious addition of jammy eggs on top, this recipe is sure to become a crowd-pleaser for busy weeknights or relaxed weekends. Ready to discover how to elevate your dinner game with this creamy, soulful dish? Let’s dive in!

Why choose 30-Minute Miso Ramen Pastina?
Quick and Easy: This recipe is designed to come together in just 30 minutes, making it perfect for those busy weeknights when you crave something comforting without the fuss.
Rich Umami Flavor: The combination of miso paste and savory broth creates an irresistible depth of flavor that warms your soul, making it a thrilling twist on traditional ramen.
Delicate Texture: The small acini di pepe pasta absorbs the broth beautifully, giving each serving a creamy, velvety finish that’s satisfying yet light.
Versatile Ingredients: Feel free to customize with your favorite vegetables or proteins, or simplify with substitutions listed in the recipe. If you’re looking for more unique ideas, check out our variation suggestions.
Crowd-Pleaser: Serve this dish at gatherings; its unique flavor profile and stunning appeal will impress family and friends alike, ensuring it’s a hit at the table.
Effortless Leftovers: This dish stores well! You can easily revive it with a splash of broth, ensuring that each bite remains delicious, even the next day.
30-Minute Miso Ramen Pastina Ingredients
For the Broth
• Beef Bone Broth – A rich, savory base; chicken broth can provide a lighter flavor.
• White Miso Paste – Essential for umami flavor; yellow miso is a suitable substitute.
• Mirin – Adds sweetness and acidity; rice vinegar with sugar can be used instead.
For the Pasta
• Acini di Pepe – Tiny pasta that absorbs broth effectively, creating a creamy texture; can swap with orzo or ditalini.
• Unsalted Butter – Adds richness to the broth; omit this for a dairy-free option.
For the Aromatics
• Neutral Oil – Used for sautéing aromatics; sesame oil can add extra flavor.
• Shallot – Gives subtle sweetness; you can use regular onion in a pinch.
• Fresh Ginger – Grated for warmth and zing; dried ginger works but lacks boldness.
• Garlic – Grated for a pungent kick; always use fresh for best results.
• Green Onions – Add freshness; reserve the white parts for cooking.
For the Toppings
• Ramen Eggs – Soft-boiled and marinated, perfect for a creamy topping; use regular boiled eggs for convenience.
• Salsa Macha – Provides a smoky crunch; chili crisp can also be used as an alternative.
• Bonito Flakes (optional) – For an added umami boost; fish sauce can substitute if needed.
• Gochujang – Adds spicy complexity; adjust to your heat preference.
This 30-Minute Miso Ramen Pastina will become your go-to recipe for quick and satisfying comfort food that pleases both the palate and the soul.
Step‑by‑Step Instructions for 30-Minute Miso Ramen Pastina
Step 1: Warm the Broth
Begin by pouring beef bone broth into a medium saucepan, heating over medium-high heat. Bring it to a gentle simmer, watching for small bubbles to form, which should take about 5–7 minutes. This rich, savory base is crucial for your 30-Minute Miso Ramen Pastina, so keep it warm as you prepare the other ingredients.
Step 2: Prepare the Onions
While your broth simmers, slice the green parts of the green onions for garnish and set them aside. Reserve the white parts, as you’ll sauté these later. The contrast in flavors from the fresh greens adds a delightful touch to your ramen, so keep them vibrant and colorful.
Step 3: Sauté the Aromatics
In a large skillet, heat 1-2 tablespoons of neutral oil over medium heat. Add the reserved white onion, shallot, and freshly grated ginger. Sauté for about 2 minutes until fragrant and translucent. Then, stir in the grated garlic and continue to cook for another 2 minutes, allowing the aromatic mixture to deepen in flavor.
Step 4: Toast the Pasta
Next, add the acini di pepe to the skillet, stirring frequently to coat the pasta in the aromatic oil. Toast for about 3 minutes; you’ll notice a light golden color beginning to develop. This step is key to enhancing the flavors of your 30-Minute Miso Ramen Pastina as the pasta absorbs all the delightful aromas.
Step 5: Incorporate Miso and Seasonings
After toasting, stir in the white miso paste, gochujang, and bonito flakes if using. Continue mixing until everything is well combined and fragrant. The miso will begin to break down and blend into the pasta, creating a tangy richness that will elevate your broth when it’s added.
Step 6: Cook Risotto-Style
Gradually add the heated beef broth to the skillet, one cup at a time, stirring constantly. Allow the pasta to absorb the broth, ensuring it cooks through and remains al dente, which should take about 11–14 minutes. This risotto-style cooking enhances creaminess and builds the depth of flavor in your 30-Minute Miso Ramen Pastina.
Step 7: Finish with Butter
Once the pasta is cooked, stir in the unsalted butter until melted and well incorporated. This will add a luscious richness to your dish, resulting in a silky texture. Taste and adjust seasoning, then prepare to serve your comforting 30-Minute Miso Ramen Pastina.
Step 8: Serve and Garnish
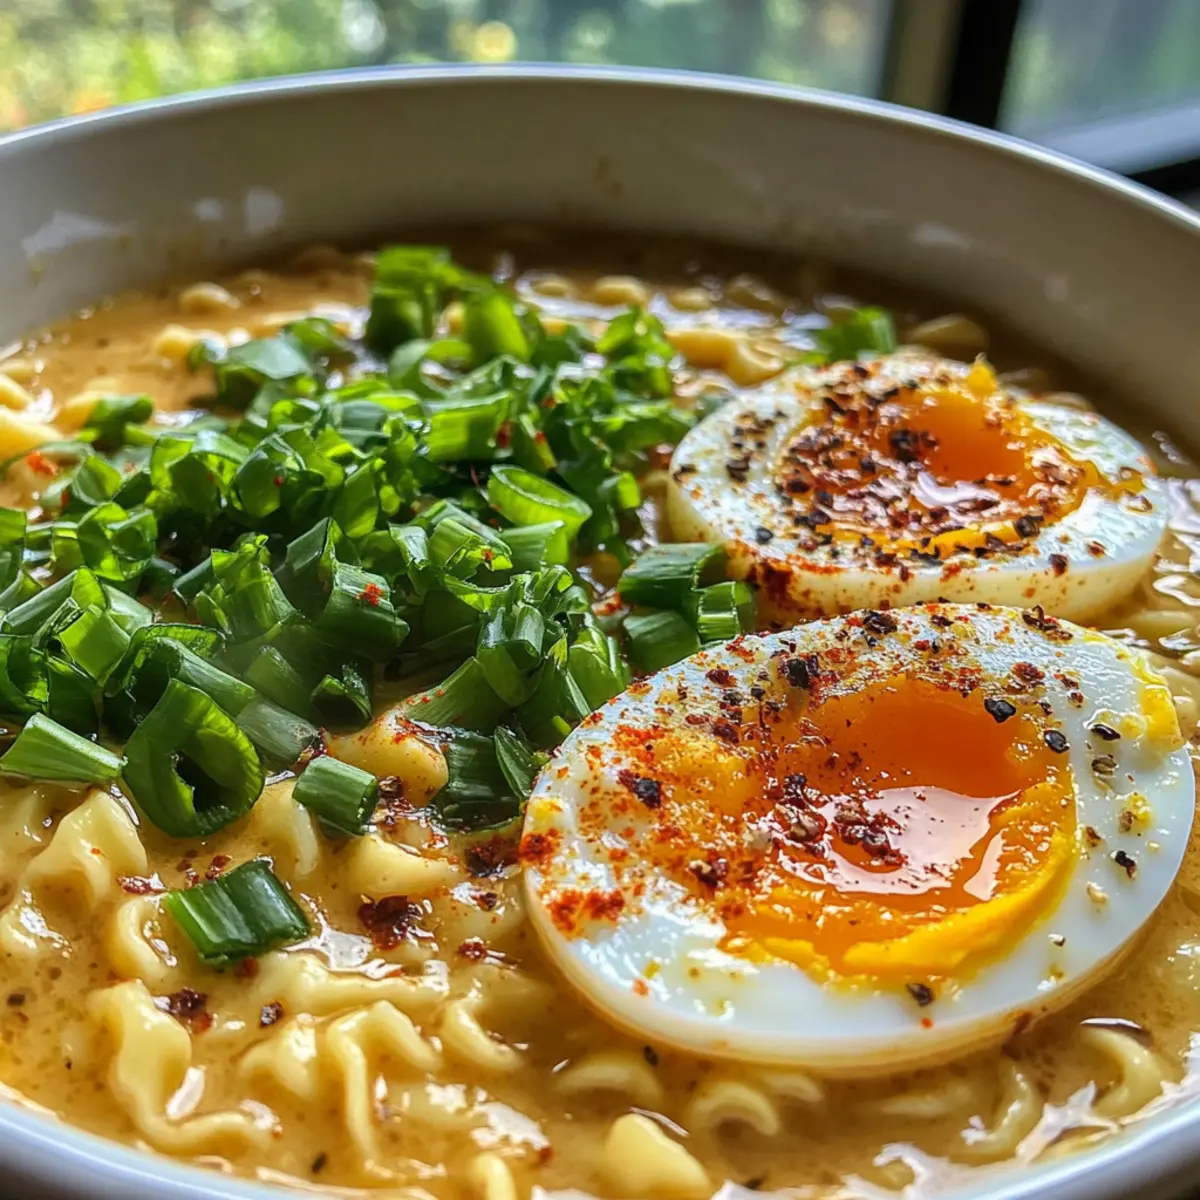
Ladle the creamy miso ramen pastina into bowls, taking care to distribute the pasta evenly. Top each serving with a soft-boiled ramen egg, a sprinkle of green onion curls, and a drizzle of salsa macha for that smoky crunch. Your meal is now ready to be enjoyed, packed with comfort and flavor!
Variations & Substitutions for 30-Minute Miso Ramen Pastina
Feel free to add your own twist to this delectable dish with these fun options that tickle the taste buds!
- Gluten-Free: Use gluten-free pasta like rice noodles or gluten-free acini di pepe to keep this dish celiac-friendly.
- Vegetable Boost: Toss in whatever veggies you have on hand, like bok choy or snap peas, to pack in extra nutrition and color.
- Creamy Vegan: Substitute miso paste with tahini and use vegetable broth and olive oil for a creamy, dairy-free delight.
- Protein Variation: Swap the ramen eggs for shredded rotisserie chicken or tofu for an easy protein add-in that’s equally comforting.
- Flavor Enhancement: Add a tablespoon of tahini or peanut butter for a luscious nutty flavor that complements the miso beautifully.
- Spicy Kick: For those who enjoy heat, throw in sliced jalapeños or a sprinkle of red pepper flakes when sautéing the aromatics.
- Noodle Shapes: Experiment with different pasta shapes like farfallini or small shells to change the texture and presentation of your ramen pastina.
- Savory Toppings: Top with seaweed strips or pickled ginger for a sophisticated touch that brightens the dish.
When you’re ready to enhance your culinary journey, don’t forget to check out our delicious recipe variations that await!
Make Ahead Options
This 30-Minute Miso Ramen Pastina is perfect for meal prepping, allowing you to save valuable time during busy weeknights! You can prepare the aromatics, including the white onion, shallot, ginger, and garlic, up to 24 hours in advance; simply chop and store them in an airtight container in the refrigerator. The acini di pepe can also be cooked ahead and kept for up to 3 days, but keep in mind that it may absorb the broth. To serve, reheat the broth and sauté your prepped ingredients as instructed, then add the acini di pepe and warm through. Enjoy the comforting richness of this dish, effortlessly ready whenever you are!
How to Store and Freeze 30-Minute Miso Ramen Pastina
Fridge: Store leftovers in an airtight container for up to 3-4 days. This keeps your 30-Minute Miso Ramen Pastina fresh and flavorful for your next meal.
Freezer: For longer storage, freeze in a freezer-safe container for up to 2 months. Note that the texture of the pasta may change slightly upon thawing.
Reheating: When ready to enjoy, add a splash of broth to the dish before reheating gently on the stovetop or in the microwave. This helps restore creaminess and flavor.
Reviving Leftovers: If the dish becomes too thick after refrigeration, stir in extra broth while reheating, ensuring each bite remains delicious and comforting.
What to Serve with 30-Minute Miso Ramen Pastina
Indulge in a comforting, flavorful experience by pairing this delightful dish with complementary sides that elevate your meal.
- Crispy Tempura Vegetables: The light crunch of tempura perfectly contrasts the creamy pasta, adding a delightful texture to your dining experience. Each bite offers a golden, crispy exterior filled with fresh vegetables, enhancing the theme of fusion.
- Quick Pickled Cucumbers: These refreshing bites provide a bright, tangy counterpoint to the richness of the miso ramen, cleansing your palate between each spoonful. Crunchy and vibrant, they bring a delightful burst of flavor.
- Garlic Edamame: The simple yet bold flavors of garlic and salt on edamame are both addictive and nutritious. These little snacks offer a fun, shareable appetizer that pairs well with the dish’s savory notes.
- Spicy Kimchi: This fermented classic adds a spicy zing and robust umami flavor, perfectly complementing the richness of the ramen pastina. Plus, it introduces a probiotic element that’s both healthy and delicious!
- Soft Green Salad with Sesame Dressing: A light salad can balance the heartiness of the ramen. Toss leafy greens with a creamy sesame dressing for added flavor and freshness, brightening up your meal.
- London Mule Cocktail: Sip on this refreshing drink, made with ginger beer and lime, for a zesty contrast to the savory broth. Its effervescence cleanses the palate and enhances the overall dining experience.
Expert Tips for 30-Minute Miso Ramen Pastina
-
Prep in Advance: Chop your onions, ginger, and garlic before starting the cooking process. This speeds up the cooking time and ensures everything flows smoothly.
-
Stir Frequently: While cooking the pasta risotto-style, stir often to prevent the acini di pepe from clumping and ensure even cooking throughout.
-
Adjust for Texture: If the dish thickens too much, simply stir in a little extra broth when serving. This helps maintain the creamy consistency of your 30-Minute Miso Ramen Pastina.
-
Flavor Boost: Don’t skip the bonito flakes if you have them; they bring an incredible umami punch. If you don’t have them, a splash of soy sauce can help enhance the flavor.
-
Serve Fresh: This dish is best enjoyed immediately for optimal taste and texture. Leftovers can thicken, but you can revive them with broth when reheating.
-
Experiment with Toppings: Feel free to add your favorite vegetables or proteins to customize your ramen experience, making each bowl uniquely yours!
30-Minute Miso Ramen Pastina Recipe FAQs
What type of broth should I use for my 30-Minute Miso Ramen Pastina?
Absolutely! A rich beef bone broth is ideal for creating a savory base, but you can use chicken broth for a lighter flavor. If you’re looking for a gluten-free option, just ensure your broth is labeled accordingly!
How do I store leftovers of 30-Minute Miso Ramen Pastina?
Very! Store any leftovers in an airtight container in the fridge for 3-4 days. This will keep your pasta fresh and flavorful for later enjoyment. For best results, reheat with a splash of broth to maintain the creamy texture.
Can I freeze the 30-Minute Miso Ramen Pastina?
Certainly! For longer storage, you can freeze your dish in a freezer-safe container for up to 2 months. Just bear in mind that the pasta texture may change slightly upon thawing. When ready to serve, defrost it in the fridge overnight before reheating.
What should I do if my pasta sticks together while cooking?
If you notice that your acini di pepe is sticking, stir frequently to keep it separated during the risotto-style cooking process. If it does clump together, simply add a bit of broth or water to loosen it while reheating.
Are there any dietary concerns I should consider when making 30-Minute Miso Ramen Pastina?
Yes! Always check for allergies related to your ingredients. For example, the white miso paste and gochujang typically contain soy, and the recipe also includes butter, which can be omitted for a dairy-free version. If you’re serving it to pets, it’s best to avoid sharing any human food, especially those with ingredients like onion and garlic, which can be toxic to them.
What are some great toppings for this dish?
Feel free to get creative! While ramen eggs are fabulous, you can enhance your 30-Minute Miso Ramen Pastina with fresh vegetables like bok choy, sliced radishes, or even proteins like shredded chicken or tofu for added heartiness. The more the merrier!
Quick & Creamy 30-Minute Miso Ramen Pastina Delight
Ingredients
Equipment
Method
- Warm the Broth: Pour beef bone broth into a medium saucepan and heat over medium-high heat. Bring to a gentle simmer, about 5-7 minutes.
- Prepare the Onions: Slice the green parts of green onions for garnish and set aside. Reserve the white parts for later.
- Sauté the Aromatics: In a large skillet, heat neutral oil over medium heat. Add white onion, shallot, and ginger; sauté for 2 minutes. Stir in garlic and cook another 2 minutes.
- Toast the Pasta: Add acini di pepe to the skillet, stirring often for about 3 minutes until lightly golden.
- Incorporate Miso and Seasonings: Stir in white miso paste, gochujang, and bonito flakes. Mix until well combined.
- Cook Risotto-Style: Gradually add heated broth to the skillet, one cup at a time, stirring constantly. Allow to cook about 11-14 minutes.
- Finish with Butter: Once pasta is cooked, stir in unsalted butter until melted and well mixed. Adjust seasoning.
- Serve and Garnish: Ladle the ramen pastina into bowls, top with ramen egg, green onion curls, and salsa macha.