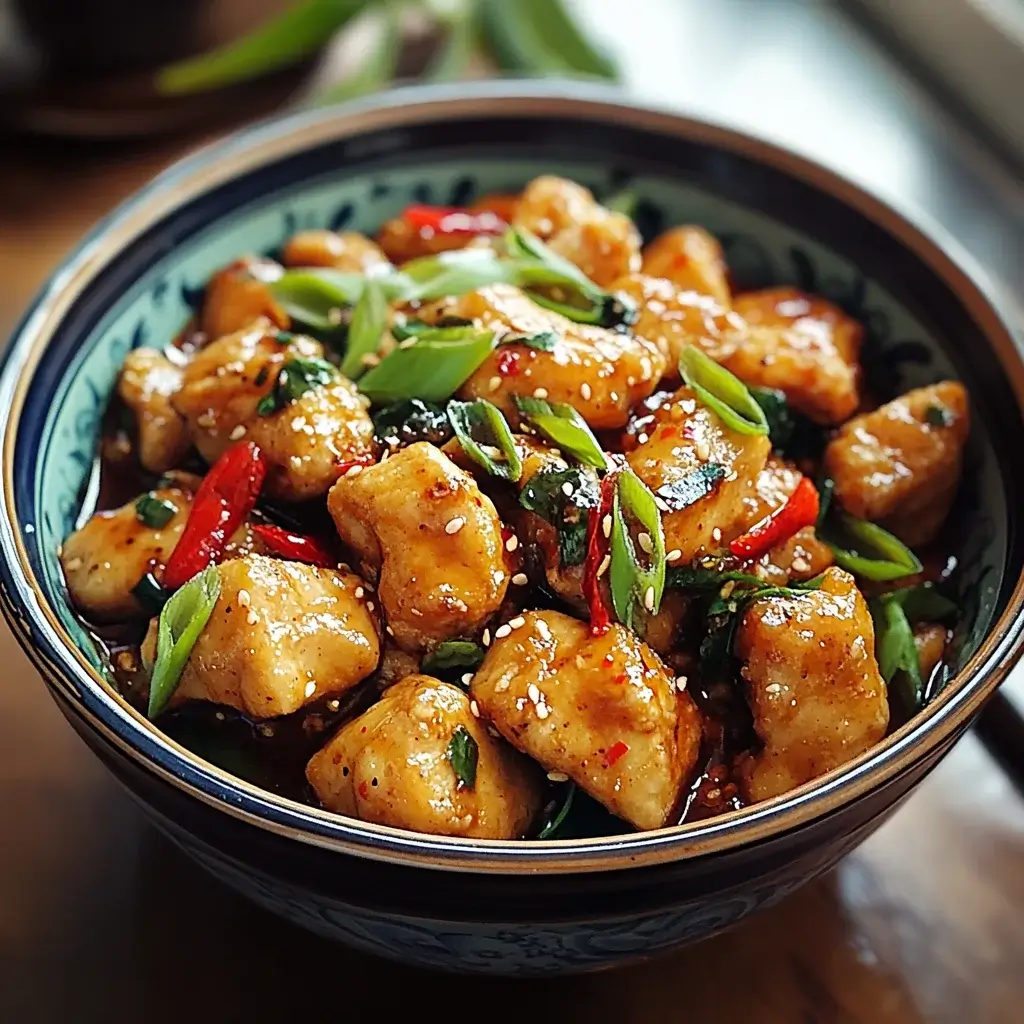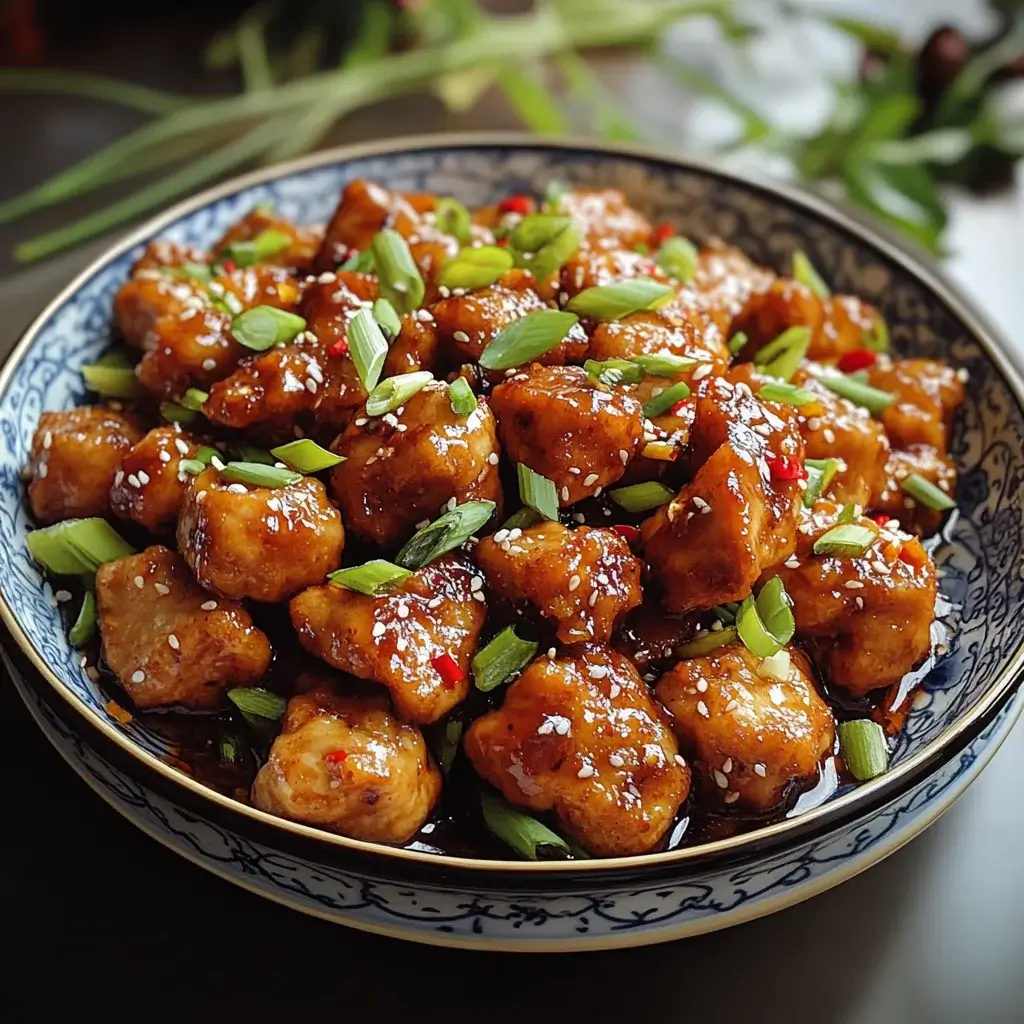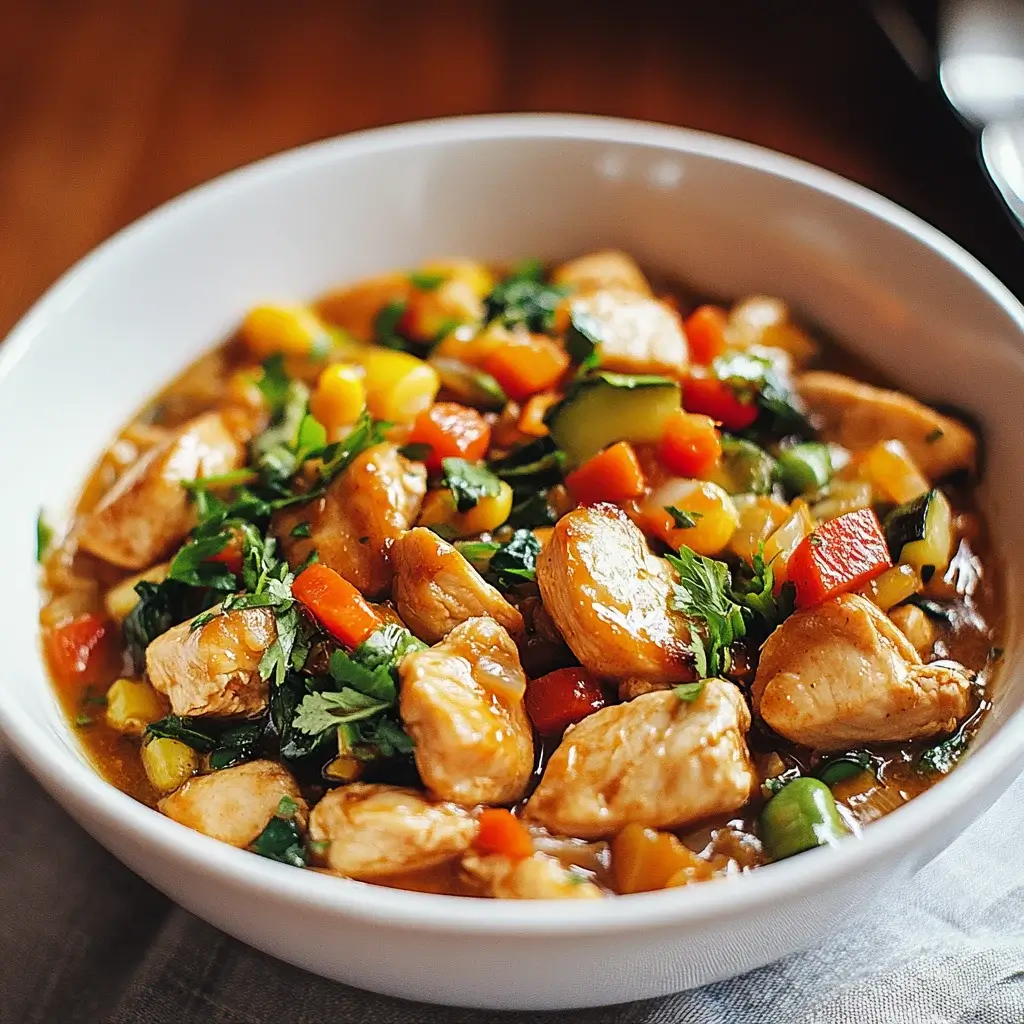
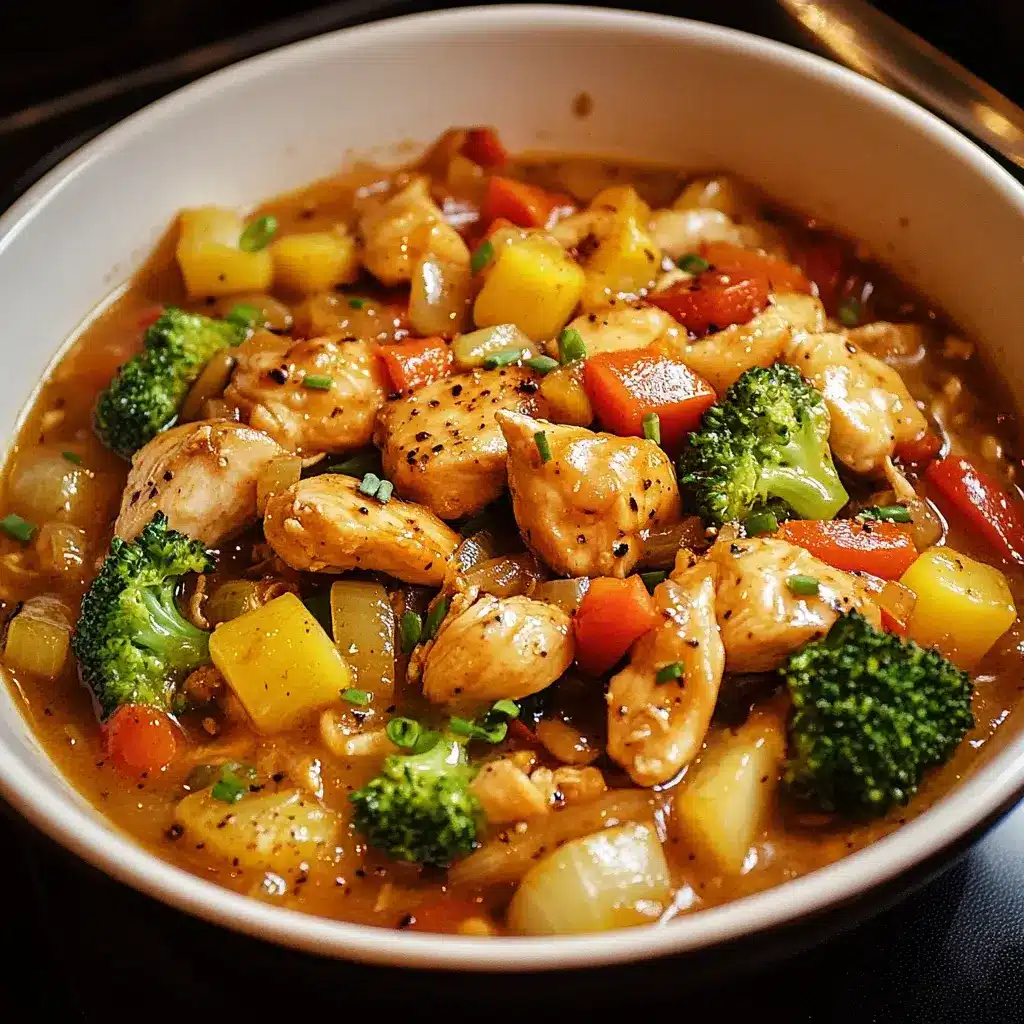
Savory Chicken and Vegetable Stir-Fry: A Quick Recipe!

Introduction to Savory Chicken and Vegetable Stir-Fry

After a long day, the last thing I want is to spend hours in the kitchen. That’s where my go-to recipe for Savory Chicken and Vegetable Stir-Fry comes in. It’s quick, delicious, and packed with vibrant flavors that can turn any weeknight dinner into a delightful experience. This dish is perfect for impressing your loved ones or simply treating yourself to something special. With just a handful of ingredients and minimal prep time, you can whip up a meal that’s not only satisfying but also healthy. Let’s dive into this culinary adventure!

Why You’ll Love This Savory Chicken and Vegetable Stir-Fry

This Savory Chicken and Vegetable Stir-Fry is a lifesaver for busy weeknights. It’s not just quick to make; it’s also bursting with flavor and nutrition. You can have a wholesome meal on the table in just 25 minutes! Plus, the colorful veggies add a delightful crunch, making it a feast for the eyes as well. Trust me, your taste buds will thank you for this one!

Ingredients for Savory Chicken and Vegetable Stir-Fry

Gathering the right ingredients is key to making a fantastic Savory Chicken and Vegetable Stir-Fry. Here’s what you’ll need:

  • Vegetable oil: This is your cooking base. It helps achieve that perfect stir-fry sizzle.
  • Boneless, skinless chicken breasts: Cut into bite-sized pieces, they cook quickly and absorb flavors beautifully.
  • Bell pepper: Adds a sweet crunch and vibrant color. Feel free to use any color you like!
  • Broccoli florets: These little trees not only provide nutrition but also a satisfying texture.
  • Snap peas: Their crispness brings a delightful snap to each bite.
  • Garlic: Minced for a punch of flavor that elevates the dish.
  • Fresh ginger: Adds warmth and a hint of spice, making the stir-fry aromatic.
  • Soy sauce: This salty, umami-rich sauce is essential for that classic stir-fry taste.
  • Honey: A touch of sweetness balances the savory elements perfectly.
  • Cornstarch: This thickening agent helps create a glossy sauce that clings to the chicken and veggies.
  • Water: Used to mix with the cornstarch and create the sauce consistency.
  • Salt and pepper: Essential for seasoning, enhancing all the flavors in the dish.
  • Cooked rice or noodles: Serve your stir-fry over these for a complete meal.

For those looking to mix things up, consider adding a teaspoon of red pepper flakes for heat or swapping chicken for tofu or shrimp. You can find the exact measurements for each ingredient at the bottom of the article, ready for printing!

How to Make Savory Chicken and Vegetable Stir-Fry

Creating a delicious Savory Chicken and Vegetable Stir-Fry is easier than you might think. Follow these simple steps, and you’ll have a mouthwatering meal ready in no time!

Step 1: Heat the Oil

Start by heating 2 tablespoons of vegetable oil in a large skillet or wok over medium-high heat. This step is crucial! Properly heated oil ensures that your chicken sears beautifully, locking in moisture and flavor. You want that satisfying sizzle when the chicken hits the pan.

Step 2: Cook the Chicken

Once the oil is hot, add 1 pound of bite-sized chicken pieces. Season them with salt and pepper. Cook for about 5-7 minutes, stirring occasionally, until the chicken is browned and cooked through. This step is where the magic begins! The chicken should be golden and juicy, ready to soak up all the flavors to come.

Step 3: Add the Vegetables

Next, toss in your sliced bell pepper, broccoli florets, and snap peas. Stir-fry these vibrant veggies for about 3-4 minutes. You want them tender-crisp, maintaining that delightful crunch. The colors will brighten your dish and your mood!

Step 4: Add Garlic and Ginger

Now, it’s time to elevate the flavor! Stir in 2 cloves of minced garlic and 1 tablespoon of minced fresh ginger. Cook for an additional minute until fragrant. The aroma will fill your kitchen, making it hard to resist sneaking a taste!

Step 5: Prepare the Sauce

In a small bowl, mix together 3 tablespoons of soy sauce, 1 tablespoon of honey, 1 teaspoon of cornstarch, and 1/4 cup of water until smooth. This sauce is the heart of your stir-fry, bringing everything together with its sweet and savory notes.

Step 6: Combine and Thicken

Pour the sauce over the chicken and vegetables in the skillet. Cook for another 2-3 minutes, stirring constantly. This is where the magic happens! The sauce will thicken and coat everything evenly, creating a glossy finish that’s simply irresistible.

Step 7: Serve

Finally, serve your savory stir-fry hot over cooked rice or noodles. For a touch of flair, garnish with sesame seeds or sliced green onions. Your Savory Chicken and Vegetable Stir-Fry is now ready to impress!
Tips for Success

  • Prep all your ingredients before you start cooking. It makes the process smoother and faster.
  • Don’t overcrowd the pan; cook in batches if necessary to achieve that perfect stir-fry sear.
  • Use high heat for a quick cook, which helps retain the veggies’ crunch.
  • Feel free to customize with your favorite vegetables or proteins for a personal touch.
  • Always taste and adjust seasoning before serving to ensure maximum flavor.

Equipment Needed

  • Large skillet or wok: Essential for even cooking. A non-stick pan works too!
  • Spatula or wooden spoon: Perfect for stirring and flipping ingredients.
  • Cutting board and knife: For chopping your chicken and veggies.
  • Measuring cups and spoons: Handy for precise ingredient measurements.

Variations

  • Protein Swap: Substitute chicken with tofu for a vegetarian option or shrimp for a seafood twist.
  • Veggie Medley: Experiment with other vegetables like carrots, zucchini, or mushrooms to keep things interesting.
  • Spicy Kick: Add a teaspoon of red pepper flakes or a splash of sriracha to the sauce for some heat.
  • Gluten-Free Option: Use tamari instead of soy sauce to make this dish gluten-free.
  • Herb Infusion: Toss in fresh herbs like basil or cilantro at the end for an aromatic finish.

Serving Suggestions

  • Pair your Savory Chicken and Vegetable Stir-Fry with fluffy jasmine rice or hearty noodles for a filling meal.
  • Serve with a side of crispy spring rolls or a fresh cucumber salad for added crunch.
  • For drinks, consider a light beer or iced green tea to complement the flavors.
  • Garnish with sesame seeds or sliced green onions for a pop of color and flavor.

FAQs about Savory Chicken and Vegetable Stir-Fry

Can I make this stir-fry ahead of time?

Absolutely! You can prep the chicken and vegetables in advance. Just store them in the fridge until you’re ready to cook. This Savory Chicken and Vegetable Stir-Fry comes together quickly, so it’s perfect for a last-minute meal.

What can I substitute for chicken?

If you’re looking for alternatives, tofu or shrimp work wonderfully in this recipe. Just adjust the cooking times accordingly. Tofu will need a bit longer to get crispy, while shrimp cooks faster than chicken.

How do I store leftovers?

Leftovers can be stored in an airtight container in the fridge for up to three days. Reheat in a skillet or microwave until warmed through. The flavors will still be delicious!

Can I use frozen vegetables?

Yes, frozen vegetables are a great time-saver! Just add them directly to the skillet, but be mindful that they may release extra moisture. Cook a little longer to ensure everything is heated through.

Is this dish gluten-free?

To make your Savory Chicken and Vegetable Stir-Fry gluten-free, simply swap regular soy sauce for tamari. This way, you can enjoy all the flavors without the gluten!

Final Thoughts

Cooking this Savory Chicken and Vegetable Stir-Fry is more than just preparing a meal; it’s about creating a moment of joy in your busy life. The vibrant colors and enticing aromas fill your kitchen, making it a welcoming space for family and friends. In just 25 minutes, you can serve up a dish that’s not only delicious but also nourishing. Whether it’s a weeknight dinner or a special occasion, this stir-fry brings people together. So grab your skillet, unleash your inner chef, and enjoy the satisfaction of a homemade meal that delights the senses!

Ranis

Savory Chicken and Vegetable Stir-Fry: A Quick Recipe!

A quick and delicious recipe for savory chicken and vegetable stir-fry, perfect for a weeknight dinner.
Prep Time 10 minutes
Cook Time 15 minutes
Total Time 25 minutes
Servings: 4 servings
Course: Main Dish
Cuisine: Asian
Calories: 320

Ingredients
  

  • 2 tablespoons vegetable oil
  • 1 pound boneless skinless chicken breasts, cut into bite-sized pieces
  • 1 bell pepper sliced
  • 1 cup broccoli florets
  • 1 cup snap peas
  • 2 cloves garlic minced
  • 1 tablespoon fresh ginger minced
  • 3 tablespoons soy sauce
  • 1 tablespoon honey
  • 1 teaspoon cornstarch
  • 1/4 cup water
  • Salt and pepper to taste
  • Cooked rice or noodles for serving

Method
 

  1. Heat the vegetable oil in a large skillet or wok over medium-high heat.
  2. Add the chicken pieces and season with salt and pepper. Cook for about 5-7 minutes, or until the chicken is browned and cooked through.
  3. Add the sliced bell pepper, broccoli florets, and snap peas to the skillet. Stir-fry for about 3-4 minutes until the vegetables are tender-crisp.
  4. Stir in the minced garlic and ginger, cooking for an additional 1 minute until fragrant.
  5. In a small bowl, mix the soy sauce, honey, cornstarch, and water until smooth. Pour this sauce over the chicken and vegetables in the skillet.
  6. Cook for another 2-3 minutes, stirring constantly, until the sauce thickens and coats the chicken and vegetables evenly.
  7. Serve hot over cooked rice or noodles.

Nutrition

Serving: 1servingCalories: 320kcalCarbohydrates: 15gProtein: 30gFat: 15gSaturated Fat: 2gPolyunsaturated Fat: 13gCholesterol: 70mgSodium: 800mgFiber: 3gSugar: 6g

Notes

  • For a spicy kick, add a teaspoon of red pepper flakes or a splash of sriracha to the sauce.
  • Substitute the chicken with tofu or shrimp for a different protein option, adjusting cooking times as necessary.

Tried this recipe?

Let us know how it was!

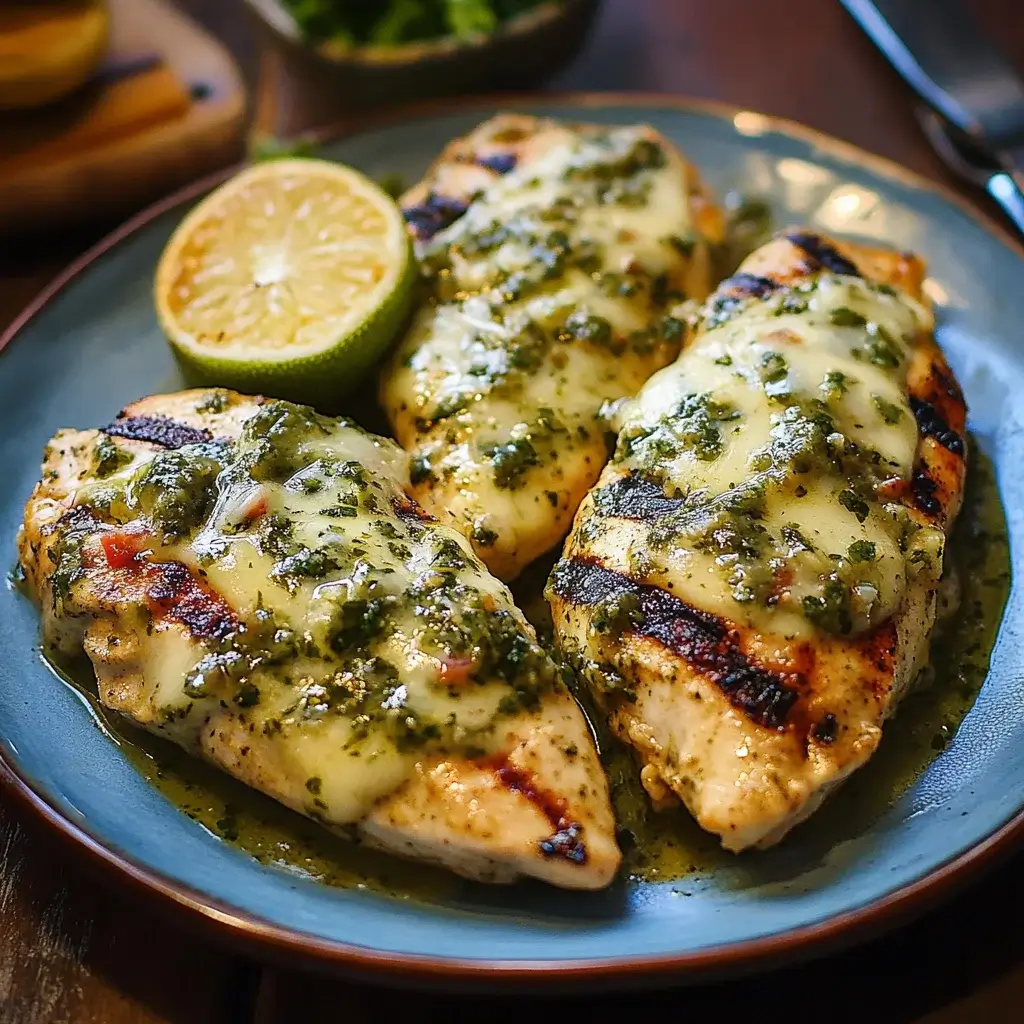
Grilled Salsa Verde Pepper Jack Chicken That Wow Your Tastebuds!

Introduction to Grilled Salsa Verde Pepper Jack Chicken

There’s something magical about the sizzle of chicken on the grill, especially when it’s topped with a zesty salsa verde and gooey pepper jack cheese. This Grilled Salsa Verde Pepper Jack Chicken is not just a meal; it’s an experience that brings friends and family together. Whether you’re looking for a quick solution after a long day or a dish to impress your loved ones at a weekend barbecue, this recipe has you covered. With just a handful of ingredients and minimal prep time, you’ll be savoring every bite in no time!

Why You’ll Love This Grilled Salsa Verde Pepper Jack Chicken

This Grilled Salsa Verde Pepper Jack Chicken is a game-changer for busy weeknights or casual gatherings. It’s incredibly easy to whip up, taking just 25 minutes from start to finish. The combination of smoky spices, tangy salsa verde, and creamy pepper jack cheese creates a flavor explosion that will have everyone asking for seconds. Plus, it’s gluten-free, making it a perfect choice for various dietary needs!

Ingredients for Grilled Salsa Verde Pepper Jack Chicken

Gathering the right ingredients is the first step to culinary success. For this Grilled Salsa Verde Pepper Jack Chicken, you’ll need:

  • Boneless, skinless chicken breasts: The star of the show! They’re lean, easy to grill, and soak up flavors beautifully.
  • Garlic powder: Adds a savory depth that elevates the chicken’s flavor without the fuss of fresh garlic.
  • Onion powder: A subtle sweetness that complements the garlic and enhances the overall taste.
  • Smoked paprika: This spice brings a smoky warmth, giving your chicken that grilled flavor even before it hits the heat.
  • Salt: Essential for bringing out the natural flavors of the chicken and spices.
  • Black pepper: A dash of heat that rounds out the seasoning mix.
  • Salsa verde: This tangy sauce is the perfect topping, adding freshness and a kick of flavor.
  • Pepper jack cheese: Creamy and slightly spicy, it melts beautifully over the chicken, creating a deliciously gooey layer.
  • Fresh cilantro (optional): A sprinkle of this herb adds a burst of freshness and color to your dish.
  • Lime wedges: A squeeze of lime juice brightens the flavors and adds a zesty finish.

For those looking to mix things up, consider marinating the chicken in salsa verde for added flavor. If pepper jack isn’t your thing, cheddar or Monterey Jack can be great substitutes. Exact measurements for these ingredients can be found at the bottom of the article, ready for printing!

How to Make Grilled Salsa Verde Pepper Jack Chicken

Creating this Grilled Salsa Verde Pepper Jack Chicken is a straightforward process that will have your taste buds dancing. Follow these simple steps, and you’ll be on your way to a delicious meal in no time!

Step 1: Preheat the Grill

Preheating your grill is crucial for achieving that perfect sear on your chicken. Aim for a medium-high heat, around 400°F. This temperature ensures the chicken cooks evenly and locks in those juicy flavors. If you’re using a charcoal grill, let the coals burn down until they’re covered in white ash. For gas grills, simply turn on the burners and close the lid for about 10-15 minutes.

Step 2: Prepare the Spice Rub

In a small bowl, mix together garlic powder, onion powder, smoked paprika, salt, and black pepper. This spice rub is the secret to infusing flavor into your chicken. Once mixed, generously rub the spice blend over both sides of the chicken breasts. Make sure every inch is coated; this is where the magic begins!

Step 3: Grill the Chicken

Now it’s time to grill! Place the seasoned chicken on the preheated grill. Cook for about 6-7 minutes on each side. To check for doneness, use a meat thermometer; the internal temperature should reach 165°F. If you don’t have a thermometer, cut into the thickest part of the chicken. It should be opaque and the juices should run clear.

Step 4: Add Salsa Verde and Cheese

During the last few minutes of grilling, it’s time to elevate your chicken. Spoon a generous amount of salsa verde over each breast, then sprinkle the shredded pepper jack cheese on top. Close the grill lid to help the cheese melt beautifully, which should take about 2-3 minutes. The combination of the tangy salsa and creamy cheese is simply irresistible!

Step 5: Rest and Serve

Once the chicken is done, remove it from the grill and let it rest for about 5 minutes. This step is essential; it allows the juices to redistribute throughout the meat, ensuring every bite is tender and juicy. After resting, garnish with fresh cilantro if desired, and serve with lime wedges for that extra zing!

Tips for Success

  • Marinate the chicken in salsa verde for 30 minutes to 2 hours for deeper flavor.
  • Use a meat thermometer to ensure perfect doneness; 165°F is the magic number.
  • Let the chicken rest after grilling to keep it juicy and tender.
  • Experiment with different cheeses like cheddar for a unique twist.
  • Don’t skip the lime wedges; they brighten up the dish beautifully!

Equipment Needed

  • Grill: A gas or charcoal grill works perfectly for this recipe.
  • Meat thermometer: Essential for checking chicken doneness; a simple knife can work in a pinch.
  • Mixing bowl: For combining your spice rub; any bowl will do.
  • Spatula or tongs: To flip the chicken safely on the grill.

Variations

  • Spicy Kick: Add diced jalapeños or a splash of hot sauce to the salsa verde for an extra kick.
  • Herb Infusion: Mix in fresh herbs like oregano or thyme into the spice rub for a fragrant twist.
  • Vegetarian Option: Substitute chicken with thick slices of zucchini or portobello mushrooms for a delicious veggie version.
  • Cheese Swap: Try using feta or goat cheese for a tangy flavor that pairs well with the salsa verde.
  • Grilled Veggies: Serve alongside grilled bell peppers and onions for a colorful and nutritious side.

Serving Suggestions

  • Side Dishes: Pair with cilantro-lime rice or grilled corn on the cob for a fresh, vibrant meal.
  • Salad: A simple avocado and tomato salad complements the flavors beautifully.
  • Drinks: Serve with a cold cerveza or a refreshing limeade to enhance the experience.
  • Presentation: Garnish with extra cilantro and lime wedges for a pop of color.

FAQs about Grilled Salsa Verde Pepper Jack Chicken

Can I use chicken thighs instead of breasts?

Absolutely! Chicken thighs are juicier and can add a different flavor profile. Just adjust the cooking time slightly, as they may take a bit longer to reach the safe internal temperature of 165°F.

What if I don’t have salsa verde?

No worries! You can make a quick substitute by blending tomatillos, cilantro, lime juice, and jalapeños. Alternatively, any green salsa will work in a pinch!

Can I prepare this dish ahead of time?

Yes! You can marinate the chicken in salsa verde a few hours before grilling. Just keep it in the fridge until you’re ready to cook. This will enhance the flavors even more!

Is this recipe suitable for meal prep?

Definitely! Grilled Salsa Verde Pepper Jack Chicken stores well in the fridge for up to 3 days. Just reheat it gently to maintain its juiciness.

What can I serve with this chicken?

Pair it with cilantro-lime rice, grilled veggies, or a fresh salad. A cold drink like limeade or a light beer complements the flavors perfectly!

Final Thoughts

Cooking this Grilled Salsa Verde Pepper Jack Chicken is more than just preparing a meal; it’s about creating moments. The vibrant flavors and the satisfying sizzle on the grill bring a sense of joy that’s hard to replicate. Whether you’re sharing it with family or enjoying a quiet dinner, each bite is a reminder of the simple pleasures in life. Plus, the ease of this recipe means you can focus on what truly matters—connecting with those around you. So fire up that grill, and let the deliciousness unfold!

Ranis

Grilled Salsa Verde Pepper Jack Chicken That Wow Your Tastebuds!

A delicious grilled chicken recipe topped with salsa verde and pepper jack cheese that will tantalize your taste buds.
Prep Time 10 minutes
Cook Time 15 minutes
Total Time 25 minutes
Servings: 2 servings
Course: Main Dish
Cuisine: Mexican
Calories: 350

Ingredients
  

  • 2 large boneless skinless chicken breasts (about 1 pound total)
  • 1 teaspoon garlic powder
  • 1 teaspoon onion powder
  • 1 teaspoon smoked paprika
  • 1 teaspoon salt
  • ½ teaspoon black pepper
  • 1 cup salsa verde
  • 4 ounces pepper jack cheese shredded
  • 2 tablespoons fresh cilantro chopped (optional)
  • Lime wedges for serving

Method
 

  1. Preheat your grill to medium-high heat (about 400°F).
  2. In a small bowl, mix together the garlic powder, onion powder, smoked paprika, salt, and black pepper. Rub this spice mixture evenly over both sides of the chicken breasts.
  3. Place the chicken on the grill and cook for about 6-7 minutes on each side, or until the internal temperature reaches 165°F.
  4. During the last few minutes of grilling, spoon salsa verde over each chicken breast and top with shredded pepper jack cheese. Close the grill lid to melt the cheese, about 2-3 minutes.
  5. Remove the chicken from the grill and let it rest for 5 minutes. Garnish with fresh cilantro, if desired, and serve with lime wedges.

Nutrition

Serving: 1chicken breastCalories: 350kcalCarbohydrates: 5gProtein: 40gFat: 18gSaturated Fat: 8gPolyunsaturated Fat: 10gCholesterol: 120mgSodium: 800mgFiber: 1gSugar: 1g

Notes

  • For added flavor, marinate the chicken in salsa verde for 30 minutes to 2 hours before grilling.
  • Substitute the pepper jack cheese with cheddar or Monterey Jack for a different flavor profile.

Tried this recipe?

Let us know how it was!

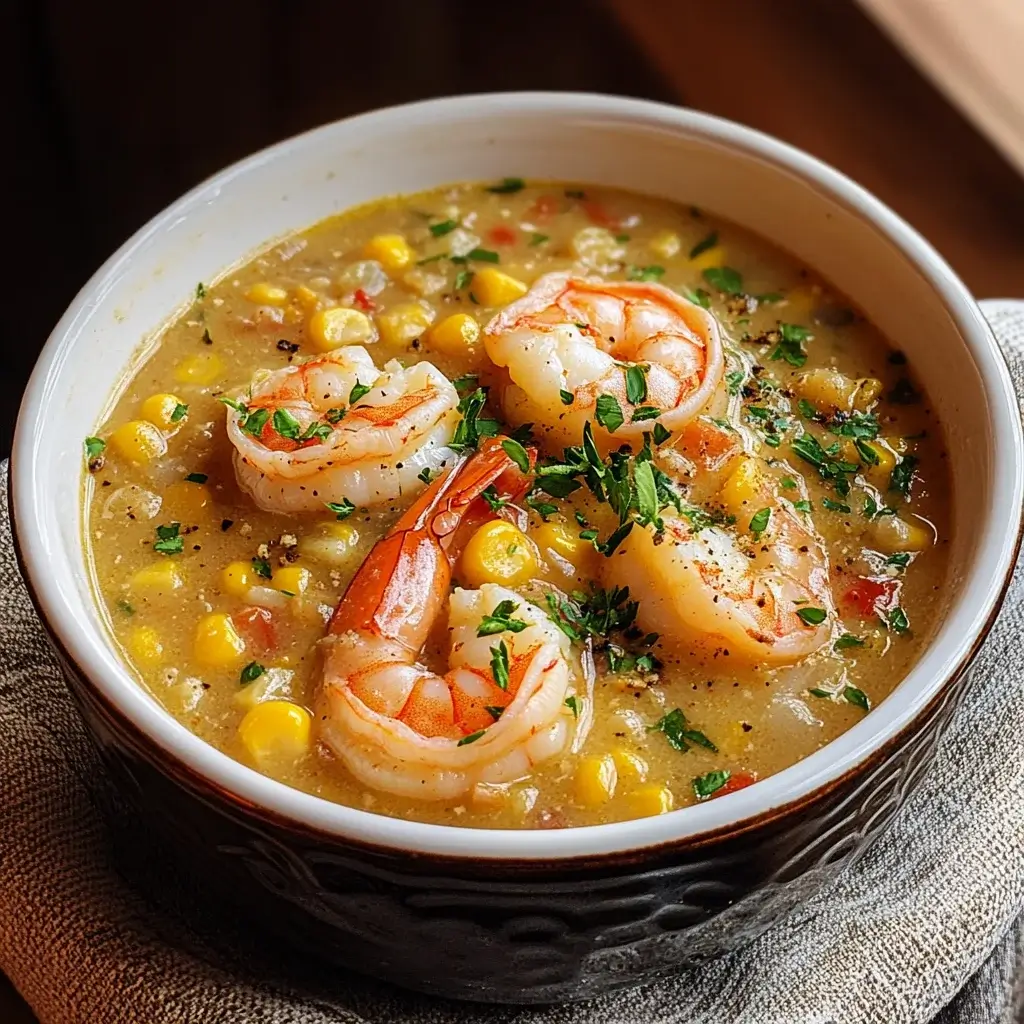
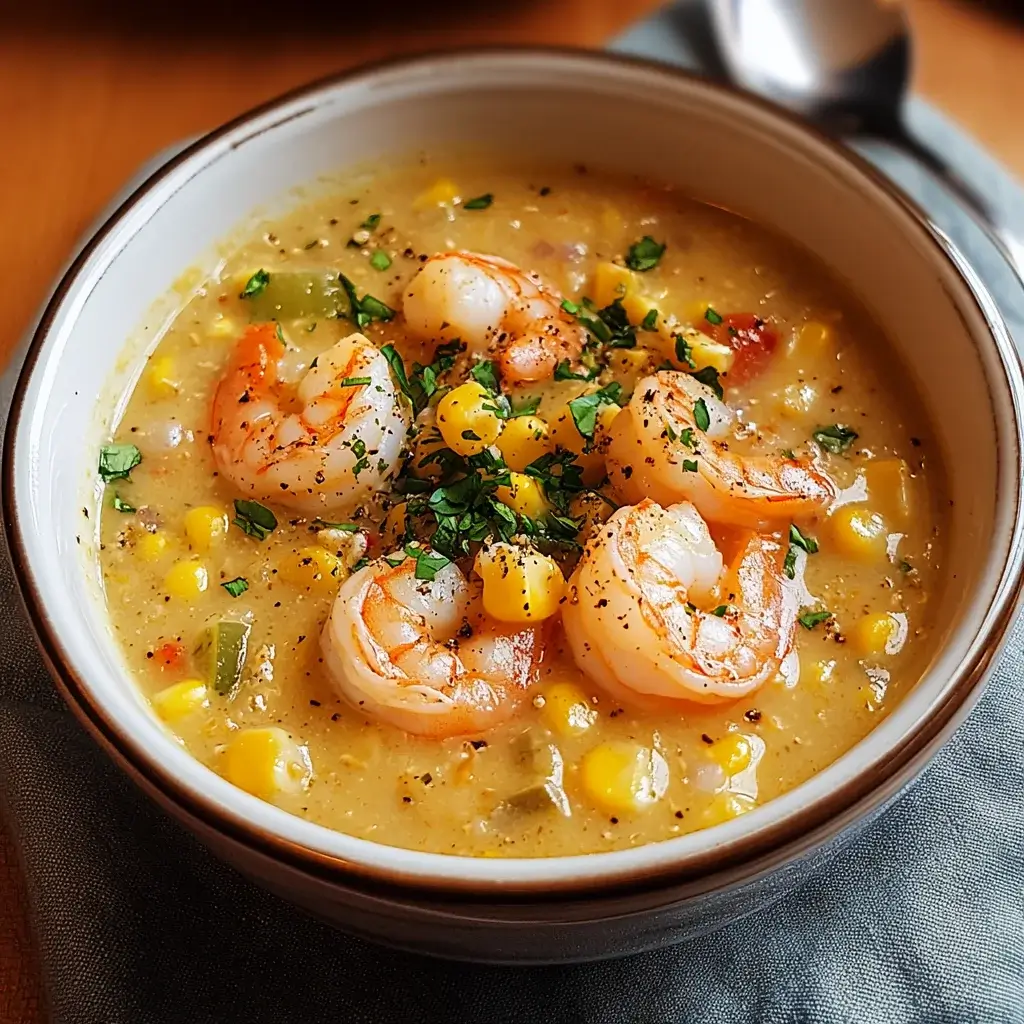
Shrimp and Corn Chowder: A Creamy, Flavorful Delight!

Introduction to Shrimp and Corn Chowder

There’s something magical about a warm bowl of shrimp and corn chowder that instantly transports me back to my childhood. Growing up, my family would gather around the table, sharing stories and laughter over hearty meals. This creamy, flavorful chowder is not just a dish; it’s a comforting hug on a chilly evening. Perfect for busy days or when you want to impress your loved ones, this recipe is quick and easy. With just a handful of ingredients, you can whip up a delightful meal that warms the heart and satisfies the soul.

Why You’ll Love This Shrimp and Corn Chowder

This shrimp and corn chowder is a game-changer for busy weeknights. It comes together in just 30 minutes, making it a perfect solution for those evenings when time is tight. The rich, creamy texture and the sweet burst of corn paired with succulent shrimp create a flavor explosion that will leave your taste buds dancing. Plus, it’s versatile enough to adapt to your pantry staples, ensuring you can enjoy it anytime!

Ingredients for Shrimp and Corn Chowder

Gathering the right ingredients is the first step to creating a delicious shrimp and corn chowder. Here’s what you’ll need:

  • Olive oil: This is your base for sautéing, adding a rich flavor to the chowder.
  • Onion: Diced onion brings sweetness and depth to the dish, enhancing the overall flavor.
  • Garlic: Minced garlic adds a fragrant kick that elevates the chowder.
  • Red bell pepper: This adds a pop of color and a sweet crunch, balancing the creaminess.
  • Smoked paprika: A key spice that imparts a smoky depth, making the chowder more complex.
  • Shrimp: Fresh, peeled, and deveined shrimp are the star of the show, providing protein and a delightful texture.
  • Corn: Whether fresh, frozen, or canned, corn adds sweetness and a lovely bite to the chowder.
  • Chicken broth: This forms the soup base, infusing the chowder with savory goodness.
  • Heavy cream: For that luxurious, creamy texture that makes this chowder irresistible.
  • Salt and black pepper: Essential seasonings to enhance all the flavors.
  • Cayenne pepper (optional): A dash of heat for those who like a little spice in their life.
  • Green onions: Sliced for garnish, they add a fresh, crisp finish to each bowl.

For those looking to mix things up, consider substituting half-and-half for a lighter version or coconut milk for a dairy-free option. You can also add diced potatoes or carrots for extra texture and nutrition. Fresh herbs like cilantro or parsley can elevate the flavor even more. Exact quantities for each ingredient are available at the bottom of the article for easy printing!

How to Make Shrimp and Corn Chowder

Step 1: Sauté the Aromatics

Start by heating the olive oil in a large pot over medium heat. Once it shimmers, toss in the diced onion. Sauté until it turns translucent, about 5 minutes. The aroma will fill your kitchen, making your mouth water. Next, add the minced garlic and diced red bell pepper. Cook for another 2-3 minutes until they soften, creating a flavorful base for your chowder.

Step 2: Add the Shrimp

Now, it’s time to bring in the shrimp! Add the peeled and deveined shrimp to the pot. Cook them until they turn a lovely pink, which should take about 3-4 minutes. This step is crucial, as perfectly cooked shrimp will elevate your chowder.

Step 3: Combine Ingredients

Once the shrimp are ready, stir in the corn and pour in the chicken broth. Bring the mixture to a gentle simmer. This is where the magic happens, as the flavors meld together beautifully, creating a comforting seafood soup.

Step 4: Finish with Cream

Reduce the heat to low and stir in the heavy cream, salt, black pepper, and cayenne pepper if you’re feeling adventurous. Let it simmer for an additional 5-10 minutes. This step adds that rich, creamy texture that makes shrimp and corn chowder so irresistible.

Step 5: Adjust and Serve

Before serving, taste your chowder and adjust the seasoning if needed. Once it’s just right, ladle the chowder into bowls and garnish with sliced green onions. Serve it hot, and watch as everyone digs in with delight!

Tips for Success

  • Prep all your ingredients before starting to cook. It makes the process smoother.
  • Don’t overcook the shrimp; they should be just pink and tender.
  • For extra flavor, use homemade chicken broth if you have it on hand.
  • Feel free to adjust the spices to suit your taste; a little more cayenne can add a nice kick!
  • Let the chowder sit for a few minutes before serving to enhance the flavors.

Equipment Needed

  • Large pot: A sturdy pot is essential for making chowder. A Dutch oven works great too.
  • Wooden spoon: Perfect for stirring and scraping the bottom of the pot.
  • Measuring cups and spoons: For accurate ingredient measurements.
  • Cutting board and knife: Essential for prepping your veggies and shrimp.

Variations

  • Spicy Shrimp and Corn Chowder: Add diced jalapeños or a splash of hot sauce for an extra kick.
  • Vegetarian Version: Replace shrimp with diced tofu or chickpeas and use vegetable broth instead of chicken broth.
  • Herb-Infused Chowder: Stir in fresh herbs like thyme or dill for a fragrant twist.
  • Southwestern Style: Incorporate black beans, corn, and a sprinkle of cumin for a southwestern flair.
  • Seafood Medley: Mix in other seafood like scallops or crab for a luxurious chowder experience.

Serving Suggestions

  • Crusty Bread: Serve with a warm, crusty baguette or sourdough for dipping.
  • Salad: Pair with a light green salad dressed in a tangy vinaigrette.
  • Wine: A chilled white wine, like Sauvignon Blanc, complements the chowder beautifully.
  • Garnish: Add a sprinkle of fresh herbs or a drizzle of olive oil for a polished look.

FAQs about Shrimp and Corn Chowder

Can I use frozen shrimp for this chowder?

Absolutely! Frozen shrimp work perfectly in this shrimp and corn chowder. Just make sure to thaw them before cooking for even results. They’ll still deliver that delightful flavor and texture.

How can I make this chowder dairy-free?

For a dairy-free version, simply substitute the heavy cream with coconut milk or a dairy-free cream alternative. This will keep the chowder creamy while accommodating dietary preferences.

Can I add other vegetables to the chowder?

Definitely! Feel free to toss in diced potatoes, carrots, or even zucchini. They’ll add extra nutrition and texture, making your chowder even heartier.

How long can I store leftovers?

Your shrimp and corn chowder can be stored in the fridge for up to 3 days. Just reheat gently on the stove, adding a splash of broth or cream if it thickens too much.

What can I serve with shrimp and corn chowder?

This chowder pairs wonderfully with crusty bread, a fresh salad, or even a light white wine. It’s a complete meal that’s sure to impress!

Final Thoughts

Cooking shrimp and corn chowder is more than just preparing a meal; it’s about creating memories and sharing warmth with those you love. The creamy texture and vibrant flavors come together to form a dish that feels like a cozy embrace on a chilly night. Whether you’re enjoying it solo or serving it to friends, this chowder brings a sense of comfort and satisfaction. Plus, the ease of making it means you can whip it up any day of the week. So grab your ingredients, and let this delightful chowder become a staple in your kitchen!

Ranis

Shrimp and Corn Chowder: A Creamy, Flavorful Delight!

A creamy and flavorful shrimp and corn chowder that is perfect for a comforting meal.
Prep Time 10 minutes
Cook Time 20 minutes
Total Time 30 minutes
Servings: 6 servings
Course: Soup
Cuisine: American
Calories: 320

Ingredients
  

  • 2 tablespoons olive oil
  • 1 medium onion diced
  • 2 cloves garlic minced
  • 1 red bell pepper diced
  • 1 teaspoon smoked paprika
  • 1 pound shrimp peeled and deveined
  • 4 cups corn fresh, frozen, or canned
  • 4 cups chicken broth
  • 1 cup heavy cream
  • 1 teaspoon salt
  • 1/2 teaspoon black pepper
  • 1/4 teaspoon cayenne pepper optional
  • 2 green onions sliced (for garnish)

Method
 

  1. In a large pot, heat the olive oil over medium heat. Add the diced onion and sauté until translucent, about 5 minutes.
  2. Stir in the minced garlic and diced red bell pepper, cooking for another 2-3 minutes until softened.
  3. Add the smoked paprika and stir to combine.
  4. Add the shrimp to the pot and cook until they turn pink, about 3-4 minutes.
  5. Stir in the corn and chicken broth, bringing the mixture to a simmer.
  6. Reduce the heat and stir in the heavy cream, salt, black pepper, and cayenne pepper if using. Simmer for an additional 5-10 minutes, allowing the flavors to meld.
  7. Taste and adjust seasoning if necessary.
  8. Serve hot, garnished with sliced green onions.

Nutrition

Serving: 1bowlCalories: 320kcalCarbohydrates: 18gProtein: 22gFat: 18gSaturated Fat: 10gPolyunsaturated Fat: 8gCholesterol: 150mgSodium: 800mgFiber: 2gSugar: 5g

Notes

  • For a lighter version, substitute half-and-half for heavy cream or use coconut milk for a dairy-free option.
  • Add diced potatoes or carrots for extra texture and nutrition.
  • Incorporate fresh herbs like cilantro or parsley for added flavor.

Tried this recipe?

Let us know how it was!

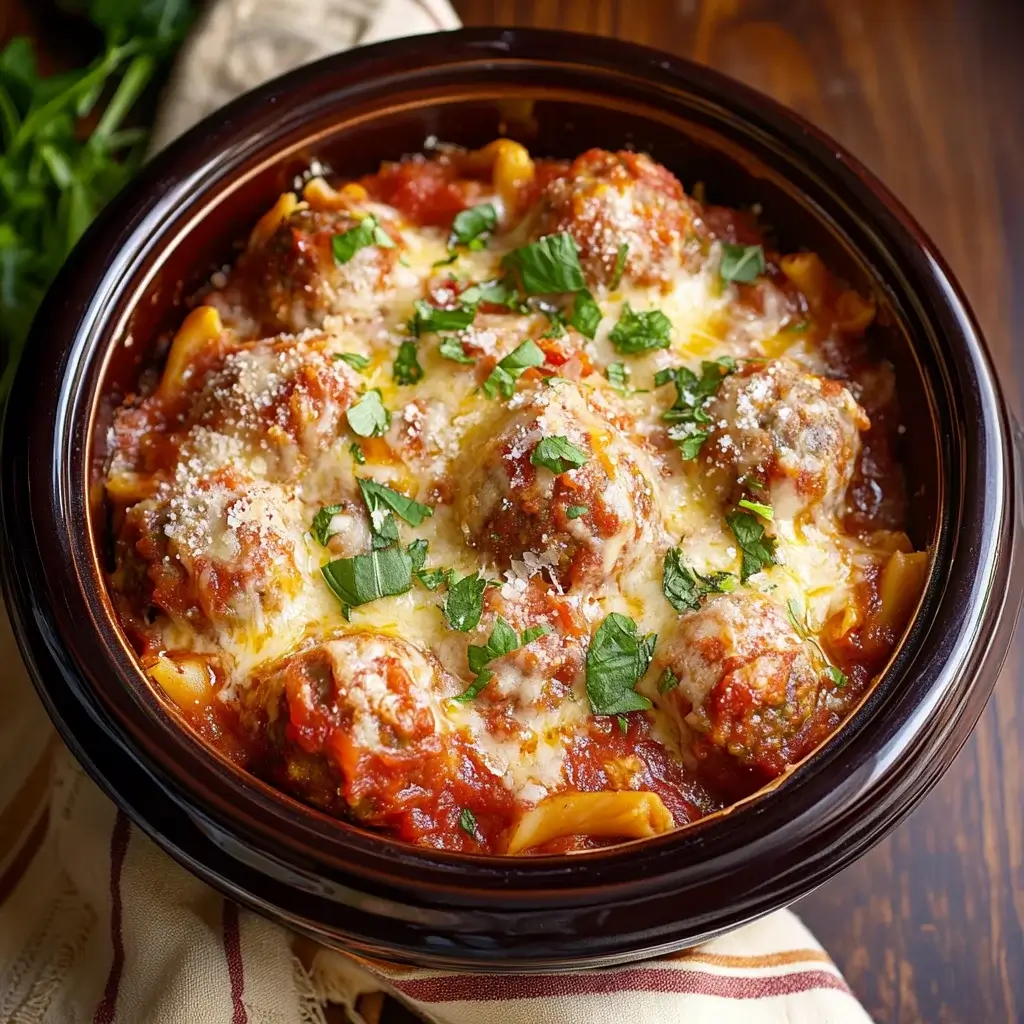
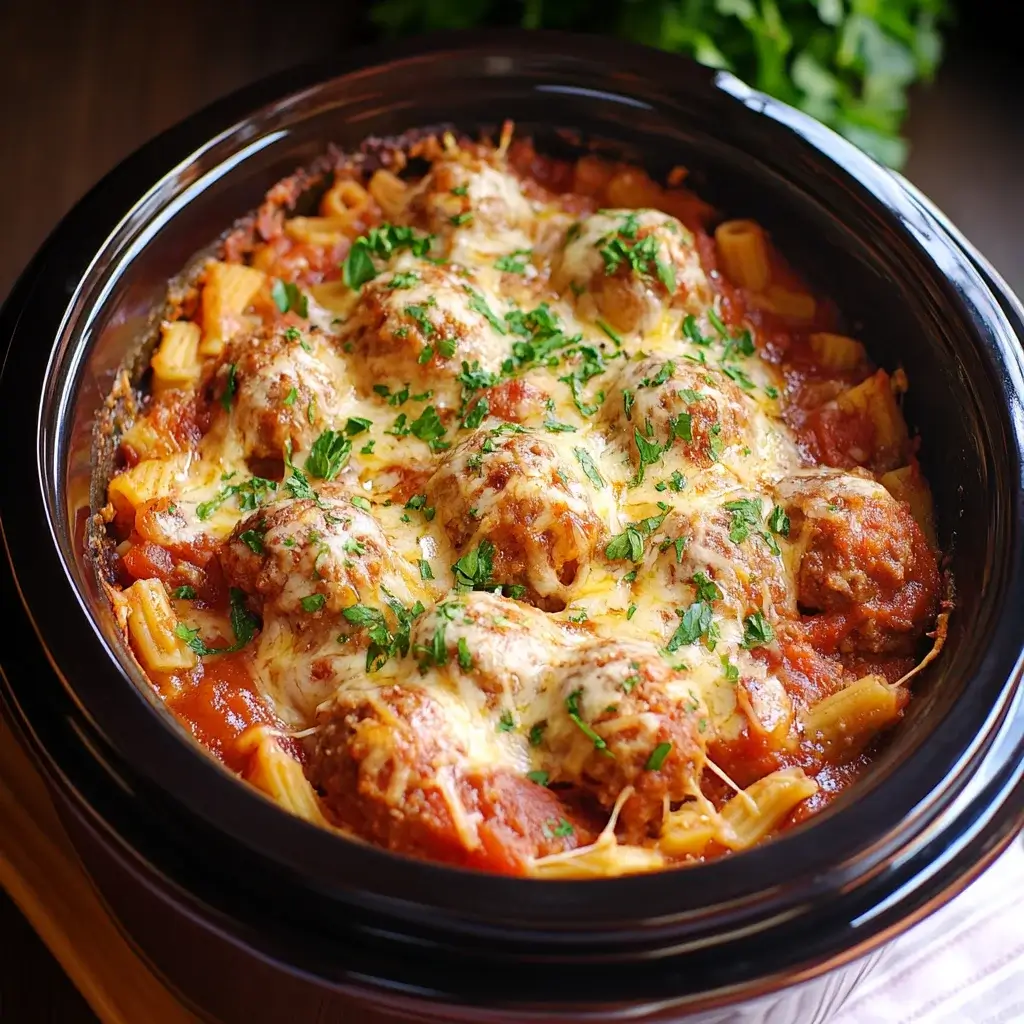
Savory Slow Cooker Meatball Casserole: Try This Easy Recipe!

Introduction to Savory Slow Cooker Meatball Casserole

After a long day, the last thing I want to do is spend hours in the kitchen. That’s where my Savory Slow Cooker Meatball Casserole comes to the rescue! This dish is a warm hug in a bowl, perfect for family dinners or when friends drop by unexpectedly. It’s easy to throw together, and the slow cooker does all the heavy lifting. Just imagine coming home to the delightful aroma of bubbling cheese and marinara sauce. Trust me, this recipe will impress your loved ones and make your life a whole lot easier!

Why You’ll Love This Savory Slow Cooker Meatball Casserole

This Savory Slow Cooker Meatball Casserole is a game-changer for busy weeknights. It’s incredibly easy to prepare, requiring minimal effort while delivering maximum flavor. The slow cooker works its magic, allowing you to focus on other things while dinner cooks itself. Plus, the combination of gooey cheese, hearty meatballs, and rich marinara creates a comforting dish that everyone will love. It’s a surefire way to bring smiles to the dinner table!

Ingredients for Savory Slow Cooker Meatball Casserole

Gathering the right ingredients is the first step to creating a delicious Savory Slow Cooker Meatball Casserole. Here’s what you’ll need:

  • Frozen meatballs: These are the star of the show! You can use beef, turkey, or chicken meatballs, depending on your preference.
  • Marinara sauce: A jar of your favorite marinara adds rich flavor and moisture. Look for one with no added sugars for a healthier option.
  • Shredded mozzarella cheese: This melty cheese brings that gooey goodness we all crave. Feel free to use low-fat mozzarella if you want to cut back on calories.
  • Ricotta cheese: This creamy cheese adds a delightful texture and richness to the casserole. It’s a great way to sneak in some extra protein!
  • Italian seasoning: A blend of herbs that enhances the dish’s flavor profile. You can also use fresh herbs if you have them on hand.
  • Garlic powder: This adds a savory depth. Fresh garlic works too, just adjust the amount to your taste.
  • Salt and black pepper: Essential for seasoning. Adjust these to your liking for the perfect balance.
  • Cooked pasta: Use penne or rotini for a hearty base. You can swap in whole wheat or gluten-free pasta if needed.
  • Grated Parmesan cheese: A sprinkle on top adds a nice finishing touch. It’s optional but highly recommended!
  • Fresh basil leaves: These are optional for garnish, but they add a pop of color and freshness to the dish.

For exact measurements, check the bottom of the article where you can find everything listed for easy printing!

How to Make Savory Slow Cooker Meatball Casserole

Now that you have all your ingredients ready, let’s dive into the fun part: making your Savory Slow Cooker Meatball Casserole. This process is straightforward and rewarding. Follow these simple steps, and you’ll have a delicious meal waiting for you!

Step 1: Combine Meatballs and Sauce

Start by placing the frozen meatballs in your slow cooker. Pour the marinara sauce over them, ensuring each meatball is well-coated. This step is crucial because the sauce infuses flavor into the meatballs as they cook. Give it a gentle stir to mix everything together.

Step 2: Prepare the Ricotta Mixture

In a separate bowl, mix the ricotta cheese, Italian seasoning, garlic powder, salt, and black pepper. Stir until everything is well combined. This creamy mixture adds a rich layer to your casserole. If you want a little kick, consider adding a pinch of red pepper flakes!

Step 3: Layer the Ingredients

Now comes the fun part—layering! Start by adding half of the cooked pasta over the meatballs in the slow cooker. Spoon half of the ricotta mixture on top, followed by half of the shredded mozzarella cheese. Repeat this process with the remaining pasta, ricotta, and mozzarella. Each layer builds flavor and texture, making every bite a delight.

Step 4: Cook the Casserole

Cover the slow cooker and set it to cook on low for 4-6 hours or on high for 2-3 hours. The key here is patience. As it cooks, the flavors meld together beautifully, and the cheese becomes melty and bubbly. You’ll know it’s ready when the meatballs are heated through and the cheese is golden.

Step 5: Garnish and Serve

Once your casserole is done cooking, sprinkle the grated Parmesan cheese on top. Let it sit for about 5 minutes before serving. This resting time allows the flavors to settle. If you have fresh basil leaves, toss a few on top for a burst of color and freshness. Now, dig in and enjoy your savory masterpiece!

Tips for Success

  • Use a good quality marinara sauce for the best flavor.
  • Don’t skip the resting time after cooking; it helps the casserole set.
  • Feel free to customize with your favorite veggies for added nutrition.
  • For a creamier texture, mix in a bit of sour cream with the ricotta.
  • Leftovers can be stored in the fridge for up to three days—perfect for lunch!

Equipment Needed

  • Slow cooker: A must-have for this recipe. If you don’t have one, a Dutch oven can work too.
  • Mixing bowl: For combining the ricotta mixture. Any bowl will do!
  • Measuring cups: Handy for portioning ingredients, but you can eyeball it if you’re feeling adventurous.
  • Spatula: Great for layering and serving your casserole.

Variations

  • Vegetarian Option: Swap out meatballs for plant-based alternatives or use hearty vegetables like mushrooms and zucchini for a filling dish.
  • Spicy Kick: Add diced jalapeños or a splash of hot sauce to the marinara for a spicy twist that’ll wake up your taste buds.
  • Cheesy Delight: Mix in a blend of different cheeses like provolone or gouda for a unique flavor profile.
  • Whole Grain Goodness: Use whole wheat or gluten-free pasta to make this dish healthier without sacrificing taste.
  • Herb Infusion: Experiment with fresh herbs like thyme or oregano in the ricotta mixture for an aromatic boost.

Serving Suggestions

  • Garlic Bread: Serve with warm, buttery garlic bread for a classic pairing that complements the casserole.
  • Salad: A fresh green salad with a light vinaigrette adds a refreshing contrast to the rich flavors.
  • Wine: Pair with a glass of red wine, like Chianti, to enhance the Italian flavors.
  • Presentation: Serve in individual bowls, garnished with fresh basil for a pop of color.

FAQs about Savory Slow Cooker Meatball Casserole

Can I use fresh meatballs instead of frozen? Absolutely! Fresh meatballs can be used, but you may need to adjust the cooking time. Just ensure they are cooked through before serving.

How can I make this dish gluten-free? To make a gluten-free Savory Slow Cooker Meatball Casserole, simply use gluten-free pasta and ensure your meatballs and marinara sauce are gluten-free as well.

Can I prepare this casserole in advance? Yes! You can assemble the casserole the night before and store it in the fridge. Just pop it in the slow cooker when you’re ready to cook.

What can I serve with this casserole? This dish pairs wonderfully with garlic bread, a fresh salad, or even some roasted vegetables for a complete meal.

How do I store leftovers? Leftovers can be stored in an airtight container in the fridge for up to three days. Reheat in the microwave or oven until warmed through.

Final Thoughts

Cooking is more than just a task; it’s a way to connect with those we love. My Savory Slow Cooker Meatball Casserole embodies that spirit. It’s a dish that brings everyone together, filling the home with warmth and delicious aromas. The joy of serving a meal that’s both comforting and easy to prepare is unmatched. Whether it’s a busy weeknight or a casual gathering, this casserole is sure to impress. So, roll up your sleeves, gather your ingredients, and let the slow cooker work its magic. You’ll create not just a meal, but cherished memories around the table.

Ranis

Savory Slow Cooker Meatball Casserole: Try This Easy Recipe!

A delicious and easy recipe for a savory slow cooker meatball casserole, perfect for family dinners.
Prep Time 15 minutes
Servings: 6 servings
Course: Main Dish
Cuisine: Italian
Calories: 350

Ingredients
  

  • 1 pound frozen meatballs about 24 meatballs
  • 1 jar 24 ounces marinara sauce
  • 1 cup shredded mozzarella cheese
  • 1 cup ricotta cheese
  • 1 teaspoon Italian seasoning
  • 1 teaspoon garlic powder
  • 1/2 teaspoon salt
  • 1/4 teaspoon black pepper
  • 1 cup cooked pasta such as penne or rotini
  • 1/4 cup grated Parmesan cheese
  • Fresh basil leaves for garnish optional

Method
 

  1. In the slow cooker, combine the frozen meatballs and marinara sauce. Stir to coat the meatballs evenly with the sauce.
  2. In a separate bowl, mix together the ricotta cheese, Italian seasoning, garlic powder, salt, and black pepper until well combined.
  3. Layer half of the cooked pasta over the meatballs in the slow cooker. Spoon half of the ricotta mixture over the pasta, followed by half of the mozzarella cheese.
  4. Repeat the layers with the remaining pasta, ricotta mixture, and mozzarella cheese.
  5. Cover the slow cooker and cook on low for 4-6 hours or on high for 2-3 hours, until the meatballs are heated through and the cheese is melted and bubbly.
  6. Before serving, sprinkle the grated Parmesan cheese on top and let it sit for 5 minutes. Garnish with fresh basil leaves if desired.

Nutrition

Serving: 1servingCalories: 350kcalCarbohydrates: 30gProtein: 22gFat: 18gSaturated Fat: 9gPolyunsaturated Fat: 6gCholesterol: 60mgSodium: 800mgFiber: 2gSugar: 6g

Notes

  • For a healthier twist, substitute turkey or chicken meatballs for a leaner option.
  • Add chopped vegetables like bell peppers or spinach to the layers for extra nutrition and flavor.

Tried this recipe?

Let us know how it was!

Crockpot Loaded Potatoes: Discover a Creamy Delight!

Introduction to Crockpot Loaded Potatoes

There’s something undeniably comforting about a warm, creamy dish that feels like a hug on a plate.

Crockpot Loaded Potatoes are just that—a delightful blend of tender russet potatoes, rich cheese, and crispy bacon that can turn any ordinary day into a special occasion.

Whether you’re juggling a busy workweek or planning a cozy family dinner, this recipe is your go-to solution.

With minimal prep and the magic of slow cooking, you can impress your loved ones without spending hours in the kitchen.

Let’s dive into this creamy delight that’s sure to become a favorite!

Why You’ll Love This Crockpot Loaded Potatoes

Crockpot Loaded Potatoes are the ultimate crowd-pleaser.

They combine ease and flavor, making them perfect for any occasion.

With just a few minutes of prep, you can set it and forget it, allowing the slow cooker to work its magic.

The result? Creamy, cheesy goodness that melts in your mouth.

Plus, they’re versatile enough to please everyone at the table, from picky eaters to gourmet lovers.

Ingredients for Crockpot Loaded Potatoes

Creating the perfect Crockpot Loaded Potatoes starts with the right ingredients.

Here’s what you’ll need to whip up this creamy delight:

  • Russet Potatoes: These starchy beauties are the backbone of the dish, providing a fluffy texture when cooked.
  • Shredded Cheddar Cheese: This adds a rich, melty layer of flavor that makes every bite irresistible.
  • Cooked and Crumbled Bacon: For that savory crunch, bacon brings a smoky depth that elevates the dish.
  • Sour Cream: Creamy and tangy, it adds a luscious texture and balances the flavors beautifully.
  • Green Onions: These provide a fresh, zesty kick and a pop of color to your loaded potatoes.
  • Garlic Powder: A sprinkle of this adds a warm, aromatic flavor that enhances the overall taste.
  • Onion Powder: Similar to garlic powder, it deepens the flavor profile without overpowering the dish.
  • Salt and Pepper: Essential for seasoning, these staples bring out the best in all the ingredients.
  • Milk (optional): If you want extra creaminess, a splash of milk can take your potatoes to the next level.

Feel free to get creative!

You can find the exact quantities for each ingredient at the bottom of the article, ready for printing.

Let’s get cooking!

How to Make Crockpot Loaded Potatoes

Making Crockpot Loaded Potatoes is a breeze.

With just a few simple steps, you’ll have a creamy, cheesy dish that’s sure to impress.

Let’s break it down step by step.

Prepare the Potatoes

Start by scrubbing your russet potatoes clean.

This removes any dirt and ensures they’re ready for cooking.

Next, prick each potato several times with a fork.

This allows steam to escape while they cook, preventing any explosions in your crockpot.

Season them generously with salt and pepper.

Then, wrap each potato tightly in aluminum foil.

This helps them cook evenly and keeps them moist.

Cook the Potatoes

Now it’s time to place the wrapped potatoes in your crockpot.

Set it to cook on low for 6-8 hours or high for 4-5 hours.

The goal is to have them tender enough to easily pierce with a fork.

While they cook, you can go about your day, knowing a delicious meal is on the way.

Prepare the Topping

Once the potatoes are cooked, carefully unwrap them.

Cut each potato lengthwise, being cautious of the steam.

Gently squeeze the sides to open them up.

In a mixing bowl, combine sour cream, garlic powder, onion powder, and milk if you’re using it.

Stir until everything is well blended.

This creamy mixture is what makes these loaded potatoes truly special.

Assemble the Loaded Potatoes

Spoon the sour cream mixture into each opened potato.

Don’t be shy—load it up!

Then, sprinkle shredded cheddar cheese, crumbled bacon, and chopped green onions on top.

The colors and textures will make your mouth water.

This is where the magic happens, transforming simple potatoes into a loaded delight.

Final Cooking Step

Return the assembled loaded potatoes to the crockpot.

Cover and cook on low for an additional 30 minutes.

This allows the cheese to melt beautifully over the toppings.

When the timer goes off, your Crockpot Loaded Potatoes are ready to serve.

Enjoy the creamy goodness and watch everyone come back for seconds!

Tips for Success

  • Don’t skip the pricking step; it prevents potatoes from bursting during cooking.
  • For extra flavor, try adding spices like paprika or cayenne pepper to the seasoning.
  • Use a mix of cheeses for a unique twist—pepper jack adds a nice kick!
  • Let the potatoes cool slightly before unwrapping to avoid steam burns.
  • For a vegetarian option, swap bacon for sautéed mushrooms or spinach.

Equipment Needed

  • Crockpot: A slow cooker is essential for this recipe. If you don’t have one, a Dutch oven can work too.
  • Aluminum Foil: This keeps the potatoes moist while cooking. Parchment paper can be a substitute.
  • Mixing Bowl: For combining the toppings. Any bowl will do!
  • Fork: To prick the potatoes and later fluff them up.

Variations

  • Spicy Loaded Potatoes: Add diced jalapeños or a drizzle of hot sauce for a fiery kick.
  • BBQ Chicken Loaded Potatoes: Top with shredded BBQ chicken instead of bacon for a smoky flavor.
  • Vegetarian Delight: Replace bacon with sautéed bell peppers and mushrooms for a hearty, meat-free option.
  • Cheesy Broccoli Loaded Potatoes: Mix in steamed broccoli with the cheese for a nutritious twist.
  • Herb-Infused Potatoes: Add fresh herbs like chives or parsley to the topping for a burst of freshness.

Serving Suggestions

  • Pair with a Salad: A crisp green salad balances the richness of the loaded potatoes.
  • Serve with Grilled Meat: These potatoes complement grilled chicken or steak beautifully.
  • Top with Extra Green Onions: A sprinkle of fresh green onions adds a pop of color.
  • Enjoy with a Cold Beer: A light lager or pale ale pairs perfectly with the flavors.

FAQs about Crockpot Loaded Potatoes

Can I make Crockpot Loaded Potatoes ahead of time?

Absolutely! You can prepare the potatoes and toppings in advance. Just store them separately in the fridge. When you’re ready to serve, assemble and cook them in the crockpot. This makes for a quick meal on busy days!

What can I substitute for sour cream?

If you’re not a fan of sour cream, Greek yogurt is a fantastic alternative. It offers a similar creaminess with a bit of tang. You can also use cream cheese for a richer flavor.

How do I store leftovers?

Leftover Crockpot Loaded Potatoes can be stored in an airtight container in the fridge for up to three days. Reheat them in the microwave or oven until warmed through. They make for a delicious snack or quick meal!

Can I freeze loaded potatoes?

While it’s possible to freeze them, the texture may change once thawed. If you plan to freeze, do so before adding toppings. When ready to eat, thaw and then add your toppings before reheating.

What other toppings can I add to my loaded potatoes?

The sky’s the limit! Consider adding diced tomatoes, avocado, or even a drizzle of ranch dressing. You can also experiment with different cheeses or herbs to create your perfect loaded potato experience.

Final Thoughts

Crockpot Loaded Potatoes are more than just a dish; they’re a celebration of comfort and flavor.

Each bite is a delightful mix of creamy, cheesy goodness that warms the soul.

Whether you’re serving them at a family gathering or enjoying a quiet night in, these potatoes bring everyone together.

The best part? They require minimal effort, allowing you to savor the moment rather than stress in the kitchen.

So, grab your crockpot and let the magic happen.

You’ll find that this creamy delight quickly becomes a cherished staple in your home!

Ranis

Crockpot Loaded Potatoes: Discover a Creamy Delight!

Crockpot Loaded Potatoes are a creamy and delicious dish made with tender russet potatoes, topped with cheese, bacon, and green onions.
Prep Time 15 minutes
Servings: 4 servings
Course: Side Dish
Cuisine: American
Calories: 450

Ingredients
  

  • 4 large russet potatoes scrubbed clean
  • 1 cup shredded cheddar cheese
  • 1 cup cooked and crumbled bacon
  • 1 cup sour cream
  • 1/2 cup green onions chopped
  • 1 teaspoon garlic powder
  • 1 teaspoon onion powder
  • Salt and pepper to taste
  • 1/4 cup milk optional, for creaminess

Method
 

  1. Prick each potato several times with a fork and season with salt and pepper. Wrap each potato in aluminum foil and place them in the crockpot.
  2. Cook on low for 6-8 hours or on high for 4-5 hours, until the potatoes are tender.
  3. Once cooked, carefully remove the potatoes from the crockpot and unwrap them. Cut each potato lengthwise and gently squeeze to open.
  4. In a mixing bowl, combine the sour cream, garlic powder, onion powder, and milk (if using). Stir well to combine.
  5. Spoon the sour cream mixture into each potato, then top with shredded cheddar cheese, crumbled bacon, and chopped green onions.
  6. Return the loaded potatoes to the crockpot and cover. Cook on low for an additional 30 minutes to melt the cheese.
  7. Serve warm and enjoy your delicious loaded potatoes!

Nutrition

Serving: 1potatoCalories: 450kcalCarbohydrates: 40gProtein: 20gFat: 25gSaturated Fat: 10gPolyunsaturated Fat: 15gCholesterol: 50mgSodium: 800mgFiber: 4gSugar: 2g

Notes

  • For a vegetarian version, omit the bacon and add sautéed mushrooms or spinach.
  • Experiment with different cheese varieties, such as pepper jack or mozzarella, for a unique flavor twist.

Tried this recipe?

Let us know how it was!

Spicy Ginger Chicken: Ignite Your Dinner Tonight!

Introduction to Spicy Ginger Chicken

When I think of a dish that can turn a regular weeknight into something special, Spicy Ginger Chicken comes to mind.

This recipe is a delightful blend of flavors that brings warmth and excitement to the table.

Whether you’re racing against the clock after a long day or looking to impress your loved ones, this dish is your go-to solution.

With just a handful of ingredients, you can create a meal that’s not only quick but also bursting with taste.

Let’s dive into this culinary adventure that’s sure to ignite your dinner tonight!

Why You’ll Love This Spicy Ginger Chicken

This Spicy Ginger Chicken is a game-changer for busy nights.

It’s quick to prepare, taking just 45 minutes from start to finish.

The combination of ginger, soy sauce, and honey creates a flavor explosion that will have your taste buds dancing.

Plus, it’s versatile enough to pair with rice or veggies, making it a complete meal.

Trust me, once you try it, you’ll be adding it to your regular rotation!

Ingredients for Spicy Ginger Chicken

Creating Spicy Ginger Chicken is all about using fresh, vibrant ingredients that work together to create a symphony of flavors.

Here’s what you’ll need:

  • Boneless, skinless chicken thighs: Tender and juicy, they soak up the marinade beautifully.
  • Vegetable oil: This is your cooking fat of choice, perfect for sautéing.
  • Onion: Sliced onions add sweetness and depth to the dish.
  • Garlic: Minced garlic brings a punch of flavor that complements the ginger.
  • Fresh ginger: Grated ginger is the star of the show, giving the dish its signature spice.
  • Soy sauce: This salty, umami-rich ingredient forms the base of the marinade.
  • Honey: A touch of sweetness balances the heat and saltiness.
  • Rice vinegar: Adds a tangy note that brightens the overall flavor.
  • Red pepper flakes: Adjust these to your spice preference for that extra kick.
  • Black pepper: A simple seasoning that enhances the dish.
  • Green onions: Sliced for garnish, they add a fresh crunch.
  • Sesame seeds: These are optional but add a nice touch of texture and flavor.

For exact measurements, check the bottom of the article where you can find everything listed for easy printing.

Feel free to get creative! You can swap chicken thighs for breasts if you prefer, or even try tofu for a vegetarian twist.

The beauty of this recipe lies in its flexibility, so don’t hesitate to make it your own!

How to Make Spicy Ginger Chicken

Cooking Spicy Ginger Chicken is a straightforward process that anyone can master.

With just a few steps, you’ll have a delicious meal ready to impress.

Let’s break it down step by step.

Step 1: Prepare the Marinade

Start by grabbing a large bowl.

Combine soy sauce, honey, rice vinegar, grated ginger, red pepper flakes, and black pepper.

Whisk everything together until it’s well blended.

This marinade is where the magic begins, infusing the chicken with flavor.

Step 2: Marinate the Chicken

Next, add the boneless, skinless chicken thighs to the marinade.

Make sure each piece is fully coated.

Cover the bowl and let it sit in the fridge for at least 30 minutes.

If you have time, marinating for up to 2 hours will deepen the flavors even more.

Step 3: Sauté the Onions

While the chicken is marinating, heat vegetable oil in a large skillet over medium-high heat.

Add the sliced onion and sauté for about 3-4 minutes.

You want them softened and slightly caramelized, adding a sweet base to your dish.

Step 4: Cook the Chicken

Once the onions are ready, remove the chicken from the marinade, but don’t toss that marinade just yet!

Add the chicken to the skillet and cook for 5-7 minutes on each side.

You’re looking for a nice golden-brown color and for the chicken to be cooked through.

Step 5: Add the Marinade

Now, pour the reserved marinade into the skillet.

Bring it to a simmer and let it cook for an additional 3-4 minutes.

This step thickens the sauce and allows all those flavors to meld beautifully.

Step 6: Garnish and Serve

Finally, remove the skillet from heat.

Garnish your Spicy Ginger Chicken with sliced green onions and a sprinkle of sesame seeds.

Serve it hot over steamed rice or quinoa, and enjoy the burst of flavors in every bite!

Tips for Success

  • Always marinate the chicken for at least 30 minutes, but longer is better for flavor.
  • Adjust the red pepper flakes to suit your spice tolerance; start small and add more if needed.
  • Use a meat thermometer to ensure the chicken reaches 165°F for perfect doneness.
  • Don’t skip the garnishes; they add freshness and visual appeal to your dish.
  • Pair with a side of steamed veggies for a balanced meal.

Equipment Needed

  • Large bowl: For mixing the marinade; a mixing jug works too.
  • Skillet: A non-stick skillet is ideal, but any large pan will do.
  • Whisk: To blend the marinade; a fork can work in a pinch.
  • Meat thermometer: Ensures chicken is cooked perfectly; optional but recommended.

Variations

  • Spicy Ginger Tofu: Swap chicken for firm tofu for a delicious vegetarian option. Just press the tofu to remove excess moisture before marinating.
  • Honey Garlic Chicken: Omit the red pepper flakes and add extra honey for a sweeter, milder flavor profile.
  • Vegetable Medley: Toss in your favorite vegetables like bell peppers, snap peas, or carrots during the cooking process for added nutrition and color.
  • Gluten-Free Option: Use tamari instead of soy sauce to keep this dish gluten-free without sacrificing flavor.
  • Herb Infusion: Add fresh herbs like cilantro or basil at the end for a fresh twist that brightens the dish.

Serving Suggestions

  • Serve Spicy Ginger Chicken over a bed of fluffy steamed rice or quinoa for a hearty meal.
  • Add a side of sautéed broccoli or snap peas for a colorful, nutritious boost.
  • Pair with a chilled Asian lager or a refreshing iced green tea.
  • For presentation, sprinkle extra sesame seeds and green onions on top before serving.

FAQs about Spicy Ginger Chicken

Can I use chicken breasts instead of thighs for this recipe?

Absolutely! While I love the juiciness of chicken thighs, breasts work just as well. Just be mindful to not overcook them, as they can dry out more easily.

How can I make Spicy Ginger Chicken less spicy?

If you prefer a milder flavor, simply reduce the amount of red pepper flakes or omit them entirely. You can also add a bit more honey to balance the heat.

Can I prepare the marinade in advance?

Yes! You can make the marinade a day ahead and store it in the fridge. Just give it a good stir before using it to ensure everything is well mixed.

What can I serve with Spicy Ginger Chicken?

This dish pairs wonderfully with steamed rice, quinoa, or even a fresh salad. For extra veggies, consider adding steamed broccoli or snap peas on the side.

Is this recipe gluten-free?

Yes, it can be! Just swap out the soy sauce for tamari, which is a gluten-free alternative. Enjoy the same great flavor without the gluten!

Final Thoughts

Cooking Spicy Ginger Chicken is more than just preparing a meal; it’s about creating an experience that brings joy to your table.

The aroma of ginger and garlic wafting through your kitchen is enough to make anyone’s mouth water.

This dish is a celebration of flavors that can turn an ordinary evening into something memorable.

Whether you’re sharing it with family or enjoying it solo, each bite is a reminder of the simple pleasures of home cooking.

So, roll up your sleeves and ignite your dinner tonight with this delightful recipe!

Ranis

Spicy Ginger Chicken: Ignite Your Dinner Tonight!

A flavorful and spicy chicken dish that combines ginger, soy sauce, and honey for a delicious dinner option.
Prep Time 30 minutes
Cook Time 15 minutes
Total Time 45 minutes
Servings: 4 servings
Course: Main Dish
Cuisine: Asian
Calories: 320

Ingredients
  

  • 2 pounds boneless skinless chicken thighs
  • 2 tablespoons vegetable oil
  • 1 medium onion sliced
  • 4 cloves garlic minced
  • 1 tablespoon fresh ginger grated
  • 1/4 cup soy sauce
  • 2 tablespoons honey
  • 1 tablespoon rice vinegar
  • 1 teaspoon red pepper flakes adjust to taste
  • 1/4 teaspoon black pepper
  • 2 green onions sliced (for garnish)
  • Sesame seeds for garnish

Method
 

  1. In a large bowl, combine the soy sauce, honey, rice vinegar, grated ginger, red pepper flakes, and black pepper. Whisk until well blended.
  2. Add the chicken thighs to the marinade, ensuring they are fully coated. Cover and refrigerate for at least 30 minutes, or up to 2 hours for more flavor.
  3. Heat the vegetable oil in a large skillet over medium-high heat. Add the sliced onion and sauté for about 3-4 minutes until softened.
  4. Remove the chicken from the marinade (reserving the marinade) and add it to the skillet. Cook for 5-7 minutes on each side until the chicken is browned and cooked through.
  5. Pour the reserved marinade into the skillet and bring to a simmer. Cook for an additional 3-4 minutes, allowing the sauce to thicken slightly.
  6. Remove from heat and garnish with sliced green onions and sesame seeds before serving.

Nutrition

Serving: 1servingCalories: 320kcalCarbohydrates: 8gProtein: 28gFat: 18gSugar: 8g

Notes

  • For a spicier kick, add more red pepper flakes or a dash of sriracha to the marinade.
  • Serve over steamed rice or quinoa for a complete meal, and add steamed broccoli or snap peas for extra veggies.

Tried this recipe?

Let us know how it was!

Taco Soup Delight: Discover a Cozy, Delicious Recipe!

Introduction to Taco Soup Delight

There’s something magical about a warm bowl of soup on a chilly evening. Taco Soup Delight is that cozy hug in a bowl, perfect for those busy days when you crave comfort without the fuss. This recipe combines the heartiness of ground beef or turkey with vibrant beans and corn, all wrapped in a blanket of spices. It’s not just a meal; it’s a way to gather around the table and share stories. Whether you’re feeding a family or impressing friends, this dish is sure to bring smiles and satisfied bellies.

Why You’ll Love This Taco Soup Delight

This Taco Soup Delight is a game-changer for your weeknight dinners. It’s quick to whip up, taking just 40 minutes from start to finish. The flavors are bold and satisfying, making it a hit with everyone at the table. Plus, it’s versatile! You can easily customize it to suit your taste or dietary needs. With minimal cleanup and maximum flavor, it’s a win-win for busy cooks like us.

Ingredients for Taco Soup Delight

Gathering the right ingredients is the first step to creating your Taco Soup Delight. Here’s what you’ll need:

  • Ground beef (or turkey): This is the protein base, adding richness and heartiness. Turkey is a leaner option if you prefer.
  • Onion: Diced onion brings sweetness and depth to the soup, enhancing the overall flavor.
  • Bell pepper: Any color works! It adds a pop of color and a slight crunch.
  • Garlic: Minced garlic infuses the soup with aromatic goodness, making it irresistible.
  • Black beans: These beans add protein and fiber, making the soup more filling.
  • Kidney beans: Another great source of protein, they also contribute a lovely texture.
  • Corn: Sweet corn adds a burst of flavor and a hint of sweetness to balance the spices.
  • Diced tomatoes: Canned tomatoes provide a juicy base, adding acidity and richness.
  • Taco seasoning: This is where the magic happens! It’s a blend of spices that gives the soup its signature flavor.
  • Beef broth (or vegetable broth): The liquid that ties everything together, adding depth and moisture.
  • Salt and pepper: Essential for seasoning, enhancing all the flavors in the soup.
  • Shredded cheddar cheese: A delicious topping that melts beautifully, adding creaminess.
  • Sour cream: A dollop on top adds a tangy contrast to the spices.
  • Tortilla chips: Perfect for scooping and adding a crunchy texture to each bite.

For those looking to mix things up, consider these options:

  • For a vegetarian version, swap the ground meat for lentils or a meat alternative and use vegetable broth.
  • Add diced jalapeños or a splash of hot sauce for an extra kick.
  • Top with avocado slices for a creamy texture that complements the spices.

Exact measurements for each ingredient can be found at the bottom of the article, ready for printing!

How to Make Taco Soup Delight

Creating Taco Soup Delight is a straightforward process that anyone can master. Follow these simple steps, and you’ll have a delicious, hearty meal ready in no time. Let’s dive in!

Step 1: Brown the Meat

Start by heating a large pot or Dutch oven over medium heat. Add your ground beef or turkey, breaking it apart with a spatula. Cook until it’s browned and no longer pink, about 5-7 minutes. If there’s excess fat, drain it off. This step is crucial for a rich flavor base.

Step 2: Sauté the Vegetables

Next, toss in the diced onion, bell pepper, and minced garlic. Sauté these veggies for about 5 minutes, or until they soften. The aroma will fill your kitchen, making it hard to resist! This step adds depth to your Taco Soup Delight.

Step 3: Combine Ingredients

Now it’s time to bring everything together. Stir in the black beans, kidney beans, corn, diced tomatoes, taco seasoning, and beef broth. Mix well to ensure all the flavors meld together. This is where the magic of Taco Soup begins!

Step 4: Simmer the Soup

Bring the mixture to a boil, then reduce the heat to low. Let it simmer uncovered for about 20-25 minutes. Stir occasionally to prevent sticking. This simmering time allows the flavors to deepen, creating a comforting, hearty soup.

Step 5: Season to Taste

After simmering, taste your soup. Add salt and pepper as needed. This is your chance to adjust the flavors to your liking. If you want a little more heat, consider adding some diced jalapeños or a splash of hot sauce!

Step 6: Serve and Enjoy

Finally, ladle the soup into bowls. Top each serving with shredded cheddar cheese and a dollop of sour cream. Serve with tortilla chips on the side for that perfect crunch. Enjoy your Taco Soup Delight with family or friends, and watch the smiles appear!

Tips for Success

  • Prep your ingredients ahead of time to streamline the cooking process.
  • Don’t skip the simmering step; it’s key for flavor development.
  • Adjust the spice level to your preference by adding more or less taco seasoning.
  • For a thicker soup, let it simmer longer or add more beans.
  • Store leftovers in an airtight container for up to three days.

Equipment Needed

  • Large pot or Dutch oven: Essential for cooking the soup evenly. A deep skillet can work in a pinch.
  • Spatula: Perfect for browning meat and stirring ingredients. A wooden spoon is a great alternative.
  • Measuring cups and spoons: Handy for precise ingredient amounts, though you can eyeball it if you’re feeling adventurous.

Variations

  • Vegetarian Delight: Swap the ground meat for lentils or a plant-based meat alternative. Use vegetable broth for a hearty, meat-free option.
  • Spicy Kick: Add diced jalapeños or a few dashes of your favorite hot sauce to amp up the heat. Perfect for those who love a fiery flavor!
  • Southwestern Twist: Incorporate diced zucchini or bell peppers for extra veggies. They add color and nutrition without compromising taste.
  • Cheesy Goodness: Mix in cream cheese or Velveeta during the simmering stage for a creamy, cheesy version of Taco Soup Delight.
  • Low-Carb Option: Replace beans with cauliflower rice or shredded cabbage for a lighter, low-carb take on this classic dish.

Serving Suggestions

  • Pair your Taco Soup Delight with warm, crusty bread or homemade cornbread for a comforting meal.
  • Serve with a side of fresh guacamole and salsa for added flavor.
  • For drinks, consider a cold beer or a refreshing margarita to complement the spices.
  • Garnish with fresh cilantro or lime wedges for a vibrant presentation.

FAQs about Taco Soup Delight

Can I make Taco Soup Delight in a slow cooker?

Absolutely! Brown the meat and sauté the vegetables first, then transfer everything to a slow cooker. Cook on low for 6-8 hours or high for 3-4 hours. This method allows the flavors to meld beautifully.

Is Taco Soup Delight gluten-free?

Yes, this recipe is naturally gluten-free! Just ensure that your taco seasoning and broth are labeled gluten-free. It’s a hearty option for those with dietary restrictions.

Can I freeze Taco Soup Delight?

Definitely! This soup freezes well. Just let it cool completely, then store it in an airtight container. It can last up to three months in the freezer. Reheat on the stovetop or in the microwave when you’re ready to enjoy it again.

What can I use instead of ground beef?

If you’re looking for alternatives, ground turkey or chicken works great. For a vegetarian option, lentils or a meat substitute are excellent choices. They’ll still give you that hearty texture!

How can I make Taco Soup Delight spicier?

To kick up the heat, add diced jalapeños, a splash of hot sauce, or even some crushed red pepper flakes. Adjust the spice level to suit your taste buds!

Final Thoughts

Taco Soup Delight is more than just a meal; it’s an experience that warms the heart and fills the belly. Each spoonful brings a burst of flavor, reminding me of cozy nights spent with family and friends. The beauty of this recipe lies in its simplicity and versatility, allowing you to make it your own. Whether you’re enjoying it on a quiet evening or serving it at a gathering, this soup is sure to create lasting memories. So grab your ingredients, gather your loved ones, and let the joy of Taco Soup Delight fill your home with warmth and laughter.

Ranis

Taco Soup Delight: Discover a Cozy, Delicious Recipe!

Taco Soup Delight is a cozy and delicious recipe that combines ground beef (or turkey) with beans, corn, and spices for a hearty meal.
Prep Time 10 minutes
Cook Time 30 minutes
Total Time 40 minutes
Servings: 6 servings
Course: Soup
Cuisine: Mexican
Calories: 350

Ingredients
  

  • 1 pound ground beef or turkey
  • 1 medium onion diced
  • 1 bell pepper diced (any color)
  • 2 cloves garlic minced
  • 1 can 15 ounces black beans, rinsed and drained
  • 1 can 15 ounces kidney beans, rinsed and drained
  • 1 can 15 ounces corn, drained
  • 1 can 28 ounces diced tomatoes (with juices)
  • 1 packet taco seasoning about 1 ounce
  • 2 cups beef broth or vegetable broth
  • Salt and pepper to taste
  • 1 cup shredded cheddar cheese for topping
  • 1 cup sour cream for topping
  • Tortilla chips for serving

Method
 

  1. In a large pot or Dutch oven, brown the ground beef (or turkey) over medium heat until fully cooked. Drain excess fat if necessary.
  2. Add the diced onion, bell pepper, and minced garlic to the pot. Sauté for about 5 minutes, or until the vegetables are softened.
  3. Stir in the black beans, kidney beans, corn, diced tomatoes, taco seasoning, and beef broth. Mix well to combine.
  4. Bring the mixture to a boil, then reduce the heat to low. Simmer uncovered for about 20-25 minutes, stirring occasionally.
  5. Taste and season with salt and pepper as needed.
  6. Serve hot, topped with shredded cheddar cheese, a dollop of sour cream, and tortilla chips on the side.

Nutrition

Serving: 1bowlCalories: 350kcalCarbohydrates: 30gProtein: 25gFat: 15gSaturated Fat: 6gPolyunsaturated Fat: 9gCholesterol: 70mgSodium: 800mgFiber: 8gSugar: 3g

Notes

  • For a vegetarian version, substitute the ground beef with lentils or a meat alternative and use vegetable broth.
  • Add diced jalapeños or a splash of hot sauce for extra heat, or top with avocado slices for a creamy texture.

Tried this recipe?

Let us know how it was!

Campfire Breakfast Pizza: A Delicious Morning Treat!

Introduction to Campfire Breakfast Pizza

There’s something magical about waking up in the great outdoors, the sun peeking through the trees, and the smell of fresh air filling your lungs. Now, imagine adding a delicious Campfire Breakfast Pizza to that morning scene. This recipe is not just a meal; it’s an experience that brings friends and family together around the fire. Whether you’re camping or just enjoying a backyard cookout, this breakfast pizza is a quick and easy solution to start your day right. It’s a dish that will impress your loved ones and fuel your adventures ahead!

Why You’ll Love This Campfire Breakfast Pizza

This Campfire Breakfast Pizza is a game-changer for your morning routine. It’s incredibly easy to whip up, making it perfect for those lazy weekends or busy mornings. The combination of gooey cheese, savory sausage, and fresh veggies creates a flavor explosion that will have everyone asking for seconds. Plus, cooking it over a campfire adds a smoky twist that elevates the whole experience. You’ll love how quickly it comes together, leaving more time for adventure!

Ingredients for Campfire Breakfast Pizza

Gathering the right ingredients is the first step to creating your Campfire Breakfast Pizza masterpiece. Here’s what you’ll need:

  • All-purpose flour: The base for your dough, providing structure and chewiness.
  • Baking powder: This leavening agent helps the dough rise, giving it a light texture.
  • Salt: Essential for enhancing flavors and balancing the sweetness of the dough.
  • Sugar: Just a touch to add a hint of sweetness to the crust.
  • Vegetable oil: Keeps the dough moist and adds richness.
  • Milk: Adds moisture and helps bind the ingredients together.
  • Shredded mozzarella cheese: The gooey, melty star of the show that brings everything together.
  • Large eggs: The protein-packed filling that makes this pizza a hearty breakfast option.
  • Cooked and crumbled breakfast sausage: Adds a savory kick; feel free to swap it out for bacon or leave it out for a vegetarian option.
  • Diced bell peppers: Fresh and colorful, they add crunch and a pop of flavor.
  • Chopped green onions: A sprinkle of these brings a fresh, oniony bite to the mix.
  • Salt and pepper: To taste, ensuring every bite is seasoned just right.

For those looking to mix things up, consider adding mushrooms or spinach for extra veggies. You can also experiment with different cheeses like cheddar or feta for a unique flavor twist. Exact quantities for each ingredient are available at the bottom of the article for easy printing!

How to Make Campfire Breakfast Pizza

Creating your Campfire Breakfast Pizza is a fun and straightforward process. Follow these steps, and you’ll have a delicious breakfast ready in no time. Let’s dive in!

Step 1: Prepare the Dough

Start by mixing the dry ingredients in a large bowl. Combine the all-purpose flour, baking powder, salt, and sugar. Stir them together until well blended. Then, add the vegetable oil and milk. Mix until just combined. Don’t overwork the dough; it should be slightly sticky but manageable.

Step 2: Form the Crust

Next, lightly grease your cast-iron skillet or pizza stone. This step is crucial to prevent sticking. Press the dough into the bottom of the skillet or stone, forming a nice, even crust. Aim for about half an inch thick. This will give you a sturdy base for all those tasty toppings!

Step 3: Add Cheese

Now, sprinkle half of the shredded mozzarella cheese over the crust. This layer acts as a barrier, keeping the crust from getting soggy. Plus, who doesn’t love extra cheese? It’s the gooey goodness that makes this Campfire Breakfast Pizza irresistible!

Step 4: Prepare the Egg Mixture

In a separate bowl, crack the large eggs and beat them well. Season with salt and pepper to taste. This mixture is what brings everything together, adding protein and richness. Pour the beaten eggs evenly over the cheese, ensuring every bite will be flavorful.

Step 5: Assemble the Pizza

Time to add the fun toppings! Scatter the cooked and crumbled breakfast sausage, diced bell peppers, and chopped green onions over the egg mixture. Finally, top it all off with the remaining mozzarella cheese. This layering creates a delicious medley of flavors that will have everyone coming back for more.

Step 6: Cook Over Campfire

Cover your skillet with aluminum foil or a lid. This helps the eggs cook evenly and keeps the heat in. Place the skillet over your campfire or grill, cooking for about 15-20 minutes. Keep an eye on it! You want the eggs to be set and the cheese to be melted. Once done, let it cool for a few minutes before slicing and serving. Enjoy your Campfire Breakfast Pizza!

Tips for Success

  • Use fresh ingredients for the best flavor; it makes a noticeable difference.
  • Don’t rush the cooking process; let the pizza cook thoroughly for even results.
  • Experiment with toppings based on your preferences; the sky’s the limit!
  • Keep a close eye on the campfire heat; adjust as needed to avoid burning.
  • Let the pizza cool slightly before slicing to prevent messy servings.

Equipment Needed

  • Cast-iron skillet: Perfect for even cooking; a heavy-duty pan works too.
  • Aluminum foil: Essential for covering the skillet; a lid can substitute.
  • Campfire or grill: Any outdoor heat source will do.
  • Mixing bowls: For combining ingredients; a large one is ideal.
  • Spatula: Handy for serving and slicing the pizza.

Variations

  • Vegetarian Delight: Omit the sausage and load up on veggies like mushrooms, spinach, or zucchini for a fresh twist.
  • Cheese Lovers: Swap mozzarella for cheddar, feta, or pepper jack to add a unique flavor profile.
  • Spicy Kick: Add jalapeños or a sprinkle of red pepper flakes for those who enjoy a bit of heat.
  • Herb Infusion: Mix in fresh herbs like basil or cilantro to elevate the flavor and freshness.
  • Breakfast Burrito Style: Use a tortilla instead of dough for a fun, portable version of breakfast pizza.

Serving Suggestions

  • Fresh Fruit: Serve with a side of seasonal fruit for a refreshing contrast.
  • Hot Coffee: Pair with a steaming cup of coffee or your favorite morning brew.
  • Presentation: Slice the pizza into wedges and serve on a rustic wooden board.
  • Yogurt: A dollop of yogurt on the side adds creaminess and tang.

FAQs about Campfire Breakfast Pizza

Can I make Campfire Breakfast Pizza ahead of time?

Absolutely! You can prepare the dough and toppings in advance. Just store them in airtight containers in the cooler. When you’re ready to cook, assemble and bake over the campfire for a quick breakfast.

What if I don’t have a cast-iron skillet?

No worries! You can use a heavy-duty baking sheet or a pizza stone. Just make sure to grease it well to prevent sticking. The key is to ensure even heat distribution.

Can I use different types of cheese?

Definitely! While mozzarella is a classic choice, feel free to experiment with cheddar, feta, or even pepper jack for a spicy twist. Each cheese brings its own unique flavor to the pizza.

How do I know when the pizza is done cooking?

Keep an eye on the pizza while it cooks. It’s done when the eggs are set, and the cheese is melted and bubbly. A gentle shake of the skillet can help you check if the eggs are firm.

Is this recipe suitable for a vegetarian diet?

Yes! Simply omit the sausage and load up on your favorite vegetables. This Campfire Breakfast Pizza can easily be adapted to fit a vegetarian lifestyle while still being delicious and satisfying.

Final Thoughts

Cooking a Campfire Breakfast Pizza is more than just preparing a meal; it’s about creating memories. The laughter shared around the fire, the aroma of melting cheese, and the satisfaction of a hearty breakfast all come together to make your outdoor mornings special. This recipe invites you to embrace the simplicity of cooking in nature while enjoying delicious flavors. Whether you’re camping with friends or having a backyard brunch, this pizza is sure to bring smiles and full bellies. So gather your ingredients, light that fire, and let the adventure begin!

Ranis

Campfire Breakfast Pizza: A Delicious Morning Treat!

A delicious and easy-to-make breakfast pizza cooked over a campfire, perfect for outdoor mornings.
Prep Time 10 minutes
Cook Time 20 minutes
Total Time 30 minutes
Servings: 4 servings
Course: Breakfast
Cuisine: American
Calories: 320

Ingredients
  

  • 2 cups all-purpose flour
  • 1 tablespoon baking powder
  • 1 teaspoon salt
  • 1 tablespoon sugar
  • 1/4 cup vegetable oil
  • 3/4 cup milk
  • 1 cup shredded mozzarella cheese
  • 4 large eggs
  • 1/2 cup cooked and crumbled breakfast sausage
  • 1/2 cup diced bell peppers
  • 1/4 cup chopped green onions
  • Salt and pepper to taste

Method
 

  1. In a large bowl, mix together the flour, baking powder, salt, and sugar.
  2. Add the vegetable oil and milk to the dry ingredients, stirring until just combined.
  3. Lightly grease a cast-iron skillet or a pizza stone. Press the dough into the bottom of the skillet or stone to form a crust.
  4. Preheat your campfire or grill to medium heat.
  5. Sprinkle half of the mozzarella cheese over the crust.
  6. In a separate bowl, beat the eggs and season with salt and pepper. Pour the eggs evenly over the cheese.
  7. Top the eggs with the cooked sausage, diced bell peppers, green onions, and the remaining mozzarella cheese.
  8. Cover the skillet with aluminum foil or a lid to help the eggs cook evenly.
  9. Place the skillet over the campfire or on the grill, cooking for about 15-20 minutes or until the eggs are set and the cheese is melted.
  10. Remove from heat and let cool for a few minutes before slicing and serving.

Nutrition

Serving: 1sliceCalories: 320kcalCarbohydrates: 30gProtein: 14gFat: 18gSaturated Fat: 6gPolyunsaturated Fat: 10gCholesterol: 200mgSodium: 500mgFiber: 1gSugar: 1g

Notes

  • For a vegetarian option, omit the sausage and add more vegetables like mushrooms or spinach.
  • Experiment with different cheeses, such as cheddar or feta, for a unique flavor twist.

Tried this recipe?

Let us know how it was!

One-Pot Italian Chicken and Orzo: A Quick Delight!

Introduction to One-Pot Italian Chicken and Orzo

Cooking can sometimes feel like a race against the clock, especially on those busy weeknights. That’s where my love for One-Pot Italian Chicken and Orzo comes in. This dish is not just a meal; it’s a comforting hug in a bowl.

With its vibrant flavors and simple preparation, it’s perfect for impressing family or friends without spending hours in the kitchen.

In just 30 minutes, you can whip up a delicious, hearty dinner that satisfies everyone at the table. Trust me, this recipe will quickly become your go-to for quick solutions on hectic days.

Why You’ll Love This One-Pot Italian Chicken and Orzo

This One-Pot Italian Chicken and Orzo is a game-changer for anyone juggling a busy schedule.

It’s incredibly easy to make, requiring minimal cleanup—just one pot!

The flavors meld beautifully, creating a dish that’s both comforting and satisfying.

Plus, it’s versatile enough to adapt to your taste.

Whether you’re feeding a family or just yourself, this recipe delivers deliciousness without the fuss.

Ingredients for One-Pot Italian Chicken and Orzo

Gathering the right ingredients is the first step to creating a delightful One-Pot Italian Chicken and Orzo. Here’s what you’ll need:

  • Olive oil: This liquid gold adds richness and depth to the dish.
  • Boneless, skinless chicken thighs: Tender and juicy, they soak up all the flavors beautifully.
  • Salt and black pepper: Essential seasonings that enhance the overall taste.
  • Onion: Diced onion brings sweetness and a savory base to the dish.
  • Garlic: Minced garlic adds a fragrant kick that elevates the flavor profile.
  • Cherry tomatoes: These burst with sweetness and add a pop of color.
  • Dried oregano and basil: Classic Italian herbs that infuse the dish with aromatic goodness.
  • Red pepper flakes (optional): For those who like a little heat, these add a nice kick.
  • Orzo pasta: This tiny pasta cooks quickly and absorbs the delicious broth.
  • Chicken broth: A flavorful base that ties all the ingredients together.
  • Fresh spinach: Adds a vibrant green touch and a boost of nutrition.
  • Grated Parmesan cheese: A sprinkle of this cheesy goodness brings everything together.
  • Fresh basil leaves: For garnish, they add a fresh aroma and a beautiful finish.

Feel free to get creative! You can swap chicken thighs for chicken breasts for a lighter option or use vegetable broth and omit the chicken for a vegetarian delight.

If you want to pack in more veggies, consider adding bell peppers or zucchini.

For exact quantities, check the bottom of the article where you can find everything available for printing.

How to Make One-Pot Italian Chicken and Orzo

Creating this One-Pot Italian Chicken and Orzo is a breeze.

Follow these simple steps, and you’ll have a delicious meal ready in no time.

Step 1: Sauté the Chicken

Start by heating the olive oil in a large pot or Dutch oven over medium-high heat.

Once the oil shimmers, toss in the chicken pieces.

Season them with salt and pepper.

Cook until they’re golden brown on all sides, about 5-7 minutes.

Remove the chicken from the pot and set it aside.

This step builds a flavorful base for your dish.

Step 2: Cook the Aromatics

In the same pot, add the diced onion.

Sauté for about 3-4 minutes until it softens and becomes translucent.

Next, stir in the minced garlic and cook for an additional minute.

You want that fragrant aroma to fill your kitchen.

It’s the kind of smell that makes everyone curious about dinner!

Step 3: Add the Vegetables and Herbs

Now, it’s time to bring in the cherry tomatoes, dried oregano, and basil.

If you’re feeling adventurous, sprinkle in some red pepper flakes for a kick.

Cook this mixture for 2-3 minutes until the tomatoes start to soften.

The colors and scents will make your mouth water!

Step 4: Incorporate the Orzo and Broth

Stir in the orzo pasta, ensuring it gets coated in all those delicious flavors.

Then, pour in the chicken broth and bring the mixture to a boil.

Once boiling, reduce the heat to a simmer.

Return the chicken to the pot and cover it.

Let it cook for about 10-12 minutes, or until the orzo is tender and has absorbed most of the liquid.

This is where the magic happens!

Step 5: Finish with Spinach and Cheese

Once the orzo is cooked, stir in the chopped spinach and grated Parmesan cheese.

Cook for an additional 2 minutes until the spinach wilts and the cheese melts into the dish.

The final result should be a creamy, comforting bowl of goodness.

Serve hot, garnished with fresh basil leaves for that extra touch.

You’ve just created a meal that’s sure to impress!

Tips for Success

  • Prep your ingredients ahead of time to streamline the cooking process.
  • Don’t skip browning the chicken; it adds depth to the flavor.
  • Adjust the seasoning to your taste; a little extra salt can make a big difference.
  • For a creamier texture, add a splash of heavy cream at the end.
  • Store leftovers in an airtight container for up to three days.

Equipment Needed

  • Large pot or Dutch oven: Essential for even cooking; a deep skillet works too.
  • Wooden spoon: Perfect for stirring; a spatula can also do the job.
  • Measuring cups and spoons: For accuracy; you can eyeball it if you’re confident!
  • Cutting board and knife: Necessary for prepping ingredients; a good chef’s knife is a must.

Variations

  • Vegetarian Delight: Swap the chicken for chickpeas or lentils and use vegetable broth for a hearty vegetarian option.
  • Spicy Kick: Add more red pepper flakes or diced jalapeños for an extra layer of heat.
  • Herb Infusion: Experiment with fresh herbs like thyme or rosemary for a different flavor profile.
  • Cheesy Goodness: Mix in different cheeses like mozzarella or feta for a unique twist.
  • Seasonal Veggies: Incorporate seasonal vegetables like asparagus or peas for added nutrition and color.

Serving Suggestions

  • Garlic Bread: Serve with warm, crusty garlic bread for a delightful pairing.
  • Salad: A fresh green salad with a light vinaigrette complements the dish perfectly.
  • Wine: Pair with a crisp white wine, like Pinot Grigio, to enhance the flavors.
  • Presentation: Garnish with extra basil and a sprinkle of Parmesan for a beautiful finish.

FAQs about One-Pot Italian Chicken and Orzo

Can I use other types of pasta instead of orzo?

Absolutely! While orzo is perfect for this dish, you can substitute it with other small pasta shapes like ditalini or even couscous. Just keep an eye on the cooking time, as it may vary.

How can I make this dish gluten-free?

To make a gluten-free version of One-Pot Italian Chicken and Orzo, simply swap the orzo for a gluten-free pasta. There are many great options available that will work just as well!

Can I prepare this dish in advance?

Yes! You can prep the ingredients ahead of time and store them in the fridge. Just follow the cooking instructions when you’re ready to enjoy your meal. It’s a great way to save time on busy nights!

What can I do with leftovers?

Leftovers can be stored in an airtight container in the fridge for up to three days. Reheat on the stovetop or in the microwave, adding a splash of broth if it seems dry. Enjoy it as a quick lunch or dinner!

Is this dish suitable for meal prep?

Definitely! One-Pot Italian Chicken and Orzo is perfect for meal prep. It reheats well and maintains its flavor, making it an excellent choice for weekly lunches or dinners.

Final Thoughts

Cooking should be a joyful experience, and this One-Pot Italian Chicken and Orzo embodies that spirit.

It’s not just about the meal; it’s about the memories created around the table.

With its rich flavors and comforting textures, this dish brings everyone together, making even the busiest nights feel special.

Whether you’re sharing it with family or enjoying a quiet dinner alone, each bite is a reminder of the simple pleasures in life.

So, roll up your sleeves, embrace the process, and let this recipe become a cherished part of your culinary repertoire.

Ranis

One-Pot Italian Chicken and Orzo: A Quick Delight!

A quick and delicious one-pot meal featuring Italian chicken and orzo pasta, perfect for busy weeknights.
Prep Time 10 minutes
Cook Time 20 minutes
Total Time 30 minutes
Servings: 4 servings
Course: Main Course
Cuisine: Italian
Calories: 450

Ingredients
  

  • 2 tablespoons olive oil
  • 1 pound boneless skinless chicken thighs, cut into bite-sized pieces
  • 1 teaspoon salt
  • 1/2 teaspoon black pepper
  • 1 medium onion diced
  • 3 cloves garlic minced
  • 1 cup cherry tomatoes halved
  • 1 teaspoon dried oregano
  • 1 teaspoon dried basil
  • 1/2 teaspoon red pepper flakes optional
  • 1 cup orzo pasta
  • 4 cups chicken broth
  • 1 cup fresh spinach roughly chopped
  • 1/2 cup grated Parmesan cheese
  • Fresh basil leaves for garnish

Method
 

  1. In a large pot or Dutch oven, heat the olive oil over medium-high heat. Add the chicken pieces and season with salt and pepper. Cook until browned on all sides, about 5-7 minutes. Remove the chicken from the pot and set aside.
  2. In the same pot, add the diced onion and sauté for about 3-4 minutes until softened. Stir in the minced garlic and cook for an additional 1 minute until fragrant.
  3. Add the cherry tomatoes, oregano, basil, and red pepper flakes (if using) to the pot. Cook for another 2-3 minutes until the tomatoes start to soften.
  4. Stir in the orzo pasta and pour in the chicken broth. Bring the mixture to a boil, then reduce the heat to a simmer. Return the chicken to the pot and cover. Cook for about 10-12 minutes, or until the orzo is tender and has absorbed most of the liquid.
  5. Once cooked, stir in the chopped spinach and grated Parmesan cheese. Cook for an additional 2 minutes until the spinach wilts.
  6. Serve hot, garnished with fresh basil leaves.

Nutrition

Serving: 1servingCalories: 450kcalCarbohydrates: 40gProtein: 30gFat: 20gSaturated Fat: 5gPolyunsaturated Fat: 15gCholesterol: 100mgSodium: 800mgFiber: 2gSugar: 3g

Notes

  • For a lighter version, substitute the chicken thighs with chicken breast or use vegetable broth and omit the chicken for a vegetarian option.
  • Add other vegetables like bell peppers or zucchini for extra flavor and nutrition.

Tried this recipe?

Let us know how it was!

Kale and White Bean Soup: A Delicious Healthy Delight!

Introduction to Kale and White Bean Soup

When the chill of winter settles in, nothing warms the soul quite like a steaming bowl of kale and white bean soup.

This dish is not just a meal; it’s a hug in a bowl.

I remember my grandmother making a similar soup on cold evenings, filling the house with comforting aromas.

This kale and white bean soup is perfect for busy days when you need something quick yet nourishing.

It’s simple to whip up, and the flavors meld beautifully, making it a delightful choice for impressing family or friends.

Let’s dive into this healthy delight!

Why You’ll Love This Kale and White Bean Soup

This kale and white bean soup is a game-changer for anyone juggling a busy lifestyle.

It comes together in just 40 minutes, making it a quick solution for weeknight dinners.

The combination of hearty white beans and vibrant kale creates a satisfying dish that’s both nutritious and delicious.

Plus, it’s versatile enough to adapt to your taste, ensuring everyone at the table will love it!

Ingredients for Kale and White Bean Soup

Creating a delicious kale and white bean soup starts with gathering the right ingredients.

Here’s what you’ll need:

  • Olive oil: This adds a rich flavor and helps sauté the vegetables.
  • Onion: Diced onion brings sweetness and depth to the soup.
  • Garlic: Minced garlic adds a punch of flavor that elevates the dish.
  • Carrot: Diced carrots contribute a subtle sweetness and vibrant color.
  • Celery: This adds a nice crunch and aromatic quality to the base.
  • Vegetable broth: A flavorful base that ties all the ingredients together.
  • White beans: Canned white beans provide protein and creaminess.
  • Kale: Fresh kale is packed with nutrients and adds a hearty texture.
  • Dried thyme: This herb enhances the soup’s flavor with its earthy notes.
  • Salt and black pepper: Essential for seasoning and bringing out the flavors.
  • Lemon juice: A splash of lemon brightens the soup and adds freshness.
  • Grated Parmesan cheese (optional): For those who enjoy a cheesy finish, this adds a savory touch.

Feel free to get creative!

For a heartier soup, consider adding diced potatoes or cooked sausage.

If you’re looking for a different flavor profile, swap the kale for spinach or Swiss chard.

All ingredient quantities are listed at the bottom of the article for easy printing.

How to Make Kale and White Bean Soup

Making kale and white bean soup is a straightforward process that anyone can master.

With just a few simple steps, you’ll have a hearty, nutritious meal ready to enjoy.

Let’s get cooking!

Step 1: Sauté the Aromatics

Start by heating the olive oil in a large pot over medium heat.

Once the oil is shimmering, toss in the diced onion.

Sauté it for about 3-4 minutes until it turns translucent and fragrant.

Next, add the minced garlic, diced carrot, and celery.

Cook these together for another 5 minutes, stirring occasionally.

This aromatic base is the heart of your kale and white bean soup!

Step 2: Add the Broth

Now it’s time to pour in the vegetable broth.

Bring the mixture to a rolling boil, letting those flavors meld together.

This step is crucial as it sets the stage for the rest of the soup.

Step 3: Incorporate the Beans and Kale

Once boiling, add the drained white beans and chopped kale to the pot.

Sprinkle in the dried thyme, salt, and black pepper.

Stir everything together, then reduce the heat to a gentle simmer.

Let it cook for about 15-20 minutes, allowing the kale to soften and the flavors to deepen.

Your kitchen will smell amazing!

Step 4: Finish with Lemon Juice

Just before serving, stir in the lemon juice.

This brightens the soup and adds a refreshing zing.

Now, you’re ready to ladle this delicious kale and white bean soup into bowls!

Tips for Success

  • Prep your ingredients ahead of time to streamline the cooking process.
  • Don’t skip the sautéing step; it builds a flavorful base for your soup.
  • Adjust the seasoning to your taste; a pinch more salt or pepper can make a difference.
  • For extra creaminess, mash some of the white beans before adding them.
  • Store leftovers in an airtight container for up to three days.

Equipment Needed

  • Large pot: A sturdy pot is essential for making your soup. A Dutch oven works great too.
  • Cutting board: A solid cutting board makes chopping veggies a breeze.
  • Knife: A sharp chef’s knife is key for efficient chopping.
  • Wooden spoon: Perfect for stirring and mixing your ingredients.
  • Measuring cups: Handy for portioning out your ingredients accurately.

Variations

  • Spicy Kick: Add a pinch of red pepper flakes for a bit of heat.
  • Herb Infusion: Experiment with fresh herbs like basil or parsley for a different flavor profile.
  • Protein Boost: Stir in cooked chicken or turkey for a heartier meal.
  • Vegan Option: Ensure the Parmesan cheese is omitted or replaced with a vegan alternative.
  • Grain Addition: Toss in cooked quinoa or farro for added texture and nutrition.

Serving Suggestions

  • Crusty Bread: Serve with a slice of warm, crusty bread for dipping.
  • Salad Pairing: A light side salad with vinaigrette complements the soup beautifully.
  • Wine Choice: A crisp white wine, like Sauvignon Blanc, enhances the flavors.
  • Garnish: Top with extra Parmesan and a sprinkle of fresh herbs for presentation.

FAQs about Kale and White Bean Soup

Can I use frozen kale instead of fresh?

Absolutely! Frozen kale works well in this kale and white bean soup. Just add it during the last few minutes of cooking to ensure it heats through without losing its texture.

How can I make this soup gluten-free?

This kale and white bean soup is naturally gluten-free! Just ensure that your vegetable broth is labeled gluten-free, and you’re good to go.

Can I make this soup in advance?

Yes! This soup actually tastes better the next day as the flavors meld. Store it in an airtight container in the fridge for up to three days.

What can I serve with kale and white bean soup?

Pair it with crusty bread, a fresh salad, or even a light pasta dish. The options are endless!

Is this soup suitable for meal prep?

Definitely! This kale and white bean soup is perfect for meal prep. Just portion it out in containers for easy lunches or dinners throughout the week.

Final Thoughts

Cooking this kale and white bean soup is more than just preparing a meal; it’s about creating a moment of warmth and comfort.

Each spoonful is a reminder of home, filled with nourishing ingredients that not only satisfy the belly but also the soul.

Whether you’re enjoying it solo or sharing it with loved ones, this soup brings people together.

It’s a dish that adapts to your tastes and lifestyle, making it a staple in any kitchen.

So, grab your ingredients and let the aroma fill your home—this kale and white bean soup is sure to become a cherished favorite!

Ranis

Kale and White Bean Soup: A Delicious Healthy Delight!

A delicious and healthy kale and white bean soup that is perfect for any meal.
Prep Time 10 minutes
Cook Time 30 minutes
Total Time 40 minutes
Servings: 4 servings
Course: Soup
Cuisine: American
Calories: 180

Ingredients
  

  • 1 tablespoon olive oil
  • 1 small onion diced
  • 2 cloves garlic minced
  • 1 carrot diced
  • 1 celery stalk diced
  • 4 cups vegetable broth
  • 1 can 15 ounces white beans, drained and rinsed
  • 4 cups kale chopped
  • 1 teaspoon dried thyme
  • 1 teaspoon salt
  • ½ teaspoon black pepper
  • 1 tablespoon lemon juice
  • Grated Parmesan cheese optional, for serving

Method
 

  1. In a large pot, heat the olive oil over medium heat. Add the diced onion and sauté for about 3-4 minutes until it becomes translucent.
  2. Stir in the minced garlic, diced carrot, and diced celery. Cook for an additional 5 minutes, stirring occasionally.
  3. Pour in the vegetable broth and bring the mixture to a boil.
  4. Once boiling, add the white beans, chopped kale, dried thyme, salt, and black pepper. Reduce the heat and let it simmer for about 15-20 minutes, or until the kale is tender.
  5. Stir in the lemon juice just before serving.
  6. Serve hot, garnished with grated Parmesan cheese if desired.

Nutrition

Serving: 1bowlCalories: 180kcalCarbohydrates: 25gProtein: 8gFat: 5gSaturated Fat: 1gPolyunsaturated Fat: 4gSodium: 800mgFiber: 7gSugar: 2g

Notes

  • For a heartier soup, add diced potatoes or cooked sausage.
  • Substitute the kale with spinach or Swiss chard for a different flavor profile.

Tried this recipe?

Let us know how it was!