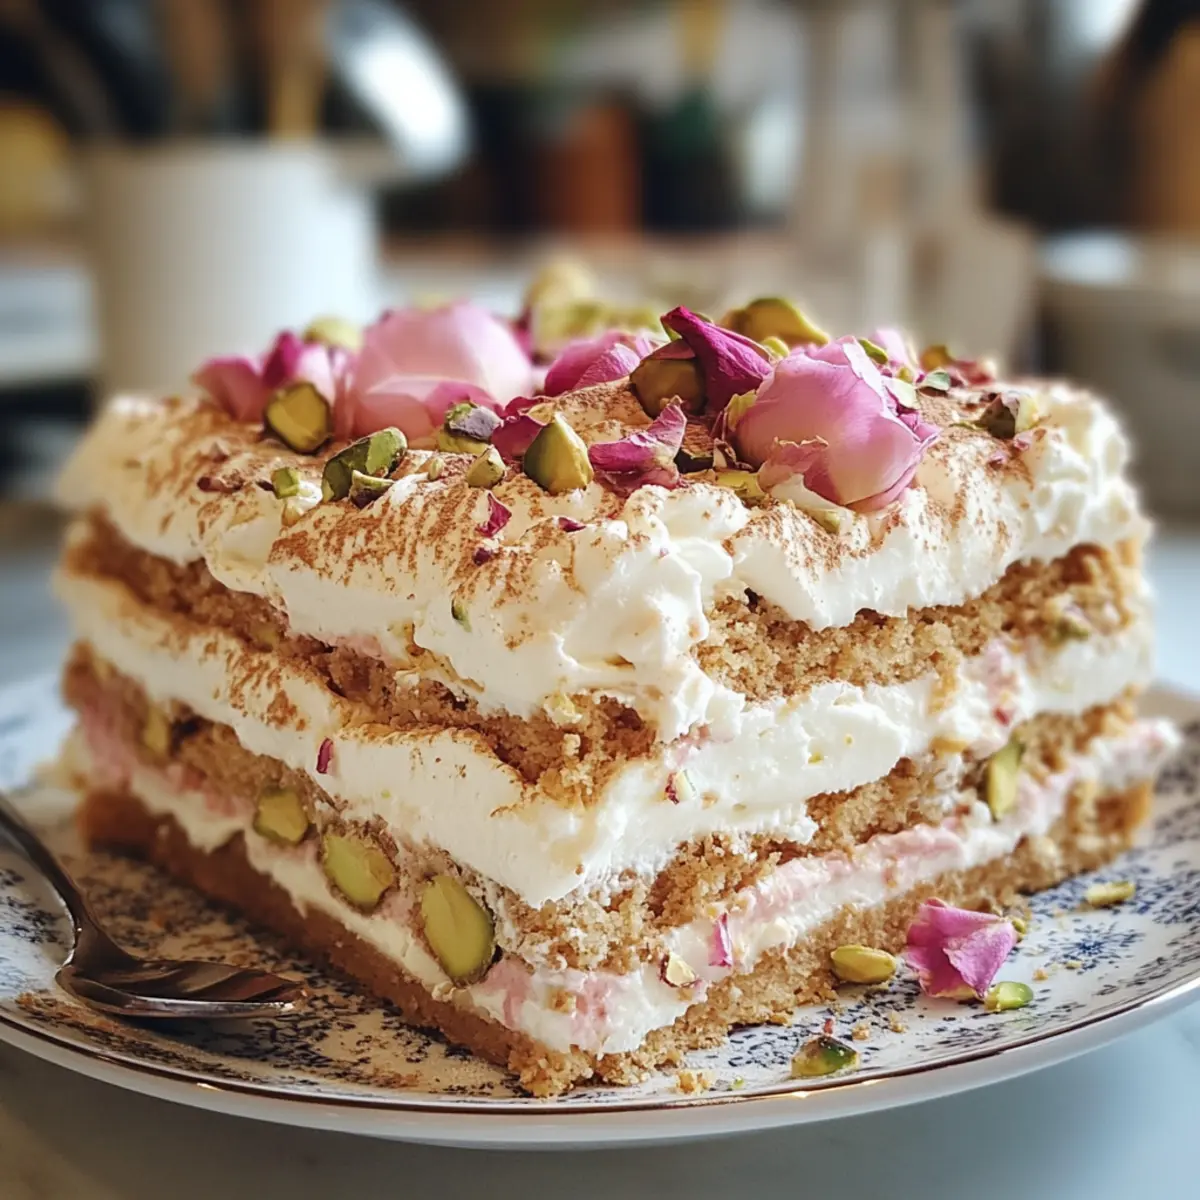
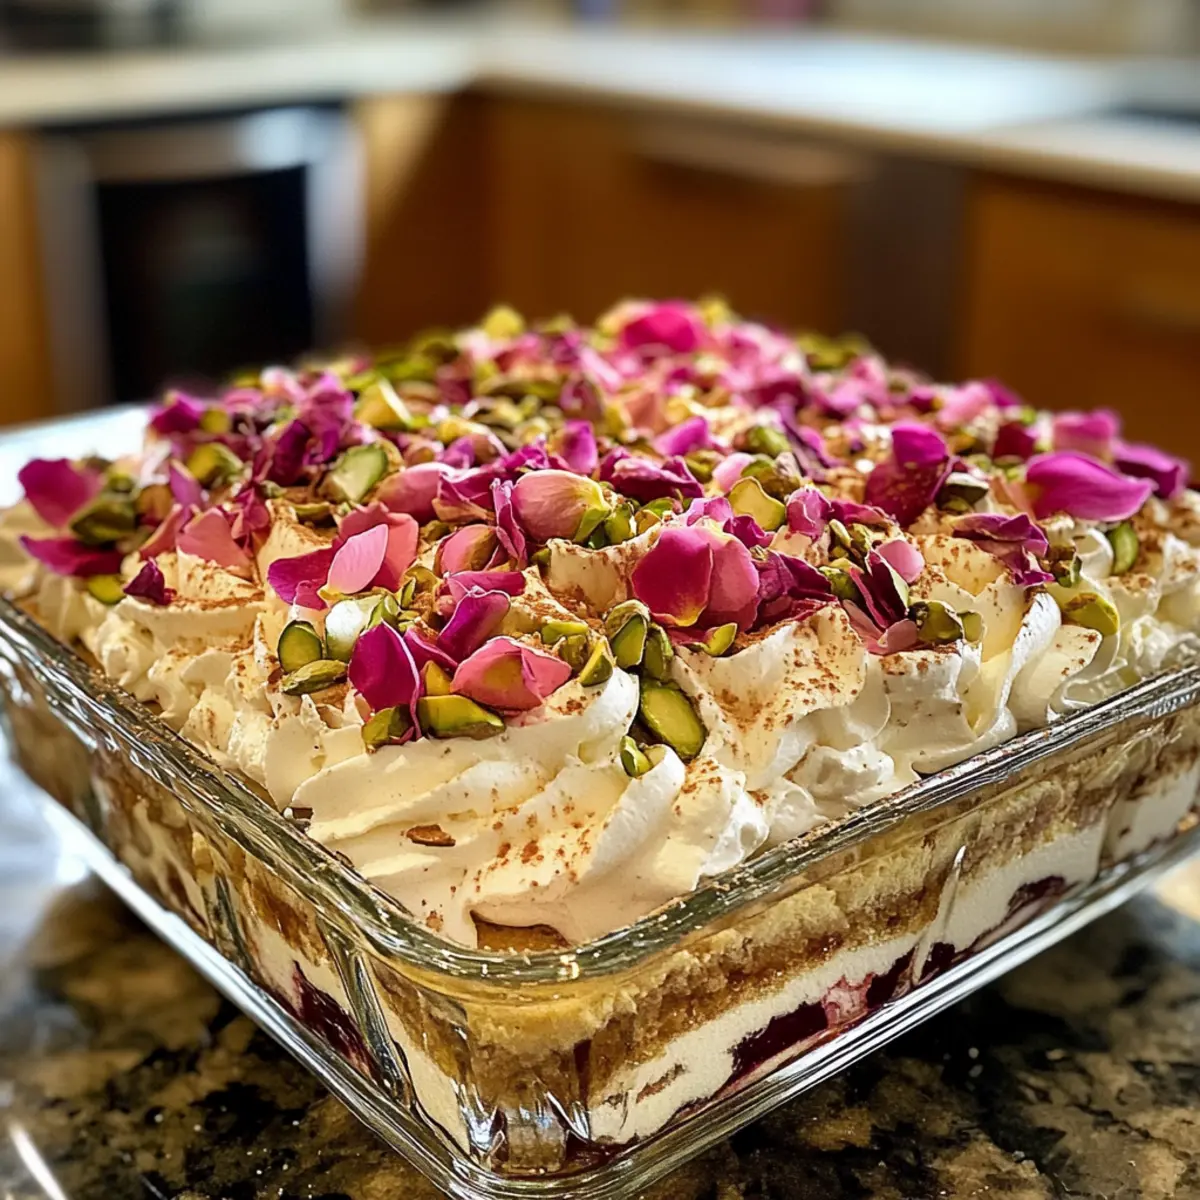
As I lifted the lid off the dessert dish, the sweet, floral aroma of this luxurious Eggless Rose Tiramisu whisked me away to a sunlit café in the heart of Italy. This no-bake delight is designed for those special moments—whether it’s a sunny afternoon with friends or an elegant gathering. What I love most about this Rose Tiramisu is its simplicity; it requires minimal effort but delivers maximum satisfaction. Plus, it’s egg-free, making it a perfect fit for vegetarians or anyone avoiding eggs. With creamy layers infused with rose syrup and delicate ladyfingers, it’s a comforting dessert that’s easily customizable to suit any palate. Curious about how to make this heavenly treat? Let’s dive into the details!
Why is this Rose Tiramisu special?
Unique Flavor Combination: The floral essence of rose syrup intertwined with rich mascarpone creates a refreshing twist on a classic dessert.
No-Bake Convenience: No oven required! This recipe is perfect for warm days or when time is tight, making it an easy go-to for gatherings.
Customizable Delight: Change it up by adding layers of fruit or experimenting with flavored syrups. Check out our ideas for a Dairy-Free Delight or a chocolate twist!
Vegetarian-Friendly: With no eggs in sight, you can serve this indulgent dish worry-free to vegetarians and egg-sensitive friends alike.
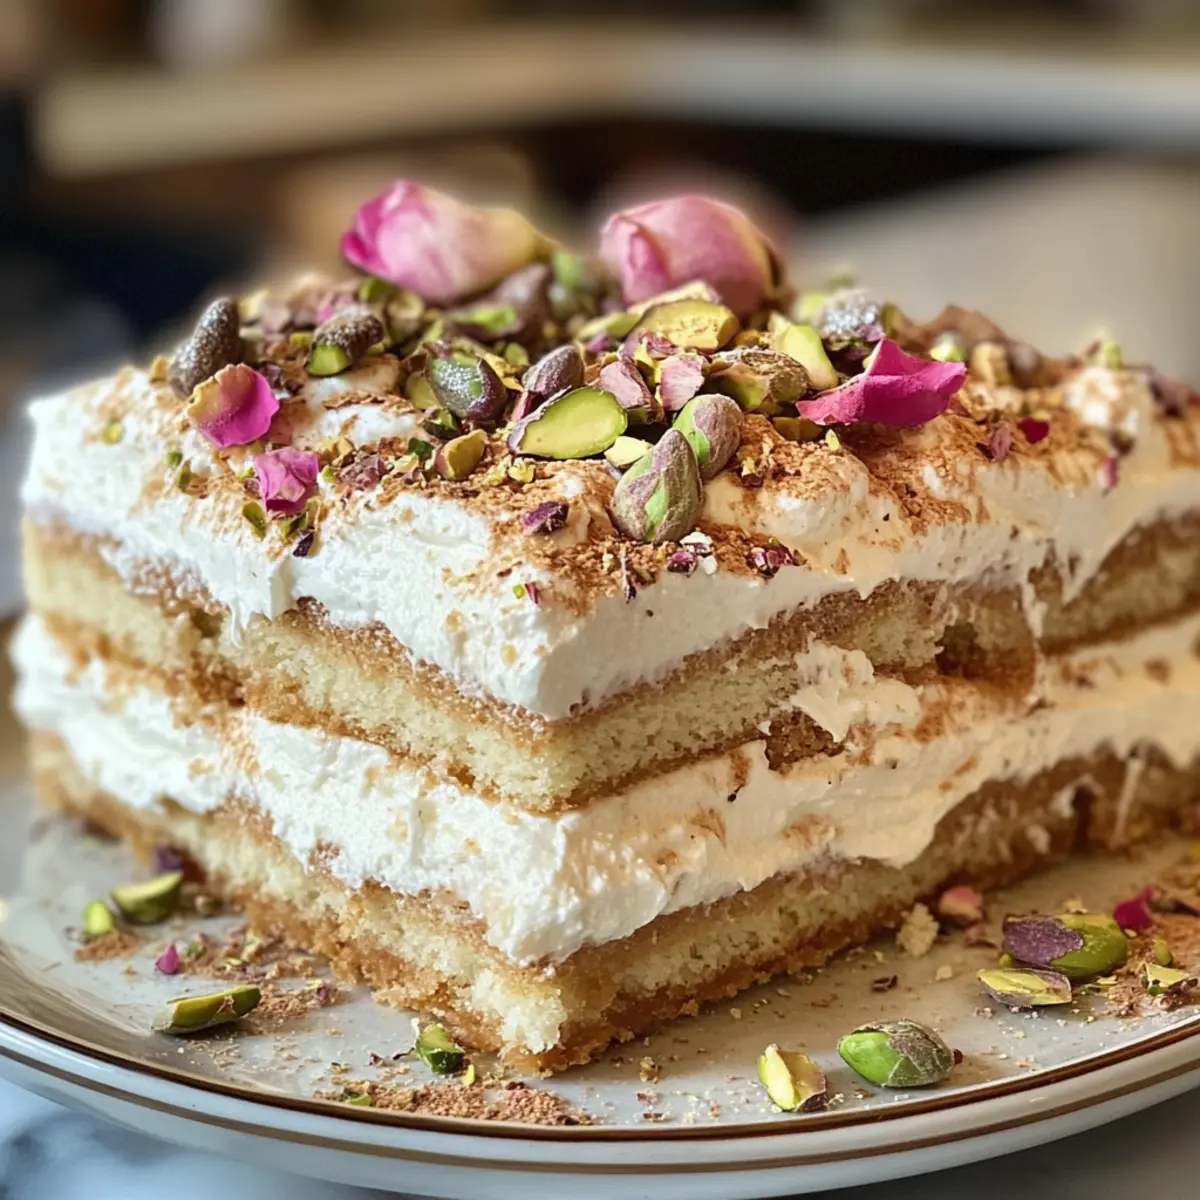
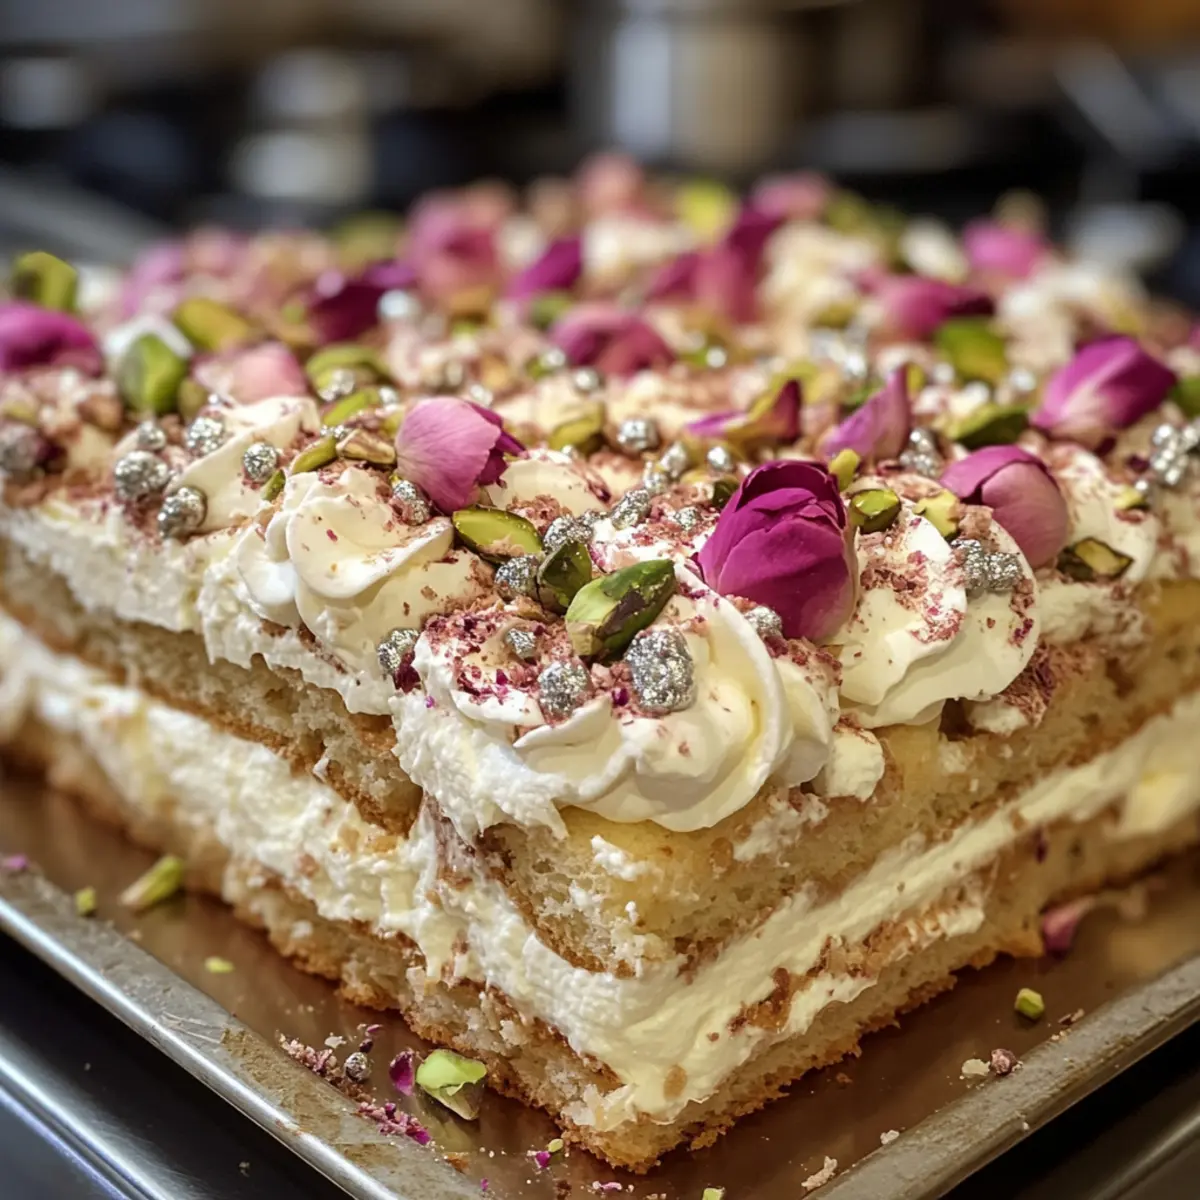
Impressive Presentation: Topped with food-grade rose buds and silvered pistachios, your guests will be in awe before even tasting the exquisite layers!
Rose Tiramisu Ingredients
• Prepare to create this exquisite Rose Tiramisu with these essential ingredients that will bring your dessert to life!
For the Rose Milk Mixture
• Rose Syrup – Provides sweetness and floral flavor; opt for Rooh Afza for an authentic taste.
• Full Fat Milk – Enhances the creaminess of the rose milk mixture; using whole milk is key for the best flavor.
• Rose Water – Adds a subtle floral note; a drop of rose essence can substitute if needed.
For the Mascarpone Layer
• Mascarpone Cheese – Acts as the rich cream layer; ensure it’s very cold for easy whipping.
• Powdered Sugar – Sweetens the mascarpone mixture; confectioners’ sugar works best.
• Heavy Cream – Creates a light and airy texture; chilling before use is essential.
For Assembly
• Ladyfinger Cookies – Provides structure to the dessert; these are used to create the layered effect.
For Decoration
• Food Grade Rose Buds – For decoration and visual appeal; enhance the presentation.
• Silvered Pistachios – Adds a crunchy texture as a finishing touch.
With these ingredients, you’re ready to whip up this delightful and elegant Rose Tiramisu!
Step‑by‑Step Instructions for Luxurious Eggless Rose Tiramisu
Step 1: Prepare Rose Milk Mixture
In a medium-sized bowl, combine 1 cup of rose syrup, 1 cup of full-fat milk, and 1 teaspoon of rose water. Whisk until the mixture is smooth and homogenous, with a lovely pastel hue. Set this fragrant rose milk aside, allowing the flavors to blend while you move to the next step.
Step 2: Whip Mascarpone
In a large mixing bowl, add 8 ounces of cold mascarpone cheese along with 1/2 cup of powdered sugar and an optional drop of rose essence. Beat with an electric mixer on medium speed for about 2-3 minutes, until you achieve a creamy and airy texture, reminiscent of soft clouds, with no lumps remaining.
Step 3: Whip Cream
In another chilled bowl, pour 1 cup of heavy cream and sprinkle in 2 tablespoons of powdered sugar. Use an electric mixer to whip the cream until soft peaks form, taking about 3-4 minutes. The cream should be fluffy and hold its shape but still be smooth enough to fold into the mascarpone mixture.
Step 4: Layer Ladyfingers
Quickly dip each ladyfinger cookie into the prepared rose milk mixture for 1-2 seconds, ensuring they’re moist but not soggy. Begin to arrange these cookies in a single layer in an 8×8-inch dish, creating a sturdy base for your Rose Tiramisu. You should achieve a neat, even layer covering the bottom.
Step 5: Add Cream Layers
Spread half of the whipped mascarpone mixture evenly over the layer of ladyfingers using a spatula, creating a smooth, luscious surface. Next, repeat the dipping process with more ladyfingers, adding another layer on top of the mascarpone. Finally, spoon the remaining mascarpone mixture over these ladyfingers for a perfect finish.
Step 6: Chill
Cover the dish tightly with plastic wrap or a lid and place it in the refrigerator for a minimum of 6 hours, or ideally overnight. This chilling period allows the flavors to meld beautifully and gives the Rose Tiramisu its signature creamy texture, ensuring it’s well set before serving.
Step 7: Decorate & Serve
Once chilled, remove the dish from the refrigerator and get ready for a stunning presentation. Pipe decorative swirls of whipped cream on top and garnish with food-grade rose buds and a sprinkle of silvered pistachios. Slice and serve your enchanting Eggless Rose Tiramisu, impressing guests with its vibrant, floral beauty.
Make Ahead Options
These Eggless Rose Tiramisu layers are perfect for meal prep, allowing you to enjoy more relaxed gatherings! You can prepare the rose milk mixture and whip the mascarpone as well as heavy cream up to 24 hours in advance; just be sure to keep them stored separately in the refrigerator to maintain optimal quality. Assemble the tiramisu by layering the dipped ladyfingers and whipped creams on the day of serving to prevent sogginess. Once assembled, refrigerate for at least 6 hours or overnight—this overnight chilling not only enhances the flavor but ensures each layer melds beautifully. Your Eggless Rose Tiramisu will be just as delicious, saving you precious time in the kitchen!
Expert Tips for Rose Tiramisu
- Chill Everything: Ensure your mixing bowls and utensils are chilled before whipping cream for the best fluffiness in your Rose Tiramisu.
- Whip Carefully: Avoid over-beating the cream; it can turn grainy. Stop when soft peaks form for a light, airy texture.
- Quick Dips: Dip ladyfingers quickly in the rose milk mixture to prevent sogginess. A second too long can leave them too wet!
- Overnight Chilling: For optimal flavor and texture, allow your assembled Rose Tiramisu to chill overnight before serving.
- Flavor Variations: Don’t hesitate to experiment with layered fruits or flavored syrups to customize your Rose Tiramisu for special occasions.
Rose Tiramisu Variations & Substitutions
Feel the joy of personalizing your Eggless Rose Tiramisu with these delightful twists that will make this creamy dessert truly yours!
- Coconut Cream: Substitute heavy cream with rich coconut cream for a tropical twist that offers a sweet, nutty flavor. Imagine every bite transporting you to a sun-soaked paradise!
- Flavored Syrups: Fancy a floral blend? Use lavender or cardamom syrups to add aromatic depth. These subtle variations turn every spoonful into a sophisticated experience, perfect for gatherings.
- Nutty Crunch: Boost texture by mixing in crushed almonds or silvered pistachios into the mascarpone layer. This adds a lovely crunch that contrasts beautifully with the creaminess.
- Fruit Layering: Elevate your dessert by incorporating a layer of fresh sliced strawberries or raspberries between mascarpone layers. The juicy fruit adds a vibrant color and a burst of freshness.
- Dairy-Free Delight: For a vegan-friendly option, blend silken tofu with coconut milk to create a divine, creamy mascarpone alternative. It’s just as indulgent without the dairy!
- Chocolate Infusion: Drizzle melted dark chocolate over the ladyfingers for a rich chocolate twist that complements the floral notes beautifully. It’s the perfect decadent upgrade!
- Spicy Kick: If you love a touch of warmth, mix in a hint of cardamom or cinnamon to the mascarpone layer. This adds a unique flavor complexity that spice lovers will appreciate.
- Color Pop: For a stunning presentation, use natural food coloring from beet juice to tint your mascarpone layer. This little touch brings an eye-catching vibrancy to your creation.
Let your creativity shine as you adapt this luxurious Eggless Rose Tiramisu to suit your taste buds! Want more ideas for your dessert repertoire? Check out our Dairy-Free Delight or explore the possibilities of flavors in our Grilled Garlic Rosemary Smashed Potatoes. Happy cooking!
What to Serve with Eggless Rose Tiramisu
As the delicate flavors of the Eggless Rose Tiramisu dance on your palate, consider these delightful pairings to create a memorable feast.
-
Fresh Berry Medley: A bouquet of strawberries, raspberries, and blueberries adds a refreshing burst that beautifully contrasts the creamy dessert.
-
Crispy Biscotti: These crunchy, almond-infused cookies provide a perfect textural contrast and make for delightful dippers alongside each slice.
-
Mint Tea: A fragrant cup of mint tea cleanses the palate and enhances the floral notes of the tiramisu, creating a serene dining experience.
-
Fruit Salad: A light fruit salad drizzled with honey complements the richness of the tiramisu while adding vibrant color and freshness.
-
Sparkling Rosé: The effervescence of sparkling rosé enhances celebration, offering a light, fruity pairing that elevates the dessert beautifully.
-
Pistachio Gelato: Creamy pistachio gelato resonates with the nutty elements in the Tiramisu’s decoration, providing a delightful harmony in flavor.
-
Chocolate-Dipped Strawberries: Decadent yet simple, these treats create a sweet companion, delighting chocolate lovers while maintaining a refined touch.
-
Lemon Sorbet: Bright and zesty, lemon sorbet offers a refreshing contrast, cleansing the palate after the rich, creamy layers of the rose tiramisu.
Embrace these pairings to elevate your Eggless Rose Tiramisu into a beautifully balanced meal that delights every sense!
How to Store and Freeze Rose Tiramisu
Fridge: Keep your Rose Tiramisu covered in an airtight container for up to 3 days. Proper storage ensures the delightful flavors continue to meld.
Freezer: You can freeze the Rose Tiramisu for up to 1 month. Wrap it tightly in plastic wrap and foil to prevent freezer burn, then thaw in the fridge before serving.
Make-Ahead: Assemble the tiramisu a day in advance; chilling overnight helps enhance the flavor and texture, making it a perfect make-ahead dessert.
Reheating: This dessert is best enjoyed cold, so no reheating is needed—just slice and serve straight from the fridge!
Eggless Rose Tiramisu Recipe FAQs
How do I select the right rose syrup for this recipe?
Absolutely! I recommend opting for Rooh Afza for an authentic floral flavor that enhances your Eggless Rose Tiramisu. Look for a syrup that is vibrant in color and aromatic. Avoid brands that are overly artificial with too many additives.
How do I store leftover Rose Tiramisu?
You can store your Rose Tiramisu in an airtight container in the refrigerator for up to 3 days. This storage method helps the flavors to continue marrying beautifully, making each bite even more delightful!
Can I freeze the Eggless Rose Tiramisu?
Yes, you can! To freeze, wrap the entire dessert tightly in plastic wrap and then in aluminum foil to prevent freezer burn. It will keep well for up to 1 month. When you’re ready to enjoy, simply place it in the refrigerator to thaw overnight.
Why is my whipped cream not holding its shape?
If your whipped cream is not holding its shape, it may be due to over-whipping. Always whip the cream until soft peaks form—usually about 3-4 minutes at medium speed. If you realize it’s too loose, you can fold in a scoop of powdered sugar or cornstarch to help stabilize it!
Are there any common allergens in this Rose Tiramisu?
Since this recipe contains mascarpone cheese and heavy cream, it is not suitable for those with dairy allergies. I often suggest substituting silken tofu blended with coconut milk for a dairy-free version. Always check ingredient labels for allergens if serving to guests!
How can I customize my Rose Tiramisu?
The more the merrier! You can incorporate layers of fruit like strawberries or raspberries for added flavor, or swap heavy cream with coconut cream for a tropical twist. You can also add spices such as cardamom for warmth or even drizzle some melted dark chocolate for a uniquely rich experience!
Indulge in Creamy Rose Tiramisu – A No-Bake Delight
Ingredients
Equipment
Method
- In a medium-sized bowl, combine the rose syrup, full-fat milk, and rose water. Whisk until smooth and set aside.
- In a large mixing bowl, add mascarpone cheese, powdered sugar, and rose essence. Beat until creamy and airy, for about 2-3 minutes.
- In another bowl, pour heavy cream and sprinkle in powdered sugar. Whip until soft peaks form, about 3-4 minutes.
- Dip ladyfinger cookies in the rose milk mixture for 1-2 seconds and arrange them in a single layer in an 8x8-inch dish.
- Spread half of the whipped mascarpone mixture over the layer of ladyfingers. Repeat with more dipped ladyfingers and top with remaining mascarpone.
- Cover the dish and refrigerate for a minimum of 6 hours, or ideally overnight.
- Decorate with whipped cream, food-grade rose buds, and silvered pistachios. Slice and serve.