Comforting French Onion Pot Roast for Cozy Family Dinners

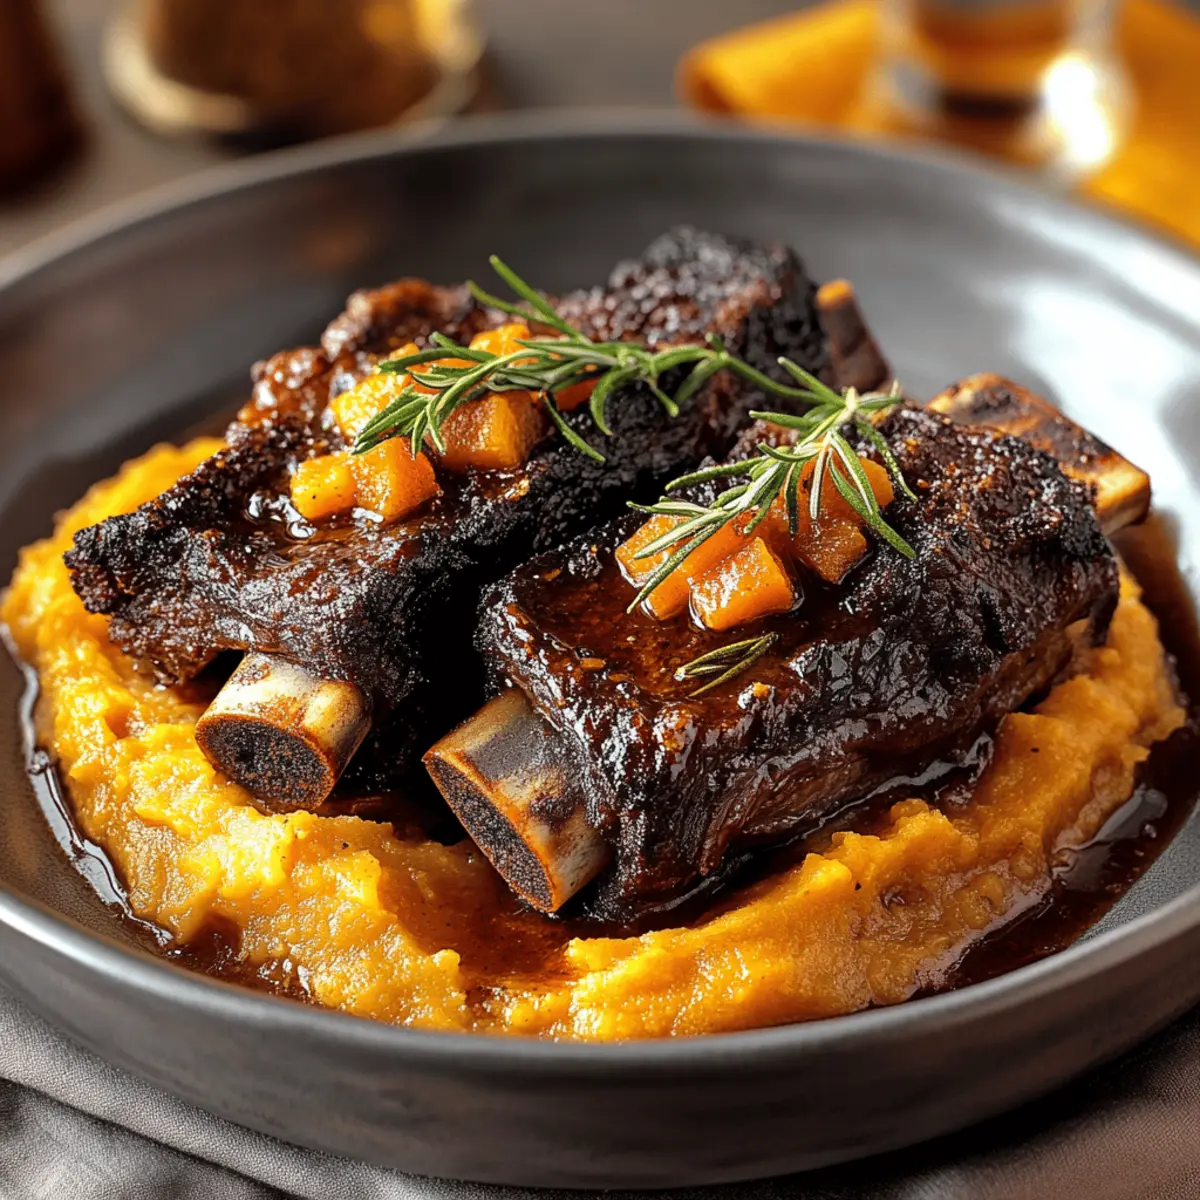
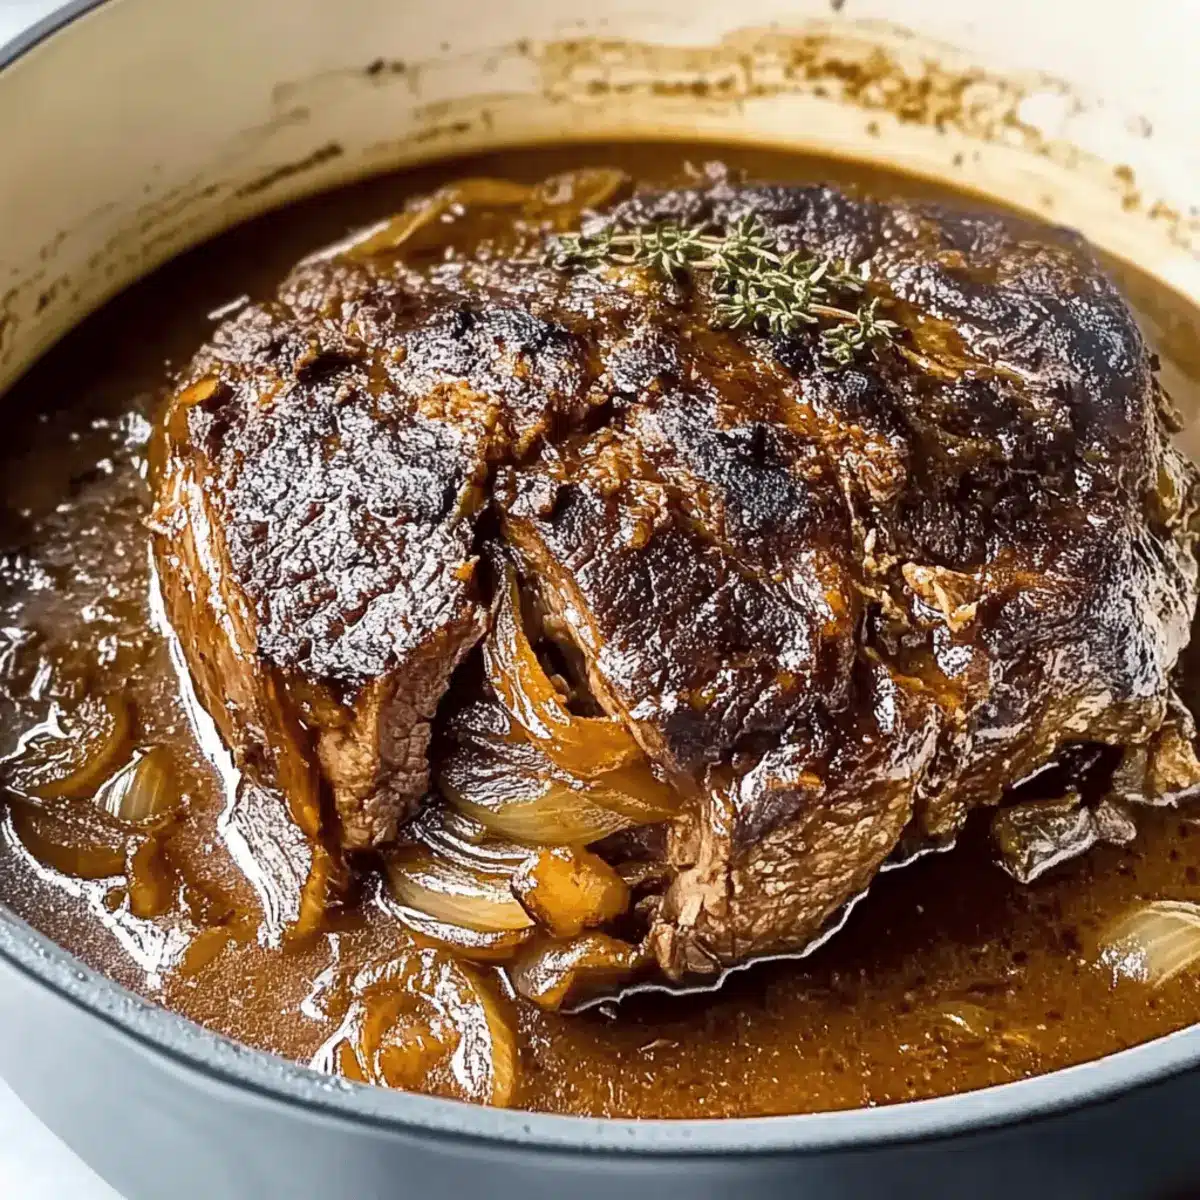
A simmering pot of savory goodness can turn even the busiest weeknight into a cozy dining experience. This Comforting French Onion Pot Roast is about more than satisfying hunger; it’s a warm embrace of flavors, where tender beef and sweet caramelized onions come together in a single, hearty dish. One of the best perks is how effortlessly it fits into your routine—only a few minutes of prep before it braises to perfection, leaving you free to unwind while filling your home with tantalizing aromas. Plus, it’s family-friendly and makes for fantastic leftovers, ensuring everyone can enjoy this deliciousness for days to come. Are you ready to dive into the comforting warmth of this pot roast? Let’s get started!

Why is this pot roast a must-try?

Ease and Convenience: This recipe simplifies your cooking—just a few minutes of prep before the roast cooks itself, allowing you to enjoy more free time.
Ultimate Comfort Food: The combination of tender beef and sweet caramelized onions creates an irresistible flavor profile that feels like a warm hug.
Versatile Pairings: Serve it with creamy mashed potatoes, egg noodles, or even crusty French bread, making every bite delicious.
Perfect for Leftovers: This dish tastes even better the next day, making it a great make-ahead option for busy weeks ahead. If you love hearty, family-friendly meals, consider also trying the delicious Cheesy French Onion or Roasted Strawberry Whipped for a delightful variety!
Crowd-Pleaser: This pot roast will become a go-to for gatherings, making it a hit with friends and family alike.

Comforting French Onion Pot Roast Ingredients

For the Roast

  • Chuck Roast – The ideal meat for a tender, flavorful pot roast; consider bottom round as a substitute if needed.
  • Fine Sea Salt – Essential for enhancing the flavors of both the meat and caramelized onions.
  • Freshly Ground Black Pepper – Offers a layer of warmth and depth to the dish.

For Cooking

  • Extra Virgin Olive Oil – Perfect for browning the roast and sautéing onions; can be replaced with another cooking oil if desired.

For the Aromatics

  • Yellow Onions – The backbone of the dish; caramelizing them brings sweetness and depth.
  • Garlic – Infuses the dish with an aromatic flavor; garlic powder can be a convenient substitute if fresh isn’t available.
  • Maple Syrup or Brown Sugar – Adds a hint of sweetness that perfectly balances savory flavors; brown sugar is a great alternative.

For Thicker Gravy

  • All-Purpose Flour – Thickens the gravy beautifully; use gluten-free flour if needed.

For the Braising Liquid

  • Red Wine or Beef Stock – Adds rich acidity to the dish; use extra beef stock for a non-alcoholic version.
  • Beef Stock – Keeps the roast tender and moist as it cooks; it’s crucial for achieving the perfect pot roast.

For Flavor Enhancements

  • Rosemary and Bay Leaf – Provide aromatic depth during the braising process; fresh herbs are preferred, but dried ones can also work well.

Enjoy the comforting flavors of this Comforting French Onion Pot Roast as you savor each bite of tender beef and sweet onions!

Step‑by‑Step Instructions for Comforting French Onion Pot Roast

Step 1: Preheat and Prepare
Start by preheating your Dutch oven over medium heat and adding a splash of extra virgin olive oil. Allow the oil to heat until shimmering, which should take about a minute. This will create the perfect base for browning your chuck roast, enhancing its rich flavor and creating a beautiful crust that sets the tone for the entire Comforting French Onion Pot Roast.

Step 2: Season and Sear
Generously season the chuck roast with fine sea salt and freshly ground black pepper on all sides. Once the oil is hot, carefully place the roast in the pot, searing it for 5-6 minutes on each side until a golden crust forms. This step is crucial for developing flavor, so resist the urge to move the roast too early; the aim is to achieve that inviting browning.

Step 3: Set Aside and Slice Onions
Once seared, remove the roast from the Dutch oven and set it aside on a plate. Allow the pot to cool slightly, then slice your yellow onions thinly. The onions will become the backbone of the gravy in your Comforting French Onion Pot Roast, providing that essential sweetness when caramelized to perfection.

Step 4: Sauté Onions
In the same pot, add a bit more olive oil if needed, then toss in the sliced onions. Sauté over medium heat for about 5 minutes until they become translucent, stirring occasionally. Reduce the heat to medium-low and continue to cook them for an additional 20 minutes, stirring constantly until they turn a deep golden brown, releasing their natural sugars for a more robust flavor.

Step 5: Add Garlic and Maple Syrup
Next, stir in minced garlic and a splash of maple syrup or brown sugar into the caramelized onions. Cook for an additional 7-8 minutes, stirring frequently, until the garlic is fragrant and the mixture further caramelizes. This step amplifies the sweetness in your Comforting French Onion Pot Roast and layers in aromatic flavors that will infuse the dish.

Step 6: Create the Gravy Base
Sprinkle all-purpose flour over the onion mixture, stirring well to combine. Gradually deglaze the pot with red wine or beef stock, scraping up any browned bits from the bottom. Mix in more beef stock, whisking until smooth and free of lumps. This rich gravy will envelop the roast, making each bite succulent in your special pot roast.

Step 7: Return the Roast
Return the seared chuck roast to the pot, ensuring that the liquid covers most of it. Nestle fresh rosemary and a bay leaf into the liquid, allowing their flavors to meld during the cooking process. This is the key moment to bring the roast back into the savory goodness of your Comforting French Onion Pot Roast.

Step 8: Simmer and Braise
Bring the mixture to a gentle simmer, then cover the pot with its lid. Transfer the Dutch oven to a preheated oven set at 300°F. Let it braise for 3 hours, allowing the low and slow cooking process to transform the meat to fork-tender perfection while filling your home with comforting aromas.

Step 9: Flip and Continue Braising
After 3 hours, carefully turn the roast over in the pot to ensure even cooking. Cover the pot again and let it continue braising for an additional 30-45 minutes, or until the meat is irresistibly tender. This extra time allows the flavors to deepen, solidifying the Comforting French Onion Pot Roast as a truly hearty meal.

Step 10: Rest and Serve
Once done, remove the pot from the oven and let it cool for about 10-15 minutes. This resting period ensures that the juices redistribute throughout the meat. Serve the roast sliced or shredded, generously topped with rich gravy over creamy mashed potatoes, polenta, or even egg noodles for a delightful meal everyone will enjoy.

Comforting French Onion Pot Roast Variations

Feel free to tweak this recipe and make it your own; there are so many delightful paths to explore!

  • Pork Swap: Replace chuck roast with pork shoulder for a sweeter, slightly tangy flavor profile that’s incredibly tender.
  • Vegetable Boost: Toss in root vegetables like carrots and potatoes while braising for an all-in-one meal that adds color and nutrition.
  • Red Wine Variation: For a deeper flavor, use a robust red wine like Cabernet Sauvignon in place of beef stock.
  • Herb Infusion: Experiment with fresh thyme or sage alongside rosemary for aromatic twists that brighten your pot roast.
  • Heat It Up: Add a pinch of cayenne pepper or red pepper flakes for a hint of heat that complements the savory elements beautifully.
  • Creamy Finish: Stir in a dollop of sour cream or creme fraiche just before serving to add a touch of creaminess and balance.
  • Gluten-Free Twist: Use cornstarch or gluten-free flour if you prefer a gluten-free option for thickening the gravy.
  • Sweeten the Deal: Swap maple syrup for honey if you desire a different sweet note that enhances the flavors of the dish.

Take a moment to explore these variations for a comforting French Onion Pot Roast that can surprise your family time and again! For more delicious twists, check out my recipe for Roasted Carrot Lentil salad or indulge in a classic Shepherd’s Pie Food dish that always has a spot on the dinner table. Enjoy your culinary journey!

Expert Tips for Comforting French Onion Pot Roast

  • Proper Searing: Ensure a deep golden crust by allowing the roast to sear undisturbed for 5-6 minutes per side; this builds rich flavor.

  • Don’t Rush the Onions: Caramelizing onions takes time (15-20 minutes); this step brings out their natural sweetness and depth important for your pot roast.

  • Control the Temperature: Braise your Comforting French Onion Pot Roast at 325°F or lower to keep the meat tender; slow cooking is key for deal meat texture.

  • Rest After Cooking: Always let the meat rest for at least 10-15 minutes post-cooking; this keeps it juicy and flavorful.

  • Experiment with Add-Ins: Feel free to include root vegetables like carrots or potatoes in the pot for added flavor and a full one-pot meal experience.

What to Serve with Comforting French Onion Pot Roast

Transform your meal into a feast with delightful accompaniments that elevate your dining experience to new heights.

  • Creamy Mashed Potatoes: The heavenly buttery goodness of mashed potatoes soaks up the rich gravy, creating a satisfying harmony of flavors with every bite.

  • Crispy Roasted Brussels Sprouts: These slightly charred sprouts provide a delicious contrast to the tender pot roast, adding a touch of crispiness and earthy flavor.

  • Butter-Braised Carrots: Their natural sweetness enhances the savory notes of the roast, while the tenderness of the carrots complements the luscious texture of the beef.

  • Crusty French Bread: Perfect for mopping up the rich gravy, this classic companion brings a comforting crunch to the table, inviting you to savor every last drop.

  • Egg Noodles: These silky noodles create a lovely bed for the pot roast, offering a chewy texture that balances perfectly with the tender meat and gravy.

  • Red Wine: A glass of full-bodied red wine not only enhances the flavors of the pot roast but also adds a touch of elegance to your meal.

  • Simple Garden Salad: A fresh salad with crisp greens and a tangy vinaigrette offers a bright, refreshing contrast to the hearty pot roast, balancing richness with lightness.

  • Apple Pie: For dessert, a warm slice of apple pie brings comforting sweetness to the end of the meal, rounding out the experience wonderfully.

Make Ahead Options

These Comforting French Onion Pot Roast are perfect for busy home cooks looking to save time during hectic weeknights! You can prepare the entire pot roast up to 24 hours in advance by seasoning and searing the meat, then cooling and refrigerating it in the braising liquid. Additionally, the caramelized onions and gravy base can be made and stored separately, allowing you to reheat them before cooking. When you’re ready to serve, simply return the roast to the pot with the gravy and braise it in the oven as instructed—this ensures that the flavors remain just as delicious while saving time and effort!

How to Store and Freeze Comforting French Onion Pot Roast

Fridge: Refrigerate in an airtight container for up to 4 days, ensuring the roast is properly cooled before sealing to maintain freshness.

Freezer: Freeze portions of the Comforting French Onion Pot Roast with gravy for up to 3 months. Use freezer-safe containers to prevent freezer burn.

Reheating: Reheat gently on the stovetop over low heat, adding a splash of beef stock or water for moisture. Alternatively, use the microwave in short intervals, stirring until heated through.

Serving Leftovers: Enjoy the delicious leftovers over mashed potatoes, noodles, or as a sandwich filling—each bite is just as comforting as the first!

Comforting French Onion Pot Roast Recipe FAQs

What type of roast should I use for the best results?
Absolutely! The chuck roast is the ideal choice for a Comforting French Onion Pot Roast due to its marbling and tenderness, which helps keep it juicy and flavorful during the slow cooking process. If you’re in a pinch, feel free to use bottom round or arm roast as a substitute; just keep in mind that the texture might vary slightly.

How do I store leftovers, and how long will they last?
You can refrigerate your Comforting French Onion Pot Roast in an airtight container for up to 4 days. It’s best to ensure the pot roast has cooled completely before sealing it up to maintain freshness. For meal prep enthusiasts, this dish also allows for fantastic make-ahead options!

Can I freeze the Comforting French Onion Pot Roast?
Definitely! You can freeze portions of the pot roast along with the gravy for up to 3 months. To freeze, place it in freezer-safe containers, making sure to label them with the date. This way, you can enjoy a cozy meal on busy nights! When ready to enjoy, simply thaw overnight in the refrigerator and reheat gently on the stovetop.

What should I do if my roast turns out tough?
No worries! If your Comforting French Onion Pot Roast turns out tough, it may need more time to braise. Simply return it to the oven and let it cook longer, checking every 30 minutes until it becomes fork-tender. Slow and gentle cooking helps break down the collagen in the meat, resulting in that melt-in-your-mouth texture we all crave.

Are there any allergy considerations I should be aware of?
Very! If you’re preparing this dish for someone with dietary restrictions, consider using gluten-free flour if you’re concerned about gluten. Additionally, if anyone has a sensitivity to alcohol, you can replace the red wine with extra beef stock without sacrificing flavor.

How can I enhance the flavor of the gravy?
If you’re looking to deepen the flavor of your gravy, consider adding a splash of Worcestershire sauce or some soy sauce along with the beef stock. You can also add more herbs like thyme or even a dash of balsamic vinegar to introduce a beautiful complexity. Enjoy experimenting; the more the merrier!

Comforting French Onion Pot Roast

Comforting French Onion Pot Roast for Cozy Family Dinners

This Comforting French Onion Pot Roast combines tender beef and caramelized onions for a delicious, hearty meal.
Prep Time 15 minutes
Cook Time 3 hours 15 minutes
Resting Time 15 minutes
Total Time 3 hours 45 minutes
Servings: 6 servings
Course: Beef
Cuisine: French
Calories: 550

Ingredients
  

For the Roast
  • 3 lbs Chuck Roast Bottom round can be used as a substitute.
  • 1 tbsp Fine Sea Salt
  • 1 tbsp Freshly Ground Black Pepper
For Cooking
  • 2 tbsp Extra Virgin Olive Oil Can be replaced with another cooking oil.
For the Aromatics
  • 3 medium Yellow Onions Sliced thinly.
  • 4 cloves Garlic Minced; garlic powder can be a substitute.
  • 1 tbsp Maple Syrup Brown sugar can be used as an alternative.
For Thicker Gravy
  • 2 tbsp All-Purpose Flour Gluten-free flour can be used.
For the Braising Liquid
  • 1 cup Red Wine Can use extra beef stock for a non-alcoholic version.
  • 2 cups Beef Stock
For Flavor Enhancements
  • 1 sprig Rosemary Fresh preferred.
  • 1 leaf Bay Leaf Fresh preferred.

Equipment

  • Dutch oven

Method
 

Preparation Steps
  1. Preheat your Dutch oven over medium heat and add olive oil until shimmering.
  2. Season the chuck roast generously with salt and pepper, then sear for 5-6 minutes on each side until golden brown.
  3. Remove the roast, slice the onions thinly, and set aside.
  4. Sauté onions in the same pot until translucent, then continue cooking until deep golden brown.
  5. Stir in minced garlic and maple syrup, cooking until fragrant and further caramelized.
  6. Add flour, then deglaze with red wine and beef stock, mixing until smooth.
  7. Return the roast to the pot, adding rosemary and bay leaf, ensuring it's mostly covered by liquid.
  8. Bring to a gentle simmer, cover, and braise in a preheated oven at 300°F for 3 hours.
  9. Flip the roast after 3 hours and continue braising for another 30-45 minutes until tender.
  10. Let the pot roast rest for 10-15 minutes before serving sliced or shredded with gravy.

Nutrition

Serving: 1servingCalories: 550kcalCarbohydrates: 15gProtein: 45gFat: 30gSaturated Fat: 10gPolyunsaturated Fat: 5gMonounsaturated Fat: 15gCholesterol: 130mgSodium: 800mgPotassium: 800mgFiber: 1gSugar: 5gVitamin A: 500IUVitamin C: 10mgCalcium: 50mgIron: 4mg

Notes

Enjoy this comforting pot roast with creamy mashed potatoes, noodles, or as a filling in sandwiches.

Tried this recipe?

Let us know how it was!

Creamy Pumpkin Queijadas for a Cozy Fall Treat

As the cool autumn air sets in, I find myself craving the sweet warmth of fall flavors, and nothing satisfies quite like Pumpkin Queijadas. These delightful custardy tarts are an irresistibly simple treat, effortlessly marrying pumpkin puree with spices that evoke cozy memories of family gatherings and festive celebrations. What makes these little gems special is their easy preparation—no special techniques required! They form the perfect handheld dessert for those who love homemade goodness without the fuss. Whether you serve them at a holiday gathering or enjoy them on a quiet afternoon, Pumpkin Queijadas are sure to bring smiles to every table. Are you ready to embrace the flavors of fall and whip up these creamy delights?

Why are Pumpkin Queijadas a Must-Try?

Irresistible Flavor: These Pumpkin Queijadas are bursting with the comforting tastes of fall, combining rich pumpkin puree and a fragrant blend of spices.

Effortless to Make: No special techniques are needed, making them a fantastic option for both novice and seasoned bakers alike.

Perfect for Any Occasion: Whether it’s a holiday get-together or a casual family night, these tarts are sure to impress your guests.

Versatile Enjoyment: Enjoy them chilled or warm, and feel free to get creative with toppings like whipped cream or a sprinkle of cinnamon!

Quick Prep and Bake: On the table in no time—perfect for when cravings hit or unexpected visitors arrive. Grab the full experience of fall flavors with these scrumptious treats, or check out this Pumpkin Cream Cold Brew coffee for a delightful pairing!

Pumpkin Queijadas Ingredients

For the Custard

  • Pumpkin Puree – Adds rich flavor and moisture; use canned 100% pumpkin for ease.
  • Whole Milk – Provides creaminess and structure to the custard; can substitute with a non-dairy alternative if necessary.
  • Butter – Enhances richness; melt it for better incorporation.
  • Granulated Sugar – Sweetens the tarts; feel free to reduce for a less sweet dessert.
  • Eggs – Acts as a binder; ensure they are large and at room temperature for optimal mixing.

For the Dry Ingredients

  • All-Purpose Flour – Gives structure; explore gluten-free flour blends for a gluten-free version.
  • Baking Powder – Aids in leavening, helping create a light texture.
  • Pumpkin Pie Spice – Essential for that classic fall flavor; make your own blend with cinnamon, nutmeg, ginger, allspice, and cloves.
  • Salt – Enhances flavor balance, ensuring your Pumpkin Queijadas shine.

Step‑by‑Step Instructions for Pumpkin Queijadas

Step 1: Preheat and Prepare
Preheat your oven to 375°F (190°C). While it warms up, grease a muffin tin with butter or cooking spray to prevent sticking. This will ensure your Pumpkin Queijadas release easily after baking, allowing for a perfect presentation when you serve them.

Step 2: Melt the Mixture
In a medium saucepan over low heat, melt the butter along with the whole milk and granulated sugar. Stir consistently for about 5 minutes, until the mixture is smooth and the sugar has fully dissolved. This step not only combines the ingredients but also prepares a creamy base for your custard.

Step 3: Mix the Pumpkin Base
In a large mixing bowl, beat the eggs until they are frothy, which will take about 2 minutes. Next, whisk in the pumpkin puree and pumpkin pie spice until fully incorporated. This fragrant mixture will form the delicious foundation of your Pumpkin Queijadas, adding that wonderful autumn flavor.

Step 4: Combine the Mixtures
Gradually pour the warm butter mixture into the pumpkin mixture while whisking constantly. This gradual addition helps temper the eggs, preventing them from scrambling. Continue whisking until the two mixtures are well combined, creating a smooth custard that will fill your tarts.

Step 5: Incorporate Dry Ingredients
Sift in the all-purpose flour, baking powder, and salt into the wet mixture. Gently fold the ingredients together with a spatula until just combined, being careful not to overmix. The batter should be silky and slightly thick, ready to be transformed into your delightful Pumpkin Queijadas.

Step 6: Fill the Muffin Tin
Using a ladle or measuring cup, pour the batter evenly into the prepared muffin cups, filling each about three-quarters full. This will allow the Pumpkin Queijadas to rise while baking without overflowing. Make sure they are evenly distributed to ensure consistent baking.

Step 7: Bake and Cool
Place the muffin tin in the preheated oven and bake for 20–25 minutes or until the tops are golden brown and a toothpick inserted in the center comes out clean. Keep an eye on them as they bake, enjoying the cozy aroma that fills the kitchen, signaling they are nearly ready.

Step 8: Let Them Rest
Once baked, remove the muffin tin from the oven and allow the Pumpkin Queijadas to cool in the pan for 10 minutes. This resting time helps them firm up and makes it easier to remove them without breaking. Afterward, transfer them to a wire rack to cool completely before serving.

Make Ahead Options

These Pumpkin Queijadas are perfect for those busy days when you need a little sweet treat without the last-minute rush! You can prepare the batter up to 24 hours in advance; simply mix all the ingredients and store it in an airtight container in the refrigerator, which helps maintain the creamy texture. Additionally, you can bake the tarts and refrigerate them for up to 3 days. To keep them fresh, layer them with parchment paper in an airtight container. When you’re ready to serve your delicious Pumpkin Queijadas, just warm them in the oven for a few minutes, and they’ll taste just as delightful as when they were first baked!

How to Store and Freeze Pumpkin Queijadas

Fridge: Store leftover Pumpkin Queijadas in an airtight container for up to 5 days. Keeping them sealed will maintain their custardy texture and prevent drying out.

Freezer: For longer storage, freeze the tarts in a single layer on a baking sheet, then transfer to an airtight container for up to 2 months. Thaw in the refrigerator before enjoying.

Reheating: To enjoy frozen Pumpkin Queijadas, simply reheat them in the oven at 350°F (175°C) for 10-15 minutes until warmed through and slightly crispy on the outside.

Pumpkin Queijadas Variations & Substitutions

Feel free to experiment and make these delightful Pumpkin Queijadas truly your own!

  • Dairy-Free: Substitute whole milk with almond or oat milk for a creamy, non-dairy version. This will still keep the custard delightfully rich.
  • Gluten-Free: Use a gluten-free flour blend to achieve a similar texture without the gluten. Your tarts will be just as delicious and perfect for gluten-sensitive friends!
  • Spice it Up: Add a pinch of cayenne or ginger to enhance the warming spice notes. A small twist can elevate the cozy flavors even more!
  • Flavor Boost: Incorporate a teaspoon of vanilla or almond extract for a lovely aromatic depth. It complements the pumpkin beautifully and adds a special touch.
  • Chocolate Delight: Mix in chocolate chips for a touch of decadence. The chocolate adds a rich layer to the sweet pumpkin, making it an irresistible combo.
  • Nutty Crunch: Sprinkle chopped nuts like pecans or walnuts into the batter before baking for added texture. This delightful crunch pairs wonderfully with the smooth custard.
  • Mini Variations: Make mini versiones in a mini muffin tin for bite-sized treats. Perfect for sharing at gatherings or for a quick sweet snack!
  • Seasonal Twist: Swap pumpkin puree with sweet potato or butternut squash puree for a twist—each brings its own unique flavor to the table.

And if you’re looking for even more cozy flavors, why not sip on a cup of this delightful Pumpkin Cream Cold brew while enjoying your tarts? It’s the perfect fall combination to satisfy all your cravings!

Expert Tips for Perfect Pumpkin Queijadas

  • Check Freshness: Always use fresh pumpkin puree or canned 100% pumpkin. Avoid pumpkin pie filling, as it contains extra sugars and spices that can alter the recipe.

  • Room Temperature Eggs: Make sure your eggs are at room temperature before mixing. This allows for better incorporation into the batter and a smoother custard for your Pumpkin Queijadas.

  • Don’t Overmix: Gently fold the dry ingredients into the wet mixture until just combined. Overmixing can lead to tough tarts, so less is more!

  • Cool Before Serving: Let the tarts cool in the muffin tin for about 10 minutes. This step helps maintain their shape and ensures a lovely, creamy texture when served.

  • Serving Style: Enjoy them warm or chilled—the flavor shifts slightly depending on the temperature. Pair with a dollop of whipped cream for a touch of elegance!

What to Serve with Pumpkin Queijadas

As the delightful aroma of these creamy tarts fills your home, consider pairing them with complementary dishes that bring warmth to your table.

  • Spiced Apple Cider: A warm beverage infused with cinnamon and cloves enhances the comforting flavors of fall, making it a perfect drink to accompany your Pumpkin Queijadas.

  • Cinnamon Sugar Doughnuts: The sweet and spicy crunch of these doughnuts provides a delightful contrast to the creamy tarts, inviting a playful harmony of textures.

  • Roasted Butternut Squash Soup: Creamy and savory, this soup adds a luscious depth to your meal, balancing the sweetness of the tarts beautifully.

  • Toasted Pecan Salad: A fresh salad with crunchy pecans, mixed greens, and a tangy dressing offers a refreshing counterpart, brightening your dessert experience.

  • Maple Whipped Cream: Light and airy, this luxurious topping elevates the creamy custard of your Pumpkin Queijadas, while the maple flavor adds an extra touch of autumn.

  • Chocolate Chip Cookies: A classic favorite, the indulgent sweetness of cookies pairs wonderfully with the tarts, creating a nostalgic vibe that warms the heart.

  • Vanilla Ice Cream: A scoop of creamy vanilla ice cream alongside a warm Pumpkin Queijadas adds an irresistible contrast, delighting the senses with every bite.

  • Hot Chocolate: Rich and comforting, this drink offers a fun and cozy pairing, perfect for those chilly evenings spent enjoying your fall treats.

Pumpkin Queijadas Recipe FAQs

What type of pumpkin puree should I use?
I recommend using canned 100% pumpkin puree for convenience and consistency in flavor. Fresh pumpkin can be used, but it’s important to cook and puree it until smooth, avoiding any excess moisture that can affect the texture.

How should I store leftover Pumpkin Queijadas?
Store your leftover Pumpkin Queijadas in an airtight container in the refrigerator for up to 5 days. Keeping them sealed will help maintain their delicious, custardy texture, ensuring they remain moist and fresh.

Can I freeze Pumpkin Queijadas?
Absolutely! To freeze your Pumpkin Queijadas, place them in a single layer on a baking sheet until frozen solid. Then, transfer them to an airtight container or freezer bag. They’ll keep well for up to 2 months. When you’re ready to enjoy, just thaw in the refrigerator overnight before serving.

What if my Pumpkin Queijadas don’t set properly?
If your tarts are too soft or gooey after baking, it could be due to underbaking, or using a too-watery pumpkin puree. Make sure to bake them a little longer and always check doneness with a toothpick. They should be set and lightly browned on top.

Can my pets have Pumpkin Queijadas?
It’s best to avoid giving Pumpkin Queijadas to pets, as they contain ingredients like sugar and butter that aren’t suitable for them. However, plain pumpkin puree is safe for dogs in moderation, so consider sharing some unseasoned puree instead.

What can I use instead of eggs in this recipe?
For a vegan option or if you have an egg allergy, you can substitute each egg with 1/4 cup of unsweetened applesauce or 1 tablespoon of ground flaxseed mixed with 2.5 tablespoons of water (let it sit for 5-10 minutes to thicken). This will help maintain the custardy texture of the Pumpkin Queijadas without compromising on flavor!

Pumpkin Queijadas

Creamy Pumpkin Queijadas for a Cozy Fall Treat

Pumpkin Queijadas are delightful custardy tarts that combine rich pumpkin puree with spices for a cozy fall treat.
Prep Time 15 minutes
Cook Time 25 minutes
Cooling Time 10 minutes
Total Time 50 minutes
Servings: 12 tarts
Course: Dessert
Cuisine: American
Calories: 160

Ingredients
  

For the Custard
  • 1 cup Pumpkin Puree Use canned 100% pumpkin for ease.
  • 1 cup Whole Milk Can substitute with a non-dairy alternative if necessary.
  • 1/4 cup Butter Melted for better incorporation.
  • 3/4 cup Granulated Sugar Feel free to reduce for a less sweet dessert.
  • 3 large Eggs At room temperature for optimal mixing.
For the Dry Ingredients
  • 1 cup All-Purpose Flour Explore gluten-free alternatives for a gluten-free version.
  • 1 teaspoon Baking Powder Aids in leavening.
  • 1 teaspoon Pumpkin Pie Spice Make your own blend if desired.
  • 1/2 teaspoon Salt Enhances flavor balance.

Equipment

  • Muffin Tin
  • Medium saucepan
  • large mixing bowl
  • Spatula

Method
 

Step-by-Step Instructions for Pumpkin Queijadas
  1. Preheat your oven to 375°F (190°C) and grease a muffin tin.
  2. In a medium saucepan over low heat, melt the butter, whole milk, and sugar, stirring until smooth.
  3. In a large bowl, beat the eggs until frothy, then whisk in the pumpkin puree and pumpkin pie spice.
  4. Gradually pour the warm butter mixture into the pumpkin mixture, whisking constantly to avoid scrambling the eggs.
  5. Sift in the flour, baking powder, and salt, folding gently until just combined.
  6. Pour the batter into the prepared muffin cups, filling each about three-quarters full.
  7. Bake for 20-25 minutes until the tops are golden and a toothpick comes out clean.
  8. Let them cool in the pan for 10 minutes before transferring to a wire rack to cool completely.

Nutrition

Serving: 1tartCalories: 160kcalCarbohydrates: 25gProtein: 3gFat: 6gSaturated Fat: 4gPolyunsaturated Fat: 0.5gMonounsaturated Fat: 2gCholesterol: 50mgSodium: 120mgPotassium: 150mgFiber: 1gSugar: 10gVitamin A: 3700IUVitamin C: 1mgCalcium: 60mgIron: 0.7mg

Notes

For best results, use fresh pumpkin puree and ensure eggs are at room temperature before mixing.

Tried this recipe?

Let us know how it was!

Crispy & Juicy Arayes: The Ultimate Flavor-Packed Snack

As I bit into the crispy shell of my first arayes, the savory goodness filled with spiced lamb kofta took me on an unexpected culinary journey. These meat-stuffed pitas are not just a delicious taste of Middle Eastern street food; they also serve as an easy-to-make appetizer perfect for any gathering or a quick weeknight dinner. The combination of juicy filling and golden, crispy pita makes these Crispy & Juicy Arayes irresistibly satisfying—plus, they can be prepared ahead of time for busy days. Trust me; this flavorful dish will soon become one of your go-to recipes that impress your family and friends. Are you ready to transform your next meal into a delightful experience?

Why Are You Going to Love Arayes?

Simplicity Meets Flavor: The effortless process requires just a handful of ingredients, ensuring you spend less time in the kitchen and more time enjoying your meal.

Versatile Variations: Whether you prefer lamb, beef, or even ground turkey, these arayes can be tailored to your taste. Pair them with a refreshing salad, like a classic tomato and feta Greek salad, to elevate your dining experience.

Make-Ahead Magic: Prep the meat mixture in advance, saving time on busy nights, and let the flavors develop while they rest in the fridge.

Crispy Perfection: The outside gets gloriously golden and crispy while the inside is juicy and packed with spices, making each bite a delightful experience.

Crowd-Pleasing Appeal: Perfect for gatherings or as a quick snack, your guests will be begging for seconds. These crispy & juicy arayes are sure to impress!

Crispy & Juicy Arayes Ingredients

• Get ready to bring a burst of flavor to your table with these delicious Crispy & Juicy Arayes!

For the Meat Filling

  • Chopped Yellow Onion – Adds moisture and sweetness; substitute with shallots for a milder flavor.
  • Garlic (2 Cloves, smashed) – Enhances aroma and flavor; garlic powder can be used as an alternative.
  • Flat-Leaf Parsley (½ cup, packed) – Offers freshness and color; cilantro can be used instead for a different taste.
  • Cilantro (½ cup, packed) – Adds herbal notes to the dish; omit for a milder profile.
  • Ground Lamb (1 pound) – Main protein providing richness; substitute with ground beef or a mix of both.
  • Paprika (1 tbsp) – Contributes depth and color; use smoked paprika for a smoky flavor.
  • Coriander (1 tbsp) – Adds a citrusy, earthy taste; ground cumin can be a replacement.
  • Cumin (2 tsp) – Imparts warmth and a slight nuttiness; can be omitted for a less intense flavor profile.
  • Cayenne Pepper (¼ tsp) – Provides heat; adjust to taste or omit for a milder dish.
  • Kosher Salt & Freshly Ground Black Pepper – Essential for seasoning; adjust to personal preference.

For the Pitas

  • Pitas (4) – Acts as the vessel for the filling; use whole wheat or gluten-free pitas as an alternative.
  • Olive Oil (¼ cup) – For brushing and cooking; can be substituted with any neutral oil.

Step‑by‑Step Instructions for Crispy & Juicy Arayes

Step 1: Prepare the Meat Mixture
Begin by placing the chopped yellow onion, smashed garlic, parsley, and cilantro into a food processor. Pulse until finely minced. In a large mixing bowl, combine this mixture with the ground lamb, paprika, coriander, cumin, cayenne, salt, and pepper. Mix until well combined, then cover and refrigerate for at least 1 hour to allow the flavors to meld perfectly within your crispy & juicy arayes.

Step 2: Stuff the Pitas
Preheat your oven to 400ºF (200ºC) while the meat mixture chills. Take each pita and carefully cut it in half to form pockets. Stuff each pocket with the flavorful lamb filling, making sure not to overfill. Seal the edges as best you can, then slice each stuffed pita in half again, resulting in eight pieces that are ready to be cooked.

Step 3: Cook on Stovetop
Heat a large skillet over medium heat and add the olive oil. Once the oil is shimmering, place the stuffed pitas in the skillet, meat side down. Sear for about 3 minutes or until they are golden brown and crisp. Carefully flip the arayes and sear the other side for another 3 minutes to achieve that lovely golden crust, ensuring the meat stays juicy within.

Step 4: Bake for Perfection
After searing, transfer the skillet directly to the preheated oven. Bake the crispy & juicy arayes for approximately 8 minutes, or until the internal temperature of the lamb reaches 160ºF and the meat is cooked through. Keep an eye on them to ensure they don’t over-brown; you’re aiming for a beautiful golden color all around.

Step 5: Serve and Enjoy
Remove the skillet from the oven and allow the arayes to cool slightly. Serve them warm, alongside creamy tahini sauce and a drizzle of hot sauce for an extra kick. These delightful bites of crispy & juicy arayes are perfect as an appetizer or a satisfying meal, inviting everyone to enjoy the rich, aromatic flavors of Middle Eastern cuisine.

Expert Tips for Crispy & Juicy Arayes

  • Chill for Flavor: Refrigerate the meat mixture for at least 1 hour, or overnight if possible; this helps meld the spices and enhances the overall taste of your crispy & juicy arayes.

  • Don’t Overstuff: Avoid filling the pitas too much, as this may make them harder to seal and can lead to messier cooking. Aim for a perfect balance of filling to pita.

  • Adjust Cooking Time: Thinner pitas may cook faster, so keep an eye on them during the stovetop searing to avoid burning.

  • Temperature Check: Always ensure that the internal temperature of the lamb reaches 160ºF for safety; a meat thermometer is a reliable tool for this.

  • Serve Fresh: While arayes can be made ahead, they are best enjoyed fresh out of the oven for that perfect crispy texture.

Make Ahead Options

These Crispy & Juicy Arayes are perfect for meal prep enthusiasts seeking a convenient yet flavorful dish! You can prepare the meat mixture up to 2 days in advance; simply mix together the ingredients and store it in an airtight container in the refrigerator to retain freshness and prevent browning. Additionally, you can stuff the pitas 24 hours ahead of time, sealing them tightly to maintain their texture. When it’s time to serve, just sear and bake as per the recipe instructions for deliciously crispy results. With these tips, you’ll have a fantastic, hassle-free meal ready in no time, allowing you to enjoy these tasty bites with minimal effort!

Storage Tips for Crispy & Juicy Arayes

  • Fridge: Store any leftovers in an airtight container in the fridge for up to 3 days. Reheat in the oven at 350°F (175°C) for about 10 minutes to restore crispiness.
  • Freezer: Freeze unstuffed pitas and meat mixture separately in airtight containers or freezer bags for up to 3 months. Thaw overnight in the refrigerator before assembling.
  • Reheating: For reheating, bake the assembled arayes in the oven at 350°F (175°C) for about 15 minutes until heated through. Enjoy the crispy & juicy arayes like they just came out of the oven!
  • Make-Ahead: You can prepare the meat mixture ahead of time, storing it in the refrigerator for up to 2 days before stuffing the pitas, making mealtime even easier.

What to Serve with Crispy Spiced Lamb Arayes?

Create a delightful meal experience that captures the essence of Middle Eastern flavors with these tasty pairings.

  • Creamy Tahini Sauce: A must-have alongside arayes, this sauce adds nutty creaminess, enhancing the savory flavors of the meat-stuffed pita.

  • Tangy Greek Salad: Fresh cucumbers, tomatoes, olives, and a hint of feta create a refreshing contrast, balancing the richness of the crispy & juicy arayes.

  • Roasted Vegetables: Seasoned veggies like zucchini, bell peppers, and eggplant bring a caramelized sweetness, adding a delightful texture contrast to your meal.

  • Stuffed Grape Leaves: These tender, savory bites filled with rice and herbs complement the arayes beautifully; they offer a scrumptious and traditional Middle Eastern connection.

  • Spiced Rice Pilaf: Fluffy rice seasoned with saffron or cumin provides a fragrant base that pairs well with the bold flavors of the lamb filling.

  • Chilled Minted Yogurt: A revitalizing dip that cuts through the richness, this yogurty salad with fresh mint can be drizzled or served on the side.

  • Pomegranate Molasses Drizzle: A sweet and tangy sauce that elevates the dish with its unique flavor, making each bite even more memorable.

  • Mint-Lemon Tea: Sip on this refreshing beverage as a palate cleanser; the zesty flavors will harmoniously blend with the meal’s rich spices.

  • Baklava for Dessert: Finish off your meal with this sweet, flaky pastry drizzled in syrup, offering a perfect blend of sweetness after the savory arayes.

Crispy & Juicy Arayes Variations

Feel free to get creative with your Crispy & Juicy Arayes and customize them to tickle your taste buds!

  • Lighter Option: Substitute ground turkey for a healthier, leaner protein without sacrificing flavor.
  • Extra Crunch: Add pine nuts into the meat mixture; they provide a delightful crunch and a hint of nuttiness.
  • Spice It Up: Adjust the cayenne pepper to your preference for a milder or spicier kick. You can even include some harissa for a fiery twist.
  • Turbo Flavor: Incorporate a blend of Middle Eastern spices like allspice or sumac into the meat. It elevates the flavor profile to new heights!
  • Regional Flair: Explore regional variations by substituting the meat with ground beef, which adds a different richness, or try lamb for an authentic taste.
  • Veggie Delight: Create a vegetarian version by using a mixture of sautéed mushrooms, chickpeas, and spices instead of meat. It’s a fun alternative that’s just as delicious!
  • Grill It: For a smoky flavor, cook your arayes on the grill until charred. Perfect for summer barbeques!
  • Baking Twist: Instead of frying, bake the stuffed pitas directly on a baking sheet for a healthier approach; just brush with olive oil for crispiness.

Pair your crispy arayes with an accompanying arugula salad for that perfect refreshing balance. Enjoy your cooking journey!

Crispy Spiced Lamb Arayes with Tahini Sauce Recipe FAQs

What are the best ingredients for the filling?
Absolutely, using fresh ingredients can elevate your crispy & juicy arayes! Choosing a sweet, vibrant yellow onion and fresh herbs like parsley and cilantro will add moisture and flavor. For the meat, ground lamb is traditional, but for a different twist, ground beef or a mix gives a lovely richness. Always check for bright, unblemished veggies to ensure they’re at their peak freshness.

How should I store leftover arayes?
You can store leftover crispy & juicy arayes in an airtight container in the refrigerator for up to 3 days. To reheat and maintain their crispy texture, pop them in the oven at 350°F (175°C) for about 10 minutes, removing them when they’re warm and crisp—just like the first time!

Can I freeze the arayes for later?
Definitely! Freezing is a great way to extend the life of your arayes. If you want to freeze them, assemble the stuffed pitas but don’t cook them. Place them in a single layer on a parchment-lined baking sheet and freeze until solid, then transfer to a freezer bag for up to 3 months. Thaw them in the fridge overnight before baking. To cook, just pop them in the oven as per the instructions!

What should I do if my pitas tear while stuffing?
Very common! If you find your pitas tearing, don’t fret. Simply patch them by using a small piece of another pita to reinforce the tear from the inside. Alternatively, you can wrap the filling in a small section of aluminum foil for baking. This way, the flavors intensify, and you still enjoy the dish without worry.

Are these arayes suitable for those with allergies?
When adjusting for dietary needs, these crispy & juicy arayes can be made gluten-free by using gluten-free pitas. For nut allergies, be cautious about adding pine nuts to the meat mixture. Always check labels for seasonings to ensure they’re allergy-friendly, and feel free to substitute spices to accommodate various sensitivities.

How long should I let the meat mixture sit before using?
For optimal flavor, I recommend letting the meat mixture chill in the refrigerator for at least 1 hour, but if you can manage overnight, you’ll find it’s even more flavorful! Allowing this time helps the spices meld together beautifully, enhancing that aromatic experience in each crispy bite.

Crispy & Juicy Arayes

Crispy & Juicy Arayes: The Ultimate Flavor-Packed Snack

Experience the irresistible taste of Crispy & Juicy Arayes, a flavorful Middle Eastern snack filled with spiced lamb kofta.
Prep Time 15 minutes
Cook Time 14 minutes
Chilling Time 1 hour
Total Time 1 hour 29 minutes
Servings: 8 pieces
Course: Appetizer
Cuisine: Middle Eastern
Calories: 250

Ingredients
  

For the Meat Filling
  • 1 pound Ground Lamb Substitute with ground beef if desired.
  • 1 medium Chopped Yellow Onion Can substitute with shallots.
  • 2 cloves Garlic Can use garlic powder as an alternative.
  • 1/2 cup Flat-Leaf Parsley Use cilantro as an alternative.
  • 1/2 cup Cilantro Omit for a milder flavor.
  • 1 tbsp Paprika Smoked paprika can be used for a smoky flavor.
  • 1 tbsp Coriander Ground cumin can be a replacement.
  • 2 tsp Cumin Can be omitted for a milder flavor.
  • 1/4 tsp Cayenne Pepper Adjust based on heat preference.
  • to taste Kosher Salt Adjust to personal preference.
  • to taste Freshly Ground Black Pepper Adjust to personal preference.
For the Pitas
  • 4 Pitas Whole wheat or gluten-free alternatives can be used.
  • 1/4 cup Olive Oil Can substitute with any neutral oil.

Equipment

  • Food processor
  • large mixing bowl
  • large skillet
  • Oven

Method
 

Step-by-Step Instructions for Crispy & Juicy Arayes
  1. Prepare the meat mixture by processing chopped onion, garlic, parsley, and cilantro until finely minced. Combine with lamb, paprika, coriander, cumin, cayenne, salt, and pepper in a bowl, mix well, and refrigerate for at least 1 hour.
  2. Preheat your oven to 400ºF (200ºC). Cut pitas in half to form pockets, stuff with meat mixture, seal edges, and cut each stuffed pita in half again.
  3. Heat olive oil in a skillet over medium heat. Sear stuffed pitas, meat side down, for about 3 minutes until golden brown. Flip and sear the other side for another 3 minutes.
  4. Transfer the skillet to the preheated oven and bake for approximately 8 minutes, or until lamb reaches 160ºF internally.
  5. Remove from oven, cool slightly, and serve warm with tahini sauce and hot sauce.

Nutrition

Serving: 1pieceCalories: 250kcalCarbohydrates: 30gProtein: 15gFat: 10gSaturated Fat: 3gPolyunsaturated Fat: 2gMonounsaturated Fat: 5gCholesterol: 70mgSodium: 400mgPotassium: 350mgFiber: 2gSugar: 1gVitamin A: 500IUVitamin C: 10mgCalcium: 50mgIron: 2mg

Notes

Chill the meat mixture for improved flavor integration. Avoid overstuffing the pitas for easier sealing and cooking.

Tried this recipe?

Let us know how it was!

Spicy Tuna Sesame Miso Cones: A Flavor-Packed Delight

Pairing vibrant flavors with a presentation that wows, these Spicy Tuna Sesame Miso Cones are my secret weapon for impressing guests. The moment you bite into the crispy homemade sesame-miso tuile, filled with velvety sushi-grade tuna, you’ll understand why this recipe is a standout. Not only is it a bold and elegant appetizer that elegantly blends textures, but it also brings a fun twist to the traditional sushi experience. Plus, it’s a breeze to prepare, making your entertaining effortless and stress-free. Whether you’re gearing up for a dinner party or simply want to elevate your weekday meals, these cones are sure to be a crowd-pleaser. Ready to dive into a fusion of flavors that will leave everyone asking for seconds? Let’s get started!

Why are Spicy Tuna Sesame Miso Cones irresistible?

Bold flavors: Experience a delightful blend of rich miso and zesty tuna that sings in every bite. Texture contrast: The crunchy, homemade sesame-miso cones beautifully complement the silky tuna tartare. Quick to prep: Whip this elegant dish up with ease, perfect for unexpected guests or a casual night in. Customizable: Swap ingredients based on your preference, like using sushi-grade salmon or even shrimp. For a lighter option, try a yogurt-based sauce instead of spicy mayonnaise. These cones aren’t just food; they’re a conversation starter, whether served at a party or enjoyed at home alongside a Tuna Salad Sandwich. Dive into this unique fusion of Japanese and French culinary artistry!

Spicy Tuna Sesame Miso Cones Ingredients

For the Tuile Cones
Unsalted Butter – Adds richness and moisture; ensure it remains unseasoned to maintain flavor balance.
Corn Syrup – Provides sweetness and binding for the cones; can be substituted with honey or agave syrup.
Miso Paste – Contributes umami depth and character; use white or yellow miso for a milder taste.
Salt – Enhances overall flavor; adjust based on dietary needs.
Ground Black Pepper – Adds subtle heat; freshly ground yields better flavor.
Toasted Sesame Oil – Provides aromatic nuttiness; substitute with grapeseed oil for a neutral flavor.
All-Purpose Flour – Gives structure to the tuile cones; for gluten-free, use a gluten-free flour blend.
Powdered Ginger – Imparts warm spiciness; fresh ginger can be used in smaller quantities.
Black Sesame Seeds & White Sesame Seeds – Add texture and visual appeal; optional but recommended for presentation.

For the Tuna Filling
Sushi-Grade Tuna – Main filling ingredient; fresh and flavorful; substitute with salmon or cooked shrimp if necessary.
Pickled Ginger – Provides acidity and brightness; can be replaced with shredded carrot for crunch.
Scallions – Freshness and mild onion flavor; chives can serve as a suitable alternative.
Soy Sauce-Wasabi Mixture – A key flavor component; use tamari for a gluten-free version.
Spicy Chili Mayonnaise – Adds creaminess and heat; Greek yogurt with sriracha can be a healthier swap.
Daikon Sprouts – Serve as a fresh garnish; microgreens like radish greens can be used as a substitute.
Massago Roe – Enhances umami flavor and texture; omit if unavailable or substitute with other fish roe.
Bonito Flakes – Creates depth and a savory finish; can be omitted if not preferred.

These Spicy Tuna Sesame Miso Cones are not only a delight to savor but also an elegant centerpiece for your table. Bring the flavors of fusion cuisine to your home and impress everyone with your culinary skills!

Step‑by‑Step Instructions for Spicy Tuna Sesame Miso Cones

Step 1: Prepare the Miso Tuiles
Preheat your oven to 175°C (350°F). In a medium saucepan, melt 1/2 cup of unsalted butter with 1/4 cup of corn syrup over low heat. Once melted, whisk in 2 tablespoons of miso paste, 1/2 teaspoon of salt, and 1/2 teaspoon of ground black pepper. Stir in 2 tablespoons of toasted sesame oil, followed by gradually mixing in 1/2 cup of all-purpose flour and 1 teaspoon of powdered ginger. Finish off by folding in 2 tablespoons each of black and white sesame seeds.

Step 2: Bake the Tuiles
Scoop tablespoon-sized amounts of the batter onto a baking sheet lined with parchment paper, spacing them about 4 inches apart. Bake for around 10–12 minutes, or until the edges are golden and slightly crisp. Keep an eye on them, as overbaking can lead to burnt tuiles. Once baked, remove from the oven and let them cool slightly before shaping.

Step 3: Shape the Cones
While the tuiles are still warm and pliable, gently lift each one and wrap it around a cone-shaped mold or a piece of parchment paper to form the classic cone shape. Hold in place for a few seconds to set, then carefully transfer to a wire rack to cool completely. Once cooled, these sesame-miso cones will be perfectly crispy and ready for filling.

Step 4: Make the Dressing
In a small bowl, whisk together 1 teaspoon of wasabi with a splash of water and 2 tablespoons of soy sauce until smooth. In another bowl, combine 1/4 cup of mayonnaise with 1 tablespoon of sriracha and a dash of toasted sesame oil. Stir until well emulsified and creamy. This robust dressing will complement your spicy tuna filling beautifully.

Step 5: Prepare the Tuna Filling
In a chilled mixing bowl, combine 1 cup of diced sushi-grade tuna, 2 tablespoons of chopped pickled ginger, and 2 tablespoons of thinly sliced scallions. Add 1 tablespoon of your prepared soy sauce-wasabi mixture and 2 tablespoons of the spicy mayonnaise. Gently fold everything together until the tuna is well coated, ensuring a balance of flavors in your filling for the Spicy Tuna Sesame Miso Cones.

Step 6: Assemble the Cones
Take each cooled sesame-miso cone and fill it with a small amount of daikon sprouts for a fresh crunch. Carefully spoon in the marinated tuna mixture, allowing it to spill just slightly over the top for an appealing presentation. To elevate the dish, garnish each cone with additional scallions, a sprinkle of massago roe, a few pieces of pickled ginger, and a drizzle of the soy sauce-wasabi mixture.

Step 7: Serve Immediately
For the best flavor and texture, serve your Spicy Tuna Sesame Miso Cones right away while the tuiles are still crisp. Arrange them on a lovely platter, showcasing their colorful toppings. These elegant appetizers are meant to be enjoyed fresh, offering a delightful experience for you and your guests alike.

Make Ahead Options

These Spicy Tuna Sesame Miso Cones are perfect for meal prep enthusiasts looking to save time! You can prepare the sesame-miso tuile cones up to 24 hours in advance; simply store them in an airtight container to maintain their crispiness. While the cones are prepped ahead, it’s best to make the spicy tuna filling just before serving to ensure freshness and quality. Keep the tuna mixture chilled for up to 3 hours. When you’re ready to impress your guests, assemble the cones by filling them with daikon sprouts and the tuna filling, then garnish as desired. This way, you’ll have a stunning appetizer ready in no time!

Spicy Tuna Sesame Miso Cones Variations

Feel free to personalize these delightful cones to match your taste buds and dietary needs!

  • Salmon Substitute: Swap sushi-grade tuna for sushi-grade salmon for a different yet equally delicious flavor.
  • Shrimp Twist: Use cooked shrimp instead of tuna for a unique twist on the filling—this makes for a fun, seafood change!
  • Yogurt Sauce: Substitute spicy mayonnaise with a tangy yogurt-based sauce mixed with sriracha, perfect for a lighter option.
  • Herb Garnish: Experiment with fresh herbs like cilantro or basil instead of scallions to elevate the flavor profile of each bite.
  • Crunchy Veggies: Add extra crunch by mixing in finely chopped cucumbers or bell peppers with the tuna filling!
  • Gluten-Free Alteration: Swap all-purpose flour with a gluten-free flour blend for a delectable gluten-free edition.
  • Heat Level: For more heat, mix in a dash of cayenne pepper into your spicy mayonnaise, exciting those who adore extra spice.
  • Sweet Twist: Incorporate a hint of mango or pineapple salsa for a sweet contrast that brightens the overall dish and adds a tropical vibe.

For even more culinary inspirations, you might enjoy whipping up a flavorful Tuna Salad Sandwich or a zesty Tuna Macaroni Salad to complement these cones perfectly. Let your imagination run wild and enjoy the deliciousness!

What to Serve with Spicy Tuna Sesame Miso Cones

Elevate your dining experience with delightful accompaniments that dance beautifully with every bite of your spicy tuna treat.

  • Crispy Seaweed Salad: A light and refreshing salad that perfectly balances the richness of the tuna with its flavor and texture.

  • Sushi Rice: Soft and sticky sushi rice provides a hearty contrast, making for a heartier meal that delights every palate.

  • Edamame Beans: Lightly salted and vibrant, these tender beans add a burst of color while providing a nutritious touch to your table.

  • Miso Soup: Savory and warm, miso soup complements the umami flavors in the cones, enhancing the overall dining experience.

  • Cucumber Salad with Rice Vinegar: Crisp cucumbers drizzled with rice vinegar offer a refreshing tang that cuts through the richness of the filling.

  • Spicy Pickled Vegetables: A medley of spicy pickles invigorates your palate, providing a zesty contrast to the creamy filling.

  • Japanese Beer or Sake: A chilled beer or a glass of sake unlocks vibrant flavors, enhancing the elegant experience without overshadowing the cones.

  • Mango Sticky Rice: This sweet dessert brings a touch of paradise, balancing the spice of the tuna with a tropical sweetness to end the meal on a high note.

Pairing these delightful additions with your Spicy Tuna Sesame Miso Cones will create a memorable culinary journey, leaving everyone craving more.

How to Store and Freeze Spicy Tuna Sesame Miso Cones

Airtight Container: Store the sesame-miso cones in an airtight container at room temperature for up to 2 days to maintain crispiness.

Refrigeration: If you’ve filled the cones with tuna and haven’t served them, keep the filling in an airtight container in the fridge for up to 4 hours before assembly.

Freezing: While it’s best to freeze the tuiles and filling separately, you can freeze the empty tuile cones for up to 1 month. Recrisp in the oven before serving.

Reheating: If necessary, reheat the tuiles in a preheated oven at 175°C (350°F) for 3–5 minutes until crisp again, ensuring your Spicy Tuna Sesame Miso Cones stay delectable!

Expert Tips for Spicy Tuna Sesame Miso Cones

  • Chill Ingredients: Keep your tuna cold: Use a chilled bowl for mixing and keep the tuna in the fridge until assembly to ensure freshness.

  • Even Cone Shapes: Use a mold: If you’re struggling to shape your cones, consider using a cone mold or foil to achieve uniformity.

  • Proper Baking: Watch your tuiles: Bake until golden but not burnt; overbaking can lead to flavor loss and an undesirable texture in your Spicy Tuna Sesame Miso Cones.

  • Adjust Spice Levels: Taste before serving: Start with less sriracha in your mayonnaise and adjust gradually to suit everyone’s spice preference.

  • Make-Ahead Convenience: Prepare in advance: You can make the tuile cones a day ahead and store them in an airtight container to maintain crispiness.

Spicy Tuna Sesame Miso Cones Recipe FAQs

What type of tuna should I use for the filling?
Absolutely! It’s crucial to use sushi-grade tuna for your Spicy Tuna Sesame Miso Cones. This ensures freshness and flavor. You can substitute it with sushi-grade salmon or even cooked shrimp if you prefer, but the key is to choose high-quality seafood that is safe for raw consumption.

How should I store leftover tuna filling?
Very important! If you have leftover tuna filling, store it in an airtight container in the refrigerator for up to 4 hours. Make sure it’s kept at a temperature below 4°C (40°F) to prevent bacterial growth. I often do this when I’m making a large batch for a gathering, so I can mix and fill the cones as needed.

Can I prepare the tuile cones in advance?
Sure! You can prepare the sesame-miso tuile cones a day in advance. Store them in an airtight container at room temperature, and they will stay crispy for up to 48 hours. Just make sure they are completely cooled first to maintain that delightful crunch.

How do I freeze the Spicy Tuna Sesame Miso Cones?
If you plan to freeze the tuile cones, it works best to do so separately from the filling. Store the empty cones in an airtight container or a freezer bag for up to 1 month. When you’re ready to serve, reheat them in a preheated oven at 175°C (350°F) for 3–5 minutes until they regain their crispiness, and then fill them fresh with the tuna mixture!

Are there any dietary alternatives for this recipe?
Yes, absolutely! If you’re looking for gluten-free options, you can use a gluten-free flour blend in place of all-purpose flour, and tamari instead of regular soy sauce. For a lighter twist, substitute the spicy mayonnaise with Greek yogurt mixed with sriracha. Always feel free to adjust the filling and toppings based on your guests’ dietary restrictions or preferences!

How can I tell if my ingredients are fresh enough to use?
Look for bright colors and firm textures! The tuna should smell clean, not fishy; it should have a slight sheen and be deep red in color. As for the vegetables, pickled ginger should be slightly firm, and scallions should be crisp. If you notice any dark spots or mushiness, it’s best to avoid those ingredients. Freshness elevates your Spicy Tuna Sesame Miso Cones!

Spicy Tuna Sesame Miso Cones

Spicy Tuna Sesame Miso Cones: A Flavor-Packed Delight

These Spicy Tuna Sesame Miso Cones are my secret weapon for impressing guests with bold flavors and elegant presentation.
Prep Time 20 minutes
Cook Time 12 minutes
Cooling Time 5 minutes
Total Time 37 minutes
Servings: 6 cones
Course: Appetizer
Cuisine: French, Japanese
Calories: 200

Ingredients
  

For the Tuile Cones
  • 0.5 cup Unsalted Butter Adds richness and moisture; ensure it remains unseasoned to maintain flavor balance.
  • 0.25 cup Corn Syrup Provides sweetness and binding for the cones; can be substituted with honey or agave syrup.
  • 2 tablespoons Miso Paste Contributes umami depth and character; use white or yellow miso for a milder taste.
  • 0.5 teaspoon Salt Enhances overall flavor; adjust based on dietary needs.
  • 0.5 teaspoon Ground Black Pepper Adds subtle heat; freshly ground yields better flavor.
  • 2 tablespoons Toasted Sesame Oil Provides aromatic nuttiness; substitute with grapeseed oil for a neutral flavor.
  • 0.5 cup All-Purpose Flour Gives structure to the tuile cones; use gluten-free flour blend for a gluten-free option.
  • 1 teaspoon Powdered Ginger Imparts warm spiciness; fresh ginger can be used in smaller quantities.
  • 2 tablespoons Black Sesame Seeds Add texture and visual appeal; optional but recommended for presentation.
  • 2 tablespoons White Sesame Seeds Add texture and visual appeal; optional but recommended for presentation.
For the Tuna Filling
  • 1 cup Sushi-Grade Tuna Main filling ingredient; substitute with salmon or cooked shrimp if necessary.
  • 2 tablespoons Pickled Ginger Provides acidity and brightness; can be replaced with shredded carrot for crunch.
  • 2 tablespoons Scallions Freshness and mild onion flavor; chives can serve as a suitable alternative.
  • 1 tablespoon Soy Sauce-Wasabi Mixture A key flavor component; use tamari for a gluten-free version.
  • 2 tablespoons Spicy Chili Mayonnaise Adds creaminess and heat; Greek yogurt with sriracha can be a healthier swap.
  • 0.5 cup Daikon Sprouts Serve as a fresh garnish; substitute with microgreens like radish greens.
  • 2 tablespoons Massago Roe Enhances umami flavor and texture; omit if unavailable or substitute with other fish roe.
  • 1 tablespoon Bonito Flakes Creates depth and a savory finish; can be omitted if not preferred.

Equipment

  • Oven
  • Mixing bowls
  • Baking Sheet
  • Cone Mold

Method
 

Step-by-Step Instructions
  1. Preheat your oven to 175°C (350°F). In a medium saucepan, melt the unsalted butter with corn syrup over low heat. Once melted, whisk in miso paste, salt, and ground black pepper. Stir in toasted sesame oil, followed by gradually mixing in all-purpose flour and powdered ginger. Finish off by folding in black and white sesame seeds.
  2. Scoop tablespoon-sized amounts of the batter onto a baking sheet lined with parchment paper, spacing them about 4 inches apart. Bake for around 10–12 minutes, or until the edges are golden and slightly crisp. Remove from the oven and let them cool slightly before shaping.
  3. While the tuiles are still warm and pliable, gently lift each one and wrap it around a cone-shaped mold or a piece of parchment paper to form the classic cone shape. Hold in place for a few seconds to set, then carefully transfer to a wire rack to cool completely.
  4. In a small bowl, whisk together wasabi with a splash of water and soy sauce until smooth. In another bowl, combine mayonnaise with sriracha and toasted sesame oil. Stir until well emulsified and creamy.
  5. In a chilled mixing bowl, combine diced sushi-grade tuna, pickled ginger, and thinly sliced scallions. Add your prepared soy sauce-wasabi mixture and spicy mayonnaise. Gently fold everything together until the tuna is well coated.
  6. Take each cooled sesame-miso cone and fill it with a small amount of daikon sprouts for a fresh crunch. Carefully spoon in the marinated tuna mixture, allowing it to spill just slightly over the top for an appealing presentation.
  7. For the best flavor and texture, serve your Spicy Tuna Sesame Miso Cones right away while the tuiles are still crisp. Arrange them on a lovely platter, showcasing their colorful toppings.

Nutrition

Serving: 1coneCalories: 200kcalCarbohydrates: 10gProtein: 15gFat: 12gSaturated Fat: 2gPolyunsaturated Fat: 2gMonounsaturated Fat: 6gCholesterol: 25mgSodium: 300mgPotassium: 250mgFiber: 1gSugar: 1gVitamin A: 500IUVitamin C: 1mgCalcium: 30mgIron: 1mg

Notes

Chill ingredients before mixing. Use a mold for even cone shapes. Bake tuiles to golden but not burnt. Adjust spice levels to taste. Tuile cones can be made ahead and stored in an airtight container.

Tried this recipe?

Let us know how it was!

Savory Cheese & Olive Quick Bread: A Flavorful Feast at Home

The aroma of freshly baked bread wafting through my kitchen has a way of instantly transforming the day. Whenever I whip up this Savory Cheese & Olive Quick Bread, it becomes an impromptu gathering spot for friends and family. Not only is this recipe incredibly simple, requiring minimal time and effort, but it also delivers a delightful twist on traditional bread that will have everyone reaching for seconds. This quick bread is a perfect accompaniment to any meal or an indulgent snack on its own, making it a versatile addition to your recipe repertoire. As you slice into the warm, cheesy goodness, you’ll find it’s the kind of dish that brings people together, making every bite worth savoring. Are you ready to elevate your baking game with this crowd-pleaser?

Why is this bread a must-try?

Irresistible aroma: The moment this bread comes out of the oven, your kitchen will fill with a warm, savory scent that beckons everyone to the table.

Ease of preparation: With no need for complex techniques or long rising times, this Savory Cheese & Olive Quick Bread is perfect for busy cooks looking for homemade goodness.

Versatile delight: Enjoy it as a side dish for dinner or as an elegant snack; it complements a variety of meals and occasions.

Flavor explosion: The blend of cheese and olives provides a deliciously rich taste that will keep your taste buds dancing.

Impress your guests: Serve it at gatherings, and watch as it quickly becomes the star of the show, leaving everyone asking for the recipe! For more delightful baked goods, check out our easy homemade muffins.

Savory Cheese & Olive Quick Bread Ingredients

• Let’s get ready to bake a delightful treat!

For the Bread Base
All-purpose flour – This forms the perfect base for your quick bread and can be substituted with whole wheat for a heartier texture.
Baking powder – Essential for that lovely rise, ensuring your bread is fluffy and light.
Salt – A crucial flavor enhancer that brings out the best in all the ingredients.
Milk – Adds moisture; you can substitute with almond or oat milk for a dairy-free option.
Egg – Acts as a binder and adds richness; for a vegan version, use a flax egg.

For the Flavor
Shredded cheese – Choose your favorite, like cheddar or a sharp gouda for a flavor punch.
Olives – Green or black, pitted and chopped; they infuse this Savory Cheese & Olive Quick Bread with a burst of briny goodness.

Optional Add-ins
Herbs (e.g., rosemary or thyme) – Fresh or dried, they enhance the aroma and add an extra dimension of flavor.
Red pepper flakes – If you like a bit of heat, sprinkle some in for a warm kick!

With these Savory Cheese & Olive Quick Bread ingredients at hand, you’ll be well on your way to creating a mouthwatering masterpiece that not only brings joy to your kitchen but also welcomes everyone to the table with open arms!

Step‑by‑Step Instructions for Savory Cheese & Olive Quick Bread

Step 1: Preheat Your Oven
Begin by preheating your oven to 375°F (190°C). This ensures that your Savory Cheese & Olive Quick Bread bakes evenly and develops that delicious golden crust. While the oven warms up, gather your mixing bowls and measuring cups—having everything at hand makes the process smoother and more enjoyable.

Step 2: Mix the Dry Ingredients
In a large mixing bowl, whisk together 2 cups of all-purpose flour, 1 tablespoon of baking powder, and 1 teaspoon of salt. Ensure there are no lumps, as this step is crucial for the fluffy texture of your quick bread. The dry ingredients will create a solid foundation, allowing the flavorful cheese and olives to shine through when baked.

Step 3: Combine the Wet Ingredients
In a separate bowl, beat together 1 cup of milk and 1 large egg until fully combined. This mixture adds moisture and binds the ingredients together. Pour this wet mixture gradually into the dry ingredients, using a spatula to fold until just combined; be careful not to over-mix—it’s okay if some flour remains visible for the best texture in your Savory Cheese & Olive Quick Bread.

Step 4: Fold in the Flavor
Now, it’s time to add the star ingredients! Gently fold in 1 cup of shredded cheese and 3/4 cup of chopped olives into the batter. You can choose your favorite cheeses and olives to personalize this recipe. Make sure the cheese and olives are evenly distributed throughout the batter, which will create pockets of flavor in every bite.

Step 5: Prepare the Baking Pan
Lightly grease a 9×5-inch loaf pan or line it with parchment paper for easy removal. Pour the batter into the prepared pan, spreading it evenly with a spatula. As you do this, the aroma of the Savory Cheese & Olive Quick Bread will start to fill your kitchen, giving you a hint of the deliciousness to come.

Step 6: Bake to Perfection
Place the loaf pan in your preheated oven and bake for 35-40 minutes. The bread is done once it turns a beautiful golden brown and springs back when lightly pressed. You’ll also notice a delightful aroma filling your home—an irresistible sign that your Savory Cheese & Olive Quick Bread is close to being ready!

Step 7: Cool and Serve
Once baked, remove the bread from the oven and let it cool in the pan for about 10 minutes. After that, carefully transfer it to a wire rack to cool completely. Once cooled, slice the loaf into thick pieces, revealing the cheesy and olive-packed interior. This delectable quick bread can be enjoyed warm or at room temperature, making it a perfect addition to any meal or snack!

Tips for the Best Quick Bread

Use Fresh Ingredients: Ensure your cheese and olives are fresh to deliver that irresistible flavor explosion in your Savory Cheese & Olive Quick Bread.

Don’t Over-Mix: Gently folding the batter until just combined is key to achieving a fluffy texture; over-mixing can lead to dense bread.

Customize Your Flavors: Feel free to experiment with different cheeses and herbs to make this quick bread your own; personalize it for every occasion!

Check for Doneness: Test the bread by inserting a toothpick; it should come out clean. If not, keep baking and watch for that golden crust.

Cool Before Slicing: Allow the bread to cool completely on a wire rack to firm up, making it easier to cut clean slices without crumbling.

Savory Cheese & Olive Quick Bread Variations

Invite your culinary creativity to shine by exploring these exciting twists on your Savory Cheese & Olive Quick Bread!

  • Gluten-Free: Substitute all-purpose flour with a gluten-free flour blend for a delicious alternative that everyone can enjoy. The same heavenly flavors remain, but with a lighter texture that might surprise you.

  • Spicy Kick: Add 1-2 teaspoons of diced jalapeños or a dash of cayenne pepper to the batter for a fiery twist. This little kick elevates the flavor profile and adds a delightful warmth that pairs beautifully with the cheese.

  • Mediterranean Medley: Incorporate sun-dried tomatoes and feta cheese alongside the olives for a rich Mediterranean flavor explosion. The sun-dried tomatoes provide a lovely sweetness that balances perfectly with the briny olives.

  • Cheesy Herb Delight: Mix in half a cup of freshly chopped parsley or basil for an aromatic finishing touch. These herbs enhance the bread’s flavor and make it a refreshing companion to any meal, especially during springtime gatherings!

  • Nutty Crunch: Fold in a handful of toasted walnuts or pine nuts for added texture and flavor. The nutty crunch beautifully contrasts the fluffiness of the bread, making each bite a delightful adventure.

  • Savory Breakfast Option: Add crumbled cooked bacon or sausage for a hearty breakfast twist. This savory addition will make your quick bread a beloved breakfast staple, perfect for brunch gatherings with friends.

  • Dairy-Free Dream: Replace shredded cheese with a plant-based cheese alternative and use almond or coconut milk. A simple yet clever swap ensures everyone can partake in the deliciousness, without compromising on flavor.

  • Cream Cheese Swirl: Incorporate dollops of herb-flavored cream cheese into the batter before baking for an indulgent twist. The creamy ribbons throughout the loaf create an extra layer of wow with every slice.

No matter which variation you choose, your Savory Cheese & Olive Quick Bread will keep the kitchen bustling with warmth and laughter. For more flavor-packed recipes, don’t forget to check out our classic banana bread and add another delightful treat to your collection!

What to Serve with Savory Cheese & Olive Quick Bread

Experience the warmth of a full meal as you surround this quick bread with delightful accompaniments that elevate every bite.

  • Garden Salad: A refreshing medley of greens cuts through the richness of the bread. Toss with a light vinaigrette for added zing.

  • Roasted Vegetables: Crispy, caramelized vegetables offer a satisfying contrast in texture and a subtle sweetness that enhances the bread’s savory notes.

  • Creamy Tomato Soup: The classic pairing of warm bread dipped into a rich, comforting soup creates a cozy dining experience perfect for chilly days.

  • Herbed Butter: Spread a bit of herbed butter on warm slices for an extra layer of flavor. The herby notes tie perfectly with the cheese and olives.

  • Charcuterie Board: Create an inviting spread with cured meats, cheeses, and olives to enjoy alongside the bread. The variety brings out the flavors beautifully.

  • Sparkling White Wine: A glass of bubbly adds a festive touch, its effervescence cleansing the palate after each delicious bite of bread.

  • Chocolate Brownies: End your meal on a sweet note with rich, fudgy brownies. The chocolate provides a delightful contrast to the savory bread.

  • Pickled Veggies: A small side of tangy pickled vegetables brightens up the meal and complements the hearty flavors of the bread.

Let your Savory Cheese & Olive Quick Bread shine amidst these tasty offerings, creating a meal guests won’t forget!

Make Ahead Options

These Savory Cheese & Olive Quick Breads are perfect for busy weeknights or for entertaining! You can mix your dry ingredients (2 cups of all-purpose flour, 1 tablespoon of baking powder, and 1 teaspoon of salt) up to 3 days in advance and store them in an airtight container to maintain freshness. Additionally, you can prepare the wet mixture (1 cup of milk and 1 egg) and refrigerate it overnight for convenience. When you’re ready to bake, simply combine the wet and dry ingredients, fold in the cheese and olives, and pour the batter into your prepared pan. This way, you’ll enjoy a delightful homemade bread with minimal effort—perfectly fluffy and just as delicious!

How to Store and Freeze Savory Cheese & Olive Quick Bread

Room Temperature: Store your Savory Cheese & Olive Quick Bread in an airtight container at room temperature for up to 3 days, keeping it fresh and ready to enjoy at a moment’s notice.

Fridge: If you want to prolong its life, keep the bread in the refrigerator for up to a week, wrapped tightly to prevent it from drying out and absorbing odors.

Freezer: For longer storage, wrap the cooled quick bread tightly in plastic wrap, then foil, and freeze for up to 3 months. Thaw in the fridge overnight before enjoying.

Reheating: To revive the bread, reheat slices in a toaster or oven at 350°F (175°C) for about 5-10 minutes, restoring its delightful warmth and cheesy goodness.

Savory Cheese & Olive Quick Bread Recipe FAQs

How do I select the best olives for this bread?
Absolutely! When choosing olives, look for ones that are firm and glossy without dark spots or wrinkles. Green olives tend to be milder, while black olives offer a richer flavor—so feel free to choose based on your taste preference!

What is the best way to store leftovers?
For sure! To keep your Savory Cheese & Olive Quick Bread fresh, store it in an airtight container at room temperature for up to 3 days. If you’d like to extend its shelf life, placing it in the fridge will keep it good for up to a week. Just wrap it tightly to prevent it from drying out!

Can I freeze the quick bread? What’s the process?
Definitely! To freeze your Savory Cheese & Olive Quick Bread, start by letting it cool completely. Then, wrap the loaf tightly in plastic wrap, followed by a layer of aluminum foil to prevent freezer burn. Label with the date, and it will stay fresh for up to 3 months. When you’re ready to enjoy, simply thaw in the fridge overnight, or reheat slices in a toaster or oven at 350°F (175°C) for 5-10 minutes!

How can I troubleshoot if my bread didn’t rise properly?
Not a problem! If your bread didn’t rise, there might be a couple of issues. First, ensure that your baking powder is fresh; if it’s older than 6 months, it may have lost its potency. Additionally, check that you mixed the batter just until combined—overmixing can lead to dense bread! If you encounter any of these issues again, double-check these steps for a lighter, fluffier loaf.

Is this recipe suitable for people with dietary restrictions?
Very much so! If you’re looking for gluten-free alternatives, use a gluten-free all-purpose flour blend, and your Savory Cheese & Olive Quick Bread will still be a hit. For a dairy-free version, substitute the milk with almond or oat milk and choose vegan cheese. Always check for any allergens in your olives and cheese to make sure everyone can enjoy this tasty treat!

Savory Cheese & Olive Quick Bread

This Savory Cheese & Olive Quick Bread is an irresistible delight, combining rich flavors and easy preparation for a perfect appetizer.
Prep Time 15 minutes
Cook Time 40 minutes
Cooling Time 10 minutes
Total Time 1 hour 5 minutes
Servings: 8 slices
Course: Appetizer
Cuisine: American
Calories: 210

Ingredients
  

For the Bread Base
  • 2 cups all-purpose flour can substitute with whole wheat
  • 1 tablespoon baking powder for rise
  • 1 teaspoon salt enhances flavor
  • 1 cup milk can substitute with almond or oat milk
  • 1 large egg acts as a binder
For the Flavor
  • 1 cup shredded cheese choose your favorite
  • 3/4 cup chopped olives green or black, pitted
Optional Add-ins
  • herbs (e.g., rosemary or thyme) fresh or dried
  • red pepper flakes for a warm kick

Equipment

  • Mixing bowls
  • Loaf Pan
  • Oven

Method
 

Step-by-Step Instructions
  1. Preheat your oven to 375°F (190°C).
  2. In a large mixing bowl, whisk together the dry ingredients: flour, baking powder, and salt.
  3. In a separate bowl, beat together the milk and egg until fully combined. Gradually pour into the dry ingredients and fold until just combined.
  4. Gently fold in the shredded cheese and chopped olives until evenly distributed.
  5. Lightly grease a 9x5-inch loaf pan or line with parchment paper. Pour the batter, spreading it evenly.
  6. Bake in the preheated oven for 35-40 minutes, until golden brown and springs back when pressed.
  7. Let cool in the pan for 10 minutes, then transfer to a wire rack to cool completely before slicing.

Nutrition

Serving: 1sliceCalories: 210kcalCarbohydrates: 30gProtein: 7gFat: 8gSaturated Fat: 4gPolyunsaturated Fat: 0.5gMonounsaturated Fat: 2.5gCholesterol: 36mgSodium: 400mgPotassium: 200mgFiber: 1gSugar: 1gVitamin A: 300IUCalcium: 150mgIron: 1mg

Notes

Use fresh ingredients for the best flavor. Don't over-mix the batter to maintain a fluffy texture. Allow bread to cool before slicing for cleaner cuts.

Tried this recipe?

Let us know how it was!

Chocolate Hazelnut Crunch Cookies – Irresistibly Crunchy Treats

As I stood in my kitchen, the enticing aroma of chocolate and freshly roasted hazelnuts filled the air, instantly transporting me to a cozy café on a winter afternoon. That’s when I decided to bake a batch of Chocolate Hazelnut Crunch Cookies. These delightful cookies combine a chewy center and crisp edges, all wrapped in a luscious coat of dark chocolate embellished with crunchy hazelnuts. They’re not just perfect for cookie exchanges or holiday gifting; they offer a homemade touch that outshines any store-bought treat. Plus, they’re easily adaptable if you’re looking for a gluten-free option! Can you imagine sharing these exquisite bites with loved ones? Let’s dive into how you can whip up these irresistible gems in your own home.

Why You’ll Crave These Cookies

Irresistible Flavor: The combination of chocolate and toasted hazelnuts creates a rich, nutty profile that tantalizes the taste buds.
Chewy and Crunchy: With a soft center and crispy edges, these cookies offer that perfect bite everyone craves.
Customizable Delight: Easily swap out nuts or chocolate to create your ideal flavor. Try them with almonds or even a hint of espresso for an extra kick!
Perfect for Gifting: Wrapped in a festive box, these cookies make thoughtful homemade gifts, sure to impress family and friends during the holiday season.
Time-Saving Joy: Bake a batch quickly, freeze extras, and enjoy this gourmet treat anytime without the fuss. Don’t forget to check out my Chocolate Cranberry Cookies for more delightful options!

Chocolate Hazelnut Crunch Cookies Ingredients

For the Cookie Dough
Butter – Provides richness and moisture; use unsalted for a precise salt balance.
Granulated Sugar – Adds sweetness and texture; coconut sugar can deepen the flavor.
Brown Sugar – Enhances sweetness and chewiness, giving cookies a moist texture.
Egg – Acts as a binder; consider plant-based options for a vegan alternative.
All-Purpose Flour – Offers structure; substitute with a 1:1 gluten-free baking blend for gluten-free option.
Cocoa Powder – Infuses chocolate flavor; ensure it’s unsweetened for best results.
Baking Powder – Acts as a leavening agent to give cookies lift.
Salt – Balances sweetness and enhances the overall flavor.
Roasted Hazelnuts – Adds nutty flavor and crunch; roast at 350°F for maximum flavor.

For the Coating
Dark Chocolate (60%-70%) – Provides a rich layer for coating; avoid variations outside this range for best taste.
Coconut Oil – Optional but recommended for a smooth, glossy finish when melting chocolate.

Step‑by‑Step Instructions for Chocolate Hazelnut Crunch Cookies

Step 1: Prepare Oven
Preheat your oven to 350°F (175°C) to ensure optimal baking conditions for your Chocolate Hazelnut Crunch Cookies. This temperature is perfect for achieving those delightfully crisp edges while keeping the centers chewy. As the oven warms up, gather your baking sheets and line them with parchment paper for easy cookie transfer.

Step 2: Roast Hazelnuts
Place your raw hazelnuts on a baking tray and roast them in the preheated oven for about 10 minutes. Keep an eye on them; you want them to be golden and fragrant, not burnt. Once roasted, let the hazelnuts cool completely before roughly chopping them. This step adds rich flavor and texture to your cookies.

Step 3: Make Dough
In a large mixing bowl, use an electric mixer to beat softened unsalted butter with granulated and brown sugars until the mixture is light and fluffy, about 3-4 minutes. Add in one egg and a splash of vanilla extract, mixing until combined. Then, sift in all-purpose flour, cocoa powder, baking powder, and salt, folding gently until just combined. Finally, fold in the chopped hazelnuts for that signature crunch.

Step 4: Shape Cookies
Scoop out tablespoon-sized portions of cookie dough and roll them into neat discs, ensuring they are about ½ inch thick for even baking. Place the discs on your prepared baking sheets, spaced apart to allow for spreading as they bake. The dough should be manageable yet slightly sticky, which is ideal for achieving the perfect texture in your Chocolate Hazelnut Crunch Cookies.

Step 5: Bake
Slide the baking sheets into your preheated oven and bake for 10-12 minutes. You’re looking for the edges to set while the centers remain slightly soft. The cookies will continue to firm up as they cool. When done, remove them from the oven and allow them to rest on the baking sheets for a few minutes before transferring to a wire rack.

Step 6: Cool
Let your baked cookies cool completely on a wire rack. This allows the cookies to firm up and makes them easier to dip later. Patience is key here; you’ll want to ensure they’re fully cooled to prevent the chocolate from melting off when coated, so sip on a cup of tea while you wait!

Step 7: Melt Chocolate
In a microwave-safe bowl, combine dark chocolate with a teaspoon of coconut oil (if using) and heat in 30-second intervals, stirring in between until smooth. This method ensures the chocolate doesn’t burn and remains glossy. You want the chocolate liquefied but not too hot, making it perfect for coating those delicious Chocolate Hazelnut Crunch Cookies.

Step 8: Coat Cookies
Dip half of each cooled cookie into the melted chocolate, allowing any excess to drip off. As you lay the dipped cookies on parchment paper, sprinkle the tops with reserved chopped hazelnuts for added crunch and visual appeal. This step not only adds flavor but creates an inviting display of your Chocolate Hazelnut Crunch Cookies.

Step 9: Set
Allow the chocolate-coated cookies to set at room temperature until the chocolate fully hardens. If you’re in a hurry, you can pop them in the fridge for a quicker set, about 15-20 minutes. The result will be beautifully adorned cookies, ready to delight friends and family or to serve during the holiday season.

What to Serve with Chocolate Hazelnut Crunch Cookies

Pairing these cookies with the right accompaniments can elevate your dessert experience to new heights, creating a symphony of flavors and textures that will delight everyone at the table.

  • Hot Cocoa: A rich, creamy cup of hot cocoa enhances the chocolatey goodness of these cookies, creating a cozy pairing perfect for winter evenings. Just imagine warming your hands around the mug as you savor the sweet crunch.

  • Vanilla Ice Cream: The smooth, creamy texture of vanilla ice cream contrasts beautifully with the crunch of the cookies, making every bite a delightful indulgence. Top with a drizzle of chocolate sauce for an added treat!

  • Fresh Berries: Juicy raspberries or strawberries add a burst of freshness that cuts through the richness of the cookies, balancing the dessert nicely. Their bright flavors complement the chocolate and hazelnuts splendidly, making for a harmonic dessert pairing.

  • Espresso: The boldness of a well-brewed espresso brings out the flavors of the dark chocolate, enhancing your overall tasting experience. This pairing is ideal for those who adore the combination of bittersweet chocolate with a rich coffee undertone.

  • Nutty Trail Mix: A handful of nutty trail mix on the side can provide crunch and chewiness, adding texture that beautifully complements the cookies. This healthy option also makes for a delightful addition to a dessert platter.

  • Caramel Sauce: Drizzling a touch of salted caramel sauce over these cookies elevates their sweetness and adds a layer of decadence. It’s an irresistible combination that will have guests licking their fingers in delight.

  • Herbal Tea: A warm cup of herbal tea, such as chamomile or mint, offers a soothing contrast to the sweet crunch of chocolate hazelnut cookies. This peaceful pairing is perfect for a relaxing afternoon treat with friends or family.

Make Ahead Options

These Chocolate Hazelnut Crunch Cookies are perfect for meal prep enthusiasts! You can prepare the cookie dough up to 24 hours in advance. Simply mix the dough as per the instructions, then wrap it tightly in plastic wrap and refrigerate. If you’re looking to prep even further ahead, the baked cookies can be stored in an airtight container for up to 5 days at room temperature or frozen for up to 3 months. To maintain quality when freezing, layer them between parchment paper to prevent sticking. When ready to enjoy, thaw at room temperature, dip in melted chocolate, and sprinkle with hazelnuts for a delightful finishing touch. Enjoy stress-free baking whenever the craving strikes!

Storage Tips for Chocolate Hazelnut Crunch Cookies

Room Temperature: Store cookies in an airtight container at room temperature for up to 5 days to maintain their delightful texture and flavor.

Freezer: For longer storage, freeze cookies in a single layer, separated by parchment paper, for up to 3 months. Thaw at room temperature before enjoying!

Layering: If stacking, place parchment paper between layers to prevent sticking and preserve the beautiful coating of your Chocolate Hazelnut Crunch Cookies.

Reheating: To revive cookies, warm them in the oven at 300°F for about 5 minutes to restore their delightful chewiness.

Chocolate Hazelnut Crunch Cookies Variations

Feel free to get creative with your cookies and make them uniquely yours!

  • Nut Swap: Substitute almonds or pecans for hazelnuts for a new flavor experience.
  • Chocolate Change: Try using milk chocolate or white chocolate instead of dark for a sweeter treat.
  • Espresso Enhancement: Add a teaspoon of espresso powder to the dough for an extra depth of flavor that complements the chocolate beautifully.
  • Vegan Twist: Replace the egg with a flaxseed egg or applesauce for a vegan-friendly version without compromising on taste.
  • Gluten-Free Glory: Use a 1:1 gluten-free baking blend in place of all-purpose flour for a delightful gluten-free cookie option.
  • Spice It Up: Incorporate spices like cinnamon or a hint of nutmeg for a warm, holiday-like essence.
  • Add-Ins: Mix in dried fruit like cranberries or cherries for a sweet and tart balance against the chocolate and nuts.
  • Zesty Brightness: Grate some orange zest into the dough for a refreshing citrus twist that brightens the flavors.

For more delicious variations, you might want to check out my No-Bake Cookies and Cream Cheesecake Cups or how to create a lovely Patriotic Chocolate Chip Cookie Pie for different celebrations!

Expert Tips for Chocolate Hazelnut Crunch Cookies

  • Perfect Roasting: Roast hazelnuts until golden: Properly roasting enhances flavor significantly. Undercooked hazelnuts can make the cookies taste flat.

  • Cooling is Key: Ensure cookies cool completely before coating: If the cookies are warm, the chocolate may slide right off. Patience pays off with well-coated treats!

  • Chocolate Quality: Use good quality dark chocolate: Opt for 60%-70% cocoa for a rich flavor; anything lower won’t provide the depth these Chocolate Hazelnut Crunch Cookies deserve.

  • Coconut Oil Magic: Add coconut oil to chocolate: This optional ingredient is key for a glossy and smooth chocolate finish that makes your cookies shine.

  • Consistent Sizing: Keep the dough uniform: Roll dough into consistent discs to ensure even baking and delightful consistency in each bite!

Chocolate Hazelnut Crunch Cookies Recipe FAQs

How do I choose the right hazelnuts?
For the best flavor, always pick roasted hazelnuts or roast raw ones yourself. Look for hazelnuts that have a golden-brown color and a firm texture. Avoid any with dark spots or a soft feel, as these may be stale. Roasting at 350°F for 10 minutes will enhance their nuttiness significantly.

How should I store Chocolate Hazelnut Crunch Cookies?
Store these delightful cookies in an airtight container at room temperature for up to 5 days. Make sure they are cooled completely to preserve that chewy texture. If you want to enjoy them later, layer the cookies with parchment paper and freeze them for up to 3 months. Just allow them to thaw at room temperature before you indulge!

Can I freeze these cookies?
Absolutely! To freeze, arrange the cookies in a single layer on a baking sheet first, and set them in the freezer until solid. Once firm, transfer them to a freezer-safe container or bag, separating layers with parchment paper to prevent sticking. They will keep well for about 3 months. Thaw them at room temperature when you’re ready to enjoy!

What if my cookies spread too much while baking?
If your cookies spread excessively, it may be due to the butter being too soft or the dough being too warm. To combat this, chill your cookie dough for about 30 minutes before shaping and baking. This helps them maintain their form during baking, allowing for those lovely chewy centers and crisp edges.

Are Chocolate Hazelnut Crunch Cookies suitable for those with allergies?
While this recipe includes common allergens such as eggs and nuts, you can adapt it by using appropriate substitutes. For a gluten-free option, swap all-purpose flour with a gluten-free baking blend. If you have nut allergies, consider using sunflower seeds for a similar crunch without the allergens, keeping the rest of the recipe intact. Always check ingredient labels for any hidden allergens!

What’s the best way to enjoy leftover cookies?
The more the merrier! If you have leftover cookies, try warming them in the oven at a low temperature (around 300°F for about 5 minutes) to restore their lovely chewiness. You could also crumble them over ice cream for a festive dessert or serve them alongside a cup of hot cocoa during cozy evenings. Enjoy your baking adventures!

Chocolate Hazelnut Crunch Cookies

Chocolate Hazelnut Crunch Cookies – Irresistibly Crunchy Treats

These Chocolate Hazelnut Crunch Cookies are irresistibly crunchy with a chewy center, perfect for cookie exchanges or holiday gifts.
Prep Time 15 minutes
Cook Time 12 minutes
Cooling Time 15 minutes
Total Time 42 minutes
Servings: 24 cookies
Course: Dessert
Cuisine: Baked Goods
Calories: 150

Ingredients
  

For the Cookie Dough
  • 1 cup unsalted Butter softened
  • 1 cup Granulated Sugar
  • 1/2 cup Brown Sugar
  • 1 large Egg
  • 2 cups All-Purpose Flour or gluten-free blend
  • 1/2 cup Cocoa Powder unsweetened
  • 1 teaspoon Baking Powder
  • 1/2 teaspoon Salt
  • 1 cup Roasted Hazelnuts roughly chopped
For the Coating
  • 8 ounces Dark Chocolate (60%-70%)
  • 1 teaspoon Coconut Oil optional

Equipment

  • Oven
  • Baking Sheet
  • Parchment paper
  • Mixing Bowl
  • Electric Mixer
  • Microwave-safe bowl

Method
 

Step-by-Step Instructions
  1. Preheat your oven to 350°F (175°C) and line baking sheets with parchment paper.
  2. Roast hazelnuts on a baking tray in the preheated oven for about 10 minutes.
  3. In a large mixing bowl, beat butter with granulated and brown sugars until fluffy, then mix in egg.
  4. Sift in flour, cocoa powder, baking powder, and salt, folding gently; fold in hazelnuts.
  5. Scoop out tablespoon-sized portions and roll into discs about ½ inch thick on baking sheets.
  6. Bake for 10-12 minutes, until edges are set while centers are slightly soft.
  7. Allow cookies to cool on a wire rack completely before handling.
  8. Melt dark chocolate with coconut oil in a microwave-safe bowl, stirring until smooth.
  9. Dip half of each cooled cookie into the melted chocolate and sprinkle with chopped hazelnuts.
  10. Let cookies set at room temperature or refrigerate for quicker setting.

Nutrition

Serving: 1cookieCalories: 150kcalCarbohydrates: 20gProtein: 2gFat: 8gSaturated Fat: 3gPolyunsaturated Fat: 2gMonounsaturated Fat: 3gCholesterol: 20mgSodium: 80mgPotassium: 100mgFiber: 1gSugar: 10gVitamin A: 200IUCalcium: 20mgIron: 1mg

Notes

Store cookies in an airtight container at room temperature for up to 5 days or freeze for up to 3 months.

Tried this recipe?

Let us know how it was!

Garlic Overboard Burgers with Creamy Sauce for Flavor Lovers

One whiff of garlic sizzling in the pan, and I’m instantly transported to summer barbecues and laughter-filled gatherings. These Garlic Overboard Burgers with Creamy Sauce are my go-to for those days when I crave fresh, homemade flavor in just about 30 minutes! Each juicy patty offers a savory punch that can easily be tweaked to fit all diets, whether opting for beef, turkey, or even a plant-based twist. The creamy sauce? Oh, it’s the perfect finishing touch that brings a delectable richness to every bite. Not only will this recipe satisfy your taste buds, but it’s also a crowd-pleaser that makes weeknight cooking feel special. Are you ready to elevate your burger experience? Let’s dive in!

Why are Garlic Overboard Burgers irresistible?

Juicy Patties: Each burger features a beautifully seasoned patty that bursts with flavor, especially when infused with roasted garlic.

Creamy Sauce: The rich creamy garlic sauce adds a delightful finish, making every bite a little more indulgent.

Quick & Easy: Ready in just 30 minutes, this recipe is perfect for busy weeknights or spontaneous gatherings.

Diet-Friendly Options: With variations for beef, turkey, and plant-based patties, everyone can enjoy their own version of this delicious burger.

Crowd-Pleasing Flavor: These burgers are a surefire hit at any BBQ or casual dinner, tantalizing taste buds and sparking conversation.

Pair them with Lemon Garlic Shrimp for a complete meal that feels extra special!

Garlic Overboard Burgers Ingredients

• Get ready for juicy, flavorful goodness!

For the Patties
Ground Beef – The heart of these juicy burgers; swap for turkey or plant-based options to fit your diet.
Garlic – Fresh enhances flavor, while roasted adds sweetness; garlic powder can be a quick alternative.
Worcestershire Sauce (optional) – Introduces a deep umami note to the meat; feel free to omit for simplicity.

For the Creamy Sauce
Sour Cream or Greek Yogurt – Adds richness; use dairy-free yogurt for a vegan version.
Mayonnaise – Creates a velvety texture in the sauce; a key player for creaminess.
Lemon Juice – Brightens the flavor of the sauce, balancing the richness perfectly.
Dill – Provides a fresh, herby note; you can substitute with fresh parsley if needed.

For the Buns
Burger Buns – Choose soft brioche, whole wheat, or gluten-free buns to suit everyone’s preferences and dietary needs.

This Garlic Overboard Burgers with Creamy Sauce recipe is versatile and packed with flavor — perfect for a delightful homemade meal!

Step‑by‑Step Instructions for Garlic Overboard Burgers with Creamy Sauce

Step 1: Make the Creamy Sauce
In a medium bowl, combine mayonnaise, sour cream (or Greek yogurt), minced garlic, lemon juice, and dill. Stir until well blended, then cover the bowl with plastic wrap and refrigerate for at least 10 minutes. This allows the flavors to meld beautifully, adding a rich, tangy twist to your Garlic Overboard Burgers.

Step 2: Prepare the Patties
In a large mixing bowl, gently combine the ground beef with minced or roasted garlic, salt, pepper, and Worcestershire sauce, if using. Be careful not to overmix, as this can lead to tough burgers. Shape the mixture into four patties, each about ¾ inch thick, ensuring to create a slight indentation in the center for even cooking.

Step 3: Preheat the Cooking Surface
Preheat your grill or a large skillet over medium-high heat for about 5 minutes, until hot. Lightly oil the grill grates or the skillet with cooking spray to prevent sticking. This step is crucial for achieving that beautifully browned, crispy exterior on your Garlic Overboard Burgers.

Step 4: Cook the Burgers
Place the patties on the preheated grill or skillet. Cook for 4–5 minutes on one side until a rich, golden-brown crust forms. Carefully flip the burgers and continue cooking for another 4 minutes for medium doneness, or adjust the time based on your preferred level of doneness.

Step 5: Toast the Buns
While the burgers finish cooking, lightly toast the burger buns on the grill or in a toaster until they are golden brown and slightly crispy. This adds another layer of texture to your Garlic Overboard Burgers and ensures they hold up against the creamy sauce.

Step 6: Assemble the Burgers
Once the patties are cooked to your liking, place each on a toasted bun. Generously drizzle the creamy garlic sauce over the patties, and top them with the other half of the bun. This layering creates a delicious bite, allowing all the flavors of the Garlic Overboard Burgers to shine through.

Step 7: Serve Immediately
Serve your Garlic Overboard Burgers warm, so the creamy sauce is perfectly melty and ready to delight your taste buds. For a complete meal, pair these burgers with crispy fries or a fresh salad, and watch them disappear in no time!

Garlic Overboard Burgers Variations

Feel free to customize these burgers and make them your own, turning each bite into a new experience!

  • Ground Turkey: Replace beef with ground turkey for a leaner option. Add extra spices for a flavor boost.

  • Plant-Based Patties: Use a plant-based ground meat substitute for a delicious vegetarian twist that doesn’t skimp on taste!

  • Roasted Garlic: Swap fresh garlic for roasted garlic in the patties and sauce for a sweeter, mellower flavor.

  • Greek Yogurt: Substitute sour cream with Greek yogurt in the sauce for a tangy twist that’s also packed with protein.

  • Gluten-Free Buns: Opt for gluten-free buns to make this burger inclusive for gluten-sensitive diners. They still hold that vibrant flavor without the gluten!

  • Cheese Delight: Top your burgers with your favorite cheese; sharp cheddar or creamy blue cheese can elevate the flavor experience.

  • Heat It Up: Add a splash of hot sauce to the creamy sauce or sprinkle some chili flakes for a fiery kick that will ignite your taste buds!

  • Extra Toppings: Get creative with toppings like avocado, sautéed mushrooms, or fresh herbs for a personalized touch that complements the garlic flavor.

These variations not only allow you to tweak the recipe to your liking but also invite exploration and exciting new tastes! If you’re looking for something complementary, consider pairing these burgers with some Grilled Garlic Rosemary Smashed Potatoes for a truly delightful meal!

What to Serve with Garlic Overboard Burgers with Creamy Sauce

Looking to create a delightful meal experience to complement your flavorful burgers?

  • Crispy Fries: Freshly cooked fries add a satisfying crunch that contrasts beautifully with the juicy burgers. You can even try sweet potato fries for a sweet twist!

  • Fresh Garden Salad: A light, refreshing salad of mixed greens, cherry tomatoes, and a zesty vinaigrette balances the richness of the creamy sauce, promoting a visceral satisfaction.

  • Grilled Veggies: Seasonal vegetables tossed in olive oil and herbs, grilled until tender and slightly charred, enhance the meal with bright, smoky flavors.

  • Coleslaw: This creamy or vinegar-based side dish brings a crisp texture and tangy flavor that pairs perfectly with the savory burgers, adding depth to every bite.

  • Baked Beans: Sweet and smoky baked beans can add a hearty element, perfectly complementing the umami flavor of the Garlic Overboard Burgers.

  • Cold Beer or Lemonade: A refreshing cold beer or a homemade lemonade is the ideal beverage choice to wash down the flavors and enhance your dining experience.

These pairings will create a well-rounded and satisfying meal that will make your Garlic Overboard Burgers truly unforgettable!

Expert Tips for Garlic Overboard Burgers

  • Handle with Care: Gently mix the meat to avoid tough burgers; overworking will lead to a dense patty instead of juicy Garlic Overboard Burgers.

  • Indent for Even Cooking: Create a slight indentation in the center of each patty. This technique ensures even cooking and prevents puffing during grilling.

  • Sauce Ahead: For the best flavor, make the creamy garlic sauce a day in advance. This allows the ingredients to meld perfectly and enhances the overall taste.

  • Proper Temperature: Preheat your grill or skillet adequately. This step is crucial for achieving that irresistible golden-brown crust on the burgers, ensuring a delightful texture.

  • Mind the Doneness: Use a meat thermometer to check the temperature; aim for 160°F for ground beef. This ensures safety while guaranteeing juiciness in your Garlic Overboard Burgers.

Storage Tips for Garlic Overboard Burgers

Fridge: Store leftover Garlic Overboard Burgers in an airtight container for up to 3 days to maintain freshness and flavor.

Freezer: Wrap the cooled patties tightly in plastic wrap and then foil; they can be frozen for up to 3 months. This makes a great meal prep option!

Reheating: For best results, reheat in a skillet over medium heat for about 5 minutes on each side until warmed through. Avoid microwave reheating if possible, as it can make the burgers soggy.

Sauce Storage: The creamy garlic sauce can be stored in the fridge for up to a week; prepare it ahead for a quick assembly on busy days!

Make Ahead Options

These Garlic Overboard Burgers with Creamy Sauce are a fantastic choice for busy home cooks looking to save time during the week! You can prepare the creamy sauce up to 3 days in advance; simply store it in an airtight container in the fridge to let the flavors deepen even more. The burger patties can be shaped and refrigerated for up to 24 hours before cooking—just remember to cover them tightly to maintain their juiciness. When you’re ready to feast, grill or pan-fry the patties for about 8-10 minutes until fully cooked, then toast your buns, assemble, and enjoy these delicious burgers with minimal effort!

Garlic Overboard Burgers with Creamy Sauce Recipe FAQs

What kind of garlic should I use for my burgers?
Absolutely! Fresh garlic enhances the flavor of your burgers beautifully. If you’re looking for a sweeter twist, I recommend using roasted garlic instead. You can also substitute with garlic powder in a pinch; just remember to reduce the quantity to about 1/2 teaspoon for a milder taste.

How do I store leftover Garlic Overboard Burgers?
Very! You can store leftover Garlic Overboard Burgers in an airtight container in the fridge for up to 3 days. To maintain their juiciness, reheat them gently in a skillet over medium heat for around 5 minutes on each side.

Can I freeze my cooked burgers?
Absolutely! To freeze your cooked Garlic Overboard Burgers, wrap each patty tightly in plastic wrap and then in foil. They can be safely stored in the freezer for up to 3 months. When you’re ready to enjoy them, allow them to thaw overnight in the fridge before reheating for best results.

What if my burgers turn out dry?
Don’t worry! If your burgers are dry, it may be because they were overcooked or the meat was overmixed. Next time, be sure to handle the ground meat gently, mixing only until combined, and aim for an internal temperature of around 160°F for perfect juiciness. Creating a slight indentation in the center of each patty also helps cook them evenly.

Are there any dietary considerations for these burgers?
Definitely! These Garlic Overboard Burgers can easily accommodate various dietary needs. You can use ground turkey for a leaner option or plant-based alternatives for a vegetarian meal. Additionally, opt for whole wheat or gluten-free buns to cater to gluten sensitivities—everyone should be able to enjoy these delicious burgers!

Garlic Overboard Burgers with Creamy Sauce

Garlic Overboard Burgers with Creamy Sauce for Flavor Lovers

Garlic Overboard Burgers with Creamy Sauce are perfect for summer barbecues and weeknight cooking, offering juicy patties and a rich sauce that satisfy every diet.
Prep Time 10 minutes
Cook Time 20 minutes
Total Time 30 minutes
Servings: 4 burgers
Course: Beef
Cuisine: American
Calories: 450

Ingredients
  

For the Patties
  • 1 pound Ground Beef or turkey or plant-based options
  • 3 cloves Garlic minced or roasted
  • 1 tablespoon Worcestershire Sauce optional
For the Creamy Sauce
  • 1 cup Sour Cream or Greek Yogurt or dairy-free yogurt for vegan option
  • 1/2 cup Mayonnaise for creaminess
  • 1 tablespoon Lemon Juice for brightness
  • 1 tablespoon Dill or substitute with fresh parsley
For the Buns
  • 4 pieces Burger Buns brioche, whole wheat, or gluten-free

Equipment

  • Grill
  • Mixing Bowl
  • Skillet
  • cooking spray

Method
 

Making the Burgers
  1. In a medium bowl, combine mayonnaise, sour cream (or Greek yogurt), minced garlic, lemon juice, and dill. Stir until well blended, then cover the bowl with plastic wrap and refrigerate for at least 10 minutes.
  2. In a large mixing bowl, gently combine the ground beef with minced or roasted garlic, salt, pepper, and Worcestershire sauce, if using. Shape into four patties, each about ¾ inch thick.
  3. Preheat your grill or skillet over medium-high heat for about 5 minutes, then lightly oil to prevent sticking.
  4. Cook the patties on the grill or skillet for 4–5 minutes on one side until a golden-brown crust forms. Flip and cook for another 4 minutes for medium doneness.
  5. Lightly toast the burger buns until golden brown.
  6. Assemble by placing each patty on a toasted bun, drizzling with creamy garlic sauce, and topping with the other half of the bun.
  7. Serve immediately with sides like crispy fries or fresh salad.

Nutrition

Serving: 1burgerCalories: 450kcalCarbohydrates: 30gProtein: 27gFat: 25gSaturated Fat: 5gPolyunsaturated Fat: 1gMonounsaturated Fat: 15gCholesterol: 90mgSodium: 700mgPotassium: 500mgFiber: 2gSugar: 3gVitamin A: 10IUVitamin C: 15mgCalcium: 4mgIron: 15mg

Notes

For best flavor, make the creamy sauce in advance and ensure the patties are cooked to the desired doneness using a meat thermometer (aim for 160°F for ground beef).

Tried this recipe?

Let us know how it was!

Cozy Apple Cider Braised Short Ribs with Rosemary Sweet Potatoes

As the leaves turn and the air carries a crisp hint of autumn, I find myself craving hearty comfort food that wraps me in warmth. Today, I’m excited to share my recipe for Apple Cider Braised Short Ribs with Rosemary Mashed Sweet Potatoes. This dish is an embrace from the kitchen—tender, melt-in-your-mouth short ribs braised in a spiced apple cider sauce, perfectly complemented by the creamy, aromatic mashed sweet potatoes. Not only is this recipe a celebration of fall flavors, but it also brings the joy of cooking back into your routine with its straightforward prep and rich, satisfying meals. So, are you ready to elevate your cozy dinner game and impress your loved ones with a plate full of deliciousness? Let’s dive into this seasonal delight!

Why Is This Recipe So Special?

Comforting Warmth: This dish captures the essence of autumn, offering tender short ribs that melt in your mouth, enveloped in a spiced apple cider sauce. Easily Adaptable: It’s straightforward enough for weeknight dinners yet impressive enough for entertaining; swap pork for a delightful twist! Rich and Hearty: Paired with creamy rosemary mashed sweet potatoes, every bite is a cozy experience. Perfect for Gatherings: Whether it’s a family dinner or a fall gathering, this meal is sure to impress your loved ones. Try serving it with a side of Garlic Rosemary Smashed or a bold red wine and make it a memorable evening!

Apple Cider Braised Short Ribs Ingredients

• Dive into this cozy dish with these essential ingredients!

For the Short Ribs

  • Bone-in Beef Short Ribs – The star of our dish, bringing rich, savory flavor. Substitution: Pork shoulder can be used with adjusted cooking times.
  • Salt & Pepper – Essential for enhancing the flavors of the meat. Note: Adjust to individual taste.
  • Olive Oil – Perfect for searing the ribs, adding a touch of richness. Substitution: Can use vegetable oil.
  • Onion – Provides sweetness and aroma, building a flavorful base. Substitution: Shallots or leeks can be used.
  • Carrots – Offers sweetness and color to balance the earthiness. Substitution: Parsnips or celery for a different flavor.
  • Garlic – Infuses aromatic depth into the dish. Note: Use fresh for best results.
  • Spiced Apple Cider – The essence of this recipe, adding warmth and sweetness. Note: Use unsweetened versions for less sugar.
  • Beef Stock – Deepens flavor and enhances the braising liquid. Substitution: Vegetable broth for a lighter version.
  • Cinnamon Sticks – Adds warm spice notes. Note: Can substitute with ground cinnamon (1 tsp).
  • Star Anise Pods – Delivers a unique aromatic touch; enhances the dish’s sweetness. Note: Optional if not available.
  • Whole Cloves – Provides additional layers of flavor. Note: Use ground cloves if necessary.

For the Rosemary Mashed Sweet Potatoes

  • Sweet Potatoes – The foundation for a creamy mash; naturally sweet. Substitution: Yukon gold potatoes for a different flavor.
  • Butter – Adds richness and creaminess. Substitution: Ghee or olive oil for dairy-free.
  • Fresh Rosemary – Delivers a hint of herbal brightness. Substitution: Thyme or sage can be used.
  • Heavy Cream – Provides a luxurious texture. Substitution: Milk or coconut cream for a lighter version.
  • Salt (for potatoes) – Essential for flavor enhancement. Note: Adjust to taste.

Now that we’re all prepped, let’s get cooking! Your home will fill with the cozy essence of fall flavors as we transform these simple ingredients into a memorable meal.

Step‑by‑Step Instructions for Apple Cider Braised Short Ribs with Rosemary Mashed Sweet Potatoes

Step 1: Sear Ribs
Begin by patting the bone-in beef short ribs dry with paper towels and generously season them with salt and pepper. In a large Dutch oven, heat 2 tablespoons of olive oil over medium-high heat. Once hot, sear the ribs in batches for 4-5 minutes on each side until they develop a rich, brown crust. Remove the ribs and set them aside on a plate.

Step 2: Sauté Vegetables
In the same pot, add chopped onions, diced carrots, and minced garlic, sautéing for about 6-8 minutes. Stir frequently until the vegetables are softened and fragrant, scraping up any flavorful bits stuck to the bottom of the pot. This aromatic base sets the stage for the delicious Apple Cider Braised Short Ribs.

Step 3: Deglaze & Spice
Pour in 2 cups of spiced apple cider, stirring to deglaze the pot and lift any browned bits. Next, add 2 cups of beef stock along with 2 cinnamon sticks, 2 star anise pods, and a few whole cloves. Bring the mixture to a gentle simmer before returning the seared short ribs back to the pot, ensuring they’re submerged in the liquid.

Step 4: Braise
Cover the Dutch oven with a lid and transfer it to a preheated oven set at 325°F (160°C). Let the short ribs braise for 2.5 to 3 hours, or until they are tender and falling off the bone. Resist the urge to lift the lid during this time, as maintaining that cozy heat is crucial for the perfect braise.

Step 5: Prepare Sweet Potatoes
While the ribs are braising, bring a large pot of salted water to a boil. Peel and dice the sweet potatoes, then add them to the boiling water. Cook for about 15-20 minutes, or until fork-tender. Drain and return the sweet potatoes to the pot to keep them warm while you prepare the mash.

Step 6: Mash Potatoes
In the pot with the drained sweet potatoes, add 4 tablespoons of butter, 2 tablespoons of heavy cream, and a tablespoon of chopped fresh rosemary. Mash everything together until it’s creamy and smooth. Season with salt to taste, ensuring each bite is flavored just right, providing a delightful balance to the savory short ribs.

Step 7: Serve
Once the short ribs are tender, carefully plate a generous scoop of the rosemary mashed sweet potatoes and top it with the succulent Apple Cider Braised Short Ribs. Drizzle over some of the rich cider sauce from the pot and garnish with additional rosemary if desired. This comforting meal is now ready to warm hearts this autumn!

Expert Tips for Apple Cider Braised Short Ribs

  • Well-Dried Ribs: Ensure the ribs are pat dry before seasoning and searing. This step is crucial for achieving a golden crust that adds depth to your Apple Cider Braised Short Ribs.

  • No Peeking: Avoid lifting the lid during the braising process. Each time you open the oven, you lose valuable heat that keeps the ribs cooking evenly and tenderizing beautifully.

  • Perfect Texture: Regularly check the ribs for tenderness. If they seem tough, don’t hesitate to braise longer. Remember, the goal is fall-off-the-bone perfection.

  • Thickening Sauce: For a thicker braising liquid, consider simmering the leftover sauce after cooking and adding a cornstarch slurry if needed. This will enhance the flavor and texture of your delicious Apple Cider Braised Short Ribs.

  • Slow Cooker Option: If you’re pressed for time, you can make this dish in a slow cooker. Simply transfer the ingredients after searing and cook on low for 8 hours for a hassle-free option.

How to Store and Freeze Apple Cider Braised Short Ribs

Fridge: Store leftover Apple Cider Braised Short Ribs in an airtight container for up to 3 days. This ensures they stay fresh and ready for another cozy meal.

Freezer: For longer storage, freeze the ribs in a freezer-safe container for up to 3 months. Make sure to allow the sauce to cool before sealing to preserve flavor and texture.

Reheating: When ready to enjoy, thaw overnight in the fridge and reheat gently on the stove or in the oven at 350°F (175°C) until warmed through, ensuring the ribs remain tender.

Keep the Sauce: Always save the braising sauce, as it adds incredible flavor when reheating, making your Apple Cider Braised Short Ribs taste just as delightful as the first serving!

Make Ahead Options

These Apple Cider Braised Short Ribs with Rosemary Mashed Sweet Potatoes are perfect for busy home cooks looking to save time during hectic weeknights! You can prepare the short ribs up to 24 hours in advance by braising them completely, letting them cool down, and then storing them in an airtight container in the refrigerator. The mashed sweet potatoes can be made ahead and refrigerated for up to 3 days. To maintain their creamy texture, gently reheat the potatoes with a splash of cream or milk, stirring until smooth before serving. When you’re ready to enjoy your meal, simply warm the ribs in the oven or stovetop and serve them alongside the fluffy sweet potatoes for a comforting feast that feels like a warm hug!

What to Serve with Apple Cider Braised Short Ribs?

Bring the flavors of fall to your dining table with a complete meal that dances in harmony with your main dish.

  • Creamy Garlic Mashed Potatoes: The buttery, garlicky goodness of mashed potatoes adds a rich, comforting texture alongside the hearty ribs.
  • Roasted Brussels Sprouts: Their slight bitterness and crisp texture cut through the sweetness of the cider, creating a perfect balance. These tender, caramelized sprouts are a delightful addition to any fall feast.
  • Crusty Bread: A loaf of warm, crusty bread for sopping up that luscious cider sauce elevates the entire dining experience, making each bite a cozy delight.
  • Autumn Salad: Bright greens tossed with apples, walnuts, and a tangy vinaigrette offer a refreshing contrast, lightening up the meal while embracing seasonal flavors.
  • Mulled Wine: This spiced red wine infused with warm flavors echoes the essence of your braised ribs, creating a drink that enhances the whole experience of the meal.
  • Pumpkin Pie: Finish with a slice of pumpkin pie to close the meal on a sweet note, celebrating fall flavors with warm spices that echo those in your main dish.
  • Honey Glazed Carrots: Sweet and tender, these carrots provide a delightful side, with their vibrant color adding a visual pop that invites everyone to the table.
  • Steamed Green Beans: Crisp-tender green beans provide a fresh crunch, contrasting beautifully with the richness of the ribs and potatoes.
  • Apple Crisp: A warm apple crisp for dessert ties in the apple flavors from your main dish, offering a sweet finish that’s simply irresistible.

Apple Cider Braised Short Ribs Variations

Feel free to let your creativity soar and tailor this dish to suit your taste buds!

  • Slow Cooker Shortcut: After searing, cook all ingredients in a slow cooker on low for 8 hours for effortless preparation. Enjoy the rich flavors melding together without constant monitoring.

  • Pork Swap: Use pork shoulder chunks instead of beef ribs, but remember to reduce the cooking time to about 2 hours. A delicious twist that might become your new favorite!

  • Spice Adventurer: Add a sliced jalapeño to the braise for a delightful kick or stir in smoked paprika to the mashed sweet potatoes for a deeper, more complex flavor. It’s all about finding that perfect balance!

  • Gluten-Free/Grain-Free: Already gluten-free, but you can substitute sweet potatoes with mashed cauliflower for a lower-carb option. This way, you can enjoy creamy goodness while keeping it light.

  • Harvest Bowl: Shred the rib meat and mix it with the sauce, serving it over the rosemary mashed sweet potatoes topped with roasted Brussels sprouts for a colorful dish. It’s like autumn on a plate!

For a complementary touch, why not pair it with a side of Cheesy French Potatoes or treat yourself to some luscious Grilled Cinnamon Apples? Each variation brings a unique twist while still celebrating the comforting essence of fall!

Apple Cider Braised Short Ribs with Rosemary Mashed Sweet Potatoes Recipe FAQs

How do I select ripe sweet potatoes for this recipe?
Absolutely! When choosing sweet potatoes, look for ones that are firm and smooth, free of any dark spots or blemishes. The skin should be vibrant in color, typically reddish-brown or orange. Avoid any that feel soft or have wrinkled skin, as these may be past their prime.

What’s the best way to store leftover Apple Cider Braised Short Ribs?
Very! Store any leftover Apple Cider Braised Short Ribs in an airtight container in the refrigerator for up to 3 days. This keeps them fresh and ready for a quick reheat. For optimum flavor, do not forget to include the cider sauce! Just reheat gently in a skillet or the oven.

Can I freeze Apple Cider Braised Short Ribs?
Absolutely! To freeze, allow the ribs to cool completely and then transfer them to a freezer-safe container. They can be stored in the freezer for up to 3 months. I recommend freezing the sauce separately if possible, to maintain the best texture when reheating. To thaw, place them in the fridge overnight and gently reheat on the stove or in the oven.

What should I do if the sauce is too thin?
Very! If you find the sauce too thin after braising, you can thicken it by simmering it on the stovetop over medium heat. Start by bringing it to a gentle boil and letting it cook uncovered for about 10-15 minutes until it reduces to your desired consistency. If you need extra thickening, whisk in a cornstarch slurry (1 tablespoon cornstarch mixed with 2 tablespoons water) and cook until thickened.

Are Apple Cider Braised Short Ribs safe for my dog?
While the short ribs themselves are safe for your pup in small amounts, be sure to omit any onions and spices when sharing. These can be harmful to dogs. Always consult with your veterinarian about your dog’s diet and what’s safe for them.

What is the best way to reheat the mashed sweet potatoes?
To reheat rosemary mashed sweet potatoes, simply return them to a pot over low heat. Add a splash of milk or cream to keep them creamy and stir continuously until warmed through. Alternatively, you can microwave them in a covered dish, adding moisture to prevent them from drying out. Enjoy that cozy taste again!

Apple Cider Braised Short Ribs with Rosemary Mashed Sweet Potatoes

Cozy Apple Cider Braised Short Ribs with Rosemary Sweet Potatoes

Delight in tender short ribs braised in apple cider, served with creamy rosemary mashed sweet potatoes, a perfect autumn dish.
Prep Time 30 minutes
Cook Time 3 hours
Total Time 3 hours 30 minutes
Servings: 4 servings
Course: Beef
Cuisine: American
Calories: 720

Ingredients
  

For the Short Ribs
  • 4 lbs Bone-in Beef Short Ribs Substitution: Pork shoulder can be used with adjusted cooking times.
  • to taste Salt Adjust to individual taste.
  • to taste Pepper Adjust to individual taste.
  • 2 tbsp Olive Oil Can use vegetable oil.
  • 1 medium Onion Substitution: Shallots or leeks can be used.
  • 2 medium Carrots Substitution: Parsnips or celery for a different flavor.
  • 4 cloves Garlic Use fresh for best results.
  • 2 cups Spiced Apple Cider Use unsweetened versions for less sugar.
  • 2 cups Beef Stock Substitution: Vegetable broth for a lighter version.
  • 2 sticks Cinnamon Sticks Can substitute with ground cinnamon (1 tsp).
  • 2 pods Star Anise Optional if not available.
  • 4 whole Cloves Use ground cloves if necessary.
For the Rosemary Mashed Sweet Potatoes
  • 2 lbs Sweet Potatoes Substitution: Yukon gold potatoes for a different flavor.
  • 4 tbsp Butter Substitution: Ghee or olive oil for dairy-free.
  • 1 tbsp Fresh Rosemary Substitution: Thyme or sage can be used.
  • 2 tbsp Heavy Cream Substitution: Milk or coconut cream for a lighter version.
  • to taste Salt Adjust to taste.

Equipment

  • Dutch oven
  • large pot
  • sharp knife
  • cutting board

Method
 

Step-by-Step Instructions
  1. Pat the bone-in beef short ribs dry with paper towels and season them with salt and pepper. In a large Dutch oven, heat olive oil over medium-high heat and sear the ribs for 4-5 minutes on each side until browned. Remove the ribs and set aside.
  2. In the same pot, add chopped onions, diced carrots, and minced garlic, sautéing for 6-8 minutes until softened and fragrant.
  3. Pour in spiced apple cider to deglaze the pot. Add beef stock, cinnamon sticks, star anise pods, and whole cloves. Simmer and return the seared short ribs to the pot, ensuring they're submerged in liquid.
  4. Cover the Dutch oven and transfer it to a preheated oven at 325°F (160°C). Braise the short ribs for 2.5 to 3 hours until tender.
  5. While the ribs are braising, boil water in a large pot. Peel and dice sweet potatoes, cook until tender, then drain and keep warm.
  6. In the pot with sweet potatoes, add butter, heavy cream, and rosemary. Mash until creamy and season with salt to taste.
  7. Plate the rosemary mashed sweet potatoes, top with the Apple Cider Braised Short Ribs, and drizzle with cider sauce. Garnish with additional rosemary if desired.

Nutrition

Serving: 1servingCalories: 720kcalCarbohydrates: 34gProtein: 55gFat: 40gSaturated Fat: 16gMonounsaturated Fat: 20gCholesterol: 180mgSodium: 850mgPotassium: 1200mgFiber: 5gSugar: 8gVitamin A: 15000IUVitamin C: 20mgCalcium: 60mgIron: 4mg

Notes

Store leftovers in an airtight container for up to 3 days, or freeze for up to 3 months. Reheat gently before serving.

Tried this recipe?

Let us know how it was!

Decadent White Chocolate Orange Almond Cocoa for Cozy Nights

As I stood in my kitchen on a chilly evening, the aroma of freshly zested oranges mingled with creamy white chocolate transported me to a cozy café tucked away in a charming nook. This Creamy White Chocolate Orange Almond Hot Chocolate is not just a winter beverage; it’s a warm embrace on a frosty day, combining rich cocoa with bright citrus and nutty sweetness. The beauty of this indulgent drink lies not only in its decadent flavor but also in its ease of preparation—perfect for when you want an elevated homemade treat without the fuss. You can whip this up in no time and even make it ahead, ensuring that a comforting cup is only a quick heat away. Curious about how to create this creamy bliss at home? Let’s dive in!

Why is White Chocolate Orange Almond Cocoa Special?

Sumptuous and Indulgent: This hot chocolate is a luxurious escape, blending sweet white chocolate with zesty orange and rich almond for a truly indulgent experience.
Effortless Preparation: With just a few simple steps, you can create a café-quality drink right in your kitchen—perfect for those busy evenings.
Versatile Variations: Feel free to adapt the recipe by swapping almond paste for peanut butter or adding a splash of peppermint for a seasonal twist!
Crowd-Pleasing Appeal: Whether you’re hosting a gathering or simply enjoying a cozy night in, this beverage is sure to impress, especially when paired with White Chocolate Cranberry cookies for a delightful treat.
Make-Ahead Friendly: Prepare the ganache ahead of time and keep it in the fridge; a comforting cup is only moments away when cravings strike!

White Chocolate Orange Almond Cocoa Ingredients

• Make sure to gather the finest ingredients for the best results!

For the Cocoa Base

  • White Chocolate – Use high-quality chocolate to ensure a smooth and creamy texture.
  • Heavy Cream – Adds a rich and velvety mouthfeel; full-fat milk can be used for a lighter version.
  • Milk (of choice) – Acts as the base for the hot chocolate; oat milk will give it a delightful creaminess.
  • Orange Juice – Freshly squeezed enhances the zesty flavor; bottled juice doesn’t compare!

For Flavor Enhancement

  • Vanilla Bean – Infuses deep flavor; scraping the seeds from a fresh bean will elevate the drink.
  • Almond Paste – Introduces nutty richness; you can substitute almond butter in a pinch.
  • Cinnamon – A pinch adds warmth and ties the flavors together perfectly.
  • Orange Zest – Freshly zested will unleash aromatic notes; use a microplane for the best results.

For Toppings

  • Whipped Cream (optional) – A luscious topping that adds a delightful finish.
  • Orange Wedge (for decoration) – Not only visual but also adds a hint of fresh citrus flavor!

With these ingredients carefully selected, your white chocolate orange almond cocoa will be a comforting and indulgent treat, perfect for cozy nights!

Step‑by‑Step Instructions for Creamy White Chocolate Orange Almond Hot Chocolate

Step 1: Melt Ingredients
Begin by preparing a bain-marie over low heat. Place high-quality white chocolate and almond paste in a heatproof bowl on top of a pot of simmering water. Stir gently until the mixture melts completely and reaches a smooth, creamy consistency, about 5-7 minutes. Once melted, remove it from heat and set aside, allowing it to cool slightly.

Step 2: Infuse Cream
In a saucepan, pour in the heavy cream and add freshly zested orange peel, scraped vanilla bean, and a pinch of cinnamon. Heat gently over medium-low heat for about 10-15 minutes, stirring occasionally. This infusion is vital; you want the cream to become fragrant with the aromatic flavors of the orange and vanilla, so watch for steam and bubbles forming at the surface.

Step 3: Combine
After the cream has infused, remove the saucepan from heat. Carefully pour the warm cream mixture into the melted white chocolate and almond paste. Using a hand blender, emulsify the mixture while gradually adding freshly squeezed orange juice. Blend until smooth and perfectly blended together, which should take 1-2 minutes for a luscious texture.

Step 4: Chill
Transfer this creamy ganache to an airtight container and place it in the refrigerator for a few hours, ideally overnight. Chilling it allows the flavors to meld together beautifully, enhancing the overall taste of your white chocolate orange almond cocoa. When ready to use, it should be thickened but still easily scoopable.

Step 5: Prepare Hot Chocolate
When you’re ready to indulge, heat your milk of choice in a saucepan until it reaches approximately 85°C (185°F). Once heated, scoop about 50g of your chilled ganache into the milk. Blend it together using a whisk or a frother until the mixture is smooth and frothy, creating the perfect warm beverage texture.

Step 6: Serve
Pour your delicious white chocolate orange almond hot chocolate into a cozy mug. Top it generously with whipped cream, a light dusting of cinnamon, and additional orange zest or a decorative orange wedge for a refreshing touch. This indulgent drink is now ready to be enjoyed during chilly nights, bringing warmth and sweetness to your evening.

Expert Tips for White Chocolate Orange Almond Cocoa

  • Quality Ingredients Matter: Always opt for high-quality white chocolate to ensure your hot chocolate is creamy and indulgent; it really makes a difference!

  • Infuse Fully: Allow the cream to infuse with orange zest and spices for the full time. This enhances the flavors and depth in your white chocolate orange almond cocoa.

  • Chill for Flavor: Don’t skip the chilling step. Letting your ganache sit in the fridge allows the flavors to meld beautifully, resulting in a richer taste.

  • Whisk for Frothiness: When mixing the ganache into the hot milk, use a whisk or frother to achieve that smooth, frothy texture that elevates this drink.

  • Variations Are Fun: Feel free to get creative! Substituting almond paste with peanut butter or trying different juices can lead to delicious twists on the classic recipe.

White Chocolate Orange Almond Cocoa Variations

Feel free to explore these delightful twists on my creamy recipe, igniting your creativity in the kitchen!

  • Nut-Free: Swap the almond paste with sunflower seed butter for a nut-free alternative. This maintains a creamy texture while offering a slightly different flavor.

  • Chocolate Lovers: Boost the cocoa content by adding a splash of dark chocolate to the ganache. The richer chocolate depth will harmonize beautifully with the white chocolate.

  • Spice It Up: Introduce a pinch of cayenne pepper or a dash of chili powder for a warm kick. This intriguing contrast brings a unique twist that warms body and soul alike.

  • Fruit Forward: Replace orange juice with raspberry or pomegranate juice for a vibrant, fruity version. These juices will lend their own sweetness and a beautiful color to your hot chocolate.

  • Milk Alternatives: Use coconut milk for a tropical spin! The creaminess of coconut beautifully complements the white chocolate and citrus flavors.

  • Creamy Dairy-Free: To make this entirely dairy-free, use almond milk or oat milk instead of heavy cream and regular milk. This will create a luscious consistency that’s equally satisfying.

  • Seasonal Splash: Add a splash of peppermint extract during the blending stage for a festive touch. This seasonal variation is perfect for those cozy holiday evenings.

  • Decadent Toppings: For an extra indulgent treat, drizzle some caramel sauce over whipped cream and sprinkle with crushed candy canes or nuts. This finishing touch elevates your cup to a delightful dessert experience.

Enjoy these variations and accompany your hot chocolate with delectable treats like Red White Blue Dirt Cups or a side of scrumptious Red White Blue Rice Krispie Treats for a truly cozy experience!

What to Serve with Creamy White Chocolate Orange Almond Hot Chocolate?

Indulging in this decadent hot chocolate is just the beginning; let’s elevate the experience!

  • Cinnamon Sugar Doughnuts: These warm, fluffy doughnuts offer a sweet, spiced flavor that harmonizes perfectly with the rich cocoa. They’re delightful for dipping and add a playful element to your treat.

  • Ginger Snap Cookies: Their spiced crunch contrasts beautifully with the creamy hot chocolate. The warmth of ginger enhances the season’s coziness, making each sip feel even more special.

  • Orange Scones: Pairing fresh scones with your cocoa brings a lovely natural brightness. The citrus notes from both enhance each other, creating a delicious harmony of flavors.

  • Chocolate-Covered Almonds: The nutty crunch complements the almond flavor in the drink while offering a satisfying texture. A handful is the perfect snack to accompany your indulgent beverage.

  • Marshmallow Skewers: Roast or dip these fluffy delights in the hot chocolate for an added layer of creamy sweetness. The melted marshmallows bring a nostalgic twist to a classic drink experience.

  • Peppermint Bark: The cool mint marries perfectly with the rich, creamy cocoa base, creating a refreshing balance that’s a treat for the senses—perfect for holiday gatherings.

  • Spiced Apple Cider: The warm spices and tartness of the cider create a wonderful contrast to the sweetness of the hot chocolate, offering a cozy, comforting drink alongside it.

  • Creamy Vanilla Ice Cream: A scoop of ice cream melted into your hot cocoa transforms it into a luscious dessert—how indulgent is that?

  • Fruit and Nut Charcuterie Board: Fresh fruits combined with varieties of nuts add a fresh, crunchy contrast to the creamy hot chocolate. It’s a beautiful way to share a range of flavors and textures with loved ones.

By mixing and matching these delightful pairings, the experience of sipping your white chocolate orange almond cocoa becomes an occasion to savor!

How to Store and Freeze White Chocolate Orange Almond Cocoa

Fridge: Store any leftover ganache in an airtight container in the fridge for up to one week. This keeps the flavors fresh and ready for a quick indulgence!

Freezer: For longer storage, freeze portions of the ganache in a freezer-safe container for up to two months. Thaw in the fridge overnight before using.

Reheating: When ready to enjoy, gently reheat the ganache in a saucepan over low heat, stirring until creamy, then mix with steamed milk for your delightful cocoa.

Serving: Always keep a cozy mug handy! When reheating, ensure the mixture is thoroughly combined and warm for the best experience with your white chocolate orange almond cocoa.

Make Ahead Options

These Creamy White Chocolate Orange Almond Hot Chocolate preparations are perfect for busy home cooks looking to enjoy a comforting beverage with minimal effort! You can make the ganache (steps 1-3) up to 24 hours in advance. After combining and chilling, store it in an airtight container in the refrigerator. This method enhances the flavors beautifully, making the drink just as delicious when reheated. When you’re ready to serve, simply heat your milk, mix in about 50g of the chilled ganache, and whisk until smooth and frothy. This way, you can savor a café-quality treat with only a few moments of prep time!

White Chocolate Orange Almond Hot Chocolate Recipe FAQs

What type of white chocolate should I use?
Absolutely use high-quality, ideally couverture white chocolate, such as Callebaut, for the best creamy texture and flavor. Cheaper varieties often contain more wax than cocoa solids, which can affect the richness of your hot chocolate.

How do I store the leftover ganache?
Store any remaining ganache in an airtight container in the fridge, where it will stay fresh for up to one week. If you need to save it for later, you can freeze it. Just wrap portions tightly in plastic wrap and place them in a freezer-safe container for up to two months.

Can I freeze the ganache for later use?
Yes! Freezing is a great option. To freeze the ganache, scoop it into a suitable container or ice cube tray, ensuring there’s enough space for expansion. When you’re ready to use it, simply thaw it in the fridge overnight and then gently reheat it in a saucepan before mixing with warm milk.

What if my hot chocolate is too thick?
Very common! If you find your hot chocolate is thicker than desired, simply mix in additional warm milk until you reach your preferred consistency. Stir continuously while heating to ensure everything is well combined and creamy.

Can I make this recipe vegan or dairy-free?
Absolutely! To make a vegan version of this white chocolate orange almond cocoa, switch the white chocolate for a vegan brand, use coconut or almond milk, and substitute heavy cream with coconut cream or a non-dairy alternative. This will still give you that luscious, indulgent flavor while keeping it dairy-free!

White chocolate orange almond cocoa

Decadent White Chocolate Orange Almond Cocoa for Cozy Nights

Indulge in this creamy white chocolate orange almond cocoa, a delightful treat for chilly nights.
Prep Time 15 minutes
Cook Time 20 minutes
Chilling Time 4 hours
Total Time 4 hours 35 minutes
Servings: 2 cups
Course: Dessert
Cuisine: American
Calories: 350

Ingredients
  

Cocoa Base
  • 100 g White Chocolate Use high-quality chocolate for best results.
  • 1 cup Heavy Cream Adds a rich and velvety mouthfeel.
  • 1 cup Milk (of choice) Oat milk gives a delightful creaminess.
  • 1/4 cup Orange Juice Freshly squeezed enhances the flavor.
Flavor Enhancement
  • 1 bean Vanilla Bean Scrape seeds for deeper flavor.
  • 50 g Almond Paste Can substitute with almond butter.
  • 1 pinch Cinnamon Adds warmth.
  • 1 tsp Orange Zest Use a microplane for best results.
Toppings
  • 1 cup Whipped Cream Optional, for a luscious finish.
  • 1 slice Orange Wedge For decoration.

Equipment

  • Heatproof bowl
  • Saucepan
  • Hand blender
  • Whisk
  • airtight container

Method
 

Preparation Steps
  1. Begin by preparing a bain-marie over low heat. Melt white chocolate and almond paste.
  2. In a saucepan, heat heavy cream with orange zest, vanilla bean, and cinnamon.
  3. Combine melted chocolate mixture with infused cream and add orange juice.
  4. Chill the ganache in an airtight container for at least 4 hours.
  5. When ready, heat the milk and blend with the ganache until smooth.
  6. Serve in a cozy mug topped with whipped cream and an orange wedge.

Nutrition

Serving: 1cupCalories: 350kcalCarbohydrates: 30gProtein: 5gFat: 20gSaturated Fat: 10gPolyunsaturated Fat: 0.5gMonounsaturated Fat: 5gCholesterol: 40mgSodium: 100mgPotassium: 300mgFiber: 1gSugar: 28gVitamin A: 500IUVitamin C: 15mgCalcium: 200mgIron: 2mg

Notes

Using high-quality ingredients enhances the flavor and texture of the drink. Variations like swapping almond for peanut butter are encouraged.

Tried this recipe?

Let us know how it was!

Irresistibly Savory Roasted Mushrooms with Garlic & Thyme

As I walked through a bustling farmer’s market, the earthy aroma of freshly picked mushrooms drew me in like a whisper from nature itself. It’s moments like these that inspire simple yet delightful dishes, and these Roasted Mushrooms with Garlic & Thyme are no exception. This vegetarian side dish is not only a breeze to whip up but also boasts a nutrient-rich punch that pairs beautifully with a variety of main courses. Whether you’re looking to elevate a cozy weeknight dinner or impress guests at your next gathering, this recipe is your go-to for effortless elegance. Curious about how a few simple ingredients can transform your meals? Let’s dive in!

Why are Roasted Mushrooms a Must-Try?

Simplicity makes these roasted mushrooms a go-to side dish that anyone can prepare. Heavenly aroma fills your kitchen as garlic and thyme mingle, creating a warm, inviting atmosphere. Versatile pairing means they complement everything from grilled meats to hearty pasta. Quick prep allows you to enjoy the final results in under 30 minutes! Finally, crowd-pleaser status guarantees they’ll be the highlight of any meal, making them an effortless addition to your recipe rotation. Don’t miss the chance to serve them alongside your favorite dishes, like Honey Garlic Shrimp or Crusted Chicken Garlic!

Roasted Mushrooms with Garlic & Thyme Ingredients

Get ready to make your kitchen smell divine!

For the Mushrooms
Open cup mushrooms – These provide a meaty texture; ensure they are even-sized for uniform cooking.
Olive oil – Adds richness and is perfect for frying the mushrooms.

For the Garlic Mixture
Fresh garlic – Chopped garlic infuses a pungent flavor and elevates the dish.
Unsalted butter – Provides a creamy base for the flavor-packed garlic herb mixture.
Fresh thyme – Adds a fragrant herbal note; can be substituted with oregano or parsley if desired.
Garlic powder – Enhances the garlic flavor; you may omit it if you prefer it more subtle.

For the Topping
Fresh breadcrumbs – Create a crispy topping that adds texture; almond meal is a great gluten-free alternative.

For the Brightness
Lemon juice – Adds a zesty brightness to the dish; reduce the amount if you prefer a milder flavor.
Salt and pepper – Essential for seasoning; adjust to your taste to enhance the overall flavor.

These Roasted Mushrooms with Garlic & Thyme will not only bring warmth and joy to your table but also take your meals to the next level!

Step‑by‑Step Instructions for Roasted Mushrooms with Garlic & Thyme

Step 1: Preheat the Oven
Begin by preheating your oven to 400°F (200°C). This high temperature is essential for achieving that perfect roast. As the oven warms, it allows the mushrooms to cook evenly, ensuring a beautifully browned and flavorful exterior while maintaining a juicy center. A hot oven makes a world of difference in the outcome of your Roasted Mushrooms with Garlic & Thyme.

Step 2: Fry the Mushrooms
In a large skillet, heat a splash of olive oil over medium-high heat. Once the oil shimmers, place the mushrooms cap-side down in the skillet. Fry them for about 2-3 minutes, or until they develop a golden-brown crust. This step intensifies the mushroom’s natural umami flavors and gives them a rich texture that works harmoniously with garlic and thyme.

Step 3: Arrange in Baking Dish
Carefully transfer the sautéed mushrooms, stalk-side up, into a greased baking dish. Make sure they are evenly spaced to allow for even cooking. Their nice, golden tops should be facing up, ready to soak in the delightful garlic butter mixture. This arrangement ensures that each mushroom can absorb the flavors of Roasted Mushrooms with Garlic & Thyme beautifully during baking.

Step 4: Prepare the Garlic Butter
In a mixing bowl, combine softened unsalted butter with freshly chopped garlic, thyme, lemon juice, and a sprinkle of salt and pepper. Mix these ingredients thoroughly, creating a fragrant garlic butter that will elevate the flavor of your mushrooms. This mixture is the heart of your Roasted Mushrooms with Garlic & Thyme, providing a creamy, savory base that complements the earthy mushrooms.

Step 5: Assemble the Dish
Spoon the garlic butter generously onto each mushroom, ensuring every one gets a delightful topping. Then, sprinkle fresh breadcrumbs over the buttered mushrooms, pressing them down lightly to create a crispy layer on top. This assembly step not only enhances the texture but also adds an irresistible crunch to each bite of your Roasted Mushrooms with Garlic & Thyme.

Step 6: Bake to Perfection
Place the baking dish in the preheated oven and bake for about 15 minutes. Keep an eye on the mushrooms as they roast; they’ll be ready when their caps turn golden brown, and the breadcrumb topping is crisp. The aroma will fill your kitchen, promising a delicious side dish that’s simple yet elegant. Enjoy your perfectly baked Roasted Mushrooms with Garlic & Thyme!

Roasted Mushrooms with Garlic & Thyme Variations

Feel free to elevate your roasted mushrooms even further with these delightful adaptations that invite your creativity to shine!

  • Dairy-Free: Use olive oil instead of butter for a light, vegan twist that still brings flavor.
    With a few simple swaps, you can accommodate diverse dietary needs while enjoying those beloved flavors.

  • Gluten-Free: Substitute breadcrumbs with almond meal or crushed gluten-free crackers for a gluten-free crispy topping.
    The textures remain satisfying without compromising the dish’s essence, making it perfect for everyone!

  • Cheesy Delight: Add grated Parmesan or mozzarella along with breadcrumbs to make your mushrooms extra indulgent.
    This addition creates a deliciously gooey layer that pairs beautifully with the herbs and garlic.

  • Herb Boost: Mix in other fresh herbs like basil or parsley along with thyme for a more vibrant herbal flavor.
    Experimenting with different herbs can add depth and personalization to your favorite recipe.

  • Spicy Kick: Sprinkle some red pepper flakes over the mushrooms for a little heat that balances the rich garlic and butter.
    The warmth from the spice can make the dish even more inviting and exciting!

  • Nutty Flavor: Toss in some pine nuts or chopped walnuts with the breadcrumbs for added crunch and flavor.
    This twist adds a delightful texture and a nutty richness that perfectly complements the earthy mushrooms.

  • Citrus Infusion: Drizzle with orange or lime juice instead of lemon for a unique flavor profile that brightens each bite.
    Citrus adds an unexpected zest, transforming the flavor experience and keeping your dishes exciting!

Don’t forget to pair these Roasted Mushrooms with Garlic & Thyme alongside succulent meals like Grilled Garlic Rosemary or a refreshing Roasted Carrot Lentil. The possibilities are endless, and your taste buds will thank you!

What to Serve with Savory Roasted Mushrooms with Garlic & Thyme

Ready to elevate your meal? These roasted mushrooms can shine alongside a plethora of delightful dishes that create a harmonious dining experience.

  • Creamy Mashed Potatoes: Their buttery smooth texture provides a delightful contrast, complementing the savory richness of the mushrooms perfectly.

  • Grilled Lemon Chicken: The zesty bright flavors of lemon chicken balance the earthy notes of the mushrooms, creating a refreshing ensemble on your plate.

  • Pasta Primavera: Toss in colorful, sautéed vegetables for a vibrant touch—and the lightness of pasta elevates the roasted mushrooms beautifully.

  • Quinoa Salad: This nutty, fluffy grain adds a wholesome dimension, while its fresh herbs and veggies harmonize with the aromatic garlic and thyme.

  • Caesar Salad: Classic crispy romaine with creamy dressing offers crunch and freshness, enhancing the ultimate flavor experience alongside your mushrooms.

  • Red Wine: A smooth, medium-bodied red such as Pinot Noir complements the earthy profile of the mushrooms and adds an elegant touch to your meal.

  • Crusty Artisan Bread: Use it to soak up all the delectable garlic butter, adding a delightful crunch and texture that pairs flawlessly with the tenderness of the mushrooms.

A vibrant array of flavors and textures will ensure your dining experience leaves your guests talking long after the meal is over!

How to Store and Freeze Roasted Mushrooms with Garlic & Thyme

Fridge: Store leftovers in an airtight container for up to 3 days. Reheat in the oven or microwave to restore their warmth and flavor.

Freezer: If preparing in advance, freeze the unbaked mushrooms in a single layer on a baking sheet before transferring to an airtight container. They can be frozen for up to 3 months.

Reheating: When ready to enjoy, bake directly from frozen or thaw in the fridge overnight. Bake at 400°F (200°C) for around 20-25 minutes until heated through and the topping is crisp.

Make-Ahead Tips: Fully prepare the Roasted Mushrooms with Garlic & Thyme, refrigerating them before baking. This is perfect for quick meal prep on busy weeknights.

Expert Tips for Roasted Mushrooms

  • Choose Quality Mushrooms: Look for fresh, firm mushrooms without any blemishes. Quality ingredients elevate the flavor of your roasted mushrooms with garlic & thyme.

  • Uniform Size Matters: Slice or choose mushrooms of similar size for even cooking. This avoids undercooked or burnt pieces, ensuring a delightful texture throughout.

  • Don’t Skip Pre-cooking: Lightly frying mushrooms before baking enhances their flavor and helps achieve that golden crust. This step is crucial for truly savory roasted mushrooms.

  • Breadcrumb Variations: Experiment with different types of breadcrumbs or cheese to suit your tastes. Panko breadcrumbs create an extra crunch, while Parmesan adds an umami kick.

  • Mind the Oven Time: Baking time can vary based on your oven and the mushroom size. Keep an eye on them, as you want a crispy topping without overcooking the mushrooms.

Make Ahead Options

These Roasted Mushrooms with Garlic & Thyme are a fantastic option for meal prep enthusiasts! You can sauté the mushrooms and prepare the garlic butter mixture up to 24 hours in advance. Simply combine the prepped garlic butter with the mushrooms, arrange them in a baking dish, and cover tightly with plastic wrap or aluminum foil to maximize freshness in the refrigerator. When you’re ready to serve, just pop them in the preheated oven for about 15 minutes until golden and bubbly. This simple make-ahead strategy ensures you’ll have a delicious side dish ready with minimal last-minute effort, allowing you more time to enjoy your meal!

Roasted Mushrooms with Garlic & Thyme Recipe FAQs

What type of mushrooms should I use for this recipe?
Absolutely! Open cup mushrooms offer a meaty texture that holds up beautifully when roasted. Look for mushrooms that are firm, without any dark spots or blemishes, to ensure maximum flavor and quality. Uniform sizes are beneficial too, as they promote even cooking.

How should I store leftovers of the Roasted Mushrooms with Garlic & Thyme?
Store any leftovers in an airtight container in the refrigerator for up to 3 days. When reheating, place them in the oven or microwave to bring back their warmth and flavor. For the best results, I recommend using the oven to keep that crispy topping intact.

Can I freeze Roasted Mushrooms with Garlic & Thyme?
Yes, you can! To freeze, prepare the mushrooms fully but do not bake them first. Arrange them in a single layer on a baking sheet, freeze until firm, and then transfer them to an airtight container. They can be stored for up to 3 months. To reheat, bake directly from frozen or thaw in the fridge overnight and then bake at 400°F (200°C) for about 20-25 minutes until heated through and crispy.

How can I troubleshoot if my mushrooms turn out soggy?
Soggy mushrooms could be due to excess moisture. To avoid this, make sure to pat the mushrooms dry before cooking. Also, ensure you fry them adequately, as this step helps to evaporate excess moisture. A hot oven is also crucial; if the temperature is too low, they can steam rather than roast, losing that delightful texture.

Are Roasted Mushrooms with Garlic & Thyme suitable for vegans?
Very! To make this dish vegan-friendly, simply omit the butter and replace it with a plant-based alternative, like vegan butter or olive oil. Ensure that any breadcrumbs used are also vegan. This simple tweak will keep the recipe delicious while accommodating dietary preferences.

How do I enhance the flavors of the Roasted Mushrooms?
Consider adding a sprinkle of grated cheese on top of the mushrooms before baking for an extra flavor boost, or try different herbs like rosemary or dill for a unique twist. You can also experiment with spice blends to add more depth to the dish. The beauty of this recipe is its adaptability to suit your taste!

Roasted Mushrooms with Garlic & Thyme

Irresistibly Savory Roasted Mushrooms with Garlic & Thyme

Delight your taste buds with these Roasted Mushrooms with Garlic & Thyme, an effortless and nutritious vegetarian side dish.
Prep Time 15 minutes
Cook Time 15 minutes
Total Time 30 minutes
Servings: 4 servings
Course: Appetizer
Cuisine: Vegetarian
Calories: 150

Ingredients
  

For the Mushrooms
  • 1 pound Open cup mushrooms Ensure they are even-sized for uniform cooking.
  • 2 tablespoons Olive oil Adds richness and is perfect for frying the mushrooms.
For the Garlic Mixture
  • 3 cloves Fresh garlic Chopped garlic infuses a pungent flavor.
  • 4 tablespoons Unsalted butter Softened to blend with other ingredients.
  • 2 teaspoons Fresh thyme Can be substituted with oregano or parsley.
  • 1 teaspoon Garlic powder Enhances the garlic flavor; optional.
For the Topping
  • 1 cup Fresh breadcrumbs Adds a crispy topping; almond meal is a gluten-free alternative.
For the Brightness
  • 1 tablespoon Lemon juice Adds a zesty brightness; adjust to taste.
  • to taste Salt and pepper Essential for seasoning.

Equipment

  • Oven
  • Skillet
  • Baking dish
  • Mixing Bowl

Method
 

Step-by-Step Instructions
  1. Preheat your oven to 400°F (200°C) for perfect roasting.
  2. Heat olive oil in a large skillet over medium-high heat, then fry mushrooms cap-side down for 2-3 minutes until golden brown.
  3. Transfer sautéed mushrooms stalk-side up into a greased baking dish.
  4. Combine softened butter with garlic, thyme, lemon juice, salt, and pepper to create the garlic butter.
  5. Generously spoon garlic butter onto each mushroom and sprinkle with breadcrumbs.
  6. Bake in the preheated oven for about 15 minutes until caps are golden brown and topping is crisp.

Nutrition

Serving: 1servingCalories: 150kcalCarbohydrates: 7gProtein: 3gFat: 13gSaturated Fat: 7gPolyunsaturated Fat: 1gMonounsaturated Fat: 5gCholesterol: 30mgSodium: 250mgPotassium: 300mgFiber: 2gSugar: 1gVitamin A: 200IUVitamin C: 5mgCalcium: 10mgIron: 1mg

Notes

Store leftovers in an airtight container for up to 3 days. Freeze unbaked mushrooms for up to 3 months.

Tried this recipe?

Let us know how it was!