Banana Split Cupcakes: Irresistibly Fun and Flavorful Treats

The kitchen filled with the sweet aroma of ripe bananas; it was like a warm hug on a chilly day. With each overripe banana I had lying around, the inspiration struck: Homemade Banana Split Cupcakes! These delightful treats are not only an effortless way to bring a flavorful twist to your baking routine, but they also capture the essence of everyone’s favorite ice cream sundae in cupcake form. Perfect for gatherings or as a special treat for yourself, this recipe will make you the star of any potluck. Plus, they’re vegetarian and can easily be made nut-free, ensuring a crowd-pleasing favorite. Ready to discover how to make these soft, banana-packed delights that are as fun to create as they are to eat? Let’s dive in!

Why are these cupcakes so irresistible?

Irresistible Flavors: The fusion of banana and chocolate brings a nostalgic, comforting taste that everyone loves.
Easy Baking: With straightforward steps, even novice bakers can whip these up effortlessly.
Customizable: Feel free to switch nuts, flavors, or frostings, tailoring each cupcake to your liking. Check out some great variation ideas to spark your creativity!
Party Hit: These cupcakes are guaranteed to be the highlight at any gathering, drawing compliments from guests.
Nut-Free Option: Perfectly suited for dietary restrictions, just adjust the frosting choice to keep it safe for everyone.

Dive into the fun and flavor of these Homemade Banana Split Cupcakes and savor each delicious bite!

Banana Split Cupcake Ingredients

• Let’s gather what you need for these delightful Banana Split Cupcakes!

For the Batter

  • 1 cup all-purpose flour – Provides structure; for gluten-free cupcakes, swap with gluten-free flour.
  • 1 tsp baking powder – Acts as a leavening agent; make sure it’s fresh for the best rise.
  • 1/2 tsp salt – Enhances flavor; omit if using salted butter.
  • 1/2 cup unsalted butter, melted – Adds moisture and richness; coconut oil can be used for a dairy-free option.
  • 3/4 cup granulated sugar – Sweetens the cupcakes; brown sugar will impart a richer flavor.
  • 2 large eggs – Binds ingredients; can substitute with flax eggs for a vegan version.
  • 1 tsp vanilla extract – Infuses delightful flavor; opt for pure vanilla for the best taste.
  • 1 cup mashed ripe bananas – Provides natural sweetness and moisture; use very ripe bananas for optimal flavor.
  • 1/2 cup chocolate chips – Optional for an extra chocolatey touch; consider dark chocolate instead.
  • 1/2 cup chopped walnuts or pecans – Adds pleasing crunch; substitute with seeds for a nut-free treat.

For Decoration

  • 8 maraschino cherries – For that classic sundae topping; fresh cherries can add a nice touch.
  • 1 cup whipped cream or buttercream frosting – Choose based on your preferred frosting texture; whipped cream is lighter and fluffy.

Gather these ingredients and get ready to create the delightful taste of banana split cupcakes!

Step‑by‑Step Instructions for Banana Split Cupcakes

Step 1: Preheat the Oven
Begin by preheating your oven to 350°F (175°C). While it’s heating, take a moment to line a muffin tin with colorful cupcake liners. This small step not only makes for easy removal but also adds a fun touch to your homemade Banana Split Cupcakes.

Step 2: Mix Dry Ingredients
In a medium bowl, whisk together 1 cup of all-purpose flour, 1 teaspoon of baking powder, and 1/2 teaspoon of salt. Ensure the ingredients are well combined and airy, which will help create a light texture in your cupcakes. Set this mixture aside while you prepare the wet ingredients.

Step 3: Combine Wet Ingredients
In a separate large bowl, mix together 1/2 cup of melted unsalted butter and 3/4 cup of granulated sugar until smooth. Next, add 2 large eggs, one at a time, ensuring each egg is fully incorporated before adding the next. Stir in 1 teaspoon of vanilla extract to enhance the flavor of your Banana Split Cupcakes.

Step 4: Fold in Bananas
Gently fold in 1 cup of mashed ripe bananas into your wet mixture, creating a smooth blend. Be sure to use very ripe bananas for optimal sweetness. Afterward, gradually add the dry ingredients to this mixture, stirring until just combined—this helps avoid overmixing, which can lead to dense cupcakes.

Step 5: Fill Cupcake Liners
With a spoon or ice cream scoop, evenly divide the batter into the lined muffin tin, filling each cup about two-thirds full. This will allow room for the cupcakes to rise beautifully while baking. Ensure an even distribution to achieve uniform baking for each Banana Split Cupcake.

Step 6: Bake
Place the muffin tin in your preheated oven and bake for 18-20 minutes. You’ll know they’re done when a toothpick inserted into the center comes out clean and the tops appear lightly golden. Once baked, allow them to cool in the tin for a few minutes before transferring to a wire rack to cool completely.

Step 7: Decorate
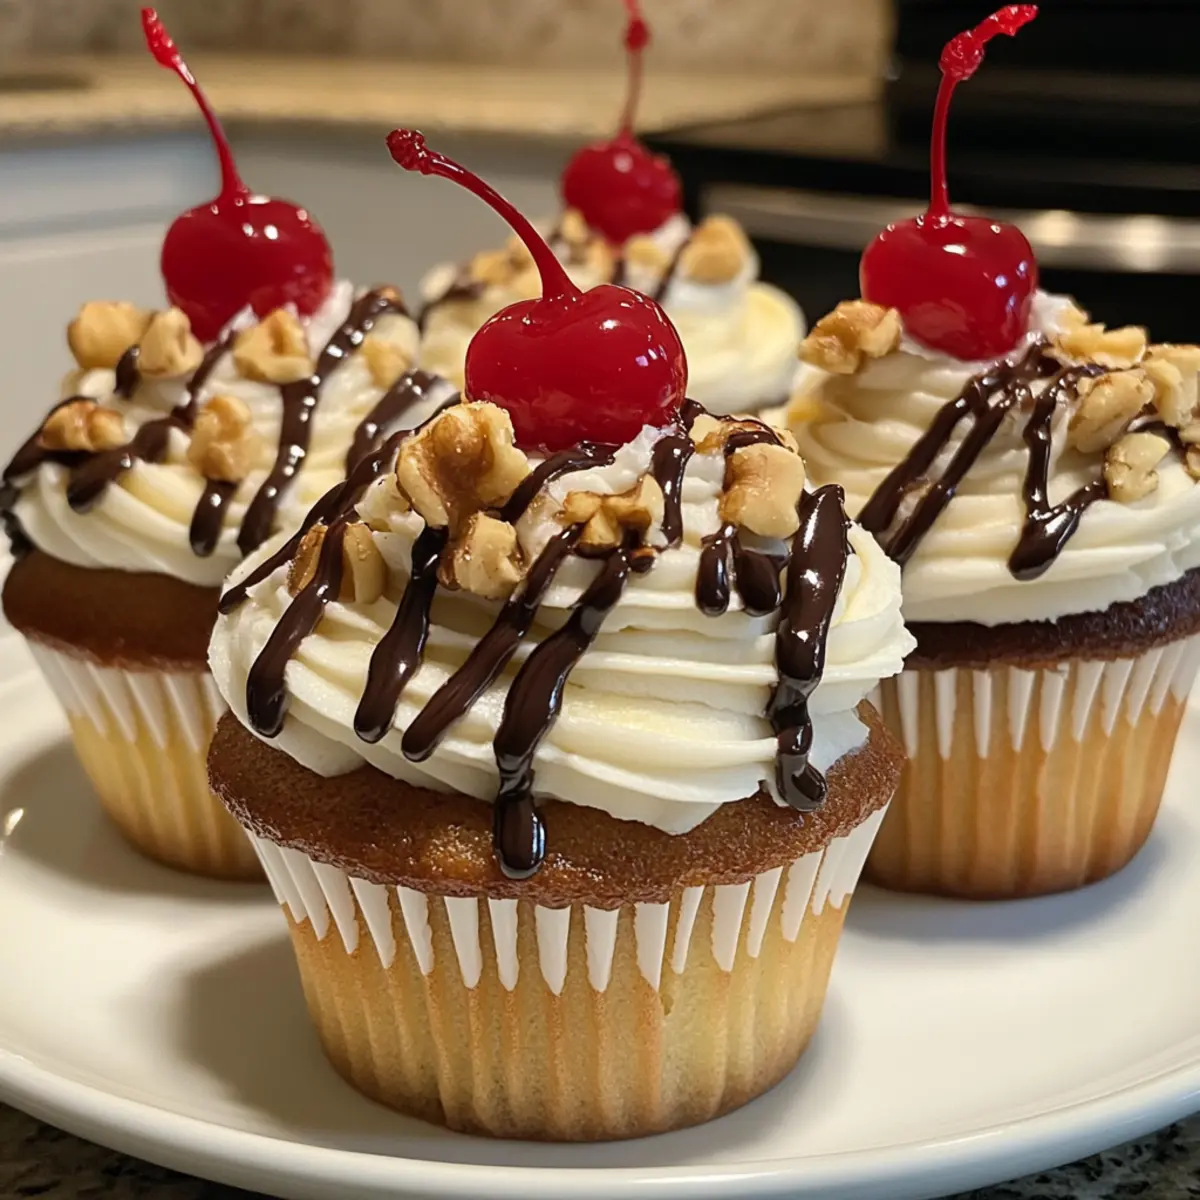
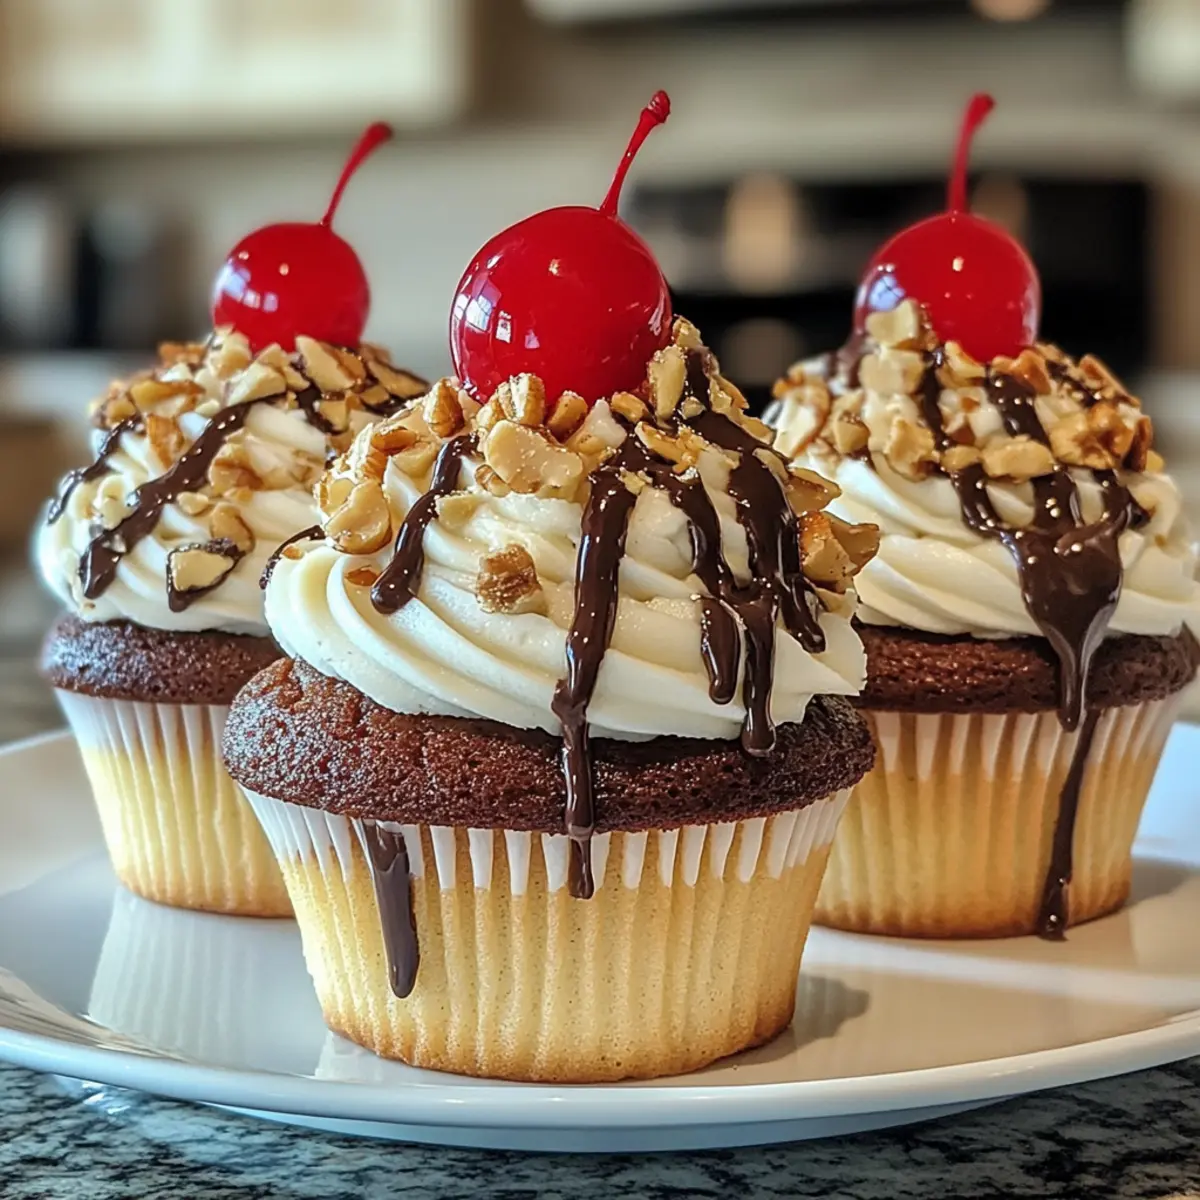
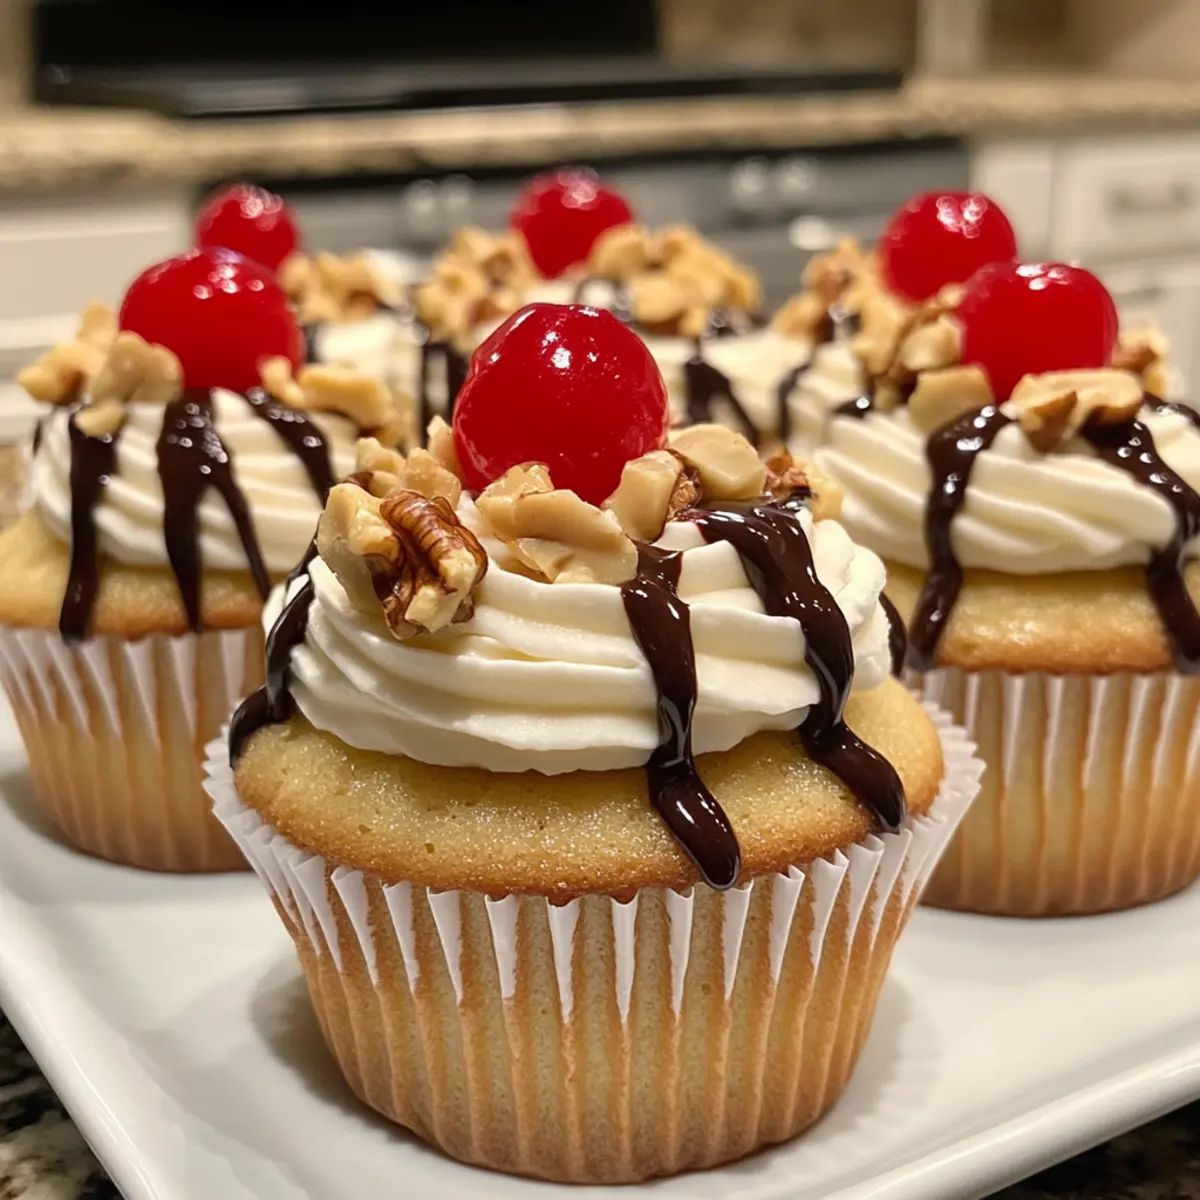
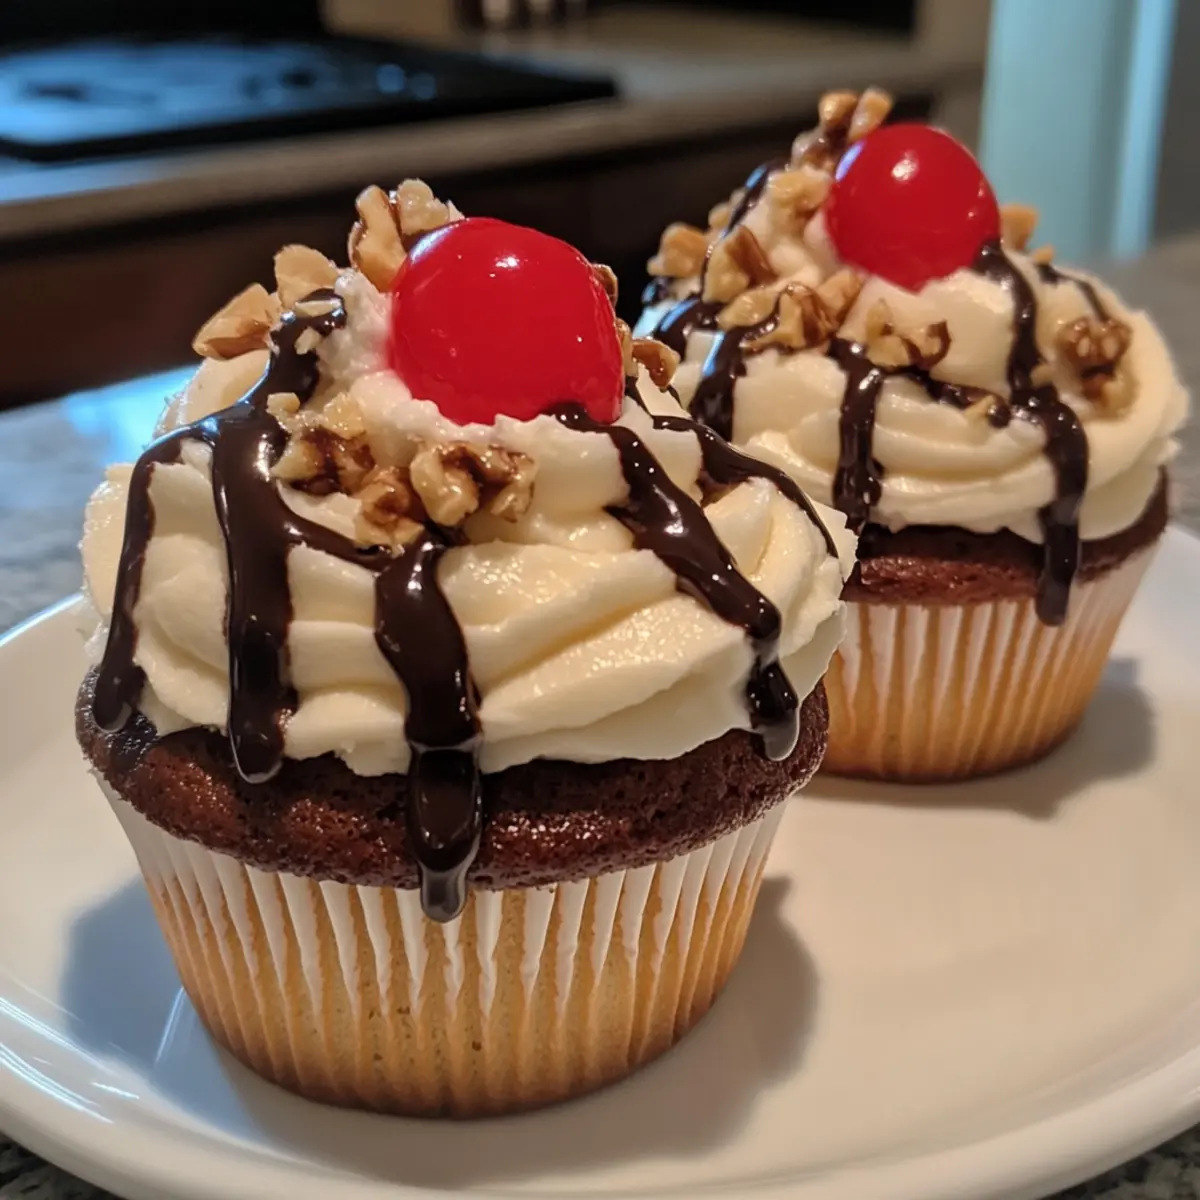
Once the cupcakes are completely cool, generously frost each one with your choice of 1 cup of whipped cream or buttercream frosting. For a delicious touch, drizzle melted chocolate over the frosting, and then sprinkle with 1/2 cup of chopped walnuts or pecans. Cap each cupcake with a maraschino cherry to complete your festive Banana Split Cupcakes!

Storage Tips for Banana Split Cupcakes

Room Temperature: Store your Banana Split Cupcakes in an airtight container at room temperature for up to 3 days to maintain their moisture and flavor.

Fridge: If you prefer your cupcakes chilled, they can be refrigerated for up to a week. However, note that this may slightly alter their texture.

Freezer: To extend their shelf life, freeze the unfrosted cupcakes in an airtight container for up to 3 months. Thaw them at room temperature before frosting and serving.

Reheating: If you’d like to enjoy a warm cupcake, gently reheat in the microwave for 10-15 seconds, ensuring they’re not too hot before devouring!

What to Serve with Homemade Banana Split Cupcakes

Whether it’s a fun family gathering or a cozy afternoon treat, these delightful cupcakes call for some delicious companions to elevate the experience.

  • Creamy Vanilla Ice Cream: The classic pairing that echoes the vanilla base of a banana split, freshening your palate with every bite. Enjoy a scoop alongside to mix warm and cold textures.

  • Rich Chocolate Sauce: Drizzling warm chocolate sauce over these cupcakes intensifies the chocolatey bliss, making every mouthful a luscious delight.

  • Whipped Cream: A dollop of fresh whipped cream can add a fluffy, light touch, balancing the dense banana cake and adding a creamy layer of sweetness.

  • Fresh Strawberries: Cut strawberries bring a burst of juicy freshness that cuts through the richness. Their tartness beautifully complements the sweetness of the cupcakes.

  • Mint Leaves: Adding a sprig of mint not only beautifies your serving plate but also delivers a refreshing contrast that’s perfect for this flavor profile.

  • Homemade Hot Fudge Sundae: Serve these cupcakes alongside a mini hot fudge sundae for a grand presentation. Bring nostalgia to life by blending these two classic desserts.

  • Sparkling Lemonade: A refreshing drink option that cleanses the palate perfectly between bites. The citrus notes of lemonade highlight the banana flavor, making this pairing delightful.

  • Chocolate-Covered Bananas: For true banana split enthusiasts, mini chocolate-covered bananas would echo the main ingredients and elevate your dessert experience even further.

Let the tables be set for a delightful treat, as these additions will ensure your Homemade Banana Split Cupcakes steal the show while harmonizing perfectly with the sweet flavors!

Banana Split Cupcakes Variations

Feel free to let your creativity run wild as you make these delectable cupcakes truly your own!

  • Gluten-Free: Substitute all-purpose flour with gluten-free flour for a delightful, safe option for those with gluten sensitivities.

  • Vegan-Friendly: Use flax eggs instead of regular eggs and coconut oil in place of butter for a fully plant-based treat. The flavor remains rich while being entirely vegan!

  • Chocolate Drizzle: Instead of just melted chocolate, mix in some peanut butter for a creamy chocolate-peanut butter sauce that elevates this treat even further!

  • Fruit Swap: For a twist, swap the mashed bananas with fresh strawberries or blueberries for a fruity variation that surprises your taste buds.

  • Tropical Delight: Replace walnuts or pecans with shredded coconut for a tropical flair. The addition of coconut brings both flavor and texture to your cupcakes.

  • Frosting Flavors: Experiment with different frostings! Try using cream cheese frosting or chocolate ganache to enhance or completely change the cupcake experience.

  • Nut-Free Version: Simply omit nuts entirely or substitute them with sunflower seeds to keep the crunch, all while keeping it safe for nut allergies.

  • Extra Fun Toppings: Add colorful sprinkles on top of your frosting for a festive touch; these cupcakes are not just delicious, but a feast for the eyes too!

Embrace the many variations above and discover the joy of creating personalized versions of these delightful Banana Split Cupcakes! Whether you explore the world of vegan options or the playful side of flavors, your baking adventure awaits!

Expert Tips for Banana Split Cupcakes

  • Moisture Matters: Use very ripe bananas for the best flavor and moisture in your cupcakes. Overripe bananas are sweeter and more flavorful.

  • Avoid Dense Cupcakes: Be careful not to overmix the batter after adding the dry ingredients. This ensures your Banana Split Cupcakes remain light and fluffy.

  • Room Temperature Eggs: Make sure your eggs are at room temperature before mixing. This offers better incorporation and a smoother batter.

  • Chilling Technique: If frosting the cupcakes ahead of time, chill them for 10-15 minutes before drizzling with chocolate. This keeps the frosting stable and looking great.

  • Creative Variations: Feel free to mix things up! Try different frostings or toppings, like toasted coconut, to make each batch unique and delicious.

Make Ahead Options

These Homemade Banana Split Cupcakes are perfect for busy weeknights and meal prep enthusiasts! You can bake the cupcakes up to 3 days in advance and store them in an airtight container at room temperature to keep them fresh. If you’re planning to frost them later, wait to add the frosting until you’re ready to serve—this will maintain the quality and texture of the cupcakes. You can also prepare the frosting up to 24 hours ahead and refrigerate it in an airtight container. When you’re ready to serve, simply bring the frosting to room temperature, frost the cupcakes, drizzle with chocolate, sprinkle the nuts, and top with a cherry for a delightful treat that tastes just as fresh as the day they were made!

Banana Split Cupcakes Recipe FAQs

What type of bananas should I use for the best flavor?
Absolutely! For the most flavorful Banana Split Cupcakes, opt for very ripe bananas. You want bananas that have turned dark and spotty, as their sweetness and softness will greatly enhance the cupcakes’ moisture and flavor.

How should I store my cupcakes after baking?
Store your Banana Split Cupcakes in an airtight container at room temperature for up to 3 days, keeping them fresh and moist. If you prefer, they can be refrigerated for up to a week, though this may change their texture slightly.

Can I freeze my cupcakes, and if so, how?
Yes! To freeze your Banana Split Cupcakes, I recommend wrapping unfrosted cupcakes individually in plastic wrap and placing them in an airtight container. They can be frozen for up to 3 months. When you’re ready to enjoy them, simply thaw at room temperature and frost as desired!

What should I do if my cupcakes come out dense?
If your cupcakes turned out dense, it could be due to overmixing the batter after adding the dry ingredients. Be sure to mix until just combined to maintain their light and fluffy texture. Also, ensure that you’re using fresh baking powder to help them rise properly.

Are these cupcakes safe for those with nut allergies?
Yes! Banana Split Cupcakes can be made nut-free by simply omitting the chopped walnuts or pecans. Additionally, you can choose a nut-free frosting option to ensure they are safe for those with allergies. Always check ingredient labels to be sure!

Banana Split Cupcakes

Banana Split Cupcakes: Irresistibly Fun and Flavorful Treats

Delight in these Banana Split Cupcakes, the fun dessert that brings the flavors of a classic banana split into a moist, sweet cupcake form.
Prep Time 20 minutes
Cook Time 20 minutes
Cooling Time 15 minutes
Total Time 55 minutes
Servings: 12 cupcakes
Course: Dessert
Cuisine: American
Calories: 250

Ingredients
  

For the Batter
  • 1 cup all-purpose flour For gluten-free, use gluten-free flour.
  • 1 tsp baking powder Make sure it’s fresh for best rise.
  • 1/2 tsp salt Omit if using salted butter.
  • 1/2 cup unsalted butter, melted Coconut oil can be used for dairy-free.
  • 3/4 cup granulated sugar Brown sugar will add a richer flavor.
  • 2 large eggs May substitute with flax eggs for vegan.
  • 1 tsp vanilla extract Opt for pure vanilla for the best taste.
  • 1 cup mashed ripe bananas Use very ripe bananas for optimal flavor.
  • 1/2 cup chocolate chips Dark chocolate recommended.
  • 1/2 cup chopped walnuts or pecans Substitute with seeds for nut-free.
For Decoration
  • 8 maraschino cherries Fresh cherries can offer a unique flavor.
  • 1 cup whipped cream or buttercream frosting Choose frosting based on preference.

Equipment

  • Oven
  • Muffin Tin
  • Mixing bowls
  • Whisk
  • spoon or ice cream scoop

Method
 

Baking Instructions
  1. Preheat your oven to 350°F (175°C) and line a muffin tin with colorful cupcake liners.
  2. In a medium bowl, whisk together the flour, baking powder, and salt. Set this mixture aside.
  3. In a large bowl, mix the melted butter and sugar until smooth. Add eggs one at a time, then stir in vanilla.
  4. Gently fold in mashed bananas and add the dry ingredients, stirring until just combined.
  5. Evenly divide the batter into the muffin tin, filling each cup about two-thirds full.
  6. Bake for 18-20 minutes until a toothpick comes out clean and tops are golden. Cool in the tin for a few minutes.
  7. Frost the cooled cupcakes with whipped cream or buttercream, drizzle with chocolate, and top with a maraschino cherry.

Nutrition

Serving: 1cupcakeCalories: 250kcalCarbohydrates: 34gProtein: 3gFat: 12gSaturated Fat: 7gPolyunsaturated Fat: 1gMonounsaturated Fat: 4gCholesterol: 40mgSodium: 150mgPotassium: 200mgFiber: 1gSugar: 18gVitamin A: 200IUVitamin C: 2mgCalcium: 20mgIron: 1mg

Notes

Use ripe bananas for best moisture and flavor. Avoid overmixing to maintain fluffy texture. Store in an airtight container to preserve freshness.

Tried this recipe?

Let us know how it was!

Delicious Egg and Cheese Toasts for a Quick Breakfast Fix

As I flipped through my recipe journal, a delightful twist on breakfast caught my eye: Egg and Cheese Toasts. This quick vegetarian marvel is perfect for those mornings when you crave something hearty yet simple. In just 15 minutes, you can elevate your breakfast experience and customize it to suit your taste buds—whether you prefer a hint of spice or the freshness of herbs. These toasts not only pack a punch of protein but also eliminate the need for those monotonous fast-food runs. Plus, you’ll love how easily they adapt to whatever you have on hand! So, what will you top your egg and cheese toast with today—maybe some fresh avocado or a sprinkle of smoked paprika?

Why Are Egg and Cheese Toasts Irresistible?

Quick and Easy: Whipping up these toasts takes just 15 minutes, making them the perfect solution for busy mornings.

Customizable Delight: Whether you prefer cheddar or a melty mozzarella, the choice is yours! Add herbs, spices, or toppings like avocado or bacon for a personalized touch.

Nutrient-Packed: Loaded with protein, these toasts satisfy your hunger while being vegetarian-friendly, a smart move away from fast food!

Crispy Texture: Enjoy the delightful crunch of the toasted bread paired with the gooeyness of melted cheese, creating a satisfying bite.

Perfect for Meal Prep: Prepare the egg mixture ahead of time and assemble in the morning for a swift breakfast rush. Enjoy with a side of fresh fruit or salad for a complete meal, and you’ve got an ideal breakfast fix any day!

Egg and Cheese Toasts Ingredients

• Get ready to create delicious Egg and Cheese Toasts!

For the Toast

  • Bread – Choose sturdy options like white, whole grain, or sourdough, ensuring thicker slices work best to hold up against moisture.

For the Egg Mixture

  • Eggs – Provides essential structure and protein; for a lighter version, consider using egg whites.
  • Cheese – Adds richness; cheddar and gruyere are fantastic choices, and mixing cheeses can enhance flavor!
  • Fresh Herbs (e.g., thyme, rosemary) – Brings depth; they can be skipped in a rush but are recommended for the best taste.
  • Salt – Enhances flavor; adjust according to the cheese being used.
  • Black Pepper – Adds a touch of seasoning for extra flavor.
  • Cayenne – Add for a kick of spice if you’re feeling adventurous!

Get ready to build the perfect breakfast with these ingredients!

Step‑by‑Step Instructions for Egg and Cheese Toasts

Step 1: Preheat Your Oven or Air Fryer
Begin by preheating your oven to 350°F (175°C) or setting your air fryer to the same temperature. This step is crucial for achieving that perfect crispy texture on your Egg and Cheese Toasts. Proper preheating ensures even cooking and helps to develop the delightful golden-brown hue that makes these toasts so irresistible.

Step 2: Lightly Toast the Bread
While your oven or air fryer warms up, take your sturdy bread slices and lightly toast them in a regular toaster for about 2–3 minutes. This pre-cooking step prevents sogginess when you add the egg mixture. The goal is to achieve a crisp outer layer that will nicely hold the creamy topping.

Step 3: Whisk the Egg Mixture
In a mixing bowl, crack open your eggs and whisk them thoroughly for about 1 minute until they are well blended. Add in your cheese, fresh herbs, salt, black pepper, and cayenne (if you like a little heat). Mix everything until fully combined; you’ll want to see the cheese evenly distributed in the vibrant egg mixture.

Step 4: Spread the Egg Mixture on Toast
Take your lightly toasted bread slices and place them on a baking sheet or air fryer basket. Carefully spread the egg mixture evenly over each slice, ensuring to reach all the edges. This will prevent any dry crusts and promote a gooey, cheesy topping on every delectable bite.

Step 5: Cook Your Toasts
Place your prepared toasts in the preheated oven and bake for about 10 minutes. If you are using an air fryer, cook for 6–8 minutes, checking halfway through to ensure they set properly. You’ll know they’re ready when the tops are puffed up and golden brown, with the cheese nicely melted and bubbly.

Step 6: Allow to Cool and Serve
Once cooked, carefully remove the Egg and Cheese Toasts from the oven or air fryer, and let them sit for a minute. This brief cooling allows for easier handling and enhances enjoyment. Serve them warm, accompanied by a side of fresh fruit or salad for a delightful breakfast experience!

What to Serve with Easy Egg and Cheese Toasts

Brighten your breakfast table with delightful accompaniments that will elevate your Egg and Cheese Toast experience.

  • Fresh Fruit Salad: A mix of berries, melons, and citrus provides a refreshing contrast to the savory toasts, enhancing your meal’s color and flavor.
  • Crunchy Green Salad: Tossed greens topped with cucumber and a light vinaigrette add a crisp texture and earthy notes, perfectly balancing the richness of the toast.
  • Herbed Tomato Slices: Juicy, ripe tomatoes sprinkled with fresh herbs elevate this dish, bringing a burst of freshness that pairs beautifully with the creamy cheese.

Imagine a plate adorned with vibrant fruit alongside your Egg and Cheese Toasts; the brightness of nature harmonizes wonderfully with your hearty breakfast.

  • Avocado Slices: Creamy avocado adds a rich, buttery element that complements the crispy toast, enhancing both taste and nutrition.
  • Smoked Paprika Dusting: A sprinkle of smoked paprika introduces a touch of warmth and depth, transforming each bite into a flavor-packed delight.
  • Coffee or Herbal Tea: A steaming mug of your favorite brew provides a comforting counterpart, offering warmth and rich notes that round out the meal.

Expert Tips for Egg and Cheese Toasts

Pre-Toast is Key: Always lightly toast the bread before adding the egg mixture. This helps avoid sogginess and ensures a crispy base.

Watch Cooking Times: Air fryer models vary. Keep an eye on your Egg and Cheese Toasts to prevent overcooking; check them halfway through.

Mix and Match Cheeses: Combining different cheeses enhances the flavor. Try pairing sharp cheddar with creamy mozzarella for a delightful taste experience!

Herbs Are Essential: Using fresh herbs elevates the flavor profile. Even if you’re pressed for time, adding just a pinch can make a world of difference.

Customize Wisely: Don’t hesitate to get creative with toppings. Pair with vegetables or proteins like spinach or bacon to make your meal heartier without sacrificing flavor.

How to Store and Freeze Egg and Cheese Toasts

Fridge: Store leftovers in an airtight container in the fridge for up to 3 days. Reheat in a toaster oven or microwave for best results.

Freezer: For longer storage, freeze individual portions wrapped in plastic wrap and then placed in a freezer bag. They can be stored for up to 1 month.

Reheating: To reheat, thaw in the refrigerator overnight, then bake in the oven at 350°F (175°C) for about 10 minutes until heated through. Enjoy your Egg and Cheese Toasts as if they were freshly made!

Make-Ahead: The egg mixture can be prepared in advance and kept in the fridge for up to 2 days. This tip saves time on busy mornings!

Make Ahead Options

These Egg and Cheese Toasts are ideal for busy mornings when you need a quick breakfast fix! You can prepare the egg and cheese mixture—whisking together the eggs, cheese, herbs, and seasonings—up to 48 hours in advance and store it in an airtight container in the refrigerator. Just remember to refrigerate it right after mixing to maintain freshness. In the morning, simply toast your bread, spread on the chilled mixture, and bake or air fry as directed. By pre-prepping this component, you’ll enjoy delicious Egg and Cheese Toasts with minimal morning fuss, giving you that comforting breakfast boost without the hassle!

Egg and Cheese Toasts Variations & Substitutions

Feel free to explore these delightful ideas and give your Egg and Cheese Toasts a personal twist!

  • Dairy-Free: Use plant-based cheese alternatives for the egg and cheese mixture to suit a dairy-free diet. They melt beautifully, ensuring you won’t miss out on that gooey goodness.

  • Spicy Kick: Add diced jalapeños or a dash of your favorite hot sauce to the egg mixture for a fiery flavor that awakens the taste buds. Enjoy each bite with a bit of heat!

  • Herb Blend: Try fresh dill or cilantro instead of traditional herbs for an aromatic twist. Each herb lends a unique flavor profile that complements the rich egg and cheese beautifully.

  • Avocado Upgrade: Top your Egg and Cheese Toasts with sliced or mashed avocado for a creamy, buttery finish. It adds a healthy dose of fats and makes each bite incredibly satisfying.

  • Veggie Power: Incorporate sautéed mushrooms, bell peppers, or leafy greens like spinach into your egg mixture for an added nutritional boost. This will create a heartier breakfast that’s good for you!

  • Meat Lovers: For a protein-packed option, add crispy bacon or diced ham to the mix. Their savory flavors meld perfectly with the cheesy egg yolk, making breakfast truly indulgent.

  • Sweet Twist: Top your toasts with a drizzle of honey or maple syrup for a sweet twist, perfectly balancing the savory elements. It’s an unexpected yet delightful combination that’s worth trying!

  • Cheese Medley: Experiment with mixing cheeses such as feta, mozzarella, or pepper jack for diverse textures and flavors. Each cheese brings its own character to the table, creating layers of deliciousness.

Whether you prefer a hearty breakfast or a lighter fare, tailoring these Egg and Cheese Toasts allows you to savor them just the way you like. For more delightful breakfast ideas, you could explore Baked Vegetable Egg Casserole or indulge in the creamy goodness of Cheddar Mac Cheese. Happy cooking!

Egg and Cheese Toasts Recipe FAQs

What type of bread is best for Egg and Cheese Toasts?
For the best results, choose sturdy options like white, whole grain, or sourdough. Thicker slices are ideal as they hold up better against moisture, preventing sogginess.

How long can I store leftover Egg and Cheese Toasts in the fridge?
You can keep leftovers in an airtight container in the fridge for up to 3 days. Simply reheat them in a toaster oven or microwave for the best texture!

Can I freeze Egg and Cheese Toasts?
Absolutely! To freeze them, wrap individual portions in plastic wrap, then place them in a freezer bag. They can be stored for up to 1 month. When you’re ready to enjoy, thaw them overnight in the refrigerator and then reheat in the oven at 350°F (175°C) for about 10 minutes.

What can I do if my Egg and Cheese Toasts turn out soggy?
If you find your toasts are soggy, it may be due to not pre-toasting the bread or adding too much egg mixture. Pre-toast your bread lightly before spreading the egg mixture, and make sure to spread it evenly without overloading.

Can I use egg whites instead of whole eggs?
Yes, you can! For a lighter option, consider using egg whites. They will still provide excellent structure and protein while lowering the fat content, making your Egg and Cheese Toasts just as delicious.

Egg and Cheese Toasts

Delicious Egg and Cheese Toasts for a Quick Breakfast Fix

These Egg and Cheese Toasts make for a quick and customizable breakfast fix, perfect for busy mornings.
Prep Time 5 minutes
Cook Time 10 minutes
Cooling Time 1 minute
Total Time 15 minutes
Servings: 2 toasts
Course: Breakfast
Cuisine: Vegetarian
Calories: 300

Ingredients
  

For the Toast
  • 2 slices Sturdy Bread White, whole grain, or sourdough recommended.
For the Egg Mixture
  • 2 large Eggs Use egg whites for a lighter version.
  • 1/2 cup Cheese Cheddar, gruyere, or mixed cheeses.
  • 1 tablespoon Fresh Herbs e.g., thyme, rosemary, can be skipped in a rush.
  • 1/4 teaspoon Salt Adjust according to cheese used.
  • 1/4 teaspoon Black Pepper
  • 1/8 teaspoon Cayenne Optional for spice.

Equipment

  • Oven
  • Air fryer
  • Toaster
  • Mixing Bowl
  • Baking Sheet

Method
 

Step-by-Step Instructions
  1. Preheat your oven to 350°F (175°C) or set your air fryer to the same temperature.
  2. Lightly toast the bread slices in a toaster for 2–3 minutes.
  3. In a bowl, whisk the eggs for 1 minute. Add cheese, herbs, salt, pepper, and cayenne. Mix until combined.
  4. Spread the egg mixture evenly over the toasted bread slices on a baking sheet.
  5. Bake in the oven for about 10 minutes (or air fry for 6–8 minutes) until tops are puffed and golden.
  6. Allow to cool for a minute before serving, and enjoy with fresh fruit or salad.

Nutrition

Serving: 1toastCalories: 300kcalCarbohydrates: 30gProtein: 15gFat: 15gSaturated Fat: 7gPolyunsaturated Fat: 1gMonounsaturated Fat: 5gCholesterol: 140mgSodium: 600mgPotassium: 350mgFiber: 2gSugar: 2gVitamin A: 500IUVitamin C: 1mgCalcium: 250mgIron: 2mg

Notes

For best results, always pre-toast the bread to prevent sogginess. Feel free to customize with different toppings or cheeses.

Tried this recipe?

Let us know how it was!

Creamy Maja Blanca Recipe with Corn for a Sweet Treat

The inviting aroma of creamy coconut and sweet corn fills the air as I unveil my Easy Maja Blanca with Corn. This delightful Filipino dessert embodies comfort food at its finest, transforming simple pantry staples into a rich, no-bake pudding that’s sure to please everyone. In just under 40 minutes, you can whip up a treat that’s not only delicious but also impressively kid-friendly. Whether you’re celebrating a festive occasion or simply craving a sweet escape, this Maja Blanca recipe with corn is your answer. The smooth texture and subtle sweetness beckon you to take a slice and savor every moment. Ready to discover how to bring this comforting treat into your kitchen? Let’s dive in!

Why is Maja Blanca a Must-Try?

Comforting flavors of coconut and corn combine to create an unforgettable dessert that captivates all ages. No-Bake and easy to prepare, this recipe is perfect for busy weeknights or festive gatherings. Versatile in sweetness, you can easily customize it to suit your taste preferences. Want another delightful Filipino treat? Check out my Tuna Macaroni Salad or go for a warm bowl of Coconut Curry Soup for a comforting meal. This Maja Blanca recipe with corn delivers both nostalgia and satisfaction in every creamy slice!

Maja Blanca Recipe with Corn Ingredients

For the Pudding Base
Coconut Milk – Full-fat coconut milk provides a silky texture that’s perfect for a creamy dessert.
Evaporated Milk – Adds body without overwhelming; replace with more coconut milk for a dairy-free option.
Sweetened Condensed Milk – The key to achieving that delightful sweetness; start with less and adjust to taste as needed.
Cornstarch – This vital thickener transforms the liquid mixture into a pudding that’s smooth and luscious.
Water – Use to create the cornstarch slurry, ensuring no lumps form during cooking.

For the Corn Addition
Whole Kernel Corn – Offers natural sweetness and texture; canned, frozen, or fresh are all fantastic options (1 to 1.5 cups recommended).
Sugar – Optional for additional sweetness; tailor to your preference for the perfect balance.

For Finishing Touches
Butter – A couple of tablespoons enhance the gloss and contribute to the pudding’s soft texture.
Salt – Just a pinch balances the sweetness and enhances all the delicious flavors.

Optional Toppings
Toasted Coconut – Adds a delightful crunch and an extra touch of coconut flavor.
Cheese Shreds – A traditional pairing that introduces savory notes to contrast the sweetness.
Latik – This coconut caramel brings a rich, indulgent element to the dish.
Crushed Roasted Peanuts – Provide a nutty crunch and elevate the creamy pudding experience.

With these ingredients, you’re well on your way to creating a delicious Maja Blanca recipe with corn that will delight your family and friends!

Step‑by‑Step Instructions for Maja Blanca Recipe with Corn

Step 1: Prepare the Cornstarch Slurry
In a mixing bowl, whisk together 1 cup of cornstarch with 1 cup of cold water until smooth and lump-free. This slurry is crucial for ensuring your Maja Blanca thickens properly, so make sure there are no clumps. Set it aside while you move on to combine the other ingredients.

Step 2: Combine Liquid Ingredients
In a pot over medium-low heat, add 2 cans of full-fat coconut milk, 1 can of evaporated milk, ¾ cup of sweetened condensed milk, and a pinch of salt. Stir gently to mix the ingredients well, watching for slight bubbles as the mixture slowly warms. This stage ensures the flavors meld beautifully.

Step 3: Add the Corn
Stir in 1 to 1.5 cups of whole kernel corn into the warm mixture in the pot. This will add delightful sweetness and texture to your Maja Blanca. Continue stirring occasionally for about 3-5 minutes, allowing the corn to heat through and the flavors to enhance.

Step 4: Thicken the Mixture
Gradually pour in the prepared cornstarch slurry while whisking constantly to avoid lumps. Keep stirring for about 5-7 minutes over medium-low heat until the mixture thickens and coats the back of a spoon. The Maja Blanca should start to resemble a smooth, creamy pudding.

Step 5: Incorporate Butter
Once thickened, remove the pot from heat and stir in 2 tablespoons of butter until fully melted. This addition will give your Maja Blanca a glossy finish and enrich the overall flavor. Make sure it’s evenly combined to enhance the creamy texture.

Step 6: Set the Mixture
Pour the thickened pudding into a lightly greased 8×8 or 9×9 inch pan. Gently tap the pan on the counter to release any air bubbles and smooth the top for an even surface. Let it cool at room temperature for about 30 minutes before transferring it to the refrigerator.

Step 7: Chill and Slice
Refrigerate your Maja Blanca for 1-2 hours until it sets firmly. This chilling time is essential for a clean, smooth slice. Once ready, use a greased knife to slice into squares, revealing the creamy layers filled with sweet corn, perfect for serving as a delightful dessert.

How to Store and Freeze Easy Maja Blanca with Corn

Fridge: Store covered in the refrigerator for up to 4 days. The flavors develop beautifully after a day, making it even more delightful!

Freezer: For longer storage, freeze the Maja Blanca in an airtight container for up to 2 months. Thaw in the fridge overnight before serving.

Reheating: If serving straight from the fridge, you can enjoy it cold or let it sit at room temperature for 30 minutes to soften before slicing.

Tips: Always wrap tightly to prevent any absorption of odors from your fridge, and remember, this Maja Blanca recipe with corn is best served chilled!

Make Ahead Options

Preparing this Easy Maja Blanca with Corn ahead of time is a fantastic way to streamline your meal planning! You can cook the pudding and let it cool to room temperature up to 24 hours in advance, then refrigerate it until you’re ready to serve. To maintain the quality, cover it tightly with plastic wrap to prevent it from absorbing any odors from the refrigerator. When it’s time to enjoy, simply slice the chilled Maja Blanca into squares, and feel free to add your favorite toppings. With this method, you’ll have a comforting dessert ready to impress guests or satisfy a late-night craving without any last-minute fuss!

Expert Tips for Maja Blanca Recipe with Corn

  • Whisking is Key: Always whisk the cornstarch with cold water thoroughly to prevent lumps from forming. A smooth slurry is crucial for a perfectly creamy pudding!

  • Adjust the Sweetness: Start with less sweetened condensed milk, and taste as you go. You can always add more if you prefer a sweeter Maja Blanca recipe with corn.

  • Chill for Texture: Allow the pudding to chill in the refrigerator for at least 1-2 hours before slicing. This helps firm up the texture for cleaner slices and enhances the flavor.

  • Experiment with Toppings: Don’t hesitate to get creative with toppings! Try toasted coconut, cheese shreds, or latik for an extra layer of flavor and texture.

  • Mind the Heat: Cook over medium-low heat to avoid scorching the mixture. Gentle heating helps the flavors meld without compromising the creamy consistency.

What to Serve with Easy Maja Blanca with Corn?

The sweet, creamy taste of this delightful dessert pairs beautifully with a variety of savory and refreshing dishes.

  • Pancit Palabok: This classic Filipino noodle dish offers a savory contrast, with its rich sauce enhancing the pudding’s sweetness.

  • Garlic Fried Rice: A familiar staple, the fragrant garlic rice brings a wonderful aroma, balancing the comforting sweetness of Maja Blanca.

  • Grilled Chicken Skewers: The smokiness of grilled chicken contrasts well with the creamy pudding, creating a delightful flavor experience.

  • Fresh Mango Slices: Juicy, sweet mango adds a refreshing quality, providing a burst of tartness that complements the dessert’s sweet profile.

  • Crispy Spring Rolls: The crunchy texture of spring rolls offers a satisfying bite, providing a textural contrast that tantalizes the taste buds.

  • Flavored Herbal Tea: A warm cup of chamomile or jasmine tea cleanses the palate, enhancing the overall dining experience with its soothing notes.

  • Coconut Milkshake: Double up on the coconut theme with a creamy milkshake that harmonizes with the tropical flavors of the Maja Blanca.

  • Chocolate Chip Cookies: For those with a sweet tooth, these warm cookies add a comforting touch and a delightful texture that pairs well with the pudding.

Enjoy experimenting with these pairings to create a memorable meal that celebrates the heartwarming essence of this Maja Blanca recipe with corn!

Maja Blanca Recipe with Corn Variations

Feel free to let your creativity shine through these delightful twists and substitutions!

  • Dairy-Free: Substitute evaporated milk with more coconut milk for a fully dairy-free dessert that doesn’t sacrifice taste. This version stays true to the creamy texture everyone loves!

  • Sweetness Level: Start with half the recommended condensed milk, taste, and add more if you prefer a sweeter kick. Each adjustment brings you closer to your perfect dessert.

  • Fresh Corn: For a fresh burst of flavor, try using fresh corn on the cob instead of canned or frozen. Just cook and scrape it off the cob for an uplifting crunch in every bite.

  • Flavor Boost: Add a splash of vanilla extract for an aromatic experience that pairs wonderfully with the coconut’s sweetness. This small change can elevate the flavor profile significantly!

  • Nutty Crunch: Toss in some chopped roasted cashews or almonds into the pudding mixture for a delightful nutty twist. The added texture creates an enticing contrast to the smooth pudding.

  • Tropical Vibe: Incorporate pineapple chunks for a refreshing tropical touch. The juicy fruit complements the creamy coconut beautifully, making every slice feel like a mini-vacation.

  • Heat It Up: For an unexpected zing, mix in finely chopped jalapeños or a sprinkle of cayenne pepper. The warmth adds a surprising depth that enhances the overall flavor.

  • Alternative Proteins: Use silken tofu blended into the mixture if you’re looking for a protein boost while keeping it creamy. This option caters to plant-based eaters without compromising taste.

Feel inspired? These variations allow you to make the Maja Blanca recipe with corn truly yours!

Maja Blanca Recipe with Corn Recipe FAQs

How do I know if my corn is fresh?
Absolutely! For the best flavor, use sweet corn with bright yellow kernels. If using canned corn, look for options without added sugars or preservatives. Fresh corn should be firm, plump, and tender when bitten, while frozen corn should have a bright color and no frost or ice crystals.

What’s the best way to store leftovers?
Very! Store your Maja Blanca in an airtight container in the refrigerator for up to 4 days. The flavors actually improve after a day, making it even more delicious. Just make sure to keep it tightly sealed to avoid absorbing odors from other foods.

Can I freeze Maja Blanca? How?
Yes, indeed! To freeze, place the cooled Maja Blanca in an airtight container or wrap it tightly in plastic wrap. It can last up to 2 months in the freezer. When you’re ready to enjoy it, simply thaw it in the fridge overnight, then slice and serve. This helps maintain its creamy texture!

What common issues should I watch out for?
If your Maja Blanca turns out too runny, it may need more cornstarch. Remember to whisk the cornstarch mixture cold before adding it to the pot, and keep stirring to prevent clumping. If it’s too thick, you can add a splash of coconut milk to loosen it up. A smooth and creamy consistency is key!

Is Maja Blanca safe for those with lactose intolerance?
Yes! You can easily adapt this recipe to be dairy-free. Replace the evaporated milk with additional coconut milk and adjust the sweetness to your liking. However, be cautious with toppings. Cheese or other dairy-based garnishes should be avoided. Enjoy the sweet flavor of this Maja Blanca recipe with corn without any worry!

How can I make this dessert sweeter?
Great question! Start with the suggested amount of sweetened condensed milk and taste as you go. If it’s not quite sweet enough, feel free to add a bit of sugar or more condensed milk until it fits your preference. Just remember, you can always add, but you can’t take away!

Maja Blanca Recipe with Corn

Creamy Maja Blanca Recipe with Corn for a Sweet Treat

This Maja Blanca recipe with corn is a delightful Filipino dessert that's creamy, no-bake, and perfect for any occasion.
Prep Time 10 minutes
Cook Time 30 minutes
Cooling Time 30 minutes
Total Time 1 hour 10 minutes
Servings: 8 slices
Course: Dessert
Cuisine: Filipino
Calories: 200

Ingredients
  

For the Pudding Base
  • 2 cans Full-fat coconut milk Provides a silky texture
  • 1 can Evaporated milk Adds body without overwhelming
  • ¾ cup Sweetened condensed milk Adjust to taste
  • 1 cup Cornstarch Vital thickener
  • 1 cup Water For the cornstarch slurry
For the Corn Addition
  • 1 to 1.5 cups Whole kernel corn Canned, frozen, or fresh
  • to taste tablespoons Sugar Optional for sweetness
For Finishing Touches
  • 2 tablespoons Butter Enhances gloss
  • a pinch Salt Balances sweetness
Optional Toppings
  • Toasted Coconut Adds crunch
  • Cheese Shreds Traditional pairing
  • Latik Coconut caramel
  • Crushed Roasted Peanuts Provides nutty crunch

Equipment

  • Mixing Bowl
  • pot
  • Whisk
  • knife
  • 9x9 inch or 8x8 inch pan

Method
 

Step-by-Step Instructions
  1. Whisk together 1 cup of cornstarch with 1 cup of cold water until smooth,
  2. In a pot over medium-low heat, add 2 cans of coconut milk, 1 can of evaporated milk, ¾ cup of sweetened condensed milk, and a pinch of salt.
  3. Stir in 1 to 1.5 cups of whole kernel corn and heat through.
  4. Gradually pour in the cornstarch slurry while whisking to avoid lumps and cook until thickened.
  5. Remove from heat and stir in 2 tablespoons of butter until melted.
  6. Pour the mixture into a lightly greased pan and let cool for 30 minutes.
  7. Refrigerate for 1-2 hours until set and slice into squares.

Nutrition

Serving: 1sliceCalories: 200kcalCarbohydrates: 30gProtein: 3gFat: 8gSaturated Fat: 7gSodium: 150mgPotassium: 150mgFiber: 1gSugar: 15gCalcium: 40mgIron: 1mg

Notes

Always whisk the cornstarch thoroughly to prevent lumps and allow the pudding to chill before slicing for best results.

Tried this recipe?

Let us know how it was!

Homemade Flour Tortillas That Are Soft, Fluffy, and Easy

There’s nothing quite like the smell of freshly cooked tortillas wafting through the kitchen, is there? Homemade Flour Tortillas are my go-to for adding a personal touch to meals, transforming even the simplest ingredients into a masterpiece. In just under an hour, you can whip up a batch of these fluffy, soft tortillas that are perfect for burritos, tacos, or served alongside your favorite dishes. The beauty of this recipe lies not only in its quick prep time but also in the peace of mind that comes from knowing exactly what’s in them—no preservatives here! Plus, they’re easily customizable to fit any flavor profile you desire. Curious how to achieve that delightful, melt-in-your-mouth texture? Keep reading, and let’s make some tortillas together!

Why Make Homemade Flour Tortillas?

Convenience: Get perfectly soft and fluffy tortillas in under an hour—ideal for busy schedules!
No Preservatives: Enjoy a healthier option that you can customize without worrying about hidden ingredients.
Versatile Base: Use these tortillas in a variety of dishes, whether it’s tacos, burritos, or as a side to your favorite meal.
Unmatched Freshness: Experience the mouthwatering aroma of homemade tortillas that elevate any dish.
Satisfaction: Crafting tortillas from scratch is rewarding! You’ll feel great serving something made with love. Check out my Butter Brioche Rolls for another delicious homemade treat!

Homemade Flour Tortilla Ingredients

For the Dough
All-Purpose Flour – The main structure ingredient; for a denser texture, substitute with whole wheat flour and adjust liquid as needed.
Baking Powder – Essential for leavening, helping to create a light and fluffy texture in your tortillas.
Salt – Enhances flavor; can be omitted for a milder taste but isn’t recommended.
Olive Oil – Adds tenderness; feel free to substitute with vegetable oil or melted butter.
Warm Water – Crucial for hydrating the dough and activating the gluten for that soft, pliable finish in your homemade flour tortillas.

Step‑by‑Step Instructions for Homemade Flour Tortillas

Step 1: Mix Dry Ingredients
In a large mixing bowl, combine 2 cups of all-purpose flour, 1 teaspoon of baking powder, and 1/2 teaspoon of salt. Use a whisk to blend these dry ingredients thoroughly, ensuring that there are no clumps. This is the foundation for your homemade flour tortillas, so it’s essential to mix well before adding any wet ingredients.

Step 2: Add Wet Ingredients
Next, create a well in the center of the dry mixture and pour in 1 tablespoon of olive oil and approximately 3/4 cup of warm water. With your hands or a sturdy wooden spoon, mix until the ingredients start to come together into a rough dough. You should see the dough forming, but it might still be slightly sticky at this stage.

Step 3: Knead the Dough
Transfer the dough onto a lightly floured surface and knead it for about 5 minutes. Press, fold, and stretch the dough until it becomes smooth and elastic. This step is crucial for developing the gluten, which gives your homemade flour tortillas their soft and fluffy texture. When done, the dough should feel pliable and slightly tacky but not sticky.

Step 4: Divide & Rest the Dough
Divide the kneaded dough into 8 or 10 equal pieces, depending on your desired tortilla size. Roll each piece into a ball and place them on a floured surface. Cover the balls with a clean kitchen towel or plastic wrap and let them rest for 30 minutes to 2 hours. This resting period allows the gluten to relax, making the dough easier to roll out.

Step 5: Roll the Tortillas
After resting, take one dough ball and flatten it slightly with your palm. On a floured surface, use a rolling pin to roll it out into a circle, aiming for 8-10 inches for larger tortillas or 6-8 inches for smaller ones. Aim for an even thickness to ensure uniform cooking. You can sprinkle flour as needed to prevent sticking.

Step 6: Cook the Tortillas
Preheat a skillet over medium-high heat until hot, around 400°F (200°C). Cook each rolled tortilla for 30-45 seconds until bubbles form on the surface. Flip it over and continue cooking for another 30-45 seconds until you see light brown spots. The tortillas should look slightly puffed and golden to indicate they are perfectly done.

Step 7: Store & Enjoy
Once cooked, transfer the tortillas to a tortilla warmer or wrap them in a clean kitchen towel to keep warm until serving. Enjoy your homemade flour tortillas right away or store them for later use. Keeping them warm helps maintain their soft and pliable nature, perfect for wrapping your favorite fillings!

Make Ahead Options

These Homemade Flour Tortillas are a fantastic choice for meal prep, saving you precious time on busy weeknights! You can easily prepare the dough up to 24 hours in advance. Simply mix and knead the dough, then cover it tightly with plastic wrap and refrigerate. When you’re ready to serve, let the dough sit at room temperature for about 30 minutes to soften, making it easier to roll out. If you’d like to cook them ahead, feel free to wrap cooked tortillas in foil and keep them warm, or store in an airtight container in the fridge for up to 3 days. Just reheat them in a skillet before using to keep them soft and delicious! This way, you’ll have fresh homemade flour tortillas ready at a moment’s notice, perfect for all your meal creations!

Expert Tips for Homemade Flour Tortillas

  • Knead Well: Ensure thorough kneading to develop gluten for that coveted softness and elasticity in your homemade flour tortillas.

  • Let It Rest: Don’t skip the resting period; it allows the gluten to relax, making the dough easier to roll out and resulting in fluffier tortillas.

  • Preheat Your Skillet: A properly preheated skillet is key to even cooking. Skipping this step could lead to uneven browning and chewier tortillas.

  • Cook in Batches: Avoid overcrowding the skillet; cooking one or two tortillas at a time allows for even heat distribution and puffing.

  • Use Warm Water: Always incorporate warm water when mixing ingredients. This step activates gluten, ensuring your tortillas come out soft and pliable.

How to Store and Freeze Homemade Flour Tortillas

Refrigerator: Store cooked tortillas in an airtight container or zip-top bag for 5-7 days to maintain freshness; ensure they are completely cooled before sealing.

Freezer: Layer tortillas with parchment paper and place them in a freezer-safe bag for up to 3 months; this prevents them from sticking together and keeps them deliciously soft.

Reheating: To reheat, use an oven, microwave, or stovetop. Warm in a skillet for 30 seconds on each side without losing that delightful softness associated with homemade flour tortillas.

Homemade Flour Tortillas Variations

Feel free to explore the world of flavors and textures with these creative twists on your homemade flour tortillas!

  • Whole Wheat: Substitute all-purpose flour with whole wheat for a nutritious, denser version. These tortillas bring a heartier flavor that’s perfect for wraps.

  • Herb-Infused: Add fresh herbs like cilantro or dried herbs such as oregano into the dough for a fragrant twist. Your tortillas will be bursting with flavor!

  • Spicy Zest: Mix in chili powder or cayenne pepper for a kick. Spicy tortillas can elevate any taco night into a fiesta.

  • Garlic Flavor: Incorporate garlic powder into your dough for a savory touch. The aroma alone will have everyone wanting more!

  • Oil Alternatives: Swap olive oil for melted coconut oil or ghee for a rich flavor. Coconut oil adds a subtle sweetness that pairs beautifully with tropical fillings.

  • Cheesy Surprise: Mix in shredded cheese for cheesy tortillas that are perfect for quesadillas. The gooey texture will have your family asking for seconds!

  • Fancy with Flax: Add ground flaxseed for a nutty flavor and added nutrition. Flaxseed is a great source of healthy fats, making your tortillas a wholesome option.

  • Sweetened: For a unique dessert twist, incorporate a touch of sugar or cinnamon into the dough. These can be served with honey or fruit for a delightful treat!

Try experimenting with these variations to make your homemade tortillas even more special. And if you’re in the mood for another delightful homemade treat, my Butter Brioche Rolls are a must-try!

What to Serve with Homemade Flour Tortillas

Nothing elevates a meal quite like the addition of freshly made tortillas, each bite bursting with flavor and warmth.

  • Savory Beef Tacos: Juicy, seasoned beef nestled inside warm tortillas creates a classic comfort food experience that’s hard to resist.
  • Refreshing Guacamole: The creamy texture and zesty flavors of guacamole perfectly contrast the soft tortillas, adding a refreshing element to the meal.
  • Spicy Salsa Verde: Bright and tangy, salsa verde offers a delightful kick that enhances the flavors of your homemade tortillas beautifully.
  • Grilled Vegetables: Charred bell peppers, zucchini, and onions contribute texture and depth, providing a delicious veggie-packed option to stuff inside your tortillas.
  • Black Bean Salad: This hearty mix of black beans, corn, and cilantro complements the softness of the tortillas while adding a refreshing crunch.
  • Crispy Chicken Fajitas: Marinated and grilled chicken served atop warm tortillas creates a joyful amalgamation of flavors, perfect for any gathering.
  • Chilled Cucumber Limeade: A refreshing drink that balances the rich flavors of filled tortillas, making every bite a delightful experience.
  • Chocolate Flan: End your meal on a sweet note with this silky dessert; its rich creaminess pairs beautifully with the simple, warm flavor of tortillas.
  • Corn on the Cob: Grilled or boiled corn adds a delightful sweetness, creating a vibrant addition to your homemade tortilla spread.
  • Vibrant Fruit Salsa: A fresh burst of fruits like mango and pineapple enhances the meal’s freshness, making it feel light and colorful.

Homemade Flour Tortillas Recipe FAQs

How do I select the best flour for my tortillas?
Absolutely! For the best results, I recommend using all-purpose flour for a light and fluffy texture. However, if you prefer a denser tortilla, whole wheat flour can be a fantastic substitute. Just remember to adjust the liquid slightly, as whole wheat tends to absorb more moisture.

What’s the best way to store homemade flour tortillas?
To keep your tortillas fresh, store them in an airtight container or zip-top bag in the refrigerator. They’ll stay good for about 5-7 days. Just make sure they are completely cooled before sealing to avoid any unwanted moisture.

Can I freeze homemade flour tortillas?
Yes, you can absolutely freeze your tortillas! To do this, layer them with parchment paper to prevent sticking, and place them in a freezer-safe bag. This way, they can last up to 3 months. When you’re ready to use them, simply thaw in the refrigerator overnight or heat them directly from the freezer.

I’m having trouble rolling my tortillas evenly. Any tips?
Very! If you notice that your tortillas aren’t rolling out evenly, there are a few things you can do. First, ensure you let your dough rest long enough—at least 30 minutes up to 2 hours—to relax the gluten. Second, sprinkle a little flour on your rolling surface and the dough to prevent sticking. Lastly, don’t rush it; take your time to roll them evenly, and try to maintain a consistent thickness.

Are these flour tortillas safe for people with allergies?
Excellent question! Since this recipe includes flour, olive oil, and salt, it’s important to consider allergen sensitivities. For those with gluten allergies, substituting with a gluten-free all-purpose flour blend is a great option. Always double-check the ingredient labels if you’re cooking for someone with food allergies to ensure safety.

How do I reheat leftover tortillas while keeping them soft?
To reheat, I recommend placing the tortillas in a dry skillet over medium heat for about 30 seconds on each side. This method revives their softness without making them chewy. Alternatively, you can microwave them under a damp paper towel for about 15-20 seconds. This keeps them moist and pliable—just how homemade flour tortillas should be!

Homemade Flour Tortillas

Homemade Flour Tortillas That Are Soft, Fluffy, and Easy

Homemade Flour Tortillas are soft, fluffy, and easy to make, elevating any meal with fresh flavors.
Prep Time 15 minutes
Cook Time 15 minutes
Resting Time 30 minutes
Total Time 1 hour
Servings: 8 tortillas
Course: Lunch
Cuisine: Mexican
Calories: 140

Ingredients
  

For the Dough
  • 2 cups all-purpose flour can substitute with whole wheat flour
  • 1 teaspoon baking powder essential for leavening
  • 1/2 teaspoon salt recommended for flavor
  • 1 tablespoon olive oil can substitute with vegetable oil or melted butter
  • 3/4 cup warm water crucial for hydrating the dough

Equipment

  • Mixing Bowl
  • Rolling Pin
  • Skillet

Method
 

Step-by-Step Instructions
  1. In a large mixing bowl, combine 2 cups of all-purpose flour, 1 teaspoon of baking powder, and 1/2 teaspoon of salt.
  2. Create a well in the center and pour in 1 tablespoon of olive oil and approximately 3/4 cup of warm water. Mix until a rough dough forms.
  3. Transfer the dough onto a lightly floured surface and knead for about 5 minutes until smooth and elastic.
  4. Divide the dough into 8-10 equal pieces, roll into balls, cover, and let rest for 30 minutes to 2 hours.
  5. Roll each dough ball into a circle, 8-10 inches for larger tortillas or 6-8 inches for smaller.
  6. Preheat a skillet over medium-high heat. Cook each tortilla for 30-45 seconds until bubbles form, then flip and cook until light brown spots appear.
  7. Transfer cooked tortillas to a warmer or wrap in a kitchen towel and serve immediately.

Nutrition

Serving: 1tortillaCalories: 140kcalCarbohydrates: 25gProtein: 4gFat: 3gSaturated Fat: 0.5gPolyunsaturated Fat: 0.5gMonounsaturated Fat: 2gSodium: 180mgPotassium: 60mgFiber: 1gIron: 1mg

Notes

Ensure thorough kneading and resting for softer tortillas. Always use warm water for the best texture.

Tried this recipe?

Let us know how it was!

Savory Onion Boil: A Simple Yet Delicious Vegan Delight

Scrolling through my feed, I stumbled upon a vibrant, steaming plate of an Onion Boil that had not only gone viral but utterly captivated the community. Let me tell you, this easy Vegan Onion Boil with Cajun Seasoning quickly became a staple in my kitchen! Not only does this dish shine with simplicity in preparation, but it also brings a unique flavor that elevates the humble onion to a whole new level. Whether you’re savoring it as a side or making it the star of your meal, this recipe is both a crowd-pleaser and a comforting hug on a plate. Plus, it’s a gluten-free and refined-sugar-free delight that anyone can enjoy. Curious to discover how to create this delightful dish that’s perfect for any occasion? Let’s dive in!

Why Should You Try This Onion Boil?

Simplicity at Its Best: This recipe is incredibly easy to make, requiring minimal prep and only a few ingredients.

Rich, Flavorful Surprise: The combination of Cajun seasoning and roasted onion brings a delightful burst of flavor that will wow your taste buds.

Versatile Meal Option: Enjoy it as a cozy side dish, or add grains for a hearty main course. It’s adaptable to fit your cravings!

Healthy, Guilt-Free Dish: With no gluten, nuts, or refined sugars, this Vegan Onion Boil is wholesome and satisfying for everyone.

Crowd-Pleasing Appeal: Perfect for gatherings, this dish transforms an ordinary onion into a stunning centerpiece that will impress friends and family alike.

Consider trying variations like adding fresh herbs or blending in your choice of spices as you explore this delightful dish, similar to our Cheesy French Onion experience!

Onion Boil Ingredients

Dive into the irresistible flavors of this Onion Boil with these essential ingredients!

For the Onion Boil

  • Onion – The star of the show, providing a sweet, savory depth when roasted; shallots make for a milder substitute.
  • Butter – Adds a rich creaminess; opt for vegan butter to keep it dairy-free.
  • Olive Oil – Keeps it moist and flavorful; feel free to swap with coconut oil for a different twist.
  • Salt – Essential for enhancing every bite; adjust according to your taste preferences.
  • Cajun Seasoning – Delivers a spicy kick that elevates this dish; try using Italian seasoning for a milder version.
  • Optional Fresh Herbs – Thyme or rosemary can be added for a fragrant touch to brighten the overall flavor.

Each ingredient plays a key role in creating the unforgettable taste of this Onion Boil, perfect for any occasion!

Step‑by‑Step Instructions for Onion Boil

Step 1: Preheat the Oven
Start by preheating your oven to 375°F (190°C). This is the perfect temperature to roast your Onion Boil, allowing the flavors to meld beautifully. While the oven warms up, gather your ingredients and equipment, including a baking dish and aluminum foil, to prepare for the delightful cooking process ahead.

Step 2: Prepare the Onion
Take your main ingredient, the onion, and carefully scoop out a small well at the top using a knife or spoon. This little reservoir is essential for holding the buttery goodness and seasonings. Ensure to peel off the outer skin first to reveal the fresh inner layers, which will soon be transformed into a savory treat.

Step 3: Assemble the Ingredients
Place the prepared onion on a sheet of aluminum foil. Generously fill the well with butter, and drizzle olive oil over the onion, ensuring it’s well-coated. Sprinkle Cajun seasoning for that spicy kick, and don’t hesitate to add extra fresh herbs if desired. This combination will enhance the flavors of your Onion Boil, making it irresistible.

Step 4: Wrap the Onion
Carefully gather the edges of the aluminum foil around the onion and seal it tightly. This creates a little steam pocket, allowing the onion to cook evenly and retain moisture. Place the wrapped onion in a baking dish to catch any drips as it roasts, ensuring easy cleanup while letting the magic happen.

Step 5: Roast in the Oven
Slide the baking dish into the preheated oven and let the onion roast for about 1 hour. During this time, the onion will become fork-tender and beautifully caramelized. Keep an eye on it; the aroma will fill your kitchen, signaling that your Onion Boil is nearing completion!

Step 6: Broil for Extra Flavor
For an extra layer of deliciousness, carefully unwrap the onion after the roasting time. Drizzle a bit more butter on top and set the oven to broil. Broil the onion for about 5-10 minutes, watching closely until it turns golden brown and offers a beautifully crispy texture that enhances the overall experience of your Onion Boil.

Step 7: Serve and Enjoy
Once perfectly roasted and broiled, remove the Onion Boil from the oven and let it cool slightly. To serve, pour the juices from the foil over the onion, enhancing its flavor even further. This warm, comforting dish is now ready to delight your taste buds, serving as the centerpiece of your meal or a beautiful side to enjoy.

How to Store and Freeze Onion Boil

  • Fridge: Store leftovers in an airtight container in the refrigerator for up to 3 days. Make sure to let it cool completely before sealing to maintain freshness.

  • Freezer: You can freeze cooked Onion Boil for up to 2 months. Wrap individual portions tightly in plastic wrap and place them in a freezer-safe bag. Thaw in the fridge before reheating.

  • Reheating: For best results, reheat in the oven at 350°F (175°C) until warmed through. Alternatively, you can microwave in short intervals, checking often to prevent drying out.

  • Texture tip: Broiling the onion for a few minutes post-reheating can restore some of the caramelization and enhance the overall flavor experience!

Onion Boil Variations & Substitutions

Customize your Onion Boil to match your mood and ingredients—let your creativity shine!

  • Dairy-Free: Use vegan butter instead of regular butter for a rich, creamy taste without the dairy.

  • Different Onions: Experiment with shallots, sweet onions, or even red onions for unique flavor profiles; each brings its own sweetness and character.

  • Spice It Up: Add smoked paprika or a touch of cayenne pepper to the Cajun seasoning for extra heat; balance with a dollop of vegan sour cream if desired.

  • Herb Infusion: Stir in fresh herbs like thyme or rosemary into the cavity of the onion; this adds a vibrant aroma and a layer of freshness to your dish.

  • Grain-Packed: Incorporate cooked quinoa or rice into the hollowed onion before roasting for a heartier meal; it transforms this side dish into a main event.

  • Zesty Twist: Squeeze fresh lemon juice over your onion before serving for a zesty finish that cuts through the sweetness, just like in our popular Cheesy French Onion dish.

  • Flavorful Broth: Instead of olive oil, use vegetable broth to add moisture; this keeps your Onion Boil light and enhances the overall flavor without extra calories.

  • Mild Spice: If Cajun isn’t your thing, replace it with Italian seasoning for a milder flavor profile that lets the onion shine through beautifully.

Feel free to mix and match these variations to create the perfect Onion Boil that’s just right for you and your loved ones!

What to Serve with Easy Vegan Onion Boil?

As you savor the rich flavors of your onion boil, consider complementing it with these delightful pairings that make for a fulfilling meal.

  • Creamy Mashed Potatoes: The buttery smooth texture of mashed potatoes beautifully balances the savory notes of the onion, creating a comforting harmony on your plate.

  • Roasted Vegetables: A medley of colorful roasted veggies adds a fresh crunch and vibrant flavors that perfectly contrast with the tender onion.

  • Cilantro Lime Rice: The zesty brightness of cilantro lime rice complements the Cajun seasoning, enhancing the overall flavor profile of your dish.

  • Herb-Infused Quinoa: This nutty grain serves as the perfect base, soaking up the onion’s juices while adding a protein-packed element to your meal.

  • Garlic Bread: The crispy, buttery goodness of garlic bread is a fantastic way to scoop up the onion’s delicious juices, making every bite even more enjoyable.

  • Crisp Green Salad: A light, refreshing salad dressed with a tangy vinaigrette cuts through the richness of the onion, adding a bright, healthful contrast.

  • Chilled Sparkling Water: Enhance your dining experience with bubbly sparkling water infused with lemon or lime to cleanse your palate between bites.

  • Silky Coconut Curry Soup: For a daring twist, serve alongside a creamy coconut curry soup. The combination of flavors is both unique and delightful.

These thoughtful pairings will elevate your meal to a new level, turning your Easy Vegan Onion Boil into a treasured feast that everyone will love!

Make Ahead Options

These Easy Vegan Onion Boils are fantastic for meal prep and can help you save time on busy weeknights! You can prep the onions by scooping out the wells and filling them with butter and seasonings up to 24 hours in advance. Just wrap them tightly in foil and refrigerate. When you’re ready to enjoy your Onion Boil, simply roast them in the oven as directed. To maintain their delicious quality, ensure they’re wrapped securely to trap moisture and flavor. For an extra touch, drizzle more butter and broil for those final 5-10 minutes for a perfect crispy finish. Experience the joy of a delightful dish with minimal effort!

Expert Tips for the Best Onion Boil

  • Check doneness: Keep an eye on the onion around the 1-hour mark. If it’s not fork-tender, reseal and cook in 10-minute increments to ensure perfect texture.

  • Watch the broil: When broiling, stay close! This step can enhance caramelization but can lead to burning if left unattended.

  • Creative leftovers: Don’t discard the cooked layers—use them for stuffed onion creations, turning leftover goodness into a delicious new dish.

  • Seasoning variation: Experiment with different seasoning blends, like smoked paprika or garlic powder, to give your Onion Boil a unique twist every time you make it.

  • Choose your onion wisely: Sweet onions work beautifully for a milder flavor, while red or yellow onions can add their own distinctive tastes for a fun mix.

  • Serving suggestions: Serve your Onion Boil over a bed of seasoned rice or alongside roasted veggies for a complete, satisfying meal that everyone will love.

Onion Boil Recipe FAQs

What kind of onions are best for the Onion Boil?
I recommend using sweet onions like Vidalia or Walla Walla for a milder, more pleasant flavor. However, yellow or red onions can add a slightly more robust taste. If you prefer a gentler flavor, shallots can also be a delightful substitute.

How do I store leftovers from the Onion Boil?
Once completely cooled, store your Onion Boil leftovers in an airtight container in the refrigerator for up to 3 days. Make sure to cool it completely to maintain its texture and flavor. If you’re enjoying your dish over a few days, consider portioning them out to keep them fresh!

Can I freeze the Onion Boil?
Absolutely! You can freeze your cooked Onion Boil for up to 2 months. Here’s how: Wrap individual portions tightly in plastic wrap, then place them in a freezer-safe bag or container to prevent freezer burn. When you’re ready to enjoy it again, simply thaw it in the fridge overnight before reheating.

What should I do if my onion isn’t tender after roasting?
No worries! After the initial hour of roasting, if your onion isn’t fork-tender, simply reseal it in the foil and return it to the oven. Check every 10 minutes until it reaches the perfect softness. The key is to ensure it cooks evenly, so don’t hesitate to be patient with it!

Can my pets eat the Onion Boil?
Onions are generally toxic to pets, especially dogs and cats, as they can damage red blood cells and lead to health issues. It’s best to keep any onion leftovers out of reach from your furry friends to ensure their safety.

Can this Onion Boil be made ahead of time?
Yes, you can prepare the Onion Boil up to the wrapping step and store it in the fridge for a day or two before cooking. Just make sure to wrap it tightly in foil and store it in a container to keep it fresh. When ready to enjoy, just pop it in the oven, and you’ll have an easy meal ready to go!

Onion Boil

Savory Onion Boil: A Simple Yet Delicious Vegan Delight

Discover the savory Onion Boil, a simple vegan dish packed with flavor and charm, perfect for any occasion.
Prep Time 15 minutes
Cook Time 1 hour
Broiling Time 10 minutes
Total Time 1 hour 25 minutes
Servings: 4 servings
Course: Dinner
Cuisine: Vegan
Calories: 150

Ingredients
  

For the Onion Boil
  • 1 large Onion Shallots make for a milder substitute.
  • 2 tablespoons Butter Use vegan butter for a dairy-free version.
  • 2 tablespoons Olive Oil Coconut oil can be used as a substitute.
  • 1 teaspoon Salt Adjust according to taste.
  • 1 tablespoon Cajun Seasoning Italian seasoning can be a milder option.
  • To taste Optional Fresh Herbs Thyme or rosemary recommended.

Equipment

  • Oven
  • Baking dish
  • Aluminum Foil
  • knife
  • Spoon

Method
 

Step-by-Step Instructions for Onion Boil
  1. Preheat your oven to 375°F (190°C). Gather ingredients and equipment.
  2. Scoop out a little well at the top of the onion after peeling.
  3. Place the onion on aluminum foil, fill with butter, drizzle olive oil, and sprinkle Cajun seasoning and herbs.
  4. Wrap the onion tightly in aluminum foil and place in a baking dish.
  5. Roast in the oven for about 1 hour until fork-tender and caramelized.
  6. Unwrap the onion, drizzle more butter, and broil for 5-10 minutes until golden brown.
  7. Let it cool slightly, serve, and enjoy the juices poured over.

Nutrition

Serving: 1portionCalories: 150kcalCarbohydrates: 24gProtein: 2gFat: 7gSaturated Fat: 1gPolyunsaturated Fat: 2gMonounsaturated Fat: 4gSodium: 300mgPotassium: 200mgFiber: 3gSugar: 1gVitamin A: 10IUVitamin C: 20mgCalcium: 2mgIron: 4mg

Notes

For best results, check doneness and adjust cooking times as necessary. Consider experimenting with different seasonings and serving suggestions.

Tried this recipe?

Let us know how it was!

Savory Georgian Eggplant Rolls That Wow at Every Gathering

As I dove into the vibrant culinary landscape of Georgian cuisine, I stumbled upon a delightful gem: Savory Georgian Eggplant Rolls with Walnuts. This dish marries the smoky richness of roasted eggplants with the satisfying crunch of walnuts, creating a flavor experience that’s hard to resist. Not only do these rolls serve as an eye-catching appetizer, but they also bring a unique vegetarian option to your table, perfect for gatherings or cozy family dinners. With minimal prep and a colorful presentation enhanced by pomegranate seeds, these rolls are destined to steal the spotlight. Are you ready to add a touch of Georgian charm to your next meal?

Why You’ll Love These Eggplant Rolls

Simplicity at Its Best: This recipe is not only quick to prepare, but it also requires minimal cooking skills, making it accessible for everyone.

Rich, Nutty Flavor: The combination of roasted eggplants and walnuts creates a rich depth that will wow your taste buds.

Eye-Catching Presentation: The vibrant colors of the dish, complemented by pomegranate seeds, make it a stunning centerpiece that impresses at any gathering.

Versatile Appetizer: Perfect alongside fresh vegetable platters or crispy pita chips, these rolls shine during festivities yet are simple enough for your weeknight dinners.

Healthy Indulgence: With healthy fats and fiber, each bite not only tastes good but is also guilt-free! If you’re looking for balanced dishes, try pairing these rolls with something like Savory Ground Turkey for a satisfying meal.

Crowd-Pleasing Delight: Bring these to your next gathering, and watch guests rave about them—it’s a vegetarian option that even meat lovers will enjoy!

Savory Georgian Eggplant Rolls Ingredients

For the Eggplant Rolls

  • Eggplants – Essential for providing a smoky depth of flavor when roasted; opt for firm varieties.
  • Salt – Enhances the natural sweetness of eggplants; use sparingly to avoid over-salting.
  • Black Pepper – Adds a hint of heat and complexity; freshly cracked pepper yields the best flavor.
  • Cooking Spray – Ensures the eggplants don’t stick to the baking tray for easier cleanup.

For the Walnut Dip

  • Walnuts (150 grams) – Offers a hearty crunch; substitute with sunflower seeds for a nut-free version.
  • Very Hot Water (100 ml) – Assists in creating a smooth and creamy texture for the dip.
  • Garlic (2 cloves, minced) – Infuses aromatic goodness that complements the flavors beautifully.
  • Khmeli Suneli (1 teaspoon) – This traditional Georgian spice mix introduces unique warmth and fragrance.
  • Ground Coriander (½ teaspoon) – Provides subtle earthy notes to enhance the dip’s richness.
  • White Wine Vinegar (2 teaspoons) – Perfect for balancing flavors with a slight tang.

For the Garnish

  • Pomegranate Seeds (3 tablespoons) – Not only adds visual appeal but also a juicy burst of sweet flavor to finish off the presentation.

These Savory Georgian Eggplant Rolls are sure to become a cherished addition to your recipe repertoire!

Step‑by‑Step Instructions for Savory Georgian Eggplant Rolls

Step 1: Preheat the Oven
Start by preheating your oven to 400°F (200°C). While the oven is heating up, prepare a baking tray by lightly spraying it with cooking spray to prevent sticking. This will ensure that your eggplants roast properly and come off the tray easily once baked.

Step 2: Prepare the Eggplants
Next, slice the eggplants into strips, aiming for about ¼ inch thick. Season the slices generously with salt and freshly cracked black pepper, ensuring even coverage. Once seasoned, lay the eggplant strips flat on the prepared baking tray. This step is key to getting those desirable roasted flavors in your Savory Georgian Eggplant Rolls.

Step 3: Bake the Eggplants
Place the baking tray in the preheated oven and roast the eggplants for 25-30 minutes. You’ll want to flip them halfway through to achieve an even caramelization. Watch for the eggplant to turn golden brown and become tender, developing that smoky flavor that makes these rolls so delicious.

Step 4: Combine Ingredients
Once your eggplants are perfectly roasted, transfer them to a food processor. Add the walnuts, very hot water, minced garlic, khmeli suneli, ground coriander, and white wine vinegar. Blend everything together until you achieve a smooth and creamy consistency. This mixture will serve as the rich filling for your Savory Georgian Eggplant Rolls.

Step 5: Adjust Seasoning
After blending, taste the mixture to see if it needs any extra seasoning. Add salt and pepper as needed, mixing thoroughly to incorporate. It’s crucial to get the flavors just right, so take your time to ensure the dip enhances the overall profile of your eggplant rolls.

Step 6: Serve and Garnish
Finally, transfer your creamy walnut dip to a serving bowl. For an appealing presentation, top it off with pomegranate seeds, which will add a pop of color and a sweet burst of flavor. Pair your beautiful Savory Georgian Eggplant Rolls with crispy pita chips or fresh veggies for a delightful appetizer experience.

What to Serve with Savory Georgian Eggplant Rolls

Elevate your dining experience by exploring delightful accompaniments that enhance the flavors of these colorful rolls.

  • Crispy Pita Chips: These provide a satisfying crunch that contrasts beautifully with the creamy walnut dip, making every bite a pleasure.

  • Fresh Vegetable Platter: Serve alongside crisp cucumbers, bell peppers, and carrots for a refreshing complement to the rich, smoky rolls. Dipping crunchy veggies adds layers of texture.

  • Tzatziki Sauce: This yogurt-based dip adds a cooling effect, balancing the spices in the rolls and further enhancing the overall flavor profile.

  • Homemade Flatbreads: Soft and warm, they can scoop up the delicious dip, bringing an authentic feel to your meal while being perfect for sharing.

  • Light Green Salad: A salad with arugula, cherry tomatoes, and citrus vinaigrette brightens the palate and adds a fresh twist to your spread, perfectly balancing the savory elements.

  • Fruity Dessert: Conclude your meal with a light dessert like poached pears, offering a refreshing, sweet finish to contrast with the savory goodness of the rolls.

  • Herbal Tea or Light Wine: Pair with a delicate herbal tea or a glass of white wine to refresh the palate and amplify the flavors throughout your meal.

Enjoy crafting the ideal dining experience by combining these complementary options with your Savory Georgian Eggplant Rolls!

Make Ahead Options

These Savory Georgian Eggplant Rolls with Walnuts are perfect for busy home cooks looking to save time without sacrificing flavor! You can roast the eggplant slices and prepare the walnut dip up to 3 days in advance. Simply roast the eggplant, let it cool, and store it in an airtight container in the refrigerator. The walnut dip can also be made ahead and stored separately; just be sure to give it a good stir after refrigerating, as it may thicken. When you’re ready to serve, assemble the rolls and garnish with pomegranate seeds. This approach allows for a delightful dish that’s just as delicious, all while making your meal prep a breeze!

Storage Tips for Savory Georgian Eggplant Rolls

  • Room Temperature: These rolls can stay fresh for up to 2 hours when served at room temperature, making them perfect for parties or gatherings.
  • Fridge: Store any leftover Savory Georgian Eggplant Rolls in an airtight container for up to 3 days. If the dip thickens, stir in a bit of warm water before serving again.
  • Freezer: For longer storage, these rolls can be placed in the freezer for up to 2 months. Thaw overnight in the fridge and gently reheat without boiling to maintain their creamy texture.

Expert Tips for Savory Georgian Eggplant Rolls

  • Choose the Right Eggplants: Look for firm, glossy-skinned varieties to ensure a rich flavor and optimal texture in your rolls. Wilted or blemished eggplants may yield a watery product.

  • Don’t Rush the Roasting: Allow your eggplants to roast until they’re golden brown and tender. This develops the smoky flavor crucial for tasty Savory Georgian Eggplant Rolls.

  • Taste as You Go: As you blend the dip, taste it frequently to avoid over-salting. Remember, flavors can intensify after chilling in the fridge.

  • Adjust for Creaminess: If you desire a smoother consistency, blend longer and add the very hot water gradually until you reach the perfect creaminess for your dip.

  • Assemble with Love: When serving, layer your rolls gently and enhance with plenty of pomegranate seeds, which provide a delightful visual appeal alongside their juicy burst.

Variations & Substitutions for Savory Georgian Eggplant Rolls

Feel free to let your creativity flourish as you customize these eggplant rolls with delightful twists that elevate their flavor!

  • Spicy Kick: Add harissa or chili flakes for a delightful heat that will awaken your taste buds.

  • Nut-Free: Replace walnuts with roasted sunflower or pumpkin seeds to create a nut-free yet satisfying dip.

  • Herby Delight: Stir in fresh herbs like parsley or cilantro after blending for a refreshing burst of flavor.

  • Creamy Addition: Blend in a scoop of Greek yogurt for tanginess and to enhance the creaminess of the dip.

  • Tangy Twist: Swap white wine vinegar with fresh lemon juice; its acidity brings a lively zest to this dish.

  • Sweet Surprise: Add a tablespoon of honey or maple syrup for a beautiful contrast to the savory flavors.

  • Cheesy Indulgence: Fold in crumbled feta or dairy-free cheese for a richer, creamier texture that complements the eggplants perfectly.

Feel like mixing things up even more? Try serving these rolls with some delicious Butter Brioche Rolls or consider making a side of Savory Turkey Patties for a complete meal that’s bound to impress!

Savory Georgian Eggplant Rolls with Walnuts Recipe FAQs

What type of eggplants should I use for this recipe?
Absolutely! Look for firm, glossy-skinned eggplants as they provide the best flavor and texture. Avoid any that are wilted or have dark spots, as these can lead to a watery result in your Savory Georgian Eggplant Rolls.

How should I store leftover eggplant rolls?
After enjoying your delicious rolls, store any leftovers in an airtight container in the fridge. They will stay fresh for up to 3 days. If the dip thickens, don’t hesitate to stir in warm water before serving to bring back that creamy consistency!

Can I freeze the Savory Georgia Eggplant Rolls?
Yes! You can freeze these rolls for up to 2 months. First, let them cool completely, then place them in a freezer-safe container. When you’re ready to enjoy them again, simply thaw overnight in the fridge and gently reheat them over low heat, avoiding boiling to preserve the texture.

What should I do if my eggplants are soggy after roasting?
To ensure your eggplants don’t turn soggy, be sure to slice them evenly and give them enough space on the baking tray. Roasting at the correct temperature (400°F/200°C) for the recommended time (25-30 minutes) should help them develop that lovely smokiness and avoid excess moisture. If they still seem soggy, consider roasting them for a bit longer until they reach that golden brown color.

Can I make this dish nut-free?
Very easily! If you’re looking for a nut-free variation, simply substitute the walnuts with roasted sunflower or pumpkin seeds. This will maintain the texture without compromising the taste, making them just as delightful for everyone at your table!

Are there any dietary considerations I should keep in mind?
Yes, keep in mind that while these rolls are vegetarian, they do contain walnuts, which may cause allergic reactions in some individuals. If you’re serving anyone with nut allergies, make sure to inform them about the ingredients or stick with the nut-free option using sunflower seeds instead. Enjoy safely!

Savory Georgian Eggplant Rolls

Savory Georgian Eggplant Rolls That Wow at Every Gathering

Enjoy Savory Georgian Eggplant Rolls as a stunning vegetarian appetizer that combines roasted eggplants and walnuts for a delightful flavor.
Prep Time 15 minutes
Cook Time 30 minutes
Total Time 45 minutes
Servings: 6 rolls
Course: Appetizer
Cuisine: Georgian
Calories: 150

Ingredients
  

For the Eggplant Rolls
  • 2 medium Eggplants Opt for firm varieties.
  • 1 teaspoon Salt Use sparingly.
  • 1 teaspoon Black Pepper Freshly cracked for best flavor.
  • 1 spray Cooking Spray To prevent sticking.
For the Walnut Dip
  • 150 grams Walnuts Substitute with sunflower seeds for a nut-free version.
  • 100 ml Very Hot Water For smoothing the dip.
  • 2 cloves Garlic Minced.
  • 1 teaspoon Khmeli Suneli A traditional Georgian spice mix.
  • 0.5 teaspoon Ground Coriander For earthy notes.
  • 2 teaspoons White Wine Vinegar To balance flavors.
For the Garnish
  • 3 tablespoons Pomegranate Seeds For visual appeal and flavor.

Equipment

  • Baking tray
  • Food processor

Method
 

Step-by-Step Instructions
  1. Preheat your oven to 400°F (200°C) and prepare a baking tray with cooking spray.
  2. Slice the eggplants into strips, about ¼ inch thick, and season with salt and black pepper.
  3. Roast the eggplants for 25-30 minutes, flipping halfway for even cooking.
  4. Transfer roasted eggplants to a food processor with walnuts, hot water, garlic, khmeli suneli, ground coriander, and vinegar. Blend until smooth.
  5. Taste and adjust seasoning with salt and pepper as needed.
  6. Serve the walnut dip in a bowl and garnish with pomegranate seeds. Enjoy with pita chips or fresh veggies.

Nutrition

Serving: 1rollCalories: 150kcalCarbohydrates: 12gProtein: 4gFat: 10gSaturated Fat: 1gPolyunsaturated Fat: 5gMonounsaturated Fat: 4gSodium: 200mgPotassium: 300mgFiber: 3gSugar: 2gVitamin A: 50IUVitamin C: 10mgCalcium: 30mgIron: 1mg

Notes

These rolls can be served at room temperature for up to 2 hours and can be stored in the fridge for up to 3 days.

Tried this recipe?

Let us know how it was!

Creamy Seafood Stuffed Shells for a Cozy Dinner Delight

As I pulled the creamy seafood stuffed shells from the oven, the aroma wafting through my kitchen felt like an embrace from a long-lost friend. These delectable pasta shells, brimming with a luxurious blend of lobster, crab, and shrimp, are the ultimate comfort food—perfect for cozy nights and gatherings alike. What I adore about this recipe is its versatility; you can swap in your favorite seafood or even jazz it up with fresh veggies to suit your taste. Plus, they are make-ahead friendly, allowing you to savor every moment with your guests rather than be glued to the stove. So, are you ready to indulge in a dish that’s as elegant as it is satisfying? Let’s dive into this culinary delight!

Why Will You Love These Shells?

Irresistible Comfort: These creamy seafood stuffed shells embody the essence of comfort food, with a rich filling that warms your soul.

Customizable Perfection: Feel free to mix and match seafood according to your preferences—lobster, crab, shrimp, or even scallops—you’re in control!

Make-Ahead Marvel: Prep in advance and refrigerate, allowing the flavors to meld beautifully for an effortless dinner party, much like our Buffalo Chicken Stuffed option.

Gourmet Experience at Home: You’ll impress your family or guests with a meal that tastes like it came from a five-star restaurant, yet it’s simple enough for any home cook.

Effortless Clean-Up: With easy cooking steps and minimal dishes, you can focus on enjoying this dish with loved ones rather than spending hours on clean-up. Enjoy these scrumptious shells and elevate your mealtime with this delicious recipe!

Creamy Seafood Stuffed Shells Ingredients

For the Filling

  • Jumbo Pasta Shells – Essential for holding the rich filling; ensure they are cooked al dente to prevent breakage while stuffing.
  • Lobster Meat – Adds a sweet, luxurious flavor; opt for fresh for the best results.
  • Crab Meat – Provides a succulent texture; fresh is preferred for optimal taste.
  • Shrimp – Enhances the overall seafood richness; can easily substitute with other seafood like scallops.
  • Cream Cheese – Contributes to a smooth, creamy texture; light cream cheese can be used for a healthier option.
  • Mozzarella Cheese – Ensures a melted, gooey filling; freshly shredded is best for ideal melting.

For the Sauce

  • Butter – Used for sautéing seafood and creating the sauce; add flavor and richness to the dish.
  • Flour – Thickens the sauce; for a gluten-free version, use gluten-free flour.
  • Heavy Cream – The main component of the sauce, creating a indulgent creamy texture; can be swapped with half-and-half if desired.
  • Parmesan Cheese – Adds depth to the sauce; a must-have for added flavor.
  • Garlic – Enhances the flavor profile; always mince for even distribution.
  • Salt and Pepper – Essential seasoning to elevate all the flavors.

Step‑by‑Step Instructions for Creamy Seafood Stuffed Shells

Step 1: Sauté the Seafood
In a large skillet, melt 2 tablespoons of butter over medium heat. Add minced garlic and sauté for about 1 minute until fragrant. Then, gently stir in the lobster and crab meat, cooking for 2-3 minutes until just opaque and heated through. This step infuses your seafood with garlic flavor while keeping it tender, making it perfect for the creamy seafood stuffed shells.

Step 2: Make the Filling
In a mixing bowl, combine the sautéed seafood with cream cheese, shredded mozzarella, salt, and pepper. Use a fork or mixer to blend everything until smooth and creamy, ensuring all the ingredients are well incorporated. This filling creates a luxurious texture that will encase your jumbo pasta shells in flavor, making your creamy seafood stuffed shells utterly irresistible.

Step 3: Prepare the Pasta Shells
Bring a large pot of salted water to a boil and carefully add your jumbo pasta shells. Cook them according to the package instructions until al dente, typically around 8-10 minutes. Once cooked, drain and rinse under cold water to stop the cooking process. Allow the shells to cool slightly, making them easier to handle as you prepare to stuff them.

Step 4: Create the Sauce
In the same skillet used for the seafood, melt the remaining 2 tablespoons of butter over medium heat. Sprinkle in the flour and whisk for 1 minute until a roux forms. Gradually pour in the heavy cream and add grated Parmesan cheese, whisking until the sauce is smooth and thickened, about 3-4 minutes. This creamy sauce will serve as both a filling and a luscious topping for your stuffed shells.

Step 5: Assemble the Dish
Preheat your oven to 375°F (190°C). Spread a layer of the creamy sauce on the bottom of a baking dish. Carefully stuff each pasta shell with the seafood filling and arrange them in the dish. Pour the remaining sauce over the stuffed shells, ensuring they are generously coated for optimal creaminess. The combination of pasta, seafood, and sauce will make your creamy seafood stuffed shells shine.

Step 6: Bake
Cover the baking dish with aluminum foil and place it in the preheated oven. Bake for 20 minutes to heat everything through. Afterward, remove the foil and bake for an additional 10 minutes, allowing the top to bubble and turn golden brown. This step ensures your creamy seafood stuffed shells are delightful and visually appealing with a golden, inviting appearance.

Step 7: Serve and Enjoy
Once baked, allow the creamy seafood stuffed shells to cool for a few minutes. Garnish with extra Parmesan cheese or fresh herbs, if desired. Serve warm and savor the comforting flavors of this dish. Each stuffed shell promises a delightful balance of seafood richness and creamy potential that will make it a new family favorite.

Expert Tips for Creamy Seafood Stuffed Shells

  • Gentle Handling: Handle pasta shells with care to prevent breakage. Cooking them al dente is key to easy stuffing and maintaining their shape.

  • Ample Sauce: Ensure you have enough creamy sauce to keep the shells moist. Left too dry, the stuffed shells can become tough and chewy.

  • Flavor Boost: A squeeze of lemon juice enhances the flavors beautifully. It cuts through the richness of the seafood filling and adds brightness to the dish.

  • Make Ahead: Don’t hesitate to assemble these creamy seafood stuffed shells a day in advance. Refrigerate before baking for more developed flavors and effortless entertaining.

  • Storage Tips: If you have leftovers, store them in an airtight container for up to 3 days, or freeze for up to 3 months. Just reheat gently to enjoy later!

Creamy Seafood Stuffed Shells Variations

Feel free to explore these delightful twists to make the recipe uniquely yours!

  • Dairy-Free: Use cashew cream or coconut cream instead of heavy cream and cream cheese for a delicious dairy-free version.
  • Seafood Swap: Substitute lobster or crab with scallops or even fish like salmon for a new seafood experience. The beauty of this dish lies in its versatility—get creative!
  • Vegetarian Twist: Omit seafood entirely and add sautéed vegetables like spinach, mushrooms, or artichokes in the filling for a vibrant vegetarian delight.
  • Spicy Kick: Add red pepper flakes or diced jalapeños to the filling or sauce for a hint of heat, giving these stuffed shells an exciting flavor boost.
  • Gluten-Free Option: Use gluten-free pasta shells and flour to make the sauce gluten-free so that everyone can enjoy this fabulous dish.
  • Herb Infusion: Incorporate fresh herbs like basil, dill, or parsley into the filling or sauce to introduce a refreshing flavor note that complements the seafood.
  • Extra Cheesy: Boost the cheesy goodness by adding more mozzarella and Parmesan in the filling as well as on top for a glorious cheesy crust.
  • Make-Ahead Magic: Assemble the shells a day in advance and refrigerate, allowing the flavors to meld beautifully, just like our scrumptious Italian Stuffed Flank.

Customizing your creamy seafood stuffed shells makes them an even more personal and heartfelt dish to share with those you love!

Make Ahead Options

These creamy seafood stuffed shells are a fantastic option for meal prep! You can assemble the entire dish up to 24 hours in advance, simply cover it tightly with foil and refrigerate. To maintain the delicious quality, make sure not to overcook the jumbo pasta shells when boiling, so they hold their shape during storing. When you’re ready to serve, bake the stuffed shells directly from the refrigerator, adding an extra 5 minutes to the baking time. This allows the flavors to meld beautifully, and your dish will still taste just as scrumptious, with creamy goodness waiting to be savored on busy weeknights!

What to Serve with Creamy Seafood Stuffed Shells

Elevate your dinner table experience by pairing these indulgent shells with a selection of delightful sides and drinks.

  • Garlic Bread: The warm, buttery crunch of garlic bread complements the creamy filling beautifully, providing a satisfying contrast in texture.
  • Fresh Green Salad: A light, crisp salad with mixed greens and a zesty vinaigrette balances the richness of the stuffed shells, refreshing the palate.
  • Steamed Asparagus: Tender asparagus drizzled with lemon and olive oil brings a bright, vibrant flavor to the meal while adding a pop of color.
  • Roasted Vegetables: A medley of roasted bell peppers, zucchini, and carrots adds warmth and earthiness, perfectly pairing with the seafood flavors.
  • Chilled Chardonnay: This white wine enhances the taste of the seafood, its crispness cutting through the richness of the cream sauce for a delightful sip.
  • Lemon Herb Quinoa: Nutty quinoa infused with lemon and herbs adds a wholesome touch to the meal, introducing a delightful chewiness alongside the shells.
  • Berry Sorbet: For dessert, a refreshing berry sorbet can cleanse the palate after this rich dish, making for a light and satisfying finish.
  • Sparkling Water with Mint: To keep things refreshing, serve up fizzy water with a hint of mint—a perfect non-alcoholic option that complements the meal beautifully.

How to Store and Freeze Creamy Seafood Stuffed Shells

Fridge: Store leftovers in an airtight container for up to 3 days. This helps maintain their creamy texture while keeping them safe to eat.

Freezer: For longer storage, freeze stuffed shells in a freezer-safe container for up to 3 months. Allow to cool completely before freezing to prevent ice crystals.

Reheating: To reheat, thaw in the fridge overnight, then bake at 350°F (175°C) until heated through, about 20-25 minutes. Cover with foil to keep moisture in during reheating.

Make-Ahead Tip: These creamy seafood stuffed shells can be assembled a day in advance and refrigerated before baking. This not only saves time but also allows the flavors to meld beautifully!

Creamy Seafood Stuffed Shells Recipe FAQs

What should I look for when selecting seafood?
Absolutely! When choosing seafood for your creamy seafood stuffed shells, freshness is key. Look for lobster, crab, or shrimp with a clean, briny smell, and avoid anything with dark spots or a strong fishy odor. Fresh seafood should have a firm texture and vibrant color, making it a delightful addition to your filling.

How should I store leftover stuffed shells?
Very! If you have leftovers, store them in an airtight container in the fridge for up to 3 days. To keep them fresh, ensure the container is sealed tightly. If you want to save them for longer, consider freezing them. They can last in the freezer for up to 3 months, just make sure they cool completely before transferring to a freezer-safe container.

Can I freeze my stuffed shells? If so, how?
Definitely! To freeze your creamy seafood stuffed shells, assemble them in a suitable baking dish, but do not bake them first. Cover the dish tightly with plastic wrap and aluminum foil to prevent freezer burn. When ready to eat, thaw in the refrigerator overnight, then bake as per the original instructions, adding a few extra minutes if necessary to ensure they are heated through.

What if my sauce is too thin?
No worries! If you find your sauce is too thin, add a bit more flour to thicken it up. Create a slurry by mixing 1-2 tablespoons of flour with a tablespoon of cold water in a separate bowl to prevent clumping, then slowly whisk it into your sauce while simmering. This will help achieve that desired creamy consistency that pairs perfectly with the seafood filling.

Are there any dietary considerations I should keep in mind?
Absolutely! When preparing your creamy seafood stuffed shells, consider any allergies or dietary restrictions. For gluten-free options, you can swap out regular flour for gluten-free flour. Also, be cautious if serving to pets, as ingredients like garlic and cheese can be harmful to them in large quantities. Always choose seafood that aligns with your dietary preferences, such as substituting with plant-based seafood alternatives if desired.

Creamy Seafood Stuffed Shells

Creamy Seafood Stuffed Shells for a Cozy Dinner Delight

Indulge in these creamy seafood stuffed shells filled with lobster, crab, and shrimp for the ultimate comfort food experience.
Prep Time 30 minutes
Cook Time 30 minutes
Baking Time 10 minutes
Total Time 1 hour 10 minutes
Servings: 4 servings
Course: Dinner
Cuisine: Italian
Calories: 600

Ingredients
  

For the Filling
  • 12 pieces Jumbo Pasta Shells Cooked al dente.
  • 1 cup Lobster Meat Fresh for best results.
  • 1 cup Crab Meat Fresh is preferred.
  • 1 cup Shrimp Can substitute with scallops.
  • 8 oz Cream Cheese Light cream cheese can be used.
  • 1 cup Mozzarella Cheese Freshly shredded is best.
For the Sauce
  • 4 tbsp Butter Divided.
  • 1/4 cup Flour Use gluten-free flour for gluten-free version.
  • 1 cup Heavy Cream Can swap with half-and-half.
  • 1/2 cup Parmesan Cheese Grated.
  • 2 cloves Garlic Minced.
  • 1 tsp Salt
  • 1 tsp Pepper

Equipment

  • large skillet
  • Mixing Bowl
  • Baking dish
  • pot

Method
 

Step-by-Step Instructions
  1. In a large skillet, melt 2 tablespoons of butter over medium heat. Add minced garlic and sauté for about 1 minute until fragrant.
  2. Gently stir in the lobster and crab meat, cooking for 2-3 minutes until just opaque and heated through.
  3. In a mixing bowl, combine the sautéed seafood with cream cheese, shredded mozzarella, salt, and pepper.
  4. Use a fork or mixer to blend everything until smooth and creamy.
  5. Bring a large pot of salted water to a boil and carefully add your jumbo pasta shells. Cook them until al dente, about 8-10 minutes.
  6. After cooking, drain and rinse under cold water to stop cooking, allowing shells to cool slightly.
  7. In the same skillet, melt the remaining 2 tablespoons of butter over medium heat. Sprinkle in the flour and whisk for 1 minute.
  8. Gradually pour in the heavy cream and add grated Parmesan cheese, whisking until the sauce is smooth and thickened, about 3-4 minutes.
  9. Preheat your oven to 375°F (190°C). Spread a layer of the creamy sauce on the bottom of a baking dish.
  10. Carefully stuff each pasta shell with the seafood filling and arrange them in the dish. Pour the remaining sauce over the stuffed shells.
  11. Cover the baking dish with aluminum foil and bake for 20 minutes. Remove the foil and bake for an additional 10 minutes.
  12. Once baked, allow the stuffed shells to cool for a few minutes. Garnish with extra Parmesan or fresh herbs, then serve warm.

Nutrition

Serving: 1servingCalories: 600kcalCarbohydrates: 50gProtein: 30gFat: 35gSaturated Fat: 20gPolyunsaturated Fat: 2gMonounsaturated Fat: 5gCholesterol: 150mgSodium: 800mgPotassium: 600mgFiber: 2gSugar: 4gVitamin A: 500IUVitamin C: 2mgCalcium: 300mgIron: 2mg

Notes

Handle pasta shells with care to prevent breakage. Ensure you have enough creamy sauce to keep the shells moist. A squeeze of lemon juice enhances flavors beautifully.

Tried this recipe?

Let us know how it was!

Savory Stuffed Pizza Rolls: Your Family’s New Favorite Snack

As the tantalizing aroma of freshly baked dough wafted through my kitchen, I had a lightbulb moment—stuffed pizza rolls! These delectable bites are a fantastic fusion of nostalgia and convenience, perfect for any gathering or a cozy family night. Imagine soft, seasoned dough wrapped around gooey melted cheese and your choice of delicious fillings like pepperoni or sausage—sort of like pizza, but with a fun twist! What I love most about these stuffed pizza rolls is how quick they are to prepare and how customizable they can be; whether you’re entertaining friends or treating your little ones, this family-friendly appetizer will satisfy everyone’s cravings. So, are you ready to roll into comfort food heaven with me? Let’s dive in!

Why Are Stuffed Pizza Rolls So Irresistible?

Flavorful Variety: These stuffed pizza rolls can be tailored to your taste—mix and match fillings like cheese, pepperoni, or veggies for a delightful surprise in every bite.

Quick Preparation: Made with frozen rolls, these appetizers come together in no time, making them perfect for unexpected guests or a simple family meal.

Crowd-Pleasing Appeal: Whether it’s game day or a cozy gathering, everyone loves finger foods. Serve them warm with marinara for dipping, and watch them disappear!

Easy Clean-Up: Minimal prep and mess mean more time enjoying with family or friends, perfect for busy weeknights.

Versatile Delight: Serve them as an appetizer, party snack, or even a fun twist on dinner, these rolls are a guaranteed hit!

Stuffed Pizza Rolls Ingredients

For the Dough
Frozen Rolls – Use any pre-prepared frozen dough brand for a convenient base that saves time.

For the Filling
Mozzarella Cheese – This gooey cheese is key for that delightful stretch; feel free to swap it with cheddar for new flavor dimensions.
Cooked Sausage or Pepperoni – Adds a savory punch; for vegetarian rolls, opt for a mix of your favorite veggies instead.

For the Topping
Melted Butter – Enhances richness and aids browning; olive oil can be used for a lighter touch.
Italian Seasoning – Infuses the rolls with aromatic herb flavors; consider using fresh herbs like basil or oregano for a vibrant twist.
Garlic Powder – Elevates the taste; you can substitute fresh minced garlic for an extra burst of flavor.
Grated Parmesan Cheese – Adds a salty, nutty finish on top; simply omit for a dairy-free alternative.

With these ingredients for your stuffed pizza rolls, you’re set to create a mouthwatering appetizer that brings warmth and joy to every gathering!

Step‑by‑Step Instructions for Stuffed Pizza Rolls

Step 1: Thaw the Rolls
Begin by allowing your frozen rolls to thaw at room temperature for about 2 hours. This will ensure they soften but do not rise, which is perfect for creating your stuffed pizza rolls. Check them periodically; they should feel pliable and easy to flatten.

Step 2: Preheat the Oven
While the rolls are thawing, preheat your oven to 350°F (175°C). This temperature is ideal for achieving that golden-brown exterior. Don’t forget to grease a 9×13 baking pan with non-stick spray or oil to prevent the rolls from sticking as they bake.

Step 3: Prepare the Dough
Once the rolls are soft, take each one and flatten it into a 3-inch circle on a clean surface. Use your hands or a rolling pin for this process. Aim for even thickness to ensure consistent cooking; you’re creating the perfect base for your flavorful fillings in the stuffed pizza rolls.

Step 4: Fill and Seal
Place about 1 tablespoon of mozzarella cheese and your chosen filling—be it sausage, pepperoni, or veggies—onto each circle. Gently wrap the dough around the filling, pinching the edges to seal securely and prevent any cheese from leaking. This step is crucial for a delightful bite!

Step 5: Arrange in Pan
Carefully place the filled balls seam side down into the prepared greased baking pan. Arrange them closely but not overcrowded to allow for some expansion during baking. Visualize a cozy cluster of stuffed pizza rolls ready to puff and brown in the oven!

Step 6: Prepare the Topping
In a small bowl, combine melted butter, Italian seasoning, and garlic powder to make a fragrant topping. Brush this mixture generously over the tops of the rolls for added richness and flavor. Finish by sprinkling grated Parmesan cheese on top for a delicious, cheesy finish.

Step 7: Bake the Rolls
Slide the baking pan into your preheated oven and bake for 15-20 minutes. Keep an eye on them, as you want the rolls to turn a lovely golden brown. You’ll know they are done when they are puffed up and the tops are beautifully browned; the aroma will be heavenly!

Step 8: Serve Warm
Once baked, let the stuffed pizza rolls cool slightly before serving. They taste best warm! Serve them alongside marinara sauce for dipping to enhance those cheesy, savory flavors. Enjoy this delightful snack with family and friends at your next gathering!

Make Ahead Options

These stuffed pizza rolls are a fantastic option for meal prep, making them perfect for busy weeknights! You can prepare the rolls up to 24 hours in advance by filling and sealing them, then storing them in an airtight container in the refrigerator. To maintain their delightful texture, brush the rolls with melted butter and sprinkle the toppings only right before baking. When you’re ready to enjoy these tasty bites, simply preheat your oven to 350°F (175°C) and bake for 15-20 minutes until golden brown and bubbling. This way, you’ll have delicious, homemade snacks ready to impress your family with minimal effort!

How to Store and Freeze Stuffed Pizza Rolls

Room Temperature: Enjoy your stuffed pizza rolls fresh out of the oven for the best texture and flavor. If left at room temperature, consume them within 2 hours.

Fridge: Store any leftovers in an airtight container in the fridge for up to 3 days. Reheating them in the oven will help restore their crispy exterior.

Freezer: For longer storage, freeze the baked rolls in a single layer on a baking sheet before transferring them to a freezer-safe bag or container. They can be kept frozen for up to 2 months.

Reheating: To reheat, place the frozen rolls directly in a 350°F (175°C) oven for about 15-20 minutes until heated through and crispy again. Enjoy!

What to Serve with Cheesy Stuffed Pizza Rolls

These tasty bites are just the beginning of a delicious meal experience. Imagine taking a moment to enjoy the layers of flavor and texture with these perfectly paired dishes.

  • Crunchy Salad: A fresh, crisp salad with mixed greens provides a delightful contrast to the warm, gooey pizza rolls. Toss in some cherry tomatoes and a zesty vinaigrette for brightness.

  • Zesty Garlic Bread: Serve buttery, garlicky bread on the side to complement the cheesy filling, making each bite feel indulgent yet balanced.

  • Marinara Dipping Sauce: A classic! Serve with additional marinara for dipping to enhance the flavors of the stuffed pizza rolls, plus it keeps things fun and interactive.

  • Roasted Vegetables: Seasoned roasted veggies like bell peppers and zucchini add a lovely roasted flavor and nutritional balance to your meal. They bring both color and health to the table.

  • Savory Sliders: Mini sliders filled with juicy beef or grilled chicken create a hearty pairing and would be an exciting addition to your appetizer spread.

  • Sweet Dessert: Finish off the meal with chocolate lava cakes or cookies. The sweet contrast will send everyone off with a smile and a satisfied palate.

  • Berry Lemonade: Refreshing lemonade with muddled berries serves as a bright beverage pairing, cutting through the richness of the pizza rolls beautifully.

Expert Tips for Stuffed Pizza Rolls

Watch the Bake: Keep an eye on the rolls while baking to prevent over-browning; a golden color is ideal for the perfect stuffed pizza rolls.

Seal It Right: Ensure each roll is tightly sealed to avoid cheese leakage during baking, which can create a messy experience.

Pan Rotation: For even cooking, consider rotating the baking pan halfway through the baking time, ensuring all rolls get equal love from the oven.

Don’t Overfill: Be mindful not to overstuff your rolls; just a tablespoon of filling keeps them from bursting open while baking.

Serving Temperature: Serve the stuffed pizza rolls warm, as they taste best fresh out of the oven, paired with delicious marinara sauce for dipping.

Stuffed Pizza Rolls Variations & Substitutions

Feel free to play with these ideas and make the stuffed pizza rolls truly your own!

  • Vegetarian Option: Swap meats for a colorful mix of bell peppers, onions, and spinach for a wholesome twist. This swap not only adds vibrant colors but also delicious flavors that will satisfy all taste buds.

  • Cheese Variations: Combine different cheeses like gouda, cheddar, or pepper jack for exciting flavor profiles. Each cheese brings its own unique melting quality, adding depth to your rolls and transforming them into an unforgettable treat.

  • Sweet Version: For a delightful dessert twist, fill with a mixture of cinnamon and sugar, then drizzle with icing after baking. This sweet surprise will leave everyone wanting more, perfect for a fun after-dinner treat!

  • Gluten-Free Alternative: Use gluten-free frozen dough to accommodate dietary preferences, allowing everyone to enjoy these tasty bites. Many brands offer great alternatives that maintain texture and flavor, so no one has to miss out!

  • Extra Crunch: Roll the sealed dough balls in breadcrumbs before baking for an extra-crispy exterior. This added layer of crunch elevates the experience, providing a satisfying contrast to the gooey filling inside.

  • Spicy Kick: Add crushed red pepper flakes or jalapeños to your filling for a delightful heat. The just-right spice can elevate the rolls, making them a favorite for those who love a little kick in their food.

  • Herb-Infused: Experiment with fresh herbs like basil or rosemary in the dough for a fragrant twist. The added aromatic notes can transform these rolls into a gourmet delight, enhancing both flavor and aroma.

For more ideas on delicious stuffed recipes, don’t miss our links to Buffalo Chicken Stuffed and Blackened Salmon Stuffed options!

Stuffed Pizza Rolls Recipe FAQs

How do I select the best frozen rolls for stuffed pizza rolls?
Absolutely! When choosing frozen rolls, look for ones that are labeled “soft” or “pre-proofed.” They should feel pliable and smooth without any dark spots. Popular brands often provide a consistent texture, making them ideal for your stuffed pizza rolls.

What’s the best way to store leftover stuffed pizza rolls?
Very! To store leftovers, place them in an airtight container in the fridge; they’ll stay fresh for up to 3 days. If you’d like to keep them longer, opt for freezing them. Just make sure they are completely cooled before you store them to prevent sogginess!

Can I freeze stuffed pizza rolls, and if so, how?
Of course! To freeze your stuffed pizza rolls, allow them to cool completely after baking. Arrange the rolls in a single layer on a baking sheet and place them in the freezer for about 1-2 hours until frozen solid. Then, transfer them to a freezer-safe bag or container. This method prevents them from sticking together. They can be stored in the freezer for up to 2 months!

What if my stuffed pizza rolls are leaking cheese while baking?
No worries! If you find that your pizza rolls are leaking cheese, it usually means they weren’t sealed tightly enough. To prevent this, make sure to pinch the edges well after filling. If they still leak a bit during baking, simply keep a close eye on them and rotate the pan for even cooking.

Are stuffed pizza rolls safe for dogs to eat?
Not necessarily! While the ingredients in stuffed pizza rolls are generally safe for humans, they may not be suitable for dogs. Foods like cheese and certain seasonings can upset their stomachs. It’s best to avoid sharing these snacks with your furry friends!

Can I make stuffed pizza rolls gluten-free?
Absolutely! For a gluten-free version, use gluten-free frozen dough. Many stores carry suitable alternatives that will work well for your stuffed pizza rolls. Just ensure the rest of your fillings and toppings are gluten-free to accommodate those dietary needs.

Stuffed Pizza Rolls

Savory Stuffed Pizza Rolls: Your Family's New Favorite Snack

These stuffed pizza rolls are a delicious fusion of flavors, perfect for any gathering or family night.
Prep Time 2 hours
Cook Time 20 minutes
Cooling Time 5 minutes
Total Time 2 hours 25 minutes
Servings: 8 rolls
Course: Appetizer
Cuisine: Italian
Calories: 150

Ingredients
  

For the Dough
  • 1 package Frozen Rolls Use any pre-prepared frozen dough brand.
For the Filling
  • 1 cup Mozzarella Cheese Feel free to swap it with cheddar.
  • 1 cup Cooked Sausage or Pepperoni Opt for veggies for vegetarian rolls.
For the Topping
  • 2 tablespoons Melted Butter Olive oil can be used for a lighter touch.
  • 1 tablespoon Italian Seasoning Consider using fresh herbs for a vibrant twist.
  • 1 teaspoon Garlic Powder Substitute with fresh minced garlic for extra flavor.
  • 1/4 cup Grated Parmesan Cheese Omit for a dairy-free alternative.

Equipment

  • Oven
  • Baking pan
  • Mixing Bowl
  • Rolling Pin

Method
 

Step-by-Step Instructions
  1. Thaw the rolls for about 2 hours at room temperature.
  2. Preheat your oven to 350°F (175°C) and grease a 9x13 baking pan.
  3. Flatten each thawed roll into a 3-inch circle.
  4. Fill each circle with about 1 tablespoon of mozzarella cheese and your chosen filling.
  5. Wrap the dough around the filling and seal the edges securely.
  6. Arrange the filled rolls seam side down in the baking pan.
  7. Combine melted butter, Italian seasoning, and garlic powder in a bowl, and brush over the rolls.
  8. Bake for 15-20 minutes until golden brown.
  9. Let cool slightly and serve warm with marinara sauce.

Nutrition

Serving: 1rollCalories: 150kcalCarbohydrates: 15gProtein: 7gFat: 8gSaturated Fat: 4gPolyunsaturated Fat: 0.5gMonounsaturated Fat: 2gCholesterol: 20mgSodium: 300mgPotassium: 120mgFiber: 1gSugar: 1gVitamin A: 200IUCalcium: 150mgIron: 1mg

Notes

Serve warm for the best taste. Pair with marinara sauce for dipping.

Tried this recipe?

Let us know how it was!

Brown Sugar Pineapple Chicken: A Tropical Flavor Adventure

I can’t help but smile when I think about summer barbecues filled with the intoxicating aroma of Tropical Brown Sugar Pineapple Chicken sizzling on the grill. The blend of juicy chicken, sweet pineapple, and the rich embrace of brown sugar creates a dish that feels like a getaway to a tropical paradise. What’s magical about this recipe is its incredible adaptability; whether you choose to grill, bake, or even whip up a vegetarian version with tofu, it’s all quick and easy to make! Plus, the burst of tropical flavors makes it a guaranteed crowd-pleaser for family dinners or gatherings with friends. Ready to elevate your mealtime? Let’s dive into this delicious adventure!

Why is this chicken recipe special?

Simplicity: Preparing this Brown Sugar Pineapple Chicken is a breeze, requiring minimal ingredients and effort, making it perfect for busy weeknights.

Tropical Taste Explosion: The combination of sweet pineapple and rich brown sugar offers a delightful contrast, transporting you straight to a sunny beach with every bite!

Customizable Options: Whether you prefer grilling, baking, or exploring vegetarian alternatives with tofu or tempeh, this recipe will fit effortlessly into your cooking routine.

Crowd-Pleasing Flavor: Ideal for family dinners, this dish guarantees compliments from guests, creating lasting memories around the dinner table.

Versatile Serving Suggestions: Pair it with rice or quinoa and steamed vegetables to enhance nutrition and flavor; it’s adaptable for any meal!

For more tropical-inspired meals, check out our Jerk Chicken Burritos or explore the flavors of our Thai Chicken Meatball recipe!

Brown Sugar Pineapple Chicken Ingredients

Get ready to savor the tropical goodness!

For the Chicken

  • Boneless Chicken Breasts or Thighs – The main protein source that delivers juicy, tender bites; substitute with tofu or tempeh for a vegetarian twist.
  • Olive Oil – Essential for marinating and cooking, ensuring the chicken stays moist and flavorful.

For the Marinade

  • Brown Sugar – Adds a rich sweetness that caramelizes beautifully; feel free to swap with honey or maple syrup for a different sweetness profile.
  • Soy Sauce – Contributes umami depth and saltiness; use tamari for a gluten-free alternative.
  • Garlic (minced) – Enhances the flavor with its aromatic notes for an irresistible marinade.
  • Fresh Ginger (grated) – Provides warmth and a spicy kick that compliments the sweetness beautifully.
  • Chili Flakes (optional) – Add heat to balance the sweet; omit for a milder dish or ramp it up for spice lovers!

For the Fruity Extras

  • Pineapple Chunks – The star of the show, bringing vibrant sweetness and acidity; mango or papaya can be delightful substitutes for an exciting twist.
  • Lime Juice – Offers acidity that brightens the dish and balances out the sweetness.

Seasonings and Garnish

  • Salt & Pepper – Simple, yet vital for enhancing the overall flavors.
  • Fresh Cilantro – An optional garnish that brings freshness and a pop of color, making the dish visually stunning.

Get your ingredients lined up, and let’s create a delicious Brown Sugar Pineapple Chicken that transforms your dinner into a tropical escape!

Step‑by‑Step Instructions for brown sugar pineapple chicken

Step 1: Marinate the Chicken
In a mixing bowl, combine the brown sugar, soy sauce, minced garlic, grated ginger, lime juice, and olive oil to create a flavorful marinade. Place the boneless chicken breasts or thighs in a resealable bag and pour the marinade over them, ensuring they are well-coated. Seal the bag, refrigerate, and marinate for at least 30 minutes, or up to 2 hours for deeper flavor.

Step 2: Prepare for Cooking
While the chicken marinates, preheat your grill to medium heat or your oven to 375°F (190°C). If using a grill, ensure the grates are clean and lightly oiled to prevent sticking. For baking, prepare a baking dish by lining it with parchment paper or greasing it lightly. This step sets the stage for your delicious brown sugar pineapple chicken to cook evenly and perfectly.

Step 3: Cook the Chicken
If grilling, place the marinated chicken on the grill and cook for about 6-8 minutes per side, or until the internal temperature reaches 165°F (74°C). For baking, transfer the chicken to the preheated oven and bake for 25-30 minutes, ensuring it’s cooked through and juices run clear. Keep an eye on the chicken to avoid overcooking; remember, you want it juicy and tender!

Step 4: Add Pineapple Chunks
In the last few minutes of cooking, add fresh pineapple chunks directly onto the grill or around the chicken in the baking dish. Allow them to caramelize slightly for about 3-5 minutes. The heat enhances their sweetness, blending perfectly with the brown sugar pineapple chicken and adding a delightful touch of tropical flavor to your dish.

Step 5: Final Flavor Check
After cooking, taste-test the pineapple chicken to ensure the flavor is balanced. If desired, adjust sweetness and tang by drizzling a bit more lime juice or soy sauce over the chicken. For those who enjoy some heat, sprinkle chili flakes or a dash of sriracha for an exciting kick that complements the sweet notes.

Step 6: Serve and Garnish
Once cooked, remove the brown sugar pineapple chicken from the grill or oven and let it rest for a few minutes. This allows the juices to redistribute for maximum tenderness. Serve it over a bed of rice or quinoa, and garnish with fresh cilantro for a burst of color and flavor. Enjoy your tropical feast!

Make Ahead Options

These Brown Sugar Pineapple Chicken preparations are perfect for meal prep, saving you valuable time on busy weeknights! You can marinate the chicken up to 24 hours in advance, allowing all those tropical flavors to deeply infuse. Simply combine the marinade and coat the chicken, then store it in the refrigerator. On the day you plan to cook, all you need to do is remove it from the fridge and let it sit at room temperature for about 15 minutes before grilling or baking. Additionally, leftover chicken can be refrigerated in an airtight container for up to 3 days. Reheat gently to maintain its tenderness, ensuring your meal remains just as delicious as the day it was cooked!

Brown Sugar Pineapple Chicken Variations

Feel free to let your culinary creativity shine by customizing this dish to suit your taste buds!

  • Grilled Chicken: Fire up the grill! Sear the marinated chicken over medium heat for a smoky flavor and beautiful grill marks.

  • Baked Delight: For a cozy oven-cooked version, bake the chicken at 375°F for about 25-30 minutes, keeping it juicy and tender.

  • Vegetarian Swap: Replace chicken with tofu or tempeh for a hearty vegetarian version that still captures that tropical vibe.

  • Tropical Twist: Try mango or papaya instead of pineapple for a unique, sweet flavor that dances on your taste buds.

  • Creamy Coconut: Add coconut milk to the marinade for a rich, creamy depth that pairs beautifully with the pineapple’s sweetness.

  • Huli-Huli Style: Mix soy sauce with rice vinegar to achieve a flavorful Hawaiian-style dish reminiscent of a classic Huli-Huli chicken.

  • Herbed Infusion: Spice things up with fresh herbs like basil or cilantro to elevate the flavor and add a fresh, vibrant touch.

  • Party Heat: For heat lovers, garnish with fresh jalapeños or a dash of sriracha to take your dish to the next level.

These variations are just the beginning! Your taste preferences can build a beautiful experience in every bite. For serving suggestions, consider enjoying this colorful dish with a side of our delicious Air Fryer Chicken or a refreshing Grilled Chicken Sandwich.

How to Store and Freeze Brown Sugar Pineapple Chicken

  • Fridge: Store leftovers in an airtight container for up to 3 days. This will keep the flavors intact and ensure the chicken remains tender.

  • Freezer: For longer storage, freeze the marinated chicken (not cooked) in a freezer-safe bag for up to 3 months. Thaw in the fridge overnight before cooking.

  • Reheating: To reheat cooked brown sugar pineapple chicken, microwave on medium power until warmed through, about 2-3 minutes, or reheat on the stovetop until steaming.

  • Make-Ahead Tips: Marinate the chicken 1-2 days in advance for easy meal prep, just remember to store it properly to maximize flavor!

What to Serve with Brown Sugar Pineapple Chicken?

Elevate your dinner with delightful sides that harmonize with tropical flavors and textures beautifully!

  • Coconut Rice: The creamy sweetness of coconut rice complements the chicken’s glaze, creating a soothing backdrop for the vibrant flavors. It’s like a tropical hug on your plate!

  • Grilled Asparagus: The smoky char and slight bitterness of grilled asparagus balance the rich sweetness of the chicken, offering a perfect contrast in every bite.

  • Mango Salsa: Fresh, zesty mango salsa with cilantro and lime ties in with the tropical theme while adding a refreshing crunch. It’s a vibrant addition that brightens the entire meal.

  • Quinoa Salad: A light quinoa salad with diced bell peppers, red onion, and a citrus vinaigrette brings a nutty texture that contrasts beautifully with the chicken’s sweetness.

  • Steamed Broccoli: Simple and nutritious, the green freshness of steamed broccoli rounds out the flavors while providing a pop of color and healthiness to your plate.

  • Pineapple Coleslaw: Creamy coleslaw with crushed pineapple adds a delightful crunch and a hint of sweetness that echoes the chicken’s flavors; it’s a refreshing complement!

  • Hawaiian Sweet Rolls: These fluffy, slightly sweet rolls are perfect for soaking up the delicious juices from the chicken, adding an extra touch of comfort to your meal.

  • Pineapple Coconut Mocktail: A tropical drink made with pineapple juice, coconut water, and a splash of lime captures the essence of the dish for a refreshing sip alongside dinner.

  • Chocolate Lava Cake: For dessert, a warm, gooey chocolate lava cake offers a rich contrast to the sweet pineapple chicken, making for a delightful end to your tropical feast.

Expert Tips for Brown Sugar Pineapple Chicken

  • Marination Matters: Ensure the chicken is well-marinated for at least 30 minutes; this enhances flavor absorption and maintains juiciness.

  • Watch the Cooking Time: To avoid the dreaded dry chicken, monitor cooking times closely—each method (grilling, baking, slow cooking) differs slightly.

  • Customize the Heat: If you’re unsure about spice levels, start with a pinch of chili flakes and adjust according to your preference; you can always add more!

  • Perfect the Sweetness: Always taste-test the marinades and adjust sweetness with lime juice or soy sauce as needed; don’t be afraid to tweak it!

  • Add Pineapple at the End: For caramelized goodness, include pineapple chunks in the last few minutes of cooking; this intensifies their flavor without overcooking.

Brown Sugar Pineapple Chicken Recipe FAQs

What type of chicken should I use for the best results?
Absolutely! For the best texture and flavor, boneless chicken breasts or thighs work wonders in this recipe. They remain juicy during cooking and absorb the marinade beautifully. If you’re aiming for a vegetarian alternative, tofu or tempeh are great substitutes and will soak up that delicious pineapple and brown sugar marinade perfectly.

How should I store leftover brown sugar pineapple chicken?
To keep your leftovers fresh, store them in an airtight container in the refrigerator for up to 3 days. This method preserves the juicy texture and deliciousness. Just reheat gently in the microwave or on the stovetop when you’re ready to enjoy it again!

Can I freeze the chicken before cooking?
Certainly! You can freeze marinated brown sugar pineapple chicken for up to 3 months. Just place the marinated chicken in a freezer-safe bag, ensuring you remove as much air as possible to prevent freezer burn. To cook, thaw it overnight in the refrigerator and then follow the cooking instructions as usual.

How can I make sure my chicken doesn’t dry out while cooking?
The key is to monitor your cooking time closely! If grilling, aim for 6-8 minutes per side, and for baking, about 25-30 minutes is perfect at 375°F. Additionally, always check that your chicken’s internal temperature reaches 165°F (74°C). If you notice the chicken is cooking too quickly, you can lower the heat or cover it lightly with foil to help maintain moisture.

What should I do if my chicken turns out too sweet?
If you find your brown sugar pineapple chicken is sweeter than you’d like, don’t worry! A splash of lime juice or a drizzle of soy sauce can help balance the sweetness. Start with a small amount, tasting as you go, to find that perfect harmony of flavors. Remember, cooking is all about personal taste preferences, so feel free to adjust!

Is this recipe pet-friendly?
It’s best to be cautious! While the ingredients in brown sugar pineapple chicken, such as chicken and pineapple, are safe for dogs in moderation, the soy sauce and garlic can be harmful. Always consult your vet before sharing any human food with your pets to ensure their health and safety.

brown sugar pineapple chicken

Brown Sugar Pineapple Chicken: A Tropical Flavor Adventure

Delight in the tropical flavors of brown sugar pineapple chicken, a quick and easy dish perfect for summer barbecues.
Prep Time 30 minutes
Cook Time 30 minutes
Marinating Time 30 minutes
Total Time 1 hour 30 minutes
Servings: 4 servings
Course: Chicken
Cuisine: American, Tropical
Calories: 350

Ingredients
  

For the Chicken
  • 4 pieces Boneless Chicken Breasts or Thighs Can substitute with tofu or tempeh
  • 2 tablespoons Olive Oil
For the Marinade
  • 1/4 cup Brown Sugar Can substitute with honey or maple syrup
  • 1/4 cup Soy Sauce Use tamari for gluten-free
  • 3 cloves Garlic (minced)
  • 1 teaspoon Fresh Ginger (grated)
  • 1/2 teaspoon Chili Flakes (optional) Omit for milder flavor
For the Fruity Extras
  • 1 cup Pineapple Chunks Can substitute with mango or papaya
  • 2 tablespoons Lime Juice
Seasonings and Garnish
  • 1 teaspoon Salt
  • 1/2 teaspoon Pepper
  • 1/4 cup Fresh Cilantro Optional garnish

Equipment

  • Grill
  • Mixing Bowl
  • Resealable Bag
  • Oven
  • Baking dish

Method
 

Cook the Chicken
  1. In a mixing bowl, combine the brown sugar, soy sauce, minced garlic, grated ginger, lime juice, and olive oil to create a flavorful marinade. Place the boneless chicken breasts or thighs in a resealable bag and pour the marinade over them, ensuring they are well-coated. Seal the bag, refrigerate, and marinate for at least 30 minutes, or up to 2 hours for deeper flavor.
  2. Preheat your grill to medium heat or your oven to 375°F (190°C). If using a grill, ensure the grates are clean and lightly oiled. For baking, prepare a baking dish by lining it with parchment paper or greasing it lightly.
  3. If grilling, place the marinated chicken on the grill and cook for about 6-8 minutes per side, or until the internal temperature reaches 165°F (74°C). For baking, transfer the chicken to the preheated oven and bake for 25-30 minutes, ensuring it’s cooked through and juices run clear.
  4. In the last few minutes of cooking, add fresh pineapple chunks directly onto the grill or around the chicken in the baking dish. Allow them to caramelize slightly for about 3-5 minutes.
  5. After cooking, taste-test the pineapple chicken to ensure the flavor is balanced. Adjust sweetness and tang with extra lime juice or soy sauce if desired.
  6. Once cooked, remove the chicken from the grill or oven and let it rest for a few minutes. Serve it over rice or quinoa, and garnish with fresh cilantro.

Nutrition

Serving: 1servingCalories: 350kcalCarbohydrates: 30gProtein: 30gFat: 12gSaturated Fat: 2gPolyunsaturated Fat: 2gMonounsaturated Fat: 8gCholesterol: 90mgSodium: 800mgPotassium: 600mgFiber: 2gSugar: 15gVitamin A: 500IUVitamin C: 20mgCalcium: 20mgIron: 1mg

Notes

Marinate the chicken 1-2 days in advance for easy meal prep. Store leftovers in an airtight container for up to 3 days.

Tried this recipe?

Let us know how it was!

Savory Dragon Chicken: Quick, Spicy Comfort at Home

The sizzling sound of chicken frying fills my kitchen, a symphony that signals a delicious culinary adventure ahead. Today, I’m whisking you away into the world of Spicy Dragon Chicken, an Indo-Chinese fusion dish that promises to spice up your dinner table. This recipe not only delivers a quick and easy weeknight meal, but it also brings the flavors of your favorite takeout right into your home. With its tantalizing blend of spicy, tangy, and sweet notes, this dish transforms simple ingredients into an unforgettable experience. Plus, its gluten-free options make it accessible for everyone! Ready to dive into this flavorful journey together? Let’s get cooking!

Why Try Spicy Dragon Chicken?

Unforgettable Flavor: Each bite is a delightful explosion of spicy, tangy, and sweet notes that will tantalize your taste buds.

Quick & Easy: This dish can be whipped up in under 30 minutes, making it perfect for busy weeknights.

Versatile Options: Feel free to customize with tofu or extra veggies like bell peppers, adapting to your preferences effortlessly.

Gluten-Free Friendly: With simple substitutions, this dish caters to dietary needs without sacrificing flavor.

Crowd-Pleasing Delight: Perfect for sharing, whether it’s a family dinner or a get-together with friends. Serve it with rice or noodles for a satisfying meal that rivals your favorite takeout!

Consider pairing your Dragon Chicken with our tasty Grilled Chicken Sandwich or try a refreshing Chicken Cashew Broccoli for a complete meal.

Dragon Chicken Ingredients

• Let’s gather everything we need for our mouthwatering dish!

For the Chicken

  • Chicken Breast – the main protein source; ensures a tender and juicy result. Substitution: Use thigh meat for a richer flavor.
  • Egg White – binds the chicken with cornstarch and adds tenderness. Note: Whisk until frothy for better coating.
  • Cornstarch – provides a crispy texture to the chicken. Prep Note: Toss chicken in cornstarch thoroughly before frying.
  • Salt & Pepper – essential seasoning for the chicken, enhancing flavor. Adjust to taste.

For the Sauce

  • Sesame Oil – adds a unique nutty flavor; essential for authentic Asian taste. Substitution: Use vegetable oil if unavailable.
  • Garlic – aromatic base that adds depth and savory notes. Prep Note: Minced for maximum flavor release.
  • Ginger – offers a warm, spicy kick; complements the garlic. Fresh ginger is recommended for potency.
  • Dried Chilies – provides heat; allows control over spice level. Substitution: Adjust quantity based on personal heat preference.
  • Ketchup – contributes sweetness and tanginess to the sauce. Note: Use a high-quality brand for the best taste.
  • Soy Sauce – adds umami flavor; salty base for the sauce. Substitution: Tamari for gluten-free version.
  • Chili Garlic Sauce – provides heat and complexity. Substitution: Sriracha or sambal oelek can be used instead.
  • Vinegar – brightens the dish, cutting through richness. Note: Rice vinegar recommended for authenticity.
  • Sugar – balances acidity and enhances flavor profile. Can be reduced depending on sweetness preference.

For Garnish

  • Green Onions – add freshness and color. Optional but recommended for visual appeal.
  • Sesame Seeds – provide an extra crunch. Optional but recommended for extra flair.

With these simple yet vibrant ingredients, you’re all set to create a delicious Dragon Chicken that will wow everyone at the table!

Step‑by‑Step Instructions for Dragon Chicken

Step 1: Prep the Chicken
In a mixing bowl, combine sliced chicken breast with egg white, cornstarch, salt, and pepper. Mix until the chicken is evenly coated, ensuring it’s well combined. Let the chicken marinate for 10-15 minutes at room temperature. This step helps tenderize the meat and allows the flavors to meld, preparing it for a delicious Dragon Chicken.

Step 2: Fry the Chicken
In a large skillet or wok, heat enough sesame oil over medium-high heat until shimmering, about 2-3 minutes. Carefully add the marinated chicken in batches to avoid overcrowding. Fry each batch for 5-7 minutes or until golden brown and crispy. Use tongs to flip the chicken halfway through for even cooking. Once done, drain the chicken on paper towels to remove excess oil.

Step 3: Make the Sauce
In the same skillet, reduce the heat to medium and add a splash of sesame oil. Sauté minced garlic, ginger, and dried chilies for 1-2 minutes until fragrant and golden, being cautious not to burn them. This aromatic base is crucial for building the rich flavors of the Dragon Chicken sauce.

Step 4: Combine Sauce Ingredients
Add ketchup, soy sauce, chili garlic sauce, vinegar, and sugar to the skillet with the sautéed aromatics. Stir well to combine all ingredients and increase the heat slightly. Allow the sauce to simmer for 2-3 minutes, adjusting the thickness by adding a splash of water if necessary. This simmering phase helps deepen the flavors of your sauce.

Step 5: Combine Chicken and Sauce
Once the sauce has thickened to a desirable consistency, carefully add the crispy fried chicken back into the skillet. Toss the chicken in the sauce until it is thoroughly coated and well integrated. Let it simmer for an additional minute, allowing the chicken to soak up the saucy goodness, turning your dish into a mouthwatering Dragon Chicken delight.

Step 6: Serve and Garnish
Remove the skillet from heat and transfer the Dragon Chicken to a serving dish. Garnish generously with sliced green onions and a sprinkle of sesame seeds for crunch and visual appeal. Serve immediately with steamed rice, noodles, or crisp lettuce cups for a fresh twist, making your flavorful meal truly unforgettable.

Storage Tips for Dragon Chicken

  • Fridge: Store leftover Dragon Chicken in an airtight container for up to 3 days. This allows the flavors to meld together even more, creating a delightful taste in each bite.
  • Freezer: For longer storage, freeze the Dragon Chicken in a freezer-safe container for up to 3 months. Ensure it cools completely before sealing to prevent freezer burn.
  • Reheating: To reheat, thaw in the refrigerator overnight, then warm in a skillet over medium heat, adding a splash of water if the sauce has thickened. This helps restore its saucy consistency.
  • Make-Ahead Tips: Prepare the chicken and sauce separately and store them in the fridge for up to 2 days. Combine just before serving to maintain the chicken’s crispy texture.

Make Ahead Options

Dragon Chicken is a fantastic recipe for meal prep, allowing you to enjoy its vibrant flavors while saving precious time on busy weeknights! You can marinate the chicken in the egg white, cornstarch, salt, and pepper up to 24 hours in advance; this not only enhances the tenderness but also locks in flavor. Additionally, you can prepare the sauce and store it in the refrigerator for up to 3 days. Just be sure to mix the sauce well before using to maintain its delicious taste. When you’re ready to serve, fry the chicken and toss it in the warm sauce, ensuring that your Dragon Chicken remains just as delectable and crisp as it was intended!

Dragon Chicken Variations & Substitutions

Feel free to customize your Dragon Chicken experience with these delicious variations that will awaken your culinary creativity!

  • Vegetarian: Swap chicken for tofu, marinating it in a similar mix for a delightful vegetarian option. The tofu absorbs all the flavors beautifully.

  • Extra Veggies: Incorporate colorful bell peppers or crisp broccoli for added nutrition and crunch. These veggies not only enhance the dish visually but also create a more balanced meal.

  • Gluten-Free: Substitute soy sauce with tamari for a gluten-free option while keeping that umami flavor intact. You can enjoy the deliciousness without worry!

  • Sweet & Sour Twist: Add pineapple chunks to the mix for a sweet and tangy contrast, reminiscent of classic sweet and sour dishes. This tropical addition will brighten every bite!

  • Smoky Flavor: To boost flavor, try adding smoked paprika or a dash of liquid smoke to the sauce. This adds a depth that will elevate your Dragon Chicken to a new level!

  • Heat Levels: Adjust the spice by adding more dried chilies or using spicy sriracha. Gauge your heat tolerance and turn up the fire if you dare!

  • Sauce Variations: Experiment with teriyaki sauce instead of ketchup for a unique flavor twist. This change will lend a different sweetness and complexity to your dish.

  • Herb Infusion: Finish with fresh cilantro or basil. This aromatic touch not only adds freshness but also a burst of aroma that you’ll love.

As you explore these variations, consider pairing your Dragon Chicken with a refreshing Thai Chicken Meatball for a lively meal, or enjoy it alongside our Crispy Air Fryer Chicken Drumsticks for a comforting feast!

What to Serve with Spicy Dragon Chicken

Transform your meal into a flavorful feast by pairing it with delightful accompaniments that elevate each bite.

  • Steamed Jasmine Rice: Each fluffy grain offers a delicate base that absorbs the vibrant sauce, balancing the dish’s heat. It’s a classic pairing that complements Dragon Chicken perfectly.

  • Garlic Noodles: These silky noodles, tossed in a light garlic sauce, add a satisfying chew and wonderful flavor, making every mouthful irresistible. Plus, they’re quick to whip up!

  • Stir-Fried Vegetables: A colorful medley of bell peppers, broccoli, and snap peas brings a crunch and freshness that contrasts beautifully with the saucy chicken. This adds a lovely pop of color and nutrition.

  • Crisp Lettuce Cups: Serving Dragon Chicken in crisp lettuce leaves brings a refreshing crunch, making each bite feel light yet satisfying—perfect for a fun, interactive meal!

  • Coconut Milk Smoothie: This creamy drink, blended with your favorite fruits, cools down the palate after each spicy bite, creating a delightful contrast to the bold flavors.

  • Mango Salsa: A sweet and tangy mango salsa with red onions and cilantro complements the spice, enhancing the flavor profile while adding a fresh twist to the meal.

  • Chilled Beer or Lemonade: Pair your vibrant dish with a chilled craft beer or tangy lemonade. Both drinks wonderfully offset the heat, ensuring a refreshing dining experience.

  • Chocolate Lava Cake: End on a sweet note with a warm, gooey chocolate lava cake. Its decadence offers a rich contrast to the savory Dragon Chicken, making for a blissful finish to your meal!

Expert Tips for Dragon Chicken

  • Fry in Batches: To achieve maximum crispiness, fry the chicken in smaller batches. Overcrowding the pan can lead to soggy pieces instead of the desired crunch.

  • Proper Oil Temperature: Always ensure your oil is hot enough before adding chicken. This helps prevent sticking and ensures a perfect golden-brown exterior for your Dragon Chicken.

  • Taste the Sauce: Before adding the fried chicken, sample the sauce to adjust the heat and sweetness to your preference. It’s your dish, make it suit your taste!

  • Controlling Spice Levels: If you’re sensitive to heat, reduce the number of dried chilies and chili garlic sauce. You can always add more, but it’s tough to tone down spice once it’s in!

  • Customize Your Ingredients: Feel free to swap out chicken for tofu or incorporate extra vegetables like bell peppers or broccoli. This adds nutrition while making the dish suitable for various diets!

Dragon Chicken Recipe FAQs

What type of chicken should I use for Dragon Chicken?
Absolutely! Chicken breast is ideal for this recipe as it ensures a tender and juicy result. However, if you’re looking for a richer flavor, I often use thigh meat as a delicious alternative.

How should I store leftover Dragon Chicken?
For the best flavor, store any leftover Dragon Chicken in an airtight container in the refrigerator for up to 3 days. The flavors actually develop deeper overnight, making it even tastier the next day!

Can I freeze Dragon Chicken?
Yes, you can! To freeze, allow the Dragon Chicken to cool completely. Then, transfer it to a freezer-safe container and store it for up to 3 months. Be sure to label it and remove as much air as possible to prevent freezer burn.

What should I do if my chicken gets soggy after frying?
To avoid soggy chicken, it’s crucial not to overcrowd the pan during frying. I recommend frying in small batches so each piece gets the space it needs to become golden and crispy. Ensure the oil is hot enough before adding the chicken—it should sizzle upon contact!

Are there any dietary substitutions for the sauce?
Yes, if you’re looking for gluten-free options, I recommend using tamari in place of soy sauce. For a lower carb experience, serve Dragon Chicken in lettuce wraps instead of rice for a fresh touch. Always adjust the sauce ingredients to suit your taste preferences!

Dragon Chicken

Savory Dragon Chicken: Quick, Spicy Comfort at Home

Dragon Chicken is a quick and easy Indo-Chinese dish that combines spicy, tangy, and sweet flavors for a delicious meal.
Prep Time 15 minutes
Cook Time 15 minutes
Marinating Time 15 minutes
Total Time 30 minutes
Servings: 4 servings
Course: Chicken
Cuisine: Indo-Chinese
Calories: 380

Ingredients
  

For the Chicken
  • 1 pound Chicken Breast Substitution: Use thigh meat for a richer flavor.
  • 1 large Egg White Whisk until frothy for better coating.
  • 1/2 cup Cornstarch Toss chicken in cornstarch thoroughly before frying.
  • Salt & Pepper Adjust to taste.
For the Sauce
  • 2 tablespoons Sesame Oil Substitution: Use vegetable oil if unavailable.
  • 3 cloves Garlic Minced for maximum flavor release.
  • 1 tablespoon Ginger Fresh ginger is recommended for potency.
  • 2-3 pieces Dried Chilies Adjust quantity based on personal heat preference.
  • 1/4 cup Ketchup Use a high-quality brand for the best taste.
  • 2 tablespoons Soy Sauce Substitution: Tamari for gluten-free version.
  • 1 tablespoon Chili Garlic Sauce Substitution: Sriracha or sambal oelek can be used.
  • 1 tablespoon Vinegar Rice vinegar recommended for authenticity.
  • 1 tablespoon Sugar Can be reduced depending on sweetness preference.
For Garnish
  • 2 tablespoons Green Onions Optional but recommended for visual appeal.
  • 1 tablespoon Sesame Seeds Optional but recommended for extra flair.

Equipment

  • skillet or wok

Method
 

Step-by-Step Instructions
  1. In a mixing bowl, combine sliced chicken breast with egg white, cornstarch, salt, and pepper. Mix until evenly coated and let marinate for 10-15 minutes at room temperature.
  2. Heat sesame oil in a large skillet over medium-high heat until shimmering. Add marinated chicken in batches, frying each for 5-7 minutes until golden brown. Drain on paper towels.
  3. In the same skillet, reduce heat and add more sesame oil. Sauté minced garlic, ginger, and dried chilies for 1-2 minutes until fragrant.
  4. Add ketchup, soy sauce, chili garlic sauce, vinegar, and sugar to the skillet. Stir well and simmer for 2-3 minutes, adjusting thickness with water if needed.
  5. Add crispy fried chicken back into the skillet and toss in the sauce until thoroughly coated. Simmer for an additional minute.
  6. Transfer Dragon Chicken to a serving dish and garnish with sliced green onions and sesame seeds. Serve with rice, noodles, or lettuce.

Nutrition

Serving: 1servingCalories: 380kcalCarbohydrates: 20gProtein: 30gFat: 20gSaturated Fat: 3gPolyunsaturated Fat: 4gMonounsaturated Fat: 10gCholesterol: 100mgSodium: 800mgPotassium: 500mgFiber: 2gSugar: 5gVitamin C: 5mgCalcium: 20mgIron: 1mg

Notes

Customize with tofu or extra veggies for dietary preferences. For best results, ensure proper oil temperature and fry in batches for maximum crispiness.

Tried this recipe?

Let us know how it was!