Savory Hainanese Chicken: Your New Family Favorite Dish

The aroma of ginger and garlic sizzling in the kitchen instantly transports me back to family gatherings filled with laughter and warmth. In the spirit of those cherished moments, I’m excited to share my take on an all-time favorite: Hainanese Chicken Rice. This recipe not only brings comfort but also promises a quick, nutritious meal ready in just 50 minutes—perfect for busy weeknights or a cozy dinner with loved ones. Featuring tender chicken served over fragrant jasmine rice, each bite is a delightful blend of flavors that everyone at the table will adore. Plus, it’s a fantastic way to introduce kids to the joys of homemade cooking. Curious to find out how easy it is to whip up this delicious dish? Let’s dive in!

Why Is Hainanese Chicken So Delightful?

Comforting Tradition: This Hainanese Chicken Rice is a classic family favorite, evoking nostalgia with every bite. Quick and Easy: Ready in just 50 minutes, it’s perfect for busy weeknights when time is short. Nutritious Value: Packed with protein, it’s a wholesome meal that keeps everyone satisfied. Crowd-Pleasing Flavor: The harmonious blend of ginger and garlic ensures it’s loved by both kids and adults alike. Versatile Dining: Enjoy it as-is or pair it with your favorite sides, like steamed veggies for a complete dinner experience. Plus, the leftover chicken broth makes a superb base for future soups—who could resist a second helping?

Hainanese Chicken Ingredients

A comforting dish made easy!

For the Chicken
Whole Chicken – This is the star ingredient; opt for a free-range chicken for enhanced flavor.
Salt – Essential for seasoning; adjust according to your taste preferences.
Ginger – Fresh ginger adds a warm zing; always use fresh for the best results.

For the Rice
Jasmine Rice – This fragrant rice is traditional; you can substitute basmati for a unique twist.
Garlic – Minced garlic deepens the savoriness of the dish; it packs a strong flavor punch.

For the Garnish
Cucumber – Adds refreshing crunch; you can swap it with radish for a different texture.
Cilantro – Offers a fragrant finish and brightens the dish; using fresh herbs is key.

For the Sauce
Soy Sauce – Complements the savory chicken perfectly; adjust based on your salt preference.
Sesame Oil – Gives a nutty richness; use it sparingly for the best flavor impact.

This delightful Hainanese Chicken will surely become a cherished family favorite!

Step‑by‑Step Instructions for Hainanese Chicken

Step 1: Prepare the Chicken
Start by bringing a large pot of water to a rolling boil. Add a generous amount of salt and a few slices of fresh ginger to infuse the water. Carefully lower the whole chicken into the pot, ensuring it’s fully submerged. Reduce the heat to a simmer and allow it to cook for about 30 minutes, until the chicken is tender and fully cooked, turning a lovely golden hue.

Step 2: Cook the Rice
Once the chicken is cooked, remove it from the pot and set it aside to rest. Strain and reserve the broth, then return 2 cups of the broth back to the pot. Bring this broth back to a boil, then add 1 cup of jasmine rice along with some grated ginger and minced garlic. Cook the rice for about 15 minutes on low heat, until it’s fluffy and absorbs all the delicious flavors.

Step 3: Make the Sauce
While the rice is cooking, prepare a simple sauce to accompany your Hainanese Chicken. In a mixing bowl, whisk together minced garlic, a tablespoon of soy sauce, and a teaspoon of sesame oil. This combination will create a savory and aromatic sauce that perfectly complements the chicken and rice, enhancing the overall dining experience.

Step 4: Serve the Dish
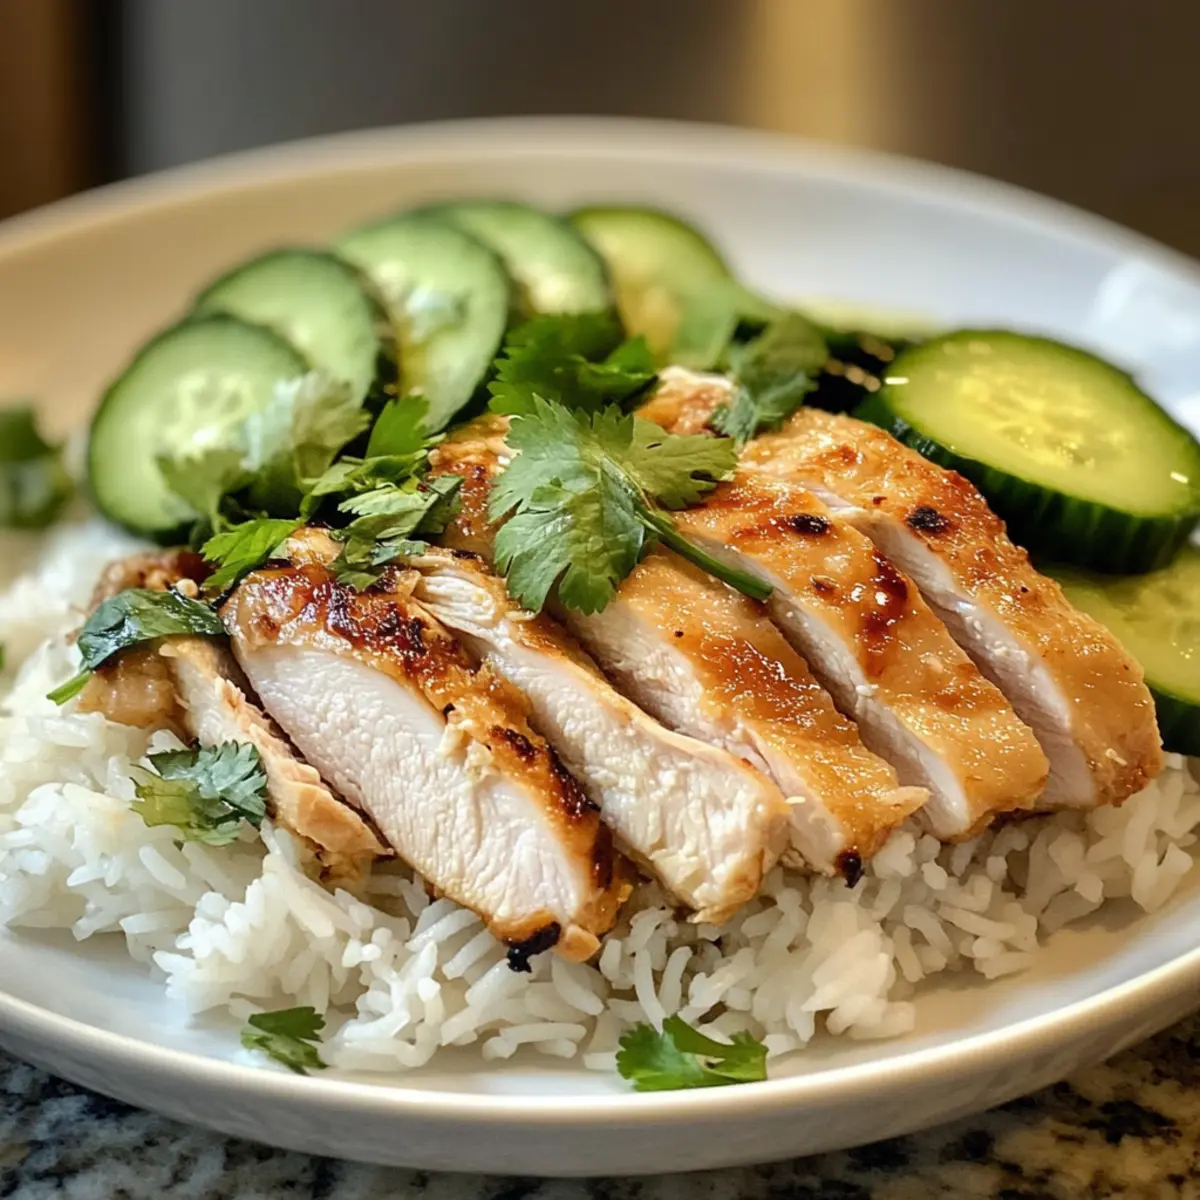
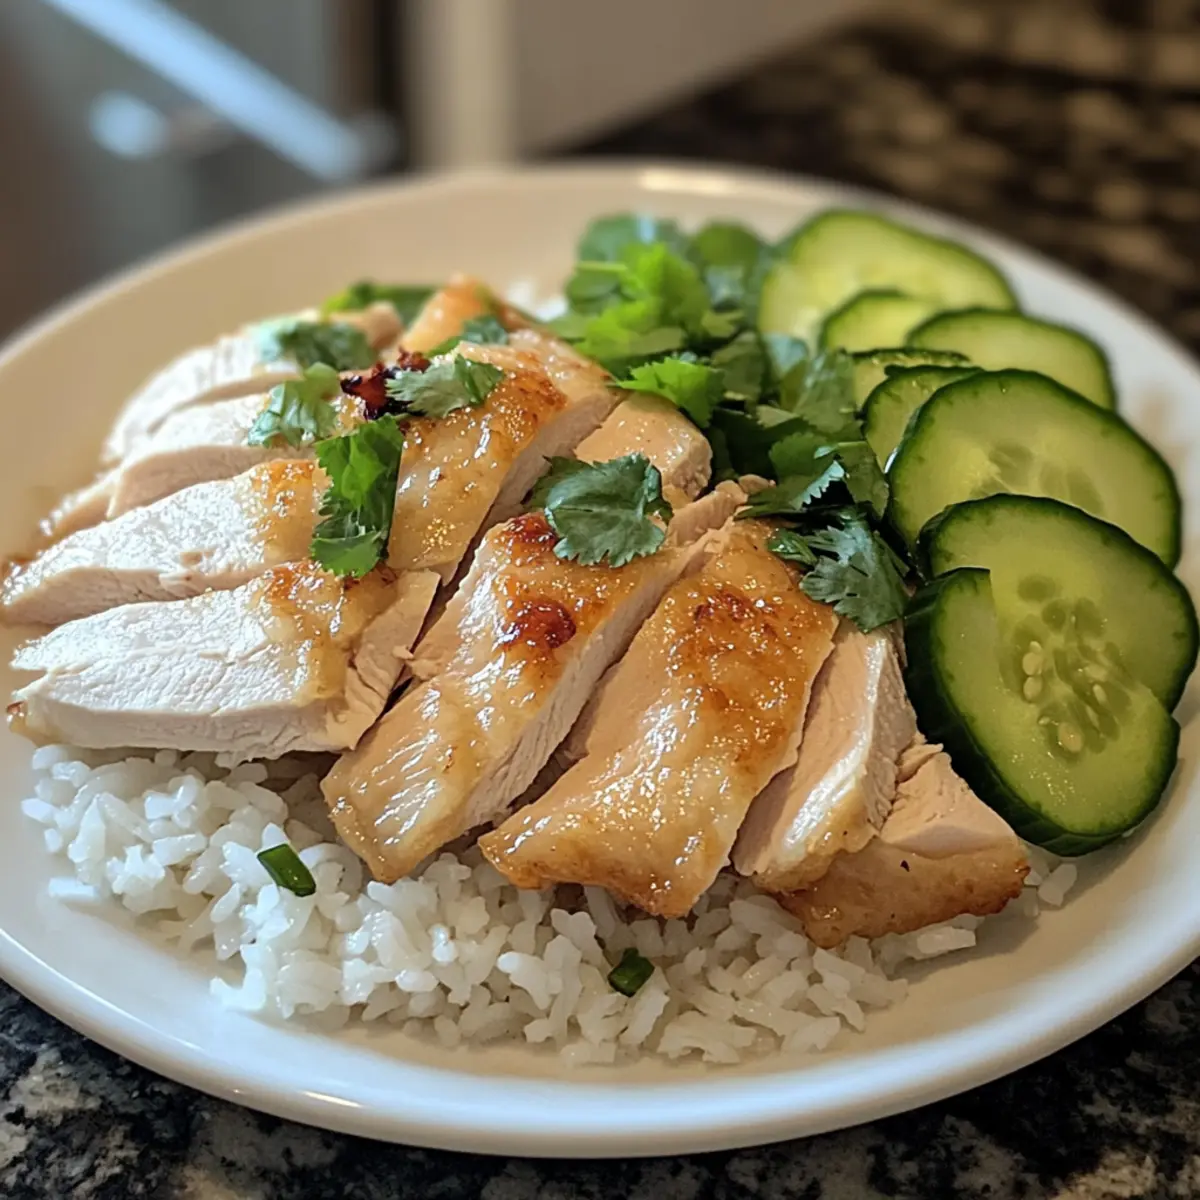
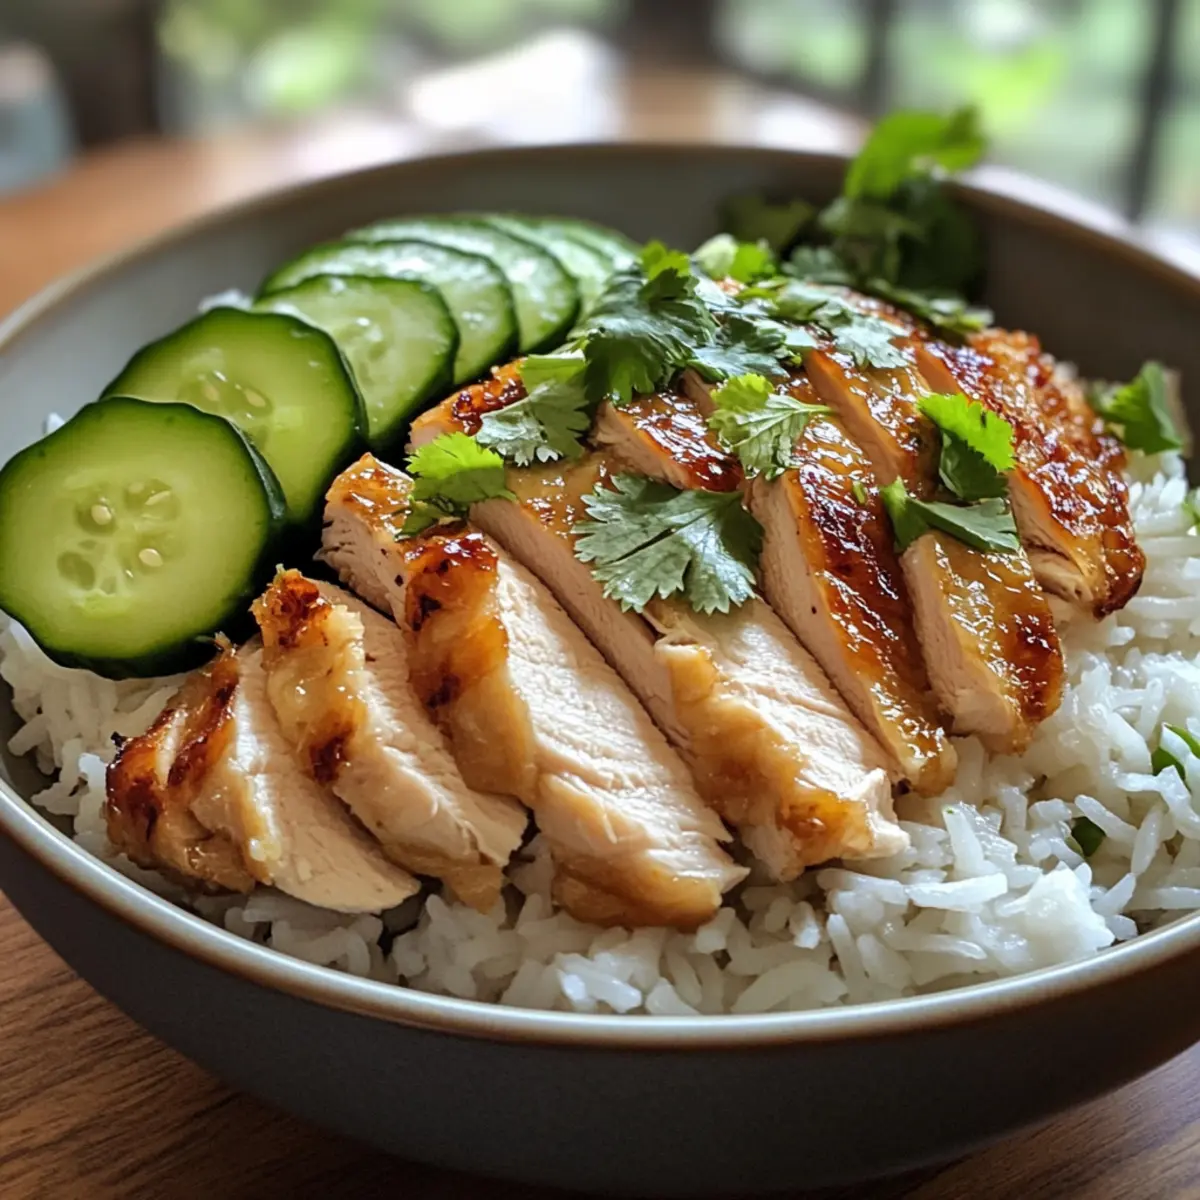
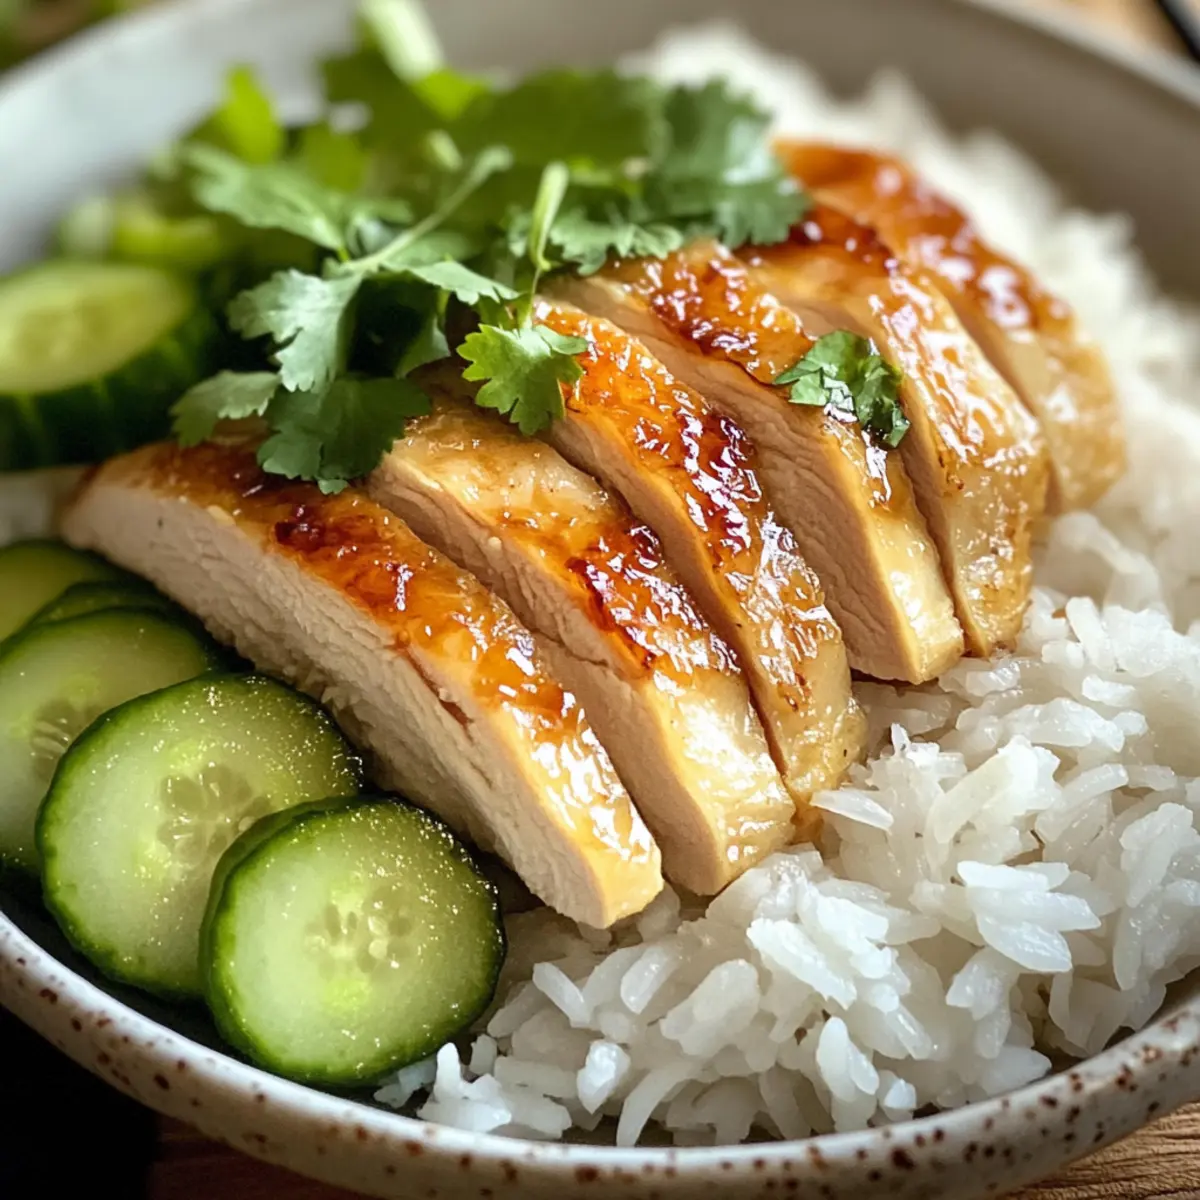
Once everything is ready, it’s time to plate your Hainanese Chicken. Slice the rested chicken into tender pieces and arrange them artistically over a bed of fluffy jasmine rice. Garnish with cucumber slices and fresh cilantro for a vibrant touch. Drizzle the prepared sauce over the chicken for added flavor, and present this comforting dish to your eager family, inviting them to enjoy a slice of nostalgia.

Expert Tips for Hainanese Chicken

  • Fresh Ingredients: Always use fresh ginger and garlic for the best flavor; dried versions can compromise the dish’s authenticity.
  • Broth Benefits: Don’t discard the chicken broth! Use it to cook rice or as a base for future soups; it’s delicious and nutritious.
  • Even Cooking: Make sure the chicken is fully submerged in boiling water to ensure even cooking; check for doneness before removing it.
  • Storing Leftovers: Store leftover chicken and rice separately in airtight containers for up to 3 days, ensuring optimal taste and texture later.
  • Kid-Friendly Spice: For a family-friendly twist, introduce a mild chili sauce on the side for those who enjoy a bit of heat without overwhelming the dish.

Make Ahead Options

These Hainanese Chicken Rice components are perfect for meal prep, allowing you to save time on busy weeknights. You can prepare the whole chicken up to 24 hours in advance; simply cook it as directed and store it in the refrigerator. To maintain quality, wrap the chicken tightly to prevent it from drying out. The jasmine rice can also be cooked ahead of time and stored in an airtight container for up to 3 days; reheat it with a splash of reserved broth to keep it fluffy. When ready to serve, simply slice the chicken and plate it with the reheated rice, garnishing with fresh cucumber and cilantro, so you can enjoy a comforting meal with minimal effort.

Hainanese Chicken Variations You’ll Love

Feel free to infuse your own personal touch into this tasty dish with these delightful variations!

  • Spicy Kick: Add a splash of chili sauce or freshly chopped chilies for a zesty heat that will excite your taste buds. It’s a simple way to elevate the dish while keeping that heartwarming essence intact.

  • Vegan Adaptation: Swap out the chicken for tofu or seitan and use vegetable broth instead. This way, you can enjoy all the comforting flavors while accommodating plant-based diets!

  • Citrus Zest: Incorporate some citrus zest, like lime or lemon, for a refreshing burst of flavor that brightens the dish. Just a sprinkle can transform your Hainanese Chicken into a vibrant feast!

  • Nutty Crunch: Top with toasted nuts, such as peanuts or cashews, for an inspiring contrast in texture and a delightful nutty flavor. Each bite becomes a fun mix of creamy and crunchy goodness!

  • Alternative Rice: Experiment with different types of rice, such as forbidden rice or brown rice, for unique flavors and health benefits. This gives the dish a wholesome twist that your family will appreciate.

  • Herb Swap: Instead of cilantro, garnish with fresh basil or mint for a Mediterranean flair, providing a refreshing taste and delightful aroma that’ll have your kitchen smelling divine.

  • Savory Soup: Use the leftover chicken broth to create a delicious soup alongside your Hainanese Chicken. This reduces waste and brings another comforting dish to your table, perfect for those chilly nights!

These scrumptious variations not only keep things exciting, but they also open up a world of flavors—the perfect way to continue the legacy of your beloved Hainanese Chicken! For other fulfilling dishes, try pairing it with a side of Thai Chicken Meatball soup or serve it alongside a delightful Grilled Chicken Sandwich. Enjoy!

What to Serve with Easy Hainanese Chicken Rice?

Looking to create a satisfying and balanced meal alongside this comforting dish?

  • Steamed Broccoli: Youthful and tender, steamed broccoli adds a burst of color and nutrients, complementing the savory chicken perfectly.
  • Garlic Bok Choy: The mild sweetness and slight crunch of bok choy stir-fried with garlic enhances the aromatic flavors of Hainanese chicken, making each bite a fresh delight.
  • Coconut Rice: For a tropical twist, serve fragrant coconut rice instead of jasmine rice, offering a creamy and slightly sweet contrast to the savory tones of chicken.
  • Soy Sauce Cucumbers: Cool, sliced cucumbers tossed in a light soy sauce dressing elevate your meal with a refreshing crunch; they’re simple to prepare and irresistible.
  • Chili Sauce: A side of homemade or store-bought chili sauce can add a delightful kick, allowing everyone to customize their heat level with each bite.
  • Mango Salad: For a refreshing side, serve a zesty mango salad, combining sweet and tangy flavors that pair beautifully with the richness of the chicken.
  • Fruit Smoothie: A creamy, fruit-filled smoothie can serve as a refreshing palate cleanser, rounding out your meal with something fruity and nourishing.

With these delightful options, you’ll transform your Hainanese Chicken Rice into a cherished family feast!

Storage Tips for Hainanese Chicken

  • Room Temperature: Keep the cooked Hainanese Chicken at room temperature for no more than 2 hours to prevent bacterial growth.
  • Fridge: Store leftovers in an airtight container in the fridge for up to 3 days. This helps maintain the flavors and texture of the chicken and rice.
  • Freezer: For longer storage, freeze shredded chicken and rice separately in airtight containers for up to 3 months. This makes reheating easier during busy weeknights.
  • Reheating: When ready to enjoy, reheat the chicken and rice gently in the microwave or on the stovetop, adding a splash of reserved chicken broth to keep it moist and delicious.

Hainanese Chicken Recipe FAQs

How do I select the best chicken for Hainanese Chicken Rice?
Absolutely! For the best flavor, opt for a whole free-range chicken. This type of chicken tends to be more flavorful and has better texture compared to conventional options. When buying, look for chickens with smooth skin and minimal dark spots. A fresh chicken will enhance the overall dish, making each bite more enjoyable.

What are the best storage methods for leftover Hainanese Chicken Rice?
Very important! Store any leftovers in an airtight container. In the fridge, they can last for up to 3 days. If you want to keep it longer, freeze the chicken and rice separately. Shredded chicken can be frozen for up to 3 months. Make sure to label the containers and enjoy it later by adding a splash of broth while reheating to retain moisture.

Can I freeze Hainanese Chicken Rice?
Absolutely! To freeze, allow the chicken and rice to cool completely before transferring them to airtight containers. Shred the chicken for easier use later. When ready to eat, thaw in the refrigerator overnight, and reheat gently on the stove or in the microwave, adding some reserved broth to prevent drying out.

How can I troubleshoot if my rice turns out sticky or mushy?
Very! If your rice is sticky, it may be because it was overcooked or didn’t have enough water. Next time, rinse the jasmine rice under cold water until the water runs clear, which removes excess starch. When cooking, follow a ratio of 1 cup of rice to 1.5 cups of broth, and keep an eye on the cooking time to avoid mushiness. If you find it mushy, you can try spreading the rice on a baking sheet to cool and dry out slightly before serving.

Are there any dietary considerations for making Hainanese Chicken?
Of course! If anyone at your table has allergies, be mindful of the soy sauce, which contains wheat. For a gluten-free option, seek out gluten-free soy sauce alternatives. This dish is naturally low in carbs and fat, making it suitable for most diets. For vegan options, substitute the chicken with tofu or seitan and use a vegetable broth for a similar flavor profile.

How do I know the chicken is fully cooked?
Very! To ensure the chicken is fully cooked, the internal temperature should reach 165°F (75°C). Additionally, you can check by slicing the chicken; the juices should run clear, not pink. If you’re not sure, use a meat thermometer for accuracy, and remember to let the chicken rest after boiling to make slicing easier.

Hainanese Chicken

Savory Hainanese Chicken: Your New Family Favorite Dish

This Hainanese Chicken recipe combines ginger and garlic flavors for a comforting, nutritious family meal in just 50 minutes.
Prep Time 20 minutes
Cook Time 30 minutes
Total Time 50 minutes
Servings: 4 servings
Course: Chicken
Cuisine: Asian
Calories: 600

Ingredients
  

For the Chicken
  • 1 whole chicken opt for free-range for enhanced flavor
  • to taste tablespoon salt
  • 2 inches ginger fresh
For the Rice
  • 1 cup jasmine rice substitute basmati for a unique twist
  • 3 cloves garlic minced
For the Garnish
  • 1 piece cucumber can swap with radish
  • 1/4 cup cilantro fresh
For the Sauce
  • 1 tablespoon soy sauce adjust based on salt preference
  • 1 teaspoon sesame oil use sparingly

Equipment

  • large pot
  • Mixing Bowl

Method
 

Step-by-Step Instructions for Hainanese Chicken
  1. Bring a large pot of water to a boil, add salt and ginger, lower the chicken in, simmer for about 30 minutes until cooked.
  2. Remove chicken, strain the broth, return 2 cups to the pot, bring to a boil, add jasmine rice, ginger, and garlic; cook for 15 minutes.
  3. Whisk minced garlic, soy sauce, and sesame oil in a bowl to prepare the sauce.
  4. Slice the chicken, arrange over the rice, garnish with cucumber and cilantro, and drizzle the sauce over.

Nutrition

Serving: 1portionCalories: 600kcalCarbohydrates: 60gProtein: 40gFat: 20gSaturated Fat: 5gPolyunsaturated Fat: 3gMonounsaturated Fat: 10gCholesterol: 90mgSodium: 800mgPotassium: 500mgFiber: 2gSugar: 1gVitamin A: 15IUVitamin C: 5mgCalcium: 2mgIron: 10mg

Notes

This Hainanese Chicken can be stored in the fridge for up to 3 days and is best served fresh. Use reserved broth for cooking rice or soups.

Tried this recipe?

Let us know how it was!

Amazing Paleo Sweet Potato Shepherd’s Pie That’s Crazy Good

As the first chill of autumn creeps in, I find myself longing for meals that wrap me in warmth and nostalgia. My Hearty Paleo Sweet Potato Shepherd’s Pie is the perfect antidote to those brisk evenings—comfort food reimagined. This recipe swaps traditional mashed potatoes for a lush, creamy sweet potato topping, making it not just paleo-friendly but a healthier choice your family will love. What’s more, it’s a convenient one-pan wonder, yielding a delightful balance of nutrition and flavor that even the pickiest eaters will appreciate.

Curious to learn how to create this comforting dish that will elevate your dinner game? Let’s dive in!

Why Is This Shepherd’s Pie Amazing?

Comforting Warmth: This Hearty Paleo Sweet Potato Shepherd’s Pie wraps you in cozy flavors, making it ideal for chilly nights.

Nutritious Twist: By using sweet potatoes instead of traditional mashed potatoes, you’re getting a nutrient boost along with natural sweetness.

One-Pan Convenience: Minimal cleanup is required, as this recipe uses an oven-safe skillet—perfect for busy weeknights!

Customizable Goodness: Feel free to throw in optional vegetables like spinach or mushrooms for added flavor and nutrition.

Crowd-Pleasing Delight: Whether you’re feeding the family or entertaining guests, this dish is sure to win over even the pickiest eaters!

For more wholesome options, check out my Zucchini Sweet Potato and Ground Beef Potato recipes!

Amazing Paleo Sweet Potato Shepherd’s Pie Ingredients

• You’ll find that making this amazing Paleo Sweet Potato Shepherd’s Pie is simpler than you think!

For the Meat Filling

  • Ground Meat – Opt for grass-fed beef or lamb for rich flavor; ground turkey or chicken are great lighter substitutes.
  • Seasonings (Salt & Pepper) – Essential for enhancing the depth of flavor in your dish.
  • Optional Vegetables (Peas, Corn, Mushrooms, Spinach, Parsnips) – Adding these will not only enrich the pie but also boost its nutritional profile.

For the Sweet Potato Topping

  • Sweet Potatoes – The star of this dish, providing a creamy texture and natural sweetness; remember to drain thoroughly after boiling.
  • Ghee or Coconut Oil – Use ghee for a buttery flavor, or opt for coconut oil to keep it dairy-free.
  • Coconut Milk – Adds creaminess; use it gradually until you achieve your desired consistency.

This rich and satisfying recipe is the perfect blend of tradition and health, making it an amazing choice for a family dinner!

Step‑by‑Step Instructions for Amazing Paleo Sweet Potato Shepherd’s Pie

Step 1: Preheat the Oven
Begin by preheating your oven to 400°F (200°C). This crucial step ensures that your Amazing Paleo Sweet Potato Shepherd’s Pie will bake evenly and reach a delightful golden brown on top. While the oven heats, gather your ingredients and equipment, such as an oven-safe skillet or Dutch oven for seamless cooking.

Step 2: Cook the Meat
In your preheated skillet over medium heat, add the ground meat of your choice. Cook it for about 6–8 minutes, stirring occasionally, until it’s browned and no longer pink. This step is essential for building a rich flavor base. Once browned, drain any excess fat to avoid a greasy pie.

Step 3: Add Optional Vegetables
Now it’s time to enhance the flavor! Stir in any optional vegetables like peas, corn, or mushrooms, along with salt and pepper to taste. Simmer this mixture for approximately 5 minutes, allowing the vegetables to soften and absorb the seasoned goodness from the meat. This will create a delicious filling for your shepherd’s pie.

Step 4: Boil Sweet Potatoes
While the meat and vegetables are simmering, bring a pot of water to a boil. Carefully add the chopped sweet potatoes and let them cook for about 15 minutes, or until they are fork-tender. Be sure to drain the sweet potatoes well to prevent a watery mash, setting the stage for a creamy topping.

Step 5: Mash Sweet Potatoes
Transfer the drained sweet potatoes back into the pot and mash them while they’re still warm. Gradually mix in ghee or coconut oil along with a splash of coconut milk, stirring until you achieve a smooth and creamy consistency. This luscious topping will beautifully complement the hearty filling of your Amazing Paleo Sweet Potato Shepherd’s Pie.

Step 6: Assemble the Pie
With the meat filling ready and the sweet potato mash prepared, it’s time to layer your pie! Spread the meat and vegetable mixture evenly at the bottom of your skillet. Carefully dollop the creamy sweet potato mash on top and use a spatula to smooth it out evenly across the filling, creating an inviting surface that will bake to perfection.

Step 7: Bake
Place the assembled shepherd’s pie in the preheated oven and bake for 25–30 minutes. Keep an eye on it, looking for visual cues like bubbling edges and a slight golden color on top. This step ensures that all the flavors meld beautifully while giving the sweet potato topping a lovely texture.

Step 8: Rest and Serve
Once baked, remove the pie from the oven and let it rest for about 10 minutes. This resting period allows the filling to set, making it easier to serve. Spoon out portions of your Amazing Paleo Sweet Potato Shepherd’s Pie, and enjoy it hot for a comforting meal everyone will adore!

Expert Tips for Amazing Paleo Sweet Potato Shepherd’s Pie

  • Flavorful Browning: Properly brown your meat for a deeper flavor; don’t rush this step as it adds richness to the filling.

  • Tender Sweet Potatoes: Avoid overcooking the sweet potatoes; they should be fork-tender but still firm enough for a fluffy mash.

  • Mash Warm: For a smooth texture, mash the sweet potatoes while they’re still warm; cold potatoes can become gummy.

  • Check for Doneness: Watch for bubbling edges in the oven, which indicate your Amazing Paleo Sweet Potato Shepherd’s Pie is heated through and ready to enjoy.

  • Customize to Taste: Don’t hesitate to experiment with optional veggies like spinach or mushrooms for extra flavor and nutrients in your dish.

What to Serve with Amazing Paleo Sweet Potato Shepherd’s Pie

Experience a delightful meal that complements the cozy flavors of this comforting dish, transforming dinner into a heartwarming celebration.

  • Garlic Roasted Greens: Perfectly sautéed greens add a crunchy texture and a burst of freshness, balancing the rich pie beautifully.

  • Crispy Brussels Sprouts: The slight bitterness of Brussels sprouts against the sweet potato topping elevates your meal while providing a satisfying crunch.

  • Herb-Infused Quinoa: This light and fluffy grain offers a nutty flavor that complements the savory filling, making it a nutritious side option.

  • Simple Garden Salad: A fresh salad with crisp lettuce, cherry tomatoes, and a tangy vinaigrette adds a refreshing contrast to the hearty shepherd’s pie.

  • Roasted Root Vegetables: The caramelized sweetness from roasted carrots and parsnips complements the dish’s flavors beautifully, bringing warmth to your meal.

  • Savory Vegetable Soup: A bowl of warm vegetable soup adds another layer of comfort, making it the perfect starter to your hearty meal.

  • Chilled White Wine: A glass of crisp Sauvignon Blanc will elevate the dining experience, as its acidity enhances the dish’s rich flavors.

  • Apple Crisp: End your meal on a sweet note with a warm apple crisp, providing a delightful contrast of textures and a hint of cinnamon warmth.

How to Store and Freeze Amazing Paleo Sweet Potato Shepherd’s Pie

Fridge: Store leftovers in an airtight container in the refrigerator for up to 3 days. This ensures your delicious pie retains its flavors and texture.

Freezer: Freeze the assembled shepherd’s pie wrapped tightly in plastic wrap and aluminum foil for up to 2 months. Thaw in the fridge overnight before reheating for best results.

Reheating: Reheat slices in the oven at 350°F (175°C) for about 20-25 minutes, or until heated through. This helps maintain the creamy topping and savory filling of your Amazing Paleo Sweet Potato Shepherd’s Pie.

Make-Ahead Tip: Prepare the filling and sweet potato topping in advance, storing them separately in the fridge. Assemble the pie just before baking for a fresh, warm meal!

Amazing Paleo Sweet Potato Shepherd’s Pie Variations

Feel free to let your creativity shine when making this dish; you can truly make it your own!

  • Vegetarian Delight: Replace the meat with a blend of lentils and mushrooms for a hearty, plant-based version.
  • Spicy Kick: Add diced jalapeños or red pepper flakes to the meat filling for a zesty boost that excites the palate.
  • Herb Infusion: Incorporate fresh herbs like rosemary or thyme into the sweet potato mash for added aroma and depth.
  • Cheesy Flavor: Stir in nutritional yeast to the sweet potato topping for a cheesy essence without the dairy.
  • Nutty Crunch: Top the sweet potato layer with crushed nuts or seeds for a delightful crunch that complements the creamy texture.
  • Smoky Essence: Use smoked paprika in the meat filling to infuse a warm, smoky flavor that lingers on the taste buds.
  • Savory Broth Base: Replace water with chicken or vegetable broth when boiling the sweet potatoes for an elevated savory note.
  • Flavor-Boosted Meat: Experiment with ground lamb or spicy chorizo instead of traditional ground beef to switch up the flavor profile.

Consider pairing this amazing pie with a fresh garden salad, like a vibrant Smoked Salmon Potato salad, for a complete meal that delights!

Make Ahead Options

Preparing the Amazing Paleo Sweet Potato Shepherd’s Pie ahead of time is a game-changer for busy weeknights! You can prepare the meat filling and sweet potato topping separately up to 24 hours in advance. Simply cook the filling and let it cool before transferring it to an airtight container in the refrigerator. For the sweet potatoes, mash them as usual, then store in another container. To maintain quality, cover both components tightly to prevent moisture loss. When you’re ready to enjoy your meal, simply reheat the filling on the stove over medium heat, then layer and bake as directed. This way, you’ll have a comforting, homemade dinner ready with minimal effort!

Amazing Paleo Sweet Potato Shepherd’s Pie Recipe FAQs

How do I choose ripe sweet potatoes?
Absolutely! When selecting sweet potatoes, look for those that are firm, with smooth skin and no dark spots or wrinkles. The color can range from orange to yellow, but be cautious of any with dark spots all over, as this indicates overripeness. If you have a choice, opt for organic sweet potatoes for the best flavor and nutrition!

What is the best way to store leftovers?
Very! To store your Amazing Paleo Sweet Potato Shepherd’s Pie, place any leftovers in an airtight container in the refrigerator. This will keep it fresh for up to 3 days. Ensure it’s completely cooled before sealing to avoid moisture buildup, which can affect texture.

Can I freeze shepherd’s pie? How?
Absolutely! You can freeze the assembled shepherd’s pie by wrapping it tightly in plastic wrap and then in aluminum foil. It can be stored in the freezer for up to 2 months. When you’re ready to enjoy it, thaw it in the fridge overnight and reheat it in the oven at 350°F (175°C) for about 20-25 minutes. This method helps retain the creamy topping and savory filling.

Why is my sweet potato topping watery?
Commonly, this can occur if the sweet potatoes are not drained well after boiling, leading to excess moisture. Here’s a little tip: after boiling, let them sit in the colander for a few minutes to allow any remaining water to evaporate. Make sure to mash them while they are still warm, as cold potatoes can become gummy instead of fluffy.

Are there any allergens I should be aware of?
Definitely, if you or someone you’re serving has allergies, make sure to check all ingredients. The standard recipe is gluten-free and dairy-free, but watch out for any pre-packaged ingredients, like seasoning mixes, that might contain traces of allergens. As a precaution, always double-check! If you’re making it for a gathering, it’s nice to let others know the ingredients you used to keep everyone safe.

Can I make this dish vegetarian-friendly?
Absolutely! For a vegetarian version, you can substitute the meat with lentils or a mixture of beans and mushrooms to create a hearty filling. This not only keeps the comforting essence of the dish but also maintains the nutritional vibe while accommodating plant-based diets.

Amazing Paleo Sweet Potato Shepherd’s Pie

Amazing Paleo Sweet Potato Shepherd’s Pie That's Crazy Good

A comforting and nutritious twist on shepherd's pie with sweet potatoes, perfect for chilly nights.
Prep Time 20 minutes
Cook Time 45 minutes
Resting Time 10 minutes
Total Time 1 hour 15 minutes
Servings: 6 servings
Course: Dinner
Cuisine: Paleo
Calories: 350

Ingredients
  

For the Meat Filling
  • 1 lb ground meat (grass-fed beef, lamb, turkey, or chicken) Opt for grass-fed for rich flavor.
  • 1 tsp salt
  • 1 tsp pepper
  • optional vegetables (peas, corn, mushrooms, spinach, parsnips) Add according to preference.
For the Sweet Potato Topping
  • 2 lbs sweet potatoes Drain thoroughly after boiling.
  • 2 tbsp ghee or coconut oil Use ghee for buttery flavor.
  • 1/2 cup coconut milk Add gradually for desired consistency.

Equipment

  • Oven-safe skillet

Method
 

Directions
  1. Preheat your oven to 400°F (200°C).
  2. In your preheated skillet over medium heat, add the ground meat. Cook for about 6–8 minutes, stirring occasionally, until browned.
  3. Stir in optional vegetables with salt and pepper. Simmer for about 5 minutes.
  4. Boil a pot of water and add chopped sweet potatoes. Cook for about 15 minutes, until fork-tender. Drain well.
  5. Mash the drained sweet potatoes and mix in ghee or coconut oil and coconut milk.
  6. Spread the meat filling in the skillet, then dollop the sweet potato mash on top and smooth it out.
  7. Bake in the oven for 25–30 minutes.
  8. Let the pie rest for about 10 minutes before serving.

Nutrition

Serving: 1servingCalories: 350kcalCarbohydrates: 40gProtein: 25gFat: 15gSaturated Fat: 5gPolyunsaturated Fat: 2gMonounsaturated Fat: 8gCholesterol: 70mgSodium: 500mgPotassium: 850mgFiber: 6gSugar: 4gVitamin A: 15000IUVitamin C: 30mgCalcium: 50mgIron: 3mg

Notes

Feel free to customize the vegetables and flavors to your taste. Great for meal prep and leftovers.

Tried this recipe?

Let us know how it was!

Iced Butterfly Pea Flower Tea Latte: Colorful & Refreshing Treat

As I poured the deep blue brew into my glass, a wave of intrigue washed over me—this was no ordinary tea. The Iced Butterfly Pea Flower Tea Latte is a magical caffeine-free drink that not only dazzles your eyes with its captivating color transformation but also delights your senses with its earthy and smooth flavors. Perfect for warm afternoons or any time you’re craving a refreshing beverage, this latte is effortlessly customizable. Whether you prefer it with almond milk for a dairy-free twist or sweetened with agave for a vegan-friendly option, it’s a delightful way to elevate your home beverage game. So, are you ready to experience the color-changing miracle of this enchanting drink?

Why is this latte so special?

Visually Stunning: This latte’s deep blue hue transitions to a vibrant purple, creating an enchanting visual that’s perfect for impressing guests or enjoying a solo treat.

Caffeine-Free Delight: Enjoy this refreshing drink any time of day without the jitters, making it suitable for all ages and occasions.

Customizable Flavors: Whether you prefer a creamy almond milk base or a splash of citrus juice for tang, choices abound to suit your palate.

Simple Preparation: You only need a handful of ingredients, and the steps are easy to follow, ensuring you can whip it up in no time—perfect for busy days!

Health Benefits: Packed with antioxidants from butterfly pea flowers, this latte not only delights your taste buds but also benefits your health.

Pair it with a delightful salad, a couple of cookies, or even consider making this alongside a refreshing Steak Fajita Salad to create a colorful meal spread!

Iced Butterfly Pea Flower Tea Latte Ingredients

For the Tea
Dried Butterfly Pea Flowers – Provides an enchanting deep blue color and earthy flavor; substitute with 1 butterfly pea tea bag if needed.
Hot Water – Essential for steeping the tea; boiling water ensures the best flavor extraction.

For the Latte
Milk – Adds creaminess and froth; can be dairy or plant-based like almond, coconut, or oat milk.
Sweetener (honey or to taste) – Enhances the flavor with sweetness; adjust based on your preference.

For Serving
Ice Cubes – Necessary for serving chilled; don’t forget to pack them in!
Lemon Juice (optional) – Contributes acidity and initiates an eye-catching color transformation; adjust based on desired acidity.

Feel free to get creative and adjust these ingredients to make your own unique Iced Butterfly Pea Flower Tea Latte!

Step‑by‑Step Instructions for Iced Butterfly Pea Flower Tea Latte

Step 1: Steep the Tea
Begin by boiling water until bubbling, then pour it over dried butterfly pea flowers in a heat-proof cup. Steep the flowers for 5-7 minutes, watching the water transform into a stunning deep blue hue. Once steeped, strain the tea into another container and allow it to cool to room temperature, which will set the stage for your Iced Butterfly Pea Flower Tea Latte.

Step 2: Sweeten (Optional)
While the tea is still warm, add honey or your preferred sweetener. Stir vigorously until it’s completely dissolved, ensuring you can adjust the sweetness to your liking. This step not only enhances the flavor of the tea but also makes every sip of your Iced Butterfly Pea Flower Tea Latte more delightful.

Step 3: Froth the Milk
Choose your preferred milk—dairy or plant-based—and froth it using a milk frother, shake it in a jar, or blend it until light and airy. This will create a creamy texture that beautifully contrasts the tea. Prepare your froth just before assembling to maintain its delightful fluffiness for your Iced Butterfly Pea Flower Tea Latte.

Step 4: Assemble the Drink
Take a tall glass and fill it with ice cubes to keep your drink chilled. Slowly pour the cooled butterfly pea tea over the ice, creating a mesmerizing blue layer. Next, gently add the frothed milk on top to form distinct layers, enhancing the visual appeal of your Iced Butterfly Pea Flower Tea Latte.

Step 5: Add Lemon Juice (Optional)
For an extra touch of flair, drizzle some lemon juice over the top of your latte. As the citrus interacts with the tea, watch in awe as it transforms from vibrant blue to a beautiful purple. This fun color change makes the Iced Butterfly Pea Flower Tea Latte an exciting treat for the eyes as well as the taste buds.

Step 6: Garnish and Serve
To elevate the visual charm of your Iced Butterfly Pea Flower Tea Latte, consider garnishing with fresh or dried butterfly pea flowers atop the frothy layer. This final touch will not only enhance its beauty but also emphasize the unique ingredients used, making your drink a showstopper at any gathering.

Make Ahead Options

These Iced Butterfly Pea Flower Tea Lattes are perfect for busy home cooks looking to save time! You can prepare the butterfly pea tea base up to 24 hours in advance by steeping the dried flowers and refrigerating the strained tea in an airtight container. For the best quality, make sure to cool the tea to room temperature before storing. You can also froth the milk right before serving to maintain its light and airy texture. When it’s time to enjoy, simply pour the prepared tea over ice, add the freshly frothed milk, and if desired, a drizzle of lemon juice to witness the magical color transformation. This way, you’ll have a delightful and visually stunning drink with minimal effort!

What to Serve with Iced Butterfly Pea Flower Tea Latte

This vibrant latte pairs beautifully with light, refreshing dishes that complement its enchanting flavors.

  • Cucumber and Mint Salad: Crisp cucumbers paired with refreshing mint create a cooling side dish that enhances the latte’s earthy notes.
  • Lemon Shortbread Cookies: A delightful sweet treat, the buttery and zesty flavors of these cookies echo the latte’s citrus surprise.
  • Vibrant Fruit Platter: A medley of fresh fruits like berries and citrus will enhance the beverage’s brightness and bring out its colorful nature.
  • Avocado Toast: Creamy avocado on whole-grain bread offers healthy fats and protein, perfectly balancing the latte’s refreshing qualities.
  • Chia Seed Pudding: A light and nutritious option, this pudding can be flavored with tropical fruits that pair wonderfully with the tea’s floral essence.
  • Sparkling Water with Citrus: For a refreshing drink, serve alongside your latte. The bubbles and zest will clean your palate and enhance the overall experience.

Each pairing creates a harmonious and delicious meal that makes any occasion feel special.

How to Store and Freeze Iced Butterfly Pea Flower Tea Latte

Fridge: Store any leftover Iced Butterfly Pea Flower Tea Latte in an airtight container for up to 3 days. This will help maintain its freshness and flavor.

Freezer: If you want to enjoy your tea latte later, pour the cooled butterfly pea tea into ice cube trays. Freeze and use the cubes in smoothies or other recipes to preserve the essence of the Iced Butterfly Pea Flower Tea Latte.

Reheating: When ready to enjoy leftover tea, gently reheat it on the stove or in the microwave, being cautious not to overheat. Add frothed milk fresh for the best texture.

Preparation Tip: To save time, prepare the butterfly pea tea base up to 24 hours in advance and refrigerate until you’re ready to froth the milk and assemble your drink.

Iced Butterfly Pea Flower Tea Latte Variations

Feel free to let your culinary creativity shine with these fun and tasty twists on this delightful latte!

  • Dairy-Free: Substitute regular milk with almond, coconut, or oat milk for a creamy, plant-based alternative. Each brings its unique flavor, enhancing your drink while keeping it light.

  • Vegan Sweetener: Swap honey for agave syrup or maple syrup to ensure a fully vegan-friendly version. The sweetness will blend beautifully, allowing the floral notes to shine through.

  • Flavor Boost: Add a splash of vanilla extract or a sprinkle of cinnamon for a comforting, aromatic twist. This little touch can elevate your latte into a warm hug in a glass.

  • Citrus Variations: Experiment with different citrus juices like lime or orange to explore diverse flavor profiles, adding a bright zing that complements the earthiness of the tea.

  • Fruit Infusion: Muddle fresh berries or mango into your latte for an extra fruity burst. This twist not only enhances flavor but also adds a beautiful pop of color.

  • Chai Spice: Incorporate a pinch of chai spices, like cardamom and ginger, to provide a warm and spiced depth to your latte. It’s a delightful blend that cozy and exotic at the same time.

  • Cool Down: For a more refreshing version, transform this latte into a smoothie! Blend your butterfly pea tea with ice, fruit of choice, and your preferred milk for a delightful icy treat.

When serving, why not pair your latte with light snacks such as a refreshing cucumber and mint salad, or consider making this alongside a lovely Steak Fajita Salad for a colorful meal spread?

Expert Tips for Iced Butterfly Pea Flower Tea Latte

Steeping Time: Ensure to steep the butterfly pea flowers for only 5-7 minutes to prevent bitterness. The perfect steeping time brings out the lush blue color without harsh flavors.

Choose Your Milk: Experiment with different types of milk to find your ideal flavor combination. Dairy-free options like almond or oat milk provide a delicious twist for your Iced Butterfly Pea Flower Tea Latte.

Frothing Technique: Froth your milk just before assembling to maintain its airy texture. If it sits too long, it may deflate, affecting the latte’s creaminess.

Color Change Magic: Add lemon juice slowly and watch the transformation! This not only adds a zesty flavor but also enhances the visual appeal of your latte.

Storage Tips: If you have leftovers, store the tea in an airtight container in the fridge for up to 3 days. Reheat gently before using again to enjoy your Iced Butterfly Pea Flower Tea Latte!

Iced Butterfly Pea Flower Tea Latte Recipe FAQs

What should I look for when selecting butterfly pea flowers?
When choosing dried butterfly pea flowers, look for vibrant blue color with no dark spots or signs of moisture. They should feel dry and crinkle easily in your hand, indicating freshness. If you’re opting for tea bags, ensure they’re premium quality for the best flavor.

How should I store my Iced Butterfly Pea Flower Tea Latte?
Store any leftover Iced Butterfly Pea Flower Tea Latte in an airtight container in the fridge for up to 3 days. This way, you can relish the refreshing flavors and beautiful colors later on. Just reheat gently when you’re ready to enjoy another cup!

Can I freeze the butterfly pea tea for later use?
Absolutely! To freeze, pour the cooled butterfly pea tea into ice cube trays and let them freeze solid. These cubes can be used later in smoothies or drinks for a burst of flavor. Just remember to make the latte fresh each time for the best experience!

What are some common mistakes to avoid when making this latte?
One common mistake is steeping the butterfly pea flowers for too long, which can lead to a bitter taste. Always steep for 5-7 minutes, and avoid boiling water to achieve a smoother flavor profile. Additionally, froth your milk just before serving to keep the texture light and airy.

Is this latte safe for those with dietary restrictions?
Yes! The Iced Butterfly Pea Flower Tea Latte is naturally caffeine-free, suitable for many dietary preferences. For a dairy-free option, use almond, oat, or coconut milk. Just be cautious with sweeteners; opt for agave syrup or maple syrup for vegan-friendly sweetness. Always check for allergies with any substitutes you make.

Can I prepare the tea base ahead of time?
Definitely! You can prepare the butterfly pea tea base up to 24 hours in advance. Simply cool it down and store it in the refrigerator. When you’re ready, froth your milk freshly and assemble your drink for a delightful and refreshing experience!

Iced Butterfly Pea Flower Tea Latte

Iced Butterfly Pea Flower Tea Latte

Iced Butterfly Pea Flower Tea Latte is a caffeine-free beverage that transforms from blue to purple, offering delicious flavors and customizable options.
Prep Time 10 minutes
Cook Time 10 minutes
Total Time 20 minutes
Servings: 2 servings
Course: Drinks
Cuisine: Beverage
Calories: 100

Ingredients
  

For the Tea
  • 2 tablespoons Dried Butterfly Pea Flowers Provides an enchanting deep blue color and earthy flavor; substitute with 1 butterfly pea tea bag if needed.
  • 2 cups Hot Water Essential for steeping the tea; boiling water ensures the best flavor extraction.
For the Latte
  • 1 cup Milk Adds creaminess and froth; can be dairy or plant-based like almond, coconut, or oat milk.
  • 2 tablespoons Sweetener (honey or to taste) Enhances the flavor with sweetness; adjust based on your preference.
For Serving
  • 1 cup Ice Cubes Necessary for serving chilled.
  • 1 tablespoon Lemon Juice (optional) Contributes acidity and initiates an eye-catching color transformation; adjust based on desired acidity.

Equipment

  • Heat-proof cup
  • Milk frother
  • Tall glass

Method
 

Step-by-Step Instructions
  1. Begin by boiling water until bubbling, then pour it over dried butterfly pea flowers in a heat-proof cup. Steep the flowers for 5-7 minutes, watching the water transform into a stunning deep blue hue. Once steeped, strain the tea into another container and allow it to cool to room temperature.
  2. While the tea is still warm, add honey or your preferred sweetener. Stir vigorously until it's completely dissolved.
  3. Choose your preferred milk—dairy or plant-based—and froth it using a milk frother, shake it in a jar, or blend it until light and airy.
  4. Take a tall glass and fill it with ice cubes. Slowly pour the cooled butterfly pea tea over the ice, then gently add the frothed milk on top to form distinct layers.
  5. For an extra touch of flair, drizzle some lemon juice over the top of your latte.
  6. Consider garnishing with fresh or dried butterfly pea flowers atop the frothy layer before serving.

Nutrition

Serving: 1cupCalories: 100kcalCarbohydrates: 20gProtein: 3gFat: 2gSaturated Fat: 1gCholesterol: 5mgSodium: 150mgPotassium: 250mgFiber: 1gSugar: 10gVitamin A: 100IUVitamin C: 5mgCalcium: 150mgIron: 1mg

Notes

Store any leftover Iced Butterfly Pea Flower Tea Latte in an airtight container for up to 3 days. Reheat gently before using again to enjoy.

Tried this recipe?

Let us know how it was!

Indulge in Creamy Rømmegrøt: Your New Favorite Norwegian Comfort

As I stirred the creamy mixture in my pot, the air filled with a rich and buttery aroma that immediately transported me to cozy family gatherings in Norway. Rømmegrøt, a traditional Norwegian sour cream porridge, is the ultimate comfort food, perfect for those chilly mornings when you crave something warm and indulgent. This recipe is not only straightforward to whip up, but it also offers that heavenly creamy texture that hugs your taste buds with every spoonful. Topped with melted butter and a generous sprinkle of cinnamon-sugar, this delightful dish can be enjoyed as a breakfast treat or a luxurious dessert. It’s time to embrace this comforting classic and treat your loved ones to a taste of Norwegian tradition! What will you top your Rømmegrøt with?

Why is Rømmegrøt a Must-Try?

Comforting warmth: This rich Norwegian porridge embraces you with a creamy texture that warms the soul. Easy preparation: With just a few simple ingredients, it’s a breeze to make—perfect for busy mornings or lazy weekends. Versatile delight: Rømmegrøt shines as breakfast, dessert, or even a savory side. Crowd-pleasing flavor: Topped with buttery goodness and cinnamon-sugar, it’s a family favorite that delights everyone at the table. Cultural experience: Enjoy a bite of tradition, linking you to cherished Norwegian customs and memories. Plus, if you’re curious about other comforting recipes, check out our family-friendly desserts.

Rømmegrøt Ingredients

• Discover the key components behind this creamy Norwegian dish!

For the Porridge

  • Whole Milk – Adds creaminess and structure to the porridge; substitute with heavy cream for an even richer texture.
  • All-Purpose Flour – Provides thickness and body; use gluten-free flour for a gluten-free version.
  • Granulated Sugar – Sweetens the dish; adjust to taste or opt for a sugar alternative if desired.
  • Kosher Salt – Enhances flavor; feel free to replace it with sea salt if you prefer.

For Serving

  • Salted Butter – Adds richness and flavor; drizzle more over the top for extra indulgence.
  • Cinnamon-Sugar – A comforting topping that enhances sweetness and warmth; perfect for that extra touch of delight!

Step‑by‑Step Instructions for Rømmegrøt

Step 1: Heat the Milk
In a large heavy-bottomed saucepan, pour in 1 quart of whole milk and heat it over medium heat. Stir the milk continuously with a wooden spoon to prevent it from burning, heating until it reaches a temperature of 195°F. You’ll know it’s ready when steam rises and little bubbles form around the edges, creating an inviting aroma.

Step 2: Prepare the Dry Mix
While the milk is heating, take a separate bowl and whisk together ¾ cup of all-purpose flour, ¼ cup of granulated sugar, and ⅛ teaspoon of kosher salt. This mixture will thicken your Rømmegrøt beautifully, so ensure it’s well-blended. Set this bowl aside, ready to integrate with the warm milk shortly.

Step 3: Melt the Butter
In a small saucepan, melt ½ cup of salted butter over low heat. It’s ideal to melt it gently, as you’ll hold it aside until the milk reaches the desired temperature. Once melted, keep the butter warm but don’t allow it to boil, as you want a silky drizzle for your completed Rømmegrøt.

Step 4: Combine the Flour Mixture and Butter
Once the milk reaches 195°F, carefully stir in the flour mixture into the melted butter. This will create a thick paste. Continue mixing until well combined and smooth, ensuring there are no lumps. This base is essential for achieving the luxurious texture of your Rømmegrøt.

Step 5: Cook the Mixture
Add the flour-butter paste to the heated milk in the saucepan. Stir constantly with a wooden spoon as it begins to thicken, ensuring an even consistency. Keep stirring until the mixture comes to a gentle boil—a sign that your Rømmegrøt is coming together perfectly.

Step 6: Simmer for Thickness
Reduce the heat to low and allow the Rømmegrøt to simmer for an additional 5 minutes. Stir it often during this time to prevent sticking or burning. You’ll notice it thickening to a pudding-like consistency, with a creamy, velvety texture that’s oh-so-comforting.

Step 7: Serve Hot
Ladle the hot Rømmegrøt into bowls and generously drizzle melted butter over each serving. To finish, sprinkle a delightful mixture of cinnamon-sugar on top, enhancing the warmth and sweetness. Enjoy this comforting Norwegian fare while it’s still warm, letting its creamy essence wrap you in joy.

Storage Tips for Rømmegrøt

Fridge: Store any leftover Rømmegrøt in an airtight container for up to 3 days to maintain its creamy consistency.

Freezer: If you want to keep it longer, freeze Rømmegrøt in individual portions for up to 3 months. Make sure to use freezer-safe containers and leave space for expansion.

Reheating: When you’re ready to enjoy your Rømmegrøt again, gently reheat it on the stove over low heat, adding a splash of milk to restore its luscious creaminess.

What to Serve with Creamy Norwegian Rømmegrøt?

When enjoying the delightful warmth of Rømmegrøt, consider these tasty companions to create a memorable meal experience.

  • Savory Cured Meats: Pairing with thinly sliced cured meats enhances Rømmegrøt’s creamy sweetness, adding a satisfying contrast that pleases the palate. The rich flavors balance beautifully, making every bite a delightful exploration of texture and taste.

  • Fresh Berries: A side of fresh berries like strawberries or blueberries adds a burst of bright acidity and color. Their natural sweetness complements the porridge, elevating your dish’s overall freshness.

  • Nutty Granola: Consider serving alongside a sprinkle of nutty granola. The crunch provides a delightful textural contrast, while the toasted oats and nuts lend a heartiness that perfectly balances out the silky porridge.

  • Cinnamon Roll Swirls: To indulge in sweetness, serve Rømmegrøt with warm cinnamon rolls. Their soft, gooey layers filled with cinnamon and sugar amplify the comforting nature of the porridge, creating a cozy breakfast experience.

  • Herbaceous Salad: A light mixed green salad, dressed in a simple vinaigrette, can cut through the richness of the rømmegrøt. Fresh herbs add brightness, enhancing your overall meal balance while delivering a refreshing crunch.

  • Cardamom Coffee: Sip on a warm cup of cardamom-infused coffee to elevate your sweet porridge. The exotic spice mingles with the creamy flavors, turning your simple breakfast into a rich aromatic experience.

  • Dark Chocolate Shavings: For a sweet indulgence, consider garnishing Rømmegrøt with dark chocolate shavings. The slight bitterness of the chocolate beautifully contrasts the sweetness, creating a luscious dessert experience.

Rømmegrøt Variations & Substitutions

Feel inspired to put your own twist on this classic Norwegian dish and make it fit your taste!

  • Sour Cream: Substitute sour cream for an extra tanginess, known as fløtegrøt or fløyelsgrøt in some variations. The flavor profile changes, giving you a delightful surprise with every bite!

  • Gluten-Free: Use gluten-free flour to keep this dish accessible for those with dietary restrictions. The creamy texture will remain, so everyone can enjoy this delightful porridge.

  • Alternative Sweeteners: Swap granulated sugar with honey or maple syrup for a healthier, natural sweetness. This adds a unique flavor dimension and lends a different depth to the Rømmegrøt.

  • Vanilla Extract: For a fragrant twist, incorporate a teaspoon of vanilla extract into the mixture. It adds a lovely warmth while balancing the dish’s sweetness perfectly.

  • Nutmeg Dusting: Instead of or alongside cinnamon-sugar, try a sprinkle of nutmeg for a spiced variation. It complements the creamy texture while giving a seasonal touch, especially in fall or winter.

  • Fruity Accents: Top with fresh fruits or berry compote for a refreshing contrast. The bursts of juicy flavors will elevate the comforting nature of your Rømmegrøt.

  • Spicy Kick: For a unique twist, consider adding a pinch of cayenne pepper or a drizzle of honey with chili flakes on top. This unexpected heat will awaken your taste buds and keep things exciting!

  • Accompaniment Ideas: Pair your Rømmegrøt with savory cured meats or smoked salmon for a delightful contrast in flavors. This combination creates a balanced meal that showcases the versatility of this dish.

Feel like venturing into other comforting recipes? Check out our collection of delightful desserts that won’t disappoint!

Make Ahead Options

Rømmegrøt is an ideal dish for meal prep, allowing you to savor its comforting goodness with minimal fuss! You can prepare the basic mixture, including the milk and flour paste, up to 24 hours in advance; just refrigerate it in an airtight container. To prevent it from losing its creamy consistency, be sure to stir well before reheating. When you’re ready to enjoy your Rømmegrøt, gently heat the mixture on the stove over low heat, adding a splash of milk if necessary to loosen it up. Finally, serve it warm, drizzling with melted butter and a sprinkle of cinnamon-sugar for that indulgent finish. Enjoy your delightful, quick-to-serve treat!

Expert Tips for Rømmegrøt

  • Use a Thermometer: Keeping an eye on the milk temperature is crucial. A kitchen thermometer ensures you heat it to the perfect 195°F, preventing burning.

  • Consistent Stirring: Constantly stir the milk while adding the flour mixture to avoid lumps. This step is key to achieving the smooth, creamy texture that defines Rømmegrøt.

  • Don’t Rush the Simmer: Allow the Rømmegrøt to simmer on low heat for 5 minutes. This extra time enhances its consistency, creating a luscious pudding-like feel.

  • Personalize Your Topping: Feel free to experiment with toppings! While melted butter and cinnamon-sugar are classic, adding fresh fruits or berry compotes can elevate your Rømmegrøt even further.

  • Store Carefully: If you have leftovers, store them in an airtight container in the fridge for up to three days. Gently reheat with a splash of milk to restore creaminess.

Rømmegrøt Recipe FAQs

How do I select the best milk for Rømmegrøt?
Absolutely! For a rich and creamy Rømmegrøt, I recommend using whole milk, which provides the best texture. If you’re seeking something even more luxurious, feel free to substitute with heavy cream. Just look for milk that has no dark spots or any off smells when making your selection.

How should I store leftover Rømmegrøt?
Very! To store your delicious leftovers, simply place them in an airtight container in the fridge, where they will keep for up to 3 days. When you’re ready to enjoy, gently reheat on the stove, adding a splash of milk to restore that creamy consistency. Your Rømmegrøt will be just as delightful!

Can I freeze Rømmegrøt?
Of course! If you’d like to keep your Rømmegrøt longer, you can freeze it. Pour the cooled porridge into freezer-safe containers or silicone molds, leaving some space for expansion. It will preserve its quality for up to 3 months. To enjoy it again, simply thaw it overnight in the fridge and reheat gently on the stove, adding a splash of milk if needed.

What should I do if my Rømmegrøt is too thick?
No problem! If you find your Rømmegrøt has become thicker than you’d prefer, just add a bit more milk while reheating. Stir it in gradually over low heat until you reach your desired consistency. Remember, gentle heating prevents it from becoming lumpy while restoring that creamy texture you love.

Are there any dietary considerations for Rømmegrøt?
Absolutely! Rømmegrøt is rich and creamy, but be mindful if you or your loved ones have dietary restrictions. The classic recipe is not gluten-free, but you can easily substitute all-purpose flour with a gluten-free flour blend for those with gluten intolerance. Also, consider using alternatives for sugar if needed, and always ensure your toppings are suitable for all guests, especially if allergies are a concern.

What can I serve with Rømmegrøt?
Very! Rømmegrøt is delightful on its own but pairs wonderfully with various accompaniments. For a classic twist, serve it alongside cured meats, fresh fruits, or berry compotes to balance its sweetness. You might even want to try it with a light dusting of nutmeg or some nuts for added flavor. The more, the merrier!

Rømmegrøt

Indulge in Creamy Rømmegrøt: Your New Favorite Norwegian Comfort

Experience the comfort of Rømmegrøt, a creamy Norwegian sour cream porridge.
Prep Time 15 minutes
Cook Time 20 minutes
Simmering Time 5 minutes
Total Time 40 minutes
Servings: 4 bowls
Course: Breakfast
Cuisine: Norwegian
Calories: 350

Ingredients
  

For the Porridge
  • 1 quart whole milk Add heavy cream for richer texture
  • 3/4 cup all-purpose flour Use gluten-free if desired
  • 1/4 cup granulated sugar Adjust to taste
  • 1/8 teaspoon kosher salt Sea salt can be used as a substitute
For Serving
  • 1/2 cup salted butter Drizzle more on top if desired
  • to taste cinnamon-sugar For extra sweetness

Equipment

  • large heavy-bottomed saucepan
  • Small saucepan
  • wooden spoon
  • Whisk
  • Mixing Bowl

Method
 

Preparation Steps
  1. In a large heavy-bottomed saucepan, pour in 1 quart of whole milk and heat it over medium heat, stirring continuously.
  2. In a separate bowl, whisk together 3/4 cup of all-purpose flour, 1/4 cup of granulated sugar, and 1/8 teaspoon of kosher salt.
  3. Melt 1/2 cup of salted butter over low heat in a small saucepan.
  4. Once the milk reaches 195°F, carefully stir in the flour mixture into the melted butter.
  5. Add the flour-butter paste to the heated milk, stirring constantly until thickened.
  6. Reduce the heat to low and allow it to simmer for an additional 5 minutes.
  7. Ladle the hot Rømmegrøt into bowls and drizzle melted butter and cinnamon-sugar over each serving.

Nutrition

Serving: 1bowlCalories: 350kcalCarbohydrates: 30gProtein: 4gFat: 22gSaturated Fat: 14gMonounsaturated Fat: 8gCholesterol: 60mgSodium: 200mgPotassium: 200mgFiber: 1gSugar: 5gVitamin A: 500IUCalcium: 250mgIron: 1mg

Notes

Serve warm and feel free to personalize with toppings like fresh fruits or berry compotes. Leftovers can be stored in an airtight container for up to 3 days.

Tried this recipe?

Let us know how it was!

Ube Muffins Recipe: Fluffy Purple Treats You’ll Love

Stepping into the world of Filipino desserts is like unlocking a treasure chest of vibrant flavors, and at the forefront is the delightful ube muffin. This Ube Muffins Recipe brings the earthiness of purple yam to your breakfast table, transforming a regular morning into an exciting culinary adventure. These muffins are not only incredibly easy to whip up—perfect for when you’re short on time—but they’re also a nutritious alternative that can be enjoyed at any hour of the day. Imagine indulging in a fluffy, moist treat with a pop of color and a subtly sweet, nutty flavor. Each bite is a step closer to exploring a facet of Filipino cuisine that you won’t want to miss. Ready to brighten your day? Let’s dive into this simple, satisfying recipe!

Why Are Ube Muffins So Irresistible?

Vibrant Color: These muffins feature a stunning purple hue that instantly brightens any dish!

Unique Flavor: The earthy sweetness of ube delivers a delightful twist compared to traditional muffins.

Easy to Make: With simple ingredients and straightforward steps, this recipe is perfect for beginner bakers.

Versatile Snack: Enjoy them for breakfast, a mid-day snack, or a dessert with coffee or tea!

Diet-Friendly: Suitable for vegetarians and easily adaptable for vegan diets, making them a crowd favorite.

Fun Baking Experience: The joy of exploring Filipino cuisine and creating something scrumptious at home is truly rewarding! If you’re looking for more easy baking ideas, check out these delightful Honey BBQ Bacon Chicken Kabobs or consider making some Bakery Style Blueberry Muffins for a tasty twist.

Ube Muffins Ingredients

For the Muffins
Ube Puree – the star ingredient providing sweetness and that vibrant purple color; fresh ube can be substituted with cooked and mashed variety.
All-Purpose Flour – gives structure to the muffins, though alternative flours can be used but may change the texture.
Granulated Sugar – adds the perfect level of sweetness and moisture; feel free to swap with other sweeteners, but note results may vary.
Baking Powder – a crucial leavening agent to ensure your muffins rise beautifully; always check for freshness.
Salt – enhances the overall flavor; adjust the quantity based on your taste preference.
Eggs – help bind the ingredients together and add moisture; for a vegan alternative, flax eggs work wonderfully.
Milk – increases moisture and richness; you can use any variety, whether dairy or non-dairy.
Vegetable Oil – contributes to moisture and tenderness; try replacing it with melted coconut oil for a hint of tropical flavor.
Shredded Coconut – optional topping that adds delightful texture and a bit of crunch; feel free to skip it if you prefer.
Vanilla Extract – elevates the flavor profile; for a unique twist, swap with almond extract.

These ube muffins are a delightful fusion of flavors that you and your loved ones will cherish at any time of day!

Step‑by‑Step Instructions for Ube Muffins Recipe

Step 1: Preheat Your Oven
Begin by preheating your oven to 350°F (175°C). This step is crucial as it ensures your ube muffins bake evenly and rise beautifully. While the oven heats up, prepare your muffin tin by greasing it lightly or lining it with paper liners to make removal effortless after baking.

Step 2: Combine Dry Ingredients
In a medium mixing bowl, sift together the all-purpose flour, baking powder, and salt. Mixing these dry ingredients thoroughly is essential for even distribution, ensuring your ube muffins rise perfectly. Set the bowl aside for later use, and take a moment to admire the lovely colors of your flour mix.

Step 3: Mix Wet Ingredients
In a large bowl, combine the ube puree, eggs, granulated sugar, vegetable oil, milk, and vanilla extract. Whisk these ingredients energetically until you achieve a smooth, uniform mixture. This creamy blend will be the foundation of your ube muffins, so take your time and enjoy the process!

Step 4: Fold in Dry Ingredients
Gently fold the dry ingredients into the wet mixture using a spatula or wooden spoon. Be careful not to over-mix; you want to combine the two mixtures just until the dry ingredients disappear. This will keep your ube muffins fluffy and tender, allowing all that vibrant flavor to shine through.

Step 5: Fill Muffin Tins
Using a ladle or spoon, evenly distribute the ube muffin batter into the prepared muffin tins. Fill each cup about two-thirds full to allow room for rising. The striking purple hue of the batter will be a delightful preview of the treats to come, adding excitement to your baking session.

Step 6: Bake the Muffins
Carefully place the filled muffin tin into your preheated oven and bake for 20-25 minutes. Keep an eye on them; they’re done when they turn golden brown and a toothpick inserted into the center comes out clean. The tantalizing aroma of baked ube muffins will fill your kitchen during this time.

Step 7: Cool the Muffins
Once baked, remove the muffin tin from the oven and let it cool for a few minutes on a wire rack. This cooling period allows the muffins to set properly. Afterward, gently remove them from the tin and let them cool completely, increasing their delightful texture before serving.

Step 8: Serve and Enjoy
Now that your ube muffins are cool, they’re ready to be served! Pair them with your favorite beverage, whether coffee or tea, for a heartwarming experience. The fluffy texture and unique flavor of these ube muffins will surely become a family favorite, perfect for any time of day.

What to Serve with Ube Muffins

Imagine indulging in soft, fluffy muffins bursting with sweet, nutty flavor, perfectly complemented by delightful sides and sips.

  • Coffee Bliss: Pair your ube muffins with a steaming cup of coffee for a warm, comforting experience; the rich blend enhances the muffins’ sweetness.

  • Creamy Coconut Yogurt: A dollop of coconut yogurt adds a refreshing, creamy touch that balances the muffins’ richness while continuing the tropical theme.

  • Citrus Salad: Brighten your meal with a zesty citrus salad, featuring oranges and grapefruits; their zing cuts through the muffin’s sweetness, creating a refreshing contrast.

  • Mango Smoothie: Enjoy a silky mango smoothie to enhance the tropical vibes; its natural sweetness beautifully pairs with the earthy ube flavor.

  • Sweetened Condensed Milk Drizzle: Elevate your muffins by drizzling them with sweetened condensed milk; this adds a luscious layer of sweetness perfect for dessert.

  • Boba Tea: Sip on a boba tea with your muffins; the chewy tapioca pearls create an exciting texture that complements the soft muffins.

  • Chocolate Dipping Sauce: For an indulgent treat, serve your ube muffins with a warm chocolate dipping sauce; the combination of flavors will satisfy any sweet tooth.

  • Fruit Jam Spread: A light spread of fruit jam, like guava or passionfruit, adds brightness to each bite and enhances the overall flavor journey.

Make Ahead Options

These ube muffins are a fantastic option for meal prep enthusiasts looking to save time during busy weeks! You can prepare the muffin batter and refrigerate it for up to 24 hours in advance, allowing the flavors to meld beautifully. Alternatively, you can bake the muffins, let them cool completely, and store them in an airtight container for up to 3 days at room temperature. For longer storage, wrap them individually and freeze for up to 3 months—simply reheat in the oven or microwave before serving. By prepping ahead, you’ll enjoy these delightful ube muffins just as deliciously fresh, making your mornings easier and more enjoyable!

Ube Muffins Variations & Substitutions

Feel free to let your creativity shine while making these ube muffins by trying out these exciting variations!

  • Condensed Milk Drizzle: Add a sweet finish by drizzling warm sweetened condensed milk over the top. It’s a rich treat that enhances each bite!
  • Chocolate Chips: Fold in a handful of semi-sweet or dark chocolate chips for a decadent twist. The sweetness beautifully contrasts with the earthy ube flavor.
  • Nutty Delight: Toss in chopped walnuts or pecans for a lovely crunch and extra nutrition. You’ll enjoy the texture contrast in these delightful bites.
  • Spicy Touch: Dust some cinnamon or nutmeg into the batter to give your muffins a warm, aromatic twist. This simple addition elevates your muffins to a cozy comfort-filled treat!
  • Dairy-Free Option: Substitute regular milk with almond, soy, or oat milk and use coconut oil instead of vegetable oil to keep it vegan-friendly. You won’t sacrifice flavor!
  • Zesty Citrus: Add some grated lemon or orange zest for a refreshing flavor boost that brightens up the muffins! It’s a fantastic way to bring a new layer of taste to your favorite treat.
  • Coconut Lovers: Amplify the tropical flavor by incorporating shredded coconut into the batter or using coconut cream instead of regular milk. It’s a delightful feast for the senses!

Explore these variations to make your ube muffins truly your own. For more delightful baking inspiration, check out these delicious Mango Coconut Pudding or those scrumptious Hobo Casserole Discover recipes!

Expert Tips for Ube Muffins

Use Fresh Ingredients: Ensure your baking powder is fresh for the best rise; expired powder can lead to flat muffins.

Don’t Over-Mix: When combining wet and dry ingredients, fold gently until just combined. Over-mixing can create dense ube muffins instead of fluffy ones.

Check for Doneness: Ovens vary in temperature; start checking your muffins around the 20-minute mark to avoid overbaking.

Cool Properly: Allow your muffins to cool in the pan for a few minutes before transferring to a wire rack to enhance texture and flavor.

Customize Flavors: Feel free to experiment with additions like coconut or spices; small variations can elevate your ube muffins recipe to new heights!

How to Store and Freeze Ube Muffins

Room Temperature: Store your ube muffins in an airtight container at room temperature for up to 3 days to maintain their delicious texture and flavor.

Fridge: If you prefer, refrigerate muffins for up to a week; just be aware that this may change their fluffiness. Make sure to wrap them in plastic wrap.

Freezer: For long-term storage, individually wrap ube muffins in plastic wrap and freeze them for up to 3 months. Thaw at room temperature before enjoying.

Reheating: To enjoy muffins warm, simply microwave them for about 15-20 seconds. This rejuvenates their fluffy texture while enhancing the delightful aroma!

Ube Muffins Recipe FAQs

What should I look for when selecting ube for the muffins?
Absolutely! When selecting ube, look for firm tubers with a vibrant purple color and no dark spots or blemishes. The ideal ube will have a smooth, even texture. Fresh ube is more flavorful, but you can also use frozen ube puree, which is often readily available and convenient for baking.

How should I store leftover ube muffins?
For optimal freshness, store your ube muffins in an airtight container at room temperature for up to 3 days. If you live in a particularly humid area, you may want to refrigerate them, but be aware that this could impact their fluffiness. A quick wrap in plastic wrap before refrigerating can help maintain moisture.

Can you freeze ube muffins, and if so, how?
Very much! Freezing ube muffins is an excellent way to prolong their shelf life. Wrap each muffin individually in plastic wrap and then place them in a freezer-safe bag or container. They can be stored for up to 3 months. When you’re ready to enjoy one, simply unwrap and thaw at room temperature for a few hours, or microwave for about 15-20 seconds for a warm treat!

What should I do if my ube muffins turn out dense?
The more the merrier! If your ube muffins turn out dense, it may be due to over-mixing the batter or using expired baking powder. To ensure fluffiness, always gently fold in the dry ingredients until just combined. Check your baking powder freshness before starting, and consider adding a bit more if you’re unsure; about 1 teaspoon for this recipe should do the trick!

Are there any allergy considerations for this ube muffins recipe?
Absolutely! This ube muffins recipe is quite versatile, but it’s essential to consider dietary restrictions. The base ingredients are generally safe for vegetarians, but allergens like wheat or eggs may affect some. You can easily substitute eggs with flax eggs (1 tablespoon ground flaxseed + 2.5 tablespoons water = 1 egg) for a vegan option. Always be cautious of cross-contamination if you’re serving to someone with allergies.

Can I make ube muffins without eggs?
Certainly! To make egg-free ube muffins, you can substitute each egg with a flax egg as mentioned above or use a commercial egg replacer. If you’re looking for something quick, unsweetened applesauce (1/4 cup per egg) works well while adding moisture, too! Enjoy your baking adventure with these delightful ube muffins!

Ube Muffins Recipe

Ube Muffins Recipe: Fluffy Purple Treats You'll Love

This Ube Muffins Recipe brings the sweetness of purple yam to your breakfast with fluffy, moist treats you'll love.
Prep Time 10 minutes
Cook Time 25 minutes
Cooling Time 10 minutes
Total Time 45 minutes
Servings: 12 muffins
Course: Breakfast
Cuisine: Filipino
Calories: 190

Ingredients
  

For the Muffins
  • 1 cup Ube Puree fresh ube can be substituted with cooked and mashed variety
  • 2 cups All-Purpose Flour alternative flours can affect texture
  • 1 cup Granulated Sugar other sweeteners can be used, results may vary
  • 2 teaspoons Baking Powder ensure freshness for best rise
  • 1/2 teaspoon Salt adjust based on taste preference
  • 2 large Eggs flax eggs are a vegan alternative
  • 1/2 cup Milk use any dairy or non-dairy variety
  • 1/3 cup Vegetable Oil can replace with melted coconut oil
  • 1/2 cup Shredded Coconut optional topping for texture
  • 1 teaspoon Vanilla Extract swap with almond extract for a twist

Equipment

  • Oven
  • Muffin Tin
  • Mixing bowls
  • Whisk
  • Spatula

Method
 

Step-by-Step Instructions
  1. Preheat your oven to 350°F (175°C) and prepare your muffin tin by greasing lightly or lining with paper liners.
  2. In a medium mixing bowl, sift together the all-purpose flour, baking powder, and salt.
  3. In a large bowl, combine the ube puree, eggs, granulated sugar, vegetable oil, milk, and vanilla extract; whisk until smooth.
  4. Gently fold the dry ingredients into the wet mixture until just combined.
  5. Evenly distribute the ube muffin batter into the prepared muffin tins, filling each about two-thirds full.
  6. Bake for 20-25 minutes until golden brown and a toothpick inserted comes out clean.
  7. Let the muffins cool for a few minutes in the pan before transferring to a wire rack.
  8. Serve and enjoy with your favorite beverage!

Nutrition

Serving: 1muffinCalories: 190kcalCarbohydrates: 30gProtein: 3gFat: 7gSaturated Fat: 1gPolyunsaturated Fat: 0.5gMonounsaturated Fat: 3gCholesterol: 30mgSodium: 180mgPotassium: 110mgFiber: 1gSugar: 10gVitamin A: 80IUVitamin C: 1mgCalcium: 40mgIron: 0.5mg

Notes

Use fresh ingredients for best results. Don't over-mix to keep muffins fluffy. Check for doneness around the 20-minute mark.

Tried this recipe?

Let us know how it was!

Crispy Baked Zucchini Fries: Healthy, Guilt-Free Snack Delight

Diving into the world of healthy snacking, I stumbled upon a delightful gem: crispy baked zucchini fries! These golden bites transform fresh zucchini into a satisfying treat, and they’re just perfect for those moments when cravings strike but fast food doesn’t feel right. With just 30 minutes of prep time, this baked zucchini fries recipe offers a gluten-free and low-carb option that’s both simple and delicious. You can indulge guilt-free while still enjoying that comforting crunch. Whether you serve them as a side dish or a fun appetizer, these fries are sure to impress friends and family alike. So, are you ready to ditch the grease and whip up a batch of these irresistible zucchini fries? Let’s get started!

Why Are Baked Zucchini Fries a Must-Try?

Irresistible Crunch: These fries offer a satisfying crispiness that rivals traditional fries, delivering all the flavor without the guilt.

Health-Conscious Choice: Perfectly aligned with gluten-free and low-carb lifestyles, they cater to various dietary needs, making them a snack everyone can enjoy.

Quick and Easy: Ready in just 30 minutes, these baked zucchini fries are a time-saving option for busy days.

Versatile Pairing: Pairs beautifully with your favorite dips like marinara or aioli, making them an ideal appetizer or side dish for gatherings.

Light and Fresh: Enjoy vibrant flavors and nutrition that make these fries not just a treat, but a healthy addition to your meals—perfect for summer!

If you love exploring more veggie-based delights, check out my recipes for Zucchini Sweet Potato Fries or Baked Vegetable Egg Casserole.

Baked Zucchini Fries Ingredients

For the Zucchini Fries
Zucchini – Freshness and moisture are key; can substitute with yellow squash for a different flavor profile.
Almond Flour – Adds a gluten-free crispy coating; coconut flour works as a substitute but changes the texture.
Italian Seasoning – Enhances flavor depth; dried oregano or basil can be used if you don’t have Italian seasoning on hand.
Garlic Powder – Boosts the flavor profile with aromatic savoriness; fresh minced garlic offers a punchier taste.
Sea Salt and Pepper – Essential for seasoning; adjust based on personal preference for taste.
Eggs – Binds the flour to the zucchini; for a vegan option, use a flax egg (1 tbsp flaxseed meal + 2.5 tbsp water).

For Serving
Dipping Sauce – A delicious accompaniment, try marinara or pesto to elevate your baked zucchini fries experience.

Step‑by‑Step Instructions for Baked Zucchini Fries

Step 1: Preheat the Oven
Begin by preheating your oven to 425°F (220°C). While the oven warms up, take a baking sheet and line it with parchment paper, creating a non-stick surface for your baked zucchini fries. This step is crucial for achieving that delightful crispy texture everyone loves.

Step 2: Prepare the Zucchini
Grab your fresh zucchini and slice it into thick, even strips. Aim for uniformity to ensure they cook evenly. Once sliced, take a paper towel and gently pat the zucchini pieces dry to eliminate excess moisture. This will help your fries get that perfect crunch while baking.

Step 3: Combine Dry Ingredients
In a mixing bowl, combine almond flour, Italian seasoning, garlic powder, sea salt, and pepper. Whisk these ingredients together thoroughly, ensuring they are well blended. This dry mixture will become the delicious coating for your baked zucchini fries, enhancing their flavor and texture beautifully.

Step 4: Whisk the Eggs
In a separate bowl, crack your eggs and whisk them until well combined—this egg wash will help the almond flour adhere to the zucchini. Make sure the mixture is smooth and consistent, as an even coating is key to making these baked zucchini fries truly scrumptious.

Step 5: Coat the Zucchini
Take each zucchini strip and first dip it into the egg wash, ensuring it’s fully coated. Next, dredge the coated zucchini in the almond flour mixture, pressing lightly to help adhere the crumbs. Repeat this process for all the zucchini slices, creating a lovely, crunchy outer layer.

Step 6: Arrange on the Baking Sheet
Place the coated zucchini fries onto the prepared baking sheet in a single layer, making sure they aren’t overlapping. This spacing is essential for proper air circulation, allowing the fries to bake evenly and achieve that golden-brown finish that makes baked zucchini fries so appealing.

Step 7: Bake the Zucchini Fries
Slide the baking sheet into your preheated oven and bake for 25 minutes. About halfway through, about 12-13 minutes in, flip the zucchini fries over to ensure they crisp up nicely on both sides. Keep an eye on them towards the end to achieve your desired level of goldenness.

Step 8: Serve and Enjoy
Once the baked zucchini fries are golden and crispy, remove them from the oven and let them cool slightly. These delicious snacks are best enjoyed warm, so serve them alongside your favorite dipping sauces, like marinara or pesto, for an extra flavor boost. Delight in your crispy baked zucchini fries!

Storage Tips for Baked Zucchini Fries

Fridge: Store leftovers in an airtight container in the refrigerator for up to 3 days to maintain freshness and flavor.

Freezer: For longer storage, freeze baked zucchini fries on a baking sheet until firm, then transfer to a freezer-safe bag for up to 2 months.

Reheating: To enjoy crispy fries again, reheat in a preheated oven at 375°F (190°C) for 10-15 minutes, ensuring they regain their delightful crunch.

Avoid Microwaving: Refrain from reheating in a microwave, as it can make the zucchini fries soggy and diminish their tempting texture.

Baked Zucchini Fries Variations & Substitutions

Feel free to get creative and tailor these baked zucchini fries to your personal taste or dietary needs.

  • Almond Flour Alternative: Switch almond flour with coconut flour for a different flavor, but note the texture may vary.
  • Spice It Up: Add a pinch of cayenne pepper or smoked paprika to the almond flour mix for a delightful kick.
  • Cheesy Flavor Boost: Incorporate nutritional yeast into the flour mix for a cheesy taste without dairy; it’s a game changer!
  • Crunchy Keto Option: For a richer crunch, substitute almond flour with crushed pork rinds—an amazing keto-friendly twist!
  • Veggie Medley: Mix in sweet potato fries or eggplant slices with zucchini for a colorful and nutritious variety platter.
  • Herb Swap: If you don’t have Italian seasoning, use fresh herbs like thyme or rosemary to bring a garden-fresh flavor to your fries.
  • Vegan Version: Replace the eggs with a flax egg (1 tbsp flaxseed meal + 2.5 tbsp water) for a plant-based binding option.
  • Dipping Sauce Pairing: Serve with a spicy yogurt dip or zesty green sauce to elevate your zucchini fries experience.

For even more veggie goodness, explore my recipes for Crispy Air Fryer Baked Potatoes or indulge in Zucchini Leek Fritters as delightful side options!

What to Serve with Crispy Baked Zucchini Fries?

Elevate your meal with delicious accompaniments that perfectly complement the delightful crunch of these baked zucchini fries.

  • Creamy Garlic Dip: A rich, tangy dip that enhances the savory notes of the fries, making each bite even more enjoyable.
  • Marinara Sauce: This classic pairing provides a vibrant tomato flavor that contrasts beautifully with the crispy texture of the fries.
  • Fresh Salad: A light, crisp salad with mixed greens and a zesty vinaigrette adds a refreshing balance to the fried goodness.
  • Spicy Aioli: A smooth and spicy aioli brings an extra kick, perfect for those who love a little heat with their snacks.
  • Parmesan Wedge Potatoes: For a hearty side, these roasted potatoes offer a crunchy exterior and fluffy inside, matching the texture of the fries.
  • Chilled Wine Spritzer: An effervescent drink like this light wine spritzer refreshes your palate, making the meal a celebratory experience.
  • Sweet Potato Fries: Serve alongside sweet potato fries for a contrasting flavor and sweet crunch, making the snack-time more dynamic!
  • Fruit Skewers: Fresh fruit skewers add a burst of sweetness and a colorful touch to your plate, perfectly rounding out the meal.
  • Chocolate Dipping Sauce: A unique dessert option, this concoction pairs surprisingly well, transforming the meal into a thrilling sweet-and-savory delight.

Expert Tips for Baked Zucchini Fries

  • Pat Dry Thoroughly: Ensure zucchini slices are patted dry properly to avoid sogginess; moisture is the enemy of crispiness.

  • Use Uniform Slices: Cut your zucchini into evenly thick strips for consistent cooking; this guarantees that all fries reach their perfect crispness at the same time.

  • Don’t Overcrowd the Pan: Arrange the sliced zucchini fries in a single layer on the baking sheet without overlapping. This helps them roast rather than steam, promoting that desirable crunch.

  • Experiment with Seasoning: Spice up your baked zucchini fries by adding cayenne pepper or smoked paprika to the almond flour mix for an extra flavor punch.

  • Check for Doneness: Keep an eye on your fries as they bake; look for a golden, crispy texture that indicates they are ready to enjoy.

  • Reheat for Best Results: If you have leftovers of these baked zucchini fries, just pop them back in the oven to reheat; this retains their crunch unlike a microwave.

Make Ahead Options

These crispy baked zucchini fries are perfect for meal prep aficionados! You can slice and coat the zucchini up to 24 hours in advance, storing them in an airtight container in the refrigerator. Ensure the coated fries are separated with parchment paper to prevent sticking and maintain their quality. When you’re ready to enjoy them, simply preheat your oven and bake the zucchini fries for about 25 minutes as directed, flipping halfway through for that desired golden crispness. This prep-ahead approach not only saves time on busy weeknights but also guarantees that you’ll have a delicious, guilt-free snack ready to impress at a moment’s notice!

Baked Zucchini Fries Recipe FAQs

How do I select the best zucchini for making fries?
Absolutely! Look for zucchini that is firm, smooth, and has a vibrant green color. Avoid those with dark spots or soft patches, as these may be overripe. Ideally, choose smaller zucchinis for the best flavor and texture; they tend to be more tender and less watery.

What is the best way to store leftover baked zucchini fries?
For sure! Store any leftovers in an airtight container in the refrigerator for up to 3 days. Make sure they are completely cool before sealing to prevent moisture buildup. To maintain their crunch, reheat in the oven instead of the microwave; just a quick 10-15 minutes at 375°F (190°C) does wonders!

Can I freeze the baked zucchini fries?
Very much so! To freeze the fries, first, lay them out in a single layer on a baking sheet and freeze until firm, about 1 hour. Transfer them to a freezer-safe bag or container, and they will keep for up to 2 months. For the best crispiness upon reheating, bake them directly from the freezer at 375°F (190°C) for 15-20 minutes.

What should I do if the zucchini fries turn out soggy?
No worries—happens to the best of us! Here’s how to prevent it next time: Make sure to pat the zucchini slices dry thoroughly before coating them. Additionally, ensure they are spread in a single layer on the baking sheet to allow for proper air circulation, helping them achieve that delightful crispiness.

Are baked zucchini fries safe for kids and pets?
Absolutely! Baked zucchini fries are a healthy snack option for kids. They contain no added sugars or unhealthy fats. Just be cautious if you have pets; while zucchini is safe for dogs in moderation, it’s always wise to consult your veterinarian before introducing new foods to their diets.

Baked Zucchini Fries

Crispy Baked Zucchini Fries: Healthy, Guilt-Free Snack Delight

Crispy Baked Zucchini Fries are a guilt-free snack that's gluten-free and low-carb.
Prep Time 30 minutes
Cook Time 25 minutes
Total Time 55 minutes
Servings: 4 servings
Course: Appetizer
Cuisine: American
Calories: 150

Ingredients
  

For the Zucchini Fries
  • 2 medium Zucchini Freshness and moisture are key; can substitute with yellow squash.
  • 1 cup Almond Flour Adds a gluten-free crispy coating.
  • 1 tbsp Italian Seasoning Enhances flavor; can use dried oregano or basil.
  • 1 tsp Garlic Powder Boosts flavor; fresh minced garlic can be used.
  • 1 tsp Sea Salt Adjust based on personal preference.
  • 1 tsp Pepper Adjust based on personal preference.
  • 2 large Eggs Binds the flour to the zucchini; use a flax egg for vegan.
For Serving
  • 1 cup Dipping Sauce Try marinara or pesto.

Equipment

  • Oven
  • Baking Sheet
  • Parchment paper
  • Mixing Bowl
  • Whisk

Method
 

Step‑by‑Step Instructions for Baked Zucchini Fries
  1. Preheat your oven to 425°F (220°C) and line a baking sheet with parchment paper.
  2. Slice the zucchini into thick, even strips and pat them dry with a paper towel to eliminate moisture.
  3. In a mixing bowl, combine almond flour, Italian seasoning, garlic powder, sea salt, and pepper. Whisk together.
  4. Whisk the eggs in a separate bowl until well combined.
  5. Dip each zucchini strip into the egg wash, then dredge in the almond flour mixture, pressing lightly.
  6. Arrange the coated zucchini fries in a single layer on the prepared baking sheet.
  7. Bake for 25 minutes, flipping halfway through for even crisping.
  8. Once golden and crispy, let them cool slightly and serve with dipping sauces.

Nutrition

Serving: 1servingCalories: 150kcalCarbohydrates: 8gProtein: 5gFat: 10gSaturated Fat: 1gPolyunsaturated Fat: 3gMonounsaturated Fat: 5gCholesterol: 186mgSodium: 200mgPotassium: 300mgFiber: 3gSugar: 2gVitamin A: 500IUVitamin C: 20mgCalcium: 50mgIron: 1mg

Notes

For best results, ensure zucchini slices are patted dry to maintain crispiness. Avoid overcrowding the baking sheet for even cooking.

Tried this recipe?

Let us know how it was!

Creamy Easy Banana Matcha Latte for a Refreshing Boost

As I stood in my kitchen one sunny morning, the sweet aroma of ripe bananas filled the air, reminding me of cozy cafés and sunlit breakfasts. If you’ve ever craved a delightful pick-me-up that’s easy to whip up, then my Easy Banana Matcha Latte is just for you. This creamy, naturally sweetened drink combines the smooth texture of blended banana with refreshing milk, all while highlighting the earthy undertones of matcha. Not only is it quick to prepare—perfect for busy mornings or lazy afternoons—but it’s also a nourishing alternative to sugary coffee beverages. With just a handful of ingredients, you’re on your way to creating a café-style treat at home. Ready to elevate your drink game and indulge in something truly special? Let’s dive into the recipe!

Why is this latte so special?

Creamy, Delicious Base: The blend of ripe banana and milk creates a smooth and creamy texture that’s simply irresistible.
Naturally Sweetened: Forget added sugars—this latte gets its sweetness from bananas, making it a guilt-free pleasure.
Quick & Easy: Whip this up in just minutes, perfect for busy mornings when you need a boost.
Versatile Options: Experiment with different milk types or add a scoop of nut butter for a nutty twist! Check out my Cheeseburger Pockets Snack for more tasty ideas.
Colorful & Inviting: The vibrant green hues make this latte as visually appealing as it is delicious, ideal for impressing guests or enjoying solo.
Health Benefits: Packed with potassium and antioxidants, this latte isn’t just a treat; it’s a nutritious choice.

Easy Banana Matcha Latte Ingredients

For the Banana Base

  • Ripe Banana – Provides natural sweetness and creaminess; overripe bananas work best for flavor and texture.
  • Milk – Acts as the liquid base that helps blend the banana and matcha smoothly; any milk (dairy or non-dairy) can be used.

For the Matcha Mix

  • Matcha Powder – Adds an earthy flavor and caffeine, essential for the latte experience; use high-quality culinary or latte-grade matcha for the best results.
  • Sweetener (optional) – Enhances sweetness according to personal preference; gradually adjust to taste for your ideal Easy Banana Matcha Latte.

Step‑by‑Step Instructions for Easy Banana Matcha Latte

Step 1: Prepare Banana Milk
Start by peeling a ripe banana and placing it in your blender. Add in your choice of milk, around 1 cup, and blend on high for 30-60 seconds until the mixture is smooth and creamy. You can blend only half of the milk for a thicker texture if you prefer. Pour this luscious banana milk into a separate bowl and set aside.

Step 2: Mix the Matcha
In a small cup, measure out about 1 teaspoon of high-quality matcha powder. Add just enough hot water, approximately 2-3 tablespoons at around 175°F (80°C), to dissolve the matcha smoothly. Use a whisk or a milk frother to mix until no clumps remain, and you get a beautiful, rich green paste; this will ensure a well-combined Easy Banana Matcha Latte.

Step 3: Combine the Mixtures
Gradually pour your creamy banana milk into the cup with the whisked matcha, stirring gently as you combine them. This step allows the earthy matcha flavor to infuse evenly throughout the smoothie-like banana milk. If desired, taste your creation and add a touch of sweetener for extra sweetness, whisking it in until fully blended.

Step 4: Serve Your Latte
Decide if you want your Easy Banana Matcha Latte hot or cold. For an iced version, fill a glass with ice and pour your latte mixture over it. If you prefer it hot, simply heat the banana milk gently over medium-low heat before pouring in the matcha blend. Garnish with banana slices or a sprinkle of matcha for an inviting finish.

Step 5: Enjoy or Store
Take a moment to savor the aroma before sipping your delightful banana matcha latte. If you’re not drinking it all in one sitting, store any leftover banana milk base in an airtight container in the refrigerator for up to 24 hours. Just give it a good stir before using it again for a quick refresh on another day!

What to Serve with Easy Banana Matcha Latte

As you sip your creamy latte, imagine a delightful spread that complements its refreshing flavors and vibrant colors.

  • Fluffy Scrambled Eggs: A warm, soft dish that adds protein and pairs perfectly with the latte’s creamy texture.
  • Avocado Toast: Rich and filling, the buttery avocado enhances the freshness of the latte, creating a winning breakfast combo.
  • Berry Parfait: Layers of yogurt and fresh berries offer a lovely contrast of tartness and sweetness, balancing the earthy notes of matcha.
  • Cinnamon Oatmeal: Comforting and hearty, this warm bowl complements the latte’s natural sweetness, making for a cozy breakfast.
  • Homemade Granola Bars: Crunchy, chewy bars add a delightful texture and are a fantastic on-the-go snack beside your latte.
  • Mint Lemonade: This crisp, refreshing drink contrasts beautifully with the earthy flavors of matcha, bringing brightness to your meal.
  • Chocolate Banana Muffins: Overflowing with sweet banana goodness, these muffins echo the flavors of your latte and are perfect for a sweet treat.
  • Light Fruit Salad: A medley of tropical fruits can evoke dreams of sunshine, enhancing the latte experience and refreshing your palate.
  • Chamomile Tea: This calming herbal tea makes a tranquil pairing, perfect if you want a gentle afternoon boost alongside your latte.

Easy Banana Matcha Latte Variations

Feel free to unleash your creativity and try these fun twists that can enhance your Easy Banana Matcha Latte experience!

  • Nutty Delight: Add a tablespoon of almond or peanut butter for a rich, nutty flavor that complements the latte beautifully. The creaminess it brings is such a treat!
  • Chocolate Twist: Substitute matcha with cacao powder for a chocolatey version that’s perfect for sweet cravings. Mix it up and see which one you enjoy more!
  • Flavored Milk: Swap out regular milk for your favorite non-dairy option like almond or oat for a unique flavor experience. The possibilities are endless with plant-based alternatives!
  • Spicy Kick: Add a sprinkle of cinnamon or a dash of cayenne pepper for a surprising warmth that elevates your drink beautifully. This little spice can lift your mood any time of the day!
  • Creamy Coconut: Use coconut milk for a tropical flair that pairs perfectly with banana and matcha. It’s like a mini-vacation in a cup!
  • Superfood Boost: Toss in some chia seeds or hemp hearts for added nutrition and texture. They infuse health benefits while giving your latte a delightful crunch!
  • Frozen Treat: Freeze your banana milk into ice cubes and blend with matcha for a refreshing slushy version on a hot day. Perfect for a summer pick-me-up!
  • Layered Beauty: Pour your banana milk and matcha separately for a stunning layered effect. Not only will it look gorgeous, but it will also add a unique drinking experience!

And while you’re at it, why not try these other delicious recipes like my Strawberry Cheesecake Bars or the savory Shrimp Sausage Foil? They make wonderful complements to your latte!

How to Store and Freeze Easy Banana Matcha Latte

Fridge: Keep any leftover banana milk base in an airtight container in the refrigerator for up to 24 hours. Give it a stir before using it again for a quick refresh.

Freezer: For longer storage, freeze the banana milk in ice cube trays for up to 3 months. Blend the frozen cubes with matcha when you’re ready for a cool treat!

Reheating: Avoid reheating the entire latte. If you prefer it warm, gently warm the banana milk over low heat before mixing in the matcha.

Freshness Tip: While the Easy Banana Matcha Latte is best enjoyed fresh, prepping the banana milk base in advance saves you time on busy mornings!

Make Ahead Options

These Easy Banana Matcha Lattes are perfect for meal prep enthusiasts! You can prepare the banana milk base up to 24 hours in advance by blending a ripe banana with your choice of milk and storing it in an airtight container in the refrigerator. This method helps maintain the smooth texture and prevents browning. When you’re ready to enjoy your latte, simply whisk your matcha powder with hot water, and mix it with the chilled banana milk. This way, you’ll have a creamy and refreshing drink ready in no time—ideal for busy mornings or a delightful afternoon treat! Thus, you can savor a café-style beverage at home with minimal effort.

Tips for the Best Easy Banana Matcha Latte

  • Banana Choice: Use overripe bananas for maximum sweetness and creaminess; they will blend into your latte more smoothly.

  • Matcha Quality: Opt for high-quality culinary or latte-grade matcha to ensure a rich flavor profile; cheap matcha may taste bitter.

  • Blending Method: If you lack a blender, mash the ripe banana thoroughly before whisking it with milk; this ensures a creamy consistency.

  • Temperature Control: For a hot latte, avoid ice and gently warm the banana milk before mixing with matcha; harsh temperature changes can affect the texture.

  • Personalize Sweetness: Taste your latte before adding sweetener; you might find you prefer the natural sweetness of the banana in your Easy Banana Matcha Latte!

Easy Banana Matcha Latte Recipe FAQs

What type of banana is best for making an Easy Banana Matcha Latte?
Overripe bananas are the absolute best choice for this recipe! Their natural sweetness and soft texture make for a creamy and flavorful banana base. Look for bananas with brown spots or ones that are fully yellow—these will blend seamlessly and enhance the sweetness of your latte.

How should I store my Easy Banana Matcha Latte?
You can keep any leftover banana milk base in an airtight container in the refrigerator for up to 24 hours. Make sure to stir it well before using it again to ensure a smooth consistency. If you prepare it all at once and have some left over, just remember to enjoy it fresh!

Can I freeze the banana milk base?
Absolutely! Freeze the banana milk in ice cube trays to store it for longer. This method allows you to keep it for up to 3 months. When you’re ready for a treat, simply blend the frozen cubes with matcha to make your Easy Banana Matcha Latte—perfect for a refreshing iced version!

What can I do if my matcha isn’t dissolving properly?
If you’re having trouble with clumps in your matcha, ensure you’re adding the matcha powder to a small amount of hot water first. Use a whisk or frother to mix until you achieve a smooth paste. This step is crucial, as it ensures that you don’t end up with lumpy matcha in your latte.

Are there any dietary concerns I should know about?
This Easy Banana Matcha Latte is naturally vegetarian and can easily be made vegan by choosing a plant-based milk. If you have allergies, be sure to check the labels on your matcha and milk types. Additionally, if you’re preparing this for children or pets, keep in mind that matcha contains caffeine; you may want to adjust the amount or skip it altogether in those cases.

What sweeteners can I use if I want to adjust the sweetness?
You can use honey, maple syrup, agave nectar, or your favorite sweetener! Start by adding just a small amount and whisk it into the latte until fully mixed. Taste as you go to find your ideal level of sweetness that complements the natural flavors of banana and matcha.

Easy Banana Matcha Latte

Creamy Easy Banana Matcha Latte for a Refreshing Boost

This Easy Banana Matcha Latte combines blended banana, refreshing milk, and matcha for a creamy, naturally sweetened drink.
Prep Time 5 minutes
Total Time 5 minutes
Servings: 2 cups
Course: Drinks
Cuisine: American
Calories: 150

Ingredients
  

For the Banana Base
  • 1 medium Ripe Banana Use overripe bananas for maximum sweetness and creaminess.
  • 1 cup Milk Any milk (dairy or non-dairy) can be used.
For the Matcha Mix
  • 1 teaspoon Matcha Powder Use high-quality culinary or latte-grade matcha.
  • 2-3 tablespoons Hot Water Use to dissolve the matcha.
  • Sweetener (optional) Adjust to taste.

Equipment

  • blender
  • Whisk
  • cup
  • bowl

Method
 

Step-by-Step Instructions
  1. Peel a ripe banana and place it in your blender. Add in your choice of milk and blend on high for 30-60 seconds until smooth and creamy.
  2. In a small cup, measure out matcha powder and add enough hot water to dissolve it smoothly. Whisk until no clumps remain.
  3. Gradually pour your banana milk into the cup with the whisked matcha, stirring gently to combine.
  4. Decide if you want your latte hot or cold, then serve accordingly.
  5. Savor the aroma before sipping your delicious Easy Banana Matcha Latte.

Nutrition

Serving: 1cupCalories: 150kcalCarbohydrates: 30gProtein: 4gFat: 2gSaturated Fat: 1gSodium: 80mgPotassium: 500mgFiber: 3gSugar: 10gVitamin A: 150IUVitamin C: 10mgCalcium: 300mgIron: 0.5mg

Notes

For a refreshing treat, store leftover banana milk in an airtight container for up to 24 hours.

Tried this recipe?

Let us know how it was!

Delightful Marbled Meringue Hearts for Your Sweet Moments

As I stood in my kitchen one sunny afternoon, the aroma of vanilla filled the air, whisking me away to a charming French patisserie. It was the perfect moment to whip up some Marbled Meringue Hearts, a delightful dessert that instantly elevates any occasion with its delicate beauty and playful swirls of pink. This gluten-free, low-fat treat is not only a feast for the eyes but also surprisingly easy to create—perfect for when you want to impress without spending hours in the kitchen. With a melt-in-your-mouth texture that feels like a sweet hug, these airy confections are a heartfelt way to celebrate love, whether on Valentine’s Day or just a Tuesday. Ready to learn how to craft these lovely hearts that will surely make someone smile?

Why Choose Marbled Meringue Hearts?

Whimsical Delight: These Marbled Meringue Hearts are a stunning treat that merges elegance with simplicity, perfect for any special occasion.

Gluten-Free: Everyone can enjoy these delightful desserts without worrying about dietary restrictions.

Quick to Make: With just a handful of ingredients and minimal effort, you’ll whip up these beautiful confections in no time.

Visual Impact: The eye-catching pink swirls against a white backdrop make these meringues not just delicious but also a feast for the eyes—ideal for impressing guests!

Low-Calorie Indulgence: At around 27 calories each, you can satisfy your sweet tooth without guilt. For a cherry on top, pair them with homemade whipped cream or fresh berries for a delightful dessert experience. Try making these alongside classic meringue cookies for a fun baking session!

Marbled Meringue Hearts Ingredients

• Get ready to create these delightful meringues!

For the Meringue

  • Egg Whites – Provides structure and aeration for the meringue; make sure they’re at room temperature for the best results.
  • Vanilla Extract – Adds a lovely flavor to enhance sweetness; feel free to substitute with almond or peppermint extract for a twist.
  • Cream of Tartar – Stabilizes the egg whites for a voluminous meringue; can be replaced with lemon juice or white vinegar if necessary.
  • Sugar – Sweetens and adds a glossy finish; incorporate it gradually to maintain the meringue’s stability.
  • Red Food Coloring – Creates those mesmerizing swirls in your meringue; this is optional if you prefer a plain version.

With these ingredients in hand, you’re ready to make your Marbled Meringue Hearts—a treat that brings heart and beauty to any table!

Step‑by‑Step Instructions for Marbled Meringue Hearts

Step 1: Prepare the Egg Whites
Start by letting your room-temperature egg whites sit in a clean mixing bowl for 30 minutes. This allows them to reach their peak volume when whipped. Make sure there are no traces of fat in the bowl, which can hinder the whipping process.

Step 2: Preheat the Oven
While the egg whites are resting, preheat your oven to a gentle 200°F (93°C). Line two baking sheets with parchment paper, ensuring they are smooth and flat. This will prevent the meringue from sticking and allow for easy removal once baked.

Step 3: Beat the Egg Whites
Add the vanilla extract and cream of tartar to the egg whites, then begin beating them at medium speed using an electric mixer. Continue whisking until soft peaks begin to form, which should take about 3-5 minutes. You’ll know they’re ready when the mixture is fluffy and holds a loose shape.

Step 4: Add Sugar Gradually
Increase the mixer speed to high and gradually add sugar one tablespoon at a time. Beat the mixture until it thickens, becomes glossy, and forms stiff peaks, about 5-7 minutes. The meringue should be shiny and hold its shape firmly, signaling it’s ready for the next step.

Step 5: Create the Marbled Effect
Remove 1/4 cup of the glossy meringue and place it in a small bowl. Add a few drops of red food coloring to this portion and gently fold it in. Be careful not to overmix; you want distinct pink swirls to form without completely blending into the white meringue.

Step 6: Pipe the Meringue Hearts
Transfer the marbled meringue mixture into a piping bag fitted with a large round tip. Pipe 2-inch heart shapes onto the prepared baking sheets, spaced about 2 inches apart. Use a gentle hand to create a lovely heart shape, which will puff up during baking, adding charm to your Marbled Meringue Hearts.

Step 7: Bake and Cool
Place the baking sheets in the preheated oven and bake for approximately 20 minutes. You’ll know they are done when the meringues feel crisp to the touch and can easily lift off the parchment. Once baked, turn off the oven and leave the meringues inside to cool completely—this helps them dry out beautifully without losing their texture.

Marbled Meringue Hearts Variations

Feel free to let your creativity shine and customize these delightful meringues to suit your taste or dietary needs!

  • Almond Extract: Swap vanilla for almond extract for a uniquely nutty flavor. This subtle change adds depth and a comforting warmth.

  • Cocoa Delight: Introduce unsweetened cocoa powder to half of the meringue for a chocolatey twist. The dark hue combined with pink swirls makes for a stunning contrast!

  • Natural Colors: Experiment with natural colorings like beet juice or spirulina powder for stunningly vibrant hues without artificial additives. Your meringues will have a beautifully rustic look!

  • Citrus Zest: Add a teaspoon of lemon or orange zest to the meringue for a refreshing citrusy kick. This bright twist complements the sweetness beautifully, creating a flavor harmony.

  • Herbal Infusion: Incorporate a touch of dried lavender or crushed mint leaves into the meringue to create an aromatic dessert. These flavors evoke a memory of spring and add a sophisticated touch.

  • Spiced Wonders: Mix in a pinch of cinnamon or ginger for a warm, spicy flavor that delights the senses. This is a perfect autumnal twist that pairs wonderfully with the airy texture.

  • Sugar Substitutes: If you’re looking to cut back on sugar, substitute it with a sugar alternative like erythritol or coconut sugar for a lower-calorie version. Remember to adjust the amount based on your chosen alternative for optimal sweetness.

By infusing these variations into your Marbled Meringue Hearts, you’ll create personalized treats that everyone will love. For an extra treat, consider pairing them with classic meringue cookies or serve alongside a dollop of fresh cream for a delightful dessert experience!

What to Serve with Marbled Meringue Hearts?

These delightful, airy confections pair beautifully with a variety of dishes, enhancing your dessert experience and making any occasion extra special.

  • Fresh Berries: Juicy strawberries or raspberries brighten the dish, adding a burst of tangy flavor that contrasts nicely with the sweet meringue.

  • Homemade Whipped Cream: Serve with a dollop of creamy, fluffy whipped cream for a luxurious touch that complements the lightness of the meringue.

  • Chocolate Sauce: Drizzling rich chocolate sauce over the meringue adds a decadent flair, giving a delightful interplay of textures with its creamy smoothness.

  • Fruit Sorbet: A scoop of raspberry or lemon sorbet offers a refreshing contrast, balancing the sweetness of the meringues and cleansing the palate.

  • Sparkling Wine: A glass of bubbly rosé or prosecco elevates the dessert experience, enhancing the romantic vibe perfect for special occasions.

  • Iced Coffee: The smooth, rich notes of iced coffee pair brilliantly, offering a delightful bitterness that offsets the sweetness of the meringues.

  • Chocolate-Covered Strawberries: The rich chocolate and luscious berry flavors are the perfect accompaniment, creating a luxurious dessert platter that dazzles guests.

  • Coconut Macaroons: These chewy treats bring an additional texture and flavor that harmonizes with the lightness of the meringue, making for an inviting dessert table.

  • Lavender Lemonade: A refreshing lavender-infused lemonade complements the light and airy nature of the meringues, creating a lovely and fragrant balance.

  • Mini Fruit Tarts: Their butter crust and creamy filling create a delightful contrast, enticing flavors that round out a beautiful dessert experience.

How to Store and Freeze Marbled Meringue Hearts

Room Temperature: Store your Marbled Meringue Hearts in an airtight container at room temperature for up to 2 weeks; this keeps them crisp and delightful.

Fridge: Avoid refrigeration as moisture can soften the meringues; the changes in humidity can ruin their texture.

Freezer: If you need to freeze them, place the meringues in a single layer in a freezer-safe container, separated by parchment paper. Use within 1 month for best quality.

Reheating: If they lose their crispness, re-dry in a low oven (200°F) for about 10 minutes to restore that delightful texture.

Expert Tips for Marbled Meringue Hearts

Perfect Egg Whites: Ensure your egg whites are at room temperature, as they whip better, creating a more stable meringue for your hearts.

Slow Sugar Addition: Add sugar gradually while beating; this helps maintain the structure and glossy finish of your Marbled Meringue Hearts.

Humidity Awareness: Meringues can absorb moisture, so choose a dry day for baking. If they turn out chewy, you can dry them again in a low oven.

Cooling is Key: Do not skip cooling the meringues in the turned-off oven—this step is crucial for achieving that delightful crispiness.

Clean Tools Rule: Ensure all your mixing bowls and utensils are completely clean and free of grease, as even slight traces can prevent the egg whites from whipping properly.

Make Ahead Options

These Marbled Meringue Hearts are perfect for busy home cooks looking to save time while still impressing loved ones! You can prepare the meringue mixture up to 24 hours in advance; simply whip the egg whites and fold in the food coloring, then pipe the hearts onto baking sheets. Cover the prepared sheets tightly with plastic wrap or place them in an airtight container, refrigerating them until you’re ready to bake. When the moment arrives, just pop them in the preheated oven for about 20 minutes. This method ensures they remain just as delightful and airy when finished, giving you more time to enjoy special moments without sacrificing quality!

Marbled Meringue Hearts Recipe FAQs

How can I tell if my egg whites are ripe for whipping?
Absolutely! For the best results, make sure your egg whites are at room temperature as they whip more easily and achieve greater volume. Look for a clean bowl with no traces of fat or grease, as even the smallest amount can impede the whipping process. Let them sit for about 30 minutes to warm up.

How should I store my Marbled Meringue Hearts?
To keep your Marbled Meringue Hearts crisp, store them in an airtight container at room temperature for up to 2 weeks. Make sure they are completely cool before placing them in the container. Avoid refrigerating them, as the humidity can soften your lovely meringues.

Can I freeze Marbled Meringue Hearts?
Certainly! To freeze your meringues, place them in a single layer in a freezer-safe container, with parchment paper between layers to prevent sticking. They’ll keep well for up to 1 month. When you’re ready to enjoy, simply thaw them at room temperature—there’s no need for reheating!

What should I do if my meringue turns chewy or sticky?
If your meringues aren’t as crisp as you’d like, it may be due to humidity. If they feel chewy, try placing them back in a low oven set at 200°F for about 10 minutes. This can help dry them out and restore their delightful texture. Keep an eye on them to prevent browning!

Are Marbled Meringue Hearts safe for those with allergies?
These meringues are inherently gluten-free and low in fat, making them a great treat for those with dietary restrictions. However, always check the ingredients for potential allergens, especially when using substitutes or flavorings. If you have pets, remember that sweeteners like xylitol are toxic to dogs, so store these treats out of their reach.

What if my egg whites aren’t whipping well?
If your egg whites aren’t whipping properly, it could be due to lingering fat in your mixing bowl or on your beaters. Ensure that all tools are grease-free. Additionally, if you’re in a humid environment, it’s best to whip them on a dry day to achieve the desired volume. If you encounter difficulty, don’t be discouraged; start fresh with clean, dry tools!

Marbled Meringue Hearts

Delightful Marbled Meringue Hearts for Your Sweet Moments

Create stunning Marbled Meringue Hearts that are gluten-free and low-fat. Perfect for impressing at any occasion!
Prep Time 30 minutes
Cook Time 20 minutes
Total Time 50 minutes
Servings: 12 hearts
Course: Dessert
Cuisine: French
Calories: 27

Ingredients
  

For the Meringue
  • 3 large Egg Whites At room temperature
  • 1 teaspoon Vanilla Extract Or substitute with almond or peppermint extract
  • 1/4 teaspoon Cream of Tartar Can be replaced with lemon juice or white vinegar
  • 3/4 cup Sugar Gradually added to maintain stability
  • few drops Red Food Coloring Optional, for marbling effect

Equipment

  • Mixing Bowl
  • Electric Mixer
  • piping bag
  • Baking Sheets
  • Parchment paper

Method
 

Step-by-Step Instructions for Marbled Meringue Hearts
  1. Let egg whites sit in a clean mixing bowl for 30 minutes.
  2. Preheat oven to 200°F (93°C) and line baking sheets with parchment paper.
  3. Beat egg whites with vanilla extract and cream of tartar on medium speed until soft peaks form.
  4. Gradually increase speed to high and add sugar one tablespoon at a time until stiff peaks form.
  5. Remove 1/4 cup of meringue, add red food coloring, and gently fold it in.
  6. Pipe 2-inch heart shapes onto the baking sheets.
  7. Bake for approximately 20 minutes until crisp, then cool in the oven.

Nutrition

Serving: 1heartCalories: 27kcalCarbohydrates: 7gSugar: 7g

Notes

Store meringues in an airtight container at room temperature for up to 2 weeks. Avoid refrigeration to keep them crispy.

Tried this recipe?

Let us know how it was!

Delightful Ube Mochi Donuts for a Chewy, Sweet Treat

When the deep-frying dough starts bubbling and the delightful aroma fills the air, you know magic is about to happen. Today, I’m excited to share my beloved recipe for Ube Mochi Donuts—an irresistible creation that marries the chewy, comforting goodness of mochi with the classic donut form we all adore. These gluten-free, vegan treats are as simple to make as they are fun, requiring just 15 minutes from kitchen to table. They offer the perfect solution for anyone craving a sweet snack without the guilt of processed fast food. Whether enjoyed fresh out of the fryer or dipped in a coconut sauce, your taste buds are in for a unique treat. Ready to bring some vibrant purple joy to your kitchen? Let’s dive into this easy recipe!

Are You Ready for Ube Mochi Donuts?

Uniqueness: These delightful donuts combine the textures of traditional mochi with the beloved format of a donut, creating a one-of-a-kind treat.

Quick to Prepare: With just 15 minutes from start to finish, these Ube Mochi Donuts offer a speedy solution for home bakers looking to impress.

Gluten-Free & Vegan: Perfect for those with dietary restrictions, these donuts ensure everyone can indulge without guilt.

Versatile Flavor: Experiment by adding your favorite extracts for a personalized taste, whether it’s classic ube or something more adventurous!

Crowd-Pleasing Appeal: Their beautiful purple hue and chewy texture are sure to be a hit at any gathering, offering a sweet escape from ordinary snacks.

Ube Mochi Donut Ingredients

For the Donuts
Mochiko – This glutenous rice flour is essential for achieving the signature chewiness of Ube Mochi Donuts.
Sugar – Adds the perfect touch of sweetness; cane sugar works best.
Coconut Milk – Use full-fat for a rich, creamy texture; alternatives may change your donut’s character.
Ube Extract – The star of the show, giving these donuts their vibrant color and unique flavor; swaps will alter the taste.

For Optional Toppings
Shredded Coconut – Adds a delightful texture and tropical flair; toasting it brings out incredible flavor!
Powdered Sugar – A light dusting elevates the presentation and sweetness without overwhelming the palate.
Coconut Dipping Sauce – Perfect for adding an indulgent touch; mix coconut milk with a hint of vanilla or sugar.

Explore this unique treat and let your creativity shine with these Ube Mochi Donuts!

Step‑by‑Step Instructions for Ube Mochi Donuts

Step 1: Heat the Oil
Begin by pouring about 2-3 inches of vegetable oil into a deep pot, ensuring there’s enough for frying. Heat the oil over medium-high heat until it reaches a temperature of 350°F (175°C); you can use a candy thermometer for precision. This temperature is key for achieving that satisfying crunchy exterior on your Ube Mochi Donuts.

Step 2: Prepare the Dough
In a large mixing bowl, whisk together 1 cup of mochiko, ½ cup of sugar, ½ cup of full-fat coconut milk, and 1 teaspoon of ube extract. Mix until the ingredients are well combined and the dough is sticky. Take a moment to relish the vibrant purple hue and the delightful aroma; you’re just steps away from enjoying fresh Ube Mochi Donuts!

Step 3: Form the Donuts
Using a tablespoon or a cookie scoop, drop about 2 tablespoons of the sticky dough into the hot oil. Be careful not to overcrowd the pot, as this can lower the oil temperature and affect frying. Allow a few donuts to fry at a time, leaving ample space between each one for even cooking and optimal results.

Step 4: Fry the Donuts
Fry the donuts for about 4-5 minutes, gently turning them with a slotted spoon until they are golden brown all around. Keep an eye on their progress, enjoying the sight of the donuts rising to the surface and bubbling. You’ll know they’re ready when they have that lovely golden color and a delightful aroma fills the kitchen.

Step 5: Drain and Cool
Once your Ube Mochi Donuts are perfectly fried, carefully remove them from the oil using a slotted spoon. Place the cooked donuts on a wire rack or a paper towel-lined sheet pan to drain any excess oil. This step helps keep them crisp on the outside while ensuring they retain their soft, chewy center.

Step 6: Serve and Enjoy
Your homemade Ube Mochi Donuts are now ready to be enjoyed! They can be served plain or topped with shredded coconut, powdered sugar, or paired with a coconut dipping sauce for an extra indulgent treat. Enjoy them warm, and share this unique delight with family and friends for a sweet experience!

How to Store and Freeze Ube Mochi Donuts

Room Temperature: These donuts can be kept at room temperature for up to 3 days in an airtight container to maintain their chewy texture.

Fridge: If you prefer a longer storage option, Ube Mochi Donuts can be refrigerated for up to a week. Make sure they’re in an airtight container to prevent them from drying out.

Freezer: For longer storage, freeze the donuts in a single layer on a baking sheet, then transfer to a freezer bag for up to 3 months. Thaw at room temperature before reheating.

Reheating: Restore their delicious texture by reheating in an air fryer or toaster oven for about 3-5 minutes at 350°F (175°C) before serving.

Expert Tips for Ube Mochi Donuts

Oil Temperature Matters: Ensure the oil is at 350°F (175°C) before frying to achieve that perfect crunchy outer layer.

Don’t Overcrowd: Fry the donuts in small batches to maintain the oil temperature, allowing for even cooking and a crispy finish.

Sticky Dough: Remember that the dough will be sticky; lightly moisten your hands or utensils to help with shaping the donuts.

Drain Properly: Place fried donuts on a wire rack or paper towels to eliminate excess oil, keeping them crispy and delightful.

Flavor Variations: Don’t hesitate to experiment with different extracts or toppings for your Ube Mochi Donuts for a personalized twist!

Ube Mochi Donuts: Variations & Substitutions

Feel free to explore different twists on these delightful donuts that will enhance your baking experience!

  • Flavor Boost: Experiment with pandan extract for a lovely aroma and vibrant green color, giving your donuts an exciting tropical flair.

  • Nutty Addition: Stir in toasted coconut flakes to the dough for an extra layer of sweetness and a satisfying chew. The combination of flavors will transport you to a sunny beach!

  • Sweetness Adjustment: If you’re watching your sugar intake, try using coconut sugar or a sugar substitute to maintain that sweet taste while keeping things healthier.

  • Color Twist: Substitute purple sweet potato puree for ube extract if you’re feeling adventurous. Your donuts will still offer that stunning color while providing a different yet delicious flavor profile!

  • Creamy Vegan Option: For a different creaminess, use oat or almond milk instead of coconut milk. This will slightly change the taste but still yield a delightful texture.

  • Rich Chocolate Flavor: Add cocoa powder to the dough for a chocolatey twist. You can also dip the finished donuts in melted dark chocolate for an indulgent treat!

  • Spice It Up: For a touch of warmth, sprinkle in a dash of cinnamon or nutmeg to the dough, giving your Ube Mochi Donuts a comforting spiced flavor that’s ideal for chilly mornings.

  • Dipping Sauce Adventure: Serve with a mango or passion fruit sauce to dip your donuts in; this will elevate every bite into a tropical escape! For inspiration, try making a coconut dipping sauce using your favorite ingredients from below.

Using these variations, you can customize your Ube Mochi Donuts to match your taste preferences and create delightful memories in the kitchen. Happy baking!

Make Ahead Options

These Ube Mochi Donuts are perfect for busy home cooks looking to save time! You can prepare the donut dough up to 24 hours in advance; simply mix together the mochiko, sugar, coconut milk, and ube extract, then refrigerate it in an airtight container. This ensures the ingredients meld together beautifully while keeping the dough fresh. When you’re ready to fry, allow the dough to come to room temperature for about 15 minutes before scooping and frying as usual. Trust me, making the dough ahead means you can whip up warm, chewy donuts with minimal effort, just as delightful as if made fresh on the spot!

What to Serve with Ube Mochi Donuts

When it comes to enjoying Ube Mochi Donuts, you’ll want to create a delightful spread that complements their unique flavor and texture.

  • Coconut Dipping Sauce: A creamy delight that enhances the donuts’ flavor, this sauce adds a beautiful tropical touch for each bite.

  • Fresh Fruit Salad: Bright, juicy fruits like mango and pineapple add freshness and contrast to the donuts’ chewy texture, making every bite exciting.

  • Vegan Ice Cream: Pairing with a scoop of coconut or ube-flavored vegan ice cream can transform your treat into a delightful dessert experience, perfect for warm days.

  • Matcha Latte: The earthy notes of a warm or iced matcha latte harmonize beautifully with the sweet and nutty profile of the donuts, offering a soothing beverage option.

  • Shredded Coconut Topping: A sprinkle of toasted coconut not only adds texture but also boosts the tropical flair of the dish, making each bite even more delightful.

  • Chocolate Drizzle: Elevate your Ube Mochi Donuts by drizzling melted vegan chocolate on top for a rich, indulgent treat that satisfies every sweet craving.

  • Sparkling Water with Lime: A refreshing drink that cuts through the richness, serving sparkling water with a splash of lime helps cleanse the palate between bites for pure enjoyment.

Indulge in these delightful pairings, and elevate your donut experience to a wonderful culinary adventure!

Ube Mochi Donuts Recipe FAQs

What type of mochi flour should I use for Ube Mochi Donuts?
You should use Mochiko, a glutenous rice flour, as it provides the unique chewiness needed for these donuts. There isn’t a direct substitute recommended, so for the best results and texture, stick with Mochiko.

How long can I store Ube Mochi Donuts at room temperature?
These delightful donuts can be stored at room temperature for up to 3 days. Just keep them in an airtight container to preserve their soft, chewy texture. Enjoy them fresh for the best taste, but they’ll remain enjoyable for a few days afterwards.

Can I freeze Ube Mochi Donuts? How?
Absolutely! To freeze your donuts, first, cool them completely. Then, arrange them in a single layer on a baking sheet and place them in the freezer until solid. Once frozen, transfer them to a freezer bag or an airtight container. They’ll keep well for up to 3 months. When you’re ready to enjoy, thaw at room temperature and reheat in an air fryer or toaster oven for about 3-5 minutes at 350°F (175°C).

What should I do if my dough is too sticky?
If you find the dough to be overly sticky, don’t worry! Lightly moisten your hands or utensils with a little coconut milk or water to help shape the donuts. This little trick should assist you in managing the stickiness while still making perfectly delicious Ube Mochi Donuts without altering the recipe.

Are Ube Mochi Donuts suitable for those with allergies?
These donuts are a wonderful gluten-free and vegan treat, making them suitable for many dietary restrictions. However, always check for allergies related to specific ingredients, like coconut or any flavor extracts you choose to add. If you’re serving guests, it’s a good practice to ask about any allergies to ensure everyone can safely indulge in these sweet delights.

Can I customize the flavors of my Ube Mochi Donuts?
Very! Feel free to experiment with different flavor extracts like pandan or even mix in some toasted coconut flakes for extra texture. You can adjust the sweetness by varying the sugar amount to suit your taste — the more the merrier in your kitchen experimentation!

Ube Mochi Donuts

Delightful Ube Mochi Donuts for a Chewy, Sweet Treat

Indulge in these gluten-free, vegan Ube Mochi Donuts, a delightful mix of chewy mochi texture and sweet flavors.
Prep Time 15 minutes
Cook Time 10 minutes
Total Time 25 minutes
Servings: 8 donuts
Course: Dessert
Cuisine: Asian
Calories: 180

Ingredients
  

For the Donuts
  • 1 cup Mochiko Essential for chewiness
  • 0.5 cup Sugar Cane sugar works best
  • 0.5 cup Coconut Milk Full-fat preferred
  • 1 teaspoon Ube Extract Gives color and flavor
For Optional Toppings
  • 1 cup Shredded Coconut Toast for enhanced flavor
  • 0.25 cup Powdered Sugar For dusting
  • 0.5 cup Coconut Dipping Sauce Mix with vanilla or sugar

Equipment

  • Deep pot
  • slotted spoon
  • Mixing Bowl
  • Candy Thermometer
  • Wire Rack

Method
 

Step-by-Step Instructions
  1. Heat about 2-3 inches of vegetable oil in a deep pot to 350°F (175°C).
  2. In a large mixing bowl, whisk together mochiko, sugar, coconut milk, and ube extract until sticky.
  3. Drop about 2 tablespoons of dough into the hot oil, frying a few donuts at a time.
  4. Fry for 4-5 minutes until golden brown, gently turning with a slotted spoon.
  5. Remove from oil and drain on a wire rack or paper towels.
  6. Serve warm with toppings or coconut dipping sauce.

Nutrition

Serving: 1donutCalories: 180kcalCarbohydrates: 24gProtein: 2gFat: 8gSaturated Fat: 7gPolyunsaturated Fat: 0.5gMonounsaturated Fat: 0.5gSodium: 50mgPotassium: 120mgFiber: 1gSugar: 5gCalcium: 20mgIron: 0.5mg

Notes

Ensure the oil is heated properly for perfect frying. Donuts stay fresh for up to 3 days at room temperature.

Tried this recipe?

Let us know how it was!

Creamy Eggnog Cheesecake: Your Festive Holiday Must-Try

As I whisked together the ingredients for my 2026 Eggnog Cheesecake, the scent of freshly grated nutmeg filled the kitchen, instantly enveloping me in a cozy holiday spirit. This festive dessert combines the smooth, creamy essence of classic cheesecake with the warm, spiced flavors of eggnog, creating a luscious delight that’s perfect for celebrating the season. With a buttery graham cracker crust and a cloud-like whipped topping, this eggnog cheesecake is not only a showstopper for holiday gatherings but also surprisingly simple to make. Imagine serving up slices of this creamy indulgence, leaving your loved ones in awe of your culinary prowess. It’s the ideal treat for those looking to elevate their holiday dessert game. Are you ready to dive into this sweet holiday adventure?

Why Is Eggnog Cheesecake a Holiday Favorite?

Creamy Delight: With its velvety texture, this Eggnog Cheesecake brings the magic of the holidays to your table. Spiced Flavor: The warm notes of nutmeg and festive eggnog create a deliciously comforting taste. Impressive Presentation: Topped with fluffy whipped cream and optional sprinkles, it’s a showstopper for gatherings. Easy to Make: The straightforward instructions make it achievable for any home cook. Versatile Option: Consider making mini cheesecakes for a fun twist, just like the Strawberry Cheesecake Bars or the delightful Cookies Cream Cheesecake. Enjoy it with spiced mulled wine for a perfect pairing!

Eggnog Cheesecake Ingredients

For the Crust

  • Graham Cracker Crumbs – Provide a buttery base; substitute with digestive biscuits for a similar texture.
  • Unsalted Butter – Binds the crust ingredients; use coconut oil for a dairy-free option.
  • Sugar – Sweetens the crust; brown sugar can be used for added depth of flavor.
  • Freshly Grated Nutmeg – Adds aromatic spice to the crust; ground nutmeg is a suitable substitute.

For the Filling

  • Cream Cheese – Forms the rich filling; ensure it’s at room temperature for smooth mixing.
  • Granulated Sugar – Sweetens the filling while balancing the spices.
  • All-Purpose Flour – Stabilizes the filling; gluten-free flour can be used as an alternative.
  • Chilled Eggnog – The star of the filling, imparting festive flavors; classic eggnog is recommended for the best taste.
  • Eggs – Provides structure; adding them one at a time prevents air pockets that can lead to cracks.

For the Topping

  • Heavy Whipping Cream – Used for the topping; can substitute with coconut cream for a non-dairy option.
  • Powdered Sugar – Sweetens and stabilizes the whipped cream.
  • Pearl Sprinkles – Optional decorative touch for visual appeal.

Step‑by‑Step Instructions for Eggnog Cheesecake

Step 1: Preheat the Oven
Begin by preheating your oven to 325°F (163°C). This initial step is crucial for ensuring that your Eggnog Cheesecake bakes evenly and achieves that creamy, luscious texture. While the oven warms up, gather all your ingredients to make the process smoother.

Step 2: Prepare the Crust
In a mixing bowl, combine graham cracker crumbs, melted unsalted butter, sugar, and freshly grated nutmeg. Use a fork or your hands to mix until the mixture resembles wet sand. Press this mixture firmly into the bottom of a 9-inch springform pan, ensuring even coverage. Bake for 10 minutes or until lightly golden, then remove from the oven and let it cool slightly.

Step 3: Make the Cream Cheese Mixture
Lower your oven temperature to 300°F (149°C). In a large bowl, beat the softened cream cheese using an electric mixer until it’s smooth and creamy. Gradually add the granulated sugar and flour, mixing just until combined. This mixture forms the rich filling of your Eggnog Cheesecake, so be careful not to over-mix.

Step 4: Incorporate Eggnog and Nutmeg
Gently stir in the chilled eggnog and a dash of ground nutmeg into the cream cheese mixture. The eggnog is the centerpiece of this recipe, imbued with festive flavor that will make your cheesecake indulgent. Mix until everything is well blended and smooth without overdoing it.

Step 5: Add Eggs Gradually
Add the eggs one at a time to the filling mixture, beating on low speed after each addition until just combined. This method helps to incorporate the eggs without introducing air bubbles, which can lead to cracks. Pour the creamy filling over the cooled crust, spreading it evenly all the way to the edges.

Step 6: Create a Water Bath
To prevent cracking during baking, prepare a water bath. Place the springform pan inside a larger roasting pan, then fill the outer pan halfway up the sides of the cheesecake pan with hot water. The steam from the water bath contributes to a moist baking environment for your Eggnog Cheesecake.

Step 7: Bake the Cheesecake
Place the assembled pans in the preheated oven and bake for 1 hour and 30–40 minutes. The cheesecake is done when the edges are set, but the center should still have a slight wobble for a creamy texture. Check occasionally to ensure the water bath remains filled with water.

Step 8: Cool the Cheesecake
Once baked, turn off the oven and slightly open the door to let it cool gradually. Leave the cheesecake inside for about 1 hour, which helps prevent sudden temperature changes that can cause cracks. Afterward, remove it from the oven and set it to cool at room temperature for 30 minutes before refrigerating.

Step 9: Prepare the Whipped Topping
While the cheesecake chills, make the whipped topping. In a mixing bowl, beat heavy whipping cream, chilled eggnog, and powdered sugar until stiff peaks form. This light, airy topping will complement the rich Eggnog Cheesecake beautifully. Once ready, cover and refrigerate until serving.

Step 10: Serve the Cheesecake
Once fully chilled for at least 5-6 hours or overnight, carefully remove the cheesecake from the springform pan. Garnish with additional freshly grated nutmeg and optional pearl sprinkles for a festive touch. Slice with a warm knife for clean cuts and serve to your delighted guests.

What to Serve with 2026 Eggnog Cheesecake

Imagine rounding out your holiday feast with thoughtfully chosen accompaniments that enhance the creamy delights of your cheesecake, creating a memorable dining experience.

  • Spiced Mulled Wine: The warm, spiced notes of mulled wine complement the rich flavors of your eggnog cheesecake, evoking cozy holiday vibes.
  • Fresh Berries: A medley of bright, tangy berries like raspberries or cranberries offers a refreshing contrast to the creamy sweetness of the cheesecake.
  • Gingerbread Cookies: Their snap and spiced flavor harmonize beautifully with the cheesecake, adding a festive touch to your dessert table.
  • Candied Pecans: These sweet, crunchy bites provide a delightful textural contrast and a nutty flavor that pairs well with the creamy cheesecake.
  • Dark Chocolate Shavings: A sprinkle of chocolate adds a luxurious depth that beautifully complements the warm spices of the cheesecake.
  • Eggnog Latte: Take your dessert to the next level with a frothy eggnog latte; the creamy coffee accentuates the festive spirit of the cheesecake.
  • Pumpkin Spice Ice Cream: This seasonal treat offers an exciting flavor twist, marrying two classic holiday favorites into one delightful dessert experience.

Expert Tips for Eggnog Cheesecake

  • Water Bath Method: Using a water bath prevents cracking by maintaining moisture during baking. Don’t skip this step for the best results!

  • Room Temperature Ingredients: Ensure your cream cheese and eggs are at room temperature. This helps create a smoother filling for your eggnog cheesecake.

  • Gradual Egg Incorporation: Add eggs one at a time and mix on low speed to avoid incorporating too much air, which can lead to cracks.

  • Cooling Technique: Allow the cheesecake to cool slowly in the oven with the door ajar. This gradual temperature change helps prevent sudden cracks.

  • Chill Overnight: For the best flavor and texture, refrigerate the cheesecake overnight. It allows the spices to meld beautifully, enhancing the overall taste.

Make Ahead Options

Preparing your Eggnog Cheesecake in advance is a game-changer for busy holiday cooks! You can make the crust and filling up to 24 hours ahead. Simply prepare the crust, press it into your springform pan, and refrigerate it until you’re ready to fill it. The cheese mixture can also be made a day in advance; just store it in an airtight container in the fridge. When it’s time to bake, pour the chilled filling over the cooled crust and proceed with your usual baking instructions. This way, your cheesecake will maintain its creamy texture and flavors will be even more pronounced, ensuring a delightful dessert that’s just as delicious on the big day!

Eggnog Cheesecake Variations

Embrace creativity and make this Eggnog Cheesecake your own with delightful twists and substitutions!

  • Mini Cheesecakes: Use the same recipe in tiny springform pans for individual servings, making them perfect for parties or gift-giving.

  • Dairy-Free: Substitute heavy whipping cream with coconut cream and cream cheese with a dairy-free alternative for a festive treat everyone can enjoy.

  • Chocolate Drizzle: Add a rich chocolate ganache drizzle on top for a pairing that beautifully contrasts the eggnog’s spiced flavor.

  • Nutty Crust: Swap out some of the graham crackers for crushed pecans or walnuts for a nutty twist that adds texture and flavor.

  • Flavored Eggnog: Experiment with flavored eggnog, such as vanilla bean or even pumpkin spice, to elevate this cheesecake’s festive character.

  • Extra Spice: Boost the flavor by adding cinnamon or allspice into the filling, creating an indulgent blend of warm holiday spices.

  • Fruit Toppers: Garnish with caramelized apples or poached pears for a delightful fruity contrast, taking your dessert to new heights.

  • Salted Caramel Drizzle: Top your cheesecake with a luscious salted caramel sauce for a sweet and salty flavor explosion that your guests will love.

Adding your unique spin to this classic dessert can transform it into something truly special. If you’re curious to explore other fantastic variations, check out the Strawberry Cheesecake Bars or treat yourself to some Cookies Cream Cheesecake for more inspiration!

How to Store and Freeze Eggnog Cheesecake

Fridge: Keep your eggnog cheesecake tightly covered in the refrigerator for up to 4 days. This helps maintain its creamy texture and flavor.

Freezer: For longer storage, wrap the cheesecake well in plastic wrap and then aluminum foil. It can be frozen for up to 2 months.

Thawing: When ready to enjoy, thaw the cheesecake overnight in the fridge. This ensures it stays moist and retains its delicious spiced flavors.

Reheating: Serve the cheesecake chilled for the best taste, and add whipped topping just before serving to keep it fresh and fluffy.

Eggnog Cheesecake Recipe FAQs

What is the best way to select eggnog for my cheesecake?
Absolutely! For your Eggnog Cheesecake, I recommend using a high-quality, classic eggnog to achieve the best flavor. Look for eggnog with a thick, creamy consistency and no artificial additives. You can also consider homemade eggnog for a personal touch, just ensure it has the right balance of sweetness and spices.

How should I store my Eggnog Cheesecake?
For optimal freshness, keep your cheesecake tightly covered in the refrigerator. It will stay delicious for up to 4 days. The rich, creamy texture remains intact when properly stored, allowing you to savor every slice.

Can I freeze Eggnog Cheesecake?
Yes, you can! Wrap your Eggnog Cheesecake tightly in plastic wrap, followed by aluminum foil to protect it from freezer burn. It can be frozen for up to 2 months. To thaw, simply move it to the refrigerator the night before you plan to serve it. This slow thawing helps maintain its wonderful flavor and texture.

What should I do if my cheesecake cracks during baking?
If your cheesecake cracks, don’t be discouraged! You can easily cover it with your whipped topping for a lovely presentation. For next time, using a water bath during baking helps keep moisture levels high, preventing cracks. And remember, incorporating eggs gradually and ensuring room temperature ingredients can greatly contribute to a smoother filling.

Are there any dietary considerations for Eggnog Cheesecake?
Enjoy your Eggnog Cheesecake but be mindful of dietary restrictions! If you’re serving guests with allergies, consider substituting gluten-free flour and coconut cream for a dairy-free option. Just be sure to inform guests about the egg content. If pets are around, keep in mind that cheesecake is not suitable for them due to sugar and dairy content.

Eggnog Cheesecake

Creamy Eggnog Cheesecake: Your Festive Holiday Must-Try

Indulge in this creamy eggnog cheesecake, a festive favorite that blends smooth cheesecake with eggnog flavors.
Prep Time 30 minutes
Cook Time 1 hour 30 minutes
Cooling Time 1 hour
Total Time 3 hours
Servings: 12 slices
Course: Dessert
Cuisine: American
Calories: 350

Ingredients
  

For the Crust
  • 1.5 cups Graham Cracker Crumbs Substitute with digestive biscuits if desired.
  • 0.5 cups Unsalted Butter Melted.
  • 0.25 cups Sugar Brown sugar can be used for added depth.
  • 0.25 teaspoons Freshly Grated Nutmeg Ground nutmeg is a suitable substitute.
For the Filling
  • 24 ounces Cream Cheese Softened.
  • 1 cups Granulated Sugar
  • 0.5 cups All-Purpose Flour Gluten-free flour can be used.
  • 1 cups Chilled Eggnog Classic eggnog is recommended.
  • 4 large Eggs Add one at a time.
For the Topping
  • 1 cups Heavy Whipping Cream Can substitute with coconut cream.
  • 0.25 cups Powdered Sugar
  • Pearl Sprinkles Optional for decoration.

Equipment

  • 9-inch springform pan
  • Mixing Bowl
  • Electric Mixer
  • Roasting Pan

Method
 

Step-by-Step Instructions for Eggnog Cheesecake
  1. Preheat your oven to 325°F (163°C).
  2. In a mixing bowl, combine graham cracker crumbs, melted butter, sugar, and nutmeg. Press into the bottom of a 9-inch springform pan and bake for 10 minutes.
  3. Lower the oven temperature to 300°F (149°C). Beat the cream cheese until smooth, then gradually mix in sugar and flour until combined.
  4. Stir in eggnog and ground nutmeg gently until smooth.
  5. Add eggs one at a time, mixing on low speed until just combined. Pour the filling over the cooled crust.
  6. Prepare a water bath by placing the springform pan in a larger roasting pan filled with hot water halfway up the sides.
  7. Bake for 1 hour and 30–40 minutes. Check occasionally to ensure the water bath remains filled.
  8. Cool gradually in the oven for 1 hour, then cool at room temperature for 30 minutes before refrigerating.
  9. Beat heavy cream, eggnog, and powdered sugar until stiff peaks form for the topping.
  10. Once chilled for at least 5-6 hours, remove from pan and garnish with nutmeg and pearl sprinkles before serving.

Nutrition

Serving: 1sliceCalories: 350kcalCarbohydrates: 30gProtein: 5gFat: 24gSaturated Fat: 14gPolyunsaturated Fat: 0.5gMonounsaturated Fat: 4gCholesterol: 100mgSodium: 300mgPotassium: 150mgFiber: 1gSugar: 15gVitamin A: 500IUCalcium: 50mgIron: 1mg

Notes

Ensure all ingredients are at room temperature for best results. Chill overnight for enhanced flavor.

Tried this recipe?

Let us know how it was!