Chilled Summer Gazpacho: Refreshing Recipe for You!

Introduction to Chilled Summer Gazpacho

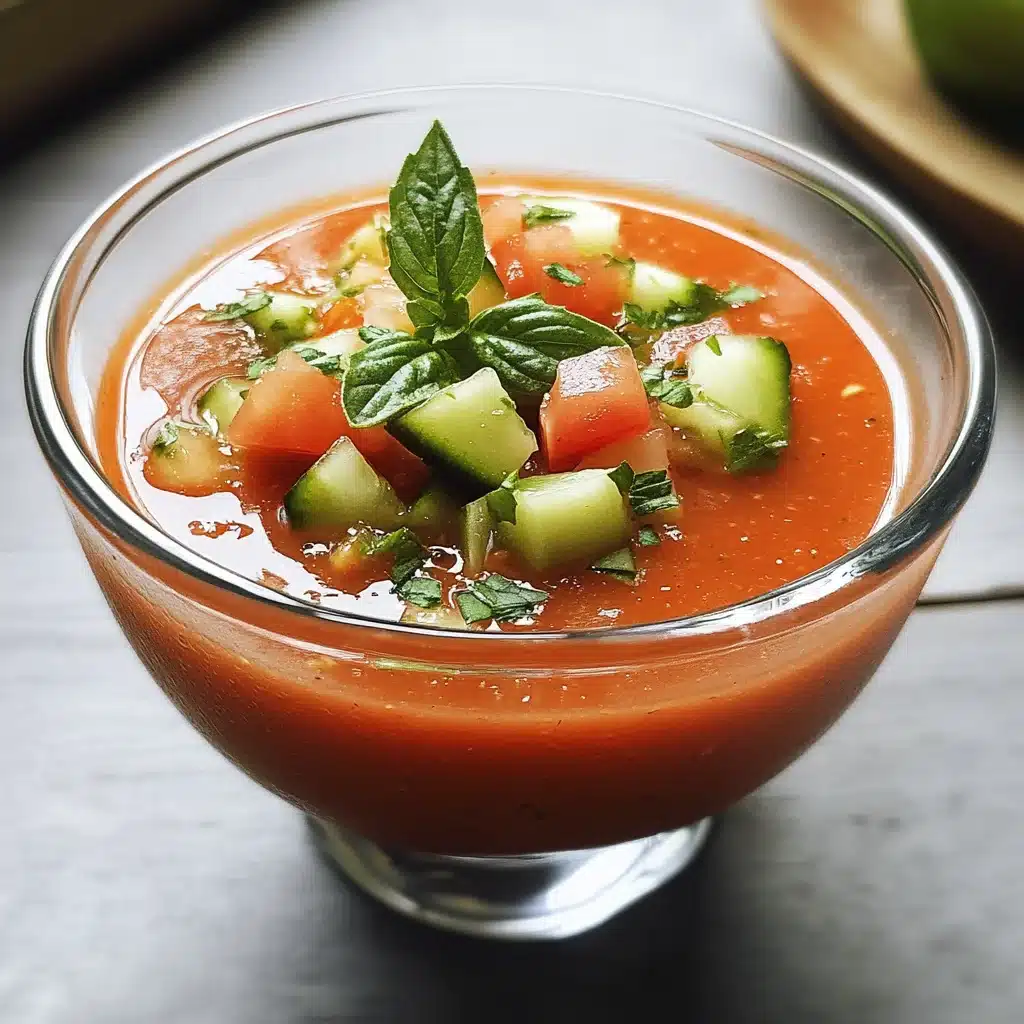
When the sun blazes down and the heat makes you long for something refreshing, Chilled Summer Gazpacho is your go-to dish. This vibrant, cold soup is not just a treat for your taste buds; it’s a quick solution for those busy summer days when you want to impress without breaking a sweat. I remember my first taste of gazpacho at a local Spanish festival, and it was love at first sip. With its bright flavors and easy prep, this recipe is perfect for gatherings or a simple weeknight dinner. Let’s dive into this delightful summer classic!

Why You’ll Love This Chilled Summer Gazpacho

This Chilled Summer Gazpacho is a culinary lifesaver. It’s incredibly easy to whip up, taking just 15 minutes of prep time. The vibrant flavors burst in your mouth, making it a refreshing treat on hot days. Plus, it’s a healthy option packed with fresh veggies. Whether you’re hosting a barbecue or just need a quick meal, this gazpacho is sure to impress and satisfy everyone at the table.

Ingredients for Chilled Summer Gazpacho

Gathering fresh ingredients is half the fun of making Chilled Summer Gazpacho. Here’s what you’ll need:

  • Ripe tomatoes: The star of the show! Choose juicy, vibrant tomatoes for the best flavor.
  • Cucumber: Adds a refreshing crunch. Peel it for a smoother texture or leave the skin on for extra nutrients.
  • Bell pepper: Red or green, this ingredient brings sweetness and color. It’s a great way to sneak in some extra vitamins.
  • Red onion: A touch of sharpness that balances the sweetness of the tomatoes. You can substitute with green onions for a milder taste.
  • Garlic: Just a couple of cloves for that aromatic kick. If you’re not a fan, you can reduce the amount or skip it altogether.
  • Tomato juice: This forms the base of your gazpacho. Opt for low-sodium varieties to control the saltiness.
  • Olive oil: A drizzle adds richness and depth. Extra virgin is best for its robust flavor.
  • Red wine vinegar: This tangy addition brightens the soup. You can swap it with apple cider vinegar if you prefer.
  • Salt and black pepper: Essential for seasoning. Adjust to your taste, but don’t skip them!
  • Cayenne pepper (optional): For those who like a little heat, this spice can elevate your gazpacho.
  • Fresh herbs: Basil or parsley for garnish. They not only look great but also enhance the flavor.

For those who want to experiment, consider adding half an avocado for creaminess or trying different herbs like cilantro or dill. The exact quantities for each ingredient are listed at the bottom of the article, ready for printing!

How to Make Chilled Summer Gazpacho

Creating your own Chilled Summer Gazpacho is a breeze. Follow these simple steps, and you’ll have a refreshing soup ready to impress your family and friends.

Step 1: Blend the Vegetables

Start by tossing the chopped tomatoes, cucumber, bell pepper, red onion, and garlic into your blender. Blend until the mixture is smooth and vibrant. The key here is to let those flavors mingle. If you prefer a chunkier texture, pulse the blender a few times instead of blending continuously.

Step 2: Add the Liquids and Seasonings

Next, pour in the tomato juice, olive oil, and red wine vinegar. Sprinkle in the salt, black pepper, and cayenne pepper if you’re feeling adventurous. Blend again until everything is well combined. This step is crucial for achieving that perfect balance of flavors in your gazpacho.

Step 3: Adjust the Consistency

Now it’s time to taste your creation. If it’s too thick for your liking, add a splash more tomato juice to reach your desired consistency. Don’t forget to adjust the seasoning as well. A little extra salt or pepper can make a world of difference!

Step 4: Chill the Gazpacho

Transfer your blended mixture into a large bowl or pitcher. Cover it and pop it in the refrigerator for at least 2 hours. This chilling time allows the flavors to meld beautifully, making each spoonful a burst of summer.

Step 5: Serve and Garnish

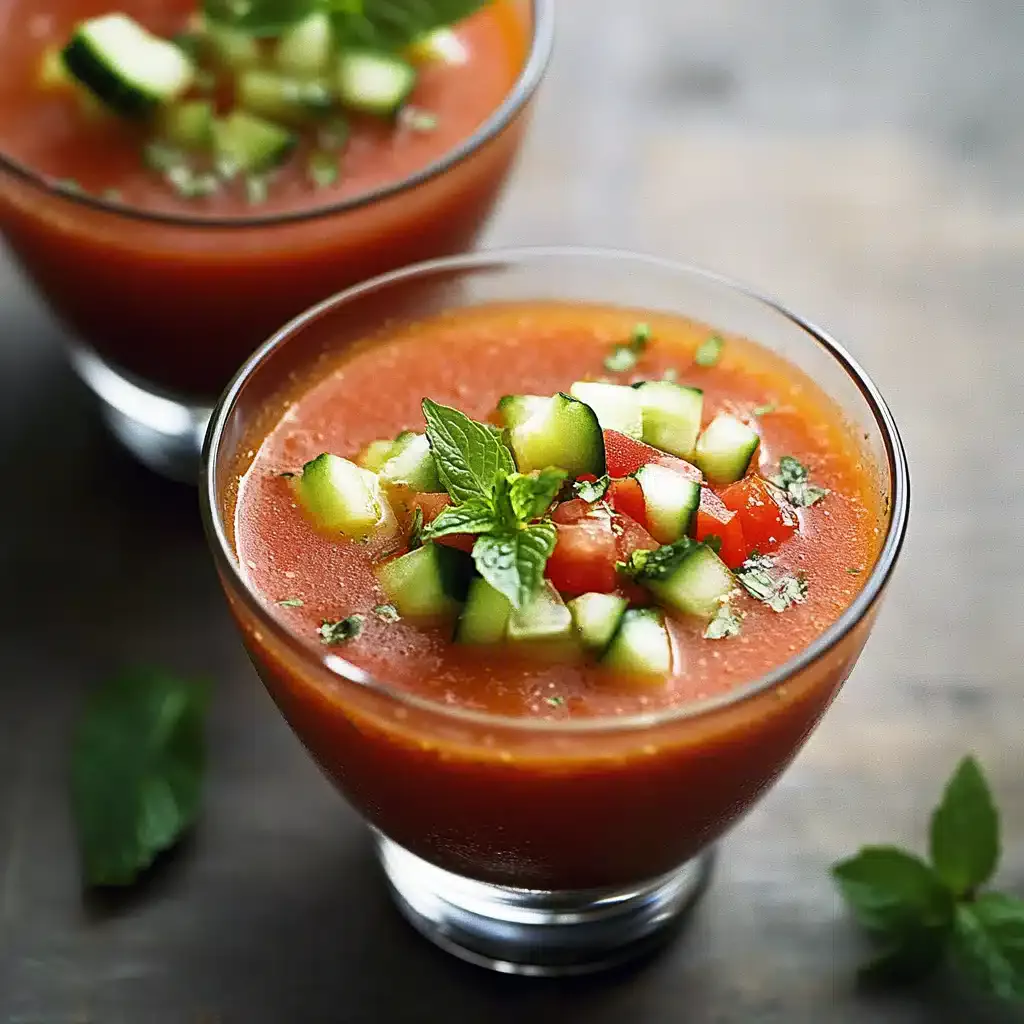
When you’re ready to serve, ladle the gazpacho into bowls or glasses. Garnish with fresh basil or parsley for a pop of color and flavor. Enjoy it cold, and watch as your guests savor every refreshing bite!

Tips for Success

  • Use the ripest tomatoes you can find for maximum flavor.
  • Chill your gazpacho overnight for an even better taste.
  • Don’t skip the garnishes; they add a fresh touch.
  • Experiment with different herbs to find your favorite flavor combination.
  • For a smoother texture, blend longer or strain the mixture.

Equipment Needed

  • Blender or food processor: Essential for achieving that smooth consistency. A hand blender works too!
  • Cutting board and knife: For chopping your fresh veggies with ease.
  • Large bowl or pitcher: To mix and chill your gazpacho.
  • Measuring cups and spoons: Handy for precise ingredient amounts.

Variations of Chilled Summer Gazpacho

  • Avocado Gazpacho: Blend in half an avocado for a creamy texture that adds richness to your soup.
  • Spicy Gazpacho: Add diced jalapeños or a splash of hot sauce for an extra kick that will wake up your taste buds.
  • Herbed Gazpacho: Experiment with different herbs like cilantro, dill, or mint for a unique flavor twist.
  • Fruit-Infused Gazpacho: Incorporate diced watermelon or mango for a sweet contrast to the savory vegetables.
  • Roasted Vegetable Gazpacho: Roast your tomatoes and peppers before blending for a deeper, smoky flavor.

Serving Suggestions for Chilled Summer Gazpacho

  • Pair with crusty bread or garlic toast for a satisfying crunch.
  • Serve alongside a light salad, like arugula with lemon vinaigrette.
  • For drinks, a chilled white wine or sparkling water complements the flavors beautifully.
  • Present in clear glasses for a stunning visual appeal.

FAQs about Chilled Summer Gazpacho

Can I make Chilled Summer Gazpacho ahead of time?

Absolutely! In fact, making it a day in advance allows the flavors to meld beautifully. Just store it in the fridge, and it’ll be ready when you are.

What can I serve with Chilled Summer Gazpacho?

This refreshing soup pairs wonderfully with crusty bread, a light salad, or even grilled shrimp. It’s versatile enough to complement many dishes!

Is Chilled Summer Gazpacho healthy?

Yes! It’s packed with fresh vegetables and is low in calories, making it a nutritious choice. Plus, it’s vegan-friendly, so everyone can enjoy it.

Can I customize the ingredients?

Definitely! Feel free to swap in your favorite veggies or herbs. You can even add fruits like watermelon for a sweet twist on this classic.

How long does Chilled Summer Gazpacho last in the fridge?

It can last up to 3 days in the fridge. Just give it a good stir before serving, as the ingredients may settle.

Final Thoughts

Making Chilled Summer Gazpacho is more than just preparing a dish; it’s about embracing the essence of summer. Each spoonful is a celebration of fresh flavors, vibrant colors, and the joy of sharing with loved ones. Whether you’re enjoying it on a hot afternoon or serving it at a gathering, this refreshing soup brings people together. The ease of preparation means you can focus on what truly matters—creating memories. So, grab those ripe tomatoes and let this delightful gazpacho be the star of your summer meals. Trust me, your taste buds will thank you!

Ranis

Chilled Summer Gazpacho: Refreshing Recipe for You!

A refreshing chilled summer gazpacho recipe perfect for hot days.
Prep Time 15 minutes
Total Time 2 hours 15 minutes
Servings: 6 servings
Course: Appetizer
Cuisine: Spanish
Calories: 120

Ingredients
  

  • 4 large ripe tomatoes chopped
  • 1 cucumber peeled and chopped
  • 1 bell pepper red or green, chopped
  • 1 small red onion chopped
  • 2 cloves garlic minced
  • 3 cups tomato juice
  • 1/4 cup olive oil
  • 2 tablespoons red wine vinegar
  • 1 teaspoon salt
  • 1/2 teaspoon black pepper
  • 1/2 teaspoon cayenne pepper optional
  • Fresh basil or parsley for garnish

Method
 

  1. In a blender or food processor, combine the chopped tomatoes, cucumber, bell pepper, red onion, and garlic. Blend until smooth.
  2. Add the tomato juice, olive oil, red wine vinegar, salt, black pepper, and cayenne pepper (if using) to the blender. Blend again until well combined.
  3. Taste and adjust seasoning if necessary. If the mixture is too thick, add a little more tomato juice to reach your desired consistency.
  4. Transfer the gazpacho to a large bowl or pitcher and refrigerate for at least 2 hours to chill and allow the flavors to meld.
  5. Serve the gazpacho cold, garnished with fresh basil or parsley.

Nutrition

Serving: 1cupCalories: 120kcalCarbohydrates: 10gProtein: 2gFat: 9gSaturated Fat: 1gPolyunsaturated Fat: 8gSodium: 400mgFiber: 2gSugar: 6g

Notes

  • For a creamier texture, add 1/2 avocado to the blender before mixing.
  • Experiment with different herbs like cilantro or dill for a unique flavor twist.

Tried this recipe?

Let us know how it was!

Peach Crisp Delight: Discover Your New Favorite Recipe!

Introduction to Peach Crisp Delight

There’s something magical about the aroma of fresh peaches wafting through the kitchen. It takes me back to summer days spent picking ripe fruit under the sun. That’s why I’m excited to share my Peach Crisp Delight recipe with you. This dessert is not just a treat; it’s a warm hug in a bowl. Perfect for a quick weeknight dessert or a showstopper for gatherings, it combines juicy peaches with a crunchy oat topping. Trust me, your loved ones will be asking for seconds, and you’ll love how easy it is to whip up!

Why You’ll Love This Peach Crisp Delight

This Peach Crisp Delight is a game-changer for dessert lovers. It’s incredibly easy to make, requiring just a handful of ingredients and minimal prep time. In about 50 minutes, you can serve a warm, comforting dish that bursts with flavor. The combination of sweet peaches and crunchy oats creates a delightful contrast that will have everyone coming back for more. Plus, it’s a versatile dessert that fits any occasion!

Ingredients for Peach Crisp Delight

Gathering the right ingredients is the first step to creating your Peach Crisp Delight. Here’s what you’ll need:

  • Fresh peaches: The star of the show! Look for ripe, juicy peaches for the best flavor. You can also use frozen peaches if fresh ones aren’t available.
  • Lemon juice: A splash of acidity to brighten the sweetness of the peaches. Freshly squeezed is best, but bottled works in a pinch.
  • Rolled oats: These provide the crunchy topping that contrasts beautifully with the soft peaches. Quick oats can be used, but rolled oats give a better texture.
  • All-purpose flour: This helps bind the topping together. If you’re looking for a gluten-free option, almond or oat flour can be great substitutes.
  • Brown sugar: Adds a rich, caramel-like sweetness. You can use light or dark brown sugar depending on your preference.
  • Granulated sugar: Balances the flavors and enhances the sweetness of the peaches. Adjust the amount based on your taste.
  • Ground cinnamon: A warm spice that complements the peaches perfectly. Feel free to add a pinch of nutmeg for extra warmth.
  • Salt: Just a touch to enhance all the flavors. It’s amazing how a little salt can elevate a dish!
  • Unsalted butter: This adds richness to the topping. If you prefer a dairy-free option, coconut oil can be a good alternative.
  • Chopped pecans or walnuts (optional): For those who love a nutty crunch, these add texture and flavor. You can skip them if you’re not a fan.

Exact measurements for each ingredient are available at the bottom of the article for easy printing. Happy cooking!

How to Make Peach Crisp Delight

Creating your Peach Crisp Delight is a straightforward process that anyone can master. Follow these simple steps, and you’ll have a delicious dessert ready to impress!

Step 1: Preheat the Oven

Start by preheating your oven to 350°F (175°C). This ensures it’s hot enough to create that perfect golden topping. Trust me, a well-preheated oven makes all the difference!

Step 2: Prepare the Peaches

In a large bowl, combine the sliced peaches with lemon juice. Toss them gently to coat. This little step brightens the flavor and prevents browning. Once coated, spread the peach mixture evenly in a greased 9×13-inch baking dish. Make sure every slice gets some love!

Step 3: Mix the Topping

In another bowl, mix together the rolled oats, flour, brown sugar, granulated sugar, cinnamon, and salt. This combination creates that irresistible crunchy topping. The cinnamon adds warmth, making your kitchen smell heavenly!

Step 4: Combine with Butter

Pour the melted butter over the oat mixture and stir until everything is well combined. If you’re feeling adventurous, fold in the chopped nuts at this stage. They add a delightful crunch that elevates your Peach Crisp Delight!

Step 5: Assemble the Dish

Now, sprinkle the oat mixture evenly over the peaches in the baking dish. Make sure to cover all the peaches; you want every bite to be a perfect blend of fruit and topping.

Step 6: Bake

Bake in the preheated oven for 30-35 minutes. Keep an eye on it! You’re looking for a golden brown topping and bubbly peaches. The aroma will have your mouth watering!

Step 7: Cool and Serve

Once baked, remove the dish from the oven and let it cool for about 10 minutes. This waiting period is crucial; it allows the juices to settle. Serve warm, and watch everyone dig in with delight!

Tips for Success

  • Use ripe peaches for the best flavor; they should be slightly soft to the touch.
  • Don’t skip the lemon juice; it brightens the dish and enhances the peach flavor.
  • For a crunchier topping, let the mixture sit for a few minutes before baking.
  • Experiment with spices; a dash of nutmeg or ginger can add a unique twist.
  • Serve with ice cream or whipped cream for an indulgent treat!

Equipment Needed

  • 9×13-inch baking dish: A standard size for this recipe. If you don’t have one, any similar-sized oven-safe dish will work.
  • Mixing bowls: Use two medium bowls for mixing the peach filling and the topping.
  • Measuring cups and spoons: Essential for accurate ingredient measurements.
  • Spatula: Great for mixing and spreading the topping evenly.

Variations

  • Berry Bliss: Mix in some blueberries or raspberries with the peaches for a burst of color and flavor.
  • Peach and Almond: Substitute chopped almonds for pecans or walnuts for a different nutty flavor.
  • Gluten-Free Option: Use gluten-free oats and almond flour instead of all-purpose flour for a gluten-free Peach Crisp Delight.
  • Spiced Up: Add a pinch of cardamom or allspice to the topping for a warm, aromatic twist.
  • Vegan Version: Replace the butter with coconut oil and use a flax egg instead of any eggs for a vegan-friendly dessert.

Serving Suggestions

  • Pair your Peach Crisp Delight with a scoop of vanilla ice cream for a classic combo.
  • Drizzle with caramel sauce for an extra touch of sweetness.
  • Serve alongside a dollop of whipped cream for a light, airy contrast.
  • For a refreshing drink, consider iced tea or lemonade to balance the dessert’s richness.

FAQs about Peach Crisp Delight

Can I use frozen peaches for this recipe?

Absolutely! Frozen peaches work well in this Peach Crisp Delight. Just make sure to thaw and drain any excess liquid before using them. This will help maintain the right texture.

How do I store leftovers?

Store any leftover Peach Crisp Delight in an airtight container in the refrigerator. It will stay fresh for about 3-4 days. Reheat in the oven or microwave before serving for the best taste.

Can I make this dessert ahead of time?

Yes! You can prepare the peach filling and topping separately a day in advance. Just assemble and bake when you’re ready to serve. It’s a great way to save time!

What can I substitute for brown sugar?

If you don’t have brown sugar, you can use granulated sugar mixed with a bit of molasses. Alternatively, coconut sugar is a great natural substitute that adds a similar flavor.

Is Peach Crisp Delight suitable for a vegan diet?

Yes! Simply replace the butter with coconut oil and use a flax egg or applesauce as a binder. This way, you can enjoy a delicious vegan version of this classic dessert!

Final Thoughts

Making Peach Crisp Delight is more than just baking; it’s about creating memories. The joy of sharing this warm, comforting dessert with family and friends is unmatched. Each bite is a delightful blend of sweet peaches and crunchy oats, evoking nostalgia and happiness. Whether it’s a casual weeknight dinner or a festive gathering, this recipe brings everyone together. Plus, the simplicity of preparation means you can focus on what truly matters—enjoying the moment. So, roll up your sleeves, embrace the process, and let this Peach Crisp Delight become a cherished part of your culinary repertoire!

Ranis

Peach Crisp Delight: Discover Your New Favorite Recipe!

Peach Crisp Delight is a delicious dessert made with fresh peaches and a crunchy oat topping, perfect for any occasion.
Prep Time 15 minutes
Cook Time 35 minutes
Total Time 50 minutes
Servings: 8 servings
Course: Dessert
Cuisine: American
Calories: 220

Ingredients
  

  • 4 cups fresh peaches peeled and sliced
  • 1 tablespoon lemon juice
  • 1 cup rolled oats
  • 1 cup all-purpose flour
  • 1 cup brown sugar packed
  • 1/2 cup granulated sugar
  • 1 teaspoon ground cinnamon
  • 1/2 teaspoon salt
  • 1/2 cup unsalted butter melted
  • 1/4 cup chopped pecans or walnuts optional

Method
 

  1. Preheat your oven to 350°F (175°C).
  2. In a large bowl, combine the sliced peaches and lemon juice. Toss to coat and then spread the mixture evenly in a greased 9x13-inch baking dish.
  3. In another bowl, mix together the rolled oats, flour, brown sugar, granulated sugar, cinnamon, and salt.
  4. Pour the melted butter over the oat mixture and stir until combined. If using, fold in the chopped nuts.
  5. Sprinkle the oat mixture evenly over the peaches in the baking dish.
  6. Bake in the preheated oven for 30-35 minutes, or until the topping is golden brown and the peaches are bubbly.
  7. Remove from the oven and let cool for about 10 minutes before serving.

Nutrition

Serving: 1servingCalories: 220kcalCarbohydrates: 30gProtein: 3gFat: 10gSaturated Fat: 6gPolyunsaturated Fat: 4gCholesterol: 30mgSodium: 150mgFiber: 2gSugar: 20g

Notes

  • For added flavor, consider mixing in a teaspoon of vanilla extract or a pinch of nutmeg into the peach mixture.
  • Serve warm with a scoop of vanilla ice cream or a dollop of whipped cream for an extra treat.

Tried this recipe?

Let us know how it was!

Pepper Steak Stir-Fry: Discover a Flavorful Recipe!

Introduction to Pepper Steak Stir-Fry

When life gets hectic, finding a quick and delicious meal can feel like a challenge. That’s where my Pepper Steak Stir-Fry comes in, a dish that’s not only packed with flavor but also comes together in just 25 minutes.

I remember the first time I made this for my friends; their eyes lit up with every bite. It’s a perfect solution for busy weeknights or a way to impress your loved ones on the weekend. With tender flank steak, vibrant veggies, and a savory sauce, this recipe is sure to become a favorite in your kitchen.

Why You’ll Love This Pepper Steak Stir-Fry

This Pepper Steak Stir-Fry is a game-changer for anyone juggling a busy schedule.

It’s quick, taking just 25 minutes from start to finish, making it perfect for those weeknights when you want something satisfying without the fuss.

The combination of tender steak and fresh vegetables creates a mouthwatering dish that’s not only delicious but also visually appealing.

Trust me, your taste buds will thank you!

Ingredients for Pepper Steak Stir-Fry

Creating a flavorful Pepper Steak Stir-Fry starts with the right ingredients. Here’s what you’ll need:

  • Flank steak: This cut is tender and perfect for stir-frying. Slice it thinly against the grain for the best texture.
  • Soy sauce: A staple in Asian cuisine, it adds depth and umami to the dish.
  • Cornstarch: This helps to tenderize the meat and gives the sauce a nice thickness.
  • Vegetable oil: A neutral oil that can withstand high heat, ideal for stir-frying.
  • Bell pepper: Any color works! It adds sweetness and crunch, making the dish vibrant.
  • Onion: Sliced onions bring a savory flavor that complements the steak beautifully.
  • Garlic: Freshly minced garlic adds a punch of flavor that elevates the entire dish.
  • Fresh ginger: A little goes a long way in adding warmth and spice.
  • Beef broth: This enriches the sauce, making it more robust and flavorful.
  • Oyster sauce: A key ingredient for that authentic stir-fry taste, it adds a hint of sweetness.
  • Sesame oil: Just a drizzle at the end gives a nutty aroma that’s irresistible.
  • Salt and pepper: Essential for seasoning to taste.
  • Cooked rice or noodles: Serve your stir-fry over these for a complete meal.

Feel free to get creative! For a spicier kick, toss in some sliced jalapeños or a dash of red pepper flakes. If you’re looking for alternatives, chicken breast or tofu can easily replace the flank steak.

Exact quantities for each ingredient are available at the bottom of the article for your convenience. Happy cooking!

How to Make Pepper Steak Stir-Fry

Creating a mouthwatering Pepper Steak Stir-Fry is easier than you might think.

Follow these simple steps, and you’ll have a delicious meal ready in no time.

Step 1: Marinate the Steak

Start by taking your thinly sliced flank steak and placing it in a bowl.

Add soy sauce and cornstarch, mixing everything together until the steak is well-coated.

Let it marinate for about 15 minutes. This step is crucial; it tenderizes the meat and infuses it with flavor.

Step 2: Cook the Steak

Heat 1 tablespoon of vegetable oil in a large skillet or wok over medium-high heat.

Once the oil is hot, add the marinated steak in a single layer.

Cook for about 2-3 minutes until it’s browned.

Don’t overcrowd the pan; you want that beautiful sear!

Remove the steak from the skillet and set it aside.

Step 3: Stir-Fry the Vegetables

In the same skillet, add the remaining tablespoon of vegetable oil.

Toss in the sliced bell pepper and onion, stir-frying for about 3-4 minutes.

You want them to soften but still retain some crunch.

The colors will brighten up your dish, making it visually appealing.

Step 4: Add Aromatics

Now, it’s time to elevate those flavors!

Add the minced garlic and ginger to the skillet.

Stir-fry for an additional minute until fragrant.

The aroma will fill your kitchen, making it hard to resist!

Step 5: Combine and Thicken

Return the cooked steak to the skillet.

Pour in the beef broth and oyster sauce, stirring to combine everything.

Cook for another 2-3 minutes until the sauce thickens slightly.

This is where the magic happens; the flavors meld together beautifully.

Step 6: Final Touches

Drizzle the stir-fry with sesame oil for that nutty finish.

Season with salt and pepper to taste.

Give it a final stir, and your Pepper Steak Stir-Fry is ready to serve!

Plate it over cooked rice or noodles, and enjoy the deliciousness you’ve created.

Tips for Success

  • Slice the flank steak against the grain for maximum tenderness.
  • Prep all ingredients before cooking to streamline the process.
  • Don’t overcrowd the skillet; cook in batches if necessary.
  • Adjust the sauce thickness by adding more broth or cornstarch as needed.
  • Experiment with different vegetables like broccoli or snap peas for variety.

Equipment Needed

  • Large skillet or wok: Essential for stir-frying; a non-stick pan works too.
  • Cutting board: A sturdy surface for slicing your ingredients.
  • Sharp knife: For easy and precise cutting of the steak and vegetables.
  • Mixing bowl: To marinate the steak and combine ingredients.
  • Spatula or tongs: For stirring and flipping the steak and veggies.

Variations

  • Spicy Pepper Steak: Add sliced jalapeños or a sprinkle of red pepper flakes for an extra kick.
  • Vegetarian Option: Substitute flank steak with tofu or tempeh for a plant-based twist.
  • Different Proteins: Try chicken breast, shrimp, or even beef tenderloin for a change of pace.
  • Colorful Veggies: Incorporate snap peas, carrots, or broccoli for added nutrition and color.
  • Gluten-Free Version: Use tamari instead of soy sauce to keep it gluten-free without sacrificing flavor.

Serving Suggestions

  • Rice or Noodles: Serve your Pepper Steak Stir-Fry over fluffy white rice or your favorite noodles for a hearty meal.
  • Fresh Herbs: Garnish with chopped green onions or cilantro for a burst of freshness.
  • Drink Pairing: Enjoy with a cold beer or a light, fruity red wine to complement the flavors.

FAQs about Pepper Steak Stir-Fry

Can I use a different cut of beef for this stir-fry?

Absolutely! While flank steak is my go-to for its tenderness, you can also use sirloin or ribeye. Just remember to slice it thinly against the grain for the best texture.

How can I make this Pepper Steak Stir-Fry gluten-free?

To keep it gluten-free, simply swap out the soy sauce for tamari. It has a similar flavor profile and works perfectly in this recipe.

What vegetables can I add to the stir-fry?

The beauty of stir-frying is its versatility! Feel free to add snap peas, broccoli, or even carrots for extra crunch and nutrition. Just adjust the cooking time accordingly.

Can I prepare this dish in advance?

Yes, you can! Marinate the steak ahead of time and chop your veggies. When you’re ready to cook, it’ll come together in no time, making it a great option for meal prep.

What can I serve with Pepper Steak Stir-Fry?

This dish pairs wonderfully with steamed rice or noodles. You can also serve it with a side of stir-fried greens for a complete meal.

Final Thoughts

Cooking this Pepper Steak Stir-Fry is more than just preparing a meal; it’s about creating a moment of joy in your kitchen.

The vibrant colors, the sizzling sounds, and the mouthwatering aroma all come together to make cooking a delightful experience.

Whether you’re whipping it up for a busy weeknight or impressing friends at a gathering, this dish never fails to deliver.

It’s quick, satisfying, and packed with flavor, making it a go-to recipe in my home.

I hope it brings as much happiness to your table as it has to mine!

Ranis

Pepper Steak Stir-Fry: Discover a Flavorful Recipe!

A delicious and flavorful Pepper Steak Stir-Fry recipe that combines tender flank steak with fresh vegetables and a savory sauce.
Prep Time 15 minutes
Cook Time 10 minutes
Total Time 25 minutes
Servings: 4 servings
Course: Main Dish
Cuisine: Asian
Calories: 320

Ingredients
  

  • 1 pound flank steak thinly sliced against the grain
  • 2 tablespoons soy sauce
  • 1 tablespoon cornstarch
  • 2 tablespoons vegetable oil
  • 1 bell pepper sliced (any color)
  • 1 onion sliced
  • 2 cloves garlic minced
  • 1 teaspoon fresh ginger minced
  • 1 cup beef broth
  • 1 tablespoon oyster sauce
  • 1 tablespoon sesame oil
  • Salt and pepper to taste
  • Cooked rice or noodles for serving

Method
 

  1. In a bowl, combine the sliced flank steak, soy sauce, and cornstarch. Mix well and let marinate for about 15 minutes.
  2. Heat 1 tablespoon of vegetable oil in a large skillet or wok over medium-high heat. Add the marinated steak in a single layer and cook for about 2-3 minutes until browned. Remove the steak from the skillet and set aside.
  3. In the same skillet, add the remaining tablespoon of vegetable oil. Add the sliced bell pepper and onion, and stir-fry for about 3-4 minutes until they start to soften.
  4. Add the minced garlic and ginger to the skillet and stir-fry for an additional 1 minute until fragrant.
  5. Return the cooked steak to the skillet. Pour in the beef broth and oyster sauce, stirring to combine. Cook for another 2-3 minutes until the sauce thickens slightly.
  6. Drizzle with sesame oil and season with salt and pepper to taste. Serve hot over cooked rice or noodles.

Nutrition

Serving: 1servingCalories: 320kcalCarbohydrates: 10gProtein: 30gFat: 18gSaturated Fat: 3gPolyunsaturated Fat: 15gCholesterol: 70mgSodium: 600mgFiber: 1gSugar: 2g

Notes

  • For a spicier kick, add sliced jalapeños or a dash of red pepper flakes while stir-frying.
  • Substitute the flank steak with chicken breast or tofu for a different protein option.

Tried this recipe?

Let us know how it was!

Creamy Honey Pepper Chicken Mac and Cheese Delight Awaits!

Introduction to Creamy Honey Pepper Chicken Mac and Cheese

There’s something magical about a warm bowl of mac and cheese, isn’t there? It’s like a hug in a dish. Now, imagine that comfort elevated with the delightful twist of Creamy Honey Pepper Chicken Mac and Cheese. This recipe is perfect for those busy weeknights when you want to whip up something quick yet impressive. With tender chicken, a creamy sauce, and a hint of sweetness from honey, it’s a dish that will have your loved ones asking for seconds. Trust me, this is the kind of meal that brings everyone together around the table.

Why You’ll Love This Creamy Honey Pepper Chicken Mac and Cheese

This Creamy Honey Pepper Chicken Mac and Cheese is a game-changer for your dinner routine. It’s quick to prepare, taking just 30 minutes from start to finish. The combination of creamy cheeses and tender chicken creates a flavor explosion that’s hard to resist. Plus, it’s a one-pot wonder, making cleanup a breeze. Whether you’re feeding a family or impressing friends, this dish is sure to be a hit!

Ingredients for Creamy Honey Pepper Chicken Mac and Cheese

Gathering the right ingredients is the first step to creating this delightful dish. Here’s what you’ll need:

  • Elbow macaroni: The classic choice for mac and cheese, these little tubes hold onto the creamy sauce beautifully.
  • Boneless, skinless chicken breasts: Diced for quick cooking, they add protein and heartiness to the dish.
  • Olive oil: A staple in many kitchens, it’s perfect for sautéing the chicken and adds a touch of flavor.
  • Salt: Essential for enhancing the flavors of the chicken and pasta.
  • Black pepper: A dash of this adds a subtle kick to the dish.
  • Garlic powder: For that aromatic depth, it’s a quick way to infuse flavor without the fuss of fresh garlic.
  • Onion powder: Another flavor booster that complements the chicken and cheese perfectly.
  • Heavy cream: This is what makes the sauce luxuriously creamy and rich.
  • Sharp cheddar cheese: Its bold flavor is a must for that classic mac and cheese taste.
  • mozzarella cheese: Adds a gooey, stretchy texture that everyone loves.
  • Honey: The star ingredient that brings a sweet contrast to the savory elements.
  • Crushed red pepper flakes (optional): For those who like a little heat, this is a great addition.
  • Fresh parsley: Not just for garnish, it adds a pop of color and freshness to the dish.

For those looking to make adjustments, consider using whole wheat macaroni for a healthier twist or low-fat cheese to lighten things up. You can also sneak in some steamed broccoli or spinach for added nutrition. Exact measurements for each ingredient can be found at the bottom of the article, ready for printing!

How to Make Creamy Honey Pepper Chicken Mac and Cheese

Now that you have all your ingredients ready, let’s dive into the steps to create this mouthwatering Creamy Honey Pepper Chicken Mac and Cheese. Each step is straightforward, ensuring you can whip this up without a hitch. Let’s get cooking!

Step 1: Cook the Elbow Macaroni

Start by boiling a pot of salted water. Once it’s bubbling, add the elbow macaroni. Cook it until it’s al dente, which usually takes about 7-8 minutes. This means it should be firm to the bite, not mushy. After cooking, drain the macaroni well. Proper draining is crucial; you don’t want excess water diluting your creamy sauce later!

Step 2: Prepare the Chicken

In a large skillet, heat a tablespoon of olive oil over medium heat. Toss in the diced chicken, seasoning it with salt, black pepper, garlic powder, and onion powder. Cook for about 6-8 minutes, stirring occasionally. You want the chicken to be golden brown and fully cooked, with no pink remaining. This step is key for flavor and texture in your mac and cheese.

Step 3: Create the Creamy Sauce

Once the chicken is cooked, reduce the heat to low. Pour in the heavy cream, followed by the sharp cheddar and mozzarella cheeses. Stir gently until the cheeses melt and the sauce becomes smooth and creamy. This is where the magic happens! The combination of cream and cheese creates a luscious sauce that will coat your macaroni perfectly.

Step 4: Combine Macaroni and Sauce

Now, it’s time to bring everything together. Add the drained macaroni to the skillet with the creamy sauce. Stir well to ensure every piece of pasta is coated in that cheesy goodness. This step is all about even distribution; you want every bite to be just as delicious as the last!

Step 5: Add Honey and Optional Heat

Drizzle the honey over the mac and cheese, and give it a good stir. The honey adds a delightful sweetness that balances the savory flavors beautifully. If you’re feeling adventurous, sprinkle in some crushed red pepper flakes for a hint of heat. It’s a simple way to elevate the dish and cater to those who enjoy a little spice!

Step 6: Serve and Garnish

Finally, it’s time to serve! Spoon the creamy mac and cheese into bowls and garnish with freshly chopped parsley. This not only adds a pop of color but also a fresh flavor that brightens the dish. Serve immediately for the best experience, and watch as everyone digs in with delight!

Tips for Success

  • Always salt your pasta water; it enhances the flavor of the macaroni.
  • Don’t rush the cheese melting process; low heat ensures a creamy sauce.
  • For extra creaminess, reserve a bit of pasta water to add to the sauce if needed.
  • Feel free to experiment with different cheeses for unique flavors.
  • Garnish just before serving to keep the parsley vibrant and fresh.

Equipment Needed

  • Large pot: For boiling the macaroni. A Dutch oven works well too.
  • Skillet: A non-stick skillet is ideal for cooking the chicken and making the sauce.
  • Colander: Essential for draining the macaroni.
  • Wooden spoon: Perfect for stirring everything together.
  • Measuring cups: Handy for accurate ingredient portions.

Variations

  • Spicy Kick: Add diced jalapeños or a splash of hot sauce for an extra layer of heat.
  • Veggie Delight: Incorporate steamed broccoli, spinach, or bell peppers for added nutrition and color.
  • Cheese Lovers: Experiment with different cheeses like gouda, pepper jack, or fontina for unique flavors.
  • Gluten-Free Option: Use gluten-free elbow macaroni to make this dish suitable for gluten-sensitive diners.
  • Protein Swap: Substitute chicken with cooked shrimp or diced turkey for a different protein twist.

Serving Suggestions

  • Side Salad: Pair with a crisp green salad dressed in a light vinaigrette for a refreshing contrast.
  • Garlic Bread: Serve with warm garlic bread for a comforting, hearty meal.
  • Drink Pairing: A chilled glass of iced tea or a light beer complements the flavors beautifully.
  • Presentation: Serve in colorful bowls to make the dish pop on the table.

FAQs about Creamy Honey Pepper Chicken Mac and Cheese

Can I make this dish ahead of time?
Absolutely! You can prepare the Creamy Honey Pepper Chicken Mac and Cheese in advance. Just store it in an airtight container in the fridge. When you’re ready to serve, reheat it on the stovetop, adding a splash of cream or milk to restore its creaminess.

What can I substitute for heavy cream?
If you’re looking for a lighter option, you can use half-and-half or whole milk. Keep in mind that the sauce may not be as rich, but it will still be delicious!

Can I use different types of cheese?
Definitely! Feel free to mix and match your favorite cheeses. Gouda, pepper jack, or even a sprinkle of parmesan can add unique flavors to your Creamy Honey Pepper Chicken Mac and Cheese.

Is this recipe suitable for kids?
Yes! The creamy texture and mild flavors make it a hit with kids. Plus, you can sneak in some veggies like broccoli or peas to boost nutrition without them noticing!

How can I make this dish spicier?
If you love heat, add more crushed red pepper flakes or diced jalapeños. You can also drizzle some hot sauce on top before serving for an extra kick!

Final Thoughts

Cooking is more than just a task; it’s an experience that brings joy and connection. This Creamy Honey Pepper Chicken Mac and Cheese is a perfect example of that. With its rich flavors and comforting texture, it transforms an ordinary meal into something special. Whether you’re sharing it with family or enjoying a quiet night in, this dish wraps you in warmth and satisfaction. Plus, the smiles around the table are the best reward. So, roll up your sleeves, gather your ingredients, and let this delightful recipe create lasting memories in your kitchen!

Ranis

Creamy Honey Pepper Chicken Mac and Cheese Delight Awaits!

A delicious and creamy mac and cheese dish featuring honey pepper chicken, perfect for a comforting meal.
Prep Time 10 minutes
Cook Time 20 minutes
Total Time 30 minutes
Servings: 4 servings
Course: Main Course
Cuisine: American
Calories: 620

Ingredients
  

  • 2 cups elbow macaroni
  • 1 pound boneless skinless chicken breasts, diced
  • 1 tablespoon olive oil
  • 1 teaspoon salt
  • 1/2 teaspoon black pepper
  • 1/2 teaspoon garlic powder
  • 1/2 teaspoon onion powder
  • 1 cup heavy cream
  • 1 cup shredded sharp cheddar cheese
  • 1 cup shredded mozzarella cheese
  • 1/4 cup honey
  • 1/4 teaspoon crushed red pepper flakes optional
  • 1/4 cup chopped fresh parsley for garnish

Method
 

  1. Cook the elbow macaroni according to package instructions until al dente. Drain and set aside.
  2. In a large skillet, heat the olive oil over medium heat. Add the diced chicken, salt, black pepper, garlic powder, and onion powder. Cook for about 6-8 minutes, or until the chicken is cooked through and no longer pink.
  3. Reduce the heat to low and stir in the heavy cream, cheddar cheese, and mozzarella cheese. Mix until the cheeses are melted and the sauce is creamy.
  4. Add the cooked macaroni to the skillet and stir until well combined.
  5. Drizzle the honey over the mac and cheese and stir to incorporate. If desired, add crushed red pepper flakes for a bit of heat.
  6. Serve immediately, garnished with chopped parsley.

Nutrition

Serving: 1servingCalories: 620kcalCarbohydrates: 45gProtein: 38gFat: 30gSaturated Fat: 15gPolyunsaturated Fat: 10gCholesterol: 120mgSodium: 800mgFiber: 2gSugar: 10g

Notes

  • For a healthier version, substitute whole wheat macaroni and use low-fat cheese.
  • Add steamed broccoli or spinach for extra veggies and nutrition.

Tried this recipe?

Let us know how it was!

Creamy Garlic Parmesan Pasta: A Delicious Recipe You’ll Love!

Introduction to Creamy Garlic Parmesan Pasta

There’s something magical about a bowl of pasta that wraps you in warmth and comfort. Creamy Garlic Parmesan Pasta is just that—a dish that feels like a hug on a plate. Whether you’re racing against the clock after a long day or looking to impress someone special, this recipe is your go-to solution. With its rich, velvety sauce and the irresistible aroma of garlic, it’s bound to become a favorite in your kitchen. Plus, it’s simple enough to whip up on a weeknight yet elegant enough for a dinner party. Let’s dive into this delicious adventure!

Why You’ll Love This Creamy Garlic Parmesan Pasta

This Creamy Garlic Parmesan Pasta is a culinary dream come true. It’s quick to prepare, taking just 25 minutes from start to finish. The rich, creamy sauce envelops each noodle, creating a delightful taste experience. Plus, it’s versatile—perfect for a cozy family dinner or a romantic date night. With minimal ingredients and maximum flavor, you’ll find yourself making this dish again and again. Trust me, your taste buds will thank you!

Ingredients for Creamy Garlic Parmesan Pasta

Gathering the right ingredients is the first step to creating this delightful dish. Here’s what you’ll need:

  • Pasta: Fettuccine or spaghetti works best, but feel free to use your favorite type. Whole wheat or gluten-free options are great alternatives.
  • Olive Oil: A splash of this liquid gold adds flavor and helps sauté the garlic to perfection.
  • Garlic: Freshly minced garlic is a must for that aromatic kick. It’s the heart of this dish!
  • Heavy Cream: This is what makes the sauce luxuriously creamy. For a lighter version, consider half-and-half.
  • Parmesan Cheese: Grated Parmesan brings a salty, nutty flavor that elevates the dish. Freshly grated is always best!
  • Salt: A pinch enhances all the flavors, making each bite more delicious.
  • Black Pepper: Freshly cracked adds a subtle heat that balances the creaminess.
  • Red Pepper Flakes: Optional, but they add a nice kick if you like a bit of spice.
  • Fresh Parsley: Chopped parsley not only adds color but also a fresh taste to finish off the dish.

For those looking to add protein, consider cooked chicken or shrimp. Sautéed vegetables like spinach or mushrooms can also be a fantastic addition. You can find the exact quantities for each ingredient at the bottom of the article, ready for printing!

How to Make Creamy Garlic Parmesan Pasta

Now that you have your ingredients ready, let’s get cooking! This process is straightforward and fun. Follow these steps, and you’ll have a delicious meal in no time.

Step 1: Cook the Pasta

Start by boiling a large pot of salted water. Once it’s bubbling, add your fettuccine or spaghetti. Cook according to the package instructions until it’s al dente. This usually takes about 8-10 minutes. Remember to reserve half a cup of that pasta water before draining. It’s liquid gold for your sauce!

Step 2: Sauté the Garlic

In a large skillet, heat the olive oil over medium heat. Once it’s shimmering, toss in the minced garlic. Sauté for about a minute, just until it’s fragrant. Be careful not to let it brown; burnt garlic can ruin the dish. You want that lovely aroma wafting through your kitchen!

Step 3: Create the Creamy Sauce

Pour in the heavy cream and bring it to a gentle simmer. Stir in the grated Parmesan cheese, salt, black pepper, and red pepper flakes if you’re feeling adventurous. Keep stirring until the cheese melts and the sauce becomes smooth and creamy. This is where the magic happens!

Step 4: Combine Pasta and Sauce

Now, it’s time to bring it all together. Add the drained pasta to the skillet, tossing it gently to coat every noodle in that luscious sauce. If the sauce seems too thick, gradually add some of that reserved pasta water until you reach your desired consistency. You want it creamy but not gloppy!

Step 5: Garnish and Serve

Remove the skillet from heat and sprinkle the chopped fresh parsley on top. This adds a pop of color and freshness. Serve immediately, and watch your loved ones dig in with delight. Trust me, they won’t be able to resist!

Tips for Success

  • Always salt your pasta water; it enhances the flavor of the noodles.
  • Use freshly grated Parmesan for the best taste and texture.
  • Don’t rush the garlic; sauté it just until fragrant to avoid bitterness.
  • Reserve pasta water to adjust sauce consistency; it’s a game changer!
  • Experiment with add-ins like grilled chicken or sautéed veggies for variety.

Equipment Needed

  • Large Pot: For boiling pasta. A deep skillet can work in a pinch.
  • Skillet: A non-stick skillet is ideal for making the sauce.
  • Measuring Cups: For accurate ingredient measurements; a simple glass can substitute.
  • Wooden Spoon: Perfect for stirring; a spatula can also do the job.
  • Colander: For draining pasta; a slotted spoon can work if you’re in a bind.

Variations

  • Protein Boost: Add cooked chicken, shrimp, or even crispy bacon for a heartier meal.
  • Vegetarian Delight: Toss in sautéed spinach, mushrooms, or roasted bell peppers for extra flavor and nutrition.
  • Vegan Option: Substitute heavy cream with coconut cream and use nutritional yeast instead of Parmesan for a dairy-free version.
  • Herb Infusion: Experiment with fresh herbs like basil or thyme to elevate the flavor profile.
  • Cheesy Twist: Mix in other cheeses like mozzarella or goat cheese for a unique taste experience.

Serving Suggestions

  • Side Salad: A crisp Caesar or mixed greens salad pairs beautifully with the creamy pasta.
  • Bread: Serve with warm garlic bread or a crusty baguette to soak up the sauce.
  • Wine: A chilled glass of white wine, like Pinot Grigio, complements the dish perfectly.
  • Presentation: Serve in shallow bowls, garnished with extra parsley and a sprinkle of Parmesan for a restaurant-style touch.

FAQs about Creamy Garlic Parmesan Pasta

Got questions about this delicious dish? You’re not alone! Here are some common queries I’ve encountered, along with helpful answers to guide you through your creamy pasta journey.

Can I make Creamy Garlic Parmesan Pasta ahead of time?

While this dish is best enjoyed fresh, you can prepare the sauce in advance. Just reheat it gently and add the cooked pasta when you’re ready to serve. This way, you’ll save time on busy nights!

What can I substitute for heavy cream?

If you’re looking for a lighter option, half-and-half works well. For a dairy-free alternative, try coconut cream or a plant-based cream substitute. Both will still give you that creamy texture!

How can I make this dish spicier?

For those who love a kick, add more red pepper flakes or even a dash of hot sauce. You can also toss in some sautéed jalapeños for an extra layer of heat!

Can I freeze Creamy Garlic Parmesan Pasta?

Freezing isn’t recommended for this dish, as the cream can separate when thawed. However, you can freeze the sauce separately and mix it with freshly cooked pasta later for a quick meal.

What sides pair well with Creamy Garlic Parmesan Pasta?

A crisp salad or garlic bread complements this dish beautifully. You could also serve it with roasted vegetables for a balanced meal. The options are endless!

Final Thoughts

Cooking Creamy Garlic Parmesan Pasta is more than just preparing a meal; it’s about creating a moment of joy. The rich, creamy sauce and the delightful aroma of garlic fill your kitchen, inviting everyone to gather around the table. Each bite is a comforting embrace, perfect for sharing with family or friends. Whether it’s a busy weeknight or a special occasion, this dish brings warmth and satisfaction. So, roll up your sleeves, embrace the process, and enjoy the delicious rewards. Trust me, once you make this pasta, it will become a cherished staple in your culinary repertoire!

Ranis

Creamy Garlic Parmesan Pasta: A Delicious Recipe You’ll Love!

A creamy and delicious pasta dish made with garlic and Parmesan cheese, perfect for a comforting meal.
Prep Time 10 minutes
Cook Time 15 minutes
Total Time 25 minutes
Servings: 4 servings
Course: Main Course
Cuisine: Italian
Calories: 550

Ingredients
  

  • 8 ounces fettuccine or spaghetti
  • 2 tablespoons olive oil
  • 4 cloves garlic minced
  • 1 cup heavy cream
  • 1 cup grated Parmesan cheese
  • 1 teaspoon salt
  • 1/2 teaspoon black pepper
  • 1/4 teaspoon red pepper flakes optional
  • 2 tablespoons chopped fresh parsley for garnish

Method
 

  1. Cook the fettuccine or spaghetti according to package instructions until al dente. Drain and set aside, reserving 1/2 cup of pasta water.
  2. In a large skillet, heat the olive oil over medium heat. Add the minced garlic and sauté for about 1 minute, until fragrant but not browned.
  3. Pour in the heavy cream and bring to a gentle simmer. Stir in the grated Parmesan cheese, salt, black pepper, and red pepper flakes (if using). Continue to stir until the cheese is melted and the sauce is smooth.
  4. Add the cooked pasta to the skillet, tossing to coat the noodles in the creamy sauce. If the sauce is too thick, gradually add some reserved pasta water until you reach your desired consistency.
  5. Remove from heat and garnish with chopped fresh parsley before serving.

Nutrition

Serving: 1servingCalories: 550kcalCarbohydrates: 45gProtein: 15gFat: 35gSaturated Fat: 20gPolyunsaturated Fat: 10gCholesterol: 100mgSodium: 800mgFiber: 2gSugar: 1g

Notes

  • For added protein, consider adding cooked chicken, shrimp, or sautéed vegetables like spinach or mushrooms.
  • Substitute half-and-half for the heavy cream for a lighter version, or use a dairy-free cream alternative for a vegan option.

Tried this recipe?

Let us know how it was!

Creamy Mac and Cheese Soup: A Cozy Comfort Food Delight

Introduction to Creamy Mac and Cheese Soup

There’s something magical about a bowl of soup that wraps you in warmth, like a cozy blanket on a chilly evening. Creamy Mac and Cheese Soup is that perfect dish, blending the nostalgic flavors of childhood with the comfort of a hearty meal. Whether you’re racing against the clock after a long day or looking to impress your family with a delightful dinner, this recipe is your go-to solution. It’s quick, satisfying, and oh-so-delicious, making it an ideal choice for busy weeknights or lazy weekends. Let’s dive into this creamy delight that’s sure to become a favorite!

Why You’ll Love This Creamy Mac and Cheese Soup

This Creamy Mac and Cheese Soup is a game-changer for anyone craving comfort food without the fuss. It’s incredibly easy to whip up, taking just 30 minutes from start to finish. The rich, cheesy flavor will transport you back to childhood, while the hearty ingredients make it a filling meal. Plus, it’s versatile enough to adapt to your taste, ensuring everyone at the table leaves satisfied. What’s not to love?

Ingredients for Creamy Mac and Cheese Soup

Gathering the right ingredients is the first step to creating this delightful soup. Here’s what you’ll need:

  • Elbow macaroni: The classic pasta choice that holds onto the creamy goodness.
  • Chicken broth: This adds depth and flavor, making the soup hearty and satisfying.
  • Milk: For that rich, creamy texture that makes every spoonful comforting.
  • Sharp cheddar cheese: Provides a bold, tangy flavor that’s essential for that mac and cheese taste.
  • mozzarella cheese: Adds a gooey, stretchy quality that elevates the creaminess.
  • Diced onion: Brings a subtle sweetness and depth to the soup.
  • Diced carrots: Adds a pop of color and a hint of natural sweetness.
  • Diced celery: Contributes a nice crunch and fresh flavor.
  • Butter: For sautéing the vegetables, adding richness to the base.
  • Garlic powder: A quick way to infuse that savory flavor without the chopping.
  • Onion powder: Enhances the onion flavor without the fuss of fresh onions.
  • Salt and pepper: Essential for seasoning and bringing all the flavors together.
  • Fresh parsley (optional): A lovely garnish that adds a touch of freshness and color.

Feel free to get creative! You can swap out the elbow macaroni for any pasta shape you prefer, like shells or penne. If you want a spicier kick, toss in a pinch of cayenne pepper or a dash of hot sauce. For exact measurements, check the bottom of the article where you can find everything available for printing.

How to Make Creamy Mac and Cheese Soup

Now that you have all your ingredients ready, let’s get cooking! This Creamy Mac and Cheese Soup comes together in just a few simple steps. Follow along, and you’ll have a warm, cheesy bowl of goodness in no time.

Step 1: Sauté the Vegetables

Start by melting the butter in a large pot over medium heat. As it sizzles, toss in the diced onion, carrots, and celery. Sauté these veggies for about 5 minutes, stirring occasionally. You want them tender and fragrant, creating a lovely base for your soup. The aroma will make your kitchen feel like home!

Step 2: Add Broth and Pasta

Once your vegetables are ready, it’s time to add the chicken broth. Pour it in and bring it to a rolling boil. This is where the magic begins! When the broth is bubbling, add the elbow macaroni. Cook it according to the package instructions, usually around 8-10 minutes, until it’s al dente. You want that perfect bite, not mushy pasta!

Step 3: Mix in Dairy and Seasonings

After the macaroni is cooked, reduce the heat to low. Now, stir in the milk, garlic powder, onion powder, salt, and pepper. This is where the creamy texture starts to shine. Mix everything well, letting those flavors meld together. It’s like a warm hug in a pot!

Step 4: Incorporate the Cheeses

Here comes the best part! Gradually add the shredded cheddar and mozzarella cheese to the pot. Stir continuously until the cheese melts and becomes creamy. The soup should be rich and velvety, with that classic mac and cheese flavor. If you find yourself sneaking bites, I won’t blame you!

Step 5: Adjust Consistency and Seasoning

Now, take a moment to taste your creation. If it’s too thick for your liking, add a splash more milk or broth to reach your desired consistency. Don’t forget to adjust the seasoning too! A little extra salt or pepper can elevate the flavors even more.

Step 6: Serve and Garnish

Finally, it’s time to serve your Creamy Mac and Cheese Soup hot! Ladle it into bowls and, if you like, sprinkle some fresh parsley on top for a pop of color. This simple garnish adds a touch of freshness that complements the rich soup beautifully. Enjoy every spoonful!

Tips for Success

  • Prep your ingredients ahead of time to streamline the cooking process.
  • Don’t rush the sautéing; it builds flavor in your soup.
  • Use freshly shredded cheese for the best melt and creaminess.
  • Adjust the thickness by adding more broth or milk gradually.
  • Experiment with different cheeses for unique flavor profiles.

Equipment Needed

  • Large pot: A sturdy pot is essential for cooking the soup. A Dutch oven works great too.
  • Wooden spoon: Perfect for stirring and mixing ingredients without scratching your pot.
  • Measuring cups: Handy for measuring out your liquids and cheese.
  • Cutting board and knife: For chopping your veggies with ease.

Variations

  • Vegetable Boost: Add more veggies like spinach, bell peppers, or peas for extra nutrition and color.
  • Protein Power: Stir in cooked chicken, bacon, or sausage for a heartier meal that packs a protein punch.
  • Spicy Twist: Incorporate diced jalapeños or a splash of hot sauce for a kick that’ll warm you up.
  • Gluten-Free Option: Substitute elbow macaroni with gluten-free pasta to accommodate dietary needs.
  • Vegan Version: Use plant-based milk and cheese alternatives for a creamy soup that’s completely dairy-free.

Serving Suggestions

  • Crusty Bread: Serve with a warm, crusty baguette or garlic bread for dipping.
  • Salad: Pair with a fresh green salad to balance the richness of the soup.
  • Drinks: Enjoy with a cold beer or a crisp white wine for a delightful meal.
  • Presentation: Serve in colorful bowls and sprinkle extra cheese on top for a tempting look.

FAQs about Creamy Mac and Cheese Soup

Can I make Creamy Mac and Cheese Soup ahead of time?

Absolutely! This soup can be made in advance and stored in the fridge for up to three days. Just reheat it gently on the stove, adding a splash of milk or broth to restore its creamy texture.

Can I freeze Creamy Mac and Cheese Soup?

Yes, you can freeze it! Allow the soup to cool completely, then transfer it to an airtight container. It will keep well for about two months. When ready to enjoy, thaw it in the fridge overnight and reheat on the stove.

What can I use instead of chicken broth?

If you prefer a vegetarian option, vegetable broth works perfectly! It will still provide a rich flavor without the meat. You can also use homemade broth for an extra touch of goodness.

How can I make this soup spicier?

For a spicy kick, add a pinch of cayenne pepper or a few dashes of hot sauce while cooking. You can also toss in some diced jalapeños for an extra layer of heat!

What are some good toppings for Creamy Mac and Cheese Soup?

Consider topping your soup with crispy bacon bits, extra shredded cheese, or even croutons for added texture. Fresh herbs like chives or parsley also make a lovely garnish!

Final Thoughts

There’s a special kind of joy that comes from a bowl of Creamy Mac and Cheese Soup. It’s not just about the rich, cheesy flavor; it’s about the memories it stirs and the warmth it brings to your kitchen. This recipe is a reminder that comfort food can be quick and easy, perfect for busy nights or cozy weekends. As you savor each spoonful, you’ll find yourself transported back to simpler times, surrounded by loved ones. So, grab your pot and let this delightful soup become a cherished part of your culinary adventures!

Ranis

Creamy Mac and Cheese Soup: A Cozy Comfort Food Delight

Creamy Mac and Cheese Soup is a cozy comfort food delight that combines the classic flavors of mac and cheese in a warm, hearty soup.
Prep Time 10 minutes
Cook Time 20 minutes
Total Time 30 minutes
Servings: 6 servings
Course: Soup
Cuisine: American
Calories: 320

Ingredients
  

  • 2 cups elbow macaroni
  • 4 cups chicken broth
  • 1 cup milk
  • 1 cup shredded sharp cheddar cheese
  • 1 cup shredded mozzarella cheese
  • 1/2 cup diced onion
  • 1/2 cup diced carrots
  • 1/2 cup diced celery
  • 2 tablespoons butter
  • 1 teaspoon garlic powder
  • 1 teaspoon onion powder
  • Salt and pepper to taste
  • Fresh parsley for garnish optional

Method
 

  1. In a large pot, melt the butter over medium heat. Add the diced onion, carrots, and celery. Sauté for about 5 minutes, or until the vegetables are tender.
  2. Stir in the chicken broth and bring to a boil. Add the elbow macaroni and cook according to package instructions until al dente, usually about 8-10 minutes.
  3. Reduce the heat to low and stir in the milk, garlic powder, onion powder, salt, and pepper. Mix well.
  4. Gradually add the shredded cheddar and mozzarella cheese, stirring until melted and creamy.
  5. Taste and adjust seasoning if necessary. If the soup is too thick, add a little more milk or broth to reach your desired consistency.
  6. Serve hot, garnished with fresh parsley if desired.

Nutrition

Serving: 1cupCalories: 320kcalCarbohydrates: 38gProtein: 14gFat: 12gSaturated Fat: 7gPolyunsaturated Fat: 3gCholesterol: 40mgSodium: 800mgFiber: 2gSugar: 4g

Notes

  • For a spicier kick, add a pinch of cayenne pepper or a dash of hot sauce while cooking.
  • You can substitute the elbow macaroni with any pasta shape you prefer, such as shells or penne.

Tried this recipe?

Let us know how it was!

One-Pot Kielbasa Mac and Cheese: Quick and Delicious!

Introduction to One-Pot Kielbasa Mac and Cheese

After a long day, the last thing I want is to spend hours in the kitchen. That’s where my One-Pot Kielbasa Mac and Cheese comes to the rescue! This dish is not just a meal; it’s a warm hug in a bowl. With its creamy cheese sauce and savory kielbasa, it’s a quick solution for busy evenings or a comforting dish to impress your loved ones. Plus, the best part? You only need one pot! So, let’s dive into this delicious recipe that will have everyone asking for seconds.

Why You’ll Love This One-Pot Kielbasa Mac and Cheese

This One-Pot Kielbasa Mac and Cheese is a game-changer for anyone who craves comfort food without the fuss. It’s incredibly easy to whip up, taking just 30 minutes from start to finish. The rich, cheesy flavor combined with the smoky kielbasa creates a dish that’s both satisfying and delicious. Plus, cleanup is a breeze since everything cooks in one pot. What’s not to love?

Ingredients for One-Pot Kielbasa Mac and Cheese

Gathering the right ingredients is the first step to creating this delightful dish. Here’s what you’ll need:

  • Elbow macaroni: The classic pasta choice for mac and cheese, it holds the creamy sauce perfectly.
  • Kielbasa: This smoked sausage adds a savory depth. You can swap it for smoked turkey sausage or a plant-based option for a healthier twist.
  • Olive oil: A splash of this helps sauté the onion and kielbasa, adding flavor and richness.
  • Onion: Diced onion brings sweetness and depth to the dish. Yellow or white onions work best.
  • Garlic: Minced garlic adds a fragrant kick that elevates the overall taste.
  • Chicken broth: This is the base of your sauce, infusing the pasta with flavor. You can use vegetable broth for a vegetarian version.
  • Smoked paprika: A teaspoon of this spice gives a subtle smokiness that complements the kielbasa beautifully.
  • Mustard powder: Just a hint of this adds a tangy note that balances the richness of the cheese.
  • Black pepper and salt: Essential seasonings to enhance all the flavors in the dish.
  • Sharp cheddar cheese: The star of the show! It melts beautifully and gives that classic mac and cheese flavor.
  • Milk: A splash of milk helps create a creamy texture in the sauce.
  • Parmesan cheese: Grated Parmesan adds a nutty flavor and extra creaminess.
  • Fresh parsley: Chopped parsley is optional but adds a pop of color and freshness when garnished.

For exact measurements, check the bottom of the article where you can find everything listed for easy printing. Now that you have your ingredients ready, let’s get cooking!

How to Make One-Pot Kielbasa Mac and Cheese

Now that you have your ingredients ready, let’s get into the fun part—cooking! This One-Pot Kielbasa Mac and Cheese is straightforward and quick, making it perfect for any night of the week. Follow these simple steps, and you’ll have a delicious meal in no time.

Step 1: Sauté the Kielbasa and Onion

Start by heating a tablespoon of olive oil in a large pot over medium heat. Once the oil is shimmering, toss in the diced onion and sliced kielbasa. Sauté them for about five minutes. You want the onion to soften and the kielbasa to get a nice golden-brown color. This step builds a flavorful base for your dish.

Step 2: Add Garlic

Next, it’s time to add the minced garlic. Stir it in and cook for about a minute until it becomes fragrant. Garlic is like the secret handshake of cooking; it elevates the dish and adds a depth of flavor that’s hard to resist. Just be careful not to burn it!

Step 3: Combine Ingredients

Now, add the elbow macaroni, chicken broth, smoked paprika, mustard powder, black pepper, and salt to the pot. Give everything a good stir to combine. Bring the mixture to a boil, then reduce the heat to low. Cover the pot and let it simmer. This is where the magic happens!

Step 4: Cook the Pasta

Let the pasta cook for about 8 to 10 minutes, or until it’s al dente. Stir occasionally to prevent sticking. You want that perfect bite, not mushy pasta. Keep an eye on it; the timing is key to achieving that ideal texture.

Step 5: Stir in the Cheese

Once the pasta is cooked, it’s time to make it creamy! Stir in the milk, shredded sharp cheddar cheese, and grated Parmesan cheese. Mix everything until the cheese melts and the sauce becomes rich and creamy. This is the moment you’ve been waiting for—watch as your dish transforms into a cheesy delight!

Step 6: Garnish and Serve

Remove the pot from heat and let it sit for a couple of minutes. This helps the sauce thicken up a bit. Before serving, sprinkle some chopped parsley on top for a fresh touch. Now, dig in and enjoy your One-Pot Kielbasa Mac and Cheese! It’s comfort food at its finest.

Tips for Success

  • Always taste as you go! Adjust seasoning to your preference.
  • For extra creaminess, add more cheese or a splash of cream.
  • Don’t skip the resting time after cooking; it thickens the sauce.
  • Use a non-stick pot to prevent sticking and make cleanup easier.
  • Feel free to add veggies like spinach or bell peppers for added nutrition.

Equipment Needed

  • Large pot: A sturdy pot is essential. A Dutch oven works great too.
  • Wooden spoon: Perfect for stirring without scratching your pot.
  • Measuring cups: Handy for precise ingredient measurements.
  • Cutting board and knife: For chopping your veggies and kielbasa.

Variations

  • Spicy Kick: Add diced jalapeños or a pinch of red pepper flakes for some heat.
  • Veggie Delight: Toss in some spinach, bell peppers, or broccoli for added nutrition and color.
  • Cheesy Twist: Experiment with different cheeses like gouda or pepper jack for a unique flavor.
  • Gluten-Free Option: Substitute elbow macaroni with gluten-free pasta to accommodate dietary needs.
  • Plant-Based Version: Use plant-based kielbasa and almond milk for a vegetarian-friendly dish.

Serving Suggestions

  • Side Salad: Pair your One-Pot Kielbasa Mac and Cheese with a crisp green salad for a refreshing contrast.
  • Garlic Bread: Serve with warm garlic bread to soak up the creamy sauce.
  • Drink Pairing: A cold beer or iced tea complements the flavors perfectly.
  • Presentation: Serve in bowls topped with extra cheese and parsley for a pop of color.

FAQs about One-Pot Kielbasa Mac and Cheese

Can I make One-Pot Kielbasa Mac and Cheese ahead of time?

Absolutely! You can prepare it in advance and store it in the fridge. Just reheat it on the stovetop, adding a splash of milk to restore creaminess.

What can I substitute for kielbasa?

If you’re looking for alternatives, smoked turkey sausage or plant-based sausage works well. They’ll still give you that savory flavor without the meat.

How do I store leftovers?

Store any leftovers in an airtight container in the fridge for up to three days. Reheat gently on the stove or in the microwave.

Can I freeze One-Pot Kielbasa Mac and Cheese?

Yes, you can freeze it! Just make sure it’s cooled completely before transferring it to a freezer-safe container. It can last up to three months in the freezer.

What can I add to make it healthier?

To boost nutrition, consider adding veggies like spinach or broccoli. You can also use whole grain pasta for added fiber and nutrients.

Final Thoughts

Cooking should be a joyful experience, and my One-Pot Kielbasa Mac and Cheese embodies that spirit. It’s not just about the delicious flavors; it’s about the memories created around the dinner table. This dish brings comfort and satisfaction, making it perfect for busy weeknights or cozy gatherings. The simplicity of one-pot cooking means less stress and more time to enjoy with family and friends. So, whether you’re a seasoned chef or a kitchen novice, this recipe is sure to become a favorite. Dive in, savor every bite, and relish the joy of home-cooked goodness!

Ranis

One-Pot Kielbasa Mac and Cheese: Quick and Delicious!

A quick and delicious one-pot meal featuring macaroni, kielbasa, and a creamy cheese sauce.
Prep Time 10 minutes
Cook Time 20 minutes
Total Time 30 minutes
Servings: 4 servings
Course: Main Dish
Cuisine: American
Calories: 450

Ingredients
  

  • 8 ounces elbow macaroni
  • 12 ounces kielbasa sliced
  • 1 tablespoon olive oil
  • 1 small onion diced
  • 2 cloves garlic minced
  • 4 cups chicken broth
  • 1 teaspoon smoked paprika
  • 1 teaspoon mustard powder
  • 1/2 teaspoon black pepper
  • 1/4 teaspoon salt
  • 1 cup shredded sharp cheddar cheese
  • 1/2 cup milk
  • 1/4 cup grated Parmesan cheese
  • Fresh parsley chopped (for garnish)

Method
 

  1. In a large pot, heat the olive oil over medium heat. Add the diced onion and sliced kielbasa. Cook for about 5 minutes, or until the onion is soft and the kielbasa is browned.
  2. Stir in the minced garlic and cook for an additional minute until fragrant.
  3. Add the elbow macaroni, chicken broth, smoked paprika, mustard powder, black pepper, and salt to the pot. Bring to a boil, then reduce the heat to low. Cover and simmer for 8-10 minutes, or until the pasta is cooked al dente.
  4. Once the pasta is cooked, stir in the milk, shredded cheddar cheese, and grated Parmesan cheese. Mix until the cheese is melted and the sauce is creamy.
  5. Remove from heat and let it sit for a couple of minutes to thicken. Garnish with chopped parsley before serving.

Nutrition

Serving: 1servingCalories: 450kcalCarbohydrates: 40gProtein: 20gFat: 25gSaturated Fat: 10gPolyunsaturated Fat: 15gCholesterol: 60mgSodium: 800mgFiber: 2gSugar: 2g

Notes

  • For a spicier kick, add a pinch of red pepper flakes or diced jalapeños when cooking the onion.
  • Substitute the kielbasa with smoked turkey sausage or a plant-based sausage for a healthier or vegetarian option.

Tried this recipe?

Let us know how it was!

Grilled Salmon with Dijon Mustard Sauce for a Tasty Meal

Introduction to Grilled Salmon with Dijon Mustard Sauce

There’s something magical about the sizzle of salmon on the grill, especially when it’s topped with a zesty Dijon mustard sauce. This Grilled Salmon with Dijon Mustard Sauce is not just a meal; it’s an experience that brings the family together. Whether you’re looking for a quick solution after a long day or a dish to impress your friends at a weekend barbecue, this recipe fits the bill perfectly. With its vibrant flavors and healthy ingredients, it’s a delightful way to enjoy a nutritious dinner without spending hours in the kitchen.

Why You’ll Love This Grilled Salmon with Dijon Mustard Sauce

This Grilled Salmon with Dijon Mustard Sauce is a game-changer for busy weeknights. It’s quick to prepare, taking just 25 minutes from start to finish. The combination of tangy mustard and sweet honey elevates the salmon, making it a dish that’s both delicious and impressive. Plus, it’s healthy! Packed with protein and healthy fats, it’s a guilt-free indulgence that everyone will love.

Ingredients for Grilled Salmon with Dijon Mustard Sauce

Gathering the right ingredients is the first step to creating a mouthwatering Grilled Salmon with Dijon Mustard Sauce. Here’s what you’ll need:

  • Salmon fillets: Fresh salmon is the star of this dish. Look for vibrant, firm fillets for the best flavor.
  • Olive oil: This adds richness and helps prevent sticking on the grill. Extra virgin olive oil is a great choice.
  • Salt: A must for enhancing the natural flavors of the salmon. Use kosher salt for even seasoning.
  • Black pepper: Freshly ground pepper adds a subtle kick that complements the salmon beautifully.
  • Dijon mustard: The tangy base of our sauce. It brings a delightful sharpness that pairs perfectly with the fish.
  • Honey: This balances the mustard’s tang with a touch of sweetness, creating a harmonious flavor profile.
  • Lemon juice: Freshly squeezed lemon juice brightens the dish and adds a refreshing zing.
  • Fresh dill: This herb adds a lovely, aromatic touch. If you don’t have fresh, dried dill works too.
  • Garlic: Minced garlic infuses the sauce with depth and warmth, enhancing the overall taste.

For those looking to spice things up, consider adding a pinch of cayenne pepper to the sauce for a little heat. You can find all the exact measurements for these ingredients at the bottom of the article, ready for printing!

How to Make Grilled Salmon with Dijon Mustard Sauce

Creating the perfect Grilled Salmon with Dijon Mustard Sauce is a straightforward process that anyone can master. Follow these simple steps, and you’ll have a delicious meal ready in no time!

Step 1: Preheat the Grill

Preheating your grill is crucial. It ensures that the salmon cooks evenly and develops those beautiful grill marks. Aim for medium-high heat, around 375°F to 400°F. This temperature allows the fish to sear nicely while keeping it moist inside. A hot grill also helps prevent sticking, making flipping the salmon a breeze.

Step 2: Prepare the Dijon Mustard Sauce

In a small bowl, whisk together the Dijon mustard, honey, lemon juice, dill, and minced garlic. This sauce is where the magic happens! Feel free to customize it; add a splash of soy sauce for an umami kick or a pinch of cayenne for some heat. Mix until smooth, and set it aside while you prepare the salmon.

Step 3: Season the Salmon

Seasoning is key to enhancing the flavor of your salmon. Brush each fillet with olive oil, then sprinkle salt and black pepper generously on both sides. This simple step elevates the dish, allowing the natural flavors of the fish to shine through. Remember, good seasoning is the foundation of a great meal!

Step 4: Grill the Salmon

Place the salmon fillets skin-side down on the grill. Grill for about 6-8 minutes, depending on the thickness. You want the salmon to be opaque and flake easily with a fork. After that, carefully flip the fillets and grill for an additional 4-6 minutes. Keep an eye on it; overcooking can lead to dry salmon!

Step 5: Apply the Sauce

During the last minute of grilling, brush the Dijon mustard sauce over the salmon fillets. This allows the flavors to meld beautifully as the sauce caramelizes slightly. It’s the finishing touch that takes your grilled salmon to the next level!

Step 6: Rest and Serve

Once the salmon is done, remove it from the grill and let it rest for a couple of minutes. Resting allows the juices to redistribute, ensuring each bite is tender and flavorful. Serve it up with your favorite sides, and enjoy the delightful flavors of your Grilled Salmon with Dijon Mustard Sauce!

Tips for Success

  • Always use fresh salmon for the best flavor and texture.
  • Let the salmon sit at room temperature for about 15 minutes before grilling.
  • Keep a close eye on the grill temperature to avoid overcooking.
  • Use a fish spatula for easy flipping without breaking the fillets.
  • Experiment with herbs and spices in the sauce for a personal touch.

Equipment Needed

  • Grill: A gas or charcoal grill works well. If you don’t have one, a grill pan on the stovetop is a great alternative.
  • Whisk: Essential for mixing the sauce. A fork can work in a pinch.
  • Fish spatula: Ideal for flipping salmon without breaking it. A regular spatula can also do the job.

Variations

  • Herb-Crusted Salmon: Add a mixture of breadcrumbs and fresh herbs on top of the salmon before grilling for a crunchy texture.
  • Maple Dijon Glaze: Substitute honey with maple syrup for a sweeter, more robust flavor that pairs beautifully with salmon.
  • Spicy Mustard Sauce: Mix in some sriracha or hot sauce to the Dijon mustard sauce for a fiery kick that will wake up your taste buds.
  • Vegetarian Option: Replace salmon with thick slices of eggplant or zucchini, following the same grilling instructions for a delicious plant-based meal.
  • Citrus Twist: Add orange or lime juice to the sauce for a refreshing citrus flavor that brightens the dish.

Serving Suggestions

  • Pair your Grilled Salmon with Dijon Mustard Sauce with a light salad of mixed greens and cherry tomatoes for a refreshing contrast.
  • Serve alongside roasted asparagus or seasonal vegetables for a colorful plate.
  • A chilled glass of white wine, like Sauvignon Blanc, complements the dish beautifully.

FAQs about Grilled Salmon with Dijon Mustard Sauce

Can I use frozen salmon for this recipe?

Absolutely! Just make sure to thaw the salmon completely before grilling. Frozen salmon can be just as delicious if prepared correctly.

What can I substitute for Dijon mustard?

If you don’t have Dijon mustard on hand, you can use yellow mustard or whole grain mustard. Each will give a slightly different flavor, but they’ll still work well in the sauce.

How do I know when the salmon is done cooking?

The best way to check is by using a fork. If the salmon flakes easily and is opaque throughout, it’s ready. You can also use a meat thermometer; it should read 145°F in the thickest part.

Can I make the Dijon mustard sauce ahead of time?

Yes! You can prepare the sauce a day in advance and store it in the refrigerator. Just give it a good stir before using it on the salmon.

What sides pair well with grilled salmon?

Grilled salmon pairs wonderfully with a variety of sides. Consider serving it with roasted vegetables, a fresh salad, or even quinoa for a complete meal.

Final Thoughts

Cooking Grilled Salmon with Dijon Mustard Sauce is more than just preparing a meal; it’s about creating moments. The aroma of salmon grilling, the vibrant colors on your plate, and the first bite of that tangy sauce all come together to make dining a joyful experience. Whether you’re sharing it with family or enjoying a quiet evening alone, this dish brings a sense of satisfaction and warmth. It’s a reminder that good food doesn’t have to be complicated. With just a few ingredients and a little love, you can create something truly special.

Ranis

Grilled Salmon with Dijon Mustard Sauce for a Tasty Meal

A delicious and healthy grilled salmon recipe topped with a tangy Dijon mustard sauce.
Prep Time 10 minutes
Cook Time 15 minutes
Total Time 25 minutes
Servings: 4 servings
Course: Main Course
Cuisine: American
Calories: 320

Ingredients
  

  • 4 salmon fillets 6 ounces each
  • 2 tablespoons olive oil
  • 1 teaspoon salt
  • 1/2 teaspoon black pepper
  • 1 tablespoon Dijon mustard
  • 1 tablespoon honey
  • 1 tablespoon lemon juice
  • 1 teaspoon fresh dill or 1/2 teaspoon dried dill
  • 1 clove garlic minced

Method
 

  1. Preheat your grill to medium-high heat.
  2. In a small bowl, whisk together the Dijon mustard, honey, lemon juice, dill, and minced garlic until well combined.
  3. Brush the salmon fillets with olive oil and season with salt and black pepper on both sides.
  4. Place the salmon fillets skin-side down on the grill. Grill for about 6-8 minutes, depending on the thickness of the fillets.
  5. Carefully flip the salmon and grill for an additional 4-6 minutes, or until the salmon flakes easily with a fork and reaches an internal temperature of 145°F.
  6. During the last minute of grilling, brush the Dijon mustard sauce over the salmon fillets.
  7. Remove the salmon from the grill and let it rest for a couple of minutes before serving.

Nutrition

Serving: 1filletCalories: 320kcalCarbohydrates: 2gProtein: 34gFat: 18gSaturated Fat: 3gPolyunsaturated Fat: 15gCholesterol: 70mgSodium: 500mgSugar: 6g

Notes

  • For a spicy kick, add a pinch of cayenne pepper to the Dijon mustard sauce.
  • Serve the grilled salmon over a bed of mixed greens or alongside roasted vegetables for a complete meal.

Tried this recipe?

Let us know how it was!

Creamy Kielbasa and Broccoli Skillet: Quick, Tasty Delight!

Introduction to Creamy Kielbasa and Broccoli Skillet

After a long day, the last thing I want is to spend hours in the kitchen. That’s where my Creamy Kielbasa and Broccoli Skillet comes in. This dish is a lifesaver, combining rich flavors and vibrant colors in just 30 minutes. It’s perfect for busy weeknights when you want something quick yet satisfying. Plus, it’s a great way to sneak in some veggies without anyone noticing! Trust me, your family will love it, and you’ll feel like a culinary hero without breaking a sweat.

Why You’ll Love This Creamy Kielbasa and Broccoli Skillet

This Creamy Kielbasa and Broccoli Skillet is a game-changer for anyone who craves flavor without the fuss. It’s quick to whip up, taking just 30 minutes from start to finish. The combination of savory kielbasa and fresh broccoli creates a delightful balance of taste and nutrition. Plus, the creamy sauce ties everything together, making it a dish that pleases even the pickiest eaters. You’ll find yourself reaching for this recipe again and again!

Ingredients for Creamy Kielbasa and Broccoli Skillet

Gathering the right ingredients is the first step to creating this delicious Creamy Kielbasa and Broccoli Skillet. Here’s what you’ll need:

  • Kielbasa: This flavorful sausage is the star of the dish. It adds a smoky, savory punch that pairs perfectly with the cream and broccoli.
  • Fresh Broccoli Florets: Not only do they bring a vibrant green color, but they also add a satisfying crunch and a healthy dose of vitamins.
  • Olive Oil: A staple in many kitchens, it’s perfect for sautéing and adds a subtle richness to the dish.
  • Onion: Diced onions provide a sweet and savory base, enhancing the overall flavor profile.
  • Garlic: Minced garlic brings an aromatic depth that elevates the dish to new heights.
  • Heavy Cream: This is what makes the sauce creamy and indulgent. For a lighter option, consider half-and-half or a plant-based cream alternative.
  • Shredded Cheddar Cheese: Melting cheese into the sauce creates a luscious texture and adds a sharp flavor that complements the kielbasa.
  • Paprika: A sprinkle of paprika adds warmth and a hint of smokiness, enhancing the dish’s overall appeal.
  • Salt and Pepper: Essential seasonings that bring all the flavors together. Adjust to your taste!
  • Cooked Rice or Pasta: Serve this creamy delight over rice or pasta to soak up all that delicious sauce.

For those looking to mix things up, feel free to add a splash of lemon juice for brightness or red pepper flakes for a spicy kick. You can find the exact quantities for each ingredient at the bottom of the article, ready for printing!

How to Make Creamy Kielbasa and Broccoli Skillet

Now that you have your ingredients ready, let’s dive into the fun part: cooking! This Creamy Kielbasa and Broccoli Skillet is straightforward and quick, making it perfect for any weeknight dinner. Follow these simple steps, and you’ll have a delicious meal on the table in no time.

Step 1: Sauté the Onions

Start by heating a tablespoon of olive oil in a large skillet over medium heat. Once the oil is shimmering, toss in the diced onion. Sauté for about 3-4 minutes until the onions are softened and translucent. This step builds a flavorful base for your dish, so don’t rush it!

Step 2: Brown the Kielbasa

Next, add the minced garlic and sliced kielbasa to the skillet. Cook for an additional 5-7 minutes, stirring occasionally. You want the kielbasa to get a nice brown color, which adds depth to the flavor. The aroma of garlic and sausage sizzling together is simply irresistible!

Step 3: Add the Broccoli

Now it’s time to bring in the broccoli. Stir in the fresh florets and cook for about 5 minutes. You want them to be bright green and tender-crisp. This not only adds color but also a satisfying crunch to your creamy dish. Keep an eye on them; you don’t want to overcook!

Step 4: Create the Creamy Sauce

Pour in the heavy cream, and sprinkle in the paprika, salt, and pepper. Stir everything together and let it simmer for 3-4 minutes. This is where the magic happens! The sauce will thicken slightly, enveloping the kielbasa and broccoli in creamy goodness.

Step 5: Melt the Cheese

Remove the skillet from heat and stir in the shredded cheddar cheese. Watch as it melts into the sauce, creating a rich and creamy texture. This step is crucial; it’s what makes your kielbasa recipe truly indulgent. Don’t be shy—make sure every bite is cheesy!

Step 6: Serve

Finally, serve your creamy kielbasa and broccoli mixture over a bed of cooked rice or pasta. This will soak up all that delicious sauce. Garnish with a sprinkle of extra cheese or a dash of paprika for a pop of color. Enjoy your meal, and get ready for compliments!

Tips for Success

  • Prep your ingredients ahead of time to streamline the cooking process.
  • Don’t skip the browning step for the kielbasa; it adds incredible flavor.
  • Adjust the creaminess by using less heavy cream or a lighter alternative.
  • For added flavor, consider sautéing some red pepper flakes with the garlic.
  • Always taste and adjust seasoning before serving for the best results.

Equipment Needed

  • Large Skillet: A non-stick skillet works best, but any large pan will do.
  • Wooden Spoon: Perfect for stirring without scratching your skillet.
  • Measuring Cups: Handy for measuring cream and cheese.
  • Knife and Cutting Board: Essential for chopping veggies and kielbasa.

Variations

  • Spicy Kick: Add a teaspoon of red pepper flakes or diced jalapeños for a spicy twist.
  • Vegetarian Option: Substitute kielbasa with smoked tempeh or your favorite plant-based sausage.
  • Cheesy Delight: Experiment with different cheeses like pepper jack or gouda for a unique flavor.
  • Herb Infusion: Toss in fresh herbs like thyme or parsley for an aromatic touch.
  • Low-Carb Version: Serve over cauliflower rice instead of traditional rice or pasta for a lighter meal.

Serving Suggestions

  • Side Salad: Pair with a crisp green salad dressed in a light vinaigrette for a refreshing contrast.
  • Garlic Bread: Serve with warm garlic bread to soak up the creamy sauce.
  • Wine Pairing: A chilled white wine, like Sauvignon Blanc, complements the dish beautifully.
  • Presentation: Garnish with fresh parsley or extra cheese for a pop of color.

FAQs about Creamy Kielbasa and Broccoli Skillet

Can I use a different type of sausage? Absolutely! While kielbasa is delicious, you can swap it for any smoked sausage or even chicken for a lighter option. Just adjust the cooking time as needed.

How can I make this dish healthier? For a healthier twist, consider using half-and-half instead of heavy cream. You can also add more vegetables like bell peppers or spinach to boost the nutrition.

Can I prepare this ahead of time? Yes! You can prep the ingredients in advance and store them in the fridge. Just follow the cooking steps when you’re ready to enjoy your kielbasa recipe.

What can I serve with this dish? This creamy kielbasa and broccoli skillet pairs wonderfully with rice, pasta, or even a side salad. Garlic bread is also a great option to soak up the sauce!

How do I store leftovers? Store any leftovers in an airtight container in the fridge for up to three days. Reheat gently on the stove or in the microwave, adding a splash of cream if needed to revive the sauce.

Final Thoughts

Cooking this Creamy Kielbasa and Broccoli Skillet is more than just preparing a meal; it’s about creating a moment of joy in your kitchen. The rich flavors and creamy texture come together to make a dish that feels indulgent yet is surprisingly simple. Whether you’re feeding a family or enjoying a quiet dinner alone, this recipe brings comfort and satisfaction. Plus, it’s a fantastic way to sneak in some veggies without anyone batting an eye! So, roll up your sleeves, embrace the process, and savor every delicious bite. You’ve earned it!

Ranis

Creamy Kielbasa and Broccoli Skillet: Quick, Tasty Delight!

A quick and tasty creamy dish featuring kielbasa and broccoli, perfect for a weeknight dinner.
Prep Time 10 minutes
Cook Time 20 minutes
Total Time 30 minutes
Course: Main Dish
Cuisine: American
Calories: 450

Ingredients
  

  • 1 pound kielbasa sliced into ¼-inch rounds
  • 4 cups fresh broccoli florets
  • 1 tablespoon olive oil
  • 1 medium onion diced
  • 3 cloves garlic minced
  • 1 cup heavy cream
  • 1 cup shredded cheddar cheese
  • 1 teaspoon paprika
  • Salt and pepper to taste
  • Cooked rice or pasta for serving

Method
 

  1. In a large skillet, heat the olive oil over medium heat. Add the diced onion and sauté for about 3-4 minutes until softened.
  2. Add the minced garlic and sliced kielbasa to the skillet. Cook for an additional 5-7 minutes, stirring occasionally, until the kielbasa is browned.
  3. Stir in the broccoli florets and cook for another 5 minutes until they are bright green and tender-crisp.
  4. Pour in the heavy cream and sprinkle in the paprika, salt, and pepper. Stir well to combine and let it simmer for 3-4 minutes until the sauce thickens slightly.
  5. Remove the skillet from heat and stir in the shredded cheddar cheese until melted and creamy.
  6. Serve the creamy kielbasa and broccoli mixture over cooked rice or pasta.

Nutrition

Serving: 1servingCalories: 450kcalCarbohydrates: 8gProtein: 20gFat: 36gSaturated Fat: 18gPolyunsaturated Fat: 10gCholesterol: 100mgSodium: 1200mgFiber: 2gSugar: 2g

Notes

  • For a lighter version, substitute heavy cream with half-and-half or a plant-based cream alternative.
  • Add a splash of lemon juice or a sprinkle of red pepper flakes for a tangy or spicy kick.

Tried this recipe?

Let us know how it was!

Honey Garlic Kielbasa Stir-Fry: A Sweet & Savory Delight!

Introduction to Honey Garlic Kielbasa Stir-Fry

After a long day, the last thing I want is to spend hours in the kitchen. That’s where my Honey Garlic Kielbasa Stir-Fry comes in, a dish that’s as quick to make as it is delicious. With its sweet and savory flavors, it’s a guaranteed crowd-pleaser, perfect for impressing family or friends. Plus, it’s packed with colorful veggies that add a pop of nutrition. Whether you’re looking for a speedy weeknight dinner or a fun meal to share, this stir-fry is your go-to solution. Let’s dive into this culinary adventure!

Why You’ll Love This Honey Garlic Kielbasa Stir-Fry

This Honey Garlic Kielbasa Stir-Fry is a game-changer for busy nights. It’s not just quick to whip up; it’s also bursting with flavor. The combination of sweet honey and savory kielbasa creates a mouthwatering experience that’s hard to resist. Plus, with vibrant veggies, you’re getting a nutritious meal that doesn’t skimp on taste. It’s the perfect balance of convenience and deliciousness, making it a staple in my kitchen!

Ingredients for Honey Garlic Kielbasa Stir-Fry

Gathering the right ingredients is key to making a fantastic Honey Garlic Kielbasa Stir-Fry. Here’s what you’ll need:

  • Kielbasa: This flavorful sausage is the star of the dish. It adds a hearty, smoky taste that pairs perfectly with the sweet sauce.
  • Vegetable Oil: A neutral oil is essential for frying. It helps achieve that golden-brown color on the kielbasa.
  • Red and Green Bell Peppers: These colorful veggies not only add crunch but also a sweet flavor that complements the dish beautifully.
  • Broccoli Florets: Packed with nutrients, broccoli adds a nice texture and a pop of green to your stir-fry.
  • Snap Peas: These sweet, crisp peas bring a delightful crunch and a hint of sweetness.
  • Garlic: Freshly minced garlic is a must for that aromatic kick. It elevates the entire dish with its rich flavor.
  • Honey: This is the secret ingredient that ties everything together, adding a luscious sweetness that balances the savory kielbasa.
  • Soy Sauce: A splash of soy sauce brings depth and umami, enhancing the overall flavor profile.
  • Cornstarch: This thickening agent helps create a glossy sauce that clings to the ingredients.
  • Water: Just a bit of water helps to mix the cornstarch smoothly into the sauce.
  • Cooked Rice or Noodles: Serve your stir-fry over rice or noodles for a complete meal. They soak up the delicious sauce beautifully.

For those looking to spice things up, consider adding red pepper flakes for a kick. If you’re watching your carbs, swap the honey for a sugar-free sweetener and serve it over cauliflower rice. You can find the exact measurements for each ingredient at the bottom of the article, ready for printing!

How to Make Honey Garlic Kielbasa Stir-Fry

Now that you have all your ingredients ready, let’s get cooking! This Honey Garlic Kielbasa Stir-Fry is straightforward and quick, making it perfect for any night of the week. Follow these simple steps to create a dish that’s bursting with flavor.

Step 1: Prepare the Kielbasa

Start by slicing the kielbasa into 1/4-inch rounds. This size ensures even cooking and allows the flavors to meld beautifully. Heat the vegetable oil in a large skillet or wok over medium-high heat. Once the oil is shimmering, add the sliced kielbasa. Cook it for about 5-7 minutes, stirring occasionally, until it’s nicely browned. This step is crucial; browning the kielbasa enhances its flavor, giving your stir-fry a rich, savory base.

Step 2: Add the Vegetables

Next, it’s time to add the colorful veggies! Toss in the sliced red and green bell peppers, broccoli florets, and snap peas. Stir-fry these vibrant ingredients for about 5 minutes. You want them to be tender-crisp, retaining that delightful crunch. This not only adds texture but also keeps the dish visually appealing. Remember, the goal is to maintain the freshness of the vegetables while allowing them to soak up the flavors.

Step 3: Incorporate Garlic

Now, let’s elevate the aroma! Add the minced garlic to the skillet and stir it in for about a minute. The moment the garlic hits the heat, your kitchen will be filled with a mouthwatering scent. This fragrant addition is what truly brings the dish to life, enhancing the overall flavor profile. Just be careful not to burn the garlic; it can turn bitter if overcooked.

Step 4: Create the Sauce

In a small bowl, mix together the honey, soy sauce, cornstarch, and water until smooth. This mixture will create a glossy sauce that clings to the kielbasa and veggies. Pour the sauce over the stir-fry, stirring to coat everything evenly. Cook for another 2-3 minutes until the sauce thickens. This step is where the magic happens, transforming your stir-fry into a sweet and savory delight!

Step 5: Serve and Enjoy

Finally, it’s time to serve! Spoon the hot stir-fry over a bed of cooked rice or noodles. This not only makes for a hearty meal but also allows the rice or noodles to soak up that delicious sauce. For a touch of flair, garnish with sesame seeds or chopped green onions. Your Honey Garlic Kielbasa Stir-Fry is now ready to impress! Enjoy every bite of this delightful dish.

Tips for Success

  • Prep all ingredients before cooking to streamline the process.
  • Use a large skillet or wok for even cooking and better heat distribution.
  • Don’t overcrowd the pan; cook in batches if necessary for that perfect sear.
  • Adjust the sweetness by adding more or less honey to suit your taste.
  • Experiment with different vegetables based on what you have on hand.

Equipment Needed

  • Large Skillet or Wok: Essential for stir-frying; a non-stick pan works too.
  • Cutting Board: For slicing the kielbasa and veggies; any sturdy surface will do.
  • Sharp Knife: A good knife makes prep easier; a paring knife can work in a pinch.
  • Measuring Cups and Spoons: For accurate ingredient measurements; you can use regular cups if needed.

Variations

  • Spicy Kick: Add red pepper flakes or sriracha for a fiery twist that complements the sweetness.
  • Vegetarian Option: Substitute kielbasa with tofu or tempeh for a plant-based version that’s just as satisfying.
  • Low-Carb Delight: Replace honey with a sugar-free sweetener and serve over cauliflower rice for a healthier alternative.
  • Extra Veggies: Incorporate other vegetables like carrots, zucchini, or mushrooms for added flavor and nutrition.
  • Asian Flair: Add a splash of sesame oil and sprinkle with sesame seeds for an authentic Asian touch.

Serving Suggestions

  • Pair your Honey Garlic Kielbasa Stir-Fry with steamed jasmine rice or lo mein noodles for a satisfying meal.
  • Serve with a side of crispy egg rolls or spring rolls for added crunch.
  • Complement the dish with a refreshing cucumber salad to balance the flavors.
  • For drinks, consider a light beer or iced green tea to enhance the meal.

FAQs about Honey Garlic Kielbasa Stir-Fry

Can I use a different type of sausage? Absolutely! While kielbasa is the star here, you can swap it for any smoked sausage or even chicken sausage for a lighter option. Just keep an eye on the cooking time, as different meats may require adjustments.

How can I make this dish gluten-free? To keep your Honey Garlic Kielbasa Stir-Fry gluten-free, simply use tamari instead of regular soy sauce. It offers the same savory flavor without the gluten, making it a great alternative.

Can I prepare this stir-fry in advance? Yes! You can chop the vegetables and slice the kielbasa ahead of time. Just store them in airtight containers in the fridge. When you’re ready to cook, it’ll be a breeze to throw everything together!

What can I serve with this stir-fry? This dish pairs wonderfully with steamed rice or noodles. You can also serve it alongside a fresh salad or some crispy egg rolls for a complete meal experience.

How do I store leftovers? If you have any leftovers, store them in an airtight container in the fridge for up to three days. Reheat in the microwave or on the stovetop, adding a splash of water to keep it moist.

Final Thoughts

Cooking the Honey Garlic Kielbasa Stir-Fry is more than just preparing a meal; it’s about creating a moment of joy in your kitchen. The sweet and savory flavors dance together, making every bite a delightful experience. This dish is a reminder that cooking can be quick, fun, and satisfying, even on the busiest days. Whether you’re sharing it with family or enjoying it solo, this stir-fry brings warmth and comfort to the table. So grab your skillet, unleash your inner chef, and savor the deliciousness that awaits!

Ranis

Honey Garlic Kielbasa Stir-Fry: A Sweet & Savory Delight!

A delicious and easy-to-make Honey Garlic Kielbasa Stir-Fry that combines sweet and savory flavors with colorful vegetables.
Prep Time 10 minutes
Cook Time 15 minutes
Total Time 25 minutes
Servings: 4 servings
Course: Main Dish
Cuisine: American
Calories: 350

Ingredients
  

  • 1 pound kielbasa sliced into 1/4-inch rounds
  • 2 tablespoons vegetable oil
  • 1 red bell pepper sliced
  • 1 green bell pepper sliced
  • 1 cup broccoli florets
  • 1 cup snap peas
  • 3 cloves garlic minced
  • 1/4 cup honey
  • 1/4 cup soy sauce
  • 1 tablespoon cornstarch
  • 1 tablespoon water
  • Cooked rice or noodles for serving

Method
 

  1. Heat the vegetable oil in a large skillet or wok over medium-high heat. Add the sliced kielbasa and cook until browned, about 5-7 minutes.
  2. Add the sliced bell peppers, broccoli, and snap peas to the skillet. Stir-fry for an additional 5 minutes until the vegetables are tender-crisp.
  3. Stir in the minced garlic and cook for 1 minute until fragrant.
  4. In a small bowl, mix together the honey, soy sauce, cornstarch, and water until smooth. Pour the sauce over the kielbasa and vegetables, stirring to coat everything evenly. Cook for another 2-3 minutes until the sauce thickens.
  5. Serve hot over cooked rice or noodles.

Nutrition

Serving: 1servingCalories: 350kcalCarbohydrates: 30gProtein: 15gFat: 20gSaturated Fat: 6gPolyunsaturated Fat: 14gCholesterol: 60mgSodium: 800mgFiber: 3gSugar: 20g

Notes

  • For a spicy kick, add red pepper flakes to the stir-fry.
  • For a lower-carb option, substitute the honey with a sugar-free sweetener and serve over cauliflower rice.

Tried this recipe?

Let us know how it was!