Peach Cobbler Cookies: Discover Your New Favorite Treat!

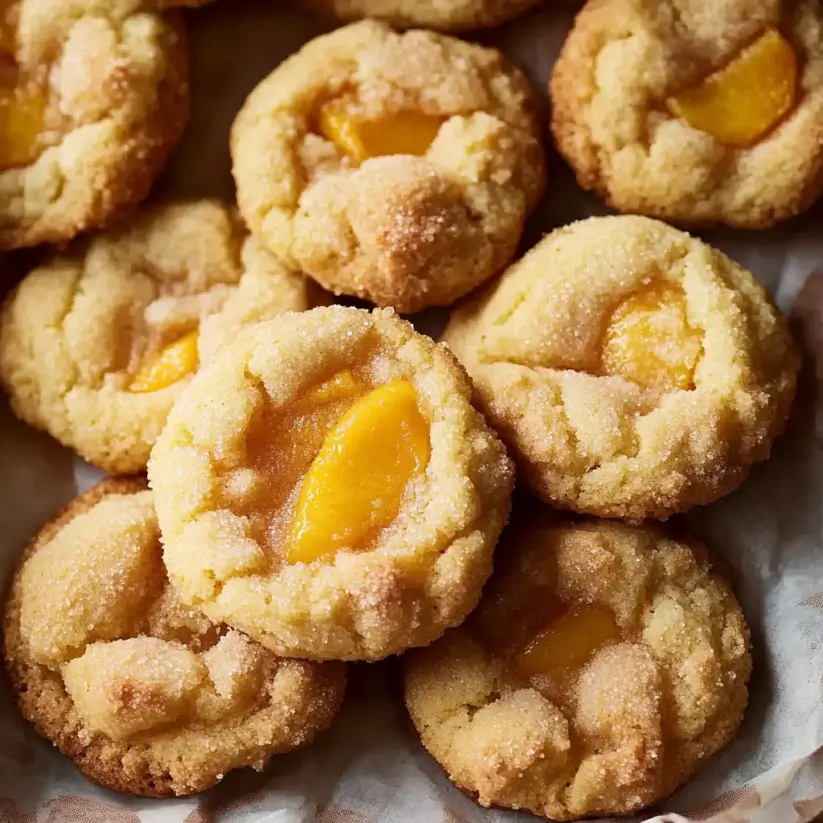
Introduction to Peach Cobbler Cookies

There’s something magical about the aroma of freshly baked cookies wafting through the house. It takes me back to my childhood, where every Sunday meant a sweet treat waiting on the kitchen counter. Today, I’m excited to share my take on that nostalgia with these delightful Peach Cobbler Cookies. They’re not just cookies; they’re a warm hug in dessert form. Perfect for a quick solution on a busy day or a charming way to impress your loved ones, these cookies blend the classic flavors of peach cobbler into a soft, chewy delight. Trust me, you’ll want to make these again and again!

Why You’ll Love This Peach Cobbler Cookies

These Peach Cobbler Cookies are a game changer in the dessert world. They’re incredibly easy to whip up, making them perfect for those busy weeknights when you crave something sweet. The combination of juicy peaches and warm spices creates a flavor explosion that will have everyone asking for seconds. Plus, they bake in just 15 minutes, so you can satisfy your sweet tooth in no time!

Ingredients for Peach Cobbler Cookies

Gathering the right ingredients is the first step to cookie perfection. Here’s what you’ll need to create these delightful Peach Cobbler Cookies:

  • All-purpose flour: The backbone of your cookies, providing structure and chewiness.
  • Baking powder: This leavening agent helps the cookies rise, giving them a light texture.
  • Baking soda: Works alongside baking powder to ensure your cookies don’t fall flat.
  • Salt: A pinch enhances the sweetness and balances flavors.
  • Ground cinnamon: Adds warmth and a hint of spice, reminiscent of classic peach cobbler.
  • Unsalted butter: Softened for easy mixing, it brings richness and moisture to the cookies.
  • Granulated sugar: Sweetens the dough and contributes to that lovely golden color.
  • Large egg: Binds the ingredients together and adds moisture.
  • Vanilla extract: A must for flavor; it elevates the overall taste of the cookies.
  • Diced fresh peaches: The star of the show! They provide juicy bursts of flavor in every bite.
  • Brown sugar: Adds depth and a slight caramel flavor, enhancing the cookie’s sweetness.
  • Rolled oats: For a bit of texture and chew, making these cookies even more satisfying.
  • Nutmeg: A pinch adds a warm, aromatic touch that complements the peaches beautifully.

For those looking to customize, consider adding a teaspoon of peach extract for an extra peachy punch. You can also swap half of the all-purpose flour with whole wheat flour for a healthier twist. The exact measurements for these ingredients are available at the bottom of the article for easy printing!

How to Make Peach Cobbler Cookies

Step 1: Preheat and Prepare

Start by preheating your oven to 350°F (175°C). This ensures your cookies bake evenly. While the oven warms up, line a baking sheet with parchment paper. This simple step prevents sticking and makes cleanup a breeze. Trust me, your future self will thank you!

Step 2: Mix Dry Ingredients

In a medium bowl, whisk together the all-purpose flour, baking powder, baking soda, salt, and ground cinnamon. This step is crucial for even distribution of the leavening agents. A well-mixed dry blend sets the stage for perfectly fluffy Peach Cobbler Cookies. No lumps allowed!

Step 3: Cream Butter and Sugar

In a large bowl, cream together the softened unsalted butter and granulated sugar until light and fluffy. This process takes about 2-3 minutes. Creaming incorporates air into the mixture, giving your cookies that delightful texture. It’s the secret to achieving cookie perfection!

Step 4: Combine Wet Ingredients

Next, beat in the large egg and vanilla extract until well combined. This adds moisture and flavor to your dough. The egg acts as a binder, ensuring all ingredients come together beautifully. You’ll love the aroma of vanilla filling your kitchen!

Step 5: Combine Wet and Dry Mixtures

Gradually add the dry ingredients to the wet mixture, mixing until just combined. Be careful not to overwork the dough; this keeps your cookies tender. A few flour streaks are okay! The goal is to create a soft, cohesive dough that’s ready for the star ingredient.

Step 6: Fold in Peaches and Other Ingredients

Gently fold in the diced fresh peaches, brown sugar, rolled oats, and nutmeg. Use a spatula to ensure even distribution without crushing the peaches. This technique keeps the fruit intact, allowing those juicy bursts of flavor in every bite. It’s like a little surprise in each cookie!

Step 7: Shape and Bake

Drop tablespoon-sized portions of dough onto the prepared baking sheet, spacing them about 2 inches apart. This gives them room to spread while baking. Bake for 12-15 minutes, or until the edges are lightly golden. Keep an eye on them; you want that perfect golden hue!

Step 8: Cool and Enjoy

Once baked, allow the cookies to cool on the baking sheet for 5 minutes. This helps them set and makes transferring easier. After that, move them to a wire rack to cool completely. The cooling process enhances their texture, making them soft and chewy—just how cookies should be!

Tips for Success

  • Use ripe, fresh peaches for the best flavor and juiciness.
  • Don’t skip the parchment paper; it prevents sticking and makes cleanup easy.
  • Chill the dough for 30 minutes if it feels too soft to handle.
  • Experiment with spices like ginger or allspice for a unique twist.
  • Store cookies in an airtight container to keep them soft and chewy.

Equipment Needed

  • Baking sheet: A standard one works, but a silicone mat can help with even baking.
  • Parchment paper: Great for lining the baking sheet; aluminum foil is a good alternative.
  • Mixing bowls: Use any size, but a large bowl is ideal for creaming.
  • Whisk: A hand whisk is perfect, but an electric mixer speeds things up.
  • Spatula: A rubber spatula is best for folding in ingredients without crushing the peaches.

Variations

  • For a tropical twist, add diced pineapple along with the peaches for a fruity explosion.
  • Try using almond flour instead of all-purpose flour for a gluten-free option.
  • Incorporate chopped nuts like pecans or walnuts for added crunch and flavor.
  • Substitute the fresh peaches with canned peaches for a quicker option; just drain them well.
  • For a vegan version, replace the egg with a flax egg and use coconut oil instead of butter.

Serving Suggestions

  • Pair these cookies with a scoop of vanilla ice cream for a delightful dessert experience.
  • Serve alongside a hot cup of coffee or tea to balance the sweetness.
  • For a festive touch, dust with powdered sugar before serving.
  • Present on a colorful platter for a charming display at gatherings.

FAQs about Peach Cobbler Cookies

Can I use frozen peaches instead of fresh?

Absolutely! Frozen peaches work well in these cookies. Just make sure to thaw and drain them to avoid excess moisture. This way, you still get that delicious peach flavor without compromising texture.

How do I store leftover cookies?

To keep your Peach Cobbler Cookies soft and chewy, store them in an airtight container at room temperature. They’ll stay fresh for about a week. If you want to keep them longer, consider freezing them!

Can I make the dough ahead of time?

Yes! You can prepare the dough and refrigerate it for up to 24 hours. Just remember to let it sit at room temperature for a few minutes before baking. This helps the cookies spread evenly.

What can I substitute for the egg?

If you’re looking for an egg substitute, a flax egg works great! Mix one tablespoon of ground flaxseed with three tablespoons of water, let it sit for a few minutes, and you’re good to go. It binds the ingredients just like an egg.

Can I add chocolate chips to the recipe?

Of course! Chocolate chips can add a delightful twist to your Peach Cobbler Cookies. Just fold in a half cup of your favorite chocolate chips along with the peaches for a sweet surprise in every bite.

Final Thoughts

Making these Peach Cobbler Cookies is more than just baking; it’s about creating memories and sharing joy. Each bite transports you to a sun-kissed summer day, where the sweetness of ripe peaches dances with warm spices. Whether you’re enjoying them fresh out of the oven or sharing them with friends, these cookies bring a sense of comfort and happiness. They’re perfect for any occasion, from casual family gatherings to festive celebrations. So, roll up your sleeves, embrace the process, and let these delightful cookies become a cherished part of your dessert repertoire. You won’t regret it!

Ranis

Peach Cobbler Cookies: Discover Your New Favorite Treat!

Delicious Peach Cobbler Cookies that combine the flavors of peach cobbler in a soft and chewy cookie form.
Prep Time 15 minutes
Cook Time 15 minutes
Total Time 30 minutes
Servings: 24 cookies
Course: Dessert
Cuisine: American
Calories: 150

Ingredients
  

  • 2 cups all-purpose flour
  • 1 teaspoon baking powder
  • 1/2 teaspoon baking soda
  • 1/2 teaspoon salt
  • 1 teaspoon ground cinnamon
  • 1/2 cup unsalted butter softened
  • 1 cup granulated sugar
  • 1 large egg
  • 1 teaspoon vanilla extract
  • 1 cup diced fresh peaches about 2 medium peaches
  • 1/2 cup brown sugar packed
  • 1/4 cup rolled oats
  • 1/4 teaspoon nutmeg

Method
 

  1. Preheat your oven to 350°F (175°C) and line a baking sheet with parchment paper.
  2. In a medium bowl, whisk together the flour, baking powder, baking soda, salt, and cinnamon. Set aside.
  3. In a large bowl, cream together the softened butter and granulated sugar until light and fluffy, about 2-3 minutes.
  4. Beat in the egg and vanilla extract until well combined.
  5. Gradually add the dry ingredients to the wet mixture, mixing until just combined.
  6. Gently fold in the diced peaches, brown sugar, rolled oats, and nutmeg until evenly distributed.
  7. Drop tablespoon-sized portions of dough onto the prepared baking sheet, spacing them about 2 inches apart.
  8. Bake for 12-15 minutes, or until the edges are lightly golden.
  9. Allow the cookies to cool on the baking sheet for 5 minutes before transferring them to a wire rack to cool completely.

Nutrition

Serving: 1cookieCalories: 150kcalCarbohydrates: 20gProtein: 2gFat: 7gSaturated Fat: 4gPolyunsaturated Fat: 3gCholesterol: 20mgSodium: 100mgFiber: 1gSugar: 10g

Notes

  • For a more intense peach flavor, try adding a teaspoon of peach extract to the dough.
  • Substitute half of the all-purpose flour with whole wheat flour for a healthier twist.

Tried this recipe?

Let us know how it was!

BBQ Chicken Bowls with Sweet Potatoes and Slaw: Try This Recipe!

Introduction to BBQ Chicken Bowls with Sweet Potatoes and Slaw

There’s something magical about a hearty meal that brings everyone together, and these BBQ Chicken Bowls with Sweet Potatoes and Slaw do just that. Whether you’re coming home after a long day or hosting friends for a casual dinner, this dish is a quick solution that doesn’t skimp on flavor. The combination of tender chicken, roasted sweet potatoes, and creamy slaw creates a symphony of tastes and textures. Plus, it’s a fantastic way to impress your loved ones without spending hours in the kitchen. Let’s dive into this delicious recipe!

Why You’ll Love This BBQ Chicken Bowls with Sweet Potatoes and Slaw

These BBQ Chicken Bowls with Sweet Potatoes and Slaw are a game-changer for busy weeknights. They come together in just 45 minutes, making them perfect for those evenings when time is tight. The flavors are bold and satisfying, with the sweetness of the potatoes balancing the tangy BBQ sauce. Plus, the creamy slaw adds a refreshing crunch, making every bite a delightful experience. You’ll find yourself craving this dish again and again!

Ingredients for BBQ Chicken Bowls with Sweet Potatoes and Slaw

Gathering the right ingredients is the first step to creating these mouthwatering BBQ Chicken Bowls with Sweet Potatoes and Slaw. Here’s what you’ll need:

  • Boneless, skinless chicken breasts: The star of the show! They’re juicy and cook quickly, making them perfect for this dish.
  • BBQ sauce: Choose your favorite brand for that smoky, tangy flavor. It’s what brings the chicken to life!
  • Sweet potatoes: These add a natural sweetness and a hearty texture. They’re also packed with nutrients.
  • Olive oil: A must for roasting the sweet potatoes, helping them caramelize beautifully.
  • Garlic powder: This adds a savory depth to the sweet potatoes. Fresh garlic works too if you prefer!
  • Paprika: A sprinkle of this spice gives a subtle smokiness and vibrant color.
  • Salt and pepper: Essential for seasoning, enhancing all the flavors in the dish.
  • Coleslaw mix: A blend of cabbage and carrots that adds crunch and freshness to the bowls.
  • Mayonnaise: This creamy base for the slaw brings everything together, making it rich and satisfying.
  • Apple cider vinegar: A splash of acidity to balance the richness of the mayo and sweet potatoes.
  • Honey: A touch of sweetness that complements the tangy slaw perfectly.
  • Dijon mustard: Adds a zesty kick to the slaw, elevating its flavor profile.
  • Fresh cilantro or green onions: Optional garnishes that add a pop of color and freshness to your bowls.

For exact measurements, check the bottom of the article where you can find everything listed for easy printing. Feel free to get creative with substitutions! For instance, if you’re looking for a vegetarian option, grilled tofu or chickpeas can work wonders in place of chicken.

How to Make BBQ Chicken Bowls with Sweet Potatoes and Slaw

Creating these BBQ Chicken Bowls with Sweet Potatoes and Slaw is a straightforward process that yields delicious results. Follow these simple steps, and you’ll have a hearty meal ready in no time!

Step 1: Preheat the Oven

Start by preheating your oven to 400°F (200°C). This step is crucial for even cooking. A hot oven ensures that your sweet potatoes roast perfectly, developing that lovely caramelization that adds depth to their flavor.

Step 2: Prepare the Sweet Potatoes

Next, grab those diced sweet potatoes. In a bowl, toss them with olive oil, garlic powder, paprika, salt, and pepper. Make sure they’re well-coated. Spread them out on a baking sheet in a single layer. Roast for 25-30 minutes, stirring halfway through. This will help them caramelize beautifully, bringing out their natural sweetness.

Step 3: Cook the Chicken

While the sweet potatoes are roasting, it’s time to cook the chicken. Season the boneless, skinless chicken breasts with salt and pepper. Heat a skillet over medium heat and cook the chicken for about 6-7 minutes on each side. You want it to reach an internal temperature of 165°F. Once cooked, brush the chicken with your favorite BBQ sauce, letting it caramelize slightly for that smoky flavor.

Step 4: Make the Slaw

In a separate bowl, combine the coleslaw mix, mayonnaise, apple cider vinegar, honey, Dijon mustard, black pepper, and salt. Mix everything until well combined. This creamy slaw adds a refreshing crunch that perfectly balances the richness of the BBQ chicken and sweet potatoes.

Step 5: Assemble the Bowls

Now comes the fun part—assembling your bowls! Start by dividing the roasted sweet potatoes among four bowls. Top each with sliced BBQ chicken, then add a generous scoop of slaw. For a finishing touch, garnish with fresh cilantro or green onions if you like. This not only adds flavor but also makes your dish look vibrant and inviting!

Tips for Success

  • Don’t skip preheating the oven; it’s key for perfect roasting.
  • For extra flavor, marinate the chicken in BBQ sauce for an hour before cooking.
  • Use a meat thermometer to ensure the chicken is cooked through.
  • Feel free to customize the slaw with your favorite add-ins like apples or nuts.
  • Leftovers? Store them separately to keep everything fresh and crunchy!

Equipment Needed

  • Baking sheet: A standard one works great, but a cast-iron skillet can also do the trick.
  • Skillet: Any non-stick or cast-iron skillet will suffice for cooking the chicken.
  • Mixing bowls: Use any size you have on hand for mixing ingredients.
  • Meat thermometer: Optional, but it ensures perfectly cooked chicken.

Variations

  • Spicy BBQ Chicken: Add a dash of cayenne pepper to the chicken or use a spicy BBQ sauce for an extra kick.
  • Vegetarian Option: Substitute the chicken with grilled tofu or chickpeas for a hearty plant-based meal.
  • Sweet Potato Alternatives: Try using butternut squash or regular potatoes if sweet potatoes aren’t your thing.
  • Different Slaw Mix: Experiment with different slaw mixes, like adding apples or nuts for added texture and flavor.
  • Grain Bowls: Serve the BBQ chicken and sweet potatoes over quinoa or brown rice for a filling grain bowl.

Serving Suggestions

  • Side Dishes: Pair with cornbread or a light green salad for a balanced meal.
  • Drinks: Enjoy with iced tea or a cold beer to complement the BBQ flavors.
  • Presentation: Serve in colorful bowls and garnish with extra cilantro for a vibrant look.

FAQs about BBQ Chicken Bowls with Sweet Potatoes and Slaw

Can I make BBQ Chicken Bowls with Sweet Potatoes and Slaw ahead of time?

Absolutely! You can prepare the sweet potatoes and chicken in advance. Just store them in airtight containers in the fridge. When you’re ready to eat, reheat them and assemble your bowls with fresh slaw for the best texture.

What can I substitute for BBQ sauce?

If you’re looking for alternatives, try teriyaki sauce or a homemade sauce made from ketchup, vinegar, and spices. These options can give your BBQ Chicken Bowls a unique twist while still delivering that delicious flavor.

How do I store leftovers?

To keep your BBQ Chicken Bowls fresh, store the components separately. Place the chicken, sweet potatoes, and slaw in different containers. This way, the slaw stays crunchy, and the chicken and sweet potatoes retain their flavors.

Can I use other vegetables in the bowls?

Definitely! Feel free to add roasted broccoli, bell peppers, or even corn for extra color and nutrition. The beauty of these BBQ Chicken Bowls is their versatility!

Is this recipe gluten-free?

Yes! As long as you choose a gluten-free BBQ sauce, these BBQ Chicken Bowls with Sweet Potatoes and Slaw are a delicious gluten-free option. Enjoy without worry!

Final Thoughts

Cooking these BBQ Chicken Bowls with Sweet Potatoes and Slaw is more than just preparing a meal; it’s about creating a moment. The aroma of roasted sweet potatoes mingling with smoky BBQ chicken fills your kitchen, inviting everyone to gather around the table. Each bite is a delightful blend of flavors and textures, making it a dish that satisfies both the palate and the soul. Whether it’s a weeknight dinner or a weekend gathering, this recipe brings joy and comfort, reminding us that good food has the power to connect us all. Enjoy every delicious moment!

Ranis

BBQ Chicken Bowls with Sweet Potatoes and Slaw: Try This Recipe!

Delicious BBQ Chicken Bowls featuring roasted sweet potatoes and a creamy slaw, perfect for a hearty meal.
Prep Time 15 minutes
Cook Time 30 minutes
Total Time 45 minutes
Servings: 4 servings
Course: Main Course
Cuisine: American
Calories: 450

Ingredients
  

  • 2 large boneless skinless chicken breasts (about 1 pound total)
  • 1 cup BBQ sauce your favorite brand
  • 2 medium sweet potatoes peeled and diced (about 2 cups)
  • 2 tablespoons olive oil
  • 1 teaspoon garlic powder
  • 1 teaspoon paprika
  • Salt and pepper to taste
  • 4 cups coleslaw mix cabbage and carrots
  • 1/4 cup mayonnaise
  • 1 tablespoon apple cider vinegar
  • 1 tablespoon honey
  • 1 teaspoon Dijon mustard
  • 1/4 teaspoon black pepper
  • 1/4 teaspoon salt
  • Fresh cilantro or green onions for garnish optional

Method
 

  1. Preheat your oven to 400°F (200°C).
  2. In a bowl, toss the diced sweet potatoes with olive oil, garlic powder, paprika, salt, and pepper. Spread them in a single layer on a baking sheet and roast for 25-30 minutes, or until tender and slightly caramelized, stirring halfway through.
  3. While the sweet potatoes are roasting, season the chicken breasts with salt and pepper. In a skillet over medium heat, cook the chicken for about 6-7 minutes per side until fully cooked (internal temperature should reach 165°F). Remove from heat and brush with BBQ sauce, allowing it to caramelize slightly.
  4. In a separate bowl, combine the coleslaw mix, mayonnaise, apple cider vinegar, honey, Dijon mustard, black pepper, and salt. Mix until well combined.
  5. Once the chicken is cooked, slice it into strips.
  6. To assemble the bowls, divide the roasted sweet potatoes among four bowls, top with sliced BBQ chicken, and add a generous scoop of coleslaw. Garnish with fresh cilantro or green onions if desired.

Nutrition

Serving: 1bowlCalories: 450kcalCarbohydrates: 35gProtein: 30gFat: 20gSaturated Fat: 3gPolyunsaturated Fat: 15gCholesterol: 80mgSodium: 800mgFiber: 5gSugar: 10g

Notes

  • For a spicier kick, add a dash of cayenne pepper to the sweet potatoes or use a spicy BBQ sauce.
  • You can substitute the chicken with grilled tofu or chickpeas for a vegetarian option.

Tried this recipe?

Let us know how it was!

Lemonade Sugar Cookie Crumble: A Tangy Delight Awaits!

Introduction to Lemonade Sugar Cookie Crumble

There’s something magical about the combination of sweet and tangy flavors, especially when it comes to desserts. The Lemonade Sugar Cookie Crumble is a delightful treat that brings back memories of summer picnics and family gatherings. It’s the kind of dessert that can brighten up a busy day or impress your friends at a weekend barbecue. With its easy preparation and refreshing taste, this crumble is perfect for anyone looking to whip up something special without spending hours in the kitchen. Trust me, once you try it, you’ll be hooked!

Why You’ll Love This Lemonade Sugar Cookie Crumble

This Lemonade Sugar Cookie Crumble is a game-changer for dessert lovers. It’s incredibly easy to make, requiring just a handful of ingredients and minimal prep time. In about 40 minutes, you can have a warm, tangy treat that’s perfect for any occasion. The delightful balance of sweetness and citrus will have your taste buds dancing, making it a crowd-pleaser that’s sure to impress family and friends alike.

Ingredients for Lemonade Sugar Cookie Crumble

Gathering the right ingredients is the first step to creating your Lemonade Sugar Cookie Crumble. Here’s what you’ll need:

  • All-purpose flour: The backbone of your crumble, providing structure and texture.
  • Baking powder: This helps the crumble rise, giving it that light, fluffy feel.
  • Baking soda: A little extra lift and helps balance the acidity of the lemonade.
  • Salt: Just a pinch enhances the sweetness and rounds out the flavors.
  • Unsalted butter: Adds richness and moisture; make sure it’s softened for easy mixing.
  • Granulated sugar: Sweetens the crumble and contributes to its delightful texture.
  • Large egg: Binds everything together and adds a touch of richness.
  • Vanilla extract: A classic flavor enhancer that complements the lemon beautifully.
  • Lemon zest: This is where the magic happens! It infuses the crumble with vibrant citrus notes.
  • Lemonade concentrate: The star of the show, providing that tangy sweetness we all love.
  • Powdered sugar: For dusting, adding a sweet finishing touch to your dessert.

For a fun twist, consider adding white chocolate chips or blueberries to the dough before baking. If you’re feeling adventurous, you can swap the lemonade concentrate for lime or orange juice to explore different citrus flavors. Exact measurements for these ingredients can be found at the bottom of the article, ready for printing!

How to Make Lemonade Sugar Cookie Crumble

Creating your Lemonade Sugar Cookie Crumble is a straightforward process that will have your kitchen smelling heavenly. Follow these simple steps, and you’ll be on your way to enjoying this delightful dessert in no time!

Step 1: Preheat and Prepare

Start by preheating your oven to 350°F (175°C). This ensures your crumble bakes evenly. While the oven warms up, line a 9×13 inch baking dish with parchment paper. Leave some overhang; it makes for easy removal later. Trust me, you’ll thank yourself when it’s time to serve!

Step 2: Mix Dry Ingredients

In a medium bowl, whisk together the all-purpose flour, baking powder, baking soda, and salt. This step is crucial as it evenly distributes the leavening agents. A well-mixed dry blend sets the stage for a perfectly risen crumble.

Step 3: Cream Butter and Sugar

In a large bowl, cream the softened butter and granulated sugar together until the mixture is light and fluffy. This should take about 3-4 minutes. The air you incorporate here is what gives your Lemonade Sugar Cookie Crumble that delightful texture. Don’t rush this step!

Step 4: Combine Wet Ingredients

Next, beat in the egg, vanilla extract, lemon zest, and lemonade concentrate. Mix until everything is well combined. The lemon zest and concentrate will infuse your batter with that refreshing tang we all love. It’s like a burst of sunshine in your bowl!

Step 5: Combine Mixtures

Gradually add the dry ingredients to the wet mixture. Mix until just combined; overmixing can lead to a dense crumble. You want to maintain that light, airy texture. A few flour streaks are okay; they’ll disappear during baking.

Step 6: Spread and Bake

Spread the dough evenly in the prepared baking dish. Use a spatula to smooth the top. Bake in your preheated oven for 20-25 minutes, or until the edges are lightly golden. A toothpick inserted in the center should come out clean. The aroma wafting through your kitchen will be irresistible!

Step 7: Cool and Dust

Once baked, allow the cookie crumble to cool in the pan for about 10 minutes. Then, lift it out using the parchment overhang and let it cool completely on a wire rack. Before serving, dust the top with powdered sugar for that sweet finishing touch. Now, it’s time to cut into squares and enjoy your creation!

Tips for Success

  • Make sure your butter is softened to room temperature for easy creaming.
  • Don’t skip the lemon zest; it adds a vibrant flavor that elevates the crumble.
  • Keep an eye on the baking time; ovens can vary, so check for that golden edge.
  • Let the crumble cool completely before dusting with powdered sugar for a beautiful finish.
  • Experiment with mix-ins like nuts or dried fruit for added texture and flavor.

Equipment Needed

  • 9×13 inch baking dish: A standard size for this recipe; you can use a similar-sized dish if needed.
  • Parchment paper: Essential for easy removal; aluminum foil can work in a pinch.
  • Mixing bowls: A medium and a large bowl will do the trick.
  • Whisk: For mixing dry ingredients; a fork can also suffice.
  • Spatula: Perfect for spreading the dough evenly; a wooden spoon can be a good alternative.

Variations

  • Chocolate Chip Lemonade Crumble: Add a cup of semi-sweet chocolate chips for a delightful contrast to the tangy lemon flavor.
  • Berry Blast: Fold in a cup of fresh blueberries or raspberries for a fruity twist that pairs beautifully with the lemon.
  • Gluten-Free Option: Substitute all-purpose flour with a gluten-free flour blend to make this dessert suitable for gluten-sensitive friends.
  • Vegan Version: Replace the egg with a flax egg (1 tablespoon ground flaxseed mixed with 2.5 tablespoons water) and use vegan butter for a plant-based treat.
  • Spiced Lemonade Crumble: Add a teaspoon of cinnamon or nutmeg to the dry ingredients for a warm, spiced flavor that complements the lemon.

Serving Suggestions

  • Pair your Lemonade Sugar Cookie Crumble with a scoop of vanilla ice cream for a delightful contrast.
  • Serve with a refreshing glass of iced tea or lemonade to enhance the citrus flavor.
  • For a beautiful presentation, garnish with fresh mint leaves or lemon slices.

FAQs about Lemonade Sugar Cookie Crumble

Can I make Lemonade Sugar Cookie Crumble ahead of time?

Absolutely! You can prepare the crumble a day in advance. Just store it in an airtight container at room temperature. Dust with powdered sugar right before serving for that fresh look.

What can I substitute for lemonade concentrate?

If you don’t have lemonade concentrate, feel free to use fresh lemon juice mixed with a bit of sugar. Lime or orange juice can also work well for a different citrus twist!

How should I store leftovers?

Store any leftover Lemonade Sugar Cookie Crumble in an airtight container at room temperature for up to three days. If you want to keep it longer, refrigerate it for up to a week.

Can I freeze the crumble?

Yes, you can freeze the crumble! Wrap it tightly in plastic wrap and then in aluminum foil. It will keep well for up to three months. Thaw it in the fridge before serving.

What’s the best way to serve this dessert?

For a delightful experience, serve your Lemonade Sugar Cookie Crumble warm with a scoop of vanilla ice cream or a dollop of whipped cream. It’s a refreshing treat that everyone will love!

Final Thoughts

Creating the Lemonade Sugar Cookie Crumble is more than just baking; it’s about crafting memories. The tangy sweetness of lemon combined with the comforting texture of sugar cookies brings joy to every bite. Whether you’re sharing it with family after dinner or enjoying a quiet moment with a cup of coffee, this dessert has a way of brightening your day. It’s simple, delightful, and perfect for any occasion. So, roll up your sleeves, embrace the process, and let this crumble become a cherished part of your culinary repertoire. You won’t regret it!

Ranis

Lemonade Sugar Cookie Crumble: A Tangy Delight Awaits!

A delightful and tangy dessert that combines the flavors of lemonade and sugar cookies in a crumble form.
Prep Time 15 minutes
Cook Time 25 minutes
Total Time 40 minutes
Servings: 12 servings
Course: Dessert
Cuisine: American
Calories: 180

Ingredients
  

  • 2 cups all-purpose flour
  • 1 teaspoon baking powder
  • 1/2 teaspoon baking soda
  • 1/4 teaspoon salt
  • 1 cup unsalted butter softened
  • 1 cup granulated sugar
  • 1 large egg
  • 1 teaspoon vanilla extract
  • 1 tablespoon lemon zest
  • 1/4 cup lemonade concentrate thawed
  • 1/2 cup powdered sugar for dusting

Method
 

  1. Preheat your oven to 350°F (175°C) and line a 9x13 inch baking dish with parchment paper, leaving some overhang for easy removal.
  2. In a medium bowl, whisk together the flour, baking powder, baking soda, and salt. Set aside.
  3. In a large bowl, cream the softened butter and granulated sugar together until light and fluffy, about 3-4 minutes.
  4. Beat in the egg, vanilla extract, lemon zest, and lemonade concentrate until well combined.
  5. Gradually add the dry ingredients to the wet mixture, mixing until just combined. Do not overmix.
  6. Spread the dough evenly in the prepared baking dish. Use a spatula to smooth the top.
  7. Bake for 20-25 minutes or until the edges are lightly golden and a toothpick inserted in the center comes out clean.
  8. Allow the cookie crumble to cool in the pan for about 10 minutes before lifting it out using the parchment overhang. Let it cool completely on a wire rack.
  9. Once cooled, dust with powdered sugar before cutting into squares.

Nutrition

Serving: 1squareCalories: 180kcalCarbohydrates: 24gProtein: 2gFat: 8gSaturated Fat: 5gPolyunsaturated Fat: 3gCholesterol: 30mgSodium: 100mgSugar: 10g

Notes

  • For a fun twist, add a handful of white chocolate chips or blueberries to the dough before baking.
  • Substitute the lemonade concentrate with lime or orange juice for a different citrus flavor.

Tried this recipe?

Let us know how it was!

Garlic Asado Chicken with Sautéed Zucchini: A Flavorful Feast!

Introduction to Garlic Asado Chicken with Sautéed Zucchini

Cooking has always been my way of unwinding after a long day. There’s something magical about the aroma of Garlic Asado Chicken with Sautéed Zucchini wafting through the kitchen. This dish is not just a meal; it’s a quick solution for busy evenings or a delightful way to impress friends and family.

With tender, marinated chicken thighs and vibrant zucchini, it’s a feast for both the eyes and the palate. Trust me, once you try this recipe, it’ll become a staple in your home, bringing joy to your dinner table.

Why You’ll Love This Garlic Asado Chicken with Sautéed Zucchini

This Garlic Asado Chicken with Sautéed Zucchini is a game-changer for your weeknight dinners.

It’s quick to prepare, taking just 45 minutes from start to finish.

The marinade infuses the chicken with rich flavors, while the sautéed zucchini adds a fresh crunch.

Plus, it’s a healthy option that doesn’t skimp on taste.

You’ll find yourself craving this dish again and again, making it a new family favorite!

Ingredients for Garlic Asado Chicken with Sautéed Zucchini

To create this mouthwatering Garlic Asado Chicken with Sautéed Zucchini, you’ll need a handful of simple yet flavorful ingredients.

Here’s what you’ll gather:

  • Boneless, skinless chicken thighs: These are juicy and tender, perfect for soaking up the marinade.
  • Garlic: Freshly minced garlic adds a robust flavor that elevates the dish.
  • Soy sauce: This brings a savory umami kick, enhancing the overall taste.
  • Olive oil: A healthy fat that helps the chicken stay moist while cooking.
  • Brown sugar: Just a touch of sweetness balances the savory elements beautifully.
  • Ground cumin: This spice adds warmth and depth, making the dish more aromatic.
  • Paprika: A sprinkle of paprika gives a subtle smokiness and vibrant color.
  • Black pepper and salt: Essential seasonings that enhance all the flavors.
  • Zucchini: Fresh, sliced zucchini provides a crunchy contrast to the tender chicken.
  • Butter: A little butter for sautéing the zucchini adds richness and flavor.
  • Fresh parsley: Chopped parsley is a lovely garnish that adds a pop of color and freshness.

For those looking to spice things up, consider adding crushed red pepper flakes to the marinade.

If zucchini isn’t your favorite, feel free to swap it out for bell peppers or asparagus.

You can find the exact quantities for each ingredient at the bottom of the article, ready for printing!

How to Make Garlic Asado Chicken with Sautéed Zucchini

Step 1: Prepare the Marinade

Start by grabbing a medium bowl.

In it, combine the minced garlic, soy sauce, olive oil, brown sugar, cumin, paprika, black pepper, and salt.

Whisk everything together until it’s well blended.

This marinade is the heart of your Garlic Asado Chicken, so make sure it’s mixed thoroughly.

The aroma will already start to tease your senses!

Step 2: Marinate the Chicken

Next, take your chicken thighs and place them in a resealable plastic bag or a shallow dish.

Pour the marinade over the chicken, ensuring each piece is well coated.

Seal the bag or cover the dish, then refrigerate for at least 30 minutes.

If you have time, let it marinate for up to 2 hours.

This extra time allows the flavors to penetrate deeply, making your chicken even more delicious.

Step 3: Cook the Chicken

Preheat your grill or skillet over medium-high heat.

Once hot, remove the chicken from the marinade, letting any excess drip off.

Cook the chicken for about 6-7 minutes on each side.

You’re looking for a nice golden-brown color and an internal temperature of 165°F.

This step is crucial for juicy, flavorful Garlic Asado Chicken!

Step 4: Sauté the Zucchini

While the chicken is cooking, melt butter in a large skillet over medium heat.

Add the sliced zucchini and sauté for about 5-7 minutes.

You want them tender and slightly golden, with a bit of crunch left.

Season with salt and pepper to taste.

This vibrant veggie side complements the chicken perfectly!

Step 5: Serve and Garnish

Once the chicken is cooked, let it rest for a few minutes before slicing.

This helps retain the juices, making every bite succulent.

Serve the chicken alongside the sautéed zucchini.

Don’t forget to garnish with fresh parsley for that pop of color and freshness.

Now, dig in and enjoy your flavorful feast!

Tips for Success

  • Always let the chicken marinate for at least 30 minutes; longer is better for flavor.
  • Use a meat thermometer to ensure your chicken reaches 165°F for perfect doneness.
  • Don’t overcrowd the skillet when sautéing zucchini; this helps them brown nicely.
  • Feel free to experiment with different herbs or spices in the marinade.
  • Let the chicken rest before slicing to keep it juicy.

Equipment Needed

  • Medium bowl: For mixing the marinade; a large measuring cup works too.
  • Resealable plastic bag or shallow dish: To marinate the chicken; any container with a lid will do.
  • Grill or skillet: For cooking the chicken; an oven can be used as an alternative.
  • Large skillet: For sautéing zucchini; a non-stick pan is ideal.
  • Meat thermometer: To check chicken doneness; a simple knife can also help check if juices run clear.

Variations

  • Spicy Garlic Asado: Add 1 teaspoon of crushed red pepper flakes to the marinade for a fiery kick.
  • Herb-Infused Chicken: Incorporate fresh herbs like thyme or rosemary into the marinade for an aromatic twist.
  • Vegetable Medley: Swap zucchini for a mix of bell peppers, asparagus, or even broccoli for a colorful veggie side.
  • Low-Carb Option: Serve the chicken over a bed of cauliflower rice instead of traditional sides for a healthier choice.
  • Grilled Variation: Try grilling the zucchini alongside the chicken for a smoky flavor that enhances the dish.

Serving Suggestions

  • Pair your Garlic Asado Chicken with a light quinoa salad for a refreshing contrast.
  • A chilled glass of white wine, like Sauvignon Blanc, complements the flavors beautifully.
  • For a pop of color, serve on a vibrant platter with lemon wedges and fresh herbs.
  • Consider adding a side of garlic bread for a hearty touch.

FAQs about Garlic Asado Chicken with Sautéed Zucchini

Can I use chicken breasts instead of thighs?

Absolutely! Chicken breasts can be used, but they may require a shorter cooking time. Just ensure they reach an internal temperature of 165°F for safety.

How can I make this dish gluten-free?

To keep your Garlic Asado Chicken with Sautéed Zucchini gluten-free, simply use tamari or a gluten-free soy sauce alternative in the marinade.

Can I prepare the marinade in advance?

Yes! You can prepare the marinade a day ahead and store it in the fridge. Just add the chicken when you’re ready to cook.

What can I serve with this dish?

This dish pairs wonderfully with a light salad, quinoa, or even garlic bread for a heartier meal. The sautéed zucchini adds a fresh touch!

How do I store leftovers?

Store any leftovers in an airtight container in the fridge for up to three days. Reheat gently in the microwave or on the stovetop to enjoy again!

Final Thoughts

Cooking Garlic Asado Chicken with Sautéed Zucchini is more than just preparing a meal; it’s about creating memories.

The rich flavors and vibrant colors bring joy to the table, making every bite a celebration.

Whether you’re cooking for family or friends, this dish is sure to impress.

It’s quick, healthy, and packed with taste, perfect for any occasion.

So, roll up your sleeves, embrace the process, and enjoy the delightful aromas filling your kitchen.

This recipe is a reminder that good food can bring us together, creating moments that linger long after the last bite.

Ranis

Garlic Asado Chicken with Sautéed Zucchini: A Flavorful Feast!

A flavorful dish featuring marinated garlic chicken thighs served with sautéed zucchini.
Prep Time 30 minutes
Cook Time 15 minutes
Total Time 45 minutes
Servings: 4 servings
Course: Main Course
Cuisine: American
Calories: 320

Ingredients
  

  • 4 boneless skinless chicken thighs (about 1 pound)
  • 4 cloves garlic minced
  • 1/4 cup soy sauce
  • 2 tablespoons olive oil
  • 1 tablespoon brown sugar
  • 1 teaspoon ground cumin
  • 1 teaspoon paprika
  • 1/2 teaspoon black pepper
  • 1/2 teaspoon salt
  • 2 medium zucchinis sliced into half-moons
  • 1 tablespoon butter
  • 1 tablespoon fresh parsley chopped (for garnish)

Method
 

  1. In a medium bowl, combine minced garlic, soy sauce, olive oil, brown sugar, cumin, paprika, black pepper, and salt. Whisk until well blended.
  2. Place the chicken thighs in a resealable plastic bag or shallow dish and pour the marinade over the chicken. Seal the bag or cover the dish and refrigerate for at least 30 minutes, or up to 2 hours for more flavor.
  3. Preheat the grill or a skillet over medium-high heat. Remove the chicken from the marinade, allowing excess to drip off.
  4. Grill or cook the chicken for about 6-7 minutes per side, or until the internal temperature reaches 165°F and the chicken is nicely browned.
  5. While the chicken is cooking, melt butter in a large skillet over medium heat. Add the sliced zucchini and sauté for about 5-7 minutes, or until tender and slightly golden. Season with salt and pepper to taste.
  6. Once the chicken is cooked, let it rest for a few minutes before slicing. Serve the chicken alongside the sautéed zucchini and garnish with fresh parsley.

Nutrition

Serving: 1servingCalories: 320kcalCarbohydrates: 6gProtein: 28gFat: 20gSaturated Fat: 4gPolyunsaturated Fat: 16gCholesterol: 100mgSodium: 800mgFiber: 2gSugar: 3g

Notes

  • For a spicier kick, add 1 teaspoon of crushed red pepper flakes to the marinade.
  • Substitute the zucchini with bell peppers or asparagus for a different vegetable option.

Tried this recipe?

Let us know how it was!

Unstuffed Bell Pepper Skillet: A Simple, Tasty Recipe!

Introduction to Unstuffed Bell Pepper Skillet

After a long day, the last thing I want is to spend hours in the kitchen. That’s where my Unstuffed Bell Pepper Skillet comes in. This dish is a lifesaver, combining all the flavors of stuffed peppers without the fuss. It’s a one-pan wonder that’s not only quick to whip up but also packed with hearty ingredients. Whether you’re cooking for yourself or impressing family and friends, this recipe is sure to please. Plus, it’s a great way to sneak in some veggies without anyone noticing!

Why You’ll Love This Unstuffed Bell Pepper Skillet

This Unstuffed Bell Pepper Skillet is a game-changer for busy weeknights. It’s incredibly easy to make, requiring just one pan and minimal cleanup. The flavors meld beautifully, creating a comforting dish that’s both satisfying and nutritious. Plus, it’s versatile! You can customize it to suit your taste or dietary needs. In just 35 minutes, you’ll have a delicious meal that everyone will love.

Ingredients for Unstuffed Bell Pepper Skillet

Gathering the right ingredients is half the fun of cooking! For this Unstuffed Bell Pepper Skillet, you’ll need a mix of hearty and vibrant components that come together beautifully. Here’s what you’ll need:

  • Ground beef or turkey: This is the protein base. Choose lean ground meat for a healthier option.
  • Onion: Diced onion adds sweetness and depth to the dish. It’s a must-have for flavor.
  • Garlic: Minced garlic brings a punch of aroma and taste. Fresh is best, but jarred works too!
  • Bell peppers: Any color works! They add crunch and a pop of color, making the dish visually appealing.
  • Diced tomatoes: Canned tomatoes provide moisture and acidity. They help bind everything together.
  • Cooked rice: This is your carb source. Use white or brown rice, or even quinoa for a twist.
  • Italian seasoning: A blend of herbs that enhances the overall flavor. It’s like a hug for your skillet!
  • Paprika: This adds a subtle smokiness. It’s optional but highly recommended for extra depth.
  • Salt and pepper: Essential for seasoning. Adjust to your taste for the perfect balance.
  • Shredded cheddar cheese: The crowning glory! It melts beautifully and adds richness.

For those looking to mix things up, consider substituting the ground meat with a plant-based protein or extra beans for a vegetarian option. If you like a bit of heat, toss in a teaspoon of chili powder or some corn for added sweetness and texture. You can find exact measurements at the bottom of the article, ready for printing!

How to Make Unstuffed Bell Pepper Skillet

Now that you have all your ingredients ready, let’s dive into making this Unstuffed Bell Pepper Skillet. It’s straightforward and fun, perfect for a weeknight dinner. Follow these simple steps, and you’ll have a delicious meal in no time!

Step 1: Brown the Meat

Start by heating a large skillet over medium heat. Add your ground beef or turkey, breaking it apart with a spatula. Cook until it’s browned and no longer pink, about 5-7 minutes. Don’t forget to drain any excess fat! This step is crucial for keeping your dish light and tasty.

Step 2: Sauté the Vegetables

Once the meat is cooked, toss in the diced onion and minced garlic. Sauté them for about 3-4 minutes until the onion turns translucent. The aroma will fill your kitchen, making it hard to resist! Next, add the diced bell peppers and cook for another 5 minutes. You want them to soften but still have a bit of crunch.

Step 3: Combine Ingredients

Now it’s time to bring everything together. Stir in the canned diced tomatoes (with their juice), cooked rice, Italian seasoning, paprika, salt, and pepper. Mix well to ensure all the flavors meld together. This is where the magic happens, and your skillet starts to look like a colorful feast!

Step 4: Simmer for Flavor

Reduce the heat to low and cover the skillet. Let it simmer for about 10 minutes. This allows the flavors to blend beautifully. If you’re feeling adventurous, you can sneak in a teaspoon of chili powder for a little kick. Just remember to taste and adjust the seasoning as needed!

Step 5: Melt the Cheese

Finally, remove the lid and sprinkle the shredded cheddar cheese on top. Cover the skillet again for 2-3 minutes until the cheese is melted and bubbly. This is the moment you’ve been waiting for! Serve hot, and if you like, garnish with fresh parsley for a pop of color.

Tips for Success

  • Prep your ingredients ahead of time to streamline the cooking process.
  • Use a non-stick skillet to prevent sticking and make cleanup easier.
  • Don’t skip the simmering step; it’s key for flavor development.
  • Feel free to customize with your favorite spices or veggies.
  • Leftovers taste even better the next day, so make extra!

Equipment Needed

  • Large skillet: A non-stick skillet works best, but any large pan will do.
  • Spatula: Use a sturdy spatula for browning meat and mixing ingredients.
  • Knife and cutting board: Essential for chopping veggies quickly.
  • Measuring cups: Handy for portioning rice and cheese.

Variations

  • Vegetarian Delight: Swap the ground meat for a plant-based protein or black beans for a hearty vegetarian option.
  • Spicy Kick: Add a teaspoon of chili powder or diced jalapeños for a fiery twist.
  • Quinoa Substitute: Use cooked quinoa instead of rice for a protein-packed alternative.
  • Cheesy Goodness: Experiment with different cheeses like pepper jack or mozzarella for varied flavors.
  • Extra Veggies: Toss in corn, zucchini, or spinach for added nutrition and color.

Serving Suggestions

  • Side Salad: Pair with a fresh garden salad for a refreshing crunch.
  • Garlic Bread: Serve with warm garlic bread to soak up the delicious juices.
  • Drink Pairing: A chilled iced tea or a light beer complements the flavors perfectly.
  • Presentation: Garnish with fresh parsley or basil for a pop of color.

FAQs about Unstuffed Bell Pepper Skillet

Can I make this Unstuffed Bell Pepper Skillet ahead of time?

Absolutely! You can prepare the dish in advance and store it in the fridge for up to three days. Just reheat it on the stove or in the microwave when you’re ready to enjoy it again.

What can I substitute for rice in this recipe?

If you’re looking for alternatives, quinoa or cauliflower rice work great! Both options add a unique texture and flavor while keeping the dish gluten-free.

Is this Unstuffed Bell Pepper Skillet suitable for meal prep?

Yes! This one-pan meal is perfect for meal prep. Divide it into individual portions and store them in airtight containers for quick lunches or dinners throughout the week.

Can I freeze leftovers?

Definitely! This dish freezes well. Just let it cool completely, then transfer it to a freezer-safe container. It can last up to three months in the freezer. Thaw overnight in the fridge before reheating.

How can I make this dish spicier?

If you love heat, add diced jalapeños or a teaspoon of red pepper flakes when cooking. You can also top it with hot sauce before serving for an extra kick!

Final Thoughts

Cooking this Unstuffed Bell Pepper Skillet is more than just preparing a meal; it’s about creating a moment of joy in your kitchen. The vibrant colors and rich aromas fill the air, making it hard not to smile. It’s a dish that brings family together, whether around the table or in the kitchen. Plus, the ease of preparation means you can focus on what really matters—enjoying good food and great company. So, roll up your sleeves, embrace the flavors, and let this skillet become a staple in your home. Trust me, you won’t regret it!

Ranis

Unstuffed Bell Pepper Skillet: A Simple, Tasty Recipe!

A simple and tasty recipe for Unstuffed Bell Pepper Skillet that combines ground meat, bell peppers, and rice in a delicious one-pan meal.
Prep Time 10 minutes
Cook Time 25 minutes
Total Time 35 minutes
Servings: 4 servings
Course: Main Dish
Cuisine: American
Calories: 400

Ingredients
  

  • 1 pound ground beef or turkey
  • 1 medium onion diced
  • 2 cloves garlic minced
  • 3 medium bell peppers any color, diced
  • 1 can 14.5 ounces diced tomatoes, undrained
  • 1 cup cooked rice white or brown
  • 1 teaspoon Italian seasoning
  • 1 teaspoon paprika
  • Salt and pepper to taste
  • 1 cup shredded cheddar cheese

Method
 

  1. In a large skillet over medium heat, brown the ground beef or turkey until fully cooked. Drain any excess fat.
  2. Add the diced onion and minced garlic to the skillet and sauté for about 3-4 minutes until the onion is translucent.
  3. Stir in the diced bell peppers and cook for an additional 5 minutes until they begin to soften.
  4. Add the diced tomatoes (with their juice), cooked rice, Italian seasoning, paprika, salt, and pepper. Stir well to combine.
  5. Reduce the heat to low, cover the skillet, and let it simmer for about 10 minutes to allow the flavors to meld.
  6. Remove the lid and sprinkle the shredded cheddar cheese on top. Cover again for 2-3 minutes until the cheese is melted.
  7. Serve hot, garnished with fresh parsley if desired.

Nutrition

Serving: 1servingCalories: 400kcalCarbohydrates: 20gProtein: 30gFat: 22gSaturated Fat: 10gPolyunsaturated Fat: 8gCholesterol: 80mgSodium: 600mgFiber: 3gSugar: 5g

Notes

  • For a vegetarian option, substitute the ground meat with a plant-based protein or extra beans.
  • Add a teaspoon of chili powder for a spicier kick or mix in some corn for added sweetness and texture.

Tried this recipe?

Let us know how it was!

Shrimp Boil Delight: A Flavorful Family Feast Recipe

Introduction to Shrimp Boil Delight

Gathering around the table with family and friends is one of life’s simple pleasures. That’s where my Shrimp Boil Delight comes in, a dish that brings everyone together with its vibrant flavors and hearty ingredients. It’s perfect for those busy weeknights when you want something quick yet impressive. Imagine the aroma of seasoned shrimp, tender potatoes, and smoky sausage wafting through your kitchen. This recipe is not just a meal; it’s an experience that sparks joy and conversation. Let’s dive into this flavorful family feast that’s sure to become a favorite!

Why You’ll Love This Shrimp Boil Delight

This Shrimp Boil Delight is a game-changer for any home cook. It’s incredibly easy to whip up, taking just 45 minutes from start to finish. The combination of succulent shrimp, hearty potatoes, and flavorful sausage creates a taste explosion that will have your family asking for seconds. Plus, it’s a one-pot wonder, making cleanup a breeze. You’ll love how this dish turns a regular dinner into a festive feast!

Ingredients for Shrimp Boil Delight

Creating the perfect Shrimp Boil Delight starts with gathering the right ingredients. Here’s what you’ll need:

  • Large shrimp: Fresh or frozen, deveined and shelled for that juicy bite.
  • Small red potatoes: Their waxy texture holds up well during cooking, adding heartiness.
  • Smoked sausage: Adds a rich, smoky flavor; andouille sausage is a great alternative for a Cajun twist.
  • Corn: Sweet corn on the cob brings a pop of color and sweetness to the dish.
  • Old Bay seasoning: This classic blend of spices is essential for that authentic seafood flavor.
  • Lemon: Freshly squeezed juice brightens the dish and balances the richness.
  • Garlic: Minced garlic infuses the boil with aromatic goodness.
  • Water: The base for boiling; you can use broth for extra flavor.
  • Salt: Enhances all the flavors; adjust to your taste.
  • Fresh parsley: A sprinkle of chopped parsley adds a fresh touch for garnish.

For those looking to spice things up, consider adding hot sauce or red pepper flakes. If you prefer a lighter option, turkey sausage works beautifully as a substitute. You can find the exact quantities for each ingredient at the bottom of the article, ready for printing!

How to Make Shrimp Boil Delight

Now that you have your ingredients ready, let’s get cooking! This Shrimp Boil Delight is straightforward and fun. Follow these steps, and you’ll have a delicious meal in no time.

Step 1: Boil the Water

Start by filling a large pot with 4 cups of water. Place it over medium-high heat and bring it to a rolling boil. This is the foundation of your boil, so don’t rush it. The bubbling water will help cook everything evenly.

Step 2: Cook the Potatoes

Once the water is boiling, toss in the halved small red potatoes. Let them cook for about 10 minutes. You want them just tender, not mushy. This step is crucial because the potatoes take longer to cook than the other ingredients.

Step 3: Add the Sausage

Next, stir in the sliced smoked sausage. Let it simmer for another 5 minutes. The sausage will infuse the water with its smoky flavor, making your seafood boil even more delicious. Trust me, your kitchen will smell amazing!

Step 4: Incorporate the Corn

Now, it’s time to add the corn. Cut the ears into thirds and drop them into the pot. Cook for an additional 5 minutes. The corn adds sweetness and a lovely crunch to the mix. Plus, it looks great on the plate!

Step 5: Season the Mixture

Sprinkle in the Old Bay seasoning, minced garlic, and a pinch of salt. Stir everything well to combine. This is where the magic happens! The seasoning will coat all the ingredients, creating that signature flavor you’re after.

Step 6: Add the Shrimp

Finally, add the deveined shrimp to the pot. Cook for just 3-4 minutes, or until they turn pink and opaque. Be careful not to overcook them; shrimp can become rubbery if left too long. You want them tender and juicy!

Step 7: Finish and Serve

Once the shrimp are cooked, remove the pot from heat. Squeeze the juice of the lemon halves over the mixture for a zesty finish. Carefully drain the pot and transfer everything to a large serving platter. Garnish with chopped parsley and serve hot, with lemon wedges on the side. Enjoy your family feast!

Tips for Success

  • Prep your ingredients ahead of time to streamline the cooking process.
  • Don’t overcrowd the pot; it helps everything cook evenly.
  • Adjust the seasoning to your taste; everyone loves a personal touch!
  • For extra flavor, consider using seafood broth instead of water.
  • Serve immediately for the best texture and taste; shrimp are best fresh!

Equipment Needed

  • Large pot: A sturdy stockpot is ideal; a Dutch oven works too.
  • Colander: For draining the boil; a slotted spoon can be a quick alternative.
  • Cutting board: Essential for prepping your ingredients.
  • Knife: A sharp chef’s knife makes cutting easier.

Variations

  • Spicy Shrimp Boil: Add a few dashes of hot sauce or red pepper flakes for a fiery kick.
  • Vegetarian Option: Replace shrimp and sausage with hearty vegetables like mushrooms, zucchini, and bell peppers for a delicious veggie boil.
  • Herb-Infused: Experiment with fresh herbs like thyme or dill for an aromatic twist.
  • Low-Carb Version: Swap out potatoes for cauliflower florets to keep it lighter.
  • Seafood Medley: Mix in other seafood like crab legs or mussels for a more diverse flavor profile.

Serving Suggestions

  • Crusty Bread: Serve with a side of warm, crusty bread to soak up the delicious broth.
  • Coleslaw: A refreshing coleslaw pairs perfectly, adding crunch and balance.
  • Cold Beverages: Enjoy with chilled beer or lemonade for a refreshing contrast.
  • Presentation: Serve on a large platter lined with parchment paper for a rustic look.

FAQs about Shrimp Boil Delight

Can I use frozen shrimp for this recipe?

Absolutely! Frozen shrimp work just fine. Just make sure to thaw them before cooking for the best texture in your seafood boil.

How do I store leftovers?

Store any leftovers in an airtight container in the fridge for up to 2 days. Reheat gently on the stove to avoid overcooking the shrimp.

Can I make this dish ahead of time?

While it’s best enjoyed fresh, you can prep the ingredients ahead. Just cook everything right before serving for that delightful taste!

What can I serve with Shrimp Boil Delight?

Pair it with crusty bread, coleslaw, or a refreshing salad. A cold drink, like lemonade or beer, complements the flavors beautifully.

Is this recipe gluten-free?

Yes! This Shrimp Boil Delight is naturally gluten-free, making it a great option for those with dietary restrictions.

Final Thoughts

Cooking the Shrimp Boil Delight is more than just preparing a meal; it’s about creating memories. The laughter around the table, the shared stories, and the satisfied smiles are what make this dish truly special. Each bite bursts with flavor, reminding us of sunny days and family gatherings. Whether it’s a casual weeknight dinner or a festive celebration, this recipe brings everyone together. So, roll up your sleeves, gather your loved ones, and dive into this delicious feast. Trust me, it’s a culinary adventure you won’t want to miss!

Ranis

Shrimp Boil Delight: A Flavorful Family Feast Recipe

Shrimp Boil Delight is a flavorful family feast recipe that combines shrimp, potatoes, sausage, and corn, seasoned to perfection.
Prep Time 15 minutes
Cook Time 30 minutes
Total Time 45 minutes
Course: Main Dish
Cuisine: Cajun
Calories: 450

Ingredients
  

  • 1 pound large shrimp deveined and shells removed
  • 1 pound small red potatoes halved
  • 1 pound smoked sausage sliced into 1-inch pieces
  • 4 ears of corn cut into thirds
  • 4 tablespoons Old Bay seasoning
  • 1 lemon halved
  • 4 cloves garlic minced
  • 4 cups water
  • Salt to taste
  • Fresh parsley chopped (for garnish)

Method
 

  1. In a large pot, bring 4 cups of water to a boil over medium-high heat.
  2. Add the halved potatoes to the boiling water and cook for about 10 minutes, or until they are just tender.
  3. Stir in the sliced sausage and continue to cook for another 5 minutes.
  4. Add the corn pieces and cook for an additional 5 minutes.
  5. Sprinkle in the Old Bay seasoning, minced garlic, and salt. Stir well to combine.
  6. Finally, add the shrimp and cook for 3-4 minutes, or until the shrimp turn pink and opaque.
  7. Remove the pot from heat and squeeze the juice of the lemon halves over the mixture.
  8. Carefully drain the pot and transfer the shrimp boil to a large serving platter.
  9. Garnish with chopped parsley and serve hot with lemon wedges on the side.

Nutrition

Serving: 1servingCalories: 450kcalCarbohydrates: 35gProtein: 30gFat: 20gSaturated Fat: 6gPolyunsaturated Fat: 14gCholesterol: 200mgSodium: 800mgFiber: 4gSugar: 2g

Notes

  • For a spicier kick, add a few dashes of hot sauce or red pepper flakes to the pot while cooking.
  • Substitute the sausage with andouille sausage for a more authentic Cajun flavor or use turkey sausage for a lighter option.

Tried this recipe?

Let us know how it was!

Honey Garlic Ground Beef and Broccoli: Quick and Delicious!

Introduction to Honey Garlic Ground Beef and Broccoli

After a long day, the last thing I want is to spend hours in the kitchen. That’s where this Honey Garlic Ground Beef and Broccoli comes in, a quick solution for busy weeknights. It’s a dish that not only satisfies your hunger but also brings a burst of flavor to your table. The sweet and savory sauce coats the tender beef and vibrant broccoli, making it a hit with everyone. Whether you’re cooking for yourself or impressing family and friends, this recipe is sure to become a go-to in your culinary repertoire.

Why You’ll Love This Honey Garlic Ground Beef and Broccoli

This dish is a lifesaver for anyone juggling a busy schedule. It’s quick to prepare, taking just 25 minutes from start to finish. The combination of honey and garlic creates a mouthwatering flavor that’s hard to resist. Plus, it’s a one-pan meal, which means less cleanup. You’ll enjoy a satisfying dinner that’s both nutritious and delicious, making it perfect for any night of the week.

Ingredients for Honey Garlic Ground Beef and Broccoli

Gathering the right ingredients is the first step to culinary success. For this Honey Garlic Ground Beef and Broccoli, you’ll need a few simple staples that pack a punch of flavor.

  • Ground Beef: The star of the dish, providing rich protein and a hearty texture. You can also swap it for ground turkey or chicken for a leaner option.
  • Broccoli Florets: These vibrant green gems add color and crunch. Fresh is best, but frozen works in a pinch.
  • Honey: This natural sweetener balances the savory elements, creating a delightful glaze. Feel free to use maple syrup for a different twist.
  • Soy Sauce: A staple in Asian cuisine, it adds depth and umami. Opt for low-sodium if you’re watching your salt intake.
  • Minced Garlic: Fresh garlic brings a robust flavor that elevates the dish. You can use garlic powder if you’re in a hurry.
  • Cornstarch: This thickening agent helps create a luscious sauce. If you’re avoiding cornstarch, arrowroot powder is a great alternative.
  • Vegetable Oil: Used for cooking the beef, it has a high smoke point. Canola or peanut oil are good substitutes.
  • Ground Ginger: Adds a warm, spicy note. Fresh ginger is fantastic if you have it on hand.
  • Salt and Pepper: Essential for seasoning, adjust to your taste.
  • Cooked Rice: While optional, serving this dish over rice makes it a complete meal. Quinoa or cauliflower rice are excellent alternatives.

For exact measurements, check the bottom of the article where you can find everything listed for easy printing.

How to Make Honey Garlic Ground Beef and Broccoli

Now that you have your ingredients ready, let’s dive into the cooking process. This Honey Garlic Ground Beef and Broccoli is straightforward and quick, making it perfect for a weeknight dinner. Follow these simple steps, and you’ll have a delicious meal on the table in no time!

Step 1: Brown the Ground Beef

Start by heating a large skillet over medium heat. Add the vegetable oil and let it warm up. Once hot, toss in the ground beef. Use a spatula to break it apart as it cooks. You want it browned and crumbly, which should take about 5-7 minutes. If there’s excess fat, drain it off to keep the dish from becoming greasy.

Step 2: Add Garlic and Ginger

With the beef nicely browned, it’s time to amp up the flavor. Add the minced garlic and ground ginger to the skillet. Stir them in for about a minute until they become fragrant. This step is crucial; it’s where the magic happens! The aroma will fill your kitchen, making your mouth water.

Step 3: Prepare the Sauce

In a small bowl, whisk together the honey, soy sauce, and cornstarch until smooth. This mixture will create a glossy sauce that clings to the beef and broccoli. Pour this sauce into the skillet with the beef, stirring to combine everything evenly. The sweetness of the honey and the saltiness of the soy sauce will create a perfect balance.

Step 4: Combine with Broccoli

Now, it’s time to add the star of the show—broccoli! Toss the florets into the skillet, mixing them well with the beef and sauce. Cover the skillet and let it cook for about 5-7 minutes. This will steam the broccoli, making it tender yet still vibrant green. Keep an eye on it; you want it cooked but not mushy!

Step 5: Season and Serve

Once the broccoli is bright and tender, it’s time to season. Sprinkle in salt and pepper to taste. Give everything a final stir to ensure the flavors meld together. Serve your Honey Garlic Ground Beef and Broccoli over a bed of cooked rice, quinoa, or even cauliflower rice for a low-carb option. Enjoy the delightful blend of flavors!

Tips for Success

  • Prep your ingredients ahead of time to streamline the cooking process.
  • Don’t overcook the broccoli; it should be tender but still crisp.
  • Adjust the sweetness by adding more or less honey based on your taste.
  • For extra flavor, marinate the ground beef in soy sauce for 15 minutes before cooking.
  • Keep a close eye on the sauce; it thickens quickly!

Equipment Needed

  • Large Skillet: Essential for browning the beef and cooking everything together. A non-stick skillet works wonders.
  • Spatula: Perfect for breaking up the beef and stirring the ingredients.
  • Small Bowl: For mixing the sauce ingredients. A measuring cup can also do the trick.
  • Knife and Cutting Board: Necessary for chopping garlic and broccoli.

Variations

  • Spicy Kick: Add red pepper flakes or a splash of sriracha to the sauce for a fiery twist.
  • Vegetarian Option: Substitute ground beef with crumbled tofu or tempeh for a plant-based version.
  • Different Veggies: Mix in bell peppers, snap peas, or carrots for added color and nutrition.
  • Low-Carb Delight: Serve over cauliflower rice instead of traditional rice for a healthier alternative.
  • Sweet and Savory: Incorporate a splash of pineapple juice into the sauce for a tropical flavor.

Serving Suggestions

  • Pair your Honey Garlic Ground Beef and Broccoli with fluffy jasmine rice or quinoa for a hearty meal.
  • A side of steamed dumplings or egg rolls complements the dish beautifully.
  • For drinks, consider a light beer or iced green tea to balance the flavors.
  • Garnish with sesame seeds or sliced green onions for a pop of color.

FAQs about Honey Garlic Ground Beef and Broccoli

Curious about this delicious dish? Here are some frequently asked questions that might help you out!

Can I use frozen broccoli for this recipe?

Absolutely! Frozen broccoli is a convenient option. Just add it to the skillet a bit earlier to ensure it cooks through. It’s a great time-saver!

How can I make this dish gluten-free?

To make your Honey Garlic Ground Beef and Broccoli gluten-free, simply use tamari instead of soy sauce. It offers the same savory flavor without the gluten.

What can I serve with this dish?

This meal pairs wonderfully with jasmine rice, quinoa, or even cauliflower rice for a low-carb option. You can also serve it alongside steamed dumplings for a complete feast!

Can I prepare this dish in advance?

While it’s best enjoyed fresh, you can prep the ingredients ahead of time. Chop the broccoli and garlic, and store them in the fridge. Just cook it all up when you’re ready!

How do I store leftovers?

Store any leftovers in an airtight container in the fridge for up to three days. Reheat in the microwave or on the stovetop for a quick meal later!

Final Thoughts

Cooking should be a joyful experience, and this Honey Garlic Ground Beef and Broccoli recipe embodies that spirit. It’s not just about the delicious flavors; it’s about the memories created around the dinner table. Whether you’re sharing a meal with family or enjoying a quiet night in, this dish brings warmth and satisfaction. The quick prep and vibrant ingredients make it a perfect choice for any weeknight. I hope this recipe becomes a staple in your kitchen, just as it has in mine, bringing smiles and full bellies to those you love.

Ranis

Honey Garlic Ground Beef and Broccoli: Quick and Delicious!

A quick and delicious recipe for Honey Garlic Ground Beef and Broccoli, perfect for a weeknight dinner.
Prep Time 10 minutes
Cook Time 15 minutes
Total Time 25 minutes
Servings: 4 servings
Course: Main Dish
Cuisine: Asian
Calories: 350

Ingredients
  

  • 1 pound ground beef
  • 2 cups broccoli florets
  • 1/4 cup honey
  • 1/4 cup soy sauce
  • 2 tablespoons minced garlic
  • 1 tablespoon cornstarch
  • 1 tablespoon vegetable oil
  • 1/2 teaspoon ground ginger
  • Salt and pepper to taste
  • Cooked rice for serving optional

Method
 

  1. In a large skillet, heat the vegetable oil over medium heat. Add the ground beef and cook until browned, breaking it apart with a spatula, about 5-7 minutes. Drain excess fat if necessary.
  2. Add the minced garlic and ground ginger to the skillet, stirring for about 1 minute until fragrant.
  3. In a small bowl, whisk together the honey, soy sauce, and cornstarch until smooth. Pour this mixture into the skillet with the beef.
  4. Add the broccoli florets to the skillet, stirring to combine. Cover and cook for 5-7 minutes, or until the broccoli is tender and bright green.
  5. Season with salt and pepper to taste. Serve over cooked rice if desired.

Nutrition

Serving: 1servingCalories: 350kcalCarbohydrates: 15gProtein: 25gFat: 20gSugar: 15g

Notes

  • For a spicier kick, add red pepper flakes or sriracha to the sauce.
  • Substitute ground turkey or chicken for a leaner option, or use tofu for a vegetarian version.

Tried this recipe?

Let us know how it was!

Savory Chicken and Vegetable Stir-Fry: A Quick Recipe!

Introduction to Savory Chicken and Vegetable Stir-Fry

After a long day, the last thing I want is to spend hours in the kitchen. That’s where my go-to recipe for Savory Chicken and Vegetable Stir-Fry comes in. It’s quick, delicious, and packed with vibrant flavors that can turn any weeknight dinner into a delightful experience. This dish is perfect for impressing your loved ones or simply treating yourself to something special. With just a handful of ingredients and minimal prep time, you can whip up a meal that’s not only satisfying but also healthy. Let’s dive into this culinary adventure!

Why You’ll Love This Savory Chicken and Vegetable Stir-Fry

This Savory Chicken and Vegetable Stir-Fry is a lifesaver for busy weeknights. It’s not just quick to make; it’s also bursting with flavor and nutrition. You can have a wholesome meal on the table in just 25 minutes! Plus, the colorful veggies add a delightful crunch, making it a feast for the eyes as well. Trust me, your taste buds will thank you for this one!

Ingredients for Savory Chicken and Vegetable Stir-Fry

Gathering the right ingredients is key to making a fantastic Savory Chicken and Vegetable Stir-Fry. Here’s what you’ll need:

  • Vegetable oil: This is your cooking base. It helps achieve that perfect stir-fry sizzle.
  • Boneless, skinless chicken breasts: Cut into bite-sized pieces, they cook quickly and absorb flavors beautifully.
  • Bell pepper: Adds a sweet crunch and vibrant color. Feel free to use any color you like!
  • Broccoli florets: These little trees not only provide nutrition but also a satisfying texture.
  • Snap peas: Their crispness brings a delightful snap to each bite.
  • Garlic: Minced for a punch of flavor that elevates the dish.
  • Fresh ginger: Adds warmth and a hint of spice, making the stir-fry aromatic.
  • Soy sauce: This salty, umami-rich sauce is essential for that classic stir-fry taste.
  • Honey: A touch of sweetness balances the savory elements perfectly.
  • Cornstarch: This thickening agent helps create a glossy sauce that clings to the chicken and veggies.
  • Water: Used to mix with the cornstarch and create the sauce consistency.
  • Salt and pepper: Essential for seasoning, enhancing all the flavors in the dish.
  • Cooked rice or noodles: Serve your stir-fry over these for a complete meal.

For those looking to mix things up, consider adding a teaspoon of red pepper flakes for heat or swapping chicken for tofu or shrimp. You can find the exact measurements for each ingredient at the bottom of the article, ready for printing!

How to Make Savory Chicken and Vegetable Stir-Fry

Creating a delicious Savory Chicken and Vegetable Stir-Fry is easier than you might think. Follow these simple steps, and you’ll have a mouthwatering meal ready in no time!

Step 1: Heat the Oil

Start by heating 2 tablespoons of vegetable oil in a large skillet or wok over medium-high heat. This step is crucial! Properly heated oil ensures that your chicken sears beautifully, locking in moisture and flavor. You want that satisfying sizzle when the chicken hits the pan.

Step 2: Cook the Chicken

Once the oil is hot, add 1 pound of bite-sized chicken pieces. Season them with salt and pepper. Cook for about 5-7 minutes, stirring occasionally, until the chicken is browned and cooked through. This step is where the magic begins! The chicken should be golden and juicy, ready to soak up all the flavors to come.

Step 3: Add the Vegetables

Next, toss in your sliced bell pepper, broccoli florets, and snap peas. Stir-fry these vibrant veggies for about 3-4 minutes. You want them tender-crisp, maintaining that delightful crunch. The colors will brighten your dish and your mood!

Step 4: Add Garlic and Ginger

Now, it’s time to elevate the flavor! Stir in 2 cloves of minced garlic and 1 tablespoon of minced fresh ginger. Cook for an additional minute until fragrant. The aroma will fill your kitchen, making it hard to resist sneaking a taste!

Step 5: Prepare the Sauce

In a small bowl, mix together 3 tablespoons of soy sauce, 1 tablespoon of honey, 1 teaspoon of cornstarch, and 1/4 cup of water until smooth. This sauce is the heart of your stir-fry, bringing everything together with its sweet and savory notes.

Step 6: Combine and Thicken

Pour the sauce over the chicken and vegetables in the skillet. Cook for another 2-3 minutes, stirring constantly. This is where the magic happens! The sauce will thicken and coat everything evenly, creating a glossy finish that’s simply irresistible.

Step 7: Serve

Finally, serve your savory stir-fry hot over cooked rice or noodles. For a touch of flair, garnish with sesame seeds or sliced green onions. Your Savory Chicken and Vegetable Stir-Fry is now ready to impress!

Tips for Success

  • Prep all your ingredients before you start cooking. It makes the process smoother and faster.
  • Don’t overcrowd the pan; cook in batches if necessary to achieve that perfect stir-fry sear.
  • Use high heat for a quick cook, which helps retain the veggies’ crunch.
  • Feel free to customize with your favorite vegetables or proteins for a personal touch.
  • Always taste and adjust seasoning before serving to ensure maximum flavor.

Equipment Needed

  • Large skillet or wok: Essential for even cooking. A non-stick pan works too!
  • Spatula or wooden spoon: Perfect for stirring and flipping ingredients.
  • Cutting board and knife: For chopping your chicken and veggies.
  • Measuring cups and spoons: Handy for precise ingredient measurements.

Variations

  • Protein Swap: Substitute chicken with tofu for a vegetarian option or shrimp for a seafood twist.
  • Veggie Medley: Experiment with other vegetables like carrots, zucchini, or mushrooms to keep things interesting.
  • Spicy Kick: Add a teaspoon of red pepper flakes or a splash of sriracha to the sauce for some heat.
  • Gluten-Free Option: Use tamari instead of soy sauce to make this dish gluten-free.
  • Herb Infusion: Toss in fresh herbs like basil or cilantro at the end for an aromatic finish.

Serving Suggestions

  • Pair your Savory Chicken and Vegetable Stir-Fry with fluffy jasmine rice or hearty noodles for a filling meal.
  • Serve with a side of crispy spring rolls or a fresh cucumber salad for added crunch.
  • For drinks, consider a light beer or iced green tea to complement the flavors.
  • Garnish with sesame seeds or sliced green onions for a pop of color and flavor.

FAQs about Savory Chicken and Vegetable Stir-Fry

Can I make this stir-fry ahead of time?

Absolutely! You can prep the chicken and vegetables in advance. Just store them in the fridge until you’re ready to cook. This Savory Chicken and Vegetable Stir-Fry comes together quickly, so it’s perfect for a last-minute meal.

What can I substitute for chicken?

If you’re looking for alternatives, tofu or shrimp work wonderfully in this recipe. Just adjust the cooking times accordingly. Tofu will need a bit longer to get crispy, while shrimp cooks faster than chicken.

How do I store leftovers?

Leftovers can be stored in an airtight container in the fridge for up to three days. Reheat in a skillet or microwave until warmed through. The flavors will still be delicious!

Can I use frozen vegetables?

Yes, frozen vegetables are a great time-saver! Just add them directly to the skillet, but be mindful that they may release extra moisture. Cook a little longer to ensure everything is heated through.

Is this dish gluten-free?

To make your Savory Chicken and Vegetable Stir-Fry gluten-free, simply swap regular soy sauce for tamari. This way, you can enjoy all the flavors without the gluten!

Final Thoughts

Cooking this Savory Chicken and Vegetable Stir-Fry is more than just preparing a meal; it’s about creating a moment of joy in your busy life. The vibrant colors and enticing aromas fill your kitchen, making it a welcoming space for family and friends. In just 25 minutes, you can serve up a dish that’s not only delicious but also nourishing. Whether it’s a weeknight dinner or a special occasion, this stir-fry brings people together. So grab your skillet, unleash your inner chef, and enjoy the satisfaction of a homemade meal that delights the senses!

Ranis

Savory Chicken and Vegetable Stir-Fry: A Quick Recipe!

A quick and delicious recipe for savory chicken and vegetable stir-fry, perfect for a weeknight dinner.
Prep Time 10 minutes
Cook Time 15 minutes
Total Time 25 minutes
Servings: 4 servings
Course: Main Dish
Cuisine: Asian
Calories: 320

Ingredients
  

  • 2 tablespoons vegetable oil
  • 1 pound boneless skinless chicken breasts, cut into bite-sized pieces
  • 1 bell pepper sliced
  • 1 cup broccoli florets
  • 1 cup snap peas
  • 2 cloves garlic minced
  • 1 tablespoon fresh ginger minced
  • 3 tablespoons soy sauce
  • 1 tablespoon honey
  • 1 teaspoon cornstarch
  • 1/4 cup water
  • Salt and pepper to taste
  • Cooked rice or noodles for serving

Method
 

  1. Heat the vegetable oil in a large skillet or wok over medium-high heat.
  2. Add the chicken pieces and season with salt and pepper. Cook for about 5-7 minutes, or until the chicken is browned and cooked through.
  3. Add the sliced bell pepper, broccoli florets, and snap peas to the skillet. Stir-fry for about 3-4 minutes until the vegetables are tender-crisp.
  4. Stir in the minced garlic and ginger, cooking for an additional 1 minute until fragrant.
  5. In a small bowl, mix the soy sauce, honey, cornstarch, and water until smooth. Pour this sauce over the chicken and vegetables in the skillet.
  6. Cook for another 2-3 minutes, stirring constantly, until the sauce thickens and coats the chicken and vegetables evenly.
  7. Serve hot over cooked rice or noodles.

Nutrition

Serving: 1servingCalories: 320kcalCarbohydrates: 15gProtein: 30gFat: 15gSaturated Fat: 2gPolyunsaturated Fat: 13gCholesterol: 70mgSodium: 800mgFiber: 3gSugar: 6g

Notes

  • For a spicy kick, add a teaspoon of red pepper flakes or a splash of sriracha to the sauce.
  • Substitute the chicken with tofu or shrimp for a different protein option, adjusting cooking times as necessary.

Tried this recipe?

Let us know how it was!

Grilled Salsa Verde Pepper Jack Chicken That Wow Your Tastebuds!

Introduction to Grilled Salsa Verde Pepper Jack Chicken

There’s something magical about the sizzle of chicken on the grill, especially when it’s topped with a zesty salsa verde and gooey pepper jack cheese. This Grilled Salsa Verde Pepper Jack Chicken is not just a meal; it’s an experience that brings friends and family together. Whether you’re looking for a quick solution after a long day or a dish to impress your loved ones at a weekend barbecue, this recipe has you covered. With just a handful of ingredients and minimal prep time, you’ll be savoring every bite in no time!

Why You’ll Love This Grilled Salsa Verde Pepper Jack Chicken

This Grilled Salsa Verde Pepper Jack Chicken is a game-changer for busy weeknights or casual gatherings. It’s incredibly easy to whip up, taking just 25 minutes from start to finish. The combination of smoky spices, tangy salsa verde, and creamy pepper jack cheese creates a flavor explosion that will have everyone asking for seconds. Plus, it’s gluten-free, making it a perfect choice for various dietary needs!

Ingredients for Grilled Salsa Verde Pepper Jack Chicken

Gathering the right ingredients is the first step to culinary success. For this Grilled Salsa Verde Pepper Jack Chicken, you’ll need:

  • Boneless, skinless chicken breasts: The star of the show! They’re lean, easy to grill, and soak up flavors beautifully.
  • Garlic powder: Adds a savory depth that elevates the chicken’s flavor without the fuss of fresh garlic.
  • Onion powder: A subtle sweetness that complements the garlic and enhances the overall taste.
  • Smoked paprika: This spice brings a smoky warmth, giving your chicken that grilled flavor even before it hits the heat.
  • Salt: Essential for bringing out the natural flavors of the chicken and spices.
  • Black pepper: A dash of heat that rounds out the seasoning mix.
  • Salsa verde: This tangy sauce is the perfect topping, adding freshness and a kick of flavor.
  • Pepper jack cheese: Creamy and slightly spicy, it melts beautifully over the chicken, creating a deliciously gooey layer.
  • Fresh cilantro (optional): A sprinkle of this herb adds a burst of freshness and color to your dish.
  • Lime wedges: A squeeze of lime juice brightens the flavors and adds a zesty finish.

For those looking to mix things up, consider marinating the chicken in salsa verde for added flavor. If pepper jack isn’t your thing, cheddar or Monterey Jack can be great substitutes. Exact measurements for these ingredients can be found at the bottom of the article, ready for printing!

How to Make Grilled Salsa Verde Pepper Jack Chicken

Creating this Grilled Salsa Verde Pepper Jack Chicken is a straightforward process that will have your taste buds dancing. Follow these simple steps, and you’ll be on your way to a delicious meal in no time!

Step 1: Preheat the Grill

Preheating your grill is crucial for achieving that perfect sear on your chicken. Aim for a medium-high heat, around 400°F. This temperature ensures the chicken cooks evenly and locks in those juicy flavors. If you’re using a charcoal grill, let the coals burn down until they’re covered in white ash. For gas grills, simply turn on the burners and close the lid for about 10-15 minutes.

Step 2: Prepare the Spice Rub

In a small bowl, mix together garlic powder, onion powder, smoked paprika, salt, and black pepper. This spice rub is the secret to infusing flavor into your chicken. Once mixed, generously rub the spice blend over both sides of the chicken breasts. Make sure every inch is coated; this is where the magic begins!

Step 3: Grill the Chicken

Now it’s time to grill! Place the seasoned chicken on the preheated grill. Cook for about 6-7 minutes on each side. To check for doneness, use a meat thermometer; the internal temperature should reach 165°F. If you don’t have a thermometer, cut into the thickest part of the chicken. It should be opaque and the juices should run clear.

Step 4: Add Salsa Verde and Cheese

During the last few minutes of grilling, it’s time to elevate your chicken. Spoon a generous amount of salsa verde over each breast, then sprinkle the shredded pepper jack cheese on top. Close the grill lid to help the cheese melt beautifully, which should take about 2-3 minutes. The combination of the tangy salsa and creamy cheese is simply irresistible!

Step 5: Rest and Serve

Once the chicken is done, remove it from the grill and let it rest for about 5 minutes. This step is essential; it allows the juices to redistribute throughout the meat, ensuring every bite is tender and juicy. After resting, garnish with fresh cilantro if desired, and serve with lime wedges for that extra zing!

Tips for Success

  • Marinate the chicken in salsa verde for 30 minutes to 2 hours for deeper flavor.
  • Use a meat thermometer to ensure perfect doneness; 165°F is the magic number.
  • Let the chicken rest after grilling to keep it juicy and tender.
  • Experiment with different cheeses like cheddar for a unique twist.
  • Don’t skip the lime wedges; they brighten up the dish beautifully!

Equipment Needed

  • Grill: A gas or charcoal grill works perfectly for this recipe.
  • Meat thermometer: Essential for checking chicken doneness; a simple knife can work in a pinch.
  • Mixing bowl: For combining your spice rub; any bowl will do.
  • Spatula or tongs: To flip the chicken safely on the grill.

Variations

  • Spicy Kick: Add diced jalapeños or a splash of hot sauce to the salsa verde for an extra kick.
  • Herb Infusion: Mix in fresh herbs like oregano or thyme into the spice rub for a fragrant twist.
  • Vegetarian Option: Substitute chicken with thick slices of zucchini or portobello mushrooms for a delicious veggie version.
  • Cheese Swap: Try using feta or goat cheese for a tangy flavor that pairs well with the salsa verde.
  • Grilled Veggies: Serve alongside grilled bell peppers and onions for a colorful and nutritious side.

Serving Suggestions

  • Side Dishes: Pair with cilantro-lime rice or grilled corn on the cob for a fresh, vibrant meal.
  • Salad: A simple avocado and tomato salad complements the flavors beautifully.
  • Drinks: Serve with a cold cerveza or a refreshing limeade to enhance the experience.
  • Presentation: Garnish with extra cilantro and lime wedges for a pop of color.

FAQs about Grilled Salsa Verde Pepper Jack Chicken

Can I use chicken thighs instead of breasts?

Absolutely! Chicken thighs are juicier and can add a different flavor profile. Just adjust the cooking time slightly, as they may take a bit longer to reach the safe internal temperature of 165°F.

What if I don’t have salsa verde?

No worries! You can make a quick substitute by blending tomatillos, cilantro, lime juice, and jalapeños. Alternatively, any green salsa will work in a pinch!

Can I prepare this dish ahead of time?

Yes! You can marinate the chicken in salsa verde a few hours before grilling. Just keep it in the fridge until you’re ready to cook. This will enhance the flavors even more!

Is this recipe suitable for meal prep?

Definitely! Grilled Salsa Verde Pepper Jack Chicken stores well in the fridge for up to 3 days. Just reheat it gently to maintain its juiciness.

What can I serve with this chicken?

Pair it with cilantro-lime rice, grilled veggies, or a fresh salad. A cold drink like limeade or a light beer complements the flavors perfectly!

Final Thoughts

Cooking this Grilled Salsa Verde Pepper Jack Chicken is more than just preparing a meal; it’s about creating moments. The vibrant flavors and the satisfying sizzle on the grill bring a sense of joy that’s hard to replicate. Whether you’re sharing it with family or enjoying a quiet dinner, each bite is a reminder of the simple pleasures in life. Plus, the ease of this recipe means you can focus on what truly matters—connecting with those around you. So fire up that grill, and let the deliciousness unfold!

Ranis

Grilled Salsa Verde Pepper Jack Chicken That Wow Your Tastebuds!

A delicious grilled chicken recipe topped with salsa verde and pepper jack cheese that will tantalize your taste buds.
Prep Time 10 minutes
Cook Time 15 minutes
Total Time 25 minutes
Servings: 2 servings
Course: Main Dish
Cuisine: Mexican
Calories: 350

Ingredients
  

  • 2 large boneless skinless chicken breasts (about 1 pound total)
  • 1 teaspoon garlic powder
  • 1 teaspoon onion powder
  • 1 teaspoon smoked paprika
  • 1 teaspoon salt
  • ½ teaspoon black pepper
  • 1 cup salsa verde
  • 4 ounces pepper jack cheese shredded
  • 2 tablespoons fresh cilantro chopped (optional)
  • Lime wedges for serving

Method
 

  1. Preheat your grill to medium-high heat (about 400°F).
  2. In a small bowl, mix together the garlic powder, onion powder, smoked paprika, salt, and black pepper. Rub this spice mixture evenly over both sides of the chicken breasts.
  3. Place the chicken on the grill and cook for about 6-7 minutes on each side, or until the internal temperature reaches 165°F.
  4. During the last few minutes of grilling, spoon salsa verde over each chicken breast and top with shredded pepper jack cheese. Close the grill lid to melt the cheese, about 2-3 minutes.
  5. Remove the chicken from the grill and let it rest for 5 minutes. Garnish with fresh cilantro, if desired, and serve with lime wedges.

Nutrition

Serving: 1chicken breastCalories: 350kcalCarbohydrates: 5gProtein: 40gFat: 18gSaturated Fat: 8gPolyunsaturated Fat: 10gCholesterol: 120mgSodium: 800mgFiber: 1gSugar: 1g

Notes

  • For added flavor, marinate the chicken in salsa verde for 30 minutes to 2 hours before grilling.
  • Substitute the pepper jack cheese with cheddar or Monterey Jack for a different flavor profile.

Tried this recipe?

Let us know how it was!

Shrimp and Corn Chowder: A Creamy, Flavorful Delight!

Introduction to Shrimp and Corn Chowder

There’s something magical about a warm bowl of shrimp and corn chowder that instantly transports me back to my childhood. Growing up, my family would gather around the table, sharing stories and laughter over hearty meals. This creamy, flavorful chowder is not just a dish; it’s a comforting hug on a chilly evening. Perfect for busy days or when you want to impress your loved ones, this recipe is quick and easy. With just a handful of ingredients, you can whip up a delightful meal that warms the heart and satisfies the soul.

Why You’ll Love This Shrimp and Corn Chowder

This shrimp and corn chowder is a game-changer for busy weeknights. It comes together in just 30 minutes, making it a perfect solution for those evenings when time is tight. The rich, creamy texture and the sweet burst of corn paired with succulent shrimp create a flavor explosion that will leave your taste buds dancing. Plus, it’s versatile enough to adapt to your pantry staples, ensuring you can enjoy it anytime!

Ingredients for Shrimp and Corn Chowder

Gathering the right ingredients is the first step to creating a delicious shrimp and corn chowder. Here’s what you’ll need:

  • Olive oil: This is your base for sautéing, adding a rich flavor to the chowder.
  • Onion: Diced onion brings sweetness and depth to the dish, enhancing the overall flavor.
  • Garlic: Minced garlic adds a fragrant kick that elevates the chowder.
  • Red bell pepper: This adds a pop of color and a sweet crunch, balancing the creaminess.
  • Smoked paprika: A key spice that imparts a smoky depth, making the chowder more complex.
  • Shrimp: Fresh, peeled, and deveined shrimp are the star of the show, providing protein and a delightful texture.
  • Corn: Whether fresh, frozen, or canned, corn adds sweetness and a lovely bite to the chowder.
  • Chicken broth: This forms the soup base, infusing the chowder with savory goodness.
  • Heavy cream: For that luxurious, creamy texture that makes this chowder irresistible.
  • Salt and black pepper: Essential seasonings to enhance all the flavors.
  • Cayenne pepper (optional): A dash of heat for those who like a little spice in their life.
  • Green onions: Sliced for garnish, they add a fresh, crisp finish to each bowl.

For those looking to mix things up, consider substituting half-and-half for a lighter version or coconut milk for a dairy-free option. You can also add diced potatoes or carrots for extra texture and nutrition. Fresh herbs like cilantro or parsley can elevate the flavor even more. Exact quantities for each ingredient are available at the bottom of the article for easy printing!

How to Make Shrimp and Corn Chowder

Step 1: Sauté the Aromatics

Start by heating the olive oil in a large pot over medium heat. Once it shimmers, toss in the diced onion. Sauté until it turns translucent, about 5 minutes. The aroma will fill your kitchen, making your mouth water. Next, add the minced garlic and diced red bell pepper. Cook for another 2-3 minutes until they soften, creating a flavorful base for your chowder.

Step 2: Add the Shrimp

Now, it’s time to bring in the shrimp! Add the peeled and deveined shrimp to the pot. Cook them until they turn a lovely pink, which should take about 3-4 minutes. This step is crucial, as perfectly cooked shrimp will elevate your chowder.

Step 3: Combine Ingredients

Once the shrimp are ready, stir in the corn and pour in the chicken broth. Bring the mixture to a gentle simmer. This is where the magic happens, as the flavors meld together beautifully, creating a comforting seafood soup.

Step 4: Finish with Cream

Reduce the heat to low and stir in the heavy cream, salt, black pepper, and cayenne pepper if you’re feeling adventurous. Let it simmer for an additional 5-10 minutes. This step adds that rich, creamy texture that makes shrimp and corn chowder so irresistible.

Step 5: Adjust and Serve

Before serving, taste your chowder and adjust the seasoning if needed. Once it’s just right, ladle the chowder into bowls and garnish with sliced green onions. Serve it hot, and watch as everyone digs in with delight!

Tips for Success

  • Prep all your ingredients before starting to cook. It makes the process smoother.
  • Don’t overcook the shrimp; they should be just pink and tender.
  • For extra flavor, use homemade chicken broth if you have it on hand.
  • Feel free to adjust the spices to suit your taste; a little more cayenne can add a nice kick!
  • Let the chowder sit for a few minutes before serving to enhance the flavors.

Equipment Needed

  • Large pot: A sturdy pot is essential for making chowder. A Dutch oven works great too.
  • Wooden spoon: Perfect for stirring and scraping the bottom of the pot.
  • Measuring cups and spoons: For accurate ingredient measurements.
  • Cutting board and knife: Essential for prepping your veggies and shrimp.

Variations

  • Spicy Shrimp and Corn Chowder: Add diced jalapeños or a splash of hot sauce for an extra kick.
  • Vegetarian Version: Replace shrimp with diced tofu or chickpeas and use vegetable broth instead of chicken broth.
  • Herb-Infused Chowder: Stir in fresh herbs like thyme or dill for a fragrant twist.
  • Southwestern Style: Incorporate black beans, corn, and a sprinkle of cumin for a southwestern flair.
  • Seafood Medley: Mix in other seafood like scallops or crab for a luxurious chowder experience.

Serving Suggestions

  • Crusty Bread: Serve with a warm, crusty baguette or sourdough for dipping.
  • Salad: Pair with a light green salad dressed in a tangy vinaigrette.
  • Wine: A chilled white wine, like Sauvignon Blanc, complements the chowder beautifully.
  • Garnish: Add a sprinkle of fresh herbs or a drizzle of olive oil for a polished look.

FAQs about Shrimp and Corn Chowder

Can I use frozen shrimp for this chowder?

Absolutely! Frozen shrimp work perfectly in this shrimp and corn chowder. Just make sure to thaw them before cooking for even results. They’ll still deliver that delightful flavor and texture.

How can I make this chowder dairy-free?

For a dairy-free version, simply substitute the heavy cream with coconut milk or a dairy-free cream alternative. This will keep the chowder creamy while accommodating dietary preferences.

Can I add other vegetables to the chowder?

Definitely! Feel free to toss in diced potatoes, carrots, or even zucchini. They’ll add extra nutrition and texture, making your chowder even heartier.

How long can I store leftovers?

Your shrimp and corn chowder can be stored in the fridge for up to 3 days. Just reheat gently on the stove, adding a splash of broth or cream if it thickens too much.

What can I serve with shrimp and corn chowder?

This chowder pairs wonderfully with crusty bread, a fresh salad, or even a light white wine. It’s a complete meal that’s sure to impress!

Final Thoughts

Cooking shrimp and corn chowder is more than just preparing a meal; it’s about creating memories and sharing warmth with those you love. The creamy texture and vibrant flavors come together to form a dish that feels like a cozy embrace on a chilly night. Whether you’re enjoying it solo or serving it to friends, this chowder brings a sense of comfort and satisfaction. Plus, the ease of making it means you can whip it up any day of the week. So grab your ingredients, and let this delightful chowder become a staple in your kitchen!

Ranis

Shrimp and Corn Chowder: A Creamy, Flavorful Delight!

A creamy and flavorful shrimp and corn chowder that is perfect for a comforting meal.
Prep Time 10 minutes
Cook Time 20 minutes
Total Time 30 minutes
Servings: 6 servings
Course: Soup
Cuisine: American
Calories: 320

Ingredients
  

  • 2 tablespoons olive oil
  • 1 medium onion diced
  • 2 cloves garlic minced
  • 1 red bell pepper diced
  • 1 teaspoon smoked paprika
  • 1 pound shrimp peeled and deveined
  • 4 cups corn fresh, frozen, or canned
  • 4 cups chicken broth
  • 1 cup heavy cream
  • 1 teaspoon salt
  • 1/2 teaspoon black pepper
  • 1/4 teaspoon cayenne pepper optional
  • 2 green onions sliced (for garnish)

Method
 

  1. In a large pot, heat the olive oil over medium heat. Add the diced onion and sauté until translucent, about 5 minutes.
  2. Stir in the minced garlic and diced red bell pepper, cooking for another 2-3 minutes until softened.
  3. Add the smoked paprika and stir to combine.
  4. Add the shrimp to the pot and cook until they turn pink, about 3-4 minutes.
  5. Stir in the corn and chicken broth, bringing the mixture to a simmer.
  6. Reduce the heat and stir in the heavy cream, salt, black pepper, and cayenne pepper if using. Simmer for an additional 5-10 minutes, allowing the flavors to meld.
  7. Taste and adjust seasoning if necessary.
  8. Serve hot, garnished with sliced green onions.

Nutrition

Serving: 1bowlCalories: 320kcalCarbohydrates: 18gProtein: 22gFat: 18gSaturated Fat: 10gPolyunsaturated Fat: 8gCholesterol: 150mgSodium: 800mgFiber: 2gSugar: 5g

Notes

  • For a lighter version, substitute half-and-half for heavy cream or use coconut milk for a dairy-free option.
  • Add diced potatoes or carrots for extra texture and nutrition.
  • Incorporate fresh herbs like cilantro or parsley for added flavor.

Tried this recipe?

Let us know how it was!