Creamy Eggnog Recipe – Your New Holiday Spread Sensation

As I stirred the creamy mixture on the stovetop, a wave of holiday nostalgia washed over me—a feeling best described as a warm hug on a chilly day. This Creamy Eggnog Recipe transforms traditional eggnog into a delightful spread that can elevate your toast, warm up desserts, or even serve as a charming gift. It’s a versatile treat that boasts a convenient, quick prep time, perfect for anyone looking to swap out fast food for homemade joy. Plus, you can customize it to fit your festivities by deciding whether to add a splash of rum or keep it alcohol-free. Ready to infuse your kitchen with the cozy essence of the holidays? Let’s dive into this creamy delight!

Why is this Creamy Eggnog Recipe a Must-Try?

Ultimate Holiday Treat: This creamy eggnog spread captures the essence of the season, making it a festive addition to any gathering.
Easy to Make: With just a few simple ingredients, you’ll have a delicious spread ready in no time!
Versatile Uses: Perfect for toast, pancakes, or drizzled over desserts; you can even use it as a filling for thumbprint cookies or swirl it into cheesecake batter.
Customize Your Flavor: Whether you prefer it with a touch of rum or completely alcohol-free, this recipe caters to all tastes.
Gift-Worthy Delight: Package it in cute jars for a thoughtful homemade gift that will impress your friends and family. For more festive inspirations, check out my recipes for Zucchini Leek Fritters and Summer Corn Chowder.

Creamy Eggnog Recipe Ingredients

• Get ready to create a delightful holiday spread!

For the Spread

  • Eggnog – The star of this creamy eggnog recipe; opt for rich homemade for the best flavor.
  • Sugar – Adds a touch of sweetness; adjust to your liking for that perfect balance.
  • Cornstarch – A thickening agent for a custard-like consistency; skip if you want a looser spread.
  • Vanilla Extract – Enhances the flavor depth; add more if you’re omitting the rum.
  • Cinnamon – Infuses warmth and holiday spirit into the spread.
  • Nutmeg – Elevates the eggnog essence, pairing perfectly with cinnamon.
  • Butter – Provides richness for a creamy texture that melts in your mouth.
  • Dark Rum – Optional to deepen the flavor without turning it into a cocktail.
  • Powdered Pectin – Optional for a jelly-like texture; otherwise, embrace its spreadable goodness!

Step‑by‑Step Instructions for Creamy Eggnog Spread

Step 1: Whisk Eggnog and Cornstarch
In a medium bowl, combine your eggnog with cornstarch. Whisk together until the mixture is smooth and fully blended, ensuring there are no lumps remaining. This base will offer the creamy consistency of your Creamy Eggnog Spread.

Step 2: Heat the Mixture
Transfer the eggnog mixture to a saucepan and place it over medium heat. Stir continuously for about 5-7 minutes, watching for it to thicken to a custard-like texture that clings to your whisk. It’s essential to maintain a steady pace to avoid scorching the mixture.

Step 3: Add Butter
Once thickened, reduce the heat to low and add in the butter. Let it melt into the eggnog mixture, stirring until fully incorporated. This step will give your Creamy Eggnog Spread its delightful richness, making it even more delightful as a topping or filling.

Step 4: Blend in Flavorings
Incorporate the vanilla extract and dark rum if desired, stirring well to blend the flavors together. Allow the mixture to continue cooking for an additional 2-3 minutes. This will help the flavors meld and enhance the holiday essence of the spread.

Step 5: Incorporate Pectin (Optional)
If you choose to add powdered pectin for a thicker texture, whisk it into the mixture now. Cook for another 1-2 minutes, stirring continuously as it thickens further. This step is optional, so feel free to skip it if you prefer a softer spread.

Step 6: Cool and Transfer
Remove the saucepan from heat and let the Creamy Eggnog Spread cool in the pan for about 5-10 minutes. This cooling time allows it to thicken slightly more before transferring it to jars, ensuring it remains warm and pourable.

Step 7: Jar and Refrigerate
Pour the slightly cooled spread into sterilized jars while it’s still warm. Seal the jars tightly and refrigerate them, where your Creamy Eggnog Spread will keep for up to two weeks. Enjoy this festive delight in a variety of ways during the holiday season!

Tips for the Best Creamy Eggnog Spread

  • Whisk Thoroughly: Avoid lumps by ensuring the eggnog and cornstarch are mixed very well before heating. This guarantees a creamy texture for your eggnog spread.
  • Don’t Rush Heating: Take your time as you heat the mixture. Rushing can result in an uneven texture, detracting from the overall experience of your creamy eggnog recipe.
  • Taste as You Go: Adjust the sweetness and spices while cooking, allowing you to fine-tune the flavors to your preference for a perfectly balanced spread.
  • Proper Cooling: Let the spread cool slightly before transferring it to jars. This helps it thicken, making your spread smooth and easy to handle.
  • Consider Alcohol Options: If gifting, remember to think about whether to include rum; an alcohol-free version can appeal to a broader audience, ensuring everyone can enjoy your creamy creation!

Make Ahead Options

These Creamy Eggnog Spread preparations are perfect for busy holiday cooks looking to save time! You can whisk together the eggnog and cornstarch up to 24 hours in advance and refrigerate the mixture until ready to use. Simply heat and follow the instructions once you’re ready to serve. Additionally, if you opt to use powdered pectin, prepare that as well; this can be prepped along with the eggnog base. This will help the spread maintain its creamy texture without any lumps. Remember to store the final product in sterilized jars in the refrigerator, where it will stay fresh for up to two weeks. Enjoy homemade holiday cheer without the last-minute rush!

What to Serve with Creamy Eggnog Spread?

Elevate your holiday gathering with these delightful companions to enhance your creamy eggnog experience.

  • Warm Cinnamon Rolls: Freshly baked, soft rolls drizzled with glaze elevate the spread’s creamy richness, creating a comforting breakfast treat.
  • Spiced Gingerbread Cookies: Their molasses and spice flavors contrast beautifully with the smooth eggnog spread, making each bite a holiday celebration.
  • Savory Toasts: Use thick, crusty bread topped with avocado or ricotta; the creamy eggnog spread brings a festive twist to each mouthful.
  • Fruit Platter: Fresh sliced apples and pears add a crisp, juicy element that pairs wonderfully with the spread’s sweetness and warmth.

For a sweet finish, consider serving it alongside a spiced hot chocolate or a rich vanilla chai tea. The creamy texture and festive flavor of the eggnog spread make it the perfect accompaniment to these delicious drinks, wrapping your holiday feast in warmth and cheer!

How to Store and Freeze Creamy Eggnog Spread

Fridge: Keep your creamy eggnog spread in an airtight container in the refrigerator for up to 2 weeks. This ensures optimal taste and texture, making it a go-to treat.

Freezer: For longer storage, freeze in small batches in airtight containers or freezer-safe jars. It can be frozen for up to 3 months, ready to add a holiday touch to your meals.

Thawing: When ready to use, thaw the spread overnight in the fridge. Give it a good stir before serving to restore its creamy consistency.

Gifting Tip: If you’re gifting this delicious spread, remember that it requires refrigeration, so ensure your recipients know how to store it properly!

Variations & Substitutions for Creamy Eggnog Recipe

Feel free to get creative with this delightful creamy eggnog spread—it’s all about tweaking to your taste!

  • No Pectin: Skip the powdered pectin for a softer, dessert sauce-like consistency that’s perfect for drizzling over pancakes.

  • Whipped Cream Bliss: Fold the spread into whipped cream for a festive topping on cakes or hot chocolate, transforming it into a light and airy delight.

  • Alcohol-Free Version: Swap the dark rum for additional vanilla extract to keep the flavors rich while making it suitable for everyone, from kids to designated drivers.

  • Thumbprint Cookies: Use this creamy spread as a delectable filling for thumbprint cookies, where the sweet-spicy profile blends beautifully with buttery cookie dough.

  • Swirls in Desserts: Add a spoonful to cheesecake batter before baking to create a holiday twist on a classic dessert; it brings a cozy warmth to each bite.

  • Liven Up Lattes: Thin with warm milk to create an indulgent holiday latte, perfect for cozying up on cold winter days.

  • Glazed Pastries: Brush the spread over pastries or warm croissants as a delightful glaze, enhancing their flaky goodness with creamy flavor.

  • Enhanced Spice: Add an extra pinch of cinnamon or nutmeg for a more pronounced holiday flavor, tailoring the spice level to your personal preference.

Looking for more ways to spread joy this season? Be sure to check out my delicious recipes for Creamy Chicken Fettuccine Alfredo and Mushroom Pasta Delightful!

Creamy Eggnog Spread Recipe FAQs

How do I choose the right eggnog for my spread?
Absolutely! For the best flavor in your Creamy Eggnog Spread, I recommend using rich homemade eggnog as your base. However, if you’re in a pinch or prefer store-bought, look for “classic” varieties that have a creamy texture and well-balanced spices. Avoid low-fat options, as they often lack the richness that makes this spread truly delightful!

What’s the best way to store creamy eggnog spread?
Very simple! Keep your creamy eggnog spread in an airtight container in the refrigerator for up to 2 weeks. This will maintain its delicious taste and creamy texture. Just be sure to use clean utensils to scoop from the jar to avoid contamination.

Can I freeze my creamy eggnog spread?
Yes, you can! For longer storage, freeze your creamy eggnog spread in small batches using airtight containers or freezer-safe jars. It can be safely frozen for up to 3 months. When you’re ready to enjoy, simply thaw it overnight in the fridge and give it a good stir to restore its creamy texture.

What should I do if my spread is too thick?
If you find your Creamy Eggnog Spread is too thick after cooling, don’t fret! Simply stir in a little bit of milk or additional eggnog to reach your desired consistency. Heat the mixture gently over low heat while stirring until it’s just warm enough to blend smoothly. This will return the lovely, creamy texture you’re after.

Are there any dietary considerations I should be aware of?
Absolutely! If you’re making this spread as a gift or for guests, consider any dietary restrictions. If you’d like a non-alcoholic option, simply omit the dark rum and increase the vanilla extract for added flavor. Additionally, if you’re making it for someone with food allergies, always check that the eggnog and any add-ins like butter or sugar are safe for their dietary needs.

Creamy Eggnog Recipe

Creamy Eggnog Recipe – Your New Holiday Spread Sensation

This Creamy Eggnog Recipe transforms traditional eggnog into a delightful spread perfect for the holidays.
Prep Time 10 minutes
Cook Time 10 minutes
Cooling Time 10 minutes
Total Time 30 minutes
Servings: 8 servings
Course: Drinks
Cuisine: American
Calories: 80

Ingredients
  

For the Spread
  • 2 cups Eggnog homemade is best
  • 1/2 cup Sugar adjust to taste
  • 2 tablespoons Cornstarch skip for looser spread
  • 1 teaspoon Vanilla Extract add more if omitting rum
  • 1 teaspoon Cinnamon for warmth
  • 1/2 teaspoon Nutmeg enhances eggnog essence
  • 1/2 cup Butter for creaminess
  • 1/4 cup Dark Rum optional
  • 1 tablespoon Powdered Pectin optional for thicker texture

Equipment

  • Saucepan
  • Medium Bowl
  • Whisk
  • Jars for storage

Method
 

Step-by-Step Instructions for Creamy Eggnog Spread
  1. In a medium bowl, combine your eggnog with cornstarch. Whisk together until smooth.
  2. Transfer the mixture to a saucepan and place over medium heat. Stir continuously for 5-7 minutes until thickened.
  3. Once thickened, reduce heat to low and add in the butter, stirring until fully incorporated.
  4. Incorporate the vanilla extract and dark rum if desired, stirring well for 2-3 minutes.
  5. If using pectin for thickness, whisk it in now and cook for another 1-2 minutes.
  6. Remove from heat and let the spread cool in the pan for 5-10 minutes.
  7. Pour the slightly cooled spread into sterilized jars while warm and seal tightly.

Nutrition

Serving: 1tablespoonCalories: 80kcalCarbohydrates: 10gProtein: 1gFat: 4gSaturated Fat: 2gMonounsaturated Fat: 2gCholesterol: 15mgSodium: 30mgPotassium: 50mgSugar: 8gVitamin A: 100IUCalcium: 10mg

Notes

This creamy eggnog spread can be used on toast, pancakes, or as a filling for desserts. It's also a great homemade gift option!

Tried this recipe?

Let us know how it was!

Chewy Maple Pumpkin Cookies That Capture Fall’s Cozy Vibes

As autumn’s vibrant colors begin to paint the landscape, I find myself craving the warm, cozy flavors that define the season. Enter these Chewy Maple Pumpkin Cookies, my latest obsession that brings that comforting touch right into your kitchen. With a soft, buttery texture and the perfect balance of maple sweetness and warm spices, they’re not just cookies; they’re a delightful reminder of everything I adore about fall. What’s best? These cookies come together quickly, making them an ideal treat for gatherings or simply to enjoy with a cup of tea. Plus, they’re incredibly versatile—perfect for experimenting with flavors or adding your favorite mix-ins. Are you ready to bake a batch and fill your home with that irresistible aroma?

Why Are These Cookies So Irresistible?

Chewy Texture: These cookies boast a uniquely chewy interior that sets them apart—perfectly tender without being cake-like.
Fall Flavors: Enhanced by warm spices and rich maple syrup, each bite delivers a cozy taste of autumn.
Quick Prep: With a straightforward process and minimal active time, you can whip up these treats without hassle.
Customizable: Feel free to mix in your favorite ingredients, like chocolate chips or nuts, for a personalized touch.
Crowd-Pleasing: Whether at a gathering or with afternoon tea, these cookies are sure to impress and delight everyone.
Ready to elevate your fall baking game? For another delicious treat, check out these Chocolate Cranberry Cookies that are just as comforting!

Chewy Maple Pumpkin Cookies Ingredients

For the Dough

  • All-Purpose Flour – Adds the necessary structure for chewy cookies; a gluten-free flour can be used for a different texture.
  • Pumpkin or Chai Spice Blend – Infuses warmth and flavor; substitute with cinnamon or nutmeg to switch up the spice profile.
  • Baking Soda – Ensures the cookies rise perfectly and achieve the right texture.
  • Salt – Balances the sweetness, enhancing all the flavors in these chewy maple pumpkin cookies.
  • European Style Unsalted Butter – Adds richness; can be substituted with regular unsalted butter or dairy-free options.
  • Light Brown Sugar – Brings moisture and sweetness; using dark brown sugar will deepen the flavor.
  • Pure Maple Syrup – The star sweetener that adds depth; maple extract can be used for extra flavor notes.
  • Large Egg Yolk – Binds the ingredients while enriching the dough’s texture.
  • Canned Pumpkin (blotted) – Offers moisture and pumpkin flavor; fresh pumpkin can work if moisture is controlled.
  • Vanilla Extract – Enhances the overall flavor profile with a warm aroma.
  • Granulated Sugar – Used for rolling the dough, giving sweetness and crunch to each bite.

For the Coating

  • Spiced Sugar (Granulated Sugar + Spice Blend) – This coating not only adds sweetness but also intensifies the cookie’s flavor before baking.

Step‑by‑Step Instructions for Chewy Maple Pumpkin Cookies

Step 1: Prepare Brown Butter
Start by melting ½ cup of European style unsalted butter in a saucepan over medium heat. Allow the butter to bubble and turn a light amber color, stirring frequently for about 5-7 minutes. Once browned, remove it from heat and let it cool for 30 minutes. This brown butter will add a nutty depth to your Chewy Maple Pumpkin Cookies.

Step 2: Prep Pumpkin
While the butter is cooling, take ¾ cup of canned pumpkin and blot it on paper towels to absorb excess moisture. This step is crucial to achieve that delightful chewy texture in your cookies. Aim to remove enough moisture so that your cookie dough won’t turn cake-like. Set the prepared pumpkin aside once you’ve blotted it well.

Step 3: Mix Dry Ingredients
In a mixing bowl, whisk together 1½ cups of all-purpose flour, 1 teaspoon of baking soda, ½ teaspoon of salt, and your chosen spice blend—either pumpkin or chai spice. Mix these dry ingredients until evenly combined, ensuring there are no lumps. This mixture forms the foundation of your Chewy Maple Pumpkin Cookies, contributing to their structure and flavor.

Step 4: Combine Wet Ingredients
In a separate large bowl, mix the cooled brown butter with 1 cup of light brown sugar and ¼ cup of pure maple syrup until smooth and well incorporated. Add in the blotted canned pumpkin, 1 large egg yolk, and 1 teaspoon of vanilla extract. Stir until everything is well blended—it should be creamy and aromatic, filling your kitchen with the scent of fall.

Step 5: Form Dough
Gradually add the dry ingredient mixture to the wet mixture, stirring gently until just combined. Avoid overmixing, as this can affect the texture of your Chewy Maple Pumpkin Cookies. The dough should be moist yet slightly sticky, perfect for rolling into balls. Once combined, cover the bowl with plastic wrap.

Step 6: Chill Dough
Place the covered dough in the refrigerator for at least 8 hours, or preferably overnight. Chilling the dough helps to enhance flavors and ensures the cookies maintain their chewy texture when baked. While you wait, the aromas will keep tempting you to sneak a taste!

Step 7: Preheat & Prepare Baking Sheets
Preheat your oven to 350°F (177°C) and line two baking sheets with parchment paper. This ensures your Chewy Maple Pumpkin Cookies won’t stick and will bake evenly. Preparing your baking sheets in advance makes the following steps smooth as you get ready to bake.

Step 8: Scoop and Coat
Once chilled, use a cookie scoop or tablespoon to portion the dough into balls, about 1 inch in diameter. Roll each ball in a mixture of granulated sugar and your spice blend until well coated. The spiced sugar coating will add a delightful crunch and enhance the flavor, making each bite of your cookies extra special.

Step 9: Bake
Arrange the coated dough balls on the prepared baking sheets, spacing them about 2 inches apart. Bake in the preheated oven for 12-14 minutes, checking for puffiness; they should have a slightly golden bottom. Remove the cookies when they look set but still soft in the center, as they will continue to cook slightly from residual heat once out of the oven.

Step 10: Cool
Allow the cookies to cool on the baking sheets for 5 minutes before transferring them to a wire rack. This cooling time lets the cookies firm up slightly while retaining that tender chewy texture. Once completely cooled, they are ready to be enjoyed or stored for later snacking!

Chewy Maple Pumpkin Cookies Variations

Embrace your culinary creativity with these delightful twists that will elevate your Chewy Maple Pumpkin Cookies to new heights!

  • Gluten-Free: Swap all-purpose flour for a gluten-free blend to accommodate gluten sensitivities while retaining that soft texture.
    Gluten-free baking can be a fun adventure! Just remember that different mixes may behave slightly differently, so a little experimentation is key.

  • Dairy-Free: Use coconut oil or a dairy-free butter substitute instead of European style unsalted butter for a dairy-free version.
    This swap not only caters to dietary needs but also adds a subtle hint of coconut flavor, turning your cookies into a tropical fall treat!

  • Flavor Infusion: Replace the pumpkin spice blend with a chai spice mix for an exotic twist that brings warmth and depth to each bite.
    Your kitchen will smell like a cozy chai latte; it’s a perfect partnership for those chilly evening gatherings.

  • Nutty Addition: Fold in ½ cup of chopped pecans or walnuts for a crunchy texture that beautifully contrasts the chewy cookie.
    Nuts provide a delightful crunch that pairs wonderfully with the soft cookie, creating a satisfying bite that will keep you coming back for more!

  • Chocolate Chip Lovers: Add ½ cup of semisweet or dark chocolate chips to the dough for a rich, decadent addition.
    The chocolate melting into the warm cookies adds an extra layer of sweetness, making each mouthful even more indulgent.

  • Fruity Twist: Substitute half of the pumpkin with applesauce for a fruity undertone that adds moisture and sweetness.
    This variation not only enhances the cookie’s chewiness but also gives a refreshing taste that’s perfect for autumn.

  • Maple Boost: Drizzle additional maple syrup into the dough or use it as a topping before baking for an extra maple punch.
    It’s a sweet way to amplify that comforting maple flavor, transforming a delightful cookie into a maple lover’s dream!

Ready to explore more mouthwatering recipes? Try out these delightful treats that are sure to brighten your baking: Bake Cookies Cream and Pumpkin Cream Cold!

How to Store and Freeze Chewy Maple Pumpkin Cookies

Room Temperature: Store cookies in an airtight container for up to 1 week. This keeps them fresh, chewy, and delicious.

Fridge: If you prefer, you can refrigerate the cookies for up to 2 weeks, but they may lose some of their chewiness.

Freezer: For longer storage, freeze the cookies in a single layer, then transfer them to a freezer bag. They’ll maintain their best quality for up to 3 months.

Reheating: To enjoy frozen cookies, simply thaw at room temperature or warm them in the oven for a few minutes at 350°F (177°C) for that just-baked texture.

Make Ahead Options

These Chewy Maple Pumpkin Cookies are perfect for meal prep, allowing you to enjoy warm, sweet treats any time! You can prepare the cookie dough up to 24 hours in advance by following these simple steps. Once you form the dough, cover it tightly with plastic wrap and refrigerate. This chilling step not only enhances the flavors but also maintains that delightful chewy texture. If you want to get even more ahead, you can scoop the dough into balls and freeze them for up to 3 months. When you’re ready to bake, simply roll in the spiced sugar mixture and bake straight from frozen, adding an extra minute or two to the baking time for fresh, homemade cookies just like you love!

Expert Tips for Chewy Maple Pumpkin Cookies

  • Cool the Butter: Let the brown butter cool before mixing; too hot butter can lead to a greasy dough that affects the chewy texture of your cookies.
  • Blot the Pumpkin: Make sure to properly blot your pumpkin to remove excess moisture, preventing cake-like cookies instead of the desired chewy pumpkin cookies.
  • Chill Time: Don’t skip the chilling step! Allowing the dough to rest enhances flavors and ensures the cookies maintain their chewy goodness during baking.
  • Avoid Overmixing: When combining wet and dry ingredients, mix just until incorporated. Overmixing can lead to tough cookies rather than delightful chewy bites.
  • Control Baking Time: Keep an eye on your cookies while baking; they should be set but still soft in the center for that perfect chewy texture.

What to Serve with Chewy Maple Pumpkin Cookies?

As the inviting scent of warm spices fills your kitchen, consider delightful companions to elevate your cozy autumn baking experience.

  • Creamy Mashed Potatoes: They provide a savory contrast to sweet cookies, perfect for a comforting fall dinner.
  • Spiced Chai Latte: The warm spices in chai harmonize beautifully with the flavors of pumpkin and maple.
  • Apple Cider Doughnuts: Their sweet, fruity flavor complements the maple notes perfectly, making for a cozy indulgence.
  • Vanilla Ice Cream: A scoop on the side adds creaminess that balances the chewiness of the cookies.
  • Pecan Pie: This classic dessert offers a crunch and sweetness that pairs wonderfully with the soft texture of the cookies.
  • Roasted Root Vegetables: The earthy flavors provide a delightful contrast, making for a balanced fall feast.
  • Hot Chocolate: Rich and chocolaty, it transforms your cookie experience into a warm hug in a mug.
  • Pumpkin Spice Latte: This drink amplifies the flavors of your cookies while keeping you cozy on chilly days.
  • Caramel Sauce: Drizzling a bit on the cookies adds a decadent touch that enhances their sweetness.

Chewy Maple Pumpkin Cookies Recipe FAQs

What type of pumpkin should I use for these cookies?
Absolutely! For the Chewy Maple Pumpkin Cookies, you can use canned pumpkin puree, which is convenient and has the right moisture content. Just be sure to blot it on paper towels to remove excess moisture before adding it to the dough. Fresh pumpkin can be an excellent alternative too, but remember to manage its moisture by cooking and pureeing it beforehand.

How should I store these cookies?
To keep your Chewy Maple Pumpkin Cookies fresh, store them in an airtight container at room temperature for up to 1 week. If you want them to last longer, you can refrigerate them for up to 2 weeks, although they may lose some of their beloved chewiness in the fridge.

Can I freeze the cookies? How do I do it?
Absolutely! To freeze your Chewy Maple Pumpkin Cookies, first let them cool completely. Then, place them in a single layer on a baking sheet and freeze until solid. After they are frozen, transfer them into a freezer bag or container. They can be kept in the freezer for up to 3 months. When you’re ready to enjoy, thaw at room temperature or warm them in the oven at 350°F (177°C) for a few minutes to revive their delightful chew.

What if my cookies come out too cake-like?
If your cookies turn out too cake-like instead of chewy, it’s likely due to excess moisture. Blotting the pumpkin thoroughly before mixing is crucial. Additionally, chilling the dough for at least 8 hours helps to create the right texture. Lastly, make sure not to overmix the dough after combining the wet and dry ingredients.

Are these cookies suitable for people with nut allergies?
Great question! The Chewy Maple Pumpkin Cookies can be made nut-free by simply omitting any additional mix-ins like nuts or chocolate chips. As always, check the ingredient labels for any hidden allergens. The recipe itself is nut-free unless you decide to add nuts or chocolate. Enjoy baking these delicious treats!

Can I add other flavors or ingredients?
Yes, very much! These cookies are incredibly versatile. You can mix in chocolate chips for a sweet boost or substitute half of the pumpkin with applesauce for a fruity twist. Chopped nuts like pecans or walnuts can add a lovely crunch. Just remember to balance the moisture content if you make substitutions to ensure your cookies remain perfectly chewy.

Chewy Maple Pumpkin Cookies

Chewy Maple Pumpkin Cookies That Capture Fall's Cozy Vibes

Delight in these Chewy Maple Pumpkin Cookies, capturing the essence of fall with cozy flavors and a chewy texture.
Prep Time 30 minutes
Cook Time 14 minutes
Chill Time 8 hours
Total Time 8 hours 44 minutes
Servings: 24 cookies
Course: Dessert
Cuisine: American
Calories: 150

Ingredients
  

For the Dough
  • 1.5 cups All-Purpose Flour
  • 0.75 cups Canned Pumpkin (blotted)
  • 1 teaspoon Baking Soda
  • 0.5 teaspoon Salt
  • 0.5 cups European Style Unsalted Butter
  • 1 cup Light Brown Sugar
  • 0.25 cups Pure Maple Syrup
  • 1 large Egg Yolk
  • 1 teaspoon Vanilla Extract
  • 0.5 cups Granulated Sugar for rolling
  • 1 tablespoon Pumpkin or Chai Spice Blend or substitute with cinnamon or nutmeg
For the Coating
  • 0.5 cups Spiced Sugar (Granulated Sugar + Spice Blend)

Equipment

  • Saucepan
  • Mixing Bowl
  • Cookie Scoop
  • Baking Sheets
  • Parchment paper

Method
 

Step‑by‑Step Instructions
  1. Prepare Brown Butter: Melt ½ cup of European style unsalted butter in a saucepan over medium heat. Allow the butter to bubble and turn a light amber color, stirring frequently for about 5-7 minutes. Once browned, remove it from heat and let it cool for 30 minutes.
  2. Prep Pumpkin: Blot ¾ cup of canned pumpkin on paper towels to absorb excess moisture, then set aside.
  3. Mix Dry Ingredients: In a mixing bowl, whisk together 1.5 cups of all-purpose flour, 1 teaspoon of baking soda, 0.5 teaspoon of salt, and the spice blend. Mix until evenly combined.
  4. Combine Wet Ingredients: In a separate bowl, mix the cooled brown butter with 1 cup of light brown sugar and 0.25 cup of pure maple syrup until smooth. Add in the blotted canned pumpkin, 1 egg yolk, and 1 teaspoon of vanilla extract. Stir until well blended.
  5. Form Dough: Gradually add the dry ingredient mixture to the wet mixture, stirring gently until just combined. Avoid overmixing. Cover the bowl with plastic wrap.
  6. Chill Dough: Place the covered dough in the refrigerator for at least 8 hours or overnight.
  7. Preheat & Prepare Baking Sheets: Preheat your oven to 350°F (177°C) and line two baking sheets with parchment paper.
  8. Scoop and Coat: Use a cookie scoop to portion the dough into balls, about 1 inch in diameter. Roll in granulated sugar and spice blend until well coated.
  9. Bake: Arrange the coated dough balls on the prepared baking sheets, spacing them about 2 inches apart. Bake for 12-14 minutes, until puffed and slightly golden on the bottom.
  10. Cool: Allow the cookies to cool on the baking sheets for 5 minutes before transferring to a wire rack.

Nutrition

Serving: 1cookieCalories: 150kcalCarbohydrates: 22gProtein: 1gFat: 7gSaturated Fat: 4gPolyunsaturated Fat: 1gMonounsaturated Fat: 2gCholesterol: 15mgSodium: 95mgPotassium: 80mgFiber: 1gSugar: 10gVitamin A: 310IUCalcium: 10mgIron: 0.5mg

Notes

For best results, cool the butter properly and avoid overmixing the dough.

Tried this recipe?

Let us know how it was!

Irresistible Trader Joe’s Sun-Dried Tomato Focaccia Sandwich Bliss

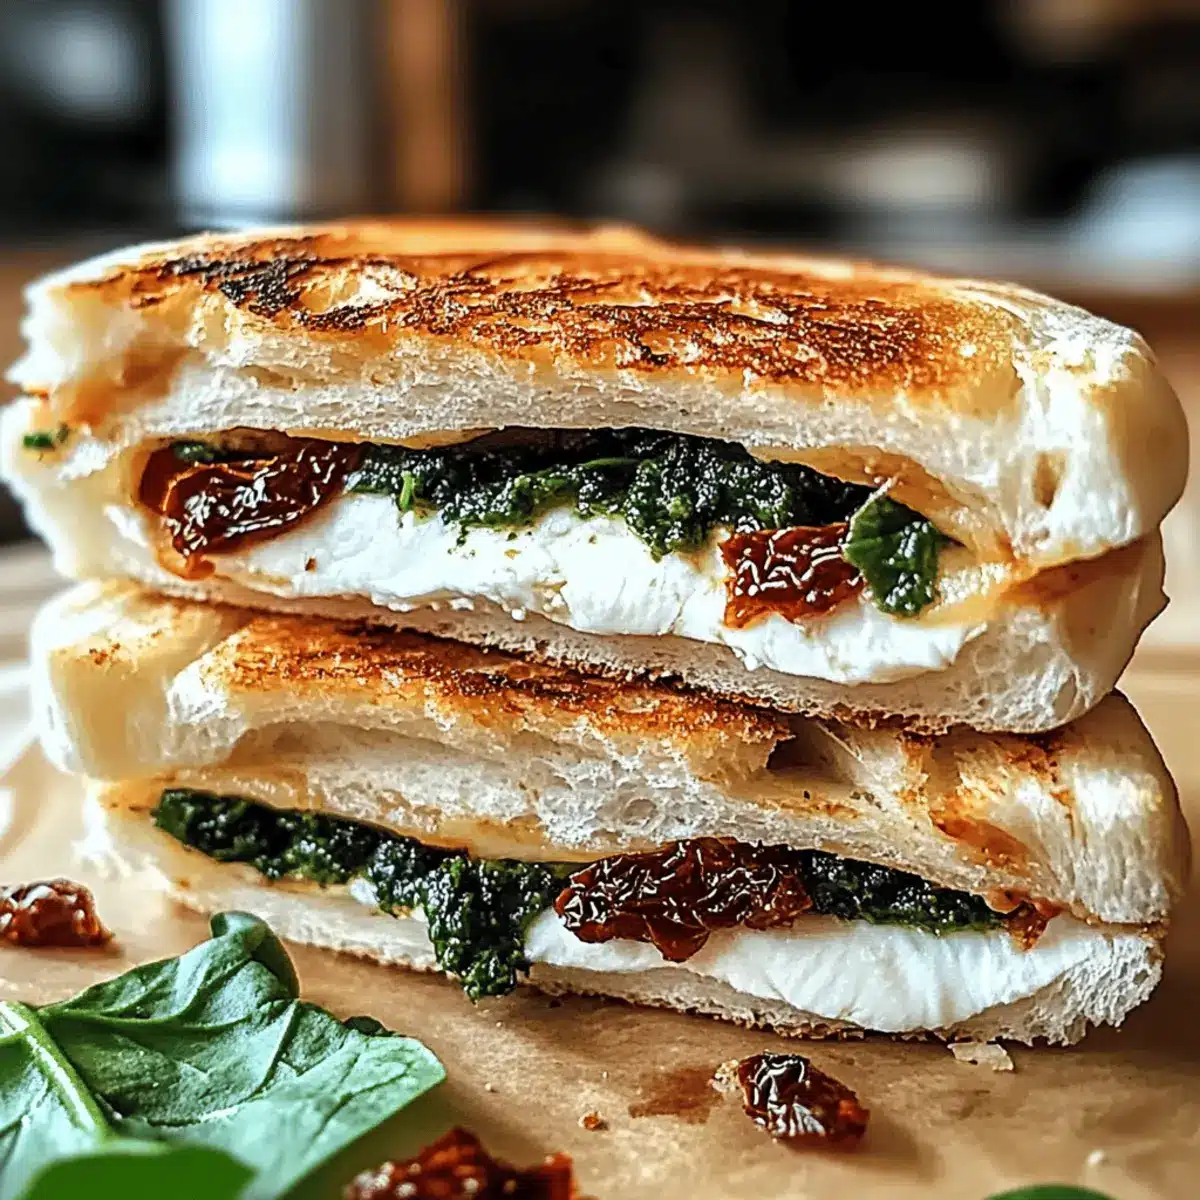
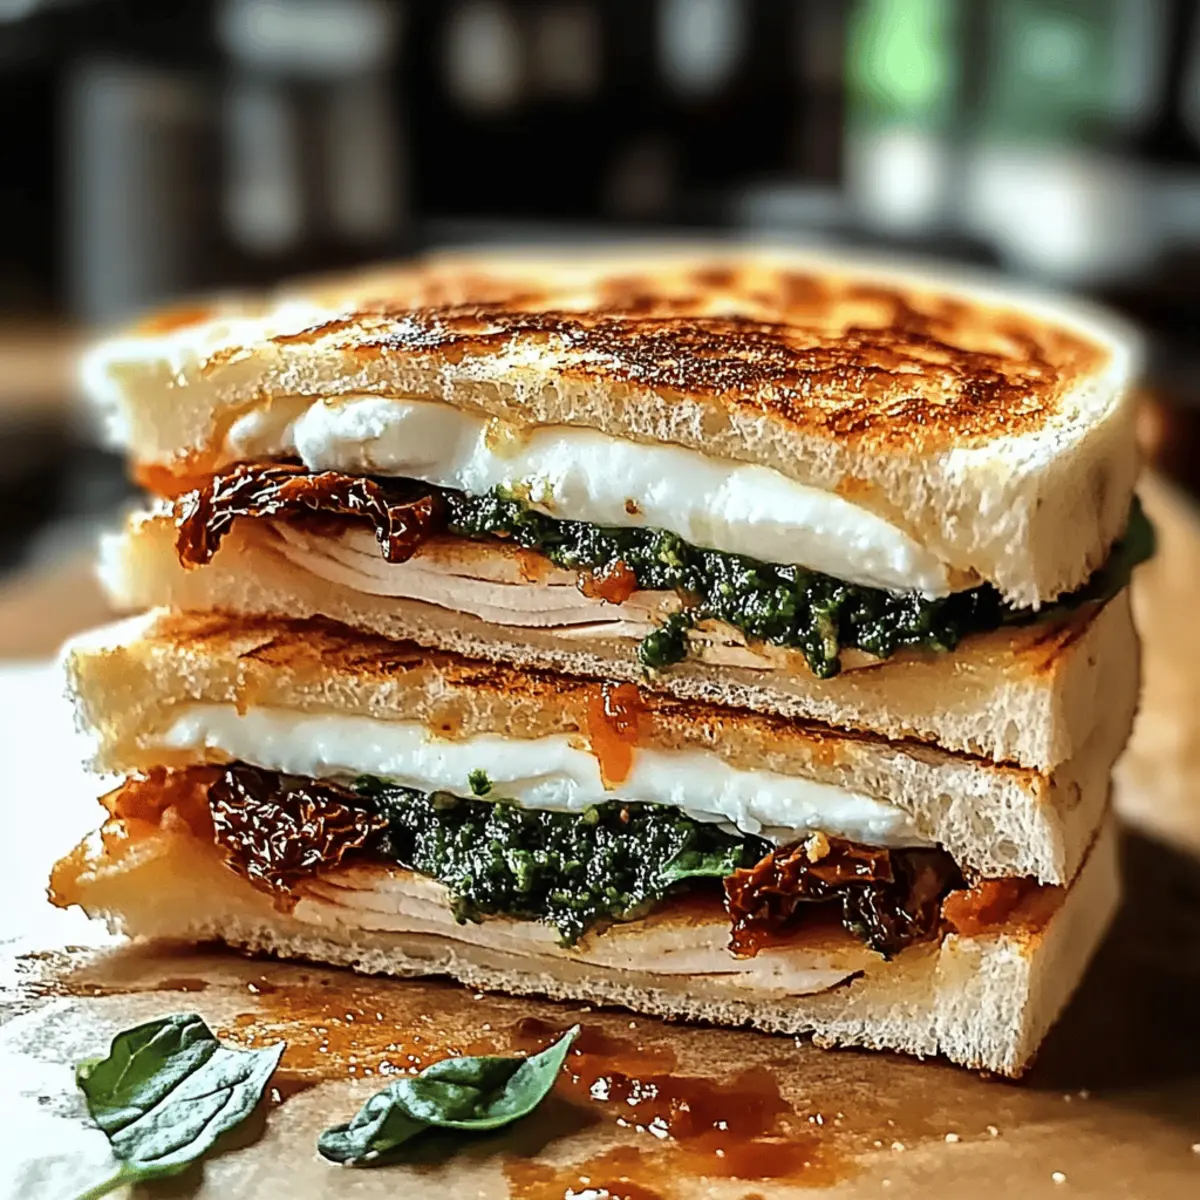
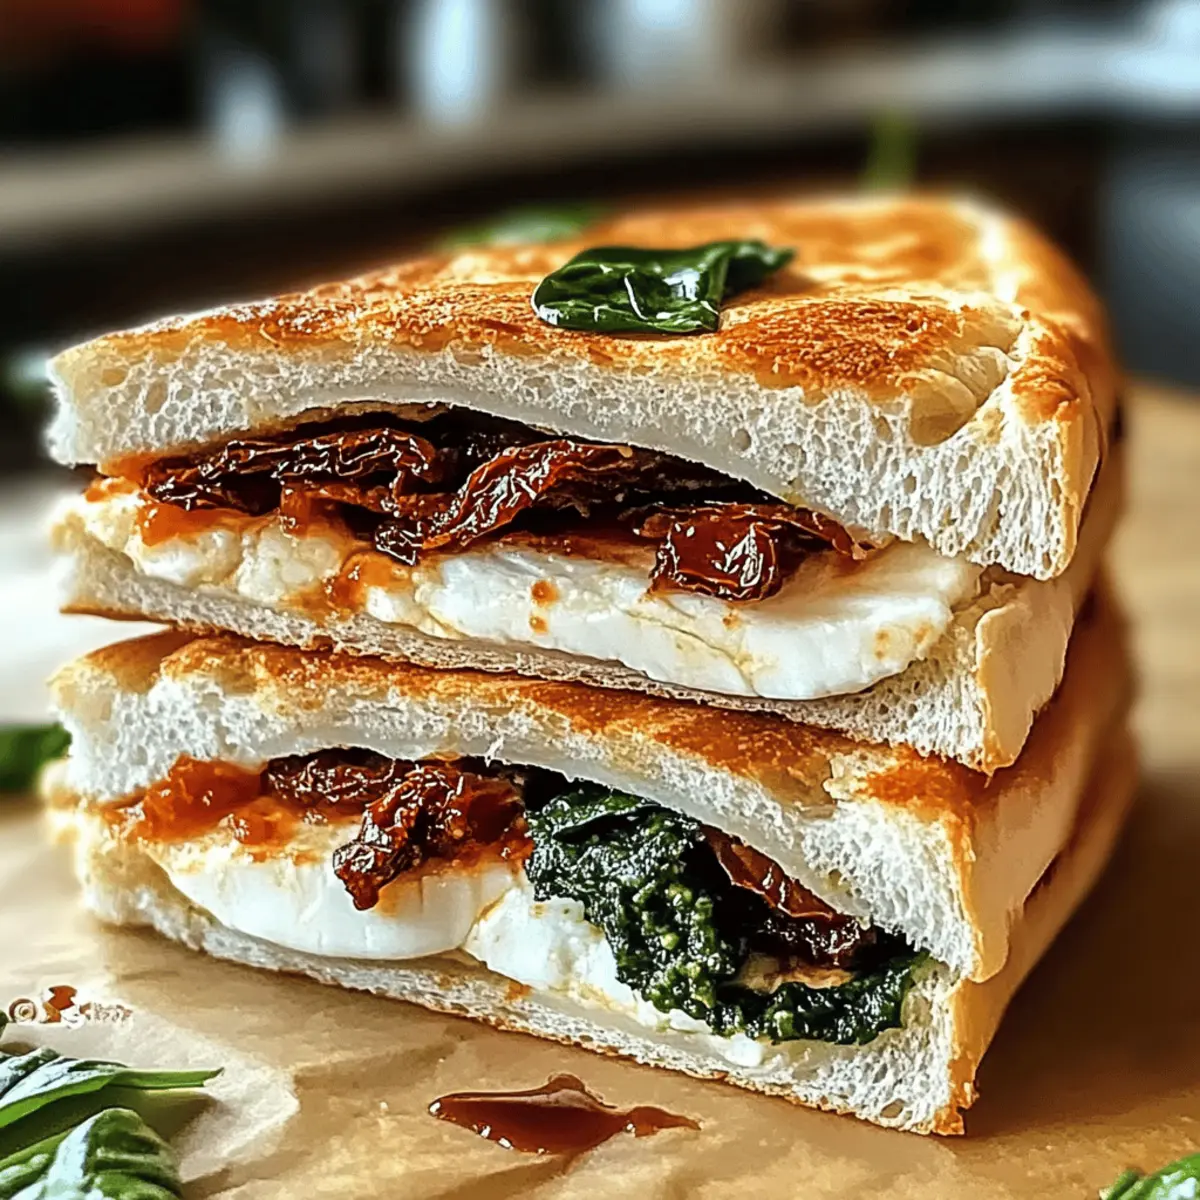
The moment the oven timer dings, a warm wave of herby goodness fills the kitchen, hinting at the delicious creation waiting to be unveiled. Today, I’m sharing my favorite quick and customizable lunch option: the Irresistible Trader Joe’s Sun-Dried Tomato Focaccia Sandwich. With its fluffy, lightly crusty focaccia as the canvas, it’s layered with savory turkey (or grilled veggies for my vegetarian friends), creamy mozzarella, and fresh spinach, all elevated by a vibrant pesto spread. Not only is this sandwich incredibly satisfying and healthy, but it also adapts beautifully to your taste preferences, making it perfect for busy weekdays or delightful brunch gatherings. So, what variations will you dream up for your next sandwich masterpiece?

Why is this sandwich so irresistible?

Comforting and warm, this sandwich brings a sense of home with each bite. Quick to prepare, it’s your go-to solution for busy days or impromptu gatherings. Customizable options allow you to cater to everyone’s tastes, whether opting for a classic turkey version or a tasty vegetarian twist. Nutritious ingredients like fresh spinach and mozzarella ensure you’re eating well while enjoying a burst of flavors. And let’s not forget the crowd-pleasing factor; pair it with a salad or chips, and you’ve got a delightful meal that everyone will love. Explore even more delicious options with our Grilled Chicken Sandwich or Tuna Salad Sandwich for variety!

Irresistible Trader Joe’s Sun-Dried Tomato Focaccia Sandwich Ingredients

• Prepare to create a scrumptious sandwich that will have everyone asking for seconds!

For the Sandwich Base

  • Trader Joe’s Sun-Dried Tomato Focaccia – This soft yet slightly crusty bread is perfect for capturing all the delicious flavors.
  • Deli-style Turkey Breast – Packed with savory protein; consider substituting with grilled chicken or roasted veggies for a delightful vegetarian option.

For the Filling

  • Fresh Spinach Leaves – These add a refreshing crunch; feel free to swap in arugula or mixed greens for a fun twist.
  • Fresh Mozzarella Cheese – Creamy and delicious; you can also experiment with provolone or gouda for a different taste.

For the Spread

  • Pesto Sauce – This herb-infused delight adds rich flavor; try using hummus or garlic aioli if you want to mix it up.

Ready to dive into a fantastic sandwich adventure? Enjoy crafting your own Irresistible Trader Joe’s Sun-Dried Tomato Focaccia Sandwich!

Step‑by‑Step Instructions for Irresistible Trader Joe’s Sun-Dried Tomato Focaccia Sandwich

Step 1: Slice the Focaccia
Using a sharp bread knife, carefully slice the Trader Joe’s Sun-Dried Tomato Focaccia horizontally into two equal halves. Aim for a clean cut to avoid excess crumbs, revealing the luscious interior. This will serve as the base and top of your sandwich and should be soft yet sturdy enough to hold the fillings.

Step 2: Spread the Pesto
Generously smear pesto sauce over the cut sides of both focaccia halves. Use the back of a spoon or a butter knife for even distribution, ensuring every bite has that fragrant herb flavor. The vibrant green color should evenly coat the entire surface, creating a delicious flavor foundation for your sandwich.

Step 3: Layer the Spinach
Place a handful of fresh spinach leaves on top of one half of the focaccia, covering it evenly. The crispness of the spinach will add a delightful crunch, balancing the creaminess of the cheese. This layer should be substantial yet not overstuffed to maintain the sandwich’s overall structure and ease of handling.

Step 4: Add the Turkey and Cheese
Next, layer slices of deli-style turkey breast over the spinach, followed by an even layer of fresh mozzarella cheese. The combination of savory turkey and gooey cheese creates a mouthwatering contrast. Ensure that the turkey is spread out nicely to avoid clumping, enhancing the flavors with every bite.

Step 5: Optional Spinach Layer
For extra freshness, you may choose to add another layer of spinach on top of the mozzarella. This not only adds a beautiful greenery but also brings bonus crunch and nutrients to your Irresistible Trader Joe’s Sun-Dried Tomato Focaccia Sandwich. Make sure it’s evenly distributed for a delightful crunch.

Step 6: Assemble the Sandwich
Carefully place the other half of the focaccia on top to seal your sandwich. Gently press it down to help the layers stick together. Ensure the edges are aligned for a neat presentation, which allows the sandwich to hold its shape securely when toasted.

Step 7: Toast the Sandwich
Heat a skillet or panini press over medium heat, then lightly toast the assembled sandwich until the bread is golden brown and the cheese is melty, approximately 3-5 minutes per side. Keep an eye on it, pressing gently to ensure even toasting and that the focus remains on achieving that gooey cheese goodness.

Step 8: Cut and Serve
Once toasted to perfection, remove the sandwich from the heat and let it cool for a minute before cutting into portions. This brief pause allows the cheese to set slightly, making it easier to handle. Serve with a light salad or crispy chips to complement your Irresistible Trader Joe’s Sun-Dried Tomato Focaccia Sandwich for a delightful meal.

What to Serve with Irresistible Trader Joe’s Sun-Dried Tomato Focaccia Sandwich

Elevate your meal experience with delightful sides that complement the rich flavors of this scrumptious sandwich.

  • Crispy Potato Chips: The crunch of potato chips provides a satisfying contrast to the soft focaccia, making each bite even more enjoyable.
  • Light Garden Salad: Fresh greens drizzled with a lemon vinaigrette create a zesty balance, enhancing the sandwich’s savory elements while adding a refreshing crunch.
  • Tomato Basil Soup: Nothing beats the classic duo of a grilled sandwich and creamy soup. The rich, warm flavors of the soup enhance the sandwich, making for a comforting meal.
  • Roasted Vegetables: A medley of lightly seasoned roasted veggies brings both color and nutrition to your plate. The caramelization adds a sweet earthiness that pairs beautifully.
  • Sweet Potato Fries: Crispy, slightly sweet fries provide a delicious contrast and satisfy your cravings while keeping the meal on the healthier side.
  • Sparkling Water with Lemon: Refreshing and light, this drink cuts through the richness of the sandwich while keeping your palate cleansed.
  • Chocolate Chip Cookies: For a little indulgence, classic cookies offer a sweet ending to your meal, making it a cherished moment of comfort.

Expert Tips for Irresistible Trader Joe’s Sun-Dried Tomato Focaccia Sandwich

  • Toasting Secret: Lightly toast the focaccia before assembly to prevent sogginess, keeping the sandwich’s layers intact.

  • Consistent Flavor: Distribute your fillings evenly for balanced flavor in every bite, ensuring all ingredients shine in your irresistible sandwich.

  • Vegetarian Option: For a vegetarian twist, try grilled portobello mushrooms or roasted veggies instead of turkey; they add hearty texture and flavor.

  • Creamy Addition: Add sliced avocado for an extra creaminess that pairs wonderfully with the savory ingredients of your focaccia sandwich.

  • Avoid Juiciness: If using juicy fillings, make sure to pat them dry to maintain that satisfying crunch and avoid a soggy sandwich.

Irresistible Trader Joe’s Sun-Dried Tomato Focaccia Sandwich Variations

Feel free to get creative and discover your perfect twist on this delightful sandwich!

  • Vegetarian Delight: Swap turkey for grilled portobello mushrooms or roasted veggies. Rich and meaty, they blend beautifully with the creamy cheese and zesty pesto.

  • Avocado Boost: Layer sliced avocado for extra creaminess. The buttery texture enhances the overall deliciousness and adds a healthful twist.

  • Spicy Kick: Incorporate sliced jalapeños or red pepper flakes for an added zesty kick. This fiery element wakes up your taste buds and makes each bite exhilarating.

  • Cheese Lovers: Experiment with tangy goat cheese or sharp cheddar. These flavor-packed options will add a unique twist while still giving you that gooey goodness.

  • Nutty Crunch: Add toasted pine nuts or walnuts for added texture. A little crunch brings a delightful surprise with every delicious mouthful.

  • Herbal Infusion: Mix in fresh basil or arugula for an herbaceous lift. The aromatic notes will elevate your sandwich experience to gourmet levels.

  • Mediterranean Flare: Use feta cheese and roasted red peppers for a Mediterranean touch. This combination provides bold flavors and a touch of the Mediterranean coast.

  • Smoky Flavor: Swap regular turkey for smoked turkey or add a few drops of liquid smoke to your pesto. This deep, smoky flavor adds a lovely depth that elevates your sandwich.

Consider pairing your delicious creation with a side, like a light salad or crispy chips, to make it an unforgettable meal. Don’t forget to check out more inspiration with our Korean Steak Sandwich or Tuna Salad Sandwich for additional tasty options!

Make Ahead Options

These Irresistible Trader Joe’s Sun-Dried Tomato Focaccia Sandwiches are perfect for meal prep enthusiasts! You can prepare the sandwich components up to 24 hours in advance, allowing you to enjoy this delightful creation even on your busiest days. To prep ahead, slice the focaccia and spread the pesto on both halves, then layer the spinach and turkey slices. Wrap the prepared sandwich tightly in plastic wrap to prevent drying and refrigerate. When you’re ready to serve, simply heat a skillet or panini press over medium heat and toast the sandwich until the cheese is melty and the bread turns golden, ensuring it remains just as delicious as when freshly made.

How to Store and Freeze Irresistible Trader Joe’s Sun-Dried Tomato Focaccia Sandwich

Fridge: Wrap tightly in plastic wrap or foil to keep your sandwich fresh, and store in the fridge for up to 2 days.

Freezer: For longer storage, place the wrapped sandwich in an airtight container or freezer bag and freeze for up to 1 month.

Reheating: When ready to enjoy, reheat in an oven preheated to 350°F for about 10-15 minutes, until warmed through and the cheese is melty again.

Assembling Ahead: You can prepare the sandwich without toasting it beforehand, then toast just before serving for the optimal texture and flavor of your Irresistible Trader Joe’s Sun-Dried Tomato Focaccia Sandwich.

Irresistible Trader Joe’s Sun-Dried Tomato Focaccia Sandwich Recipe FAQs

What type of focaccia should I use for this recipe?
Absolutely! Look for Trader Joe’s Sun-Dried Tomato Focaccia that is soft yet slightly crusty on the outside. When choosing, feel it for the right texture – you want it to be a little springy to the touch and not overly dry. The sun-dried tomatoes will add incredible flavor that enhances the sandwich experience.

How long can I store the sandwich in the fridge?
Very! After wrapping your sandwich tightly in plastic wrap or foil, it can comfortably reside in the refrigerator for up to 2 days. This way, you can make ahead and have a delicious lunch ready to go. Just be sure to remove any watery ingredients before wrapping to keep it fresh!

Can I freeze the Irresistible Trader Joe’s Sun-Dried Tomato Focaccia Sandwich?
Of course! To freeze, wrap it tightly in plastic wrap and place it inside an airtight container or freezer bag. Your sandwich can last in the freezer for up to 1 month. When you’re ready to enjoy it, let it thaw in the fridge overnight, then reheat in an oven preheated to 350°F for about 10-15 minutes until warmed through.

What should I do if my sandwich turns out soggy?
No worries! If you find your sandwich soggy, pat down any juicy ingredients like tomatoes or dressings before assembly. You can also toast the focaccia lightly prior to spreading the pesto to create a barrier, preventing moisture from sneaking in. This prevents sogginess and retains that delightful crunch.

What are some allergy considerations for this sandwich?
Great question! This sandwich contains gluten from the focaccia and dairy from the mozzarella. If you’re catering to gluten-free or dairy-free guests, consider using gluten-free bread and plant-based cheese alternatives, which can be equally delightful. Always check ingredient labels to ensure safety for anyone with food allergies!

Can I customize this sandwich to suit other dietary needs?
Absolutely! The beauty of this Irresistible Trader Joe’s Sun-Dried Tomato Focaccia Sandwich lies in its versatility. You can easily swap turkey for grilled chicken, or even offer a vegetarian option by using roasted vegetables or portobello mushrooms instead. Go wild with your ingredient choices, from spicy peppers to different greens, making it a canvas of flavor for everyone!

Irresistible Trader Joe’s Sun-Dried Tomato Focaccia Sandwich

Irresistible Trader Joe’s Sun-Dried Tomato Focaccia Sandwich Bliss

Enjoy the Irresistible Trader Joe’s Sun-Dried Tomato Focaccia Sandwich, a customizable and satisfying lunch option.
Prep Time 10 minutes
Cook Time 10 minutes
Total Time 20 minutes
Servings: 2 sandwiches
Course: Lunch
Cuisine: American
Calories: 500

Ingredients
  

For the Sandwich Base
  • 1 loaf Trader Joe's Sun-Dried Tomato Focaccia Soft yet slightly crusty bread
  • 8 ounces Deli-style Turkey Breast Savory protein option
For the Filling
  • 2 cups Fresh Spinach Leaves Add crunch; consider arugula or mixed greens
  • 8 ounces Fresh Mozzarella Cheese Creamy and delicious
For the Spread
  • 1/2 cup Pesto Sauce Herb-infused delight

Equipment

  • Sharp bread knife
  • Skillet or panini press

Method
 

Step-by-Step Instructions
  1. Slice the focaccia horizontally into two equal halves.
  2. Spread pesto sauce over the cut sides of both focaccia halves.
  3. Layer fresh spinach leaves on top of one half of the focaccia.
  4. Add slices of deli-style turkey breast over the spinach, followed by mozzarella cheese.
  5. Optionally add another layer of spinach on top of the mozzarella.
  6. Assemble the sandwich by placing the other half of the focaccia on top.
  7. Toast the sandwich in a skillet or panini press until golden brown and cheese is melty.
  8. Cut and serve with a light salad or crispy chips.

Nutrition

Serving: 1sandwichCalories: 500kcalCarbohydrates: 45gProtein: 30gFat: 25gSaturated Fat: 10gPolyunsaturated Fat: 2gMonounsaturated Fat: 10gCholesterol: 70mgSodium: 900mgPotassium: 600mgFiber: 5gSugar: 2gVitamin A: 1500IUVitamin C: 10mgCalcium: 300mgIron: 2mg

Notes

For a vegetarian option, use grilled portobello mushrooms or roasted veggies instead of turkey.

Tried this recipe?

Let us know how it was!

Savory Steak and Cauliflower in Cream Sauce Perfected at Home

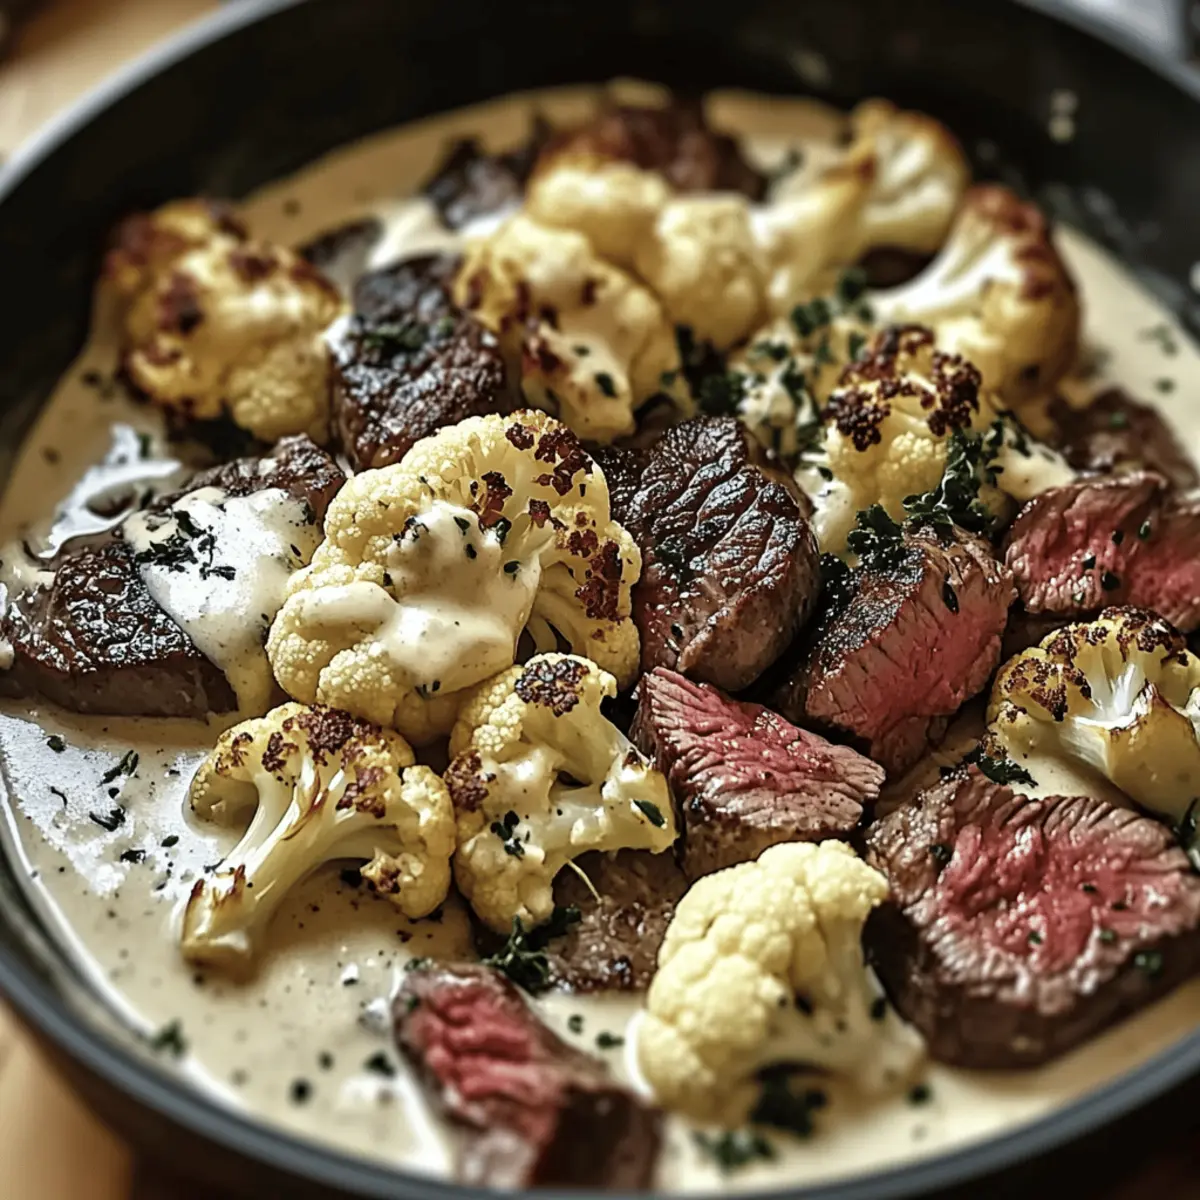
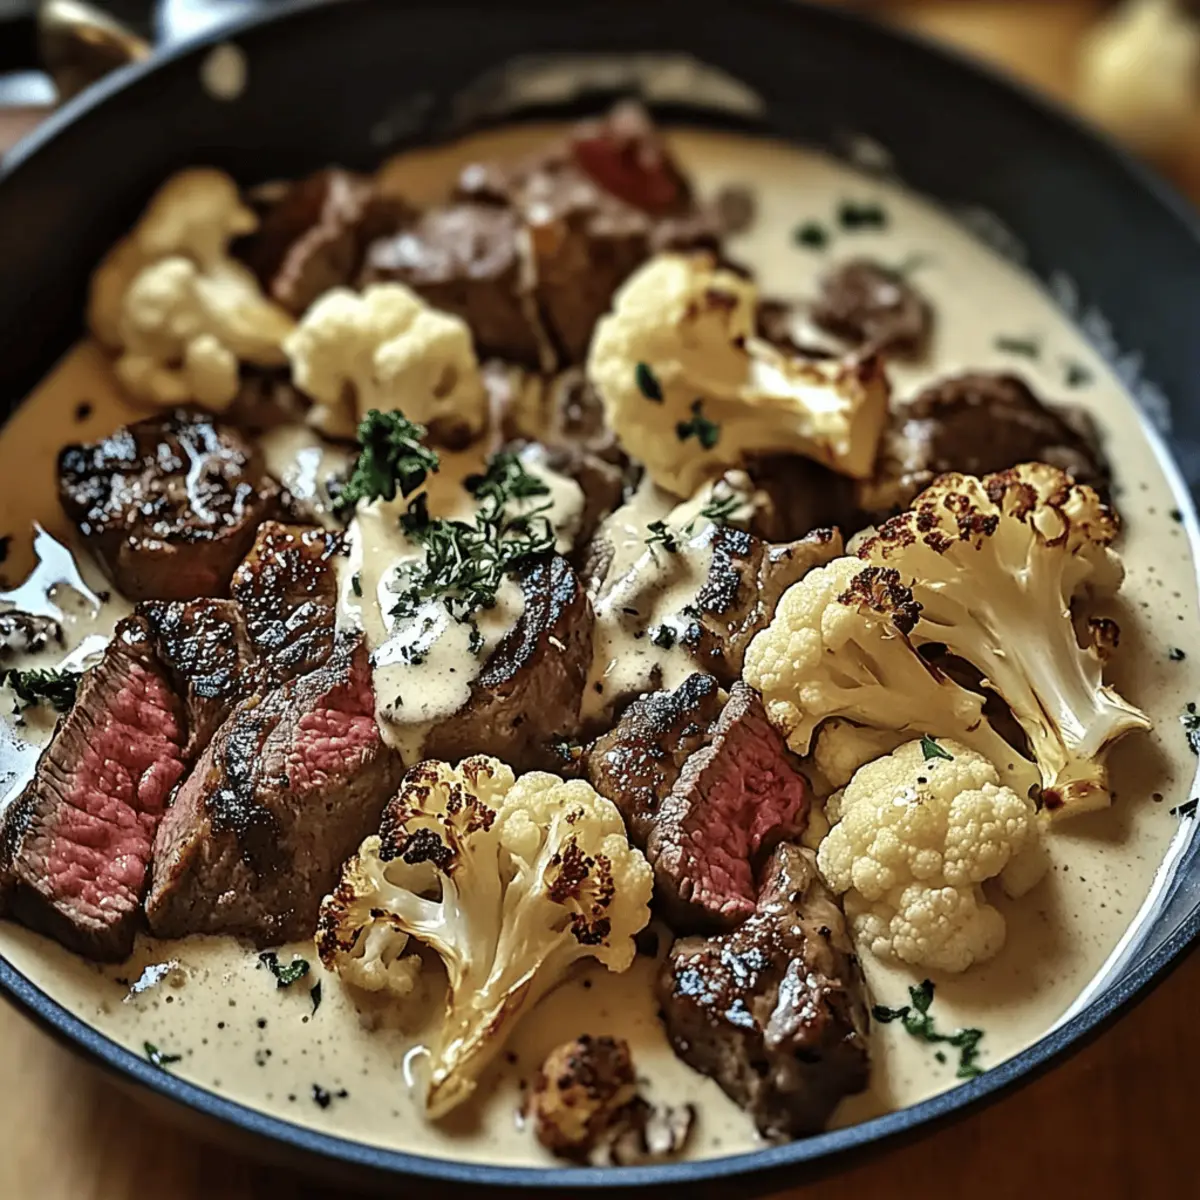
The other night, I found myself gazing at the last remnants of my neglected pantry, half-heartedly considering another round of takeout. Then inspiration struck! I whipped up a colorful and sumptuous dish that revived my enthusiasm for home cooking: Savory Steak and Cauliflower in Cream Sauce. Tender steak pairs perfectly with roasted cauliflower, enveloped in a luxuriously creamy sauce that feels indulgent yet remains keto-friendly. Best of all, this quick comfort dish comes together in just 35 minutes, making it an ideal solution for busy nights when you crave something hearty and satisfying without the guilt of fast food. Ready to transform your weeknight dinners? Let’s dive in!

Why is this dish a must-try?

Quick and Easy: The Savory Steak and Cauliflower in Cream Sauce comes together in just 35 minutes, making it perfect for busy weeknights.

Flavor Explosion: The combination of tender steak and roasted cauliflower in a rich, creamy sauce creates a mouthwatering dish that’s both indulgent and satisfying.

Keto-Friendly Delight: With only 10g of carbs per serving, this dish fits perfectly into your low-carb lifestyle without sacrificing flavor.

Customization Potential: Easily adapt this recipe by substituting proteins or adding vegetables; try it with mushrooms for an earthy twist!

Crowd-Pleasing Appeal: Whether you’re cooking for family or hosting friends, this hearty meal will impress everyone at the table, clearing out your pantry in a satisfying way.

If you’re looking for more delicious low-carb ideas, check out the Savory Ground Turkey or indulge in a dessert like the No Bake Cookies and Cream Cheesecake Cups.

Savory Steak and Cauliflower Ingredients

For the Creamy Sauce
Butter – Provides richness and helps sauté the cauliflower; opt for plant-based butter for a dairy-free version.
Heavy Cream – Adds a luxurious creaminess to the sauce; use coconut cream as a substitute if desired.

For the Main Dish
Cauliflower – The star veggie that adds volume and nutrition; frozen cauliflower works too—just thaw and drain properly.
Steak – Hearty protein source making the dish satisfyingly filling; consider using tofu or tempeh for a vegan twist.

For Seasoning
Garlic Powder – Infuses savory depth into the dish; fresh minced garlic can intensify the flavor even more.
Salt & Pepper – Essential to enhance the overall flavors; adjust these to your personal taste.

With these ingredients on hand, you’re just a few steps away from creating a mouthwatering Savory Steak and Cauliflower in Cream Sauce that is sure to delight!

Step‑by‑Step Instructions for Savory Steak and Cauliflower in Cream Sauce

Step 1: Melt Butter
In a large skillet, heat 2 tablespoons of butter over medium-high heat until melted and bubbly. You should see it start to shimmer within a minute. This will create the perfect foundation for your Savory Steak and Cauliflower in Cream Sauce, allowing the cauliflower to sauté beautifully.

Step 2: Chop Cauliflower
While the butter melts, wash and chop one head of cauliflower into uniform, bite-sized pieces, ensuring even cooking. Aim for pieces that are about 1-2 inches in size, as this will help them brown nicely in the skillet. Once chopped, set aside briefly.

Step 3: Sauté Cauliflower
Add the chopped cauliflower to the skillet, evenly coating it with the melted butter. Sauté for 8-10 minutes, stirring occasionally until the cauliflower is tender and lightly browned. Look for a golden hue to indicate that the cauliflower is perfectly cooked, adding delightful sweetness to the dish.

Step 4: Prepare Steak
As the cauliflower cooks, take 1 pound of steak and cut it into bite-sized pieces for quicker, even cooking. This step is crucial in ensuring that the steak cooks through properly and allows you to thoroughly enjoy the rich flavors in the Savory Steak and Cauliflower in Cream Sauce.

Step 5: Combine Ingredients
Once the cauliflower is cooked, add the steak pieces and 1 cup of heavy cream to the skillet. Stir everything together to ensure that the steak and cauliflower are well-coated in the creamy goodness. The combination should start to bubble gently, bringing together the flavors beautifully.

Step 6: Cook to Perfection
Continue cooking the mixture for an additional 3-4 minutes, or until the steak reaches your desired level of doneness. For medium-rare, look for a warm red center, which you can verify with a meat thermometer, aiming for about 130°F. The sauce will also become creamy and luxurious in texture.

Step 7: Plate and Garnish
Once cooked, remove the skillet from heat and plate your Savory Steak and Cauliflower in Cream Sauce immediately. Garnish with fresh parsley or a sprinkle of red pepper flakes for an enticing pop of color and a hint of warmth. This will elevate your dish and make it visually pleasing.

Savory Steak and Cauliflower in Cream Sauce Variations

Feel free to take this delectable dish to new heights by adding your own twists!

  • Mushroom Medley:
    Toss in sliced mushrooms when sautéing the cauliflower for an earthy flavor that complements the dish beautifully. They absorb the creamy sauce and add a delightful texture.

  • Chicken Swap:
    Replace steak with chicken breast or thighs for a lighter twist. The juicy chicken pairs perfectly with the creamy sauce and keeps your meal hearty.

  • Spicy Kick:
    Add a pinch of cayenne pepper or crushed red pepper flakes for a hint of heat. This will bring an exciting contrast to the comforting cream sauce that everyone will love.

  • Herbal Infusion:
    Fresh herbs like rosemary or thyme enhance the dish’s aroma and flavor. Add these aromatic wonders while cooking the steak for a depth that transports you to your favorite bistro.

  • Savory Cheese:
    Incorporate a sprinkle of grated Parmesan or crumbled feta as a final topping for extra creaminess and a burst of umami that makes each bite irresistible.

  • Creamy Dream:
    For an even richer sauce, blend in cream cheese along with the heavy cream. This luscious enhancement gives the sauce an irresistible thickness that clings to the cauliflower and steak beautifully.

  • Zucchini Noodles:
    Swap cauliflower for zucchini noodles for a lighter option that embraces the creamy sauce perfectly. It’s a fantastic way to sneak in more vegetables!

  • Coconut Delight:
    For a tropical twist, replace heavy cream with coconut cream for a slightly sweet, rich flavor. It brings a new dimension, creating a unique dish that’s both comforting and refreshing.

For additional meal inspirations, you might enjoy the savory flavors in a Korean Steak Sandwich or indulge in the sweet delight of No Bake Cookies and Cream Cheesecake Cups.

Storage Tips for Savory Steak and Cauliflower

  • Fridge: Store leftovers in an airtight container for up to 3 days. Ensure the dish is completely cooled before refrigerating to maintain quality.

  • Freezer: For longer storage, freeze your Savory Steak and Cauliflower in Cream Sauce for up to 2 months. Portion it into freezer-safe containers to make reheating easier later.

  • Reheating: When ready to enjoy again, gently reheat on the stove over low heat, adding a splash of cream to restore the sauce’s creamy consistency. Stir occasionally to prevent sticking.

Expert Tips for Savory Steak and Cauliflower

  • Perfect Timing: Start cooking the cauliflower first, as it takes longer than the steak. This helps ensure everything is perfectly cooked together in your Savory Steak and Cauliflower in Cream Sauce.

  • Avoid Soggy Cauliflower: Make sure to dry the cauliflower thoroughly before adding it to the skillet. Excess moisture can prevent it from browning nicely and achieving that delightful texture.

  • Steak’s Doneness: Use a meat thermometer to avoid overcooking. For tender, juicy steak, aim for 130°F for medium-rare. It’s better to undercook slightly and let it rest.

  • Elevate the Flavor: Consider adding a splash of Worcestershire sauce or a pinch of smoked paprika to the creamy sauce for an extra flavor boost that complements the dish perfectly.

  • Add Fresh Herbs: Toss in fresh herbs like parsley or thyme towards the end of cooking. This not only enhances flavor but also adds a beautiful pop of color to your Savory Steak and Cauliflower in Cream Sauce.

Make Ahead Options

These Savory Steak and Cauliflower in Cream Sauce are perfect for busy home cooks who want to save time without sacrificing flavor! You can chop the cauliflower and marinate the steak up to 24 hours in advance, storing them separately in airtight containers in the refrigerator to maintain their freshness. Additionally, you can prepare the creamy sauce (combining heavy cream and butter) and refrigerate it for up to 3 days; this helps the flavors meld beautifully! When ready to serve, simply sauté the prepped cauliflower, add the steak, and stir in the refrigerated sauce. This approach ensures you can enjoy a delicious, restaurant-quality meal with minimal effort on your busiest nights!

What to Serve with Savory Steak and Cauliflower in Cream Sauce

Elevate your meal experience with delightful sides that complement the rich, creamy goodness of steak and cauliflower.

  • Garlic Bread: The warm, buttery crunch of garlic bread contrasts beautifully with the creamy sauce, perfect for sopping up every delicious bite.

  • Roasted Asparagus: Striking a balance with its crisp, tender texture and subtly earthy flavor, roasted asparagus adds a vibrant pop of color to your plate.

  • Bright Side Salad: A garden-fresh salad with zesty dressing brightens the meal, offering a refreshing crunch that beautifully offsets the dish’s creaminess.

  • Cauliflower Rice: Staying true to low-carb living, cauliflower rice serves as a hearty base while mirroring the main veggie and making the dish even more satisfying.

  • Wine Pairing: A smooth red wine like Cabernet Sauvignon enhances the savory notes of your steak, turning a weeknight dinner into a bistro-style experience.

  • Chocolate Mousse: For dessert, a rich chocolate mousse rounds out the meal elegantly, balancing the savory flavors with its luscious sweetness for a perfect finale.

Savory Steak and Cauliflower in Cream Sauce Recipe FAQs

What type of cauliflower should I use?
You can use fresh cauliflower, chopped into bite-sized pieces, or opt for frozen cauliflower—just be sure to thaw and drain it thoroughly. Fresh cauliflower provides a better texture, while frozen can save you prep time when needed.

How should I store leftovers of Savory Steak and Cauliflower in Cream Sauce?
Store any leftovers in an airtight container and refrigerate for up to 3 days. Ensure the dish has cooled down completely before sealing the container to maintain its freshness.

Can I freeze Savory Steak and Cauliflower in Cream Sauce?
Absolutely! You can freeze this dish for up to 2 months. Just divide it into freezer-safe containers for easier reheating later. Be sure to label the containers with the date!

What’s the best way to reheat Savory Steak and Cauliflower in Cream Sauce?
To reheat, gently warm the dish on the stove over low heat, adding a splash of cream to help regain its creamy texture. Stir occasionally to ensure even heating and prevent it from sticking to the pan.

Is this dish suitable for those with dairy allergies?
You can easily customize the Savory Steak and Cauliflower in Cream Sauce to be dairy-free by using plant-based butter and coconut cream instead of heavy cream. Simply follow the ingredient substitutions listed in your recipe.

What if my steak turns out tough?
To avoid tough steak, ensure that you aren’t overcooking it. Aim for medium-rare, about 130°F internal temperature, and remember to let it rest for a few minutes after cooking. This allows the juices to redistribute, making every bite tender and juicy.

Savory Steak and Cauliflower in Cream Sauce

Savory Steak and Cauliflower in Cream Sauce Perfected at Home

This Savory Steak and Cauliflower in Cream Sauce is a delicious, keto-friendly dish that comes together in just 35 minutes.
Prep Time 10 minutes
Cook Time 25 minutes
Total Time 35 minutes
Servings: 4 servings
Course: Beef
Cuisine: American
Calories: 450

Ingredients
  

For the Creamy Sauce
  • 2 tablespoons Butter Opt for plant-based butter for a dairy-free version.
  • 1 cup Heavy Cream Use coconut cream as a substitute if desired.
For the Main Dish
  • 1 head Cauliflower Frozen cauliflower works too, just thaw and drain properly.
  • 1 pound Steak Consider using tofu or tempeh for a vegan twist.
For Seasoning
  • 1 teaspoon Garlic Powder Fresh minced garlic can intensify the flavor.
  • to taste Salt Adjust to your personal taste.
  • to taste Pepper Adjust to your personal taste.

Equipment

  • Skillet
  • Meat Thermometer

Method
 

Step-by-Step Instructions
  1. In a large skillet, heat 2 tablespoons of butter over medium-high heat until melted and bubbly.
  2. Wash and chop one head of cauliflower into uniform, bite-sized pieces.
  3. Add the chopped cauliflower to the skillet, sauté for 8-10 minutes until tender and lightly browned.
  4. Cut 1 pound of steak into bite-sized pieces for quicker, even cooking.
  5. Once the cauliflower is cooked, add the steak pieces and 1 cup of heavy cream to the skillet.
  6. Continue cooking for an additional 3-4 minutes, or until the steak reaches your desired doneness.
  7. Remove from heat and plate your dish. Garnish with fresh parsley or red pepper flakes.

Nutrition

Serving: 1servingCalories: 450kcalCarbohydrates: 10gProtein: 35gFat: 30gSaturated Fat: 15gPolyunsaturated Fat: 5gMonounsaturated Fat: 10gCholesterol: 90mgSodium: 600mgPotassium: 800mgFiber: 4gSugar: 3gVitamin A: 10IUVitamin C: 70mgCalcium: 100mgIron: 3mg

Notes

Ensure to dry the cauliflower thoroughly before cooking to avoid sogginess. Use a meat thermometer for perfect steak doneness.

Tried this recipe?

Let us know how it was!

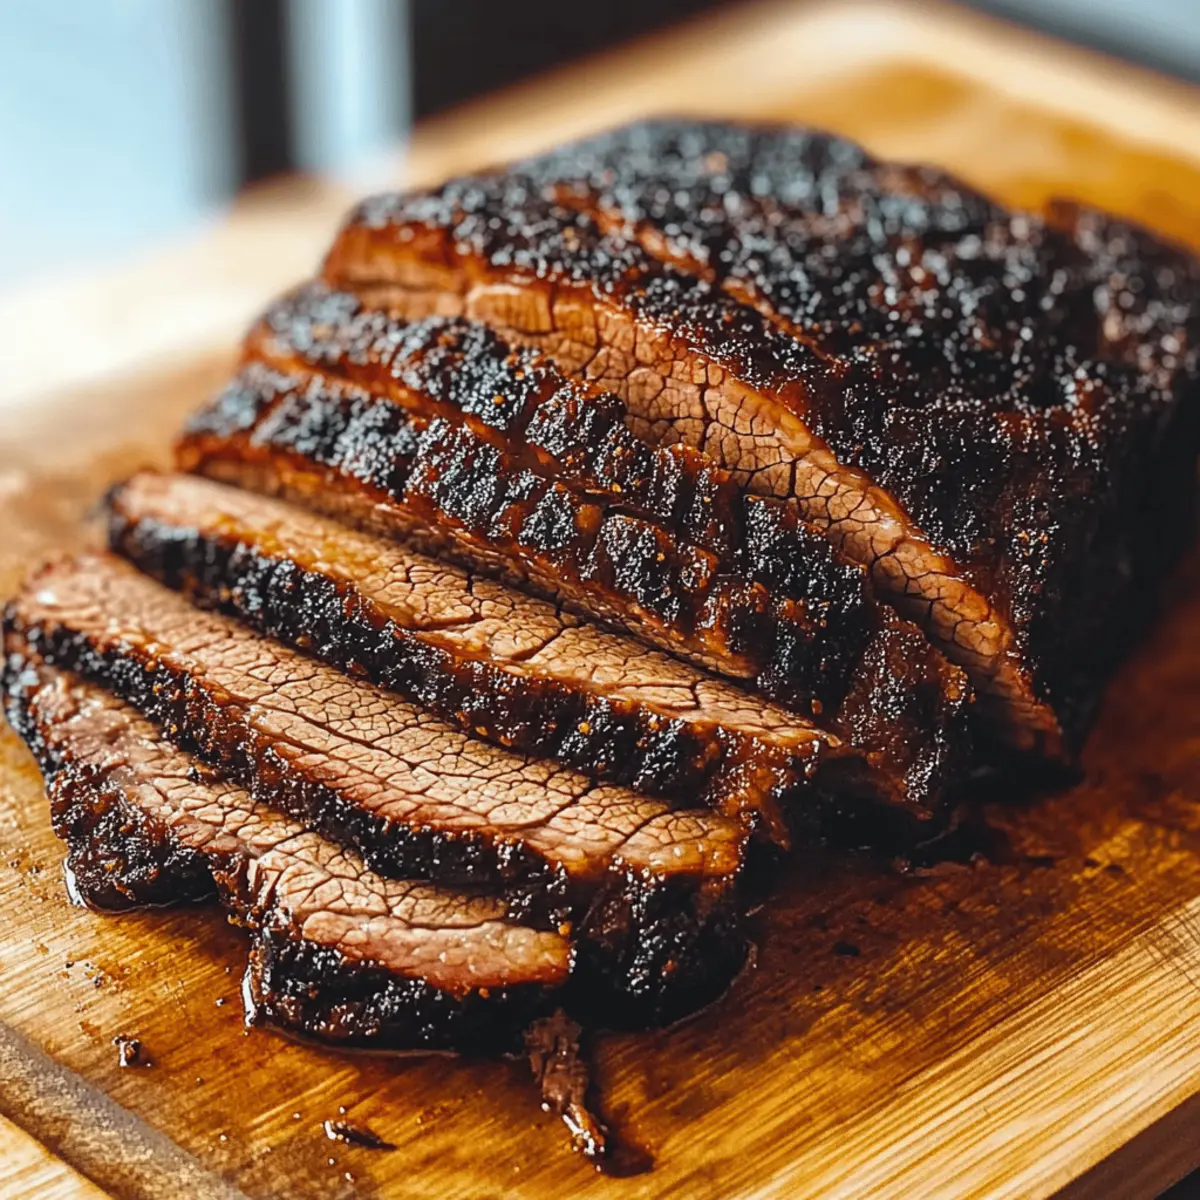
Oven Baked Beef Brisket for Tender, Flavorful Family Dinners

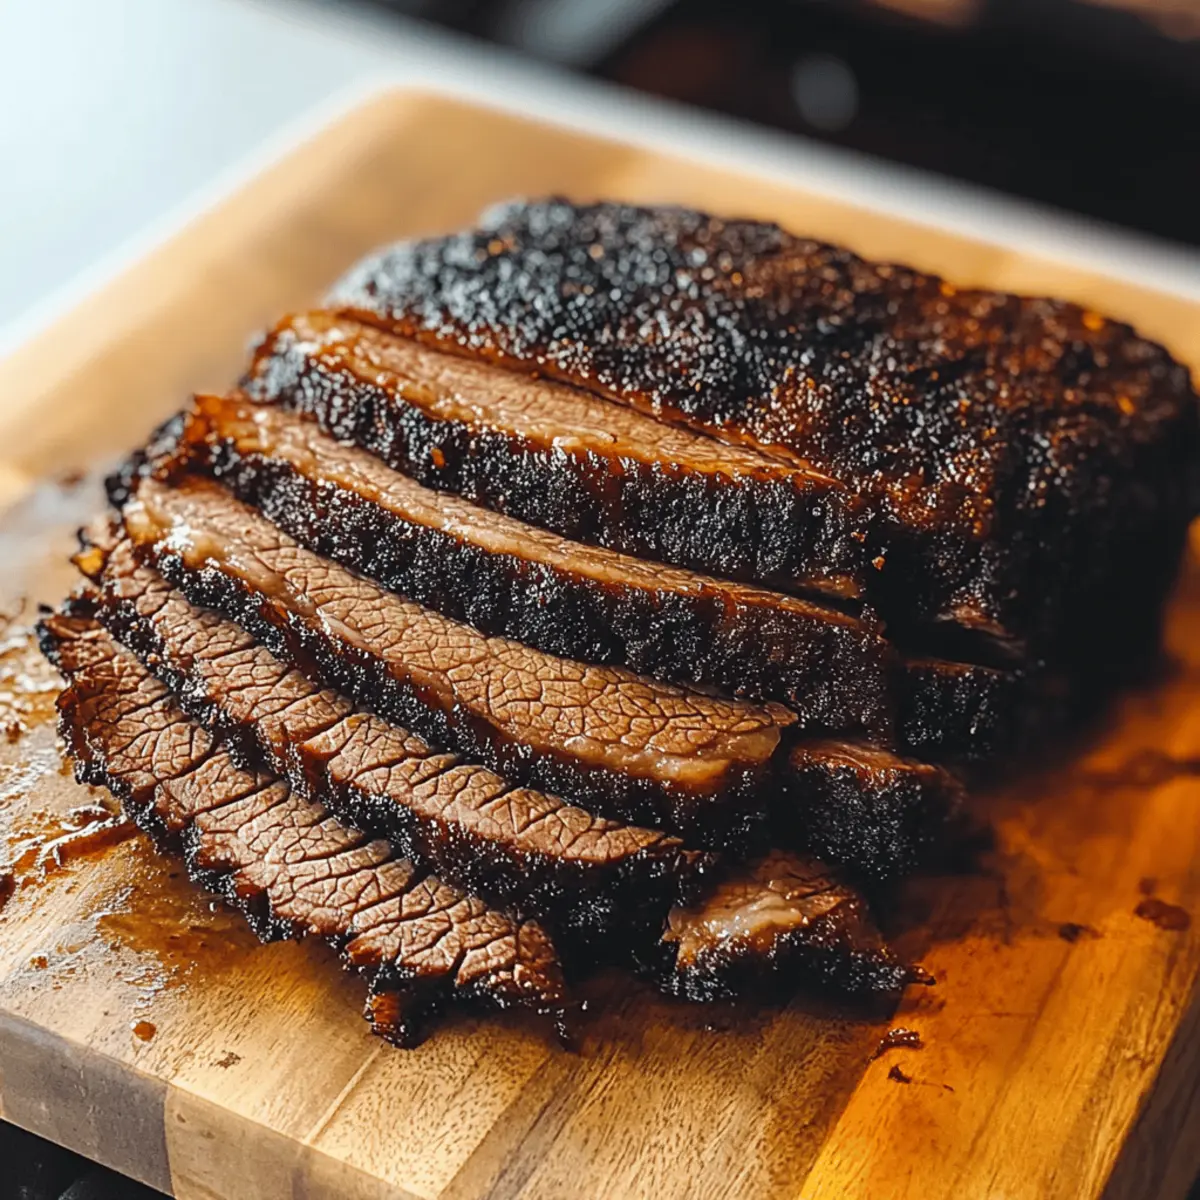
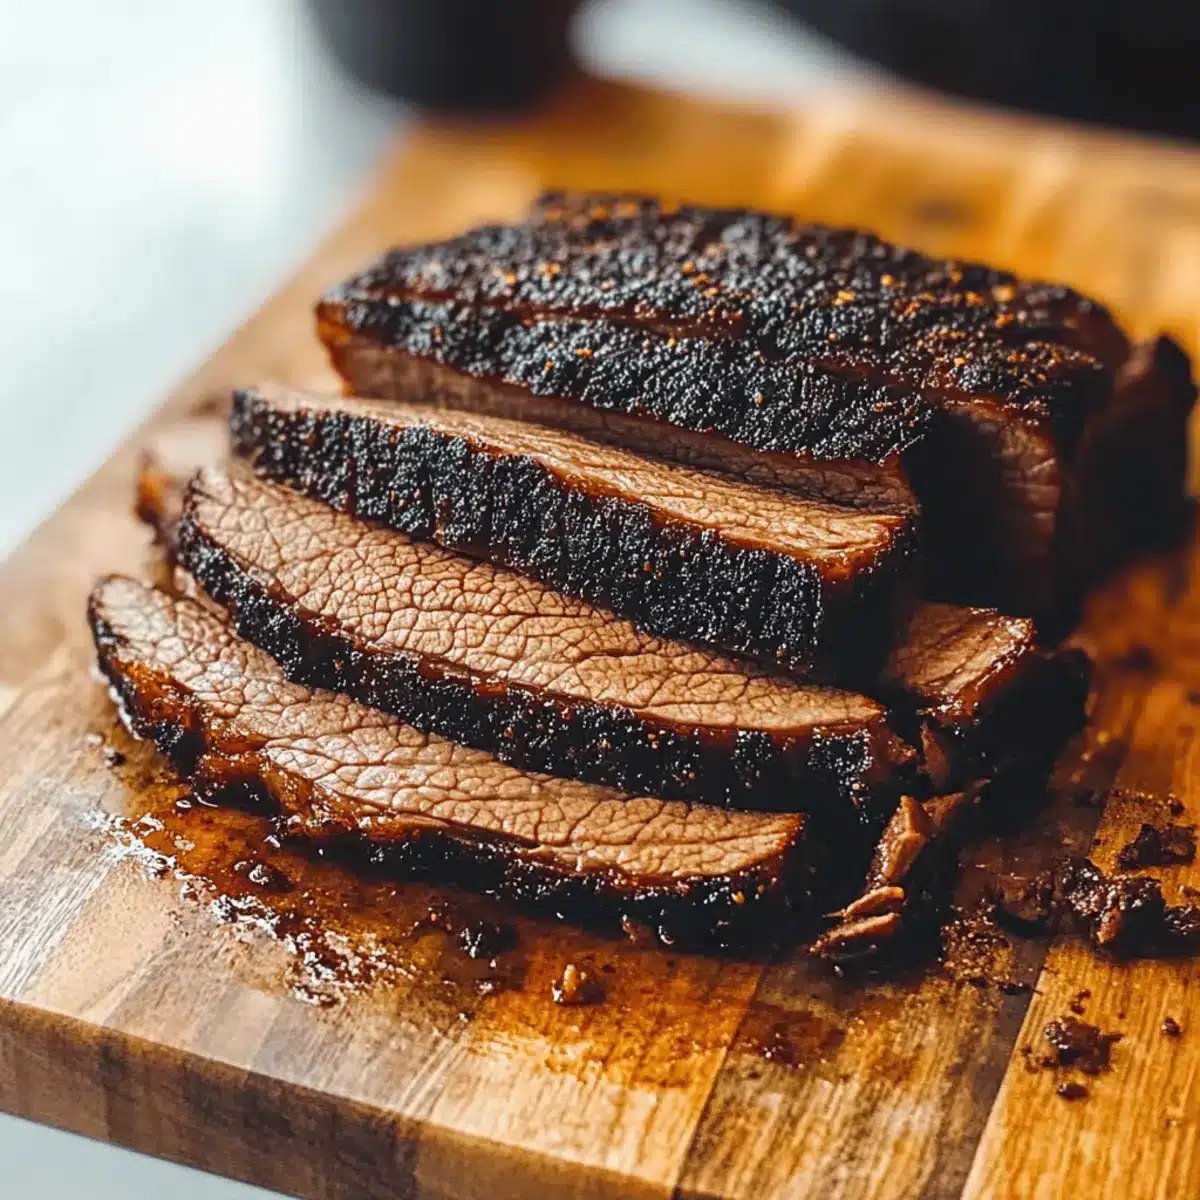
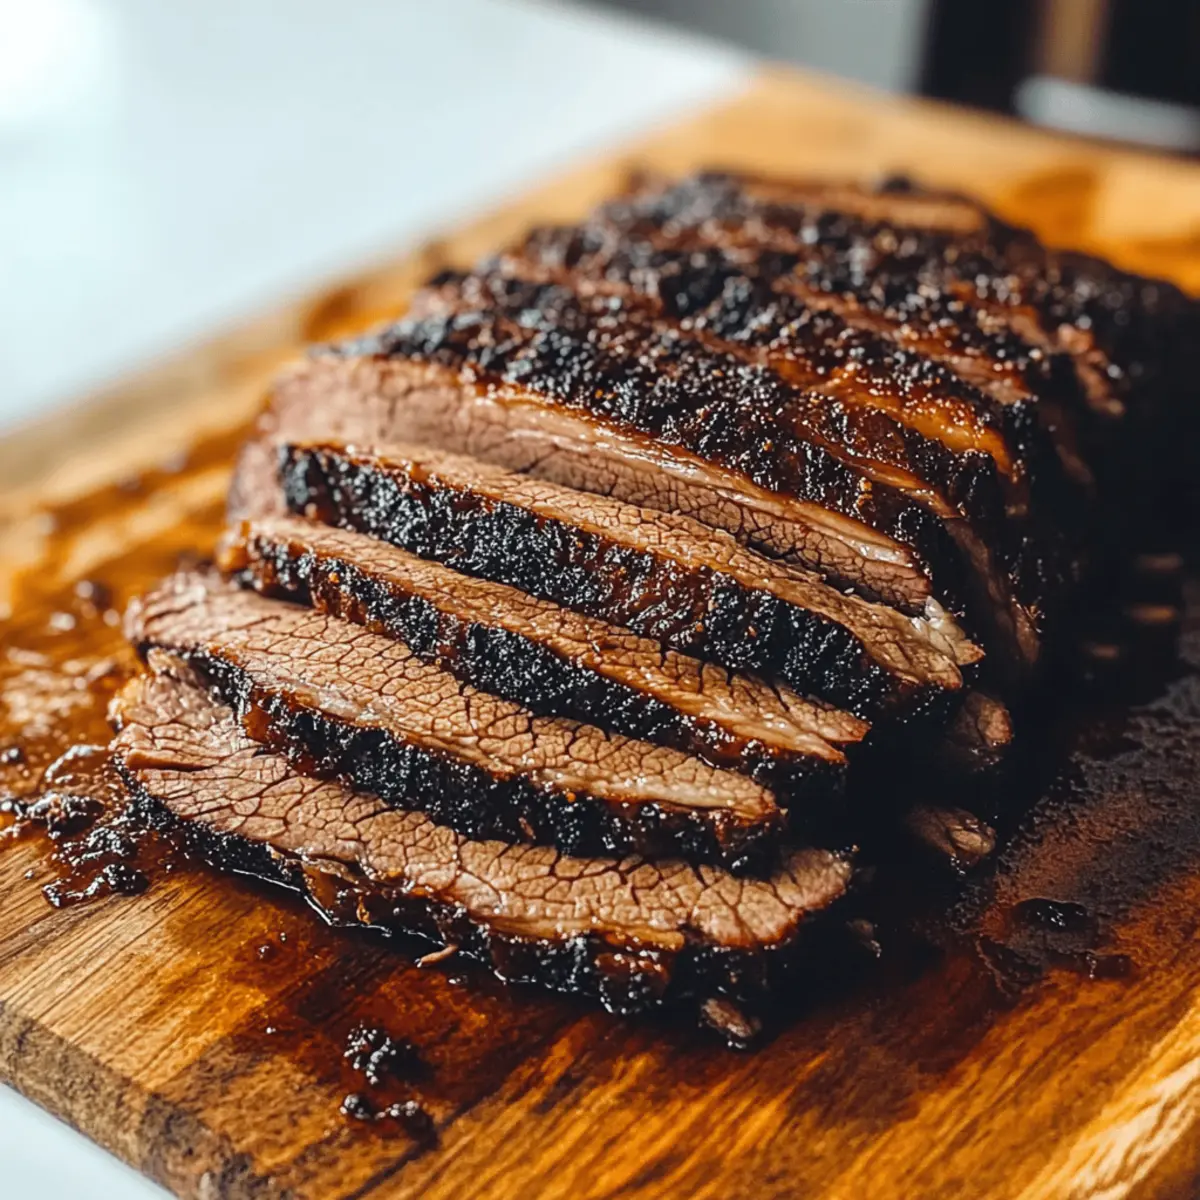
As I pulled the brisket from the oven, the rich, smoky aroma wrapped around me like a warm hug, promising comfort in every bite. This Oven Baked Beef Brisket transforms an ordinary family dinner into an epic feast that lingers in your heart and memory. With its slow-cooked perfection, this dish is not only incredibly tender and juicy but also allows for endless variations, making it a true crowd-pleaser. Whether you’re hosting loved ones or simply looking to treat yourself, the easy preparation and nourishing ingredients mean you can focus on what really matters—sharing joy and laughter at the table. Are you ready to elevate your meal to something unforgettable? Let’s dive in!

Why is this brisket recipe a must-try?

Tender, Juicy Perfection: This Oven Baked Beef Brisket will be the star of your table, offering melt-in-your-mouth goodness that will leave everyone asking for seconds.

Endless Variations: Feel free to experiment! Spice it up with a kick of cayenne, or add sweetness with brown sugar. The recipe is flexible, perfect for customizing to your taste.

Comfort Food Classic: A true American staple, this dish brings that cozy feel of home-cooked meals to your family gatherings.

Simplicity Made Delicious: With straightforward instructions, you don’t need to be a seasoned chef. Just mix, bake, and enjoy!

Feeding a Crowd: It’s ideal for gatherings—generous portions ensure everyone leaves satisfied. Pair with sides like creamy mashed potatoes or tangy coleslaw for a complete meal.

Make Ahead Magic: Season it the night before for even deeper flavors. Leftovers are great for sandwiches, making it a versatile favorite for meal preppingBaked Vegetable Egg lovers will appreciate the ease of this dish too!

Oven Baked Beef Brisket Ingredients

For the Brisket

  • Brisket – This is the main protein source; choose a well-marbled cut for improved tenderness.
  • Browning Sauce – Adds depth of flavor; substitute with soy sauce or Worcestershire sauce for a different twist.
  • Liquid Smoke – Infuses a smoky flavor, but you can omit it if you prefer a milder taste.

For the Spice Rub

  • Coarse Ground Coffee – Provides earthy richness; replace with espresso powder for an intense flavor.
  • Coarse Black Pepper – Adds a kick; adjust to your taste or use regular black pepper if coarse is unavailable.
  • Smoked Paprika – Gives smokiness and color; regular paprika can be used if desired.
  • Garlic Powder – Enhances overall flavor; use fresh garlic instead, adjusting the amount to your liking.
  • Onion Powder – Complements garlic; fresh onion is a good alternative; adjust the quantity based on your preference.
  • Kosher Salt – Essential for seasoning; sea salt can substitute with a slight reduction in quantity.

Optional Ingredients

  • Activated Charcoal – Adds an intriguing smoky visual appeal; feel free to omit for simplicity.

Enjoy your culinary adventure with this Oven Baked Beef Brisket, perfect for creating unforgettable family dinners!

Step‑by‑Step Instructions for Oven Baked Beef Brisket

Step 1: Preheat Your Oven
Begin by preheating your oven to 275°F (135°C). This low and slow cooking method is essential for achieving tender, melt-in-your-mouth Oven Baked Beef Brisket. Make sure your oven rack is positioned in the center for even heat distribution, setting the stage for delicious, evenly cooked brisket.

Step 2: Prepare the Marinade
In a small bowl, mix together the browning sauce and liquid smoke until well combined. Generously rub this mixture over the entire surface of the brisket, ensuring it’s evenly coated. This step adds layers of flavor that will enhance your brisket during the cooking process.

Step 3: Create the Spice Rub
In another bowl, combine the coarse ground coffee, coarse black pepper, smoked paprika, garlic powder, onion powder, and kosher salt. Once mixed thoroughly, take this hearty spice rub and evenly coat the brisket, pressing it in gently to ensure it adheres. This spice blend is crucial for flavor depth.

Step 4: Set Up for Baking
Position the seasoned brisket fat side up on a wire rack inside a roasting pan. This setup allows for proper airflow and ensures the heat circulates around the meat, leading to a beautifully cooked Oven Baked Beef Brisket.

Step 5: Bake the Brisket
Slide the roasting pan into your preheated oven and bake the brisket for approximately 3 to 4 hours, or until the internal temperature reaches 165°F (74°C). At this point, your kitchen will be filled with mouthwatering aromas, signaling that the brisket is well on its way to perfection.

Step 6: Wrap and Continue Baking
Once the brisket reaches 165°F, carefully remove it from the oven and wrap it tightly in butcher paper or aluminum foil. Return the wrapped brisket to the oven and continue baking until it reaches an internal temperature of 203°F (95°C), which should take another 2 to 3 hours. This wrapping phase is vital for locking in moisture and achieving tenderness.

Step 7: Rest Before Slicing
After reaching the final temperature, turn off the oven and let the brisket rest, wrapped, for about 1 hour. This resting period allows the juices to redistribute throughout the meat, resulting in succulent slices that are bursting with flavor and ready to elevate your family dinner.

How to Store and Freeze Oven Baked Beef Brisket

  • Room Temperature: Allow the brisket to cool completely before storing at room temperature for no more than 2 hours to prevent bacterial growth.

  • Fridge: Store leftover brisket in an airtight container in the fridge for up to 4 days. Reheat gently in the oven or microwave to preserve flavor and moisture.

  • Freezer: Wrap the brisket tightly in plastic wrap and aluminum foil, or place in a freezer-safe bag to store for up to 3 months. Thaw in the fridge overnight before reheating.

  • Reheating: For the best taste and texture, reheat the brisket in the oven at 300°F (150°C) until warmed through, not exceeding 165°F (74°C). Enjoy your delicious Oven Baked Beef Brisket!

Expert Tips for Oven Baked Beef Brisket

  • Season Generously: A robust seasoning creates depth; don’t skimp on the spice rub for your Oven Baked Beef Brisket to maximize flavor.

  • Meat Thermometer Essential: Using a meat thermometer ensures your brisket reaches the perfect doneness—avoid guesswork for truly tender results.

  • Limit Oven Peeking: Resist the urge to open the oven frequently. Each peek can cause temperature drops, potentially leading to uneven cooking.

  • Rest for Tenderness: Always allow your brisket to rest after cooking. This crucial step lets the juices redistribute for moist, flavorful slices.

  • Experiment with Variations: Don’t hesitate to try different spices or sweetness for your rub. The versatility of this Oven Baked Beef Brisket makes it adaptable to your tastes!

Oven Baked Beef Brisket Variations

Feel free to explore these delicious twists on your Oven Baked Beef Brisket, bringing your culinary creativity to life!

  • Spicy Kick: Add cayenne pepper or chili powder to the spice rub for an extra burst of heat. Your taste buds will dance with delight from the bold flavors!

  • Sweet & Smoky: Blend brown sugar or maple syrup into the spice mixture for a delightful contrast with the beef’s richness. This beautiful balance of flavors makes every bite unforgettable.

  • Fresh Herbs: Incorporate finely chopped rosemary or thyme into your seasonings for a fragrant aroma that brings freshness to the dish. It elevates the brisket, making it an even more tantalizing experience.

  • Alternative Cuts: Substitute brisket with chuck roast or pork shoulder to explore different textures while enjoying aromatic spices. Each alternate cut offers its unique charm, allowing you to adjust according to your preference.

  • BBQ Marinade: Mix in your favorite BBQ sauce with the marinade for an added zing and tangy sweetness. This transformation creates a delightful fusion that’s perfect for BBQ lovers.

  • Veggie Infusion: Throw in sliced onions, bell peppers, or mushrooms in the roasting pan for a delightful medley of flavors that pairs beautifully with the brisket. They cook down, providing a delicious side of flavor.

  • Beer Braise: Use a dark beer in place of liquid smoke for a unique depth of flavor as it combines beautifully with the spices. The result is an infusion of rich, satisfying taste that you won’t want to miss.

  • Savory Wrap: If you’re keen on wraps, slice the brisket thinly and pile it in a warm tortilla topped with coleslaw for a deliciously satisfying handheld treat. It’s a delightful option for lunch or a casual dinner!

Embrace these variations and make this recipe your own! If you’re captivated by delightful baked options, check out these Air Fryer Baked potatoes or tantalizing Sweet Potato Beef dishes for more inspiration.

Make Ahead Options

Preparing your Oven Baked Beef Brisket ahead of time is a fantastic way to save precious minutes on busy weeknights! You can season the brisket up to 24 hours in advance, wrapping it in plastic wrap and refrigerating to enhance flavor. This marinating step allows the spices to penetrate deeply, resulting in an even more delicious outcome. For a solid meal prep option, cooked brisket can also be refrigerated for up to 4 days or frozen for up to 3 months; just be sure to store it in an airtight container to maintain its juicy tenderness. When you’re ready to enjoy, simply reheat gently in the oven to retain its moist texture, and you’ll have a comforting, hearty family dinner with minimal effort!

What to Serve with Oven Baked Beef Brisket

Bring your loved ones to the table with a comforting array of accompaniments that elevate the flavors of the brisket.

  • Creamy Mashed Potatoes: The rich, buttery texture complements the tender beef, soaking up the delectable juices for each bite.

  • Tangy Coleslaw: Crunchy and refreshing, this side adds a zesty contrast, brightening the rich flavors of the brisket.

  • Roasted Vegetables: Caramelized and slightly charred, vegetables like carrots and Brussels sprouts provide a hearty balance to the meal, enhancing the brisket’s smoky notes.

  • Garlic Bread: Warm and crusty, garlic bread offers a comforting touch, perfect for mopping up leftover juices from the plate.

  • Full-Bodied Red Wine: A glass of Merlot or Cabernet Sauvignon pairs beautifully, its robust flavors marrying perfectly with the richness of the brisket.

  • Rich Chocolate Cake: For dessert, this indulgent treat adds a sweet finish to your meal, offering the comforting nostalgia of family gatherings around the table.

Oven Baked Beef Brisket Recipe FAQs

How do I choose the best brisket?
Absolutely! When selecting brisket, look for a well-marbled cut. The fat marbling is key to achieving that tender and juicy texture everyone loves. A good guide is to choose a brisket with a nice layer of fat on top, as it will melt during cooking, keeping the meat moist and flavorful.

What’s the best way to store leftovers?
Very simple! To store leftovers, let the brisket cool completely at room temperature for no more than 2 hours. Then, transfer it to an airtight container, where it can be kept in the fridge for up to 4 days. When reheating, gently warm it in the oven or microwave, ensuring it reaches 165°F (74°C) for safety and optimal flavor.

Can I freeze Oven Baked Beef Brisket?
Yes, you can! To freeze your brisket, wrap it tightly in plastic wrap and then in aluminum foil, or place it in a freezer-safe bag, ensuring all air is removed. It will keep well for up to 3 months. When ready to enjoy, simply transfer it to the fridge overnight to thaw, then reheat in a low oven until warmed through.

What should I do if the brisket is tough?
If your brisket turns out tough, don’t worry! This can sometimes happen if it’s not cooked long enough. For the next attempt, make sure to monitor the internal temperature closely. Aim for at least 203°F (95°C) during the final cooking phase. Additionally, let it rest after cooking; this helps redistribute the juices, providing a more tender texture.

Can I make this recipe suitable for my gluten-free friends?
Absolutely! If you need this Oven Baked Beef Brisket to be gluten-free, simply substitute the browning sauce with a gluten-free soy sauce or tamari. Make sure to check labels for any hidden gluten ingredients in your spices and sauces.

Are there any ingredients I can substitute in the spice rub?
Yes! If you want to switch things up, you can easily substitute some spices in the rub. For instance, if you’re out of smoked paprika, regular paprika works fine, or you can even use a touch of cayenne for added heat. Adjust the spices according to your taste preferences—it’s all about making it your own!

Oven Baked Beef Brisket

Oven Baked Beef Brisket for Tender, Flavorful Family Dinners

This Oven Baked Beef Brisket is tender and flavorful, perfect for family dinners.
Prep Time 30 minutes
Cook Time 4 hours
Resting Time 1 hour
Total Time 5 hours 30 minutes
Servings: 8 slices
Course: Beef
Cuisine: American
Calories: 350

Ingredients
  

For the Brisket
  • 1 piece Brisket Choose a well-marbled cut for improved tenderness
  • 1/2 cup Browning Sauce Can substitute with soy sauce or Worcestershire sauce
  • 2 teaspoons Liquid Smoke Can omit if you prefer a milder taste
For the Spice Rub
  • 1 tablespoon Coarse Ground Coffee Replace with espresso powder for an intense flavor
  • 1 tablespoon Coarse Black Pepper Adjust to taste or use regular black pepper
  • 1 tablespoon Smoked Paprika Regular paprika can be used if desired
  • 1 teaspoon Garlic Powder Use fresh garlic instead, adjusting amount to liking
  • 1 teaspoon Onion Powder Fresh onion is a good alternative
  • 1 tablespoon Kosher Salt Sea salt can substitute, with slight reduction in quantity
Optional Ingredients
  • 1 teaspoon Activated Charcoal Adds smoky visual appeal; feel free to omit

Equipment

  • Oven
  • Roasting Pan
  • Wire Rack
  • Meat Thermometer
  • Aluminum Foil

Method
 

Cooking Steps
  1. Preheat your oven to 275°F (135°C).
  2. In a small bowl, mix the browning sauce and liquid smoke, then rub over the brisket.
  3. In another bowl, combine the spice rub ingredients and coat the brisket.
  4. Position the brisket fat side up on a wire rack in a roasting pan.
  5. Bake the brisket for 3 to 4 hours, until the internal temperature reaches 165°F (74°C).
  6. Wrap the brisket in butcher paper or aluminum foil and bake until it reaches 203°F (95°C), about 2 to 3 hours more.
  7. Let the brisket rest, wrapped, for about 1 hour before slicing.

Nutrition

Serving: 1sliceCalories: 350kcalCarbohydrates: 3gProtein: 25gFat: 26gSaturated Fat: 10gPolyunsaturated Fat: 1gMonounsaturated Fat: 13gTrans Fat: 1gCholesterol: 98mgSodium: 796mgPotassium: 600mgSugar: 1gCalcium: 5mgIron: 2mg

Notes

Feel free to experiment with different spices or sweetness for your rub to make it your own.

Tried this recipe?

Let us know how it was!

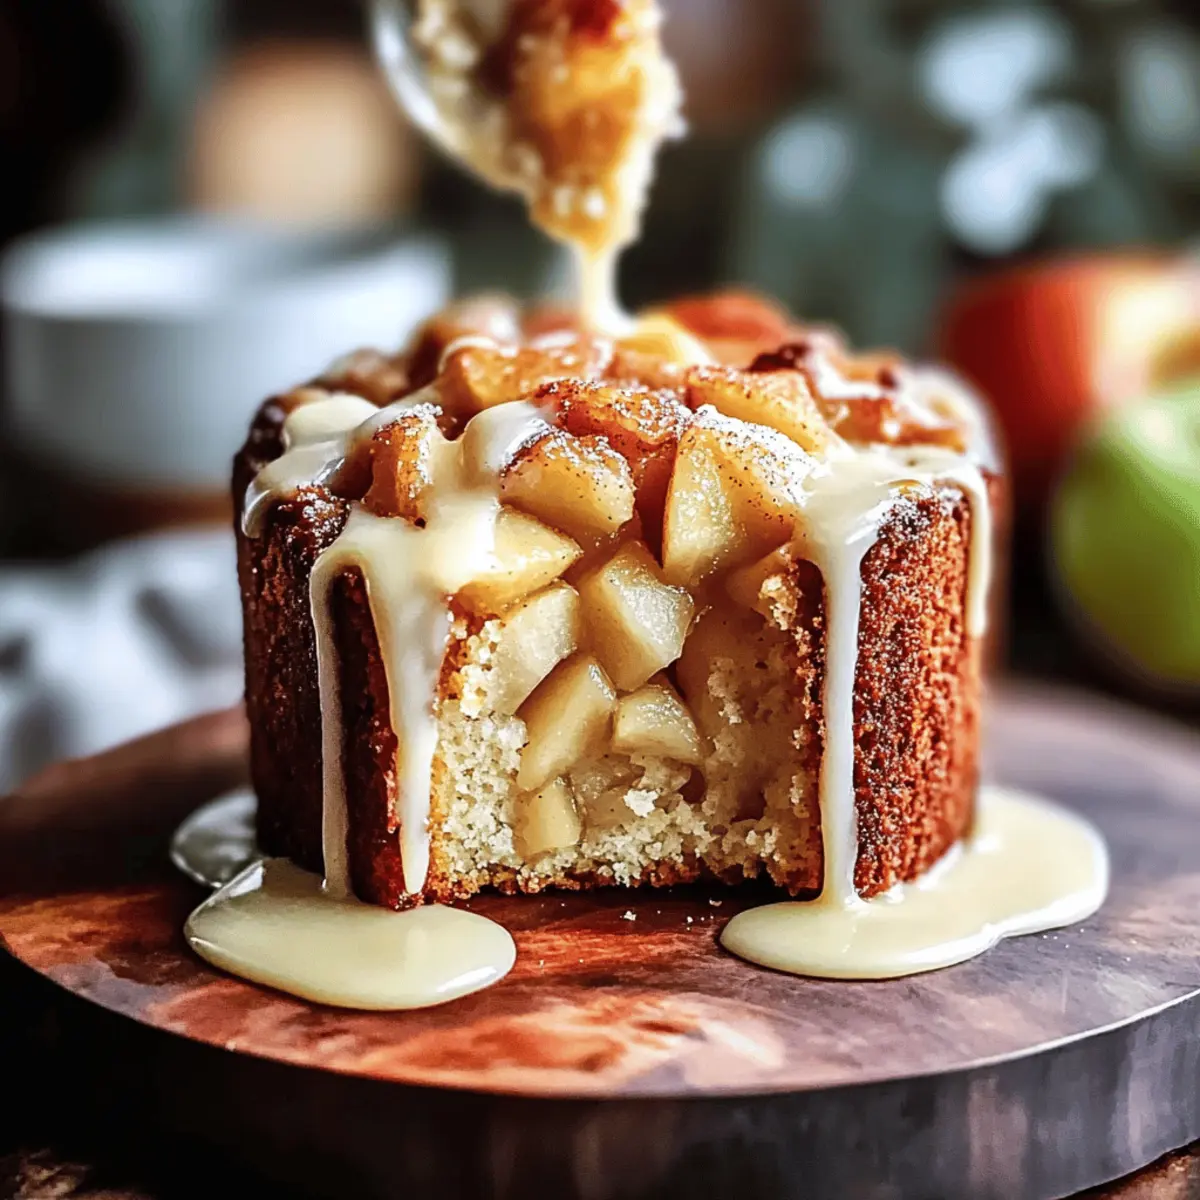
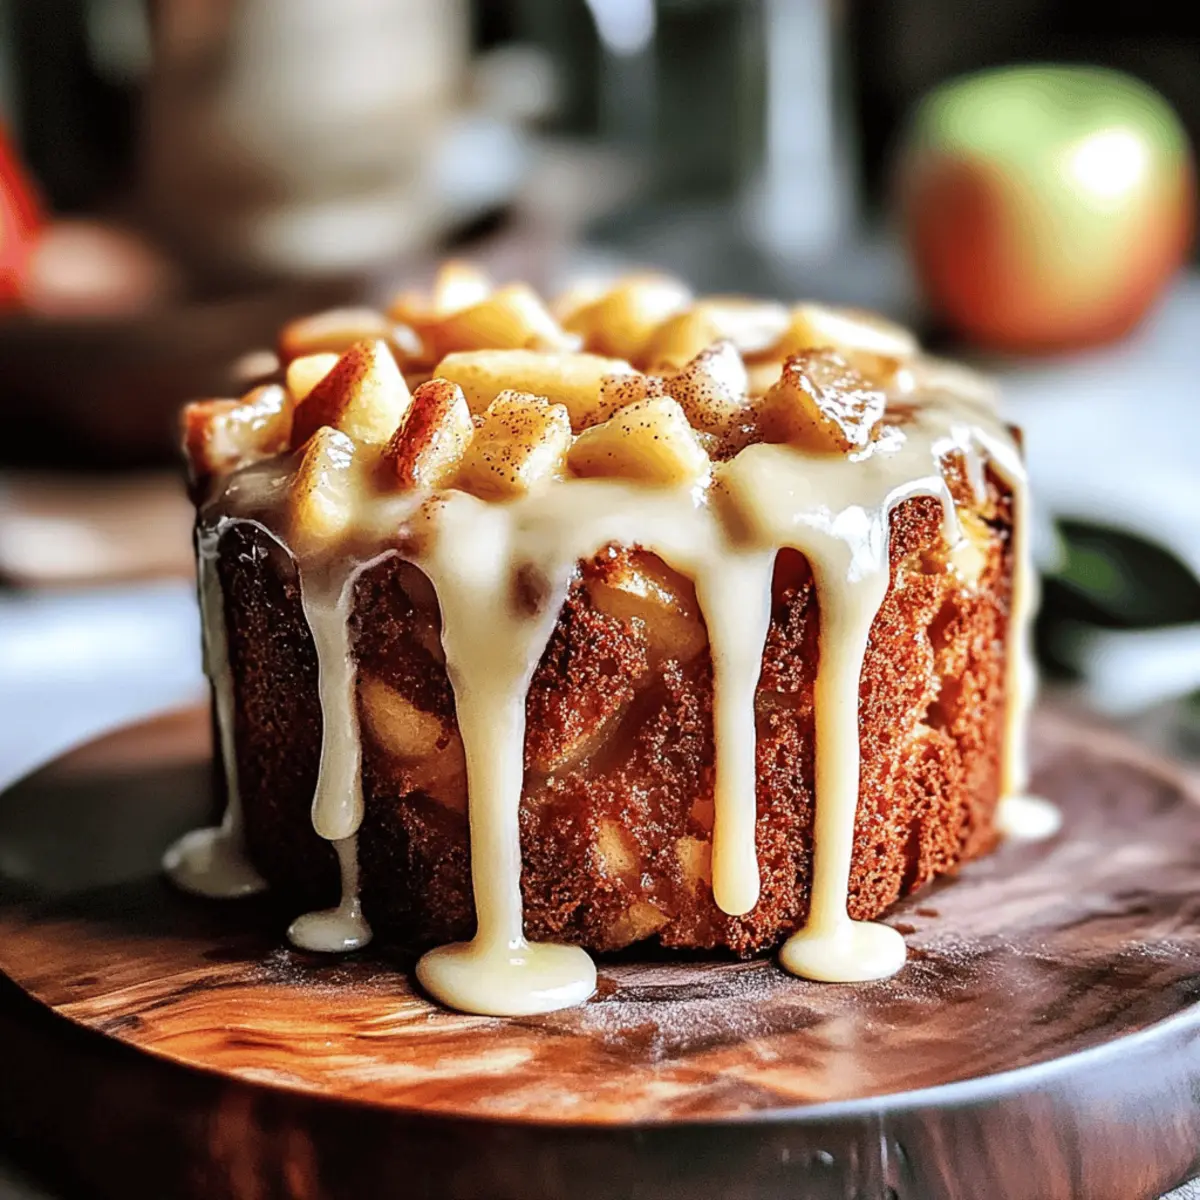
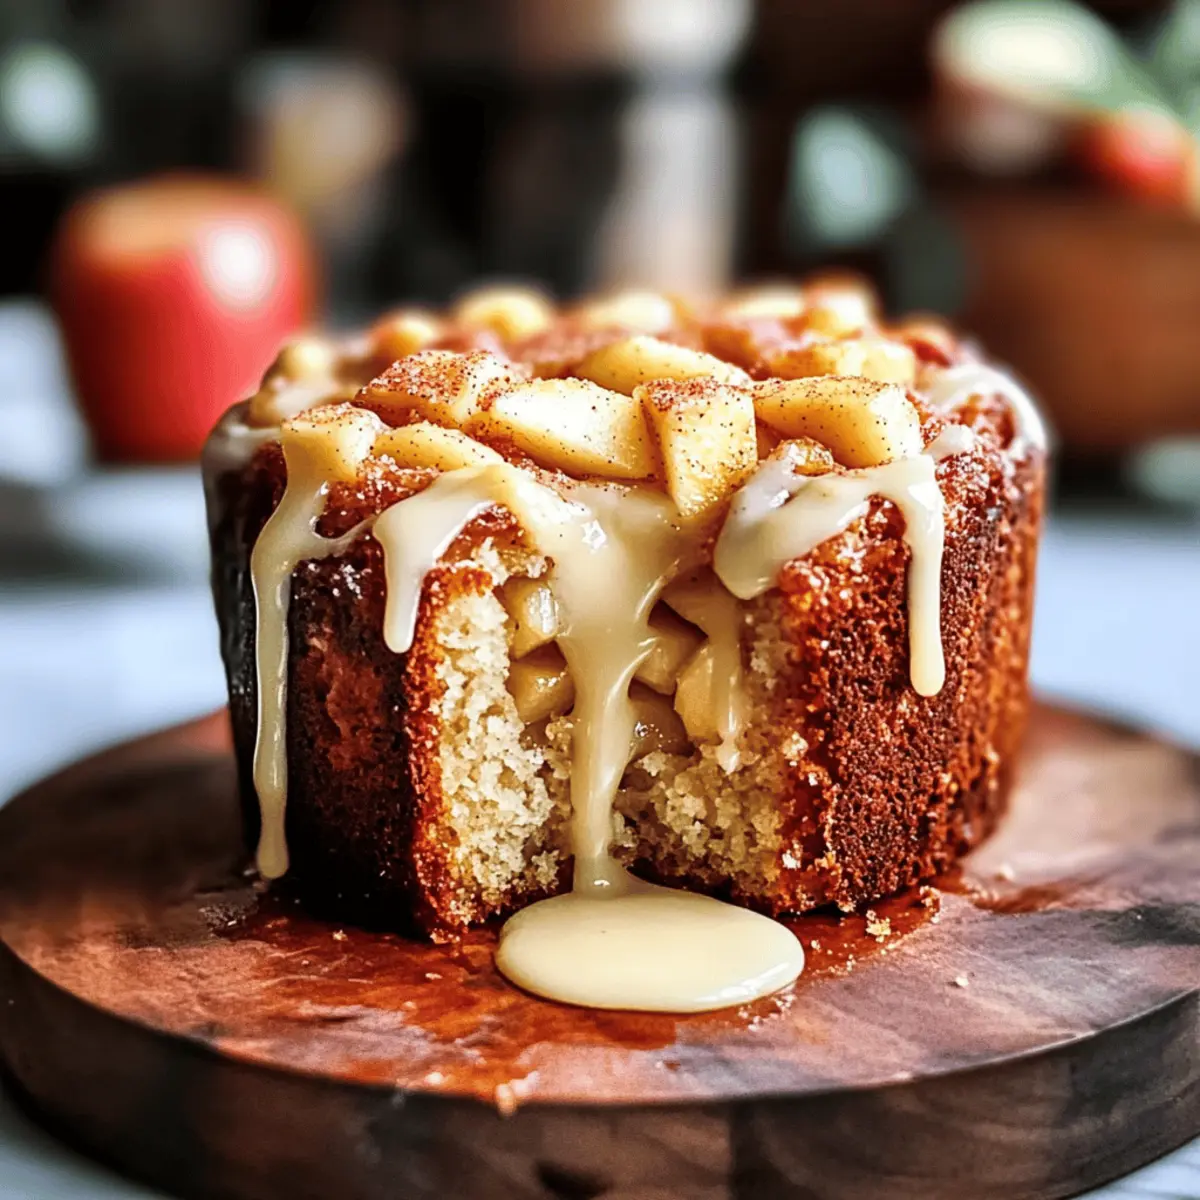
Amish Apple Fritter Bread: Taste the Warmth of Fall Comfort

As the crisp autumn air sweeps in, there’s a certain magic that happens in the kitchen—warm spices start dancing, and the scent of baked goods fills the room. This Amish Apple Fritter Bread perfectly captures that cozy charm, transforming simple ingredients into a delightful treat that everyone will adore. With its ability to satisfy sweet cravings while being incredibly easy to whip up, you’ll find yourself reaching for this recipe time and time again. Plus, it’s versatile enough to be tailored for gluten-free and vegan diets, making it a welcoming option for all! Whether it’s a lazy Sunday morning or a sweet after-dinner surprise, what’s not to love about this comforting loaf? Ready to discover how to make your kitchen smell heavenly?

Why is Amish Apple Fritter Bread a Must-Try?

Cozy Comfort: This bread captures the essence of fall, infusing every bite with warm spices and juicy apple chunks that evoke nostalgic memories.

Versatility for Everyone: With easily adaptable gluten-free and vegan options, sharing this treat is a breeze!

Simplicity: The straightforward preparation means you can enjoy this homemade delight without hours in the kitchen.

Texture Magic: Experience the perfect harmony of a tender crumb and a crunchy cinnamon topping that will have your taste buds dancing with joy.

Crowd-Pleasing: Whether it’s breakfast, brunch, or dessert, this dish is sure to be a hit among family and friends, just like my Pineapple Coconut Mojito or Grilled Cinnamon Apples. Enjoy it warm, alongside ice cream or a drizzle of maple syrup!

Amish Apple Fritter Bread Ingredients

• A delightful mix of flavors for your cozy baking!

For the Bread

  • All-Purpose Flour – Provides structure to the bread. Substitution: Gluten-free flour can be used for a gluten-free option.
  • Baking Powder – Leavens the bread for a light texture. Check expiration for effectiveness.
  • Baking Soda – Enhances leavening and browning.
  • Salt – Balances sweetness and enhances flavor.
  • Ground Cinnamon – Adds warmth and spice. Increase amount for extra flavor.
  • Ground Nutmeg – Optional spice to deepen the flavor profile.
  • Granulated Sugar – Sweetens the bread. Substitution: Coconut sugar can be used.
  • Eggs – Provides moisture and binding. Substitution: Flaxseed meal mixed with water can be used for a vegan version.
  • Buttermilk – Contributes moisture and flavor. Substitution: Milk with vinegar or lemon juice can replicate buttermilk.
  • Unsweetened Applesauce – Adds moisture and sweetness. Substitution: Mashed bananas can be used.
  • Vanilla Extract – Enhances overall flavor. Use pure extract for best results.
  • Peeled and Diced Apples (Granny Smith or Honeycrisp) – Provides the signature apple flavor and texture.
  • Vegetable Oil – Adds moisture to the bread. Substitution: Coconut oil can be used for a different flavor.

For the Topping

  • Brown Sugar – Adds sweetness and gives a crunchy topping.
  • Unsalted Butter – Provides rich flavor for the batter and topping. Substitution: Vegetable oil can be used for dairy-free.
  • Cinnamon Sugar Topping – Adds a sweet and crunchy finish on top.

Step‑by‑Step Instructions for Amish Apple Fritter Bread

Step 1: Prepare the Fritters
In a mixing bowl, whisk together the dry ingredients: all-purpose flour, baking powder, baking soda, salt, cinnamon, and nutmeg. In another bowl, combine your wet ingredients, folding in the diced apples. Heat oil in a frying pan over medium-high heat. Drop spoonfuls of the batter into the hot oil and fry for 2-3 minutes on each side or until golden brown. Remove and drain on paper towels.

Step 2: Make the Bread Batter
Preheat your oven to 350°F (175°C). In a large mixing bowl, combine the flour, baking powder, baking soda, granulated sugar, and salt. In a separate bowl, whisk together the eggs, buttermilk, unsweetened applesauce, and vanilla extract until fully blended. Gently mix the wet ingredients into the dry, folding in the remaining diced apples until just combined to create a fluffy Amish Apple Fritter Bread batter.

Step 3: Combine the Layers
Prepare a greased loaf pan by lightly coating it with butter or cooking spray. Pour half of the batter into the bottom of the pan, making sure it is evenly spread. Next, layer the fried fritters over this batter, creating a delightful apple-filled surprise. Carefully spoon the remaining batter on top, smoothing it out to completely cover the fritters and ensuring a beautiful presentation.

Step 4: Add the Topping
In a small bowl, mix brown sugar and ground cinnamon to create the crunchy topping. Brush the melted butter generously over the top of the batter in the loaf pan, allowing it to soak in. Sprinkle the cinnamon sugar mixture evenly over the batter. This will create a deliciously sweet and crunchy crust on your Amish Apple Fritter Bread once baked.

Step 5: Bake the Bread
Place the loaf pan in the preheated oven and bake for 50-60 minutes. Keep an eye on your bread, looking for a golden brown color and a toothpick inserted in the center coming out clean. This means your Amish Apple Fritter Bread is perfectly cooked and ready to share the delightful aromas of spices and apples throughout your kitchen.

Step 6: Serve and Store
Once the bread is baked, allow it to cool in the pan for about 10-15 minutes before transferring it to a wire rack to cool completely. Slice warm and serve with a pat of butter or a drizzle of ice cream for a comforting treat. Store leftover slices in an airtight container for up to 3 days, or freeze for later enjoyment up to 2 months.

Make Ahead Options

These Amish Apple Fritter Bread preparations are perfect for busy home cooks looking to save time during hectic weekdays! You can make the batter and prep the fried fritters up to 24 hours in advance; simply store the fritters in an airtight container in the refrigerator. When you’re ready to bake, layer the fritters and batter in your loaf pan, add the topping, and pop it into the oven. For best results, make sure to cover the batter tightly to prevent it from drying out. After baking, this delightful bread is just as delicious the next day, so you can enjoy a cozy slice for breakfast or a sweet snack!

Storage Tips for Amish Apple Fritter Bread

Room Temperature: Store the bread in an airtight container at room temperature for up to 3 days to keep it fresh and moist.

Fridge: If you want to extend the shelf life, refrigerate the bread in an airtight container for up to a week, but be aware it may dry out slightly.
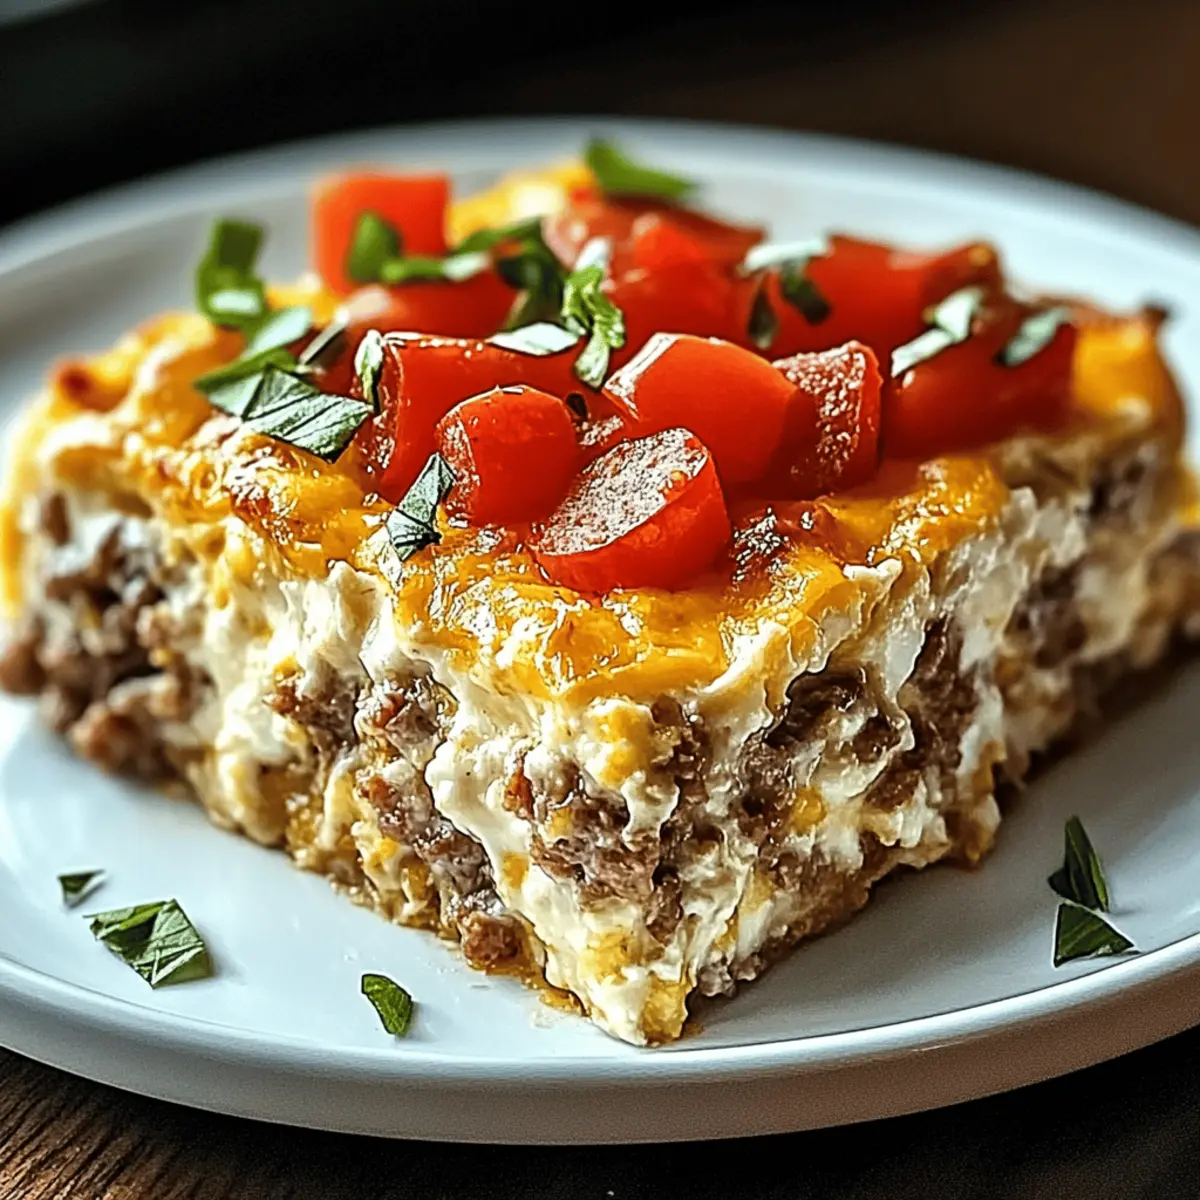
Freezer: For long-term storage, slice the Amish Apple Fritter Bread and wrap individual pieces tightly in plastic wrap before placing in a freezer bag. It will stay fresh for up to 2 months.

Reheating: To enjoy, simply thaw slices overnight in the fridge or microwave them for about 15-20 seconds until warm, perfect for a quick treat!

What to Serve with Amish Apple Fritter Bread

Warm, comforting, and fragrant with spices, this delightful bread invites you to create a beautifully complete meal experience.

  • Creamy Mashed Potatoes: Their rich, buttery texture contrasts wonderfully with the sweet bread, making for a satisfying meal.

  • Freshly Whipped Cream: A dollop of light, airy whipped cream adds a creamy touch that balances the spices in the bread beautifully.

  • Maple Syrup Drizzle: A drizzle of pure maple syrup elevates the sweetness to divine levels, enhancing the bread’s flavors even more.

  • Cinnamon Ice Cream: Creamy and cool, this indulgent pairing adds a delightful twist, echoing the warm spices of the Amish Apple Fritter Bread.

  • Roasted Pumpkin Soup: The soup’s velvety texture and earthy flavors create a cozy, grounding contrast that embraces the warmth of fall.

  • Fruit Salad: A refreshing mix of seasonal fruits adds vibrant flavors and a juicy crunch, uplifting every bite of soft, spiced bread.

  • Hot Apple Cider: Serve this classic fall beverage alongside your bread to create a heartwarming experience that warms the soul.

  • Chocolate Chip Cookies: For a sweet twist, these classic cookies provide an irresistible chewy contrast to the delightful softness of the bread.

Tips for the Best Amish Apple Fritter Bread

  • Perfect Apple Chunks: Ensure apples are diced evenly for uniform texture throughout the bread, keeping every slice deliciously balanced.

  • Monitor Mixing: Avoid overmixing your batter; just mix until combined to maintain a light, airy texture in your Amish Apple Fritter Bread.

  • Exact Baking Time: Check the bread a few minutes before the suggested baking time to avoid overbaking and ensure a moist crumb.

  • Substitution Savvy: When using substitutions, such as for the eggs or buttermilk, be mindful of maintaining the flavor and consistency of the bread.

  • Cooling Essentials: Let the bread cool thoroughly before slicing to achieve clean, perfect slices and enhance flavors.

Amish Apple Fritter Bread: Customization Ideas

Feel free to let your creativity run wild with these variations that enhance flavor and cater to dietary preferences!

  • Gluten-Free: Substitute all-purpose flour with a gluten-free flour blend for a cozy alternative without compromising texture. Your gluten-free friends will thank you!

  • Vegan Delight: Use flaxseed meal mixed with water instead of eggs, and substitute buttermilk with oat milk mixed with lemon juice. This ensures everyone can enjoy this delightful treat.

  • Fruit Swap: Replace apples with ripe pears or a medley of seasonal fruits like peaches or berries for a fresh twist. Each fruit brings a unique sweetness and flavor.

  • Nuts Galore: Add chopped walnuts or pecans to the batter for a delightful crunch that pairs beautifully with the soft bread. The nuttiness complements the apples wonderfully!

  • Spiced Up: Want to add heat? Incorporate a pinch of cayenne or some chopped jalapeños to kick things up a notch while maintaining that comforting sweetness.

  • Swirled Goodness: To elevate the aesthetic and taste, create a cinnamon swirl by mixing extra cinnamon and sugar into some of the batter before layering it in the pan.

  • Glaze Finish: Drizzle a simple glaze made from powdered sugar and milk over the cooled bread for a sweet finishing touch that looks as good as it tastes.

Whether you’re reminiscing over family recipes or experimenting with new flavors, these variations will keep the spirit of homemade goodness alive, just like my Zucchini Leek Fritters or the indulgent BBQ Pineapple Chicken. Enjoy crafting your perfect loaf!

Amish Apple Fritter Bread Recipe FAQs

How do I select ripe apples for this recipe?
Absolutely! For the best flavor in your Amish Apple Fritter Bread, choose apples that are firm and slightly tart, such as Granny Smith or Honeycrisp. Look for apples that have vibrant color and are free from bruises or dark spots. Ripe apples should feel heavier and have a pleasant aroma. A good rule of thumb is to avoid overly soft or mealy apples to ensure they hold up well in baking.

What is the best way to store leftover Amish Apple Fritter Bread?
Very good question! To keep your Amish Apple Fritter Bread fresh, store it in an airtight container at room temperature for up to 3 days. If you want to extend its shelf life, refrigerate it for up to a week, although it might dry out a bit. If you’re not going to eat it within that time frame, slice it and freeze it for up to 2 months, ensuring you wrap each slice tightly in plastic wrap for the best results!

Can I freeze Amish Apple Fritter Bread? How?
Absolutely! Freezing is a great way to preserve your delicious bread. To freeze your Amish Apple Fritter Bread, wait until it has completely cooled. Slice the bread into individual pieces, then wrap each slice tightly in plastic wrap. Place the wrapped slices into a freezer-safe bag, removing as much air as possible. It can be frozen for up to 2 months. When you’re ready to eat, thaw it in the refrigerator overnight or warm in the microwave for about 15-20 seconds until soft.

What should I do if my batter is too thick?
If you find that your batter for the Amish Apple Fritter Bread is too thick, don’t worry! This can sometimes happen, especially if your flour measurement is slightly off. To remedy this, gradually add a tablespoon of milk or buttermilk to the batter at a time, mixing gently until you achieve a smooth and pourable consistency. Be cautious not to overmix though, as this can lead to denser bread.

Are there any allergy considerations for this recipe?
Very much so! If you’re adapting this recipe for dietary restrictions or allergies, there are wonderful alternatives available. To keep it gluten-free, use a certified gluten-free flour blend in place of all-purpose flour. For vegan substitutions, you can replace the eggs with a mixture of flaxseed meal and water (1 tablespoon of flaxseed meal mixed with 2.5 tablespoons of water for each egg). For the buttermilk, simply mix non-dairy milk (like almond or soy) with a teaspoon of vinegar or lemon juice. Always check your ingredient labels for potential allergens!

Amish Apple Fritter Bread

Amish Apple Fritter Bread: Taste the Warmth of Fall Comfort

Amish Apple Fritter Bread captures the essence of fall with warm spices and juicy apples, making it a must-try for cozy gatherings.
Prep Time 20 minutes
Cook Time 1 hour
Cooling Time 15 minutes
Total Time 1 hour 35 minutes
Servings: 10 slices
Course: Breakfast
Cuisine: American
Calories: 250

Ingredients
  

For the Bread
  • 3 cups All-Purpose Flour Substitution: Gluten-free flour can be used for a gluten-free option.
  • 1 tbsp Baking Powder Check expiration for effectiveness.
  • 1 tsp Baking Soda
  • 1 tsp Salt
  • 2 tsp Ground Cinnamon Increase amount for extra flavor.
  • 0.5 tsp Ground Nutmeg Optional spice.
  • 1 cup Granulated Sugar Substitution: Coconut sugar can be used.
  • 2 large Eggs Substitution: Flaxseed meal mixed with water can be used for a vegan version.
  • 1 cup Buttermilk Substitution: Milk with vinegar or lemon juice can replicate buttermilk.
  • 0.5 cup Unsweetened Applesauce Substitution: Mashed bananas can be used.
  • 1 tsp Vanilla Extract Use pure extract for best results.
  • 2 cups Peeled and Diced Apples (Granny Smith or Honeycrisp)
  • 0.5 cup Vegetable Oil Substitution: Coconut oil can be used for a different flavor.
For the Topping
  • 0.5 cup Brown Sugar
  • 0.25 cup Unsalted Butter Substitution: Vegetable oil can be used for dairy-free.
  • 1 tbsp Cinnamon Sugar Topping

Equipment

  • Mixing Bowl
  • Frying pan
  • Loaf Pan
  • Whisk

Method
 

Step-by-Step Instructions
  1. In a mixing bowl, whisk together the dry ingredients: all-purpose flour, baking powder, baking soda, salt, cinnamon, and nutmeg.
  2. In another bowl, combine your wet ingredients, folding in the diced apples.
  3. Heat oil in a frying pan over medium-high heat. Drop spoonfuls of the batter into the hot oil and fry for 2-3 minutes on each side or until golden brown. Remove and drain on paper towels.
  4. Preheat your oven to 350°F (175°C). In a large mixing bowl, combine the flour, baking powder, baking soda, granulated sugar, and salt.
  5. In a separate bowl, whisk together the eggs, buttermilk, unsweetened applesauce, and vanilla extract until fully blended.
  6. Gently mix the wet ingredients into the dry, folding in the remaining diced apples until just combined.
  7. Prepare a greased loaf pan by lightly coating it with butter or cooking spray. Pour half of the batter into the bottom of the pan.
  8. Layer the fried fritters over this batter, then spoon the remaining batter on top, smoothing it out.
  9. Mix brown sugar and ground cinnamon for the topping. Brush melted butter over the top of the batter in the loaf pan, then sprinkle the cinnamon sugar mixture.
  10. Bake for 50-60 minutes, looking for a golden brown color and a toothpick inserted in the center coming out clean.
  11. Allow cooling in the pan for 10-15 minutes before transferring to a wire rack. Slice warm and serve.

Nutrition

Serving: 1sliceCalories: 250kcalCarbohydrates: 34gProtein: 3gFat: 12gSaturated Fat: 7gPolyunsaturated Fat: 1gMonounsaturated Fat: 4gCholesterol: 60mgSodium: 250mgPotassium: 130mgFiber: 1gSugar: 15gVitamin A: 3IUVitamin C: 5mgCalcium: 5mgIron: 6mg

Notes

Ensure apples are diced evenly for uniform texture. Avoid overmixing to maintain a light texture. Store in an airtight container for a few days.

Tried this recipe?

Let us know how it was!

Pappadeaux Catfish Opelousas – A Creamy Cajun Classic to Relish

The savory scent of blackened catfish sizzling in a hot skillet can transport anyone straight to the lively streets of New Orleans. Meet Pappadeaux Catfish Opelousas, a dish bursting with Cajun spirit that’s not just a feast for the taste buds but also a quick solution for busy weeknights. With its rich, creamy seafood sauce enveloping perfectly seasoned catfish, this recipe effortlessly accommodates various dietary needs—think gluten-free, dairy-free, or even vegetarian! Whether you’re hosting friends or simply indulging in a comforting meal for yourself, this delightful dish will wow all palates at the dinner table. Are you ready to dive into a taste of the South?

Why is Pappadeaux Catfish Opelousas a Must-Try?

Flavor Explosion: The marriage of blackened catfish and a rich, creamy sauce offers a taste experience that’s out of this world.

Customization Galore: Easily adapt this recipe for gluten-free, dairy-free, or even vegetarian tastes, making it versatile for any dietary need.

Quick & Convenient: Ready in about 30 minutes, it’s perfect for busy weeknights when dinner needs to be delicious and fast.

Crowd-Pleaser: Impress family and friends with a dish that brings the essence of Cajun cuisine right to your table – no need to visit New Orleans!

Textural Delight: Enjoy the contrast of the crispy catfish with the silky sauce that complements it beautifully, creating a satisfying mouthfeel.

Pappadeaux Catfish Opelousas is more than just a meal; it’s a cozy gathering moment at your table. For more delightful dishes, check out our guide on Cajun flavors and explore how to accommodate every guest with easy substitutions.

Pappadeaux Catfish Opelousas Ingredients

For the Blackened Catfish
Catfish fillets – Fresh fillets provide the base of the dish; substitute with snapper or black drum for accessibility.
Unsalted butter – Adds richness and aids in cooking the fish; for a dairy-free option, use coconut oil.
Spice Blend – Contains garlic powder, onion powder, cayenne pepper, paprika, black pepper, seasoned salt, oregano, and thyme; adjust cayenne for desired heat level.

For the Creamy Sauce
Onion – Provides foundational flavor and sweetness; shallots can be used for a milder taste.
Garlic – Enhances overall taste; adjust according to personal preference.
Heavy cream – Creates a luscious texture; substitute with coconut cream for a dairy-free version.
Lemon juice – Offers acidity to balance richness; fresh is preferred.
Shrimp stock – Forms the base of the sauce flavor; use vegetable stock for a vegetarian option.

For the Seafood Addition
Crawfish tails – Add seafood flavor; can be omitted for a vegetarian variation.
Shrimp – Optional for additional flavor; can be omitted or increased as desired.
Crab meat – Enhances seafood richness; imitation crab is a cost-effective substitute.
Fresh oysters – Contributes to the sauce’s depth but can be skipped.

For the Garnish
Fresh parsley – Used for garnish to add color and freshness.

Embrace the vibrant spirit of the South with these Pappadeaux Catfish Opelousas ingredients, perfect for creating a dish that truly celebrates Cajun cuisine!

Step‑by‑Step Instructions for Pappadeaux Catfish Opelousas

Step 1: Prepare Fish
Pat the fresh catfish fillets dry with a paper towel, ensuring they are completely moisture-free. Generously sprinkle the Cajun spice blend over both sides of the fillets, allowing the flavors to penetrate. Let the seasoned fish sit for about 10 minutes while you prepare your cooking equipment, ensuring the spices enhance the taste of the Pappadeaux Catfish Opelousas.

Step 2: Cook Fish
Heat a cast-iron skillet over medium-high heat and add unsalted butter, allowing it to melt until bubbly. Carefully place the seasoned catfish fillets in the skillet, cooking for 3-4 minutes on each side until they develop a deep, blackened crust and flake easily with a fork. Once cooked, transfer the fish to a warm plate while you prepare the sauce, keeping them covered to retain heat.

Step 3: Make Sauce
Reduce the skillet heat to medium and add a tablespoon of remaining butter. Once melted, add the chopped onion and minced garlic, sautéing for 2-3 minutes until the onion becomes translucent and the garlic is fragrant. This creates a flavorful base for your Pappadeaux Catfish Opelousas sauce, filling the kitchen with delightful aromas.

Step 4: Combine Sauce Ingredients
Stir in the shrimp stock and heavy cream, followed by the fresh lemon juice. Bring the mixture to a gentle simmer, scraping up any browned bits from the skillet, which adds depth to the sauce. After about 2 minutes, incorporate the crawfish tails, shrimp, crab meat, and oysters (if using), letting the seafood warm through as the sauce thickens, approximately 5-7 minutes.

Step 5: Plate Dish
Carefully place the blackened catfish fillets on serving plates; then, generously pour the creamy seafood sauce over the top, ensuring each piece is well-coated. For an added touch of freshness, sprinkle chopped parsley on top to enhance the visual appeal of your Pappadeaux Catfish Opelousas. Serve immediately alongside your favorite sides, like dirty rice or coleslaw.

Expert Tips for Pappadeaux Catfish Opelousas

  • Seasoning Matters: Make sure to season the catfish well, allowing the spices to penetrate for a flavorful experience that elevates your Pappadeaux Catfish Opelousas.

  • Adjust Spice Levels: If you’re concerned about heat, start with less cayenne pepper in the spice blend, and gradually increase according to your taste preferences.

  • Perfect Sauce Consistency: If the seafood sauce turns out too thick, simply thin it with a splash of shrimp stock or water for just the right creaminess.

  • Keep Fish Warm: After cooking, cover the blackened catfish with foil to keep it warm while you prepare the sauce, ensuring it’s hot when served.

  • Storage Wisdom: Store any leftovers separately in airtight containers to preserve flavors and textures, allowing you to enjoy your delicious dish later!

Make Ahead Options

Pappadeaux Catfish Opelousas is a fantastic choice for meal prep enthusiasts! You can season the catfish fillets up to 24 hours in advance, allowing the spices to fully permeate the fish for enhanced flavor. Additionally, the creamy seafood sauce can be prepared ahead of time and refrigerated for up to 3 days. To maintain quality, be sure to store the sauce in an airtight container to avoid any moisture loss. When it’s time to serve, simply reheat the sauce gently on the stove and cook the seasoned catfish for about 3-4 minutes per side until blackened. This makes enjoying a delightful Pappadeaux Catfish Opelousas easier than ever on busy weeknights!

Pappadeaux Catfish Opelousas Variations

Feel free to embark on a flavorful journey by tailoring your dish just the way you like it!

  • Dairy-Free: Swap heavy cream for coconut cream to maintain the luscious texture while keeping it dairy-free.

  • Gluten-Free: Ensure your spice blend is gluten-free and serve with gluten-free sides like cauliflower rice for a complete meal.

  • Vegetarian Delight: Replace the seafood with firm tofu or hearty vegetables like zucchini, bringing a fresh twist to this classic dish.

  • Heat Adjustments: If you prefer milder flavors, decrease the cayenne, or replace it entirely with smoked paprika for a warm essence without the heat.

  • Seafood Swap: Try swapping the catfish for snapper or tilapia, allowing for a slight variation in flavor and texture in your Opelousas experience.

  • Additional Veggies: Boost nutrition by adding sautéed spinach or bell peppers into the sauce; they’ll add color and a delightful crunch.

  • Extra Flavor Boost: Stir in some freshly chopped dill or a splash of white wine to elevate the sauce’s complexity for a gourmet touch.

  • Creamy Alternatives: Consider using Greek yogurt instead of heavy cream for a tangy yet creamy version that still delights the palate.

Whether you’re looking for dietary-friendly options or just want to shake things up, each of these variations is designed to enhance your experience with Pappadeaux Catfish Opelousas. For more inspiration, check out our guide on Cajun spices or explore creative ideas in our seafood substitute guide to make every meal a celebration!

What to Serve with Pappadeaux Catfish Opelousas?

Elevate your dining experience with delightful companions that complement the rich flavors of this Cajun classic.

  • Dirty Rice: This flavorful side delivers a perfect balance with the creamy sauce, enhancing your meal with its hearty textures and spices.

  • Coleslaw: Crunchy and refreshing, coleslaw adds a contrast to the creamy fish and provides a cool texture that brightens the dish.

  • Garlic Bread: Crispy, buttery garlic bread is perfect for sopping up those luscious seafood sauces, creating a comforting experience with every bite.

  • Steamed Vegetables: Fresh, seasonal vegetables bring a vibrant element to the table; their natural sweetness will highlight the savory notes of the catfish.

  • Cornbread Muffins: Sweet, moist cornbread muffins are a delightful nod to Southern cuisine, perfectly balancing the spiciness of the Cajun dish.

  • Crispy Fried Green Tomatoes: The crunchy exterior and tangy flavors of fried green tomatoes add a Southern twist while maintaining harmony with the catfish.

  • Lemonade: Refreshing and zesty, this drink cuts through the richness of the creamy sauce, providing the perfect palate cleanser.

By pairing these sides and beverages, you’ll create a well-rounded feast that truly celebrates the essence of Cajun cuisine!

Storage Tips for Pappadeaux Catfish Opelousas

  • Fridge: Store leftover Pappadeaux Catfish Opelousas in an airtight container for up to 3 days. This ensures that the flavors remain vibrant and fresh until you’re ready to enjoy them again.

  • Freezer: If you need to freeze your catfish dish, it’s best to store only the sauce and seafood separately, as fish can lose its texture when frozen. Use freezer-safe containers and consume within 2 months for optimal taste.

  • Reheating: To reheat, thaw in the fridge overnight if frozen, then gently warm on the stovetop over low heat, stirring occasionally. This preserves the creamy consistency of the sauce while keeping the fish moist.

  • Make-Ahead Tips: The sauce can be made ahead of time and refrigerated for up to 3 days; just reheat gently before serving over freshly cooked catfish.

Pappadeaux Catfish Opelousas Recipe FAQs

What type of catfish is best for Pappadeaux Catfish Opelousas?
Fresh catfish fillets are ideal as they provide a firm texture and rich flavor. However, if catfish isn’t available, you can easily substitute it with snapper or black drum, which also work wonderfully with the blackening spices and creamy sauce.

How should I store leftovers of Pappadeaux Catfish Opelousas?
Leftovers should be stored in an airtight container in the fridge for up to 3 days. To maintain the integrity of the dish, I recommend keeping the sauce separate from the fish until you reheat it. This way, it stays fresh and delicious!

Can I freeze Pappadeaux Catfish Opelousas?
Absolutely! However, it’s best to freeze only the sauce and any seafood (like shrimp or crawfish) separately, as freezing the fish can affect its texture. Store in freezer-safe containers for up to 2 months. When you’re ready to enjoy, thaw in the fridge overnight and reheat gently on the stovetop.

What if my sauce is too thick?
If you find your creamy sauce is too thick for your liking, don’t worry! Simply add a splash of shrimp stock or water, then stir well while heating over low heat. This will help achieve that luxurious, creamy consistency without any lumps.

Are there any dietary considerations for this recipe?
Yes! Pappadeaux Catfish Opelousas can easily accommodate various dietary needs. For a gluten-free option, ensure the spice blend and stock are gluten-free. You can also make it dairy-free by substituting heavy cream with coconut cream. If going vegetarian, replace the seafood with firm tofu or additional veggies, and use vegetable stock in the sauce.

How is the spice level best adjusted for my preferences?
To tailor the heat level to your liking, start by using less cayenne pepper in the spice mix. You can add more gradually as you taste. This gives you complete control over how spicy you want your Pappadeaux Catfish Opelousas to be, ensuring it’s just right for everyone at the table!

Pappadeaux Catfish Opelousas

Pappadeaux Catfish Opelousas - A Creamy Cajun Classic to Relish

Pappadeaux Catfish Opelousas is a flavorful Cajun dish featuring blackened catfish and a rich creamy sauce, perfect for any dinner gathering.
Prep Time 10 minutes
Cook Time 20 minutes
Total Time 30 minutes
Servings: 4 servings
Course: Dinner
Cuisine: Cajun
Calories: 450

Ingredients
  

For the Blackened Catfish
  • 4 fillets catfish Substitute with snapper or black drum if needed
  • 2 tablespoons unsalted butter Use coconut oil for dairy-free option
  • 1 tablespoon spice blend Contains garlic powder, onion powder, cayenne pepper, paprika, black pepper, seasoned salt, oregano, and thyme
For the Creamy Sauce
  • 1 medium onion Shallots can be used for a milder taste
  • 2 cloves garlic Adjust according to personal preference
  • 1 cup heavy cream Coconut cream can be used for dairy-free version
  • 2 tablespoons lemon juice Fresh is preferred
  • 1 cup shrimp stock Use vegetable stock for vegetarian option
For the Seafood Addition
  • 1 cup crawfish tails Can be omitted for a vegetarian variation
  • 1 cup shrimp Optional; can be omitted or increased as desired
  • 1 cup crab meat Imitation crab is a cost-effective substitute
  • 1 cup fresh oysters Contributes depth to the sauce but can be skipped
For the Garnish
  • 2 tablespoons fresh parsley Used for garnish

Equipment

  • cast-iron skillet

Method
 

Step-by-Step Instructions
  1. Pat the fresh catfish fillets dry with a paper towel, sprinkle Cajun spice blend over both sides, and let sit for about 10 minutes.
  2. Heat the cast-iron skillet over medium-high heat, add unsalted butter, and place seasoned catfish fillets in the skillet, cooking for 3-4 minutes on each side until blackened.
  3. Reduce skillet heat to medium, add remaining butter, chopped onion, and minced garlic, sautéing until onion is translucent.
  4. Stir in shrimp stock and heavy cream, add lemon juice, and simmer. Incorporate crawfish tails, shrimp, crab meat, and oysters, letting seafood warm through as sauce thickens.
  5. Plate the blackened catfish, pour the creamy sauce over it, and garnish with chopped parsley before serving.

Nutrition

Serving: 1servingCalories: 450kcalCarbohydrates: 10gProtein: 30gFat: 35gSaturated Fat: 15gPolyunsaturated Fat: 5gMonounsaturated Fat: 10gCholesterol: 120mgSodium: 800mgPotassium: 600mgFiber: 1gSugar: 2gVitamin A: 20IUVitamin C: 4mgCalcium: 100mgIron: 2mg

Notes

Store leftovers in airtight containers for up to 3 days. For best results, keep fish warm while preparing the sauce.

Tried this recipe?

Let us know how it was!

Easily Whip Up an Omelet with Salmon & Cream Cheese Today

As the first hints of morning light peek through my kitchen window, the rich aroma of a savory omelet with salmon & cream cheese fills the air, teasing my senses and promising a delightful start to the day. This quick breakfast not only comes together in just five minutes but also packs a protein punch, making it the perfect solution for busy mornings or leisurely brunches with friends. What I adore most about this recipe is its versatility; you can easily customize it to fit your palate, whether you’re craving a touch of spice or a sprinkle of fresh herbs. Ready to elevate your breakfast game with an omelet that’s both satisfying and oh-so-simple? Let’s dive into the deliciousness together!

Why Is This Omelet So Special?

Quick Preparation: This omelet takes just five minutes from start to finish, making it an ideal choice for busy mornings!
Protein-Packed: With rich smoked salmon and robust cream cheese, you’re fueling your day right.
Endless Customization: Feeling adventurous? Toss in sautéed veggies or swap to a dairy-free cheese for a personalized touch.
Restaurant-Quality: Impress your friends with a dish that looks and tastes gourmet, yet is effortlessly made at home.
Versatile Pairings: Serve it with crispy toast or a fresh salad for a meal that balances tastes and textures. Ready to explore more delicious dishes? Check out our Beef Cheese Roll or savor a great brunch with this Pumpkin Cream Cold coffee!

Omelet with Salmon & Cream Cheese Ingredients

• Get ready to whip up a delicious, protein-rich meal!

For the Batter

  • Eggs – Fresh, free-range eggs offer the best flavor and texture.
  • Butter – Use a pat to prevent sticking and enhance the omelet’s richness.
  • Salt and Pepper – Essential seasonings to elevate the overall taste.

For the Filling

  • Smoked Salmon – The star of the show, rich in flavor and protein.
  • Cream Cheese – Creamy goodness that adds a luxurious touch; can be swapped for ricotta if desired.
  • Chives – Fresh chives bring a lovely herbal note; green onions are a great substitute.

Feel free to customize your omelet with your favorite add-ins to create your ideal omelet with salmon & cream cheese!

Step‑by‑Step Instructions for Omelet with Salmon & Cream Cheese

Step 1: Prep Eggs
Begin by cracking two large, fresh eggs into a mixing bowl. Add a generous pinch of salt and freshly cracked black pepper to your taste. Whisk the eggs vigorously for about 30 seconds until the mixture is smooth, frothy, and slightly lightened in color. This will help create a fluffy texture for your omelet with salmon & cream cheese.

Step 2: Heat Pan
Next, take a non-stick frying pan and place it over medium heat. Add a pat of butter to the pan, allowing it to melt and coat the surface evenly. Keep an eye on the pan; it’s ready when the butter is bubbly and starts to slightly brown, signaling that the perfect temperature for your omelet is reached.

Step 3: Cook Eggs
Pour the beaten eggs into the hot pan, swirling gently to ensure an even coverage. Let the mixture cook undisturbed for about 2-3 minutes. Watch the edges carefully—the omelet is ready to move on when the edges are set and the center remains slightly runny, giving it a soft and creamy interior.

Step 4: Add Fillings
Once the eggs are nearly set, it’s time to add your delicious fillings. On one half of the omelet, place dollops of cream cheese and scatter pieces of smoked salmon. Allow the fillings to warm through for an additional 30 seconds, enhancing the flavors as the omelet continues to cook.

Step 5: Fold Omelet
Carefully fold the unfilled half of the omelet over the fillings with a spatula. Gently press down and continue cooking for another minute, allowing the inside to heat completely. The omelet is done when both sides are lightly golden and the filling is deliciously melty but not overcooked.

Step 6: Serve
Now it’s time to serve your vibrant omelet with salmon & cream cheese. Use a spatula to slide it onto a plate. Garnish with freshly chopped chives for a pop of color and flavor. Dive right into this nourishing breakfast, enjoying each fluffy, creamy bite while the warmth fills your kitchen.

Make Ahead Options

These Savory Omelets with Salmon & Cream Cheese are perfect for busy home cooks who want to streamline their breakfast routine! You can prepare the fillings (smoked salmon, cream cheese, and chopped chives) up to 3 days in advance and refrigerate them in an airtight container. This not only saves time on hectic mornings but ensures that all the flavors meld beautifully. When you’re ready to enjoy your omelet, simply whisk your eggs fresh (to keep that fluffy texture), pour them into the preheated pan, and follow the cooking instructions. This way, you’ll achieve that delightful restaurant-quality result with minimal effort, enjoying a nutritious breakfast without the stress!

Omelet with Salmon & Cream Cheese Variations

Feel free to get creative with your omelet and make it your own with these fun twists and swaps!

  • Dairy-Free: Substitute cream cheese with a dairy-free alternative like cashew cream for a deliciously creamy texture.
  • Veggie Boost: Add sautéed spinach or mushrooms for a nutritious punch and a lovely contrast to the rich salmon.
  • Spicy Kick: Stir in red pepper flakes or drizzle hot sauce over the top for an invigorating kick that wakes up your taste buds.
  • Cheesy Flavor: Mix in some crumbled feta or goat cheese for a tangy flavor that pairs beautifully with the salmon and chives.
  • Herb-Infused: Elevate your dish with a mix of fresh herbs like dill or parsley, which complement the salmon perfectly.

  • Avocado Addition: Top your omelet with sliced avocado for a creamy texture and added healthy fats.
  • Smokier Flavor: Use smoked gouda or cheddar instead of cream cheese for a deeper, smoky flavor that’s incredibly rich.
  • Tomato Burst: Add diced cherry tomatoes right before serving to introduce a burst of freshness and color to your dish.

Looking for more incredible breakfast ideas? Don’t miss out on our delightful Blackened Salmon Stuffed recipe or whip up some delightful Cookies Cream Cheesecake cups for dessert!

Expert Tips for Making an Omelet with Salmon & Cream Cheese

  • Pan Temperature: Preheat your frying pan thoroughly before adding eggs to prevent sticking and ensure a beautiful golden crust.

  • Whisk Energetically: Whisk the eggs vigorously to incorporate air, which makes for a fluffier omelet with salmon & cream cheese.

  • Monitor Cooking Time: Avoid overcooking by watching the edges. A slightly runny center provides the perfect creaminess from the fillings.

  • Fill Sparingly: Don’t overstuff your omelet; a few thoughtful bites of salmon and cream cheese allow for easier folding and a neater presentation.

  • Customize Freely: Experiment with various fillings, like sautéed vegetables or fresh herbs, for a unique twist on your omelet every time!

What to Serve with Savory Omelet with Salmon & Cream Cheese

Brighten your breakfast experience with delightful sides that complement your delicious omelet!

  • Crispy Toast: The crunch of lightly buttered toast pairs perfectly with the creamy interior of your omelet, adding satisfying texture. Enjoy it with a sprinkle of your favorite herbs for an aromatic twist.
  • Fresh Avocado Slices: Creamy avocado adds a rich flavor and provides healthy fats, creating a delightful balance with the savory notes of the omelet. Plus, the vibrant green color elevates your breakfast presentation!
  • Light Mixed Green Salad: A refreshing salad with citrus vinaigrette brightens the meal, providing a crisp contrast to the warm, fluffy omelet. This adds a fresh, invigorating crunch, perfect for brunch gatherings.
  • Roasted Cherry Tomatoes: Sweet, bursty cherry tomatoes enhance flavor and bring a delicious sweetness that complements the savory elements of your dish. These can be enjoyed warm or at room temperature, making them versatile!
  • Herbed Quinoa: For a wholesome option, serve with fluffy quinoa mixed with fresh herbs. The nutty flavor of the quinoa complements the rich omelet while adding wholesome nutrition and satisfying texture.
  • Elderflower Sparkling Water: Refresh yourself with a bubbly drink that cleanses the palate between flavors. Elderflower adds a floral sweetness that beautifully contrasts the salty salmon and cream cheese!

Storage Tips for Omelet with Salmon & Cream Cheese

Fridge: Store any leftover omelet in an airtight container and refrigerate for up to 3 days to maintain freshness and flavor.

Freezer: If you want to freeze portions, wrap individual pieces in plastic wrap and then in foil. They can be stored in the freezer for up to 2 months.

Reheating: To enjoy your omelet with salmon & cream cheese later, reheat it in a non-stick pan over low heat until warmed through. Avoid using the microwave to prevent a rubbery texture.

Make-Ahead: Prepare fillings a few days in advance and keep them refrigerated; cook the omelet just before serving for the best taste and texture.

Omelet with Salmon & Cream Cheese Recipe FAQs

What kind of eggs should I use for the omelet?
I recommend using fresh, free-range or organic eggs for the best flavor and texture. These eggs often hold a richer taste and creamier consistency, making your omelet with salmon & cream cheese even more delicious! Look for eggs with a clean shell and no visible spots for optimal quality.

How should I store leftover omelet?
Absolutely! To store any leftover omelet, place it in an airtight container and refrigerate for up to 3 days. This will help maintain its freshness and flavor. If you’re planning to eat it later, try to slice it beforehand for easier reheating.

Can I freeze the omelet?
Yes, you can! To freeze your omelet with salmon & cream cheese, wrap individual portions tightly in plastic wrap, then in foil to prevent freezer burn. It can be stored in the freezer for up to 2 months. When you’re ready to enjoy it, thaw it in the refrigerator overnight and reheat gently in a non-stick pan over low heat to avoid a rubbery texture.

What should I do if my omelet is sticking to the pan?
If your omelet sticks, it’s usually due to either insufficient preheating or not enough fat. Ensure the pan is preheated over medium heat until the butter is melted and bubbly before adding your eggs. If it still sticks, you might try adding a bit more butter or oil for lubrication. A non-stick skillet is key to a smooth omelet experience!

Are there dietary considerations I should keep in mind?
Definitely! This omelet with salmon & cream cheese is gluten-free and can be adjusted for various dietary needs. If you have allergies to dairy, feel free to substitute the cream cheese with a dairy-free alternative like tofu cream or avocado for a creamy texture. Always ensure your smoked salmon is sourced from a reputable supplier to guarantee quality and safety, especially for pregnant women or those with weakened immune systems.

How long does it take to prep and cook the omelet?
Making the omelet takes just about 5-6 minutes in total! With the right prepped ingredients, you’ll find that this quick breakfast can be whipped up in no time, allowing you to savor a delicious and satisfying meal even on the busiest of mornings.

Omelet with Salmon & Cream Cheese

Easily Whip Up an Omelet with Salmon & Cream Cheese Today

Enjoy a protein-packed omelet with salmon & cream cheese, perfect for busy mornings or brunch with friends.
Prep Time 5 minutes
Cook Time 5 minutes
Total Time 10 minutes
Servings: 1 omelet
Course: Breakfast
Cuisine: American
Calories: 340

Ingredients
  

For the Batter
  • 2 large eggs Fresh, free-range eggs offer the best flavor and texture.
  • 1 pat butter Use a pat to prevent sticking and enhance richness.
  • to taste salt Essential seasoning to elevate the taste.
  • to taste black pepper Essential seasoning to elevate the taste.
For the Filling
  • 3 oz smoked salmon The star of the show, rich in flavor and protein.
  • 2 oz cream cheese Can be swapped for ricotta if desired.
  • 1 tbsp chives Fresh chives bring a lovely herbal note.

Equipment

  • non-stick frying pan
  • Mixing Bowl
  • Spatula

Method
 

Step-by-Step Instructions
  1. Begin by cracking two large, fresh eggs into a mixing bowl. Add a pinch of salt and pepper. Whisk the eggs for about 30 seconds until smooth and frothy.
  2. Next, heat a non-stick frying pan over medium heat. Add a pat of butter and let it melt.
  3. Pour the beaten eggs into the hot pan, swirling gently for even coverage. Cook for 2-3 minutes until edges are set and center is slightly runny.
  4. Once the eggs are nearly set, add dollops of cream cheese and pieces of smoked salmon on one half of the omelet. Warm through for an additional 30 seconds.
  5. Carefully fold the unfilled half over the fillings and cook for another minute until golden.
  6. Serve your omelet on a plate. Garnish with chopped chives and enjoy!

Nutrition

Serving: 1omeletCalories: 340kcalCarbohydrates: 2gProtein: 20gFat: 28gSaturated Fat: 10gPolyunsaturated Fat: 2gMonounsaturated Fat: 6gCholesterol: 425mgSodium: 800mgPotassium: 350mgSugar: 1gVitamin A: 800IUCalcium: 50mgIron: 2mg

Notes

Customize with your favorite add-ins, such as sautéed vegetables or fresh herbs.

Tried this recipe?

Let us know how it was!

Hearty Hamburger Gravy: The Ultimate Comfort Food Delight

As the savory aroma of hamburger gravy fills your kitchen, you can’t help but feel transported to a cozy family gathering. This dish is a perfect solution for those bustling weeknights when you crave something warm and comforting yet need it on the table in under 30 minutes. My Quick Savory Hamburger Gravy is not only adaptable—allowing for gluten-free and dairy-free options—but it’s also a guaranteed crowd-pleaser. Imagine serving it over fluffy mashed potatoes, egg noodles, or even biscuits, each bite soaking up that rich, creamy goodness. Your family will be asking for seconds, and who could blame them? What’s your go-to way of enjoying gravy at home—classic or with a twist?

Why is Hamburger Gravy a Must-Try?

Quick and Easy: This recipe comes together in just 30 minutes, making it perfect for those busy weeknights.

Rich and Flavorful: The combination of ground beef, onions, and Worcestershire sauce creates a delightful gravy that elevates any meal.

Customizable: Feel free to experiment by adding mushrooms, veggies, or even a bit of spice to suit your taste.

Comfort Food Bliss: Serving it over hot mashed potatoes or biscuits transforms your meal into a warm hug on a plate.

Family Favorite: This Hamburger Gravy is sure to impress everyone at the table, turning dinner into a cherished moment.

Storage Made Easy: Leftovers can be refrigerated or frozen for quick future meals, making it a time-saving treasure in your recipe collection!

Hamburger Gravy Ingredients

For the Gravy Base

  • Lean Ground Beef – The savory foundation of your hamburger gravy; ground turkey or chicken can be a lighter alternative.
  • Onions – Adds a touch of sweetness and depth; yellow onions are ideal, but feel free to substitute with shallots or green onions.
  • Garlic – Infuses warmth and flavor; freshly minced garlic is best, while garlic powder serves in a pinch.
  • Butter – Creates a thick, rich roux; olive oil or plant-based butter can be used for a dairy-free option.

For Thickening

  • Flour – Essential for thickening the gravy; all-purpose or gluten-free blends work well here.

For Creaminess

  • Milk – Contributes to the gravy’s creamy texture; any milk variety works, but whole or half-and-half enhances the flavor.

For Savory Depth

  • Beef Broth – Provides that rich savory essence; chicken or vegetable broth works as a great substitute.
  • Worcestershire Sauce – Adds complexity and umami; if gluten-free, you may opt to omit or use soy sauce instead.

For Seasoning

  • Salt and Black Pepper – Crucial for enhancing all flavors; adjust to your taste preference.

This Hamburger Gravy will not only become a staple but also make weeknight dinners something to look forward to!

Step‑by‑Step Instructions for Hamburger Gravy

Step 1: Cook the Beef
In a large skillet, heat over medium heat and add 1 pound of lean ground beef. Brown the meat for about 5-7 minutes, breaking it apart with a spatula until it is crispy and no longer pink. Drain any excess fat, leaving just enough to add flavor to the dish.

Step 2: Add Aromatics
Next, add 1 medium diced onion and 2 minced garlic cloves to the skillet with the browned beef. Sauté the mixture for about 3-4 minutes, stirring frequently until the onions become translucent and fragrant, which will enhance the overall flavor of your savory hamburger gravy.

Step 3: Make the Roux
Carefully push the beef and onion mixture to one side of the skillet. On the other side, melt 2 tablespoons of butter over medium heat. Once melted, whisk in 2 tablespoons of flour for 1-2 minutes, until the mixture turns golden brown, forming a roux that will give your gravy its thickness.

Step 4: Create Gravy Base
Gradually whisk in 1 cup of milk and 1 cup of beef broth to the skillet, ensuring a smooth combination without lumps. As the mixture begins to thicken, stir in 1 tablespoon of Worcestershire sauce, then season with salt and black pepper, adjusting according to your taste preferences.

Step 5: Thicken
Return the beef mixture to the skillet and bring everything to a gentle simmer over low heat. Allow the hamburger gravy to cook and thicken for about 5-10 minutes, stirring occasionally until it reaches your desired consistency and the flavors meld beautifully together.

Step 6: Serve
Once thickened, remove the skillet from heat and serve the hearty hamburger gravy over your choice of mashed potatoes, egg noodles, rice, or biscuits. If desired, garnish with fresh parsley for an extra pop of color and flavor that complements this comforting dish perfectly.

What to Serve with Savory Hamburger Gravy?

Imagine a plate overflowing with warmth and comfort, ready to take your dining experience to the next level.

  • Creamy Mashed Potatoes: The perfect canvas for your savory hamburger gravy, these fluffy potatoes soak up every rich bite, creating a satisfying harmony of flavors.

  • Warm Buttermilk Biscuits: These flaky delights are ideal for sopping up the delicious gravy, adding a buttery texture that enhances the meal’s charm.

  • Hearty Egg Noodles: Tender noodles provide an inviting base for the gravy, making each forkful a nostalgic embrace of comforting flavors.

  • Steamed Green Beans: The crisp freshness of green beans balances the richness of the gravy, adding a delightful crunch and a pop of color to your plate.

  • Garlic Bread: It’s a classic side that’s not just for pasta! The buttery, garlicky flavor pairs wonderfully with the savory richness of the gravy.

  • Cauliflower Rice: For a lighter option, cauliflower rice brings a unique texture and mild flavor that won’t compete with the hearty gravy.

  • Crispy Salad: A simple green salad with a zesty vinaigrette can cut through the richness, offering a refreshing contrast that brightens up your meal.

  • Sweet Corn: Its natural sweetness complements the savory notes of the gravy, making it an easy and enjoyable side to round out your dinner.

  • Red Wine: A glass of Cabernet or Merlot adds depth to your meal, enhancing the savory flavors without overshadowing the comforting experience.

  • Chocolate Cake: End your hearty meal on a sweet note; a slice of moist chocolate cake will be a delightful finale that leaves everyone smiling.

Make Ahead Options

These savory hamburger gravy preparations are perfect for busy home cooks looking to save time during weekdays! You can brown the ground beef and cook the aromatics up to 3 days in advance, then refrigerate them in an airtight container. When you’re ready to enjoy the meal, simply reheat the mixture in a skillet over medium heat, then follow by whisking in the milk and beef broth, along with the roux ingredients. For best results, store the gravy base separately from any sides like mashed potatoes or biscuits to maintain their textures. This way, you’ll have comforting homemade hamburger gravy ready to serve in a snap, ensuring dinner feels just as satisfying as if you made it all at once!

Expert Tips for Hamburger Gravy

  • Whisk Constantly: When adding liquids to the roux, whisking continuously helps prevent lumps and creates a velvety consistency in your hamburger gravy.

  • Heat Control: Maintain medium heat while cooking to avoid burning the butter and flour, which can lead to a bitter taste.

  • Season After Thickening: Always taste and adjust seasoning once the gravy has thickened, as broth and Worcestershire sauce can add saltiness that intensifies during cooking.

  • Substitution Savvy: Utilize alternatives like ground turkey for a lighter option or plant-based butter for a dairy-free hamburger gravy without compromising flavor.

  • Add Extra Flavor: Consider incorporating fresh herbs, sliced mushrooms, or spicy elements during cooking to elevate your gravy’s taste profile.

Hamburger Gravy Variations & Substitutions

Explore these delightful options to make the recipe your own and tantalize your taste buds!

  • Mushroom Boost: Sauté sliced mushrooms along with the onions for an earthy flavor. Their richness melds beautifully with the gravy, creating a deeper taste experience.

  • Spicy Kick: Add red pepper flakes or a splash of hot sauce while simmering to introduce a fiery twist. It’s perfect for those who crave a little heat in their comfort food.

  • Cheesy Indulgence: Stir in shredded cheese like cheddar or mozzarella at the end for a creamy enhancement. This twist not only adds flavor but transforms the gravy into a luscious, cheesy delight.

  • Veggie Power: Incorporate diced carrots or bell peppers during the aromatics phase for extra nutrition. This simple addition enhances the color and makes the dish even heartier.

  • Herbaceous Twist: Fresh herbs like thyme, rosemary, or parsley can be folded in at the end for an aromatic lift. The freshness of herbs beautifully contrasts the richness of the gravy.

  • Dairy-Free Delight: Substitute milk with unsweetened almond milk or coconut milk, and use plant-based butter for a creamy, dairy-free version. You won’t lose any of the comforting goodness while catering to dietary needs.

  • Gluten-Free Version: Use a gluten-free flour blend in place of all-purpose flour to maintain the thickness of your gravy. It ensures everyone at the table can savor this dish without worry.

  • Beef Broth Alternatives: Swap beef broth for chicken or vegetable broth, providing a subtle flavor change while keeping the comforting essence intact. This is particularly helpful for those avoiding red meat.

For more inspiration, give a warm embrace to this Cheesy Garlic Mashed Potatoes or serve it over Fluffy Buttermilk Biscuits to make your meal even more delightful!

How to Store and Freeze Hamburger Gravy

Fridge: Refrigerate leftover hamburger gravy in airtight containers for up to 4 days. Reheat gently on the stove with a splash of milk to restore creaminess.

Freezer: For longer storage, freeze in airtight containers for up to 2 months. Thaw overnight in the refrigerator before reheating on low heat to maintain texture.

Reheating: Always stir while reheating to ensure even heating and to bring back the comforting, rich consistency that makes this hamburger gravy so delightful.

Portioning: Consider freezing in individual portions for quick and easy meal options; perfect for busy days when comfort food is a must!

Hamburger Gravy Recipe FAQs

What type of ground meat should I use for hamburger gravy?
Absolutely! While lean ground beef is the traditional choice for hamburger gravy, feel free to switch it up with ground turkey or chicken for a lighter option. Just remember that the flavor may slightly change, but it will still be delicious!

How long can I store leftover hamburger gravy?
You can refrigerate leftover hamburger gravy in airtight containers for up to 4 days. It’s best warmed gently on the stove, and don’t forget to add a splash of milk to help restore its creamy texture!

Can I freeze hamburger gravy?
Yes, you can! Portion your hamburger gravy into airtight containers and freeze it for up to 2 months. Just remember to thaw it overnight in the refrigerator before reheating it on low heat to maintain that velvety consistency.

What should I do if my gravy is too thick?
No worries if your hamburger gravy turns out thicker than you’d like! Just add a little more beef broth or milk, a few tablespoons at a time, while stirring over low heat until you achieve your desired consistency. It’s all about finding that perfect balance!

Is hamburger gravy gluten-free?
To make your hamburger gravy gluten-free, simply substitute the all-purpose flour with a gluten-free flour blend, and ensure that the Worcestershire sauce you use is also gluten-free. It can easily be made suitable for various dietary needs without losing any flavor!

Can I use non-dairy milk in this recipe?
Very! You can absolutely use non-dairy milk such as almond, oat, or soy milk to create a dairy-free version of hamburger gravy. Just keep in mind that flavors might vary slightly, but I recommend trying it—you’ll be surprised at how comforting it still is!

Hamburger Gravy

Hearty Hamburger Gravy: The Ultimate Comfort Food Delight

Enjoy this Hearty Hamburger Gravy, a savory and comforting dish perfect for busy weeknights, ready in under 30 minutes.
Prep Time 10 minutes
Cook Time 20 minutes
Total Time 30 minutes
Servings: 4 servings
Course: Beef
Cuisine: American
Calories: 250

Ingredients
  

For the Gravy Base
  • 1 pound lean ground beef Alternatively, use ground turkey or chicken.
  • 1 medium onion Diced, yellow onions are ideal.
  • 2 cloves garlic Minced; garlic powder can be used in a pinch.
  • 2 tablespoons butter Can use olive oil or plant-based butter for dairy-free option.
For Thickening
  • 2 tablespoons flour All-purpose or gluten-free blends work.
For Creaminess
  • 1 cup milk Any variety, whole or half-and-half enhances flavor.
For Savory Depth
  • 1 cup beef broth Can substitute with chicken or vegetable broth.
  • 1 tablespoon Worcestershire sauce Omit or use gluten-free soy sauce if needed.
For Seasoning
  • to taste salt
  • to taste black pepper

Equipment

  • large skillet

Method
 

Step-by-Step Instructions for Hamburger Gravy
  1. In a large skillet, heat over medium heat and add lean ground beef. Brown the meat for about 5-7 minutes, breaking it apart until it's crispy and no longer pink. Drain excess fat.
  2. Add diced onion and minced garlic to the skillet with browned beef. Sauté for about 3-4 minutes until onions become translucent.
  3. Push the beef and onion mixture to one side and melt butter on the other side. Whisk in flour and cook for 1-2 minutes until golden brown to create a roux.
  4. Gradually whisk in milk and beef broth, ensuring a smooth mixture. Stir in Worcestershire sauce and season with salt and pepper.
  5. Return beef mixture to the skillet and simmer over low heat for about 5-10 minutes until thickened.
  6. Remove from heat and serve the hamburger gravy over mashed potatoes, egg noodles, rice, or biscuits and garnish if desired.

Nutrition

Serving: 1cupCalories: 250kcalCarbohydrates: 15gProtein: 20gFat: 15gSaturated Fat: 7gPolyunsaturated Fat: 1gMonounsaturated Fat: 8gCholesterol: 70mgSodium: 600mgPotassium: 400mgFiber: 1gSugar: 2gVitamin A: 400IUVitamin C: 2mgCalcium: 100mgIron: 3mg

Notes

This Hamburger Gravy is perfect for those busy weeknights and can easily be customized with additional ingredients for extra flavor.

Tried this recipe?

Let us know how it was!

Cottage Cheese & Turkey Sausage Casserole for Cozy Mornings

As I opened my fridge this morning, a half-empty container of cottage cheese caught my eye, a small treasure eagerly awaiting its fate. It sparked the perfect idea for a hearty breakfast: a High-Protein Cottage Cheese & Turkey Sausage Casserole! This deliciously creamy yet savory dish is not just a delightful way to start the day; it’s an adaptable meal that fits seamlessly into busy mornings or family brunches. With plenty of protein and a comforting, satisfying texture, it’s a great twist to the typical breakfast routine. Plus, it can be prepped in advance, making it a game-changer for those hectic weekday mornings. Have you ever thought about how easy it is to whip up something so nourishing and delicious? Let’s dive into this recipe together!

Why Make Cottage Cheese & Turkey Sausage Casserole?

Versatility Galore: This casserole adapts to your preferences—swap turkey sausage for chicken or plant-based options!
Protein Powerhouse: With a whopping 28g of protein per slice, it fuels your morning and keeps you satisfied.
Easy Meal Prep: Perfect for busy schedules, assemble it ahead of time and bake when you’re ready.
Comforting Flavor: The creamy cottage cheese and savory sausage mix provide a deliciously hearty texture, perfect for cozy mornings.
Family-Friendly: A crowd-pleaser that everyone will love, pairing well with sides like fresh fruit salad or crispy hash browns.
Quick and Simple: Whipping up this dish takes minimal effort but offers maximum satisfaction—your ultimate breakfast solution!

Cottage Cheese & Turkey Sausage Casserole Ingredients

For the Casserole
Eggs – Essential for binding and providing structure; consider egg alternatives for a lighter option.
Cottage Cheese – Adds creaminess with over 20g of protein per cup; ricotta can be used as a delightful substitute.
Turkey Sausage – The star protein that lends a savory flavor; swap for chicken or plant-based sausage for a varied taste.
Shredded Mozzarella Cheese – Offers that luscious melty goodness; feel free to experiment with cheddar for a kick!
Chopped Spinach – A nutritious addition supplying vitamins; kale works beautifully too, or skip it if you prefer.
Garlic Powder – Boosts the flavor profile; fresh garlic can bring an extra pop of richness to the dish.
Salt – Necessary for balanced seasoning; season to your taste for the best results.
Pepper – Complements the flavors well; adjust according to your spice preference.

Optional Add-Ins
Fresh Herbs (Basil, Parsley) – For an aromatic finish before baking; they enhance color and freshness in every bite.
Different Cheese Varieties – Try pepper jack or feta for a unique twist, making each casserole truly your own!

This Cottage Cheese & Turkey Sausage Casserole is not only wholesome but customizable, sure to become a favorite in your morning routine!

Step‑by‑Step Instructions for Cottage Cheese & Turkey Sausage Casserole

Step 1: Preheat and Prepare
Begin by preheating your oven to 350°F (175°C) to ensure it reaches the perfect baking temperature. While it warms up, grease a 9×13-inch baking dish with cooking spray or butter; this will prevent the casserole from sticking. The right preparation allows for a beautiful, easy release post-baking, making your Cottage Cheese & Turkey Sausage Casserole even more enjoyable!

Step 2: Mix the Base
In a large mixing bowl, whisk together a dozen eggs, the cottage cheese, garlic powder, salt, and pepper until the mixture is smooth and well combined. This should take about 2-3 minutes, and the goal is a creamy texture that evenly distributes the flavors. Keep an eye on the visual consistency to ensure there are no lumps, setting a solid foundation for your casserole.

Step 3: Add the Protein and Cheese
Gently fold in the crumbled turkey sausage and shredded mozzarella cheese into the egg mixture. Make sure to blend in any chopped spinach at this stage too, if you’re including it. Use a spatula to mix everything together carefully, allowing the sausage and cheese to be evenly distributed throughout the mixture, creating a delightful harmony in your Cottage Cheese & Turkey Sausage Casserole.

Step 4: Bake
Pour the assembled mixture into the prepared baking dish, ensuring an even spread across the surface. Place the dish in your preheated oven and bake for 35-40 minutes. Look for the casserole to puff slightly and the top to become a beautiful golden brown. A clean knife inserted into the center should come out clean, indicating it’s done!

Step 5: Cool and Slice
Once baked to perfection, remove the Cottage Cheese & Turkey Sausage Casserole from the oven and allow it to cool for 5-10 minutes before slicing. This resting period helps the casserole set up a bit more, making it easier to cut into neat squares. The warm, inviting aroma will have everyone eager to dig in!

Step 6: Serve and Enjoy
Finally, slice into squares and serve your warm Cottage Cheese & Turkey Sausage Casserole, perhaps alongside fresh fruit salad or crispy hash browns for a delightful breakfast spread. Enjoy this hearty dish with family or save it for your busy mornings ahead; it’s both satisfying and versatile, perfect for any occasion!

What to Serve with Cottage Cheese & Turkey Sausage Casserole?

Elevate your breakfast experience by pairing this delightful dish with complementary sides that enhance its creamy, savory goodness.

  • Fresh Fruit Salad: Offers a refreshing burst of sweetness that balances the savory flavors, making each bite a delightful experience.
  • Crispy Hash Browns: Their crunchy texture contrasts beautifully with the soft casserole, adding heartiness and keeping your mornings exciting.
  • Avocado Toast: Creamy avocado on whole-grain toast brings healthy fats and an earthy flavor that pairs perfectly with the casserole’s richness.
  • Herbal Tea: A light chamomile or mint tea refreshes the palate and complements the richness of the casserole, creating a harmonious breakfast atmosphere.
  • Greek Yogurt Parfait: Layers of Greek yogurt and berries add a tangy and sweet element, making for a satisfying end to a cozy morning meal.
  • Sautéed Mushrooms and Onions: Earthy mushrooms caramelized in onions enhance the dish’s umami richness, reflecting a gourmet touch that’s surprisingly easy to prepare.

Cottage Cheese & Turkey Sausage Casserole Variations

Feel free to get creative with this casserole, making it truly your own masterpiece!

  • Vegetarian Twist: Substitute turkey sausage with plant-based sausage for a hearty, meat-free option that’s just as satisfying.
  • Cheese Options: Experiment with different cheeses like cheddar or pepper jack for a zesty flavor upgrade, adding depth to every bite.
  • Extra Greens: Toss in some chopped kale or bell peppers for an added crunch and extra nutrients; they blend wonderfully with the other ingredients.
  • Herb Infusion: Fresh herbs like basil or chives can be folded in for a burst of flavor and a delightful fragrance before baking.
  • Spice It Up: Add crushed red pepper flakes to kick up the heat level; it’s a great way to give your casserole a bit of a punch.
  • Savory Swap: Use crumbled bacon or ham for a smoky character. This will create a completely different taste profile while enhancing the savory goodness.
  • Low-Carb Delight: For a keto variant, replace the cottage cheese with a blend of cream cheese and sour cream for a higher fat, lower carb option.
  • Mushroom Medley: Incorporate sautéed mushrooms for an earthy twist that adds a satisfying texture to your casserole.

Discover more delicious ideas like Savory Ground Turkey or get inspired with our Shrimp Sausage Foil for a quick dinner solution!

Expert Tips for Cottage Cheese & Turkey Sausage Casserole

  • Baking Time Vigilance: Keep an eye on the casserole while it bakes; overcooking can make it dry. Aim for a golden brown top with a firm yet tender center.
  • Cooling Counts: Allow the casserole to rest for 5-10 minutes after baking for easier slicing and enhanced flavor depth in every bite.
  • Moisture Management: Drain excess moisture from cottage cheese and turkey sausage before mixing to prevent a watery Cottage Cheese & Turkey Sausage Casserole.
  • Egg Alternatives: If you’re looking to lighten up the dish, consider using egg alternatives like flax eggs or egg whites while maintaining flavor and protein.
  • Fresh Herbs Boost: Enhance your casserole’s flavor by folding in fresh herbs like basil or parsley just before baking, adding a fresh pop and lovely aroma!

Storage Tips for Cottage Cheese & Turkey Sausage Casserole

Fridge: Store leftovers in an airtight container for up to 4 days. This makes it easy to enjoy your delicious Cottage Cheese & Turkey Sausage Casserole throughout the week!

Freezer: For longer storage, freeze portions wrapped tightly in plastic wrap or aluminum foil for up to 3 months. Thaw overnight in the fridge before reheating.

Reheating: To reheat, place the casserole in a preheated oven at 350°F (175°C) for about 15-20 minutes, or until heated through. You might want to cover it with aluminum foil to prevent drying out.

Make-Ahead: Assemble the casserole up to 24 hours in advance and refrigerate. When ready, simply bake fresh in the morning for a quick and hearty breakfast!

Make Ahead Options

These High-Protein Cottage Cheese & Turkey Sausage Breakfast Casseroles are perfect for meal prep enthusiasts! You can assemble the casserole up to 24 hours in advance; just cover it tightly and refrigerate it until you’re ready to bake. To ensure a delicious texture, remove excess moisture from the cottage cheese and turkey sausage before mixing. When you’re set to serve, simply pop it into a preheated oven at 350°F (175°C) and bake fresh for about 35–40 minutes until it’s golden brown and the center sets perfectly. This make-ahead approach allows you to enjoy comforting, homemade meals with minimal morning hassle—just as satisfying as if you’d made it fresh!

Cottage Cheese & Turkey Sausage Casserole Recipe FAQs

How do I choose ripe ingredients for the casserole?
When selecting ingredients, look for cottage cheese that is creamy and free from excess whey for the best texture. For turkey sausage, opt for fresh, high-quality brands without artificial additives. Spinach should be vibrant and crisp—avoid wilted greens. Fresh eggs should be free from cracks and have a clean shell; the quality directly affects your casserole’s richness!

How long can I store leftovers from the casserole?
Absolutely! Leftovers can be kept in an airtight container in the fridge for up to 4 days. Make sure it’s cooled down before sealing it up; this helps maintain its freshness. When you’re ready to enjoy it again, simply reheat in the oven or microwave for a quick breakfast solution!

Can I freeze portions of the casserole for later use?
Yes! To freeze your Cottage Cheese & Turkey Sausage Casserole, cut it into individual portions and wrap each piece tightly in plastic wrap or aluminum foil. It can last in the freezer for up to 3 months. When you’re ready to enjoy, thaw overnight in the fridge, then reheat in the oven at 350°F (175°C) for about 15-20 minutes until warmed through.

What should I do if my casserole comes out too watery?
No worries! If your casserole turns out watery, it often means excess moisture was in the cottage cheese or turkey sausage. To prevent this in the future, drain the cottage cheese and cook off any moisture from the sausage by browning it in a pan before adding it to the mixture. This keeps your casserole firm and delicious!

Is this casserole suitable for people with dietary restrictions?
Very much so! If anyone has dietary restrictions, consider substituting the turkey sausage with chicken or plant-based sausage. For a dairy-free version, swap cottage cheese with a non-dairy alternative, like almond or soy-based products. Additionally, you can use egg alternatives if you need to avoid eggs, such as flax or chia seeds mixed with water as a binding agent.

How can I enhance the flavor of my casserole?
To amplify flavor, I recommend folding in fresh herbs such as basil or parsley just before baking—they not only brighten the dish with flavor but also add color. Also, experimenting with different cheese varieties like pepper jack can add an exciting kick to the classic balance. Feel free to get creative; this casserole is adaptable to your taste!

Cottage Cheese & Turkey Sausage Casserole

Cottage Cheese & Turkey Sausage Casserole for Cozy Mornings

A hearty Cottage Cheese & Turkey Sausage Casserole packed with protein, perfect for busy mornings and family brunches.
Prep Time 15 minutes
Cook Time 40 minutes
Cooling Time 10 minutes
Total Time 1 hour 5 minutes
Servings: 8 slices
Course: Breakfast
Cuisine: American
Calories: 280

Ingredients
  

For the Casserole
  • 12 large Eggs Essential for binding
  • 1 cup Cottage Cheese Can substitute with ricotta
  • 1 lb Turkey Sausage Can substitute with chicken or plant-based sausage
  • 2 cups Shredded Mozzarella Cheese Feel free to use cheddar
  • 1 cup Chopped Spinach Can substitute with kale or omit
  • 1 teaspoon Garlic Powder Can use fresh garlic
  • 1 teaspoon Salt Adjust to taste
  • 1 teaspoon Pepper Adjust to taste
Optional Add-Ins
  • 1 cup Fresh Herbs (Basil, Parsley) For garnish
  • Different Cheese Varieties Such as pepper jack or feta

Equipment

  • 9x13-inch baking dish
  • Mixing Bowl
  • Spatula

Method
 

Step-by-Step Instructions
  1. Preheat your oven to 350°F (175°C) and grease a 9x13-inch baking dish.
  2. In a large mixing bowl, whisk together the eggs, cottage cheese, garlic powder, salt, and pepper.
  3. Gently fold in the crumbled turkey sausage, shredded mozzarella cheese, and chopped spinach.
  4. Pour the mixture into the prepared baking dish and bake for 35-40 minutes until golden brown.
  5. Cool for 5-10 minutes before slicing into squares.
  6. Serve warm, optionally with fresh fruit salad or crispy hash browns.

Nutrition

Serving: 1sliceCalories: 280kcalCarbohydrates: 6gProtein: 28gFat: 15gSaturated Fat: 6gPolyunsaturated Fat: 1gMonounsaturated Fat: 4gCholesterol: 195mgSodium: 800mgPotassium: 300mgFiber: 1gSugar: 2gVitamin A: 600IUVitamin C: 5mgCalcium: 200mgIron: 2mg

Notes

Store leftovers in an airtight container for up to 4 days. You can also freeze individual portions.

Tried this recipe?

Let us know how it was!