Fresh Salsa Chicken: Enjoy a Flavorful, Easy Recipe!

Introduction to Fresh Salsa Chicken

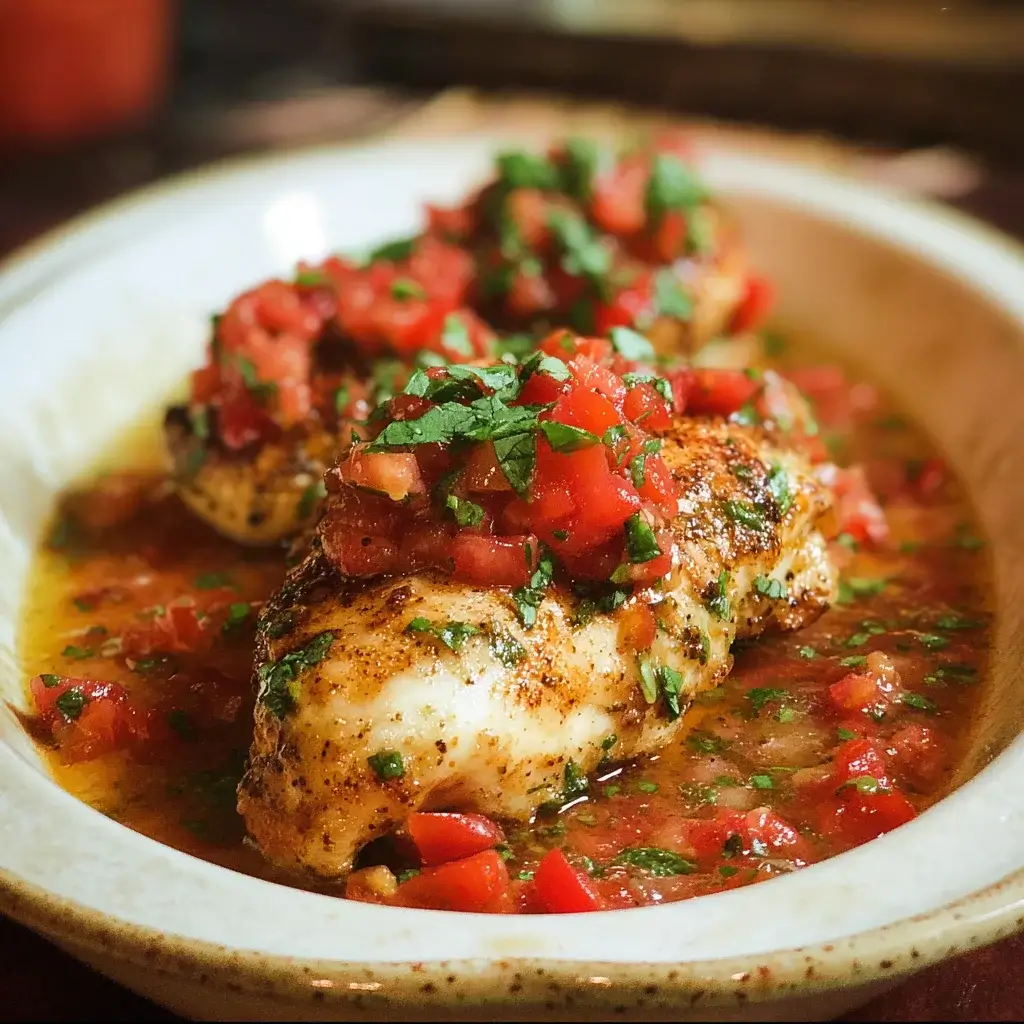
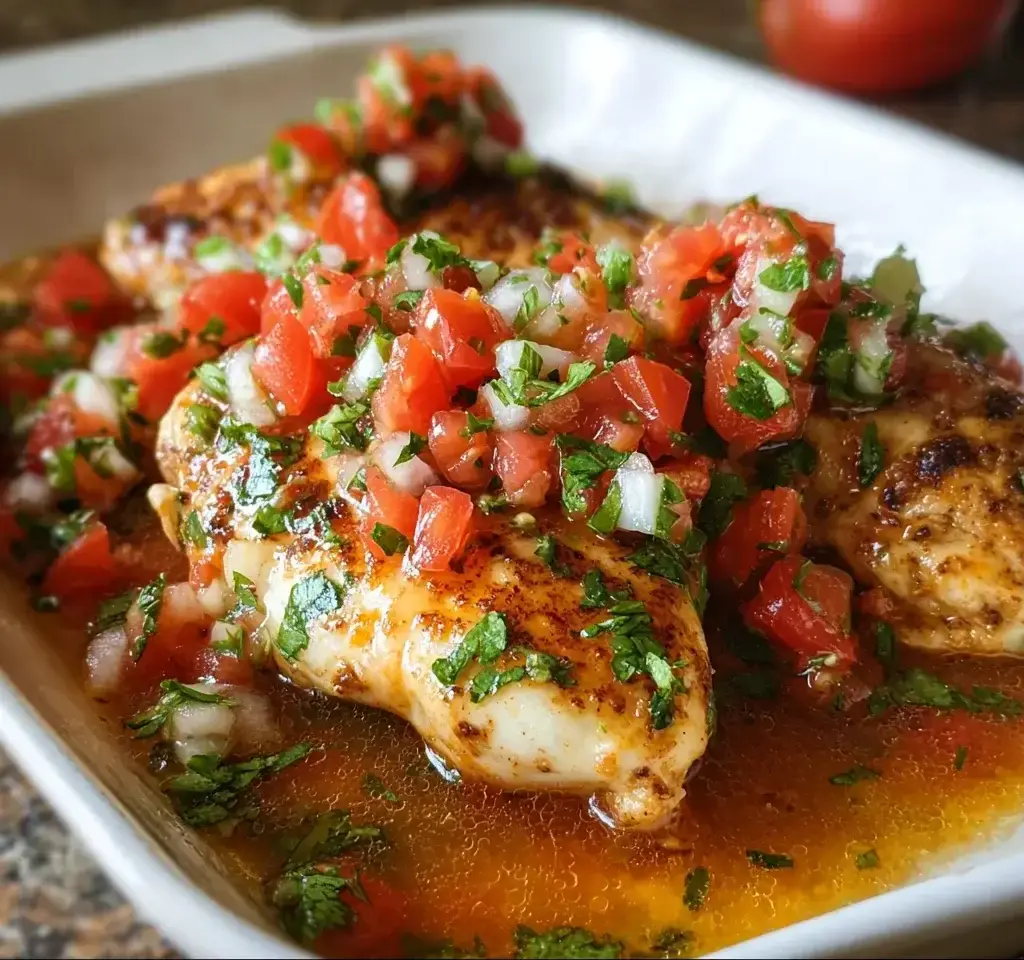
After a long day, the last thing I want is to spend hours in the kitchen. That’s where my go-to recipe, Fresh Salsa Chicken, comes in. It’s a delightful dish that’s not only easy to whip up but also bursting with flavor. Picture tender chicken breasts topped with zesty salsa and gooey cheese—what’s not to love? This recipe is perfect for impressing friends or simply treating yourself to a satisfying meal. With just a few ingredients and minimal prep time, you’ll have a delicious dinner on the table in no time!

Why You’ll Love This Fresh Salsa Chicken

This Fresh Salsa Chicken is a game-changer for busy weeknights. It’s quick to prepare, taking just about 10 minutes of your time, and the oven does the rest. The combination of spices and fresh salsa creates a flavor explosion that will have your taste buds dancing. Plus, it’s versatile enough to please picky eaters while being healthy and gluten-free. You’ll find yourself making this dish again and again!

Ingredients for Fresh Salsa Chicken

Gathering the right ingredients is key to making Fresh Salsa Chicken a hit. Here’s what you’ll need:

  • Boneless, skinless chicken breasts: The star of the dish, they’re lean and cook up juicy.
  • Olive oil: A touch of healthy fat that helps the spices stick and adds richness.
  • Garlic powder: This brings a savory depth to the chicken without the fuss of fresh garlic.
  • Cumin: Earthy and warm, cumin adds a hint of smokiness that complements the salsa.
  • Chili powder: A little kick that enhances the overall flavor profile, making it exciting.
  • Salt and pepper: Essential for seasoning, they elevate all the other flavors.
  • Fresh salsa: You can use store-bought or homemade; it’s the vibrant topping that brings everything together.
  • Shredded Monterey Jack cheese: Melts beautifully, adding creaminess and a mild flavor.
  • Avocado: Diced for a fresh, creamy contrast that balances the dish.
  • Fresh cilantro: A sprinkle of this herb adds brightness and a pop of color.
  • Lime wedges: For serving, they add a zesty finish that brightens every bite.

For those looking to spice things up, consider adding diced jalapeños to the salsa or sprinkling red pepper flakes over the chicken before baking. If you want a heartier meal, serve the chicken over a bed of rice or quinoa. You can find the exact quantities for each ingredient at the bottom of the article, ready for printing!

How to Make Fresh Salsa Chicken

Creating Fresh Salsa Chicken is a breeze! Follow these simple steps, and you’ll have a mouthwatering meal ready in no time. Let’s dive in!

Step 1: Preheat the Oven

Start by preheating your oven to 375°F (190°C). This step is crucial because it ensures even cooking. A hot oven helps the chicken cook through while keeping it juicy. Trust me, no one wants dry chicken!

Step 2: Prepare the Spice Mixture

In a small bowl, combine olive oil, garlic powder, cumin, chili powder, salt, and pepper. This spice mixture is the secret to elevating your chicken’s flavor. The olive oil helps the spices adhere, while the garlic and cumin create a savory base that’s hard to resist.

Step 3: Season the Chicken

Rub the spice mixture evenly over both chicken breasts. Make sure to cover every inch for maximum flavor. I like to use my hands for this—get in there! The spices will create a delicious crust as the chicken bakes.

Step 4: Bake the Chicken

Place the seasoned chicken breasts in a baking dish and pop them in the oven. Bake for 25-30 minutes, or until the internal temperature reaches 165°F (75°C). To check for doneness, use a meat thermometer. This ensures your chicken is perfectly cooked and safe to eat.

Step 5: Add Salsa and Cheese

Once the chicken is done, remove it from the oven and top each breast with fresh salsa and shredded Monterey Jack cheese. This layering process not only adds flavor but also creates a beautiful presentation. The salsa brings freshness, while the cheese adds creaminess.

Step 6: Final Bake

Return the dish to the oven for an additional 5-7 minutes. This final bake allows the cheese to melt and bubble, creating a delightful texture. The aroma wafting through your kitchen will have everyone eagerly waiting for dinner!

Step 7: Garnish and Serve

After removing the dish from the oven, let it rest for a few minutes. Top with diced avocado and chopped cilantro for a pop of color and flavor. Serve with lime wedges on the side for that zesty finish. Your Fresh Salsa Chicken is now ready to impress!

Tips for Success

  • Always use a meat thermometer to ensure your chicken is cooked to 165°F (75°C).
  • Let the chicken rest for a few minutes after baking to keep it juicy.
  • Feel free to customize the spice levels to suit your taste.
  • For extra flavor, marinate the chicken in the spice mixture for an hour before baking.
  • Pair with a side salad for a refreshing contrast.

Equipment Needed

  • Baking dish: A glass or ceramic dish works well; a metal one is fine too.
  • Meat thermometer: Essential for checking chicken doneness; a simple knife can also help.
  • Mixing bowl: Any bowl will do for combining spices.
  • Measuring spoons: Handy for precise spice measurements; you can eyeball it if you’re confident!

Variations

  • Spicy Salsa Chicken: Add diced jalapeños to the salsa for an extra kick.
  • Herb-Infused: Mix in dried oregano or thyme with the spice blend for a fragrant twist.
  • Cheese Swap: Try pepper jack cheese instead of Monterey Jack for a spicier flavor.
  • Vegetarian Option: Substitute chicken with portobello mushrooms or zucchini slices for a meatless version.
  • Low-Carb Version: Serve over cauliflower rice instead of traditional rice or quinoa.

Serving Suggestions

  • Rice or Quinoa: Serve the chicken over a bed of fluffy rice or quinoa for a hearty meal.
  • Fresh Salad: A crisp side salad with lime vinaigrette complements the flavors beautifully.
  • Chips and Guacamole: Pair with tortilla chips and guacamole for a fun appetizer.
  • Refreshing Drink: Enjoy with a cold beer or a zesty margarita to elevate the experience.

FAQs about Fresh Salsa Chicken

Can I use frozen chicken breasts for this recipe?

Yes, you can use frozen chicken breasts! Just make sure to thaw them completely before seasoning and baking. Cooking from frozen will require additional time, so check the internal temperature to ensure it reaches 165°F (75°C).

What type of salsa works best?

Fresh salsa is ideal for this dish, whether store-bought or homemade. Look for a salsa that’s chunky and vibrant. If you prefer a smoother texture, you can blend it slightly before using.

Can I make this dish ahead of time?

Absolutely! You can prepare the chicken and spice mixture in advance. Just store them separately in the fridge. When you’re ready to cook, simply follow the baking instructions. It’s a great way to save time on busy nights!

What can I serve with Fresh Salsa Chicken?

This dish pairs wonderfully with rice, quinoa, or a fresh salad. You can also serve it with tortilla chips and guacamole for a fun twist. The options are endless!

Is Fresh Salsa Chicken gluten-free?

Yes, this recipe is naturally gluten-free! Just ensure that any store-bought salsa you use is labeled gluten-free. Enjoy this flavorful chicken dish without worry!

Final Thoughts

Fresh Salsa Chicken is more than just a meal; it’s an experience that brings joy to the table. The vibrant flavors and simple preparation make it a go-to for any occasion, whether it’s a weeknight dinner or a gathering with friends. Each bite is a celebration of fresh ingredients and spices that dance together in harmony. Plus, the satisfaction of creating something delicious in your own kitchen is unmatched. So, roll up your sleeves, embrace the process, and enjoy the delightful journey of making this dish. Your taste buds will thank you, and so will your loved ones!

Ranis

Fresh Salsa Chicken: Enjoy a Flavorful, Easy Recipe!

Fresh Salsa Chicken is a flavorful and easy recipe featuring seasoned chicken breasts topped with fresh salsa and melted cheese.
Prep Time 10 minutes
Course: Main Dish
Cuisine: Mexican
Calories: 450

Ingredients
  

  • 2 boneless skinless chicken breasts (about 1 pound)
  • 1 teaspoon olive oil
  • 1 teaspoon garlic powder
  • 1 teaspoon cumin
  • 1 teaspoon chili powder
  • Salt and pepper to taste
  • 1 cup fresh salsa store-bought or homemade
  • 1 cup shredded Monterey Jack cheese
  • 1 avocado diced
  • 1/4 cup fresh cilantro chopped
  • Lime wedges for serving

Method
 

  1. Preheat your oven to 375°F (190°C).
  2. In a small bowl, mix together the olive oil, garlic powder, cumin, chili powder, salt, and pepper.
  3. Rub the spice mixture evenly over both chicken breasts.
  4. Place the seasoned chicken breasts in a baking dish and bake for 25-30 minutes, or until the internal temperature reaches 165°F (75°C).
  5. Remove the chicken from the oven and top each breast with fresh salsa and shredded cheese.
  6. Return the dish to the oven and bake for an additional 5-7 minutes, until the cheese is melted and bubbly.
  7. Remove from the oven and let rest for a few minutes. Top with diced avocado and chopped cilantro before serving.
  8. Serve with lime wedges on the side.

Nutrition

Serving: 1servingCalories: 450kcalCarbohydrates: 6gProtein: 40gFat: 28gSaturated Fat: 10gPolyunsaturated Fat: 18gCholesterol: 120mgSodium: 500mgFiber: 1gSugar: 2g

Notes

  • For a spicier version, add diced jalapeños to the salsa or sprinkle red pepper flakes over the chicken before baking.
  • Serve the chicken over a bed of rice or quinoa for a heartier meal.

Tried this recipe?

Let us know how it was!

Soft Oatmeal Chocolate Chip Cookies You Can’t Resist!

Introduction to Soft Oatmeal Chocolate Chip Cookies

There’s something magical about the aroma of freshly baked cookies wafting through the house. It takes me back to my childhood, where every Sunday afternoon was a sweet adventure in the kitchen. Today, I’m excited to share my recipe for Soft Oatmeal Chocolate Chip Cookies. These cookies are not just a treat; they’re a warm hug on a plate. Perfect for a quick solution on a busy day or a delightful way to impress your loved ones, they combine the heartiness of oats with the indulgence of chocolate. Trust me, you won’t be able to resist!

Why You’ll Love This Soft Oatmeal Chocolate Chip Cookies

These Soft Oatmeal Chocolate Chip Cookies are a game-changer in the baking world. They come together in just 15 minutes, making them perfect for those last-minute cravings or unexpected guests. The chewy texture paired with rich chocolate creates a delightful balance that’s hard to resist. Plus, they’re versatile enough to satisfy everyone, from kids to adults. You’ll find yourself making these cookies again and again!

Ingredients for Soft Oatmeal Chocolate Chip Cookies

Gathering the right ingredients is the first step to cookie perfection. Here’s what you’ll need for these Soft Oatmeal Chocolate Chip Cookies:

  • Rolled oats: These provide the chewy texture and heartiness that make oatmeal cookies so satisfying.
  • All-purpose flour: This is the backbone of your cookie dough, giving it structure and stability.
  • Baking soda: A leavening agent that helps the cookies rise and become fluffy.
  • Salt: Just a pinch enhances the flavors and balances the sweetness.
  • Ground cinnamon: This adds a warm, comforting spice that complements the chocolate beautifully.
  • Unsalted butter: Softened butter creates a rich flavor and tender texture in your cookies.
  • Brown sugar: Packed with moisture, it gives the cookies a chewy texture and deep caramel notes.
  • Granulated sugar: This adds sweetness and helps the cookies spread while baking.
  • Large egg: Acts as a binder, helping to hold everything together while adding richness.
  • Vanilla extract: A splash of this elevates the flavor profile, making the cookies irresistible.
  • Semi-sweet chocolate chips: The star of the show! They melt beautifully and provide that classic chocolatey goodness.

Feel free to get creative! You can substitute half of the chocolate chips with dried fruit or nuts for added texture and flavor. For exact measurements, check the bottom of the article where you can find everything available for printing.

How to Make Soft Oatmeal Chocolate Chip Cookies

Now that you have your ingredients ready, let’s dive into the fun part—making these Soft Oatmeal Chocolate Chip Cookies! Follow these simple steps, and you’ll be enjoying warm cookies in no time.

Step 1: Preheat the Oven and Prepare Baking Sheet

First things first, preheat your oven to 350°F (175°C). This step is crucial because it ensures your cookies bake evenly. While the oven heats up, line a baking sheet with parchment paper. This prevents sticking and makes cleanup a breeze. Trust me, your future self will thank you!

Step 2: Combine Dry Ingredients

In a medium bowl, mix together the rolled oats, all-purpose flour, baking soda, salt, and ground cinnamon. This step is essential for evenly distributing the leavening agent and spices throughout the dough. It also helps to create a uniform texture in your cookies. Give it a good stir and set it aside for now.

Step 3: Cream Butter and Sugars

In a large bowl, cream together the softened unsalted butter, brown sugar, and granulated sugar until the mixture is light and fluffy. This process is key for achieving that soft, chewy texture we all love. The air incorporated during creaming helps the cookies rise beautifully. Don’t rush this step; it’s worth the extra minute!

Step 4: Add Egg and Vanilla

Next, beat in the large egg and vanilla extract until everything is well combined. These ingredients not only add moisture but also enhance the flavor of your cookies. The vanilla, in particular, brings a warm, inviting aroma that will have everyone flocking to the kitchen.

Step 5: Mix Dry and Wet Ingredients

Now it’s time to combine the dry and wet ingredients. Gradually add the dry mixture to the wet ingredients, stirring gently until just combined. Be careful not to overmix; this can lead to tough cookies. You want to see a few flour streaks remaining—this is perfectly fine!

Step 6: Fold in Chocolate Chips

Gently fold in the semi-sweet chocolate chips until they are evenly distributed throughout the dough. This step is crucial for ensuring every bite is packed with chocolatey goodness. Plus, who doesn’t want a cookie that’s bursting with chocolate?

Step 7: Shape and Bake Cookies

Using a tablespoon, drop rounded scoops of dough onto the prepared baking sheet, spacing them about 2 inches apart. This allows room for spreading. Bake your cookies for 10-12 minutes, or until the edges are lightly golden. The centers may look slightly underbaked, but they will firm up as they cool.

Step 8: Cooling Process

Once baked, allow the cookies to cool on the baking sheet for about 5 minutes. This cooling time is essential for achieving that perfect texture. Afterward, transfer them to a wire rack to cool completely. This step prevents sogginess and ensures your cookies stay soft and chewy!

Tips for Success

  • Chill the dough for 30 minutes for chewier cookies.
  • Use a cookie scoop for uniform sizes and even baking.
  • Don’t skip the parchment paper; it makes cleanup easy.
  • Experiment with mix-ins like nuts or dried fruit for variety.
  • Store cookies in an airtight container to maintain softness.

Equipment Needed

  • Baking sheet: A standard cookie sheet works well, but a stoneware pan can give you a nice, even bake.
  • Parchment paper: If you don’t have this, greasing the baking sheet is a good alternative.
  • Mixing bowls: Use any size, but a large bowl is ideal for creaming ingredients.
  • Measuring cups and spoons: Essential for accuracy; a kitchen scale can also be handy.
  • Cookie scoop: A tablespoon works too, but a scoop ensures uniform cookies.

Variations

  • Nutty Delight: Add chopped walnuts or pecans for a crunchy texture that complements the softness of the cookies.
  • Fruit Fusion: Substitute half of the chocolate chips with dried cranberries or raisins for a fruity twist.
  • Spiced Up: Experiment with spices like nutmeg or ginger for a unique flavor profile.
  • Gluten-Free Option: Use gluten-free flour instead of all-purpose flour to make these cookies suitable for gluten-sensitive friends.
  • Vegan Version: Replace the egg with a flaxseed meal or applesauce and use vegan butter for a plant-based treat.

Serving Suggestions

  • Pair these cookies with a tall glass of cold milk for a classic combination.
  • Serve warm with a scoop of vanilla ice cream on top for an indulgent dessert.
  • For a cozy touch, enjoy them with a cup of hot coffee or tea.
  • Present on a rustic wooden platter for a charming display at gatherings.

FAQs about Soft Oatmeal Chocolate Chip Cookies

Can I use quick oats instead of rolled oats?

While rolled oats give the best texture, you can use quick oats in a pinch. Just keep in mind that the cookies may turn out a bit softer and less chewy.

How do I store Soft Oatmeal Chocolate Chip Cookies?

To keep your cookies soft and fresh, store them in an airtight container at room temperature. They’ll stay delicious for up to a week!

Can I freeze the cookie dough?

Absolutely! You can freeze the dough for up to three months. Just scoop the dough onto a baking sheet, freeze until solid, then transfer to a freezer bag. Bake straight from the freezer, adding a couple of extra minutes to the baking time.

What can I substitute for chocolate chips?

If you want to mix things up, try using white chocolate chips, butterscotch chips, or even chopped dark chocolate. You can also add dried fruits or nuts for a different flavor profile.

Why are my cookies flat?

Flat cookies can be a result of too much butter or not enough flour. Make sure to measure your ingredients accurately. Also, chilling the dough can help prevent spreading!

Final Thoughts

There’s a special kind of joy that comes from baking Soft Oatmeal Chocolate Chip Cookies. The process is simple, yet it fills your kitchen with warmth and delightful aromas. Each bite offers a perfect blend of chewy oats and rich chocolate, making them a treat for any occasion. Whether you’re sharing them with family or enjoying a quiet moment with a cup of coffee, these cookies bring comfort and happiness. So, roll up your sleeves, gather your ingredients, and create a batch that will surely become a cherished favorite in your home!

Ranis

Soft Oatmeal Chocolate Chip Cookies You Can't Resist!

Deliciously soft and chewy oatmeal chocolate chip cookies that are irresistible.
Prep Time 15 minutes
Cook Time 12 minutes
Total Time 27 minutes
Servings: 24 cookies
Course: Dessert
Cuisine: American
Calories: 150

Ingredients
  

  • 2 cups rolled oats
  • 1 cup all-purpose flour
  • 1 teaspoon baking soda
  • 1/2 teaspoon salt
  • 1 teaspoon ground cinnamon
  • 1/2 cup unsalted butter softened
  • 1/2 cup brown sugar packed
  • 1/2 cup granulated sugar
  • 1 large egg
  • 1 teaspoon vanilla extract
  • 1 cup semi-sweet chocolate chips

Method
 

  1. Preheat your oven to 350°F (175°C) and line a baking sheet with parchment paper.
  2. In a medium bowl, combine the rolled oats, flour, baking soda, salt, and cinnamon. Mix well and set aside.
  3. In a large bowl, cream together the softened butter, brown sugar, and granulated sugar until light and fluffy.
  4. Beat in the egg and vanilla extract until well combined.
  5. Gradually add the dry ingredients to the wet mixture, stirring until just combined.
  6. Fold in the chocolate chips until evenly distributed.
  7. Drop rounded tablespoons of dough onto the prepared baking sheet, spacing them about 2 inches apart.
  8. Bake for 10-12 minutes, or until the edges are lightly golden. The centers may look slightly underbaked; they will firm up as they cool.
  9. Allow the cookies to cool on the baking sheet for 5 minutes before transferring them to a wire rack to cool completely.

Nutrition

Serving: 1cookieCalories: 150kcalCarbohydrates: 20gProtein: 2gFat: 7gSaturated Fat: 4gPolyunsaturated Fat: 3gCholesterol: 15mgSodium: 100mgFiber: 1gSugar: 10g

Notes

  • For a chewier cookie, chill the dough for 30 minutes before baking.
  • You can also substitute half of the chocolate chips with dried fruit or nuts for added texture and flavor.

Tried this recipe?

Let us know how it was!

Mongolian Beef Delight: A Must-Try Recipe Tonight!

Introduction to Mongolian Beef Delight

There’s something magical about a dish that combines sweet and savory flavors, and Mongolian Beef Delight is just that. This recipe is a lifesaver for those busy weeknights when you want to whip up something delicious without spending hours in the kitchen. With tender flank steak coated in a rich sauce, it’s sure to impress your family or friends. Plus, it’s quick to prepare, making it the perfect solution for a satisfying dinner. Trust me, once you try this dish, it will become a staple in your home cooking repertoire!

Why You’ll Love This Mongolian Beef Delight

Mongolian Beef Delight is a game-changer for anyone who craves a flavorful meal without the fuss. It’s quick to make, taking just 30 minutes from start to finish. The tender beef melts in your mouth, while the sweet and savory sauce dances on your taste buds. Plus, it’s versatile enough to please even the pickiest eaters. You’ll find yourself reaching for this recipe time and again, making dinner a breeze!

Ingredients for Mongolian Beef Delight

Gathering the right ingredients is key to making Mongolian Beef Delight a success. Here’s what you’ll need:

  • Flank steak: This cut is perfect for stir-frying, as it’s tender and flavorful when sliced thin against the grain.
  • Soy sauce: A staple in Asian cuisine, it adds a savory depth to the dish. Opt for low-sodium if you’re watching your salt intake.
  • Brown sugar: This brings a touch of sweetness that balances the saltiness of the soy sauce, creating that irresistible flavor.
  • Cornstarch: A secret weapon for thickening the sauce, giving it that glossy finish that clings to the beef.
  • Vegetable oil: Used for cooking the beef, it has a high smoke point, making it ideal for stir-frying.
  • Minced garlic: Fresh garlic adds a punch of flavor that elevates the dish. You can use garlic powder in a pinch.
  • Minced ginger: This adds warmth and a hint of spice, enhancing the overall taste profile.
  • Green onions: Chopped and added at the end, they provide a fresh crunch and vibrant color.
  • Red pepper flakes (optional): For those who like a little heat, these can be adjusted to your spice preference.
  • Cooked rice: The perfect base for soaking up all that delicious sauce. You can use white, brown, or even cauliflower rice for a low-carb option.

For exact measurements, check the bottom of the article where you can find everything listed for easy printing!

How to Make Mongolian Beef Delight

Creating Mongolian Beef Delight is a straightforward process that will have your kitchen smelling amazing in no time. Follow these simple steps, and you’ll be enjoying a delicious meal that’s sure to impress!

Step 1: Prepare the Sauce

Start by grabbing a bowl. Combine soy sauce, brown sugar, cornstarch, minced garlic, minced ginger, and red pepper flakes if you’re feeling adventurous. Whisk everything together until it’s smooth. This sauce is the heart of the dish, so make sure it’s well mixed. Set it aside for now; it’ll be ready to work its magic soon!

Step 2: Cook the Beef

Heat a large skillet over medium-high heat and add vegetable oil. Once the oil is shimmering, toss in the sliced flank steak. Cook it for about 3-4 minutes, stirring occasionally, until it’s nicely browned. The key here is to avoid overcrowding the pan; you want that beautiful sear on the beef. If you have to, cook it in batches!

Step 3: Combine and Simmer

Now it’s time to bring it all together. Pour the prepared sauce over the browned beef in the skillet. Stir well to coat every piece of meat evenly. Reduce the heat to low and let it simmer for about 10-15 minutes. This allows the sauce to thicken and the flavors to meld beautifully. Keep an eye on it, stirring occasionally to prevent sticking.

Step 4: Add Green Onions

Just before serving, stir in the chopped green onions. They add a fresh crunch and a pop of color to your dish. Plus, they bring a lovely oniony flavor that complements the beef perfectly. Give it a quick stir, and you’re almost there!

Step 5: Serve Over Rice

Finally, it’s time to plate up! Serve your Mongolian Beef Delight over a bed of cooked rice. The rice will soak up all that delicious sauce, making every bite a delight. You can garnish with extra green onions or even sesame seeds for a little flair. Enjoy your meal!

Tips for Success

  • Slice the flank steak against the grain for maximum tenderness.
  • Don’t skip the cornstarch; it’s essential for that glossy sauce.
  • Prep all ingredients before cooking to streamline the process.
  • Adjust the sweetness by varying the brown sugar to your taste.
  • For a quicker meal, use pre-cooked rice or microwaveable rice packets.

Equipment Needed

  • Large skillet: A non-stick skillet works wonders, but any heavy-bottomed pan will do.
  • Whisk: Essential for mixing the sauce; a fork can work in a pinch.
  • Cutting board: A sturdy surface for slicing the flank steak.
  • Sharp knife: A good chef’s knife makes slicing the meat a breeze.
  • Measuring cups: Handy for precise ingredient measurements, though you can eyeball it if you’re confident!

Variations

  • Protein Swap: Try using sirloin or chicken instead of flank steak for a different flavor profile.
  • Vegetarian Option: Substitute beef with tofu or tempeh for a plant-based twist that’s equally satisfying.
  • Spicy Kick: Add sliced jalapeños or a splash of sriracha to the sauce for an extra layer of heat.
  • Veggie Boost: Toss in bell peppers, broccoli, or snap peas during the cooking process for added nutrition and color.
  • Gluten-Free: Use tamari instead of soy sauce to keep this dish gluten-free without sacrificing flavor.

Serving Suggestions

  • Steamed Vegetables: Pair your Mongolian Beef Delight with steamed broccoli or snap peas for a colorful plate.
  • Rice Variations: Try jasmine or basmati rice for a fragrant twist.
  • Drink Pairing: A light lager or iced green tea complements the flavors beautifully.
  • Presentation: Garnish with sesame seeds and extra green onions for a restaurant-style finish.

FAQs about Mongolian Beef Delight

As you dive into the world of Mongolian Beef Delight, you might have a few questions. Here are some common queries that can help you navigate this delicious dish:

Can I use a different cut of beef for this recipe?

Absolutely! While flank steak is ideal for its tenderness, you can also use sirloin or even ribeye. Just remember to slice it thinly against the grain for the best texture.

Is Mongolian Beef Delight spicy?

The beauty of this dish is its versatility. The base recipe isn’t spicy, but you can easily add red pepper flakes or sriracha to kick up the heat. Adjust it to your taste!

Can I make this dish ahead of time?

Yes! Mongolian Beef Delight can be made ahead and stored in the fridge for up to three days. Just reheat it gently on the stovetop, adding a splash of water if needed to loosen the sauce.

What can I serve with Mongolian Beef Delight?

This dish pairs wonderfully with steamed vegetables, fried rice, or even a simple salad. The options are endless, so feel free to get creative!

Is this recipe gluten-free?

To make Mongolian Beef Delight gluten-free, simply substitute soy sauce with tamari. It maintains the same rich flavor without the gluten!

Final Thoughts

Mongolian Beef Delight is more than just a meal; it’s an experience that brings warmth and satisfaction to your dinner table. The combination of tender beef and a rich, sweet-savory sauce creates a symphony of flavors that will have everyone asking for seconds. Whether you’re cooking for family or hosting friends, this dish is sure to impress. Plus, it’s quick and easy, making it a perfect choice for those busy nights. So, roll up your sleeves, gather your ingredients, and let the delightful aromas fill your kitchen. You’re in for a treat that will become a cherished favorite!

Ranis

Mongolian Beef Delight: A Must-Try Recipe Tonight!

Mongolian Beef Delight is a savory and sweet dish featuring tender flank steak cooked in a flavorful sauce, perfect for serving over rice.
Prep Time 10 minutes
Cook Time 20 minutes
Total Time 30 minutes
Servings: 4 servings
Course: Main Dish
Cuisine: Asian
Calories: 320

Ingredients
  

  • 1 pound flank steak sliced thin against the grain
  • 1/4 cup soy sauce
  • 1/4 cup brown sugar
  • 2 tablespoons cornstarch
  • 1 tablespoon vegetable oil
  • 1 teaspoon minced garlic
  • 1 teaspoon minced ginger
  • 1/2 cup green onions chopped
  • 1/4 teaspoon red pepper flakes optional
  • Cooked rice for serving

Method
 

  1. In a bowl, combine soy sauce, brown sugar, cornstarch, garlic, ginger, and red pepper flakes (if using). Whisk until smooth and set aside.
  2. Heat the vegetable oil in a large skillet over medium-high heat. Add the sliced flank steak and cook until browned, about 3-4 minutes.
  3. Pour the sauce mixture over the beef in the skillet. Stir to coat the beef evenly.
  4. Reduce the heat to low and let simmer for about 10-15 minutes, stirring occasionally, until the sauce thickens.
  5. Stir in the chopped green onions just before serving.
  6. Serve the Mongolian beef over cooked rice.

Nutrition

Serving: 1servingCalories: 320kcalCarbohydrates: 18gProtein: 25gFat: 15gSaturated Fat: 4gPolyunsaturated Fat: 11gCholesterol: 70mgSodium: 800mgFiber: 1gSugar: 10g

Notes

  • For a spicier kick, add more red pepper flakes or a splash of sriracha to the sauce.
  • Substitute flank steak with sirloin or chicken for a different protein option.

Tried this recipe?

Let us know how it was!

Mongolian Meatball Ramen: A Unique Comfort Food Recipe

Introduction to Mongolian Meatball Ramen

There’s something magical about a steaming bowl of ramen, especially when it’s filled with savory Mongolian meatballs. This dish is more than just a meal; it’s a warm hug on a chilly evening or a quick solution for a busy day. I remember the first time I tried a similar recipe; it was a game-changer. The combination of tender meatballs and flavorful broth is simply irresistible. Whether you’re looking to impress your loved ones or just want to treat yourself, Mongolian Meatball Ramen is the perfect comfort food that brings joy to any table.

Why You’ll Love This Mongolian Meatball Ramen

This Mongolian Meatball Ramen is a game-changer for busy weeknights. It’s incredibly easy to whip up, thanks to the slow cooker. Just toss in the ingredients and let it work its magic while you kick back. The rich flavors of the broth combined with the tender meatballs create a taste sensation that’s hard to resist. Plus, it’s a dish that warms the soul, making it perfect for any occasion.

Ingredients for Mongolian Meatball Ramen

Gathering the right ingredients is the first step to creating this delightful dish. Here’s what you’ll need:

  • Ground beef: The star of the show! It provides a rich flavor and juicy texture for the meatballs.
  • Breadcrumbs: These help bind the meatball mixture together, ensuring they hold their shape while cooking.
  • Grated Parmesan cheese: Adds a savory depth to the meatballs, enhancing their overall flavor.
  • Egg: Acts as a binder, keeping the meatballs moist and tender.
  • Garlic: Freshly minced garlic brings a punch of flavor that elevates the dish.
  • Ginger: A hint of ginger adds warmth and a subtle zing to the meatballs.
  • Green onions: These provide a fresh, crisp element, both in the meatballs and as a garnish.
  • Soy sauce: This salty, umami-rich ingredient is essential for flavoring the broth.
  • Brown sugar: Balances the saltiness of the soy sauce, creating a harmonious flavor profile.
  • Sesame oil: Adds a nutty aroma and richness to the meatballs when browned.
  • Beef broth: The base of the soup, providing depth and heartiness to the dish.
  • Water: Helps to dilute the broth to the perfect consistency.
  • Ramen noodles: The perfect vehicle for soaking up all that delicious broth. Discard the seasoning packets for this recipe.
  • Frozen mixed vegetables: A convenient way to add color and nutrition to your ramen.
  • Salt and pepper: Essential for seasoning the meatballs to your taste.

For those looking to spice things up, consider adding red pepper flakes or a splash of sriracha to the broth. If you prefer a leaner option, ground turkey or chicken can be substituted for the beef. You can find the exact quantities for each ingredient at the bottom of the article, ready for printing!

How to Make Mongolian Meatball Ramen

Creating this Mongolian Meatball Ramen is a straightforward process that will have your kitchen smelling amazing. Follow these simple steps, and you’ll be enjoying a bowl of comfort in no time!

Step 1: Prepare the Meatball Mixture

In a large bowl, combine the ground beef, breadcrumbs, grated Parmesan cheese, egg, minced garlic, minced ginger, and chopped green onions. Season the mixture with salt and pepper to taste. Use your hands to mix everything together until well combined. Don’t be shy; this is where the magic begins!

Step 2: Form the Meatballs

Now it’s time to shape the mixture into meatballs. Aim for about 1 inch in diameter for even cooking. This size is perfect for fitting into your ramen bowl without overwhelming the noodles. Place the formed meatballs on a plate as you go.

Step 3: Brown the Meatballs

Heat sesame oil in a large skillet over medium-high heat. Once hot, add the meatballs to the skillet. Cook them until they are browned on all sides, which should take about 5-7 minutes. This step adds a delicious layer of flavor that will enhance your broth later. Once browned, remove the meatballs from the skillet and set them aside.

Step 4: Prepare the Broth

In your slow cooker, combine the beef broth, water, soy sauce, and brown sugar. Stir well to ensure the sugar dissolves completely. This broth is the heart of your Mongolian Meatball Ramen, so make sure it’s well mixed and ready to absorb all those flavors!

Step 5: Combine Ingredients in Slow Cooker

Add the browned meatballs and frozen mixed vegetables to the broth mixture in the slow cooker. Give it a gentle stir to combine everything. Cover the slow cooker and let it work its magic. The meatballs will soak up the broth’s flavors while the vegetables add color and nutrition.

Step 6: Cook the Ramen

About 15 minutes before you’re ready to serve, add the ramen noodles to the slow cooker. Stir gently to ensure the noodles are submerged in the broth. Allow them to cook until tender, soaking up all that delicious flavor. Your kitchen will soon be filled with an irresistible aroma!

Tips for Success

  • Use fresh ingredients for the best flavor, especially the garlic and ginger.
  • Don’t skip browning the meatballs; it adds depth to the dish.
  • Adjust the broth’s seasoning to your taste; a little extra soy sauce can go a long way.
  • For a heartier meal, add more vegetables or even an egg on top when serving.
  • Let the dish sit for a few minutes after cooking; it allows the flavors to meld beautifully.

Equipment Needed

  • Slow cooker: Essential for this recipe; a stovetop pot can work too, but requires more attention.
  • Large bowl: For mixing the meatball ingredients; any mixing bowl will do.
  • Skillet: Needed for browning the meatballs; a non-stick pan is ideal.
  • Measuring cups and spoons: For accurate ingredient measurements; you can use standard kitchen cups if needed.
  • Serving bowls: To present your delicious ramen; any bowl will suffice!

Variations

  • Spicy Mongolian Meatball Ramen: Add red pepper flakes or a splash of sriracha to the broth for a fiery kick.
  • Vegetarian Option: Substitute ground beef with plant-based meat or chickpeas, and use vegetable broth for a meat-free version.
  • Gluten-Free Adaptation: Use gluten-free soy sauce and rice noodles instead of traditional ramen for a gluten-free meal.
  • Asian-Inspired Twist: Incorporate bok choy or shiitake mushrooms for an extra layer of flavor and texture.
  • Herb-Infused Broth: Add fresh herbs like cilantro or basil to the broth for a refreshing twist.

Serving Suggestions

  • Pair your Mongolian Meatball Ramen with a side of crispy spring rolls for a delightful crunch.
  • A chilled Asian cucumber salad complements the warmth of the ramen beautifully.
  • Serve with a refreshing iced green tea to balance the flavors.
  • Garnish with extra green onions and sesame seeds for a pop of color.

FAQs about Mongolian Meatball Ramen

Can I make Mongolian Meatball Ramen ahead of time?

Absolutely! You can prepare the meatballs and broth in advance. Just store them separately in the fridge. When you’re ready to eat, combine them in the slow cooker and add the ramen noodles. It’s a great way to save time on busy nights!

What can I substitute for ground beef?

If you’re looking for a leaner option, ground turkey or chicken works well. You can also use plant-based meat alternatives for a vegetarian version. Just keep in mind that cooking times may vary slightly.

How do I store leftovers?

Leftovers can be stored in an airtight container in the fridge for up to three days. Reheat gently on the stove or in the microwave. The flavors will continue to meld, making it even tastier!

Can I freeze Mongolian Meatball Ramen?

Yes, you can freeze the meatballs and broth separately. Just make sure to cool them completely before transferring to freezer-safe containers. When you’re ready to enjoy, thaw in the fridge overnight and reheat on the stove.

What can I add to enhance the flavor?

For an extra flavor boost, consider adding a splash of rice vinegar or a dash of sesame oil just before serving. Fresh herbs like cilantro or basil can also elevate the dish, giving it a fresh twist!

Final Thoughts

Cooking Mongolian Meatball Ramen is more than just preparing a meal; it’s about creating a comforting experience that warms the heart. The rich flavors of the broth, combined with the tender meatballs and noodles, make every bite a delightful journey. Whether you’re sharing it with family or enjoying a quiet night in, this dish brings a sense of joy and satisfaction. Plus, the ease of the slow cooker means you can savor the moment without stress. So, roll up your sleeves, gather your ingredients, and let this recipe transform your dinner into a cozy celebration!

Ranis

Mongolian Meatball Ramen: A Unique Comfort Food Recipe

Mongolian Meatball Ramen is a unique comfort food recipe that combines savory meatballs with ramen noodles in a flavorful broth.
Prep Time 20 minutes
Servings: 4 servings
Course: Main Course
Cuisine: Asian
Calories: 450

Ingredients
  

  • 1 pound ground beef
  • 1/2 cup breadcrumbs
  • 1/4 cup grated Parmesan cheese
  • 1 large egg
  • 2 cloves garlic minced
  • 1 teaspoon ginger minced
  • 1/4 cup green onions chopped (plus more for garnish)
  • 1/4 cup soy sauce
  • 1/4 cup brown sugar
  • 1 tablespoon sesame oil
  • 4 cups beef broth
  • 2 cups water
  • 2 packs of ramen noodles discard seasoning packets
  • 1 cup frozen mixed vegetables peas, carrots, corn
  • Salt and pepper to taste

Method
 

  1. In a large bowl, combine ground beef, breadcrumbs, Parmesan cheese, egg, minced garlic, minced ginger, and chopped green onions. Season with salt and pepper. Mix until well combined.
  2. Form the mixture into meatballs, about 1 inch in diameter.
  3. In a large skillet over medium-high heat, add sesame oil. Once hot, add the meatballs and cook until browned on all sides, about 5-7 minutes. Remove from skillet and set aside.
  4. In a slow cooker, combine beef broth, water, soy sauce, and brown sugar. Stir well.
  5. Add the browned meatballs and frozen mixed vegetables to the slow cooker. Cover and cook on low for 4 hours or high for 2 hours.
  6. About 15 minutes before serving, add the ramen noodles to the slow cooker. Stir gently to combine and allow to cook until noodles are tender.
  7. Serve hot, garnished with additional chopped green onions.

Nutrition

Serving: 1servingCalories: 450kcalCarbohydrates: 40gProtein: 25gFat: 20gSaturated Fat: 6gPolyunsaturated Fat: 14gCholesterol: 80mgSodium: 800mgFiber: 3gSugar: 10g

Notes

  • For a spicier kick, add red pepper flakes or sriracha to the broth.
  • Substitute ground turkey or chicken for a leaner option, and adjust cooking times as necessary.

Tried this recipe?

Let us know how it was!

Strawberry Rhubarb Crockpot Crumble: Simple & Delicious!

Introduction to Strawberry Rhubarb Crockpot Crumble

There’s something magical about the combination of strawberries and rhubarb, isn’t there?

The tartness of rhubarb perfectly balances the sweetness of strawberries, creating a symphony of flavors that dances on your palate.

This Strawberry Rhubarb Crockpot Crumble is not just a dessert; it’s a warm hug after a long day.

With minimal prep and the convenience of a crockpot, you can whip up this delightful treat while tackling your busy schedule.

Whether you’re impressing friends or treating your family, this recipe is sure to become a cherished favorite in your home.

Why You’ll Love This Strawberry Rhubarb Crockpot Crumble

This Strawberry Rhubarb Crockpot Crumble is a game-changer for busy weeknights.

With just a few simple steps, you can create a dessert that feels gourmet without the fuss.

The slow cooking process allows the flavors to meld beautifully, resulting in a dish that’s both comforting and delicious.

Plus, it fills your home with an irresistible aroma that will have everyone gathering around the kitchen.

What’s not to love?

Ingredients for Strawberry Rhubarb Crockpot Crumble

Creating this Strawberry Rhubarb Crockpot Crumble is a breeze, especially with the right ingredients.

Here’s what you’ll need:

  • Fresh strawberries: Sweet and juicy, they bring a burst of flavor to the dish.
  • Rhubarb: This tart vegetable adds a delightful zing that balances the sweetness of the strawberries.
  • Granulated sugar: Essential for sweetening the fruit mixture, enhancing the overall flavor.
  • Cornstarch: A thickening agent that helps create a luscious filling.
  • Vanilla extract: Adds a warm, aromatic note that elevates the dessert.
  • Lemon juice: Brightens the flavors and complements the fruit beautifully.
  • Ground cinnamon: A warm spice that adds depth and warmth to the crumble.
  • Rolled oats: Provides a hearty texture to the crumble topping.
  • All-purpose flour: Helps bind the crumble together for that perfect crunch.
  • Brown sugar: Adds a rich, caramel-like sweetness to the topping.
  • Unsalted butter: Brings richness and helps create that crumbly texture.
  • Salt: Just a pinch enhances all the flavors in the dish.

For those looking to add a nutty twist, consider tossing in some chopped nuts like pecans or walnuts into the crumble topping.

You can find the exact quantities for each ingredient at the bottom of the article, ready for printing.

Happy cooking!

How to Make Strawberry Rhubarb Crockpot Crumble

Making this Strawberry Rhubarb Crockpot Crumble is as easy as pie—well, easier actually!

Follow these simple steps, and you’ll have a delicious dessert ready to impress.

Step 1: Prepare the Fruit Mixture

Start by hulling and slicing the fresh strawberries.

Chop the rhubarb into 1-inch pieces.

In a large bowl, combine the strawberries, rhubarb, granulated sugar, cornstarch, vanilla extract, lemon juice, and ground cinnamon.

Mix everything well until the fruit is coated.

This mixture is the heart of your crumble, bursting with flavor and sweetness.

Step 2: Make the Crumble Topping

In a separate bowl, combine rolled oats, all-purpose flour, brown sugar, and a pinch of salt.

Pour in the melted butter and mix until the mixture resembles coarse crumbs.

This topping is what gives your Strawberry Rhubarb Crockpot Crumble that delightful crunch.

Feel free to add nuts for an extra layer of flavor!

Step 3: Assemble in the Crockpot

Now, it’s time to layer!

Pour the fruit mixture into the bottom of your crockpot.

Evenly sprinkle the crumble topping over the fruit.

This layering ensures that every bite is a perfect blend of sweet fruit and crunchy topping.

Step 4: Cook to Perfection

Cover the crockpot and set it to low.

Let it cook for 4 to 5 hours, or until the fruit is bubbly and the topping is golden brown.

Keep an eye on it, as every crockpot can vary slightly in cooking time.

The aroma will be irresistible, drawing everyone to the kitchen!

Tips for Success

  • Use fresh, ripe strawberries and rhubarb for the best flavor.
  • Don’t skip the cornstarch; it thickens the filling beautifully.
  • For a deeper flavor, let the fruit mixture sit for 10 minutes before cooking.
  • Experiment with spices like nutmeg or ginger for a unique twist.
  • Serve warm with a scoop of vanilla ice cream for a delightful contrast.

Equipment Needed

  • Crockpot: The star of the show! Any size will do, but a 4-quart is perfect.
  • Mixing bowls: Use two for easy mixing of fruit and crumble.
  • Measuring cups and spoons: Essential for accuracy in your ingredients.
  • Spatula: Great for mixing and serving your delicious crumble.

Variations

  • Gluten-Free: Substitute all-purpose flour with a gluten-free flour blend and ensure your oats are certified gluten-free.
  • Vegan: Replace the unsalted butter with coconut oil or a vegan butter alternative, and use maple syrup instead of granulated sugar.
  • Berry Medley: Mix in other berries like blueberries or raspberries for a colorful twist and added flavor.
  • Spiced Up: Add a pinch of nutmeg or ginger to the fruit mixture for a warm, spiced flavor profile.
  • Nutty Delight: Incorporate chopped almonds or pecans into the crumble topping for an extra crunch and flavor.

Serving Suggestions

  • Serve warm with a generous scoop of vanilla ice cream for a classic pairing.
  • Top with whipped cream for a light and airy finish.
  • Pair with a cup of coffee or tea for a cozy afternoon treat.
  • Garnish with fresh mint leaves for a pop of color and freshness.

FAQs about Strawberry Rhubarb Crockpot Crumble

Can I use frozen strawberries and rhubarb for this recipe?

Absolutely! Frozen strawberries and rhubarb work well, but you may need to adjust the cooking time. They might release more moisture, so keep an eye on the consistency of the filling.

How do I store leftovers of the Strawberry Rhubarb Crockpot Crumble?

Store any leftovers in an airtight container in the refrigerator for up to three days. Reheat in the microwave or oven before serving for the best taste.

Can I make this crumble ahead of time?

Yes! You can prepare the fruit mixture and crumble topping separately, then assemble them in the crockpot when you’re ready to cook. Just remember to adjust the cooking time if the mixture is cold.

What can I substitute for granulated sugar?

If you’re looking for alternatives, try using honey, maple syrup, or coconut sugar. Just remember that liquid sweeteners may require slight adjustments in the other ingredients.

Is this Strawberry Rhubarb Crockpot Crumble suitable for a vegan diet?

Yes! Simply replace the butter with a vegan alternative and use a plant-based sweetener. This way, you can enjoy a delicious dessert that fits your dietary needs.

Final Thoughts

Creating this Strawberry Rhubarb Crockpot Crumble is more than just making dessert; it’s about crafting memories.

The aroma wafting through your home as it cooks is like a warm invitation to gather around the table.

Each bite offers a delightful contrast of sweet and tart, making it a crowd-pleaser for any occasion.

Whether you’re enjoying it solo or sharing with loved ones, this crumble brings a sense of comfort and joy.

So, roll up your sleeves, embrace the simplicity, and let this recipe become a cherished part of your culinary adventures.

Ranis

Strawberry Rhubarb Crockpot Crumble: Simple & Delicious!

A simple and delicious Strawberry Rhubarb Crockpot Crumble that combines fresh strawberries and rhubarb with a crumbly topping, perfect for a sweet dessert.
Prep Time 15 minutes
Total Time 4 hours 15 minutes
Course: Dessert
Cuisine: American
Calories: 250

Ingredients
  

  • 2 cups fresh strawberries hulled and sliced
  • 2 cups rhubarb chopped into 1-inch pieces
  • 1 cup granulated sugar
  • 2 tablespoons cornstarch
  • 1 teaspoon vanilla extract
  • 1 teaspoon lemon juice
  • 1 teaspoon ground cinnamon
  • 1 cup rolled oats
  • 1 cup all-purpose flour
  • 1/2 cup brown sugar packed
  • 1/2 cup unsalted butter melted
  • 1/4 teaspoon salt

Method
 

  1. In a large bowl, combine the strawberries, rhubarb, granulated sugar, cornstarch, vanilla extract, lemon juice, and ground cinnamon. Mix well and pour the mixture into the crockpot.
  2. In a separate bowl, mix the rolled oats, all-purpose flour, brown sugar, melted butter, and salt until crumbly. Sprinkle this mixture evenly over the fruit in the crockpot.
  3. Cover the crockpot and cook on low for 4-5 hours or until the fruit is bubbly and the topping is golden brown.
  4. Once cooked, remove the lid and let it cool for about 10 minutes before serving.

Nutrition

Serving: 1servingCalories: 250kcalCarbohydrates: 35gProtein: 3gFat: 10gSaturated Fat: 6gPolyunsaturated Fat: 4gCholesterol: 20mgSodium: 150mgFiber: 2gSugar: 35g

Notes

  • For a nutty flavor, add 1/2 cup of chopped nuts (like pecans or walnuts) to the crumble topping.
  • Serve warm with a scoop of vanilla ice cream or whipped cream for an extra treat.

Tried this recipe?

Let us know how it was!

Garlic Herb Chicken Pillows: A Delicious Recipe to Try!

Introduction to Garlic Herb Chicken Pillows

There’s something magical about a dish that combines comfort and convenience, and that’s exactly what Garlic Herb Chicken Pillows deliver. Picture this: a busy weeknight, and you’re craving something warm and satisfying. These delightful pillows are not just easy to whip up; they’re also a surefire way to impress your loved ones. With a creamy chicken filling wrapped in flaky crescent roll dough, they’re perfect for a quick dinner or a fun appetizer at your next gathering. Trust me, once you try them, they’ll become a staple in your kitchen!

Why You’ll Love This Garlic Herb Chicken Pillows

These Garlic Herb Chicken Pillows are a game-changer for anyone juggling a busy schedule. They come together in just 35 minutes, making them perfect for those hectic weeknights. The combination of creamy chicken and flaky dough is simply irresistible. Plus, they’re versatile enough to please picky eaters and adventurous palates alike. Whether you’re serving them as an appetizer or a main dish, they’re sure to be a hit!

Ingredients for Garlic Herb Chicken Pillows

Gathering the right ingredients is the first step to creating these delightful Garlic Herb Chicken Pillows. Here’s what you’ll need:

  • Cooked chicken: Shredded chicken is the star of the show. You can use rotisserie chicken for convenience or leftover chicken from a previous meal.
  • Cream cheese: This adds a rich, creamy texture to the filling. Make sure it’s softened for easy mixing.
  • Shredded cheddar cheese: A classic choice that brings a sharp flavor. Feel free to experiment with other cheeses like mozzarella or pepper jack for a twist.
  • Garlic powder: This ingredient infuses the filling with a robust garlic flavor without the hassle of chopping fresh garlic.
  • Onion powder: It complements the garlic and adds depth to the overall taste.
  • Dried parsley: A sprinkle of this herb brightens the filling and adds a touch of color.
  • Dried thyme: This herb brings an earthy flavor that pairs beautifully with chicken.
  • Salt and black pepper: Essential for seasoning, these ingredients enhance all the flavors in the filling.
  • Crescent roll dough: The flaky exterior that wraps around the filling. It’s easy to work with and bakes up beautifully.
  • Egg (for egg wash): A beaten egg brushed on top gives the pillows a golden, shiny finish.

For those looking to mix things up, consider adding fresh herbs like basil or chives to the filling for an extra flavor boost. If you want a vegetarian option, swap the chicken for sautéed vegetables. You can find the exact quantities for each ingredient at the bottom of the article, ready for printing!

How to Make Garlic Herb Chicken Pillows

Creating Garlic Herb Chicken Pillows is a straightforward process that anyone can master. Follow these simple steps, and you’ll have a delicious dish ready in no time!

Step 1: Preheat the Oven

Start by preheating your oven to 375°F (190°C). Preheating is crucial because it ensures that your Garlic Herb Chicken Pillows bake evenly. A hot oven helps achieve that golden, flaky crust we all love.

Step 2: Prepare the Filling

In a large mixing bowl, combine the shredded chicken, softened cream cheese, and shredded cheddar cheese. Add the garlic powder, onion powder, dried parsley, dried thyme, salt, and black pepper. Mix everything together until it’s well combined. The filling should be creamy and flavorful, with a nice balance of herbs and spices. Don’t be afraid to taste it; you want to make sure it’s just right!

Step 3: Unroll the Dough

Next, carefully unroll the crescent roll dough. It’s best to do this on a clean, flat surface. Separate the dough into triangles along the perforated lines. Handle the dough gently to avoid tearing it. Each triangle will be the perfect little pocket for your delicious filling.

Step 4: Fill the Dough

Now it’s time to fill the dough! Place a generous tablespoon of the chicken mixture at the wide end of each triangle. Be careful not to overfill; you want to leave enough space to roll it up without spilling. Starting from the wide end, roll the dough over the filling, tucking in the sides as you go. This will help seal the filling inside, creating a delightful pillow.

Step 5: Bake the Pillows

Place the rolled pillows on a baking sheet lined with parchment paper. Brush the tops with the beaten egg for that beautiful golden finish. Bake in the preheated oven for 15-20 minutes. Keep an eye on them; they’re done when they’re golden brown and puffed up. Let them cool for a few minutes before serving, and enjoy the aroma that fills your kitchen!

Tips for Success

  • Use rotisserie chicken for a quick and easy filling.
  • Make sure your cream cheese is softened to blend smoothly.
  • Don’t overfill the dough; a tablespoon of filling is just right.
  • Experiment with different cheeses for unique flavors.
  • Brush the egg wash evenly for a beautiful golden color.

Equipment Needed

  • Baking sheet: A standard baking sheet works well, but a stone baking pan can enhance browning.
  • Parchment paper: This helps prevent sticking; aluminum foil is a good alternative.
  • Mixing bowl: Any large bowl will do, but a stand mixer can make mixing easier.
  • Measuring spoons: Essential for accuracy; you can use your eyes if you’re feeling adventurous!
  • Spatula: A rubber spatula is great for mixing and scraping the bowl clean.

Variations

  • Vegetarian Option: Swap the chicken for sautéed mushrooms, spinach, or a mix of your favorite vegetables for a hearty vegetarian dish.
  • Spicy Kick: Add diced jalapeños or a dash of hot sauce to the filling for a spicy twist that will wake up your taste buds.
  • Herb Infusion: Experiment with fresh herbs like dill or cilantro for a unique flavor profile that adds freshness to each bite.
  • Cheese Lovers: Mix in different cheeses such as feta or gouda for a rich and creamy filling that elevates the dish.
  • Gluten-Free Option: Use gluten-free crescent roll dough to make this dish suitable for those with gluten sensitivities.

Serving Suggestions

  • Pair with a fresh garden salad for a light and refreshing meal.
  • Serve with a side of creamy mashed potatoes or garlic bread for a comforting feast.
  • Complement with a chilled glass of white wine or sparkling water for a delightful touch.
  • Garnish with fresh herbs for an appealing presentation that impresses your guests.

FAQs about Garlic Herb Chicken Pillows

As you dive into making these Garlic Herb Chicken Pillows, you might have a few questions. Here are some common queries that can help you along the way:

Can I use leftover chicken for this recipe?

Absolutely! Leftover chicken works perfectly in this recipe. Just shred it up, and you’re good to go. It’s a great way to reduce waste and enjoy a delicious meal.

How can I make these pillows ahead of time?

You can prepare the filling and fill the dough ahead of time. Just cover and refrigerate them until you’re ready to bake. This makes for a quick dinner option on busy nights!

What can I serve with Garlic Herb Chicken Pillows?

These pillows pair wonderfully with a fresh salad, roasted vegetables, or even a side of creamy mashed potatoes. They’re versatile enough to complement many sides!

Can I freeze Garlic Herb Chicken Pillows?

Yes, you can freeze them! Just assemble the pillows, place them on a baking sheet, and freeze until solid. Then transfer them to a freezer bag. Bake from frozen, adding a few extra minutes to the cooking time.

What if I don’t have crescent roll dough?

If you’re out of crescent roll dough, you can use puff pastry or even homemade dough. Just ensure it’s rolled out thin enough to create those delightful pillows!

Final Thoughts

Making Garlic Herb Chicken Pillows is more than just cooking; it’s about creating moments. The joy of pulling a tray of golden, flaky pillows from the oven fills the kitchen with warmth and anticipation. Each bite is a delightful blend of creamy chicken and herbs, wrapped in a comforting embrace of dough. Whether you’re sharing them with family or enjoying them solo, these pillows bring a sense of satisfaction that’s hard to beat. So, roll up your sleeves, gather your ingredients, and let this recipe transform your next meal into a memorable experience filled with flavor and love!

Ranis

Garlic Herb Chicken Pillows: A Delicious Recipe to Try!

Garlic Herb Chicken Pillows are a delicious and easy-to-make dish featuring a creamy chicken filling wrapped in flaky crescent roll dough.
Prep Time 15 minutes
Cook Time 20 minutes
Total Time 35 minutes
Servings: 8 servings
Course: Appetizer
Cuisine: American
Calories: 230

Ingredients
  

  • 2 cups cooked chicken shredded
  • 1 cup cream cheese softened
  • 1 cup shredded cheddar cheese
  • 1 teaspoon garlic powder
  • 1 teaspoon onion powder
  • 1 teaspoon dried parsley
  • 1 teaspoon dried thyme
  • 1 teaspoon salt
  • 1/2 teaspoon black pepper
  • 2 cans 8 oz each refrigerated crescent roll dough
  • 1 egg beaten (for egg wash)

Method
 

  1. Preheat the oven to 375°F (190°C).
  2. In a large mixing bowl, combine the shredded chicken, cream cheese, cheddar cheese, garlic powder, onion powder, parsley, thyme, salt, and black pepper. Mix until well combined.
  3. Unroll the crescent roll dough and separate it into triangles.
  4. Place a generous tablespoon of the chicken mixture at the wide end of each triangle.
  5. Roll the dough over the filling, starting from the wide end and tucking in the sides as you go to seal the filling inside.
  6. Place the rolled pillows on a baking sheet lined with parchment paper.
  7. Brush the tops of the pillows with the beaten egg for a golden finish.
  8. Bake in the preheated oven for 15-20 minutes, or until the pillows are golden brown.
  9. Remove from the oven and let cool for a few minutes before serving.

Nutrition

Serving: 1pillowCalories: 230kcalCarbohydrates: 5gProtein: 12gFat: 18gSaturated Fat: 10gPolyunsaturated Fat: 8gCholesterol: 60mgSodium: 500mgSugar: 1g

Notes

  • For added flavor, mix in some chopped fresh herbs like basil or chives into the filling.
  • Substitute the chicken with cooked turkey or even sautéed vegetables for a vegetarian option.

Tried this recipe?

Let us know how it was!

Spring Vegetable Frittata: A Delightful Recipe to Try!

Introduction to Spring Vegetable Frittata

Spring is a time of renewal, and what better way to celebrate than with a vibrant Spring Vegetable Frittata? This dish is not just a feast for the eyes; it’s a quick solution for those busy mornings when you want something delicious yet healthy. I remember my first attempt at making a frittata—it was a delightful mess, but the taste was unforgettable. Packed with fresh veggies and cheesy goodness, this frittata is perfect for brunch with friends or a cozy breakfast at home. Let’s dive into this easy recipe that will impress your loved ones and brighten your day!

Why You’ll Love This Spring Vegetable Frittata

This Spring Vegetable Frittata is a game-changer for your breakfast routine. It’s incredibly easy to whip up, taking just 35 minutes from start to finish. The vibrant flavors of fresh vegetables combined with creamy cheese create a taste sensation that’s hard to resist. Plus, it’s versatile! You can customize it with whatever veggies you have on hand. Whether you’re feeding a crowd or just yourself, this dish is sure to please.

Ingredients for Spring Vegetable Frittata

Gathering fresh ingredients is half the fun of cooking, and this Spring Vegetable Frittata is no exception. Here’s what you’ll need:

  • Large eggs: The star of the show! Eggs provide the base and fluffy texture.
  • Milk: A splash of milk adds creaminess and helps the frittata rise.
  • Fresh spinach: This leafy green brings a pop of color and nutrients.
  • Asparagus: Tender and slightly sweet, asparagus adds a delightful crunch.
  • Cherry tomatoes: Their juicy burst of flavor brightens up every bite.
  • Bell pepper: Any color works! It adds sweetness and a bit of crunch.
  • Onion: A classic flavor enhancer that brings depth to the dish.
  • Shredded cheese: Cheddar or mozzarella melts beautifully, adding richness.
  • Olive oil: For sautéing the veggies, it adds healthy fats and flavor.
  • Salt and pepper: Essential for seasoning and enhancing all the flavors.

Feel free to get creative! You can swap in seasonal vegetables like zucchini or mushrooms, or even add herbs like basil or parsley for an extra flavor kick. If you’re looking for a heartier option, consider tossing in some cooked bacon or sausage. For exact quantities, check the bottom of the article where you can find everything available for printing.

How to Make Spring Vegetable Frittata

Creating a Spring Vegetable Frittata is a straightforward process that yields delicious results. Follow these simple steps, and you’ll have a beautiful dish ready to impress!

Step 1: Preheat the Oven

Start by preheating your oven to 375°F (190°C). This step is crucial for even cooking. A hot oven ensures that your frittata puffs up nicely and cooks through without any soggy spots.

Step 2: Whisk the Egg Mixture

In a large bowl, crack open those eggs and add a splash of milk. Sprinkle in some salt and pepper. Whisk everything together until it’s well combined. This mixture is the heart of your frittata, so make sure it’s fluffy and smooth!

Step 3: Sauté the Vegetables

Grab a large oven-safe skillet and heat up the olive oil over medium heat. Toss in the diced onion and bell pepper, sautéing for about 3-4 minutes until they soften. Then, add the asparagus and cook for another 2-3 minutes. You want them tender but still with a bit of crunch.

Step 4: Add Spinach and Tomatoes

Next, stir in the chopped spinach and halved cherry tomatoes. Cook for just a minute until the spinach wilts. This step adds vibrant color and flavor, making your frittata even more appealing.

Step 5: Combine Egg Mixture and Vegetables

Now it’s time to pour that egg mixture over the sautéed vegetables in the skillet. Make sure the veggies are evenly distributed. This ensures every bite is packed with flavor!

Step 6: Add Cheese

Sprinkle the shredded cheese on top of the egg mixture. This is where the magic happens! As it bakes, the cheese will melt and create a deliciously gooey layer.

Step 7: Cook on the Stovetop

Cook the frittata on the stovetop for about 2-3 minutes. You’ll notice the edges starting to set. This step helps to create a nice base before it goes into the oven.

Step 8: Bake in the Oven

Transfer the skillet to your preheated oven and bake for 15-20 minutes. Keep an eye on it! You’ll know it’s done when the frittata is puffed up and the center is set. A toothpick inserted should come out clean.

Step 9: Cool and Serve

Once it’s out of the oven, let the frittata cool for a few minutes. This makes slicing easier. Serve it warm or at room temperature. It’s perfect for brunch or a light dinner!

Tips for Success

  • Use fresh, seasonal vegetables for the best flavor and nutrition.
  • Don’t skip preheating the oven; it’s key for a perfectly puffed frittata.
  • Experiment with different cheeses for unique taste profiles.
  • Let the frittata cool slightly before slicing to maintain its shape.
  • For a spicier kick, add a pinch of red pepper flakes to the egg mixture.

Equipment Needed

  • Oven-safe skillet: A cast-iron or non-stick skillet works great.
  • Mixing bowl: Any large bowl will do for whisking the eggs.
  • Whisk: A fork can also work in a pinch.
  • Spatula: For serving and slicing the frittata.

Variations

  • Herb-Infused: Add fresh herbs like basil, parsley, or dill to the egg mixture for an aromatic twist.
  • Cheese Swap: Try feta or goat cheese for a tangy flavor that pairs beautifully with the veggies.
  • Protein Boost: Incorporate cooked bacon, sausage, or even smoked salmon for a heartier frittata.
  • Veggie Swap: Substitute seasonal vegetables like zucchini, mushrooms, or kale based on what you have on hand.
  • Spicy Kick: Add jalapeños or a dash of hot sauce to the egg mixture for a spicy version.

Serving Suggestions

  • Pair your frittata with a fresh green salad for a light, balanced meal.
  • Serve with crusty bread or toasted bagels for a satisfying crunch.
  • A glass of freshly squeezed orange juice complements the flavors beautifully.
  • Garnish with fresh herbs for a pop of color and flavor.

FAQs about Spring Vegetable Frittata

Can I make a Spring Vegetable Frittata ahead of time?

Absolutely! You can prepare the frittata a day in advance. Just store it in the refrigerator after it cools. When you’re ready to serve, reheat it in the oven for a few minutes. This makes it a great option for meal prep!

What vegetables can I use in a frittata?

The beauty of a frittata is its versatility! You can use any vegetables you have on hand. Zucchini, mushrooms, or even leftover roasted veggies work wonderfully. Just remember to sauté them first for the best flavor.

How do I know when the frittata is done baking?

Your frittata is ready when it’s puffed up and the center is set. A toothpick inserted into the middle should come out clean. If it’s still runny, give it a few more minutes in the oven.

Can I freeze a Spring Vegetable Frittata?

Yes, you can freeze it! Just slice it into portions and wrap each slice tightly in plastic wrap. Store them in an airtight container. When you’re ready to enjoy, thaw in the fridge and reheat in the oven.

What can I serve with a frittata?

A frittata pairs beautifully with a fresh salad, crusty bread, or even some fruit. For a brunch spread, consider adding pastries or a cheese platter to elevate the meal!

Final Thoughts

Cooking this Spring Vegetable Frittata is more than just preparing a meal; it’s about creating a moment of joy. The vibrant colors and fresh flavors bring a sense of springtime to your table, making every bite a celebration. Whether you’re enjoying it solo or sharing it with family and friends, this dish is sure to spark smiles and conversation. Plus, the ease of preparation means you can focus on what truly matters—connecting with loved ones over a delicious meal. So, roll up your sleeves and dive into this delightful recipe; your taste buds will thank you!

Ranis

Spring Vegetable Frittata: A Delightful Recipe to Try!

A delicious and healthy Spring Vegetable Frittata packed with fresh vegetables and cheese, perfect for breakfast or brunch.
Prep Time 10 minutes
Cook Time 25 minutes
Total Time 35 minutes
Servings: 6 servings
Course: Breakfast
Cuisine: American
Calories: 220

Ingredients
  

  • 8 large eggs
  • 1/4 cup milk
  • 1 cup fresh spinach chopped
  • 1 cup asparagus trimmed and cut into 1-inch pieces
  • 1/2 cup cherry tomatoes halved
  • 1/2 cup bell pepper diced (any color)
  • 1/2 cup onion diced
  • 1 cup shredded cheese cheddar or mozzarella
  • 2 tablespoons olive oil
  • Salt and pepper to taste

Method
 

  1. Preheat your oven to 375°F (190°C).
  2. In a large bowl, whisk together the eggs, milk, salt, and pepper until well combined. Set aside.
  3. In a large oven-safe skillet, heat the olive oil over medium heat. Add the diced onion and bell pepper, and sauté for about 3-4 minutes until softened.
  4. Add the asparagus and cook for an additional 2-3 minutes until slightly tender.
  5. Stir in the chopped spinach and cherry tomatoes, cooking for another minute until the spinach wilts.
  6. Pour the egg mixture over the sautéed vegetables in the skillet, making sure the vegetables are evenly distributed.
  7. Sprinkle the shredded cheese on top of the egg mixture.
  8. Cook on the stovetop for about 2-3 minutes until the edges begin to set.
  9. Transfer the skillet to the preheated oven and bake for 15-20 minutes, or until the frittata is puffed and the center is set.
  10. Remove from the oven and let it cool for a few minutes before slicing. Serve warm or at room temperature.

Nutrition

Serving: 1sliceCalories: 220kcalCarbohydrates: 4gProtein: 14gFat: 16gSaturated Fat: 6gPolyunsaturated Fat: 10gCholesterol: 400mgSodium: 300mgFiber: 1gSugar: 2g

Notes

  • For added flavor, consider adding herbs like basil or parsley to the egg mixture before baking.
  • You can swap out the vegetables for whatever is in season or available, such as zucchini or mushrooms.
  • For a heartier version, add cooked bacon or sausage to the vegetable mixture.

Tried this recipe?

Let us know how it was!

Delicious Homemade Crepes: Master the Art of Crepes Today!

Introduction to Delicious Homemade Crepes

There’s something magical about the first bite of a warm, Delicious Homemade Crepes. It takes me back to lazy Sunday mornings, where the aroma of freshly cooked crepes filled the air, and the family gathered around the table, ready to indulge. These thin pancakes are not just a treat; they’re a canvas for your culinary creativity. Whether you’re in a rush or looking to impress your loved ones, this recipe is your go-to. With just a few simple ingredients, you can whip up a delightful breakfast or dessert that will leave everyone asking for seconds.

Why You’ll Love This Delicious Homemade Crepes

These Delicious Homemade Crepes are a game-changer in the kitchen. They’re incredibly easy to make, requiring minimal ingredients and time. In just 40 minutes, you can create a dish that’s both versatile and delicious. Whether you prefer sweet or savory, crepes can satisfy any craving. Plus, they’re perfect for impressing guests or enjoying a cozy breakfast at home. Who knew something so simple could bring so much joy?

Ingredients for Delicious Homemade Crepes

Creating Delicious Homemade Crepes starts with a handful of simple ingredients that you likely already have in your kitchen. Here’s what you’ll need:

  • All-purpose flour: This is the base of your crepes, providing structure and a light texture. You can swap it for a gluten-free blend if needed.
  • Large eggs: Eggs add richness and help bind the batter together, giving your crepes that perfect, tender bite.
  • Milk: Milk hydrates the flour and creates a smooth batter. Whole milk works best, but feel free to use any milk you prefer.
  • Melted butter: This adds flavor and helps prevent sticking. You can use unsalted butter for a more controlled taste.
  • Sugar: Just a touch of sugar balances the flavors, especially if you’re going for sweet fillings. You can skip it for savory crepes.
  • Salt: A pinch of salt enhances the overall flavor, making your crepes taste even better.
  • Vanilla extract (optional): For a hint of sweetness and warmth, add vanilla if you’re making dessert crepes.

For exact measurements, check the bottom of the article where you can find everything listed for easy printing. With these ingredients, you’re well on your way to mastering the art of crepes!

How to Make Delicious Homemade Crepes

Making Delicious Homemade Crepes is a straightforward process that anyone can master. Follow these simple steps, and you’ll be flipping crepes like a pro in no time!

Step 1: Prepare the Batter

Start by whisking together the all-purpose flour, eggs, milk, melted butter, sugar, salt, and optional vanilla extract in a mixing bowl. The goal is a smooth batter, so take your time. Let it rest for about 30 minutes. This allows the flour to hydrate and the gluten to relax, resulting in tender crepes.

Step 2: Heat the Pan

While the batter rests, heat a non-stick skillet or crepe pan over medium heat. A well-heated pan is crucial for achieving that perfect golden color. Lightly grease the pan with a small amount of butter or cooking spray. This prevents sticking and adds flavor.

Step 3: Pour the Batter

Once the pan is hot, pour about ¼ cup of batter into the center. Quickly tilt and swirl the pan to spread the batter into a thin, even layer. The key is to work fast; you want a delicate crepe, not a thick pancake!

Step 4: Cook the Crepe

Cook the crepe for about 1-2 minutes. Watch for the edges to lift and the bottom to turn lightly golden. When it’s ready, flip it using a spatula and cook for an additional minute on the other side. You’ll know it’s done when it’s set but still soft.

Step 5: Stack and Serve

Remove the crepe from the pan and place it on a plate. Repeat the process with the remaining batter, stacking the cooked crepes on top of each other. This keeps them warm and ready for your favorite fillings. Whether you go sweet or savory, the choice is yours!

Tips for Success

  • Let the batter rest for at least 30 minutes. This ensures tender crepes.
  • Use a non-stick pan for easy flipping and minimal sticking.
  • Keep the heat at medium; too high can burn the crepes.
  • Experiment with flavors by adding spices or extracts to the batter.
  • Stack crepes with parchment paper in between to prevent sticking.

Equipment Needed

  • Non-stick skillet or crepe pan: Essential for easy flipping. A regular frying pan works too.
  • Mixing bowl: For combining your ingredients. Any bowl will do.
  • Whisk: To blend the batter smoothly. A fork can work in a pinch.
  • Spatula: For flipping the crepes. A thin, flexible spatula is ideal.

Variations on Delicious Homemade Crepes

  • Chocolate Crepes: Add cocoa powder to the batter for a rich, chocolatey twist. Perfect for dessert!
  • Cinnamon Sugar Crepes: Mix in a teaspoon of cinnamon for a warm, spiced flavor. Dust with sugar before serving.
  • Savory Herb Crepes: Incorporate fresh herbs like basil or thyme into the batter for a savory option. Great for filling with cheese and veggies.
  • Fruit-Infused Crepes: Blend in pureed fruits like strawberries or bananas for a fruity flavor. Ideal for breakfast!
  • Gluten-Free Crepes: Substitute all-purpose flour with a gluten-free flour blend to accommodate dietary needs.

Serving Suggestions for Delicious Homemade Crepes

  • Fresh Berries: Serve with a side of mixed berries for a refreshing contrast.
  • Maple Syrup: Drizzle warm maple syrup over sweet crepes for added sweetness.
  • Whipped Cream: Top with a dollop of whipped cream for a decadent touch.
  • Herb Salad: Pair savory crepes with a light herb salad for balance.
  • Hot Beverages: Enjoy with coffee or hot chocolate for a cozy meal.

FAQs about Delicious Homemade Crepes

Curious about Delicious Homemade Crepes? Here are some common questions I often hear, along with helpful answers to guide you on your crepe-making journey.

Can I make the crepe batter ahead of time?

Absolutely! You can prepare the batter a day in advance. Just store it in the fridge. Give it a good whisk before using, as it may thicken slightly.

What can I use as fillings for my crepes?

The options are endless! For sweet crepes, think Nutella, fresh fruits, or whipped cream. For savory, try ham and cheese, sautéed mushrooms, or spinach.

How do I store leftover crepes?

Store any leftover crepes in an airtight container in the fridge for up to three days. You can reheat them in a skillet or microwave when you’re ready to enjoy.

Can I freeze crepes?

Yes! Stack the crepes with parchment paper in between and wrap them tightly in plastic wrap. They can be frozen for up to two months. Just thaw and reheat when you’re ready!

What’s the secret to flipping crepes without tearing them?

Patience is key! Wait until the edges lift and the bottom is golden before flipping. A thin, flexible spatula helps too. With practice, you’ll be flipping like a pro!

Final Thoughts

Creating Delicious Homemade Crepes is more than just cooking; it’s about crafting memories. Each crepe you flip brings a sense of accomplishment and joy, whether you’re enjoying them solo or sharing with family and friends. The versatility of crepes means you can tailor them to any occasion, from a cozy breakfast to an elegant dessert. As you master this art, you’ll find that the kitchen becomes a place of creativity and connection. So, roll up your sleeves, gather your ingredients, and let the magic of crepes transform your meals into delightful experiences!

Ranis

Delicious Homemade Crepes: Master the Art of Crepes Today!

Delicious Homemade Crepes are thin pancakes that can be filled with sweet or savory ingredients, perfect for breakfast or dessert.
Prep Time 30 minutes
Cook Time 10 minutes
Total Time 40 minutes
Course: Breakfast/Dessert
Cuisine: French
Calories: 150

Ingredients
  

  • 1 cup all-purpose flour
  • 2 large eggs
  • 1 ½ cups milk
  • 2 tablespoons melted butter
  • 1 tablespoon sugar
  • ¼ teaspoon salt
  • 1 teaspoon vanilla extract optional

Method
 

  1. In a mixing bowl, whisk together the flour, eggs, milk, melted butter, sugar, salt, and vanilla extract until the batter is smooth. Let the batter rest for about 30 minutes to allow the flour to hydrate and the gluten to relax.
  2. Heat a non-stick skillet or crepe pan over medium heat. Lightly grease the pan with a small amount of butter or cooking spray.
  3. Pour about ¼ cup of batter into the center of the hot pan, quickly tilting and swirling the pan to spread the batter into a thin, even layer.
  4. Cook for about 1-2 minutes, or until the edges start to lift and the bottom is lightly golden. Flip the crepe using a spatula and cook for an additional 1 minute on the other side.
  5. Remove the crepe from the pan and place it on a plate. Repeat the process with the remaining batter, stacking the cooked crepes on top of each other.
  6. Serve warm with your favorite fillings such as fresh fruit, Nutella, whipped cream, or savory options like ham and cheese.

Nutrition

Serving: 1crepeCalories: 150kcalCarbohydrates: 20gProtein: 5gFat: 5gSaturated Fat: 2gPolyunsaturated Fat: 3gCholesterol: 70mgSodium: 100mgFiber: 1gSugar: 1g

Notes

  • For a gluten-free version, substitute all-purpose flour with a gluten-free flour blend.
  • Experiment with flavors by adding cocoa powder for chocolate crepes or cinnamon for a warm spice.

Tried this recipe?

Let us know how it was!

Keto Donut Chaffles: Delight in Guilt-Free Indulgence!

Introduction to Keto Donut Chaffles

There’s something magical about the combination of donuts and waffles, isn’t there?

Keto Donut Chaffles bring that delightful fusion right to your kitchen, guilt-free!

Whether you’re navigating a busy morning or looking to impress friends at brunch, these chaffles are your go-to solution.

They’re quick to whip up and satisfy that sweet tooth without derailing your keto journey.

Imagine biting into a warm, fluffy chaffle, the aroma of cinnamon wafting through the air.

It’s a treat that feels indulgent but fits perfectly into your low-carb lifestyle.

Let’s dive into this delicious adventure together!

Why You’ll Love This Keto Donut Chaffles

These Keto Donut Chaffles are a game-changer for anyone craving a sweet treat without the carbs.

They come together in just 20 minutes, making them perfect for busy mornings or spontaneous dessert cravings.

The taste? Absolutely divine!

With a crispy exterior and a soft, fluffy inside, they deliver all the satisfaction of traditional donuts.

Plus, they’re low in sugar and high in protein, so you can indulge without the guilt.

Ingredients for Keto Donut Chaffles

Creating these Keto Donut Chaffles is a breeze, thanks to a handful of simple ingredients.

Here’s what you’ll need to bring this delightful treat to life:

  • Shredded mozzarella cheese: This is the star ingredient, providing that gooey texture we all love.
  • Large eggs: They bind everything together and add richness to the chaffles.
  • Almond flour: A low-carb alternative to regular flour, it gives the chaffles a nice structure.
  • Erythritol (or your preferred sweetener): This sugar substitute keeps things sweet without the carbs.
  • Baking powder: A little leavening agent to help the chaffles rise and become fluffy.
  • Vanilla extract: Adds a warm, sweet flavor that enhances the overall taste.
  • Ground cinnamon: This spice brings a cozy aroma and a hint of warmth to each bite.
  • Salt: Just a pinch to balance the sweetness and enhance the flavors.
  • Cooking spray or oil: Essential for greasing the waffle maker, ensuring your chaffles come out easily.

Feel free to get creative!

For a chocolate twist, consider adding unsweetened cocoa powder.

You can also experiment with different extracts like almond or coconut for unique flavors.

Exact measurements are available at the bottom of the article for your convenience.

How to Make Keto Donut Chaffles

Making Keto Donut Chaffles is a straightforward process that anyone can master.

With just a few simple steps, you’ll be on your way to enjoying these delicious treats.

Let’s break it down step by step!

Step 1: Preheat Your Waffle Maker

Start by preheating your waffle maker according to the manufacturer’s instructions.

This step is crucial!

A hot waffle maker ensures that your chaffles cook evenly and develop that perfect crispy exterior.

Don’t forget to lightly grease it with cooking spray or oil.

This will help prevent sticking and make cleanup a breeze.

Step 2: Combine Dry Ingredients

In a mixing bowl, combine the shredded mozzarella cheese and almond flour.

Mix them together until they’re well blended.

The cheese adds that delightful gooeyness, while the almond flour provides structure.

This combination is what makes these Keto Donut Chaffles so special!

Step 3: Whisk Wet Ingredients

In a separate bowl, whisk together the eggs, erythritol, vanilla extract, ground cinnamon, and salt.

Keep whisking until the mixture is smooth and well combined.

This step is where the magic happens!

The eggs will bind everything together, while the vanilla and cinnamon add a warm, inviting flavor.

Step 4: Mix Everything Together

Now, pour the egg mixture into the bowl with the cheese and almond flour.

Stir until all the ingredients are well combined.

You want a thick batter that holds together nicely.

If it feels too dry, don’t hesitate to add a splash of water or almond milk to loosen it up.

Step 5: Cook the Chaffles

Pour half of the batter into the preheated waffle maker.

Close the lid and cook for about 3-5 minutes.

Keep an eye on them!

You’re looking for a golden brown color and a cooked-through texture.

Once done, carefully remove the chaffle and repeat with the remaining batter.

Step 6: Serve and Enjoy

Allow the chaffles to cool slightly before serving.

This helps them firm up a bit more.

Top them with sugar-free syrup, whipped cream, or your favorite keto-friendly toppings.

The possibilities are endless!

Enjoy your guilt-free indulgence and savor every bite of these delightful Keto Donut Chaffles.

Tips for Success

  • Make sure your waffle maker is fully preheated for the best texture.
  • Don’t skip greasing the waffle maker; it prevents sticking.
  • For extra flavor, try adding a pinch of nutmeg along with the cinnamon.
  • Let the chaffles cool slightly before serving to enhance their structure.
  • Store any leftovers in an airtight container for up to three days.

Equipment Needed

  • Waffle Maker: Essential for creating those perfect chaffles. A non-stick model works best.
  • Mixing Bowls: Use two bowls—one for dry ingredients and one for wet.
  • Whisk: A simple whisk will do, but an electric mixer can save time.
  • Spatula: Handy for mixing and transferring the batter.

Variations

  • Chocolate Keto Donut Chaffles: Add 2 tablespoons of unsweetened cocoa powder to the batter for a rich chocolate flavor.
  • Nutty Delight: Mix in a handful of chopped nuts like walnuts or pecans for added crunch and healthy fats.
  • Berry Bliss: Fold in some fresh or frozen berries, such as blueberries or raspberries, for a fruity twist.
  • Spiced Pumpkin: Substitute some of the almond flour with pumpkin puree and add pumpkin spice for a seasonal treat.
  • Almond Joy: Incorporate shredded coconut and a few chopped almonds for a tropical flavor reminiscent of the candy bar.

Serving Suggestions

  • Pair your Keto Donut Chaffles with a side of fresh berries for a burst of flavor.
  • Enjoy them with a hot cup of coffee or tea to complement the sweetness.
  • For a fun presentation, stack them high and drizzle with sugar-free syrup.
  • Top with whipped cream and a sprinkle of cinnamon for an extra indulgent touch.

FAQs about Keto Donut Chaffles

Can I make these Keto Donut Chaffles dairy-free?

Absolutely! You can substitute the mozzarella cheese with a dairy-free cheese alternative. Just ensure it melts well for that perfect chaffle texture.

How do I store leftover chaffles?

Store any leftover Keto Donut Chaffles in an airtight container in the fridge for up to three days. You can reheat them in the waffle maker or toaster for a quick snack!

Can I freeze Keto Donut Chaffles?

Yes, these chaffles freeze beautifully! Just place them in a single layer on a baking sheet to freeze, then transfer to a freezer bag. They’ll be ready for a quick breakfast or treat anytime.

What can I use instead of erythritol?

If you prefer a different sweetener, feel free to use stevia, monk fruit, or any keto-friendly sweetener you enjoy. Just adjust the quantity to taste, as sweetness levels can vary.

Are Keto Donut Chaffles suitable for meal prep?

Definitely! These chaffles are perfect for meal prep. Make a batch ahead of time, and you’ll have a delicious, low-carb treat ready to go whenever you need it.

Final Thoughts

Keto Donut Chaffles are more than just a recipe; they’re a delightful experience that brings joy to your kitchen.

Each bite is a reminder that you can enjoy sweet treats without compromising your health goals.

The warm, comforting flavors of cinnamon and vanilla create a cozy atmosphere, perfect for sharing with family or savoring solo.

Whether it’s a busy morning or a leisurely brunch, these chaffles fit seamlessly into your day.

So, grab your waffle maker and indulge in this guilt-free pleasure.

You deserve it! Enjoy the journey of creating and tasting these delicious Keto Donut Chaffles.

Ranis

Keto Donut Chaffles: Delight in Guilt-Free Indulgence!

Keto Donut Chaffles are a delicious and guilt-free treat that combines the flavors of donuts and waffles, perfect for those following a keto diet.
Prep Time 10 minutes
Cook Time 10 minutes
Total Time 20 minutes
Servings: 4 servings
Course: Dessert
Cuisine: Keto
Calories: 150

Ingredients
  

  • 1 cup shredded mozzarella cheese
  • 2 large eggs
  • 1/4 cup almond flour
  • 1/4 cup erythritol or your preferred sweetener
  • 1 teaspoon baking powder
  • 1 teaspoon vanilla extract
  • 1/2 teaspoon ground cinnamon
  • 1/4 teaspoon salt
  • Cooking spray or oil for the waffle maker

Method
 

  1. Preheat your waffle maker according to the manufacturer's instructions. Lightly grease it with cooking spray or oil.
  2. In a mixing bowl, combine the shredded mozzarella cheese and almond flour. Mix well.
  3. In a separate bowl, whisk together the eggs, erythritol, vanilla extract, ground cinnamon, and salt until smooth.
  4. Pour the egg mixture into the bowl with the cheese and almond flour. Stir until all ingredients are well combined.
  5. Pour half of the batter into the preheated waffle maker, close the lid, and cook for about 3-5 minutes or until golden brown and cooked through.
  6. Carefully remove the chaffle and repeat with the remaining batter.
  7. Allow the chaffles to cool slightly before serving. You can top them with sugar-free syrup, whipped cream, or your favorite keto-friendly toppings.

Nutrition

Serving: 1chaffleCalories: 150kcalCarbohydrates: 2gProtein: 8gFat: 12gSaturated Fat: 7gPolyunsaturated Fat: 5gCholesterol: 150mgSodium: 200mgFiber: 1g

Notes

  • For a chocolate version, add 2 tablespoons of unsweetened cocoa powder to the batter.
  • Experiment with different extracts like almond or coconut for unique flavors.

Tried this recipe?

Let us know how it was!

Mini Donut Breakfast Casserole: A Sweet Morning Treat!

Introduction to Mini Donut Breakfast Casserole

There’s something magical about waking up to the smell of freshly baked goods wafting through the house. The Mini Donut Breakfast Casserole captures that essence perfectly. It’s a delightful way to start your day, combining the sweetness of mini glazed donuts with the heartiness of a breakfast casserole. Whether you’re looking to impress your family on a lazy Sunday or need a quick solution for a busy weekday morning, this dish is your answer. It’s simple, satisfying, and sure to bring smiles to the breakfast table. Let’s dive into this sweet morning treat!

Why You’ll Love This Mini Donut Breakfast Casserole

This Mini Donut Breakfast Casserole is a game-changer for your mornings. It’s incredibly easy to whip up, taking just 10 minutes of prep time. The combination of flavors is out of this world, with the sweetness of donuts and the richness of eggs creating a breakfast that feels indulgent yet comforting. Plus, it’s a crowd-pleaser, making it perfect for family gatherings or brunch with friends. Who wouldn’t love a sweet start to their day?

Ingredients for Mini Donut Breakfast Casserole

Gathering the right ingredients is the first step to creating this delightful Mini Donut Breakfast Casserole. Here’s what you’ll need:

  • Mini glazed donuts: These are the star of the show! Their sweetness and soft texture make the casserole irresistible.
  • Large eggs: They provide the structure and richness, binding everything together beautifully.
  • Milk: Adds creaminess and helps create a custard-like base for the casserole.
  • Vanilla extract: A splash of this enhances the overall flavor, making it even more delightful.
  • Ground cinnamon: This warm spice adds a cozy touch, perfect for breakfast.
  • Salt: Just a pinch balances the sweetness and enhances the flavors.
  • Maple syrup: Drizzled on top, it adds a sweet, sticky finish that’s hard to resist.
  • Chocolate chips (optional): For those who want an extra touch of decadence, these can be sprinkled in for a chocolatey surprise.
  • Whipped cream (optional): A dollop on top makes for a beautiful presentation and adds a creamy element.

Feel free to get creative! You can substitute mini glazed donuts with chocolate or cinnamon sugar donuts for a different flavor profile. If you want to add some fruitiness, consider tossing in fresh berries or sliced bananas. For exact measurements, check the bottom of the article where you can find everything available for printing.

How to Make Mini Donut Breakfast Casserole

Creating this Mini Donut Breakfast Casserole is a breeze! Follow these simple steps, and you’ll have a delicious breakfast ready in no time. Let’s get started!

Step 1: Preheat and Prepare

First things first, preheat your oven to 350°F (175°C). This ensures your casserole bakes evenly. While the oven warms up, grab a 9×9-inch baking dish and grease it well. This will help prevent sticking and make serving easier later on.

Step 2: Whisk the Egg Mixture

In a large bowl, crack open those six large eggs. Add in the milk, vanilla extract, ground cinnamon, and salt. Whisk everything together until it’s well combined. You want a smooth mixture that’s ready to embrace those donuts!

Step 3: Combine Donuts and Egg Mixture

Now, it’s time for the star of the show! Take your quartered mini donuts and gently fold them into the egg mixture. Make sure every piece is coated. This is where the magic happens, as the donuts soak up all that deliciousness.

Step 4: Pour into Baking Dish

Carefully pour the donut and egg mixture into your prepared baking dish. Spread it out evenly with a spatula. This helps ensure that every slice has a good mix of donuts and custard.

Step 5: Add Toppings

Drizzle the maple syrup generously over the top. If you’re feeling adventurous, sprinkle some chocolate chips on as well. They’ll melt into gooey pockets of sweetness, making each bite even more delightful!

Step 6: Bake

Pop the baking dish into your preheated oven and let it bake for 25-30 minutes. Keep an eye on it! You’ll know it’s done when the casserole is set and lightly golden on top. The aroma will be irresistible!

Step 7: Cool and Serve

Once baked, allow the casserole to cool for a few minutes. This makes slicing easier. Serve it warm, and don’t forget to add a dollop of whipped cream if you like. It’s the perfect finishing touch!

Tips for Success

  • Use day-old mini donuts for better absorption of the egg mixture.
  • Don’t skip the greasing step; it makes serving a breeze.
  • Let the casserole cool slightly before slicing for cleaner pieces.
  • Experiment with different toppings like nuts or coconut for added texture.
  • For a richer flavor, try using half-and-half instead of milk.

Equipment Needed

  • 9×9-inch baking dish: A standard size for this casserole; you can also use an 8×8-inch dish if that’s what you have.
  • Mixing bowl: Any large bowl will do for whisking the egg mixture.
  • Whisk: A fork can work in a pinch for mixing.
  • Spatula: Essential for spreading the mixture evenly.

Variations

  • Fruit-Infused: Add 1 cup of fresh berries or sliced bananas to the mixture for a fruity twist.
  • Chocolate Lovers: Swap mini glazed donuts for chocolate donuts and increase the chocolate chips for a double chocolate delight.
  • Nutty Crunch: Incorporate chopped nuts like pecans or walnuts for added texture and flavor.
  • Gluten-Free Option: Use gluten-free mini donuts to make this casserole suitable for those with gluten sensitivities.
  • Vegan Version: Substitute eggs with a flaxseed mixture and use plant-based milk and donuts for a vegan-friendly treat.

Serving Suggestions

  • Fresh Fruit: Serve with a side of mixed berries or sliced bananas for a refreshing contrast.
  • Coffee or Tea: Pair with a hot cup of coffee or your favorite tea to complement the sweetness.
  • Presentation: Dust with powdered sugar or drizzle extra maple syrup for a beautiful finish.
  • Breakfast Sandwich: For a heartier meal, add a breakfast sandwich with eggs and bacon on the side.

FAQs about Mini Donut Breakfast Casserole

Can I make Mini Donut Breakfast Casserole ahead of time?

Absolutely! You can prepare the casserole the night before and store it in the fridge. Just cover it tightly with plastic wrap. In the morning, pop it in the oven straight from the fridge, adding a few extra minutes to the baking time.

What type of donuts work best for this recipe?

While mini glazed donuts are the classic choice, feel free to experiment! Chocolate or cinnamon sugar donuts can add a unique twist. Just make sure they’re soft and fresh for the best results.

Can I freeze Mini Donut Breakfast Casserole?

Yes, you can freeze it! After baking, let it cool completely, then slice and wrap individual pieces in plastic wrap. Store them in an airtight container. When you’re ready to enjoy, simply reheat in the oven or microwave.

How do I store leftovers?

Store any leftovers in an airtight container in the fridge for up to three days. Reheat individual slices in the microwave or oven until warmed through. It’s just as delicious the next day!

Can I add other ingredients to the casserole?

Definitely! Feel free to add fresh fruit, nuts, or even a splash of liqueur for an adult twist. Just remember to adjust the sweetness if you add extra ingredients!

Final Thoughts

Creating a Mini Donut Breakfast Casserole is more than just whipping up a dish; it’s about crafting a joyful experience for yourself and your loved ones. The aroma of sweet donuts mingling with warm spices fills the kitchen, setting the stage for a delightful morning. Each slice is a little piece of happiness, perfect for sharing or savoring solo. Whether it’s a special occasion or just a regular Tuesday, this casserole transforms any day into a celebration. So, gather your ingredients, embrace the sweetness, and enjoy the smiles that come with every bite!

Ranis

Mini Donut Breakfast Casserole: A Sweet Morning Treat!

A delightful and sweet breakfast casserole made with mini glazed donuts, perfect for a special morning treat.
Prep Time 10 minutes
Cook Time 30 minutes
Total Time 40 minutes
Servings: 6 servings
Course: Breakfast
Cuisine: American
Calories: 220

Ingredients
  

  • 2 cups mini glazed donuts cut into quarters
  • 6 large eggs
  • 1 cup milk
  • 1 teaspoon vanilla extract
  • 1 teaspoon ground cinnamon
  • 1/4 teaspoon salt
  • 1/2 cup maple syrup
  • 1/2 cup chocolate chips optional
  • Whipped cream for serving (optional)

Method
 

  1. Preheat your oven to 350°F (175°C) and grease a 9x9-inch baking dish.
  2. In a large bowl, whisk together the eggs, milk, vanilla extract, cinnamon, and salt until well combined.
  3. Add the quartered mini donuts to the egg mixture and gently fold until the donuts are evenly coated.
  4. Pour the mixture into the prepared baking dish, spreading it out evenly.
  5. Drizzle the maple syrup over the top and sprinkle with chocolate chips if using.
  6. Bake in the preheated oven for 25-30 minutes, or until the casserole is set and lightly golden on top.
  7. Allow to cool for a few minutes before slicing. Serve warm with whipped cream if desired.

Nutrition

Serving: 1sliceCalories: 220kcalCarbohydrates: 25gProtein: 6gFat: 10gSaturated Fat: 3gPolyunsaturated Fat: 7gCholesterol: 180mgSodium: 200mgFiber: 1gSugar: 10g

Notes

  • For a fruity twist, add 1 cup of fresh berries or sliced bananas into the mixture before baking.
  • Substitute the mini glazed donuts with chocolate or cinnamon sugar donuts for different flavor profiles.

Tried this recipe?

Let us know how it was!