Delicious Grilled Tofu Sandwich with a Spicy Twist

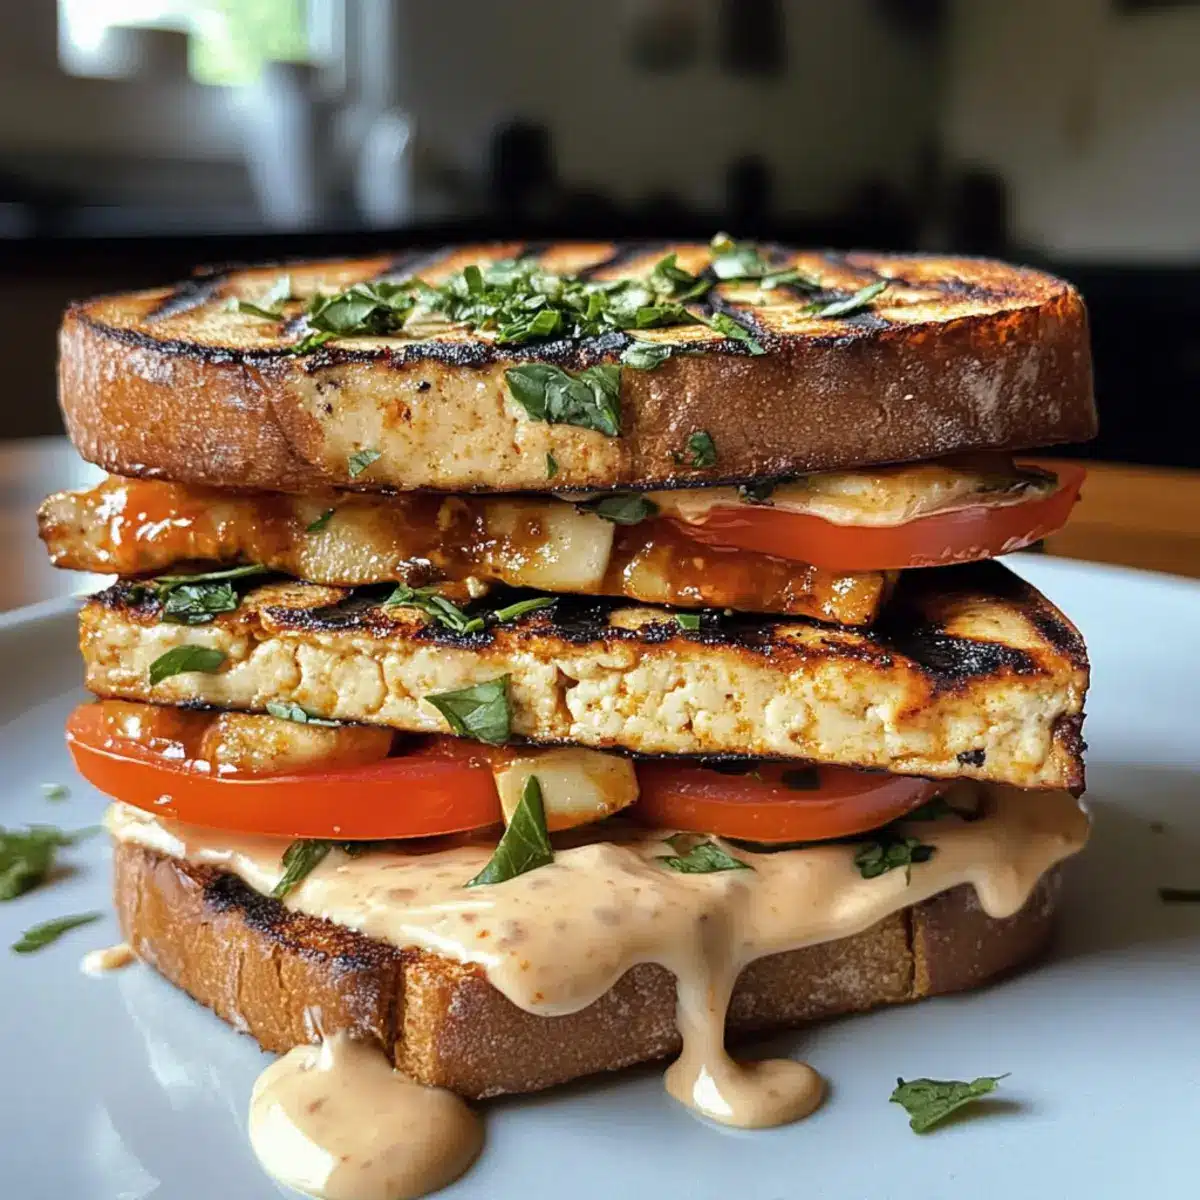
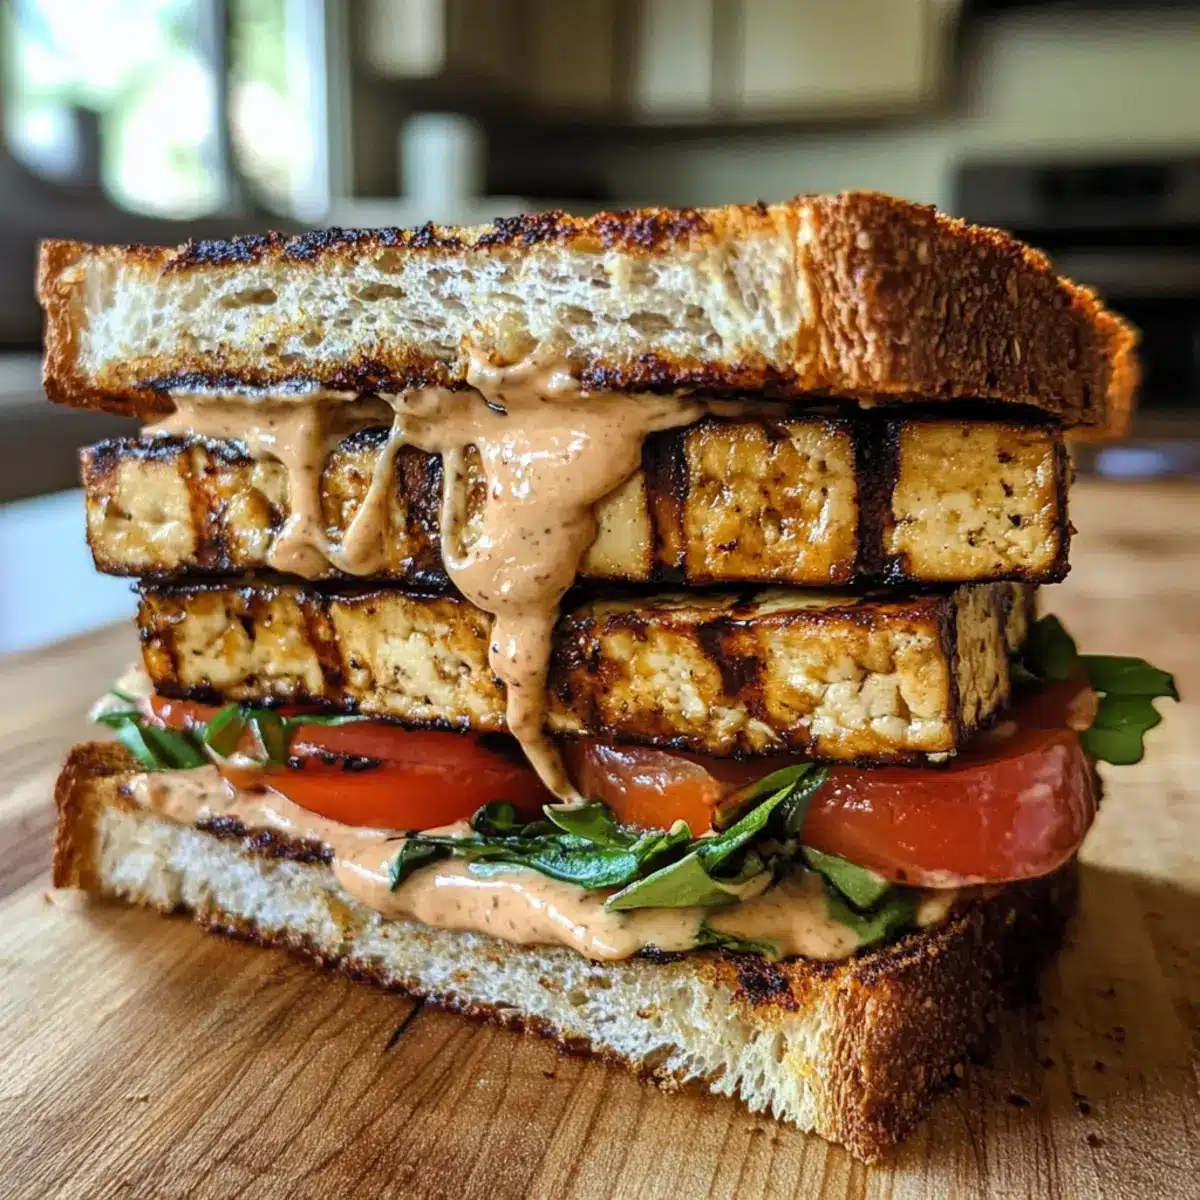
“Is tofu even edible?” I overheard a friend exclaim during a dinner party once, eyeing the platter of grilled delights. Little did they know, it’s one of the most versatile ingredients out there, especially when it comes to this Grilled Tofu Sandwich. Trust me when I say, this hearty, plant-based meal is about to turn skeptics into believers! With its satisfying crunch on the outside and a warm, flavor-packed tofu filling, this sandwich isn’t just scrumptious—it’s a quick prep that’s perfect for weeknight dinners or lunch meal prep. And for those craving a little extra zing, the spicy tahini sauce adds a delightful kick, making it an unforgettable bite every time. Ready to transform how you think about tofu? Dive in and discover how easy and delicious a homemade Grilled Tofu Sandwich can be!

Why is this Grilled Tofu Sandwich a Must-Try?

Flavor Explosion: This grilled tofu sandwich boasts a delightful mix of spices, giving each bite a zesty kick that dances on your taste buds.

Quick and Easy: With minimal prep time, you can whip up this hearty dish in no time—perfect for busy weeknights!

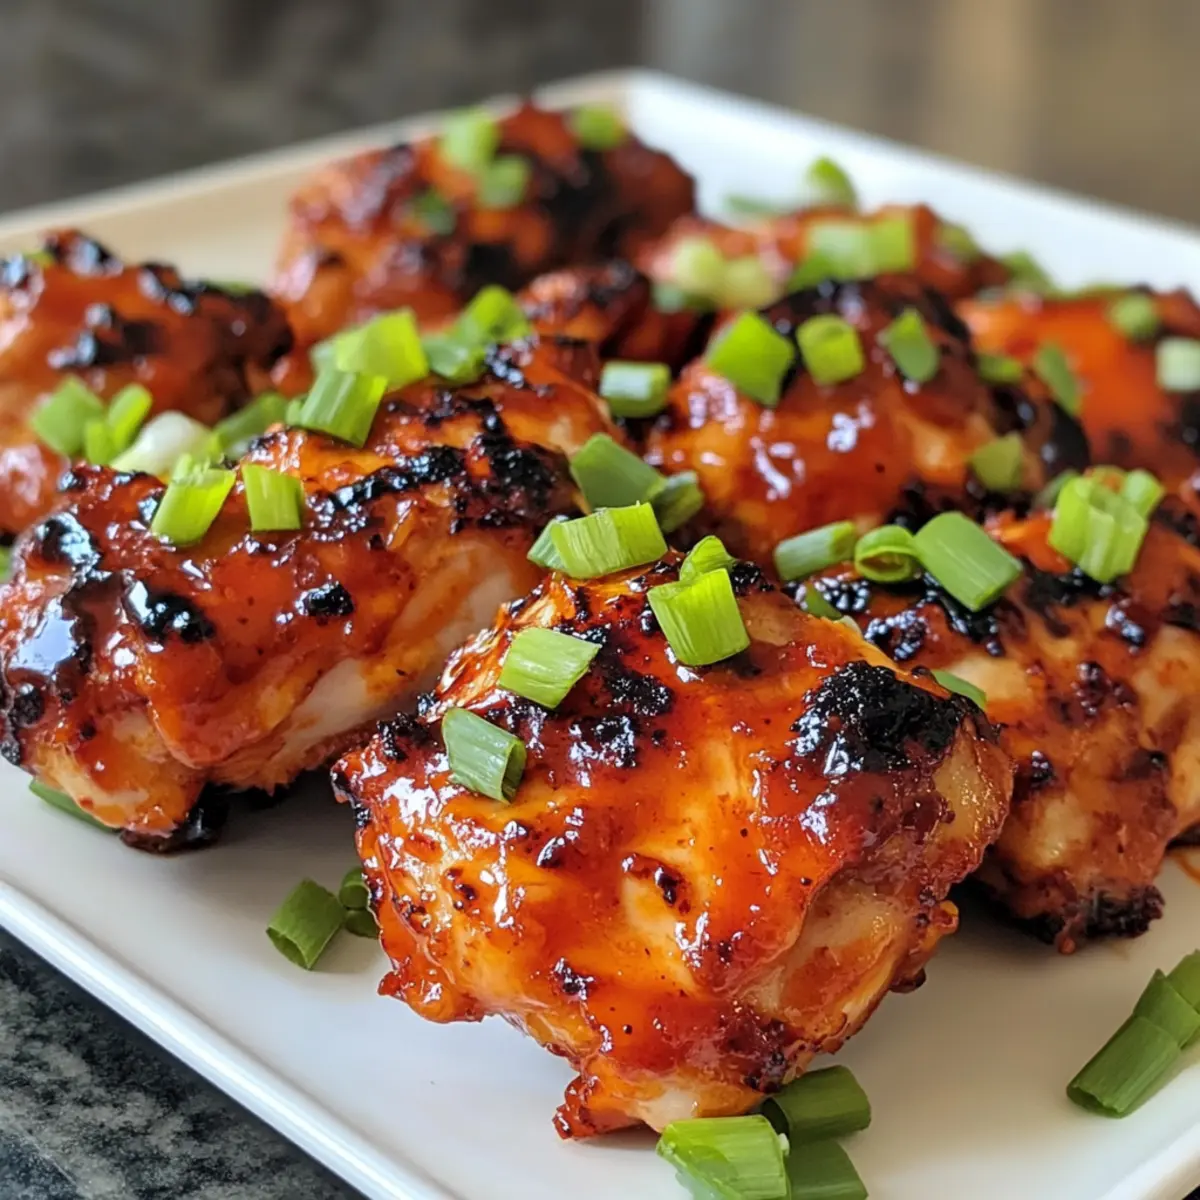
Versatile Delight: Pair it with a fresh salad or even some Grilled Honey BBQ chicken kabobs for a full meal that tantalizes the senses.

Health Boosting: Packed with protein and iron, this sandwich is not just filling but also nutritious, making it great for meal prep!

Crispy and Creamy: The toasted bread draws a perfect contrast to the chewy tofu, while the spicy tahini sauce brings in a luscious creaminess, ensuring satisfaction in every bite.

Grilled Tofu Sandwich Ingredients

  • For the Tofu

  • High-Protein Tofu – A key protein source; use firm or extra-firm tofu for the best texture in your grilled tofu sandwich.

  • Vegetable Broth – Adds moisture and flavor to the marinade; opt for homemade broth or low-sodium versions to control salt levels.

  • Bragg’s Liquid Aminos (or Tamari/Soy Sauce) – Provides umami flavor; substitute with regular soy sauce if preferred.

  • Liquid Smoke – Contributes smoky depth to the tofu; omit for a lighter taste or substitute with smoked paprika if desired.

  • For the Seasoning

  • Smoked Paprika – Enhances richness and color; regular paprika can be used for less heat.

  • Garlic Powder – Offers aromatic depth and flavor; fresh garlic can elevate the taste even more.

  • Cayenne Pepper (optional) – Adds a spice kick; feel free to omit if you prefer a milder profile.

  • For the Cooking

  • Light Olive Oil – Essential for roasting and grilling; use another neutral oil if you like experimenting with flavors.

  • Vegan Butter – Perfect for grilling the sandwich; can be replaced with olive oil for a dairy-free version.

  • For the Bread

  • Bread (8 slices) – Structural base for the sandwich; gluten-free options are available for those avoiding gluten.

  • For the Sauce

  • Spicy Tahini Sauce – Adds creaminess and heat; substitute with another favorite condiment if desired for a twist.

Step‑by‑Step Instructions for Grilled Tofu Sandwich

Step 1: Preheat the Oven
Begin by preheating your oven to 400°F (204°C). This ensures that when the marinated tofu is ready, it can be baked immediately to achieve a perfect golden brown and crispy texture. Prepare a greased baking sheet or line it with parchment paper for easy cleanup.

Step 2: Prepare the Tofu
While the oven heats, drain a block of high-protein tofu, then pat it dry using a clean kitchen towel. Using a mandoline slicer or a sharp knife, slice the tofu thinly, aiming for even pieces to promote uniform cooking. This preparation will enhance the flavors and textures of your grilled tofu sandwich.

Step 3: Marinate the Tofu
In a shallow dish, whisk together vegetable broth, Bragg’s Liquid Aminos, liquid smoke, smoked paprika, garlic powder, and cayenne pepper for an aromatic marinade. Place the sliced tofu in the marinade, ensuring all pieces are well-coated. Allow the tofu to marinate for at least 10 minutes, or refrigerate for up to 2 days for a deeper flavor infusion.

Step 4: Bake the Tofu
Once marinated, arrange the tofu slices on the prepared sheet pan, spreading them out in a single layer. Bake in the preheated oven for 30-35 minutes, flipping the tofu halfway through. Keep an eye out for those crisp edges, which are a sign that your tofu is ready to add to the grilled tofu sandwich.

Step 5: Assemble the Sandwich
While the tofu bakes, take eight slices of your preferred bread. Lightly butter one side of each slice with vegan butter or olive oil. Grill the buttered side on a skillet over medium heat, placing a slice of toasted bread on the skillet, followed by a few slices of the baked tofu. Drizzle with spicy tahini sauce before topping with another buttered slice of bread, buttered side up.

Step 6: Grill the Sandwich
In the same skillet, cook the assembled sandwich for 3-4 minutes on each side, pressing down gently to encourage even browning. Look for a golden-brown crust on both sides, ensuring the sandwich is crispy outside with the warm tofu filling inside. Slice in half and serve your delicious grilled tofu sandwich hot for maximum flavor.

What to Serve with Grilled Tofu Sandwich

Create the perfect meal experience with delightful sides that elevate your grilled tofu sandwich to new heights.

  • Crispy Sweet Potato Fries: The sweet, tender bites of fries add a satisfying crunch that pairs beautifully with the creamy tahini sauce.

  • Fresh Garden Salad: Crisp greens tossed with a tangy vinaigrette add a refreshing contrast while enhancing the sandwich’s flavors.

  • Avocado Slices: The creamy richness of sliced avocado brings a luscious texture and healthy fat, complementing the sandwich perfectly.

  • Grilled Veggie Skewers: Skewered seasonal vegetables infused with light herbs add color and a smoky flavor that harmonizes with the grilled tofu.

  • Roasted Chickpeas: Crunchy and seasoned to perfection, roasted chickpeas create a protein-packed snack that’s fun and adds an extra bite to your meal.

  • Vegan Coleslaw: This creamy, tangy addition cuts through the richness of the sandwich and brings a crunchy component that balances nicely.

Pair your meal with a glass of sparkling water with lemon, and enjoy every bite!

How to Store and Freeze Grilled Tofu Sandwich

Fridge: Store leftover grilled tofu sandwiches in an airtight container in the refrigerator for up to 3 days. Wrap them tightly to keep the bread fresh and avoid sogginess.

Freezer: For longer storage, freeze assembled sandwiches wrapped tightly in plastic wrap, followed by foil, for up to 2 months. Thaw in the refrigerator before reheating.

Reheating: To reheat, place the thawed sandwich in a skillet over medium heat until warmed through and crispy, about 5-7 minutes per side. Enjoy the delightful flavors of your grilled tofu sandwich!

Preparation Ahead: You can also store marinated tofu separately in the fridge for up to 5 days. This makes it easy to whip up fresh sandwiches anytime!

Grilled Tofu Sandwich Variations

Let your taste buds roam free with these delicious twists and substitutions that elevate your grilled tofu sandwich!

  • Gluten-Free Bread: Use gluten-free bread for an equally satisfying texture, ensuring everyone can enjoy the savory goodness. It’s an easy way to accommodate dietary needs without sacrificing flavor.

  • Sauce Switch-Up: Boldly swap spicy tahini sauce for your favorite condiment, like a rich pesto or zesty barbecue sauce, to give your sandwich a fresh flair! Each option brings its own unique taste, perfect for those adventurous diners.

  • Avocado Delight: Layer in sliced avocado for a creamy addition that pairs beautifully with the grilled tofu, enhancing both flavor and nutrition! Not to mention, it adds a lovely green color to your plate.

  • Add Veggies: Introduce thinly sliced cucumbers or spinach leaves for a refreshing crunch and vibrant color, completing the sandwich with extra nutrients and texture. Feel free to mix and match based on what you have on hand!

  • Spice It Up: Incorporate jalapeños or chili flakes for an extra kick. The added heat contrasts beautifully with the creamy tahini sauce, transforming the flavor profile and making each bite a new adventure.

  • Seasonal Twist: Try seasonal spices such as smoked garlic or dill to infuse new aromas that enhance the overall taste. Sometimes, a little twist is all it takes to make things feel new again!

  • Veggie-Loaded: Add a generous helping of roasted bell peppers or sautéed mushrooms for a umami boost that pairs excellently with the tofu’s chewy texture! These flavorful additions make every bite more satisfying.

  • Sweet & Savory: Drizzle a little maple syrup or honey on your sandwich before grilling for a sweet contrast that amplifies the savory notes of tofu and spices. It’s a delightful touch that surprises the palate!

These variations not only enhance your grilled tofu sandwich but also allow you to get creative in the kitchen. Consider pairing your tasty creation with a side of Grilled Garlic Rosemary potatoes or a fresh salad to complete the meal. Enjoy experimenting with flavors!

Expert Tips for the Best Grilled Tofu Sandwich

  • Choose the Right Tofu: Use firm or extra-firm tofu for the best texture. Silken tofu will not hold up well during grilling, resulting in a soggy sandwich.

  • Don’t Rush the Marinade: Allow the tofu to marinate for at least 10 minutes, but if possible, refrigerate it for a day. This enhances the flavor depth in your grilled tofu sandwich.

  • Check for Crispiness: Pay close attention to the tofu towards the end of baking. Thin slices can burn quickly, so checking them often ensures you achieve the perfect texture without any charred bits.

  • Grill with Care: When grilling the assembled sandwich, press down gently on the top slice of bread. This helps to create a nice, even brown crust while keeping the tofu filling warm and tender.

  • Experiment with Sauce: While the spicy tahini sauce is delicious, don’t hesitate to try different condiments like hummus or pesto for unique flavor twists and to suit your preferences.

Make Ahead Options

These Grilled Tofu Sandwiches are perfect for meal prep aficionados! You can marinate the tofu up to 24 hours in advance by simply combining the marinade ingredients and allowing the tofu to soak up all those flavors in the fridge. Additionally, the baked tofu can be stored in an airtight container for up to 3 days—just be sure to let it cool before refrigerating to maintain its texture. To finish your sandwiches, simply grill the bread with a bit of vegan butter or olive oil, add the prepped tofu, drizzle with spicy tahini sauce, and grill until crispy. This way, you can enjoy delicious, homemade Grilled Tofu Sandwiches with minimal effort, even on your busiest days!

Grilled Tofu Sandwich Recipe FAQs

How do I select the right tofu for this recipe?
Absolutely! For the best results, choose firm or extra-firm tofu. These varieties hold their shape during the cooking process, ensuring your grilled tofu sandwich has that perfect bite. Avoid silken tofu, as it will become too mushy when grilled.

How should I store leftover grilled tofu sandwiches?
Leftover grilled tofu sandwiches can be stored in an airtight container in the refrigerator for up to 3 days. It’s best to wrap them tightly to prevent the bread from getting soggy and maintain freshness.

Can I freeze grilled tofu sandwiches?
Yes, you can! To freeze your grilled tofu sandwiches, wrap them tightly in plastic wrap and then in aluminum foil. They can be stored for up to 2 months. When you’re ready to enjoy, thaw them overnight in the refrigerator and reheat them on a skillet for that crispy exterior, which should take about 5-7 minutes per side.

What if my tofu burns while baking?
Very important! Thin slices of tofu can easily overcook if you’re not paying close attention. If you notice them starting to brown too quickly, consider reducing the baking temperature by 25°F and flipping them more frequently. Checking around the 20-minute mark can help avoid any burning.

Are there any dietary considerations for this recipe?
Yes, this grilled tofu sandwich is vegan and can be gluten-free if you choose appropriate bread. If you’re managing allergies, ensure that your sauces, like tahini, are free from any allergens and that your bread is certified gluten-free. Always read labels to ensure the ingredients fit your dietary needs.

Can I make the marinade ahead of time?
Absolutely! You can prepare the tofu marinade ahead of time and store it in the refrigerator for up to 5 days. This way, you can have quick access to delicious, marinated tofu whenever you’re ready to whip up your grilled tofu sandwich!

Grilled Tofu Sandwich

Delicious Grilled Tofu Sandwich with a Spicy Twist

This Grilled Tofu Sandwich with a spicy twist is a hearty, plant-based meal that’s perfect for skeptics and ideal for quick weeknight dinners.
Prep Time 10 minutes
Cook Time 35 minutes
Marinating Time 10 minutes
Total Time 55 minutes
Servings: 4 sandwiches
Course: Lunch
Cuisine: Vegan
Calories: 350

Ingredients
  

For the Tofu
  • 1 block High-Protein Tofu Use firm or extra-firm for best texture.
  • 1 cup Vegetable Broth Opt for low-sodium versions.
  • 2 tablespoons Bragg's Liquid Aminos Or Tamari/Soy Sauce.
  • 1 teaspoon Liquid Smoke Omit for a lighter taste.
For the Seasoning
  • 1 teaspoon Smoked Paprika Regular paprika can be used for less heat.
  • 1 teaspoon Garlic Powder Fresh garlic can elevate the taste.
  • 1/4 teaspoon Cayenne Pepper Optional for spice.
For the Cooking
  • 2 tablespoons Light Olive Oil Use another neutral oil if desired.
  • 2 tablespoons Vegan Butter Can be replaced with olive oil.
For the Bread
  • 8 slices Bread Gluten-free options available.
For the Sauce
  • 1/2 cup Spicy Tahini Sauce Substitute with another condiment if desired.

Equipment

  • Oven
  • Skillet
  • Baking Sheet
  • Parchment paper
  • Mandoline slicer

Method
 

Preparation
  1. Preheat your oven to 400°F (204°C). Prepare a greased baking sheet or line it with parchment paper.
  2. Drain the tofu and pat it dry. Slice the tofu thinly using a mandoline slicer or sharp knife.
  3. In a shallow dish, whisk together vegetable broth, Bragg's Liquid Aminos, liquid smoke, smoked paprika, garlic powder, and cayenne pepper. Marinate the tofu for at least 10 minutes.
  4. Arrange the tofu slices on the baking sheet and bake for 30-35 minutes, flipping halfway through.
  5. While the tofu bakes, butter one side of each slice of bread. Grill the buttered side in a skillet, layering with baked tofu and spicy tahini sauce.
  6. Cook the assembled sandwich for 3-4 minutes on each side until golden brown. Serve hot.

Nutrition

Serving: 1sandwichCalories: 350kcalCarbohydrates: 30gProtein: 20gFat: 18gSaturated Fat: 3gPolyunsaturated Fat: 1gMonounsaturated Fat: 6gSodium: 600mgPotassium: 450mgFiber: 5gSugar: 2gVitamin A: 500IUVitamin C: 2mgCalcium: 150mgIron: 3mg

Notes

Store leftover sandwiches in the fridge for up to 3 days. For longer storage, freeze assembled sandwiches for up to 2 months.

Tried this recipe?

Let us know how it was!

Brown Butter Biscoff Blondies for the Ultimate Sweet Craving

As the warm, nutty aroma of brown butter fills your kitchen, it becomes crystal clear: dessert isn’t just food; it’s an experience. That’s where these delightful Brown Butter Biscoff Blondies come in, perfectly chewy and fudgy with a unique twist of caramel-like Biscoff spread. Not only are they incredibly simple to whip up in just one bowl, but they also come together in under 25 minutes—making them a quick treat for any craving or gathering. The combination of luscious chocolate pools and the depth of flavor from the brown butter offers a comforting sweetness that never fails to impress. So, what’s your favorite way to enjoy blondies? Let’s dive into this recipe and create something truly special!

Why are Brown Butter Biscoff Blondies a must-try?

Simplicity at its Core: You’ll appreciate how easy it is to create these delightful blondies—all it takes is one bowl and minimal fuss.

Rich, Indulgent Flavor: The warm nuttiness of brown butter perfectly complements the unique caramel notes from Biscoff spread, creating a dessert experience like no other.

Versatile Treats: Whether you’re serving these for a casual movie night or a festive gathering, they’ll surely please a crowd.

Gooey Deliciousness: Each bite offers a perfect balance of chewy centers and pools of melted chocolate, making them irresistible. Pair them with a scoop of ice cream for an extra treat, like with our Garlic Butter Shrimp or Honey Butter Brioche for a complete indulgence!

Quick Baking Bliss: Ready in under 25 minutes, this recipe is ideal for satisfying your sweet tooth without spending hours in the kitchen. Dive into these blissful blondies and elevate your dessert game!

Brown Butter Biscoff Blondies Ingredients

For the Batter

  • Unsalted Butter – Adds richness and flavor; brown butter will provide nutty undertones.
  • Brown Sugar – Provides deep caramel notes and moisture; may substitute with coconut sugar for a healthier option.
  • Egg + Egg Yolk – Adds structure and richness to the blondies; using an extra yolk ensures a chewier texture.
  • Biscoff Cookie Butter – A key ingredient, offering a unique spice and caramel flavor; no substitute gives the same flavor profile.
  • Salt – Balances sweetness; can omit for a completely sugar-free dish.
  • All-Purpose Flour – Provides structure; can substitute with a gluten-free flour blend.
  • Chocolate (chopped or chips) – Adds delicious chocolatey pools of flavor; choose 60-70% dark chocolate for optimal richness.

Optional Toppings

  • Biscoff Cookies – Provides added crunch and flavor; can omit if desired.

Step‑by‑Step Instructions for Brown Butter Biscoff Blondies

Step 1: Preheat the Oven
Begin by preheating your oven to 350°F (175°C). While the oven warms up, line an 8×8 inch baking pan with parchment paper, allowing some overhang for easy removal later. This setup ensures your Brown Butter Biscoff Blondies will bake evenly and slide out smoothly once cooled.

Step 2: Brown the Butter
In a medium saucepan, melt ½ cup of unsalted butter over medium heat. Stir constantly for about 6-10 minutes until the butter foams and turns a deep golden brown, releasing a nutty aroma. Keep a close eye to prevent burning. Once ready, remove from heat and let it cool slightly while you prepare the batter.

Step 3: Mix the Batter
In a medium bowl, combine the cooled brown butter and 1 cup of brown sugar, whisking until well blended. Next, add in 1 large egg and 1 egg yolk, whisking until the mixture is smooth. Gradually mix in ½ cup of Biscoff cookie butter until fully incorporated, creating a rich and creamy base for your blondies.

Step 4: Incorporate Dry Ingredients
Sprinkle in ½ teaspoon of salt and 1 cup of all-purpose flour into the wet mixture. Gently stir until just combined; it’s important not to overmix. Once you see no dry flour, fold in ½ cup of chopped chocolate, ensuring even distribution throughout the batter, adding those delicious chocolatey pools to your Brown Butter Biscoff Blondies.

Step 5: Transfer and Optional Toppings
Pour the blondie batter into your prepared baking pan, using a spatula to spread it evenly. If desired, sprinkle extra chocolate and crushed Biscoff cookies on top for an added crunch and flavor boost. This step elevates your blondies and makes them visually appealing.

Step 6: Bake to Perfection
Place the pan in the preheated oven and bake for approximately 20-25 minutes. You’ll know they are done when the edges are lightly browned and a toothpick inserted in the center comes out mostly clean. Keep an eye on them to avoid overbaking, which can lead to a dry texture.

Step 7: Cool and Slice
Remove the pan from the oven and allow the Brown Butter Biscoff Blondies to cool completely in the pan for about 2 hours. This cooling time enhances their fudgy texture. Once cooled, lift the blondies out using the parchment overhang, slice them into squares, and prepare to indulge in this delicious homemade treat!

What to Serve with Brown Butter Biscoff Blondies?

The magic of these blondies doesn’t stop at their deliciousness; they invite you to create a full dessert experience.

  • Vanilla Ice Cream: A classic pairing, the creaminess of vanilla ice cream balances the rich flavors, enhancing the experience with each heavenly bite.

  • Whipped Cream: Light and airy, a dollop of freshly whipped cream adds a soft texture that complements the chewy blondies, making each mouthful extra luscious.

  • Fresh Berries: Bright, tangy berries (like raspberries or strawberries) offer a refreshing contrast to the sweet, dense blondies, adding a touch of natural sweetness and color to your plate.

  • Espresso or Coffee: Serve with a warm cup of espresso or a rich coffee to balance the sweetness. The bitterness will highlight the caramel notes of the blondies beautifully, making it a match made in heaven.

  • Chocolate Sauce: Drizzle warm chocolate sauce over each blondie for an indulgent treat that brings out the chocolate pools within and makes for an eye-catching dessert.

  • Coconut Whipped Cream: For a tropical twist, coconut whipped cream provides a delicious, dairy-free option that pairs wonderfully with the nutty flavors of brown butter.

Each pairing elevates the sensory experience, creating memorable moments around the dessert table, inviting everyone to savor sweetness together!

Expert Tips for Brown Butter Biscoff Blondies

  • Measure Precisely: Use a kitchen scale for accurate measurements, especially for flour and brown sugar, to achieve the perfect texture in your blondies.

  • Watch the Butter: Keep a close eye on the butter as it browns. Remove it from heat when it reaches a deep golden color and nutty aroma to avoid burning.

  • Mix Wisely: Be careful not to overmix the batter. Fold ingredients until just combined for a chewy and fudgy blondie texture without toughness.

  • Check Early: Start checking your blondies around the 20-minute mark to ensure they’re not overbaked—aim for a slight gooeyness in the center.

  • Cool Completely: Allow the blondies to cool for at least 2 hours before slicing; this helps enhance the fudgy texture, making every bite a dream.

Make Ahead Options

These Brown Butter Biscoff Blondies are perfect for meal prep, allowing you to enjoy their deliciousness without the last-minute rush! You can prepare the batter up to 24 hours in advance; simply mix all the wet and dry ingredients as directed and store it in an airtight container in the refrigerator. This helps maintain the blondies’ rich texture and flavor. When you’re ready to bake, just pour the chilled batter into your prepared pan, top with additional chocolate and Biscoff cookies if desired, and bake as instructed. With this make-ahead option, you’ll save precious time while still treating your family to homemade delightful treats!

Brown Butter Biscoff Blondies Variations

Feel free to let your creativity shine by customizing these delectable blondies to suit your taste!

  • Nutty Delight: Add chopped walnuts or pecans for delightful crunch and added texture in every bite. The warm nuttiness pairs perfectly with the caramel notes of Biscoff.

  • Peanut Butter Twist: Substituting Biscoff with creamy peanut butter or Nutella will introduce a rich, nutty flavor. Each square becomes a new adventure in flavor!

  • White Chocolate Shift: Swap dark chocolate for sweet white chocolate chips for a delightful contrast. The creaminess will elevate the overall sweetness of your blondies.

  • Coconut Charm: Add shredded coconut to the batter for a tropical touch. It not only adds flavor but also enhances the chewy texture that blondies are known for.

  • Spiced Up: Incorporate a dash of cinnamon or a pinch of nutmeg into the batter for an aromatic twist. This subtle change adds warmth and depth, making each bite even more comforting.

  • Caramel Drizzle: Pour a generous drizzle of salted caramel on top before serving. It adds a luscious layer that would complement the rich flavors beautifully!

  • Fruit Enhancement: Toss in some mini chocolate chips or dried fruit like cranberries for a fruity twist. This adds bursts of flavor and texture, making every bite delightful!

Elevate your dessert experience with these variations, and have fun experimenting! If you’re looking for something equally indulgent, try out our Fudgy Brownies Indulge or our delightful Buttermilk Pancakes Discover for a breakfast treat!

How to Store and Freeze Brown Butter Biscoff Blondies

Room Temperature: Store the blondies in an airtight container at room temperature for up to 4-5 days to maintain their chewy texture and rich flavor.

Fridge: For extended freshness, keep them in the refrigerator, where they will last up to a week. Allow them to come to room temperature before serving for the best taste.

Freezer: To freeze, wrap individual blondies in plastic wrap and place them in a freezer-safe bag or container. They can last up to 3 months in the freezer.

Reheating: When ready to enjoy, thaw the blondies in the refrigerator overnight, then warm them in the microwave for about 10-15 seconds to revive their gooey goodness.

Brown Butter Biscoff Blondies Recipe FAQs

How do I choose the right Biscoff spread for my Blondies?
Absolutely! Look for a jar of smooth Biscoff cookie butter, as it will blend seamlessly into the batter and create that signature caramel-like flavor. Be sure to check the ingredients list; the purer the spread, the richer the taste!

How should I store leftover Brown Butter Biscoff Blondies?
Store the blondies in an airtight container at room temperature for up to 4-5 days for optimal freshness. If you want to keep them longer, place them in the refrigerator, where they can last for a week. Allow them to come to room temperature before serving for the best taste!

Can I freeze Brown Butter Biscoff Blondies?
Very! For freezing, wrap each blondie individually in plastic wrap and place them in a freezer-safe bag or container to prevent freezer burn. They can last up to 3 months in the freezer! When you’re ready to enjoy them, thaw in the refrigerator overnight, then warm them in the microwave for about 10-15 seconds for that fresh-baked taste.

What if my Blondies turn out too cakey?
If your blondies end up too cakey, it’s likely from overmixing the batter or using too much flour. Be sure to mix until just combined and measure your flour accurately. To correct this next time, try adding an extra egg yolk to enhance the chewiness!

Can I use a different type of flour for my Blondies?
Yes, you can substitute all-purpose flour with a gluten-free flour blend if needed! Just ensure that your blend includes xanthan gum, which helps bind the ingredients together, maintaining the blondies’ chewy texture. Enjoy experimenting while keeping the deliciousness intact!

Are there any dietary concerns for pets or allergies with these Blondies?
Definitely, it’s essential to consider allergies! Brown Butter Biscoff Blondies contain ingredients like butter, wheat, and eggs, which could be allergens for some individuals. Also, be mindful that chocolate is toxic to dogs, so keep these treats safely out of their reach. Always check for any known allergies before serving!

Brown Butter Biscoff Blondies

Brown Butter Biscoff Blondies for the Ultimate Sweet Craving

These Brown Butter Biscoff Blondies are chewy, fudgy, and filled with chocolate, making them a perfect dessert experience.
Prep Time 10 minutes
Cook Time 25 minutes
Cooling Time 2 hours
Total Time 2 hours 35 minutes
Servings: 16 slices
Course: Dessert
Cuisine: American
Calories: 220

Ingredients
  

For the Batter
  • 1/2 cup Unsalted Butter Browned for nutty flavor
  • 1 cup Brown Sugar Can substitute with coconut sugar
  • 1 large Egg Plus 1 egg yolk
  • 1/2 cup Biscoff Cookie Butter Key ingredient for flavor
  • 1/2 teaspoon Salt Can omit for sugar-free version
  • 1 cup All-Purpose Flour Can substitute with gluten-free flour
  • 1/2 cup Chocolate (chopped or chips) Use 60-70% dark chocolate
Optional Toppings
  • 1 cup Biscoff Cookies Can omit if desired

Equipment

  • Medium saucepan
  • Mixing Bowl
  • Spatula
  • 8x8 inch baking pan

Method
 

Step-by-Step Instructions
  1. Preheat your oven to 350°F (175°C) and line an 8x8 inch baking pan with parchment paper.
  2. Melt 1/2 cup of unsalted butter in a medium saucepan over medium heat and brown it for about 6-10 minutes.
  3. Combine the cooled brown butter with 1 cup of brown sugar, then whisk in 1 large egg and 1 egg yolk.
  4. Sprinkle in 1/2 teaspoon of salt and 1 cup of all-purpose flour, mixing until just combined, then fold in 1/2 cup of chopped chocolate.
  5. Pour the batter into the prepared baking pan, spreading it evenly. Optionally, add more chocolate and crushed Biscoff cookies on top.
  6. Bake for 20-25 minutes until lightly browned and mostly clean when tested with a toothpick.
  7. Allow the blondies to cool in the pan for about 2 hours before lifting them out to slice into squares.

Nutrition

Serving: 1sliceCalories: 220kcalCarbohydrates: 28gProtein: 2gFat: 11gSaturated Fat: 7gPolyunsaturated Fat: 0.5gMonounsaturated Fat: 3.5gCholesterol: 25mgSodium: 80mgPotassium: 50mgFiber: 1gSugar: 15gVitamin A: 300IUCalcium: 10mgIron: 1mg

Notes

Store in an airtight container for up to 4-5 days at room temperature or refrigerate for up to a week. Can be frozen for up to 3 months.

Tried this recipe?

Let us know how it was!

Delightful Ginger Peach Sparkler Mocktail for Refreshing Sips

As the sun sets on a balmy summer evening, I find myself craving something refreshingly vibrant to sip on. Enter the Ginger Peach Sparkler Mocktail—a delightful non-alcoholic beverage that perfectly captures the essence of summer in every fizzy sip. Combining the sweet juiciness of ripe peaches with the zesty punch of fresh ginger, this easy mocktail dazzles guests during gatherings or serves as a guilt-free indulgence after a long day. Best of all, you can whip it up in just five minutes, making it your go-to recipe for those warm days ahead. So, are you ready to elevate your summer sipping game with this sparkling delight?

Why is this mocktail a must-try?

Simplicity: You’ll be amazed at how quick and easy this mocktail is to prepare; it takes only five minutes from start to finish!

Vibrant Flavors: The juicy peaches and zesty ginger create an irresistible flavor combination that’s both refreshing and satisfying.

Versatile: Feel free to play around with ingredients! Try using fresh mint instead of ginger or adding a splash of orange juice for a twist.

Perfect for Gatherings: Whether it’s a summer party or a cozy night in, this mocktail is sure to impress guests with its beautiful presentation and delightful taste.

Guilt-Free Indulgence: With just around 84 calories per serving, you can enjoy this sweet treat without any guilt. Looking for more refreshing ideas? Check out our delicious summer beverage recipes.

Ginger Peach Sparkler Mocktail Ingredients

For the Mocktail Base

  • Ripe Peaches – Fresh, ripe peaches provide the sweetest flavor, but canned peaches work if well-drained.
  • Fresh Ginger – Adds a spicy zing; adjust according to your heat preference.
  • Lemon Juice – Freshly squeezed balances the sweetness with its acidity.

For the Fizz

  • Sparkling Water or Soda – Creates refreshing fizz; flavored sparkling water can add an exciting twist.
  • Ice Cubes – Essential for chilling the drink and making it refreshing.

For the Garnish

  • Mint Leaves – Use fresh mint for an aromatic touch that elevates the drink’s appeal.

The Ginger Peach Sparkler Mocktail not only dazzles but delivers a refreshingly delightful experience for every sip!

Step‑by‑Step Instructions for Ginger Peach Sparkler Mocktail

Step 1: Prepare the Peach Base
Start by washing and slicing 2 ripe peaches. If you prefer a smoother texture, blend the peach slices in a blender until you achieve a puree consistency. Add 1 tablespoon of freshly squeezed lemon juice to brighten the flavors. The vibrant peach color will assure you of the juicy sweetness awaiting in your Ginger Peach Sparkler Mocktail.

Step 2: Add Fresh Ginger
Next, take approximately 1 inch of fresh ginger and grate it finely using a microplane or a box grater. Sprinkle the grated ginger over the peach mixture, adjusting to your preferred spice level. The ginger’s aromatic zest will infuse the mocktail with a delightful kick, setting the stage for a refreshing flavor explosion.

Step 3: Assemble with Ice
Fill your favorite tall glass generously with ice cubes, ensuring they occupy about half the glass. The ice will keep your mocktail chilled, adding to its refreshing appeal. Pour the prepared peach and ginger mixture over the ice, creating a vibrant base that invites joyful sipping.

Step 4: Pour Sparkling Water
Slowly pour about 1 cup of sparkling water or your choice of sparkling soda over the peach and ginger mixture. The fizz should create delightful bubbles that dance above the ice. Watch as the sparkling water combines with the ingredients, enhancing the mocktail’s potential for refreshment while keeping it light and bubbly.

Step 5: Stir to Combine
Gently stir the mixture with a long spoon or a straw for about 10 seconds to combine all the ingredients without losing too much fizz. This careful mixing ensures that the sweetness of the peaches, the zing of the ginger, and the effervescence of the sparkling water meld perfectly in your Ginger Peach Sparkler Mocktail.

Step 6: Garnish and Serve
To elevate your mocktail, garnish it with a sprig of fresh mint or a thin peach slice on the rim of the glass. This final touch not only adds a pop of color but also releases a refreshing aroma. Serve immediately to enjoy the delightful fizziness and vibrant flavors of the Ginger Peach Sparkler Mocktail while it’s icy cold.

What to Serve with Ginger Peach Sparkler Mocktail

Elevate your dining experience with magical pairings that complement this refreshing drink perfectly.

  • Grilled Chicken Skewers: Deliciously seasoned and juicy, these skewers add a savory, smoky contrast to the lightness of the mocktail.
  • Light Summer Salad: A mix of greens, tomatoes, and feta cheese provides a crisp, refreshing hit, making each sip of the mocktail even more delightful.
  • Fruit and Cheese Platter: Combining creamy cheeses and fresh fruits complements the sweetness of the mocktail while offering a variety of textures and flavors.
  • Spicy Shrimp Tacos: The heat from the shrimp mixes beautifully with the refreshing ginger peach flavors, making for an exciting contrast in each bite.
  • Crispy Vegetable Spring Rolls: These light, crunchy rolls are perfect alongside the mocktail, providing an engaging textural experience that refreshes the palate.
  • Lemon Sorbet: A palate cleanser that enhances the fruity nature of the drink. The icy texture pairs beautifully and cools you down on a hot day.
  • Iced Green Tea: This subtle, refreshing beverage complements the mocktail’s flavors without overpowering, keeping your taste buds singing of summer.
  • Mini Fruit Tartlets: The sweet and tangy bite of fresh fruit on crisp pastry creates a stunning dessert to round off your summer gathering.
  • Sparkling Mineral Water: If you love fizz, serve chilled sparkling water alongside your mocktail for an extra bubbly treat that matches the festive feel of any occasion.

Ginger Peach Sparkler Mocktail Variations

Get ready to explore delicious twists on the classic mocktail that will delight your taste buds!

  • Minty Fresh: Swap fresh ginger for fresh mint to create a cooler, aromatic drink that’s perfect on hot days.
  • Berry Bliss: Toss in some mixed berries like strawberries or blueberries for a colorful and fruity twist that enhances sweetness.
  • Citrus Burst: Add a splash of orange or grapefruit juice to brighten flavors and give a zesty kick to your mocktail.
  • Spicy Ginger: For those who enjoy a little more heat, try using candied ginger pieces instead of fresh for a sweet and spicy contrast.
  • Tropical Vibe: Incorporate a splash of coconut water or pineapple juice for a tropical twist that feels like a summer vacation.
  • Adult Version: Want something a bit stronger? Add a shot of vodka or champagne to turn this mocktail into a festive cocktail.
  • Cucumber Cooler: Mix in some muddled cucumber for a refreshing twist that adds a crisp texture and bright flavor.
  • Herbal Infusion: Enhance with fresh basil or rosemary; this brings an intriguing aromatic depth that’s sure to impress.

Feel free to experiment with these variations! If you’re looking for additional refreshing options, don’t miss our summer beverage recipes for more inspiration.

Make Ahead Options

These Ginger Peach Sparkler Mocktails are perfect for busy home cooks looking to save time on summer gatherings! You can prepare the peach puree (made from 2 ripe peaches blended with 1 tablespoon of lemon juice) and store it in the refrigerator for up to 3 days. This allows the sweetness to deepen while maintaining vibrant color. When you’re ready to serve the mocktail, simply fill a glass with ice, pour in the prepared peach mixture, and top it off with 1 cup of sparkling water for that delightful fizz. Remember to garnish with fresh mint or a peach slice right before serving to ensure it remains just as refreshing!

How to Store and Freeze Ginger Peach Sparkler Mocktail

Fridge: Store any leftover peach puree in an airtight container in the refrigerator for up to 2 days. Keep the sparkling water separate to maintain fizz.

Freezer: You can freeze peach slices by laying them flat on a baking sheet until solid. Transfer them to a freezer bag for use in future mocktails, lasting up to 3 months.

Reheating: Not applicable for this mocktail, as it’s best served cold and fresh. Mix the frozen peach slices into your drink for a frosty touch of flavor!

Make Ahead: Prepare the peach puree a day in advance; just mix with sparkling water just before serving for an instant refreshment with your Ginger Peach Sparkler Mocktail!

Expert Tips for Ginger Peach Sparkler Mocktail

  • Fresh Ingredients: Always opt for fresh, ripe peaches and ginger for the best flavor. Canned peaches can dilute the taste if not well-drained.

  • Adjust Sweetness: If you prefer a sweeter mocktail, add a drizzle of honey or a splash of orange juice to enhance the flavor profile.

  • Serve Chilled: To maintain maximum fizz, serve the Ginger Peach Sparkler Mocktail immediately after mixing or store the peach puree and sparkling water separately until just before serving.

  • Garnish Wisely: Don’t skip the mint or peach garnish! It not only beautifies the drink but also adds a fragrant aroma to each sip.

  • Create Variations: Experiment with flavored sparkling water or add a handful of berries for a fruity twist. Each variation can bring a new dimension to this refreshing mocktail!

Ginger Peach Sparkler Mocktail Recipe FAQs

How do I select ripe peaches for the mocktail?
Absolutely! When choosing peaches, look for those that are slightly soft to the touch with a sweet aroma. The skin should have a vibrant color, free from dark spots or wrinkles. If you only have canned peaches on hand, ensure they are well-drained and preferably packed in juice rather than syrup for the best flavor.

How should I store leftover mocktail ingredients?
For any leftover peach puree, store it in an airtight container in the refrigerator for up to 2 days. It’s best to keep the sparkling water separate to maintain its fizz. If you’re preparing ahead, you could also refrigerate the ginger, but I recommend storing your mocktail components separately until you are ready to serve.

Can I freeze peaches for future mocktails?
Yes! To freeze peaches, slice them and lay them flat on a baking sheet to flash freeze for about 2 hours until solid. Then, transfer the frozen slices into freezer bags, squeezing out excess air. They can last for up to 3 months in the freezer. When you’re ready to make a mocktail, just blend them into the drink or use them as ice cubes!

What if my mocktail doesn’t have enough fizz?
To ensure your mocktail is wonderfully fizzy, always use fresh sparkling water or soda right before serving. If the mocktail isn’t fizzy enough, it might be that the sparkling water was mixed in too soon or wasn’t carbonated enough. Blend your peach and ginger mixture first, then pour the sparkling water on top and stir gently just to combine, as this helps preserve the bubbles!

Are there any dietary considerations for pets or allergies?
Very! While the ingredients for the Ginger Peach Sparkler Mocktail are generally safe for humans, they are not recommended for pets. Dogs, for instance, should avoid peaches and citrus fruits due to potential gastrointestinal upset. Additionally, if anyone has allergies, ensure they are not sensitive to any specific ingredient, especially ginger or natural fruit sugars. For a sweetener alternative, consider using maple syrup if someone is avoiding honey!

Ginger Peach Sparkler Mocktail

Delightful Ginger Peach Sparkler Mocktail for Refreshing Sips

Ginger Peach Sparkler Mocktail is a delightful non-alcoholic beverage that combines ripe peaches and fresh ginger for a refreshing summer sip.
Prep Time 5 minutes
Total Time 5 minutes
Servings: 2 glasses
Course: Drinks
Cuisine: American
Calories: 84

Ingredients
  

For the Mocktail Base
  • 2 pieces ripe peaches Fresh, ripe peaches provide the sweetest flavor
  • 1 tablespoon fresh lemon juice Freshly squeezed balances the sweetness
  • 1 inch fresh ginger Adjust according to your heat preference
For the Fizz
  • 1 cup sparkling water or soda Creates refreshing fizz
For the Garnish
  • 1 sprig mint leaves Fresh mint for an aromatic touch

Equipment

  • blender
  • Grater
  • Tall glass
  • Spoon

Method
 

Step-by-Step Instructions
  1. Start by washing and slicing 2 ripe peaches. If you prefer a smoother texture, blend the peach slices in a blender until you achieve a puree consistency. Add 1 tablespoon of freshly squeezed lemon juice to brighten the flavors.
  2. Next, take approximately 1 inch of fresh ginger and grate it finely using a microplane or a box grater. Sprinkle the grated ginger over the peach mixture, adjusting to your preferred spice level.
  3. Fill your favorite tall glass generously with ice cubes, ensuring they occupy about half the glass. Pour the prepared peach and ginger mixture over the ice.
  4. Slowly pour about 1 cup of sparkling water or your choice of sparkling soda over the peach and ginger mixture. Watch as the sparkling water combines with the ingredients.
  5. Gently stir the mixture with a long spoon or a straw for about 10 seconds to combine all the ingredients without losing too much fizz.
  6. To elevate your mocktail, garnish it with a sprig of fresh mint or a thin peach slice on the rim of the glass.

Nutrition

Serving: 1glassCalories: 84kcalCarbohydrates: 21gSodium: 10mgPotassium: 200mgFiber: 2gSugar: 16gVitamin A: 300IUVitamin C: 15mgCalcium: 20mgIron: 0.3mg

Notes

Store leftover peach puree in the fridge for up to 2 days. Keep sparkling water separate to maintain fizz.

Tried this recipe?

Let us know how it was!

Creamy Roasted Red Pepper Tomato Feta Dip for Every Occasion

As the holidays approach, my kitchen transforms into a bustling hub where flavors mingle and laughter echoes. The moment I took my first bite of Roasted Red Pepper Tomato Feta Dip, I knew I had uncovered a gem among appetizers. This warm dip, with its luscious blend of roasted red peppers, sweet cherry tomatoes, and creamy feta, is the perfect dish for cozy gatherings and unexpected guests alike. What’s more, it’s incredibly easy to whip up, making it a hassle-free option for both beginner cooks and seasoned home chefs. Not only does it offer a comforting bite, but it also dazzles the table with its vibrant colors and delectable aroma. So why not treat your family and friends to a delightful experience? Curious about how to master this dish? Let’s dive into the delicious details!

Why is this dip a must-try?

Warm, Creamy Indulgence: The Roasted Red Pepper Tomato Feta Dip offers an irresistible combination of rich flavors and creamy textures that will charm any crowd.

Simple Preparation: With minimal ingredients and straightforward steps, this recipe is perfect for both kitchen novices and expert chefs.

Versatile Ingredients: Feel free to adapt it based on what you have at hand, whether swapping feta for goat cheese or adding a sprinkle of fresh herbs.

Crowd-Pleasing Choice: This delectable dip is sure to impress at parties, making it a go-to appetizer for any gathering or holiday feast.

Perfectly Roasted Sweetness: The roasted elements elevate this dip, providing a unique depth that pairs beautifully with crunchy dippers like fresh veggies or toasted baguette slices.

Elevate your next gathering with this delightful dip, and if you’re looking for other tasty options, check out these Red White Blue Fruit Kabobs or our American Flag Layered Taco Dip for some festive fun!

Roasted Red Pepper Tomato Feta Dip Ingredients

For the Base

  • Feta Cheese – Adds creamy richness and tang; crumbled feta can be a handy substitute if needed.
  • Cherry Tomatoes – Provides sweetness and juiciness; feel free to add extra for a burst of flavor.
  • Garlic – Enhances the overall flavor; use sliced fresh garlic for the best taste.
  • Olive Oil – Adds a buttery richness and helps roast the vegetables.
  • Salt and Pepper – Essential for seasoning; adjust to taste for the perfect balance.

For Creaminess

  • Cream Cheese – Contributes to the dip’s creamy texture; ensure it’s softened for easy mixing.
  • Italian Seasoning – Adds herby flavor depth; substitute with dried herbs like oregano or basil if needed.

For Extra Flavor

  • Jarred Roasted Red Peppers – Provides a sweet, smoky flavor; feel free to use homemade or store-bought for convenience.
  • Fresh Basil – For garnish, adds a burst of fresh flavor and vibrant color to the presentation.

Step‑by‑Step Instructions for Roasted Red Pepper Tomato Feta Dip

Step 1: Preheat the Oven
Start by preheating your oven to 400°F (200°C). This temperature is perfect for roasting and melding the flavors together. While the oven heats, lightly grease an 8 or 9-inch baking dish with olive oil to prevent sticking and ensure an easy cleanup.

Step 2: Prepare the Base Ingredients
In the greased baking dish, place the feta cheese in the center and surround it with halved cherry tomatoes and sliced garlic. These ingredients will create a deliciously fragrant base for your Roasted Red Pepper Tomato Feta Dip. Make sure the tomatoes are evenly spread out for optimal roasting.

Step 3: Season and Drizzle
Drizzle a generous amount of olive oil over the feta, tomatoes, and garlic. Sprinkle with salt and pepper to taste, ensuring every element gets seasoned for that savory depth. The olive oil will help enhance the roasting process and create a luscious texture.

Step 4: Bake the Mixture
Place the prepared dish in the preheated oven and bake for 25-30 minutes. You’ll know the dip is ready when the tomatoes are tender and starting to burst, and the feta is beautifully softened and slightly golden on top. This step brings out the natural sweetness of the ingredients.

Step 5: Mix the Creamy Component
While the mixture is baking, take a separate bowl to combine the softened cream cheese with Italian seasoning until smooth. This will create the creamy base of the dip. Make sure to use softened cream cheese for easy blending, ensuring a velvety texture for your dip.

Step 6: Incorporate Baked Ingredients
Once the feta and tomatoes have roasted perfectly, remove the baking dish from the oven. Gently stir in the baked feta and roasted red peppers into the cream cheese mixture, ensuring that each element is well combined. This combination will enhance the overall richness of your Roasted Red Pepper Tomato Feta Dip.

Step 7: Combine and Reheat
Carefully fold the creamy mixture back into the baking dish with the roasted tomatoes. For an extra touch, return the dish to the oven for just 5-10 minutes, allowing it to heat through and become bubbly. This will meld all the flavors together while adding a lovely warmth to the dip.

Step 8: Garnish and Serve
Finally, remove the dip from the oven and let it cool slightly before serving. Garnish with fresh basil, which adds a pop of color and freshness. This Roasted Red Pepper Tomato Feta Dip is ready to be enjoyed warm, partnered perfectly with crunchy dippers like baguette slices or crispy veggies!

How to Store and Freeze Roasted Red Pepper Tomato Feta Dip

Fridge: Store any leftovers in an airtight container in the refrigerator for up to 3 days. Allow to cool completely before sealing to maintain freshness.

Freezer: This dip can be frozen for up to 2 months. Allow it to cool, then transfer to a freezer-safe container, leaving space for expansion.

Reheating: Thaw in the fridge overnight before reheating. Warm in the oven at 350°F (175°C) until heated through and bubbly, about 15-20 minutes.

Serving Tip: For best flavor, serve warm with toppings like fresh basil, and enjoy your delicious Roasted Red Pepper Tomato Feta Dip!

Expert Tips for Roasted Red Pepper Tomato Feta Dip

Cream Cheese Tip: Ensure your cream cheese is at room temperature for easy mixing, creating a smooth, velvety texture in your dip.

Adjust to Taste: Don’t hesitate to tweak the amount of salt and pepper. Proper seasoning enhances the overall flavor of your Roasted Red Pepper Tomato Feta Dip.

Tomato Selection: Use ripe cherry tomatoes for sweetness. If unavailable, substitute with diced canned tomatoes, but be sure to drain them well.

Roasting Technique: Keep an eye on the baking time; over-roasting can cause the garlic to become bitter. Aim for a tender, bursting tomato without charring.

Dippers Variety: Experiment with different dippers! Alongside baguette slices, try crunchy veggies like carrot sticks or cucumber rounds for a fresh contrast.

Roasted Red Pepper Tomato Feta Dip Variations

There’s so much room for creativity with this dip, allowing you to elevate the flavors to match your taste buds!

  • Cheese Swap: Substitute feta cheese with goat cheese for a tangy twist that adds a fresh zing.
    Goat cheese will bring a new dimension, making it even more creamy and fun to enjoy!

  • Heat Level Up: Add sliced jalapeños or a sprinkle of red pepper flakes for a spicy touch.
    This fiery kick can really awaken your taste buds and make each serving a little adventure!

  • Veggie Boost: Mix in chopped spinach or artichokes for an extra layer of texture and flavor.
    These additions transform your dip into a vibrant veggie delight that pairs perfectly with dippers.

  • Dairy-Free: Opt for cashew cream or a vegan feta substitute to make this dip dairy-free.
    You’ll hardly miss the dairy, and it opens this delicious option to a wider audience!

  • Herb Variation: Play with fresh herbs like dill or parsley instead of basil for a different flavor profile.
    Each herb brings its own character, changing the ambiance of your dip with every choice.

  • Roasted Garlic: Roast a whole head of garlic instead of just slices for a mellower, sweeter taste.
    The deep flavor of roasted garlic will make your dip a crowd favorite, offering a wonderful aroma.

  • Nutty Crunch: Add toasted pine nuts or walnuts on top for a lovely crunchy texture that complements the creaminess.
    This addition creates a delightful contrast and enhances the overall experience of indulgence.

For more tantalizing options, be sure to check out the delightful Red White Blue Fruit Kabobs or the celebratory American Flag Layered Taco Dip to mix up your appetizer game!

What to Serve with Roasted Red Pepper Tomato Feta Dip

A cozy gathering isn’t complete without the perfect accompaniments to elevate your dip experience.

  • Toasted Baguette Slices: Their crisp exterior and soft interior create a delightful contrast with the creamy dip, bringing every bite to life.

  • Assorted Crackers: A variety of textures enriches the tasting experience. Choose savory, crunchy options to balance the dip’s richness.

  • Fresh Veggie Sticks: Carrot, cucumber, and celery sticks not only add vibrant colors but also provide a refreshing bite that complements the dip’s warmth.

  • Pita Chips: These crunchy chips are ideal for scooping, enhancing the Mediterranean flair of the dip while adding an extra layer of flavor.

  • Olive Tapenade: This Mediterranean spread introduces depth and a bit of saltiness, making each bite of the dip feel like a gourmet affair.

  • Herbed Flatbreads: Soft and slightly chewy, they serve as the perfect vessel for scooping up the roasted flavors, taking the experience to a new level.

  • Chilled White Wine: Pair with a crisp Sauvignon Blanc to elevate the dining experience; its acidity cuts through the richness of the dip beautifully.

  • Fruit Salad: Fresh, juicy fruits can provide a sweet contrast, cleansing the palate and making each bite of the dip feel new.

Enjoy crafting a delightful assortment that brings joy to your table!

Make Ahead Options

These Roasted Red Pepper Tomato Feta Dip is perfect for those busy weeknights or gatherings when time is of the essence! You can prepare the entire dip up to 24 hours in advance. Simply roast the feta, tomatoes, and garlic, and allow them to cool before mixing them with the cream cheese and Italian seasoning. Store the mixture in an airtight container in the refrigerator to keep the flavors fresh. When you’re ready to serve, simply reheat in the oven for about 10 minutes until it’s bubbly and warm again. This way, you’ll have a delicious, crowd-pleasing appetizer that saves you time and ensures everyone gets to enjoy that creamy goodness!

Roasted Red Pepper Tomato Feta Dip Recipe FAQs

How do I choose the right tomatoes?
For this dip, I recommend using ripe cherry tomatoes as they offer the perfect balance of sweetness and juiciness. Look for tomatoes that are firm, vibrant in color, and free from any dark spots. If cherry tomatoes aren’t available, you can substitute with diced canned tomatoes, just make sure to drain them well so the dip won’t be watery.

How should I store the Roasted Red Pepper Tomato Feta Dip?
You can store any leftovers in an airtight container in the refrigerator for up to 3 days. Make sure the dip is completely cooled before sealing it to keep it as fresh as possible. Just give it a stir before serving again, and enjoy!

Can I freeze this dip?
Absolutely! This dip can be frozen for up to 2 months. Once cooled, transfer it to a freezer-safe container, leaving a little space at the top for expansion as it freezes. When you’re ready to enjoy it again, thaw it in the fridge overnight before reheating for the best flavor and texture.

What should I do if the dip is too thick after baking?
If you find your dip is thicker than you’d like after baking, don’t worry! Simply stir in a splash of warm water or a drizzle of olive oil until it reaches your desired consistency. This will help loosen the dip, making it creamy and easy to scoop with your favorite dippers.

Is this dip suitable for those with dietary restrictions?
Yes! This Roasted Red Pepper Tomato Feta Dip can easily be adapted for various dietary needs. If you have lactose intolerance, you might substitute the dairy elements with lactose-free cream cheese and feta. For vegan diets, try using cashew cream or a good vegan feta alternative. It’s always great to adjust based on what your guests can enjoy!

Roasted Red Pepper Tomato Feta Dip

Creamy Roasted Red Pepper Tomato Feta Dip for Every Occasion

This Roasted Red Pepper Tomato Feta Dip combines roasted red peppers, cherry tomatoes, and creamy feta for an irresistible appetizer.
Prep Time 10 minutes
Cook Time 30 minutes
Cooling Time 5 minutes
Total Time 45 minutes
Servings: 6 servings
Course: Appetizer
Cuisine: Mediterranean
Calories: 150

Ingredients
  

For the Base
  • 8 oz Feta Cheese crumbled if needed
  • 1 cup Cherry Tomatoes halved
  • 2 cloves Garlic sliced
  • 2 tbsp Olive Oil
  • to taste Salt
  • to taste Pepper
For Creaminess
  • 8 oz Cream Cheese softened
  • 1 tbsp Italian Seasoning
For Extra Flavor
  • 1 jar Jarred Roasted Red Peppers chopped
  • to garnish Fresh Basil

Equipment

  • Oven
  • Baking dish
  • Mixing Bowl

Method
 

Preparation Steps
  1. Preheat your oven to 400°F (200°C). Lightly grease an 8 or 9-inch baking dish with olive oil.
  2. In the greased baking dish, place the feta cheese in the center and surround it with halved cherry tomatoes and sliced garlic.
  3. Drizzle a generous amount of olive oil over the feta, tomatoes, and garlic. Sprinkle with salt and pepper.
  4. Place the prepared dish in the preheated oven and bake for 25-30 minutes until tomatoes are tender and feta is golden.
  5. In a separate bowl, combine softened cream cheese with Italian seasoning until smooth.
  6. Once the feta and tomatoes have roasted, gently stir them into the cream cheese mixture.
  7. Fold the creamy mixture back into the baking dish with the roasted tomatoes and return to the oven for 5-10 minutes.
  8. Remove from the oven and let cool slightly. Garnish with fresh basil before serving.

Nutrition

Serving: 1servingCalories: 150kcalCarbohydrates: 6gProtein: 5gFat: 12gSaturated Fat: 6gPolyunsaturated Fat: 1gMonounsaturated Fat: 5gCholesterol: 30mgSodium: 300mgPotassium: 200mgFiber: 1gSugar: 2gVitamin A: 500IUVitamin C: 15mgCalcium: 150mgIron: 1mg

Notes

Ensure cream cheese is at room temperature for easy mixing. Adjust salt and pepper to taste. Use ripe cherry tomatoes for sweetness. Experiment with different dippers like veggies or baguette slices.

Tried this recipe?

Let us know how it was!

Decadent Red Velvet Hot Chocolate for Cozy Nights

As I stood in my kitchen, the chilly air drifting in, I found myself daydreaming about the ultimate cozy treat—Red Velvet Hot Chocolate. Imagine a beverage that combines the velvety richness of a classic dessert with the comforting warmth of a hot drink. This luxurious drink isn’t just a feast for the eyes with its vibrant red hue; it’s also incredibly easy to whip up, making it a perfect choice for both special occasions and everyday indulgences. With kid-friendly options and endless variations—whether you prefer a dairy-free version or a delightful twist with a splash of liqueur—this recipe is sure to become a staple in your home. Ready to elevate your hot chocolate game? Let’s dive in and make some holiday magic together!

Why is Red Velvet Hot Chocolate a must-try?

Luxurious feel in every sip: Experience the indulgent creaminess that makes this drink feel like a dessert.
Kid-friendly and customizable: Perfect for all ages, and easy to tweak with variations!
Eye-catching color: Its vibrant red hue is sure to impress guests and brighten your day.
Quick and easy: Whip it up in just minutes—ideal for a cozy evening in or a festive gathering.
For more delightful treats, check out our White Chocolate Cranberry cookies or explore options like Red White Blue desserts that pair beautifully with this warm beverage!

Red Velvet Hot Chocolate Ingredients

Let’s gather the ingredients to craft this cozy delight!

For the Base

  • Milk – A creamy foundation; switch to almond or oat milk for a dairy-free treat.
  • White Chocolate Chips – These add the signature sweetness of red velvet; try dairy-free white chocolate for a vegan option.
  • Granulated Sugar – Adjust the sweetness to taste; consider using sugar substitutes for a low-calorie version.
  • Vanilla Extract – Essential for depth of flavor, making each sip irresistible.

For the Color

  • Red Food Coloring – Gives that iconic hue; opt for beet powder for a natural alternative that enhances health benefits.

For Toppings

  • Whipped Cream – Adds a rich, creamy finish and aesthetic appeal; feel free to use dairy-free options!
  • Sprinkles (optional) – A fun, decorative touch to make your drink extra special.

Now that we have everything ready, it’s time to create that stunning Red Velvet Hot Chocolate that’ll warm your soul!

Step‑by‑Step Instructions for Red Velvet Hot Chocolate

Step 1: Heat the Milk
In a small saucepan, pour in 2 cups of milk and place it over medium heat. Stir the milk gently with a whisk for about 5 minutes until it becomes steaming but does not reach a boil. Look for small bubbles forming around the edges to signify it’s warm enough, setting the perfect creamy base for your Red Velvet Hot Chocolate.

Step 2: Melt the White Chocolate
Once the milk is heated, add 1 cup of white chocolate chips to the saucepan. Stir continuously with your whisk for about 2 minutes, allowing the chocolate to melt into the warm milk. Aim for a smooth and velvety mixture; the white chocolate will impart sweetness and the signature flavor essential for your luxurious Red Velvet Hot Chocolate.

Step 3: Sweeten the Mixture
Next, blend in 2 tablespoons of granulated sugar, stirring well until it completely dissolves in the chocolatey milk. This step will take about 1 minute, and you can taste the mixture to adjust the sweetness according to your preference. The sugar enhances the decadent flavor, lightening the creaminess and making the hot chocolate irresistible.

Step 4: Add Vanilla and Color
Pour in 1 teaspoon of vanilla extract and mix it thoroughly into the warm concoction for an aromatic touch. Following this, add 2-3 drops of red food coloring, stirring gently to incorporate it evenly. Adjust the drops to achieve your desired shade of red, making your Red Velvet Hot Chocolate visually stunning as well as delicious.

Step 5: Maintain Heat and Stir
Continue to keep the mixture over low heat for an additional 2-3 minutes, stirring occasionally to blend the flavors without boiling. As you do this, keep an eye on the consistency; it should remain creamy and warm. The gentle heat allows the ingredients to meld beautifully, enhancing the overall taste profile of your drink.

Step 6: Serve and Garnish
Once everything is well combined and aromatic, remove the saucepan from the heat. Carefully pour the luxurious Red Velvet Hot Chocolate into your favorite mug, filling it generously. Top it off with a dollop of whipped cream, and for a festive touch, sprinkle edible decorations or colorful sprinkles on top.

Step 7: Enjoy Warm
Serve your Red Velvet Hot Chocolate immediately while it’s warm and inviting. The rich, creamy texture and the enticing aroma create a cozy atmosphere perfect for chilly evenings or festive gatherings. Allow yourself to revel in the indulgence of each sip—this drink is sure to become a beloved favorite!

What to Serve with Red Velvet Hot Chocolate

Cozy up your next gathering with delightful pairings that elevate this luxurious drink into a full-fledged experience.

  • Chewy Chocolate Chip Cookies: These classic cookies add a delightful texture contrast, perfectly complementing the creamy richness of your hot chocolate.

  • Vanilla Bean Cupcakes: Light and fluffy, these cupcakes enhance the sweet flavors of your drink while providing a beautiful visual centerpiece.

  • Puffed Pastry Twists: Crispy and golden, these buttery twists offer a flaky delight that balances the smoothness of your Red Velvet Hot Chocolate.

  • Chocolate-Dipped Strawberries: The fresh burst of flavor from the strawberries creates a delightful pairing; plus, they bring a touch of elegance to your setup.

  • Spiced Almonds: For a crunchy and savory option, spiced almonds offer an intriguing contrast, bringing warmth and depth to your cozy drink.

  • Fizzy Raspberry Lemonade: This refreshing beverage provides a bubbly and zesty counterpoint, cleansing the palate between sips of your rich hot chocolate.

For a festive touch, consider setting the table with fairy lights and soft blankets to create a magical atmosphere that invites enjoyment and connection!

Red Velvet Hot Chocolate Variations

Feel free to explore these exciting twists to make your Red Velvet Hot Chocolate even more delightful!

  • Dairy-Free: Swap regular milk with almond or oat milk and use dairy-free white chocolate for a vegan treat.
  • Caffeine Kick: Add a shot of espresso or brewed coffee for a delightful caffeine boost—perfect for chilly mornings.
  • Minty Fresh: Stir in peppermint extract or crush some peppermint candies on top to give your drink a festive, minty flavor.
  • Chocolate Lovers: Double the white chocolate chips for a richer, more indulgent experience that chocolate aficionados will adore.
  • Spicy Twist: Add a dash of cayenne pepper or cinnamon to the mix for a warm, spicy twist that beautifully complements the sweet flavors.
  • Summer Chill: Blend your hot chocolate with ice for a refreshing frozen version, perfect for those hot summer days!
  • S’mores Style: Top with mini marshmallows and crushed graham crackers to recreate the s’mores experience in your cup.
  • Liqueur Option: For an adult twist, add a splash of chocolate liqueur or Baileys for a dessert drink that’s sure to impress.

Looking for more fun, festive treats? Don’t forget to try out these delicious Red White Blue and White Chocolate Cranberry desserts to pair wonderfully with your Red Velvet Hot Chocolate!

How to Store and Freeze Red Velvet Hot Chocolate

Fridge: Store any leftover Red Velvet Hot Chocolate in an airtight container for up to 3 days. Make sure it cools to room temperature before sealing to maintain freshness.

Freezer: For longer storage, freeze the hot chocolate in individual portions using ice cube trays. Once frozen, transfer the cubes to a zip-top freezer bag for up to 3 months.

Reheating: To enjoy, thaw the frozen cubes in the fridge overnight or microwave on low power. Reheat gently on the stove, stirring until warm. Avoid bringing it to a boil to preserve flavor.

Expert Tips for Red Velvet Hot Chocolate

  • Avoid Boiling: Keep an eye on the milk and avoid boiling, as it can alter the taste and texture of your luxurious Red Velvet Hot Chocolate.
  • Use a Whisk: A whisk ensures smooth blending of the ingredients, preventing clumps of chocolate and ensuring an indulgent, velvety drink.
  • Adjust Color Intensity: Start with 2 drops of red food coloring; you can always add more to achieve your desired shade without overdoing it.
  • Experiment with Sweetness: Taste as you go! Adjust the granulated sugar to match your sweetness preference—it’s all about making this cozy drink just right for you.
  • Dairy-Free Options: Don’t hesitate to substitute traditional ingredients, like using almond or oat milk and dairy-free white chocolate, for a tasty dairy-free version that everyone can enjoy.

Make Ahead Options

These Red Velvet Hot Chocolate concoctions are perfect for meal prep enthusiasts looking to save time on busy nights! You can prepare the chocolate base (milk, white chocolate, sugar, and vanilla) up to 24 hours in advance by cooking and allowing it to cool before refrigerating in an airtight container. This prevents any separation and keeps the flavors intact. When you’re ready to indulge, simply reheat the mixture gently on the stove, stirring to maintain its creamy texture. Add the red food coloring before serving and top with whipped cream for that finishing touch. Enjoy the same luxurious taste with minimal effort!

Red Velvet Hot Chocolate Recipe FAQs

What type of milk should I use for Red Velvet Hot Chocolate?
Absolutely! You can use any milk you prefer, but for a rich and creamy experience, whole milk works wonders. If you’re looking for dairy-free options, almond milk or oat milk are great alternatives that still give you that luscious texture.

How do I store leftover Red Velvet Hot Chocolate?
Very simply! Store any leftover Red Velvet Hot Chocolate in an airtight container in the fridge for up to 3 days. Be sure to let it cool to room temperature first before sealing to help maintain its freshness and flavor.

Can I freeze Red Velvet Hot Chocolate?
You sure can! To freeze, pour your leftover hot chocolate into ice cube trays and freeze until solid. Once frozen, transfer the cubes to a zip-top freezer bag, where they’ll keep well for up to 3 months. When you’re ready to enjoy, simply thaw in the fridge overnight or microwave on low power until warmed through.

What can I do if my hot chocolate turns out too thick?
If your Red Velvet Hot Chocolate is thicker than you’d like, don’t worry! You can easily remedy this. Just add a bit of warm milk—start with a tablespoon at a time—while stirring continuously, until you reach your desired consistency. It should be luxurious and smooth without losing the delicious flavor!

Is Red Velvet Hot Chocolate suitable for kids?
Absolutely! This delightful drink is kid-friendly, with a fun color and sweetness that kids love. Just adjust the sugar to taste, and you can even lighten it up with lower-sugar or alternative sweeteners if you prefer. It’s a fantastic way to treat your little ones to something special!

What are some dietary considerations for this recipe?
This luxurious Red Velvet Hot Chocolate can easily accommodate various dietary needs. For a dairy-free version, simply swap out regular milk for almond or oat milk, and use dairy-free white chocolate chips. Additionally, you can adjust sugar levels for those watching their intake or use natural alternatives like stevia for those looking for healthier options.

Red Velvet Hot Chocolate

Decadent Red Velvet Hot Chocolate for Cozy Nights

Indulge in the luxurious taste of Red Velvet Hot Chocolate, perfect for cozy nights and festive gatherings.
Prep Time 5 minutes
Cook Time 10 minutes
Total Time 15 minutes
Servings: 2 cups
Course: Drinks
Cuisine: American
Calories: 350

Ingredients
  

For the Base
  • 2 cups milk Can substitute with almond or oat milk for dairy-free.
  • 1 cup white chocolate chips Use dairy-free white chocolate for vegan option.
  • 2 tablespoons granulated sugar Adjust sweetness to taste.
  • 1 teaspoon vanilla extract
For the Color
  • 2-3 drops red food coloring Or use beet powder for a natural alternative.
For Toppings
  • 1 cup whipped cream Use dairy-free whipped cream if needed.
  • sprinkles Optional for decoration.

Equipment

  • Small saucepan
  • Whisk

Method
 

Step-by-Step Instructions
  1. In a small saucepan, pour in 2 cups of milk and place it over medium heat. Stir gently with a whisk for about 5 minutes until steaming, avoiding boiling.
  2. Add 1 cup of white chocolate chips to the warm milk. Stir continuously for about 2 minutes until melted and smooth.
  3. Blend in 2 tablespoons of granulated sugar, stirring until dissolved. Taste and adjust sweetness as necessary.
  4. Pour in 1 teaspoon of vanilla extract and mix thoroughly. Add 2-3 drops of red food coloring and stir to incorporate.
  5. Keep the mixture over low heat for an additional 2-3 minutes, stirring occasionally until creamy.
  6. Remove from heat and pour into mugs. Top with whipped cream and optional sprinkles.
  7. Serve warm and enjoy the luxurious taste!

Nutrition

Serving: 1cupCalories: 350kcalCarbohydrates: 40gProtein: 6gFat: 20gSaturated Fat: 12gMonounsaturated Fat: 8gCholesterol: 30mgSodium: 150mgPotassium: 400mgFiber: 1gSugar: 25gVitamin A: 500IUCalcium: 300mgIron: 1mg

Notes

Avoid boiling the milk, and whisk for smooth blending. Adjust the color and sweetness to your preference. Dairy-free options are available!

Tried this recipe?

Let us know how it was!

Spice Up Dinner with Easy Korean Fire Chicken Recipe

As I stood in my kitchen, the fiery fragrance of spices enveloped me, drawing me into a world of culinary thrills. Today, I couldn’t resist whipping up Buldak, or Korean Fire Chicken, a dish that delivers an exhilarating kick with its spicy glaze and succulent chicken. What I love most about this recipe is how quickly it comes together, perfect for busy weeknights, yet it packs enough flavor to impress at any gathering. Plus, there’s an exciting vegetarian option available using tofu or tempeh, so everyone can join the flavor fiesta! Curious to see how this bold dish can transform your dinner? Let’s dive into the deliciousness!

Why is Korean Fire Chicken so popular?

Simplicity, This recipe requires just a few straightforward steps, making it easy for anyone to whip up at home.

Fiery Flavor, The combination of gochugaru and gochujang creates a spicy, savory taste that elevates your dining experience.

Versatile Options, Whether you prefer chicken or a vegetarian twist with tofu or tempeh, there’s a version for every palate.

Quick Prep, With minimal marination time and fast cooking, you’ll have dinner on the table in under 30 minutes!

Crowd-Pleasing Appeal, Serve it with steamed rice and kimchi for a meal that will impress your family and friends—just like my Jerk Chicken Burritos or Spicy Korean Gochujang Beef Noodles!

Get ready to ignite your taste buds with this sensational dish!

Korean Fire Chicken Ingredients

• Unlock the bold flavors of Korean Fire Chicken with these essential ingredients!

For the Chicken

  • Chicken (boneless thighs or breast) – Juicy and tender, use thighs for added richness, or tofu/tempeh for a vegetarian twist.

For the Marinade

  • Gochugaru (Korean red pepper flakes) – The key to achieve that fiery heat; adjust according to your spice preference!
  • Gochujang (Korean fermented chili paste) – Infuses depth and umami; substitute with another spicy paste if needed, but flavors will vary.
  • Soy Sauce – Adds saltiness and enhances flavors; opt for low-sodium for a healthier alternative.
  • Garlic – Fresh minced garlic gives the dish aromatic depth; using fresh is always best!
  • Sugar – Balances out the heat, providing a touch of sweetness; tweak based on your taste.

Optional Additions

  • Vegetables (such as onions and green onions) – Throw in for extra flavor and texture; they bring nutritious crunch to the plate.

Now you’re ready to bring home the authentic flavors of Korean Fire Chicken to your dinner table, guaranteed to excite those dinner guests!

Step‑by‑Step Instructions for Korean Fire Chicken

Step 1: Marinate the Chicken
Start by cutting the chicken into bite-sized pieces, then place it in a bowl. Add gochugaru, gochujang, soy sauce, minced garlic, and sugar to the chicken, making sure every piece is well-coated. Cover the bowl and let it marinate for at least 30 minutes in the refrigerator, allowing the flavors to meld and intensify.

Step 2: Prepare the Sauce
In a medium skillet over medium heat, pour in the remaining marinade from the chicken. Bring it to a gentle simmer, stirring occasionally. Let it cook for about 5 minutes until it slightly thickens and becomes fragrant, transforming into a luscious sauce that will envelop the chicken beautifully once cooked.

Step 3: Cook the Chicken
Add the marinated chicken to the simmering sauce in the skillet, spreading it out evenly. Cook the chicken on medium-high heat for about 6-8 minutes, stirring occasionally, until it’s fully cooked through and the internal temperature reaches 165°F. The sauce will become sticky and glaze the chicken, showcasing its vibrant color.

Step 4: Finish and Serve
If using, add optional vegetables like sliced onions or green onions to the skillet during the last 2-3 minutes of cooking. Toss gently until the vegetables are tender yet crisped. Serve the Korean Fire Chicken hot, garnished with fresh green onions, alongside steamed rice or your favorite side dishes to soak up the spicy goodness.

Make Ahead Options

These Korean Fire Chicken preparations are perfect for busy weeknights, saving you valuable time without sacrificing flavor! You can marinate the chicken with gochugaru, gochujang, soy sauce, minced garlic, and sugar up to 24 hours in advance for richer flavors (just refrigerate it in an airtight container). Additionally, any leftover sauce can be prepared up to 3 days ahead and stored in the fridge until ready to use. When it’s time to cook, simply heat the sauce in a skillet, add the marinated chicken, and cook until fully cooked through (about 6-8 minutes). This way, you’ll still enjoy that spicy, sticky delight of Korean Fire Chicken with minimal effort!

Expert Tips for Korean Fire Chicken

  • Marination Magic: Ensure you marinate the chicken for at least 30 minutes, but if time allows, overnight is even better for more intense flavors.

  • Heat Adjustment: Control the spice level by adjusting gochugaru and gochujang. Start with less if you’re unsure, and increase gradually to find your perfect heat!

  • Cook Carefully: Watch for splattering while cooking; the sugar in the sauce can cause it to bubble over. Using a splatter guard can be helpful.

  • Vegetable Variety: Tossing in vegetables like bell peppers or snap peas not only adds nutrition but also enhances the dish’s texture and color.

  • Storage Savvy: If you have leftovers, store them in an airtight container in the fridge for up to 3 days. Reheat gently on the stove to preserve that delicious flavor!

  • Served Right: Pair your Korean Fire Chicken with sides like kimchi or pickled vegetables for a well-rounded and mesmerizing meal.

How to Store and Freeze Korean Fire Chicken

Fridge: Store leftover Korean Fire Chicken in an airtight container for up to 3 days. Reheat gently in a skillet over medium heat to maintain its juicy texture.

Freezer: For longer storage, freeze the dish in an airtight container or freezer bag for up to 3 months. Thaw overnight in the fridge before reheating.

Reheating: When reheating from the fridge or freezer, add a splash of water or broth to help revive the sauce’s consistency while warming on the stove.

Airtight Guidance: Always ensure the container is airtight to prevent freezer burn and retain the vibrant flavors of your Korean Fire Chicken.

What to Serve with Fiery Buldak (Korean Fire Chicken)

Transform your dining experience with delightful side dishes that balance the spice and boldness of this captivating dish.

  • Steamed Rice: A classic companion, fluffy rice soaks up the spicy glaze, making each bite comforting and delicious.
  • Kimchi: This traditional Korean side offers a tangy crunch that perfectly contrasts the fire of the chicken, enhancing your meal’s complexity.
  • Pickled Vegetables: Refreshing and crisp, pickled veggies like radishes provide a tangy bite that helps cool the palate between spicy flavors.
  • Cucumber Salad: Light and crisp, this salad drizzled with sesame oil adds a refreshing touch, brightening the overall meal experience.
  • Garlic Bread: For a unique twist, serve slices of garlic bread to scoop up the sauce, combining spicy and savory flavors in every bite.
  • Cold Noodles: Perfect for summer nights, these chewy noodles tossed in a light sesame dressing coolly complement the heated chicken, providing delightful texture variation.
  • Green Onion Pancakes: These crispy, savory snacks bring a hearty texture and green-onion flavor that complements the fiery dish beautifully.
  • Lager Beer: A light, crisp lager pairs excellently, washing down the heat with its carbonation and subtle sweetness.
  • Chilled Soju: This Korean spirit, served cold, offers a delightful way to enjoy and balance the bold spices of Buldak, making every sip refreshing.

Variations & Substitutions for Korean Fire Chicken

Feel free to make this recipe your own with these fun twists that excite the palate and fit your dietary preferences!

  • Vegetarian Delight: Substitute chicken with cubed tofu or tempeh for a hearty, plant-based alternative that soaks up the delicious marinade beautifully.

  • Shrimp Sensation: Swap out chicken for shrimp to create a lighter dish that cooks even quicker, while still delivering that delightful spice.

  • Spicy Sweetness: For those who adore sweet and spicy combinations, try adding a tablespoon of honey or maple syrup to the marinade for a delightful balance.

  • Smoky Flavor: Incorporate a teaspoon of smoked paprika into your marinade for a robust, smoky kick that juxtaposes the heat beautifully.

  • Extra Crunch: Toss in some chopped bell peppers or broccoli during the last few minutes of cooking to add vibrant color and crunch, enhancing both texture and nutrition.

  • Mild Mayhem: Scale back on gochugaru and gochujang to make this dish milder, allowing delicate flavors to shine through while still keeping it aromatic.

  • Gochujang Swap: If you’re out of gochujang, a chili garlic sauce or sriracha may work in a pinch, albeit with different flavor undertones—experiment to find what you love!

  • Herb Boost: Add a sprinkle of freshly chopped cilantro or basil on top just before serving for an added burst of freshness and flavor.

Explore these variations to elevate your culinary journey! And for more kitchen inspiration, don’t forget to check out my delightful Thai Chicken Meatball recipe or discover the flavors in my Chicken Cashew Broccoli Stir Fry!

Korean Fire Chicken Recipe FAQs

What type of chicken is best for Korean Fire Chicken?
I highly recommend using boneless chicken thighs for their juicy texture, but boneless breasts work just as well! If you prefer, you can substitute with tofu or tempeh for a delicious vegetarian option.

How should I store leftover Korean Fire Chicken?
Store any leftovers in an airtight container in the refrigerator for up to 3 days. Gently reheat in a skillet over medium heat to keep the chicken tender and the sauce flavorful.

Can I freeze Korean Fire Chicken?
Absolutely! Freeze the Korean Fire Chicken in an airtight container or freezer bag for up to 3 months. For best results, let it thaw overnight in the refrigerator before reheating. This method preserves the dish’s vibrant flavors!

What if my sauce is too thick when cooking?
If your sauce becomes too thick, don’t worry! Simply add a splash of water or broth to the skillet and stir well, ensuring it reaches your desired consistency while reheating.

Can I adjust the spice level in this dish?
Very! You can easily control the spice level by adjusting the amounts of gochugaru and gochujang used in the marinade. Start with less if you’re sensitive to spice, and gradually add more to find your perfect heat level.

Is Korean Fire Chicken safe for pets or those with allergies?
If your pets are curious, it’s best to keep this spicy dish away from them, as it contains ingredients like garlic and spicy components that are not safe for pets. For those with allergies, always check ingredient labels, especially for soy sauce and gochujang, which may contain allergens.

Korean Fire Chicken

Spice Up Dinner with Easy Korean Fire Chicken Recipe

Try this flavorful Korean Fire Chicken recipe that packs a spicy kick, perfect for any dinner!
Prep Time 30 minutes
Cook Time 15 minutes
Total Time 45 minutes
Servings: 4 servings
Course: Chicken
Cuisine: Korean
Calories: 400

Ingredients
  

For the Chicken
  • 1 pound boneless chicken thighs or breast Juicy and tender, use thighs for added richness or tofu/tempeh for a vegetarian option.
For the Marinade
  • 2 tablespoons gochugaru Korean red pepper flakes, adjust according to your spice preference.
  • 2 tablespoons gochujang Korean fermented chili paste.
  • 2 tablespoons soy sauce Use low-sodium for a healthier alternative.
  • 4 cloves garlic Fresh minced garlic is best.
  • 1 tablespoon sugar Balances the spiciness.
Optional Additions
  • 1 cup vegetables Add onions and green onions for extra flavor and nutrition.

Equipment

  • bowl
  • medium skillet

Method
 

Step-by-Step Instructions for Korean Fire Chicken
  1. Cut the chicken into bite-sized pieces and place in a bowl. Add gochugaru, gochujang, soy sauce, minced garlic, and sugar. Marinade for at least 30 minutes in the fridge.
  2. In a medium skillet over medium heat, pour in the remaining marinade. Simmer for about 5 minutes until thickened.
  3. Add the marinated chicken to the skillet, spreading evenly. Cook for about 6-8 minutes until fully cooked through.
  4. If using, add optional vegetables during the last 2-3 minutes of cooking. Serve hot with steamed rice and garnished with green onions.

Nutrition

Serving: 1servingCalories: 400kcalCarbohydrates: 25gProtein: 30gFat: 20gSaturated Fat: 5gPolyunsaturated Fat: 2gMonounsaturated Fat: 10gCholesterol: 90mgSodium: 900mgPotassium: 600mgFiber: 3gSugar: 5gVitamin A: 500IUVitamin C: 10mgCalcium: 30mgIron: 2mg

Notes

Marinate chicken overnight for more intense flavors. Adjust spice levels based on personal preference.

Tried this recipe?

Let us know how it was!

Delicious Korean Fire Chicken Recipe for Spice Lovers

“Did you hear about that spicy chicken dish everyone can’t stop raving about?” That overheard conversation ignited my curiosity and led me straight to the kitchen, where I discovered the incredible world of Buldak, or Korean Fire Chicken. This fiery delight packs a punch, featuring tender chicken coated in a sticky, spicy sauce that brings both flavor and heat to your plate. Whether you’re a spice enthusiast or looking to impress at your next dinner party, this recipe promises to be a thrilling culinary adventure. The best part? You can easily adjust the spice levels to suit your taste, or swap in tofu for a delightful vegetarian option. Ready to turn up the heat and create a dish that everyone will rave about? Let’s dive into this recipe for Korean Fire Chicken and explore the electrifying flavors together!

Why is Korean Fire Chicken a Must-Try?

Bold, Flavorful Impact: Dive into the world of Buldak, where every bite bursts with an electrifying kick that will leave spice lovers cheering for more.
Quick & Easy Prep: You won’t spend hours in the kitchen! A simple marinade and a quick cook time means you’ll have a delicious meal ready to enjoy in no time.
Versatile Options: With adaptable spice levels and a vegetarian alternative using tofu or tempeh, it’s perfect for everyone at your table!
Serve with Style: Pair it with steamed rice, refreshing kimchi, or a crisp salad for a balanced and delightful meal that impresses guests.
Cultural Experience: Bring a piece of Korea to your dining room and surprise your family or friends with this authentic yet accessible dish.

Korean Fire Chicken Ingredients

For the Marinade

  • Chicken – Use boneless chicken thighs for juiciness and depth in flavor.
  • Gochugaru (Korean red pepper flakes) – Essential for authentic heat; substitute with less spicy flakes if desired.
  • Gochujang (Korean chili paste) – Provides depth and sweetness; adjust the amount based on your spice preference.
  • Soy Sauce – Enhances umami; opt for low-sodium to keep the dish lighter.
  • Garlic – Fresh minced garlic is ideal, but garlic powder can work in a pinch.
  • Sugar – Use brown sugar or honey to balance the spice with a hint of sweetness.

For Cooking

  • Vegetable Oil – Opt for any neutral oil like canola for frying; this ensures even cooking.
  • Sesame Oil – Adds a lovely nutty flavor; you may omit if allergic, as it’s not a necessary substitute.

For Garnish

  • Sesame Seeds – Sprinkling these adds a delightful crunch and visual appeal to your dish.
  • Green Onions – Chopped green onions bring freshness and a pop of color to the finished dish.

This Korean Fire Chicken recipe is sure to capture your heart and ignite your palate!

Step‑by‑Step Instructions for Korean Fire Chicken

Step 1: Marinate the Chicken
Begin by preparing the marinade for the Korean Fire Chicken. In a large bowl, combine gochugaru, gochujang, soy sauce, minced garlic, and sugar. Add boneless chicken thighs and mix thoroughly until the chicken is well-coated. Cover and let the mixture marinate in the refrigerator for at least 30 minutes, allowing the flavors to meld and infuse the chicken for a delicious taste.

Step 2: Heat the Oil
After marinating, heat 2 tablespoons of vegetable oil in a large skillet over medium-high heat. Ensure the oil is shimmering but not smoking, which indicates it’s hot enough for cooking. This step is crucial as it will help achieve that perfect sear on your Korean Fire Chicken, promising an appetizing golden-brown color.

Step 3: Cook the Chicken
Carefully add the marinated chicken to the skillet, spreading it out evenly. Cook for about 8-10 minutes, flipping the pieces halfway through, until the chicken is browned and cooked through. You can check if it’s done by slicing a piece and ensuring it’s no longer pink inside and has reached an internal temperature of 165°F.

Step 4: Finish with Sesame Oil
Once the chicken is fully cooked, reduce the heat to low. Drizzle sesame oil over the chicken in the skillet, tossing gently to coat each piece. This adds a nutty flavor and complements the spicy marinade beautifully. Allow the chicken to sit in the skillet for a few moments, letting the flavors combine before serving.

Step 5: Serve and Garnish
Transfer your delicious Korean Fire Chicken to a serving plate. Garnish generously with sesame seeds and chopped green onions for added color and texture. Serve hot alongside steamed rice, kimchi, or a refreshing salad to balance the spiciness, ensuring your meal is both flavorful and satisfying.

Expert Tips for Korean Fire Chicken

  • Adjust Spice Levels: Tailor the amount of gochugaru and gochujang to fit your spice tolerance. Start small; you can always add more heat later!

  • Use Fresh Ingredients: Fresh garlic and high-quality sauces make a significant difference in flavor. Don’t reach for the old jars hiding in the back of your pantry.

  • Check Doneness: Ensure your chicken is cooked to an internal temperature of 165°F for safety. Use a meat thermometer for accuracy and peace of mind.

  • Serve Immediately: For the best experience, serve the Korean Fire Chicken right after cooking. The sauce will be stickier and more flavorful.

  • Try a Vegetarian Option: Swap chicken for cubes of firm tofu or tempeh for a delicious vegetarian Korean Fire Chicken while still experiencing those fiery flavors.

Make Ahead Options

These Korean Fire Chicken (Buldak) are perfect for busy cooks who want to save time during hectic weekdays! You can marinate the chicken up to 24 hours in advance—just combine the gochugaru, gochujang, soy sauce, minced garlic, and sugar, coating the chicken thoroughly before refrigerating it in an airtight container. Additionally, prepare and chop your garnishes like sesame seeds and green onions a day ahead to streamline your cooking process. When you’re ready to enjoy your meal, simply heat the oil, cook the marinated chicken for 8-10 minutes until browned, and finish it with a drizzle of sesame oil for that deliciously nutty flavor. This not only keeps dinner stress-free but also ensures your Buldak remains just as flavorful!

How to Store and Freeze Korean Fire Chicken

Fridge: Store leftover Korean Fire Chicken in an airtight container for up to 3 days. Always let it cool before sealing to maintain freshness.

Freezer: For longer storage, freeze in an airtight container for up to 2 months. Ensure the chicken is fully cooled before freezing to prevent ice crystals.

Reheating: Thaw frozen chicken overnight in the fridge before reheating. Warm it on the stovetop over low heat until heated through, adding a splash of water if necessary to maintain moisture.

Container Tip: Always use freezer-safe containers, and consider labeling with the date to keep track of freshness!

Korean Fire Chicken Variations

Feel free to let your creativity shine as you explore these delicious twists on Korean Fire Chicken!

  • Vegetarian Option: Substitute chicken with cubes of firm tofu or tempeh for a mouthwatering vegan alternative. This variation captures the essence of Buldak while catering to plant-based diets.

  • Spicy Kick: Add sliced jalapeños or diced fresh chili peppers to the marinade for an extra layer of heat. This elevates the fire without losing the dish’s signature Korean flavor.

  • Smoky Flavor: Incorporate some smoked paprika or chipotle powder into the marinade for a delightful smoky twist. It’ll create a rich dance of flavors that complements the spiciness beautifully.

  • Herbaceous Touch: Mix in fresh chopped cilantro or green onions into your marinade for a herbaceous lift. This addition brightens the dish and balances the spicy richness quite well.

  • Noodle Bowl Upgrade: Serve your Korean Fire Chicken on a bed of udon noodles instead of rice for a hearty upgrade. This transforms the dish into a satisfying noodle bowl that’s equally cozy.

  • Creamy Dip: Create a dipping sauce using yogurt mixed with a hint of gochugaru and lemon juice. This creamy touch soothes the spice, bringing a delicious contrast to every bite.

  • Sweet & Savory: Add pineapple chunks or mango pieces to the marinade for a burst of sweetness. The juicy fruit counters the heat beautifully, making every taste an exciting experience.

If you stumble upon leftover chicken, why not whip up a stir-fried dish or throw together a spicy burrito with some rice like in Jerk Chicken Burritos? The possibilities are endless!

What to Serve with Spicy Korean Fire Chicken

Ignite your culinary creativity by pairing this fiery delight with sides that will enhance its bold flavors and cool the heat.

  • Steamed Rice: Simple yet essential, a fluffy bed of steamed rice helps to mellow the spice while soaking up the delicious sauce.

  • Kimchi: This iconic Korean side adds a tangy crunch, providing a delightful contrast to the fire and perfectly complementing the chicken’s flavors.

  • Fresh Green Salad: A crunchy salad with refreshing vegetables can cool down the spice while adding a bright, crisp texture to your meal.

  • Pickled Vegetables: Tangy and slightly sweet, these can cut through the richness of the chicken, balancing the meal with their zesty flavors.

  • Grilled Corn on the Cob: Charred sweetness from the corn is a delightful pairing that helps to soften the dish’s heat, making for a joyful complement.

  • Cucumber Slaw: This cool, crunchy side with a hint of acidity will refresh your palate, mingling beautifully with the bold flavors of the Buldak.

Korean Fire Chicken Recipe FAQs

What’s the best way to select ripe ingredients for Korean Fire Chicken?
Absolutely! When choosing your chicken, go for fresh, boneless thighs for that juicy flavor. For gochugaru, look for vibrant red flakes without any dark spots, as this indicates freshness. Always check the expiration dates on gochujang, soy sauce, and other packaged ingredients to ensure you’re using the best quality.

How should I store leftover Korean Fire Chicken?
Very! After enjoying your meal, let leftover Korean Fire Chicken cool completely before transferring it to an airtight container. Store it in the refrigerator for up to 3 days. Remember, allowing it to cool before sealing helps lock in freshness!

Can I freeze Korean Fire Chicken for later use?
Definitely! To freeze your Korean Fire Chicken, first allow it to cool completely. Transfer the chicken into a freezer-safe airtight container or freezer bag, removing as much air as possible. It can be stored in the freezer for up to 2 months. When you’re ready to enjoy it again, thaw it overnight in the refrigerator for the best results.

What do I do if my Korean Fire Chicken is too spicy?
If you find that your Buldak is a bit too fiery for your palate, don’t worry! Try serving it with a side of steamed rice or a refreshing salad to balance the heat. You can also add a dollop of plain yogurt or sour cream on the side to cool things down. Adjusting the quantity of gochugaru and gochujang is also key—next time, start with a smaller amount!

Can I make a vegetarian version of Korean Fire Chicken?
Absolutely! It’s very simple. Substitute the chicken with cubes of firm tofu or tempeh. Marinate the tofu in the same spicy mixture, and follow the same cooking instructions, making sure to adjust the cooking time slightly—about 5-7 minutes will be sufficient for tofu to fully incorporate the flavorful marinade.

Are there any dietary considerations I should be aware of?
Yes, indeed! This recipe includes soy sauce, which may contain gluten, so opt for a gluten-free variant if needed. Additionally, keep an eye on sesame oil if anyone at your table has a sesame allergy. Always make sure to check ingredient labels to avoid potential allergens!

Korean Fire Chicken

Delicious Korean Fire Chicken Recipe for Spice Lovers

This Korean Fire Chicken recipe features tender chicken coated in a sticky, spicy sauce, perfect for spice lovers.
Prep Time 30 minutes
Cook Time 10 minutes
Marinating Time 30 minutes
Total Time 1 hour 10 minutes
Servings: 4 servings
Course: Chicken
Cuisine: Korean
Calories: 350

Ingredients
  

For the Marinade
  • 1 lb boneless chicken thighs use for juiciness
  • 2 Tbsp gochugaru Korean red pepper flakes
  • 2 Tbsp gochujang Korean chili paste
  • 3 Tbsp soy sauce low-sodium preferred
  • 4 cloves garlic minced
  • 1 Tbsp sugar brown sugar or honey
For Cooking
  • 2 Tbsp vegetable oil neutral oil like canola
  • 1 Tbsp sesame oil optional
For Garnish
  • 2 Tbsp sesame seeds
  • 2 stalks green onions chopped

Equipment

  • large bowl
  • Skillet
  • Meat Thermometer

Method
 

Marinating and Cooking
  1. In a large bowl, combine gochugaru, gochujang, soy sauce, minced garlic, and sugar. Add boneless chicken thighs and mix thoroughly. Cover and marinate in the refrigerator for at least 30 minutes.
  2. Heat 2 tablespoons of vegetable oil in a large skillet over medium-high heat until shimmering.
  3. Add the marinated chicken to the skillet, spreading it out evenly. Cook for about 8-10 minutes, flipping halfway through.
  4. Drizzle sesame oil over the chicken and toss gently to coat. Let the chicken sit in the skillet for a few moments.
  5. Transfer to a serving plate and garnish with sesame seeds and chopped green onions. Serve hot.

Nutrition

Serving: 1servingCalories: 350kcalCarbohydrates: 12gProtein: 30gFat: 20gSaturated Fat: 4gPolyunsaturated Fat: 6gMonounsaturated Fat: 8gCholesterol: 90mgSodium: 800mgPotassium: 400mgFiber: 1gSugar: 5gVitamin A: 500IUVitamin C: 1mgCalcium: 20mgIron: 2mg

Notes

Adjust spice levels to fit your taste. Serve immediately for the best flavor.

Tried this recipe?

Let us know how it was!

Irresistible Korean Chicken Bao Buns You Can Make at Home

With a gentle steam wafting in the air, I found myself wrapped in the delightful embrace of Korean Chicken Bao Buns. These beautifully soft, pillowy buns aren’t just the vehicle for tender, marinated chicken; they’re a fusion of flavor and comfort that transforms any dinner into an occasion. Perfect for those cozy family nights or casual gatherings with friends, this recipe not only satisfies your cravings but also brings eager smiles around the table. Think spicy, sweet, and savory all rolled into one—an ideal comfort food that’s both fun to prepare and utterly irresistible. Are you ready to elevate your homemade meals with these incredible bao buns? Let’s dive into this delicious culinary adventure together!

Why Are Korean Chicken Bao Buns Special?

Comforting Fusion: These bao buns beautifully blend Korean flavors into a traditional Asian staple, giving you a unique culinary experience.

Soft and Fluffy: The dough is incredibly light, which pairs perfectly with succulent chicken filling, making each bite a delightful surprise.

Fun to Make: Gather your loved ones for a cooking adventure! Rolling and filling the dough can be a fantastic way to turn a meal into a memorable event.

Impressive Presentation: Served warm and garnished with sesame seeds and green onions, these buns are sure to impress at your next gathering.

Versatile Options: Feel free to experiment! Whether you prefer pork or tofu, or even adding vegetables for crunch, the possibilities are endless—just like with our Thai Chicken Meatball recipe!

In just one bite, you’ll understand why these Korean Chicken Bao Buns are a must-have for your next meal!

Korean Chicken Bao Buns Ingredients

For the Dough
All-Purpose Flour – Provides structure for the bao buns, but you can swap in whole wheat or gluten-free flour as alternatives.
Sugar – Adds a slight sweetness to the dough; no significant substitutions are needed here.
Instant Yeast – Essential for leavening the dough; regular yeast may work too, just remember to proof it first.
Baking Powder – Creates a light, fluffy texture; omit if you’re solely using instant yeast.
Salt – Enhances flavor in both the dough and filling, making it a crucial ingredient.
Warm Water – Activates the yeast and hydrates the flour; make sure it’s warm, not hot!
Vegetable Oil – Adds moisture and softness to the dough; you can substitute any neutral oil if needed.

For the Chicken Filling
Boneless Chicken Thighs – The main filling that offers tenderness; feel free to use breast for a leaner option.
Soy Sauce – Provides umami and saltiness; tamari can work for a gluten-free option.
Gochujang (Korean Chili Paste) – Adds spice and depth; adjust the amount to suit your taste!
Honey – Sweetens the filling; you can substitute with maple syrup or agave if desired.
Sesame Oil – Imparts a nutty flavor; toasted sesame oil provides even more depth.
Garlic – Adds an aromatic layer to the dish; minced fresh garlic is highly recommended.
Ginger – Contributes warmth and zest—fresh ginger is the best choice for flavor.
Salt and Pepper – Essential for seasoning; use to taste for the perfect finishing touch.
Sesame Seeds – Optional garnish that adds crunch and visual appeal.
Green Onions – Adds freshness and color as an optional garnish.

Dive into the delicious adventure of making Korean Chicken Bao Buns with these essential ingredients!

Step‑by‑Step Instructions for Korean Chicken Bao Buns

Step 1: Dough Preparation
In a large mixing bowl, combine 3 cups of all-purpose flour, 2 tablespoons of sugar, 1 tablespoon of instant yeast, 1 teaspoon of baking powder, and 1 teaspoon of salt. Gradually pour in 1 cup of warm water and 2 tablespoons of vegetable oil, stirring to combine. Knead the mixture on a lightly floured surface for about 8-10 minutes until smooth and elastic.

Step 2: Dough Rising
Place the kneaded dough in a lightly greased bowl and cover it with a damp cloth or plastic wrap. Let it rise in a warm spot for about 1 hour, or until it has doubled in size. The dough should feel airy and soft, indicating it’s ready for shaping into bao buns.

Step 3: Chicken Filling Preparation
While the dough rises, prepare the filling. In a medium bowl, mix 1 pound of boneless chicken thighs with 3 tablespoons of soy sauce, 2 tablespoons of gochujang, 1 tablespoon of honey, 1 tablespoon of sesame oil, 2 minced garlic cloves, and 1 tablespoon of grated fresh ginger. Allow the chicken to marinate for at least 30 minutes, ensuring the flavors meld together beautifully.

Step 4: Cooking the Chicken
After marinating, heat a skillet over medium heat. Add the chicken mixture and sauté for 10-15 minutes, stirring occasionally, until the chicken is fully cooked and no longer pink in the center. The chicken should develop a slightly caramelized exterior and a delicious aroma should fill your kitchen, signaling it’s ready for the bao buns.

Step 5: Assembling Bao Buns
Once the dough has risen and your filling is ready, punch down the dough and divide it into 10-12 equal pieces. Roll each piece into a small circle, about 3-4 inches in diameter. Spoon a generous tablespoon of the chicken filling in the center of each circle and fold the dough over to seal, pinching the edges to ensure they’re secure.

Step 6: Steaming Buns
Prepare a steamer basket lined with parchment paper to prevent sticking. Arrange the formed bao buns in the steamer, leaving space for them to expand. Cover and steam over simmering water for about 10 minutes, or until the buns are fluffy and cooked through. The buns should look soft and white, with a slight bounce when gently pressed.

Step 7: Serving
Carefully remove the steamed Korean Chicken Bao Buns from the steamer and transfer them to a serving plate. Garnish with sesame seeds and sliced green onions for added color and texture. Serve warm with your favorite dipping sauces for a delightful finishing touch to this comforting dish.

How to Store and Freeze Korean Chicken Bao Buns

Room Temperature: Bao buns should ideally be enjoyed fresh. If left at room temperature, consume them within 2 hours for the best taste and texture.

Fridge: Place leftover bao buns in an airtight container in the fridge, and they’ll stay fresh for up to 3 days. Reheat in the steamer or microwave with a damp paper towel to retain moisture.

Freezer: For longer storage, freeze cooked bao buns in a single layer on a baking sheet before transferring them to a freezer-safe bag. They can be stored for up to 1 month.

Reheating: To reheat frozen bao, steam them for about 5-6 minutes or microwave them for a quick minute while covered. Enjoy the flavors of your Korean Chicken Bao Buns once more!

What to Serve with Korean Chicken Bao Buns

Create a complete dining experience that tantalizes the taste buds and satisfies the soul.

  • Pickled Vegetables: A tangy crunch balances the bao’s softness and enhances the overall flavor profile.
  • Asian Greens Salad: Fresh greens tossed in a light sesame dressing provide a vibrant contrast to the rich chicken filling. The refreshing textures will complete your meal beautifully.
  • Spicy Chili Sauce: For heat lovers, drizzling or dipping the bao buns in spicy chili sauce adds an exciting kick that complements the savory chicken.
  • Jasmine Rice: Fluffy and aromatic, jasmine rice serves as a comforting side that allows for creative mixing and matching with the bao.
  • Cucumber Slaw: Crisp and refreshing, a slaw made with julienned cucumbers laced with rice vinegar brings a burst of freshness. Serve this alongside the bao for a delightful contrast in textures.
  • Kimchi: A staple in Korean cuisine, its robust flavors and fermented crunch provide an authentic touch and depth of flavor.
  • Sweet Chili Dipping Sauce: A drizzle of this sweet-and-spicy sauce enhances the bao’s flavor while adding a delightful element to enjoy while pairing together!
  • Green Tea: Serve chilled or warm, this light drink nurtures the palate, offering a serene balance to the indulgent bao buns.

Expert Tips for Korean Chicken Bao Buns

  • Warm Water: Use water that is warm, not hot, to effectively activate the yeast. Too hot can kill the yeast, ruining the dough.

  • Kneading Technique: Avoid overworking the dough. Knead just until it’s smooth and elastic to ensure your bao buns stay fluffy and light.

  • Check for Doneness: When steaming, ensure the buns are fluffy and firm, not sticky or wet. This indicates they’ve been cooked properly.

  • Marination Time: Allow the chicken to marinate longer than 30 minutes if possible. This absorption of flavors enhances the overall taste of your Korean Chicken Bao Buns.

  • Experiment with Fillings: Don’t hesitate to switch up the protein or add vegetables. Making variations keeps this dish exciting and tailored to your preferences.

Make Ahead Options

These Korean Chicken Bao Buns are perfect for busy weeknights when you want to save time without sacrificing flavor! You can prepare the chicken filling up to 3 days in advance; simply marinate it, then store it in an airtight container in the refrigerator. The bao dough can also be made ahead of time and refrigerated for up to 24 hours—just knead, let it rise, and then punch it down before shaping. When you’re ready to enjoy your delicious bao buns, simply steam the assembled buns straight from the fridge for about 12-15 minutes until fluffy. This way, you’ll have delightful, homemade Korean Chicken Bao Buns with minimal effort and just as much flavor!

Korean Chicken Bao Buns Variations & Substitutions

Feel free to get creative with your Korean Chicken Bao Buns, customizing them to fit your taste and dietary needs!

  • Gluten-Free: Use a gluten-free all-purpose flour blend for the dough to cater to gluten sensitivities. The texture might be slightly different, but still delicious!

  • Vegetarian: Substitute the chicken with marinated tofu or mushrooms for a savory plant-based version. Tofu absorbs flavors beautifully, making it a perfect filling.

  • Spicy Kick: Add extra gochujang or some chili flakes to the chicken filling for those who crave heat. A little bit of spice can elevate the flavor profile and awaken your taste buds.

  • Veggie-Loaded: Mix in shredded carrots, bell peppers, or cabbage with the chicken for additional crunch and nutrition. Not only does this enhance the texture, but it also packs in more veggies for a balanced bite.

  • Sweet Twist: Experiment with the fillings by adding a bit of pineapple or mango for a fruity contrast. The sweetness will beautifully balance the savory spices, reminiscent of the flavors in our Spicy Korean Gochujang.

  • Crunchy Toppings: Garnish with crushed peanuts or fried shallots for a delightful crunch that contrasts with the soft bao. Add this step to make your dishes visually appealing as well!

  • Asian Dips: Serve with a variety of dipping sauces, like sweet chili or a soy sauce and vinegar mix, to enhance the meal’s flavor. Variety transforms your dining experience into an exciting culinary adventure!

  • Meal Prep: If time is short, prepare the filling ahead and freeze it. This way, making fresh bao during the week becomes a quick and fun cooking experience.

Dive into these variations to create your unforgettable version of Korean Chicken Bao Buns!

Korean Chicken Bao Buns Recipe FAQs

How do I select the best ingredients for the bao buns?
Absolutely! For the best results, choose all-purpose flour that’s fresh and has not been stored for too long. When it comes to chicken, boneless thighs offer tenderness, but if you’re looking for a leaner option, go for chicken breast. Ensure the garlic is fresh for full flavor and opt for a gochujang that suits your heat preferences—some are milder while others pack a punch!

What are the best storage methods for leftover bao buns?
Very good question! Bao buns are best enjoyed fresh, but if you have leftovers, store them in an airtight container in the fridge for up to 3 days. For optimal taste, I recommend reheating them in a steamer or covering them with a damp paper towel in the microwave to maintain their moist texture.

Can I freeze Korean Chicken Bao Buns?
Absolutely! To freeze, place the cooked bao buns in a single layer on a baking sheet and freeze until solid. Once frozen, transfer them to a freezer-safe bag. They can be stored for up to 3 months. When you’re ready to enjoy, simply steam them for about 5-6 minutes or microwave them for around 1 minute to heat through. Trust me, this way, you’ll still savor the fluffy goodness!

What if my dough doesn’t rise properly?
Very often, this can happen if the water you used to activate the yeast was too hot or if the yeast was expired. To troubleshoot, double-check the water temperature—aim for around 110°F to 115°F (43°C to 46°C). If the dough still doesn’t rise, try leaving it in a warm, draft-free location to help it along or consider using fresh yeast.

Are Korean Chicken Bao Buns safe for different dietary requirements?
You can certainly adjust the recipe to accommodate various dietary needs! For gluten-free options, substitute all-purpose flour with a gluten-free blend. For a vegetarian alternative, feel free to use tofu or mushrooms instead of chicken, adding your desired seasonings. Just remember to check labels for gluten-free soy sauce or gochujang if necessary.

How long can the chicken filling be stored?
The chicken filling can be prepared in advance and stored in the refrigerator for up to a day. Simply cover it in an airtight container to maintain freshness. Before using it, you may want to sauté it again briefly to warm it through, ensuring all those delicious flavors are revived!

Korean Chicken Bao Buns

Irresistible Korean Chicken Bao Buns You Can Make at Home

Enjoy making these Korean Chicken Bao Buns, a delightful fusion of comfort and flavor, perfect for any occasion.
Prep Time 30 minutes
Cook Time 20 minutes
Dough Rising Time 1 hour
Total Time 1 hour 50 minutes
Servings: 10 buns
Course: Dinner
Cuisine: Korean
Calories: 250

Ingredients
  

For the Dough
  • 3 cups all-purpose flour can substitute with whole wheat or gluten-free flour
  • 2 tablespoons sugar
  • 1 tablespoon instant yeast regular yeast may work, proof first
  • 1 teaspoon baking powder omit if using solely instant yeast
  • 1 teaspoon salt
  • 1 cup warm water not hot
  • 2 tablespoons vegetable oil can use any neutral oil
For the Chicken Filling
  • 1 pound boneless chicken thighs can use breast for a leaner option
  • 3 tablespoons soy sauce tamari works for gluten-free
  • 2 tablespoons gochujang (Korean chili paste) adjust to taste
  • 1 tablespoon honey can substitute with maple syrup or agave
  • 1 tablespoon sesame oil toasted sesame oil is recommended
  • 2 cloves garlic minced fresh garlic is preferred
  • 1 tablespoon ginger grated fresh ginger is best
  • salt and pepper to taste
  • sesame seeds optional garnish
  • green onions optional garnish

Equipment

  • Mixing Bowl
  • steamer basket
  • Skillet
  • Parchment paper
  • Whisk
  • Measuring cups and spoons

Method
 

Dough Preparation
  1. In a large mixing bowl, combine the dough ingredients and knead until smooth and elastic.
Dough Rising
  1. Let the kneaded dough rise in a warm spot until doubled in size.
Chicken Filling Preparation
  1. Mix the chicken filling ingredients and let marinate for at least 30 minutes.
Cooking the Chicken
  1. Sauté the marinated chicken in a skillet until fully cooked.
Assembling Bao Buns
  1. Divide the dough, fill, and seal each bun before steaming.
Steaming Buns
  1. Steam the formed bao buns until fluffy and cooked through.
Serving
  1. Garnish steamed buns and serve warm with sauces.

Nutrition

Serving: 1bunCalories: 250kcalCarbohydrates: 30gProtein: 15gFat: 10gSaturated Fat: 2gPolyunsaturated Fat: 1gMonounsaturated Fat: 3gCholesterol: 50mgSodium: 600mgPotassium: 200mgFiber: 2gSugar: 5gVitamin A: 200IUVitamin C: 2mgCalcium: 20mgIron: 1mg

Notes

Experiment with fillings for variations and enhanced flavors.

Tried this recipe?

Let us know how it was!

Irresistible Mustard Potato Poppers Recipe for Vegan Snacking

As I stood in my kitchen, the air thick with the savory aroma of roasting potatoes, I couldn’t help but feel a surge of excitement. There’s something magical about taking simple ingredients and transforming them into something unforgettable. This is exactly what you’ll accomplish with my Mustard Potato Poppers Recipe. This delightful vegan-friendly side dish brings together the creamy texture of baby potatoes with the bold kick of Dijon and whole grain mustard, spiced just right with aromatic garlic and onion powder. Not only is it incredibly easy to whip up, but it’s also bound to impress your family or guests. Whether you’re looking for a quick weeknight snack or a standout addition to your dinner table, these crispy poppers are the answer. Ready to give your taste buds a charming surprise with every bite? Let’s dive in!

Why Are These Potato Poppers Irresistible?

Crispy, Crunchy Delight: Each bite offers a perfectly crisp exterior that gives way to a tender, creamy interior. Vegan-Friendly: These poppers fit seamlessly into any plant-based lifestyle without sacrificing flavor. Bold, Tangy Flavors: The combination of Dijon and whole grain mustard packs a punch, making them anything but ordinary. Simple Preparation: Whip them up in just a few easy steps, perfect for a quick weeknight snack. Crowd-Pleasing Treat: Serve them at your next gathering, and watch as they disappear in no time! For more flavorful side dishes, check out my Zucchini Sweet Potato and Ground Beef Potato recipes!

Mustard Potato Poppers Recipe Ingredients

For the Potatoes
Baby Potatoes – Their creamy interior and crisp exterior make them the perfect base for poppers; feel free to use regular potatoes cut into even chunks if needed.

For the Mustard Mixture
Dijon Mustard – Provides that wonderful sharpness; try spicy brown mustard if you want to change up the flavor profile!
Whole Grain Mustard – Adds an extra layer of tang and texture that elevates every bite.
Olive Oil – Crucial for achieving golden, caramelized goodness; other oils can be used, but they might alter the taste.
Garlic Powder – Infuses the dish with a rich, savory depth; fresh garlic can work, just adjust to your liking.
Onion Powder – Brings a hint of sweetness and umami; it’s okay to omit if you’re low on supplies.
Salt and Pepper – Essential for enhancing the overall flavor; don’t hesitate to adjust them according to your taste preferences.

Optional Garnish
Fresh Parsley – A sprinkle of bright green freshness adds a lovely touch before serving.
Smoked Paprika – For those who enjoy a bit of smoky flair, this spice makes a fantastic topping!

These Mustard Potato Poppers are sure to please, bringing tangy delight to your snacking repertoire. Get ready to impress with this simple yet unforgettable recipe!

Step‑by‑Step Instructions for Mustard Potato Poppers Recipe

Step 1: Preheat the Oven
Begin by preheating your oven to 425°F (220°C), ensuring it reaches the perfect roasting temperature for crispy Mustard Potato Poppers. This initial step is crucial, as it will help achieve a golden, crunchy exterior while keeping the insides tender. Use an oven thermometer for accuracy if you have one, and be sure to allow ample time for the oven to heat up fully.

Step 2: Prepare the Potatoes
Take your baby potatoes and rinse them thoroughly under cold water to remove any dirt. Next, halve each potato to ensure even cooking and optimal crisping during roasting. Make sure the cuts are clean and even, as this promotes uniform browning. By the end of this step, you’ll have perfectly halved potatoes ready for flavor enhancement.

Step 3: Make the Mustard Mixture
In a mixing bowl, combine a generous splash of olive oil with Dijon mustard, whole grain mustard, garlic powder, onion powder, salt, and pepper to create a flavorful coating for your Mustard Potato Poppers. Whisk the ingredients together until well blended, creating a lovely, thick mixture that will cling beautifully to the potatoes. This mixture is the heart of the recipe, setting the stage for rich, tangy flavors.

Step 4: Coat the Potatoes
Add the halved potatoes to the bowl with the mustard mixture. Toss them gently but thoroughly, ensuring that each potato half is evenly coated with the tangy blend. This step is important for maximizing flavor and achieving that crave-worthy crispness. You want to see every potato bathed in mustard goodness before they hit the oven.

Step 5: Arrange & Roast
Transfer the coated potato halves to a parchment-lined baking sheet, placing them in a single layer for optimal roasting. This allows hot air to circulate around each piece, promoting even browning and crisping. Slide the baking sheet into your preheated oven and roast for 25-30 minutes. Halfway through, give the potatoes a good stir to encourage even cooking and achieve a gorgeous golden brown color.

Step 6: Cool & Garnish
Once the Mustard Potato Poppers are beautifully golden and crispy, take them out of the oven and allow them to cool slightly on the baking sheet. As they cool, consider adding a sprinkle of fresh parsley or smoked paprika for a pop of color and flavor. This simple garnish elevates the dish, making it visually appealing and fragrant, ready to impress everyone at your dining table.

Mustard Potato Poppers Recipe Variations

Feel free to let your creativity shine and customize these delightful potato poppers to suit your taste preferences!

  • Regular Potatoes: Use regular potatoes instead of baby ones; just cut them into even, bite-sized pieces for the perfect roast.

  • Honey Mustard: Swap Dijon for honey mustard for a sweeter, more mellow flavor that still adds a delicious tang.

  • Spicy Kick: Add a pinch of cayenne pepper to the mustard mixture for a zesty, spicy twist that’s sure to wake up your taste buds.

  • Herbed Delight: Mix in fresh herbs like rosemary or thyme with the mustard mixture for a fragrant and flavorful touch.

  • Cheesy Addition: Sprinkle crumbled feta cheese or vegan cheese on top right after roasting for a creamy texture that complements the crispy poppers wonderfully.

  • Flavored Oil: Use flavored oils, like garlic-infused or chili oil, instead of regular olive oil to enhance the flavor profile of your poppers.

  • Sweet Potato Version: Substitute traditional potatoes with sweet potatoes for a naturally sweet twist that’s both nutritious and delicious.

For even more sides to pair with your meals, try my recipe for American Potato Salad or warm up with a bowl of Hearty Potato Kielbasa Soup. Enjoy experimenting with these variations!

What to Serve with Mustard Potato Poppers

The crispy, flavorful experience of these poppers deserves the perfect companion to create a delightful meal.

  • Roasted Vegetables: A medley of seasonal, roasted veggies adds vibrant colors and earthy flavors, balancing the tanginess of the poppers beautifully.
  • Fresh Green Salad: A crisp, refreshing salad with a zesty vinaigrette complements the poppers’ richness, providing a crunchy texture contrast. Consider including ingredients like mixed greens, cucumber, and cherry tomatoes.
  • Grilled Tofu: This protein-rich addition delivers a satisfying chew while absorbing flavors from your favorite marinade, making it an ideal pairing for the mustard’s zing.
  • Quinoa Pilaf: This nutty, fluffy grain dish offers an excellent base that enhances the overall meal while being nutritious and filling.
  • Hummus Dip: Serve a side of creamy hummus for dipping; its smooth texture and chickpea goodness pairs effortlessly with the poppers.
  • Craft Beer: A light, refreshing craft beer can enhance the flavor experience while cutting through the richness, making for a splendid sip with each bite.
  • Sweet Potato Fries: For the ultimate comfort food pairing, crispy sweet potato fries offer a sweet contrast to the savory poppers, ensuring a mouthwatering feast.
  • Vegan Creamy Dip: A vegan yogurt or cashew-based dip provides a cooling contrast that beautifully complements the tangy richness, adding a creamy touch to each bite.

Expert Tips for Making Mustard Potato Poppers

  • Coat Evenly: Ensure each potato half is thoroughly coated with the mustard mixture to maximize flavor and crispiness.

  • Space Them Out: Arrange the potatoes on the baking sheet in a single layer, allowing air to circulate for even browning.

  • Stir Midway: Stir the potatoes halfway through roasting to promote a uniform crispiness—this step is crucial for achieving that perfect crunch!

  • Reheat Right: For leftover Mustard Potato Poppers, reheat them in a hot oven or toaster oven instead of the microwave to maintain their crispy texture.

  • Spice It Up: Don’t hesitate to experiment with flavors by adding a pinch of cayenne pepper for an extra kick in your Mustard Potato Poppers recipe!

How to Store and Freeze Mustard Potato Poppers

  • Room Temperature: Best consumed fresh; if left at room temperature, enjoy within 2 hours to prevent food safety issues.

  • Fridge: Store in an airtight container for up to 3 days to retain freshness. Allow them to cool completely before sealing to avoid moisture buildup.

  • Freezer: For longer storage, freeze the mustard potato poppers in a single layer on a baking sheet before transferring to a freezer-safe bag. They’re perfect for up to 2 months!

  • Reheating: To reheat, place frozen or refrigerated poppers on a baking sheet in a preheated oven at 400°F (200°C) for about 10-15 minutes, keeping them crispy and delicious.

Make Ahead Options

These Mustard Potato Poppers are perfect for busy home cooks looking to save time during the week! You can prepare the mustard mixture and coat the potatoes up to 24 hours in advance. Simply follow the initial steps, then cover the bowl with plastic wrap and refrigerate overnight. When you’re ready to serve, just preheat the oven and roast the potatoes as instructed. This ensure they remain just as delicious and crispy while minimizing your prep time on the day of serving. Trust me, your family will appreciate the convenience, and you’ll love having a meal ready in a hurry!

Mustard Potato Poppers Recipe FAQs

How do I select the best baby potatoes?
When choosing baby potatoes, look for smooth skins without dark spots or blemishes. The more vibrant and firm they feel, the better! They should be small and evenly sized to ensure even cooking. If you prefer, regular potatoes can work—just cut them into similar sizes.

What is the best way to store leftover Mustard Potato Poppers?
To store your delicious Mustard Potato Poppers, place them in an airtight container in the refrigerator. They will remain fresh for up to 3 days. Ensure that they have completely cooled before sealing to prevent moisture buildup, which can lead to sogginess.

Can I freeze Mustard Potato Poppers?
Absolutely! Freezing is a fantastic way to enjoy your Mustard Potato Poppers later. First, lay them out in a single layer on a baking sheet and freeze until solid. Then, transfer them to a freezer-safe bag or container for up to 2 months. Just remember to label them with the date, so you don’t lose track!

What should I do if my potato poppers aren’t getting crispy?
If your Mustard Potato Poppers aren’t crispy, there could be a couple of factors at play. Ensure they’re coated evenly in the mustard mixture and spaced out well on the baking sheet. Crowding can lead to steaming instead of roasting. Also, check your oven temperature—if it’s too low, they won’t crisp up properly. Stirring them halfway through cooking can help achieve that perfect crunch.

Are there any dietary considerations for pets or allergies?
While these Mustard Potato Poppers are vegan-friendly, it’s important to note their ingredients if you’re serving others. Garlic and onion powder can be harmful to pets, so keep them away from your furry friends. For allergies, make sure to check if anyone has sensitivities to mustard or any other ingredients used in the recipe.

Mustard Potato Poppers Recipe

Irresistible Mustard Potato Poppers Recipe for Vegan Snacking

Try these Mustard Potato Poppers for a delicious vegan snack featuring creamy potatoes and bold mustard flavors!
Prep Time 10 minutes
Cook Time 30 minutes
Cooling Time 5 minutes
Total Time 45 minutes
Servings: 4 poppers
Course: Appetizer
Cuisine: Vegan
Calories: 150

Ingredients
  

For the Potatoes
  • 1 pound Baby Potatoes Feel free to use regular potatoes cut into even chunks.
For the Mustard Mixture
  • 2 tablespoons Dijon Mustard Try spicy brown mustard for a different flavor.
  • 2 tablespoons Whole Grain Mustard Adds tang and texture.
  • 2 tablespoons Olive Oil For golden, caramelized goodness.
  • 1 teaspoon Garlic Powder Adjust based on preference.
  • 1 teaspoon Onion Powder Optional; can be omitted.
  • to taste Salt Enhances overall flavor.
  • to taste Pepper Adjust according to taste.
Optional Garnish
  • 2 tablespoons Fresh Parsley For garnish.
  • 1 teaspoon Smoked Paprika Optional, adds a smoky flair.

Equipment

  • Oven
  • Mixing Bowl
  • Baking Sheet
  • Parchment paper

Method
 

Step‑by‑Step Instructions
  1. Preheat your oven to 425°F (220°C).
  2. Rinse baby potatoes thoroughly and halve each one.
  3. In a mixing bowl, combine olive oil, Dijon mustard, whole grain mustard, garlic powder, onion powder, salt, and pepper.
  4. Toss the halved potatoes in the mustard mixture until evenly coated.
  5. Arrange the potatoes in a single layer on a parchment-lined baking sheet and roast for 25-30 minutes, stirring halfway through.
  6. Allow the poppers to cool slightly, then garnish with parsley or smoked paprika before serving.

Nutrition

Serving: 1poppersCalories: 150kcalCarbohydrates: 24gProtein: 3gFat: 5gSaturated Fat: 1gPolyunsaturated Fat: 1gMonounsaturated Fat: 3gSodium: 250mgPotassium: 400mgFiber: 3gSugar: 1gVitamin C: 15mgCalcium: 2mgIron: 6mg

Notes

Ensure each potato half is thoroughly coated for maximum flavor. Arrange in a single layer for even crispiness.

Tried this recipe?

Let us know how it was!

Savor Every Bite of Bang Bang Fried Rice Tonight

One evening, as I rummaged through my fridge, I spotted some day-old rice just waiting to be transformed. That’s when I decided to whip up a quick and easy Bang Bang Fried Rice, the perfect solution for my cravings—comforting, satisfying, and oh-so-simple. This dish is not only a one-pan wonder that’s ready in under 30 minutes, but it’s also customizable for all your dietary needs, whether you’re vegan or gluten-free (just swap in tamari). The delightful blend of textures and flavors—crispy rice, tender chicken (or shrimp, if you prefer!), and vibrant veggies—will have your loved ones begging for seconds. What would you add to make this dish your own?

Why is Bang Bang Fried Rice a must-try?

Comforting and Customizable: You can adapt this dish to fit any dietary preference, whether gluten-free or vegan, ensuring everyone at the table enjoys it.
Quick Preparation: With a total cooking time of under 30 minutes, it’s the ideal choice for weeknight dinners.
One-Pan Wonder: Cleanup is a breeze—cook everything in one skillet for less hassle!
Bursting with Flavor: The combo of spicy-sweet bang bang sauce and colorful veggies makes every bite exciting.
Creative Variations: Feel free to substitute proteins or add extra veggies to make it your own, just like I did with my Corn Chicken Rice for a fun twist!
Crowd-Pleasing Appeal: This vibrant dish is sure to impress family and friends—perfect for gatherings!

Bang Bang Fried Rice Ingredients

For the Base
Cooked Rice – Day-old rice works best for achieving a crispy texture without getting mushy.
Chicken Breast – Diced for quick cooking; feel free to substitute shrimp or tofu for variety.
Eggs – Lightly beaten to add protein and a soft texture to the dish.

For the Vegetables
Carrots – Diced small for sweetness and crunch; frozen carrots can be a convenient substitute.
Green Peas – Adds a touch of color and balance; frozen peas work perfectly in this recipe.
Garlic – Minced to enhance the savory flavor profile.

For the Sauce
Soy Sauce – Provides essential umami; use tamari to keep it gluten-free.
Bang Bang Sauce – A mix of mayonnaise (or a vegan alternative), Sriracha, sweet chili sauce, and rice vinegar for that classic creamy and spicy drizzle.

For Cooking
Oil – A neutral oil like vegetable or canola oil to fry the ingredients without overpowering their flavors.

For Garnish
Green Onions – Sliced to add freshness; stir-fry them briefly for extra aroma in the dish.

Now, you’re all set to create a sensational Bang Bang Fried Rice that’s endlessly customizable!

Step‑by‑Step Instructions for Bang Bang Fried Rice

Step 1: Prepare the Bang Bang Sauce
In a small bowl, whisk together equal parts mayonnaise (or vegan alternative), sweet chili sauce, Sriracha, and a splash of rice vinegar until smooth and creamy. Set this delicious bang bang sauce aside as it will elevate your dish with its spicy-sweet flavor. This step sets the tone for the delightful taste of your Bang Bang Fried Rice.

Step 2: Sauté the Chicken
Heat 2 tablespoons of neutral oil in a large skillet over medium-high heat. Once hot, add the diced chicken breast to the skillet, cooking for about 5-6 minutes until it’s nicely browned and fully cooked. Stir occasionally to ensure even cooking. Once done, remove the chicken from the skillet and set it aside to keep warm.

Step 3: Scramble the Eggs
In the same skillet, add a little more oil if needed, then pour in the lightly beaten eggs. Cook them, stirring gently for about 2 minutes or until just set. You want fluffy scrambled eggs without browning. Once done, transfer the scrambled eggs to a plate and set aside alongside the chicken, letting the flavors mingle.

Step 4: Cook the Vegetables
Next, in the same skillet, add diced carrots and minced garlic, sautéing for 2-3 minutes until they are softened and aromatic. Add the green peas and continue cooking for another minute to heat them through. This mixture provides a lovely crunch and sweetness that complements the other ingredients in your Bang Bang Fried Rice.

Step 5: Stir-Fry the Rice
Now, add the chilled, day-old rice to the skillet, breaking up any clumps with your spatula. Stir-fry on high heat for about 3-4 minutes until the rice is heated through and develops slight crispiness. This step is crucial for achieving the perfect texture, making your Bang Bang Fried Rice indulgently delicious.

Step 6: Combine Ingredients
Return the cooked chicken and scrambled eggs to the skillet with the stir-fried rice and vegetables. Pour in the soy sauce, stirring everything together to combine well. Cook for an additional minute to allow all flavors to meld, creating a cohesive and flavorful blend for your Bang Bang Fried Rice.

Step 7: Add the Bang Bang Sauce
Drizzle the prepared bang bang sauce over the rice mixture, making sure to coat everything evenly. Stir gently until heated through, about 1-2 minutes. The sauce should cling to every grain of rice, enhancing the overall deliciousness of your dish.

Step 8: Garnish and Serve
Finally, remove the skillet from heat and garnish with sliced green onions for a pop of freshness. Serve your vibrant Bang Bang Fried Rice hot, and enjoy the blend of flavors that will surely satisfy everyone at the table.

What to Serve with Bang Bang Fried Rice?

Enhance your dining experience by pairing this vibrant dish with complementary sides that will tantalize your taste buds.

  • Cool Cucumber Salad: A refreshing salad balances the rich, spicy flavors of the fried rice, adding a crisp texture with every bite.

  • Steamed Broccoli: Its slight bitterness and tender crunch create a delightful contrast, boosting the meal’s overall nutrition.

  • Egg Drop Soup: This light, savory soup enriches your dinner with warmth, enhancing the comfort food experience of Bang Bang Fried Rice.

  • Sweet and Spicy Pickles: These tangy bites bring a zing to the palate, perfectly offsetting the creamy bang bang sauce.

  • Teriyaki Chicken Skewers: Succulent and slightly sweet, these can serve as protein-packed additions alongside your fried rice for a satisfying meal.

  • Lychee or Mango Sorbet: Finish off your dinner with a light, fruity dessert that cleanses the palate while echoing the tropical flavors.

Pairing these delicious options will ensure a well-rounded meal that’s sure to impress!

Make Ahead Options

Preparing Bang Bang Fried Rice in advance makes mealtime a breeze! You can prep all your vegetables and the bang bang sauce up to 3 days before serving. Just chop the carrots, mince the garlic, and store them in an airtight container in the fridge. Additionally, cook the chicken and scrambled eggs up to 24 hours ahead, refrigerating them separately. When you’re ready to serve, stir-fry the prepped ingredients along with cold, day-old rice, and finish by adding the sauce. This method ensures that your dish maintains its vibrant flavors and textures, delivering the same satisfying taste as freshly made Bang Bang Fried Rice, all while saving you precious time on busy nights!

Expert Tips for Bang Bang Fried Rice

Use Cold Rice: Using day-old, chilled rice helps achieve that perfect crispy texture; fresh rice can lead to mushiness.

Cook in Stages: Saute ingredients separately before mixing to keep everything from getting soggy and losing its flavor.

Adjust Spice Level: If you’re sensitive to heat, start with less Sriracha in the bang bang sauce, then adjust to taste.

Don’t Rush the Stir-Fry: Allow the rice to sit in the pan for a few minutes to develop that essential crunchy texture in your Bang Bang Fried Rice.

Experiment with Veggies: Feel free to add more vegetables like bell peppers or broccoli for extra nutrition and flavor.

Leftover Magic: This dish stores well in the fridge for 3 days, making it perfect for quick meals later in the week.

How to Store and Freeze Bang Bang Fried Rice

Fridge: Store leftovers in an airtight container for up to 3 days. Reheat in a skillet over medium heat, adding a splash of water for moisture.

Freezer: For longer storage, freeze in portions using airtight containers or freezer bags for up to 2 months. Thaw in the fridge overnight before reheating.

Reheating: To reheat, use a skillet for even heating, stirring occasionally until warmed through. Alternatively, you can microwave it in short intervals, stirring to avoid hot spots.

Wrapping: Make sure to let the Bang Bang Fried Rice cool completely before sealing it in containers to prevent condensation and sogginess.

Bang Bang Fried Rice Variations

Feel free to get creative and make this delightful dish your own with these fun twists and swaps!

  • Plant-Based: Swap chicken for tofu or chickpeas for a vegan-friendly option. This gives your fried rice a hearty, protein-packed punch while keeping it in the comfort zone!
  • Veggie-Loaded: Add bell peppers, broccoli, or snow peas for extra crunch and nutrients. A colorful mix of veggies not only elevates flavor but also makes for a beautiful presentation.
  • Spice Level: Adjust Sriracha to your liking; reduce it for a milder bite or double it for a fiery kick. Spice lovers will appreciate the extra heat!
  • Rice Variation: Use brown rice or cauliflower rice for a healthier alternative. This simple swap retains the essence but adds nutrition to the mix.
  • Sweet Twist: For a unique flavor, incorporate a dash of pineapple or mango. The sweet fruit pairs wonderfully with the savory components, creating a perfect balance.
  • Nuts for Crunch: Sprinkle cashews or peanuts on top before serving for an added crunchy texture. They bring a delightful nutty flavor and an unexpected twist!
  • Bang Bang Sauce Alternatives: Experiment with different sauces; try a homemade peanut sauce for a different flavor profile, or use tahini for a creamy twist.
  • Savory Herbs: Add fresh herbs like cilantro or basil right before serving for a burst of freshness that brightens up the dish!

If you’re looking for a vibrant variety, why not check out my delightful White Blue Rice dish for another twist to your meal experience? This Bang Bang Fried Rice is endlessly adaptable—let your culinary creativity shine!

Bang Bang Fried Rice Recipe FAQs

What type of rice is best for Bang Bang Fried Rice?
Absolutely! Day-old, chilled rice is ideal for this recipe as it helps achieve a crispy texture. Freshly cooked rice can become mushy during stir-frying, which is not what we want in this dish.

How should I store leftover Bang Bang Fried Rice?
To keep your leftovers fresh, store them in an airtight container in the fridge for up to 3 days. It’s best to reheat it in a skillet over medium heat, adding a splash of water to maintain moisture—this keeps it from getting dry.

Can I freeze Bang Bang Fried Rice?
Yes, you can! Portion out your Bang Bang Fried Rice into airtight containers or freezer bags. It will keep well for up to 2 months. When you’re ready to enjoy it again, thaw it in the fridge overnight, and then reheat in a skillet or microwave, stirring occasionally for even heating.

What substitutions can I make for proteins and vegetables?
The more the merrier! Feel free to swap out chicken for shrimp, tofu, or even tempeh. For vegetables, you can add bell peppers, broccoli, or mushrooms for added nutrition and flavor. Just remember to adjust cooking times based on your alternatives to ensure everything is properly cooked.

Are there any dietary considerations for Bang Bang Fried Rice?
Very! This dish can easily accommodate various dietary restrictions. To make it gluten-free, simply substitute soy sauce with tamari. For a vegan option, use a plant-based mayonnaise in the bang bang sauce and replace any animal proteins with tofu or additional veggies.

What should I do if my rice is clumpy?
No worries at all! If your rice is clumping together, try breaking it apart gently with a spatula while stir-frying. You can also sprinkle a little water over the clumps and cover the pan briefly to steam and loosen them up, making it easier to handle.

Bang Bang Fried Rice

Savor Every Bite of Bang Bang Fried Rice Tonight

Enjoy a comforting and customizable Bang Bang Fried Rice, ready in under 30 minutes for dinner.
Prep Time 10 minutes
Cook Time 20 minutes
Total Time 30 minutes
Servings: 4 servings
Course: Dinner
Cuisine: Asian
Calories: 450

Ingredients
  

For the Base
  • 4 cups Day-old rice
  • 1 lb Chicken breast Diced
  • 2 large Eggs Lightly beaten
For the Vegetables
  • 1 cup Carrots Diced small
  • 1 cup Green peas
  • 3 cloves Garlic Minced
For the Sauce
  • 3 Tbsp Soy sauce Use tamari for gluten-free
  • 1/2 cup Bang Bang Sauce Mayonnaise, Sriracha, sweet chili sauce, rice vinegar
For Cooking
  • 2 Tbsp Oil Neutral oil like vegetable or canola
For Garnish
  • 1/4 cup Green onions Sliced

Equipment

  • large skillet

Method
 

Step‑by‑Step Instructions
  1. Prepare the Bang Bang Sauce by whisking together equal parts mayonnaise, sweet chili sauce, Sriracha, and rice vinegar until smooth. Set aside.
  2. Heat 2 tablespoons of oil in a large skillet over medium-high heat. Add diced chicken and cook for 5-6 minutes until browned. Remove and keep warm.
  3. In the same skillet, add more oil if needed and scramble the eggs, stirring gently for about 2 minutes. Transfer to a plate.
  4. Add diced carrots and minced garlic to the skillet, sauté for 2-3 minutes. Then add green peas and cook for another minute.
  5. Stir-fry the rice in the skillet for about 3-4 minutes, breaking up clumps until heated through and crispy.
  6. Combine the chicken and eggs back into the skillet, pour in soy sauce, and stir everything together for another minute.
  7. Drizzle the prepared bang bang sauce over the mixture and stir gently until heated through, about 1-2 minutes.
  8. Garnish with sliced green onions and serve hot.

Nutrition

Serving: 1servingCalories: 450kcalCarbohydrates: 60gProtein: 30gFat: 15gSaturated Fat: 2gPolyunsaturated Fat: 5gMonounsaturated Fat: 6gCholesterol: 140mgSodium: 800mgPotassium: 600mgFiber: 4gSugar: 3gVitamin A: 800IUVitamin C: 15mgCalcium: 40mgIron: 3mg

Notes

Perfect for customizing with your favorite proteins and vegetables. Leftovers can be stored in the fridge for up to 3 days.

Tried this recipe?

Let us know how it was!