Golden Crust Garlic Rosemary Focaccia Muffins You’ll Love

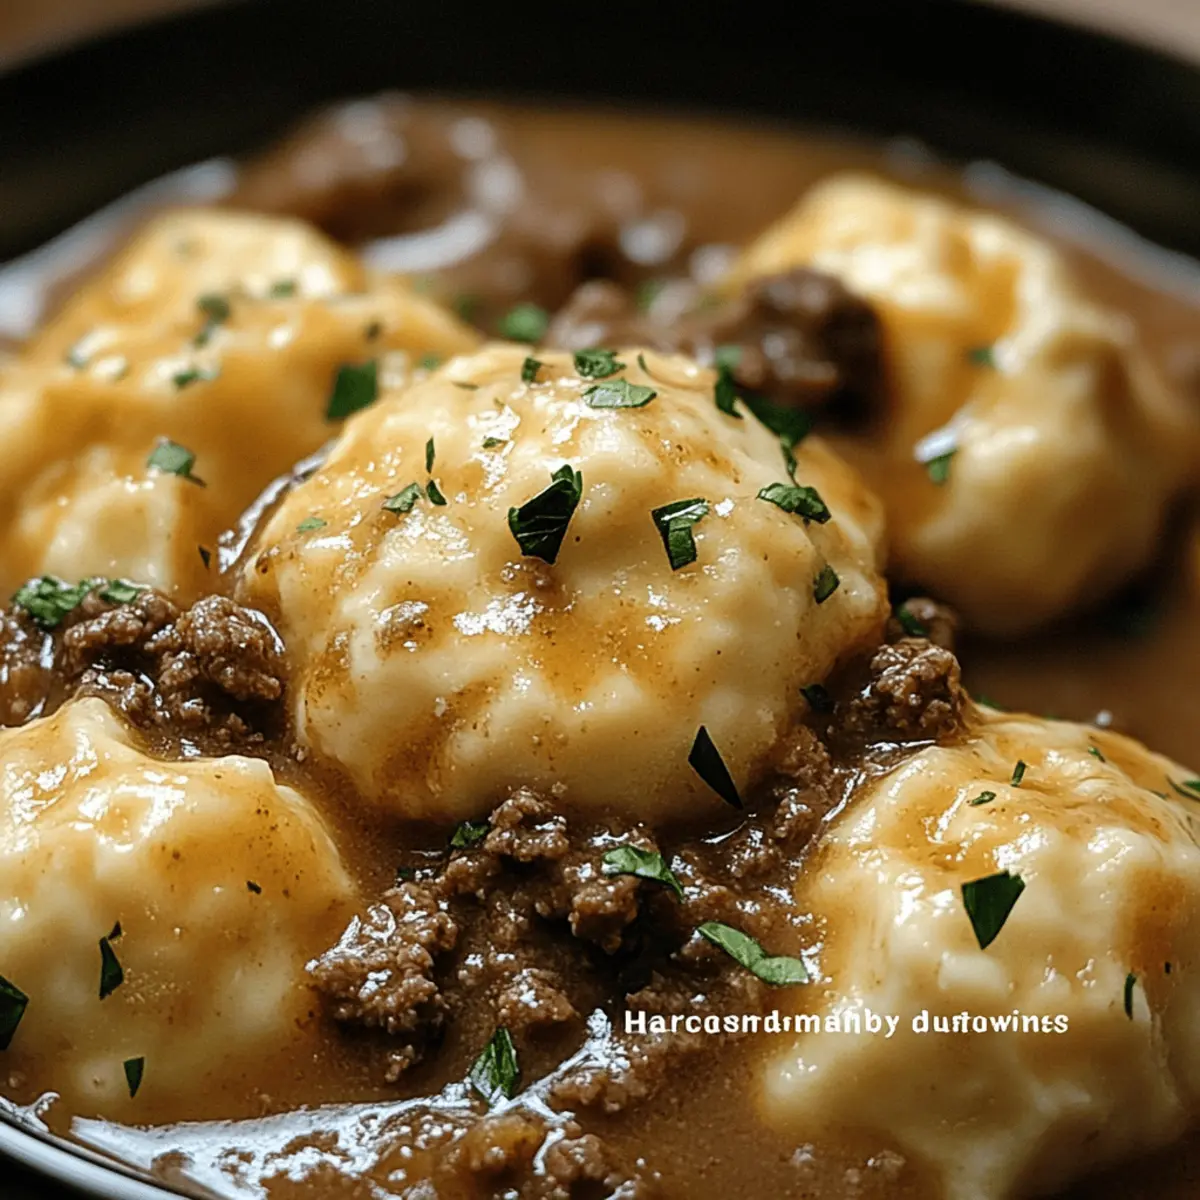
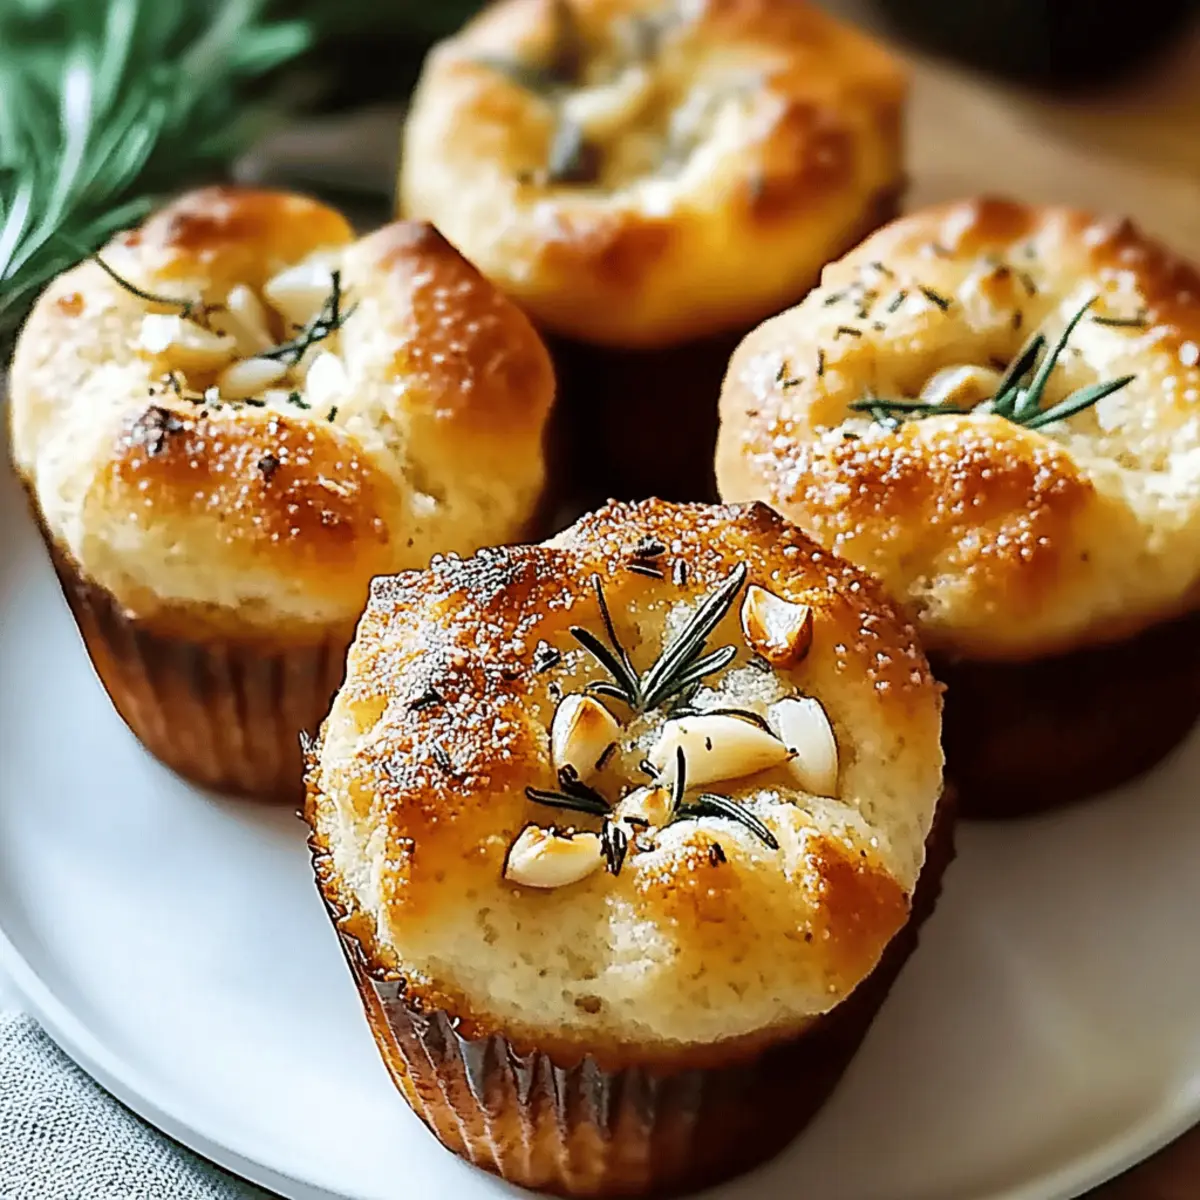
The first bite of these Golden Crust Garlic Rosemary Focaccia Muffins is like stepping into a cozy Italian kitchen, where the air is thick with the aroma of freshly baked bread and herbs. With a crackling golden crust and soft, airy interior, they are not just muffins; they’re a delightful experience that transforms any meal into a celebration. These muffins are quick to prepare and versatile enough to serve alongside soups, salads, or even as a savory snack on their own. With just a handful of ingredients, you’ll create a mouthwatering treat that brings joy to your home, filling it with warmth and flavor. Curious about how to craft these irresistible muffins and impress your family and friends? Let’s dive into the recipe together!

Why will you fall for these muffins?

Irresistible Flavor: The combination of garlic and rosemary creates a savory profile that elevates any meal.
Quick Preparation: With only a handful of ingredients and a straightforward process, you’ll be enjoying fresh muffins in no time.
Versatile Delight: Perfect alongside soups or salads, these muffins can even shine as a stand-alone snack.
Homey Aroma: Your kitchen will fill with the lovely scent of freshly baked bread, bringing warmth to your home.
Elevated Comfort Food: A step above fast food, these delightful muffins are guaranteed to impress family and friends, making them the ultimate comfort treat! If you’re excited about other baked goods, check out my Bakery Style Blueberry Muffins for another tasty adventure.

Golden Crust Garlic Rosemary Focaccia Muffin Ingredients

• Here’s everything you need to create these warm, fluffy delights perfect for any occasion!

For the Muffins

  • All-Purpose Flour – Essential for structure; provides the perfect base for the muffins.
  • Fresh Rosemary – Adds aromatic flavor; substitute with fresh thyme for a delightful twist.
  • Garlic Cloves – Brings savory depth to each bite; dried garlic powder can work if fresh is unavailable.
  • Active Dry Yeast – Critical for leavening; you can opt for instant yeast with adjusted activation time.
  • Olive Oil – Delivers moisture and enhances flavor; melted butter works too, if you want a richer taste.
  • Warm Water – Activates the yeast; ensure it’s warm to touch, never hot.
  • Salt – Enhances flavor balance; reduce if using salted butter elsewhere in the recipe.
  • Sugar – Helps activate the yeast and adds a hint of sweetness; honey or maple syrup makes a great substitute.

Step‑by‑Step Instructions for Golden Crust Garlic Rosemary Focaccia Muffins

Step 1: Activate Yeast
In a small bowl, combine 1 cup of warm water with 1 tablespoon of sugar and 2 teaspoons of active dry yeast. Gently stir and let it sit for about 5 minutes, or until the mixture becomes frothy. This step is crucial as it ensures the yeast is active, setting the foundation for your Golden Crust Garlic Rosemary Focaccia Muffins.

Step 2: Mix Dough
In a large mixing bowl, whisk together 3 cups of all-purpose flour and 1 teaspoon of salt. Gradually pour in the yeast mixture and 2 tablespoons of olive oil, stirring with a wooden spoon until the mixture forms a sticky dough. The dough should pull away from the sides of the bowl but remain soft, indicating it’s ready for kneading.

Step 3: Knead
Transfer the dough to a lightly floured surface. Begin kneading by folding and pressing for about 8–10 minutes until the dough becomes smooth and elastic. Use your hands to shape the dough into a ball; it should feel soft and spring back gently when pressed. This step helps develop the gluten, giving your muffins their delightful texture.

Step 4: Add Flavor
Once the dough is kneaded, gently fold in 4 minced garlic cloves and 2 tablespoons of finely chopped fresh rosemary. Ensure the herbs and garlic are evenly distributed throughout the dough for a burst of flavor in each of your Golden Crust Garlic Rosemary Focaccia Muffins, enhancing their aromatic appeal.

Step 5: First Rise
Place the flavored dough in a lightly oiled bowl, turning it to coat. Cover the bowl with a damp cloth or plastic wrap and let it rise in a warm area for about 1 hour, or until it doubles in size. Watch for the dough to puff up, which indicates that the yeast is working its magic and will create airy muffins.

Step 6: Muffin Preparation
Preheat your oven to 375°F (190°C). After the dough has risen, gently punch it down to release the air. Divide the dough into even portions and shape them into muffin-sized balls. Place them into a greased muffin tin, covering them again to rise for another 30 minutes. This second rise will ensure your muffins are light and fluffy.

Step 7: Bake
Once the muffins have risen, place the muffin tin in the preheated oven. Bake the Golden Crust Garlic Rosemary Focaccia Muffins for 20–25 minutes or until they are golden brown on top. The muffins should have a delightful aroma filling your kitchen and a crisp crust, indicating they’re perfectly baked.

How to Store and Freeze Golden Crust Garlic Rosemary Focaccia Muffins

Room Temperature: Store cooled muffins in an airtight container at room temperature for up to 3 days to maintain freshness and a soft texture.

Fridge: If you need to keep them longer, muffins can be refrigerated for up to 1 week. Be sure to place them in an airtight container to prevent drying out.

Freezer: For extended storage, wrap each muffin tightly in plastic wrap and then place in a freezer-safe bag. They keep well in the freezer for up to 3 months.

Reheating: Reheat muffins in the microwave for 10-15 seconds or warm them in the oven at 350°F (175°C) for about 5 minutes for that freshly baked experience. Enjoy your Golden Crust Garlic Rosemary Focaccia Muffins!

Golden Crust Garlic Rosemary Focaccia Muffins Variations

Feel free to mix things up and create your very own version of these delightful muffins!

  • Cheesy Delight: Add 1 cup of shredded mozzarella or parmesan cheese to the dough for a rich, savory flavor. Cheese will melt beautifully during baking, creating a creamy texture surrounded by the crispy crust.

  • Herb Medley: Swap fresh rosemary for a mix of fresh thyme and basil to add a unique twist. This combination provides a fresh, fragrant aroma that will remind you of a blooming herb garden.

  • Garlic Lovers: Incorporate roasted garlic instead of fresh cloves for a sweeter, deeper garlic flavor. Roasting the garlic brings out a caramelized sweetness that perfectly complements the herbs.

  • Spicy Kick: Mix in a teaspoon of red pepper flakes to the dough for added heat. It’s a fantastic way to elevate the flavor profile, perfect for those who enjoy a bit of spice in their bread.

  • Savory Additions: Fold in a handful of chopped sun-dried tomatoes or olives for a Mediterranean flair. These additions will play beautifully with the garlic and rosemary, bringing a burst of flavor with each bite.

  • Sweet Twist: For a subtle sweetness, drizzle a tablespoon of honey or maple syrup into the dough. This will make the muffins slightly sweet, perfect for enjoying with jams or butter.

  • Vegan Option: Substitute the yogurt with unsweetened almond milk and the olive oil with coconut oil for a delicious vegan version. You’ll still enjoy that beautiful texture and taste without any animal products.

  • Caramelized Onions: Sauté half a cup of finely chopped onions until golden and sweet, then fold them into the dough. The sweetness of the caramelized onions pairs perfectly with the savory elements, adding complexity and depth to your muffins.

If you enjoy experimenting in the kitchen, you might also love pairing them with some delicious dishes like my Garlic Butter Shrimp for the perfect meal!

Helpful Tricks for Golden Crust Garlic Rosemary Focaccia Muffins

  • Perfect Dough Rise: Ensure the dough rises fully; a lack of rising will result in dense muffins. Cover in a warm place to encourage proper fermentation.

  • Measurement Accuracy: Use precise measurements for flour and yeast; too much flour can make your muffins dry. A kitchen scale can help ensure accuracy.

  • Water Temperature: Make sure your warm water is around 110°F (43°C) to activate the yeast without killing it. Hot water can hinder the rising process.

  • Herb Variations: Feel free to experiment with other herbs; basil or oregano pairs beautifully with garlic and rosemary for a flavorful twist on these muffins.

  • Storage Tips: Cool completely before storing. Keep your Golden Crust Garlic Rosemary Focaccia Muffins in an airtight container at room temperature for the best texture.

What to Serve with Golden Crust Garlic Rosemary Focaccia Muffins

These beautiful muffins not only stand out on their own but also make a delightful addition to any meal, bringing warmth and flavor to your table.

  • Hearty Tomato Basil Soup: The rich, savory flavors of this classic soup perfectly complement the rosemary and garlic notes in the muffins, creating a cozy, comforting meal.

  • Caesar Salad: The crunchy romaine and creamy dressing provide a refreshing contrast to the warm, fluffy muffins. It’s a vibrant pairing that will brighten your dining experience.

  • Savory Olive Tapenade: A spoonful of this tangy, briny spread atop your warm muffin can elevate the dish, adding depth and a burst of Mediterranean flavor.

  • Grilled Vegetables: Roasted or grilled veggies like zucchini, bell peppers, and eggplant add a smoky, charred taste that harmonizes beautifully with the muffins’ fragrant herbs.

  • Creamy Garlic Mashed Potatoes: The buttery richness and garlic infusion of these potatoes will enhance the muffin’s flavors, making for a comforting, indulgent side dish.

  • Fresh Arugula Salad with Lemon Vinaigrette: The peppery notes of arugula, combined with a bright vinaigrette, will cut through the richness of the muffins, offering a delightful balance.

  • Cheesy Spinach Dip: This decadent dip is perfect for slathering on your muffins, adding a gooey richness that pairs exceptionally well with the garlic and rosemary.

  • Sparkling Lemonade: A refreshing drink option, the zesty sweetness of sparkling lemonade can brighten your palate and enhance the savory flavors of the meal.

  • Dark Chocolate Brownies: For dessert, a rich, fudgy brownie provides a sweet contrast after enjoying the savory muffins, making for a satisfying finish.

Make Ahead Options

These Golden Crust Garlic Rosemary Focaccia Muffins are a fantastic option for meal prep enthusiasts! You can prepare the dough up to 24 hours in advance by letting it rise, then punch it down and shape it into muffin portions. Place these portions in the muffin tin, cover, and refrigerate overnight. When you’re ready to bake, simply let them rise in a warm spot for about 30 minutes before preheating your oven to 375°F (190°C) and baking. To maintain their delightful flavor and texture, ensure they are well-covered in the fridge to prevent drying out. With this make-ahead approach, you’ll have warm, homemade muffins ready to impress your family with minimal effort!

Golden Crust Garlic Rosemary Focaccia Muffins Recipe FAQs

How do I select the best garlic for this recipe?
Absolutely! Look for firm garlic bulbs that are plump and have no dark spots or sprouting shoots. Fresh garlic is pivotal for the best flavor in your Golden Crust Garlic Rosemary Focaccia Muffins, so avoid any with soft spots or mold.

What’s the best way to store leftover muffins?
To keep your Golden Crust Garlic Rosemary Focaccia Muffins fresh, store them in an airtight container at room temperature for up to 3 days. If you need to extend their life, they can be refrigerated for up to a week.

Can I freeze the muffins for later?
Yes! To freeze your muffins, wrap each one tightly in plastic wrap, ensuring no air can get in, and then place them in a freezer-safe bag. They can be kept in the freezer for up to 3 months. When you’re ready to enjoy them, simply thaw and reheat for that delicious fresh-baked flavor!

What should I do if my dough doesn’t rise properly?
If your dough isn’t rising, it could be due to inactive yeast. Make sure your warm water is around 110°F (43°C) before adding the yeast, as higher temperatures can kill it. If you suspect your yeast is bad, try proofing it first by mixing it with warm water and sugar and waiting for it to froth. Make sure the dough is in a warm area to rise – a cozy spot in your kitchen works wonders!

Are there any allergy considerations with the ingredients?
Very! The primary ingredients in your Golden Crust Garlic Rosemary Focaccia Muffins include wheat (from flour) and can include gluten if you’re using regular flour. If you have gluten sensitivities or are baking for someone who does, consider using a gluten-free flour blend. Always check for any potential allergies with your guests before serving!

Golden Crust Garlic Rosemary Focaccia Muffins

Golden Crust Garlic Rosemary Focaccia Muffins You’ll Love

Experience the delightful Golden Crust Garlic Rosemary Focaccia Muffins, ideal for any meal or snack.
Prep Time 25 minutes
Cook Time 25 minutes
Rising Time 1 hour 30 minutes
Total Time 2 hours 20 minutes
Servings: 12 muffins
Course: Appetizer
Cuisine: Italian
Calories: 150

Ingredients
  

For the Muffins
  • 3 cups All-Purpose Flour Essential for structure;
  • 2 teaspoons Active Dry Yeast Critical for leavening;
  • 1 tablespoon Sugar Helps activate the yeast;
  • 1 teaspoon Salt Enhances flavor balance;
  • 1 cup Warm Water Activates the yeast;
  • 2 tablespoons Olive Oil Delivers moisture and enhances flavor;
  • 4 cloves Garlic Cloves Brings savory depth to each bite;
  • 2 tablespoons Fresh Rosemary Adds aromatic flavor;

Equipment

  • Mixing Bowl
  • Muffin Tin
  • wooden spoon
  • kitchen scale
  • Oven

Method
 

Step-by-Step Instructions
  1. In a small bowl, combine warm water with sugar and active dry yeast. Let it sit for 5 minutes until frothy.
  2. In a large bowl, whisk together all-purpose flour and salt. Gradually add the yeast mixture and olive oil, stirring until a sticky dough forms.
  3. Transfer dough to a floured surface and knead for about 8–10 minutes until smooth and elastic.
  4. Fold in minced garlic cloves and chopped rosemary, ensuring even distribution.
  5. Place dough in a lightly oiled bowl, cover, and let it rise in a warm area for 1 hour.
  6. Preheat oven to 375°F (190°C). Punch down the risen dough, divide into muffin-sized portions, and place in a greased muffin tin.
  7. Cover and let the muffins rise for another 30 minutes.
  8. Bake for 20–25 minutes or until golden brown on top.

Nutrition

Serving: 1muffinCalories: 150kcalCarbohydrates: 30gProtein: 4gFat: 3gSaturated Fat: 0.5gMonounsaturated Fat: 2gSodium: 200mgPotassium: 80mgFiber: 1gSugar: 1gCalcium: 2mgIron: 6mg

Notes

Store cooled muffins in an airtight container for up to 3 days, refrigerate for up to 1 week, or freeze for up to 3 months. Reheat in microwave or oven.

Tried this recipe?

Let us know how it was!

Moist Zucchini Muffins Bursting with Pineapple Goodness

As I stood in my kitchen the other day, the scent of freshly baked treats wafting through the air, a familiar memory blossomed—muffins that were moist, sweet, and just waiting to be devoured. Enter these delightful Moist Zucchini Muffins with Pineapple and Crunchy Walnuts, a comforting twist on a classic that would have my family eagerly lining up for breakfast. The combination of tender zucchini and juicy pineapple not only makes for a super moist texture but also keeps them health-friendly! And the best part? They’re incredibly simple to whip up, making them perfect for those busy mornings or as a grab-and-go snack. Are you ready to light up your taste buds? Let’s dive into baking these scrumptious muffins together!

Why You’ll Love These Muffins

Moist, Flavorful Delight: These muffins are incredibly moist thanks to the crushed pineapple, creating a soft bite that feels indulgent yet healthy.
Kid-Friendly and Fun: With their subtle sweetness, they make a perfect snack for kids who might otherwise shy away from veggies.
Quick and Easy: With minimal prep time, these muffins are a breeze to whip up on a busy morning.
Versatile for Everyone: Enjoy them as a breakfast item, snack, or even a sweet treat; they cater to all palates.
Make-Ahead Magic: These muffins freeze beautifully, so you can always have a stash on hand for those unexpected cravings.
Delicious Variations: Feel free to explore flavors by adding chocolate chips or swapping in sunflower seeds for a nut-free option! Check out our other great recipes like Ground Turkey Zucchini or Zucchini Sweet Potato for more creativity in the kitchen.

Moist Zucchini Muffin Ingredients

• The perfect ingredients for a delightful treat!

For the Muffins

  • Grated Zucchini – Adds moisture; use one packed cup without peeling for ease.
  • Crushed Pineapple – Provides sweetness and moisture; make sure to drain it well to avoid sogginess.
  • Chopped Walnuts – Adds crunch and texture; chop coarsely for best results or substitute with sunflower seeds for a nut-free option.
  • Eggs – Acts as a binder for structure; use large eggs for optimal results.
  • Vegetable Oil – Contributes to moisture; can be replaced with applesauce for a lighter version.
  • Granulated Sugar – Sweetens the muffins; consider reducing to 1/2 cup for less sweetness, or use a sugar alternative.
  • Vanilla Extract – Enhances flavor; opt for real vanilla for the best taste.
  • All-Purpose Flour – Provides structure; for gluten-free, use a 1:1 gluten-free baking blend.
  • Baking Soda and Baking Powder – Helps the muffins rise; ensure they’re fresh for maximum lift.
  • Ground Cinnamon – Adds warmth and flavor; adjust according to your personal taste.
  • Salt – Enhances overall flavor; just a pinch will balance the sweetness perfectly.

These Moist Zucchini Muffins are sure to become a favorite in your home, a delightful blend of taste and texture you can’t resist!

Step‑by‑Step Instructions for Moist Zucchini Muffins

Step 1: Preheat and Prepare
Preheat your oven to 350°F (175°C). While the oven warms, line a 12-cup muffin tin with paper liners or spray it with non-stick cooking spray. This will ensure your Moist Zucchini Muffins come out easily and maintain their soft texture. Set the prepared tin aside and get ready to mix the wet ingredients.

Step 2: Mix the Wet Ingredients
In a large mixing bowl, use a whisk to combine two large eggs, 1/2 cup of vegetable oil, 3/4 cup of granulated sugar, and 1 teaspoon of vanilla extract until the mixture is smooth and well blended. The consistency should be slightly thick but vibrant. This step is crucial as it serves as the base for your Moist Zucchini Muffins.

Step 3: Incorporate Zucchini and Pineapple
Gently fold in 1 packed cup of grated zucchini and 1 cup of drained crushed pineapple into the wet mixture. Make sure the pineapple is well-drained to avoid excess moisture in your muffins. Stir until everything is evenly distributed, giving your muffins that delightful moisture and sweetness characteristic of a deliciously moist muffin.

Step 4: Whisk Dry Ingredients
In a separate bowl, combine 1 and 3/4 cups of all-purpose flour, 1 teaspoon of baking soda, 1 teaspoon of baking powder, 1 teaspoon of ground cinnamon, and a pinch of salt. Whisk them together until they are well mixed. These dry ingredients will provide structure and help the Moist Zucchini Muffins rise beautifully.

Step 5: Combine Wet and Dry Mixtures
Slowly add the dry ingredients into the wet mixture, gently stirring with a spatula or wooden spoon. Avoid overmixing; just blend until you see no more flour visible. This step is essential for keeping your muffins light and fluffy. The batter will be thick, but don’t worry—it’s perfect for Muffins.

Step 6: Add the Walnuts
Carefully fold in 1 cup of coarsely chopped walnuts into the batter. The nuts add a wonderful crunch that complements the softness of the muffins. Make sure the walnuts are evenly dispersed throughout the batter, enhancing the texture of your Moist Zucchini Muffins without breaking them apart.

Step 7: Fill the Muffin Cups
Spoon the batter into the prepared muffin tin, filling each cup about 3/4 full. This will allow enough space for the muffins to rise without spilling over. Use a scoop or two tablespoons to ensure even portions, which will help them bake uniformly.

Step 8: Bake the Muffins
Place the muffin tin in the preheated oven and bake for 18-22 minutes. The muffins are done when they are golden brown and a toothpick inserted into the center comes out clean. Keep an eye on them during the last few minutes for the perfect bake.

Step 9: Cool Before Serving
Once baked, remove the muffins from the oven and let them cool in the pan for 5 minutes. Then, carefully transfer them to a wire rack to cool completely. This step prevents sogginess and allows them to firm up, ensuring your Moist Zucchini Muffins maintain their delicious texture.

Make Ahead Options

These Moist Zucchini Muffins with Pineapple and Crunchy Walnuts are perfect for meal prep enthusiasts! You can prepare the batter up to 24 hours in advance; just refrigerate it in an airtight container to keep it fresh. Alternatively, you can scoop the batter into the muffin tin and cover it tightly, then store in the fridge for up to 3 days before baking. When ready to bake, simply pop the chilled muffins into the preheated oven, adding an extra couple of minutes to the baking time for best results. This way, you’ll enjoy fresh, delicious muffins without the last-minute rush, making your busy mornings just a little easier!

Expert Tips for Moist Zucchini Muffins

  • Drain Zucchini Well: Ensure your grated zucchini is well-drained before adding it to the batter, as excess moisture can result in soggy muffins.
  • Avoid Overmixing: Mix the batter just until combined for fluffy, tender muffins. Overmixing can make them dense and tough.
  • Test with Toothpick: Check for doneness by inserting a toothpick into the center. If it comes out clean, your Moist Zucchini Muffins are ready!
  • Limit Add-Ins: When making variations, limit additional ingredients to one or two to maintain the muffins’ light texture.
  • Use Fresh Leavening Agents: Ensure your baking soda and baking powder are fresh to achieve the perfect rise and fluffy muffins.

How to Store and Freeze Moist Zucchini Muffins

Room Temperature: Store muffins in an airtight container at room temperature for up to 7 days to maintain freshness. Keep them away from direct sunlight for best results.

Fridge: For longer-lasting freshness, place muffins in the refrigerator for up to 2 weeks. Wrap them individually to prevent them from drying out and to maintain moisture.

Freezer: Freeze muffins by wrapping them tightly in plastic wrap and placing them in a freezer bag. They can stay fresh for up to 3 months. When ready to eat, simply thaw at room temperature or microwave for a few seconds.

Reheating: To enjoy muffins warm, reheat in the microwave for 15-20 seconds or in the oven at 350°F for 5-10 minutes for that freshly baked taste.

What to Serve with Moist Zucchini Muffins with Pineapple and Crunchy Walnuts

Treat your taste buds to a delightful meal pairing that complements the sweet and nutty flavors of these muffins perfectly.

  • Fresh Fruit Salad: A vibrant mix of seasonal fruits adds freshness and brightness alongside the muffins. The juicy sweetness enhances their flavor.

  • Cream Cheese Spread: A light layer of cream cheese offers a tangy contrast to the muffin’s sweetness, creating a rich, satisfying bite.

  • Herbal Tea: A warm herbal tea, such as chamomile or mint, provides a soothing balance and enhances the comforting vibe, perfect for breakfast or an afternoon snack.

  • Greek Yogurt Parfait: Layered with granola and fresh berries, this creamy concoction offers rich protein and complementary flavors that feel indulgent yet healthy.

  • Savory Breakfast Quiche: The eggs and veggies in a quiche provide a savory note, beautifully contrasting with the muffins’ sweetness while offering a hearty meal.

  • Almond Milk Smoothie: A light, creamy smoothie with bananas and spinach adds a nutritious, refreshing touch to your meal, making it a wonderful breakfast combo.

  • Honey Drizzle: Drizzling a bit of honey over the muffins adds an extra layer of sweetness and pairs beautifully with their moistness.

  • Cinnamon Spice Coffee: A warm cup of cinnamon coffee will keep the cozy flavors going, making every bite of your muffin even more delightful.

Moist Zucchini Muffins Customization Ideas

Feel free to let your imagination run wild with these delightful variations to make this recipe your own!

  • Nut-Free Delight: Swap chopped walnuts for sunflower seeds to cater to nut allergies while keeping the crunch.
  • Chocolate Indulgence: Add a handful of chocolate chips to the batter for a sweet twist that kids will adore—just remember to balance it with a little less sugar!
  • Fruity Surprise: Toss in some dried cranberries or raisins alongside the pineapple for an extra burst of flavor without overpowering the muffin.
  • Oatmeal Boost: Mix in a 1/2 cup of quick oats for added texture and a wholesome feel—these additions can also enhance fiber content!
  • Healthier Option: Replace half the vegetable oil with unsweetened applesauce to lighten up your muffins without sacrificing moisture.
  • Cinnamon Swirl: Add a cinnamon sugar swirl on top before baking for a delightful crust that offers an extra layer of flavor in every bite.
  • Mini Muffins: Bake these muffins as mini versions for perfectly bite-sized snacks! Adjust the baking time to about 12-15 minutes.
  • Savory Twist: Try adding crumbled feta or shredded cheddar for a savory take—that pineapple might surprise you by pairing well!

For even more delightful recipes, don’t miss out on our Crispy Zucchini Creamy Leek Fritters or Bakery Style Blueberry Muffins. Happy baking!

Moist Zucchini Muffins with Pineapple and Crunchy Walnuts Recipe FAQs

How do I know if my zucchini is ripe enough?
Absolutely! Look for zucchinis that are firm and smooth, with no dark spots or blemishes. A ripe zucchini should feel heavy for its size and should not be too large; aim for those 6 to 8 inches long for the best flavor and moisture content in your muffins.

What’s the best way to store my muffins?
To keep your Moist Zucchini Muffins fresh, store them in an airtight container at room temperature for up to 7 days. For longer shelf life, place them in the fridge wrapped individually, and they will stay fresh for about 2 weeks.

Can I freeze these muffins?
Very! To freeze your muffins, wrap each one tightly in plastic wrap and place them in a freezer-safe bag. They can be kept in the freezer for up to 3 months. When you’re ready to enjoy them, just leave them out at room temperature for a few hours, or microwave them on low for 15-20 seconds to bring back that fresh-baked warmth.

What should I do if my muffins turn out dense?
If your Moist Zucchini Muffins end up dense, it’s often due to overmixing the batter. Be sure to mix just until the dry ingredients are incorporated, with no visible flour remaining. Also, check that your leavening agents, like baking powder and baking soda, are fresh before using—they should be active for optimal rise.

Are these muffins safe for kids with nut allergies?
Absolutely! You can easily make these muffins nut-free by substituting the walnuts with sunflower seeds or even pumpkin seeds. Both options add a nice crunch without the allergens, making them a safe and delicious treat for children with nut allergies.

How can I tell when my muffins are fully baked?
The best way to check for doneness is to insert a toothpick into the center of a muffin. If it comes out clean, your Moist Zucchini Muffins are ready to be removed from the oven. Keeping an eye on them during the last few minutes is essential for perfectly cooked muffins!

Moist Zucchini Muffins

Moist Zucchini Muffins Bursting with Pineapple Goodness

These Moist Zucchini Muffins are filled with crushed pineapple and walnuts, making them a healthy and delicious breakfast option.
Prep Time 10 minutes
Cook Time 22 minutes
Cooling Time 5 minutes
Total Time 37 minutes
Servings: 12 muffins
Course: Breakfast
Cuisine: American
Calories: 180

Ingredients
  

Muffins
  • 1 cup grated zucchini packed
  • 1 cup crushed pineapple drained
  • 1 cup chopped walnuts coarsely chopped or substitute with sunflower seeds
  • 2 large eggs for binding
  • 1/2 cup vegetable oil can substitute with applesauce
  • 3/4 cup granulated sugar can reduce to 1/2 cup
  • 1 teaspoon vanilla extract real vanilla for best flavor
  • 1 3/4 cups all-purpose flour gluten-free blend can be used
  • 1 teaspoon baking soda
  • 1 teaspoon baking powder
  • 1 teaspoon ground cinnamon to taste
  • 1 pinch salt to enhance flavor

Equipment

  • Muffin Tin
  • Mixing bowls
  • Whisk
  • Spatula

Method
 

Baking Instructions
  1. Preheat your oven to 350°F (175°C) and line a muffin tin with liners.
  2. In a bowl, whisk together eggs, vegetable oil, sugar, and vanilla extract until smooth.
  3. Fold in grated zucchini and drained pineapple until combined.
  4. In another bowl, combine flour, baking soda, baking powder, cinnamon, and salt.
  5. Gradually mix dry ingredients into wet ingredients until just combined.
  6. Fold in chopped walnuts until evenly distributed.
  7. Fill each muffin cup 3/4 full with batter.
  8. Bake for 18-22 minutes, or until a toothpick comes out clean.
  9. Allow to cool in the pan for 5 minutes, then transfer to a wire rack to cool completely.

Nutrition

Serving: 1muffinCalories: 180kcalCarbohydrates: 25gProtein: 3gFat: 8gSaturated Fat: 1gPolyunsaturated Fat: 2gMonounsaturated Fat: 4gCholesterol: 20mgSodium: 180mgPotassium: 150mgFiber: 1gSugar: 5gVitamin A: 200IUVitamin C: 3mgCalcium: 20mgIron: 1mg

Notes

These muffins freeze well, and you can reheat them for a quick snack.

Tried this recipe?

Let us know how it was!

Indulge in Peanut Butter Chocolate Caramel Cookies Today

“Isn’t it amazing how a few simple ingredients can transform into something delightful?” When I first whipped up these no-bake Peanut Butter Chocolate Caramel Cookies, I couldn’t believe how effortlessly they combined chewy oats, creamy peanut butter, and sweet caramel into a heavenly treat. This recipe is all about minimal effort with maximum reward—perfect for when those sweet cravings hit but you want to skip the oven. Not only are they incredibly quick to make, but they also make for a crowd-pleasing dessert that’s bound to impress friends and family alike. Plus, you’ll love how easily you can customize them to suit your own taste. Are you ready to indulge in these delightful creations?

Why Should You Make These Cookies?

Indulgent Flavors: The rich combination of creamy peanut butter, sweet caramel, and chocolate creates a dessert experience like no other.

No-Bake Convenience: Just mix and chill—this recipe takes minimal effort and time, making it perfect for busy days.

Customizable Fun: Feel free to swap ingredients to suit your taste, whether it’s using almond butter or experimenting with dark chocolate.

Crowd-Pleasing Treat: These cookies are guaranteed to impress at gatherings, perfect for sharing with friends or family during special occasions.

Chewy Perfection: Enjoy the delightful texture of chewy oats paired with a gooey caramel center, making each bite satisfying and delightful.

If you’re in the mood for more easy treats, check out these Chocolate Cranberry Cookies or try my delicious Buttermilk Pancakes that pair wonderfully with these cookies!

Peanut Butter Chocolate Caramel Cookies Ingredients

• Get ready to create something amazing!

For the Cookie Base

  • Oats – Provide a chewy texture and sturdy base; opt for old-fashioned oats for the best results.
  • Peanut Butter – Adds creaminess and salty depth; both smooth and chunky varieties can be used for added texture.
  • Unsalted Butter – Contributes richness to the cookies, allowing you to control the salt levels.
  • Brown Sugar – Adds a delightful sweetness and moisture from its molasses content, enhancing the caramel flavor.
  • Milk – Binds the mixture together and adds a touch of moisture for a perfect consistency.
  • Vanilla Extract – Enhances the overall flavor profile, making these cookies even more decadent.

For the Sweet Fillings

  • Caramel Sauce – Adds a sweet and gooey center; use homemade or store-bought based on your preference.
  • Chocolate Chips – Used for drizzling; opt for high-quality chocolate for that luxurious touch.
  • Sea Salt – A finishing touch that balances sweetness, enhancing the flavor wonderfully.

These Peanut Butter Chocolate Caramel Cookies are all about indulgence while being super easy to whip up!

Step‑by‑Step Instructions for No-Bake Peanut Butter Chocolate Caramel Cookies

Step 1: Prepare the Base
In a medium saucepan, melt ½ cup of unsalted butter over medium heat. Add 1 cup of brown sugar and ¼ cup of milk, stirring constantly until the sugar completely dissolves and the mixture becomes glossy and bubbly, about 3-5 minutes. This forms the rich base for your Peanut Butter Chocolate Caramel Cookies.

Step 2: Combine Ingredients
Remove the saucepan from heat and whisk in 1 cup of creamy or chunky peanut butter and 1 teaspoon of vanilla extract until everything is well-blended and smooth. The combination of peanut butter and vanilla will give a delightful flavor to your cookie mixture, making it irresistibly sweet and nutty.

Step 3: Incorporate Oats
Gradually fold in 2 cups of old-fashioned oats into the peanut butter mixture. Stir gently until the oats are evenly coated with the mixture, resulting in a sticky, cohesive dough. This step is crucial for achieving the chewy texture that makes these no-bake Peanut Butter Chocolate Caramel Cookies so tempting.

Step 4: Scoop Cookies
Using a tablespoon, scoop portions of the cookie mixture onto a parchment-lined baking sheet. Flatten each scoop slightly, creating an indentation in the center for the caramel filling. Arrange the cookies close together but with enough space as they will set without spreading, making about 12-16 cookies depending on the size.

Step 5: Add Caramel
Spoon a generous dollop of caramel sauce into each indentation, allowing it to pool beautifully in the center of each cookie. The gooey caramel adds an indulgent touch, balancing wonderfully with the peanut butter and oats in your Peanut Butter Chocolate Caramel Cookies.

Step 6: Melt Chocolate
In a microwave-safe bowl, melt 1 cup of chocolate chips in short bursts of 30 seconds, stirring in between until smooth and completely melted. This method prevents burning and ensures a silky chocolate for drizzling. Once melted, it’s time to add that real chocolatey goodness to your cookies!

Step 7: Drizzle Chocolate
Using a spoon or a piping bag, drizzle the melted chocolate generously over each cookie. Be creative as you do this—everyone loves a little artistic flair! The chocolate drizzle will harden slightly as the cookies set, making them look extra inviting to anyone who sees them.

Step 8: Chill
Refrigerate the baking sheet with cookies for about 30 minutes. This will firm up the cookies, chocolate, and caramel, allowing all the layers to meld into dreamy perfection. You’ll know they are ready when the chocolate is set and the cookies have firmed up nicely.

Step 9: Serve
After chilling, allow the Peanut Butter Chocolate Caramel Cookies to come to room temperature before serving. This sweet treat is best enjoyed slightly warm, allowing the caramel and chocolate to offer a delightful experience in every bite. Perfect for sharing or as a satisfying snack!

What to Serve with No-Bake Peanut Butter Chocolate Caramel Cookies

These scrumptious treats shine even brighter when paired with delightful sides that enhance their flavors and textures.

  • Vanilla Ice Cream: A scoop of creamy vanilla ice cream adds a cool, velvety contrast to the rich, chewy cookies, making each bite a heavenly experience.
  • Fresh Berries: Juicy strawberries or raspberries bring a burst of freshness and a hint of tartness, perfectly balancing the sweetness of the cookies.
  • Coconut Whipped Cream: Light and airy, this topping adds a tropical flair and pairs wonderfully with the peanut butter and caramel.
  • Chocolaty Smoothie: A chocolate banana smoothie can be a deliciously indulgent companion, adding a creamy and chocolatey twist that complements your cookies.
  • Nutty Trail Mix: A crunchy trail mix featuring nuts and dried fruits offers a delightful contrast to the chewy cookies, enhancing the overall snacking experience.
  • Coffee or Espresso: A warm cup of coffee or a shot of espresso elevates these cookies, enhancing their flavors with a cozy, comforting vibe.
  • Chocolate-Covered Pretzels: The sweet and salty crunch of chocolate-covered pretzels can be a fantastic pairing, complementing the flavors while adding an extra crunch.
  • Caramel Sauce Drizzle: Serve with a side of warm caramel sauce for dipping, enhancing the indulgent nature of these cookies even further.
  • Milk: A classic side, cold milk will wash down the rich sweetness beautifully, making each bite more enjoyable.

Peanut Butter Chocolate Caramel Cookies Variations

Feel free to get creative and adjust the flavors of your cookies to tickle your taste buds!

  • Nut-Free Option: Replace peanut butter with sunflower seed butter for a nut-free version that still brings delicious creaminess.
  • Dark Chocolate Delight: Use dark chocolate chips instead of milk chocolate for a richer, deeper chocolate experience that complements the sweetness perfectly.
  • Fruity Twist: Add dried fruits like raisins or cranberries into the oats for a touch of natural sweetness and chewiness that contrasts beautifully with the rich caramel.
  • Crunchy Add-ins: Toss in some chopped nuts, like almonds or walnuts, to add a satisfying crunch to each bite, elevating the texture.
  • Coconut Flakes: Incorporate a half cup of unsweetened shredded coconut for a tropical twist that pairs remarkably well with the peanut butter and caramel.
  • Spiced Treat: Mix in a teaspoon of cinnamon or a pinch of cayenne pepper for subtle warmth that enhances the flavor profile with a tiny kick.
  • Holiday Cheer: Drizzle with white chocolate instead of dark for a delightful festive flair that looks as good as it tastes, especially around special occasions.
  • Oat Variety: Switch up the oats by using a combination of old-fashioned and quick oats for a variable texture; the quick oats will soften faster but still provide a chewy basis.

If you’d like to explore more delicious treats, consider making a batch of these delightful Honey Butter Brioche or whip up some smooth No-Bake Cookies and Cream Cheesecake Cups that would be a perfect pairing for your cookies!

Expert Tips for No-Bake Cookies

Choose Quality Ingredients: Using high-quality peanut butter and chocolate significantly enhances the flavor of your Peanut Butter Chocolate Caramel Cookies.

Avoid Overheating: When melting chocolate, use short bursts in the microwave to prevent seizing; stir in between for a smooth texture.

Don’t Skip the Chill: Refrigerating the cookies helps them firm up properly, ensuring the caramel and chocolate layers maintain their delightful texture without being too gooey.

Perfect Oat Consistency: Stick to old-fashioned oats instead of quick oats to maintain the chewy texture and avoid a mushy result in your cookies.

Customize with Mix-Ins: Don’t hesitate to add your favorite extras like nuts or dried fruits for unique variations on these Peanut Butter Chocolate Caramel Cookies!

Make Ahead Options

These No-Bake Peanut Butter Chocolate Caramel Cookies are ideal for busy home cooks looking to save time during the week! You can prepare the cookie base (steps 1-3) up to 24 hours in advance; just store the mixture in an airtight container in the refrigerator to maintain its texture. Additionally, scoop the cookies onto the baking sheet and create the indents for caramel, then cover and refrigerate for up to 3 days. When you’re ready to complete the recipe, simply fill the centers with caramel, drizzle with melted chocolate, and chill again for 30 minutes before serving. This way, your cookies will taste just as delicious with minimal last-minute effort!

Storage Tips for Peanut Butter Chocolate Caramel Cookies

Room Temperature: Keep the cookies in a cool, dry place for up to 3 days. Use a lined container with parchment to prevent sticking.

Fridge: Store cookies in an airtight container in the refrigerator for up to 1 week. This will help maintain the caramel and chocolate texture.

Freezer: For longer storage, freeze cookies for up to 2 months. Package them in layers with parchment paper in a freezer-safe container.

Reheating: Allow frozen cookies to thaw at room temperature for about 15-20 minutes before enjoying, ensuring a delightful warm caramel experience.

No-Bake Peanut Butter Chocolate Caramel Cookies Recipe FAQs

How do I choose the right oats?
Absolutely! For the best texture in your cookies, I recommend using old-fashioned oats. They provide that delightful chewy consistency. Instant oats may work, but they can become mushy and may not hold up as well in the cookie mixture.

What is the best way to store these cookies?
For optimal freshness, store your Peanut Butter Chocolate Caramel Cookies in an airtight container in the refrigerator for up to 1 week. This helps maintain the firmness of the caramel and chocolate layers. If you’d like them at room temperature, keep them in a cool, dry place for up to 3 days, but make sure they’re in a lined container to prevent sticking.

Can I freeze the cookies?
Very much! To freeze your cookies, first ensure they’re fully cooled. Then, layer them in a freezer-safe container, placing parchment paper between each layer to prevent sticking. They will keep well for up to 2 months. When you’re ready to enjoy one, let it thaw at room temperature for about 15-20 minutes, and you’ll have a delightful treat!

What if the chocolate drizzle seizes?
Oh no, that can happen! If your chocolate drizzle seizes up, don’t worry—just add a teaspoon of vegetable oil or melted coconut oil, and stir well until it becomes smooth again. This helps to loosen up the chocolate, allowing you to achieve that elegant drizzle over the cookies.

Is there an allergy-friendly version of this recipe?
Certainly! If you need a nut-free version, you can substitute peanut butter with sunflower seed butter or a similar seed-based spread. For chocolate allergies, opt for dairy-free chocolate chips. Just make sure to check the labels for any potential allergens, especially if you are serving these cookies to friends or family with dietary restrictions.

Can pets eat any part of these cookies?
Not at all! While the ingredients in small amounts may seem harmless to humans, many of them, particularly chocolate and certain nut products, can be toxic to pets. Always keep these cookies safely out of reach from our furry friends!

Peanut Butter Chocolate Caramel Cookies

Indulge in Peanut Butter Chocolate Caramel Cookies Today

These delectable Peanut Butter Chocolate Caramel Cookies combine creamy peanut butter, sweet caramel, and chewy oats for a delightful no-bake treat.
Prep Time 15 minutes
Cook Time 5 minutes
Chill Time 30 minutes
Total Time 50 minutes
Servings: 12 cookies
Course: Dessert
Cuisine: American
Calories: 180

Ingredients
  

For the Cookie Base
  • 2 cups old-fashioned oats Provide a chewy texture and sturdy base.
  • 1 cup creamy or chunky peanut butter Adds creaminess and salty depth.
  • 0.5 cups unsalted butter Contributes richness to the cookies.
  • 1 cup brown sugar Adds sweetness and moisture.
  • 0.25 cups milk Binds the mixture together.
  • 1 teaspoon vanilla extract Enhances the flavor profile.
For the Sweet Fillings
  • 1 cup caramel sauce Adds a sweet and gooey center.
  • 1 cup chocolate chips For drizzling, opt for high-quality chocolate.
  • 1 teaspoon sea salt Balances sweetness.

Equipment

  • Medium saucepan
  • Mixing spoon
  • Parchment paper
  • Microwave-safe bowl
  • Spoon or piping bag

Method
 

Step-by-Step Instructions
  1. In a medium saucepan, melt ½ cup of unsalted butter over medium heat. Add 1 cup of brown sugar and ¼ cup of milk, stirring constantly until the mixture is glossy and bubbly, about 3-5 minutes.
  2. Remove the saucepan from heat and whisk in 1 cup of peanut butter and 1 teaspoon of vanilla extract until smooth.
  3. Fold in 2 cups of old-fashioned oats until evenly coated.
  4. Scoop portions onto a parchment-lined baking sheet, flattening each slightly.
  5. Spoon caramel sauce into each indentation.
  6. Melt 1 cup of chocolate chips in a microwave-safe bowl in short bursts, stirring until smooth.
  7. Drizzle melted chocolate over each cookie.
  8. Refrigerate for about 30 minutes to set.
  9. Allow to come to room temperature before serving.

Nutrition

Serving: 1cookieCalories: 180kcalCarbohydrates: 22gProtein: 4gFat: 8gSaturated Fat: 4gPolyunsaturated Fat: 1gMonounsaturated Fat: 3gCholesterol: 10mgSodium: 95mgPotassium: 120mgFiber: 2gSugar: 10gVitamin A: 200IUCalcium: 30mgIron: 1mg

Notes

Using high-quality ingredients significantly enhances flavor. Refrigerating the cookies helps to maintain texture.

Tried this recipe?

Let us know how it was!

Chocolate Covered Cranberry Sauce Bites for Festive Indulgence

As I surveyed the remnants of Thanksgiving dinner, I felt a twinge of disappointment at the thought of tossing perfectly good cranberry sauce into the trash. That’s when inspiration struck—why not turn it into something truly delightful? Enter my Chocolate Covered Cranberry Sauce Bites, a clever and scrumptious way to transform that tart-sweet leftover into a memorable dessert. With an easy-to-follow process and just a few ingredients, you’ll whip up a treat that’s gluten-free and vegetarian, perfect for parties or a cozy night in. These little bites pack a punch of flavor—a delicious balance of rich chocolate and vibrant cranberry that will have both kids and adults coming back for more. Curious about how to create these holiday favorites? Let’s dive in!

Why Choose Chocolate Covered Cranberry Sauce?

Unique Twist: Transform leftover cranberry sauce into a gourmet treat that’s sure to impress your guests.
Simple Ingredients: With just a handful of common pantry items, you can make these bites without extra hassle.
Flavor Burst: Indulge in the tantalizing combination of rich dark chocolate and zesty cranberry—a crowd-pleaser for all ages!
Versatile Treat: They’re perfect for holiday gatherings or a cozy movie night; serve them alongside other delights like White Chocolate Cranberry cookies or Patriotic Chocolate Chip pie!
Quick Preparation: Ready in under an hour, these delightful bites are a time-saver for busy festive seasons.

Chocolate Covered Cranberry Sauce Ingredients

Unlock the secret to delightful bites!

For the Cranberry Bites

  • Canned Jellied Cranberry Sauce – The key ingredient that provides a sweet-tart flavor and ensures smooth texture.
  • Dark Chocolate Chips – Recommended for balancing the cranberry’s tartness; feel free to swap with milk chocolate for a sweeter touch.
  • Coconut Oil (optional) – Adds smoothness to the chocolate coating for easier dipping.

For Optional Toppings

  • Crushed Nuts – Sprinkle on top for an added crunch and nutty flavor contrast.
  • Sea Salt – A pinch can enhance the chocolate’s rich taste and the cranberry’s tartness.
  • Festive Sprinkles – Add color and fun to your bites, perfect for holiday gatherings!

With this Chocolate Covered Cranberry Sauce recipe, you’re just steps away from an unforgettable treat that celebrates the essence of Thanksgiving flavors!

Step‑by‑Step Instructions for Chocolate Covered Cranberry Sauce Bites

Step 1: Prepare the Cranberry Sauce
Begin by opening a can of jellied cranberry sauce. Slice it into approximately ½-inch thick rounds with a sharp knife, ensuring even sizes for uniform coating. The vivid red color will brighten your workspace and signal that you’re about to create something delicious with your chocolate covered cranberry sauce.

Step 2: Freeze
Place the cranberry slices neatly on a lined baking sheet, making sure they’re not touching to avoid sticking. Freeze these rounds for at least 30 minutes, allowing them to firm up nicely. You’ll know they’re ready when they feel solid to the touch, setting the perfect foundation for dipping in chocolate.

Step 3: Melt Chocolate
In a microwave-safe bowl, combine dark chocolate chips with a teaspoon of coconut oil if desired. Microwave on high for 1 minute, then stir to combine. Continue heating in 15-second intervals, stirring until smooth and melted. The chocolate should have a glossy finish, ready to envelop the cranberry slices in a delightful chocolate covered cranberry sauce.

Step 4: Dip Cranberry Slices
Remove the cranberry rounds from the freezer, and using a fork, gently dip each slice into the melted chocolate. Allow excess chocolate to drip off back into the bowl before placing them back onto the lined baking sheet. The chocolate should coat each slice beautifully, creating a tempting layer of richness over the tart cranberries.

Step 5: Set the Chocolate
Once all the cranberry slices are dipped, return the baking sheet to the freezer for an additional 30 minutes. This step is crucial as it allows the chocolate to harden completely. You’ll know they are ready when the chocolate feels firm and has a lovely shine, making your chocolate covered cranberry sauce bites a visual delight.

Step 6: Serve and Enjoy
After the chocolate has set, your chocolate covered cranberry sauce bites are ready to be served! Arrange them on a festive platter or store them in an airtight container in the refrigerator. These bites are a perfect sweet and tart treat for any occasion, ready to impress your family and friends.

Tips for the Best Chocolate Covered Cranberry Sauce

  • Layering Trick: Place wax paper between layers if storing stacked bites; this prevents sticking and keeps your chocolate covered cranberry sauce looking pristine.

  • Chill Before Dipping: Ensure cranberry slices are fully frozen before dipping; this helps the chocolate coat smoothly and prevents melting.

  • Chocolate Melting: For a glossy finish, use high-quality chocolate and a bit of coconut oil; it makes dipping easier and enhances the chocolate flavor.

  • Taste Test Variations: Experiment with different chocolate types or add spices like cinnamon; this can elevate your chocolate covered cranberry sauce bites to new flavor heights.

  • Serving Ideas: Present these bites on a beautiful platter alongside other festive treats; they make for a stunning addition to any holiday gathering.

Chocolate Covered Cranberry Sauce Variations

Dive into the world of customization! Let your creativity shine as you transform this delightful recipe into various versions perfect for every palate.

  • Coating Alternatives: Use milk chocolate or white chocolate for a sweeter or creamier take that suits your taste.
  • Nutty Crunch: Top with crushed almonds or walnuts for a delightful texture and nutty flavor that complements the chocolate beautifully.
  • Festive Sprinkles: Add colorful sprinkles on top before setting for a fun visual twist, making these bites perfect for holiday gatherings.
  • Flavor Infusions: Incorporate spices like cinnamon or ginger to the chocolate for a warming touch that dances on your taste buds.
  • Mix-and-Match Flavors: Experiment by combining dried fruits, such as diced apricots, with the cranberry for an exciting blend of flavors.
  • Dairy-Free Option: Substitute dark chocolate with dairy-free chocolate chips to make these bites suitable for lactose-intolerant friends.
  • Zesty Citrus: A pinch of orange or lemon zest added to the chocolate brings an uplifting brightness to each bite.
  • Spicy Kick: Drizzle with hot honey or sprinkle cayenne pepper atop the chocolate for a surprising sweet-heat contrast!

With these variations, you’ll find a personalized version of your Chocolate Covered Cranberry Sauce Bites that everyone will adore. Pair them with an indulgent dessert like Parmesan Crusted Sauce for a festive table or a cozy evening treat!

Make Ahead Options

These Chocolate Covered Cranberry Sauce Bites are perfect for busy home cooks looking to save time during the festive season! You can prepare the cranberry slices up to 24 hours in advance by slicing the canned jellied cranberry sauce and freezing them on a lined baking sheet. To maintain their delightful texture, make sure they are well-frozen before dipping them in chocolate. Once coated, the bites can be stored in an airtight container in the refrigerator for up to 3 days before serving. When you’re ready to enjoy them, simply return them to the freezer for about 30 minutes to firm up any softened chocolate. This way, you’ll have a delicious treat ready with minimal last-minute effort!

What to Serve with Chocolate Covered Cranberry Sauce Bites?

Delight your taste buds with a complete meal that pairs perfectly with these sweet and tart treats.

  • Creamy Mashed Potatoes: The smooth texture and buttery flavor contrast wonderfully with the sweetness of the chocolate bites.

  • Savory Cheese Platter: A selection of sharp cheeses adds a rich, salty component that balances the sweet-tart of the cranberry bites beautifully.

  • Honey-Glazed Carrots: The sweetness of these glazed carrots harmonizes with the dessert, offering a fresh crunch in between bites.

  • Roasted Brussels Sprouts: The earthy flavors of Brussels sprouts bring a depth that enhances the indulgent nature of the chocolate covered cranberry sauce.

  • Apple Cider: Serve with a chilled glass of apple cider; its fruity notes pair well with the combination of chocolate and cranberry, making for a refreshing drink.

  • Chocolate Chip Cookies: Why not serve another treat alongside? The classic flavors of chocolate chip cookies echo the chocolate bites, creating a dessert table that guests will swoon over!

Each of these pairings will elevate your Chocolate Covered Cranberry Sauce Bites into an unforgettable experience.

Storage Tips for Chocolate Covered Cranberry Sauce

Fridge: Store your chocolate covered cranberry sauce bites in an airtight container for up to one week. This keeps them fresh and preserves their delightful flavors.

Freezer: For longer storage, freeze the bites for up to three months. Place parchment paper between layers in a container to prevent sticking.

Reheating: If you’ve frozen the bites, allow them to thaw in the fridge before serving. Enjoy them chilled or at room temperature for the best taste experience.

Airtight Guidance: Ensure that the container is completely sealed to avoid moisture and air exposure, which can affect the quality of your chocolate covered cranberry sauce bites.

Chocolate Covered Cranberry Sauce Recipe FAQs

What type of cranberry sauce works best for this recipe?
The best choice is canned jellied cranberry sauce, as it has a smooth texture that holds up well during the chocolate dipping process. If you’re using homemade cranberry sauce, ensure it’s thick enough to slice without falling apart.

How should I store the chocolate covered cranberry sauce bites?
To keep your delicious bites fresh, store them in an airtight container in the refrigerator for up to one week. If you want them to last longer, freeze them for up to three months. Just make sure to use parchment paper between layers to prevent sticking!

Can I freeze the chocolate covered cranberry sauce bites?
Absolutely! To freeze, place your bites in a single layer on a baking sheet until firm, then transfer them to an airtight container. This method keeps them from sticking together, and you can enjoy them later by simply letting them thaw in the fridge!

What should I do if my chocolate isn’t melting smoothly?
If your chocolate doesn’t melt smoothly, it could be due to overheating. Try adding a teaspoon of coconut oil to your chocolate chips before melting, which helps create a smoother consistency. Heat it in short bursts and stir regularly to prevent burning.

Are these chocolate covered cranberry sauce bites safe for kids and those with allergies?
Yes, these bites are vegetarian and gluten-free, making them safe for most diets. However, always check the labels on your chocolate chips and toppings for allergens, especially if you’re serving guests with nut allergies.

How can I customize the flavor of the chocolate covered cranberry sauce bites?
Feel free to swap dark chocolate for milk or white chocolate depending on your taste preference. You can also experiment with flavors by adding a sprinkle of cinnamon or nutmeg to the melted chocolate for a festive twist!

Chocolate Covered Cranberry Sauce

Chocolate Covered Cranberry Sauce Bites for Festive Indulgence

Delightful Chocolate Covered Cranberry Sauce Bites are a perfect festive dessert made with leftover cranberry sauce.
Prep Time 15 minutes
Cook Time 15 minutes
Freezing Time 1 hour
Total Time 1 hour 30 minutes
Servings: 12 bites
Course: Dessert
Cuisine: American
Calories: 100

Ingredients
  

For the Cranberry Bites
  • 1 can Canned Jellied Cranberry Sauce
  • 1 cup Dark Chocolate Chips Can substitute with milk chocolate for sweeter flavor.
  • 1 tablespoon Coconut Oil Optional for smoother dipping.
For Optional Toppings
  • 1/2 cup Crushed Nuts For added crunch.
  • 1 teaspoon Sea Salt Enhances flavor.
  • 1/4 cup Festive Sprinkles For decoration.

Equipment

  • Microwave
  • Baking Sheet
  • Mixing Bowl
  • Fork
  • knife

Method
 

Step-by-Step Instructions
  1. Prepare the Cranberry Sauce: Open a can of jellied cranberry sauce and slice it into ½-inch thick rounds.
  2. Freeze: Place cranberry slices on a lined baking sheet and freeze for 30 minutes.
  3. Melt Chocolate: Combine dark chocolate chips and coconut oil in a bowl. Microwave until melted.
  4. Dip Cranberry Slices: Using a fork, dip each cranberry slice into melted chocolate and let excess drip off.
  5. Set the Chocolate: Return the baking sheet to the freezer for another 30 minutes to harden the chocolate.
  6. Serve and Enjoy: Serve the chocolate covered cranberry sauce bites on a platter or store in an airtight container.

Nutrition

Serving: 1biteCalories: 100kcalCarbohydrates: 12gProtein: 1gFat: 6gSaturated Fat: 3gPolyunsaturated Fat: 1gMonounsaturated Fat: 2gSodium: 50mgPotassium: 30mgFiber: 1gSugar: 8gVitamin C: 2mgCalcium: 1mgIron: 2mg

Notes

Layer with wax paper when storing to prevent sticking. Ensure cranberry slices are fully frozen before dipping.

Tried this recipe?

Let us know how it was!

Irresistible Gluten-Free Cookies & Cream Cupcakes to Indulge!

As I stood in my kitchen, surrounded by the comforting scent of baking cupcakes, I had a delightful revelation—Gluten-Free Cookies & Cream Cupcakes are a game changer for dessert lovers. These scrumptious little wonders feature a rich chocolate sandwich cookie nestled at the bottom, and are topped with a luscious cookies & cream buttercream frosting that dreams are made of. Not only are these treats gluten-free, but they’re also incredibly simple to prepare, perfect for anyone tired of fast food and looking to indulge in homemade goodness. Whether you’re hosting a gathering or treating yourself after a long day, these cupcakes will bring smiles to faces and joy to taste buds. Curious about how you can whip up these easy crowd-pleasers in your own kitchen? Let’s dive in!

Why make Gluten-Free Cookies & Cream Cupcakes?

Decadent Indulgence: Each bite of these cupcakes offers a harmonious blend of fluffy vanilla cake and rich chocolate cookie, making them utterly irresistible.

Quick and Easy: With simple ingredients and straightforward steps, anyone can create these delicious treats without spending hours in the kitchen.

Gluten-Free Delight: Perfect for those with gluten sensitivities, everyone can enjoy these delightful cupcakes without sacrificing flavor.

Customizable Options: Want to mix things up? Swap in different cookie flavors or add chocolate chips for a unique twist.

Party Perfect: Ideal for celebrations and gatherings, these cupcakes are sure to impress your guests and leave them asking for more.

For more delightful treats, check out my Chocolate Cranberry Cookies or even a refreshing Pumpkin Cream Cold Brew Coffee to accompany these sweet desserts!

Gluten-Free Cookies & Cream Cupcakes Ingredients

Here’s everything you need to bring these irresistible gluten-free treats to life!

For the Cupcakes

  • Butter – Softened, adds richness and moisture to the cupcakes. Substitution: Use dairy-free butter for a vegan option.
  • Oil – Coconut or vegetable, enhances the moisture and richness of the batter. No substitutions necessary, but can use applesauce for lower fat content.
  • Granulated Sugar – Sweetens the batter, creating a balanced flavor. No substitutions; however, coconut sugar may be used for a lower glycemic index.
  • Egg Whites – Acts as a binding agent, providing structure. Can substitute with aquafaba or flaxseed mixture for vegan options.
  • Sour Cream – Contributes moisture and a tangy flavor. Substitution: Greek yogurt or dairy-free yogurt.
  • Milk – Combined with sour cream, it adds creaminess. Use any plant-based milk as a substitute.
  • Vanilla Extract – Enhances sweetness and flavor depth. No direct substitution recommended; however, almond extract may be used for variation.
  • Gluten-Free Flour – Essential for structure; provides the body of the cupcakes. Substitution: A 1:1 gluten-free baking blend may be used.
  • Baking Powder – Leavening agent for rise and fluffiness. Check expiration date; no substitutions.
  • Salt – Balances flavors and enhances sweetness. No substitutions necessary.
  • Crushed Gluten-Free Chocolate Sandwich Cookies – Adds flavor and texture to the batter. Use different gluten-free cookie varieties for flavor twists.

For the Frosting

  • Butter – Softened, central for creamy frosting. Dairy-free options available.
  • Cream Cheese – Adds smoothness and tang to the frosting. Substitution: Dairy-free cream cheese or coconut cream for vegan option.
  • Powdered Sugar – Sweetens and thickens the frosting. No direct substitutions; however, powdered erythritol can be used for a low-sugar version.
  • Vanilla Extract – Enhances overall flavor. Substitution: Almond extract for a different taste.
  • Heavy Cream or Milk – Adjusts the consistency of frosting. Non-dairy alternatives can be used.

Step‑by‑Step Instructions for Gluten-Free Cookies & Cream Cupcakes

Step 1: Preheat the Oven
Begin your baking adventure by preheating your oven to 350°F (175°C). This ensures the perfect environment for your Gluten-Free Cookies & Cream Cupcakes to rise beautifully. While the oven heats up, gather your mixing bowls and measuring utensils, setting the stage for a delightful culinary experience.

Step 2: Cream Butter and Sugar
In a large mixing bowl, combine the softened butter, oil, and granulated sugar. Using an electric mixer, beat the ingredients together on medium speed until the mixture is creamy and fluffy, about 2–3 minutes. This step is crucial as it incorporates air, giving your cupcakes a light texture.

Step 3: Incorporate Wet Ingredients
Next, add the egg whites one at a time, mixing well after each addition until fully incorporated. Then, stir in the sour cream, milk, and vanilla extract until the mixture is smooth and well-blended. Feel free to scrape down the sides of the bowl to ensure everything is mixed evenly.

Step 4: Combine Dry Ingredients
In a separate bowl, sift together the gluten-free flour, baking powder, and salt. This process helps aerate the flour and combines the leavening agent evenly throughout. Gradually add the dry mixture into the wet ingredients while mixing on low speed until just combined and free of lumps.

Step 5: Fold in Cookies
Gently fold the crushed gluten-free chocolate sandwich cookies into the batter using a spatula. This will add a delightful crunch and rich flavor to your cupcakes. Make sure not to overmix; you want those cookie bits to remain intact for that Cookies & Cream experience.

Step 6: Prepare the Cupcake Pan
Line a cupcake pan with paper liners and place one whole chocolate sandwich cookie at the bottom of each liner. This hidden treat adds surprise and richness to each cupcake. Ensure the liners are secure, ready to be filled with the delicious batter.

Step 7: Fill with Batter
Using a spoon or a scoop, fill each cupcake liner with batter, filling them about three-quarters full. This volume allows room for the cupcakes to rise while baking. Take a moment to smooth the tops with a spatula for an even bake.

Step 8: Bake the Cupcakes
Carefully place the filled cupcake pan into the preheated oven. Bake for about 22 minutes or until a toothpick inserted in the center comes out clean. The tops should be slight golden brown and spring back when gently pressed.

Step 9: Cool the Cupcakes
Once baked, remove the pan from the oven and allow the cupcakes to cool in the pan for 8–10 minutes. This resting period helps them set properly. Afterward, transfer the cupcakes to a wire rack to cool completely before frosting.

Step 10: Make the Frosting
In a mixing bowl, beat together the softened butter and cream cheese until the mixture is creamy and smooth, about 2 minutes. Gradually mix in the powdered sugar, vanilla extract, and enough heavy cream to reach your desired frosting consistency.

Step 11: Fold in Cookies for Frosting
Once your frosting is ready, fold in the remaining crushed cookies. This will give your frosting that delightful cookies and cream flavor. You can either frost the cupcakes using a knife for a rustic look or use a piping bag for elegant decoration.

Step 12: Decorate and Serve
Once the cupcakes are completely cool and frosted, they are ready to serve! These Gluten-Free Cookies & Cream Cupcakes are perfect for sharing at parties, celebrations, or just as a sweet treat for yourself. Enjoy the delightful mix of flavors!

Gluten-Free Cookies & Cream Cupcakes Variations

Customize your Gluten-Free Cookies & Cream Cupcakes and take them to the next level with these fun and delicious variations!

  • Dairy-Free: Substitute dairy butter and cream cheese with coconut or almond options for an entirely vegan and dairy-free treat.
  • Flavor Twist: Swap crushed chocolate cookies for vanilla or peanut butter cookies to explore exciting new flavor profiles!
  • Mini Choco Chips: Add mini chocolate chips to the batter before baking for an extra dimension of indulgence in every bite.
  • Nutty Crunch: Incorporate finely chopped nuts, like pecans or walnuts, into the batter for a delightful crunchy texture.
  • Fruity Fun: Add some fresh berries into the batter for a fruity surprise that adds a refreshing contrast to the sweet frosting.
  • Herbal Note: A sprinkle of mint extract in the frosting can give your cupcakes a delightful minty refresh without overwhelming the original flavor.
  • Spicy Kick: Sprinkle a bit of cinnamon or cayenne pepper into the batter for a warm, spicy twist that will surprise your palate.
  • Decadent Drizzle: Top the cupcakes with a drizzle of chocolate ganache or caramel sauce for an elegant touch that enhances their appeal.

With any of these variations, your cupcakes will always be a hit—like pairing them with my light and creamy Chicken Fettuccine Alfredo for a complete meal experience!

What to Serve with Gluten-Free Cookies & Cream Cupcakes

Indulging in these delightful treats opens the door to a world of sweet pairings that will make your dessert experience unforgettable.

  • Classic Milk: The creamy richness of dairy or plant-based milk enhances the flavors while balancing the sweetness of the cupcakes.

  • Iced Coffee: A splash of cold coffee provides a delightful contrast to the sweetness, creating a perfect afternoon treat.

  • Fresh Berries: Vibrant strawberries or raspberries offer a refreshing tartness that cuts through the richness of the frosting.

  • Vanilla Ice Cream: A scoop of creamy vanilla ice cream melts seamlessly over the warm cupcake, creating a dreamy dessert experience.

  • Chocolate Sauce: Drizzling warm chocolate sauce adds an extra depth of flavor, transforming the cupcakes into an indulgent treat.

Imagine a cozy gathering where people savor each cupcake, and every bite is accompanied by laughter and joy. Pairing these cupcakes with your favorite beverages or fresh fruits can elevate the experience and create lasting memories.

  • Whipped Cream: Light and airy, whipped cream can be dolloped on top to add an extra layer of luxury.

  • Fruit Tart: For a party spread, a fruit tart introduces a colorful, refreshing option that complements the cupcakes’ rich chocolate flavor beautifully.

  • Sparkling Water: A bubbly drink can cleanse the palate between bites, allowing the rich flavors of the cupcakes to shine even more brightly.

  • Brownies or Bars: A plate of fudgy brownies or lemon bars creates a delightful variety and satisfies different taste preferences among your guests.

Expert Tips for Gluten-Free Cookies & Cream Cupcakes

  • Room Temperature Ingredients: Ensure butter and cream cheese are at room temperature for optimal mixing. This helps create a creamy, lump-free frosting.

  • Crushing Cookies: Use a food processor or place cookies in a ziplock bag and crush using a rolling pin. Aim for a fine crumb to incorporate smoothly into your batter.

  • Fresh Baking Powder: Double-check that your baking powder is fresh. Expired baking powder can lead to dense cupcakes that sink rather than rise beautifully.

  • Frosting Technique: For a polished finish, use a piping bag fitted with a Wilton 1M tip to frost your cupcakes. This simple tool gives your cupcakes a professional look.

  • Customize Flavor: Experiment with different crushed gluten-free cookie flavors or add mini chocolate chips to the cupcake batter for a delightful twist on these cookies & cream cupcakes.

Make Ahead Options

These Gluten-Free Cookies & Cream Cupcakes are fantastic for meal prep enthusiasts! You can prepare the cupcake batter up to 24 hours in advance by mixing all wet and dry ingredients and storing it in the refrigerator. Additionally, you can bake the cupcakes ahead and cool them completely, storing them in an airtight container for up to 3 days. For the frosting, whip it up and keep it in the fridge until you’re ready to use it; just allow it to soften for a few minutes before frosting your cupcakes. When it’s time to serve, simply frost and enjoy fresh, delightful cupcakes that are just as delicious as if made the same day!

How to Store and Freeze Gluten-Free Cookies & Cream Cupcakes

Fridge: Store leftovers in an airtight container in the fridge for up to 3-5 days, keeping them fresh and delicious.

Freezer: For longer storage, freeze cupcakes individually wrapped in plastic wrap and aluminum foil for up to 2 months.

Reheating: Thaw in the fridge overnight or microwave for 10-15 seconds for a quick treat, but avoid direct heat to maintain their moist texture.

Frosting Storage: Keep any leftover cookies & cream buttercream frosting in an airtight container in the fridge for up to 1 week; rewhip before using.

Gluten-Free Cookies & Cream Cupcakes Recipe FAQs

How do I select the right gluten-free flour?
When choosing gluten-free flour, look for blends that contain a mix of starches and whole grains for the best texture. A 1:1 gluten-free baking blend usually works great for this recipe. I often recommend checking labels for a blend that includes xanthan gum, which can help mimic the elasticity found in traditional flour.

How should I store my Gluten-Free Cookies & Cream Cupcakes?
To keep your cupcakes fresh, store them in an airtight container in the refrigerator for 3-5 days. If you would like them to last longer, you can freeze them. Just wrap each cupcake individually in plastic wrap, then place them in an airtight container or freezer bag. They can be stored in the freezer for up to 2 months!

Can I freeze the cupcakes after frosting?
Absolutely! To freeze, place the frosted cupcakes on a baking sheet to firm up for about an hour, then wrap each one individually in plastic wrap, followed by aluminum foil. This helps maintain their moisture and flavor. When you’re ready to enjoy, thaw them in the refrigerator overnight or microwave them for a quick microwave treat!

What should I do if my cupcakes sink in the middle?
If your cupcakes sink, it’s often due to overmixing the batter or using expired baking powder. Ensure you only mix until combined and check your baking powder’s expiration date before starting. Also, make sure not to open the oven door too soon during baking, as the temperature drop can cause sinking.

Is this recipe safe for nut allergies?
The Gluten-Free Cookies & Cream Cupcakes can be made nut-free by using specific substitutes. For instance, if you use a dairy-free butter and avoid almond extracts, you can cater to those with nut allergies. Always check labels for cross-contamination if you’re serving anyone with severe allergic reactions.

What can I substitute for sour cream in the cupcakes?
If you don’t have sour cream on hand, you can use Greek yogurt or a dairy-free yogurt as a substitute. Both options provide similar moisture and tang to the cupcakes. For a lower-fat option, try using applesauce or more plant-based milk, but this may slightly alter the richness of the flavor.

Gluten-Free Cookies & Cream Cupcakes

Irresistible Gluten-Free Cookies & Cream Cupcakes to Indulge!

These Gluten-Free Cookies & Cream Cupcakes are a delightful treat for dessert lovers, combining rich chocolate cookies with creamy frosting.
Prep Time 20 minutes
Cook Time 22 minutes
Cooling Time 10 minutes
Total Time 52 minutes
Servings: 12 cupcakes
Course: Dessert
Cuisine: American
Calories: 300

Ingredients
  

For the Cupcakes
  • 1 cup Butter Softened, use dairy-free for vegan option
  • 1/2 cup Oil Coconut or vegetable, no substitutions necessary
  • 1 cup Granulated Sugar No substitutions; coconut sugar may be used
  • 4 large Egg Whites Can substitute with aquafaba or flaxseed mixture
  • 1 cup Sour Cream Substitution: Greek yogurt or dairy-free yogurt
  • 1/2 cup Milk Any plant-based milk can be used
  • 2 teaspoons Vanilla Extract No direct substitution recommended
  • 1 1/2 cups Gluten-Free Flour Substitution: 1:1 gluten-free baking blend
  • 1 teaspoon Baking Powder Check expiration date; no substitutions
  • 1/2 teaspoon Salt No substitutions necessary
  • 1 cup Crushed Gluten-Free Chocolate Sandwich Cookies Use different gluten-free cookie varieties
For the Frosting
  • 1/2 cup Butter Softened, dairy-free options available
  • 8 ounces Cream Cheese Substitution: dairy-free cream cheese or coconut cream
  • 3 cups Powdered Sugar No direct substitutions; powdered erythritol for low-sugar
  • 1 teaspoon Vanilla Extract Substitution: almond extract for a different taste
  • 2 tablespoons Heavy Cream or Milk Non-dairy alternatives can be used

Equipment

  • Mixing bowls
  • Electric Mixer
  • cupcake pan
  • measuring utensils
  • Spatula
  • piping bag

Method
 

Step‑By‑Step Instructions
  1. Preheat your oven to 350°F (175°C).
  2. In a large mixing bowl, combine the softened butter, oil, and granulated sugar. Beat until creamy and fluffy, about 2–3 minutes.
  3. Add the egg whites one at a time, mixing well after each. Stir in the sour cream, milk, and vanilla extract until smooth.
  4. Sift together the gluten-free flour, baking powder, and salt in a separate bowl. Gradually mix into the wet ingredients until just combined.
  5. Gently fold in the crushed gluten-free chocolate sandwich cookies.
  6. Line a cupcake pan with paper liners and place one whole chocolate sandwich cookie at the bottom of each liner.
  7. Fill each liner about three-quarters full with batter.
  8. Bake for about 22 minutes or until a toothpick inserted comes out clean.
  9. Allow the cupcakes to cool in the pan for 8–10 minutes, then transfer to a wire rack to cool completely.
  10. Beat together the softened butter and cream cheese until creamy. Gradually mix in the powdered sugar, vanilla extract, and heavy cream.
  11. Fold in the remaining crushed cookies into the frosting.
  12. Frost the cooled cupcakes and serve.

Nutrition

Serving: 1cupcakeCalories: 300kcalCarbohydrates: 40gProtein: 3gFat: 15gSaturated Fat: 8gPolyunsaturated Fat: 1gMonounsaturated Fat: 6gCholesterol: 30mgSodium: 200mgPotassium: 150mgFiber: 1gSugar: 20gVitamin A: 400IUCalcium: 30mgIron: 1mg

Notes

Ensure all ingredients are gluten-free and check for potential allergens based on your dietary needs.

Tried this recipe?

Let us know how it was!

Cheesy Salsa Chicken and Rice Bake: Comfort in Every Bite

As I stood in my kitchen, the delightful aroma of bubbling cheese and zesty salsa wafted through the air, giving me that instant feeling of comfort everyone craves. This Cheesy Salsa Chicken and Rice Bake is not just a meal; it’s a warm embrace on a hectic day, perfect for family gatherings or cozy weeknight dinners. With its simple preparation and customization options, this recipe allows you to express your culinary creativity—whether you prefer swapping out chicken for veggies or mixing in your favorite spices. Plus, it’s a definite crowd-pleaser that guarantees smiles all around the table. Are you ready to dive into this cheesy haven of comfort food?

Why is this recipe a family favorite?

Comforting, the Cheesy Salsa Chicken and Rice Bake brings everyone together for a satisfying meal, reminiscent of home-cooked joy. Customizable, it allows you to tweak flavors or ingredients to suit any taste—try adding black olives for a twist! Quick prep time makes it ideal for busy weeknights, letting you whip up a delicious dinner in no time. Crowd-pleaser status? Absolutely! Everyone, from kids to adults, will love digging into this cheesy delight. If you’re also looking for other comforting classics, check out my Chicken Tacos Salsa or Corn Chicken Rice for more family-friendly options!

Cheesy Salsa Chicken and Rice Bake Ingredients

For the Base

  • Cooked Rice – The foundation of the dish; you can swap it for brown or cauliflower rice for a healthier twist.
  • Shredded Chicken – Adds protein; consider using precooked or rotisserie chicken for convenience.
  • Salsa – Your flavor enhancer; use mild to hot varieties depending on your preferred spice level.
  • Corn – Provides sweetness and crunch; both canned or frozen corn work beautifully.
  • Black Beans – Increases fiber and protein; make sure to rinse and drain if using canned.

For the Cheese Layer

  • Cheddar Cheese – Essential for creaminess and binding; mix in Monterey Jack or pepper jack for extra zest.

For Seasoning

  • Spices (Cumin, Garlic Powder, Onion Powder, Chili Powder) – They enhance flavor; adjust them based on your taste buds!
  • Salt and Pepper – The basics for seasoning; don’t skip these!

For Garnish

  • Fresh Cilantro (optional) – A lovely garnish for freshness and color; adds a pop to the dish.

For Greasing

  • Olive Oil – Use for greasing the baking dish to prevent sticking, ensuring a clean serve every time.

This Cheesy Salsa Chicken and Rice Bake is brimming with comfort, making it an ideal meal to gather the family around the table. Enjoy crafting this delightful dish!

Step‑by‑Step Instructions for Cheesy Salsa Chicken and Rice Bake

Step 1: Preheat the Oven
Begin your culinary adventure by preheating your oven to 375°F (190°C). While the oven warms up, grab a 9×13-inch baking dish and generously grease it with olive oil to ensure that the Cheesy Salsa Chicken and Rice Bake won’t stick. The fragrant aroma of the warming oven sets the stage for this mouthwatering dish.

Step 2: Mix Base Ingredients
In a large mixing bowl, combine the cooked rice, shredded chicken, salsa, corn, and black beans. To this flavorful foundation, add half of the shredded cheese along with your spices—cumin, garlic powder, onion powder, chili powder—seasoning with salt and pepper to taste. Use a sturdy spoon or spatula to mix everything thoroughly until you achieve a beautifully cohesive mixture.

Step 3: Transfer to Baking Dish
Once your ingredients are well combined, carefully spread the enticing mixture evenly into the greased baking dish. Make sure it’s level to ensure even cooking. The sight of vibrant colors from the salsa and corn peeking through will already have your taste buds tingling in anticipation of the Cheesy Salsa Chicken and Rice Bake.

Step 4: Top with Cheese
Next, take the remaining shredded cheese and sprinkle it generously over the mixture in the baking dish. This layer helps create that gooey, melty top that is a hallmark of a comforting casserole. The cheese will melt and bubble beautifully, turning golden brown—just what we want!

Step 5: Bake
Cover the baking dish with aluminum foil, creating a snug fit to lock in moisture, and place it in the preheated oven. Bake for about 25 minutes. Then, carefully remove the foil, allowing the cheese to achieve that bubbly, golden perfection for an additional 10-15 minutes. Keep an eye on the cheese, as it should be beautifully melted and lightly browned.

Step 6: Cool and Serve
Once your Cheesy Salsa Chicken and Rice Bake is out of the oven, allow it to cool for about 5 minutes. This brief cooling period helps set the dish, making it easier to serve. Finally, garnish with fresh cilantro if desired, and scoop generous portions onto plates for a warm and inviting meal that’s ready to delight your family!

Cheesy Salsa Chicken and Rice Bake Customization

Feel free to get creative and make this Cheesy Salsa Chicken and Rice Bake your own; the possibilities are deliciously endless!

  • Vegetarian Option: Substitute chicken with lentils, beans, or textured vegetable protein (TVP) for a hearty, meat-free dish. You’ll still enjoy all that comforting flavor!

  • Heat Preference: Adjust the salsa for desired spice level; use homemade salsa for a milder flavor or hot salsa for an extra kick that will awaken your taste buds.

  • Cheese Variety: Mix in different cheeses like Monterey Jack or pepper jack to take the flavor profile up a notch! Each cheese will melt differently, contributing its unique goodness.

  • Grain Alternatives: Swap out white rice for brown rice or quinoa for a hearty and healthy twist that adds texture and fiber. Consider using cauliflower rice for a low-carb option.

  • Extra Veggies: Toss in bell peppers, diced zucchini, or spinach to not only enhance the nutrition but also add vibrancy and color to your dish.

  • Mediterranean Flair: Integrate black olives or swap out salsa for a mix of diced tomatoes and feta cheese for a tasty Mediterranean version. It’s a fresh take on this comforting classic!

  • Diced Tomatoes: Incorporate canned diced tomatoes for added moisture and a delicious tomato flavor that beautifully complements the chicken and cheese.

If you’re excited about variations, don’t miss my Grilled Chicken Sandwich or Chicken Cashew Broccoli for more ideas on transforming your meals!

What to Serve with Cheesy Salsa Chicken and Rice Bake

Elevate your dining experience with delightful pairings that create a wholesome and satisfying meal.

  • Creamy Mashed Potatoes: These buttery potatoes offer a wonderful contrast to the zesty flavors, adding a rich, comforting touch. The smooth texture complements the cheesy bake beautifully, making each bite a dream.

  • Fresh Garden Salad: A crisp salad, bursting with seasonal greens and vibrant veggies, brings a refreshing balance to the dish. Drizzle with a light vinaigrette to cut through the richness of the baked goodness.

  • Corn on the Cob: Sweet, juicy corn is the perfect summer side, with its natural sweetness enhancing the bold flavors of the Cheesy Salsa Chicken and Rice Bake. Grilled or boiled, it’s a crowd-pleaser!

  • Roasted Vegetables: Toss a medley of your favorite seasonal vegetables in olive oil and spices, roasting them until caramelized. Their earthy flavors and slight crunch will make for an excellent contrast to the creamy bake.

  • Crispy Garlic Bread: Serve up slices of garlic bread, toasty and warm, for a satisfying crunch. The garlicky goodness matches beautifully with the savory notes of the chicken and cheese.

  • Sparkling Lemonade: Quench your thirst with a refreshing glass of sparkling lemonade. Its tartness provides a delightful contrast to the richness of the bake and cleanses the palate after every bite.

  • Chocolate Lava Cake: For dessert, indulge in a molten chocolate lava cake. Its warm, gooey center will delight everyone and create a delightful sweet ending to a savory meal.

Each of these options enhances your dinner, ensuring that your Cheesy Salsa Chicken and Rice Bake remains the star of the table!

Make Ahead Options

These Cheesy Salsa Chicken and Rice Bake is perfect for meal prep enthusiasts! You can mix the base ingredients of cooked rice, shredded chicken, salsa, corn, black beans, and half of the shredded cheese up to 24 hours in advance. Just cover the mixture tightly and refrigerate until you’re ready to bake. To keep the dish fresh, ensure it’s well sealed to prevent moisture loss. When you’re set to serve, simply transfer the mixture to a greased baking dish, top with the remaining cheese, and bake as instructed for that golden, bubbly finish. This way, you’ll enjoy a comforting, homemade meal with minimal time spent in the kitchen!

Expert Tips for Cheesy Salsa Chicken and Rice Bake

  • Moisture Matters: Cover your dish with foil during the first half of baking to keep the chicken juicy and rice perfectly cooked.

  • Cheese Perfection: For a beautifully bubbly layer, switch to a higher temperature in the final stages, ensuring your Cheesy Salsa Chicken and Rice Bake gets that golden crust you crave.

  • Grate Fresh: Always opt for freshly grated cheese over pre-shredded varieties for optimal melt and flavor.

  • Flavor Boosters: Don’t hesitate to adjust your spices! More cumin or chili powder can elevate your dish based on personal preference.

  • Cool Before Storing: If you have leftovers, allow your dish to cool completely before transferring it to airtight containers, preserving texture and taste.

  • Easy Serving: Consider serving in individual ramekins for a charming presentation at gatherings, making it feel even more special!

Storage Tips for Cheesy Salsa Chicken and Rice Bake

  • Fridge: Store leftovers in airtight containers for up to 3-4 days. Make sure to let the Cheesy Salsa Chicken and Rice Bake cool completely before sealing to maintain texture.

  • Freezer: For longer storage, freeze your baked dish in airtight containers for up to 3 months. It’s perfect for meal prep or last-minute dinners!

  • Thawing: When ready to enjoy, transfer the frozen Cheesy Salsa Chicken and Rice Bake to the refrigerator and let it thaw overnight before reheating.

  • Reheating: Reheat individual portions in the microwave or warm the entire dish in the oven at 350°F (175°C) until heated through, ensuring that it’s just as delicious as the first time!

Cheesy Salsa Chicken and Rice Bake Recipe FAQs

How do I choose ripe ingredients for this recipe?
Absolutely! When selecting ingredients, look for fresh produce. For salsa, choose ripe tomatoes for a vibrant flavor and consider fresh cilantro with lively green leaves, avoiding any that appear wilted or brown. If using corn, opt for bright-yellow kernels whether canned or frozen, ensuring they’re not past their prime.

How should I store leftovers of the Cheesy Salsa Chicken and Rice Bake?
Very good question! Allow your dish to cool completely, then place it in airtight containers. In the refrigerator, leftovers will last for about 3-4 days. For longer storage, pop it in the freezer, where it can stay delicious for up to 3 months. Just remember to label with the date so you know when to enjoy it!

Can I freeze the Cheesy Salsa Chicken and Rice Bake? What’s the best way?
Absolutely! To freeze, once cooled, cut your Cheesy Salsa Chicken and Rice Bake into portions. Wrap each piece tightly in plastic wrap, then place them in airtight containers or heavy-duty freezer bags. This way, it can last up to 3 months. When ready to heat, thaw overnight in the fridge and rewarm in the oven to retain that wonderful cheesy goodness!

What if my dish turns out too dry after baking?
A common challenge! If you find the Cheesy Salsa Chicken and Rice Bake is dry, next time consider covering it with foil for the first portion of cooking to trap moisture. You might also add a splash of chicken broth or salsa over the top if reheating, which helps revive those flavors and moisture levels.

Are there any dietary considerations I should keep in mind?
Indeed! For those with allergies, ensure all ingredients are suitable, particularly when using boxed salsa, which can contain preservatives. If preparing for guests with dietary restrictions, consider making a vegetarian version by swapping chicken for a protein source like lentils or beans, and opt for non-dairy cheese if lactose intolerance is a concern.

How can I customize the spice levels in this recipe?
Great question! To control the heat, start with a mild salsa, and you can always adjust by adding fresh or pickled jalapeños for an extra kick. Alternatively, you can create your own spice blend, increasing the chili powder incrementally until you achieve your desired level of warmth. Feel free to experiment to find what works best for you!

Cheesy Salsa Chicken and Rice Bake

Cheesy Salsa Chicken and Rice Bake

This Cheesy Salsa Chicken and Rice Bake combines creamy cheese and zesty salsa for a comforting, customizable family dinner.
Prep Time 15 minutes
Cook Time 35 minutes
Cooling Time 5 minutes
Total Time 55 minutes
Servings: 6 servings
Course: Dinner
Cuisine: Mexican
Calories: 400

Ingredients
  

For the Base
  • 3 cups Cooked Rice can swap for brown or cauliflower rice
  • 2 cups Shredded Chicken precooked or rotisserie recommended
  • 1 cup Salsa use mild to hot varieties
  • 1 cup Corn canned or frozen works
  • 1 can Black Beans rinse and drain if using canned
For the Cheese Layer
  • 2 cups Cheddar Cheese mix with Monterey Jack or pepper jack for zest
For Seasoning
  • 1 teaspoon Cumin
  • 1 teaspoon Garlic Powder
  • 1 teaspoon Onion Powder
  • 1 teaspoon Chili Powder
  • to taste Salt
  • to taste Pepper
For Garnish
  • 1 cup Fresh Cilantro optional
For Greasing
  • 1 tablespoon Olive Oil for greasing baking dish

Equipment

  • 9x13-inch baking dish
  • Mixing Bowl
  • Sturdy spoon or spatula

Method
 

Step-by-Step Instructions
  1. Preheat your oven to 375°F (190°C) and grease a 9x13-inch baking dish with olive oil.
  2. In a large mixing bowl, combine cooked rice, shredded chicken, salsa, corn, and black beans. Mix in half of the shredded cheese and the spices, seasoning with salt and pepper.
  3. Spread the mixture evenly into the greased baking dish.
  4. Sprinkle the remaining shredded cheese over the mixture.
  5. Cover with aluminum foil and bake for about 25 minutes. Remove the foil and bake for an additional 10-15 minutes until cheese is bubbly and golden.
  6. Allow to cool for 5 minutes before serving. Garnish with fresh cilantro if desired.

Nutrition

Serving: 1portionCalories: 400kcalCarbohydrates: 45gProtein: 30gFat: 15gSaturated Fat: 7gPolyunsaturated Fat: 1gMonounsaturated Fat: 5gCholesterol: 60mgSodium: 700mgPotassium: 400mgFiber: 6gSugar: 3gVitamin A: 500IUVitamin C: 15mgCalcium: 300mgIron: 3mg

Notes

For optimal texture, allow leftovers to cool completely before transferring to airtight containers for storage.

Tried this recipe?

Let us know how it was!

Ground Beef and Dumplings for the Coziest Family Dinner

The aroma of a simmering pot can instantly transport me to countless cherished family dinners, all centered around one timeless dish: Ground Beef and Dumplings. This hearty comfort food is the perfect antidote to chilly evenings, combining rich, savory gravy with fluffy dumplings that feel like a warm embrace. This recipe not only delights the taste buds but also offers a quick and satisfying way to gather loved ones around the table. With just a few simple ingredients, you can whip up a crowd-pleasing meal that is both budget-friendly and fulfilling. Are you ready to create a bowl of warmth that your family will crave again and again?

Why is Ground Beef and Dumplings a Must-Try?

Comforting warmth radiates from every bowl, making this dish a heartwarming staple for family dinners. Simple to make, you can prepare Ground Beef and Dumplings in under an hour, making it a perfect weeknight solution. Flavor-packed gravy, rich with savory goodness, envelops fluffy dumplings that melt in your mouth. Versatile options let you swap ingredients—try it with ground turkey or seasonal veggies like peas or carrots! Your whole family will be asking for seconds, just like my kids do after enjoying this dish alongside a light side salad or some crusty bread. Make it ahead of time and you’ll always have a comforting meal on standby.

Ground Beef and Dumplings Ingredients

For the Beef Mixture
Ground Beef – A hearty source of protein that brings a robust flavor. Substitute with ground turkey, chicken, or pork for different taste profiles.
Onion – Adds sweetness and depth; yellow or white onions work best for this dish.
Garlic – Essential for enhancing overall flavor; always go for fresh minced garlic.
Beef Broth – This savory base forms the heart of the dish. Chicken or vegetable broth can be substituted for a different flavor twist.
Worcestershire Sauce – Infuses umami goodness into the mix; soy sauce can be a great alternative if needed.
Black Pepper – Provides the perfect seasoning; adjust according to your spice tolerance.

For the Dumplings
All-Purpose Flour – The backbone of your dumplings, providing necessary structure; gluten-free flour can be a valid substitute.
Baking Powder – Essential for making your dumplings rise and stay fluffy; ensure it’s fresh for the best results.
Salt – A key ingredient for enhancing flavors; adjust according to your taste preference.
Sugar – Balances the savory elements; you can omit it if desired.
Milk – Adds moisture and richness; feel free to substitute with almond or oat milk for a dairy-free option.
Olive Oil – Ideal for sautéing the beef, but any cooking oil will do.

For Garnish
Fresh Parsley – An optional garnish that adds freshness and color to your dish.

With these carefully selected ingredients, your Ground Beef and Dumplings will become the cozy centerpiece of family dinners, creating memories that linger long after the plates are cleared.

Step‑by‑Step Instructions for Ground Beef and Dumplings

Step 1: Prepare the Ground Beef
Start by heating a large skillet over medium heat. Add the ground beef, breaking it apart with a spatula. Cook for about 6-8 minutes or until it’s well-browned and no longer pink, stirring occasionally. If there’s excess grease, drain it off. This savory beef will form the delicious base for your Ground Beef and Dumplings.

Step 2: Add Seasoning and Vegetables
With the beef browned, add finely chopped onions and minced garlic to the skillet. Stir everything together and cook for an additional 3-4 minutes, or until the onions become translucent and fragrant. The combination of these ingredients will infuse your dish with deep, comforting flavors, setting the stage for the hearty dumplings to come.

Step 3: Prepare the Broth
In a separate pot, pour in the beef broth and stir in a splash of Worcestershire sauce, along with black pepper to taste. Heat this mixture over medium heat and bring it to a gentle simmer, about 5 minutes. This rich broth will serve as a flavorful base, enveloping both the beef and dumplings as they cook together.

Step 4: Mix in the Dumplings
While the broth is simmering, prepare the dumpling dough by mixing flour, baking powder, salt, sugar, milk, and olive oil in a mixing bowl. Once the dough is combined, use a spoon to drop generous spoonfuls of the dumpling mixture into the simmering broth, leaving space between each dumpling to prevent them from sticking together.

Step 5: Simmer the Dish
Cover the pot with a lid and let the dumplings cook for about 15 minutes. Avoid lifting the lid during this time, as the steam is essential for achieving fluffy dumplings. You’ll know they’re done when they have puffed up and are cooked through, giving your Ground Beef and Dumplings a comforting, hearty texture.

Step 6: Combine and Serve
Gently fold the cooked ground beef mixture into the pot with the dumplings and broth. Allow everything to warm together for a couple of minutes. Once everything is well combined and heated through, ladle the savory Ground Beef and Dumplings into bowls. Garnish with fresh parsley for an added touch of color and flavor before serving hot.

Expert Tips for Ground Beef and Dumplings

  • Avoid Overcrowding: Ensure dumplings have enough space in the broth for even cooking. Overcrowding leads to sticky, uneven dumplings.

  • Gentle Simmering: Simmer the broth gently rather than rapidly boiling to create fluffy dumplings. Boiling can lead to dense textures.

  • Ingredient Substitutions: Feel free to use ground turkey or chicken instead of beef. This swap can lighten the dish while still keeping it hearty.

  • Extra Nutrition: Consider adding peas or diced carrots to the beef mixture for added color and nutrients. It enhances the flavor and visual appeal!

  • Storage Secrets: Keep leftovers in an airtight container for up to three days or freeze for up to three months. Reheat thoroughly before serving.

  • Freshness Matters: Use fresh garlic and baking powder for the best flavor and fluffiness in your dumplings. Outdated ingredients can throw off the dish’s quality.

Ground Beef and Dumplings Variations

Feel free to put your unique spin on this comforting dish and create delightful new experiences for your family!

  • Turkey Swap: Use ground turkey instead of beef for a lighter twist without sacrificing flavor.
  • Vegetable Boost: Throw in carrots or peas to the beef mixture for an extra burst of color and nutrients.
  • Spicy Kick: Add crushed red pepper flakes or a dash of hot sauce for a fiery kick that warms from the inside out.
  • Herb Enhancements: Try adding fresh thyme or rosemary for a fragrant herbal note that complements the savory gravy beautifully.
  • Dairy-Free Dumplings: Substitute regular milk with almond or oat milk to create scrumptious dairy-free dumplings.
  • Gluten-Free Flour: Use gluten-free flour in your dumplings for a celiac-friendly option, allowing everyone to enjoy this cozy classic.
  • Hearty Cheddar: Mix in some shredded cheese to the dumpling dough for a cheesy, gooey texture that will have everyone reaching for seconds.
  • Different Proteins: Swap the ground beef for a mixture of ground chicken and pork for a tasty flavor mix, inviting a new depth to your dish.

These variations can take your Ground Beef and Dumplings from familiar to extraordinary! If you’re looking for more ways to enjoy similar tasty recipes, don’t forget to check out my versions like Savory Ground Turkey or Honey Sriracha Ground. Your kitchen adventure awaits!

Make Ahead Options

These Ground Beef and Dumplings are ideal for busy weeknights and meal prep aficionados! You can brown the ground beef and sauté the onions and garlic up to 24 hours in advance; simply refrigerate them in an airtight container. The dumpling dough can also be prepared ahead and stored wrapped in plastic wrap in the fridge for up to 3 days. When you’re ready to serve, simply simmer the beef mixture and broth, drop in the refrigerated dumplings, and cook until fluffy—this will ensure your dish is just as delicious and flavorful as when made fresh! With these simple make-ahead tips, you’ll save time and enjoy a comforting meal without the last-minute rush.

How to Store and Freeze Ground Beef and Dumplings

Fridge: Store leftovers in an airtight container for up to 3 days to maintain freshness and flavor.

Freezer: For longer storage, freeze Ground Beef and Dumplings in a freezer-safe container for up to 2-3 months, ensuring it’s sealed tightly to prevent freezer burn.

Reheating: To enjoy, reheat on the stove over low heat or in the microwave until warmed through. Add a splash of broth if the dumplings seem dry!

What to Serve with Ground Beef and Dumplings

There’s nothing like a cozy family dinner where heartwarming flavors meet delightful textures, enhancing your gathering around the table.

  • Crusty Bread: Slices of warm, crusty bread are perfect for mopping up the rich beef gravy. It adds a lovely texture contrast and can make every bite feel indulgent.

  • Simple Side Salad: A light, refreshing salad with crisp greens and a tangy vinaigrette cuts through the richness of the dish, balancing flavors beautifully. Consider mixing in seasonal veggies to elevate the experience.

  • Steamed Green Beans: Bright green beans tossed with a hint of lemon and garlic bring a fresh crunch, complementing the hearty dumplings without overwhelming the palate.

  • Garlic Mashed Potatoes: Silky smooth mashed potatoes enriched with garlic pair wonderfully, transforming your dinner into a comforting feast that embraces the warmth of home.

  • Roasted Vegetables: Seasonal roasted vegetables like carrots and Brussels sprouts add earthy flavors that harmonize with the gravy. Their caramelization provides sweet notes that elevate each bite.

  • Homemade Applesauce: The sweetness of warm applesauce served on the side creates a delightful contrast to the savory beef and dumplings, offering a nostalgic twist that kids and adults alike will love.

  • Red Wine: A glass of Merlot or Cabernet Sauvignon enhances your meal’s comforting nature, adding depth and pairing seamlessly with the bold flavors of beef.

  • Chocolate Chip Cookies: End your meal on a sweet note with warm chocolate chip cookies. Their gooey decadence will leave everyone with a smile, creating memories long after the dinner is over.

Ground Beef and Dumplings Recipe FAQs

How do I know if my ingredients are ripe or fresh?
Absolutely! For the best dish, use fresh ingredients. Look for ground beef that is bright red without any brown or grey spots, and choose onions that are firm with no dark spots. Garlic should be plump and tightly wrapped. Check your baking powder to ensure it’s fresh—an easy way to test is to mix it with a bit of vinegar; it should fizz.

How should I store leftovers of Ground Beef and Dumplings?
For the freshest taste, store your leftovers in an airtight container in the refrigerator for up to 3 days. Make sure the container is sealed well to avoid any odors. You can always splash a little broth or water on the dish before reheating to restore moisture and flavor.

Can I freeze Ground Beef and Dumplings?
Yes, you can! Allow the dish to cool completely, then transfer it to a freezer-safe container. It will keep well for 2-3 months. When you’re ready to enjoy it again, simply thaw in the refrigerator overnight and reheat gently on the stove or in the microwave, adding some broth if needed for moisture.

What should I do if my dumplings are dense or chewy?
Very! If your dumplings turn out dense, it’s often due to overmixing the dough or overcrowding them in the pot. To ensure fluffy dumplings, mix the dough gently and drop spoonfuls into the simmering broth without allowing them to touch. Remember not to lift the lid while they’re cooking; steam is crucial for fluffiness.

Are there any dietary considerations I should keep in mind when making Ground Beef and Dumplings?
Absolutely! If you have allergies or dietary restrictions, you can substitute gluten-free flour for the all-purpose flour and use almond or oat milk as a dairy-free option. If you’re making this for a pet, it’s best to avoid sharing; the seasoning and certain ingredients like onions may not be safe for them. Always plan according to everyone’s needs for a home-cooked meal that everyone can enjoy!

Ground Beef and Dumplings

Ground Beef and Dumplings for the Coziest Family Dinner

A heartwarming dish of Ground Beef and Dumplings, perfect for cozy family dinners.
Prep Time 15 minutes
Cook Time 30 minutes
Total Time 45 minutes
Servings: 4 servings
Course: Beef
Cuisine: Comfort Food
Calories: 450

Ingredients
  

For the Beef Mixture
  • 1 lb Ground Beef Can substitute with ground turkey, chicken, or pork.
  • 1 medium Onion Yellow or white onions work best.
  • 3 cloves Garlic Fresh minced garlic recommended.
  • 2 cups Beef Broth Chicken or vegetable broth can be substituted.
  • 2 tbsp Worcestershire Sauce Soy sauce can be an alternative.
  • 1 tsp Black Pepper Adjust according to spice tolerance.
For the Dumplings
  • 2 cups All-Purpose Flour Gluten-free flour can be substituted.
  • 1 tbsp Baking Powder Make sure it's fresh for best results.
  • 1 tsp Salt Adjust according to taste preference.
  • 1 tbsp Sugar Can be omitted if desired.
  • 1 cup Milk Almond or oat milk can be used for a dairy-free option.
  • 2 tbsp Olive Oil Any cooking oil will suffice.
For Garnish
  • 2 tbsp Fresh Parsley Optional garnish for freshness.

Equipment

  • large skillet
  • Mixing Bowl
  • pot

Method
 

Step-by-Step Instructions
  1. Prepare the Ground Beef by heating a large skillet over medium heat. Add the ground beef, breaking it apart with a spatula. Cook for 6-8 minutes until well-browned and no longer pink, stirring occasionally.
  2. Add finely chopped onions and minced garlic to the skillet. Stir together and cook for an additional 3-4 minutes, until onions are translucent and fragrant.
  3. In a separate pot, pour in the beef broth and stir in Worcestershire sauce and black pepper. Heat over medium heat and bring to a gentle simmer for about 5 minutes.
  4. Prepare the dumpling dough by mixing flour, baking powder, salt, sugar, milk, and olive oil in a bowl. Drop spoonfuls of the dumpling mixture into the simmering broth.
  5. Cover the pot with a lid and let the dumplings cook for about 15 minutes without lifting the lid.
  6. Gently fold the cooked ground beef mixture into the pot with the dumplings and broth. Warm together for a couple of minutes, then serve hot garnished with fresh parsley.

Nutrition

Serving: 1bowlCalories: 450kcalCarbohydrates: 45gProtein: 25gFat: 18gSaturated Fat: 5gPolyunsaturated Fat: 2gMonounsaturated Fat: 10gCholesterol: 70mgSodium: 750mgPotassium: 600mgFiber: 3gSugar: 2gVitamin A: 500IUVitamin C: 3mgCalcium: 150mgIron: 3mg

Notes

For best results, use fresh garlic and ensure that baking powder is fresh for the fluffiest dumplings. Leftovers can be stored for up to three days in an airtight container or frozen for up to three months.

Tried this recipe?

Let us know how it was!

Savory Olive Cheese Bread: The Perfect Cheesy Snack Delight

As I walked through the bustling farmers’ market last weekend, the rich, briny aroma of fresh olives danced in the air. It immediately sparked an idea—a delicious creation I could hardly wait to share: my Ultimate Olive Cheese Bread. This irresistible vegetarian appetizer is not only quick to whip up, but it also combines creamy, savory goodness with gooey, melty cheese that’s baked to golden perfection. Perfect for parties or a cozy night in, it’s a delightful way to elevate your snacking game. Ready for a culinary project that offers big flavor with minimal effort? Let’s dive into this gem of a recipe!

Why is Olive Cheese Bread a Must-Try?

Irresistible Flavor: This Olive Cheese Bread brings together the perfect marriage of briny olives and gooey cheese to create a taste explosion that everyone will love.

Effortless Prep: With a straightforward process, you’ll have this cheesy delight ready for the oven in minutes—perfect for busy home cooks!

Versatility at Its Best: Serve it as an appetizer at your next gathering or pair it with soups for a comforting meal. The possibilities are endless!

Make-Ahead Friendly: You can prepare the cheese mixture in advance, making it a time-saving option for parties or family nights.

Whether you’re a fan of cheesy snacks or looking for a new appetizer, this Cookies Cream Cheesecake offers a delightful twist!

Olive Cheese Bread Ingredients

For the Filling
Full Fat Sour Cream – Adds creaminess and tang; substitute with cream cheese thinned with heavy cream for a thicker mixture.
Butter (Softened) – Provides richness and helps blend flavors; margarine can be used as a dairy-free alternative.
Green Olives – Contributes briny flavor and texture; try jalapeno or garlic-stuffed olives for added zest.
Black Olives – Offers a mild taste that balances the green olives; Kalamata olives can be used for a bolder flavor.
Monterey Jack Cheese (Shredded) – Delivers melty, gooey texture; shredding from a block improves melting properties—consider cheddar for a sharper taste.
Green Onions (Sliced) – Adds freshness and a slight onion flavor; chives can be substituted if desired.
Garlic Powder – Enhances flavor with a strong garlic note; fresh minced garlic can be adjusted to taste.

For the Bread
French Bread Loaf – Forms the base of the appetizer; ciabatta or whole wheat bread can serve as alternatives.
Kosher Salt and Fresh Cracked Pepper – Seasoning to taste; adjust according to your preference.

Olive Cheese Bread is not only a delightful treat but also a crowd-pleaser that brings joy to any gathering!

Step‑by‑Step Instructions for Olive Cheese Bread

Step 1: Preheat Your Oven
Begin by preheating your oven to 350°F (175°C). This step is crucial for achieving that perfect golden crust on your Olive Cheese Bread. While the oven heats up, gather your ingredients so everything is within easy reach, ensuring a smooth cooking experience that lets you focus on the joyful process of creating!

Step 2: Mix the Creamy Base
In a medium bowl, combine the full-fat sour cream, garlic powder, and softened butter. Use a spatula or wooden spoon to blend these ingredients together, adding a generous pinch of kosher salt and freshly cracked pepper. Aim for a mostly smooth consistency, which should take about 2-3 minutes. This creamy mixture forms the delicious foundation for your Olive Cheese Bread.

Step 3: Incorporate the Cheese and Onions
Next, stir in the shredded Monterey Jack cheese and sliced green onions into the creamy mixture. Ensure everything is well-obscured and evenly distributed, creating a rich and flavorful filling. This should take about 2 minutes of gentle stirring. The cheese will contribute that delightful melty texture you’re aiming for in your Olive Cheese Bread.

Step 4: Fold in the Olives
Gently fold in the sliced green and black olives, mixing carefully to avoid mashing the olives. This mix brings a briny, savory kick to your filling, enhancing the overall flavor of the Olive Cheese Bread. Continue folding until the olives are evenly distributed throughout the mixture, which should take an additional 1-2 minutes.

Step 5: Prepare the Bread
Take your French bread loaf and slice it in half lengthwise, then widthwise to create quarters. Lay the bread pieces cut-side up on a baking sheet lined with parchment paper. This arrangement ensures that each piece is ready to be generously topped with your lush filling and provides a sturdy base for your Olive Cheese Bread.

Step 6: Spread the Filling
Spread the olive and cheese mixture evenly on the cut sides of each bread piece, using a spatula for smooth application. Ensure to cover the entire surface—each bite should be filled with that rich, cheesy goodness. This step should be done carefully and should take about 3-5 minutes to ensure an even layer over all the bread.

Step 7: Bake to Perfection
Put the prepared baking sheet in the oven and bake your Olive Cheese Bread for 20-25 minutes. You’re looking for the cheese to be melted and the edges of the bread to turn golden brown. The aroma will begin to fill your kitchen, enticing everyone nearby with its savory scent as it bakes to perfection.

Step 8: Broil for a Toasty Finish
Switch your oven to broil for an additional 1-2 minutes once the baking time is up. This final step ensures that the top layer achieves a beautiful dark golden brown color, maximizing flavor and texture. Keep an eye on the bread during this stage to prevent it from burning—golden is the goal!

Step 9: Slice and Serve
Once finished, remove the Olive Cheese Bread from the oven and allow it to cool for a minute. Carefully slice into individual pieces, and if desired, garnish with fresh parsley for a pop of color. Serve warm alongside your favorite dips or as a stand-alone delightful snack, and watch how quickly it disappears!

Tips for the Best Olive Cheese Bread

Use Fresh Ingredients: Always choose fresh olives and quality cheeses for the best flavor profile. Aged or stale ingredients can diminish the overall taste.

Customize Your Olives: Experiment with various types of olives; stuffed olives can add unique flavors to your Olive Cheese Bread.

Avoid Overmixing: When folding in the olives, do so gently to maintain their texture. Overmixing can lead to a mushy filling.

Broil Carefully: Keep a keen eye on the Olive Cheese Bread while broiling to avoid burning. You want a golden brown top, not a charred one!

Make Ahead: If you’re hosting, prepare the cheese mixture a day in advance. This will save you time and allow the flavors to meld beautifully!

How to Store and Freeze Olive Cheese Bread

Room Temperature: Keep leftover Olive Cheese Bread in an airtight container for up to 2 days. Be sure to let it cool completely before sealing to prevent sogginess.

Fridge: Store in the refrigerator, wrapped tightly in plastic wrap or in an airtight container, for up to 3 days. Reheat in the oven for best results.

Freezer: For longer storage, freeze the baked Olive Cheese Bread for up to 3 months. Wrap tightly in foil or freezer-safe bags to prevent freezer burn.

Reheating: To reheat, thaw overnight in the fridge, then bake at 350°F (175°C) for about 10-15 minutes until warmed through. Enjoy the melty goodness again!

Olive Cheese Bread Variations & Substitutions

Feel free to let your imagination run wild and customize this recipe to suit your taste buds!

  • Dairy-Free: Use vegan cream cheese and nutritional yeast to keep it creamy and flavorful without dairy.
  • Spicy Kick: Add diced jalapeños or sriracha to the filling for a fiery twist that will awaken your taste buds.
  • Herb Infusion: Mix in fresh herbs like basil or oregano to elevate the flavor profile and add a pop of color.
  • Different Cheeses: Swap Monterey Jack for a sharper cheddar or rich fontina for a variation in taste and texture.
  • Boosted Olives: Incorporate a mix of olives, like Kalamata or stuffed varieties, for an exciting flavor explosion.
  • Added Crunch: Sprinkle some toasted pine nuts or chopped walnuts on top before baking for delightful texture and nuttiness.
  • Heartier Option: Toss in shredded rotisserie chicken to transform this into a more filling, protein-packed snack.
  • Gluten-Free Bread: Replace the French loaf with gluten-free bread to accommodate dietary restrictions without losing flavor.

Ready to explore more delicious options? You might also enjoy these delectable treats like Cheddar Mac Cheese or indulge in some rich Strawberry Cheesecake Bars for dessert after your savory delight!

Make Ahead Options

These Olive Cheese Bread beauties are perfect for meal prep, allowing you to enjoy their delicious flavors with less hassle! You can prepare the creamy filling up to 24 hours in advance by mixing together the sour cream, garlic powder, butter, cheese, green onions, and olives. Store the mixture in an airtight container in the refrigerator to keep it fresh. When you’re ready to serve, simply spread the prepped filling on the prepared bread and bake it for 20-25 minutes until the cheese is melted and the edges are golden brown. With these make-ahead tips, you’ll have a crowd-pleasing appetizer in no time—just as delicious as if you made it on the spot!

What to Serve with Olive Cheese Bread?

Enjoy this delectable bread as part of a simple yet satisfying meal that delights all senses and brings everyone together.

  • Fresh Garden Salad: A crisp salad with seasonal veggies provides a refreshing contrast to the warm, cheesy bread, balancing flavors beautifully.

  • Creamy Tomato Soup: Dip your Olive Cheese Bread into a velvety tomato soup for a classic, comforting combination that warms the soul. The acidity of the tomato cuts through the richness, making each bite exciting.

  • Charcuterie Board: Serve alongside meats, cheeses, and olives for an elegant spread that invites guests to customize their snacking experience. A fun way to add variety and let flavors mingle!

  • Savory Spinach Dip: Pairing with a warm spinach dip enhances the indulgence and complements the briny flavors, creating a party atmosphere that everyone enjoys.

  • Roasted Vegetables: Add roasted asparagus or bell peppers for a colorful, nutritious side that adds earthy flavors and vibrant colors to your table.

  • Sparkling Lemonade: A glass of refreshing sparkling lemonade not only quenches thirst but also adds a zesty brightness that elevates the overall experience, excitedly balancing the savory notes.

  • Cheesecake for Dessert: End the meal on a sweet note with a slice of cheesecake, rounding out the evening with a rich and creamy finish that keeps the deliciousness flowing!

  • White Wine Spritzer: For a simple, elegant drink, a white wine spritzer enhances your Olive Cheese Bread while adding a delightful fizz and lightness to the experience.

  • Garlic Breadsticks: An additional option for those who can’t get enough bread! These offer a different flavor profile but pair excellently with the cheesy notes.

  • Homemade Pesto Pasta: Serve it as a delightful side dish that can bring out the flavors of the olive bread, making each mouthful a new adventure.

Olive Cheese Bread Recipe FAQs

What type of olives should I use?
Absolutely! For the best flavor, I recommend using a mix of green and black olives. Green olives add a briny kick, while black olives provide a milder balance. If you’re feeling adventurous, try stuffed olives like jalapeno or garlic for a unique twist!

How should I store leftover Olive Cheese Bread?
Leftover Olive Cheese Bread can be stored in an airtight container at room temperature for up to 2 days. If you want to keep it longer, refrigerate it wrapped tightly in plastic wrap or in an airtight container for up to 3 days. Just remember, letting it cool completely before sealing will help prevent sogginess.

Can I freeze Olive Cheese Bread?
Very! You can freeze baked Olive Cheese Bread for up to 3 months. Wrap it tightly in foil or freezer-safe bags to prevent freezer burn. When you’re ready to enjoy it again, thaw overnight in the fridge, and then reheat by baking at 350°F (175°C) for about 10-15 minutes until warmed through.

What can I do if my cheese doesn’t melt properly?
No worries! If you’re having trouble with the cheese melting, it’s often due to pre-shredded varieties containing anti-caking agents. For a fantastic melt, always shred your cheese from a block. If you find your mixture too thick, add a splash of milk to make it creamier before baking.

Is this recipe gluten-free?
Definitely! To make Olive Cheese Bread gluten-free, simply swap out the French bread for your favorite gluten-free bread. There are many great options available now that provide wonderful taste and texture, so everyone can enjoy this cheesy delight!

Can I use low-fat ingredients for a healthier version?
Absolutely! If you’re leaning towards a lighter option, feel free to substitute low-fat sour cream and cheese in the recipe. While you may sacrifice some creaminess and richness, the delicious flavor will still shine through, making it a healthier alternative.

Olive Cheese Bread

Savory Olive Cheese Bread: The Perfect Cheesy Snack Delight

Olive Cheese Bread is an irresistible cheesy snack delight that's quick to make, perfect for any gathering.
Prep Time 15 minutes
Cook Time 25 minutes
Total Time 40 minutes
Servings: 8 slices
Course: Appetizer
Cuisine: Vegetarian
Calories: 300

Ingredients
  

For the Filling
  • 1 cup Full Fat Sour Cream Substitute with cream cheese thinned with heavy cream.
  • 1/2 cup Butter Softened, margarine can be used as a dairy-free alternative.
  • 1/2 cup Green Olives Try jalapeno or garlic-stuffed olives for added zest.
  • 1/2 cup Black Olives Kalamata olives can be used for a bolder flavor.
  • 2 cups Monterey Jack Cheese Shredded, consider cheddar for a sharper taste.
  • 1/4 cup Green Onions Sliced, chives can be substituted if desired.
  • 1 teaspoon Garlic Powder Fresh minced garlic can be adjusted to taste.
For the Bread
  • 1 loaf French Bread Ciabatta or whole wheat bread can serve as alternatives.
  • to taste Kosher Salt Seasoning to taste, adjust according to your preference.
  • to taste Fresh Cracked Pepper Seasoning to taste, adjust according to your preference.

Equipment

  • Oven
  • Baking Sheet
  • Medium Bowl
  • Spatula

Method
 

Step-by-Step Instructions for Olive Cheese Bread
  1. Preheat your oven to 350°F (175°C). Gather your ingredients for a smooth cooking experience.
  2. In a medium bowl, combine the sour cream, garlic powder, and softened butter, blending until mostly smooth.
  3. Stir in the shredded Monterey Jack cheese and sliced green onions into the creamy mixture until evenly distributed.
  4. Gently fold in the sliced green and black olives, mixing carefully to ensure even distribution.
  5. Slice the French bread loaf in half lengthwise and widthwise, laying cut-side up on a lined baking sheet.
  6. Spread the olive and cheese mixture evenly on the cut sides of each bread piece.
  7. Bake the Olive Cheese Bread for 20-25 minutes until the cheese is melted and the edges are golden brown.
  8. Switch to broil for an additional 1-2 minutes to achieve a beautiful golden brown top.
  9. Allow the Olive Cheese Bread to cool for a minute before slicing and serving warm.

Nutrition

Serving: 1sliceCalories: 300kcalCarbohydrates: 35gProtein: 8gFat: 15gSaturated Fat: 9gPolyunsaturated Fat: 1gMonounsaturated Fat: 5gCholesterol: 30mgSodium: 600mgPotassium: 200mgFiber: 2gSugar: 1gVitamin A: 500IUVitamin C: 1mgCalcium: 200mgIron: 1mg

Notes

Use fresh ingredients for the best flavor and feel free to customize your olive selections.

Tried this recipe?

Let us know how it was!

Ground Beef and Dumplings: A Cozy Comfort Food Delight

As the aroma of savory seasonings fills your kitchen, you can’t help but feel a wave of nostalgia wash over you. Ground Beef and Dumplings is more than just a meal; it’s a hug in a bowl, perfect for those nights when all you crave is comfort and warmth. This delightful dish comes together in no time, offering a satisfying option for busy weeknights that the whole family will adore. With a rich, flavorful gravy and fluffy dumplings that practically melt in your mouth, you can hardly resist second helpings! Plus, the best part? This recipe is easily customizable, allowing you to swap in your favorite veggies or even try different proteins, ensuring every dinner is a new experience. Want to learn how to create this cozy masterpiece? Let’s dive in!

Why is Comfort Food So Beloved?

Hearty, Ground Beef and Dumplings is the ultimate comfort food, combining rich flavors with heartwarming textures that everyone craves. Quick and Easy: This dish comes together effortlessly, making it perfect for busy weeknights. Customizable: Feel free to swap in your favorite vegetables or proteins, like substituting ground turkey or chicken for a lighter take. Family-Friendly: It’s a meal that pleases even the pickiest eaters, ensuring a happy family dinner. Nostalgic: Each bite transports you back to cozy family gatherings, making it a timeless classic worth adding to your recipe collection. If you’re in the mood for more comfort food, check out my Savory Ground Turkey Potato Skillet for another delicious option!

Ground Beef and Dumplings Ingredients

• Gather everything you need to make this comforting dish!

For the Beef Mixture

  • Ground Beef – Provides protein and rich flavor; can be substituted with ground turkey or chicken for a lighter option.
  • Onion (1 medium, diced) – Adds sweetness and depth to the flavor.
  • Garlic (2 cloves, minced) – Enhances taste with its aromatic qualities.
  • Olive Oil (2 tablespoons) – For sautéing ground beef and vegetables, helping to develop rich flavors.
  • Worcestershire Sauce (1 tablespoon) – Adds umami and depth of flavor, boosting the richness of the beef mixture.
  • Black Pepper (1/2 teaspoon) – Provides heat and enhances flavor.

For the Gravy

  • Beef Broth (2 cups) – Serves as the base for the gravy; homemade or low-sodium varieties can be used for healthier options.

For the Dumplings

  • All-purpose Flour (2 cups) – Functions as the dumpling base; gluten-free flour can be used for a gluten-free option.
  • Baking Powder (2 tablespoons) – Acts as a leavening agent for fluffy dumplings.
  • Salt (1 teaspoon) – Enhances overall flavor which is essential in comforting dishes.
  • Sugar (1 teaspoon) – Balances flavors in the dish, adding a subtle sweetness.
  • Milk (1 cup) – Adds moisture and richness to the dumplings, creating a soft texture.

Optional Garnish

  • Fresh Parsley – Adds a pop of color and freshness for a beautiful finishing touch.

With these simple ingredients, you’ll find yourself on your way to crafting a delightful bowl of Ground Beef and Dumplings that will surely delight your family!

Step‑by‑Step Instructions for Ground Beef and Dumplings

Step 1: Cook Ground Beef
In a large skillet, heat 2 tablespoons of olive oil over medium heat. Add 1 pound of ground beef and cook, breaking it apart with a spatula, until it’s browned and no longer pink, about 6-8 minutes. Drain any excess grease, and set the skillet aside while you prepare the vegetables to enhance the rich flavor of the Ground Beef and Dumplings.

Step 2: Add Seasoning and Vegetables
Stir in 1 diced onion and 2 minced garlic cloves into the skillet with the cooked ground beef. Sauté for about 3-4 minutes, or until the onion becomes translucent and fragrant. This step builds the savory base for the dish, adding depth to your Ground Beef and Dumplings.

Step 3: Prepare Broth
In a separate pot, pour in 2 cups of beef broth and bring it to a gentle simmer over medium heat. You may add a splash of Worcestershire sauce for extra flavor. Keep an eye on the broth, as it will soon be ready to cradle the fluffy dumplings.

Step 4: Mix Dumpling Dough
In a mixing bowl, combine 2 cups of all-purpose flour, 2 tablespoons of baking powder, 1 teaspoon of salt, and 1 teaspoon of sugar. Gradually stir in 1 cup of milk until the mixture is just combined and forms a soft dough. This will create the tender dumplings that perfectly complement the rich beef.

Step 5: Drop Dumplings
Once your broth is simmering, drop spoonfuls of the dumpling dough into the pot, ensuring they are spaced apart to avoid sticking together. You can use a cookie scoop or two spoons for this task. The dumplings will puff up as they cook, becoming fluffy and light.

Step 6: Simmer
Cover the pot and let the dumplings simmer in the broth for 15-20 minutes. Avoid lifting the lid too soon, as the steam is essential for fluffy dumplings. You’ll know they’re done when they have expanded and are cooked through—look for a soft, pillowy texture.

Step 7: Combine and Serve
Gently fold the ground beef mixture back into the pot with the dumplings, stirring carefully to combine without breaking the dumplings apart. Serve hot in bowls, garnishing with fresh parsley if desired. Your Ground Beef and Dumplings are now ready for a warm, comforting family dinner!

Ground Beef and Dumplings Variations

Feel free to mix things up and make this dish uniquely yours!

  • Turkey Swap: Substitute ground beef with ground turkey for a leaner option while keeping the flavor intact.
  • Chicken Delight: Use ground chicken instead of beef for a lighter, yet equally satisfying meal that the family will love.
  • Vegetable Boost: Toss in diced bell peppers or frozen peas for added nutrition and a splash of color in every bite.
  • Gluten-Free: Swap all-purpose flour for a gluten-free blend to accommodate dietary needs without sacrificing taste.
  • Herb Infusion: Sprinkle in fresh thyme or rosemary to elevate the dish with aromatic flavors that will dance on your palate.
  • Cheesy Twist: Add shredded cheese to the dumpling mixture for a gooey surprise that will delight cheese lovers!
  • Spicy Kick: Mix in some crushed red pepper flakes or diced jalapeños for an unexpected heat that adds excitement to every spoonful.

And if you’re looking for more culinary inspiration, don’t forget to check out my delicious Honey Sriracha Ground Chicken Broccoli stir-fry for a zesty alternative, or indulge in comforting Shepherd’s Pie Ground Beef for another warm family favorite!

Expert Tips for Ground Beef and Dumplings

  • Dumpling Spacing: Ensure dumplings are spaced apart when dropping them into the broth. This prevents sticking and helps them cook evenly.

  • Cook Gently: Avoid boiling the broth vigorously once the dumplings are in; a gentle simmer is key for tender, fluffy dumplings.

  • Ingredient Flexibility: Feel free to add frozen peas or diced carrots to the beef mixture for extra nutrition and color in your Ground Beef and Dumplings.

  • Flavor Boost: Experiment with different herbs like thyme or parsley in the beef mixture to enhance the overall flavor profile of the dish.

  • Consistent Dough: Don’t overmix the dumpling dough; mix just until combined for the best texture. Overmixing can lead to dense dumplings.

Make Ahead Options

Ground Beef and Dumplings is an ideal choice for meal prep, saving you precious time on busy weeknights! You can prepare the ground beef mixture and refrigerate it in an airtight container up to 3 days before serving. Just make sure to let it cool completely first to maintain its rich flavors. Additionally, you can mix the dry ingredients for the dumplings and store them in a separate container, ready to go. On the day you want to enjoy the dish, simply reheat the beef mixture, make the dumpling dough, drop it into simmering broth, and follow the remaining steps. This way, you’ll have a hearty, comforting meal with minimal effort—just as delicious as if you made it from scratch that day!

How to Store and Freeze Ground Beef and Dumplings

Fridge: Store leftovers in an airtight container for up to 3 days. This way, you can enjoy your cozy meal again!

Freezer: If you want to keep your Ground Beef and Dumplings for later, freeze in a freezer-safe container for up to 2-3 months.

Reheating: To reheat, thaw in the fridge overnight, then warm on the stovetop over low heat until heated through, stirring gently to maintain the integrity of the dumplings.

Tip: For best results, avoid freezing dumplings separately. Instead, keep the mixture combined for a hassle-free meal when you’re ready to enjoy it again.

What to Serve with Ground Beef and Dumplings

A cozy family dinner is never complete without a few delightful sides that enhance the heartwarming experience of this comforting dish.

  • Crusty Bread: Perfect for soaking up the savory gravy, crusty bread adds a satisfying crunch to your meal.

  • Garlic Mashed Potatoes: Creamy and buttery, these mashed potatoes offer a cozy complement, creating a rich, hearty plate.

  • Roasted Vegetables: A medley of seasonal roasted vegetables provides a fresh burst of flavor and vibrant color on your table.

  • Simple Green Salad: Crisp greens dressed in a light vinaigrette add a refreshing contrast to the rich beef and dumplings.

  • Steamed Broccoli: Mild and nutritious, steamed broccoli not only adds a pop of green but also balances the meal with a wholesome touch.

  • Homemade Coleslaw: Crunchy and slightly sweet, coleslaw introduces a tangy flavor that livens up the plate with its delightful crunch.

  • Apple Crisp: For dessert, a warm apple crisp pairs beautifully, with its sweet and tart flavors echoing the comfort of the main dish.

  • Red Wine: A glass of light-bodied red wine or a fruity soda can enhance the savory notes of the beef while adding a celebratory touch.

Ground Beef and Dumplings Recipe FAQs

How do I select the best ground beef for this recipe?
Absolutely! When choosing ground beef, look for lean ground beef (90% lean or higher) for a healthier option. You may also consider ground chuck for more flavor, as it’s typically more marbled. The right choice depends on your preference for richness versus lower fat content.

How should I store leftovers of Ground Beef and Dumplings?
Very! Leftovers can be stored in an airtight container in the refrigerator for up to 3 days. Be sure to let it cool to room temperature before sealing to maintain its taste and texture. Just reheat it gently on the stovetop or microwave before serving for a quick meal.

Can I freeze Ground Beef and Dumplings?
Absolutely! To freeze, place the entire dish in a freezer-safe container after letting it cool completely. It will keep well for up to 2-3 months. When you’re ready to enjoy it, thaw in the refrigerator overnight and reheat gently, stirring occasionally to maintain the dumpling’s fluffy texture.

What can I do if my dumplings come out dense?
Oh no! If your dumplings turn out dense, it might be due to overmixing the dough. When combining your ingredients, mix until just combined; a few lumps are okay. Additionally, ensure you’re cooking them in a gentle simmer rather than a rolling boil, as this can also cause tough dumplings. Don’t be discouraged; you can always try again!

Are there any dietary considerations I should keep in mind?
Definitely! For gluten-free eaters, you can substitute all-purpose flour with a gluten-free blend to make dumplings. Also, if you’re cooking for pets, keep in mind that ingredients like onions and garlic are harmful to dogs and should be avoided if you’re sharing your dinner with furry friends. Always check for allergies and preferences!

Ground Beef and Dumplings

Ground Beef and Dumplings: A Cozy Comfort Food Delight

Ground Beef and Dumplings is a comforting dish that combines rich flavors and soft dumplings, perfect for cozy family dinners.
Prep Time 20 minutes
Cook Time 30 minutes
Total Time 50 minutes
Servings: 4 servings
Course: Dinner
Cuisine: American
Calories: 500

Ingredients
  

For the Beef Mixture
  • 1 pound Ground Beef can be substituted with ground turkey or chicken
  • 1 medium Onion, diced adds sweetness and depth
  • 2 cloves Garlic, minced enhances taste
  • 2 tablespoons Olive Oil for sautéing
  • 1 tablespoon Worcestershire Sauce adds umami
  • 1/2 teaspoon Black Pepper provides heat
For the Gravy
  • 2 cups Beef Broth homemade or low-sodium
For the Dumplings
  • 2 cups All-purpose Flour gluten-free option available
  • 2 tablespoons Baking Powder for leavening
  • 1 teaspoon Salt enhances flavor
  • 1 teaspoon Sugar balances flavors
  • 1 cup Milk adds moisture
Optional Garnish
  • Fresh Parsley adds color and freshness

Equipment

  • large skillet
  • separate pot
  • Mixing Bowl

Method
 

Step-by-Step Instructions
  1. In a large skillet, heat 2 tablespoons of olive oil over medium heat. Add 1 pound of ground beef and cook until browned, about 6-8 minutes. Drain excess grease and set aside.
  2. Stir in 1 diced onion and 2 minced garlic cloves. Sauté for about 3-4 minutes until the onion is translucent.
  3. In a separate pot, bring 2 cups of beef broth to a gentle simmer. Optionally add Worcestershire sauce for extra flavor.
  4. In a mixing bowl, combine 2 cups of all-purpose flour, 2 tablespoons of baking powder, 1 teaspoon of salt, and 1 teaspoon of sugar. Gradually stir in 1 cup of milk until just combined.
  5. Drop spoonfuls of the dumpling dough into the pot with simmering broth, ensuring they are spaced apart.
  6. Cover the pot and let the dumplings simmer for 15-20 minutes until cooked through and fluffy.
  7. Gently fold the ground beef mixture back into the pot and serve hot, garnishing with fresh parsley if desired.

Nutrition

Serving: 1servingCalories: 500kcalCarbohydrates: 45gProtein: 30gFat: 20gSaturated Fat: 6gPolyunsaturated Fat: 2gMonounsaturated Fat: 5gCholesterol: 80mgSodium: 800mgPotassium: 600mgFiber: 3gSugar: 2gVitamin A: 500IUVitamin C: 5mgCalcium: 100mgIron: 3mg

Notes

Ensure dumplings are spaced apart when added to avoid sticking. Use a gentle simmer for the best texture.

Tried this recipe?

Let us know how it was!

Crispy Air Fryer Broccoli Cheddar Poppers You’ll Crave Daily

As the air fryer whirs to life, the aroma of roasted broccoli wafts through my kitchen, transporting me to carefree days of childhood snacks. These Crispy Air Fryer Broccoli Cheddar Poppers have become my go-to guilt-free treat, effortlessly merging indulgence with nutrition. With the vibrant crunch of fresh broccoli and the inviting melt of sharp cheddar, this healthy snack not only satisfies my cravings but also makes me feel great about indulging! Plus, the air fryer delivers that golden, crispy exterior we all love without drowning everything in oil. Whether you’re looking for a quick party appetizer or a fun way to sneak in veggies, these poppers are here to delight. Ready to transform your snack game and impress your friends? Let’s dive into this easy recipe that will keep you coming back for seconds!

Why are these poppers irresistible?

Irresistible Flavor: The delightful combination of broccoli and sharp cheddar ignites your taste buds with every bite.
Guilt-Free Indulgence: Enjoy a crunchy snack that’s light on calories but big on taste.
Quick & Easy: Ready in just about 20 minutes, perfect for busy weeknights or spontaneous gatherings!
Versatile Dish: Enjoy them as a snack, appetizer, or even a side dish; they fit any occasion beautifully.
Health-Conscious Delight: Full of nutrients and easily made gluten-free with the right breadcrumbs, these poppers are a smart choice for everyone! For more delicious air fryer options, check out my Air Fryer Chicken or Air Fryer Baked recipes.

Crispy Air Fryer Broccoli Cheddar Poppers Ingredients

For the Filling
Fresh Broccoli Florets – Provides nutrition, texture, and flavor; use fresh for a better crunch.
Sharp Cheddar Cheese – Adds rich, tangy flavor and melts beautifully for a creamy filling.
Cream Cheese – Binds everything together; full-fat is recommended for creaminess.
Grated Parmesan Cheese – Enhances flavor with its nutty notes and richness.
Large Egg – Acts as a binder to keep the filling intact.
Garlic Powder – Adds aromatic depth to the flavor profile.
Onion Powder – Complements the garlic, enhancing the overall taste.
Salt and Pepper – Essential for basic seasoning; adjust to your preference.

For the Coating
Panko Breadcrumbs – Offers a crunchy coating; choose gluten-free if necessary.

For Cooking
Cooking Spray – Used to achieve that perfect golden and crispy exterior during air frying.

Try making these Crispy Air Fryer Broccoli Cheddar Poppers for a delicious and healthier snack experience!

Step‑by‑Step Instructions for Crispy Air Fryer Broccoli Cheddar Poppers

Step 1: Prepare the Broccoli
Blanch fresh broccoli florets in boiling water for 2-3 minutes, or until the vibrant bright green color appears. Immediately transfer the florets to an ice bath to stop the cooking process. Once cooled, drain and pat dry thoroughly with paper towels to eliminate any excess moisture, ensuring your Crispy Air Fryer Broccoli Cheddar Poppers achieve that perfect crunch.

Step 2: Mix the Filling
In a large mixing bowl, combine the blanched broccoli, cream cheese, sharp cheddar cheese, grated parmesan cheese, egg, garlic powder, onion powder, salt, and pepper. Using a sturdy spatula or wooden spoon, mix until all ingredients are well incorporated and the mixture is creamy, creating a flavorful filling that promises cheesy goodness inside each popper.

Step 3: Shape the Poppers
With lightly dampened hands to prevent sticking, scoop out portions of the filling and roll them into 1 to 2-inch balls. Make sure the poppers are compact and well-formed, as this will help them hold their shape during cooking. Lay the formed Crispy Air Fryer Broccoli Cheddar Poppers on a clean plate, ready for their coating.

Step 4: Coat with Breadcrumbs
In a shallow dish, pour panko breadcrumbs to create an even coating surface. Gently roll each broccoli popper in the panko until fully coated, ensuring an even layer for that deliciously crunchy texture. This breadcrumb layer is key to elevating the flavor and crunchiness of your Crispy Air Fryer Broccoli Cheddar Poppers.

Step 5: Preheat the Air Fryer
Set your air fryer to preheat at 375°F (190°C) for about 5 minutes. Preheating is essential for achieving that golden-brown crispiness. As the air fryer warms up, gather your coated poppers and get ready to air fry for a delectable snack experience that’s both healthy and satisfying.

Step 6: Air Fry the Poppers
Once preheated, lightly spray the air fryer basket with cooking spray to prevent sticking. Arrange the poppers in a single layer in the basket, ensuring they are not touching. Lightly spray the tops with cooking spray for that extra crunch, setting the stage for the perfect cook on your Crispy Air Fryer Broccoli Cheddar Poppers.

Step 7: Cook
Air fry the poppers for 10-12 minutes, flipping halfway through to ensure even browning on all sides. Keep an eye out for a golden-brown color and a crispy texture that signals they’re done. When the timer goes off, let them rest briefly before serving and enjoying your delicious air-fried snack!

Make Ahead Options

These Crispy Air Fryer Broccoli Cheddar Poppers are perfect for meal prep enthusiasts! You can assemble the entire mixture and shape the poppers up to 24 hours in advance. Just prepare the broccoli, mix your filling, and form the poppers, then refrigerate them in an airtight container. This will keep them fresh and ready to cook whenever you’re short on time. When you’re ready to serve, simply preheat your air fryer, lightly spray the poppers with cooking spray, and air fry them for 10-12 minutes. This way, you’ll enjoy the same delicious, golden-brown crunch as if they were made fresh, but with the ease of prior preparation!

What to Serve with Crispy Air Fryer Broccoli Cheddar Poppers

Pairing these delightful bites with complementary dishes not only elevates your meal but also enhances their deliciousness.

  • Creamy Ranch Dressing: A classic dipping sauce that adds a cool tang, perfect for balancing the warm, cheesy poppers.

  • Garlic Aioli: This rich condiment provides a fragrant kick, enhancing each bite with creamy garlic goodness.

  • Fresh Veggie Platter: Crisp cucumbers, carrots, and bell peppers bring brightness and crunch, creating a refreshing contrast to the poppers.

  • Crispy Sweet Potato Fries: Their natural sweetness and tender texture make these fries a delightful counterpart to the savory cheese-laden bites.

  • Zesty Side Salad: A light salad with mixed greens, cherry tomatoes, and a lemon vinaigrette adds freshness and acidity, complementing the richness.

  • Herbed Quinoa: Nutty quinoa mixed with fresh herbs delivers a wholesome side that’s protein-packed and satisfying alongside the crispy poppers.

  • Cucumber Mint Lemonade: This refreshing drink, with its cool cucumber and mint notes, balances the flavors beautifully and keeps you refreshed.

  • Chocolate Dipped Fruit: For a sweet finish, serve alongside strawberries or bananas dipped in dark chocolate, marrying health with indulgence for dessert.

Expert Tips for Crispy Air Fryer Broccoli Cheddar Poppers

  • Broccoli Preparation: Ensure your broccoli is well-dried after blanching to prevent sogginess; excess moisture leads to a less crispy outcome.

  • Double Coating: For a thicker and crunchier crust, consider double-coating by dipping the poppers in beaten egg before rolling them in breadcrumbs.

  • Preheating is Key: Always preheat your air fryer to 375°F (190°C) for about 5 minutes; this step is crucial for achieving that delightful crispy exterior.

  • Even Cooking: Shake the air fryer basket a couple of times during cooking to promote even browning and a uniform crunch on your Crispy Air Fryer Broccoli Cheddar Poppers.

  • Watch the Time: Keep an eye on the poppers as they air fry; cooking times can vary slightly depending on your air fryer model. Aim for a golden brown color for the best results.

How to Store and Freeze Crispy Air Fryer Broccoli Cheddar Poppers

Fridge: Store leftovers in an airtight container in the refrigerator for up to 3 days to maintain freshness.

Freezer: To freeze, place the poppers in a single layer on a baking sheet. After they’re frozen solid, transfer them to a freezer-safe bag for up to 2 months.

Reheating: Reheat in the air fryer at 375°F (190°C) for about 5-7 minutes to restore their crispy texture, making sure they’re heated through and golden.

Defrosting: For best results, defrost in the fridge overnight before reheating, or cook directly from frozen, adding a few extra minutes as needed. Enjoy your Crispy Air Fryer Broccoli Cheddar Poppers even after storing!

Crispy Air Fryer Broccoli Cheddar Poppers Variations

Feel free to give these poppers your personal touch with delicious swaps and twists that tickle your taste buds!

  • Cheese Swap: Use mozzarella or pepper jack cheese for a gooey texture and a kick of heat. These creative alternatives add new flavor profiles.

  • Herb Infusion: Toss in finely chopped herbs like parsley or chives for a freshness that brightens every bite. Herbs can transform this dish into an aromatic delight!

  • Spicy Kick: Mix in diced jalapeños or red pepper flakes for an exciting zesty flavor. Perfect for those who crave a little heat with their cheesy goodness.

  • Nutty Crunch: Substitute panko breadcrumbs with crushed nuts for added texture and flavor. Almonds or walnuts can elevate the overall nuttiness of the poppers.

  • Vegan Version: Replace dairy with cashew cheese or almond cream and omit the egg for a plant-based version without sacrificing taste. Enjoy guilt-free snacking while staying true to your dietary preferences.

  • Sweet Twist: Add a touch of honey or maple syrup to the filling for a unique sweet and savory combination. It can awaken your taste buds in unexpected ways!

  • Savory Dipping Sauces: Serve with different dipping sauces like spicy mustard or tzatziki to enhance the flavor experience. Dips can elevate this snack into a whole new adventure!

For more tasty air-fried ideas, discover my Garlic Shrimp Broccoli or indulge in a comforting bowl of Smoky Cheddar Mac.

Crispy Air Fryer Broccoli Cheddar Poppers Recipe FAQs

Which broccoli should I use for the best flavor and texture?
Absolutely! For the best flavor and crunch, always opt for fresh broccoli florets instead of frozen. Look for vibrant green florets with firm stems and no dark spots. They should feel crisp and not rubbery, ensuring your Crispy Air Fryer Broccoli Cheddar Poppers will have the perfect texture!

How do I store leftovers of the poppers?
Very! To store, place your leftovers in an airtight container in the refrigerator for up to 3 days. This helps maintain their flavor and texture. When you’re ready to enjoy them again, simply reheat them in the air fryer at 375°F (190°C) for about 5-7 minutes, and they’ll be as crispy as when freshly made.

Can I freeze the poppers for future snacking?
Certainly! To freeze your Crispy Air Fryer Broccoli Cheddar Poppers, arrange them in a single layer on a baking sheet and freeze until solid. Once frozen, transfer them to a freezer-safe bag. This way, they’ll stay fresh for up to 2 months. When you’re ready to cook, either thaw them in the fridge overnight or cook them from frozen, adding a few extra minutes to the air frying time.

What should I do if my poppers turned out soggy?
Oh no! If you find your Crispy Air Fryer Broccoli Cheddar Poppers are soggy, it’s likely due to excess moisture. Ensure your broccoli is thoroughly dried after blanching, as any leftover water can lead to a less crispy result. If this happens again, consider taking a little time to double-coat the poppers: dip them in beaten egg before rolling in breadcrumbs for an extra crunch!

Are these poppers suitable for those with dietary restrictions?
Yes! For gluten-free options, choose gluten-free panko breadcrumbs to keep the poppers safe for anyone avoiding gluten. Additionally, if you are concerned about allergies, be sure to check the labels on your ingredients—particularly the cheese and breadcrumbs—to ensure they meet your dietary needs. These Crispy Air Fryer Broccoli Cheddar Poppers are adaptable and can be enjoyed by many!

Crispy Air Fryer Broccoli Cheddar Poppers

Crispy Air Fryer Broccoli Cheddar Poppers You’ll Crave Daily

These Crispy Air Fryer Broccoli Cheddar Poppers are a guilt-free treat that blends indulgence and nutrition.
Prep Time 10 minutes
Cook Time 12 minutes
Cooling Time 3 minutes
Total Time 25 minutes
Servings: 4 poppers
Course: Appetizer
Cuisine: American
Calories: 90

Ingredients
  

For the Filling
  • 2 cups Fresh Broccoli Florets Blanched and pat dried
  • 1 cup Sharp Cheddar Cheese Grated
  • 4 oz Cream Cheese Full-fat recommended
  • 1/4 cup Grated Parmesan Cheese
  • 1 large Egg Acts as a binder
  • 1 teaspoon Garlic Powder
  • 1 teaspoon Onion Powder
  • to taste Salt
  • to taste Pepper
For the Coating
  • 1 cup Panko Breadcrumbs Gluten-free if necessary
For Cooking
  • 1 spray Cooking Spray For air frying

Equipment

  • Air fryer
  • Mixing Bowl
  • Spatula
  • Baking Sheet
  • shallow dish

Method
 

Step‑by‑Step Instructions
  1. Blanch fresh broccoli florets in boiling water for 2-3 minutes, then transfer to an ice bath.
  2. In a mixing bowl, combine blanched broccoli, cream cheese, sharp cheddar, parmesan, egg, garlic powder, onion powder, salt, and pepper.
  3. Roll the mixture into 1 to 2-inch balls with damp hands.
  4. Coat each popper in panko breadcrumbs.
  5. Preheat air fryer to 375°F (190°C) for 5 minutes.
  6. Lightly spray the basket and arrange poppers in a single layer, spraying tops with cooking spray.
  7. Air fry for 10-12 minutes, flipping halfway, until golden-brown.

Nutrition

Serving: 1popperCalories: 90kcalCarbohydrates: 7gProtein: 5gFat: 5gSaturated Fat: 2.5gPolyunsaturated Fat: 0.5gMonounsaturated Fat: 2gCholesterol: 40mgSodium: 200mgPotassium: 180mgFiber: 1gSugar: 1gVitamin A: 500IUVitamin C: 30mgCalcium: 200mgIron: 0.5mg

Notes

For extra crunch, double-coat poppers in beaten egg before breadcrumbs. Keep an eye on cooking time for best results.

Tried this recipe?

Let us know how it was!