Decadent Whiskey Caramel Bread Pudding to Savor and Enjoy

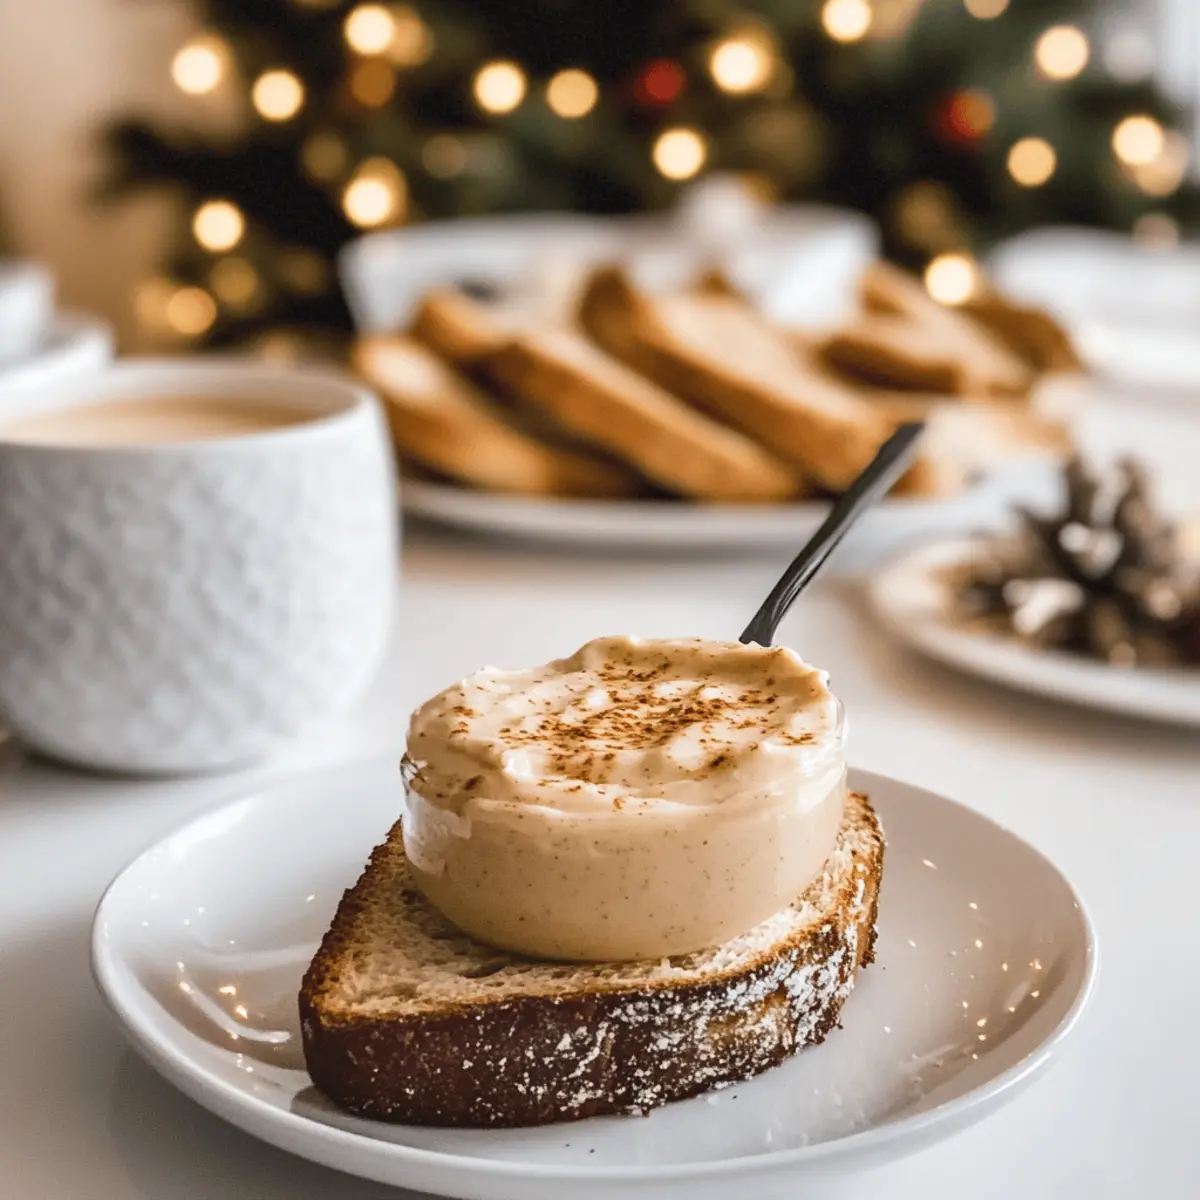
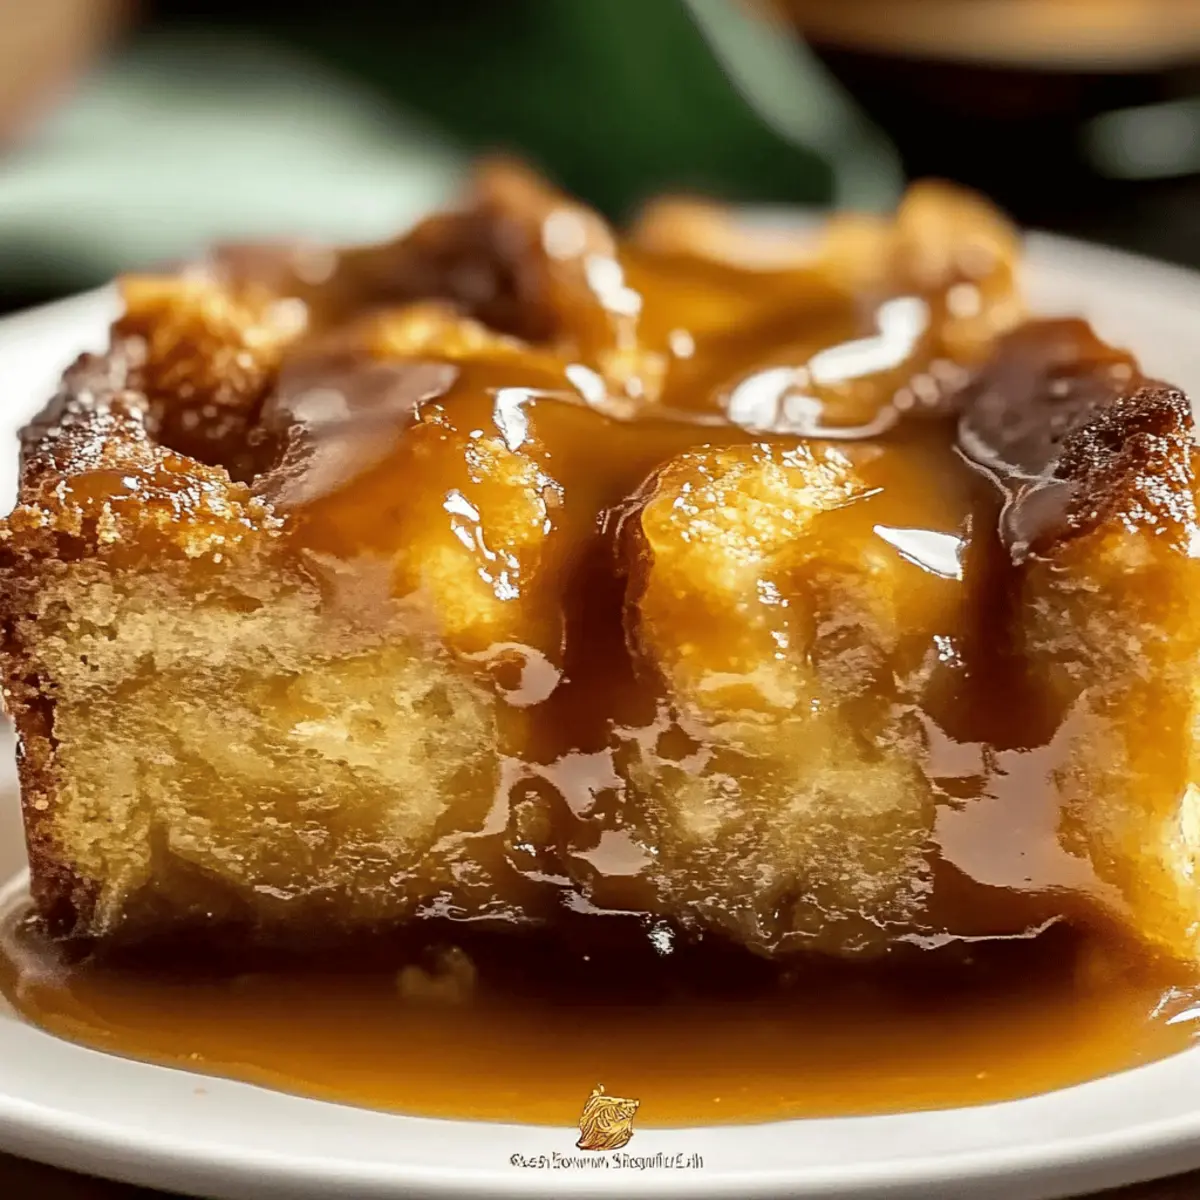
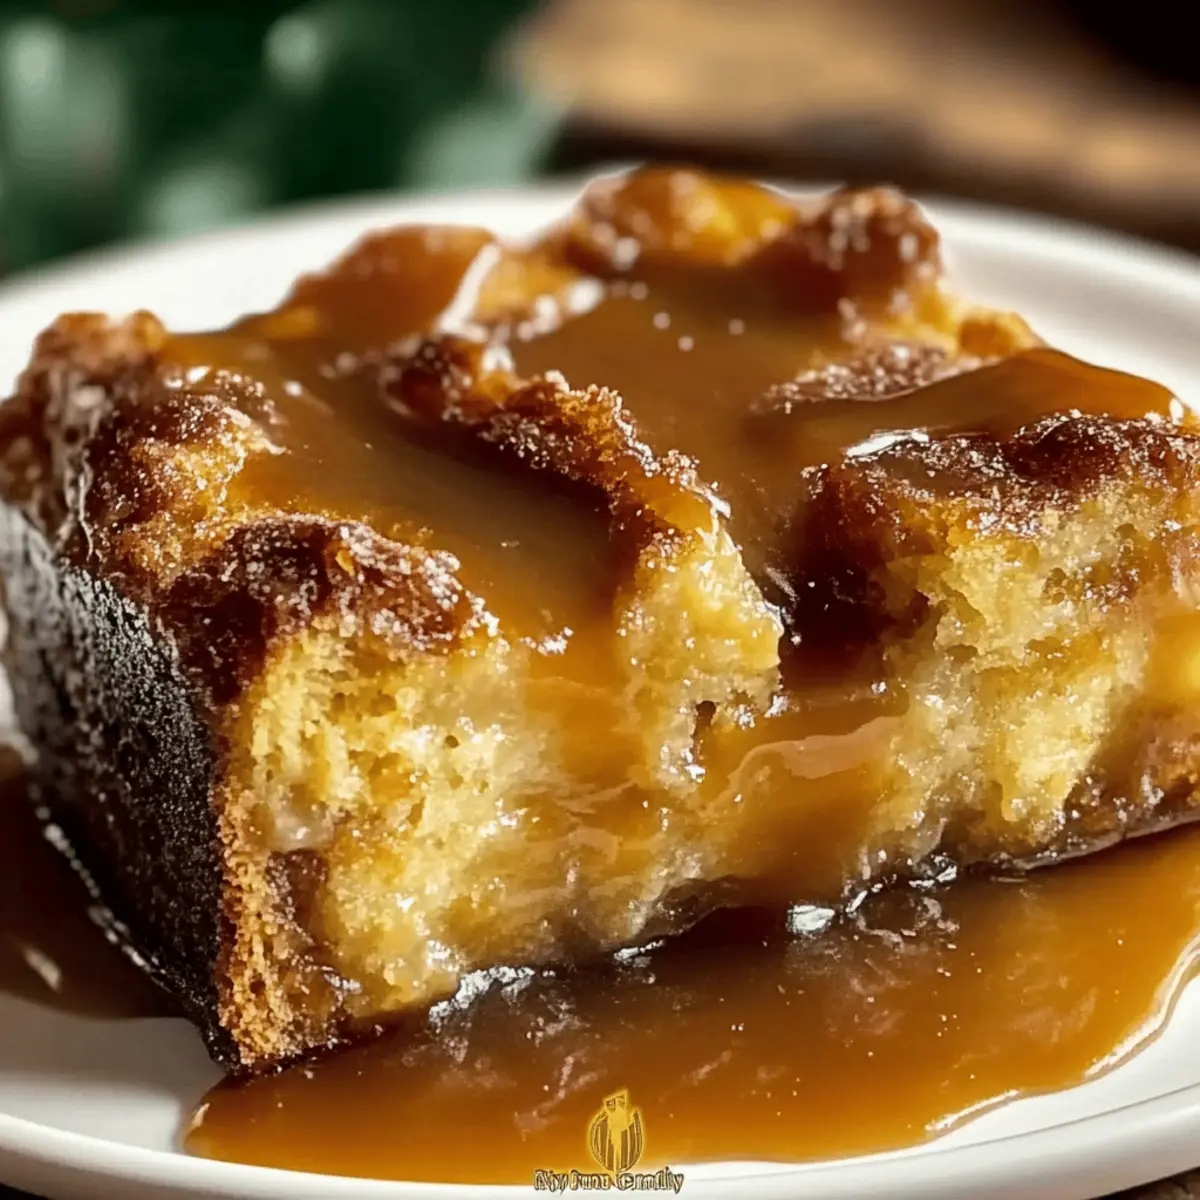
As the golden sun sets, the warm aroma of cinnamon and caramel drifts through my kitchen, taking me back to cherished family gatherings filled with laughter and the comforting clatter of silverware. Today, I’m excited to share my favorite indulgence: Whiskey Caramel Bread Pudding. This dessert combines buttery brioche soaked in a luscious custard, drizzled with a silky whiskey caramel sauce that elevates every bite. It’s not only a delightful crowd-pleaser but also a breeze to whip up for those cozy evenings at home. Trust me, this creamy, dreamy treat is perfect for any occasion, especially as we celebrate the special moments in life. Ready to impress your loved ones? Let’s dive into this delicious journey and elevate your dessert game!

Why is this bread pudding irresistible?

Decadent, this Whiskey Caramel Bread Pudding delivers a rich and buttery flavor that warms the heart. Simplicity reigns, as it requires minimal ingredients and effort, making it perfect for any home cook. Crowd-pleasing, it’s great for family gatherings or cozy dinners, delighting everyone from kids to adults. Versatile, feel free to customize with different breads or toppings for a unique twist! For a lighter option, pair it with a refreshing fruit dessert like Mango Coconut Pudding. You won’t want to miss out on this sensational dessert!

Whiskey Caramel Bread Pudding Ingredients

• Explore the essentials for this delightful dessert!

For the Bread Pudding Base

  • Brioche or French Bread – Stale bread works best for absorption, adding a delightful texture.
  • Eggs – Provides structure and richness; replace with ¾ cup unsweetened applesauce for a vegan version.
  • Milk or Cream – Adds creaminess; opt for whole milk or heavy cream for extra flavor.
  • Sugar – Sweetens the dish and enhances caramelization; use brown sugar for a deeper flavor.
  • Vanilla Extract – Enhances flavor; for an interesting twist, use rum or bourbon instead of whiskey.

For the Flavor Boost

  • Whiskey – Adds a sophisticated touch; if preferred, substitute with extra vanilla extract for a lighter flavor profile.
  • Cinnamon, Nutmeg, and Other Warm Spices – Infuse warmth and depth, making every bite comforting.

For Preparation

  • Butter – Use for greasing the dish, contributing to a rich taste and ensuring easy removal of the pudding.

For the Caramel Sauce

  • Whiskey Caramel Sauce – Drizzle over the top of the warm pudding; homemade sauce can enhance the flavor experience.

Step‑by‑Step Instructions for Whiskey Caramel Bread Pudding

Step 1: Preheat and Prepare
Begin by preheating your oven to 350°F (175°C). While the oven is heating, generously grease a 9×13-inch baking dish with butter to ensure that your delectable Whiskey Caramel Bread Pudding comes out smoothly once baked. Take a moment to appreciate the fragrant butter, which will contribute to the richness of your dessert.

Step 2: Prepare the Bread
Slice your stale brioche or French bread into 1-inch cubes and arrange them evenly in the greased baking dish. If you’re using fresh bread, consider lightly toasting the cubes in the oven for a few minutes to enhance their texture and flavor. This will form a delightful base that soaks up the custard beautifully.

Step 3: Mix the Custard
In a medium mixing bowl, whisk together the eggs, milk or cream, brown sugar, vanilla extract, and your choice of warm spices: cinnamon and nutmeg. Aim for a smooth, well-combined mixture that will envelop the bread cubes. This creamy custard will infuse your Whiskey Caramel Bread Pudding with deep flavor.

Step 4: Combine Bread and Custard
Pour the custard mixture evenly over the bread cubes, ensuring that every piece is generously coated. Use a spatula to gently press the bread down, allowing it to soak up the custard for about 10 minutes. This step is crucial for achieving a light, fluffy pudding that won’t dry out during baking.

Step 5: Bake the Pudding
Place your baking dish in the preheated oven and bake for approximately 50 minutes. Keep an eye on the pudding; you want the center to be set but still slightly soft, with a golden top. A clean toothpick inserted into the center should come out with a few moist crumbs, confirming the perfect texture.

Step 6: Cool and Serve
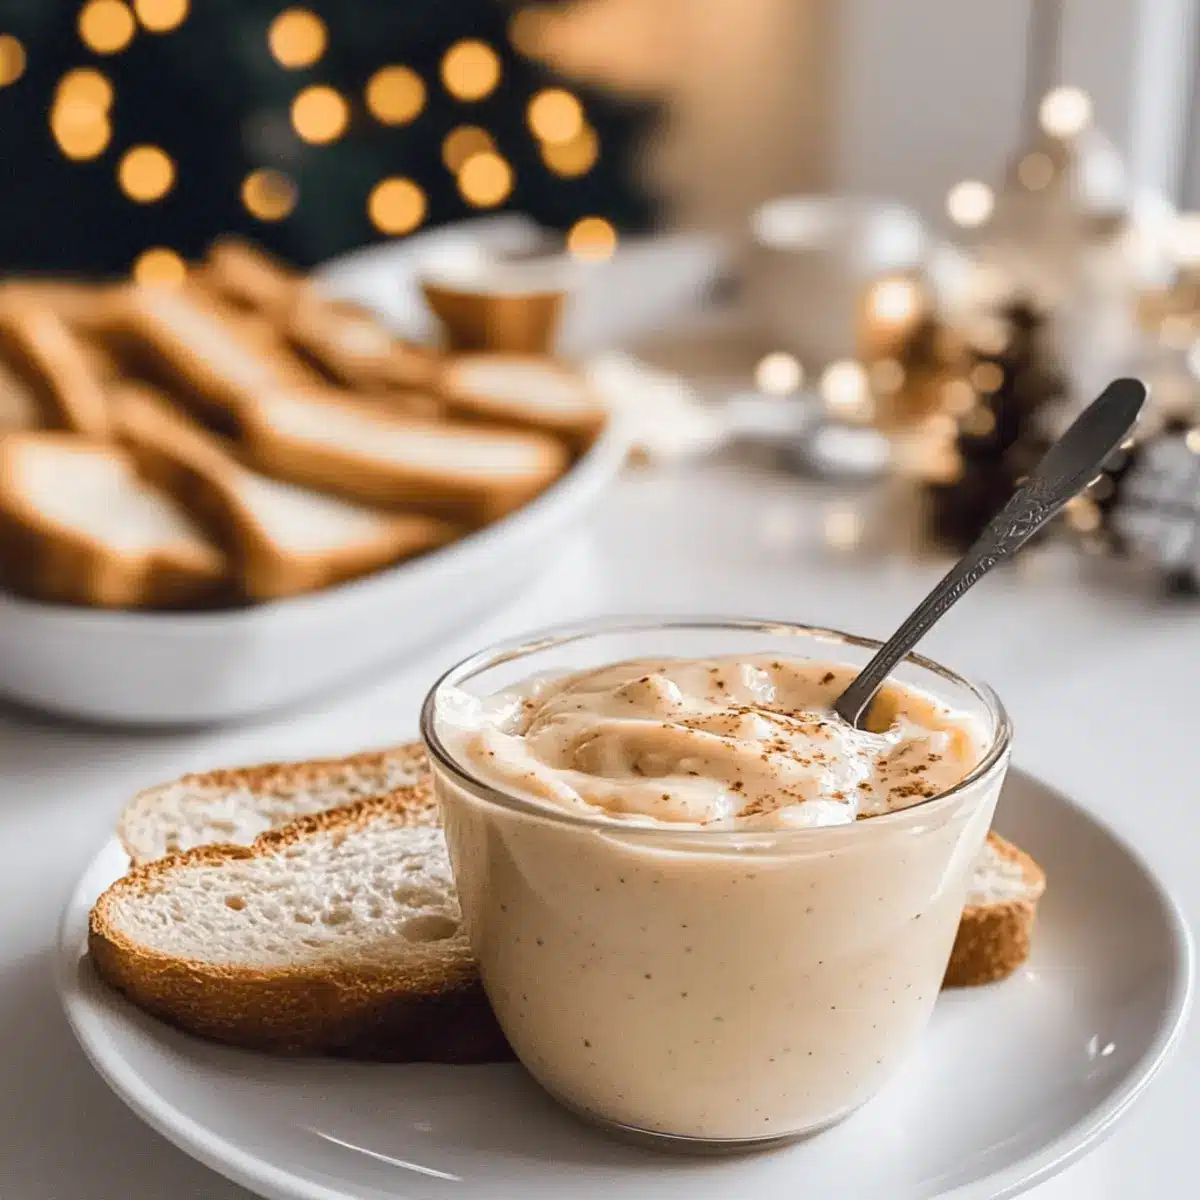
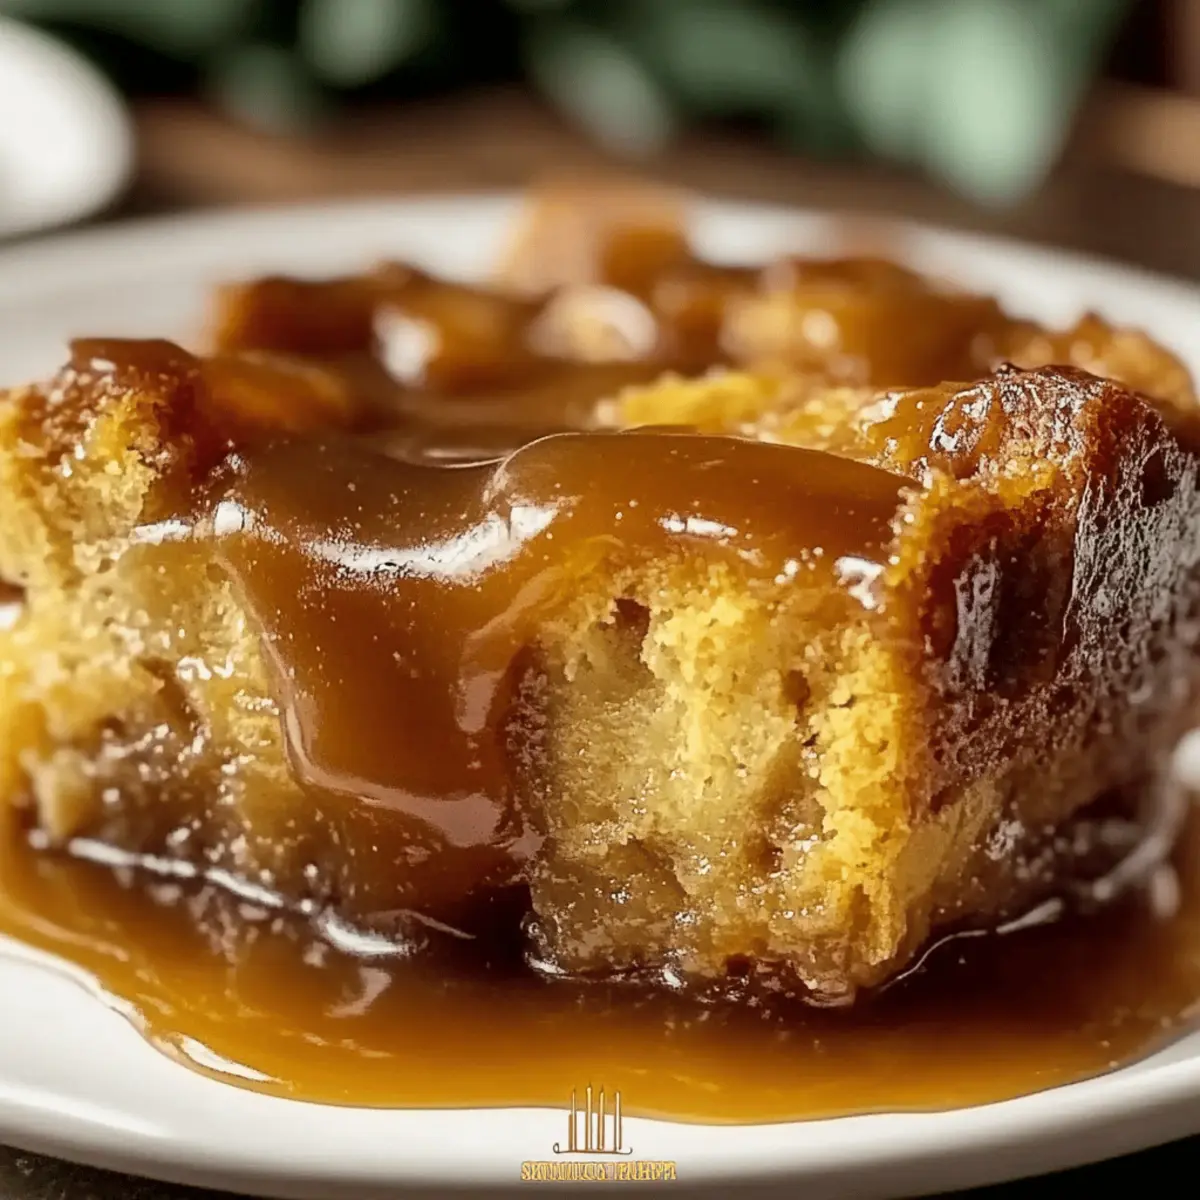
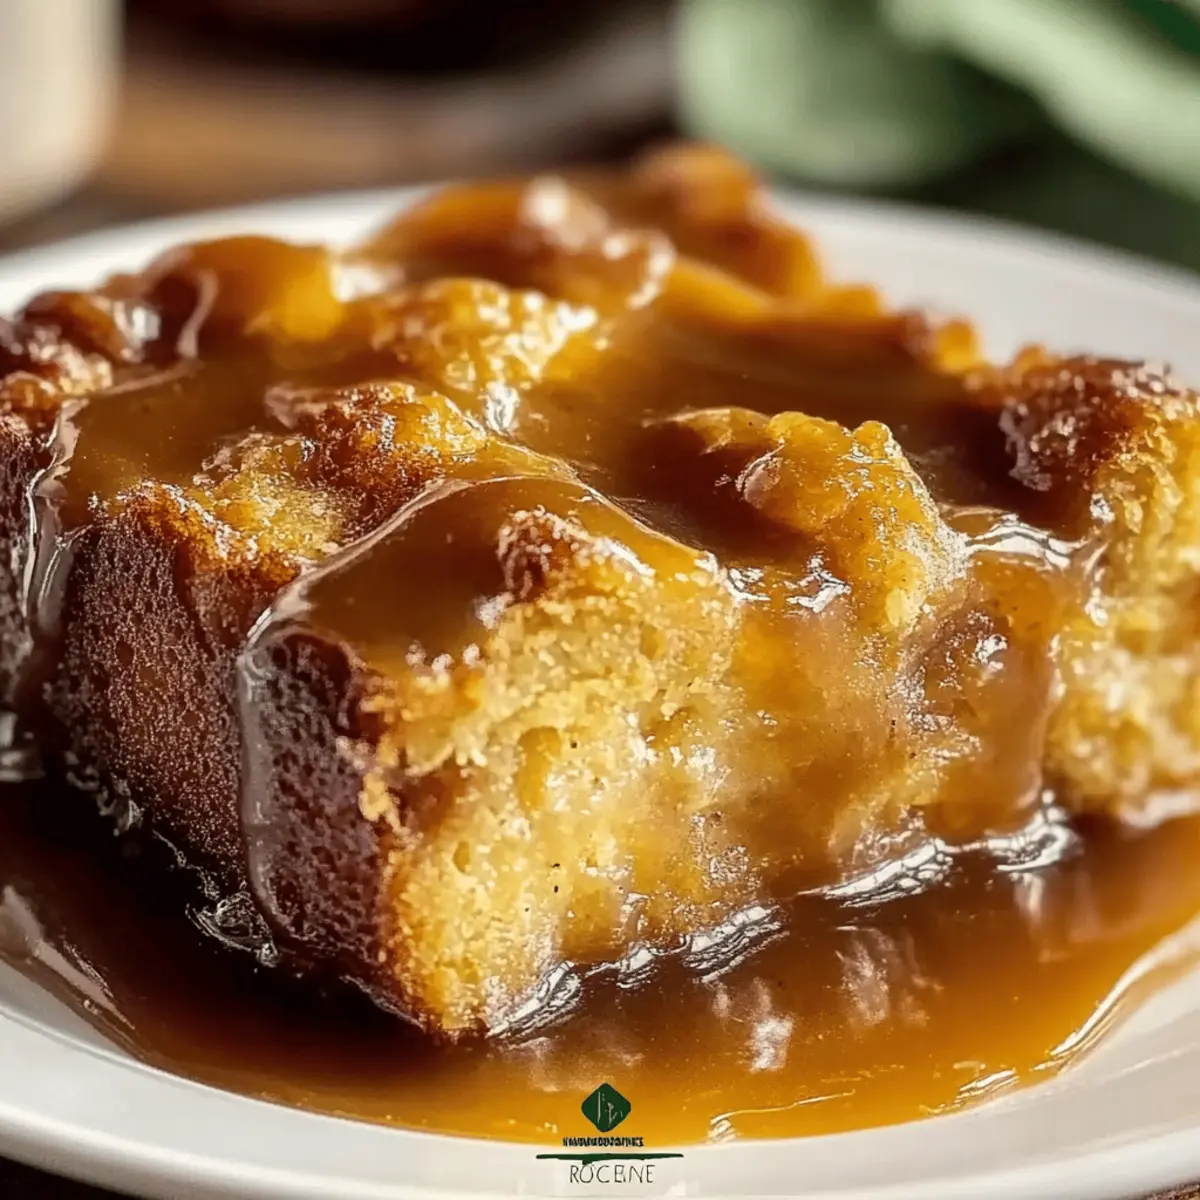
Once your whiskey caramel bread pudding is out of the oven, allow it to cool for about 10-15 minutes. This resting period will enhance the flavors further. Serve warm, drizzled with a luscious homemade whiskey caramel sauce, and pair with a scoop of ice cream or a dollop of whipped cream for an indulgent treat.

Make Ahead Options

These Whiskey Caramel Bread Puddings are perfect for busy weeknights and can be prepped in advance to save you valuable time! You can assemble the entire pudding and refrigerate it up to 24 hours before baking. To do this, simply follow the recipe instructions up until the soaking step, cover your baking dish tightly with plastic wrap, and place it in the fridge. This allows the bread to absorb the custard flavors fully, ensuring a moist and delicious result. When you’re ready to serve, just pop it in a preheated oven and bake as directed, giving you that comforting, homemade dessert with minimal effort!

Helpful Tricks for Whiskey Caramel Bread Pudding

  • Perfect Bread Choice: Use stale brioche or French bread for optimal absorption; this prevents a soggy pudding and ensures a delightful texture.

  • Soaking Time Matters: Let the bread cubes soak in the custard for at least 10 minutes. This step is crucial for achieving a rich, custardy consistency in your whiskey caramel bread pudding.

  • Watch the Baking: Keep an eye on the baking time, as ovens vary. A toothpick should come out clean yet slightly moist, indicating that the center is still soft—your goal for that heavenly texture!

  • Make Your Own Caramel: For heightened flavor, consider making homemade whiskey caramel sauce. It’s simple and makes a world of difference in taste!

  • Experiment with Flavors: Don’t hesitate to swap spices or add toppings like toasted nuts or fruits to personalize your whiskey caramel bread pudding to your family’s liking.

Whiskey Caramel Bread Pudding Variations

Get ready to explore delightful twists that will elevate your whiskey caramel bread pudding experience!

  • Different Bread: Switch things up with challah, sourdough, or buttery croissants for a unique twist that changes the flavor profile beautifully. Each type of bread brings its own charm, so don’t be afraid to experiment!

  • Dairy-Free: Use almond milk or coconut cream to create a lactose-free version while keeping the pudding rich and creamy. Pair it with a fruitier sauce, like a homemade mango topping, to complete your bold dessert.

  • Nutty Additions: Fold in chopped pecans or walnuts for a satisfying crunch that complements the soft texture of the pudding. These nutty bits add exciting contrast with each bite!

  • Spiced Infusion: Swap standard spices for a dash of cardamom or ginger to get a refreshing zing. These warm spices will add depth and intrigue, making your pudding all the more mouthwatering!

  • Bourbon Variation: If whiskey isn’t your favorite, why not try bourbon instead? It adds a slightly sweeter flavor and pairs perfectly with the caramel sauce. It’s a delicious alternative that keeps the spirit of the dessert intact!

  • Caramel Swirl: Instead of drizzling caramel on top, consider swirling it directly into the custard mixture before baking. This results in pockets of gooey goodness throughout the pudding, making each slice a delight.

  • Fruit Fusion: Toss in some seasonal fruits, like blueberries or roasted apples, to add a delightful burst of flavor and color. These natural sweetness complements the richness of the bread pudding wonderfully.

  • Toppings Galore: Get creative with toppings! Serve your indulgent pudding with flavored whipped cream or a scoop of vanilla bean ice cream to bring a satisfying cold contrast to the warm dessert.

Whichever variation you choose, remember to savor every bite of this comforting dessert. If you’re back for more dessert suggestions, don’t forget to check out the silky-smooth Mango Coconut Pudding or keep the jazz going with a delightful homemade whiskey caramel sauce for that extra touch of sweetness!

What to Serve with Whiskey Caramel Bread Pudding

Indulging in a slice of whiskey caramel bread pudding opens up a world of delightful pairs that can elevate your entire dining experience.

  • Vanilla Ice Cream: The creamy sweetness of vanilla ice cream beautifully balances the rich flavors of the pudding.

  • Whipped Cream: Light and airy, whipped cream adds a lovely contrast to the dense, custardy texture of the bread pudding. It’s the perfect dollop of decadence!

  • Fresh Berries: Tart raspberries or blueberries can offer a refreshing burst of flavor, cutting through the sweetness and adding a vibrant touch.

  • Toasted Pecans: These add a delightful crunch and nutty flavor, enhancing the overall experience while providing a lovely textural contrast.

  • Coffee: A good cup of coffee, whether brewed or espresso, pairs beautifully with this dessert, enriching the overall flavor profile with its boldness.

  • Caramel Sauce Drizzle: An extra touch of homemade or store-bought caramel can intensify the dessert experience, elevating it to heavenly heights!

  • Chocolate Sauce: For chocolate lovers, a drizzle of warm chocolate sauce adds another layer of indulgence, creating a truly decadent dessert.

  • Dessert Wine: A glass of sweet dessert wine or a smooth bourbon can complement your meal, rounding off the flavor journey perfectly.

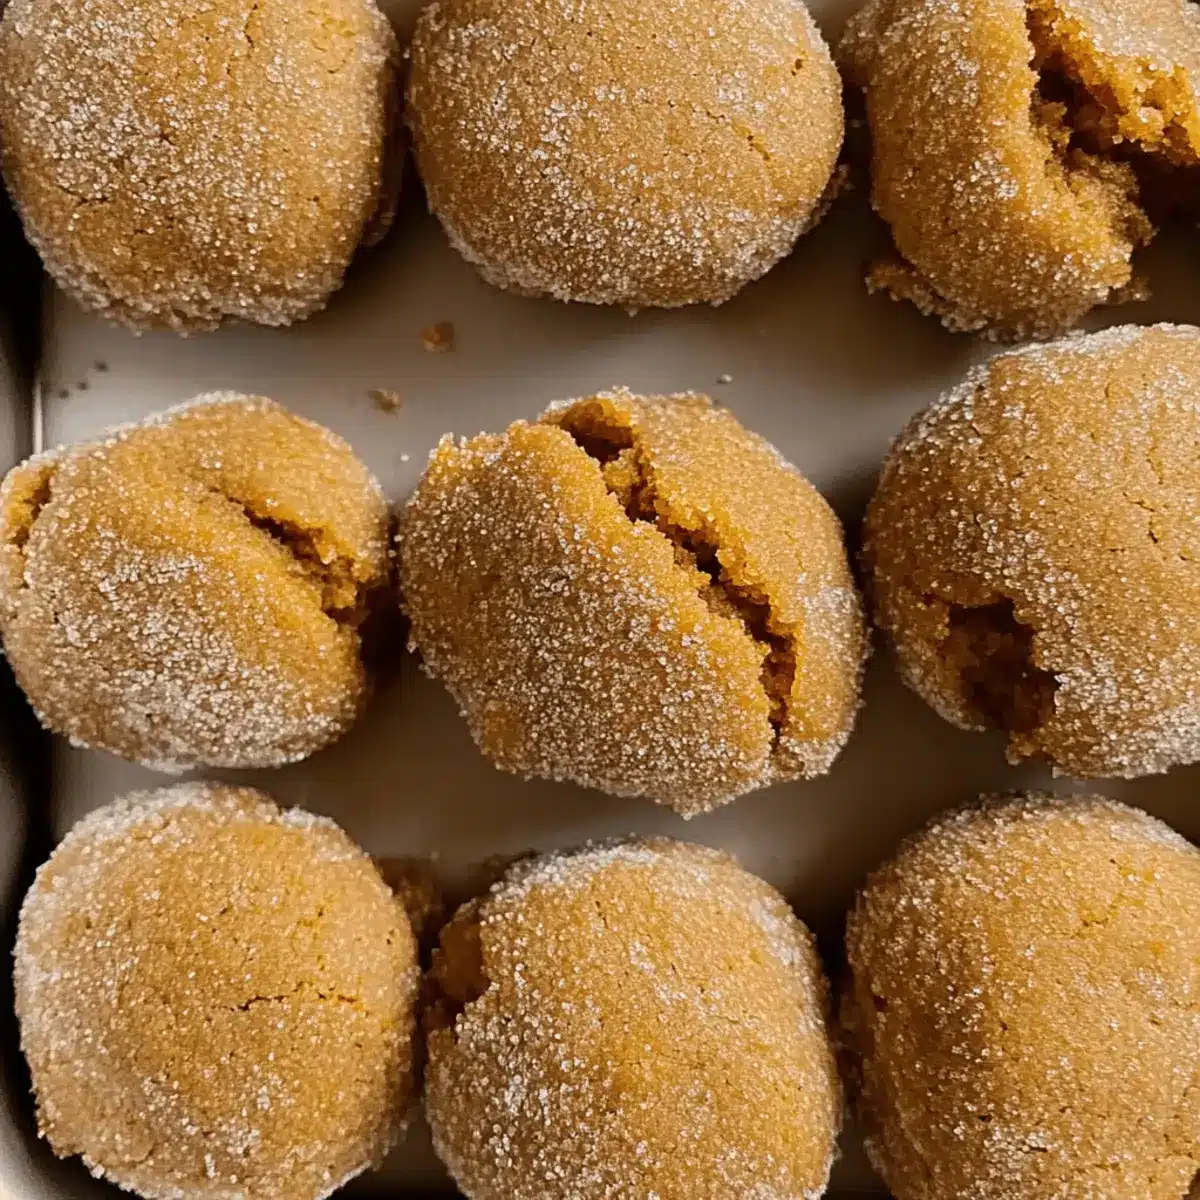
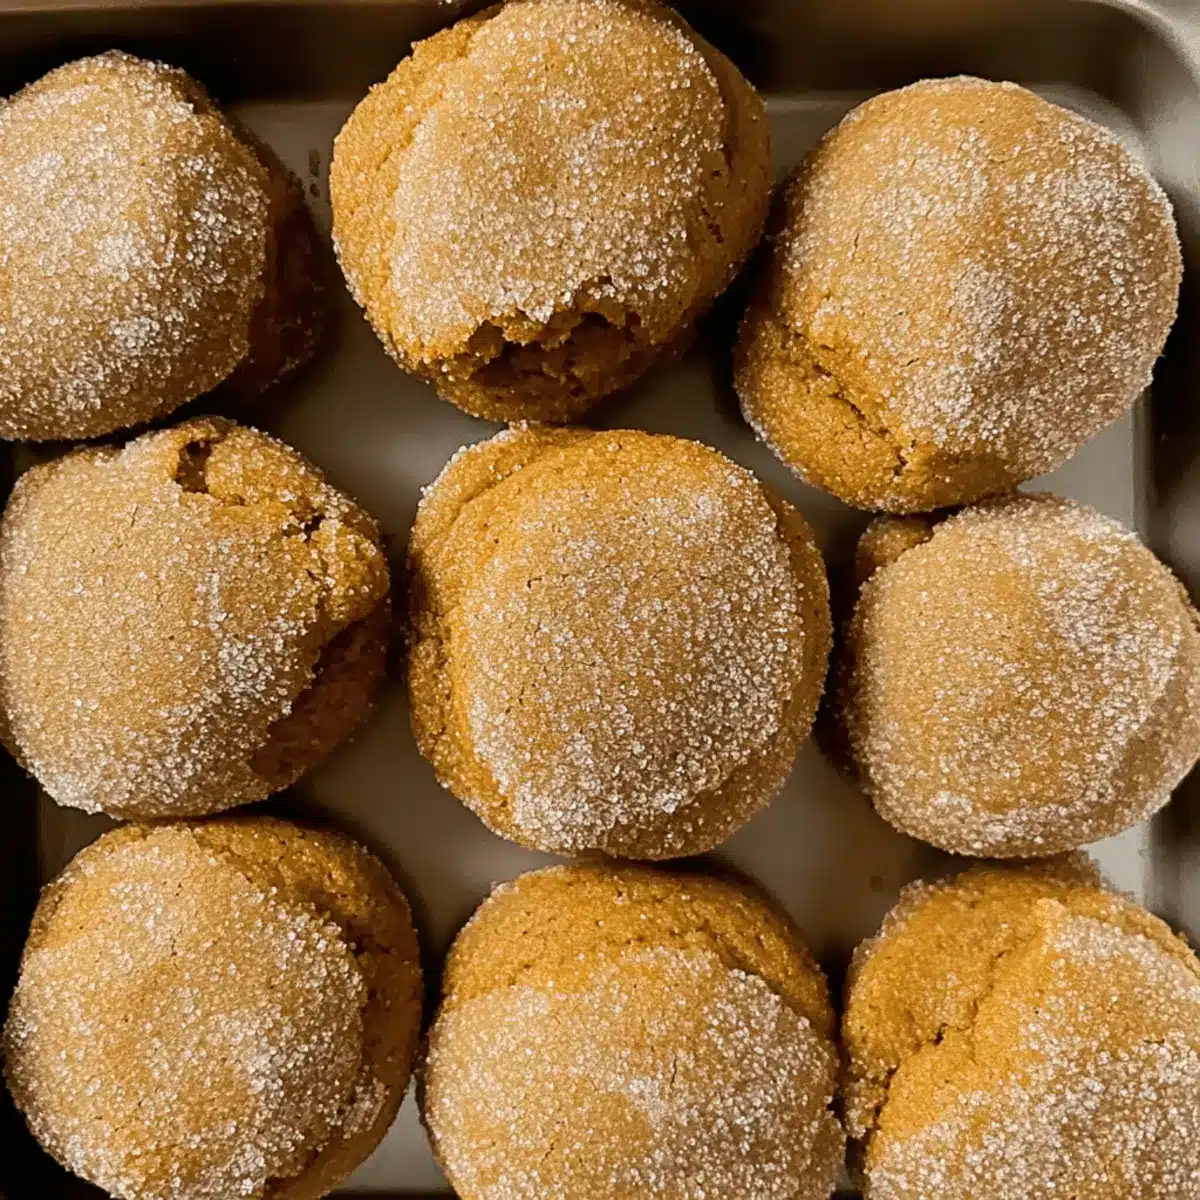
  • Cinnamon Sugar Doughnuts: These whimsical bites, with their hint of spice, are a fun and delicious companion to the rich pudding!

Pair any of these selections with your delicious whiskey caramel bread pudding for an unforgettable dining experience.

How to Store and Freeze Whiskey Caramel Bread Pudding

Room Temperature: Allow the whiskey caramel bread pudding to cool completely before covering it with plastic wrap. It can be kept at room temperature for up to 2 days.

Fridge: Store leftover bread pudding in an airtight container in the fridge for up to 4 days. Reheat individual portions in the microwave or in a warm oven until heated through.

Freezer: For longer storage, freeze the bread pudding in a tightly sealed freezer-safe container for up to 3 months. Thaw overnight in the fridge before reheating.

Reheating: To enjoy the pudding warm again, reheat in the oven at 350°F (175°C) for about 15-20 minutes, drizzling some extra whiskey caramel sauce over the top for added flavor.

Whiskey Caramel Bread Pudding Recipe FAQs

What type of bread should I use for the best results?
I highly recommend using stale brioche or French bread, as they absorb the custard beautifully, enhancing the texture. If you don’t have stale bread, lightly toasting fresh bread cubes in the oven for a few minutes can also help.

How do I store leftover bread pudding?
Once cooled completely, keep the whiskey caramel bread pudding in an airtight container in the fridge for up to 4 days. Reheat individual portions in the microwave or oven until warmed through. If you leave it at room temperature, be sure to use it within 2 days.

Can I freeze Whiskey Caramel Bread Pudding?
Absolutely! To freeze, place cooled bread pudding in a tightly sealed freezer-safe container. It can be stored for up to 3 months. When you’re ready to enjoy it again, thaw overnight in the fridge and then reheat in the oven at 350°F (175°C) for about 15-20 minutes for the best texture.

What should I do if my pudding turns out soggy?
If your whiskey caramel bread pudding is too soggy, it might be due to using fresh bread or not allowing enough soaking time before baking. For next time, stick with stale bread and make sure to let it soak for at least 10 minutes. Keep an eye on the baking time, too!

Are there any dietary considerations for this recipe?
Yes! For a vegan alternative, you can substitute the eggs with ¾ cup of unsweetened applesauce or a flaxseed mixture (1 tablespoon ground flaxseed mixed with 2.5 tablespoons water). Always check labeling on your whiskey and vanilla to ensure they meet dietary needs, especially for allergies.

How can I enhance the flavor of my whiskey caramel sauce?
For a flavor boost, try making your own whiskey caramel sauce. Melt 1 cup of sugar in a pan over medium heat until golden brown, then carefully swirl in ½ cup of heavy cream and 2 tablespoons of whiskey off the heat. Stir until smooth, and drizzled warmly over the pudding for that extra special touch!

Whiskey Caramel Bread Pudding

Decadent Whiskey Caramel Bread Pudding to Savor and Enjoy

Indulge in this rich and buttery Whiskey Caramel Bread Pudding, perfect for any occasion.
Prep Time 15 minutes
Cook Time 50 minutes
Cooling Time 15 minutes
Total Time 1 hour 20 minutes
Servings: 8 slices
Course: Dessert
Cuisine: American
Calories: 300

Ingredients
  

For the Bread Pudding Base
  • 1 loaf Brioche or French Bread Stale bread works best for absorption.
  • 4 large Eggs Can substitute with ¾ cup unsweetened applesauce for a vegan version.
  • 2 cups Milk or Cream Use whole milk or heavy cream for extra flavor.
  • 1 cup Brown Sugar Enhances caramelization.
  • 1 teaspoon Vanilla Extract Can substitute with rum or bourbon for a twist.
For the Flavor Boost
  • 1/2 cup Whiskey Can substitute with extra vanilla extract.
  • 1 teaspoon Cinnamon
  • 1/2 teaspoon Nutmeg Or other warm spices as desired.
For Preparation
  • 1 tablespoon Butter For greasing the dish.
For the Caramel Sauce
  • 1 cup Whiskey Caramel Sauce Homemade sauce recommended.

Equipment

  • 9x13-inch baking dish
  • Mixing Bowl
  • Spatula

Method
 

Step-by-Step Instructions for Whiskey Caramel Bread Pudding
  1. Preheat your oven to 350°F (175°C) and grease a 9×13-inch baking dish with butter.
  2. Slice stale brioche or French bread into 1-inch cubes and arrange them in the baking dish.
  3. In a medium mixing bowl, whisk together eggs, milk or cream, brown sugar, vanilla extract, and warm spices.
  4. Pour custard mixture over bread cubes, ensuring they are well coated. Let soak for 10 minutes.
  5. Bake for approximately 50 minutes until the center is set but still slightly soft.
  6. Allow to cool for about 10-15 minutes before serving, drizzled with whiskey caramel sauce.

Nutrition

Serving: 1sliceCalories: 300kcalCarbohydrates: 45gProtein: 6gFat: 12gSaturated Fat: 7gPolyunsaturated Fat: 1gMonounsaturated Fat: 4gCholesterol: 70mgSodium: 200mgPotassium: 200mgFiber: 1gSugar: 20gVitamin A: 300IUCalcium: 100mgIron: 1mg

Notes

Use stale bread for best results. Monitor the baking time carefully to achieve desired texture.

Tried this recipe?

Let us know how it was!

Lavender Honey Panna Cotta: A Chic Dessert to Savor

The moment I first stumbled upon the enchanting scent of lavender wafting through a café, I knew I had to recreate that experience at home. That’s when I discovered the delightful recipe for Lavender Honey Panna Cotta—a creamy elegant dessert that beautifully combines the soothing properties of lavender with the natural sweetness of honey. Not only does this indulgent treat impress guests during special occasions, but it also offers a calming touch that makes it perfect for an evening of self-care. With its smooth texture and subtle floral notes, each spoonful transports you into a peaceful culinary journey. Ready to bring a touch of serenity to your dessert table? Let’s find out how to craft this exquisite dish at home!

Why is Lavender Honey Panna Cotta special?

Creamy Indulgence: The silky texture of this panna cotta is truly indulgent, creating a dessert that feels like a luxurious treat.
Floral Elegance: The enchanting flavor of lavender combined with honey offers a unique taste that surprises and delights your palate.
Easy to Make: With just a handful of simple ingredients, you can create a stunning dessert that elevates any meal, much like my Grilled Honey BBQ Bacon Chicken Kabobs.
Versatile Variations: Feel free to experiment by adding your favorite fruits or syrup options to customize this elegant dessert.
Perfect for Any Occasion: Elevate dinner parties or cozy nights in—this panna cotta makes any event a touch more special!

Lavender Honey Panna Cotta Ingredients

For the Panna Cotta

  • Heavy Cream – Provides richness and creaminess; substitute with coconut cream for a delightful dairy-free option.
  • Whole Milk – Contributes to the creamy texture; almond milk offers a lighter alternative for your Lavender Honey Panna Cotta.
  • Sugar – Sweetens the panna cotta; consider using honey or maple syrup for a natural touch.
  • Gelatin – Sets the panna cotta with a delicate wobble; for a vegetarian option, agar-agar works beautifully.
  • Dried Lavender Buds – Infuses flavor and aroma; feel free to use fresh lavender in smaller amounts for a fresher kick.
  • Honey – Adds a natural sweetness that pairs wonderfully with lavender; opt for a mild honey to balance the flavors.

For the Optional Syrup

  • Water – Serves as the base for your syrup.
  • Sugar – Adds sweetness to the syrup; you can adjust to taste.
  • Lemon Juice – Brings brightness and balances flavors beautifully in the syrup.
  • Rose Water/Orange Blossom Water – These optional floral notes enhance the experience and pair well with your Lavender Honey Panna Cotta.

Step‑by‑Step Instructions for Lavender Honey Panna Cotta

Step 1: Heat the Cream
In a medium saucepan, combine 1 cup of heavy cream, 1 cup of whole milk, and 1/2 cup of sugar with 1 tablespoon of dried lavender buds. Heat the mixture over medium heat until it begins to steam, stirring gently to dissolve the sugar. Avoid boiling, as you want to infuse the delicate flavors without scorching the cream.

Step 2: Bloom the Gelatin
While the cream mixture is heating, take a small bowl and sprinkle 1 tablespoon of gelatin powder over 1/4 cup of cold water. Allow it to sit for about 5 minutes until it swells and becomes gelatinous. This blooming process is essential for ensuring a smooth and creamy Lavender Honey Panna Cotta without any lumps.

Step 3: Combine Ingredients
Once your cream mixture is steaming, remove it from the heat. Stir in the bloomed gelatin and 1/4 cup of honey, mixing until everything is fully dissolved and combined. You should notice a slight thickness forming as the gelatin activates. Take a moment to inhale the lovely lavender aroma—it’s a sign you’re on the right track!

Step 4: Strain Mixture
Next, pour the creamy mixture through a fine-mesh sieve into a large measuring cup or bowl. This step removes the lavender buds, giving your Lavender Honey Panna Cotta a silky texture. Use a spatula to gently press down on the solids to extract as much liquid as possible, ensuring a smooth and refined dessert.

Step 5: Pour into Molds
Carefully divide the strained mixture into individual ramekins or silicone molds. Fill each one to about three-quarters full, leaving a little space at the top for expansion. Once filled, cover the molds with plastic wrap and place them in the refrigerator. Allow them to chill and set for at least 4 hours, though overnight is even better for the perfect consistency.

Step 6: Serve
When ready to enjoy your delightful Lavender Honey Panna Cotta, remove the molds from the refrigerator. Carefully unmold the panna cotta onto serving plates by running a knife around the edges. Drizzle with additional honey and garnish with fresh lavender sprigs if desired, adding an elegant touch that’s sure to impress your guests.

What to Serve with Lavender Honey Panna Cotta

A charming meal begins with delightful flavors and complements, creating a culinary symphony that dances on your palate.

  • Fresh Berries: Juicy strawberries, raspberries, or blueberries add a burst of freshness that balances the creamy dessert beautifully.
  • Shortbread Cookies: The buttery crunch of shortbread enhances the silky texture, offering a lovely contrast that’s simply irresistible.
  • Tart Berry Compote: A vibrant compote made from tart berries creates a lovely contrast to the sweetness of the panna cotta, elevating each bite.
  • Candied Citrus Peel: The citrusy sweetness and slight chewiness of candied peel harmonize beautifully with the floral lavender, adding a delightful zing.
  • Chilled Herbal Tea: Serve with a refreshing herbal tea like chamomile to enhance the calming properties of the lavender and create a serene dining experience.
  • Lemon Sorbet: A scoop of zesty lemon sorbet cleanses the palate and adds a refreshing brightness, rounding off an elegant meal perfectly.
  • Mimosa Sparkler: Pairing with a sparkling mimosa infuses a celebratory spirit, perfect for brunch or a special gathering, adding a festive touch.

Lavender Honey Panna Cotta Variations

Feel free to let your creativity bloom when it comes to customizing this delightful dessert!

  • Dairy-Free: Swap heavy cream for coconut cream and use almond milk to make a rich yet dairy-free version.
  • Natural Sweeteners: Try using agave nectar or maple syrup in place of sugar for a healthier twist.
  • Spiced Touch: Add a pinch of cinnamon or cardamom to the cream mixture for an unexpected warmth.
  • Floral Infusions: Substitute dried lavender with other floral flavors like chamomile, hibiscus, or rose petals for a unique twist.
  • Fruit Layers: Layer fresh berries, like raspberries or blueberries, between the panna cotta for added texture and vibrant colors.
  • Chocolate Delight: Mix in a bit of cocoa powder or melt dark chocolate into the cream mixture for a delectable chocolate-honey fusion.
  • Herbaceous Flavor: Include chopped mint or basil in the infusion process for a refreshing herbal note that contrasts beautifully with the honey.
  • Serving Options: Elevate your dish by drizzling it with a honey-lavender syrup or serve alongside a tart berry compote to enhance the sweetness.

No matter which variation you choose, this Lavender Honey Panna Cotta is sure to impress. If you’re looking for other honey-infused delights, consider trying my Honey Sriracha Ground Chicken or Honey Garlic Shrimp for a savory turn!

Make Ahead Options

Preparing Lavender Honey Panna Cotta ahead of time is a fantastic way to streamline your dessert planning, especially for busy weeknights or special occasions. You can make the panna cotta mixture up to 24 hours in advance; just refrigerate it in the molds after pouring. To maintain optimal texture, cover the molds tightly with plastic wrap to prevent any drying out or absorbing fridge odors. When you’re ready to serve, simply unmold the panna cotta about 10-15 minutes before presentation, allowing it to soften slightly at room temperature for a creamy, luscious texture. With this approach, you’ll impress your guests without the last-minute hassle!

Expert Tips for Lavender Honey Panna Cotta

  • Dissolve Gelatin Completely: Ensure the gelatin is fully dissolved to avoid any unwanted lumps in your Lavender Honey Panna Cotta. Blooming is key!
  • Adjust Lavender Wisely: Start with less dried lavender if you’re unsure; too much can create an unpleasant, soapy taste.
  • Chill for Optimal Texture: Refrigerate the panna cotta for a full 6-8 hours or overnight for best results. This ensures the perfect creamy texture and sets beautifully.
  • Gentle Unmolding: Use a rubber spatula or a knife along the edges to gently release the panna cotta from molds, maintaining its delicate shape.
  • Flavor Variations: Feel free to switch up the honey or try adding different floral extracts to customize your dessert, making it uniquely yours!

Storage Tips for Lavender Honey Panna Cotta

Fridge: Keep any leftover Lavender Honey Panna Cotta covered in the refrigerator for up to 3 days to maintain its creamy texture and flavor.

Freezer: For longer storage, you can freeze the panna cotta for up to 2 months. Wrap each ramekin tightly in plastic wrap, then place in an airtight container.

Reheating: If thawed, let the panna cotta come to room temperature before serving. A gentle re-chill in the refrigerator can help restore its delicious, silky texture.

Make Ahead: This elegant dessert can be prepared a day in advance, making it a perfect option for stress-free entertaining!

Lavender Honey Panna Cotta Recipe FAQs

What kind of lavender should I use for this recipe?
For the best flavor, I recommend using culinary-grade dried lavender buds, which you can find at most specialty grocery stores or online. If you want a fresher taste, feel free to use fresh lavender, but use it in smaller amounts since its flavor is more concentrated.

How should I store leftover Lavender Honey Panna Cotta?
To keep your Lavender Honey Panna Cotta fresh, store any leftovers covered in the refrigerator for up to 3 days. It retains its delightful creamy texture, making it a perfect dessert for later! If you’re not planning to eat it soon, you can freeze the panna cotta for up to 2 months by tightly wrapping each ramekin in plastic wrap and placing them in an airtight container.

Can I freeze Lavender Honey Panna Cotta?
Absolutely! To freeze, wrap each individual serving tightly in plastic wrap and then place them into an airtight container. When you’re ready to enjoy, let them thaw in the refrigerator for several hours, then bring them to room temperature. A gentle re-chill is often helpful to restore that silky texture.

How can I troubleshoot if my panna cotta doesn’t set properly?
If your Lavender Honey Panna Cotta doesn’t set, it could be due to insufficient gelatin or not blooming it correctly. Always sprinkle the gelatin over cold water and let it sit for 5 minutes to ensure it activates fully. If you find your dessert is still runny, gently reheat the mixture (do not boil) and add an additional tablespoon of bloomed gelatin, stirring until dissolved. Pour it back into the molds and refrigerate again.

Is Lavender Honey Panna Cotta suitable for those with allergies?
While this elegant dessert is made with common ingredients, be cautious of potential allergies. It contains dairy and gelatin, which may pose issues for those who are lactose intolerant or vegetarian. Consider using coconut cream and agar-agar as substitutions to create a dairy-free and vegetarian-friendly version. Always check labels for allergens, as some honeys may contain trace amounts of pollen.

Can pets eat lavender?
While lavender is generally safe in small amounts for dogs and cats, excessive consumption can lead to gastrointestinal upset. It’s best to keep your Lavender Honey Panna Cotta out of reach to ensure your furry friends stay safe!

Lavender Honey Panna Cotta

Lavender Honey Panna Cotta: A Chic Dessert to Savor

Lavender Honey Panna Cotta is a creamy elegant dessert that combines soothing lavender with honey, perfect for any occasion.
Prep Time 20 minutes
Cook Time 10 minutes
Chill Time 4 hours
Total Time 4 hours 30 minutes
Servings: 4 servings
Course: Dessert
Cuisine: French
Calories: 320

Ingredients
  

For the Panna Cotta
  • 1 cup heavy cream substitute with coconut cream for a dairy-free option
  • 1 cup whole milk almond milk can be used as a lighter alternative
  • 1/2 cup sugar can use honey or maple syrup instead
  • 1 tablespoon gelatin powder for a vegetarian option, use agar-agar
  • 1 tablespoon dried lavender buds fresh lavender can be used in smaller amounts
  • 1/4 cup honey opt for a mild honey
For the Optional Syrup
  • 1 cup water
  • 1/2 cup sugar adjust to taste
  • 2 tablespoons lemon juice
  • 1 tablespoon rose water or orange blossom water optional

Equipment

  • Medium saucepan
  • fine-mesh sieve
  • ramekins or silicone molds

Method
 

Step-by-Step Instructions for Lavender Honey Panna Cotta
  1. In a medium saucepan, combine heavy cream, whole milk, sugar, and dried lavender buds. Heat over medium heat until steaming.
  2. Sprinkle gelatin over cold water in a small bowl and let sit for 5 minutes until bloomed.
  3. Remove cream mixture from the heat, stir in bloomed gelatin and honey until fully dissolved.
  4. Strain the mixture through a fine-mesh sieve into a measuring cup or bowl to remove lavender buds.
  5. Carefully divide the strained mixture into ramekins or molds and cover with plastic wrap. Chill for at least 4 hours.
  6. To serve, unmold the panna cotta onto plates, drizzle with honey, and garnish with fresh lavender if desired.

Nutrition

Serving: 1servingCalories: 320kcalCarbohydrates: 30gProtein: 4gFat: 20gSaturated Fat: 12gPolyunsaturated Fat: 1gMonounsaturated Fat: 7gCholesterol: 80mgSodium: 60mgPotassium: 200mgSugar: 25gVitamin A: 500IUVitamin C: 2mgCalcium: 200mgIron: 0.5mg

Notes

This dessert can be prepared a day in advance and stored in the refrigerator for up to 3 days. It can also be frozen for up to 2 months.

Tried this recipe?

Let us know how it was!

Creamy Butternut Squash Lasagna Roll Ups for Cozy Fall Nights

As the leaves turn and the air becomes crisp, I find myself yearning for cozy meals that embody the essence of fall. My latest discovery—Creamy Butternut Squash Lasagna Roll Ups—has quickly become a favorite in my kitchen. Not only are these vegetarian delights a colorful addition to your dinner table, but they also come together quickly for those busy weeknights, making them perfect for anyone looking to ditch fast food. Each roll features layers of sweet butternut squash and rich ricotta, all smothered in a velvety béchamel sauce that elevates the dish to pure comfort food bliss. Trust me, this recipe will make you feel all warm inside! Ready to dive into a plate of cheesy goodness? Let’s get cooking!

Why are these roll ups a must-try?

Creamy Comfort: Each bite of these roll-ups is an embrace of warmth, thanks to the smooth and rich béchamel sauce that enhances the sweet butternut squash filling.
Quick Preparation: With simple steps and a short baking time, these roll-ups fit perfectly into your busy weeknight schedule.
Seasonal Delight: Celebrate fall flavors with every layer—sweet squash, aromatic sage, and creamy ricotta come together to create a festive dish.
Versatile Meal: Ideal as a delicious main course or served as a side, these roll-ups pair beautifully with a fresh side salad or some crusty bread for a complete meal.
Crowd Pleaser: Perfect for gatherings, whether it’s a Friendsgiving feast or a cozy family dinner, everyone will be asking for seconds!

Creamy Butternut Squash Lasagna Roll Ups Ingredients

For the Roll Ups
Lasagna Noodles – The backbone of this dish; feel free to use gluten-free noodles for a lighter option.
Mashed Butternut Squash – The star of this filling; canned pumpkin purée works too, just add spices for added flavor.
Ricotta Cheese – This brings creaminess and moisture; aim for 1¾ cups, adjusting to make spreading easier.
Grated Parmesan – Adds a salty kick and richness; extra for serving is always a good idea!
Large Egg – A natural binder to keep the filling together.
Chopped Sage – Fresh flavor that enhances the dish; reserve some for garnishing!
Kosher Salt and Black Pepper – Essential for balancing and enhancing flavors; taste and adjust as needed.
Shredded Mozzarella – Provides that melty cheesiness; use generously for top-layer goodness.

For the Béchamel Sauce
Unsalted Butter – Essential for the béchamel base; ensures a rich finish.
All-Purpose Flour – Thickens the sauce; whisk until golden for the best flavor.
Milk – Adds creaminess and helps achieve the desired sauce consistency; warm it beforehand!
Grated Nutmeg and Cayenne Pepper – Spices that elevate the béchamel; use these sparingly for a hint of warmth.
Smashed Garlic Cloves – Infuses the sauce with depth and aroma; perfect for adding richness.

Garnish
Neutral Oil – For frying crispy sage leaves to top your rolls, adding a crunchy texture and an aromatic flourish.

With these ingredients, you’re set to create a delightful plate of Creamy Butternut Squash Lasagna Roll Ups that will warm your hearts and satisfy your taste buds this fall!

Step‑by‑Step Instructions for Creamy Butternut Squash Lasagna Roll Ups

Step 1: Cook Lasagna Noodles
Begin by boiling a large pot of salted water. Once the water is at a rolling boil, cook the lasagna noodles for about 8–10 minutes until al dente, stirring occasionally. Drain them carefully and lay them flat on a baking sheet, ensuring they don’t stick together while you prepare the filling.

Step 2: Make the Filling
In a spacious mixing bowl, combine the mashed butternut squash, ricotta cheese, grated Parmesan, egg, chopped sage, salt, and black pepper. Mix until the ingredients are well incorporated and the texture is smooth. If the mixture appears too thick, adjust with a bit more ricotta for easy spreading.

Step 3: Prepare Béchamel Sauce
In a saucepan over medium heat, melt 4 tablespoons of unsalted butter. Whisk in 4 tablespoons of all-purpose flour, cooking for about 2 minutes until golden. Gradually add 3 cups of warm milk while whisking continuously, and let the mixture thicken for 5–7 minutes. Stir in the chopped sage, smashed garlic, nutmeg, cayenne, salt, and pepper, ensuring a velvety consistency.

Step 4: Assemble Roll Ups
Preheat your oven to 375°F (190°C). Lay out a noodle and evenly spread a generous portion of the butternut squash filling on it. Top with a sprinkle of shredded mozzarella, then roll it up tightly, starting from one end. Place the roll in a greased baking dish, seam side down. Repeat with remaining noodles and filling.

Step 5: Bake
Once all your roll-ups are in the dish, pour the prepared béchamel sauce evenly over the top, ensuring every roll is covered. Sprinkle any remaining mozzarella cheese on top and place the dish in the preheated oven. Bake for 30 minutes, or until the sauce is bubbly and the edges of the noodles are slightly crisped.

Step 6: Garnish and Serve
Remove the baking dish from the oven and let it cool for about 5 minutes to allow the roll-ups to set slightly. If desired, fry some sage leaves in a little neutral oil until crispy for garnish. Serve your Creamy Butternut Squash Lasagna Roll Ups warm, drizzled with more béchamel and topped with crispy sage leaves for a delightful twist.

Creamy Butternut Squash Lasagna Roll Ups Variations

Feel free to explore these variations and personalize your lasagna roll-ups to fit your taste!

  • Gluten-Free: Use gluten-free lasagna noodles to accommodate dietary needs without sacrificing flavor or texture.
  • Vegetable Medley: Incorporate cooked spinach or kale into the filling for added nutrition and a pop of color; it’s a delightful way to sneak in more greens!
  • Cheese Swap: Try using goat cheese or a dairy-free alternative for a unique flavor profile; this twist can make your dish stand out even more.
  • Spicy Kick: Add a pinch of red pepper flakes or diced jalapeños to the filling for a spicy surprise; this bold move elevates the dish to new levels!
  • Nutty Crust: Consider topping your roll-ups with crushed nuts like walnuts or pine nuts; this adds a lovely crunch that contrasts beautifully with the creamy sauce.
  • Herbal Infusion: Experiment with fresh herbs like thyme or rosemary in place of sage; these aromatic additions can bring a new dimension to the classic flavors.
  • Extra Savory: Mix in sautéed mushrooms or roasted garlic in the filling for a hearty, earthy flavor; these ingredients harmonize perfectly with the sweetness of butternut squash.
  • Side Suggestions: Pair these roll-ups with a fresh side salad or a warm crusty bread; both complement the rich flavors of the lasagna while adding balance to the meal.

Feel inspired? You can whip up these delightful Creamy Butternut Squash Lasagna Roll Ups with any of these variations for a cozy family dinner or a gathering with friends! If you’re looking for more comforting options, check out Chicken Fettuccine Alfredo or Taco Lasagna Discover!

What to Serve with Creamy Butternut Squash Lasagna Roll Ups

These delightful roll-ups are bound to bring warmth and joy to your dining table, perfectly complementing the flavors of fall.

  • Crispy Side Salad: A fresh green salad with light vinaigrette adds a crunchy contrast, balancing the richness of the lasagna.

  • Garlic Bread: Soft and buttery garlic bread is wonderful for soaking up the creamy béchamel, enhancing every bite.

  • Roasted Vegetables: Seasonal roasted vegetables like Brussels sprouts or sweet potatoes add a nutty flavor, enriching the meal experience.

  • Sautéed Greens: Lively sautéed kale or spinach provides vibrant color and a nutritious element, making the dish even more wholesome.

  • Wine Pairing: A crisp Chardonnay pairs beautifully, as its fruity notes harmonize with the sweetness of butternut squash.

  • Dessert Option: Pumpkin pie or an apple crisp delivers a sweet ending, echoing the fall theme while satisfying your dessert cravings.

Serve these alongside your Creamy Butternut Squash Lasagna Roll Ups for a cozy, heartwarming meal that celebrates the flavors of the season!

Make Ahead Options

These Creamy Butternut Squash Lasagna Roll Ups are a fantastic option for meal prep enthusiasts! You can assemble the roll-ups up to 24 hours in advance and store them covered in the refrigerator. Simply prepare the béchamel sauce and fill the noodles as directed, then wrap and refrigerate. For best quality, wait to add the béchamel sauce until just before baking. When you’re ready to serve, preheat your oven and pour the sauce over the assembled roll-ups, then bake as instructed. This way, you reap the time-saving benefits of prepped meals without sacrificing flavor—your cozy dinner will be just as delicious and comforting when it’s time to enjoy!

How to Store and Freeze Creamy Butternut Squash Lasagna Roll Ups

  • Fridge: Store any leftover roll-ups in an airtight container in the fridge for up to 3 days. Reheat in the oven at 350°F until heated through for best results.
  • Freezer: Freeze unbaked roll-ups in a tightly sealed freezer-safe dish for up to 3 months. When ready, bake directly from frozen, adding an extra 10-15 minutes to the cooking time.
  • Make-Ahead Tip: Assemble Creamy Butternut Squash Lasagna Roll Ups a day in advance. Cover and store in the fridge; simply bake when ready to serve for a stress-free meal.
  • Reheating: For reheating, cover with foil in the oven to prevent drying out. Bake at 350°F until warmed through, about 20-25 minutes.

Expert Tips for Creamy Butternut Squash Lasagna Roll Ups

  • Perfectly Cooked Noodles: Ensure your lasagna noodles are al dente to prevent them from tearing during assembly; overcooking makes them too soft.
  • Adjust Filling Consistency: If your butternut squash filling is too thick to spread, add extra ricotta gradually until it reaches a smooth, spreadable texture.
  • Béchamel Bliss: Whisk continuously while making the béchamel; this avoids lumps and guarantees a velvety sauce that beautifully complements the roll ups.
  • Flavor Enhancements: Feel free to add a dash of cinnamon or more sage to the béchamel for an additional layer of flavor in your creamy butternut squash lasagna roll ups.
  • Even Baking: Cover the baking dish with foil during the first half of baking to allow the filling to heat through without over-browning the top.
  • Make-Ahead Options: Prepare and assemble the roll ups a day in advance, storing them in the refrigerator; just pop them in the oven before serving for fuss-free entertaining.

Creamy Butternut Squash Lasagna Roll Ups Recipe FAQs

What type of lasagna noodles should I use?
You can use traditional lasagna noodles or opt for gluten-free noodles if needed. Ensure they are cooked al dente to prevent them from tearing while assembling the roll-ups.

How should I store leftover roll-ups?
Store any leftover Creamy Butternut Squash Lasagna Roll Ups in an airtight container in the refrigerator for up to 3 days. Reheat them in the oven at 350°F (175°C) until heated through, about 15-20 minutes for the best texture.

Can I freeze the roll-ups?
Absolutely! You can freeze unbaked roll-ups in a tightly sealed, freezer-safe dish for up to 3 months. When you’re ready to enjoy, bake them directly from frozen, adding an extra 10-15 minutes to the cooking time at 375°F (190°C).

What if my béchamel sauce isn’t thickening?
If the béchamel sauce isn’t thickening as desired, continue to whisk over medium heat for a few more minutes. It may help to gradually add more flour, about a tablespoon at a time, while whisking continuously until you achieve a smooth, velvety consistency.

Can I use a different filling instead of butternut squash?
Certainly! You can substitute the butternut squash with other seasonal vegetables like sweet potatoes or zucchini. Adding cooked spinach or kale not only boosts nutrition but also adds flavor and color to your dish.

Are these roll-ups suitable for vegetarians or people with allergies?
These Creamy Butternut Squash Lasagna Roll Ups are vegetarian-friendly! However, if you have dairy allergies, you can explore using dairy-free cheeses and plant-based alternatives for the béchamel sauce to suit your dietary needs.

Creamy Butternut Squash Lasagna Roll Ups

Creamy Butternut Squash Lasagna Roll Ups for Cozy Fall Nights

Discover the comforting flavors of Creamy Butternut Squash Lasagna Roll Ups, perfect for cozy fall dinners.
Prep Time 15 minutes
Cook Time 30 minutes
Cooling Time 5 minutes
Total Time 50 minutes
Servings: 6 rolls
Course: Dinner
Cuisine: Italian
Calories: 400

Ingredients
  

For the Roll Ups
  • 12 noodles Lasagna Noodles gluten-free option available
  • 2 cups Mashed Butternut Squash canned pumpkin purée can be used
  • 1.75 cups Ricotta Cheese adjust for easy spreading
  • 0.5 cups Grated Parmesan extra for serving
  • 1 large Egg acts as binder
  • 0.25 cups Chopped Sage reserve some for garnishing
  • to taste Kosher Salt adjust to taste
  • to taste Black Pepper adjust to taste
  • 2 cups Shredded Mozzarella use generously
For the Béchamel Sauce
  • 4 tablespoons Unsalted Butter essential for béchamel base
  • 4 tablespoons All-Purpose Flour whisk until golden
  • 3 cups Milk warm it beforehand
  • 1 teaspoon Grated Nutmeg use sparingly
  • 0.25 teaspoon Cayenne Pepper use sparingly
  • 2 cloves Smashed Garlic infuses depth and aroma
Garnish
  • 1 tablespoon Neutral Oil for frying sage leaves

Equipment

  • large pot
  • Baking Sheet
  • Mixing Bowl
  • Saucepan
  • Whisk
  • Baking dish

Method
 

Step-by-Step Instructions
  1. Begin by boiling a large pot of salted water. Once boiling, cook the lasagna noodles for about 8–10 minutes until al dente. Drain and lay flat on a baking sheet.
  2. In a mixing bowl, combine mashed butternut squash, ricotta cheese, grated Parmesan, egg, chopped sage, salt, and black pepper. Mix until smooth, adjusting with more ricotta if necessary.
  3. In a saucepan over medium heat, melt butter. Whisk in flour and cook for 2 minutes until golden. Gradually add warm milk, whisking continuously until thickened for 5–7 minutes. Stir in sage, garlic, nutmeg, cayenne, salt, and pepper.
  4. Preheat oven to 375°F (190°C). Spread butternut squash filling on each noodle, sprinkle with mozzarella, and roll tightly. Place seam side down in a greased baking dish.
  5. Pour béchamel sauce over the roll-ups, cover with remaining mozzarella. Bake for 30 minutes until bubbly and edges are crisped.
  6. Let cool for 5 minutes. Fry sage leaves in oil until crispy for garnish. Serve warm drizzled with béchamel and topped with crispy sage.

Nutrition

Serving: 1rollCalories: 400kcalCarbohydrates: 50gProtein: 15gFat: 18gSaturated Fat: 10gPolyunsaturated Fat: 2gMonounsaturated Fat: 4gCholesterol: 70mgSodium: 550mgPotassium: 640mgFiber: 4gSugar: 8gVitamin A: 4500IUVitamin C: 15mgCalcium: 300mgIron: 2.5mg

Notes

For best results, store leftovers in an airtight container. Reheat at 350°F until warmed through.

Tried this recipe?

Let us know how it was!

Sweet Focaccia with Raspberry Jam for a Delightful Brunch

As I pulled the warm loaf from the oven, the sweet smell of raspberry wafted through my kitchen, instantly transporting me back to carefree brunches filled with laughter and cozy chats. This Sweet Focaccia with Raspberry Jam captures those cherished memories in every fluffy, chewy bite. With just a few simple ingredients and a bit of patience, you can create this delightful treat that goes perfectly with coffee or tea, making it an ideal centerpiece for breakfast, brunch, or even as a tempting dessert. The best part? It’s easy to prepare and sure to impress your friends and family, blending traditional baking with a fun twist. Ready to add a sweet touch to your next gathering? Let’s dive in!

Why is this focaccia so special?

Uniquely Delicious: The combination of sweet raspberry jam and fluffy dough creates a flavor profile that’s simply irresistible.

Impressive Simplicity: With just a handful of ingredients, this recipe is beginner-friendly and perfect for home bakers.

Versatile Delight: Enjoy it warm as a brunch centerpiece or chilled as a snack; it fits effortlessly into any occasion.

Nostalgic Comfort: The sweet aroma will bring back fond memories of cozy gatherings, adding a heartfelt touch to your meal.

Perfect Pairing: This focaccia pairs wonderfully with coffee or tea, making it an ideal companion for your morning or afternoon break.

Whether you’re indulging on your own or impressing guests at your next gathering, this Sweet Focaccia with Raspberry Jam is sure to delight!

Sweet Focaccia with Raspberry Jam Ingredients

For the Dough
Warm Water (1 ¾ cups) – Activates yeast; ensure the water is between 105-115°F for optimum yeast activity.
Sugar (2 tsp) – Feeds the yeast for activation; don’t skip this step to ensure a good rise.
Active Dry Yeast (1 packet) – Leavening agent that helps the dough rise; always check for freshness before use.
Bread Flour (2 cups) – Provides structure and chewiness; you can substitute with all-purpose flour but expect some texture change.
All-Purpose Flour (2 cups) – Adds additional texture and lightness to the dough.
Salt (2 tsp) – Enhances flavor and controls yeast fermentation; essential for taste.
Olive Oil (6 tbsp, divided) – Keeps the dough moist; applying it generously at each stage prevents dryness.

For the Topping
Raspberry Jam (1 jar) – Adds sweetness and flavor; for the best taste, consider Bonne Maman brand.
Powdered Sugar (2 cups) – Used for icing that adds a delightful sweetness; adjust to desired glaze thickness.
Milk (2-4 tbsp) – Adjust for the desired icing consistency; this is key for that perfect drizzle.

With these simple yet essential ingredients, you’re well on your way to creating a show-stopping Sweet Focaccia with Raspberry Jam that will have everyone asking for seconds!

Step‑by‑Step Instructions for Sweet Focaccia with Raspberry Jam

Step 1: Activate the Yeast
In a stand mixer, combine 1 ¾ cups of warm water (between 105-115°F) with 2 teaspoons of sugar, whisking until dissolved. Sprinkle the packet of active dry yeast over the water and let it sit for 5 minutes until it becomes frothy, indicating that the yeast is alive and ready to work its magic in your Sweet Focaccia with Raspberry Jam.

Step 2: Mix the Dough
Add 2 cups of bread flour, 2 cups of all-purpose flour, and 2 teaspoons of salt to the yeast mixture in the stand mixer. Using the dough hook attachment, mix on low speed until a sticky dough forms, which should take about 5 minutes. This dough will become the fluffy base for your delicious focaccia, so ensure everything is well combined.

Step 3: First Rise
Grease a large mixing bowl with olive oil, ensuring you cover the sides to prevent sticking. Transfer the dough into the oiled bowl, cover it with a clean kitchen towel, and place it in a warm spot to rise for about 1 hour or until it doubles in size. This crucial step develops the airy texture of your Sweet Focaccia with Raspberry Jam.

Step 4: Prepare the Pan
While your dough is rising, prepare a 9×13 metal pan by generously coating it with olive oil. Once the dough has risen, gently punch it down to release the air, then transfer it to the prepared pan. Fold and stretch it to coat with the oil, ensuring every inch is covered before covering it again to rise for another hour.

Step 5: Preheat the Oven
As the dough undergoes its second rise, preheat your oven to 425°F (220°C). This temperature ensures that your Sweet Focaccia with Raspberry Jam will bake to a beautiful golden brown, achieving that perfect crispy crust while remaining fluffy inside.

Step 6: Dimple the Dough
Once the dough has risen nicely, use your fingers to dimple the surface of the dough. This process creates small indentations that will hold the raspberry jam beautifully. The dimples also help to prevent large air bubbles and enhance the flavor, preparing the dough for the sweet topping.

Step 7: Add Raspberry Jam
Spread a generous layer of raspberry jam evenly over the dimpled surface of the dough, allowing it to flow into the crevices. The sweetness of the jam will swirl throughout the focaccia as it bakes, creating a delightful combination with the bread. Bake in your preheated oven for 18-22 minutes until the focaccia is golden brown and puffed up.

Step 8: Poke and Soak
Remove the focaccia from the oven and immediately poke holes across the surface using a skewer or your fingers. This step allows the raspberry jam to seep into the bread, infusing it with sweet flavor. Let it cool slightly in the pan while you prepare the icing.

Step 9: Prepare the Icing
In a separate bowl, mix 2 cups of powdered sugar with 2-4 tablespoons of milk, whisking until you achieve a smooth, drizzle-able consistency. Adjust the milk as needed to ensure the icing is neither too thick nor too runny. This icing will add a lovely sweet finish to your Sweet Focaccia with Raspberry Jam.

Step 10: Drizzle and Serve
Once the focaccia has cooled to room temperature, drizzle the icing generously over the top. Cut it into squares and serve warm or at room temperature as a delightful brunch treat. The combination of fluffy dough, sweet raspberry jam, and the luscious icing will make this Sweet Focaccia with Raspberry Jam a family favorite!

Sweet Focaccia with Raspberry Jam Variations

Feel free to unleash your creativity and customize this delicious focaccia recipe to suit your taste buds!

  • Fruit Swaps: Substitute raspberry jam with apricot, strawberry, or blueberry for delightful new flavors. Imagine a sweet, colorful spread that brightens up your brunch!

  • Citrus Zing: Add lemon or orange zest to the dough for a refreshing twist. The citrus notes will complement the sweetness beautifully and elevate the whole experience.

  • Nutty Crunch: Toss in some chopped walnuts or almonds for extra texture. The crunch from the nuts and the softness of the bread create a delightful contrast.

  • Spice Infusion: Sprinkle in a pinch of cinnamon or nutmeg to the dough before mixing. It will add warmth and hint at cozy flavors reminiscent of the holidays.

  • Herb Touch: Add finely chopped fresh rosemary or thyme to the dough for an unexpected savory note. This blend of sweet and savory will amaze anyone trying it for the first time.

  • Decadent Chocolate: Swirl in some chocolate ganache or mini chocolate chips along with the raspberry jam for a rich dessert version. Sweet tooth rejoice!

  • Healthier Option: Replace half of the bread flour with whole wheat flour for added nutrition and fiber. The extra nuttiness will pair well with the fruity jam.

  • Decadent Toppings: After icing the focaccia, sprinkle it with shredded coconut or your favorite nuts for an added crunch. It gives an admirable finish that everyone will love!

With these simple twists, your Sweet Focaccia with Raspberry Jam will remain an exciting dish that never gets old. If you’re interested in further recipe exploration, consider trying a tangy Sweet Hawaiian Crockpot dish or a comforting Coconut Curry Soup. Enjoy!

How to Store and Freeze Sweet Focaccia with Raspberry Jam

Room Temperature: Store the focaccia in an airtight container for up to 3 days. It’s best enjoyed fresh, but can remain tasty for short periods.

Fridge: If you live in a warmer climate, consider storing the focaccia in the fridge to prevent spoilage for up to 5 days. Just remember to bring it back to room temperature before serving!

Freezer: Wrap slices tightly in plastic wrap and place them in a freezer-safe bag to freeze for up to 3 months. Thaw overnight in the fridge or at room temperature before enjoying.

Reheating: To reheat, warm in the oven at 350°F for about 10 minutes, or until heated through. This restores that delightful fresh-baked texture to your Sweet Focaccia with Raspberry Jam.

What to Serve with Sweet Focaccia with Raspberry Jam

Looking to create a wholesome meal that perfectly balances flavors and textures?

  • Rich Greek Yogurt: A dollop of creamy yogurt drizzled with honey will contrast beautifully with the sweet focaccia. This pairing boosts the breakfast or brunch experience, providing a luscious creaminess that compliments the jam.

  • Fresh Berries: Light and vibrant, local berries like strawberries or blueberries enhance the fruity essence of the focaccia. Their tartness adds a refreshing layer, making each bite exciting and colorful.

  • Crisp Garden Salad: A mixed green salad dressed with a zingy vinaigrette introduces a delightful crunch, cutting through the sweetness. The freshness of the greens elevates the focaccia, creating a balanced brunch spread.

  • Nutty Granola: Serve a small bowl of granola on the side for added crunch and texture. The nuttiness complements the softness of the focaccia while offering a satisfying chew, perfect for a leisurely breakfast.

  • Decadent Hot Chocolate: Indulge in a rich hot chocolate or mocha to accompany your sweet focaccia. The warmth and chocolate flavors blend perfectly with the sweetness, making for a comforting treat at any time of day.

  • Sparkling Lemonade: A glass of bubbly lemonade adds a refreshing and zesty touch to your meal. The acidity will brighten the palate and offset the sweetness of the focaccia, creating a vibrant dining experience.

  • Vanilla Ice Cream: A scoop of vanilla ice cream melts beautifully atop the warm focaccia, creating a decadent dessert. The creaminess and sweetness tie together the flavors delightfully, making it a show-stopping finish!

Make Ahead Options

These Sweet Focaccia with Raspberry Jam are perfect for meal prep enthusiasts! You can prepare the dough and let it rise up to 24 hours in advance. Simply follow the steps through the first rise, then cover the bowl tightly with plastic wrap and refrigerate it. When you’re ready to bake, allow the dough to come to room temperature for about 30 minutes before transferring it to the prepared pan for the second rise. To ensure the focaccia remains just as delicious, be generous with olive oil during all stages, preventing dryness. Then, follow the final steps of dimpling the dough, spreading the jam, and baking it to golden perfection. Enjoy a delightful treat that’s simple and quick, perfect for busy weeknights!

Expert Tips for Sweet Focaccia with Raspberry Jam

  • Yeast Freshness: Ensure the active dry yeast is fresh and bubbly; if it doesn’t activate, the focaccia won’t rise properly.
  • Generous Olive Oil: Don’t skimp on olive oil at every stage; it keeps the dough moist and prevents it from drying out.
  • Dimples Matter: Make sure to dimple the dough well before baking; these create pockets for the raspberry jam to soak in, enhancing flavor.
  • Cooling Time: Allow the focaccia to cool slightly before icing; this helps the glaze set beautifully without melting immediately into the bread.
  • Icing Consistency: Adjust the milk in your icing carefully; it should be pourable but thick enough to cling and add that sweet finishing touch.

Sweet Focaccia with Raspberry Jam Recipe FAQs

What type of raspberry jam should I use?
I recommend using Bonne Maman brand for the best flavor. Its rich, fruity profile complements the fluffy dough perfectly, adding depth to your Sweet Focaccia with Raspberry Jam. However, feel free to experiment with other brands or homemade jams if you prefer!

How long can I store the focaccia?
Store your Sweet Focaccia with Raspberry Jam in an airtight container at room temperature for up to 3 days. If you want it to last a bit longer, you can refrigerate it for up to 5 days, but be sure to let it come back to room temperature before serving for that fresh-baked taste!

Can I freeze the focaccia?
Absolutely! To freeze, slice your focaccia and wrap each piece tightly in plastic wrap. Then, place the wrapped slices in a freezer-safe bag, and they’ll stay good for up to 3 months. When you’re ready to enjoy, simply thaw them overnight in the fridge or on the counter for a few hours.

What if my dough doesn’t rise?
If your dough fails to rise, it’s likely due to inactive yeast. Always check that your yeast is fresh by ensuring it bubbles in warm water with sugar. If it doesn’t, you’ll need to start over with fresh yeast.

Can I add other ingredients to the dough?
Yes, definitely! You can personalize your Sweet Focaccia with Raspberry Jam by adding lemon zest or spices like cardamom to the dough for an extra flavor kick. You can also substitute the raspberry jam with other fruit preserves such as apricot, strawberry, or blueberry!

Are there any dietary considerations for my pets?
While the focaccia itself is safe for humans, ingredients like sugar and jam are not ideal for pets. It’s best to keep this delicious treat out of their reach, but your furry friends can enjoy their own special snack instead!

Sweet Focaccia with Raspberry Jam

Sweet Focaccia with Raspberry Jam for a Delightful Brunch

This Sweet Focaccia with Raspberry Jam is a delicious treat perfect for brunch or dessert, combining fluffy dough with sweet raspberry jam.
Prep Time 1 hour
Cook Time 22 minutes
Rising Time 2 hours
Total Time 3 hours 24 minutes
Servings: 12 slices
Course: Dessert
Cuisine: Italian
Calories: 250

Ingredients
  

For the Dough
  • 1.75 cups Warm Water Ensure the water is between 105-115°F for optimum yeast activity.
  • 2 tsp Sugar Feeds the yeast for activation; essential for a good rise.
  • 1 packet Active Dry Yeast Always check for freshness before use.
  • 2 cups Bread Flour Provides structure and chewiness.
  • 2 cups All-Purpose Flour Adds additional texture and lightness.
  • 2 tsp Salt Enhances flavor and controls yeast fermentation.
  • 6 tbsp Olive Oil Keeps the dough moist; apply generously.
For the Topping
  • 1 jar Raspberry Jam For the best taste, consider Bonne Maman brand.
  • 2 cups Powdered Sugar Adjust for desired icing thickness.
  • 2-4 tbsp Milk Adjust for desired icing consistency.

Equipment

  • Stand Mixer
  • Mixing Bowl
  • 9x13 metal pan

Method
 

Step-by-Step Instructions
  1. In a stand mixer, combine 1 ¾ cups of warm water with 2 teaspoons of sugar, whisk until dissolved. Sprinkle the packet of active dry yeast over the water and let it sit for 5 minutes until it becomes frothy.
  2. Add 2 cups of bread flour, 2 cups of all-purpose flour, and 2 teaspoons of salt to the yeast mixture. Mix on low speed until a sticky dough forms.
  3. Grease a large mixing bowl with olive oil, transfer the dough into the oiled bowl, cover it, and place it in a warm spot to rise for about 1 hour.
  4. Prepare a 9x13 metal pan by generously coating it with olive oil. Once the dough has risen, punch it down and transfer it to the pan, folding and stretching to coat with oil.
  5. Preheat your oven to 425°F (220°C). This ensures the focaccia will bake to a golden brown.
  6. Dimple the surface of the dough with your fingers to create small indentations for the jam.
  7. Spread a layer of raspberry jam evenly over the dimpled surface of the dough. Bake for 18-22 minutes until golden brown.
  8. Remove the focaccia from the oven and poke holes across the surface to allow the jam to seep into the bread.
  9. Mix 2 cups of powdered sugar with 2-4 tablespoons of milk until you achieve a smooth consistency for icing.
  10. Once cooled, drizzle the icing over the focaccia, cut into squares and serve.

Nutrition

Serving: 1sliceCalories: 250kcalCarbohydrates: 40gProtein: 4gFat: 10gSaturated Fat: 1gPolyunsaturated Fat: 5gMonounsaturated Fat: 3gSodium: 250mgPotassium: 100mgFiber: 1gSugar: 15gIron: 6mg

Notes

This focaccia is easy to prepare and perfect for brunch or as a dessert. Store it in an airtight container for up to 3 days.

Tried this recipe?

Let us know how it was!

Delicious Spicy Fish Nuggets for Your Next Snack Attack

With a lively sizzle and a tantalizing aroma wafting through the kitchen, I found myself craving something crispy yet flavorful. That’s when I decided to elevate an ordinary piece of white fish into what I now call my Spicy Fish Nuggets. Coated in a crunchy panko exterior and seasoned with a kick of peri peri spice, these nuggets are the perfect blend of indulgence and health—ideal for a quick dinner, light snack, or even game day treats. Not only do they come together in a flash, but they can be easily customized to suit your spice-loving family’s taste buds. Whether you choose to fry, bake, or air fry them, these nuggets promise to deliver a delightful crunch and satisfying flavor that will leave you wanting more. What dipping sauce will you pair with your crispy creation?

Why Are These Spicy Fish Nuggets Special?

Flavor Explosion: Each bite offers a perfect blend of spicy peri peri seasoning and a savory fish base that’s hard to beat.

Customizable Spice: Whether you like it mild or fiery hot, you can easily adjust the spice level to suit your palate.

Versatile Cooking Methods: Fry, bake, or air fry—this recipe fits into any cooking style for a crispy treat every time.

Quick & Easy: Ready in just a matter of minutes, these nuggets are perfect for those busy evenings or spontaneous snack cravings.

Crowd-Pleaser: Serve them at your next gathering or game day event for an irresistible appetizer that everyone will love! Pair them with homemade tartar sauce or spicy mayo for a delightful dip. If you’re in the mood for more exciting flavors, check out our recipes for Spicy Korean Gochujang or Spicy Thai Basil. Your taste buds will thank you!

Spicy Fish Nuggets Ingredients

Unlock the secrets to crafting the perfect Spicy Fish Nuggets with these essential ingredients!

For the Nuggets
Boneless White Fish (300 g) – Choose firm varieties like cod or tilapia for the best texture, avoiding delicate fish that may break apart.
Panko Breadcrumbs (¾ cup) – Offers that irresistible crunch and golden finish, crucial for the ultimate nugget experience.
All-Purpose Flour (4 tablespoons total) – This base coating helps the spices adhere; swap for gluten-free flour to suit dietary needs.
Dried Parsley (2 tablespoons) – Adds a pop of color and a hint of freshness to the coating.
Egg (1) – Acts as a binder, ensuring a sturdy coating that holds up in frying.
Milk (2 tablespoons) – Creates a smooth egg wash for better adhesion during breading.
Vinegar (1 teaspoon) – Tenderizes the fish while adding a subtle tang to enhance flavor.
Peri Peri Seasoning (1–2 teaspoons) – Infuses the nuggets with zesty heat; adjust to your liking for a milder touch, or use paprika for color.
Ginger Garlic Paste (1 teaspoon) – Introduces aromatic depth that rounds out the flavor profile beautifully.
Salt (½ teaspoon) & Crushed Black Pepper (½ teaspoon) – Essential seasonings to elevate the overall taste of the nuggets.
Cooking Oil – Select high smoke point oils like vegetable or canola for frying to achieve that perfect crispy texture.

Step‑by‑Step Instructions for Spicy Fish Nuggets

Step 1: Prepare the Fish
Begin by patting the boneless white fish cubes dry with paper towels to remove excess moisture, which helps achieve that perfect crisp in your Spicy Fish Nuggets. Cut the fish into uniform 1-inch cubes, ensuring even cooking and an appealing presentation when they’re golden brown and crispy.

Step 2: Create Spice Marinade
In a mixing bowl, combine 1 teaspoon of vinegar, 1 to 2 teaspoons of peri peri seasoning, 1 teaspoon of ginger garlic paste, along with ½ teaspoon each of salt and crushed black pepper. Gradually add 2 tablespoons of flour to create a thick paste. This marinade will infuse the fish cubes with flavor, preparing them for an extraordinary nugget experience.

Step 3: Marinate the Fish
Coat the fish cubes thoroughly in the spice marinade, ensuring each piece is well covered. Allow the fish to marinate for at least 15 minutes to allow the flavors to penetrate; for deeper flavor, consider marinating for up to 2 hours in the refrigerator. This step is crucial to elevate your Spicy Fish Nuggets.

Step 4: Set Up Breading Assembly
While the fish is marinating, prepare three shallow dishes. In one, add 2 tablespoons of all-purpose flour; in another, whisk together 1 egg and 2 tablespoons of milk to create an egg wash; and in the last dish, combine ¾ cup of panko breadcrumbs and 2 tablespoons of dried parsley. This organized setup streamlines the breading of your nuggets.

Step 5: Bread the Nuggets
Take each marinated fish cube and start the breading process by dredging it through the flour, shaking off any excess. Next, dip the cube into the egg wash, coating it evenly. Finally, roll the fish in the seasoned panko breadcrumbs until fully covered. The crunchy exterior is key to your delicious Spicy Fish Nuggets.

Step 6: Cook the Nuggets
Heat oil in a deep frying pan over medium heat until it reaches 350°F (175°C). Carefully place the breaded fish nuggets into the hot oil in small batches. Fry them for about 3-4 minutes or until they turn golden brown, turning them occasionally for even cooking. Watch closely for that ideal crispy texture!

Step 7: Drain and Serve
Once cooked, remove the nuggets from the hot oil and place them on a paper towel-lined plate to drain excess oil. Serve your Spicy Fish Nuggets immediately while they’re hot, crispy, and bursting with flavor. Pair them with your favorite dipping sauces, and enjoy a delightful snack or appetizer that’s sure to impress.

What to Serve with Crispy Spicy Fish Nuggets

The perfect meal comes together with vibrant flavors and satisfying textures that will leave your family asking for seconds.

  • Creamy Coleslaw: This crunchy, tangy side provides a refreshing contrast to the spicy fish nuggets, balancing heat with coolness.

  • Garlic Butter Rice: Fluffy rice infused with garlic butter serves as a delightful base that complements the nuggets’ flavor while adding a touch of comfort.

  • Zesty Cucumber Salad: A light, crisp salad with zesty dressing brings brightness to your plate, complementing the savory nuggets beautifully. The freshness of cucumber helps cleanse the palate between bites.

  • Sweet Chili Dipping Sauce: Pair with your spicy fish nuggets for an explosion of flavor! The sweetness of the sauce perfectly balances the piquant spice of the nuggets.

  • Chilled Lemonade: A refreshing drink with a tangy kick, it wonderfully offsets the heat of the spicy fish, making it a perfect hydration choice for your meal.

  • Buttery Corn on the Cob: This classic side adds sweetness and a satisfying texture, rounding out your meal while enhancing the overall experience with its buttery goodness.

  • Mixed Green Salad: Tossed greens with a citrus vinaigrette offer a light and refreshing contrast to the richness of the nuggets, ensuring your meal is both balanced and vibrant.

  • Crispy Potato Wedges: These can be seasoned simply or dressed up with herbs, creating a hearty complement to your spicy fish nuggets and appealing to the whole family.

Variations & Substitutions for Spicy Fish Nuggets

Feel free to sprinkle your creativity into this recipe, making it uniquely yours!

  • Heat Level: Adjust the peri peri seasoning to control the spiciness—swap it for paprika for a milder option. This way, even the little ones will enjoy the nuggets without the heat!

  • Gluten-Free: Substitute the all-purpose flour and panko breadcrumbs with gluten-free alternatives to enjoy these nuggets worry-free. They are just as delicious and crunchy!

  • Oven-Baked Nuggets: Bake the nuggets at 425°F (220°C) for 15-18 minutes for a healthier twist. They’ll still be crispy and flavorful, perfect for those seeking a lighter option.

  • Air Frying Method: Try air frying them at 400°F (200°C) for 8-10 minutes instead of frying. You’ll achieve that delightful crunch without the excess oil!

  • Flavor Variations: Experiment with different seasonings—like Cajun spice or Italian herbs—in place of peri peri for a distinct flavor profile that’s equally enjoyable.

  • Add Veggies: Mix finely chopped spinach or grated zucchini into the breadcrumb mixture for a nutritional boost. Not only do they add color, but they also sneak in some extra veggies!

  • Fun Dipping Sauces: Pair these spicy bites with a variety of dips—think lemon garlic sauce, tartar sauce, or a zesty cilantro yogurt sauce for a refreshing twist.

  • Fish Alternatives: Swap out the white fish for shrimp or even chicken—this recipe adapts well to various proteins while keeping that beloved crunchy exterior.

For any extra flavors, don’t forget to check out our scrumptious Grilled Fish Tacos or try some Spicy Korean Gochujang in your next creation!

Make Ahead Options

These Spicy Fish Nuggets are perfect for meal prep enthusiasts looking to save time during busy weeknights! You can marinate the fish cubes in the spice marinade up to 2 hours in advance, or for even more flavor, let them sit in the refrigerator overnight. Additionally, you can bread the fish nuggets and refrigerate them for up to 24 hours before cooking; this maintains their crispy texture. To finish, simply fry or bake the nuggets straight from the fridge when you’re ready to serve, ensuring a quick and easy snack or meal that’s just as delicious as if made fresh!

How to Store and Freeze Spicy Fish Nuggets

Fridge: Store cooked spicy fish nuggets in an airtight container in the refrigerator for up to 3 days. To reheat, use the oven or air fryer to restore their crispy texture.

Freezer: For longer storage, freeze unbaked or cooked nuggets in a zip-top freezer bag for up to 3 months. Lay them flat to save space, then reheat directly from frozen.

Reheating: Cooked nuggets can be reheated in the oven at 375°F (190°C) for 10-15 minutes or in an air fryer for about 8 minutes to ensure they stay crispy.

Preventing Moisture: To maintain their crunch, make sure the nuggets are cooled completely before storing, and avoid stacking them in the fridge or freezer.

Expert Tips for Spicy Fish Nuggets

Choose Firm Fish: Select varieties like cod or tilapia to ensure the nuggets hold together during cooking and maintain a nice texture.

Don’t Rush Marination: Allow marinating for at least 15 minutes; longer marinating enhances the depth of flavor making your spicy fish nuggets even more delicious.

Monitor Oil Temperature: Keep a thermometer handy to maintain frying oil at 350°F (175°C); proper heat ensures a crisp exterior without excessive greasiness.

Batch Cooking: Fry the nuggets in small batches to avoid overcrowding, ensuring they cook evenly and achieve that perfect golden brown color.

Customize Spice Levels: Adjust the peri peri seasoning according to your family’s preferences; for kids, tone down the heat or add paprika for extra color without spice.

Spicy Fish Nuggets Recipe FAQs

How do I choose the right fish for my nuggets?
Absolutely! When selecting your boneless white fish, go for firm varieties like cod, haddock, or tilapia. These will hold their shape better during frying and give you that desired texture. Avoid delicate fish such as sole, as they may break apart easily.

How should I store leftover spicy fish nuggets?
Very simply! Place your cooked spicy fish nuggets in an airtight container and refrigerate them for up to 3 days. To reheat and keep them crispy, pop them in the oven at 375°F (190°C) for 10-15 minutes or use an air fryer for about 8 minutes.

Can I freeze spicy fish nuggets?
Yes, you can! For freezing, either freeze unbaked or cooked nuggets in a zip-top freezer bag for up to 3 months. Lay the nuggets flat to save space in your freezer. When ready to enjoy, reheat directly from frozen in the oven or air fryer until heated through and nicely crispy.

What spices can I use if I don’t have peri peri seasoning?
If you’re looking for alternatives, consider using smoked paprika and cayenne pepper as a substitute for peri peri seasoning. Mix ½ teaspoon of smoked paprika with a pinch of cayenne for a similar flavor profile but at a milder spice level. You can easily adjust the ratios based on your taste preference!

What should I do if my nuggets aren’t crispy after frying?
To achieve that perfect crunch, ensure your oil is at 350°F (175°C) before adding the nuggets. If they’re not crisping up, it might be due to overcrowding in the pan, which lowers the oil temperature. Fry them in smaller batches to allow each piece to cook evenly and develop that golden-brown exterior.

Is there a gluten-free option for the recipe?
Absolutely! To make your spicy fish nuggets gluten-free, substitute the all-purpose flour and panko breadcrumbs with gluten-free flour and gluten-free breadcrumbs. They’ll still come out deliciously crispy and flavorful, allowing everyone to enjoy them without worry!

Spicy Fish Nuggets

Delicious Spicy Fish Nuggets for Your Next Snack Attack

Try these indulgent yet healthy Spicy Fish Nuggets, perfect for any occasion, with a crunchy panko coating and customizable spice levels.
Prep Time 30 minutes
Cook Time 10 minutes
Total Time 40 minutes
Servings: 4 nuggets
Course: Appetizer
Cuisine: Seafood
Calories: 200

Ingredients
  

For the Nuggets
  • 300 g Boneless White Fish Choose firm varieties like cod or tilapia.
  • ¾ cup Panko Breadcrumbs For crunch and golden finish.
  • 4 tablespoons All-Purpose Flour Base coating; substitute for gluten-free if needed.
  • 2 tablespoons Dried Parsley Adds color and freshness.
  • 1 Egg Binder for the coating.
  • 2 tablespoons Milk For egg wash.
  • 1 teaspoon Vinegar Tenderizes fish and adds tang.
  • 1–2 teaspoons Peri Peri Seasoning Adjust spice level to taste.
  • 1 teaspoon Ginger Garlic Paste Adds aromatic depth.
  • ½ teaspoon Salt Essential seasoning.
  • ½ teaspoon Crushed Black Pepper Essential seasoning.
  • Cooking Oil High smoke point oils like vegetable or canola.

Equipment

  • Deep frying pan
  • Mixing bowls
  • Measuring cups
  • Measuring spoons

Method
 

Step-by-Step Instructions
  1. Pat dry the fish cubes and cut into uniform 1-inch cubes.
  2. Combine vinegar, peri peri seasoning, ginger garlic paste, salt, and pepper in a bowl. Add flour to create a marinade.
  3. Marinate the fish cubes thoroughly and let sit for at least 15 minutes.
  4. Prepare three shallow dishes for flour, egg wash, and panko breadcrumb mix.
  5. Dredge fish in flour, dip in egg wash, and coat with breadcrumbs.
  6. Heat oil to 350°F (175°C) and fry nuggets for 3-4 minutes until golden brown.
  7. Drain on paper towels and serve immediately with dipping sauces.

Nutrition

Serving: 4nuggetsCalories: 200kcalCarbohydrates: 15gProtein: 25gFat: 8gSaturated Fat: 1gPolyunsaturated Fat: 2gMonounsaturated Fat: 4gCholesterol: 100mgSodium: 300mgPotassium: 350mgFiber: 1gSugar: 1gVitamin A: 200IUVitamin C: 5mgCalcium: 20mgIron: 1mg

Notes

Perfect for a quick snack or appetizer, customizable to fit your spice preference. Pair with tartar sauce or spicy mayo for added flavor.

Tried this recipe?

Let us know how it was!

Millionaire Peach Salad: Your Perfect Summer Treat!

The moment the sun breaks through the clouds, I find myself transported to a summer picnic, where smiles are as abundant as ripe peaches. This Millionaire Peach Salad captures that cheerful season with its luscious sweetness and creamy texture, making it a delightful addition to any gathering. Not only is this recipe quick to prepare, but it’s also a versatile crowd-pleaser, allowing for easy adaptations to suit dietary needs like dairy-free options. The combination of refreshing fruit topped with a crunchy graham cracker mix brings a wonderful contrast that feels indulgent yet light. Whether as a side or a refreshing dessert, you won’t want to miss out on this vibrant salad! So, ready to dive into a taste of summer? Let’s get started!

Why is Millionaire Peach Salad a Must-Try?

Refreshing, Sweet Flavors: The juicy peaches provide a burst of summer sweetness that will leave everyone craving more.

Quick Preparation: You can whip this no-cook recipe together in under 15 minutes, making it perfect for busy days!

Versatile Ingredients: Customize your salad by substituting fruits and nuts, whether you opt for dairy-free or more decadent choices!

Perfect for Gatherings: Whether as a side dish for a barbecue or a light dessert at a picnic, this salad is sure to impress and delight your guests.

Don’t forget to check out complementary dishes like Tuna Salad Sandwich for a delightful meal pairing!

Millionaire Peach Salad Ingredients

• Here’s what you need to create this irresistible salad!

For the Salad

  • Ripe Peaches – Sweetness and freshness are key; choose firm, ripe peaches for the best flavor.
  • Whipped Cream – Adds a creamy texture; opt for non-dairy whipped topping for a dairy-free version.
  • Cream Cheese – Provides richness; substitute with dairy-free cream cheese if needed.
  • Honey or Maple Syrup – Acts as a sweetener; agave syrup is a great alternative based on your preference.
  • Vanilla Extract – Enhances flavor; for depth, use pure vanilla extract.

For the Topping

  • Crushed Graham Crackers – Brings crunchiness and sweetness; crushed cookies can also be used for a different take.
  • Chopped Pecans or Walnuts – Offer nutty flavor and crunch; consider sunflower seeds for a nut-free option.
  • Brown Sugar – Can slightly enhance sweetness; it’s optional based on your taste.
  • Fresh Mint Leaves – Use as a garnish for an added pop of color and freshness.

Embrace this delightful Millionaire Peach Salad recipe, and let your culinary creativity shine!

Step‑by‑Step Instructions for Millionaire Peach Salad

Step 1: Prepare the Creamy Mixture
In a medium mixing bowl, combine the whipped cream, cream cheese, honey (or maple syrup), and vanilla extract. Whisk these ingredients together until you achieve a smooth, creamy texture, which should take about 2-3 minutes. The mixture should be fluffy and well-blended, creating a perfect base for your Millionaire Peach Salad.

Step 2: Add the Peaches
Carefully slice the ripe peaches and gently fold them into the creamy mixture from Step 1. Use a spatula to coat the peach slices evenly, ensuring they are well-covered with the delightful creaminess. This step should take about 1-2 minutes, and the peaches should look lush and inviting, ready to shine in your salad.

Step 3: Make the Crunchy Topping
In a separate small bowl, mix together the crushed graham crackers, chopped pecans (or walnuts), and brown sugar. Stir the ingredients until well combined, creating a sweet and crunchy topping that will add texture to your Millionaire Peach Salad. This should take around 1-2 minutes, and the mixture will be coarse and crumbly.

Step 4: Assemble the Salad
Transfer the creamy peach mixture into a serving bowl and spread it out evenly. Next, generously sprinkle the crunchy topping over the salad, allowing some to mix in while keeping a good amount on top for visual appeal. This assembly should take about 2-3 minutes; the salad should look vibrant and inviting.

Step 5: Garnish and Serve
Finish off your Millionaire Peach Salad by garnishing it with fresh mint leaves for a pop of color and flavor. You can serve it immediately for a fresh taste or chill it in the refrigerator for about 30 minutes to let the flavors meld. If chilling, remember to add the crunchy topping right before serving to maintain that delightful crunch.

Make Ahead Options

These Millionaire Peach Salad preparations make mealtime a breeze for busy cooks! You can prepare the creamy mixture (whipped cream, cream cheese, honey, and vanilla extract) up to 24 hours in advance and store it in an airtight container in the refrigerator. Additionally, slice your ripe peaches and toss them in lemon juice to prevent browning; this can be done a few hours ahead and kept chilled. However, to maintain that delightful crunch, wait to mix in the graham cracker topping and nuts until just before serving. When you’re ready to enjoy, simply fold the peaches into the creamy base and top with the crunchy mixture for a refreshing salad that tastes just as delicious as when made fresh!

What to Serve with Millionaire Peach Salad

Elevate your summer dining experience with delightful pairings that complement this luscious salad beautifully.

  • Grilled Chicken Skewers: Juicy, tender chicken adds a savory element, balancing the sweet peaches perfectly.

  • Quinoa Salad: A hearty, protein-packed option with fresh vegetables brings a wholesome contrast, making it a satisfying meal.

  • Light White Wine: Crisp and refreshing, a chilled Sauvignon Blanc enhances the fruity notes of the peach salad while keeping the vibe light.

  • Pasta Salad with Basil Pesto: The herbal flavors of basil pesto mingle perfectly with the creamy salad, creating a vibrant meal.

  • Sliced Baguette with Olive Oil: Crusty bread dipped in rich olive oil offers a rustic touch that beautifully absorbs the salad’s creamy dressing.

  • Berry Tart: A sweet and tangy dessert like a berry tart provides a delightful ending to your meal, echoing the summer fruit theme.

  • Iced Herbal Tea: Refreshing herbal tea brings out the flavors of the salad while providing a cooling effect on a hot day.

With these flavorful options, your Millionaire Peach Salad will shine even brighter at any gathering!

Storage Tips for Millionaire Peach Salad

  • Fridge: Store leftover Millionaire Peach Salad in an airtight container for up to 2 days. Enjoy best within the first 24 hours for optimal freshness and flavor.
  • Room Temperature: It’s best to keep the salad chilled. Avoid leaving it at room temperature for more than 2 hours to maintain quality and safety.
  • Freezer: Freezing is not recommended as it can compromise the texture of the cream and peaches, making the salad watery upon thawing.
  • Reheating: This salad is served cold, so simply enjoy as is. If made ahead, add the crunchy topping right before serving to preserve its delightful crunch.

Millionaire Peach Salad Variations

Feel free to get creative and adapt this delightful recipe to suit your taste buds!

  • Berry Fusion: Swap out peaches for fresh strawberries, raspberries, or blueberries to create a vibrant berry salad. The tartness will add a fun twist!

  • Tropical Paradise: Replace peaches with pineapple or mango for a cheerful tropical flair. This option is a refreshing summer treat that inspires sunny vibes.

  • Nuts About It: Try mixing different nuts such as almonds or pistachios instead of pecans or walnuts. The subtle crunch enhances the overall flavor—plus, they all add a beautiful touch!

  • Citrus Zest: Add a splash of lemon or lime juice to the creamy mixture for a zesty kick. This vibrant touch can brighten flavors and enhance the overall experience.

  • Sweet & Spicy: Sprinkle in some cayenne pepper or a dash of chili powder to give your salad a sweet heat. The contrast of flavors will surprise and delight your guests!

  • Dairy-Free Delight: Use coconut cream and vegan cream cheese for a completely dairy-free version that doesn’t skimp on taste. Indulgence has never felt so guilt-free!

  • Herbal Infusion: Incorporate fresh basil or lemon verbena instead of mint for a unique herbal note. This substitution promotes an unexpected yet harmonious flavor profile.

  • Crunchy Alternative: Swap crushed graham crackers for crushed pretzels or cereal for a delightful salty-sweet combination. It adds a fun twist that’ll keep everyone guessing!

Remember, this Millionaire Peach Salad is just the beginning of your culinary creativity. If you enjoyed this salad, consider pairing it with a lovely Strawberry Spinach Salad or our refreshing Tuna Macaroni Salad for a delightful summer feast!

Expert Tips for Millionaire Peach Salad

Texture Matters: For the best texture, add the crunchy topping right before serving. This keeps the graham crackers crispy and prevents them from getting soggy.

Peach Selection: Always use firm, ripe peaches for sweetness. If using frozen peaches, make sure to thaw and drain any excess moisture to avoid a watery salad.

Adjust Sweetness: Taste the creamy mixture before adding all the fruit. Everyone’s sweetness preference varies, so feel free to adjust the honey or maple syrup to your liking.

Mixing Options: If you love variety, don’t hesitate to swap peaches with other fruits like strawberries or pineapple for added excitement in your Millionaire Peach Salad.

Storage Tips: Store any leftovers in an airtight container in the refrigerator and enjoy them within 48 hours for the best flavor and texture.

Millionaire Peach Salad Recipe FAQs

What type of peaches should I use for the Millionaire Peach Salad?
Absolutely! For optimal flavor, choose firm, ripe peaches that yield slightly to pressure. If you’re in a pinch, frozen peaches can work too; just make sure to thaw and drain them well to avoid excess moisture.

How long can I store leftover Millionaire Peach Salad?
You can keep leftover Millionaire Peach Salad in an airtight container in the refrigerator for up to 2 days. However, it’s best enjoyed within the first 24 hours to maintain its freshness and texture.

Can I freeze Millionaire Peach Salad?
Freezing is not recommended for this salad. The creamy components and peaches may break down upon thawing, resulting in a watery texture. If you’re preparing it for later, store it in the fridge and add toppings just before serving for the best results.

What should I do if my salad becomes watery?
If you notice that your salad has become watery, it may be due to overripe peaches or excess moisture from frozen ones. To fix this, strain the mixture through a fine mesh sieve to remove excess liquid. Additionally, make sure to use firm peaches and drain any thawed ones well before mixing.

Can I make this salad dairy-free?
Very! To create a dairy-free version of the Millionaire Peach Salad, substitute the whipped cream and cream cheese with non-dairy alternatives. There are various coconut-based or almond-based whipped toppings that work delightfully well, ensuring everyone can enjoy this summer treat.

Is this salad safe for pets?
While the ingredients in the Millionaire Peach Salad are generally safe for humans, be cautious about serving it to pets. Peaches are safe in moderation, but avoid giving them any whipped cream or cream cheese, as dairy products can upset their stomachs. Always consult your vet before introducing new foods to your pet’s diet.

Millionaire Peach Salad

Millionaire Peach Salad: Your Perfect Summer Treat!

This Millionaire Peach Salad is a refreshing burst of summer sweetness, perfect for gatherings and adaptable for dietary preferences.
Prep Time 15 minutes
Chilling Time 30 minutes
Total Time 45 minutes
Servings: 8 servings
Course: Salad
Cuisine: American
Calories: 200

Ingredients
  

For the Salad
  • 4 cups Ripe Peaches firm and ripe
  • 1 cup Whipped Cream dairy-free option available
  • 8 oz Cream Cheese dairy-free option available
  • 1/4 cup Honey or Maple Syrup agave syrup as alternative
  • 1 tsp Vanilla Extract pure vanilla recommended
For the Topping
  • 1 cup Crushed Graham Crackers or crushed cookies
  • 1/2 cup Chopped Pecans or Walnuts sunflower seeds for nut-free option
  • 1 tbsp Brown Sugar optional
  • 1/4 cup Fresh Mint Leaves for garnish

Equipment

  • Mixing Bowl
  • Spatula
  • Serving Bowl

Method
 

Step-by-Step Instructions
  1. In a medium mixing bowl, combine the whipped cream, cream cheese, honey (or maple syrup), and vanilla extract. Whisk until smooth, about 2-3 minutes.
  2. Carefully slice the ripe peaches and gently fold them into the creamy mixture, about 1-2 minutes.
  3. In a separate small bowl, mix together the crushed graham crackers, chopped pecans (or walnuts), and brown sugar until well combined.
  4. Transfer the creamy peach mixture into a serving bowl and spread it out evenly. Generously sprinkle the crunchy topping over the salad.
  5. Garnish with fresh mint leaves and serve immediately, or chill for about 30 minutes before serving.

Nutrition

Serving: 1servingCalories: 200kcalCarbohydrates: 30gProtein: 3gFat: 8gSaturated Fat: 3gPolyunsaturated Fat: 2gMonounsaturated Fat: 2gCholesterol: 15mgSodium: 80mgPotassium: 150mgFiber: 2gSugar: 18gVitamin A: 500IUVitamin C: 10mgCalcium: 30mgIron: 0.5mg

Notes

For best texture, add the crunchy topping right before serving. Store leftovers in the refrigerator for up to 2 days.

Tried this recipe?

Let us know how it was!

Heavenly Vanilla Cinnamon Buttermilk Pancakes Made Easy

The aroma of vanilla and cinnamon wafting through the kitchen is like a warm hug on a chilly morning. There’s something special about gathering with loved ones around the table, especially when those Vanilla Cinnamon Buttermilk Pancakes are the star of the show. Not only are they a delightful twist on a breakfast classic, but these fluffy pancakes also provide the perfect opportunity for a cozy family brunch or a quick treat for yourself. With minimal prep time and comforting goodness in every bite, you’ll find yourself wanting to whip them up time and again. Curious about how to create these fluffy delights? Let’s dive into the recipe that will transform your mornings!

Why Are These Pancakes So Irresistible?

Fluffy, the texture of these pancakes is nothing short of cloud-like, making each bite a memory you’ll cherish. Sweet aroma fills your kitchen, thanks to the perfect blend of vanilla and cinnamon. Quick prep time means you can have a delightful breakfast without the fuss. Family favorite, these pancakes are sure to please kids and adults alike, turning any meal into a special occasion. Looking to elevate your breakfast experience? Try them with a drizzle of maple syrup or warm dusting of cinnamon sugar for an extra touch. For more cozy breakfast ideas, check out my Buttermilk Pancakes Discover and delicious Rhubarb Scones Vanilla.

Vanilla Cinnamon Buttermilk Pancake Ingredients

  • For the Batter
    All-Purpose Flour – Provides structure and body; gluten-free flour is a great alternative for those with dietary needs.
    Sugar – Adds just the right sweetness; you can use brown sugar for a richer flavor.
    Baking Powder – Acts as a leavening agent to make the pancakes wonderfully fluffy.
    Baking Soda – Works in tandem with buttermilk, enhancing the lift and lightness.
    Ground Cinnamon – Infuses warmth and a hint of spice that complements the vanilla beautifully.
    Salt – Enhances flavor balance, ensuring your pancakes are perfectly seasoned.
    Buttermilk – Provides tang and moisture, creating that tender pancake texture; for a substitute, use milk mixed with vinegar or lemon juice.
    Large Egg – Binds the ingredients and adds moisture; consider using a flax egg for a vegan option.
    Melted Butter – Adds richness; remember to use some extra for cooking.
    Vanilla Extract – Lends a sweet, aromatic flavor to the pancakes; it can be omitted if you’re aiming for a different taste.

These Vanilla Cinnamon Buttermilk Pancakes are just waiting to be savored!

Step‑by‑Step Instructions for VANILLA CINNAMON BUTTERMILK PANCAKES

Step 1: Mix Dry Ingredients
In a large mixing bowl, whisk together 1 cup of all-purpose flour, 2 tablespoons of sugar, 2 teaspoons of baking powder, ½ teaspoon of baking soda, 1 teaspoon of ground cinnamon, and a pinch of salt. This is the foundation for your Vanilla Cinnamon Buttermilk Pancakes. Ensure everything is well combined, as this mixture will provide lift and flavor to create fluffy pancakes.

Step 2: Mix Wet Ingredients
In a separate bowl, whisk together 1 cup of buttermilk, 1 large egg, 2 tablespoons of melted butter, and 1 teaspoon of vanilla extract. The wet ingredients contribute moisture and richness to the batter. Mix until combined, ensuring the melted butter blends smoothly. The aroma of vanilla should fill the air, setting the stage for the delicious pancakes ahead.

Step 3: Combine Mixtures
Gradually pour the wet ingredients into the bowl with the dry ingredients, stirring gently with a spatula. Mix just until combined, and don’t fret about a few lumps—overmixing can result in denser pancakes. Let the batter rest for about 5 minutes; this helps activate the leavening agents for truly light and fluffy Vanilla Cinnamon Buttermilk Pancakes.

Step 4: Cook Pancakes
Preheat a nonstick skillet or griddle over medium heat and add a little butter to coat the surface. For each pancake, pour about ¼ cup of batter onto the skillet. Cook until bubbles form on the surface and the edges look set, which should take about 2-3 minutes. Flip the pancake once golden brown and continue cooking for an additional 1-2 minutes to finish.

Step 5: Serve Warm
Once cooked, transfer the Vanilla Cinnamon Buttermilk Pancakes to a plate. Enjoy them immediately while they’re warm, topped with your choice of butter, maple syrup, or a sprinkle of cinnamon sugar for an extra comforting touch. These pancakes make for a delightful breakfast that will bring smiles to your table!

How to Store and Freeze Vanilla Cinnamon Buttermilk Pancakes

Fridge: Store cooked pancakes in an airtight container in the refrigerator for up to 3 days. This keeps them fresh and ready for a quick breakfast option later.

Freezer: For longer storage, place pancakes in a single layer on a baking sheet to freeze for 1-2 hours. Once frozen, transfer them to a freezer-safe bag, where they can last up to 2 months.

Reheating: Reheat pancakes straight from the fridge or freezer in a toaster, skillet, or microwave until warmed through. Add a pat of butter or a drizzle of maple syrup for that freshly-made taste.

Layering: Separate pancakes with parchment paper before freezing to prevent sticking, especially handy for those irresistible Vanilla Cinnamon Buttermilk Pancakes!

What to Serve with Fluffy Vanilla Cinnamon Buttermilk Pancakes

Indulging in fluffy pancakes is a delightful way to start your day, but pairing them with the right sides elevates your breakfast experience even further.

  • Crispy Bacon: The salty crunch of bacon contrasts beautifully with the sweetness of the pancakes, making every bite a flavorful journey. This classic pairing is a must for any breakfast spread.

  • Fresh Berries: Strawberries, blueberries, or raspberries add a burst of vibrant freshness and tang. Their natural sweetness complements the warm vanilla and cinnamon beautifully.

  • Whipped Cream: Light and airy, a dollop of homemade whipped cream adds a luxurious touch. It enhances the overall texture and brings a sweet, creamy element to each bite.

  • Maple Syrup: No pancake is complete without a generous drizzle of pure maple syrup. The rich, earthy flavor wonderfully balances the sweetness of the pancakes, creating a breakfast masterpiece.

  • Sautéed Apples: Warm sautéed apples with a sprinkle of cinnamon offer a comforting and cozy addition. The warmth and sweetness harmonize perfectly with the fluffy pancakes.

  • Nutty Granola: A sprinkle of crunchy granola adds texture and depth. The nutty flavor and slight sweetness create a delicious layer that contrasts nicely with the soft pancakes.

  • Breakfast Smoothie: Pair your pancakes with a refreshing smoothie made from yogurt, spinach, and banana. The creamy, cold drink will invigorate your breakfast experience.

  • Eggs Any Style: Whether scrambled, fried, or poached, eggs add protein and savoriness to your meal. Their richness balances the sweetness of the pancakes.

  • Iced Coffee: A refreshing glass of iced coffee makes for the perfect beverage choice. Its bold flavor and caffeine kick complement the sugary pancakes seamlessly.

  • Cinnamon Sugar Dusting: A light dusting of cinnamon sugar before serving adds simple yet delightful flavor. It enhances the cinnamon notes already present in the pancakes for an extra punch of sweetness.

Make Ahead Options

These Vanilla Cinnamon Buttermilk Pancakes are perfect for meal prep enthusiasts! You can mix the dry ingredients and refrigerate them up to 3 days in advance to save time on busy mornings. Simply whisk together the flour, sugar, baking powder, baking soda, cinnamon, and salt, then store the mixture in an airtight container. You can also whisk the wet ingredients (buttermilk, egg, melted butter, and vanilla extract) and keep them separately in the fridge for up to 24 hours. When you’re ready to enjoy, combine the wet and dry mixtures, let it rest for 5 minutes, cook as directed, and you’ll have fluffy pancakes just as delicious as if you made them from scratch!

Variations & Substitutions for Vanilla Cinnamon Buttermilk Pancakes

Feel free to get creative with these pancakes and make them your own, exploring flavors and ingredients that excite your taste buds!

  • Gluten-Free: Substitute all-purpose flour with a gluten-free blend, ensuring the same fluffy texture without the gluten. This way, everyone can enjoy these delightful pancakes!

  • Lower Sugar: Replace white sugar with a natural sweetener like stevia or honey to cut back on calories while maintaining sweetness. Just adjust the measurements accordingly for a guilt-free treat!

  • Vegan Option: Use a flax egg instead of a large egg and swap buttermilk for almond or coconut milk mixed with a splash of lemon juice. These adaptations provide a plant-based version that’s just as delightful.

  • Spiced Up: Boost the flavor by adding nutmeg or cardamom alongside the cinnamon. It creates a warm, aromatic experience—a perfect choice for cozy mornings or special occasions.

  • Add-Ins: Fold in fresh blueberries, chocolate chips, or even chopped nuts for added texture and flavor. The possibilities are endless, and each bite will be a delightful surprise!

  • Fruit Toppings: Opt for toppings like sautéed apples or caramelized bananas to elevate your pancake experience. A sprinkle of cinnamon sugar on top adds a sweet crunch.

  • Serve with Sauce: Drizzle a homemade vanilla sauce or chocolate syrup over the pancakes for a decadent brunch treat. You might also enjoy them with a side of freshly made Grilled Cinnamon Apples for a lovely flavor contrast.

  • Oat Incorporation: Blend in some oats to the batter for a heartier texture. This adds a wholesome twist, making your pancakes not only delicious but also more filling!

Every variation brings its own charm to the table, so don’t hesitate to experiment and make these pancakes truly yours. Happy cooking!

Expert Tips for Fluffy Pancakes

  • Don’t Overmix: Stir the batter just until combined; overmixing leads to dense pancakes instead of the light, fluffy Vanilla Cinnamon Buttermilk Pancakes you desire.

  • Measure Accurately: For the best results, use the spoon-and-level method for the flour. This prevents heavy pancakes that lack fluffiness.

  • Temperature Matters: Ensure your skillet is at medium heat before pouring the batter. Too hot can burn the pancakes, while too cool can make them soggy.

  • Rest is Key: Let the batter rest for at least 5 minutes. This allows the leavening agents to activate, resulting in fluffier pancakes.

  • Check for Doneness: Look for bubbles on the surface and set edges before flipping. This ensures evenly cooked and perfectly golden Vanilla Cinnamon Buttermilk Pancakes.

  • Topping Ideas: Consider adding a dollop of whipped cream or fresh fruit for a delightful touch that enhances the comforting flavor of the pancakes.

Vanilla Cinnamon Buttermilk Pancakes Recipe FAQs

How do I choose ripe ingredients for my pancakes?
Absolutely! For the best flavor, select fresh ingredients. The buttermilk should be slightly tangy, which indicates freshness. Check your eggs for intact shells and a recent expiration date. When it comes to cinnamon, opt for fresh-ground if possible, as it has more vibrant flavor compared to older jars.

What is the best way to store leftover pancakes?
Very! Cool your cooked Vanilla Cinnamon Buttermilk Pancakes completely and then stack them with parchment paper between each pancake. Place the stack in an airtight container and refrigerate for up to 3 days. This helps maintain their fluffy texture and prevents them from sticking together.

Can I freeze my pancakes for later?
Absolutely! To freeze, lay the pancakes in a single layer on a baking sheet for about 1-2 hours until they are firm. After that, transfer them to a freezer-safe bag or container, separating layers with parchment paper. They can be stored in the freezer for up to 2 months, making for a quick breakfast option.

What if my pancakes come out dense and heavy?
Don’t worry! If your pancakes turn out dense, a few things might have gone awry. First, double-check your measurements—too much flour can weigh them down. Make sure not to overmix the batter; a few lumps are perfectly fine. Finally, allow the batter to rest for at least 5 minutes to activate the leavening agents, which results in light and fluffy pancakes.

Are these pancakes suitable for people with dietary restrictions?
Very! You can make these Vanilla Cinnamon Buttermilk Pancakes more inclusive. For those avoiding gluten, swap in a gluten-free flour blend. If dairy is an issue, use a plant-based milk with lemon juice instead of buttermilk; it works beautifully! For vegan options, replace the egg with a flax egg (1 tablespoon of ground flaxseed mixed with 2.5 tablespoons of water, let sit until gel-like) and incorporate a non-dairy butter alternative.

What should I do if I don’t have buttermilk on hand?
No worries at all! You can easily create a buttermilk substitute by mixing 1 cup of regular milk with 1 tablespoon of white vinegar or lemon juice. Let it sit for about 5 minutes until it thickens slightly. This simple trick ensures your pancakes remain fluffy and flavorful!

These Vanilla Cinnamon Buttermilk Pancakes are just waiting to be savored!

VANILLA CINNAMON BUTTERMILK PANCAKES

Heavenly Vanilla Cinnamon Buttermilk Pancakes Made Easy

Delightful and fluffy Vanilla Cinnamon Buttermilk Pancakes that are perfect for breakfast gatherings.
Prep Time 10 minutes
Cook Time 15 minutes
Resting Time 5 minutes
Total Time 30 minutes
Servings: 4 pancakes
Course: Breakfast
Cuisine: American
Calories: 200

Ingredients
  

For the Batter
  • 1 cup all-purpose flour Gluten-free flour is a great alternative.
  • 2 tablespoons sugar Brown sugar can be used for a richer flavor.
  • 2 teaspoons baking powder Leavening agent for fluffiness.
  • 0.5 teaspoon baking soda Works with buttermilk to enhance lift.
  • 1 teaspoon ground cinnamon Infuses warmth and spice.
  • 1 pinch salt Enhances flavor.
  • 1 cup buttermilk For a substitute, use milk mixed with vinegar or lemon juice.
  • 1 large egg Can use a flax egg for vegan option.
  • 2 tablespoons melted butter Plus extra for cooking.
  • 1 teaspoon vanilla extract Can be omitted for a different taste.

Equipment

  • Mixing Bowl
  • Whisk
  • Spatula
  • nonstick skillet

Method
 

Step-by-Step Instructions for VANILLA CINNAMON BUTTERMILK PANCAKES
  1. In a large mixing bowl, whisk together the flour, sugar, baking powder, baking soda, cinnamon, and salt.
  2. In a separate bowl, whisk together buttermilk, egg, melted butter, and vanilla extract.
  3. Gradually pour the wet ingredients into the dry ingredients, stirring gently just until combined. Let the batter rest for about 5 minutes.
  4. Preheat a nonstick skillet over medium heat, adding butter to coat the surface. Pour about ¼ cup of batter for each pancake. Cook until bubbles form, then flip and cook until golden.
  5. Transfer the pancakes to a plate and serve warm, topped with butter, maple syrup, or cinnamon sugar.

Nutrition

Serving: 1pancakeCalories: 200kcalCarbohydrates: 30gProtein: 4gFat: 8gSaturated Fat: 5gMonounsaturated Fat: 3gCholesterol: 35mgSodium: 300mgPotassium: 150mgFiber: 1gSugar: 4gVitamin A: 400IUCalcium: 100mgIron: 1mg

Notes

These pancakes are best enjoyed straight off the skillet. Consider additional toppings such as whipped cream or fresh fruit for a delightful touch.

Tried this recipe?

Let us know how it was!

Creamy Eggnog Recipe – Your New Holiday Spread Sensation

As I stirred the creamy mixture on the stovetop, a wave of holiday nostalgia washed over me—a feeling best described as a warm hug on a chilly day. This Creamy Eggnog Recipe transforms traditional eggnog into a delightful spread that can elevate your toast, warm up desserts, or even serve as a charming gift. It’s a versatile treat that boasts a convenient, quick prep time, perfect for anyone looking to swap out fast food for homemade joy. Plus, you can customize it to fit your festivities by deciding whether to add a splash of rum or keep it alcohol-free. Ready to infuse your kitchen with the cozy essence of the holidays? Let’s dive into this creamy delight!

Why is this Creamy Eggnog Recipe a Must-Try?

Ultimate Holiday Treat: This creamy eggnog spread captures the essence of the season, making it a festive addition to any gathering.
Easy to Make: With just a few simple ingredients, you’ll have a delicious spread ready in no time!
Versatile Uses: Perfect for toast, pancakes, or drizzled over desserts; you can even use it as a filling for thumbprint cookies or swirl it into cheesecake batter.
Customize Your Flavor: Whether you prefer it with a touch of rum or completely alcohol-free, this recipe caters to all tastes.
Gift-Worthy Delight: Package it in cute jars for a thoughtful homemade gift that will impress your friends and family. For more festive inspirations, check out my recipes for Zucchini Leek Fritters and Summer Corn Chowder.

Creamy Eggnog Recipe Ingredients

• Get ready to create a delightful holiday spread!

For the Spread

  • Eggnog – The star of this creamy eggnog recipe; opt for rich homemade for the best flavor.
  • Sugar – Adds a touch of sweetness; adjust to your liking for that perfect balance.
  • Cornstarch – A thickening agent for a custard-like consistency; skip if you want a looser spread.
  • Vanilla Extract – Enhances the flavor depth; add more if you’re omitting the rum.
  • Cinnamon – Infuses warmth and holiday spirit into the spread.
  • Nutmeg – Elevates the eggnog essence, pairing perfectly with cinnamon.
  • Butter – Provides richness for a creamy texture that melts in your mouth.
  • Dark Rum – Optional to deepen the flavor without turning it into a cocktail.
  • Powdered Pectin – Optional for a jelly-like texture; otherwise, embrace its spreadable goodness!

Step‑by‑Step Instructions for Creamy Eggnog Spread

Step 1: Whisk Eggnog and Cornstarch
In a medium bowl, combine your eggnog with cornstarch. Whisk together until the mixture is smooth and fully blended, ensuring there are no lumps remaining. This base will offer the creamy consistency of your Creamy Eggnog Spread.

Step 2: Heat the Mixture
Transfer the eggnog mixture to a saucepan and place it over medium heat. Stir continuously for about 5-7 minutes, watching for it to thicken to a custard-like texture that clings to your whisk. It’s essential to maintain a steady pace to avoid scorching the mixture.

Step 3: Add Butter
Once thickened, reduce the heat to low and add in the butter. Let it melt into the eggnog mixture, stirring until fully incorporated. This step will give your Creamy Eggnog Spread its delightful richness, making it even more delightful as a topping or filling.

Step 4: Blend in Flavorings
Incorporate the vanilla extract and dark rum if desired, stirring well to blend the flavors together. Allow the mixture to continue cooking for an additional 2-3 minutes. This will help the flavors meld and enhance the holiday essence of the spread.

Step 5: Incorporate Pectin (Optional)
If you choose to add powdered pectin for a thicker texture, whisk it into the mixture now. Cook for another 1-2 minutes, stirring continuously as it thickens further. This step is optional, so feel free to skip it if you prefer a softer spread.

Step 6: Cool and Transfer
Remove the saucepan from heat and let the Creamy Eggnog Spread cool in the pan for about 5-10 minutes. This cooling time allows it to thicken slightly more before transferring it to jars, ensuring it remains warm and pourable.

Step 7: Jar and Refrigerate
Pour the slightly cooled spread into sterilized jars while it’s still warm. Seal the jars tightly and refrigerate them, where your Creamy Eggnog Spread will keep for up to two weeks. Enjoy this festive delight in a variety of ways during the holiday season!

Tips for the Best Creamy Eggnog Spread

  • Whisk Thoroughly: Avoid lumps by ensuring the eggnog and cornstarch are mixed very well before heating. This guarantees a creamy texture for your eggnog spread.
  • Don’t Rush Heating: Take your time as you heat the mixture. Rushing can result in an uneven texture, detracting from the overall experience of your creamy eggnog recipe.
  • Taste as You Go: Adjust the sweetness and spices while cooking, allowing you to fine-tune the flavors to your preference for a perfectly balanced spread.
  • Proper Cooling: Let the spread cool slightly before transferring it to jars. This helps it thicken, making your spread smooth and easy to handle.
  • Consider Alcohol Options: If gifting, remember to think about whether to include rum; an alcohol-free version can appeal to a broader audience, ensuring everyone can enjoy your creamy creation!

Make Ahead Options

These Creamy Eggnog Spread preparations are perfect for busy holiday cooks looking to save time! You can whisk together the eggnog and cornstarch up to 24 hours in advance and refrigerate the mixture until ready to use. Simply heat and follow the instructions once you’re ready to serve. Additionally, if you opt to use powdered pectin, prepare that as well; this can be prepped along with the eggnog base. This will help the spread maintain its creamy texture without any lumps. Remember to store the final product in sterilized jars in the refrigerator, where it will stay fresh for up to two weeks. Enjoy homemade holiday cheer without the last-minute rush!

What to Serve with Creamy Eggnog Spread?

Elevate your holiday gathering with these delightful companions to enhance your creamy eggnog experience.

  • Warm Cinnamon Rolls: Freshly baked, soft rolls drizzled with glaze elevate the spread’s creamy richness, creating a comforting breakfast treat.
  • Spiced Gingerbread Cookies: Their molasses and spice flavors contrast beautifully with the smooth eggnog spread, making each bite a holiday celebration.
  • Savory Toasts: Use thick, crusty bread topped with avocado or ricotta; the creamy eggnog spread brings a festive twist to each mouthful.
  • Fruit Platter: Fresh sliced apples and pears add a crisp, juicy element that pairs wonderfully with the spread’s sweetness and warmth.

For a sweet finish, consider serving it alongside a spiced hot chocolate or a rich vanilla chai tea. The creamy texture and festive flavor of the eggnog spread make it the perfect accompaniment to these delicious drinks, wrapping your holiday feast in warmth and cheer!

How to Store and Freeze Creamy Eggnog Spread

Fridge: Keep your creamy eggnog spread in an airtight container in the refrigerator for up to 2 weeks. This ensures optimal taste and texture, making it a go-to treat.

Freezer: For longer storage, freeze in small batches in airtight containers or freezer-safe jars. It can be frozen for up to 3 months, ready to add a holiday touch to your meals.

Thawing: When ready to use, thaw the spread overnight in the fridge. Give it a good stir before serving to restore its creamy consistency.

Gifting Tip: If you’re gifting this delicious spread, remember that it requires refrigeration, so ensure your recipients know how to store it properly!

Variations & Substitutions for Creamy Eggnog Recipe

Feel free to get creative with this delightful creamy eggnog spread—it’s all about tweaking to your taste!

  • No Pectin: Skip the powdered pectin for a softer, dessert sauce-like consistency that’s perfect for drizzling over pancakes.

  • Whipped Cream Bliss: Fold the spread into whipped cream for a festive topping on cakes or hot chocolate, transforming it into a light and airy delight.

  • Alcohol-Free Version: Swap the dark rum for additional vanilla extract to keep the flavors rich while making it suitable for everyone, from kids to designated drivers.

  • Thumbprint Cookies: Use this creamy spread as a delectable filling for thumbprint cookies, where the sweet-spicy profile blends beautifully with buttery cookie dough.

  • Swirls in Desserts: Add a spoonful to cheesecake batter before baking to create a holiday twist on a classic dessert; it brings a cozy warmth to each bite.

  • Liven Up Lattes: Thin with warm milk to create an indulgent holiday latte, perfect for cozying up on cold winter days.

  • Glazed Pastries: Brush the spread over pastries or warm croissants as a delightful glaze, enhancing their flaky goodness with creamy flavor.

  • Enhanced Spice: Add an extra pinch of cinnamon or nutmeg for a more pronounced holiday flavor, tailoring the spice level to your personal preference.

Looking for more ways to spread joy this season? Be sure to check out my delicious recipes for Creamy Chicken Fettuccine Alfredo and Mushroom Pasta Delightful!

Creamy Eggnog Spread Recipe FAQs

How do I choose the right eggnog for my spread?
Absolutely! For the best flavor in your Creamy Eggnog Spread, I recommend using rich homemade eggnog as your base. However, if you’re in a pinch or prefer store-bought, look for “classic” varieties that have a creamy texture and well-balanced spices. Avoid low-fat options, as they often lack the richness that makes this spread truly delightful!

What’s the best way to store creamy eggnog spread?
Very simple! Keep your creamy eggnog spread in an airtight container in the refrigerator for up to 2 weeks. This will maintain its delicious taste and creamy texture. Just be sure to use clean utensils to scoop from the jar to avoid contamination.

Can I freeze my creamy eggnog spread?
Yes, you can! For longer storage, freeze your creamy eggnog spread in small batches using airtight containers or freezer-safe jars. It can be safely frozen for up to 3 months. When you’re ready to enjoy, simply thaw it overnight in the fridge and give it a good stir to restore its creamy texture.

What should I do if my spread is too thick?
If you find your Creamy Eggnog Spread is too thick after cooling, don’t fret! Simply stir in a little bit of milk or additional eggnog to reach your desired consistency. Heat the mixture gently over low heat while stirring until it’s just warm enough to blend smoothly. This will return the lovely, creamy texture you’re after.

Are there any dietary considerations I should be aware of?
Absolutely! If you’re making this spread as a gift or for guests, consider any dietary restrictions. If you’d like a non-alcoholic option, simply omit the dark rum and increase the vanilla extract for added flavor. Additionally, if you’re making it for someone with food allergies, always check that the eggnog and any add-ins like butter or sugar are safe for their dietary needs.

Creamy Eggnog Recipe

Creamy Eggnog Recipe – Your New Holiday Spread Sensation

This Creamy Eggnog Recipe transforms traditional eggnog into a delightful spread perfect for the holidays.
Prep Time 10 minutes
Cook Time 10 minutes
Cooling Time 10 minutes
Total Time 30 minutes
Servings: 8 servings
Course: Drinks
Cuisine: American
Calories: 80

Ingredients
  

For the Spread
  • 2 cups Eggnog homemade is best
  • 1/2 cup Sugar adjust to taste
  • 2 tablespoons Cornstarch skip for looser spread
  • 1 teaspoon Vanilla Extract add more if omitting rum
  • 1 teaspoon Cinnamon for warmth
  • 1/2 teaspoon Nutmeg enhances eggnog essence
  • 1/2 cup Butter for creaminess
  • 1/4 cup Dark Rum optional
  • 1 tablespoon Powdered Pectin optional for thicker texture

Equipment

  • Saucepan
  • Medium Bowl
  • Whisk
  • Jars for storage

Method
 

Step-by-Step Instructions for Creamy Eggnog Spread
  1. In a medium bowl, combine your eggnog with cornstarch. Whisk together until smooth.
  2. Transfer the mixture to a saucepan and place over medium heat. Stir continuously for 5-7 minutes until thickened.
  3. Once thickened, reduce heat to low and add in the butter, stirring until fully incorporated.
  4. Incorporate the vanilla extract and dark rum if desired, stirring well for 2-3 minutes.
  5. If using pectin for thickness, whisk it in now and cook for another 1-2 minutes.
  6. Remove from heat and let the spread cool in the pan for 5-10 minutes.
  7. Pour the slightly cooled spread into sterilized jars while warm and seal tightly.

Nutrition

Serving: 1tablespoonCalories: 80kcalCarbohydrates: 10gProtein: 1gFat: 4gSaturated Fat: 2gMonounsaturated Fat: 2gCholesterol: 15mgSodium: 30mgPotassium: 50mgSugar: 8gVitamin A: 100IUCalcium: 10mg

Notes

This creamy eggnog spread can be used on toast, pancakes, or as a filling for desserts. It's also a great homemade gift option!

Tried this recipe?

Let us know how it was!

Chewy Maple Pumpkin Cookies That Capture Fall’s Cozy Vibes

As autumn’s vibrant colors begin to paint the landscape, I find myself craving the warm, cozy flavors that define the season. Enter these Chewy Maple Pumpkin Cookies, my latest obsession that brings that comforting touch right into your kitchen. With a soft, buttery texture and the perfect balance of maple sweetness and warm spices, they’re not just cookies; they’re a delightful reminder of everything I adore about fall. What’s best? These cookies come together quickly, making them an ideal treat for gatherings or simply to enjoy with a cup of tea. Plus, they’re incredibly versatile—perfect for experimenting with flavors or adding your favorite mix-ins. Are you ready to bake a batch and fill your home with that irresistible aroma?

Why Are These Cookies So Irresistible?

Chewy Texture: These cookies boast a uniquely chewy interior that sets them apart—perfectly tender without being cake-like.
Fall Flavors: Enhanced by warm spices and rich maple syrup, each bite delivers a cozy taste of autumn.
Quick Prep: With a straightforward process and minimal active time, you can whip up these treats without hassle.
Customizable: Feel free to mix in your favorite ingredients, like chocolate chips or nuts, for a personalized touch.
Crowd-Pleasing: Whether at a gathering or with afternoon tea, these cookies are sure to impress and delight everyone.
Ready to elevate your fall baking game? For another delicious treat, check out these Chocolate Cranberry Cookies that are just as comforting!

Chewy Maple Pumpkin Cookies Ingredients

For the Dough

  • All-Purpose Flour – Adds the necessary structure for chewy cookies; a gluten-free flour can be used for a different texture.
  • Pumpkin or Chai Spice Blend – Infuses warmth and flavor; substitute with cinnamon or nutmeg to switch up the spice profile.
  • Baking Soda – Ensures the cookies rise perfectly and achieve the right texture.
  • Salt – Balances the sweetness, enhancing all the flavors in these chewy maple pumpkin cookies.
  • European Style Unsalted Butter – Adds richness; can be substituted with regular unsalted butter or dairy-free options.
  • Light Brown Sugar – Brings moisture and sweetness; using dark brown sugar will deepen the flavor.
  • Pure Maple Syrup – The star sweetener that adds depth; maple extract can be used for extra flavor notes.
  • Large Egg Yolk – Binds the ingredients while enriching the dough’s texture.
  • Canned Pumpkin (blotted) – Offers moisture and pumpkin flavor; fresh pumpkin can work if moisture is controlled.
  • Vanilla Extract – Enhances the overall flavor profile with a warm aroma.
  • Granulated Sugar – Used for rolling the dough, giving sweetness and crunch to each bite.

For the Coating

  • Spiced Sugar (Granulated Sugar + Spice Blend) – This coating not only adds sweetness but also intensifies the cookie’s flavor before baking.

Step‑by‑Step Instructions for Chewy Maple Pumpkin Cookies

Step 1: Prepare Brown Butter
Start by melting ½ cup of European style unsalted butter in a saucepan over medium heat. Allow the butter to bubble and turn a light amber color, stirring frequently for about 5-7 minutes. Once browned, remove it from heat and let it cool for 30 minutes. This brown butter will add a nutty depth to your Chewy Maple Pumpkin Cookies.

Step 2: Prep Pumpkin
While the butter is cooling, take ¾ cup of canned pumpkin and blot it on paper towels to absorb excess moisture. This step is crucial to achieve that delightful chewy texture in your cookies. Aim to remove enough moisture so that your cookie dough won’t turn cake-like. Set the prepared pumpkin aside once you’ve blotted it well.

Step 3: Mix Dry Ingredients
In a mixing bowl, whisk together 1½ cups of all-purpose flour, 1 teaspoon of baking soda, ½ teaspoon of salt, and your chosen spice blend—either pumpkin or chai spice. Mix these dry ingredients until evenly combined, ensuring there are no lumps. This mixture forms the foundation of your Chewy Maple Pumpkin Cookies, contributing to their structure and flavor.

Step 4: Combine Wet Ingredients
In a separate large bowl, mix the cooled brown butter with 1 cup of light brown sugar and ¼ cup of pure maple syrup until smooth and well incorporated. Add in the blotted canned pumpkin, 1 large egg yolk, and 1 teaspoon of vanilla extract. Stir until everything is well blended—it should be creamy and aromatic, filling your kitchen with the scent of fall.

Step 5: Form Dough
Gradually add the dry ingredient mixture to the wet mixture, stirring gently until just combined. Avoid overmixing, as this can affect the texture of your Chewy Maple Pumpkin Cookies. The dough should be moist yet slightly sticky, perfect for rolling into balls. Once combined, cover the bowl with plastic wrap.

Step 6: Chill Dough
Place the covered dough in the refrigerator for at least 8 hours, or preferably overnight. Chilling the dough helps to enhance flavors and ensures the cookies maintain their chewy texture when baked. While you wait, the aromas will keep tempting you to sneak a taste!

Step 7: Preheat & Prepare Baking Sheets
Preheat your oven to 350°F (177°C) and line two baking sheets with parchment paper. This ensures your Chewy Maple Pumpkin Cookies won’t stick and will bake evenly. Preparing your baking sheets in advance makes the following steps smooth as you get ready to bake.

Step 8: Scoop and Coat
Once chilled, use a cookie scoop or tablespoon to portion the dough into balls, about 1 inch in diameter. Roll each ball in a mixture of granulated sugar and your spice blend until well coated. The spiced sugar coating will add a delightful crunch and enhance the flavor, making each bite of your cookies extra special.

Step 9: Bake
Arrange the coated dough balls on the prepared baking sheets, spacing them about 2 inches apart. Bake in the preheated oven for 12-14 minutes, checking for puffiness; they should have a slightly golden bottom. Remove the cookies when they look set but still soft in the center, as they will continue to cook slightly from residual heat once out of the oven.

Step 10: Cool
Allow the cookies to cool on the baking sheets for 5 minutes before transferring them to a wire rack. This cooling time lets the cookies firm up slightly while retaining that tender chewy texture. Once completely cooled, they are ready to be enjoyed or stored for later snacking!

Chewy Maple Pumpkin Cookies Variations

Embrace your culinary creativity with these delightful twists that will elevate your Chewy Maple Pumpkin Cookies to new heights!

  • Gluten-Free: Swap all-purpose flour for a gluten-free blend to accommodate gluten sensitivities while retaining that soft texture.
    Gluten-free baking can be a fun adventure! Just remember that different mixes may behave slightly differently, so a little experimentation is key.

  • Dairy-Free: Use coconut oil or a dairy-free butter substitute instead of European style unsalted butter for a dairy-free version.
    This swap not only caters to dietary needs but also adds a subtle hint of coconut flavor, turning your cookies into a tropical fall treat!

  • Flavor Infusion: Replace the pumpkin spice blend with a chai spice mix for an exotic twist that brings warmth and depth to each bite.
    Your kitchen will smell like a cozy chai latte; it’s a perfect partnership for those chilly evening gatherings.

  • Nutty Addition: Fold in ½ cup of chopped pecans or walnuts for a crunchy texture that beautifully contrasts the chewy cookie.
    Nuts provide a delightful crunch that pairs wonderfully with the soft cookie, creating a satisfying bite that will keep you coming back for more!

  • Chocolate Chip Lovers: Add ½ cup of semisweet or dark chocolate chips to the dough for a rich, decadent addition.
    The chocolate melting into the warm cookies adds an extra layer of sweetness, making each mouthful even more indulgent.

  • Fruity Twist: Substitute half of the pumpkin with applesauce for a fruity undertone that adds moisture and sweetness.
    This variation not only enhances the cookie’s chewiness but also gives a refreshing taste that’s perfect for autumn.

  • Maple Boost: Drizzle additional maple syrup into the dough or use it as a topping before baking for an extra maple punch.
    It’s a sweet way to amplify that comforting maple flavor, transforming a delightful cookie into a maple lover’s dream!

Ready to explore more mouthwatering recipes? Try out these delightful treats that are sure to brighten your baking: Bake Cookies Cream and Pumpkin Cream Cold!

How to Store and Freeze Chewy Maple Pumpkin Cookies

Room Temperature: Store cookies in an airtight container for up to 1 week. This keeps them fresh, chewy, and delicious.

Fridge: If you prefer, you can refrigerate the cookies for up to 2 weeks, but they may lose some of their chewiness.

Freezer: For longer storage, freeze the cookies in a single layer, then transfer them to a freezer bag. They’ll maintain their best quality for up to 3 months.

Reheating: To enjoy frozen cookies, simply thaw at room temperature or warm them in the oven for a few minutes at 350°F (177°C) for that just-baked texture.

Make Ahead Options

These Chewy Maple Pumpkin Cookies are perfect for meal prep, allowing you to enjoy warm, sweet treats any time! You can prepare the cookie dough up to 24 hours in advance by following these simple steps. Once you form the dough, cover it tightly with plastic wrap and refrigerate. This chilling step not only enhances the flavors but also maintains that delightful chewy texture. If you want to get even more ahead, you can scoop the dough into balls and freeze them for up to 3 months. When you’re ready to bake, simply roll in the spiced sugar mixture and bake straight from frozen, adding an extra minute or two to the baking time for fresh, homemade cookies just like you love!

Expert Tips for Chewy Maple Pumpkin Cookies

  • Cool the Butter: Let the brown butter cool before mixing; too hot butter can lead to a greasy dough that affects the chewy texture of your cookies.
  • Blot the Pumpkin: Make sure to properly blot your pumpkin to remove excess moisture, preventing cake-like cookies instead of the desired chewy pumpkin cookies.
  • Chill Time: Don’t skip the chilling step! Allowing the dough to rest enhances flavors and ensures the cookies maintain their chewy goodness during baking.
  • Avoid Overmixing: When combining wet and dry ingredients, mix just until incorporated. Overmixing can lead to tough cookies rather than delightful chewy bites.
  • Control Baking Time: Keep an eye on your cookies while baking; they should be set but still soft in the center for that perfect chewy texture.

What to Serve with Chewy Maple Pumpkin Cookies?

As the inviting scent of warm spices fills your kitchen, consider delightful companions to elevate your cozy autumn baking experience.

  • Creamy Mashed Potatoes: They provide a savory contrast to sweet cookies, perfect for a comforting fall dinner.
  • Spiced Chai Latte: The warm spices in chai harmonize beautifully with the flavors of pumpkin and maple.
  • Apple Cider Doughnuts: Their sweet, fruity flavor complements the maple notes perfectly, making for a cozy indulgence.
  • Vanilla Ice Cream: A scoop on the side adds creaminess that balances the chewiness of the cookies.
  • Pecan Pie: This classic dessert offers a crunch and sweetness that pairs wonderfully with the soft texture of the cookies.
  • Roasted Root Vegetables: The earthy flavors provide a delightful contrast, making for a balanced fall feast.
  • Hot Chocolate: Rich and chocolaty, it transforms your cookie experience into a warm hug in a mug.
  • Pumpkin Spice Latte: This drink amplifies the flavors of your cookies while keeping you cozy on chilly days.
  • Caramel Sauce: Drizzling a bit on the cookies adds a decadent touch that enhances their sweetness.

Chewy Maple Pumpkin Cookies Recipe FAQs

What type of pumpkin should I use for these cookies?
Absolutely! For the Chewy Maple Pumpkin Cookies, you can use canned pumpkin puree, which is convenient and has the right moisture content. Just be sure to blot it on paper towels to remove excess moisture before adding it to the dough. Fresh pumpkin can be an excellent alternative too, but remember to manage its moisture by cooking and pureeing it beforehand.

How should I store these cookies?
To keep your Chewy Maple Pumpkin Cookies fresh, store them in an airtight container at room temperature for up to 1 week. If you want them to last longer, you can refrigerate them for up to 2 weeks, although they may lose some of their beloved chewiness in the fridge.

Can I freeze the cookies? How do I do it?
Absolutely! To freeze your Chewy Maple Pumpkin Cookies, first let them cool completely. Then, place them in a single layer on a baking sheet and freeze until solid. After they are frozen, transfer them into a freezer bag or container. They can be kept in the freezer for up to 3 months. When you’re ready to enjoy, thaw at room temperature or warm them in the oven at 350°F (177°C) for a few minutes to revive their delightful chew.

What if my cookies come out too cake-like?
If your cookies turn out too cake-like instead of chewy, it’s likely due to excess moisture. Blotting the pumpkin thoroughly before mixing is crucial. Additionally, chilling the dough for at least 8 hours helps to create the right texture. Lastly, make sure not to overmix the dough after combining the wet and dry ingredients.

Are these cookies suitable for people with nut allergies?
Great question! The Chewy Maple Pumpkin Cookies can be made nut-free by simply omitting any additional mix-ins like nuts or chocolate chips. As always, check the ingredient labels for any hidden allergens. The recipe itself is nut-free unless you decide to add nuts or chocolate. Enjoy baking these delicious treats!

Can I add other flavors or ingredients?
Yes, very much! These cookies are incredibly versatile. You can mix in chocolate chips for a sweet boost or substitute half of the pumpkin with applesauce for a fruity twist. Chopped nuts like pecans or walnuts can add a lovely crunch. Just remember to balance the moisture content if you make substitutions to ensure your cookies remain perfectly chewy.

Chewy Maple Pumpkin Cookies

Chewy Maple Pumpkin Cookies That Capture Fall's Cozy Vibes

Delight in these Chewy Maple Pumpkin Cookies, capturing the essence of fall with cozy flavors and a chewy texture.
Prep Time 30 minutes
Cook Time 14 minutes
Chill Time 8 hours
Total Time 8 hours 44 minutes
Servings: 24 cookies
Course: Dessert
Cuisine: American
Calories: 150

Ingredients
  

For the Dough
  • 1.5 cups All-Purpose Flour
  • 0.75 cups Canned Pumpkin (blotted)
  • 1 teaspoon Baking Soda
  • 0.5 teaspoon Salt
  • 0.5 cups European Style Unsalted Butter
  • 1 cup Light Brown Sugar
  • 0.25 cups Pure Maple Syrup
  • 1 large Egg Yolk
  • 1 teaspoon Vanilla Extract
  • 0.5 cups Granulated Sugar for rolling
  • 1 tablespoon Pumpkin or Chai Spice Blend or substitute with cinnamon or nutmeg
For the Coating
  • 0.5 cups Spiced Sugar (Granulated Sugar + Spice Blend)

Equipment

  • Saucepan
  • Mixing Bowl
  • Cookie Scoop
  • Baking Sheets
  • Parchment paper

Method
 

Step‑by‑Step Instructions
  1. Prepare Brown Butter: Melt ½ cup of European style unsalted butter in a saucepan over medium heat. Allow the butter to bubble and turn a light amber color, stirring frequently for about 5-7 minutes. Once browned, remove it from heat and let it cool for 30 minutes.
  2. Prep Pumpkin: Blot ¾ cup of canned pumpkin on paper towels to absorb excess moisture, then set aside.
  3. Mix Dry Ingredients: In a mixing bowl, whisk together 1.5 cups of all-purpose flour, 1 teaspoon of baking soda, 0.5 teaspoon of salt, and the spice blend. Mix until evenly combined.
  4. Combine Wet Ingredients: In a separate bowl, mix the cooled brown butter with 1 cup of light brown sugar and 0.25 cup of pure maple syrup until smooth. Add in the blotted canned pumpkin, 1 egg yolk, and 1 teaspoon of vanilla extract. Stir until well blended.
  5. Form Dough: Gradually add the dry ingredient mixture to the wet mixture, stirring gently until just combined. Avoid overmixing. Cover the bowl with plastic wrap.
  6. Chill Dough: Place the covered dough in the refrigerator for at least 8 hours or overnight.
  7. Preheat & Prepare Baking Sheets: Preheat your oven to 350°F (177°C) and line two baking sheets with parchment paper.
  8. Scoop and Coat: Use a cookie scoop to portion the dough into balls, about 1 inch in diameter. Roll in granulated sugar and spice blend until well coated.
  9. Bake: Arrange the coated dough balls on the prepared baking sheets, spacing them about 2 inches apart. Bake for 12-14 minutes, until puffed and slightly golden on the bottom.
  10. Cool: Allow the cookies to cool on the baking sheets for 5 minutes before transferring to a wire rack.

Nutrition

Serving: 1cookieCalories: 150kcalCarbohydrates: 22gProtein: 1gFat: 7gSaturated Fat: 4gPolyunsaturated Fat: 1gMonounsaturated Fat: 2gCholesterol: 15mgSodium: 95mgPotassium: 80mgFiber: 1gSugar: 10gVitamin A: 310IUCalcium: 10mgIron: 0.5mg

Notes

For best results, cool the butter properly and avoid overmixing the dough.

Tried this recipe?

Let us know how it was!

Irresistible Trader Joe’s Sun-Dried Tomato Focaccia Sandwich Bliss

The moment the oven timer dings, a warm wave of herby goodness fills the kitchen, hinting at the delicious creation waiting to be unveiled. Today, I’m sharing my favorite quick and customizable lunch option: the Irresistible Trader Joe’s Sun-Dried Tomato Focaccia Sandwich. With its fluffy, lightly crusty focaccia as the canvas, it’s layered with savory turkey (or grilled veggies for my vegetarian friends), creamy mozzarella, and fresh spinach, all elevated by a vibrant pesto spread. Not only is this sandwich incredibly satisfying and healthy, but it also adapts beautifully to your taste preferences, making it perfect for busy weekdays or delightful brunch gatherings. So, what variations will you dream up for your next sandwich masterpiece?

Why is this sandwich so irresistible?

Comforting and warm, this sandwich brings a sense of home with each bite. Quick to prepare, it’s your go-to solution for busy days or impromptu gatherings. Customizable options allow you to cater to everyone’s tastes, whether opting for a classic turkey version or a tasty vegetarian twist. Nutritious ingredients like fresh spinach and mozzarella ensure you’re eating well while enjoying a burst of flavors. And let’s not forget the crowd-pleasing factor; pair it with a salad or chips, and you’ve got a delightful meal that everyone will love. Explore even more delicious options with our Grilled Chicken Sandwich or Tuna Salad Sandwich for variety!

Irresistible Trader Joe’s Sun-Dried Tomato Focaccia Sandwich Ingredients

• Prepare to create a scrumptious sandwich that will have everyone asking for seconds!

For the Sandwich Base

  • Trader Joe’s Sun-Dried Tomato Focaccia – This soft yet slightly crusty bread is perfect for capturing all the delicious flavors.
  • Deli-style Turkey Breast – Packed with savory protein; consider substituting with grilled chicken or roasted veggies for a delightful vegetarian option.

For the Filling

  • Fresh Spinach Leaves – These add a refreshing crunch; feel free to swap in arugula or mixed greens for a fun twist.
  • Fresh Mozzarella Cheese – Creamy and delicious; you can also experiment with provolone or gouda for a different taste.

For the Spread

  • Pesto Sauce – This herb-infused delight adds rich flavor; try using hummus or garlic aioli if you want to mix it up.

Ready to dive into a fantastic sandwich adventure? Enjoy crafting your own Irresistible Trader Joe’s Sun-Dried Tomato Focaccia Sandwich!

Step‑by‑Step Instructions for Irresistible Trader Joe’s Sun-Dried Tomato Focaccia Sandwich

Step 1: Slice the Focaccia
Using a sharp bread knife, carefully slice the Trader Joe’s Sun-Dried Tomato Focaccia horizontally into two equal halves. Aim for a clean cut to avoid excess crumbs, revealing the luscious interior. This will serve as the base and top of your sandwich and should be soft yet sturdy enough to hold the fillings.

Step 2: Spread the Pesto
Generously smear pesto sauce over the cut sides of both focaccia halves. Use the back of a spoon or a butter knife for even distribution, ensuring every bite has that fragrant herb flavor. The vibrant green color should evenly coat the entire surface, creating a delicious flavor foundation for your sandwich.

Step 3: Layer the Spinach
Place a handful of fresh spinach leaves on top of one half of the focaccia, covering it evenly. The crispness of the spinach will add a delightful crunch, balancing the creaminess of the cheese. This layer should be substantial yet not overstuffed to maintain the sandwich’s overall structure and ease of handling.

Step 4: Add the Turkey and Cheese
Next, layer slices of deli-style turkey breast over the spinach, followed by an even layer of fresh mozzarella cheese. The combination of savory turkey and gooey cheese creates a mouthwatering contrast. Ensure that the turkey is spread out nicely to avoid clumping, enhancing the flavors with every bite.

Step 5: Optional Spinach Layer
For extra freshness, you may choose to add another layer of spinach on top of the mozzarella. This not only adds a beautiful greenery but also brings bonus crunch and nutrients to your Irresistible Trader Joe’s Sun-Dried Tomato Focaccia Sandwich. Make sure it’s evenly distributed for a delightful crunch.

Step 6: Assemble the Sandwich
Carefully place the other half of the focaccia on top to seal your sandwich. Gently press it down to help the layers stick together. Ensure the edges are aligned for a neat presentation, which allows the sandwich to hold its shape securely when toasted.

Step 7: Toast the Sandwich
Heat a skillet or panini press over medium heat, then lightly toast the assembled sandwich until the bread is golden brown and the cheese is melty, approximately 3-5 minutes per side. Keep an eye on it, pressing gently to ensure even toasting and that the focus remains on achieving that gooey cheese goodness.

Step 8: Cut and Serve
Once toasted to perfection, remove the sandwich from the heat and let it cool for a minute before cutting into portions. This brief pause allows the cheese to set slightly, making it easier to handle. Serve with a light salad or crispy chips to complement your Irresistible Trader Joe’s Sun-Dried Tomato Focaccia Sandwich for a delightful meal.

What to Serve with Irresistible Trader Joe’s Sun-Dried Tomato Focaccia Sandwich

Elevate your meal experience with delightful sides that complement the rich flavors of this scrumptious sandwich.

  • Crispy Potato Chips: The crunch of potato chips provides a satisfying contrast to the soft focaccia, making each bite even more enjoyable.
  • Light Garden Salad: Fresh greens drizzled with a lemon vinaigrette create a zesty balance, enhancing the sandwich’s savory elements while adding a refreshing crunch.
  • Tomato Basil Soup: Nothing beats the classic duo of a grilled sandwich and creamy soup. The rich, warm flavors of the soup enhance the sandwich, making for a comforting meal.
  • Roasted Vegetables: A medley of lightly seasoned roasted veggies brings both color and nutrition to your plate. The caramelization adds a sweet earthiness that pairs beautifully.
  • Sweet Potato Fries: Crispy, slightly sweet fries provide a delicious contrast and satisfy your cravings while keeping the meal on the healthier side.
  • Sparkling Water with Lemon: Refreshing and light, this drink cuts through the richness of the sandwich while keeping your palate cleansed.
  • Chocolate Chip Cookies: For a little indulgence, classic cookies offer a sweet ending to your meal, making it a cherished moment of comfort.

Expert Tips for Irresistible Trader Joe’s Sun-Dried Tomato Focaccia Sandwich

  • Toasting Secret: Lightly toast the focaccia before assembly to prevent sogginess, keeping the sandwich’s layers intact.

  • Consistent Flavor: Distribute your fillings evenly for balanced flavor in every bite, ensuring all ingredients shine in your irresistible sandwich.

  • Vegetarian Option: For a vegetarian twist, try grilled portobello mushrooms or roasted veggies instead of turkey; they add hearty texture and flavor.

  • Creamy Addition: Add sliced avocado for an extra creaminess that pairs wonderfully with the savory ingredients of your focaccia sandwich.

  • Avoid Juiciness: If using juicy fillings, make sure to pat them dry to maintain that satisfying crunch and avoid a soggy sandwich.

Irresistible Trader Joe’s Sun-Dried Tomato Focaccia Sandwich Variations

Feel free to get creative and discover your perfect twist on this delightful sandwich!

  • Vegetarian Delight: Swap turkey for grilled portobello mushrooms or roasted veggies. Rich and meaty, they blend beautifully with the creamy cheese and zesty pesto.

  • Avocado Boost: Layer sliced avocado for extra creaminess. The buttery texture enhances the overall deliciousness and adds a healthful twist.

  • Spicy Kick: Incorporate sliced jalapeños or red pepper flakes for an added zesty kick. This fiery element wakes up your taste buds and makes each bite exhilarating.

  • Cheese Lovers: Experiment with tangy goat cheese or sharp cheddar. These flavor-packed options will add a unique twist while still giving you that gooey goodness.

  • Nutty Crunch: Add toasted pine nuts or walnuts for added texture. A little crunch brings a delightful surprise with every delicious mouthful.

  • Herbal Infusion: Mix in fresh basil or arugula for an herbaceous lift. The aromatic notes will elevate your sandwich experience to gourmet levels.

  • Mediterranean Flare: Use feta cheese and roasted red peppers for a Mediterranean touch. This combination provides bold flavors and a touch of the Mediterranean coast.

  • Smoky Flavor: Swap regular turkey for smoked turkey or add a few drops of liquid smoke to your pesto. This deep, smoky flavor adds a lovely depth that elevates your sandwich.

Consider pairing your delicious creation with a side, like a light salad or crispy chips, to make it an unforgettable meal. Don’t forget to check out more inspiration with our Korean Steak Sandwich or Tuna Salad Sandwich for additional tasty options!

Make Ahead Options

These Irresistible Trader Joe’s Sun-Dried Tomato Focaccia Sandwiches are perfect for meal prep enthusiasts! You can prepare the sandwich components up to 24 hours in advance, allowing you to enjoy this delightful creation even on your busiest days. To prep ahead, slice the focaccia and spread the pesto on both halves, then layer the spinach and turkey slices. Wrap the prepared sandwich tightly in plastic wrap to prevent drying and refrigerate. When you’re ready to serve, simply heat a skillet or panini press over medium heat and toast the sandwich until the cheese is melty and the bread turns golden, ensuring it remains just as delicious as when freshly made.

How to Store and Freeze Irresistible Trader Joe’s Sun-Dried Tomato Focaccia Sandwich

Fridge: Wrap tightly in plastic wrap or foil to keep your sandwich fresh, and store in the fridge for up to 2 days.

Freezer: For longer storage, place the wrapped sandwich in an airtight container or freezer bag and freeze for up to 1 month.

Reheating: When ready to enjoy, reheat in an oven preheated to 350°F for about 10-15 minutes, until warmed through and the cheese is melty again.

Assembling Ahead: You can prepare the sandwich without toasting it beforehand, then toast just before serving for the optimal texture and flavor of your Irresistible Trader Joe’s Sun-Dried Tomato Focaccia Sandwich.

Irresistible Trader Joe’s Sun-Dried Tomato Focaccia Sandwich Recipe FAQs

What type of focaccia should I use for this recipe?
Absolutely! Look for Trader Joe’s Sun-Dried Tomato Focaccia that is soft yet slightly crusty on the outside. When choosing, feel it for the right texture – you want it to be a little springy to the touch and not overly dry. The sun-dried tomatoes will add incredible flavor that enhances the sandwich experience.

How long can I store the sandwich in the fridge?
Very! After wrapping your sandwich tightly in plastic wrap or foil, it can comfortably reside in the refrigerator for up to 2 days. This way, you can make ahead and have a delicious lunch ready to go. Just be sure to remove any watery ingredients before wrapping to keep it fresh!

Can I freeze the Irresistible Trader Joe’s Sun-Dried Tomato Focaccia Sandwich?
Of course! To freeze, wrap it tightly in plastic wrap and place it inside an airtight container or freezer bag. Your sandwich can last in the freezer for up to 1 month. When you’re ready to enjoy it, let it thaw in the fridge overnight, then reheat in an oven preheated to 350°F for about 10-15 minutes until warmed through.

What should I do if my sandwich turns out soggy?
No worries! If you find your sandwich soggy, pat down any juicy ingredients like tomatoes or dressings before assembly. You can also toast the focaccia lightly prior to spreading the pesto to create a barrier, preventing moisture from sneaking in. This prevents sogginess and retains that delightful crunch.

What are some allergy considerations for this sandwich?
Great question! This sandwich contains gluten from the focaccia and dairy from the mozzarella. If you’re catering to gluten-free or dairy-free guests, consider using gluten-free bread and plant-based cheese alternatives, which can be equally delightful. Always check ingredient labels to ensure safety for anyone with food allergies!

Can I customize this sandwich to suit other dietary needs?
Absolutely! The beauty of this Irresistible Trader Joe’s Sun-Dried Tomato Focaccia Sandwich lies in its versatility. You can easily swap turkey for grilled chicken, or even offer a vegetarian option by using roasted vegetables or portobello mushrooms instead. Go wild with your ingredient choices, from spicy peppers to different greens, making it a canvas of flavor for everyone!

Irresistible Trader Joe’s Sun-Dried Tomato Focaccia Sandwich

Irresistible Trader Joe’s Sun-Dried Tomato Focaccia Sandwich Bliss

Enjoy the Irresistible Trader Joe’s Sun-Dried Tomato Focaccia Sandwich, a customizable and satisfying lunch option.
Prep Time 10 minutes
Cook Time 10 minutes
Total Time 20 minutes
Servings: 2 sandwiches
Course: Lunch
Cuisine: American
Calories: 500

Ingredients
  

For the Sandwich Base
  • 1 loaf Trader Joe's Sun-Dried Tomato Focaccia Soft yet slightly crusty bread
  • 8 ounces Deli-style Turkey Breast Savory protein option
For the Filling
  • 2 cups Fresh Spinach Leaves Add crunch; consider arugula or mixed greens
  • 8 ounces Fresh Mozzarella Cheese Creamy and delicious
For the Spread
  • 1/2 cup Pesto Sauce Herb-infused delight

Equipment

  • Sharp bread knife
  • Skillet or panini press

Method
 

Step-by-Step Instructions
  1. Slice the focaccia horizontally into two equal halves.
  2. Spread pesto sauce over the cut sides of both focaccia halves.
  3. Layer fresh spinach leaves on top of one half of the focaccia.
  4. Add slices of deli-style turkey breast over the spinach, followed by mozzarella cheese.
  5. Optionally add another layer of spinach on top of the mozzarella.
  6. Assemble the sandwich by placing the other half of the focaccia on top.
  7. Toast the sandwich in a skillet or panini press until golden brown and cheese is melty.
  8. Cut and serve with a light salad or crispy chips.

Nutrition

Serving: 1sandwichCalories: 500kcalCarbohydrates: 45gProtein: 30gFat: 25gSaturated Fat: 10gPolyunsaturated Fat: 2gMonounsaturated Fat: 10gCholesterol: 70mgSodium: 900mgPotassium: 600mgFiber: 5gSugar: 2gVitamin A: 1500IUVitamin C: 10mgCalcium: 300mgIron: 2mg

Notes

For a vegetarian option, use grilled portobello mushrooms or roasted veggies instead of turkey.

Tried this recipe?

Let us know how it was!