Irresistible 3-Ingredient Mango Mousse in Minutes

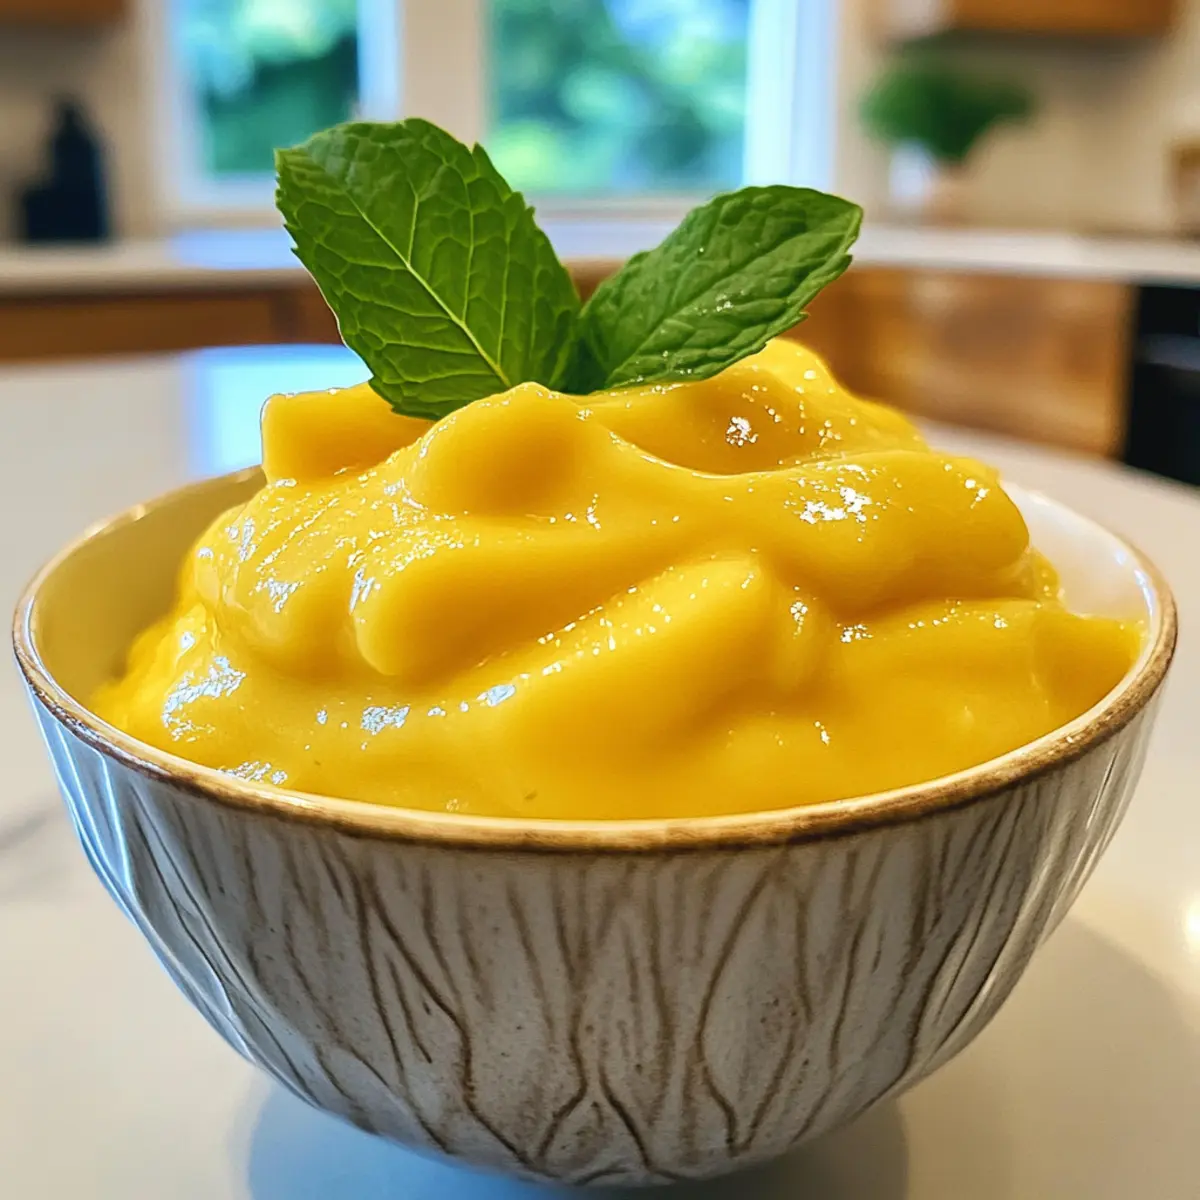
As the summer sun begins to set, the air fills with the sweet, inviting aroma of ripe mangoes. I couldn’t help but be transported to a sun-kissed island where tropical delights are a daily indulgence. With just three simple ingredients, you can create a delightful 3-Ingredient Mango Mousse, the perfect solution for those warm evenings when you’re craving a refreshing treat. Not only is this no-bake dessert a crowd-pleaser, but it’s also gluten-free and incredibly easy to whip up in minutes. Plus, it’s a great way to impress friends or simply enjoy a little self-care. So, are you ready to dive into this creamy, luscious delight that’ll have everyone asking for seconds?

Why is Mango Mousse a Must-Try?

Simplicity at Its Finest: With just three ingredients, this no-bake dessert is effortless to whip up, making it a perfect choice for busy days.
Tropical Escape: The vibrant mango flavor transports you straight to a sun-kissed paradise, bringing a taste of summer to your table year-round.
Guilt-Free Indulgence: Being both gluten-free and moderately rich in calories, this mousse allows you to satisfy your sweet cravings without the guilt.
Versatility: Whether served alongside a side of coconut macaroons or paired with a fresh fruit salad, this mousse complements a variety of desserts beautifully. Check out our Mango Coconut Pudding for another fantastic mango treat!
Crowd-Pleasing Option: Impress your guests with this elegant dessert at your next gathering; it’s bound to be a hit and leave everyone wanting more!

3-Ingredient Mango Mousse Ingredients

For the Mousse

  • Heavy Cream – Provides richness and creaminess to the mousse; full-fat cream is recommended for the best texture.
  • Mango Pulp – Acts as the primary flavoring agent, giving the mousse its tropical taste; use ripe mangoes or canned pulp without added sugars.
  • Brown Sugar – Adds sweetness and balances the flavors; adjust the amount according to the sweetness of the mangoes used.

Step‑by‑Step Instructions for 3-Ingredient Mango Mousse

Step 1: Combine Ingredients
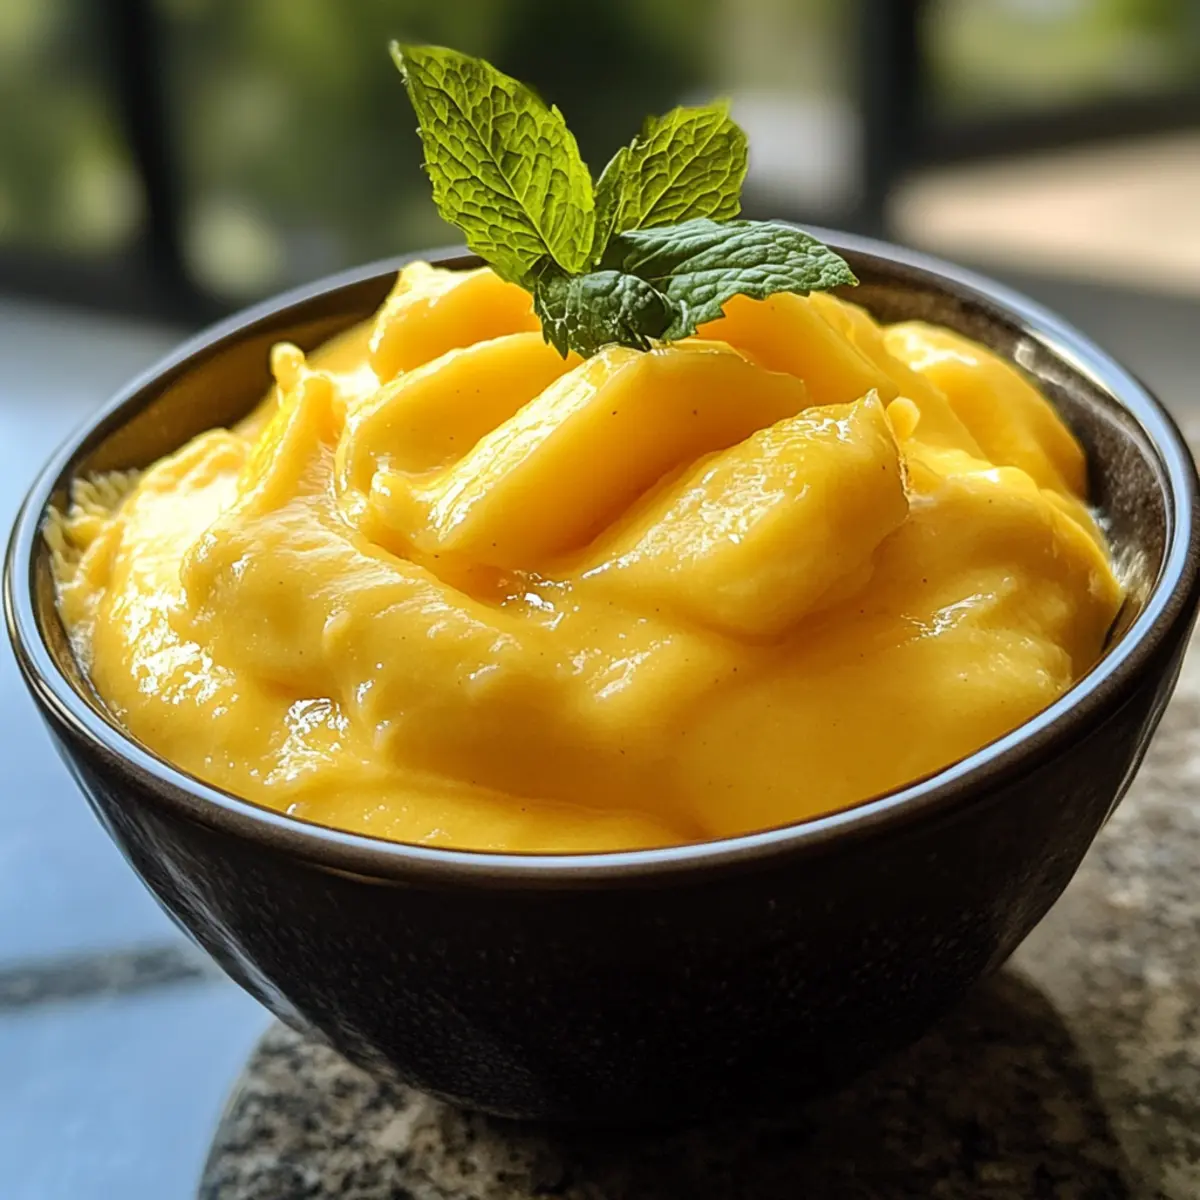
In a mixing bowl, combine 1 cup of chilled heavy cream, 1 cup of mango pulp, and 2 tablespoons of brown sugar. Using a whisk or an electric mixer, blend everything together until the ingredients are well mixed, with the sugar fully dissolved. You can expect a vibrant orange hue as the mango pulp integrates smoothly into the cream, forming a luscious base for your 3-Ingredient Mango Mousse.

Step 2: Whip the Mixture
Next, continue whisking the mixture on medium speed until it reaches a soft peak stage, which typically takes about 3-5 minutes. You want the mousse to be light and fluffy, maintaining a creamy consistency without becoming grainy. Keep an eye on the texture; it should easily hold its shape while still being airy, which is essential for creating that delightful mouthfeel in your mango mousse.

Step 3: Chill
Once whipped to perfection, transfer the mousse into individual serving cups or a large bowl. Smooth the top with a spatula for an appealing finish. Then, cover the cups with plastic wrap and place them in the refrigerator to chill for at least 30 minutes, allowing the flavors to meld beautifully and the mousse to set. This step is key for achieving that heavenly texture that makes your 3-Ingredient Mango Mousse irresistibly enjoyable.

Step 4: Serve
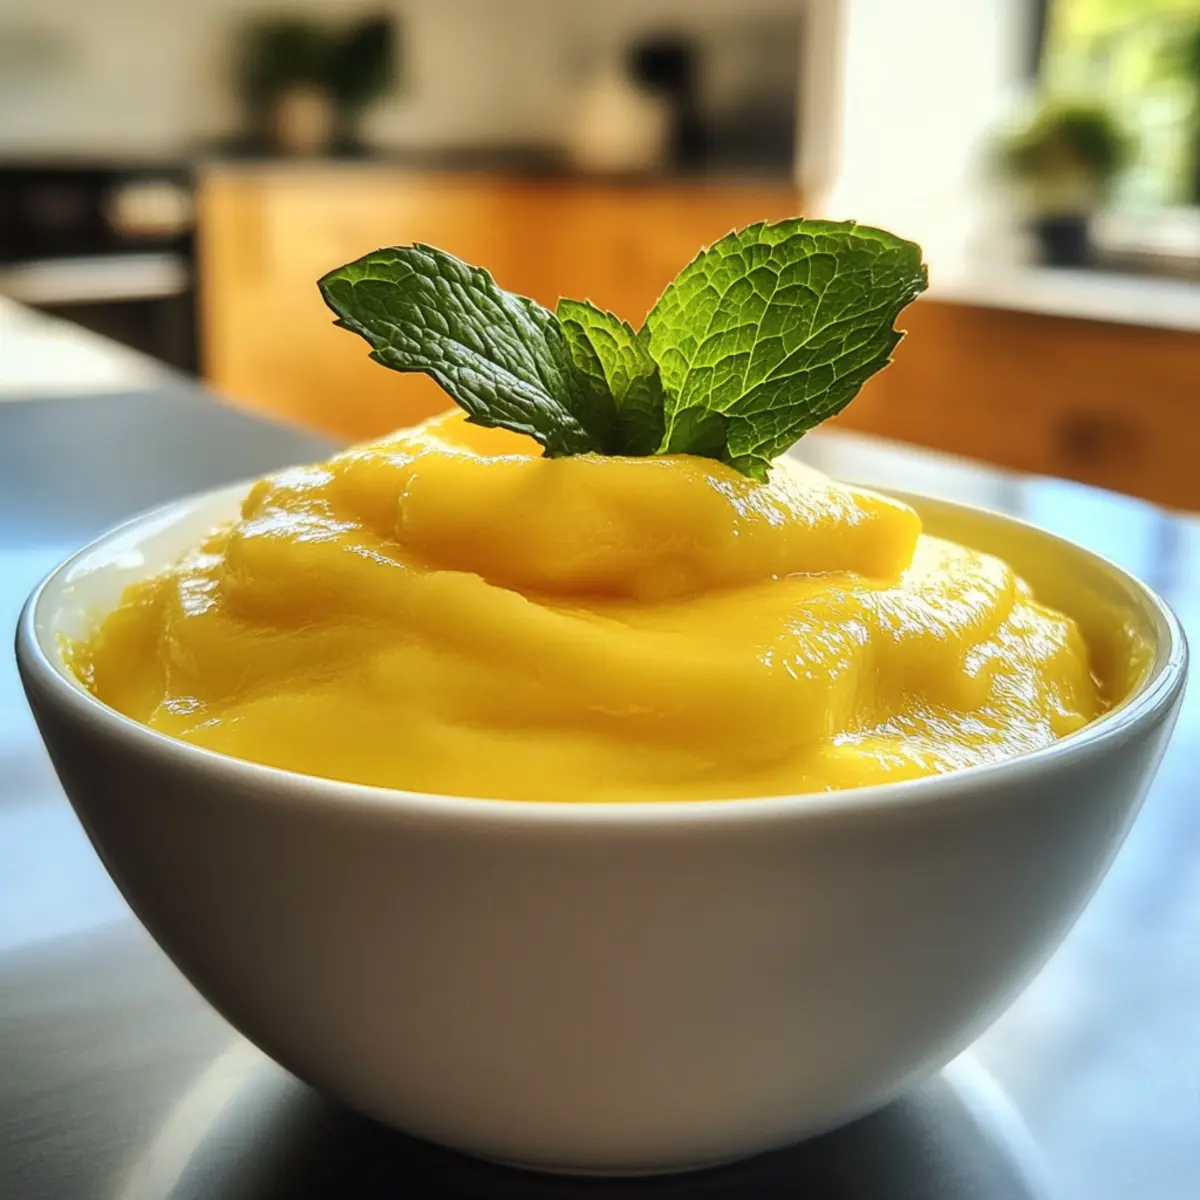
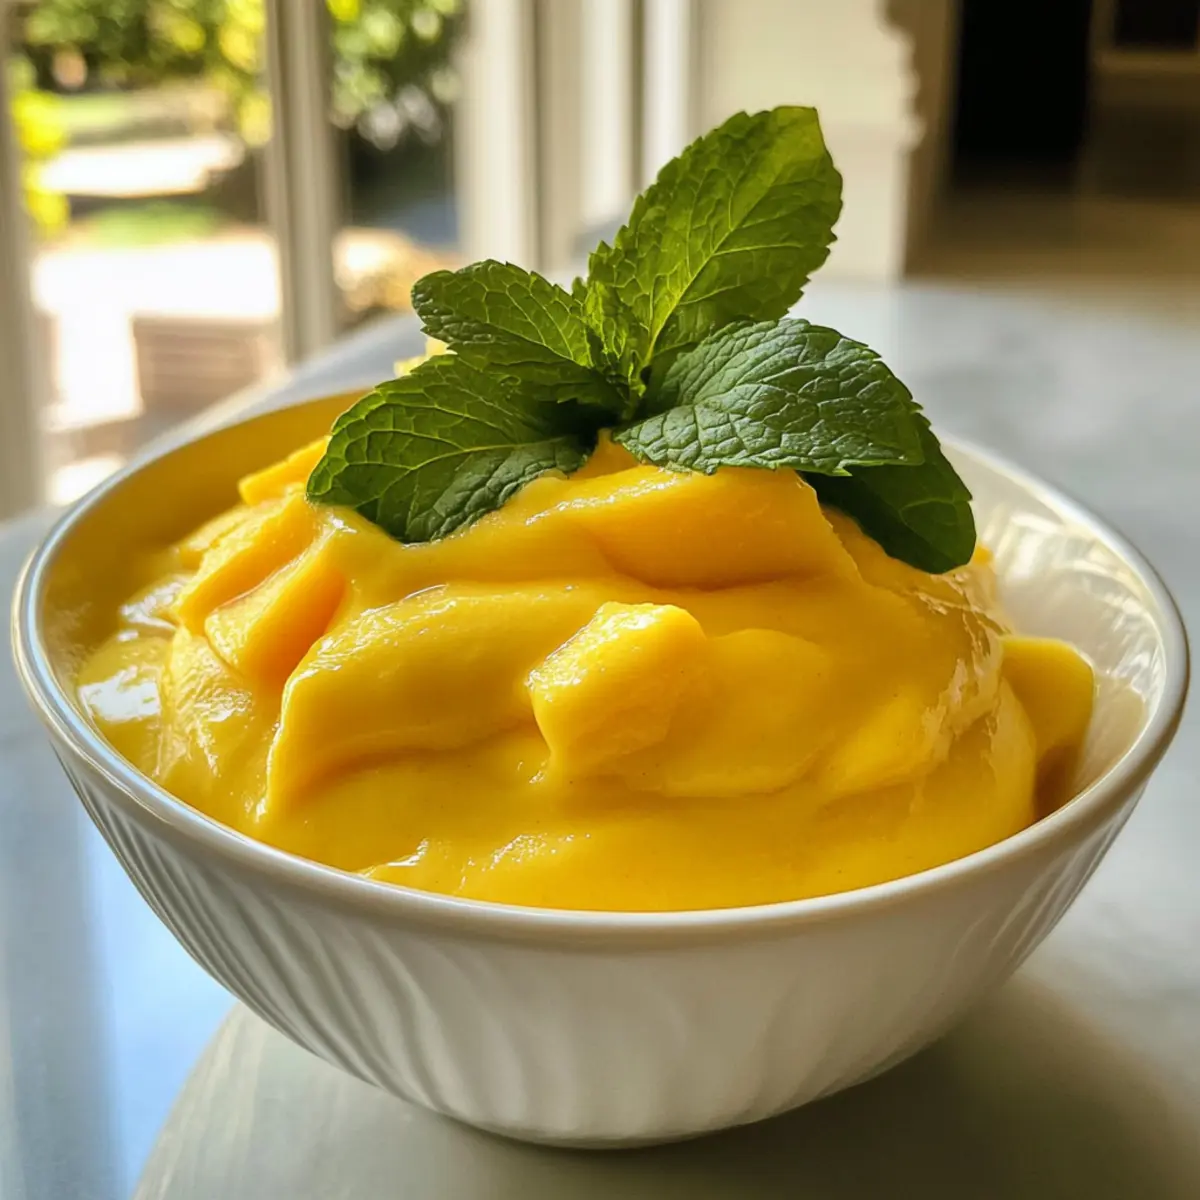
After chilling, remove the mousse from the refrigerator and uncover it to reveal its silky, smooth surface. To elevate your dessert, consider garnishing each cup with a sprig of fresh mint, a sprinkle of crushed nuts, or your favorite fruit topping. Serve the mousse chilled for a refreshing treat that showcases the tropical flavors, making it a perfect ending to any meal or a satisfying snack on its own.

What to Serve with 3-Ingredient Mango Mousse?

Delight in the tropical escape this mousse offers by complementing it with scrumptious sides and drinks.

  • Coconut Macaroons: These chewy delights bring a hint of coconut that pairs beautifully with the mango flavor, creating a tropical harmony.
  • Fresh Fruit Salad: A medley of berries and citrus fruits adds brightness and freshness, balancing out the creaminess of the mousse.
  • Ginger Snap Cookies: The spicy crunch of ginger snaps contrasts wonderfully with the smooth mousse, adding texture and a bit of zing.
  • Mint Sprig Garnish: A simple sprig of mint not only adds color but also enhances the mousse’s refreshing tropical profile.
  • Sparkling Water: The light bubbles of sparkling water cleanse the palate between bites, making your dessert experience even more pleasurable.
  • Pineapple Sorbet: Serve alongside a scoop of pineapple sorbet for a zingy, frozen treat that enhances the tropical vibe while adding a fun texture.
  • Lime Wedges: A squeeze of fresh lime juice can elevate the flavors of the mousse, enhancing its brightness and complementing its sweetness beautifully.

Expert Tips for 3-Ingredient Mango Mousse

  • Choose Ripe Mangoes: Select mangoes that are fragrant and slightly soft to enhance the mousse’s flavor. Avoid overly ripe mangoes to prevent a watery texture.

  • Whipping Technique: Whip the heavy cream until it reaches soft peaks for a light and airy mousse. Over-whipping can make it grainy, leading to a less enjoyable texture.

  • Taste Before Chilling: Always taste the mixture before refrigerating. Adjust the brown sugar to suit the sweetness of your mangoes for a balanced flavor in your 3-Ingredient Mango Mousse.

  • Chill Thoroughly: Allow the mousse to chill for at least 30 minutes. This step is essential for the mousse to set properly while melding those wonderful tropical flavors.

  • Garnishing Ideas: Elevate your presentation by garnishing with fresh mint leaves or a drizzle of honey. This not only adds flavor but also enhances the visual appeal of your dessert.

Make Ahead Options

These 3-Ingredient Mango Mousse cups are perfect for meal prep enthusiasts! You can prepare the mousse up to 24 hours in advance; simply make it as directed and refrigerate in airtight containers. To maintain the mousse’s creamy texture, ensure it’s covered properly to prevent air exposure. If you’re planning to enjoy it beyond 24 hours, you can freeze the mousse in individual servings for up to 1 month—just remember to thaw it in the refrigerator overnight before serving. When ready to indulge, garnish with fresh mint or toppings of your choice for an elegant touch. This way, you’ll have a delightful tropical treat ready to enjoy any time!

3-Ingredient Mango Mousse Variations

Feel free to explore and customize your Mango Mousse to suit your taste preferences or dietary needs!

  • Dairy-Free: Substitute heavy cream with coconut cream for a deliciously tropical twist that’s perfect for lactose-intolerant friends.

  • Canned Mango: Use canned mango pulp if fresh fruit is hard to find; just ensure it’s unsweetened for the best flavor.

  • Natural Sweeteners: Replace brown sugar with maple syrup or honey for a more natural sweetness that enhances the tropical vibe.

  • Texture Boost: Add a sprinkle of crushed nuts or granola on top for a delightful crunch that contrasts beautifully with the creamy mousse.

  • Flavor Infusion: Mix in a splash of lime juice or zest for a zesty kick that brightens the sweet mango flavor.

  • Tropical Fusion: Blend in diced fresh fruits like pineapple or passion fruit into the mousse for an exotic blend of textures and tastes.

  • Chocolate Variation: Drizzle melted dark chocolate over the mousse before serving for an indulgent, rich touch that pairs wonderfully with mango.

For a delightful combination of mango flavors, explore our recipe for Chicken Burritos Mango or enjoy some Fish Tacos Mango on the side for a complete tropical feast!

How to Store and Freeze 3-Ingredient Mango Mousse

Fridge: Store any leftover mousse in an airtight container in the refrigerator for up to 3 days. It’s best enjoyed fresh but can hold its lovely texture when stored properly.

Freezer: If you want to keep it longer, you can freeze the mousse in individual portions for up to 1 month. Just ensure they’re well-wrapped or in freezer-safe containers to prevent freezer burn.

Thawing: When ready to enjoy, simply transfer the frozen mousse to the refrigerator to thaw overnight. This method helps retain its creamy texture and flavor.

Make-Ahead: This mousse can be made 24 hours in advance. Just cover it once it’s set in the fridge, making it a quick dessert option for entertaining!

3-Ingredient Mango Mousse Recipe FAQs

How do I select ripe mangoes for the mousse?
Absolutely! When choosing mangoes, look for ones that are fragrant, slightly soft to the touch, and have a vibrant color. Ripe mangoes should yield slightly when pressed gently but not be overly squishy. Avoid any with dark spots or blemishes, as these can indicate overripeness, which may lead to a watery mousse.

How should I store leftover mango mousse?
Very! Store any remaining mousse in an airtight container in the refrigerator. It will keep well for up to 3 days. Ensure it’s covered to prevent it from absorbing any odors from other foods in the fridge.

Can I freeze 3-Ingredient Mango Mousse?
Definitely! You can freeze the mousse in individual portions for up to 1 month. scoop the mousse into freezer-safe containers or wrap it tightly in plastic wrap. When you’re ready to enjoy it, move it to the refrigerator overnight to thaw. This method helps maintain its creamy texture and vibrant flavor.

What should I do if the mousse turns out grainy?
If your mousse becomes grainy, it could be because the cream was over-whipped. Always whip the cream to just soft peaks, taking care not to overdo it. If it happens, you can try folding in a bit of freshly beaten cream (not over-whipped) to salvage its texture.

Are there any allergenic ingredients in this recipe?
Very! This recipe is naturally gluten-free, making it friendly for those with gluten sensitivities. However, keep in mind that some commercial whipped creams may contain additives. Always double-check the labels if you have dietary restrictions. For a dairy-free version, you can substitute heavy cream for coconut cream, ensuring that it meets your dietary needs!

3-Ingredient Mango Mousse

Irresistible 3-Ingredient Mango Mousse in Minutes

Create a refreshing 3-Ingredient Mango Mousse that's gluten-free and perfect for warm evenings.
Prep Time 10 minutes
Chilling Time 30 minutes
Total Time 40 minutes
Servings: 4 cups
Course: Dessert
Cuisine: Tropical
Calories: 250

Ingredients
  

For the Mousse
  • 1 cup Heavy Cream Full-fat cream is recommended for the best texture.
  • 1 cup Mango Pulp Use ripe mangoes or canned pulp without added sugars.
  • 2 tablespoons Brown Sugar Adjust according to the sweetness of the mangoes used.

Equipment

  • Mixing Bowl
  • Whisk or Electric Mixer
  • Spatula
  • Plastic Wrap

Method
 

Step-by-Step Instructions
  1. In a mixing bowl, combine heavy cream, mango pulp, and brown sugar. Blend until well mixed.
  2. Whisk the mixture on medium speed until it reaches a soft peak stage, about 3-5 minutes.
  3. Transfer the mousse into serving cups or a bowl. Cover with plastic wrap and refrigerate for at least 30 minutes.
  4. Remove from the refrigerator, garnish as desired, and serve chilled.

Nutrition

Serving: 1cupCalories: 250kcalCarbohydrates: 28gProtein: 3gFat: 15gSaturated Fat: 9gPolyunsaturated Fat: 0.5gMonounsaturated Fat: 4gCholesterol: 50mgSodium: 30mgPotassium: 200mgFiber: 1gSugar: 18gVitamin A: 500IUVitamin C: 40mgCalcium: 80mgIron: 1mg

Notes

Select ripe mangoes for the best flavor and texture. Whipping too much can make the mousse grainy, so don't over-whip the heavy cream. Chill thoroughly for optimal taste.

Tried this recipe?

Let us know how it was!

Fluffy High Protein Cinnamon Crepes for a Wholesome Breakfast

There’s a certain magic that happens when breakfast meets a high-protein twist. My Fluffy High Protein Cinnamon Crepes are a testament to that enchanting fusion, perfect for anyone ready to elevate their morning routine. The first bite reveals a delightful softness, accompanied by a warm hint of cinnamon that dances on your taste buds. What’s more, these crepes are not just delicious; they’re wholesome and nutritious, making them suitable for both a busy weekday and a leisurely brunch with friends. The best part? They come together in a flash, allowing you to whip up a satisfying meal without a long time in the kitchen. So, are you ready to transform your breakfast game and indulge in a delightful stack of these protein-packed beauties?

Why Choose Fluffy High Protein Crepes?

Healthy, Delicious Fuel: Start your day with wholesome nutrition packed into every bite of these crepes. With 10g of protein per crepe, they keep you full and satisfied.

Effortless Cooking: In just a few simple steps, you can master the art of crepe-making! This recipe is perfect for chefs of all levels, making morning meals a breeze.

Versatile Filling Options: Make them your own! Experiment with flavors by adding fresh fruits, nut butters, or even indulge with a bit of chocolate spread for dessert-like yumminess.

Perfect for Every Occasion: Whether it’s a busy weekday breakfast or a relaxed weekend brunch with friends, these crepes fit the bill. Serve them alongside fresh berries or a dollop of Greek yogurt for a delightful treat.

Stellar Storage Solution: Prep in advance and enjoy later! These crepes store well in the fridge or freezer, making them a time-saving kitchen hero. Just reheat and enjoy!

Discover more delicious breakfast recipes like my Buttermilk Pancakes or indulge in some sweetness with Grilled Cinnamon Apples.

Fluffy High Protein Cinnamon Crepes Ingredients

• Create a nourishing breakfast experience with these amazing Fluffy High Protein Cinnamon Crepes!

For the Crepes

  • Oat Flour – Provides structure and a gluten-free base; swap with whole wheat flour for a different taste.
  • Maple Syrup – Adds sweetness and depth; honey or agave can be used for a similar effect.
  • Egg – Acts as a binding agent; replace with a flax or chia egg for a vegan option.
  • Egg Whites – Boost protein content and fluffiness; additional whole eggs can be used but may alter texture.
  • Greek Yogurt – Delivers protein and moisture; opt for dairy-free yogurt to keep it vegan.
  • Vanilla Extract – Enhances flavor; feel free to omit if preferred.
  • Milk – Adjusts batter consistency; use almond or oat milk for a dairy-free variation.

For the Filling

  • Greek Yogurt – Combines with sweetener and cinnamon for a creamy filling; it lends additional protein to the dish.
  • Sweetener – Choose your favorite, whether it’s sugar, honey, or a sugar substitute to cater to taste.
  • Cinnamon – Adds that warm, inviting aroma; feel free to increase or decrease per your cinnamon preference.

Enjoy making these delightful Fluffy High Protein Cinnamon Crepes and elevate your breakfast or brunch to a whole new level!

Step‑by‑Step Instructions for Fluffy High Protein Cinnamon Crepes

Step 1: Prepare the Batter
In a mixing bowl, whisk together oat flour, maple syrup, one whole egg, and egg whites. Add Greek yogurt, vanilla extract, and milk, blending until the mixture is smooth and free of lumps. Aim for a batter that is thin yet pourable. This combination of ingredients creates the base for your delicious Fluffy High Protein Cinnamon Crepes.

Step 2: Preheat the Skillet
Place a non-stick skillet over medium heat for about 2 minutes until hot. Lightly grease the surface with cooking spray or a small amount of oil to prevent sticking. Ensuring the skillet is adequately heated is crucial for achieving that golden, crispy edge on your crepes while maintaining a soft interior.

Step 3: Cook the Crepes
Pour approximately 1/4 cup of the prepared batter into the skillet, swirling gently to form a thin, even layer. Cook for 1-2 minutes, or until the edges begin to lift and the bottom is lightly golden. This quick cook time ensures a soft, airy crepe that perfectly showcases the cinnamon flavor.

Step 4: Flip the Crepe
Carefully use a spatula to flip the crepe over. Allow it to cook for an additional 1-2 minutes, or until it becomes golden brown on the other side. The goal is to maintain the fluffiness while ensuring a slight crispiness. Repeat this process for the remaining batter, stacking the cooked crepes on a plate.

Step 5: Prepare the Filling
In a separate bowl, mix Greek yogurt, your choice of sweetener, and a pinch of cinnamon. This creamy filling complements the Fluffy High Protein Cinnamon Crepes wonderfully, adding flavor and extra protein. Adjust the sweetness to your preference for a more personalized touch.

Step 6: Fill the Crepes
Spread a generous layer of the filling onto each cooked crepe before folding them in half or rolling them up. The filling can be adjusted based on your taste, enhancing the overall deliciousness of your protein-packed breakfast or brunch creation.

Step 7: Serve and Enjoy
Finally, serve your Fluffy High Protein Cinnamon Crepes with an optional sprinkle of sweetener and cinnamon on top. Fresh fruits or a drizzle of syrup can enhance the experience, making these crepes even more delightful. Enjoy your wholesome breakfast, knowing you’ve crafted something delicious and nutritious!

Expert Tips for Fluffy High Protein Cinnamon Crepes

  • Perfect Temperature: Ensure your skillet is thoroughly preheated before pouring the batter to achieve that ideal crispy edge while keeping the inside airy.

  • Gentle Flipping: Use a spatula to carefully flip the crepes; this prevents tearing and keeps them fluffy, ensuring your Fluffy High Protein Cinnamon Crepes stay intact.

  • Consistency Check: Gradually adjust the milk in the batter until it’s thin yet pourable—this balance is key for tenderness.

  • Cooling Method: Stack the cooked crepes on a plate with parchment paper between them. This prevents sticking during storage, keeping them lovely and fresh.

  • Flavor Experimentation: Feel free to mix in spices or add vanilla for a unique twist, enhancing the taste of your Fluffy High Protein Cinnamon Crepes!

How to Store and Freeze Fluffy High Protein Cinnamon Crepes

  • Room Temperature: Enjoy your crepes fresh! If you plan to eat them right away, serve warm, and they can stay at room temperature for up to 2 hours.
  • Fridge: Stack crepes with parchment paper between layers and store in an airtight container in the refrigerator for up to 3 days. This helps maintain their softness while preventing sticking.
  • Freezer: Freeze cooked crepes for up to 2 months. Place parchment paper between each crepe before wrapping them in plastic wrap or placing them in a freezer-safe bag.
  • Reheating: To enjoy later, reheat in a skillet over medium heat for a minute on each side, or microwave for 30-60 seconds until warmed through, and savor your Fluffy High Protein Cinnamon Crepes!

Fluffy High Protein Cinnamon Crepes Variations

Feel free to have some fun and make this delightful recipe your own with these tasty twists!

  • Gluten-Free: Use a gluten-free flour blend instead of oat flour for equally fluffy, high-protein crepes. This way, everyone can enjoy them!

  • Nutty Twist: Add a tablespoon of almond or peanut butter to the crepe batter to infuse a rich, nutty flavor while boosting the protein content.

  • Fruit-Packed: Stuff the crepes with sliced bananas or mixed berries for a refreshing touch. The sweet fruits will complement the warm cinnamon beautifully.

  • Choco-Delight: For a decadent treat, fill the crepes with chocolate spread. It transforms your breakfast into a delightful dessert!

  • Protein Boost: Mix in a scoop of your favorite protein powder into the batter for an extra protein punch that keeps you energized throughout the day.

  • Zesty Flavor: Add a touch of lemon zest to the batter for a bright citrus flavor that elevates the taste of these delightful crepes.

  • Savory Option: Experiment with savory fillings like spinach and feta for a unique, satisfying meal option. This twist can be perfect for brunch gatherings!

  • Spicy Hint: Sprinkle in a pinch of cayenne or chili powder for an unexpected kick that contrasts beautifully with the sweetness of the cinnamon.

And if you ever need a side to pair with these delightful crepes, don’t miss out on the joy of serving them with some Grilled Cinnamon Apples or a tall stack of fluffy Buttermilk Pancakes. Let your imagination run wild!

What to Serve with Fluffy High Protein Cinnamon Crepes

There’s nothing like a cozy breakfast spread that complements the delightful flavors and textures of these fluffy crepes.

  • Fresh Berries: Juicy strawberries and blueberries brighten up the plate, adding a tartness that balances the sweetness of the crepes. Their vibrant colors also enhance the visual appeal of your breakfast.

  • Sliced Bananas: Creamy and sweet, bananas provide a smooth contrast to the fluffy texture of the crepes. Top them with a sprinkle of cinnamon for a delightful flavor boost.

  • Greek Yogurt Parfait: A dollop of Greek yogurt adds a tangy creaminess and enhances the protein content. Layer it with granola for a satisfying crunch alongside the soft crepes.

  • Maple Syrup Drizzle: A warm drizzle of pure maple syrup offers a rich sweetness that complements the cinnamon flavor beautifully. It brings a touch of indulgence to your morning meal.

  • Nut Butter Swirl: Spread almond or peanut butter inside the crepes for an added protein punch. The nutty flavor creates a decadent experience that satisfies both taste and hunger.

  • Herbal Tea: A cozy cup of chamomile or peppermint tea pairs perfectly with the sweet notes of the crepes, providing a refreshing contrast that completes your breakfast.

  • Chai Spiced Coffee: Enjoy a warm chai latte or spiced coffee to complement the cinnamon vibe of the crepes. The aromatic spices will elevate your breakfast ritual to something special.

Make Ahead Options

These Fluffy High Protein Cinnamon Crepes are ideal for meal prep, allowing you to save time during busy mornings! You can make the crepes up to 3 days in advance. Simply cook the crepes as instructed, let them cool slightly, then stack them with parchment paper in between each layer to prevent sticking. Store the stack in an airtight container in the refrigerator. When you’re ready to enjoy, just reheat them gently in a skillet or microwave, and fill with your prepared Greek yogurt mixture. This way, you’ll have a quick and nutritious breakfast option that tastes just as delightful as when freshly made!

Fluffy High Protein Cinnamon Crepes Recipe FAQs

How do I choose the right oat flour for my crepes?
Absolutely! When selecting oat flour, look for a finely ground option that’s gluten-free if needed. If you’re in a pinch, you can blend rolled oats in a food processor to make your own oat flour. Just remember to ensure that it’s free from any dark spots, which can indicate spoilage.

How long can I store cooked crepes in the refrigerator?
Very! You can store Fluffy High Protein Cinnamon Crepes stacked with parchment paper in between layers in an airtight container in the refrigerator for up to 3 days. This method prevents them from sticking together and keeps them fresh.

Can I freeze my Fluffy High Protein Cinnamon Crepes?
Yes, of course! To freeze, place parchment paper between each crepe and wrap them tightly in plastic wrap or put them in a freezer-safe bag. They can be stored in the freezer for up to 2 months. When you’re ready to eat, just reheat them in a skillet over medium heat or in the microwave for a quick 30-60 seconds.

What can I do if my crepes are falling apart?
No worries! If your crepes are breaking or tearing, you might want to check the thickness of your batter. It should be thin but pourable. If it’s too thick, add a little more milk to achieve the right consistency. Additionally, ensure your skillet is properly heated before pouring in the batter—this helps set the crepe quickly and hold its shape.

Are Fluffy High Protein Cinnamon Crepes suitable for those with gluten allergies?
Certainly! Just substitute oat flour with a gluten-free flour blend. Many options are available on the market today that can provide similar results. Always double-check that the flour is labeled gluten-free to avoid any cross-contamination.

Can pets eat the ingredients used in Fluffy High Protein Cinnamon Crepes?
It’s best to keep these crepes away from pets. While the ingredients like egg and yogurt are not toxic, some pets may have allergies or digestive issues with dairy and grains. If you’re looking to share homemade treats with your furry friends, stick to pet-safe recipes!

Fluffy High Protein Cinnamon Crepes

Fluffy High Protein Cinnamon Crepes for a Wholesome Breakfast

Enjoy Fluffy High Protein Cinnamon Crepes, a delicious breakfast packed with protein and a hint of cinnamon for a wholesome start.
Prep Time 10 minutes
Cook Time 10 minutes
Total Time 20 minutes
Servings: 2 plates
Course: Breakfast
Cuisine: American
Calories: 150

Ingredients
  

For the Crepes
  • 1 cup Oat Flour Provides gluten-free base
  • 2 tbsp Maple Syrup Can substitute with honey or agave
  • 1 whole Egg Acts as binding agent
  • 3 whites Egg Whites Boosts protein content
  • 1 cup Greek Yogurt For protein and moisture
  • 1 tsp Vanilla Extract Enhances flavor
  • 1 cup Milk Adjusts batter consistency
For the Filling
  • 1 cup Greek Yogurt Combine with sweetener and cinnamon
  • 2 tbsp Sweetener Choose your preferred type
  • 1 tsp Cinnamon Adjust according to preference

Equipment

  • Non-stick skillet
  • Mixing Bowl
  • Whisk

Method
 

Preparation
  1. In a mixing bowl, whisk together oat flour, maple syrup, one whole egg, and egg whites. Add Greek yogurt, vanilla extract, and milk, blending until the mixture is smooth and free of lumps.
  2. Place a non-stick skillet over medium heat for about 2 minutes until hot. Lightly grease the surface to prevent sticking.
  3. Pour approximately 1/4 cup of the prepared batter into the skillet, swirling gently. Cook for 1-2 minutes until the edges begin to lift and the bottom is lightly golden.
  4. Carefully flip the crepe over and cook for an additional 1-2 minutes until golden brown. Repeat for the remaining batter.
  5. In a separate bowl, mix Greek yogurt, your choice of sweetener, and a pinch of cinnamon for the filling.
  6. Spread a generous layer of the filling onto each cooked crepe before folding them in half or rolling them up.
  7. Serve with a sprinkle of sweetener and cinnamon on top. Fresh fruits or syrup can enhance the experience.

Nutrition

Serving: 1crepeCalories: 150kcalCarbohydrates: 20gProtein: 10gFat: 4gSaturated Fat: 1gCholesterol: 70mgSodium: 150mgPotassium: 200mgFiber: 3gSugar: 5gVitamin A: 2IUCalcium: 10mgIron: 4mg

Notes

These crepes can be stored in the fridge for up to 3 days and frozen for up to 2 months. Reheat before serving for best results.

Tried this recipe?

Let us know how it was!

Decadent Caramel Panna Cotta Chocolate Truffle Bliss

The rich scent of caramel fills the air, mingling with anticipation as dinner draws to a close. What could possibly take this meal from delightful to downright memorable? Enter the Caramel Panna Cotta Chocolate Truffle—a luxurious Italian dessert that transforms simple gatherings into exquisite feasts. This recipe not only dazzles the eyes but also offers the ultimate make-ahead convenience, letting you prepare an impressive treat without the last-minute rush. With a silky smooth texture and the option for an indulgent chocolate truffle layer, it strikes the perfect balance between elegance and ease. Whether you’re catering to friends, family, or just treating yourself, this panna cotta is sure to impress. Are you ready to learn how to craft this delightful dessert and perhaps even explore some fun variations?

Why Not Elevate Your Dessert Game?

Indulgence Awaits: This Caramel Panna Cotta Chocolate Truffle combines creamy, caramelly richness with a luxurious chocolate twist, perfect for impressing guests.
Make-Ahead Magic: Prepare it in advance for stress-free entertaining, allowing flavors to meld beautifully.
Versatile Creativity: Customize with dairy-free or sugar-free adaptations to suit every palate, ensuring no one misses out on dessert bliss.
Impressive Presentation: Serve in elegant glasses or molds, visually stunning and inviting.
Crowd-Pleasing Favorite: Ideal for dinner parties or cozy nights in, this dessert guarantees delighted smiles with each silky spoonful. Don’t forget to check out my delicious White Chocolate Cranberry for another festive treat!

Caramel Panna Cotta Chocolate Truffle Ingredients

For the Panna Cotta
Heavy Cream – Provides richness and creaminess; substitute with coconut cream for a dairy-free option.
Milk – Contributes to the dessert’s smooth texture; whole or low-fat can be used.
Dulce de Leche – Adds sweetness and caramel flavor; use caramel sauce as a substitute if necessary.
Gelatine – Acts as a thickener, giving panna cotta its signature jiggle; ensure proper blooming for best results.
Cold Water – Used to bloom gelatine; essential for activating the gelatine.

For the Chocolate Truffle Layer (Optional)
Dark Chocolate – Provides a rich, deep chocolate flavor; substitute with milk chocolate for a sweeter taste.
Heavy Cream (for Truffle) – Used to create a ganache; it can be replaced with a non-dairy alternative for a vegan version.
Sea Salt – Enhances the flavor of the chocolate and balances sweetness; a pinch is sufficient.

Get ready to dazzle your guests with this decadent Caramel Panna Cotta Chocolate Truffle dessert, combining rich flavors and elegant presentation!

Step‑by‑Step Instructions for Caramel Panna Cotta Chocolate Truffle

Step 1: Mix Cream and Milk
In a medium saucepan, combine 2 cups of heavy cream, 1 cup of milk, and 1 cup of dulce de leche over medium heat. Stir gently until the mixture is warm but not boiling, approximately 5–7 minutes, until well combined and smooth. You’ll know it’s ready when it’s steaming but doesn’t reach a simmer.

Step 2: Bloom Gelatine
While your cream mixture is warming, take 2 tablespoons of gelatine and sprinkle it over ¼ cup of cold water in a small bowl. Allow it to sit for about 5 minutes, or until the gelatine absorbs the water and swells, forming a thick, jelly-like texture, which is essential for achieving the perfect consistency in your Caramel Panna Cotta.

Step 3: Combine Mixtures
Once the cream mixture is warm, remove it from the heat and whisk in the bloomed gelatine. Stir until the gelatine is completely dissolved, which should take about 2–3 minutes. The mixture will become silky and smooth, indicating that your Caramel Panna Cotta base is ready to be poured.

Step 4: Pour and Chill
Carefully divide the panna cotta mixture into serving glasses or molds, filling them about ¾ full. Refrigerate the glasses for at least 4 hours, or until set. You’ll know they’re ready when the panna cotta is firm to the touch and wobbles slightly as you shake the glasses gently.

Step 5: Make Chocolate Truffle Layer (Optional)
For the optional chocolate truffle layer, heat 1 cup of heavy cream in a small saucepan over low heat until warm, around 3–5 minutes. Pour the warm cream over 8 ounces of chopped dark chocolate in a bowl and let it sit for a minute before stirring until smooth and glossy. This ganache will be rich and luxurious, enhancing your Caramel Panna Cotta.

Step 6: Serve
Once the panna cotta has set, gently pour the chocolate ganache on top of each chilled glass. You can elevate the presentation with fresh berries or a sprinkle of sea salt. To serve your delightful Caramel Panna Cotta Chocolate Truffle, simply scoop a spoonful and enjoy the layers of creamy decadence.

How to Store and Freeze Caramel Panna Cotta Chocolate Truffle

Fridge: Store your Caramel Panna Cotta in an airtight container in the fridge for up to 3 days; this keeps it fresh and creamy for your next indulgent treat.

Freezer: If you need to freeze it, pour the panna cotta in a freezer-safe container and freeze for up to 1 month; just remember to thaw it in the fridge before serving.

Reheating: When ready to enjoy, gently place the panna cotta at room temperature for about 30 minutes or refrigerate overnight if frozen, allowing it to regain its silky texture.

Pre-Making: You can prepare the panna cotta mixture up to 24 hours in advance; cover it and chill in the fridge to enhance the flavors before serving.

What to Serve with Decadent Caramel Panna Cotta Chocolate Truffle

The perfect meal deserves perfect pairings, enhancing each delectable spoonful with complementary flavors and textures.

  • Fresh Berries: Juicy raspberries or strawberries add a tart contrast, beautifully balancing the creamy sweetness of the panna cotta.
  • Almond Biscotti: The crunchy texture of biscotti provides a delightful contrast, perfect for dipping, while adding a nutty flavor that elevates the dessert.
  • Chocolate Espresso: A rich coffee pairing enhances the chocolate depth, making every bite of your Caramel Panna Cotta a delightful end to your meal. The combination of chocolate and coffee is always a win!
  • Whipped Cream: A dollop of lightly sweetened whipped cream adds an airy texture, allowing you to dive deeper into the creaminess of the panna cotta.
  • Nutty Granola: Add a sprinkle of mixed nut granola for a satisfying crunch, offering a contrast that adds complexity to each creamy bite.
  • Dark Chocolate Shavings: A sprinkle of chocolate shavings on top enhances the visual appeal and adds an extra layer of luxurious flavor.

These delightful accompaniments will transform your dessert into an unforgettable finale, making every gathering feel special!

Caramel Panna Cotta Chocolate Truffle Variations

Feel free to make this delightful dessert your own with some fun twists and variations!

  • Dairy-Free: Substitute heavy cream with coconut cream and use almond milk for an equally creamy result.

  • Sugar-Free: Swap out dulce de leche with a sugar-free alternative to enjoy the same sweet satisfaction without the sugar rush.

  • Flavor Enhancements: Add a splash of vanilla or almond extract to amplify the depth of flavor, or fold in fruit purees for a refreshing fruit twist. A hint of orange zest could also elevate the caramel beautifully.

  • Textural Additions: For added crunch, sprinkle in crushed nuts like pistachios or hazelnuts. Spice it up by adding a dash of cayenne or cinnamon to the chocolate ganache for an unexpected kick.

  • Chocolate Type Change: If you’re in the mood for something sweeter, try using milk chocolate instead of dark chocolate for the ganache layer. This will soften the chocolate notes and create a different flavor profile.

  • Berry Bliss: Top your panna cotta with a medley of fresh berries, or create a berry compote for a tart contrast to the creamy sweetness.

  • Nutty Delight: Prepare a nut-based crust to serve as a base for the panna cotta, which adds a delicious crunch and an earthy flavor.

  • Elegant Serving Ideas: Consider layering the panna cotta with different flavored gels or sauces, like a raspberry or mango puree, for a vibrant show-stopping presentation.

For more delicious experiences, you can check out my recipe for Patriotic Chocolate Chip or try a twist on the classic with Strawberry Whipped Ricotta for another impressive dessert option!

Expert Tips for Caramel Panna Cotta Chocolate Truffle

  • Proper Gelatine Blooming: Ensure gelatine is fully bloomed in cold water before adding to the cream mixture. This step guarantees a smooth texture in your Caramel Panna Cotta.
  • Prevent Boiling: Avoid boiling the cream mixture. Heating just enough to warm it preserves the creamy texture and flavor, resulting in a velvety dessert.
  • Gelatine Measurement: Stick to the accurate amount of gelatine; too much can create a rubbery panna cotta, while too little will result in a runny consistency.
  • Chill Time is Key: Be patient and chill for a minimum of 4 hours. This allows the panna cotta to set perfectly, achieving that desired jiggle.
  • Elegant Presentation: Experiment with different serving vessels, like glass cups or ramekins, to enhance the visual appeal of your dessert, making each serving a delightful experience.

Make Ahead Options

These Caramel Panna Cotta Chocolate Truffles are perfect for busy home cooks looking to save time while still impressing their guests! You can prepare the panna cotta mixture up to 24 hours in advance—simply mix and pour into serving glasses, then refrigerate. The truffle layer can also be made up to 3 days ahead; just store the chocolate ganache in an airtight container in the fridge. To maintain its smooth texture, reheat the ganache gently before serving. When it’s time to enjoy, pour the chocolate ganache over the set panna cotta, add your favorite toppings, and reveal an elegant dessert that tastes just as delightful as freshly made!

Caramel Panna Cotta Chocolate Truffle Recipe FAQs

How do I select ripe dulce de leche?
When choosing dulce de leche, look for a smooth, creamy texture without any crystallization. The color should be a golden brown, indicating it’s well-cooked. If you’re making it from scratch, simmer sweetened condensed milk in a pot for about 1-2 hours. Just keep stirring to prevent burning!

What is the best way to store leftover panna cotta?
Store your Caramel Panna Cotta in an airtight container in the fridge for up to 3 days. Make sure it’s covered well to maintain its creamy consistency. I often transfer mine to individual glasses to serve straight from the fridge, making it easy to enjoy a sweet treat anytime!

Can I freeze Caramel Panna Cotta?
Absolutely! To freeze your Caramel Panna Cotta, pour it into a freezer-safe container and freeze for up to 1 month. When you’re ready to enjoy it, thaw it overnight in the refrigerator or let it sit at room temperature for about 30 minutes. This method helps it regain its silky texture, but keep in mind it may lose some creaminess.

What should I do if my panna cotta doesn’t set?
If your panna cotta hasn’t set, it may be due to not blooming the gelatine properly or not using enough gelatine. To troubleshoot, you can melt the panna cotta mixture gently in a saucepan (do not boil) and then whisk in a little more bloomed gelatine. Allow it to cool slightly before pouring it back into molds or glasses, then refrigerate again until set.

Is this dessert safe for people with dietary restrictions?
Yes! You can easily make this dessert suitable for various dietary preferences. For dairy-free options, substitute heavy cream with coconut cream and use almond milk. If sugar-free is a must, opt for a sugar-free version of dulce de leche or caramel sauce. Make sure to check for any potential allergens in all your ingredients!

How long can I keep this dessert in the fridge after making it?
You can keep your Caramel Panna Cotta in the fridge for up to 3 days. Just make sure to store it in an airtight container to prevent it from absorbing odors and maintain its delicious flavor. Enjoy it cold and undisturbed for the best taste experience!

Caramel Panna Cotta Chocolate Truffle

Decadent Caramel Panna Cotta Chocolate Truffle Bliss

Experience the indulgent delight of Caramel Panna Cotta Chocolate Truffle, a luxurious Italian dessert perfect for unforgettable gatherings.
Prep Time 10 minutes
Cook Time 15 minutes
Chill Time 4 hours
Total Time 4 hours 25 minutes
Servings: 6 servings
Course: Dessert
Cuisine: Italian
Calories: 350

Ingredients
  

For the Panna Cotta
  • 2 cups heavy cream or substitute with coconut cream for dairy-free option
  • 1 cup milk whole or low-fat
  • 1 cup dulce de leche or caramel sauce as a substitute
  • 2 tablespoons gelatine bloom in cold water
  • 1/4 cup cold water for blooming gelatine
For the Chocolate Truffle Layer (Optional)
  • 8 ounces dark chocolate or substitute with milk chocolate
  • 1 cup heavy cream for ganache; can use non-dairy alternative
  • a pinch sea salt to enhance flavor

Equipment

  • Medium saucepan
  • small bowl
  • Whisk

Method
 

Step‑by‑Step Instructions
  1. In a medium saucepan, combine 2 cups of heavy cream, 1 cup of milk, and 1 cup of dulce de leche over medium heat. Stir gently until warm, around 5–7 minutes.
  2. In a small bowl, sprinkle 2 tablespoons of gelatine over 1/4 cup of cold water. Let sit for about 5 minutes.
  3. Once the cream mixture is warm, remove from heat and whisk in the bloomed gelatine until completely dissolved.
  4. Carefully divide the panna cotta mixture into serving glasses or molds, refrigerate for at least 4 hours until set.
  5. For the optional chocolate truffle layer, heat 1 cup of heavy cream over low heat until warm. Pour over 8 ounces of chopped dark chocolate and stir until smooth.
  6. Once the panna cotta has set, pour the chocolate ganache over each chilled glass and serve, optionally garnished with fresh berries or sea salt.

Nutrition

Serving: 1servingCalories: 350kcalCarbohydrates: 30gProtein: 3gFat: 25gSaturated Fat: 15gPolyunsaturated Fat: 1gMonounsaturated Fat: 4gCholesterol: 80mgSodium: 100mgPotassium: 250mgFiber: 1gSugar: 28gVitamin A: 500IUCalcium: 100mgIron: 1mg

Notes

Ensure gelatine is fully bloomed for a smooth texture. Chill for at least 4 hours for best results.

Tried this recipe?

Let us know how it was!

Creamy Coconut Curry Soup That’s Ready in Just 30 Minutes

As the chilly evening breeze whispers through the trees, there’s nothing quite like the warm embrace of a hearty bowl of soup. This Quick Vegan Coconut Curry Soup with Dumplings is here to rescue you from those fast-food cravings! Rich and creamy, the broth is infused with vibrant spices and tender dumplings that transform your kitchen into a cozy haven. Not only is this dish a quick meal solution for busy nights, but it’s also the ultimate comfort food—perfectly satisfying on its own or paired with fluffy rice or a crisp salad. Plus, with the flexibility to switch up the dumplings, you can make it your own! Curious about how to bring this deliciousness to your table in a flash? Let’s dive in!

What makes this soup a must-try?

Quick and Easy: This Coconut Curry Soup comes together in just 30 minutes, making it perfect for those hectic weeknights.

Flavor Explosion: The rich, creamy broth is a harmonious blend of spices and coconut milk, creating a comforting flavor that warms your soul.

Customizable: With options for vegan or meat-based dumplings, you can tailor this recipe to fit your dietary preferences.

Nutrient-Packed: Add extra veggies like spinach or bell peppers for a nutrient boost, making this soup both delicious and wholesome.

Comfort in a Bowl: Each spoonful provides an inviting hug, ideal for curling up on the couch with a good book or movie.

If you crave more hearty soups, don’t miss out on our hearty Potato Kielbasa Soup or the creamy Chicken Mushroom Soup that can elevate your cozy nights!

Coconut Curry Soup Ingredients

• Everything you need for a delicious meal!

For the Broth

  • Vegetable Broth (3 cups) – Serves as the hearty base of our Coconut Curry Soup; choose chicken broth for a non-vegan version.
  • Coconut Milk (1 cup, full-fat preferred) – Adds creamy richness; light coconut milk is a lighter alternative.
  • Red Thai Curry Paste (1 tbsp) – Offers vibrant flavor; swap with green curry paste for a slightly different taste.
  • Soy Sauce – Provides depth and umami; tamari is a gluten-free option.

For the Dumplings

  • Frozen Vegan Dumplings (12 to 15 pieces) – The main protein source; feel free to use any vegetable, chicken, or pork dumplings designed for boiling.

For Seasoning & Garnish

  • Salt – Essential for balancing flavors; adjust to taste for the perfect seasoning.
  • Sugar – Balances savory notes; opt for brown sugar for a richer flavor.
  • Chili Oil (2-3 tsp) – Adds a kick of heat; adjust according to your spice tolerance.
  • Chopped Fresh Cilantro (1 tbsp) – Brightens the dish as a finishing touch; parsley can be substituted for a milder flavor.
  • Sliced Scallion Greens (1 tbsp) – For garnish; adds a pop of color and mild onion flavor.
  • Crunchy Garlic (1 tbsp) – Delivers delightful crunch and contrast in flavor.

For the Vegetables

  • Diced Onion (1 cup) – A vital aromatic base; shallots can be used for a slightly sweeter profile.
  • Minced Garlic (1 tbsp) – Imparts aromatic goodness; fresh garlic powder (1 tsp) can work in a pinch.
  • Chopped Cremini Mushrooms (½ cup) – Adds an earthy texture; substitute with button mushrooms if needed.
  • Scallions (4) – The white parts are sautéed for flavor while the greens are used for garnish.

Now that you have your ingredients ready, you’re on your way to creating a cozy bowl of Coconut Curry Soup that will surely warm your heart and tantalize your taste buds!

Step‑by‑Step Instructions for Quick Vegan Coconut Curry Soup with Dumplings

Step 1: Heat the Oil
Begin by heating 2 tablespoons of avocado oil in a heavy-bottom pot over medium-low heat. Allow the oil to shimmer, indicating it’s ready for cooking. This step sets the foundation for your Coconut Curry Soup, ensuring the aromatics will infuse their flavors into the broth.

Step 2: Sauté Aromatics
Add 1 cup of diced onion, the white parts of 4 chopped scallions, and 1 tablespoon of minced garlic to the pot. Sauté these ingredients with a pinch of salt for about 5–7 minutes, stirring frequently until the onions soften and turn translucent. The fragrant aroma will fill your kitchen as the onions caramelize beautifully.

Step 3: Cook the Mushrooms
Next, introduce ½ cup of chopped cremini mushrooms to the pot. Cook for an additional 4–5 minutes, stirring occasionally until the mushrooms are tender and the moisture has evaporated. This step adds the earthy texture that complements the rich flavors of your Coconut Curry Soup.

Step 4: Add Curry Flavor
Stir in 1 tablespoon of red Thai curry paste, balancing it with 1 tablespoon of sugar and 2 tablespoons of soy sauce. Sauté this mixture for about 1 minute, allowing the spices to bloom and release their full aroma. Your Coconut Curry Soup is starting to come together with a depth of flavor!

Step 5: Pour in Broth
Carefully pour in 3 cups of vegetable broth, scraping the bottom of the pot to release any fond bits. Increase the heat slightly to bring the mixture to a gentle simmer. This should take about 3–4 minutes, as the broth melds with the sautéed ingredients, creating a harmonious base for the soup.

Step 6: Add Coconut Milk
Once simmering, mix in 1 cup of full-fat coconut milk, stirring gently to combine. Reduce the heat to medium-low and let it return to a gentle simmer for another 2–3 minutes. This step adds a creamy richness that enhances the comforting nature of your Coconut Curry Soup.

Step 7: Cook the Dumplings
Gently add 12 to 15 frozen vegan dumplings to the pot, making sure they are evenly distributed. Allow them to cook for about 7 minutes, carefully stirring occasionally to prevent them from sticking to the pot. You’ll know they are done when they are heated through and tender to the touch.

Step 8: Final Touches
Before serving, taste the soup and adjust seasoning if needed. Spoon the soup into bowls and drizzle with 2-3 teaspoons of chili oil for added heat. Garnish each serving with chopped fresh cilantro, sliced scallion greens, and a sprinkle of crunchy garlic. Your Quick Vegan Coconut Curry Soup is now ready to be enjoyed!

Make Ahead Options

These Quick Vegan Coconut Curry Soup with Dumplings are perfect for meal prep lovers looking to save time during busy weeknights! You can chop vegetables (like onions and mushrooms) and store them in the refrigerator for up to 3 days, maintaining their freshness in airtight containers. Additionally, you can prepare the soup base (up through adding coconut milk) and refrigerate it for up to 24 hours—this way, all those lovely spices will deepen in flavor! When you’re ready to serve, simply reheat the soup, add the frozen dumplings straight from the freezer, and cook for about 7 minutes until heated through. You’ll enjoy a comforting bowl just as delicious as when freshly made!

Expert Tips for Coconut Curry Soup

  • Flavor Blooming: Bloom the red Thai curry paste in the sautéed aromatics to enhance its flavor and prevent bitterness.

  • Gentle Simmer: Once coconut milk is added, keep the soup at a gentle simmer to avoid curdling.

  • Careful Dumpling Addition: Gently place dumplings in the broth; avoid vigorous stirring to prevent breaking them apart.

  • Tasting is Key: Always taste your soup before serving. Adjust seasoning with salt or sugar to ensure a perfect flavor balance.

  • Vegetable Boost: Don’t hesitate to add extra vegetables as they not only enrich the soup but also enhance its nutrition and flavor profile.

  • Storage Tips: Store leftovers without dumplings to retain texture, adding fresh dumplings when reheating for the best Coconut Curry Soup experience.

What to Serve with Quick Vegan Coconut Curry Soup with Dumplings

As you prepare to indulge in a cozy bowl of rich and creamy soup, consider these delightful pairings that elevate your meal to new heights.

  • Steamed Jasmine Rice: A classic companion that soaks up the flavorful broth, providing a comforting base to every spoonful.

  • Cucumber Salad: A refreshing side with crisp veggies and a tangy dressing, balancing the warmth of the curry and offering a crunchy contrast.

  • Garlic Naan: Soft, buttery bread that’s perfect for dipping into the aromatic soup, enhancing the flavor experience with each bite.

  • Chili Lime Avocado Wontons: These crunchy bites introduce a zesty element that complements the creamy broth, adding an exciting flavor twist.

  • Mango Chutney: The sweet and spicy dip serves as a delightful contrast, enhancing the curry flavors while also adding a fruity touch.

  • Iced Coconut Water: Cool and hydrating, this drink echoes the coconut notes in your soup, refreshing your palate beautifully.

  • Chocolate Coconut Truffles: End your meal on a sweet note with these rich treats, mirroring the coconut essence in the soup for a harmonious conclusion.

These pairings not only complement the rich and spicy qualities of your Coconut Curry Soup but also create an inventive, well-rounded meal that will leave your taste buds singing!

How to Store and Freeze Coconut Curry Soup

Fridge: Store the Coconut Curry Soup in an airtight container for up to 4 days. Remember, the dumplings will soften as they absorb the broth, but the flavors will still remain delicious!

Freezer: If you’re looking to freeze, separate the soup base from the dumplings. The soup can be frozen for up to 3 months. Add fresh dumplings when reheating for best quality.

Reheating: To reheat, gently warm the soup on the stovetop over medium-low heat, ensuring it doesn’t boil to preserve the creamy texture. Add dumplings after thawing if they were frozen separately.

Airtight Tip: Always use airtight containers for both fridge and freezer storage to prevent freezer burn and maintain the flavors of your comforting Coconut Curry Soup.

Coconut Curry Soup Variations

Feeling adventurous? This recipe is your canvas, inviting you to add your personal touch with delightful variations!

  • Dumpling Variety: Swap out frozen vegan dumplings for meat-filled options or gluten-free dumplings, allowing you to customize the protein to your liking.
  • Veggie Boost: Toss in nutrient-rich vegetables like kale, baby spinach, or a colorful bell pepper mix for extra flavor and health benefits. Adding these veggies not only enhances the taste but transforms your soup into a vibrant feast!
  • Nutty Twist: Incorporate a tablespoon of peanut butter or almond butter into the soup for a rich, nutty flavor that beautifully complements the coconut. A warm hug of flavor awaits with this unexpected mix!
  • Heat Level: Adjust the chili oil for your spice preference—less for a mild soup or more for a fiery kick. You can also add fresh diced jalapeños for an added layer of heat!
  • Herb Freshness: Replace cilantro with fresh basil or parsley for a different aromatic profile that still brightens your dish. Their unique flavors will make your Coconut Curry Soup sing!
  • Creaminess Factor: For a lighter option, use light coconut milk, or transform it into a richer version with a splash of heavy cream at the end. Each choice brings out a different level of indulgence!
  • Curry Paste Alternatives: Experiment with different curry pastes, such as green or yellow, to create an entirely different flavor experience. Each variation creates a new journey through the world of flavors!
  • Broth Swap: Utilize chicken broth instead of vegetable broth for a hearty, meaty base. This simple switch can offer a delightful change, especially for non-vegan versions of the soup.

For those who love soup, try our lovely Old Fashioned Soup or venture into the creamy world of Mango Coconut Pudding for a sweet twist!

Quick Vegan Coconut Curry Soup with Dumplings Recipe FAQs

How do I select ripe ingredients for my Coconut Curry Soup?
Absolutely! When choosing your vegetables, look for firm, brightly colored bell peppers and fresh spinach without any wilting. Mushrooms should be firm and free of dark spots or slime, while scallions should have bright green tops. For coconut milk, opt for a can that is unopened and has no dents or swelling to ensure freshness.

What are the best storage methods for Coconut Curry Soup?
Very important! Store your Coconut Curry Soup in an airtight container in the refrigerator for up to 4 days. Just a heads up, the dumplings may get a bit softer as they absorb the broth. If you want to keep it longer, I recommend freezing the soup base without dumplings, which can last for up to 3 months when stored properly in an airtight, freezer-safe container.

How do I freeze Coconut Curry Soup with Dumplings?
The more the merrier when it comes to meal prep! To freeze, first let your soup cool completely. Then pour the soup base (without dumplings) into a freezer-safe container. Make sure to leave some space at the top for expansion. Seal tightly and label with the date. When you’re ready to enjoy, thaw in the fridge overnight, then gently heat and add fresh dumplings to ensure they cook perfectly!

What are some common troubleshooting tips for this recipe?
If the soup tastes too salty, a sprinkle of sugar can help balance it out. If it’s too thick, add a splash of vegetable broth or water to reach your desired consistency. To achieve a richer flavor, consider sautéing your aromatics for a few extra minutes before adding other ingredients. Don’t forget to taste as you go for the best results!

Can I modify this recipe for dietary restrictions?
Absolutely! This recipe is quite flexible. For gluten-free options, substitute soy sauce with tamari. If you have an allergy to coconut, you can replace the coconut milk with oat or almond milk, though the flavor will vary slightly. Always check the labels for any packaged dumplings to avoid allergens. If you’re serving this dish to pets, be cautious as garlic and onion can be harmful to them.

Coconut Curry Soup

Creamy Coconut Curry Soup That’s Ready in Just 30 Minutes

This Coconut Curry Soup is a quick, rich, and creamy dish that offers a comforting experience on chilly evenings.
Prep Time 10 minutes
Cook Time 20 minutes
Total Time 30 minutes
Servings: 4 bowls
Course: Appetizer
Cuisine: Asian, Vegan
Calories: 350

Ingredients
  

For the Broth
  • 3 cups Vegetable Broth Choose chicken broth for a non-vegan version.
  • 1 cup Coconut Milk Full-fat preferred; light coconut milk is a lighter alternative.
  • 1 tbsp Red Thai Curry Paste Swap with green curry paste for different taste.
  • Soy Sauce Tamari is a gluten-free option.
For the Dumplings
  • 12 to 15 pieces Frozen Vegan Dumplings Any vegetable, chicken, or pork dumplings can be used.
For Seasoning & Garnish
  • Salt Adjust to taste.
  • Sugar Opt for brown sugar for richer flavor.
  • 2-3 tsp Chili Oil Adjust according to spice tolerance.
  • 1 tbsp Chopped Fresh Cilantro Parsley can be substituted.
  • 1 tbsp Sliced Scallion Greens For garnish.
  • 1 tbsp Crunchy Garlic
For the Vegetables
  • 1 cup Diced Onion Shallots can be used for a sweeter profile.
  • 1 tbsp Minced Garlic Fresh garlic powder (1 tsp) can be used.
  • ½ cup Chopped Cremini Mushrooms Substitute with button mushrooms if needed.
  • 4 Scallions White parts sautéed for flavor; greens used as garnish.

Equipment

  • Heavy-bottom pot

Method
 

Cooking Steps
  1. Heat 2 tablespoons of avocado oil in a heavy-bottom pot over medium-low heat until shimmering.
  2. Sauté 1 cup of diced onion, white parts of 4 chopped scallions, and 1 tablespoon of minced garlic with a pinch of salt for 5–7 minutes.
  3. Add ½ cup of chopped cremini mushrooms and cook for another 4–5 minutes.
  4. Stir in 1 tablespoon of red Thai curry paste, 1 tablespoon of sugar, and 2 tablespoons of soy sauce for 1 minute.
  5. Pour in 3 cups of vegetable broth and bring to a gentle simmer, about 3–4 minutes.
  6. Mix in 1 cup of full-fat coconut milk and simmer for 2–3 minutes.
  7. Gently add 12 to 15 frozen vegan dumplings and cook for 7 minutes, stirring occasionally.
  8. Adjust seasoning if needed before serving and garnish with chili oil, cilantro, scallion greens, and crunchy garlic.

Nutrition

Serving: 1bowlCalories: 350kcalCarbohydrates: 40gProtein: 10gFat: 18gSaturated Fat: 9gPolyunsaturated Fat: 1gMonounsaturated Fat: 7gSodium: 800mgPotassium: 500mgFiber: 4gSugar: 4gVitamin A: 200IUVitamin C: 5mgCalcium: 50mgIron: 2mg

Notes

Store leftovers without dumplings to retain texture. Add fresh dumplings when reheating.

Tried this recipe?

Let us know how it was!

Baked Apple Pie Rice Paper Rolls: A Cozy Vegan Delight

The aroma of cinnamon and baked apples wafts through my kitchen, coloring my day with warmth and nostalgia. Guess what? You can enjoy that same comforting feeling, but in a fun, handheld form with my Baked Apple Pie Rice Paper Rolls! These delightful treats combine the beloved flavors of traditional apple pie with a modern twist that’s not only gluten-free and vegan but also incredibly easy to whip up. Perfect for satisfying a sweet tooth or impressing guests, these rolls come together in just 45 minutes. They’re light yet satisfying, making them a great healthy snack or dessert option without the fuss. Curious to discover the secrets behind creating these crispy, flavorful bites that are bound to become your new favorite? Let’s dive in!

Why Are These Rolls So Irresistible?

Unique Flavor Fusion: Each bite captures the essence of classic apple pie, wrapped in a chewy rice paper that’s as fun to eat as it is delicious.

Quick and Easy: With just 5 simple ingredients, you can whip up these delightful rolls in just 45 minutes—perfect for those seeking a homemade treat without the hassle.

Health-Conscious Treat: These Baked Apple Pie Rice Paper Rolls are gluten-free and vegan, making them a delightful option for anyone looking to indulge guilt-free.

Versatile Variations: Don’t hesitate to experiment! Swap in pears or peaches, add nuts for crunch, or drizzle with a light glaze for an extra touch of sweetness.

Crowd-Pleasing Dessert: Whether enjoyed warm as a standalone treat or paired with a scoop of dairy-free ice cream, these rolls are sure to impress family and friends alike!

For more delicious treats, check out my recipe for Honey Butter Brioche Rolls or try some comforting Baked Vegetable Egg Casserole.

Baked Apple Pie Rice Paper Rolls Ingredients

For the Filling

  • Apples – These provide natural sweetness and the primary flavor; choose any variety you love, from tart Granny Smith to sweet Fuji.
  • Brown Sugar – Adds sweetness with a caramel touch; swap for coconut sugar if you prefer a lower glycemic option.
  • Cinnamon – Enhances the apple flavor while adding warmth; no substitutions needed, but feel free to add a hint of nutmeg for an extra layer of spice.

For the Wrapping

  • Rice Paper – This chewy wrapper holds the delightful filling; you can find it in most grocery stores or Asian markets.
  • Cooking Oil – Ensures the rolls turn crispy when baked; any neutral oil, like vegetable or coconut oil, works great.

Now that you have all the ingredients ready, let’s roll up our sleeves and create these delightful Baked Apple Pie Rice Paper Rolls!

Step‑by‑Step Instructions for Baked Apple Pie Rice Paper Rolls

Step 1: Prep Apples
Begin by peeling and slicing your apples into thin pieces, aiming for uniform sizes for even cooking. In a large bowl, mix the sliced apples with brown sugar and a generous sprinkle of cinnamon. Allow this to sit for about 10 minutes, letting the flavors meld and the juices begin to release, which enhances the natural sweetness of the filling.

Step 2: Soak Rice Paper
In a shallow bowl, fill it with warm water. Dip each rice paper sheet into the water, ensuring it’s submerged until soft but still slightly firm, about 10-15 seconds. Carefully remove the sheet and lay it flat on a clean, damp surface. The rice paper should be pliable yet not overly soggy, making it perfect for wrapping your filling later on.

Step 3: Roll Filling
Take 1-2 tablespoons of the apple mixture and place it in the center of the soft rice paper. Fold the bottom over the filling, then tuck in the sides and roll tightly, like a burrito. Make sure to keep the edges wet while rolling to prevent tearing and ensure a secure seal. Continue this process until all the apple filling is wrapped in the rice paper.

Step 4: Prepare for Baking
Preheat your oven to 450°F (232°C) and line a baking sheet with parchment paper or lightly oil it. Place the rolled rice paper intact on the sheet, ensuring they’re spaced evenly. Brush the tops of each roll with a bit of cooking oil for a golden finish, enhancing the crispiness while baking, and prepare to bake these tasty Baked Apple Pie Rice Paper Rolls.

Step 5: Bake
Slide the baking sheet into your preheated oven and bake the rolls for 20-25 minutes. Keep an eye on them, turning occasionally for even browning. You’ll know they’re done when the rolls are golden brown and crispy, filling your kitchen with the warm aroma reminiscent of a classic apple pie, making them an irresistible treat.

Make Ahead Options

These Baked Apple Pie Rice Paper Rolls are perfect for busy home cooks who love to meal prep! You can prepare the apple filling up to 24 hours in advance by mixing the sliced apples with brown sugar and cinnamon, then refrigerating it in an airtight container. Additionally, you can soak the rice paper and roll the filling up to 3 days before serving; simply store the pre-rolled rolls in the fridge, covered with a damp cloth to prevent drying out. When you’re ready to enjoy these delightful treats, just brush them with oil and bake at 450°F (232°C) for 20-25 minutes until golden and crispy, ensuring a delicious dessert that’s practically effortless!

Expert Tips for Baked Apple Pie Rice Paper Rolls

  • Perfectly Soaked Rice Paper: Avoid overly soaking the rice paper; it should be soft yet firm, preventing sogginess that can lead to tearing.

  • Control Juiciness: If using juicy apples, allow them to sit with sugar for a few minutes to release excess moisture before wrapping, ensuring a balanced filling.

  • Sealing the Edges: Keep the edges of the rice paper moist while rolling to create a secure seal and prevent any leaks during baking, ensuring delightful Baked Apple Pie Rice Paper Rolls.

  • Uniform Cooking: For even baking, ensure rolls are spaced apart on the baking sheet. This allows hot air to circulate and crisp each roll beautifully.

  • Golden Finish: Brush the tops with oil for a stunning golden color and extra crispiness. You’ll be rewarded with a visually appealing and crave-worthy dessert!

  • Enjoy Fresh: These rolls are best served warm and fresh! If storing leftovers, keep them in an airtight container and reheat briefly in the oven for crispiness.

What to Serve with Baked Apple Pie Rice Paper Rolls

Indulging in warm, golden Baked Apple Pie Rice Paper Rolls creates a cozy atmosphere perfect for gathering around the table with loved ones.

  • Vanilla Coconut Ice Cream: The creamy, sweet notes of vanilla coconut ice cream pair wonderfully with the warm spices and apples, providing a refreshing contrast. A scoop makes each bite even more delightful!

  • Caramel Dipping Sauce: Drizzling warm caramel over the rolls enhances their sweetness and adds a luxurious touch, making these treats feel extra special.

  • Mixed Green Salad: A light salad with arugula, sliced apple, and a tangy vinaigrette balances the richness of the rolls, adding a refreshing crunch that elevates the meal.

  • Sweetened Almond Milk: This creamy drink complements the apple flavors beautifully while keeping the dessert theme. Serve it warm for a comforting pairing.

  • Chai Tea: The aromatic spices of chai tea echo the cinnamon in the rolls, creating a warming, aromatic experience that wraps you in comfort with every sip.

  • Cinnamon Sugar Dust: A light sprinkle of cinnamon sugar on top adds a delightful sweetness and enhances the overall flavor, bringing a familiar dessert vibe to your table.

  • Fresh Berries: A side of juicy, fresh berries adds a burst of color and tartness, beautifully contrasting the sweetness of the rolls and offering a palette of flavors.

  • Lemon Sorbet: For a refreshing, light option, serve lemon sorbet as a palate cleanser between bites, highlighting the sweet apple while refreshing the senses.

How to Store and Freeze Baked Apple Pie Rice Paper Rolls

Fridge: Store any leftover baked rolls in an airtight container for up to 2 days. This helps maintain their flavor and ideal texture.

Freezer: For longer storage, freeze the unbaked rolls by arranging them on a baking sheet; once frozen, transfer to a zip-top bag for up to 3 months.

Reheating: To enjoy left-over Baked Apple Pie Rice Paper Rolls, reheat them in a preheated oven at 350°F (175°C) for about 10 minutes to regain that crispy, golden texture.

Make-Ahead: Prepare the filling and roll the rice paper ahead of time, storing them separately until you’re ready to bake for a fresh treat!

Baked Apple Pie Rice Paper Rolls Variations

Feel free to let your creativity shine and customize your Baked Apple Pie Rice Paper Rolls with these delightful variations!

  • Pear Substitution: Swap apples for ripe pears for a sweeter, softer filling that offers a unique flavor twist.
    Pears work wonderfully when they’re slightly ripe, adding a lovely creaminess to the rolls.

  • Nutty Crunch: Stir in a handful of chopped pecans or walnuts into the apple mixture for added texture and crunch.
    Nuts not only enhance the flavor but also provide a satisfying bite that contrasts beautifully with the soft filling.

  • Peach Surprise: Replace apples with juicy peaches for a summery take on these rolls.
    Peaches will deliver a different yet equally luscious experience, reminding you of warm summer days with every bite.

  • Chocolate Drizzle: After baking, drizzle melted dark chocolate over the rolls for an indulgent finish.
    The rich chocolate pairs beautifully with the sweet apple filling, creating a delectable dessert that feels extra special.

  • Spiced Up: Add a pinch of nutmeg or allspice to your apple mixture for an extra layer of warmth and complexity.
    These spices bring depth and a comforting scent reminiscent of festive gatherings and cozy evenings.

  • Glazed Goodness: Whip up a simple glaze using powdered sugar and almond milk, and drizzle it over the baked rolls.
    This sweet touch elevates your rolls, making them even more irresistible and perfect for special occasions.

  • Serving Styles: Serve the rolls alongside a scoop of your favorite dairy-free ice cream for a delightful contrast in temperature and texture.
    Ice cream not only enhances the flavor experience but turns these rolls into an elegant dessert that’s hard to resist.

For more delightful variations in your cooking adventures, explore my Air Fryer Baked Potatoes or treat yourself to a comforting Shepherd’s Pie Ground!

Baked Apple Pie Rice Paper Rolls Recipe FAQs

What kind of apples should I use for the filling?
Absolutely! You can use any variety of apples that you love. For a tart flavor, Granny Smith works beautifully, while Fuji or Honeycrisp offers delightful sweetness. The key is to choose apples that are crisp and flavorful to make your filling shine.

How can I store leftover Baked Apple Pie Rice Paper Rolls?
These rolls can be stored in an airtight container in the refrigerator for up to 2 days. To keep them fresh and maintain their delightful texture, make sure they are completely cooled before storing. Just remember that they taste best when served warm!

Can I freeze these rice paper rolls?
Yes! To freeze unbaked Baked Apple Pie Rice Paper Rolls, lay them flat on a baking sheet without touching each other and place them in the freezer until solid. After about 2 hours, transfer them to a zip-top bag to save space and store for up to 3 months. When you’re ready to bake, pop them straight into the oven without defrosting—just add a few extra minutes to the baking time!

What if my rice paper tears while rolling?
Don’t worry, it happens to the best of us! If your rice paper tears, simply overlap the torn edges and continue rolling. Alternatively, you can use a second piece of rice paper to wrap your filling completely. Just remember to keep the edges damp while you work to minimize tears.

Are Baked Apple Pie Rice Paper Rolls suitable for a gluten-free diet?
Yes, definitely! These rolls are made using rice paper, which is naturally gluten-free. Just double-check that your sugar and any additional ingredients, like nuts, do not contain gluten, ensuring everyone can enjoy this cozy dessert worry-free.

How can I add extra sweetness without using sugar?
Certainly! If you’re looking to sweeten your filling without traditional sugar, try adding mashed ripe bananas or a splash of pure maple syrup. Both options will lend a natural sweetness while complementing the apple flavor beautifully.

Baked Apple Pie Rice Paper Rolls

Baked Apple Pie Rice Paper Rolls: A Cozy Vegan Delight

Baked Apple Pie Rice Paper Rolls are a cozy vegan delight with the beloved flavors of traditional apple pie, wrapped in crispy rice paper.
Prep Time 15 minutes
Cook Time 25 minutes
Total Time 45 minutes
Servings: 8 rolls
Course: Dessert
Cuisine: Vegan
Calories: 150

Ingredients
  

For the Filling
  • 2 cups Apples Choose any variety you love.
  • 1/2 cup Brown Sugar Can swap for coconut sugar.
  • 2 teaspoons Cinnamon Optional to add nutmeg.
For the Wrapping
  • 8 sheets Rice Paper
  • 2 tablespoons Cooking Oil Any neutral oil works.

Equipment

  • Baking Sheet
  • Parchment paper
  • shallow bowl

Method
 

Step-by-Step Instructions
  1. Prep Apples: Peel and slice apples into thin pieces. Mix with brown sugar and cinnamon. Let sit for about 10 minutes.
  2. Soak Rice Paper: Dip each rice paper sheet in warm water for 10-15 seconds, then lay flat on a damp surface.
  3. Roll Filling: Place 1-2 tablespoons of apple mixture in the center of the rice paper. Fold and roll tightly.
  4. Prepare for Baking: Preheat oven to 450°F (232°C) and line a baking sheet. Brush rolls with cooking oil.
  5. Bake: Bake rolls for 20-25 minutes until golden brown and crispy.

Nutrition

Serving: 1rollCalories: 150kcalCarbohydrates: 30gProtein: 1gFat: 5gSaturated Fat: 1gSodium: 8mgPotassium: 150mgFiber: 2gSugar: 10gVitamin A: 50IUVitamin C: 2mgCalcium: 10mgIron: 0.5mg

Notes

These rolls are best served warm and fresh. Store in an airtight container for up to 2 days in the fridge or freeze unbaked for up to 3 months.

Tried this recipe?

Let us know how it was!

Keto Garlic Knots: Your New Favorite Low-Carb Snack

As I kneaded the dough, the warm aroma of garlic and cheese surrounded me like a comforting hug. I knew I was onto something special with these Easy Keto Garlic Knots. Perfect for those busy weeknights, this low-carb treat takes just 10 minutes of prep time—and trust me, that’s a total game-changer when you’re juggling dinner plans. Not only do these knots satisfy those carb cravings, but they also deliver a delightful, chewy texture that rivals traditional garlic knots. Imagine pulling apart a steaming, buttery morsel, topped with fragrant minced garlic and cheesy goodness. Ready to impress your taste buds without the guilt? Stick around, because these are sure to become your new go-to snack!

Why Are These Keto Garlic Knots Irresistible?

Convenience at Its Finest: With just 10 minutes of prep time, you’ll have freshly baked knots ready to go!
Flavor Explosion: Each bite bursts with garlic and buttery goodness, ensuring satisfaction in every morsel.
Low-Carb Delight: Enjoy the traditional taste of garlic knots without the guilt of carbs, making them perfect for your keto lifestyle.
Flexible Variations: From spicy jalapeños to fresh herbs, you can customize these knots to suit any palate—ideal for family meals!
Crowd-Pleaser: Serve them at gatherings or weeknight dinners, and watch them disappear faster than you can say “keto!” Don’t forget to pair them with your favorite dipping sauce, just like with my Honey Garlic Shrimp or Lemon Garlic Shrimp!

Keto Garlic Knots Ingredients

  • For the Dough
    Shredded Mozzarella Cheese – Essential for that chewy texture; make sure it’s well-shredded for easy melting.
    Blanched Almond Flour – Keeps the recipe low-carb; avoid almond meal for a smoother consistency.
    Cream Cheese – Adds creaminess and richness to the knots; farmer’s cheese can work as a substitute.
    Large Egg – Binds the dough together; mix thoroughly until there are no dry bits.
    Garlic Powder – Infuses the dough with delightful garlic flavor without the grit.
    Italian Seasoning – Boosts the savory profile of your knots.
    Baking Powder – Helps the dough rise, giving it a fluffy texture.
    Salt – Balances the flavors perfectly; be mindful if you’re using garlic salt.

  • For the Topping
    Minced Garlic – Freshly added on top for an aromatic boost in flavor.
    Butter – Creates a rich, indulgent flavor when brushed over your baked knots.
    Grated Parmesan Cheese – Offers a savory topping that perfectly complements the Keto Garlic Knots.

Step‑by‑Step Instructions for Easy Keto Garlic Knots

Step 1: Preheat the Oven
Begin by preheating your oven to 350°F (175°C). This temperature ensures that your Easy Keto Garlic Knots bake evenly, developing a beautifully golden brown exterior. While the oven heats up, gather all your ingredients and equipment, including a mixing bowl and a baking dish, to streamline your cooking process.

Step 2: Prepare the Baking Dish
Grease a baking dish with butter or a nonstick oil spray. This helps to prevent your Keto Garlic Knots from sticking and ensures they slide out easily once baked. Use a brush or paper towel to spread the grease evenly across the bottom and sides of the dish, getting ready for your delightful knots.

Step 3: Combine Dry Ingredients
In a large mixing bowl, combine blanched almond flour, minced garlic, Italian seasoning, baking powder, and salt. Stir these ingredients together until they are thoroughly mixed. This will create the flavorful base for your dough, ensuring that every cheesy knot is infused with delicious garlic and Italian flavors.

Step 4: Melt the Cheese
Add the shredded mozzarella cheese and cream cheese to the dry ingredient mixture. Microwave this combo for about 40-45 seconds or until the cheeses have melted together into a gooey mixture. This melting will give your Keto Garlic Knots their signature chewy texture. Stir well to combine everything into a cohesive dough.

Step 5: Mix in the Egg
Once the cheese mixture is smooth, add the large egg to the bowl. Mix vigorously until you see no dry bits remaining in your dough. The egg acts as a binder, bringing the ingredients together and ensuring your Keto Garlic Knots hold their shape while baking.

Step 6: Shape the Dough
Divide the dough into 8 equal pieces. With each piece, roll it gently into a log and then shape it into a knot. Make sure to secure the ends well as you twist, so they stay together during baking. Place each formed knot on a prepared baking sheet, leaving about 1 inch of space between each.

Step 7: Brush with Garlic Butter
Melt some butter and mix in additional minced garlic. Brush this fragrant mixture generously over each knot. This step adds a rich, buttery flavor that enhances your Keto Garlic Knots’ deliciousness. Don’t forget to sprinkle grated parmesan cheese over the top for an extra savory touch.

Step 8: Bake to Perfection
Bake your Keto Garlic Knots in the preheated oven for about 25 minutes. Keep an eye on them, looking for a golden brown color and the aroma of baked garlic filling your kitchen. You’ll know they’re ready when they are puffed up and lightly browned, promising that delightful, chewy texture.

Step 9: Cool and Serve
Once baked to perfection, remove the garlic knots from the oven and allow them to cool slightly. They’ll be hot and aromatic. Serve them warm, and maybe pair with your favorite dipping sauce for a delightful snack or side dish. These Easy Keto Garlic Knots are sure to be a hit!

What to Serve with Easy Keto Garlic Knots

Looking to create a delightful meal that perfectly complements these chewy, buttery bites? Let’s explore some fantastic pairings!

  • Marinara Sauce: Perfect for dipping, it adds a sweet and tangy flavor that beautifully contrasts the knots’ rich garlic goodness.

  • Fresh Garden Salad: Light and crunchy, a salad with mixed greens and a zesty vinaigrette balances the richness of the knots, providing a refreshing bite.

  • Italian Sausage: The savory and spicy notes from grilled or roasted sausage create a hearty meal alongside the Keto Garlic Knots, enhancing their Italian flair.

  • Roasted Vegetables: Tender, slightly caramelized veggies add a burst of color and nutrition, making for a well-rounded plate that satisfies.

  • Pesto Dip: This herby, nutty sauce complements the cheesy knots, adding a delicious depth of flavor that makes for an unforgettable duo.

  • Cheesy Cauliflower Mash: Creamy and low-carb, this mash yields a satisfying texture alongside the knots—perfect for a comforting feel at dinner.

  • Crisp White Wine: A glass of chilled Sauvignon Blanc or Pinot Grigio elevates the dining experience, refreshing your palate between bites.

  • Garlic Butter Shrimp: Juicy shrimp brushed with garlic butter echoes the flavors of the knots, crafting a flavorful seafood twist to your meal.

  • Tiramisu: For dessert, this rich and creamy Italian treat adds a sweet finish to your meal, melding beautifully with the savory knots you’ve just devoured.

Keto Garlic Knots Variations & Substitutions

Feel free to add your own unique spin to these delicious keto garlic knots—get ready to play with flavors and textures!

  • Herb Boost: Swap Italian seasoning for fresh herbs like parsley or basil for a garden-fresh twist. The vibrant flavors will brighten your knots, making every bite a delight.

  • Spicy Kick: Add minced jalapeños or crushed red pepper for a spicy version. Feel the warmth build with every chew, perfect for those who love heat in their snacks!

  • Cheesy Twist: Experiment with different cheeses like pepper jack or gouda instead of mozzarella. This change introduces a whole new flavor profile, creating knots that are creamy and intriguing.

  • Nut-Free Alternative: For a nut-free option, replace almond flour with sunflower seed flour. These knots will still deliver that delicious chewy texture while catering to different dietary needs.

  • Dairy-Free Delight: To make these knots dairy-free, use vegan cream cheese and margarine for the topping. Enjoy a guilt-free treat that everyone can savor!

  • Zesty Surprise: Add lemon juice or zest to the dough for a zesty twist. This subtle addition brightens the overall flavor, making each knot a refreshing experience.

  • Garlic Lovers Unite: Double down on garlic by sautéing fresh minced garlic in olive oil before brushing it over the knots. The rich, aromatic flavor will have garlic enthusiasts cheering!

  • Sourdough Vibe: For a tangy twist, incorporate a tablespoon of sourdough starter into your dough. This not only gives an exciting depth of flavor but also enhances that lovely chewiness!

And while you’re at it, why not pair these knots with a warm marinara sauce? It makes for an irresistible dipping experience—just like with my delightful Garlic Butter Shrimp! Enjoy your culinary journey!

How to Store and Freeze Keto Garlic Knots

Room Temperature: Keep uneaten knots at room temperature for up to 2 hours to maintain freshness and texture.

Fridge: Store in an airtight container for up to 1 week. To enjoy them warm, reheat in the oven at 350°F (175°C) for optimal softness.

Freezer: Freeze uncooked knots for up to 1 week. When ready to bake, simply place them in the oven from frozen, adding a few extra minutes to the cooking time.

Reheating: For best results, reheat baked Keto Garlic Knots in the oven to restore their delightful chewiness. Avoid microwaving, as it may cause them to become tough.

Expert Tips for Keto Garlic Knots

  • Quality Cheese Matters: Always use high-quality, well-shredded mozzarella for the best melting results and chewy texture in your keto garlic knots.
  • Avoid Grittiness: Ensure you’re using blanched almond flour instead of almond meal. This helps create a smooth, enjoyable dough free from grittiness.
  • Mix Thoroughly: Incorporate the egg fully into the dough. This prevents any dry bits from remaining, ensuring a consistent and tender result.
  • Reheating Tips: To maintain the fluffy texture of your leftovers, reheat them in the oven instead of the microwave, which can make them tough.
  • Watch Cooking Time: Keep an eye on the baking process—oven temperatures may vary, and you want perfectly golden brown knots, not overly brown or burnt!

Make Ahead Options

These Easy Keto Garlic Knots are perfect for meal prep, saving you precious time on busy weeknights! You can prepare the dough up to 24 hours in advance by mixing all the dry ingredients and then combining them with the melted cheese and egg. Simply refrigerate the formed dough in an airtight container. When you’re ready to enjoy, let the dough sit at room temperature for about 30 minutes before shaping it into knots and baking. This step prevents the dough from becoming too cold, ensuring they bake just as deliciously fluffy and golden. You can also freeze uncooked knots for up to 1 week; just bake them straight from the freezer with a few extra minutes added to the baking time. Enjoy the convenience of having these delightful Keto Garlic Knots ready to go!

Keto Garlic Knots Recipe FAQs

How do I choose the right mozzarella cheese for these knots?
Absolutely! For the best results, opt for high-quality, well-shredded mozzarella cheese. This type melts beautifully, ensuring that your Keto Garlic Knots have that perfect chewy texture. Avoid pre-shredded cheese blends that often contain anti-caking agents which can alter the melting process.

How should I store leftover Keto Garlic Knots?
Very! Leftover knots should be stored in an airtight container in the fridge for up to 1 week. To reheat, place them in a preheated oven at 350°F (175°C) for about 5-10 minutes. This method keeps them fluffy, ensuring that they taste freshly baked.

Can I freeze Keto Garlic Knots?
Certainly! You can freeze uncooked Keto Garlic Knots for up to 1 week. To do this, shape the knots and place them on a baking sheet in the freezer until solid. Once frozen, transfer the knots to a freezer-safe bag or container. When ready to bake, you can bake them directly from frozen; just add an extra 5-10 minutes to the baking time until they’re golden brown!

What if my dough is too sticky or dry?
Don’t worry; troubleshooting is part of cooking! If your dough is too sticky, try adding a bit more almond flour, a tablespoon at a time, until you reach a less sticky consistency. On the other hand, if it’s too dry, mix in a tiny bit of cream cheese or an additional egg to bring it together. Always mix well after adding!

Are Keto Garlic Knots pet-friendly?
It’s best to avoid sharing these knots with pets, particularly because of the garlic. While we enjoy garlic for its flavor, it can be harmful to dogs. Always check with your veterinarian if you’re unsure about certain ingredients!

Are there any common allergens in these Garlic Knots?
Absolutely! This recipe contains dairy (mozzarella cheese and cream cheese) and almonds (in the almond flour). If you have allergies, consider substituting with dairy-free cheese options and using sunflower seed flour or coconut flour instead of almond flour for a nut-free alternative. Always ensure that your substitutions fit your dietary needs!

Keto Garlic Knots

Keto Garlic Knots: Your New Favorite Low-Carb Snack

These Keto Garlic Knots are a delightful low-carb snack, bursting with garlic and cheesy goodness, perfect for those on a keto diet.
Prep Time 10 minutes
Cook Time 25 minutes
Total Time 35 minutes
Servings: 8 knots
Course: Appetizer
Cuisine: Keto
Calories: 150

Ingredients
  

For the Dough
  • 2 cups Shredded Mozzarella Cheese Essential for that chewy texture; make sure it’s well-shredded for easy melting.
  • 1 cup Blanched Almond Flour Keeps the recipe low-carb; avoid almond meal for a smoother consistency.
  • 4 oz Cream Cheese Adds creaminess and richness to the knots; farmer’s cheese can work as a substitute.
  • 1 large Egg Binds the dough together; mix thoroughly until there are no dry bits.
  • 1 tsp Garlic Powder Infuses the dough with delightful garlic flavor without the grit.
  • 1 tsp Italian Seasoning Boosts the savory profile of your knots.
  • 1 tsp Baking Powder Helps the dough rise, giving it a fluffy texture.
  • 1/2 tsp Salt Balances the flavors perfectly; be mindful if you’re using garlic salt.
For the Topping
  • 3 cloves Minced Garlic Freshly added on top for an aromatic boost in flavor.
  • 2 tbsp Butter Creates a rich, indulgent flavor when brushed over your baked knots.
  • 1/4 cup Grated Parmesan Cheese Offers a savory topping that perfectly complements the Keto Garlic Knots.

Equipment

  • Mixing Bowl
  • Baking dish

Method
 

Step-by-Step Instructions for Easy Keto Garlic Knots
  1. Preheat your oven to 350°F (175°C).
  2. Grease a baking dish with butter or a nonstick oil spray.
  3. Combine blanched almond flour, minced garlic, Italian seasoning, baking powder, and salt in a large mixing bowl.
  4. Add the shredded mozzarella cheese and cream cheese to the dry ingredient mixture and microwave for about 40-45 seconds until melted.
  5. Add the large egg to the mixture and mix vigorously until no dry bits remain.
  6. Divide the dough into 8 equal pieces, shape each piece into a knot, and place on a prepared baking sheet.
  7. Melt some butter, mix in additional minced garlic, and brush this over each knot. Sprinkle with grated parmesan cheese.
  8. Bake for about 25 minutes or until golden brown.
  9. Cool slightly after baking and serve warm, optionally with a dipping sauce.

Nutrition

Serving: 1knotCalories: 150kcalCarbohydrates: 5gProtein: 6gFat: 12gSaturated Fat: 7gPolyunsaturated Fat: 1gMonounsaturated Fat: 4gCholesterol: 30mgSodium: 200mgPotassium: 100mgFiber: 3gSugar: 1gVitamin A: 500IUCalcium: 200mgIron: 1mg

Notes

These Keto Garlic Knots are perfect for a low-carb snack and are sure to please a crowd. Customize with herbs or spices as desired.

Tried this recipe?

Let us know how it was!

Irresistible Cottage Cheese Wraps: A Protein-Packed Delight

It was a busy afternoon, and I needed a quick, satisfying meal that wouldn’t weigh me down. That’s when I stumbled upon these Irresistible Cottage Cheese Wraps—a delightful solution that combines protein-packed goodness with low prep time, perfect for a guilt-free breakfast, lunch, or dinner! What I love most about this recipe is how effortlessly it adapts to your tastes; whether you’re craving something fresh and crunchy or savory and warm, the customizable fillings ensure every bite is just right. Plus, they’re meal prep-friendly, so you can whip up a batch ahead of time and dive into healthy, homemade goodness without the fuss. Want to discover how easy it is to make your own wraps that are not only delicious but also stay vibrant and fresh? Let’s jump in and create a wrap that’s totally your own!

Why You’ll Crave These Wraps

Customizable fillings let you tailor each wrap to your unique cravings—swap in grilled chicken or roasted veggies for endless flavor combinations! Protein-Packed goodness ensures you stay full and satisfied, making it a great option for any meal. Quick Preparation fits seamlessly into your busy schedule; in under an hour, you can enjoy these delicious wraps! Plus, they’re meal prep friendly, allowing you to easily whip up a batch to enjoy throughout the week. If you love creative, nutritious dishes, these Cheeseburger Pockets or savory Cheddar Mac Cheese are fantastic pairings for a complete meal.

Irresistible Cottage Cheese Wrap Ingredients

Want to make the most delicious and satisfying cottage cheese wraps? Here’s everything you need!

For the Wraps

  • Cottage Cheese – This is the star ingredient that provides protein and structure; feel free to choose full-fat for more sturdiness!
  • Egg – Acts as a binder to hold your wraps together perfectly.
  • Salt – A little goes a long way in enhancing the flavor of your wraps.
  • Italian Seasoning – Adds a savory depth; switch it with oregano or basil for a twist.
  • Garlic Powder – Infuses the wrap with delicious flavor, but can be omitted for a milder taste.

For the Fillings

  • Mozzarella Cheese – Creamy goodness that melts beautifully, helping to hold your wrap together.
  • Arugula – Provides a peppery freshness that brightens up the flavors.
  • Roasted Red Peppers – Add sweetness and a delightful texture; fresh bell peppers work too!
  • Cucumber – Offers that crispy crunch; zucchini is a great alternative if you prefer.
  • Avocado – Adds richness and creaminess, making every bite more luxurious.

For Drizzling

  • Balsamic Glaze – A tangy finish that elevates the entire dish; use it sparingly to keep wraps from getting soggy.

For Garnishing

  • Basil – Freshness that complements all the flavors; feel free to swap with spinach or leave it out if you prefer.

Now you’re ready to bring your Irresistible Cottage Cheese Wraps to life! Enjoy the process of creating and customizing these delightful and nutritious wraps.

Step‑by‑Step Instructions for Irresistible Cottage Cheese Wraps

Step 1: Blend the Batter
In a blender or food processor, combine the cottage cheese, egg, salt, Italian seasoning, and garlic powder. Blend until the mixture is smooth and creamy, which should take about 30 seconds. This flavorful batter will be the foundation for your Irresistible Cottage Cheese Wraps.

Step 2: Prepare the Oven
Preheat your oven to 350°F (175°C) while you prepare the baking sheet. Line a large baking sheet with parchment paper to prevent sticking. This ensures that your wraps bake evenly and come off the sheet without any hassle.

Step 3: Spread the Batter
Using a spatula, carefully spread the cottage cheese batter onto the lined baking sheet, creating an even layer about 1/8 inch thick. It’s important to keep it thin for optimal texture. Make sure the edges are neat so the wraps bake uniformly for that perfect pliability.

Step 4: Bake the Wraps
Place the baking sheet in the preheated oven and bake for 25-35 minutes. You’ll know the wraps are ready when they turn golden and set, being flexible enough to gently press with your fingers. Keep an eye on them to prevent over-baking, which can lead to dryness.

Step 5: Cool for Handling
Once baked, remove the wraps from the oven and allow them to cool for about 5 minutes. This cooling period helps firm up the wraps, making them easier to handle without tearing. Enjoy the delightful aroma wafting through your kitchen.

Step 6: Slice and Prepare Fillings
While the wraps cool, take this time to prepare your fillings. Slice the cucumber and avocado, and gather your arugula, roasted red peppers, and any additional toppings you wish to include. This step allows you to customize your Irresistible Cottage Cheese Wraps to your taste!

Step 7: Assemble the Wraps
Begin layering your fillings by placing mozzarella cheese, arugula, roasted red peppers, cucumber slices, avocado, and basil in the center of each wrap. Depending on your preference, feel free to sprinkle a pinch of salt and pepper over the fillings before you roll.

Step 8: Roll the Wraps
Carefully roll each wrap tightly like a burrito, starting from the side where you’ve laid down your fillings. Ensuring they are snug will help keep everything together when you slice them for serving. The cottage cheese wrap should hold its shape beautifully without falling apart.

Step 9: Drizzle and Serve
Just before serving, drizzle each wrap lightly with balsamic glaze for a tangy and delicious finish. Serve immediately for the best experience, showcasing your Irresistible Cottage Cheese Wraps as a delightful meal perfect for any time of day.

Expert Tips for Irresistible Cottage Cheese Wraps

  • Spread Thinly: A thin battery layer ensures pliability; thick wraps can turn rubbery and hard to roll.

  • Cool Completely: Let the wraps cool for at least 5 minutes; this helps prevent tearing when you handle them.

  • Avoid Sogginess: Don’t overload your wraps with wet ingredients; use drier fillings to keep them crisp.

  • Use Quality Cheese: Opt for high-quality mozzarella, like Galbani, as it melts beautifully and binds your wrap together seamlessly.

  • Customize Wisely: Experiment with fillings, but balance wet and dry ingredients for the best texture in your Irresistible Cottage Cheese Wraps.

Irresistible Cottage Cheese Wraps Variations

Get ready to personalize your cottage cheese wraps and create a delightful meal bursting with flavors and textures!

  • Dairy-Free: Substitute cottage cheese with blended silken tofu for a creamy, non-dairy alternative that still packs a protein punch. You’ll find this version incredibly versatile and delicious.

  • Spicy Kick: Add some diced jalapeños or a sprinkle of crushed red pepper to your fillings for a fiery twist. This will elevate the flavor profile, igniting your taste buds with every bite!

  • Savory Turkey: Swap in sliced turkey breast for a lean protein option that pairs beautifully with the wraps’ creamy fillings. This could be a fantastic lunch idea that keeps things interesting yet satisfying.

  • Mediterranean Flair: Use feta cheese, tomatoes, and olives for a Mediterranean twist on your wraps. The tang of feta combined with fresh herbs like oregano creates an explosion of vibrant flavors!

  • Breakfast Boost: Fill your wraps with scrambled eggs, spinach, and a sprinkle of feta for a hearty breakfast option. The added protein will keep you fueled throughout the morning while offering satisfying flavor.

  • Crunchy Alternatives: Experiment with different textures by adding shredded carrots or thinly sliced radishes. These add a delightful crunch and fresh flavor that complements the creamy components perfectly.

  • Sweet Option: Combine cottage cheese with sliced strawberries and a drizzle of honey for a sweet wrap. It’s a unique way to enjoy this recipe for a light dessert or breakfast treat!

  • Gourmet Greens: Try using arugula or kale, instead of traditional lettuce, for added depth and nutrient density. These leafy greens pack a refreshing punch, making your wraps exciting and colorful.

Feel free to let your creativity shine and mix up these delicious variations whenever you’re in the mood for something different! If you’re looking for more ideas, try pairing these wraps with a vibrant salad or give my Strawberry Cheesecake Bars a go for dessert after!

Storage Tips for Irresistible Cottage Cheese Wraps

  • Fridge: Store leftover wraps in an airtight container for up to 3 days. Keep the fillings separate to avoid sogginess, ensuring your delicious wraps remain fresh.
  • Freezer: For longer storage, freeze the plain cottage cheese wraps for up to 1 month. Wrap them tightly in plastic wrap and store them in a freezer bag to prevent freezer burn.
  • Reheating: When ready to enjoy, thaw the wraps in the fridge overnight, then reheat in a skillet or microwave until warmed through. Fill them with your favorite fresh ingredients just before serving for the best taste.
  • Make-Ahead: Consider making a batch of wraps and fillings in advance for convenient meals. The wraps freeze well, and you can prepare fresh fillings whenever a craving strikes!

Make Ahead Options

These Irresistible Cottage Cheese Wraps are perfect for busy weeknights and meal prep enthusiasts! You can prepare the wraps themselves up to 3 days in advance by following the baking instructions and then storing them in the refrigerator, ensuring they’re completely cooled to maintain their flexibility. Layer your chosen fillings separately (like cucumber, avocado, and arugula) and keep them in airtight containers, which allows you to customize each wrap right before serving. Simply reheat the wraps for a few seconds in the microwave or enjoy them cold, then assemble your wraps with fresh ingredients. This way, you’ll have a quick and nutritious meal ready to enjoy without compromising on quality!

What to Serve with Irresistible Cottage Cheese Wraps

Pair your delicious wraps with these complementary sides that elevate your meal experience and satisfy your cravings.

  • Side Salad: A fresh mix of greens dressed with olive oil and lemon accentuates the flavors of the wraps while adding a refreshing crunch.

  • Tomato Soup: This classic pairing offers warmth and comforting richness that contrasts beautifully with the lightness of the wraps.

  • Crispy Sweet Potato Fries: Their natural sweetness and crispy texture create a delightful contrast that makes for a memorable meal.

  • Grilled Vegetables: Smoky, charred veggies introduce hearty flavor and a satisfying bite, enhancing the wholesome goodness of your wraps.

  • Quinoa Salad: Light and nutty, a side of quinoa salad packed with herbs adds a protein boost to your plate while keeping it balanced and filling.

  • Fruit Smoothie: A refreshing smoothie made with your favorite fruits not only quenches your thirst but also adds a burst of vitamins to your meal.

  • Chickpea Hummus: Creamy and rich, hummus is perfect for dipping and spreads a luxurious texture that pairs well with the fillings in your wraps.

  • Herbed Yogurt Dip: A cool, tangy dip made with Greek yogurt and fresh herbs is an ideal accompaniment that complements the wraps’ savory flavors.

Irresistible Cottage Cheese Wraps Recipe FAQs

What type of cottage cheese should I use?
You can use any type of cottage cheese—full-fat varieties yield sturdier wraps, while lower-fat options work for a lighter choice. Choosing well-drained cottage cheese will help prevent excess moisture.

How should I store leftover wraps?
Store leftover wraps in an airtight container in the fridge for up to 3 days. Always keep the fillings separate to prevent sogginess and ensure the wraps maintain their delightful texture.

Can I freeze the wraps?
Absolutely! To freeze, wrap the plain cottage cheese wraps tightly in plastic wrap and place them in a freezer bag. They can be stored for up to 1 month. When you’re ready to enjoy, thaw them overnight in the fridge and fill with fresh ingredients just before serving.

What can I do if my wraps are too thick?
If your wraps come out too thick and rubbery, that could be due to spreading the batter too heavily. For next time, aim for an even layer about 1/8 inch thick. This ensures they bake properly, making them pliable and easy to roll.

Is this recipe suitable for people with dietary restrictions?
This recipe can be made gluten-free depending on the fillings you choose. For a dairy-free version, consider substituting the cottage cheese with blended silken tofu. Always check the labels of your ingredients to avoid any allergens!

How do I prevent my wraps from getting soggy?
To keep your wraps fresh and crispy, avoid overloading them with wet ingredients. Stick to drier fillings and ensure that any ingredients like cucumbers or tomatoes are well-drained. This way, you can savor every bite of your Irresistible Cottage Cheese Wraps without any sogginess!

Irresistible Cottage Cheese Wraps

Irresistible Cottage Cheese Wraps: A Protein-Packed Delight

Irresistible Cottage Cheese Wraps are a protein-packed delight perfect for any meal, customizable to your taste and quick to make.
Prep Time 10 minutes
Cook Time 30 minutes
Cooling Time 5 minutes
Total Time 45 minutes
Servings: 2 wraps
Course: Lunch
Cuisine: American, Healthy
Calories: 250

Ingredients
  

For the Wraps
  • 1 cup Cottage Cheese Use full-fat for more sturdiness
  • 1 large Egg Acts as a binder
  • 1 teaspoon Salt
  • 1 teaspoon Italian Seasoning Can be swapped with oregano or basil
  • 1 teaspoon Garlic Powder Can be omitted
For the Fillings
  • 1 cup Mozzarella Cheese Creamy, melts beautifully
  • 1 cup Arugula Provides peppery freshness
  • 1/2 cup Roasted Red Peppers Can use fresh bell peppers
  • 1 medium Cucumber Offers crispy crunch
  • 1 medium Avocado Adds richness
For Drizzling
  • 1 tablespoon Balsamic Glaze Use sparingly to avoid sogginess
For Garnishing
  • 1 leaf Basil Can be swapped with spinach

Equipment

  • Blender or Food Processor
  • Baking Sheet
  • Parchment paper

Method
 

Preparation Steps
  1. Blend the Batter: In a blender, combine cottage cheese, egg, salt, Italian seasoning, and garlic powder. Blend until smooth, about 30 seconds.
  2. Prepare the Oven: Preheat your oven to 350°F (175°C) and line a baking sheet with parchment paper.
  3. Spread the Batter: Spread the cottage cheese batter onto the prepared baking sheet, creating an even layer about 1/8 inch thick.
  4. Bake the Wraps: Bake in the oven for 25-35 minutes until golden and flexible.
  5. Cool for Handling: Allow the wraps to cool for about 5 minutes before handling.
  6. Slice and Prepare Fillings: While cooling, prepare the fillings by slicing cucumber and avocado, and gathering arugula and roasted red peppers.
  7. Assemble the Wraps: Layer mozzarella cheese, arugula, roasted red peppers, cucumber, avocado, and basil in the center of each wrap.
  8. Roll the Wraps: Roll each wrap tightly like a burrito, ensuring they are snug.
  9. Drizzle and Serve: Drizzle each wrap with balsamic glaze and serve immediately.

Nutrition

Serving: 1wrapCalories: 250kcalCarbohydrates: 20gProtein: 15gFat: 15gSaturated Fat: 5gPolyunsaturated Fat: 1gMonounsaturated Fat: 9gCholesterol: 40mgSodium: 300mgPotassium: 500mgFiber: 4gSugar: 3gVitamin A: 500IUVitamin C: 10mgCalcium: 200mgIron: 1mg

Notes

These wraps can be customized with various fillings and stored in the fridge or freezer for convenience.

Tried this recipe?

Let us know how it was!

Bacon Ranch Pasta Salad: Creamy Bliss for Summer BBQs

Stepping into the sun-drenched yard, the tantalizing aroma of sizzling bacon fills the air, instantly awakening my appetite. This Creamy Bacon Ranch Pasta Salad is the perfect answer to those summer BBQ cravings. Packed with crispy bacon, sharp cheddar cheese, and vibrant tomatoes, this dish delivers a medley of textures and flavors that are sure to impress your family and friends. The beauty of this pasta salad lies in its quick prep time — you can delight your guests with a scrumptious side that takes less than 20 minutes to make! Not only does it complement grilled meats effortlessly, but it also serves as a creamy, crowd-pleasing option that even the pickiest eaters will adore. Are you ready to elevate your summer gatherings with this delicious twist on a classic salad?

What Makes This Pasta Salad Irresistible?

Creamy Delight: The rich, silky texture of the dressing perfectly envelopes every pasta twist, making each bite a comforting experience.
Savory Crunch: Crispy bacon adds a delightful crunch, ensuring you have that satisfying contrast of textures.
Quick Prep: With under 20 minutes needed, this recipe is a game changer for busy cooks looking to make an impressive side dish.
Flavorful Pairing: This Bacon Ranch Pasta Salad complements almost any grilled dish, making it ideal for your summer BBQs. Whether you’re serving it with ribs or enjoying it on its own, this salad is sure to be a hit, much like a refreshing Strawberry Spinach Salad.
Crowd-Pleaser: Loved by kids and adults alike, it’s the ultimate choice for family gatherings or potlucks, ensuring everyone leaves satisfied!

Bacon Ranch Pasta Salad Ingredients

For the Pasta

  • Rotini Pasta – A fun shape that holds dressing well; can substitute with any small pasta like shells or bowties.

For the Dressing

  • Bacon – Adds a smoky crunch; turkey bacon can be a lighter option without sacrificing taste.
  • Mayo – Acts as the creamy base; Greek yogurt makes for a healthier alternative with added protein.
  • Dry Ranch Seasoning Mix – Infuses the bold ranch flavor; homemade ranch seasoning can be tailored to your taste.
  • Garlic Powder – Enhances savory depth; fresh minced garlic can be used for an extra punch.
  • Black Pepper – Adds subtle heat; adjust it to taste or opt for white pepper for a milder kick.
  • Milk – Adjusts the dressing consistency, yielding creaminess; use buttermilk for extra tang.

For the Veggies

  • Cherry or Grape Tomatoes – Provides freshness and color; can substitute with diced bell peppers for added crunch.
  • Frozen Peas – Adds sweetness and vibrant pops of color; fresh peas can bring a more robust flavor.

For the Cheese

  • Shredded Cheddar Cheese – Offers rich, melty goodness; switch to dairy-free cheese for a vegan-friendly option.

Enjoy assembling this Bacon Ranch Pasta Salad, a creamy yet lively companion for your summer BBQ spread!

Step‑by‑Step Instructions for Bacon Ranch Pasta Salad

Step 1: Cook Pasta
Begin by bringing a large pot of salted water to a boil. Add the rotini pasta and cook according to the package instructions, usually 8-10 minutes, until al dente. Once ready, drain the pasta in a colander and rinse under cold water to halt the cooking process. This step ensures a perfect texture for your Bacon Ranch Pasta Salad.

Step 2: Cook Bacon
While the pasta cooks, heat a skillet over medium-high heat and add chopped bacon. Sauté the bacon for about 6-8 minutes, stirring occasionally until it turns crispy and golden. Use a slotted spoon to remove the bacon, allowing excess grease to drain on paper towels. The crispy bacon will lend that delightful crunch your pasta salad craves.

Step 3: Make Dressing
In a large mixing bowl, combine mayo, dry ranch seasoning mix, garlic powder, black pepper, and milk. Using a whisk, blend the ingredients together until the mixture is smooth and creamy, about 1-2 minutes. This delicious dressing will be the star of your Bacon Ranch Pasta Salad, enveloping all the ingredients in rich flavor.

Step 4: Combine Ingredients
Add the cooled rotini pasta to the bowl with the ranch dressing, then gently fold in the crispy bacon, halved cherry tomatoes, peas, and shredded cheddar cheese. Stir the mixture until all components are well-coated with the dressing. This colorful combination creates a vibrant and satisfying Bacon Ranch Pasta Salad that’s ready to impress.

Step 5: Chill and Serve
For the best flavors, cover the bowl with plastic wrap and refrigerate the salad for at least 30 minutes before serving. This allows the ingredients to meld beautifully. When ready to serve, give the salad a gentle stir, and enjoy your Bacon Ranch Pasta Salad alongside grilled meats or as a delightful standalone dish.

Make Ahead Options

These Bacon Ranch Pasta Salad preparations are perfect for busy home cooks! You can cook the rotini pasta and bacon up to 24 hours in advance, storing them separately in the refrigerator to maintain their textures. Prepare the creamy dressing, mixing mayo, ranch seasoning, garlic powder, black pepper, and milk, and refrigerate it for maximum flavor infusion. You can also chop the tomatoes and measure out the peas 1-3 days before serving. Just before you’re ready to serve, combine all the ingredients for a fresh salad, and give it a quick stir to revive the flavors. This way, you’ll save time and ensure a delightful dish that tastes just as delicious!

What to Serve with Bacon Ranch Pasta Salad

Delightful and creamy, this pasta salad can be the star of any summer BBQ spread, but what should you pair it with for a complete meal?

  • Grilled Chicken: Juicy, seasoned grilled chicken complements the creamy textures in the pasta salad and adds a savory balance.

  • Beef Burgers: The hearty flavors of a grilled beef burger elevate the meal, creating a satisfying combination that pleases all ages.

  • Corn on the Cob: Sweet, tender corn brings a pop of freshness and a crunch that pairs beautifully with the rich pasta salad.

  • Watermelon Wedges: Juicy and refreshing, watermelon provides a cool, sweet contrast to the savory flavors of the bacon ranch.

  • Greek Yogurt Dip: Serve with crisp veggies for dipping. The tanginess of the yogurt dip counteracts the creamy salad, making every bite refreshing.

  • Lemonade or Iced Tea: Both beverages provide a perfect thirst-quencher alongside the rich flavors of the pasta salad, setting a cheerful tone for your gathering.

  • Chocolate Chip Cookies: End your meal on a sweet note with classic cookies. Their comforting, familiar taste complements the inviting flavors of the entire spread.

Expert Tips for Bacon Ranch Pasta Salad

  • Chill Time Matters: Allow your Bacon Ranch Pasta Salad to chill in the refrigerator for at least 30 minutes before serving for the best flavor blend.

  • Perfect Pasta: Don’t overcook the rotini; aim for al dente. This ensures the pasta maintains a delightful bite in your creamy salad.

  • Crispy Bacon: For maximum crunch, drain and pat your bacon well after cooking. This helps keep it crispy once mixed into the salad.

  • Dressing Consistency: If the dressing seems too thick, add a splash more milk or buttermilk to loosen it while maintaining that creamy texture.

  • Flavor Variations: Feel free to add additional veggies like diced cucumbers or bell peppers for an extra crunch in your Bacon Ranch Pasta Salad!

How to Store and Freeze Bacon Ranch Pasta Salad

Fridge: Store leftover Bacon Ranch Pasta Salad in an airtight container, and it will stay fresh for up to 3 days.

Room Temperature: Do not leave the salad out for more than 2 hours at room temperature to ensure food safety.

Freezer: This pasta salad is best enjoyed fresh, but if you need to freeze it, do so without the cheese and bacon. It can be frozen for up to 1 month; thaw in the fridge overnight before serving.

Reheating: If you’ve frozen the salad, rehydrate it with a splash of milk when ready to serve, and adjust the seasoning to taste for freshness.

Bacon Ranch Pasta Salad Variations

Feel free to make this delightful dish your own with exciting twists that will tantalize your taste buds!

  • Vegetarian Delight: Omit the bacon and incorporate diced avocado for a creamy texture and rich flavor. Fresh olives also add a savory touch!
  • Extra Crunch: Add diced cucumbers or bell peppers for a refreshing crunch. These veggies not only enhance texture but also pack extra nutrition.
  • Pasta Alternatives: Swap the rotini for bowtie pasta or even whole wheat pasta for a different shape and added fiber. Each option brings its own charm to the salad!
  • Herb Boost: Fresh herbs like chopped dill or parsley can elevate the flavor profile significantly. Just a handful has the power to brighten up the entire salad!
  • Spicy Kick: For those who enjoy heat, sprinkle in some red pepper flakes or diced jalapeños for an exciting spicy twist. This addition awakens the senses and adds an adventure to your palate!
  • Creamy Swap: Replace mayo with Greek yogurt or avocado for a lighter, healthier dressing option. This swap keeps the creaminess while adding a nutritious edge.
  • Cheesy Bliss: Try adding crumbled feta or goat cheese instead of cheddar for a tangy flavor explosion. These cheeses bring a lovely creaminess that blends beautifully with the other ingredients.
  • Protein Power: To make this salad more filling, mix in some shredded rotisserie chicken or chickpeas, transforming it from a side dish into a hearty main course. For another quick meal option, check out this Tuna Salad Sandwich.

Each of these variations allows you to create a unique version of your favorite Bacon Ranch Pasta Salad, perfect for any occasion!

Bacon Ranch Pasta Salad Recipe FAQs

What type of pasta is best for Bacon Ranch Pasta Salad?
I recommend using rotini pasta as its fun shape holds dressing beautifully, but you can swap it out for small pasta shapes like shells or bowties if you prefer.

How do I store leftover Bacon Ranch Pasta Salad?
Store your leftovers in an airtight container in the refrigerator for up to 3 days. This keeps the flavors fresh and ensures your pasta salad tastes delicious when you’re ready to enjoy it again!

Can I freeze Bacon Ranch Pasta Salad?
While it’s best enjoyed fresh, you can freeze the salad without cheese and bacon for up to 1 month. To do this, prepare the salad as directed, but store those add-ins separately. Thaw it overnight in the fridge when you’re ready to serve, and rehydrate it with a splash of milk for the best flavor.

How can I ensure my pasta stays firm in the salad?
To avoid mushy pasta, cook the rotini according to package instructions until it’s al dente, usually 8-10 minutes. Drain it and rinse it under cold water to stop the cooking process immediately.

Is there a way to make this recipe healthier?
Absolutely! You can substitute Greek yogurt for mayo for a healthier dressing option. Additionally, using turkey bacon or omitting the bacon entirely and adding diced avocado or olives can create a delicious vegetarian version that’s still packed with flavor!

Bacon Ranch Pasta Salad

Bacon Ranch Pasta Salad: Creamy Bliss for Summer BBQs

This Bacon Ranch Pasta Salad is a creamy, flavorful side dish perfect for summer BBQs, featuring crispy bacon and vibrant veggies.
Prep Time 10 minutes
Cook Time 10 minutes
Chill Time 30 minutes
Total Time 50 minutes
Servings: 6 servings
Course: Salad
Cuisine: American
Calories: 350

Ingredients
  

For the Pasta
  • 8 ounces Rotini Pasta Can substitute with any small pasta like shells or bowties.
For the Dressing
  • 6 slices Bacon Turkey bacon can be a lighter option.
  • 1 cup Mayo Greek yogurt makes for a healthier alternative.
  • 1 packet Dry Ranch Seasoning Mix Homemade ranch seasoning can be tailored to your taste.
  • 1 teaspoon Garlic Powder Fresh minced garlic can be used for extra punch.
  • 1/2 teaspoon Black Pepper Adjust it to taste.
  • 1/4 cup Milk Use buttermilk for extra tang.
For the Veggies
  • 1 cup Cherry or Grape Tomatoes Can substitute with diced bell peppers.
  • 1 cup Frozen Peas Fresh peas can bring a more robust flavor.
For the Cheese
  • 1 cup Shredded Cheddar Cheese Switch to dairy-free cheese for a vegan-friendly option.

Equipment

  • large pot
  • Skillet
  • colander
  • Mixing Bowl
  • Whisk

Method
 

Step-by-Step Instructions
  1. Bring a large pot of salted water to a boil. Add the rotini pasta and cook according to the package instructions, usually 8-10 minutes, until al dente. Drain and rinse under cold water.
  2. Heat a skillet over medium-high heat and add chopped bacon. Sauté for about 6-8 minutes until crispy. Remove and drain on paper towels.
  3. In a large mixing bowl, combine mayo, dry ranch seasoning mix, garlic powder, black pepper, and milk. Whisk until smooth and creamy, about 1-2 minutes.
  4. Add the cooled rotini pasta to the bowl with the ranch dressing. Fold in the crispy bacon, halved cherry tomatoes, peas, and shredded cheddar cheese. Stir until well-coated.
  5. Cover the bowl with plastic wrap and refrigerate the salad for at least 30 minutes before serving.

Nutrition

Serving: 1cupCalories: 350kcalCarbohydrates: 36gProtein: 12gFat: 20gSaturated Fat: 5gPolyunsaturated Fat: 3gMonounsaturated Fat: 9gCholesterol: 29mgSodium: 480mgPotassium: 300mgFiber: 2gSugar: 2gVitamin A: 500IUVitamin C: 10mgCalcium: 200mgIron: 1mg

Notes

Allow your Bacon Ranch Pasta Salad to chill for best flavor. Don't overcook the rotini for the perfect texture. Keep bacon crispy by draining well after cooking.

Tried this recipe?

Let us know how it was!

Heartwarming Chicken Meatball Soup You’ll Crave All Winter

As the crisp air settles in and clouds hint at impending rain, I find myself craving something warming and hearty. That’s when I whip up my go-to Chicken Meatball Soup, a comforting bowl full of tender meatballs, vibrant vegetables, and just a hint of pasta. What I love most about this recipe is its versatility—it allows you to swap in ground turkey or beef and mix in your favorite greens, making it perfect for any dietary need. Plus, it’s a fantastic meal prep option, ready to nourish you all week long. Whether you’re in need of a cozy dinner after a long day or a serve-and-reheat solution for busy lunches, this soup is sure to become a staple in your kitchen. What secret ingredients will you choose to make it your own?

Why Is This Chicken Meatball Soup Irresistible?

Comforting flavors embrace your senses, making each spoonful feel like a warm hug. Versatile at its core, you can easily modify this soup by swapping out ground chicken for turkey or beef and including your favorite vegetables. Quick to make, this dish saves you time in the kitchen without sacrificing taste, perfect for busy weeknights. If you’re a fan of meal prep, you’ll love how it keeps well in the fridge, ready to nourish you throughout the week. Crowd-pleaser status is guaranteed—serve it with some crusty bread or a side salad for a delightful family dinner. Perfect for cold winter nights, this soup will quickly become your must-have recipe!

Essential Chicken Meatball Soup Ingredients

• For the Meatballs

  • Ground Chicken – The main protein, offering a flavorful, lean base for your soup; ground turkey or beef can be great alternatives.
  • Bread Crumbs – These help bind the meatballs together; use gluten-free bread crumbs to keep it gluten-free.
  • Parmesan Cheese – Adds a rich, savory depth to the meatballs; omit for a dairy-free option or switch to nutritional yeast.
  • Garlic – Fresh garlic enhances flavor beautifully; consider jarred as a quick substitute if needed.

• For the Soup Base

  • Carrots – Provide natural sweetness and a nutritional boost; zucchini or kale can be swapped in for variety.
  • Celery – Essential for that classic soup flavor; bell peppers are a great substitute when you’re in a pinch.
  • Chicken Broth – This hearty base adds moisture; vegetable broth works perfectly for a vegetarian version.
  • Water – Adjusts the consistency of the soup; use more broth if you prefer a richer flavor.

• For Additional Ingredients

  • Small Pasta (e.g., ditalini) – Adds heartiness to the soup; opt for gluten-free pasta or skip it for a lower-carb meal.
  • Spinach – Brightens up the dish with color and nutrition; frozen spinach is a handy alternative if fresh isn’t available.

Indulge in this Chicken Meatball Soup adventure—each ingredient crafted to bring comfort and satisfaction to your table!

Step‑by‑Step Instructions for Chicken Meatball Soup

Step 1: Prepare Meatball Mixture
In a large mixing bowl, combine ground chicken, bread crumbs, grated Parmesan, minced garlic, and your favorite seasonings like salt and pepper. Mix all the ingredients thoroughly using your hands until well incorporated. Once mixed, form the mixture into small meatballs, about 1 inch in diameter, and set them aside on a plate for later use.

Step 2: Sauté Vegetables
In a large pot, heat 2 tablespoons of olive oil over medium heat until shimmering. Add diced carrots and celery, stirring frequently. Sauté the vegetables for about 5–7 minutes until they soften and become fragrant, absorbing the warm oil. This step builds the flavorful base for your Chicken Meatball Soup that will enrich the broth.

Step 3: Cook Meatballs
Gently add the prepared meatballs into the pot, ensuring they don’t overcrowd. Cook them for about 5–7 minutes, turning occasionally, until they achieve a nice golden-brown color on all sides. This browning process not only adds flavor but also helps seal in the juices, creating a moist Chicken Meatball Soup.

Step 4: Add Liquids
Pour in 6 cups of chicken broth and 2 cups of water, stirring to combine all the ingredients. Increase the heat and bring the mixture to a boil. This broth will provide the heart and soul of your Chicken Meatball Soup, enhancing the flavors of the meatballs and vegetables.

Step 5: Simmer
Once boiling, reduce the heat to low and let the soup simmer uncovered for about 20 minutes. This simmering allows the flavors to meld beautifully while ensuring the meatballs are cooked thoroughly. Look for the meatballs to reach an internal temperature of 165°F for safe consumption.

Step 6: Add Pasta and Spinach
After the soup has simmered, stir in 1 cup of small pasta and 2 cups of fresh spinach. Cook for an additional 8–10 minutes, or until the pasta is al dente. The pasta will absorb some of the soup’s flavors, adding heartiness to your Chicken Meatball Soup while the spinach wilts down beautifully.

Step 7: Adjust Seasoning
Once cooked, taste your Chicken Meatball Soup and adjust seasoning as needed with additional salt and pepper. This is your chance to enhance the flavors, ensuring it’s just right for you. Feel free to add any fresh herbs or spices that you enjoy at this stage for an extra flavor boost.

Step 8: Serve
Ladle the hot Chicken Meatball Soup into bowls, optionally garnishing with additional Parmesan cheese or fresh herbs if desired. Serve it warm, enjoying each comforting spoonful filled with meats, vegetables, and pasta—a delightful meal perfect for cozy evenings or meal prep for the week ahead.

Chicken Meatball Soup Variations

Feel free to explore these enticing variations and make this comforting soup truly your own!

  • Turkey Swap: Use ground turkey instead of chicken for a leaner option without sacrificing flavor.
  • Beef Option: Ground beef makes for a rich, hearty meatball if you’re craving something more robust.
  • Vegetarian Adaptation: Swap meatballs for cannellini beans and use vegetable broth for a delightful plant-based twist.
  • Gluten-Free Alternative: Replace bread crumbs with gluten-free alternatives to enjoy a worry-free soup experience.
  • Flavor Boost: Add freshly chopped herbs like rosemary or thyme for an aromatic enhancement that will elevate the soup.
  • Creamy Texture: Stir in a splash of coconut milk or heavy cream for a luxurious, velvety finish that warms the soul.
  • Spicy Kick: Toss in a pinch of crushed red pepper flakes or a dash of hot sauce for those who love a little heat.
  • Pasta Variation: Switch up the pasta! Try orzo or even quinoa for an interesting twist while keeping it hearty.

As you play with these variations, you might find inspiration to create a delicious twist on this classic. If you’re looking for more ways to incorporate chicken into your meals, consider trying Jerk Chicken Burritos or Chicken Cashew Broccoli. Enjoy your culinary adventure!

Expert Tips for Chicken Meatball Soup

Cooking Temperature: Ensure meatballs reach 165°F for safe consumption. Use a meat thermometer for accuracy.

Gluten-Free Options: For a gluten-free Chicken Meatball Soup, switch out traditional bread crumbs for gluten-free alternatives; don’t skip this for texture!

Don’t Overcook Pasta: Add the pasta towards the end of cooking to avoid mushiness. It should be al dente for the best texture in your soup.

Flavor Boost: Experiment with fresh herbs like basil or thyme added just before serving to enhance the soup’s overall flavor profile.

Storage Secrets: Store leftovers in an airtight container for up to 5 days. To reheat, warm gently on the stove to maintain flavor and texture.

Meal Prep Friendly: This Chicken Meatball Soup freezes well—portion it out and enjoy a homemade meal any night!

What to Serve with Chicken Meatball Soup

Cozy up your dinner table with delightful accompaniments that elevate your comfort meal to the next level.

  • Garlic Bread: The crunchy, buttery taste of garlic bread perfectly complements the savory broth, inviting you to savor every scoop.
  • Crusty Bread: A hearty, crusty loaf provides the perfect vehicle for enjoying the soup, soaking up those rich flavors and enhancing meal satisfaction.
  • Fresh Side Salad: A crisp, vibrant side salad with mixed greens and a tangy dressing adds a refreshing contrast to the warm soup. Every forkful offers a lift to your palate!
  • Roasted Vegetables: Roasted root vegetables like sweet potatoes or carrots bring a delightful sweetness and added texture that harmonizes beautifully with the meatballs.
  • Herbed Rice: A light, fragrant herbed rice adds a lovely filler to your meal, providing a different texture without overpowering the soup.
  • Herbal Tea: A steaming cup of herbal tea with calming properties pairs perfectly for a soothing finish to your meal experience.
  • Apple Crisp: Indulge in a warm apple crisp for dessert—the sweet, spiced flavors create a delightful transition from the savory soup.

Blend these options into your dinner plans for a fulfilling and heartwarming experience!

Make Ahead Options

These Chicken Meatball Soup components are ideal for meal prep, saving you time during busy weeks! You can make the meatballs and refrigerate them for up to 24 hours before cooking to maintain their moist texture. Additionally, chop the vegetables (carrots, celery) and store them in an airtight container in the fridge for up to 3 days. To keep the soup fresh, prepare the broth and store it separately; combine everything when you’re ready to serve. Simply bring the broth to a simmer, add your prepped meatballs, vegetables, small pasta, and cook until heated through. This way, you’ll enjoy a hearty Chicken Meatball Soup that’s just as delicious, with minimal effort!

How to Store and Freeze Chicken Meatball Soup

Fridge: Store in an airtight container for up to 5 days; cool the soup completely before sealing to maintain freshness.

Freezer: Freeze in individual portions for up to 3 months. Place in freezer-safe containers or bags, removing as much air as possible.

Reheating: Thaw in the fridge overnight, then reheat gently on the stovetop over medium heat, stirring occasionally until warmed through.

Meal Prep Tip: This Chicken Meatball Soup is perfect for meal prep—prepare it in advance and enjoy nourishing bowls throughout the week!

Chicken Meatball Soup Recipe FAQs

How do I choose ripe vegetables for my Chicken Meatball Soup?
Absolutely! Look for vibrant carrots and fresh celery that are free of dark spots or wrinkles. For spinach, choose bright green leaves; avoid any with yellowing or wilting. When selecting produce, aim for firmness which indicates freshness.

How should I store leftover Chicken Meatball Soup?
Very easy! Allow the soup to cool completely before transferring it to an airtight container. It can be stored in the fridge for up to 5 days. If you’d like to enjoy it longer, consider freezing it.

Can I freeze Chicken Meatball Soup? If so, how?
Absolutely, this soup freezes wonderfully! Once cooled, portion it into freezer-safe containers or bags, removing as much air as possible. It can be stored in the freezer for up to 3 months. When you’re ready to enjoy it, thaw in the fridge overnight, then reheat on the stovetop over medium-low heat until warmed through.

What should I do if my meatballs fall apart while cooking?
Don’t worry, it happens! If you notice your meatballs are falling apart, ensure that you’re using enough bread crumbs to bind them. You can also add an egg to the mixture for better cohesion. When cooking, be gentle when adding them to the pot and avoid overcrowding, which helps them cook evenly and stay intact.

Is Chicken Meatball Soup suitable for a gluten-free diet?
Very much so! To make it gluten-free, simply swap traditional bread crumbs for gluten-free ones. Additionally, ensure that any pasta you use is labeled gluten-free. This way, you can enjoy this hearty Chicken Meatball Soup without worry!

Can pets have Chicken Meatball Soup?
It’s best to keep it for humans only! While chicken in moderation can be a treat for pets, the seasonings and garlic used in this soup could be harmful. Always consult your vet before sharing any cooked meals with your furry friends.

Chicken Meatball Soup

Heartwarming Chicken Meatball Soup You’ll Crave All Winter

A hearty Chicken Meatball Soup filled with tender meatballs and vibrant vegetables, perfect for cold winter nights.
Prep Time 30 minutes
Cook Time 40 minutes
Total Time 1 hour 10 minutes
Servings: 6 bowls
Course: Chicken
Cuisine: American
Calories: 350

Ingredients
  

For the Meatballs
  • 1 pound Ground Chicken Can substitute with ground turkey or beef.
  • 1 cup Bread Crumbs Use gluten-free breadcrumbs if desired.
  • 1/2 cup Parmesan Cheese Omit for dairy-free or switch to nutritional yeast.
  • 2 cloves Garlic Use minced fresh garlic.
For the Soup Base
  • 2 cups Carrots Diced, can substitute with zucchini or kale.
  • 2 stalks Celery Diced, can substitute with bell peppers.
  • 6 cups Chicken Broth Use vegetable broth for a vegetarian version.
  • 2 cups Water Adjust for desired consistency.
For Additional Ingredients
  • 1 cup Small Pasta (e.g., ditalini) Opt for gluten-free pasta or omit.
  • 2 cups Spinach Fresh, can substitute with frozen.

Equipment

  • large mixing bowl
  • large pot
  • Meat Thermometer

Method
 

Step‑by‑Step Instructions
  1. In a large mixing bowl, combine ground chicken, bread crumbs, grated Parmesan, minced garlic, and seasonings. Form into meatballs and set aside.
  2. In a large pot, heat 2 tablespoons of olive oil over medium heat. Add diced carrots and celery, sauté for 5–7 minutes.
  3. Gently add the meatballs, cook for 5–7 minutes until golden brown.
  4. Pour in chicken broth and water, bring to a boil.
  5. Reduce heat and simmer uncovered for 20 minutes.
  6. Stir in pasta and spinach, cook for an additional 8–10 minutes.
  7. Adjust seasoning with salt and pepper as needed.
  8. Serve hot, garnishing with Parmesan cheese or herbs if desired.

Nutrition

Serving: 1bowlCalories: 350kcalCarbohydrates: 25gProtein: 30gFat: 15gSaturated Fat: 5gPolyunsaturated Fat: 2gMonounsaturated Fat: 8gCholesterol: 80mgSodium: 800mgPotassium: 600mgFiber: 4gSugar: 5gVitamin A: 2500IUVitamin C: 30mgCalcium: 150mgIron: 3mg

Notes

This Chicken Meatball Soup is great for meal prep and freezes well for future meals.

Tried this recipe?

Let us know how it was!

Ranch Taco Pasta Salad: A Flavorful Summer Crowd-Pleaser

As the sun rises higher and the days grow longer, my mind drifts to summer gatherings filled with laughter, good vibes, and, of course, delicious food. Among my favorite warm-weather recipes is the Creamy Ranch Taco Pasta Salad, a dish that never fails to steal the show. This easy, customizable salad combines the delectable sweetness of ripe cherry tomatoes and the crunch of colorful bell peppers, all brought together with a zesty ranch dressing that perfectly complements the savory taco seasoning. Ideal for potlucks or BBQs, this crowd-pleaser not only packs a punch in flavor but also offers the convenience of preparing it ahead of time. Trust me, you’ll be the star of the next gathering with this vibrant, satisfying dish. Curious how to assemble this delightful medley? Let’s dive in!

Why Is Ranch Taco Pasta Salad a Must-Try?

Easy Preparation: Whip up this dish in just 30 minutes, making it a go-to for last-minute gatherings.
Customizable Delight: Swap in your favorite veggies or add protein; the possibilities are endless!
Flavor Explosion: The combo of ranch dressing and taco seasoning delivers a mouthwatering taste.
Perfect for Sharing: Great for potlucks, BBQs, or family gatherings; it’s a guaranteed hit!
Make Ahead Friendly: Prep it the night before to enhance the flavors, giving you one less thing to worry about!
Elevate your summer meals with this delightful pasta salad, and for more vibrant options, don’t miss my delicious Strawberry Spinach Salad or a comforting dish like Mushroom Pasta Delightful.

Ranch Taco Pasta Salad Ingredients

For the Salad

  • Rotini Pasta – A fun twist on traditional pasta; it holds the dressing well.
  • Ranch Dressing – Provides that creamy richness; feel free to use buttermilk ranch for a tangy kick.
  • Taco Seasoning – Adds a robust, savory flavor; consider homemade for a personalized touch.
  • Cherry Tomatoes – Juicy and sweet; substitute with diced regular tomatoes if needed.
  • Green Bell Pepper – Adds a crisp crunch; explore red or yellow bell peppers for different tastes.
  • Red Bell Pepper – Sweetness and color enhancer; use according to your flavor preference.
  • Red Onion – Provides a sharp bite; green onions can be a milder alternative.
  • Black Beans – Brings protein and texture; chickpeas are an excellent substitute if desired.
  • Corn – Sweet and crunchy; canned corn is convenient, or use fresh if you prefer.
  • Chopped Cilantro (optional) – A fresh, herbal garnish that brightens the dish.
  • Tortilla Strips or Crunched-up Doritos (optional) – For an extra crunch that elevates the flavors.

Explore the vibrant ingredients of this Ranch Taco Pasta Salad, and get ready to impress at your next gathering!

Step‑by‑Step Instructions for Ranch Taco Pasta Salad

Step 1: Prepare the Dressing
In a small mixing bowl, combine approximately 1 cup of ranch dressing with 2 tablespoons of taco seasoning. Stir vigorously for about 1 minute until the mixture is smooth and fully blended. This creamy dressing will infuse your Ranch Taco Pasta Salad with a deliciously zesty flavor that sets the foundation for all the delightful textures to come.

Step 2: Cook the Pasta
Bring a large pot of salted water to a rolling boil. Add 8 ounces of rotini pasta and cook according to package instructions until al dente, usually around 8-10 minutes. Once cooked, drain the pasta in a colander and rinse under cold water for a couple of seconds. This helps cool down the pasta quickly and prevents it from becoming mushy in your salad.

Step 3: Combine Pasta and Dressing
In a large mixing bowl, add the cooled rotini pasta, pouring the ranch dressing mixture over it. Toss gently but thoroughly for about 1-2 minutes until each piece of pasta is evenly coated with the dressing. This step is crucial for ensuring that the flavors of the Ranch Taco Pasta Salad are well-distributed throughout.

Step 4: Add Fresh Ingredients
Next, dice 1 cup of cherry tomatoes, chop ½ cup each of green and red bell peppers, and finely chop ¼ cup of red onion. Add these vibrant veggies and 1 can (15 oz) of drained and rinsed black beans along with 1 cup of corn to the pasta mixture. Stir well for another 2 minutes until all ingredients are perfectly combined and brimming with color.

Step 5: Chill for Flavor Development
Cover the bowl tightly with plastic wrap or a lid and refrigerate the salad for at least 30 minutes. This chilling period allows the flavors to meld beautifully, enhancing the overall taste of your Ranch Taco Pasta Salad. If you have time, chilling it for a few hours or overnight would be even better!

Step 6: Serve with Garnishes
Before serving, give the pasta salad a good stir to refresh its texture. If desired, sprinkle with chopped cilantro for an herbal boost and top with tortilla strips or crunched-up Doritos to add a satisfying crunch. Serve this vibrant Ranch Taco Pasta Salad in bowls, letting everyone dig in and enjoy a refreshing dish that’s perfect for summer gatherings.

Make Ahead Options

These Ranch Taco Pasta Salad is perfect for meal prep and can save you time on busy weeknights! You can cook the rotini pasta and prepare the ranch dressing (mixing in the taco seasoning) up to 24 hours in advance, storing them separately in the refrigerator to maintain their texture and flavor. Additionally, chop the veggies (cherry tomatoes, bell peppers, red onion) and refrigerate them in airtight containers for up to 3 days. When you’re ready to serve, simply combine the pasta, dressing, and chopped ingredients, and toss well. Finish by adding black beans and corn, ensuring everything is evenly mixed. Trust me, this prep ahead strategy ensures your Ranch Taco Pasta Salad is just as delicious while reducing meal prep stress!

Expert Tips for Ranch Taco Pasta Salad

  • Cool the Pasta: Make sure the rotini pasta is fully cooled before mixing with the dressing to prevent a mushy texture.

  • Adjust Seasoning: Taste the ranch dressing mixture before adding it to the pasta; you can adjust the taco seasoning for a milder or spicier flavor depending on your preference.

  • Chill Time: Refrigerate the salad for at least 30 minutes; this allows the flavors to meld perfectly in your Ranch Taco Pasta Salad.

  • Veggie Swaps: Don’t hesitate to swap out veggies based on what you love or have on hand—it’s all about customizing your perfect salad!

  • Tasty Garnishes: Consider topping your salad with fresh herbs like cilantro or crunchy tortilla strips just before serving for added flavor and texture.

How to Store and Freeze Ranch Taco Pasta Salad

Fridge: Enjoy your Ranch Taco Pasta Salad fresh! Store leftovers in an airtight container in the fridge for up to 3 days—flavors will continue to develop, but texture may change slightly.

Freezer: For long-term storage, freeze the salad without garnishes for up to 1 month. Thaw in the refrigerator overnight before serving.

Reheating: If desired, serve the salad chilled straight from the fridge. Avoid reheating it in the microwave, as the fresh veggies may become mushy.

Serving Tips: For the best flavors and texture, consume the salad within 1-2 days of making it.

Ranch Taco Pasta Salad Variations

Feel free to let your creativity shine and customize the Ranch Taco Pasta Salad to suit your taste buds!

  • Dairy-Free: Substitute ranch dressing with a dairy-free alternative and use a cashew cream for a rich, vegan option.

  • Protein-Packed: Boost the salad by adding cooked and diced rotisserie chicken or grilled shrimp for extra heartiness. Just imagine the delightful shift in flavors!

  • Spicy Kick: Add diced jalapeños or a dash of hot sauce to the ranch dressing for an extra punch of heat that’ll tickle your taste buds.

  • Gluten-Free: Swap rotini pasta with a gluten-free pasta option like quinoa or brown rice pasta to accommodate dietary needs without sacrificing taste.

  • Vegetable Medley: Include diced cucumbers or shredded carrots for an extra crunch and vibrant color, enhancing the freshness of your salad.

  • Pasta Shape Variety: Experiment with different pasta shapes like fusilli or farfalle for a fun twist! Each shape holds dressings differently, adding a unique texture.

  • Chickpea Swap: Replace black beans with chickpeas for a protein boost while delivering a wonderful nutty flavor that pairs beautifully with the other ingredients.

  • Fresh Herb Infusion: Incorporate fresh basil or parsley into the mix for an aromatic lift and bright flavor, making each bite feel like summer in your mouth!

For some delightful dish inspirations, don’t forget to check out my tasty Taco Lasagna Discover or refreshing Strawberry Spinach Salad. Enjoy customizing your salad experience!

What to Serve with Ranch Taco Pasta Salad?

As you prepare this vibrant and zesty pasta salad, think about the perfect pairings that will enhance your gathering and brighten your table.

  • Grilled Chicken Breast: Juicy and tender, grilled chicken complements the flavors and adds a hearty element to your meal experience.

  • Corn on the Cob: Sweet and buttery, this classic summer side adds a delightful freshness that harmonizes beautifully with the salad’s rich dressing.

  • Fresh Fruit Salad: A refreshing mix of seasonal fruits provides a sweet contrast, balancing the savory notes of the pasta salad perfectly.

  • Guacamole and Chips: Creamy guacamole with crunchy tortilla chips offers a familiar Mexican flavor, creating a fun snacking option alongside the salad.

  • Crispy Garlic Bread: This warm and crunchy side adds an inviting aroma and pairs wonderfully, adding a comforting dimension to your meal.

  • Lemonade or Iced Tea: A refreshing beverage like lemonade or iced tea will cleanse the palate and keep the gathering feeling lively and vibrant.

Indulging in these pairings will elevate your Ranch Taco Pasta Salad, ensuring your summer gathering is unforgettable!

Ranch Taco Pasta Salad Recipe FAQs

How do I select ripe ingredients for my Ranch Taco Pasta Salad?
Absolutely! For the best flavor, look for cherry tomatoes that are bright and shiny, with no dark spots. Choose bell peppers that feel firm and vibrant in color, and opt for fresh herbs like cilantro that smell fragrant. It’s all about vibrant, fresh ingredients to elevate your dish!

What’s the best way to store leftover Ranch Taco Pasta Salad?
To keep your salad fresh, store any leftovers in an airtight container in the refrigerator for up to 3 days. The flavors will deepen over time, but be aware that the texture may slightly change due to moisture from the veggies. If it seems watery, just give it a good stir before serving again!

Can I freeze Ranch Taco Pasta Salad?
The more the merrier! While it’s best enjoyed fresh, you can freeze the salad without any garnishes like chips or fresh herbs. Just pack it tightly in an airtight container or heavy-duty freezer bag and freeze it for up to 1 month. When you’re ready to enjoy it, thaw it overnight in the fridge before serving.

What if my pasta is mushy? How can I prevent this?
Very! Overcooked pasta can take away from the salad’s delightful crunch. Always cook the rotini according to package directions until al dente, and immediately chill it under cold water after draining. This will halt cooking and maintain that perfect bite. If it does become mushy, you can also try adding some extra crunchy ingredients to balance it out!

Are there any dietary considerations for Ranch Taco Pasta Salad?
Absolutely! This salad is easily adaptable. If you’re cooking for someone with allergies, always check the ranch dressing and taco seasoning for allergens like dairy or gluten. You can also swap black beans for chickpeas if needed. For a vegan option, use dairy-free ranch and omit any animal products for a plant-based treat your friends and family will love!

How can I enhance the flavors of my Ranch Taco Pasta Salad?
For the best results, let your pasta salad chill in the refrigerator for at least 30 minutes before serving. This helps meld the flavors beautifully! Additionally, don’t hesitate to add more of your favorite seasonings or even a squeeze of lime juice for a citrusy kick. Adjust seasonings to your taste to create a dish that satisfies your palate!

Ranch Taco Pasta Salad

Ranch Taco Pasta Salad: A Flavorful Summer Crowd-Pleaser

Ranch Taco Pasta Salad combines pasta, vibrant veggies, and zesty ranch dressing, making it a must-try for summer gatherings.
Prep Time 30 minutes
Cook Time 10 minutes
Chill Time 30 minutes
Total Time 1 hour 10 minutes
Servings: 6 servings
Course: Salad
Cuisine: American
Calories: 350

Ingredients
  

For the Salad
  • 8 ounces Rotini Pasta cook according to package instructions
  • 1 cup Ranch Dressing buttermilk ranch can be used for a tangy kick
  • 2 tablespoons Taco Seasoning adjust based on spice preference
  • 1 cup Cherry Tomatoes diced; substitute with regular tomatoes if needed
  • ½ cup Green Bell Pepper chopped; can use red or yellow peppers too
  • ½ cup Red Bell Pepper chopped
  • ¼ cup Red Onion finely chopped; green onions can be a milder alternative
  • 1 can (15 oz) Black Beans drained and rinsed
  • 1 cup Corn canned or fresh
  • 1 tablespoon Chopped Cilantro optional garnish
  • 1 cup Tortilla Strips or Crunched-up Doritos optional garnish for crunch

Equipment

  • large mixing bowl
  • pot
  • colander
  • small mixing bowl

Method
 

Step-by-Step Instructions
  1. In a small mixing bowl, combine ranch dressing and taco seasoning. Stir until smooth.
  2. Bring salted water to a boil. Add rotini pasta and cook until al dente, around 8-10 minutes. Drain and cool.
  3. In a large mixing bowl, combine cooled pasta with ranch dressing mixture and toss until coated.
  4. Add diced cherry tomatoes, chopped green and red bell peppers, finely chopped red onion, black beans, and corn. Stir well until combined.
  5. Cover and refrigerate for at least 30 minutes to allow flavors to meld.
  6. Before serving, stir the salad, and if desired, add cilantro and tortilla strips for extra crunch.

Nutrition

Serving: 1cupCalories: 350kcalCarbohydrates: 45gProtein: 12gFat: 15gSaturated Fat: 3gPolyunsaturated Fat: 1gMonounsaturated Fat: 5gCholesterol: 10mgSodium: 600mgPotassium: 400mgFiber: 7gSugar: 4gVitamin A: 30IUVitamin C: 80mgCalcium: 4mgIron: 10mg

Notes

Store leftovers in an airtight container in the fridge for up to 3 days. For longer storage, freeze without garnishes for up to 1 month.

Tried this recipe?

Let us know how it was!