Creamy White Pizza Dip That’ll Wow Your Guests

As I savored the first bite of this Creamy White Pizza Dip, I was suddenly transported to a cozy Italian trattoria, the aroma of fresh basil and melted cheese enveloping me. This decadent appetizer is a fantastic take on classic pizza, complete with warm, buttery garlic knots that are perfect for dipping. What makes my White Pizza Dip truly irresistible is its creamy texture that you can whip up in no time, making it a crowd-pleaser for both casual get-togethers and special occasions. You can easily customize the recipe to suit your tastes or accommodate dietary preferences, whether you want to add in some spinach for a nutritious boost or try out different cheeses for a personalized touch. So, are you ready to dive into this cheesy delight? Let’s get cooking!
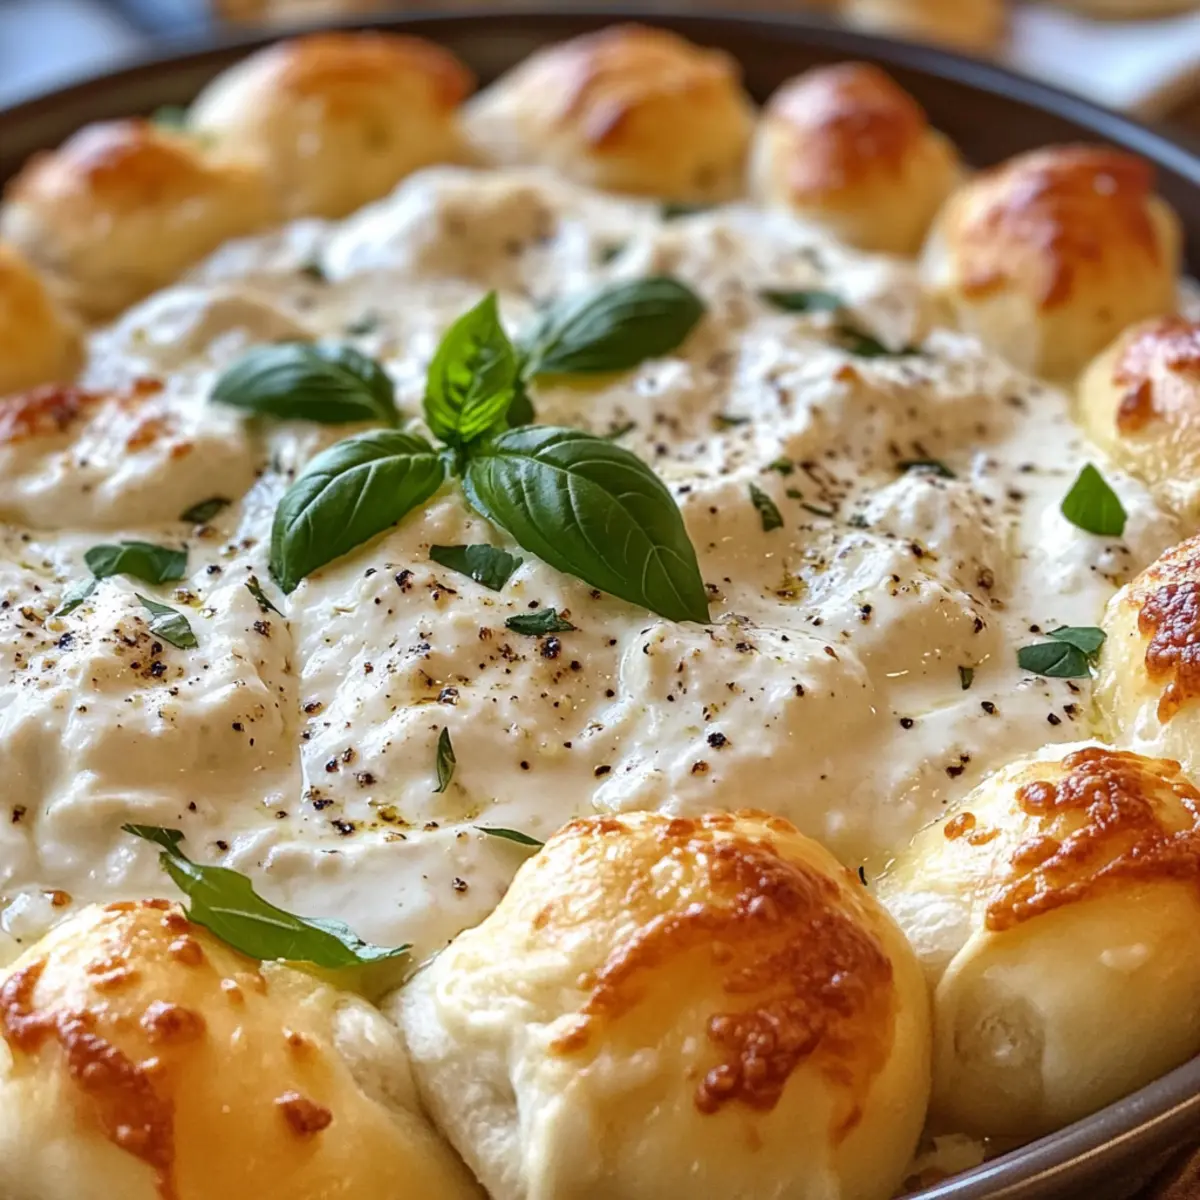
Why is White Pizza Dip a Must-Try?

Irresistible Creaminess: This dip is a creamy, dreamy combination of cheeses that will leave your taste buds rejoicing.

Quick to Prepare: In just a few simple steps, you can achieve a restaurant-quality appetizer right in your kitchen!

Customizable Delight: Feel free to personalize it with spinach or various cheeses to fit your mood or dietary needs; it’s truly versatile.

Crowd-Pleasing Appetizer: Perfect for parties or cozy nights, it’s sure to impress your friends and family, leaving them asking for more!

Elevate your gatherings by pairing it with marinara sauce for dipping or enjoy it alongside a fresh salad for balance—your guests will love it!

White Pizza Dip Ingredients

• Ready to create a creamy masterpiece? Here’s what you need!

For the Garlic Knots

  • Pizza Dough – Provides the base; use homemade or store-bought for convenience.
  • Olive Oil – Adds flavor and moisture; can be replaced with melted vegan butter.
  • Unsalted Butter – Enriches flavor post-baking; substitute with vegan butter for a dairy-free option.
  • Garlic – Enhances flavor; opt for minced garlic for a more intense taste.
  • Italian Seasoning – Delivers aromatic herbs; homemade dried herbs can be used as a substitute.
  • Kosher Salt – Balances flavor; regular salt works too if kosher is unavailable.

For the Creamy Dip

  • Cream Cheese – Acts as the creamy base; vegan cream cheese can substitute for a plant-based option.
  • Shredded Mozzarella Cheese – Adds a melty texture; dairy-free mozzarella is a suitable alternative.
  • Grated Parmesan Cheese – Enhances flavor and texture; nutritional yeast can replace this for a vegan option.
  • Ricotta Cheese – Contributes creaminess and lightness; silken tofu can be used as a dairy-free substitute.
  • Milk – Adjusts dip consistency; almond milk is a great dairy-free option.
  • Fresh Basil – Provides brightness; swap with dried basil, but the flavor will be less intense.
  • Red Pepper Flakes – Adds a hint of heat; omit for a non-spicy version or substitute with black pepper.

Now gather these ingredients and get ready to wow your guests with this delightful White Pizza Dip!

Step‑by‑Step Instructions for White Pizza Dip

Step 1: Prepare the Skillet
Begin by brushing a cast iron skillet generously with olive oil to ensure a non-stick surface. Place a small oven-safe bowl in the center of the skillet to hold the creamy White Pizza Dip later. This prep will give a lovely presentation and keep the dip warm while baking.

Step 2: Shape the Dough
Take your pizza dough and divide it into 12 equal pieces. Cut each piece into 3 smaller pieces, rolling them into tight, uniform balls. Toss these garlic knot balls in olive oil to coat them lightly. Arrange them neatly around the bowl in the skillet, ensuring they are close but not touching.

Step 3: Let the Dough Rise
Cover the skillet with a clean kitchen towel and place it in a warm, draft-free area for about 1 hour. This will allow the garlic knot dough to rise and puff up, resulting in a fluffy texture. Look for the dough to double in size and appear soft to the touch.

Step 4: Preheat the Oven and Mix the Dip
While the dough is rising, preheat your oven to 375°F (190°C). In a mixing bowl, combine the cream cheese, shredded mozzarella cheese, grated Parmesan, ricotta cheese, and milk. Incorporate fresh basil, minced garlic, and red pepper flakes, stirring until everything is well blended and creamy.

Step 5: Assemble the White Pizza Dip
Once the dough has risen, carefully remove the small bowl from the center of the skillet. Spoon the prepared White Pizza Dip mixture into the bowl, creating a generous mound. Make sure to smooth the top for even baking, and nestle the garlic knots around the dip for a cohesive look.

Step 6: Bake to Perfection
Place the skillet in the preheated oven and bake for 28-30 minutes. Keep an eye on it as it bakes; you want the dip to bubble and turn golden brown on the top. The aroma of the cheeses and garlic will fill your kitchen, creating an inviting atmosphere.

Step 7: Finish the Garlic Knots
While the White Pizza Dip is baking, melt unsalted butter in a small bowl and whisk together with Parmesan cheese, minced garlic, Italian seasoning, and salt. Once the garlic knots are out of the oven, brush this flavorful mixture over them to enhance their taste and give them a beautiful sheen.

Step 8: Serve and Enjoy
Once baked, allow the White Pizza Dip to cool for a few minutes before serving. This dip is best enjoyed warm alongside your buttery garlic knots. Consider serving with a side of marinara sauce for dipping, creating the perfect blend of flavors for a delightful appetizer experience.
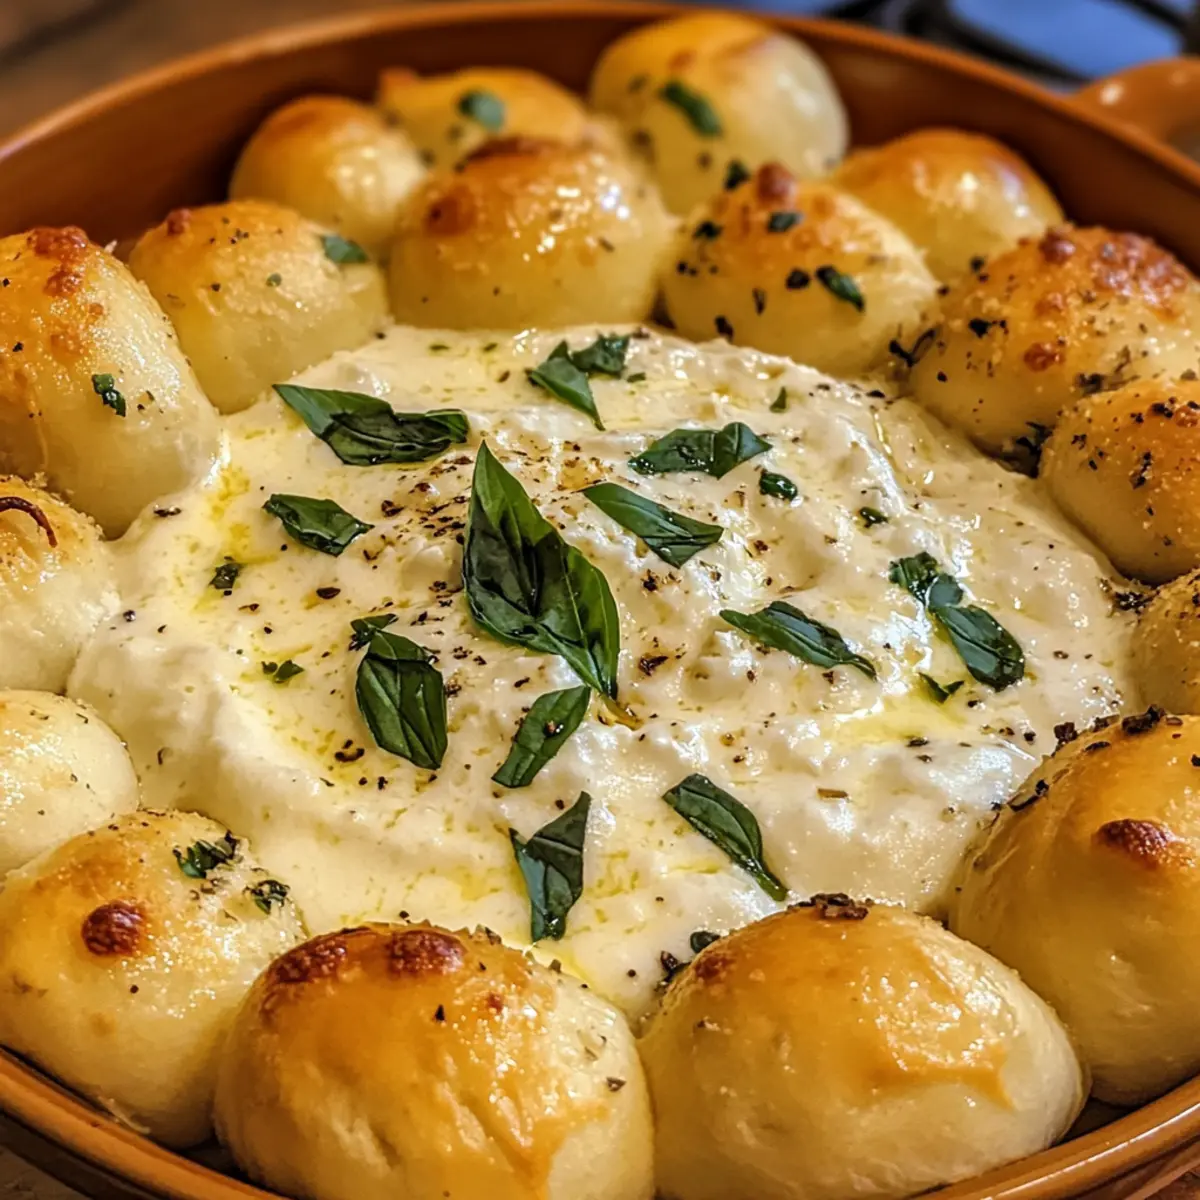
Make Ahead Options

These Creamy White Pizza Dip components are perfect for busy home cooks looking to simplify their meal prep! You can prepare the dip mixture up to 24 hours in advance. Simply combine the cream cheese, mozzarella, Parmesan, ricotta, milk, basil, garlic, and red pepper flakes in a mixing bowl and store it in an airtight container in the refrigerator. For optimal flavor, cover it tightly to prevent drying. You can also shape the garlic knots in advance; just place them on a baking sheet, cover with plastic wrap, and refrigerate for up to 3 days. When you’re ready to bake, allow the dip to come to room temperature and the knots to rise for about 30 minutes before proceeding with baking. Enjoy a seamless cooking experience and serve a delicious appetizer with ease!

How to Store and Freeze White Pizza Dip

Fridge: Keep leftover White Pizza Dip in an airtight container for up to 3 days. Reheat gently in the oven before serving to restore its creamy goodness.

Freezer: You can freeze the dip for up to 2 months. Portion it into freezer-safe containers, leaving some space for expansion. Thaw overnight in the fridge and reheat in the oven.

Garlic Knots: Store garlic knots in a zip-lock bag in the fridge for up to 2 days. Reheat in the oven for a few minutes until warm and crispy.

Make-Ahead Tip: Prepare the dip a day in advance and store it in the fridge. Bake just before serving for a freshly melted treat!

What to Serve with White Pizza Dip

Elevate your entertaining game with delightful accompaniments that balance flavors and textures beautifully.

  • Crisp Garden Salad: A fresh salad adds brightness, cutting through the richness of the dip and garlic knots.
  • Marinara Sauce: Perfect for dipping, this tangy sauce complements the cheesy dip, creating a classic pizza experience.
  • Roasted Vegetables: Seasonal roasted veggies add a savory touch while providing a lovely contrast to the creamy dip.
  • Herbed Breadsticks: Soft herbed breadsticks offer a delightful textural contrast and are perfect for scooping up every cheesy morsel.
  • Sparkling Water: Effervescent drinks cleanse the palate, preparing you for another rich bite of the dip.
  • Red Wine: A glass of light red wine enhances the flavors of the cheese, making for a sophisticated pairing.
  • Cheese Platter: Adding a variety of cheeses enriches the experience and gives your guests something to nibble on.
  • Fruit Skewers: Fresh fruits like strawberries or grapes add a touch of sweetness that perfectly balances the savory dip.

White Pizza Dip Variations

Feel free to get creative with your White Pizza Dip for an exciting twist on this beloved appetizer!

  • Add Spinach: Incorporate sautéed spinach for a nutritional boost and vibrant flavor. A touch of greenery pairs wonderfully with the creamy cheese.
  • Cheesy Overload: Top the dip with extra mozzarella or some pepperoni slices before baking for macronutrient-packed satisfaction. You’re guaranteed a mouthful of cheesy goodness!
  • Vegan-Friendly: Use all vegan substitutes such as vegan cream cheese and dairy-free mozzarella to make a delightful plant-based version. Everyone can enjoy this creamy treasure!
  • Herb Variations: Experiment with fresh herbs like oregano or thyme to add unique flavors. Each herb brings its character—play with them to find your favorite blend!
  • Add Heat: Toss in some chopped jalapeños or a sprinkle of cayenne pepper for an extra kick. Spice lovers will appreciate the fiery twist!
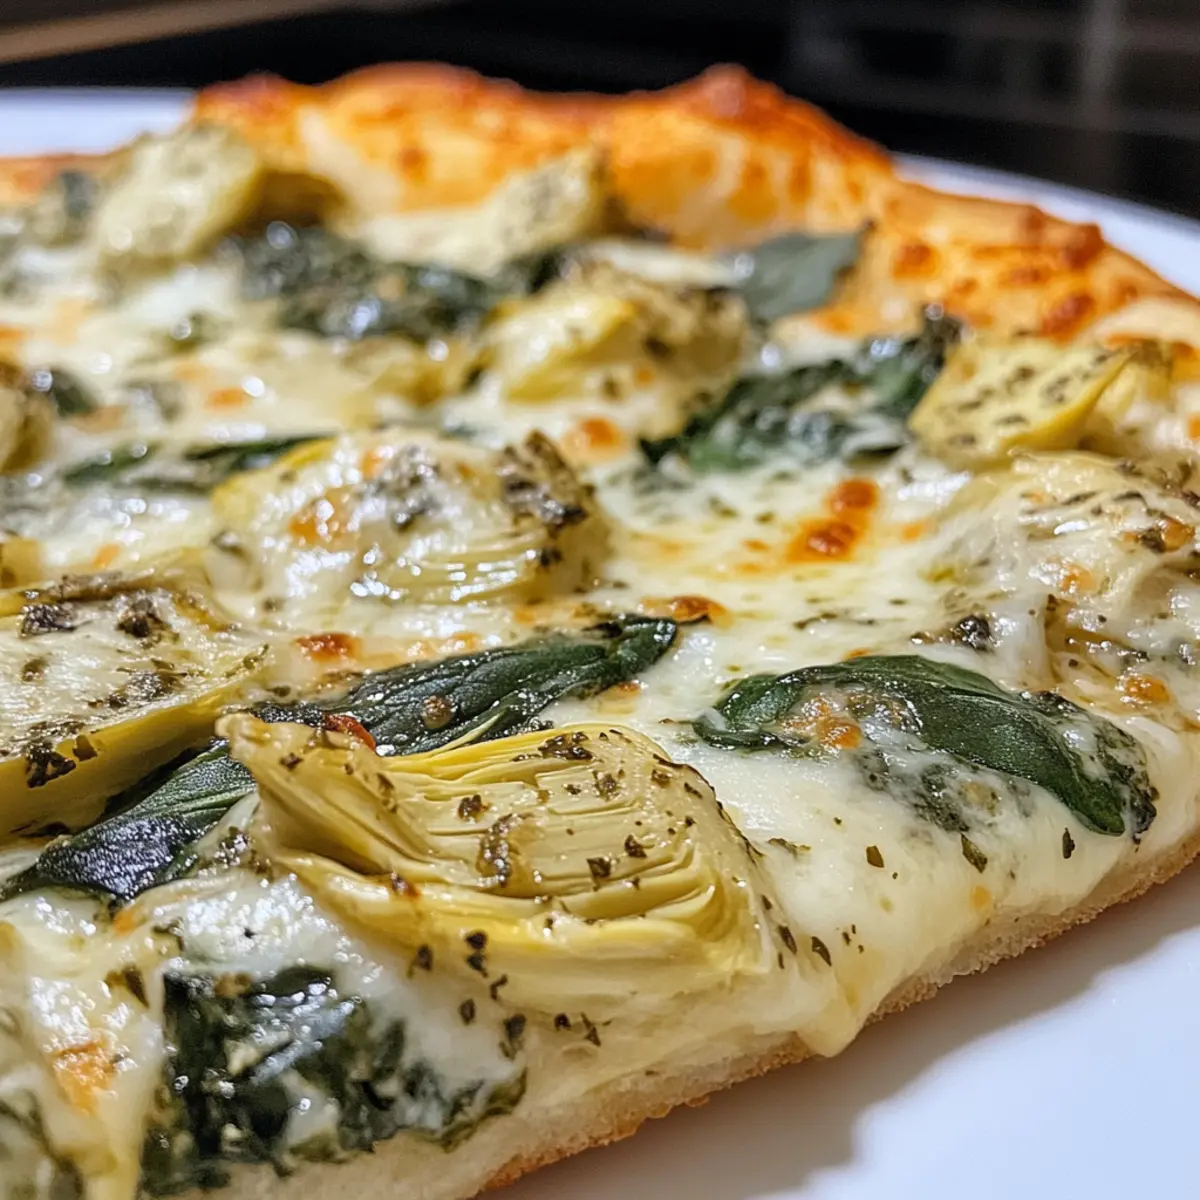
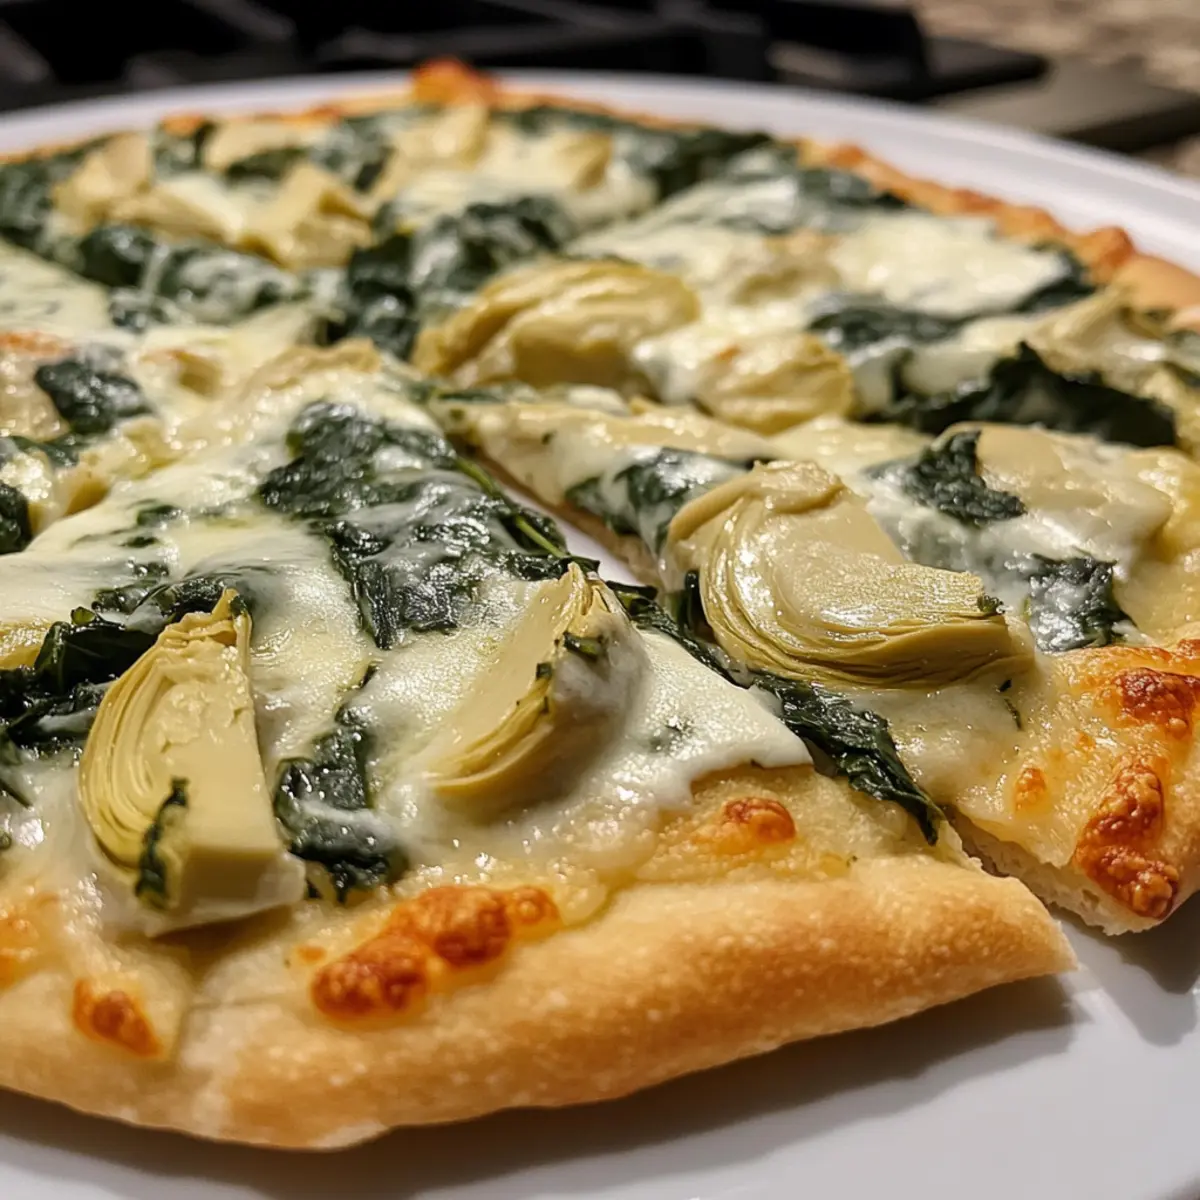
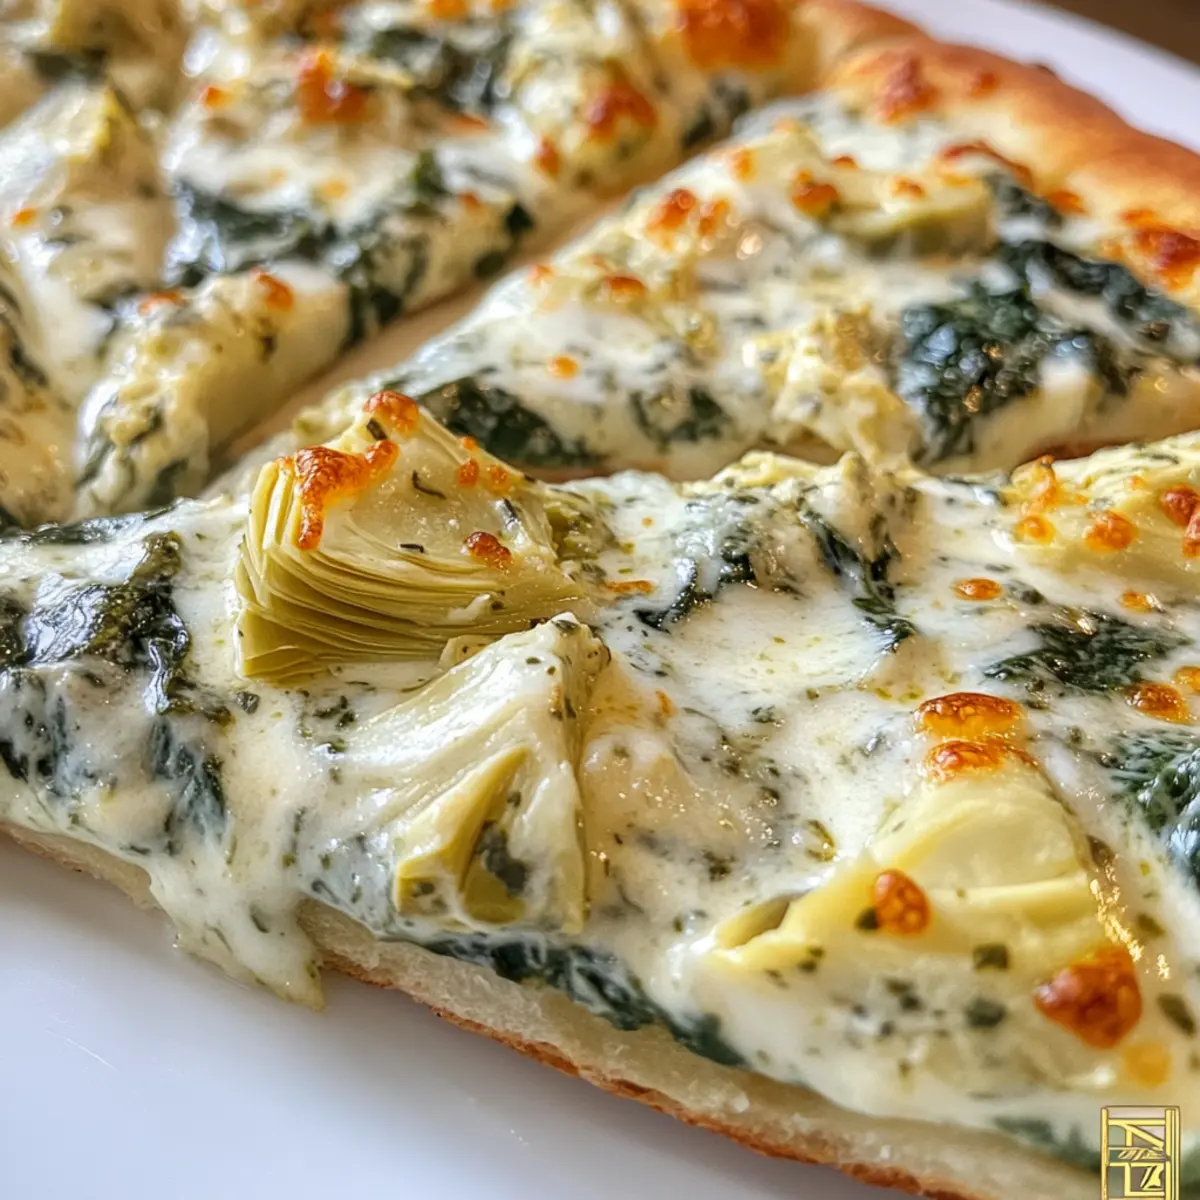
  • Creamy Artichoke: Fold in chopped artichokes along with the other ingredients for a richer texture and taste. This classic combination will bring a Mediterranean flair to your gathering!
  • Nutty Flavor: Stir in a bit of nutritional yeast for a cheesy but dairy-free twist. It adds depth without altering the creamy base!
  • Swirl Pesto: Drizzle some basil pesto over the dip before baking for an herby flavor explosion that elevates the traditional taste of white pizza.

If you’re hungry for more delicious ideas, consider pairing this dip with Chicken Naan Pizza or fresh sides like a crispy salad. Your creativity knows no bounds!

Expert Tips for White Pizza Dip

  • Mix Thoroughly: Ensure that all cheese layers are well combined for a smooth and even flavor. This avoids any bland spots in your White Pizza Dip.

  • High-Quality Ingredients: Use fresh, high-quality cheeses and olive oil. It truly enhances the creaminess and depth of flavor in the dip.

  • Baking Time: Keep a close watch in the last few minutes of baking. A golden-brown crust indicates that it’s perfectly bubbly and delicious.

  • Dough Handling: Don’t overwork your dough when shaping the garlic knots. Less handling results in fluffier knots when baked.

  • Flavor Variations: Experiment with adding sautéed vegetables, like spinach or artichokes, to boost nutrients and flavors for a custom White Pizza Dip.

  • Serve Warm: This dip is best enjoyed warm, so serve immediately after baking for the ultimate creamy experience!
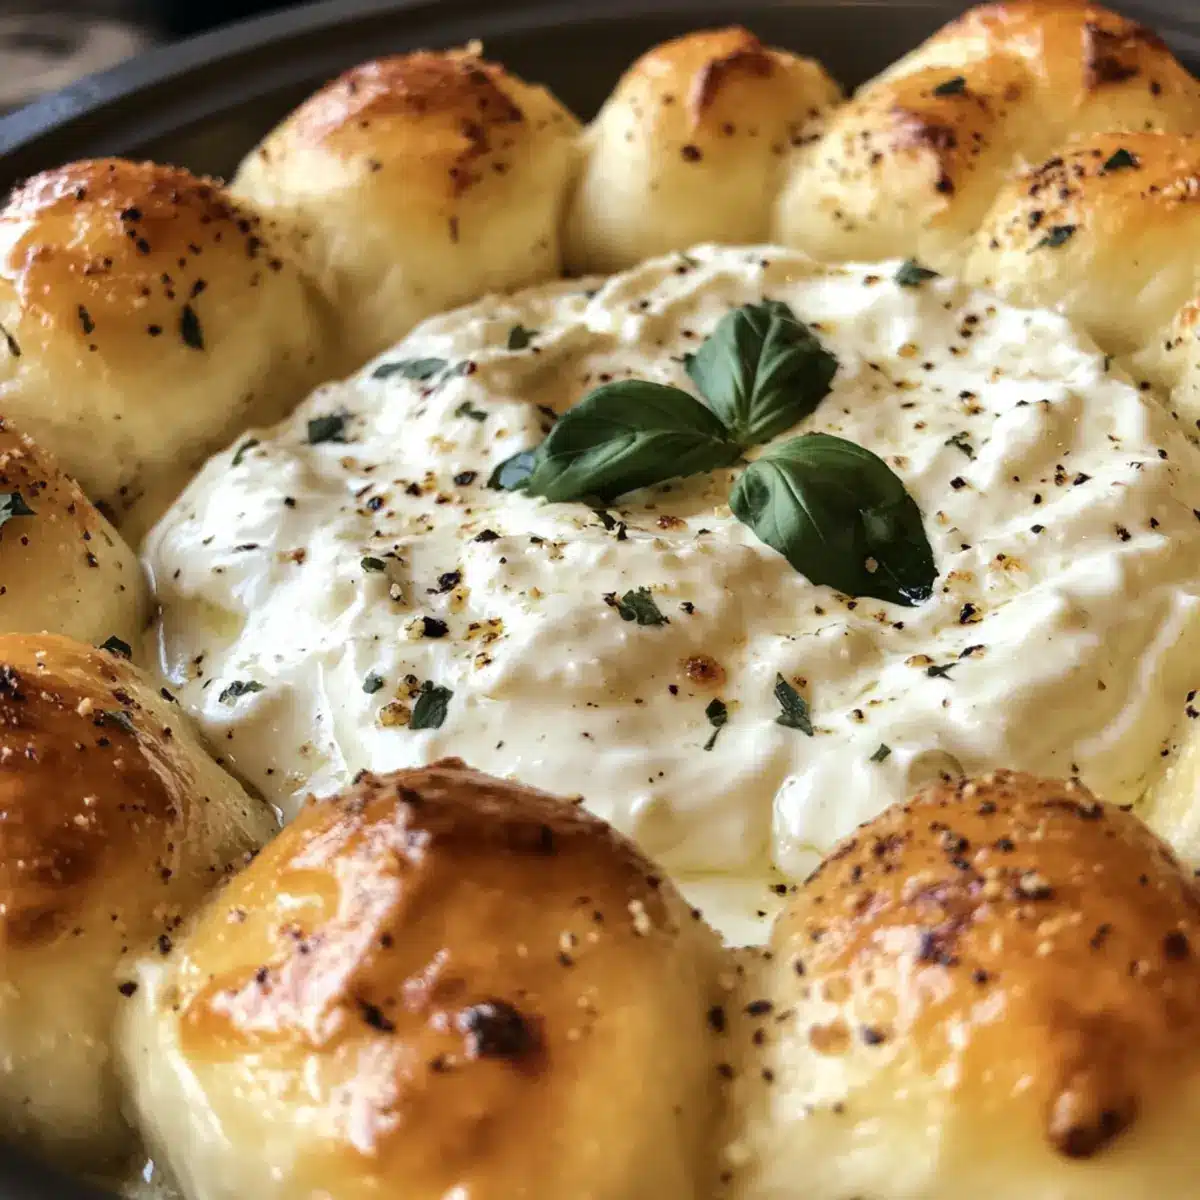
White Pizza Dip Recipe FAQs

How do I select the right ingredients for my White Pizza Dip?
Absolutely! When choosing ingredients, look for fresh and high-quality cheeses. For a creamy texture, I recommend using full-fat cream cheese and freshly shredded mozzarella rather than pre-packaged options, as those can contain anti-caking agents. Fresh basil should be bright green and fragrant; avoid any leaves with dark spots or wilting.

How should I store leftover White Pizza Dip?
Very! After enjoying your dip, transfer any leftovers into an airtight container. It keeps well in the fridge for up to 3 days. When you’re ready to indulge again, simply reheat it gently in the oven at 350°F (175°C) until warmed through, about 15–20 minutes should suffice for that creamy texture!

Can I freeze the White Pizza Dip?
Absolutely! You can freeze your White Pizza Dip for up to 2 months. Portion it into freezer-safe containers, ensuring you leave some space at the top for expansion. To thaw, place it in the refrigerator overnight before reheating. When you’re ready to serve, bake at 350°F (175°C) until heated through.

What’s the best way to maintain the texture of the garlic knots?
For the fluffiest garlic knots, avoid overworking the dough while shaping. After baking, store them in a zip-lock bag to prevent them from becoming too hard. Reheat in the oven for about 5-7 minutes to rejuvenate their warmth and texture. If they turn out a bit dense, a small splash of water before reheating can create some steam and soften them up beautifully!

Can I customize my White Pizza Dip for dietary restrictions?
Very! The beauty of this recipe lies in its flexibility. For a dairy-free option, you can substitute cream cheese and other cheeses with vegan alternatives made from nuts or tofu. Also, if you’re looking to add some greens, chopped spinach or artichoke hearts can boost nutrition without sacrificing flavor! Just make sure any substitutes complement the creamy base while fitting your dietary needs.

Is this White Pizza Dip pet-friendly?
Not really! While the ingredients are generally safe, I recommend avoiding giving your pets any dip or garlic knots due to their high fat content and the potential for seasonings that might not agree with them. It’s best to save this creamy delight for your human guests!
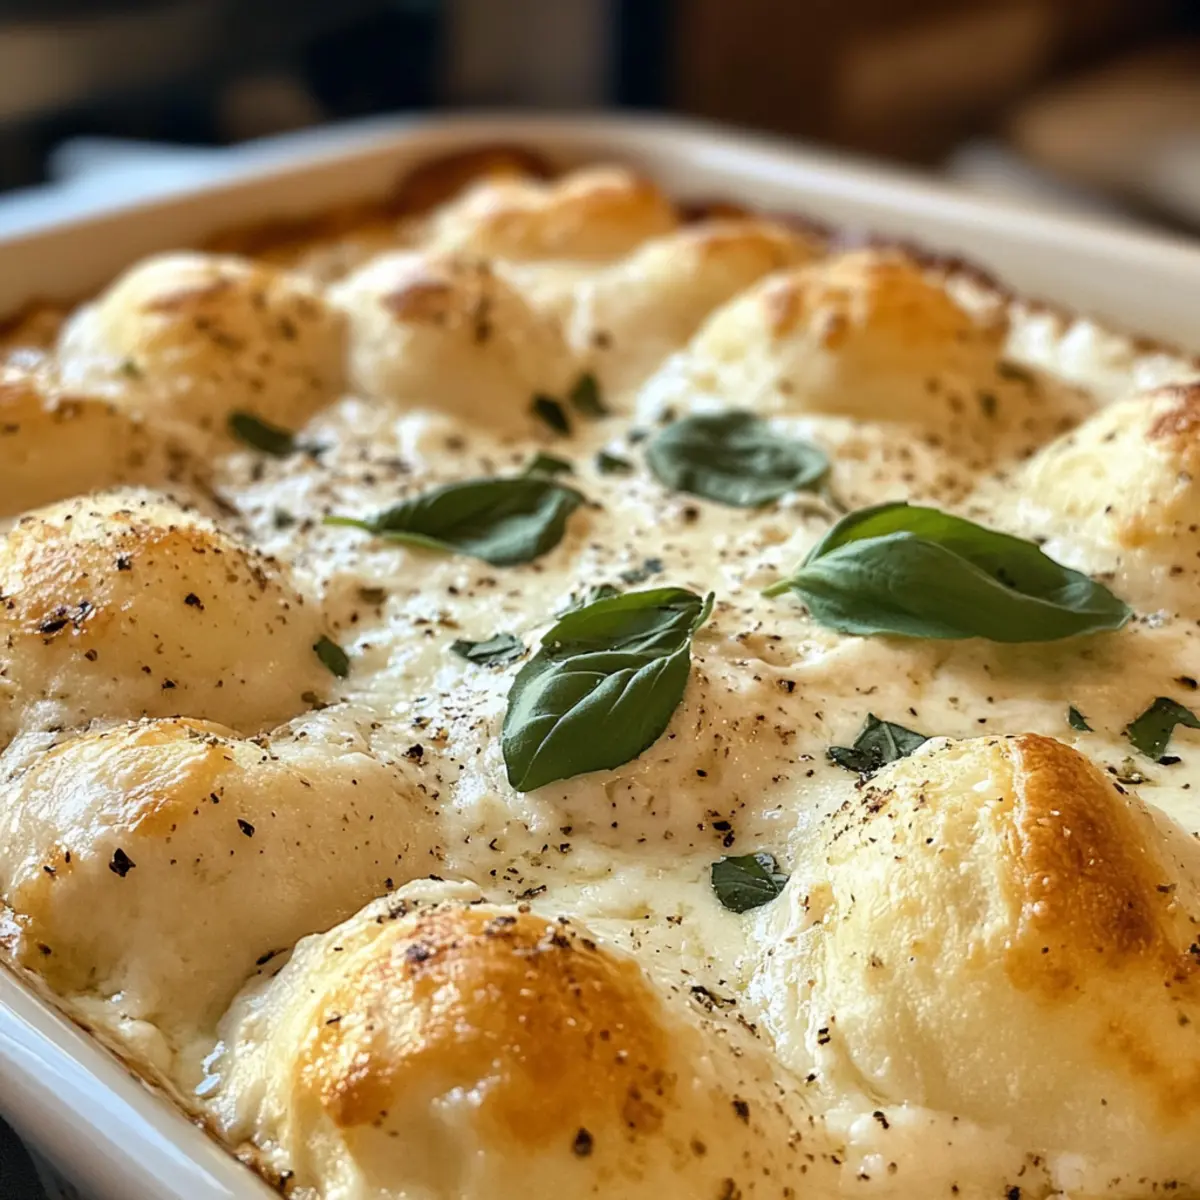
White Pizza Dip

Creamy White Pizza Dip That'll Wow Your Guests

This Creamy White Pizza Dip is a cheesy delight perfect for parties and gatherings, capturing the essence of traditional pizza in a delicious dip.
Prep Time 15 minutes
Cook Time 30 minutes
Rising Time 1 hour
Total Time 1 hour 45 minutes
Servings: 8 servings
Course: Appetizer
Cuisine: Italian
Calories: 250

Ingredients
  

For the Garlic Knots
  • 1 lb Pizza Dough Use homemade or store-bought for convenience.
  • 3 tbsp Olive Oil Can be replaced with melted vegan butter.
  • 2 tbsp Unsalted Butter Substitute with vegan butter for a dairy-free option.
  • 3 cloves Garlic Opt for minced garlic for a more intense taste.
  • 1 tbsp Italian Seasoning Homemade dried herbs can be used as a substitute.
  • 1 tsp Kosher Salt Regular salt works too if kosher is unavailable.
For the Creamy Dip
  • 8 oz Cream Cheese Vegan cream cheese can substitute for a plant-based option.
  • 1 cup Shredded Mozzarella Cheese Dairy-free mozzarella is a suitable alternative.
  • 1/2 cup Grated Parmesan Cheese Nutritional yeast can replace this for a vegan option.
  • 1 cup Ricotta Cheese Silken tofu can be used as a dairy-free substitute.
  • 1/2 cup Milk Almond milk is a great dairy-free option.
  • 1/4 cup Fresh Basil Swap with dried basil, but the flavor will be less intense.
  • 1/2 tsp Red Pepper Flakes Omit for a non-spicy version or substitute with black pepper.

Equipment

  • cast-iron skillet
  • Mixing Bowl
  • Oven

Method
 

Directions
  1. Brush a cast iron skillet generously with olive oil and place a small oven-safe bowl in the center for the creamy White Pizza Dip.
  2. Divide pizza dough into 12 equal pieces, roll them into tight balls, and toss in olive oil before arranging around the bowl.
  3. Cover with a towel and let rise in a warm area for about 1 hour until doubled in size.
  4. Preheat oven to 375°F (190°C) and mix cream cheese, mozzarella, Parmesan, ricotta, and milk in a bowl, adding basil, garlic, and red pepper flakes.
  5. Spoon White Pizza Dip mixture into the bowl and smooth the top, arranging garlic knots around it.
  6. Bake for 28-30 minutes until bubbly and golden brown.
  7. Mix melted butter with Parmesan, garlic, Italian seasoning, and salt, then brush over garlic knots after baking.
  8. Let cool slightly, serve warm with garlic knots, and enjoy!
Nutrition

Serving: 1servingCalories: 250kcalCarbohydrates: 30gProtein: 8gFat: 12gSaturated Fat: 7gPolyunsaturated Fat: 1gMonounsaturated Fat: 4gCholesterol: 35mgSodium: 400mgPotassium: 200mgFiber: 1gSugar: 2gVitamin A: 300IUVitamin C: 2mgCalcium: 200mgIron: 1mg

Notes

For best results, mix thoroughly, use high-quality ingredients, and serve warm right after baking for the ultimate experience.

Tried this recipe?

Let us know how it was!

Ground Beef Casserole: Cozy Comfort Food Your Family Will Love

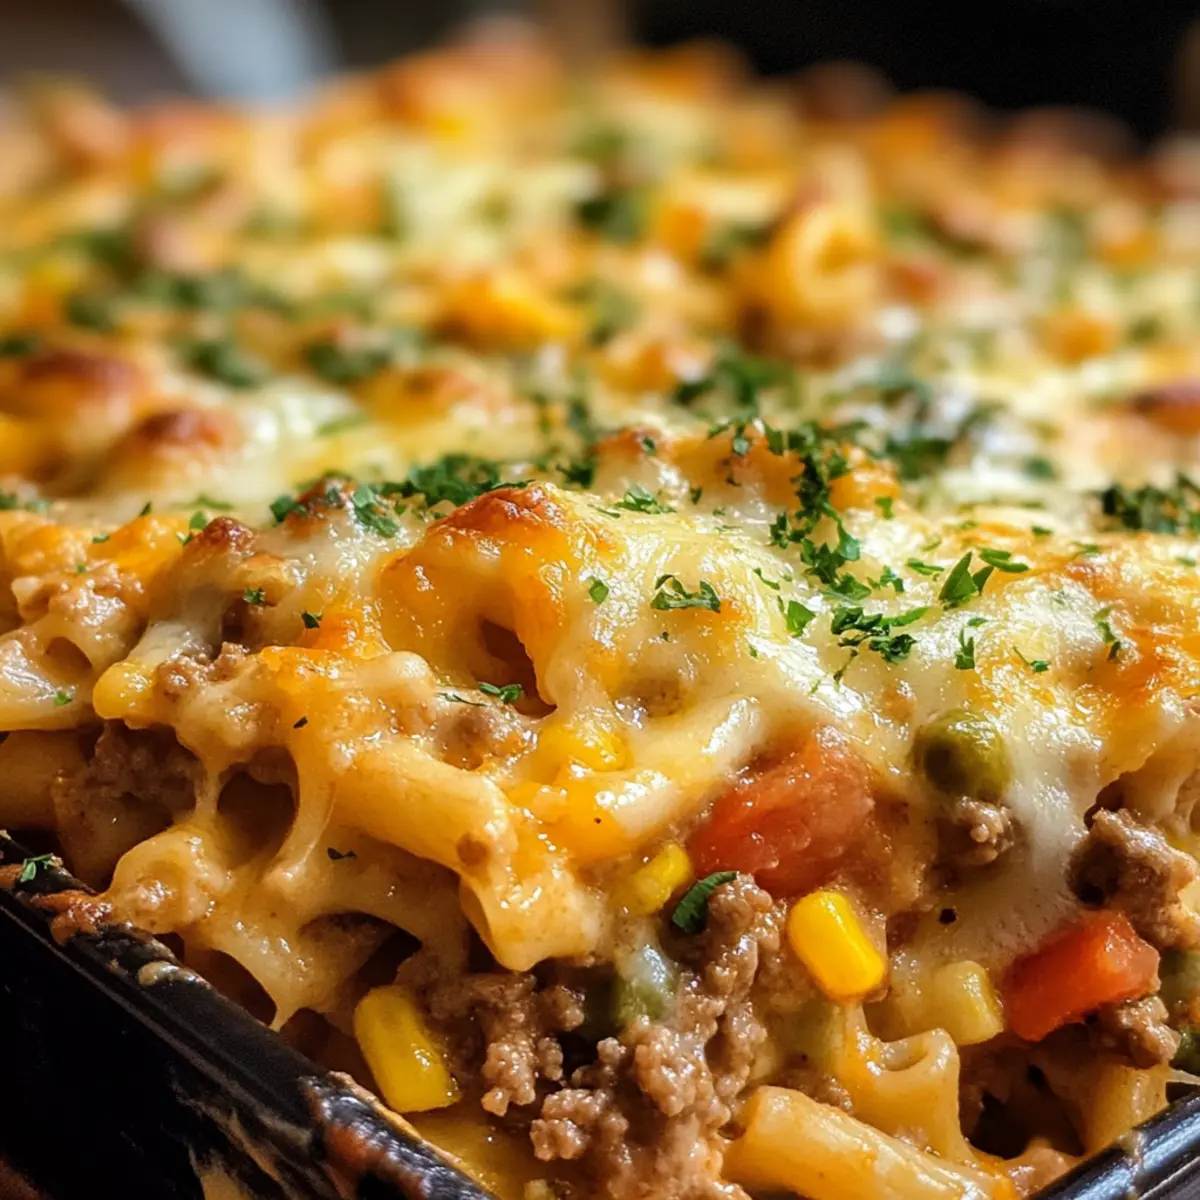
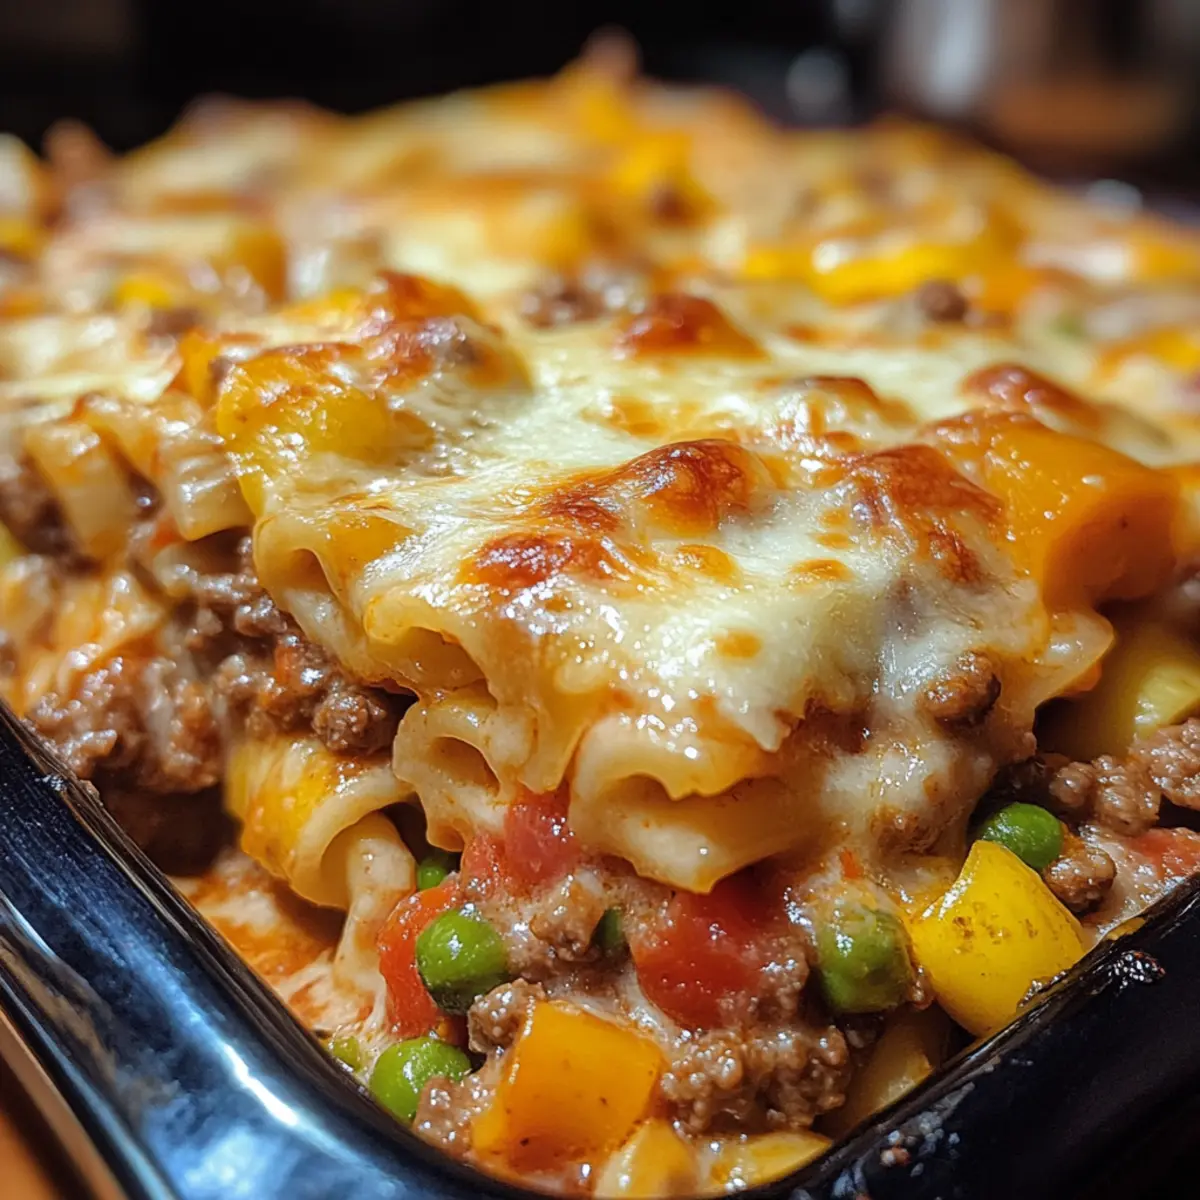
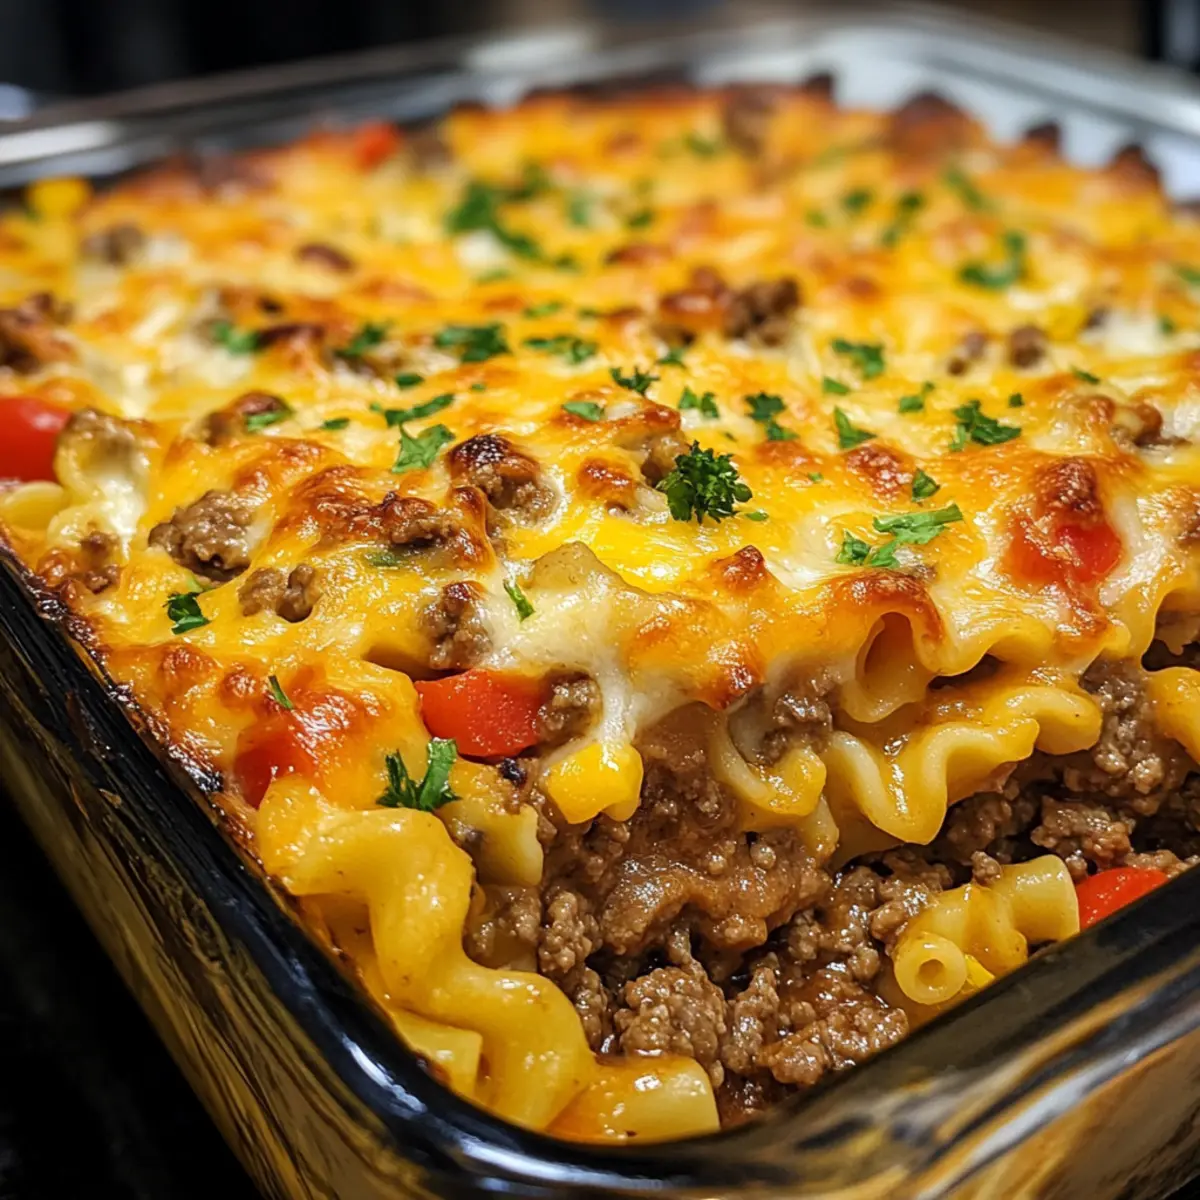
As the clock inches closer to dinnertime, a faint rumble in my stomach reminds me of the evening’s culinary quest: a cozy, fulfilling meal that requires minimal fuss. Enter the Easy Ground Beef Casserole—a dish that not only brings comfort to the table but also embraces the creativity of blending flavors. With only a handful of ingredients, this budget-friendly recipe transforms into a hearty masterpiece perfect for a quick weeknight dinner. Whether you’re cooking for a hungry family or just craving something satisfying, these casseroles promise no leftovers and a contented sigh after every bite. Curious about how to whip up this delicious comfort food? Let’s dig into the details!

Why Choose Ground Beef Casserole?

Ease of Preparation: You can whip this casserole together in under 10 minutes, making it the ideal choice for busy weeknights.

Crowd-Pleasing Comfort: With its cheesy goodness and savory beef, this dish is sure to win over even the pickiest eaters in your family.

Versatile Options: Feel free to customize your casserole with leftover veggies or your favorite sauces, just like you might do with other ground beef favorites like a Ground Turkey Zucchini skillet meal.

Budget-Friendly: Using ground beef means you can feed the family without breaking the bank, allowing you to enjoy your culinary creativity responsibly.

Freezer-Friendly: Make extra batches for a quick meal option down the road! Just pop it in the freezer for those evenings when you need something on the table fast.

This casserole isn’t just dinner; it’s a way to create warm memories at home!

Ground Beef Casserole Ingredients

• Gather the essential ingredients to create your Ground Beef casserole. Each component enhances the flavors while keeping the recipe simple!

For the Casserole Base

  • Ground Beef – Use 80/20 for a juicy, flavorful dish that keeps the casserole moist.
  • Pasta/Rice/Tater Tots – Choose your favorite base; pasta is classic, while tater tots add a fun twist!

For the Flavor Layer

  • Cheese (Mozzarella/Ch cheddar) – Use a blend for creaminess; vegan cheese works well for a dairy-free option.
  • Enchilada Sauce – Adds a zesty kick; consider homemade sauce for a fresh touch or salsa as a milder alternative.
  • Vegetables (e.g., bell peppers, onions) – Fresh or frozen, they enhance nutrition and flavor—use whatever you have in the fridge!

For Seasoning

  • Seasonings (e.g., garlic powder, taco seasoning) – Tailor this to your taste; feel free to sprinkle more for an extra kick!

Now that you have your Ground Beef Casserole ingredients ready, let’s move on to the delicious preparation!

Step‑by‑Step Instructions for Ground Beef Casserole

Step 1: Prepare Ingredients
Begin by gathering all your ingredients for the Ground Beef Casserole. Chop any vegetables such as bell peppers and onions into bite-sized pieces. Preheat your oven to 350°F (175°C) so it’s ready when your casserole is assembled. Make sure to measure out any sauces, cheeses, and pasta or rice you plan to use.

Step 2: Cook Beef
In a large skillet over medium heat, add the ground beef, breaking it apart with a spatula. Cook for about 6-8 minutes, stirring occasionally, until the meat is no longer pink and browned. Drain any excess fat to keep your casserole light and flavorful, ensuring a nice base for your dish.

Step 3: Combine
Once the beef is cooked, stir in the chopped vegetables and your favorite seasonings, along with the enchilada sauce or chosen alternative. Cook this mixture for an additional 5 minutes, allowing the flavors to meld together nicely. This step ensures each bite of your Ground Beef Casserole is packed with flavor.

Step 4: Layer Casserole
In a deep baking dish, start layering your Ground Beef mixture evenly across the bottom. Next, add your pasta, rice, or tater tots as the hearty base, pressing down slightly. Finally, sprinkle shredded cheese over the top, giving it a creamy look that promises deliciousness.

Step 5: Bake
Cover the baking dish with aluminum foil, ensuring it is tightly sealed to lock in moisture. Place the dish in the preheated oven and bake for 25-30 minutes. This helps all the flavors combine beautifully while allowing the cheese to melt and bubble.

Step 6: Finish Baking
After baking, carefully remove the foil and bake for an additional 10 minutes. This step ensures the cheese gets that beautiful golden-brown hue. Keep an eye on it—when the cheese is bubbly and lightly browned, your Ground Beef Casserole is perfectly done.

Step 7: Serve
Once out of the oven, let the casserole cool for about 5 minutes before slicing. This slight cooling period makes it easier to serve, resulting in neat slices. Pair it with a side salad or garlic bread for a complete meal that your family will love, showcasing the comfort of this delightful dish.

How to Store and Freeze Ground Beef Casserole

Fridge: Store leftovers in an airtight container for up to 3 days. Allow the casserole to cool completely before sealing to preserve its texture.

Freezer: Freeze portions in airtight containers for up to 3 months. Make sure to label the containers with the date for easy tracking.

Reheating: For best results, reheat frozen ground beef casserole in the oven at 350°F (175°C) for about 30-40 minutes until heated through. Microwave options are convenient but may lead to uneven heating.

Make-Ahead: Prepare the casserole up to the baking step, refrigerate for up to 24 hours, and then bake as directed. This allows for quick, easy dinners on busy nights.

What to Serve with Easy Ground Beef Casserole?

As you indulge in the comforting flavors of this casserole, consider pairing it with delightful sides to create a well-rounded meal.

  • Garden Salad: A light salad bursting with fresh greens and veggies complements the richness of the casserole, adding a refreshing crunch.

  • Garlic Bread: The buttery, toasted goodness of garlic bread is the perfect vehicle for soaking up every cheesy bite, balancing flavors beautifully.

  • Steamed Broccoli: Tender, vibrant broccoli adds a pop of color and essential nutrients, enhancing your meal’s nutritional profile in a simple way.

  • Coleslaw: The sweet and tangy crunch of coleslaw offers a delightful contrast to the warm casserole, making each forkful more exciting.

  • Corn on the Cob: Juicy, sweet corn brings a burst of summer to the plate, and its buttery flavor pairs wonderfully with the savory dish.

  • Roasted Vegetables: A medley of roasted vegetables adds depth and texture. Their caramelized sweetness beautifully complements the casserole’s savory notes.

  • Apple Crisp: End on a sweet note with a warm slice of apple crisp. Its cinnamon-spiced flavor adds warmth, perfectly rounding off the meal.

  • Red Wine: A glass of red wine, such as Merlot, enhances the meal’s comfort factor and brings out the savory elements in the casserole.

  • Iced Tea: Quench your thirst with refreshing iced tea, a versatile drink that pairs excellently with rich, hearty meals.

These pairings will elevate your dining experience, creating heartwarming memories around the dinner table!

Make Ahead Options

These Easy Ground Beef Casseroles are perfect for meal prep enthusiasts looking to save time during busy weeknights! You can assemble the entire casserole up to 24 hours in advance; just be sure to cover it tightly with foil to maintain freshness and prevent drying out. If you’re planning to enjoy it later, refrigerate before baking. When you’re ready to serve, simply remove it from the fridge, let it sit at room temperature for about 30 minutes (to promote even cooking), then bake at 350°F (175°C) for 25-30 minutes, removing the foil for an additional 10 minutes until bubbly and golden. This make-ahead strategy ensures a delightful, comforting meal with minimal effort!

Ground Beef Casserole Variations

Feel free to get creative with your casserole, adding your own flair to this comforting dish. It’s all about crafting a meal that delights the senses!

  • Vegetarian: Swap ground beef for lentils or quinoa for a nutritious twist. This adds protein while keeping the heartiness you love.

  • Creamy Spin: Mix in a can of cream of mushroom soup for an extra layer of creaminess. This will elevate your casserole to a rich, indulgent dish.

  • Zesty Heat: Incorporate diced jalapeños or a splash of hot sauce for a fiery kick. This spicy addition will cater to those who crave a little heat.

  • Cauliflower Rice: For a low-carb option, substitute regular rice with cauliflower rice. It’s a fantastic swap that keeps the dish light and healthy without sacrificing taste.

  • Cheesy Delight: Add a mix of shredded cheese types like pepper jack for a kick or Gouda for smokiness. This gives your casserole a depth of flavor that’s hard to resist.

  • Herb Infusion: Fresh herbs such as thyme or rosemary can be stirred into the beef mixture for an aromatic boost. A touch of freshness makes all the difference!

  • BBQ Flair: Use BBQ sauce in place of enchilada sauce for a sweet and tangy version. This will take your casserole to a whole new flavor dimension.

  • Savory Beef Mix: Create a delightful mashup with flavors from other favorite dishes, like adding taco seasoning to transform it into a Tex-Mex treat, just like in the versatile Honey Sriracha Ground recipe!

No matter the variation, each bite of your Ground Beef Casserole will bring happiness and comfort to your dinner table!

Expert Tips for Ground Beef Casserole

  • Avoid Overcooking: Overcooking the ground beef can lead to a dry texture. Ensure it’s browned but not overdone for a juicy casserole.

  • Choose the Right Dish: Use a deep baking dish to prevent overflow and accommodate all the bubbling goodness during baking.

  • Make Ahead: Prep your Ground Beef Casserole in advance, refrigerate but don’t bake. You can cook it fresh later, saving time on busy nights.

  • Add Freshness: Include fresh herbs like parsley or cilantro right before serving to enhance flavors and brighten the dish. It’s a fantastic touch!

  • Customize Your Layers: Don’t hesitate to swap ingredients or add extras like black beans or corn for additional flavor and nutrition; just keep the balance in mind.

Ground Beef Casserole Recipe FAQs

What type of ground beef should I use for the casserole?
I recommend using 80/20 ground beef for the perfect combination of flavor and moisture. The slight fat content helps to keep the casserole juicy without becoming greasy, offering a satisfying bite in every forkful.

How should I store leftover ground beef casserole?
After letting it cool completely, store any leftovers in an airtight container in the fridge for up to 3 days. This method helps retain the dish’s flavor and texture while keeping it fresh for your next meal.

Can I freeze ground beef casserole, and how?
Absolutely! To freeze it, first allow the casserole to cool completely. Then, transfer it to airtight containers or wrap it tightly in aluminum foil. This way, it can last for up to 3 months in the freezer. When you’re ready, simply thaw it in the fridge overnight and reheat it in the oven at 350°F (175°C) for about 30-40 minutes until heated through.

My casserole turned out too dry—what went wrong?
Dryness can occur if the ground beef is overcooked while browning. Aim for a nice brown color without cooking it completely to avoid losing moisture. Additionally, be sure to use enough sauce or cheese to keep the casserole creamy; you might consider adding extra cheese or sauce next time for a more luscious result.

Are there any dietary considerations for this recipe?
Yes! If you have lactose intolerance, feel free to substitute regular cheese with dairy-free alternatives. You can also swap ground beef for ground turkey or lentils if you’re looking for lower-fat or vegetarian options. Always make sure to check for any allergies related to the ingredients you choose to use.

How long can I keep ready-to-bake casserole in the fridge?
You can prepare the casserole in advance and keep it in the refrigerator for up to 24 hours before baking. Just follow the layering instructions, cover tightly with foil, and bake it fresh the next day for a quick and easy dinner solution!

Ground Beef

Ground Beef Casserole: Cozy Comfort Food Your Family Will Love

This Ground Beef Casserole is the perfect cozy dish for busy nights, combining savory beef, cheesy goodness, and hearty ingredients.
Prep Time 10 minutes
Cook Time 30 minutes
Cooling Time 5 minutes
Total Time 45 minutes
Servings: 6 servings
Course: Beef
Cuisine: American
Calories: 400

Ingredients
  

For the Casserole Base
  • 1 pound Ground Beef Use 80/20 for best flavor
  • 2 cups Pasta/Rice/Tater Tots Use your favorite base
For the Flavor Layer
  • 2 cups Cheese (Mozzarella/Cheddar) Blend for creaminess
  • 1 cup Enchilada Sauce Or substitute with salsa
  • 2 cups Vegetables Bell peppers, onions, fresh or frozen
For Seasoning
  • 2 teaspoons Seasonings Garlic powder, taco seasoning, or to taste

Equipment

  • large skillet
  • Deep baking dish
  • Measuring cups
  • Spatula

Method
 

Preparation
  1. Gather all your ingredients, chop vegetables, and preheat your oven to 350°F (175°C).
  2. In a large skillet over medium heat, cook the ground beef for about 6-8 minutes until browned. Drain excess fat.
  3. Stir in the chopped vegetables and seasonings, adding the enchilada sauce. Cook for an additional 5 minutes.
  4. Layer the beef mixture in a deep baking dish, add the pasta/rice/tater tots, press down, and sprinkle with cheese.
  5. Cover with aluminum foil and bake for 25-30 minutes.
  6. Remove foil and bake for another 10 minutes until the cheese is bubbly and golden.
  7. Let the casserole cool for 5 minutes before slicing and serving.

Nutrition

Serving: 1servingCalories: 400kcalCarbohydrates: 30gProtein: 25gFat: 20gSaturated Fat: 10gPolyunsaturated Fat: 3gMonounsaturated Fat: 5gCholesterol: 70mgSodium: 800mgPotassium: 600mgFiber: 2gSugar: 3gVitamin A: 250IUVitamin C: 15mgCalcium: 200mgIron: 3mg

Notes

Customize with leftover veggies or different sauces. Great for freezing and reheating later.

Tried this recipe?

Let us know how it was!

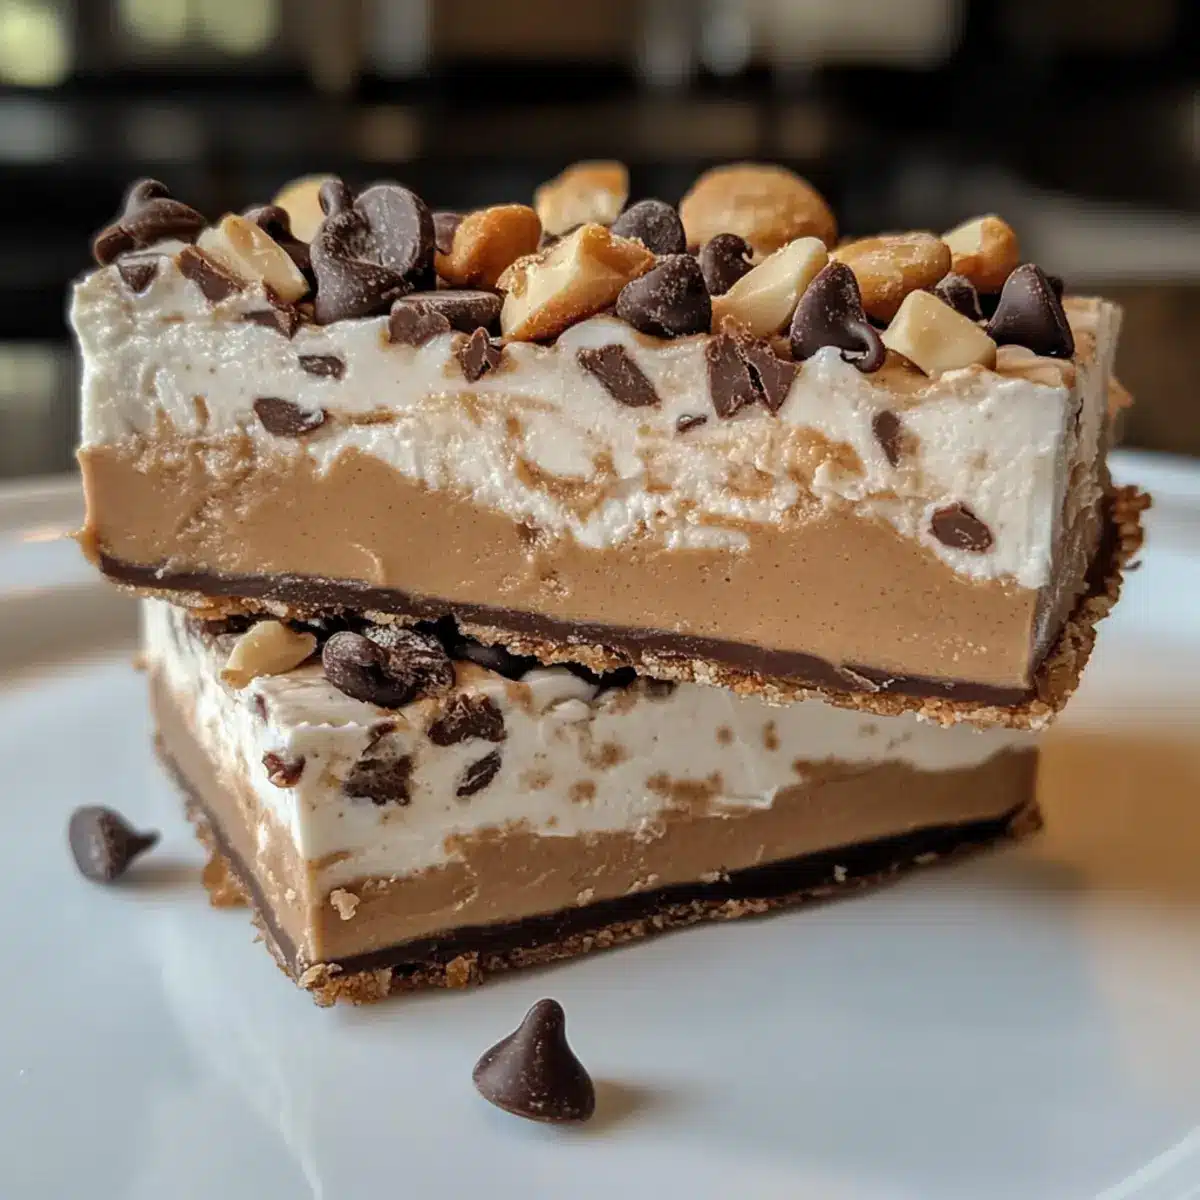
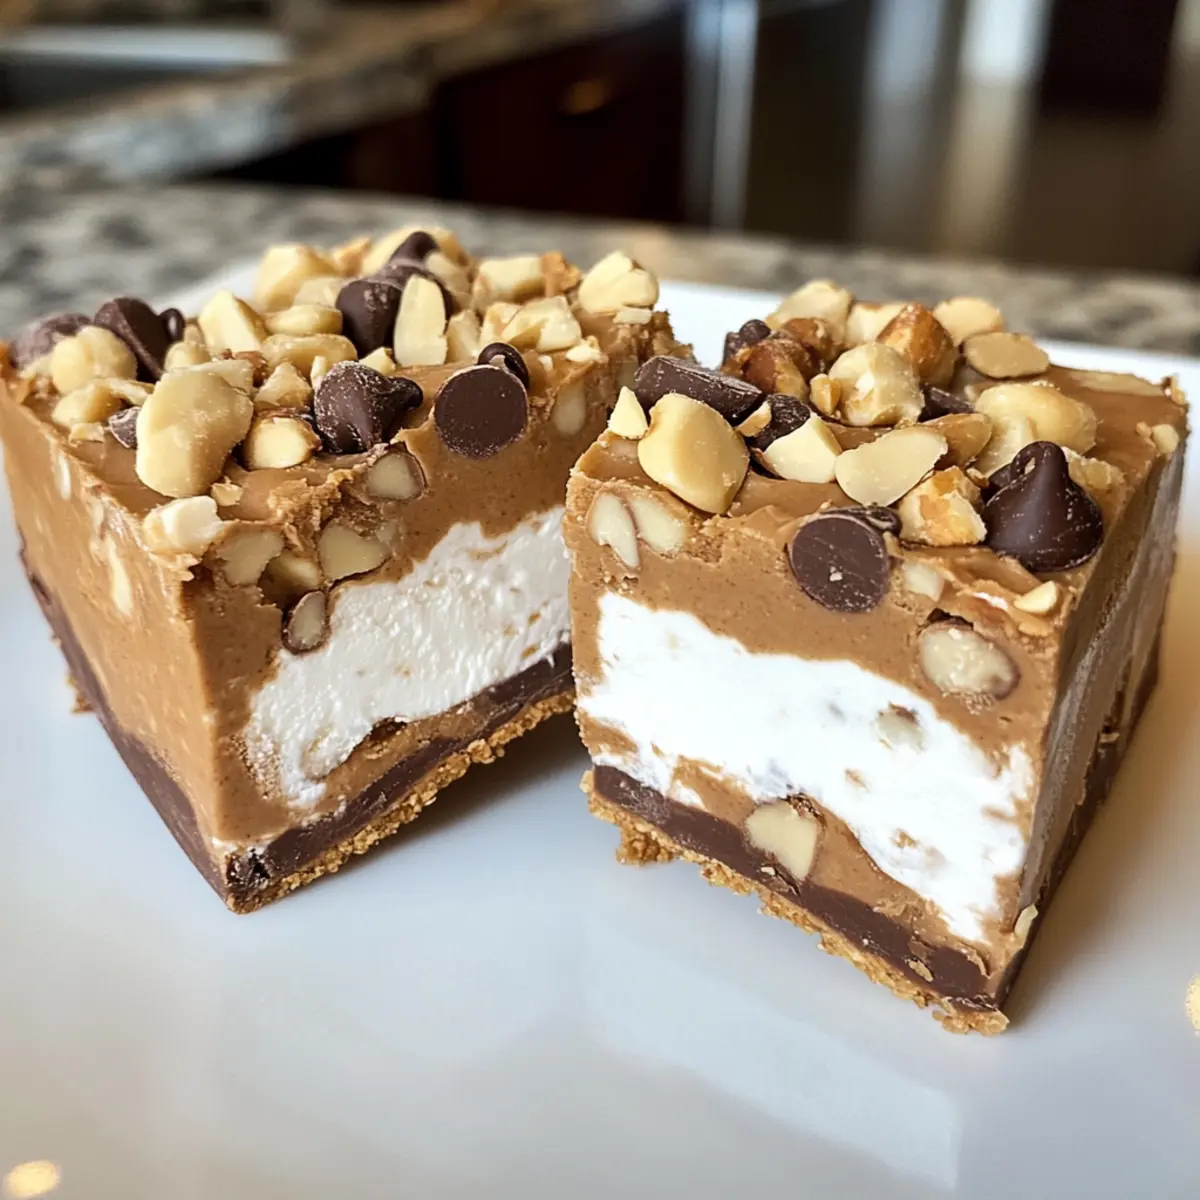
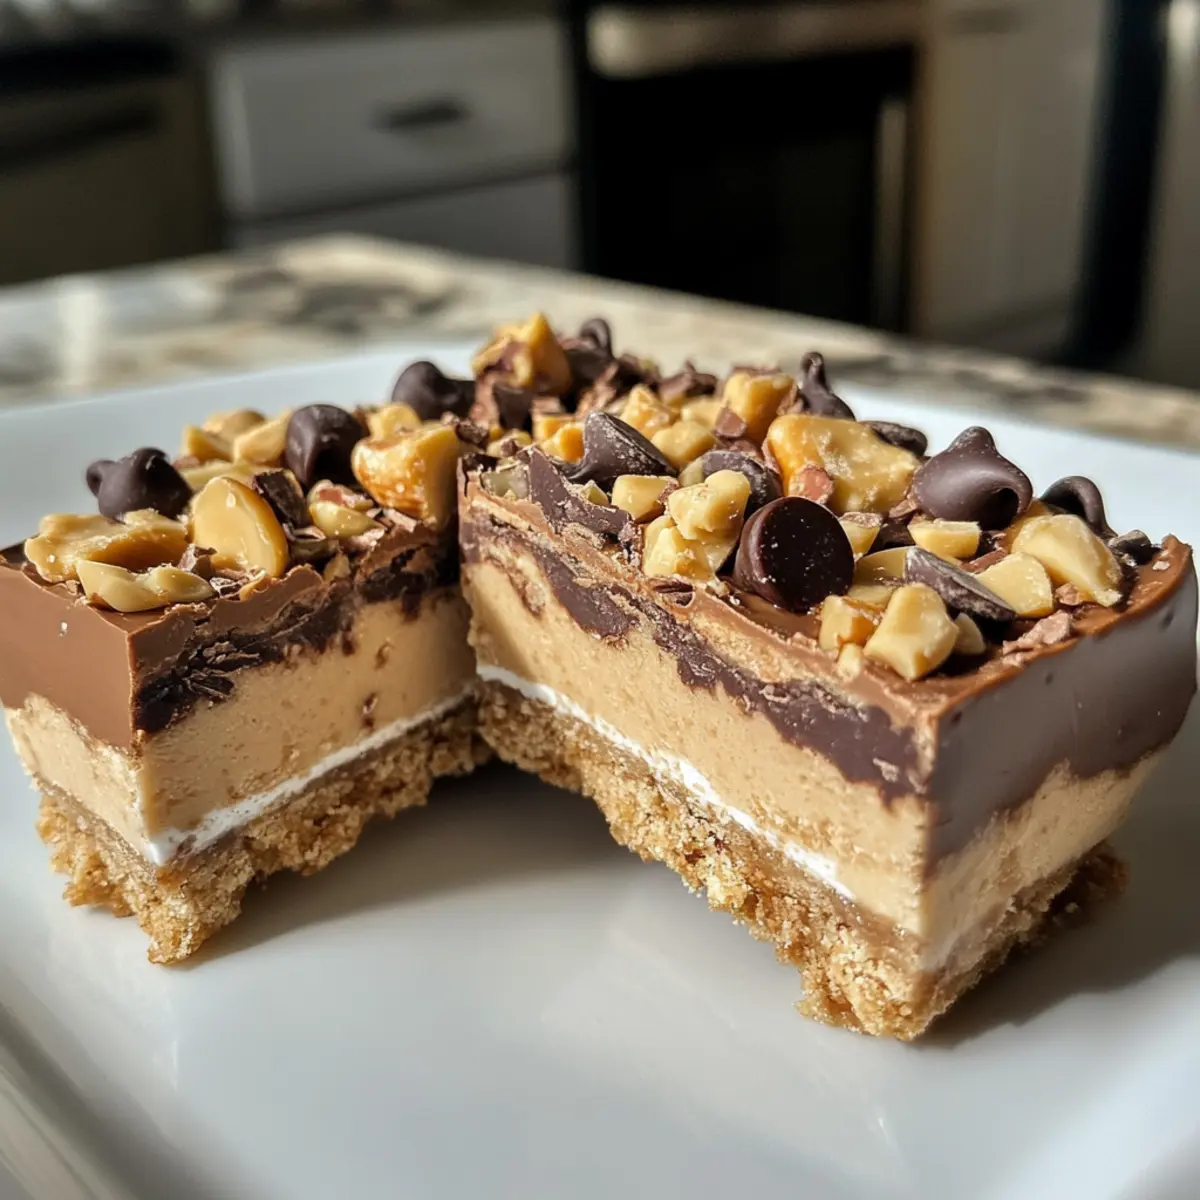
Frozen Peanut Butter Yogurt Bars You’ll Love on Hot Days

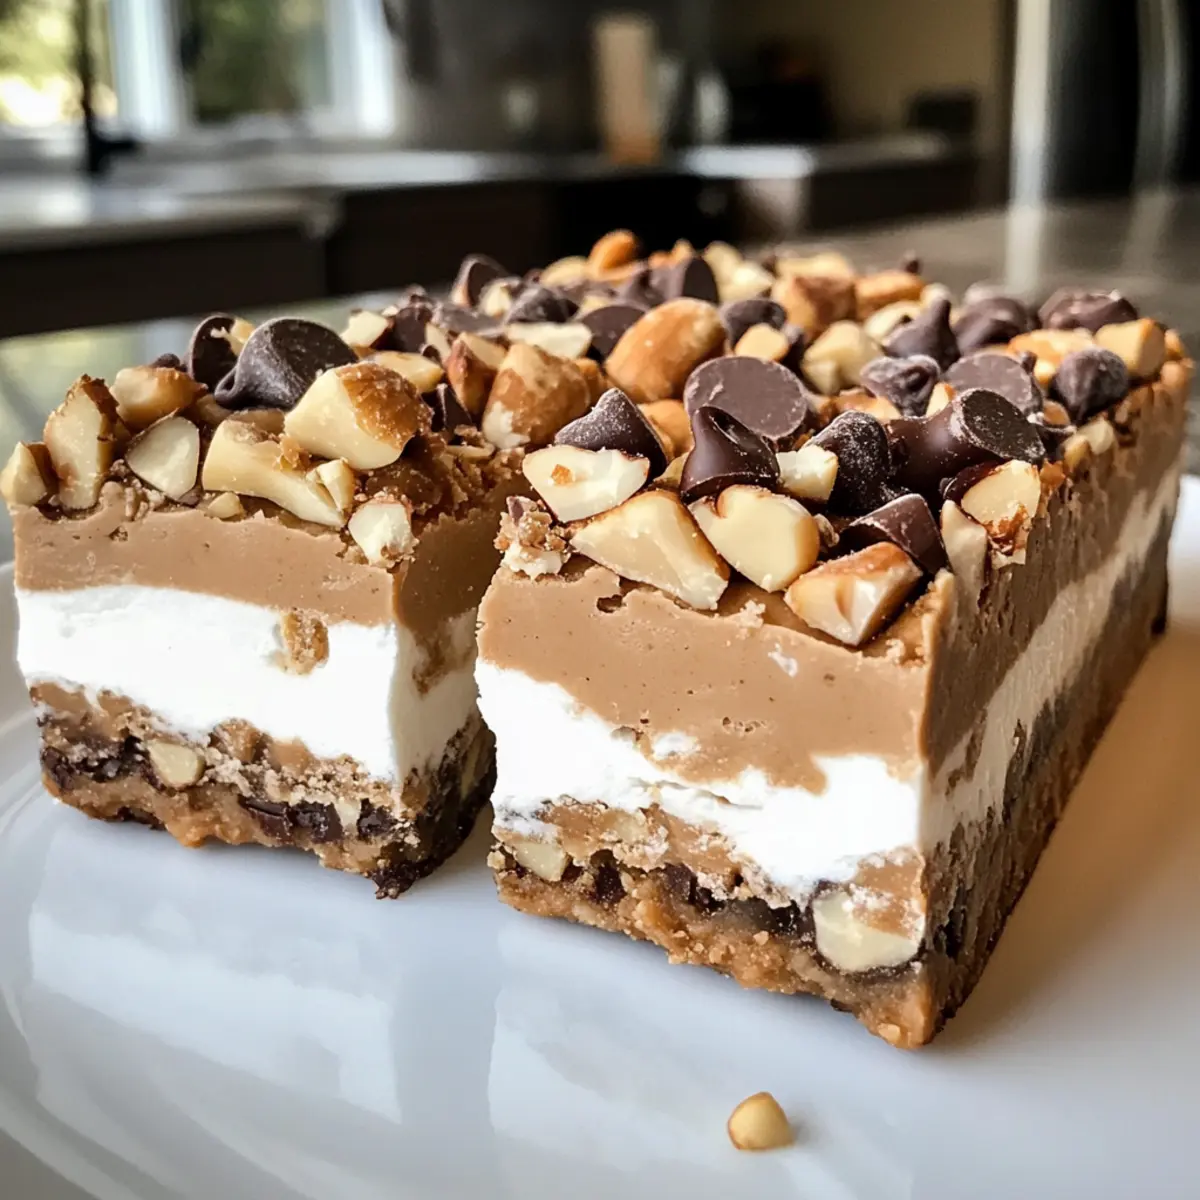
On a sweltering summer afternoon, as the sun blares through my kitchen window, I find myself reaching for something cool, creamy, and absolutely delicious. That’s when these No-Bake Frozen Peanut Butter Yogurt Bars come to the rescue—offering a delightful blend of peanut butter and yogurt that makes my taste buds sing. Not only are these treats refreshingly easy to whip up, but they also serve as an incredibly healthy snack or dessert option perfect for anyone looking to ditch fast food. Best of all, you can customize them with your favorite mix-ins, from crunchy nuts to indulgent chocolate chips, making each batch uniquely yours. Are you ready to elevate your snacking game? Let’s dive into this simple, satisfying recipe together!

Why are Frozen Peanut Butter Yogurt Bars a Must-Try?

Nutritious Goodness: Packed with protein-rich Greek yogurt and healthy fats from peanut butter, these bars are a guilt-free indulgence.

No Baking Required: Enjoy the ease of a no-bake recipe — simply mix, spread, and freeze!

Customize Away: Get creative! You can swap out ingredients or add mix-ins like dried fruits and nuts for personalized flair.

Perfect for Hot Days: Refreshing and creamy, these bars are an ideal snack or dessert that cools you down when the sun is blazing.

Crowd-Pleasing Treats: Whether it’s a family gathering or a casual get-together, these bars are sure to impress, just like my Honey Butter Brioche that disappears in seconds!

Frozen Peanut Butter Yogurt Bars Ingredients

For the Base
Greek Yogurt – Provides creaminess and a protein boost; substitute with regular yogurt for a lighter version.
Peanut Butter – Adds flavor and richness; can use almond butter or sunflower seed butter for nut-free options.
Honey or Maple Syrup – Acts as a natural sweetener; adjust quantity based on desired sweetness, agave or stevia are great substitutes.
Vanilla Extract – Enhances overall flavor; optional, but adds an aromatic quality.
Salt – Balances sweetness and enhances flavors; use sea salt or omit for a low-sodium option.

Optional Add-Ins
Chocolate Chips – For a touch of sweetness and indulgence; dark chocolate chips can elevate the flavor.
Nuts – Adds crunch and texture; try walnuts or almonds based on your preference.
Dried Fruits – Introduces chewiness and sweetness; dried cranberries or raisins work wonderfully.

With these ingredients, making your very own Frozen Peanut Butter Yogurt Bars has never been easier or more satisfying!

Step‑by‑Step Instructions for Frozen Peanut Butter Yogurt Bars

Step 1: Combine Base Ingredients
In a large mixing bowl, add 2 cups of Greek yogurt and 1 cup of peanut butter. Using a spatula or whisk, mix thoroughly for about 2-3 minutes until the texture is smooth and creamy, with no lumps remaining. You want it to resemble a thick, luscious batter. This step is essential for ensuring your Frozen Peanut Butter Yogurt Bars have a delightful consistency.

Step 2: Sweeten the Mixture
Next, incorporate 1/3 cup of honey or maple syrup, 1 teaspoon of vanilla extract, and a pinch of salt to enhance the flavors. Stir this mixture well for another 1-2 minutes until everything is completely integrated and you achieve a uniform sweetness throughout. The mixture should have a rich aroma that signals it’s ready for the next step.

Step 3: Spread in a Baking Dish
Line an 8×8-inch baking dish with parchment paper for easy removal; then pour the creamy peanut butter yogurt mixture into the dish. Use a spatula to spread the mixture evenly, reaching all corners, about 1 inch thick. Visualize a smooth surface that will freeze evenly in preparation for your delicious Frozen Peanut Butter Yogurt Bars.

Step 4: Freeze to Firm Up
Transfer the baking dish into the freezer and allow the mixture to freeze for at least 4 hours. For best results, check periodically—you’re looking for a solid, firm texture that holds its shape when poked. This freezing step is crucial for achieving the perfect bite-ability in your Frozen Peanut Butter Yogurt Bars.

Step 5: Slice the Bars
Once fully frozen, remove the dish from the freezer. Lift the mixture out using the parchment paper and place it on a cutting board. With a sharp knife, cut the frozen block into rectangular bars. You should see a clean, smooth cut that reveals the creamy layers inside, ready to be enjoyed.

Step 6: Add Finishing Touches
For an added touch, melt some chocolate in the microwave and drizzle it over the sliced bars. You can also sprinkle on some chopped nuts or dried fruit at this stage for extra flavor and texture. This final touch will elevate your Frozen Peanut Butter Yogurt Bars and create a stunning presentation worthy of sharing.

How to Store and Freeze Frozen Peanut Butter Yogurt Bars

Fridge: Keep your Frozen Peanut Butter Yogurt Bars in an airtight container in the fridge for up to 3 days if you plan to enjoy them right away.

Freezer: For long-term storage, wrap individual bars in plastic wrap or parchment paper, then place them in a resealable freezer bag. They can be frozen for up to 3 months.

Thawing: When ready to eat, simply take out the desired number of bars and let them thaw in the fridge for about 30 minutes, or leave them at room temperature for around 10-15 minutes.

Reheating: There’s no need to reheat these bars; they taste best when slightly chilled, offering a refreshing treat that’s easy to grab and go!

Expert Tips for Frozen Peanut Butter Yogurt Bars

Smooth Consistency: Whip the Greek yogurt and peanut butter thoroughly until completely smooth, ensuring your Frozen Peanut Butter Yogurt Bars have a luscious, creamy texture.

Chill Before Cutting: Allow the bars to sit at room temperature for 5-10 minutes before slicing; this makes cutting through the frozen mixture much easier and prevents breakage.

Mix-in Caution: If adding mix-ins, be cautious of the volume; too many add-ins can affect the freezing process and texture, resulting in a less firm bar.

Choose Your Sweetness: Adjust honey or maple syrup to your liking; it’s best to start with less and add more, keeping your bars perfectly sweetened without overpowering flavors.

Experiment with Flavors: Try swapping peanut butter with almond or cashew butter for a delightful twist, offering a new take on your Frozen Peanut Butter Yogurt Bars each time!

Make Ahead Options

These No-Bake Frozen Peanut Butter Yogurt Bars are perfect for meal prep enthusiasts! You can make the entire base mixture up to 24 hours in advance and store it in an airtight container in the refrigerator. Simply prepare the mixture as instructed, then spread it into the lined baking dish. Freeze for at least 4 hours or until solid. When you’re ready to serve, drizzle with chocolate or sprinkle your favorite toppings for added flair. By prepping ahead, you save time on busy weeknights, ensuring that these delicious Frozen Peanut Butter Yogurt Bars are always on hand for a quick and healthy snack that’s just as delightful!

What to Serve with Frozen Peanut Butter Yogurt Bars

On a warm day, these delightful bars are the perfect treat, and pairing them with complementary dishes can elevate your snack experience.

  • Fresh Berries: The natural sweetness and tartness of berries like strawberries or raspberries perfectly balance the creamy richness of the bars.
  • Chilled Almond Milk: A cool glass of almond milk provides a refreshing beverage option and enhances the nutty flavors of the bars.
  • Granola: Sprinkle some crunchy granola on top or serve it on the side for a delightful contrast of textures and added nutty flavor.

Pair your frozen bars with a berry smoothie for a wholesome brunch. The fruity flavors will harmonize beautifully with the rich peanut butter, making every bite feel like a treat!

  • Creamy Oatmeal: A warm bowl of oatmeal topped with honey and nuts adds warmth and provides a comforting contrast to the frozen treat.
  • Ice Cream: Indulge your sweet tooth by serving these bars alongside a scoop of vanilla or chocolate ice cream for a rich dessert experience.
  • Dark Chocolate Dipping Sauce: Drizzling these bars with a dark chocolate sauce offers an instant upgrade, bringing an indulgent twist to your snacking.

Frozen Peanut Butter Yogurt Bars Variations

Feel free to let your creativity shine with these delicious twists on your Frozen Peanut Butter Yogurt Bars!

  • Nut-Free: Swap peanut butter for sunflower seed butter for a nut-free tasty option and still enjoy creamy goodness.

  • Dairy-Free: Use coconut yogurt in place of Greek yogurt to create a luscious dairy-free delight that brings tropical vibes.

  • Sweetener Alternative: Substitute honey or maple syrup with agave syrup for a vegan-friendly version, keeping it sweet yet wholesome!

  • Choco-Lover’s Dream: Add chocolate chips or drizzle melted dark chocolate on top for a rich chocolate flavor that will satisfy any sweet tooth.

  • Fruit Fusion: Mix in fresh berries or layer with fruit puree to brighten flavors and enhance the bar’s fresh, fruity appeal.

  • Crunchy Delight: Toss in granola or crushed cookies for an added crunch that complements the creamy base, giving each bite texture.

  • Spiced Up: Add a pinch of cinnamon or a splash of espresso powder for a warm, cozy flavor that elevates your bars to a whole new level of deliciousness.

  • Tropical Twist: Incorporate shredded coconut and a dash of pineapple puree for a refreshing tropical escape in every bite!

The beauty of these bars lies in their versatility! You can experiment with flavors just as you might with my favorite Strawberry Cheesecake Bars for a delightful twist on classic desserts. Enjoy!
Frozen Peanut Butter Yogurt Bars Recipe FAQs

How should I select ripe ingredients for my Frozen Peanut Butter Yogurt Bars?
Absolutely! For the best flavor, look for Greek yogurt that is fresh and free from added sugars or artificial ingredients. If using fruit as a mix-in, opt for ripe bananas or strawberries that are juicy and flavorful. For peanut butter, go for natural varieties without added sugar or oils; the creamier, the better!

What’s the best way to store my Frozen Peanut Butter Yogurt Bars?
Very! To keep your bars fresh, store them in an airtight container in the fridge for up to 3 days. If you want them to last longer, wrap individual bars in plastic wrap or parchment and place them in a resealable freezer bag. This way, they can be stored in the freezer for up to 3 months.

Can I freeze my Frozen Peanut Butter Yogurt Bars?
Absolutely! After cutting the bars, you can freeze them by wrapping each bar individually in plastic or parchment paper and then placing them in a resealable freezer bag. This prevents freezer burn and allows you to grab a bar whenever the craving hits! They will keep well for about 3 months.

What if my Frozen Peanut Butter Yogurt Bars don’t freeze properly?
If your bars aren’t firm enough, it may be due to excess mix-ins that prevent them from setting correctly. I recommend trying a smaller amount next time or letting them freeze for a bit longer—at least 4 to 6 hours. If they still seem too soft, place them back in the freezer for a while to firm up. Letting them sit at room temperature for about 5-10 minutes before cutting also helps with slicing.

Are Frozen Peanut Butter Yogurt Bars safe for pets or allergy-friendly?
Very! While the ingredients are generally safe for most kids and adults, peanut butter can pose a risk for those with nut allergies—make sure to choose alternatives like sunflower seed butter to ensure it’s safe for everyone. Also, always check with your healthcare provider if you have dietary restrictions or concerns regarding allergies.

Frozen Peanut Butter Yogurt Bars

Frozen Peanut Butter Yogurt Bars You’ll Love on Hot Days

Delicious Frozen Peanut Butter Yogurt Bars are a refreshing treat perfect for hot days, combining healthy ingredients for a guilt-free snack.
Prep Time 15 minutes
Freezing Time 4 hours
Total Time 4 hours 15 minutes
Servings: 8 bars
Course: Dessert
Cuisine: American
Calories: 180

Ingredients
  

For the Base
  • 2 cups Greek yogurt Can substitute with regular yogurt for a lighter version.
  • 1 cup Peanut butter Can use almond butter or sunflower seed butter for nut-free options.
  • 1/3 cup Honey or maple syrup Adjust quantity based on desired sweetness.
  • 1 teaspoon Vanilla extract Optional, but adds an aromatic quality.
  • 1 pinch Salt Use sea salt or omit for low-sodium.
Optional Add-Ins
  • 1/2 cup Chocolate chips Dark chocolate chips can elevate the flavor.
  • 1/2 cup Nuts Try walnuts or almonds based on preference.
  • 1/2 cup Dried fruits Dried cranberries or raisins work wonderfully.

Equipment

  • Mixing Bowl
  • Spatula
  • Whisk
  • 8x8-inch Baking Dish
  • Parchment paper
  • knife

Method
 

Step-by-Step Instructions
  1. In a large mixing bowl, add 2 cups of Greek yogurt and 1 cup of peanut butter. Mix thoroughly for about 2-3 minutes until smooth and creamy.
  2. Incorporate 1/3 cup of honey or maple syrup, 1 teaspoon of vanilla extract, and a pinch of salt. Stir well for another 1-2 minutes.
  3. Line an 8x8-inch baking dish with parchment paper and pour the peanut butter yogurt mixture into the dish. Spread evenly to about 1 inch thick.
  4. Transfer the dish into the freezer and allow to freeze for at least 4 hours until firm.
  5. Once frozen, remove the dish from the freezer, lift out using parchment paper, and cut into rectangular bars.
  6. Melt some chocolate and drizzle it over the sliced bars. Add chopped nuts or dried fruit for extra flavor.

Nutrition

Serving: 1barCalories: 180kcalCarbohydrates: 20gProtein: 8gFat: 8gSaturated Fat: 2gPolyunsaturated Fat: 1gMonounsaturated Fat: 5gSodium: 50mgPotassium: 250mgFiber: 2gSugar: 10gCalcium: 10mgIron: 4mg

Notes

These bars can be customized with various mix-ins for a unique taste every time. Store in an airtight container for optimal freshness.

Tried this recipe?

Let us know how it was!

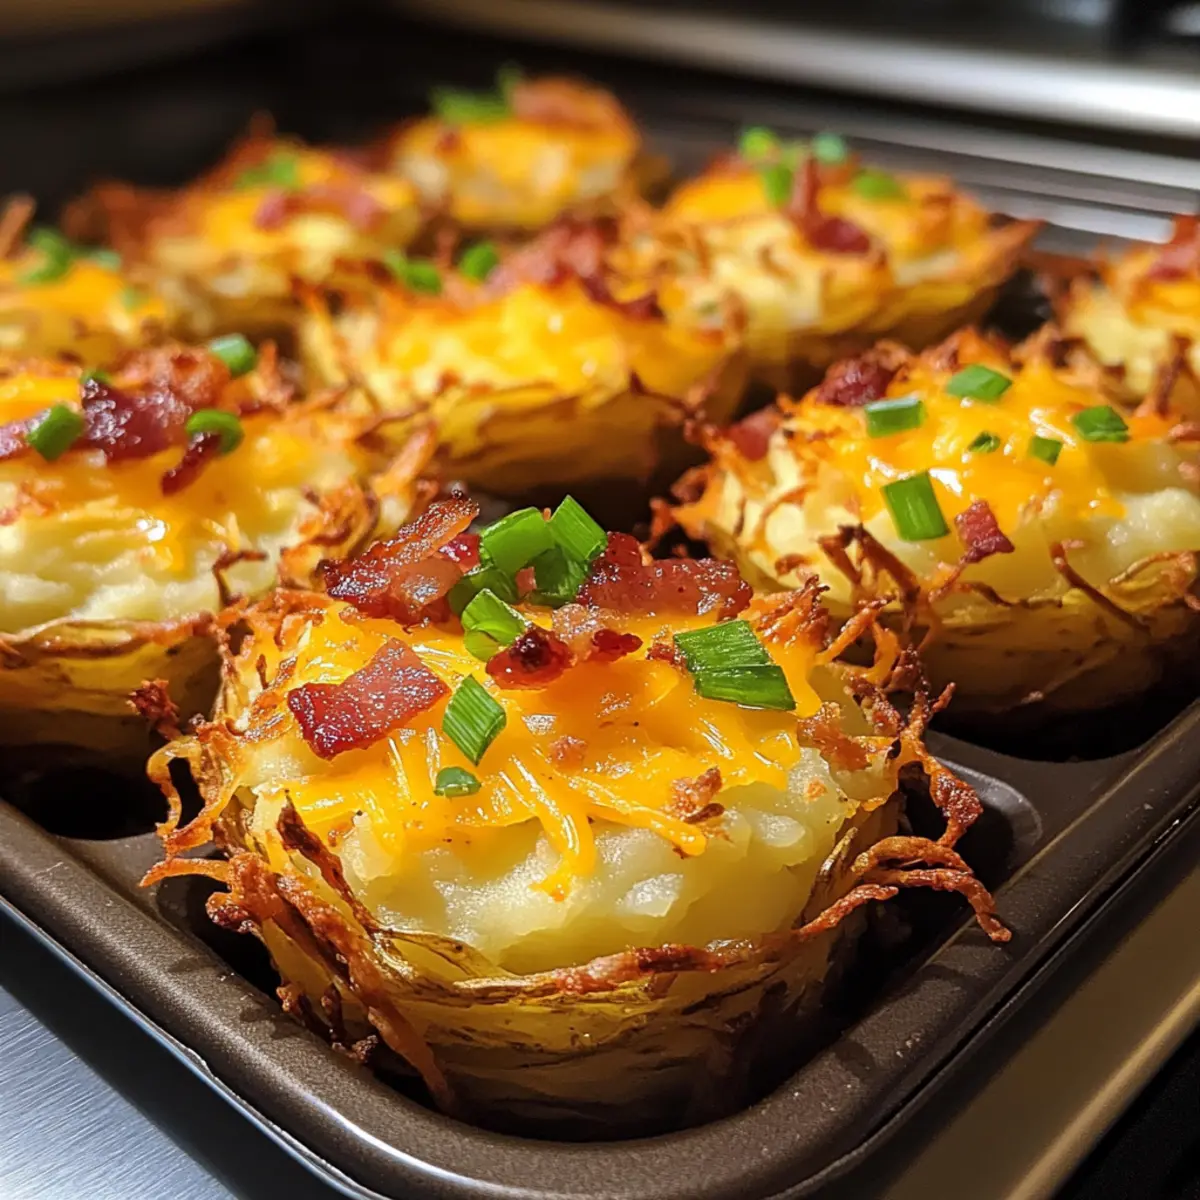
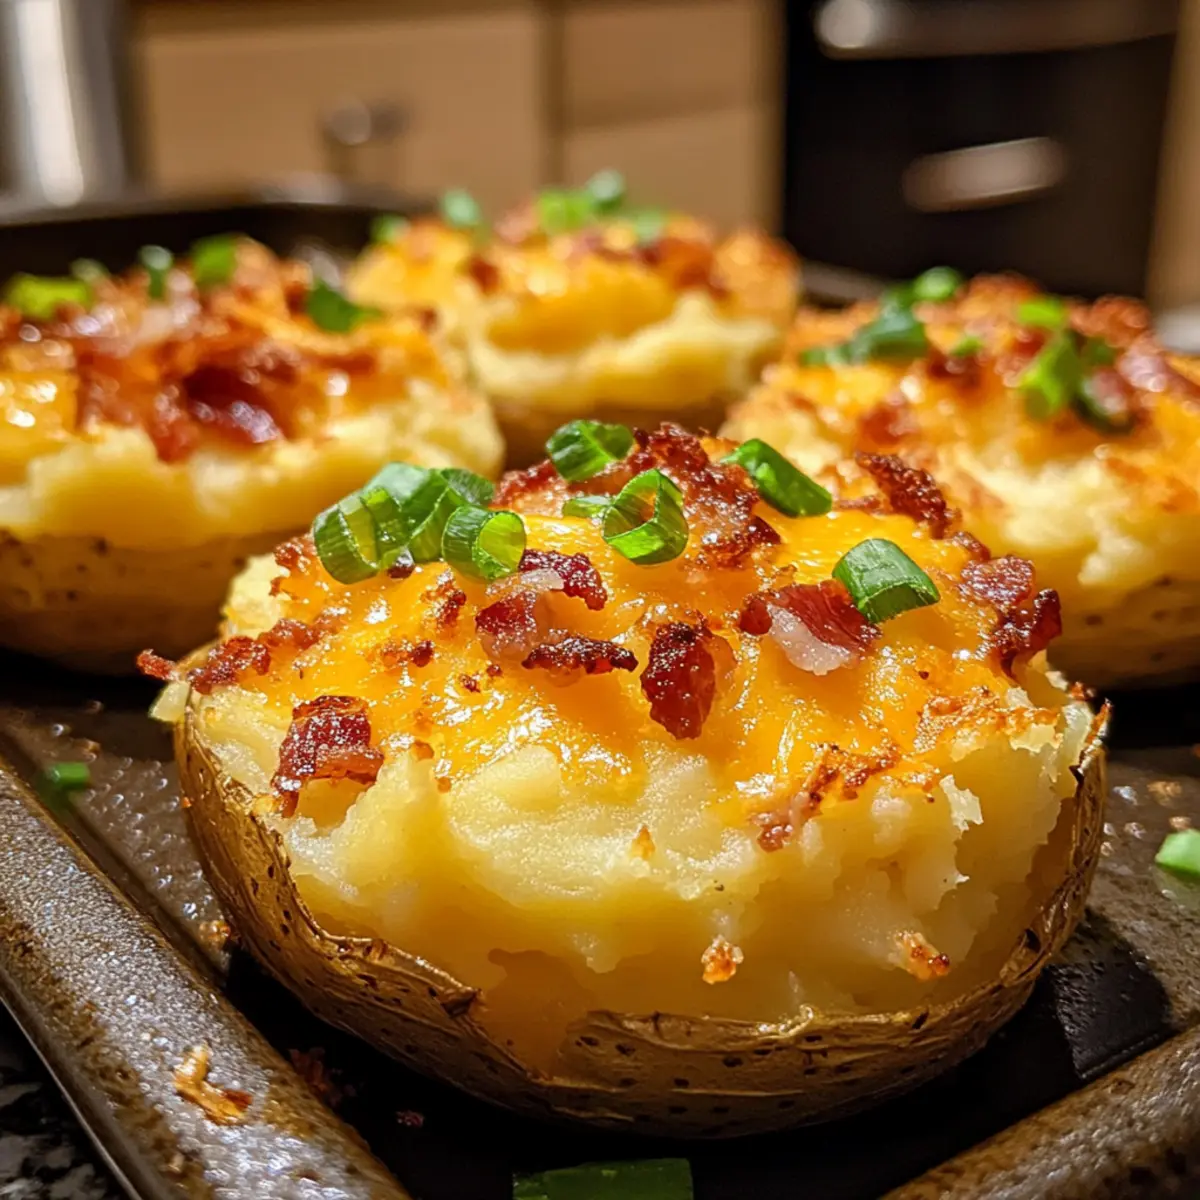
Delicious Stuffed Mashed Potato Nests for Cozy Comfort Food

“Crispy on the outside, creamy on the inside” could describe many comforting dishes, but today, it perfectly captures the magic of these Stuffed Mashed Potato Nests. As I prepared to host friends for a cozy gathering, I stumbled upon this ingenious twist on traditional mashed potatoes that has since become a must-have on my dinner table. Packed with cheesy goodness, savory bacon, and vibrant green onions, these delightful nests offer a playful presentation that makes them a standout side dish. Not only are they incredibly satisfying, but they’re also make-ahead and freezer-friendly, allowing you to streamline your hosting preparations. What could be better than delicious comfort food that can be prepped in advance and enjoyed with ease? Join me as we dive into the delicious world of these crispy stuffed wonders—your loved ones will thank you for it! Are you ready to elevate your next meal with this heartwarming recipe?

Why Are Stuffed Mashed Potato Nests Amazing?

Comfort Food Reinvented: These Stuffed Mashed Potato Nests transform humble ingredients into a standout dish. Their golden, crispy exterior pairs perfectly with a creamy and savory filling, inviting everyone to indulge.

Make-Ahead Marvel: Prepare the potato mixture a day in advance, and you can assemble the nests just before baking. This helps save time and stress, perfect for last-minute entertaining!

Freezer-Friendly: Bake extra nests and freeze them for later. When you need a quick meal, simply reheat in the oven; they will retain their delightful crunch!

Crowd-Pleasing Appeal: These nests are not only fun to eat but visually stunning, making them perfect for gatherings, like a casual get-together or holiday feast.

Versatile Variations: Feel free to customize your filling by swapping in your favorite ingredients. Whether adding sautéed vegetables or different cheeses, these nests never get old!

Try them alongside dishes like Garlic Rosemary Smashed potatoes or as an exciting side to Buffalo Chicken Stuffed peppers for an unforgettable meal experience!

Stuffed Mashed Potato Nests Ingredients

For the Nests
Potatoes – Russet or Yukon Gold provides the best creamy texture for your nests.
Butter – Adds richness; can be substituted with olive oil for a dairy-free option.
Milk – Ensures creaminess; can be replaced with almond milk or any non-dairy version.
Salt – Enhances flavor in the mashed potatoes; adjust to taste.
Pepper – Adds a hint of warmth to the dish; fresh ground is best.

For the Filling
Cheddar Cheese – Adds a gooey, savory flavor; swap with mozzarella for a milder option.
Bacon – Delivers smoky, salty goodness; use sautéed mushrooms for a vegetarian twist.
Green Onions – Offers freshness; can be substituted with chives for a similar taste.

These delicious Stuffed Mashed Potato Nests are sure to elevate your next meal!

Step‑by‑Step Instructions for Stuffed Mashed Potato Nests

Step 1: Preheat and Prepare
Begin by preheating your oven to 400°F (200°C), ensuring your kitchen warms up for delicious baking. While the oven heats, gather a large pot and bring salted water to a boil. This step is crucial for cooking the potatoes evenly, so make sure the water is bubbling before adding in your peeled and cubed russet or Yukon Gold potatoes.

Step 2: Boil and Mash Potatoes
Once the water is boiling, carefully add your potato cubes. Cook them for about 15-20 minutes, or until they are fork-tender and easily mashed. Drain the potatoes well, then return them to the pot. Mash them with butter, milk, salt, and pepper until the mixture is smooth and creamy, avoiding over-mashing to keep a perfect texture.

Step 3: Mix in the Filling Ingredients
Allow the mashed potatoes to cool slightly for about 5 minutes. Then, stir in the shredded cheddar cheese, crispy bacon bits, and chopped green onions until everything is well combined. This savory filling is the heart of your Stuffed Mashed Potato Nests, so ensure it’s thoroughly mixed to distribute the flavors evenly.

Step 4: Form the Nests
Prepare a greased muffin tin, as this will hold your nests beautifully. Using a spoon or cookie scoop, take a generous portion of the mashed potato mixture and press it into each muffin cup, creating an indentation in the center for the filling. The nests should appear rounded on top, ready to crisp up in the oven.

Step 5: Bake the Nests
Place the muffin tin in the preheated oven and bake for about 20-25 minutes. You’ll know the Stuffed Mashed Potato Nests are ready when the edges turn golden brown, and the top slightly puffs. The delicious aroma in your kitchen will be a clear sign that comfort food is on its way!

Step 6: Cool and Serve
Once baked, let the nests cool in the tin for a few minutes, allowing them to set. Carefully use a flexible spatula to gently lift each nest out of the muffin tin. Serve them warm, delighting your family and friends with these charming Stuffed Mashed Potato Nests that perfectly blend crispiness and creamy goodness.

What to Serve with Crispy Stuffed Mashed Potato Nests

Elevate your dining experience with delightful sides that perfectly complement the flavors of these golden, crispy nests.

  • Crispy Green Salad: A refreshing salad adds crunchy texture and brightness. Tossed greens with a tangy vinaigrette balance the richness of the nests beautifully.

  • Sour Cream Dip: This creamy dip offers a cooling contrast to the crispy potato nests. A dollop on top adds a delightful blend of flavors, enhancing your comfort food experience.

  • Roasted Vegetables: Seasoned with herbs, roasted vegetables can bring a hearty, earthy flavor alongside your nests. Carrots and Brussels sprouts roast beautifully and provide vibrant colors to your plate.

  • Garlic Bread: Pairing garlic bread with your nests creates a comforting meal feel. The buttery, crispy bread is perfect for sopping up any extra filling from your nests.

  • Grilled Chicken: A simple grilled chicken business can elevate this dish from side to main. Its smoky flavor complements the savory fillings superbly, making it a satisfying combo.

  • Sweet Corn Casserole: This sweet and creamy side dish adds a delightful contrast. It enhances the comfort food vibes and offers a delicious, nostalgic flavor profile.

Explore different beverages to accompany your meal; a crisp white wine or a homemade apple cider can perfectly tie everything together. Whatever you choose, your cozy gathering will be complete!

Stuffed Mashed Potato Nests Variations

Explore the exciting ways to customize your stuffed nests, tailored to your taste buds!

  • Dairy-Free: Use almond milk and substitute butter with olive oil for a creamy, rich base without dairy.
    You won’t miss the creaminess, as the olive oil provides a lovely flavor.

  • Vegetable Boost: Add sautéed spinach or red bell peppers to the filling for a nutrition-packed twist.
    This not only enhances the flavor but also adds vibrant color to your nests.

  • Spicy Kick: Mix in diced jalapeños or a sprinkle of chili flakes to amp up the heat.
    The warm, spicy notes will make these nests a standout at any gathering!

  • Cheese Variations: Swap out cheddar for pepper jack or feta cheese to change the flavor profile dramatically.
    Each cheese brings its unique character, making the nests feel fresh every time.

  • Bacon Alternatives: For a vegetarian option, use sautéed mushrooms or smoked paprika to achieve a savory taste without meat.
    This gives a hearty flavor that everyone will love, regardless of their diet.

  • Herb-infused: Mix in fresh herbs like parsley or dill to add aromatic depth to the filling.
    Fresh herbs not only elevate the taste but also brighten the presentation of your nests.

  • Sweet Potato Twist: Swap regular potatoes for sweet potatoes for a naturally sweet variant that pairs well with spices.
    Sweet and savory come together beautifully in these nests, perfect for fall gatherings.

Make these delightful variations your own, and consider serving them alongside a comforting dish like Hearty Potato Kielbasa soup or a scrumptious Ground Beef Potato taco bowl for a hearty spread!

Expert Tips for Stuffed Mashed Potato Nests

  • Use Quality Potatoes: Choose russet or Yukon Gold potatoes for the best creamy texture in your nests. Avoid waxy varieties, which can lead to a gummy consistency.

  • Perfectly Seasoned: Don’t skimp on salt and pepper in your mashed potatoes. Well-seasoned stuffed mashed potato nests elevate the overall flavor, ensuring each bite is delightful.

  • Cool Before Mixing: Allow your mashed potatoes to cool slightly before mixing in cheese and other ingredients. This helps prevent the cheese from melting too quickly, creating a well-distributed filling.

  • Grease Muffin Tins Well: Ensure your muffin tins are adequately greased to avoid sticking. Consider using a non-stick spray or brush melted butter in the cups before filling.

  • Flexible Spatula Trick: Use a flexible spatula to gently lift the nests out of the muffin tin after baking. This helps maintain their shape and prevents breakage.

  • Customize the Filling: Feel free to experiment with ingredients in your filling—different cheeses or even sautéed veggies can create uniquely delicious stuffed mashed potato nests!

Make Ahead Options

These Stuffed Mashed Potato Nests are perfect for meal prep enthusiasts! You can prepare the potato mixture up to 24 hours in advance, storing it in an airtight container in the refrigerator. The nests can also be formed and refrigerated overnight, but be sure to cover them tightly to prevent browning. When you’re ready to bake, simply preheat your oven and pop the nests in, baking for about 20-25 minutes until golden and crispy. This makes dinner not just easier, but ensures your delicious Stuffed Mashed Potato Nests taste just as amazing even after being prepped ahead! Enjoy the convenience of having a comforting dish ready to go on busy nights!

How to Store and Freeze Stuffed Mashed Potato Nests

Fridge: Store baked Stuffed Mashed Potato Nests in an airtight container for up to 3 days. Reheat in the oven at 350°F (175°C) for about 10-15 minutes to restore crispiness.

Freezer: Freeze nests after baking in a single layer before transferring them to an airtight container. They keep well for up to 3 months; reheat straight from the freezer for 25-30 minutes at 400°F (200°C).

Make-Ahead: Prepare the potato mixture up to 24 hours in advance. Store it in the fridge before forming the nests and baking, saving you time on busy days.

Reheating: For best results, reheat in the oven instead of the microwave. This method ensures your Stuffed Mashed Potato Nests maintain their delightful crunch while warming through.

Stuffed Mashed Potato Nests Recipe FAQs

What kind of potatoes are best for stuffed mashed potato nests?
Absolutely! For the best flavor and texture, I recommend using russet or Yukon Gold potatoes. These varieties have the perfect starch content to create creamy, fluffy mashed potatoes without becoming gummy.

How should I store leftover stuffed mashed potato nests?
After cooling, store your baked Stuffed Mashed Potato Nests in an airtight container in the refrigerator. They will remain delicious for up to 3 days. When reheating, place them in a preheated oven at 350°F (175°C) for about 10-15 minutes to regain their original crispiness.

Can I freeze stuffed mashed potato nests?
Absolutely! To freeze, first allow the baked nests to cool completely. Then, place them in a single layer on a baking sheet and freeze until solid. Transfer them to an airtight container or freezer bag for storage. They can be frozen for up to 3 months. When ready to enjoy, reheat straight from the freezer at 400°F (200°C) for 25-30 minutes.

What should I do if my mashed potatoes are gluey?
To avoid a gluey texture, ensure you don’t over-mash your potatoes. I suggest using a potato masher instead of an electric mixer. Also, make sure you’re using the right type of potato—russet or Yukon Gold are best. If your mixture becomes gluey, try adding a bit more butter or milk to help balance the texture.

Are there any dietary considerations for serving stuffed mashed potato nests?
Very! These nests can easily be adapted for various dietary needs. For a vegetarian option, simply omit the bacon or replace it with sautéed mushrooms. Additionally, you can substitute butter with olive oil and regular milk with a non-dairy alternative to make them dairy-free. Always check for allergies related to cheese or the other ingredients before serving to your guests!

Stuffed Mashed Potato Nests

Delicious Stuffed Mashed Potato Nests for Cozy Comfort Food

These Stuffed Mashed Potato Nests combine crispy exteriors with creamy interiors, perfect for a cozy gathering.
Prep Time 30 minutes
Cook Time 25 minutes
Total Time 55 minutes
Servings: 6 nests
Course: Appetizer
Cuisine: Comfort Food
Calories: 220

Ingredients
  

For the Nests
  • 2 pounds Russet or Yukon Gold Potatoes
  • 4 tablespoons Butter can be substituted with olive oil for a dairy-free option
  • 1/2 cup Milk can be replaced with almond milk or any non-dairy version
  • 1 teaspoon Salt adjust to taste
  • 1/2 teaspoon Pepper fresh ground is best
For the Filling
  • 1 cup Cheddar Cheese can swap with mozzarella for a milder option
  • 6 slices Bacon use sautéed mushrooms for a vegetarian twist
  • 1/4 cup Green Onions can be substituted with chives

Equipment

  • Muffin Tin
  • large pot
  • Spatula

Method
 

Step-by-Step Instructions
  1. Preheat the oven to 400°F (200°C) and bring salted water to a boil in a large pot.
  2. Add peeled and cubed potatoes to the boiling water and cook for 15-20 minutes until fork-tender.
  3. Drain the potatoes and mash them with butter, milk, salt, and pepper until smooth.
  4. Allow mashed potatoes to cool slightly, then stir in cheese, bacon, and green onions.
  5. Grease a muffin tin and press the potato mixture into each cup, creating an indentation for filling.
  6. Bake for 20-25 minutes, until edges are golden brown and tops puff slightly.
  7. Let cool in the tin for a few minutes before gently lifting out with a spatula.

Nutrition

Serving: 1nestCalories: 220kcalCarbohydrates: 30gProtein: 6gFat: 10gSaturated Fat: 6gPolyunsaturated Fat: 1gMonounsaturated Fat: 3gCholesterol: 25mgSodium: 400mgPotassium: 450mgFiber: 3gSugar: 1gVitamin A: 500IUVitamin C: 15mgCalcium: 100mgIron: 1mg

Notes

These nests are make-ahead and freeze well for easy reheating. Customize the filling with different cheeses or vegetables for unique flavors.

Tried this recipe?

Let us know how it was!

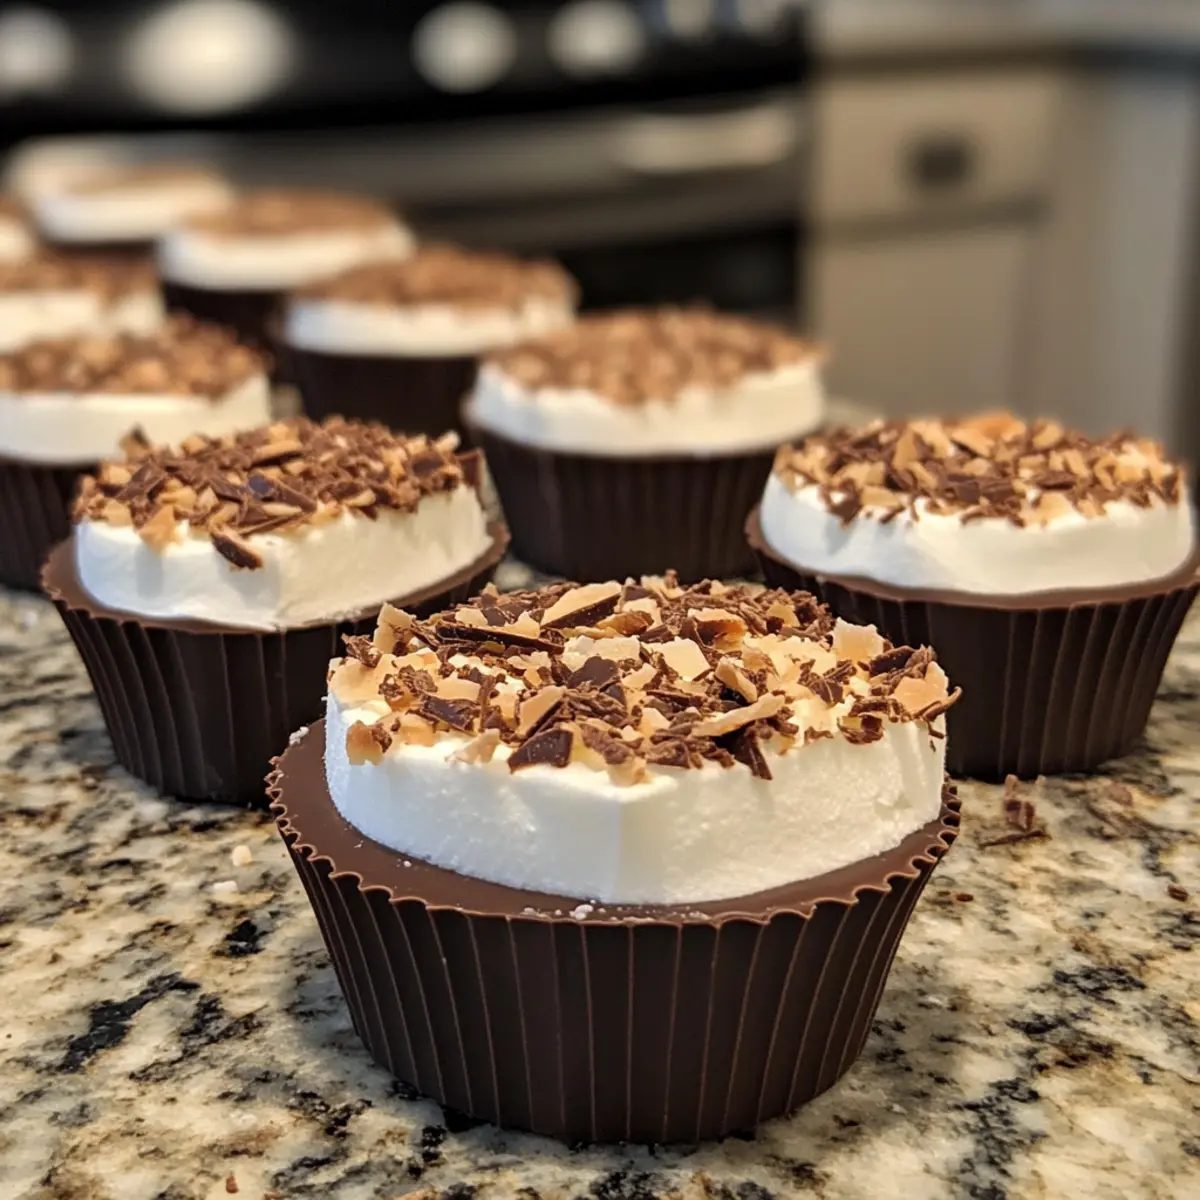
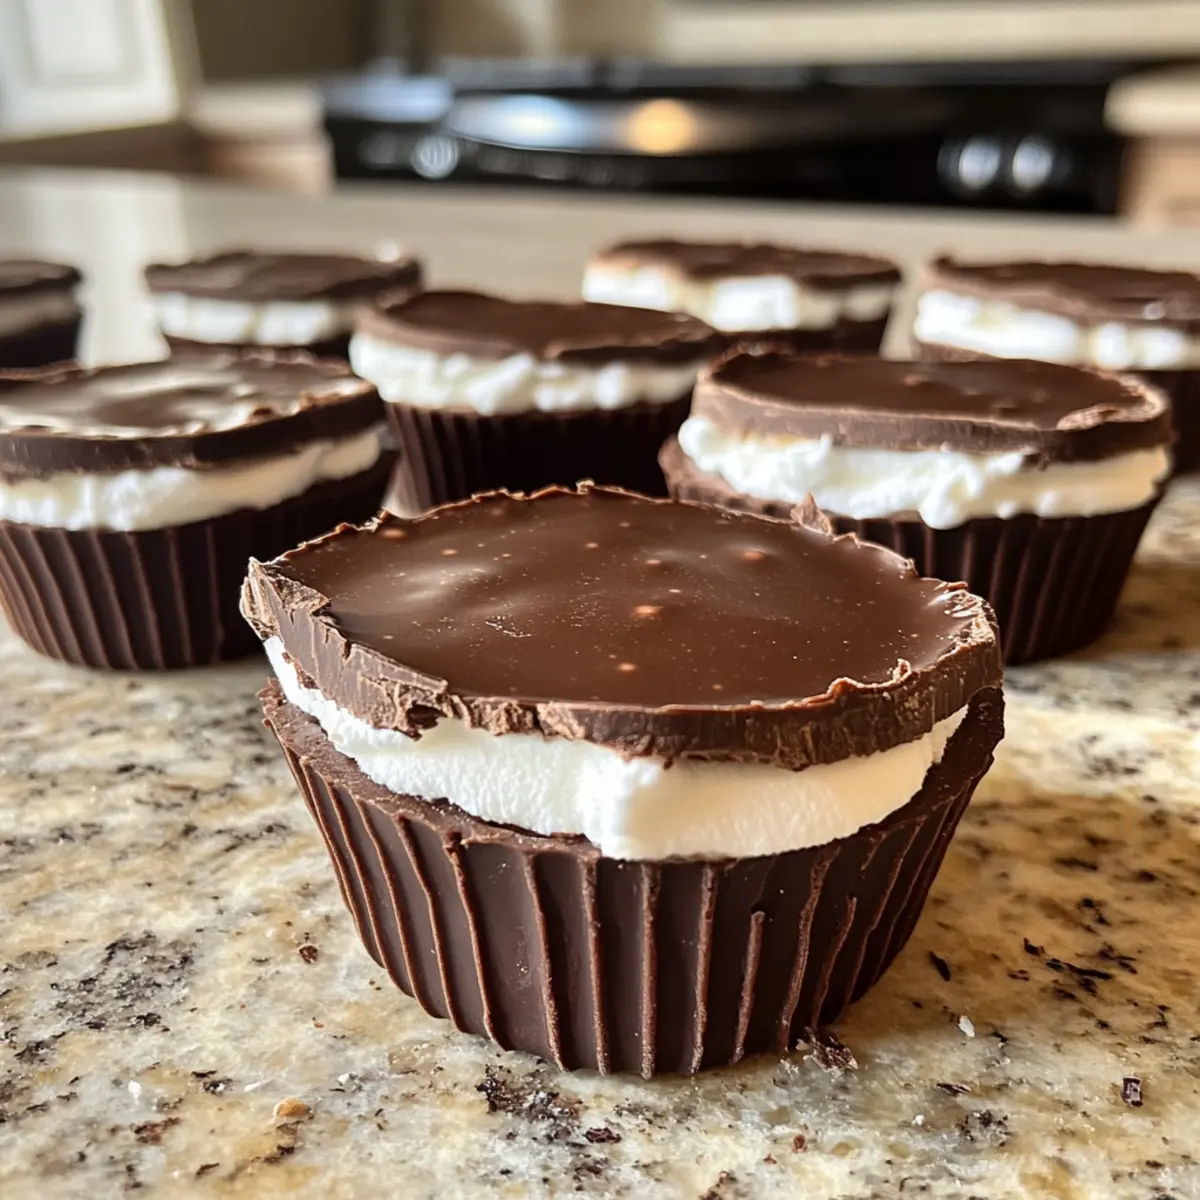
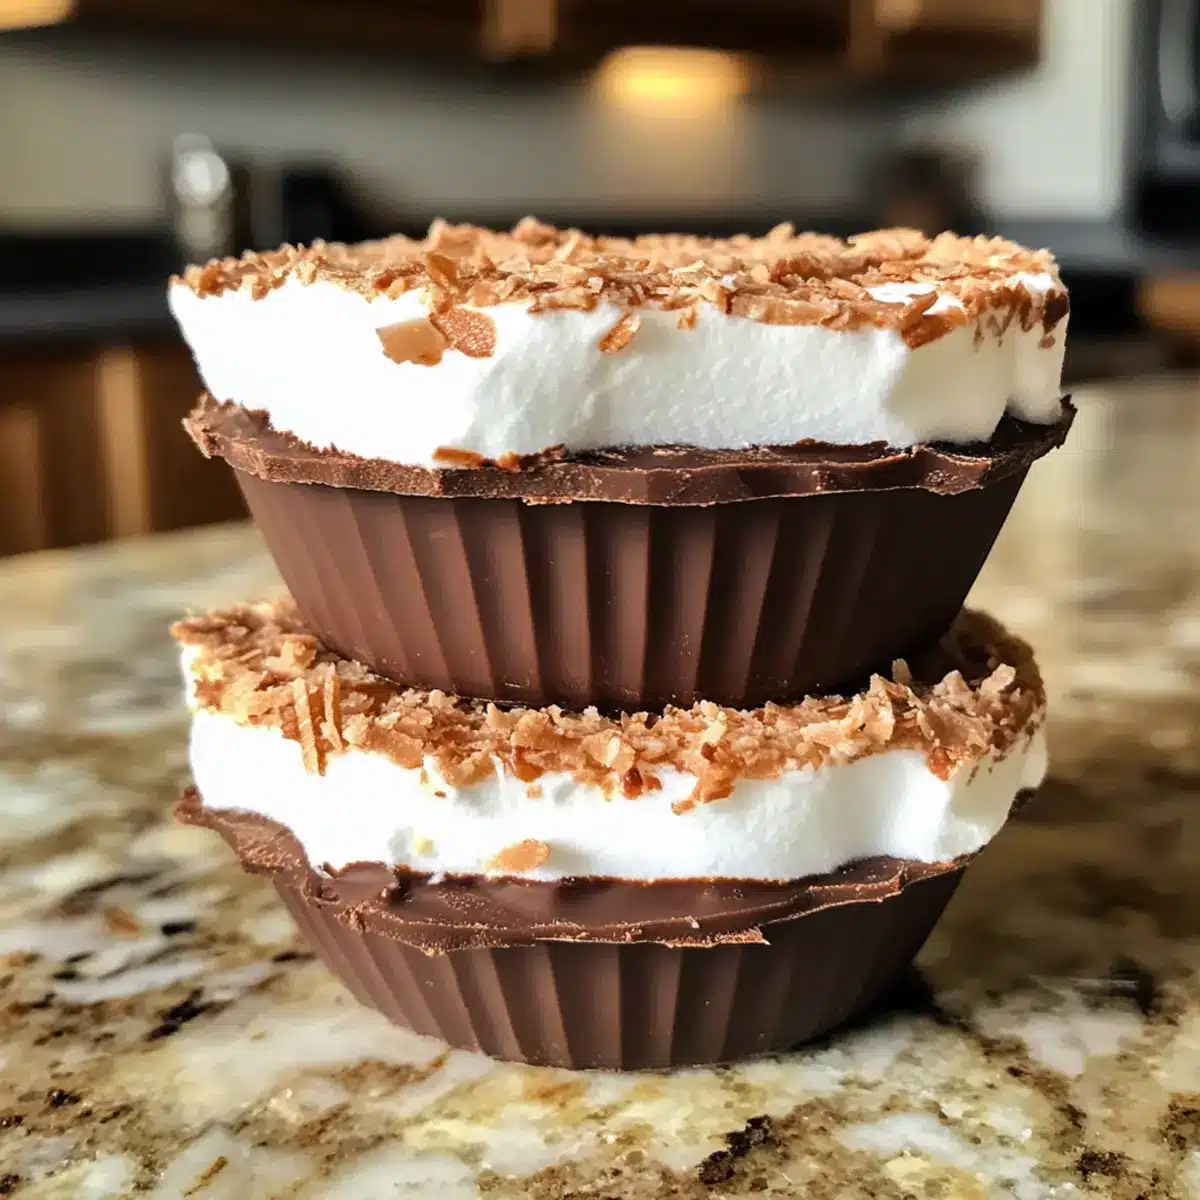
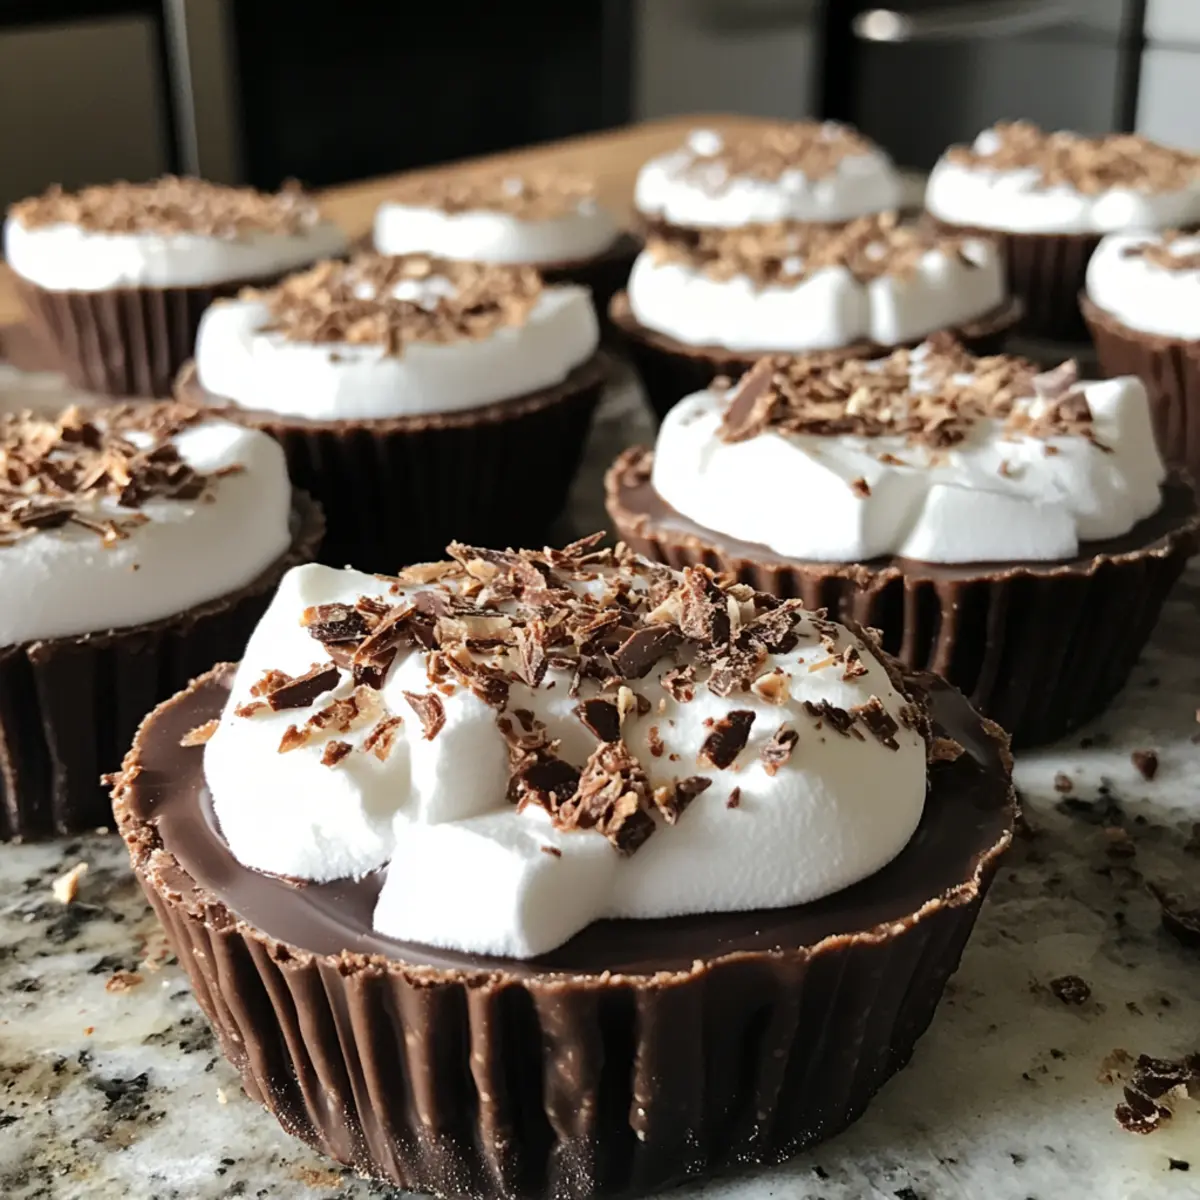
Decadent Homemade Mallo Cups for a Sweet Treat Adventure

As I rummaged through my pantry, looking for a bit of inspiration, my eyes landed on a jar of fluffy marshmallow goodness. Suddenly, the thought of crafting my own Homemade Mallo Cups ignited a spark of excitement! This delightful treat combines luscious milk chocolate and airy marshmallow fluff, making it a favorite for any chocolate lover. Not only are these cups incredibly easy to whip up, but they’re also a crowd-pleaser, perfect for parties or a sweet afternoon indulgence. With just a few simple ingredients and a personal touch, you can impress friends and family alike. So, are you ready to dive into this delightful confection? Let’s get started!

Why Are Homemade Mallo Cups a Must-Try?

Irresistible Combination: The pairing of rich milk chocolate and fluffy marshmallow creates an unbeatable flavor experience that will leave your taste buds dancing.

Quick and Easy: With just a few simple steps, you can have these delicious treats ready in no time—great for baking novices and seasoned pros alike!

Customizable: Feel free to personalize your cups by adding nuts or experimenting with different chocolate varieties—dark chocolate adds a delightful twist!

Perfect for Sharing: Whether it’s a gathering with friends or a sweet treat for the family, these Homemade Mallo Cups are sure to impress. For more delicious ideas, don’t miss out on my tempting Honey Butter Brioche rolls or festive Red White Dessert.

Crowd Favorite: These delightful cups are not just a treat for yourself but a hit at parties, making them a surefire way to elevate any gathering!

Homemade Mallo Cups Ingredients

For the Chocolate Cups

  • Milk Chocolate – Provides the rich chocolate flavor; feel free to use dark chocolate for a more intense experience.
  • Coconut Oil – Helps achieve a smoother chocolate consistency; you can replace it with vegetable oil if desired.

For the Marshmallow Filling

  • Marshmallow Fluff – Serves as the creamy center; you can also make your own by whipping egg whites, sugar, and corn syrup.
  • Flaked Coconut – Adds delightful texture; it’s optional and can be swapped with chopped nuts or cookie crumbs if preferred.

Step‑by‑Step Instructions for Homemade Mallo Cups

Step 1: Prepare Muffin Tin
Start by lining a standard muffin tin with muffin liners to make removing your Homemade Mallo Cups easy. Ensure each liner is completely seated in the tin. This preparation will make for a smooth assembly as you layer in chocolate and marshmallow fluff later on.

Step 2: Melt Chocolate
In a double boiler or microwave, melt your milk chocolate alongside the coconut oil for added smoothness. If using the microwave, heat in 30-second increments, stirring until fully melted and creamy. This process should take about 2-3 minutes. Avoid overheating the chocolate to ensure a silky consistency and prevent burning.

Step 3: Create Chocolate Cups
Using a spoon, carefully fill each muffin liner with 1 to 1.5 tablespoons of the melted chocolate. Tilt the tin gently as you spread the chocolate up the sides, forming a cup shape. Once filled, sprinkle chopped coconut on top and chill in the refrigerator for 20 minutes or until set. Your chocolate cups should appear firm and glossy.

Step 4: Add Marshmallow Fluff
After the chocolate has set, spoon 1.5 tablespoons of marshmallow fluff into each chilled cup. Be generous, as this airy filling gives the treat its signature texture. For an added touch, sprinkle the remaining coconut over the marshmallow fluff and return the muffin tin to the refrigerator for another 20 minutes. The cups will look inviting with a fluffy layer.

Step 5: Seal with Chocolate
Re-melt any remaining chocolate to create a smooth top layer for your Homemade Mallo Cups. Spoon the melted chocolate over each filled cup, smoothing it out for a polished finish. Chill the muffin tin once again for an additional 20 minutes. The final result should be a beautiful and cohesive chocolate layer atop the marshmallow filling.

Step 6: Serve and Enjoy
Once the last layer has set, carefully remove the Mallo Cups from the muffin linters. They should pop out easily, showcasing their deliciously layered structure. Your Homemade Mallo Cups are now ready to share, satiate sweet cravings, and impress family and friends at any gathering!

How to Store and Freeze Homemade Mallo Cups

Room Temperature: Store uneaten Homemade Mallo Cups in a cool, dry place for up to 3 days. Keep them in an airtight container to maintain freshness.

Fridge: For longer freshness, place the cups in the refrigerator, where they can be stored for up to 1 week. Ensure they are in an airtight container to prevent them from absorbing any odors.

Freezer: Wrap individual Homemade Mallo Cups in plastic wrap and place them in a freezer-safe container or bag. They can be frozen for up to 3 months. Thaw them in the fridge before serving.

Reheating: If you prefer a warm treat, gently microwave your Mallo Cups for about 10-15 seconds to slightly melt the chocolate topping before enjoying!

Make Ahead Options

These Homemade Mallo Cups are fantastic for busy home cooks looking to save time! You can prepare the chocolate cups up to 24 hours in advance, allowing the chocolate to set properly in the refrigerator. Simply follow the steps to create the chocolate bases, and after they’ve chilled, cover them with plastic wrap to prevent any unwanted absorption of odors. The marshmallow fluff filling can be added just before serving, ensuring it remains fluffy and airy. Alternatively, if you prefer to prep everything ahead, assemble the cups completely and store them in an airtight container in the fridge for up to 3 days. Just know that they may lose a bit of freshness by the third day, so enjoy them sooner for the best experience!

What to Serve with Easy Homemade Mallo Cups

While these delightful cups on their own are an indulgent treat, pairing them with the right accompaniments can elevate your dessert experience to new heights.

  • Fresh Berries: Juicy blueberries or strawberries provide a refreshing contrast to the sweetness of chocolate and marshmallow, enhancing every bite.

  • Vanilla Ice Cream: A scoop of creamy vanilla ice cream paired with Mallo Cups creates a dreamy dessert combination. The melted chocolate and fluffy center blend beautifully with the cold ice cream.

  • Coffee or Espresso: The rich, bold flavors of coffee complement the sweetness of Homemade Mallo Cups, balancing their sugary notes while keeping your palate refreshed.

  • Nutty Cookies: Serve your cups alongside crunchy peanut butter or chocolate chip cookies for an extra layer of texture and flavor. The contrast of crispy against creamy offers a delightful experience.

  • Chocolate-Dipped Fruit: Try serving chocolate-dipped strawberries or bananas for a decadent twist. The fruity freshness pairs heavenly with the chocolatey Mallo Cups.

  • Milkshakes: Blend up a thick milkshake, either classic vanilla or chocolate, to match the treat’s flavors. It creates a nostalgic dessert reminiscent of childhood indulgence.

  • Sparkling Water: A glass of bubbly sparkling water adds a refreshing effervescence that cleanses the palate, perfect after a sweet treat.

With these delightful pairings, you can craft the ultimate dessert experience, making your Homemade Mallo Cups even more enjoyable!

Expert Tips for Homemade Mallo Cups

  • Chill Between Layers: Ensure each layer of chocolate and marshmallow is thoroughly chilled before adding the next. This ensures that the cups hold their shape and the layers stick together beautifully.

  • Avoid Chocolate Seizing: When melting chocolate, be mindful not to introduce water, as even a drop can cause the chocolate to seize. Stick to dry bowls and utensils.

  • Adjust Sweetness: If you prefer less sweetness, consider reducing the marshmallow fluff slightly or balancing it with a pinch of salt for a richer flavor profile in your Homemade Mallo Cups.

  • Texture Matters: For crunchier cups, feel free to replace flaked coconut with chopped nuts or crispy cookie crumbs. Just give your Mallo Cups a delicious new twist!

  • Careful Heating: When using a microwave, heat the chocolate in short bursts of 30 seconds. Stir in between to ensure even melting and prevent burning for a smooth finish.

Homemade Mallo Cups: Creative Variations

Feel free to let your imagination run wild as you customize these delightful cups to suit your taste!

  • Dark Chocolate: Swap milk chocolate for dark chocolate to achieve a bolder, more intense flavor that chocolate lovers will adore.
  • Flavor Infusion: Add a splash of vanilla or peppermint extract to the marshmallow fluff for a delightful aromatic twist that elevates the classic taste.
  • Nutty Crunch: Replace flaked coconut with chopped nuts like almonds or walnuts for a delicious crunch that adds extra texture and flavor.
  • Cookie Crust: For a decadent base, crush your favorite cookies and mix with melted butter to form a crust in the muffin liners before adding chocolate.
  • Spicy Kick: Incorporate a pinch of cayenne pepper or chili powder in the chocolate layer for a surprising kick that intensifies the sweetness.
  • Fruity Twist: Fold in dried fruit like cherries or cranberries into the marshmallow fluff for a fruity burst that complements the chocolate beautifully.
  • Caramel Delight: Drizzle a layer of caramel sauce over the marshmallow fluff before sealing with chocolate for that luscious caramel-chocolate combination.

By diving into these variations, you can create a new adventure in every bite! And if you’re up for more sweet exploring, check out these delightful Honey Butter Brioche rolls or indulge in the vibrant flavors of my Red White Dessert. Enjoy crafting your perfect Homemade Mallo Cups!

Homemade Mallo Cups Recipe FAQs

How do I choose the right chocolate?
Absolutely! For the best flavor in your Homemade Mallo Cups, opt for high-quality milk chocolate. If you prefer a deeper, richer taste, dark chocolate is a fantastic alternative. Look for chocolate with a cocoa content of 60% or higher for that extra punch—your taste buds will thank you!

How should I store my Homemade Mallo Cups?
Very simply! Store your uneaten Homemade Mallo Cups in an airtight container at room temperature for up to 3 days. If you want to preserve them longer, place them in the refrigerator, where they can last up to 1 week. Just be sure the container is sealed to keep them fresh and free from any fridge odors!

Can I freeze Homemade Mallo Cups?
Absolutely! To freeze, wrap each Homemade Mallo Cup individually in plastic wrap, and then place them in a freezer-safe bag or container. This way, they will stay fresh for up to 3 months! When you’re ready to enjoy, simply thaw them in the fridge overnight for the best texture.

What if my chocolate seizes when melting?
No worries! If your chocolate seizes, it’s most likely due to moisture getting in. If this happens, you can salvage it by adding a teaspoon of vegetable oil into the melted chocolate and stirring well. This will help restore some smoothness. Remember to use completely dry bowls and utensils for the best results!

Are there any allergies I should consider?
Yes, definitely! Homemade Mallo Cups can contain common allergens like nuts if you choose to add them as a topping. Always check if your guests have allergies before serving. If you’re looking to avoid gluten, confirm that your chocolate and any add-ins are certified gluten-free to keep everyone safe while enjoying this sweet treat!

Can I make the marshmallow fluff at home?
Yes, you can! To make your own marshmallow fluff, beat 2 large egg whites until frothy, gradually add 1 cup of granulated sugar and 1/4 cup of corn syrup, and continue beating until glossy and fluffy—about 5 minutes. This homemade version adds a personal touch to your Homemade Mallo Cups and removes store-bought ingredients!

Homemade Mallo Cups

Decadent Homemade Mallo Cups for a Sweet Treat Adventure

Indulge in these Homemade Mallo Cups, a delightful treat combining chocolate and marshmallow goodness.
Prep Time 15 minutes
Cook Time 10 minutes
Chilling Time 1 hour
Total Time 1 hour 25 minutes
Servings: 12 cups
Course: Dessert
Cuisine: American
Calories: 200

Ingredients
  

For the Chocolate Cups
  • 2 cups Milk Chocolate or dark chocolate for a more intense experience
  • 2 tablespoons Coconut Oil or vegetable oil if desired
For the Marshmallow Filling
  • 1 cup Marshmallow Fluff or homemade by whipping egg whites, sugar, and corn syrup
  • 1/2 cup Flaked Coconut optional, can substitute with chopped nuts or cookie crumbs

Equipment

  • Muffin Tin
  • Double boiler or microwave
  • Spoon

Method
 

Step-by-Step Instructions for Homemade Mallo Cups
  1. Start by lining a standard muffin tin with muffin liners to make removing your Homemade Mallo Cups easy.
  2. In a double boiler or microwave, melt your milk chocolate alongside the coconut oil until creamy.
  3. Carefully fill each muffin liner with 1 to 1.5 tablespoons of the melted chocolate and chill.
  4. Spoon 1.5 tablespoons of marshmallow fluff into each chilled cup.
  5. Re-melt any remaining chocolate to create a smooth top layer for your Homemade Mallo Cups.
  6. Once set, carefully remove the Mallo Cups from the muffin liners to serve.

Nutrition

Serving: 1cupCalories: 200kcalCarbohydrates: 25gProtein: 2gFat: 10gSaturated Fat: 6gPolyunsaturated Fat: 1gMonounsaturated Fat: 3gCholesterol: 5mgSodium: 50mgPotassium: 100mgFiber: 1gSugar: 15gCalcium: 2mgIron: 4mg

Notes

Chill each layer for shape and texture; avoid adding water when melting chocolate.

Tried this recipe?

Let us know how it was!

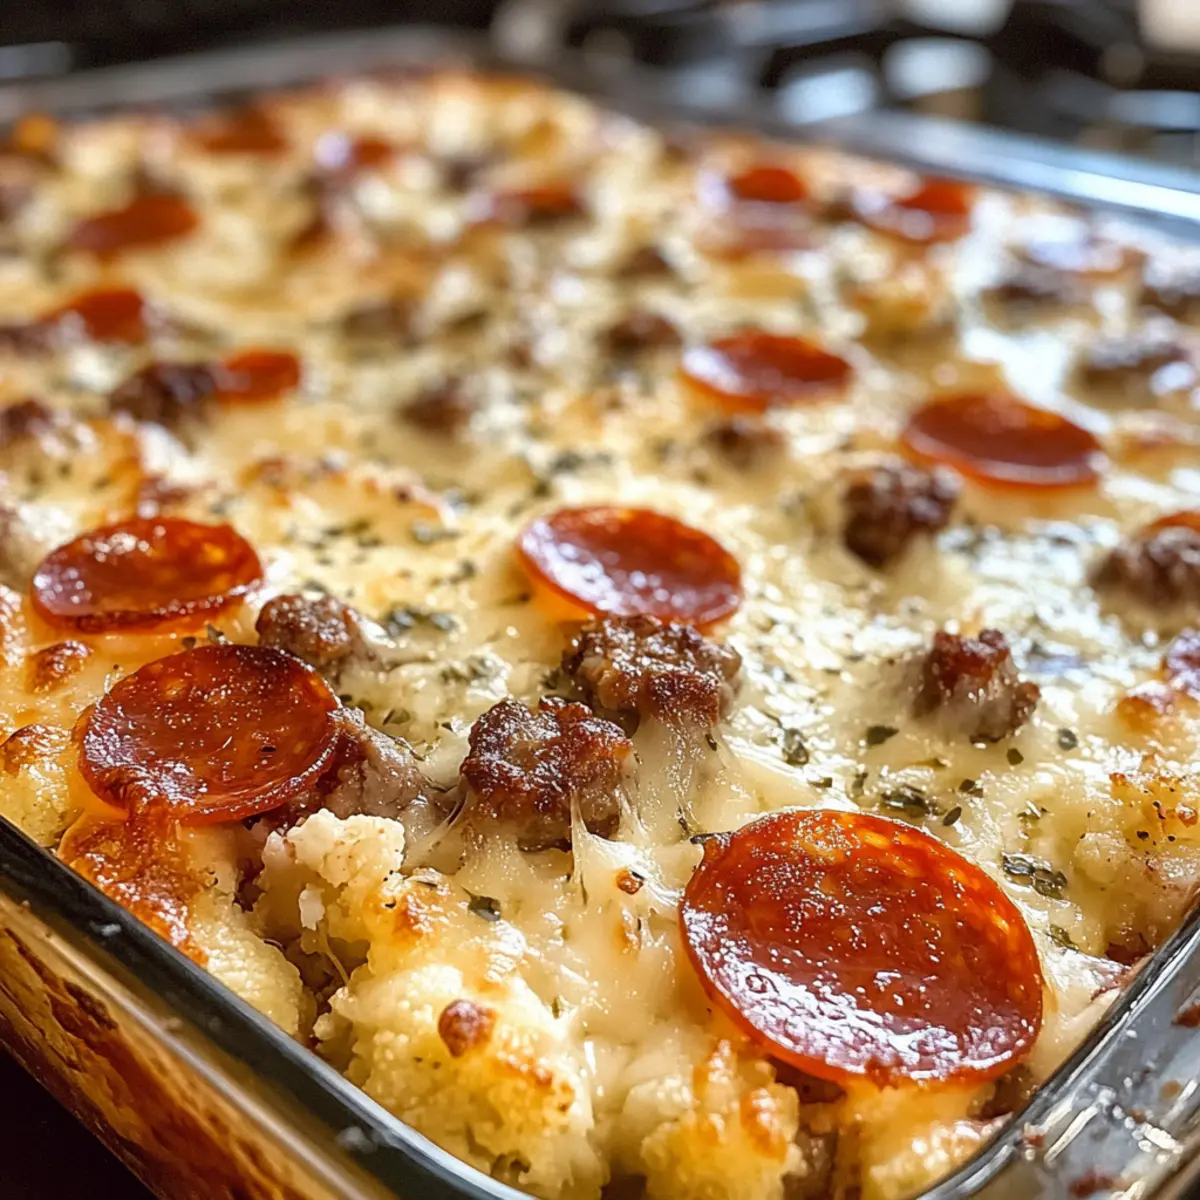
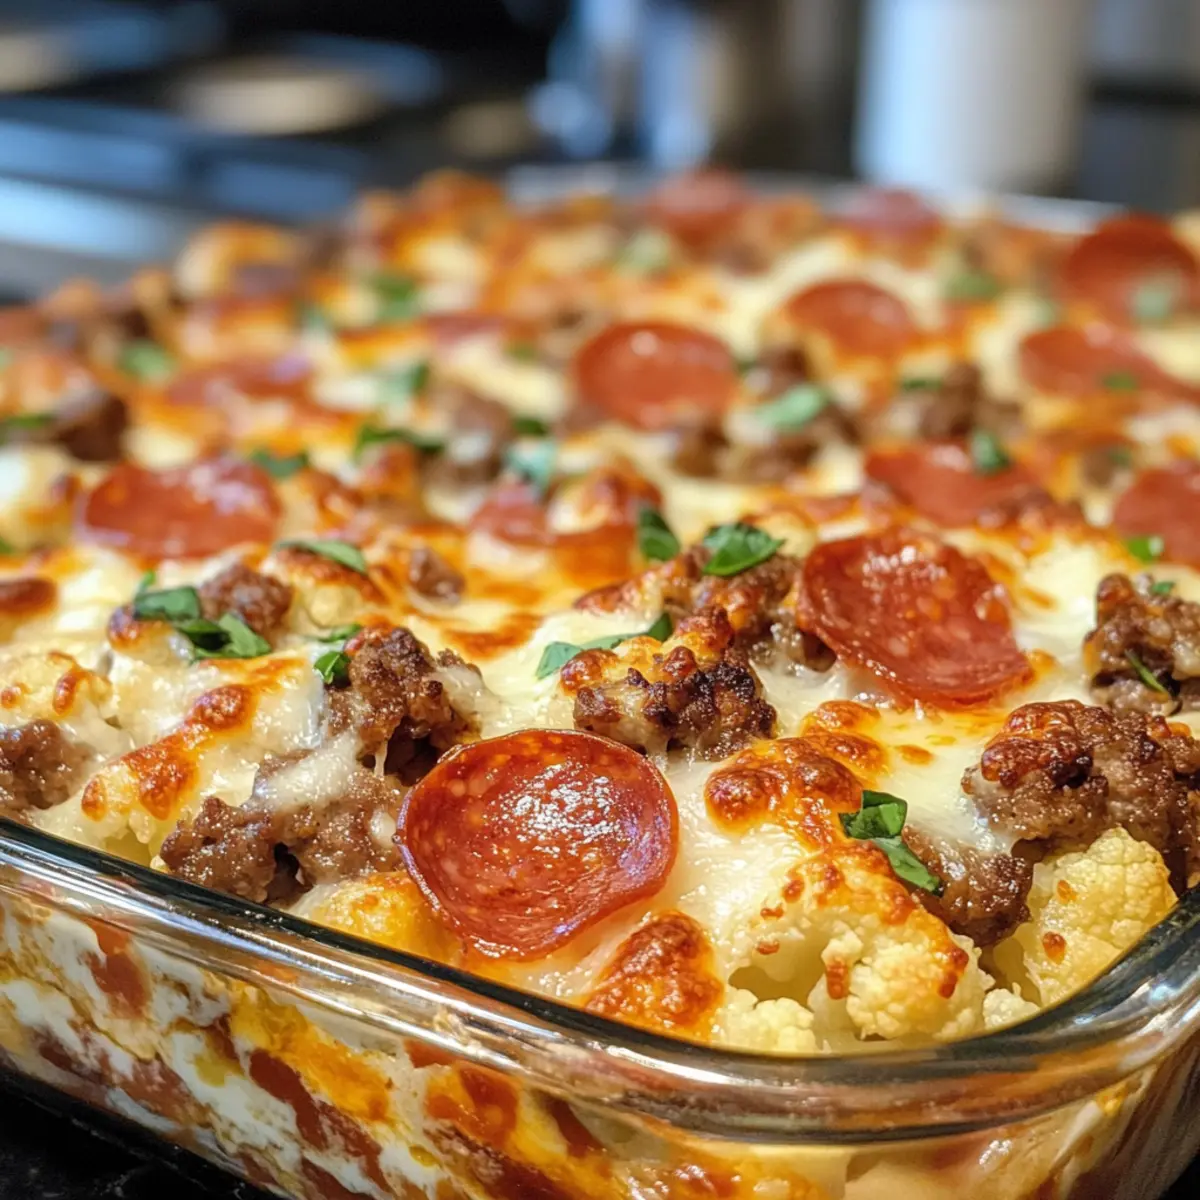
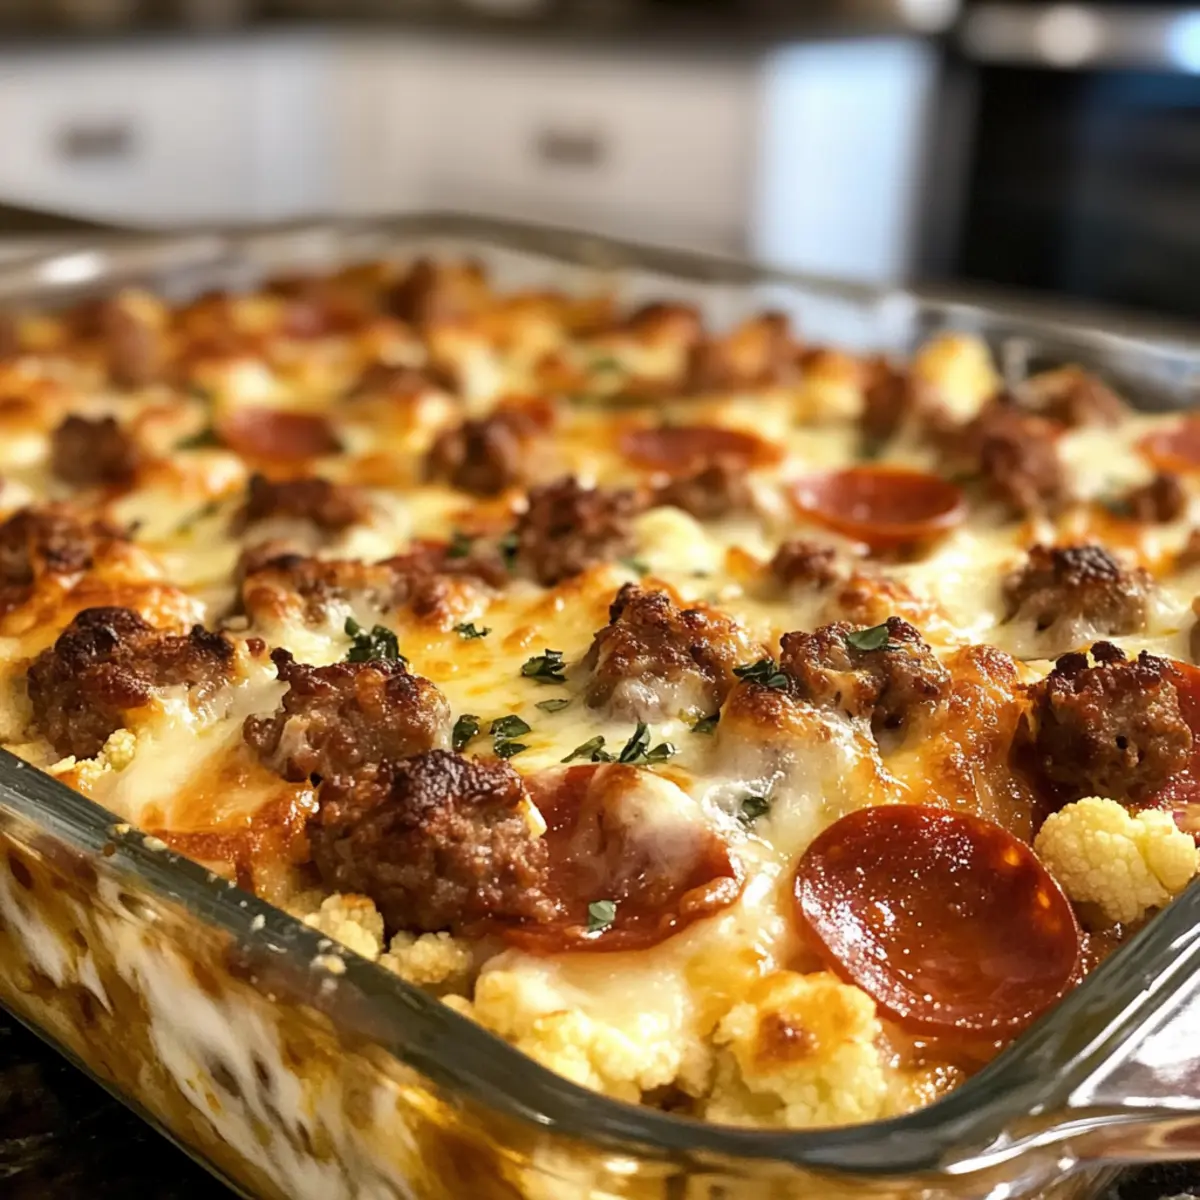
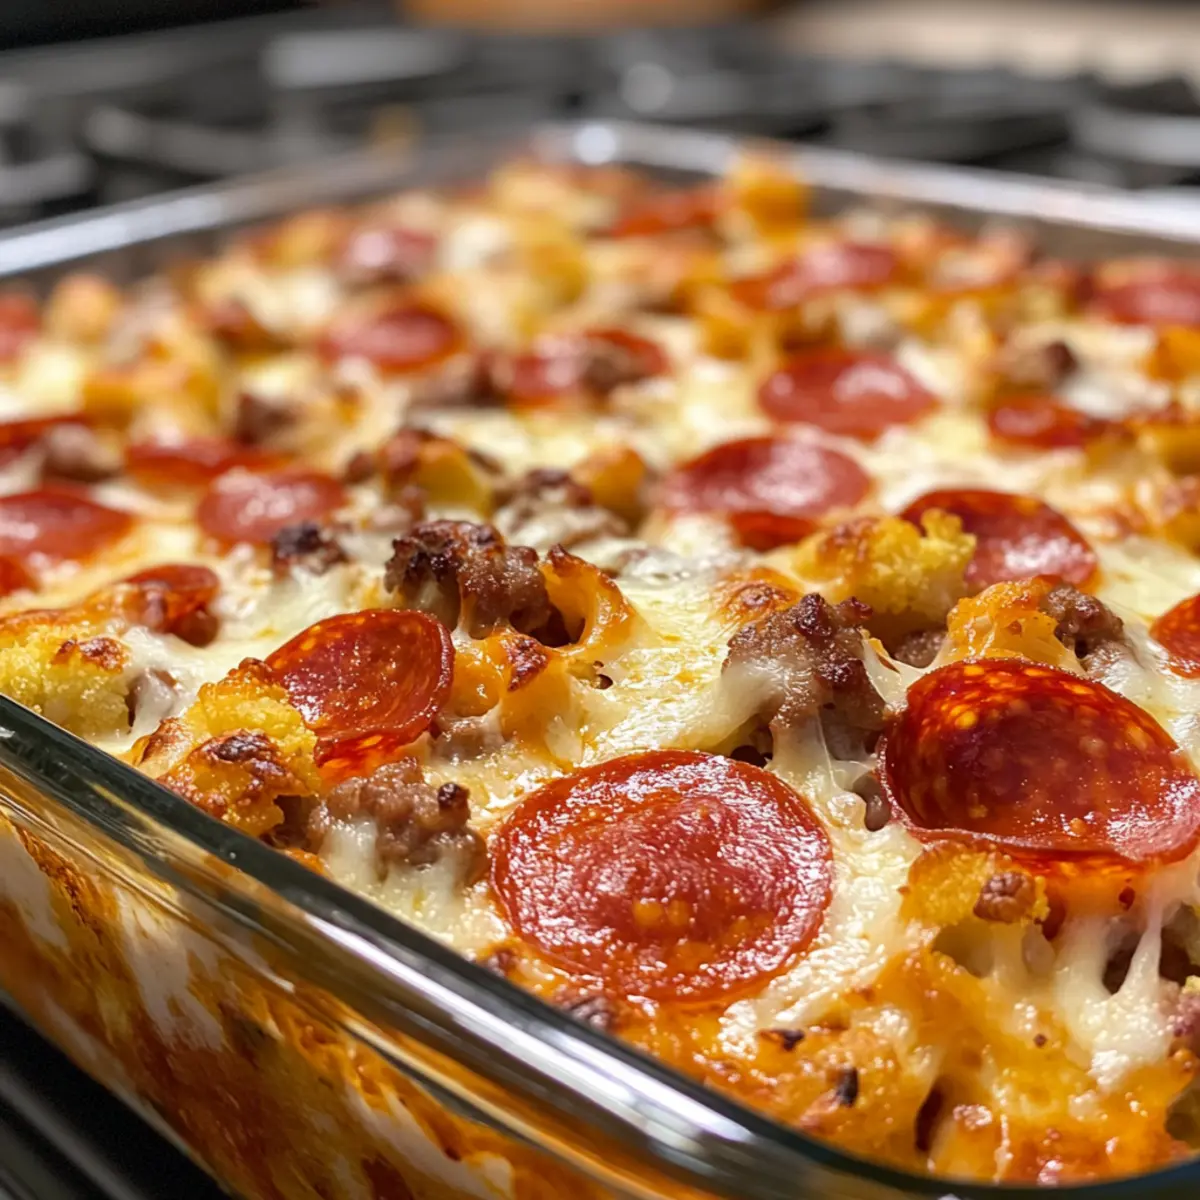
Low Carb Pizza Casserole: A Cheesy Delight You’ll Crave

As I stood in my kitchen, the rich aroma of savory sausage and melted cheese wafted through the air, instantly transporting me to a cozy Italian pizzeria. This Low Carb Pizza Casserole brings all the comforting flavors of pizza to the table without the carbs, making it the perfect go-to for those on a gluten-free or keto journey. With a tender cauliflower base packed with hearty toppings like pepperoni, mushrooms, and bell peppers, this dish is not only a satisfying crowd-pleaser but also quick to whip up on even the busiest evenings. Trust me; you’ll love how easy it is to customize with your favorite toppings! Are you ready to dive into a guilt-free pizza experience?

Why is Low Carb Pizza Casserole a Must-Try?

Cheesy Comfort: This casserole delivers a cheesy, indulgent experience, reminiscent of classic pizza but without the carbs.

Quick Preparation: With minimal prep time, you can have a delicious dinner ready in under an hour, perfect for busy nights.

Endless Customization: Personalize it with your favorite toppings—think olives, spinach, or different meats—for a unique twist every time.

Healthy Indulgence: Embrace a low-carb lifestyle without sacrificing flavor. Each serving packs flavor and nutrients while keeping you satisfied.

Family Favorite: Kids and adults alike will rave about this comforting dish, making it a surefire hit at your dinner table. Spice it up further with sides like a fresh salad or pair it with a Vegetable Egg Casserole for a balanced meal!

Low Carb Pizza Casserole Ingredients

For the Casserole
Cauliflower florets – A wonderful base that adds great texture; consider riced cauliflower for a fluffier option.
Pepperoni – Infuses classic pizza flavor; swap for turkey pepperoni for a lighter choice.
Italian Sausage – Adds savory richness; don’t forget to remove casing if needed before cooking.
Olive Oil – Perfect for sautéing veggies; avocado oil works well for higher heat cooking.
Mushrooms – Bring in that delightful umami flavor; make sure to sauté to reduce moisture.
Green Pepper – Introduces nice crunch and freshness; feel free to use sweet bell peppers instead.
Mozzarella Cheese – Melts beautifully, creating that gooey goodness; mix with other cheeses if preferred.
Low Carb Pasta Sauce – A tasty base to unite all flavors; you can also make homemade marinara to reduce carbs.
Parmesan Cheese – Enhances flavor with a crispy topping; blend with Italian seasoning for even more depth.
Italian Seasoning – Brings that authentic Italian essence; using fresh herbs will heighten the flavor!

This Low Carb Pizza Casserole will surely satisfy those pizza cravings while keeping the carbs in check!

Step‑by‑Step Instructions for Low Carb Pizza Casserole

Step 1: Prepare the Cauliflower
Start by steaming the cauliflower florets until they are tender, which takes about 3 minutes in the microwave. Once done, drain any excess water and pat them dry with a clean kitchen towel to ensure your Low Carb Pizza Casserole isn’t soggy later. This step is crucial for achieving the perfect texture.

Step 2: Preheat the Oven
Preheat your oven to 400°F (200°C). This temperature will ensure that your casserole bakes evenly, allowing the cheese to melt beautifully on top. While the oven heats, gather your other ingredients to streamline the cooking process, so everything is ready to go in the next steps.

Step 3: Cook the Sausage
In a skillet over medium heat, add the Italian sausage and cook for about 15 minutes until browned and cooked through. Use a wooden spoon to break it apart as it cooks. Once nicely browned, drain any excess fat from the pan, as this will help keep your Low Carb Pizza Casserole from becoming greasy.

Step 4: Sauté the Vegetables
In the same skillet, combine sliced mushrooms with a splash of olive oil and sauté for about 10 minutes. This will help draw out their moisture, enhancing the overall flavor of the dish. Once they are golden and tender, remove from heat and set aside to cool slightly.

Step 5: Build the Base
Grease a 9×13-inch casserole dish, then spread ½ cup of low carb pasta sauce evenly across the bottom. This flavorful layering sets the foundation for your Low Carb Pizza Casserole and helps prevent sticking while baking, creating a delicious base for the toppings.

Step 6: Mix the Fillings
In a large mixing bowl, combine the steamed cauliflower, cooked sausage, sautéed mushrooms, and chopped green peppers. Mix everything together thoroughly to ensure every bite of the casserole is packed with flavor. The varied textures will create a delightful eating experience when baked.

Step 7: First Layer of Ingredients
Spoon half of the mixture from the bowl into the casserole dish, spreading it evenly. Top this layer with another ½ cup of low carb pasta sauce, half of the pepperoni, and 6 oz of mozzarella cheese. This creates a delicious midpoint in your Low Carb Pizza Casserole where flavors meld beautifully.

Step 8: Finish Layering
Add the remaining filling mixture on top of the first layers. Keep it even, then generously top it again with the remaining pasta sauce, pepperoni, and the rest of the mozzarella cheese. This ensures the final layer is gooey and melty, providing that classic pizza experience everyone loves.

Step 9: Season the Top
Mix ¼ cup of grated Parmesan cheese with italian seasoning, then sprinkle this blend evenly over the top layer of your casserole. This will add an extra burst of flavor and a delightful crispiness after baking, enhancing the overall taste of your Low Carb Pizza Casserole.

Step 10: Bake
Place the casserole in the preheated oven and bake for 30 minutes, or until the cheese is bubbling and has turned a lovely golden brown. Keep an eye on it during the last few minutes to achieve that perfect melty finish. The enticing aroma will fill your kitchen, signaling that your meal is nearly ready!

What to Serve with Low Carb Pizza Casserole

Transform your meal into an extraordinary dining experience with delightful sides and pairings that complement every cheesy bite.

  • Simple Side Salad: A fresh, crisp salad with mixed greens and a tangy vinaigrette adds a refreshing contrast to the rich casserole.
  • Garlic Breadsticks: Pair with gluten-free garlic breadsticks for a wonderful, hearty add-on that mirrors classic pizza nights.
  • Steamed Broccoli: Tender, vibrant broccoli offers a nutritious balance, soaking up any extra sauce left on your plate perfectly.
  • Zucchini Noodles: Swap traditional pasta for zoodles to keep the carb count low while adding a pleasant texture to your meal.
  • Caprese Salad: Fresh tomatoes, mozzarella, and basil drizzled in balsamic glaze enhance those Italian vibes beautifully.
  • Sparkling Coconut Water: A refreshing drink that’s light and hydrating, it pairs seamlessly with the savory flavors of the casserole.
  • Chocolate Avocado Mousse: For dessert, this creamy and indulgent mousse is a low-carb treat that wraps up the meal on a sweet note.
  • Herbed Cauliflower Rice: Elevate your side dish with light herbed cauliflower rice, bringing extra flavor and health benefits to your plate.
  • Roasted Asparagus: Perfectly roasted asparagus offers a lovely crunch, while its earthy tones beautifully contrast the casserole’s cheesiness.
  • Unsweetened Iced Tea: A chilled, refreshing drink that pairs exceptionally well with the casserole, cleansing the palate while enhancing the meal.

Low Carb Pizza Casserole Variations

Get ready to unleash your creativity with this Low Carb Pizza Casserole and make it uniquely yours!

  • Zucchini Base: Swap cauliflower for thinly sliced zucchini for a lighter texture that still satisfies.
  • Turkey Sausage: Use ground turkey sausage instead of Italian sausage for a leaner option without sacrificing flavor.
  • Spicy Kick: Add crushed red pepper flakes or diced jalapeños to amp up the heat and tantalize your taste buds.
  • Veggie Boost: Incorporate spinach or kale for an extra pop of color and nutrients. You won’t even notice the greens in this cheesy delight!
  • Cheese Variety: Experiment with different cheeses like gouda or cheddar for a flavorful twist. Each cheese can bring its unique personality to the casserole!
  • Oven-Baked Olives: Toss in some sliced olives before baking for that classic Mediterranean pizza flavor. They’ll provide a delightful briny burst!
  • Herb Upgrade: Fresh basil or oregano can be used instead of Italian seasoning to bring a vibrant herbaceous note to every bite.
  • Mushroom Medley: Mix in a variety of mushrooms, such as shiitake or cremini, which will deepen the umami flavor and provide a lovely earthy aroma.

Don’t forget, this dish shines even more when paired with a side like a refreshing Vegetable Egg Casserole, creating a delightful balance on your dinner table. Happy cooking!

Make Ahead Options

This Low Carb Pizza Casserole is a fantastic choice for meal prep lovers! You can prepare the entire casserole up to 24 hours in advance. Simply assemble it in your greased dish, cover it tightly with foil, and refrigerate. To maintain quality, be sure to pat the cauliflower dry to avoid excess moisture. When you’re ready to bake, just remove it from the fridge and cook it in the preheated oven. You may need to add an additional 5-10 minutes to the cooking time since it’s coming straight from the cold. This way, you’ll enjoy a restaurant-quality Low Carb Pizza Casserole with minimal effort on busy weeknights!

How to Store and Freeze Low Carb Pizza Casserole

Fridge: Store your Low Carb Pizza Casserole in an airtight container for up to 3 days. Reheat individual portions in the microwave or oven.

Freezer: Assemble the casserole and freeze it before baking for up to 2 months. Thaw overnight in the fridge before baking directly from there.

Reheating: To reheat, place the casserole in a preheated oven at 350°F (175°C) for about 20-30 minutes, until heated through and the cheese is bubbly.

Serving Suggestions: Pair leftovers with a fresh salad or roasted vegetables to balance out flavors and enhance your meal during the week!

Expert Tips for Low Carb Pizza Casserole

Moisture Control: Ensure to thoroughly drain and pat dry the cauliflower before adding it to the casserole to prevent a soggy texture.

Customizable Toppings: Feel free to add your favorite low-carb veggies or alternative meats. This Low Carb Pizza Casserole adapts easily to suit various tastes!

Layer Smartly: Layer ingredients carefully; this ensures even distribution of flavors and prevents any one topping from overpowering the others.

Cheese Variations: Experiment with different cheese combinations for a unique flavor. Mixing mozzarella with provolone or cheddar can add depth to your casserole.

Baking Time: Keep an eye on your casserole during the last few minutes of baking. Each oven is different, so look for that golden, bubbly cheese to signal it’s done!

Low Carb Pizza Casserole Recipe FAQs

What is the best way to choose cauliflower for the casserole?
Absolutely! Look for cauliflower florets that are firm and tightly packed without dark spots or soft spots. Fresh cauliflower should have a bright white or cream-colored appearance. If given the choice, I often choose smaller heads, as they tend to be fresher and less likely to have a bitter taste.

How long can I store Low Carb Pizza Casserole in the fridge?
You can store your casserole in an airtight container in the fridge for up to 3 days. Just reheat individual portions in the microwave or oven to enjoy its cheesy goodness again; it’s a delightful reminder of home-cooked comfort.

Can I freeze the Low Carb Pizza Casserole?
Absolutely! You can assemble the casserole and freeze it before baking. Wrap it tightly in plastic wrap or aluminum foil and freeze for up to 2 months. For best results, thaw it overnight in the fridge and bake according to the recipe instructions. If baking from frozen, just add an additional 10-15 minutes to the cooking time.

What should I do if my casserole is too watery?
Very! If you notice extra moisture in your casserole, the key is to thoroughly drain and pat dry the cauliflower after steaming. Additionally, sautéing the mushrooms before mixing them in significantly reduces their water content, helping to maintain that luscious texture we all crave.

Are there any considerations for dietary restrictions?
Definitely! This Low Carb Pizza Casserole is inherently gluten-free and keto-friendly. However, if you’re cooking for others, always ask about allergies, especially to dairy or certain meats. If you’re serving this to pets, be sure to leave out any ingredients that might be harmful to them, like onions and garlic.

What variations can I make to the casserole?
The more the merrier! Feel free to personalize this Low Carb Pizza Casserole with your favorite toppings. You can swap cauliflower for zucchini, add different proteins like chicken or turkey sausage, or incorporate veggies like spinach or black olives. Just be mindful of moisture levels with each addition!

Low Carb Pizza Casserole

Low Carb Pizza Casserole: A Cheesy Delight You’ll Crave

This Low Carb Pizza Casserole brings all the comforting flavors of pizza to the table without the carbs.
Prep Time 20 minutes
Cook Time 30 minutes
Total Time 50 minutes
Servings: 8 slices
Course: Dinner
Cuisine: Italian
Calories: 350

Ingredients
  

For the Casserole
  • 4 cups Cauliflower florets Consider riced cauliflower for a fluffier option.
  • 6 oz Pepperoni Swap for turkey pepperoni for a lighter choice.
  • 1 lb Italian Sausage Remove casing if needed before cooking.
  • 2 tbsp Olive Oil Avocado oil works well for higher heat cooking.
  • 8 oz Mushrooms Sauté to reduce moisture.
  • 1 cup Green Pepper Feel free to use sweet bell peppers instead.
  • 12 oz Mozzarella Cheese Mix with other cheeses if preferred.
  • 1 cup Low Carb Pasta Sauce Homemade marinara can reduce carbs.
  • ¼ cup Parmesan Cheese Blend with Italian seasoning for depth.
  • 1 tbsp Italian Seasoning Using fresh herbs will heighten the flavor.

Equipment

  • Oven
  • Skillet
  • Casserole dish
  • Mixing Bowl
  • Microwave

Method
 

Step‑by‑Step Instructions
  1. Prepare the Cauliflower: Steam the cauliflower florets until tender, about 3 minutes in the microwave. Drain excess water and pat dry.
  2. Preheat the Oven: Preheat your oven to 400°F (200°C) to ensure even baking.
  3. Cook the Sausage: In a skillet over medium heat, cook the Italian sausage for about 15 minutes until browned. Drain excess fat.
  4. Sauté the Vegetables: Sauté mushrooms with olive oil for about 10 minutes until golden and tender.
  5. Build the Base: Grease a 9x13-inch casserole dish and spread ½ cup of low carb pasta sauce across the bottom.
  6. Mix the Fillings: In a large bowl, combine the steamed cauliflower, cooked sausage, sautéed mushrooms, and chopped green peppers.
  7. First Layer of Ingredients: Spoon half of the mixture into the casserole dish, top with another ½ cup of low carb pasta sauce, half of the pepperoni, and 6 oz of mozzarella cheese.
  8. Finish Layering: Add the remaining filling mixture, top with last pasta sauce, pepperoni, and the rest of the mozzarella cheese.
  9. Season the Top: Mix Parmesan cheese with Italian seasoning and sprinkle over the top layer.
  10. Bake: Bake in the preheated oven for 30 minutes until the cheese is bubbling and golden brown.

Nutrition

Serving: 1sliceCalories: 350kcalCarbohydrates: 8gProtein: 25gFat: 25gSaturated Fat: 10gPolyunsaturated Fat: 3gMonounsaturated Fat: 10gCholesterol: 75mgSodium: 800mgPotassium: 500mgFiber: 3gSugar: 2gVitamin A: 500IUVitamin C: 30mgCalcium: 300mgIron: 2.5mg

Notes

Store in an airtight container for up to 3 days. Freeze before baking for up to 2 months. Reheat in the oven at 350°F for 20-30 minutes.

Tried this recipe?

Let us know how it was!

Creamy French Onion Butter Rice: Your New Favorite Comfort Dish

As I stood in my kitchen, the warm aroma of caramelized onions wafting through the air instantly transported me to a cozy French bistro. That’s when I knew I had to share my latest love: French Onion Butter Rice. This comforting side dish marries the rich, buttery goodness of classic French onion soup with the fluffy texture of rice, making it an ideal addition to any meal. Simple yet satisfying, it effortlessly elevates weeknight dinners or festive gatherings. Best of all, it’s adaptable—easily made vegetarian with just a few swaps. Ready to see how this delightful dish can transform your dining experience? Let’s dive into the recipe!

Why is This Rice Recipe a Must-Try?

Elevated Comfort: Imagine transforming the classic flavors of French onion soup into a delightful rice dish! This French Onion Butter Rice will be your go-to comfort food that warms the soul.

So Simple: It’s effortless to prepare; just mix and bake! Perfect for busy weekdays or last-minute gatherings.

Versatile Delight: Pair it with any protein, or serve as a vegetarian side. It’s a fantastic addition to dishes like Garlic Butter Shrimp or a complement to Cheesy French Onion recipes!

Flavor Explosion: The blend of rich beef broth and fragrant onions creates an umami richness your taste buds will adore.

Leftover Friendly: Make it ahead and simply reheat! Enjoy it for days, making it perfect for meal prepping.

French Onion Butter Rice Ingredients

For the Rice Base
Long Grain White Rice – Provides the perfect fluffy texture, making it a fantastic base for this dish.
French Onion Soup – Adds deep umami flavor; opt for a high-quality version for the best taste.
Beef Broth – Enhances the savory profile; swap for vegetable broth for a delicious vegetarian option.

For the Onions and Flavor
Chopped Onions (optional) – Intensifies the onion flavor; can be skipped if a milder taste is desired.
Butter – Ensures a creamy and rich consistency; unsalted butter allows for better seasoning control.

Embrace the comforting warmth of French Onion Butter Rice with these carefully selected ingredients, perfect for elevating any meal!

Step‑by‑Step Instructions for French Onion Butter Rice

Step 1: Preheat the Oven
Begin by preheating your oven to 400°F (200°C). While the oven heats, lightly grease a medium-sized baking dish with cooking spray or butter. This prepares the dish for the French Onion Butter Rice, ensuring it cooks evenly and doesn’t stick.

Step 2: Mix Ingredients
In the greased baking dish, combine long grain white rice, French onion soup, beef broth, and chopped onions if using. Stir everything together until the rice is submerged in the liquid. This mixture is crucial for infusing the rice with that deep umami flavor characteristic of French onion soup.

Step 3: Add Butter
Slice unsalted butter into thin pieces and layer them evenly over the rice mixture. This step is essential, as the melting butter will enrich the dish, creating a creamy texture in the final result.

Step 4: Cover and Bake
Cover the baking dish tightly with aluminum foil to trap moisture inside. Place it in the preheated oven and bake for 30 minutes. This step allows the rice to cook thoroughly and absorb the flavors from the broth and soup.

Step 5: Uncover and Finish
After 30 minutes, carefully remove the foil, ensuring not to burn yourself with the steam. Bake the uncovered rice for an additional 20-25 minutes, or until the liquid is absorbed and the top is golden brown. You’ll know it’s done when the edges are crisp, and a delightful aroma fills your kitchen.

Step 6: Fluff and Serve
Once finished baking, take the dish out and let it sit for about 5 minutes. This resting time helps the flavors meld. Finally, fluff the French Onion Butter Rice gently with a fork before serving warm, allowing the buttery goodness to mix evenly throughout.

Storage Tips for French Onion Butter Rice

  • Fridge: Store leftovers in an airtight container for up to 3 days. This ensures your French Onion Butter Rice stays fresh and flavorful for your subsequent meals.

  • Freezer: To extend the shelf life, freeze portions of the rice in airtight freezer bags for up to 2 months. Make sure to label the bags for easy identification later!

  • Reheating: When ready to enjoy, thaw in the fridge overnight, then reheat in the oven at 350°F (175°C) for about 20 minutes, or until warmed through. Stir occasionally for even heating.

  • Make-Ahead Tip: This dish can be prepared ahead of time and stored, making it a fantastic option for meal prepping. Enjoy the comforting flavors anytime!

Make Ahead Options

These delightful French Onion Butter Rice dishes are perfect for busy home cooks looking to save time during hectic weeknights! You can prepare the rice mixture (excluding the butter) up to 24 hours in advance; simply mix the long grain rice, French onion soup, beef broth, and chopped onions in a greased baking dish, tightly cover it with foil, and refrigerate. This allows the flavors to meld beautifully. When you’re ready to serve, just layer the butter on top and bake as directed. For leftover French Onion Butter Rice, store in an airtight container in the fridge for up to 3 days. Reheat gently in the oven for the best results—enjoy the comforting aroma and rich flavors all week long!

What to Serve with French Onion Butter Rice?

As you savor the rich, buttery delight of this dish, consider adding complementary flavors and textures to create a complete meal experience.

  • Roasted Chicken: Tender chicken, with its herb-infused flavors, harmonizes beautifully with the savory richness of the rice.

  • Grilled Vegetables: Bright and colorful, grilled seasonal veggies add a fresh contrast, while their charred sweetness balances the dish’s richness.

  • Creamy Spinach Salad: A refreshing salad with creamy dressing offers a cool crunch, enhancing the overall meal with vibrant textures and taste.

  • Steak: A perfectly cooked steak, whether grilled or pan-seared, provides an indulgent protein pairing that matches the luxurious feel of the rice.

  • Garlic Bread: The warm, crispy texture delivers comforting carb goodness, perfect for scooping up the buttery rice and enhancing the dining experience.

  • Mushroom Risotto: For extra comfort, serving alongside a creamy mushroom risotto offers a wonderful contrast in flavors, combining earthy notes and richness.

  • Apple Crisp: To round off the meal on a sweet note, a warm apple crisp brings in comforting spices and a delightful crunch, perfectly complementing the buttery rice dish.

  • Chardonnay: This creamy white wine provides a lovely acidity to balance the dish’s richness, enhancing both your meal and the flavors of the rice.

French Onion Butter Rice Variations

Feel free to personalize this recipe and explore new flavors that excite your taste buds!

  • Brown Rice: Swap white for brown rice for a nuttier flavor and more fiber. Just remember to increase the liquid and baking time by 15-20 minutes for perfect results.

  • Vegetarian Delight: Use vegetable broth instead of beef broth, ensuring your French onion soup is meat-free. This is a comforting option that still delivers on flavor!

  • Cheesy Twist: Sprinkle grated cheese on top during the last 10 minutes of baking for a gooey, cheesy finish. Try incorporating a blend of cheeses for a delightful flavor explosion.

  • Herb Infusion: Add fresh herbs like thyme or rosemary before baking. Their aromatic qualities add a beautiful depth that enhances the overall dish.

  • Garlic Boost: Toss in minced garlic or garlic powder with the rice mixture. The warm, savory notes of garlic will elevate the dish, making it irresistible.

  • Spice it Up: For a bit of heat, add crushed red pepper flakes or diced jalapeños into the mix. This will transform your dish into a comforting yet spicy treat.

  • Mushroom Medley: Stir in sautéed mushrooms for added texture and earthy flavor. Their umami richness pairs wonderfully with the onion base.

  • Sweet Caramelization: Mix in some caramelized onions along with your chopped onions for an extra layer of sweetness. This caramelized goodness deepens the flavor beautifully!

These delightful changes can help spice up your French Onion Butter Rice experience. Enjoy the adventure of creating your own unique variations!

Expert Tips for French Onion Butter Rice

  • Butter Distribution: Ensure the butter is evenly distributed across the rice mixture. This maximizes flavor infusion, resulting in a beautifully creamy texture.

  • Timing Matters: Watch the baking time closely; overbaking can lead to dryness. Check your rice at the 50-minute mark for doneness.

  • Rest After Baking: Let the dish sit for about 5 minutes after baking. This helps the rice absorb remaining moisture, enhancing the overall texture and flavor.

  • Onion Quality: Use high-quality French onion soup for the best flavor profile. A cheap version can diminish the dish’s richness and taste.

  • Vegetarian Substitutes: For a vegetarian French Onion Butter Rice, opt for vegetable broth and ensure your onion soup is meat-free.

French Onion Butter Rice Recipe FAQs

What type of rice is best for this dish?
For the best texture, I recommend using long grain white rice. It provides the fluffiness that complements the creamy sauce beautifully. If you’re looking for a nuttier flavor, consider brown rice, but remember to adjust the liquid and increase the cooking time by about 15-20 minutes.

How should I store leftovers?
Absolutely! After savoring your delicious French Onion Butter Rice, store leftovers in an airtight container in the fridge for up to 3 days. This keeps them fresh and ready for another comforting meal.

Can I freeze French Onion Butter Rice?
Certainly! To freeze, let the rice cool completely, then portion it into airtight freezer bags. It will stay good for up to 2 months. Make sure to label each bag for easy identification later. To reheat, thaw overnight in the fridge and warm in the oven at 350°F (175°C) for about 20 minutes, stirring occasionally to heat evenly.

What should I do if my rice is too dry after baking?
If your French Onion Butter Rice turns out dry, it might have baked too long or the liquid wasn’t sufficient. Next time, ensure you tightly cover the dish with foil while baking to retain moisture, and check for doneness around the 50-minute mark. You can also add a splash of broth when storing leftovers to keep it moist!

Is this recipe suitable for a vegetarian diet?
Absolutely! To make a vegetarian version of this French Onion Butter Rice, simply substitute the beef broth with vegetable broth and ensure your French onion soup is meat-free. It’s a delightful and cozy option for meatless meals and still bursting with flavor!

Can I use fresh onions instead of French onion soup?
Yes! If you prefer to use fresh onions, caramelize about 2-3 medium onions in butter first until they are golden and sweet. Then, add them in place of the French onion soup, and combine with a mixture of vegetable broth and additional seasonings to achieve that rich taste. This method may take a little extra time but adds a wonderful homemade touch!

French Onion Butter Rice

Creamy French Onion Butter Rice: Your New Favorite Comfort Dish

Indulge in the comforting flavors of French Onion Butter Rice, a dish that perfectly blends umami richness with fluffy rice.
Prep Time 10 minutes
Cook Time 55 minutes
Resting Time 5 minutes
Total Time 1 hour 10 minutes
Servings: 4 servings
Course: Dinner
Cuisine: French
Calories: 250

Ingredients
  

For the Rice Base
  • 1 cup Long Grain White Rice Provides the perfect fluffy texture.
  • 1 can French Onion Soup Opt for a high-quality version.
  • 2 cups Beef Broth Can swap for vegetable broth for a vegetarian option.
For the Onions and Flavor
  • 1 cup Chopped Onions Optional; can be skipped for milder taste.
  • 4 tablespoons Butter Unsalted for better seasoning control.

Equipment

  • Baking dish
  • Aluminum Foil
  • cooking spray

Method
 

Step-by-Step Instructions
  1. Preheat your oven to 400°F (200°C) and grease a baking dish.
  2. Combine the rice, French onion soup, beef broth, and chopped onions in the baking dish.
  3. Slice the butter and layer over the rice mixture.
  4. Cover the dish with foil and bake for 30 minutes.
  5. Remove the foil and bake for an additional 20-25 minutes until golden brown.
  6. Let it sit for 5 minutes before fluffing with a fork and serving warm.

Nutrition

Serving: 1cupCalories: 250kcalCarbohydrates: 40gProtein: 6gFat: 10gSaturated Fat: 5gPolyunsaturated Fat: 0.5gMonounsaturated Fat: 3gCholesterol: 15mgSodium: 600mgPotassium: 350mgFiber: 1gSugar: 1gVitamin A: 450IUVitamin C: 1mgCalcium: 20mgIron: 1mg

Notes

Ensure even butter distribution for maximum flavor. Watch the baking time to avoid dryness. Let sit after baking for best texture.

Tried this recipe?

Let us know how it was!

Peanut Butter Cornflake Marshmallow Bars for Easy Snacking

“Can you believe how simple it is to make a treat this delicious?” I overheard a friend exclaim while savoring a bite of my latest creation: No-Bake Peanut Butter Cornflake Marshmallow Bars. This delightful combination of soft marshmallows and creamy peanut butter, paired with a satisfying crunch from cornflakes, is simply irresistible. Not only are these bars quick and easy to whip up, they require just a handful of ingredients you probably already have in your pantry. Whether you’re preparing for a last-minute potluck or looking for a fun snack to share with the kids, this recipe is a must-try! Plus, they’re perfect for those busy days when you want something sweet without turning on the oven. So, are you ready to create your new favorite no-bake treat? Let’s dive in!

Why Are These Bars So Irresistible?

Simplicity at Its Finest: These Peanut Butter Cornflake Marshmallow Bars are a breeze to make, requiring only a few pantry staples and no baking!

Crowd-Pleasing Delight: Their sweet, salty flavor profile makes them a hit at parties, picnics, or just as an after-school snack for the kids.

Quick and Easy: You can whip these up in under 30 minutes—perfect for those impromptu get-togethers!

Versatile Base: Feel free to customize your bars! Add chocolate chips for richness or swap cornflakes with oats for a wholesome twist.

No-Fuss Cleanup: With minimal cooking and an easy prep process, you’ll spend less time in the kitchen and more time enjoying!

Try pairing these bars with our Buttermilk Pancakes for a scrumptious brunch menu or enjoy them alongside Honey Butter Brioche for a delightful treat!

Peanut Butter Cornflake Marshmallow Bars Ingredients

Get ready to discover the few simple ingredients that come together to create these delicious treats!

For the Base

  • Unsalted Butter – Adds richness and binds the bars; if needed, margarine works as a dairy-free substitute.
  • Mini Marshmallows – Provides delightful sweetness and texture; regular marshmallows can easily replace mini ones in a pinch.
  • Smooth Peanut Butter – Delivers creamy flavor; almond butter can be used for an interesting nutty twist.
  • Cornflake Cereal – Offers that satisfying crunch; consider rice cereal for a gluten-free alternative.

Feel free to modify your Peanut Butter Cornflake Marshmallow Bars with chocolate or dried fruits to make them even more indulgent! Enjoy this quick and easy recipe that’s sure to become a family favorite.

Step‑by‑Step Instructions for Peanut Butter Cornflake Marshmallow Bars

Step 1: Prepare the Pan
Begin by greasing an 8×8-inch pan with nonstick spray or line it with parchment paper for easy removal later. This will ensure your Peanut Butter Cornflake Marshmallow Bars are easy to cut and serve. Set the pan aside, as you will soon fill it with your delicious mixture.

Step 2: Melt the Butter
In a large saucepan, melt ¼ cup of unsalted butter over medium heat. Stir frequently for about 3-4 minutes until the butter turns a light golden brown and you can smell its nutty aroma. This browning step adds depth of flavor to your bars, creating the perfect base for the ensuing ingredients.

Step 3: Incorporate the Marshmallows
Once the butter is browned, add 4 cups of mini marshmallows to the saucepan. Stir continuously for about 2-3 minutes until the marshmallows are completely melted and have formed a smooth mixture with the butter. Keep an eye on the heat to prevent the mixture from burning—your perfect marshmallow blend will be glossy and fluffy.

Step 4: Mix in the Peanut Butter
Now, remove the saucepan from heat and immediately stir in 1 cup of smooth peanut butter. Blend until the peanut butter is fully incorporated and the mixture is silky and uniform. This will create a creamy texture that perfectly complements the sweetness of the marshmallows in your Peanut Butter Cornflake Marshmallow Bars.

Step 5: Add the Cornflakes
Carefully fold in 4 cups of cornflake cereal, ensuring each flake is evenly coated with the marshmallow-peanut butter mixture. Gently mix for about 1-2 minutes until the cornflakes are well distributed and fully coated. For an extra touch, you can fold in a handful of additional marshmallows for a colorful visual appeal.

Step 6: Press into the Pan
Transfer the mixture to your prepared pan and use a spatula or a piece of wax paper to press it down firmly. Make sure it’s evenly distributed across the pan for uniform bars. Let the mixture set at room temperature for about 30 minutes, which will help it firm up without requiring an oven.

Step 7: Cut and Serve
After the bars have cooled completely, use a sharp knife to cut them into squares or rectangles. This ensures clean edges and easy serving. Your Peanut Butter Cornflake Marshmallow Bars are now ready to be enjoyed! For the best texture, wait a little longer if possible before serving to allow them to firm up fully.

What to Serve with Peanut Butter Cornflake Marshmallow Bars

These delightful, no-bake treats can elevate your snacking experience when paired with the right accompaniments.

  • Chilled Milk: The classic pairing of peanut butter and cornflakes goes wonderfully with a tall glass of cold milk, enhancing the sweet and salty flavors.
  • Fresh Fruit Salad: A vibrant fruit salad offers a refreshing contrast to the richness of the bars, adding a bright, juicy element to your snack time.
  • Chocolate-Dipped Strawberries: Indulge in decadent chocolate-covered strawberries that echo the sweetness of the marshmallows while balancing it with a bit of tartness.
  • Homemade Hot Chocolate: Cozy up with a warm cup of rich hot chocolate that mirrors the comforting vibe of the bars, perfect for chilly afternoons or evening treats.
  • Nutty Trail Mix: A handful of nutty trail mix can add a delightful crunch and healthy boost, creating a balanced snack that’s both satisfying and wholesome.
  • Vanilla Ice Cream: The creamy goodness of vanilla ice cream serves as a fantastic companion, melting slightly over the bars for an indulgent dessert experience.
  • Caramel Sauce Drizzle: Elevate your bars with a drizzle of warm caramel sauce, providing an extra layer of sweetness that’s simply irresistible.
  • Coffee or Espresso: An aromatic cup of coffee or espresso contrasts beautifully with the sweetness of the bars, making it a perfect pairing for your afternoon pick-me-up.
  • Coconut Chips: Toasted coconut chips can introduce a delightful crunch and a hint of tropical flavor to your snacking adventure.

How to Store and Freeze Peanut Butter Cornflake Marshmallow Bars

Room Temperature: Store your bars in an airtight container at room temperature for up to 2-3 days. This keeps them soft and chewy, maintaining that delightful texture.

Fridge: For longer storage, keep the bars in the refrigerator where they can last for up to 1 week. Just be sure they are sealed well to prevent them from drying out.

Freezer: If you want to save them for later, wrap individual bars in plastic wrap and place them in a freezer-safe bag. They can last up to 3 months in the freezer.

Reheating: To refresh your bars, let them sit at room temperature for about 10-15 minutes before serving, allowing them to soften slightly for that irresistible chewy goodness!

Expert Tips for Perfect Peanut Butter Cornflake Marshmallow Bars

  • Butter Brilliance: Ensure your butter is perfectly browned but not burnt; this adds a rich flavor depth, elevating your Peanut Butter Cornflake Marshmallow Bars.

  • Stay Stick-Free: Use wax paper or a spatula to press the mixture into the pan. This prevents sticky fingers and helps achieve uniformly shaped bars.

  • Cool for Clean Cuts: Allow your bars to cool completely before slicing. This step is crucial for clean cuts and maintaining the beautiful shape of your treats.

  • Optional Add-ins: Feel free to customize your bars! Adding chocolate chips or dried fruit can enhance flavors and textures for a delightful twist.

  • Storage Strategy: Keep your bars in an airtight container at room temperature for 2-3 days. For longer freshness, consider refrigerating them!

Make Ahead Options

These Peanut Butter Cornflake Marshmallow Bars are perfect for meal prep, making your busy days a little sweeter! You can prepare the marshmallow-peanut butter mixture up to 24 hours in advance. Simply follow the steps to melt the butter, add the marshmallows and peanut butter, and fold in the cornflakes. Store the mixture in an airtight container in the refrigerator to maintain its quality and prevent it from hardening. When you’re ready to serve, simply press the chilled mixture into the prepared pan and let it sit at room temperature for about 30 minutes before cutting into bars. They’ll be just as delicious as when freshly made, saving you time for more important moments!

Peanut Butter Cornflake Marshmallow Bars Variations

Explore the endless possibilities of customizing your delicious bars to suit your taste and dietary preferences!

  • Chocolate Delight: Drizzle melted chocolate over the top for a rich, indulgent twist that takes these bars to the next level.

  • Nutty Addition: Toss in a handful of chopped nuts, like almonds or walnuts, for an extra crunch and healthy boost. A delightful texture contrast!

  • Dried Fruit Burst: Incorporate dried fruits such as cranberries or raisins for a sweet and chewy surprise in every bite.

  • Spicy Kick: Add a sprinkle of cinnamon or a dash of cayenne pepper to the melted mixture for a warming spice that complements the peanut butter beautifully.

  • Oats Swap: Replace cornflakes with oats for a heartier, chewy version that adds wholesome goodness to your bars.

  • Marshmallow Layers: Add layers of mini marshmallows throughout the mixture for an even more gooey texture. It’s visually appealing and oh-so-tasty!

For more sweet ideas, pair your bars with delightful treats like our Honey Butter Brioche or enjoy them as part of a breakfast spread alongside fluffy Buttermilk Pancakes. The options are endless!

Peanut Butter Cornflake Marshmallow Bars Recipe FAQs

What type of cornflakes should I use?
You can use any cornflake cereal you like! I recommend classic cornflakes for their crunch, but if you’re looking for a gluten-free version, feel free to substitute with rice cereal instead. Both options will provide that necessary satisfying crunch.

How should I store Peanut Butter Cornflake Marshmallow Bars?
Store your bars in an airtight container at room temperature for about 2-3 days to keep them soft and chewy. If you want to keep them fresh for a longer period, refrigerate them for up to a week. Just make sure they’re well-sealed to prevent drying out.

Can I freeze Peanut Butter Cornflake Marshmallow Bars?
Absolutely! To freeze, first wrap individual bars in plastic wrap and then place them into a freezer-safe bag. They can be stored in the freezer for up to 3 months. When you’re ready to enjoy, simply let them sit at room temperature for about 10-15 minutes to soften before serving.

What should I do if my mixture is too sticky?
If your mixture feels overly sticky when you’re incorporating the cornflakes, it might help to lightly spray your hands or spatula with nonstick spray. This will help you handle the mixture without it sticking to your fingers. Also, pressing the mixture into the pan using wax paper instead of your hands can prevent additional stickiness.

Are these bars safe for pets?
While these bars are generally safe for humans, they contain ingredients like peanut butter and marshmallows that aren’t ideal for pets, especially dogs. If you want to share a treat with your furry friends, it’s best to stick to pet-friendly alternatives. Always consult your veterinarian for advice on safe foods for your pets!

Peanut Butter Cornflake Marshmallow Bars

Peanut Butter Cornflake Marshmallow Bars for Easy Snacking

These Peanut Butter Cornflake Marshmallow Bars are a quick and easy no-bake treat that's simply irresistible.
Prep Time 10 minutes
Cook Time 10 minutes
Cooling Time 30 minutes
Total Time 50 minutes
Servings: 12 bars
Course: Dessert
Calories: 150

Ingredients
  

Base
  • ¼ cup unsalted butter or margarine for dairy-free
  • 4 cups mini marshmallows or regular marshmallows
  • 1 cup smooth peanut butter or almond butter for a nutty twist
  • 4 cups cornflake cereal or rice cereal for gluten-free

Equipment

  • 8x8-inch pan
  • large saucepan
  • Spatula

Method
 

Preparation Steps
  1. Prepare the Pan: Grease an 8x8-inch pan or line it with parchment paper.
  2. Melt the Butter: Melt ¼ cup of unsalted butter over medium heat until golden brown.
  3. Incorporate the Marshmallows: Stir in 4 cups of mini marshmallows and melt completely.
  4. Mix in the Peanut Butter: Remove from heat and stir in 1 cup of smooth peanut butter until well blended.
  5. Add the Cornflakes: Fold in 4 cups of cornflake cereal until evenly coated.
  6. Press into the Pan: Transfer the mixture to the prepared pan and press down firmly.
  7. Cut and Serve: After cooling, cut into squares and serve.

Nutrition

Serving: 1barCalories: 150kcalCarbohydrates: 18gProtein: 3gFat: 7gSaturated Fat: 3gPolyunsaturated Fat: 1gMonounsaturated Fat: 3gCholesterol: 5mgSodium: 80mgPotassium: 100mgFiber: 1gSugar: 10gVitamin A: 200IUCalcium: 10mgIron: 0.5mg

Notes

Store bars in an airtight container for up to 3 days, or refrigerate for up to 1 week. Wrap individual bars for freezing up to 3 months.

Tried this recipe?

Let us know how it was!

Melt-in-Your-Mouth Biscoff Millionaires Shortbread Delight

You know that thrilling moment when you sink your teeth into something so delightful that it feels like a warm hug? That’s exactly what you’ll experience with my No Bake Biscoff Millionaires Shortbread. This indulgent dessert combines the unique flavors of Lotus Biscoff cookies with layers of gooey caramel and a glossy chocolate topping—creating a rich treat that is deceptively easy to make. With just seven simple ingredients, this no-bake wonder is perfect for impressing guests or satisfying your sweet cravings without spending hours in the kitchen. Plus, it’s a versatile masterpiece that you can whip up in no time, making it a true crowd-pleaser. Are you ready to treat yourself? Let’s dive into the indulgent world of Biscoff Millionaires Shortbread!

Why Is This Biscoff Shortbread Irresistible?

Decadent Delight: Each bite of this Biscoff Millionaires Shortbread offers a symphony of flavors that will leave you craving more—spicy, caramel notes paired with creamy chocolate are downright heavenly!

No Bake Convenience: With no baking required, you can craft this treat in mere minutes, perfect for busy weeknights or spontaneous gatherings.

Versatile Treat: Whether served at a fancy dinner or enjoyed as a midday snack, this dessert easily adapts to any occasion—try it with coffee or tea for a delightful pairing!

Crowd-Pleasing Appeal: Impress guests or family with a dessert that looks fancy yet is effortlessly simple to make. It’s a guaranteed hit at parties!

Storage Friendly: Make ahead of time and store in the fridge—this treat keeps well for a week, so you can enjoy a slice whenever the craving strikes!

Are you ready to discover the joy of creating this scrumptious dessert? Let’s get started!

Biscoff Millionaires Shortbread Ingredients

For the Biscuit Base
Lotus Biscoff biscuits – A crumbly base that gives a unique flavor; substitute with another crunchy cookie if needed.
Unsalted butter (100g) – Adds richness and binds ingredients; fresh butter enhances taste.
Salt (¼ tsp) – Enhances flavor; you can omit if using salted butter.

For the Caramel Layer
Unsalted butter (125g) – Melting this into the caramel adds a creamy depth.
Light brown sugar (½ cup) – Brings sweetness and depth; granulated sugar can work but may alter flavor.
Sweetened condensed milk (1 tin, 397g) – Provides the caramel with creaminess; evaporated milk can be used but will lack sweetness.
Lotus Biscoff spread (2 tbsp) – Infuses the caramel with that delicious signature Biscoff flavor; swapping it will change the taste.

For the Chocolate Topping
Milk chocolate (250g) – A smooth, sweet finishing touch to this no bake dessert; try dark chocolate for a bolder flavor.

Dive into these simple ingredients and create your own scrumptious Biscoff Millionaires Shortbread that will impress everyone around!

Step‑by‑Step Instructions for Biscoff Millionaires Shortbread

Step 1: Prepare the Biscuit Base
Begin by crushing the Lotus Biscoff biscuits into fine crumbs using a food processor. In a bowl, mix the biscuit crumbs with 100g of melted unsalted butter and ¼ teaspoon of salt until fully combined. The mixture should resemble wet sand and pack together when pressed. Transfer the base into a lined 8×8 inch square baking dish, pressing it evenly into the bottom with the back of a spoon. Chill in the fridge while you prepare the caramel.

Step 2: Make the Caramel
In a heavy-bottomed saucepan, melt 125g of unsalted butter over low-medium heat, ensuring it doesn’t brown. Once melted, stir in ½ cup of light brown sugar and 397g of sweetened condensed milk. Gradually increase the heat to just below medium, stirring constantly for about 5-7 minutes. The caramel will thicken, reaching a temperature of 110°C / 225°F. It should become a smooth, light golden color—watch closely to prevent burning.

Step 3: Finish the Caramel
Remove the caramel mixture from heat and quickly stir in 2 tablespoons of Lotus Biscoff spread and a pinch of salt until it’s fully blended. The caramel will become creamy and luscious. Pour this warm mix over the chilled biscuit base, spreading it evenly with a spatula. Allow the caramel to cool at room temperature while you prepare the chocolate topping, giving it time to set slightly.

Step 4: Add the Chocolate Topping
Melt 250g of milk chocolate in a microwave-safe bowl, heating in 20-second intervals and stirring between each until smooth and creamy. Be careful not to overheat the chocolate. Once melted, pour the chocolate over the cooled caramel layer, spreading it evenly with a spatula. The contrast of the shiny chocolate on top of the caramel creates a beautiful finish for your Biscoff Millionaires Shortbread.

Step 5: Set and Slice
Refrigerate the complete Biscoff Millionaires Shortbread for at least 2 hours until firm. Once set, let it sit at room temperature for about 10-15 minutes to soften slightly, making it easier to cut. Use a warm knife to slice into squares or rectangles, enjoying the perfect balance of the crunchy base, gooey caramel, and smooth chocolate topping.

Biscoff Millionaires Shortbread Variations

Feel free to get creative and customize your Biscoff Millionaires Shortbread with these fun twists and substitutions!

  • Gluten-Free: Use gluten-free biscuits to maintain a crumbly base while accommodating dietary restrictions without skimping on flavor.

  • White Chocolate: Swap milk chocolate for creamy white chocolate for a sweeter and more decadent topping. It’s a delightful contrast to the caramel’s richness.

  • Salted Caramel: Sprinkle a bit of sea salt over the melted chocolate to enhance the flavors. This touch elevates the treat into a salted caramel dream!

  • Nutty Texture: Fold in crushed nuts like pecans or almonds into the caramel layer for a delightful crunch. Adding nuts introduces a new texture that complements the smooth layers.

  • Spicy Kick: Add a pinch of cinnamon or a hint of chili powder to the biscuit base for a warm spice twist. This unexpected flavor profile will surprise and delight!

  • Fruit Infusion: Drizzle a thin layer of caramel sauce mixed with pureed fruit, like raspberry or strawberry, for a fruity zing. It lightens up the richness beautifully!

  • Spiced Caramel: Add a dash of vanilla extract to your caramel for extra aroma and depth. It enhances the overall flavor while maintaining that indulgent experience.

  • Layered Delight: Create mini Biscoff parfaits by layering crumbled shortbread, caramel, and chocolate in dessert glasses. It’s a fun way to serve and showcase each delicious component!

Incorporating these variations is a splendid way to make your Biscoff Millionaires Shortbread truly yours, and don’t forget to pair it with a cozy cup of coffee or tea while indulging!

Make Ahead Options

These Biscoff Millionaires Shortbread are perfect for meal prep enthusiasts! You can prepare the biscuit base and caramel layers up to 24 hours in advance, allowing the flavors to meld beautifully. Simply crush the Lotus Biscoff biscuits and mix with melted butter, then layer with the caramel mixture and let it set in the fridge. To maintain that delicious quality, cover it tightly with plastic wrap or store in an airtight container. When you’re ready to finish your Biscoff Millionaires Shortbread, melt the milk chocolate topping, pour it over, and refrigerate until firm. This way, you can enjoy a slice of this indulgent treat whenever you desire with minimal effort!

Expert Tips for Biscoff Millionaires Shortbread

  • Thermometer Placement: Ensure your thermometer is correctly placed when checking the caramel temperature to prevent splitting during cooking.

  • Stir Constantly: Always stir the caramel mixture constantly when heating. This helps avoid burning and ensures a smooth caramel consistency.

  • Slicing Ease: For easier slicing of the chilled Biscoff Millionaires Shortbread, warm the blade of your knife slightly before cutting through the chocolate topping.

  • Flavor Substitutions: If you’re out of Lotus Biscoff spread, be aware that swapping it for another type of spread will change the overall flavor profile of this dessert.

  • Chill Time: Don’t rush the chilling step! Allowing the shortbread to sit in the fridge for at least 2 hours ensures it sets properly, making it easier to cut.

These tips will help you achieve a perfect batch of Biscoff Millionaires Shortbread every time!

What to Serve with Biscoff Millionaires Shortbread

Elevate your indulgent treat into a memorable meal experience with these delightful pairings.

  • Rich Coffee: A warm, robust cup of coffee beautifully balances the sweetness of the shortbread, enhancing the caramel’s richness.

  • Spiced Chai Latte: This aromatic drink brings a warm spice that complements the Biscoff flavors and adds a comforting touch to your dessert experience.

  • Vanilla Ice Cream: Creamy vanilla ice cream pairs wonderfully with the chocolate topping, creating a delightful contrast of temperatures and textures.

  • Fruit Salad: A refreshing mix of seasonal fruits provides a burst of freshness that cuts through the richness of the dessert—think juicy berries and crisp apples!

  • Chocolate Mint Tea: This soothing herbal tea offers a refreshing finish to your meal, perfectly complementing the chocolate and caramel layers.

  • Caramel Sauce Drizzle: For the ultimate indulgence, drizzle extra caramel sauce on top for an even richer experience, enhancing each sweet bite.

  • Dark Chocolate Coffee Stout: An adventurous pairing that brings out the chocolate notes, creating a refreshing yet indulgent experience with a hint of bitterness.

  • Coconut Macaroons: These chewy treats bring a different texture and flavor, making for a satisfying dessert collision with the soft Biscoff wafer layers.

  • Cheese Platter: A selection of gourmet cheeses can balance the sweetness of the shortbread; try pairing with a tangy goat cheese for an interesting contrast.

Storage Tips for Biscoff Millionaires Shortbread

Fridge: Store your Biscoff Millionaires Shortbread in an airtight container for up to 1 week. To maintain freshness and prevent the chocolate from becoming dull, ensure the container is well-sealed.

Freezer: If you want to enjoy this treat later, freeze it! Cut into slices and wrap them individually in plastic wrap before placing them in an airtight container. They can stay frozen for up to 3 months.

Reheating: If you prefer to soften the chocolate topping for a few minutes, allow the slices to sit at room temperature before serving. You can also microwave a slice for about 10 seconds for a warm, melt-in-your-mouth experience.

Serve: Biscoff Millionaires Shortbread can be enjoyed chilled directly from the fridge or at room temperature, making it versatile for any occasion.

Biscoff Millionaires Shortbread Recipe FAQs

What type of Lotus Biscoff biscuits should I use?
Absolutely use original Lotus Biscoff biscuits for the best flavor! They create the ideal crumbly base for your millionaires shortbread. If you’d like a different taste or have allergies, you can substitute them with similar crunchy biscuits, but the unique spiced flavor will change.

How should I store my Biscoff Millionaires Shortbread?
Store your Biscoff Millionaires Shortbread in an airtight container in the fridge for up to 1 week to maintain its freshness. This ensures that each slice remains as delightful as the first!

Can I freeze Biscoff Millionaires Shortbread?
Very! To freeze, cut the shortbread into slices and wrap each piece individually in plastic wrap. Place them in an airtight container and they will last up to 3 months in the freezer. When ready to enjoy, let them thaw in the fridge for a few hours or at room temperature.

What if my caramel isn’t thickening?
If your caramel isn’t thickening, make sure you’re cooking it at medium heat and stirring constantly for 5-7 minutes until it reaches 110°C / 225°F. If it’s still not thickening, you may need to slightly increase the heat while ensuring not to burn it. Remember, it should become a smooth, light golden color—this indicates it’s the right consistency!

Is this recipe suitable for those with allergies?
Always check the ingredient labels! This version contains gluten from the biscuits and dairy from the butter and condensed milk, so it might not be suitable for those with gluten or lactose intolerance. You can use gluten-free biscuits and dairy alternatives like coconut cream to make it more inclusive for dietary restrictions.

How can I make the Biscoff Millionaires Shortbread more visually appealing?
For a stunning presentation, feel free to drizzle some melted chocolate on top or sprinkle crushed Biscoff biscuits over the chocolate layer before it sets! This not only adds gorgeous visual elements but also enhances the flavors, making your Biscoff Millionaires Shortbread even more irresistible.

Biscoff Millionaires Shortbread

Melt-in-Your-Mouth Biscoff Millionaires Shortbread Delight

Experience the luxurious layers of Biscoff cookies, gooey caramel, and chocolate in this Biscoff Millionaires Shortbread.
Prep Time 20 minutes
Cook Time 10 minutes
Chilling Time 2 hours
Total Time 2 hours 30 minutes
Servings: 16 slices
Course: Dessert
Cuisine: American
Calories: 250

Ingredients
  

For the Biscuit Base
  • 250 g Lotus Biscoff biscuits Crushed into fine crumbs
  • 100 g Unsalted butter Melted
  • 0.25 tsp Salt
For the Caramel Layer
  • 125 g Unsalted butter Melted
  • 0.5 cup Light brown sugar
  • 397 g Sweetened condensed milk 1 tin
  • 2 tbsp Lotus Biscoff spread
For the Chocolate Topping
  • 250 g Milk chocolate Melted

Equipment

  • Food processor
  • Saucepan
  • Baking dish
  • Spatula
  • Microwave-safe bowl

Method
 

Step-by-Step Instructions
  1. Crush the Lotus Biscoff biscuits into fine crumbs. Mix with melted butter and salt, then press into the bottom of a lined baking dish. Chill.
  2. Melt unsalted butter in a saucepan. Stir in brown sugar and sweetened condensed milk, heating until the mixture thickens.
  3. Remove from heat and stir in Lotus Biscoff spread. Pour over the biscuit base and let cool.
  4. Melt milk chocolate and pour over the cooled caramel layer. Spread it evenly.
  5. Refrigerate for at least 2 hours until firm, then slice into squares.

Nutrition

Serving: 1sliceCalories: 250kcalCarbohydrates: 30gProtein: 3gFat: 15gSaturated Fat: 9gPolyunsaturated Fat: 1gMonounsaturated Fat: 4gCholesterol: 25mgSodium: 100mgPotassium: 150mgFiber: 1gSugar: 20gVitamin A: 200IUCalcium: 50mgIron: 1mg

Notes

This no-bake treat can be stored in the fridge for up to a week or frozen for longer preservation.

Tried this recipe?

Let us know how it was!

Decadent Spinach Artichoke Pizza That Will Wow Your Guests

As the aroma of freshly baked dough wafts through the kitchen, memories of cozy gatherings start to resurface. This is not just any pizza; it’s my beloved Spinach Artichoke Pizza, a delightful homage to the classic dip that always has everyone coming back for more. With rich, creamy layers of cheese and vibrant colors from fresh veggies, this dish effortlessly transforms a simple pizza night into a memorable culinary experience. What I love most is its amazing versatility—make it vegetarian or add grilled chicken for an extra protein punch! Plus, it’s easy to whip up, perfect for weeknight dinners or to impress guests. Are you ready to discover how to bring this cheesy Italian delight to your table? Let’s get cooking!

Why is Spinach Artichoke Pizza a Must-Try?

Irresistible Flavors: The combination of creamy cheese and tangy artichokes mimics your favorite dip, elevating your pizza experience.
Easy to Make: With simple ingredients and straightforward steps, even novice cooks can master this dish, making it perfect for weeknight dinners.
Customizable Options: Make it vegetarian by omitting chicken, or swap the base with naan for a unique twist.
Crowd Pleaser: Serve it at gatherings, and watch as everyone savors each bite—it’s a guaranteed hit! This dish pairs beautifully with a fresh side like a Strawberry Spinach Salad for a complete meal.
Fresh Ingredients: Using fresh spinach and quality cheeses ensures every slice is bursting with flavor and nutrition.

Spinach Artichoke Pizza Ingredients

The perfect Spinach Artichoke Pizza is just a few ingredients away!

For the Dough
Pizza Dough – Provides structure; substitute with store-bought for convenience.

For the Creamy Sauce
Unsalted Butter – Essential for richness in the sauce.
Garlic (2 cloves, minced) – Enhances savory notes; fresh is recommended for best flavor.
All-Purpose Flour (1 tbsp) – Thickens the sauce; no direct substitutions recommended.
Whole Milk (½ cup) – Adds creaminess to the sauce; can use low-fat for a lighter option.
Half and Half (¼ cup) – Enhances creaminess; substitute with whole milk for a lighter sauce.
Salt (¼ tsp) – Balances flavor; kosher sea salt is preferable.
Black Pepper (¼ tsp) – Adds warmth; freshly ground is best.
Paprika (pinch) – Adds a subtle smokiness; optional for depth.
Cream Cheese (1 oz) – Essential for creaminess; makes the sauce decadent.
Grated Parmesan Cheese (2 tbsp) – Adds a salty, nutty flavor to the sauce.

For the Toppings
Grated Mozzarella Cheese (8 oz) – Provides the beloved melting quality for pizza.
Grilled Chicken (1 cup, optional) – Adds protein and flavor enhancement; season well.
Fresh Spinach (1 bunch, coarsely chopped and wilted) – Adds freshness and nutrition; fresh is best!
Marinated Artichokes (1 jar, 6 oz, drained and chopped) – Adds tanginess; ensure they’re well-drained for right texture.
Shaved Parmesan Cheese (¼ cup) – Garnish that adds a finishing touch of flavor.

Enjoy crafting this delightful Spinach Artichoke Pizza with these fresh ingredients!

Step‑by‑Step Instructions for Spinach Artichoke Pizza

Step 1: Prepare the Pizza Dough
Begin by preparing your pizza dough according to the package instructions or your favorite homemade recipe. If using store-bought dough, lightly flour your work surface and roll it into a 14-inch circle. This will act as the base for your Spinach Artichoke Pizza, so ensure it’s even and smooth, with slightly raised edges for a crust.

Step 2: Preheat the Oven
Preheat your oven to 450°F (232°C) to create a hot environment for baking your pizza. A properly heated oven is essential for achieving a crispy crust. Once heated, set aside a pizza pan lined with parchment paper, ready for the dough to be transferred on it for further preparation.

Step 3: Make the Creamy Sauce
In a medium saucepan, melt 1 tablespoon of unsalted butter over medium-low heat. Once melted, stir in 2 cloves of minced garlic and a pinch of red pepper flakes, sautéing for about 1 minute until the garlic becomes fragrant. This will build a delicious base for your creamy Spinach Artichoke Pizza sauce.

Step 4: Thicken the Sauce
Whisk in 1 tablespoon of all-purpose flour, cooking it briefly while continuously stirring. Gradually add ½ cup of whole milk and ¼ cup of half-and-half, ensuring there are no lumps. Season with ¼ teaspoon of salt, ¼ teaspoon of black pepper, and a pinch of paprika, cooking until the sauce thickens, which should take about 2-3 minutes.

Step 5: Combine Cheeses
Once the sauce thickens, mix in 1 ounce of cream cheese and 2 tablespoons of grated Parmesan cheese. Stir until the cheeses melt completely into the sauce. The result should be a rich, creamy texture that will beautifully coat your Spinach Artichoke Pizza toppings. Set the sauce aside to cool slightly.

Step 6: Prep the Dough for Baking
Transfer the rolled-out dough to the prepared pizza pan, pressing the edges to form a crust. Brush the surface of the dough generously with olive oil to enrich the flavor and ensure a crispy finish. Use a fork to dock the crust, creating small holes to prevent bubbling, then bake in the preheated oven for 5-7 minutes until slightly golden.

Step 7: Assemble the Pizza
Remove the par-cooked crust from the oven, and spread the creamy sauce evenly over its surface. Sprinkle half of the 8 ounces of grated mozzarella cheese over the sauce, followed by an even layer of chopped grilled chicken (if using), fresh spinach, and drained marinated artichokes. Top with the remaining mozzarella for that gooey, melty goodness.

Step 8: Bake the Pizza
Return the assembled Spinach Artichoke Pizza to the oven and bake for another 7-10 minutes until the crust is golden-brown and the cheese is bubbling and melted. Keep an eye on it to ensure it doesn’t over-bake; the aroma will guide you to the perfect moment to remove it.

Step 9: Garnish and Serve
Allow the pizza to cool for about 5 minutes before garnishing with ¼ cup of shaved Parmesan cheese and 1 tablespoon of additional grated Parmesan. This will enhance the pizza’s flavor and presentation. After cooling for 2-3 minutes, slice your Spinach Artichoke Pizza into servings and indulge in the creamy, cheesy delight you’ve created!

What to Serve with Spinach Artichoke Pizza

Elevate your dining experience with delightful pairings that enhance the creamy, cheesy goodness of your pizza.

  • Crisp Garden Salad: A light salad with mixed greens adds freshness, crunch, and a tangy vinaigrette to balance the rich flavors of the pizza.

  • Garlic Bread: Golden, buttery garlic bread complements the pizza perfectly, providing a satisfying crunch and savory aroma, ideal for dipping into any leftover sauce.

  • Roasted Vegetables: Seasoned roasted zucchini, bell peppers, and asparagus bring a vibrant splash of color, enhancing both flavor and nutrition on your plate.

  • Pesto Pasta: Creamy pesto pasta offers a decadent Italian touch, pairing well with the cheesy layers of your spinach artichoke pizza for a comforting meal.

  • Chilled White Wine: A glass of crisp Sauvignon Blanc or Pinot Grigio brightens up the meal, cutting through the richness of the pizza while adding a refreshing sip between bites.

  • Chocolate Mousse: Finish with a light and fluffy chocolate mousse for dessert, providing a sweet contrast that leaves your guests dreaming of the next bite long after they’ve finished.

How to Store and Freeze Spinach Artichoke Pizza

Fridge: Store leftover Spinach Artichoke Pizza in an airtight container in the refrigerator for up to 3 days. This keeps the flavors fresh and the crust from becoming soggy.

Freezer: To freeze, wrap slices tightly in plastic wrap or aluminum foil, then place them in a freezer-safe bag. They can be frozen for up to 2 months while preserving the taste.

Reheating: For the best texture, reheat slices in the oven at 350°F (175°C) for about 10-15 minutes. This helps maintain the crispness of the crust.

Thawing: When ready to enjoy frozen slices, thaw them in the fridge overnight before reheating, ensuring they heat evenly and taste delicious!

Spinach Artichoke Pizza Variations

Feel free to take this beloved recipe and make it your own with these delightful twists!

  • Grilled Chicken: Skip the chicken for a vegetarian delight, or add seasoned grilled chicken for a protein boost.
  • Flatbread Swap: Use naan or pita bread instead of traditional dough for a delicious, easy alternative. It’s quick and just as delicious!
  • Savory Additions: Toss in caramelized onions or sautéed mushrooms to deepen the flavor profile—a little earthiness adds a wonderful twist.
  • Herb Infusion: Sprinkle fresh herbs like basil or oregano on top before baking for a fragrant burst that brightens every bite.
  • Heat Level: Crank up the spice by adding jalapeños or crushed red pepper to the sauce for a fiery kick. Adjust according to your preference!
  • Cheese Blend: Experiment with a mix of cheeses like Gouda or Fontina for comprehensive flavor layers and a different melting experience.
  • Veggie Boost: Add sweet bell peppers or zucchini for extra veggies and a pop of color—perfect for adding a few more nutrients!
  • Creamy Upgrade: Swap cream cheese for ricotta for a different texture and mild flavor that still adds creaminess to your sauce.

For a delightful pairing, serve this pizza alongside a fresh Strawberry Spinach Salad to complement those rich flavors. Or, if you’re in the mood for something heartier, why not try these flavorful Pizza Burgers Flavor that echo the deliciousness of pizza? Enjoy getting creative in the kitchen!

Make Ahead Options

These Spinach Artichoke Pizza components are perfect for meal prep, making your busy weeknights a breeze! You can prepare the creamy sauce up to 24 hours in advance; simply refrigerate it in an airtight container. Also, roll out your pizza dough ahead of time—this can be done 2-3 days prior and stored in the fridge, wrapped tightly to prevent drying out. When you’re ready to finish the pizza, just spread the chilled sauce over the par-baked crust, add your toppings, and pop it in the oven. This way, you’ll enjoy that fresh, delicious taste with minimal effort—just as delightful as when you made it from scratch!

Expert Tips for Spinach Artichoke Pizza

Crispy Crust Trick: Brush the pizza crust with olive oil before baking for a golden, crispy finish that enhances flavor.

Fresh Ingredients Matter: Use fresh spinach and high-quality cheese for the best taste and texture in your Spinach Artichoke Pizza.

Avoid Moisture: Ensure spinach is well-wilted and marinated artichokes are drained properly to prevent sogginess.

Perfect Baking: Keep an eye on your pizza as it bakes to achieve perfect melty cheese and golden crust without burning.

Customize Your Toppings: Feel free to add caramelized onions or mushrooms for extra depth of flavor. This flexibility makes your pizza truly unique!

Spinach Artichoke Pizza Recipe FAQs

How do I select the best spinach for my pizza?
Absolutely! For your Spinach Artichoke Pizza, always choose fresh spinach with vibrant green leaves, free from dark spots or wilting. Look for bunches that are firm and plump. If you see dark spots all over, it’s best to skip that batch. Fresh spinach, either baby or mature, will provide the best flavor and texture.

How should I store leftover Spinach Artichoke Pizza?
You can easily store leftover slices of Spinach Artichoke Pizza in an airtight container in the fridge for up to 3 days. Make sure to let the pizza cool completely before sealing it up to avoid trapping moisture, which can make the crust soggy.

Can I freeze Spinach Artichoke Pizza, and if so, how?
Very! To freeze your Spinach Artichoke Pizza, start by wrapping individual slices tightly in plastic wrap or aluminum foil. Then, place the wrapped slices in a freezer-safe bag. They can be frozen for up to 2 months. When you’re ready to enjoy them, thaw the slices in the fridge overnight before reheating in the oven to restore the crust’s crispiness.

What if my sauce becomes too thick?
If your sauce ends up too thick, don’t worry! Just whisk in a bit of whole milk or half-and-half, 1 tablespoon at a time, until you reach your desired consistency. Keep stirring over low heat until it’s well combined. This helps incorporate extra creaminess, ensuring each bite of your Spinach Artichoke Pizza remains luscious.

Are there any dietary considerations I should keep in mind?
Very! If you’re making Spinach Artichoke Pizza for guests, consider allergies or dietary restrictions. Using gluten-free pizza dough and dairy-free cheese can make it accessible for those with gluten intolerance or lactose sensitivity. Just check the labels to ensure all ingredients are suitable for their needs, making your pizza a delightful choice for everyone!

Spinach Artichoke Pizza

Decadent Spinach Artichoke Pizza That Will Wow Your Guests

This Spinach Artichoke Pizza combines creamy cheese and tangy artichokes for a delicious twist on a classic dish.
Prep Time 20 minutes
Cook Time 15 minutes
Cooling Time 5 minutes
Total Time 40 minutes
Servings: 8 slices
Course: Dinner
Cuisine: Italian
Calories: 320

Ingredients
  

For the Dough
  • 1 batch Pizza Dough Substitute with store-bought for convenience
For the Creamy Sauce
  • 1 tbsp Unsalted Butter Essential for richness in the sauce
  • 2 cloves Garlic, minced Fresh is recommended for best flavor
  • 1 tbsp All-Purpose Flour Thickens the sauce; no direct substitutions recommended
  • 0.5 cup Whole Milk Can use low-fat for a lighter option
  • 0.25 cup Half and Half Substitute with whole milk for a lighter sauce
  • 0.25 tsp Salt Kosher sea salt is preferable
  • 0.25 tsp Black Pepper Freshly ground is best
  • pinch Paprika Optional for depth
  • 1 oz Cream Cheese Essential for creaminess; makes the sauce decadent
  • 2 tbsp Grated Parmesan Cheese Adds a salty, nutty flavor to the sauce
For the Toppings
  • 8 oz Grated Mozzarella Cheese Provides the beloved melting quality for pizza
  • 1 cup Grilled Chicken, optional Adds protein and flavor enhancement; season well
  • 1 bunch Fresh Spinach, coarsely chopped and wilted Fresh is best!
  • 1 jar Marinated Artichokes, drained and chopped Ensure they're well-drained for right texture
  • 0.25 cup Shaved Parmesan Cheese Garnish that adds a finishing touch of flavor

Equipment

  • Medium saucepan
  • Pizza pan
  • Rolling Pin

Method
 

Step-by-Step Instructions for Spinach Artichoke Pizza
  1. Prepare your pizza dough according to the package instructions or your favorite homemade recipe. If using store-bought dough, roll it into a 14-inch circle.
  2. Preheat your oven to 450°F (232°C). Prepare a pizza pan lined with parchment paper.
  3. In a medium saucepan, melt the unsalted butter over medium-low heat. Stir in minced garlic and sauté for about 1 minute.
  4. Whisk in all-purpose flour, cooking briefly. Gradually add whole milk and half-and-half, then season with salt, black pepper, and paprika, cooking until the sauce thickens.
  5. Mix in cream cheese and grated Parmesan cheese into the thickened sauce until melted.
  6. Transfer the rolled-out dough to the pizza pan, brush with olive oil, and dock the crust. Bake for 5-7 minutes until slightly golden.
  7. Spread the creamy sauce over the crust. Sprinkle half of the mozzarella over it, then add chopped grilled chicken (if using), spinach, and artichokes. Top with remaining mozzarella.
  8. Return the pizza to the oven and bake for another 7-10 minutes until the crust is golden-brown and the cheese is bubbly.
  9. Allow the pizza to cool for about 5 minutes and garnish with shaved Parmesan cheese before slicing.

Nutrition

Serving: 1sliceCalories: 320kcalCarbohydrates: 30gProtein: 15gFat: 15gSaturated Fat: 7gPolyunsaturated Fat: 1gMonounsaturated Fat: 2gCholesterol: 45mgSodium: 620mgPotassium: 300mgFiber: 2gSugar: 2gVitamin A: 70IUVitamin C: 15mgCalcium: 25mgIron: 8mg

Notes

Use fresh ingredients for the best taste, and feel free to customize toppings to your preference.

Tried this recipe?

Let us know how it was!