Mother’s Day Pink Velvet Cake: Sweet Celebration Delight

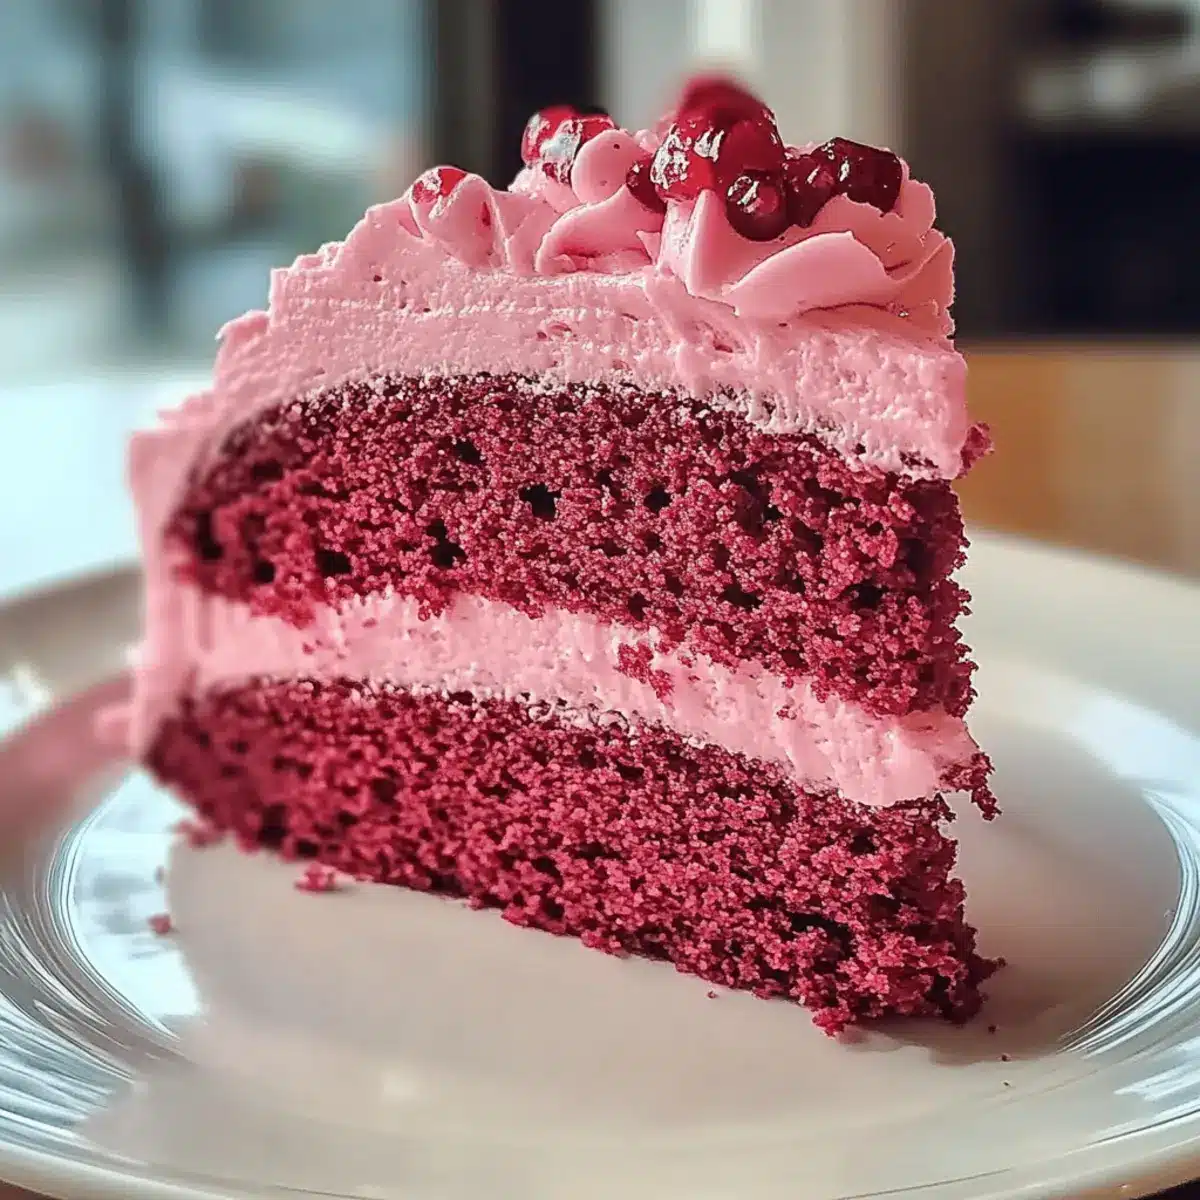
The aroma of freshly baked cake filled my kitchen, instantly transporting me back to joyous family gatherings. Nothing says “celebration” like a Mother’s Day Pink Velvet Cake, and trust me, this one is a showstopper! With its fluffy texture and charming pink hue, this cake is not only visually stunning but also wonderfully moist and flavorful—making it the perfect treat to honor the special women in our lives. What’s even better? You can whip it up quickly, and it’s a delightful crowd-pleaser that will have your loved ones asking for seconds! Ready to bake something that will create unforgettable memories at your next gathering? Let’s dive into this deliciously sweet journey together!

Why is Pink Velvet Cake So Special?

Irresistible Color: The vibrant pink hue will amaze your guests, making every slice a visual treat.
Fluffy Texture: Achieve a soft, airy cake that melts in your mouth, ensuring it’s a hit at gatherings.
Quick to Prepare: Enjoy the simplicity of whipping up this cake in no time—perfect for busy bakers.
Versatile Variations: Try substituting with yogurt or adding almond extract for unique twists, catering to all tastes.
Crowd-Pleasing Flavor: Delight your family and friends with the rich chocolate and vanilla notes that compliment any celebration.

You won’t want to miss serving this stunning cake, especially alongside treats like Strawberry Cheesecake Bars or Cookies Cream Cheesecake for an impressive dessert spread.

Mother’s Day Pink Velvet Cake Ingredients

For the Cake

  • Cake Flour – A crucial ingredient for structure and light texture; substitute with all-purpose flour for a denser cake.
  • Granulated Sugar – Sweetens and adds moisture to the cake; no substitutions recommended.
  • Cocoa Powder – Infuses a rich chocolate flavor; using Dutch-processed cocoa enhances the taste even more.
  • Baking Powder – Essential for rise; ensure it’s fresh for best results.
  • Salt – Balances sweetness and enhances overall flavors.
  • Unsalted Butter – Adds richness; can be substituted with vegan butter for a dairy-free option.
  • Eggs – Provides structure and moisture; must be at room temperature for the best incorporation.
  • Buttermilk – Creates a tender crumb; yogurt is a suitable substitute.
  • Vanilla Extract – Enhances the overall flavor; pure extract is recommended for the best results.
  • Red Food Coloring – Achieves the iconic pink color without changing the flavor; gel coloring is suggested for vibrancy.

For the Frosting

  • Cream Cheese – Provides creaminess and an irresistible tang; softening it first will help for a smooth frosting.
  • Powdered Sugar – Adds sweetness and helps achieve the perfect consistency for frosting.
  • Vanilla Extract – A dash enhances the frosting’s flavor; use pure for the best taste.
  • Heavy Cream – Adds richness and a lighter texture to the frosting; use full-fat for best results.

Whip up this Mother’s Day Pink Velvet Cake, and watch it turn any ordinary occasion into an extraordinary celebration!

Step‑by‑Step Instructions for Mother’s Day Pink Velvet Cake

Step 1: Preheat Oven
Begin by preheating your oven to 350°F (175°C). While the oven warms up, prepare two 9-inch round cake pans by greasing them with unsalted butter and dusting with flour. This ensures your Mother’s Day Pink Velvet Cake will release easily after baking, promoting a beautiful finish.

Step 2: Mix Dry Ingredients
In a medium-sized mixing bowl, whisk together the cake flour, cocoa powder, baking powder, and salt. Take your time to combine these dry ingredients well—this foundation will contribute to the cake’s fluffy texture. Aim for a uniform mixture, ensuring there are no lumps of cocoa that could affect flavor and color.

Step 3: Cream Butter and Sugar
In a large mixing bowl, beat together the softened unsalted butter and granulated sugar using an electric mixer on medium speed for about 3 minutes. Your mixture should become light and fluffy, showcasing a pale yellow color that signals it’s well aerated. This step is crucial for ensuring a tender crumb in your Pink Velvet Cake.

Step 4: Incorporate Eggs
Add the eggs to your butter and sugar mixture one at a time. After each addition, beat well until the mixture is fully incorporated. This should take about 30 seconds per egg. By allowing each egg to blend in before adding the next, you’ll enhance the structure of the cake, resulting in a moist and cohesive batter.

Step 5: Combine Wet Ingredients
Stir in the buttermilk, vanilla extract, and red food coloring until fully combined. The mixture should have a smooth consistency and vibrant pink hue. This step not only adds moisture but also ensures that the signature color of the Mother’s Day Pink Velvet Cake comes to life, giving it that eye-catching look.

Step 6: Fold in Dry Mix
Gradually add your dry ingredient mixture to the wet mixture, folding gently with a spatula. Do this until just combined, ensuring your batter remains airy and smooth without any lumps. This delicate folding technique retains the lightness you want, resulting in a beautifully fluffy cake structure.

Step 7: Bake
Divide the batter evenly between the prepared cake pans. Place them in the preheated oven and bake for 25-30 minutes. To check for doneness, insert a toothpick into the center; it should come out clean or with a few moist crumbs. The cakes should also spring back when lightly pressed.

Step 8: Cool Cakes
Once baked, allow the cakes to cool in the pans for about 10 minutes. Afterward, carefully transfer them to wire racks to cool completely. This cooling process is vital, as it stabilizes the cake’s structure and avoids any melting when you add the luscious cream cheese frosting later on.

Step 9: Frosting
Prepare your cream cheese frosting by beating room-temperature cream cheese with powdered sugar and a splash of vanilla extract until smooth and creamy. Once your cakes are completely cool, generously spread frosting between the layers and on top, letting it cascade down the sides for a beautifully decadent finish to your Mother’s Day Pink Velvet Cake.

How to Store and Freeze Mother’s Day Pink Velvet Cake

  • Room Temperature: Keep leftover slices in an airtight container at room temperature for up to 3 days while maintaining moisture and flavor.
  • Fridge: If you want to extend its freshness, refrigerate the cake for up to a week, ensuring it’s well-covered to prevent drying out.
  • Freezer: For longer storage, freeze wrapped slices of the Mother’s Day Pink Velvet Cake in plastic wrap and foil for up to 3 months.
  • Reheating: To enjoy frozen slices, thaw them overnight in the fridge, and reheat gently in the microwave for a few seconds if you prefer a warm treat.

Mother’s Day Pink Velvet Cake Variations

Feel free to get creative with your Mother’s Day Pink Velvet Cake—it’s all about personal touches and delightful twists that make it even more special!

  • Dairy-Free: Swap unsalted butter for vegan butter and use almond milk instead of buttermilk for a delicious dairy-free version.

  • Nutty Delight: Add a splash of almond extract to the batter for a subtly nutty flavor that elevates the cake experience.

  • Fruity Topper: Top the frosted cake with fresh strawberries or raspberries. Their tartness pairs beautifully with the sweet cream cheese frosting.

  • Chocolate Lovers: Drizzle melted dark chocolate over the frosted cake for an indulgent finish that adds richness and elegance.

  • Citrus Zing: Incorporate lemon zest into the batter for a refreshing citrus twist that brightens the flavors—perfect for spring gatherings!

  • Layered Flavor: Bake two layers of pink velvet and one layer of traditional vanilla cake. Alternating layers create a lovely striped effect and flavor blend.

  • Spicy Kick: Add a pinch of cayenne pepper or chili powder to the frosting for a surprising heat that contrasts beautifully with the sweetness.

  • Sugar-Free Option: Use a sugar substitute like erythritol in place of granulated sugar for a lighter version that still satisfies your sweet tooth.

With these variations in mind, you can transform your cake into something wonderfully unique and fit for any celebration! If you love baking, you might also enjoy making a splendid Patriotic Poke Cake or trying your hand at these sumptuous Buttermilk Pancakes for a breakfast treat!

Make Ahead Options

These Mother’s Day Pink Velvet Cakes are perfect for meal prep enthusiasts! You can bake the cake layers up to 3 days in advance and store them tightly wrapped in plastic wrap at room temperature to retain moisture. The cream cheese frosting can also be prepared up to 24 hours ahead—just keep it refrigerated in an airtight container. When it’s time to serve, simply allow the frosting to come to room temperature before spreading it between the layers and on top, ensuring a creamy texture. This planning will not only save time on busy baking days but will also keep your cake just as delicious and delightful for your special gathering!

What to Serve with Mother’s Day Pink Velvet Cake

The perfect Mother’s Day Pink Velvet Cake deserves equally delightful companions to elevate your celebration experience.

  • Fresh Strawberries: Their sweet and slightly tart flavor contrasting with the cake’s richness adds a refreshing touch. Plus, the vibrant red will complement the pink beautifully!

  • Vanilla Ice Cream: Creamy and cool, a scoop of vanilla ice cream balances the cake’s sweetness while enhancing its decadent texture. The combination makes each bite downright heavenly.

  • Sparkling Lemonade: This fizzy, citrusy drink brings a refreshing brightness that cuts through the rich layers of cake, ensuring every slice feels light and joyful.

  • Chocolate-Covered Almonds: The crunch of these sweet treats pairs wonderfully with the soft cake texture while adding elements of surprise and flavor to every bite.

  • Fluffy Whipped Cream: A dollop of freshly whipped cream will add a luxurious creaminess that enhances the cake’s texture, making for an indulgent dessert experience.

  • Buttercream Cookies: Soft, colorful cookies provide a delightful contrast to the cake while maintaining a playful, celebratory vibe—perfect for guests of all ages.

  • Lavender Infused Iced Tea: A floral tea beautifully complements the whimsical nature of the cake and adds an extra level of sophistication and flavor to your gathering.

  • Mini Fruit Tarts: These bite-sized delights bring freshness and a sweet crunch, enhancing the overall dessert experience and making your platter more enticing.

Embrace the celebration and create sweet memories with these fantastic pairings!

Expert Tips for Mother’s Day Pink Velvet Cake

  • Room Temperature Eggs: Ensure your eggs are at room temperature for better mixing. Cold eggs can lead to a dense batter, so plan ahead!

  • Gentle Mixing: Avoid over-mixing the batter after adding dry ingredients. This can result in a tough cake; mix until just combined for a fluffy texture.

  • Use Gel Coloring: Opt for gel food coloring instead of liquid. It gives a vibrant pink hue without changing the cake’s moisture content or flavor.

  • Watch the Bake Time: Keep an eye on the cake during baking. Every oven is different; check for doneness a few minutes early to avoid dry layers.

  • Cool Completely: Allow the cakes to cool entirely before frosting. Frosting warm cakes can melt your cream cheese frosting, resulting in a gooey mess.

These tips will help you nail the perfect Mother’s Day Pink Velvet Cake, making your celebration even sweeter!

Mother’s Day Pink Velvet Cake Recipe FAQs

How do I choose ripe ingredients for this cake?
Absolutely! Selecting ripe, high-quality ingredients is key. For the best results, make sure your eggs are fresh and at room temperature to incorporate well into the batter. When it comes to buttermilk, look for a carton with a recent expiration date. Using fresh, high-quality ingredients elevates the flavor and texture of your Mother’s Day Pink Velvet Cake.

How should I store the Mother’s Day Pink Velvet Cake?
For sure! Store leftover slices in an airtight container at room temperature for up to 3 days. This keeps the cake moist and flavorful. If you want it to last longer, refrigerate your cake for up to a week, ensuring it’s tightly covered to prevent drying out.

Can I freeze pieces of the Mother’s Day Pink Velvet Cake?
Very much so! Freezing is a great option for long-term storage. Simply wrap slices tightly in plastic wrap and then in aluminum foil to avoid freezer burn. This way, your cake can be enjoyed for up to 3 months. When you’re ready to enjoy, just thaw overnight in the fridge, and reheat gently in the microwave for a few seconds if you’d like it warm.

What if my cake doesn’t rise properly?
No worries! If your cake didn’t rise well, it could be due to using expired baking powder. Always double-check that it’s fresh before baking. Additionally, did you fold the dry ingredients gently into the wet mix? Over-mixing can create a dense cake. If you’re unsure, stick to the folding technique I shared for light, fluffy layers.

Can I make any substitutions for dietary considerations?
Certainly! If you need a dairy-free option, you can substitute the unsalted butter with vegan butter and use non-dairy yogurt in place of buttermilk. Just be cautious about checking for allergens in your chosen alternatives. For example, ensure your powdered sugar is allergy-friendly if you’re sensitive to certain ingredients.

How can I adjust the sweetness of the cake?
Of course! If you prefer a less sweet version of the Mother’s Day Pink Velvet Cake, consider reducing the amount of granulated sugar by about 1/4 cup. This way, your cake will still maintain its lovely texture while catering to those who enjoy less sweetness. Just remember, the frosting will still add some sweetness, so it balances well.

Mother’s Day Pink Velvet Cake

Mother’s Day Pink Velvet Cake: Sweet Celebration Delight

A delightful Mother’s Day Pink Velvet Cake that is visually stunning and wonderfully moist, perfect for celebrating special women in our lives.
Prep Time 20 minutes
Cook Time 30 minutes
Cooling Time 10 minutes
Total Time 1 hour
Servings: 12 slices
Course: Dessert
Cuisine: American
Calories: 390

Ingredients
  

For the Cake
  • 2 cups Cake Flour Substitute with all-purpose flour for a denser cake
  • 1.5 cups Granulated Sugar No substitutions recommended
  • 2 tablespoons Cocoa Powder Using Dutch-processed cocoa enhances taste
  • 1 tablespoon Baking Powder Ensure it's fresh for best results
  • 1 teaspoon Salt Balances sweetness and enhances flavors
  • 1 cup Unsalted Butter Can be substituted with vegan butter
  • 3 large Eggs Must be at room temperature
  • 1 cup Buttermilk Yogurt is a suitable substitute
  • 1 teaspoon Vanilla Extract Pure extract is recommended
  • 1 tablespoon Red Food Coloring Gel coloring is suggested for vibrancy
For the Frosting
  • 8 ounces Cream Cheese Softened for smooth frosting
  • 3 cups Powdered Sugar Helps achieve perfect consistency
  • 1 teaspoon Vanilla Extract Pure for best taste
  • 1 cup Heavy Cream Use full-fat for best results

Equipment

  • 9-inch round cake pans
  • Mixing bowls
  • Electric Mixer
  • Spatula
  • Wire racks

Method
 

Step-by-Step Instructions
  1. Preheat oven to 350°F (175°C). Grease two 9-inch round cake pans with unsalted butter and dust with flour.
  2. In a medium bowl, whisk together cake flour, cocoa powder, baking powder, and salt.
  3. In a large bowl, beat softened butter and sugar with an electric mixer on medium speed for about 3 minutes until light and fluffy.
  4. Incorporate eggs one at a time, beating well after each addition.
  5. Stir in buttermilk, vanilla extract, and red food coloring until fully combined.
  6. Gradually add dry mixture to wet mixture, folding gently until just combined.
  7. Divide batter evenly between prepared cake pans and bake for 25-30 minutes.
  8. Let cakes cool in pans for 10 minutes, then transfer to wire racks to cool completely.
  9. Prepare cream cheese frosting by beating cream cheese with powdered sugar and vanilla until smooth. Frost the cooled cakes.

Nutrition

Serving: 1sliceCalories: 390kcalCarbohydrates: 56gProtein: 4gFat: 20gSaturated Fat: 12gPolyunsaturated Fat: 1gMonounsaturated Fat: 5gCholesterol: 45mgSodium: 320mgPotassium: 130mgFiber: 1gSugar: 30gVitamin A: 800IUCalcium: 90mgIron: 1mg

Notes

Ensure eggs are at room temperature for better mixing. Avoid over-mixing the batter after adding dry ingredients for a fluffy texture.

Tried this recipe?

Let us know how it was!

Decadent No-Bake Biscoff Truffles for Effortless Indulgence

As I stood in my kitchen, the aroma of spiced caramel wafting through the air, I knew I was about to create something special. These Easy No-Bake Biscoff Truffles will transport you right to dessert heaven with just three simple ingredients. Not only are they a time-saver—who wouldn’t love a delightful treat that requires zero baking?—but they also satisfy that sweet tooth without any fuss. The creamy, rich filling made from Lotus Biscoff cookies and tangy cream cheese beautifully contrasts with the velvety white chocolate coating. Perfect for holiday parties or to brighten a regular day, these truffles are an indulgent pick-me-up you won’t want to miss. Curious to see how this simple recipe comes together? Let’s dive in!

Why Are These Truffles So Irresistible?

Simplicity at Its Finest: With just three ingredients, these no-bake Biscoff truffles are incredibly easy to whip up, making them perfect for anyone who wants tasty treats without the hassle.

Rich, Creamy Texture: The combination of Biscoff cookies and cream cheese creates a luscious filling that melts in your mouth, bringing joy with every bite.

Versatile Delight: Feel free to experiment! Try using dark chocolate, or you could even swap the cream cheese for mascarpone for a unique twist.

Perfect Gift Idea: Package these truffles in a decorative box for a sweet and thoughtful gift that friends and family will adore.

Time-Saving Treat: No baking means you can have these decadent truffles ready in no time—ideal for last-minute gatherings or sweet cravings.

Ready to impress your guests? These Easy No-Bake Biscoff Truffles are a surefire crowd-pleaser! If you’re looking to explore other delightful desserts, check out Bake Cookies Cups or try our delicious Strawberry Icebox Pie.

No-Bake Biscoff Truffles Ingredients

For the Truffles

  • Lotus Biscoff Cookies – These cookies provide the flavorful foundation of your truffles; feel free to use any speculoos cookies for a similar taste.
  • Cream Cheese – Offers a creamy richness and helps bind the cookie crumbs together; for the best texture, opt for full-fat cream cheese.
  • Ghirardelli White Chocolate Melting Wafers – Perfect for coating the truffles; melts smoothly and adds sweetness—any quality white chocolate works as a delightful substitute.

For Garnishing

  • Reserved Crushed Biscoff Cookies – Sprinkle these on top for added crunch and an extra touch of flavor to your No-Bake Biscoff Truffles.

Step‑by‑Step Instructions for No-Bake Biscoff Truffles

Step 1: Prepare the Baking Sheet
Start by lining a baking sheet with parchment or wax paper. This will prevent the truffles from sticking and make cleanup a breeze. Ensure the paper is smooth and flat, providing a perfect surface for your creations to rest on as they chill.

Step 2: Crush the Biscoff Cookies
Using a food processor, pulse the Lotus Biscoff cookies until they become fine crumbs, about 15–20 seconds. If you prefer a bit of texture, pulse them a little less. This step is essential for the consistency of your no-bake Biscoff truffles, so aim for a sandy texture.

Step 3: Mix the Dough
Reserve 1 tablespoon of the cookie crumbs for later use. In a mixing bowl, combine the remaining crumbs with softened cream cheese. Use a spatula or wooden spoon to mix vigorously until a soft, cohesive dough forms, which should take about 2–3 minutes. The mixture should be smooth and easy to mold.

Step 4: Shape the Truffles
Scoop out small portions of the dough, about 1 inch in diameter, and roll them into smooth balls using your palms. Place each truffle on the lined baking sheet, ensuring they are spaced apart. Once all the dough is shaped, refrigerate the truffles for 30 minutes to firm up before coating them.

Step 5: Melt the White Chocolate
In a microwave-safe bowl, add the Ghirardelli white chocolate melting wafers. Microwave in 15-second intervals, stirring in between, until fully melted and smooth—this should take about 30-60 seconds total. Be cautious not to overheat to avoid burning the chocolate.

Step 6: Coat the Truffles
Remove the chilled truffles from the refrigerator. Using two forks, dip each ball into the melted white chocolate, allowing excess to drip off. Carefully place the coated truffles back onto the lined baking sheet. Remember, the chocolate coating should be even and thick enough to encase each delicious no-bake Biscoff truffle.

Step 7: Add Topping and Chill
Sprinkle the reserved crushed Biscoff cookies over the freshly coated truffles for an extra crunch. Once all truffles are covered, return them to the refrigerator and let them chill until the chocolate completely sets, approximately 30 minutes. This helps to ensure a perfect finish and enhances the flavors.

Step 8: Serve and Store
Once the chocolate is firm, your no-bake Biscoff truffles are ready to serve! If not enjoyed right away, store them in an airtight container in the refrigerator. They will stay fresh for up to two weeks, making them the perfect treat for any occasion.

Make Ahead Options

These Easy No-Bake Biscoff Truffles are perfect for meal prep enthusiasts! You can prepare the truffle mixture up to 24 hours in advance. Simply follow the initial steps of crushing the cookies and mixing them with cream cheese, then shape the balls and refrigerate them. Store the shaped truffles in an airtight container to maintain their freshness and prevent them from drying out. When you’re ready to serve, simply dip them in melted chocolate and chill until set. This way, you can enjoy these delightful treats with minimal effort, making your busy weeknights sweeter without any extra hassle!

What to Serve with Easy No-Bake Biscoff Truffles

Indulging in sweet, creamy Biscoff truffles opens up a world of delightful accompaniments that elevate your dessert experience.

  • Fresh Berries: The tartness of strawberries or raspberries cuts through the sweetness, adding a refreshing burst of flavor to each bite.

  • Vanilla Ice Cream: A scoop of creamy vanilla ice cream pairs beautifully with the spiced truffles, creating a luxurious and satisfying combination that melts in your mouth.

  • Coffee or Espresso: Enjoying these truffles alongside a hot cup of coffee enhances the flavors, creating a cozy and comforting culinary embrace.

  • Chocolate Dipped Pretzels: The salty crunch of pretzels dipped in chocolate provides a fun contrast to the rich, smooth textures of the truffles in each bite.

  • Nutty Crunch Trail Mix: A handful of nutty trail mix alongside the truffles adds texture and balances out the sweetness, offering satisfying crunch and protein.

  • Coconut Macaroons: Chewy coconut macaroons bring an added layer of flavor complexity, making a perfect companion for those who love a variety of sweet treats.

Each of these delightful pairings creates a harmonious balance, ensuring your Easy No-Bake Biscoff Truffles shine even brighter on any dessert table!

No-Bake Biscoff Truffles Variations

Feel free to let your creativity shine as you customize these delightful treats to suit your taste!

  • Dairy-Free: Substitute cream cheese with vegan cream cheese for a plant-based option without sacrificing creaminess. These truffles will still taste heavenly!

  • Chocolate Twist: Replace the white chocolate coating with dark or milk chocolate for a richer flavor variation. Each bite delivers a delightful surprise!

  • Nutty Delight: Add crushed nuts like almonds or hazelnuts to the truffle mixture for added crunch and flavor. The texture will be wonderful, creating a more decadent treat.

  • Fruity Surprise: Incorporate finely chopped dried fruits such as cranberries or apricots into the truffle mixture. This adds a delightful zing and turns your truffles into a fruity delight!

  • Spiced Up: Enhance the flavor by adding a pinch of cinnamon or nutmeg to the truffle dough for an aromatic twist. The spices complement the Biscoff beautifully.

  • Crunchy Coating: Instead of just cookie crumbs on top, roll your truffles in toasted coconut or crushed pretzels for a unique crunch that offers a contrast to the creamy filling.

  • Coffee Kick: Mix in a teaspoon of espresso powder with the cream cheese for a mocha-inspired treat. This elevates the flavor profile and adds a lovely coffee note.

  • Additional Toppings: Get creative with your toppings! Drizzle melted chocolate or caramel over the finished truffles for an extra sweet touch that will wow your guests.

As you explore these variations, don’t forget to check out our scrumptious Bake Cookies Cups or give the refreshing Strawberry Icebox Pie a try for more delightful dessert options!

Expert Tips for No-Bake Biscoff Truffles

Room Temperature Cheese: Ensure your cream cheese is at room temperature for easy mixing. Cold cream cheese can make the dough lumpy and harder to shape.

Careful Melting: Watch the white chocolate carefully while melting—overheating can create a grainy texture. Stir frequently to achieve a smooth finish.

Chill Before Dipping: Don’t skip the chilling step! Chilling the truffles before dipping allows the chocolate coating to adhere better and keeps the truffles firm.

Consistent Size: Aim for uniform truffle sizes to ensure even chocolate coating and a consistent treat. A melon baller or small cookie scoop works wonders for this.

Flavor Boost: Experiment with adding a pinch of salt or vanilla extract to the Biscoff mixture for an enhanced flavor profile in your no-bake Biscoff truffles.

Storage Tips for No-Bake Biscoff Truffles

Fridge: Keep your no-bake Biscoff truffles in an airtight container in the refrigerator, where they will stay fresh for up to 2 weeks.

Freezer: For longer storage, freeze the truffles in a single layer on a baking sheet first, then transfer them to an airtight container. They can last for up to 3 months.

Thawing: When ready to enjoy, simply transfer the frozen truffles to the fridge for a few hours or overnight to thaw slowly.

Reheating: There’s no need to reheat these treats! Serve them cold to experience the delightful contrast of textures.

Easy No-Bake Biscoff Truffles Recipe FAQs

How do I choose the right Biscoff cookies?
Absolutely! When selecting Lotus Biscoff cookies, look for those that are packaged well and have no dark spots or signs of damage. For a similar flavor, you can substitute with speculoos cookies, which are also spiced and crunchy, adding that delightful essence to your truffles.

How should I store the truffles to keep them fresh?
To keep your no-bake Biscoff truffles fresh, store them in an airtight container in the refrigerator for up to 2 weeks. Ensure they are fully cooled after making and separated by parchment paper if stacked, to avoid sticking. This will maintain their texture and flavor, so they’re perfect for whenever a sweet craving strikes!

Can I freeze the Biscoff truffles? How?
Yes, you can absolutely freeze them! Start by placing your truffles in a single layer on a baking sheet lined with parchment paper, ensuring they don’t touch. Freeze for about 1-2 hours until solid, then transfer them to an airtight container or resealable freezer bag. They can be stored in the freezer for up to 3 months. When you’re ready to enjoy, thaw them in the fridge for several hours or overnight to maintain their creamy texture.

What if my chocolate coating is too thick or gets grainy?
Very! If your chocolate coating is too thick, it may not adhere well to the truffles. To fix graininess, carefully re-melt your chocolate using the microwave in 15-second intervals, stirring frequently to restore its smoothness. If it’s still too thick after melting, you can add a small splash of coconut oil to help loosen it, creating a light and silky coating.

Are there any dietary considerations I should keep in mind?
If you have allergies, keep in mind that Biscoff cookies contain gluten and may also include traces of nuts. The cream cheese is dairy-based, so use a dairy-free cream cheese alternative if needed. Always check ingredient labels to ensure they meet your dietary needs, especially if preparing for guests with specific allergies.

Can I customize the flavors in the truffles?
Absolutely! The more the merrier! Feel free to experiment by adding in a pinch of sea salt, a splash of vanilla extract, or even mixing in some finely chopped nuts or dried fruits to the filling for extra flavor and texture. Just remember to adjust the measurements slightly to maintain the right consistency.

No-Bake Biscoff Truffles

Decadent No-Bake Biscoff Truffles for Effortless Indulgence

Indulge in these No-Bake Biscoff Truffles made with just three ingredients for a delightful treat.
Prep Time 15 minutes
Chilling Time 30 minutes
Total Time 1 hour 15 minutes
Servings: 12 truffles
Course: Dessert
Cuisine: American
Calories: 120

Ingredients
  

Truffles
  • 8 ounces Lotus Biscoff Cookies or any speculoos cookies
  • 4 ounces Cream Cheese full-fat recommended
  • 10 ounces Ghirardelli White Chocolate Melting Wafers any quality white chocolate can be used
Garnishing
  • 2 tablespoons Reserved Crushed Biscoff Cookies for topping

Equipment

  • Food processor
  • Microwave
  • Mixing Bowl
  • Spatula
  • Baking Sheet
  • Parchment paper

Method
 

Step-by-Step Instructions
  1. Line a baking sheet with parchment or wax paper.
  2. Pulse the Lotus Biscoff cookies in a food processor until fine crumbs.
  3. Reserve 1 tablespoon of cookie crumbs. Mix remaining crumbs with softened cream cheese until a dough forms.
  4. Scoop out small portions and roll them into balls. Chill for 30 minutes.
  5. Melt the white chocolate in a microwave-safe bowl, stirring frequently.
  6. Dip each truffle in melted chocolate and place back on the lined baking sheet.
  7. Sprinkle with reserved crushed Biscoff cookies and return to the refrigerator to set.
  8. Serve directly from the fridge or store in an airtight container.

Nutrition

Serving: 1truffleCalories: 120kcalCarbohydrates: 14gProtein: 1gFat: 7gSaturated Fat: 4gPolyunsaturated Fat: 0.5gMonounsaturated Fat: 2gCholesterol: 15mgSodium: 50mgPotassium: 30mgSugar: 10gVitamin A: 5IUCalcium: 2mg

Notes

Ensure cream cheese is at room temperature for easy mixing. Watch the melting chocolate carefully to avoid burning.

Tried this recipe?

Let us know how it was!

Irresistible Fried Mac and Cheese Bites for Your Next Bash

As I bit into the crispy exterior of a Fried Mac and Cheese Bite, the delightful crunch gave way to a creamy, cheesy center that instantly transported me to my favorite childhood comfort food moments. These little nuggets of joy are perfect as a party snack or a cozy appetizer—ideal for impressing friends and family. Not only are they quick to prepare, but they are also a fun twist on classic mac and cheese that will have everyone reaching for more. Plus, with easy gluten-free options, you can cater to all tastes while keeping everyone happy. Ready to uncover the secrets behind these delightful bites? Let’s dive in!

Why are Fried Mac and Cheese Bites irresistible?

Irresistible flavor: Indulging in these golden bites offers a rich explosion of cheesy goodness that’s hard to resist.
Quick preparation: With just a few straightforward steps, you can whip up these snacks in no time, perfect for any last-minute gathering.
Crowd-pleaser: Loved by both kids and adults, they are sure to be the star of your next party or game night.
Versatile pairings: Serve them with a variety of dipping sauces like marinara or spicy aioli to elevate the experience even further.
Gluten-free options: With ideal substitutions, everyone can enjoy these bites, making them a great choice for diverse gatherings.
For a delightful variation, consider making Cheddar Mac Cheese inspired dishes to satisfy those mac and cheese cravings!

Fried Mac and Cheese Bites Ingredients

For the Base
Elbow Macaroni – The essential ingredient providing structure; feel free to swap in any pasta shape you prefer.
Sharp Cheddar Cheese – Delivers rich flavor and creaminess; try aged gouda for a unique twist.
Mozzarella Cheese – Ensures a gooey stretchiness; substituting with provolone offers a sharper taste.
Butter – Forms the roux, adding richness; shortening works as a dairy-free option.
All-Purpose Flour – Creates the roux for a smooth cheese sauce; use gluten-free flour for a gluten-free dish.
Milk – Adds creaminess to the sauce; almond milk can substitute for a lactose-free choice.
Salt and Pepper – Essential seasoning; mix in garlic powder or cayenne for added flavor.

For Breading
All-Purpose Flour (for Breading) – Binds the breadcrumbs to bites; cornstarch is a great gluten-free alternative.
Eggs – Help hold the breading together; for a vegan option, aquafaba works well.
Breadcrumbs – Create the crispy outer layer; use gluten-free panko for a gluten-free version.

For Frying
Vegetable Oil – Ideal for frying; olive oil can be a healthier alternative.

Step‑by‑Step Instructions for Fried Mac and Cheese Bites

Step 1: Cook the Macaroni
Start by boiling a pot of salted water. Once it reaches a rolling boil, add the elbow macaroni and cook until al dente, about 7-8 minutes. Drain the pasta in a colander and set it aside to cool slightly, ensuring it can absorb the creamy sauce later without becoming mushy.

Step 2: Make the Cheese Sauce
In a medium saucepan, melt 4 tablespoons of butter over medium heat. Whisk in 4 tablespoons of all-purpose flour, creating a roux, and cook until bubbly, about 1-2 minutes. Gradually pour in 2 cups of milk, whisking continuously until the mixture thickens, about 5-7 minutes, then stir in sharp cheddar and mozzarella until melted and smooth.

Step 3: Combine and Season
Once the cheese sauce is ready, pour it over the cooked macaroni in a large mixing bowl. Stir until every piece of pasta is cloaked in that cheesy goodness. Season with salt and pepper to taste. This combination will set the stage for your Fried Mac and Cheese Bites, bringing all those flavors together.

Step 4: Chill the Mixture
Spread the mac and cheese mixture evenly into a greased baking dish. Cover it with plastic wrap and refrigerate for about 2 hours, or until fully firm. Chilling is crucial as it helps the bites hold their shape during breading and frying, ensuring a perfect texture.

Step 5: Cut into Shapes
After chilling, remove the dish from the fridge. Use a sharp knife to cut the mac and cheese into bite-sized squares, or use cookie cutters for fun shapes. These little pieces will transform into delightful Fried Mac and Cheese Bites, ready to be breaded and fried.

Step 6: Prepare the Breading Station
Set up a breading station with three shallow bowls: one for flour, one for beaten eggs, and one for breadcrumbs. This setup allows for an efficient and mess-free way to coat each piece of mac and cheese. Make sure your hands are dry to avoid clumping during the breading process.

Step 7: Bread the Bites
Take each mac and cheese piece, dredge it in flour first, ensuring it’s fully coated. Dip it into the beaten eggs next, and finally roll it in breadcrumbs until completely covered. Repeat this process with all the pieces, which will help create a lovely crispy crust on your Fried Mac and Cheese Bites.

Step 8: Heat the Oil
In a large, deep skillet, pour in enough vegetable oil to cover the bottom by about an inch. Heat the oil over medium-high heat until it reaches 350°F (175°C). A slice of bread dropped into the oil should sizzle immediately, indicating it’s hot enough for frying.

Step 9: Fry the Bites
Carefully add the breaded mac and cheese bites to the hot oil in batches, making sure not to overcrowd the pan. Fry each batch for about 3-4 minutes per side, or until they are golden brown and crispy. Use a slotted spoon to flip them halfway through for even browning.

Step 10: Drain and Serve
Once golden and crispy, remove the Fried Mac and Cheese Bites from the oil and place them on a paper towel-lined plate to drain any excess oil. Serve hot and enjoy them while they’re still warm, paired with your favorite dipping sauces for an irresistible snack experience!

What to Serve with Fried Mac and Cheese Bites?

These crispy, cheesy delights are just waiting for the perfect companions to create a truly memorable meal experience!

  • Creamy Tomato Soup: A warm bowl of tomato soup provides delightful acidity that perfectly balances the richness of the bites. Dip them straight in for the ultimate comfort!
  • Spicy Aioli: This zesty sauce adds a punch of flavor and creaminess that contrasts beautifully with the crunchy exterior. A little heat goes a long way!
  • Fresh Garden Salad: Crisp greens with a tangy vinaigrette offer a refreshing contrast to the dense bites, creating a well-rounded plate bursting with texture.
  • Garlic Butter Breadsticks: Soft and garlicky, these breadsticks bring a satisfying chewiness that complements the crunch of the Fried Mac and Cheese Bites. Enjoy the combo while warm!
  • Honey Mustard Dipping Sauce: The sweet and tangy notes of honey mustard enhance the savory bites, making each dip a delicious surprise. Perfect for adventurous eaters!
  • Bubbly Sparkling Cider: This refreshing drink cuts through the richness of the fried bites, pairing wonderfully with the meal while keeping the vibe celebratory and fun.
  • Chocolate Chip Cookies: End on a sweet note with classic cookies that offer gooey chocolate and a soft texture, creating a delightful contrast to the crispy appetizer.
  • Milkshake: A thick, creamy milkshake provides a delightful pairing that links nostalgic childhood memories with your adult culinary adventures—an indulgent treat to enjoy!

How to Store and Freeze Fried Mac and Cheese Bites

Fridge: Store leftover Fried Mac and Cheese Bites in an airtight container for up to 3 days to keep them fresh.

Freezer: For long-term storage, freeze the bites laid out in a single layer on a baking sheet, then transfer to a freezer bag. They’ll keep well for up to 2 months.

Reheating: To restore their crispy texture, reheat frozen bites straight from the freezer at 375°F (190°C) for about 15-20 minutes, flipping halfway through until heated through.

Preparation Tip: Ensure to chill the bites thoroughly before frying; this helps them maintain shape and enhances the overall experience of these delicious Fried Mac and Cheese Bites.

Make Ahead Options

Fried Mac and Cheese Bites are perfect for meal prep, allowing busy cooks to enjoy a delicious snack with minimal fuss. You can prepare the mac and cheese mixture up to 24 hours in advance; just refrigerate it in an airtight container until ready to use, ensuring it remains firm for cutting. Additionally, once shaped into bites, they can be coated in breadcrumbs and frozen for up to 3 months—just place them in a single layer on a baking sheet until frozen, then transfer to a freezer-safe bag. When you’re ready to serve, simply fry them straight from the freezer, adding an extra minute or two to the cooking time. This way, you achieve that crispy exterior and gooey interior effortlessly, making your gatherings stress-free!

Fried Mac and Cheese Bites Variations

Feel free to get creative and add your own twist to these delightful bites!

  • Bacon Boost: Mix in crispy, chopped bacon for a savory crunch that elevates the flavor.

  • Jalapeño Kick: Incorporate finely diced jalapeños for a spicy kick that warms up every bite. Spice lovers will rejoice!

  • Herb Infusion: Add fresh herbs like chives or parsley into the cheese sauce for an aromatic touch and a pop of color. This not only enhances the flavor but also makes the bites visually appealing.

  • Vegan Makeover: Use plant-based cheese and aquafaba instead of eggs for a fully vegan version without sacrificing taste. Everyone can enjoy these tasty treats!

  • Baked Version: For a healthier alternative, bake the breaded bites at 400°F (200°C) for around 20 minutes instead of frying. Crisp on the outside and cheesy inside—still irresistible!

  • Cheesy Swaps: Experiment with different cheese types like pepper jack or gouda for a unique flavor profile that speaks to your taste buds. Mixing cheeses can turn these bites into a gourmet treat.

While you savor these variations, don’t forget to try pairing your Fried Mac and Cheese Bites with some delectable dipping sauces, like marinara or ranch for a delightful snack experience. If you’re looking for more cheesy goodness, check out these tasty Cheeseburger Pockets Snack or a luscious Cookies Cream Cheesecake for dessert!

Expert Tips for Fried Mac and Cheese Bites

  • Chill for Success: Ensure your mac and cheese is well-chilled before cutting. This helps maintain shape during breading and frying, preventing a gooey mess.

  • Cheese Varieties: Don’t be afraid to experiment with different cheeses, like pepper jack for a spicy kick or gouda for extra richness. It adds depth to your Fried Mac and Cheese Bites!

  • Avoid Overcrowding: Fry in small batches to prevent overcrowding the pot. This ensures even cooking and that delightful crispiness you’re aiming for.

  • Perfect Breading Technique: Dry hands are key during the breading process. It helps prevent clumping, ensuring a beautiful, even layer of breadcrumbs on each bite.

  • Monitor Oil Temperature: Keep an eye on the oil temperature using a thermometer. If it’s too hot, the bites will burn; too low and they may absorb excess oil, becoming greasy.

Fried Mac and Cheese Bites Recipe FAQs

What kind of pasta should I use for Fried Mac and Cheese Bites?
Absolutely! While elbow macaroni is the traditional choice and provides a great structure, feel free to experiment with any pasta shape you like. Options like shells or penne can add an interesting twist while still being delicious!

How do I store and how long can I keep Fried Mac and Cheese Bites?
You can store leftover Fried Mac and Cheese Bites in an airtight container in the refrigerator for up to 3 days. Just make sure they are well-cooled before sealing to keep them fresh. For best results, reheat them in the oven rather than the microwave to restore that beloved crispiness!

Can I freeze these bites for later?
Yes, the freezing process is simple! Lay the breaded mac and cheese bites out on a baking sheet in a single layer until they’re solid, about 1-2 hours. Then, transfer them to a freezer bag or airtight container. They will maintain quality for up to 2 months. When you’re ready to enjoy, cook them directly from frozen by baking at 375°F (190°C) for about 15-20 minutes, flipping halfway through.

What should I do if my cheese sauce is too thick?
If your cheese sauce seems too thick, don’t worry! Simply add a splash of milk gradually while whisking it over low heat until it reaches the desired consistency. This technique helps smooth things out and ensures that the mac and cheese remains creamy and luscious.

Are Fried Mac and Cheese Bites suitable for people with gluten allergies?
Very much so! By using gluten-free pasta and substituting all-purpose flour in the breading with cornstarch or gluten-free breadcrumbs, you can easily make these bites suitable for those with gluten allergies. Just be sure to double-check all your ingredients to ensure they are gluten-free.

Can I make these bites vegan?
Absolutely! To make Fried Mac and Cheese Bites vegan, replace the cheeses with dairy-free alternatives, use plant-based milk like almond or oat milk, and opt for aquafaba instead of eggs for the breading. The result will still deliver a delightful taste and texture that everyone will enjoy!

Fried Mac and Cheese Bites

Irresistible Fried Mac and Cheese Bites for Your Next Bash

Delightful Fried Mac and Cheese Bites are a perfect party snack with a crispy exterior and creamy, cheesy center, catering to all tastes.
Prep Time 30 minutes
Cook Time 20 minutes
Chilling Time 2 hours
Total Time 2 hours 50 minutes
Servings: 8 bites
Course: Appetizer
Cuisine: American
Calories: 150

Ingredients
  

For the Base
  • 1 cup Elbow Macaroni Feel free to swap in any pasta shape you prefer.
  • 1 cup Sharp Cheddar Cheese Try aged gouda for a unique twist.
  • 1 cup Mozzarella Cheese Substituting with provolone offers a sharper taste.
  • 4 tablespoons Butter Shortening works as a dairy-free option.
  • 4 tablespoons All-Purpose Flour Use gluten-free flour for a gluten-free dish.
  • 2 cups Milk Almond milk can substitute for a lactose-free choice.
  • to taste Salt
  • to taste Pepper Mix in garlic powder or cayenne for added flavor.
For Breading
  • 1 cup All-Purpose Flour Cornstarch is a great gluten-free alternative.
  • 2 large Eggs Aquafaba works well as a vegan option.
  • 1 cup Breadcrumbs Use gluten-free panko for a gluten-free version.
For Frying
  • for frying Vegetable Oil Olive oil can be a healthier alternative.

Equipment

  • Medium saucepan
  • colander
  • large mixing bowl
  • Baking dish
  • sharp knife
  • Shallow bowls
  • Deep skillet

Method
 

Step-by-Step Instructions
  1. Start by boiling a pot of salted water. Once it reaches a rolling boil, add the elbow macaroni and cook until al dente, about 7-8 minutes. Drain the pasta in a colander and set it aside to cool slightly.
  2. In a medium saucepan, melt 4 tablespoons of butter over medium heat. Whisk in 4 tablespoons of all-purpose flour, creating a roux. Gradually pour in 2 cups of milk, whisking continuously until thickened. Stir in sharp cheddar and mozzarella until melted.
  3. Pour the cheese sauce over the cooked macaroni in a large mixing bowl. Stir until well combined, and season with salt and pepper to taste.
  4. Spread the mac and cheese mixture evenly into a greased baking dish. Cover with plastic wrap and refrigerate for about 2 hours, or until fully firm.
  5. Remove the dish from the fridge and cut the macaroni into bite-sized squares using a sharp knife.
  6. Set up a breading station with three shallow bowls: one with flour, one with beaten eggs, and one with breadcrumbs.
  7. Dredge each mac and cheese piece in flour, dip into eggs, and roll in breadcrumbs until covered.
  8. In a deep skillet, pour in vegetable oil to cover the bottom by about an inch. Heat until it reaches 350°F (175°C).
  9. Carefully add the breaded bites to hot oil in batches. Fry for about 3-4 minutes per side until golden brown and crispy.
  10. Remove the fried bites from the oil and place them on a paper towel-lined plate to drain. Serve hot with dipping sauces.

Nutrition

Serving: 1biteCalories: 150kcalCarbohydrates: 20gProtein: 5gFat: 7gSaturated Fat: 4gPolyunsaturated Fat: 0.5gMonounsaturated Fat: 1.5gCholesterol: 30mgSodium: 200mgPotassium: 80mgFiber: 1gVitamin A: 200IUCalcium: 100mgIron: 1mg

Notes

Ensure to chill the bites thoroughly before frying; this helps maintain shape and enhances the overall texture.

Tried this recipe?

Let us know how it was!

Savory Shrimp Stuffed Jalapeño Poppers You’ll Crave!

The tantalizing aroma of smoky jalapeños roasting in the oven instantly transports me to lively gatherings where flavor and fun unite. I bring you my delightful Shrimp Stuffed Jalapeño Poppers, a crowd-pleasing appetizer that’s sure to be the star of your next get-together. Not only are these poppers quick to whip up, but they also provide a perfect balance of spice and creaminess that will leave your guests coming back for more. With customizable filling options, you can cater to your friends’ tastes while keeping it gluten-free if you choose. Ready to impress everyone at your next party? Let’s dive into this flavorful adventure together!

Why Are These Poppers So Irresistible?

Flavor Explosion: Each bite of these Shrimp Stuffed Jalapeño Poppers delivers a rich combination of smoky heat and creamy indulgence.

Customizable Goodness: You can easily adapt the filling with different cheeses or even switch to crab for a luxurious twist.

Quick and Easy: Preparation is a breeze—just mix, stuff, and bake for a fantastic appetizer ready in no time!

Perfect Party Treat: Your guests will rave about these eye-catching poppers, making them a must-have at gatherings.

Versatile Serving: Pair them with a cooling dip like ranch to enhance the experience, or enjoy them solo!

Elevate your snack game with these delightful poppers, perfect for anyone tired of boring fast food. Looking for more delightful seafood ideas? Check out Honey Garlic Shrimp and Garlic Butter Shrimp for more inspiration!

Shrimp Stuffed Jalapeño Poppers Ingredients

For the Poppers
Jalapeños – Choose larger ones for easier stuffing and a smoky kick.
Shrimp (12 shrimp) – Fresh or thawed offers the best taste, but dried shrimp can add extra flavor.
Cream Cheese (4 oz) – A rich filling; low-fat versions can make this lighter.
Shredded Cheese (½ cup) – Cheddar, Monterey Jack, or a spicy blend amp up the creaminess.
Breadcrumbs (2 tablespoons) – Provides a crispy texture; omit for a gluten-free option.
Garlic Powder (1 teaspoon) – Enhances flavor; fresh minced garlic gives an added punch.
Green Onions (1 tablespoon) – Adds crunch and freshness; chives make an excellent substitute.

With these ingredients, you’re on your way to making irresistible Shrimp Stuffed Jalapeño Poppers that your guests will adore!

Step‑by‑Step Instructions for Shrimp Stuffed Jalapeño Poppers

Step 1: Preheat the Oven
Start by preheating your oven to 375°F (190°C). Meanwhile, grab a cutting board and a sharp knife, and prepare the jalapeños by slicing them in half lengthwise. Carefully remove the seeds and membranes to reduce the heat and create space for the delicious shrimp filling.

Step 2: Prepare the Filling
In a large mixing bowl, combine the minced shrimp with cream cheese, shredded cheese, garlic powder, and finely chopped green onions. Mix all the ingredients thoroughly until the mixture is creamy and well incorporated. Feel free to taste a tiny bit and adjust seasonings if desired—this shrimp stuffed jalapeño poppers filling should be bursting with flavor!

Step 3: Stuff the Jalapeños
Spoon a generous amount of the shrimp mixture into each jalapeño half, ensuring they are filled to the brim. Use your fingers or a small spatula to pack the filling tightly, creating a delightful mound. This step is crucial; ensure each popper is adequately stuffed for maximum flavor and satisfaction.

Step 4: Add the Topping
If desired, sprinkle breadcrumbs on top of each filled jalapeño to achieve a crispy, golden finish. This adds a delightful crunch to your shrimp stuffed jalapeño poppers. For a gluten-free option, simply skip this step, as the poppers are already rich and satisfying on their own.

Step 5: Bake the Poppers
Line a baking sheet with parchment paper for easy cleanup and arrange the stuffed jalapeños on it, cut side up. Place them in the preheated oven and bake for 20 minutes. You’ll know they’re ready when the cheese is melty and bubbly, and the jalapeños are tender and slightly charred at the edges.

Step 6: Cool and Serve
Once baked, remove the shrimp stuffed jalapeño poppers from the oven and let them cool for a few minutes on the baking sheet. This brief cooling period allows the flavors to settle and makes handling easier. Serve warm and enjoy these delectable poppers at your next gathering!

Shrimp Stuffed Jalapeño Poppers Variations

Feel free to personalize these poppers to suit your taste buds and dietary preferences!

  • Crustacean Swap: Replace shrimp with crab or lobster for an indulgent seafood upgrade. The sweet flavors of crab mix perfectly with cream cheese, making each bite a celebration.

  • Extra Veggies: Stir in diced bell peppers or corn to the filling for added sweetness and crunch. This delightful twist brings a refreshing contrast to the spice of the jalapeños.

  • Spicy Additions: For an extra kick, fold in diced jalapeños or a splash of your favorite hot sauce into the stuffing. This fiery enhancement will wake up your taste buds and is perfect for heat lovers!

  • Dairy-Free Option: Swap the cream cheese and shredded cheese with vegan alternatives to create a dairy-free version. Nutritional yeast can lend a cheesy flavor, making it just as satisfying.

  • Baked vs. Fried: Instead of baking the poppers, try frying them in a little olive oil for a crispy exterior. This method gives a delightful crunch that pairs beautifully with the creamy filling.

  • Gluten-Free Twist: Omit the breadcrumbs or use gluten-free breadcrumbs for that satisfying crunch without the gluten. The poppers are still great without the topping, ensuring everyone can enjoy!

  • Herb Infusion: Add chopped fresh herbs like cilantro or parsley to brighten the filling. This fresh addition brings a lively flavor that enhances the poppers beautifully.

  • Cheese Variation: Experiment with different cheese blends such as pepper jack or feta for a unique flavor experience. Each variety will bring its own character, appealing to various palates!

With these variations, you can make these Shrimp Stuffed Jalapeño Poppers uniquely yours. And if you’re still craving seafood inspiration, don’t forget to explore the delicious Lemon Garlic Shrimp for another flavor-packed dish or the flavorful Garlic Butter Shrimp recipe! Enjoy your culinary adventure!

Make Ahead Options

These Shrimp Stuffed Jalapeño Poppers are perfect for busy home cooks looking to save time without compromising on flavor! You can prepare the filling up to 24 hours in advance; simply mix the minced shrimp, cream cheese, and seasonings, then cover and refrigerate the mixture. Additionally, you can stuff the jalapeños with the filling ahead of time—just be sure to store them in an airtight container to prevent moisture loss. When it’s time to serve, simply pop the stuffed jalapeños in the oven and bake according to the instructions. This meal prep strategy allows you to enjoy delicious Shrimp Stuffed Jalapeño Poppers with minimal effort, ensuring they are just as delightful as if they’d been freshly made!

Storage Tips for Shrimp Stuffed Jalapeño Poppers

Room Temperature: Keep leftover poppers at room temperature for no more than 2 hours to maintain freshness and avoid spoilage.

Fridge: Store any uneaten shrimp stuffed jalapeño poppers in an airtight container for up to 3 days. Reheat in the oven for a few minutes to restore their crispness.

Freezer: For longer storage, freeze the stuffed poppers on a baking sheet until solid, then transfer to a freezer-safe bag. They can be stored for up to 2 months.

Reheating: To enjoy frozen shrimp stuffed jalapeño poppers, thaw in the fridge overnight and reheat in the oven until heated through and crispy.

Expert Tips for Shrimp Stuffed Jalapeño Poppers

  • Quality Counts: Use fresh, high-quality shrimp for the best flavor. Frozen shrimp should be thawed and patted dry to avoid excess moisture in your filling.

  • Spice Level: Jalapeños can vary in heat. Taste a raw pepper before use to gauge how spicy they are and adjust your choice of peppers accordingly.

  • Creamy Contrast: For an irresistibly creamy filling, mix in extra cheese or opt for a spicy cheese blend. This will elevate your shrimp stuffed jalapeño poppers even more.

  • Baking Perfection: Avoid overcooking by keeping an eye on the poppers as they bake. 20 minutes is usually perfect for achieving bubbly cheese and tender jalapeños.

  • Make Ahead: Prepare and stuff your poppers a day in advance, then refrigerate. Bake right before serving to maintain freshness and taste.

What to Serve with Shrimp Stuffed Jalapeño Poppers

Elevate your appetizer experience by pairing these colorful, flavorful bites with complementary dishes that enhance their smoky, creamy goodness.

  • Cool Ranch Dip: A creamy, tangy dip balances the poppers’ spiciness and adds a refreshing touch. Perfect for dipping and cooling off the heat.

  • Classic Coleslaw: Crisp and slightly sweet, coleslaw brings crunch and lightness, complementing the richness of the poppers. Serve it on the side for added texture.

  • Guacamole: The smooth, creamy avocado dip enhances the flavor profile, bringing a delightful contrast to the spicy jalapeños. Plus, who can resist fresh guacamole?

  • Crispy Tortilla Chips: Perfect for scooping up any leftover dip, these chips add a satisfying crunch and a hint of saltiness that pairs wonderfully with the poppers.

  • Corn on the Cob: Tender, sweet corn adds a summer vibe to your meal, balancing the heat with a burst of natural sweetness and crunch.

  • Sparkling Lemonade: A refreshing drink with a zesty twist enhances the flavor while providing a cooling effect against the heat. Perfect for unwinding after savory bites.

  • Margaritas: For an added festive touch, serve with a classic margarita. The tangy lime and salt complement the poppers beautifully.

  • Chocolate Brownies: Round off your meal with rich, fudgy brownies. Their sweetness offers a delightful contrast to the savory poppers, making for a satisfying finish.

These complementary sides will turn your Shrimp Stuffed Jalapeño Poppers into a stunning spread everyone will love!

Shrimp Stuffed Jalapeño Poppers Recipe FAQs

What kind of jalapeños should I use for the poppers?
Choose larger jalapeños to make stuffing easier and provide a better smoky kick. Look for peppers that feel firm, with vibrant green color, and no dark spots. Using the right size helps ensure your poppers have just the right amount of spice without overwhelming heat.

How should I store leftover shrimp stuffed jalapeño poppers?
Store any uneaten shrimp stuffed jalapeño poppers in an airtight container in the refrigerator for up to 3 days. I recommend reheating them in the oven at 350°F (175°C) for about 10 minutes to restore their crispiness. Avoid microwaving, as it can make them soggy!

Can I freeze stuffed jalapeño poppers?
Absolutely! To freeze, arrange the stuffed poppers on a baking sheet, making sure they don’t touch. Freeze until solid, about 1-2 hours, then transfer them to a freezer-safe bag. They can be stored for up to 2 months. To reheat, thaw in the fridge overnight and bake at 375°F (190°C) for 15-20 minutes until hot and crispy.

What if my shrimp filling is too watery?
If your filling seems too watery, you can pat down the minced shrimp after thawing to remove excess moisture before mixing it with cream cheese and other ingredients. Additionally, consider adding a little more cheese or some gluten-free breadcrumbs to thicken it up.

Are these poppers suitable for gluten-free diets?
Yes! Simply omit the breadcrumbs for a gluten-free version. The shrimp stuffed jalapeño poppers will still be rich and flavorful. Always double-check ingredient labels, especially cheese and any other additives, to ensure they meet gluten-free standards.

Can I substitute the shrimp with other seafood?
Very! If you’re not in the mood for shrimp, try substituting it with crab or even lobster for a luxurious touch. Just ensure to adjust the quantities accordingly to maintain the texture and flavor balance in your poppers!

Shrimp Stuffed Jalapeño Poppers

Savory Shrimp Stuffed Jalapeño Poppers You’ll Crave!

Delicious Shrimp Stuffed Jalapeño Poppers are a crowd-pleasing appetizer that balances spice and creaminess perfectly.
Prep Time 15 minutes
Cook Time 20 minutes
Cooling Time 5 minutes
Total Time 40 minutes
Servings: 6 poppers
Course: Appetizer
Cuisine: American
Calories: 160

Ingredients
  

For the Poppers
  • 12 pieces Jalapeños Choose larger ones for easier stuffing.
  • 12 shrimp Shrimp Fresh or thawed offers the best taste.
  • 4 oz Cream Cheese A rich filling; low-fat versions can make this lighter.
  • 0.5 cup Shredded Cheese Cheddar, Monterey Jack, or a spicy blend.
  • 2 tablespoons Breadcrumbs Provides a crispy texture; omit for gluten-free.
  • 1 teaspoon Garlic Powder Enhances flavor; fresh minced garlic gives an added punch.
  • 1 tablespoon Green Onions Adds crunch and freshness.

Equipment

  • Oven
  • Mixing Bowl
  • Baking Sheet
  • Parchment paper
  • knife
  • cutting board

Method
 

Step-by-Step Instructions
  1. Preheat your oven to 375°F (190°C). Slice jalapeños in half lengthwise and remove seeds and membranes.
  2. In a mixing bowl, combine minced shrimp with cream cheese, shredded cheese, garlic powder, and green onions until creamy and well incorporated.
  3. Spoon the shrimp mixture into each jalapeño half, ensuring they are filled to the brim.
  4. Sprinkle breadcrumbs on top if desired for a crispy finish. Skip for gluten-free option.
  5. Arrange stuffed jalapeños on a parchment-lined baking sheet and bake for 20 minutes until cheesey and tender.
  6. Remove from oven, let cool for a few minutes, then serve warm.

Nutrition

Serving: 1popperCalories: 160kcalCarbohydrates: 5gProtein: 10gFat: 10gSaturated Fat: 5gPolyunsaturated Fat: 1gMonounsaturated Fat: 3gCholesterol: 60mgSodium: 300mgPotassium: 200mgFiber: 1gSugar: 1gVitamin A: 500IUVitamin C: 20mgCalcium: 150mgIron: 1mg

Notes

These poppers are versatile; customize with different cheeses or protein like crab for luxury. Perfect for gatherings and can be made ahead.

Tried this recipe?

Let us know how it was!

Savory Spinach and Chicken Quesadilla for Guilt-Free Lunches

As I flipped through my recipe book one afternoon, I stumbled upon a simple yet enticing entry: Spinach and Chicken Quesadilla. This dish is not only a breeze to whip up for a quick lunch, but it also offers a guilt-free indulgence perfect for those adhering to keto or Weight Watchers diets. Imagine crunchy tortillas enveloping tender chicken and vibrant spinach—it’s a satisfying, wholesome twist on classic Mexican cuisine! Packed with protein and flavor, this quesadilla is bound to become your new go-to meal, whether you’re in a rush or simply craving something delicious. Curious about how to make this delightful treat in your kitchen? Let’s dive in!

Why will you love this quesadilla?

Quick and Easy: This Spinach and Chicken Quesadilla comes together in just minutes, making it the perfect solution for busy afternoons when you need something nourishing and satisfying.

Flavorful and Nutritious: With the combination of tender chicken, fresh spinach, and savory black beans, each bite is a burst of flavor that feels indulgent without the guilt.

Versatile Options: Feel free to customize with different greens or your favorite spices; this adaptable recipe invites creativity, allowing you to make it your own!

Guilt-Free Indulgence: Catering to both keto and Weight Watchers, you can enjoy a hearty meal without compromising your dietary goals. It’s a win-win for anyone looking to eat healthily without sacrificing taste!

Whether served with a side of Strawberry Spinach Salad or a dollop of Greek yogurt, this quesadilla is sure to impress everyone at your table!

Spinach and Chicken Quesadilla Ingredients

For the Quesadilla
Chicken Breast – The main protein source; cook until no longer pink. Shredded rotisserie chicken can also be a convenient substitute.
Tortillas – The base for your quesadilla; choose wheat flour for Weight Watchers, or corn tortillas for a gluten-free option.
Spinach – Adds nutrition and color; kale or arugula can be substituted if desired.
Black Beans – Offers fiber and adds texture; canned beans work great—just remember to rinse before using.
Corn – Provides sweetness and texture; use frozen or canned corn, draining it if canned.
Fat-Free Greek Yogurt – Gives creaminess and a tangy flavor; can be swapped with sour cream but may change health benefits.

Each ingredient contributes to the delightful experience of enjoying a Spinach and Chicken Quesadilla, making it a perfect choice for those wanting a quick, healthy meal!

Step‑by‑Step Instructions for Spinach and Chicken Quesadilla

Step 1: Cook the Chicken
Begin by cutting the chicken breast into bite-sized pieces. Heat a skillet over medium heat and add the chicken, cooking for about 6-8 minutes until no longer pink, stirring occasionally. Once cooked, the chicken should be golden on the outside and tender. Remove from heat and set aside to let the juices settle.

Step 2: Prepare the Tortilla
In the same skillet, add a splash of oil and heat over medium-high heat. Place one tortilla in the skillet and fry for approximately 1-2 minutes or until the bottom side is golden brown and slightly crisp. You’ll know it’s ready when it releases easily from the skillet. Carefully lift it out and set aside, then repeat with a second tortilla.

Step 3: Layer the Fillings
On the toasted side of the first tortilla, layer the cooked chicken, a handful of black beans, sweet corn, and fresh spinach. For a touch of creaminess, add a dollop of Greek yogurt. Ensure the ingredients are evenly spread out for every bite of your delicious Spinach and Chicken Quesadilla.

Step 4: Assemble the Quesadilla
Place the second tortilla on top of the filling, pressing down gently to help it adhere. Return the filled quesadilla to the skillet over medium heat, letting it cook for about 2-3 minutes. Keep an eye on it; the goal is to achieve a beautiful golden brown and crisp exterior.

Step 5: Flip and Finish Cooking
Carefully flip the quesadilla using a spatula, taking care not to spill the filling. Allow the other side to cook for another 2-3 minutes until it’s equally golden and crispy. Check for doneness to ensure both sides are evenly cooked and that the cheese or creamy filling has warmed through.

Step 6: Serve and Enjoy
Remove the quesadilla from the skillet and place it on a cutting board. Let it cool slightly for about a minute, then cut it into wedges. Serve your Spinach and Chicken Quesadilla warm, perhaps with a side of salsa or guacamole for dipping to enhance the flavors!

Storage Tips for Spinach and Chicken Quesadilla

Fridge: Store leftover Spinach and Chicken Quesadilla in an airtight container for up to 2 days. This keeps it fresh and ready for your next meal.

Freezer: For longer storage, freeze individually wrapped quesadillas for up to 3 months. Thaw overnight in the fridge before reheating for the best results.

Reheating: Reheat quesadillas in a skillet over medium heat until warmed through, about 3-5 minutes per side, ensuring the exterior stays crispy and delicious.

Covering: If storing in the fridge, use a paper towel to absorb moisture before sealing, preventing sogginess in the quesadilla.

What to Serve with Spinach and Chicken Quesadilla

Elevate your meal experience with delightful sides and accompaniments that harmonize beautifully with this tasty quesadilla.

  • Zesty Salsa: A fresh, chunky salsa provides a burst of flavor and acidity, perfectly balancing the quesadilla’s richness.
  • Guacamole: Creamy and rich, the smooth avocado dip adds a delightful texture that enhances each bite, making every mouthful indulgent.
  • Crisp Side Salad: A light, green salad with a vinaigrette offers a refreshing contrast to the warm quesadilla, bringing a touch of crunch to your meal.

Pair your quesadilla with a mixed greens salad for a balance of textures and flavors. Top it off with some citrus dressing for an extra zing!

  • Roasted Veggies: Add a colorful platter of roasted vegetables for a nutritious and hearty side; their caramelization complements the simplicity of the quesadilla so well.
  • Rice: A side of cilantro lime rice could provide a lovely aromatic quality, enhancing the Mexican flair of your meal while keeping it satisfying.

Completing your Spinach and Chicken Quesadilla with these delightful sides creates a hearty and nutritious experience that’s sure to impress.

Spinach and Chicken Quesadilla Variations

Feel free to mix and match these variations to create a custom quesadilla that tantalizes your taste buds and suits your dietary needs!

  • Cheesy Delight: Add shredded cheese like mozzarella or cheddar for extra creaminess and flavor. It melts beautifully, making each bite even more indulgent.

  • Vegetarian Options: Substitute the chicken for grilled bell peppers or sautéed mushrooms. This twist makes for a delicious and hearty vegetarian meal!

  • Spicy Kick: Toss in diced jalapeños or a sprinkle of red pepper flakes to bring some heat to your quesadilla. Adjust it according to your spice preference for a flavorful punch.

  • Herb Infusion: Incorporate fresh herbs like cilantro or parsley into the filling before cooking. It adds a refreshing burst of flavor that elevates the entire dish.

  • Sweet Corn & Avocado: Mix in diced avocado or extra corn for a delightful sweetness and creaminess. These ingredients add layers of texture to each bite and enhance the nutrition.

  • Taco-flavored Quesadilla: Add taco seasoning to the chicken as it cooks for an extra flavor dimension reminiscent of your favorite taco night. You can also serve it with salsa for a refreshing dip.

  • Protein Swap: Try swapping chicken for turkey or tofu for a different protein option. Both alternatives deliver unique flavors and keep the quesadilla feeling light and nutritious.

Looking for more delightful recipes? You might enjoy this refreshing Strawberry Spinach Salad on the side or perhaps a heartwarming bowl of Rotisserie Chicken Mushroom Soup to complement your meal!

Make Ahead Options

These Spinach and Chicken Quesadillas are perfect for meal prep enthusiasts! You can cook the chicken and assemble your quesadillas up to 24 hours in advance, making them a convenient option for busy weeknights. To prepare, simply cook the chicken, then layer it with black beans, corn, and spinach between the tortillas, ensuring to wrap them tightly in plastic wrap or store in an airtight container in the refrigerator. When you’re ready to enjoy, heat a skillet over medium heat, add a little oil, and cook your quesadillas for about 2-3 minutes on each side until golden brown. This way, you’ll have a delicious meal ready to serve that is just as satisfying as when freshly made!

Expert Tips for Spinach and Chicken Quesadilla

  • Watch the Heat: Adjust the pan’s temperature to medium-low if the tortillas brown too quickly; you want them crisp, not burnt!

  • Season Your Chicken: For an extra flavor boost, add spices like cumin, paprika, or garlic powder while cooking the chicken.

  • Layer Wisely: Make sure to distribute the chicken, beans, corn, and spinach evenly to ensure each bite of your Spinach and Chicken Quesadilla is full of flavor.

  • Use Fresh Tortillas: Opt for fresh tortillas for a softer bite and better overall texture compared to dry ones; they make a world of difference!

  • Keep it Warm: To maintain a creamy texture, ensure the Greek yogurt is at room temperature before adding it to the quesadilla.

  • Prepare Ahead: For even quicker lunches, you can pre-cook the chicken and store it in the fridge; this will save you time on busy days!

Spinach and Chicken Quesadilla Recipe FAQs

How do I select the best spinach for my quesadilla?
Absolutely! When selecting spinach, look for vibrant green leaves that are crisp and free from dark spots or wilting. Fresh spinach should feel dry and have a slightly crinkled texture. If you’re using frozen spinach, make sure it’s bright green and not overly mushy.

How should I store leftover quesadilla?
Very simple! Store any leftover Spinach and Chicken Quesadilla in an airtight container in the fridge for up to 2 days. To maintain the crispness, you can place a paper towel inside the container before sealing it; this absorbs moisture that can make the tortillas soggy.

Can I freeze my quesadilla?
Of course! To freeze your Spinach and Chicken Quesadilla, wrap each one tightly in plastic wrap or aluminum foil, then place them in a freezer-safe bag. They can be stored for up to 3 months. When you’re ready to enjoy, simply thaw them overnight in the fridge before reheating in a skillet for the best texture!

What can I do if my quesadilla is burning on the outside before the inside heats through?
If you find your quesadilla browning too quickly, it’s crucial to adjust the heat on your skillet. Turn it down to medium-low and allow more time for the inside to warm. You can also cover the skillet with a lid to help trap heat, ensuring the filling cooks through without burning the outside.

Are there any dietary considerations I should be aware of for this recipe?
Absolutely! If you are catering to gluten-free diets, use corn tortillas instead of wheat flour. Additionally, always check for any allergies to the ingredients, such as black beans or Greek yogurt. For a dairy-free option, you can substitute the yogurt with avocado or a plant-based crema.

Can pets safely eat leftovers from this quesadilla?
While ingredients like chicken and spinach can be safe for dogs in moderation, avoid giving them the quesadilla with any added spices or sauces. Always check with your vet before sharing homemade food with pets, as individual dietary needs can vary.

Spinach and Chicken Quesadilla

Savory Spinach and Chicken Quesadilla for Guilt-Free Lunches

Enjoy a delicious Spinach and Chicken Quesadilla—perfect for a quick, healthy lunch that adheres to keto and Weight Watchers diets.
Prep Time 15 minutes
Cook Time 15 minutes
Total Time 30 minutes
Servings: 2 quesadillas
Course: Lunch
Cuisine: Mexican
Calories: 350

Ingredients
  

For the Quesadilla
  • 1 pound Chicken Breast Shredded rotisserie chicken can also be a substitute.
  • 4 pieces Tortillas Use wheat flour for Weight Watchers, or corn for gluten-free.
  • 2 cups Spinach Kale or arugula can be substituted.
  • 1 cup Black Beans Canned and rinsed.
  • 1 cup Corn Use frozen or canned, drained if canned.
  • 1/2 cup Fat-Free Greek Yogurt Can be swapped with sour cream.

Equipment

  • Skillet
  • Spatula

Method
 

Step-by-Step Instructions
  1. Begin by cutting the chicken breast into bite-sized pieces. Heat a skillet over medium heat and add the chicken, cooking for about 6-8 minutes until no longer pink, stirring occasionally.
  2. In the same skillet, add a splash of oil and heat over medium-high heat. Place one tortilla in the skillet and fry for approximately 1-2 minutes or until the bottom side is golden brown and slightly crisp.
  3. On the toasted side of the first tortilla, layer the cooked chicken, black beans, sweet corn, and fresh spinach. Add a dollop of Greek yogurt.
  4. Place the second tortilla on top of the filling, pressing down gently. Return the filled quesadilla to the skillet over medium heat, letting it cook for about 2-3 minutes.
  5. Carefully flip the quesadilla using a spatula, cooking the other side for another 2-3 minutes until equally golden and crispy.
  6. Remove the quesadilla from the skillet, let it cool slightly for about a minute, then cut it into wedges.

Nutrition

Serving: 1quesadillaCalories: 350kcalCarbohydrates: 40gProtein: 30gFat: 10gSaturated Fat: 2gPolyunsaturated Fat: 1gMonounsaturated Fat: 4gCholesterol: 80mgSodium: 600mgPotassium: 400mgFiber: 10gSugar: 2gVitamin A: 1500IUVitamin C: 20mgCalcium: 150mgIron: 3mg

Notes

Adjust the pan’s temperature to medium-low if the tortillas brown too quickly. Season your chicken with spices for extra flavor. Store leftovers for up to 2 days in the fridge or freeze for up to 3 months.

Tried this recipe?

Let us know how it was!

Delicious Baked Pumpkin Donuts for a Cozy Fall Treat

As the leaves turn golden and the air fills with crispness, there’s nothing quite like the warm embrace of Easy Baked Pumpkin Donuts to celebrate the season. These delightful treats are not just about taste; they embody the spirit of autumn with their moist texture, infused with rich pumpkin puree and a comforting cinnamon sugar coating. Unlike traditional fried donuts, this healthy baking approach allows anyone—from novice bakers to seasoned chefs—to whip up a batch with ease, all while savoring that fall flavor without the guilt. They’re perfect for cozy breakfasts, afternoon pick-me-ups, or sharing with friends at fall gatherings. Who wouldn’t smile at the thought of a freshly baked pumpkin donut enjoyed with a steaming cup of coffee? Let’s dive in and bring that autumn joy to your kitchen!

Why are baked pumpkin donuts a must-try?

Irresistible Flavor: These donuts are packed with rich, spiced pumpkin flavor, creating a cozy autumn experience in every bite.

Healthier Alternative: Baked, not fried, they offer a guilt-free indulgence perfect for anyone looking to enjoy fall treats without the excess calories.

Quick and Easy: Whipping up a batch is a breeze! With simple ingredients and easy-to-follow steps, even novice bakers can shine.

Perfectly Versatile: Feel free to customize with chocolate chips, nuts, or spices to cater to your taste buds—great for any gathering or cozy morning at home.

Great for Sharing: These treats are bound to impress friends and family, sparking smiles at any gathering—much like our Air Fryer Baked goodies!

Baked Pumpkin Donuts Ingredients

For the Donuts

  • Pumpkin Puree – Adds moisture and rich flavor; use canned or homemade for convenience.
  • Milk – Provides hydration and a tender texture; substitute with almond milk for a dairy-free option.
  • Vegetable Oil – Contributes to moistness; can be replaced with melted coconut oil for a healthier fat choice.
  • All-Purpose Flour – Forms the structure of the donuts; use gluten-free flour if needed.
  • Brown Sugar – Adds sweetness and a hint of molasses; substitute with coconut sugar for a less processed option.
  • Pumpkin Pie Spice – Brings warm, autumn flavors; blend cinnamon, nutmeg, and ginger as an alternative.
  • Baking Powder – Acts as a leavening agent for fluffy donuts; ensure it’s fresh for best results.
  • Cinnamon – Enhances flavor profile and aroma; add more for a stronger spice flavor if desired.
  • Salt – Balances sweetness and elevates overall flavor.
  • Nutmeg – Adds warmth and depth; can be omitted if unavailable.

For the Coating

  • Granulated Sugar – Sweetens the exterior; can substitute with a sugar alternative for a lighter option.
  • Butter – Provides a base for the sugar to stick; use dairy-free margarine for a vegan version.
  • Cinnamon – Complements sugar and elevates the fall flavor profile.

These delectable Baked Pumpkin Donuts are perfect for celebrating the flavors of autumn! Enjoy baking!

Step‑by‑Step Instructions for Easy Baked Pumpkin Donuts

Step 1: Preheat Your Oven
Begin by preheating your oven to 350°F (175°C). While the oven warms up, prepare a donut pan by spraying it lightly with non-stick cooking spray. This step is essential for ensuring your donuts release effortlessly after baking.

Step 2: Mix Wet Ingredients
In a medium mixing bowl, whisk together the pumpkin puree, brown sugar, vegetable oil, and milk until the mixture is smooth and well combined. This should take about 2-3 minutes. The batter will become fragrant with that warm, inviting scent of pumpkin, giving you a taste of the delightful Baked Pumpkin Donuts to come.

Step 3: Combine Dry Ingredients
In a separate bowl, blend together the all-purpose flour, baking powder, pumpkin pie spice, cinnamon, nutmeg, and salt. Whisk these dry ingredients thoroughly for about a minute, making sure there are no clumps. This step is crucial for achieving the perfect texture in your donuts.

Step 4: Incorporate Wet and Dry Mixtures
Gradually add the dry ingredient mixture to the wet mixture, folding them together gently. Aim to combine them until just incorporated, about 1-2 minutes. It’s important to avoid over-mixing to keep the donuts light and fluffy, ensuring each bite of your Baked Pumpkin Donuts is airy and delicious.

Step 5: Fill the Donut Pan
Transfer your batter into a piping bag or a ziplock bag with one corner snipped off for clean filling. Carefully squeeze the batter into each cavity of the donut pan, filling them about three-quarters full. This method helps maintain the classic donut shape and ensures even baking.

Step 6: Bake the Donuts
Place the filled donut pan in the preheated oven and bake for 15-16 minutes. The donuts are done when they are lightly golden and a toothpick inserted into the center comes out clean. Keep an eye on them to prevent over-baking, as you want them tender and moist.

Step 7: Cool the Donuts
Once baked, remove the donut pan from the oven and let them cool in the pan for about 10 minutes. Afterward, gently transfer the donuts to a cooling rack. Allowing them to cool properly ensures they maintain their structure and don’t become soggy.

Step 8: Coat with Cinnamon Sugar
For a delightful finish, melt some butter in a small bowl. Once the donuts are cool, dip each one into the melted butter, then roll them in a mixture of granulated sugar and cinnamon to coat them evenly. This sweet topping adds an irresistible crunch to your delicious Baked Pumpkin Donuts.

What to Serve with Easy Baked Pumpkin Donuts

As the aroma of freshly baked donuts fills your kitchen, it’s the perfect time to think about what delightful pairings will elevate your cozy meal experience.

  • Creamy Hot Chocolate: The rich chocolate flavor complements the spiced pumpkin, creating a comforting beverage that warms your soul on chilly autumn days.

  • Spiced Apple Cider: This warm concoction enhances the seasonal flavors, with notes of cinnamon and nutmeg that harmonize beautifully with the donuts’ essence.

  • Maple Glazed Bacon: The savory punch of caramelized bacon adds a delightful contrast, making each donut bite more indulgent with a sweet and salty twist.

  • Vanilla Ice Cream: A scoop of creamy vanilla atop a warm donut creates a heavenly dessert experience. The cold ice cream paired with the spiced warmth is simply irresistible.

  • Chai Tea: Its aromatic spices resonate with the flavors of the donuts, making for a soothing drink that brightens your afternoon break or cozy breakfast.

  • Fresh Fruit Salad: A medley of crisp apples, pears, or citrus fruits offers a refreshing bite, balancing the sweet and spiced donuts while adding a bright, vibrant touch.

  • Whipped Cream: Light and airy, this easy topping enhances the flavors of the donuts without overwhelming them. It’s a delicious addition that encourages indulgence.

  • Spiced Nut Mix: A crunchy blend of nuts roasted with cinnamon and maple adds texture and depth, turning your donut treat into a satisfying snack experience.

How to Store and Freeze Baked Pumpkin Donuts

Room Temperature: Store cooled donuts in an airtight container at room temperature for up to 2 days to maintain their soft texture and flavor.

Fridge: If you prefer, Baked Pumpkin Donuts can be stored in the fridge for up to 5 days. Just ensure they are in an airtight container to keep them fresh.

Freezer: For longer storage, freeze uncoated donuts in a single layer on a baking sheet, then once frozen, transfer them to a freezer-safe bag. They will keep for up to 3 months.

Reheating: To enjoy, thaw the required number of donuts, then warm them in the microwave for about 15-20 seconds or in the oven at 350°F for 5-10 minutes.

Expert Tips for Baked Pumpkin Donuts

  • Room Temperature Ingredients: Ensure all wet ingredients are at room temperature for better blending and a smoother batter, which results in lighter Baked Pumpkin Donuts.

  • Avoid Over-Mixing: Mix the batter gently until just combined to prevent dense donuts. Over-mixing can lead to tough texture, so be kind to your dough!

  • Proper Cooling: Let the donuts cool completely before coating them in cinnamon sugar. This helps prevent sogginess and ensures a delightful crunch.

  • Consistent Size: Use a piping bag or ziplock bag to fill the donut pan evenly. This not only helps with shape but also ensures even baking for all your Baked Pumpkin Donuts.

  • Experiment with Flavors: Don’t hesitate to add your favorite mix-ins like chocolate chips or nuts for added flavor and texture. Customize your donuts to make them truly yours!

Make Ahead Options

These Easy Baked Pumpkin Donuts are perfect for meal prep enthusiasts! You can prepare the batter up to 24 hours in advance. Simply mix the wet and dry ingredients separately, then combine them just before baking. For added convenience, fill the donut pan with the batter and cover it tightly with plastic wrap before refrigerating. This ensures the flavors meld beautifully while keeping the donuts just as delicious when baked. When ready to serve, simply pop the donut pan in the oven and bake as instructed. Let cool, and coat with the cinnamon sugar mixture for a delightful treat, saving you valuable time on busy mornings!

Baked Pumpkin Donuts Variations & Substitutions

Feel free to play around with these delightful baked pumpkin donuts to make them uniquely yours!

  • Dairy-Free: Use almond or oat milk instead of regular milk, and replace butter with coconut oil for a completely dairy-free experience.
    A simple swap, but it opens up the sweet joy for everyone, ensuring your pumpkin donuts remain delicious without dairy!

  • Gluten-Free: Substitute all-purpose flour with a 1-to-1 gluten-free baking blend.
    This way, those with gluten sensitivities can still indulge in the cozy flavors of autumn with ease.

  • Spiced Up: Swap pumpkin pie spice for a combination of cinnamon, nutmeg, and a pinch of clove for an extra flavor kick.
    The complexity adds a delightful twist that heightens the autumn experience with every bite.

  • Nutty Additions: Toss in ½ cup of chopped pecans or walnuts to the batter for added texture and a nutty flavor boost.
    The crunch complements the soft donut, balancing the flavors beautifully.

  • Chocolaty Delight: Fold in ½ cup of chocolate chips to the batter for rich, melty pockets of chocolate.
    Nothing beats the combination of pumpkin and chocolate—ideal for a cozy dessert or snack!

  • Maple Glaze: Instead of a cinnamon sugar coating, dress your donuts with a simple maple glaze for a sweet finish.
    This treat brings an irresistible, sticky sweetness that’s simply delightful, especially if you’re a fan of maple flavors.

  • Vegan Option: Replace eggs (if used) with ¼ cup of unsweetened applesauce for a scrumptious vegan twist.
    This replacement ensures your donuts stay fluffy while accommodating those following a plant-based lifestyle.

Don’t forget, you can serve these delicious baked donuts alongside a warm cup of coffee or tea for an even cozier experience. For a little extra fun, why not try them with the savory delights from our Baked Vegetable Egg recipe for a delightful brunch?

Easy Baked Pumpkin Donuts Recipe FAQs

Can I use fresh pumpkin instead of canned pumpkin puree?
Absolutely! If you prefer fresh pumpkin, roast a small pumpkin until tender, then scoop out the flesh and puree it in a blender or food processor. For every cup of canned pumpkin puree, you can substitute with one cup of fresh pumpkin puree. The key is to ensure it’s smooth, as this will maintain the tender texture of your Baked Pumpkin Donuts.

What’s the best way to store Baked Pumpkin Donuts?
For optimal freshness, store your cooled Baked Pumpkin Donuts in an airtight container at room temperature for about 2 days. If you’d like, you can extend their shelf life by refrigerating them for up to 5 days. Just remember to keep them sealed tight to prevent them from drying out!

Can I freeze leftover donuts, and how?
Definitely! To freeze your Baked Pumpkin Donuts, place them in a single layer on a baking sheet to freeze individually. Once they’re solid, transfer them to a freezer-safe bag or container. They can be stored in the freezer for up to 3 months. When you’re ready to enjoy them, simply thaw at room temperature or warm them in the microwave for 15-20 seconds!

What can I add if I want to customize my donut recipe?
The more, the merrier! You can add chocolate chips or chopped nuts to the batter for extra flavor and crunch. Another fabulous idea is to experiment with different spices like allspice or cardamom for a more complex taste. If you’re feeling adventurous, drizzle a maple glaze instead of rolling them in cinnamon sugar for a festive twist!

How can I ensure my donuts don’t turn out dense?
To achieve light and fluffy Baked Pumpkin Donuts, avoid over-mixing the batter. Combine the wet and dry ingredients just until they’re incorporated—roughly 1-2 minutes is ample time. Also, make sure your ingredients are at room temperature to help create a smooth and airy dough. Lastly, allow them to cool completely before coating to keep that delightful crunch intact.

Can I make these donuts dairy-free or gluten-free?
Very much so! To make them dairy-free, substitute regular milk with almond milk or another plant-based milk of your preference, and use dairy-free margarine for the coating. For a gluten-free version, simply replace all-purpose flour with a gluten-free all-purpose blend. Just be sure to check that your baking powder is also gluten-free for best results!

Baked Pumpkin Donuts

Delicious Baked Pumpkin Donuts for a Cozy Fall Treat

These Baked Pumpkin Donuts embody the spirit of autumn with their moist texture and comforting flavor.
Prep Time 10 minutes
Cook Time 16 minutes
Cooling Time 10 minutes
Total Time 36 minutes
Servings: 12 donuts
Course: Breakfast
Cuisine: American
Calories: 150

Ingredients
  

For the Donuts
  • 1 cup pumpkin puree use canned or homemade
  • 1/2 cup milk substitute with almond milk for dairy-free
  • 1/4 cup vegetable oil can be replaced with melted coconut oil
  • 1 cup all-purpose flour use gluten-free flour if needed
  • 1/2 cup brown sugar substitute with coconut sugar if preferred
  • 1 tbsp pumpkin pie spice or blend cinnamon, nutmeg, and ginger
  • 2 tsp baking powder ensure it's fresh
  • 1 tsp cinnamon add more for a stronger flavor if desired
  • 1/4 tsp salt balances sweetness
  • 1/4 tsp nutmeg can be omitted if unavailable
For the Coating
  • 1/4 cup granulated sugar can substitute with a sugar alternative
  • 1/4 cup butter use dairy-free margarine for a vegan version
  • 1 tbsp cinnamon to complement the sugar

Equipment

  • donut pan
  • Mixing bowls
  • Whisk
  • piping bag

Method
 

Step-by-Step Instructions
  1. Preheat your oven to 350°F (175°C) and spray a donut pan lightly with non-stick cooking spray.
  2. In a medium mixing bowl, whisk together the pumpkin puree, brown sugar, vegetable oil, and milk until smooth.
  3. In another bowl, blend together the all-purpose flour, baking powder, pumpkin pie spice, cinnamon, nutmeg, and salt.
  4. Gradually add the dry ingredients to the wet mixture, folding them together gently until just blended.
  5. Transfer the batter into a piping bag and fill each cavity of the donut pan about three-quarters full.
  6. Bake in the preheated oven for 15-16 minutes, or until golden and a toothpick inserted comes out clean.
  7. Once baked, cool the donuts in the pan for about 10 minutes before transferring them to a cooling rack.
  8. Melt butter in a bowl, then dip each donut in the melted butter and roll in the cinnamon sugar mixture.

Nutrition

Serving: 1donutCalories: 150kcalCarbohydrates: 20gProtein: 2gFat: 7gSaturated Fat: 3gPolyunsaturated Fat: 1gMonounsaturated Fat: 2gCholesterol: 15mgSodium: 200mgPotassium: 150mgFiber: 1gSugar: 8gVitamin A: 2000IUCalcium: 80mgIron: 1mg

Notes

For best results, use room temperature ingredients and avoid over-mixing the batter.

Tried this recipe?

Let us know how it was!

Irresistible Vanilla Bean Brown Butter Cheesecake Recipe

As I took my first bite of this Vanilla Bean Brown Butter Cheesecake, a wave of nostalgia washed over me—like revisiting a beloved bakery from my childhood. The luxurious harmony of nutty brown butter and fragrant vanilla bean in this dessert creates an experience that’s both comforting and indulgent. Not only is this cheesecake a showstopper for special occasions, but it also offers the perfect balance of creamy richness and a buttery graham cracker crust, making it a guaranteed crowd-pleaser. Whether you’re looking to impress friends or simply indulge yourself, this delightful recipe is sure to leave sweet memories lingering long after the last slice is gone. What creative twist will you add to enhance this classic treat?

Why is this cheesecake so special?

Irresistible flavor: The delightful combination of nutty brown butter and aromatic vanilla bean makes each bite an indulgence.
Creamy texture: A velvety cheesecake filling paired with a buttery graham cracker crust creates a satisfying mouthfeel.
Crowd-pleaser: Perfect for gatherings, this dessert is sure to impress family and friends alike.
Customizable: With variations like citrus zest or chocolate swirls, you can easily personalize it to suit any taste.
Simple process: You’ll find the steps easy to follow, making this gourmet cheesecake achievable in your own kitchen. For those with a craving for something sweet, this vanilla bean brown butter cheesecake recipe is a must-try!

Vanilla Bean Brown Butter Cheesecake Ingredients

For the Crust
Graham Cracker Crumbs – Provides the structure for the crust; consider using crushed digestive biscuits for a similar flavor.
Unsalted Butter – Binds the crust ingredients and adds richness; melted butter is essential for even mixing.
Brown Sugar – Contributes sweetness and caramel notes to the crust; using dark brown sugar intensifies the flavor.

For the Filling
Unsalted Butter – Enhances the creamy texture and adds nutty flavor; be sure to brown the butter carefully to avoid burning.
Cream Cheese – The base of the filling, providing creaminess and density; ensure it’s softened for easy mixing.
Granulated Sugar – Sweetens the filling; adjust sweetness based on your preference for a perfect balance.
Vanilla Bean Paste or Seeds – Adds authentic vanilla flavor and visual charm; using pure vanilla extract is an alternative, though it won’t have the same depth.
Eggs – Necessary for structure and stability; incorporate them one at a time to avoid overmixing.
Sour Cream – Adds moisture and a slight tang, balancing the richness; Greek yogurt is a great substitute for a similar texture.

This irresistible Vanilla Bean Brown Butter Cheesecake is simply a must-try for anyone seeking to delight their taste buds and elevate their dessert repertoire!

Step‑by‑Step Instructions for https://www.recipesbynatalie.com/vanilla-bean-brown-butter-cheesecake/

Step 1: Preheat the Oven
Begin by preheating your oven to 325°F (163°C). This ensures a consistent baking environment for your Vanilla Bean Brown Butter Cheesecake. While the oven heats, prepare the crust so it can bake right away for optimal texture.

Step 2: Prepare the Crust
In a mixing bowl, combine the graham cracker crumbs, melted unsalted butter, and brown sugar until fully integrated. The mixture should feel sandy and slightly moist. Press this mixture firmly into the bottom of a 9-inch springform pan to create an even layer. Bake for 10 minutes, then set aside to cool while you move on to the filling preparation.

Step 3: Brown the Butter
In a medium saucepan, melt the unsalted butter over medium heat. Stir frequently as it heats, allowing it to bubble and turn golden brown, which should take about 5–8 minutes. Look for a nutty aroma and a brown color; this is when it’s perfect. Remove from heat and let the butter cool slightly before incorporating it into the filling.

Step 4: Mix the Cream Cheese and Sugar
In a large mixing bowl, beat the softened cream cheese with granulated sugar using an electric mixer on medium speed until the mixture is smooth and creamy—about 2 minutes. Scrape down the sides of the bowl as needed. This forms the base of your Vanilla Bean Brown Butter Cheesecake, ensuring it’s sweet and rich.

Step 5: Add the Vanilla and Eggs
Add the vanilla bean paste to the cream cheese mixture, blending well until evenly distributed. Then, incorporate the eggs one at a time, mixing until just combined after each addition. This gentle handling prevents overmixing, which is crucial for a smooth filling with minimal cracks.

Step 6: Incorporate Sour Cream and Butter
Next, gently fold in the sour cream and the browned butter until fully combined, creating a rich and silky filling. Take care to maintain a smooth texture without overmixing. This harmony of flavors will enhance the cheesecake’s creaminess while adding the signature nutty depth.

Step 7: Pour the Filling
Carefully pour the cheesecake filling over the cooled graham cracker crust, smoothing the surface with a spatula. This even distribution will ensure every slice has the perfect balance of crust and filling. It’s now ready to bake and fill your kitchen with delightful aromas.

Step 8: Bake the Cheesecake
Place the filled pan in your preheated oven and bake for 55-65 minutes. Look for the edges to be set with a slightly jiggly center that will firm up as it cools. Avoid opening the oven door during baking to keep the temperature stable for your Vanilla Bean Brown Butter Cheesecake.

Step 9: Cool Gradually
Once the baking time is complete, turn off the oven but leave the cheesecake inside for 1 hour. This gradual cooling helps prevent cracks by allowing the temperature to drop slowly. Once the time is up, remove the cheesecake and cool to room temperature on a wire rack.

Step 10: Refrigerate Before Serving
Finally, refrigerate the cheesecake for at least 4 hours, or preferably overnight, to let the flavors meld and the cheesecake set fully. When ready to serve, release the sides of the springform pan, slice, and enjoy a slice of your indulgent Vanilla Bean Brown Butter Cheesecake!

What to Serve with Vanilla Bean Brown Butter Cheesecake

Indulging in a slice of this cheesecake is a delightful experience, but pairing it with complementary flavors makes the moment even more special.

  • Fresh Berries: Their vibrant sweetness and slight tartness create a refreshing contrast to the rich cheesecake, enhancing every bite.

  • Whipped Cream: A dollop of lightly sweetened whipped cream adds a fluffy texture that balances the creamy filling beautifully.

  • Chocolate Ganache: Drizzling warm chocolate ganache over the cheesecake introduces a rich, velvety element that amplifies the dessert’s indulgence.

  • Caramel Sauce: The buttery sweetness of caramel adds depth, making each forkful a luscious explosion of flavors that’s hard to resist.

  • Coffee: A robust cup of coffee has a wonderful way of accentuating the cheesecake’s flavors, providing a comforting warmth to your dessert experience.

  • Toasted Nuts: Sprinkling toasted pecans or almonds on top introduces a delightful crunch, contrasting with the smooth texture of the cheesecake.

  • Citrine Zest: A sprinkle of fresh lemon or orange zest can brighten the dish, adding a pop of freshness that cuts through the richness.

  • Mint Leaves: Adding a touch of fresh mint as a garnish offers a refreshing note, lifting the overall taste and providing a pleasing aroma.

How to Store and Freeze Vanilla Bean Brown Butter Cheesecake

Fridge: Store leftover cheesecake in an airtight container for up to 5 days to maintain its creamy texture and flavor.

Freezer: For extended storage, wrap slices individually in plastic wrap, then place them in a freezer-safe bag or container. They can be frozen for up to 3 months.

Thawing: To enjoy frozen cheesecake, transfer it to the fridge for several hours or overnight to thaw slowly. This method preserves the cheesecake’s delightful taste and texture.

Reheating: While cheesecake is best enjoyed cold, if you prefer a warm slice, gently warm it in the microwave for 10-15 seconds. Enjoy every indulgent bite of your Vanilla Bean Brown Butter Cheesecake!

Vanilla Bean Brown Butter Cheesecake Variations

Feel free to unleash your culinary creativity with these exciting twists that can elevate your cheesecake!

  • Citrus Zest: Stir in zest from lemon or orange for a bright, refreshing contrast to the rich flavors.

  • Chocolate Swirl: Fold melted chocolate into the filling before pouring it over the crust for a decadent chocolate flavor.

  • Nutty Crust: Substitute graham cracker crumbs with crushed nuts like almonds or pecans for a crunchier texture.

  • Caramel Drizzle: Before serving, warm caramel sauce and drizzle it over the top to add a sweet, gooey layer of indulgence.

  • Spiced Infusion: Add a pinch of cinnamon or nutmeg to the filling for a warm spice note that complements the cheesecake beautifully.

  • Berry Compote: Top with a homemade mixed berry compote for a fruity balance that bursts with freshness.

  • Vegan Alternative: For a vegan twist, substitute cream cheese with cashew cream and eggs with flax eggs for a delicious plant-based cheesecake.

  • Sour Cream Substitute: Use Greek yogurt in place of sour cream for a slightly tangy flavor and luscious consistency.

Whatever variation you choose to try, your Vanilla Bean Brown Butter Cheesecake will surely be a showstopper at any gathering. For more delightful ideas, consider experimenting with additional toppings or crusts, such as an almond or ginger snap crust!

Make Ahead Options

These Vanilla Bean Brown Butter Cheesakes are perfect for busy home cooks looking to save time! You can prepare the graham cracker crust up to 24 hours in advance—just make sure it’s completely cooled before storing it tightly wrapped in plastic wrap at room temperature. The filling can be mixed and refrigerated for up to 3 days; simply cover it with plastic wrap or transfer it to an airtight container to maintain its creamy texture. When you’re ready to bake, pour the chilled filling over the crust and bake as directed, ensuring you monitor the baking time. This way, you’ll enjoy a delicious dessert with minimal last-minute effort!

Expert Tips for Vanilla Bean Brown Butter Cheesecake

  • Room Temperature Ingredients: Ensure that all ingredients, especially cream cheese and eggs, are at room temperature for a smoother batter and creamier cheesecake.

  • Careful Butter Browning: Brown the unsalted butter until golden but watch closely. A few seconds too long can result in a burnt flavor, which can spoil your cheesecake.

  • Gentle Mixing: Mix the ingredients just until combined, especially when adding eggs. Overmixing can lead to a tough texture and cracks in your cheesecake.

  • Slow Cooling: Allow the cheesecake to cool gradually in the oven by leaving the door ajar for an hour after baking. This step helps to prevent surface cracks, ensuring a beautiful presentation.

  • Chill for Flavor: Refrigerate the cheesecake for at least 4 hours or overnight. This extensive chilling allows flavors to meld beautifully and makes for easier slicing.

These tips will help you create the perfect Vanilla Bean Brown Butter Cheesecake, ensuring a delightful treat for any occasion!

Vanilla Bean Brown Butter Cheesecake Recipe FAQs

How do I select ripe ingredients for my cheesecake?
Absolutely! When selecting your vanilla bean, look for ones that are plump, slightly oily, and fragrant—those dark, flexible pods contain the richest flavor. For the cream cheese, choose a brand that feels smooth and creamy. Fresh eggs should be clean, with unblemished shells—you want that vibrant yolk for color and richness. If you’re using sour cream, opt for full-fat versions for the best texture.

What are the best storage methods for leftover cheesecake?
Very! To store your leftover Vanilla Bean Brown Butter Cheesecake, wrap it tightly in plastic wrap or transfer it to an airtight container. This will keep it fresh in the refrigerator for up to 5 days. Remember, the cheesecake is much tastier after a day in the fridge—those flavors meld beautifully over time!

Can I freeze my cheesecake, and how should I do that?
Absolutely! If you’d like to freeze your cheesecake, first slice it into individual pieces. Wrap each slice tightly in plastic wrap, and then place them in a freezer-safe bag or container. Make sure to label them with the date; they can be frozen for up to 3 months! To thaw, simply transfer your slice to the refrigerator for several hours or overnight before enjoying.

What should I do if my cheesecake cracks during baking?
No worries! Cracks are common but can often be avoided with a few careful steps. Ensure you mix the batter just until combined—overmixing incorporates too much air. Also, allowing the cheesecake to cool gradually in the oven once baking is complete will help prevent temperature shock that can lead to cracking. If cracks still appear, you can always cover them with a delicious topping like whipped cream or fruit compote, making them part of the presentation!

Can pets enjoy a slice of this cheesecake?
Very! While your Vanilla Bean Brown Butter Cheesecake is an indulgent treat for you, it’s best to keep it away from furry friends. The ingredients, especially cream cheese and sugar, aren’t safe for pets in significant amounts. If you’re looking to treat your pet, consider whipping up a special dog-friendly dessert!

Are there any allergies I should consider when making this cheesecake?
Indeed! This cheesecake contains common allergens, including dairy (cream cheese, butter) and eggs, which can be triggers for some people. If you’re making it for someone with allergies or dietary restrictions, you might want to experiment with dairy-free cream cheese and egg substitutes such as aquafaba or flaxseed meal. Always double-check all ingredient labels for potential allergens!

https://www.recipesbynatalie.com/vanilla-bean-brown-butter-cheesecake/

Irresistible Vanilla Bean Brown Butter Cheesecake Recipe

Delight in this Vanilla Bean Brown Butter Cheesecake, featuring nutty brown butter and aromatic vanilla. A must-try for dessert lovers!
Prep Time 30 minutes
Cook Time 1 hour 5 minutes
Cooling Time 1 hour
Total Time 2 hours 35 minutes
Servings: 8 slices
Course: Dessert
Cuisine: American
Calories: 450

Ingredients
  

For the Crust
  • 1 cup graham cracker crumbs Consider using crushed digestive biscuits for a similar flavor
  • 1/4 cup unsalted butter Melted
  • 1/4 cup brown sugar Dark brown sugar intensifies the flavor
For the Filling
  • 1/2 cup unsalted butter Browned
  • 16 oz cream cheese Softened
  • 1 cup granulated sugar Adjust sweetness to preference
  • 2 tbsp vanilla bean paste or seeds Using pure vanilla extract is an alternative
  • 3 large eggs Incorporate one at a time
  • 1 cup sour cream Greek yogurt is a great substitute

Equipment

  • 9-inch springform pan
  • Mixing Bowl
  • Electric Mixer
  • Medium saucepan

Method
 

Step-by-Step Instructions
  1. Preheat your oven to 325°F (163°C).
  2. Combine the graham cracker crumbs, melted unsalted butter, and brown sugar. Press into a 9-inch springform pan.
  3. Bake for 10 minutes and let it cool.
  4. Melt the unsalted butter in a medium saucepan until golden brown.
  5. Beat softened cream cheese with granulated sugar until smooth.
  6. Add vanilla bean paste, then incorporate eggs one at a time.
  7. Fold in sour cream and browned butter.
  8. Pour cheesecake filling over crust.
  9. Bake for 55-65 minutes, until the edges are set.
  10. Cool gradually in the oven for 1 hour.
  11. Refrigerate for at least 4 hours or overnight before serving.

Nutrition

Serving: 1sliceCalories: 450kcalCarbohydrates: 36gProtein: 6gFat: 32gSaturated Fat: 18gPolyunsaturated Fat: 1gMonounsaturated Fat: 10gCholesterol: 85mgSodium: 320mgPotassium: 150mgFiber: 1gSugar: 24gVitamin A: 800IUCalcium: 100mgIron: 1mg

Notes

Room temperature ingredients ensure a smoother batter. Watch the butter closely while browning to avoid burning. Chill the cheesecake for optimal flavor.

Tried this recipe?

Let us know how it was!

Irresistible Pumpkin S’mores Cookies for a Cozy Fall Treat

As the crisp autumn air settles in and leaves begin to crunch underfoot, there’s nothing quite like the comforting scent of freshly baked cookies wafting through the house. One recipe that has quickly become my go-to is the Pumpkin S’mores Cookies. These delightful treats combine the soft, chewy texture of a cookie with the nostalgic flavors of s’mores, complete with warm pumpkin spices. They’re not just a perfect fall dessert; they also whip up in no time, making them a fantastic option for busy weekdays or cozy gatherings with friends. So, why not treat yourself to a batch of these scrumptious cookies? I’m sure the gooey goodness will bring a smile to your face! Curious about how to make your own Pumpkin S’mores Cookies? Keep reading!

Why Are These Cookies a Must-Try?

Fall Flavor Fusion: These Pumpkin S’mores Cookies beautifully marry warm pumpkin spices with classic s’mores elements, creating an irresistible taste experience.
Quick and Easy: Ready in just a few simple steps, they’re perfect for busy days when you crave a homemade treat.
Gooey Goodness: The melty chocolate and marshmallows make each bite a delightful blend of textures, ensuring satisfaction cookie after cookie.
Versatile Treat: Whether you serve them warm with milk or as part of a dessert spread, they’re sure to impress! Don’t forget to check out other favorites like Pumpkin Cream Cold or Chocolate Cranberry Cookies for more delicious options.
Crowd-Pleaser: With this unique twist on a beloved classic, everyone will be reaching for seconds at your next gathering!

Pumpkin S’mores Cookies Ingredients

  • For the Cookie Base

  • Unsalted Butter – Provides rich flavor and contributes to the cookie’s soft texture; ensure it’s at room temperature for easy mixing.

  • Brown Sugar – Adds moisture and a deeper flavor through caramelization; can be swapped with white sugar, but reduce sweetness.

  • Granulated Sugar – Sweetens the cookies while helping with browning; you can use just brown sugar if preferred.

  • Pumpkin Puree – Responsible for the cookies’ moistness and that delightful pumpkin flavor; ensure it’s 100% pure pumpkin puree and not pie filling.

  • Egg – Acts as a binder to keep your cookies together nicely.

  • Vanilla Extract – Enhances flavors and adds a touch of sweetness to the mix.

  • All-Purpose Flour – Provides structure; can substitute with a gluten-free blend if needed.

  • Baking Soda – Helps the cookies rise, creating that sought-after lighter texture.

  • Pumpkin Pie Spice – Infuses the cookies with autumnal spices like cinnamon and nutmeg; feel free to adjust to taste.

  • Salt – Balances out sweetness and is essential for flavor enhancement.

  • For the S’mores Elements

  • Chocolate Chips – Adds a rich chocolate flavor; feel free to use milk, dark, or white chocolate chips based on your preference.

  • Mini Marshmallows – Provide that gooey, chewy texture; consider using non-melting vegan marshmallows for a twist.

  • Graham Crackers – Adds crunch and classic s’mores flavor; can be replaced with crushed cookies or omitted entirely.

  • Optional Touch

  • Orange Food Coloring – A fun addition for a vibrant cookie color; just one or two drops should do!

By gathering these ingredients, you’ll be well on your way to creating delicious Pumpkin S’mores Cookies that are perfect for cozy fall gatherings!

Step‑by‑Step Instructions for Pumpkin S’mores Cookies

Step 1: Preheat and Prepare
Begin by preheating your oven to 350°F (175°C). While it heats, take a baking sheet and line it with parchment paper to prevent the cookies from sticking. This small step ensures easy cleanup and helps maintain the cookie’s soft texture as they bake.

Step 2: Cream the Buttery Mixture
In a large mixing bowl, combine room temperature unsalted butter, brown sugar, and granulated sugar. Using an electric mixer, beat them together on medium speed for about 2-3 minutes, until the mixture is light, fluffy, and pale in color. This important creaming step creates the perfect base for your Pumpkin S’mores Cookies.

Step 3: Mix in the Wet Ingredients
Next, add the pumpkin puree, egg, vanilla extract, and optional orange food coloring to the creamed butter and sugars. Mix on low speed until everything is fully incorporated and the mixture appears smooth. Be careful not to overmix, as you want the batter to remain light and airy.

Step 4: Whisk the Dry Ingredients
In a separate bowl, whisk together the all-purpose flour, baking soda, pumpkin pie spice, and salt. Ensure there are no lumps and the spices are evenly distributed. This step is essential for even seasoning and rising, laying the groundwork for the delightful flavors of your pumpkin-flavored cookies.

Step 5: Combine Wet and Dry Mixtures
Gradually add the dry mixture to the wet ingredients, mixing gently with a spatula or wooden spoon. Stir until just combined, making sure not to overmix, which could make the cookies tough. You should see traces of flour but no large pockets remaining. Your cookie dough is now ready for the s’mores elements!

Step 6: Fold in Chocolate and S’mores Goodies
Gently fold in the chocolate chips, mini marshmallows, and graham cracker pieces into the cookie dough. Stir until they are evenly dispersed throughout the dough, ensuring each cookie will be filled with delicious s’mores flavors. This step adds the signature gooeyness and crunch to your Pumpkin S’mores Cookies.

Step 7: Shape the Cookies
Using a tablespoon or cookie scoop, drop rounded balls of dough onto the prepared baking sheet. Make sure to leave about 2 inches of space between each dough ball to allow for spreading during baking. The dough should be soft but manageable, creating the perfect shape for your cookies.

Step 8: Add Extra Toppings
Before baking, take a few extra chocolate chips, marshmallows, and graham cracker pieces and gently press them into the tops of each cookie dough ball. This will give your cookies an eye-catching finish and ensure that every bite bursts with flavor. Get creative with the placements to make them visually appealing!

Step 9: Bake to Perfection
Place the baking sheet in the preheated oven and bake for 12 to 14 minutes. Keep a close eye on them; the edges should turn golden brown while the centers remain soft and slightly undercooked. This is key for achieving that delightful chewy texture in your Pumpkin S’mores Cookies.

Step 10: Cool and Enjoy
Once baked, remove the cookies from the oven and let them cool on the baking sheet for about 5 minutes. This allows them to set before transferring to a wire rack. After cooling completely, indulge in the ooey-gooey goodness of your Pumpkin S’mores Cookies, perfect for any fall gathering!

What to Serve with Pumpkin S’mores Cookies

As you cozy up with your freshly baked Pumpkin S’mores Cookies, consider pairing them with delicious sides to enhance your fall feast.

  • Warm Milk: The classic pairing brings out the soft, chewy texture of the cookies, making every bite a delightful experience.

  • Vanilla Ice Cream: A scoop alongside the cookies creates a heavenly contrast of temperatures, complementing the rich, gooey flavors perfectly.

  • Spiced Apple Cider: The warm, fragrant spices of apple cider mirror those in the cookies, creating a fall-themed beverage that warms the soul.

  • Roasted Pumpkin Seeds: These crunchy bites add a delightful textural contrast, echoing the pumpkin essence in your cookies.

  • Candied Pecans: Their sweet, nutty flavor brings another layer of warmth, making them a delightful snack to enjoy between bites of cookies.

  • Pumpkin Spice Latte: Treat yourself to this seasonal favorite. The rich coffee and spices echo the flavors in the cookies, making it the perfect cozy companion!

  • Caramel Sauce: Drizzle some warm caramel over the cookies or serve as a dip; the sweet richness complements the cookies’ flavors beautifully.

Indulging in these pairings will take your cookies from delightful to extraordinary, leaving everyone asking for more!

Expert Tips for Pumpkin S’mores Cookies

  • Room Temperature Ingredients: Ensure butter and egg are at room temperature for easier mixing, helping to create a creamy, well-blended dough.

  • Don’t Overmix: Combine wet and dry ingredients gently. Overmixing can lead to tough cookies instead of the soft, chewy texture you desire.

  • Mind the Baking Time: Keep a close eye on the baking time. Remove cookies while the centers are still soft to ensure that delightful chewiness in your Pumpkin S’mores Cookies.

  • Toppings Matter: Press additional chocolate chips and marshmallows onto the cookie tops before baking for a beautiful finish and extra gooeyness.

  • Proper Cooling: Allow cookies to cool on the baking sheet briefly before transferring them to a wire rack. This prevents them from breaking apart and retains their perfect soft texture.

Make Ahead Options

These Pumpkin S’mores Cookies are perfect for busy home cooks looking to save time! You can prepare the cookie dough up to 24 hours in advance by mixing it and storing it in an airtight container in the refrigerator. This ensures the flavors meld beautifully while maintaining the dough’s quality. Alternatively, you can freeze the dough for up to 3 months; just scoop the dough onto a baking sheet and freeze until solid, then transfer to a freezer bag. When ready to bake, simply thaw overnight in the refrigerator and bake as directed. You’ll enjoy the same delightful gooey texture and warmth as if they were made fresh from scratch!

How to Store and Freeze Pumpkin S’mores Cookies

Room Temperature: Store your cookies in an airtight container at room temperature for up to 2-3 days for optimal freshness.

Fridge: If you want to extend their life, refrigerate the cookies in an airtight container for up to a week. This will help maintain their soft texture.

Freezer: You can freeze the cookies for up to three months. Place them in a single layer on a baking sheet to freeze solid, then transfer to a freezer bag or container for longer-lasting enjoyment.

Reheating: When you’re ready to enjoy your frozen Pumpkin S’mores Cookies, simply thaw them in the fridge overnight and warm them in the microwave for about 10-15 seconds to bring back that gooey goodness!

Pumpkin S’mores Cookies Variations

Feel free to get creative with these cookies and customize them to suit your taste!

  • Chocolate Twist: Substitute regular chocolate chips with white chocolate or chocolate chunks for a deliciously different flavor. The creamy sweetness of white chocolate adds a whole new level of indulgence!

  • Marshmallow-Free: If you’re not in the mood for marshmallows, simply replace them with additional chocolate chips or chunks for extra chocolate goodness. This will still give you that chewy texture while keeping it straightforward and delightful.

  • Spice it Up: Adjust the amount of pumpkin pie spice to kick up the flavor, or experiment with individual spices like nutmeg or cardamom. A touch more cinnamon creates a warm, cozy experience that’s perfect for autumn.

  • Nutty Crunch: Add chopped walnuts or pecans into the dough for an extra crunch that pairs perfectly with the softness of the cookies. The nuts will bring a lovely hint of richness to each bite.

  • Gluten-Free Option: Swap out the all-purpose flour for a gluten-free baking blend to make these cookies friendly for everyone. Just be sure to check the consistency of your dough!

  • Double the Graham: Use crushed graham crackers in the dough instead of just pieces for a more intense graham flavor throughout. This twist enhances the classic s’mores experience in every bite.

  • Pumpkin Spice Drizzle: Consider drizzling a homemade pumpkin spice icing over cooled cookies for an extra sweet finish that beautifully complements the pumpkin flavor. It’s a fun and delicious way to up your cookie game!

  • Stuffed Cookies: Create a secret center by placing a chocolate or caramel candy in the middle of the dough ball before baking. This will result in a delightful surprise when you take a bite!

Don’t hesitate to explore these variations as you make your own Pumpkin S’mores Cookies. And for more tasty delights, try your hand at Bake Cookies Cream or the fabulous Chocolate Cranberry Cookies! Happy baking!

Pumpkin S’mores Cookies Recipe FAQs

How do I know if my pumpkin puree is good?
Absolutely! You’ll want to make sure your pumpkin puree is 100% pure with no added sugars or spices. Check the label to avoid canned pumpkin pie filling, which can affect the cookies’ flavor. Fresh puree should have a bright, deep orange color without dark spots or a watery texture.

How should I store Pumpkin S’mores Cookies?
For sure! Store your Pumpkin S’mores Cookies in an airtight container at room temperature for 2-3 days. If you want to keep them for a bit longer, refrigerate them; they’ll remain fresh for up to a week. Just ensure they are completely cooled before sealing them to avoid moisture buildup!

Can I freeze Pumpkin S’mores Cookies?
Yes, indeed! To freeze, allow the baked cookies to cool completely first. Then, place them in a single layer on a baking sheet and freeze until solid. Transfer to a freezer bag or container, and they’ll stay fresh for up to 3 months. When ready to enjoy, thaw them overnight in the refrigerator and warm briefly in the microwave for that fresh-out-of-the-oven taste.

What can I do if my cookies come out too crumbly?
Oh no! If your cookies turn out crumbly, it might be due to overmixing your dough or too much flour. To troubleshoot, keep the dry ingredients to a minimum and mix just until combined. If you find yourself with a dry dough, try adding a little more pumpkin puree, one tablespoon at a time, until you reach the desired consistency.

Are there any dietary considerations for these cookies?
Indeed! If you have any allergies, these cookies contain gluten (from flour) and dairy (from butter). For gluten-free versions, you can substitute with a gluten-free flour blend. If you’re concerned about dairy, try using vegan butter and non-melting vegan marshmallows. Always double-check all labels to ensure they meet your dietary needs.

Can I make these cookies ahead of time?
Absolutely! You can whip up the cookie dough ahead and store it in the refrigerator for up to 2 days. Alternatively, you can also freeze the unbaked dough balls for up to a year. Just thaw in the refrigerator overnight before baking whenever you need a fresh batch of Pumpkin S’mores Cookies.

Pumpkin S’mores Cookies

Irresistible Pumpkin S’mores Cookies for a Cozy Fall Treat

Enjoy the delightful flavors of Pumpkin S’mores Cookies, a perfect fall dessert combining warm pumpkin spices with classic s’mores elements.
Prep Time 15 minutes
Cook Time 14 minutes
Cooling Time 5 minutes
Total Time 34 minutes
Servings: 24 cookies
Course: Dessert
Cuisine: American
Calories: 150

Ingredients
  

For the Cookie Base
  • 1 cup Unsalted Butter Room temperature
  • 1 cup Brown Sugar Packed
  • 1/2 cup Granulated Sugar
  • 1 cup Pumpkin Puree 100% pure
  • 1 large Egg
  • 2 teaspoons Vanilla Extract
  • 2 cups All-Purpose Flour Can substitute with gluten-free blend
  • 1 teaspoon Baking Soda
  • 2 teaspoons Pumpkin Pie Spice Adjust to taste
  • 1/2 teaspoon Salt
For the S'mores Elements
  • 1 cup Chocolate Chips Milk, dark, or white
  • 1 cup Mini Marshmallows Optional: non-melting vegan
  • 1 cup Graham Crackers Crushed or omitted
Optional Touch
  • 1-2 drops Orange Food Coloring For vibrant color

Equipment

  • Mixing Bowl
  • Electric Mixer
  • Baking Sheet
  • Parchment paper
  • Spatula

Method
 

Step‑by‑Step Instructions for Pumpkin S’mores Cookies
  1. Preheat your oven to 350°F (175°C) and line a baking sheet with parchment paper.
  2. In a mixing bowl, cream together unsalted butter, brown sugar, and granulated sugar until light and fluffy.
  3. Mix in pumpkin puree, egg, vanilla extract, and optional orange food coloring until smooth.
  4. In another bowl, whisk together all-purpose flour, baking soda, pumpkin pie spice, and salt.
  5. Gradually add the dry mixture to the wet ingredients and stir until just combined.
  6. Fold in chocolate chips, mini marshmallows, and graham cracker pieces until evenly dispersed.
  7. Drop rounded balls of dough onto the prepared baking sheet, leaving space in between.
  8. Press extra chocolate chips, marshmallows, and graham crackers onto the tops of each cookie ball.
  9. Bake for 12 to 14 minutes until the edges are golden and the centers are soft.
  10. Cool on the baking sheet for 5 minutes before transferring to a wire rack.

Nutrition

Serving: 1cookieCalories: 150kcalCarbohydrates: 22gProtein: 2gFat: 7gSaturated Fat: 4gPolyunsaturated Fat: 1gMonounsaturated Fat: 2gCholesterol: 20mgSodium: 100mgPotassium: 80mgFiber: 1gSugar: 10gVitamin A: 500IUCalcium: 20mgIron: 1mg

Notes

Ensure butter and egg are at room temperature for easier mixing. Don't overmix the dough for the ideal texture. For best results, watch the baking time closely and allow cookies to cool properly after baking.

Tried this recipe?

Let us know how it was!

Jalapeno Popper Cucumber Salad for a Cool Summer Twist

As I sliced into the cool, crisp cucumbers, I could already envision the refreshing Jalapeno Popper Cucumber Salad being the star of my next summer gathering. With just 5 minutes of prep time, this quick and vibrant dish is not only a crowd-pleaser but also a delightful, low-carb option for anyone craving a healthy twist on classic flavors. The combination of spicy jalapenos and creamy cheese creates a tantalizing experience that’s perfect for barbecues, lunchboxes, or simply as a refreshing snack on a hot day. Who could resist the idea of enjoying a salad that captures the essence of a jalapeno popper without the extra hassle? Ready to dive into a burst of flavor? Let’s get started!

Why Is Jalapeno Popper Cucumber Salad So Great?

Quick and Easy: Made in just five minutes, this salad requires minimal prep, making it perfect for spontaneous summer gatherings.

Refreshing Flavor: The crunchy cucumbers paired with spicy jalapenos and creamy cheese create a flavor explosion that dances on your taste buds.

Versatile: Customize with different veggies or cheeses to suit your taste. Imagine adding some fresh herbs for a twist!

Low-Carb Delight: This salad is keto-friendly, offering a guilt-free way to enjoy your favorite flavors without the carbs.

Crowd-Pleaser: Whether at a barbecue or picnic, this vibrant dish is sure to impress and disappear faster than you can make it. Check out my other favorites like Strawberry Spinach Salad to complement your meal!

Jalapeno Popper Cucumber Salad Ingredients

For the Salad

  • Persian Cucumbers – These provide crunch and a refreshing flavor; you can substitute any variety, but Persian cucumbers hold up best.
  • Red Onion – Adds sweetness and a slight bite; consider using green onions for a milder flavor.
  • Jalapeno – Offers heat and spice; replace with a mild chili if you prefer less heat.
  • Cream Cheese – Acts as the creamy element, binding the salad together; Greek yogurt can be used for a lighter option.
  • Greek Yogurt/Sour Cream – Adds tanginess and smoothness; use more cream cheese for a richer flavor if needed.
  • Garlic Powder – Provides a savory depth; fresh minced garlic can enliven the taste with more intensity.
  • Smoked Paprika – Enhances the smoky flavor profile; substitute regular paprika for a milder taste if desired.
  • Coarse Sea Salt – Boosts overall flavor; adjust according to your taste preferences.
  • Sharp Cheddar Cheese – Introduces a rich, nutty flavor; Monterey Jack can create a creamier texture if you prefer.
  • Soy Sauce (optional) – Adds umami depth; use low-sodium soy sauce for a healthier twist.
  • Sesame Seeds – For garnish, adding texture and visual appeal; you’ll love how they elevate the dish!

Feel free to explore the unique flavors of this Jalapeno Popper Cucumber Salad, and let your taste buds have a refreshing experience!

Step‑by‑Step Instructions for Jalapeno Popper Cucumber Salad

Step 1: Slice the Cucumbers
Begin by washing 2-3 Persian cucumbers thoroughly under cool water. Using a sharp knife or a mandoline, slice them into ½ cm (¼”) thick pieces, creating uniform rounds that will provide the perfect crunch in your Jalapeno Popper Cucumber Salad. Arrange the slices on a large serving platter or in a mixing bowl, ensuring they remain neat and vibrant.

Step 2: Prepare the Veggies
Next, finely chop half a medium red onion and one jalapeno pepper, removing the seeds for a milder taste if desired. Sprinkle these over the cucumber slices, showcasing their colors and adding a delightful bite. The spicy jalapeno will offer a kick, while the onion contributes subtle sweetness, perfectly complementing the cucumber’s freshness.

Step 3: Mix the Creamy Base
In a separate mixing bowl, combine 4 oz. of softened cream cheese with ¼ cup of Greek yogurt, a teaspoon of garlic powder, and a teaspoon of smoked paprika. Use a spatula to blend these ingredients until smooth and creamy, creating a luscious dressing that will bind the salad. This combination will add both richness and flavor to your Jalapeno Popper Cucumber Salad.

Step 4: Combine the Ingredients
Gently fold the creamy mixture into the cucumber, red onion, and jalapeno mixture. Use a large spoon to mix thoroughly, ensuring every ingredient is evenly coated while maintaining the integrity of the cucumber slices. This step should only take about a minute, as you want to avoid bruising the cucumbers too much for a beautiful presentation.

Step 5: Add Cheese and Season
Sprinkle ½ cup of shredded sharp cheddar cheese over the top of your salad. Then, season with a pinch of coarse sea salt to enhance the overall flavors. For an optional umami twist, consider adding a dash of soy sauce. Carefully fold again to incorporate everything, ensuring the cheese is mixed in without losing the salad’s structure.

Step 6: Chill and Garnish
Transfer the salad to an airtight container or keep it on the serving platter. For the best flavor, refrigerate for about 15-20 minutes to meld the ingredients together. Once chilled, sprinkle sesame seeds over the top for a delightful garnish that adds texture. Your Jalapeno Popper Cucumber Salad is now ready to serve!

Make Ahead Options

These Jalapeno Popper Cucumber Salads are a fantastic choice for meal prep, saving you precious time during busy weekdays! You can slice the Persian cucumbers and chop the red onion and jalapeno up to 24 hours in advance, storing them separately in airtight containers to maintain their crunch. Additionally, the creamy dressing made from cream cheese, Greek yogurt, and spices can be prepared and refrigerated for 3 days. When you’re ready to serve, simply combine the prepped ingredients, add the cheese and seasonings, and give it a gentle toss. By prepping in advance, you’ll enjoy a fresh, delicious salad that’s just as satisfying as when made from scratch!

Storage Tips for Jalapeno Popper Cucumber Salad

Fridge: Store the salad in an airtight container for up to 1 day. This helps maintain its freshness and crisp texture while preventing the dressing from becoming too runny due to cucumber moisture.

Freezer: It is not recommended to freeze the Jalapeno Popper Cucumber Salad, as cucumbers can become mushy upon thawing, losing their delightful crunch.

Reheating: If serving leftover salad that has been chilled, gently toss it to redistribute the dressing before serving. Enjoy it cold for the best flavor experience!

Jalapeno Popper Cucumber Salad Variations

Customize this vibrant salady dish to suit your taste buds! Each twist can elevate your eating experience to a whole new level.

  • Cheese Swap: Replace sharp cheddar with feta or goat cheese for a tangy twist that brings a creamy richness.
  • Extra Crunch: Add bell peppers or corn for a burst of color and texture, bringing a fresh garden feel to your salad.
  • Low-Fat Option: Use Greek yogurt in place of cream cheese for a lighter version without sacrificing creaminess. The tanginess will be a delightful surprise!
  • Herb Infusion: Toss in some fresh herbs like cilantro or dill to brighten up your salad, adding a refreshing aroma that sings of summer.
  • Heat Level: For a milder kick, substitute jalapenos with banana peppers, perfect for those who love flavor without the heat.
  • Nutty Touch: Add toasted pine nuts or sliced almonds for a crunchy contrast to the creamy base, enriching the texture with nutty goodness.
  • Vegan Delight: Switch to dairy-free cream cheese and yogurt alternatives for a fully vegan-friendly delicious version. You won’t miss the cheese!
  • Asian Twist: Drizzle with sesame oil and sprinkle with thinly sliced scallions for an East Asian flavor infusion that pairs well with grilled meats.

Feel free to mix and match these variations! And if you’re looking for other refreshing recipes, consider trying my Tuna Salad Sandwich or the delightful Italian Chopped Salad. Enjoy experimenting!

What to Serve with Jalapeno Popper Cucumber Salad

Elevate your summer gatherings with delightful pairings that truly shine alongside this refreshing dish.

  • Grilled Chicken Skewers: Juicy and smoky, the tender meat complements the salad’s cool crunch, making it a perfect protein addition.
  • Corn on the Cob: Sweet and buttery, this classic summer side balances the heat of the jalapenos while enhancing the fresh flavors.
  • Crusty Bread: A warm, crusty loaf is ideal for scooping up the creamy salad, providing heartiness to the light bites.
  • Watermelon Feta Salad: The sweetness of watermelon mixed with tangy feta brings a juicy and refreshing contrast to the spiced salad.
  • Classic Coleslaw: Crunchy and creamy, coleslaw offers a different texture while matching the vibrant flavors of your dish.
  • Sparkling Lemonade: Refreshing and tart, this bubbly drink perfectly contrasts the creaminess of the salad while enhancing the overall experience.
  • Cheesy Garlic Bread: With its crispy edges and gooey cheese, it’s a fulfilling accompaniment that complements the salad’s flavor profile beautifully.
  • Peach Sangria: Sweet, fruity, and slightly tangy, this delightful drink adds a lovely summery vibe to your meal.
  • Mini Caprese Skewers: Fresh mozzarella, basil, and cherry tomatoes offer a bright burst of flavors that harmonize with your savory salad.

Expert Tips for Jalapeno Popper Cucumber Salad

Cucumber Choice: Use Persian cucumbers for their crisp texture and minimal seeds. Avoid overripe cucumbers as they can be watery and affect the salad’s crunch.

Mixing Method: Always mix the creamy ingredients in a separate bowl before combining with the veggies. This ensures an even distribution in your Jalapeno Popper Cucumber Salad without bruising the cucumbers.

Chill Time: Allow the salad to chill for at least 15-20 minutes before serving. Chilling enhances flavors and keeps the salad refreshing.

Ingredient Prep: Chop the jalapenos and onions finely to ensure their flavors distribute evenly throughout the salad. This balances the heat and sweetness perfectly.

Serving Fresh: Enjoy this salad within a day for the best texture. Cucumbers release moisture over time, which can make the dressing watery if left too long.

Jalapeno Popper Cucumber Salad Recipe FAQs

What cucumbers are best for this salad?
Absolutely! I recommend using Persian cucumbers for their crisp texture and minimal seeds. You can use other varieties such as English cucumbers, but stay away from overripe ones, as they can be watery and affect the salad’s crunch.

How should I store leftover Jalapeno Popper Cucumber Salad?
Store the salad in an airtight container in the refrigerator for up to 1 day. This helps maintain its freshness and crisp texture. Just remember, cucumbers release moisture over time, which can make the dressing a bit runny, so consume it sooner rather than later!

Can I freeze Jalapeno Popper Cucumber Salad?
Not recommended! The texture of cucumbers changes drastically after freezing, resulting in a mushy salad when thawed. Instead, enjoy this fresh and zesty salad right away for the best experience!

What can I do if my cucumbers start to wilt?
If your cucumbers are wilting, you can try adding a pinch of salt and letting them sit in a colander for about 15 minutes to draw out excess moisture. Afterward, pat them dry with a paper towel before mixing them back into the salad for a refreshing bite.

Is this salad suitable for those with dairy allergies?
You can absolutely customize the Jalapeno Popper Cucumber Salad to be dairy-free! Replace cream cheese and Greek yogurt with dairy-free alternatives, such as cashew or almond cream cheese, and plant-based yogurt. This way, everyone can enjoy the delightful flavors!

How can I spice it up more?
If you’re looking for an extra kick, consider adding more chopped jalapenos or even some diced serrano peppers for additional heat. You could also toss in some sliced radishes for a peppery crunch that complements the creamy elements beautifully!

Jalapeno Popper Cucumber Salad

Jalapeno Popper Cucumber Salad for a Cool Summer Twist

This refreshing Jalapeno Popper Cucumber Salad offers a low-carb twist on classic flavors, perfect for summer gatherings.
Prep Time 5 minutes
Chill Time 20 minutes
Total Time 25 minutes
Servings: 4 cups
Course: Salad
Cuisine: American
Calories: 220

Ingredients
  

For the Salad
  • 2-3 pieces Persian Cucumbers These provide crunch and a refreshing flavor.
  • 0.5 medium Red Onion Adds sweetness and a slight bite.
  • 1 piece Jalapeno Offers heat and spice.
  • 4 oz. Cream Cheese Acts as the creamy element.
  • 0.25 cup Greek Yogurt Adds tanginess and smoothness.
  • 1 tsp Garlic Powder Provides a savory depth.
  • 1 tsp Smoked Paprika Enhances the smoky flavor profile.
  • to taste tsp Coarse Sea Salt Boosts overall flavor.
  • 0.5 cup Sharp Cheddar Cheese Introduces a rich, nutty flavor.
  • to taste tsp Soy Sauce (optional) Adds umami depth if desired.
  • to taste tsp Sesame Seeds For garnish, adding texture.

Equipment

  • Mixing Bowl
  • cutting board
  • knife
  • Spatula

Method
 

Step-by-Step Instructions
  1. Slice the Cucumbers: Wash the cucumbers thoroughly and slice them into ½ cm thick pieces.
  2. Prepare the Veggies: Finely chop the red onion and jalapeno pepper, then sprinkle over the cucumber slices.
  3. Mix the Creamy Base: In a bowl, combine cream cheese, Greek yogurt, garlic powder, and smoked paprika until smooth.
  4. Combine the Ingredients: Gently fold the creamy mixture into the veggies.
  5. Add Cheese and Season: Sprinkle cheddar cheese and season with salt and optional soy sauce.
  6. Chill and Garnish: Refrigerate for 15-20 minutes and garnish with sesame seeds before serving.

Nutrition

Serving: 1cupCalories: 220kcalCarbohydrates: 10gProtein: 8gFat: 18gSaturated Fat: 10gPolyunsaturated Fat: 1gMonounsaturated Fat: 7gCholesterol: 40mgSodium: 300mgPotassium: 250mgFiber: 2gSugar: 3gVitamin A: 600IUVitamin C: 15mgCalcium: 200mgIron: 1mg

Notes

For best results, enjoy the salad within a day to maintain freshness and texture.

Tried this recipe?

Let us know how it was!

Soul-Warming Gumbo for Cozy Nights In

As I lifted the lid from the pot, a wave of fragrant spices enveloped me like a warm hug—this is the kind of experience that only a bowl of classic Cajun gumbo can deliver. Rich and hearty, this delicious stew combines the warmth of andouille sausage, the tenderness of shrimp, and the sweetness of vegetables in a symphony of flavors. It’s the ultimate comfort food, ideal for cozy family gatherings or when the chill of the evening air demands something special. While it does take time to prepare, the reward is an unforgettable depth of flavor that will linger long after the last bite. Ready to bring a taste of Louisiana right into your kitchen? Dive into this delightful journey of cooking gumbo, where tradition meets irresistible warmth! What would you serve alongside this cozy masterpiece?

Why is Gumbo the Ultimate Comfort Food?

Comforting, Hearty Dish: There’s nothing like a bowl of hearty gumbo to warm you up on a chilly night. Bold, Rich Flavors: The blend of spices and ingredients creates a depth of flavor that dances on your palate—think smoky sausage and sweet, tender shrimp. Crowd-Pleasing Delight: Perfect for family gatherings, it’s a dish that brings everyone together. Versatile Options: Customize your gumbo by substituting proteins or adjusting the heat level to suit your tastes. Time Well Spent: While the cooking process may take a little time, the aroma wafting through your home is worth every moment, creating the anticipation for something truly special. Serve it alongside some homemade cornbread for a complete meal that’s sure to impress!

Gumbo Ingredients

For the Roux
Unsalted Butter – ¾ cup, this forms the base and adds richness.
All-Purpose Flour – 1 cup, combined with butter to create a deep flavor that’s essential for gumbo.

For the Vegetables
Celery – 2 ribs, chopped; it adds a lovely crunch and depth to your gumbo’s flavor profile.
Yellow Onion – 1 large, chopped; enhances the aromatic foundation of the dish.
Green Bell Pepper – 1 large, chopped; known as part of “The Holy Trinity” in Cajun cooking, contributing both sweetness and texture.
Garlic – 2 teaspoons, minced; elevates the dish with its pungent flavor.

For the Stew
Beef Broth – 10 cups; serves as the flavorful liquid base for your gumbo, enhancing richness.
Andouille Sausage – 14 ounces; the heart of the gumbo, imparting smokiness and a bit of spice.
Stewed Tomatoes – 1 can (14.5 ounces); balances the dish with acidity and sweetness.
Tomato Sauce – 1 can (6 ounces); adds body and deepens the flavor of your gumbo.
Hot Sauce – 2 tablespoons; adjust based on your spice tolerance to kick up the heat.
White Sugar – 1 tablespoon; mellows the acidity from the tomatoes, bringing depth to the flavor.
Cajun Seasoning – ½ teaspoon; essential for authenticity and adds that distinct gumbo taste.
Dried Thyme – ½ teaspoon; infuses earthy notes that enhance the overall flavor.
Gumbo File Powder – 4 teaspoons, divided; adds unique flavor and thicken your gumbo, also a staple in the dish.
Bay Leaves – 4; infuses the stew with delightful flavor during simmering—remember to remove before serving.

For the Seafood
Medium Shrimp – 3 pounds, peeled and deveined; adds luxurious seafood richness to this gumbo masterpiece.

For the Finish
Worcestershire Sauce – 2 tablespoons; contributes umami richness and depth.
White Rice – Essential for serving; acts as a comforting base that absorbs all the wonderful flavors of the gumbo.

Now that you have all the ingredients ready, let’s transform these into a soul-warming gumbo that encapsulates the heart of Cajun cuisine!

Step‑by‑Step Instructions for Classic Cajun Gumbo with Andouille Sausage and Shrimp

Step 1: Prepare the Roux
In a 6-quart pot over medium-low heat, melt ¾ cup of unsalted butter. Once melted, gradually add 1 cup of all-purpose flour while whisking continuously. Keep stirring for about 30 to 40 minutes until the mixture reaches a deep brown color, similar to chocolate. This roux is a key element in creating the rich, nutty flavor of your gumbo.

Step 2: Cook Vegetables
Once your roux is ready, quickly add 2 ribs of chopped celery, 1 chopped large yellow onion, 1 chopped green bell pepper, and 2 teaspoons of minced garlic. Cook this aromatic mixture for about 8 to 12 minutes, stirring frequently, until the vegetables soften and their colorful hues brighten. This step builds a flavorful base for your Classic Cajun Gumbo.

Step 3: Add Broth and Simmer
Gradually whisk in 10 cups of beef broth into the vegetable and roux mixture. Increase the heat to bring the mixture to a rolling boil, which should take about 15 to 20 minutes. Keep an eye on the bubbles; they should signal a lively cooking stage where flavors begin to meld beautifully in your gumbo.

Step 4: Combine Ingredients
Reduce the heat to low and add in 14 ounces of sliced andouille sausage, 1 can of stewed tomatoes, 1 can of tomato sauce, 2 tablespoons of hot sauce, 1 tablespoon of white sugar, ½ teaspoon of Cajun seasoning, ½ teaspoon of dried thyme, and 4 bay leaves. Allow the gumbo to simmer uncovered for about 45 minutes, stirring occasionally to ensure nothing sticks to the bottom.

Step 5: Finish Flavoring
After the initial simmering, stir in 2 teaspoons of gumbo file powder, which will enhance both the flavor and texture of your gumbo. Continue to simmer the mixture for an additional 15 minutes, allowing the spices and thickening agents to meld together, resulting in a deep, complex taste that is the hallmark of gumbo.

Step 6: Add Shrimp Finally
Finally, add 3 pounds of peeled and deveined medium shrimp along with 2 tablespoons of Worcestershire sauce. Cook over low heat for 45 to 60 minutes, until the shrimp turn opaque and tender. During this time, the seafood infuses the gumbo with a delightful richness, bringing the dish to its savory peak.

Step 7: Serve
Before serving, stir in the remaining 2 teaspoons of gumbo file powder to finish off your Classic Cajun Gumbo. Ladle the luscious stew over a bed of cooked white rice in bowls, ensuring to capture all the delightful flavors. Enjoy this soul-warming dish hot, perfect for chilly nights and gatherings with loved ones!

Expert Tips for the Best Gumbo

  • Master the Roux: Constant stirring is crucial while making the roux to prevent burning. A dark roux adds depth and flavor to your gumbo.

  • Vegetable Substitutions: Feel free to personalize your gumbo by switching the vegetables. Green onions can replace celery, while red bell peppers can add more sweetness.

  • Let It Rest: For the best flavor, allow your gumbo to rest overnight in the fridge. This enhances the rich taste, making each bite even more satisfying.

  • Adjust the Spice: Customize the heat level by varying the amount of Cajun seasoning and hot sauce to match your preference for spice in your gumbo.

  • Don’t Rush the Simmer: Letting the gumbo simmer slowly helps blend all the flavors beautifully, creating a robust and comforting dish that’s perfect for cozy nights in.

How to Store and Freeze Gumbo

Fridge: Store any leftover gumbo in an airtight container in the refrigerator for up to 3 days. Make sure it’s cooled to room temperature before sealing to avoid condensation.

Freezer: Gumbo can be frozen for up to 3 months. Ladle it into freezer-safe containers, leaving some space at the top for expansion. Avoid freezing with rice to maintain texture.

Reheating: Thaw in the refrigerator overnight before reheating. Heat gently on the stovetop or in the microwave until heated through, adding a splash of broth if needed to restore consistency.

Airtight Guidance: Always ensure containers are airtight to prevent freezer burn and to keep the gumbo’s delicious flavors intact for when you’re ready to enjoy it again.

Make Ahead Options

These Classic Cajun Gumbo options are perfect for meal prep enthusiasts! You can prepare the roux (¾ cup unsalted butter and 1 cup all-purpose flour) up to 24 hours in advance; simply let it cool, then refrigerate in an airtight container to maintain its rich, nutty flavor. Additionally, chop the vegetables (celery, onion, bell pepper, and garlic) and store them in the fridge for up to 3 days. When you’re ready to enjoy your gumbo, simply cook the roux, sauté the veggies, and add the broth and other ingredients as outlined in the recipe. This way, you’ll have a hearty meal ready with minimal effort on busy weeknights—just as delicious as if you made it all at once!

Gumbo Variations & Substitutions

Get ready to make this gumbo not just a meal, but your own culinary canvas!

  • Seafood Swap: Substitute shrimp with crab or chicken for a delightful change in protein that still delivers satisfaction.

  • Add Okra: Toss in fresh or frozen okra for that classic Southern texture and a hint of natural thickening.

  • Vegetable Twist: Replace celery with sliced green onions for a milder taste, or try using yellow squash for a fresh spin.

  • Spice It Up: Amp up the heat by adding cayenne pepper or a drop more hot sauce, tailoring the spice level to your family’s tastes.

  • Herb Options: Feel adventurous? Incorporate fresh herbs like parsley or cilantro right before serving for a brightness that contrasts the rich flavors.

  • Gluten-Free Roux: Instead of all-purpose flour, use a combination of cornstarch and a gluten-free flour blend to keep the roux deliciously thick without gluten.

  • Creamy Add-in: For a luxuriously creamy gumbo, swirl in a bit of heavy cream just before serving—perfect for indulgent nights in.

  • Spice Variety: Experiment with additional spices; smoked paprika can enhance the smokiness, adding a layer of depth that’s truly heartwarming.

Whichever path you take in personalizing your gumbo, it’s sure to be a delightful masterpiece. For a more traditional flavor, you might also consider making your own Cajun seasoning to elevate your dish even further. Don’t forget to serve your gumbo with some comforting homemade cornbread to complete the experience!

What to Serve with Classic Cajun Gumbo with Andouille Sausage and Shrimp

There’s just something magical about pairing gumbo with complementary sides that enhance its warm, soulful flavors.

  • White Rice: A classic accompaniment, it absorbs the rich, flavorful broth of the gumbo, making each bite delightful.

  • Homemade Cornbread: The buttery sweetness of cornbread creates a perfect balance with the spicy, smoky notes of the gumbo—it’s a comforting duo.

  • Collard Greens: With their earthy flavor and slight bitterness, these greens add a refreshing contrast to the gumbo’s richness, providing a hearty touch.

  • Crispy Fried Okra: The crunchiness of fried okra adds a fun texture while staying true to the southern flair. Dip them in the gumbo for extra flavor!

  • Garlic Bread: A warm loaf of garlicky goodness is perfect for mopping up every last drop of gumbo. Its crunchy exterior complements the stew’s velvety texture.

  • Pineapple Upside-Down Cake: For dessert, this sweet treat adds a fruity finish that cleanses the palate nicely after the spiciness of gumbo. It’s a nostalgic favorite.

Classic Cajun Gumbo with Andouille Sausage and Shrimp Recipe FAQs

How do I choose the best shrimp for my gumbo?
Absolutely! Look for medium-sized shrimp that are fresh, firm, and have a mild ocean scent. If buying frozen, ensure they’re labeled “peeled and deveined” for convenience. I recommend avoiding shrimp with dark spots or an overly strong fishy smell, as these can signal poor freshness.

How should I store leftover gumbo?
Very simple! Store any leftover gumbo in an airtight container in the refrigerator for up to 3 days. Make sure it cools to room temperature before sealing; this will help avoid excess condensation and keep the flavors locked in for your next serving!

Can I freeze my gumbo, and if so, how?
Of course! To freeze gumbo, ladle it into freezer-safe containers, leaving some space at the top for expansion. You can freeze it for up to 3 months. Just remember not to freeze it with rice to maintain the best texture! When ready to enjoy, thaw in the refrigerator overnight and reheat on the stovetop or in the microwave, adding a splash of broth if it looks thick.

What are some common troubleshooting tips for gumbo?
If your gumbo turns out too thick, stir in a little beef broth or water to reach the desired consistency. Conversely, if it’s too thin, let it simmer longer to thicken up. If you find the flavors lacking, don’t hesitate to adjust with salt or more Cajun seasoning—tasting is key! Your gumbo should have a robust, well-balanced flavor.

Are there any dietary considerations I should be aware of?
Very important! If you’re cooking for anyone with allergies, be mindful that andouille sausage and shrimp can trigger reactions. You can swap shrimp for chicken or omit the sausage entirely to suit dietary preferences, and there are various gluten-free broth options available for those sensitive to gluten. Always check labels when purchasing store-bought products!

How do I know when my gumbo is done cooking?
The key signs are tender shrimp and a rich aroma wafting through your kitchen. Cook until the shrimp are opaque, which usually takes about 45-60 minutes after adding them to the pot. The gumbo should be thick, creamy, and full of flavors—just what you want in a soul-warming dish!

Gumbo

Soul-Warming Gumbo for Cozy Nights In

This classic Cajun gumbo combines andouille sausage, shrimp, and aromatic vegetables for a comforting dinner that warms the soul.
Prep Time 30 minutes
Cook Time 3 hours
Total Time 3 hours 30 minutes
Servings: 8 bowls
Course: Dinner
Cuisine: Cajun, Southern
Calories: 450

Ingredients
  

For the Roux
  • ¾ cup Unsalted Butter this forms the base and adds richness.
  • 1 cup All-Purpose Flour combined with butter to create a deep flavor that's essential for gumbo.
For the Vegetables
  • 2 ribs Celery chopped; it adds a lovely crunch and depth to your gumbo's flavor profile.
  • 1 large Yellow Onion chopped; enhances the aromatic foundation of the dish.
  • 1 large Green Bell Pepper chopped; known as part of 'The Holy Trinity' in Cajun cooking.
  • 2 teaspoons Garlic minced; elevates the dish with its pungent flavor.
For the Stew
  • 10 cups Beef Broth serves as the flavorful liquid base for your gumbo.
  • 14 ounces Andouille Sausage the heart of the gumbo, imparting smokiness and a bit of spice.
  • 1 can (14.5 ounces) Stewed Tomatoes balances the dish with acidity and sweetness.
  • 1 can (6 ounces) Tomato Sauce adds body and deepens the flavor of your gumbo.
  • 2 tablespoons Hot Sauce adjust based on your spice tolerance.
  • 1 tablespoon White Sugar mellows the acidity from the tomatoes.
  • ½ teaspoon Cajun Seasoning essential for authenticity.
  • ½ teaspoon Dried Thyme infuses earthy notes that enhance the overall flavor.
  • 4 teaspoons Gumbo File Powder divided; adds unique flavor and thickens your gumbo.
  • 4 Bay Leaves infuses the stew with delightful flavor during simmering.
For the Seafood
  • 3 pounds Medium Shrimp peeled and deveined; adds luxurious seafood richness.
For the Finish
  • 2 tablespoons Worcestershire Sauce contributes umami richness and depth.
  • White Rice essential for serving.

Equipment

  • 6-quart pot

Method
 

Step‑by‑Step Instructions
  1. In a 6-quart pot over medium-low heat, melt the unsalted butter. Gradually add the all-purpose flour while whisking continuously for about 30 to 40 minutes until the roux reaches a deep brown color.
  2. Quickly add the chopped celery, yellow onion, green bell pepper, and minced garlic to the roux. Cook for about 8 to 12 minutes until the vegetables soften.
  3. Gradually whisk in the beef broth and increase the heat to bring the mixture to a rolling boil, which should take about 15 to 20 minutes.
  4. Reduce the heat to low and add the sliced andouille sausage, stewed tomatoes, tomato sauce, hot sauce, white sugar, Cajun seasoning, dried thyme, and bay leaves. Simmer uncovered for about 45 minutes.
  5. Stir in 2 teaspoons of gumbo file powder after the initial simmering and continue to simmer for an additional 15 minutes.
  6. Add the medium shrimp and Worcestershire sauce, cook over low heat for 45 to 60 minutes until the shrimp turn opaque and tender.
  7. Before serving, stir in the remaining gumbo file powder and ladle the gumbo over cooked white rice.

Nutrition

Serving: 1bowlCalories: 450kcalCarbohydrates: 30gProtein: 25gFat: 20gSaturated Fat: 10gPolyunsaturated Fat: 2gMonounsaturated Fat: 5gCholesterol: 150mgSodium: 1000mgPotassium: 800mgFiber: 3gSugar: 5gVitamin A: 500IUVitamin C: 15mgCalcium: 50mgIron: 3mg

Notes

Let the gumbo rest overnight in the fridge for the best flavor. Adjust the spice level to your preference.

Tried this recipe?

Let us know how it was!