Creamy Ube Sago Delight: A Sweet Escape You’ll Love

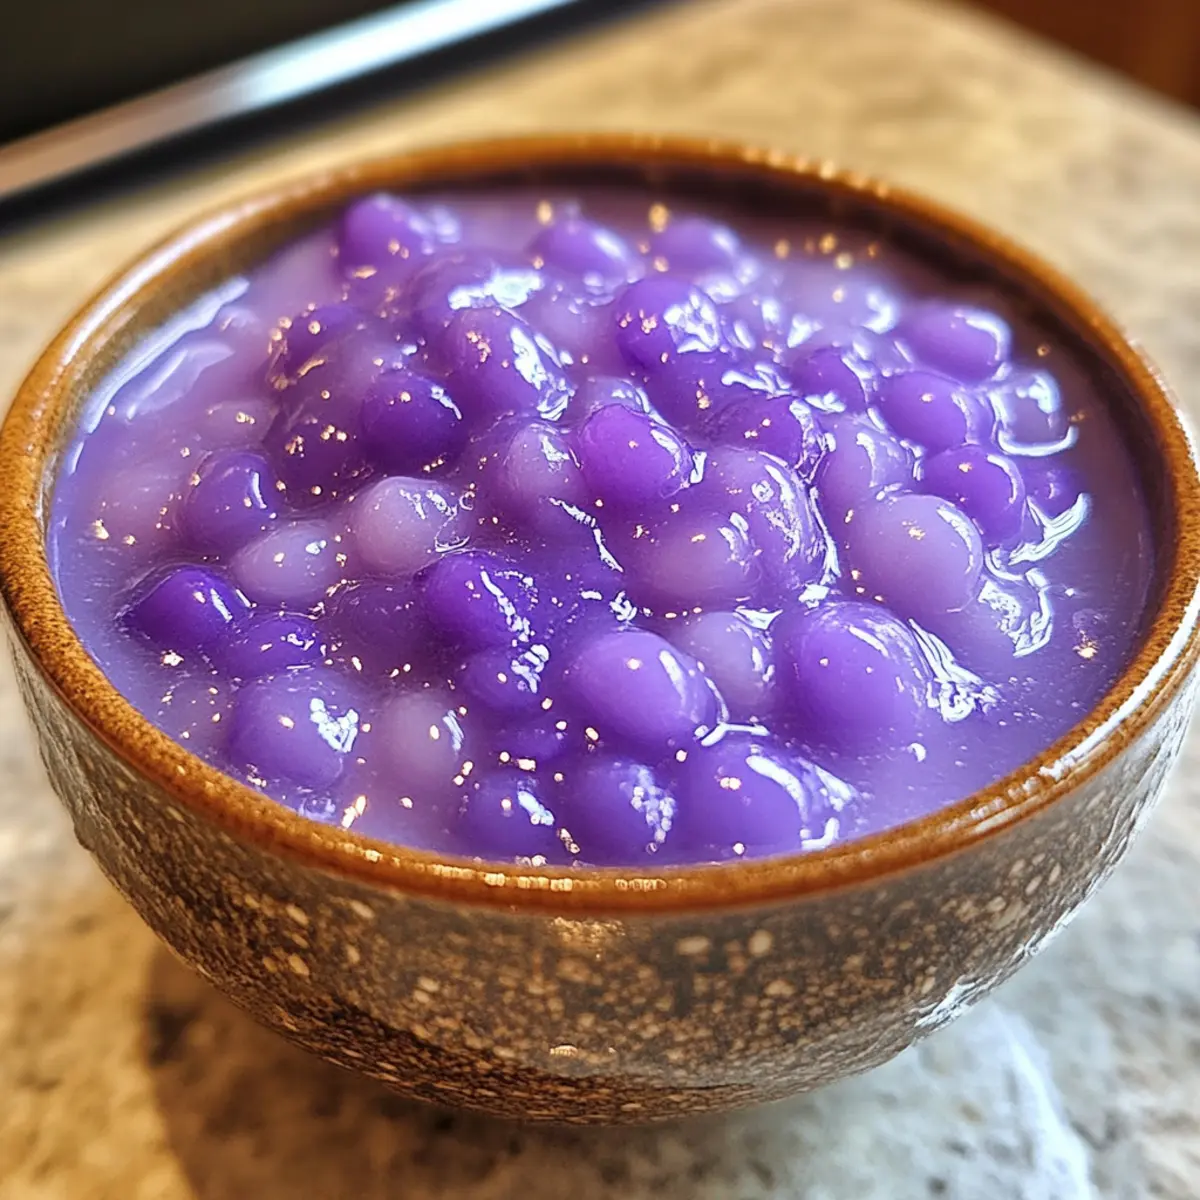
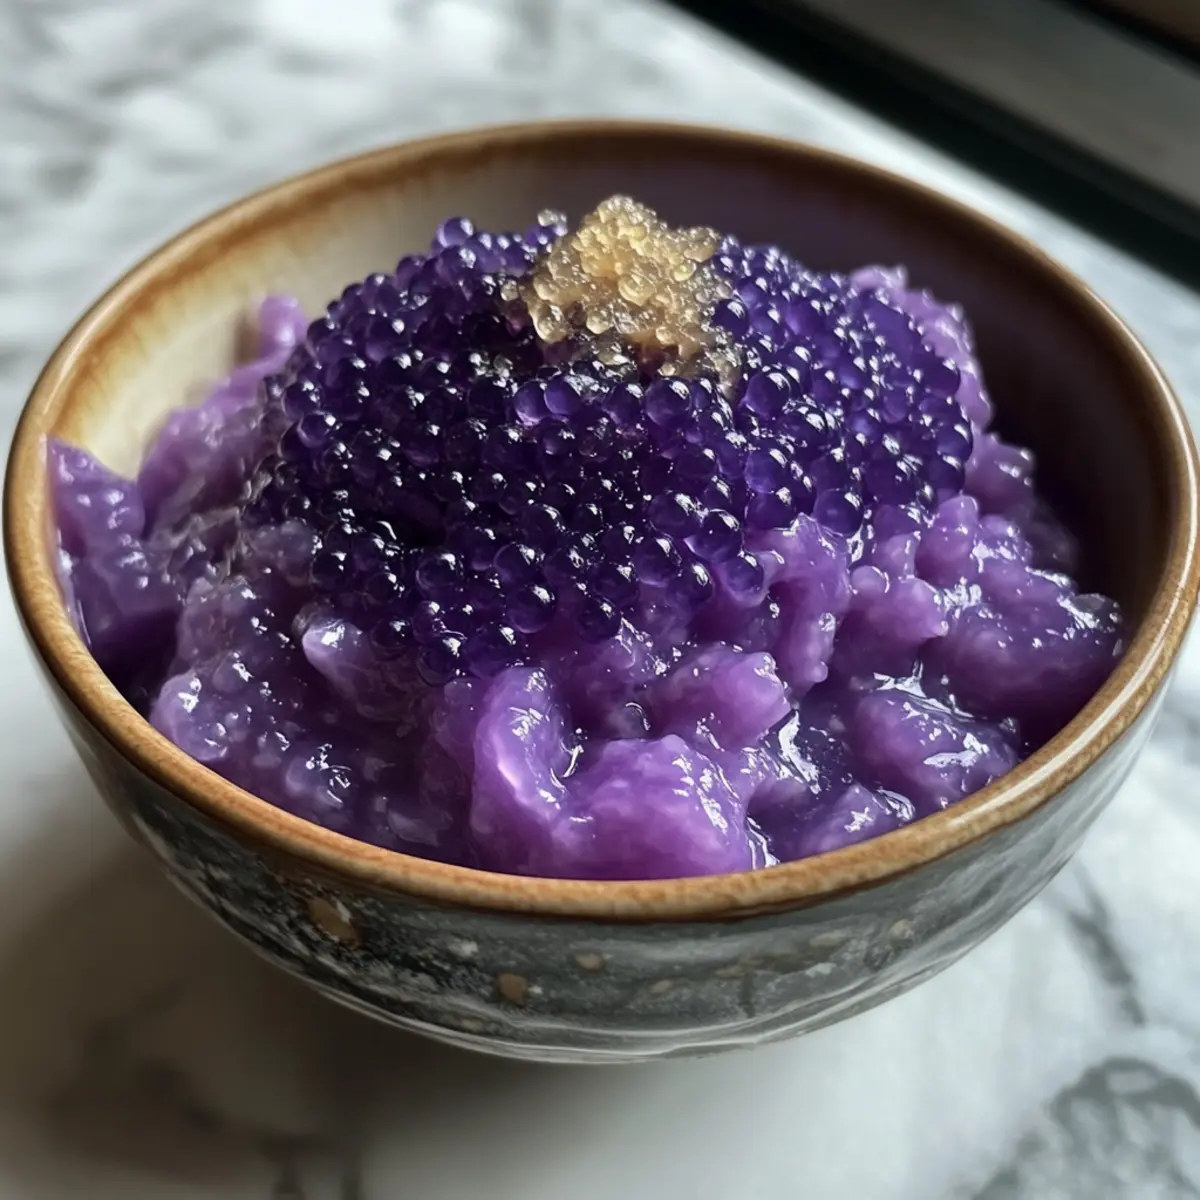
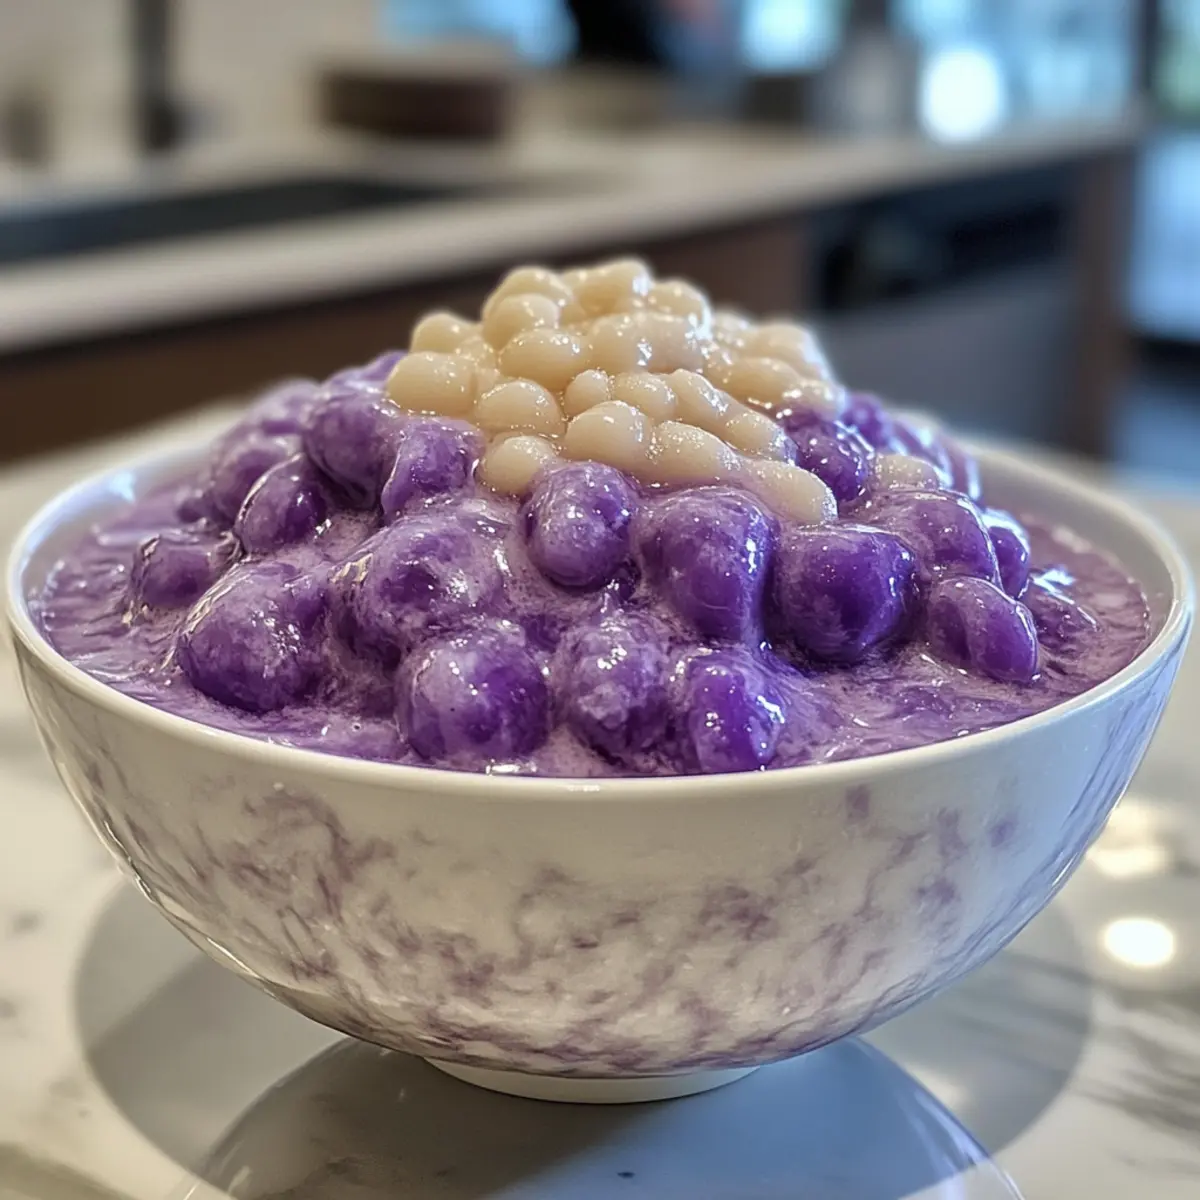
In a bustling market in the Philippines, I stumbled upon a vendor expertly preparing a bright purple dessert that caught my eye. That treat was Ube Sago, and I couldn’t resist its creamy allure! This easy dessert, featuring delightful tapioca pearls, is not just visually stunning but also remarkably simple to whip up in just 30 minutes. Whether you’re satisfying a sweet craving or impressing friends at a gathering, this Ube Sago recipe is your secret weapon. Plus, it’s wonderfully customizable—feel free to experiment with flavors like mango or strawberry for a fresh twist. Are you ready to bring a taste of the islands into your kitchen? Let’s dive in!

Why Is Ube Sago a Must-Try?

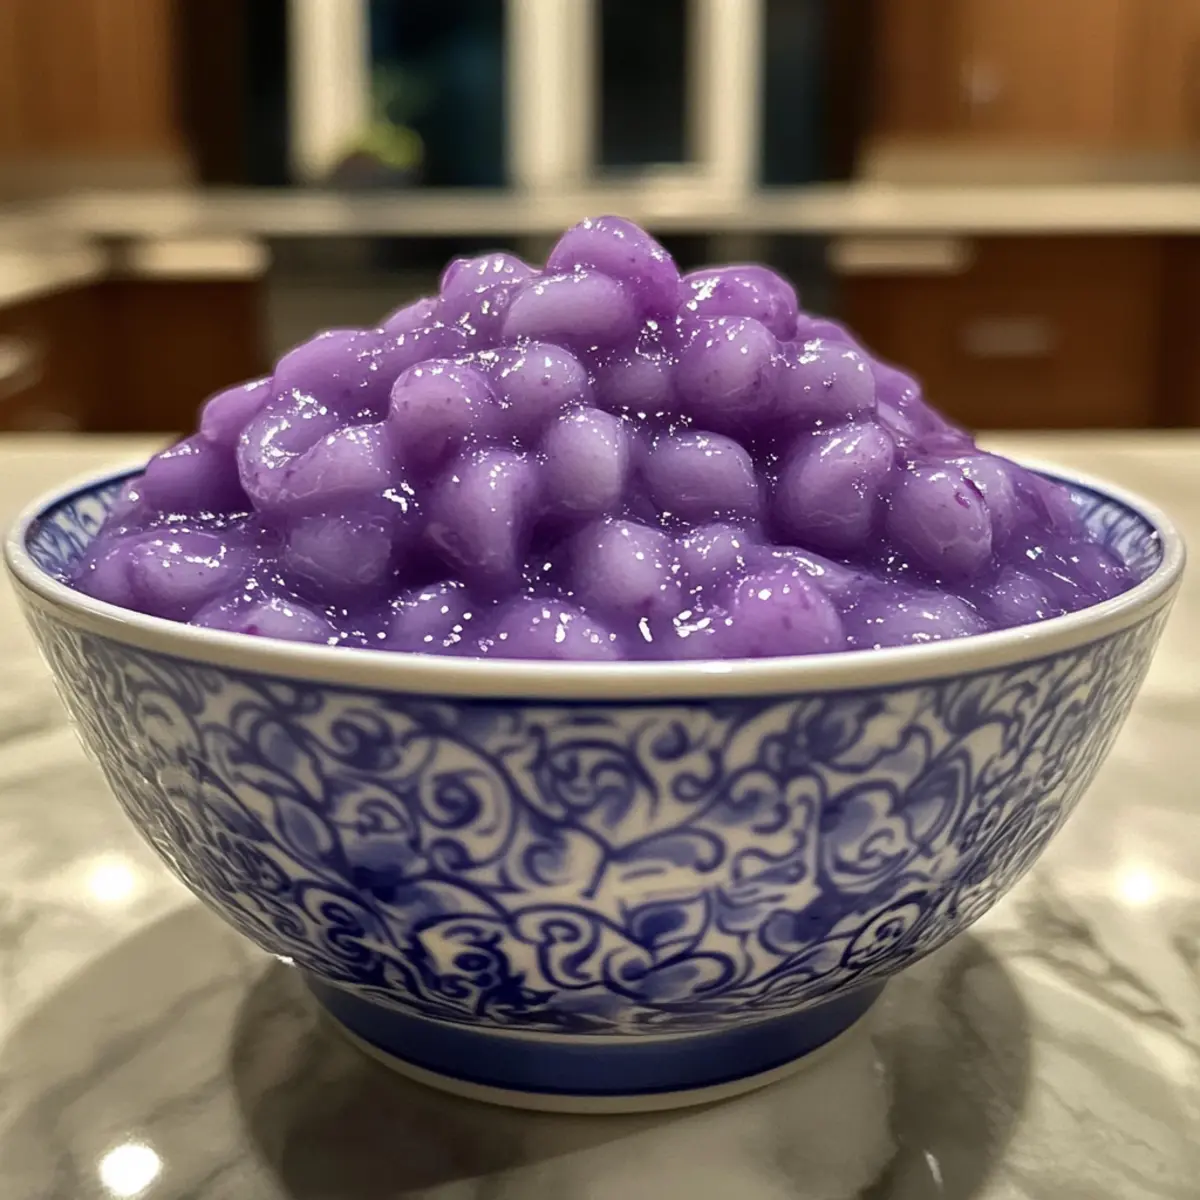
Creamy, Dreamy Delights: The smooth ube mixture combined with chewy tapioca pearls creates a dessert that feels like a hug in a bowl!

Bright, Eye-Catching Hue: Its vibrant purple color not only thrills the eyes but also sparks curiosity in any setting.

Quick and Easy: Whip it up in just 30 minutes—perfect for when you find yourself in need of a sweet fix!

Versatile Flavor Options: Customize your Ube Sago by swapping in different flavors like mango or strawberry, making it adaptable to any palate.

Crowd-Pleaser: Serve it at parties or family gatherings, and just watch everyone come back for seconds! This dessert is sure to impress and satisfy!

Ube Sago Ingredients

• Here’s what you need to craft this delightful dessert.

For the Base

  • Small Tapioca Pearls – Essential for the unique chewy texture; ensure you use small pearls for a perfect Ube Sago.
  • Ube Halaya – The star of the dessert, adding that sweet, rich ube flavor; easily adjustable to suit your sweetness preference.
  • Milk – Provides creamy consistency; substitute with any plant-based milk if you prefer a dairy-free option.
  • Coconut Milk – Enhances the richness with a subtle coconut flavor that pairs beautifully with ube.
  • Ube Extract – Intensifies ube flavor and color; optional if you prefer a lighter essence.
  • Vanilla Extract – Complements the ube’s flavor and enhances overall sweetness.

Optional Garnish

  • Chopped Fruit – Add fresh mango or strawberries for a pop of color and refreshing contrast on top of your Ube Sago.

Let’s get cooking and enjoy this creamy delight that’s bound to become a family favorite!

Step‑by‑Step Instructions for Ube Sago

Step 1: Cook the Tapioca Pearls
Begin by boiling about 4 cups of water in a medium pot over high heat. Once boiling, gently add 1 cup of small tapioca pearls, stirring occasionally to prevent sticking. Cook for approximately 25 minutes, or until the pearls are completely translucent, with no white dot in the center. Once cooked, remove from heat and drain the tapioca pearls, rinsing them under cold water to stop the cooking process.

Step 2: Prepare the Ube Mixture
In a large mixing bowl, combine 1 cup of ube halaya with 1 cup of coconut milk. Whisk vigorously until the mixture is smooth and well-blended. Gradually add 1 cup of milk and 1 teaspoon of vanilla extract, mixing thoroughly to incorporate all the ingredients. For an extra pop of color and flavor, add a few drops of ube extract if desired, stirring until the mixture is vibrant.

Step 3: Combine Tapioca Pearls and Ube Mixture
After rinsing, drain the cooked tapioca pearls one more time and add them directly to the creamy ube mixture in the bowl. Carefully fold the pearls into the mixture using a spatula, ensuring even distribution without breaking the pearls. This will help create the delightful texture characteristic of Ube Sago, combining the chewy pearls and the smooth ube flavors seamlessly.

Step 4: Chill and Serve
Once everything is combined, you can serve the Ube Sago immediately for a warm dessert or refrigerate it for about one hour for a chilled version. When ready to serve, ladle the creamy Ube Sago into individual bowls or cups. For an added touch, garnish with chopped fresh fruit like strawberries or mango, enhancing both flavor and presentation. Enjoy this delightful treat!

Make Ahead Options

These Creamy Ube Sago desserts are perfect for meal prep, making them an excellent choice for busy weeknights! You can cook the small tapioca pearls up to 24 hours in advance; just drain and immerse them in cold water to maintain their chewy texture. Additionally, prepare the ube mixture by combining the ube halaya, coconut milk, and milk a day ahead, then refrigerate it separately. When ready to serve, simply drain the tapioca pearls, fold them into the ube mixture, and garnish with fresh fruit. This way, you’ll have a delicious Ube Sago ready to delight your family with minimal last-minute effort!

How to Store and Freeze Ube Sago

Fridge: Keep Ube Sago in an airtight container and store it in the refrigerator for up to 2 days. The flavors will deepen over time, making each bite even more delightful!

Freezer: While fresh Ube Sago is best enjoyed right away, if you must freeze it, portion it into airtight containers for up to 1 month. Thaw in the fridge before serving.

Reheating: If you prefer your Ube Sago slightly warm, gently reheat in a saucepan over low heat, adding a splash of coconut or regular milk to maintain the creamy texture.

Separation Tip: It’s normal for Ube Sago to thicken in the fridge; give it a good stir before serving to reincorporate the tapioca pearls back into the mixture.

Expert Tips for Ube Sago

  • Perfectly Cooked Pearls: Ensure the small tapioca pearls are completely transparent before draining to achieve that signature chewy texture. If not fully cooked, continue boiling.
  • Flavor Balance: Adjust the sweetness to your liking by modifying the amount of ube halaya used—start with less and add more as needed for your perfect Ube Sago.
  • Color Consideration: Ube extract can deepen the color, but be cautious as it is quite concentrated; mix with a bit of milk first to integrate it smoothly into your dessert.
  • Cool Down: If chilling the dessert, allow it to sit for at least an hour before serving. This helps flavors meld beautifully, enhancing the overall taste experience.
  • Garnish Wisely: Enhance presentation and taste by adding fresh chopped fruits just before serving—fruits like strawberries and mango add brightness and contrast to your Ube Sago.

What to Serve with Creamy Ube Sago with Tapioca Pearls

Indulging in this colorful Filipino dessert calls for some delightful companions to create the perfect meal experience.

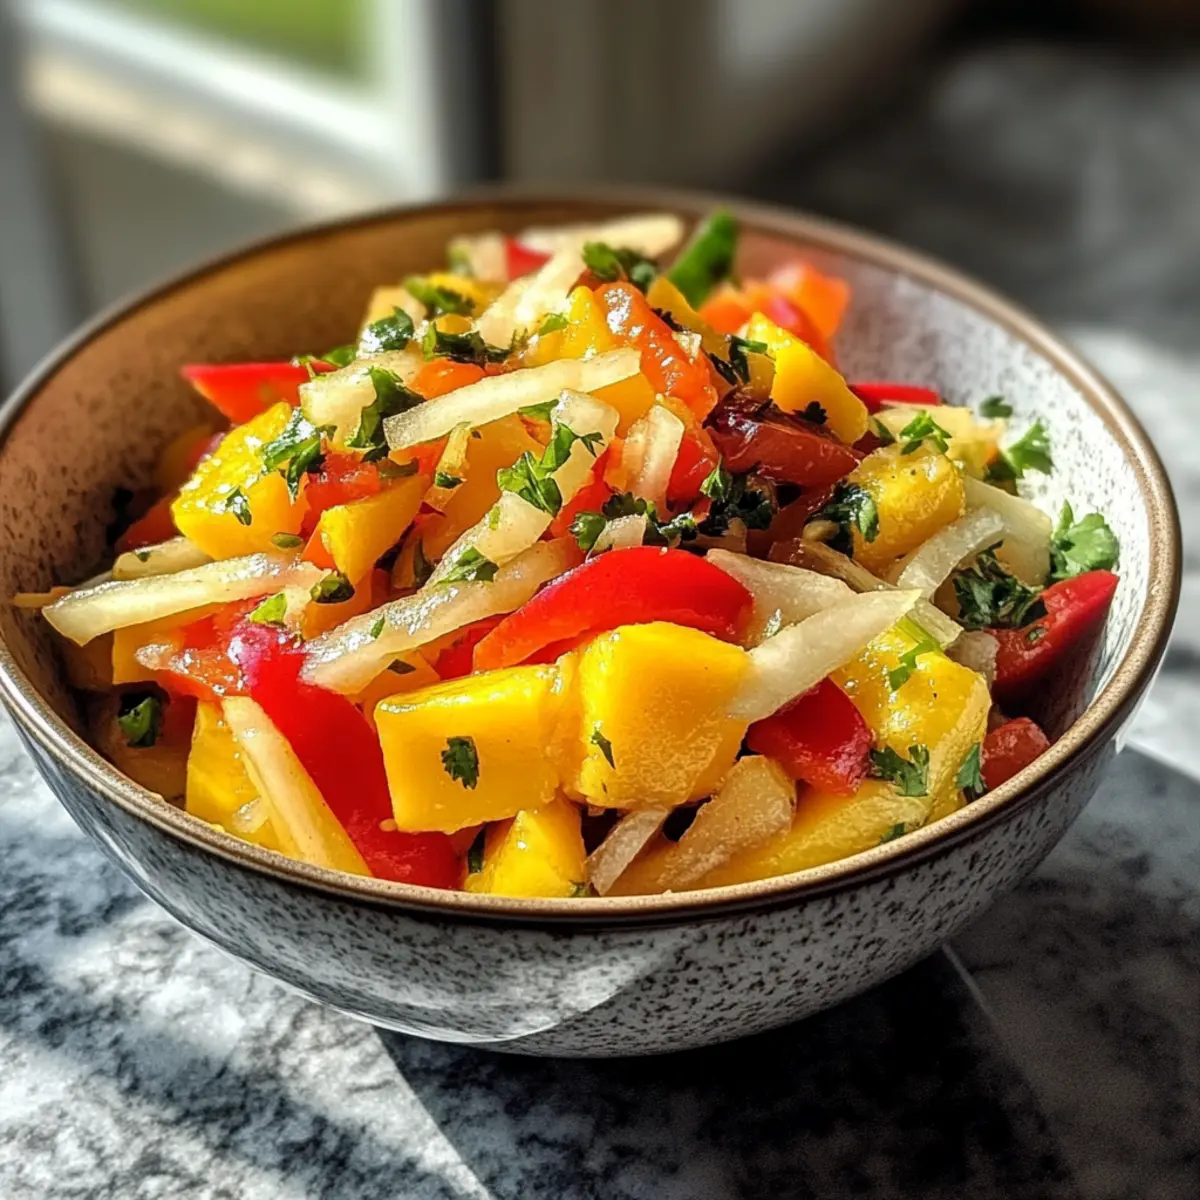
  • Fresh Fruit Salad: A refreshing mix of seasonal fruits brightens the palate and adds a burst of natural sweetness to contrast with the creamy Ube Sago. Think juicy mangoes, tart strawberries, and ripe bananas for a tropical vibe!

  • Coconut Sticky Rice: This subtly sweet and chewy rice dish balances the creamy Ube Sago beautifully. It’s a traditional pairing that enhances the coconut undertones in both desserts.

  • Sweet Banana Fritters: Crispy, golden fritters provide a comforting crunch that complements the smooth texture of Ube Sago, merging rich flavors in a delightful way. Each bite is a new adventure!

  • Filipino Leche Flan: A luxurious custard with caramelized sugar offers a rich contrast, making for a decadent dessert duo that’s sure to impress. These silky treats create harmony on the dessert table!

  • Iced Tea with Lemon: A refreshing iced tea infused with a hint of lemon or calamansi helps cleanse the palate and adds a zesty kick that brightens up your dessert spread.

  • Mango Float: This no-bake layered dessert brings another creamy, fruity element to your meal, featuring luscious mango pieces that complement the Ube Sago’s sweet flavors. The more, the merrier!

  • Chocolates or Mints: A simple yet elegant finish with a few chocolates or spearmint leaves offers a delightful surprise to the taste buds, rounding out your sweet journey perfectly!

Ube Sago Variations & Substitutions

Feel free to get creative with this Ube Sago recipe, transforming it into a new favorite dessert for every occasion!

  • Flavor Twist: Substitute Ube Halaya with other sweet flavors like mango or strawberry for a vibrant fruity version. The new taste will surprise and delight your palate!
  • Dairy-Free Delight: Switch Milk with any plant-based alternative like almond or oat milk for a creamy, dairy-free treat. This option is perfect for vegan eaters or those with lactose intolerance.
  • Extra Creamy: Use Coconut Cream instead of coconut milk for an even richer dessert that makes each bite feel indulgent. Your taste buds will thank you for this luxurious version!
  • Nutty Surprise: Add toasted Coconut Flakes into the dessert for added crunch and flavor. This delightful texture pairs beautifully with the creamy elements of the Ube Sago.
  • Flavorful Infusion: Incorporate a hint of Cardamom or Cinnamon into the ube mixture for a warm, aromatic touch that elevates the dessert to a new level. These spices will wrap you in a cozy embrace!
  • Chili Kick: For those who prefer a little heat, mix in a dash of Cayenne Pepper or finely chopped Jalapeño for an unexpected spicy twist. It’s a bold way to surprise your guests!
  • Berry Burst: Top with Mixed Berries like blueberries or blackberries before serving for a pop of freshness and color. This simple addition brightens the dish and provides a tart contrast to the sweetness.
  • Garnish Upgrade: Instead of chopped fruit, consider a drizzle of Honey or Agave Syrup for added sweetness that lingers. This sweet touch mellows out the flavors perfectly!

For more fresh inspiration, you can check out delicious dairy-free dessert options or learn how to create delightful tropical fruit variations that will make your Ube Sago the star of any gathering!

Ube Sago Recipe FAQs

What type of tapioca pearls should I use for Ube Sago?
Absolutely use small tapioca pearls for Ube Sago! These are essential for achieving that delightful chewy texture. Larger pearls are often used in bubble tea but can be too large for this dessert. Look for packages labeled as “small” or “instant” tapioca pearls to ensure the perfect outcome.

How should I store leftover Ube Sago?
You can store Ube Sago in an airtight container in the refrigerator for up to 2 days. Just remember that as it sits, the flavors will deepen, making each bite a bit more scrumptious! If you notice any separation, don’t worry—just give it a good stir before serving.

Can I freeze Ube Sago and how do I do it?
While fresh Ube Sago tastes best, you can freeze it for up to 1 month. Pour the dessert into airtight containers, portioning it for easier serving later. When you’re ready to enjoy, simply thaw it in the refrigerator overnight. If you want to warm it up, gently reheat on low heat with a splash of milk for creaminess.

What should I do if my tapioca pearls are still white inside after cooking?
Very! If you find that the pearls still have a white dot in the center, they need more cooking. Simply bring the pot back to a gentle boil and continue cooking for a few more minutes, stirring occasionally until they are completely translucent. Patience is key to achieving the perfect chewy texture!

Are there any dietary considerations for making Ube Sago?
Definitely! Ube Sago can be made dairy-free by substituting the regular milk with any plant-based milk, like almond or oat milk. Additionally, make sure to check ingredient labels for potential allergens, particularly if you’re planning to serve it to friends or family with specific sensitivities. Enjoy your dessert worry-free!

Ube Sago

Creamy Ube Sago Delight: A Sweet Escape You’ll Love

Experience the vibrant and creamy Ube Sago, a delightful dessert that's simple to make and bursting with flavor.
Prep Time 10 minutes
Cook Time 25 minutes
Chilling Time 1 hour
Total Time 1 hour 35 minutes
Servings: 4 servings
Course: Dessert
Cuisine: Filipino
Calories: 200

Ingredients
  

Base Ingredients
  • 1 cup Small Tapioca Pearls Ensure you use small pearls for perfect texture.
  • 1 cup Ube Halaya Adjust sweetness preference as needed.
  • 1 cup Milk Substitute with plant-based milk if desired.
  • 1 cup Coconut Milk Enhances richness with coconut flavor.
  • 1 teaspoon Vanilla Extract Enhances sweetness and ube flavor.
  • Optional Ube Extract Intensifies flavor and color, use sparingly.
Optional Garnish
  • 1 Chopped Fruit Fresh mango or strawberries for garnish.

Equipment

  • Medium pot
  • large mixing bowl
  • Spatula
  • Whisk

Method
 

Cooking Instructions
  1. Boil about 4 cups of water in a medium pot. Once boiling, gently add 1 cup of small tapioca pearls. Cook for approximately 25 minutes, stirring occasionally. Drain and rinse the pearls.
  2. In a large mixing bowl, combine 1 cup of ube halaya with 1 cup of coconut milk. Whisk until smooth, then add 1 cup of milk and 1 teaspoon of vanilla extract, mixing thoroughly.
  3. Add the cooked tapioca pearls to the ube mixture, carefully folding them in without breaking.
  4. Chill for about an hour or serve warm. Ladle into bowls and garnish with chopped fresh fruit if desired.

Nutrition

Serving: 1cupCalories: 200kcalCarbohydrates: 38gProtein: 3gFat: 5gSaturated Fat: 4gMonounsaturated Fat: 1gCholesterol: 10mgSodium: 75mgPotassium: 130mgFiber: 1gSugar: 15gVitamin A: 500IUVitamin C: 2mgCalcium: 150mgIron: 1mg

Notes

Adjust sweetness by modifying the amount of ube halaya. Use ube extract carefully for color intensity. Allow to chill for an hour for best flavor melding.

Tried this recipe?

Let us know how it was!

Balsamic Chicken and Brussel Sprouts: Creamy Comfort in Every Bite

As I sifted through my pantry, I stumbled upon a bottle of rich balsamic vinegar just waiting to shine in a dish. That sparked my inspiration for Creamy Balsamic Chicken and Brussels Sprouts—a recipe that’s not only Whole 30 approved but also a delightful celebration of wholesome ingredients. This colorful meal marries the crispiness of sautéed Brussels sprouts with tender chicken, all enveloped in a creamy dressing that feels luxurious yet entirely guilt-free. With quick prep and a crowd-pleasing appeal, this dish is your new go-to for busy weekday dinners or meal prep triumphs. Ready to discover how to elevate your dining experience while staying on track? Let’s dive into the recipe!

Why is Balsamic Chicken a Must-Try?

Simplicity in Preparation: This recipe takes minimal time and effort, making it perfect for busy weeknights.

Rich, Creamy Flavor: The blend of balsamic vinegar and mayo creates an indulgent taste without the guilt.

Nutrient-Packed Goodness: Packed with protein and healthy fats from chicken and walnuts, it’s not just tasty but nourishing.

Versatile Ingredients: Feel free to swap in your favorite vegetables or proteins, like tofu or grilled shrimp, to keep things fresh.

Meal Prep Hero: Make a larger batch for easy lunches throughout the week; it reheats beautifully!

Looking for more wholesome recipes? This Creamy Balsamic Chicken and Brussels Sprouts is a fantastic next step, especially if you enjoyed options like Chicken Cashew Broccoli or Rotisserie Chicken Mushroom.

Balsamic Chicken and Brussels Sprouts Ingredients

For the Chicken and Vegetables

  • Cooked Shredded Chicken – Provides protein and substance; opt for rotisserie chicken for convenience.
  • Brussels Sprouts – Adds freshness and crunch; halve them for even cooking and a quicker sauté.
  • Baby Bella Mushrooms – Introduces umami flavor and moisture; substitute with zucchini or sweet potatoes for variety.
  • Chopped Walnuts – Offers a crunchy texture and healthy fats; pecans or almonds can be great alternatives.

For the Creamy Dressing

  • Olive Oil Mayo – Adds creaminess and richness; homemade mayo complies with Whole 30 or use mashed avocado for a tasty swap.
  • Balsamic Vinegar – Enhances flavor with acidity and sweetness; using high-quality balsamic takes this dish to the next level.
  • Italian Seasoning – Provides a blend of herbs for depth; consider fresh herbs for a vibrant taste.
  • Garlic Powder – Gives a savory aroma and taste; fresh minced garlic can be a robust alternative for added flavor.
  • Kosher Salt and Fresh Ground Pepper – Essential for seasoning to taste; adjusting these can elevate your dish further.

This Creamy Balsamic Chicken and Brussels Sprouts recipe is not only a satisfying option for dinner, but it’s also a vibrant addition to your Whole 30 meal plans!

Step‑by‑Step Instructions for Balsamic Chicken and Brussels Sprouts

Step 1: Sauté the Brussels Sprouts
Heat a medium frying pan over medium heat and pour in a drizzle of olive oil. Add the halved Brussels sprouts to the pan, cut-side down, and sauté them for about 5 minutes, stirring occasionally. They should become tender and start to caramelize, giving that beautiful golden color. This will establish a lovely flavor base for your Balsamic Chicken and Brussels Sprouts.

Step 2: Add the Mushrooms
Next, introduce the quartered baby bella mushrooms to the pan. Cook them alongside the Brussels sprouts for an additional 4-5 minutes, ensuring they soften and release their juices. Stir them gently until everything is well combined and beautifully cooked, creating a rich and savory aroma that fills your kitchen.

Step 3: Incorporate the Chicken and Walnuts
Now it’s time to add the cooked shredded chicken and chopped walnuts into the pan. Toss everything together, allowing the chicken to heat through for about 2-3 minutes. You’ll want to see everything well mixed, with the warm, tender chicken providing ample flavor and the crunchy walnuts offering great texture to your dish.

Step 4: Make the Creamy Dressing
In a small bowl, whisk together the olive oil mayo, balsamic vinegar, and Italian seasoning until smooth and creamy. This should only take about a minute. Ensure there are no lumps for a uniform texture that envelops your Balsamic Chicken and Brussels Sprouts perfectly. The dressing will add a delicious richness that elevates the entire dish.

Step 5: Combine and Serve
Pour the creamy dressing over the chicken and vegetable mixture in the pan. Gently toss everything to coat evenly, ensuring each bite is filled with flavor. Serve the dish warm, and enjoy the harmony of textures and tastes, knowing you’ve created a wholesome meal that nourishes your body with every bite.

Make Ahead Options

These Creamy Balsamic Chicken and Brussels Sprouts are perfect for meal prep enthusiasts! You can prepare the chicken and sautéed vegetables up to 3 days in advance, storing them in an airtight container in the refrigerator. Just sauté the Brussels sprouts and mushrooms until tender, then combine them with the shredded chicken and walnuts. To maintain their quality, keep the creamy dressing separate until you’re ready to serve—this prevents the veggies from getting soggy. When it’s time to enjoy your meal, simply reheat the chicken mixture in a pan over medium heat, add the dressing, and toss until everything is warmed through. You’ll have a delicious, wholesome dish ready in no time!

What to Serve with Creamy Balsamic Chicken and Brussels Sprouts

Elevate your dining experience with these vibrant side dishes that perfectly complement a creamy, savory escape.

  • Cauliflower Rice: A light and fluffy alternative that soaks up the delicious creamy dressing, adding a grain-free element to your meal.
  • Roasted Sweet Potatoes: Their natural sweetness balances the tang of balsamic, providing a heartwarming and colorful addition to your plate.

A great pairing to consider is a refreshing garden salad. Fresh greens, crunchy cucumbers, and a light vinaigrette create an uplifting profile that contrasts beautifully with the richness of the chicken.

  • Garlic Lemon Asparagus: Bright and tangy, this dish offers a crisp bite that rounds out the meal and adds a beautiful pop of color.
  • Herbed Quinoa: Packed with protein, the nutty flavor complements the balsamic chicken while adding a satisfying texture.
  • Sautéed Green Beans: Crunchy and vibrant, these beans enhance the visual appeal and provide added nutrients to your wholesome meal.

For a delightful finish, enjoy a Dark Chocolate Avocado Mousse. This rich dessert keeps the Whole 30 theme alive and adds a creamy, silky touch to your dining experience.

Balsamic Chicken and Brussels Sprouts Variations

Feel free to get creative and customize this dish to suit your taste and dietary needs!

  • Vegetarian Delight: Substitute the shredded chicken with grilled tofu or chickpeas for a plant-based option. This twist not only caters to vegetarians but also offers a delightful new texture.

  • Nut-Free Option: Replace chopped walnuts with sunflower seeds or omit nuts entirely to cater to those with nut allergies. You’ll still enjoy the wonderful flavors without the crunch.

  • Spicy Kick: Add a sprinkle of red pepper flakes to the dressing or sauté sliced jalapeños with the Brussels sprouts for an exciting heat boost. This can transform the dish from mild to spicy with just a dash!

  • Zesty Additions: Incorporate fresh lemon juice or zest into the creamy dressing for a refreshing citrus twist. This adds brightness and can elevate the dish’s overall flavor profile.

  • Roasted Brussels Sprouts: For a deeper flavor, try roasting your Brussels sprouts instead of sautéing them. Simply toss them in olive oil and roast until caramelized for an added layer of richness.

  • Try Different Greens: Swap Brussels sprouts for kale or Swiss chard for a delightful variety in textures and flavors. Each leafy green brings its unique charm to the dish.

  • Craft Your Own Dressing: Mix in different mustards such as Dijon or whole-grain for a tangy homemade dressing that personalizes your dish even more. This small tweak can lead to big flavor!

Looking for more wholesome meals? Pair it with my Jerk Chicken Burritos or mix it in with Sriracha Ground Chicken for further inspiration!

Expert Tips for Balsamic Chicken and Brussels Sprouts

  • Whisk Smoothly: Make sure to whisk your olive oil mayo thoroughly to avoid any lumps; a smooth dressing ensures an even coating on your chicken and veggies.

  • Perfectly Cook Brussels: For even cooking, always halve your Brussels sprouts; this enhances caramelization and brings out a sweeter flavor.

  • Fresh Alternatives: Feel free to swap in fresh garlic instead of garlic powder for a robust taste. It will elevate your balsamic chicken’s flavor profile.

  • Check Compliance: When selecting balsamic vinegar, always verify that it adheres to Whole 30 guidelines—some versions may contain unwanted additives.

  • Meal Prep Wonder: This dish reheats beautifully, making it an excellent choice for meal prep; just store it in airtight containers for quick, nutritious lunches.

How to Store and Freeze Balsamic Chicken and Brussels Sprouts

Fridge: Store leftovers in an airtight container for up to 3 days. This way, you can enjoy your Balsamic Chicken and Brussels Sprouts for quick, healthy meals throughout the week.

Freezer: If you want to freeze the dish, place it in a freezer-safe container. It can maintain its flavor and texture for up to 3 months—just be sure to label it!

Reheating: When ready to enjoy, thaw overnight in the fridge. Reheat in a skillet over medium heat until warmed through, adding a splash of water or broth to reintroduce moisture.

Make-Ahead Tip: Consider preparing a larger batch to store in the fridge for easy meal prep. Simply warm it up for a nutritious and satisfying lunch or dinner on busy days!

Balsamic Chicken and Brussels Sprouts Recipe FAQs

What are the best Brussels sprouts to use for this recipe?
Absolutely! Look for Brussels sprouts that are firm and bright green. Avoid those with dark spots or yellowing leaves, as these are signs of over-ripeness. Halving them helps with even cooking and enhances the caramelization during sautéing.

How long can I store the leftovers in the fridge?
You can store leftovers in an airtight container for up to 3 days. This allows you to enjoy your Balsamic Chicken and Brussels Sprouts multiple times throughout the week, perfect for quick and healthy meals.

Can I freeze the Balsamic Chicken and Brussels Sprouts?
Very! To freeze, place the dish in a freezer-safe container and it will maintain its flavor and texture for up to 3 months. Be sure to label it with the date so you can keep track of freshness.

What’s the best way to reheat this dish?
When you’re ready to enjoy your frozen Balsamic Chicken and Brussels Sprouts, thaw it overnight in the fridge. Reheat it in a skillet over medium heat until warmed through, adding a splash of water or broth to help restore moisture and prevent drying out.

Is this recipe suitable for those with allergies?
Definitely! This recipe is gluten-free, dairy-free, and low-carb, making it perfect for many dietary needs, including Whole 30 compliance. However, always check for specific allergies related to nuts, such as walnuts, and feel free to substitute them with seeds if necessary.

What should I do if the dressing turns lumpy?
If you find that your dressing has lumps, don’t worry! Simply return it to a mixing bowl and whisk vigorously until it smooths out. A smooth, creamy dressing is key for evenly coating your chicken and veggies, so make that your goal!

Balsamic Chicken and Brussel Sprouts

Balsamic Chicken and Brussel Sprouts: Creamy Comfort in Every Bite

This Balsamic Chicken and Brussel Sprouts recipe combines crispy Brussels sprouts with tender chicken in a creamy dressing, perfect for busy weeknight dinners.
Prep Time 10 minutes
Cook Time 20 minutes
Total Time 30 minutes
Servings: 4 servings
Course: Dinner
Cuisine: American
Calories: 450

Ingredients
  

For the Chicken and Vegetables
  • 2 cups Cooked Shredded Chicken Opt for rotisserie chicken for convenience.
  • 4 cups Brussels Sprouts Halved for even cooking.
  • 1 cup Baby Bella Mushrooms Substitute with zucchini or sweet potatoes for variety.
  • 1/2 cup Chopped Walnuts Pecans or almonds can be great alternatives.
For the Creamy Dressing
  • 1/2 cup Olive Oil Mayo Homemade mayo complies with Whole 30.
  • 1/4 cup Balsamic Vinegar High-quality balsamic recommended.
  • 1 teaspoon Italian Seasoning Consider fresh herbs for a vibrant taste.
  • 1 teaspoon Garlic Powder Fresh minced garlic can be a robust alternative.
  • to taste Kosher Salt Adjust to elevate your dish.
  • to taste Fresh Ground Pepper Adjust to elevate your dish.

Equipment

  • Frying pan

Method
 

Step-by-Step Instructions
  1. Heat a medium frying pan over medium heat and drizzle in olive oil. Add halved Brussels sprouts, cut-side down, and sauté for about 5 minutes until tender and caramelized.
  2. Introduce quartered baby bella mushrooms to the pan. Cook alongside the Brussels sprouts for 4-5 minutes until softened.
  3. Add cooked shredded chicken and chopped walnuts. Toss for 2-3 minutes until heated through.
  4. In a small bowl, whisk together olive oil mayo, balsamic vinegar, and Italian seasoning until smooth and creamy.
  5. Pour the creamy dressing over the chicken and vegetable mixture. Toss to coat evenly and serve warm.

Nutrition

Serving: 1servingCalories: 450kcalCarbohydrates: 12gProtein: 35gFat: 30gSaturated Fat: 4gPolyunsaturated Fat: 7gMonounsaturated Fat: 15gCholesterol: 80mgSodium: 300mgPotassium: 650mgFiber: 5gSugar: 5gVitamin A: 600IUVitamin C: 90mgCalcium: 60mgIron: 2mg

Notes

This dish reheats beautifully and can be prepared in larger batches for meal prep.

Tried this recipe?

Let us know how it was!

Delicious Coconut Pandan Rolls: Soft, Fluffy & Irresistible

As I stood in my kitchen, the sweet, fragrant aroma of pandan filled the air, instantly transporting me to tropical shores. That’s when I knew I had to share these delightful Coconut Pandan Rolls with you. These soft, fluffy buns, enriched with a luscious coconut filling, are not only a fabulous snack but also a perfect companion for a cozy afternoon tea. Baking these rolls is surprisingly quick and accessible, making them an ideal choice for those nostalgic moments when you crave something comforting yet exotic. The enchanting flavor of pandan adds a unique twist, sure to impress your family and friends at any gathering. So, are you ready to embark on a culinary journey to Malaysia with me? Let’s roll up our sleeves and dive into this delightful recipe!

Why Are Coconut Pandan Rolls Special?

Exotic Flavors: The combination of pandan and coconut introduces a delightful taste that transports you straight to tropical paradise.

Simple Preparation: Even if you’re new to baking, this recipe is easy to follow, making it suitable for everyone.

Versatile Treat: Enjoy these rolls for breakfast, as a snack, or paired with tea—perfect for any occasion.

Crowd-Pleasing Appeal: Their soft, fluffy texture and delightful flavor make these rolls a hit at gatherings and family meals.

Looking for a refreshing beverage to pair with your rolls? Try this delicious Pineapple Coconut Mojito or indulge in a sweet finish with Mango Coconut Pudding.

Enduring Freshness: These rolls store well, letting you savor the experience over a couple of days. Enjoy them warm for an extra treat!

Coconut Pandan Rolls Ingredients

Indulging in Coconut Pandan Rolls is all about having the right ingredients for that perfect fluffy texture and heavenly coconut filling. Here’s what you’ll need:

For the Dough

  • Milk – Provides moisture and richness; feel free to substitute with any plant-based milk for a dairy-free option.
  • Egg – Adds structure and richness; you can replace it with a flax egg (1 tbsp ground flaxseed + 2.5 tbsp water) for a vegan version.
  • All-Purpose Flour – Forms the dough’s structure; ensure it is well-measured for the best results.
  • Granulated Sugar – Sweetens the dough; try brown sugar for extra moisture and a hint of caramel flavor.
  • Butter – Adds flavor and tenderness; use dairy-free or vegan butter for a vegan twist.
  • Salt – Enhances flavor and strengthens gluten structure; crucial for overall taste.
  • Pandan Paste – Infuses the rolls with a unique green color and flavor; substitute with pandan extract if needed.
  • Active Dry Yeast – Leavens the dough, making it rise; instant yeast can be used without any changes to the process.

For the Filling

  • Sweetened Coconut Flakes – Provides a rich, sweet filling; you can replace it with desiccated coconut if you add a little bit of sweetening.

Enjoy the delightful journey of making Coconut Pandan Rolls with these simple ingredients that promise to create a mouthwatering snack loved by all!

Step‑by‑Step Instructions for Coconut Pandan Rolls

Step 1: Dough Preparation
Pour the milk into the bread machine pan, followed by cracking the egg. Next, add all-purpose flour, granulated sugar, salt, butter, pandan paste, and active dry yeast. Ensure the ingredients are well positioned to achieve a smooth consistency. Close the lid and select the dough setting on your bread machine, then press start. In about 90 minutes, the dough will double in size and be ready for shaping.

Step 2: Prepare Filling
While the dough rises, prepare the filling by toasting the sweetened coconut flakes. Heat a dry skillet over medium heat and add the coconut flakes, stirring frequently for about 3–5 minutes until you see a golden brown color and a fragrant aroma. Remove from heat and let the toasted coconut cool slightly, ensuring it’s ready to add a delightful texture to your Coconut Pandan Rolls.

Step 3: Shape Rolls
Once the dough cycle is complete, lightly flour a clean surface and turn the dough out onto it. Roll it out into a 15-inch square, ensuring the thickness is even for perfect baking. Brush the surface with melted butter, then sprinkle the toasted coconut evenly across the dough. Roll the dough tightly from one edge to create a log shape, making sure the filling stays inside as you go.

Step 4: Cut and Rise
Using a sharp knife or dough cutter, slice the rolled dough into 12 equal pieces. Arrange these pieces in a greased baking pan, making sure they are snug but not overcrowded. Cover the pan with a clean kitchen towel and place it in a warm, draft-free area. Let the rolls rise for 30 to 45 minutes until they have puffed up and doubled in size, signaling they are ready for baking.

Step 5: Bake
Preheat your oven to 400°F (200°C). Once preheated, carefully uncover the pan with the Coconut Pandan Rolls and place it in the oven. Bake for approximately 20–22 minutes, or until the rolls are golden brown on top and sound hollow when tapped. The enticing aroma of pandan and coconut will fill your kitchen as they bake to perfection.

Step 6: Cool and Serve
After baking, remove the rolls from the oven and allow them to cool slightly in the pan for about 5–10 minutes. Then, transfer them gently to a wire rack to cool completely. This brief cooling time will enhance their texture, allowing the Coconut Pandan Rolls to be perfectly fluffy and ready to serve, whether warm or at room temperature.

How to Store and Freeze Coconut Pandan Rolls

Room Temperature: Store leftover Coconut Pandan Rolls in an airtight container for up to 2 days to maintain freshness. Place parchment between layers to prevent sticking.

Fridge: These rolls can be refrigerated for up to 4 days. Seal them tightly in plastic wrap or an airtight container to keep them moist.

Freezer: Freeze Coconut Pandan Rolls individually wrapped in plastic wrap and placed in a freezer bag for up to 2 months. Thaw and reheat for a cozy treat any time!

Reheating: To restore softness, microwave rolls for 10-15 seconds or warm them in a preheated oven at 350°F (175°C) for about 5-10 minutes.

Coconut Pandan Rolls Variations

Feel free to get creative with your Coconut Pandan Rolls by trying out these fun variations that will elevate your baking experience.

  • Fresh Coconut: Substitute sweetened coconut flakes with minced fresh coconut for a delightful twist in texture and flavor. The natural sweetness of fresh coconut adds an extra tropical flair.

  • Chocolate Delight: Add chocolate chips to the filling for a decadent surprise with every bite. The sweet, melted chocolate paired with coconut is absolutely dreamy!

  • Fruit Preserves: Experiment with fruit preserves, such as mango or guava, as an alternative filling. This twist will bring a burst of fruity flavor that complements the rolls beautifully.

  • Increase Pandan Flavor: For a more intense pandan flavor, increase the amount of pandan paste slightly. Just a little more can take these rolls from wonderful to extraordinary.

  • Nutty Crunch: Introduce some toasted nuts, like almonds or cashews, for added crunch and flavor in the filling. The nutty texture will contrast nicely with the softness of the rolls.

  • Spiced Coconut: Enhance the filling by adding a sprinkle of cinnamon or cardamom to the toasted coconut flakes. This will provide a warm and inviting spiciness to the rolls.

  • Vegan Twist: Use plant-based substitutes for butter and milk, in addition to the flax egg, creating a completely vegan-friendly version that everyone can enjoy. The results will still be equally fluffy and delicious!

Pair these Coconut Pandan Rolls with a refreshing beverage like Pineapple Coconut Mojito or treat yourself to a sweet dessert like Mango Coconut Pudding for an unbeatable culinary experience!

Make Ahead Options

Coconut Pandan Rolls are perfect for meal prep and can be a delightful time-saver for busy home cooks! You can prepare the dough up to 24 hours in advance—just follow the first two steps and refrigerate the dough after it has risen. For the best results, wrap it tightly in plastic wrap to prevent it from drying out. You can also toast the coconut filling and store it in an airtight container at room temperature for up to 3 days. When you’re ready to bake, simply shape the rolls, let them rise for 30-45 minutes, and then pop them in the oven. This way, you’ll enjoy freshly baked Coconut Pandan Rolls with minimal work on busy mornings or when entertaining guests!

What to Serve with Coconut Pandan Rolls

Experience the joy of creating a full meal that echoes the tropical allure of your Coconut Pandan Rolls, taking your taste buds on an unforgettable journey.

  • Refreshing Tropical Fruit Salad:
    Bright, colorful fruits like mango, pineapple, and kiwi complement the sweetness of the rolls, adding a burst of freshness to your meal.

  • Strong Black Coffee:
    The robust flavor of black coffee contrasts beautifully with the sweet, fluffy rolls, making every bite even more enjoyable.

  • Jasmine Tea:
    Serve Coconut Pandan Rolls alongside fragrant jasmine tea, enhancing the aromatic experience and providing a soothing companion.

  • Creamy Coconut Custard:
    This silky dessert mirrors the coconut filling in the rolls, creating a delightful harmony of flavors perfect for satisfying your sweet tooth.

  • Fluffy Rice Pudding:
    Rich and creamy, rice pudding offers a comforting softness that pairs well with the texture of the rolls while balancing the sweetness.

  • Mango Coconut Pudding:
    For a touch of tropical sweetness, this luscious dessert echoes the flavors of the rolls, proving to be a satisfying finish to your meal.

  • Pineapple Coconut Mojito:
    This refreshing beverage not only quenches your thirst but also elevates the overall tropical flavor journey, perfect for entertaining or a casual gathering.

  • Sponge Cake:
    Light and airy, a simple sponge cake pairs well, letting the rolls shine while offering a delightful texture contrast.

Expert Tips for Coconut Pandan Rolls

  • Fresh Ingredients: Always check that your yeast is fresh; stale yeast can lead to flat rolls that don’t rise properly.

  • Precise Measurements: Use a kitchen scale for measuring flour and sugar; accurate measurements affect the dough’s texture and overall result.

  • Avoid Overproofing: Do not let the rolls rise too long after cutting; this can cause them to collapse. A warm environment is ideal for rising.

  • Brush for Shine: For a glossy finish, brush the tops of the Coconut Pandan Rolls with melted butter right before baking.

  • Cool Before Serving: Allow the rolls to cool slightly before serving; it enhances their flavor and helps maintain the fluffy texture.

Coconut Pandan Rolls Recipe FAQs

How do I choose ripe coconut for the filling?
Selecting ripe coconut is straightforward! Look for coconut flakes that are moist and slightly sweet. If using fresh coconut, opt for mature coconuts with brown shells, which indicate higher oil content. The coconut flesh should be white and tender, offering a deliciously rich flavor for your rolls.

What’s the best way to store Coconut Pandan Rolls?
Store your Coconut Pandan Rolls in an airtight container at room temperature for up to 2 days. If you want to keep them fresher for longer, consider refrigerating them for up to 4 days. Just remember to seal them tightly to prevent dryness!

Can I freeze Coconut Pandan Rolls?
Absolutely! To freeze your delightful Coconut Pandan Rolls, wrap each roll individually in plastic wrap and place them in a freezer bag. They can be frozen for up to 2 months. When you’re ready to enjoy them, simply thaw and reheat. For the best results, microwave for 10-15 seconds or warm them in a preheated oven at 350°F (175°C) for about 5-10 minutes to restore their fluffy texture.

What should I do if the rolls don’t rise properly?
No worries! If your Coconut Pandan Rolls don’t rise, first check your yeast; it must be fresh and active. Ensure the dough is kept in a warm, draft-free area for rising. If they seem too dense, you might not have measured the flour correctly. When in doubt, always use a kitchen scale for precision!

Are Coconut Pandan Rolls suitable for those with food allergies?
Great question! This recipe contains dairy and gluten, but it can be easily modified. Swap out milk with plant-based alternatives for a dairy-free version, and replace the egg with a flax egg for those avoiding animal products. For gluten-free options, you can use a 1:1 gluten-free flour substitute, but the texture might vary slightly. Always double-check for any specific allergies!

Can pets eat these rolls?
While Coconut Pandan Rolls are delicious for humans, they contain ingredients like sugar and butter that aren’t suitable for pets. It’s best to keep these delightful treats for yourself and offer your furry friends safe snacks made specifically for them!

Coconut Pandan Rolls Recipe FAQs

Coconut Pandan Rolls

Delicious Coconut Pandan Rolls: Soft, Fluffy & Irresistible

Coconut Pandan Rolls are soft, fluffy buns with a luscious coconut filling that bring tropical flavors to your table.
Prep Time 15 minutes
Cook Time 22 minutes
Rising Time 1 hour 30 minutes
Total Time 2 hours 7 minutes
Servings: 12 rolls
Course: Dessert
Cuisine: Malaysian
Calories: 200

Ingredients
  

Dough Ingredients
  • 1 cup Milk or any plant-based milk for a dairy-free option
  • 1 large Egg or flax egg (1 tbsp ground flaxseed + 2.5 tbsp water)
  • 3 cups All-Purpose Flour
  • 1/4 cup Granulated Sugar or brown sugar for extra moisture
  • 1/4 cup Butter or dairy-free butter for a vegan option
  • 1 tsp Salt
  • 2 tbsp Pandan Paste or pandan extract if needed
  • 2 tsp Active Dry Yeast or instant yeast
Filling Ingredients
  • 1 cup Sweetened Coconut Flakes or desiccated coconut with sweetening

Equipment

  • Bread Machine
  • Skillet
  • Rolling Pin
  • Baking pan
  • Wire Rack

Method
 

Step-by-Step Instructions
  1. Pour the milk into the bread machine pan, followed by cracking the egg. Add all-purpose flour, granulated sugar, salt, butter, pandan paste, and active dry yeast. Close the lid and select the dough setting, then press start. In about 90 minutes, the dough will double in size.
  2. Heat a dry skillet over medium heat and add the sweetened coconut flakes. Stir frequently for about 3–5 minutes until golden brown and fragrant. Remove from heat and let cool.
  3. Lightly flour a clean surface and turn the dough out onto it. Roll it out into a 15-inch square. Brush the surface with melted butter and sprinkle the toasted coconut evenly. Roll the dough tightly into a log shape.
  4. Slice the rolled dough into 12 equal pieces. Arrange them in a greased baking pan, cover with a kitchen towel, and let rise for 30 to 45 minutes until puffed.
  5. Preheat your oven to 400°F (200°C). Uncover the rolls and bake for approximately 20–22 minutes until golden brown and hollow-sounding when tapped.
  6. Remove from the oven and let cool in the pan for 5–10 minutes before transferring to a wire rack to cool completely.

Nutrition

Serving: 1rollCalories: 200kcalCarbohydrates: 30gProtein: 3gFat: 8gSaturated Fat: 5gPolyunsaturated Fat: 1gMonounsaturated Fat: 2gCholesterol: 30mgSodium: 150mgPotassium: 100mgFiber: 1gSugar: 6gVitamin A: 250IUCalcium: 20mgIron: 1mg

Notes

Store leftover rolls in an airtight container for up to 2 days. For longer storage, refrigerate for up to 4 days or freeze individually for up to 2 months.

Tried this recipe?

Let us know how it was!

Keto Pepperoni Cheese Crisps: Crunchy, Guilt-Free Snack Delight

The moment the timer dings, I can hardly contain my excitement. The aroma of Keto Pepperoni Cheese Crisps fills the kitchen, transforming it into a haven of savory delight. These crispy snacks are not just easy to whip up—whether you choose to bake them, microwave, or fry in a skillet—they are also a satisfying low-carb alternative to those greasy chips we often reach for. I love that they combine the rich flavors of cheese with crispy pepperoni, creating bite-sized wonders that are perfect for munching anytime. Plus, they’re gluten-free and grain-free, making them a hit with everyone! Curious how to make these addictive little treats your new go-to snack? Let’s dive into the details!

Why are Keto Pepperoni Cheese Crisps amazing?

Crunchy Delights: These Keto Pepperoni Cheese Crisps offer a satisfying, crispy texture that’s reminiscent of your favorite chips but without the guilt.

Quick to Make: With multiple preparation methods available (oven, microwave, or skillet), these snacks can be ready in minutes—perfect for busy weeknights or spontaneous gatherings.

Flavorful Combinations: The savory mix of melted cheese and pepperoni provides robust flavor in each bite. Experiment with different cheese varieties or spices for a unique twist!

Diet-Friendly: Ideal for those on a keto or low-carb diet, they contain virtually zero net carbs and are gluten-free and grain-free.

Perfect for Sharing: Whether it’s movie night or a casual get-together, these crisps are bound to impress your friends and family. They also pair seamlessly with dips like guacamole or salsa for added enjoyment.

Check out this delightful Cheddar Mac Cheese for more delicious snack ideas!

Keto Pepperoni Cheese Crisps Ingredients

For the Cheese Crisps
Cheddar Cheese – a classic choice that melts beautifully and provides a rich flavor.
Mozzarella Cheese – offers a chewy texture and mild taste that blends perfectly with pepperoni.
Parmesan Cheese – for a sharp, nutty taste that adds extra umami to your crisps.

For the Toppings
Pepperoni Slices – these add a smoky, savory flavor; swap for salami or turkey slices for variety.
Garlic Powder – enhances the flavor profile and pairs beautifully with the cheese.
Paprika – adds a subtle smoky kick, making the crisps even more delightful.

For Serving (Optional)
Guacamole – a creamy dip that pairs excellently with the crunchy crisps.
Salsa – add freshness and zest for a perfect bite-sized appetizer.

Get ready to whip up these lip-smacking Keto Pepperoni Cheese Crisps that will keep you coming back for more!

Step‑by‑Step Instructions for Keto Pepperoni Cheese Crisps

Step 1: Preheat the Oven
Begin by preheating your oven to 400°F (200°C). This temperature is perfect for achieving that crispy texture in your Keto Pepperoni Cheese Crisps. Ensure your oven is fully heated before moving on to the next step; this will help the cheese melt evenly and become golden brown.

Step 2: Prepare the Baking Sheet
Line a baking sheet with parchment paper to prevent sticking and make cleanup easier. Use this time to gather your shredded cheese and pepperoni slices, ensuring you have your cheese combinations ready—choose cheddar, mozzarella, or parmesan, depending on your taste preference.

Step 3: Form the Cheese Mounds
On the prepared baking sheet, scoop small, spaced-apart mounds of shredded cheese. Each mound should be about two tablespoons in size; this spacing allows the cheese to melt and spread without overlapping. Visualize about 2 inches between each mound for optimal crisping.

Step 4: Add the Pepperoni
Top each cheese mound with a slice of pepperoni, pressing it down slightly to secure it. The pepperoni will not only add delicious flavor but will also make for an attractive crispy snack. Feel free to sprinkle a pinch of garlic powder or paprika for added flavor before baking.

Step 5: Bake to Crisp Perfection
Place the baking sheet in the preheated oven and bake for 5 to 7 minutes. Keep a close eye on them; once the cheese melts and the edges turn golden brown, they are ready to come out. The delightful aroma will signal that your Keto Pepperoni Cheese Crisps are almost done!

Step 6: Cool on Baking Sheet
Remove the baking sheet from the oven and allow the crisps to cool for a few minutes directly on the parchment paper. This cooling stage is crucial, as it allows the crisps to harden and become wonderfully crunchy. Don’t rush this step; patience rewards you with the perfect texture.

Step 7: Remove and Serve
Carefully lift the cooled crisps from the parchment paper using a spatula. Transfer them to a serving platter or an airtight container. These Keto Pepperoni Cheese Crisps are now ready to be enjoyed alone or paired with your favorite dips, creating the perfect guilt-free snack for any occasion.

Tips for the Best Keto Pepperoni Cheese Crisps

  • Choose Quality Cheese: Select cheese with no fillers to achieve the crispiest texture. High-quality cheese melts evenly and enhances the flavor of your Keto Pepperoni Cheese Crisps.

  • Mind Your Portions: Be careful not to crowd the baking sheet. Each mound of cheese should have enough space to spread out and crisp up nicely, preventing soggy treats.

  • Cooling is Key: Allow the crisps to cool completely on the parchment paper. This step is vital for maintaining their crunch. Rushing will leave you with chewy snacks instead!

  • Experiment Wisely: Don’t be afraid to play with flavors by adding spices like garlic powder or herbs to the cheese before baking. Just remember, a little goes a long way in your Keto Pepperoni Cheese Crisps!

  • Storage Savvy: If you have leftovers, store them in an airtight container. Reheat briefly in the oven or microwave to bring back that beloved crunch when you’re ready to enjoy them again.

Make Ahead Options

These Keto Pepperoni Cheese Crisps are perfect for busy home cooks looking to save time! You can prepare the cheese mounds ahead of time, storing them in the refrigerator for up to 24 hours before baking. Simply follow the initial steps of forming the cheese mounds on parchment and topping with pepperoni, then cover with plastic wrap and refrigerate. When you’re ready to enjoy, preheat your oven, bake the crisps for 5-7 minutes until golden, and allow them to cool on the baking sheet for that extra crunch. This way, you’ll have a delightfully quick, low-carb snack ready with minimal effort!

What to Serve with Keto Pepperoni Cheese Crisps?

Elevate your snacking experience by pairing these crunchy delights with complementary flavors and textures that excite the palate.

  • Guacamole: This creamy dip adds a fresh twist, perfectly balancing the savory crunch of the crisps with its rich, smooth texture. A match made in snack heaven!

  • Salsa: A zesty and tangy salsa will brighten up your plate, creating a refreshing contrast that heightens the enjoyment of each bite. The fresh ingredients sing with every crunch.

  • Cheese Dip: Indulge in a warm cheese dip for an extra cheesy delight that takes your crispy treats to the next level. Not only does it add fun flavors, but it also intensifies that cheesy goodness!

  • Cauliflower Rice Salad: For a heartier side, serve a cool cauliflower rice salad loaded with veggies. Its crunch and freshness balance the richness of the crisps and keep the meal light yet satisfying.

  • Pepperoni and Cheese Platter: Extend the theme by presenting a platter filled with assorted cheeses, pepperoni, and olives. This not only pairs beautifully but also allows guests to create their perfect snack bites.

  • Sparkling Water or Iced Tea: Refresh your palate with a glass of sparkling water or a cool iced tea. The bubbly or tea flavors invigorate the senses and complement the overall enjoyment of your snacking experience.

How to Store and Freeze Keto Pepperoni Cheese Crisps

Airtight Container: Store the crisps in an airtight container at room temperature for up to 3 days. This keeps them fresh and crunchy, ready to satisfy your snack cravings.

Fridge: If you want to extend their shelf life, place the crisps in the fridge for up to a week, although this may slightly affect their crispness.

Freezer: For longer storage, freeze the crisps in a single layer inside an airtight bag or container for up to 2 months. When ready to enjoy, thaw them in the fridge and reheat in the oven for that fresh-out-of-the-oven taste.

Reheating: To restore the crunch of your Keto Pepperoni Cheese Crisps, reheat them in a preheated oven at 350°F for about 5 minutes, or microwave briefly at low power, watching carefully to avoid sogginess.

Keto Pepperoni Cheese Crisps Variations

Customize your Keto Pepperoni Cheese Crisps into delightful new treats that will surprise your taste buds!

  • Dairy-Free: Use dairy-free cheese alternatives to create a lactose-free version that still packs a crunch.

  • Spicy Kick: Add a sprinkle of crushed red pepper flakes to the cheese for those who love a little heat in their snacks. The balance of spicy and savory will have your taste buds dancing!

  • Herb-Infused: Incorporate dried herbs like oregano or basil into your cheese mixture for an Italian twist. The aroma while baking will transport you to your favorite Italian trattoria.

  • Cheese Variety: Combine different cheeses such as Gouda or pepper jack with mozzarella for a complex flavor profile. Each type will add its unique character to the crisps, making every bite a new experience.

  • Nutty Flavor: Sprinkle toasted sesame seeds on top before baking for added crunch and a nutty flavor. It’ll elevate your crisps from simple to sensational!

  • Sweet Treats: Drizzle melted dark chocolate on cooled crisps for an unexpected sweet-and-savory combination. It sounds unusual, but trust me; the chocolate pairs wonderfully with the pepperoni.

  • Vegetarian Option: Replace pepperoni with roasted red pepper slices or mushrooms for a savory veggie alternative that everyone will love. You’ll enjoy the same satisfying crunch minus the meat.

Consider pairing these tasty crisps with a refreshing guacamole or a zesty salsa. They make for an excellent complement to your homemade Cheeseburger Pockets Snack or alongside delightful Cookies Cream Cheesecake. Enjoy exploring these variations!

Keto Pepperoni Cheese Crisps Recipe FAQs

What type of cheese is best for Keto Pepperoni Cheese Crisps?
Absolutely! The best cheese for making these crisps includes cheddar, mozzarella, or parmesan. I recommend using cheese that’s free from fillers, as this helps achieve a beautiful, crisp texture. Cheddar provides a robust flavor, while mozzarella offers a delightful chewiness. Parmesan adds a sharp, nutty taste that elevates the crisps even further!

How should I store Keto Pepperoni Cheese Crisps?
Store your Keto Pepperoni Cheese Crisps in an airtight container at room temperature for up to 3 days. If you want to keep them fresh for a bit longer, they can be refrigerated for up to one week, although the texture might vary. Just ensure they’re completely cooled before sealing them up!

Can I freeze Keto Pepperoni Cheese Crisps?
Very! Freezing is a great option for these crisps. To freeze, arrange them in a single layer on a baking sheet and place them in the freezer until solid. Then, transfer the crisps to an airtight container or freezer bag, ensuring to remove as much air as possible. They’ll stay fresh for up to 2 months this way. When you’re ready to enjoy, just thaw in the fridge and reheat for that delightful crunch!

What can I do if my crisps are chewy instead of crunchy?
Oh no, nobody wants chewy crisps! If your Keto Pepperoni Cheese Crisps come out chewy, it could be due to overcrowding the baking sheet or not cooling them properly after baking. To fix this, try spacing your cheese mounds further apart next time, and give them ample time to cool on the parchment paper. This will allow the moisture to escape, ensuring a perfect crunch!

Are there any dietary considerations I should keep in mind?
Definitely! These Keto Pepperoni Cheese Crisps are gluten-free and grain-free, making them suitable for those on keto or looking to reduce carbs. If you or anyone you’re serving has dairy allergies, consider using dairy-free cheese alternatives, or simply enjoy the crisps without the cheese entirely. Always check labels for specific dietary needs!

Keto Pepperoni Cheese Crisps

Keto Pepperoni Cheese Crisps: Crunchy, Guilt-Free Snack Delight

Keto Pepperoni Cheese Crisps are a crunchy, low-carb snack that's easy to make and packed with flavor.
Prep Time 10 minutes
Cook Time 7 minutes
Cooling Time 5 minutes
Total Time 22 minutes
Servings: 4 crisps
Course: Appetizer
Cuisine: Keto
Calories: 150

Ingredients
  

For the Cheese Crisps
  • 1 cup Cheddar Cheese shredded
  • 1 cup Mozzarella Cheese shredded
  • 0.5 cup Parmesan Cheese grated
For the Toppings
  • 1 cup Pepperoni Slices
  • 1 teaspoon Garlic Powder
  • 1 teaspoon Paprika
For Serving (Optional)
  • 1 cup Guacamole for dipping
  • 1 cup Salsa for dipping

Equipment

  • Oven
  • Baking Sheet
  • Parchment paper
  • Spatula

Method
 

Cooking Instructions
  1. Preheat the oven to 400°F (200°C) to ensure crispy texture.
  2. Line a baking sheet with parchment paper.
  3. Scoop small, spaced-apart mounds of shredded cheese on the prepared baking sheet.
  4. Top each cheese mound with a slice of pepperoni and sprinkle with garlic powder and paprika.
  5. Bake for 5 to 7 minutes until the cheese melts and edges are golden brown.
  6. Allow the crisps to cool for a few minutes on the baking sheet before serving.
  7. Carefully lift the cooled crisps and transfer them to a serving platter or an airtight container.

Nutrition

Serving: 5crispsCalories: 150kcalCarbohydrates: 2gProtein: 10gFat: 12gSaturated Fat: 7gPolyunsaturated Fat: 1gMonounsaturated Fat: 3gCholesterol: 30mgSodium: 300mgPotassium: 100mgFiber: 1gVitamin A: 200IUCalcium: 200mgIron: 1mg

Notes

Choose high-quality cheese for better texture and flavor. Store leftovers in an airtight container to maintain crispness.

Tried this recipe?

Let us know how it was!

Taco Casserole: A Hearty, Comforting Dinner Delight

As I stood in my kitchen, the rich scent of spices wafting through the air reminded me of the cozy meals shared with family. Today, I’m excited to share my Whole30 Taco Casserole, a nourishing dish that effortlessly blends comfort and health. It’s loaded with ground beef and vibrant veggies, all baked to perfection, making it a go-to option for easy weeknight dinners and delightful meal prep. Not only is this casserole simple to put together, but it’s also gluten-free and packed with flavors that even the pickiest eaters will love. Ready to make a nutritious meal that satisfies cravings without the fuss? Let’s dive in and create a family favorite that will have everyone asking for seconds!

Why is this Taco Casserole a Must-Try?

Quick Prep Time: This casserole comes together in just a few easy steps, perfect for busy weeknights.

Flavor Explosion: Packed with savory ground beef and zesty spices, each bite bursts with deliciousness that will warm your heart.

Health-Conscious Choice: Whole30-approved, it’s a nutritious alternative to fast food without sacrificing flavor.

Family Appeal: Even picky eaters will enjoy this dish, making it a hit at the dinner table.

Endless Variations: Customize it to your taste by swapping out proteins or veggies, just like in my ground beef potato taco bowl.

Enjoy this easy, comforting meal that brings everyone together and makes healthy eating a joy!

Taco Casserole Ingredients

For the Meat Mixture

  • Ground Beef – Provides protein and richness; opt for lean beef to keep it healthier.
  • Chili Powder – Adds warmth and depth; feel free to substitute with taco seasoning if that’s on hand.
  • Cumin – Brings an earthy tone; coriander serves as a suitable alternative for a unique flavor.
  • Garlic Powder – Enhances savory notes; for a fresher taste, use minced garlic instead.
  • Salt – Adjusts overall flavor; sprinkle according to your taste preference.
  • Black Pepper – Adds a slight heat; freshly cracked can amplify its intensity.
  • Cayenne (optional) – For a fiery kick; feel free to omit for a milder casserole.

For the Veggies and Base

  • White Onion, diced – Offers sweetness and texture; yellow or red onion are great substitutes.
  • Green Peppers, diced – Adds crunch and color; you can use any bell pepper variety.
  • Russet Potatoes, diced – Serves as a hearty base; swap for sweet potatoes to change the flavor profile.
  • Salsa – Provides moisture and zest; ensure it’s no-sugar-added to comply with Whole30.
  • Mild Green Chiles (canned, drained) – Infuses mild heat; jarred jalapeños can add extra spice if desired.
  • Sliced Black Olives (canned, drained) – Contributes a briny flavor; can be omitted if you prefer.
  • Diced Tomatoes (canned, drained) – Provides juiciness; fresh tomatoes work beautifully in season.

For Binding

  • Minced Garlic – Lends a fresh flavor; can be replaced with garlic powder at a 1:1 ratio if preferred.
  • Beaten Eggs – Binds the casserole for a hearty texture; omit for a different consistency, but the binding will change.

This Taco Casserole is a beautiful blend of flavors and textures, making it a satisfying meal option that fits seamlessly into your healthy eating journey!

Step‑by‑Step Instructions for Taco Casserole

Step 1: Preheat the Oven
Begin by preheating your oven to 350°F (175°C). This ensures that your Taco Casserole will bake evenly and develop a beautifully crisp top when it comes out of the oven. While the oven heats, gather your ingredients and prepare your workspace to make the cooking process smoother.

Step 2: Brown the Meat
In a large skillet, over medium heat, add the ground beef and allow it to brown for about 5-7 minutes. Use a spatula to break it apart and stir as it cooks. When the meat is no longer pink, add the minced garlic and diced onion, cooking until the onion is softened and translucent, which should take another 3-4 minutes.

Step 3: Prepare the Veggie Mixture
While the beef mixture cooks, grab a large casserole dish and combine the diced green peppers, russet potatoes, salsa, mild green chiles, sliced black olives, and diced tomatoes. Mix everything thoroughly until all ingredients are well-coat and evenly distributed, creating a colorful and hearty base for your Taco Casserole.

Step 4: Combine Beef and Spices
Once the beef is browned and the onions are tender, drain any excess grease from the pan. Return the beef mixture to the skillet and stir in chili powder, cumin, garlic powder, salt, black pepper, and cayenne if using. Allow the spices to toast for about 1-2 minutes, enhancing the flavors before proceeding.

Step 5: Mix Everything Together
Transfer the seasoned beef mixture into the prepared casserole dish with the vegetables. Next, add the beaten eggs, which will help bind all the ingredients together as they bake. Mix everything thoroughly until all components are well incorporated into a cohesive and colorful mixture.

Step 6: Bake the Casserole
Cover the casserole dish with aluminum foil to trap the steam, which will cook the potatoes perfectly. Bake your Taco Casserole in the preheated oven for 45 minutes to 1 hour, or until the potatoes are tender when pierced with a fork. The top should be slightly golden and fragrant when done.

Step 7: Serve and Enjoy
Once baked to perfection, remove the casserole from the oven and let it sit for a few minutes before serving. Dish up generous portions over fresh greens or your favorite toppings like avocado, pico de gallo, or guacamole. This Taco Casserole is a comforting meal that is ready to be enjoyed!

How to Store and Freeze Taco Casserole

Fridge: Store leftovers in an airtight container for up to 4 days. Reheat individual portions in the microwave or oven until hot throughout for a quick meal that satisfies.

Freezer: Freeze unbaked taco casserole before cooking or store leftovers for up to 3 months. Wrap tightly in plastic wrap and aluminum foil to prevent freezer burn for best results.

Reheating: To reheat a frozen taco casserole, thaw in the fridge overnight, then bake at 350°F (175°C) for approximately 30-40 minutes until heated through and bubbly.

Room Temperature: Avoid leaving taco casserole out for more than 2 hours to ensure food safety and freshness.

What to Serve with Whole30 Taco Casserole

As you dish out this delicious casserole, let your imagination run wild with the perfect accompaniments that will elevate your meal experience!

  • Crisp Side Salad: A refreshing mix of greens and colorful veggies adds crunch and balances the savory flavors of the casserole.

  • Sliced Avocado: Creamy avocado slices bring a luscious texture that harmonizes beautifully with the hearty casserole. Plus, they add those good fats everyone loves!

  • Guacamole: The zesty, fresh flavor of guacamole perfectly complements the seasoned ground beef, offering a delightful dip for extra flavor with every bite.

  • Cauliflower Rice: Low-carb and nutrient-rich, cauliflower rice is a delightful substitute that soaks up the casserole’s flavors, making it a satisfying base for each serving.

  • Pico de Gallo: This fresh salsa made with tomatoes, cilantro, and onions adds a zesty kick that enhances the entire meal experience with vibrant flavor.

  • Dairy-Free Sour Cream: A smooth dollop of dairy-free sour cream provides a cool contrast to the warm, hearty casserole, offering a delightful finish to each forkful.

  • Sweet Potato Fries: Crispy on the outside and soft on the inside, sweet potato fries add a touch of sweetness, creating a delightful balance with the savory casserole.

  • Sparkling Water or Iced Tea: Quench your thirst with a refreshing sparkling water or a chilled iced tea, adding a touch of elegance to your wholesome meal.

Explore these delightful pairings for your Whole30 Taco Casserole, and craft a meal that everyone at the table will love!

Taco Casserole Variations & Substitutions

Feel free to explore these delightful twists to make this taco casserole truly your own!

  • Dairy-Free Cheese: Swap regular cheese with dairy-free cheese or nutritional yeast for a rich, cheesy flavor without the dairy.
  • Veggie Boost: Add extra veggies like zucchini or spinach to amp up the nutrition and flavor; they’re packed with vitamins and give wonderful texture.
  • Lean Protein: Substitute ground beef with shredded chicken or turkey for a lighter option that’s still satisfying and delicious.
  • Sweet Potato Base: Replace russet potatoes with sweet potatoes for a slightly sweeter flavor and added nutrients that complement the spices beautifully.
  • Spice Level: Increase heat by adding diced jalapeños or swapping cayenne pepper for chipotle powder for a smoky kick.
  • Fresh Herbs: Top off the casserole with fresh cilantro or green onions just before serving for a pop of flavor that brightens every bite.
  • Black Bean Twist: Add a can of drained black beans for added protein and a different texture that works harmoniously with the other ingredients.
  • Taco Seasoning: If you prefer an extra flavor kick, use a packet of taco seasoning instead of individual spices for a quick and easy alternative.

With these variations, you can enjoy endless possibilities for your taco casserole, just like how a comforting dish can easily transform into a delightful weekly tradition! For more hearty meals, you might love my flavorsome Hobo Casserole or the delightful Taco Lasagna.

Expert Tips for Taco Casserole

  • Drain Canned Ingredients: Thoroughly drain all canned items, such as olives and tomatoes, to avoid excess liquid making your casserole soggy.

  • Firmness Matters: Including beaten eggs helps bind the casserole together, giving it a firmer texture. Skip them for a softer consistency.

  • Customize Your Veggies: Feel free to add in other veggies like zucchini or spinach for added nutrition and flavor variations in your Taco Casserole.

  • Leftover Love: Store any leftover casserole in an airtight container in the refrigerator for up to 4 days, making for quick meals throughout the week.

  • Dairy-Free Options: If you’re looking to keep this dish dairy-free, consider topping it with avocado or a sprinkle of nutritional yeast for a cheesy feel without the dairy.

Make Ahead Options

These Whole30 Taco Casseroles are a lifesaver for meal prep enthusiasts! You can prepare the entire casserole up to 24 hours in advance by assembling it in the dish and covering it tightly with plastic wrap or foil to maintain moisture and flavor. If you prefer to prep components separately, you can sauté the ground beef and veggies, then refrigerate them for up to 3 days. Just be sure to allow the mixture to cool before storing to prevent steaming. When you’re ready to enjoy, simply bake the casserole straight from the fridge, adjusting the cooking time to ensure everything is heated through and delicious. With these make-ahead options, you’ll have wholesome, home-cooked comfort for busy weeknights without the rush!

Whole30 Taco Casserole Recipe FAQs

What type of ground beef should I use for the casserole?
Absolutely! For a healthier option, lean ground beef is recommended. It has lower fat content, which makes the casserole lighter without sacrificing flavor. If you prefer to switch things up, ground turkey or shredded chicken would work beautifully as well.

How should I store leftovers?
Very! You can store any leftover Taco Casserole in an airtight container in the refrigerator for up to 4 days. When you’re ready to dig in again, simply reheat individual portions in the microwave or oven until they are heated through. It’s a quick and satisfying meal!

Can I freeze the Taco Casserole?
Absolutely! If you’re looking to save this delicious meal for later, you can freeze the unbaked taco casserole before cooking or any leftovers for up to 3 months. Just wrap it tightly in plastic wrap and then aluminum foil to prevent freezer burn. When you’re ready to enjoy, thaw it overnight in the fridge and bake as instructed!

What should I do if my casserole is too watery?
If you find yourself with a watery casserole, it could be due to excess liquid from canned ingredients such as tomatoes or olives. To fix this, ensure all canned items are drained thoroughly before mixing them into the casserole. Adding a bit more potato or baking longer uncovered can also help to absorb the moisture.

Are there any dietary considerations for this recipe?
Very much so! This Taco Casserole is Whole30, Paleo, and gluten-free, making it suitable for various dietary needs. If you’re preparing it for someone with an allergy, be mindful of the ingredients used—like green chiles if they’re sensitive to nightshades. It’s best to customize the recipe according to your guests’ preferences.

Can I substitute any ingredients for different flavors?
Absolutely! You can get creative with this Taco Casserole. Consider swapping ground beef for shredded chicken or turkey for a leaner dish. You might also incorporate different vegetables, such as spinach or even cauliflower rice, for added nutrients, making it your own unique creation!

Taco Casserole

Taco Casserole: A Hearty, Comforting Dinner Delight

Taco Casserole is a Whole30-approved dish loaded with ground beef and veggies, perfect for family dinners.
Prep Time 15 minutes
Cook Time 1 hour
Total Time 1 hour 15 minutes
Servings: 6 servings
Course: Dinner
Cuisine: Mexican
Calories: 350

Ingredients
  

For the Meat Mixture
  • 1 lb Ground Beef opt for lean beef
  • 2 tbsp Chili Powder can substitute with taco seasoning
  • 1 tsp Cumin coriander is a suitable alternative
  • 1 tsp Garlic Powder or use minced garlic
  • 1 tsp Salt to taste
  • 1 tsp Black Pepper freshly cracked for more intensity
  • 1/4 tsp Cayenne optional for heat
For the Veggies and Base
  • 1 medium White Onion, diced yellow or red onion can be substitutes
  • 1 cup Green Peppers, diced any bell pepper variety works
  • 2 medium Russet Potatoes, diced sweet potatoes can be used instead
  • 1 cup Salsa ensure it’s no-sugar-added
  • 1 can Mild Green Chiles, drained jarred jalapeños can be added for spice
  • 1/2 cup Sliced Black Olives, drained optional
  • 1 can Diced Tomatoes, drained fresh tomatoes can be used
For Binding
  • 2 cloves Minced Garlic or replace with garlic powder
  • 2 large Beaten Eggs omit for a different consistency

Equipment

  • large skillet
  • Casserole dish
  • Spatula

Method
 

Step-by-Step Instructions for Taco Casserole
  1. Preheat your oven to 350°F (175°C) and gather your ingredients.
  2. In a large skillet, brown the ground beef for 5-7 minutes, then add minced garlic and diced onion, cooking for an additional 3-4 minutes.
  3. In a casserole dish, combine the diced green peppers, russet potatoes, salsa, mild green chiles, sliced black olives, and diced tomatoes.
  4. Drain excess grease from the beef, then stir in chili powder, cumin, garlic powder, salt, black pepper, and cayenne. Toast for 1-2 minutes.
  5. Transfer the beef mixture into the casserole dish with the veggies, add beaten eggs, and mix thoroughly.
  6. Cover the dish with aluminum foil and bake for 45 minutes to 1 hour until the potatoes are tender.
  7. Let it sit for a few minutes before serving over fresh greens or with toppings of choice.

Nutrition

Serving: 1servingCalories: 350kcalCarbohydrates: 30gProtein: 25gFat: 15gSaturated Fat: 5gPolyunsaturated Fat: 1gMonounsaturated Fat: 10gCholesterol: 150mgSodium: 600mgPotassium: 800mgFiber: 5gSugar: 4gVitamin A: 10IUVitamin C: 25mgCalcium: 5mgIron: 15mg

Notes

Store leftovers in an airtight container for up to 4 days. Can freeze unbaked or cooked leftovers for up to 3 months.

Tried this recipe?

Let us know how it was!

Spicy Spanish Clams with Tomatoes for a Quick Tasty Tapas

A delightful fusion of sea and spice fills the air while cooking Spicy Spanish Clams with Tomatoes, transporting me to the sun-soaked coasts of Spain with every aromatic whiff. This recipe captures the essence of quick and satisfying tapas, where smoky paprika and juicy clams come together in a vibrant tomato sauce. Not only can this dish be prepared in just 25 minutes, but it also doubles as a crowd-pleasing appetizer or a pasta topper that will leave your loved ones asking for seconds. Whether you’re a seasoned home chef or simply seeking a dish to impress, this seafood gem has you covered. Are you ready to dive into the flavors that celebrate the Mediterranean spirit?

Why are you going to adore this dish?

Simplicity, this recipe comes together in just 25 minutes, making it perfect for weeknight dinners or last-minute gatherings. Flavor-packed, the combination of smoky paprika, fresh clams, and aromatic tomatoes delivers an irresistible taste of Spain right in your kitchen. Versatile, don’t hesitate to swap the clams for mussels or shrimp, tailoring it to your preference. Crowd-pleasing, serve these vibrant tapas as a stunning appetizer or a hearty pasta topping that’s sure to impress. Authentic, each bite transports you to sun-drenched Mediterranean shores, inviting everyone to gather around the table! For more mouthwatering seafood options, check out my delicious Coconut Curry Soup or explore the stunning flavors of Spicy Thai Basil.

Spicy Spanish Clams with Tomatoes Ingredients

For the Clams
Fresh clams (1 lb) – Main protein source; any type of fresh clams can be used.

For the Aromatics
Garlic (3 cloves) – Adds aromatic depth; mince finely for best flavor.
Onion (1/2) – Provides sweetness and texture; any onion works, with yellow preferred.

For the Sauce
Sweet smoked Spanish paprika (1/2 tsp) – Adds a smoky, sweet flavor; swap with regular paprika if unavailable.
Hot smoked Spanish paprika (1/2 tsp) – Provides the spicy kick; adjust to taste or substitute with cayenne for extra heat.
Canned diced tomatoes (15 oz) – Forms the sauce base; substitute with fresh diced tomatoes in season for a fresher taste.
Extra virgin olive oil (2 tbsp) – For sautéing and flavor; use high-quality oil for best results.
Sea salt & black pepper (pinch each) – Essential seasoning to enhance flavors.

For Garnish
Fresh parsley (handful) – Used for garnish and additional flavor; substitute with fresh basil if desired.

Step‑by‑Step Instructions for Spicy Spanish Clams with Tomatoes

Step 1: Clean the Clams
Begin by rinsing the fresh clams under cold running water to remove any grit or sand. Use your hands to scrub the shells gently, ensuring they’re clean. Shake off any excess water and set the clams aside while you prepare the aromatics, as this step is crucial for a delightful Spicy Spanish Clams with Tomatoes dish.

Step 2: Sauté the Aromatics
In a large skillet, heat the extra virgin olive oil over medium heat. Once shimmering, add the minced garlic and diced onion. Sauté them for about 3 minutes, or until the onion becomes translucent and fragrant, releasing a golden hue. This aromatic base will add depth and flavor to the tomato sauce that will envelop the clams.

Step 3: Add the Paprika
Stir in both the sweet smoked and hot smoked Spanish paprika into the pan, mixing well for about 1 minute. You’ll notice the vibrant colors and smoky aroma filling the kitchen. This step is essential to create a robust flavor profile that defines the essence of your Spicy Spanish Clams with Tomatoes.

Step 4: Create the Sauce
Next, pour in the canned diced tomatoes along with a pinch of sea salt and black pepper. Stir everything together and bring it to a gentle simmer over medium heat. Let the sauce bubble away for about 5 minutes, allowing the tomatoes to soften and meld with the spices into a rich, inviting sauce.

Step 5: Incorporate the Clams
Carefully add the cleaned clams to the sauce, ensuring they are well mixed in. Cover the skillet with a lid and lower the heat to medium-low, creating steam that helps cook the clams. Allow them to cook for 6 to 8 minutes or until the clams open, reminding you that your Spicy Spanish Clams with Tomatoes are nearly ready!

Step 6: Discard Unopened Clams
After cooking, check the clams and discard any that haven’t opened as a precaution. These might not be suitable for consumption. With the rest of the clams now nestled in a luscious sauce, give everything a gentle toss to coat them beautifully in the flavors you’ve created.

Step 7: Serve and Garnish
Serve the Spicy Spanish Clams with Tomatoes directly from the skillet for a rustic touch. Garnish generously with freshly chopped parsley to add a splash of color and vibrancy. Pair with crusty bread on the side to soak up every last drop of that heavenly sauce, inviting everyone to indulge in this delightful seafood experience!

Spicy Spanish Clams with Tomatoes Variations

Feel free to get creative with this dish and make it your own with these fun variations!

  • Mussels or Shrimp: Swap out the clams for mussels or succulent shrimp for a delightful change in texture and flavor. Either option pairs wonderfully with the smoky sauce!

  • Fresh Tomatoes: If you have fresh tomatoes on hand, use them instead of canned for a brighter, seasonal taste. Just dice them and add them in when the sauce is ready to simmer.

  • Vegetarian Twist: Transform this into a vegetarian delight by omitting seafood entirely. Replace clams with diced zucchini and bell peppers for a colorful veggie medley that still sings with flavor.

  • Spice it Up: Want an extra kick? Add a pinch of red pepper flakes or a splash of your favorite hot sauce to the sauce while it simmers. It’ll give your dish a delightful heat that warms the soul.

  • Herb Infusion: Sprinkle in some fresh thyme or oregano alongside the parsley for an herbaceous twist. These aromatics will elevate the Mediterranean vibes and add depth to your sauce.

  • Coconut Cream: For a creamy variation, stir in a touch of coconut cream during the simmering process. This adds a subtly sweet flavor, balancing the spices beautifully.

  • Pasta Dish: Turn this into a sensational pasta dish by serving the clams and sauce over your favorite cooked pasta. Toss with some olive oil and freshly grated cheese for a satisfying meal.

  • Wine-Laced Sauce: Integrate a splash of white wine when adding the tomatoes for a sophisticated flavor boost. The acidity will enhance the overall richness of your Spicy Spanish Clams with Tomatoes.

These variations add a personal touch, inviting you to tailor the dish to your tastes. For more exciting seafood flavors, be sure to explore my delightful Coconut Curry Soup or try whipping up some amazing Tuna Macaroni Salad. Enjoy your culinary adventure!

How to Store and Freeze Spicy Spanish Clams with Tomatoes

Fridge: Store leftover Spicy Spanish Clams with Tomatoes in an airtight container for up to 2 days. Reheating gently in the pan will preserve the clams’ texture.

Freezer: While not recommended for optimal taste, you can freeze the dish for up to 1 month. Store it in a freezer-safe container, but be aware that clams may toughen upon thawing.

Reheating: For best results, reheat the dish on low heat until warmed through. Avoid boiling, as it can overcook the clams and alter their texture.

Make Ahead Options

These Spicy Spanish Clams with Tomatoes are ideal for meal prep, saving you time on busy weeknights! You can clean the clams and store them in the refrigerator for up to 24 hours before cooking, ensuring they remain fresh. Additionally, you can prepare the sautéed garlic, onion, and spices, refrigerating that mixture for up to 3 days. When it’s time to enjoy your dish, simply reheat the aromatics in a skillet, add the canned tomatoes, and then incorporate the fresh clams, cooking until they open. This way, you’ll have a delicious meal ready with minimal effort and maximum flavor!

What to Serve with Spicy Spanish Clams with Tomatoes

Dive into a delightful dining experience that enhances the flavors and complements your tapas!

  • Crusty Bread: Perfect for soaking up the aromatic tomato sauce, a freshly baked baguette makes every bite a sweet escape.

  • Garlic Butter Shrimp: The delicate sweetness of shrimp sautéed in garlic butter pairs beautifully with the smoky, spicy notes of your clams. Together, they create an unforgettable seafood medley.

  • Mixed Green Salad: A refreshing side of mixed greens tossed with a zesty vinaigrette adds a crunchy contrast to the tender clams and robust sauce, balancing the meal perfectly.

  • Spanish Red Wine: A glass of Tempranillo enhances the meal, mirroring the rich flavors of the dish while cutting through the spice with its smooth finish.

  • Patatas Bravas: Crispy, spiced potatoes with flavorful aioli are a classic pairing that complements the seafood’s richness and adds a comforting texture to the table.

  • Lemon Sorbet: This refreshing palate cleanser brings a bright citrus note, perfect for finishing off your meal while preparing you for the next delicious bite.

Expert Tips for Spicy Spanish Clams with Tomatoes

  • Cleaning Clams: Ensure all clams are cleaned properly under cold water to prevent grit in your dish. Discard any clams that do not open during cooking.
  • Quality Ingredients: Use high-quality extra virgin olive oil and smoked paprikas for an authentic flavor in your Spicy Spanish Clams with Tomatoes dish.
  • Adjusting Spice Levels: If you prefer milder flavors, reduce the amount of hot smoked paprika or substitute with mild chili powder.
  • Wine Addition: For a richer sauce, consider adding a splash of white wine during the simmering phase; it will enhance the flavors beautifully.
  • Serving Suggestions: Serve this dish directly from the pan for a rustic presentation, garnished with fresh parsley and crusty bread for dipping.

Spicy Spanish Clams with Tomatoes Recipe FAQs

What type of clams should I use for this recipe?
Absolutely! You can use any fresh clams such as littleneck, Manila, or epicurean clams for this dish. Just be sure they are alive and tightly closed before cooking – any clams that are open should be tapped lightly; if they do not close, discard them.

How can I store leftover Spicy Spanish Clams with Tomatoes?
Leftovers can be stored in an airtight container in the refrigerator for up to 2 days. Just make sure to let them cool to room temperature before sealing. When you’re ready to eat them again, gently reheat in a skillet on low heat to retain their tender texture.

Can you freeze Spicy Spanish Clams with Tomatoes?
While not ideal, you can freeze this dish for up to 1 month. Store it in a freezer-safe container, but note that clams may toughen during reheating. For best results, thaw overnight in the fridge and reheat gently on low heat until warmed through.

What should I do if my clams don’t open while cooking?
No worries at all! Discard any clams that remain closed after cooking, as that indicates they weren’t safe to eat. This ensures you enjoy only fresh and perfectly cooked clams in your Spicy Spanish Clams with Tomatoes!

Are there any dietary considerations for this dish?
If you’re concerned about allergies, keep in mind that this recipe features seafood, which can be a common allergen. Always check for fresh shellfish allergies for your guests. As for pets, it’s best to avoid sharing any leftovers with them, as shellfish can be risky for some animals.

Can I use substitutes for any ingredients?
Very! If clams are not available, feel free to swap them for mussels or shrimp. If you prefer a vegetarian option, consider omitting the seafood entirely and using chopped zucchini and bell peppers instead, keeping the same vibrant flavor profile!

Spicy Spanish Clams with Tomatoes

Spicy Spanish Clams with Tomatoes for a Quick Tasty Tapas

A quick and flavorful recipe for Spicy Spanish Clams with Tomatoes, perfect for tapas lovers.
Prep Time 10 minutes
Cook Time 15 minutes
Total Time 25 minutes
Servings: 4 servings
Course: Appetizer
Cuisine: Spanish
Calories: 250

Ingredients
  

For the Clams
  • 1 lb Fresh clams Any type of fresh clams can be used.
For the Aromatics
  • 3 cloves Garlic Mince finely for best flavor.
  • 1/2 Onion Any onion works, with yellow preferred.
For the Sauce
  • 1/2 tsp Sweet smoked Spanish paprika Swap with regular paprika if unavailable.
  • 1/2 tsp Hot smoked Spanish paprika Adjust to taste or substitute with cayenne.
  • 15 oz Canned diced tomatoes Substitute with fresh diced tomatoes in season.
  • 2 tbsp Extra virgin olive oil Use high-quality oil for best results.
  • a pinch Sea salt Essential seasoning to enhance flavors.
  • a pinch Black pepper Essential seasoning to enhance flavors.
For Garnish
  • handful Fresh parsley Substitute with fresh basil if desired.

Equipment

  • large skillet

Method
 

Step‑by‑Step Instructions for Spicy Spanish Clams with Tomatoes
  1. Begin by rinsing the fresh clams under cold running water to remove any grit or sand. Use your hands to scrub the shells gently, ensuring they’re clean.
  2. In a large skillet, heat the extra virgin olive oil over medium heat. Once shimmering, add the minced garlic and diced onion. Sauté for about 3 minutes, or until the onion becomes translucent and fragrant.
  3. Stir in both the sweet smoked and hot smoked Spanish paprika into the pan, mixing well for about 1 minute.
  4. Pour in the canned diced tomatoes along with a pinch of sea salt and black pepper. Stir and bring to a gentle simmer over medium heat for about 5 minutes.
  5. Carefully add the cleaned clams to the sauce, cover with a lid, and lower the heat to medium-low. Allow them to cook for 6 to 8 minutes or until the clams open.
  6. Check the clams and discard any that haven’t opened. Toss the remaining clams gently to coat them in the sauce.
  7. Serve the dish directly from the skillet and garnish generously with freshly chopped parsley.

Nutrition

Serving: 1servingCalories: 250kcalCarbohydrates: 15gProtein: 20gFat: 12gSaturated Fat: 2gPolyunsaturated Fat: 1gMonounsaturated Fat: 9gCholesterol: 45mgSodium: 800mgPotassium: 400mgFiber: 3gSugar: 5gVitamin A: 500IUVitamin C: 10mgCalcium: 80mgIron: 5mg

Notes

Store leftover clams in an airtight container for up to 2 days. Not recommended to freeze for optimal taste.

Tried this recipe?

Let us know how it was!

Irresistible Pistachio Puppy Chow for Sweet Snacking Bliss

You know that feeling when you uncover a treasure from your childhood? That’s exactly what making Pistachio Puppy Chow brings to mind! This simple and sweet recipe is a delightful blend of nostalgia and modern indulgence, perfect for satisfying your sweet tooth or impressing guests at gatherings. With just 15 minutes of prep time, this crunchy treat is not only gluten-free when using the right Chex and pudding mix, but it also delivers a colorful burst of flavor that makes it a fantastic crowd-pleaser. Imagine serving a bowl of this vibrant mix during movie nights or as a unique gift – you won’t believe how quickly it disappears! Are you ready to dive into this delicious, pistachio-infused adventure? Let’s get started!

Why is Pistachio Puppy Chow So Irresistible?

Nostalgic Delight: This Pistachio Puppy Chow is a treasure trove of memories, combining nostalgic flavors with a modern twist.
Quick and Easy: With just 15 minutes of prep, it’s perfect for last-minute snacking or surprises!
Colorful Presentation: Its vibrant green hue not only looks festive but also makes it a hit at parties.
Gluten-Free Option: Easily modify using gluten-free Chex and pudding mix to ensure everyone can enjoy this treat!
Versatile Snacking: Serve it as a crunchy snack, a fun movie night munch, or even package it for gift-giving! Combine it with recipes like Summer Corn Chowder for a perfect treat spread.

Pistachio Puppy Chow Ingredients

• Experience the magic of flavor with these delightful ingredients!

For the Cereal Base

  • Rice Chex cereal – Adds the perfect crunch and texture; feel free to substitute with Crispix or Corn Chex for a delightful twist.

For the Coating

  • White chocolate chips – Provides irresistible sweetness and a smooth finish; consider using vanilla or butterscotch chips for a flavored variation.
  • Unsalted butter – Enhances richness; it’s crucial to stick with butter instead of margarine for best results.
  • Sweetened condensed milk – Infuses creaminess; an essential ingredient for achieving that beloved consistency, no substitutes recommended.

For Flavoring

  • Instant pistachio pudding mix – The star of this recipe, delivering vibrant flavor and color; try swapping for vanilla or banana if you’re feeling adventurous!
  • Vanilla extract – Elevates the overall taste; opt for pure vanilla for a richer flavor profile.

For the Topping

  • Powdered sugar – Coats the puppy chow with just the right amount of sweetness.
  • Crushed pistachios (optional) – Adds an extra crunch and nutty flavor; feel free to replace with any nut of your choice or omit if allergies are a concern.

Dive into your cooking adventure and make your own Pistachio Puppy Chow—a transformative treat that promises to be a hit for every occasion!

Step‑by‑Step Instructions for Pistachio Puppy Chow

Step 1: Prepare the Cereal
In a large mixing bowl, carefully add 6 cups of Rice Chex cereal. Take your time to ensure all pieces are intact and none are crushed. Set this bowl aside, as it will hold the mixture that transforms into your delightful Pistachio Puppy Chow.

Step 2: Melt the Butter
Grab a microwave-safe bowl and add 1/4 cup of unsalted butter. Microwave in 30-second intervals, stirring after each round, until the butter is completely melted and bubbling gently. This should take about 1-2 minutes. A smooth, hot liquid will serve as the base for your decadent coating.

Step 3: Mix Chocolate and Milk
Into the melted butter, stir in 1 cup of white chocolate chips alongside 1/2 cup of sweetened condensed milk. Microwave this mixture again, but now in 15-20 second intervals, stirring each time until the chocolate is fully melted and the mixture is silky smooth. This luscious blend is key to making your Pistachio Puppy Chow delightful!

Step 4: Combine Pudding Mix
Once the chocolate mixture is smooth, blend in 1 (3.4 oz) box of pistachio pudding mix and 1/2 teaspoon of vanilla extract. Stir vigorously until the mixture is completely combined and smooth in consistency, exhibiting a vibrant green color. The pudding mix is what infuses the signature flavor into your treat.

Step 5: Coat the Cereal
Pour your creamy pistachio mixture over the prepared Rice Chex cereal. Working gently with a spatula, fold the cereal into the mixture. Continue until all pieces are generously coated, taking care not to crush the cereal. This step will ensure that every bite of your Pistachio Puppy Chow is bursting with flavor.

Step 6: Shake in Sugar
Transfer the coated cereal mixture into a large zip-top bag. Add 1 1/2 cups of powdered sugar, seal the bag tightly, and shake it vigorously. Continue shaking until all the cereal is evenly coated in powdered sugar, which adds sweetness and helps prevent clumping.

Step 7: Add Pistachios
Open the zip-top bag and sprinkle in your crushed pistachios for extra crunch and flavor. Seal the bag once more and give it a gentle shake to combine. This step adds a delightful texture to your Pistachio Puppy Chow, making it extra special!

Step 8: Serve or Store
Pour the completed Pistachio Puppy Chow into a festive serving bowl for immediate enjoyment. Alternatively, if you want to save some for later, store it in an airtight container at room temperature. It will keep well for up to one week, but I doubt it will last that long—it’s just too delicious!

Make Ahead Options

These Pistachio Puppy Chow treats are ideal for meal prep, saving you time on busy days! You can prepare and coat the Rice Chex cereal up to 24 hours in advance. Simply follow the initial steps of melting the butter, mixing in the white chocolate and sweetened condensed milk, and blending in the pistachio pudding mix, then pour it over the cereal and coat it. Store the coated cereal in an airtight container to maintain its crunch, and when ready to serve, simply shake in the powdered sugar and crushed pistachios for finishing touches. This method ensures that you’ll have a delightful snack ready to go, without losing any of that tasty charm!

Pistachio Puppy Chow Customizations

Feel free to unleash your creativity and modify this Pistachio Puppy Chow recipe to suit your preferences!

  • Gluten-Free: Substitute with gluten-free Rice Chex and pudding mix to make this treat accessible to everyone.
  • Nut-Free: Swap crushed pistachios with sunflower seeds or omit them entirely for a nut-free version without sacrificing flavor.
  • Chocolatey Delight: Drizzle melted chocolate over the finished puppy chow for a rich, decadent layer that chocolate lovers will adore.
  • Flavor Variations: Use vanilla or butterscotch pudding mix instead of pistachio for a different spin on this crunchy classic.
  • Spiced Up: Add a pinch of cinnamon or cayenne pepper for a surprising kick that balances the sweetness perfectly.
  • Texture Addition: Incorporate mini marshmallows or pretzel pieces for an interesting crunch and flavor contrast in every bite.
  • Taste the Rainbow: Mix in colorful candy-coated chocolates or sprinkles to create a fun look that’s bound to wow at parties.

As you explore these variations, you can also serve your Pistachio Puppy Chow alongside dishes like Summer Corn Chowder for a fantastic gathering spread, or pair it with the decadent flavors of Pistachio Carrot Cake to keep your guests smiling!

Expert Tips for the Best Pistachio Puppy Chow

  • Melted Perfection: Ensure both white chocolate and butter are melted smoothly; avoid overheating to prevent the chocolate from seizing up.

  • Gluten-Free Check: For a gluten-free Pistachio Puppy Chow, double-check the labels on your Chex and pudding mix to guarantee they are safe.

  • Even Coating: Use a spatula to gently fold the cereal into the pistachio mixture to prevent crushing. Every piece deserves that delicious coating!

  • Powdered Sugar Bliss: When shaking the mix in the bag, don’t skimp on shaking time. Your goal is a fully coated mixture, so be persistent!

  • Texture Twist: Feel free to get creative! Consider mixing in other nuts or drizzling melted chocolate for an extra decadent treat.

  • Storage Solutions: To maintain freshness, store your Pistachio Puppy Chow in an airtight container. It can last up to a week, but good luck keeping it around that long!

What to Serve with Simple and Sweet Pistachio Puppy Chow

Imagine a vibrant gathering where crunchy treats meet delightful flavors, creating a feast for both the eyes and taste buds.

  • Creamy Fruit Dip: This velvety dip pairs beautifully with fresh fruits, enhancing the sweet flavor of the pistachio chow amidst a colorful spread.

  • Savory Cheese Platter: A selection of cheeses like brie, goat cheese, and aged cheddar will offer a tasty contrast to the sweet and salty notes of the puppy chow, making for a well-rounded tasting experience.

  • Homemade Chocolate Bark: Dark chocolate bark, studded with nuts and dried fruit, makes for a wonderful partner. The rich chocolate will play off the nuttiness of the pistachios, keeping all flavors in perfect harmony.

  • Zesty Lemonade: A refreshing glass of homemade lemonade adds a citrus kick, balancing the sweetness of the chow while enhancing the whole snacking affair.

  • Miniature Cupcakes: Their light and fluffy texture will complement the crunchiness of the puppy chow, turning your gathering into a delightful dessert buffet. Choose flavors like vanilla or lemon to keep it lively.

  • Chilled Sparkling Water: Infused with herbs or fruits, this drink is a great palate cleanser that won’t overpower the sweet and nutty flavors. It keeps your guests refreshed and ready for more snacks.

Elevate your snacking experience by intermingling these delightful choices with your Simple and Sweet Pistachio Puppy Chow!

How to Store and Freeze Pistachio Puppy Chow

Room Temperature: Store in an airtight container at room temperature for up to 1 week to maintain its delightful crunch.

Fridge: If you prefer a cooler snack, you can store it in the fridge, but keep it airtight to prevent it from drying out; it’s good for about 1 week here as well.

Freezer: For longer storage, freeze the Pistachio Puppy Chow in an airtight container or freezer bag for up to 2 months. Thaw in the refrigerator before serving for best texture.

Reheating: No reheating is necessary; simply enjoy it cold!

Pistachio Puppy Chow Recipe FAQs

How do I select the best ingredients for Pistachio Puppy Chow?
Absolutely! When selecting your pistachio pudding mix, choose one with a vibrant green color and a strong pistachio flavor for the best taste. For the Rice Chex cereal, look for fresh boxes without any tears or damage. If you’re adding crushed pistachios, opt for ones that are unsalted and keep an eye out for any dark spots which indicate they may be past their prime.

What’s the best way to store Pistachio Puppy Chow?
Very! For optimal freshness, store your Pistachio Puppy Chow in an airtight container at room temperature. It will stay crunchy for up to 1 week. If you choose to keep it in the fridge, make sure it’s sealed tightly to prevent any moisture from making it soggy.

Can I freeze Pistachio Puppy Chow?
Absolutely! To freeze your Pistachio Puppy Chow, place it in an airtight container or freezer bag to prevent freezer burn. It can be stored for up to 2 months. When you’re ready to enjoy it again, thaw it in the refrigerator. Avoid leaving it at room temperature for extended periods to maintain the ideal crisp texture!

What should I do if my mixture clumps together?
No worries! If you find that your Pistachio Puppy Chow is clumping, it might be due to not mixing the powdered sugar well enough. Try adding a bit more powdered sugar to the bag and give it another vigorous shake. Alternatively, if the chocolate mixture was too hot when coating the cereal, try spreading it on a baking sheet to cool slightly and break up any clumps before bagging.

Is this recipe safe for dogs?
I recommend it! While the name “Puppy Chow” might sound enticing for your furry friends, this recipe is not safe for dogs due to ingredients like chocolate and sweetened condensed milk, which can be harmful. Always keep treats meant for humans away from pets.

Are there any allergy concerns with Pistachio Puppy Chow?
Very! Keep in mind that this recipe contains nuts and dairy ingredients, which can be common allergens. If you have guests with nut allergies, consider omitting the crushed pistachios or replacing them with a safe alternative like sunflower seeds. Always check the labels of your pudding mix and Chex cereal to ensure no other allergens are present.

Pistachio Puppy Chow

Irresistible Pistachio Puppy Chow for Sweet Snacking Bliss

Pistachio Puppy Chow is a delightful blend of nostalgia and modern indulgence, perfect for satisfying your sweet tooth.
Prep Time 15 minutes
Total Time 15 minutes
Servings: 10 cups
Course: Dessert
Cuisine: American
Calories: 180

Ingredients
  

Cereal Base
  • 6 cups Rice Chex cereal Feel free to substitute with Crispix or Corn Chex.
Coating
  • 1 cup white chocolate chips Consider using vanilla or butterscotch chips.
  • 1/4 cup unsalted butter Stick with butter instead of margarine.
  • 1/2 cup sweetened condensed milk No substitutes recommended.
Flavoring
  • 1 box (3.4 oz) instant pistachio pudding mix Try swapping for vanilla or banana.
  • 1/2 teaspoon vanilla extract Opt for pure vanilla for richer flavor.
Topping
  • 1 1/2 cups powdered sugar Coats the puppy chow with sweetness.
  • crushed pistachios Optional; replace with any nut or omit if allergies are a concern.

Equipment

  • large mixing bowl
  • Microwave-safe bowl
  • Spatula
  • zip-top bag

Method
 

Preparation Steps
  1. In a large mixing bowl, carefully add 6 cups of Rice Chex cereal. Set aside.
  2. In a microwave-safe bowl, add 1/4 cup of unsalted butter and microwave in 30-second intervals until melted.
  3. Stir in 1 cup of white chocolate chips and 1/2 cup of sweetened condensed milk; microwave until fully melted and smooth.
  4. Blend in 1 box of pistachio pudding mix and 1/2 teaspoon of vanilla extract until smooth and vibrant green.
  5. Pour the pistachio mixture over the Rice Chex and fold gently to coat.
  6. Transfer the mixture into a zip-top bag, add 1 1/2 cups of powdered sugar, seal and shake until evenly coated.
  7. Add crushed pistachios to the bag, seal, and shake gently to combine.
  8. Pour into a serving bowl or store in an airtight container.

Nutrition

Serving: 1cupCalories: 180kcalCarbohydrates: 20gProtein: 2gFat: 10gSaturated Fat: 5gPolyunsaturated Fat: 2gMonounsaturated Fat: 2gCholesterol: 15mgSodium: 50mgPotassium: 100mgFiber: 1gSugar: 12gVitamin A: 10IUCalcium: 2mgIron: 4mg

Notes

Store in an airtight container for up to one week. Deliciously addictive!

Tried this recipe?

Let us know how it was!

Spicy Mango & Jicama Street Salad: Your Summer Flavor Fix

What’s more refreshing than the first bite of a summer street salad? The Spicy Mango & Jicama Street Salad is a vibrant, no-cook delight that’s perfect for those balmy days when you crave something light yet satisfying. With just 15 minutes of prep, this salad combines the sweet juiciness of ripe mangoes with the satisfying crunch of jicama. It’s not just quick to whip up; it’s also vegan and a crowd-pleaser that will brighten any picnic or barbecue. As zesty lime and a touch of jalapeño dance on your palate, you’ll find this salad evokes sunshine and good vibes in every mouthful. Ready to dive into a bowl of joyful flavors? Let’s get started!

Why is this salad a must-try?

**Vibrant **colors: The combination of bright mango, crunchy jicama, and colorful bell pepper creates a stunning dish that looks as good as it tastes.
**Quick **and easy: With just 15 minutes of prep time and no cooking required, you can enjoy this refreshing salad without any hassle.
**Versatile *ingredients: Feel free to customize it! Swap jicama for cucumber or add black beans for extra protein, making it your own.
Flavor explosion: The sweet, spicy, and tangy notes from mango, jalapeño, and lime come together in every bite, delivering a delightful experience.
*
**Perfect for **gatherings: Impress your guests at barbecues or picnics with this crowd-pleaser that pairs wonderfully with grilled chicken, fish, or even tortilla chips.

This Spicy Mango & Jicama Street Salad is not just delicious; it’s everything you want in a summer dish! Plus, if you’re looking to explore other refreshing options, don’t miss out on our Strawberry Spinach Salad or the zesty Mango Dragonfruit Refresher. Enjoy the flavors of summer!

Spicy Mango & Jicama Street Salad Ingredients

• For a vibrant summer delight!

For the Base

  • Mango – Choose ripe, slightly soft mangoes for optimal sweetness and flavor.
  • Jicama – A crunchy and refreshing element; other crunchy vegetables like cucumber can be substituted.
  • Red Bell Pepper – Adds sweetness and color; feel free to swap for yellow or orange bell peppers based on your preference.
  • Red Onion – Offers sharpness; if too strong, soak it in cold water to mellow the taste.

For the Dressing

  • Lime Juice – Use fresh lime for acidity that brightens flavors; lemon juice is a good substitute.
  • Salt – Essential for enhancing all flavors; adjust to your personal taste.

For the Heat

  • Jalapeño – Adds spice; you can adjust the amount or remove the seeds for a milder flavor.

For Freshness

  • Cilantro – Provides a fresh, aromatic flavor; parsley can be used as a substitute if preferred.

This Spicy Mango & Jicama Street Salad is a delightful mix of flavors and textures perfect for summer. Enjoy the vibrant goodness!

Step‑by‑Step Instructions for Spicy Mango & Jicama Street Salad

Step 1: Prepare the Ingredients
Begin by selecting ripe mangoes; their slight softness indicates perfect sweetness. Dice the mango into small, bite-sized pieces, then peel and julienne the jicama until you have a crunchy texture. Next, chop the red bell pepper and finely dice the red onion. Don’t forget to chop the fresh cilantro and jalapeño, adjusting the heat level by removing seeds if desired. Set aside all the freshly prepared ingredients.

Step 2: Combine in a Bowl
In a large mixing bowl, gently combine the diced mango, julienned jicama, chopped red bell pepper, and red onion. Add the cilantro and the jalapeño pieces for that spicy kick. Make sure to use a bowl large enough to allow for easy mixing, as the Spicy Mango & Jicama Street Salad will expand as you combine the ingredients.

Step 3: Dress the Salad
Squeeze fresh lime juice generously over the mixture in the bowl, ensuring that all the ingredients get a touch of that zesty flavor. Add an appropriate amount of salt to enhance the overall taste of your salad. The acidity of the lime juice will brighten the salad, showcasing the fresh ingredients beautifully, so don’t skip this step.

Step 4: Toss with Care
Using a large spoon or salad tongs, gently toss the salad to combine all the elements without mashing the mango pieces. Aim for a light and fluffy texture, allowing the vibrant colors and ingredients to meld together. The goal is to have a bright mix of crunch and sweetness evident at every turn in your Spicy Mango & Jicama Street Salad.

Step 5: Let it Marinate
Allow the salad to sit for about 10 minutes at room temperature. This resting period helps the flavors meld beautifully, with the lime juice soaking into the ingredients. If desired, cover the bowl to maintain freshness. After 10 minutes, the salad will reach a harmonious blend of tastes and textures, ready to make a delightful impression.

Step 6: Serve and Enjoy
Once the flavors have mingled, serve the Spicy Mango & Jicama Street Salad either chilled or at room temperature. This vibrant dish is perfect as a side for grilled meats, fish, or simply enjoyed on its own. The bright colors will make it a star at your summer gatherings, so grab your serving utensil and dig in when ready!

How to Store and Freeze Spicy Mango & Jicama Street Salad

  • Fridge: Store the salad in an airtight container for up to 2 days. To keep jicama crunchy, add lime juice just before serving.
  • Room Temperature: If serving at a picnic or outdoor event, it can sit out for about an hour before the ingredients start to wilt and lose freshness.
  • Freezer: It’s best to avoid freezing, as the texture of mango and jicama will degrade. Enjoy it fresh for the best experience!
  • Reheating: This salad is to be served cold or at room temperature, so there’s no need to reheat it—just toss and enjoy!

Spicy Mango & Jicama Street Salad Variations

Feel free to get creative with this refreshing salad to make it truly yours!

  • Avocado Addition: Add diced avocado for a creamy texture that complements the crunchiness of jicama.

  • Lemon Zest: Substitute lime juice with lemon juice for a bright, tangy twist and a slightly different citrus profile.

  • Serrano Heat: Use serrano peppers in place of jalapeños for a bolder kick, perfect for those who like it spicy.

  • Black Beans Boost: Incorporate black beans for added protein and a pleasing texture contrast; they also enhance the salad’s heartiness.

  • Nutty Flavor: Toss in a handful of chopped peanuts or almonds for a delightful crunch and a nutty flavor that pairs beautifully.

  • Herb Variations: Instead of cilantro, try fresh mint for a refreshing note or basil for a unique aromatic twist.

  • Fruit Mix: Add a handful of pineapple or diced cucumbers for additional sweetness and juiciness, transforming it into a fruit salad delight.

Imagine enjoying your Spicy Mango & Jicama Street Salad with a side of flavorful grilled chicken or fish, bringing a lovely symphony of flavors to any summer gathering. And if you love the vibrant fruitiness of this dish, don’t forget to check out our Strawberry Spinach Salad for more refreshing flavors!

Expert Tips for Spicy Mango & Jicama Street Salad

  • Choose Ripe Mangoes: Always select slightly soft, ripe mangoes for the sweetest flavor; it makes a world of difference in your Spicy Mango & Jicama Street Salad.
  • Keep Jicama Crunchy: To maintain jicama’s texture, add lime juice just before serving. This will prevent it from getting soggy.
  • Adjust Heat Level: For those who prefer a milder salad, remove the jalapeño seeds completely. You can also reduce the quantity to suit your taste.
  • Flavor Meld Time: Let the salad rest for 10 minutes before serving; this allows the flavors to blend beautifully without losing the salad’s refreshing crunch.
  • Add Fresh Herbs: If you’re not a fan of cilantro, parsley is a great substitute that still brings freshness to the Spicy Mango & Jicama Street Salad.

What to Serve with Spicy Mango & Jicama Street Salad

Creating a delightful meal is simple when you pair this vibrant salad with complementary dishes that enhance its refreshing flavors.

  • Grilled Chicken: Juicy chicken adds protein and a savory contrast to the sweetness of the mangoes, making for a well-rounded meal. Serve the salad alongside to balance the flavors perfectly.

  • Crispy Tortilla Chips: The crunchy texture of chips provides an enjoyable contrast to the salad’s softness. They are great for munching and soaking up the fresh cilantro and lime goodness.

  • Zesty Black Bean Tacos: Packed with flavor, these tacos bring a satisfying element to your meal. The smoky taste of the black beans harmonizes beautifully with the salad’s sweet and spicy notes.

  • Avocado Toast: Creamy and rich, avocado toast is a fantastic way to indulge with healthy fats. Top it with a sprinkle of chili flakes to echo the jalapeño’s spice from the salad.

  • Chilled White Wine: A crisp Sauvignon Blanc or a light Pinot Grigio enhances the fresh, zesty elements of the salad. It makes an elegant pairing that elevates any summer gathering.

  • Fruit Sorbet: For dessert, a refreshing fruit sorbet complements the salad’s vibrant flavors without overwhelming your palate. Opt for mango or lime for a delightful finish.

Each of these pairings not only offers a tasty companion to the Spicy Mango & Jicama Street Salad but also adds different textures and flavors to create an unforgettable summer meal!

Make Ahead Options

Preparing the Spicy Mango & Jicama Street Salad in advance is a fantastic way to save time on busy days! You can chop the mango, jicama, bell peppers, and onions up to 24 hours ahead of time. Store each ingredient in airtight containers in the refrigerator to maintain their freshness and crunch. If you’re looking to prep even further, the salad can be mixed together without dressing and refrigerated for 1-2 days. However, it’s best to add the lime juice and salt just before serving to keep the jicama crisp. When you’re ready to enjoy, simply toss the salad together and serve; it will be just as delicious and refreshing!

Spicy Mango & Jicama Street Salad Recipe FAQs

How do I choose ripe mangoes for the salad?
Absolutely! Look for mangoes that are slightly soft to the touch and have a fragrant aroma. A ripe mango should yield slightly when pressed, indicating juiciness and sweetness. Avoid mangoes with dark spots all over, as they may be overripe.

What’s the best way to store leftovers?
You can store the Spicy Mango & Jicama Street Salad in an airtight container in the fridge for up to 2 days. To retain the crunchiness of the jicama, I recommend keeping the lime juice separate and adding it just before serving. This will keep the salad fresh and delicious!

Can I freeze the salad for later?
It’s best to avoid freezing the Spicy Mango & Jicama Street Salad, as both mango and jicama lose their delightful texture when frozen. Instead, enjoy it fresh for maximum flavor and crunch!

What if I don’t like cilantro?
No worries at all! If cilantro isn’t your thing, you can substitute it with parsley for a different fresh herbal note. This way, you can still enjoy the vibrant flavors of the salad without the cilantro taste.

How can I adjust the spiciness of the salad?
To tailor the heat of the salad to your liking, simply remove the seeds from the jalapeño or reduce the amount of jalapeño used entirely. If you want more heat, you could also add serrano peppers instead!

Can this salad be made ahead of time?
Absolutely! You can prepare the Spicy Mango & Jicama Street Salad a few hours in advance. Just remember to keep the lime juice separate until you’re ready to serve to ensure the jicama stays crisp. Enjoy the convenience of making it ahead while still delighting in its fresh flavor!

Spicy Mango & Jicama Street Salad

Spicy Mango & Jicama Street Salad: Your Summer Flavor Fix

Enjoy a refreshing Spicy Mango & Jicama Street Salad, perfect for summer with vibrant flavors and no cooking required.
Prep Time 15 minutes
Marinating Time 10 minutes
Total Time 25 minutes
Servings: 4 servings
Course: Salad
Cuisine: Mexican
Calories: 150

Ingredients
  

Base Ingredients
  • 2 cups diced ripe mango Choose ripe, slightly soft mangoes
  • 1 cup julienned jicama A crunchy and refreshing element, cucumber can be substituted
  • 1 cup chopped red bell pepper Swap for yellow or orange bell peppers if desired
  • 1/2 cup finely diced red onion Soak in cold water if too strong
Dressing Ingredients
  • 1 tablespoon lime juice Use fresh lime for the best flavor
  • 1/2 teaspoon salt Adjust to personal taste
Heat Ingredients
  • 1 tablespoon jalapeño Adjust amount or remove seeds for less heat
Freshness Ingredients
  • 1/4 cup chopped cilantro Parsley can be used as a substitute

Equipment

  • Mixing Bowl
  • knife
  • cutting board
  • Spoon or salad tongs

Method
 

Preparation Steps
  1. Begin by selecting ripe mangoes; dice the mango into small pieces, julienne the jicama, chop the red bell pepper and red onion, and chop the cilantro and jalapeño.
  2. In a large mixing bowl, gently combine the mango, jicama, red bell pepper, red onion, cilantro, and jalapeño.
  3. Squeeze fresh lime juice over the mixture and add salt to enhance the taste.
  4. Toss the salad gently to combine all the ingredients without mashing the mango.
  5. Allow the salad to sit for about 10 minutes to let the flavors meld.
  6. Serve the salad chilled or at room temperature.

Nutrition

Serving: 1cupCalories: 150kcalCarbohydrates: 35gProtein: 2gSodium: 250mgPotassium: 300mgFiber: 5gSugar: 20gVitamin A: 1000IUVitamin C: 50mgCalcium: 30mgIron: 0.5mg

Notes

Adjust the heat of the salad by managing the jalapeño quantity and removing seeds. Store in an airtight container for up to 2 days, adding lime juice just before serving to maintain jicama's crunch.

Tried this recipe?

Let us know how it was!

Delicious Chicken Kofta with Garlic Yogurt Sauce You’ll Love

As I pulled the warm, fragrant chicken kofta off the grill, I couldn’t help but marvel at the delicious transformation that had taken place. This Juicy Chicken Kofta with Garlic Yogurt Sauce has quickly become a go-to recipe in my kitchen, turning everyday meals into something truly special. Not only is it quick to prepare—ready in under 30 minutes—but it’s also gluten-free, making it a deliciously inclusive option for everyone around the table. The tender kofta, perfectly seasoned and grilled to golden perfection, pairs beautifully with a creamy garlic yogurt sauce, adding a refreshing twist to each bite. Curious to learn how to create this incredible dish and discover your own flavor variations? Let’s dive in!

Why Is Chicken Kofta So Irresistible?

Flavor Explosion: Each bite of these juicy kofta brings a punch of warm spices that create a beautifully aromatic dish.

Customization: Easily swap ground chicken for turkey or tweak the spices to suit your palate, making it versatile for any dinner table.

Quick and Simple: Ready in under 30 minutes, it’s a hassle-free meal for busy weeknights, ensuring you spend less time in the kitchen and more time enjoying!

Perfect Pairing: When served with the creamy garlic yogurt sauce, it’s a delightful contrast of textures, elevating the dish to a true culinary delight.

Health-Conscious Choice: Gluten-free with protein-rich ingredients, it’s a satisfying option for everyone, and if you’re looking for more dinner ideas, try out my Grilled Citrus Chicken or a tasty Grilled Chicken Sandwich!

Crowd-Pleasing: Whether it’s a family dinner or a casual gathering, this dish is certain to please all your guests.

Chicken Kofta Ingredients

Get ready to make delicious Chicken Kofta with Garlic Yogurt Sauce!

For the Kofta
Ground Chicken – The main protein source that keeps each kofta juicy; you can swap it for ground turkey if you prefer a lighter option.
Onion – Provides moisture and sweetness; be sure to finely chop it for an even distribution in the mixture.
Garlic – Essential for that aromatic punch; mince it to release maximum flavor.
Fresh Parsley – Adds a vibrant touch; feel free to replace it with cilantro for a different flavor profile.
Ground Cumin – Offers a warm, earthy depth; this spice is key for authentic taste.
Ground Coriander – Complements cumin with citrus notes; it’s essential for an authentic Chicken Kofta experience.
Salt and Black Pepper – These staples enhance overall flavor; adjust according to your personal taste.
Olive Oil – Helps prevent sticking while grilling and adds a lovely richness to the kofta mixture.

For the Garlic Yogurt Sauce
Plain Yogurt – The base for this creamy sauce; substitute with coconut yogurt to make it dairy-free.
Lemon Juice – Brightens the yogurt sauce; fresh lemon juice is ideal for the best flavor.

Enjoy crafting your Chicken Kofta with Garlic Yogurt Sauce!

Step‑by‑Step Instructions for Chicken Kofta with Garlic Yogurt Sauce

Step 1: Prepare the Kofta Mixture
In a large mixing bowl, combine the ground chicken, finely chopped onion, minced garlic, fresh parsley, ground cumin, ground coriander, salt, and black pepper. Use your hands to mix the ingredients until just combined, being careful not to overwork the mixture to maintain tenderness. This aromatic blend will serve as the flavorful base for your Chicken Kofta.

Step 2: Shape the Kofta
Wet your hands with a little water to prevent the chicken mixture from sticking. Take a portion of the mixture and shape it into oval kofta, about the size of your palm, making 10-12 pieces in total. Place them on a plate or tray, ensuring that they hold their shape while you prepare for grilling. This step is essential for achieving that juicy texture in your Chicken Kofta.

Step 3: Preheat the Grill
Preheat your grill to medium-high heat, around 200°C (400°F), and lightly oil the grate to prevent sticking. You want that grill to be hot enough to give your kofta a nice sear. As the grill heats, take a moment to visualize those delicious, golden-brown bites you’ll be enjoying soon; the anticipation makes it all the more rewarding.

Step 4: Grill the Kofta
Carefully place the shaped kofta on the grill and cook for 5-7 minutes on each side, ensuring they reach a golden brown color with the internal temperature hitting 75°C (165°F). Use tongs to gently turn the kofta for even cooking. As they grill, enjoy the delightful scent of spices wafting through the air, signaling that something special is in the works.

Step 5: Make the Garlic Yogurt Sauce
While the kofta are grilling, prepare the garlic yogurt sauce. In a separate bowl, mix the plain yogurt with fresh lemon juice and a sprinkle of salt. Stir until smooth, letting the tangy flavors meld together. This creamy garlic yogurt sauce will beautifully complement your Chicken Kofta with a refreshing touch, ready to elevate each bite!

Step 6: Serve and Enjoy
Once grilled to perfection, remove the kofta from the grill and arrange them on a serving plate. Drizzle with the garlic yogurt sauce or serve it on the side for dipping. Pair your Chicken Kofta with warm pita bread, a fresh Mediterranean salad, or your favorite side dishes to complete this delightful meal. This dish is about showcasing flavors and enjoying good company—dig in!

Tips for the Best Chicken Kofta

  • Don’t Overmix: Mixing the kofta too much can lead to a tough texture. Stir just until combined for juicy Chicken Kofta.

  • Adjust Wetness: If your mixture feels too wet, add breadcrumbs or ground oats to help hold it together without altering flavor.

  • Prep Ahead: You can prepare the kofta mixture or shape the kofta ahead of time—just chill them for up to 3 days for easy grilling.

  • Grill Smart: Keep an eye on the grill’s temperature to achieve a golden-brown char while ensuring the kofta are cooked through to 75°C (165°F).

  • Serve Wisely: Serve the garlic yogurt sauce separately to maintain its creamy texture, allowing everyone to enjoy at their own pace.

Storage Tips for Chicken Kofta with Garlic Yogurt Sauce

Fridge: Store leftover Chicken Kofta in an airtight container for up to 3 days. Keep the garlic yogurt sauce separate to maintain its creamy consistency.

Freezer: Freeze cooked kofta in a single layer on a baking sheet for up to 3 months. Once frozen, transfer to a zip-top bag for easier storage.

Reheating: To reheat, place the kofta in a preheated oven at 175°C (350°F) for 10-15 minutes until warmed through. This helps retain their juicy texture.

Make-Ahead: Prepare the kofta mixture or shape them in advance; refrigerate for up to 3 days before grilling to save time on busy days.

What to Serve with Juicy Chicken Kofta with Garlic Yogurt Sauce

Enhance your meal with delightful pairings that elevate the juicy flavors of grilled kofta.

  • Fluffy Rice Pilaf: The light, aromatic grains soak up juices and add a comforting base to your meal.

  • Mediterranean Salad: Crisp greens with vibrant vegetables and a tangy dressing provide a refreshing contrast to the warmth of the kofta.

  • Warm Pita Bread: Soft, pillowy pita is perfect for wrapping around the kofta and dunking in the creamy garlic yogurt sauce.

  • Roasted Vegetables: Charred and caramelized seasonal veggies add depth and a touch of sweetness, beautifully balancing the dish’s savory elements.

  • Tzatziki Sauce: A cool cucumber yogurt dip gives a refreshing twist, pairing perfectly with the juicy spices in the kofta.

  • Pickled Red Onions: Their tangy crunch brightens the dish and brings an exciting flavor burst with every bite.

  • Lemon Wedge: A squeeze of fresh lemon over the kofta enhances their flavor, adding a citrusy brightness that complements the garlic yogurt sauce.

  • Sparkling Water: A refreshing, bubbly drink cleanses the palate, making every bite a new experience.

These pairings create a beautifully balanced meal that transforms your Chicken Kofta into a feast of flavors and textures!

Make Ahead Options

These Juicy Chicken Kofta with Garlic Yogurt Sauce are perfect for meal prep enthusiasts! You can prepare the kofta mixture up to 3 days in advance by combining the ground chicken, finely chopped onion, minced garlic, fresh parsley, and spices. Chill the mixture in an airtight container to maintain its juiciness and freshness. If you prefer, you can also shape the kofta into patties and refrigerate them, ready to grill straight from the fridge. When you’re ready to serve, simply grill them on a preheated medium-high grill for 5-7 minutes on each side until golden brown. Enjoy the convenience of great flavors without the last-minute rush!

Chicken Kofta with Garlic Yogurt Sauce Variations

Feel free to get creative with this dish; these variations offer exciting twists that will invigorate your taste buds!

  • Ground Turkey: Swap ground chicken for turkey for a leaner version without sacrificing flavor.

  • Herb Swap: Replace fresh parsley with cilantro or mint to introduce a refreshing and different flavor profile. The brightness of herbs can elevate the dish wonderfully.

  • Spice Adjustment: Add cayenne or red pepper flakes to the kofta or sauce for an invigorating kick! Spice versatility is key to catering to your palate’s desires.

  • Dairy-Free Sauce: Use coconut yogurt or cashew cream instead of plain yogurt for a creamy, dairy-free alternative. This ensures everyone can indulge in the delight!

  • Veggie Addition: Finely diced zucchini can replace some of the ground chicken, boosting moisture and adding a nutritious touch. It’s a clever way to sneak in extra veggies!

  • Baking Alternative: For a healthier option, bake the kofta at 200°C (400°F) on a lined baking sheet, making clean-up a breeze while still achieving a delicious result.

If you’re seeking flavor inspiration, don’t forget to pair these kofta with my delightful Grilled Citrus Chicken or try creating a delicious meal with Grilled Boneless Chicken. The possibilities are endless!

Juicy Chicken Kofta with Garlic Yogurt Sauce Recipe FAQs

How do I choose ripe ingredients for the kofta?
Absolutely! For the best flavor, use fresh ground chicken that appears pink and isn’t gray or discolored. Select firm onions without soft spots for the best moisture, and choose fresh garlic with a firm texture. Opt for vibrant green parsley or cilantro, avoiding wilted or yellowed leaves.

What is the best way to store leftover Chicken Kofta?
Store leftover Chicken Kofta in an airtight container in the fridge for up to 3 days. To maintain the freshness of the garlic yogurt sauce, keep it separate in its own container. When ready to enjoy, you can simply reheat the kofta!

Can I freeze the Chicken Kofta? If so, how?
Yes, you can freeze the Chicken Kofta! To do this, first allow the grilled kofta to cool completely. Then, arrange them in a single layer on a baking sheet and freeze for about 1-2 hours. Once they’re firm, transfer the kofta to a zip-top freezer bag for storage. They will keep well for up to 3 months. When ready to eat, reheat them in a preheated oven at 175°C (350°F) for about 10-15 minutes.

What if my kofta mixture is too wet?
If your kofta mixture feels too wet, don’t worry! Simply add a few tablespoons of breadcrumbs or ground oats to help bind the mixture. Start with a small amount and mix thoroughly before adding more. This will help achieve the perfect texture while still packing in those wonderful flavors.

Is this recipe safe for those with allergies?
Yes, this recipe is customizable for various dietary needs. It’s gluten-free and can easily be made dairy-free by substituting plain yogurt with coconut yogurt. Always check labels for any hidden allergens, and if you’re cooking for specific dietary restrictions, feel free to modify the ingredients to suit your needs.

How can I adjust the spices for different preferences?
The beauty of Chicken Kofta is its versatility! For a mild flavor, stick to the recommended spices. If you crave some heat, sprinkle in cayenne or red pepper flakes to the kofta or the garlic yogurt sauce. Experimenting with spices allows you to create a dish that perfectly fits your taste buds—so feel free to get creative!

Chicken Kofta with Garlic Yogurt Sauce

Delicious Chicken Kofta with Garlic Yogurt Sauce You’ll Love

Chicken Kofta with Garlic Yogurt Sauce is a quick, gluten-free delight that transforms everyday meals into something special.
Prep Time 15 minutes
Cook Time 15 minutes
Total Time 30 minutes
Servings: 4 kofta
Course: Dinner
Cuisine: Mediterranean
Calories: 250

Ingredients
  

Chicken Kofta Ingredients
  • 1 pound Ground Chicken Can substitute with ground turkey.
  • 1 medium Onion Finely chopped.
  • 3 cloves Garlic Minced.
  • 1/4 cup Fresh Parsley Chopped, can substitute with cilantro.
  • 1 teaspoon Ground Cumin Key spice for flavor.
  • 1 teaspoon Ground Coriander Complements cumin.
  • 1 teaspoon Salt To taste.
  • 1/2 teaspoon Black Pepper To taste.
  • 1 tablespoon Olive Oil For grilling.
Garlic Yogurt Sauce
  • 1 cup Plain Yogurt Can substitute with coconut yogurt.
  • 1 tablespoon Lemon Juice Fresh is best.

Equipment

  • Grill
  • Mixing Bowl
  • Measuring cups
  • Measuring spoons
  • Tongs

Method
 

Step‑by‑Step Instructions
  1. In a large mixing bowl, combine the ground chicken, finely chopped onion, minced garlic, fresh parsley, ground cumin, ground coriander, salt, and black pepper. Mix until just combined.
  2. Wet your hands and shape the mixture into oval kofta, about the size of your palm, making 10-12 pieces. Place on a tray.
  3. Preheat your grill to medium-high heat (200°C/400°F) and lightly oil the grate.
  4. Place the shaped kofta on the grill and cook for 5-7 minutes on each side until golden brown and reaching an internal temperature of 75°C (165°F).
  5. In a separate bowl, mix the plain yogurt with fresh lemon juice and a sprinkle of salt until smooth.
  6. Serve the grilled kofta on a plate, drizzled with the garlic yogurt sauce or on the side.

Nutrition

Serving: 1koftaCalories: 250kcalCarbohydrates: 5gProtein: 25gFat: 15gSaturated Fat: 4gPolyunsaturated Fat: 1gMonounsaturated Fat: 10gCholesterol: 70mgSodium: 400mgPotassium: 300mgFiber: 1gSugar: 2gVitamin A: 600IUVitamin C: 5mgCalcium: 150mgIron: 2mg

Notes

Prep the kofta mixture or shapes in advance and refrigerate for up to 3 days for quick grilling. Adjust seasoning and serve the garlic yogurt sauce separately to maintain texture.

Tried this recipe?

Let us know how it was!

Deliciously Easy 2-Ingredient Cottage Cheese Bread Recipe

As I stood in my kitchen, contemplating a quick, healthy snack, I stumbled upon a brilliant idea: 2-Ingredient Cottage Cheese Bread. With only cottage cheese and eggs, this simple recipe gives you a delightfully soft bread that’s both high in protein and low in carbs. Perfect for anyone tired of the usual fast-food options, this flourless wonder is not only quick to whip up but also incredibly versatile. Whether you’re crafting mini pizzas or enjoying it plain with your favorite toppings, this bread is a game-changer for meal prep and snack cravings alike. Curious to try a delicious twist on traditional bread that won’t derail your healthy goals? Let’s dive into this easy recipe together!

Why is this bread a must-try?

Simplicity at its Finest: It requires just two ingredients—cottage cheese and eggs—making it incredibly easy for anyone to whip up, no complicated techniques necessary.

Protein-Packed Goodness: This bread is not only high in protein, but it’s also a great low-carb option, satisfying your hunger without the guilt of traditional bread.

Endless Versatility: Use it as a base for mini pizzas, as a sandwich filler, or simply topped with your favorite spreads—there’s no limit to how you can enjoy it!

Quick Prep Time: With a baking time of just 30-35 minutes, it’s a perfect choice for anyone on the go, ready to serve deliciousness in no time.

Meal Prep Heaven: It stores beautifully, remaining fresh in an air-tight container for up to 3-5 days, or you can freeze portions for longer enjoyment—perfect for meal prepping!

Just imagine how delightful it would be alongside dishes like Strawberry Cheesecake Bars or with a side of Cheddar Mac Cheese for a fulfilling meal combo.

2-Ingredient Cottage Cheese Bread Ingredients

For the Bread

  • Cottage Cheese – Provides moisture and a protein boost; opt for low-sodium for better flavor control.
  • Eggs – Serves as a binding agent to give structure; you can replace whole eggs with two egg whites if you’re looking for a lighter option.

Optional Seasonings

  • Garlic Powder – Adds a delightful flavor twist; feel free to swap it with onion powder or paprika for variation.
  • Italian Seasoning – Enhances the taste of the bread; any favorite herb mix can be used in its place to suit your palate.

This simple combination results in a delectable 2-Ingredient Cottage Cheese Bread that’s high in protein and low in carbs!

Step‑by‑Step Instructions for Easy 2-Ingredient Cottage Cheese Bread

Step 1: Preheat and Prepare
Preheat your oven to 350°F (175°C) while you line a baking sheet with parchment paper. Lightly grease the parchment to prevent sticking. This step is crucial for achieving the perfect texture in your 2-Ingredient Cottage Cheese Bread. The oven should be ready to provide that gentle heat needed for baking as you move on to preparing the batter.

Step 2: Blend the Ingredients
In a food processor or blender, combine 1 cup of cottage cheese and 2 large eggs. If you’re using optional seasonings like garlic powder or Italian seasoning, add them here. Blend everything until the mixture is smooth and creamy, resembling a batter. This will ensure your 2-Ingredient Cottage Cheese Bread has a delightful texture that’s moist and flavorful.

Step 3: Shape the Mixture
Pour the blended mixture onto the prepared baking sheet. Use a spatula to spread it into your desired shape, whether that’s a larger rectangle for wraps or smaller circles for individual servings. Aim for an even thickness so the bread bakes uniformly. The visual cue here is a smooth top that’s spread evenly across the baking sheet, ready to rise and brown in the oven.

Step 4: Bake to Perfection
Slide the baking sheet into your preheated oven and bake for 30-35 minutes. Keep an eye on it; the bread should turn golden brown and set firmly in the center. A visual cue of doneness is a slightly puffed appearance and a lovely golden crust. Adjust the baking time depending on the thickness of your bread; thinner versions may need less time.

Step 5: Cool and Serve
Once baked, remove the 2-Ingredient Cottage Cheese Bread from the oven and let it cool on a wire rack for about 10 minutes. This cooling process helps solidify the bread’s structure. After it cools, gently peel off the parchment paper. You’re now ready to slice and savor your delicious homemade bread, perfect for any meal or snack!

What to Serve with Easy 2-Ingredient Cottage Cheese Bread

Create a delightful meal by pairing flavors and textures for a memorable dining experience.

  • Creamy Avocado Spread: A smooth, rich avocado topping enhances the bread’s soft texture, adding healthy fats and creaminess that’s simply irresistible.

  • Savory Hummus: The nutty flavor of hummus offers a delightful contrast to the fluffy bread, perfect for breakfast or as a healthy snack.

  • Fresh Garden Salad: Crisp greens and vibrant veggies brighten the meal, providing a refreshing crunch that complements the moist bread beautifully.

  • Mini Pizza Topping: Turn your cottage cheese bread into mini pizzas; simply layer with sauce, cheese, and your favorite toppings for a nutritious twist on a classic favorite.

  • Greek Yogurt Dip: A zesty dip made from Greek yogurt adds a tangy punch, perfect for dipping slices or using as a spread for an extra protein boost.

  • Light Soup: Pair the bread with a warm bowl of vegetable or chicken soup; the comforting broth balances the bread’s texture, creating a satisfying combination.

  • Fruity Dessert: Try serving with a side of mixed berries or a light fruit salad; the sweetness and juiciness create a refreshing finish to your meal.

  • Sparkling Water: A bubbly drink infused with citrus or berries refreshes and cleanses the palate, complementing the bread’s savory options perfectly.

2-Ingredient Cottage Cheese Bread Variations

Feel free to get creative and adapt this delightful bread recipe to suit your taste and dietary needs!

  • Gluten-Free: Substitute ricotta cheese for a creamy alternative that’s still low-carb and adds a delicious twist.
  • Herb-Infused: Toss in your favorite fresh herbs like basil or chives to elevate the flavor profile. This lends an aromatic kick that’s simply irresistible!
  • Spicy Kick: Add a pinch of crushed red pepper flakes for a subtle heat. It’s a fantastic way to awaken your taste buds and add zest to your meal.
  • Cheesy Delight: Mix in shredded cheese, such as mozzarella or cheddar, for an extra ooey-gooey texture. Think of the delightful melty goodness with every bite!
  • Sweet Version: Instead of savory, add a tablespoon of honey and a sprinkle of cinnamon for a sweeter twist. Perfect for breakfast with a drizzle of maple syrup!
  • Thicker Loaf: Use a smaller baking pan to create a thicker loaf-style bread. This makes for an excellent base for hearty sandwiches or toasting.
  • Nutty Flavor: Add ground flaxseed or chia seeds for extra nutritional benefits and a delightful crunch. It’s a great way to pack more protein and fiber into your meal.
  • Zucchini Boost: Incorporate grated zucchini into the mixture for added moisture and a subtle veggie twist. It’s a fantastic way to sneak in some greens!

No matter how you choose to customize it, this 2-Ingredient Cottage Cheese Bread is bound to impress. You might even find it makes a perfect side for a comforting dish like Cheeseburger Pockets Snack or pairs delightfully with Cookies Cream Cheesecake. Happy baking!

Expert Tips for 2-Ingredient Cottage Cheese Bread

  • Blend Well: Ensure the cottage cheese is fully blended until smooth. This guarantees your 2-Ingredient Cottage Cheese Bread has a delightful, even texture without lumps.

  • Watch the Bake: Keep an eye on the bread as it bakes; remember, thinner breads may bake faster. Look for a golden brown crust and a firm center as indicators of doneness.

  • Cooling Matters: Allow the bread to cool completely on a wire rack before slicing. This step helps to set the structure and ensures it won’t collapse upon cutting.

  • Adjust Thickness: For more prominent shapes, like wraps, spread the mixture thinner on your baking sheet. Experiment with size based on how you plan to use the bread!

  • Play with Flavors: Feel free to incorporate your favorite herbs and spices into the mixture. This is a great way to customize your 2-Ingredient Cottage Cheese Bread to suit your taste.

Storage Tips for 2-Ingredient Cottage Cheese Bread

  • Room Temperature: Allow the bread to cool completely before storing. It can be kept at room temperature for up to 1 day; ensure it’s covered to maintain moisture.
  • Fridge: Store cooled 2-Ingredient Cottage Cheese Bread in an airtight container in the refrigerator for up to 3-5 days. This keeps it fresh and ready for quick snacks!
  • Freezer: For long-term storage, slice the bread and wrap individual portions in plastic wrap, then place them in a freezer-safe bag. Enjoy frozen bread for up to 1 month.
  • Reheating: When ready to use, reheat in the oven or toaster until warmed through. This will restore its delightful texture and flavor, making it feel freshly baked!

Make Ahead Options

These Easy 2-Ingredient Cottage Cheese Bread are perfect for busy home cooks looking to save time! You can prepare the batter up to 24 hours in advance by mixing the cottage cheese, eggs, and optional seasonings and storing it in an airtight container in the refrigerator. When you’re ready to bake, simply pour the mixture onto your prepared baking sheet and follow the usual baking instructions. For longer storage, bake the bread and let it cool completely, then refrigerate for 3-5 days, or freeze individual portions for up to 1 month. Just reheat in the oven briefly before serving to enjoy delicious, fresh-tasting bread that fits seamlessly into your meal prep routine!

Easy 2-Ingredient Cottage Cheese Bread Recipe FAQs

How do I choose the right cottage cheese?
Absolutely! For the best results, opt for full-fat or low-fat cottage cheese without added preservatives. If you prefer a creamier texture, full-fat varieties work wonders in blending smoothly. Check for freshness, ensuring there are no dark spots or sour smells on the container.

What’s the best way to store the bread?
Very good question! Allow the 2-Ingredient Cottage Cheese Bread to cool completely. Store it in an airtight container in the refrigerator for up to 3-5 days. If you want to keep it longer, slice it and wrap individual portions in plastic wrap, then place them in a freezer-safe bag. This way, you can enjoy it for up to 1 month without losing its lovely texture.

Can I freeze the bread? How should I do it?
Of course! Freezing is a great way to extend the shelf life of your 2-Ingredient Cottage Cheese Bread. After baked and cooled, slice the bread into portions. Wrap each piece tightly in plastic wrap, making sure to remove any excess air. Then, place the wrapped portions in a freezer-safe bag. When you’re ready to use it, simply remove a slice and reheat it in the oven or toaster until warmed through.

What if my bread didn’t rise?
Absolutely understandable! If your bread didn’t rise, it might be due to the blending process. Ensure that the cottage cheese is well-blended until smooth; lumps can affect the texture and structure. Additionally, make sure your oven is properly preheated before baking, as uneven heat may prevent the bread from puffing up as it should.

Can I customize the flavors?
The more the merrier! This bread is incredibly versatile; you can add optional ingredients like garlic powder, onion powder, or any favorite herbs to suit your taste. Feel free to experiment with flavorings to make it truly your own—just remember, if you add too much liquid, it may alter the bread’s texture.

Are there any dietary considerations I should keep in mind?
Definitely! This 2-Ingredient Cottage Cheese Bread is low-carb and high-protein, making it suitable for many diets. However, if your family includes anyone with dairy allergies or lactose intolerance, consider using a dairy-free alternative like silken tofu blended to a smooth consistency. Always check with family members for preferences or restrictions!

2-Ingredient Cottage Cheese Bread

Deliciously Easy 2-Ingredient Cottage Cheese Bread Recipe

This 2-Ingredient Cottage Cheese Bread is a quick, healthy snack option that's high in protein and low in carbs.
Prep Time 10 minutes
Cook Time 35 minutes
Cooling Time 10 minutes
Total Time 55 minutes
Servings: 8 slices
Course: Breakfast
Cuisine: Healthy
Calories: 70

Ingredients
  

For the Bread
  • 1 cup Cottage Cheese opt for low-sodium for better flavor control
  • 2 large Eggs can replace with two egg whites for a lighter option
Optional Seasonings
  • 1 teaspoon Garlic Powder can swap for onion powder or paprika
  • 1 teaspoon Italian Seasoning substitute with any favorite herb mix

Equipment

  • Food processor
  • Baking Sheet
  • Parchment paper
  • Spatula

Method
 

Step-by-Step Instructions
  1. Preheat your oven to 350°F (175°C) while lining a baking sheet with parchment paper.
  2. In a food processor or blender, combine cottage cheese and eggs. Add any optional seasonings and blend until smooth.
  3. Pour the blended mixture onto the prepared baking sheet and shape it into your desired form.
  4. Bake in the preheated oven for 30-35 minutes until golden brown and set in the center.
  5. Remove from the oven and let it cool on a wire rack for about 10 minutes before slicing.

Nutrition

Serving: 1sliceCalories: 70kcalCarbohydrates: 3gProtein: 8gFat: 3gSaturated Fat: 1gCholesterol: 80mgSodium: 200mgPotassium: 150mgSugar: 2gVitamin A: 5IUCalcium: 120mgIron: 1mg

Notes

Store in an airtight container for up to 3-5 days or freeze individual portions for longer storage.

Tried this recipe?

Let us know how it was!