Tilapia in Roasted Pepper Sauce: A Flavorful Mediterranean Delight

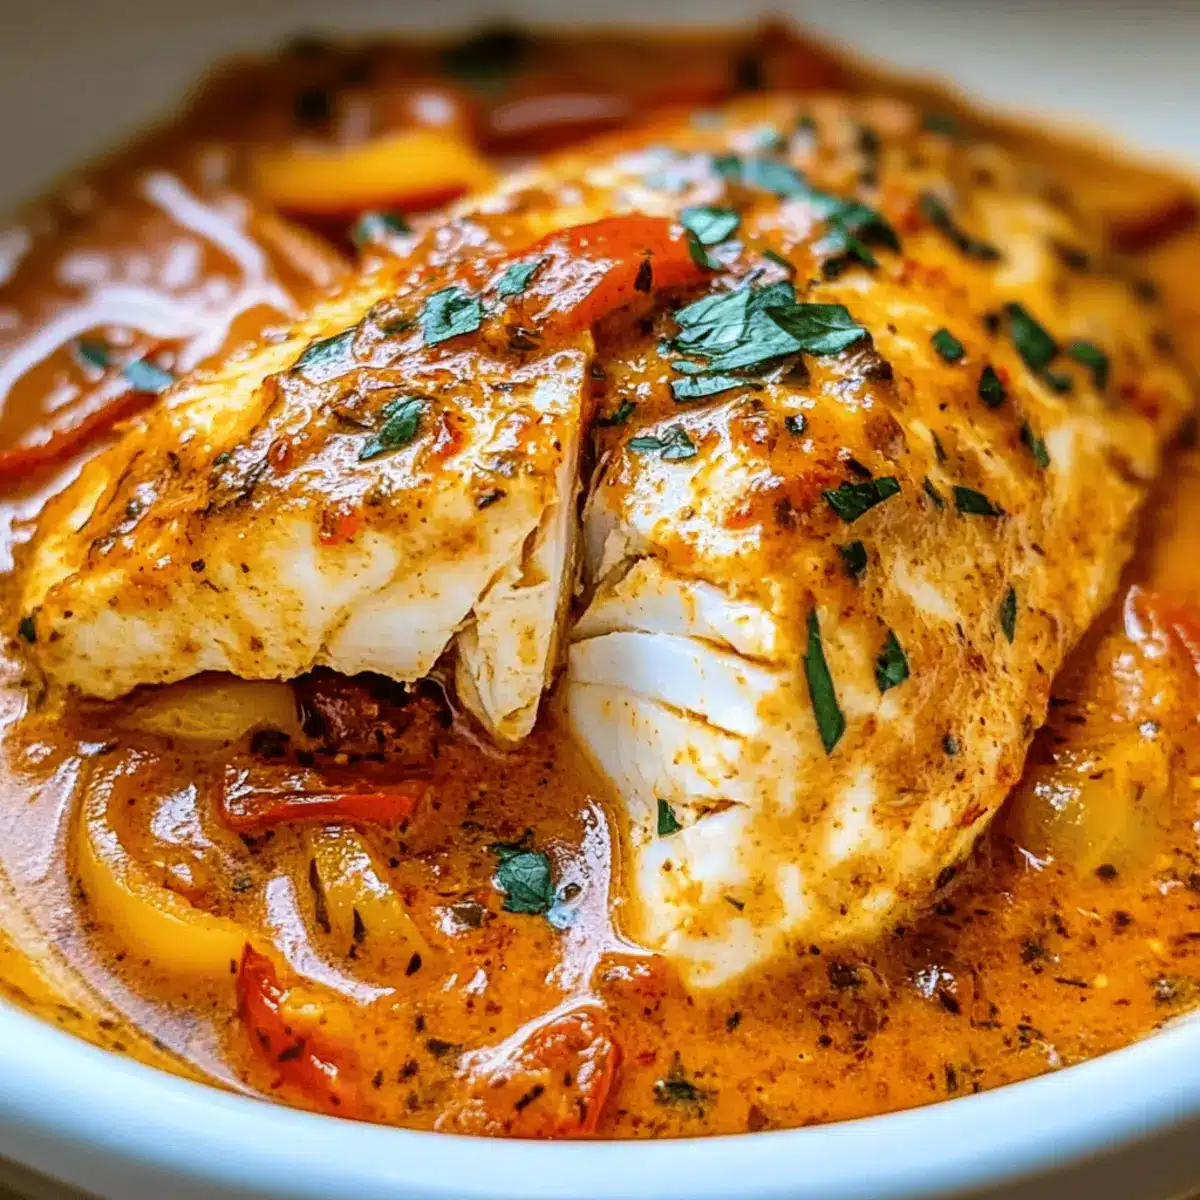
The aroma of roasted peppers wafting through the kitchen is nothing short of enchanting, conjuring visions of sun-soaked Mediterranean coasts. My Mediterranean Tilapia in Roasted Pepper Sauce has become a weeknight staple, transforming everyday ingredients into an extraordinary meal in just 35 minutes. The star of this dish, the tender tilapia, melts in your mouth, beautifully complemented by the smoky sweetness of charred red bell peppers and the zing of fresh garlic. This recipe not only delivers a quick, healthy option for busy schedules but also elevates your dinner table with its vibrant colors and rich flavors. Curious about how to bring that Mediterranean magic to your kitchen? Let’s dive into the details!

Why Is This Recipe a Must-Try?

Quick and Easy: You can whip up this meal in just 35 minutes, making it perfect for busy weeknights.

Flavor Explosion: The combination of smoky roasted peppers and fresh garlic creates a tantalizing sauce that perfectly enhances tender tilapia.

Versatile Choice: Feel free to experiment with other firm white fish like cod or haddock, or spice things up with red pepper flakes for a kick.

Healthy Delight: Packed with protein and low in calories, this dish is a guilt-free indulgence. Pair it with a fresh green salad or quinoa for a complete meal!

Transform your cooking with dishes like Roasted Carrot Lentil Salad for a healthy side. Dive into Mediterranean flavors and impress your family or guests tonight!

Tilapia in Roasted Pepper Sauce Ingredients

For the Fish
Tilapia Fillets – Main protein source; fresh is best, but frozen works too.
Olive Oil – Ideal for roasting and cooking; avocado oil is a great substitute.

For the Roasted Pepper Sauce
Red Bell Peppers – Adds smoky sweetness; try yellow or orange peppers for variety.
Garlic – Fresh enhances the sauce, but garlic powder can save the day in a pinch.
Lemon Juice – Brightens the flavors; lime juice offers a delightful twist.
Salt and Pepper – Essential for seasoning; adjust to taste based on personal preference.

This Tilapia in Roasted Pepper Sauce will surely make your dinner delightful with its vibrant flavors and healthy profile!

Step‑by‑Step Instructions for Tilapia in Roasted Pepper Sauce

Step 1: Preheat Oven
Preheat your oven to 400°F (200°C). This temperature is perfect for roasting, allowing the red bell peppers to soften and develop a smoky sweetness. Make sure your oven is fully preheated before moving on to the next step for optimal flavor.

Step 2: Roast the Peppers
Slice the red bell peppers into strips and toss them in a bowl with olive oil, salt, and pepper. Spread the seasoned peppers evenly on a baking sheet, then roast them in the preheated oven for about 20 minutes. Look for them to become tender and slightly charred, bringing out their natural sweetness.

Step 3: Blend the Sauce
Once the peppers are roasted, carefully transfer them to a blender. Add minced garlic and freshly squeezed lemon juice to the blender, then blend the mixture until smooth. This vibrant sauce will beautifully complement your tilapia, blending flavors seamlessly. Set the sauce aside for the next step.

Step 4: Cook the Fish
Heat a tablespoon of olive oil in a skillet over medium heat. Pat the tilapia fillets dry and gently place them in the skillet. Sear the fish for 3-4 minutes on each side until golden brown and flaky. You’ll know they’re ready when they easily flake with a fork, signifying perfect doneness.

Step 5: Combine and Serve
Once the tilapia is cooked, pour the roasted pepper sauce over the fillets in the skillet. Let them simmer together for 1-2 minutes, allowing the flavors to meld beautifully. Carefully plate the tilapia, ensuring each fillet is generously coated in sauce – a delightful finish for your Tilapia in Roasted Pepper Sauce!

Expert Tips for Tilapia in Roasted Pepper Sauce

  • Perfectly Cooked Fish: Make sure the tilapia is cooked until it flakes easily with a fork for the ideal texture.
  • Sauce Variety: Feel free to experiment with other peppers like yellow or orange for varying flavor profiles in your Tilapia in Roasted Pepper Sauce.
  • Herb Infusion: Add fresh herbs like basil or parsley to the sauce right before serving to elevate the dish and add freshness.
  • Avoid Dry Fish: Monitor your cooking time closely; overcooking can make the fish dry. Use a timer to keep track!
  • Leftover Love: Store any extra sauce in an airtight container; it can be used for pasta or grilled veggies, adding Mediterranean flair to another meal.

Tilapia in Roasted Pepper Sauce Variations

Embrace the opportunity to make this recipe your own, and let your taste buds guide the way!

  • Fish Alternatives: Swap tilapia for cod or haddock; both provide a delightful texture and absorb the sauce beautifully.
  • Spicy Kick: Add red pepper flakes directly into the sauce for an extra zing – just a pinch can transform the dish!
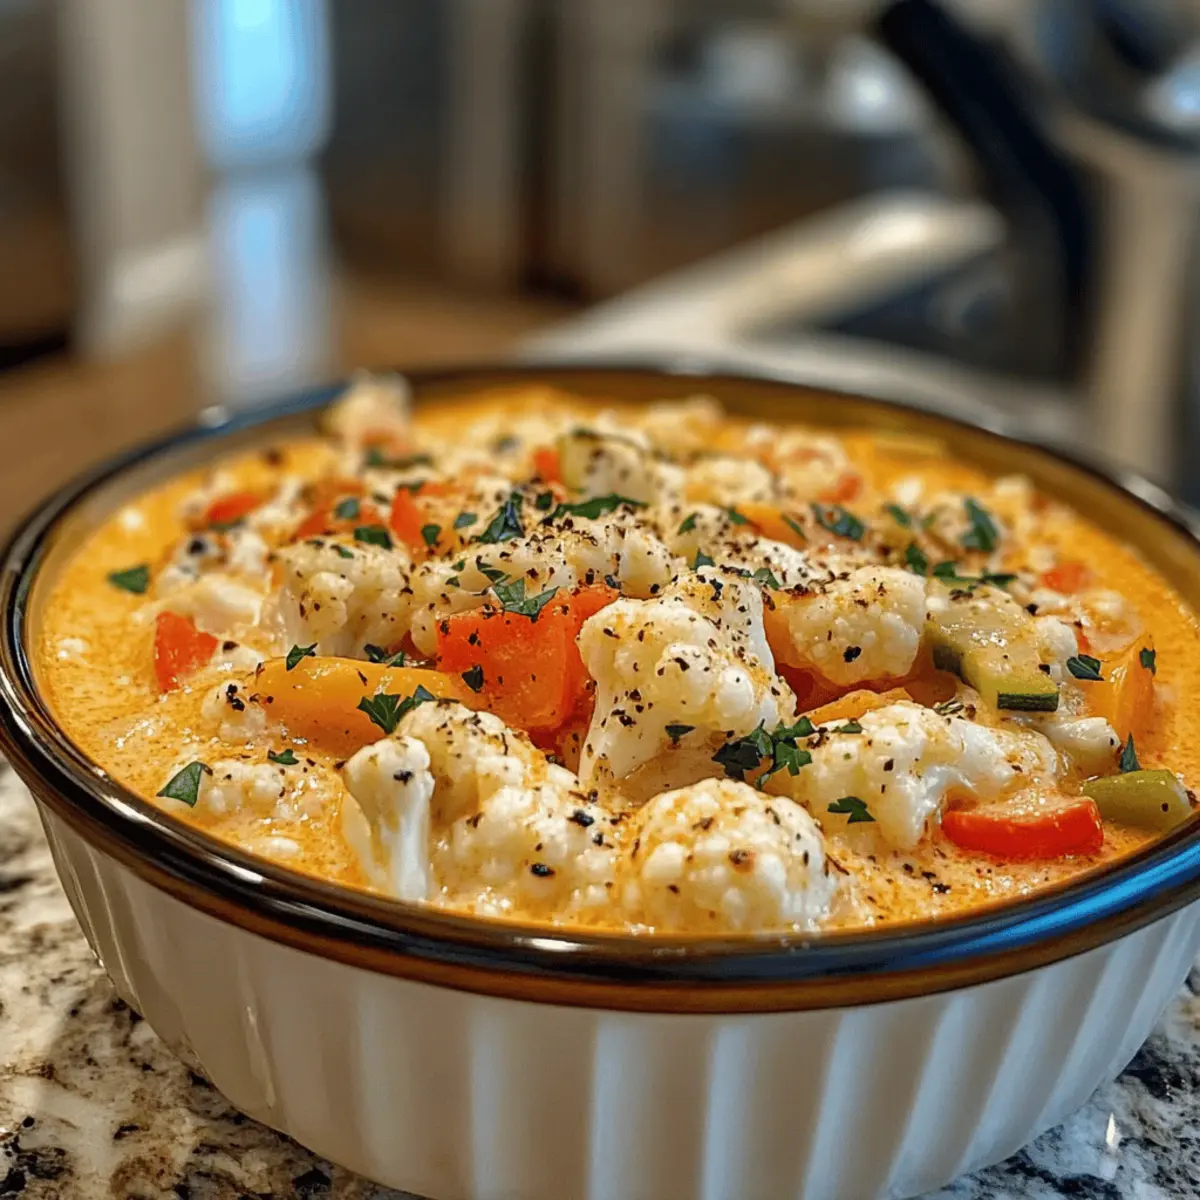
  • Vegetarian Style: Use zucchini or cauliflower steaks instead of fish, drenching them in the roasted pepper sauce for a flavorful plant-based option.
  • Creamy Addition: Mix in some heavy cream or coconut cream into the sauce for a richer, luxurious texture that’s simply irresistible.
  • Herbaceous Twist: Stir in fresh herbs like dill or basil towards the end of cooking for a bright flavor lift. This literally makes the dish burst with freshness!
  • Citrus Variations: Replace lemon juice with lime or even orange juice for a different citrus spin that adds a tangy sweetness.
  • Nutty Flavor: Top with toasted pine nuts or slivered almonds before serving for added crunch and a delightful nutty flavor.
  • Grain Pairing: Serve over farro or barley instead of quinoa for a heartier grain that complements the tilapia perfectly.

Feel inspired? Pair it alongside a refreshing Roasted Carrot Lentil Salad to enhance this Mediterranean experience! Or switch gears with a cozy Parmesan Crusted Chicken with Creamy Garlic Sauce for variety. Enjoy experimenting and making this dish your own!

What to Serve with Mediterranean Tilapia in Smoky Roasted Pepper Sauce

Enhance your Mediterranean experience with delightful pairings that balance flavors and textures, creating a full meal for the senses.

  • Creamy Mashed Potatoes: The rich, buttery texture of mashed potatoes contrasts beautifully with the flaky tilapia, making every forkful a comforting delight.

  • Quinoa Salad: A light, nutty quinoa salad with cherry tomatoes and cucumbers adds a refreshing crunch, balancing the dish’s smokiness.

  • Garlic Bread: Crispy, warm garlic bread is perfect for scooping up the roasted pepper sauce, adding a delightful crunch alongside the tender fish.

  • Steamed Asparagus: Tender asparagus drizzled with lemon wakes up the palate, complementing the fish’s smokiness with a fresh, earthy flavor.

  • Roasted Vegetables: A medley of seasonal roasted vegetables, like zucchini and carrots, brings a spectrum of colors and natural sweetness that pairs perfectly with the dish.

  • Fresh Green Salad: Crisp greens tossed with a light vinaigrette will brighten your meal, providing an invigorating contrast to the rich sauce.

  • Chardonnay: A chilled glass of Chardonnay brings out the dish’s flavors wonderfully, with its light oak and fruity notes complementing the smokiness.

  • Tiramisu: End your meal on a sweet note! This creamy, coffee-flavored dessert is a delightful way to finish off a Mediterranean feast.

How to Store and Freeze Tilapia in Roasted Pepper Sauce

Fridge: Store leftover Tilapia in Roasted Pepper Sauce in an airtight container for up to 3 days. Ensure it’s cooled before sealing to maintain freshness.

Freezer: For longer storage, freeze the tilapia and sauce in a freezer-safe container for up to 2 months. Thaw in the fridge overnight before reheating.

Reheating: Gently reheat the tilapia and sauce on the stove over low heat, adding a splash of water or broth to prevent drying out.

Meal Prep: Prepare the sauce a day in advance and refrigerate it, allowing the flavors to develop even more. This makes meal assembly quicker and more convenient!

Make Ahead Options

These Mediterranean Tilapia in Roasted Pepper Sauce are perfect for busy home cooks looking to save time while enjoying a delightful meal. You can prepare the roasted pepper sauce up to 24 hours in advance by roasting the peppers and blending the sauce; simply refrigerate it in an airtight container. To maintain the sauce’s vibrant flavor and texture, store it separately from the fish. When you’re ready to serve, cook the tilapia fillets fresh in about 8 minutes. Just sear them on medium heat and pour the warmed sauce over before serving, allowing the flavors to meld beautifully for an easy, delicious dinner that feels freshly made!

Tilapia in Roasted Pepper Sauce Recipe FAQs

What type of tilapia should I use?
I recommend using fresh tilapia fillets for the best flavor and texture. However, frozen tilapia works perfectly well too! Just ensure it’s fully thawed before cooking to avoid uneven cooking.

How long can I store leftovers?
You can store leftover Tilapia in Roasted Pepper Sauce in an airtight container in the refrigerator for up to 3 days. Make sure the dish is cooled completely before sealing to maintain freshness and prevent spoilage.

Can I freeze Tilapia in Roasted Pepper Sauce?
Absolutely! To freeze, place the tilapia and sauce in a freezer-safe container or heavy-duty freezer bag, taking care to remove as much air as possible. It can last for up to 2 months in the freezer. When you’re ready to enjoy it again, thaw it in the fridge overnight and reheat gently.

What can I do if my sauce is too thick?
If you find your roasted pepper sauce is too thick, you can easily adjust its consistency. Simply add a splash of water or broth while blending until you achieve your desired thickness. Alternatively, after it’s blended, stirring in a bit of olive oil can also create a silkier texture.

Are there any dietary considerations I should know about?
Yes! This dish is naturally gluten-free and low in calories, making it a healthy option for many diets. However, if you or your guests have allergies, be mindful of the ingredients like garlic and olive oil. Always check for cross-contamination if you’re serving someone with a severe allergy.

Can I prepare the sauce in advance?
Yes, making the roasted pepper sauce a day ahead is a fantastic idea! Just blend the roasted peppers, garlic, and lemon juice, and store it in the refrigerator. Allowing it to sit overnight can enhance the flavors, making your meal preparation smoother and quicker!

Tilapia in Roasted Pepper Sauce

Tilapia in Roasted Pepper Sauce: A Flavorful Mediterranean Delight

Discover the delicious taste of Tilapia in Roasted Pepper Sauce, a quick Mediterranean dish perfect for weeknight dinners.
Prep Time 15 minutes
Cook Time 20 minutes
Total Time 35 minutes
Servings: 4 servings
Course: Dinner
Cuisine: Mediterranean
Calories: 250

Ingredients
  

For the Fish
  • 4 fillets Tilapia fresh is best, but frozen works too.
  • 1 tablespoon Olive Oil ideal for roasting and cooking.
For the Roasted Pepper Sauce
  • 2 cups Red Bell Peppers adds smoky sweetness.
  • 3 cloves Garlic fresh enhances the sauce.
  • 2 tablespoons Lemon Juice brightens the flavors.
  • to taste Salt essential for seasoning.
  • to taste Pepper essential for seasoning.

Equipment

  • Oven
  • Baking Sheet
  • blender
  • Skillet

Method
 

Step-by-Step Instructions
  1. Preheat your oven to 400°F (200°C).
  2. Slice the red bell peppers into strips and toss them with olive oil, salt, and pepper. Spread on a baking sheet and roast for about 20 minutes until tender and slightly charred.
  3. Transfer roasted peppers to a blender and add minced garlic and lemon juice. Blend until smooth.
  4. Heat olive oil in a skillet over medium heat. Pat the tilapia fillets dry, place them in the skillet, and cook for 3-4 minutes on each side until golden brown.
  5. Pour the roasted pepper sauce over the cooked tilapia and simmer for 1-2 minutes. Serve immediately.

Nutrition

Serving: 1filletCalories: 250kcalCarbohydrates: 10gProtein: 30gFat: 12gSaturated Fat: 2gPolyunsaturated Fat: 2gMonounsaturated Fat: 6gCholesterol: 70mgSodium: 200mgPotassium: 600mgFiber: 2gSugar: 4gVitamin A: 300IUVitamin C: 60mgCalcium: 50mgIron: 1mg

Notes

Store leftover sauce in an airtight container for up to 3 days. It can be used for pasta or grilled veggies.

Tried this recipe?

Let us know how it was!

Vanilla Bean Crème Brûlée Cheesecake Cupcakes to Swoon Over

With a gentle crack and a sweet caramel hiss, the world of desserts opens up before you. Welcome to my latest obsession: Vanilla Bean Crème Brûlée Cheesecake Cupcakes. This indulgent treat marries the classic flavors of rich cheesecake and the luxurious allure of crème brûlée, all tucked neatly into a cupcake. The buttery graham cracker crust sets the stage for a creamy filling that’s simply irresistible. Not only do these stunning cupcakes elevate any occasion with their elegant presentation, but they also offer a delightful way to impress your guests without spending hours in the kitchen. Whether you’re celebrating a special birthday or just treating yourself after a long week, each bite delivers pure bliss. Ready to see what all the fuss is about? Let’s dive into this delightful recipe!

Why Are These Cupcakes So Irresistible?

Indulgent flavors: These Vanilla Bean Crème Brûlée Cheesecake Cupcakes blend rich cheesecake and the caramel notes of crème brûlée, crafting a dessert experience that’s hard to resist.
Stunning presentation: Each cupcake is a visual masterpiece, perfect for impressing guests at birthdays or festive gatherings.
Easy to make: With straightforward steps, you can create elegant treats without spending endless hours in the kitchen.
Perfectly balanced textures: Enjoy the satisfying crunch of the graham cracker crust paired with the creamy filling and caramelized sugar topping—simply heavenly!
Versatile options: Feel free to mix in fruit purees or alternate crusts for a personalized touch, allowing you to cater to your guests’ preferences.
For more delightful dessert inspirations, check out my Strawberry Cheesecake Bars or whip up some Cookies Cream Cheesecake for your next gathering!

Vanilla Bean Crème Brûlée Cheesecake Cupcake Ingredients

For the Crust
Graham Cracker Crumbs – Provides a crunchy base for the cupcakes; can substitute with Oreo crumbs for a chocolatey twist.
Unsalted Butter – Binds the crumbs together for a rich flavor; coconut oil can be used as a dairy-free alternative.

For the Cheesecake Filling
Cream Cheese – Creates a rich and creamy filling with a smooth texture; mascarpone can be swapped for a different flavor profile.
Granulated Sugar – Sweetens the cheesecake batter and caramelizes beautifully on top; brown sugar can give a deeper flavor.
Eggs – Adds structure and helps set the filling; ensure they are at room temperature for better mixing.
Heavy Cream – Enhances the creaminess of the filling and adds to the cheesecake texture; full-fat coconut cream works for a non-dairy option.
Vanilla Bean Seeds – Infuses the cupcakes with luxurious vanilla flavor; pure vanilla extract is a suitable substitute if needed.

For the Topping
Granulated Sugar – Sprinkled on top to create the iconic caramelized layer; always use fresh sugar for the best results.

Step‑by‑Step Instructions for Vanilla Bean Crème Brûlée Cheesecake Cupcakes

Step 1: Preheat and Prepare
Preheat your oven to 325°F (165°C). While it’s heating, line a cupcake tin with your choice of cupcake liners, ensuring each spot is ready for a delicious Vanilla Bean Crème Brûlée Cheesecake Cupcake. This step sets the stage for crafting your delightful treats.

Step 2: Make the Crust
In a mixing bowl, combine graham cracker crumbs with melted unsalted butter until well mixed. The mixture should resemble wet sand. Firmly press this crust mixture into the bottom of each cupcake liner, making sure it is evenly distributed. This forms a solid base that will add a delightful crunch to your cupcakes.

Step 3: Mix the Cheesecake Filling
In another bowl, beat the cream cheese, granulated sugar, and vanilla bean seeds until the mixture is smooth and creamy, about 2-3 minutes. Gradually add the eggs one at a time, ensuring you mix well after each addition. Finally, stir in the heavy cream until everything is fully incorporated, creating a luscious filling for your Vanilla Bean Crème Brûlée Cheesecake Cupcakes.

Step 4: Fill and Bake
Pour the cheesecake mixture into each lined cupcake, filling them about 3/4 full for the best rise. Carefully place the cupcake tin in the preheated oven and bake for 20-25 minutes. The centers should be set but still slightly jiggly; this ensures a creamy texture to the filling once cooled.

Step 5: Cool Down
Once baked, remove the cupcakes from the oven and allow them to cool in the tin for about 10 minutes. Then transfer them to a wire rack to cool completely. This cooling process is essential to help firm up the filling and make it easier for you to achieve that perfect caramelized topping later.

Step 6: Caramelize the Sugar Topping
Before serving, generously sprinkle granulated sugar atop each cooled cupcake. Using a kitchen torch, carefully caramelize the sugar until it is golden and crispy. If you don’t have a torch, you can place them under a broiler for a short time, but keep an eye on them to avoid burning. This creates the classic brûlée crust that takes your Vanilla Bean Crème Brûlée Cheesecake Cupcakes to the next level!

Step 7: Serve and Savor
Allow the caramelized topping to cool for a minute before serving. Pair your Vanilla Bean Crème Brûlée Cheesecake Cupcakes with fresh berries or a dollop of whipped cream for an extra touch. Each bite is a heavenly blend of creamy filling, crunchy crust, and that satisfying sugar crack, making them a star treat for any occasion.

Vanilla Bean Crème Brûlée Cheesecake Cupcake Variations

Feel free to let your creativity shine as you customize these delectable cupcakes to suit your taste!

  • Dairy-Free: Substitute cream cheese and heavy cream with coconut cream and dairy-free cream cheese for a delightful non-dairy version. Enjoy the same velvety texture while embracing a lighter option!
  • Chocolate Twist: Use Oreo crumbs instead of graham cracker crumbs for the crust to add a rich chocolaty flavor. This twist makes them extra decadent and indulgent.
  • Fruit-Infused: Stir in fruit purees like raspberry or strawberry into the cheesecake filling for a fruity burst of flavor. This adds a refreshing twist that’s perfect for summer gatherings!
  • Nutty Accents: Incorporate crushed nuts, such as almonds or hazelnuts, into the crust or sprinkle them on top before caramelizing. This adds an unexpected crunch and a nutty richness you’ll adore!
  • Flavored Extracts: Swap vanilla bean seeds with flavored extracts like almond or hazelnut for a unique taste. Just a teaspoon goes a long way in making your cupcakes stand out!
  • Gourmet Toppings: Top with a dollop of flavored whipped cream before serving for an extra elegant touch. Consider using espresso or chocolate whipped cream for added indulgence!
  • Spicy Kick: Add a pinch of cinnamon or ginger to the filling for a hint of warmth and spice. This creates a cozy flavor profile perfect for autumn gatherings.
  • Mini Versions: Bake mini cupcakes instead of standard ones for bite-sized treats that are perfect for parties. Just be mindful to adjust the baking time slightly for a fluffy finish.

For more delightful dessert inspirations, check out my Rhubarb Scones Vanilla or whip up some Strawberry Cheesecake Bars for your next gathering!

What to Serve with Vanilla Bean Crème Brûlée Cheesecake Cupcakes

Elevate your dessert experience by complementing these dreamy cupcakes with delightful side dishes that tantalize the taste buds.

  • Fresh Berries: Raspberries, strawberries, or blueberries add a burst of freshness and acidity, balancing the rich creaminess of the cupcakes. Their vibrant colors also make for a beautiful presentation!

  • Whipped Cream: A dollop of lightly sweetened whipped cream adds a light, airy texture that pairs beautifully with the cupcake’s dense filling. It’s a classic choice that’s hard to resist.

  • Chocolate Sauce: Drizzling warm chocolate sauce over these cupcakes brings an indulgent twist, transforming them into a decadent interpretation of dessert bliss. The combination is simply irresistible!

  • Espresso or Coffee: A cup of strong espresso or a rich coffee enhances the flavors of the cupcakes, providing a warm contrast to the creamy sweetness. It’s the perfect way to finish off your dessert course.

  • Mini Fruit Tarts: Offering a variety of mini fruit tarts provides a refreshing and colorful addition that complements the cupcakes while appealing to different tastes. They’re ideal for a delightful dessert spread!

  • Coconut Macaroons: These soft and chewy treats introduce a delightful coconut flavor, beautifully contrasting the creamy vanilla of the cupcakes. They’re reminiscent of tropical vibes and perfect for special occasions.

  • Chilled White Wine: A glass of semi-sweet white wine or sparkling wine can complement the cupcakes well, enhancing the richness of the dessert while adding a celebratory touch.

  • Lemon Sorbet: A light and refreshing lemon sorbet cuts through the richness, offering a palate cleanser that makes each bite of cupcake even more enjoyable. The citrus notes perfectly contrast the sweet elements.

Expert Tips for Vanilla Bean Crème Brûlée Cheesecake Cupcakes

  • Room Temperature Ingredients: Ensure all ingredients, especially cream cheese and eggs, are at room temperature. This helps achieve a smooth, creamy filling without lumps in your Vanilla Bean Crème Brûlée Cheesecake Cupcakes.
  • Watch the Bake Time: Keep a close eye on the cupcakes while baking. They should be set but slightly jiggly in the center. Overbaking can lead to a dry texture.
  • Perfectly Caramelized Sugar: When caramelizing the sugar, use a kitchen torch for the best results. If broiling, watch closely—sugar can burn in seconds!
  • Avoid Overmixing: Mix gently when adding the eggs. Overmixing can introduce too much air, leading to cracks in your filling while baking.
  • Customize Your Crust: Experiment with different cookie bases! Oreo or shortbread crumbs can add a unique flavor twist to your Vanilla Bean Crème Brûlée Cheesecake Cupcakes.
  • Chill Before Serving: For the best flavor and texture, chill the cupcakes for a few hours before serving. This allows flavors to meld beautifully while enhancing the creaminess of the filling.

Storage Tips for Vanilla Bean Crème Brûlée Cheesecake Cupcakes

Fridge: Store uncaramelized cupcakes in an airtight container for up to 3 days. This keeps them fresh and creamy without impacting texture.

Freezer: For longer storage, freeze uncaramelized cupcakes in a freezer-safe container for up to 2 months. Be sure to wrap each cupcake well to prevent freezer burn.

Caramelization Tip: For best results and texture, caramelize the sugar topping just before serving. This ensures the satisfying crunch stays intact, enhancing your Vanilla Bean Crème Brûlée Cheesecake Cupcakes experience.

Reheating: If enjoying leftovers, place the cupcakes in the fridge overnight to thaw, then caramelize the sugar topping again for that perfect finish!

Make Ahead Options

These Vanilla Bean Crème Brûlée Cheesecake Cupcakes are ideal for busy cooks looking to streamline their meal planning! You can prepare the cupcake base and filling up to 3 days in advance; simply refrigerate the uncaramelized cupcakes in an airtight container to maintain their creamy texture. For the best results, wait to sprinkle on the sugar layer and caramelize right before serving—this keeps that iconic crisp topping fresh. When you’re ready to serve, just take them out of the fridge and finish with the torch to create a stunning dessert that delights without the last-minute rush. Enjoy the time-saving benefits on your special occasion!

Vanilla Bean Crème Brûlée Cheesecake Cupcakes Recipe FAQs

How do I choose the best graham crackers for the crust?
When selecting graham crackers, aim for fresh, crunchy ones without any signs of moisture. Look for brands that contain minimal ingredients for a more authentic flavor. Alternatively, you can use chocolate sandwich cookies to add a chocolatey twist to your crust, enhancing the overall taste of your Vanilla Bean Crème Brûlée Cheesecake Cupcakes.

How should I store my Vanilla Bean Crème Brûlée Cheesecake Cupcakes?
Absolutely! Keep uncaramelized cupcakes in an airtight container in the refrigerator for up to 3 days. This will help maintain their creaminess and flavor. If you prefer to make them ahead of time, you can also freeze the uncaramelized cupcakes for up to 2 months in a freezer-safe container. Remember to wrap each cupcake well to prevent freezer burn!

Can I freeze these cupcakes? How do I do it?
Yes! To freeze your Vanilla Bean Crème Brûlée Cheesecake Cupcakes, allow them to cool completely after baking. Wrap each cupcake individually in plastic wrap and then place them in a freezer-safe container. They can be stored in the freezer for up to 2 months. When you’re ready to enjoy, thaw them in the refrigerator overnight and caramelize the sugar topping right before serving for a delightful crunchy finish.

What should I do if my cheesecake filling cracks while baking?
Don’t worry! If your filling cracks, it might be due to overmixing or baking at too high a temperature. To prevent this, ensure you mix the batter gently after adding the eggs—just enough to combine. Also, keep an eye on the baking time; cupcakes should be set but still slightly jiggly in the center. For a smooth top, you can easily cover any cracks with caramelized sugar!

Are these cupcakes suitable for people with dietary restrictions?
Very! You can customize these Vanilla Bean Crème Brûlée Cheesecake Cupcakes to meet various dietary needs. For a dairy-free option, you can substitute cream cheese with dairy-free cream cheese and use coconut cream instead of heavy cream. If needed, replace eggs with a mixture of flaxseed meal and water (1 tablespoon ground flaxseed mixed with 3 tablespoons water equals one egg) for a vegan version. Just keep in mind, this may slightly alter the texture and flavor!

Vanilla Bean Crème Brûlée Cheesecake Cupcakes

Vanilla Bean Crème Brûlée Cheesecake Cupcakes to Swoon Over

Indulge in Vanilla Bean Crème Brûlée Cheesecake Cupcakes, a mesmerizing blend of cheesecake and crème brûlée in a cupcake form.
Prep Time 30 minutes
Cook Time 25 minutes
Cooling Time 10 minutes
Total Time 1 hour 5 minutes
Servings: 12 cupcakes
Course: Dessert
Cuisine: American
Calories: 350

Ingredients
  

For the Crust
  • 1 cup Graham Cracker Crumbs Substitute with Oreo crumbs for a chocolatey twist.
  • 1/2 cup Unsalted Butter Can use coconut oil as a dairy-free alternative.
For the Cheesecake Filling
  • 8 oz Cream Cheese Can swap for mascarpone for a different flavor profile.
  • 3/4 cup Granulated Sugar Brown sugar can give a deeper flavor.
  • 2 large Eggs Ensure they are at room temperature.
  • 1 cup Heavy Cream Full-fat coconut cream works for a non-dairy option.
  • 1 tbsp Vanilla Bean Seeds Pure vanilla extract is a suitable substitute.
For the Topping
  • 1/4 cup Granulated Sugar Always use fresh sugar for the best results.

Equipment

  • Oven
  • Cupcake Tin
  • Mixing bowls
  • Mixer
  • Kitchen Torch
  • Wire Rack

Method
 

Step-by-Step Instructions
  1. Preheat your oven to 325°F (165°C) and line a cupcake tin with liners.
  2. Mix graham cracker crumbs with melted unsalted butter until resembling wet sand. Press into the cupcake liners.
  3. Beat cream cheese, granulated sugar, and vanilla bean seeds until smooth. Add eggs one at a time, then stir in heavy cream.
  4. Fill each cupcake liner with the cheesecake mixture, about 3/4 full, and bake for 20-25 minutes.
  5. Allow cupcakes to cool in the tin for about 10 minutes, then transfer to a wire rack to cool completely.
  6. Sprinkle granulated sugar on each cooled cupcake and caramelize the sugar using a kitchen torch.
  7. Let the caramelized topping cool for a minute before serving.

Nutrition

Serving: 1cupcakeCalories: 350kcalCarbohydrates: 27gProtein: 4gFat: 25gSaturated Fat: 15gPolyunsaturated Fat: 0.5gMonounsaturated Fat: 9gCholesterol: 100mgSodium: 200mgPotassium: 100mgFiber: 1gSugar: 18gVitamin A: 600IUCalcium: 50mgIron: 1mg

Notes

Ensure all ingredients are at room temperature for a smooth filling. Watch cupcakes closely during baking to maintain a creamy texture.

Tried this recipe?

Let us know how it was!

Banana Bread Brownies: The Ultimate Dessert Fusion Bliss

As I stood in my kitchen last Sunday, the sweet aroma of ripe bananas wafted through the air, sending my senses into a delightful frenzy. That’s when I decided to combine two beloved treats into one incredible recipe: Banana Bread Brownies with Brown Butter Frosting. This irresistible dessert perfectly marries the moist texture of traditional banana bread with the fudgy richness of brownies, creating a truly unforgettable experience for your taste buds. The best part? They’re quick to whip up and vanish almost as fast—making them ideal for any gathering or a late afternoon pick-me-up. Curious to learn how to make these delicious bars that will have everyone coming back for seconds? Let’s dive into the recipe!

Why are Banana Bread Brownies so irresistible?

Unique Fusion: This recipe combines two classic favorites, delivering both banana bread’s softness and brownie richness in every bite.

Quick and Easy: Perfect for those busy days, these brownies come together in no time, making dessert creation hassle-free.

Decadent Flavor: Topped with brown butter frosting, each square bursts with the exquisite flavors of chocolate and ripe bananas.

Crowd-Pleaser: Serve warm or chilled, and watch as friends and family gather around for a second (or third!) helping.

For more banana-inspired delights, check out my Fudgy Brownies Indulge for a chocolate fix or try the Patriotic Star Brownies for festive gatherings!

Banana Bread Brownies Ingredients

For the Brownies
Sugar – Adds sweetness and moisture; substitute with brown sugar for a richer flavor.
Sour Cream – Contributes to a rich texture; Greek yogurt can be used as an alternative.
Butter – Provides richness and moisture; coconut oil works as a dairy-free option.
Eggs – Binds ingredients together and adds structure; an egg replacer can be used for vegan options.
Ripe Bananas – Essential for sweetness and moisture; choose 3-4 overripe bananas for maximum flavor.
Vanilla Extract – Enhances flavor; using pure vanilla will result in a more fragrant treat.
All-Purpose Flour – The base ingredient that contributes to structure; can be swapped with a gluten-free blend.
Baking Soda – Acts as a leavening agent to help brownies rise; make sure it’s fresh for the best results.
Salt – Balances sweetness and enhances flavors.
Chopped Walnuts (optional) – Adds a delightful crunch; can be omitted or replaced with chocolate chips for extra decadence.

For the Brown Butter Frosting
Butter – Use unsalted for better control over flavor; remember to brown it to achieve that nutty taste.
Powdered Sugar – Sweetens the frosting; sift it for a smooth texture.
Vanilla Extract – Adds depth of flavor; stick with pure vanilla for the best results.
Milk – Adjusts frosting consistency; substitute with dairy-free milk to cater to dietary needs.

Unleash your inner baker with these delightful Banana Bread Brownies!

Step‑by‑Step Instructions for Banana Bread Brownies

Step 1: Preheat the Oven
Begin by preheating your oven to 375°F (190°C). While the oven heats up, take a 15×10 inch jelly roll pan and grease it thoroughly with butter or cooking spray. This will prevent your delicious Banana Bread Brownies from sticking and ensure they come out perfectly!

Step 2: Cream the Ingredients
In a large mixing bowl, add the sugar, sour cream, softened butter, and eggs. Using an electric mixer, cream together these ingredients on medium speed until the mixture is smooth and creamy, which should take about 2–3 minutes. You should see a light and fluffy texture when you’re done.

Step 3: Incorporate Bananas and Vanilla
Next, add the mashed ripe bananas and vanilla extract to your creamy mixture. With a spatula or your mixer on low speed, combine everything until the bananas and vanilla are fully incorporated. The batter should become a lovely yellow color, filled with banana goodness, ready for the dry ingredients!

Step 4: Mix the Flour and Dry Ingredients
Gradually sprinkle in the all-purpose flour along with the baking soda and salt into the banana mixture. Gently fold the dry ingredients in using a spatula, mixing just until no flour streaks remain. Avoid overmixing at this stage to keep your Banana Bread Brownies soft and chewy.

Step 5: Add Walnuts (Optional)
If you’re using walnuts, gently fold them into the batter at this point. This step adds a delightful crunch to your Banana Bread Brownies. Once thoroughly mixed, pour the batter into your greased jelly roll pan, spreading it evenly to ensure uniform baking.

Step 6: Bake the Brownies
Place the pan in the preheated oven and bake for 20–25 minutes. Check for doneness by inserting a toothpick into the center; it should come out clean or with a few moist crumbs attached. The edges of the brownies should appear golden brown and set—watch closely to avoid overbaking!

Step 7: Prepare the Brown Butter Frosting
While the brownies bake, make the brown butter frosting. In a small saucepan over medium heat, melt the butter until it becomes golden brown and releases a nutty aroma—this should take about 5 minutes. Stir frequently to prevent burning, and then remove from heat once done.

Step 8: Whisk in the Frosting Ingredients
Immediately whisk in the powdered sugar, vanilla extract, and milk into the browned butter. Continue mixing until you achieve a smooth and creamy consistency, which should take just a couple of minutes. Your frosting will have a deliciously rich flavor that perfectly complements the brownies.

Step 9: Spread the Frosting
Once the Banana Bread Brownies are out of the oven and slightly cooled, pour the brown butter frosting over the warm brownies. Use a spatula to spread the frosting evenly across the top, allowing the warmth of the brownies to help the frosting melt slightly, making it easier to spread.

Step 10: Cool and Slice
Let the brownies cool in the pan for about 10–15 minutes before cutting them into squares. This helps them set up for better slicing. Once cooled, enjoy your delectable Banana Bread Brownies, whether warm or at room temperature!

Expert Tips for Banana Bread Brownies

Use Overripe Bananas: Ripe bananas are key to achieving the best sweetness and moisture in your Banana Bread Brownies. Don’t be shy—use those dark speckled ones!

Avoid Overmixing: Gently fold in the flour to prevent the brownies from becoming tough. Overmixing can lead to a dense texture that isn’t quite as delightful.

Watch the Butter: For your brown butter frosting, monitor the butter carefully. It should be golden brown, not burnt; this adds a delightful nutty flavor.

Cooling Matters: Allow the brownies to cool slightly before cutting. This ensures they hold their shape and maintain that luscious, chewy texture.

Flavor Variations: Don’t hesitate to add a sprinkle of cinnamon or nutmeg for an extra warm, cozy flavor in your Banana Bread Brownies.

Banana Bread Brownies Variations

Feel free to get creative with these Banana Bread Brownies! Here are some delightful twists to customize your baking experience.

  • Chocolate Chip Delight: Add 1 cup of semi-sweet or dark chocolate chips for an extra chocolatey bite that will please any chocoholic.

  • Nutty Option: Swap walnuts for pecans or almonds to give your brownies a lovely crunch and a different flavor profile.

  • Spicy Kick: Add a teaspoon of cinnamon or nutmeg to the batter for a warm, aromatic spice that will elevate the flavor of your brownies.

  • Dairy-Free Alternative: Replace butter with a dairy-free spread and use almond milk in the frosting – perfect for your plant-based guests.

  • Tropical Twist: Incorporate shredded coconut into the batter for a pleasing texture and a hint of the tropics; it’s a fun way to switch things up!

  • Fudgy Brownies: For even more indulgence, swap in 1/2 cup of cocoa powder to make your brownies richer and fudgier. A chocolate lover’s dream!

  • Peanut Butter Swirl: Add dollops of peanut butter to the batter before baking and swirl lightly with a knife for a deliciously creamy addition.

  • Zesty Refresh: Mix in the zest of one orange or lemon to brighten up the flavors, creating a refreshing twist on the traditional banana flavor.

For more yummy recipes, don’t forget to check out my Fudgy Brownies Indulge and the festive Patriotic Star Brownies for your next gathering!

Make Ahead Options

Banana Bread Brownies are a fantastic dessert for meal prep, making them an excellent choice for busy home cooks! You can prepare the brownie batter up to 24 hours in advance; simply mix all the ingredients together and store it in an airtight container in the refrigerator. To prevent browning, cover the container tightly to maintain moisture. You can also bake the brownies ahead of time and store them at room temperature for up to 3 days or refrigerate for longer freshness. When you’re ready to enjoy, simply frost with the brown butter frosting and serve. These steps ensure that your Banana Bread Brownies remain just as delicious when you’re ready to indulge!

What to Serve with Banana Bread Brownies

Indulging in warm Banana Bread Brownies is just the beginning; it’s all about crafting a delightful meal experience!

  • Vanilla Ice Cream: A classic pairing, the creaminess of vanilla ice cream complements the rich chocolate and banana flavors beautifully.
  • Fresh Berries: Add a burst of freshness with strawberries or raspberries to brighten the sweetness of the brownies. Their tartness balances the richness perfectly.
  • Whipped Cream: Light and airy, a dollop of freshly whipped cream enhances the luscious texture, making each bite even more delightful.
  • Chocolate Drizzle: For the chocolate lovers, a warm drizzle of chocolate sauce not only adds elegance but enhances the chocolatey goodness of the brownies.
  • Coffee or Espresso: A steaming cup of coffee or a shot of espresso elevates the dessert experience, bringing out the deep, savory notes of the chocolate and bananas.
  • Caramel Sauce: Drizzling warm caramel sauce over the brownies creates an irresistible sweet layer, turning an already amazing dessert into an indulgent treat.
  • Chopped Nuts: Consider serving with lightly salted, chopped pecans or almonds on the side for an extra crunch, contrasting beautifully with the soft brownies.
  • Hot Chocolate: On a chilly day, why not sip some rich hot chocolate alongside your brownies? The warmth and flavor will cozy up your dessert time!
  • Chai Tea: The spices in chai tea bring a comforting element to the table, pairing nicely with the flavors of banana and chocolate in the brownies.

How to Store and Freeze Banana Bread Brownies

Room Temperature: Store your Banana Bread Brownies in an airtight container for up to 3 days at room temperature to keep them soft and chewy.

Fridge: If you want to extend their shelf life, refrigerate the brownies for up to a week; just make sure they’re covered to avoid drying out.

Freezer: For longer storage, freeze individual slices wrapped tightly in plastic wrap and then in foil, safely keeping them for up to 3 months.

Reheating: To enjoy them warm, simply microwave individual pieces for about 10-15 seconds—or wrap in aluminum foil and heat in a low oven until warm.

Banana Bread Brownies Recipe FAQs

What kind of bananas are best for this recipe?
Absolutely! For the best flavor and moisture in your Banana Bread Brownies, choose overripe bananas. Look for bananas with lots of dark spots on the peel; they will be sweeter and mash more easily, contributing to the moist texture of the brownies.

How should I store leftover brownies?
Store your Banana Bread Brownies in an airtight container at room temperature for up to 3 days to keep them deliciously soft and chewy. If you need to keep them longer, placing them in the refrigerator will extend their shelf life to about a week—just be sure to cover them well to avoid drying out.

Can I freeze these brownies?
Very much! To freeze your Banana Bread Brownies, first let them cool completely. Then, cut them into individual slices and wrap each piece tightly in plastic wrap, followed by a layer of aluminum foil. This method will keep them fresh for up to 3 months. When you’re ready to enjoy, simply thaw them in the refrigerator or at room temperature, or heat them in the microwave for a quick treat.

What if my brownies turn out too dense?
If your Banana Bread Brownies come out dense, it’s possible that you may have overmixed the batter after adding the flour. To get that perfect soft and chewy texture, mix the dry ingredients just until combined. For next time, also ensure you’re using fresh baking soda as it helps with rising!

Are there any dietary considerations when making these brownies?
Definitely! If you’re baking for someone with dietary restrictions, you can easily make swaps in this recipe. Use Greek yogurt instead of sour cream for a healthier option, or substitute eggs with an egg replacer to make it vegan-friendly. Additionally, feel free to replace butter with coconut oil for a dairy-free version. Always check ingredient labels if there are specific allergies like nuts in the optional chopped walnuts.

How do I know when the brownies are done baking?
To check for doneness, use the classic toothpick test! Insert a toothpick in the center of the brownies around the 20-minute mark. If it comes out clean or with a few moist crumbs, they are ready. Keep an eye on the edges, which should be a lovely golden brown. If you see dark spots all over the surface, it’s a sign to take them out before they burn.

These FAQs should guide you through the process and enhance your experience while making these delightful Banana Bread Brownies. Enjoy your baking!

Banana Bread Brownies

Banana Bread Brownies: The Ultimate Dessert Fusion Bliss

Indulge in Banana Bread Brownies, a fusion of moist banana bread and rich brownies topped with brown butter frosting.
Prep Time 15 minutes
Cook Time 25 minutes
Cooling Time 15 minutes
Total Time 55 minutes
Servings: 12 slices
Course: Dessert
Cuisine: American
Calories: 250

Ingredients
  

For the Brownies
  • 1 cup Sugar Substitute with brown sugar for richer flavor.
  • 1 cup Sour Cream Greek yogurt can be used as an alternative.
  • 1/2 cup Butter Provides richness; coconut oil works as a dairy-free option.
  • 2 large Eggs An egg replacer can be used for vegan options.
  • 3-4 medium Ripe Bananas Choose overripe for maximum flavor.
  • 1 teaspoon Vanilla Extract Using pure vanilla will result in a more fragrant treat.
  • 1 1/2 cups All-Purpose Flour Can be swapped with a gluten-free blend.
  • 1 teaspoon Baking Soda Make sure it’s fresh for the best results.
  • 1/2 teaspoon Salt Balances sweetness and enhances flavors.
  • 1/2 cup Chopped Walnuts Optional; can be replaced with chocolate chips.
For the Brown Butter Frosting
  • 1/2 cup Butter Use unsalted for better control over flavor.
  • 2 cups Powdered Sugar Sift for a smooth texture.
  • 1 teaspoon Vanilla Extract Stick with pure vanilla for best results.
  • 2 tablespoons Milk Substitute with dairy-free milk if needed.

Equipment

  • Mixing Bowl
  • Electric Mixer
  • Jelly roll pan
  • Saucepan
  • Spatula

Method
 

Step‑by‑Step Instructions
  1. Preheat your oven to 375°F (190°C). Grease a 15x10 inch jelly roll pan with butter or cooking spray.
  2. In a large mixing bowl, cream together the sugar, sour cream, softened butter, and eggs on medium speed until smooth and creamy (about 2–3 minutes).
  3. Add the mashed ripe bananas and vanilla extract to the mixture and combine until fully incorporated.
  4. Gradually sprinkle in the flour, baking soda, and salt, folding gently until no flour streaks remain.
  5. If using walnuts, fold them into the batter, then pour the batter into the prepared pan and spread evenly.
  6. Bake for 20–25 minutes, checking for doneness with a toothpick; it should come out clean or with a few moist crumbs.
  7. To make the brown butter frosting, melt the butter in a saucepan over medium heat until golden brown and nutty (about 5 minutes).
  8. Whisk in the powdered sugar, vanilla extract, and milk until smooth and creamy.
  9. Spread the frosting over the warm brownies and let cool for 10–15 minutes before slicing.
  10. Enjoy your Banana Bread Brownies warm or at room temperature!

Nutrition

Serving: 1sliceCalories: 250kcalCarbohydrates: 35gProtein: 3gFat: 11gSaturated Fat: 7gPolyunsaturated Fat: 1gMonounsaturated Fat: 3gCholesterol: 30mgSodium: 150mgPotassium: 150mgFiber: 1gSugar: 18gVitamin A: 300IUVitamin C: 2mgCalcium: 20mgIron: 1mg

Notes

Use overripe bananas for sweetness and moisture. Avoid overmixing for a soft texture. Watch the butter while making frosting to not burn it.

Tried this recipe?

Let us know how it was!

Cozy Pumpkin Spice Overnight Oats for a Fall Wake-Up Treat

As the leaves begin to crunch beneath our feet and the crisp air fills our lungs, it’s time to embrace the warm, nostalgic flavors of fall. Introducing these delightful Pumpkin Spice Overnight Oats, where each spoonful captures the essence of the season! Not only are these oats incredibly nutritious, but they also come together in a snap, making them perfect for busy mornings. Imagine waking up to a creamy, heartwarming breakfast that tastes like autumn in a jar; it’s the ultimate way to kickstart your day. With twelve irresistible variations, you’ll find plenty of inspiration to keep your breakfasts exciting and seasonal. What flavor combination will you try first?

Why Choose Pumpkin Spice Overnight Oats?

Cozy Comfort: These overnight oats bring the warm flavors of fall straight to your breakfast table, making every bite a reminder of cool breezes and cozy sweaters.

Nutritious & Quick: Packed with fiber and antioxidants, they’re a healthy option that requires just minutes of prep—perfect for busy individuals looking to enjoy homemade food.

Versatile Variations: With 12 different flavor combinations to explore, you can switch things up daily! Try adding a touch of Pumpkin Cream Cold for a luxurious twist.

Make-Ahead Magic: Prep a batch on the weekend, and you’re set for the week! Just grab a jar and go.

Family-Friendly Appeal: These oats are a hit with everyone—transforming breakfast into a delightful experience the whole family will love.

Pumpkin Spice Overnight Oats Ingredients

For the Oats Base
Rolled Oats – These hearty oats provide the perfect base, but you can use instant oats for quicker preparation.
Milk (Dairy or Non-Dairy) – Hydrates the oats and creates that creamy texture; almond milk can add a subtle nuttiness.

For Sweetness
Maple Syrup – This natural sweetener enhances flavor without refined sugar; honey works beautifully too!

For Flavoring
Pumpkin Spice Mix – This blend of cinnamon, nutmeg, and ginger adds the seasonal warmth; adjust to your taste preferences.

For the Fruits
Pumpkin Purée – Offers rich flavor and nutrients, making each bite feel like a cozy fall hug; use canned or homemade puree.

For Crunch
Chia Seeds – These little gems add a delightful crunch and are packed with healthy fats; consider flax seeds as an alternative.
Nuts (Pecans or Walnuts) – Add a delicious crunch and healthy fats; you can substitute with almonds if preferred.

For Creaminess
Greek Yogurt – This ingredient elevates the creaminess while providing additional protein; choose a non-dairy option if needed.

Prep these Pumpkin Spice Overnight Oats the night before, and you’ll have a cozy, nutritious breakfast waiting for you—a perfect start to your busy fall mornings!

Step‑by‑Step Instructions for Pumpkin Spice Overnight Oats

Step 1: Combine the Base
In a mixing bowl, combine 1 cup of rolled oats with 1 cup of your choice of milk, whether dairy or non-dairy. Stir in 2 tablespoons of maple syrup to add sweetness. Use a whisk or a spoon to ensure everything is well mixed, and the oats are fully submerged in the liquid for optimal texture.

Step 2: Add Flavor and Texture
Mix in 1/2 cup of pumpkin purée and 1 teaspoon of pumpkin spice mix, adjusting the spice level to your taste. For added crunch, fold in 2 tablespoons of chia seeds. This step not only enhances the flavor profile of your Pumpkin Spice Overnight Oats but also incorporates nutrients, ensuring a deliciously creamy consistency.

Step 3: Portion and Refrigerate
Divide the mixture evenly into airtight jars or containers. Seal each one tightly to lock in freshness and refrigerate overnight, allowing the flavors to meld beautifully. This overnight chilling is crucial as it transforms the oats into a delightful, creamy breakfast that you can easily grab in the morning.

Step 4: Morning Prep and Toppings
When you wake up, take the jars out of the fridge and give the oats a good stir. This will help integrate any liquid that may have settled overnight. Top each serving with your choice of additional fruit, such as sliced bananas or apples, and a sprinkle of nuts for an added crunch.

Step 5: Optional Warmth
If you prefer a warm breakfast, place your jars in the microwave for 30-60 seconds until heated through. This provides a cozy, warm start to your day while still reminding you of the comforting flavors from your Pumpkin Spice Overnight Oats.

What to Serve with Pumpkin Spice Overnight Oats?

As autumn breezes in, create a comforting breakfast spread that captures the season’s warmth and flavors.

  • Cinnamon Apples: Softened, spiced apples add a sweet, fruity contrast that pairs beautifully with the oats’ rich creaminess.

  • Chai Latte: A warm cup of chai, with its spices, complements the pumpkin flavor and offers a soothing morning perk.

  • Maple Pecan Granola: Crunchy granola sprinkled on top brings texture and enhances the nutty notes of your oats for a delightful bite.

  • Greek Yogurt Parfait: Adding a layer of tangy Greek yogurt not only boosts protein but also creates a wonderful contrast in textures.

  • Cardamom-Spiced Tea: This aromatic tea enhances the cozy flavors of your oats, making every spoonful feel like a warm hug.

  • Fresh Pomegranate Seeds: Their juicy bursts of flavor balance the creamy oats and offer a fresh, vibrant touch to your meal.

  • Nut Butter Drizzle: A swirl of almond or peanut butter adds richness and protein, transforming your breakfast into a more indulgent treat.

  • Honey-Glazed Banana Slices: Sweet, caramelized bananas provide a comforting sweetness that complements the pumpkin spice perfectly.

Prepare a warming breakfast spread and enjoy the delightful flavors of fall, making every morning a cozy embrace!

Expert Tips for Pumpkin Spice Overnight Oats

  • Soak Fully: Ensure the oats are completely submerged in milk to achieve a creamy texture. This prevents dry patches in your Pumpkin Spice Overnight Oats.

  • Customize Your Sweetness: Adjust the amount of maple syrup according to your taste. Start small, and remember you can always add more later!

  • Flavor Variations: Feel free to experiment with spices like cardamom or allspice for a unique twist. Mixing up your spice game can lead to exciting new flavor profiles.

  • Prep Ahead: Make a double batch and store in separate jars for quick breakfasts throughout the week. This makes enjoying homemade food easier than ever!

  • Use Seasonal Ingredients: Incorporate fresh fall fruits like diced apples or pears to elevate your oats and keep them in season. Fresh produce makes all the difference!

Pumpkin Spice Overnight Oats Variations

Embrace your creativity with these delicious twists on pumpkin spice overnight oats, bringing a delightful taste of fall to your mornings!

  • Fruit-Focused: Add chopped apples or pears for a refreshing sweetness that complements the pumpkin flavor beautifully. Try mixing in seasonal fruits for an extra touch of autumn.

  • Nutty Delight: Incorporate almond or peanut butter for added creaminess and a protein boost. This variation adds a luxurious mouthfeel, transforming each bite into a hearty experience.

  • Choco-Pumpkin: Mix in a tablespoon of unsweetened cocoa powder or chocolate chips for a rich and indulgent twist. Chocolate lovers rejoice as this combo elevates breakfast into a decadent treat!

  • Spicy Kick: Add a pinch of cayenne pepper or crushed red pepper flakes for a warming heat that beautifully contrasts the sweetness of the pumpkin. It’s a bold way to shake things up!

  • Creamy Coconut: Substitute regular milk with coconut milk and top with shredded coconut for a tropical flair. This will give your oats an exotic touch that’s reminiscent of a warm island breeze.

  • Protein Power: Stir in a scoop of your favorite protein powder to make this breakfast even more satisfying. It’s an easy way to fuel your mornings and maintain your energy throughout the day.

  • Vegan-Friendly: Use maple syrup and plant-based yogurt for a creamy vegan alternative, and enjoy the same warm flavors without any animal products. Perfect for a compassionate breakfast!

  • Gourmet Touch: Drizzle with caramel sauce or maple syrup right before serving to make this dish feel extra special. It’s a delightful indulgence that adds a touch of luxury to your morning routine!

Feel free to experiment with these variations or even create your own unique versions! And if you’re curious about more cozy recipes, check out this delightful Overnight Croissant Breakfast that mixes seasonal flair with effortless preparation.

How to Store and Freeze Pumpkin Spice Overnight Oats

Fridge: Store your Pumpkin Spice Overnight Oats in the refrigerator for up to 4 days in airtight jars. This keeps them fresh and ready for a quick breakfast.

Freezer: For longer storage, place the overnight oats in freezer-safe containers and freeze for up to 3 months. Thaw overnight in the fridge before enjoying.

Reheating: If you prefer your oats warm, reheat in the microwave for 30-60 seconds. Stir well before eating to ensure an even temperature throughout.

Batch Prep: Prepare multiple jars at once for easy, nutritious breakfasts throughout the week—perfect for those busy mornings!

Make Ahead Options

These Pumpkin Spice Overnight Oats are perfect for meal prep enthusiasts! You can prepare the oat mixture up to 24 hours in advance, allowing the flavors to meld beautifully while ensuring a creamy texture. Simply combine the rolled oats, milk, sweeteners, pumpkin purée, and spices in an airtight container, then store in the refrigerator. For the best results, make sure the oats are fully submerged in the milk to prevent them from drying out. When you’re ready to enjoy them, simply give the mixture a good stir, add your favorite toppings, and if desired, warm them in the microwave for a cozy breakfast experience. Enjoy all the flavors of fall with ease!

Pumpkin Spice Overnight Oats Recipe FAQs

How should I select the pumpkin purée for my Overnight Oats?
Absolutely! When choosing pumpkin purée, opt for 100% pure pumpkin, avoiding pumpkin pie filling as it contains added sugars and spices. Check the label to ensure it’s made with just pumpkin for the best flavor and health benefits!

How long can I store Pumpkin Spice Overnight Oats in the fridge?
You can store your Pumpkin Spice Overnight Oats in the refrigerator for up to 4 days. Just make sure they are in airtight jars to maintain freshness. It’s a great way to prep for a busy week ahead!

Can I freeze my Overnight Oats? If so, how?
Yes, you can freeze your Pumpkin Spice Overnight Oats! Transfer them into freezer-safe containers, ensuring there’s some space for expansion. They can last up to 3 months. When you’re ready to eat, simply thaw them in the fridge overnight, or for a quick option, microwave them directly from the freezer, stirring halfway through for even warming.

What if my oats are too thick after refrigerating?
Very! If your oats are too thick, this may be due to the absorption of liquid overnight. Simply stir in a splash of milk in the morning until you reach your desired consistency. Add a bit more maple syrup if you like it sweeter!

Can I use non-dairy alternatives in my Pumpkin Spice Overnight Oats?
Absolutely! Almond milk, oat milk, or coconut milk work wonderfully as substitutes for dairy milk, allowing you to customize based on dietary needs. Each alternative brings a unique flavor that can complement your oats beautifully.

Are there any dietary considerations for pets with Pumpkin Spice Overnight Oats?
Yes, if you’re thinking about sharing a small bite with your furry friends, it’s important to note that while oats are generally safe for dogs, avoid adding sweeteners and spices like nutmeg, which can be toxic to pets. Always check ingredients before sharing!

These Pumpkin Spice Overnight Oats Recipe FAQs should help you create the perfect cozy breakfast to enjoy all fall long!

Pumpkin Spice Overnight Oats

Cozy Pumpkin Spice Overnight Oats for a Fall Wake-Up Treat

Enjoy these Pumpkin Spice Overnight Oats, a nutritious and quick breakfast perfect for fall mornings.
Prep Time 15 minutes
Refrigeration Time 8 hours
Total Time 8 hours 15 minutes
Servings: 2 servings
Course: Breakfast
Calories: 350

Ingredients
  

Oats Base
  • 1 cup Rolled Oats Can substitute with instant oats
  • 1 cup Milk (Dairy or Non-Dairy) Almond milk for nuttiness
Sweetness
  • 2 tablespoons Maple Syrup Honey can be used as alternative
Flavoring
  • 1 teaspoon Pumpkin Spice Mix Adjust to taste
Fruits
  • 1/2 cup Pumpkin Purée Use canned or homemade
Crunch
  • 2 tablespoons Chia Seeds Flax seeds can be an alternative
  • 1/4 cup Nuts (Pecans or Walnuts) Substitute with almonds if preferred
Creaminess
  • 1/2 cup Greek Yogurt Non-dairy option available

Equipment

  • Mixing Bowl
  • Airtight jars or containers
  • Whisk or spoon

Method
 

Preparation
  1. Combine rolled oats, milk, and maple syrup in a bowl and stir well.
  2. Mix in pumpkin purée and pumpkin spice, then fold in chia seeds.
  3. Divide mixture into jars and refrigerate overnight.
  4. In the morning, stir well and add fruit and nuts on top.
  5. If desired, microwave for 30-60 seconds before serving.

Nutrition

Serving: 1servingCalories: 350kcalCarbohydrates: 45gProtein: 12gFat: 15gSaturated Fat: 3gPolyunsaturated Fat: 3gMonounsaturated Fat: 9gCholesterol: 5mgSodium: 150mgPotassium: 300mgFiber: 8gSugar: 10gVitamin A: 2500IUVitamin C: 1mgCalcium: 150mgIron: 2mg

Notes

Make these overnight oats the night before for a quick, nutritious breakfast ready for you in the morning.

Tried this recipe?

Let us know how it was!

Hawaiian Pineapple Coconut Thumbprint Cookies for Tropical Bliss

As I settled onto my patio with a warm breeze dancing around me, the scent of toasted coconut filled the air, instantly whisking me away to a tropical beach. That’s the magic of these Hawaiian Pineapple Coconut Thumbprint Cookies! With their inviting blend of sweet, tangy pineapple filling and the rich crunch of toasted coconut, this easy recipe transforms simple ingredients into a delightful escape to paradise. Perfect for any occasion, these cookies are not only a feast for the eyes but also a true crowd-pleaser. Plus, they’re adaptable for gluten-free baking, ensuring everyone can join in the fun. Ready to embark on a sweet culinary adventure? Let’s dive into making these irresistible treats!

Why Are These Cookies a Must-Try?

Tropical Escape: Each bite of these Hawaiian Pineapple Coconut Thumbprint Cookies transports you to a sunny paradise, combining tropical flavors in an easy-to-make treat.

Versatile Variations: Feel free to experiment! Try using different fruit fillings like mango or even raspberry to switch things up.

Quick Delight: With simple ingredients and just a handful of steps, you’ll have a delicious dessert ready in no time!

Perfect for Everyone: Whether you’re gluten-free or prefer traditional baking, this recipe adapts beautifully for all taste buds.

Crowd-Pleaser: Whether it’s a family gathering or a casual get-together, these cookies will surely impress your guests – they won’t last long!

Hawaiian Pineapple Coconut Thumbprint Cookies Ingredients

For the Dough

  • Butter – Adds richness and tenderness to the cookies; use unsalted for better salt control.
  • Sugar – Provides sweetness and promotes browning; try substituting with coconut sugar for a tropical twist.
  • All-Purpose Flour – Gives structure to the cookie; swap with a 1:1 gluten-free flour blend for an easy gluten-free option.
  • Eggs – Binds the ingredients together; for an egg-free variation, consider using flaxseed meal instead.

For the Filling

  • Pineapple Filling – Offers sweet, tangy flavor; opt for crushed pineapple to ensure a smooth texture.

For the Topping

  • Toasted Coconut – Adds delightful crunch and flavor; you can substitute with chopped nuts for a different texture.

These delectable Hawaiian Pineapple Coconut Thumbprint Cookies are a tropical delight, perfect for any occasion!

Step‑by‑Step Instructions for Hawaiian Pineapple Coconut Thumbprint Cookies

Step 1: Prep the Dough
Start by creaming together 1 cup of softened unsalted butter and 3/4 cup of sugar in a mixing bowl with an electric mixer until the mixture is light and fluffy, about 2-3 minutes. Add in 1 large egg, mixing until fully incorporated. Gradually sift in 2 cups of all-purpose flour (or a gluten-free flour blend) and mix until a soft dough forms.

Step 2: Form Cookies
Scoop tablespoon-sized portions of the dough and roll them into balls between your palms. Place the balls onto a parchment-lined baking sheet, spacing them about 2 inches apart to allow for spreading. Using your thumb, gently press down in the center of each ball to create a thumbprint, ensuring it’s deep enough to hold the filling later.

Step 3: Add Filling
Now it’s time to fill those thumbprints! Carefully spoon about 1 teaspoon of crushed pineapple filling into each thumbprint, making sure not to overflow. The filling should be slightly heaped, providing a sweet and tangy burst in every bite of your Hawaiian Pineapple Coconut Thumbprint Cookies.

Step 4: Bake
Preheat your oven to 350°F (175°C) and bake the cookies for 12-15 minutes or until the edges are a beautiful golden brown. Keep an eye on them to avoid over-baking, as this can dry out the cookies. Your kitchen will soon be filled with a delightful tropical aroma!

Step 5: Cool
Once baked, remove the baking sheet from the oven and let the cookies cool on the sheet for about 5 minutes. Then, transfer them to a wire rack to cool completely. This step ensures that your Hawaiian Pineapple Coconut Thumbprint Cookies maintain their soft, buttery texture, ready to be enjoyed!

Expert Tips for Hawaiian Pineapple Coconut Thumbprint Cookies

  • Use Cold Ingredients: Ensure your butter is softened, but not melted to achieve the right cookie texture.

  • Don’t Skip the Cooling: Allow cookies to cool completely on a wire rack; this helps maintain their soft and chewy consistency.

  • Mind the Thumbprint: Press deeply enough into the dough to hold the filling, but not too deep that it breaches the bottom.

  • Try Variations: Substitute crushed pineapple with other fruit preserves like mango or raspberry for a fun twist on these Hawaiian Pineapple Coconut Thumbprint Cookies.

  • Watch Your Baking Time: Keep a close eye on the cookies while they bake to prevent overbaking—golden edges are the key!

What to Serve with Hawaiian Pineapple Coconut Thumbprint Cookies

Nothing pairs better with a tropical treat than a little taste of paradise to complete your meal.

  • Tropical Fruit Salad: A medley of fresh fruits like mango, kiwi, and papaya enhances the tropical vibe while adding refreshing brightness and crunch.

  • Coconut Sorbet: This creamy, dairy-free dessert mirrors the cookie’s coconut flavor, offering a cool contrast that’s perfect for warm days.

  • Rum Punch: A glass of this fruity, refreshing drink complements the cookie’s sweet profile and adds an effervescent kick to your gathering.

  • Macadamia Nut Ice Cream: The rich and buttery notes of macadamia nuts pair beautifully with the sweet pineapple filling, creating a decadent combination.

  • Creamy Yogurt Dip: Serve the cookies with a side of coconut-flavored yogurt for a creamy dip that balances sweetness with tang.

  • Pineapple Coconut Smoothie: Blend pineapple, coconut milk, and a hint of banana for a smoothie that echoes the cookie’s tropical flavors, making a delightful pairing.

By mixing and matching these suggestions, you can create a whimsical, tropical-inspired spread that will transport your guests straight to the Hawaiian islands!

Storage Tips for Hawaiian Pineapple Coconut Thumbprint Cookies

Room Temperature: Store cookies in an airtight container at room temperature for up to one week to maintain freshness and texture.

Fridge: If you prefer, you can refrigerate the cookies for extended freshness. They should last about 10 days; just ensure they’re well-wrapped to prevent drying out.

Freezer: For longer storage, freeze cookies in a single layer on a baking sheet before transferring them to an airtight container. They can be frozen for up to three months.

Reheating: To enjoy your Hawaiian Pineapple Coconut Thumbprint Cookies warm, reheat them in the oven at 350°F (175°C) for about 5-7 minutes or until warmed through.

Make Ahead Options

These Hawaiian Pineapple Coconut Thumbprint Cookies are perfect for busy home cooks looking to save time without sacrificing flavor! You can prepare the cookie dough up to 24 hours in advance. Just mix the dough, wrap it tightly in plastic wrap, and refrigerate until you’re ready to bake. The thumbprint cookies can also be formed and filled with the pineapple filling up to 3 days ahead; simply store them covered in the fridge. When you’re ready to serve, bake them straight from the fridge, adding a couple of extra minutes if desired. This way, you’ll have warm, fresh cookies that are just as delightful as if they were made right before serving!

Hawaiian Pineapple Coconut Thumbprint Cookies Variations

Feel free to explore your creativity with these delightful cookies. Each twist brings a new flavor adventure!

  • Fruit Fillings: Experiment with mango, passionfruit, or raspberry as alternative fillings. Each fruit adds its unique sweetness and tang, making every bite exciting!

  • Gluten-Free Delight: Use a 1:1 gluten-free flour blend instead of all-purpose flour. This swap ensures everyone can enjoy the cookies without sacrificing flavor or texture.

  • Nutty Crunch: Add chopped macadamia nuts into the dough for a delightful crunch. You can even sprinkle some on top before baking to elevate the cookie’s nutty flavor.

  • Dairy-Free Option: Replace butter with coconut oil or a vegan butter substitute. This simple switch yields cookies that are equally rich yet dairy-free.

  • Lower Sugar Twist: Substitute regular sugar with a sugar alternative, like coconut sugar or a stevia blend, for a healthier treat without compromising on sweetness.

  • Add Spices: Incorporate a pinch of cinnamon or nutmeg into the dough for a warm, cozy flavor. This adds an aromatic touch that brings out the tropical essence beautifully.

If you’re interested in other fruity recipes, consider trying out Mango Coconut Pudding or the refreshing Pineapple Coconut Mojito. Embrace the tropical flavors and enjoy every variation!

Hawaiian Pineapple Coconut Thumbprint Cookies Recipe FAQs

What type of pineapple should I use for the filling?
Choose crushed pineapple for a smooth and sweet filling. If you prefer a chunkier texture, opt for small diced pineapple. Always look for pineapple that is ripe—sweet smelling and free of dark spots for the best flavor.

How should I store the cookies?
Store your Hawaiian Pineapple Coconut Thumbprint Cookies in an airtight container at room temperature for up to one week. If you’re looking to extend their shelf life, refrigerate them wrapped tightly, which can help them last up to 10 days.

Can I freeze these cookies?
Absolutely! To freeze your Hawaiian Pineapple Coconut Thumbprint Cookies, first place them in a single layer on a baking sheet and freeze for 1-2 hours until firm. Then, transfer them to an airtight container or freezer bag, and they can be kept in the freezer for up to three months. To enjoy, simply reheat them in the oven at 350°F (175°C) for about 5-7 minutes.

What if my cookies spread too much while baking?
If your cookies spread too much, it could be due to using melted butter instead of softened butter, or not chilling the dough for a short period before baking. Try refrigerating the dough for 30 minutes before you form and bake your cookies to help them maintain their shape.

Are there any dietary considerations for these cookies?
Good question! This recipe can be made gluten-free by substituting all-purpose flour with a 1:1 gluten-free flour blend. Additionally, for those with egg allergies, you can replace the egg with a flaxseed meal (1 tablespoon flaxseed meal mixed with 2.5 tablespoons water) for a binding agent. Always check for any other allergies related to the ingredients used, such as nuts in the toasted coconut.

Can I use different fillings in these thumbprint cookies?
Yes, very! You can switch out the pineapple filling with other options like mango, passionfruit, or even strawberry jam for a delightful twist. Each option brings its flavor flair to the cookies, making them a wonderful treat for any tropical-themed event or gathering.

Hawaiian Pineapple Coconut Thumbprint Cookies

Hawaiian Pineapple Coconut Thumbprint Cookies for Tropical Bliss

These Hawaiian Pineapple Coconut Thumbprint Cookies are a delightful blend of sweet pineapple and toasted coconut.
Prep Time 15 minutes
Cook Time 15 minutes
Cooling Time 5 minutes
Total Time 35 minutes
Servings: 24 cookies
Course: Dessert
Cuisine: Hawaiian
Calories: 120

Ingredients
  

For the Dough
  • 1 cup unsalted butter softened
  • 3/4 cup sugar coconut sugar can be used
  • 2 cups all-purpose flour can substitute with gluten-free flour
  • 1 large egg can use flaxseed meal as an egg replacer
For the Filling
  • 1 cup crushed pineapple use for filling
For the Topping
  • 1 cup toasted coconut can substitute with chopped nuts

Equipment

  • Mixing Bowl
  • Electric Mixer
  • Baking Sheet
  • Parchment paper
  • Wire Rack

Method
 

Step-by-Step Instructions
  1. Cream together the softened butter and sugar until light and fluffy.
  2. Add in the egg and mix until fully incorporated.
  3. Gradually sift in all-purpose flour and mix until a soft dough forms.
  4. Scoop tablespoon-sized portions, roll into balls and place on a baking sheet.
  5. Press down in the center of each ball to create a thumbprint.
  6. Fill each thumbprint with crushed pineapple filling.
  7. Preheat oven to 350°F and bake for 12-15 minutes until golden brown.
  8. Let cookies cool on the sheet for 5 minutes before transferring to a wire rack.

Nutrition

Serving: 1cookieCalories: 120kcalCarbohydrates: 15gProtein: 1gFat: 6gSaturated Fat: 4gPolyunsaturated Fat: 0.5gMonounsaturated Fat: 1gCholesterol: 30mgSodium: 50mgPotassium: 50mgFiber: 0.5gSugar: 8gVitamin A: 250IUVitamin C: 2mgCalcium: 10mgIron: 0.5mg

Notes

These cookies can be stored in an airtight container for up to one week at room temperature, or refrigerated for up to 10 days. They can also be frozen for up to three months.

Tried this recipe?

Let us know how it was!

Pesto Chicken Flatbread: A Flavorful Twist for Easy Dinners

The kitchen filled with the unmistakable aroma of sun-soaked basil, a hint of garlic, and the promise of comfort in every bite. That’s the magic of my Pesto Chicken Flatbread, an Italian-inspired dish that’s quick and effortless to prepare. This recipe beautifully balances the savory flavors of grilled chicken, gooey mozzarella, and vibrant pesto, all atop a crispy flatbread that feels like a warm hug. Not only does it whip up in just minutes, making it the perfect solution for a busy weeknight dinner, but it’s versatile enough to impress at casual gatherings, too. Whether you’re a seasoned home-chef or just getting started, this delightful flatbread will surely become a favorite in your household. Ready to transform your dinner routine? Let’s dive in!

Why is Pesto Chicken Flatbread a Must-Try?

Quick and Effortless: This recipe comes together in no time, making it perfect for busy weeknights when you need a delicious meal fast.

Flavor-Packed Delight: With the zesty basil pesto and succulent chicken, every bite bursts with savory goodness.

Versatile Base: Use any flatbread you like, and switch up toppings to suit your taste, whether it’s adding grilled veggies from a Chicken Cashew Broccoli stir-fry or choosing different cheeses.

Crowd-Pleaser: Whether served as a main dish or an appetizer at gatherings, it’s bound to impress your guests and keep everyone asking for seconds!

Healthy and Nutritious: Packed with protein and fresh ingredients, this flatbread is a nourishing option that makes you feel good about dinner.

Baking Made Easy: Just pop it in the oven for a perfectly crispy finish, no complicated cooking techniques required!

Pesto Chicken Flatbread Ingredients

For the Flatbread

  • Chicken Breasts – The main protein source that provides texture and sustenance; substitute with grilled veggies or tofu for a vegetarian option.
  • Basil Pesto – Adds vibrant flavor and moisture; can be homemade or store-bought for convenience.
  • Flatbread – Serves as the base for the dish; use store-bought or homemade for more control over ingredients.

For the Toppings

  • Mozzarella Cheese – Enhances creaminess and provides that gooey texture when melted; use low-fat mozzarella for a lighter version.
  • Cherry Tomatoes – Adds sweetness and freshness; substitute with sun-dried tomatoes for a different flavor profile.
  • Parmesan Cheese – Provides a sharp and salty flavor; can use Pecorino Romano as an alternative.

For Cooking and Seasoning

  • Olive Oil – Necessary for cooking the chicken, adding richness, and preventing sticking; substitute with canola or vegetable oil.
  • Salt and Pepper – Essential seasonings to enhance all flavors; adjust according to taste preferences.

For Garnish

  • Fresh Basil Leaves – Optional garnish to add color and fresh flavor; perfect for making the Pesto Chicken Flatbread look as good as it tastes!

Step‑by‑Step Instructions for Pesto Chicken Flatbread

Step 1: Preheat the Oven
Begin by preheating your oven to 400°F (200°C). This step is crucial to ensure that your Pesto Chicken Flatbread bakes evenly, providing that perfect crispy texture. While the oven heats, gather your ingredients and baking sheet, so you’re ready for the next steps.

Step 2: Season and Cook Chicken
Pat the chicken breasts dry using paper towels and season them generously with salt and pepper. In a large skillet, heat 2 tablespoons of olive oil over medium-high heat. Add the chicken and cook for about 6-7 minutes per side, or until the chicken is golden brown and reaches an internal temperature of 165°F (75°C). This will create a flavorful base for your flatbread.

Step 3: Rest and Slice the Chicken
Once the chicken is cooked through, transfer it to a cutting board and let it rest for about 5 minutes. This resting period allows the juices to redistribute, keeping your chicken tender and flavorful. After resting, slice the chicken into thin strips for even distribution over your Pesto Chicken Flatbread.

Step 4: Prepare the Flatbreads
Lay your flatbreads on a baking sheet lined with parchment paper. Using a spatula or the back of a spoon, spread a generous layer of basil pesto over each flatbread, ensuring a good distribution for maximum flavor. This step infuses the flatbread with aromatic basil goodness that pairs perfectly with the chicken.

Step 5: Assemble the Flatbreads
Evenly distribute your sliced chicken over the pesto-covered flatbreads. Next, sprinkle shredded mozzarella and halved cherry tomatoes on top. The cheese will melt beautifully, while the tomatoes will add a delightful burst of sweetness. Finally, sprinkle freshly grated Parmesan cheese over everything for that irresistible savory kick.

Step 6: Bake the Flatbreads
Place the assembled flatbreads in the preheated oven and bake for 10-12 minutes. Keep an eye on them; you’re looking for the cheese to be melted and bubbly, with the edges of the flatbread turning a lovely golden brown. For extra crispiness, feel free to broil for an additional 1-2 minutes, but watch closely to prevent burning.

Step 7: Slice and Serve
After baking, remove your Pesto Chicken Flatbread from the oven and let it cool for about a minute. Slice into pieces using a sharp knife or pizza cutter for easy serving. If desired, garnish with fresh basil leaves for a pop of color and fresh flavor before serving your delicious creation to family and friends.

Expert Tips for Pesto Chicken Flatbread

  • Perfect Chicken Every Time: Check the internal temperature to ensure it’s fully cooked; aim for 165°F (75°C) to keep it juicy.

  • Watch the Baking: Keep an eye on the flatbreads while baking; they can go from perfect to burnt quickly, especially under the broiler.

  • Customize Your Pesto: Feel free to experiment with homemade or store-bought pesto; fresh basil will provide the best flavor while keeping your Pesto Chicken Flatbread versatile.

  • Layering Matters: Layer your toppings evenly for balanced flavor; this way, each bite delivers that savory goodness without being top-heavy.

  • Reheating Tips: If you have leftovers, reheat in the oven to restore crispness instead of using the microwave, which can make the flatbread soggy.

  • Add Fresh Greens: Enhance nutrition and flavor by topping the flatbread with fresh arugula or spinach after baking for a delightful crunch!

Pesto Chicken Flatbread Variations

Feel free to customize and elevate your Pesto Chicken Flatbread to suit your taste buds and preferences!

  • Vegetarian Delight: Substitute chicken with grilled vegetables or marinated tofu to create a hearty vegetarian flatbread. The smoky flavors and textures pair beautifully with the vibrant pesto.

  • Greens Galore: Toss arugula or spinach on top after baking for extra nutrition and a vibrant pop of color. The fresh greens will add a delightful crunch to every bite.

  • Cheese Swap: Consider swapping mozzarella cheese with gooey burrata for an indulgent twist. The creamy texture will melt into the flatbread, creating an irresistible experience.

  • Heat it Up: Add a sprinkle of red pepper flakes or sliced jalapeños before baking for a spicy kick. This twist will elevate the flavor profile to a whole new level!

  • Savory Additions: Top with olives or artichokes for a Mediterranean flair. These ingredients impart a depth of flavor that complements the basil pesto beautifully.

  • Nutty Flavor: Drizzle a little tahini or sprinkle chopped nuts, such as pine nuts or walnuts, on top for a satisfying crunch and nutty richness. This will enhance the texture of your flatbread.

  • Herb-Infused: Mix fresh herbs like oregano or thyme into the pesto or sprinkle on top before serving for an added burst of fresh flavor. This will elevate the entire dish to gourmet levels.

  • Unique Flatbreads: Experiment with different flatbreads, such as whole wheat or gluten-free varieties, to cater to dietary needs while maintaining deliciousness. Also, try pairing it with a side of Air Fryer Chicken for a flavorful feast!

How to Store and Freeze Pesto Chicken Flatbread

Fridge: Keep any leftover Pesto Chicken Flatbread in an airtight container for up to 3 days. This ensures it stays flavorful and fresh for your next meal.

Freezer: Wrap the flatbread tightly in foil or plastic wrap and store it in a freezer-safe bag for up to 2 months. This will help maintain its crispy texture once reheated.

Reheating: To restore the crispiness, reheat frozen or refrigerated flatbread in a preheated oven at 375°F (190°C) for about 10-15 minutes. This will get it deliciously warm and crispy again!

Notes: Avoid microwaving the flatbread if you’re aiming for that delightful crunch; the oven is your best friend for reheating the Pesto Chicken Flatbread properly.

What to Serve with Pesto Chicken Flatbread

Creating a delightful meal goes beyond just the main dish—it’s about the harmonious blend of flavors and textures that make each bite memorable.

  • Mixed Green Salad: A light salad adds freshness, with crisp greens and a tangy vinaigrette that balances the richness of the flatbread. Toss in some walnuts or feta for extra flavor!

  • Garlic Breadsticks: These will amplify the Italian experience, offering an irresistible crunch with melted butter and garlic. Perfect for dipping into any leftover pesto!

  • Roasted Vegetables: Roast seasonal veggies like zucchini, bell peppers, and asparagus for a warm side; their caramelized sweetness will complement the savory flatbread beautifully.

  • Bruschetta: This classic starter brings simple, vibrant flavors of fresh tomatoes, basil, and garlic, making it a bright pairing that’s ideal for sharing.

  • Italian Wine: A glass of crisp Pinot Grigio or a light Chianti will elevate your dining experience, enhancing the pesto’s herbal notes while cooling the palate.

  • Tiramisu: For dessert, a luscious tiramisu is the perfect sweet finale, with its creamy layers of mascarpone and coffee flavors providing a delightful contrast to the savory flatbread.

Enjoy crafting a meal that’ll have everyone gathering around the table with smiles and satisfied appetites!

Make Ahead Options

These Pesto Chicken Flatbreads are perfect for meal prep enthusiasts! You can prepare the chicken by cooking it up to 3 days in advance; simply season and cook as per the instructions, then slice and refrigerate in an airtight container. The flatbreads can also be prepped with pesto and toppings up to 24 hours before

serving; just assemble them and cover tightly with foil or cling wrap to maintain quality. When you’re ready to enjoy your homemade flatbreads, simply bake them directly from the fridge for 12-15 minutes at 400°F (200°C), ensuring a crispy texture just like fresh. This way, you’ll have a delightful dinner on the table in no time, allowing you to savor every bite without the hassle!

Pesto Chicken Flatbread Recipe FAQs

What type of chicken should I use for Pesto Chicken Flatbread?
Absolutely, boneless, skinless chicken breasts work best for this recipe as they cook quickly and remain juicy. If you’d like a vegetarian alternative, grilled vegetables or marinated tofu make for delightful substitutes, adding unique textures and flavors.

How should I store leftover Pesto Chicken Flatbread?
You can keep any leftover Pesto Chicken Flatbread in an airtight container in the refrigerator for up to 3 days. I often recommend reheating it in the oven rather than the microwave to maintain that delightful crispy texture, which can be lost in the microwave.

Can I freeze Pesto Chicken Flatbread?
Yes! To freeze, wrap the flatbread tightly in aluminum foil or plastic wrap, and place it in a freezer-safe bag. It can be stored for up to 2 months. When you’re ready to enjoy it again, reheat it in a preheated oven at 375°F (190°C) for about 10-15 minutes for optimal crispiness.

What if my chicken isn’t cooking evenly?
If your chicken isn’t cooking evenly, try reducing the heat slightly and allowing it to cook a bit longer, ensuring it reaches an internal temperature of 165°F (75°C). You could also butterfly the chicken breasts for a more even cooking time, which helps them cook through without drying out.

Can I use store-bought pesto, or should I make my own?
You can absolutely use store-bought pesto for this recipe; it’s quick and convenient! However, if you have the time and fresh basil on hand, homemade pesto is a wonderful option that brings a fresh, vibrant flavor. Simply blend fresh basil, garlic, pine nuts, Parmesan, and olive oil together for a delicious homemade version.

What toppings can I customize for my Pesto Chicken Flatbread?
The great thing about Pesto Chicken Flatbread is its versatility! You can easily add toppings like arugula or spinach after baking for added freshness, or try sun-dried tomatoes instead of cherry tomatoes for a richer flavor. Explore with other cheeses like goat cheese or feta, and even olives or artichokes for a Mediterranean twist!

Pesto Chicken Flatbread

Pesto Chicken Flatbread: A Flavorful Twist for Easy Dinners

Enjoy the delicious Pesto Chicken Flatbread, a quick and flavorful dish featuring tender chicken and vibrant pesto.
Prep Time 15 minutes
Cook Time 15 minutes
Resting Time 5 minutes
Total Time 35 minutes
Servings: 4 pieces
Course: Dinner
Cuisine: Italian
Calories: 350

Ingredients
  

For the Flatbread
  • 2 pieces Chicken Breasts Main protein source; can substitute with grilled veggies or tofu.
  • 1/2 cup Basil Pesto Can be homemade or store-bought.
  • 2 pieces Flatbread Store-bought or homemade.
For the Toppings
  • 1 cup Mozzarella Cheese Shredded; can use low-fat version.
  • 1 cup Cherry Tomatoes Halved; can substitute with sun-dried tomatoes.
  • 1/4 cup Parmesan Cheese Grated; Pecorino Romano can be used as alternative.
For Cooking and Seasoning
  • 2 tablespoons Olive Oil Can substitute with canola or vegetable oil.
  • to taste Salt Essential seasoning.
  • to taste Pepper Essential seasoning.
For Garnish
  • 1/4 cup Fresh Basil Leaves Optional garnish.

Equipment

  • Oven
  • Skillet
  • Baking Sheet
  • Spatula
  • knife

Method
 

Step‑by‑Step Instructions
  1. Preheat your oven to 400°F (200°C). Gather your ingredients and baking sheet.
  2. Pat the chicken breasts dry, season with salt and pepper, and cook in a skillet with olive oil over medium-high heat for 6-7 minutes per side.
  3. Let the chicken rest for 5 minutes, then slice into thin strips.
  4. Spread a generous layer of basil pesto over each flatbread on a baking sheet lined with parchment paper.
  5. Distribute sliced chicken over the pesto, followed by mozzarella and cherry tomatoes. Sprinkle with Parmesan cheese.
  6. Bake for 10-12 minutes until cheese is melted and edges are golden brown. Broil for 1-2 minutes for extra crispiness, if desired.
  7. Cool for a minute, slice into pieces, and garnish with fresh basil leaves before serving.

Nutrition

Serving: 1pieceCalories: 350kcalCarbohydrates: 30gProtein: 25gFat: 15gSaturated Fat: 7gPolyunsaturated Fat: 2gMonounsaturated Fat: 8gCholesterol: 70mgSodium: 650mgPotassium: 400mgFiber: 2gSugar: 3gVitamin A: 15IUVitamin C: 10mgCalcium: 20mgIron: 6mg

Notes

Store leftovers in an airtight container for up to 3 days. Reheat in a preheated oven for best results.

Tried this recipe?

Let us know how it was!

Creamy Pistachio Pudding Overnight Oats for a Nutritious Kick

Mornings can often feel like a mini crisis, especially when your stomach is rumbling and you’re short on time. But what if I told you that you could wake up to a delightful bowl of Creamy Pistachio Pudding Overnight Oats? This recipe is not just a comforting hug in a jar; it’s a game-changer for anyone seeking a nutritious breakfast with high protein and fiber. Whether you’re rushing off to work or have a busy day ahead, these overnight oats are meal prep-friendly, making busy mornings a breeze. They’re creamy, satisfying, and offer a perfect balance of nutty sweetness that will make anyone feel like they’ve indulged in dessert for breakfast. Curious to see how simple it is to whip up this delicious start to your day? Let’s dive in!

Why Choose Creamy Pistachio Oats?

Nutritious Delight: Packed with high protein and fiber, these oats are not only filling but also support your health goals.

Meal Prep-Friendly: Perfect for those busy mornings, you can prepare in advance and enjoy throughout the week. Store them in individual jars for a quick breakfast!

Unique Flavor: The nutty and creamy essence of pistachio creates a delightful taste that elevates your morning routine.

Versatile Toppings: Dress them up with sliced bananas or chopped pistachios for a personalized touch, making each bite a new experience.

Easily Customizable: Swap in your favorite nut milks and yogurts to suit your dietary needs or personal preferences. For more delicious options check out our Mango Coconut Pudding or Overnight Croissant Breakfast for more variety!

Creamy Pistachio Pudding Overnight Oats Ingredients

• For the perfect start to your day, gather these simple ingredients to create delicious Creamy Pistachio Pudding Overnight Oats.

For the Base

  • Rolled Oats – Provide a chewy texture and are rich in fiber; opt for certified gluten-free if needed.
  • Vanilla Almond Milk – Adds creaminess and a hint of sweetness; feel free to substitute with any milk of your choice.
  • Greek Yogurt – Brings in extra protein and a velvety texture; swap for a dairy-free yogurt for a vegan option.
  • Jell-O Pistachio Instant Pudding Mix – Intensifies the pistachio flavor and enhances creaminess; use less for a milder taste.

For Thickening

  • Chia Seeds – Help thicken the mixture while boosting fiber content; can be omitted for a lighter consistency.

To Sweeten

  • Honey – Acts as a natural sweetener; adjust the amount to match your sweetness preference or leave it out for less sugar.

For Toppings (optional)

  • Chopped Pistachios – Adds crunch and enhances the nutty flavor; perfect for a little extra texture.
  • Whipped Cream – A dollop of luxury to elevate your breakfast experience.
  • Sliced Bananas – Brings sweetness and creaminess; add just before serving for freshness.
  • Mixed Berries – Brighten the dish and add a burst of flavor.
  • Dark Chocolate Chips – For a decadent twist that feels like dessert!

Each bite will be a delightful reminder that a nutritious breakfast can also be a delectable treat. Enjoy your Creamy Pistachio Pudding Overnight Oats!

Step‑by‑Step Instructions for Creamy Pistachio Pudding Overnight Oats

Step 1: Combine the Base Ingredients
In a large airtight container, whisk together rolled oats, 2 cups of vanilla almond milk, 1 cup of Greek yogurt, and 1 package of Jell-O pistachio instant pudding mix. Ensure everything is well blended, creating a creamy mixture. Add 2 tablespoons of chia seeds for thickening. This is the foundation of your Creamy Pistachio Pudding Overnight Oats, setting the stage for a delicious breakfast.

Step 2: Sweeten to Taste
Next, drizzle in 1-2 tablespoons of honey, adjusting the sweetness to your preference. Mix well until fully incorporated. If you prefer a less sweet version, feel free to reduce the amount of honey or even omit it. This step enhances the creamy texture and balances the nutty flavor of the oats, ensuring your overnight oats are delightful.

Step 3: Chill the Mixture
Cover the container securely with a lid and place it in the refrigerator. Allow the mixture to chill for at least 4 hours, but overnight is best for maximum creaminess. The oats will absorb the liquid and thicken, giving you that satisfying consistency. When ready, you’ll see a creamy, luscious mixture that makes for an inviting breakfast.

Step 4: Portion and Serve
Once set, divide the creamy mixture into individual bowls or jars for easy grab-and-go servings. Use a spatula to scoop out the oats, ensuring everyone gets a generous portion of the flavorful base. This makes your Creamy Pistachio Pudding Overnight Oats not only convenient but also visually appealing.

Step 5: Add Toppings
Before serving, sprinkle with your choice of toppings like chopped pistachios, sliced bananas, or mixed berries to elevate the dish. You can also add a dollop of whipped cream or a few dark chocolate chips for an indulgent touch. These toppings provide extra texture and flavor, making each bite a delightful experience.

Step 6: Store for Later
If you have leftovers, store the individual servings in airtight containers in the refrigerator for up to 5 days. Make sure to keep toppings separate until ready to enjoy for the best freshness. This storage method allows you to savor your Creamy Pistachio Pudding Overnight Oats throughout the week, making busy mornings a breeze!

How to Store and Freeze Creamy Pistachio Pudding Overnight Oats

Fridge: Store in individual airtight containers for up to 5 days. This ensures your Creamy Pistachio Pudding Overnight Oats remain fresh and delicious for busy mornings.

Freezer: For longer storage, you can freeze portions in freezer-safe containers for up to 3 months. Allow them to thaw in the fridge overnight before enjoying.

Reheating: If you prefer warm oats, heat gently in the microwave after thawing, adding a splash of almond milk to regain creaminess.

Topping Storage: Keep toppings like sliced bananas and chopped pistachios separate until ready to serve for maximum freshness and texture in your overnight oats.

Make Ahead Options

These Creamy Pistachio Pudding Overnight Oats are perfect for busy home cooks looking to simplify their mornings. You can prepare the base mixture (oats, almond milk, Greek yogurt, pudding mix, chia seeds, and honey) up to 24 hours in advance. Just whisk everything together and refrigerate overnight to allow the flavors to meld and the oats to thicken beautifully. Portion the mixture into individual airtight containers for easy grab-and-go breakfasts that will stay fresh in the refrigerator for up to 5 days. To maintain quality, keep any toppings like sliced bananas or whipped cream separate until serving. When ready to enjoy, simply add your favorite toppings, and you’ll have a nutritious start to your day without the morning rush!

Expert Tips for Creamy Pistachio Pudding Overnight Oats

  • Consistency Control: Don’t forget, you can adjust the creaminess by adding more milk for thinner oats, or reducing the liquid for a thicker texture.

  • Avoid Gritty Mixture: If your oats feel gritty, consider using less pudding mix or a finer protein powder to ensure a smooth, creamy finish.

  • Maximize Creaminess: For an ultra-creamy result, try using coconut milk instead of almond milk. It enhances the richness of your Creamy Pistachio Pudding Overnight Oats.

  • Topping Timing: Add toppings like banana slices just before serving to maintain their freshness and prevent browning.

  • Customize Your Flavor: Feel free to swap ingredients! Using different flavored yogurts or nut milks can transform your overnight oats experience into something unique each time.

What to Serve with Creamy Pistachio Pudding Overnight Oats

These delectable oats are just the beginning of a balanced breakfast experience that will leave you feeling nourished and satisfied.

  • Fresh Fruit Salad: A mix of berries and citrus adds brightness and a refreshing zing, complementing the creaminess of the oats perfectly.

  • Greek Yogurt Parfait: Layer with tart yogurt to balance the sweetness—add some granola for crunch and boost protein intake!

  • Nutty Granola: Crunchy granola offers a delightful contrast to the creamy texture, enhancing flavors while providing satisfying crunch in every spoonful.

  • Nut Butter Toast: Spread almond or peanut butter on whole-grain toast for an additional protein hit, while the nutty flavors harmonize beautifully with the oats.

  • Smoothie Bowl: Blend your favorite greens with banana and almond milk for a nutritious, smoothie bowl that complements the pasta’s nutty notes.

  • Herbal Tea: A warm cup of chamomile or peppermint tea can soothe and balance out the meal, making this morning experience even more delightful.

  • Chia Seed Pudding: Serve alongside for a fun texture contrast! Infuse with vanilla for an extra layer of flavor without overpowering the star of the morning.

Creamy Pistachio Pudding Overnight Oats Variations

Feel free to explore these variations and make this delicious recipe your own!

  • Nut-Free: Use sunflower seed butter instead of nut milk for a creamy base that’s safe for schools and nut allergies. The rich flavor will still satisfy your craving!

  • Plant-Based: Substitute Greek yogurt with coconut yogurt for a completely dairy-free version. This will add a subtle tropical twist to your overnight oats!

  • Chocolate Lovers: Mix in cocoa powder or top with dark chocolate shavings for a decadent treat. Just imagine a blend of creamy pistachio and rich chocolate!

  • Protein Boost: Stir in protein powder to amplify the nutrition without changing the flavor significantly. It’s a great way to kickstart your day, especially pre-workout!

  • Fruit Infusion: Add fresh diced apples or chopped pears to the base for a refreshing juicy punch. This will add an extra layer of sweetness and texture to your oats.

  • Spicy Kick: Sprinkling in a pinch of cinnamon or nutmeg can elevate your oats with warm, comforting spices. These flavors harmonize beautifully with the pistachio!

  • Savory Spin: Replace honey with a drizzle of maple syrup or a few crushed sea salt flakes to create a sweet and salty experience. This twist may surprise your taste buds!

Each variation lets you explore new flavors while keeping your breakfast nutritious. For an inspired touch, consider enjoying your overnight oats alongside a dish of Summer Corn Chowder, turning your meal into a delightful spread!

Creamy Pistachio Pudding Overnight Oats Recipe FAQs

How do I choose the right pistachios for this recipe?
When selecting pistachios, look for ones that are vibrant green and have a little bit of nutty fragrance. Avoid any that have dark spots or signs of mold. Fresh pistachios will add a delightful crunch and enhance the overall flavor of your Creamy Pistachio Pudding Overnight Oats.

How should I store Creamy Pistachio Pudding Overnight Oats?
Store your overnight oats in individual airtight containers in the refrigerator for up to 5 days. This keeps them fresh and ready for busy mornings. Be sure to check for any changes in texture or smell before consuming, particularly after a few days.

Can I freeze Creamy Pistachio Pudding Overnight Oats?
Absolutely! For longer storage, you can freeze portions in freezer-safe containers for up to 3 months. To enjoy, simply thaw overnight in the refrigerator. If you prefer your oats warm, heat them gently in the microwave with a splash of almond milk to restore creaminess!

What if my overnight oats turn out too thick?
If you find your Creamy Pistachio Pudding Overnight Oats too thick after refrigeration, simply stir in a little almond milk until the desired consistency is reached. This way, you’ll still enjoy that creamy texture without losing any flavor.

Are Creamy Pistachio Pudding Overnight Oats suitable for everyone?
They are gluten-free if you choose certified gluten-free oats and can be made dairy-free by using plant-based yogurt and milk. However, make sure to check for specific allergies, particularly to nuts and dairy, to cater to everyone’s dietary needs at your breakfast table.

Can I add other flavors or ingredients?
The beauty of this Creamy Pistachio Pudding Overnight Oats recipe is its versatility! Feel free to experiment with different flavored yogurts or nut milks. You can also try adding spices like cinnamon or nutmeg, or even mix in other seeds and fruits for added nutrition and flavor.

Creamy Pistachio Pudding Overnight Oats

Creamy Pistachio Pudding Overnight Oats for a Nutritious Kick

Delightful Creamy Pistachio Pudding Overnight Oats offer a nutritious breakfast with high protein and fiber, perfect for busy mornings.
Prep Time 15 minutes
Chilling Time 4 hours
Total Time 4 hours 15 minutes
Servings: 2 jars
Course: Breakfast
Calories: 350

Ingredients
  

Base Ingredients
  • 2 cups Vanilla Almond Milk Can substitute with any milk of your choice.
  • 1 cup Greek Yogurt Can swap for dairy-free yogurt for vegan option.
  • 1 package Jell-O Pistachio Instant Pudding Mix Use less for a milder taste.
  • 1 cup Rolled Oats Opt for certified gluten-free if needed.
Thickening Ingredients
  • 2 tablespoons Chia Seeds Can be omitted for a lighter consistency.
Sweetening Ingredients
  • 1-2 tablespoons Honey Adjust amount for sweetness preference.
Optional Toppings
  • Chopped Pistachios Adds crunch and enhances nutty flavor.
  • Whipped Cream Optional luxurious addition.
  • Sliced Bananas Add just before serving for freshness.
  • Mixed Berries Brighten toppings and add flavor.
  • Dark Chocolate Chips For a decadent dessert-like twist.

Equipment

  • large airtight container

Method
 

Preparation Steps
  1. Combine rolled oats, vanilla almond milk, Greek yogurt, and Jell-O pistachio pudding mix in a large airtight container, whisking until well blended.
  2. Drizzle in honey, adjusting sweetness to your preference, and mix well.
  3. Cover and refrigerate for at least 4 hours or overnight for best results.
  4. Once chilled, divide the mixture into bowls or jars.
  5. Top with chopped pistachios, sliced bananas, or your chosen toppings before serving.
  6. Store leftovers in individual containers in the fridge for up to 5 days.

Nutrition

Serving: 1jarCalories: 350kcalCarbohydrates: 40gProtein: 15gFat: 15gSaturated Fat: 2gMonounsaturated Fat: 8gCholesterol: 5mgSodium: 150mgPotassium: 350mgFiber: 5gSugar: 10gVitamin A: 5IUVitamin C: 2mgCalcium: 20mgIron: 8mg

Notes

Customize flavors with different nut milks and yogurts for a unique breakfast experience.

Tried this recipe?

Let us know how it was!

Irresistible Brown Sugar Pineapple Chicken for Family Dinners

As I stood in my kitchen, the savory aroma of marinating chicken intertwined with sweet and tangy notes, a wave of nostalgia swept over me. This Brown Sugar Pineapple Chicken recipe captures the essence of family dinners, where every bite feels like a warm hug. With just a handful of pantry staples, you can whip up this irresistible dish in no time—a true game-changer for those busy weeknights. Not only does it deliver on taste, but it’s also incredibly versatile; whether you choose to grill, bake, or pan-sear, each method brings out the delicious melodies of sweet pineapple and rich brown sugar. So, are you ready to take your taste buds on a tropical adventure?

Why is Brown Sugar Pineapple Chicken a must-try?

Irresistible flavors: The combination of sweet brown sugar and tangy pineapple creates an unforgettable taste that will have everyone asking for seconds.

Quick prep: This recipe is perfect for busy weeknights, taking just minutes to marinate and cook, giving you more time to enjoy with your family.

Versatile cooking: Whether you grill, bake, or pan-sear, each method enhances the chicken’s juicy texture, making it a go-to dish for any cooking preference.

Family-friendly appeal: With its rich flavors and vibrant presentation, this dish is bound to please even the pickiest eaters, much like our popular Jerk Chicken Burritos.

Leftover friendly: Transform any leftovers into delicious wraps or salads, making it a fantastic option for meal prep, similar to the Chicken Cashew Broccoli!

Exotic touch: Inspired by Hawaiian cuisine, this dish brings a slice of tropical paradise to your dinner table.

Brown Sugar Pineapple Chicken Ingredients

For the Marinade

  • ½ cup brown sugar – Provides sweetness and caramelization; consider using coconut sugar for a lower glycemic index option.
  • ½ cup pineapple juice – Adds tropical flavor and moisture; fresh juice is ideal, but canned 100% juice works well, too.
  • ⅓ cup low-sodium soy sauce – Contributes umami and saltiness; tamari or coconut aminos are great gluten-free options.
  • 2 tbsp olive oil – Aids in marinating and cooking; you can substitute it with canola or avocado oil.
  • 1 tbsp rice vinegar (or apple cider vinegar) – Balances the sweetness; white vinegar can be used as an alternative, though it may alter the flavor.
  • 1 tsp garlic powder – Adds depth of flavor; fresh minced garlic can enhance aroma irresistibly.
  • 1 tsp onion powder – Enhances the overall flavor profile; fresh shallots serve as a fine substitute.
  • ½ tsp ground ginger – Infuses warmth and spice; fresh grated ginger can be used for a stronger flavor.
  • ½ tsp red pepper flakes (optional) – Provides a hint of heat; feel free to omit if spice isn’t your style.

For the Chicken

  • 2 lbs boneless, skinless chicken thighs or breasts – The main protein in this delightful dish; bone-in chicken pieces can provide a different texture.
  • 1 tbsp oil for searing or grilling – Ensures the chicken doesn’t stick during cooking.

For Garnish

  • Sliced green onions and sesame seeds (optional) – Adds freshness and a touch of elegance to your presentation.

With these ingredients, you’re just a whisk away from creating the unforgettable flavors of Brown Sugar Pineapple Chicken!

Step‑by‑Step Instructions for Brown Sugar Pineapple Chicken

Step 1: Marinate the Chicken
In a large bowl or resealable bag, whisk together the brown sugar, pineapple juice, soy sauce, olive oil, rice vinegar, garlic powder, onion powder, ground ginger, and optional red pepper flakes. Once well combined, add the chicken, ensuring it is evenly coated in the marinade. Seal the bag or cover the bowl and refrigerate for at least 1 hour, ideally overnight, to let the flavors deepen.

Step 2: Preheat Your Cooking Surface
Depending on your chosen method, preheat your grill to medium-high heat, your oven to 400°F (200°C), or a skillet over medium-high heat. If grilling, oil the grates to prevent sticking. For baking, lightly grease a baking dish, and for pan-searing, heat the oil in the skillet. Preparing your cooking surface ensures that the Brown Sugar Pineapple Chicken cooks evenly and develops a delicious caramelized exterior.

Step 3: Cook the Chicken
For grilling, place the marinated chicken on the preheated grill, cooking for 5-6 minutes per side or until the internal temperature reaches 165°F (74°C). If baking, arrange the chicken in the greased baking dish and bake for 20-25 minutes, basting once halfway through to enhance moisture. For the pan-searing method, cook the chicken for 5-7 minutes per side until golden brown and caramelized, adding reserved marinade in the last 2 minutes for a glossy glaze.

Step 4: Let It Rest and Garnish
Once cooked, remove the Brown Sugar Pineapple Chicken from the heat and let it rest for 5 minutes to allow the juices to redistribute, ensuring each bite is succulent. Slice the chicken as desired, then garnish with sliced green onions and sesame seeds, adding a touch of freshness and elegance to your dish. Serve alongside your favorite sides for a complete and satisfying meal.

Brown Sugar Pineapple Chicken Variations

Feel free to play with this delightful recipe and make it your own, celebrating every bite with exciting new spins!

  • Spicy Kick: Add sriracha or your favorite hot sauce to the marinade for an extra layer of heat that tantalizes the taste buds.
  • Crockpot Comfort: Cook the marinated chicken in a crockpot on low for 4-5 hours, allowing the flavors to meld beautifully for a set-it-and-forget-it meal.
  • Vegetarian Delight: Substitute chicken with tofu or cauliflower steaks, marinating them the same way for a hearty, plant-based option that’s just as tasty.
  • Glazed Goodness: Transform leftover marinade into a glaze by boiling it for a few minutes, thickening it into a sticky sauce for drizzling over the chicken.
  • Fruit Fusion: Toss in chopped bell peppers or pineapple chunks into the cooking mix for a colorful, sweet crunch alongside the marinated chicken.
  • Tangy Twist: Swap out rice vinegar for a splash of lime juice in the marinade for a citrusy zing that brightens up the whole dish.
  • Herb Haven: Add fresh herbs like cilantro or basil to the garnish for an aromatic finish, enhancing the tropical feel of this dish.
  • Umami Upgrade: Use miso paste in place of soy sauce for an umami-packed flavor boost that gives the chicken an extra savory depth, much like in my favorite Grilled Chicken Sandwich.

Remember, the beauty of cooking lies in your ability to experiment and adjust to your taste preferences!

Tips for the Best Brown Sugar Pineapple Chicken

  • Marination Magic: Allow the chicken to marinate for at least 1 hour, but ideally overnight, to infuse maximum flavor and tenderness.

  • Cooking Precision: Use a meat thermometer to check that the chicken reaches an internal temperature of 165°F (74°C) for safe and optimal results.

  • Avoid Leftover Marinade: Never use leftover marinade without boiling it first, as it may harbor harmful bacteria from raw chicken.

  • Choose Your Method: Don’t hesitate to experiment! Whether grilling, baking, or pan-searing, each method offers a unique take on the same delicious Brown Sugar Pineapple Chicken.

  • Add a Kick: For those who love spice, consider adding hot sauce or sriracha to your marinade for added heat and flavor layers.

How to Store and Freeze Brown Sugar Pineapple Chicken

  • Fridge: Store leftover cooked Brown Sugar Pineapple Chicken in an airtight container for up to 4 days. This helps retain its juicy texture and delicious flavor.

  • Freezer: For longer storage, freeze marinated raw chicken in a freezer-safe bag for up to 3 months. Make sure to remove excess air to prevent freezer burn.

  • Reheating: When ready to enjoy, thaw frozen chicken in the fridge overnight. Reheat in the oven at 350°F (175°C) until warmed through, or use a microwave for quick reheating.

  • Meal Prep Tip: Let your family enjoy this dish fresh; simply make extra for meal prep, ensuring it remains a delightful option throughout the week!

Make Ahead Options

These Brown Sugar Pineapple Chicken are perfect for busy weeknights! You can marinate the chicken up to 24 hours in advance to allow the flavors to meld beautifully. Simply whisk together the marinade ingredients, coat the chicken, and refrigerate it in an airtight container. For best results, ensure the chicken is fully coated to prevent browning. When you’re ready to cook, simply preheat your grill, oven, or skillet, then follow the cooking instructions. The chicken will be just as delicious, succulent, and flavorful, allowing you to serve a delightful meal with minimal effort!

What to Serve with Brown Sugar Pineapple Chicken

Bring the warmth of a family gathering to your dining table with these delightful pairings that complement the sweet and savory notes of the chicken.

  • Coconut Rice: The creamy texture and tropical flavor are perfect companions for the glaze, absorbing all those wonderful juices for a truly satisfying experience.

  • Grilled Pineapple Slices: Adding caramelized sweetness from fresh pineapple slices accentuates the dish’s fruity notes while bringing a playful, vibrant touch to your plate.

  • Garlic Sautéed Green Beans: A crunchy, savory side that balances the dish’s sweetness, these bright green beans add a fresh pop of color and nutrition to your meal.

  • Fresh Cucumber Salad: The crispness of cucumbers dressed in a light vinaigrette cuts through the richness of the chicken, offering a refreshing contrast that brightens every bite.

  • Coleslaw: Creamy coleslaw provides a crunchy texture and slight tanginess that complements the sweetness, making it a crunchy side refreshingly juxtaposed with the chicken’s glaze.

  • Mango Salsa: Vibrant and fruity, mango salsa adds zing and freshness, enriching your dish while providing a delicious tropical flair that mirrors the chicken’s flavor profile.

  • Red Wine Sangria: Pair your meal with a fruity sangria to enhance the tropical vibes. The refreshing ingredients will harmonize beautifully with the flavors of the chicken.

  • Lemon Sorbet: For dessert, a light and zesty lemon sorbet will cleanse the palate, leaving a refreshing finish after the rich and sweet dinner.

Brown Sugar Pineapple Chicken Recipe FAQs

How do I choose ripe pineapple for the marinade?
To select the perfect pineapple, look for one that is slightly soft at the base, has a sweet aroma, and features a golden-yellow color. Avoid any pineapples with dark spots or bruises. A ripe pineapple will create a deliciously tropical flavor in your Brown Sugar Pineapple Chicken!

How should I store leftover Brown Sugar Pineapple Chicken?
Store any leftover cooked chicken in an airtight container in the refrigerator for up to 4 days. It’s best to let the chicken cool completely before sealing to prevent condensation. Reheat gently in the oven or microwave before enjoying!

Can I freeze marinated chicken?
Absolutely! You can freeze the marinated raw chicken in a freezer-safe bag for up to 3 months. Make sure to remove as much air as possible to prevent freezer burn. When you’re ready to cook, thaw it overnight in the fridge and follow the cooking instructions as usual.

What if the chicken is not cooking evenly?
If you notice your chicken isn’t cooking evenly, it might be due to the thickness of the pieces. Ensure that the chicken is uniform in thickness before cooking. For best results, consider pounding the chicken to an even size or using a meat thermometer to check for doneness. It should reach an internal temperature of 165°F (74°C) for perfect results!

Are there any dietary considerations for this recipe?
Yes! If you need a gluten-free option, substitute regular soy sauce with tamari or coconut aminos. For those watching their sugar intake, you can replace brown sugar with coconut sugar, which has a lower glycemic index. Additionally, ensure all ingredients are safe for any allergies or dietary preferences you may have.

How do I know when the Brown Sugar Pineapple Chicken is done cooking?
Using a meat thermometer is the best way to ensure your chicken is perfectly cooked! The internal temperature should read 165°F (74°C). If you’re grilling or baking, look for a golden-brown color with a sticky, glossy glaze. Let it rest for 5 minutes after cooking for juicy results!

Brown Sugar Pineapple Chicken

Irresistible Brown Sugar Pineapple Chicken for Family Dinners

This Brown Sugar Pineapple Chicken combines sweet and tangy flavors for a delightful family meal.
Prep Time 10 minutes
Cook Time 25 minutes
Marinating Time 1 hour
Total Time 1 hour 35 minutes
Servings: 4 servings
Course: Chicken
Cuisine: Hawaiian
Calories: 360

Ingredients
  

For the Marinade
  • 0.5 cup brown sugar Consider using coconut sugar for a lower glycemic index option.
  • 0.5 cup pineapple juice Fresh juice is ideal, but canned 100% juice works well, too.
  • 0.33 cup low-sodium soy sauce Tamari or coconut aminos are great gluten-free options.
  • 2 tbsp olive oil Can substitute with canola or avocado oil.
  • 1 tbsp rice vinegar Or apple cider vinegar; white vinegar can alter the flavor.
  • 1 tsp garlic powder Fresh minced garlic can enhance aroma.
  • 1 tsp onion powder Fresh shallots serve as a fine substitute.
  • 0.5 tsp ground ginger Fresh grated ginger can be used for stronger flavor.
  • 0.5 tsp red pepper flakes Optional for a hint of heat.
For the Chicken
  • 2 lbs boneless, skinless chicken thighs or breasts Bone-in chicken pieces can provide a different texture.
  • 1 tbsp oil for searing or grilling Ensures the chicken doesn’t stick during cooking.
For Garnish
  • sliced green onions and sesame seeds Optional for freshness and elegance.

Equipment

  • Large bowl or resealable bag
  • Grill or baking dish or skillet
  • Meat Thermometer

Method
 

Step-by-Step Instructions
  1. In a large bowl or resealable bag, whisk together the brown sugar, pineapple juice, soy sauce, olive oil, rice vinegar, garlic powder, onion powder, ground ginger, and optional red pepper flakes. Add the chicken, ensuring it is evenly coated, then seal and refrigerate for at least 1 hour, ideally overnight.
  2. Preheat your grill to medium-high heat, oven to 400°F (200°C), or skillet over medium-high heat. Oil the grates or grease a baking dish.
  3. For grilling, cook chicken for 5-6 minutes per side or until it reaches 165°F (74°C). For baking, arrange in the greased dish and bake for 20-25 minutes. For pan-searing, cook for 5-7 minutes per side, adding reserved marinade in the last 2 minutes.
  4. Remove the chicken from heat, let it rest for 5 minutes, slice, and garnish with green onions and sesame seeds.

Nutrition

Serving: 1servingCalories: 360kcalCarbohydrates: 27gProtein: 30gFat: 15gSaturated Fat: 3gPolyunsaturated Fat: 0.5gMonounsaturated Fat: 10gCholesterol: 85mgSodium: 600mgPotassium: 500mgFiber: 1gSugar: 24gVitamin A: 250IUVitamin C: 5mgCalcium: 25mgIron: 2mg

Notes

Allow chicken to marinate overnight for maximum flavor. Always ensure chicken reaches a safe internal temperature of 165°F (74°C). Consider using a meat thermometer.

Tried this recipe?

Let us know how it was!

Irresistible Creamy Crab and Shrimp Seafood Bisque Delight

The aroma of sautéed bell peppers and fresh herbs wafts through the kitchen, instantly conjuring memories of cozy gatherings and comfort food. This Easy Low-Carb Vegetarian Casserole is the answer for those hectic weeknights when you crave something wholesome but don’t have hours to spare. Packed with vibrant vegetables like cauliflower and zucchini, plus a cheesy, creamy base that brings it all together, this dish is as satisfying to eat as it is to make. And the best part? It’s a true crowd-pleaser and perfectly fits into a low-carb lifestyle, ensuring everyone at your table leaves happy and full. So, are you ready to create a comforting meal that skips the takeout and warms the heart?

Why is this casserole a must-try?

Simplicity at Its Best: With just a handful of everyday ingredients, whipping up this casserole is a breeze, even for novice cooks.

Rich, Creamy Texture: The meld of cheese, eggs, and cream creates a luscious base that envelops the vegetables, making every bite divine.

Versatile Variations: Feel free to customize with your favorite veggies or cheeses, like feta or goat cheese, to keep things exciting in the kitchen!

Perfect Comfort Food: Inspired by Southern traditions, this dish brings that warm, homey feel right to your table.

Time-Saving Delight: Prepping in advance? You can easily store leftovers for quick meals, just like our Creamy Seafood Bisque Soup or Honey Garlic Shrimp.

Elevate your weeknight dinners with this delicious vegetarian casserole that’s sure to satisfy cravings without sacrificing nutrition!

Easy Low-Carb Vegetarian Casserole Ingredients

For the Casserole

  • Cauliflower – Main vegetable base, but feel free to substitute with broccoli for a different flavor profile.
  • Bell Peppers – Adds sweetness and vibrant texture; using a mix of colors makes it visually appealing.
  • Zucchini – Contributes moisture and a mild flavor; consider swapping it with yellow squash for variety.
  • Shredded Cheese – Provides creaminess and binds the casserole together; opt for dairy-free cheese if making it vegan.
  • Eggs – Acts as a binding agent; for a vegan alternative, mix flaxseed meal with water instead.
  • Heavy Cream or Coconut Milk – Adds richness to the dish; use almond milk for a lighter, low-carb option.
  • Herbs (e.g., thyme, oregano) – Enhances flavor with freshness; fresh herbs are best, but dried varieties work in a pinch.
  • Salt and Pepper – Essential for seasoning; adjust quantities to fit your taste preferences.

For Optional Topping

  • Breadcrumbs or Crushed Nuts – For a delightful crunchy topping, sprinkle them over before baking (great with the casserole!).

Step‑by‑Step Instructions for Easy Low-Carb Vegetarian Casserole

Step 1: Preheat the Oven
Begin by preheating your oven to 375°F (190°C). This important step ensures the Easy Low-Carb Vegetarian Casserole bakes evenly, developing a beautifully golden top. While the oven warms up, gather your ingredients and prepare your baking dish by greasing it lightly with cooking spray or olive oil for easy serving later.

Step 2: Prepare the Vegetables
Chop the cauliflower, bell peppers, and zucchini into bite-sized pieces. Aim for uniform sizes to guarantee even cooking throughout the casserole. The fresh colors will create a vibrant dish that looks as good as it tastes. Set aside your chopped veggies in a large mixing bowl, ready for combining with the rest of the ingredients.

Step 3: Mix Ingredients
In the mixing bowl with the vegetables, add the shredded cheese, eggs, heavy cream or coconut milk, and your choice of herbs. Stir everything together until the vegetables are well-coated and the mixture appears homogenous. This creamy base binds the casserole, ensuring all the flavors meld beautifully as it bakes, creating that irresistible comfort food experience.

Step 4: Transfer to Baking Dish
Carefully pour the mixed ingredients into your prepared baking dish, using a spatula to spread it out evenly. Press down gently on the mixture to compact it a bit, which will help it hold together once baked. The top layer should be smooth and even, ensuring a nice crust forms while the casserole cooks in the oven.

Step 5: Bake the Casserole
Place the baking dish in your preheated oven and bake for 30-35 minutes. Keep an eye on the casserole as it bakes; you’ll know it’s ready when the top is a beautiful golden brown and the center feels set when gently pressed. The aroma wafting through your kitchen will be a delectable hint of what’s to come.

Step 6: Cool and Serve
Once baked to perfection, remove the casserole from the oven and let it cool for about 5-10 minutes. This slight cooling time allows the casserole to firm up, making it easier to slice and serve. Gather your friends or family and dish out generous portions of this delicious Easy Low-Carb Vegetarian Casserole, savoring every bite together.

Make Ahead Options

These Easy Low-Carb Vegetarian Casseroles are perfect for busy home cooks looking to save time during their week! You can chop the vegetables—cauliflower, bell peppers, and zucchini—up to 24 hours in advance and store them in an airtight container in the refrigerator to maintain freshness. Additionally, you can prepare the entire casserole mixture and refrigerate it for up to 3 days before baking. Just remember to cover the baking dish tightly with plastic wrap. When you’re ready to serve, simply preheat your oven, uncover the casserole, and bake as instructed, ensuring it bakes evenly and remains just as delicious! Enjoy your hassle-free meal prep and savor the flavors on your busy weeknights!

What to Serve with Easy Low-Carb Vegetarian Casserole

Elevate your dining experience with delightful sides and drinks that complement the rich flavors of your casserole.

  • Fresh Garden Salad: A crisp salad with mixed greens and a zesty vinaigrette adds a refreshing contrast to the creamy casserole.
  • Garlic Bread Sticks: A side of warm garlic bread sticks provides that perfect touch of comfort and can soak up any extra creamy goodness.
  • Steamed Asparagus: Lightly seasoned asparagus offers a tender crunch, enhancing the meal’s overall texture without overwhelming the flavors.
  • Roasted Brussels Sprouts: The earthy notes of roasted Brussels sprouts pair beautifully with the casserole, bringing a lovely balance to the dish.
  • Herbed Quinoa: This fluffy, protein-rich grain dish complements the casserole’s rich filling while adding a nutty flavor and delightful texture.
  • Chilled Lemonade: A refreshing glass of lemonade brings a sweet and tangy element that brightens each bite of casserole, making for a delightful pairing.
  • Red Wine: A medium-bodied red wine, like Pinot Noir, enhances the flavors of the casserole, creating an elegant touch to your meal.
  • Apple Crisp: Cap off your meal with a warm apple crisp, offering sweet and spiced notes that perfectly balance the savory casserole.
  • Sliced Avocado: Creamy avocado slices provide a smooth, buttery texture that beautifully complements the casserole’s richness.
  • Grilled Corn on the Cob: Sweet, charred corn provides a seasonal touch that adds sweetness and a delightful crunch to your meal.

Storage Tips for Easy Low-Carb Vegetarian Casserole

  • Fridge: Store leftovers in an airtight container for up to 3 days. This Easy Low-Carb Vegetarian Casserole keeps well, making it perfect for meal prep.

  • Freezer: You can freeze the casserole for up to 2 months. Wrap it tightly in plastic wrap and then in aluminum foil to prevent freezer burn.

  • Reheating: For the best texture, reheat in the oven at 350°F (175°C) for about 20-25 minutes, until warmed through. This helps retain its creamy goodness.

  • Make-Ahead: Consider making the casserole ahead of time! You can assemble it a day prior, store it in the fridge, and simply bake it when ready to serve.

Tips for the Best Vegetarian Casserole

  • Even Cutting: Ensure the vegetables are cut evenly to guarantee consistent cooking throughout the casserole. This will enhance the texture and flavor.

  • Crunchy Topping: For an extra layer of texture, sprinkle breadcrumbs or crushed nuts on top before baking. This adds a delightful crunch that contrasts with the creamy filling.

  • Don’t Overcook: Keep an eye on your casserole to avoid overcooking. It should be slightly firm when done to maintain the integrity of the vegetables for a satisfying bite.

  • Flavor Boosters: Consider adding herbs like basil or parsley for an aromatic twist. Fresh herbs elevate the dish, enhancing the overall flavor profile.

  • Make-Ahead Magic: You can prepare this vegetarian casserole a day in advance and refrigerate it overnight. Just reheat it in the oven to enjoy a quick, home-cooked meal.

Easy Low-Carb Vegetarian Casserole Variations

Feel free to explore your culinary creativity with these suggestions that bring out new flavors and textures!

  • Spaghetti Squash: Swap the cauliflower for spaghetti squash for a fun texture that mimics pasta.

  • Quinoa Boost: Add cooked quinoa or lentils for a protein-packed, hearty twist that complements the vegetables beautifully.

  • Cheese Variety: Mix in different cheeses like feta or goat cheese to add a tangy twist that elevates the flavor profile.

  • Herb Medley: Experiment with fresh herbs like basil or cilantro for bright, aromatic notes that refresh every bite. A sprinkle of fresh herbs adds vibrancy!

  • Lower Carb: If you’re looking for a lower-carb version, use riced cauliflower instead of traditional grains while retaining that satisfying base.

  • Spice It Up: Add a dash of red pepper flakes or cayenne for a gentle heat that contrasts wonderfully with the creamy filling.

  • Nutritional Yeast: For a dairy-free option, sprinkle nutritional yeast on top before baking for a cheesy flavor without the dairy.

  • Mix in Greens: Toss in spinach or kale for an extra boost of nutrition and color. These greens wilt beautifully and balance the casserole’s richness.

These variations ensure that each time you make this casserole, it feels like a new culinary adventure! For more comforting recipes, you might also enjoy our Garlic Butter Shrimp or a classic Chicken Mushroom Soup. Let your creativity shine!

Easy Low-Carb Vegetarian Casserole Recipe FAQs

What should I look for when selecting cauliflower?
When choosing cauliflower, look for heads that are firm and tightly packed with florets. Avoid any that have dark spots or brown patches, which indicate spoilage. Ideally, the cauliflower should be a creamy white color and free from blemishes for the freshest flavor.

How should I store leftover casserole?
Store your Easy Low-Carb Vegetarian Casserole in an airtight container in the fridge for up to 3 days. This helps retain its freshness while ensuring it’s ready for quick meals during the week. To make it even easier, you can prepare it ahead of time and store it in the fridge before baking!

Can I freeze this casserole? If so, how?
Absolutely! To freeze the casserole, assemble it in a baking dish but don’t bake it yet. Wrap tightly with plastic wrap, then cover with aluminum foil for added protection against freezer burn. It can be frozen for up to 2 months. When you’re ready to enjoy it, simply thaw overnight in the fridge and bake it as directed.

What if my casserole is too runny?
If you find that your casserole is too runny after baking, it’s likely due to excess moisture from the vegetables. To troubleshoot, ensure the vegetables are dried thoroughly after washing. If it’s already baked, try putting it back in the oven for an additional 5-10 minutes to help firm it up, or sprinkle a bit of cornstarch in the mixture unbaked for a thicker texture.

Are there any allergy considerations I should be aware of?
Yes, it’s important to note that this casserole contains eggs and dairy, which may pose issues for those with allergies. For a vegan version, replace eggs with a flaxseed meal mixture (1 tablespoon flaxseed mixed with 3 tablespoons water) and use dairy-free cheese alternatives. Always check the labels on your ingredients to ensure they meet your dietary requirements.

How should I reheat my casserole for best results?
To reheat the casserole while maintaining its delicious creamy texture, preheat your oven to 350°F (175°C). Place the casserole in the oven, covered with foil, for about 20-25 minutes or until heated through. This method stops it from becoming dry and ensures that it stays as delightful as when you first made it!

Creamy Crab and Shrimp Seafood Bisque

Irresistible Creamy Crab and Shrimp Seafood Bisque Delight

Enjoy the rich flavors of Creamy Crab and Shrimp Seafood Bisque, a perfect dinner option that dazzles with taste.
Prep Time 15 minutes
Cook Time 30 minutes
Cooling Time 10 minutes
Total Time 55 minutes
Servings: 4 servings
Course: Dinner
Cuisine: American
Calories: 350

Ingredients
  

For the Casserole
  • 1 head Cauliflower Main vegetable base
  • 2 cups Bell Peppers Mix of colors for visual appeal
  • 1 medium Zucchini Mild flavor, can substitute with yellow squash
  • 2 cups Shredded Cheese Use dairy-free cheese for vegan option
  • 3 large Eggs Acts as a binding agent
  • 1 cup Heavy Cream or Coconut Milk Adds richness
  • 2 tablespoons Herbs (e.g., thyme, oregano) Fresh herbs preferred
  • to taste Salt and Pepper Essential for seasoning
For Optional Topping
  • 1 cup Breadcrumbs or Crushed Nuts For a crunchy topping

Equipment

  • Oven
  • Mixing Bowl
  • Baking dish

Method
 

Step-by-Step Instructions
  1. Preheat the Oven to 375°F (190°C).
  2. Chop the cauliflower, bell peppers, and zucchini into bite-sized pieces.
  3. In a mixing bowl, combine the vegetables, shredded cheese, eggs, heavy cream, and herbs.
  4. Transfer the mixture to a baking dish, spreading it evenly.
  5. Bake for 30-35 minutes until golden brown.
  6. Remove from oven and let cool for 5-10 minutes before serving.

Nutrition

Serving: 1sliceCalories: 350kcalCarbohydrates: 12gProtein: 20gFat: 25gSaturated Fat: 15gPolyunsaturated Fat: 2gMonounsaturated Fat: 8gCholesterol: 180mgSodium: 600mgPotassium: 500mgFiber: 3gSugar: 4gVitamin A: 500IUVitamin C: 60mgCalcium: 300mgIron: 2mg

Notes

For best results, ensure even vegetable cutting and top with breadcrumbs for crunch.

Tried this recipe?

Let us know how it was!

Irresistible Whiskey Caramel Bread Pudding That Delights Your Soul

The sweet, inviting scent of sugar caramelizing mingles with warm spices, transporting me back to cherished family gatherings and cozy nights at home. That’s the magic of this Whiskey Caramel Bread Pudding—a delightful dessert that takes simple ingredients and elevates them into pure indulgence. Combining buttery brioche soaked in a rich custard with the sophisticated touch of whiskey caramel sauce, this recipe is not only incredibly easy to prepare, but it also serves as the perfect centerpiece for any celebration. Whether you’re hosting a festive dinner or just seeking a comforting treat to unwind after a long day, this dessert will impress your loved ones and satisfy your cravings. Are you ready to dive into this mouthwatering adventure with me?

Why is this bread pudding unforgettable?

Indulgence at Its Finest: Every bite of this Whiskey Caramel Bread Pudding is a luxurious experience, combining rich flavors and comforting textures.
Crowd-Pleasing Delight: Perfect for gatherings, this dessert will impress friends and family alike, making it a standout showstopper at any event.
Easy to Make: This recipe allows you to whip up a homemade dessert that seems gourmet, while keeping things simple and practical.
Versatile Variations: Feel free to get creative with ingredients – from using different types of bread to experimenting with alternatives like rum for the whiskey. Check out how you can also enjoy this luxurious dessert with Mango Coconut Pudding for a delightful tropical twist!
Make-Ahead Friendly: Prepare ahead of time, assemble in advance, and bake fresh just before serving, making it an ideal choice for busy hosts.

Whiskey Caramel Bread Pudding Ingredients

For the Pudding
Brioche or French bread – Choose stale bread for optimal soaking and custard absorption.
Milk – Adds creaminess and a velvety texture to the custard base.
Heavy cream – Enhances the richness, making every bite a delight.
Eggs – Binds the ingredients and sets the pudding; you can use applesauce or a flaxseed mixture as a substitute.
Brown sugar – Provides sweetness and depth; granulated sugar works in a pinch.
Vanilla extract – Adds a warm undertone; feel free to omit if preferred.
Cinnamon and nutmeg – Infuse warm spices that elevate the flavor profile.
Whiskey – Provides complexity and richness; for a non-alcoholic version, try omitting it or using rum.
Salt – Balances the sweetness beautifully and brightens flavors.

For the Whiskey Caramel Sauce
Granulated sugar – The star ingredient for that luscious caramel richness.
Butter – Adds creaminess and depth to the sauce.
Heavy cream – Helps achieve that smooth and silky texture in your caramel.
Whiskey – A dash enhances the caramel’s flavor; can be omitted for a non-alcoholic version.

Creating your perfect Whiskey Caramel Bread Pudding is just a gathering of these ingredients away, and with each bite, you’ll be thankful for the warmth and richness this dessert brings.

Step‑by‑Step Instructions for Whiskey Caramel Bread Pudding

Step 1: Preheat the Oven
Begin by preheating your oven to 350°F (175°C). While it warms up, grease a 9×13-inch baking dish thoroughly with butter or cooking spray. This ensures that your decadent Whiskey Caramel Bread Pudding does not stick and allows for easy serving.

Step 2: Prepare the Custard Mixture
In a large mixing bowl, whisk together 2 cups of milk, 1 cup of heavy cream, 4 eggs, 1 cup of brown sugar, 1 teaspoon of vanilla extract, ½ cup of whiskey, 1 teaspoon of cinnamon, ¼ teaspoon of nutmeg, and a pinch of salt. Mix until well combined and smooth, letting the flavors merge beautifully as you prepare the base for your bread pudding.

Step 3: Assemble the Bread Pudding
Take your stale brioche or French bread and cut it into bite-sized cubes, about 1-inch in size. Place the cubed bread evenly into the prepared baking dish. Once arranged, pour the custard mixture over the bread, ensuring every piece is soaked. Let it sit for approximately 10 minutes, allowing the bread to absorb that luscious custard.

Step 4: Bake the Pudding
Place the baking dish in the preheated oven and bake for 50 minutes. Keep an eye out for a golden-brown top, and ensure the edges are set while the center remains slightly soft—this gives the pudding its perfect custardy texture. To check for doneness, insert a toothpick into the center; it should come out clean but may still be soft.

Step 5: Cool and Serve
Once baked, remove the Whiskey Caramel Bread Pudding from the oven and allow it to cool slightly for about 15 minutes. This cooling period helps the pudding set further. Serve it warm, generously drizzled with a homemade whiskey caramel sauce for that indulgent experience, and enjoy this delightful dessert!

How to Store and Freeze Whiskey Caramel Bread Pudding

Fridge: Keep leftovers covered in an airtight container for up to 3 days. This helps maintain the pudding’s moistness while allowing the flavors to develop further.

Freezer: If you wish to freeze, wrap the cooled bread pudding tightly in plastic wrap and then foil; it can be frozen for up to 2 months. Thaw in the fridge before reheating.

Reheating: To reheat, bake at 350°F (175°C) for about 15-20 minutes until warmed through. Serve it warm, drizzled with fresh whiskey caramel sauce for the best experience.

Make-Ahead: You can prepare the bread pudding mixture a day in advance and refrigerate it. Bake just before serving for a fresh, warm dessert that feels homemade.

Expert Tips for Whiskey Caramel Bread Pudding

  • Soak the Bread Well: Allow the bread to soak in the custard for at least 10 minutes to absorb maximum moisture, ensuring a decadent final texture.
  • Make Your Caramel: Homemade whiskey caramel enhances flavor significantly; consider making it from scratch instead of using store-bought for a richer taste.
  • Adjust Baking Time: If using a larger baking dish than specified, keep an eye on the baking time and test for doneness as it may need more time to set properly.
  • Custard Consistency: Remember that a slightly soft center is ideal for this whiskey caramel bread pudding; it should not be too dry or overbaked.
  • Experiment with Bread: Don’t hesitate to try different types of bread like challah, sourdough, or even croissants to bring unique flavors to your pudding.
  • Toppings Galore: Get creative with toppings! Whipped cream or a scoop of ice cream makes this already indulgent dessert even more delightful.

Make Ahead Options

These Whiskey Caramel Bread Pudding are perfect for those busy weeknights when you crave something indulgent but don’t have the time to prepare from scratch! You can assemble the pudding up to 24 hours in advance by mixing the custard and soaking the bread, then cover it tightly and refrigerate. This ensures the flavors meld beautifully. When you’re ready to serve, simply bake it straight from the fridge, adding a few extra minutes to the cooking time for an optimal, just-like-fresh result. For the whiskey caramel sauce, prepare it up to 3 days ahead and store it in an airtight container in the fridge to maintain its gooey consistency. Just reheat in a saucepan before drizzling it over the warm bread pudding for an effortlessly delightful dessert!

Whiskey Caramel Bread Pudding Variations

Feel free to get creative with this delightful recipe and make it your own; your kitchen is your canvas!

  • Different Bread: Switch brioche for challah, sourdough, or even croissants for unique flavor profiles. Each bread brings its own charm to the pudding.
  • Non-Alcoholic Option: Replace whiskey with vanilla extract or your favorite fruit juice to create a kid-friendly or alcohol-free version. The results remain delightful without losing the spirit of the dish.
  • Flavor Boost: Add a splash of espresso or a teaspoon of almond extract to the custard for unexpected depth. It adds a little twist that can surprise your taste buds.
  • Nutty Addition: Fold in some chopped nuts, such as pecans or walnuts, for added texture and richness. They not only enhance flavor but also give a delightful crunch to each bite.
  • Rich Topping: For an even more indulgent experience, serve with homemade whipped cream or a scoop of ice cream. It’ll satisfy your sweet tooth and make each serving feel like a treat!
  • Spicy Kick: Introduce a hint of heat by adding crushed red pepper flakes to the custard or some cayenne pepper. This unexpected kick makes for an adventurous dessert worth trying.
  • Fruit Fusion: Incorporate fresh fruits, like sliced bananas or berries, directly into the pudding for a burst of freshness. They pair beautifully with the caramel flavor!
  • Coconut Delight: Use coconut milk instead of regular milk for a unique twist; it adds a tropical flair that will have you dreaming of palm trees! For something extraordinary, try pairing it with a refreshing Mango Coconut Pudding for dessert.

Your imagination is the limit! Each variation ramps up the flavor or adds personal touches, ensuring your Whiskey Caramel Bread Pudding shines at any occasion.

What to Serve with Whiskey Caramel Bread Pudding

Bring your dessert experience to a whole new level with these delightful pairings that complement the warmth and sweetness of the pudding.

  • Creamy Vanilla Ice Cream: The smooth, cold ice cream contrasts beautifully with the warm, rich bread pudding, enhancing every bite. A scoop of ice cream serves as a refreshing counterpart, making every spoonful an indulgent delight.

  • Fresh Berries: Toss in a handful of tart raspberries or sweet strawberries for a burst of freshness. Their juicy vibrancy balances the sweetness of the pudding, adding a bright touch to your dessert plate.

  • Chocolate Sauce: Drizzle some luscious chocolate sauce over the bread pudding for a decadent twist. The richness of chocolate enhances the whiskey caramel, creating a sweet symphony of flavors that indulgent dessert lovers will adore.

  • Coffee or Espresso: A warm cup of freshly brewed coffee or a shot of espresso provides the perfect finishing touch. The bold coffee flavors cut through the sweetness, making for a beautifully balanced dessert experience.

  • Homemade Whipped Cream: Light and airy whipped cream adds a luscious creaminess that complements the pudding beautifully. It brings a dreamy texture and enhances the dessert’s indulgent character, making each bite even more delightful.

  • Caramelized Bananas: Sauté some ripe bananas in butter and brown sugar for a warm, sweet topping. Their smooth sweetness pairs perfectly with the pudding, creating a truly indulgent dessert combination.

Enjoying these pairings alongside your Whiskey Caramel Bread Pudding will create an unforgettable dessert experience that you and your loved ones will cherish.

Whiskey Caramel Bread Pudding Recipe FAQs

How do I choose the right bread for this recipe?
I recommend using stale brioche or French bread for optimal soaking and custard absorption. Stale bread allows the custard to penetrate fully without falling apart. If you only have fresh bread, simply leave it out overnight to dry out slightly before using it.

What’s the best way to store leftover bread pudding?
Store leftovers in an airtight container in the fridge for up to 3 days. This helps to retain its moisture while allowing the flavors to meld. Just reheat in a warm oven before serving to bring back that fresh-baked taste!

Can I freeze Whiskey Caramel Bread Pudding?
Absolutely! To freeze, wrap the cooled bread pudding tightly in plastic wrap and then in aluminum foil. It can be stored for up to 2 months. When you’re ready to indulge, thaw it in the fridge overnight, and then reheat at 350°F (175°C) for 15-20 minutes until warmed through and served with a drizzle of whiskey caramel sauce.

What should I do if my bread pudding is too dry?
If your bread pudding turns out too dry, next time ensure to let the bread soak in the custard for a full 10 minutes. Additionally, when reheating, cover it with foil to retain moisture. If it’s already baked, consider serving it with additional whiskey caramel sauce or a scoop of ice cream to add moisture and richness.

Are there any dietary considerations for this recipe?
This Whiskey Caramel Bread Pudding contains eggs and dairy, making it unsuitable for vegans or those with egg or dairy allergies. However, you can substitute eggs with unsweetened applesauce or a flaxseed mixture, and use plant-based milk and cream for a dairy-free version. Always check with your guests about any allergies or dietary restrictions before serving!

Can I make the whiskey caramel sauce ahead of time?
Yes, you can! Prepare the whiskey caramel sauce ahead and store it in a sealed container in the fridge for up to 2 weeks. Just reheat it gently in a saucepan or microwave before drizzling it over your warm bread pudding. This adds convenience and helps intensify those delicious flavors!

Whiskey Caramel Bread Pudding

Irresistible Whiskey Caramel Bread Pudding That Delights Your Soul

This Whiskey Caramel Bread Pudding is a decadent dessert combining brioche, custard, and whiskey caramel for pure indulgence.
Prep Time 15 minutes
Cook Time 50 minutes
Cooling Time 15 minutes
Total Time 1 hour 20 minutes
Servings: 8 slices
Course: Dessert
Cuisine: American
Calories: 400

Ingredients
  

For the Pudding
  • 6 cups Brioche or French bread Stale bread is preferred.
  • 2 cups Milk Whole milk recommended.
  • 1 cup Heavy cream
  • 4 large Eggs Can substitute with applesauce or flaxseed mixture.
  • 1 cup Brown sugar Granulated sugar can be used in a pinch.
  • 1 teaspoon Vanilla extract Omit if preferred.
  • 1 teaspoon Cinnamon
  • 1/4 teaspoon Nutmeg
  • 1/2 cup Whiskey Can be omitted for a non-alcoholic version.
  • 1 teaspoon Salt
For the Whiskey Caramel Sauce
  • 1 cup Granulated sugar
  • 1/2 cup Butter
  • 1/2 cup Heavy cream
  • 2 tablespoons Whiskey Can be omitted for a non-alcoholic version.

Equipment

  • 9x13-inch baking dish
  • Mixing Bowl
  • Whisk

Method
 

Step-by-Step Instructions
  1. Preheat your oven to 350°F (175°C) and grease a 9x13-inch baking dish.
  2. In a large mixing bowl, whisk together milk, heavy cream, eggs, brown sugar, vanilla extract, whiskey, cinnamon, nutmeg, and salt until smooth.
  3. Cut stale brioche or French bread into 1-inch cubes and place in the prepared baking dish. Pour custard mixture over bread and let soak for 10 minutes.
  4. Bake for 50 minutes until golden brown, with edges set and center slightly soft. A toothpick inserted should come out clean but with some softness.
  5. Allow the pudding to cool for about 15 minutes before serving warm, drizzled with whiskey caramel sauce.

Nutrition

Serving: 1sliceCalories: 400kcalCarbohydrates: 55gProtein: 6gFat: 20gSaturated Fat: 12gCholesterol: 150mgSodium: 300mgPotassium: 200mgFiber: 1gSugar: 25gVitamin A: 500IUCalcium: 150mgIron: 1mg

Notes

This dessert can be made ahead of time and baked just before serving for optimal freshness.

Tried this recipe?

Let us know how it was!